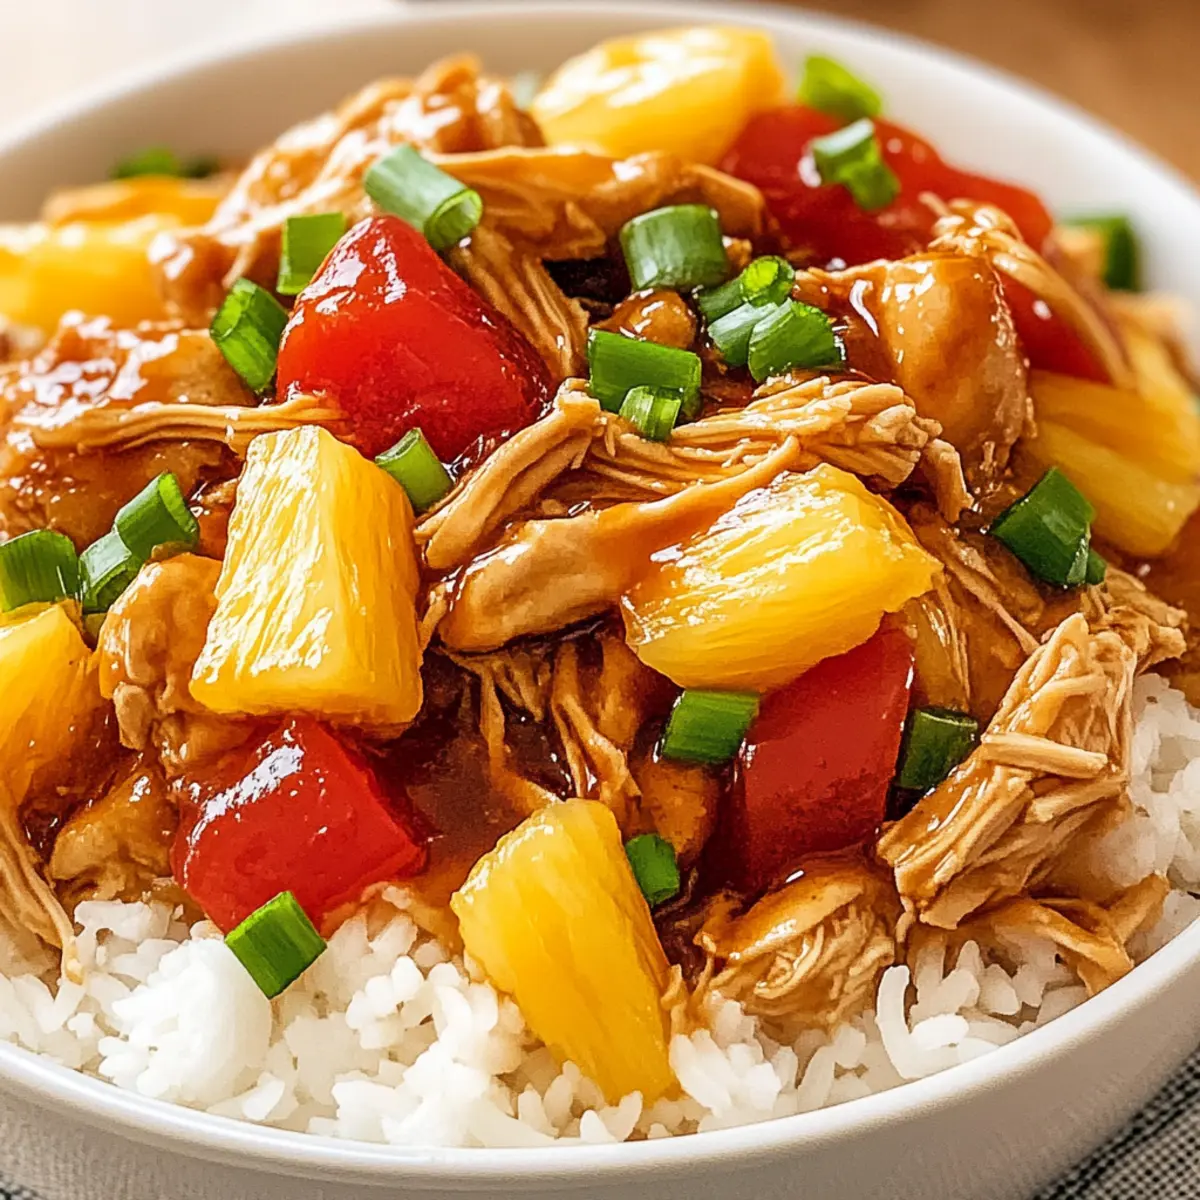
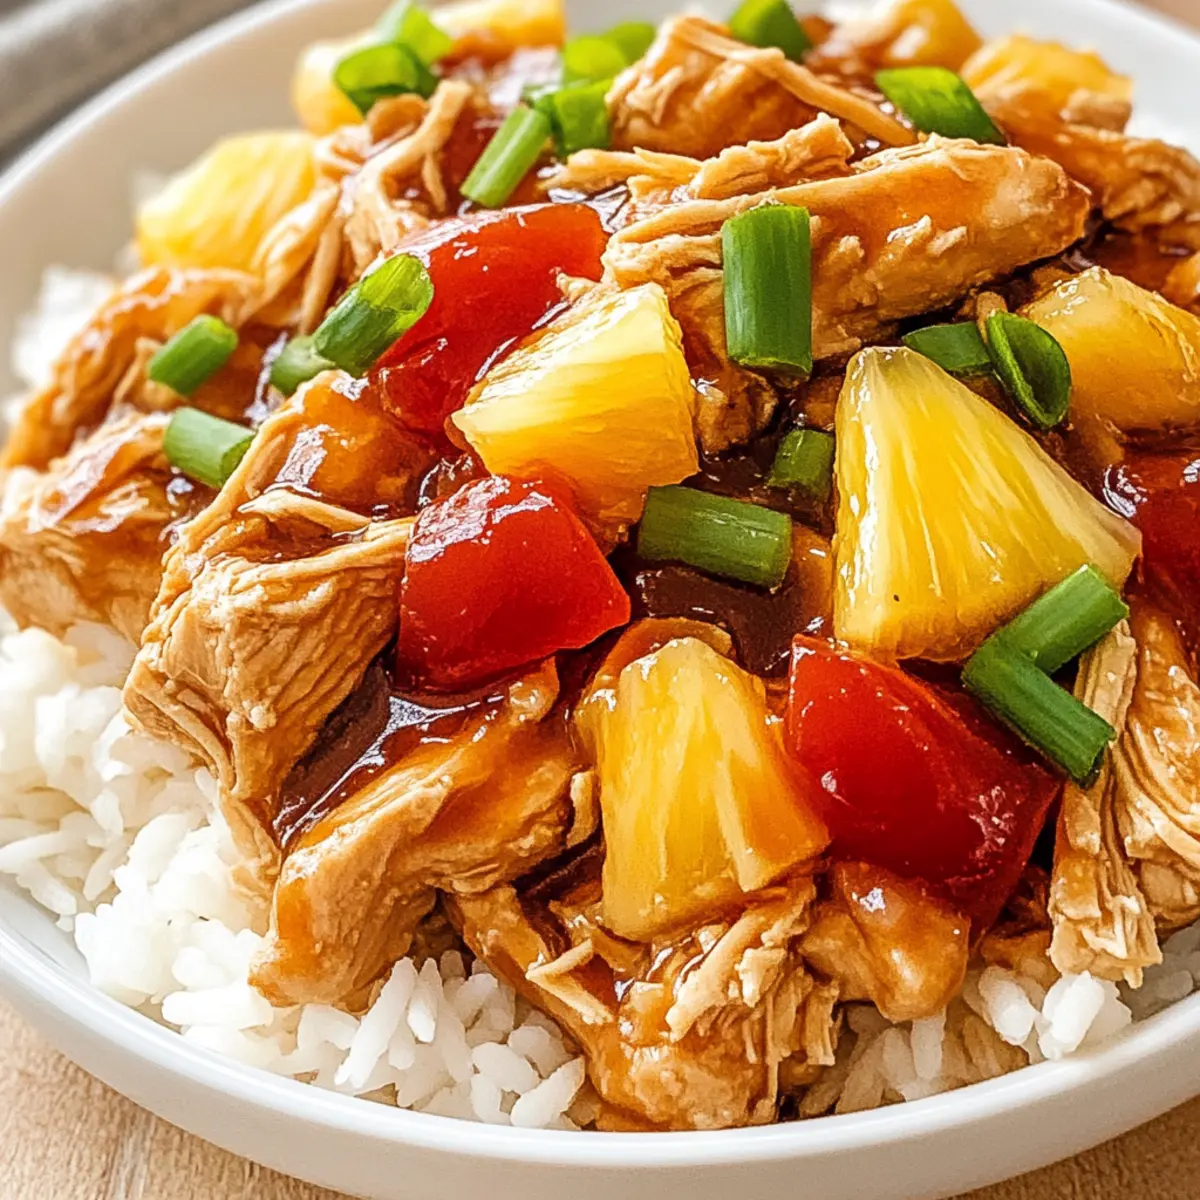
tastytrendingredients

  • Home
  • Recipes
    • Appetizers
    • Breakfast
    • Dessert
    • Dinner
    • Drinks
    • Salads
    • Snacks
    • Soups
  • About me
  • Contact me
menu icon
go to homepage
  • Home
  • Recipes
    • Appetizers
    • Breakfast
    • Dessert
    • Dinner
    • Drinks
    • Salads
    • Snacks
    • Soups
  • About me
  • Contact me
search icon
Homepage link
  • Home
  • Recipes
    • Appetizers
    • Breakfast
    • Dessert
    • Dinner
    • Drinks
    • Salads
    • Snacks
    • Soups
  • About me
  • Contact me
×

Mediterranean Shrimp Skillet with Lemon Garlic Sauce Bliss

April 9, 2026 by Grace Snow Leave a Comment

As I stood in my kitchen, the warm scent of garlic sizzling in olive oil instantly transported me to a sun-drenched Mediterranean terrace. This Mediterranean Shrimp Skillet with Lemon Garlic Sauce is my go-to dish for a quick, healthy weeknight dinner that never fails to impress. In just one pan, you’ll combine succulent shrimp with juicy cherry tomatoes and briny Kalamata olives, creating a melody of flavors that’s both vibrant and comforting. Not only is this recipe effortless to whip up, but it’s also versatile enough to adapt to your taste preferences, making it a recipe you’ll return to again and again. So, what are you waiting for? Let’s dive into this delicious adventure together!

Why is this shrimp skillet a must-try?

Quick and Easy: This Mediterranean Shrimp Skillet cooks up in under 30 minutes, letting you enjoy a satisfying meal without the fuss.

Flavor Explosion: The combination of zesty lemon, aromatic garlic, and briny olives creates a taste sensation that transports you to the Mediterranean coast.

Versatile Ingredients: Feel free to swap shrimp for scallops or even incorporate seasonal veggies to customize your dish effortlessly.

Crowd-Pleaser: Perfect for family dinners or impressing guests, this delightful dish works well with sides like couscous or a fresh salad.

Health-Conscious: Packed with lean protein and vibrant veggies, it's a nutritious option that doesn't compromise on flavor—each serving has only 280 calories!

Don’t miss out on creating this dish that’s bound to become a staple alongside other favorites like Shrimp Tacos Zesty or Skillet Pasta Sun.

Mediterranean Shrimp Skillet Ingredients

• For the Skillet

  • Fresh shrimp, peeled and deveined – Use high-quality shrimp for best flavor and texture.
  • Olive oil – Opt for extra virgin for enhanced flavor.
  • Garlic, minced – Adjust quantity based on personal taste; can substitute with garlic powder in a pinch.
  • Cherry tomatoes, halved – Adds sweetness and acidity; substitute with regular tomatoes if needed.
  • Kalamata olives, pitted and halved – Provides briny flavor; can be replaced with green olives for a different taste.
  • Fresh lemon juice – Fresh is preferred over bottled for optimal flavor.
  • Fresh parsley, chopped – Substitute with basil or cilantro if desired.
  • Salt and pepper to taste – Essential seasonings; adjust according to dietary needs.
  • Optional: Red pepper flakes – Adds heat; omit for a milder dish.

This Mediterranean Shrimp Skillet with Lemon Garlic Sauce offers you a simple yet delicious way to bring the warmth of the Mediterranean into your home!

Step‑by‑Step Instructions for Mediterranean Shrimp Skillet with Lemon Garlic Sauce

Step 1: Heat the Oil
In a large skillet, heat 2 tablespoons of extra virgin olive oil over medium heat for about 1 minute until shimmering. Add 3 cloves of minced garlic and sauté for 1-2 minutes until fragrant, stirring frequently to prevent burning. This initial step sets the flavor foundation for the Mediterranean Shrimp Skillet, inviting warmth into your kitchen.

Step 2: Cook the Shrimp
Add 1 pound of peeled and deveined shrimp to the skillet, arranging them in an even layer. Cook for 2-3 minutes without stirring until they turn pink on one side. Flip the shrimp over and continue cooking for another 2-3 minutes until fully opaque. The vibrant color transformation signals that they're perfectly cooked, enhancing the dish's appeal.

Step 3: Incorporate the Vegetables
Gently stir in 1 cup of halved cherry tomatoes and ½ cup of halved Kalamata olives. Cook the mixture for an additional 2-3 minutes, allowing the tomatoes to soften and release their juices while incorporating the addictive briny flavors. This step brings the Mediterranean essence to life and fills your skillet with colorful ingredients.

Step 4: Add Seasoning and Lemon Juice
Drizzle the juice of 1 fresh lemon over the shrimp and vegetable mixture, and season with salt and pepper to taste. If desired, add a pinch of red pepper flakes for some heat. Stir well to combine, allowing the bright citrus notes to meld with the savory elements. The lemon juice will elevate the overall flavor profile beautifully.

Step 5: Final Touches and Serve
Allow the Mediterranean Shrimp Skillet to cook for an additional 1-2 minutes, ensuring everything is heated through and flavors meld. Remove the skillet from heat and sprinkle with freshly chopped parsley for a burst of color and freshness. Serve hot with lemon wedges on the side, inviting your family to savor this tantalizing meal.

Mediterranean Shrimp Skillet Customizations

Get ready to elevate your cooking game by personalizing this delightful dish with your favorite ingredients!

  • Seafood Swap: Replace shrimp with scallops or white fish for a different seafood delight. Different textures can bring new experiences to your table.
  • Veggie Boost: Incorporate seasonal vegetables like bell peppers or zucchini for a vibrant twist. Fresh produce adds color and a nutritional punch that everyone will enjoy.
  • Creamy Indulgence: Stir in Greek yogurt or crème fraîche for a rich, creamy texture. This variation transforms your dish into a luxurious treat, perfect for special occasions.
  • Flavor Enhancement: Add capers or artichoke hearts for an extra briny kick. This twist provides a delightful contrast to the sweetness of the tomatoes.
  • Heat Factor: Sprinkle in more red pepper flakes for an exciting zing. If you love a bit of spice, this variation will have you dancing with delight.
  • Herb Alternatives: Swap fresh parsley for basil or cilantro for a new herbaceous flavor. Each option brings its unique aroma, making every dish a little different.
  • Grain-Upgrade: Serve over a bed of couscous or quinoa instead of rice for a more wholesome base. It’s a delightful way to change up the texture while keeping the Mediterranean theme.
  • Zesty Addition: A splash of white wine during cooking can enhance the sauce with depth. This extra touch makes the entire skillet even more enticing, beautiful, and flavorful.

As you explore these creative ideas, don't forget to pair your skillet with a fresh green salad or crusty bread for a complete Mediterranean experience. Happy cooking!

Make Ahead Options

This Mediterranean Shrimp Skillet with Lemon Garlic Sauce is perfect for meal prep, allowing you to save precious time on busy weeknights. You can clean and chop the ingredients, such as garlic, cherry tomatoes, and Kalamata olives, up to 24 hours in advance. Store them in airtight containers in the refrigerator to maintain their freshness. However, it’s best to keep the shrimp uncooked until you're ready to serve, as this ensures their texture remains juicy and tender. When you’re ready to enjoy this dish, simply heat olive oil in the skillet, toss in the shrimp and prepped ingredients, and follow the cooking instructions. You'll have a delicious, vibrant meal on the table in no time!

What to Serve with Mediterranean Shrimp Skillet with Lemon Garlic Sauce

Looking to create a complete feast? Pairing delightful sides will elevate this vibrant dish to new culinary heights.

  • Couscous: This fluffy grain soaks up the sauce beautifully, adding a hearty base that's perfect for scooping up shrimp.

  • Crusty Bread: A warm, crusty baguette or rustic loaf is ideal for mopping up the savory lemon garlic sauce, ensuring no drop goes unappreciated.

  • Fresh Green Salad: A crisp salad with mixed greens, cucumber, and a light vinaigrette adds a refreshing contrast and balances the rich flavors of the skillet.

  • Roasted Vegetables: Roasting seasonal veggies like zucchini and bell peppers brings out their natural sweetness and pairs wonderfully with the shrimp's briny notes.

  • Steamed Asparagus: Tender asparagus drizzled with olive oil and a squeeze of lemon complements the dish's Mediterranean flair while adding a delightful crunch.

  • Chilled White Wine: A glass of dry, crisp white wine like Sauvignon Blanc heightens the overall dining experience, creating a sophisticated balance with the seafood.

  • Lemon Sorbet: For a refreshing dessert, a scoop of lemon sorbet offers a tangy finish that mirrors the highlights of the main dish, cleansing the palate beautifully.

Storage Tips for Mediterranean Shrimp Skillet

Fridge: Store any leftovers in an airtight container for up to 2 days. Reheat gently on the stove or in the microwave to retain flavors.

Freezer: If you want to save this Mediterranean Shrimp Skillet, it's best to freeze it before cooking. Place prepared ingredients in a freezer-safe bag and store for up to 2 months.

Reheating: When ready to enjoy, thaw in the fridge overnight, then reheat in a skillet over medium heat until warmed through, adding a splash of olive oil if needed to revive flavor.

Prep Ahead: For convenience, you can prep the shrimp and vegetables a day in advance, storing them separately in the fridge until you're ready to cook.

Expert Tips for Mediterranean Shrimp Skillet

Quality Counts: Use fresh, high-quality shrimp for the best flavor and texture. Frozen shrimp can work, but thaw properly for optimal results.

Taste Adjustment: Don’t hesitate to customize the garlic and lemon juice amounts according to your preferences. It's essential for achieving the perfect Mediterranean Shrimp Skillet balance.

Add Depth: For a richer flavor, consider adding a splash of white wine or seafood broth during cooking. It enhances the sauce and creates a delightful depth.

Serve Smart: Pair the dish with couscous, crusty bread, or a fresh green salad to complete the meal. They complement the skillet beautifully and add texture.

Avoid Overcooking: Keep an eye on the shrimp while cooking. Overcooked shrimp can become rubbery, detracting from the dish's overall enjoyment.

Mediterranean Shrimp Skillet with Lemon Garlic Sauce Recipe FAQs

What type of shrimp should I use for this recipe?
Absolutely! For the best flavor and texture, always opt for high-quality, fresh shrimp that are peeled and deveined. If fresh isn't available, frozen shrimp can work well too—just ensure they are thoroughly thawed before cooking for the best results.

How should I store leftovers from the Mediterranean Shrimp Skillet?
Store any leftovers in an airtight container and place them in the refrigerator for up to 2 days. When reheating, do so gently on the stove or in the microwave to retain the dish's delightful flavors. Stir occasionally to ensure even heating.

Can I freeze the Mediterranean Shrimp Skillet?
Very! To freeze, it’s best to do so before cooking. Place the shrimp, cherry tomatoes, olives, and prepped garlic in a freezer-safe bag. Make sure to remove excess air before sealing. You can freeze it for up to 2 months. When you're ready to enjoy it, thaw overnight in the refrigerator, and then cook as directed.

How can I adjust the recipe for dietary restrictions?
Great question! If you're concerned about allergies, be mindful of substituting Kalamata olives if you're allergic to them—green olives or capers can be used instead. For gluten-free options, simply serve the skillet as is or over gluten-free grains.

What if my shrimp turn rubbery while cooking?
Oh no! If that happens, it typically means the shrimp were overcooked. To avoid this in the future, keep an eye on them during cooking; they only need about 2-3 minutes per side until they turn a vibrant pink and are fully opaque. Timing is key, so get ready for a delicious meal!

How do I know when the shrimp are fresh?
Fresh shrimp should have a mild ocean scent and a firm, slightly springy texture. Avoid shrimp with a strong fishy smell or any dark spots all over, as these are signs that they might not be fresh. Aim for shrimp that looks moist and shiny, with a slight sheen.

Mediterranean Shrimp Skillet with Lemon Garlic Sauce

Mediterranean Shrimp Skillet with Lemon Garlic Sauce Bliss

A quick, healthy Mediterranean Shrimp Skillet with Lemon Garlic Sauce, perfect for weeknight dinners.
Print Recipe Pin Recipe
Prep Time 10 minutes mins
Cook Time 20 minutes mins
Total Time 30 minutes mins
Servings: 4 servings
Course: Dinner
Cuisine: Mediterranean
Calories: 280
Ingredients Equipment Method Nutrition Notes

Ingredients
  

For the Skillet
  • 1 pound fresh shrimp, peeled and deveined Use high-quality shrimp for best flavor and texture.
  • 2 tablespoons olive oil Opt for extra virgin for enhanced flavor.
  • 3 cloves garlic, minced Adjust quantity based on personal taste; can substitute with garlic powder in a pinch.
  • 1 cup cherry tomatoes, halved Adds sweetness and acidity; substitute with regular tomatoes if needed.
  • ½ cup Kalamata olives, pitted and halved Provides briny flavor; can be replaced with green olives for a different taste.
  • 1 tablespoon fresh lemon juice Fresh is preferred over bottled for optimal flavor.
  • ¼ cup fresh parsley, chopped Substitute with basil or cilantro if desired.
  • salt and pepper to taste Essential seasonings; adjust according to dietary needs.
  • red pepper flakes Optional: Adds heat; omit for a milder dish.

Equipment

  • Large skillet

Method
 

Step-by-Step Instructions
  1. In a large skillet, heat 2 tablespoons of extra virgin olive oil over medium heat for about 1 minute until shimmering. Add 3 cloves of minced garlic and sauté for 1-2 minutes until fragrant, stirring frequently to prevent burning.
  2. Add 1 pound of peeled and deveined shrimp to the skillet, arranging them in an even layer. Cook for 2-3 minutes without stirring until they turn pink on one side. Flip the shrimp over and continue cooking for another 2-3 minutes until fully opaque.
  3. Gently stir in 1 cup of halved cherry tomatoes and ½ cup of halved Kalamata olives. Cook the mixture for an additional 2-3 minutes.
  4. Drizzle the juice of 1 fresh lemon over the shrimp and vegetable mixture, and season with salt and pepper to taste. If desired, add a pinch of red pepper flakes for some heat.
  5. Allow the Mediterranean Shrimp Skillet to cook for an additional 1-2 minutes, ensuring everything is heated through and flavors meld. Remove from heat and sprinkle with freshly chopped parsley.

Nutrition

Serving: 1servingCalories: 280kcalCarbohydrates: 10gProtein: 24gFat: 16gSaturated Fat: 3gPolyunsaturated Fat: 1gMonounsaturated Fat: 11gCholesterol: 200mgSodium: 600mgPotassium: 400mgFiber: 2gSugar: 3gVitamin A: 20IUVitamin C: 25mgCalcium: 4mgIron: 6mg

Notes

Pair the dish with couscous, crusty bread, or a fresh green salad to complete the meal.

Tried this recipe?

Let us know how it was!

Gordon Ramsay Shrimp Scampi: Quick, Flavorful, and Irresistible

April 9, 2026 by Grace Snow Leave a Comment

As the aroma of garlic fills the kitchen, I can’t help but feel transported to a bustling coastal restaurant, where the waves meet savory culinary magic. Gordon Ramsay’s shrimp scampi has become my go-to recipe when I crave a quick, elegant dinner that impresses without overwhelming. This delightful dish combines succulent shrimp, al dente pasta, and a zesty sauce, all in just 30 minutes—perfect for both novice cooks and seasoned pros alike. Plus, it’s adaptable; whether you’re gluten-free or in the mood to get a little creative with ingredients, this recipe has you covered. Can you already taste the burst of flavors and hear the compliments from your loved ones? Let’s dive into making this stunning meal!

Why is Shrimp Scampi a Must-Try?

Simplicity, this dish comes together in just 30 minutes, making it perfect for busy weeknights. Adaptable, you can easily customize it with gluten-free pasta or even swap in zucchini noodles for a fresh twist. Flavor-packed, the combination of garlic, lemon, and red pepper flakes creates a mouthwatering aroma that will have everyone asking for seconds. Restaurant-quality results can be achieved right in your own kitchen, impressing any guest. Crowd-pleaser, this dish is sure to win over even the pickiest eaters—think of it as your culinary secret weapon! And if you're curious about more seafood options, check out my Shrimp Tacos Zesty or the delightful Pan Fried Shrimp for variety.

Gordon Ramsay Shrimp Scampi Ingredients

For the Shrimp

  • Large Shrimp – Provides protein and a savory, ocean-fresh flavor; opt for wild-caught for the best taste.

For the Pasta

  • Linguine or Spaghetti – Serves as the filling base for the dish; spaghetti can be used as a substitute if desired.

For the Sauce

  • Unsalted Butter – Adds richness and depth to the sauce; using unsalted helps control seasoning.
  • Olive Oil – Enhances flavor and helps cook the shrimp without burning; choose good quality for the best results.
  • Garlic – Imparts a fragrant and savory aroma; fresh garlic is preferable for a more robust taste.
  • Red Pepper Flakes – Adds a mild heat to the dish; adjust the amount based on your spice preference.
  • Lemon (Zest and Juice) – Introduces brightness and acidity to balance flavors; fresh lemons are recommended for optimal zest.
  • Chicken Broth – Provides depth and moisture to the sauce; vegetable broth is a great alternative for lighter flavors.

For Garnishing and Seasoning

  • Fresh Parsley – Adds freshness and color as a garnish; dried parsley can substitute but use in a reduced quantity.
  • Salt and Pepper – Essential for seasoning; adjust to enhance the natural flavors of the ingredients.

This Gordon Ramsay shrimp scampi recipe is not just quick and easy, but it's also packed with flavors that will leave everyone coming back for more!

Step‑by‑Step Instructions for Gordon Ramsay Shrimp Scampi

Step 1: Cook the Pasta
Bring a large pot of salted water to a rolling boil over high heat. Add linguine or spaghetti, cooking according to package instructions until al dente, typically about 8-10 minutes. Once cooked, reserve one cup of pasta water and drain the rest, then set the pasta aside while you prepare the sauce.

Step 2: Sauté the Shrimp
In a large skillet, heat 2 tablespoons of olive oil and 2 tablespoons of unsalted butter over medium-high heat until the butter melts and begins to bubble. Add large shrimp in a single layer, cooking for 2-3 minutes on each side until they're pink, opaque, and slightly curled. Once cooked, transfer the shrimp to a plate and set aside, keeping the heat on.

Step 3: Prepare the Sauce
Using the same skillet, lower the heat to medium and add 4 minced garlic cloves and a pinch of red pepper flakes. Sauté for about 30 seconds until the garlic becomes fragrant but not browned. This is essential for creating the aromatic base for your Gordon Ramsay shrimp scampi.

Step 4: Add Liquid Ingredients
Pour in 1 cup of chicken broth and the juice and zest of one lemon into the skillet. Increase the heat slightly and let the mixture simmer for about 2-3 minutes, allowing it to reduce and concentrate those beautiful flavors. You'll know it's ready when it's slightly thickened and aromatic.

Step 5: Combine
Return the cooked shrimp and drained pasta to the skillet, tossing everything together gently. Gradually add the reserved pasta water a little at a time, stirring until you reach your desired sauce consistency. The starch from the water will help the sauce cling to both the shrimp and pasta beautifully.

Step 6: Finish and Serve
Remove the skillet from heat and stir in a handful of chopped fresh parsley, seasoning with salt and pepper to taste. Serve your Gordon Ramsay shrimp scampi immediately, garnished with extra parsley and lemon wedges for a touch of brightness.

Make Ahead Options

These Gordon Ramsay Shrimp Scampi are perfect for busy weeknights when you need to save time while still enjoying a delicious meal! You can prep the shrimp by marinating them in the garlic, lemon juice, and olive oil mixture up to 24 hours in advance. Store them in an airtight container in the refrigerator to maintain quality and prevent any browning. Additionally, you can cook the pasta ahead of time and refrigerate it for up to 3 days. When you're ready to serve, simply sauté the shrimp in the skillet until pink, reheat the pasta, and combine everything with the sauce for restaurant-quality results with minimal effort!

What to Serve with Gordon Ramsay Shrimp Scampi?

Create an unforgettable dining experience by adding exciting sides to your delicious shrimp scampi feast.

  • Garlic Bread: A crispy, buttery delight perfect for soaking up the rich scampi sauce. Nothing beats that satisfying crunch coupled with the garlicky goodness.
  • Light Salad: A refreshing salad with mixed greens, cherry tomatoes, and a zesty lemon vinaigrette adds brightness to your meal and helps cleanse the palate.
  • Steamed Asparagus: Tender and vibrant, asparagus provides a lovely crunch and a touch of earthy flavor that complements the shrimp beautifully.
  • Creamy Risotto: A luscious risotto creates a comforting base that harmonizes with the shrimp scampi, making each bite simply irresistible. This dish effortlessly elevates the entire meal.
  • Chardonnay: A glass of chilled Chardonnay pairs beautifully with shrimp, enhancing the dish's savory and citrusy notes with its crisp acidity.
  • Lemon Sorbet: End your meal with a refreshing lemon sorbet that brings a cool, zesty finish to your unforgettable shrimp scampi night. It’s like a sweet, frosty hug!

Gordon Ramsay Shrimp Scampi Variations

Feel free to explore different twists on this classic dish that will tantalize your taste buds and keep things exciting!

  • Gluten-Free: Substitute zucchini noodles for traditional pasta for a refreshing and low-carb alternative.
  • Creamy Delight: Add a splash of heavy cream to the sauce for a rich and velvety finish that elevates the dish.
  • Veggie Boost: Toss in cherry tomatoes or fresh spinach towards the end of cooking for a vibrant touch and added nutrition. It's an easy way to add color and flavor.
  • Wine Lover’s Version: Introduce a splash of white wine after sautéing the garlic, allowing it to reduce before adding broth for extra depth.
  • Briny Twist: Add capers to the sauce for a burst of salty goodness that balances out the flavors beautifully.
  • Herb Variations: Experiment with fresh basil or dill instead of parsley for a unique herbaceous flavor. Each brings a delightful twist that complements the shrimp.
  • Sweet Heat: Incorporate diced jalapeños or a dash of sriracha for an extra kick, ideal for those who love a bit more spice in their life.
  • Citrus Burst: Swap lemon for lime for a tangy alternative, giving your shrimp scampi a tropical flair.

Creating your version of Gordon Ramsay’s shrimp scampi will not only make the dish your own but delight everyone at the table! If you’re searching for more seafood options, why not try some lovely Shrimp Tacos Zesty or indulge in a comforting Pan Fried Shrimp? There’s a world of flavor waiting for you!

Storage Tips for Gordon Ramsay Shrimp Scampi

Fridge: Store leftover shrimp scampi in an airtight container for up to 2 days. Cool the dish completely before sealing to maintain freshness.

Freezer: If freezing, portion out your shrimp scampi in airtight containers or freezer bags. It can last in the freezer for up to 2 months; just label them with the date!

Reheating: To reheat, gently warm in a skillet over low heat, adding a splash of chicken broth or water to restore the sauce's consistency and prevent the shrimp from overcooking.

Serving: While it's best to consume fresh, thawed shrimp scampi can be reheated and still be delicious, making it a convenient option for quick meals later on.

Expert Tips for Gordon Ramsay Shrimp Scampi

• Cook Time Awareness: Avoid overcooking the shrimp; they only need 2-3 minutes per side. Overdone shrimp become rubbery and tough.

• Seasoning Balance: Don’t skimp on salt and pepper. Proper seasoning with these essentials amplifies the natural flavors of your Gordon Ramsay shrimp scampi.

• Pasta Water Magic: Add reserved pasta water gradually to reach your desired sauce consistency. The starch helps thicken the sauce perfectly.

• Skillet Heat Management: Start off with a hot skillet to achieve a good sear on the shrimp. Avoid overcrowding the pan to ensure even cooking.

• Ingredient Freshness: Use fresh garlic and lemons for the best flavor. Their zest and brightness make a noticeable difference in your dish.

• Flavor Boost Options: Feel free to experiment with ingredients like white wine or capers for a unique twist on the classic Gordon Ramsay shrimp scampi!

Gordon Ramsay Shrimp Scampi Recipe FAQs

What type of shrimp should I use for this recipe?
Absolutely! For the best flavor, I recommend using large, wild-caught shrimp. They offer a fresher taste compared to farmed shrimp. Look for shrimp that have a firm texture and a slightly sweet ocean aroma—steer clear of any that have dark spots all over, as this indicates they may not be fresh.

How can I store leftovers?
Very simple! Allow your leftover shrimp scampi to cool completely before transferring it to an airtight container. It will stay fresh in the fridge for up to 2 days. When you’re ready to eat, just reheat it gently in a skillet over low heat to avoid making the shrimp rubbery.

Can I freeze shrimp scampi?
Definitely! If you want to save it for later, portion your shrimp scampi into airtight containers or freezer bags, and it can last in the freezer for up to 2 months. Be sure to label them with the date. When you're ready to enjoy, thaw in the refrigerator overnight, and reheat gently on the stove, adding a splash of chicken broth to help with the sauce consistency.

What if my shrimp are overcooked?
Don't fret! If you find your shrimp are becoming tough or rubbery, it usually happens from prolonged cooking. To ensure perfectly cooked shrimp, keep a close eye as they only need about 2-3 minutes per side. If this does happen, consider mixing the shrimp into a thicker sauce or adding vegetables that cook well in your dish—this can help mask any tough texture!

Can I customize the recipe for dietary restrictions?
Absolutely! For gluten-free options, simply swap out the linguine or spaghetti for zucchini noodles or gluten-free pasta. You can also replace the chicken broth with vegetable broth to keep it vegetarian-friendly. For any allergies, always read labels on your ingredients, especially if you're using products like broth or butter.

How long does the zest from a lemon last?
The zest is best when used fresh! However, if you have leftover zest, you can store it in an airtight container in the fridge for about 5 days. Alternatively, you can freeze it in small amounts in ice cube trays—perfect for adding a burst of flavor to future dishes!

Gordon Ramsay Shrimp Scampi

Gordon Ramsay Shrimp Scampi: Quick, Flavorful, and Irresistible

Gordon Ramsay's shrimp scampi is a quick, delicious dish that impresses with its savory flavors.
Print Recipe Pin Recipe
Prep Time 10 minutes mins
Cook Time 20 minutes mins
Total Time 30 minutes mins
Servings: 4 servings
Course: Dinner
Cuisine: Italian
Calories: 450
Ingredients Equipment Method Nutrition Notes

Ingredients
  

For the Shrimp
  • 1 pound large shrimp opt for wild-caught for best taste
For the Pasta
  • 8 ounces linguine or spaghetti spaghetti can be used as a substitute
For the Sauce
  • 4 tablespoons unsalted butter helps control seasoning
  • 2 tablespoons olive oil choose good quality for best results
  • 4 cloves garlic fresh is preferable for robust taste
  • 1/2 teaspoon red pepper flakes adjust according to spice preference
  • 1 each lemon (zest and juice) fresh lemons recommended for optimal flavor
  • 1 cup chicken broth vegetable broth is a lighter alternative
For Garnishing and Seasoning
  • 1/4 cup fresh parsley dried parsley can substitute in reduced quantity
  • salt adjust to enhance natural flavors
  • pepper adjust to enhance natural flavors

Equipment

  • Large pot
  • Large skillet
  • Colander

Method
 

Step-by-Step Instructions
  1. Bring a large pot of salted water to a rolling boil over high heat. Add linguine or spaghetti, cooking until al dente, about 8-10 minutes.
  2. In a large skillet, heat olive oil and butter over medium-high heat until melted. Add shrimp in a single layer, cooking for 2-3 minutes on each side until pink and opaque.
  3. Lower the heat and add minced garlic and red pepper flakes. Sauté for about 30 seconds until fragrant but not browned.
  4. Pour in chicken broth and lemon juice and zest. Increase heat and let simmer for 2-3 minutes until slightly thickened.
  5. Return cooked shrimp and drained pasta to the skillet, tossing together. Add reserved pasta water gradually to reach desired sauce consistency.
  6. Remove from heat, stir in chopped parsley, and season with salt and pepper to taste. Serve immediately, garnished with extra parsley and lemon wedges.

Nutrition

Serving: 1servingCalories: 450kcalCarbohydrates: 44gProtein: 25gFat: 20gSaturated Fat: 7gPolyunsaturated Fat: 1gMonounsaturated Fat: 10gCholesterol: 150mgSodium: 780mgPotassium: 350mgFiber: 3gSugar: 1gVitamin A: 500IUVitamin C: 20mgCalcium: 50mgIron: 2mg

Notes

Serve immediately for best taste, and add extra lemon for brightness if desired.

Tried this recipe?

Let us know how it was!

Creamy Tuscan Shrimp Orzo with Sun-Dried Tomatoes Delight

April 9, 2026 by Grace Snow Leave a Comment

In the heart of a bustling kitchen, I found myself in that all-too-familiar dilemma: what to whip up for dinner on a tight schedule? That's when my love for quick and wholesome meals led me to create my beloved Quick One-Pot Tuscan Shrimp Orzo with Sun-Dried Tomatoes. This dish not only comes together in under 30 minutes but also gifts you that creamy Italian bliss that feels indulgent yet effortless. The blend of succulent shrimp and savory sun-dried tomatoes transforms this simple one-pot recipe into a comforting feast, making it a standout choice for busy weeknights or a cozy gathering with friends. Plus, it’s a fantastic way to impress anyone with minimal effort! Are you curious to see how easily this delightful dish comes together? Let’s dive in!

Why Is This Recipe So Popular?

Simplicity at Its Best: You’ll love how straightforward this recipe is, allowing anyone to whip up a delicious meal without fussing over complex steps.

Rich, Creamy Flavor: A delightful blend of shrimp, sun-dried tomatoes, and cream creates a luxurious sauce that’s both comforting and satisfying.

One-Pot Wonder: A single pot means minimal cleanup, perfect for busy individuals or families who want to enjoy a homemade meal without the hassle.

Versatile and Adaptable: Whether you prefer shrimp, chicken, or even a veggie boost, there are countless ways to customize this dish to suit your taste. Try adding some seasonal vegetables or opting for zoodles for a low-carb twist!

Quick and Efficient: In less than 30 minutes, you can serve a meal that feels gourmet—ideal for hectic weeknights yet special enough to impress guests.

Explore more inspiring ideas like our Tuscan White Bean Pasta to complement this dish!

Tuscan Shrimp Orzo Ingredients

For the Shrimp
• Shrimp – 1 lb; use medium to large shrimp (26-30 or 31-40 count); can substitute with chicken or tofu for a non-seafood version.

For the Seasoning
• Paprika – 1.5 tsp; adds warmth and color; can swap with smoked paprika for a smoky flavor.
• Italian Seasoning – 0.5 tsp; provides herbaceous notes; replace with a mix of oregano and basil if desired.
• Salt – 0.25 tsp; enhances all flavors; adjust to taste.
• Pepper – 0.25 tsp; adds heat; freshly ground is preferred for best flavor.
• Garlic – 6 cloves; gives aromatic base flavor; freshly minced is best, but garlic powder (1 tsp) works in a pinch.

For the Orzo Base
• Olive Oil – 2 tbsp; for sautéing shrimp and integrating flavors; can use any cooking oil or butter if preferred.
• Onion Powder – 0.5 tsp; adds depth; substitute with minced fresh onion if desired.
• Orzo – 1 cup; the carbohydrate base for the dish; can replace with another small pasta like ditalini or farro.

For the Creamy Sauce
• Sun-Dried Tomatoes – 0.33 cup; adds concentrated sweetness and tang; can use fresh tomatoes or roasted red peppers as alternatives.
• Chicken Stock – 2 cups; liquid base for cooking orzo; a vegetarian option is vegetable stock.
• Artichoke Hearts – 14 oz; adds texture and flavor; use canned or frozen; can omit if unavailable.
• Spinach – 4 oz; for added nutrients and color; substitute with kale or any leafy green.
• Cream – 1 cup; provides a rich, velvety sauce; substitute with half-and-half or a non-dairy alternative for a lighter option.
• Red Pepper Flakes – 0.25 tsp; introduces heat; omit for a milder dish.

This creamy Tuscan Shrimp Orzo with Sun-Dried Tomatoes is not only a delectable delight but also simplifies your cooking with its delightful ease and quick preparation!

Step‑by‑Step Instructions for Tuscan Shrimp Orzo with Sun-Dried Tomatoes

Step 1: Cook Shrimp
In a large skillet, heat 2 tablespoons of olive oil over medium-high heat. Season 1 pound of shrimp with paprika, Italian seasoning, salt, and pepper. Sear the shrimp for about 2 minutes per side until they turn pink and opaque. In the last 30 seconds, add 6 minced garlic cloves to the skillet for aromatic depth. Remove shrimp from the skillet and set aside.

Step 2: Prepare Orzo Base
In the same skillet, add 0.33 cup of sun-dried tomatoes and 1 cup of orzo. Toast the mixture over medium heat for 2 minutes, stirring frequently to enhance the flavors and prevent sticking. This step effectively builds a flavorful base for your creamy Tuscan Shrimp Orzo while the aromas fill your kitchen.

Step 3: Simmer Orzo
Pour in 2 cups of chicken stock and bring the mixture to a boil. Once boiling, reduce the heat to a simmer and cook uncovered for about 5-10 minutes, stirring occasionally. The orzo should absorb most of the liquid and become al dente while the sauce thickens slightly, creating the perfect creamy consistency.

Step 4: Combine Ingredients
Once the orzo is ready, stir in 1 cup of cream, 14 ounces of artichoke hearts, 4 ounces of fresh spinach, and the reserved shrimp. Continue to cook on low for an additional 2 minutes, allowing the ingredients to warm through and the spinach to wilt. This will create a rich, velvety sauce enveloping the shrimp and orzo beautifully.

Step 5: Taste & Adjust
Before serving, taste your Tuscan Shrimp Orzo with Sun-Dried Tomatoes and adjust seasoning. Add additional salt, pepper, and 0.25 teaspoon of red pepper flakes for a kick, if desired. Mix well to incorporate, then remove from heat. The dish should now be a creamy masterpiece ready to impress!

Tuscan Shrimp Orzo Variations

Feel free to make this delicious dish your own with these exciting twists and thoughtful substitutions!

  • Chicken Swap: Use chicken breasts or thighs in place of shrimp for a hearty alternative. Cook until golden brown for extra flavor!

  • Veggie Delight: Replace shrimp with sautéed mushrooms or zucchini for a plant-based option that’s equally satisfying and nutrient-rich.

  • Dairy-Free: Substitute the cream with coconut milk or a plant-based cream for a dairy-free, yet luxurious sauce that adds a hint of sweetness.

  • Zoodle Upgrade: Use spiralized zucchini (zoodles) instead of orzo for a low-carb, gluten-free dish that’s still packed with flavor and comfort.

  • Seasonal Veggies: Stir in asparagus tips or cherry tomatoes for a colorful, fresh touch that enhances both nutrition and presentation.

  • Spice It Up: For an added kick, mix in diced jalapeños or a splash of hot sauce; it’ll create a delightful contrast with the creamy sauce.

  • Nutty Twist: Toss in a handful of pine nuts or chopped walnuts for an unexpected crunch and richer flavor in every bite.

  • Herb Boost: Fresh basil or parsley can elevate the dish's aroma and taste—sprinkle generously just before serving for a burst of freshness!

Looking for more delightful pasta recipes? Check out our Skillet Pasta Feta for a delicious alternative!

How to Store and Freeze Tuscan Shrimp Orzo

Fridge: Store any leftovers in an airtight container for up to 3 days. This helps maintain freshness, although the cream may thicken upon cooling.

Freezer: For longer storage, freeze the Tuscan Shrimp Orzo in a freezer-safe container for up to 2 months. Make sure to leave some space for expansion as it freezes.

Reheating: When ready to enjoy, thaw in the fridge overnight and gently reheat on the stove with a splash of chicken stock or cream to restore its creamy texture.

Avoid Freezing: Note that shrimp can become rubbery when frozen and reheated, so consume within the recommended timeframe to enjoy the best flavor and texture.

Make Ahead Options

These Quick One-Pot Tuscan Shrimp Orzo with Sun-Dried Tomatoes are perfect for those busy weeknights when you need a meal on the table without any fuss! You can prepare the orzo base (steps 1 and 2) up to 24 hours in advance. Simply follow the initial steps, allow the orzo to cool completely, then refrigerate in an airtight container. When you're ready to serve, reheat the orzo with an additional splash of chicken stock or cream to maintain its creamy texture. Just before serving, add the shrimp and remaining ingredients (steps 3 to 5), and you'll have a delicious, homemade dinner that's just as satisfying as if you made it fresh!

Expert Tips for Tuscan Shrimp Orzo

  • Perfectly Cooked Shrimp: Avoid overcooking shrimp; they become tough if left too long. Cook until just pink for tender bites.

  • Stirring Orzo: Keep the orzo moving! Stir frequently during simmering to prevent it from sticking to the pan and ensure even cooking.

  • Add Spinach Last: To maintain its vibrant color and nutritional value, toss in the spinach just minutes before serving.

  • Creamy Sauce: For a rich texture, allow the orzo to absorb most of the chicken stock before adding cream to prevent a watery sauce.

  • Reheating Tips: When reheating leftover Tuscan Shrimp Orzo, add a splash of chicken stock or cream to revitalize its creamy consistency.

What to Serve with Quick One-Pot Tuscan Shrimp Orzo?

Create a delightful meal that elevates your dining experience, perfectly complementing the rich Mediterranean flavors of your dish.

  • Garlic Bread: Warm, crusty garlic bread is perfect for soaking up the creamy sauce and adds a satisfying crunch.

  • Arugula Salad: Crisp arugula tossed with lemon vinaigrette provides a fresh balance to the rich flavors of the orzo.

  • Roasted Vegetables: Seasonal roasted veggies like zucchini and bell peppers not only add color but also enhance the meal's nutrition and earthiness.

  • Crispy Bruschetta: Crunchy toasted bread topped with fresh tomatoes and basil makes a vibrant appetizer that echoes the sauce's Mediterranean vibes.

  • White Wine: A crisp white wine, like Pinot Grigio, elevates the dining experience, cutting through the creaminess with its acidity.

  • Dessert - Tiramisu: Follow the meal with a classic Italian tiramisu to satisfy your sweet tooth and wrap up your culinary journey on a delightful note.

Tuscan Shrimp Orzo with Sun-Dried Tomatoes Recipe FAQs

How do I choose the best shrimp for this recipe?
Absolutely! When selecting shrimp, look for medium to large shrimp, specifically sizes 26-30 or 31-40 count. Fresh shrimp should have a slight ocean scent and a firm texture. If purchasing frozen shrimp, ensure they are properly thawed before cooking. This ensures they'll cook evenly and lend their delicious flavor to the orzo.

What’s the best way to store leftovers?
Very good question! Store any leftover Tuscan Shrimp Orzo in an airtight container in the refrigerator for up to 3 days. Be sure to keep it sealed to maintain freshness. While it may thicken as it cools, you can easily revive it by adding a splash of chicken stock or cream during reheating.

Can I freeze Tuscan Shrimp Orzo?
Absolutely! To freeze, allow the dish to cool completely, then transfer it to a freezer-safe container. It will keep well for up to 2 months. Remember to leave some room for expansion. When you’re ready to enjoy, thaw it overnight in the fridge and gently reheat it on the stove, adding a bit of chicken stock or cream to restore its creamy texture.

What should I do if the sauce is too watery?
If you find your sauce is too watery, it’s likely because the orzo hasn’t absorbed enough of the chicken stock. To fix this, let the orzo simmer longer until it reaches the desired consistency. If you’ve already added the cream, continue cooking over low heat to allow more evaporation. I recommend frequent stirring for the best results.

Are there any dietary considerations I should be aware of?
Great question! This recipe contains shrimp, cream, and gluten from the orzo. If you have seafood allergies, consider substituting with chicken or tofu. For lactose-free options, use a non-dairy milk or broth and replace cream with a suitable alternative. If gluten is a concern, opt for gluten-free pasta like brown rice pasta or a similar alternative.

Tuscan Shrimp Orzo with Sun-Dried Tomatoes

Creamy Tuscan Shrimp Orzo with Sun-Dried Tomatoes Delight

Enjoy a quick and wholesome Tuscan Shrimp Orzo with Sun-Dried Tomatoes that delights with creamy Italian flavors in under 30 minutes.
Print Recipe Pin Recipe
Prep Time 10 minutes mins
Cook Time 20 minutes mins
Total Time 30 minutes mins
Servings: 4 servings
Course: Dinner
Cuisine: Italian
Calories: 600
Ingredients Equipment Method Nutrition Notes

Ingredients
  

For the Shrimp
  • 1 lb Shrimp Use medium to large shrimp (26-30 or 31-40 count); can substitute with chicken or tofu for a non-seafood version.
For the Seasoning
  • 1.5 tsp Paprika Adds warmth and color; can swap with smoked paprika for a smoky flavor.
  • 0.5 tsp Italian Seasoning Provides herbaceous notes; replace with a mix of oregano and basil if desired.
  • 0.25 tsp Salt Enhances all flavors; adjust to taste.
  • 0.25 tsp Pepper Adds heat; freshly ground is preferred for best flavor.
  • 6 cloves Garlic Gives aromatic base flavor; freshly minced is best, but garlic powder (1 tsp) works in a pinch.
For the Orzo Base
  • 2 tbsp Olive Oil For sautéing shrimp and integrating flavors; can use any cooking oil or butter if preferred.
  • 0.5 tsp Onion Powder Adds depth; substitute with minced fresh onion if desired.
  • 1 cup Orzo The carbohydrate base for the dish; can replace with another small pasta like ditalini or farro.
For the Creamy Sauce
  • 0.33 cup Sun-Dried Tomatoes Adds concentrated sweetness and tang; can use fresh tomatoes or roasted red peppers as alternatives.
  • 2 cups Chicken Stock Liquid base for cooking orzo; a vegetarian option is vegetable stock.
  • 14 oz Artichoke Hearts Adds texture and flavor; use canned or frozen; can omit if unavailable.
  • 4 oz Spinach For added nutrients and color; substitute with kale or any leafy green.
  • 1 cup Cream Provides a rich, velvety sauce; substitute with half-and-half or a non-dairy alternative for a lighter option.
  • 0.25 tsp Red Pepper Flakes Introduces heat; omit for a milder dish.

Equipment

  • Large skillet

Method
 

Step-by-Step Instructions for Tuscan Shrimp Orzo with Sun-Dried Tomatoes
  1. In a large skillet, heat 2 tablespoons of olive oil over medium-high heat. Season 1 pound of shrimp with paprika, Italian seasoning, salt, and pepper. Sear the shrimp for about 2 minutes per side until they turn pink and opaque. In the last 30 seconds, add 6 minced garlic cloves to the skillet for aromatic depth. Remove shrimp from the skillet and set aside.
  2. In the same skillet, add 0.33 cup of sun-dried tomatoes and 1 cup of orzo. Toast the mixture over medium heat for 2 minutes, stirring frequently to enhance the flavors and prevent sticking.
  3. Pour in 2 cups of chicken stock and bring the mixture to a boil. Once boiling, reduce the heat to a simmer and cook uncovered for about 5-10 minutes, stirring occasionally.
  4. Once the orzo is ready, stir in 1 cup of cream, 14 ounces of artichoke hearts, 4 ounces of fresh spinach, and the reserved shrimp. Continue to cook on low for an additional 2 minutes.
  5. Before serving, taste your Tuscan Shrimp Orzo with Sun-Dried Tomatoes and adjust seasoning. Add additional salt, pepper, and 0.25 teaspoon of red pepper flakes for a kick, if desired.

Nutrition

Serving: 1servingCalories: 600kcalCarbohydrates: 60gProtein: 25gFat: 30gSaturated Fat: 15gPolyunsaturated Fat: 2gMonounsaturated Fat: 10gCholesterol: 170mgSodium: 850mgPotassium: 800mgFiber: 3gSugar: 4gVitamin A: 1600IUVitamin C: 15mgCalcium: 150mgIron: 2mg

Notes

Store any leftovers in an airtight container for up to 3 days. For longer storage, freeze the Tuscan Shrimp Orzo in a freezer-safe container for up to 2 months.

Tried this recipe?

Let us know how it was!

Sweet and Zesty Honey Lime Shrimp Salad for Summer Bliss

April 9, 2026 by Grace Snow Leave a Comment

It was one of those sweltering days when the thought of turning on the oven felt unbearable. I needed something refreshing that captured the essence of summer without sacrificing flavor. Enter the Southwest Honey Lime Shrimp Salad, a dish that delivers a delightful blend of sweet and tangy marinated shrimp, alongside fresh corn, juicy cherry tomatoes, and creamy avocado. Not only is this salad gluten-free, but its quick preparation makes it an absolute lifesaver for busy days when you crave something healthy and satisfying. Perfect for lunch or dinner, this vibrant main dish salad invites you to savor every bite while enjoying the sunny outdoors. So, are you ready to bring a taste of summer to your table?

Why is this Honey Lime Shrimp Salad a Must-Try?

Bursting with Flavor: The honey lime marinade infuses the shrimp with a deliciously sweet and tangy taste that’s hard to resist.
Quick to Prepare: With a prep time of just 15-30 minutes, this salad is perfect for those busy summer days.
Versatile Ingredients: Feel free to customize it with your favorite veggies or proteins, like grilled chicken or black beans for added crunch!
Nutritious and Light: Packed with fresh produce and lean protein, this dish makes a satisfying yet healthy meal option without the guilt.
Impressive Presentation: The vibrant colors and textures make it not just a meal, but a feast for the eyes, ready to impress your guests at any summer gathering.
Perfect for Leftovers: Enjoy the flavors even more the next day! Just keep the vinaigrette separate until serving to maintain freshness.

Honey Lime Shrimp Salad Ingredients

For the Marinade

  • Olive Oil – Adds moisture and richness to the shrimp. Substitution: Avocado oil can be used for a different flavor profile.
  • Honey – Provides natural sweetness and balances the lime acidity. Substitution: Agave syrup or maple syrup can be used.
  • Lime Zest and Juice – Enhances flavor with bright acidity. Substitution: Lemon can be used as an alternative.
  • Chili Powder – Adds a mild, spicy undertone to the marinade. Substitution: Smoked paprika for a different flavor.
  • Ground Cumin – Offers earthy warmth and depth to the recipe. Substitution: Ground coriander can deliver a lighter taste.
  • Garlic Powder – Infuses the shrimp with a savory note. Substitution: Fresh minced garlic can also be used.
  • Kosher Salt and Fresh Ground Black Pepper – Enhances overall flavor; adjust according to taste.

For the Salad

  • Medium-Sized Shrimp (1 lb) – The primary protein, giving a chewy texture once cooked. Ensure shrimp are peeled and deveined.
  • Butter Lettuce (1 head or 5 cups) – Forms the fresh base of the salad, offering a soft crunch. Substitution: Romaine or green leaf lettuce can be used.
  • Cherry Tomatoes (1 cup, halved) – Adds juiciness and a sweet burst of flavor.
  • Avocado (1, sliced) – Contributes creaminess and healthy fats. Tip: Use ripe avocados for the best texture.
  • Fresh or Frozen Corn (1/2 cup) – Brings sweetness and crunch to the dish. Note: Grilled or charred corn can elevate the flavor.
  • Queso Fresco (1/3 cup, crumbled) – Provides a mild, salty contrast with a creamy texture. Substitution: Feta cheese offers a similar taste and texture.
  • Cilantro (for garnish) – Adds a fresh herbaceous note. Omit if you’re not a fan of cilantro.

Step‑by‑Step Instructions for Honey Lime Shrimp Salad

Step 1: Prepare the Marinade
In a small jar or bowl, blend together olive oil, honey, lime zest, and lime juice with chili powder, ground cumin, garlic powder, kosher salt, and fresh ground black pepper. Shake or whisk thoroughly until everything is well incorporated and the mixture is unified. This honey lime marinade will infuse your shrimp with delightful flavors, setting the stage for a refreshing honey lime shrimp salad.

Step 2: Marinate the Shrimp
Pat the medium-sized shrimp dry with paper towels to enhance their ability to absorb the marinade. In a large mixing bowl, toss the shrimp with three tablespoons of the prepared marinade. Let the shrimp marinate for 15 to 30 minutes, stirring occasionally. This marination time allows the sweet and tangy flavors to penetrate the shrimp, making them utterly delicious.

Step 3: Assemble the Salad Base
While the shrimp is marinating, prepare the salad by arranging butter lettuce on a large serving platter or individual bowls. This crunchy base is perfect for your honey lime shrimp salad. Next, scatter fresh corn, halved cherry tomatoes, sliced avocado, and crumbled queso fresco over the lettuce. Take a moment to admire the vibrant colors as they come together!

Step 4: Cook the Shrimp
Heat a skillet over medium-high heat and add a drizzle of olive oil. Once hot, carefully add the marinated shrimp in a single layer, making sure not to overcrowd the pan. Cook for 2 minutes without moving them, until they develop a lovely caramelization. The shrimp should begin to turn opaque, indicating they're almost ready.

Step 5: Finalize Cooking
Flip the shrimp and allow them to cook for an additional 1-2 minutes, or until fully cooked and opaque. Once done, remove the skillet from the heat and let the shrimp cool slightly. Be sure to save any remaining marinade in the pan to further enhance the flavors of your salad.

Step 6: Combine and Serve
Top the arranged salad base with the cooked shrimp, drizzling the reserved marinade over everything for added flavor. Garnish your honey lime shrimp salad with freshly chopped cilantro for an aromatic touch. Serve right away, allowing everyone to enjoy this refreshing dish bursting with summer flavors!

What to Serve with Southwest Honey Lime Shrimp Salad

Enhance your meal experience with delightful pairings that perfectly complement this vibrant shrimp salad.

  • Crispy Garlic Bread: The crunchy texture and buttery flavor of garlic bread bring a comforting sidekick to your refreshing salad. Perfect for soaking up any leftover marinade!

  • Quinoa Pilaf: Light and nutty, quinoa adds a wholesome contrast to the tender shrimp, making it a delightful bed for the salad or a side dish.

  • Grilled Veggies: Roasted seasonal vegetables, like zucchini and bell peppers, bring warmth and earthiness, making each bite of the cold shrimp salad even more enjoyable.

  • Watermelon Feta Salad: The sweetness of juicy watermelon paired with refreshing feta creates a delightful balance to the shrimp’s tangy flavor.

  • Chilled White Wine: A crisp Sauvignon Blanc or Pinot Grigio can elevate your dining experience, enhancing the tangy notes of the honey lime shrimp.

  • Pineapple Salsa: This vibrant, tropical salsa adds a fresh twist with each bite, blending the flavors of juicy fruit with a hint of zest, perfectly balancing the salad’s profile.

  • Avocado Corn Tortilla Chips: Crispy chips served with guacamole make for a great crunchy snack that pairs well with the creaminess and freshness of the shrimp salad.

  • Lemon Sorbet: Brush off the heat with a light and invigorating lemon sorbet for dessert! Its zesty flavor serves as a refreshing palate cleanser after a flavorful meal.

Storage Tips for Honey Lime Shrimp Salad

  • Fridge: Store any leftovers in airtight containers for up to 3 days. Keep shrimp, lettuce, and vinaigrette separate to maintain freshness and texture.

  • Freezer: It’s not recommended to freeze assembled salads, as the lettuce will wilt. However, shrimp can be frozen in a single layer before cooking for up to 2 months.

  • Reheating: If using frozen shrimp, thaw overnight in the refrigerator. Reheat in a skillet over medium heat until warmed through, avoiding overcooking.

  • Assembling: For the best experience, assemble the salad just before serving, combining all elements for a fresh burst of flavor in your honey lime shrimp salad.

Expert Tips for Honey Lime Shrimp Salad

  • Marination Time: Allow shrimp to marinate for at least 15 minutes; longer marination enhances flavor without compromising texture.

  • Cooking Technique: Cook shrimp in a single layer to achieve caramelization; avoid overcrowding the skillet for perfect results.

  • Keep It Fresh: To prevent sogginess, store shrimp and vinaigrette separately until ready to serve in your honey lime shrimp salad.

  • Vegetable Variety: Feel free to add additional veggies like bell peppers or radishes for extra crunch and color in your salad.

  • Garnish Wisely: Consider using chopped scallions instead of cilantro if you know some guests aren’t fans of the herb; it adds a lovely brightness!

Make Ahead Options

These Southwest Honey Lime Shrimp Salad components are perfect for meal prep enthusiasts! You can marinate the shrimp up to 24 hours in advance, allowing the flavors to infuse deeply. Additionally, you can prepare the salad base (butter lettuce, corn, cherry tomatoes, and avocado) and store it in an airtight container in the refrigerator for up to 3 days. To maintain quality, keep the shrimp and salad separate until you're ready to serve, preventing sogginess. When you’re ready to enjoy your salad, simply cook the shrimp as instructed and assemble the salad quickly for fresh, vibrant results. Enjoy a delicious dinner with minimal effort!

Honey Lime Shrimp Salad Variations

Get ready to make this delightful salad your own! There are endless possibilities to customize flavors and textures.

  • Grilled Chicken: Swap the shrimp for grilled chicken for a heartier protein option that still shines in this vibrant dish.

  • Tortilla Strips: Add crunchy tortilla strips for an exciting textural twist that enhances the southwestern flair of the salad.

  • Quinoa Upgrade: For a filling touch, incorporate cooked quinoa to add a nutty flavor and extra protein to each bite.

  • Vegetarian Delight: Replace shrimp with grilled zucchini and bell peppers for a veggie-packed alternative bursting with flavor.

  • Spicy Kick: Sprinkle some red pepper flakes or diced jalapeños on top for a spicy twist that will tantalize your taste buds.

  • Creamier Avocado: Mash the avocado and mix it into the salad for a creamier texture that brings the dish together beautifully.

  • Chunky Salsa: Drizzle some fresh salsa on top for a bright, zesty finish that ties all the flavors together.

  • Seafood Medley: Mix in scallops or crab meat to create a seafood lover's dream that elevates your honey lime shrimp salad to a whole new level.

Looking for more ways to enjoy flavorful shrimp? Check out my recipe for Pan Fried Shrimp, or try some refreshing Shrimp Ceviche for a light meal!

Honey Lime Shrimp Salad Recipe FAQs

How do I select the best shrimp for my salad?
Absolutely! Look for medium-sized shrimp that are firm to the touch and have a fresh, ocean-like smell. Avoid shrimp with dark spots or a dull appearance, which can indicate they're not as fresh. If possible, opt for shrimp that are wild-caught, as they often have a better flavor and texture compared to farm-raised options.

What are the best storage methods for leftover Honey Lime Shrimp Salad?
Very! To keep your Honey Lime Shrimp Salad fresh, store the components separately in airtight containers. The shrimp can last up to 3 days in the fridge, while lettuce should be eaten sooner for the best texture. It's a good idea to dress the salad right before serving to avoid sogginess!

Can I freeze the shrimp for this salad?
Certainly! If you want to prepare in advance, you can freeze the marinated shrimp in a single layer on a parchment-lined baking sheet for about an hour. Once they're firm, transfer them to a freezer-safe bag and store for up to 2 months. When ready to cook, thaw overnight in the refrigerator and proceed with the cooking instructions.

What if I have leftovers but don't want them to get soggy?
I often recommend storing your Honey Lime Shrimp Salad by keeping the shrimp, lettuce, and dressing separate. When you're ready to eat, simply combine them for that fresh, just-made taste! This way, you can enjoy every delectable bite without worrying about losing that crispiness.

Are there any dietary considerations for my Honey Lime Shrimp Salad?
Definitely! This shrimp salad is gluten-free, making it a great choice for those with gluten sensitivities. Additionally, if anyone in your family has shellfish allergies, be cautious as shrimp may not be suitable. You can also easily modify the recipe by substituting shrimp with grilled chicken or marinated vegetables for a vegetarian option.

How can I tell if my shrimp is overcooked?
Absolutely! Overcooked shrimp will lose their tender, juicy texture and become rubbery, which no one wants in their Honey Lime Shrimp Salad. Properly cooked shrimp will be opaque throughout and slightly firmer to the touch. If they look chalky or curled tightly, that's a sign they are overdone. Keep an eye on them while cooking to achieve that perfect bite!

Honey Lime Shrimp Salad

Sweet and Zesty Honey Lime Shrimp Salad for Summer Bliss

A refreshing Honey Lime Shrimp Salad, bursting with flavor and perfect for summer.
Print Recipe Pin Recipe
Prep Time 30 minutes mins
Cook Time 5 minutes mins
Marination Time 30 minutes mins
Total Time 1 hour hr 5 minutes mins
Servings: 4 servings
Course: Salads
Cuisine: Southwest
Calories: 320
Ingredients Equipment Method Nutrition Notes

Ingredients
  

For the Marinade
  • 3 tablespoons Olive Oil Substitution: Avocado oil can be used for a different flavor profile.
  • 2 tablespoons Honey Substitution: Agave syrup or maple syrup can be used.
  • 1 tablespoon Lime Zest
  • 3 tablespoons Lime Juice Substitution: Lemon can be used as an alternative.
  • 1 teaspoon Chili Powder Substitution: Smoked paprika for a different flavor.
  • 1 teaspoon Ground Cumin Substitution: Ground coriander can deliver a lighter taste.
  • 1 teaspoon Garlic Powder Substitution: Fresh minced garlic can also be used.
  • to taste Kosher Salt Enhances overall flavor; adjust according to taste.
  • to taste Fresh Ground Black Pepper Enhances overall flavor; adjust according to taste.
For the Salad
  • 1 lb Medium-Sized Shrimp Ensure shrimp are peeled and deveined.
  • 1 head Butter Lettuce Substitution: Romaine or green leaf lettuce can be used.
  • 1 cup Cherry Tomatoes Halved.
  • 1 Avocado Tip: Use ripe avocados for the best texture.
  • 1/2 cup Fresh or Frozen Corn Note: Grilled or charred corn can elevate the flavor.
  • 1/3 cup Queso Fresco Substitution: Feta cheese offers a similar taste and texture.
  • to taste Cilantro Omit if you’re not a fan of cilantro.

Equipment

  • Mixing Bowl
  • Skillet
  • Jar or bowl for marinade

Method
 

Preparation Steps
  1. In a small jar or bowl, blend together olive oil, honey, lime zest, lime juice, chili powder, ground cumin, garlic powder, kosher salt, and fresh ground black pepper. Shake or whisk thoroughly until unified.
  2. Pat the medium-sized shrimp dry with paper towels. Toss the shrimp with three tablespoons of the prepared marinade and let marinate for 15 to 30 minutes.
  3. Arrange butter lettuce on a serving platter or bowls. Scatter fresh corn, halved cherry tomatoes, sliced avocado, and crumbled queso fresco over the lettuce.
  4. Heat a skillet over medium-high heat, add olive oil, and cook marinated shrimp in a single layer for 2 minutes until caramelized.
  5. Flip the shrimp and cook for an additional 1-2 minutes until fully cooked and opaque. Remove from heat and let cool slightly.
  6. Top the salad base with cooked shrimp, drizzling remaining marinade over. Garnish with cilantro and serve immediately.

Nutrition

Serving: 1servingCalories: 320kcalCarbohydrates: 15gProtein: 28gFat: 18gSaturated Fat: 4gPolyunsaturated Fat: 2gMonounsaturated Fat: 10gCholesterol: 200mgSodium: 400mgPotassium: 600mgFiber: 4gSugar: 8gVitamin A: 25IUVitamin C: 30mgCalcium: 200mgIron: 3mg

Notes

Allow shrimp to marinate for at least 15 minutes; longer marination enhances flavor. Store shrimp and vinaigrette separately until serving for freshness.

Tried this recipe?

Let us know how it was!

Flavor-Packed Shrimp Tacos You'll Crave Every Night

April 9, 2026 by Grace Snow Leave a Comment

Picture yourself gathered around the dinner table, the tantalizing aroma of spiced shrimp wafting through the air, inviting you to dig in. These Easy Shrimp Tacos with Creamy Cilantro Lime Sauce are not just a meal; they're an adventure in flavor, perfect for those busy weeknights when you yearn for something delicious yet quick to prepare. This recipe delivers a delightful mix of juicy shrimp, a refreshing creamy sauce, and crunchy slaw, ensuring everyone in the family will rave about them long after the last bite. Plus, they can easily be made gluten-free with flour tortillas, making them a fantastic choice for everyone to enjoy. Ready to elevate your taco game and discover a new favorite in your kitchen?

Why are these Shrimp Tacos a must-try?

Easy to Make: With just a few simple steps, these tacos come together quickly, making them perfect for busy weeknights.
Flavor Explosion: The blend of spices on the shrimp and the creamy cilantro lime sauce offers a tantalizing taste that will keep you coming back for more.
Healthy & Satisfying: Low in calories yet packed with satisfying ingredients like shrimp and fresh slaw, you won't feel deprived.
Versatile Options: Customize your tacos with toppings like avocado or mango salsa, or switch the protein to make it your own.
Family-Friendly: Even the pickiest eaters will love the crunchy slaw and juicy shrimp, ensuring a meal that pleases everyone.

If you love tacos as much as I do, don’t miss out on trying out Shrimp Tacos Zesty for an extra flavor boost!

Shrimp Tacos Ingredients

For the Shrimp
• Large or Jumbo Shrimp – Juicy protein that can be substituted with chicken or fish if desired.
• Extra-Virgin Olive Oil – A healthy cooking fat; avocado oil works equally well.
• Chili Powder – Adds warmth and depth; cayenne pepper can be used for more heat.
• Ground Chipotle Chili Pepper – Introduces smokiness; use paprika for a milder flavor.
• Ground Cumin – Provides earthiness; you can omit if unavailable but may change flavor.
• Kosher Salt – Enhances flavor; feel free to use sea salt or table salt instead.
• Corn or Flour Tortillas – The base for tacos; gluten-free tortillas can replace flour ones easily.

For the Sauce
• Nonfat Plain Greek Yogurt – Creates a creamy base for the taco sauce; sour cream can provide a richer taste.
• Garlic – An essential aromatic; substitute with garlic powder if fresh isn't available.
• Jalapeño – Adds heat and flavor; omit seeds for less spice or swap for poblano for a milder heat.
• Fresh Cilantro Leaves – Imparts freshness; parsley can be used but will alter the taste.
• Lime Zest and Juice – Brightens up the sauce; lemon juice makes a great alternative.

For the Slaw
• Shredded Cabbage or Slaw Mix – Provides crunch; any crunchy vegetable can be used, like carrots or radishes.

Ready for a flavor-packed taco night? These Shrimp Tacos will surely impress your family!

Step‑by‑Step Instructions for Easy Shrimp Tacos with Creamy Cilantro Lime Sauce

Step 1: Prepare the Shrimp
Begin by rinsing 1 pound of large or jumbo shrimp under cold water, then pat them dry with paper towels to remove excess moisture. In a mixing bowl, combine the shrimp with 2 tablespoons of extra-virgin olive oil, 1 tablespoon of chili powder, 1 teaspoon of ground chipotle chili pepper, 1 teaspoon of ground cumin, and 1 teaspoon of kosher salt. Toss well until the shrimp are fully coated and let them marinate for about 10 minutes to infuse the flavors.

Step 2: Make the Taco Sauce
In a blender, combine 1 cup of nonfat plain Greek yogurt, 2 tablespoons of olive oil, 2 cloves of minced garlic, 1 diced jalapeño (seeds removed for less heat), ½ cup of fresh cilantro leaves, the juice and zest of 1 lime, and a pinch of salt. Blend on high until smooth and creamy, adjusting seasoning as needed. This zesty sauce will elevate your shrimp tacos, so set it aside for later.

Step 3: Prepare the Slaw
In another bowl, mix 2 cups of shredded cabbage or a slaw mix with a few tablespoons of the creamy cilantro lime sauce. Toss until the cabbage is lightly coated, ensuring that the slaw is fresh and crunchy. Reserve some of the sauce to serve with the tacos later. This refreshing slaw will provide a delightful crunch to your shrimp tacos.

Step 4: Cook the Shrimp
Heat a nonstick skillet over medium-high heat and add a drizzle of olive oil. Once the oil is hot, add the marinated shrimp in a single layer. Sauté for about 4 minutes, stirring occasionally, until the shrimp turn opaque and curl slightly. They should be cooked through but not overdone, so watch for a firm texture and vibrant color to indicate doneness.

Step 5: Warm the Tortillas
While the shrimp is cooking, warm your corn or flour tortillas in a separate skillet over medium heat for about 30 seconds on each side, or until they become pliable. You can also wrap them in a clean kitchen towel and microwave for about 20 seconds. Soft tortillas will cradle your shrimp and slaw beautifully.

Step 6: Assemble the Tacos
To assemble your easy shrimp tacos, place a few sautéed shrimp on each tortilla, top with a generous scoop of the prepared slaw, and drizzle with additional creamy cilantro lime sauce for extra flavor. You can also add lime juice or any desired toppings like avocado or fresh jalapeños. Serve immediately for a delicious meal everyone will love.

Shrimp Tacos Variations & Substitutions

Feel free to get creative and customize these scrumptious shrimp tacos to suit your taste and dietary needs!

  • Chicken or Tofu: Swap shrimp for grilled chicken or firm tofu for a different protein twist. Both options bring their unique flavors, ensuring that everyone finds something they love.
  • Avocado & Salsa: Top your tacos with creamy avocado slices or vibrant mango salsa for an even fresher taste. The creaminess of the avocado or sweetness of the mango adds yet another layer of flavor that’s hard to resist.
  • Lettuce Wraps: For a low-carb option, opt for crisp lettuce leaves instead of tortillas. It becomes a refreshing, light meal, perfect for warm evenings!
  • Spice it Up: Add more heat with diced serrano peppers or a dash of hot sauce in your taco sauce, if you crave the fire. The extra kick will tantalize your taste buds!
  • Crunchy Veggies: Mix shredded carrots or radishes into your slaw for a fun texture twist. These additions will brighten up the dish and add an extra crunch!
  • Vegan Swap: Replace Greek yogurt with cashew cream or a dairy-free yogurt alternative for a vegan take. It keeps the creamy texture without compromising flavor.
  • Smoky BBQ: Give your tacos a different twist by adding a smoky BBQ sauce to the shrimp before cooking. It transforms the flavor profile, creating a savory fusion experience!
  • Herb Boost: Experiment with basil or mint instead of cilantro for a fresh herbaceous taste. This unique touch will surprise and delight your guests.

If you would like more incredible shrimp recipes, don’t miss trying out Shrimp Ceviche Zesty or the delightful Turmeric Dill Shrimp Stir Fry!

How to Store and Freeze Shrimp Tacos

  • Fridge: Store leftover shrimp tacos in an airtight container for up to 3 days. It's best to keep the shrimp, slaw, and sauce separate until ready to serve for optimal freshness.
  • Freezer: For longer storage, freeze cooked shrimp in a freezer-safe bag for up to 2 months. Thaw in the fridge overnight before reheating.
  • Reheating: To reheat, place the shrimp in a skillet over medium heat for 3-4 minutes until warmed through. Avoid microwaving to keep their texture intact.
  • Slaw: Use slaw within 2 days for the best crunch. If stored with the shrimp, it may become soggy, so keep it separate until you're ready to enjoy your shrimp tacos!

Make Ahead Options

These Easy Shrimp Tacos with Creamy Cilantro Lime Sauce are the ideal choice for meal prep! You can marinate the shrimp up to 24 hours in advance, allowing the flavors to develop beautifully. Additionally, prepare the creamy cilantro lime sauce and slaw up to 3 days ahead; simply store them in airtight containers in the fridge to maintain freshness and crunch. When you’re ready to serve, quickly sauté the shrimp for just 4 minutes until cooked through, warm the tortillas for about 30 seconds, and assemble your tacos. This way, busy weeknights become effortless, ensuring your family enjoys delicious, homemade tacos without the stress!

Expert Tips for Shrimp Tacos

• Don’t Overcook: Ensure shrimp only cook until they’re opaque and curl slightly; overcooked shrimp can become rubbery.

• Perfect Marinade Time: Let the shrimp marinate for at least 10 minutes. This allows the flavors to penetrate, enhancing your shrimp tacos significantly.

• Creamy Sauce Balance: Adjust your sauce's tanginess to your liking. If it’s too tart, a bit more Greek yogurt can mellow it out.

• Tortilla Technique: Warm tortillas until pliable and tuck them into a clean kitchen towel to keep them soft while assembling your shrimp tacos.

• Customize Slaw: Feel free to experiment with different veggies in your slaw—crunchy carrots or radishes add a delightful twist!

• Serving Tips: Include lime wedges on the side for an extra zing. Fresh lime juice complements the shrimp tacos beautifully!

What to Serve with Easy Shrimp Tacos with Creamy Cilantro Lime Sauce

Picture a vibrant gathering around the table, with tantalizing flavors mingling in the air, ready to elevate your taco night.

  • Crispy Tortilla Chips: These crunchy delights provide an irresistible textural contrast and are perfect for scooping up leftover sauce.

  • Refreshing Cucumber Salad: Light and crisp, this salad brings a fresh element that balances the savory shrimp and creamy sauce beautifully.

  • Zesty Mango Salsa: This sweet and tangy salsa complements the spices in the tacos, adding a tropical flair that brightens each bite.

  • Creamy Guacamole: Rich and velvety, guacamole offers a delightful creaminess that pairs wonderfully with the spices of the shrimp and adds extra indulgence.

  • Spicy Black Bean Soup: A warm sidekick, this hearty soup brings a comforting element alongside your shrimp tacos while enhancing the overall meal experience.

  • Chilled White Wine: A refreshing glass of Sauvignon Blanc or a crisp Pinot Grigio complements the flavors perfectly, enhancing the dining experience.

  • Cilantro Lime Rice: Fluffy rice infused with lime and cilantro serves as a wonderful side, adding brightness and soaking up the delicious flavors of the tacos.

Take your shrimp taco night to the next level with these delightful pairings!

Shrimp Tacos Recipe FAQs

How do I select the right shrimp for my tacos?
Absolutely! When choosing shrimp, look for large or jumbo shrimp that are firm to the touch and have a mild, ocean-like smell. Avoid any shrimp with dark spots all over, which could indicate spoilage. Fresh shrimp should be transparent and slightly pinkish.

What's the best way to store leftover shrimp tacos?
For optimal freshness, store leftover shrimp tacos in an airtight container in the fridge for up to 3 days. I recommend keeping the shrimp, slaw, and sauce separate to prevent sogginess. That way, when you’re ready to enjoy them again, they’ll taste almost like when they were freshly made!

Can I freeze leftover shrimp for later use?
Absolutely! To freeze cooked shrimp, place them in a freezer-safe bag, removing as much air as possible, and store for up to 2 months. When you’re ready to eat, simply thaw them in the fridge overnight. For reheating, toss the shrimp in a skillet over medium heat for about 3-4 minutes until they’re warmed through. This method helps keep their texture nice and firm!

What if my shrimp tacos come out rubbery?
Very! The key to perfectly cooked shrimp is avoiding overcooking. Make sure to sauté them just until they turn opaque and start to curl. If you notice them turning a bit too firm, reduce the cooking time next time. Trust me, the right timing can elevate your shrimp tacos from good to great!

Can I make these tacos gluten-free?
Absolutely! For a gluten-free option, use corn tortillas instead of flour tortillas. They hold up beautifully and are just as delicious. Plus, if you're careful with your ingredient choices, including the sauce, you can ensure that everyone at the table can enjoy these tasty shrimp tacos without worry!

What dietary considerations should I keep in mind?
If you're serving individuals with allergies, be sure to check for any sensitivities to shrimp or jalapeños. You can easily customize the recipe by swapping shrimp for grilled chicken or tofu for a delightful alternative, ensuring a meal that suits everyone’s dietary needs!

Shrimp Tacos

Flavor-Packed Shrimp Tacos You'll Crave Every Night

Discover these easy shrimp tacos featuring a creamy cilantro lime sauce that delivers a flavor explosion, ideal for busy weeknights.
Print Recipe Pin Recipe
Prep Time 10 minutes mins
Cook Time 8 minutes mins
Marinating Time 10 minutes mins
Total Time 28 minutes mins
Servings: 4 tacos
Course: Dinner
Cuisine: Mexican
Calories: 220
Ingredients Equipment Method Nutrition Notes

Ingredients
  

For the Shrimp
  • 1 pound Large or Jumbo Shrimp Can substitute with chicken or fish
  • 2 tablespoons Extra-Virgin Olive Oil Avocado oil works equally well
  • 1 tablespoon Chili Powder Cayenne pepper can be used for more heat
  • 1 teaspoon Ground Chipotle Chili Pepper Use paprika for a milder flavor
  • 1 teaspoon Ground Cumin Omit if unavailable
  • 1 teaspoon Kosher Salt Feel free to use sea salt or table salt
  • 4 pieces Corn or Flour Tortillas Use gluten-free tortillas for a gluten-free option
For the Sauce
  • 1 cup Nonfat Plain Greek Yogurt Sour cream can be used for a richer taste
  • 2 cloves Garlic Substitute with garlic powder if fresh isn't available
  • 1 piece Jalapeño Remove seeds for less heat
  • ½ cup Fresh Cilantro Leaves Parsley can be used but will alter the taste
  • 1 piece Lime Zest and Juice Lemon juice makes a great alternative
For the Slaw
  • 2 cups Shredded Cabbage or Slaw Mix Any crunchy vegetable can be used

Equipment

  • Nonstick skillet
  • Blender
  • Mixing Bowl

Method
 

Prepare the Shrimp
  1. Rinse 1 pound of large or jumbo shrimp under cold water and pat dry. In a bowl, combine shrimp with olive oil, chili powder, chipotle chili pepper, cumin, and salt. Toss to coat and let marinate for 10 minutes.
Make the Taco Sauce
  1. In a blender, combine Greek yogurt, olive oil, minced garlic, diced jalapeño, fresh cilantro, lime juice, and salt. Blend until smooth and set aside.
Prepare the Slaw
  1. Mix shredded cabbage with a few tablespoons of the creamy cilantro lime sauce until lightly coated.
Cook the Shrimp
  1. Heat a nonstick skillet over medium-high heat. Add a drizzle of olive oil, then sauté marinated shrimp for about 4 minutes until opaque.
Warm the Tortillas
  1. Warm corn or flour tortillas in a skillet for 30 seconds on each side, or microwave wrapped in a towel for 20 seconds.
Assemble the Tacos
  1. Place sautéed shrimp on each tortilla, top with slaw, and drizzle with additional sauce. Add lime juice or desired toppings.

Nutrition

Serving: 1tacoCalories: 220kcalCarbohydrates: 25gProtein: 18gFat: 8gSaturated Fat: 1gPolyunsaturated Fat: 1gMonounsaturated Fat: 5gCholesterol: 150mgSodium: 600mgPotassium: 300mgFiber: 3gSugar: 2gVitamin A: 500IUVitamin C: 10mgCalcium: 40mgIron: 1.5mg

Notes

Store leftover tacos separately in an airtight container for optimal freshness. Best eaten within 3 days.

Tried this recipe?

Let us know how it was!

Zesty Lemon Garlic Shrimp and Asparagus for Quick Delights

April 8, 2026 by Grace Snow Leave a Comment

I can still recall the aroma wafting through the kitchen as my mom simmered garlic and butter, coaxing out the rich flavors that would soon envelop the shrimp. If you’re craving a dinner that’s not only quick to whip up but also brimming with flavor, this Lemon Garlic Shrimp and Asparagus recipe is a fantastic choice. In under 30 minutes, you can relish a fresh, homemade dish that’s light yet satisfying. It’s perfect for those evenings when a fast-food temptation lurks but you’d rather savor something wholesome and truly delicious. With just a handful of ingredients, you’re in for a delightful meal that’s both vibrant and easy to customize. Can you feel that enticing blend of citrus and garlic already? Let’s dive into this irresistible recipe!

Why Choose This Shrimp Recipe?

Quick and Easy: You can whip this dish up in under 30 minutes, making it a perfect go-to for busy weeknights.

Bursting with Flavor: The zesty combination of lemon and garlic infuses the shrimp with a lively taste that will make your taste buds dance.

Healthy and Wholesome: Packed with asparagus, this dish not only tastes great but also provides a nutritious boost, helping you avoid fast food cravings.

Versatile Options: Feel free to swap in your favorite vegetables or even serve it over rice or pasta for a delightful twist! For other quick meals, check out my Pan Fried Shrimp or the enticing Shrimp Tacos Zesty.

Crowd-Pleaser: Whether it’s a family dinner or a gathering with friends, this dish is sure to impress everyone at the table!

Lemon Garlic Shrimp and Asparagus Ingredients

For the Shrimp

  • Shrimp – Fresh or frozen, peeled, and deveined shrimp works best for optimal flavor.
  • Garlic – Minced garlic is essential for that rich, aromatic base. Adjust the quantity to suit your taste.
  • Unsalted Butter – Adds a rich creaminess; you can use olive oil for a lighter option.
  • Olive Oil – Helps in cooking and adds depth to the flavor; choose extra virgin for an enhanced taste.

For the Asparagus

  • Asparagus – Tender, young asparagus spears provide that perfect crunch and nutrition.
  • Salt – Enhances all the flavors; feel free to use sea salt for a touch of sophistication.
  • Black Pepper – Freshly cracked black pepper adds a delightful heat.

For the Zesty Flavor

  • Lemon Juice – Freshly squeezed lemon juice brings brightness and balances the dish; don’t skimp on this!
  • Lemon Zest – Adds an extra zing of citrus flavor—get that bright yellow zest from an organic lemon if possible!
  • Red Pepper Flakes – Optional, but they add a lovely hint of heat that pairs beautifully with shrimp.

Feel free to play with this Lemon Garlic Shrimp and Asparagus recipe, making it your own while savoring every bite!

Step‑by‑Step Instructions for Lemon Garlic Shrimp and Asparagus

Step 1: Preheat the Oven
Begin by preheating your oven to 400°F (200°C). While the oven warms up, line a baking sheet with parchment paper. This keeps your shrimp and asparagus from sticking and makes cleanup a breeze. Preparing your baking sheet in advance sets the stage for a smooth cooking process.

Step 2: Prepare the Asparagus
Trim the woody ends off the asparagus and rinse them under cold water. Place the asparagus onto the baking sheet and drizzle with a bit of olive oil. Sprinkle with salt and black pepper, then toss to coat evenly, making sure every spear is seasoned just right. Arrange them in a single layer to achieve that perfect roast.

Step 3: Roast the Asparagus
Slide the baking sheet into your preheated oven and roast the asparagus for about 10 minutes. You want them to become tender and slightly crispy while still retaining their vibrant green color. This initial roasting helps build layers of flavor for your Lemon Garlic Shrimp and Asparagus dish.

Step 4: Cook the Shrimp
While the asparagus is roasting, heat a large skillet over medium heat and add unsalted butter and a splash of olive oil. Once melted and bubbly, add minced garlic and sauté for about 1 minute until fragrant. Be careful not to let the garlic brown, as it may turn bitter; it should be just golden and aromatic.

Step 5: Combine the Shrimp
Introduce the peeled and deveined shrimp into the skillet and stir to coat them with the garlic-butter mixture. Cook for about 4-5 minutes, turning the shrimp occasionally until they turn pink and opaque. You'll know they’re done when they curl slightly and are firm to the touch.

Step 6: Add Zesty Flavor
Once the shrimp is cooked, remove the skillet from heat and squeeze in freshly squeezed lemon juice, along with a sprinkle of lemon zest. This bright tang really enhances the overall flavor of your Lemon Garlic Shrimp and Asparagus. Optionally, toss in some red pepper flakes for an extra kick if desired.

Step 7: Combine and Serve
Carefully remove the roasted asparagus from the oven and add it to the skillet with the shrimp. Gently toss everything together, making sure the asparagus is well-coated with the lemony garlic sauce. Serve this delightful combination hot, garnished with fresh herbs if desired—your homemade meal is ready to be savored!

Storage Tips for Lemon Garlic Shrimp and Asparagus

Fridge: Store any leftovers in an airtight container in the fridge for up to 2 days. Reheat gently in a skillet over low heat to maintain the shrimp's tenderness.

Freezer: For longer storage, freeze the cooked shrimp and asparagus in a single layer on a baking sheet, then transfer to a zip-top bag. They’ll last up to 3 months.

Reheating: Thaw overnight in the fridge before reheating. To restore the dish's zing, add a splash of fresh lemon juice while warming. Enjoy the deliciousness of your Lemon Garlic Shrimp and Asparagus even days later!

Lemon Garlic Shrimp and Asparagus Variations

Feel free to get creative with this dish; it's all about personalizing flavors that delight your palate!

  • Gluten-Free:
    Substitute soy sauce with tamari for a gluten-free option without sacrificing flavor.

  • Vegetarian:
    Replace shrimp with chickpeas for a plant-based twist that still packs a protein punch.

  • Extra Veggies:
    Add diced bell peppers or zucchini to the mix for additional color and crunch. They roast beautifully!

  • Pasta Delight:
    Serve this shrimp and asparagus over cooked linguine or spaghetti to create a cozy pasta dish. Toss it all together for a delightful meal!

  • Creamy Touch:
    Stir in a splash of heavy cream or coconut milk after adding the lemon for a creamy, dreamy sauce. It elevates the dish to a whole new level!

  • Spice It Up:
    Add more red pepper flakes or diced jalapeños for an extra kick of heat that will awaken your taste buds.

  • Herb Infusion:
    Incorporate fresh basil or dill to complement the zesty flavors and brighten the dish with herbal notes.

  • Citrus Medley:
    Try using lime or orange juice instead of lemon for a unique take on the classic lemon garlic flavor. It’s a refreshing change!

Let your creativity shine as you explore these delicious modifications! And if you’re looking for more seafood inspiration, check out my Turmeric Dill Shrimp Stir Fry.

Make Ahead Options

Preparing your Lemon Garlic Shrimp and Asparagus ahead of time is a fantastic way to save precious moments on busy weeknights! You can marinate the shrimp in olive oil, minced garlic, lemon juice, and seasonings up to 24 hours in advance for maximum flavor infusion. As for the asparagus, you can trim and wash it up to 3 days ahead, then store it in a sealed container in the fridge. When it’s time to enjoy this delicious dish, simply roast the asparagus and cook the shrimp as directed. This ensures your meal is just as fresh and flavorful while giving you the gift of time to relax!

Expert Tips for Lemon Garlic Shrimp and Asparagus

  • Quality Ingredients: Use fresh shrimp and organic asparagus whenever possible. Fresh ingredients elevate the flavors, making your Lemon Garlic Shrimp and Asparagus truly shine.

  • Don't Overcook: Pay attention to the shrimp; they cook quickly. Remove them from heat as soon as they turn pink and opaque to avoid a rubbery texture.

  • Zesty Balance: Always adjust the lemon juice and zest to your taste. Adding too much acidity can overpower the dish, so start with less and increase gradually.

  • Cook in Stages: Roasting asparagus before adding shrimp ensures everything is perfectly cooked. This method builds rich flavors and maintains the asparagus's crispiness.

  • Add Veggie Variety: Feel free to swap in or add other veggies like bell peppers or snap peas. This adds nutrition and enhances the color of your Lemon Garlic Shrimp and Asparagus.

  • Herb Garnish: A sprinkle of fresh herbs like parsley or cilantro right before serving gives a beautiful finish and a burst of color that complements the dish.

What to Serve with Zesty Lemon Garlic Shrimp and Asparagus?

Elevate your meal with delightful pairings that complement the bright flavors of this shrimp dish.

  • Coconut Rice: A creamy, subtly sweet side that balances the zesty shrimp while adding a tropical touch to your plate.
  • Garlic Bread: When slathered with butter and toasted to perfection, it captures the essence of garlic, making it a flavorful accompaniment.
  • Caesar Salad: Crisp romaine lettuce topped with Parmesan and a tangy dressing enhances the meal with crunchy textures and fresh greens.
  • Quinoa Pilaf: This nutty, protein-packed grain adds wholesome earthiness while soaking up the zesty sauce of the shrimp.
  • Zucchini Noodles: Light and refreshing, zucchini noodles create a fun twist on pasta, absorbing the bright lemon-garlic flavors beautifully.
  • Chardonnay: A chilled glass of this white wine complements the dish’s citrus notes while enhancing the overall dining experience with its crispness.
  • Lemon Sorbet: Serve this frozen treat as a light dessert to cleanse the palate, echoing the zesty lemon notes from the meal.
  • Honey-Glazed Carrots: Their natural sweetness pairs wonderfully with the savory shrimp, offering a lovely contrast in flavors and colors.
  • Grilled Vegetable Skewers: Colorful and packed with flavor, these add a smoky essence that beautifully rounds out the lightness of your meal.
  • Herb-Infused Olive Oil Dip: A simple yet flavorful dip for crusty bread can tie the meal together, embodying the essence of Italian cuisine.

Lemon Garlic Shrimp and Asparagus Recipe FAQs

What type of shrimp should I use for this recipe?
Absolutely! Fresh or frozen, peeled, and deveined shrimp works best for optimal flavor. If using frozen shrimp, be sure to thaw them completely before cooking. You can soak them in cold water for about 15-20 minutes to speed things up.

How should I store leftover Lemon Garlic Shrimp and Asparagus?
Store any leftovers in an airtight container in the fridge for up to 2 days. To preserve the shrimp's tenderness during reheating, gently warm them in a skillet over low heat. This will help maintain their delicious flavor and texture.

Can I freeze Lemon Garlic Shrimp and Asparagus?
Certainly! For longer storage, freeze the cooked shrimp and asparagus in a single layer on a baking sheet first. After they firm up, transfer them to a zip-top bag where they'll last up to 3 months. Just be sure to thaw overnight in the fridge before reheating for the best results!

What if my shrimp turns out rubbery after cooking?
Very! Overcooking shrimp can make them tough and rubbery, so it’s crucial to keep an eye on them. The moment they turn pink and opaque, they’re done—usually around 4-5 minutes of cooking! Removing them from heat at just the right time will give you the succulent texture you desire.

Can I substitute vegetables other than asparagus?
Of course! This dish is versatile, so feel free to swap in your favorite vegetables like bell peppers, snap peas, or broccoli. Each will add a new layer of flavor and texture to your Lemon Garlic Shrimp and Asparagus, making it a wonderfully customizable meal.

Lemon Garlic Shrimp and Asparagus

Zesty Lemon Garlic Shrimp and Asparagus for Quick Delights

This Lemon Garlic Shrimp and Asparagus recipe offers a quick, flavorful dinner option in under 30 minutes.
Print Recipe Pin Recipe
Prep Time 10 minutes mins
Cook Time 20 minutes mins
Total Time 30 minutes mins
Servings: 4 servings
Course: Dinner
Cuisine: American
Calories: 250
Ingredients Equipment Method Nutrition Notes

Ingredients
  

For the Shrimp
  • 1 lb Shrimp, peeled and deveined Fresh or frozen
  • 3 cloves Garlic, minced
  • 2 tbsp Unsalted Butter
  • 1 tbsp Olive Oil Extra virgin preferred
For the Asparagus
  • 1 lb Asparagus, trimmed Tender, young spears
  • 1 tsp Salt Sea salt recommended
  • 1/2 tsp Black Pepper, freshly cracked
For the Zesty Flavor
  • 2 tbsp Lemon Juice, freshly squeezed
  • 1 tbsp Lemon Zest From an organic lemon
  • 1/4 tsp Red Pepper Flakes Optional

Equipment

  • Oven
  • Skillet
  • Baking Sheet

Method
 

Preparation
  1. Preheat your oven to 400°F (200°C) and line a baking sheet with parchment paper.
  2. Trim the woody ends off the asparagus, rinse them, and place them on the baking sheet with olive oil, salt, and pepper. Toss to coat.
  3. Roast the asparagus in the oven for about 10 minutes until tender and slightly crispy.
  4. In a skillet, melt the butter with olive oil over medium heat. Add garlic and sauté for about 1 minute until fragrant.
  5. Add the shrimp to the skillet and cook for about 4-5 minutes, turning until they are pink and opaque.
  6. Remove from heat and mix in lemon juice and zest. Add red pepper flakes if using.
  7. Combine the roasted asparagus with the shrimp in the skillet, tossing gently, and serve hot.

Nutrition

Serving: 1servingCalories: 250kcalCarbohydrates: 10gProtein: 20gFat: 15gSaturated Fat: 5gPolyunsaturated Fat: 2gMonounsaturated Fat: 8gCholesterol: 180mgSodium: 500mgPotassium: 500mgFiber: 4gSugar: 2gVitamin A: 800IUVitamin C: 20mgCalcium: 80mgIron: 2mg

Notes

Feel free to customize with other veggies or adjust flavors to your preference.

Tried this recipe?

Let us know how it was!

Irresistible Green Onion Zucchini Cheddar Quick Bread Delight

April 8, 2026 by Grace Snow Leave a Comment

As I stood in my kitchen, the vibrant green of fresh zucchini caught my eye, sparking a craving for something warm and savory. That's when I remembered my go-to recipe for Green Onion Zucchini Cheddar Quick Bread. This delightful bread marries the subtle sweetness of zucchini with the sharp tang of cheddar and the freshness of green onions, making it a satisfyingly moist treat that fits right in with summer meals. One of the best parts? It's incredibly adaptable—whether you want to spice things up with jalapeños or try a different type of cheese, the options are practically endless. Plus, it comes together in a flash, perfect for those busy weekdays when fast food beckons. Are you ready to elevate your baking skills and impress your family with this easy, savory quick bread? Let's dive into the recipe!

Why is this quick bread a must-try?

Simplicity at its finest: This Green Onion Zucchini Cheddar Quick Bread comes together effortlessly, making it an ideal choice for both beginner and experienced bakers.

Adaptable ingredients: Feel free to swap cheeses or add spices, like jalapeños, to personalize the flavor to your liking.

Moist texture: Thanks to the zucchini and cheese, this bread is incredibly moist and luscious, offering a delightful mouthfeel with every bite.

Perfect for any occasion: Serve it warm with butter alongside soups or slice it for sandwiches, making it versatile enough for casual lunches or dinner parties.

Quick preparation: Ready in about an hour, it’s the perfect solution to skip fast food on busy nights. Enjoy this delicious homemade bread that your family will love!

Green Onion Zucchini Cheddar Quick Bread Ingredients

For the Bread
• All-purpose flour – This forms the base structure; sift for best results.
• Baking powder – A vital leavening agent; ensure it’s fresh for effective rise.
• Baking soda – Works with vinegar for lift; don't skip!
• Table salt – Enhances flavor; kosher salt can be a great substitute.
• Milk – Adds moisture to your batter; plant-based alternatives can also work well.
• Vinegar – Curdles the milk to simulate buttermilk; lemon juice serves as a good replacement.
• Unsalted butter – Provides richness; can swap for vegetable or coconut oil for a dairy-free option.
• Egg – Binds everything together and adds moisture; consider a flax egg for a vegan version.
• Zucchini – The star ingredient that provides moisture; use medium-sized zucchinis and make sure to squeeze out excess liquid.
• Sharp cheddar cheese – Infuses flavor and texture; fresh-grated cheese yields the best results.
• Chopped green onions – Adds a fresh kick; feel free to substitute with chives for variety.
• Cracked black pepper – Optional, but adds a nice hint of spice to your quick bread.

This Green Onion Zucchini Cheddar Quick Bread is not only savory but adaptable, allowing you to create a delicious dish that fits your family's preferences seamlessly. Enjoy your baking adventure!

Step‑by‑Step Instructions for Green Onion Zucchini Cheddar Quick Bread

Step 1: Preheat the Oven
Begin by preheating your oven to 350°F (175°C). While the oven is warming up, prepare a 9 x 5 inch bread pan by generously greasing it with non-stick spray to ensure easy removal later. This step is crucial as you want the pan ready for the rich, savory Green Onion Zucchini Cheddar Quick Bread batter.

Step 2: Prepare the Zucchini
Grate the zucchini using a box grater, then wrap it in a clean paper towel. Squeeze firmly to remove excess moisture; you want it damp but not watery. This ensures your quick bread stays moist and has the perfect texture without becoming soggy. Set the prepared zucchini aside while you mix the batter.

Step 3: Combine Dry Ingredients
In a large mixing bowl, whisk together the all-purpose flour, baking powder, baking soda, and table salt. Ensure that there are no lumps in your dry mixture and that everything is evenly combined. This creates a solid base for your Green Onion Zucchini Cheddar Quick Bread, allowing for a lovely rise and fluffy texture.

Step 4: Mix the Wet Ingredients
In a separate bowl, combine milk and vinegar, letting them sit for a few minutes to curdle slightly, mimicking the texture of buttermilk. Next, stir in the melted unsalted butter and chicken egg, mixing until your wet ingredients are smooth and fully incorporated. This wet mixture adds richness and moisture to your delightful quick bread.

Step 5: Combine Wet and Dry Mixtures
Gently pour the wet ingredients into the bowl with the dry ingredients. Using a spatula, fold them together carefully until just combined. Be cautious not to overmix; a few visible streaks of flour are perfectly fine and will give you that tender crumb in your Green Onion Zucchini Cheddar Quick Bread.

Step 6: Add the Veggies and Cheese
Now it’s time to incorporate the prepared zucchini, grated sharp cheddar cheese, and chopped green onions into the batter. Using your spatula, fold these ingredients in gently until they are evenly distributed throughout the mixture. This step adds vibrant flavor and moisture to your quick bread, making it irresistibly savory.

Step 7: Transfer to Pan
Pour the finished batter into your greased bread pan, spreading it evenly to smooth the top. This will help ensure your Green Onion Zucchini Cheddar Quick Bread bakes uniformly. Take a moment to admire the colorful mix of green and yellow, signaling a delicious treat ahead!

Step 8: Bake the Bread
Place the bread pan in the preheated oven and bake for approximately 1 hour. Keep an eye on it, and you’ll know it’s done when a toothpick inserted into the center comes out clean. The bread will be golden brown and fragrant, filling your kitchen with an enticing aroma.

Step 9: Cool and Slice
Once baked, remove the pan from the oven and allow the Green Onion Zucchini Cheddar Quick Bread to cool in the pan for about 10 minutes. Then, carefully transfer the loaf to a wire rack to cool completely, which is essential for achieving clean slices. Enjoy the wonderful texture and taste once it’s ready to serve!

What to Serve with Green Onion Zucchini Cheddar Quick Bread?

As you slice into this savory bread, think about delightful pairings that will elevate your meal and complement its rich flavors.

  • Creamy Tomato Soup: This classic pairing adds a luscious acidity that beautifully balances the richness of the cheddar.

  • Fresh Garden Salad: Tossed with a light vinaigrette, it brings a refreshing crunch that contrasts with the bread's moist texture.

  • Spicy Garlic Roasted Shrimp: The bold flavors of garlic and spice add excitement and elevate your dish to a delicious seafood complement.

  • Herbed Butter: Spread a rich herb-infused butter on warm slices for a luxurious finish that accentuates the bread’s savory notes.

  • Pickled Vegetables: The tangy crunch of pickles introduces a delightful contrast, enhancing the overall flavor experience while refreshing the palate.

  • Cheesy Broccoli Casserole: The creamy and cheesy elements work harmoniously, creating a cozy, comforting meal perfect for family gatherings.

  • Zesty Lemonade: A tall glass of this refreshing drink brightens up the meal with its citrusy zing, making bites even more enjoyable.

  • Apple Pie: For dessert, this classic choice provides a sweet contrast, making it a satisfying way to end a savory meal.

Helpful Tricks for Green Onion Zucchini Cheddar Quick Bread

  • Zucchini Prep: Squeeze the grated zucchini thoroughly before adding it to the batter; excess moisture can lead to a wet bread that doesn’t rise well.

  • Mixing Method: Avoid overmixing the batter. Gently fold the wet and dry ingredients together until just combined to maintain a light and airy texture in your quick bread.

  • Cooling Time: Allow the bread to cool in the pan for 10 minutes before transferring to a wire rack. This helps set the loaf's structure and ensures cleaner slices.

  • Cheese Choice: Opt for freshly grated sharp cheddar instead of pre-shredded. This ensures better melting and flavor, as pre-shredded varieties often come with anti-caking agents.

  • Flavor Variations: Get creative! Feel free to add spices, like jalapeños for heat, or experiment with different cheeses to make your Green Onion Zucchini Cheddar Quick Bread uniquely yours.

How to Store and Freeze Green Onion Zucchini Cheddar Quick Bread

Room Temperature: Keep the quick bread wrapped securely in a paper towel or in an airtight container for up to 2 days to preserve its moisture.

Fridge: Store in an airtight container for up to 5 days if you prefer to extend its freshness; simply reheat slices in the microwave or oven for a delightful warm treat.

Freezer: For longer storage, wrap individual slices in plastic wrap, then in foil, and freeze for up to 3 months. Thaw at room temperature or reheat directly from frozen in the oven.

Reheating: To refresh your Green Onion Zucchini Cheddar Quick Bread, pop it in the toaster or reheat in the oven wrapped in foil for a few minutes until warmed through; it’s like enjoying it fresh all over again!

Green Onion Zucchini Cheddar Quick Bread Variations

Feel free to explore and adapt this delightful recipe to suit your taste and dietary needs!

  • Spicy Jalapeños: Add diced jalapeños for a zesty kick that elevates the flavor profile. The heat pairs beautifully with the cheese.

  • Cheese Swap: Experiment with different cheese varieties like pepper jack or gouda. Each type brings its unique flair and texture!

  • Herb-Infused: Toss in fresh herbs like dill or basil for a burst of freshness. These additions will brighten the flavors, making the bread even more irresistible.

  • Gluten-Free: Substitute all-purpose flour with a gluten-free blend. You'll maintain the moist texture and savory flavor without the gluten challenge.

  • Dairy-Free Delight: Replace milk and butter with plant-based alternatives like almond milk and coconut oil. This keeps the bread creamy and delicious while catering to dairy-free diets.

  • Savory Add-Ins: Consider adding sun-dried tomatoes or olives for an unexpected twist that brings Mediterranean flair to your quick bread.

  • Skillet Version: Try baking the bread in a cast-iron skillet for a lovely crusty exterior. The skillet also makes a gorgeous serving dish!

  • Sweet Twist: Looking for a touch of sweetness? Mix in a few tablespoons of honey or maple syrup for a delightful contrast to the savoriness of zucchini and cheese.

These variations are just the beginning! If you’re interested in hearty sides, you might enjoy pairing this bread with a rich soup like Coconutty Beans Greens or complementing it with Cheesy Garlic Bread for a feast! Let your imagination run wild, and don't hesitate to personalize your Green Onion Zucchini Cheddar Quick Bread experience.

Make Ahead Options

These Green Onion Zucchini Cheddar Quick Bread are perfect for busy home cooks looking to streamline their meal prep! You can prepare the dry ingredients (flour, baking powder, baking soda, and salt) and store them in an airtight container for up to 3 days. Additionally, you can grate the zucchini and cheese and refrigerate them (in separate containers) for up to 24 hours. When you're ready to bake, simply mix the wet ingredients and combine everything following the original recipe instructions. To maintain the bread's quality, be sure to avoid overmixing and allow it to cool completely before slicing. This way, you'll have a delicious, homemade bread ready with minimal effort, perfect for adding a savory touch to any meal!

Green Onion Zucchini Cheddar Quick Bread Recipe FAQs

What type of zucchini should I use?
Look for medium-sized zucchinis that feel firm and heavy. Avoid any with dark spots all over or that feel soft, as these could indicate overripeness. Fresh zucchini provides moisture and flavor, making your Green Onion Zucchini Cheddar Quick Bread delicious!

How should I store leftover quick bread?
Store your Green Onion Zucchini Cheddar Quick Bread wrapped securely in a paper towel for up to 2 days at room temperature. If you're looking to keep it fresh longer, transfer it to an airtight container, and it will last up to 5 days in the refrigerator. Just warm it slightly before serving for that fresh-baked taste!

Can I freeze Green Onion Zucchini Cheddar Quick Bread?
Absolutely! To freeze, wrap individual slices in plastic wrap, then cover them with foil. This will keep them fresh for up to 3 months. To thaw, simply let them sit at room temperature or reheat directly from the freezer in the oven—just wrap in foil to regain that fresh-baked warmth!

What if my bread is too dense?
If your Green Onion Zucchini Cheddar Quick Bread turns out dense, it might be due to overmixing. Make sure to mix the wet and dry ingredients just until combined, leaving some visible streaks of flour. Also, ensure your baking powder and baking soda are fresh for effective leavening.

Is this recipe suitable for my dairy allergies?
Yes! You can easily adapt this recipe for dairy allergies by substituting unsalted butter with vegetable or coconut oil and using plant-based milk. For the egg, consider using a flax egg (1 tablespoon ground flaxseed mixed with 3 tablespoons of water), which works wonderfully to bind the ingredients without the dairy.

What ingredients can I swap for more flavor?
Feel free to personalize your Green Onion Zucchini Cheddar Quick Bread by adding jalapeños for some heat, or try using different cheeses like pepper jack for a twist. Fresh herbs like dill or basil can also enhance the flavor profile beautifully!

Green Onion Zucchini Cheddar Quick Bread

Irresistible Green Onion Zucchini Cheddar Quick Bread Delight

This Green Onion Zucchini Cheddar Quick Bread is a savory and adaptable treat that is quick to prepare, perfect for family meals.
Print Recipe Pin Recipe
Prep Time 15 minutes mins
Cook Time 1 hour hr
Cooling Time 10 minutes mins
Total Time 1 hour hr 25 minutes mins
Servings: 8 slices
Course: Breakfast
Cuisine: American
Calories: 180
Ingredients Equipment Method Nutrition Notes

Ingredients
  

For the Bread
  • 2 cups all-purpose flour Sift for best results.
  • 1 tbsp baking powder Ensure it’s fresh for effective rise.
  • 1 tsp baking soda Works with vinegar for lift.
  • 1 tsp table salt Enhances flavor.
  • 1 cup milk Plant-based alternatives can also work well.
  • 1 tbsp vinegar Curdles the milk.
  • 1/4 cup unsalted butter Melted.
  • 1 large egg Can substitute with a flax egg for vegan.
  • 1 cup zucchini Grated and excess liquid squeezed out.
  • 1 cup sharp cheddar cheese Freshly grated for best results.
  • 1/4 cup chopped green onions Can substitute with chives.
  • 1/2 tsp cracked black pepper Optional.

Equipment

  • 9 x 5 inch bread pan
  • Box grater
  • Mixing bowls
  • Spatula

Method
 

Step-by-Step Instructions
  1. Preheat your oven to 350°F (175°C). Grease a 9 x 5 inch bread pan with non-stick spray.
  2. Grate the zucchini, wrap in a paper towel, and squeeze out excess moisture.
  3. In a large bowl, whisk together the flour, baking powder, baking soda, and salt.
  4. In a separate bowl, combine milk and vinegar, then stir in melted butter and egg until smooth.
  5. Pour the wet ingredients into the dry ingredients and fold together until just combined.
  6. Gently fold in zucchini, cheese, and green onions until evenly distributed.
  7. Pour the batter into the greased pan and smooth the top.
  8. Bake for approximately 1 hour, or until a toothpick comes out clean.
  9. Cool in the pan for 10 minutes, then transfer to a wire rack to cool completely.

Nutrition

Serving: 1sliceCalories: 180kcalCarbohydrates: 20gProtein: 5gFat: 8gSaturated Fat: 5gPolyunsaturated Fat: 0.5gMonounsaturated Fat: 1.5gCholesterol: 30mgSodium: 250mgPotassium: 150mgFiber: 1gSugar: 2gVitamin A: 300IUVitamin C: 2mgCalcium: 100mgIron: 1mg

Notes

To maintain moisture, wrap the bread securely or store in an airtight container.

Tried this recipe?

Let us know how it was!

Cheesy Zucchini Breadsticks: A Guilt-Free Cheesy Delight

April 8, 2026 by Grace Snow Leave a Comment

As I eyed the overflowing basket of zucchini on my kitchen counter, a tantalizing idea began to take shape. Who knew that these vibrant green veggies could be transformed into something utterly delightful? Enter my Cheesy Zucchini Breadsticks—a low-carb, gluten-free snack that whispers comfort while packing in healthy goodness. These crispy, golden beauties are perfect for guilt-free munching when game day arrives or as a savory side to elevate your weeknight meals. With gooey melted cheese intermingling with fresh zucchini, they are as satisfying as they are nutritious. Serve them with a rich marinara or tangy ranch for a dipping experience that will leave even the pickiest eaters asking for seconds! Curious how to bring this cheesy sensation to life in your own kitchen? Let’s dive into the recipe!

Why are these Zucchini Breadsticks irresistible?

Deliciously Cheesy: The blend of mozzarella and Parmesan creates a gooey, melty texture that you won't be able to resist.

Low-Carb Goodness: Perfect for those watching their carbs, these breadsticks deliver all the flavor without the guilt, making them suitable for a gluten-free lifestyle.

Versatile Snack: Enjoy them as an appetizer, a side dish, or even a late-night snack! Pair them with marinara for dipping, or try serving as a side to your favorite soup.

Quick to Prepare: With simple ingredients and straightforward steps, you can whip these up in no time, perfect for a last-minute craving. If you're a fan of cheesy bites, check out my Cheesy Corn Fritters for another easy treat!

Crowd-Pleaser: Whether you're hosting a game night or just having family over, everyone will love snacking on these cheesy delights. Who wouldn’t want to indulge in a guilt-free option that still satisfies those cravings?

Cheesy Zucchini Breadsticks Ingredients

For the Breadsticks

  • Zucchini – Fresh medium zucchinis provide the structure and moisture for the breadsticks; do not peel for maximum flavor.
  • Eggs – Large eggs act as a binder, ensuring your cheesy zucchini breadsticks hold together perfectly.
  • Shredded Mozzarella Cheese – Low-moisture mozzarella adds that delicious meltiness and stretchy texture you crave in a cheese snack.
  • Grated Parmesan Cheese – Freshly grated Parmesan brings a savory kick that enhances the overall flavor profile.
  • Garlic Powder – This adds a familiar garlic flavor; feel free to substitute with fresh garlic for an even bolder taste.
  • Italian Seasoning – A blend of dried herbs such as basil, oregano, and thyme enriches the taste without overpowering the zucchini.
  • Salt & Pepper – Essential for basic seasoning; adjust according to your taste to make these cheesy zucchini breadsticks truly delightful.

Optional Garnish

  • Fresh Parsley or Basil – A sprinkle of fresh herbs adds a pop of color and extra freshness to the finished dish.

Step‑by‑Step Instructions for Cheesy Zucchini Breadsticks

Step 1: Preheat and Prepare Baking Sheet
Begin by preheating your oven to 425°F (220°C). While the oven heats up, line a baking sheet with parchment paper to prevent sticking. This will provide a perfect surface for your Cheesy Zucchini Breadsticks, ensuring they bake evenly and achieve that golden, crispy finish.

Step 2: Shred and Squeeze Zucchini
Take fresh medium zucchinis and thoroughly shred them using a box grater or food processor. Transfer the shredded zucchini to a clean kitchen towel and squeeze out as much moisture as possible; this crucial step prevents sogginess and promotes a crisp texture in your finished breadsticks.

Step 3: Combine Ingredients
In a large mixing bowl, combine the drained shredded zucchini with eggs, ½ cup of shredded mozzarella, grated Parmesan, garlic powder, and Italian seasoning. Mix well until all ingredients are fully integrated, creating a cohesive mixture that will form the base of your cheesy breadsticks—this should be a thick, slightly wet blend.

Step 4: Shape and Bake
Spread the zucchini mixture onto the prepared baking sheet, shaping it into a thin rectangle with an even thickness. Make sure to smooth the surface for uniform baking. Place in the preheated oven and bake for 20 to 25 minutes, or until the edges are golden and the base is firmer to the touch, signaling it's time to add cheese.

Step 5: Add Cheese Topping
Once the zucchini crust is ready, carefully remove it from the oven. Sprinkle the remaining shredded mozzarella generously over the top, ensuring even coverage. Return the baking sheet to the oven and bake for an additional 5 to 7 minutes, or until the cheese is melted, bubbling, and lightly browned.

Step 6: Cool, Slice, and Serve
After baking, let the Cheesy Zucchini Breadsticks cool for about 5 minutes on the baking sheet. This allows them to set a bit before slicing. Using a sharp knife, cut into strips, then garnish with fresh parsley or basil if desired. Serve warm alongside marinara or ranch dressing for dipping.

What to Serve with Cheesy Zucchini Breadsticks?

These delectable breadsticks offer endless possibilities for creating a heartwarming and memorable meal.

  • Rich Marinara Sauce: A classic pairing, tangy and savory, this sauce enhances the cheesy flavors while adding a delightful acidity.
  • Creamy Ranch Dressing: Cool and herbaceous, ranch dressing complements the warm, cheesy breadsticks, making every bite addictive.
  • Caesar Salad: Crisp romaine, creamy dressing, and crunchy croutons provide a refreshing counterpoint to the cheesy richness, balancing textures beautifully.
  • Garlic Parmesan Roasted Vegetables: These roasted delights echo the flavors of the breadsticks while providing a satisfying crunch; it feels like a delicious dinner party.
  • Spinach Artichoke Dip: The creamy, cheesy dip mirrors the zucchini bread's flavor while offering a different texture, creating a fun and indulgent appetizer experience.
  • Herbed Quinoa Salad: Light and refreshing, this salad introduces a nutty flavor and nutritious punch, perfectly complementing your cheesy breadsticks.
  • Tomato Basil Soup: A warm bowl of soup offers comfort, with rich tomatoes and basil enhancing the savory notes of the breadsticks.
  • Chilled Sparkling Water: Bubbles cleanse the palate between bites, making this a refreshing drink choice that cleanses and excites the taste buds.
  • Chocolate Chip Cookies: For dessert, these classic treats serve as a sweet ending that balances the savory bites, rounding off your meal perfectly.

Cheesy Zucchini Breadsticks Variations

Feel free to get creative and customize your cheesy zucchini breadsticks to your liking!

  • Spicy Kick: Add red pepper flakes for a zesty heat, elevating the flavor and making these stick even more enticing. A little spice can transform the ordinary into something extraordinary!

  • Cheddar Swap: Substitute some mozzarella with sharp cheddar cheese for a deeper flavor twist. This will intensify the cheesy goodness while maintaining that glorious melt.

  • Fresh Herb Bliss: Incorporate fresh herbs like basil or parsley directly into the mixture. These vibrant additions won’t just enhance the taste; they'll also make your breadsticks visually appealing.

  • Pizza Lover's Version: Spread marinara sauce over the baked crust before adding cheese and topping with pepperoni. This hearty twist will satisfy any pizza cravings.

  • Fab Flavor Burst: Mix in some sun-dried tomatoes or olives into the batter for a savory flavor boost. Their tangy profiles pair beautifully with the creamy cheeses for a Mediterranean flair.

  • Dairy-Free Delight: For those avoiding dairy, use cashew cheese or nutritional yeast to mimic the cheesy flavor and texture without the lactose. You won’t miss the dairy but will love the results!

  • Texture Play: For a crunchier texture, top with crushed garlic croutons before the final baking step. Each bite will give you a delightful crunch that complements the cheesy softness.

  • Garlic Lovers Unite: Replace garlic powder with roasted garlic for a rich, sweet flavor that permeates the breadsticks, taking them to a whole new level of yumminess!

Incorporating these variations will not only make your dish unique but also invite a sense of adventure. If you enjoy these cheesy zucchini delights, don't miss out on trying my Cheesy Garlic Bread for another indulgent treat!

Storage Tips for Cheesy Zucchini Breadsticks

  • Fridge: Store leftovers in an airtight container in the refrigerator for up to 3 days. Reheat in the oven or air fryer for a crisp finish.
  • Freezer: For longer storage, freeze the breadsticks in a single layer, then transfer to a freezer bag. They can be frozen for up to 3 months.
  • Reheating: When ready to enjoy, bake from frozen at 375°F (190°C) for 15-20 minutes, or until heated through and crispy again.
  • Make-Ahead: You can prepare the zucchini base, cool it, and refrigerate it. Just add cheese and reheat whenever you're ready for a cheesy snack!

Make Ahead Options

These Cheesy Zucchini Breadsticks are ideal for meal prep, saving you time and energy on busy weeknights! You can prepare the zucchini base up to 24 hours in advance; simply shred the zucchini, squeeze out moisture, and combine with the other ingredients. Shape the mixture into a rectangle and bake as directed, then let it cool before refrigerating. When you're ready to serve, just sprinkle on the remaining mozzarella and bake until the cheese is melted and bubbly, ensuring they’re just as delicious as when freshly made. This approach not only enhances convenience but also allows you to enjoy a wholesome, homemade treat with minimal effort!

Expert Tips for Cheesy Zucchini Breadsticks

  • Squeeze Thoroughly: Ensure to squeeze out as much moisture from the zucchini as possible. This will prevent sogginess and help achieve that crispy texture in your cheesy zucchini breadsticks.

  • Pre-bake for Perfection: Bake the zucchini base ahead of time, let it cool, and refrigerate. Top with cheese and reheat when you're ready to serve; this ensures a deliciously crisp crust.

  • Cheese Choices: For a fun twist, experiment with different cheese options like cheddar or a dairy-free alternative. Just remember that low-moisture cheese will give you the best results.

  • Herb Infusion: Don't hesitate to add fresh herbs like basil or parsley directly into the mixture for an extra layer of flavor; they pair wonderfully with the cheese.

  • Air Fryer Option: If you're looking for a quicker cooking method, try air frying! Cook the base at 375°F for 12–15 minutes for a lighter, air-fried version of these cheesy delights.

Cheesy Zucchini Breadsticks Recipe FAQs

What type of zucchini should I use?
Absolutely! For the best results, opt for fresh medium zucchinis. They’ll provide the structure and moisture needed while baking. Make sure to avoid peeling them for maximum flavor and texture.

How should I store leftovers?
You can store any leftover Cheesy Zucchini Breadsticks in an airtight container in the refrigerator for up to 3 days. When you're ready to enjoy, just reheat them in the oven or air fryer to bring back that crispy texture.

Can I freeze these breadsticks?
Very! To freeze, first, allow the breadsticks to cool completely. Lay them in a single layer on a baking sheet and freeze until solid. After that, transfer them to a freezer bag. They can be stored for up to 3 months. When you're ready to eat, bake them from frozen at 375°F (190°C) for 15-20 minutes until heated through and crispy.

What if my zucchini breadsticks turn out soggy?
No worries! The key to avoiding sogginess lies in squeezing out as much moisture from the zucchini as possible. If they still turn out soggy, you can also bake them a little longer or even add a light dusting of almond flour or breadcrumbs to the mixture next time to help absorb excess moisture.

Are these suitable for gluten-free diets?
Yes, they are! These Cheesy Zucchini Breadsticks are inherently gluten-free since they're made primarily with zucchini and cheese. Just be sure to check the labels on your chosen brands of cheese and seasonings to ensure they are gluten-free as well.

Can I customize the cheese used in this recipe?
Absolutely! Feel free to experiment with different cheese options like cheddar, gouda, or even a dairy-free alternative if needed. Low-moisture cheese is best for optimal flavor and texture, so try to stick with that guideline for a successful outcome.

Cheesy Zucchini Breadsticks

Cheesy Zucchini Breadsticks: A Guilt-Free Cheesy Delight

Cheesy Zucchini Breadsticks are a low-carb, gluten-free snack packed with flavor and healthy goodness.
Print Recipe Pin Recipe
Prep Time 10 minutes mins
Cook Time 30 minutes mins
Cooling Time 5 minutes mins
Total Time 45 minutes mins
Servings: 4 sticks
Course: Snacks
Cuisine: American
Calories: 120
Ingredients Equipment Method Nutrition Notes

Ingredients
  

For the Breadsticks
  • 2 medium Zucchini Fresh; do not peel
  • 2 large Eggs Act as a binder
  • 1 cup Shredded Mozzarella Cheese Low-moisture for meltiness
  • 1/2 cup Grated Parmesan Cheese Freshly grated
  • 1 teaspoon Garlic Powder Can substitute with fresh garlic
  • 1 teaspoon Italian Seasoning Blend of dried herbs
  • 1 teaspoon Salt Essential for basic seasoning
  • 1/2 teaspoon Pepper Adjust according to taste
Optional Garnish
  • 1 tablespoon Fresh Parsley or Basil Sprinkle for color and freshness

Equipment

  • Oven
  • Baking Sheet
  • Parchment Paper
  • Box Grater or Food Processor

Method
 

Step-by-Step Instructions
  1. Preheat your oven to 425°F (220°C) and line a baking sheet with parchment paper.
  2. Shred the zucchinis and squeeze out as much moisture as possible using a kitchen towel.
  3. In a mixing bowl, combine shredded zucchini, eggs, ½ cup mozzarella, Parmesan, garlic powder, and Italian seasoning.
  4. Spread the mixture onto the prepared baking sheet in a thin rectangle, smoothing the surface.
  5. Bake for 20 to 25 minutes until edges are golden and the base is firmer.
  6. Remove from oven, sprinkle the remaining mozzarella on top, and bake for an additional 5 to 7 minutes.
  7. Let cool for 5 minutes, slice into strips, and garnish with fresh herbs if desired.

Nutrition

Serving: 1stickCalories: 120kcalCarbohydrates: 4gProtein: 8gFat: 8gSaturated Fat: 4gPolyunsaturated Fat: 0.5gMonounsaturated Fat: 2.5gCholesterol: 80mgSodium: 300mgPotassium: 200mgFiber: 2gSugar: 2gVitamin A: 250IUVitamin C: 25mgCalcium: 200mgIron: 1mg

Notes

Store leftovers in an airtight container in the refrigerator for up to 3 days. Reheat in the oven or air fryer for a crisp finish.

Tried this recipe?

Let us know how it was!

Heavenly Ravioli with Tomatoes, Asparagus, Garlic & Herbs

April 8, 2026 by Grace Snow Leave a Comment

As I tossed together a handful of vibrant vegetables with the delicate ravioli, the kitchen came alive with the enticing aroma of garlic and fresh herbs. This Ravioli with Tomatoes, Asparagus, Garlic, and Herbs is my go-to dish when I crave something comforting yet elegant, ready in just under 30 minutes. The best part? It's so versatile—you can easily make it vegetarian or add your favorite protein like chicken or shrimp, making it perfect for any occasion. Not only does this recipe showcase seasonal produce, but it also delivers a healthy, satisfying meal that will have everyone asking for seconds. So, are you ready to elevate your weeknight dinners? Let's dive into this delightful recipe and make some magic in the kitchen!

Why Is This Ravioli Recipe a Must-Try?

Quick Preparation: This recipe comes together in under 30 minutes, making it perfect for busy weeknights or impromptu gatherings.

Bursting with Flavor: Fresh tomatoes, tender asparagus, and aromatic garlic create a deliciously vibrant taste that celebrates seasonal ingredients.

Versatile Options: Easily customize by keeping it vegetarian or adding grilled chicken or shrimp to suit your dietary preference.

Crowd Pleaser: With its beautiful colors and rich ingredients, this dish is sure to impress family and friends—serving as a delightful centerpiece!

Healthy Balance: Packed with vegetables, this meal not only tastes amazing but also includes a healthy mix of carbs and proteins, providing nourishment you can feel good about.

Ready to experience comfort food with an elegant twist? Check out my other recipes like Pasta Sun Dried for even more quick and delicious meal ideas!

Ravioli with Tomatoes, Asparagus, Garlic, and Herbs Ingredients

• Here’s everything you’ll need to make this delightful dish!

For the Ravioli

  • Ravioli – Use cheese-filled for a rich texture; frozen options work great for convenience.

For the Vegetables

  • Asparagus – Adds a fresh crunch; remember to snap off woody ends before cutting.
  • Cherry Tomatoes – Their sweetness brightens the dish; substitute with diced regular tomatoes if not in season.
  • Garlic – Fresh is best for maximum flavor; dried can be used but in smaller amounts.

For the Sauce

  • Broth (Chicken or Vegetable) – This creates a light, savory base; vegetable broth keeps it fully vegetarian.

For the Flavor

  • Fresh Herbs (Basil, Parsley, etc.) – They bring brightness and aroma; dried herbs are fine but use one-third of the quantity.
  • Parmesan Cheese – Adds a salty depth; freshly grated is ideal for the best taste.

Get ready to whip up a gorgeous meal that not only impresses but also nourishes!

Step‑by‑Step Instructions for Ravioli with Tomatoes, Asparagus, Garlic, and Herbs

Step 1: Prepare the Ingredients
Begin by cooking the ravioli according to package directions in salted boiling water—typically about 4-5 minutes until they float. While the ravioli cooks, wash the asparagus, snapping off the tough ends. Cut the asparagus into 2-inch pieces and halve the cherry tomatoes. Mince about 3 cloves of garlic and chop your favorite fresh herbs like basil and parsley for added flavor.

Step 2: Sauté the Garlic and Asparagus
In a large skillet, heat 2 tablespoons of olive oil over medium heat. Once the oil is shimmering, add the minced garlic, sautéing for about 30 seconds until fragrant—be careful not to let it brown. Next, toss in the asparagus pieces and cook for 3-4 minutes, stirring frequently, until they start to become tender and bright green.

Step 3: Add the Tomatoes
After the asparagus has softened, add the halved cherry tomatoes to the skillet. Cook the mixture for an additional 2-3 minutes, allowing the tomatoes to soften and release their juices. You'll know they’re ready when they start to burst slightly. Stir occasionally, integrating the flavors, and enjoy the delicious aroma of the sautéed vegetables mingling together.

Step 4: Combine with Ravioli
Once the ravioli are cooked, gently drain them and add them straight into the skillet with the vegetable medley. Pour in about 1 cup of chicken or vegetable broth and carefully toss everything together. Allow it to simmer for a few minutes on low heat so the ravioli soak up the flavors, warming the dish through until everything is nicely combined.

Step 5: Finish with Herbs and Cheese
Remove the skillet from heat and stir in the chopped fresh herbs and freshly grated Parmesan cheese, incorporating it well into the mixture. Season to taste with salt, pepper, and a pinch of red pepper flakes for a kick if desired. The final result should be a beautiful, colorful blend of ravioli, tomatoes, asparagus, and herbs, ready to be served.

Ravioli with Tomatoes, Asparagus, Garlic, and Herbs Variations

Feel free to put your unique spin on this delightful dish with these tasty alternatives!

  • Vegan: Omit cheese and use vegetable broth for a completely plant-based version. Fresh herbs retain their essential brightness without dairy.

  • Protein-Packed: Add grilled chicken or sautéed shrimp for an extra protein boost. The savory additions ensure a satisfying meal any time of day.

  • Gluten-Free: Substitute ravioli with gluten-free options available at your local grocery store, maintaining the dish’s joyful flavor and texture.

  • Creamy Twist: Stir in a dollop of cream or a splash of white wine for a decadent richness that elevates each bite. The creamy sauce complements the vegetables beautifully.

  • Zesty Flavor: Toss in some lemon juice or zest before serving for a refreshing brightness. It brightens the entire dish and enhances the garden-fresh taste.

  • Add Heat: Mix in red pepper flakes or sliced jalapeños for a spicy kick that will satisfy heat lovers. This addition creates a delicious contrast with the sweetness of the veggies.

  • Roasted Veggies: Roast the asparagus and cherry tomatoes beforehand for a deeper, caramelized flavor. Roasted vegetables add a new layer of complexity and enhance the dish's fragrance.

  • Herb Infusion: Experiment with different fresh herbs like thyme or oregano for unique flavor profiles. Each herb brings its character, transforming the dish beautifully.

For more exciting ideas, you might enjoy trying the delicious Bratwurst Peppers Onions or checking out variations like Tagliatelle Asparagus Peas. Each dish brings its charm to the table!

Make Ahead Options

These Ravioli with Tomatoes, Asparagus, Garlic, and Herbs are perfect for meal prep enthusiasts looking to save time on busy weeknights! You can prepare the vegetables (asparagus, tomatoes, and minced garlic) up to 24 hours in advance. Keep them in an airtight container in the refrigerator to maintain freshness. Additionally, you can cook the ravioli and refrigerate them separately for up to 3 days. When it's time to enjoy your dish, simply reheat the vegetable mixture in a skillet, add the cooked ravioli along with some broth, and gently toss everything together until warmed through. You'll have a delicious meal ready with minimal effort, just as comforting as if freshly made!

What to Serve with Quick Vegetarian Ravioli with Tomatoes, Asparagus, Garlic & Fresh Herbs

Looking to create a full meal experience that complements the vibrant flavors of your ravioli?

  • Crispy Garlic Bread: The crunchy, toasted exterior with a buttery garlic spread pairs wonderfully with the savory ravioli sauce.
  • Simple Arugula Salad: Tossed with lemon vinaigrette, this peppery salad adds a lovely freshness and a crisp contrast to the tender ravioli.
  • Roasted Brussels Sprouts: Their caramelized sweetness and slight earthiness elevate the dish, adding texture and depth to your meal.
  • Lemon Zest Zucchini Noodles: Light and bright, these noodles offer a fantastic alternative, balancing the richness of the ravioli while keeping your dinner low-carb.
  • Chardonnay: A glass of chilled Chardonnay complements the dish perfectly, enhancing the wine’s fruity and floral notes alongside the vegetables.
  • Chocolate Mousse: For dessert, this rich and luscious treat promises to finish your meal on a decadent note, making it a splendid conclusion!

With these pairings, you’ll create a harmonious dining experience, perfect for impressing family or friends at your next gathering!

How to Store and Freeze Ravioli with Tomatoes, Asparagus, Garlic, and Herbs

Fridge: Store leftover ravioli with sauce in an airtight container for up to 3 days. For optimal quality, consider keeping ravioli and sauce separate to prevent sogginess.

Freezer: You can freeze the cooked ravioli without sauce for up to 2 months. Place them in a single layer on a baking sheet to freeze individually, then transfer to a freezer bag.

Reheating: When ready to enjoy, reheat the ravioli in a skillet over low heat. Add a splash of broth to maintain moisture and enhance flavor.

Freshness Tip: For best taste and texture, consume the ravioli as soon as possible, but freezing is a great option to extend your meal’s life!

Expert Tips for Ravioli with Tomatoes, Asparagus, Garlic, and Herbs

• Fresh Ingredients Matter: Use fresh garlic and seasonal produce to elevate your ravioli dish’s flavor profile significantly.

• Don’t Overcook Veggies: Sauté asparagus just until tender; you want it to retain a little crunch for texture in your ravioli.

• Master the Broth Ratio: Start with less broth and add more as needed. This helps avoid a too-soupy sauce while keeping the flavors concentrated.

• Herbs Make the Difference: Fresh herbs add brightness, so always prefer them over dried. If using dried, reduce their amount to one-third.

• Separate for Storage: To maintain the texture of your ravioli, store the pasta and sauce separately when refrigerating leftovers.

Enjoy this delightful Ravioli with Tomatoes, Asparagus, Garlic, and Herbs with these tips to optimize your cooking experience!

Ravioli with Tomatoes, Asparagus, Garlic, and Herbs Recipe FAQs

How do I know if my asparagus is fresh?
Absolutely! When selecting asparagus, look for vibrant green stalks that are firm and straight. The tips should be tightly closed and not mushy. If there are dark spots all over or if it appears wilted, it’s best to avoid those. Fresh asparagus is the key to enhancing the dish's overall flavor and texture.

What’s the best way to store leftovers?
Very! Store any leftover ravioli with sauce in an airtight container in the refrigerator for up to 3 days. To maintain the integrity of the dish, consider storing the ravioli and sauce in separate containers; this helps prevent the pasta from becoming soggy. Just remember to reheat gently on the stove for the best results!

Can I freeze the ravioli?
Definitely! To freeze the cooked ravioli without sauce, arrange them in a single layer on a baking sheet to let them freeze individually. Once frozen, transfer them into a freezer bag or airtight container. They can be kept frozen for up to 2 months. When you’re ready to enjoy them, just cook them straight from frozen in boiling water for about 4-5 minutes or until heated through.

What should I do if my dish turns out too watery?
Oh no! If you find you're dealing with a watery sauce, try a couple of simple fixes. First, let it simmer on low heat for a few more minutes to evaporate some excess liquid. If it’s still too watery, consider adding a small cornstarch slurry (1 tablespoon of cornstarch mixed with 2 tablespoons of water) to thicken it up. Stir it in gradually until you achieve your desired consistency!

Are there any allergy concerns with this recipe?
Absolutely! This ravioli dish contains gluten and dairy, so those with gluten intolerance or lactose sensitivity should opt for gluten-free ravioli and skip the cheese or use a dairy alternative. For anyone with shellfish allergies, be mindful if you choose to add shrimp as a variation. Always ensure to read labels and check ingredients when purchasing pre-made items for safety.

Can I make this dish vegan?
Very! For a delightful vegan version of this Ravioli with Tomatoes, Asparagus, Garlic, and Herbs, simply omit the Parmesan cheese and use vegetable broth instead of chicken broth. You might also consider adding a plant-based cheese alternative if you still want that cheesy flavor. It's a great way to enjoy all the delicious aspects of the dish while accommodating a vegan diet!

Ravioli with Tomatoes, Asparagus, Garlic, and Herbs

Heavenly Ravioli with Tomatoes, Asparagus, Garlic & Herbs

This Ravioli with Tomatoes, Asparagus, Garlic, and Herbs is a comforting yet elegant dish ready in just under 30 minutes.
Print Recipe Pin Recipe
Prep Time 10 minutes mins
Cook Time 20 minutes mins
Total Time 30 minutes mins
Servings: 4 servings
Course: Dinner
Cuisine: Italian
Calories: 400
Ingredients Equipment Method Nutrition Notes

Ingredients
  

For the Ravioli
  • 16 ounces cheese-filled ravioli frozen options work great
For the Vegetables
  • 1 bunch asparagus snapped woody ends
  • 1 pint cherry tomatoes substitute with diced regular tomatoes if not in season
  • 3 cloves garlic minced
For the Sauce
  • 1 cup chicken or vegetable broth vegetable broth keeps it fully vegetarian
For the Flavor
  • 1 cup fresh herbs (basil, parsley, etc.) chopped
  • 1/2 cup Parmesan cheese freshly grated

Equipment

  • Large skillet
  • pot

Method
 

Step-by-Step Instructions
  1. Cook the ravioli according to package directions in salted boiling water for about 4-5 minutes until they float. Wash the asparagus, snapping off the tough ends, cut into 2-inch pieces and halve the cherry tomatoes. Mince the garlic and chop the fresh herbs.
  2. In a large skillet, heat olive oil over medium heat. Add minced garlic and sauté for about 30 seconds until fragrant. Next, add asparagus pieces and cook for 3-4 minutes until tender and bright green.
  3. Add the halved cherry tomatoes to the skillet. Cook for an additional 2-3 minutes until they soften and begin to burst. Stir occasionally, integrating all flavors together.
  4. Once the ravioli are cooked, gently drain and add them to the skillet with the vegetables. Pour in the broth and toss everything together, allowing it to simmer on low heat for a few minutes so the ravioli soak up the flavors.
  5. Remove from heat and stir in chopped fresh herbs and grated Parmesan cheese. Season with salt, pepper, and red pepper flakes if desired. Serve warm.

Nutrition

Serving: 1plateCalories: 400kcalCarbohydrates: 45gProtein: 15gFat: 18gSaturated Fat: 6gPolyunsaturated Fat: 1gMonounsaturated Fat: 10gCholesterol: 25mgSodium: 700mgPotassium: 600mgFiber: 5gSugar: 4gVitamin A: 800IUVitamin C: 20mgCalcium: 200mgIron: 2mg

Notes

Use fresh ingredients for the best flavor. Store pasta and sauce separately for optimal freshness.

Tried this recipe?

Let us know how it was!

Creamy One-Pot Spring Vegetable Pasta: Easy Comfort in Minutes

April 8, 2026 by Grace Snow Leave a Comment

As I stood in the kitchen, the scent of sautéing asparagus danced through the air, reminding me that spring is upon us. This Creamy One-Pot Spring Vegetable Pasta is my go-to recipe for those busy weeknights when I crave something comforting yet fresh. Ready in just 30 minutes, this dish beautifully combines the vibrant colors and flavors of seasonal vegetables with a rich, creamy sauce that will make you forget all about takeout. The joy of one-pot cooking means less cleanup, allowing you to savor a wholesome meal that satisfies everyone at the table. Plus, it’s customizable—feel free to swap in your favorite veggies or even try a dairy-free version! Are you ready to stir up some deliciousness? Let’s dive in!

Why You'll Love This Creamy Pasta?

Simplicity and Speed: This dish comes together in just 30 minutes, making it the perfect choice for hectic weeknights.

Comforting Creaminess: The combination of rich cream (or coconut milk for a dairy-free option) envelops the pasta in a luscious sauce that’s simply irresistible.

Fresh Seasonal Veggies: Enjoy the bright flavors of spring with peas and asparagus, or mix in your favorites for a personalized twist.

One-Pot Convenience: Fewer dishes to wash means more time to enjoy your delicious meal—clean up has never been easier!

Crowd-Pleasing Appeal: Whether it's a family dinner or a friends' gathering, this creamy one-pot pasta is sure to impress everyone at the table.

For more quick and delightful recipes, check out our Skillet Pasta Sun or One Pot Rice.

Creamy One-Pot Spring Vegetable Pasta Ingredients

• Let’s gather everything you need for this delightful dish!

For the Pasta

  • Short, ridged pasta (e.g., penne or fusilli) – The ideal shape for capturing every bit of creamy sauce. Use gluten-free pasta if needed.

For the Vegetables

  • Fresh spring vegetables (e.g., peas, asparagus) – These vibrant veggies add freshness and texture; feel free to substitute with whatever is in season.

For the Broth

  • Vegetable or chicken broth – This provides essential flavor; choosing low-sodium options keeps it light without sacrificing taste.

For the Creaminess

  • Heavy cream (or coconut milk for dairy-free) – The secret to that lush, creamy sauce; coconut milk offers a dairy-free twist!

For the Umami

  • Parmesan cheese (or nutritional yeast for dairy-free) – This adds a savory depth of flavor; nutritional yeast is a fantastic vegan alternative.

For Seasoning

  • Salt and pepper – Essential for enhancing all the flavors in the dish; always season to taste.

For Cooking

  • Olive oil – Used to sauté the vegetables, adding flavor and moisture as they cook.

Now that you have your ingredients ready, it’s time to get cooking!

Step‑by‑Step Instructions for Creamy One-Pot Spring Vegetable Pasta

Step 1: Sauté the Vegetables
Begin by heating 2 tablespoons of olive oil in a large pot over medium heat. Add 1 cup of chopped asparagus and sauté for 3–4 minutes until tender and bright green. The aroma of sautéing veggies will bring a delightful freshness to your kitchen. Stir occasionally, so the asparagus cooks evenly, inviting spring flavors to your Creamy One-Pot Spring Vegetable Pasta.

Step 2: Add Broth and Pasta
Pour in 4 cups of vegetable or chicken broth, bringing the mixture to a simmer. Stir in 12 ounces of short, ridged pasta like penne or fusilli, making sure to coat every piece. Watch as the broth bubbles gently, infusing the pasta with flavor. Allow the mixture to simmer uncovered for 8–10 minutes, stirring regularly to prevent sticking and ensuring the pasta absorbs most of the liquid.

Step 3: Incorporate Delicate Vegetables
When the pasta is almost tender, add 1 cup of fresh peas to the pot and stir gently. This will cook the peas for about 2–3 minutes while maintaining their vibrant color and sweetness. The peas will add a wonderful crunch to your Creamy One-Pot Spring Vegetable Pasta, enhancing the dish's overall texture and freshness.

Step 4: Create the Creamy Sauce
Reduce the heat to low, then stir in 1 cup of heavy cream or coconut milk, combining it thoroughly with the pasta and vegetables. Allow the mixture to warm for another 2 minutes, as the creaminess envelops the pasta. This step is crucial for achieving that rich, velvety sauce that defines your one-pot masterpiece.

Step 5: Finish with Cheese and Seasoning
Remove the pot from heat and fold in 1 cup of grated Parmesan cheese or nutritional yeast, mixing until melted and well-combined. Season with salt and pepper to taste, adjusting to your preference. Let the Creamy One-Pot Spring Vegetable Pasta sit for a minute, allowing all the flavors to meld beautifully, before serving it hot.

Step 6: Garnish and Serve
For a final touch, garnish your dish with freshly chopped herbs like parsley or basil, enhancing both presentation and flavor. Serve immediately in warm bowls, relishing the creamy, comforting goodness of this delightful pasta. Your family will love this vibrant combination of spring vegetables and rich sauce!

What to Serve with Creamy One-Pot Spring Vegetable Pasta

Whether you're planning a lovely family dinner or a cozy night in, pairing this delicious pasta with the right sides enhances the experience.

  • Crisp Green Salad: A refreshing salad with mixed greens, cucumbers, and a tangy vinaigrette complements the creamy richness of the pasta.
  • Garlic Breadsticks: The crunchy texture of garlic breadsticks provides a delightful contrast, perfect for wiping up any leftover sauce.

For a delightful touch, consider serving the salad with a zesty lemon dressing, brightening up each bite.

  • Roasted Vegetables: Seasonal roasted veggies like bell peppers and zucchini add color and flavor to your meal while echoing the fresh elements in the pasta.
  • Lemon Sorbet: For dessert, a light and zesty lemon sorbet cleanses the palate, making it a refreshing finish after a rich dish.

Pairing sweet and citrusy elements with creamy dishes always creates a delightful balance.

  • Chilled White Wine: A glass of crisp Sauvignon Blanc or Pinot Grigio highlights the vibrant flavors of the dish and serves as a perfect pairing.
  • Herb-Infused Lemonade: For a non-alcoholic option, a glass of herb-infused lemonade offers a refreshing twist that complements the dish beautifully.

Creamy One-Pot Spring Vegetable Pasta Variations

Feel free to let your creativity shine while making this delicious recipe!

  • Dairy-Free: Use coconut milk instead of heavy cream for a luscious, dairy-free sauce that doesn’t compromise on flavor. The subtle sweetness of coconut milk enhances the vegetable medley beautifully.

  • Protein Boost: Add grilled chicken or sautéed shrimp for a heartier dish. Their savory flavors will take your one-pot pasta to the next level, making it a satisfying meal for everyone.

  • Whole Grain Twist: Swap regular pasta with whole grain or gluten-free options like brown rice pasta. This change introduces a nuttier flavor and boosts fiber content, making the dish even more nutritious.

  • Veggie Glory: Add zucchini ribbons or spinach for an extra burst of color and nutritional value. These additions not only enrich the dish but also keep it light and fresh, perfect for spring.

  • Sun-Dried Tomato Delight: Toss in some chopped sun-dried tomatoes for a tangy kick that complements the creamy sauce. Their robust flavors will elevate your dish, making it feel gourmet with every bite.

  • Heat It Up: Add red pepper flakes or diced jalapeños to spice things up! The heat will contrast beautifully with the creamy sauce, giving your one-pot pasta a lively edge.

  • Herb Infusion: Experiment with fresh herbs like basil or thyme for an aromatic twist. These herbs will add depth and freshness, making each serving a fragrant delight.

  • Nutty Texture: Stir in a handful of toasted pine nuts or walnuts for added crunch and flavor. The nutty contrast will create layers of texture that makes each bite more exciting.

So, whether you fancy a creamy delight or a spicy variation, these ideas will help make your Creamy One-Pot Spring Vegetable Pasta uniquely yours. Consider pairing it with a fresh salad or a comforting Asparagus Soup Healthy for a delightful meal. Enjoy cooking!

Make Ahead Options

These Creamy One-Pot Spring Vegetable Pasta are perfect for busy home cooks looking to save time! You can chop the vegetables and measure out the pasta and broth up to 24 hours in advance, storing them in airtight containers in the refrigerator. Additionally, you can prepare the creamy sauce by mixing the heavy cream (or coconut milk) and cheese, keeping this in a separate container. When you're ready to cook, simply sauté the vegetables, add the broth and pasta, and let it simmer until cooked. Finish by stirring in your prepared sauce and enjoy the same comforting flavors with minimal effort on a hectic weeknight!

Storage Tips for Creamy One-Pot Spring Vegetable Pasta

Fridge: Store leftovers in an airtight container for up to 3 days. Make sure to let it cool to room temperature before sealing to maintain freshness.

Freezer: For longer storage, freeze the pasta in airtight containers or freezer bags for up to 2 months. Label with the date for easy tracking.

Reheating: When ready to enjoy, thaw overnight in the fridge, then reheat gently in a saucepan over low heat, adding a splash of broth or cream to restore the creaminess of your Creamy One-Pot Spring Vegetable Pasta.

Avoid Sticking: If it seems dry during reheating, a bit of extra broth or water can help revive the sauce’s smooth texture.

Expert Tips for Creamy One-Pot Spring Vegetable Pasta

• Choose the Right Pasta: Select short, ridged pasta like penne or fusilli for better sauce cling. Avoid overly thin pasta to prevent it from becoming mushy.

• Timing is Key: Add sturdier vegetables like asparagus first, then incorporate delicate peas towards the end for optimal texture and flavor in your Creamy One-Pot Spring Vegetable Pasta.

• Watch for Sticking: Stir frequently during cooking to prevent the pasta from sticking. Keeping a close eye helps you achieve perfectly cooked pasta without any burnt bits.

• Adjust Creaminess: If you prefer a thicker sauce, use less broth and more cream or coconut milk. Adjust the liquids according to your desired creaminess for the perfect mouthfeel.

• Cookware Matters: Use a sturdy, heavy-bottom pot to ensure even cooking and prevent burning. A lid during cooking helps steam the pasta, enhancing the cooking process.

Creamy One-Pot Spring Vegetable Pasta Recipe FAQs

How do I select the freshest spring vegetables for this recipe?
Absolutely! When choosing vegetables like peas and asparagus, look for vibrant colors and firm textures. Avoid any with dark spots or wilting. Fresh asparagus should be bright green and snap easily when bent, while peas should be plump and shiny. Seasonal farmers' markets are fantastic for finding the freshest picks, so if you can, take a visit!

What's the best way to store leftovers of the Creamy One-Pot Spring Vegetable Pasta?
You can store leftovers in an airtight container for up to 3 days in the fridge. Ensure it has cooled down to room temperature before sealing to keep it fresh. When reheating, add a splash of broth or cream to help restore the sauce’s creaminess - it’ll make it taste like new!

Can I freeze Creamy One-Pot Spring Vegetable Pasta?
Yes, indeed! To freeze, let the pasta cool completely, then transfer it to airtight containers or freezer bags, removing as much air as possible. You can store it for up to 2 months. When you're ready to enjoy it again, thaw the pasta in the fridge overnight and reheat in a saucepan over low heat, adding a bit of broth or cream to bring back the creamy texture.

What should I do if my pasta becomes too sticky while cooking?
Very common! To prevent sticking, stir the pasta frequently as it cooks and keep enough broth in the pot. If it does end up sticky, add a splash of warm broth or water while stirring gently to loosen the sauce and pasta. If it’s already cooked, be careful to avoid overcooking during reheating.

Are there any dietary considerations I should be aware of for this recipe?
Absolutely! This Creamy One-Pot Spring Vegetable Pasta can be made dairy-free by substituting heavy cream with coconut milk and using nutritional yeast instead of Parmesan cheese. For gluten sensitivities, opt for gluten-free pasta. Also, be sure to check the broth for any potential allergens! If you’re cooking for pets, avoid adding any onions or garlic as they can be harmful.

Can I customize the vegetables in this recipe?
The more the merrier! This recipe is wonderfully adaptable; feel free to swap asparagus for other seasonal favorites like zucchini or spinach. You can also add proteins such as grilled chicken or shrimp for a heartier meal. Just make sure to adjust the cooking times accordingly to keep everything perfectly tender and delicious!

Creamy One-Pot Spring Vegetable Pasta

Creamy One-Pot Spring Vegetable Pasta: Easy Comfort in Minutes

This Creamy One-Pot Spring Vegetable Pasta is a comforting, fresh dish ready in just 30 minutes.
Print Recipe Pin Recipe
Prep Time 10 minutes mins
Cook Time 20 minutes mins
Total Time 30 minutes mins
Servings: 4 servings
Course: Dinner
Cuisine: Italian
Calories: 450
Ingredients Equipment Method Nutrition Notes

Ingredients
  

For the Pasta
  • 12 ounces Short, ridged pasta (e.g., penne or fusilli) Use gluten-free pasta if needed.
For the Vegetables
  • 1 cup Fresh spring vegetables (e.g., peas, asparagus) Feel free to substitute with whatever is in season.
For the Broth
  • 4 cups Vegetable or chicken broth Choosing low-sodium options keeps it light without sacrificing taste.
For the Creaminess
  • 1 cup Heavy cream (or coconut milk for dairy-free) The secret to that lush, creamy sauce.
For the Umami
  • 1 cup Parmesan cheese (or nutritional yeast for dairy-free) This adds a savory depth of flavor.
For Seasoning
  • to taste Salt
  • to taste Pepper
For Cooking
  • 2 tablespoons Olive oil Used to sauté the vegetables.

Equipment

  • Large pot

Method
 

Step-by-Step Instructions
  1. Heat 2 tablespoons of olive oil in a large pot over medium heat. Add 1 cup of chopped asparagus and sauté for 3–4 minutes until tender and bright green.
  2. Pour in 4 cups of vegetable or chicken broth, bringing the mixture to a simmer. Stir in 12 ounces of short, ridged pasta and allow to simmer uncovered for 8–10 minutes.
  3. When the pasta is almost tender, add 1 cup of fresh peas and stir gently. Cook for about 2–3 minutes.
  4. Reduce heat to low, then stir in 1 cup of heavy cream or coconut milk. Allow to warm for another 2 minutes.
  5. Remove from heat and fold in 1 cup of grated Parmesan cheese or nutritional yeast. Season with salt and pepper to taste.
  6. Garnish with freshly chopped herbs like parsley or basil, and serve immediately.

Nutrition

Serving: 1servingCalories: 450kcalCarbohydrates: 60gProtein: 15gFat: 20gSaturated Fat: 10gPolyunsaturated Fat: 2gMonounsaturated Fat: 8gCholesterol: 50mgSodium: 600mgPotassium: 800mgFiber: 5gSugar: 2gVitamin A: 800IUVitamin C: 15mgCalcium: 200mgIron: 2mg

Notes

Feel free to customize with your favorite vegetables or make it dairy-free with coconut milk and nutritional yeast.

Tried this recipe?

Let us know how it was!
  • « Previous Page
  • 1
  • 2
  • 3
  • 4
  • 5
  • 6
  • …
  • 199
  • Next Page »

Welcome!

Hi, I’m Grace, a Sydney-based home cook with a passion for bold flavors and trending ingredients. Whether you’re a busy beginner or a seasoned foodie, you’ll find dishes here that are fresh, fun, and full of flavor.

More about me

Popular Recipes

  • Starbucks Copycat Banana Bread
    Starbucks Copycat Banana Bread: Moist, Flavor-Packed Delight
  • Mediterranean Chicken Bowl
    Mediterranean Chicken Bowl: Fresh, Flavorful, and Healthy Delight
  • Cottage Cheese Banana Bread
    Cottage Cheese Banana Bread: Moist, Protein-Packed Goodness
  • Banana Bread Donuts
    Irresistibly Soft Banana Bread Donuts You Can’t Resist

Footer

↑ back to top

About

  • Privacy Policy
  • Disclaimer
  • Terms & Conditions

Newsletter

  • Sign Up! for emails and updates

Contact

  • About me
  • Contact me

Copyright © 2025 TastyTrendIngredients