tastytrendingredients

  • Home
  • Recipes
    • Appetizers
    • Breakfast
    • Dessert
    • Dinner
    • Drinks
    • Salads
    • Snacks
    • Soups
  • About me
  • Contact
menu icon
go to homepage
  • Home
  • Recipes
    • Appetizers
    • Breakfast
    • Dessert
    • Dinner
    • Drinks
    • Salads
    • Snacks
    • Soups
  • About me
  • Contact
search icon
Homepage link
  • Home
  • Recipes
    • Appetizers
    • Breakfast
    • Dessert
    • Dinner
    • Drinks
    • Salads
    • Snacks
    • Soups
  • About me
  • Contact
×

Festive Holiday Punch: A Refreshing Family Favorite

May 16, 2026 by Grace Snow Leave a Comment

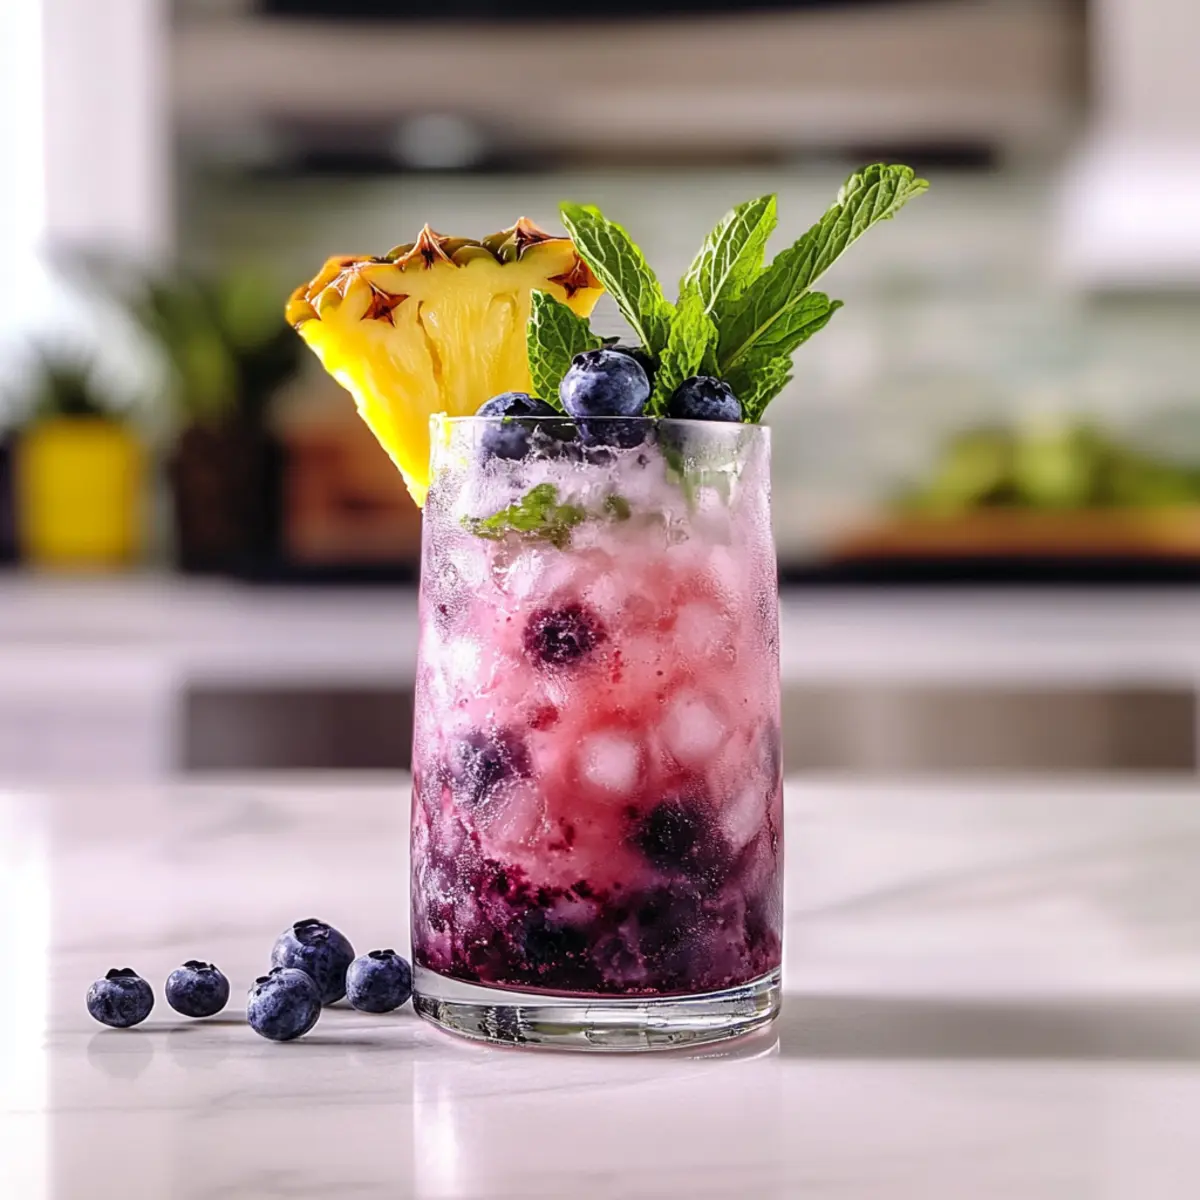
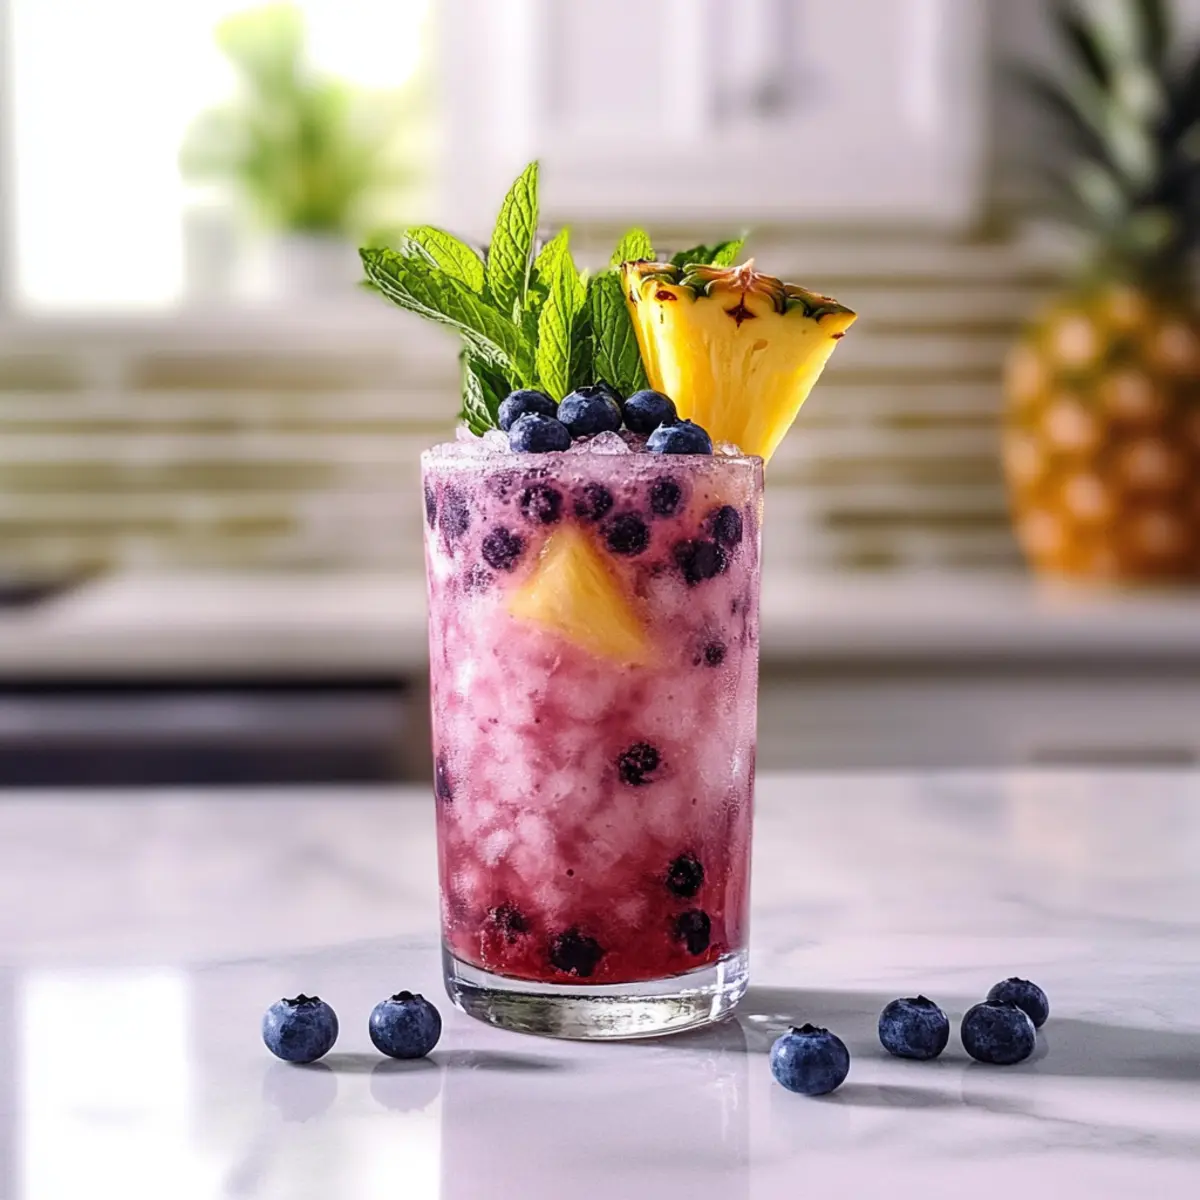
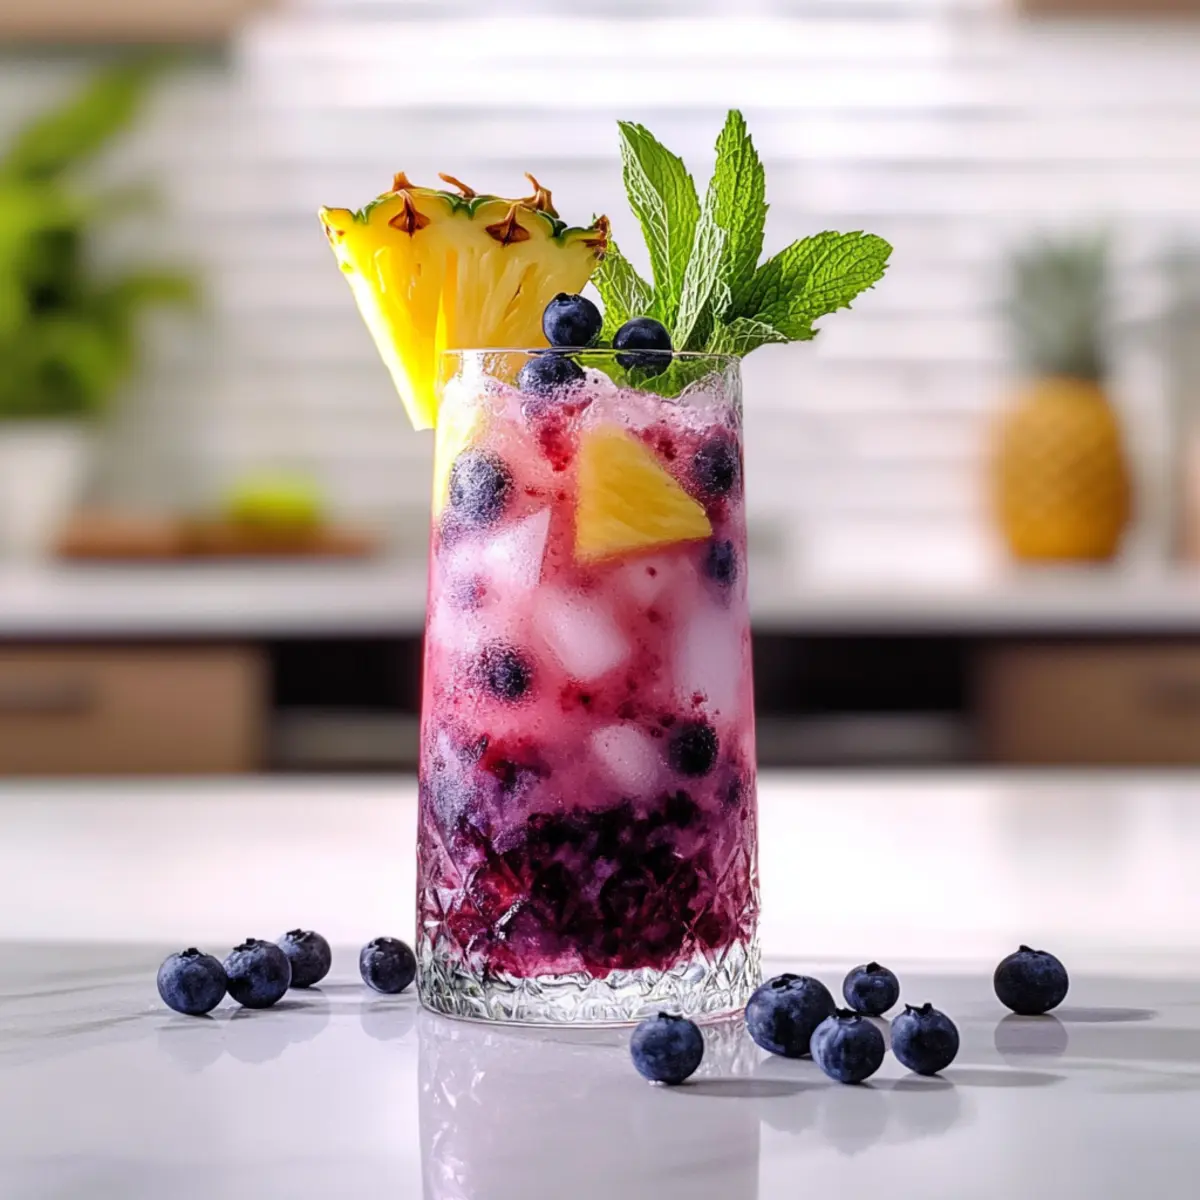
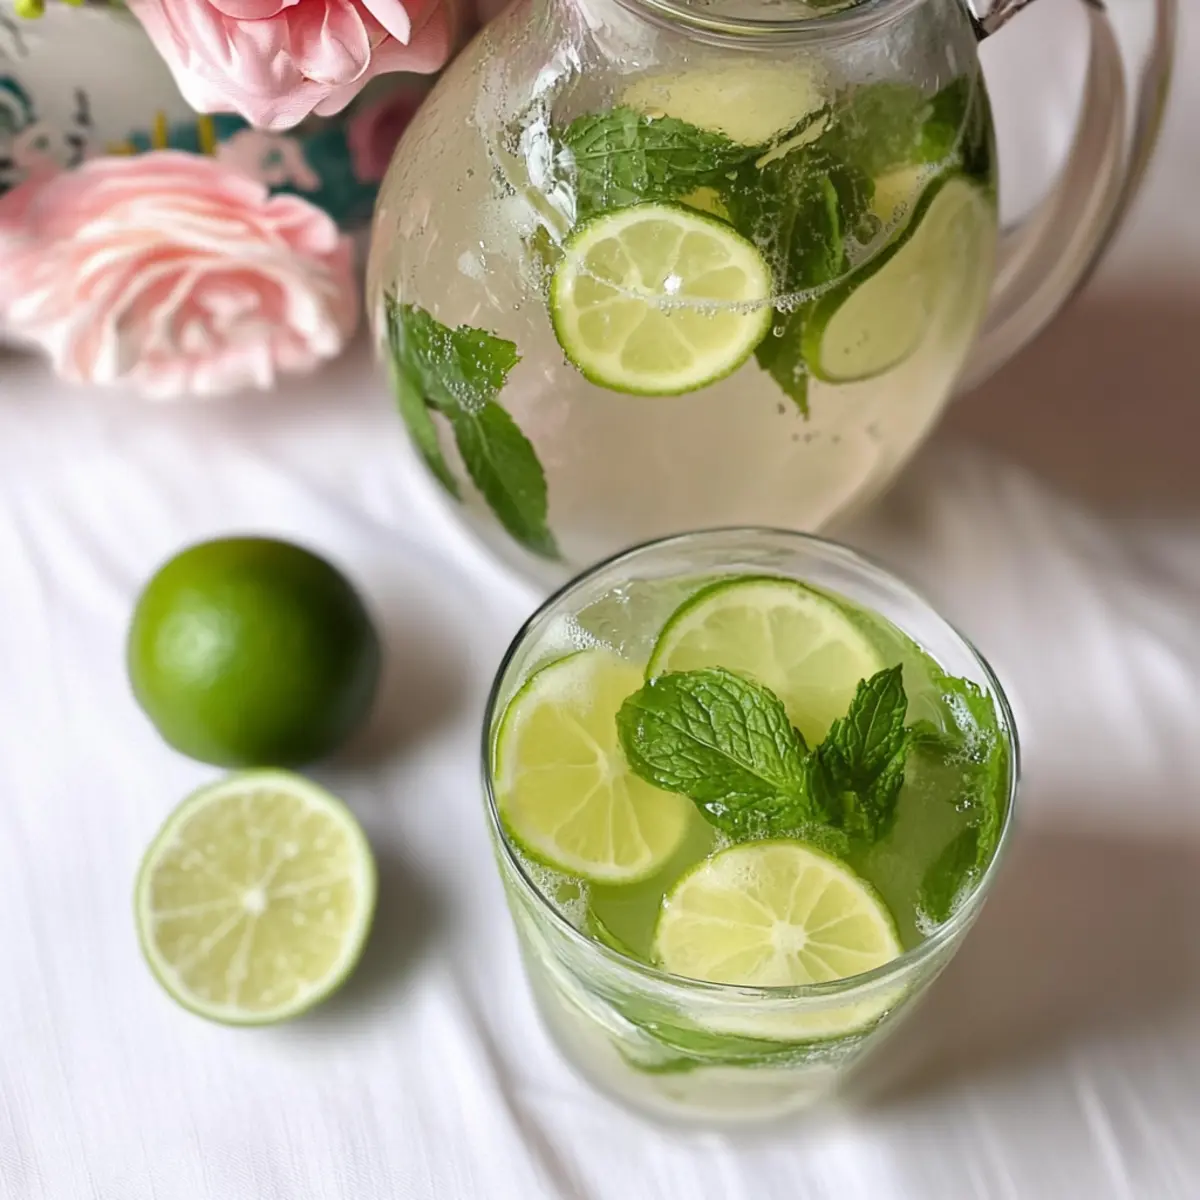
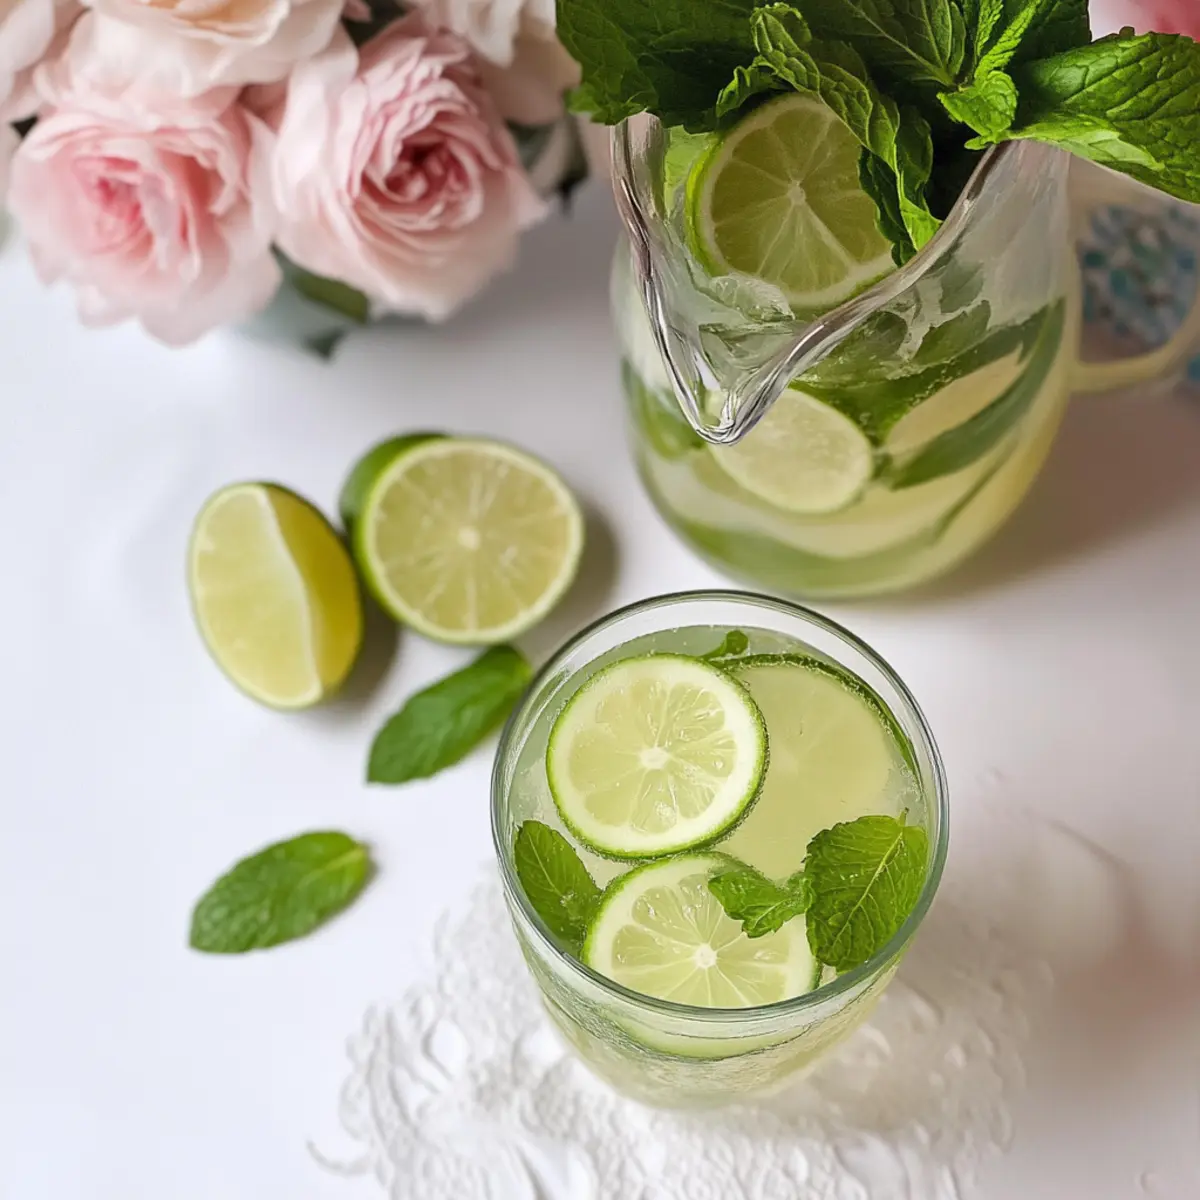
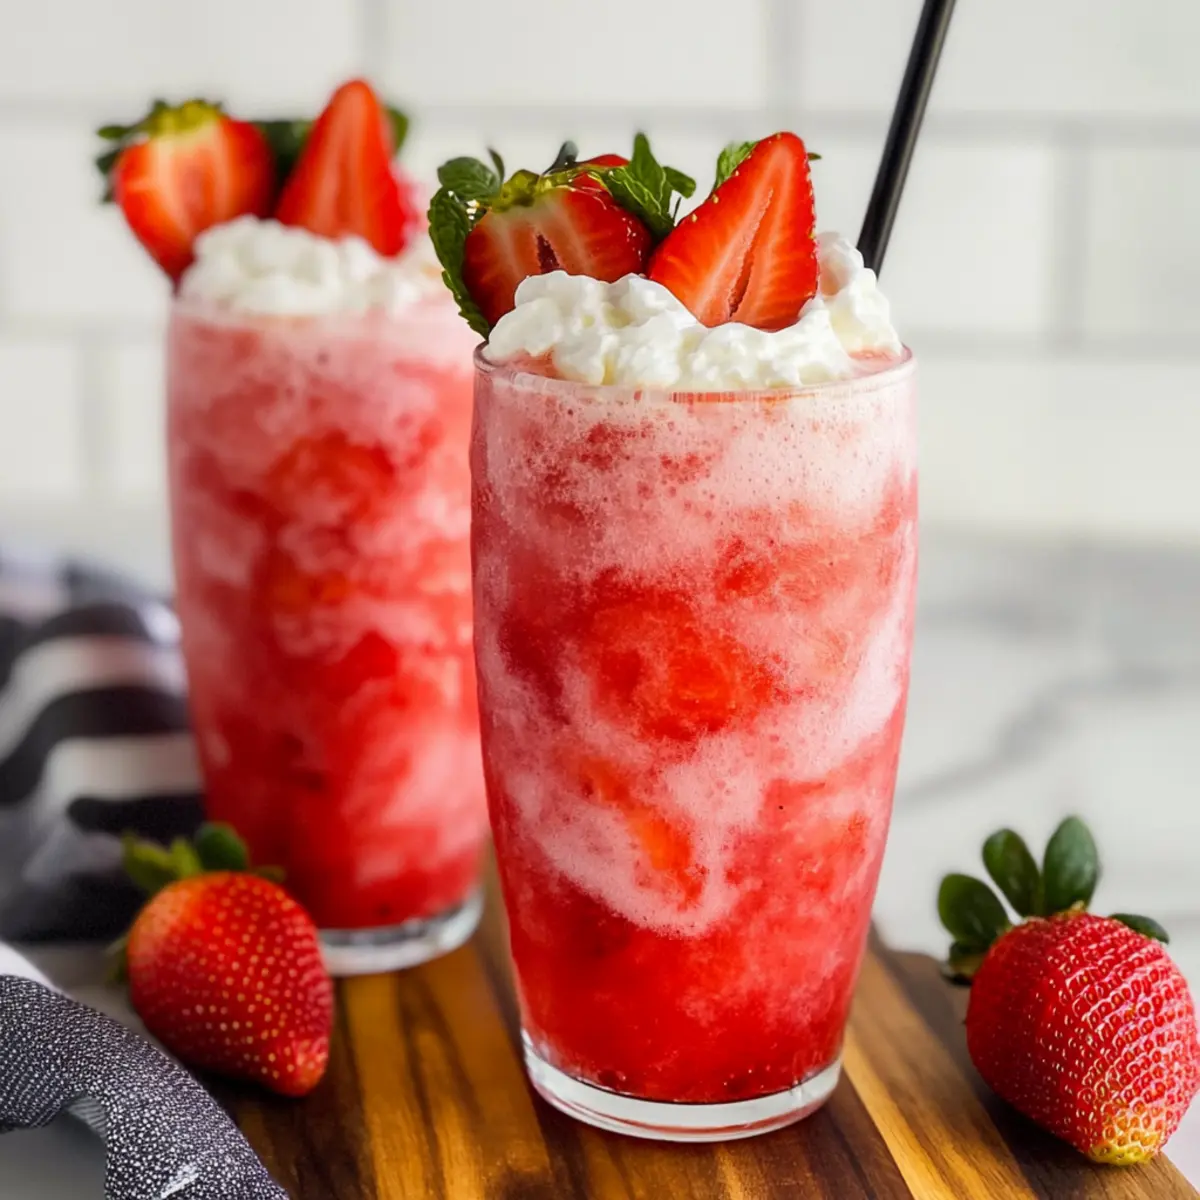
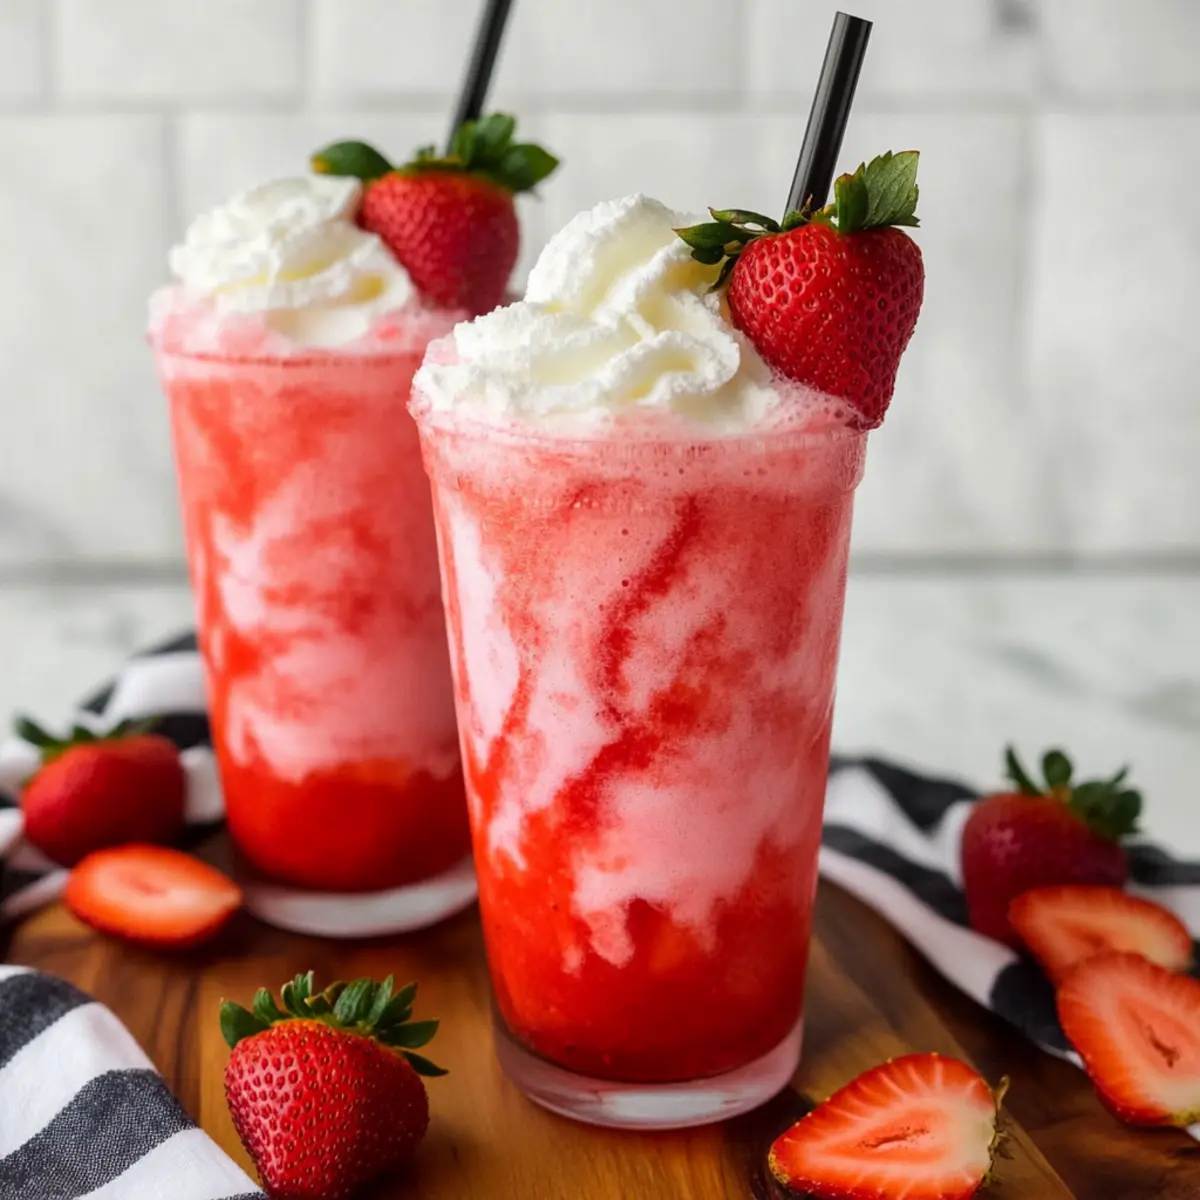
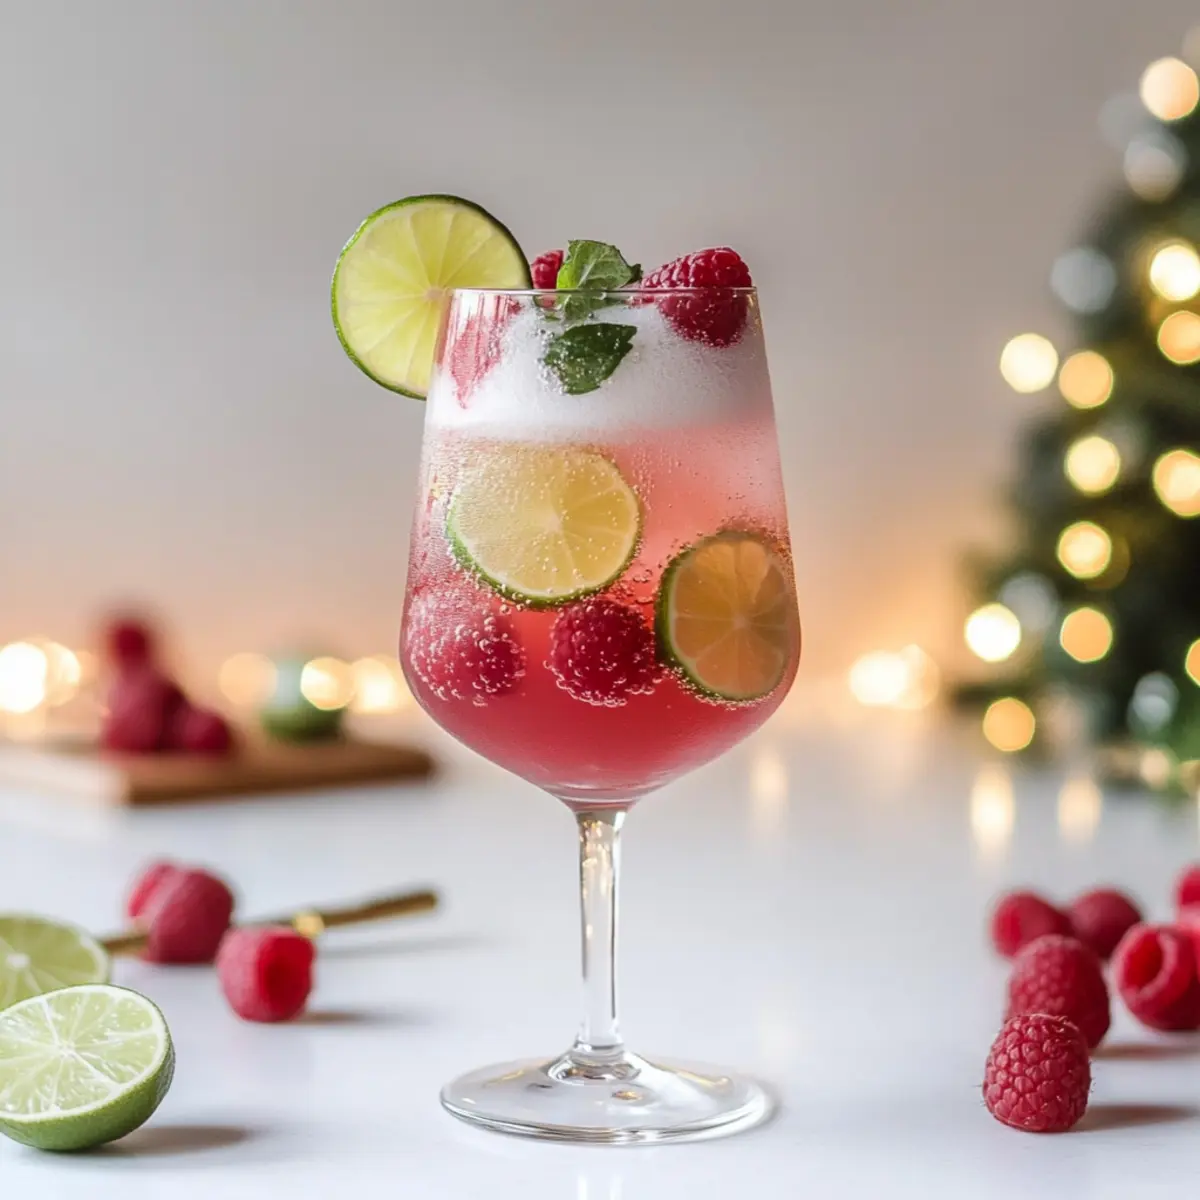
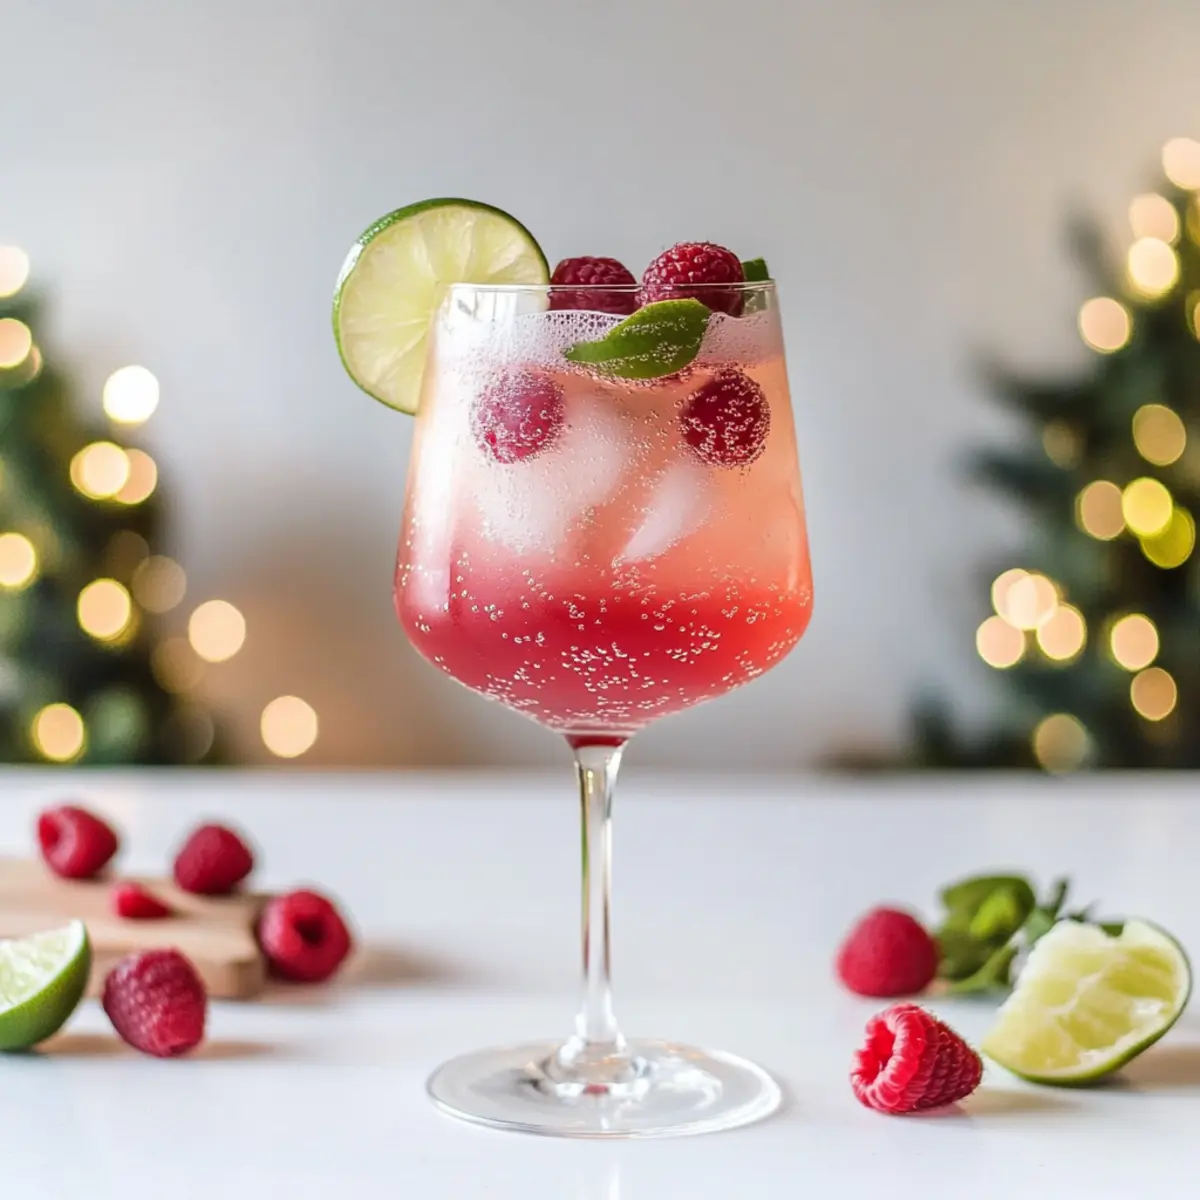
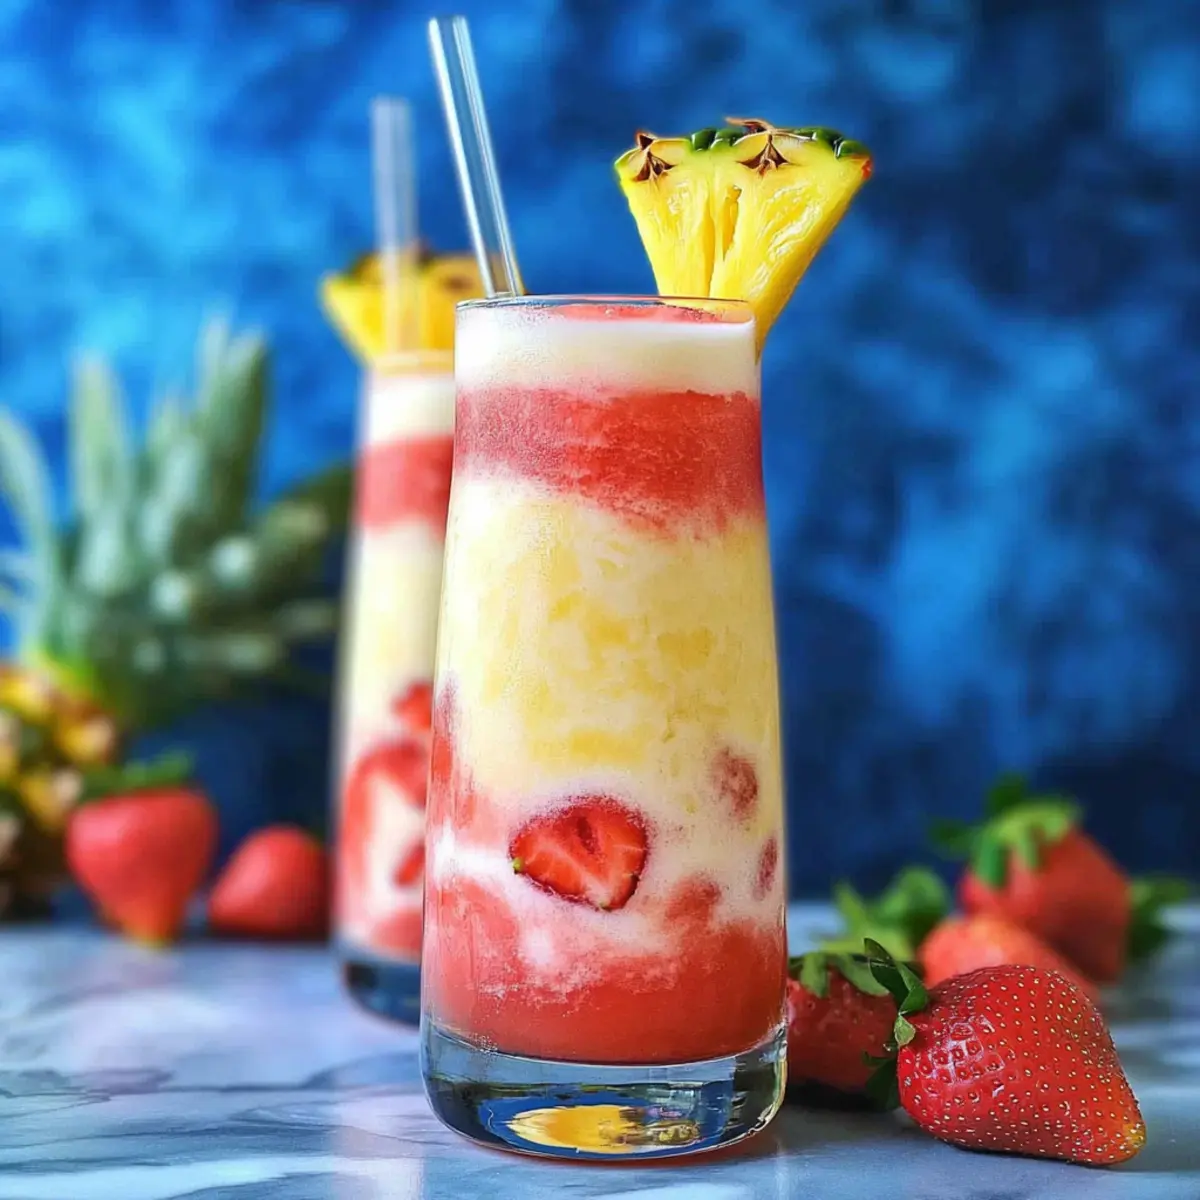
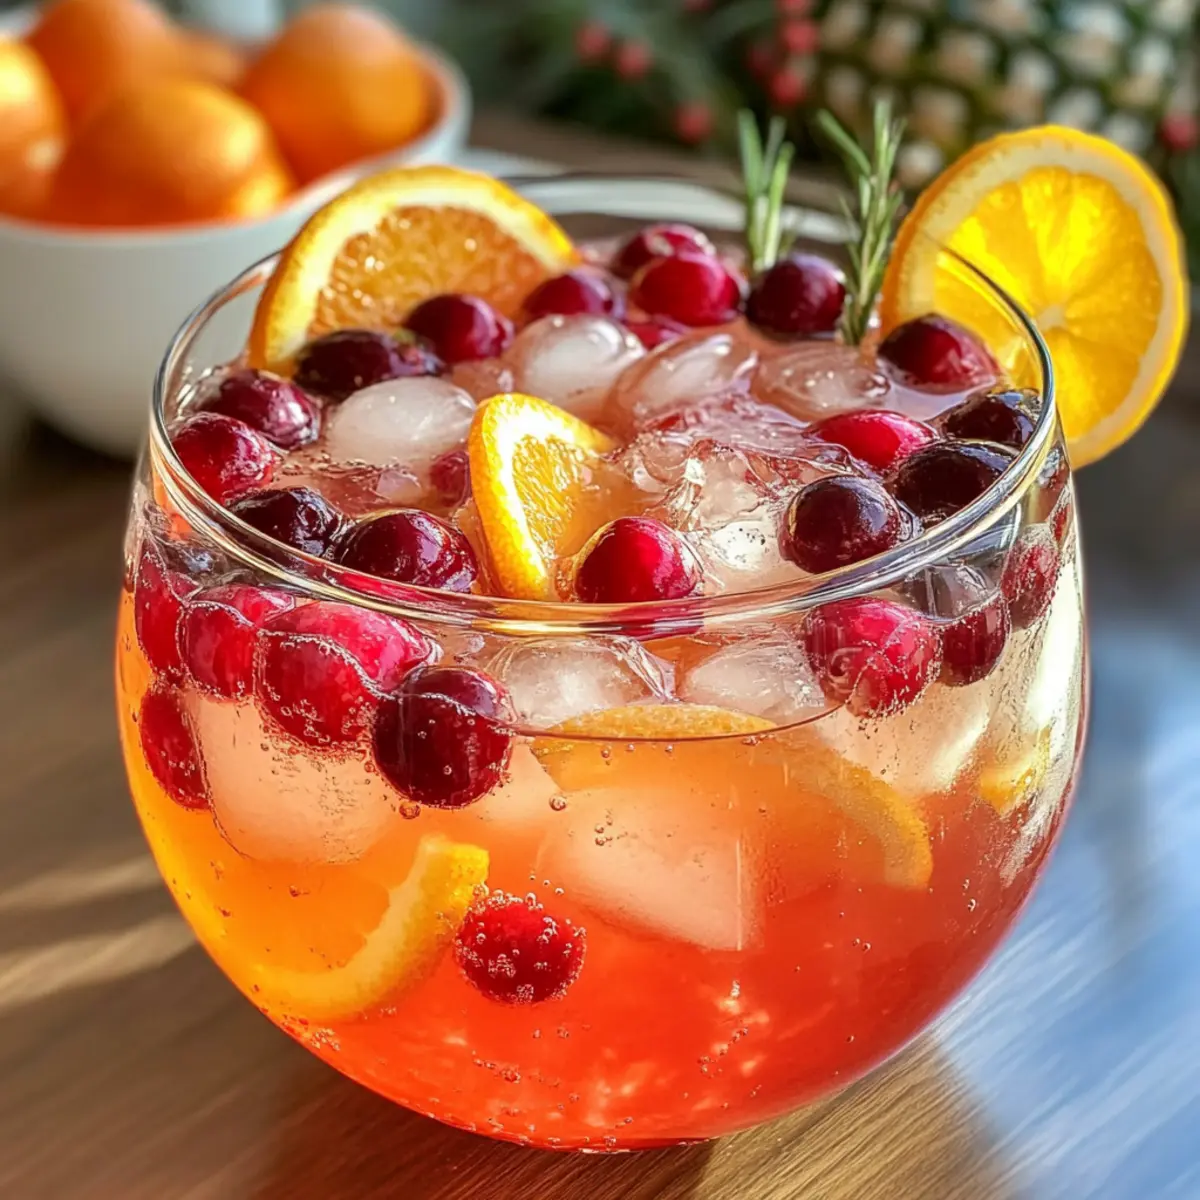
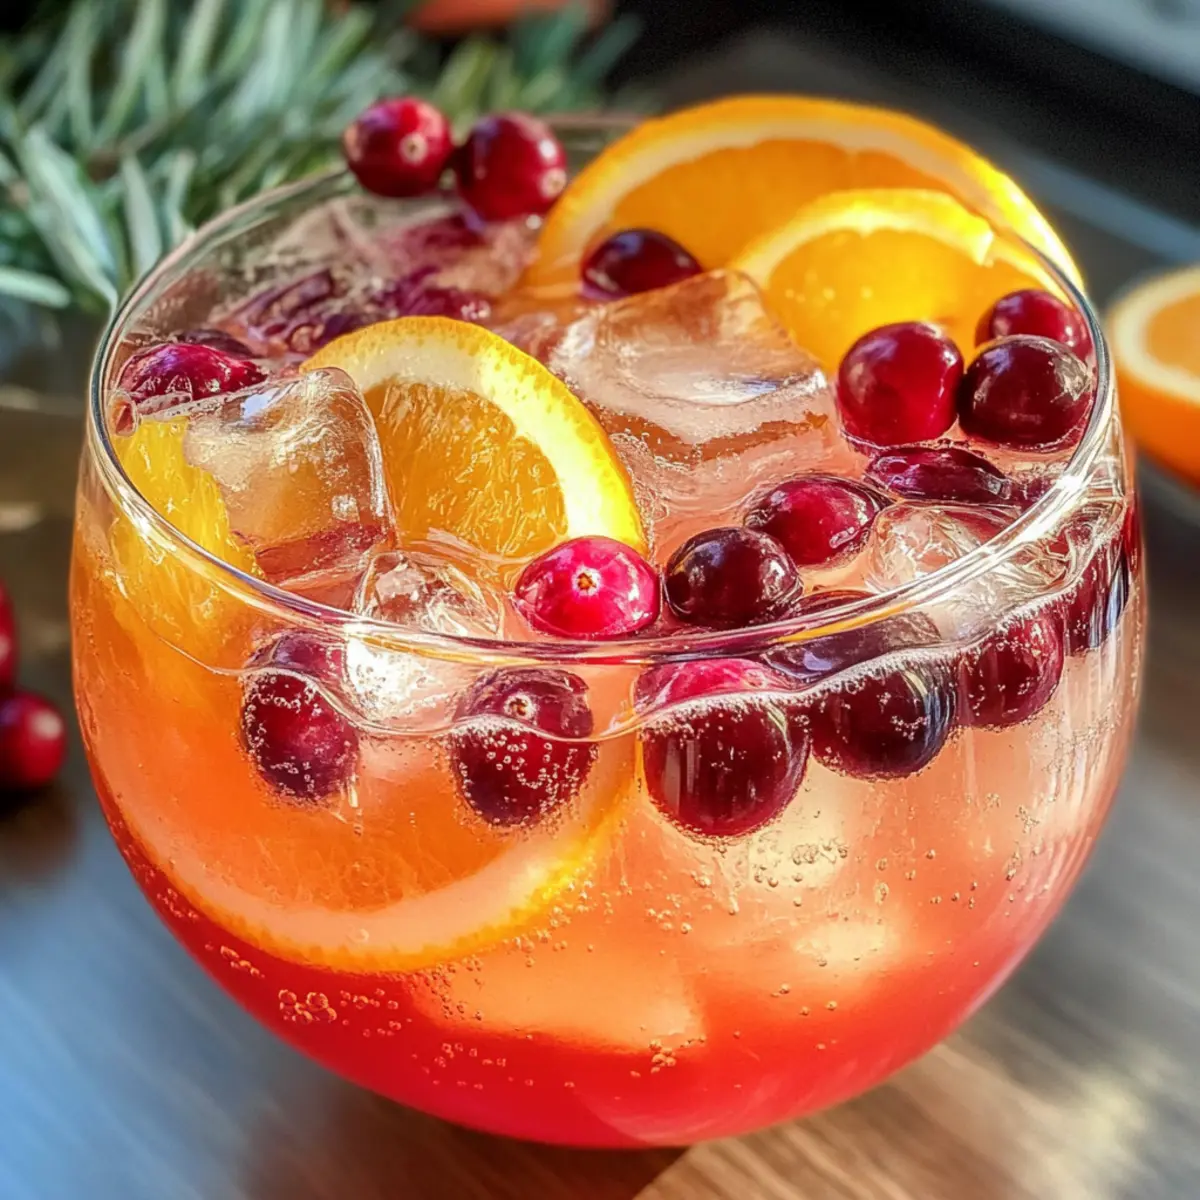
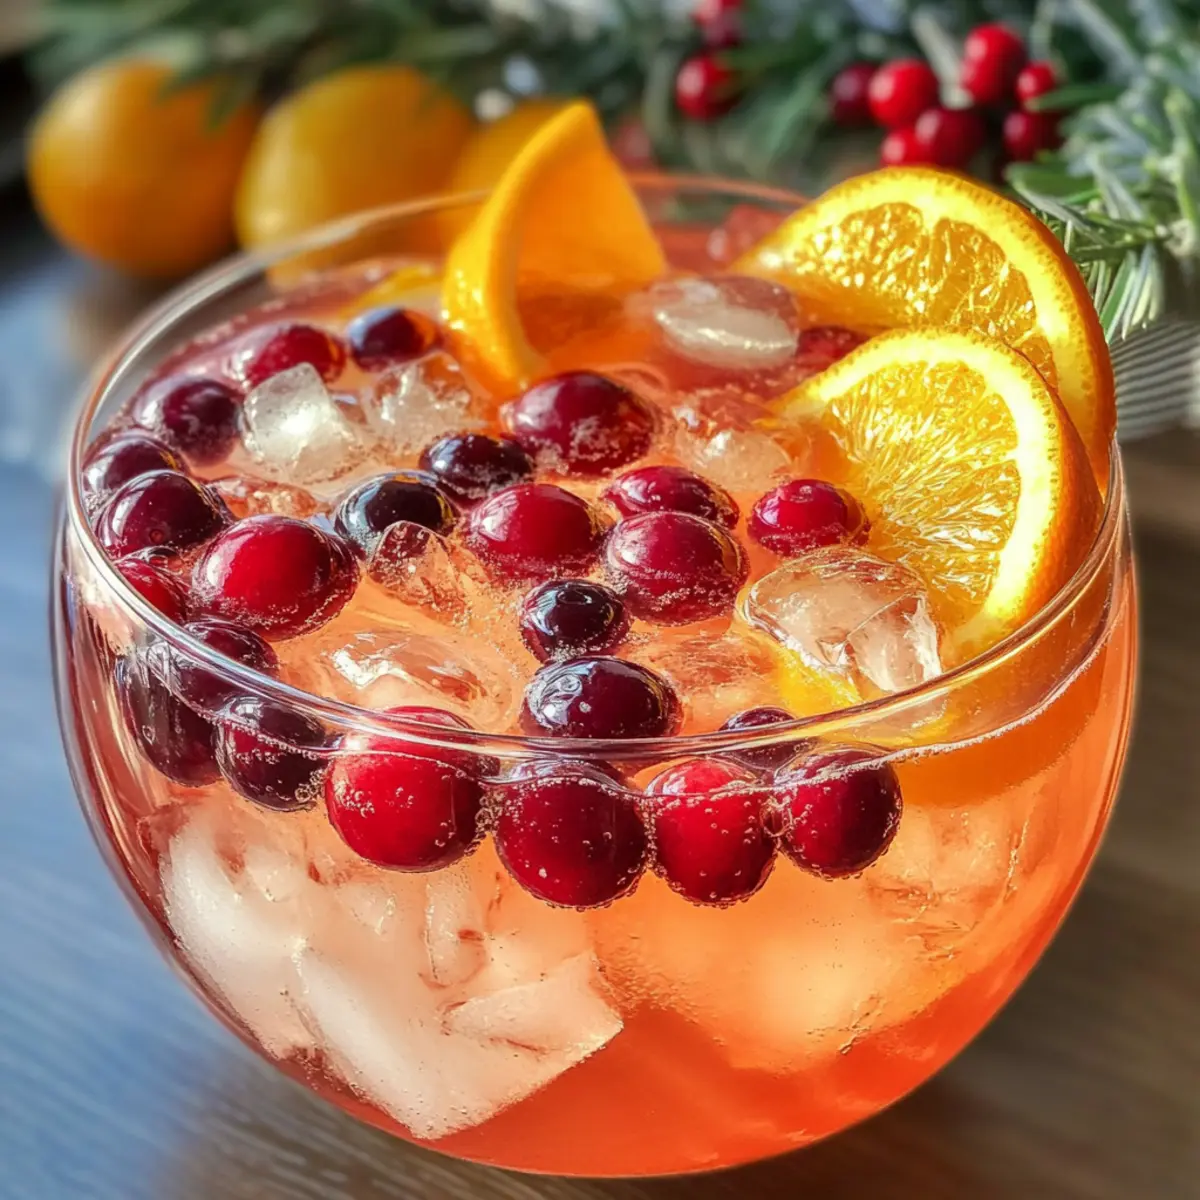
As the festive season approaches, the search for the perfect drink begins. This Easy Holiday Punch is just the solution, offering a sparkling blend of cranberry and pineapple that dances in the glass. Family-friendly and alcohol-free, this delightful concoction is not only quick to whip up in just 10 minutes, but it also brings vibrant colors and fruity flavors that will impress your guests of all ages. Perfect for Christmas, Thanksgiving, or any celebration, it’s a refreshing twist on traditional holiday beverages. Imagine serving this fizzy punch in clear glasses, garnished with bright orange slices and fresh cranberries—who wouldn’t want to take a sip? Curious about how to create this cheerful drink? Let’s dive into the recipe!

Why is Holiday Punch a Must-Try?

Effortless to Make: With just a 10-minute prep time, this punch requires no advanced skills, making it perfect for both beginners and seasoned home chefs alike.
Crowd-Pleasing Refreshment: The bright combination of cranberry and pineapple juices paired with fizzy soda ensures everyone can enjoy this festive drink, regardless of age.
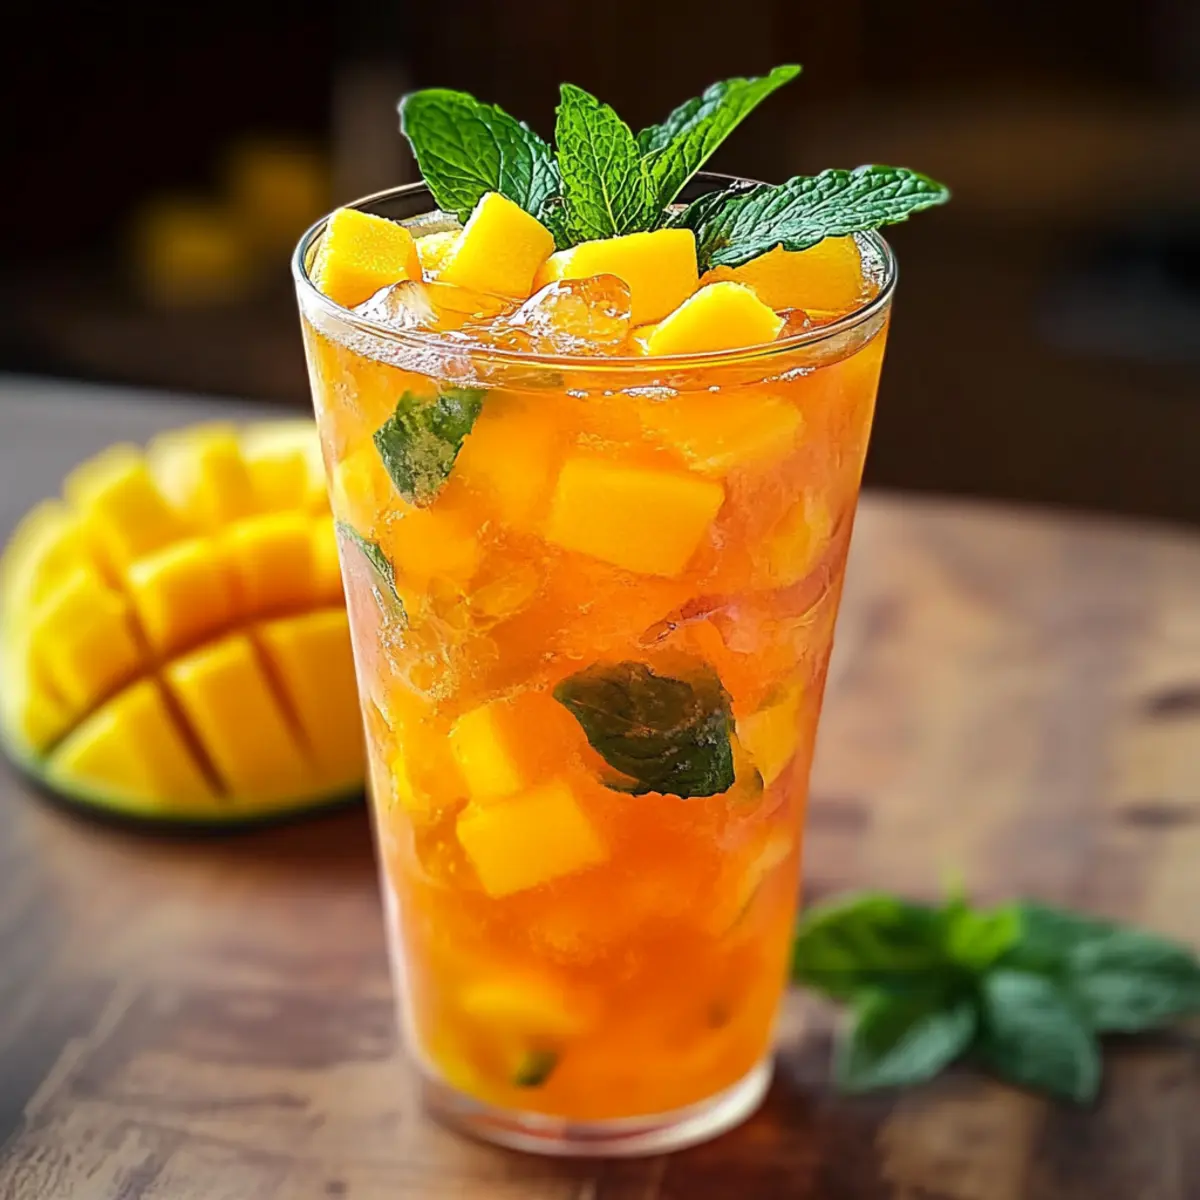
Versatile Flavor: Feel free to customize with spices or alternative juices for unique variations that can suit any holiday gathering, like Eggnog Cookies Soft or seasonal treats!
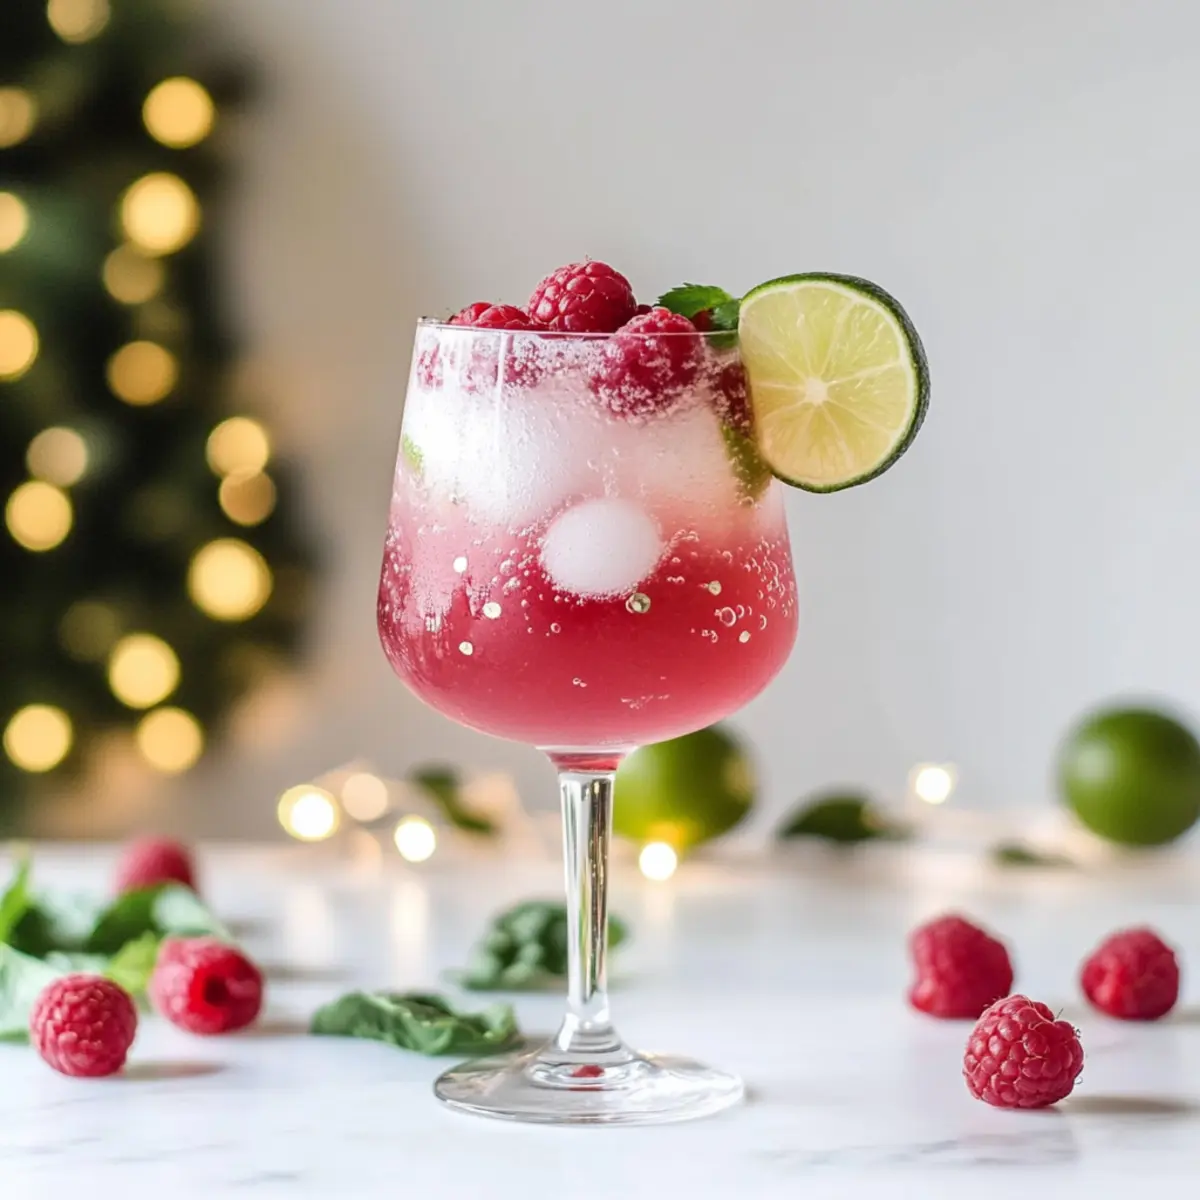
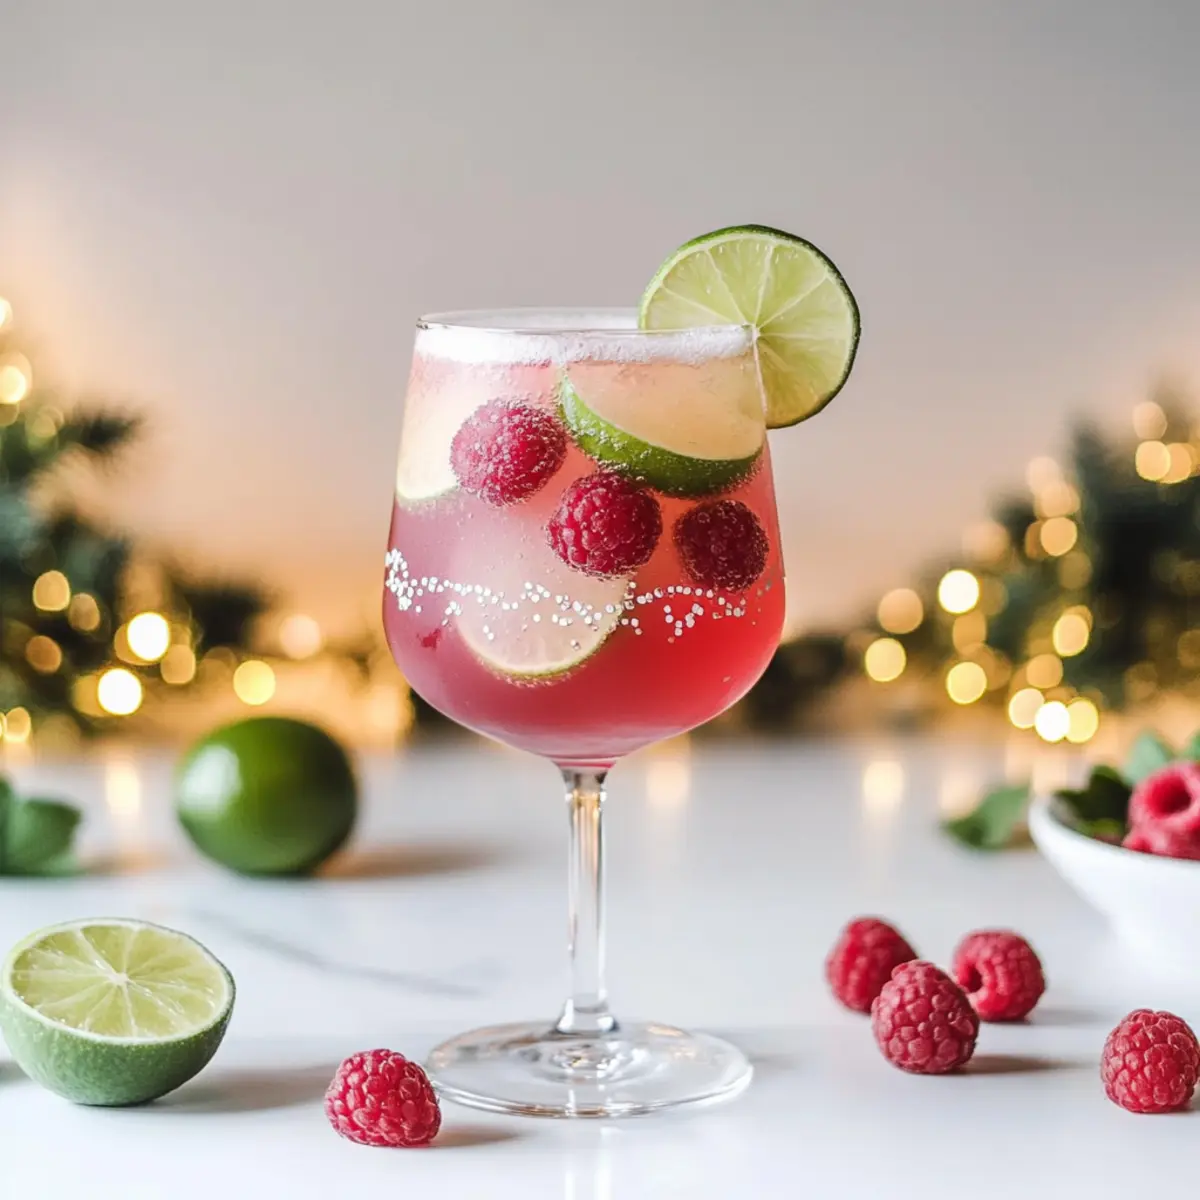
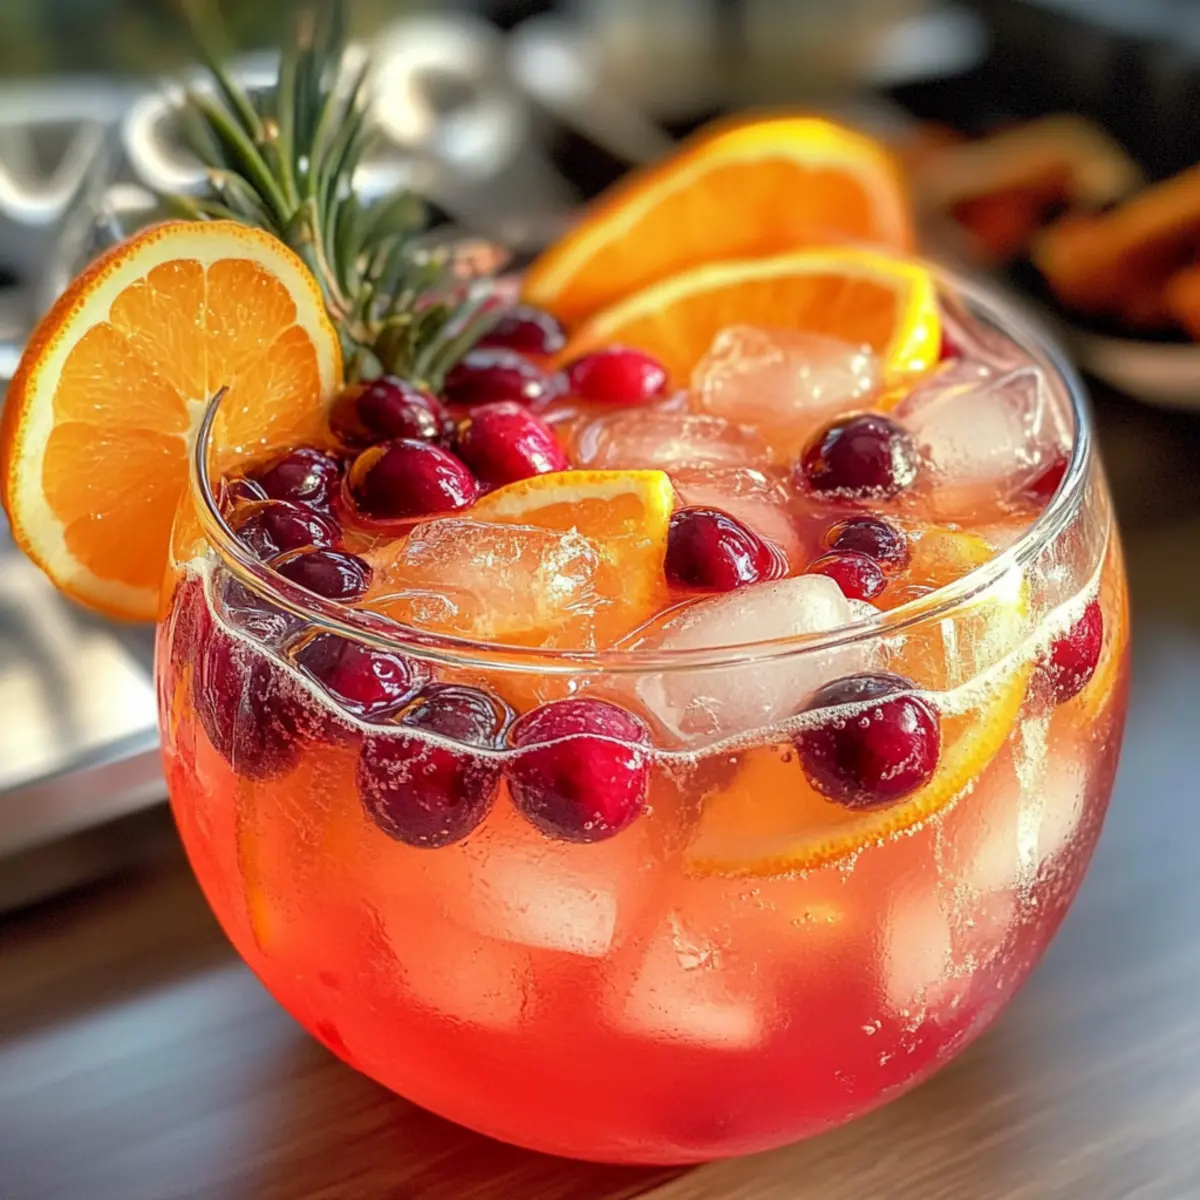
Vibrant Presentation: Served in clear glasses, the punch not only tastes great but looks stunning on your festive table, enhancing the holiday spirit.
Health-Conscious Choice: Alcohol-free and low in calories, this delightful punch is a guilt-free indulgence, making it a healthy option that doesn't compromise on flavor or fun!

Holiday Punch Ingredients

For the Base

  • Cranberry Juice Cocktail – Provides the drink’s rich color and base flavor; choose unsweetened varieties for a healthier option.
  • Pineapple Juice – Adds a tropical sweetness that beautifully balances the tartness of cranberry; fresh or canned juice both work well.
  • Frozen Lemonade Concentrate – Contributes a tangy sweetness that enhances the overall flavor; ensure it's fully thawed before use.

For the Fizz

  • Lemon-Lime Soda (or Ginger Ale) – Adds fizz and sweetness; for a less sweet alternative, you can substitute with sparkling water.

For the Garnish

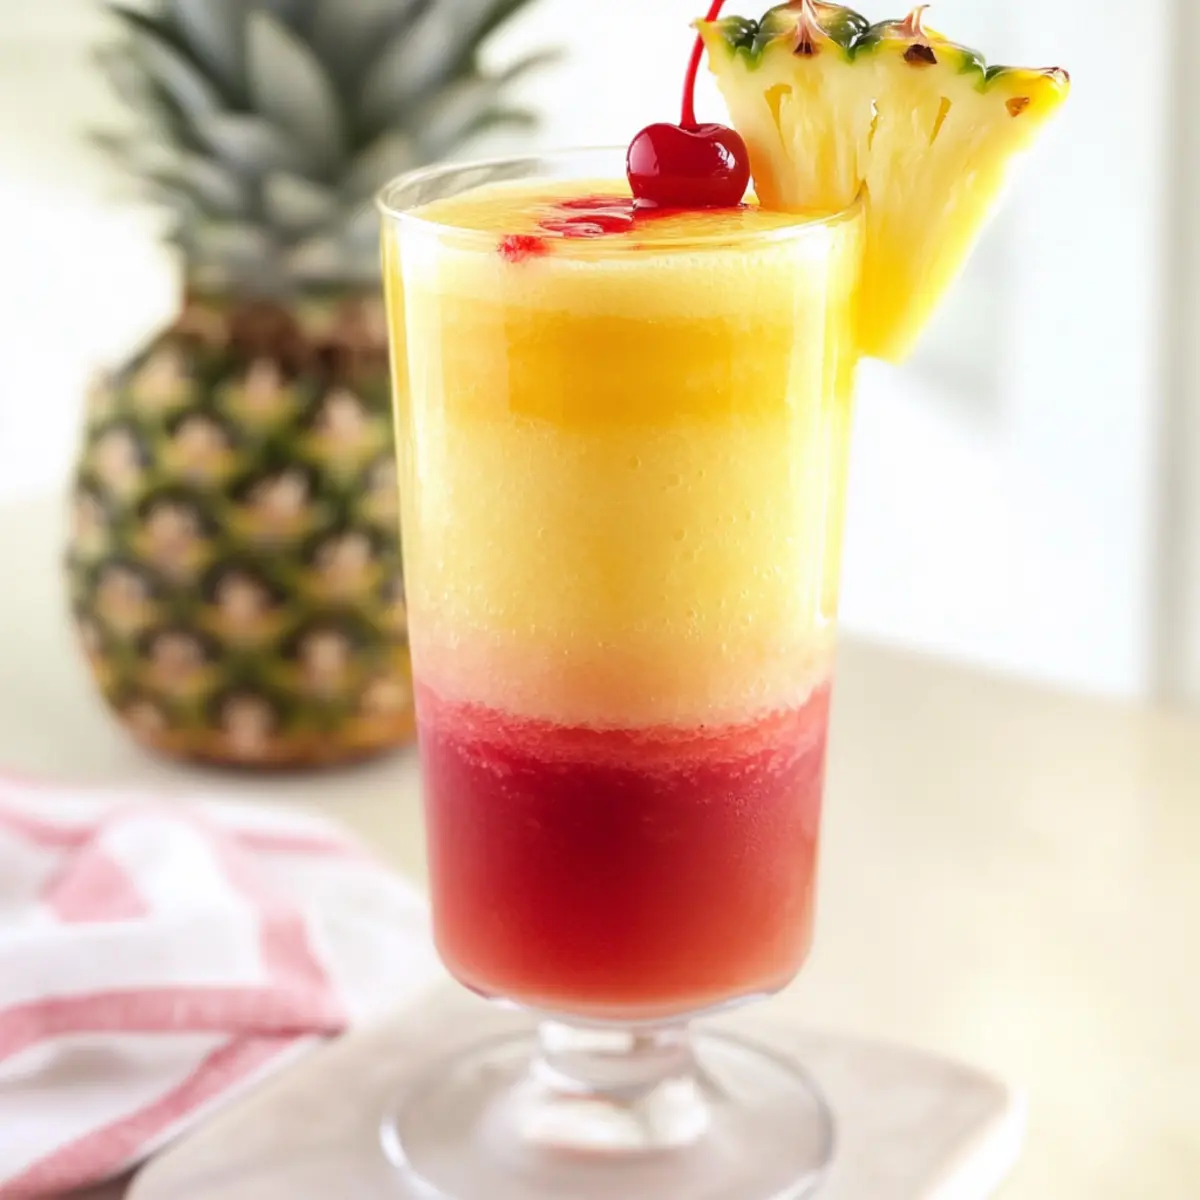
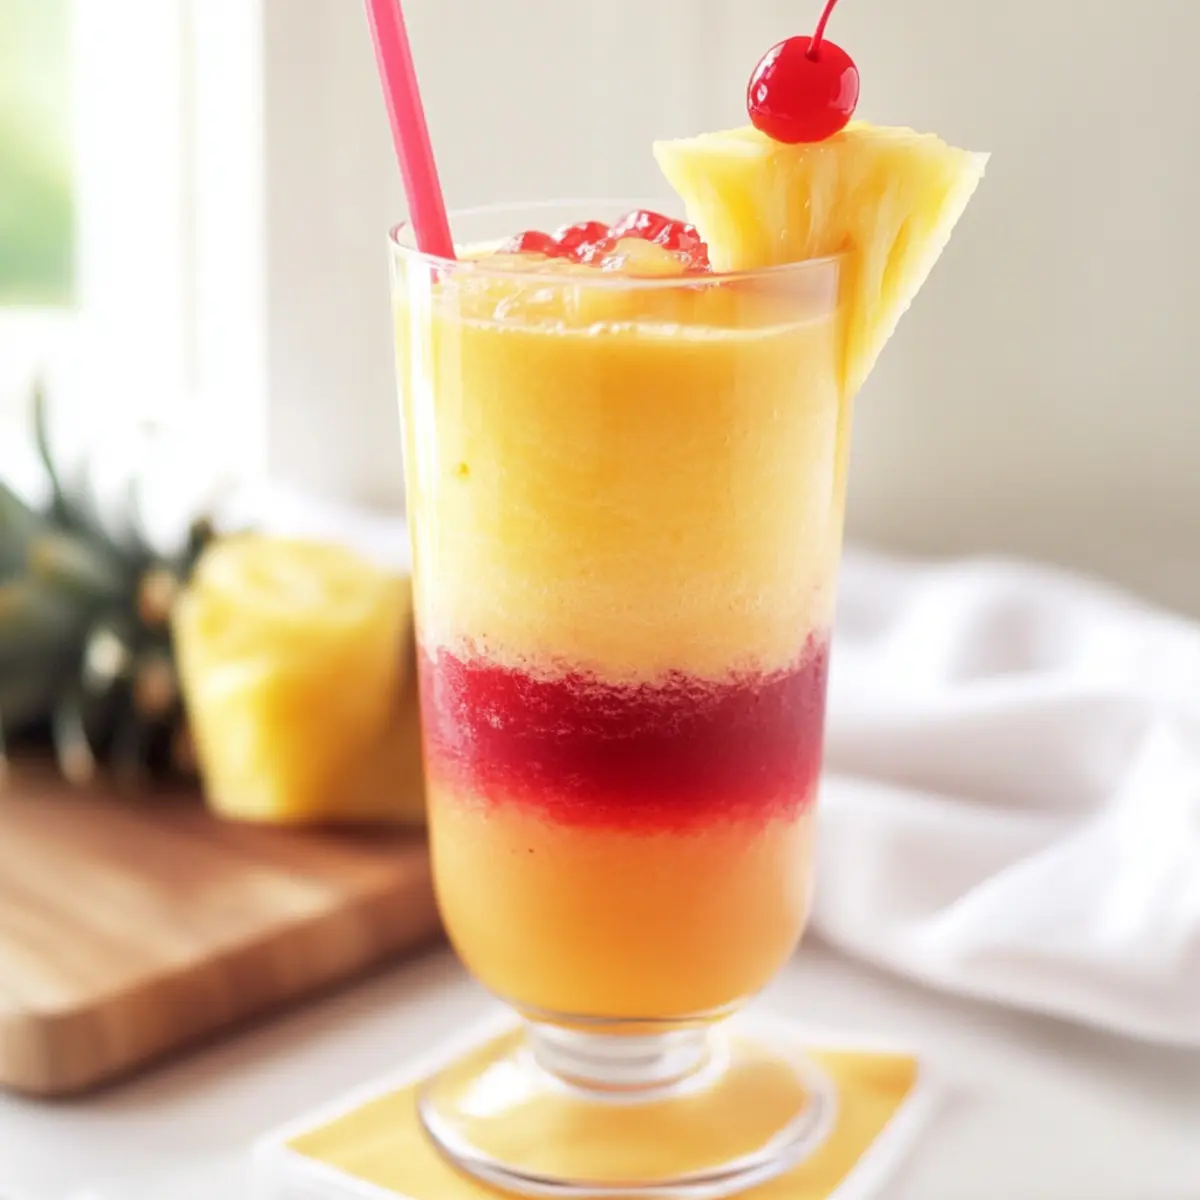
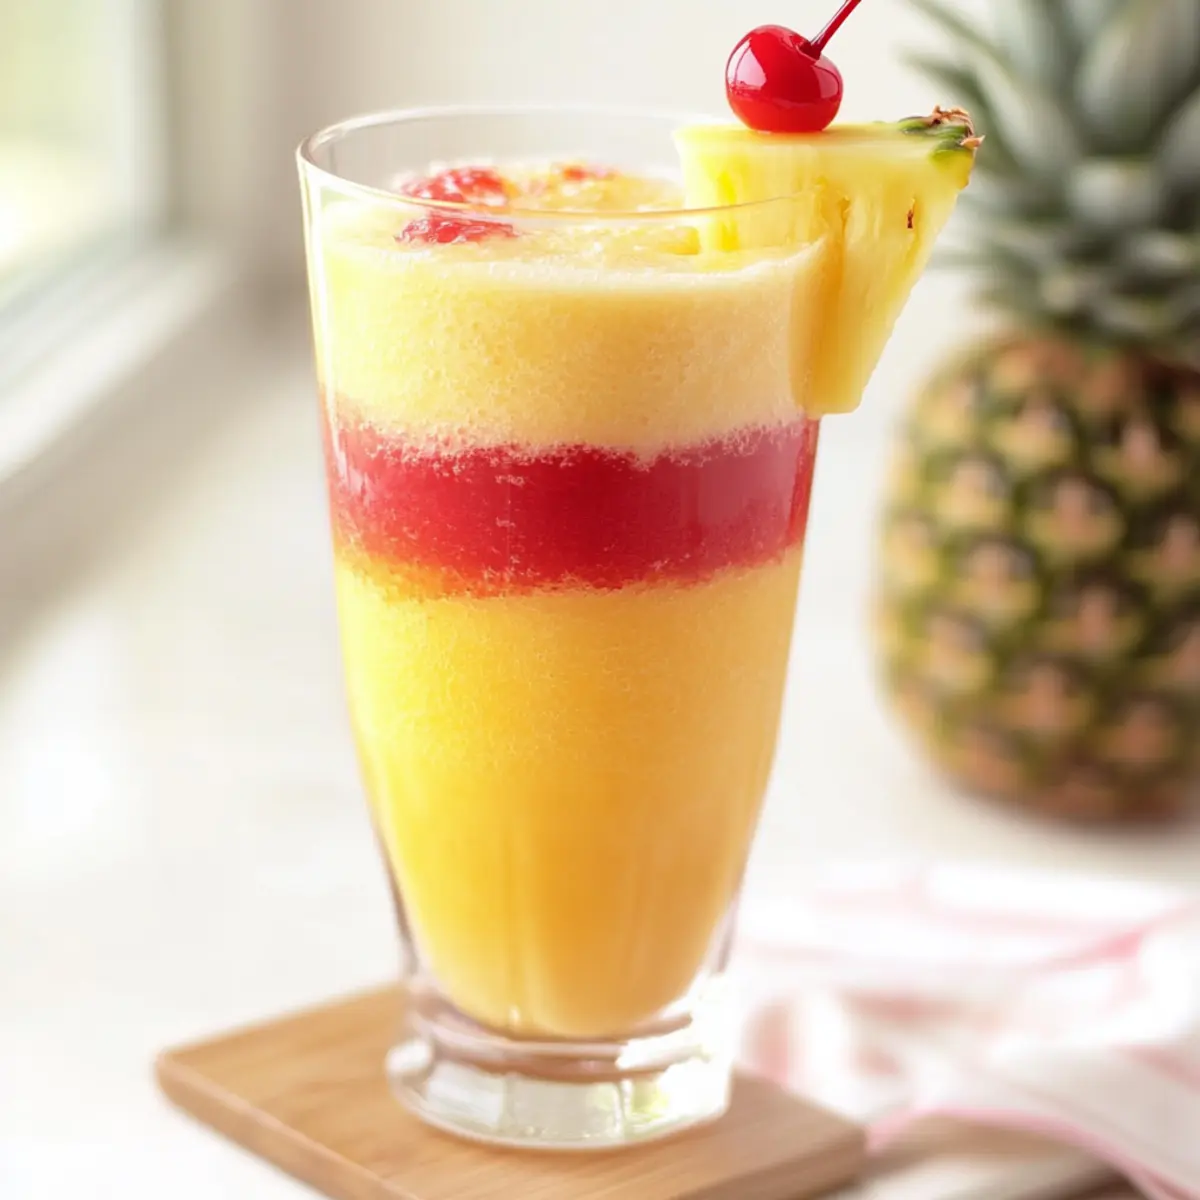
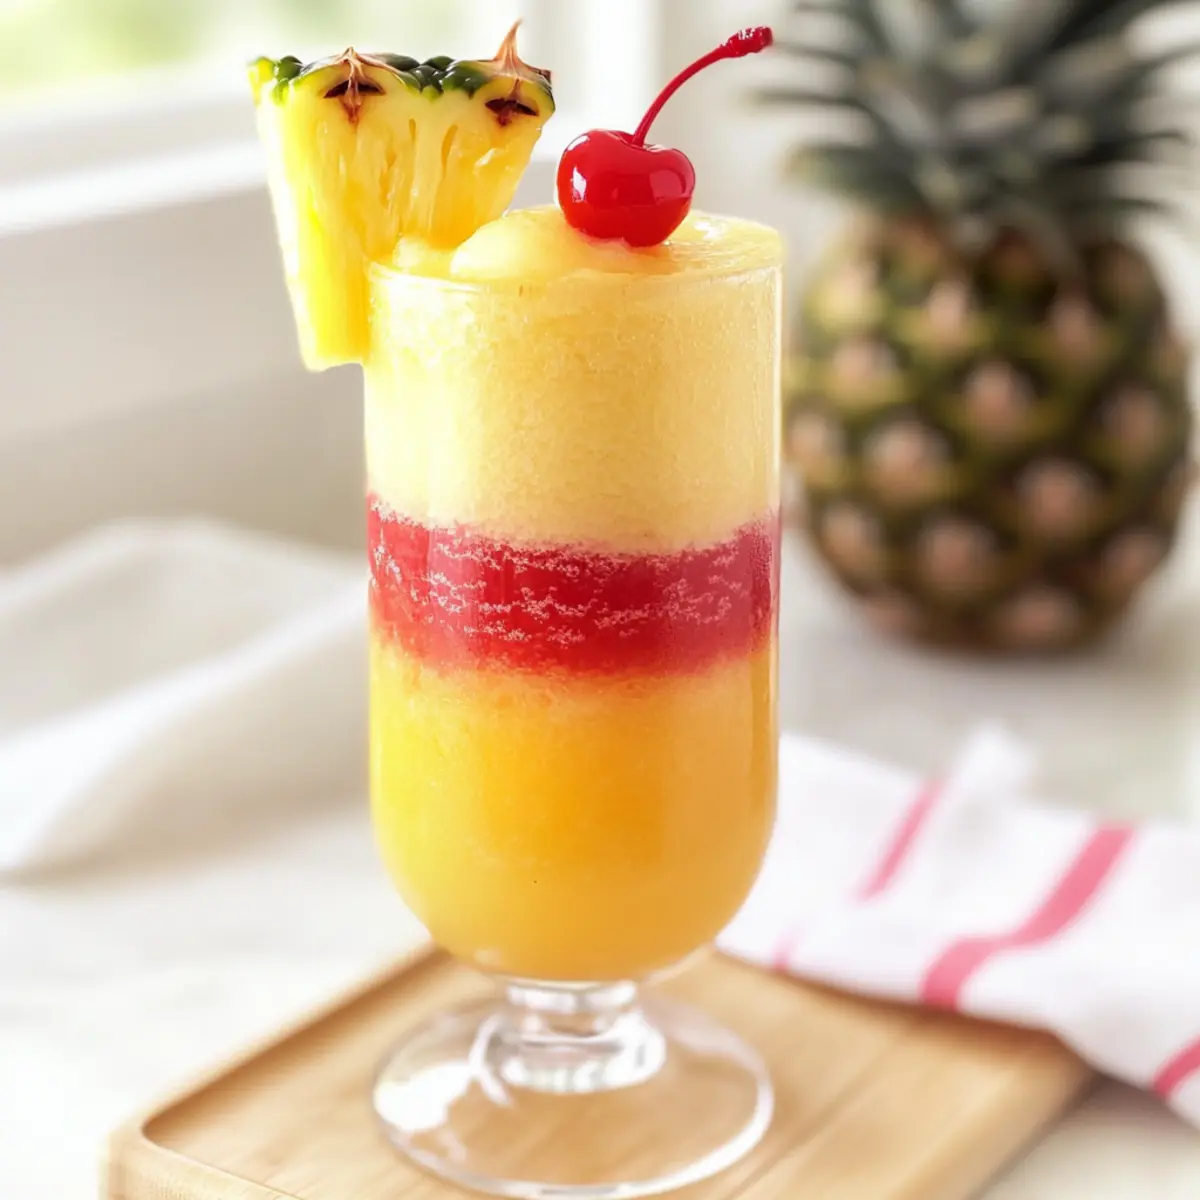
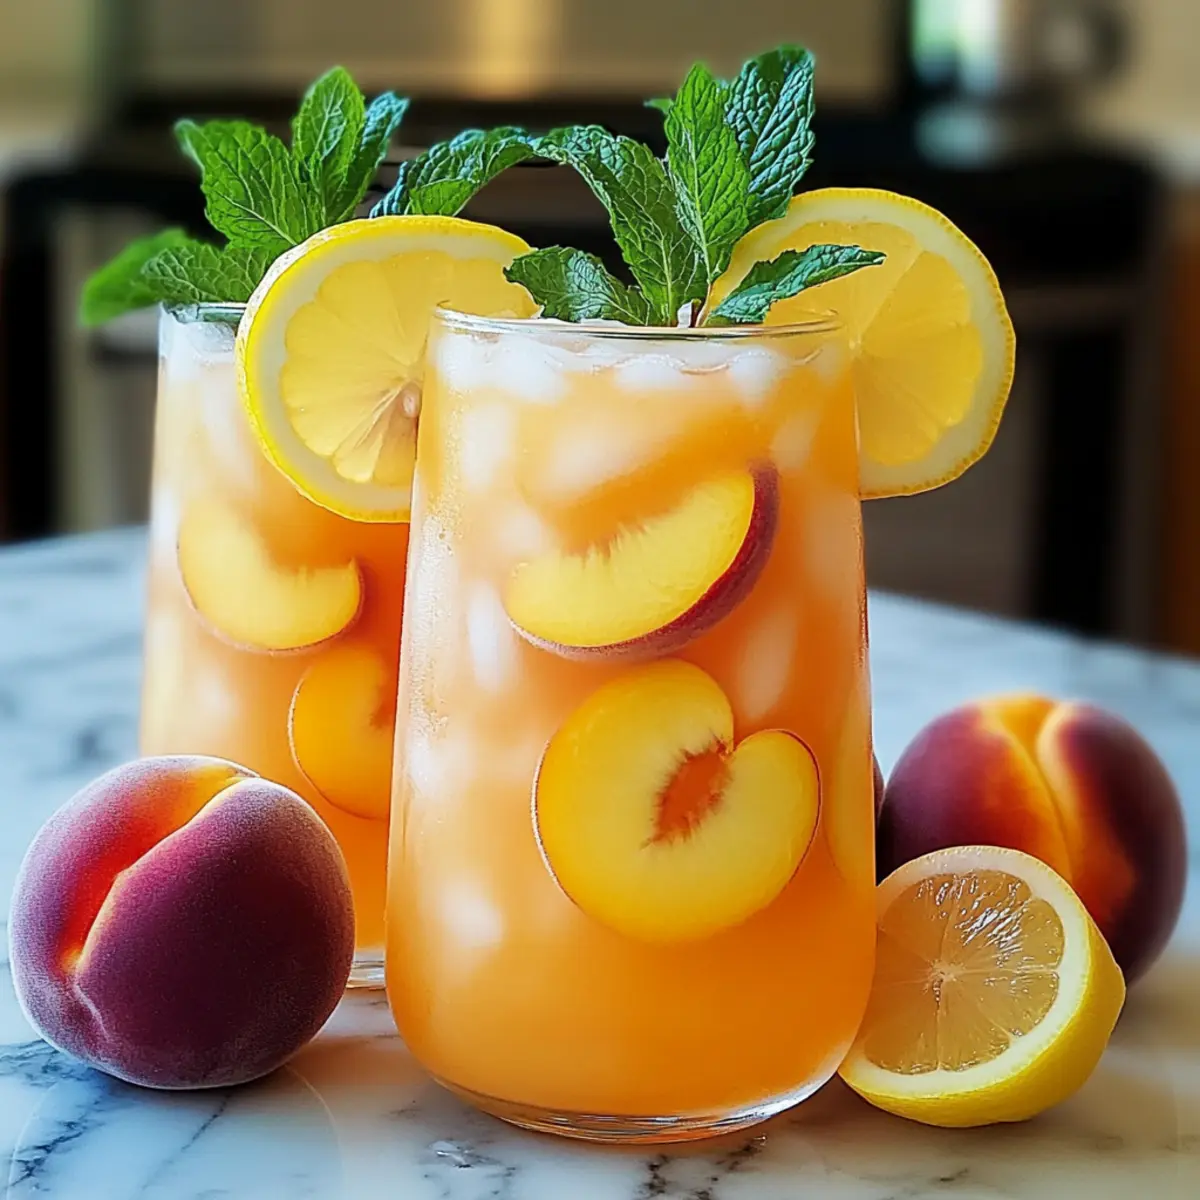
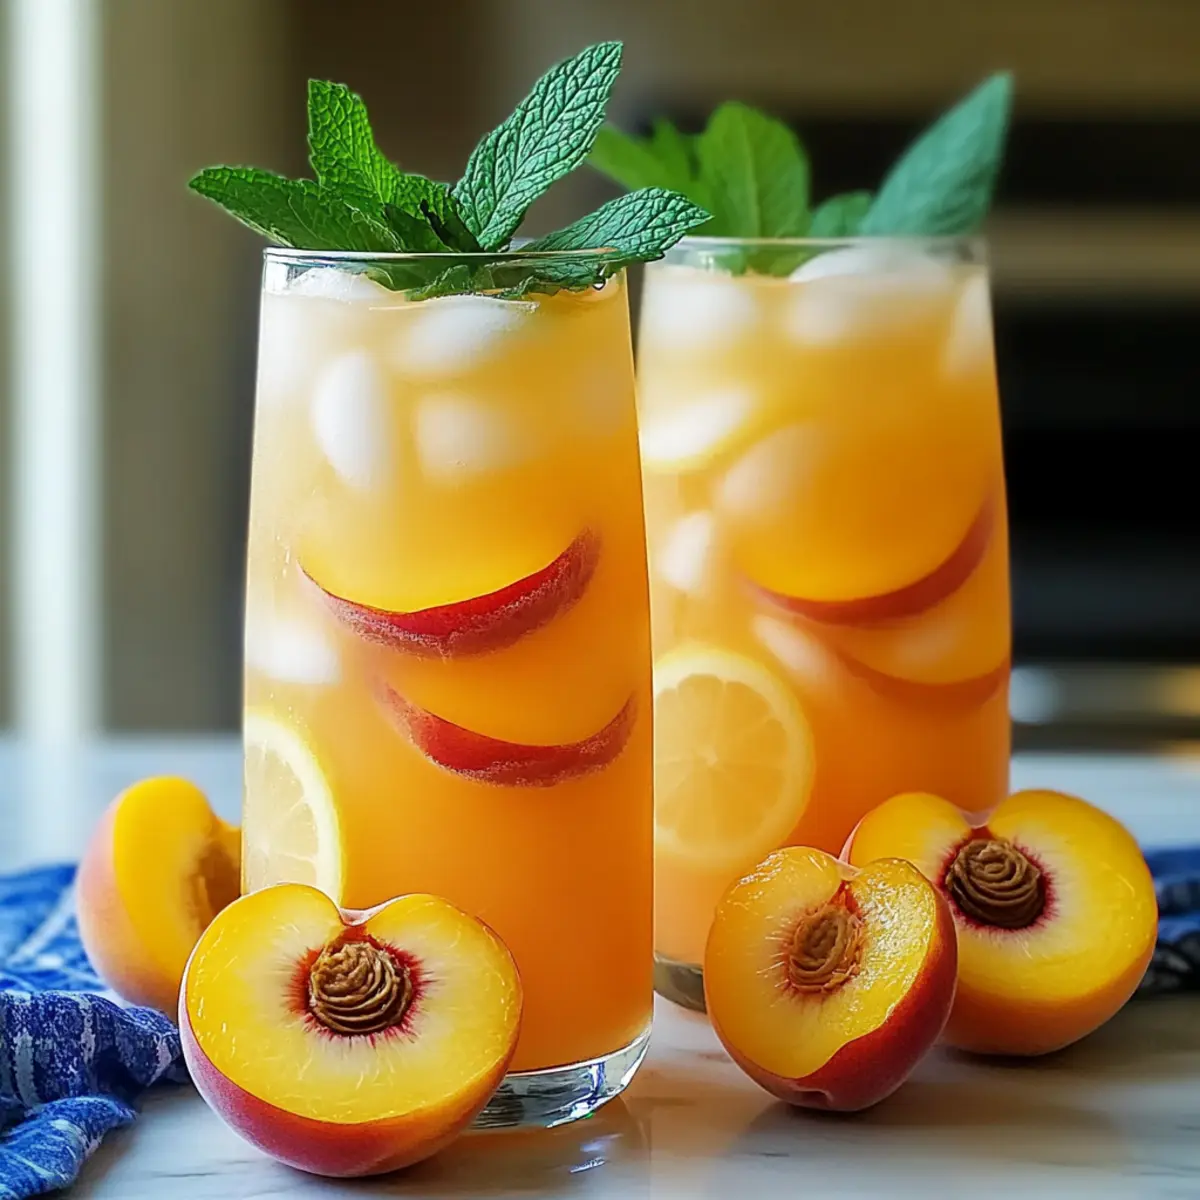
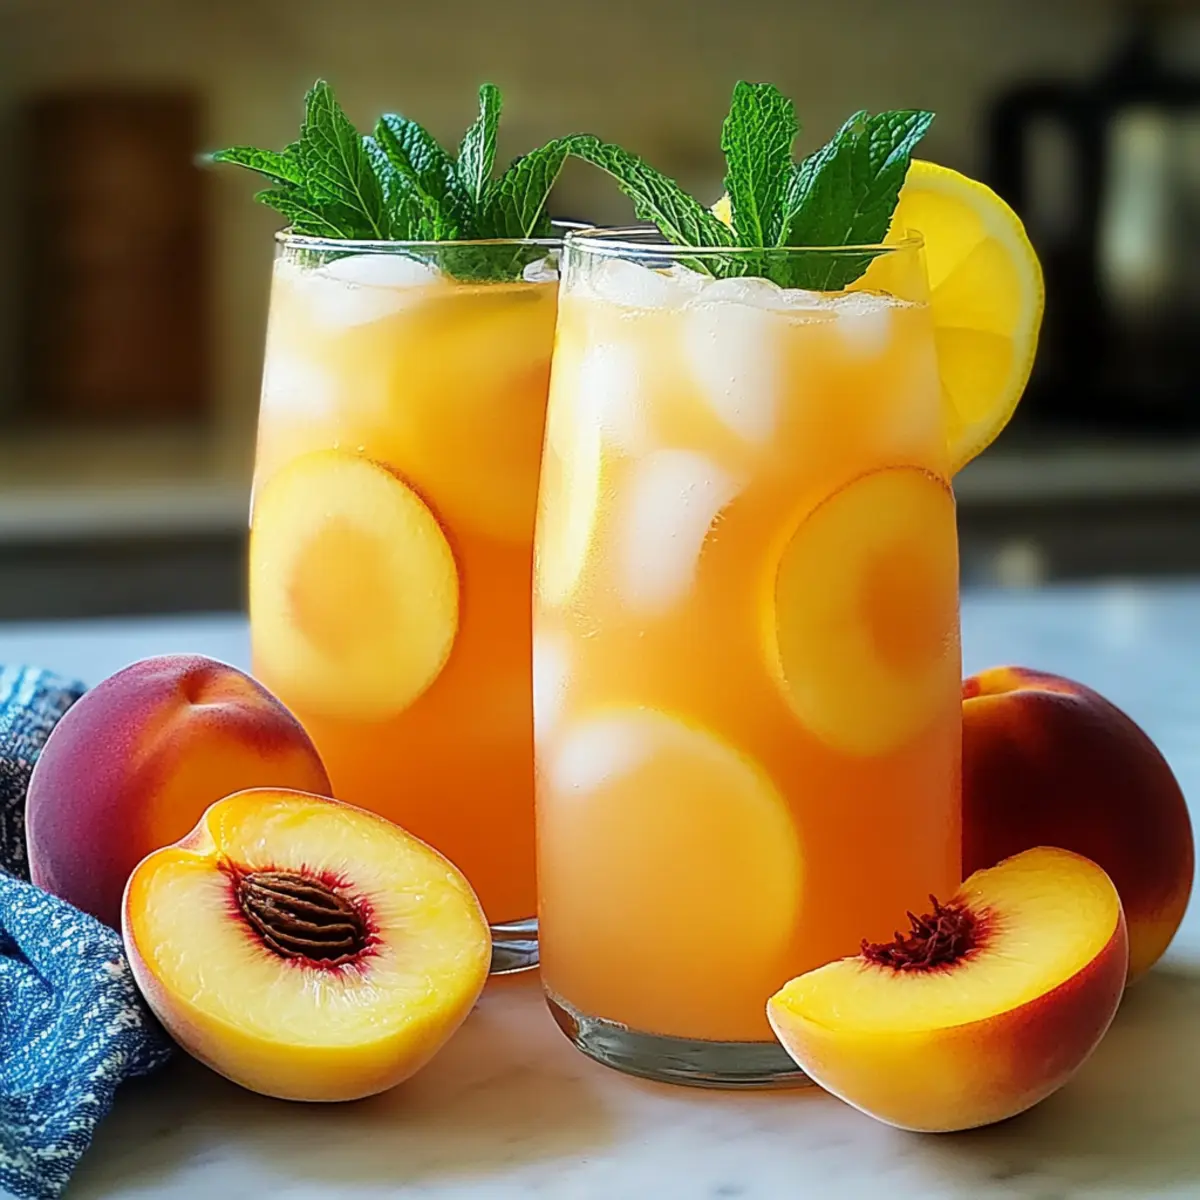
  • Orange Slices & Fresh Cranberries – Enhance the presentation and add a festive touch, making each glass a delight to behold.

This holiday punch is not only a feast for the senses with its vibrant colors but also an easy-to-make, alcohol-free drink that the whole family can enjoy!

Step‑by‑Step Instructions for Holiday Punch

Step 1: Combine the Juices
In a large pitcher or punch bowl, pour in the cranberry juice cocktail and pineapple juice. Use a spatula or large spoon to mix them together gently for about 30 seconds, ensuring a harmonious blend of flavors and vibrant colors. The cranberry juice will provide a beautiful, rich base for your Holiday Punch.

Step 2: Add Frozen Lemonade
Next, incorporate the thawed frozen lemonade concentrate into the juice mixture. Stir well with your spoon for about 1 minute until it's fully integrated, creating a delightful tangy sweetness that balances the bold flavors. This step is crucial for achieving that refreshing punch taste everyone loves.

Step 3: Incorporate the Fizz
Gradually pour in the lemon-lime soda or ginger ale, starting with a slow stream. Gently stir the mixture again for about 30 seconds to combine, taking care not to agitate it too much to preserve the effervescence. This bubbling addition brings the Holiday Punch to life, making it irresistibly festive.

Step 4: Prepare the Glasses
While the punch is coming together, fill clear glasses with ice cubes to keep your drink chilled. You can use a scoop to fill each glass generously with ice, allowing the Holiday Punch to stay refreshing and cool for every guest. This visual cue enhances the experience and showcases the vibrant colors.

Step 5: Serve and Garnish
Finally, pour the prepared Holiday Punch into each glass, filling them to the top while showcasing the colorful layers. Garnish each drink with slices of orange and a few fresh cranberries, adding a festive flair that delights the senses. Serve immediately to enjoy the refreshing blend at its best!

Expert Tips for Holiday Punch

  • Slow Fizz Addition: Pour the lemon-lime soda in slowly to maintain carbonation and prevent a flat punch. A gentle stir at the end helps keep the bubbles intact.
  • Adjusting Sweetness: Taste your mixture before serving! Vary the amount of frozen lemonade for your preferred sweetness level, ensuring your Holiday Punch is just right.
  • Garnish Wisely: Use fresh orange slices and cranberries not just for decoration but also for an extra burst of flavor that enhances the entire experience.
  • Make Ahead: For convenience, prepare the juices and chill the sodas separately. Just mix them together shortly before serving to keep the Holiday Punch fresh and effervescent.
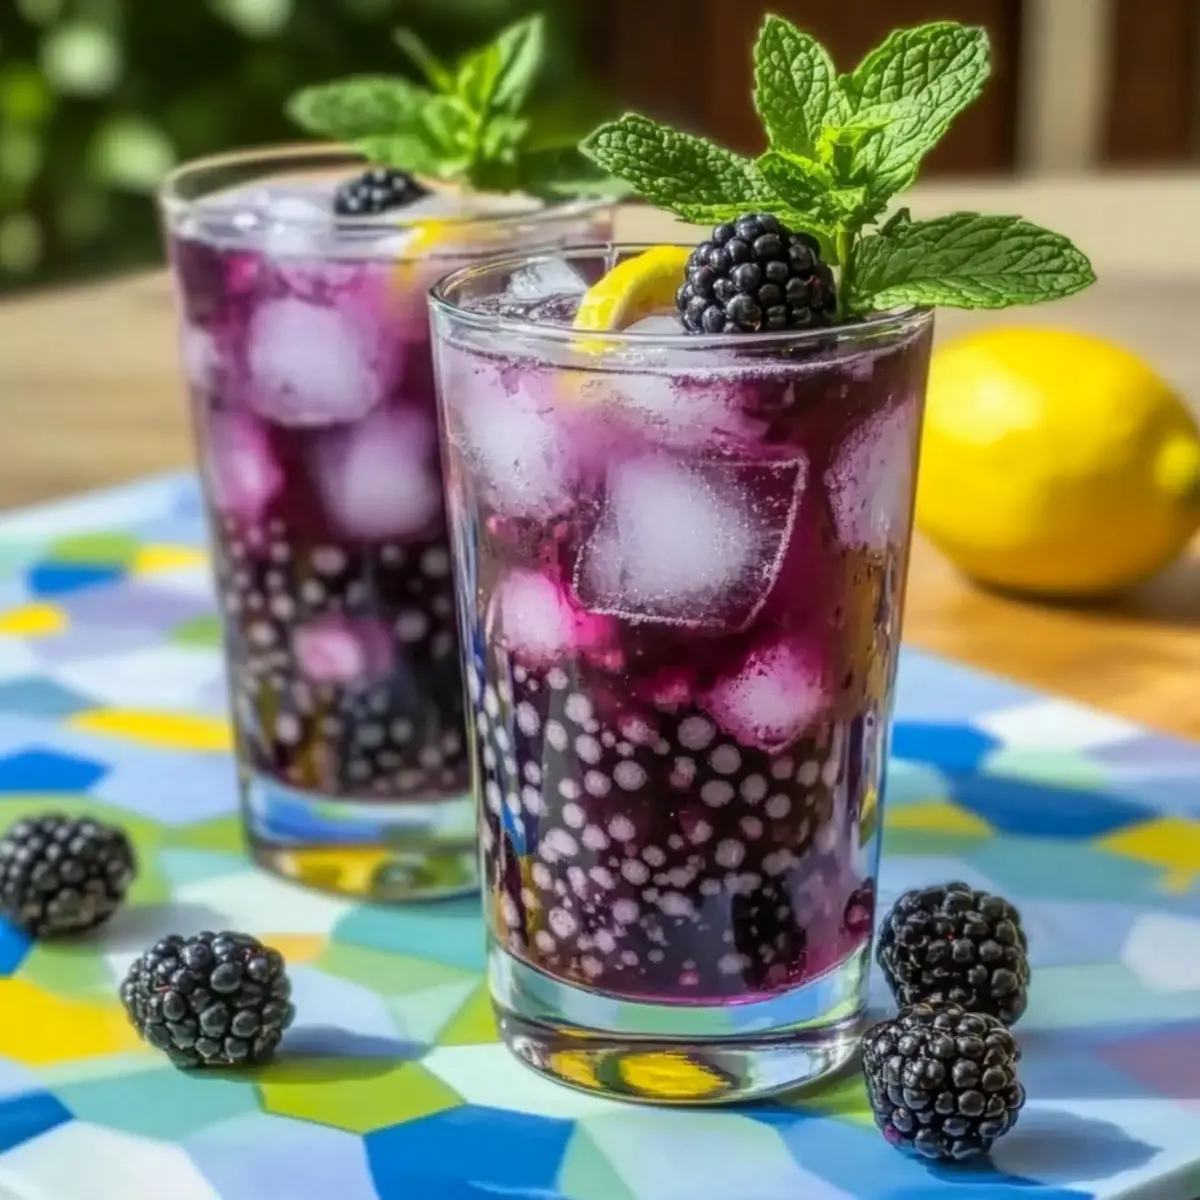
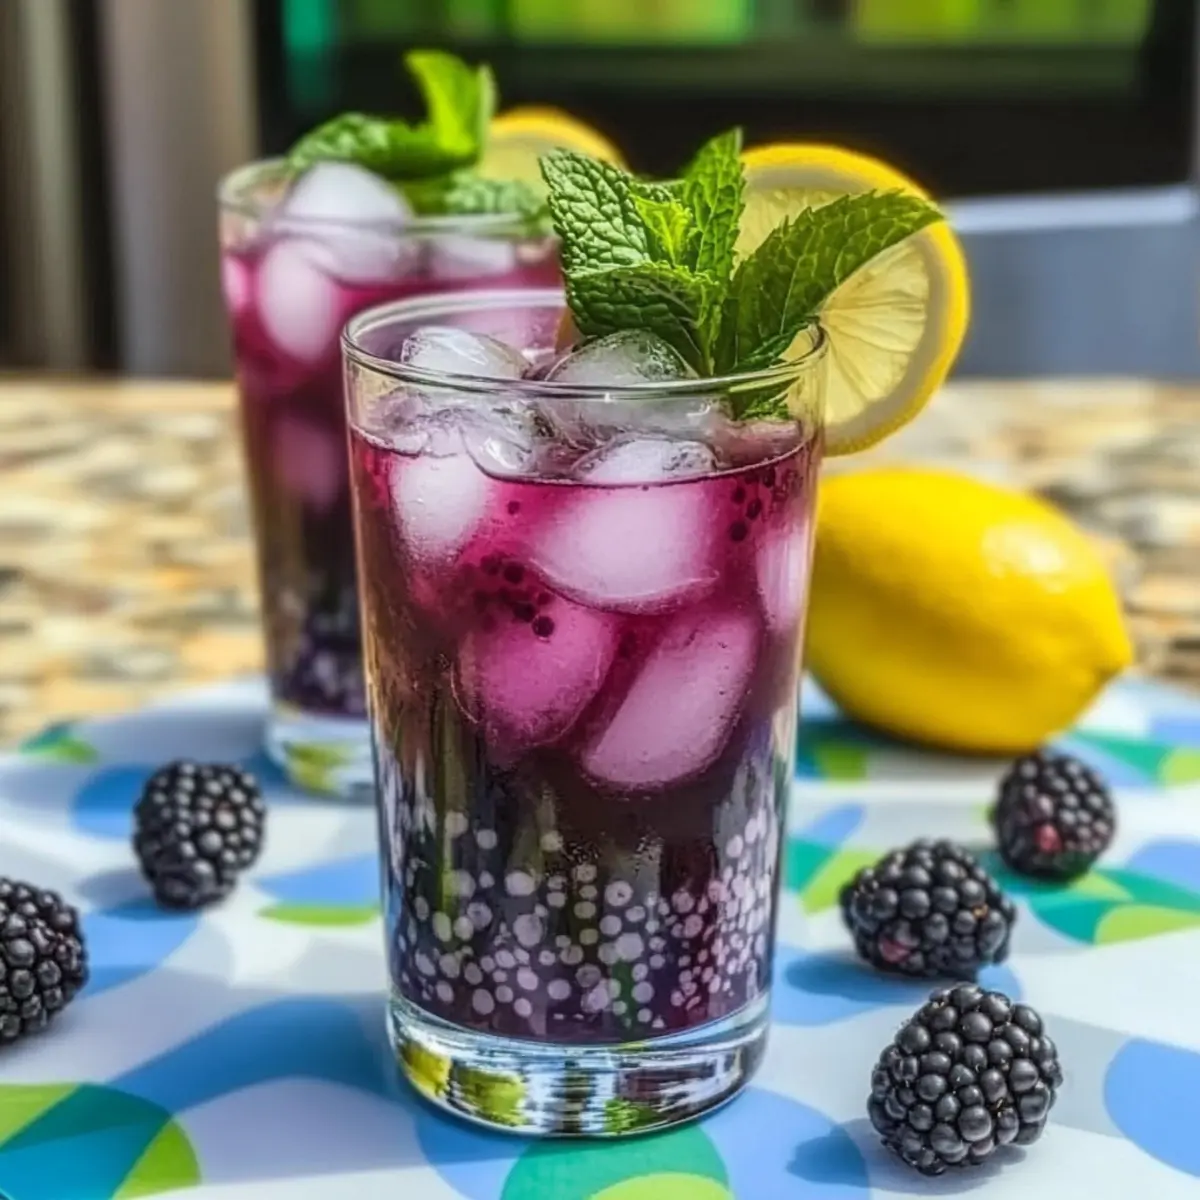
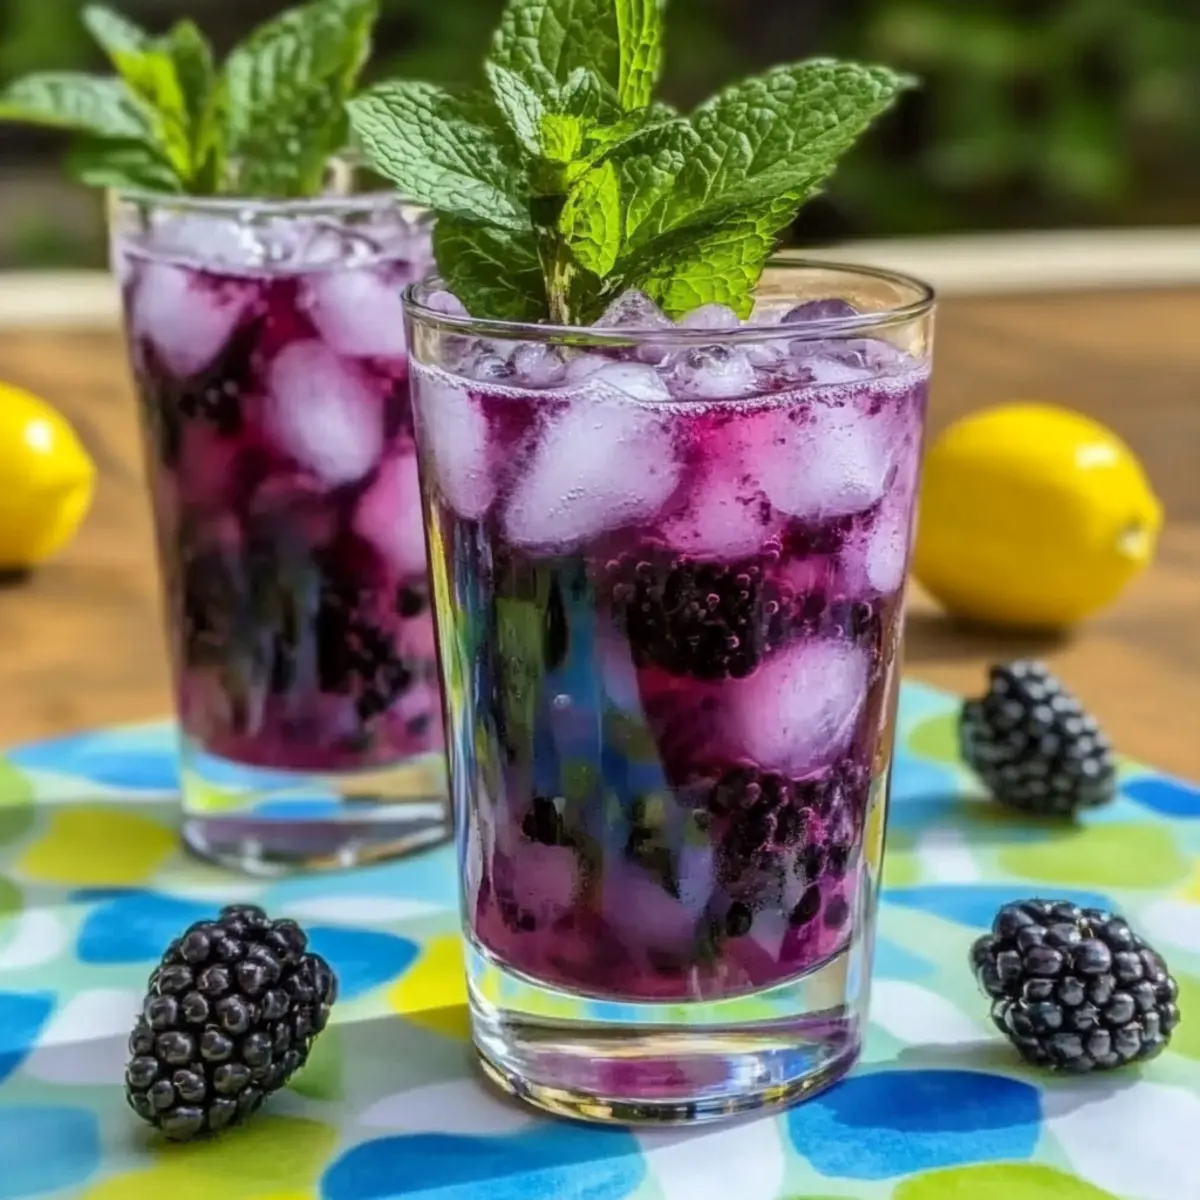
  • Experiment with Flavors: Don’t be afraid to customize with spices like cinnamon or nutmeg, or substitute the cranberry juice with pomegranate juice for unique twists!

What to Serve with Easy Holiday Punch?

As you prepare to celebrate, think of delightful pairings that complement the fruity fizz of this vibrant punch!

  • Cheese Platter: A variety of cheeses, from sharp cheddar to creamy brie, contrasts beautifully with the sweetness of the punch, creating a well-rounded snack.

  • Holiday Cookies: Classic treats like gingerbread or sugar cookies bring warmth and nostalgia, harmonizing perfectly with the festive vibes of your Holiday Punch.

  • Shrimp Cocktail: The refreshing kick of shrimp cocktail pairs well with the fruity flavors of the punch, offering a light and elegant appetizer for your guests.

  • Vegetable Crudités: Crisp and colorful veggies with a creamy dip provide a refreshing crunch that balances the sweetness of the punch while keeping things light and healthy.

  • Stuffed Mini Peppers: These bite-sized beauties filled with cream cheese or herbed cheese add a savory depth that complements the sweet and tangy notes of the Holiday Punch.

  • Fruit Salad: A medley of sliced fruits enhances the freshness of the punch. Consider citrus fruits which echo the orange accents in the drink, both visually and flavor-wise.

Everyone will be reaching for that punch, so don’t forget to serve it alongside these tantalizing treats for a complete and memorable gathering!

Holiday Punch: Customization Ideas

Feel free to get creative and tailor this punch to fit your taste buds and festive spirit!

  • Pomegranate Juice: Substitute cranberry juice with pomegranate juice for a unique twist that adds a delightful tartness. What a beautiful splash of color that will bring!

  • Warm Spices: Add a dash of cinnamon or nutmeg for a cozy, holiday-inspired flavor. These spices will envelop your punch in warmth, reminiscent of a winter's evening.

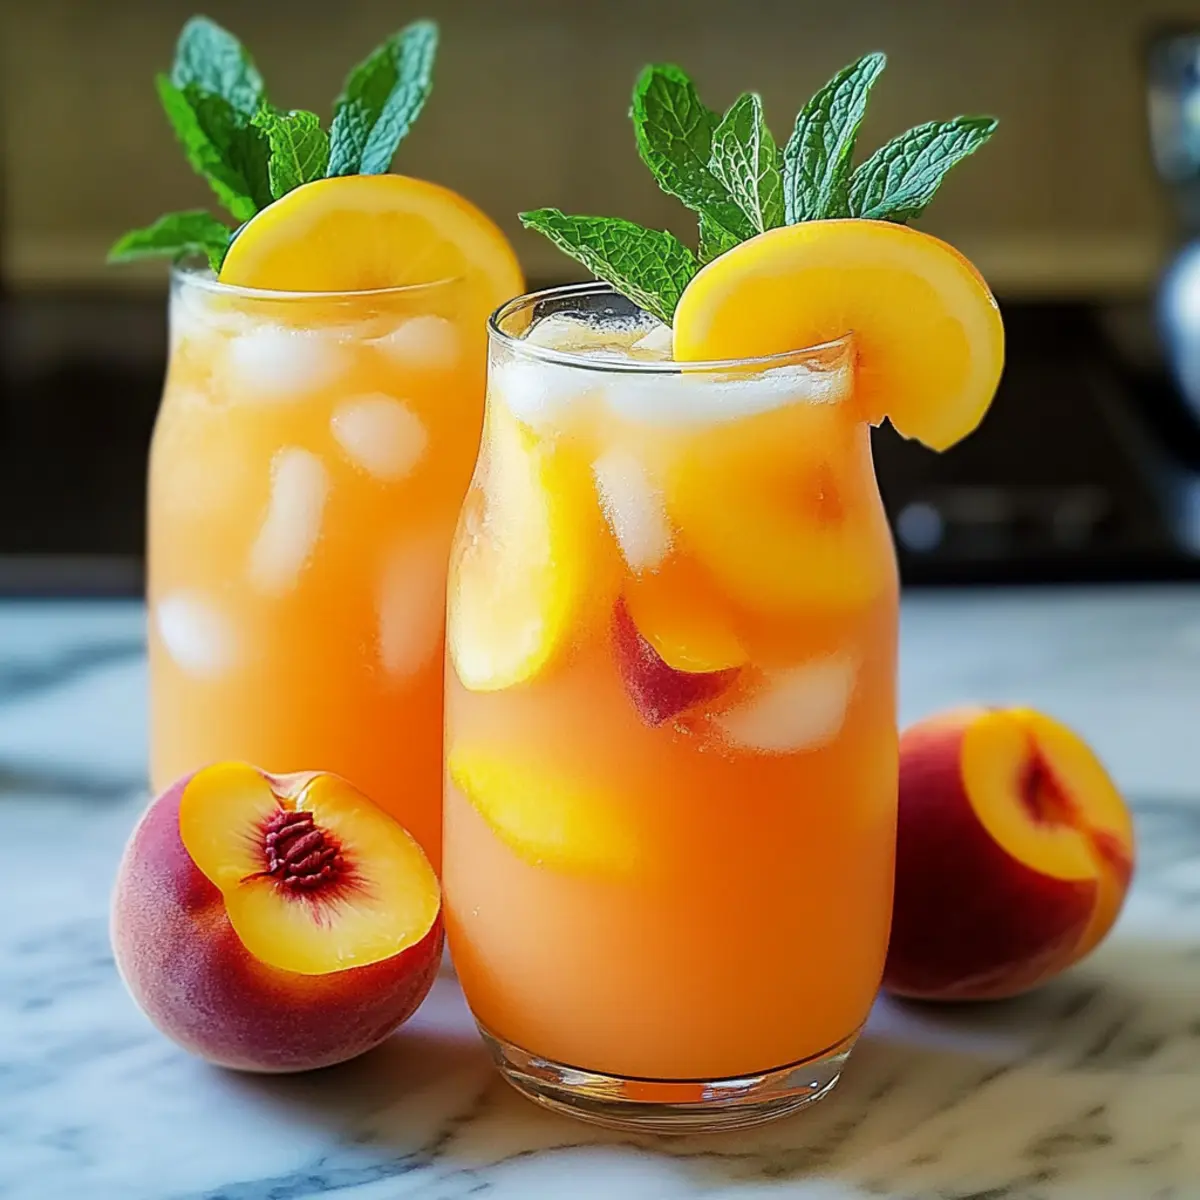
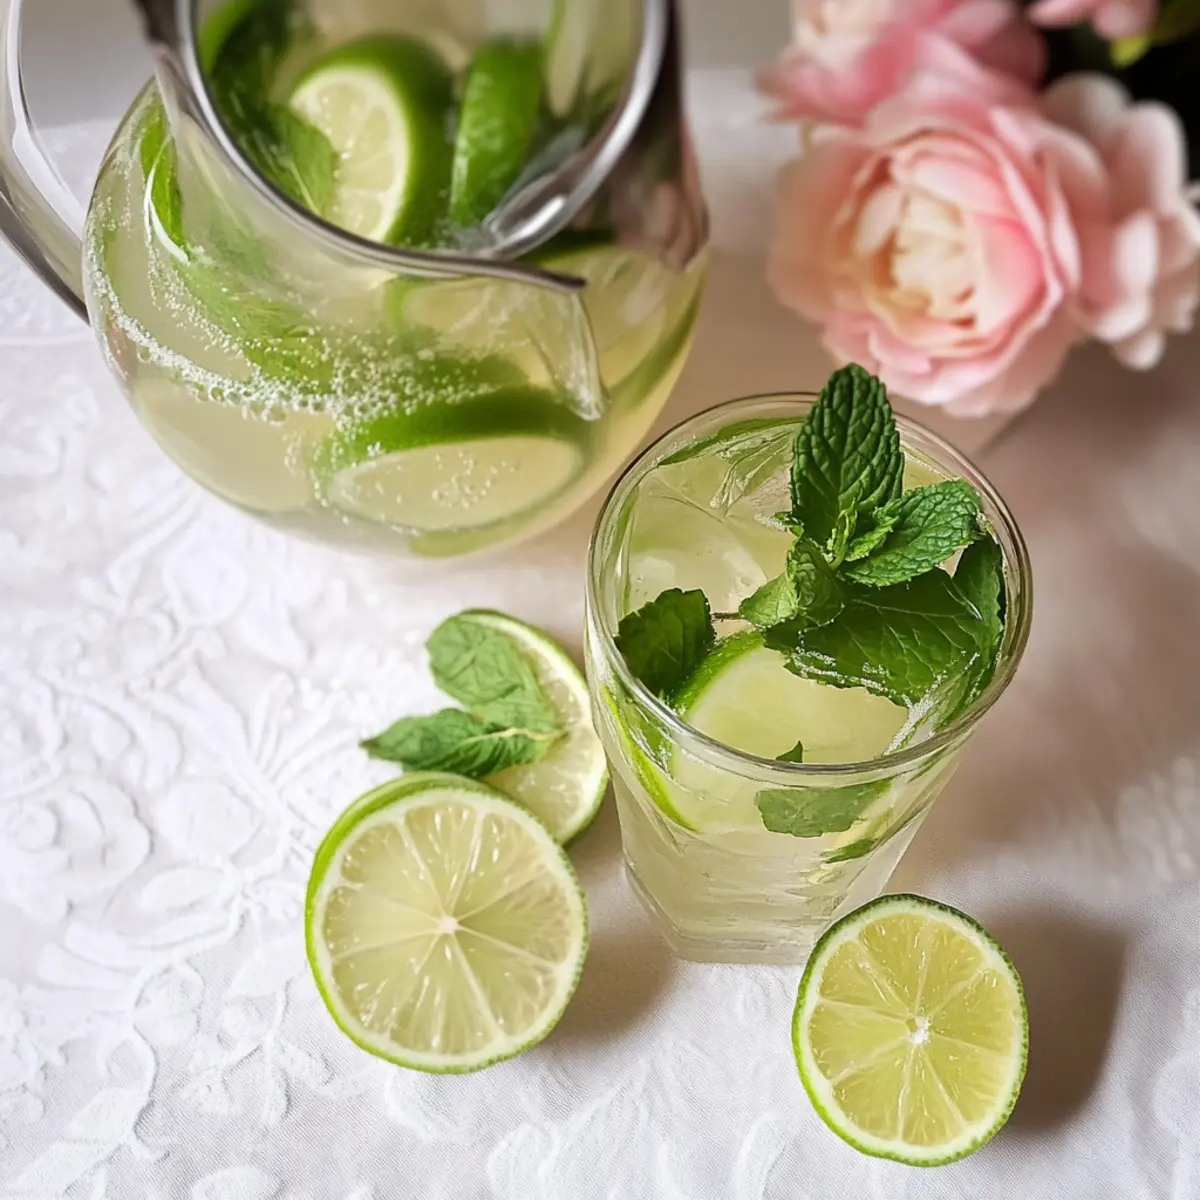
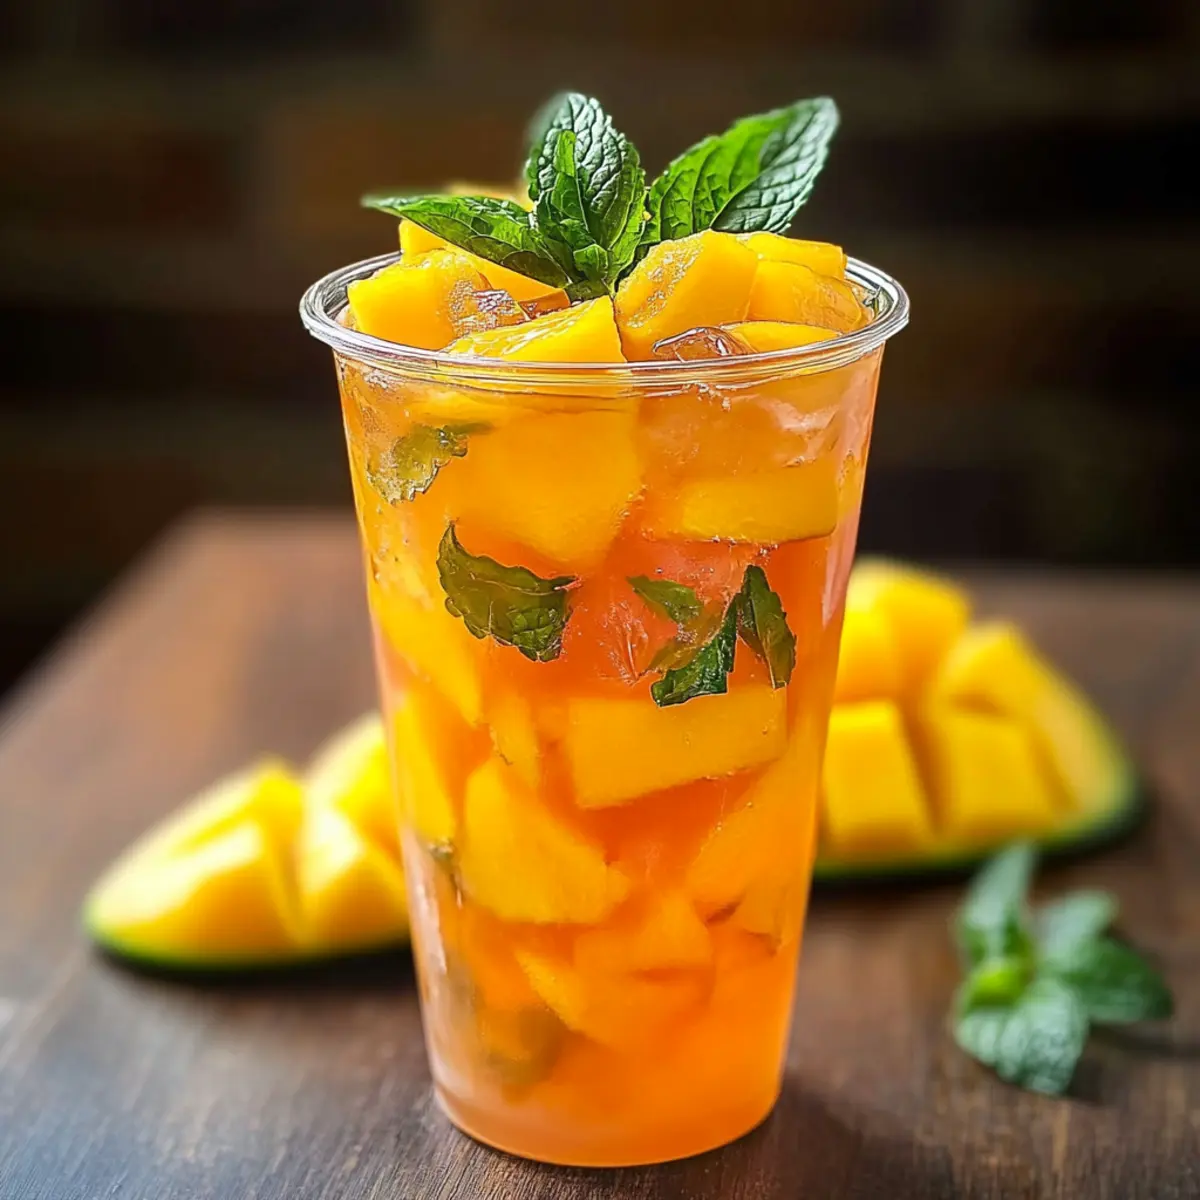
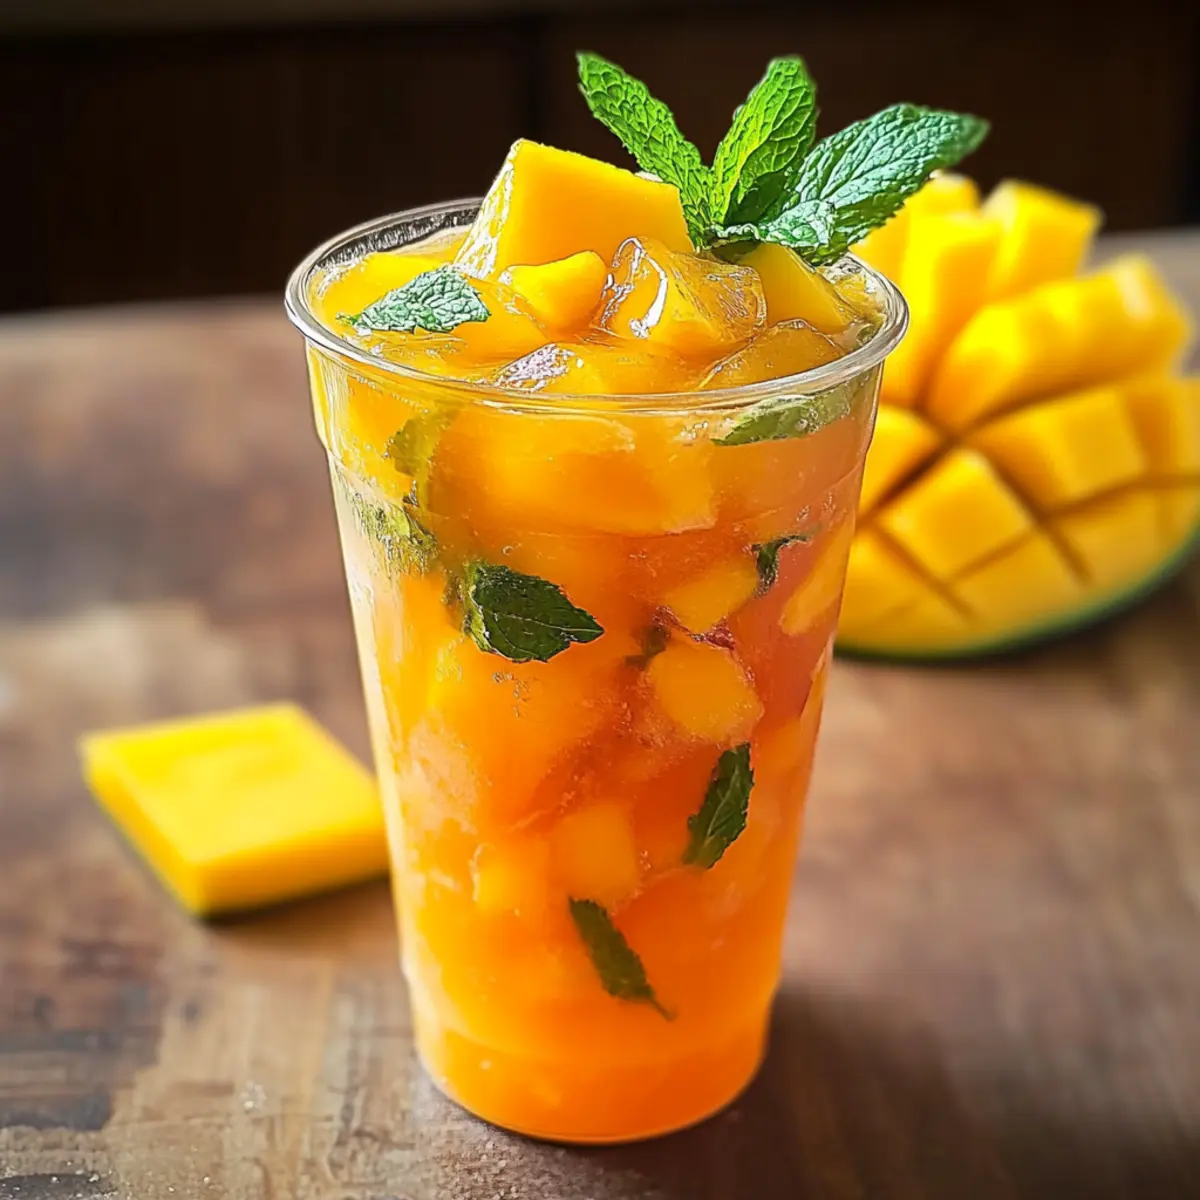
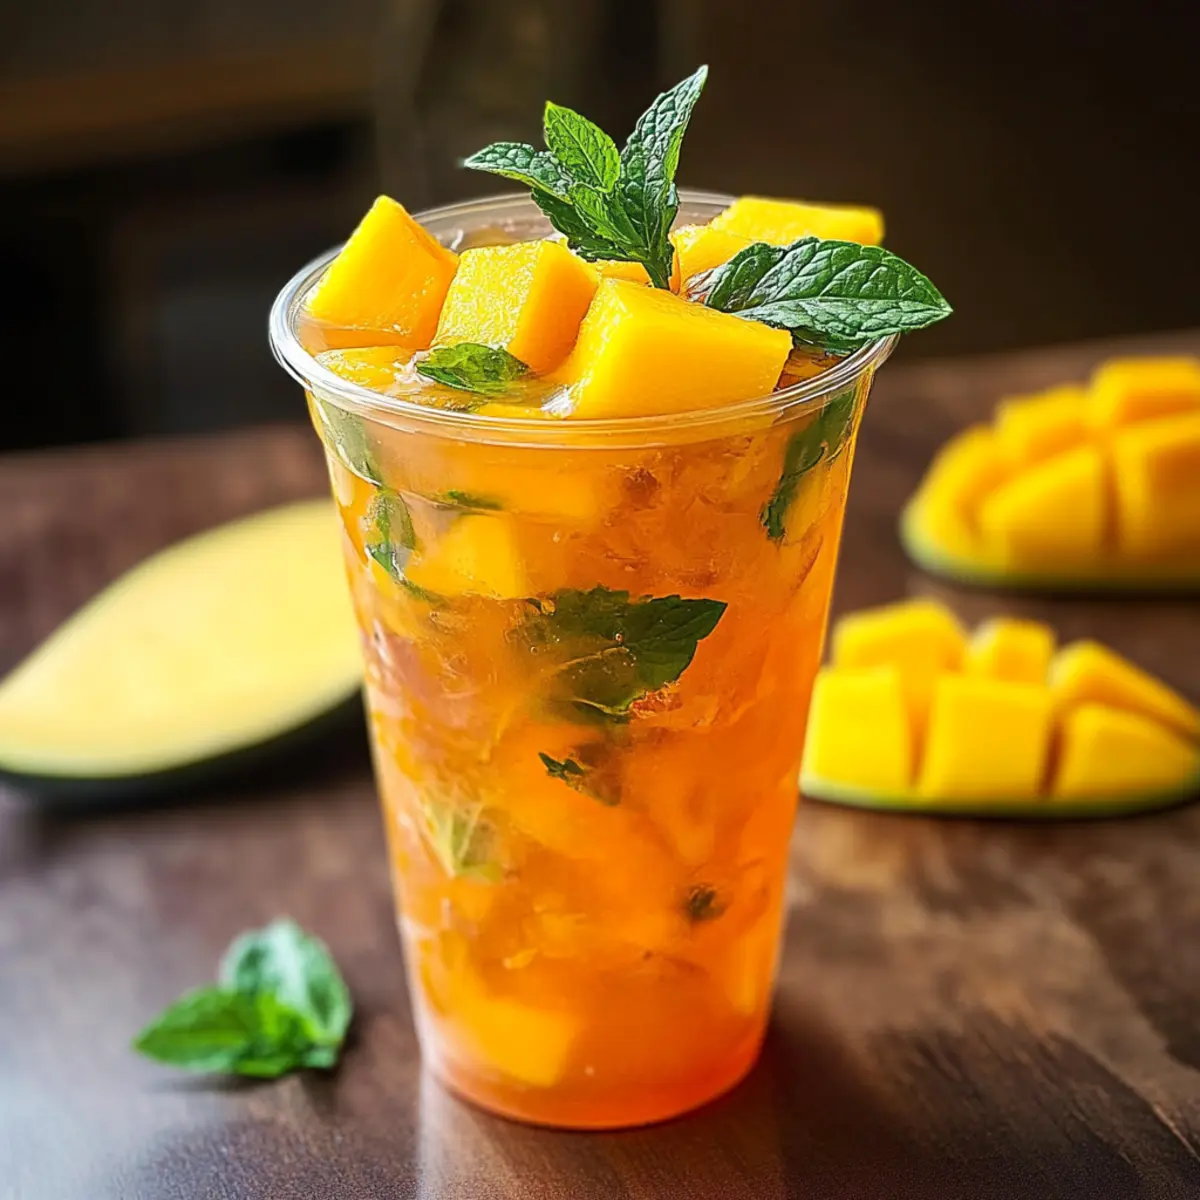
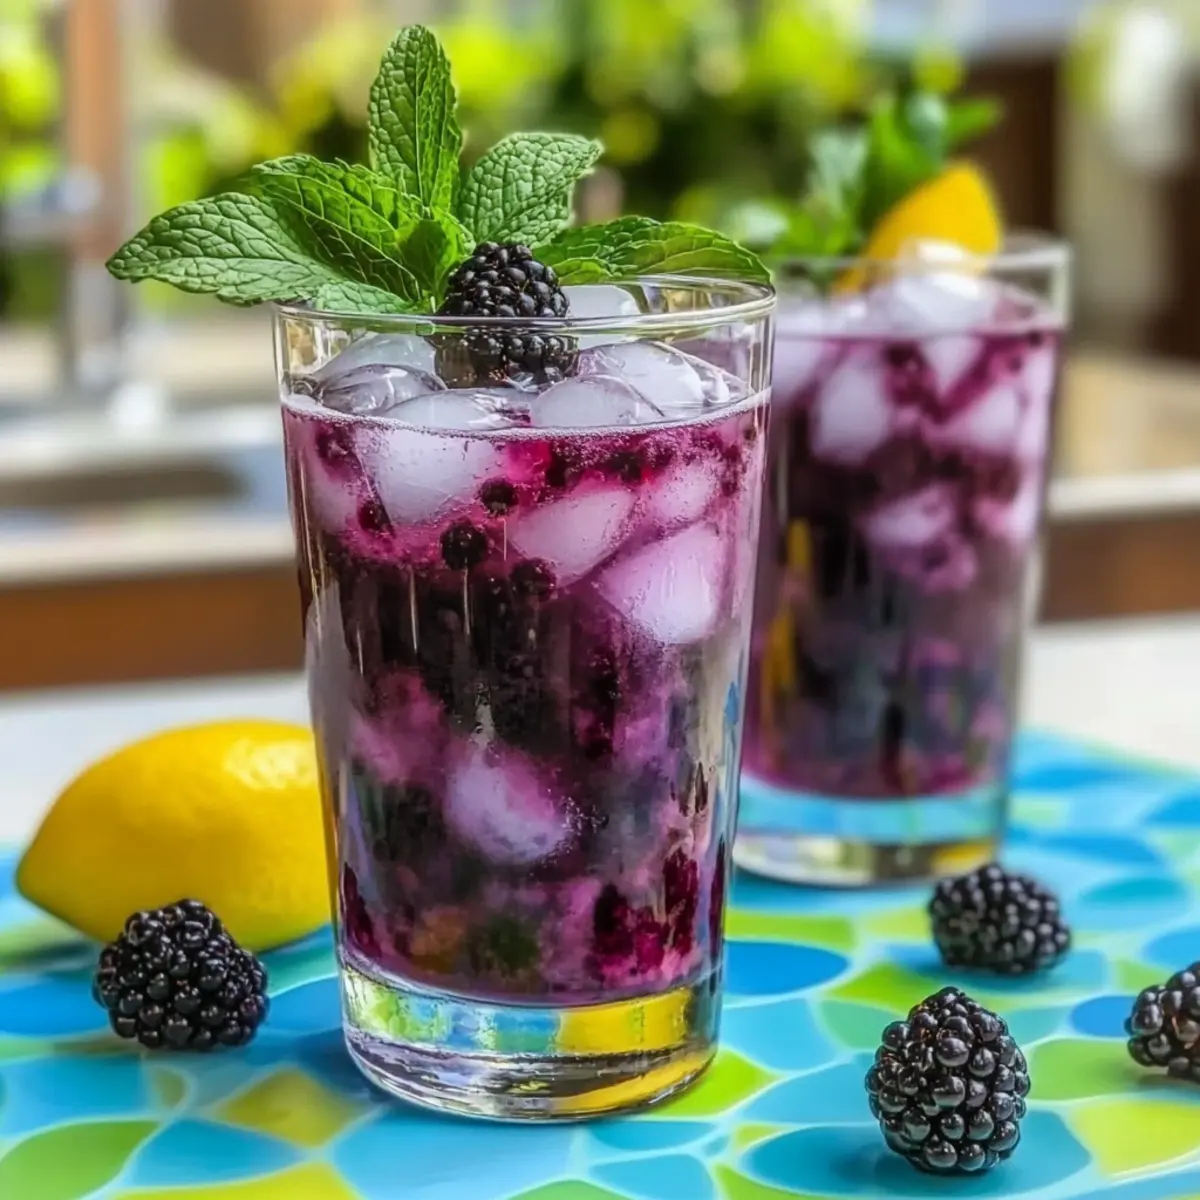
  • Fruit Variations: Try garnishing with sliced limes or diced apple wedges for refreshing twists. Mixing and matching fruits can elevate both the look and taste!

  • Herbal Infusion: Toss in mint leaves or rosemary sprigs for a fragrant herbaceous note. The aroma will entice guests as they take their first sip!

  • Citrus Splash: Mix in a few splashes of lemon or lime juice for an extra zesty kick. This brightens up the flavors and adds a scintillating tang.

  • Sparkling Alternatives: Swap the lemon-lime soda for ginger beer for a spicier finish or use club soda for a lighter, less sweet option. A refreshing change that caters to different palates!

  • Frozen Fruit Ice Cubes: Freeze some fruit chunks (like berries or citrus slices) in ice cubes for an attractive and flavor-infused addition to your punch. This way, your drink stays cold without watering it down!

  • Frozen Lemonade Variants: Opt for different flavors of frozen lemonade, like strawberry or raspberry, for an unexpected fruity flair. Each choice delivers its own unique twist on the classic!

For more inspired drink ideas, don’t forget to check out our Eggnog Cookies Soft and make a festive pairing with your Holiday Punch!

Make Ahead Options

These Easy Holiday Punch preparations are perfect for busy home cooks looking to streamline their festive gatherings! You can mix the cranberry juice cocktail, pineapple juice, and thawed frozen lemonade concentrate up to 24 hours in advance and refrigerate in a sealed container to retain their flavors. Just remember to wait until before serving to add the lemon-lime soda, as this helps maintain its fizzy freshness. If you prefer, you can also freeze the prepared juices in ice cube trays for up to 3 months; when party time arrives, simply thaw and combine! Your Holiday Punch will still taste just as delicious and refreshing, ensuring you have more time to enjoy with your loved ones.

How to Store and Freeze Holiday Punch

Fridge: Store leftover Holiday Punch in an airtight container for up to 2 days. To maintain its fizzy quality, consider keeping the soda separate until you're ready to serve.

Freezer: For longer storage, freeze the punch in freezer-safe containers for up to 3 months. Be sure to leave some space for expansion as it freezes.

Thawing: When ready to enjoy, transfer the frozen punch to the fridge to thaw overnight. Stir gently before serving to bring back its festive charm.

Reheating: This drink is best enjoyed cold, so avoid reheating. Simply mix in freshly poured lemon-lime soda before serving for that bubbly effect!

Holiday Punch Recipe FAQs

How do I choose ripe ingredients for my Holiday Punch?
Absolutely! For the best flavor, select cranberry juice that is unsweetened for a healthier option and look for pineapple juice that is fresh or canned with no added sugars. Fresh cranberries and ripe oranges for garnishing should be bright, firm, and free of any dark spots or blemishes. This attention to ingredient quality will enhance the overall taste of your Holiday Punch.

What is the best way to store leftover Holiday Punch?
Very good question! After your gathering, if you have any leftovers, store the Holiday Punch in an airtight container in the refrigerator for up to 2 days. Remember to keep the soda separate if you want to maintain the fizz, as mixing it in the punch will result in a flat drink.

Can I freeze Holiday Punch for later use?
Absolutely! You can freeze the Holiday Punch in freezer-safe containers for up to 3 months. Just remember to leave some space at the top for expansion as it freezes. When you're ready to enjoy it again, simply transfer it to the fridge to thaw overnight. For that fresh and bubbly texture again, mix in freshly poured lemon-lime soda right before serving!

What should I do if my punch is too sweet or too tart?
If your Holiday Punch turns out sweeter than you'd like, you can balance it by adding a splash of additional cranberry juice or more lemon-lime soda to dilute the sweetness. Conversely, if it's too tart, try adding a bit more frozen lemonade concentrate to brighten the flavor without overpowering it. Taste along the way until you find that perfect balance!

Are there any dietary considerations for making Holiday Punch?
Of course! This recipe is alcohol-free, making it a fantastic choice for family gatherings or celebrations where guests of all ages will be present. If you're concerned about allergies, always confirm that your juice and soda brands do not contain allergens, and feel free to substitute ingredients based on dietary preferences—like using sparkling water instead of soda for a lighter option.

Can pets enjoy any leftovers from my Holiday Punch?
Good thought! However, it’s best to keep leftovers away from pets, especially the sugar-laden elements like lemon-lime soda, as they can be harmful to animals. Stick to pet-friendly treats for your furry friends instead!

Holiday Punch

Festive Holiday Punch: A Refreshing Family Favorite

This Holiday Punch is a vibrant, refreshing drink that combines cranberry and pineapple for a family-friendly, alcohol-free treat perfect for any celebration.
Print Recipe Pin Recipe
Prep Time 10 minutes mins
Total Time 10 minutes mins
Servings: 8 glasses
Course: Drinks
Cuisine: American
Calories: 70
Ingredients Equipment Method Nutrition Notes

Ingredients
  

For the Base
  • 4 cups Cranberry Juice Cocktail choose unsweetened varieties for a healthier option
  • 2 cups Pineapple Juice fresh or canned juice both work well
  • 1 cup Frozen Lemonade Concentrate ensure it's fully thawed before use
For the Fizz
  • 2 liters Lemon-Lime Soda or Ginger Ale; for less sweet, substitute with sparkling water
For the Garnish
  • 1 cup Orange Slices
  • 1 cup Fresh Cranberries

Equipment

  • large pitcher or punch bowl
  • spatula or large spoon
  • clear glasses
  • ice scoop

Method
 

Step-by-Step Instructions for Holiday Punch
  1. In a large pitcher or punch bowl, pour in the cranberry juice cocktail and pineapple juice. Mix together gently for about 30 seconds.
  2. Incorporate the thawed frozen lemonade concentrate into the juice mixture. Stir well for about 1 minute until fully integrated.
  3. Gradually pour in the lemon-lime soda or ginger ale, stirring gently for about 30 seconds to combine.
  4. Fill clear glasses with ice cubes to keep the drink chilled.
  5. Pour the prepared Holiday Punch into each glass, garnishing with slices of orange and fresh cranberries.

Nutrition

Serving: 1glassCalories: 70kcalCarbohydrates: 17gSodium: 5mgPotassium: 100mgSugar: 16gVitamin C: 30mgCalcium: 1mg

Notes

To maintain carbonation, add soda slowly. Adjust sweetness to preference, and consider spices for unique flavors. Store leftovers in an airtight container for up to 2 days.

Tried this recipe?

Let us know how it was!

Tropical Bahama Mama Smoothie Recipe for a Refreshing Escape

May 16, 2026 by Grace Snow Leave a Comment

As the sun blazes overhead, a hint of tropical paradise wafts through the air, and I can't help but dream of lazy beach days filled with laughter and refreshing drinks. Enter my Bahama Mama smoothie recipe, a delightful fusion of pineapple, orange, and coconut that captures the essence of summer with every sip. This luscious treat isn't just packed with vibrant flavors; it’s also a breeze to whip up, making it perfect for impromptu gatherings or sun-soaked afternoons. Whether you're opting for the spirited cocktail version or the fun mocktail for the whole family, everyone can savor a taste of the tropics. Are you ready to blend up your own slice of paradise?

Why is this Bahama Mama Smoothie a Must-Try?

Tropical Escape: Your taste buds will feel like they’re on vacation, thanks to the delightful combo of pineapple, orange, and coconut.
Versatile Drinks: Whether you’re hosting a summer bash or just unwinding after a long day, this smoothie can easily be transformed into a refreshing cocktail or soothing mocktail.
Quick & Easy: With simple ingredients that blend in minutes, you can have this tropical treat ready to enjoy in no time!
Family-Friendly: Everyone from kids to adults can join in on the fun, making it a perfect recipe for gatherings or cozy afternoons.
Lively Presentation: Serve it up with colorful garnishes like pineapple slices and cherries that make for an Instagram-worthy drink! For more refreshing ideas, check out my Pitaya Smoothie Bowl or the rich flavors of a Chocolate Cherry Smoothie.

Bahama Mama Smoothie Ingredients

For the Smoothie

  • Frozen Orange Juice – Adds sweetness and citrus flavor; use fresh orange juice for a more vibrant taste.
  • Frozen Pineapple Juice – Contributes a tropical essence; fresh pineapple can be blended if preferred.
  • Coconut Water – Provides the liquid base and coconut flavor; substitute with plain water if unavailable.
  • Coconut Extract – Enhances the coconut flavor to replicate the essence of coconut rum in the mocktail; omit for a milder taste.
  • Ice – Creates the slush texture; use fresh ice or frozen fruit for a thicker blend.

For the Garnish

  • Grenadine – Adds sweetness and a beautiful layered effect; substitute with pomegranate juice for a different flavor profile.
  • Pineapple Slices and Cherries – Provide visual appeal and additional tropical flavor; fresh fruit can be used based on preference.

Enjoy crafting your own Bahama Mama smoothie recipe that can transport you to a cozy beach getaway with every sip!

Step‑by‑Step Instructions for Bahama Mama Smoothie Recipe

Step 1: Blend the Juices
Start your Bahama Mama smoothie by adding frozen orange juice, frozen pineapple juice, coconut water, and coconut extract into your blender. Blend on high for about 30 seconds until the mixture is smooth and creamy, resembling a vibrant tropical base. Make sure all ingredients are well combined, setting the stage for that refreshing flavor we crave.

Step 2: Add Ice for Texture
Next, add a generous amount of ice to the blended juice mixture. Blend again on high for another 15–30 seconds or until the ice is crushed and the mix turns into a slushy consistency. You’re aiming for a texture that is thick and frosty, perfect for a refreshing Bahama Mama treat on a sunny day.

Step 3: Create the Layered Look
Pour the slushy smoothie into chilled glasses, leaving a little space at the top. Take your grenadine and gently drizzle it along the inside edge of each glass. This will create beautiful layers of color that enhance the visual appeal of your Bahama Mama smoothie, making it a real eye-catcher for your gatherings.

Step 4: Garnish with Flair
To finish off your tropical creation, garnish each glass with a slice of fresh pineapple and a cherry on top. This eye-catching touch not only adds flavor but also elevates your presentation. As you serve your guests these delightful smoothies, watch their faces light up with excitement as they prepare to enjoy this refreshing escape.

Expert Tips for the Best Bahama Mama Smoothie

  • Juice Order Matters: Blending your juices before adding ice ensures a smoother base. Mixing them first allows the flavors to meld perfectly.
  • Adjust Consistency: For a thicker Bahama Mama smoothie, gradually add more ice until you reach your desired texture. Less ice means a more liquid drink.
  • Drizzle with Care: To achieve the beautiful layered look with grenadine, drizzle it gently along the glass edge instead of pouring it into the center.
  • Fresh Fruit Benefits: Using fresh fruit instead of frozen can enhance flavor but may yield a thinner smoothie. Balance accordingly with ice for texture.
  • Experiment with Variations: Don’t hesitate to swap in different tropical juices like passion fruit or mango for a delightful twist on the classic Bahama Mama smoothie!

How to Store and Freeze Bahama Mama Smoothie

Fridge: Store any leftover Bahama Mama smoothie in an airtight container and refrigerate for up to 3 days. Give it a quick stir before serving again.

Freezer: To freeze, pour the smoothie into an airtight container, leaving some space for expansion. It can be stored for up to 1 month; re-blend after thawing to restore the slushy texture.

Make-Ahead: Prepare the smoothie in advance and freeze it in individual portions. This way, you can enjoy a quick tropical treat whenever you want!

Reheating: If you prefer a liquid consistency, gently reheat the smoothie in a blender after thawing, but this is not typically recommended for slushy textures.

Make Ahead Options

These Bahama Mama smoothies are perfect for meal prep, allowing you to enjoy refreshing tropical flavors even on busy days! You can prepare the juice mixture—frozen orange juice, frozen pineapple juice, coconut water, and coconut extract—up to 24 hours in advance, simply storing it in an airtight container in the refrigerator. For optimal texture, add ice just before serving to achieve that slushy consistency you love. When you're ready to enjoy, blend the prepped mixture with ice for a quick, vibrant treat that feels like a sunny getaway, just as delicious as when freshly made!

What to Serve with Tropical Bahama Mama Smoothie?

As you blend up a slice of paradise, consider how to elevate your summer gathering with delightful pairings that sing in harmony with your drink.

  • Light Summer Salad: A refreshing mix of greens, mango, and avocado will balance the smoothie’s sweetness and add a crunchy texture.
  • Tropical Fruit Platter: Juicy slices of watermelon, kiwi, and strawberries resonate with the tropical flavors, creating a vibrant and colorful presentation.
  • Spicy Shrimp Tacos: The zesty and spicy taco fillings will complement the sweetness of the smoothie perfectly, making for a balanced meal experience.
  • Grilled Chicken Skewers: Marinated in citrus and herbs, these tender skewers add a savory note that pairs beautifully with the fruity smoothie.
  • Coconut Rice: This creamy, coconut-infused side echoes the smoothie’s flavors and provides a delightful textural contrast.
  • Mango Salsa: Fresh mango, lime, and cilantro create a zesty topping for chips or grilled chicken, resonating with the smoothie’s tropical essence.
  • Coconut Water: Serve this thirst-quenching drink alongside for added hydration and a taste of the tropics.
  • Mojito Mocktails: For a festive vibe, serve minty mocktails that echo the summery spirit without competing with the smoothie’s vibrant flavors.
  • Chocolate Banana Muffins: A sweet treat that lightly contrasts with the smoothie’s fruitiness, enticing both kids and adults alike.

Bahama Mama Smoothie Recipe Variations

Feel free to get creative with your Bahama Mama smoothie and make it uniquely yours with these fun twists!

  • Mocktail Delight: Replace the coconut extract with vanilla extract for a richer flavor without the alcohol. This adds a creamy essence that all ages will enjoy.
  • Citrus Burst: Use fresh-squeezed orange juice instead of frozen for a zesty kick. The freshness will elevate the tropical vibe, making every sip brighter.
  • Berry Bliss: Add a handful of mixed berries such as strawberries or blueberries for extra color and a bit of tartness. This variation opens up a world of fruity goodness that'll have you reaching for more.
  • Nutty Twist: Blend in a tablespoon of almond butter or coconut cream for a creamy texture. This not only amps up the nutrition but also creates a delightful nutty richness.
  • Heat It Up: Add a pinch of cayenne pepper or a splash of jalapeño juice for those who like a little kick. This twist will surprise and delight your taste buds with a tropical heat!
  • Frozen Fruit Fusion: Incorporate frozen mango or passion fruit for a tropical twist. Each addition brings its unique flavor profile, transforming your drink into a fruity fiesta.
  • Chocolate Surprise: Drizzle in some chocolate syrup or add cocoa powder for a chocolatey touch to your smoothie. It’s like a tropical treat with a luxurious twist!
  • Garnish Galore: Switch up your garnishes by using fresh mint leaves or passion fruit slices to enhance the visual appeal and add a fresh aroma. Not only do they look stunning, but they also elevate the flavor profile beautifully.

For more tropical inspirations, you might also enjoy my refreshing Pitaya Smoothie Bowl or indulge in the luscious flavors of a Chocolate Cherry Smoothie!

Bahama Mama Smoothie Recipe FAQs

What kind of juice should I use for the Bahama Mama smoothie?
Absolutely! I recommend using frozen orange juice for a sweet, citrus flavor, but fresh orange juice can give a more vibrant taste. Frozen pineapple juice is also key to achieving that tropical essence, though fresh pineapple works beautifully too if you want to blend it right in.

How long can I store my leftover Bahama Mama smoothie?
You can keep any leftover smoothie in an airtight container in the fridge for up to 3 days. Just give it a good stir before serving again to restore its consistency. However, for the best experience, I really suggest enjoying it fresh!

Can I freeze Bahama Mama smoothie? If so, how?
Certainly! Pour the smoothie into an airtight container, leaving about an inch of space for expansion. It can be frozen for up to 1 month. When you're ready to enjoy it, just let it thaw overnight in the fridge and then re-blend it to restore its slushy texture. This way, you have a quick tropical treat whenever you fancy.

What can I do if my Bahama Mama smoothie is too thin?
If you find your smoothie isn't as thick as you'd like, no problem! Simply add more ice to the mixture and blend again until you reach your desired consistency. The gradual mixing of ice allows for control over texture, ensuring it's just right for sipping on a hot day.

Are there any dietary considerations with this recipe?
Very! This Bahama Mama smoothie can easily be made kid-friendly as a mocktail. If you or any family members have allergies, be careful with the coconut and fruit components. You can also swap out the coconut water for plain water if allergies are a concern, although it might slightly alter the flavor profile.

Can I make a non-alcoholic version of the Bahama Mama smoothie?
Absolutely! This recipe is inherently family-friendly as it includes no alcohol. Just follow the same steps, omitting any spirits, and you’ll have a delightful mocktail version that everyone can enjoy, adding just as much fun to your gatherings!

Bahama Mama Smoothie Recipe

Tropical Bahama Mama Smoothie Recipe for a Refreshing Escape

Enjoy this Bahama Mama smoothie recipe, a delightful blend of tropical flavors that will transport you to a sunny paradise.
Print Recipe Pin Recipe
Prep Time 5 minutes mins
Total Time 5 minutes mins
Servings: 2 glasses
Course: Drinks
Cuisine: Tropical
Calories: 200
Ingredients Equipment Method Nutrition Notes

Ingredients
  

For the Smoothie
  • 1 cup Frozen Orange Juice Adds sweetness and citrus flavor; use fresh orange juice for a more vibrant taste.
  • 1 cup Frozen Pineapple Juice Contributes a tropical essence; fresh pineapple can be blended if preferred.
  • 1 cup Coconut Water Provides the liquid base and coconut flavor; substitute with plain water if unavailable.
  • 1 teaspoon Coconut Extract Enhances the coconut flavor to replicate the essence of coconut rum in the mocktail; omit for a milder taste.
  • 1 cup Ice Creates the slush texture; use fresh ice or frozen fruit for a thicker blend.
For the Garnish
  • 2 tablespoons Grenadine Adds sweetness and a beautiful layered effect; substitute with pomegranate juice for a different flavor profile.
  • 2 slices Pineapple Slices Provide visual appeal and additional tropical flavor; fresh fruit can be used based on preference.
  • 2 pieces Cherries Provide visual appeal and additional tropical flavor; fresh fruit can be used based on preference.

Equipment

  • Blender

Method
 

Steps
  1. Start your Bahama Mama smoothie by adding frozen orange juice, frozen pineapple juice, coconut water, and coconut extract into your blender. Blend on high for about 30 seconds until the mixture is smooth and creamy, resembling a vibrant tropical base.
  2. Next, add a generous amount of ice to the blended juice mixture. Blend again on high for another 15–30 seconds or until the ice is crushed and the mix turns into a slushy consistency.
  3. Pour the slushy smoothie into chilled glasses, leaving a little space at the top. Take your grenadine and gently drizzle it along the inside edge of each glass.
  4. Garnish each glass with a slice of fresh pineapple and a cherry on top.

Nutrition

Serving: 1glassCalories: 200kcalCarbohydrates: 50gProtein: 2gFat: 1gSodium: 5mgPotassium: 300mgFiber: 2gSugar: 35gVitamin A: 500IUVitamin C: 60mgCalcium: 30mgIron: 0.5mg

Notes

Adjust consistency by adding more ice for a thicker smoothie. Experiment with different tropical juices for variations.

Tried this recipe?

Let us know how it was!

Tropical Blueberry Smash: Your New Favorite Summer Sip

May 16, 2026 by Grace Snow Leave a Comment

As I poured the last splash of soda water, a sudden burst of vibrant colors filled my glass, reminiscent of sun-kissed beaches and warm summer nights. The Tropical Blueberry Smash cocktail is where refreshing fruitiness meets tropical delight, blending the sweetness of fresh blueberries with cool mint and zesty lime. Finished off with the smoothness of coconut rum and a fizzy top, this drink is not only a crowd-pleaser but incredibly quick to whip up—perfect for unexpected guests or a leisurely evening on the patio. Its stunning presentation, adorned with fresh fruit and a mint garnish, makes it as beautiful as it is delicious. Are you ready to elevate your cocktail game and transport your taste buds to paradise?

Why Is This Cocktail a Must-Try?

Refreshing, Bright Flavors: The Tropical Blueberry Smash combines juicy blueberries with zesty lime and cool mint, offering a delightful burst of taste in every sip.

Quick and Easy: This cocktail is ready in just minutes, ideal for busy hosts or impromptu gatherings where delicious refreshments are a must.

Visually Stunning: A vibrant mix of colors and garnishes ensures this cocktail not only tastes great but also looks fantastic, making it a perfect centerpiece for any summer event.

Versatile Variations: Feel free to experiment with different fruits or rums, whether you want to swap in spiced rum or play with tropical fruits like mango or passion fruit for a personalized touch.

Perfect for Entertaining: It’s the ultimate crowd-pleaser, sure to impress friends and family at barbecues or pool parties. Just as easy to enjoy on your patio as it is at a festive gathering! If you're interested in similar refreshing creations, check out these Mini Tropical Pavlovas for dessert inspiration!

Tropical Blueberry Smash Ingredients

For the Cocktail Base
• Fresh Blueberries – Provides sweetness and fruity flavor; substitute with frozen blueberries if necessary for a cold treat.
• Mint Leaves – Adds a refreshing herbal note; fresh mint is recommended for optimal flavor and aroma.
• Lime – Gives acidity and balance; adjust based on your taste preferences for a more tart or mellow drink.
• Simple Syrup – Sweetness level can be adjusted; use honey or agave syrup as alternatives for a healthier option.
• Coconut Rum – Base spirit that imparts tropical flavor; feel free to swap with regular white rum for a different essence.
• Pineapple Juice – Brings sweetness and tropical depth; opt for fresh juice if available or substitute with orange juice in a pinch.
• Soda Water – Adds the perfect fizz to the drink; can be replaced with tonic water for a unique twist.

For Garnishing
• Pineapple Wedge – Adds a tropical flair and enhances presentation; choose ripe fruit for the best flavor.
• Mint Leaves – Fresh mint sprigs elevate the look and aroma; a little goes a long way for garnishing!
• Extra Blueberries – For garnish; they add a pop of color and reinforce the fruity theme of the Tropical Blueberry Smash.

Step‑by‑Step Instructions for Tropical Blueberry Smash

Step 1: Muddle the Base
In a cocktail shaker, gently muddle ½ cup of fresh blueberries and a handful of mint leaves together using a muddler or the back of a spoon. Ensure you're releasing the flavors without shredding the mint too finely, which could make the cocktail bitter. This should take about 1-2 minutes, and you’ll start to see the berries break down and the mint release its aroma.

Step 2: Add the Liquids
Next, pour in the freshly squeezed lime juice, simple syrup, coconut rum, and pineapple juice into the shaker with the muddled mixture. The combination of these ingredients will create a flavorful tropical base for your Tropical Blueberry Smash, balancing sweetness and acidity. Close the lid securely to prevent any spills during shaking.

Step 3: Shake Well
Fill the shaker with ice, securing the lid tightly, and shake vigorously for approximately 15 seconds. This step is crucial to chill the mixture thoroughly and combine all the flavors. You’ll know it’s ready when the shaker feels cold to the touch and you hear the ice clinking around inside.

Step 4: Pour the Cocktail
Strain the mixture into a highball glass filled with crushed ice. If you prefer a smoother drink, you may strain out the muddled fruit at this point. Take a moment to admire the beautiful tropical colors swirling together in your glass as you prepare to add the final fizzy touch.

Step 5: Add Fizz
Top your cocktail with soda water to create that delightful fizzy finish. Pour slowly to maintain the bubbles and watch as the carbonation lifts the vibrant colors to the surface. This step adds a refreshing element, perfect for any gathering and completing your Tropical Blueberry Smash.

Step 6: Garnish and Serve
Finally, elevate your cocktail by garnishing it with skewered fresh blueberries, a pineapple wedge, and a sprig of mint. These toppings not only enhance the presentation but also invite guests to enjoy the fresh flavors of the drink. Your Tropical Blueberry Smash is now ready to be served and enjoyed!

Expert Tips for Tropical Blueberry Smash

  • Fresh Is Best: Use fresh blueberries and mint for maximum flavor. Frozen berries can work, but fresh ingredients truly enhance the Tropical Blueberry Smash.

  • Balance Sweetness: Start with half an ounce of simple syrup and taste-test. Adjust sweetness according to your preference to avoid overpowering the other flavors.

  • Chill It Well: Shake vigorously for at least 15 seconds to ensure your cocktail is properly chilled. A colder drink elevates enjoyment, especially in warm weather.

  • Muddle Gently: Be cautious when muddling mint to avoid tearing it too finely, which can introduce a bitter taste. Just press enough to release its essence.

  • Prep Ahead: Make the cocktail mixture (without soda) ahead of time and refrigerate for up to 2 hours. Add soda just before serving for maximum fizz.

How to Store and Freeze Tropical Blueberry Smash

Refrigerator: Keep the cocktail mixture (without soda) in an airtight container for up to 2 hours. To maintain freshness, avoid adding soda until just before serving.

Freezer: If you want to enjoy a frozen treat, pour leftover Tropical Blueberry Smash into an ice cube tray and freeze. These fruity ice cubes can add a refreshing chill to your drinks later.

Serving: When ready to serve, you can blend frozen cubes into smoothies or cocktails, or let them thaw in the fridge for a quick tropical fix.

Extra Tip: Always store fresh blueberries and mint in the refrigerator to keep them crisp and vibrant for your next cocktail occasion!

Make Ahead Options

These Tropical Blueberry Smash cocktails are perfect for meal prep enthusiasts! You can prepare the cocktail base (excluding soda water) up to 24 hours in advance, making it a breeze to whip up for busy weeknights or parties. Simply muddle ½ cup of blueberries, mint leaves, lime juice, simple syrup, coconut rum, and pineapple juice together, then store the mixture in an airtight container in the refrigerator. This keeps the flavors vibrant and fresh without any loss in quality. When ready to serve, just shake with ice, pour into glasses filled with crushed ice, and top with soda water for that delightful fizz. Enjoy the convenience of having a refreshing cocktail ready with minimal effort!

Tropical Blueberry Smash Variations

Get ready to become the cocktail master of your gatherings with these fun twists!

  • Spiced Rum: Swap coconut rum for spiced rum to infuse your Tropical Blueberry Smash with deeper, warming flavors. Perfect for adventurous sippers!
  • Herbal Twist: Substitute fresh mint with basil for an unexpected herbal kick. The fragrant basil will add a beautifully unique flavor to the drink that is both refreshing and aromatic.
  • Creamy Delight: Add a splash of coconut cream for a rich, creamy version. This will give your cocktail an even more indulgent tropical touch that feels like a vacation in a glass!
  • Tropical Fruits: Mix in chunks of mango or passion fruit for a truly personal tropical experience. Each sip will surprise you with bursts of exotic flavors that dance with the blueberries.
  • Tartness Boost: Swap lime for fresh lemon or even grapefruit juice for a zesty twist. This will brighten the drink further, creating a zippy flavor that pairs beautifully with the sweetness of the blueberries.
  • Fizzy Alternatives: Replace soda water with ginger ale or tonic water for an effervescent twist. The subtle spiciness of ginger ale will enhance the overall flavor, making each sip sparkle!
  • Frozen Variation: Blend all ingredients for a refreshing frozen cocktail. The icy slush will keep you cool and invigorated, making it a perfect summer treat to enjoy while relaxing on the porch.
  • Garnish Upgrade: Elevate the look by adding edible flowers along with traditional garnishes. This not only prettifies your drink but adds an extra layer of sophistication to your summer sip.

With these variations, your Tropical Blueberry Smash is sure to become the star of your summer gatherings! If you're looking to impress your guests even further, consider finishing off the evening with some delightful Mini Tropical Pavlovas for dessert!

What to Serve with Tropical Blueberry Smash

As you sip on this invigorating cocktail, consider pairing it with dishes that perfectly complement its fruity, tropical essence.

  • Grilled Shrimp Tacos: The light and zesty flavors of grilled shrimp wrapped in soft tortillas make for a delightful contrast to the cocktail's sweetness.

  • Tropical Fruit Salad: Incorporate similar flavors with a mix of mango, pineapple, and kiwi to elevate your tropical experience. Add a drizzle of lime for an extra zing!

  • Coconut Rice: The creamy, nutty flavor of coconut rice offers a comforting, subtle base that matches the cocktail's tropical notes, creating a harmonious meal.

  • Spicy Salsa with Tortilla Chips: The heat from spicy salsa pairs splendidly with the refreshing and cooling qualities of the Tropical Blueberry Smash, offering a perfect balance for your palate.

  • Chilled Cucumber Salad: Crisp cucumbers tossed with mint and lime provide a refreshing bite, mirroring the bright flavors of your drink.

  • Lightly Fried Calamari: The crispy texture and mild seasoning of fried calamari create a delightful contrast against the bold fruity taste of the cocktail.

  • Mojito Mocktails: For a non-alcoholic option, consider serving a mojito mocktail with fresh mint and lime for a refreshing sip alongside your Tropical Blueberry Smash.

Next time you gather with friends, serve these delightful dishes to enhance the experience!

Tropical Blueberry Smash Recipe FAQs

How do I choose ripe blueberries for the Tropical Blueberry Smash?
Absolutely! Look for blueberries that are plump, firm, and have a deep blue color. Avoid any with dark spots all over, as these could indicate overripeness. If fresh blueberries aren’t available, you can use frozen ones, which are still packed with flavor and perfect for cocktails.

How should I store my Tropical Blueberry Smash cocktail mixture?
Very! You can store the cocktail mixture (without the soda) in an airtight container in the refrigerator for up to 2 hours. This is a great way to prepare ahead of time for gatherings. Just remember to add the soda water right before serving to maintain that effervescent fizz!

Can I freeze leftover Tropical Blueberry Smash?
Absolutely! Pour any leftover cocktail into an ice cube tray and freeze for later use. These fruity ice cubes can enhance drinks or smoothies, bringing back that tropical taste whenever you want a refreshing sip. For the best results, consume them within 3 months to enjoy optimal flavor.

What should I do if the cocktail tastes too sweet?
Very! If you find your Tropical Blueberry Smash too sweet, simply add a splash of extra lime juice to balance the flavors. Start with half a lime, mix well, and taste-test. This will brighten the cocktail and offset the sweetness beautifully.

Are there any dietary considerations for the Tropical Blueberry Smash?
Absolutely! If you’re serving guests with allergies, it’s wise to note that the recipe contains alcohol and can include sugars from the syrup. Opt for organic or agave syrup for a healthier alternative if you have health-conscious friends. Always double-check with guests regarding any specific allergies to fruits or ingredients used in this cocktail!

Tropical Blueberry Smash

Tropical Blueberry Smash: Your New Favorite Summer Sip

Experience the vibrant flavors of Tropical Blueberry Smash, a refreshing cocktail blending blueberries, mint, and coconut rum for the perfect summer sip.
Print Recipe Pin Recipe
Prep Time 5 minutes mins
Total Time 5 minutes mins
Servings: 2 cocktails
Course: Drinks
Cuisine: Tropical
Calories: 200
Ingredients Equipment Method Nutrition Notes

Ingredients
  

For the Cocktail Base
  • ½ cup Fresh Blueberries Substitute with frozen blueberries if necessary.
  • handful Mint Leaves Fresh mint is recommended.
  • 1 Juice of Lime Adjust based on taste preferences.
  • ½ ounce Simple Syrup Use honey or agave syrup as alternatives.
  • 2 ounces Coconut Rum Swap with regular white rum for a different flavor.
  • 2 ounces Pineapple Juice Opt for fresh juice if available.
  • splash Soda Water Can be replaced with tonic water.
For Garnishing
  • 1 wedge Pineapple Choose ripe fruit for the best flavor.
  • 1 sprig Mint Leaves Elevate the look and aroma.
  • extra Blueberries Adds a pop of color for garnish.

Equipment

  • cocktail shaker
  • muddler
  • Highball Glass

Method
 

Step-by-Step Instructions
  1. In a cocktail shaker, gently muddle the blueberries and mint leaves using a muddler or the back of a spoon for about 1-2 minutes.
  2. Pour in the lime juice, simple syrup, coconut rum, and pineapple juice into the shaker with the muddled mixture.
  3. Fill the shaker with ice, secure the lid tightly, and shake vigorously for approximately 15 seconds.
  4. Strain the mixture into a highball glass filled with crushed ice.
  5. Top with soda water to create the fizzy finish, pouring slowly to maintain bubbles.
  6. Garnish with skewered blueberries, a pineapple wedge, and a sprig of mint.

Nutrition

Serving: 1cocktailCalories: 200kcalCarbohydrates: 30gSodium: 5mgPotassium: 150mgFiber: 1gSugar: 25gVitamin C: 10mgCalcium: 2mgIron: 1mg

Notes

Use fresh ingredients for maximum flavor. Chill the mixture well and consider preparing it ahead without soda to maintain fizz when serving.

Tried this recipe?

Let us know how it was!

Sweet & Tart Peach Lemonade to Refresh Your Summer Days

May 16, 2026 by Grace Snow Leave a Comment

On a particularly sweltering summer afternoon, I stumbled upon a treasure trove of ripe peaches just waiting to be transformed. This sparked my creation of Sweet & Tart Peach Lemonade, a refreshing summer drink that beautifully marries vibrant lemon zest with the succulent sweetness of peaches. Not only is this homemade beverage quick to whip up, but it also serves as a delightful crowd-pleaser for your backyard gatherings or intimate brunches. The customizable nature of this drink lets you play with flavors, whether you're craving a classic taste or an adventurous twist. So, are you ready to elevate your hydration game with this captivating concoction that’s perfect for sipping under the sun?

Why is Peach Lemonade a Summer Must-Have?

Unmatched Refreshment: This Sweet & Tart Peach Lemonade offers a cooling burst of flavor that’s perfect for scorching summer days.

Simple to Craft: With just a handful of ingredients, you can easily whip up a batch that elevates any occasion.

Customizable Delight: Whether you want to add a splash of sparkling water or infuse herbs for a unique twist, this drink is your canvas.

Crowd Favorite: Ideal for barbecues, brunches, or quiet afternoons, it’s a beverage everyone will adore, just like my Peaches Cream Cookies.

Vibrant Presentation: Garnished with fresh peaches and mint, it’s not only delicious but also visually stunning, serving as the perfect centerpiece for your summer gatherings.

Sweet & Tart Peach Lemonade Ingredients

For the Peach Puree

  • Ripe Peaches (6-8 large) – These are the main flavor component, offering sweetness and a fruity essence; frozen peaches can be substituted if fresh aren't available.
  • Granulated Sugar (1/2 cup) – Sweetens the puree; honey or agave can be great alternatives for a different flavor profile.
  • Water (1/2 cup) – Helps cook down the peaches, creating a smooth blend for your lemonade.

For the Lemonade Base

  • Fresh Lemon Juice (1 1/2 cups) – Essential for balancing the sweetness with tartness; always use freshly squeezed for the best flavor.
  • Granulated Sugar (1 cup) – This simple syrup sweetens and blends all flavors beautifully; adjust with honey or agave for less processed options.
  • Water (4-6 cups) – Dilutes and adjusts the strength of the lemonade to your taste; you can also use sparkling water for a fizzy finish.

For Garnish

  • Fresh Peach Slices – Add a lovely color and remind everyone of that peachy goodness in the drink.
  • Lemon Wheels – Enhances presentation and adds a zesty flair; great for extra flavor if desired.
  • Fresh Mint Sprigs – Provides a refreshing aroma and an appealing look; feel free to substitute with other herbs like basil for a fresh twist.

With these ingredients, you're set to make the perfect Sweet & Tart Peach Lemonade that will be loved by everyone!

Step‑by‑Step Instructions for Sweet & Tart Peach Lemonade

Step 1: Prepare Peaches & Peach Syrup
Start by washing, pitting, and dicing 6-8 ripe peaches to ensure maximum flavor in your Sweet & Tart Peach Lemonade. In a medium saucepan, combine the diced peaches with ½ cup sugar and ½ cup water. Heat over medium flame for 10-15 minutes, stirring occasionally until the peaches are soft and syrupy, releasing their sweet juices.

Step 2: Make & Cool Peach Puree
Once the peaches have softened, use a fork or potato masher to mash the mixture until it’s a chunky puree. For a smooth texture, pour the mashed mixture through a fine sieve, pressing down to separate the puree from the pulp. Allow the peach puree to cool completely before using it in your lemonade.

Step 3: Prepare Simple Syrup
In a clean saucepan, combine 1 cup of granulated sugar with 1 cup of water over medium heat. Stir the mixture frequently until the sugar has dissolved entirely, creating a clear simple syrup. Remove it from heat and let it cool to room temperature, which will provide the perfect sweetness for your lemonade.

Step 4: Prepare Lemonade Base
Juice 8-10 medium lemons to yield about 1 ½ cups of freshly squeezed lemon juice, crucial for balancing the sweetness of your lemonade. In a large pitcher, combine the cooled simple syrup with the fresh lemon juice, stirring well to blend the flavors together, setting the stage for your sweeter, tart lemonade.

Step 5: Assemble Lemonade
Incorporate the cooled peach puree into your pitcher with the lemon and syrup mix. Gradually stir in 4-6 cups of cold water, tasting as you go to achieve your desired strength and sweetness. This balance is key to the refreshing nature of your Sweet & Tart Peach Lemonade.

Step 6: Chill & Serve
Refrigerate your peach lemonade for at least 30 minutes to enhance the flavors and cool it down. Serve over ice, garnished with fresh peach slices, lemon wheels, and sprigs of mint for a delightful presentation. For a fizzy twist, substitute the dilution water with sparkling water before serving.

Make Ahead Options

Making this Sweet & Tart Peach Lemonade ahead of time is a fantastic way to save time on busy days! You can prepare the peach puree and simple syrup up to 3 days in advance. To do this, simply complete Steps 1 to 3, cool the components, and refrigerate them in airtight containers. This will ensure they maintain their fresh flavors and vibrant color. When you're ready to enjoy your lemonade, just combine the chilled peach puree and syrup with the freshly squeezed lemon juice and cold water in a pitcher, stir well, and refrigerate for an additional 30 minutes before serving. This way, you’ll have a refreshingly delicious drink with minimal effort!

How to Store and Freeze Sweet & Tart Peach Lemonade

Fridge: Store in an airtight container for up to 3 days; stir before serving for optimal taste and freshness.

Freezer: For longer storage, freeze in ice cube trays or freezer-safe containers for up to 3 months. Thaw overnight in the fridge before using.

Serving Suggestions: When ready to serve, you can blend the frozen cubes with ice for a slushy version of your Sweet & Tart Peach Lemonade, perfect for hot days.

Reheating: Not applicable; this drink is best served cold or blended.

Expert Tips for Sweet & Tart Peach Lemonade

  • Ripe Peaches Only: Ensure your peaches are perfectly ripe for maximum sweetness; under-ripe peaches can lead to a lackluster flavor in your Sweet & Tart Peach Lemonade.

  • Adjusting Sweetness: Taste as you mix and use less sugar if your peaches are super sweet; this allows you to customize the drink based on your preference.

  • Experiment with Garnishes: Enhance your drink visually and aromatically by adding mint or even basil; these can elevate your Sweet & Tart Peach Lemonade to a new level.

  • Cooling is Key: Let your lemonade chill for at least 30 minutes; this allows all flavors to blend beautifully and serve it refreshingly cold.

  • Use Fresh Ingredients: Always opt for fresh lemon juice and ripe peaches; pre-packaged solutions can lack the brightness and zest that define this summer drink.

What to Serve with Sweet & Tart Peach Lemonade

Pair your refreshing summertime beverage with delightful dishes that complement its bright flavors and make your gathering unforgettable.

  • Grilled Chicken Skewers: The smoky char of grilled chicken pairs perfectly with the vibrant sweetness of the lemonade, creating a delightful balance on your palate.

  • Caprese Salad: Fresh mozzarella, juicy tomatoes, and basil enhance the fruity tones of your lemonade, offering a refreshing and colorful side.

  • Spicy Shrimp Tacos: These zesty tacos contrast the sweet and tart flavors of the lemonade wonderfully, providing a thrilling taste experience.

  • Berry Salad: Combine mixed greens topped with berries and a light vinaigrette to highlight the lemonade’s fruity flavors, creating a refreshing and healthy option.

  • Barbecue Ribs: The tangy, sticky glaze of barbecue ribs works beautifully with the sweet peach lemonade, making each sip even more enjoyable.

  • Lemon Basil Pasta: Light and zesty, this dish echoes the lemonade's flavors, making your meal harmonious and refreshing.

  • Watermelon Feta Salad: A perfect summer duo, the sweetness of watermelon pairs beautifully with the tartness of peach lemonade while adding a crisp texture.

  • Sparkling Water: For a fizzy contrast that enhances your drink, serve sparkling water on the side for guests who may want an extra bubbly twist.

Sweet & Tart Peach Lemonade Variations

Feel free to get creative and customize your Sweet & Tart Peach Lemonade to suit your taste buds and summer vibe!

  • Frozen Twist: Blend the finished lemonade with ice for a refreshing slushy version that will cool you down instantly. It's like a summer treat in a glass!

  • Iced Tea Fusion: Mix brewed iced tea with your lemonade for a peach-flavored Arnold Palmer. It’s a delightful way to enjoy the best of both worlds—lemonade and tea!

  • Herb-Infused: Add a unique touch by infusing fresh herbs like rosemary or thyme into the lemonade. This lovely twist elevates the flavor profile and adds a beautiful aromatic aspect to your drink.

  • Sparkling Delight: Swap regular water for sparkling water to turn your lemonade into a fizzy sensation! It brings a fun twist that you'll love for summer celebrations.

  • Spiked Version: For an adult twist, add vodka or rum for a refreshing cocktail perfect for evening gatherings. Just a splash will enhance the flavor without overpowering it.

  • Berry Blend: Toss in some muddled raspberries or blackberries for an extra fruity dimension that complements the peaches beautifully.

  • Flavored Simple Syrup: Experiment with flavored syrups like lavender or vanilla in place of plain sugar to give your lemonade an extraordinary flavor boost. Your guests will be asking for the secret ingredient!

  • Citrus Medley: Mix in other citrus juices, like orange or grapefruit, for a more complex fruit cocktail. It adds a delightful zing alongside the peaches for a mouthwatering blend.

Embrace your inner mixologist with these variations, and don't hesitate to check out my other delightful treats like Maple Roasted Sweet or Smoky Sweet Potatoes for more kitchen inspiration!

Sweet & Tart Peach Lemonade Recipe FAQs

What type of peaches should I use for the best flavor?
Always use ripe peaches for your Sweet & Tart Peach Lemonade! Look for those that are slightly soft to the touch and have a sweet fragrance. If fresh peaches are unavailable, frozen peaches work well too. Just make sure to thaw them before use.

How long can I store the lemonade in the refrigerator?
You can store your Sweet & Tart Peach Lemonade in an airtight container in the fridge for up to 3 days. Just give it a good stir before serving, as some separation may occur.

Can I freeze the lemonade? If so, how?
Absolutely! To freeze your lemonade, pour it into ice cube trays or freezer-safe containers. This way, you can enjoy a refreshing slushy later. It will keep well for up to 3 months. Thaw it overnight in the fridge or blend the frozen cubes with ice for a refreshing treat.

What should I do if my lemonade ends up too sweet?
If your Sweet & Tart Peach Lemonade is sweeter than you'd like, you can dilute it by adding more cold water or even a splash of soda water. You can also balance it out by squeezing in additional lemon juice for extra tartness. Taste as you go!

Is this drink safe for pets or allergy-friendly?
While the lemonade is delicious for humans, it’s best to keep it away from pets, especially due to the sugar content and potential citric acid sensitivity in some animals. If you have allergies, just be careful with the garnishes and adjust as needed.

Can I customize the flavors?
Definitely! This recipe invites creativity. You can add fresh herbs like rosemary or thyme, use different fruits like raspberries, or even create a spiked version with rum or vodka for adult gatherings. The more the merrier!

Sweet & Tart Peach Lemonade

Sweet & Tart Peach Lemonade to Refresh Your Summer Days

Enjoy a refreshing Sweet & Tart Peach Lemonade that's perfect for summer days.
Print Recipe Pin Recipe
Prep Time 20 minutes mins
Cook Time 15 minutes mins
Chill Time 30 minutes mins
Total Time 1 hour hr 5 minutes mins
Servings: 6 cups
Course: Drinks
Cuisine: American
Calories: 150
Ingredients Equipment Method Nutrition Notes

Ingredients
  

For the Peach Puree
  • 6-8 large Ripe Peaches Fresh or frozen peaches
  • 1/2 cup Granulated Sugar Honey or agave can be substitutes
  • 1/2 cup Water
For the Lemonade Base
  • 1 1/2 cups Fresh Lemon Juice Use freshly squeezed
  • 1 cup Granulated Sugar Adjust with honey or agave for less processed options
  • 4-6 cups Water Can use sparkling water
For Garnish
  • Fresh Peach Slices
  • Lemon Wheels
  • Fresh Mint Sprigs

Equipment

  • Medium saucepan
  • pitcher
  • fine sieve
  • Fork or potato masher

Method
 

Step-by-Step Instructions
  1. Wash, pit, and dice the peaches. Combine diced peaches with sugar and water in a saucepan. Heat for 10-15 minutes until soft.
  2. Mash the mixture until chunky. Strain through a sieve for a smooth puree. Let it cool.
  3. Create a simple syrup by dissolving sugar in water over medium heat. Cool to room temperature.
  4. Juice lemons to get about 1 1/2 cups of juice. Mix with the cooled simple syrup.
  5. Combine the peach puree with the lemon mixture. Add cold water to achieve desired strength.
  6. Refrigerate for at least 30 minutes and serve over ice, garnished with peach slices, lemon wheels, and mint.

Nutrition

Serving: 1cupCalories: 150kcalCarbohydrates: 38gProtein: 1gSodium: 5mgPotassium: 150mgFiber: 1gSugar: 30gVitamin A: 500IUVitamin C: 30mgCalcium: 10mgIron: 0.5mg

Notes

Ensure peaches are ripe for maximum sweetness. Adjust sugar based on peach sweetness. Chill for flavors to meld.

Tried this recipe?

Let us know how it was!

Sparkling Lime Mint Punch: Refreshment for Every Occasion

May 16, 2026 by Grace Snow Leave a Comment

I’ll never forget that warm afternoon when the sun was shining just right, and we gathered on the patio for a casual brunch. As laughter floated through the air, someone brought out a cheerful bowl of Sparkling Lime Mint Punch that instantly brightened the table. It was a refreshing, non-alcoholic drink made with just four simple ingredients that instantly transported us to summer bliss. Not only is this punch incredibly easy to make, but it also doubles as a fun party starter, perfect for any get-together. The zesty lime paired with garden-fresh mint creates a light, rejuvenating flavor that leaves everyone coming back for more. Want to make it even more special? Toss in some sliced strawberries or smooshed blackberries for a delightful twist. Curious about how to whip up this crowd-pleaser that’s bound to become a staple at your gatherings? Let’s dive into the recipe!

Why Is Sparkling Lime Mint Punch Perfect?

Simplicity: With only four ingredients, this punch is a breeze to whip up, perfect for busy hosts!

Refreshingly Unique: The combination of zesty lime and fresh mint delivers a delightful burst of flavor that stands out at any gathering.

Versatile Variations: Feel free to get creative! Add sliced strawberries or smooshed blackberries for a fruity twist that will impress your guests.

Crowd-Pleasing Choice: Ideal for parties, brunches, or family gatherings, this non-alcoholic drink appeals to all ages, ensuring everyone can join in the fun!

Time-Saving: Quickly prepare this bubbly delight that can be elegantly served in a pitcher, letting you focus on enjoying the company of friends and family.

Sparkling Lime Mint Punch Ingredients

For the Punch

  • Frozen Limeade Concentrate – Use one 12 oz. can, softened for easier mixing and the perfect base for your Sparkling Lime Mint Punch.
  • Club Soda – Opt for cold club soda to add fizziness and balance the sweetness of the limeade for a refreshing drink.
  • Lime Slices – Add these to enhance the lime flavor; use sparingly to prevent the punch from becoming too sour.
  • Fresh Mint Sprigs – Gently bruise the leaves before adding them; this releases essential oils and a delightful aroma in your drink.

Optional Variations

  • Sliced Strawberries – Include these for a fruity twist that adds vibrant color and extra sweetness.
  • Smooshed Blackberries – Incorporate these for an added depth of flavor that will delight your guests' taste buds.

Step‑by‑Step Instructions for Sparkling Lime Mint Punch

Step 1: Prepare Limeade
Begin by softening the frozen limeade concentrate in a medium bowl for about 10 minutes at room temperature. Once semi-melted, replace the recommended water with 4 cups of cold club soda. Stir gently for 1-2 minutes until well combined, ensuring the mix is bubbly and smooth—in this step, you'll see the vibrant limeade color come to life.

Step 2: Add Ingredients
Next, thinly slice a fresh lime, setting aside a few slices for garnish. Add the remaining lime slices to the punch mixture along with 10-12 fresh mint sprigs. Use a wooden spoon to gently bruise the mint leaves—this will release their aromatic oils. Give the punch a couple of light stirs, allowing the lime and mint to infuse their flavors throughout the Sparkling Lime Mint Punch.

Step 3: Chill the Punch
If time permits, let the punch chill in the refrigerator for about 15-20 minutes—this ensures every sip is as refreshing as possible. During this time, the mint will further flavor the punch while the carbonation remains intact. Keep an eye on the texture; it should look vibrant and frothy, enticing everyone to take a sip.

Step 4: Serve Immediately
To serve this lively Sparkling Lime Mint Punch, pour the mixture into a large pitcher or punch bowl. Fill glasses with ice for a delightful chill and garnish with reserved lime slices and mint sprigs for an added touch of elegance. It's best enjoyed right away to maintain its fizziness, so invite your guests to join in on the fun of sipping this non-alcoholic delight!

Expert Tips for Sparkling Lime Mint Punch

  • Use Chilled Ingredients: Ensure your club soda is ice-cold for maximum fizz and to keep the punch refreshing longer; warm soda will diminish the carbonation quickly.

  • Brew the Mint: Gently bruising fresh mint sprigs releases aromatic oils—just enough to enhance flavor without overwhelming the punch. Avoid shredding the leaves as it can make the drink bitter.

  • Balance the Lime: When adding lime slices, remember a little goes a long way; too much can make the Sparkling Lime Mint Punch overly sour. Taste along the way!

  • Serve Fresh: For the best experience, make the punch shortly before serving. Leftovers are fine briefly, but the fizz will be lost after a day in the fridge.

  • Scale Up Easily: Need to serve more guests? Multiply the recipe effortlessly—four cans of limeade pair perfectly with four quarts of club soda for larger gatherings.

Sparkling Lime Mint Punch Variations

Feel free to get creative with your Sparkling Lime Mint Punch and take it to the next level!

  • Berry Blast: Add sliced strawberries or smooshed blackberries for a fruity explosion that complements the zesty lime perfectly. The sweetness of the berries creates a lovely balance and adds a pop of color.

  • Citrus Medley: Try incorporating fresh orange or lemon slices; their bright flavors will enhance the punch and create a tangy twist that's both refreshing and uplifting.

  • Herbal Addition: Add a few sprigs of fresh basil to the mix for a unique herbal note. Basil pairs beautifully with mint and lime, offering an aromatic dimension that elevates your beverage beautifully.

  • Tropical Twist: Substitute half of the limeade with coconut water for a tropical flair. The natural sweetness and lightness of coconut water will give a new essence to your punch that's delightful during summer days.

  • Spicy Zing: If you're feeling adventurous, add a splash of ginger ale or a few slices of fresh jalapeño for a spicy kick. The heat will surprise your guests in a fun way, making the drink a stand-outat the party!

  • Fruity Soda Swap: Consider using flavored sparkling water or fruity soda instead of club soda for a unique fizzy twist. A berry or citrus-flavored soda can add an unexpected layer of sweetness that enhances the overall flavor.

  • Frozen Delight: Freeze mint and lime slices into ice cubes and use these to chill your punch without watering it down! It adds a beautiful visual element while keeping every sip refreshing.

Want to explore more enticing ideas? You might enjoy trying this delightful Chipotle Lime Chicken or the vibrant Fiesta Lime Chicken alongside your Sparkling Lime Mint Punch! Or if you’re in the mood for a coastal vibe, whip up some Shrimp Tacos for a fantastic pairing!

Storage Tips for Sparkling Lime Mint Punch

  • Fridge: Keep any leftover Sparkling Lime Mint Punch in an airtight container in the refrigerator for up to 2 days. However, note that the fizz will diminish, so enjoy it fresh whenever possible.

  • Serving: If you plan to serve the punch later, store the mint and lime slices separately to maintain their flavor. Add them just before serving to keep the punch vibrant and aromatic.

  • Freezer: Avoid freezing the punch as the carbonation will not hold up in the freezing process, leading to a flat drink and undesirable texture upon thawing.

  • Reheating: This punch is best served cold and fresh! Any attempts to reheat will loss its delightful flavors and fizziness, so stick to serving it chilled.

Make Ahead Options

Preparing this Sparkling Lime Mint Punch in advance is a fantastic way to save time during your next gathering! You can mix the frozen limeade concentrate with the cold club soda up to 24 hours ahead of time. However, take care to add lime slices and fresh mint sprigs only right before serving to prevent them from losing their freshness. For optimal quality, refrigerate the punch mix in an airtight container, and when it's time to serve, simply stir in the garnishes and pour over ice. This approach allows you to enjoy the refreshing taste of the punch with minimal effort while ensuring it stays just as delicious and fizzy as when you first mixed it!

What to Serve with Sparkling Lime Mint Punch

Imagine a bright afternoon gathering where the cool, crisp taste of a refreshing drink dances on your palate, perfectly paired with delightful bites.

  • Savory Finger Sandwiches: Light and airy, these sandwiches filled with cucumber and cream cheese complement the zesty punch beautifully.

  • Chilled Shrimp Cocktail: The sweetness of chilled shrimp paired with a tangy cocktail sauce enhances the lime and mint flavors in the punch, creating a refreshing balance.

  • Fruit Skewers: Colorful and vibrant, these skewers offer sweet bites that match the bubbly nature of the punch, satisfying any craving for freshness.

  • Caprese Salad Bites: Fresh mozzarella, basil, and cherry tomatoes drizzled with balsamic make for a visually stunning and delicious pairing that complements the punch’s minty flavor.

  • Mini Quiches: These savory pastries filled with cheese and veggies provide a hearty option, balancing the lightness of the punch while adding a comforting touch.

  • Lemon Sorbet: Serving this refreshing dessert immediately following your vibrant punch rounds off the meal with a sweet and tart finale, reminding everyone of your delightful gathering.

Sparkling Lime Mint Punch Recipe FAQs

How do I choose ripe limes for the Sparkling Lime Mint Punch?
Absolutely! Look for limes that are firm, shiny, and slightly soft when squeezed. A good lime will yield to gentle pressure, indicating juiciness. Dark spots may suggest overripeness, so choose vibrant green limes for the best flavor!

How should I store leftover Sparkling Lime Mint Punch?
You can keep any leftovers in an airtight container in the fridge for up to 2 days. However, keep in mind that the carbonation will decrease over time, so it's best to enjoy it fresh. Stir gently before serving again to try and reincorporate any bubbles that remain.

Can I freeze Sparkling Lime Mint Punch?
I recommend against freezing the punch as the carbonation will not survive the freezing process, leading to a flat and unappealing texture when thawed. For a refreshing twist, consider freezing lime or mint ice cubes beforehand to enhance your punch without altering its fizz!

What do I do if my punch is too sour?
Very! If you find your Sparkling Lime Mint Punch is a bit too sour, try adding a dash of simple syrup or blending in more cold club soda to balance the flavors. You can also add a small amount of fruit puree, such as smooshed blackberries or strawberries, to introduce sweetness and additional flavor without losing the refreshing essence.

Are there any allergies to be aware of with this recipe?
While this Sparkling Lime Mint Punch is generally safe for most diets, always check for individual allergies. Some people may have sensitivities to citrus fruits. Make sure your guests feel comfortable, and you can always provide a substitute like flavored sparkling water instead of regular club soda for an alternative!

How can I enhance the presentation of the punch?
To elevate the look of your Sparkling Lime Mint Punch, use decorative glasses, fresh mint sprigs, and vibrant lime slices for garnish. You could even add whole strawberries or freeze whole raspberries as ice cubes. This adds a charming touch and makes each serving feel special!

Sparkling Lime Mint Punch

Sparkling Lime Mint Punch: Refreshment for Every Occasion

This Sparkling Lime Mint Punch is a refreshing, non-alcoholic drink perfect for any occasion, made with four simple ingredients.
Print Recipe Pin Recipe
Prep Time 15 minutes mins
Chill Time 20 minutes mins
Total Time 35 minutes mins
Servings: 8 cups
Course: Drinks
Cuisine: Non-Alcoholic
Calories: 90
Ingredients Equipment Method Nutrition Notes

Ingredients
  

For the Punch
  • 1 12 oz can Frozen Limeade Concentrate Softened for easier mixing
  • 4 cups Club Soda Cold
  • 1 each Lime Slices Use sparingly to prevent sourness
  • 10-12 sprigs Fresh Mint Bruised to release essential oils
Optional Variations
  • 1 cup Sliced Strawberries For a fruity twist
  • 1 cup Smooshed Blackberries For added flavor

Equipment

  • medium bowl
  • Large pitcher
  • Wooden spoon

Method
 

Step-by-Step Instructions
  1. Begin by softening the frozen limeade concentrate in a medium bowl for about 10 minutes. Replace the recommended water with 4 cups of cold club soda and stir gently for 1-2 minutes until well combined.
  2. Thinly slice a fresh lime and set aside a few slices for garnish. Add the remaining lime slices and fresh mint sprigs to the punch mixture. Use a wooden spoon to gently bruise the mint leaves and stir lightly.
  3. If time permits, let the punch chill in the refrigerator for about 15-20 minutes to enhance flavors and maintain carbonation.
  4. Pour the mixture into a large pitcher or punch bowl, fill glasses with ice, and garnish with reserved lime slices and mint sprigs. Serve immediately.

Nutrition

Serving: 1cupCalories: 90kcalCarbohydrates: 22gSodium: 10mgSugar: 22gVitamin C: 20mg

Notes

Make the punch shortly before serving for the best experience. Leftovers are fine for up to 2 days in the fridge, but will lose fizz. Avoid freezing the punch.

Tried this recipe?

Let us know how it was!

Deliciously Creamy Dirty Strawberry Soda Mocktail Recipe

May 16, 2026 by Grace Snow Leave a Comment

As I swirled the vibrant pink drink in my glass, I couldn't help but feel like a kid again, enchanted by the magic of summer. The Dirty Strawberry Soda Mocktail is more than just a delicious refreshment; it’s a bubbly masterpiece that effortlessly combines the wholesome sweetness of strawberry soda with a creamy twist. This easy-to-make drink isn’t just a delight for the taste buds; it’s also a refreshing non-alcoholic treat that can be enjoyed by everyone—perfect for those warm afternoons when you crave something extra. Plus, it’s a fantastic way to elevate any gathering or simply add a little whimsy to your day. Ready to take a sip of nostalgia and enjoy a refreshing escape? Let's dive into the recipe together!

Why is Dirty Strawberry Soda a Must-Try?

Delightfully Easy: The steps are uncomplicated, making it perfect for all skill levels! Just mix, pour, and enjoy.

Refreshing Flavor: The sweet strawberry soda combined with creamy coffee creamer creates an irresistible taste that dances on your palate.

Versatile for All Occasions: Serve it at summer parties, family gatherings, or as a fun afternoon pick-me-up! It pairs beautifully with light snacks or even desserts like cheesecake.

Colorful Presentation: This drink not only tastes fantastic but looks stunning in a glass, making it a showstopper at any event. Want to explore more mocktail ideas? Check out our creative mocktail collection!

Crowd-Pleasing Treat: Everyone, from kids to adults, will love this uniquely refreshing drink that sparks joy with every sip!

Dirty Strawberry Soda Ingredients

For the Drink

  • 16 ounces Strawberry Soda – This delivers the sweet and fruity flavor that makes this mocktail irresistible.
  • 4 ounces Vanilla Coffee Creamer – Adds a lush creaminess; feel free to substitute with a dairy-free alternative for a lighter option.
  • Strawberry Syrup – Drizzle this for extra sweetness and an eye-catching presentation; consider making your own for the freshest taste!

For the Garnish (Optional)

  • Fresh Strawberries – Sliced strawberries add a lovely visual and a fresh burst of flavor.
  • Mint Leaves – A sprig of mint elevates the drink's aesthetic and adds a hint of refreshing herbal notes.

With these quality ingredients, your Dirty Strawberry Soda will not only taste amazing but look stunning, too!

Step‑by‑Step Instructions for Dirty Strawberry Soda

Step 1: Prepare the Glasses
Begin by filling two tall glasses with ice cubes, leaving enough room at the top for the strawberry soda and coffee creamer. For an extra-refreshing experience, you can chill the glasses in the freezer for about 15 minutes prior to serving, ensuring your Dirty Strawberry Soda stays cool and delightful.

Step 2: Drizzle the Strawberry Syrup
Take your strawberry syrup and carefully drizzle it around the inside edges of each glass and over the ice. This not only adds a touch of sweetness but also creates a beautiful visual effect as the syrup runs down the ice. Aim for a spiral pattern for a more dynamic look that complements the vibrant colors of your drink.

Step 3: Pour the Strawberry Soda
Next, pour 8 ounces of strawberry soda into each glass over the ice, filling them up to about three-quarters full. As the soda splashes against the ice, watch the fizz create an effervescent dance, awakening the enticing flavors of the Dirty Strawberry Soda.

Step 4: Add the Creamy Touch
Top off each glass with 2 ounces of vanilla coffee creamer. Slowly pour the creamer down the side of the glass to allow a lovely layering effect that adds to the overall presentation of the mocktail. The cream will gently blend, creating a beautiful swirl that tempts anyone to take a sip.

Step 5: Garnish and Serve
For the final flourish, garnish your Dirty Strawberry Soda with a few fresh strawberry slices and a sprig of mint if desired. This not only enhances the drink’s visual appeal but also uplifts its flavor profile. Serve immediately to enjoy the bubbly refreshment while it’s at its best!

Make Ahead Options

These Dirty Strawberry Soda mocktails are a fantastic choice for meal prep, making them perfect for busy days! You can prepare the strawberry syrup up to 3 days in advance; simply store it in an airtight container in the refrigerator to keep it fresh. Additionally, fill your glasses with ice and drizzle the syrup just before serving to maintain that vibrant visual effect. However, it’s best to mix the strawberry soda and vanilla coffee creamer on the day you plan to enjoy them, as this will ensure the drink remains bubbly and flavorful. When you're ready to serve, simply pour the soda over the ice and cream for a delightful refreshment in minutes!

Dirty Strawberry Soda Variations

Feel free to mix and match these ideas to create your perfect version of Dirty Strawberry Soda!

  • Dairy-Free: Substitute the vanilla coffee creamer with almond or coconut creamer for a deliciously creamy option that’s also dairy-free.

  • Flavor Fusion: Experiment with raspberry, lime, or peach soda instead of strawberry for a unique fruity twist. Each choice promises a different refreshing experience!

  • Creamy Combos: Try flavored creamers like hazelnut or caramel to give your mocktail an exciting new flavor profile. Why not pair caramel with a hint of chocolate syrup for an indulgent treat?

  • Layered Presentation: Adjust the order by pouring the syrup last or use a spoon to create a layered effect. This can make the drink not just tasty but a stunning work of art in a glass!

  • Sparkling Elegance: Add sparkling water or tonic water for extra fizz and a sophisticated touch. This will create a lighter drink that’s still full of flavor!

  • Herbal Infusion: Muddle in some fresh mint or basil leaves at the bottom of the glass before adding ice for a refreshing herbal touch that wakes up the drink beautifully.

  • Spiced Up: If you enjoy a little heat, add a pinch of cayenne pepper or some jalapeño slices to give your mocktail a surprising kick. This is perfect for adventurous palates!

  • Sweetness Adjustment: Want it sweeter or less so? Adjust the amount of strawberry syrup according to your taste or swap it for muddled fresh strawberries for a more natural sweetness.

Let your imagination run wild with these variations! Want more inspiration for creative drinks? Don’t forget to check out our refreshing mocktail collection!

What to Serve with Dirty Strawberry Soda

The vibrant and refreshing flavors of this delightful mocktail lend themselves to a variety of delicious pairings.

  • Cheesecake: The creamy richness of cheesecake complements the fruity sweetness, making each sip and bite a heavenly match.
  • Fresh Fruit Platter: Serve an assortment of berries and citrus fruits to enhance the drink's fresh flavors and add a crunchy texture.
  • Mini Tacos: These bite-sized delights bring a savory zing that balances the sweetness of the soda, perfect for a casual gathering. Enjoy them together for a fiesta of flavors!
  • Chocolate-Dipped Pretzels: The sweet and salty combo will elevate your drink experience, bringing a delightful crunch with every sip.
  • Grilled Veggie Skewers: The smoky, savory grilled veggies add a splendid contrast to the sweetness of the Dirty Strawberry Soda, making it a vibrant meal option.
  • Vanilla Ice Cream Floats: Elevate the sweetness even further by adding scoops of vanilla ice cream on top, creating a delectable dessert drink fusion.
  • Lemonade Bars: These tangy treats will harmonize beautifully with your mocktail, balancing sweetness and adding a zesty punch.
  • Coconut Rice Pudding: The creamy texture and luscious flavor will echo the creaminess of the drink, resulting in a comforting pair that warms the heart.
  • Sparkling Water: For those wanting to keep it light, a refreshing glass of sparkling water with a twist of lime is a delightful palate cleanser.
  • Mixed Nuts: Crunchy and lightly salted, nuts provide a satisfying contrast to the fizzy sweetness of the soda, serving as a lovely snack.

How to Store and Freeze Dirty Strawberry Soda

  • Room Temperature: For best taste and freshness, enjoy your Dirty Strawberry Soda immediately after preparation. The vibrant flavors are best when served fresh.
  • Fridge: If you need to store leftovers, keep the components—strawberry soda, coffee creamer, and syrup—separate in airtight containers in the fridge for up to 2 days.
  • Freezer: We don't recommend freezing the prepared drink as it can affect the texture and carbonation. However, you can freeze leftover strawberry soda as ice cubes for added flavor in future drinks!
  • Reheating: For any leftover strawberry soda that might lose fizz, just give it a gentle stir before enjoying, or use cold soda cubes to refresh the drink without diluting it!

Expert Tips for Dirty Strawberry Soda

  • Chill the Glasses: For an ultra-refreshing experience, place your glasses in the freezer for about 15 minutes before filling them with your Dirty Strawberry Soda.

  • Maintain the Fizz: To keep the drink bubbly, add the vanilla coffee creamer just before serving. If you mix everything beforehand, consume it within a couple of hours.

  • Adjust Sweetness: Always taste your drink before serving and feel free to adjust the strawberry syrup or soda to match your sweetness preference.

  • Creative Garnishes: Experiment with different garnishes like whipped cream, or even a sprinkle of crushed nuts for a delightful crunch alongside your Dirty Strawberry Soda!

  • Flavor Variations: Don’t hesitate to mix it up! Try using different flavors of soda or creamers to create your own unique spin on this mocktail.

Dirty Strawberry Soda Recipe FAQs

What type of strawberry soda should I use?
Absolutely! For the best flavor experience, opt for high-quality strawberry soda. Look for brands that emphasize natural flavors and minimal artificial ingredients. This ensures the sweet, fruity taste shines through in your Dirty Strawberry Soda.

How should I store leftover ingredients?
Very! If you have leftover strawberry soda or vanilla coffee creamer, it's best to store them separately. Place the strawberry soda and coffee creamer in airtight containers in the fridge for up to 2 days. This helps keep the flavors fresh and prevents the soda from going flat!

Can I freeze the Dirty Strawberry Soda?
Not recommended! Freezing the prepared Dirty Strawberry Soda can lead to a change in texture and carbonation. However, if you have leftover strawberry soda, pour it into ice cube trays and freeze. You can use these flavorful cubes in future drinks for a delightful twist!

What should I do if my drink doesn’t stay fizzy?
If your Dirty Strawberry Soda starts to lose its fizz, there are a couple of tricks to revive it! First, avoid stirring too vigorously. If you find it has lost its sparkle, try adding a few of your frozen strawberry soda ice cubes to refresh the drink's bubbly nature without watering it down.

Is this mocktail suitable for people with dairy allergies?
Absolutely! The beauty of the Dirty Strawberry Soda is that you can easily make it dairy-free. Simply substitute the vanilla coffee creamer with a dairy-free alternative like almond or coconut cream. This way, everyone can enjoy this delightful and refreshing drink!

Can I add other flavors to my Dirty Strawberry Soda?
The more the merrier! Feel free to get creative with your Dirty Strawberry Soda by mixing different flavored sodas or creamers. Try raspberry soda for a fruity twist or hazelnut coffee creamer for a completely different experience. The possibilities are endless!

Dirty Strawberry Soda

Deliciously Creamy Dirty Strawberry Soda Mocktail Recipe

Enjoy a refreshing Dirty Strawberry Soda, a delightful blend of strawberry soda and cream, perfect for summer gatherings.
Print Recipe Pin Recipe
Prep Time 15 minutes mins
Chilling Time 15 minutes mins
Total Time 30 minutes mins
Servings: 2 glasses
Course: Drinks
Cuisine: American
Calories: 220
Ingredients Equipment Method Nutrition Notes

Ingredients
  

For the Drink
  • 16 ounces Strawberry Soda Delivers sweet and fruity flavor
  • 4 ounces Vanilla Coffee Creamer Feel free to use dairy-free alternative
  • Strawberry Syrup Drizzle for extra sweetness
For the Garnish (Optional)
  • Fresh Strawberries Sliced for visual appeal
  • Mint Leaves Adds refreshing herbal notes

Equipment

  • tall glasses
  • ice cubes
  • Spoon

Method
 

Step-by-Step Instructions for Dirty Strawberry Soda
  1. Prepare the glasses by filling them with ice cubes, and chill in the freezer for about 15 minutes if desired.
  2. Drizzle strawberry syrup around the inside edges of the glasses and over the ice.
  3. Pour 8 ounces of strawberry soda into each glass.
  4. Top off with 2 ounces of vanilla coffee creamer, pouring down the side.
  5. Garnish with fresh strawberry slices and mint leaves if desired.

Nutrition

Serving: 1glassCalories: 220kcalCarbohydrates: 28gProtein: 1gFat: 10gSaturated Fat: 5gCholesterol: 5mgSodium: 130mgPotassium: 120mgSugar: 24gVitamin A: 500IUVitamin C: 25mgCalcium: 100mgIron: 0.6mg

Notes

Best served fresh. Adjust sweetness with more strawberry syrup or soda as needed.

Tried this recipe?

Let us know how it was!

Delightfully Refreshing Raspberry Lime Fizz Mocktail Recipe

May 16, 2026 by Grace Snow Leave a Comment

As I stood in my kitchen on a sun-soaked afternoon, the sweet scent of ripe raspberries wafted through the air, inspiring me to create something special. That’s when I decided to whip up a refreshing Raspberry Lime Fizz Mocktail! Bursting with vibrant colors and zesty flavors, this delightful drink is perfect for any occasion, whether you’re hosting a garden party or simply treating yourself to something fancy at home. Not only is it a breeze to prepare—made with just a few simple ingredients—but it also makes for a unique, non-alcoholic option that everyone can enjoy. Imagine the refreshing fizz hitting your taste buds, bringing a joyful sparkle to any gathering. Curious to try your hand at this effervescent delight? Let’s dive into the recipe!

Why is This Mocktail So Irresistible?

Simplicity reigns supreme: With just a few easy-to-find ingredients, you can mix up this Raspberry Lime Fizz Mocktail in no time!
Fresh Flavors dance together: The sweetness of raspberries combined with the tang of lime creates an invigorating flavor explosion.
Versatile and fun: Customize with your favorite fruits, such as adding a splash of cranberry juice or experimenting with blueberries for a unique twist.
Party-ready appeal: Impress your friends at gatherings with this stunning, bubbly drink that everyone can enjoy—no alcohol necessary!
Effortless prep can save your day: Make a batch of the muddled mixture in advance, just adding sparkling water right before serving, ensuring you can relax while your guests enjoy.
This Raspberry Lime Fizz Mocktail will surely elevate your next celebration or quiet afternoon!

Raspberry Lime Fizz Mocktail Ingredients

Here’s everything you need to create this refreshing mocktail!

For the Drink
• Fresh Raspberries – Sweetness and vibrant color; substitute with strawberries for a unique flavor twist.
• Lime Juice – Adds tanginess and brightness; if lime is unavailable, lemon juice can serve as a great alternative.
• Sparkling Water – Provides fizz and lightness; feel free to use club soda instead for a similar bubbly effect.
• Honey or Simple Syrup – Sweetens the drink beautifully; agave syrup can be a wonderful substitute for a vegan option.
• Ice Cubes – Chills the drink, keeping it refreshingly cool throughout.

Enjoy crafting this flavorful Raspberry Lime Fizz Mocktail, perfect for any occasion!

Step‑by‑Step Instructions for Raspberry Lime Fizz Mocktail

Step 1: Muddle Raspberries
In a shaker, add 1 cup of fresh raspberries and gently muddle them with a muddler for about 30 seconds, just enough to release their vibrant juice. Look for a slight breaking down of the berries while still keeping a bit of texture; this creates a luscious, fruity base for your Raspberry Lime Fizz Mocktail.

Step 2: Mix Ingredients
Next, squeeze the juice of 2 limes into the shaker along with 2 tablespoons of honey or simple syrup and a handful of ice cubes. Secure the lid and shake vigorously for about 15-20 seconds until the mixture is well combined and chilled. The ice should break down slightly, creating a refreshing blend of flavors.

Step 3: Strain the Mixture
Now, position a strainer over a serving glass and carefully pour the muddled mixture through it. This step allows the vibrant raspberry juice to flow while catching any seeds, ensuring your mocktail is smooth and pleasing to drink. You should see a beautiful red liquid collecting in your glass, ready for the next step.

Step 4: Finish with Sparkling Water
To give your Raspberry Lime Fizz Mocktail its signature fizz, slowly pour in 1 cup of sparkling water. Use a spoon to stir gently, mixing the drink while preserving the bubbly texture. The effervescence should dance atop the deep red liquid, creating a bright and inviting visual perfect for any occasion.

Step 5: Adjust Sweetness or Garnish
Take a moment to taste your mocktail; if desired, you can add a touch more honey for sweetness, stirring to combine. For an appealing presentation, consider garnishing the rim with fresh raspberries or a lime wedge. This final touch adds not only a delightful visual but enhances the drink's fresh appeal as you serve it to friends or family.

Raspberry Lime Fizz Mocktail Variations

Feel free to get creative and tweak the flavors and ingredients of this delightful mocktail!

  • Cranberry Splash: Add a splash of cranberry juice for a lovely tartness that beautifully complements the raspberries.

  • Berry Medley: Mix in blueberries or sliced strawberries alongside the raspberries for a delightful fruit blend that adds even more color.

  • Lemon Twist: Swap lime juice for lemon juice to create a slightly sweeter, lemony flavor profile.

  • Herb Infusion: Muddle in a few mint leaves with the raspberries for a refreshing herbal twist that brightens each sip.

  • Spicy Zing: For those who enjoy a bit of heat, add a dash of jalapeño or cayenne pepper to the mixture and shake it up!

  • Coconut Cream: Blend in a splash of coconut milk for a tropical twist that lends a creamy texture to the mocktail.

  • Soda Swap: Use flavored sparkling water, like raspberry or lime, for an extra burst of taste that enhances your drink.

  • Non-Sweet: Omit the sweetener entirely and allow the natural sweetness of the fruit to shine while keeping it perfectly refreshing and wholesome.

By incorporating these variations into your Raspberry Lime Fizz Mocktail, you can create a personalized drink experience that resonates with every guest. Once you've perfected your version, consider serving it alongside Fiesta Lime Chicken or enjoying it with some light bites like Shrimp Tacos for a vibrant gathering!

Storage Tips for Raspberry Lime Fizz Mocktail

Fridge: Store any leftover mocktail in an airtight container in the fridge for up to 3 days, keeping it fresh and tasty.

Prepping Ahead: You can prepare the muddled raspberry mixture in advance and store it in the fridge. Just add sparkling water right before serving to maintain fizz.

Ice: If serving later, consider storing the mocktail without ice to prevent dilution. Add ice just before serving for a refreshing chill.

Serving Fresh: For the best flavor experience, enjoy your Raspberry Lime Fizz Mocktail fresh, allowing the flavors to shine at any gathering or special occasion.

Helpful Tricks for Raspberry Lime Fizz Mocktail

  • Muddle Wisely: Gently muddle the raspberries to release juice without making the mixture too pulpy. This ensures your Raspberry Lime Fizz Mocktail remains smooth.
  • Taste Test: After mixing, always taste the drink before serving. You can adjust sweetness or tartness to match your palate preferences.
  • Chill Your Glasses: For an extra refreshing experience, chill your serving glasses beforehand. This keeps your mocktail cool longer and enhances the drinking experience.
  • Garnish with Flair: Elevate presentation by garnishing with fresh raspberries or lime wedges. It not only looks stunning but also enhances the fruity aroma.
  • Prep Ahead: Make the muddled raspberry mixture a few hours in advance and store it in the fridge. Add sparkling water just before serving to maintain fizz.

What to Serve with Raspberry Lime Fizz Mocktail

Bring flair to your gathering with side delights that elevate this vibrant drink!

  • Crispy Vegetable Platter: A medley of fresh veggies like bell peppers and cucumbers offers a crunchy contrast, enhancing the drink's refreshing taste.
  • Zesty Mini Tacos: Filled with citrusy fish or zesty beans, these small bites complement the mocktail's tanginess, creating a fun flavor pairing.
  • Sweet Fruit Skewers: Beautifully arranged with strawberries, pineapple, and melon, these bright bites echo the fruity allure of your mocktail while adding sweetness.
  • Savory Guacamole and Chips: The creaminess of guacamole balances the mocktail’s fizz while the tortilla chips introduce a satisfying crunch.
  • Light Spinach Salad: A simple salad dressed with lime vinaigrette invites a crisp freshness that mirrors the zesty notes of the drink.
  • Refreshing Lemon Sorbet: Serve as a palate cleanser or dessert, this icy treat enhances the fruity notes of the Raspberry Lime Fizz Mocktail.
  • Chilled Sparkling Water: For a non-sweet option, iced sparkling water or flavored seltzer can keep the refreshment going without overpowering flavors.

Make Ahead Options

These refreshing Raspberry Lime Fizz Mocktails are perfect for busy home cooks looking to save time! You can prepare the muddled raspberry and lime mixture up to 24 hours in advance, storing it in an airtight container in the refrigerator. This keeps the vibrant flavors intact while preventing browning. When it’s time to serve, simply pour the prepared mixture into glasses, add ice, and top it off with sparkling water for that delightful fizz. This way, you’ll have a quick, tasty drink ready to impress your guests with minimal effort—just as refreshing and bubbly as if made from scratch!

Raspberry Lime Fizz Mocktail Recipe FAQs

What type of raspberries should I use for the best flavor?
Absolutely! When selecting raspberries, look for plump, fresh berries that are vibrant in color and free of dark spots. The fresher, the sweeter! If you can’t find raspberries, strawberries or even blueberries can be delightful substitutes.

How long can I store leftover Raspberry Lime Fizz Mocktail?
Very! You can store any leftover mocktail in an airtight container in the fridge for up to 3 days. For the best flavor, try to enjoy it fresh, as carbonation tends to fade over time.

Can I freeze the Raspberry Lime Fizz Mocktail mixture?
Yes! To freeze, prepare the muddled raspberry mixture without adding sparkling water. Pour it into an ice cube tray or a sealable bag, and freeze for up to 3 months. When you’re ready to serve, thaw it in the fridge overnight and then mix with freshly carbonated water right before enjoying.

What should I do if my drink is too sweet/tart?
If your mocktail turns out too sweet or tart, don’t worry! Simply add more lime juice to cut down the sweetness or a little honey/syrup to balance out the tartness. Additionally, stirring in a bit of plain sparkling water can help achieve the perfect flavor balance without extra sweetness.

Is this mocktail safe for kids and pets?
Absolutely! The Raspberry Lime Fizz Mocktail is a non-alcoholic, refreshing drink perfect for children. Just keep an eye on any garnishes (like lime wedges) if pets are around, as citrus can be harmful to some animals. Always best to double-check what’s safe!

Can I prepare this mocktail in advance for a party?
Definitely! You can prepare the muddled raspberry mixture up to a few hours in advance and store it in the fridge. Just remember to add the sparkling water right before serving to keep the fizz intact. Enjoy the party stress-free, knowing your mocktail is ready to delight!

Raspberry Lime Fizz Mocktail

Delightfully Refreshing Raspberry Lime Fizz Mocktail Recipe

Enjoy the vibrant flavors of raspberry and lime in this delightful Raspberry Lime Fizz Mocktail, perfect for any occasion.
Print Recipe Pin Recipe
Prep Time 10 minutes mins
Total Time 10 minutes mins
Servings: 2 glasses
Course: Drinks
Cuisine: American
Calories: 120
Ingredients Equipment Method Nutrition Notes

Ingredients
  

For the Drink
  • 1 cup fresh raspberries Sweetness and vibrant color; substitute with strawberries for a unique flavor twist.
  • 2 tablespoons honey or simple syrup Sweetens the drink beautifully; agave syrup can be a wonderful substitute for a vegan option.
  • 2 Limes lime juice Adds tanginess and brightness; if lime is unavailable, lemon juice can serve as a great alternative.
  • 1 cup sparkling water Provides fizz and lightness; feel free to use club soda instead for a similar bubbly effect.
  • as needed ice cubes Chills the drink, keeping it refreshingly cool throughout.

Equipment

  • shaker
  • strainer
  • serving glass

Method
 

Step-by-Step Instructions
  1. In a shaker, add 1 cup of fresh raspberries and gently muddle them with a muddler for about 30 seconds to release their juice.
  2. Squeeze the juice of 2 limes into the shaker, add 2 tablespoons of honey or simple syrup and a handful of ice cubes. Shake vigorously for 15-20 seconds.
  3. Strain the muddled mixture into a serving glass using a strainer to catch any seeds.
  4. Slowly pour in 1 cup of sparkling water, stirring gently to preserve the fizz.
  5. Taste your mocktail and adjust sweetness if needed, then garnish with fresh raspberries or a lime wedge before serving.

Nutrition

Serving: 1glassCalories: 120kcalCarbohydrates: 30gSodium: 2mgPotassium: 150mgFiber: 2gSugar: 25gVitamin C: 30mgCalcium: 2mgIron: 1mg

Notes

For best flavor experience, enjoy your Raspberry Lime Fizz Mocktail fresh, allowing the flavors to shine at any gathering or special occasion.

Tried this recipe?

Let us know how it was!

Delightful Virgin Strawberry Pina Colada for Refreshing Sips

April 17, 2026 by Grace Snow Leave a Comment

As the sun begins to cast its warm glow, visions of chilling with a refreshing drink tantalize my taste buds. Enter the Virgin Strawberry Pina Colada. This delightful beverage combines the sweet charm of fresh strawberries with the creamy tropical notes of coconut and pineapple. Perfect for summer gatherings or a cozy afternoon on the porch, this non-alcoholic treat not only pleases the palate but is also family-friendly, making it a fantastic choice for all ages. With minimal prep and a slush-like texture that's undeniably refreshing, it packs a punch of flavor without the fuss. So, who’s ready to blend up something spectacular and enjoy a mini-vacation at home?

Why is this Virgin Strawberry Pina Colada amazing?

Refreshing: This drink bursts with fruity flavors, making it the ultimate summer refresher! The combination of strawberries, coconut, and pineapple creates a taste sensation that everyone loves.

Family-Friendly: Perfect for kids and adults alike, it’s a delicious way to keep the whole family happy without any alcohol.

Visual Appeal: The stunning gradient layers not only please the eye but also spark excitement at any gathering.

Easy to Prepare: With just a few steps and minimal ingredients, you can whip this up in no time. Ideal for those busy summer days!

Versatile: Feel free to customize it—add a splash of mango or banana for a unique twist, or adjust the sweetness to your taste.

For more fun and vibrant recipes, check out my Chickpea Spinach Curry for a delightful dinner option or explore this delicious Spinach Pie Deliciously for a tasty snack!

Virgin Strawberry Pina Colada Ingredients

• Delight in your refreshing creation!

For the Strawberry Base

  • Strawberries – Use ripe strawberries for the best flavor and vibrant color.
  • Pineapple Juice – Freshly squeezed juice enhances the pineapple flavor beautifully.
  • Second Pineapple Juice – Complements strawberries to create a harmonious flavor mixture.

For the Coconut Mixture

  • Fresh Pineapple – Provides a sweet and tangy base; fresh is recommended for optimal flavor.
  • Coconut Milk – Introduces creaminess and a signature tropical flavor; substitute with coconut cream for a richer texture.
  • Ice Cubes – Adds chill and a refreshing slush-like texture; more ice results in a thicker consistency.

Sweetener

  • Brown Sugar (optional) – Adds sweetness if strawberries are not ripe; use sparingly as the drink is naturally sweet.

This Virgin Strawberry Pina Colada is set to make your summer sipping extraordinary!

Step‑by‑Step Instructions for Virgin Strawberry Pina Colada

Step 1: Prepare Strawberry Base
Begin by washing and hulling 1 cup of ripe strawberries. In a blender, combine the strawberries with ¼ cup of freshly squeezed pineapple juice. Blend this mixture on medium speed for about 30 seconds or until smooth and vibrant. The strawberry base should have a rich red color and a silky texture; set it aside in a pitcher or bowl.

Step 2: Make the Coconut Drink
Rinse your blender to ensure a clean mixture. Next, add 1 cup of fresh pineapple chunks, 1 cup of ice cubes, ¾ cup of pineapple juice, and ½ cup of coconut milk to the blender. Blend on high for around 1 minute or until the mixture is smooth and creamy. You’ll want a luscious, fluffy texture that radiates tropical vibes!

Step 3: Combine and Serve
Select tall glasses to showcase your delightful Virgin Strawberry Pina Colada. Start by pouring the vibrant strawberry base into each glass until it fills about 25% full. Slowly pour the creamy coconut mixture over it, allowing the flavors to blend and create a beautiful gradient effect that pleases the eye. Take your time here for a stunning presentation!

Step 4: Garnish
To add a special touch, garnish each drink with a slice of fresh pineapple on the rim and a whole strawberry perched on top. This step not only enhances the look of your Virgin Strawberry Pina Colada but also adds a fun tropical flair. Serve these refreshing drinks immediately for the best taste and visual appeal.

How to Store and Freeze Virgin Strawberry Pina Colada

Refrigerator: Store any leftover strawberry base in an airtight container in the fridge for up to 2 days. The coconut mixture is best enjoyed fresh due to its consistency.

Freezer: If you want to prepare in advance, freeze the individual components separately. The strawberry base can be frozen for up to 1 month, while the coconut mixture is best made fresh to maintain its creamy texture.

Preparation Tip: When you're ready to enjoy the frozen strawberry base, simply thaw it in the refrigerator overnight, then blend it again briefly before serving for the best texture.

Garnishing Options: Prepare garnishes, like fresh fruit, ahead of time. Store them in the fridge in a sealed container and add before serving your Virgin Strawberry Pina Colada for that vibrant visual appeal.

What to Serve with Refreshing Non-Alcoholic Strawberry Pina Colada

The perfect pairing elevates your summer sipping experience and keeps the good vibes rolling.

  • Tropical Fruit Platter: A medley of juicy fruits like mango, kiwi, and watermelon brings a fresh, vibrant complement that echoes the drink’s tropical flair.

  • Coconut Macaroons: These chewy, sweet treats resonate with the coconut notes in the drink, offering a delightful contrast of textures and flavors.

  • Grilled Shrimp Skewers: Light and savory, these skewers enhance the beachy vibe, pairing well with the drink's fruity sweetness and offering a hearty option.

  • Tostadas with Avocado: The creamy richness of avocado on a crispy base adds a satisfying crunch that balances the drink's slushy texture beautifully.

  • Crispy Veggie Spring Rolls: Fresh, crunchy veggies wrapped in a light rice paper create a refreshing bite that complements the tropical flavors of your Virgin Strawberry Pina Colada.

  • Minty Lemonade: An invigorating, tangy drink that draws out the sweetness, making it a delightful non-alcoholic refreshment alongside your coconut creation.

Pairing these scrumptious delights will transport you straight to paradise!

Expert Tips for Virgin Strawberry Pina Colada

  • Fresh Ingredients: Always use fresh strawberries and pineapple for the best flavor. Frozen fruits can change the drink's texture and taste.

  • Blender Power: Utilize a high-powered blender to ensure a smooth, creamy mixture, especially for the strawberry base. This helps achieve that delightful slush-like consistency.

  • Adjust Sweetness: If your strawberries aren’t ripe, add brown sugar sparingly. This keeps your Virgin Strawberry Pina Colada perfectly balanced, without overwhelming it with sweetness.

  • Ice Control: For a thicker, slushier drink, add more ice cubes while blending. Be cautious, though; too much ice can dilute the flavors.

  • Layering Technique: Pour carefully to create that stunning gradient. A gentle pour or using a straw to guide the liquid helps maintain beautiful layers.

Make Ahead Options

These Virgin Strawberry Pina Coladas are fantastic for busy home cooks looking to save time! You can prepare the vibrant strawberry base up to 2 days in advance by blending the strawberries and ¼ cup of pineapple juice, then refrigerate in an airtight container. The coconut mixture, however, is best made fresh for optimal texture and flavor. When you're ready to serve, simply pour the strawberry base into glasses, add a fresh batch of the coconut mixture, and give it a gentle swirl for that stunning gradient. This prep-ahead method helps keep your drink just as delicious, ensuring you spend less time in the kitchen and more time enjoying your refreshing summer treat!

Virgin Strawberry Pina Colada Variations

Feel free to mix things up and add your personal touch to this delightful drink!

  • Fruity Twist: Add a cup of diced mango or a banana for a richer tropical flavor. The sweetness and creaminess of these fruits create a whole new taste sensation.

  • Coconut Cream: Substitute coconut milk with coconut cream for a heavier, richer texture. This change elevates the creaminess, giving you that indulgent coconut experience.

  • Berry Medley: Incorporate other berries, such as blueberries or raspberries, into the mix. The colorful medley not only enhances the flavor but also adds visual appeal.

  • Less Sweet: To dial down the sweetness, try reducing the brown sugar or omitting it altogether. This allows the natural fruit flavors to shine through beautifully.

  • Spicy Kick: For those who like a little heat, add a pinch of cayenne pepper or a dash of hot sauce. This unexpected twist can elevate your sipping experience to a new level.

  • Minty Freshness: Toss in a handful of fresh mint leaves during blending. The mint adds a refreshing note that complements the tropical flavors perfectly.

  • Berry Layering: Create a fun layered effect by blending different fruit bases separately and pouring them in stages. This method showcases the colors and gives a fabulous presentation.

For even more culinary inspiration, try my delicious Chickpea Spinach Curry or make a tasty Spinach Pie Deliciously for a fun family meal!

Virgin Strawberry Pina Colada Recipe FAQs

How do I choose ripe strawberries for my Virgin Strawberry Pina Colada?
Absolutely! Selecting ripe strawberries is essential for the best flavor. Look for berries that are vibrant red with a sweet aroma. They should be firm to the touch, with no dark spots or signs of mold. If you press gently, they should yield slightly without being mushy. Choosing fresh, ripe strawberries will give your drink that wonderful burst of sweetness!

What’s the best way to store leftover Virgin Strawberry Pina Colada?
For any leftovers, store the strawberry base in an airtight container in the fridge, where it will keep for up to 2 days. However, it's best to consume the coconut mixture fresh. If you have blended more than you can drink, awaiting storage, I recommend freezing the components separately to maintain their textures and flavors.

Can I freeze the Virgin Strawberry Pina Colada?
Certainly! You can freeze the strawberry base for up to 1 month. Pour it into an airtight container or ice cube trays for easy portions. The coconut mixture is best prepared fresh, but if you want to freeze it, try blending it before use again for that creamy consistency.

What if my coconut mixture isn’t creamy enough?
If your coconut mixture isn't as creamy as you'd like, there are a couple of options! First, make sure you're using full-fat coconut milk or coconut cream for that rich texture. If it's too watery, you can blend in more coconut milk until you reach your desired consistency. You can also try blending in a ripe banana for extra creaminess without altering the tropical flavor too much.

Is there a way to reduce the sweetness of my drink?
Very! If you prefer a less sweet Virgin Strawberry Pina Colada, you can reduce or omit the brown sugar, especially if your strawberries are ripe. Also, using fresh pineapple over canned can help manage sweetness levels. You might also want to add a hint of lime juice; this adds flavor complexity and a refreshing tartness that balances sweetness nicely.

Virgin Strawberry Pina Colada

Delightful Virgin Strawberry Pina Colada for Refreshing Sips

This Virgin Strawberry Pina Colada combines ripe strawberries, coconut, and pineapple for a refreshing non-alcoholic treat perfect for all ages.
Print Recipe Pin Recipe
Prep Time 10 minutes mins
Total Time 10 minutes mins
Servings: 4 glasses
Course: Drinks
Cuisine: Tropical
Calories: 180
Ingredients Equipment Method Nutrition Notes

Ingredients
  

For the Strawberry Base
  • 1 cup ripe strawberries Use ripe strawberries for the best flavor and vibrant color.
  • 0.25 cup freshly squeezed pineapple juice Enhances the pineapple flavor beautifully.
  • 0.25 cup pineapple juice Complements strawberries to create a harmonious flavor mixture.
For the Coconut Mixture
  • 1 cup fresh pineapple chunks Provides a sweet and tangy base; fresh is recommended for optimal flavor.
  • 0.5 cup coconut milk Introduces creaminess; substitute with coconut cream for a richer texture.
  • 1 cup ice cubes Adds chill and a refreshing slush-like texture.
Sweetener
  • 1 tablespoon brown sugar Adds sweetness if strawberries are not ripe; use sparingly.

Equipment

  • Blender

Method
 

Step-by-Step Instructions for Virgin Strawberry Pina Colada
  1. Prepare Strawberry Base: Wash and hull 1 cup of ripe strawberries. In a blender, combine with ¼ cup of freshly squeezed pineapple juice. Blend on medium speed until smooth and vibrant, then set aside.
  2. Make the Coconut Drink: Rinse the blender, then add 1 cup of fresh pineapple chunks, 1 cup of ice cubes, ¾ cup of pineapple juice, and ½ cup of coconut milk. Blend on high for about 1 minute until smooth and creamy.
  3. Combine and Serve: Pour the strawberry base into tall glasses, filling about 25% full. Gradually pour the coconut mixture over it, allowing a gradient effect.
  4. Garnish: Add a slice of fresh pineapple and a whole strawberry on top of each drink for a tropical flair. Serve immediately.

Nutrition

Serving: 1glassCalories: 180kcalCarbohydrates: 40gProtein: 2gFat: 5gSaturated Fat: 4gSodium: 35mgPotassium: 350mgFiber: 3gSugar: 30gVitamin A: 5IUVitamin C: 80mgCalcium: 3mgIron: 2mg

Notes

Use fresh ingredients for optimal flavor and adjust sweetness as needed. Prepare garnishes in advance for convenience.

Tried this recipe?

Let us know how it was!

Homemade Mango Iced Tea: Refreshing Summer Sips Await

April 17, 2026 by Grace Snow Leave a Comment

As I watched the summer sun spill golden light into my kitchen, the idea of crafting a vibrant batch of Homemade Mango Iced Tea danced in my mind. This delightful drink combines the tropical sweetness of ripe mangoes with the soothing warmth of black tea, making it a refreshing escape from the ordinary. Best of all, it’s a breeze to whip up, requiring just 15 minutes and minimal ingredients, perfect for those spontaneous summer gatherings or a quiet moment of indulgence on the porch. Whether you’re using fresh mangoes or those convenient frozen cubes, this recipe promises a chilled delight that will have everyone clamoring for seconds. So, are you ready to elevate your beverage game with a taste of the tropics?

Why Is Mango Iced Tea a Must-Try?

Incredible Refreshment: This Mango Iced Tea offers a burst of tropical flavor that instantly transports you to a sun-soaked paradise.

Quick and Easy: With just 15 minutes required, it’s a delightful drink you can prepare on a whim, no advanced skills needed.

Versatile Variations: Feel free to swap ingredients! Use green tea for a lighter alternative or incorporate fresh herbs for an exciting twist—like mint or basil!

Crowd-Pleasing: Perfect for summer parties or quiet evenings, this iced tea will have friends and family asking for your recipe.

Healthier Choice: Naturally sweetened with ripe mangoes and a touch of honey, you can control the sweetness depending on your taste preferences.

For more refreshing drink ideas, check out my recipe for Homemade Hot Chocolate that’s a cozy treat year-round or the zingy Grilled Balsamic Steak Salad to accompany your thirst-quenchers.

Homemade Mango Iced Tea Ingredients

For the Tea Base

  • Black Tea Bags – Provides a rich, comforting flavor; loose leaf tea can enhance freshness.
  • Water – Essential for brewing the tea and creating the perfect mango infusion; use filtered for the best taste.

For the Mango Mixture

  • Ripe Mango – Adds a sweet, tropical essence; frozen mango cubes are a fantastic alternative when fresh isn’t available.
  • Honey – Sweetens the tea beautifully and balances the mango; feel free to adjust based on your sweetness preference or substitute with sugar.

For Serving

  • Ice – Chills the drink instantly, making every sip ultra-refreshing; don't skimp on the ice for that perfect summer vibe.
  • Additional Mango Slices – Optional garnish that adds a lovely visual touch and extra sweetness when served over ice.

Create your own refreshing homemade mango iced tea with these simple ingredients and enjoy the taste of summer in every sip!

Step‑by‑Step Instructions for Homemade Mango Iced Tea

Step 1: Brew the Tea
Start by boiling 2 cups of water in a kettle or saucepan. Once it reaches a rolling boil, remove it from heat and add 2 black tea bags to the water. Let the tea steep for about 10 minutes, allowing the deep, rich color to develop. After steeping, remove the tea bags and pour the brewed tea into a large pitcher, letting it cool slightly before proceeding.

Step 2: Prepare the Mango Mixture
In a medium saucepan, combine the remaining 2 cups of water and one ripe, diced mango. Bring this mixture to a boil over medium-high heat. As it heats, mash the mango gently with a fork or potato masher for about 10 minutes, allowing its sweet essence to infuse into the water and create a thick, vibrant puree.

Step 3: Combine and Sweeten
Once the mango blend has simmered, strain the mixture through a fine mesh sieve to separate the puree from the liquid. Pour the mango infusion directly into the pitcher with the brewed black tea. Add 2 tablespoons of honey for sweetness, stirring well until the honey completely dissolves, creating the perfect balance of flavors in your Homemade Mango Iced Tea.

Step 4: Cool and Serve
Let the pitcher of mango iced tea cool at room temperature for a few minutes before refrigerating it for additional chilling. After about 10-15 minutes, remove it from the fridge, and fill tall glasses with ice. Pour the chilled mango iced tea over the ice, and garnish with additional mango slices for a delightful summer presentation.

Make Ahead Options

These Homemade Mango Iced Tea preparations are perfect for busy home cooks looking to save time without sacrificing flavor! You can brew the tea base and prepare the mango infusion up to 24 hours in advance. Simply follow the initial steps, allowing the brewed tea to cool, and then combine it with the mango puree before refrigerating. To maintain the vibrant taste and freshness, store the tea in an airtight container. When you're ready to serve, just pour the chilled tea over ice and garnish with additional mango slices. This way, you’ll have a refreshing drink at your fingertips with minimal effort on hot summer days.

Homemade Mango Iced Tea Variations

Get ready to put your own spin on this delightful drink and create your signature summer refresher!

  • Frozen Triumph: Swap fresh mango for frozen cubes to simplify prep. Perfect for those last-minute cravings.
  • Green Tea Twist: Replace black tea with green tea for a lighter, refreshing flavor. It can enhance the fruity notes beautifully!
  • Herbal Delight: Add fresh mint or basil for an aromatic twist. The herbs will invigorate your senses and elevate your sip.
  • Agave Sweetness: Substitute honey with agave syrup for a vegan-friendly option. It keeps every drop just as sweet without animal products.
  • Spice It Up: Sprinkle a pinch of cayenne pepper for a surprising kick. The hint of heat beautifully contrasts the mango's sweetness.
  • Coconut Creaminess: Blend in a splash of coconut milk for a creamy texture. It transforms your iced tea into a tropical smoothie sensation!
  • Citrus Splash: Stir in a squeeze of lime or lemon juice for a zesty twist. This brightens up the drink and adds an exciting layer of flavor.
  • Easy Mango Nectar: Use store-bought mango nectar for a quick alternative. Just mix it with tea—great when you’re short on time!

Feel free to explore and mix these variations as you create a delightful drink tailored just for you. And if you’re in the mood for something equally comforting, try my Homemade Hot Chocolate or pair this iced tea with a refreshing Grilled Balsamic Steak Salad for a delightful meal combo!

What to Serve with Refreshing Mango Iced Tea

As the sweet aroma of mangoes wafts through your kitchen, it's time to think about the perfect accompaniments for this delightful drink.

  • Crispy Spring Rolls: These light and crunchy bites offer a refreshing contrast to the sweetness of mango iced tea, making for a delicious party snack.
  • Grilled Shrimp Skewers: The savory, smoky flavor of grilled shrimp pairs wonderfully with the tropical notes of your iced tea, enhancing every sip with a succulent delight.

A light salad can complement the drink beautifully. Consider a Citrus Arugula Salad topped with tangy vinaigrette for a delightful citrus twist that brightens the palate.

  • Mini Fruit Tarts: Sweet and tangy, these pastries are a perfect dessert match, echoing the vibrant flavors of the homemade mango iced tea while providing a delightful textural contrast.

For the warmer months, serving with a refreshing coconut water or even a light white wine spritzer can lift the tropical experience—offering a light, bubbly sip alongside the iced tea.

Storage Tips for Homemade Mango Iced Tea

Fridge: Store your homemade mango iced tea in an airtight container in the refrigerator for up to 4 days to maintain its refreshing flavor and vibrant color.

Freezer: If you want to keep it longer, consider freezing the tea in ice cube trays. This way, you can enjoy mango iced tea at a later date without losing its flavor.

Reheating: While it's best served cold, if you do prefer it warm, gently reheat it on the stovetop over low heat until warm, but avoid boiling to retain the mango's freshness.

Serving Suggestion: When serving, feel free to add fresh mango slices or herbs like mint for a refreshing garnish before pouring over ice.

Expert Tips for Homemade Mango Iced Tea

  • Stronger Brew: Always steep the black tea longer if serving over ice, as the melting ice can dilute the flavor of your homemade mango iced tea.
  • Freeze for Flavor: For a more intense mango essence, freeze mango puree or iced tea into ice cubes to keep your drink flavorful as it cools.
  • Watch the Sweetness: When using store-bought mango nectar, be cautious of added sugars that may overpower the fresh mango flavor in your iced tea.
  • Fresh vs. Frozen: If using frozen mango cubes, blend them for a few seconds before adding to ensure a smooth texture in your homemade mango iced tea.
  • Herb Infusion: Experiment with other herbs like mint or basil for a refreshing twist that complements the mango perfectly.

Homemade Mango Iced Tea Recipe FAQs

How ripe should my mango be for this recipe?
Absolutely ripe mangoes are best! Look for those that give slightly when you press them and have a fragrant aroma. Avoid any with dark spots all over, as they may be overripe. If fresh mangoes aren’t available, frozen mango cubes are a fantastic substitute!

How can I store my Homemade Mango Iced Tea?
You can store it in an airtight container in the fridge for up to 4 days. I often recommend using glass jars as they help maintain clarity and flavor. Just make sure it’s sealed tight to avoid absorbing any fridge odors!

Can I freeze my Homemade Mango Iced Tea?
Yes! To freeze, pour the iced tea into ice cube trays and freeze until solid. These mango iced tea cubes make a delightful addition to drinks later, keeping them flavorful without diluting the taste as ice melts. Simply pop a cube into your glass for an instant flavor boost!

What should I do if my iced tea tastes too sweet?
If your iced tea turns out sweeter than desired, you can adjust the flavor by adding more brewed tea to dilute the sweetness or a bit of lemon juice for a citrusy contrast. It’s a great way to balance out the flavors, and remember, the more the merrier when adjusting to your taste!

Are there any dietary considerations I should keep in mind?
Yes! If you or your loved ones have allergies to mango or sensitivities to honey, consider using other fruits like peaches or berries for a similar refreshing effect, and substitute honey with agave syrup or stevia. Always great to check with your guests to ensure everyone can enjoy this homemade treat!

Can I use a different type of tea in my Mango Iced Tea?
Absolutely! While black tea offers a rich base flavor, you can experiment with green tea for a lighter, more refreshing taste. Herbal teas can also add fun, fragrant notes, especially if you’re looking to mix things up. The world of iced tea is your oyster!

Homemade Mango Iced Tea

Homemade Mango Iced Tea: Refreshing Summer Sips Await

This Homemade Mango Iced Tea combines tropical sweetness with soothing black tea for a refreshing summer drink.
Print Recipe Pin Recipe
Prep Time 15 minutes mins
Cooling Time 15 minutes mins
Total Time 30 minutes mins
Servings: 4 cups
Course: Drinks
Cuisine: Tropical
Calories: 100
Ingredients Equipment Method Nutrition Notes

Ingredients
  

For the Tea Base
  • 2 cups Water Filtered for best taste.
  • 2 bags Black Tea Bags Loose leaf tea can enhance freshness.
For the Mango Mixture
  • 1 cup Ripe Mango Diced; frozen mango cubes can be used.
  • 2 tablespoons Honey Adjust sweetness as desired.
For Serving
  • Ice Ice Chills the drink instantly for refreshment.
  • Additional Mango Slices Optional garnish for serving.

Equipment

  • Kettle
  • Saucepan
  • Fine-mesh sieve
  • Large pitcher

Method
 

Step-by-Step Instructions
  1. Boil 2 cups of water in a kettle and add 2 black tea bags, steep for 10 minutes, then remove bags.
  2. In a saucepan, combine 2 cups of water and one ripe diced mango, boil, and mash for 10 minutes.
  3. Strain the mango mixture and add it to the pitcher with brewed tea, add 2 tablespoons of honey, and stir well.
  4. Cool the pitcher at room temperature, refrigerate for 10-15 minutes, then serve over ice garnished with mango slices.

Nutrition

Serving: 1cupCalories: 100kcalCarbohydrates: 27gProtein: 1gSodium: 5mgPotassium: 120mgFiber: 1gSugar: 20gVitamin A: 540IUVitamin C: 30mgCalcium: 20mgIron: 0.5mg

Notes

Store in an airtight container for up to 4 days. Freezing extra tea for later use is recommended.

Tried this recipe?

Let us know how it was!

Revitalize Your Summer with this Blackberry Lemon Mocktail Recipe

April 17, 2026 by Grace Snow Leave a Comment

Have you ever sipped something so refreshing that it instantly transported you to a sun-drenched summer afternoon? That’s exactly what my Blackberry Lemon Mocktail does! Combining the sweet burst of fresh blackberries with the zesty brightness of lemon juice, this delightful non-alcoholic drink is a wonderful way to quench your thirst on warm days or during lively gatherings. Not only is this Blackberry Lemon Mocktail Recipe incredibly easy to whip up, but it’s also packed with antioxidants, making it a healthier choice for those looking to skip fast food for something homemade. Who knew a drink could not only taste amazing but also elevate your summer vibes? Ready to mix up something special? Let’s dive in!

Why Choose This Mocktail Recipe?

Refreshing and Vibrant: This Blackberry Lemon Mocktail bursts with flavor, bringing a blend of sweet and tart that screams summer.

Quick and Easy: Whipping up this drink takes only minutes, making it perfect for impromptu gatherings or sunny afternoons.

Healthy Twist: Packed with antioxidants from blackberries, this mocktail is a guilt-free treat compared to sugary soft drinks.

Versatile: You can easily switch flavors by adding different berries or swapping lemon for lime, allowing for endless variations.

Crowd-Pleaser: Whether you're hosting a backyard BBQ or a brunch, this mocktail is sure to delight guests of all ages.

For a light bite to pair with this refreshing drink, check out this delicious Blackberry Crisp Amp.

Blackberry Lemon Mocktail Ingredients

  • For the Mocktail Base

  • Blackberries – Fresh blackberries add natural sweetness and vibrant color; substitute with frozen blackberries when fresh aren’t available.

  • Fresh Lemon Juice – Provides a zesty kick that perfectly balances the sweetness; always opt for freshly squeezed juice for the best flavor.

  • Honey/Simple Syrup – A delightful sweetener to enhance your mocktail; feel free to adjust based on your taste, or use maple syrup for something different.

  • For the Fizz

  • Sparkling Water – Introduces a delightful fizz and lightness; you can swap in any soda water or flavored sparkling water depending on your preference.

  • For Serving

  • Ice Cubes – Essential for keeping your drink cool; larger cubes are better for slower dilution.

  • Mint Leaves – Optional garnish that adds an aromatic touch and hint of coolness, enhancing the overall aesthetic of your mocktail.

This simple and refreshing Blackberry Lemon Mocktail recipe will impress your guests and make sunny days even better!

Step‑by‑Step Instructions for Blackberry Lemon Mocktail Recipe

Step 1: Blend the Blackberries
Begin by adding 1 cup of fresh blackberries to a blender. Blend on high speed for about 30 seconds until completely smooth and pulpy, creating a vibrant berry puree. Aim for a luscious consistency without any large chunks, which will give your mocktail a silky texture.

Step 2: Strain the Mixture
Using a fine-mesh strainer, pour the blackberry puree into a bowl or measuring jug, pressing down gently with a spatula. This will help separate the juice from the seeds and thicker pulp. Collect at least half a cup of smooth blackberry juice, showcasing its deep purple hue as you work.

Step 3: Combine with Lemon Juice
In a large pitcher, mix together the freshly strained blackberry juice with 1/2 cup of freshly squeezed lemon juice. Stir in 1/4 cup of honey or simple syrup, depending on your preferred sweetness. Give it a gentle mix until everything is well combined, ensuring the bright tartness of lemon balances the richness of the blackberry.

Step 4: Add Fizz
Pour in 2 cups of sparkling water into the pitcher, taking care to maintain its effervescence. Gently stir the mixture with a wooden spoon or spatula just until combined, letting the bubbles dance through the blackberry lemon mocktail. This step adds a refreshing lightness that elevates the drink.

Step 5: Serve Over Ice
Fill stylish glasses with ice cubes, allowing room for the bubbling mocktail. Carefully pour the blackberry lemon mixture over the ice, watching it cascade beautifully. If desired, garnish with fresh mint leaves for an aromatic touch, enhancing the visual appeal and refreshing flavor of this blackberry lemon mocktail recipe.

Expert Tips for Blackberry Lemon Mocktail Recipe

  • Fresh Ingredients Matter: Use the freshest blackberries and lemons for the best flavor. A great mocktail starts with quality ingredients!

  • Adjust Sweetness: Always taste your mixture before serving; feel free to adjust the honey or syrup levels to suit your personal preference.

  • Chill Your Glassware: For an extra refreshing experience, chill your glasses in the freezer beforehand. It keeps your drink colder for longer!

  • Muddle for More Flavor: If you want a bolder berry flavor, consider muddling the blackberries before blending. It enhances the overall richness.

  • Garnish Creatively: Don't forget about presentation! Use attractive glassware and garnish with mint leaves to elevate visual appeal and aromatics.

What to Serve with Blackberry Lemon Mocktail

Elevate your summer gatherings with these delightful pairings that complement the invigorating flavors of this refreshing drink.

  • Savory Sliders: Mini burgers add a deliciously savory contrast to the sweet and tangy mocktail, making them a hit at any barbecue.
  • Pineapple Salsa: The bright, tropical notes of pineapple salsa pair wonderfully with the mocktail's berry vibes while offering fresh, zesty bites.
  • Caprese Skewers: Juicy tomatoes, creamy mozzarella, and fragrant basil deliver a fresh, colorful touch that harmonizes perfectly with the drink.
  • Spiced Nuts: A savory mix of roasted nuts can provide a delightful crunch and balance out the drink’s sweetness while adding a flavor kick.
  • Fruit Salad: A mix of summer fruits like watermelon, cucumber, and, of course, blackberries, creates a refreshing harmony that complements the drink.
  • Lemon Tart: For those with a sweet tooth, a zesty lemon tart elevates the meal, echoing the mocktail’s bright citrus flavors in a scrumptious way.

These pairings not only bring out the best in your Blackberry Lemon Mocktail but also create a vibrant dining experience that friends and family will love.

How to Store and Freeze Blackberry Lemon Mocktail

Refrigerator: Store any leftover mocktail in an airtight container for up to 2 days. This helps maintain its freshness and fizz.

Freezer: For longer storage, pour the mocktail into ice cube trays and freeze. Use these cubes in future drinks for a flavorful twist!

Reheating: If made ahead, avoid reheating as this drink is best enjoyed cold. Simply blend the mocktail again with ice if separation occurs.

Freshness Note: The Blackberry Lemon Mocktail is best enjoyed fresh, so consider making smaller batches to savor its vibrant flavor at its peak!

Make Ahead Options

These Blackberry Lemon Mocktail Recipe components can easily be prepped ahead to save you time during busy summer gatherings! You can blend and strain the blackberries up to 24 hours in advance; simply store the puree in an airtight container in the refrigerator to keep it fresh and vibrant. Additionally, you can mix the blackberry juice with lemon juice and sweetener (honey or simple syrup) up to 3 days ahead, allowing the flavors to meld beautifully. When you're ready to serve, gently stir in the sparkling water just before pouring over ice, ensuring that each glass is effervescent and just as delicious as when freshly made. This way, you can enjoy hosting without the last-minute scramble!

Blackberry Lemon Mocktail Recipe Variations

Feel free to explore these fun twists and make this Blackberry Lemon Mocktail your own!

  • Citrus Swap: Replace fresh lemon juice with lime juice for a bright, tangy profile. Lime offers a refreshing change and pairs beautifully with blackberries.

  • Berry Medley: Mix in additional berries like raspberries or strawberries for a fruity explosion. Each bite and sip will bring a delightful blend of flavors that feels like a summer party!

  • Ginger Kick: Add a splash of ginger juice or a slice of fresh ginger for a spicy twist. The warmth of ginger enhances the drink's invigorating qualities, making it even more special.

  • Herbal Infusion: Experiment with herbs like basil or rosemary in addition to mint. These herbs can add an unexpected depth of flavor that will surprise and delight your taste buds.

  • Sparkling Variants: Use flavored sparkling water, like berry or citrus-infused, for even more exciting layers of taste. It's a simple way to elevate the mocktail and impress your guests!

  • Frozen Treat: Blend the mocktail with ice to create a slushy version. This icy treat is perfect for hot days and adds a fun texture that both kids and adults will adore.

  • Sweetener Options: Try swapping honey for agave syrup or maple syrup for different sweetness levels. Each sweetener brings its unique flavor to the drink, enhancing your mocktail's character.

For an irresistible side, don't miss out on the Blackberry Crisp Amp – a delicious pairing to your refreshing drink that will surely please! Want something hearty? Try this revitalizing Lemon Chicken Soup as a perfect complement. Enjoy your mixing adventure!

Blackberry Lemon Mocktail Recipe FAQs

How do I choose ripe blackberries?
Absolutely! When selecting blackberries, look for ones that are plump, shiny, and predominantly dark purple. They should have a slight give when gently squeezed. Avoid blackberries with dark spots or signs of mold, as these may indicate overripeness. If you can’t find fresh ones, frozen blackberries work well too!

How long can I store the mocktail in the fridge?
Very good question! You can store any leftover Blackberry Lemon Mocktail in an airtight container in the fridge for up to 2 days. However, it's best enjoyed fresh to maintain the bubbly fizz and vibrant flavors, so make smaller batches if you want to ensure maximum freshness.

Can I freeze the mocktail for later?
Sure thing! To freeze your Blackberry Lemon Mocktail, pour it into ice cube trays and freeze until solid. These flavorful cubes can be added to sparkling water for a refreshing drink later on! Just remember, the mocktail should be consumed cold, so avoid reheating.

What if my mocktail turns out too sweet or tart?
No worries at all! If your Blackberry Lemon Mocktail is too sweet, you can balance it out with a touch more lemon juice to add brightness. Conversely, if it’s too tart, simply mix in a little more honey or simple syrup to adjust your sweetness. Always taste as you go to find that perfect balance!

Is this mocktail safe for my pets?
Excellent consideration! This Blackberry Lemon Mocktail is safe for humans, but it’s important to keep it away from pets. The honey can be harmful to pets, especially if they are young pups or kittens. Always enjoy your mocktail as a treat just for you!

Blackberry Lemon Mocktail Recipe

Revitalize Your Summer with this Blackberry Lemon Mocktail Recipe

Refreshing and vibrant, this Blackberry Lemon Mocktail Recipe is a perfect summer drink packed with antioxidants.
Print Recipe Pin Recipe
Prep Time 10 minutes mins
Total Time 10 minutes mins
Servings: 4 cups
Course: Drinks
Cuisine: American
Calories: 60
Ingredients Equipment Method Nutrition Notes

Ingredients
  

For the Mocktail Base
  • 1 cup Fresh Blackberries Substitute with frozen blackberries when fresh aren’t available.
  • 1/2 cup Fresh Lemon Juice Always opt for freshly squeezed juice for the best flavor.
  • 1/4 cup Honey or Simple Syrup Adjust based on your taste, or use maple syrup for something different.
For the Fizz
  • 2 cups Sparkling Water Swap in any soda water or flavored sparkling water depending on your preference.
For Serving
  • Mint Leaves Optional garnish that adds an aromatic touch.

Equipment

  • Blender
  • fine mesh strainer
  • pitcher
  • Measuring Jug
  • Spatula
  • Wooden spoon

Method
 

Step-by-Step Instructions
  1. Blend the blackberries by adding 1 cup of fresh blackberries to a blender and blend on high speed for about 30 seconds until completely smooth and pulpy.
  2. Strain the mixture using a fine-mesh strainer to separate the juice from the seeds and thicker pulp, collecting at least half a cup of smooth blackberry juice.
  3. Combine the blackberry juice with 1/2 cup of freshly squeezed lemon juice and stir in 1/4 cup of honey or simple syrup until well combined.
  4. Add 2 cups of sparkling water to the mixture and gently stir until combined, maintaining the effervescence.
  5. Serve over ice in stylish glasses and garnish with fresh mint leaves if desired.

Nutrition

Serving: 1cupCalories: 60kcalCarbohydrates: 15gSodium: 1mgPotassium: 100mgFiber: 1gSugar: 12gVitamin A: 100IUVitamin C: 20mgCalcium: 10mgIron: 0.5mg

Notes

This mocktail is best enjoyed fresh. Consider making smaller batches to savor its vibrant flavor at its peak.

Tried this recipe?

Let us know how it was!
  • 1
  • 2
  • 3
  • …
  • 5
  • Next Page »

Welcome!

Hi, I’m Grace, a Sydney-based home cook with a passion for bold flavors and trending ingredients. Whether you’re a busy beginner or a seasoned foodie, you’ll find dishes here that are fresh, fun, and full of flavor.

More about me

Popular Recipes

  • One Pot Keto Tuna Casserole
    One Pot Keto Tuna Casserole: Creamy Comfort in Minutes
  • Ultimate Jalapeno Popper Chicken Salad
    Ultimate Jalapeno Popper Chicken Salad That'll Wow Your Tastebuds
  • Green Chile Cheese Dip
    Mouthwatering Green Chile Cheese Dip for Cozy Gatherings
  • Easy Chimichurri Sauce
    Fresh and Zesty Easy Chimichurri Sauce in Just Minutes

Footer

↑ back to top

About

  • Privacy Policy
  • Disclaimer
  • Terms & Conditions

Newsletter

  • Sign Up! for emails and updates

Contact

  • About me
  • Contact me

Copyright © 2025 TastyTrendIngredients