tastytrendingredients

  • Home
  • Recipes
    • Appetizers
    • Breakfast
    • Dessert
    • Dinner
    • Drinks
    • Salads
    • Snacks
    • Soups
  • About me
  • Contact
menu icon
go to homepage
  • Home
  • Recipes
    • Appetizers
    • Breakfast
    • Dessert
    • Dinner
    • Drinks
    • Salads
    • Snacks
    • Soups
  • About me
  • Contact
search icon
Homepage link
  • Home
  • Recipes
    • Appetizers
    • Breakfast
    • Dessert
    • Dinner
    • Drinks
    • Salads
    • Snacks
    • Soups
  • About me
  • Contact
×

Hearty Ground Beef Vegetable Soup for Cozy Nights In

June 11, 2026 by Grace Snow Leave a Comment

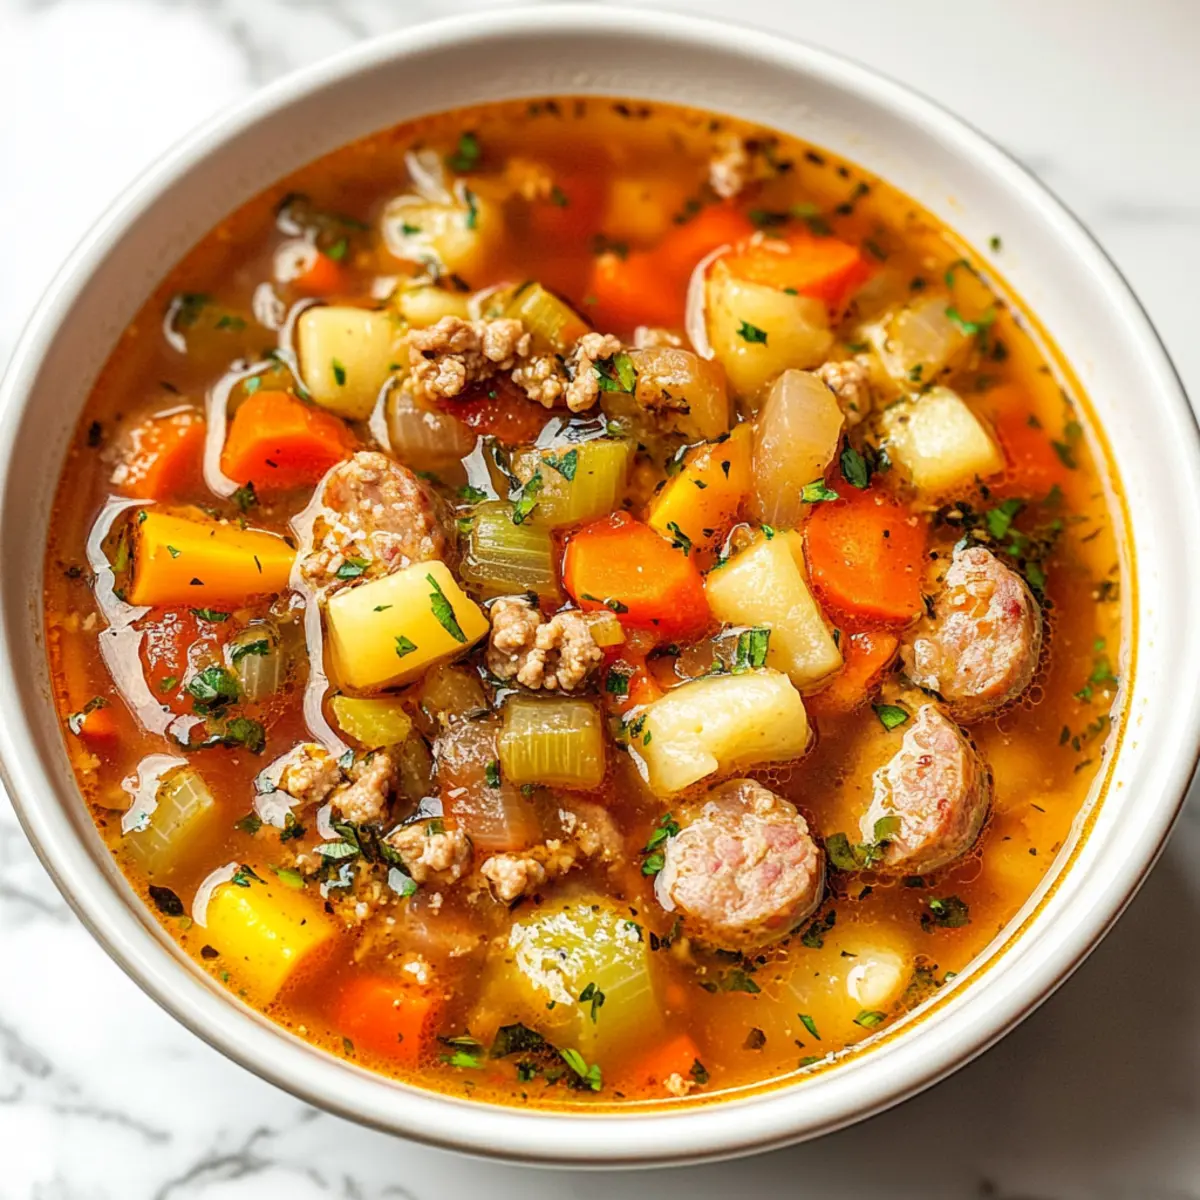
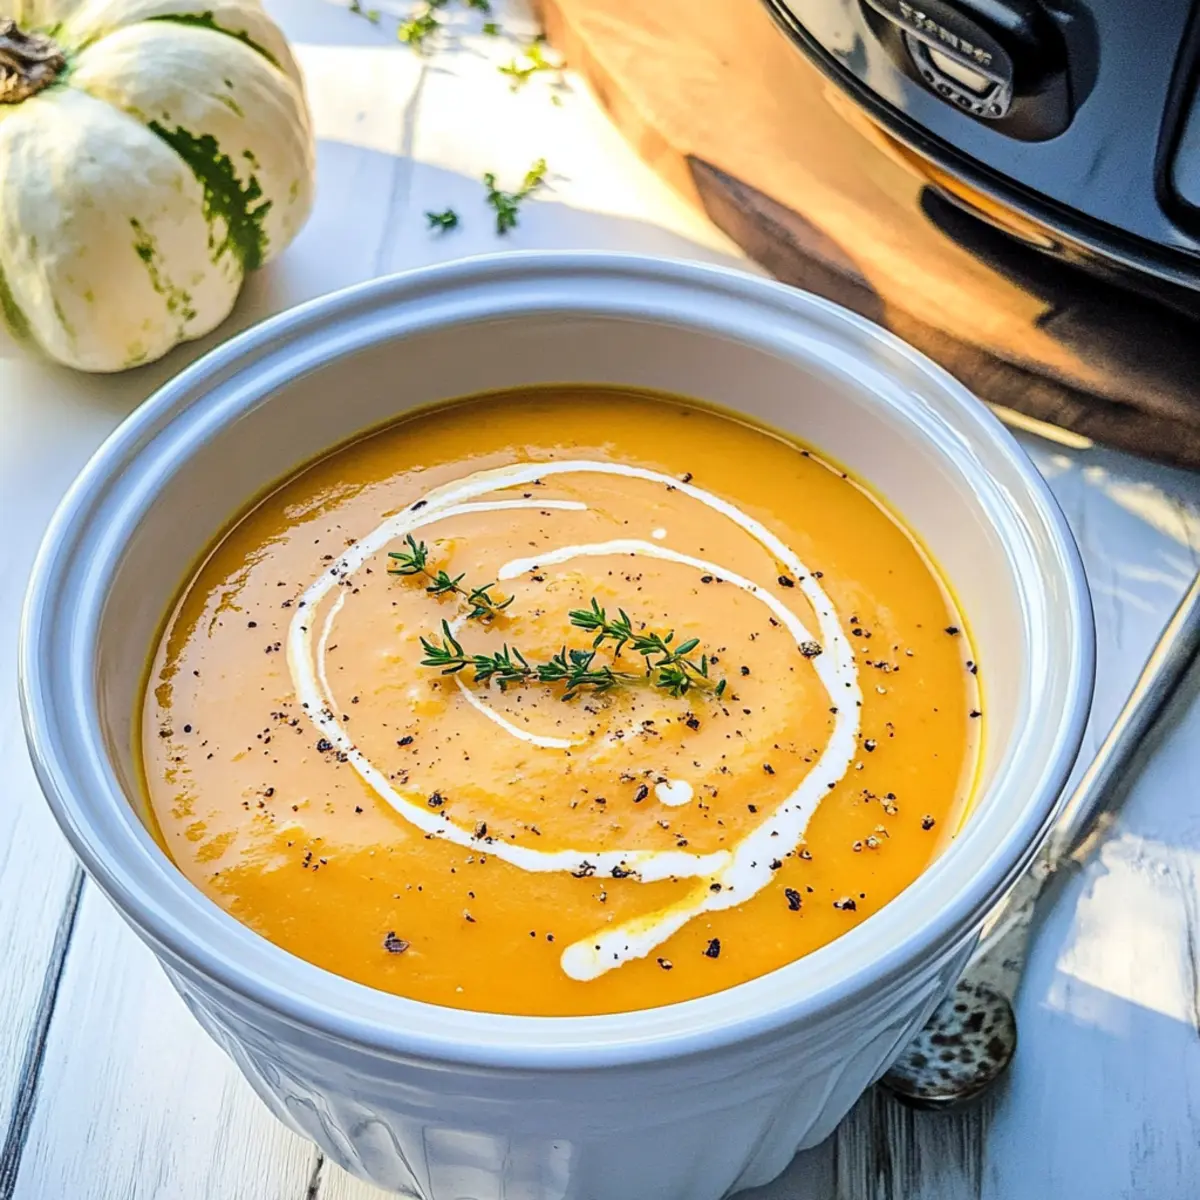
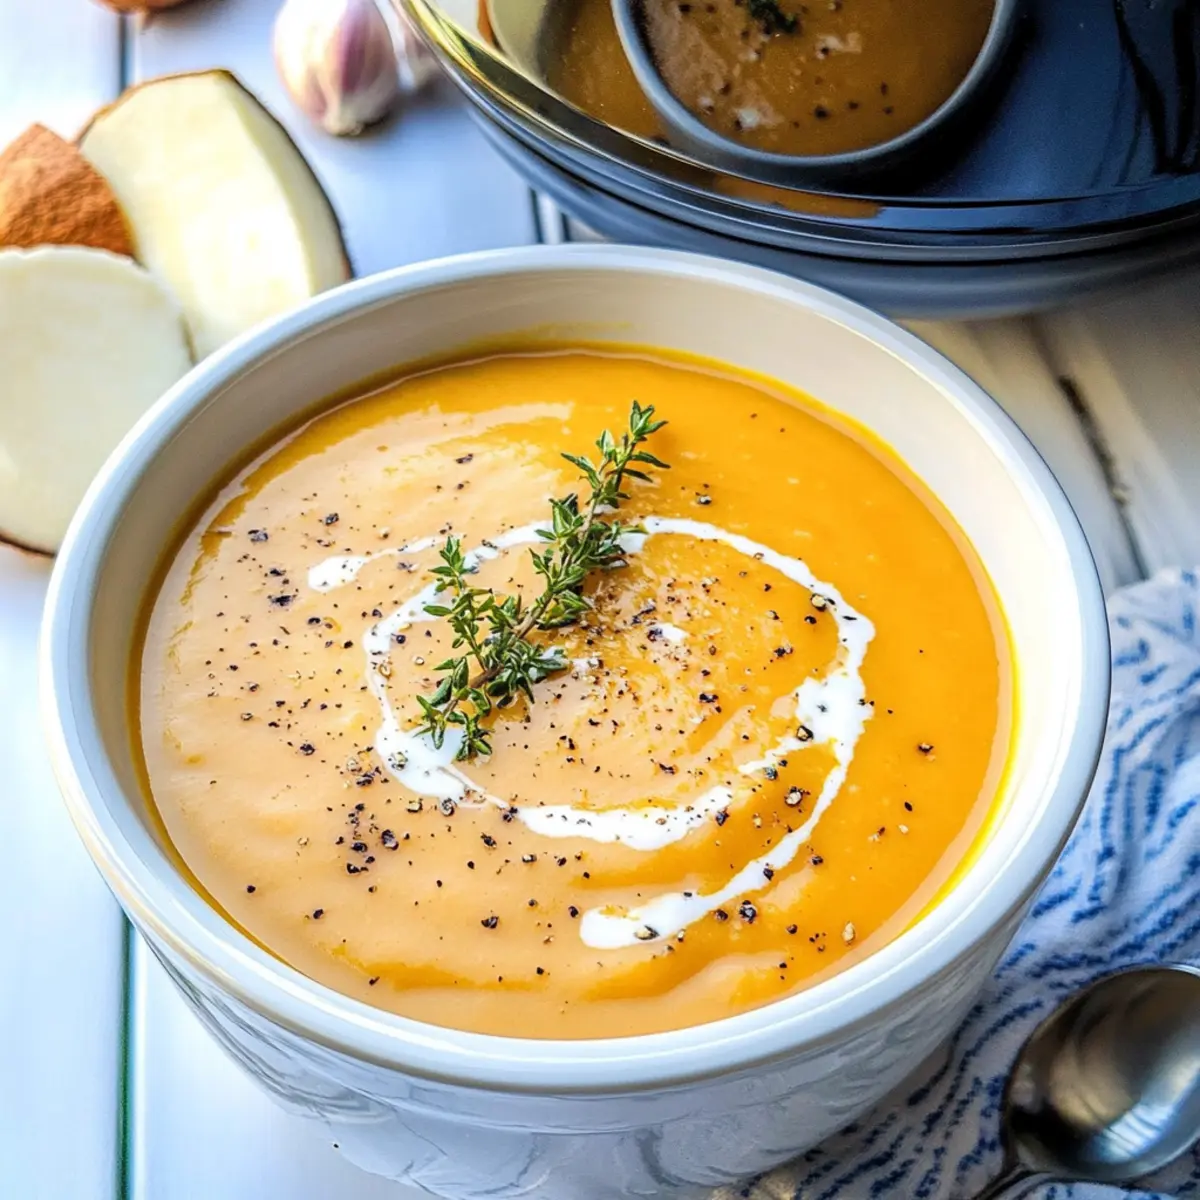
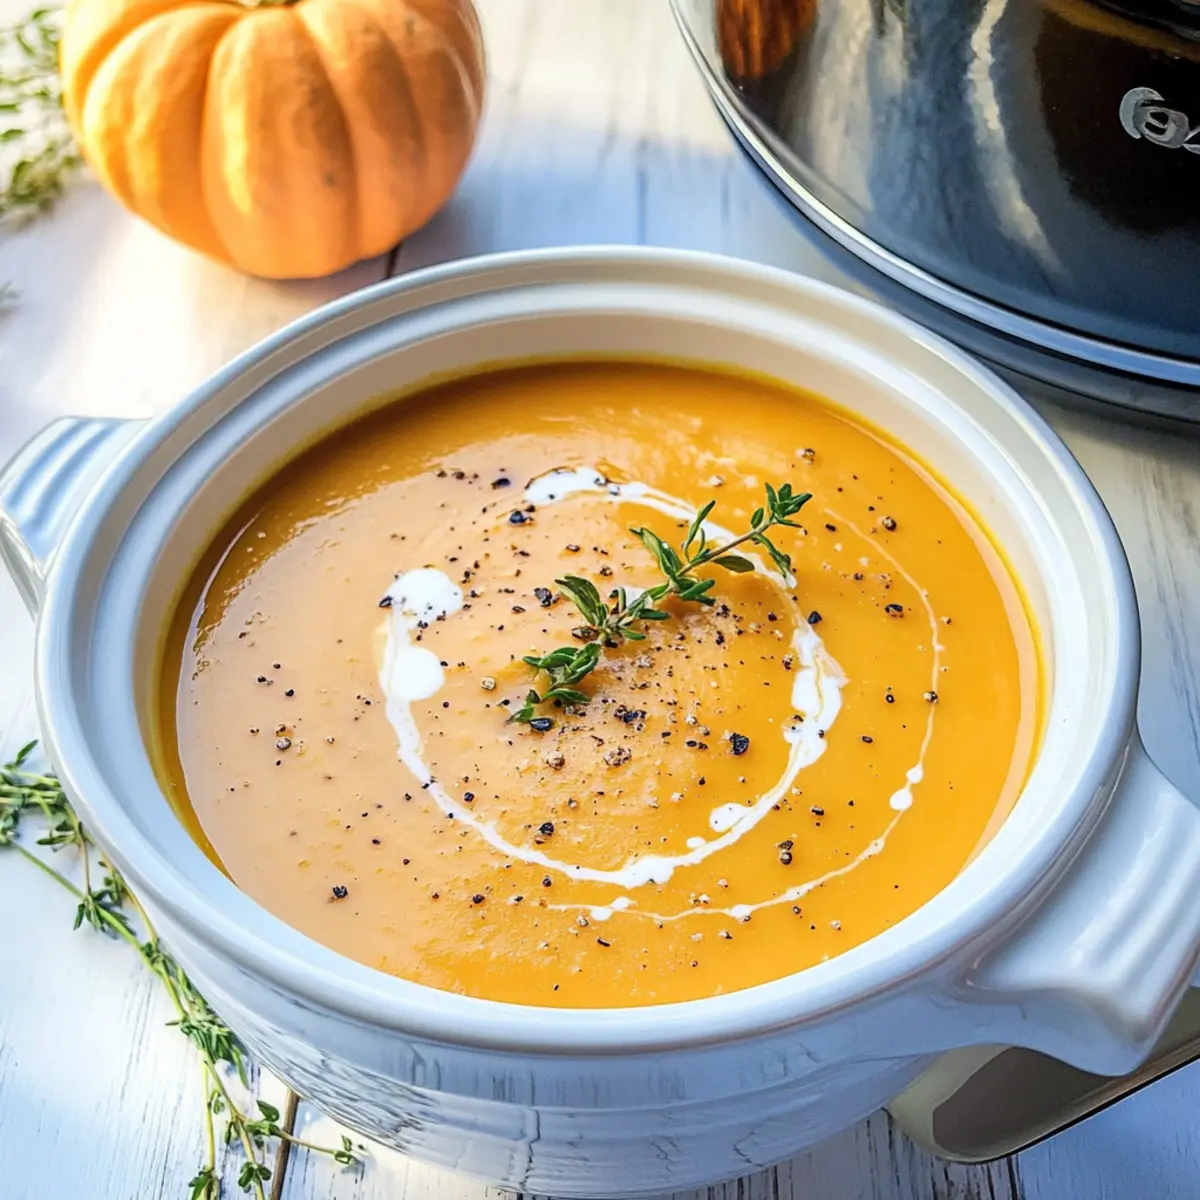
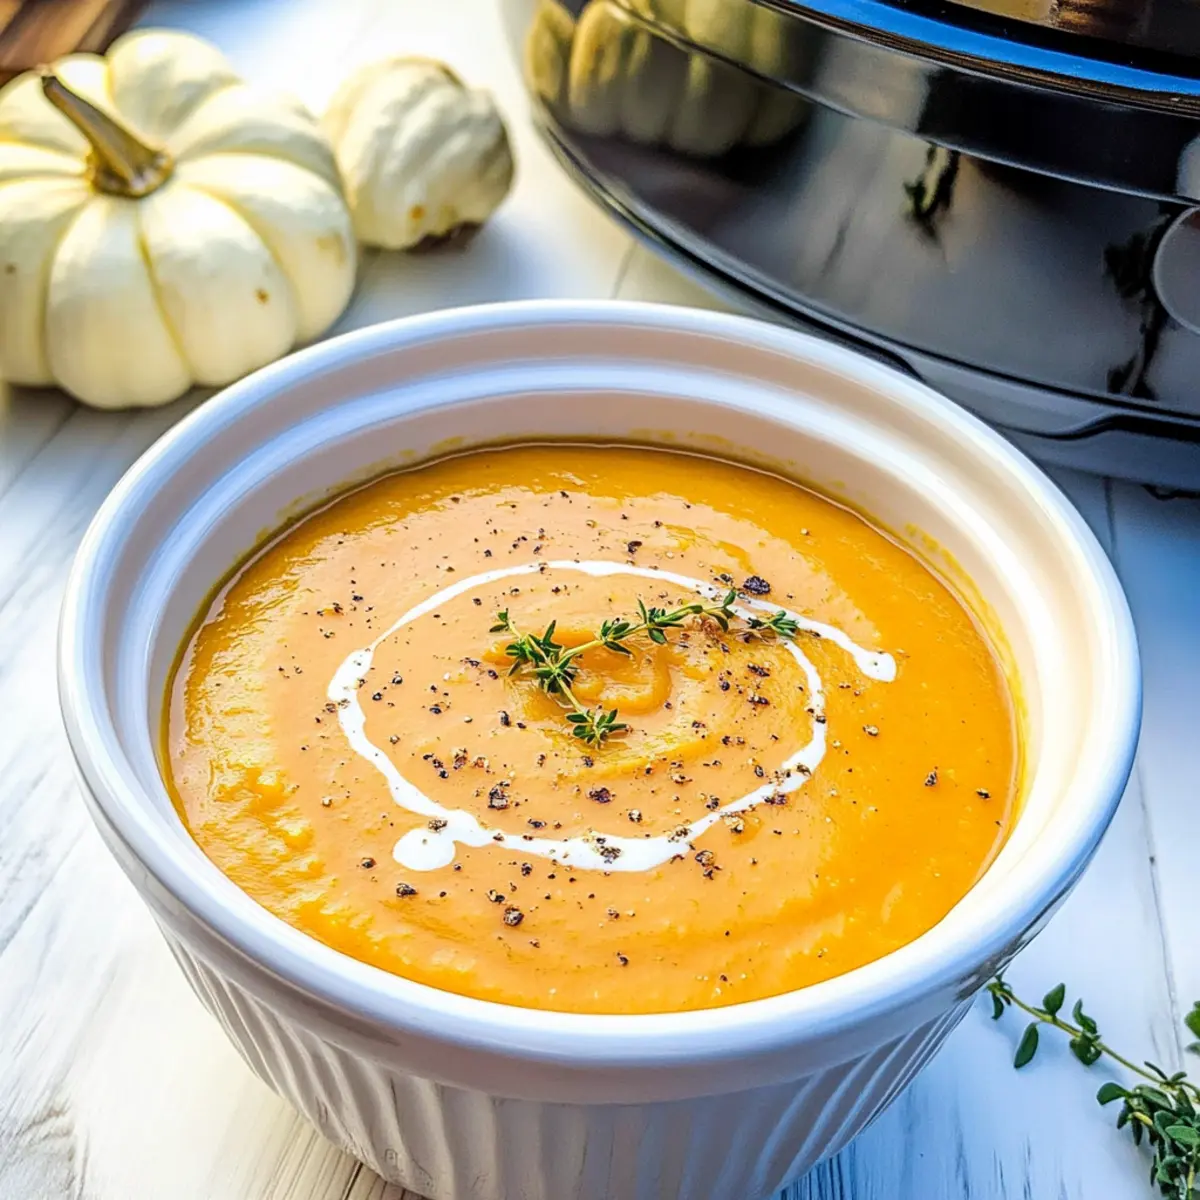
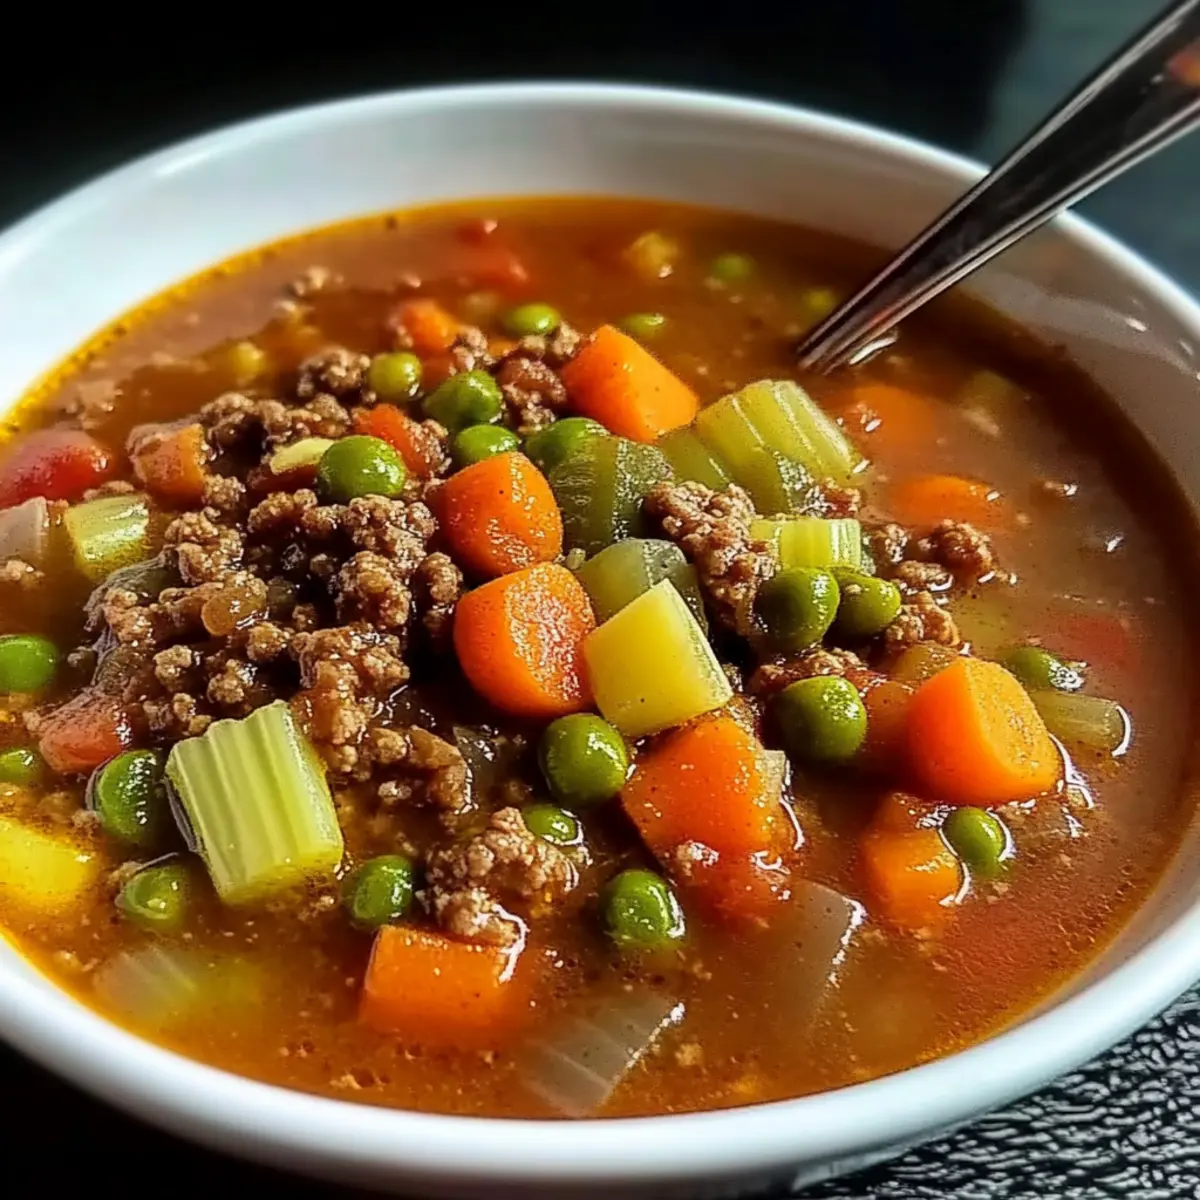
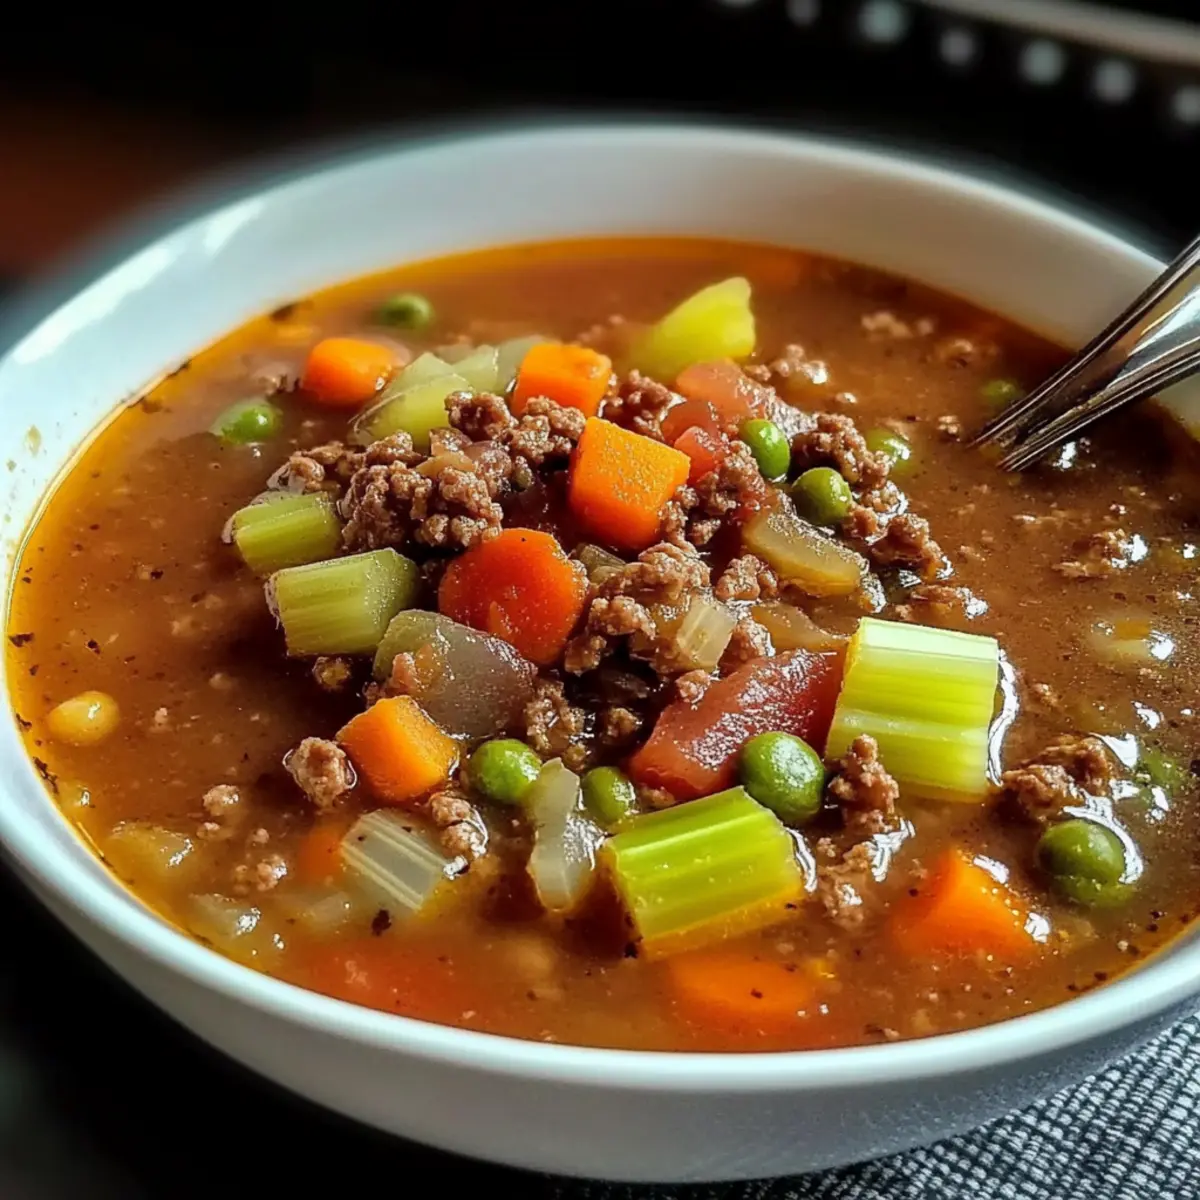
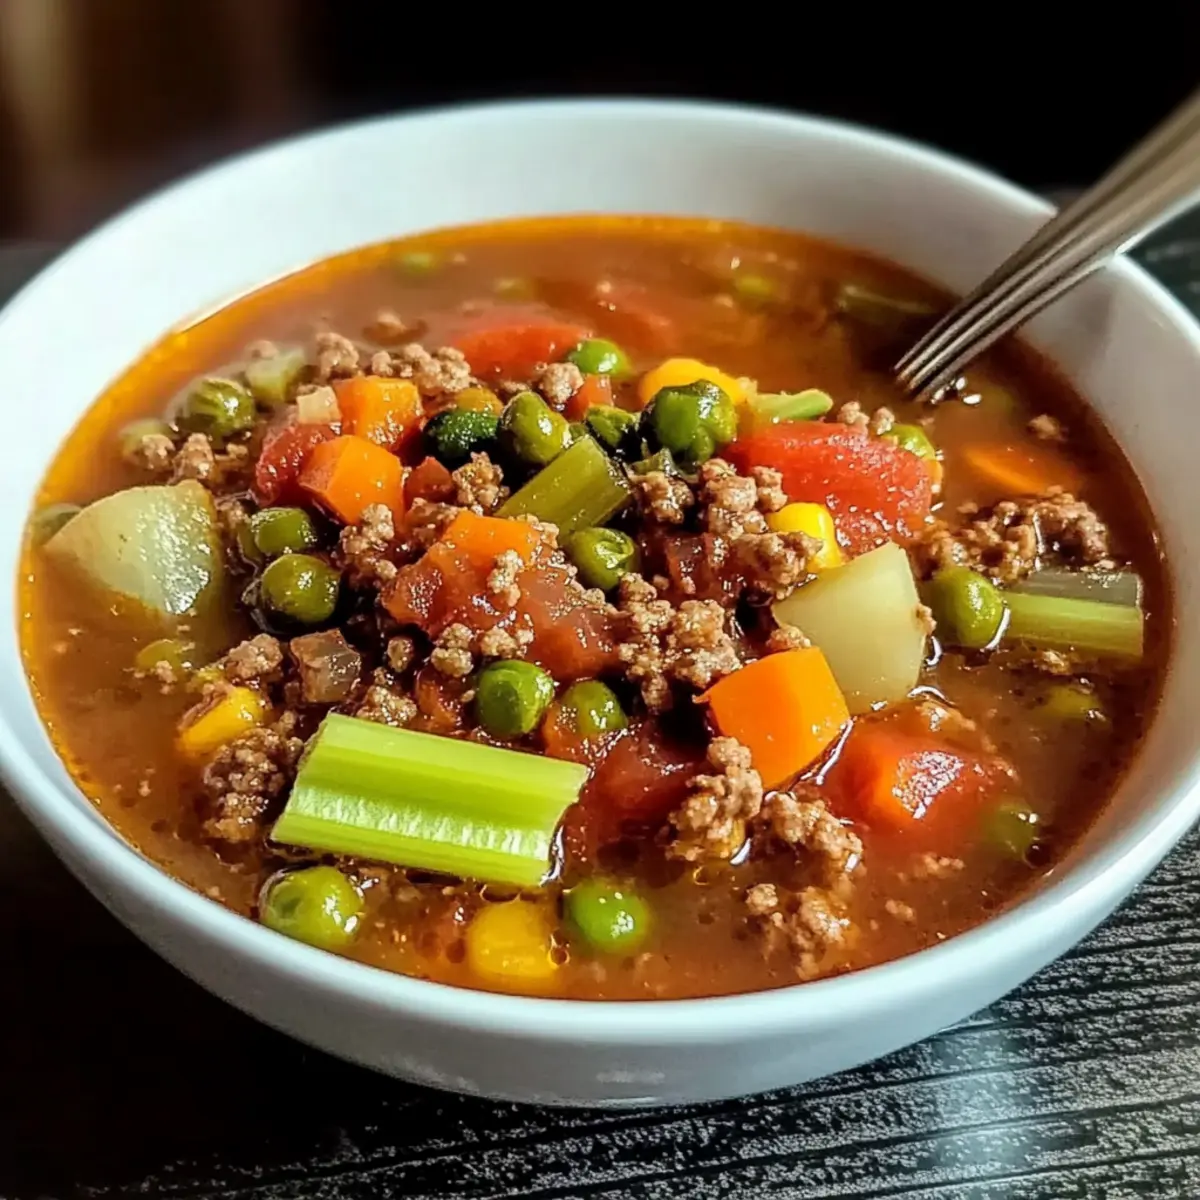
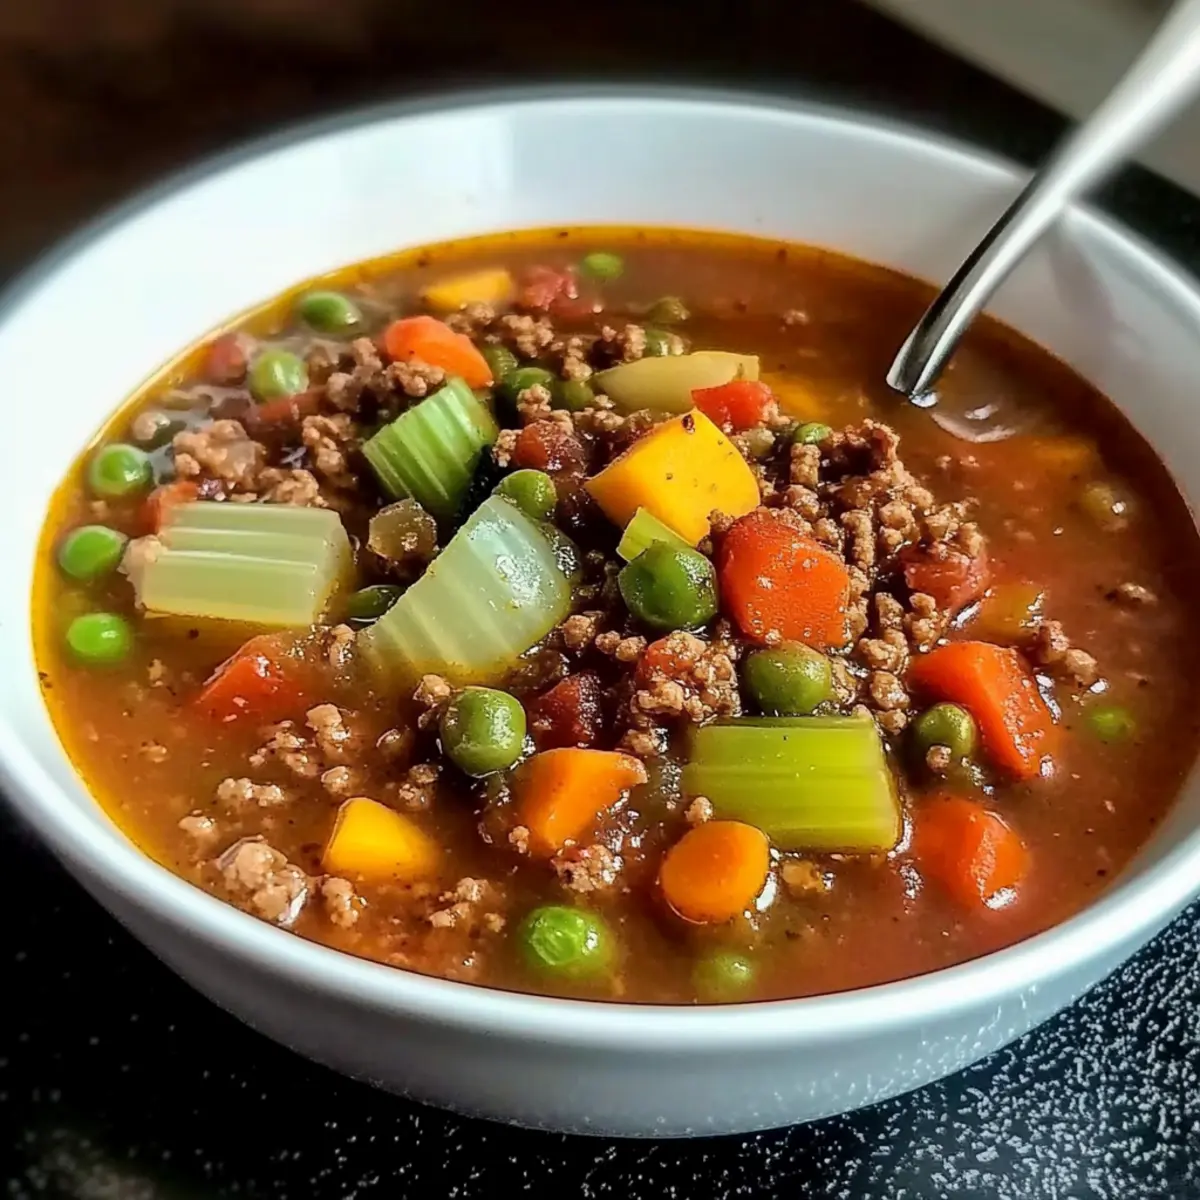
As I stirred the pot, the rich aroma of simmering vegetables and savory beef wafted through my kitchen, instantly melting away the chill of the day. This Hearty Ground Beef Vegetable Soup is my go-to recipe for cozy nights when comfort food is a must. Packed with a rainbow of vibrant vegetables and the satisfying heartiness of lean ground beef, this soup not only warms your soul but is incredibly versatile—perfect for using up those pantry staples and making it your own. Whether you're whipping it up for a family gathering or craving a little self-care through nourishing food, this easy-to-prepare recipe promises to be a crowd-pleaser. Ready to embrace some delicious comfort in a bowl? Let’s dive into making this favorite together!

Why Is This Soup So Special?

Homemade Comfort: Nothing beats the warmth of a homemade soup that fills both your stomach and your heart. Quick and Easy: With simple ingredients and straightforward steps, you'll have a hearty dinner ready in no time. Flavorful Medley: The robust mix of grounded beef and fresh veggies creates a rich tapestry of flavors you won’t forget. Versatile Recipe: Feel free to personalize it with your favorite vegetables; it's great for using whatever you have on hand! Plus, if you're craving more soup ideas, check out my delicious Asparagus Soup Healthy or the hearty Zuppa Toscana Soup. Crowd-Pleasing Dish: Perfect for any gathering, this soup has a way of bringing everyone together and making them feel right at home.

Ground Beef Vegetable Soup Ingredients

For the Soup

• Olive Oil – A basic for sautéing; any cooking oil works too.
• Lean Ground Beef (1 lb.) – Provides protein and richness; ground turkey or chicken can lighten it up.
• Medium Onion (1, diced) – Adds flavor and a hint of sweetness.
• Garlic (2 cloves, minced) – Elevates aroma and depth of flavor in the soup.
• Carrots (3 medium, sliced) – Sweetness and essential nutrients come from these vibrant orange veggies.
• Celery (2 stalks, sliced) – Adds a delightful crunch and contributes complexity to the dish.
• Potatoes (2 medium, diced) – Gives the soup heartiness and comforting structure.
• Italian Seasoning (1 teaspoon) – Brings herby goodness; swap with dried basil or oregano for variation.
• Bay Leaf (1) – Infuses depth; remember to remove it before serving.
• Beef Broth (4 cups) – The soul of the soup; vegetable or chicken broth works just as well.
• Diced Tomatoes (1 can, 15 oz.) – Adds acidity and a burst of flavor.
• Condensed Tomato Soup (1 can, 10.5 oz.) – Creaminess enhancer and tomato flavor booster.
• Tomato Paste (3 tablespoons) – Intensifies our delicious tomato flavor.
• Worcestershire Sauce (1 tablespoon) – For an umami flavor that deepens the taste.
• Cut Green Beans (1 can, 14.5 oz.) – Introduces beautiful color and satisfying texture.
• Corn (1 can, 15.25 oz., drained) – Adds delightful sweetness to balance the savory ingredients.
• Salt and Pepper – Season to your taste for the perfect finish.

Now you’re equipped with everything you need to make your very own Ground Beef Vegetable Soup! Get ready to embrace the cozy vibes in your kitchen.

Step‑by‑Step Instructions for Ground Beef Vegetable Soup

Step 1: Heat the Oil
In a large Dutch oven, heat 2 tablespoons of olive oil over medium heat until shimmering, about 2 minutes. This oil will create a flavorful base for your soup. Swirl it around to coat the bottom of the pot evenly, making sure it’s hot before adding the next ingredients.

Step 2: Cook the Beef and Aromatics
Add 1 pound of lean ground beef, along with 1 diced medium onion and 2 minced garlic cloves. Cook for about 6-8 minutes, stirring occasionally, until the beef is browned and crumbly, while the onion becomes translucent. This step brings out the wonderful flavors that will define your Ground Beef Vegetable Soup.

Step 3: Sauté the Vegetables
Next, stir in 3 sliced medium carrots and 2 sliced celery stalks. Sauté for an additional 6-8 minutes, allowing the vegetables to soften slightly and release their sweet aromas. As they cook, you'll notice the colors brightening, which enhances the soup's visual appeal.

Step 4: Add Seasonings
Sprinkle in 1 teaspoon of Italian seasoning and toss in 1 bay leaf. Stir and cook for another minute so the herbs release their fragrant oils. This step deepens the flavor profile of your Ground Beef Vegetable Soup and prepares it for the rich liquids that follow.

Step 5: Include the Potatoes and Broth
Incorporate 2 diced medium potatoes into the pot, followed by 4 cups of beef broth. Add 1 can of diced tomatoes, 1 can of condensed tomato soup, and 3 tablespoons of tomato paste. Stir until well combined, ensuring all ingredients meld together. The mixture should look vibrant and inviting.

Step 6: Flavor with Worcestershire Sauce
Pour in 1 tablespoon of Worcestershire sauce, stirring thoroughly to mix it in. This addition enhances the umami flavor in your Ground Beef Vegetable Soup. As you stir, the rich aroma of the simmering ingredients wafts through your kitchen, tantalizing your taste buds.

Step 7: Add the Final Vegetables
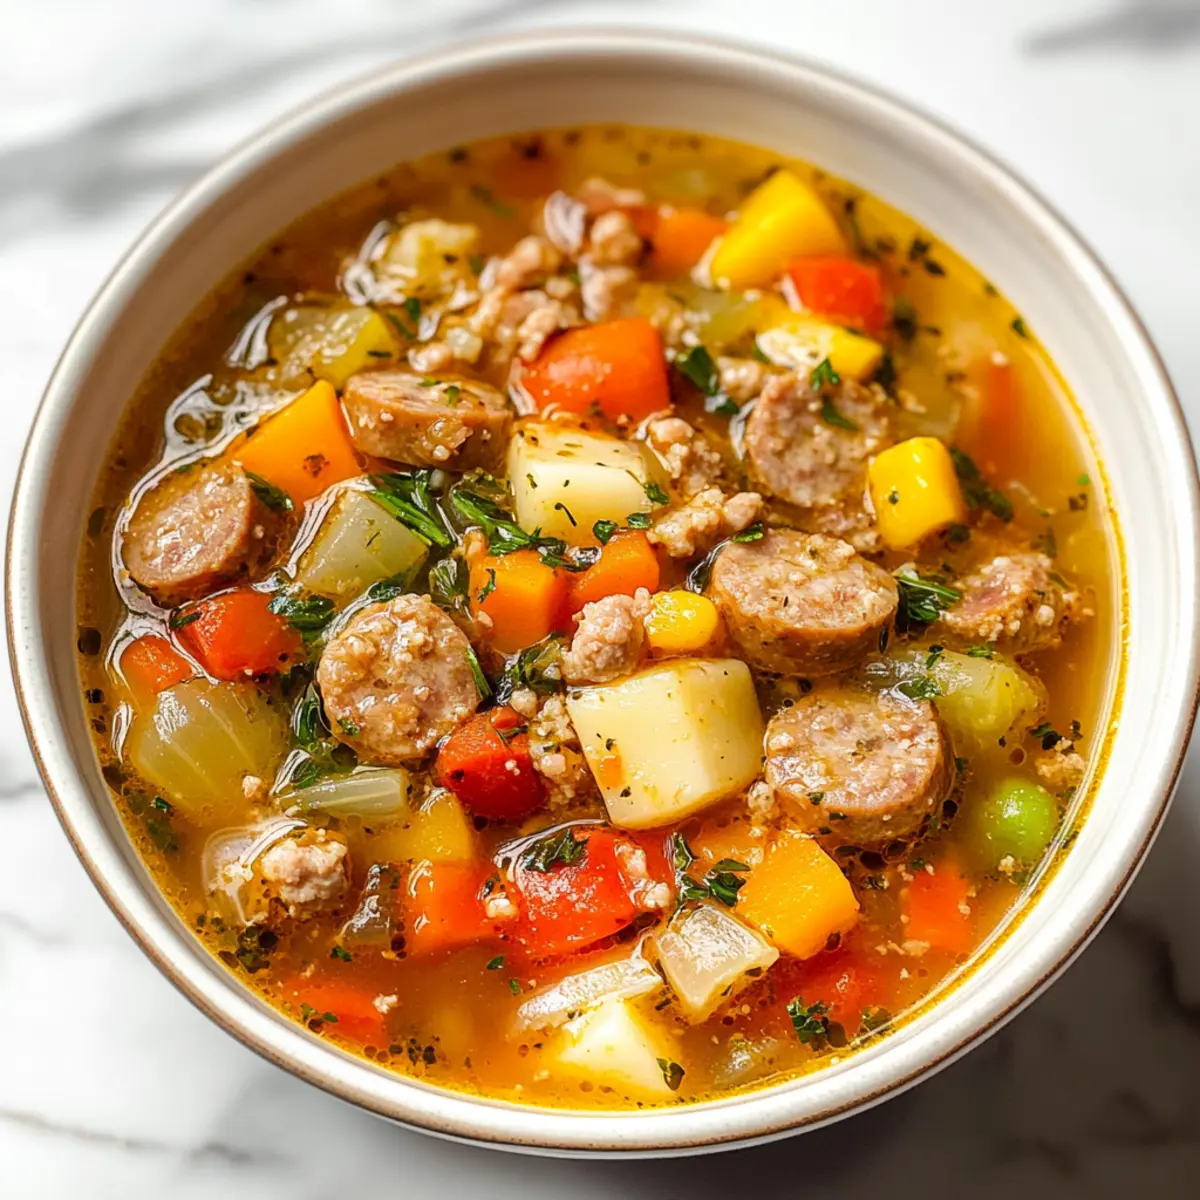
Mix in 1 can of green beans and 1 can of corn, drained. These will add more texture and color to the soup. Once incorporated, bring the mixture to a boil over high heat; then lower the heat to simmer for a harmonious blending of flavors.

Step 8: Simmer to Perfection
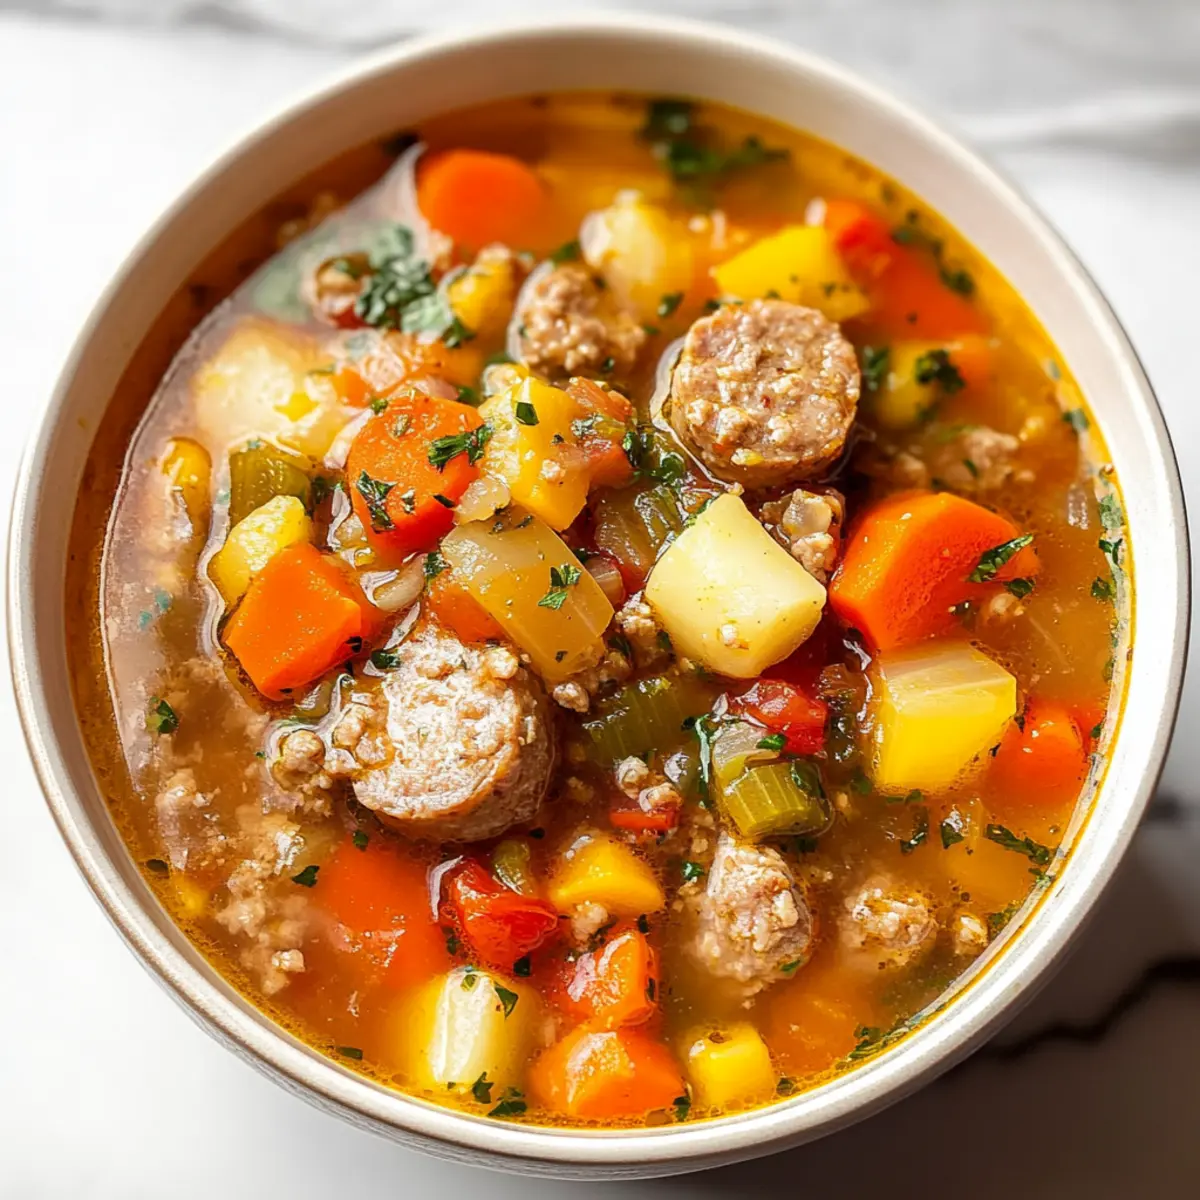
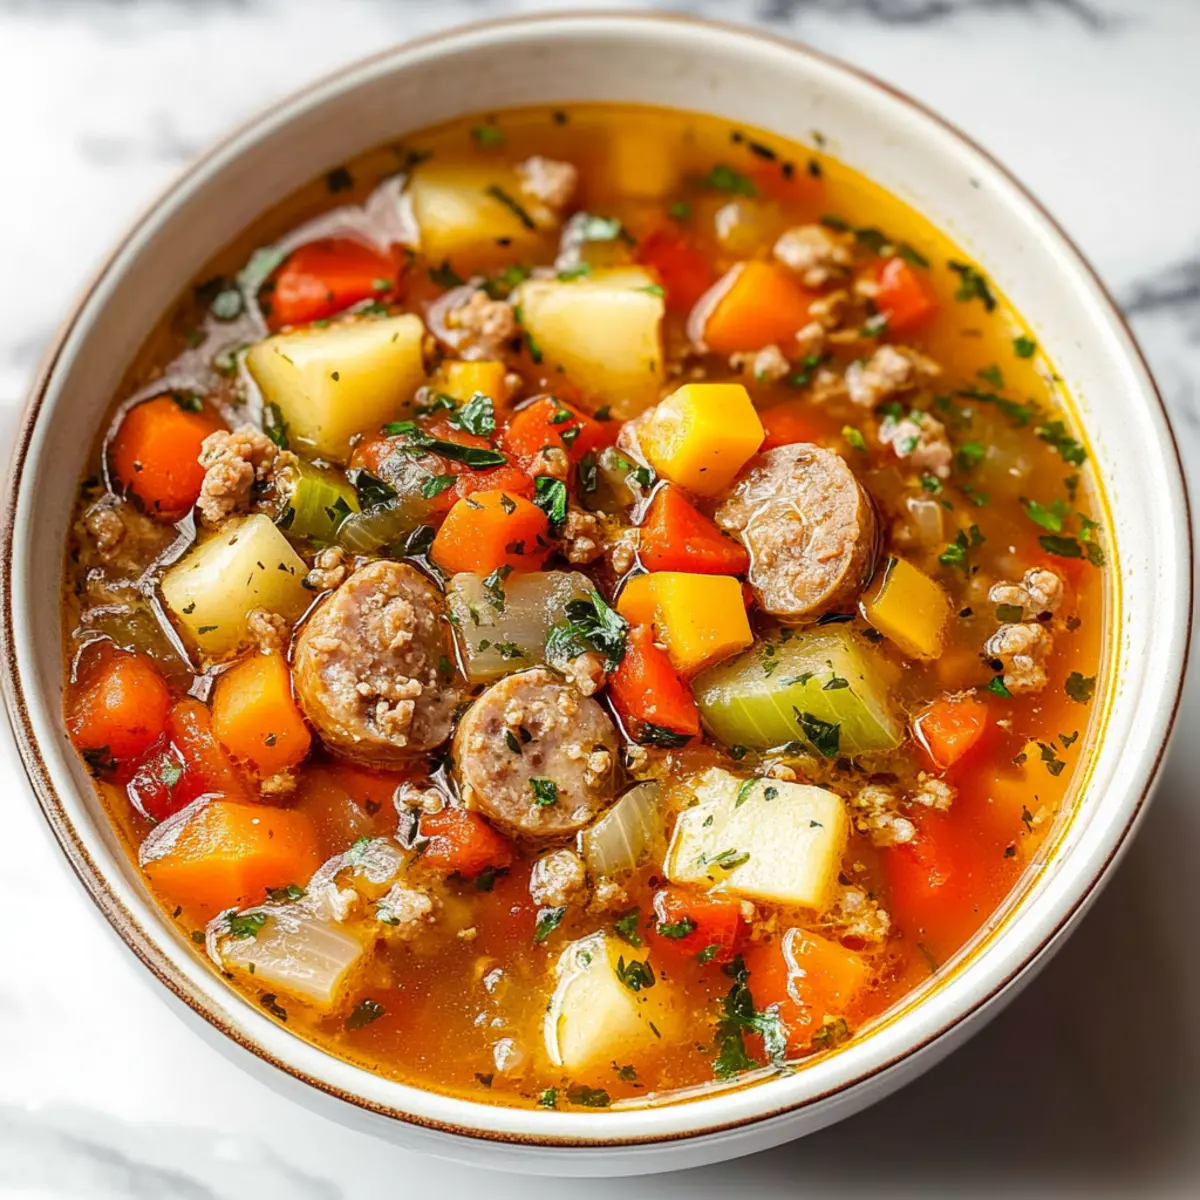
Cover the pot and simmer the soup on low for 35-40 minutes, stirring occasionally. You’ll know it’s done when the vegetables are tender and the flavors have melded beautifully. The soup should be thick and hearty, ready to warm you from the inside out.

Make Ahead Options

These Ground Beef Vegetable Soup preparations are perfect for busy weeknights! You can chop your vegetables and brown the ground beef up to 24 hours in advance, storing them in separate airtight containers to maintain their freshness. Additionally, you can prepare the soup completely and refrigerate it for up to 3 days—just remember to leave some space in the pot to prevent overflow. To reheat, simply warm on the stove over medium heat, stirring occasionally. If you prefer to freeze it, the soup can last up to 3 months; ensure it cools completely before transferring to freezer-safe containers. Just as delicious when reheated, this make-ahead option saves you time while still delivering comforting warmth!

What to Serve with Hearty Ground Beef Vegetable Soup

There’s something wonderfully comforting about pairing this savory bowl of soup with delightful sides that elevate your mealtime experience.

  • Crusty Bread: Perfect for dipping, a slice of warm, crusty bread soaks up the rich broth, enhancing each bite.
  • Simple Green Salad: A refreshing salad with a light vinaigrette balances the hearty soup, adding a crisp, refreshing crunch.
  • Savory Grilled Cheese: Melted cheese between crispy bread creates a nostalgic, indulgent pairing that the whole family will love.
  • Garlic Breadsticks: Soft, buttery breadsticks sprinkled with garlic are not only tasty but also ideal for scooping up every last drop of soup.
  • Cornbread Muffins: Slightly sweet and moist, cornbread muffins complement the robust flavors of the soup beautifully.
  • Homemade Biscuits: Flaky, buttery biscuits served warm provide a comforting addition, inviting you to savor the meal.
  • Bubbly Red Wine: A glass of rich red wine brings fruity notes that play off the meat and vegetables in the soup.
  • Apple Crisp: Finish on a sweet note with warm apple crisp, the perfect transitional dessert that keeps the cozy vibes alive.

Ground Beef Vegetable Soup Variations

Let your creativity shine and explore delightful twists on this comforting classic!

  • Dairy-Free: Swap any cream-based ingredients or cheese for coconut cream, adding a subtle richness without dairy.

  • Spicy Kick: Incorporate diced jalapeños or a splash of hot sauce to elevate the heat level and excite your taste buds.

  • Hearty Grains: Stir in cooked quinoa or barley for an added nutritional boost and delightful texture variation.

  • Herb Infusion: Fresh herbs like thyme or parsley can be used in place of Italian seasoning for a fresh flavor profile.

  • Veggie-Packed: Add diced bell peppers, zucchini, or spinach for a colorful addition that ramps up the nutrition.

  • Chili Style: Transform the soup into a chili by adding kidney beans and swapping Italian seasoning for chili powder.

  • Pasta Option: Include small pasta shapes like ditalini or orzo for a fun twist that makes it even more filling. As it cooks, the pasta absorbs delicious broth, creating a delightful one-pot meal!

  • Different Proteins: Consider switching out the ground beef for turkey, chicken, or even lentils for a heartier plant-based option.

Don’t forget that with every variation, you have the chance to create something uniquely yours! Looking for more soup inspiration? Try pairing this with my savory Santa Soup Savory and take your comfort food experience to the next level.

How to Store and Freeze Ground Beef Vegetable Soup

Fridge: Store in an airtight container for up to 3 days to maintain freshness and flavor. Cool to room temperature before sealing to avoid condensation.

Freezer: Freeze the soup in airtight containers or heavy-duty freezer bags for up to 3 months. Make sure to leave space for expansion as it freezes.

Reheating: Thaw overnight in the fridge before reheating on the stovetop over medium heat, stirring occasionally until heated through, about 10-15 minutes.

Leftover Tip: This Ground Beef Vegetable Soup often tastes even better the next day, so enjoy those flavorful leftovers!

Expert Tips for Ground Beef Vegetable Soup

  • Ingredient Freshness: Use fresh vegetables to ensure a vibrant, rich flavor and avoid a watery texture in your soup.
  • Right Pot Choice: A Dutch oven is ideal for even heat distribution, ensuring your Ground Beef Vegetable Soup cooks evenly and thoroughly.
  • Seasoning Timing: Adjust salt and pepper at the end of cooking for optimal taste. Start with less and add as needed!
  • Customization Options: This recipe accommodates flexibility; don’t hesitate to add or substitute with your favorite veggies based on what you have on hand.
  • Leftover Love: Store leftovers in airtight containers and enjoy for up to 3 days—this soup often tastes even better the next day!

Ground Beef Vegetable Soup Recipe FAQs

What type of vegetables should I use for the best flavor?
Absolutely! Fresh, vibrant vegetables will enhance the flavor of your Ground Beef Vegetable Soup. Look for carrots, celery, and potatoes that are firm and free of dark spots or blemishes. If you have leftover vegetables—or favorites like bell peppers or zucchini—feel free to toss them in; this soup is wonderfully versatile!

How can I store the leftover soup properly?
Very! To store your Ground Beef Vegetable Soup, let it cool to room temperature first. Then transfer it to an airtight container and refrigerate for up to 3 days. For longer storage, you can freeze it in airtight containers or heavy-duty freezer bags for up to 3 months. Remember to leave some space at the top for expansion!

Can I freeze the soup for later? What's the best method?
Certainly! Here's how to freeze your Ground Beef Vegetable Soup effectively:

  1. Cool the soup to room temperature.
  2. Pour it into freezer-safe containers, leaving about an inch of space at the top for expansion.
  3. Seal tightly and label with the date.
    You can enjoy this comforting soup for up to 3 months! When you’re ready to eat, simply thaw it overnight in the fridge.

What should I do if my soup turns out too watery?
No worries at all! If your Ground Beef Vegetable Soup is too watery, it’s usually due to overcooked vegetables or too much broth. You can remedy this by uncovering the pot and simmering it on low heat for an additional 10-15 minutes. This will help some of the excess liquid evaporate and thicken the soup.

Can my pets enjoy any of these ingredients?
Absolutely! Most ingredients in the Ground Beef Vegetable Soup are fine for pets, but make sure to avoid giving them any onions or garlic, as they can be harmful to dogs and cats. Always consult your veterinarian before introducing new foods to your pet's diet!

Ground Beef Vegetable Soup

Hearty Ground Beef Vegetable Soup for Cozy Nights In

Enjoy this comforting Ground Beef Vegetable Soup, packed with vegetables and protein, perfect for cozy nights in.
Print Recipe Pin Recipe
Prep Time 15 minutes mins
Cook Time 40 minutes mins
Total Time 55 minutes mins
Servings: 6 bowls
Course: Soups
Cuisine: American
Calories: 350
Ingredients Equipment Method Nutrition Notes

Ingredients
  

For the Soup
  • 2 tablespoons Olive Oil A basic for sautéing; any cooking oil works too.
  • 1 lb Lean Ground Beef Provides protein and richness; ground turkey or chicken can lighten it up.
  • 1 medium Onion, diced Adds flavor and a hint of sweetness.
  • 2 cloves Garlic, minced Elevates aroma and depth of flavor in the soup.
  • 3 medium Carrots, sliced Sweetness and essential nutrients come from these vibrant orange veggies.
  • 2 stalks Celery, sliced Adds a delightful crunch and contributes complexity to the dish.
  • 2 medium Potatoes, diced Gives the soup heartiness and comforting structure.
  • 1 teaspoon Italian Seasoning Brings herby goodness; swap with dried basil or oregano for variation.
  • 1 Bay Leaf Infuses depth; remember to remove it before serving.
  • 4 cups Beef Broth The soul of the soup; vegetable or chicken broth works just as well.
  • 1 can (15 oz) Diced Tomatoes Adds acidity and a burst of flavor.
  • 1 can (10.5 oz) Condensed Tomato Soup Creaminess enhancer and tomato flavor booster.
  • 3 tablespoons Tomato Paste Intensifies our delicious tomato flavor.
  • 1 tablespoon Worcestershire Sauce For an umami flavor that deepens the taste.
  • 1 can (14.5 oz) Cut Green Beans Introduces beautiful color and satisfying texture.
  • 1 can (15.25 oz) Corn, drained Adds delightful sweetness to balance the savory ingredients.
  • Salt and Pepper Season to your taste for the perfect finish.

Equipment

  • Dutch oven

Method
 

Step-by-Step Instructions for Ground Beef Vegetable Soup
  1. In a large Dutch oven, heat 2 tablespoons of olive oil over medium heat until shimmering, about 2 minutes.
  2. Add 1 pound of lean ground beef, along with 1 diced medium onion and 2 minced garlic cloves. Cook for about 6-8 minutes, stirring occasionally, until the beef is browned and crumbly.
  3. Next, stir in 3 sliced medium carrots and 2 sliced celery stalks. Sauté for an additional 6-8 minutes, allowing the vegetables to soften slightly.
  4. Sprinkle in 1 teaspoon of Italian seasoning and toss in 1 bay leaf. Stir and cook for another minute.
  5. Incorporate 2 diced medium potatoes, followed by 4 cups of beef broth, 1 can of diced tomatoes, 1 can of condensed tomato soup, and 3 tablespoons of tomato paste. Stir until well combined.
  6. Pour in 1 tablespoon of Worcestershire sauce, stirring thoroughly to mix it in.
  7. Mix in 1 can of green beans and 1 can of corn, drained. Bring the mixture to a boil over high heat; then lower the heat to simmer.
  8. Cover the pot and simmer the soup on low for 35-40 minutes, stirring occasionally.

Nutrition

Serving: 1bowlCalories: 350kcalCarbohydrates: 35gProtein: 25gFat: 15gSaturated Fat: 5gPolyunsaturated Fat: 2gMonounsaturated Fat: 7gCholesterol: 70mgSodium: 800mgPotassium: 800mgFiber: 8gSugar: 5gVitamin A: 5000IUVitamin C: 20mgCalcium: 50mgIron: 3mg

Notes

Use fresh vegetables for a vibrant, rich flavor and to avoid a watery texture. Adjust salt and pepper at the end of cooking for optimal taste.

Tried this recipe?

Let us know how it was!

Creamy White Bean Soup with Dijon for Cozy Evenings

May 29, 2026 by Grace Snow Leave a Comment

As the chilly evening air wraps around me, I find myself craving something cozy and heartwarming. This 27-Minute Creamy White Bean Soup with Dijon is my go-to remedy, effortlessly transforming ordinary ingredients into a soul-soothing bowl of goodness. Not only does it come together in just over half an hour, but it's also incredibly customizable; whether you're adding crumbled turkey bacon for a savory twist or opting for a plant-based cream alternative, every spoonful is designed to nurture. Perfect for busy weeknights or any occasion when you seek comfort, this recipe will soon become part of your culinary repertoire. Curious about how this creamy delight can become a staple in your kitchen? Let’s dive in!

Why is this soup a must-try?

Comforting Warmth: Each bowl offers a thick, creamy texture that wraps you in warmth, making it the perfect companion for chilly evenings.

Quick and Easy: In just 27 minutes, you’ll have a deliciously satisfying soup ready to enjoy. Perfect for busy nights!

Endlessly Customizable: Mix and match flavors by adding ingredients like turkey bacon, or switch it up with vegan options like coconut milk.

Nutrition-Packed: Rich in protein and fiber from white beans, this soup is as nourishing as it is comforting.

Versatile Serving Options: Pair with warm baguettes or a side salad for a complete meal. For more ideas, check out my Tuscan White Bean recipe for a similar flavor twist.

Make this creamy delight your go-to recipe, impressing family and friends with minimal effort!

Creamy White Bean Soup with Dijon Ingredients

For the Soup Base

  • Olive Oil – Provides the fat needed for sautéing vegetables; you can substitute with vegetable oil for a neutral flavor.
  • Chopped Onion – Adds sweetness and depth to the flavor base; yellow or white onions work best.
  • Minced Garlic – Enhances flavor with its aromatic qualities; fresh garlic is preferable for a stronger taste.
  • White Beans (canned) – Forms the creamy base and contributes protein; feel free to substitute with dried beans (cooked beforehand) if desired.
  • Vegetable Broth – Acts as the soup's liquid base while contributing to the overall flavor; chicken broth can be used for a non-vegetarian option.
  • Dijon Mustard – Adds a distinctive tanginess to the soup; you can replace it with yellow mustard for a milder flavor.
  • Dried Thyme – Offers an earthy flavor profile; fresh thyme can be used in a 3:1 ratio for a fresher taste.
  • Black Pepper – Provides a touch of spice; adjust to taste.
  • Salt – Enhances overall flavor; adjust based on dietary preferences.

For the Creamy Texture

  • Heavy Cream – Gives the soup its creamy texture; substitute with coconut milk or nut-based cream for a vegan version.

Optional Add-Ins

  • Turkey Bacon (optional) – Adds a crunchy and smoky element if desired; can skip for a vegetarian version or substitute with plant-based bacon.

Each ingredient contributes to the delightful experience of this Creamy White Bean Soup with Dijon that you won’t want to miss!

Step‑by‑Step Instructions for Creamy White Bean Soup with Dijon

Step 1: Heat the Oil
In a large pot, heat 2 tablespoons of olive oil over medium heat until shimmering, about 1-2 minutes. This will create the perfect base for your Creamy White Bean Soup with Dijon. Be careful not to let the oil smoke, as you want to gently sauté the onions without burning them.

Step 2: Sauté the Onions
Add 1 chopped onion to the pot and sauté until it turns translucent and soft, about 5 minutes. Stir occasionally to ensure even cooking. The onions should be fragrant and slightly caramelized, providing a sweet depth of flavor that forms the foundation of your soup.

Step 3: Add Garlic
Stir in 3 cloves of minced garlic and cook for another minute, allowing it to become aromatic. You should notice a savory scent wafting through your kitchen. This step adds a delightful richness to the Creamy White Bean Soup with Dijon that sets the stage for the beans.

Step 4: Combine the Ingredients
Pour in 2 cans of drained white beans, 4 cups of vegetable broth, 2 tablespoons of Dijon mustard, 1 teaspoon of dried thyme, and a sprinkle of black pepper. Bring the mixture to a vigorous boil, allowing it to bubble and blend for about 5 minutes. The vibrant aromas will start to fill the room, showcasing the comforting flavors of the soup.

Step 5: Simmer the Soup
Reduce the heat to low and let the soup simmer uncovered for 15 minutes. This slow cooking process melds the flavors together beautifully, allowing the thyme and Dijon to thrive within the creamy beans. Stir occasionally to prevent sticking, enjoying the thickening texture that develops.

Step 6: Blend the Soup
Using an immersion blender, carefully blend the soup until smooth, about 1-2 minutes. If you don’t have an immersion blender, allow the soup to cool slightly before transferring it in batches to a countertop blender. Aim for a velvety consistency that promises a rich taste in every bite.

Step 7: Incorporate the Cream
Stir in 1 cup of heavy cream and heat the soup over low for an additional 2 minutes, just until warmed through. This step is crucial for achieving that luscious creaminess synonymous with the Creamy White Bean Soup with Dijon. Taste and adjust seasoning as needed, adding salt for enhanced flavor.

Step 8: Serve and Enjoy
Ladle the soup into bowls and garnish with crumbled turkey bacon if desired. Serve hot with warm baguettes or croutons on the side for a delightful meal. The vibrant presentation and rich flavor will make each bowl a comforting delight, perfect for cozy evenings.

Make Ahead Options

These 27-Minute Creamy White Bean Soup with Dijon are fantastic for meal prep, helping you save time on busy weeknights! You can chop the onions and mince the garlic up to 24 hours in advance; simply store them in the refrigerator to keep their freshness. Additionally, you can combine the white beans, vegetable broth, Dijon mustard, thyme, and black pepper and refrigerate that mixture for up to 3 days. When you’re ready to serve, just heat the sautéed onion and garlic, add the prepped soup mixture, and simmer as instructed. Finally, blend in the heavy cream to achieve that signature creamy texture, ensuring dinner is just as delicious!

Expert Tips for Creamy White Bean Soup

  • Choosing the Right Beans: Use high-quality canned white beans for ease; if opting for dried, soak them overnight to ensure a creamy texture in your Creamy White Bean Soup with Dijon.
  • Balance the Flavors: Taste as you go! Adjust the Dijon mustard and black pepper to achieve the perfect tanginess and spice level that suits your palate.
  • Blending Wisely: An immersion blender makes for easy cleanup, but if using a standard blender, let the soup cool a bit to minimize splattering.
  • Add Extra Veggies: For a nutrition boost, toss in chopped carrots or celery when you sauté the onions. They add a delightful texture and sweetness!
  • Make it Your Own: Feel free to experiment with add-ins like smoked paprika or a splash of lemon juice for extra zest in your creamy soup.

Creamy White Bean Soup Variations

Embrace creativity in your kitchen by exploring delightful variations of this creamy soup that will tantalize your taste buds.

  • Turkey Bacon: For smoky crunch, crumble turkey bacon into each bowl before serving. It adds a savory twist that enhances the creaminess of the soup.

  • Dairy-Free Cream: Substitute heavy cream with coconut milk or almond cream for a luscious vegan version. You won't miss the dairy, and it adds a hint of tropical flavor.

  • Herb Boost: Swap dried thyme for fresh herbs like basil or parsley for a brighter, fresher taste. These herbs will elevate the flavor profile and bring color to your bowl.

  • Spice it Up: Add red pepper flakes or a splash of hot sauce during the simmering stage for a kick of heat. This addition balances the creaminess with spice, perfect for those who like it hot.

  • Veggie Packed: Stir in diced carrots or celery when sautéing onions for added nutrition and texture. This simple addition brings extra color and a wholesome crunch to your creamy soup.

  • Flavor Twists: Mix in smoked paprika or a squeeze of lemon juice for a smoky or zesty twist. Each variation invites an exciting adventure in flavors that will keep you coming back for more.

  • Bean Variety: Instead of white beans, use cannellini or chickpeas for a different texture and taste. These changes will create a unique yet comforting soup experience.

Feel free to experiment and find your ideal match! For more delightful variations, check out my Zuppa Toscana Soup or try another comforting dish like Santa Fe Soup Savory. There’s always a new flavor adventure waiting for you!

Storage Tips for Creamy White Bean Soup with Dijon

Fridge: Store your creamy white bean soup in an airtight container in the fridge for up to 3 days. This allows the flavors to meld even more!

Freezer: You can freeze the soup in individual portions for up to 3 months. Just make sure to leave some space in the container for expansion as it freezes.

Reheating: When ready to enjoy, gently reheat on the stove over low heat, adding a splash of vegetable broth to loosen the soup if it thickens.

Airtight Storage: Always use airtight containers or freezer bags to prevent freezer burn and ensure the best taste when you pull this comforting delight from your freezer.

What to Serve with 27-Minute Creamy White Bean Soup with Dijon

Create a comforting meal experience that will warm your soul and tickle your taste buds.

  • Crusty Baguette: A warm, crusty baguette is perfect for dipping into the creamy soup, enhancing its richness with every bite.
  • Fresh Side Salad: A light, mixed greens salad with a zesty vinaigrette adds a refreshing contrast to the creamy texture of the soup.
  • Garlic Toast: Crunchy garlic toast provides a flavorful crunch, making each spoonful of soup even more delightful.
  • Roasted Vegetables: Oven-roasted seasonal veggies provide a natural sweetness that complements the savory notes of the soup beautifully.
  • Creamy Risotto: A side of creamy risotto adds an elegant touch, creating a luxurious dining experience alongside your soup.
  • Chardonnay: A chilled glass of fruity Chardonnay brings a delightful brightness, enhancing your soup experience with its crisp acidity.
  • Fruit Sorbet: For dessert, a light fruit sorbet refreshes the palate, balancing the dish's creamy elements with its fruity zest.
  • Herbed Rice: Fluffy herbed rice offers a subtle flavor and soft texture that pairs nicely with the rich beans in your creamy soup.
  • Spicy Croutons: Add some croutons with a kick to bring an unexpected crunch and a hint of heat that elevates the dish's overall flavor.

Creamy White Bean Soup with Dijon Recipe FAQs

What kind of white beans should I use?
I recommend using high-quality canned white beans for convenience and creaminess. If you prefer dried beans, soak them overnight and cook them until tender before adding them to your Creamy White Bean Soup with Dijon to maintain that velvety texture.

How do I store leftover soup?
Store your creamy white bean soup in an airtight container in the fridge for up to 3 days. The flavors will continue to meld and become even more delightful!

Can this soup be frozen?
Absolutely! You can freeze the soup in individual portions for up to 3 months. Just be sure to leave some space in your containers for expansion as the soup freezes to prevent any mess.

What should I do if the soup is too thick?
If your soup turns out thicker than desired, simply reheat it on the stove over low heat, adding a splash of vegetable broth to loosen it up. Stir well until you reach your desired consistency—it's that easy!

Are there any dietary considerations for this soup?
Yes, if you're accommodating dietary needs, you can substitute the heavy cream with coconut milk or a nut-based cream for a vegan version. Additionally, if you're concerned about allergies, always check for any reactions to specific beans or flavorful add-ins you decide to incorporate.

Can I add extra vegetables?
Very! Toss in chopped carrots or celery when sautéing the onions to add nutrition and a delightful texture. You can really make this soup your own by experimenting with whatever veggies you have on hand!

Creamy White Bean Soup with Dijon

Creamy White Bean Soup with Dijon for Cozy Evenings

A soul-soothing Creamy White Bean Soup with Dijon, ready in 27 minutes for comforting chilly evenings.
Print Recipe Pin Recipe
Prep Time 10 minutes mins
Cook Time 17 minutes mins
Total Time 27 minutes mins
Servings: 4 servings
Course: Soups
Cuisine: American
Calories: 320
Ingredients Equipment Method Nutrition Notes

Ingredients
  

For the Soup Base
  • 2 tablespoons Olive Oil can substitute with vegetable oil
  • 1 unit Chopped Onion yellow or white onions work best
  • 3 cloves Minced Garlic fresh garlic is preferable
  • 2 cans White Beans (canned) drained; can use dried beans
  • 4 cups Vegetable Broth chicken broth for non-vegetarian option
  • 2 tablespoons Dijon Mustard can replace with yellow mustard
  • 1 teaspoon Dried Thyme use fresh thyme in a 3:1 ratio
  • Black Pepper adjust to taste
  • Salt adjust based on dietary preferences
For the Creamy Texture
  • 1 cup Heavy Cream can substitute with coconut milk or nut-based cream
Optional Add-Ins
  • Turkey Bacon (optional) can skip for a vegetarian version

Equipment

  • Large pot
  • Immersion blender

Method
 

Directions
  1. In a large pot, heat 2 tablespoons of olive oil over medium heat until shimmering, about 1-2 minutes.
  2. Add 1 chopped onion to the pot and sauté until it turns translucent and soft, about 5 minutes.
  3. Stir in 3 cloves of minced garlic and cook for another minute.
  4. Pour in 2 cans of drained white beans, 4 cups of vegetable broth, 2 tablespoons of Dijon mustard, 1 teaspoon of dried thyme, and a sprinkle of black pepper.
  5. Reduce the heat to low and let the soup simmer uncovered for 15 minutes.
  6. Using an immersion blender, carefully blend the soup until smooth, about 1-2 minutes.
  7. Stir in 1 cup of heavy cream and heat the soup over low for an additional 2 minutes.
  8. Ladle the soup into bowls and garnish with crumbled turkey bacon if desired.

Nutrition

Serving: 1bowlCalories: 320kcalCarbohydrates: 30gProtein: 12gFat: 18gSaturated Fat: 10gPolyunsaturated Fat: 1gMonounsaturated Fat: 6gCholesterol: 60mgSodium: 700mgPotassium: 550mgFiber: 8gSugar: 2gVitamin A: 500IUVitamin C: 5mgCalcium: 80mgIron: 2mg

Notes

This soup is nourishing, customizable, and perfect for cozy evenings.

Tried this recipe?

Let us know how it was!

Cozy Chicken Noodle Soup for Heartfelt Moments at Home

May 22, 2026 by Grace Snow Leave a Comment

There's something truly magical about the first sip of Homemade Chicken Noodle Soup that instantly transports me back to my grandmother's kitchen, where the warm aroma of savory broth and tender chicken filled the air. This classic comfort food is not only a hearty meal, but it's also a go-to remedy for chilly days or when you need a little extra love in a bowl. With a quick prep time and simple ingredients, this soup is perfect for busy weeknights or those moments when you crave something nourishing and familiar. Imagine gathering around the table, sharing stories while savoring each delightful spoonful. Are you ready to create a bowl of warmth that will leave your heart and soul feeling satisfied? Let’s dive into this delightful recipe!

Why is Chicken Noodle Soup So Comforting?

Nostalgic warmth: The aroma of simmering broth fills your home, evoking cherished memories of family gatherings.
Quick prep time: With just a handful of simple ingredients, you can whip up this cozy dish in under an hour.
Hearty satisfaction: Packed with protein from chicken and wholesome noodles, it’s a filling meal that comforts the soul.
Versatile and customizable: Feel free to add seasonal veggies or spice it up with a dash of cayenne, making it your own.
Perfect for all occasions: Whether it's a weekday dinner or a remedy for the sniffles, this soup fits every moment beautifully. Enjoy it alongside a slice of crusty bread or a fresh garden salad for a complete meal experience!

Chicken Noodle Soup Ingredients

For the Soup Base

  • 1 lb boneless skinless chicken breasts – The primary protein source; rotisserie chicken offers a convenient substitute.
  • 8 cups low-sodium chicken broth – Provides a flavorful base; vegetable broth works great for a vegetarian twist.
  • 1 small onion, diced – Builds a delightful flavor foundation; shallots can provide a milder taste.
  • 3 cloves garlic, minced – Adds depth and richness to the dish; garlic powder can be used if you’re in a hurry (1 tsp).

For the Vegetables

  • 2 large carrots, sliced – Adds sweetness and vibrant color; frozen carrots are a handy alternative.
  • 2 celery stalks, sliced – Brings crunch and refreshing flavor; feel free to skip it if celery isn’t your thing.

For the Noodles

  • 2 cups egg noodles – Contributes heartiness and texture; you can swap in gluten-free pasta as needed.

For Seasoning

  • 2 tbsp olive oil – Perfect for sautéing your vegetables; butter can add delicious richness instead.
  • 1 tsp dried thyme – Infuses the soup with its earthy aroma; Italian seasoning can be a good substitute.
  • Salt and pepper to taste – Essential for enhancing overall flavors; adjust according to your palate.

For Garnish

  • 2 tbsp fresh parsley, chopped – A sprinkle of freshness and color on top; dried parsley can be a last-minute alternative.

Creating a bowl of Chicken Noodle Soup has never been easier! Gather these fresh ingredients, and let the warmth of this classic dish fill your home.

Step‑by‑Step Instructions for Homemade Chicken Noodle Soup

Step 1: Sauté the Vegetables
Heat 2 tablespoons of olive oil in a large Dutch oven over medium heat. Add the diced onion, sliced carrots, and sliced celery, then sauté for 5-6 minutes until the vegetables are softened and the onions become translucent. Stir occasionally to prevent sticking, allowing the enticing aroma to fill your kitchen as you start this cozy Chicken Noodle Soup.

Step 2: Add Garlic and Thyme
Stir in 3 minced garlic cloves and 1 teaspoon of dried thyme to the softened vegetables. Sauté for an additional minute until the garlic is fragrant and golden, stirring to ensure even cooking. This step enhances the flavors in your Chicken Noodle Soup, setting a rich base for the delicious broth that’s to come.

Step 3: Incorporate the Broth and Chicken
Pour in 8 cups of low-sodium chicken broth, bringing the mixture to a gentle boil over medium-high heat. Carefully add 1 pound of boneless, skinless chicken breasts to the pot, ensuring they are submerged in the broth. Let the soup come back to a boil, then reduce the heat to a simmer and cover. Cook for 20-25 minutes until the chicken is cooked through and tender.

Step 4: Shred the Chicken
Once the chicken is thoroughly cooked, remove it from the pot and let it cool slightly. Shred the chicken into bite-sized pieces using two forks, then return it to the pot. Stir the shredded chicken into the simmering Chicken Noodle Soup, which should now be bubbling enticingly, further integrating the flavors of the soup.

Step 5: Cook the Noodles
Add 2 cups of egg noodles to the pot, stirring them into the savory broth. Cook uncovered for 8-10 minutes, or until the noodles are tender but still have a slight bite (al dente). Keep an eye on the pot to avoid overcooking the noodles, which are key to achieving that classic comfort in your Chicken Noodle Soup.

Step 6: Season and Garnish
Once the noodles are just right, season the soup with salt and pepper to taste, enhancing the overall flavor. Stir in 2 tablespoons of freshly chopped parsley for a burst of color and freshness right before serving. Now your homemade Chicken Noodle Soup is ready to be ladled into bowls, offering warmth and comfort with every spoonful.

What to Serve with Homemade Chicken Noodle Soup

Enhance your comforting bowl of soup with delightful sides that complement its warmth and heartiness.

  • Crusty Bread: Perfect for dipping, this fresh loaf gives a satisfying crunch that pairs beautifully with the soup's velvety broth.
  • Simple Salad: A light, crisp salad with mixed greens and a tangy vinaigrette offers a refreshing contrast to the rich soup.
  • Garlic Breadsticks: Warm and buttery, these add flavor and an indulgent twist that's irresistible alongside your homemade soup.
  • Steamed Broccoli: Tender yet crisp, these greens add a nutritious touch and vibrant color, enhancing your meal visually and flavorfully.
  • Savory Biscuits: Flaky and buttery, biscuits are excellent for soaking up the flavorful broth, turning each bite into a comforting delight.
  • Apple Crisp: Satisfy your sweet tooth by finishing your meal with a warm apple crisp, creating a perfect blend of comfort food moments.

Make Ahead Options

These Homemade Chicken Noodle Soup options are perfect for meal prep enthusiasts! You can cook the entire soup base up to 3 days in advance, refrigerating it in an airtight container to maintain its delightful flavors. To prep ahead, simply sauté the vegetables and simmer them with the chicken and broth, then cool it down before refrigerating. The noodles can be cooked separately and added just before serving to prevent them from becoming mushy. When you're ready to enjoy your comforting Chicken Noodle Soup, reheat the soup gently on the stove, adding additional broth if needed for the perfect consistency. This way, you'll have a cozy, heartwarming meal ready with minimal effort!

How to Store and Freeze Chicken Noodle Soup

Fridge: Store leftover Chicken Noodle Soup in an airtight container for up to 3 days. This keeps it fresh while preventing a mushy texture from the noodles.

Freezer: For longer storage, freeze the soup in portions using freezer-safe containers for up to 3 months. This makes it easy to reheat on busy days!

Reheating: Thaw frozen soup overnight in the fridge before reheating. Warm it gently on the stovetop, adding extra broth if needed to regain its cozy texture.

Serve Fresh: For optimal flavor and texture, consume the soup within a few days. Over time, noodles may absorb broth, so adjust accordingly when reheating.

Expert Tips for Homemade Chicken Noodle Soup

  • Noodle Perfection: Check doneness at 8 minutes for al dente noodles. Overcooked noodles can turn mushy, ruining your Chicken Noodle Soup.
  • Enhance Flavor: Always season with salt and pepper at the end. This ensures the flavors shine without being muted during cooking.
  • Vegetable Flexibility: If you dislike celery, no worries! Feel free to substitute or leave it out entirely; this soup is delicious with or without.
  • Storage Savvy: Store leftover soup in an airtight container for up to 3 days. Note that noodles absorb broth over time, so you may want to add extra broth when reheating.
  • Aromatic Boost: For extra depth, consider adding a bay leaf while simmering. Just remember to remove it before serving!

Chicken Noodle Soup Variations & Substitutions

Feel free to customize this comforting classic to suit your taste buds and dietary needs!

  • Chicken Thighs: Swap chicken breasts for chicken thighs for a richer, more flavorful soup.
  • Vegetarian Delight: Use vegetable broth and replace chicken with hearty mushrooms for a vegetarian spin.
  • Additional Veggies: Add frozen peas or corn for extra nutrition and a pop of color.
  • Gluten-Free Noodles: Substitute egg noodles with gluten-free pasta for a safe alternative for those with dietary restrictions.
  • Spicy Kick: For heat, incorporate a pinch of cayenne or red pepper flakes—just the right amount will elevate your soup's flavor!
  • Herb Variations: Experiment with fresh herbs like dill or rosemary for a different aromatic profile. They bring their unique warmth to this dish.
  • Creamy Twist: Stir in a splash of heavy cream for a luxurious, creamy texture that enhances the soup's heartiness.
  • Asian Influence: Add soy sauce and switch egg noodles for rice noodles for an Asian-inspired twist, reminiscent of savory Chicken Teriyaki Noodles.

Whether you explore these substitutes or enhance with flavorful additions, your Chicken Noodle Soup can easily adapt to your preferences while still delivering that cherished comfort. If you’re looking for more homestyle recipes, check out my Chicken Adobo Again for another heartwarming dish!

Homemade Chicken Noodle Soup Recipe FAQs

How do I choose the right chicken for this recipe?
Absolutely! For the best flavor and texture, opt for boneless skinless chicken breasts, as they cook quickly and allow for easy shredding. Alternatively, you can use rotisserie chicken for a shortcut without compromising on taste. If you prefer darker meat, chicken thighs add a richer flavor but may require slightly longer cooking times.

What’s the best way to store leftover chicken noodle soup?
Very! After enjoying your homemade chicken noodle soup, let any leftovers cool to room temperature before transferring them to an airtight container. The soup can be stored in the fridge for up to 3 days. Just keep in mind that the noodles may absorb some broth, so consider adding a splash of broth when reheating to revive the soup’s perfect consistency.

Can I freeze chicken noodle soup?
Of course! Freezing your chicken noodle soup is a fantastic way to have a comforting meal on hand during those busy days. To freeze, portion the soup into freezer-safe containers, leaving some space for expansion. It can be frozen for up to 3 months. When ready to enjoy, thaw it overnight in the fridge and reheat gently on the stovetop, adding extra broth as needed.

What should I do if my soup is too salty?
If your soup is too salty, don't worry! You can balance the flavors by adding more broth or water to dilute the saltiness. If you're using broth that is high in sodium next time, consider reducing the amount of added salt initially or using low-sodium broth. Adding a few slices of raw potato can absorb some saltiness; simmer it for about 10 minutes, then remove the potato before serving.

Are there any allergy considerations with chicken noodle soup?
Absolutely! This homemade chicken noodle soup generally contains common allergens like chicken and gluten from the egg noodles. For those with gluten sensitivities, feel free to substitute egg noodles with gluten-free pasta. If you're serving it to kids or pets, ensure that you avoid any ingredients like onion or garlic, which can be harmful to dogs. Always check labels for any pre-made products to avoid hidden allergens!

Chicken Noodle Soup

Cozy Chicken Noodle Soup for Heartfelt Moments at Home

This Chicken Noodle Soup is a comforting classic, perfect for chilly days and nourishing soul food.
Print Recipe Pin Recipe
Prep Time 15 minutes mins
Cook Time 30 minutes mins
Total Time 45 minutes mins
Servings: 6 bowls
Course: Soups
Cuisine: American
Calories: 350
Ingredients Equipment Method Nutrition Notes

Ingredients
  

For the Soup Base
  • 1 lb boneless skinless chicken breasts rotisserie chicken offers a convenient substitute
  • 8 cups low-sodium chicken broth vegetable broth works great for a vegetarian twist
  • 1 small onion, diced shallots can provide a milder taste
  • 3 cloves garlic, minced 1 tsp garlic powder can be used if you're in a hurry
For the Vegetables
  • 2 large carrots, sliced frozen carrots are a handy alternative
  • 2 stalks celery, sliced feel free to skip it if celery isn’t your thing
For the Noodles
  • 2 cups egg noodles you can swap in gluten-free pasta as needed
For Seasoning
  • 2 tbsp olive oil butter can add delicious richness instead
  • 1 tsp dried thyme Italian seasoning can be a good substitute
  • Salt and pepper to taste
For Garnish
  • 2 tbsp fresh parsley, chopped dried parsley can be a last-minute alternative

Equipment

  • Large Dutch oven

Method
 

Step-by-Step Instructions for Homemade Chicken Noodle Soup
  1. Heat 2 tablespoons of olive oil in a large Dutch oven over medium heat. Add the diced onion, sliced carrots, and sliced celery, then sauté for 5-6 minutes until the vegetables are softened and the onions become translucent.
  2. Stir in 3 minced garlic cloves and 1 teaspoon of dried thyme to the softened vegetables. Sauté for an additional minute until the garlic is fragrant and golden.
  3. Pour in 8 cups of low-sodium chicken broth, bringing the mixture to a gentle boil. Carefully add 1 pound of boneless, skinless chicken breasts to the pot, ensuring they are submerged in the broth. Let the soup come back to a boil, then reduce the heat to a simmer and cover. Cook for 20-25 minutes until the chicken is cooked through and tender.
  4. Once the chicken is thoroughly cooked, remove it from the pot and let it cool slightly. Shred the chicken into bite-sized pieces using two forks, then return it to the pot.
  5. Add 2 cups of egg noodles to the pot, stirring them into the savory broth. Cook uncovered for 8-10 minutes, or until the noodles are tender but still have a slight bite (al dente).
  6. Once the noodles are just right, season the soup with salt and pepper to taste. Stir in 2 tablespoons of freshly chopped parsley before serving.

Nutrition

Serving: 1bowlCalories: 350kcalCarbohydrates: 30gProtein: 25gFat: 15gSaturated Fat: 3gPolyunsaturated Fat: 3gMonounsaturated Fat: 8gCholesterol: 70mgSodium: 800mgPotassium: 600mgFiber: 2gSugar: 3gVitamin A: 3000IUVitamin C: 10mgCalcium: 30mgIron: 2mg

Notes

Store leftover Chicken Noodle Soup in an airtight container for up to 3 days in the fridge, or freeze in portions for up to 3 months. Thaw frozen soup overnight before reheating.

Tried this recipe?

Let us know how it was!

Comforting Sausage and Vegetable Soup for Cozy Nights

May 15, 2026 by Grace Snow Leave a Comment

On a chilly evening, as the wind howls outside, there's nothing quite like the aroma of a simmering pot of Hearty Italian Sausage and Vegetable Soup to lift the spirits. This soul-soothing dish brings together savory Italian sausage, tender potatoes, and a vibrant mix of vegetables, creating a meal that is both comforting and nutritious. Not only can it be whipped up in under an hour, making it perfect for those busy weeknights, but it also doubles as a freezer-friendly meal that’s ready when you need it most. With endless customization options, from different types of sausage to your favorite veggies, this recipe puts you in control of your kitchen creations. So, what delightful twist will you add to your soup tonight?

Why is this soup a must-try?

Comforting, on a cold night, this Hearty Italian Sausage and Vegetable Soup envelops you in warmth with every spoonful. Customizable, it invites you to experiment with various sausages and seasonal veggies, ensuring a new twist each time. Time-saving, it’s ready in under an hour, perfect for busy weeknights. Nutrient-packed, this dish is rich in vitamins and fiber, making it a wholesome meal. Freezer-friendly, it can be stored for those unexpected busy days—just reheat and enjoy! For more hearty soup ideas, check out my Asparagus Soup Healthy and Lemon Chicken Soup.

Sausage and Vegetable Soup Ingredients

• Get ready to gather all the comforting flavors!

For the Soup Base

  • Italian Sausage – Provides savory richness; swap for ground turkey or chicken for a lighter option.
  • Onion – Adds sweetness and depth; shallots work well for a milder taste.
  • Celery – Contributes crunch and aroma; leeks can be used instead for a different flavor.
  • Garlic – Enhances flavor; fresh garlic is best, but garlic powder can suffice in a pinch.
  • Chicken Broth – Serves as the flavorful base; vegetable broth can substitute for a vegetarian meal.
  • Water – Balances out the broth; omit if you prefer a thicker soup.

For the Vegetables

  • Carrots – Adds sweetness and texture; frozen carrots are a great time-saving alternative.
  • Russet Potatoes – Provides heartiness; you can use Yukon gold or red potatoes for a unique texture.
  • Red Bell Pepper – Adds sweetness and vibrant color; green bell peppers can be used in place.
  • Corn (Frozen) – Offers sweetness; canned corn can also be a convenient substitute.

Seasoning

  • Salt & Pepper – Enhances overall flavor; adjust to taste, especially mindful of the broth's sodium.

This Sausage and Vegetable Soup makes for the perfect cozy meal, packed with nutrients and ready to warm you up!

Step‑by‑Step Instructions for Hearty Italian Sausage and Vegetable Soup

Step 1: Brown the Sausage
In a large Dutch oven or heavy soup pot, heat over medium-high heat and add the crumbled Italian sausage. Cook it for about 5 minutes, stirring occasionally to break it apart as it cooks, until it's nicely browned and has released its flavorful oils. You'll know it’s ready when the meat is no longer pink.

Step 2: Sauté the Vegetables
Add the chopped onion, diced celery, and minced garlic to the pot with the browned sausage. Continue cooking for another 5 minutes, stirring frequently until the onion becomes translucent and softens, and the garlic is fragrant. This step builds a wonderful aromatic foundation for your hearty Sausage and Vegetable Soup.

Step 3: Drain Excess Fat
If there’s excessive fat in the pot, carefully spoon out some of it to prevent the soup from being greasy. This will ensure that your Hearty Italian Sausage and Vegetable Soup maintains a perfect balance of flavors and richness.

Step 4: Add Broth and Vegetables
Pour in the chicken broth and water, then add the sliced carrots, diced potatoes, chopped red bell pepper, and corn. Stir everything together well, bringing all the vibrant ingredients and flavors into harmony. You’ll start to see the soup come together beautifully!

Step 5: Bring to a Boil
Increase the heat to high and allow the mixture to come to a vigorous boil. Watch closely, as it can bubble over quickly. This step is crucial as it helps to infuse the flavors into your soup, creating that hearty essence you crave.

Step 6: Simmer for Tenderness
Once boiling, reduce the heat to low and let the soup simmer for about 15-20 minutes. Stir occasionally until the potatoes and carrots are tender and easily pierced with a fork. This slow cooking will ensure all the ingredients meld wonderfully, showcasing the delightful qualities of your Sausage and Vegetable Soup.

Step 7: Season and Serve
Before serving, taste the soup and season with salt and pepper according to your preference. Remember to start lightly, as the broth may already have salt. Once perfectly seasoned, ladle the soup into bowls, ready to warm your hearts and feed your family with this comforting Hearty Italian Sausage and Vegetable Soup!

Expert Tips for Sausage and Vegetable Soup

  • Choose Quality Sausage: Select a flavorful Italian sausage, as it defines the soup's richness. Avoid low-fat sausages, which may lack depth.

  • Cut Uniformly: Chop vegetables into similar-sized pieces to ensure even cooking and a harmonious texture in your sausage and vegetable soup.

  • Season Gradually: Taste and adjust your seasonings throughout the cooking process to achieve the perfect balance. Broth can be salty, so start with less salt.

  • Add Greens: For extra nutrition and color, toss in fresh greens like spinach or kale during the last few minutes of cooking.

  • Store Smartly: This sausage and vegetable soup keeps well in the fridge for up to 5 days. For longer storage, freeze portions for those busy days ahead!

  • Reheat With Care: If reheating, add a splash of broth or water to prevent the soup from drying out. Adjust seasoning as needed after reheating.

Make Ahead Options

These Hearty Italian Sausage and Vegetable Soup are perfect for meal prep enthusiasts! You can chop the vegetables and store them in the refrigerator for up to 3 days, ensuring they stay fresh and ready to go. Additionally, you can brown the sausage up to 24 hours in advance and refrigerate it, which reduces your cooking time significantly. When you're ready to enjoy your soup, simply sauté the vegetables, add the browned sausage, broth, and remaining ingredients, then bring everything to a boil before simmering until tender. This way, you’ll have a comforting, homemade meal that is just as delicious as if you prepared it fresh that day!

What to Serve with Hearty Italian Sausage and Vegetable Soup

Warm your heart with a delightful meal that perfectly complements the flavors of cozy soup!

  • Crusty Bread: A classic pairing, its crunchy crust and tender inside are perfect for soaking up every last drop of savory broth.
  • Mixed Greens Salad: Fresh salad brings a crisp contrast, brightening the meal with vibrant colors and a zesty dressing that balances the soup's warmth.
  • Garlic Breadsticks: Fluffy and buttery, these are fantastic for dipping, with an extra touch of garlic enhancing the overall flavor experience.
  • Parmesan Cheese: A sprinkle of this nutty cheese adds an indulgent creaminess, elevating each spoonful with its rich, savory notes.
  • Roasted Vegetables: Offering a textural contrast, the caramelized sweetness of roasted seasonal vegetables harmonizes beautifully with the soup.
  • Pinot Noir: A light-bodied red wine with soft tannins enhances the flavors of the sausage, making for a sophisticated yet comforting dining experience.
  • Fruit Sorbet: A refreshing palate cleanser, it provides a light finish after enjoying the hearty soup, making every bite a new adventure.
  • Chili Lime Cornbread: This unique twist adds a hint of sweetness and a zesty kick, which perfectly complements the robust flavors of the soup.

Let each choice create a memorable meal, surrounding your Hearty Italian Sausage and Vegetable Soup with delightful contrasts and flavors!

Storage Tips for Sausage and Vegetable Soup

  • Fridge: Store leftover Sausage and Vegetable Soup in an airtight container for up to 5 days. Let it cool to room temperature before refrigerating for best results.

  • Freezer: Freeze servings of the soup in airtight containers or freezer bags for up to 3 months. Be sure to leave space for expansion as it freezes.

  • Thawing: To enjoy frozen soup, thaw it overnight in the fridge or use the defrost setting on your microwave.

  • Reheating: Reheat the soup gently on the stove or in the microwave, adding a splash of broth or water if needed to maintain moisture and flavor.

Sausage and Vegetable Soup Variations

Embrace the freedom to make this cozy dish uniquely yours, experimenting with flavors and textures that tantalize your taste buds.

  • Spicy Kick: Add sliced jalapeños or a dash of red pepper flakes for a fiery twist that warms you from the inside out. Your soup will transform into a lively harmony of heat and comfort!

  • Vegetarian Delight: Swap the Italian sausage for plant-based sausage or simply omit it entirely. Packed with protein from beans, this version retains heartiness while being completely meat-free—perfect for plant lovers!

  • Creamy Twist: Stir in a touch of heavy cream or coconut milk at the end of cooking for a luscious, creamy base that adds richness to the dish. This transforms your soup into a silky wonder, ideal for special occasions.

  • Herb-Infusion: Enhance the flavor by tossing in fresh herbs like thyme or basil during the last minutes of cooking. These fresh notes will awaken your soup with aromatic bliss that feels like a hug from the garden.

  • Sweet Potato Swap: Substitute Russet potatoes with diced sweet potatoes for a hint of natural sweetness. They add a beautiful color and a slightly different texture, making the dish even more comforting.

  • Beans Galore: Incorporate white beans, like cannellini or navy beans, for added protein and creaminess. This variation not only fulfills but also enriches the nutrient profile of your soup.

  • Root Vegetable Medley: Experiment with seasonal root vegetables like parsnips or turnips alongside your standard fare. Each bite delivers a delightful surprise, turning your classic soup into a seasonal celebration.

  • Garnish Galore: Top with fresh parsley, chives, or a sprinkle of cheese before serving for an added layer of flavor. This little touch can elevate your bowl to a gourmet experience that impresses every guest.

With all these options, feel free to craft your own masterpiece! And if you're looking for more delicious soup ideas, don't forget to check out my cozy Zuppa Toscana Soup and warm Egg Drop Soup.

Sausage and Vegetable Soup Recipe FAQs

What type of sausage should I use for the best flavor?
Absolutely! Choosing a good quality Italian sausage is key to achieving a rich, savory flavor in your sausage and vegetable soup. Look for ground sausage that has a mix of herbs and spices included. If you’re looking for a lighter option, ground turkey or chicken sausage can work well too, although the flavor will be milder.

How do I store leftovers of this soup?
Very easy! Store any leftover sausage and vegetable soup in an airtight container in the refrigerator for up to 5 days. Make sure to let the soup cool to room temperature before sealing it up. This helps maintain the freshness and flavor, ensuring you have a delicious meal ready to enjoy later!

Can I freeze this soup?
Yes, for sure! To freeze the sausage and vegetable soup, ladle it into airtight containers or freezer bags, leaving some space at the top for expansion (about 1 inch). Label the containers with the date and it will keep nicely frozen for up to 3 months. When you’re ready to enjoy it, just thaw it in the fridge overnight or use the microwave's defrost setting.

What should I do if my soup is too salty?
If you find your soup has become too salty, there are a couple of tricks you can try. First, you can add more vegetables or an extra potato to absorb some of the excess salt. Alternatively, adding a splash of vinegar can help to balance the flavors. Remember to take small steps, tasting frequently, so you don’t overcorrect.

Are there any dietary considerations for this recipe?
Yes! If you or a loved one have dietary restrictions, keep in mind that Italian sausage contains a fair amount of fat and sodium. For a healthier alternative, opt for lean ground turkey or chicken sausage. Additionally, if you have allergies, make sure to choose broth without allergens and always check labels for potential issues. This soup is also easily customized to be vegetarian; simply substitute the sausage with beans or additional veggies, and use vegetable broth instead!

Sausage and Vegetable Soup

Comforting Sausage and Vegetable Soup for Cozy Nights

A comforting Sausage and Vegetable Soup perfect for chilly nights, combining savory sausage and vibrant vegetables for a nutritious meal.
Print Recipe Pin Recipe
Prep Time 10 minutes mins
Cook Time 30 minutes mins
Total Time 40 minutes mins
Servings: 6 bowls
Course: Soups
Cuisine: Italian
Calories: 350
Ingredients Equipment Method Nutrition Notes

Ingredients
  

For the Soup Base
  • 1 pound Italian Sausage Savory richness; swap for ground turkey or chicken for a lighter option.
  • 1 medium Onion Adds sweetness and depth; shallots work well for a milder taste.
  • 2 stalks Celery Contributes crunch and aroma; leeks can be used instead for a different flavor.
  • 3 cloves Garlic Enhances flavor; fresh garlic is best, but garlic powder can suffice.
  • 4 cups Chicken Broth Flavorful base; vegetable broth can substitute for a vegetarian meal.
  • 2 cups Water Balances out the broth; omit if you prefer a thicker soup.
For the Vegetables
  • 2 medium Carrots Adds sweetness and texture; frozen carrots are a great alternative.
  • 2 medium Russet Potatoes Provides heartiness; you can use Yukon gold or red potatoes.
  • 1 medium Red Bell Pepper Adds sweetness and color; green bell peppers can be used.
  • 1 cup Corn (Frozen) Offers sweetness; canned corn can also be used.
Seasoning
  • to taste Salt Enhances overall flavor; adjust to taste.
  • to taste Pepper Enhances overall flavor; adjust to taste.

Equipment

  • Dutch oven

Method
 

Step-by-Step Instructions
  1. Brown the sausage in a large Dutch oven over medium-high heat for about 5 minutes until nicely browned.
  2. Sauté the chopped onion, diced celery, and minced garlic for another 5 minutes until the onion is translucent.
  3. Drain excess fat if necessary to keep the soup balanced.
  4. Add the chicken broth and water along with the carrots, potatoes, bell pepper, and corn. Stir well.
  5. Bring the mixture to a vigorous boil, watching closely.
  6. Once boiling, reduce to low and let simmer for 15-20 minutes until vegetables are tender.
  7. Season with salt and pepper to taste before serving.

Nutrition

Serving: 1bowlCalories: 350kcalCarbohydrates: 35gProtein: 20gFat: 15gSaturated Fat: 5gPolyunsaturated Fat: 1gMonounsaturated Fat: 3gCholesterol: 55mgSodium: 800mgPotassium: 850mgFiber: 5gSugar: 5gVitamin A: 3000IUVitamin C: 30mgCalcium: 80mgIron: 3mg

Notes

This soup keeps well in the fridge for up to 5 days and can be frozen for up to 3 months. Add greens for extra nutrition if desired.

Tried this recipe?

Let us know how it was!

Delicious Rotisserie Chicken Pho Recipe for Quick Comfort

May 11, 2026 by Grace Snow Leave a Comment

As I stirred the simmering broth, the fragrant aroma of cinnamon and star anise wafted through my kitchen, transporting me to a bustling street market in Vietnam. This Easy Rotisserie Chicken Pho Recipe is my go-to for those busy weeknights when I crave comfort without the fuss of a lengthy cooking process. With tender, shredded rotisserie chicken and wholesome rice noodles floating in a flavorful broth, this dish not only satisfies your taste buds but also embraces the gluten-free lifestyle. The best part? You can easily customize the spice level to your liking, making it a family-friendly favorite. Are you ready to dive into a warm bowl of homemade goodness? Let’s get cooking!

Why is Rotisserie Chicken Pho a Game Changer?

Ease of Preparation: This recipe takes just 30 minutes to whip up, making it perfect for busy weeknights.

Flavorful Broth: The combination of aromatic spices like cinnamon, star anise, and ginger creates a depth of flavor that’s undeniably comforting.

Customizable: Adjust the spice level with Sriracha, or add fresh herbs to elevate the taste.

Guilt-Free Enjoyment: With wholesome rice noodles and a gluten-free profile, this soup fulfills cravings without compromise.

Crowd-Pleaser: Serve it up at dinner gatherings, and watch it disappear—everyone loves a hearty bowl of pho!

Enhance your meal with a side of Honey Garlic Chicken Thighs for a well-rounded dinner experience.

Rotisserie Chicken Pho Ingredients

For the Broth
• Chicken Broth – Use low-sodium broth for optimal control over salt content.
• Cinnamon Stick – Adds a warm, aromatic flavor essential for the broth.
• Cloves – Introduces depth and a hint of sweetness, enhancing the broth's complexity.
• Star Anise – Crucial for authentic pho; imparts a distinct anise flavor.
• Garlic (minced) – Enhances aroma and overall taste for a fragrant soup.
• Fresh Minced Ginger – Offers a spicy zest that elevates the broth's profile.
• Sriracha Sauce – Provides heat; customize the amount to suit your spice preference.
• Fish Sauce – Essential for achieving that umami depth characteristic of traditional pho.

For the Noodles
• Rice Noodles (8 oz) – The heart of the soup; choose small or medium for the best bite.

Main Ingredients
• Rotisserie Chicken – A time-saving protein; opt for shredded or chopped pieces for easy serving.
• Green Onions – Brightens the dish with freshness and a mild onion flavor.
• Bean Sprouts – Adds crunch and a refreshing element to the soup.
• Fresh Basil & Cilantro – Essential herbs that enhance the aromatic appeal of the dish.
• Lime Wedges – Adds a zesty finish, balancing the flavors beautifully.

Feel free to savor this Rotisserie Chicken Pho Recipe at home, and experience the comforting warmth in every delicious spoonful!

Step‑by‑Step Instructions for Rotisserie Chicken Pho Recipe

Step 1: Boil the Broth
In a large stockpot or Dutch oven, bring 6 cups of low-sodium chicken broth to a rolling boil over medium-high heat. This serves as the flavorful base for your Rotisserie Chicken Pho. Keep an eye on the pot to ensure the broth doesn’t boil over, which typically takes about 5–7 minutes.

Step 2: Infuse the Flavors
Once boiling, reduce the heat to medium and add a cinnamon stick, 3 cloves, 2 star anise, 3 minced garlic cloves, and a tablespoon of freshly minced ginger. Stir in 2 tablespoons of Sriracha and 2 tablespoons of fish sauce, then let it simmer uncovered for 10–15 minutes, allowing the spices to fully infuse their flavors into the broth.

Step 3: Cook the Rice Noodles
While the broth simmers, bring another pot of water to a boil and cook 8 ounces of rice noodles according to the package instructions—typically about 4–6 minutes. Drain the noodles when they are al dente and rinse them under cold water to stop the cooking process. Set them aside for later assembly.

Step 4: Combine Chicken and Vegetables
About 2 minutes before the noodles finish cooking, add the shredded rotisserie chicken and a cup of fresh bean sprouts to the simmering broth. Stir gently to combine, ensuring the chicken warms through while the bean sprouts soften slightly but retain their crunch—this should take about 2 minutes.

Step 5: Finalize the Pho
Once everything is cooked, remove the pot from heat and carefully discard the whole spices like the cinnamon stick and star anise for a smoother soup. Ladle the aromatic broth with chicken and noodles into bowls and garnish generously with chopped green onions, fresh basil, cilantro, and serve with lime wedges on the side for a zesty finish.

How to Store and Freeze Rotisserie Chicken Pho

Fridge: Store leftover Rotisserie Chicken Pho in an airtight container for up to 3 days. Make sure the soup has cooled down to room temperature before sealing it to avoid condensation.

Freezer: For longer storage, freeze the broth and noodles separately in airtight containers for up to 3 months. This helps maintain texture and flavor when you’re ready to enjoy it again.

Reheating: Thaw the broth overnight in the fridge, then reheat gently on the stove. Add fresh noodles and any extra toppings just before serving to bring the soup back to life!

Noodle Care: If you’ve stored the noodles separately, rinse them under warm water while reheating to refresh their texture before mixing them into the soup.

Expert Tips for Rotisserie Chicken Pho Recipe

  • Taste and Adjust: Always taste the broth before serving. Make any necessary seasoning adjustments with additional fish sauce or Sriracha to achieve your desired flavor.

  • Spice Removal: Remember to remove whole spices like cinnamon sticks and star anise before serving. This ensures a smoother broth without unexpected bites of spice.

  • Toast Spices for Depth: For a more intense flavor, try toasting the spices in the pot for a couple of minutes before adding the broth. This will help release their essential oils and enhance the broth's complexity in your Rotisserie Chicken Pho.

  • Customize Your Broth: Feel free to customize the broth's spice level by adjusting the amount of Sriracha or adding fresh herbs. It’s a delightful way to make the dish your own and cater to different palates.

  • Proper Noodle Cooking: Don’t overcook the rice noodles; aim for al dente. They’ll soak up the broth flavors while still delivering the perfect texture in your dish.

Rotisserie Chicken Pho Variations

Feel free to explore these delightful variations and make this comforting soup uniquely yours.

  • Vegetarian Pho: Replace chicken broth with vegetable broth for a comforting meat-free version.

  • Turkey Twist: Swap out the chicken for leftover turkey after the holidays for a festive spin.

  • Herb Overload: Use fresh mint or Thai basil for a refreshing, aromatic lift to the broth.

  • Spicy Kick: Add fresh sliced jalapeños or increase the Sriracha for an extra heat boost that ignites your taste buds.

  • Veggie-Laden: Toss in additional vegetables like bell peppers or mushrooms to add texture and elevate the nutrition factor in your bowl.

  • Broth Boost: Enhance the broth with a splash of coconut milk for a creamy, rich twist ideal for those looking to indulge.

  • Noodle Substitution: Try using zucchini noodles or rice paper for a low-carb alternative that still delivers on flavor.

  • Asian Flair: Add a dash of soy sauce or hoisin sauce to deepen the umami flavors, reminiscent of your favorite Asian dishes.

If you love adding a personal touch to your meals, you might enjoy pairing this soup with Honey Garlic Chicken Thighs or exploring the delicious world of Chipotle Lime Chicken for a full-flavored dinner that dances on your palate!

Make Ahead Options

These Easy Rotisserie Chicken Pho ingredients make meal prep a breeze! You can prepare the aromatic broth and store it in the refrigerator up to 3 days in advance, which saves you precious time on busy weeknights. Simply simmer the spices (cinnamon, cloves, star anise), garlic, ginger, Sriracha, and fish sauce in the broth and let it cool before refrigerating. For the noodles, cook them just until al dente, then refrigerate them separately. When you're ready to serve, reheat the broth, add in the shredded rotisserie chicken and bean sprouts, and finish off the dish with the garnishes for a delightful, freshly made Rotisserie Chicken Pho that’s just as delicious!

What to Serve with Easy Rotisserie Chicken Pho

Cuddle up to a comforting bowl of pho, perfectly complemented by delightful sides that elevate your meal experience.

  • Crispy Spring Rolls: Light and crunchy, these rolls offer a satisfying contrast to the warm soup, filled with fresh veggies and proteins.

  • Herbed Rice: A fragrant mix of jasmine rice with cilantro and lime zest pairs beautifully with pho, soaking up all those savory broth flavors.

  • Refreshing Mango Salad: The sweetness of ripe mango and the crunch of fresh veggies creates a refreshing balance against the rich broth of the pho.

  • Savory Crab Rangoon: These delightful, crispy bites stuffed with cream cheese and crab bring indulgence to your meal, complementing the savory pho perfectly.

  • Chili Lime Grilled Shrimp: Grilled shrimp brushed with zesty lime and spicy chili add a welcome burst of flavor, bringing a little extra protein to your feast.

  • Vietnamese Iced Coffee: This sweet and creamy brew is a sensational way to cool down and complements the aromatic spices in your pho while awakening your senses.

Create a vibrant meal that not only satisfies your hunger but also excites your taste buds!

Rotisserie Chicken Pho Recipe FAQs

How do I choose the best chicken broth for my Rotisserie Chicken Pho?
Absolutely! Opt for low-sodium chicken broth to have better control over the saltiness of your dish. Look for one that’s rich in flavor without additives, and if you can, choose organic to ensure quality ingredients. A flavorful broth forms the backbone of your pho, so make it count!

How long can I store leftovers of Rotisserie Chicken Pho?
Leftover Rotisserie Chicken Pho can be safely stored in an airtight container in the refrigerator for up to 3 days. Be sure to cool the soup to room temperature before refrigerating to avoid condensation that can lead to sogginess. When you're ready to enjoy it again, reheat gently on the stove for the best results.

Can I freeze Rotisserie Chicken Pho?
Very much so! You can freeze the broth and noodles separately in airtight containers. This way, your soup will maintain its texture and flavor for up to 3 months. When you’re ready to indulge, thaw the broth overnight in the fridge and heat it on the stove before adding your noodles and toppings.

What should I do if my broth tastes too bland?
The more the merrier! If your broth lacks flavor, consider adjusting the seasoning. Start by adding more fish sauce for umami depth and a touch of Sriracha for heat. For an extra boost, you can also toss in a pinch of salt and let it simmer for a few more minutes. Always taste as you go for the perfect balance!

Is Rotisserie Chicken Pho suitable for gluten-free diets?
Absolutely! This recipe is gluten-free as long as you ensure the ingredients, especially the chicken broth and rice noodles, have no gluten-containing additives. Always check labels when shopping, and feel free to replace the noodles with rice vermicelli or another gluten-free option if needed for complete peace of mind.

Rotisserie Chicken Pho Recipe

Delicious Rotisserie Chicken Pho Recipe for Quick Comfort

This Rotisserie Chicken Pho Recipe is a quick and comforting soup, perfect for busy weeknights.
Print Recipe Pin Recipe
Prep Time 10 minutes mins
Cook Time 30 minutes mins
Total Time 40 minutes mins
Servings: 4 bowls
Course: Soups
Cuisine: Vietnamese
Calories: 320
Ingredients Equipment Method Nutrition Notes

Ingredients
  

For the Broth
  • 6 cups low-sodium chicken broth
  • 1 stick cinnamon
  • 3 whole cloves
  • 2 whole star anise
  • 3 cloves garlic (minced)
  • 1 tablespoon fresh minced ginger
  • 2 tablespoons Sriracha sauce
  • 2 tablespoons fish sauce
For the Noodles
  • 8 oz rice noodles
Main Ingredients
  • 2 cups shredded rotisserie chicken
  • 2 stalks green onions (chopped)
  • 1 cup bean sprouts
  • 1 cup fresh basil
  • 1 cup cilantro
  • 1 lime lime wedges

Equipment

  • Stockpot or Dutch oven

Method
 

Step-by-Step Instructions
  1. In a large stockpot or Dutch oven, bring 6 cups of low-sodium chicken broth to a rolling boil over medium-high heat.
  2. Once boiling, reduce the heat to medium and add a cinnamon stick, 3 cloves, 2 star anise, 3 minced garlic cloves, and a tablespoon of freshly minced ginger. Stir in 2 tablespoons of Sriracha and 2 tablespoons of fish sauce, then let it simmer uncovered for 10–15 minutes.
  3. While the broth simmers, bring another pot of water to a boil and cook 8 ounces of rice noodles according to the package instructions—typically about 4–6 minutes.
  4. About 2 minutes before the noodles finish cooking, add the shredded rotisserie chicken and a cup of fresh bean sprouts to the simmering broth.
  5. Once everything is cooked, remove the pot from heat and carefully discard the whole spices. Ladle the broth with chicken and noodles into bowls and garnish with chopped green onions, fresh basil, cilantro, and serve with lime wedges.

Nutrition

Serving: 1bowlCalories: 320kcalCarbohydrates: 35gProtein: 25gFat: 10gSaturated Fat: 2gPolyunsaturated Fat: 0.5gMonounsaturated Fat: 3gCholesterol: 60mgSodium: 700mgPotassium: 450mgFiber: 2gSugar: 2gVitamin A: 15IUVitamin C: 10mgCalcium: 4mgIron: 6mg

Notes

Taste and adjust the broth with additional fish sauce or Sriracha as needed. For best results, remember to remove whole spices before serving.

Tried this recipe?

Let us know how it was!

Creamy Rich Mediterranean Cauliflower Soup in 30 Minutes

April 11, 2026 by Grace Snow Leave a Comment

As I stood in my kitchen, the comforting aroma of roasting garlic and spices enveloped me like a warm embrace, instantly transporting me to the sun-drenched shores of the Mediterranean. This Rich Mediterranean Cauliflower Soup has become a cherished recipe in my home, not only for its creamy textures and vibrant flavors but also for its ability to come together in just about 30 minutes—all in one pot! As someone who loves homemade food, I can assure you that this vegetarian delight is perfect for warming chilly days and a sure-fire hit with even the pickiest eaters in the family. Plus, it’s gluten-free, making it accessible to a wider audience. So why not dive into this delectable recipe and discover a new favorite that promises comfort and satisfaction? What are you waiting for? Let’s get cooking!

Why will you adore this soup?

Simplicity at its finest: This one-pot wonder comes together in under 30 minutes, making it a perfect option for busy weeknights.

Creamy, Dreamy Flavor: The blend of roasted garlic, herbs, and lemon creates a symphony of taste that dances on your palate.

Family Favorite: Even picky eaters can't resist this hearty soup—it's a sure way to gather everyone around the table!

Versatile Ingredients: Feel free to swap in broccoli or other veggies based on what you have on hand, just like with my Asparagus Soup Healthy.

Meal Prep Marvel: Make ahead and store for up to five days or freeze for later, making it a great choice for quick lunches or cozy dinners.

Health-Conscious Dish: At only about 550 calories per serving, you can indulge without guilt, making it an ideal meal to balance cravings and nutrition!

Rich Mediterranean Cauliflower Soup Ingredients

  • For the Soup

  • Cauliflower – The creamy base; fresh heads give the best flavor.

  • Kosher Salt – Enhances and balances flavors; adjust to taste.

  • Black Pepper – Adds warmth; freshly ground pepper elevates the taste.

  • Extra Virgin Olive Oil – Perfect for sautéing; it enriches the soup's flavor.

  • Onion – Sweetness and depth are best found in yellow onions.

  • Garlic – Brings a beautiful aroma; feel free to use garlic powder as a quick substitute.

  • Ground Cumin – Adds warmth; coriander can be a lovely alternative.

  • Sweet Paprika – For sweetness and vibrant color; try smoked paprika for a twist.

  • Ground Sumac – Delivers a tangy lemony note; lemon zest can be used if you’re out.

  • Ground Turmeric – A hint of earthiness and color; optional if you prefer.

  • Low-Sodium Vegetable Broth – The soup's base liquid; chicken broth works too if you're not strict vegetarian.

  • Water – Use to adjust the soup's consistency as desired.

  • Whole Milk or Unsweetened Plant-Based Milk – Ensures creaminess; coconut milk can change the flavor profile deliciously.

  • Lemon Juice – Brightens the dish; using fresh will give you the best results.

  • Fresh Dill – Adds herbaceous notes; parsley can stand in if preferred.

  • Optional Add-Ins

  • Roasted Chickpeas – A protein-packed addition for extra texture and taste.

  • Roasted Garlic – For a deeper, caramelized flavor profile.

  • Additional Herbs (like Thyme or Parsley) – A flavorful twist to cater to your palate.

This rich Mediterranean cauliflower soup is sure to please everyone at your table, combining wholesome ingredients with a delightful, comforting taste!

Step‑by‑Step Instructions for Rich Mediterranean Cauliflower Soup

Step 1: Preheat the Oven
Start by preheating your oven to 425°F (220°C). This will ensure it’s hot enough to roast the cauliflower perfectly. While the oven heats up, gather your ingredients and a large baking sheet to prepare the cauliflower for roasting, which is essential for developing its rich flavor in the Mediterranean cauliflower soup.

Step 2: Prepare and Roast the Cauliflower
Trim the cauliflower into bite-sized florets, then toss them in a bowl with kosher salt, black pepper, and a drizzle of extra virgin olive oil. Spread the seasoned florets evenly on the baking sheet. Roast for about 45 minutes, stirring halfway through, until they’re golden brown and caramelized, bringing out an irresistible nutty flavor that will enhance your soup.

Step 3: Sauté the Aromatics
While your cauliflower is roasting, heat a Dutch oven over medium heat and add a splash of extra virgin olive oil. Sauté the diced onion for about 7 minutes, stirring occasionally until softened and translucent. Add minced garlic, ground cumin, sweet paprika, ground sumac, and ground turmeric, cooking for 1 more minute until the spices are fragrant, creating a warm base for the rich Mediterranean cauliflower soup.

Step 4: Combine Soup Ingredients
Once the cauliflower is done roasting, carefully add it to the Dutch oven with the sautéed aromatics. Pour in low-sodium vegetable broth and enough water to achieve your desired consistency. Increase the heat, bringing the mixture to a boil, then reduce to a simmer. Cover the pot and let it cook for 5–7 minutes, allowing the flavors to meld beautifully.

Step 5: Blend the Soup
After simmering, it’s time to blend your soup for that creamy Mediterranean texture! Use an immersion blender directly in the pot to blend until smooth, leaving some chunks for a rustic feel, or transfer the mixture in batches to a countertop blender. Blend until you reach your preferred consistency, ensuring that the soup is creamy and inviting.

Step 6: Finish with Creaminess
To add a luscious finish to your rich Mediterranean cauliflower soup, stir in whole milk or your choice of unsweetened plant-based milk along with freshly squeezed lemon juice. Gently heat the soup until warm, making sure not to boil, and taste for seasoning. Adjust with extra salt and pepper if needed, ensuring every spoonful is flavorful.

Step 7: Serve and Garnish
Ladle the hot soup into bowls, and for a fresh touch, garnish each serving with a sprinkle of fresh dill and an extra squeeze of lemon if desired. This adds brightness to the rich Mediterranean cauliflower soup and elevates its presentation, making it perfect for a cozy dinner or a special gathering. Enjoy your delicious creation!

How to Store and Freeze Rich Mediterranean Cauliflower Soup

  • Fridge: Store in an airtight container for up to 5 days. The flavors meld beautifully, making it taste even better after a day or two!

  • Freezer: This soup freezes well for up to 3 months. To maintain the best quality, be sure to omit fresh dill before freezing.

  • Reheat: When ready to enjoy, gently reheat on the stove or in the microwave. Add a splash of broth or milk if it has thickened too much during storage.

  • Make-Ahead: Perfect for meal prep! Make a large batch of this rich Mediterranean cauliflower soup for quick lunches or cozy dinners throughout the week.

Variations & Substitutions for Rich Mediterranean Cauliflower Soup

Feel free to play with flavors and textures in this delightful recipe to make it your own!

  • Dairy-Free: Substitute whole milk with coconut milk or almond milk for a creamy, nutty twist without the dairy.

  • Protein-Packed: Add roasted chickpeas on top or blend them in for an extra boost of plant-based protein and a satisfying crunch.

  • Herb Swaps: Experiment with different herbs! Fresh thyme or rosemary can lend aromatic notes that complement the existing flavors beautifully.

  • Extra Vegetables: Toss in some spinach or kale during simmering for a nutritious green boost. Just allow them to wilt before blending; they’ll add color and vitamins.

  • Spice it Up: For a fiery kick, include a pinch of red pepper flakes or some diced jalapeño during the sautéing phase. Adjust to your heat tolerance!

  • Smoky Flavor: Replace sweet paprika with smoked paprika for a deeper, more complex flavor profile. This adds a rustic touch that enhances the soup's overall essence.

  • Nutty Twist: Swirl in some tahini or almond butter just before serving to introduce a rich, nutty depth that pairs incredibly with the soup.

Don’t stop here! If you’re looking to explore even more hearty flavors, check out my Zuppa Toscana Soup for a comforting twist. Whether you prefer the creamy richness or wish to venture into something different, these variations invite creativity in the kitchen. Enjoy every spoonful!

What to Serve with Creamy Mediterranean Cauliflower Soup

The perfect meal is just a sprinkle away, inviting warm flavors and delightful textures to dance on your palate.

  • Warm Pita Bread: Soft and pillowy, it’s perfect for dipping into the creamy soup, enhancing each spoonful’s Mediterranean charm.

  • Greek Salad: Fresh cucumbers, tomatoes, and olives add a crisp, tangy contrast, brightening up the rich Mediterranean cauliflower soup with vibrant flavors.

  • Crusty Sourdough: This bread provides a satisfying crunch on the outside while remaining soft inside, perfect for soaking up the luscious soup.

  • Grilled Chicken Skewers: Juicy and flavorful, these add a touch of protein that pairs wonderfully with the soup’s creamy consistency for a hearty meal.

  • Roasted Chickpeas: Crispy and spiced, these provide an extra crunch and complement the soup’s smooth texture with added protein.

  • Stuffed Grape Leaves: A flavorful side offering stuffed rice and herbs, adding a cultural touch that pairs beautifully with the Mediterranean theme.

  • Wine Pairing: A glass of chilled Sauvignon Blanc enhances the soup’s bright flavors, making it a lovely accompaniment for your meal.

  • Lemon Sorbet: A refreshing palate cleanser after the soup, its lightness and citrus notes echo the lemon juice zing in the dish.

Expert Tips for Rich Mediterranean Cauliflower Soup

  • Roasting Perfection: Make sure your cauliflower is deeply golden and caramelized. Browning adds a rich, nutty flavor to the soup that's simply irresistible.

  • Blend Wisely: Use an immersion blender to achieve your desired texture. Blending too long can result in a completely smooth soup, which takes away some of the lovely rustic feel.

  • Season Gradually: Always taste as you go! Adjust salt and pepper at the end for the best flavor in your rich Mediterranean cauliflower soup.

  • Avoid Curdling: When adding milk, incorporate it slowly and off the heat; this prevents curdling and ensures a creamy finish.

  • Herb Freshness: Reserve adding fresh herbs like dill and any citrus until just before serving. This keeps their vibrant flavors intact and enhances the overall freshness of the dish.

Make Ahead Options

This Rich Mediterranean Cauliflower Soup is a fantastic option for meal prep and healthy eating during busy weeks! You can roast the cauliflower and sauté the aromatics up to 24 hours in advance, storing them separately in the fridge to preserve their flavors. Additionally, the blended soup can be refrigerated for up to 5 days, allowing the flavors to deepen even further. When you’re ready to enjoy it, simply reheat gently on the stove, stirring in the milk and lemon juice right before serving to ensure it stays creamy. By prepping the components ahead, you'll save time while still savoring a comforting, home-cooked meal that's just as delicious as when freshly made!

Rich Mediterranean Cauliflower Soup Recipe FAQs

How do I select the best cauliflower for this soup?
Absolutely! When choosing cauliflower, look for heads that are firm and white with no dark spots or blemishes. The florets should be tightly packed together; avoid those that show signs of yellowing or wilting. For a twist, you can also substitute with fresh, vibrant broccoli, which adds a different flavor profile!

How should I store leftovers of the soup?
Very simply! Transfer the cooled soup into an airtight container and refrigerate; it will keep well for up to 5 days. The flavors tend to deepen after a day or two, making it even tastier for quick lunches or light dinners!

Can I freeze the Rich Mediterranean Cauliflower Soup?
Yes! This soup freezes beautifully for up to 3 months. Just remember to omit the fresh dill before freezing to maintain the best flavor. To freeze, let the soup cool completely, then pour it into freezer-safe containers. Leave some space at the top for expansion. When you’re ready to enjoy, thaw overnight in the fridge and reheat over low heat, adding a splash of broth or milk as needed.

What can I do if the soup turns out too thick?
If your soup ends up thicker than desired, no worries! Simply add more vegetable broth or a splash of water while reheating to reach your preferred consistency. You can use an immersion blender again for a smoother texture if necessary.

Is this soup suitable for dietary restrictions?
Indeed! This Rich Mediterranean Cauliflower Soup is vegetarian and gluten-free, making it accessible to various dietary preferences. If you have lactose intolerance, you can easily use unsweetened plant-based milk like almond or oat milk. It’s also a great option for those avoiding nuts, as it’s nut-free!

Can pets share this soup with me?
While dogs can enjoy some cooked cauliflower as a treat, this soup contains several ingredients that are not suitable for pets, such as garlic and onions, which can be harmful in larger amounts. Always be cautious and consult with your veterinarian before giving your pets any human food!

Rich Mediterranean Cauliflower Soup

Creamy Rich Mediterranean Cauliflower Soup in 30 Minutes

Discover this Rich Mediterranean Cauliflower Soup, a creamy vegetarian delight perfect for chilly days, ready in just 30 minutes!
Print Recipe Pin Recipe
Prep Time 10 minutes mins
Cook Time 30 minutes mins
Total Time 40 minutes mins
Servings: 4 servings
Course: Soups
Cuisine: Mediterranean
Calories: 550
Ingredients Equipment Method Nutrition Notes

Ingredients
  

For the Soup
  • 1 head Cauliflower fresh heads give the best flavor
  • 1 teaspoon Kosher Salt adjust to taste
  • 1/2 teaspoon Black Pepper freshly ground
  • 2 tablespoons Extra Virgin Olive Oil for sautéing
  • 1 medium Onion yellow onions are best
  • 4 cloves Garlic minced; garlic powder as substitute
  • 1 teaspoon Ground Cumin warm flavor
  • 1 teaspoon Sweet Paprika smoked paprika for a twist
  • 1 teaspoon Ground Sumac or lemon zest
  • 1/2 teaspoon Ground Turmeric optional
  • 4 cups Low-Sodium Vegetable Broth or chicken broth
  • 1 cup Water to adjust consistency
  • 1 cup Whole Milk or Unsweetened Plant-Based Milk coconut milk is a tasty alternative
  • 2 tablespoons Lemon Juice fresh juice for best results
  • 1/4 cup Fresh Dill or parsley as substitute
Optional Add-Ins
  • 1 cup Roasted Chickpeas for extra protein
  • 1 head Roasted Garlic for deeper flavor
  • Additional Herbs (like Thyme or Parsley) for extra flavor

Equipment

  • Dutch oven
  • Baking Sheet
  • Immersion blender

Method
 

Step-by-Step Instructions
  1. Preheat your oven to 425°F (220°C). Gather your ingredients and a large baking sheet.
  2. Trim the cauliflower into bite-sized florets and toss them with salt, pepper, and olive oil. Spread on a baking sheet and roast for about 45 minutes, stirring halfway through.
  3. In a Dutch oven, heat olive oil and sauté diced onion for 7 minutes until soft. Add garlic, cumin, paprika, sumac, and turmeric, cooking for 1 minute until fragrant.
  4. Add the roasted cauliflower to the Dutch oven. Pour in vegetable broth and enough water to adjust consistency. Bring to a boil, then simmer for 5-7 minutes.
  5. Blend the soup with an immersion blender until smooth, leaving some chunks for a rustic feel.
  6. Stir in milk and lemon juice, heating gently without boiling. Adjust seasoning with salt and pepper.
  7. Ladle into bowls, garnish with fresh dill and a squeeze of lemon, and serve hot.

Nutrition

Serving: 1bowlCalories: 550kcalCarbohydrates: 40gProtein: 10gFat: 30gSaturated Fat: 10gPolyunsaturated Fat: 5gMonounsaturated Fat: 15gCholesterol: 30mgSodium: 500mgPotassium: 800mgFiber: 8gSugar: 3gVitamin A: 200IUVitamin C: 70mgCalcium: 300mgIron: 2mg

Notes

This soup is perfect for meal prep; make a large batch for quick lunches.

Tried this recipe?

Let us know how it was!

Soup Dumplings in Creamy Gochujang Sauce for a Flavor Kick

March 13, 2026 by Grace Snow Leave a Comment

As I stood over the stove, the rich aroma of sautéed garlic filled my kitchen, a promise of something extraordinary. Enter my Creamy Gochujang Soup Dumplings, a delightful twist on the classic dish that marries juicy, savory dumplings with the creamy, spicy allure of Korean gochujang sauce. This recipe is not only quick to prepare, making it a perfect weeknight dinner, but it also comes with a crowd-pleasing charm that will have your family and friends clamoring for seconds. Whether you're looking to impress or simply enjoy a cozy meal, these dumplings are a fantastic way to indulge your cooking passions. Ready to explore this fusion of flavors that brings warmth to any table? Let’s dive in!

Why Are These Dumplings So Special?

Flavor Explosion: The combination of creamy heavy cream and spicy gochujang elevates the taste to new heights, making every bite an exciting experience.
Quick & Easy: With a straightforward cooking process, you'll have a comforting meal on the table in no time—perfect for busy weeknights.
Versatile Options: Feel free to experiment with different proteins or add veggies like spinach, just like in Chicken Dumplings Cozy.
Crowd-Pleasing: These dumplings are sure to impress family and friends, creating a dining experience everyone will rave about.
Cultural Fusion: This dish beautifully marries Korean and Chinese flavors, introducing a unique twist to your traditional soup dumpling recipes.

Soup Dumplings in Creamy Gochujang Sauce Ingredients

For the Sauce
• Butter – Adds richness and depth when sautéing garlic; substitute with olive oil for a dairy-free version.
• Minced Garlic – Essential for flavor; sauté until fragrant, and fresh garlic gives the best taste.
• Heavy Cream – Creates the creamy base for the sauce; swap with coconut cream for a dairy-free alternative.
• Water – Helps adjust the sauce consistency to your liking.
• Gochujang – Infuses the dish with spice and sweetness, the star ingredient in this soup dumpling recipe; try sriracha mixed with miso if needed.

For the Dumplings
• Frozen Soup Dumplings – Quick and flavorful; ensure they're properly spaced while cooking for even heating.
• Parmesan Cheese (optional) – Adds creaminess and a savory finish; can be omitted for a dairy-free option.

For Garnish
• Sage or Chives – Offers a fresh finish and visual appeal to your dish.

Step‑by‑Step Instructions for Soup Dumplings in Creamy Gochujang Sauce

Step 1: Sauté Garlic
Begin by melting 1 tablespoon of butter in a medium-sized pot over medium-high heat. Once the butter is bubbling, add 2 tablespoons of minced garlic and sauté for about 1–2 minutes until fragrant and lightly golden. This aromatic base will enhance the overall flavor of your soup dumplings in creamy gochujang sauce.

Step 2: Create the Sauce
Next, reduce the heat to medium and pour in 1 cup of heavy cream along with ¼ cup of water. Stir in 3 tablespoons of gochujang, ensuring it blends well into the creamy mixture. Allow the sauce to slowly come to a gentle simmer, which should take about 3 minutes, stirring occasionally until it thickens slightly.

Step 3: Cook the Dumplings
Carefully add the frozen soup dumplings to the hot sauce, ensuring they are spaced apart to avoid sticking. Cover the pot with a lid, and let the dumplings steam in the creamy sauce for about 12 minutes, or until they are cooked through and tender. You’ll know they are ready when the dumplings are plump and the sauce is bubbling gently.

Step 4: Add the Finishing Touches
Once the dumplings are cooked, remove the lid and turn off the heat. Sprinkle freshly grated Parmesan cheese on top, if using, letting it melt slightly into the sauce for added richness. This step brings an extra layer of flavor and creaminess to your soup dumplings in creamy gochujang sauce.

Step 5: Garnish and Serve
To finish, garnish your delicious soup dumplings with chopped sage or chives for a vibrant touch. Serve hot, allowing everyone to enjoy the beautiful contrast of creamy sauce and juicy dumplings right at the table. These comforting bites are sure to impress and satisfy!

Make Ahead Options

These Soup Dumplings in Creamy Gochujang Sauce are perfect for meal prep, allowing you to enjoy this delightful dish even on the busiest of nights! You can prepare the creamy gochujang sauce up to 24 hours ahead by sautéing the garlic and mixing in the cream and gochujang; just store it in an airtight container in the refrigerator. The frozen soup dumplings themselves can also be prepped and kept in the freezer for easy access. When ready to serve, simply reheat the sauce in a pot, add the frozen dumplings, and steam them in the sauce for about 12 minutes. This way, you maintain the flavors and textures, delivering a restaurant-quality meal with minimal effort!

Expert Tips for Soup Dumplings

  • Space Matters: Ensure there’s enough room between the dumplings when cooking. This helps them cook evenly and prevents sticking.
  • Watch the Heat: Keep an eye on the sauce as it simmers; reducing the heat can prevent it from boiling over.
  • Quality Ingredients: For a rich and authentic flavor, use fresh garlic and high-quality gochujang in your soup dumplings in creamy gochujang sauce.
  • Taste Testing: Towards the end, taste the sauce and tweak the seasoning as needed. Add a pinch of salt or a dash more gochujang for extra depth.
  • Garnishing Tips: Fresh herbs, like chives or sage, not only enhance the presentation but also add a burst of freshness to the final dish.

Soup Dumplings in Creamy Gochujang Sauce Variations

Feel free to explore these delightful twists that can enhance your dumpling experience, inviting new flavors to your dinner table.

  • Protein Swap: Use chicken or pork soup dumplings for a hearty variation. This adds a different flavor profile while maintaining that comforting essence.
  • Veggie Boost: Incorporate fresh spinach or bok choy into the sauce for added nutrition and color. The veggies will soften beautifully, enhancing your dish's overall appeal.
  • Dairy-Free Delight: Substitute heavy cream with coconut cream for a vegan-friendly option. You'll enjoy a hint of tropical flavor that beautifully complements the spicy gochujang.
  • Flavor Enhancement: Mix in a splash of soy sauce or sesame oil for a deeper umami flavor. This additional layer will elevate your soup dumplings, making them even more irresistible.
  • Cheesy Goodness: For a creamier texture, try blending different cheeses like cream cheese or gouda into your sauce. This twist will take the richness of your dish to the next level.
  • Heat Lover's Choice: If you crave extra spice, add crushed red pepper flakes or even a dab of chili oil to the sauce. This way, you can customize the heat level to your liking.
  • Quinoa Fusion: Swap out dumplings for quinoa-shaped alternatives for a gluten-free option. Quinoa's nutty flavor pairs surprisingly well with the creamy sauce.
  • Asian Twist: Add a hint of kimchi to the final dish for a punchy probiotic kick. This garnish not only adds flavor but also a delightful crunch, enhancing the overall texture of your soup dumplings in creamy gochujang sauce.

Ready for more culinary inspiration? Try pairing these dumplings with a refreshing side of Egg Drop Soup or explore an enriching warm bowl of Zuppa Toscana Soup.

How to Store and Freeze Soup Dumplings in Creamy Gochujang Sauce

Fridge: Store any leftovers in an airtight container for up to 2 days. Reheat gently on the stove before serving to preserve the creamy sauce's texture.

Freezer: For long-term storage, freeze the soup dumplings separately from the sauce in a freezer-safe container. They can last up to 3 months. Thaw in the fridge before reheating.

Reheating: To reheat, gently simmer the dumplings in sauce over low heat until warmed through. Avoid rapid boiling to keep the dumplings intact.

Tip: Enjoy your delicious soup dumplings in creamy gochujang sauce fresh for the best taste, while leftovers can be a delightful reminder of this flavor-packed meal!

What to Serve with Soup Dumplings in Creamy Gochujang Sauce

Imagine a meal where each bite invites you to savor the warmth and excitement of fusion flavors, making every gathering special.

  • Fluffy Rice: A perfect canvas to soak up the delicious creamy gochujang sauce, adding a comforting, filling element to your meal.
  • Fresh Garden Salad: Crisp greens with a light vinaigrette provide a refreshing contrast to the rich dumplings, balancing textures beautifully.
  • Steamed Bok Choy: The subtle bitterness of bok choy enhances the dish’s flavors, bringing a delightful crunch to accompany the creamy dumplings.
  • Korean Pickled Cucumbers: These tangy, crunchy bites cleanse the palate and complement the spicy notes of the gochujang, making each course memorable.
  • Sesame Noodles: Cold or warm, sesame noodles dressed with soy sauce and sesame oil offer a nutty flavor that pairs harmoniously with the vibrant dumpling sauce.
  • Sooja Cocktail: A lightly carbonated drink with a hint of citrus brings a bright splash of refreshment, perfectly cutting through the richness of the dish.

Let these delightful pairings elevate your dining experience, ensuring no bite goes unappreciated at your table.

Soup Dumplings in Creamy Gochujang Sauce Recipe FAQs

How do I know if my ingredients, like gochujang, are fresh?
Absolutely! Check your gochujang for any off-smells or unusual colors. It should have a rich, deep red color and a slightly sticky texture. If you see dark spots or anything unusual, it’s best to discard it.

What’s the best way to store and reheat leftovers?
Very! Store any leftovers in an airtight container in the fridge for up to 2 days. When ready to enjoy, gently reheat the dumplings on the stove over low heat, adding a little extra cream or water to the sauce to restore its creamy texture. Avoid boiling to prevent the dumplings from breaking apart.

Can I freeze Soup Dumplings in Creamy Gochujang Sauce?
The more the merrier! To freeze, separate the dumplings from the sauce. Place the dumplings in a single layer on a baking sheet to freeze individually before transferring them to a freezer-safe container. They can be frozen for up to 3 months. When ready to use, thaw in the fridge overnight and reheat as mentioned above.

What if my dumplings are sticky together after cooking?
Don’t worry! If your dumplings stick together, gently separate them with a spatula or spoon. For next time, ensure there’s enough space between the dumplings when you add them to the sauce. This will help them cook evenly and reduce sticking.

Is this dish suitable for people with dietary restrictions?
Absolutely! If you have lactose intolerance or dairy allergies, substitute the heavy cream with coconut cream and skip the Parmesan cheese. For gluten-free options, ensure your dumplings are made with gluten-free flour. Always check the labels on your gochujang as some brands may contain gluten.

Can I use fresh dumplings instead of frozen ones?
Yes! If you’re using fresh dumplings, they will likely cook faster. Steam them in the sauce for about 8-10 minutes, checking for doneness when they are plump and heated through. Adjust the sauce ingredients accordingly for the best flavor.

Soup Dumplings in Creamy Gochujang Sauce

Soup Dumplings in Creamy Gochujang Sauce for a Flavor Kick

Delightful Soup Dumplings in Creamy Gochujang Sauce for an exciting flavor kick.
Print Recipe Pin Recipe
Prep Time 10 minutes mins
Cook Time 15 minutes mins
Total Time 25 minutes mins
Servings: 4 dumplings
Course: Soups
Cuisine: Chinese, Korean
Calories: 250
Ingredients Equipment Method Nutrition Notes

Ingredients
  

For the Sauce
  • 1 tablespoon Butter Adds richness and depth
  • 2 tablespoons Minced Garlic Essential for flavor
  • 1 cup Heavy Cream Creates the creamy base
  • ¼ cup Water Adjusts sauce consistency
  • 3 tablespoons Gochujang Star ingredient for spice and sweetness
For the Dumplings
  • 1 package Frozen Soup Dumplings Quick and flavorful
  • ½ cup Parmesan Cheese Optional for creaminess
For Garnish
  • to taste Sage or Chives Fresh finish and visual appeal

Equipment

  • medium-sized pot

Method
 

Step-by-Step Instructions
  1. Begin by melting 1 tablespoon of butter in a medium-sized pot over medium-high heat. Once the butter is bubbling, add 2 tablespoons of minced garlic and sauté for about 1–2 minutes until fragrant and lightly golden.
  2. Next, reduce the heat to medium and pour in 1 cup of heavy cream along with ¼ cup of water. Stir in 3 tablespoons of gochujang, ensuring it blends well.
  3. Carefully add the frozen soup dumplings to the hot sauce, ensuring they are spaced apart to avoid sticking. Cover the pot with a lid, and let the dumplings steam for about 12 minutes.
  4. Once the dumplings are cooked, remove the lid and turn off the heat. Sprinkle freshly grated Parmesan cheese on top, if using.
  5. To finish, garnish your soup dumplings with chopped sage or chives and serve hot.

Nutrition

Serving: 1dumplingCalories: 250kcalCarbohydrates: 30gProtein: 8gFat: 12gSaturated Fat: 7gPolyunsaturated Fat: 1gMonounsaturated Fat: 3gCholesterol: 35mgSodium: 400mgPotassium: 150mgFiber: 2gSugar: 1gVitamin A: 200IUVitamin C: 2mgCalcium: 120mgIron: 1mg

Notes

Ensure enough space between dumplings while cooking to prevent sticking. Use fresh ingredients for the best flavor.

Tried this recipe?

Let us know how it was!

Creamy Crock-pot Butternut Squash Soup for Cozy Nights

March 13, 2026 by Grace Snow Leave a Comment

As the crisp autumn air brings in a swirl of colorful leaves, I've found myself reaching for comforting bowls of soup more often. This Creamy Crock-pot Butternut Squash Soup is my go-to during this cozy season. Not only is it a breeze to prepare, cooking slowly in the crock-pot allows the flavors to meld beautifully while you enjoy your day. Loaded with anti-inflammatory benefits, this vegan and gluten-free delight is perfect for those seeking a nutritious boost while savoring rich, velvety goodness. Whether you're looking to elevate your meal prep game or simply craving a bowl of warmth, this soup checks all the boxes. Curious to find out why this will soon become your favorite chilly-weather recipe? Let’s dive in!

Why is this soup a must-try?

Comforting, Rich Flavor: The creamy butternut squash paired with warm spices creates a delightful flavor profile that brings a cozy feeling to any meal.

Effortless Preparation: Simply toss ingredients into your crock-pot, set it, and forget it! This makes it an easy option for those busy weekdays.

Nutritious Boost: Loaded with vitamins and anti-inflammatory benefits, it's a wholesome addition to your Lemon Chicken Soup lineup or any clean eating plan.

Versatile Base: This soup can easily accommodate your dietary needs - it’s vegan, gluten-free, and dairy-free, making it suitable for everyone at your table.

Perfect for Meal Prep: Enjoy leftovers for days, or freeze portions for quick dinners down the line, just like with our Crock Pot Chicken.

Indulge in the comforting warmth of this soup that's not only delicious but also packed with goodness!

Crock-pot Butternut Squash Soup Ingredients

For the Soup

  • Butternut Squash – The star of the dish, providing natural sweetness and a creamy texture; substitute with pumpkin if out of season.
  • Vegetable Stock – The liquid base that enriches the soup's flavor; choose low-sodium for a healthier option.
  • Garlic (2-3 cloves, minced) – Adds an aromatic kick; garlic powder (1 tsp) is a suitable alternative if fresh garlic isn't available.
  • Medium Apple (cored and quartered) – Introduces natural sweetness that pairs perfectly with the squash; pears can be used instead.
  • Onion (1 medium, diced) – Provides a foundational flavor; enhances the overall aroma and sweetness of the soup.
  • Fresh Ginger (2 knobs, peeled and sliced) – Infuses warmth and a spicy edge; ground ginger (1 tsp) works as a substitute if fresh isn't on hand.
  • Bay Leaf (1) – Gifts a subtle depth to the flavor profile; don't forget to remove it before blending!
  • Ground Cinnamon (1 tsp) – Adds a warm, sweet spice to enhance cozy flavors; perfect for fall vibes.
  • Cayenne Pepper (1/4 tsp) – Introduces a touch of heat; feel free to adjust the quantity to taste or omit it altogether.
  • Sea Salt and Pepper – Essential for seasoning to elevate the soup's taste; seasoned to your preference.
  • Coconut Milk (1 can, 15 oz) – Provides rich creaminess; almond milk can be a lighter alternative if desired.
  • Fresh Thyme – For garnishing, adding a fresh herbal note that brightens up the dish.

Indulge in the soothing goodness of this Crock-pot Butternut Squash Soup—it’s more than just a meal; it’s a bowl of comfort!

Step‑by‑Step Instructions for Crock-pot Butternut Squash Soup

Step 1: Prepare the Ingredients
Begin by peeling, de-seeding, and cutting the butternut squash into cubes. Dice the onion, mince the garlic, and peel and slice the fresh ginger. Core and quarter the medium apple, and set all these ingredients aside. Having everything ready will make assembling the Crock-pot Butternut Squash Soup a breeze.

Step 2: Combine in the Crock-Pot
Place the cubed butternut squash, diced onion, minced garlic, quartered apple, and sliced ginger into your slow cooker. Add the vegetable stock, bay leaf, ground cinnamon, cayenne pepper, sea salt, and pepper. Gently toss all ingredients together until well combined. This is where the warmth begins to develop for your cozy soup.

Step 3: Set the Cooking Time
Cover the crock-pot with its lid and set it to cook on LOW for 6–8 hours or on HIGH for 3–4 hours. The goal is to have the vegetables soft and tender enough to blend smoothly later. Enjoy the delicious aroma wafting through your home as the flavors meld together!

Step 4: Remove the Bay Leaf
Once cooking time is up, carefully remove the lid and take out the bay leaf, discarding it. This step is crucial for ensuring that your Crock-pot Butternut Squash Soup has a smooth texture without any unwanted chewy bits.

Step 5: Add Coconut Milk
Stir in the can of coconut milk, giving your soup a rich, creamy texture. This addition enhances the savory notes and balances the natural sweetness of the butternut squash. Mix thoroughly until all ingredients are well blended into a deliciously creamy consistency.

Step 6: Blend Until Smooth
Using an immersion blender, blend the soup directly in the crock-pot until it’s perfectly smooth and creamy. If you don’t have an immersion blender, you can transfer the soup in batches to a regular blender, but be cautious of the hot liquid. This step ensures a velvety finish for your Crock-pot Butternut Squash Soup.

Step 7: Garnish and Serve
Once blended to your liking, ladle the soup into bowls and garnish with fresh thyme for an herbal touch. Serve warm, perhaps alongside some crusty bread for a wholesome meal. This beautiful soup is now ready to warm your heart and nourish your body!

Make Ahead Options

These Crock-pot Butternut Squash Soup preparations are perfect for busy weeknights! You can chop and measure all your ingredients, such as the butternut squash, onion, and garlic, up to 24 hours in advance, storing them in an airtight container in the refrigerator to maintain freshness. Additionally, the assembled soup (without the coconut milk) can sit in the crock-pot for up to 3 days for easy meal prep—just remember to refrigerate it until you’re ready to cook. When it’s time to serve, simply stir in the coconut milk, blend until smooth, and enjoy a delicious, homemade soup with minimal effort on your part!

How to Store and Freeze Crock-pot Butternut Squash Soup

Fridge: Keep the soup in an airtight container for up to 5 days. Make sure it has cooled completely before sealing to prevent condensation.

Freezer: Portion the soup into freezer-safe bags or containers and freeze for up to 3 months. Squeeze out excess air to prevent freezer burn.

Reheating: To reheat, thaw overnight in the fridge, then warm gently on the stovetop. Add a splash of vegetable stock or water to restore creaminess.

Make-Ahead: This Crock-pot Butternut Squash Soup is perfect for meal prep! Prepare it over the weekend for quick dinners during the week.

What to Serve with Crock-pot Butternut Squash Soup

As the warmth of your creamy soup fills the air, consider delightful sides that will elevate your cozy meal.

  • Crusty Bread: Perfect for dipping, the crunchy exterior contrasts beautifully with the creamy soup, making every bite a comforting delight.
  • Simple Green Salad: A fresh salad with a light vinaigrette brings a refreshing crunch, balancing the soup's rich flavors elegantly.
  • Roasted Brussels Sprouts: These add a touch of nuttiness and a crispy texture that complements the velvety soup wonderfully.
  • Warm Garlic Bread: Infused with garlic and herbs, this bread adds an aromatic dimension that pairs beautifully with the butternut squash soup.
  • Savory Quinoa: This nutty, protein-rich grain adds heartiness to your meal and soaks up that delicious soup.
  • Apple Cider: A cup of warm apple cider echoes the soup's apple notes, providing a flavorful drink that embodies the fall spirit.
  • Cinnamon-Spiced Cookies: For a sweet finish, these cookies echo the warm spices in the soup, creating a cozy and delightful end to your meal.
  • Toasted Pumpkin Seeds: Sprinkle these on top of your soup or serve as a snack; they offer a satisfying crunch and a nutty flavor.
  • Coconut Chia Pudding: A creamy, dairy-free dessert that mirrors the soup's flavors, leaving you with a light and luscious finish.
  • Crispy Kale Chips: Their salty crunch adds an exciting texture contrast while being a healthy side that complements the soup’s richness.

Expert Tips for Crock-pot Butternut Squash Soup

• Use Fresh Ingredients: Fresh butternut squash and herbs make a huge difference in flavor. Ditch any older produce for the best results.

• Avoid Overcooking: Letting the soup cook for too long can make the squash mushy. Stick to the recommended cooking times to maintain a perfect texture.

• Adjust for Spice: Feel free to add more cayenne if you love heat. Always start with less and taste; you can always add more!

• Blend Carefully: If using a regular blender, ensure to let soup cool slightly before blending. Hot liquid can create a dangerous splatter.

• Storage Tips: This soup stores well in the fridge for up to 5 days or can be frozen for up to 3 months. Just reheat gently when ready to enjoy!

Indulge in this delightful Crock-pot Butternut Squash Soup and savor every spoonful of comfort!

Crock-pot Butternut Squash Soup Variations

Feel free to add your personal touch to this comforting soup with these creative variations!

  • Dairy-Free: Replace coconut milk with almond milk for a lighter, nutty flavor while keeping the creaminess intact.
  • Roasted Veggies: Toss in roasted carrots or sweet potatoes for an extra layer of flavor and texture. Roasting brings out their natural sweetness and adds a delightful depth.
  • Protein Boost: Add cooked lentils or chickpeas for added protein and fiber, turning it into a heartier meal. These legumes will blend seamlessly into the velvety soup.
  • Spice It Up: Incorporate an extra pinch of cayenne or even chili flakes for a touch of heat, perfect for warming up on chilly nights. Tailor the spice level to your preference!
  • Herb Medley: Experiment with different herbs like rosemary or basil to switch up the flavor profile, creating a unique twist every time you make it. Fresh herbs invigorate the soup with vibrant tastes.
  • Nutty Crunch: Top with toasted pumpkin seeds or walnuts for a satisfying crunch that contrasts the creamy texture. This adds a delightful combination of flavors and textures.
  • Curry Spin: Mix in a teaspoon of curry powder for an exotic flavor twist that complements the sweetness of squash beautifully. It’s a taste adventure you don’t want to miss!

Explore these variations and discover your new favorite take on this delicious Zuppa Toscana Soup or try a refreshing change with an Egg Drop Soup. Enjoy the cozy experimentation!

Crock-pot Butternut Squash Soup Recipe FAQs

What type of butternut squash should I choose?
Absolutely! Look for a butternut squash that feels heavy for its size, with smooth, tan skin and no dark spots. A squash that's firm to the touch and free of blemishes will yield the sweetest and creamiest soup.

How long can I store leftover soup in the fridge?
You can safely store this comforting Crock-pot Butternut Squash Soup in an airtight container in the refrigerator for up to 5 days. Be sure to let it cool completely before sealing to avoid condensation that can lead to spoilage.

Can I freeze the soup for later?
Yes! To freeze, ladle the cooled soup into freezer-safe containers or bags, making sure to leave a little space at the top for expansion. It can be frozen for up to 3 months. For best results, label the containers with the date, so you know when to enjoy it next! When you’re ready to eat, just thaw it in the fridge overnight and reheat gently on the stovetop.

What if my soup is too thick after blending?
If your soup turns out thicker than desired, don’t worry! Simply add a splash of vegetable stock or water while reheating to thin it out to your preferred consistency. Stir well to ensure everything is well mixed, and feel free to adjust the seasoning if needed.

Is this soup suitable for my dietary needs?
Very! This stew is wonderfully adaptable, being vegan, dairy-free, and gluten-free, which makes it safe for those with allergies or dietary restrictions. However, always double-check the labels on any pre-packaged ingredients like vegetable stock or seasonings to confirm they meet your specific needs.

How do I enhance the soup's flavor?
To elevate the flavor further, consider adding a drizzle of maple syrup for added sweetness or a splash of apple cider vinegar for a touch of acidity. Experiment with spices like nutmeg or smoked paprika based on your taste preferences for a personalized twist!

Crock-pot Butternut Squash Soup

Creamy Crock-pot Butternut Squash Soup for Cozy Nights

This comforting Crock-pot Butternut Squash Soup is a nutritious vegan delight, perfect for chilly nights.
Print Recipe Pin Recipe
Prep Time 15 minutes mins
Cook Time 5 hours hrs
Total Time 5 hours hrs 15 minutes mins
Servings: 6 cups
Course: Soups
Cuisine: Vegan
Calories: 220
Ingredients Equipment Method Nutrition Notes

Ingredients
  

For the Soup
  • 1 each Butternut Squash Peeled, de-seeded, and cut into cubes
  • 4 cups Vegetable Stock Low-sodium for a healthier option
  • 2-3 cloves Garlic Minced; garlic powder (1 tsp) can be a substitute
  • 1 each Medium Apple Cored and quartered; pears can be used instead
  • 1 each Onion Diced
  • 2 knobs Fresh Ginger Peeled and sliced; ground ginger (1 tsp) works as a substitute
  • 1 each Bay Leaf Remove before blending
  • 1 tsp Ground Cinnamon
  • 1/4 tsp Cayenne Pepper Adjust to taste
  • to taste Sea Salt
  • to taste Pepper
  • 1 can Coconut Milk 15 oz; almond milk can be a lighter alternative
  • to garnish Fresh Thyme

Equipment

  • Crock-pot

Method
 

Step‑by‑Step Instructions
  1. Prepare the Ingredients: Peel, de-seed, and cut the butternut squash into cubes. Dice the onion, mince the garlic, and peel and slice the fresh ginger. Core and quarter the medium apple, and set these ingredients aside.
  2. Combine in the Crock-Pot: Place the cubed butternut squash, diced onion, minced garlic, quartered apple, and sliced ginger into the slow cooker. Add the vegetable stock, bay leaf, ground cinnamon, cayenne pepper, sea salt, and pepper. Toss all ingredients together until well combined.
  3. Set the Cooking Time: Cover the crock-pot and set it to cook on LOW for 6–8 hours or on HIGH for 3–4 hours until vegetables are soft and tender.
  4. Remove the Bay Leaf: After cooking, take out the bay leaf and discard it to ensure a smooth texture.
  5. Add Coconut Milk: Stir in the coconut milk until fully blended into a creamy consistency.
  6. Blend Until Smooth: Using an immersion blender, blend the soup directly in the crock-pot until smooth. Alternatively, transfer in batches to a regular blender, being cautious of the hot liquid.
  7. Garnish and Serve: Ladle soup into bowls and garnish with fresh thyme. Serve warm.

Nutrition

Serving: 1cupCalories: 220kcalCarbohydrates: 30gProtein: 3gFat: 10gSaturated Fat: 7gMonounsaturated Fat: 3gSodium: 500mgPotassium: 600mgFiber: 5gSugar: 6gVitamin A: 150IUVitamin C: 30mgCalcium: 4mgIron: 10mg

Notes

Store in an airtight container for up to 5 days in the fridge or freeze for up to 3 months. Reheat gently, adding a splash of vegetable stock if needed.

Tried this recipe?

Let us know how it was!

Creamy Irish Vegetable Soup: A Cozy Bowl of Goodness

March 8, 2026 by Grace Snow Leave a Comment

"What's your go-to comfort food for a chilly day?" That was the question I heard last week while enjoying coffee with a friend, and it sparked a delightful debate. For me, nothing beats a steaming bowl of Irish Vegetable Soup. This dish embraces the essence of home-cooked warmth, featuring a velvety mix of earthy potatoes, sweet carrots, and tender leeks, all simmered to perfection. Plus, it's quick and easy to whip up, making it an ideal option for busy weeknights or lazy weekends. Embracing a plant-based lifestyle? This vegetarian, vegan, and gluten-free recipe offers pure comfort without the fuss. If you're ready to dive into the heart of Ireland with this nourishing soup, let’s explore how to create this one-pot delight that will have your kitchen filled with the aroma of home. What variations would you try with this versatile recipe?

Why is Irish Vegetable Soup So Irresistible?

Simplicity: This recipe is a breeze to make, allowing even novice cooks to create a wholesome meal in under an hour!

Comforting Flavor: Experience the heartwarming combination of potatoes and carrots, making every spoonful a cozy hug in a bowl.

Versatile Ingredients: Customize your soup with optional vegetables like broccoli or kale, catering to your taste buds and pantry.

Healthy Choice: Packed with nutrients, this vegetarian, vegan, and gluten-free soup is not only delicious but also light on calories—about 181 per serving!

Perfect Pairing: Serve with traditional Irish brown bread or your favorite crusty rolls, and enjoy a delightful meal that impresses family and friends.

Meal Prep Friendly: This soup reverses the fast-food ritual with ease; it keeps well in the fridge for a week and also freezes perfectly! Try making a big batch and savoring the taste of Ireland right from your kitchen.

Irish Vegetable Soup Ingredients

• Here’s everything you need to create a heartwarming Irish Vegetable Soup.

For the Base

  • Butter (3 tablespoons) – Adds richness; can substitute with olive oil for a dairy-free option.
  • Olive Oil (1 tablespoon) – Provides healthy fat and flavor to enhance the blend.
  • Yellow Onions (2 medium, roughly sliced) – Gives sweetness and depth to the flavor profile.
  • Leek (1 large, cleaned and sliced) – Creates an aromatic base; be sure to rinse well to remove sand.
  • Carrots (2 large, roughly sliced) – Introduces sweetness and vibrant color; parsnips can be substituted if desired.
  • Garlic (3 cloves, minced) – Infuses the soup with aroma and savory taste.

For the Soup

  • Kosher Salt (to taste) – Enhances all the flavors; adjust according to your preference.
  • Red Skin Potatoes (4 medium to large, cut into large pieces) – Provides body and creaminess when blended; keep the skin on for added nutrients.
  • Unsalted Vegetable Broth (2 quarts, or 8 cups) – Acts as the liquid base; opt for low-sodium for a healthier choice.

Optional Add-ins

  • Broccoli (2 cups, florets) – Offers nutrition and a slight bitterness; can be swapped with kale or spinach for variety.
  • Fresh Chives (snipped) – Perfect as a decorative garnish and adds a mild onion flavor.
  • Freshly Ground Black Pepper – Adds a delightful heat and depth of flavor; adjust to taste.

This Irish Vegetable Soup is a dish that embodies home, warmth, and comfort, and with these simple ingredients, you’re on your way to creating a delightful meal your friends and family will adore!

Step‑by‑Step Instructions for Irish Vegetable Soup

Step 1: Melt the Base
In a 5 to 6-quart Dutch oven, melt 3 tablespoons of butter and 1 tablespoon of olive oil over medium heat. Wait for the butter to fully melt and start bubbling gently, creating a fragrant base. This process takes about 2–3 minutes, and you'll see the butter foam slightly, signaling it's ready for the vegetables.

Step 2: Sauté the Vegetables
Add 2 roughly sliced large carrots, 1 cleaned and sliced leek, and 2 medium roughly sliced yellow onions to the pot, sprinkling them with kosher salt to taste. Stir these vegetables to coat them in the butter and oil, then cover the pot. Cook for approximately 10 minutes until they soften and begin to caramelize, enhancing their natural sweetness and aroma.

Step 3: Add Garlic
After the vegetables have softened, stir in 3 minced garlic cloves and sauté for an additional 2 minutes. The garlic will release a rich and savory aroma, blending beautifully with the other vegetables. Keep an eye on it to ensure it doesn’t burn, as you want it fragrant but not overly browned.

Step 4: Introduce Potatoes and Broth
Next, incorporate 4 large red skin potatoes, cut into large pieces, into the pot. Pour in 2 quarts (8 cups) of unsalted vegetable broth and stir well. Increase the heat to bring the mixture to a rapid boil, observing the bubbles forming on the surface, which will take about 5–7 minutes.

Step 5: Simmer with Broccoli
Once boiling, reduce the heat to low and add 2 cups of broccoli florets if desired. Cover the pot and let it gently simmer for 20 minutes, stirring occasionally. The vegetables should be fork-tender; you can test the broccoli and potatoes for tenderness as they cook.

Step 6: Blend the Soup
After the vegetables are tender, carefully blend the soup in batches using a countertop blender, covering the lid with a clean cloth to prevent splatter. Alternatively, if you have a stick blender, use it directly in the pot for a quicker method. Blend until smooth and creamy, achieving a velvety texture characteristic of a delightful Irish Vegetable Soup.

Step 7: Final Seasoning and Reheat
Return the blended soup to the pot. Taste and adjust the seasoning with additional kosher salt and freshly ground black pepper, warming it over low heat if necessary. This step ensures that all flavors meld beautifully together, providing that heartwarming taste you're aiming for.

Step 8: Serve and Garnish
Spoon the velvety Irish Vegetable Soup into bowls and finish each serving with a sprinkle of freshly chopped chives and a touch of black pepper. The finishing touches add a vibrant color and elevate the dish with a mild onion flavor, inviting your loved ones to enjoy a comforting bowl of soup.

What to Serve with Velvety Irish Vegetable Soup

Nothing complements the warmth of a cozy meal quite like the perfect side dishes, enhancing both flavor and experience.

  • Crusty Bread: A fresh loaf of crusty bread adds texture, perfect for soaking up the velvety soup and amplifying the comforting vibe.

  • Irish Brown Bread: Traditional and hearty, this dense bread is a classic pairing, delivering a nutty flavor that pairs beautifully with the soup.

  • Simple Salad: A light mixed greens salad with a zesty vinaigrette provides a refreshing contrast to the rich soup, balancing out your meal beautifully.

  • Roasted Root Vegetables: Sweet, caramelized, and slightly crispy, these rustic sides echo the earthy flavors of the soup and add delightful texture.

  • Cheesy Garlic Toast: Crispy and cheesy, this irresistible side adds a layer of indulgence, making each bite with the soup even more satisfying.

  • Crisp Apple Slices: For a surprising sweet touch, serve some fresh apple slices on the side. Their crispness will provide a delightful crunch that contrasts nicely with the soup's creaminess.

  • Herbal Iced Tea: A refreshing drink like herbal iced tea cleanses the palate, allowing the flavors of the soup to shine brightly with each bite.

These pairings will not only make your meal more rounded but will also create a memorable dining experience full of warmth and comfort.

Make Ahead Options

Preparing Irish Vegetable Soup ahead of time is a fantastic way to save time during busy weeknights! You can chop all your vegetables and store them in an airtight container in the refrigerator for up to 24 hours before cooking, which helps maintain their freshness and prevents browning. Alternatively, you can cook the soup entirely and let it cool before transferring it to the fridge, where it will keep for up to 3 days. When ready to serve, simply reheat the soup on the stovetop and adjust the seasoning, ensuring it's just as delicious and flavorful as the day you made it. Enjoy the convenience without compromising quality!

Irish Vegetable Soup Variations

Feel free to play around with this recipe and make it your own; there's a world of options waiting to be explored!

  • Broccoli Swap: Replace broccoli with kale or spinach for a different green option, adding both nutrition and color.
  • Flavorful Herbs: Introducing fresh herbs like thyme or bay leaves during cooking deepens the soup's flavor, providing a touch of aromatic goodness.
  • Root Veggie Twist: Substitute parsnips for carrots for an earthy flavor profile that surprises and delights your taste buds.
  • Creamy Texture: Add a splash of coconut milk before blending for a creamy, tropical twist that complements the vegetables beautifully.
  • Add Sweetness: Toss in diced sweet potatoes for a hint of natural sweetness that pairs wonderfully with the savory broth.
  • Chunky Variation: Reserve some cooked vegetables before blending; this will create a delightful textural contrast and add heartiness to your soup.
  • Spice It Up: For a kick, add a pinch of red pepper flakes or a dash of hot sauce to the mix, awakening those taste buds!
  • Umami Upgrade: Stir in some nutritional yeast after blending for a cheesy flavor without the dairy, perfect for a vegan delight!

These variations will surely keep your soup fresh and exciting. Looking for even more comforting soup recipes? You might enjoy Santa Soup Savory or try a warm bowl of Zuppa Toscana Soup. Whatever variation you choose, you’re in for a delicious treat!

Expert Tips for Irish Vegetable Soup

  • Chop Evenly: Ensuring your vegetables are cut roughly the same size helps them cook evenly, making a harmonious blend when pureed.

  • Splash Guard: When blending, always cover the lid with a clean towel to prevent hot soup from splattering, ensuring a mess-free experience.

  • Season to Taste: After blending, taste your soup and adjust the seasoning. Flavors can intensify while cooking, so it's key to enhance it after blending for the perfect Irish Vegetable Soup.

  • Textural Variation: For a chunkier soup, reserve a handful of cooked vegetables before blending. This adds delightful texture and makes every spoonful more interesting.

  • Leek Preparation: Take extra care to thoroughly rinse the sliced leek to remove any sand or grit, giving your soup a clean, smooth taste.

How to Store and Freeze Irish Vegetable Soup

Fridge: Keep your Irish Vegetable Soup in an airtight container for up to 1 week. Let it cool completely before refrigerating to maintain freshness.

Freezer: Freeze the soup in freezer-safe containers for up to 6 months. Leave some space at the top of the container for expansion as it freezes.

Reheating: To reheat, thaw overnight in the fridge. Warm gently on the stove over low heat or in the microwave in short bursts, stirring in between.

Flavor Boost: Consider adjusting seasoning after thawing and reheating, as flavors can mellow during storage. Enjoy a bowl of this comforting Irish Vegetable Soup any time!

Irish Vegetable Soup Recipe FAQs

What types of vegetables work best for this soup?
Absolutely! The core vegetables of this Irish Vegetable Soup are potatoes, carrots, leeks, and onions, but feel free to customize based on your pantry. Broccoli is a fantastic optional add-in that brings nutrition and a subtle bitterness. You can also switch these with kale or spinach, or include parsnips and celery for a unique flavor profile. The key is to ensure they are fresh and fairly firm to avoid mushiness.

How long can I keep Irish Vegetable Soup in the fridge?
This comforting Irish Vegetable Soup can be stored in an airtight container for up to 1 week. Before refrigerating, remember to let it cool completely. This will help preserve its freshness and flavor, allowing you to enjoy the comforting goodness throughout the week!

Can I freeze Irish Vegetable Soup?
Certainly! Freeze your Irish Vegetable Soup in freezer-safe containers for up to 6 months. To ensure the best results, allow it to cool first and leave a little space at the top of the container for the soup to expand as it freezes. When you're ready to enjoy it, thaw overnight in the fridge and reheat gently on the stove or microwave.

How can I avoid splattering when blending the soup?
To prevent splattering when blending, always cover the lid with a clean towel. This creates a splash guard, keeping your kitchen tidy while ensuring a smooth blend. If using a countertop blender, process it in batches and take your time to avoid overheating. If you have a stick blender, you can blend directly in the pot, making it quicker and mess-free!

Is this soup suitable for people with allergies?
This Irish Vegetable Soup is a wonderful option for various dietary needs. It's entirely vegetarian, vegan, and gluten-free. However, if you're cooking for someone with allergies, make sure to check the ingredient labels on your broth and any optional add-ins. Additionally, be cautious with seasonings—confirm they are allergy-safe, especially if using pre-made products.

What should I do if the soup is too thick?
If you find your Irish Vegetable Soup is too thick for your liking, simply stir in a bit more vegetable broth or water while reheating it. Do this gradually until you reach your desired consistency. Additionally, if you're looking for a creamier texture without dairy, blending in a few cooked potatoes can help smooth it out wonderfully!

Irish Vegetable Soup

Creamy Irish Vegetable Soup: A Cozy Bowl of Goodness

Enjoy a warm and nourishing bowl of Irish Vegetable Soup that embodies comfort and simplicity, perfect for chilly days.
Print Recipe Pin Recipe
Prep Time 15 minutes mins
Cook Time 30 minutes mins
Total Time 45 minutes mins
Servings: 6 cups
Course: Soups
Cuisine: Irish
Calories: 181
Ingredients Equipment Method Nutrition Notes

Ingredients
  

For the Base
  • 3 tablespoons Butter Adds richness; can substitute with olive oil for a dairy-free option.
  • 1 tablespoon Olive Oil Provides healthy fat and flavor to enhance the blend.
  • 2 medium Yellow Onions Roughly sliced; gives sweetness and depth to the flavor profile.
  • 1 large Leek Cleaned and sliced; creates an aromatic base.
  • 2 large Carrots Roughly sliced; introduces sweetness and vibrant color.
  • 3 cloves Garlic Minced; infuses the soup with aroma and savory taste.
For the Soup
  • to taste Kosher Salt Enhances all flavors; adjust according to preference.
  • 4 medium to large Red Skin Potatoes Cut into large pieces; keep the skin on for added nutrients.
  • 2 quarts Unsalted Vegetable Broth Acts as the liquid base; opt for low-sodium for a healthier choice.
Optional Add-ins
  • 2 cups Broccoli Florets; can be swapped with kale or spinach.
  • Fresh Chives Snipped; perfect as a decorative garnish.
  • Freshly Ground Black Pepper Adds heat and depth; adjust to taste.

Equipment

  • Dutch oven

Method
 

Cooking Steps
  1. In a 5 to 6-quart Dutch oven, melt 3 tablespoons of butter and 1 tablespoon of olive oil over medium heat. Wait for the butter to fully melt and start bubbling gently, about 2–3 minutes.
  2. Add 2 roughly sliced large carrots, 1 cleaned and sliced leek, and 2 medium roughly sliced yellow onions to the pot, sprinkling them with kosher salt to taste. Cover and cook for approximately 10 minutes.
  3. Stir in 3 minced garlic cloves and sauté for an additional 2 minutes.
  4. Incorporate 4 large red skin potatoes cut into large pieces, and pour in 2 quarts of unsalted vegetable broth. Stir well and bring to boil, approximately 5–7 minutes.
  5. Reduce heat to low and add 2 cups of broccoli florets if desired. Cover and let it simmer for 20 minutes.
  6. Carefully blend the soup in batches using a countertop blender or a stick blender until smooth and creamy.
  7. Return the blended soup to the pot and adjust seasoning with kosher salt and freshly ground black pepper before warming over low heat.
  8. Serve the soup in bowls, garnished with freshly chopped chives and black pepper.

Nutrition

Serving: 1cupCalories: 181kcalCarbohydrates: 33gProtein: 4gFat: 5gSaturated Fat: 2gPolyunsaturated Fat: 0.5gMonounsaturated Fat: 2.5gSodium: 700mgPotassium: 750mgFiber: 6gSugar: 3gVitamin A: 1500IUVitamin C: 45mgCalcium: 40mgIron: 1.5mg

Notes

Chop vegetables evenly for uniform cooking. Cover lid while blending to prevent splattering.

Tried this recipe?

Let us know how it was!

Deliciously Creamy Broccoli Cheddar Soup in 30 Minutes

March 8, 2026 by Grace Snow Leave a Comment

"On a chilly evening, there’s nothing quite like the smell of a warm, creamy soup wafting through the house. This Creamy Broccoli Cheddar Soup not only wraps you in a cozy blanket of flavor, but it also offers a quick cooking solution when time is tight—ready in just 30 minutes! Packed with fresh broccoli, vibrant carrots, and rich cheddar, it's a delightful twist on that beloved Panera classic, minus the long wait. Whether you're feeding a crowd or enjoying a night in, this comforting dish is both a nutritious option and a sure-fire hit with kids and adults alike. Curious how to whip up this creamy goodness in your kitchen? Let’s dive into the details!"

Why is Broccoli Cheddar Soup a Must-Try?

Quick prep time: In just 30 minutes, you can serve a deliciously creamy soup that rivals your favorite restaurants.

Nutritious ingredients: This recipe is loaded with fresh broccoli and vibrant carrots, making it a wholesome choice.

Versatile dish: Enjoy it as a meal or paired with crusty bread. For more variety, consider trying Asparagus Soup Healthy or a hearty Santa Soup Savory.

Kid-approved: The smooth texture and cheesy flavor are sure to be a hit with the little ones, keeping mealtime enjoyable for everyone.

Comfort in a bowl: Perfect for chilly evenings, this soup feels like a warm hug on a cold day!

Broccoli Cheddar Soup Ingredients

• To create your delicious Broccoli Cheddar Soup, gather your ingredients for this creamy delight!

For the Soup Base

  • Butter – Adds richness and flavor; substitute with olive oil for a lighter option.
  • Onion – Provides sweetness and depth; shallots can be used for a milder taste.
  • Garlic – Enhances aroma and taste; fresh garlic is ideal but powdered can work in a pinch.
  • All-Purpose Flour – Thickens the soup; gluten-free flour can be substituted for a gluten-free version.
  • Chicken or Vegetable Stock – Forms the savory soup base; water mixed with bouillon is a great alternative.
  • Kosher Salt & Black Pepper – Essential for seasoning; adjust according to your personal taste.
  • Paprika/Nutmeg (optional) – Adds warmth and complexity; nutmeg can elevate the flavor but is not necessary.

For the Veggies

  • Broccoli Florets – The star of the soup, packed with nutrients and texture; feel free to use fresh or frozen.
  • Carrot – Optional for color and additional nutrients; can be omitted or doubled based on your liking.

For Creaminess and Flavor

  • Half & Half – Contributes to a creamy texture; substitute with milk for a lighter option or heavy cream for richness.
  • Cheddar Cheese – Essential for that classic flavor; freshly grated is best for avoiding gritty texture.

Now you're ready to bring this comforting Broccoli Cheddar Soup to life!

Step‑by‑Step Instructions for Broccoli Cheddar Soup

Step 1: Sauté the Aromatics
In a large Dutch oven, melt 2 tablespoons of butter over medium-high heat until bubbly. Add 1 medium chopped onion, stirring it for about 3-4 minutes until softened and lightly golden. This step builds a delicious flavor base that you’ll love in your Broccoli Cheddar Soup.

Step 2: Add the Garlic
Next, stir in 2 minced garlic cloves and cook for an additional minute until fragrant, releasing all those warm, inviting aromas. Make sure to keep stirring to prevent any garlic from burning, as this step adds depth to the Broccoli Cheddar Soup’s overall flavor.

Step 3: Incorporate the Flour
Whisk in 1/4 cup of all-purpose flour, cooking it for about 1-2 minutes until it turns a light golden color. This will help thicken your soup and give it a luscious, creamy consistency. Keep whisking to avoid lumps and achieve that velvety texture we all crave in our Broccoli Cheddar Soup.

Step 4: Gradually Add the Stock
Slowly pour in 4 cups of chicken or vegetable stock while whisking constantly to avoid clumping. Once well combined, bring the mixture to a boil. Add 4 cups of broccoli florets and 1 grated carrot, then reduce the heat to low, covering the pot for 15 minutes until the veggies are tender and vibrant.

Step 5: Stir in Cream and Cheese
After the vegetables soften, stir in 1 cup of half & half and 2 cups of grated sharp cheddar cheese. Allow the soup to simmer for another minute, stirring until the cheese is melted and creamy. Keep an eye on the consistency, adjusting with more broth if needed to achieve your desired thickness in the Broccoli Cheddar Soup.

Step 6: Season and Serve
Finally, taste your Broccoli Cheddar Soup and season with kosher salt and black pepper to your liking. If desired, sprinkle in a dash of paprika or nutmeg for an added layer of flavor. Serve hot, ideally with crusty bread, and relish each warm, comforting bite!

How to Store and Freeze Broccoli Cheddar Soup

Fridge: Store leftover Broccoli Cheddar Soup in an airtight container for up to 3-4 days. Let it cool to room temperature before sealing.

Freezer: For longer storage, freeze portions of the soup in resealable freezer bags or airtight containers for up to 3 months. Remember to leave some space for expansion.

Reheating: Thaw frozen soup in the refrigerator overnight and reheat on the stovetop over low heat, stirring frequently until warm. Add a splash of broth or milk if it thickens too much.

Avoid Refreezing: Try not to refreeze any soup that has already been thawed, as it can compromise the texture and flavor of this creamy delight.

Expert Tips for Broccoli Cheddar Soup

  • Use Fresh Cheese: Freshly grated cheddar is crucial for preventing a gritty texture; pre-packaged cheese often contains fillers.

  • Mind the Veggies: Avoid overcooking by adding frozen broccoli in the last few minutes. This keeps the texture vibrant and fresh in your Broccoli Cheddar Soup.

  • Taste Before Serving: Always taste and adjust seasoning right before serving. A little extra salt or pepper can elevate the flavor tremendously.

  • Thin the Soup: If your soup thickens too much, simply add a little more broth or milk to achieve your desired creaminess.

  • Customization is Key: Don’t hesitate to get creative! Adding ingredients like diced potatoes or cooked chicken can add heartiness to your Broccoli Cheddar Soup.

Make Ahead Options

These Creamy Broccoli Cheddar Soup preparations are perfect for busy weeknights! You can chop the vegetables and measure your ingredients up to 24 hours in advance, storing them in an airtight container in the fridge to keep them fresh. Additionally, you can fully prepare the soup, let it cool, and refrigerate it for up to 3 days—just remember to leave out the cheese until you reheat it to prevent clumping. When you're ready to enjoy your delicious soup, simply reheat it on the stove over medium heat, stir in the cheese until melted, and season to taste. This way, you’ll have a comforting bowl of Broccoli Cheddar Soup ready to savor in no time!

What to Serve with Creamy 30-Minute Broccoli Cheddar Soup

On a chilly evening, pairing your comforting soup with delicious sides can elevate your meal and create a heartwarming dining experience.

  • Crusty Bread: Perfect for dipping! The crunchy exterior and soft interior complement the soup's creamy texture.

  • Garden Salad: A refreshing mix of greens and veggies contrasts with the rich soup, adding bright flavors and crunch.

  • Garlic Breadsticks: Their buttery, garlicky goodness pairs beautifully, inviting you to indulge even further. Every bite is a cozy delight!

  • Grilled Cheese Sandwich: The iconic pairing! The gooey cheese and crispy bread make it a nostalgic favorite that both kids and adults adore.

  • Roasted Vegetables: Caramelized veggies add depth and a slightly sweet earthiness, perfectly balancing the savory soup.

  • Apple Crisp: End your meal with a warm dessert. Its sweet, baked apples and crunchy topping create a lovely contrast to the soup.

  • Herbed Rice: Fluffy, flavorful rice infused with herbs brings lightness, providing a satisfying side that complements the earthiness of broccoli.

  • Chardonnay or Pilsner: A glass of chilled Chardonnay or a refreshing Pilsner drink pairs wonderfully, enhancing the meal's comfort and warmth.

  • French Onion Soup: Continuing the warmth, a cup of French Onion Soup sets a wonderful tone with its savory broth and melty cheese.

Exploring these options can make your cozy night in feel extra special!

Broccoli Cheddar Soup Variations

Customize this delicious Broccoli Cheddar Soup to make it uniquely yours and delight your taste buds in new ways!

  • Gluten-Free: Substitute all-purpose flour with gluten-free flour for a smooth and creamy soup without the gluten.

  • Dairy-Free: Use coconut milk or almond milk instead of half & half and choose a dairy-free cheddar for scrumptious creaminess.

  • Veggie Boost: Toss in some additional veggies like diced zucchini or cauliflower for a nutrient-packed twist that keeps it vibrant and delicious.

  • Protein-Packed: Add shredded rotisserie chicken or cooked sausage to turn your soup into a satisfying meal that’s both hearty and wholesome.

  • Spicy Kick: Stir in some red pepper flakes or a dash of hot sauce to give your soup a warm, spicy kick that ignites your palate!

  • Herbal Infusion: Fresh herbs like thyme or parsley can add a fragrant boost. Sprinkle them in just before serving for a burst of freshness.

  • Cheese Variety: Try different cheeses like smoked gouda or pepper jack for unique flair, enhancing both flavor and depth in your soup.

  • Potato Addition: For a thicker texture, incorporate diced potatoes. This will make every bite creamy and filling, perfect for a comforting meal.

Feel free to explore these options or create your own variations. And if you’re in the mood for more soup inspiration, why not check out our lovely Zuppa Toscana Soup or try a warming Lemon Chicken Soup for another delightful dinner idea?

Broccoli Cheddar Soup Recipe FAQs

What type of broccoli should I use for Broccoli Cheddar Soup?
Absolutely! While fresh broccoli florets provide the best texture and flavor, you can also use frozen broccoli for convenience. Just remember to add frozen broccoli towards the end of cooking to prevent it from becoming mushy!

How should I store leftover Broccoli Cheddar Soup?
Store any leftover soup in an airtight container in the refrigerator for up to 3-4 days. Let it cool to room temperature before sealing to keep it fresh. When you're ready to enjoy it again, just reheat it on the stovetop over low heat, stirring occasionally.

Can I freeze Broccoli Cheddar Soup?
Yes, you can! Pour the cooled soup into resealable freezer bags or airtight containers, leaving some space at the top to allow for expansion. It can be safely frozen for up to 3 months. To reheat, thaw overnight in the refrigerator and slowly warm on the stovetop, stirring frequently to maintain a creamy texture.

What if my soup is too thick?
Very! If you find your Broccoli Cheddar Soup has thickened too much, simply add a splash of chicken or vegetable stock while reheating. Stir well until you reach your desired consistency. If it’s still too thick, repeat until it’s to your liking!

Are there any dietary considerations with this recipe?
Yes, if you have dietary restrictions, use gluten-free flour instead of all-purpose flour for a gluten-free option. For lactose-free diets, you can substitute half & half with a plant-based milk alternative and use a dairy-free cheese. Enjoy customizing this recipe to fit your needs!

How can I enhance the flavor of my Broccoli Cheddar Soup?
To maximize flavor, always taste before serving and adjust seasonings according to your preference. Adding a pinch of paprika or nutmeg can bring out the warmth in your soup. I often experiment with different cheeses, such as sharp cheddar or pepper jack, for a delicious twist!

Broccoli Cheddar Soup

Deliciously Creamy Broccoli Cheddar Soup in 30 Minutes

This Broccoli Cheddar Soup delivers warmth and comfort, with creamy richness and nutritious ingredients, all in just 30 minutes.
Print Recipe Pin Recipe
Prep Time 10 minutes mins
Cook Time 20 minutes mins
Total Time 30 minutes mins
Servings: 4 servings
Course: Soups
Cuisine: American
Calories: 350
Ingredients Equipment Method Nutrition Notes

Ingredients
  

For the Soup Base
  • 2 tablespoons Butter Add richness and flavor; substitute with olive oil for a lighter option.
  • 1 medium Onion Provides sweetness and depth; can use shallots for a milder taste.
  • 2 cloves Garlic Enhances aroma and taste; fresh is ideal but powdered can work.
  • 1/4 cup All-Purpose Flour Thickens the soup; gluten-free flour can be substituted.
  • 4 cups Chicken or Vegetable Stock Forms the savory soup base; water mixed with bouillon is an alternative.
  • to taste Kosher Salt Essential for seasoning.
  • to taste Black Pepper Essential for seasoning.
  • optional Paprika/Nutmeg Adds warmth and complexity; nutmeg can elevate the flavor.
For the Veggies
  • 4 cups Broccoli Florets The star of the soup; can use fresh or frozen.
  • 1 medium Carrot Optional for color and additional nutrients; can be omitted or doubled.
For Creaminess and Flavor
  • 1 cup Half & Half Contributes to a creamy texture; can substitute with milk or heavy cream.
  • 2 cups Cheddar Cheese Essential for flavor; freshly grated is best.

Equipment

  • Dutch oven

Method
 

Step-by-Step Instructions
  1. In a large Dutch oven, melt 2 tablespoons of butter over medium-high heat until bubbly. Add 1 medium chopped onion, stirring it for about 3-4 minutes until softened and lightly golden.
  2. Next, stir in 2 minced garlic cloves and cook for an additional minute until fragrant.
  3. Whisk in 1/4 cup of all-purpose flour, cooking it for about 1-2 minutes until it turns a light golden color.
  4. Slowly pour in 4 cups of chicken or vegetable stock while whisking constantly. Once well combined, bring to a boil. Add 4 cups of broccoli florets and 1 grated carrot, then reduce heat to low and cover for 15 minutes.
  5. After the vegetables soften, stir in 1 cup of half & half and 2 cups of grated cheddar cheese, allowing to simmer for another minute.
  6. Taste the soup and season with kosher salt and black pepper, adding a dash of paprika or nutmeg if desired. Serve hot.

Nutrition

Serving: 1servingCalories: 350kcalCarbohydrates: 30gProtein: 12gFat: 22gSaturated Fat: 12gPolyunsaturated Fat: 1gMonounsaturated Fat: 5gCholesterol: 60mgSodium: 800mgPotassium: 600mgFiber: 3gSugar: 4gVitamin A: 15IUVitamin C: 80mgCalcium: 25mgIron: 6mg

Notes

Serve with crusty bread for a complete meal.

Tried this recipe?

Let us know how it was!
  • 1
  • 2
  • 3
  • …
  • 14
  • Next Page »

Welcome!

Hi, I’m Grace, a Sydney-based home cook with a passion for bold flavors and trending ingredients. Whether you’re a busy beginner or a seasoned foodie, you’ll find dishes here that are fresh, fun, and full of flavor.

More about me

Popular Recipes

  • One Pot Keto Tuna Casserole
    One Pot Keto Tuna Casserole: Creamy Comfort in Minutes
  • Ultimate Jalapeno Popper Chicken Salad
    Ultimate Jalapeno Popper Chicken Salad That'll Wow Your Tastebuds
  • Green Chile Cheese Dip
    Mouthwatering Green Chile Cheese Dip for Cozy Gatherings
  • Easy Chimichurri Sauce
    Fresh and Zesty Easy Chimichurri Sauce in Just Minutes

Footer

↑ back to top

About

  • Privacy Policy
  • Disclaimer
  • Terms & Conditions

Newsletter

  • Sign Up! for emails and updates

Contact

  • About me
  • Contact me

Copyright © 2025 TastyTrendIngredients