tastytrendingredients

  • Home
  • Recipes
    • Appetizers
    • Breakfast
    • Dessert
    • Dinner
    • Drinks
    • Salads
    • Snacks
    • Soups
  • About me
  • Contact
menu icon
go to homepage
  • Home
  • Recipes
    • Appetizers
    • Breakfast
    • Dessert
    • Dinner
    • Drinks
    • Salads
    • Snacks
    • Soups
  • About me
  • Contact
search icon
Homepage link
  • Home
  • Recipes
    • Appetizers
    • Breakfast
    • Dessert
    • Dinner
    • Drinks
    • Salads
    • Snacks
    • Soups
  • About me
  • Contact
×

Mouthwatering Green Chile Cheese Dip for Cozy Gatherings

June 19, 2026 by Grace Snow Leave a Comment

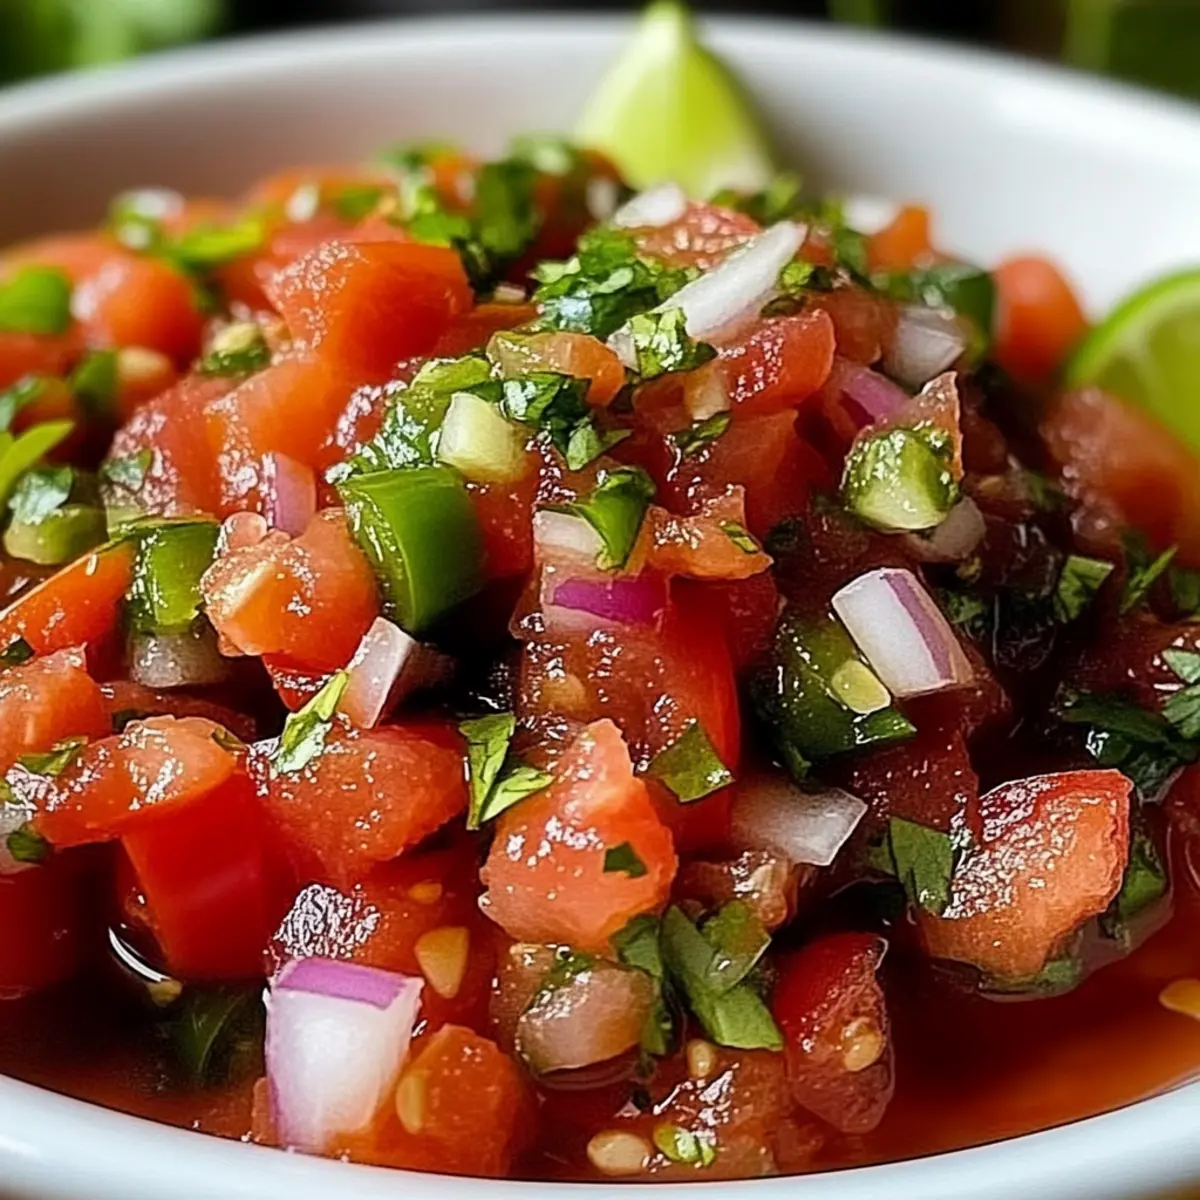
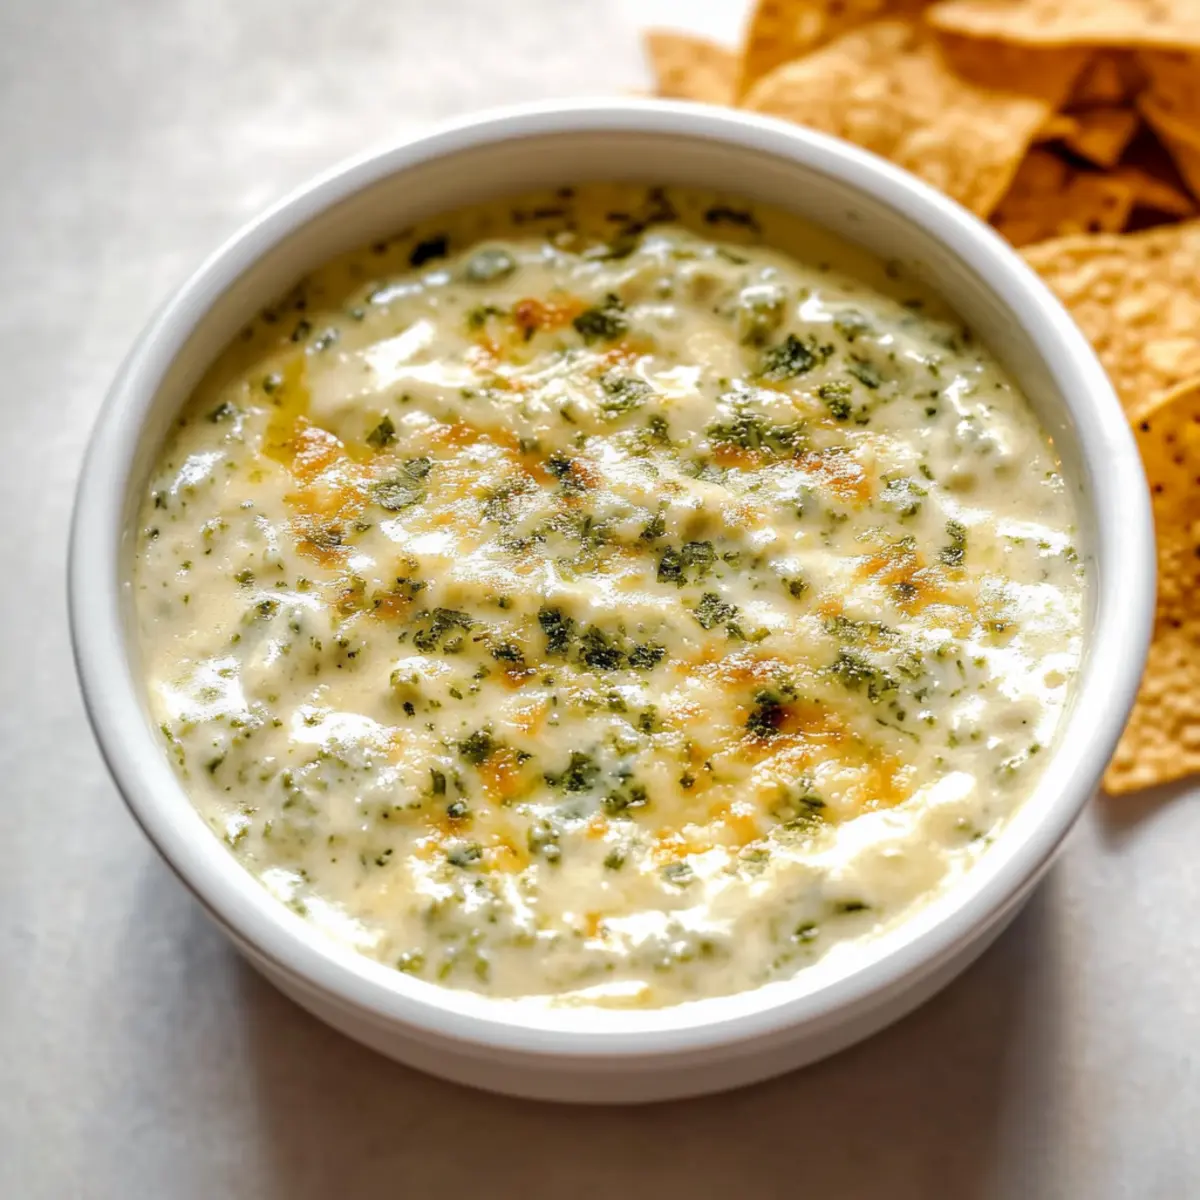
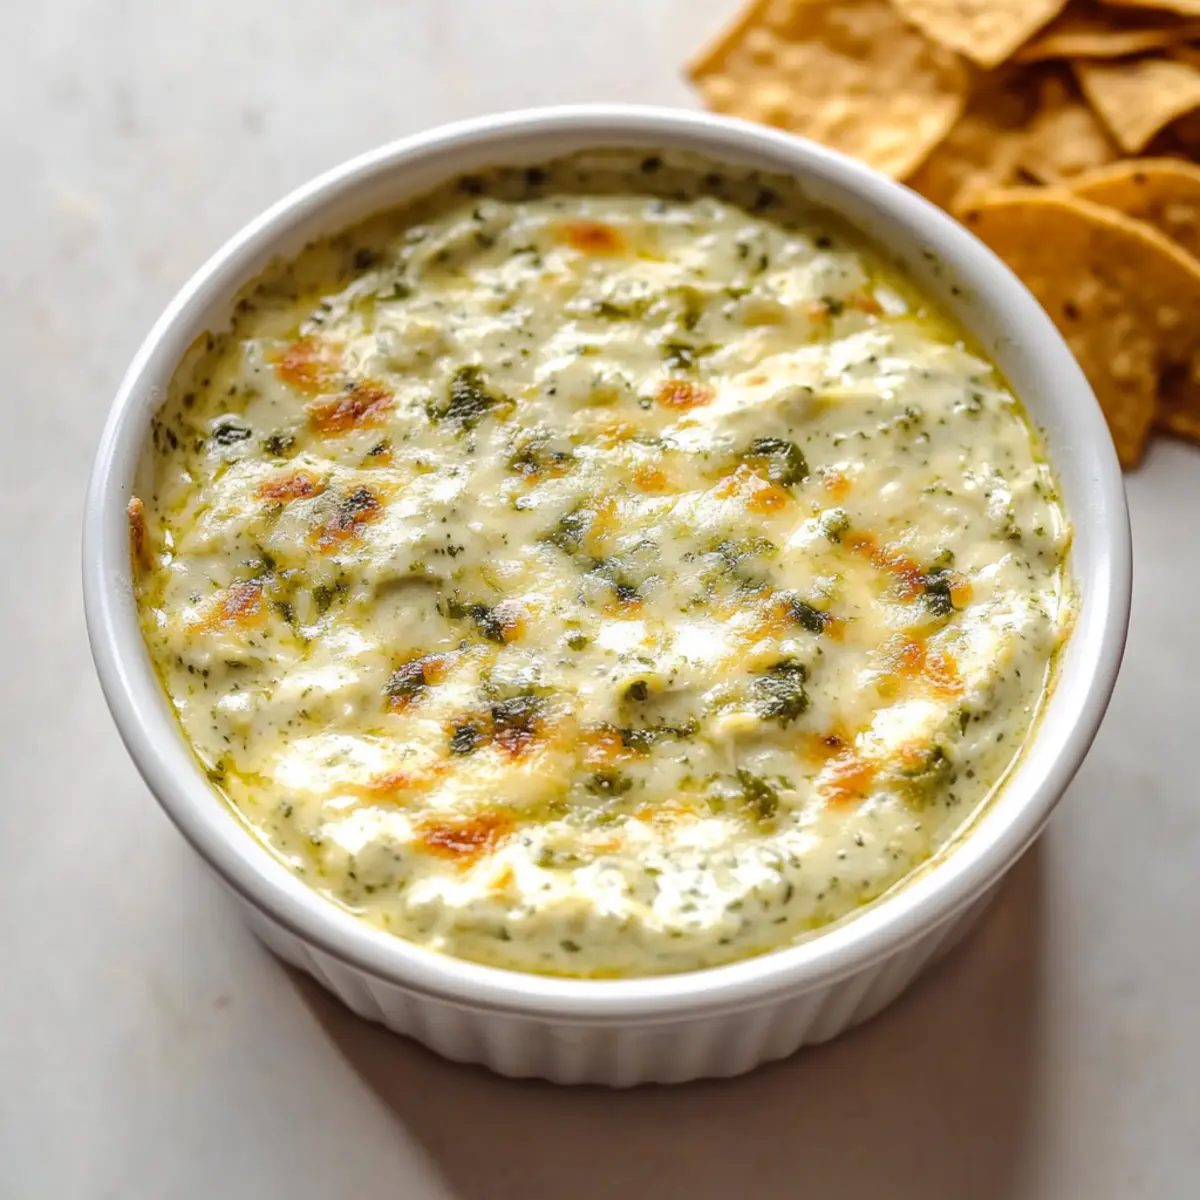
The aroma of warm cheese wafting through the kitchen brings back memories of game nights and gatherings filled with laughter. My go-to comfort food has always been this Green Chile Cheese Dip, a crowd-pleaser that comes together in minutes. It’s beautifully creamy, with just the right kick from the green chiles, making it perfect whether you’re hosting a big party or enjoying a cozy family dinner. Not only is it ridiculously easy to prepare, but it’s also adaptable to suit different tastes—think spicy jalapeño kicks or smoky bacon twists! Plus, it's naturally low carb and keto-friendly, ensuring everyone can enjoy this delightful dip. Are you ready to elevate your snacking game? Let’s dive into the cheesy goodness!

Why is Green Chile Cheese Dip a Must-Try?

Irresistible Comfort: This Green Chile Cheese Dip oozes warmth and nostalgia, making it a go-to for game days or cozy get-togethers.

Easy Preparation: With just a few simple ingredients and minimal fuss, you can create a dip that's both impressive and satisfying!

Adaptable for All Tastes: Whether you're a fan of spicy jalapeños, savory sausage, or smoky bacon, this dip can easily be tailored to everyone's palate.

Crowd-Pleasing Delight: Serve it with tortilla chips or fresh veggies, and watch as everyone instantaneously gravitates toward it—perfect for any gathering!

Healthy Indulgence: Being low carb and keto-friendly means you can enjoy this creamy dip without the guilt. Try it alongside a refreshing salad, like a Coconutty Beans Greens, for a balanced meal!

Green Chile Cheese Dip Ingredients

Here’s everything you need to whip up this comforting dip!

For the Dip

  • Cream Cheese – Provides a creamy texture; be sure it’s fully softened to avoid lumps.
  • Canned Diced Green Chiles – Adds warmth and depth; choose mild or hot based on your taste.
  • Shredded Cheese (Monterey Jack & Sharp Cheddar) – Delivers meltiness and flavor; shred your own for the best texture.
  • Heavy Cream or Milk – Adjusts consistency; use heavy cream for a richer dip or whole milk for a lighter texture.
  • Garlic Powder – Adds savory depth; it's easy to mix in without affecting the dip's creaminess.
  • Onion Powder – Enhances flavor with subtle sweetness; no added texture!
  • Salt – Boosts the overall flavor; season lightly since cheese is naturally salty.

Optional Add-Ins

  • Diced Jalapeños – For extra heat; just fold them in before baking!
  • Cooked Sausage or Chorizo – Create a heartier dip that’s perfect for meat lovers.
  • Crispy Bacon – For a smoky twist; add this delicious flavor before serving.
  • Diced Tomatoes – A refreshing Tex-Mex twist; mix in for added moisture and texture!

Enjoy crafting your Green Chile Cheese Dip!

Step‑by‑Step Instructions for Green Chile Cheese Dip

Step 1: Preheat the Oven
Begin by preheating your oven to 375°F (190°C). While it heats, take a moment to grease a medium-sized baking dish with cooking spray or butter. This will ensure that your Green Chile Cheese Dip slides right out when it’s ready, adding convenience to your serving!

Step 2: Mix Cream Cheese
In a large mixing bowl, beat the softened cream cheese using an electric mixer on medium speed until it’s smooth and creamy—this should take about 2-3 minutes. Ensure there are no lumps, as they can affect the final texture of your dip. The mixture should be velvety and inviting before you proceed.

Step 3: Incorporate Green Chiles
Once the cream cheese is smooth, fold in the drained canned diced green chiles gently with a spatula. Mix until the chiles are evenly distributed throughout the cream cheese—it should add little flecks of green throughout the mixture, hinting at the delicious flavor to come!

Step 4: Add Shredded Cheeses
Next, gradually stir in the shredded Monterey Jack and sharp cheddar cheeses. Make sure to mix gently to maintain a creamy texture. As you do this, you’ll notice the consistency thickening and becoming even cheesier. This step will infuse your Green Chile Cheese Dip with fantastic flavors!

Step 5: Adjust Consistency
To achieve your desired dip consistency, pour in the heavy cream or whole milk slowly while stirring the mixture. Keep mixing until it becomes thick yet spreadable—aim for a smooth blend. You want it to be rich but not too runny so it holds up when served.

Step 6: Season the Mixture
Now, it’s time to add in the garlic powder, onion powder, and a pinch of salt. Stir the seasonings into the dip until they are fully incorporated, enhancing the overall flavor. Taste the mixture and adjust the seasoning if needed; it should taste savory and inviting!

Step 7: Transfer & Bake
Spread the creamy mixture evenly into your prepared baking dish. Place it in the preheated oven and bake for 20-25 minutes, or until the top is bubbling and golden brown. Watch it closely; the enticing aroma will fill your kitchen and signal when it’s ready!

Step 8: Cool Before Serving
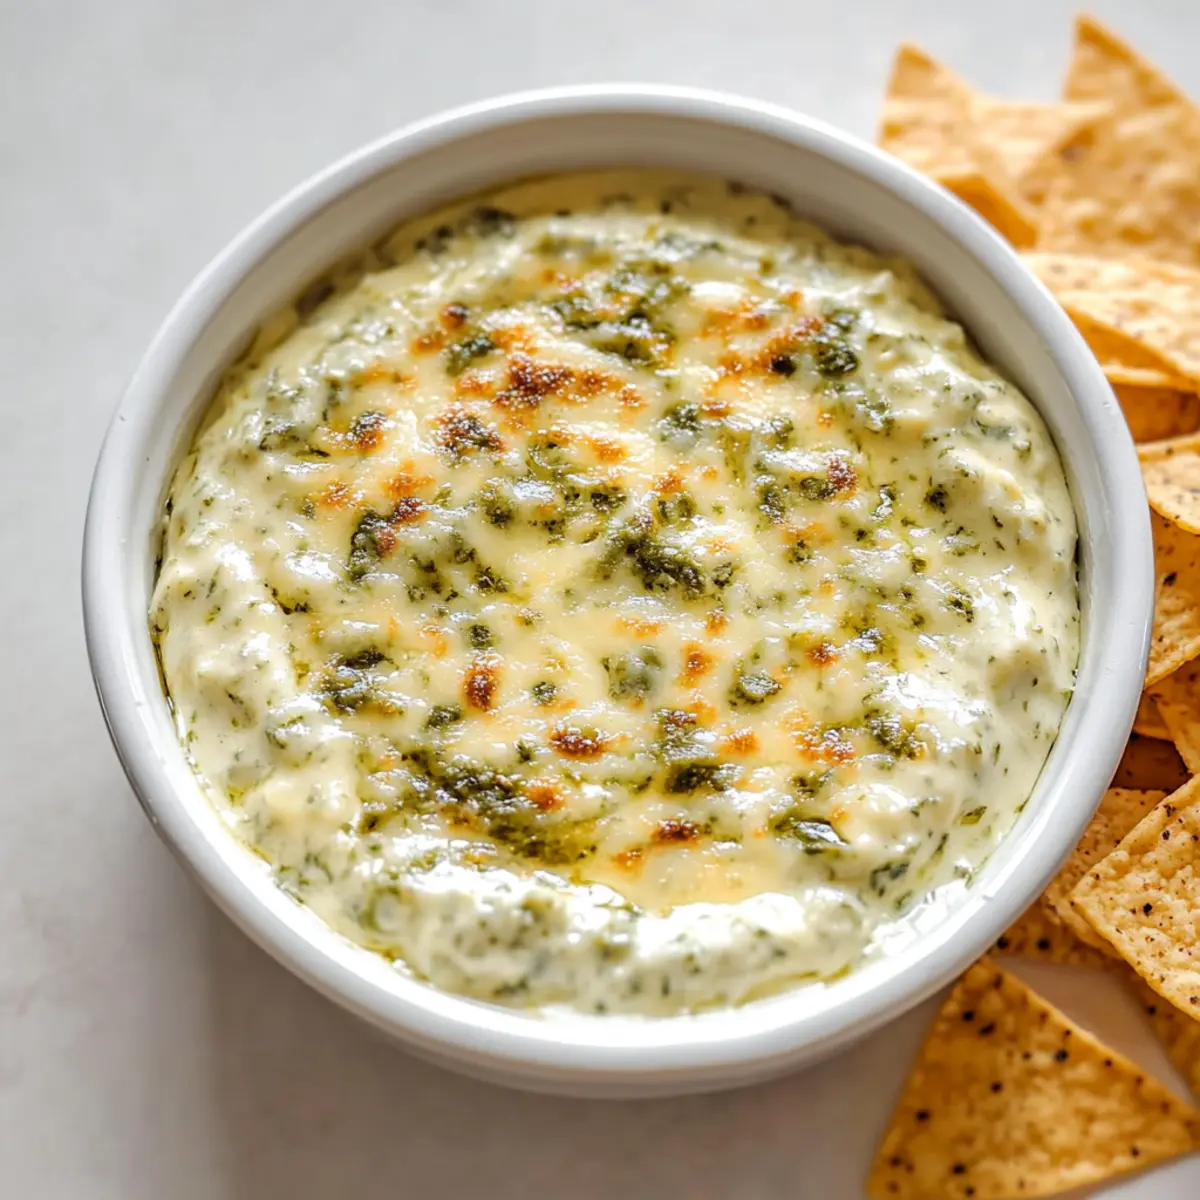
Once baked to perfection, remove the dish from the oven and let it cool for about 5 minutes. This cooling period helps the dip set a bit, making it easier to serve. As you wait, gather your favorite dippers like tortilla chips or fresh veggies to enjoy with your delicious Green Chile Cheese Dip!

What to Serve with Creamy Green Chile Cheese Dip?

The ultimate treat for parties or cozy evenings, this rich dip pairs beautifully with various delightful accompaniments.

  • Tortilla Chips: The perfect crunch to contrast the creamy dip—ideal for scooping and enjoying every savory bite.
  • Veggie Platter: Bright, fresh vegetables like bell peppers and carrots provide a refreshing balance to the richness of the dip.
  • Pita Chips: These crispy chips add an interesting flavor twist that complements the cheesy and spicy notes beautifully.
  • Baked Potatoes: Drizzle the dip over baked potatoes for a satisfying, comforting meal that elevates your traditional sides.
  • Nachos: Spread tortilla chips onto a baking sheet, drizzle with the dip, and add toppings for a decadent indulgence everyone loves.
  • Sliders: Mini sandwiches paired with the dip create a hearty and fun meal, perfect for gatherings where light bites are a must.
  • Salad: A crisp green salad alongside brings freshness, balancing richness and creating a lovely, complete meal experience.
  • Wine or Beer: Serve with a chilled chardonnay or a pale ale to enhance flavors, making every bite more enjoyable.

Green Chile Cheese Dip Variations

Feel free to play with this recipe to match your family's taste preferences and spice levels!

  • Spicy Jalapeño: Add diced jalapeños for an extra kick that balances beautifully with the creamy dip.

  • Sausage Lover's Delight: Incorporate cooked breakfast sausage or chorizo for a heartier, savory twist that meat lovers will adore.

  • Smoky Bacon Bliss: For a deliciously smoky flavor, fold in crispy bacon bits—this adds a satisfying crunch and hearty bite.

  • Three-Cheese Extravaganza: Boost the cheesiness by mixing in mozzarella or pepper jack cheese for extra melt and stretchiness.

  • Tomato Tango: Add diced tomatoes to the mix for a refreshing, vibrant touch that brightens up the whole experience.

  • Creamy Avocado Addition: Mash in some ripe avocado for a creamy, healthy twist that pairs perfectly with the cheese base.

  • Herb Infusion: Mix in fresh herbs like cilantro or chives for an aromatic pop of flavor that elevates your dip.

  • Cheesy Dip Bar: For an interactive twist, set up a dip bar with assorted toppings like chopped green onions, olives, or jalapeños for guests to customize their bowls.

Serving this dip alongside options like tortilla chips, fresh veggies, or even drizzling over nachos will keep everyone coming back for more. For another flavorful combination, consider transforming your veggies into a delightful salad with Coconutty Beans Greens on the side. Enjoy the creative journey!

Expert Tips for Green Chile Cheese Dip

  • Cheese Matters: Always shred your cheese fresh from the block for the best texture—pre-shredded cheese often includes anti-caking agents that can affect meltability.

  • Avoid Graininess: Mix the cream cheese thoroughly until smooth to prevent lumps. Overheating can also lead to a grainy texture, so bake just until bubbly and golden.

  • Make Ahead: You can prepare your dip a day in advance. Simply assemble, cover, and refrigerate; then, bake just before serving for fresh warmth.

  • Stovetop Option: Need a quicker method? Melt everything together slowly over low heat, stirring continuously until smooth—perfect for last-minute gatherings!

  • Spice It Up: For a kick, include diced jalapeños or a pinch of cayenne pepper in your mixture. This adds a delightful heat that complements the creamy dip savory.

  • Storage Tips: Leftovers can be stored in an airtight container in the refrigerator for up to 4 days. Reheat gently to maintain creaminess in your Green Chile Cheese Dip.

How to Store and Freeze Green Chile Cheese Dip

  • Fridge: Store leftovers in an airtight container for up to 4 days. This keeps your Green Chile Cheese Dip fresh and ready for snacking!

  • Freezer: For longer storage, freeze the dip in a freezer-safe container for up to 3 months. Be sure to label and date it, so you remember when you made it.

  • Reheating: Thaw overnight in the refrigerator before reheating. Warm gently in the oven or microwave, mixing occasionally to maintain that creamy texture.

  • Assembly Tips: If you plan to make it ahead, prepare the dip and store it unbaked in the fridge. Bake before serving for a fresh, bubbling delight!

Make Ahead Options

This Green Chile Cheese Dip is perfect for meal prep, allowing you to enjoy its cheesy goodness with minimal effort! You can prepare the entire dip mixture up to 24 hours in advance. Just follow the instructions up until transferring it to the baking dish, then cover and refrigerate. For the best results, ensure the dip is stored in an airtight container to maintain its creamy texture. When you’re ready to serve, simply remove it from the fridge and let it sit at room temperature for about 15-20 minutes before baking. This way, your dip will come out just as delicious and bubbly as when freshly made, ready to impress your guests!

Green Chile Cheese Dip Recipe FAQs

What type of cheese is best for Green Chile Cheese Dip?
I recommend using a combination of Monterey Jack and sharp cheddar for the best meltiness and flavor. Always shred your cheese from the block to avoid anti-caking agents found in pre-shredded varieties, which can affect how well the cheese melts!

How long can I store leftovers of Green Chile Cheese Dip?
Leftovers can be stored in an airtight container in the refrigerator for up to 4 days. This is perfect if you want to enjoy the dip again without losing the creamy goodness! Just be sure to reheat it gently to maintain that lovely texture.

Can I freeze Green Chile Cheese Dip?
Absolutely! You can freeze the dip in a freezer-safe container for up to 3 months. When you're ready to enjoy it again, thaw it overnight in the refrigerator. For reheating, warm it gently in the oven or microwave, stirring occasionally to preserve its luscious consistency.

What if my dip turns out grainy?
If you find your dip has a grainy texture, it's usually due to overheating or not mixing the cream cheese thoroughly enough. To avoid this, be sure to beat the cream cheese until completely smooth before adding other ingredients, and watch it closely while baking—just until bubbly and golden!

Are there any dietary considerations I should keep in mind?
This Green Chile Cheese Dip is naturally low in carbs, making it a fantastic option for those following a keto diet. However, if you or your guests have cheese allergies, consider using a dairy-free cream cheese alternative and adjust the other ingredients accordingly to fit those dietary needs.

Can I prepare the dip ahead of time?
Yes! You can assemble the Green Chile Cheese Dip a day in advance. Simply prepare the mixture, cover it, and store it in the refrigerator until you're ready to bake. This not only saves you time but also allows the flavors to meld beautifully before serving!

Green Chile Cheese Dip

Mouthwatering Green Chile Cheese Dip for Cozy Gatherings

Easy to prepare and adaptable Green Chile Cheese Dip is a crowd-pleaser that brings warmth and flavor to any gathering.
Print Recipe Pin Recipe
Prep Time 10 minutes mins
Cook Time 25 minutes mins
Cooling Time 5 minutes mins
Total Time 40 minutes mins
Servings: 8 servings
Course: Snacks
Cuisine: Mexican
Calories: 240
Ingredients Equipment Method Nutrition Notes

Ingredients
  

For the Dip
  • 8 oz Cream Cheese Fully softened to avoid lumps
  • 1 can Canned Diced Green Chiles Choose mild or hot
  • 1 cup Shredded Cheese (Monterey Jack & Sharp Cheddar) Shred your own for best texture
  • 1/2 cup Heavy Cream or Milk Use heavy cream for richer dip
  • 1 tsp Garlic Powder Adds savory depth
  • 1 tsp Onion Powder Enhances flavor without added texture
  • 1 tsp Salt Season lightly since cheese is naturally salty
Optional Add-Ins
  • 1/2 cup Diced Jalapeños For extra heat
  • 1 cup Cooked Sausage or Chorizo For a heartier dip
  • 1 cup Crispy Bacon Add before serving
  • 1/2 cup Diced Tomatoes Mix in for moisture and texture

Equipment

  • Mixing Bowl
  • Electric mixer
  • Baking Dish

Method
 

Baking Instructions
  1. Preheat your oven to 375°F (190°C) and grease a medium-sized baking dish.
  2. Beat the softened cream cheese until smooth and creamy—a velvety mixture.
  3. Fold in the drained canned diced green chiles gently until evenly distributed.
  4. Gradually stir in the shredded Monterey Jack and sharp cheddar cheeses, mixing gently.
  5. Pour in the heavy cream or whole milk slowly while stirring until thick yet spreadable.
  6. Add the garlic powder, onion powder, and salt, and stir to incorporate.
  7. Spread the mixture into the prepared baking dish, and bake for 20-25 minutes until bubbling and golden.
  8. Let the dip cool for about 5 minutes before serving with tortilla chips or fresh veggies.

Nutrition

Serving: 1servingCalories: 240kcalCarbohydrates: 6gProtein: 10gFat: 22gSaturated Fat: 12gPolyunsaturated Fat: 1gMonounsaturated Fat: 8gCholesterol: 60mgSodium: 500mgPotassium: 150mgSugar: 2gVitamin A: 500IUVitamin C: 2mgCalcium: 250mgIron: 1mg

Notes

Freshly shredded cheese is recommended for best meltability. Can be prepared a day in advance and baked just before serving.

Tried this recipe?

Let us know how it was!

Fresh and Flavorful Homemade Salsa for Your Next Gathering

June 19, 2026 by Grace Snow Leave a Comment

As I stood in the kitchen, the aroma of ripe tomatoes and zesty lime filled the air, instantly transporting me to a sun-drenched market in Mexico. There's something so gratifying about whipping up a batch of Homemade Salsa, a dish that invites creativity while being naturally fresh, vegan, and gluten-free. This quick and versatile recipe is not just about flavor—it's a celebration of customizable ingredients that suit every palate, from the heat-seekers to those who prefer a milder touch. Whether it's a spontaneous movie night with friends or an elegant family dinner, this salsa is the perfect companion, elevating any meal with its vibrant color and texture. Ready to dive in and discover all the delicious possibilities? Let’s get started!

Why Make Your Own Salsa?

Freshness is key: There's nothing quite like the taste of homemade salsa made with ripe, juicy tomatoes and vibrant ingredients. Customizable to suit your palate, whether you like it mild or spicy, this recipe offers endless variations. Easy preparation means you can whip it up in just minutes—perfect for last-minute gatherings or snacks! Healthy and wholesome, it's a guilt-free dip packed with flavor and nutrients. Pair it with your favorite dishes or enjoy it straight with tortilla chips. Want more fantastic recipes? Check out my Homemade Hot Chocolate for a cozy treat or try Fiesta Lime Chicken for an exciting meal!

Homemade Salsa Ingredients

For the Salsa

  • Tomatoes – The star of your homemade salsa; use ripe, juicy varieties for a burst of flavor.
  • Onion – Adds a sharp, aromatic bite to balance the sweetness; swap for green onions if you prefer something milder.
  • Jalapeños – Introduces heat; adjust according to your spice tolerance or substitute with diced bell peppers for a milder salsa.
  • Cilantro – Lends a fresh, herbaceous note that brightens the dish; if it’s not your favorite, fresh parsley works too.
  • Lime – Infuses zesty acidity for a flavor boost; freshly squeezed juice is ideal, but bottled can do in a hurry.
  • Salt – Enhances overall flavor; start with a small amount and adjust to taste for your perfect homemade salsa.

Optional Add-ins

  • Corn – Sweetens the mix, adding a delightful crunch; fresh or canned works wonderfully.
  • Diced Mango – For a fruity twist that brings an unexpected flavor contrast; ensure it’s ripe for optimal sweetness.
  • Smoked Tomatoes or Chipotle Peppers – Incorporate a deep, smoky flavor for a unique spin on traditional salsa.

This homemade salsa is customizable for every occasion, so don't hesitate to get creative!

Step‑by‑Step Instructions for Homemade Salsa

Step 1: Prepare the Ingredients
Start by washing and drying 4 ripe tomatoes, 1 small onion, 2 jalapeños, and a bunch of cilantro. Finely dice the tomatoes, ensuring there are no large chunks, to create that perfect salsa texture. Chop the onion and jalapeños uniformly, keeping them bite-sized for a balanced flavor. Roughly chop the cilantro, releasing its fresh aroma, and set all the ingredients aside for mixing.

Step 2: Combine the Base Ingredients
In a large mixing bowl, gently combine the diced tomatoes, chopped onion, jalapeños, and cilantro. Use a spatula or wooden spoon to mix them together, ensuring even distribution of flavors. Look for a colorful medley of ingredients, showcasing that vibrant freshness which is the hallmark of your homemade salsa. This ensures each scoop is packed with delightful taste.

Step 3: Add Lime Juice
Squeeze the juice of 2 fresh limes over the salsa mixture, allowing the citrusy goodness to enhance the flavors. Make sure to catch any seeds with your hand or use a strainer if you prefer. Gently fold the ingredients together again to ensure the lime juice is well distributed, brightening the dish with its zesty kick. The salsa should start to glisten at this point.

Step 4: Season with Salt
Sprinkle about 1 teaspoon of salt over the salsa, adjusting to your taste preferences. Use your spatula to mix gently, taking care not to bruise the vegetables. Taste the mixture, making adjustments to the salt as needed, and ensure that all flavors are balanced, creating a deliciously cohesive homemade salsa. The vibrant color and enhanced aroma should invite immediate enjoyment.

Step 5: Let the Flavors Meld
Cover the bowl with plastic wrap or a lid and let the mixture sit at room temperature for at least 30 minutes. This resting period allows the flavors in your homemade salsa to meld beautifully, creating a richer, more complex taste. As you wait, imagine the bursts of freshness that will soon grace your favorite meals or snack times.

Step 6: Serve and Enjoy
After the flavors have mingled, give the salsa a quick stir before serving. Present the vibrant salsa in a beautiful bowl alongside crispy tortilla chips, or use it as a topping for tacos and salads. The texture should be chunky yet cohesive, with each bite delivering a delicious blast of flavor. Your homemade salsa is ready to elevate any occasion!

Homemade Salsa Variations to Try

Feel free to make this homemade salsa truly yours with these creative twists that will tantalize your taste buds!

  • Mango Madness: Add diced ripe mango for a sweet, fruity surprise that pairs beautifully with the tangy lime.

  • Corny Goodness: Toss in fresh or canned corn to lend a delightful crunch and natural sweetness to your salsa.

  • Smoky Flavor: Substitute regular tomatoes with smoked tomatoes or add chipotle peppers for a rich, smoky twist that’s sure to impress.

  • Herb Blend: Experiment with fresh herbs like basil or mint to give your salsa a unique spin that brightens each bite.

  • Roasted Red Peppers: Replace jalapeños with diced roasted red peppers for a milder taste that adds a beautiful color and flavor.

  • Adjustable Heat: Modify the jalapeño quantity to control spice levels; remove seeds for a milder kick or leave them in for bold flavor.

  • Black Bean Boost: Stir in some canned black beans for added protein and a hearty texture that makes this dip even more satisfying.

  • Citrus Burst: Add zests of lemon or orange alongside lime juice for a refreshing citrus note that dances on the palate.

Don’t forget to check out my notes on Shakshuka Savor Bold for more culinary inspiration. Enjoy your vibrant creation!

Make Ahead Options

These Homemade Salsa preparations are perfect for meal prep enthusiasts! You can chop the tomatoes, onions, jalapeños, and cilantro up to 24 hours in advance and store them in an airtight container in the refrigerator. To maintain the freshness and prevent the ingredients from becoming soggy, keep the chopped veggies separate from the lime juice and salt until you're ready to serve. Just before serving, mix in the lime juice and seasoning, allowing the salsa to meld its flavors for about 30 minutes at room temperature. By prepping ahead, you’ll have a fresh, flavorful salsa ready to complement any meal with minimal effort!

What to Serve with Customizable Homemade Salsa?

As you prepare to enjoy your vibrant salsa, consider these delightful companions that elevate your snacking experience to new heights.

  • Crispy Tortilla Chips: The classic pairing; their salty crunch perfectly balances the freshness of the salsa, delivering an irresistible snack.

  • Guacamole: A rich, creamy contrast to the tangy salsa, guacamole adds a smooth texture that complements the crunch of chips beautifully.

  • Tacos Filled with Grilled Chicken: The savory grilled chicken harmonizes with the zesty salsa, creating a mouthwatering blend that excites the taste buds.

  • Mexican Street Corn (Elote): Sweet, grilled corn lathered in lime and cheese offers a delightful texture contrast alongside the fresh salsa.

  • Fresh Avocado Slices: The creaminess of ripe avocado enhances the flavors of the salsa while providing a silky texture that’s simply heavenly.

  • Cilantro Lime Rice: This fragrant, fluffy rice brings subtle acidity and fresh notes, making each mouthful a captivating adventure.

  • Cold Beer or Sangria: Pair your salsa with a refreshing drink to quench your thirst; both drinks enhance the vibrant flavors of the salsa.

  • Margaritas: For a festive touch, the citrusy notes of a margarita echo the lime in your salsa, making for a refreshing and complementary sip.

  • Fruit Salad: A light, refreshing combo of seasonal fruits brightens each bite, adding a touch of sweetness that contrasts with the bold salsa.

How to Store and Freeze Homemade Salsa

Fridge: Store your homemade salsa in an airtight container in the refrigerator for up to 4 days. This helps preserve its freshness while the flavors continue to deepen.

Freezer: For longer storage, you can freeze homemade salsa in freezer-safe bags or containers for up to 3 months. Make sure to leave some space for expansion as it freezes.

Thawing: To enjoy frozen salsa, transfer it to the fridge to thaw overnight. Stir well before serving, as some separation may occur during freezing.

Reheating: Homemade salsa is best enjoyed fresh; however, if reheating, do it gently on the stove over low heat and enjoy it warm with your favorite dishes!

Expert Tips for Homemade Salsa

  • Taste as You Go: Always sample your homemade salsa while mixing. Adjust acidity and salt based on your preferences for a balanced flavor.

  • Fix Watery Salsa: If your salsa turns out too watery, strain it with a fine-mesh sieve or add diced onion to absorb excess liquid.

  • Chill for Flavor: Allow the salsa to sit at room temperature for at least 30 minutes. This resting period allows flavors to meld beautifully for an even tastier salsa.

  • Customize Heat Level: When adjusting jalapeño heat, remember that removing the seeds and membranes will reduce spiciness.

  • Explore Add-ins: Consider incorporating sweet corn or diced mango for a fun twist. These add-ins can enhance the fruitiness of your homemade salsa.

Homemade Salsa Recipe FAQs

How do I know if my tomatoes are ripe enough for salsa?
Absolutely! Look for tomatoes that are firm but slightly yielding to the touch. The skin should be smooth and vibrant in color, with no dark spots or blemishes. Ideally, for the best salsa, you want your tomatoes to smell fragrant and have that juicy, sweet aroma.

How should I store my homemade salsa?
Store your homemade salsa in an airtight container in the refrigerator for up to 4 days. Keeping it covered helps preserve freshness, and as you enjoy it, you'll notice the flavors deepening over time. Just remember to give it a good stir before serving after storage!

Can I freeze homemade salsa, and how?
Yes, you absolutely can! To freeze homemade salsa, ladle it into freezer-safe bags or containers, leaving some space at the top for expansion. It can be frozen for up to 3 months. When you're ready to enjoy it, simply transfer the salsa to the fridge to thaw overnight. Stir it well before serving, as some separation may occur during freezing.

What if my salsa is too watery?
If your salsa is too watery, don’t worry! You can easily fix it. Strain the salsa using a fine-mesh sieve, allowing excess liquid to drain off. Alternatively, add some additional finely diced onion; it will absorb excess liquid and enhance the flavor. Just mix gently, and you’ll be back to that perfect chunky salsa!

Can I make this recipe gluten-free and vegan?
Absolutely! This homemade salsa is naturally gluten-free and vegan, making it a fabulous option for everyone at the table. Just ensure that any additional toppings or ingredients you add are also gluten-free and vegan if you’re catering to dietary restrictions.

Is there a substitute for cilantro if I don't like it?
Very! If cilantro isn't your favorite, fresh parsley works wonderfully as a substitute, adding a different but still fresh flavor profile. Alternatively, you can also use fresh basil, which will give your salsa a unique twist without the cilantro taste!

Homemade Salsa

Fresh and Flavorful Homemade Salsa for Your Next Gathering

Enjoy the vibrant flavors of Homemade Salsa, perfect for any gathering.
Print Recipe Pin Recipe
Prep Time 15 minutes mins
Resting Time 30 minutes mins
Total Time 45 minutes mins
Servings: 4 cups
Course: Snacks
Cuisine: Mexican
Calories: 80
Ingredients Equipment Method Nutrition Notes

Ingredients
  

For the Salsa
  • 4 medium Tomatoes ripe and juicy
  • 1 small Onion or green onions for milder flavor
  • 2 medium Jalapeños adjust according to spice tolerance
  • 1 bunch Cilantro fresh, or substitute with parsley
  • 2 medium Limes freshly squeezed
  • 1 teaspoon Salt adjust to taste
Optional Add-ins
  • 1 cup Corn fresh or canned
  • 1 cup Diced Mango ripe for optimal sweetness
  • 1 Smoked Tomatoes or Chipotle Peppers for smoky flavor

Equipment

  • Mixing Bowl
  • Knife
  • Cutting Board
  • Spatula

Method
 

Step-by-Step Instructions
  1. Start by washing and drying the tomatoes, onion, jalapeños, and cilantro. Finely dice the tomatoes, chop the onion and jalapeños, and roughly chop the cilantro.
  2. In a large mixing bowl, gently combine the diced tomatoes, chopped onion, jalapeños, and cilantro.
  3. Squeeze the juice of fresh limes over the salsa mixture and gently fold the ingredients together.
  4. Sprinkle about 1 teaspoon of salt over the salsa and mix gently, tasting and adjusting salt as needed.
  5. Cover the bowl and let the mixture sit at room temperature for at least 30 minutes.
  6. After resting, stir the salsa before serving with tortilla chips or as a topping for dishes.

Nutrition

Serving: 1cupCalories: 80kcalCarbohydrates: 18gProtein: 2gSodium: 400mgPotassium: 250mgFiber: 3gSugar: 2gVitamin A: 500IUVitamin C: 20mgCalcium: 20mgIron: 0.5mg

Notes

Taste as you go to adjust flavors, and consider adding sweet corn or diced mango for a fun twist.

Tried this recipe?

Let us know how it was!

Savory Carnivore Pizza Muffins: A Keto-Friendly Delight

June 18, 2026 by Grace Snow Leave a Comment

As the smell of warm, cheesy goodness wafts through my kitchen, I’ve struck culinary gold with these Carnivore Pizza Muffins. In just five minutes of prep, they come together as a high-protein, low-carb option that truly satisfies those pizza cravings without the guilt. Whether you’re juggling a busy schedule or simply want to indulge in a delicious homemade treat, these muffins prove to be the ultimate crowd-pleaser. Plus, the customization options are endless; you can jazz them up with BBQ chicken or spice them with jalapeños for a fun twist! Are you ready to discover your new favorite kitchen staple?

Why are Carnivore Pizza Muffins a Must-Try?

Deliciously satisfying, these Carnivore Pizza Muffins capture the classic pizza flavor in a convenient bite-sized treat. Versatile options allow you to create your perfect muffin, from BBQ Chicken to a Veggie Boost, making them suitable for all tastes. Quick to prepare, you’ll have a gourmet delight in just five minutes of prep. Protein-packed and keto-friendly, they're an ideal addition to your meal prep, pairing perfectly with a refreshing avocado salad or garlic butter zoodles. Crowd-pleaser status? Absolutely! These muffins are guaranteed to impress at any gathering, leaving everyone coming back for more.

Carnivore Pizza Muffin Ingredients

• Create your delicious Carnivore Pizza Muffins with these essential ingredients!

For the Batter

  • Eggs – Provide structure and moisture; opt for free-range eggs for enhanced flavor.
  • Heavy Cream – Adds richness and moisture; use full-fat coconut milk for a dairy-free option.
  • Mozzarella Cheese – Delivers a creamy texture; you can substitute with fresh mozzarella for the best flavor.
  • Parmesan Cheese – Adds a salty, nutty taste; nutritional yeast works well if you're aiming for dairy-free.
  • Ground Meat (beef or pork) – The primary protein source; feel free to use cooked ground turkey or chicken for a leaner muffin.
  • Pepperoni – Brings that classic pizza vibe; switch to turkey pepperoni for a lighter touch, or omit completely.
  • Salt – Enhances flavor throughout the blend.
  • Black Pepper – Adds a hint of mild heat.
  • Italian Seasoning – Infuses those beloved pizza herbs into the mix.
  • Garlic Powder – Introduces delightful depth to the flavor.
  • Bacon (optional) – Adds richness; diced turkey bacon makes a great alternative.

Optional Add-ins

  • Spices or Extras – Diced jalapeños or crushed red pepper flakes for a spicy kick!
  • Veggies – Add chopped spinach, bell peppers, or mushrooms for a veggie boost!

These ingredients will make your Carnivore Pizza Muffins sing with flavor, making every bite a delicious experience worth savoring!

Step‑by‑Step Instructions for Carnivore Pizza Muffins

Step 1: Preheat the Oven and Prepare the Tin
Preheat your oven to 375°F (190°C) while you prepare your muffin tin by greasing it generously with non-stick spray or butter. The greasing step is essential for ensuring that your Carnivore Pizza Muffins pop out easily after baking. Setting the stage with hot, ready conditions will lead to even baking results.

Step 2: Whisk the Eggs
In a mixing bowl, crack in the eggs and whisk them vigorously for about 1 minute until they become pale and frothy. This aeration is crucial for achieving a light texture in your muffins. You’ll want to see small bubbles forming, indicating that the eggs are well-mixed and ready for the next ingredients.

Step 3: Add Cream and Blend
Pour in the heavy cream into the whipped eggs, mixing gently until you achieve a smooth and cohesive batter. The cream adds richness to your Carnivore Pizza Muffins, intensifying their flavor. Make sure there are no lumps, as you want a silky mixture before integrating the gooey cheeses and proteins.

Step 4: Incorporate the Cheeses and Meat
Fold in the mozzarella and parmesan cheese, along with the cooked ground meat of your choice. Stir gently to ensure even distribution without deflating the batter. The melted cheese will provide that beloved pizza essence, while the meat adds a hearty protein punch that keeps these muffins satisfying and flavorful.

Step 5: Season the Mixture
Sprinkle in the pepperoni, salt, black pepper, Italian seasoning, and garlic powder. Fold these ingredients into the mixture with a soft touch, careful not to overmix. This is where your Carnivore Pizza Muffins gain their classic pizza flavor, so make sure the spices are evenly spread throughout the batter.

Step 6: Fill the Muffin Cups
Using a ladle or spoon, fill each muffin cup about ¾ full with the delicious batter. This ensures that they have enough room to rise without spilling over. Make sure to adjust the amounts if you notice some cups are fuller than others, aiming for uniformity for even baking.

Step 7: Bake to Perfection
Transfer the muffin tin to the preheated oven and bake for 18-22 minutes, or until the tops turn a golden brown and feel firm to the touch. Keep an eye on them during the last few minutes; you want the tops to be nicely set and pleasingly puffed.

Step 8: Cool and Serve
Allow the Carnivore Pizza Muffins to cool in the pan for about 5 minutes, then gently transfer them to a wire rack to cool completely. This cooling step is important as it helps them firm up for easy removal and serving. Whether enjoyed warm or at room temperature, they’re ready to be savored!

Variations & Substitutions for Carnivore Pizza Muffins

Looking to make your Carnivore Pizza Muffins uniquely yours? Here are some delightful twists to awaken your flavor senses!

  • BBQ Chicken: Swap out pepperoni for shredded BBQ chicken for a sweet and tangy surprise. Imagine the smoky aroma wrapping each bite!

  • Veggie Boost: Toss in chopped spinach, bell peppers, or mushrooms for a veggie-packed delight. Adding vibrant veggies enhances color and nutrition, making each muffin a feast for the eyes and taste buds.

  • Different Cheeses: Experiment with gouda, cheddar, or feta to switch up cheese flavors. Each type introduces a new depth; let your creativity flow!

  • Spicy Kick: Mix in diced jalapeños or crushed red pepper flakes for a fiery thrill. The heat adds an exciting dimension that will wake up your palate in the best way.

  • Meat Lovers’ Delight: Combine various ground meats like beef, pork, or chicken for a satisfying feast. This hearty option creates a meaty blend that will leave carnivores cheering!

  • Dairy-Free: Opt for full-fat coconut milk and nutritional yeast instead of cream and cheese to cater to dairy-free needs. Embrace the creamy texture while enjoying a guilt-free indulgence!

  • Protein Extra: Fold in cooked sausage or crispy bacon for a power-packed punch of protein. Each hearty bite promises to keep you full and fueled for your day!

And if you’re in the mood for more creativity, try pairing your muffins with a fresh side like a creamy avocado salad or a rich marinara sauce for dipping. The possibilities are truly endless with these delightful muffin bases!

Make Ahead Options

These Carnivore Pizza Muffins are a fantastic choice for meal prep enthusiasts! You can mix the batter up to 24 hours in advance and refrigerate it—this keeps the flavors fresh and ensures your muffins taste just as delicious when baked. Additionally, once baked, the muffins can be stored in an airtight container for up to 5 days or frozen individually for easy access for up to 3 months. To enjoy them at their best, reheat the muffins in the oven to maintain their texture, giving them a quick 10-minute warm-up at 350°F (175°C). With these prep tips, you’ll have a hearty, protein-packed snack ready to go for busy weeknights!

How to Store and Freeze Carnivore Pizza Muffins

  • Room Temperature: Keep your baked Carnivore Pizza Muffins in an airtight container on the counter for up to 2 days. This keeps them fresh while allowing easy access for quick snacks.

  • Fridge: Store leftover muffins in an airtight container in the refrigerator for up to 5 days. Reheat them in the microwave for about 30 seconds for freshness.

  • Freezer: For longer storage, freeze muffins individually wrapped in plastic wrap or placed in a freezer bag for up to 3 months. Thaw in the fridge overnight before reheating.

  • Reheating: Reheat muffins in the oven at 350°F (175°C) for about 10 minutes or microwave for 30-45 seconds, ensuring they’re warm and delicious when you enjoy them!

What to Serve with Carnivore Pizza Muffins

Indulging in the rich, savory flavors of these delights opens a world of delicious pairings to create an unforgettable meal experience.

  • Creamy Avocado Salad: This refreshing salad adds a cool, creamy contrast, balancing the savory muffins beautifully. A splash of lime juice elevates freshness!
  • Marinara Sauce for Dipping: Classic marinara pairs perfectly, enhancing the pizza flavor while adding a delightful, tangy note to each bite.
  • Garlic Butter Zoodles: Light and flavorful, spiraled zucchini tossed in garlic butter offers a satisfying, low-carb side that complements the muffin's richness.
  • Rustic Antipasto Platter: A colorful spread of olives, cured meats, and cheeses harmonizes with the flavors of the muffins, creating a beautifully presented feast.
  • Caesar Salad: Crisp romaine, crunchy croutons, and a velvety dressing provide a satisfying contrast in texture while maintaining a cheesy vibe.
  • Red Wine or Sparkling Water: Pair with a glass of full-bodied red wine for a rich flavor combo or opt for sparkling water with lemon for a refreshing, bubbly delight.

Each of these ideas enhances your Carnivore Pizza Muffins, making your dining experience truly memorable!

Expert Tips for Carnivore Pizza Muffins

  • Fully Cook Meat: Ensure ground meat is cooked thoroughly before adding it to the batter to prevent any food safety issues.

  • Whisk Well: Whisk eggs until they are pale and frothy to create a light and airy texture in your Carnivore Pizza Muffins.

  • Grease Generously: Make sure to generously grease the muffin tin to avoid any sticking, allowing for easy removal of your fabulous muffins.

  • Cool Properly: Allow the muffins to cool for a few minutes in the tin before transferring to a wire rack; this helps them firm up nicely for easier serving.

  • Customize Freely: Don’t hesitate to explore different combinations; add jalapeños for heat or veggies like bell peppers for added nutrition and flavor!

Carnivore Pizza Muffins Recipe FAQs

What type of eggs should I use for Carnivore Pizza Muffins?
Absolutely! I recommend using free-range eggs as they not only add great flavor but also support humane farming practices. They provide the perfect structure and moisture needed for those delightful muffins.

How should I store my baked Carnivore Pizza Muffins?
You can keep your baked muffins in an airtight container at room temperature for up to 2 days for quick snacks. If you want them to last longer, pop them in the fridge where they’ll stay fresh for up to 5 days. Just reheat them in the microwave for about 30 seconds when you’re ready to enjoy!

Can I freeze Carnivore Pizza Muffins?
Absolutely! To freeze, wrap each muffin individually in plastic wrap or place them in a freezer bag, ensuring they're sealed tightly. They can last up to 3 months in the freezer. When you're ready to enjoy, thaw them in the fridge overnight, and reheat either in the oven at 350°F (175°C) for about 10 minutes or in the microwave for 30-45 seconds.

What if my muffins are sticking to the muffin tin?
To prevent sticking, make sure you generously grease your muffin tin before filling it. If you find yourself in a sticky situation, let the muffins cool for a few minutes in the tin before trying to pop them out. If you’re still struggling, using silicone muffin liners can help them release easily every time!

Are these muffins suitable for those with allergies?
Great question! Since these Carnivore Pizza Muffins contain eggs and dairy, they’re not suitable for individuals with egg or dairy allergies. However, you can easily switch to dairy-free options like coconut milk and nutritional yeast for cheese. Always check ingredient labels if you're accommodating specific dietary needs!

Can I customize the ingredients in my Carnivore Pizza Muffins?
Very much so! The beauty of these muffins lies in their versatility! You can mix in various cheeses, spices, or even swap out the meats based on your family's preferences. Try adding chopped veggies for extra nutrition or a dash of hot sauce for a spicy kick to make them your very own!

Carnivore Pizza Muffins

Savory Carnivore Pizza Muffins: A Keto-Friendly Delight

Delight in these Carnivore Pizza Muffins, a satisfying keto-friendly snack perfect for indulgence without guilt.
Print Recipe Pin Recipe
Prep Time 5 minutes mins
Cook Time 22 minutes mins
Cooling Time 5 minutes mins
Total Time 32 minutes mins
Servings: 12 muffins
Course: Snacks
Cuisine: Keto
Calories: 180
Ingredients Equipment Method Nutrition Notes

Ingredients
  

Batter Ingredients
  • 6 large Eggs Opt for free-range for enhanced flavor.
  • 1 cup Heavy Cream Use full-fat coconut milk for a dairy-free option.
  • 1 cup Mozzarella Cheese Substitute with fresh mozzarella for best flavor.
  • 1/2 cup Parmesan Cheese Nutritional yeast works well for dairy-free.
  • 1 lb Ground Meat (beef or pork) Cooked ground turkey or chicken for leaner option.
  • 1 cup Pepperoni Turkey pepperoni can be used for a lighter version.
  • 1 tsp Salt
  • 1 tsp Black Pepper
  • 1 tbsp Italian Seasoning
  • 1 tsp Garlic Powder
  • 4 oz Bacon (optional) Diced turkey bacon makes a great alternative.
Optional Add-ins
  • 1 cup Spices or Extras Diced jalapeños or crushed red pepper flakes for spiciness.
  • 1 cup Veggies Chopped spinach, bell peppers, or mushrooms for a veggie boost.

Equipment

  • Muffin tin
  • Mixing Bowl
  • Whisk
  • Ladle or spoon

Method
 

Baking Instructions
  1. Preheat your oven to 375°F (190°C) and grease the muffin tin.
  2. Whisk the eggs in a mixing bowl until pale and frothy.
  3. Add the heavy cream to the eggs and mix until smooth.
  4. Fold in the mozzarella and parmesan cheese along with cooked ground meat.
  5. Sprinkle in the pepperoni, salt, black pepper, Italian seasoning, and garlic powder.
  6. Fill each muffin cup about ¾ full with the batter.
  7. Bake for 18-22 minutes until the tops are golden and firm.
  8. Allow to cool in the pan for 5 minutes before transferring to a wire rack.

Nutrition

Serving: 1muffinCalories: 180kcalCarbohydrates: 3gProtein: 12gFat: 15gSaturated Fat: 6gPolyunsaturated Fat: 1gMonounsaturated Fat: 1gCholesterol: 100mgSodium: 450mgPotassium: 180mgSugar: 1gVitamin A: 400IUCalcium: 200mgIron: 1mg

Notes

Customize with different ingredients like jalapeños or veggies to fit your taste preference.

Tried this recipe?

Let us know how it was!

Crispy Cheesy Beef Taquitos: Quick, Crispy Comfort Food

June 14, 2026 by Grace Snow Leave a Comment

Every time I roll up crispy, cheesy beef taquitos, I'm reminded of the vibrant streets of Mexico where these delectable bites are a favorite. With each golden, crunchy shell filled with seasoned ground beef and melted cheese, my kitchen transforms into a fiesta of flavors in just 30 minutes. These taquitos are not only a quick dinner solution for busy weeknights but also a family-friendly option that keeps everyone happily satisfied. Plus, they’re easy to customize, allowing for variations that can cater to every palate. Are you ready to make your dinner a celebration? Let’s dive into this irresistible recipe that’s sure to delight!

Why are Crispy Cheesy Beef Taquitos Irresistible?

Quick and Easy: This recipe guarantees a homemade meal in just 30 minutes, perfect for those busy evenings when time is of the essence.

Family-Friendly Delight: Everyone loves crispy taquitos—serve them as a fun dinner option that kids will enjoy helping to make and eat!

Flavorful Filling: The combination of seasoned ground beef, garlic, and melted Parmesan cheese creates a savory explosion in every bite, making them utterly scrumptious.

Versatile Customizations: Feel free to switch up the fillings by using shredded chicken, beans, or even a mix of spices for a unique twist. Add a zing with jalapeños or experiment with different cheese blends for varied tastes!

Perfect for Sharing: Serve with a selection of dipping sauces like guacamole or salsa verde, and you’ll have a hit at your next gathering, just like these Cheesy Corn Fritters or Crispy Fish Taco Bowls.

Crispy Texture Guaranteed: The secret to their irresistible crunch lies in frying them to a golden brown, providing that satisfying crunch you crave!

Crispy Cheesy Beef Taquitos Ingredients

• Kick off your flavorful adventure with these must-have ingredients!

For the Filling
• Ground Beef – Main protein source providing flavor; substitute with ground turkey for a leaner option.
• Minced Garlic – Adds aromatic richness; fresh garlic is best for authentic flavor, but powder will suffice in a pinch.
• Heavy Cream – Creates a decadent, creamy filling; low-fat cream is a fabulous alternative if you wish to cut calories.
• Italian Seasoning – Imparts a wonderful herby flavor; mix dried oregano, basil, and thyme for a homemade blend.
• Freshly Grated Parmesan Cheese – Contributes richness and depth; avoid pre-shredded cheese for optimal melting.
• Spinach (optional) – Adds a nutritious touch and vibrant color; you can replace it with other greens like kale or leave it out altogether.

For the Taquitos
• Tortillas (corn or flour) – Serve as the crucial base for taquitos; opt for corn for a classic flavor and gluten-free option.
• Oil (vegetable or canola) – Essential for frying to achieve that signature crispiness; steer clear of olive oil as it has a low smoke point.

Dive into this delicious journey of crispy cheesy beef taquitos as you prepare to tantalize your taste buds!

Step‑by‑Step Instructions for Crispy Cheesy Beef Taquitos

Step 1: Brown the Beef
In a large skillet, heat over medium-high heat for about 2 minutes. Add the ground beef and cook for 5–7 minutes, breaking it apart until browned and fully cooked. Season with salt and pepper to enhance the flavor. You’ll know it’s ready when it’s no longer pink and just starting to sizzle.

Step 2: Sauté the Garlic
Once the beef is browned, carefully drain excess grease from the skillet to avoid soggy taquitos. Return to the heat and add the minced garlic, stirring for 30 seconds until fragrant. The garlic should be golden but not burned, which helps to infuse the beef with aromatic flavor before moving on to the next step.

Step 3: Create the Creamy Filling
Lower the heat slightly and gradually pour in the heavy cream, scraping the bottom of the skillet to release all those delicious bits. Stir in Italian seasoning for a herby kick, combining everything well. Your mixture should begin to bubble softly as it simmers, indicating it’s ready for the cheese.

Step 4: Incorporate the Cheese
Reduce the heat to low and slowly mix in the freshly grated Parmesan cheese. Stir continuously for about 3 minutes until the cheese melts and the filling thickens to a creamy consistency. If using spinach, fold it in now for added nutrition and color, letting it wilt into the hot mixture.

Step 5: Prepare the Taquitos
Take each tortilla and spoon about 2 tablespoons of the savory filling onto one side. Roll them tightly from the filled edge, securing with a toothpick if needed. Repeat this process until all tortillas are filled, ensuring not to overfill to prevent bursting during frying.

Step 6: Fry Until Golden
In a deep skillet or frying pan, heat vegetable or canola oil to approximately 350°F (175°C). Carefully add the rolled taquitos in batches, frying for 2–3 minutes on each side until they are golden brown and crispy. Keep an eye on them, turning as needed, to achieve that signature crunch.

Step 7: Drain and Serve
Once perfectly fried, transfer the crispy cheesy beef taquitos onto a wire rack to cool slightly and drain excess oil. This helps maintain their crispy texture. Serve immediately with your favorite dipping sauces, allowing everyone to indulge in this delightful homemade treat!

Crispy Cheesy Beef Taquitos Variations

Feel free to spice up your crispy cheesy beef taquitos and make them your own with these fun variations!

  • Shredded Chicken: Swap out ground beef for flavorful shredded chicken for a lighter, yet equally delicious option.

  • Vegetarian Delight: Use black beans or a mixture of your favorite vegetables to create a hearty vegetarian filling. These are great for those seeking meatless meals!

  • Spicy Kick: Add diced jalapeños or your favorite hot sauce to the filling for an exciting heat that will awaken your taste buds. Each bite will bring a delightful surprise!

  • Cheese Variations: Experiment with different cheese blends like pepper jack or cheddar for a creamy, zesty filling. A mix of cheese not only enhances the flavor but also adds a delightful gooey texture.

  • Herb Infusion: Season your beef with fresh herbs like cilantro or parsley instead of Italian seasoning for a different flavor profile. This fragrant twist will transport your taste buds to a sunny garden.

  • Crunchy Add-ins: Mix in crushed tortilla chips or panko breadcrumbs to the filling for an added crunch that contrasts perfectly with the creamy cheese. You might just discover your new favorite texture!

  • Low-Lactose Option: Swap heavy cream for a lactose-free alternative or use a nut-based cream for a lighter, yet still creamy texture in the filling.

  • Global Flavors: Try incorporating Asian flavors by adding sesame oil, ginger, and green onions to the beef filling, creating a fusion taco with unexpected taste that will wow your guests.

With these variations, you can turn your crispy cheesy beef taquitos into a new adventure each time you make them! Serve them with a side of homemade salsa or your favorite dipping sauces to elevate the experience further, just like you would with a delicious batch of Cheesy Garlic Bread!

How to Store and Freeze Crispy Cheesy Beef Taquitos

Fridge: Store completely cooled taquitos in an airtight container for up to 3 days. This helps maintain their flavor and allows for easy reheating.

Freezer: For longer storage, freeze the taquitos individually on a baking sheet before transferring them to a freezer-safe bag. They can last for up to 2 months.

Reheating: To restore crispiness, reheat in an oven or air fryer at 375°F for 5–7 minutes. This method ensures your crispy cheesy beef taquitos come back to life just like fresh!

Preparation Tip: It's best to pre-fry the taquitos before freezing, allowing an easy fry from frozen whenever you crave a quick, tasty dinner!

Expert Tips for Crispy Cheesy Beef Taquitos

  • Proper Drainage: Ensure to drain the cooked beef thoroughly to prevent soggy taquitos that lack the desired crunch.

  • Fresh Cheese is Key: Use freshly grated Parmesan cheese for the best melting texture in your filling, elevating the flavor profile of your crispy cheesy beef taquitos.

  • Heat Matters: Make sure your oil is hot enough (around 350°F) before frying. This temperature is crucial to achieving that irresistible crispy exterior.

  • Mind the Filling: Avoid overfilling the tortillas; sticking to 2 tablespoons helps prevent them from bursting during frying, ensuring each bite is perfectly intact.

  • Cooling for Crispiness: After frying, let your taquitos drain on a wire rack instead of paper towels to maintain their crunch—and keep the sogginess at bay!

Make Ahead Options

These Crispy Cheesy Beef Taquitos are perfect for meal prep, allowing you to enjoy homemade goodness with minimal effort during the week! You can prepare the filling up to 3 days in advance; simply follow the cooking instructions, let it cool completely, and store it in an airtight container in the refrigerator. The tortillas can be rolled with the filling and refrigerated up to 24 hours before frying. To maintain the crispy texture, fry the taquitos right before serving, ensuring the oil is hot (around 350°F) for that golden crunch. With these make-ahead options, your weeknight dinners will be a breeze, delivering comfort food that’s just as delicious as freshly made!

What to Serve with Crispy Cheesy Beef Taquitos

Elevate your feast with delightful sides and accompaniments that perfectly complement the crispy, cheesy goodness of these taquitos.

  • Guacamole: A creamy, zesty dip that adds a refreshing contrast to the savory taquitos. It's a classic pairing that will please everyone at your table.

  • Salsa Verde: This tangy green sauce brings a bright, vibrant flavor that cuts through the richness of the beef. It's the perfect drizzle or dip to add a kick!

  • Mexican Rice: Fluffy, seasoned rice offers a comforting side, beautifully balancing the crispy taquitos. Each bite of rice enhances the meal’s heartiness.

  • Charro Beans: Adding these slightly smoky beans enhances the meal's protein and fiber. They bring a fulfilling, rustic touch that resonates with traditional Mexican cuisine.

  • Mexican Street Corn: Also known as Elote, this sweet corn dish sprinkled with cheese and chili powder adds a burst of flavor and a bit of sweetness, harmonizing with the savory taquitos.

  • Crisp Green Salad: A simple salad with fresh lettuce, avocado, and lime dressing provides a refreshing contrast, adding vital nutrients and crunch to your plate—perfect against the crispy texture of the taquitos.

  • Margaritas: Spice up your dinner with a refreshing margarita! This citrusy drink paired with the taquitos enhances the fiesta spirit, making it a perfect dinner celebration.

  • Churros: For a sweet ending, serve warm churros with chocolate sauce for dipping. Their sugary crunch is an irresistible way to wrap up the meal, leaving everyone with a smile.

With these delicious accompaniments, your dinner is sure to be a festive and satisfying experience!

Crispy Cheesy Beef Taquitos Recipe FAQs

What type of tortillas should I use for taquitos?
You can use either corn or flour tortillas for your crispy cheesy beef taquitos. Corn tortillas are traditional and gluten-free, offering authentic flavor. Flour tortillas are softer and easier to roll if you prefer them. It's all about personal preference!

How can I tell if my ground beef is ripe enough to use?
When selecting ground beef, look for meat that is bright red with minimal dark spots. Avoid any packages that have an off smell or excessive discoloration, as this could indicate spoilage. Fresh meat should feel firm to the touch.

How do I store leftover taquitos?
Store your crispy cheesy beef taquitos in an airtight container at room temperature if eaten within a few hours. For longer storage, refrigerate them for up to 3 days. Make sure they are completely cooled before sealing to prevent condensation, which can lead to sogginess.

Can I freeze crispy cheesy beef taquitos?
Absolutely! After frying, let the taquitos cool completely. Freeze them on a baking sheet in a single layer before transferring them to a freezer-safe bag. They can conveniently be stored for up to 2 months. When ready to enjoy, fry them straight from frozen for 3-5 minutes until golden and crispy.

What should I do if my taquitos burst while frying?
If your taquitos burst during frying, it may be because they were overfilled or not tightly rolled. Use about 2 tablespoons of filling and roll them firmly to prevent this. If they do burst, don't fret—just serve them as crispy beef nachos by tossing the pieces with some salsa and cheese!

Are there any dietary considerations I should be aware of?
Yes! These taquitos can accommodate various dietary needs. If you're concerned about lactose, I recommend using a low-fat cream in place of heavy cream. For a gluten-free option, stick to corn tortillas. If anyone has meat allergies, feel free to substitute the ground beef with black beans or jackfruit for a vegetarian-friendly option!

Crispy Cheesy Beef Taquitos

Crispy Cheesy Beef Taquitos: Quick, Crispy Comfort Food

Enjoy Crispy Cheesy Beef Taquitos, a quick and satisfying meal bursting with flavor!
Print Recipe Pin Recipe
Prep Time 15 minutes mins
Cook Time 15 minutes mins
Total Time 30 minutes mins
Servings: 4 taquitos
Course: Snacks
Cuisine: Mexican
Calories: 250
Ingredients Equipment Method Nutrition Notes

Ingredients
  

For the Filling
  • 1 pound Ground Beef Substitute with ground turkey for a leaner option.
  • 2 cloves Minced Garlic Fresh garlic is best for authentic flavor.
  • 1/2 cup Heavy Cream Low-fat cream is a fabulous alternative.
  • 1 teaspoon Italian Seasoning Mix dried oregano, basil, and thyme for homemade blend.
  • 1/2 cup Freshly Grated Parmesan Cheese Avoid pre-shredded cheese for optimal melting.
  • 1 cup Spinach Optional for added nutrition and color.
For the Taquitos
  • 8 pieces Tortillas (corn or flour) Opt for corn for a classic flavor and gluten-free option.
  • 2 cups Oil Vegetable or canola oil for frying.

Equipment

  • Skillet
  • frying pan
  • Spoon
  • toothpick

Method
 

Step-by-Step Instructions
  1. In a large skillet, heat over medium-high heat. Add the ground beef and cook for 5–7 minutes until browned, seasoning with salt and pepper.
  2. Drain excess grease and add minced garlic, stirring for 30 seconds until fragrant.
  3. Lower the heat slightly and pour in heavy cream, stirring in Italian seasoning, letting it bubble softly.
  4. Reduce heat to low and mix in Parmesan cheese until melted and thickened. Fold in spinach if using.
  5. On each tortilla, spoon about 2 tablespoons of filling, roll tightly, and secure with a toothpick if needed.
  6. Heat oil in a frying pan to approximately 350°F. Fry taquitos in batches for 2-3 minutes until golden brown.
  7. Transfer fried taquitos to a wire rack to cool slightly and drain excess oil. Serve immediately with dipping sauces.

Nutrition

Serving: 1taquitoCalories: 250kcalCarbohydrates: 22gProtein: 15gFat: 14gSaturated Fat: 7gPolyunsaturated Fat: 1gMonounsaturated Fat: 4gCholesterol: 45mgSodium: 300mgPotassium: 300mgFiber: 1gSugar: 1gVitamin A: 15IUVitamin C: 2mgCalcium: 150mgIron: 2mg

Notes

Store in an airtight container for up to 3 days in the fridge or freeze for 2 months for longer storage.

Tried this recipe?

Let us know how it was!

Moist Garden Zucchini Bread for a Irresistibly Tasty Snack

June 14, 2026 by Grace Snow Leave a Comment

As I sliced into a freshly baked loaf, the warm aroma of cinnamon and sweet zucchini swirled around me, instantly bringing back memories of sunny backyard gatherings. This Moist Garden Zucchini Bread is more than just a delightful recipe; it’s a beautiful way to make the most of those garden-fresh zucchinis. Perfect for breakfast or a cozy coffee break, this easy zucchini bread transforms a simple vegetable into a light and tender snack that even the most skeptical will love. Not only is it versatile—with options for gluten-free and dairy-free adaptations—but it also packs in fiber and nutrients, making it a guilt-free indulgence. Ready to elevate your baking game with this simple yet irresistible recipe? Let’s dive in!

Why is this zucchini bread a must-try?

Moisture and Flavor: The essence of this bread lies in its moist texture, thanks to the fresh zucchini, which adds not only moisture but also a subtle sweetness.

Versatile Options: You can easily adapt this recipe for different diets with gluten-free or dairy-free alternatives, ensuring everyone can enjoy the goodness!

Quick and Easy: With simple ingredients and straightforward steps, this bread is perfect for busy days when you need a delicious snack without the fuss.

Nutritional Benefits: Packed with fiber and vitamins A and C, this light snack is a guilt-free treat that satisfies your cravings and supports your health.

Crowd-Pleasing Appeal: Whether served warm or toasted, it’s an inviting addition to breakfast or afternoon tea. For more delightful zucchini recipes, check out the Cheesy Zucchini Bake and Cornbread Breakfast Casserole for your next gathering!

Moist Garden Zucchini Bread Ingredients

• This deliciously moist garden zucchini bread is a must-try for all baking enthusiasts!

For the Batter

  • Zucchini – Provides moisture and fiber; be sure to squeeze out excess water after grating for the best texture.
  • All-Purpose Flour – Aids in structure; can be swapped with a gluten-free baking blend for a gluten-free option.
  • Granulated Sugar – Adds sweetness and balances zucchini's flavor; you can reduce the amount for a less sweet loaf.
  • Brown Sugar – Enhances flavor with a touch of molasses; can replace with all white sugar if preferred.
  • Baking Soda – Acts as a leavening agent; ensure it's fresh for optimal rise.
  • Baking Powder – Another leavening agent that contributes to a lighter texture.
  • Salt – Balances sweetness and enhances overall flavors.
  • Cinnamon – A warm spice that adds depth; try ground cardamom instead for a unique twist.
  • Vegetable Oil/Applesauce – Adds moisture and richness; using applesauce decreases fat content.
  • Eggs – Binds ingredients; using room temperature eggs improves batter mixing. You can use egg replacers for a vegan version.

Optional Add-Ins

  • Nuts (Walnuts or Pecans) – Add crunch and flavor; chopped for easy incorporation.
  • Chocolate Chips – For a touch of sweetness and indulgence; perfect for chocolate lovers!

Step‑by‑Step Instructions for Moist Garden Zucchini Bread

Step 1: Preheat and Prepare
Start by preheating your oven to 350°F (175°C). While the oven warms up, grab a 9x5-inch loaf pan and grease it generously with cooking spray or line it with parchment paper for easy removal after baking. This preparation ensures that your moist garden zucchini bread slides out effortlessly once baked.

Step 2: Grate the Zucchini
Wash and trim the ends of your zucchini, then grate it using a box grater. Once grated, place the zucchini in a clean kitchen towel or cheesecloth and twist it to squeeze out as much excess moisture as possible. This step is crucial for maintaining the texture of your moist garden zucchini bread, helping it bake perfectly without becoming soggy.

Step 3: Mix Dry Ingredients
In a large mixing bowl, whisk together your dry ingredients: all-purpose flour, granulated sugar, brown sugar, baking soda, baking powder, salt, and cinnamon. Make sure everything is well combined and the dry ingredients are lump-free; you want to create a solid base that will give your moist garden zucchini bread its wonderful structure and flavor.

Step 4: Combine Wet Ingredients
In a separate bowl, whisk together the eggs, vegetable oil (or applesauce), and the freshly squeezed zucchini. Ensure all components are blended well, as this mixture will add moisture and flavor to your bread. Using room temperature ingredients helps them combine more seamlessly, creating a cohesive batter for the best results.

Step 5: Combine Mixtures
Gradually add the wet mixture into the dry ingredients, using a spatula to fold everything together gently. Mix until just combined—be careful not to overmix, as this can make the bread dense. You’ll want a thick, lumpy batter that holds together but still has visible bits of zucchini throughout for that inviting appearance in your moist garden zucchini bread.

Step 6: Transfer to Pan
Pour the batter into your prepared loaf pan, using a spatula to smooth the top for an even bake. This helps ensure your moist garden zucchini bread will rise evenly, creating a beautiful, golden-brown loaf. Give the pan a gentle tap on the counter to release any air bubbles trapped in the batter, creating a more uniform texture.

Step 7: Bake to Perfection
Place the loaf pan in your preheated oven and bake for 50-60 minutes. Keep an eye on the bread, and check for doneness around the 50-minute mark by inserting a toothpick into the center; it should come out clean or with a few moist crumbs. This is the key to achieving that perfectly moist texture that makes this zucchini bread so delightful.

Step 8: Cool and Slice
Once the baking time is up, remove the loaf from the oven and let it cool in the pan for about 10-15 minutes. Then, transfer the bread onto a wire rack to cool completely. This cooling process is vital; it allows your moist garden zucchini bread to set properly so you can enjoy it sliced and will help achieve the ultimate tenderness in every bite.

Make Ahead Options

These Moist Garden Zucchini Bread loaves are fantastic for meal prep! You can prepare the batter up to 24 hours in advance and store it in the refrigerator. Just mix the dry ingredients (flour, sugars, baking soda, baking powder, salt, and spices) and the wet ingredients (eggs, oil, and zucchini) in separate bowls. Keep the dry ingredients stored tightly covered to maintain freshness. When you're ready to bake, simply combine the wet and dry ingredients and pour the batter into your prepared pan. This way, you'll enjoy the same wonderful flavors and texture while saving precious time on busy mornings! Plus, if you're looking to savor the bread later, it can be sliced and stored in the freezer for up to 3 months—just thaw and enjoy the deliciousness whenever you want!

Tips for the Best Moist Garden Zucchini Bread

  • Fresh Ingredients: Use fresh zucchini and check the expiration dates on baking powder and baking soda. Fresh ingredients yield the best rise and flavor in your moist garden zucchini bread.

  • Avoid Overmixing: Gently fold your wet and dry ingredients together. Overmixing can lead to dense bread—remember, a few lumps are perfectly fine!

  • Squeeze Effectively: Ensure you thoroughly squeeze out excess moisture from the grated zucchini. This prevents soggy bread and maintains texture.

  • Room Temperature Eggs: Using room temperature eggs in the batter allows for better incorporation, leading to a light and airy loaf. Take the eggs out ahead of time to warm up.

  • Even Baking: If the top of the bread browns too quickly, tent it loosely with foil to prevent burning while the inside finishes baking.

  • Cool Before Slicing: Let your zucchini bread cool completely before slicing to keep it moist. Cutting too early can lead to a crumbly texture.

How to Store and Freeze Moist Garden Zucchini Bread

Room Temperature: Wrap the cooled loaf tightly in plastic wrap to keep it fresh for 2-3 days. Store at room temperature, ensuring it's kept in a cool, dry place.

Fridge: For up to 1 week, refrigerate your wrapped zucchini bread. This helps maintain its moisture while prolonging its shelf life, especially in warmer climates.

Freezer: Slice the loaf and freeze individual pieces in airtight bags or containers for up to 3 months. Thaw at room temperature or pop into the toaster for a quick treat.

Reheating: Warm individual slices in the microwave for about 10-15 seconds or toast for a crispy exterior. Enjoy the delightful taste of your Moist Garden Zucchini Bread again!

What to Serve with Moist Garden Zucchini Bread?

This delightful zucchini bread pairs beautifully with a variety of dishes and drinks, creating a cozy, satisfying meal or snack experience.

  • Creamy Mashed Potatoes: The rich, creamy texture of mashed potatoes complements the lightness of zucchini bread, creating a comforting contrast. Pairing these two is like a warm hug on a plate!

  • Fresh Garden Salad: A crisp salad tossed with seasonal greens, cherry tomatoes, and a light vinaigrette adds a refreshing crunch, balancing the sweetness of the bread. The vibrant flavors keep your palate excited.

  • Herb-Infused Greek Yogurt: Spread this tangy dip on warm slices for a creamy, savory touch. With fresh herbs, it beautifully enhances the bread's flavor while adding protein to your snack.

  • Roasted Vegetable Medley: Roasting seasonal veggies caramelizes their natural sugars and brings a hearty touch, harmonizing with the subtle sweetness of the zucchini bread for a wholesome meal.

  • Warm Cinnamon Apples: Served warm, these tender apples echo the cinnamon notes in the bread, making for a comforting dessert-like finale. Imagine the sweet aroma wafting through your kitchen!

  • Honey Butter Spread: Whipped honey butter adds a creamy, sweet twist that perfectly complements the moistness of the zucchini bread. You'll find yourself savoring each bite!

  • Brewed Earl Grey Tea: This fragrant tea with notes of bergamot enhances the bread’s delightful spices, making it an ideal pairing for afternoon tea. Relax with a cup and indulge.

  • Vanilla Ice Cream: A scoop of creamy vanilla ice cream on the side creates a delightful contrast in temperature. The cool creaminess alongside the warm bread is pure bliss.

  • Chia Seed Pudding: A light and nutritious dessert option, chia pudding provides an enjoyable texture, making your snack feel indulgent yet healthy. Enjoy it with a dash of fruit on top!

  • Apple Cider Cocktail: A crisp, refreshing apple cider cocktail pairs wonderfully with the zucchini bread, adding a festive touch to any gathering while enhancing those autumn-inspired flavors.

Moist Garden Zucchini Bread Variations

Feel free to make this delightful zucchini bread your own with fun twists and substitutions that cater to your taste preferences!

  • Gluten-Free: Substitute all-purpose flour with a gluten-free baking blend for a deliciously alternative option.
  • Dairy-Free: Use almond milk or coconut yogurt in place of any dairy for those avoiding lactose.
  • Nutty Delight: Add ½ cup of chopped walnuts or pecans for a delightful crunch that pairs beautifully with the soft texture of the bread.
  • Chocolate Indulgence: Incorporate ½ cup of chocolate chips for a decadent treat that makes the perfect afternoon snack.
  • Spice It Up: Swap out cinnamon with nutmeg or cardamom for a warm twist that elevates the flavor profile.
  • Mini Muffins: Transform your loaf into miniature muffins by adjusting the baking time to 20-25 minutes—perfect for single servings!
  • Adding Veggies: Toss in a shredded carrot or some grated apple for added sweetness and a hint of extra moisture.
  • Heated Version: Spice up your loaf by adding diced jalapeños or chili flakes for a subtle kick that will make your taste buds dance!

For more ways to sneak zucchini into your meals, check out the comforting Cheesy Garlic Bread or warm up with a slice of Cornbread Breakfast Casserole. Enjoy exploring these creative variations!

Moist Garden Zucchini Bread Recipe FAQs

What should I look for when selecting zucchini?
Absolutely! Choose firm, shiny zucchinis with smooth skin, ideally around 6-8 inches long. Avoid any with dark spots or softness, as this indicates they're past their prime. Fresh zucchinis yield the best flavor and moisture for your bread.

How should I store leftover zucchini bread?
I recommend wrapping your cooled loaf tightly in plastic wrap and storing it at room temperature for 2-3 days. If you want it to last longer, refrigerate it for up to 1 week. This keeps your Moist Garden Zucchini Bread deliciously moist!

Can I freeze zucchini bread?
Absolutely! After slicing the loaf, individually wrap each piece in plastic wrap and place them in airtight bags or containers. It will keep well for up to 3 months. When you're ready to enjoy, just thaw at room temperature or pop slices in the toaster.

What if my zucchini bread didn't rise properly?
Very often, issues stem from expired baking soda or baking powder. Always double-check those ingredients for freshness before mixing. Also, be careful not to overmix the batter; it can make your bread dense. If the batter looks thick and lumpy, you’re on the right track!

Does zucchini bread contain allergens?
For those with dietary concerns, this Moist Garden Zucchini Bread can be easily adapted! You can use a gluten-free flour blend and swap eggs for flaxseed meal or commercial egg replacers for vegan options. Just be sure to check any add-ins, like nuts or chocolate chips, for specific allergens.

How can I enhance the flavor of my zucchini bread?
There are plenty of delightful ways to elevate your zucchini bread! Try adding a teaspoon of vanilla extract to your wet ingredients for extra depth. You can also toss in spices like nutmeg or even lemon zest for a new twist that complements the zucchini beautifully.

Moist Garden Zucchini Bread

Moist Garden Zucchini Bread for a Irresistibly Tasty Snack

This Moist Garden Zucchini Bread is a delightful recipe that transforms garden-fresh zucchinis into a light and tender snack.
Print Recipe Pin Recipe
Prep Time 15 minutes mins
Cook Time 1 hour hr
Total Time 1 hour hr 15 minutes mins
Servings: 10 slices
Course: Snacks
Cuisine: American
Calories: 150
Ingredients Equipment Method Nutrition Notes

Ingredients
  

For the Batter
  • 1 cup Zucchini Squeeze out excess water after grating.
  • 2 cups All-Purpose Flour Can be swapped with gluten-free baking blend.
  • 1 cup Granulated Sugar Can reduce for less sweet loaf.
  • 1/2 cup Brown Sugar Can replace with all white sugar if preferred.
  • 1 teaspoon Baking Soda Ensure it's fresh.
  • 1 teaspoon Baking Powder
  • 1/2 teaspoon Salt
  • 1 teaspoon Cinnamon Try ground cardamom for uniqueness.
  • 1/2 cup Vegetable Oil or Applesauce Applesauce decreases fat content.
  • 2 large Eggs Use room temperature eggs.
Optional Add-Ins
  • 1/2 cup Nuts (Walnuts or Pecans) Chopped for easy incorporation.
  • 1/2 cup Chocolate Chips For a touch of sweetness.

Equipment

  • 9x5-inch loaf pan
  • Box grater
  • Mixing Bowl
  • Spatula

Method
 

Step-by-Step Instructions for Moist Garden Zucchini Bread
  1. Preheat your oven to 350°F (175°C) and grease a 9x5-inch loaf pan.
  2. Grate the zucchini and squeeze out excess moisture using a clean kitchen towel.
  3. In a large bowl, whisk together the dry ingredients: flour, granulated sugar, brown sugar, baking soda, baking powder, salt, and cinnamon.
  4. In a separate bowl, whisk together the eggs, vegetable oil (or applesauce), and zucchini.
  5. Gradually add the wet mixture to the dry ingredients and fold until just combined.
  6. Pour the batter into the prepared loaf pan and smooth the top.
  7. Bake for 50-60 minutes, checking for doneness with a toothpick.
  8. Remove from oven and cool in the pan for 10-15 minutes before transferring to a wire rack.

Nutrition

Serving: 1sliceCalories: 150kcalCarbohydrates: 22gProtein: 2gFat: 6gSaturated Fat: 1gPolyunsaturated Fat: 0.5gMonounsaturated Fat: 2.5gCholesterol: 30mgSodium: 180mgPotassium: 200mgFiber: 1gSugar: 10gVitamin A: 500IUVitamin C: 2mgCalcium: 20mgIron: 0.5mg

Notes

Use fresh zucchini for best results. Avoid overmixing to keep the bread light and fluffy. Let cool fully before slicing to maintain moisture.

Tried this recipe?

Let us know how it was!

Garlic Butter Potato Wedges for Ultimate Cozy Comfort

June 10, 2026 by Grace Snow Leave a Comment

In the hustle and bustle of daily life, coming home to the warm aroma of freshly baked Garlic Butter Potato Wedges feels like a comforting embrace. These crispy delights transform your evenings into something special, all while being incredibly quick and easy to prepare. With just a handful of ingredients, you can whip up a batch of these delectable wedges in under 30 minutes, making them the perfect side dish for cozy family dinners or small gatherings. Not only do they deliver on flavor, but they also offer a twist on traditional fries—thanks to the luscious garlic butter sauce that envelops each wedge. Who needs takeout when homemade goodness is just a few steps away? Ready to impress your taste buds and your loved ones? Let's dive into this scrumptious recipe together!

Why are Garlic Butter Potato Wedges irresistible?

Quick and Easy: These Garlic Butter Potato Wedges are perfect for anyone who desires a delicious side dish without the hassle of complicated recipes.

Crispy Goodness: Baked to perfection, their golden-brown edges create a satisfying crunch that contrasts beautifully with their fluffy interiors.

Flavor Explosion: The rich garlic butter sauce infuses each wedge with an irresistible savory flavor, ensuring that every bite is a delightful experience.

Versatile Side Dish: Pair them with burgers, grilled meats, or even a hearty salad, making them a flexible addition to any meal.

Crowd-Pleaser: Whether it’s a family dinner or a small gathering, these wedges bring people together with their mouthwatering aroma and taste.

Enhance your meal with a side of Garlic Aioli or some homemade ranch for that extra special touch!

Garlic Butter Potato Wedges Ingredients

For the Wedges

  • Gold Potatoes – These provide a fluffy interior; starchy potatoes are your best bet for perfect wedges.
  • Melted Butter – This is the heart of the garlic butter flavor; substitute with dairy-free margarine for a dairy-free option.
  • Garlic (minced) – Essential for that fragrant flavor; in a pinch, garlic powder can serve as a quick substitute.
  • Dried Rosemary or Preferred Herb – Enhances the dish with earthy notes; fresh herbs can brighten the flavor beautifully.
  • Salt and Black Pepper – Brightens up the taste; feel free to adjust to your liking for the perfect seasoning.
  • Fresh Parsley (optional) – Adds a pop of color and freshness when sprinkled on top before serving.

Ready to bring these crispy Garlic Butter Potato Wedges to life? Let's get cooking!

Step‑by‑Step Instructions for Garlic Butter Potato Wedges

Step 1: Preheat the Oven
Begin by preheating your oven to 425°F (220°C). While the oven warms up, line a baking sheet with parchment paper to prevent sticking and promote even cooking. This preparation ensures your Garlic Butter Potato Wedges will bake to crispy perfection without any fuss.

Step 2: Make the Garlic Butter Mixture
In a large mixing bowl, combine melted butter, minced garlic, dried rosemary, salt, and black pepper. Stir well until all the ingredients are thoroughly incorporated and the aroma of garlic fills the air. This rich mixture will be the foundational flavor for your wedges, setting the stage for a delicious side dish.

Step 3: Coat the Potato Wedges
Add your prepared potato wedges to the bowl containing the garlic butter mixture. Drizzle the mixture over the wedges, then use your hands or a spatula to toss them gently, ensuring each wedge is evenly coated. This crucial step is where the magic happens, transforming the simple potatoes into luscious Garlic Butter Potato Wedges.

Step 4: Arrange the Wedges on the Baking Sheet
Transfer the coated potato wedges to the lined baking sheet, placing them in a single layer. Make sure there's space between each wedge to allow for proper airflow and crispiness during baking. This arrangement is vital for achieving that golden-brown exterior everyone loves in Garlic Butter Potato Wedges.

Step 5: Bake to Crispy Perfection
Place the baking sheet in the preheated oven and let the wedges bake for 25 to 30 minutes. Halfway through the baking time, use a spatula to flip the wedges for even browning. When done, the exterior should be golden and crispy while the interior remains soft and tender—just what you want in Garlic Butter Potato Wedges.

Step 6: Serve and Garnish
Once baked, remove the potato wedges from the oven and let them cool for a minute. For a touch of freshness, sprinkle with optional chopped fresh parsley before serving. Dive in while they're hot, and indulge in the comforting flavors of your homemade Garlic Butter Potato Wedges!

Garlic Butter Potato Wedges Variations & Substitutions

Feel free to explore these delightful twists to your Garlic Butter Potato Wedges, enhancing flavors and catering to dietary preferences.

  • Dairy-Free: Substitute melted butter with dairy-free margarine or olive oil for a lightened-up version that still tastes delicious.

  • Herb Swap: Replace rosemary with thyme, oregano, or fresh parsley for a fresher, more vibrant flavor profile that can change the entire dish.

  • Cheesy Delight: Mix in grated Parmesan or cheddar cheese before baking for a creamy, cheesy layer that adds an irresistible twist to your wedges.

  • Spicy Kick: Add cayenne pepper or smoked paprika for a hint of heat, perfect for those who love a little spice in their life.

  • Zesty Lemon: Squeeze fresh lemon juice over the baked wedges just before serving to elevate the flavors, bringing a burst of freshness that pairs perfectly with garlic.

  • Sweet Potato Alternative: Use sweet potatoes in place of gold potatoes for a caramelized sweetness and a gorgeous orange hue to your dish.

  • Garlic Lovers: Add more minced garlic or even roasted garlic for an extra punch of aromatics that will make your kitchen smell heavenly!

  • Tyrolean Twist: For a heartier experience, consider tossing in some diced bacon pieces or pancetta before baking, introducing a savory depth to every bite.

As you experiment, imagine the magic of these flavors coming together, much like how a great dip complements your beloved Garlic Aioli or a comforting Sweet Potato Casserole warms up a chilly evening. The possibilities are endless!

How to Store and Freeze Garlic Butter Potato Wedges

Fridge: Keep leftover Garlic Butter Potato Wedges in an airtight container for up to 3 days. Reheat them in the oven for the best texture revival.

Freezer: For longer storage, freeze the cooled wedges in a single layer on a baking sheet, then transfer to a freezer-safe bag for up to 2 months.

Reheating: To enjoy your wedges after freezing, preheat the oven to 425°F (220°C) and bake directly from frozen for about 15-20 minutes until crispy.

Make-Ahead: You can prep and coat the wedges ahead of time; simply refrigerate them until ready to bake and enjoy fresh.

Expert Tips for Garlic Butter Potato Wedges

  • Perfectly Cut Wedges: Aim for uniform thickness when cutting your potatoes to ensure even cooking. Uneven pieces can lead to some being overdone while others are undercooked.

  • Soak for Crispiness: Try soaking the potato wedges in water for 30 minutes before baking. This simple step helps to remove excess starch, resulting in crispier Garlic Butter Potato Wedges.

  • Don’t Overcrowd: When placing the wedges on the baking sheet, ensure they’re not touching. Overcrowding can trap steam and prevent them from achieving that delightful crispy texture.

  • Flavor Variations: Experiment with different herbs or spices! Swap out rosemary for thyme or add some chili powder for a spicy kick in your Garlic Butter Potato Wedges.

  • Storage Tips: If you have leftovers, store them in an airtight container in the refrigerator. To reheat, use the oven or toaster oven for that freshly baked crispiness.

Make Ahead Options

These Garlic Butter Potato Wedges are perfect for busy weeknights and meal prep enthusiasts! You can prep and coat the potato wedges up to 24 hours in advance, allowing them to soak up all that delicious garlic butter flavor. To do this, simply follow the coating steps and then refrigerate the wedges in an airtight container. When you're ready to serve, bake them straight from the refrigerator to save time—there's no need to thaw! Just remember to check for crispiness during the baking process; they might need an extra few minutes. With this make-ahead option, you can enjoy the same mouthwatering, golden-brown results with minimal effort!

What to Serve with Garlic Butter Potato Wedges

These delightful wedges can easily become the star of your meal, but pairing them with the right dishes will elevate your dining experience!

  • Juicy Burgers: A classic pairing that never fails! The crunchy texture of the wedges perfectly complements a juicy burger’s tender bite, making every mouthful joyous.

  • Grilled Chicken Thighs: The smoky flavors of grilled chicken paired with buttery potato wedges create a comfort food symphony, perfect for a family feast!

  • Fresh Garden Salad: Adding a crisp salad brings a refreshing contrast to the richness of the wedges. Try mixed greens with a zesty vinaigrette for balance.

  • Spicy Dipping Sauce: Serve with garlic aioli or spicy ketchup to dip your wedges into; each bite becomes an explosion of flavor that adds fun to your meal.

  • Creamy Coleslaw: The crunch and tang of coleslaw provide a bright, refreshing note to the meal, harmonizing beautifully with the rich garlic butter flavor.

  • Cheesy Chili: Warm, hearty chili topped with cheese pairs wonderfully with the golden wedges, combining comfort and heartiness for a satisfying dinner.

  • Savory Grilled Corn: Grilled corn brushed with lime and spices adds a sweet and smoky taste that pairs exceptionally well with the rich potato wedges.

  • Chilled White Wine: A crisp, chilled Sauvignon Blanc or Pinot Grigio will complement the garlic flavors in the wedges, offering a delightful sip with each bite.

  • Chocolate Brownies: End your meal on a sweet note! The contrasting textures of warm chocolate brownies topped with ice cream balance the savory and buttery flavors of the wedges.

Garlic Butter Potato Wedges Recipe FAQs

How do I choose the right potatoes for Garlic Butter Potato Wedges?
Absolutely! I recommend using starchy potatoes like Gold Potatoes or Yukon Gold for their fluffy interior. Look for potatoes that are firm, with no dark spots or blemishes, ensuring they’re fresh and ready to create those perfect crispy wedges.

How should I store leftover Garlic Butter Potato Wedges?
For best results, store leftover wedges in an airtight container in the refrigerator for up to 3 days. When you’re ready to enjoy them again, simply reheat in the oven at 350°F (175°C) for about 10-15 minutes until they’re warm and crispy again!

Can I freeze Garlic Butter Potato Wedges?
Yes, you can! Allow your wedges to cool completely, then arrange them in a single layer on a baking sheet and place in the freezer for about 1 hour. Once frozen, transfer them to a freezer-safe bag, where they can last for up to 2 months. When ready to eat, bake them directly from frozen for about 15-20 minutes at 425°F (220°C).

What should I do if my Garlic Butter Potato Wedges aren't getting crispy?
Don’t worry, this happens sometimes! Make sure you’re spreading the wedges out on the baking sheet with enough space in between. If you notice they are still soggy, try soaking them in cold water for 30 minutes before coating with butter and baking. This helps remove excess starch, leading to crispier results.

Are Garlic Butter Potato Wedges suitable for a dairy-free diet?
Very! If you're making them dairy-free, simply substitute melted butter with a dairy-free margarine or olive oil. You won't lose the rich flavor, and your wedges will still turn out delicious!

Can pets eat Garlic Butter Potato Wedges?
I wouldn't recommend it. Garlic can be harmful to pets, especially dogs. If sharing is your goal, set aside a few plain baked potato wedges without any seasoning to keep your furry friends safe while you enjoy the full flavor of your Garlic Butter Potato Wedges.

Garlic Butter Potato Wedges

Garlic Butter Potato Wedges for Ultimate Cozy Comfort

These Garlic Butter Potato Wedges are a quick and easy side that transforms your evenings, offering crispy texture and rich flavor in under 30 minutes.
Print Recipe Pin Recipe
Prep Time 10 minutes mins
Cook Time 25 minutes mins
Total Time 35 minutes mins
Servings: 4 wedges
Course: Snacks
Cuisine: American
Calories: 250
Ingredients Equipment Method Nutrition Notes

Ingredients
  

For the Wedges
  • 4 pieces Gold Potatoes Starchy potatoes for fluffy interior
  • 1/4 cup Melted Butter Can substitute with dairy-free margarine
  • 3 cloves Garlic (minced) Fresh garlic preferred, can substitute with garlic powder
  • 1 teaspoon Dried Rosemary or Preferred Herb Can use fresh herbs for better flavor
  • 1 teaspoon Salt Adjust to taste
  • 1/2 teaspoon Black Pepper Adjust to taste
  • 2 tablespoons Fresh Parsley (optional) For garnish before serving

Equipment

  • Oven
  • Baking Sheet
  • Mixing Bowl
  • Spatula

Method
 

Step-by-Step Instructions
  1. Preheat your oven to 425°F (220°C) and prepare a baking sheet with parchment paper.
  2. In a large mixing bowl, combine melted butter, minced garlic, dried rosemary, salt, and black pepper.
  3. Add potato wedges to the bowl and toss gently with the garlic butter mixture.
  4. Transfer the wedges to the lined baking sheet, ensuring they are in a single layer.
  5. Bake in the oven for 25 to 30 minutes, flipping halfway through for even browning.
  6. Remove from the oven, let cool for a minute, and sprinkle with fresh parsley before serving.

Nutrition

Serving: 1cupCalories: 250kcalCarbohydrates: 35gProtein: 3gFat: 12gSaturated Fat: 7gPolyunsaturated Fat: 1gMonounsaturated Fat: 4gCholesterol: 20mgSodium: 400mgPotassium: 750mgFiber: 4gSugar: 1gVitamin A: 200IUVitamin C: 15mgCalcium: 20mgIron: 1mg

Notes

For best results, soak cut wedges in water for 30 minutes prior to baking to enhance crispiness.

Tried this recipe?

Let us know how it was!

Pepperoni Pizza Crescent Rolls: Your New Favorite Snack

June 7, 2026 by Grace Snow Leave a Comment

The first whiff of warm, garlic-kissed crescents wafting through the air can instantly transport anyone back to cozy family gatherings and pizza parties. It was during one such evening that I rediscoveed the magic of Pepperoni Pizza Crescent Rolls. This delightful recipe wraps all the nostalgic flavors of classic pizza in a flaky, buttery crust, making it a favorite for both kids and adults alike. Not only are these rolls quick to prepare, but they're also wonderfully customizable—perfect for those who love to get creative in the kitchen. Pair them with marinara for dipping, and you’ve got a delicious crowd-pleaser that’s ready to steal the spotlight at your next gathering. So, are you ready to roll with me into this tasty adventure?

Why Are These Rolls So Irresistible?

Simplicity: Made with just a few common ingredients, they provide a stress-free cooking experience for everyone—from beginner cooks to seasoned chefs.

Endless Customization: Want to switch it up? Substitute pepperoni with veggies or experiment with different cheeses for a fun twist. Check out my recipe for Blue Cheese Pizza for even more ideas!

Kid-Friendly Fun: Kids will love to help roll them up, making it a perfect family activity that ends with a delicious reward.

Party-Ready: Bake up a batch for your next gathering and watch them disappear! Pair with marinara sauce for an extra dip of flavor.

Quick and Easy: Ready in just 15 minutes, these rolls are perfect for those busy weeknights when cravings strike.

With every bite, you'll be reminded why Pepperoni Pizza Crescent Rolls are a go-to favorite!

Pepperoni Pizza Crescent Rolls Ingredients

These easy-to-make rolls are packed with flavor!

For the Dough

  • Crescent Roll Dough – Provides structure and a flaky texture; substitute with puff pastry for a richer feel.

For the Filling

  • Pepperoni – Adds savory flavor; use turkey pepperoni for a leaner option or swap for cooked sausage for a different taste.
  • String Cheese – Creates that gooey center; can be replaced with mozzarella, cheddar, or vegan cheese alternatives.
  • Italian Seasoning – Enhances aroma and taste; substitute with a mix of oregano, basil, and thyme if unavailable.
  • Garlic Powder – Enhances flavor; fresh garlic can be used for a more robust taste.

For Serving

  • Marinara or Pizza Sauce – Perfect for dipping; enhance with a homemade sauce for extra flavor.
  • Butter – Used for brushing to achieve a golden brown crust; substitute with olive oil for a healthier option.

With these ingredients, your Pepperoni Pizza Crescent Rolls will be a hit at any gathering!

Step‑by‑Step Instructions for Pepperoni Pizza Crescent Rolls

Step 1: Preheat the Oven
Start by preheating your oven to 375°F (190°C) to ensure that it reaches the perfect temperature for baking. An adequately heated oven will give your Pepperoni Pizza Crescent Rolls a beautifully golden crust while keeping the inside soft and gooey. This step is crucial for achieving that delightful melt in your cheese that everyone loves.

Step 2: Prepare the Baking Sheet
While the oven warms up, take a baking sheet and line it with parchment paper. This will not only prevent the crescent rolls from sticking but also make for easy cleanup after baking. Set the lined baking sheet aside as you prepare to work with the crescent roll dough.

Step 3: Separate the Dough
Carefully open your tube of crescent roll dough and gently separate it into 8 triangles. Lay them out on a clean surface with the wide end facing you. Make sure to handle the dough gently to preserve its flaky texture, ensuring that each triangle is intact and ready for some delicious fillings.

Step 4: Add Sauce (Optional)
If you’d like to add a burst of flavor, take a teaspoon of marinara or pizza sauce and spread it on the wide end of each triangle. This step adds a delicious zing to your Pepperoni Pizza Crescent Rolls, setting the stage for the pepperoni and cheese to shine through. Remember to keep the sauce within the edges to prevent messiness when rolling.

Step 5: Layer the Ingredients
Next, place 3 slices of pepperoni on the wide end of each triangle, followed by half of a string cheese stick. Layering the ingredients in this order ensures that the pepperoni flavor is prominent and that the cheese melts perfectly inside the roll. The combination of pepperoni and gooey cheese will definitely tantalize taste buds.

Step 6: Roll Up the Dough
Starting from the wide end, carefully roll the dough towards the pointed tip, making sure to encase the filling properly. Roll them tightly, but not too tight, to allow the dough to expand while baking. Once rolled, place them seam-side down on the prepared baking sheet to keep their shape.

Step 7: Brush & Season
In a small bowl, melt a tablespoon of butter and use a pastry brush to coat the tops of your rolled crescents. Sprinkle with garlic powder and Italian seasoning, enhancing their aroma and flavor. This step not only adds taste but also contributes to the golden-brown color as they bake.

Step 8: Bake
Now, it’s time to bake your Pepperoni Pizza Crescent Rolls! Place the baking sheet in the preheated oven and let them bake for 12-15 minutes. Keep an eye on them, and when they turn golden brown and the cheese is bubbling, you’ll know they’re ready to be pulled out. Enjoy the mouthwatering aroma filling your kitchen!

Expert Tips for the Best Pepperoni Pizza Crescent Rolls

  • Keep It Simple: Only use a teaspoon of sauce to avoid soggy rolls. Too much sauce can lead to a messy overflow during baking.

  • Seal the Seams: Ensure that the dough seams are pressed well after rolling to keep the cheesy goodness inside and avoid leaks.

  • Watch the Bake Time: Baking for 12-15 minutes will yield a golden exterior. Adjust timing based on your oven’s accuracy.

  • Experiment with Fillings: Feel free to swap pepperoni for your favorite ingredients—veggies or different cheeses can breathe new life into your Pepperoni Pizza Crescent Rolls.

  • Using Parchment Paper: Always line your baking sheet to prevent sticking, which makes cleanup a breeze and helps achieve that gorgeous golden finish.

What to Serve with Pepperoni Pizza Crescent Rolls

The delightful aroma of these crescent rolls wafts through your kitchen, beckoning for the perfect side dishes to complete your meal.

  • Garlic Breadsticks: Soft and buttery with a hint of garlic, these are perfect for dipping in marinara sauce, complementing the flavors of the rolls perfectly.

  • Caesar Salad: Crisp romaine lettuce tossed with creamy dressing provides a refreshing contrast to the warm, cheesy rolls, adding a healthy element to your meal.

  • Vegetable Platter: A colorful array of fresh cut veggies adds crunch and balance, ideal for dipping in leftover marinara sauce or ranch dressing.

  • Mozzarella Sticks: These gooey, cheesy bites echo the pizza theme, offering an irresistible finger food that will delight both kids and adults.

  • Fruit Salad: A light, sweet medley of seasonal fruits can offset the savory richness of the crescent rolls, bringing brightness and a fresh taste to your table.

  • Sparkling Lemonade: This bubbly drink offers a zingy refreshment that cuts through the richness of the rolls, making each bite feel vibrant.

  • Chocolate Chip Cookies: End your meal on a sweet note with warm, gooey cookies, creating a dessert experience that’s sure to please everyone around the table.

Embrace the cozy gathering that comes with these Pepperoni Pizza Crescent Rolls and let these pairings bring your meal to life!

How to Store and Freeze Pepperoni Pizza Crescent Rolls

Fridge: Keep leftover Pepperoni Pizza Crescent Rolls in an airtight container for up to 3 days to maintain their freshness and flavor.

Freezer: For longer storage, freeze the rolls in a single layer on a baking sheet before transferring them to a freezer-safe bag. They can last up to one month.

Reheating: To reheat, bake from frozen at 375°F (190°C) for 15-20 minutes until heated through and crispy. This preserves their delicious texture.

Room Temperature: If serving at a party, these rolls can sit out for about 2 hours at room temperature, but it's best to consume them warm for optimal enjoyment.

Pepperoni Pizza Crescent Rolls Variations

Dive into delicious possibilities and unleash your culinary creativity with these exciting changes!

  • Vegetarian Delight: Swap out pepperoni for a vibrant mix of bell peppers, mushrooms, and onions. Perfect for a garden-fresh twist and packed with flavor!

  • Cheese Medley: Try mixing different cheeses like provolone, gouda, or ricotta for a creamy, luxurious filling. The melting of these cheeses offers a delightful surprise in every bite.

  • Spicy Kick: Add sliced jalapeños or crushed red pepper flakes for a zesty heat that will leave your taste buds tingling. Spice enthusiasts will love the extra kick!

  • Savory Sausage: Replace pepperoni with crumbled, cooked Italian sausage for a hearty, robust flavor. This variation is sure to satisfy even the biggest appetites!

  • Creamy Spinach & Cheese: Fill rolls with a mixture of cream cheese and chopped spinach for a creamy, decadent option. This twist makes for a delightful finger food perfect for parties.

  • BBQ Chicken Style: Use shredded barbecue chicken instead of pepperoni, and drizzle a touch of barbecue sauce before rolling. This sweet and smoky variation will impress guests at your next gathering.

  • Deep-Fried Crunch: Instead of baking, deep-fry the rolls for an extra crispy texture. This indulgent option is highly recommended for those who crave an irresistibly crunchy snack.

Feel free to explore these options and create your own signature roll! And if you're looking for even more ideas, check out my recipe for Blue Cheese Pizza that may inspire your next filling twist. Your kitchen is your playground, so have fun with these Pepperoni Pizza Crescent Rolls!

Make Ahead Options

These Pepperoni Pizza Crescent Rolls are ideal for meal prep, making your life easier during busy weeknights! You can prepare the rolls up to 24 hours in advance by assembling them and then covering them tightly with plastic wrap before refrigerating. Keep in mind that chilling them will slightly alter the texture, so try to bake them soon after assembling for the best results. If you’d like to prep even further in advance, you can freeze the unbaked rolls for up to one month; just ensure they are placed on a baking sheet until firm, then transfer to an airtight container. When you're ready to enjoy, bake them straight from the freezer, adding an extra few minutes to the baking time, and you'll have warm, cheesy Pepperoni Pizza Crescent Rolls that are just as delicious!

Pepperoni Pizza Crescent Rolls Recipe FAQs

How do I choose the best crescent roll dough?
Absolutely! Look for fresh crescent roll dough that is free from any dark spots or breaks in packaging. If you're feeling adventurous, you could also use puff pastry for a richer texture; just remember it'll need a bit more time in the oven!

How should I store leftover Pepperoni Pizza Crescent Rolls?
Very simple! Store your leftover rolls in an airtight container in the fridge where they’ll remain fresh for up to 3 days. If you want to keep them longer, you can freeze them, ensuring they're in a single layer first, then transfer them into a freezer-safe bag. They can last up to 1 month in the freezer!

Can I freeze Pepperoni Pizza Crescent Rolls?
Absolutely! To freeze, first bake the rolls until they're golden brown. Let them cool completely, then place them in a single layer on a baking sheet and freeze until solid. Once frozen, move them to a freezer-safe bag. To reheat, just bake them from frozen at 375°F (190°C) for 15-20 minutes until heated through and crispy.

What do I do if the cheese leaks out while baking?
This can sometimes happen! To avoid it, make sure to seal the dough seams well by pressing them together firmly after rolling. Also, avoid overstuffing the rolls; a few slices of pepperoni and half a stick of cheese is just right. If some cheese does leak, no worries—your rolls will still be tasty!

Are there dietary considerations for the ingredients?
For sure! If you have food allergies, check that your crescent roll dough doesn’t contain any allergens, like gluten or dairy. If you're serving these to kids or guests with dietary restrictions, consider swapping regular cheese for vegan options or replacing pepperoni with veggies for a more inclusive snack.

Can I make these rolls ahead of time?
Certainly! You can prepare the rolls, but instead of baking them, store them unbaked in the fridge for up to 24 hours. When you’re ready to serve, just pop them in the oven as instructed and enjoy fresh-baked goodness!

Delight in Crispy Ham & Cheese Puff Pastry Stacks Today!

June 7, 2026 by Grace Snow Leave a Comment

As the aroma of freshly baked pastries envelops your kitchen, I can almost hear the chorus of delighted gasps that fills the air when you serve up these Crispy Ham & Cheese Puff Pastry Stacks. This easy recipe is a dream come true for busy home chefs like us, clocking in at just 50 minutes, transforming humble ingredients into an indulgent gourmet snack ideal for brunch or a light dinner. Imagine layers of flaky pastry cradling savory ham and gooey cheese, all baked to golden perfection. Not only is this dish a crowd-pleaser, but it also gives you a chance to creatively reuse pantry staples—winning on both flavor and convenience! Are you ready to elevate your cooking game with this delightful treat?

Why Are Puff Pastry Stacks So Irresistible?

Crispy Layers: Each bite of these delightful stacks showcases flaky, golden pastry that offers a satisfying crunch, making them a standout at any gathering.

Savory Goodness: Loaded with savory ham and gooey cheese, they provide a warm, comforting flavor that will please your taste buds every time.

Quick & Easy: Ready in just 50 minutes, even busy home cooks can whip up this impressive dish without stress.

Versatile Dish: Perfect for brunch, elegant appetizers, or a light dinner, these stacks shine in any setting! Paired beautifully with a creamy tomato soup, they create a symphony of flavors. Get ready for the compliments!

Crispy Ham & Cheese Puff Pastry Ingredients

• Dive into the delicious details!

For the Pastry

  • Puff Pastry Sheets – Look for high-quality frozen options to ensure the most flaky results.

For the Filling

  • Ham – Thinly sliced varieties add a savory, smoky flavor that pairs beautifully with the cheese.
  • Cheese (Swiss, Gruyère, or Cheddar) – Melts perfectly to create that gooey goodness inside your stacks.
  • Dijon Mustard – This optional ingredient gives a pleasant tang that enhances the overall flavor of the crispy ham & cheese puff pastry stacks.
  • Salt and Pepper – Essential for balancing the flavors and elevating the dish.

For the Egg Wash

  • Egg (beaten) – Acts as an adhesive to hold the pastry together and gives a lovely golden finish.
  • Milk – Blending with the egg creates a smoother coating for an even bake.

Optional Garnish

  • Fresh Herbs (thyme or rosemary) – Sprinkle over the top for a touch of aroma and freshness, making your stacks not only flavorful but visually appealing.

Step‑by‑Step Instructions for Crispy Ham & Cheese Puff Pastry Stacks

Step 1: Preheat and Prepare
Begin by preheating your oven to 400°F (200°C). While the oven warms up, line a baking sheet with parchment paper to prevent sticking and ensure perfect flakiness. This is the first step to achieving that golden, crispy exterior that will make your Crispy Ham & Cheese Puff Pastry Stacks utterly irresistible.

Step 2: Roll Out the Pastry
Unroll the thawed puff pastry sheets on a clean surface. Using a rolling pin, gently roll them out to smooth out any creases and slightly enlarge the sheets. Aim for a thickness of about 1/8 inch to ensure that they puff up beautifully while baking. This extra preparation guarantees the layers will lift and create that perfect flaky texture.

Step 3: Cut the Pastry Squares
Take a sharp knife or a pizza cutter and cut each sheet into four equal squares, giving you a total of eight squares. These uniform pieces will help ensure that your Crispy Ham & Cheese Puff Pastry Stacks bake evenly and maintain a professional look. Lay the squares flat on the lined baking sheet, ready for the delicious filling.

Step 4: Prepare the Egg Wash
In a small bowl, mix together one beaten egg and a splash of milk to create a smooth egg wash. This mixture will help seal the edges of your pastry and provide a beautiful golden finish as they bake. Don't skip this step, as it is essential for achieving that ideal, shiny crust that will impress anyone who sees your delightful stacks.

Step 5: Assemble the Filling
On each pastry square, layer one slice of savory ham and one slice of gooey cheese. For an added kick, you can optionally spread a thin layer of Dijon mustard on the pastry before adding the ham and cheese. This simple addition can elevate the flavor profile of your Crispy Ham & Cheese Puff Pastry Stacks beautifully, making them even more delicious.

Step 6: Season and Top Off
Sprinkle each stack with salt, pepper, and any fresh herbs you’d like to use, such as thyme or rosemary, for an aromatic touch. This seasoning will enhance the flavors of the ham and cheese, ensuring every bite is packed with savory delight. Once seasoned, place another pastry square on top to create a sandwich effect with the filling in the center.

Step 7: Seal the Edges
Press the edges of the stacked pastries together firmly to seal in the filling, then use a fork to crimp the edges for added security. This crimping not only secures the delicious contents but also adds a charming visual detail that elevates the presentation of your Crispy Ham & Cheese Puff Pastry Stacks, making them look perfect for any gathering.

Step 8: Brush with Egg Wash
Gently brush the top of each puff pastry stack with the prepared egg wash, ensuring an even layer is applied. This step is crucial for obtaining that beautiful, golden-brown color during baking. The egg wash will also help the pastries develop a delightful shine, making them look as good as they taste once they're out of the oven.

Step 9: Arrange for Baking
Carefully arrange the puff pastry stacks on the lined baking sheet, leaving enough space between each stack to allow for puffing up during baking. This spacing ensures that the heat circulates evenly around each pastry, helping achieve the perfect crispness on all sides of each stack.

Step 10: Bake to Perfection
Place the baking sheet in the preheated oven and bake for 20-25 minutes or until the pastries are puffed up and golden brown. Keep an eye on them toward the end of baking; the visual cue here is a delightful, rich golden color. This step is where the magic happens, transforming your simple ingredients into stunning Crispy Ham & Cheese Puff Pastry Stacks.

Step 11: Cool and Serve
Remove the baking sheet from the oven and allow the crispy stacks to cool slightly before serving. This brief cooling period allows the cheese to set a little, ensuring that your first bite is perfectly gooey without everything spilling out. Set them on your table for a delightful presentation that will surely impress your family and friends!

What to Serve with Crispy Ham & Cheese Puff Pastry Stacks

These delightful stacks will elevate your meal from simple to sensational, inviting a touch of gourmet elegance to any occasion.

  • Fresh Side Salad: A crisp mixed greens salad with a tangy vinaigrette balances the richness of the stacks, adding refreshing notes to each bite.

  • Creamy Tomato Soup: Pair your stacks with a warm bowl of creamy tomato soup for a classic combo that offers cozy comfort on chilly days—perfect for dipping!

  • Coleslaw: The crunch and acidity of coleslaw create a wonderful contrast to the flaky, savory stacks, adding texture and brightness to your plate.

  • Roasted Vegetables: A medley of roasted seasonal veggies provides a sweet and savory complement, enhancing the warmth and comfort of the fluffiness of the stacks.

  • Fruit Salad: A side of fresh fruit salad introduces a sweet and juicy finish to your meal, balancing out the savory flavors beautifully.

  • Sparkling Lemonade: Serve with a refreshing glass of sparkling lemonade to cleanse the palate and add a zesty kick that contrasts delightfully with the cheesy richness.

  • Herbed Mashed Potatoes: Creamy, herbed mashed potatoes create a comforting pairing, bringing earthiness that works harmoniously with the stacks’ savory profile.

  • Cheese Platter: Create a small cheese platter with assorted cheeses and nuts to enhance the gourmet experience, allowing guests to mix flavors and textures as they desire.

Expert Tips for Crispy Ham & Cheese Puff Pastry Stacks

  • Preheat Properly: Ensure your oven is fully preheated before baking. A hot oven is crucial for achieving that perfect puff and crispiness in your stacks.

  • Use Quality Ingredients: Opt for high-quality puff pastry and cheese. These ingredients greatly influence the overall taste and texture of the Crispy Ham & Cheese Puff Pastry Stacks.

  • Don’t Overcrowd: Give each stack enough space on the baking sheet. This prevents them from sticking together and allows proper puffing for a flaky finish.

  • Seal Carefully: Make sure to seal the edges of the pastry well, crimping with a fork. This helps keep the gooey cheese and ham filling from leaking out during baking.

  • Experiment with Fillings: Feel free to customize your stacks! Try different meats, cheeses, or add sautéed vegetables for added flavor and variety.

How to Store and Freeze Crispy Ham & Cheese Puff Pastry Stacks

  • Fridge: Store cooked stacks in an airtight container for up to 2 days. This helps retain their flaky texture and prevents them from drying out.

  • Freezer: To freeze, place stacks on a baking sheet in a single layer until firm, then transfer to a freezer bag for up to 1 month.

  • Reheating: Bake from frozen by adding a few extra minutes to the cooking time, ensuring they heat through and regain that crispy texture.

  • Thawing: If thawed, reheat stacks in the oven at 375°F (190°C) for about 10 minutes, restoring their delightful crispy crust.

Crispy Ham & Cheese Puff Pastry Stacks Variations

Feel free to tailor these Crispy Ham & Cheese Puff Pastry Stacks to your liking and savor the adventure of creativity in your kitchen!

  • Turkey Option: Swap ham for turkey slices for a lighter, yet still savory alternative that maintains delicious flavor. This twist is perfect for those looking to enjoy a healthier option.

  • Salami Surprise: Use salami instead of ham for a bolder, spiced taste. The unique flavor of salami paired with gooey cheese adds a nice kick that will excite your palate.

  • Cheese Medley: Experiment with cheeses like provolone, mozzarella, or blue cheese to find your favorite combination. Each cheese brings its own distinct flavor and texture, opening up a whole new world of deliciousness!

  • Veggie Delight: Add sautéed spinach or mushrooms to the filling for a wholesome boost of flavor and nutrition. Pairing veggies with the ham and cheese transforms your stacks into a balanced dish while still being utterly comforting.

  • Herbed Twist: Mix fresh herbs like basil or dill into your cheese filling for an aromatic elegance. These herbs can elevate the dish from a simple snack to a gourmet experience, perfect for impressing guests or adding flair to family meals.

  • Spicy Kick: Add a dash of crushed red pepper flakes or chopped jalapeños for heat. This variation brings a delightful warmth that will awaken your senses and satisfy spicy cravings.

  • Sweet & Savory: Incorporate a thin layer of apple or pear slices in-between the ham and cheese for a sweet contrast. This addition surprises with a lovely balance of flavors, making every bite a unique experience.

  • Pasta Inspired: Try a layer of pesto in place of mustard to bring a fresh, herby result that's great for a Mediterranean twist. This variation not only adds depth of flavor but also gives a nod to classic Italian cooking.

These variations will not only enhance your main recipe but will also open the doors to new culinary creations. If you need more ideas, consider pairing your stacks with marinated Parmesan Artichoke Hearts for a delightful appetizer experience! Happy cooking!

Make Ahead Options

These Crispy Ham & Cheese Puff Pastry Stacks are the ultimate meal prep solution for busy home cooks! You can prepare the stacks up to 24 hours in advance by assembling them completely, then covering them tightly with plastic wrap and refrigerating. If you need to plan even further ahead, you can freeze the unbaked stacks for up to 1 month. When you're ready to enjoy them, simply bake from frozen, adding a few extra minutes to the cooking time. To maintain that delightful flakiness, avoid stacking the assembled pastries directly on top of each other and ensure that they are spaced out on the baking sheet while they bake. Your family will be treated to warm, flaky goodness with minimal effort!

Crispy Ham & Cheese Puff Pastry Stacks Recipe FAQs

What type of puff pastry should I use?
For the best results, I recommend using high-quality frozen puff pastry sheets. Look for brands that have a good reputation for flakiness and richness; this will elevate your Crispy Ham & Cheese Puff Pastry Stacks to a whole new level!

How should I store leftover stacks?
Store your cooked stacks in an airtight container in the fridge for up to 2 days. This keeps them flaky and delicious without drying out. Just reheat them in the oven to restore their crispy texture!

Can I freeze my puff pastry stacks?
Absolutely! To freeze, arrange your assembled stacks on a baking sheet, leaving space between them, and freeze until firm. Then transfer them to a freezer bag, where they can stay fresh for up to 1 month. When you're ready to enjoy, bake them from frozen, adding a few extra minutes to the cooking time.

What if my pastry doesn’t puff up?
If your pastry doesn’t puff, ensure your oven was fully preheated. A hot oven is essential for that beautiful rise! Additionally, avoid overcrowding the baking sheet, as proper air circulation is key for achieving that flaky texture.

Are there any dietary considerations for my guests?
Yes, you might want to check for any allergies related to dairy or gluten, as both ham and puff pastry contain these ingredients. If you have guests with dietary restrictions, consider using gluten-free pastry and a turkey or veggie option as an alternative to ham for a delicious twist!

Irresistible Broccoli Cheese Patties You’ll Love to Make

June 3, 2026 by Grace Snow Leave a Comment

There's something incredibly satisfying about transforming a humble vegetable into a mouthwatering treat. Enter my Nutritious Broccoli Cheese Patties, where vibrant broccoli meets gooey cheese in a delightful fritter that’s simply hard to resist. Not only are these little bites a fantastic way to sneak in some veggies, but they’re also versatile enough to suit any occasion—from quick snacks to festive gatherings. Plus, with the option for gluten-free breadcrumbs and different cheese variations, you can easily customize them to satisfy your cravings. Curious to see how these can quickly elevate your meal game? Let’s dive into this delicious recipe!

Why Make Broccoli Cheese Patties?

Flavorful Fusion: These patties blend savory broccoli with creamy cheese, making for a delicious bite that everyone will love.

Nutrient-Packed Deliciousness: Loaded with vitamins, they're a guilt-free treat that’s perfect for health-conscious eaters.

Versatile Option: Great as a snack, appetizer, or even a side dish—pair them with herbed yogurt for a refreshing twist!

Easy Customization: With simple swaps like different cheese types or gluten-free breadcrumbs, you can easily adapt the recipe to fit dietary needs.

Quick to Prepare: Whip these up in no time—ideal for busy weekdays or unexpected guests! You won't regret trying these scrumptious Broccoli Cheese Patties!

Broccoli Cheese Patties Ingredients

• Here’s everything you need to make these delicious patties!

For the Fritters

  • Chopped Broccoli – Provides the base flavor and nutrition; fresh or frozen works well.
  • Cheese (Cheddar recommended) – Adds creamy goodness; feel free to substitute with mozzarella, gouda, or feta for different tastes.
  • Eggs – Acts as a binder to hold the patties together; use enough to ensure a firm mixture.
  • Breadcrumbs – Adds structure and texture; try gluten-free breadcrumbs or almond flour for a gluten-free option.
  • Salt & Pepper – Enhances flavor; adjust to your liking.

With the right ingredients, you’ll create irresistible Broccoli Cheese Patties that everyone will adore!

Step‑by‑Step Instructions for Broccoli Cheese Patties

Step 1: Prep Broccoli
Begin by chopping the broccoli into small, bite-sized pieces. Steam or boil the chopped broccoli for about 5-7 minutes until it's tender but still bright green. Drain thoroughly and let it cool for a few minutes. Properly draining and cooling the broccoli is essential to achieving a good texture in your Broccoli Cheese Patties.

Step 2: Mix Ingredients
In a large mixing bowl, combine the cooled broccoli with shredded cheese, beaten eggs, breadcrumbs, salt, and pepper. Use a fork or spatula to mix until all ingredients are well integrated and the mixture is slightly sticky. This will create a cohesive blend for your Broccoli Cheese Patties, ensuring they hold together during cooking.

Step 3: Shape Patties
With clean hands, scoop out portions of the mixture and form them into small, firm patties—about the size of your palm. Press the mixture gently but firmly to ensure they stay intact. Place the shaped patties on a plate or baking sheet lined with parchment paper, ready for cooking.

Step 4: Cook Patties
Heat a nonstick skillet over medium heat and add a few tablespoons of oil. Once hot, carefully place the patties in the skillet, cooking for 3-4 minutes on each side until golden brown and crispy. Alternatively, preheat your oven to 375°F (190°C) and bake the patties on a lined baking sheet for 20 minutes, flipping halfway through for even cooking.

Step 5: Serve and Enjoy
Once cooked, transfer the Broccoli Cheese Patties to a paper towel-lined plate to drain any excess oil. Serve them warm with your favorite dipping sauces or as a delicious side dish. The crunchy exterior and cheesy interior make these patties a delightful addition to any meal or gathering.

Broccoli Cheese Patties Variations

Feel free to get creative with these delightful patties, enhancing both flavor and nutrition!

  • Cheese Swap: Use mozzarella, gouda, or feta instead of cheddar for a different creamy profile. Each cheese adds a distinct surprise!

  • Gluten-Free: Substitute regular breadcrumbs with gluten-free options or almond flour to suit dietary needs while maintaining delicious crunch.

  • Herb Infusion: Add fresh herbs like parsley or chives for a burst of flavor and freshness. They'll lighten up the patties beautifully!

  • Spice It Up: Incorporate spices such as garlic powder or paprika to infuse heat and zest. A sprinkle of chili flakes can elevate the experience!

  • Extra Veggies: Toss in shredded carrots or spinach alongside the broccoli for added nutrition and vibrant color. Your mixed veggies will become a family favorite!

  • Baking Alternative: For a lighter version, bake the patties in the oven until golden and crispy, skipping the oil while keeping that delightful crunch.

  • Dipping Delight: Pair them with a tangy homemade dipping sauce or herbed yogurt, such as our herbed yogurt for added flavor.

By exploring these variations, you'll find endless possibilities to cherish your Broccoli Cheese Patties just the way you love them!

Expert Tips for Broccoli Cheese Patties

  • Compact Mixture: Ensure the broccoli, cheese, and breadcrumbs are well-mixed and formed into compact patties to avoid them falling apart while cooking.

  • Cooking Method: For a crispier exterior, frying in hot oil yields the best results; however, baking is a healthier option that still delivers delicious Broccoli Cheese Patties.

  • Make Ahead: Form the patties in advance and refrigerate them for up to 24 hours, or freeze them for longer storage. Cook from frozen without thawing for a quick meal!

  • Flavor Boost: Experiment with spices like garlic powder or herbs to enhance the flavor profile. A hint of onion powder can also add an extra depth of taste.

  • Cheese Variations: Don't hesitate to swap out cheddar for mozzarella, gouda, or feta to customize the taste of your patties—each cheese adds its unique charm!

How to Store and Freeze Broccoli Cheese Patties

Fridge: Keep cooked patties in an airtight container for up to 3 days. This helps preserve their crispness and flavor for tasty leftovers.

Freezer: For longer storage, wrap each individual patty in plastic wrap and place them in a freezer-safe bag. They can be frozen for up to 3 months.

Reheating: To reheat, cook the frozen patties directly from the freezer in a skillet over medium heat for about 5-7 minutes per side, or bake in a preheated oven at 375°F (190°C) for 15-20 minutes until heated through and crispy.

Make Ahead: You can form the patties in advance and refrigerate them for up to 24 hours before cooking, making it easier to enjoy your nutritious Broccoli Cheese Patties on busy days.

What to Serve with Broccoli Cheese Patties

Elevate your dining experience with delightful accompaniments that enhance the savory goodness of these cheesy bites.

  • Creamy Herb Yogurt: A refreshing dip that balances the richness of the patties, perfect for summer gatherings or casual dinners.

  • Zesty Marinara Sauce: This tangy sauce complements the cheesy flavor and adds a burst of acidity, making each bite even more enjoyable.

  • Simple Green Salad: A crisp salad with mixed greens, cherry tomatoes, and a light vinaigrette provides a bright contrast to the warm patties.

  • Roasted Veggies: Roasted seasonal vegetables add a lovely char and depth of flavor, creating a colorful and nutritious side.

  • Adult-Approved Wine: Pair with a chilled Sauvignon Blanc or light Pinot Grigio to create an elegant touch; their acidity complements the cheesy richness.

  • Garlic Bread: Crunchy, buttery garlic bread offers a satisfying side that makes your meal feel indulgent and comforting.

  • Sweet Potato Fries: For a hearty side, these crispy fries add sweetness and their unique texture wonderfully contrasts with the Broccoli Cheese Patties.

  • Fruit Salad: A light fruit salad with berries, melon, and mint adds a refreshing sweetness, enhancing the overall dining experience without overwhelming the palate.

  • Chocolate Dipped Strawberries: End your meal on a sweet note with these indulgent treats—perfect for a cozy evening!

Make Ahead Options

These Broccoli Cheese Patties are perfect for meal prep enthusiasts looking to save time during busy weeknights! You can prepare the mixture and shape the patties up to 24 hours in advance; just store them in an airtight container in the fridge to keep them fresh. Alternatively, you can also freeze the uncooked patties, which will last for up to 3 months—just make sure to layer parchment paper between them to prevent sticking. When you’re ready to enjoy, cook them directly from frozen or let them thaw in the fridge overnight for more even cooking. With these make-ahead tips, you’ll have delicious, nutritious Broccoli Cheese Patties ready with minimal effort whenever cravings strike!

Broccoli Cheese Patties Recipe FAQs

How do I choose the right broccoli?
Absolutely! When selecting broccoli, look for firm, bright green florets without dark spots or yellow blooms. Fresh broccoli should feel crisp to the touch; if it’s beginning to wilt or displays dark spots all over, it might not be as fresh. For convenience, you can also use frozen broccoli, ensuring it is completely thawed and well-drained before mixing.

What’s the best way to store leftover patties?
Very! Store cooked Broccoli Cheese Patties in an airtight container in the fridge for up to 3 days. This maintains their flavor and texture, making them perfect for quick snacks or meals. Just remember to let them cool completely before sealing them up to prevent excess moisture from making the patties soggy.

Can I freeze these patties for later use?
Definitely! To freeze your Broccoli Cheese Patties, first wrap each one individually in plastic wrap. Then, place them in a freezer-safe bag to prevent freezer burn. They can be stored for up to 3 months. When you’re ready to enjoy, you can cook them straight from the freezer without thawing—just add a few extra minutes to your cooking time!

How do I troubleshoot patties that fall apart during cooking?
No worries! If you find that your patties are falling apart, ensure that your mixture is well-combined and compact. You may need to add a bit more egg to help bind it together. Additionally, take care to form them into firm patties, and avoid overcrowding the pan. This gives the patties space to crisp up without losing their form.

Are these patties suitable for gluten-free diets?
Absolutely! To make gluten-free Broccoli Cheese Patties, simply substitute regular breadcrumbs with gluten-free breadcrumbs or almond flour. This ensures that everyone can enjoy them without compromising on taste or texture. Plus, feel free to experiment with different types of cheese to cater to various dietary preferences!

Delicious Broccoli Tots: A Fun, Nutritious Snack for Kids

May 28, 2026 by Grace Snow Leave a Comment

The vibrant green of fresh broccoli always makes me feel hopeful about mealtime, especially when I’m eager to introduce my little ones to wholesome foods. These Crispy Broccoli Tots are an exciting way to sneak in those essential nutrients while keeping snack time fun and tasty! Perfect for babies 6 months and up, these veggie-packed delights are not only baby-friendly but also a hit with older kids—proving that healthy snacks can indeed cater to every family member. With a quick prep time and easy-to-find ingredients, you can whip these up in no time, making them a go-to option for busy afternoons. How about serving them with a tasty dip to elevate the fun? Let’s dive into this recipe that might just become the next family favorite!

Why Are Broccoli Tots a Must-Try?

Healthful Delight: Packed with essential nutrients, these tots give you the perfect opportunity to introduce vegetables to kids in a fun way!
Quick Preparation: With just a few simple steps, you can have a nutritious snack ready in no time—ideal for multitasking parents.
Versatile Options: Whether you need a baby-friendly dish or something to please older siblings, these tots adapt effortlessly to dietary needs.
Kid-Approved Flavor: The mild cheesy taste and garlic infusion make them utterly irresistible; even picky eaters will be asking for seconds!
Crowd-Pleasing Snack: Perfect for playdates or family dinners, these tots will please everyone around the table. Plus, consider serving them with a refreshing dip for extra enjoyment!

Broccoli Tots Ingredients

• The perfect blend for crispy tots!

For the Base

  • Broccoli – The star ingredient that brings essential nutrients; use fresh or frozen for convenience.
  • Eggs – Binds everything together and adds protein; for a vegan option, use chickpea flour mixed with water.
  • Almond meal/flour – Provides structure and a delightful texture; you can substitute with breadcrumbs or panko for a crunchier finish.

For the Flavor

  • Sharp cheddar cheese – Adds creaminess and rich flavor; opt for low-sodium mozzarella if preparing for babies.
  • Garlic cloves – Enhances the overall taste; adjust the amount for a milder garlic flavor according to preference.
  • Salt (optional) – Brings out the flavors; skip this for toddler-friendly versions to keep sodium low.

These Broccoli Tots are not just nutritious; they’re a fantastic way to make vegetables fun for your little ones!

Step‑by‑Step Instructions for Broccoli Tots

Step 1: Preheat the Oven
Start by preheating your oven to 375℉ (190℃). While it warms up, line a baking sheet with parchment paper to prevent sticking. This will help the Broccoli Tots achieve that perfect crispiness once they bake, so make sure to spread the paper evenly across the tray.

Step 2: Prepare the Broccoli
Take fresh or frozen broccoli and chop it into small florets. Steam the broccoli for about 4 to 5 minutes until it's tender but still vibrant green. Once done, allow it to cool slightly before finely chopping it. This ensures the broccoli blends well into your mixture for the tots.

Step 3: Mix the Ingredients
In a large mixing bowl, combine the finely chopped broccoli, eggs, almond meal, shredded sharp cheddar cheese, and minced garlic. Stir thoroughly until all the ingredients are well incorporated, creating a cohesive mixture. The blend should be moist enough to hold together, which is key for forming your Broccoli Tots.

Step 4: Shape the Tots
Using your hands, scoop out small portions of the broccoli mixture and shape them into small oval or round tots. Aim for about the size of a golf ball. Place each tot onto the prepared baking sheet, leaving a little space between each to allow for even cooking.

Step 5: Bake Until Golden
If desired, lightly spray the tops of the tots with cooking oil to enhance browning. Bake in the preheated oven for about 20 minutes, or until the tops are golden brown and crispy. Keep an eye on them towards the end of cooking, ensuring they don’t over-bake while achieving that perfect texture.

Step 6: Serve Warm
Once your Broccoli Tots are done baking, remove them from the oven and let them cool for a few minutes. Serve them warm with a dip of your choice, such as yogurt or hummus, to make snack time even more enjoyable. These tasty treats are ready to be devoured by the whole family!

Make Ahead Options

Making Broccoli Tots can be a lifesaver for busy families! You can prepare the broccoli mixture and refrigerate it for up to 24 hours before baking. Simply steam and chop the broccoli, then combine it with the other ingredients (eggs, almond meal, cheese, and garlic) in a bowl. To maintain their fresh flavor, store the mixture in an airtight container within the fridge. When you're ready to serve, form the mixture into tots, place them on a baking sheet, and bake as directed. This way, you’ll have a quick, nutritious meal ready to go, taking the stress out of mealtime while keeping snack time fun!

Broccoli Tots Variations & Substitutions

Feel free to sprinkle your creativity into these delicious tots, making every batch uniquely yours!

  • Nut-Free: Substitute almond meal with sunflower seed flour, perfect for school lunches and allergy-friendly eating.
    Sometimes, skipping nuts doesn't mean sacrificing flavor! Sunflower seed flour maintains the delightful texture while keeping everyone safe.

  • Vegan: Replace eggs with a mixture of 3 tablespoons chickpea flour and 3 tablespoons water for a plant-based binding option.
    These vegan tots deliver just as much flavor, ensuring no one misses out on the joy of crispy snacks!

  • Spice It Up: Add a pinch of cayenne pepper or smoked paprika for a delightful kick.
    This simple twist elevates the flavor profile, giving your tots a fun, unexpected zing that adventurous eaters will adore.

  • Mixed Veggies: Blend in finely chopped cauliflower or spinach to enhance nutrient levels without altering the taste.
    Diverse textures and flavors keep these tots lively and appealing, making them even more nutritious for growing kids.

  • Herbed Delight: Incorporate fresh herbs like parsley or dill for an aromatic twist.
    These fragrant additions not only brighten the flavor but also add an appealing pop of color, turning each bite into a treat for the senses.

  • Cheddar Variety: Experiment with different cheeses like pepper jack for a cheesy, spicy flair.
    A hint of heat and extra creaminess can take your broccoli tots to the next level, making the cooking experience just as exciting!

  • Crunch Factor: Replace almond meal with panko breadcrumbs for an extra crispy exterior.
    Bringing in those crunchy textures ensures your tots are loved by kids and parents alike—who doesn't enjoy a satisfying crunch?

For even more tasty ideas, check out our healthy snacks for kids that can make your kitchen feel like a culinary wonderland!

Expert Tips for Broccoli Tots

• Choose Fresh Broccoli: Use fresh, vibrant broccoli for the best flavor and texture. If using frozen, ensure it’s fully thawed and drained to avoid excess moisture.

• Perfectly Bind: Avoid large chunks of broccoli that can prevent the mixture from holding together. Finely chop or blend the broccoli to ensure optimal binding in your Broccoli Tots.

• Watch the Bake Time: Different ovens vary, so keep an eye on the tots in the last few minutes of baking. They should be golden brown on the outside and firm to the touch.

• Flavor Variations: Get creative! Try adding spices like cumin, or fresh herbs like parsley, to intensify the flavor and make them unique each time.

• Cool Before Serving: Allow the tots to cool for a couple of minutes after baking. This enhances their crispiness and makes them easier for little hands to grab!

How to Store and Freeze Broccoli Tots

Fridge: Store leftover Broccoli Tots in an airtight container in the refrigerator for up to 3 days. Reheat in the oven or microwave before serving to maintain crispiness.

Freezer: For longer storage, freeze fully cooled tots in a single layer on a baking sheet. Once frozen, transfer them to a freezer-safe bag and store for up to 3 months.

Reheating: To reheat, bake from frozen at 375℉ (190℃) for about 15-20 minutes until heated through and crispy, or use the microwave for a quicker option—just keep in mind they won’t be as crispy.

Make-Ahead: These Broccoli Tots can be prepared in advance, making them a convenient option for quick snacks or meals throughout the week!

What to Serve with Crispy Broccoli Tots?

Elevate your meal experience with delightful pairings that create a well-rounded feast the whole family will enjoy.

  • Lemon Yogurt Dip: The zesty brightness of lemon complements the savory flavors of the tots, making it a refreshing dipping option. This creamy dip is a favorite among kids and adults alike, enhancing each bite with a burst of tanginess.
  • Hummus: Creamy and protein-rich, hummus adds a velvety texture that pairs perfectly with the crispy broccoli tots. Spread it on a plate for kids to dip or even use as a spread on whole grain wraps.
  • Sweet Potato Fries: These crispy-on-the-outside, tender-on-the-inside fries provide a natural sweetness that balances the savory broccoli tots beautifully. Their vibrant orange color and slightly sweet flavor introduce another layer of nutrition and enjoyment.
  • Mixed Green Salad: A light salad with fresh greens and a simple vinaigrette offers a pleasant crunch alongside the tots. Toss in cherry tomatoes for a burst of color and sweetness—ideal for a healthy, refreshing contrast!
  • Apple Slices with Nut Butter: The crispness of fresh apple slices paired with creamy nut butter creates a delightful sweet-meets-savory snack that your little ones will love. This combination provides a nutritious and fun dessert option after enjoying the tots.
  • Milk or Herbal Tea: A glass of cold milk or a soothing herbal tea creates a comforting beverage pairing, perfect to wash down those delightful bites. Opt for chamomile or mint tea for a calming finish to your meal.
  • Zucchini Fritters: For a veggie boost, consider serving zucchini fritters alongside the broccoli tots. Their crispy outside and soft interior mirror the texture of the tots while adding variation in flavors and essential nutrients.
  • Fruit Smoothie: A refreshing fruit smoothie packs a natural sweetness and nutrition, making it a great complement to the crispy tots. Blend bananas, spinach, and yogurt for a nutritious drink that kids will adore.
  • Cucumber Sticks: Serve these crunchy veggies with a light dip like tzatziki for an extra bite of freshness. They not only add crispness to your meal but also enhance hydration, perfect for those hot days.

Broccoli Tots Recipe FAQs

What kind of broccoli should I use for these tots?
Absolutely! Fresh broccoli is ideal for the best flavor and texture. However, frozen broccoli works too; just make sure it's thoroughly thawed and well drained to avoid excess moisture in your mixture.

How should I store leftover Broccoli Tots?
After cooking, store your leftover Broccoli Tots in an airtight container in the refrigerator for up to 3 days. Reheating them in the oven will help regain their crispy texture, or you can pop them in the microwave for a quicker option.

Can I freeze Broccoli Tots for later use?
Yes! To freeze, allow the Broccoli Tots to cool completely, then place them in a single layer on a baking sheet. Freeze until solid, then transfer them to a freezer-safe bag or container. They can be stored in the freezer for up to 3 months.

What’s the best way to reheat frozen Broccoli Tots?
To reheat frozen tots, preheat your oven to 375℉ (190℃) and bake for about 15-20 minutes until heated through and crispy. Alternatively, you can microwave them for faster results, but keep in mind that the texture may not be as crisp.

Are Broccoli Tots suitable for babies and young children?
Very! These Broccoli Tots are perfect for babies 6 months and older, especially when made without added salt. They can also adapt to dietary needs—just substitute with egg alternatives if needed. Monitor young children while eating to ensure they take small bites and prevent choking.

Broccoli Tots

Delicious Broccoli Tots: A Fun, Nutritious Snack for Kids

These Broccoli Tots are a fun, nutritious snack perfect for kids, packed with essential nutrients and kid-approved flavors.
Print Recipe Pin Recipe
Prep Time 15 minutes mins
Cook Time 20 minutes mins
Cooling Time 5 minutes mins
Total Time 40 minutes mins
Servings: 4 tots
Course: Snacks
Cuisine: American
Calories: 80
Ingredients Equipment Method Nutrition Notes

Ingredients
  

For the Base
  • 2 cups Broccoli Fresh or frozen
  • 2 large Eggs
  • 1 cup Almond meal/flour Can substitute with breadcrumbs or panko
For the Flavor
  • 1 cup Sharp cheddar cheese Or low-sodium mozzarella for babies
  • 2 cloves Garlic Minced
  • 1 teaspoon Salt Optional

Equipment

  • Oven
  • Baking Sheet
  • Parchment Paper
  • Mixing Bowl

Method
 

Step‑by‑Step Instructions for Broccoli Tots
  1. Preheat the oven to 375℉ (190℃) and line a baking sheet with parchment paper.
  2. Chop broccoli into small florets and steam for 4-5 minutes until tender. Cool and finely chop.
  3. In a large bowl, combine broccoli, eggs, almond meal, cheddar cheese, and garlic. Mix thoroughly.
  4. Shape the mixture into small oval or round tots and place on the baking sheet.
  5. Bake for about 20 minutes until golden brown and crispy.
  6. Let cool for a few minutes and serve warm with dip.

Nutrition

Serving: 1totsCalories: 80kcalCarbohydrates: 10gProtein: 4gFat: 4gSaturated Fat: 1gPolyunsaturated Fat: 1gMonounsaturated Fat: 1gCholesterol: 40mgSodium: 150mgPotassium: 200mgFiber: 2gSugar: 1gVitamin A: 250IUVitamin C: 30mgCalcium: 100mgIron: 1mg

Notes

Store leftovers in an airtight container in the fridge for up to 3 days; freeze for up to 3 months. Reheat in the oven for best crispiness.

Tried this recipe?

Let us know how it was!
  • 1
  • 2
  • 3
  • …
  • 23
  • Next Page »

Welcome!

Hi, I’m Grace, a Sydney-based home cook with a passion for bold flavors and trending ingredients. Whether you’re a busy beginner or a seasoned foodie, you’ll find dishes here that are fresh, fun, and full of flavor.

More about me

Popular Recipes

  • One Pot Keto Tuna Casserole
    One Pot Keto Tuna Casserole: Creamy Comfort in Minutes
  • Ultimate Jalapeno Popper Chicken Salad
    Ultimate Jalapeno Popper Chicken Salad That'll Wow Your Tastebuds
  • Green Chile Cheese Dip
    Mouthwatering Green Chile Cheese Dip for Cozy Gatherings
  • Easy Chimichurri Sauce
    Fresh and Zesty Easy Chimichurri Sauce in Just Minutes

Footer

↑ back to top

About

  • Privacy Policy
  • Disclaimer
  • Terms & Conditions

Newsletter

  • Sign Up! for emails and updates

Contact

  • About me
  • Contact me

Copyright © 2025 TastyTrendIngredients