tastytrendingredients

  • Home
  • Recipes
    • Appetizers
    • Breakfast
    • Dessert
    • Dinner
    • Drinks
    • Salads
    • Snacks
    • Soups
  • About me
  • Contact
menu icon
go to homepage
  • Home
  • Recipes
    • Appetizers
    • Breakfast
    • Dessert
    • Dinner
    • Drinks
    • Salads
    • Snacks
    • Soups
  • About me
  • Contact
search icon
Homepage link
  • Home
  • Recipes
    • Appetizers
    • Breakfast
    • Dessert
    • Dinner
    • Drinks
    • Salads
    • Snacks
    • Soups
  • About me
  • Contact
×

Crispy Mexican Potatoes That Will Spice Up Your Meals

May 18, 2026 by Grace Snow Leave a Comment

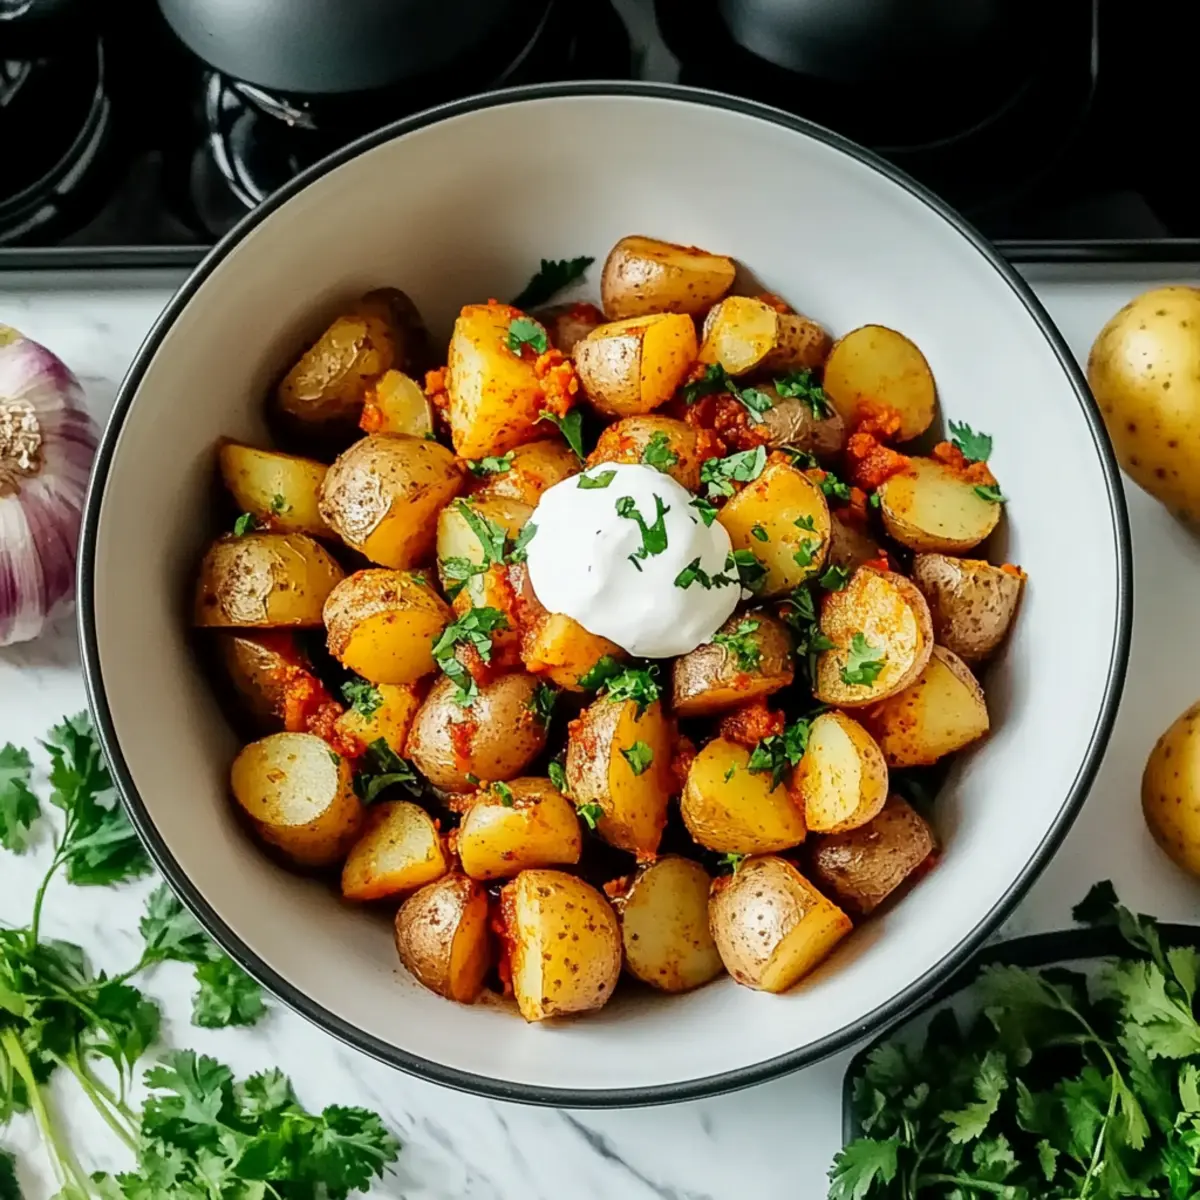
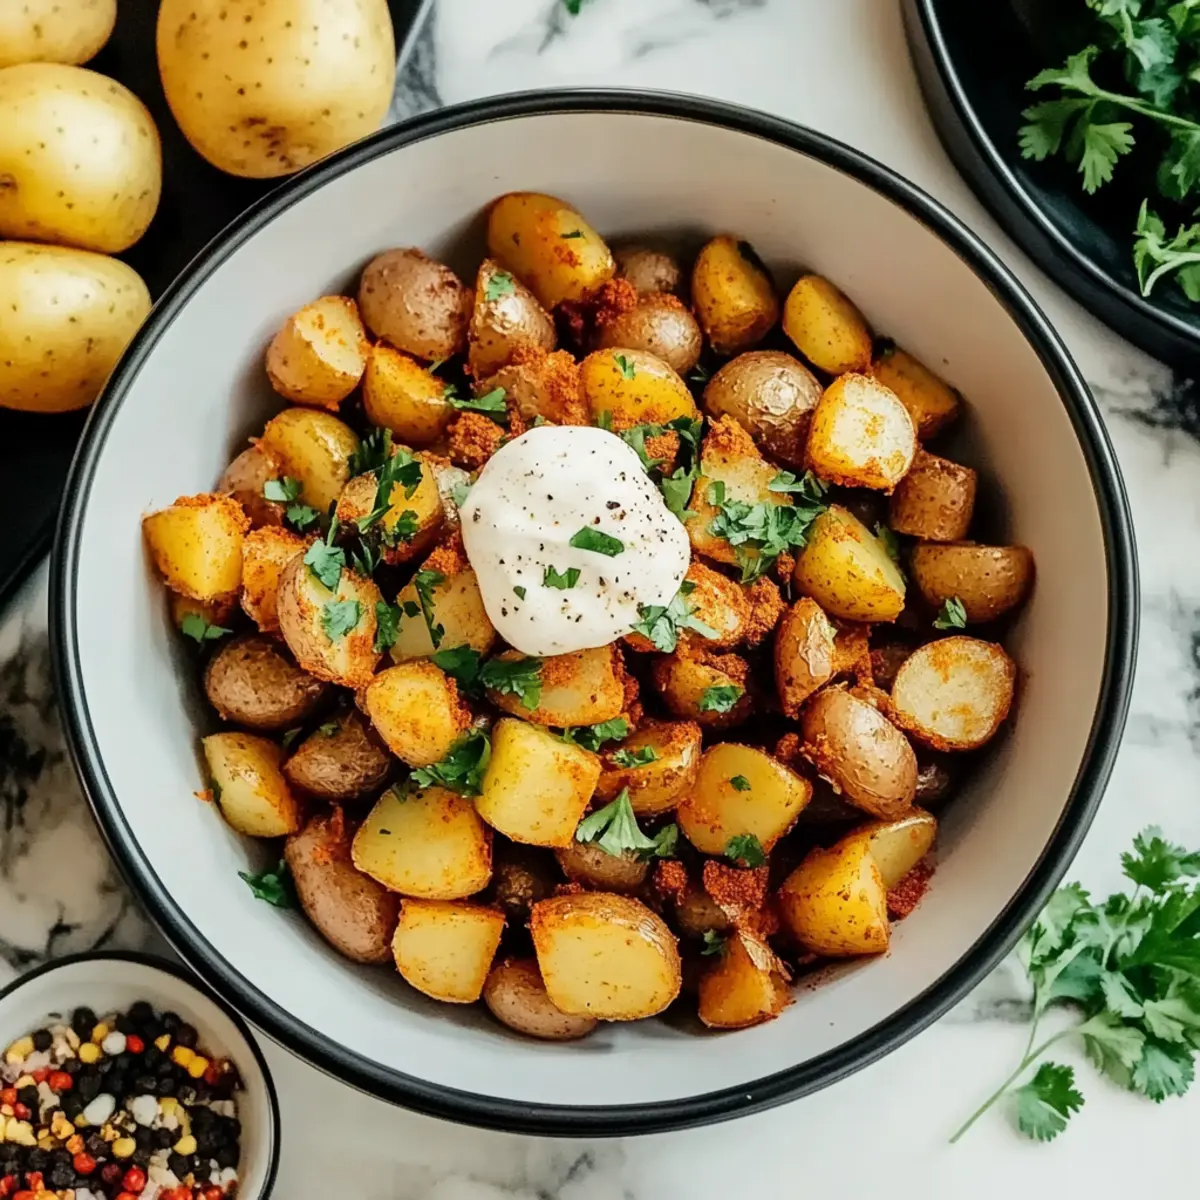
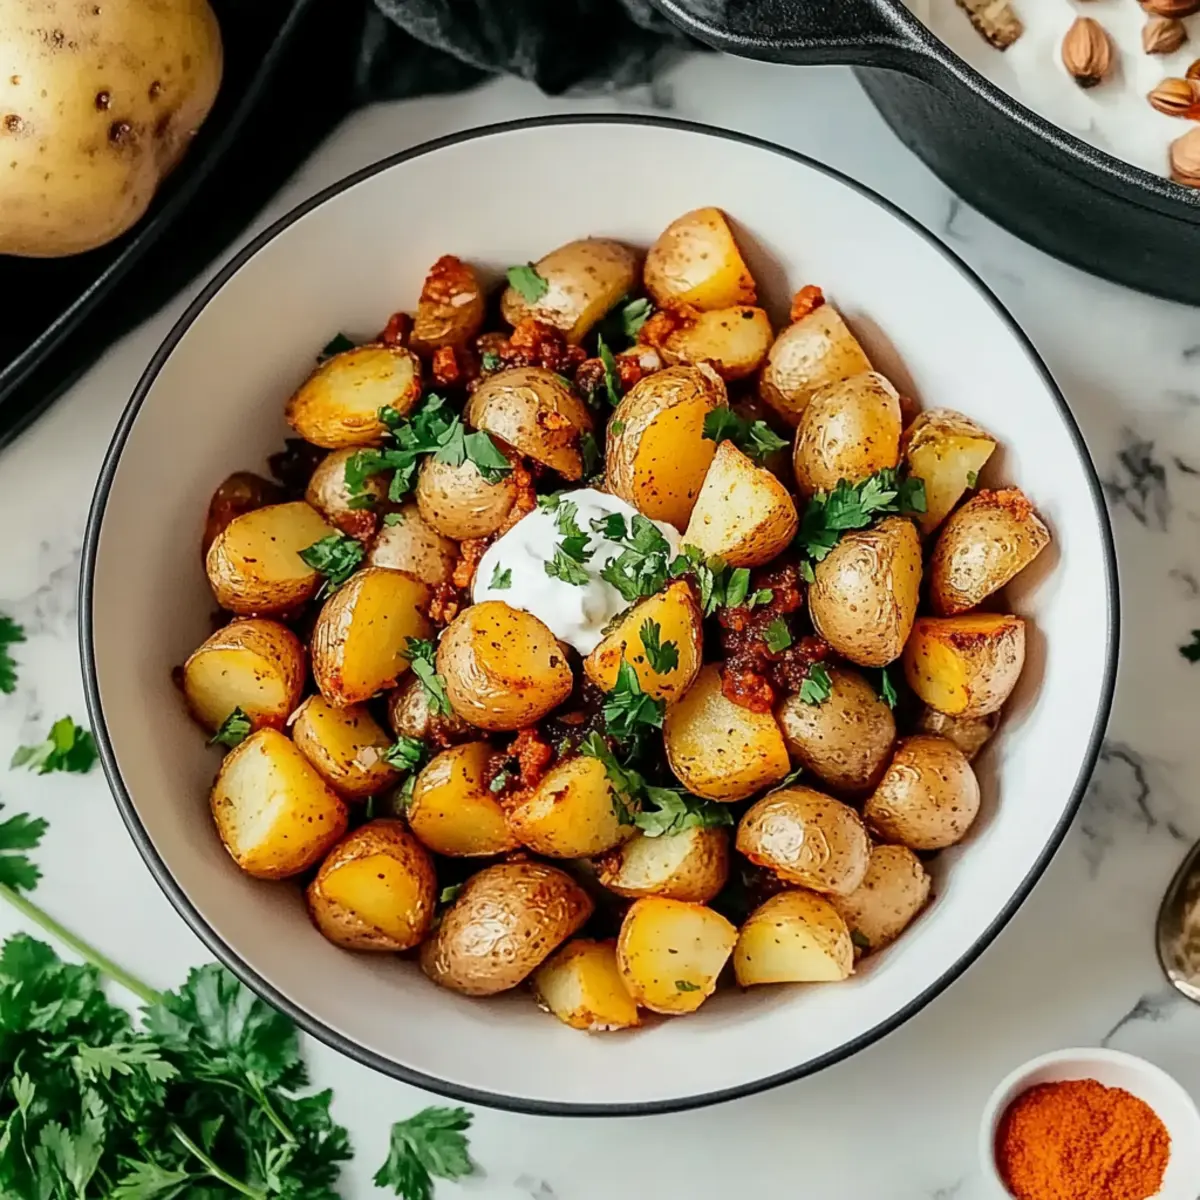
As I stood in my kitchen, the aroma of spices began to dance through the air, triggering memories of vibrant markets in Mexico. It was then I decided to whip up a batch of these Crispy Mexican Potatoes with a Crunchy Twist. The combination of crispy exteriors and fluffy interiors offers a delightful texture, making this vegetarian side dish an exciting addition to any meal. With minimal prep time and a flavor profile that sings, these potatoes are not just an easy recipe; they’re an invitation to experiment with your favorite toppings, like zesty salsa or fresh herbs. Whether you’re looking to impress guests or treat yourself to a cozy night in, these Mexican potatoes will make your taste buds rejoice. Are you ready to dig into this fiesta of flavor? Let’s get cooking!

Why Are These Potatoes So Irresistible?

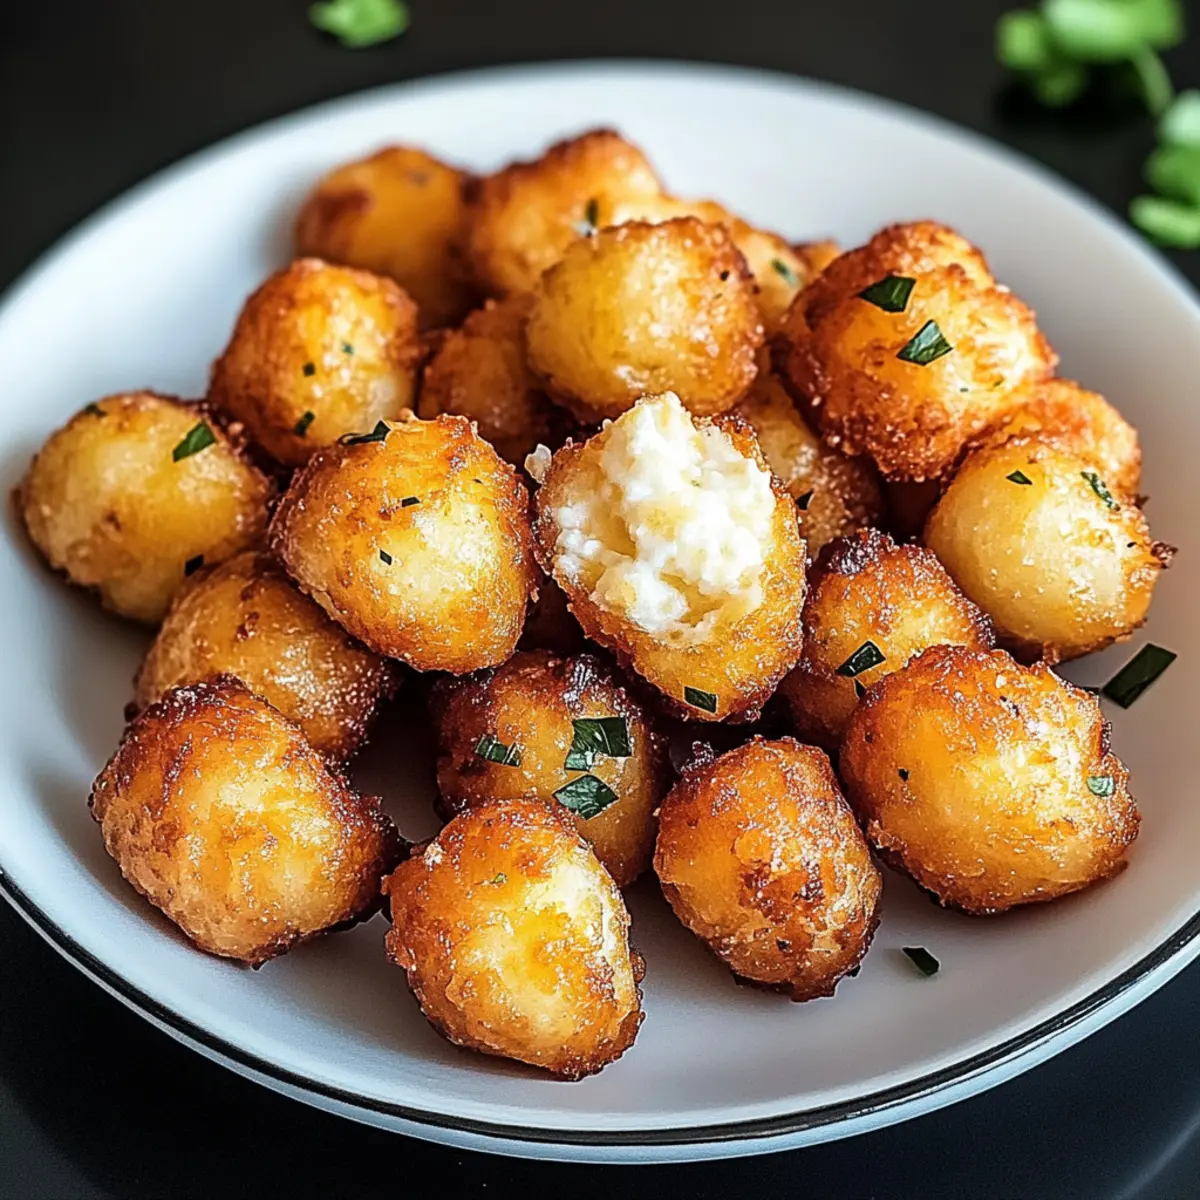
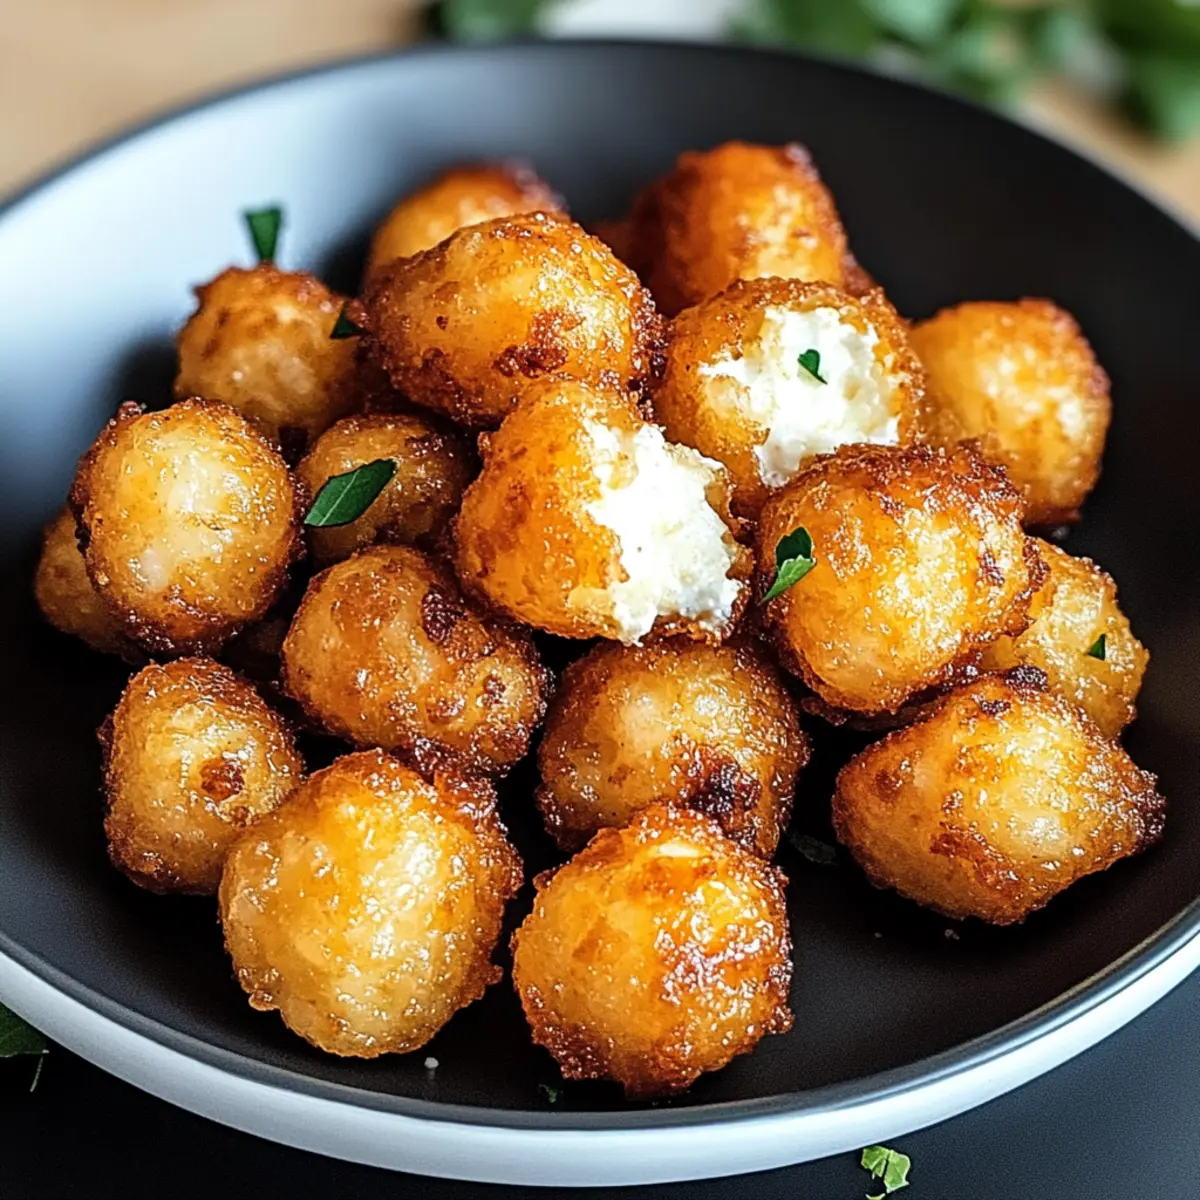
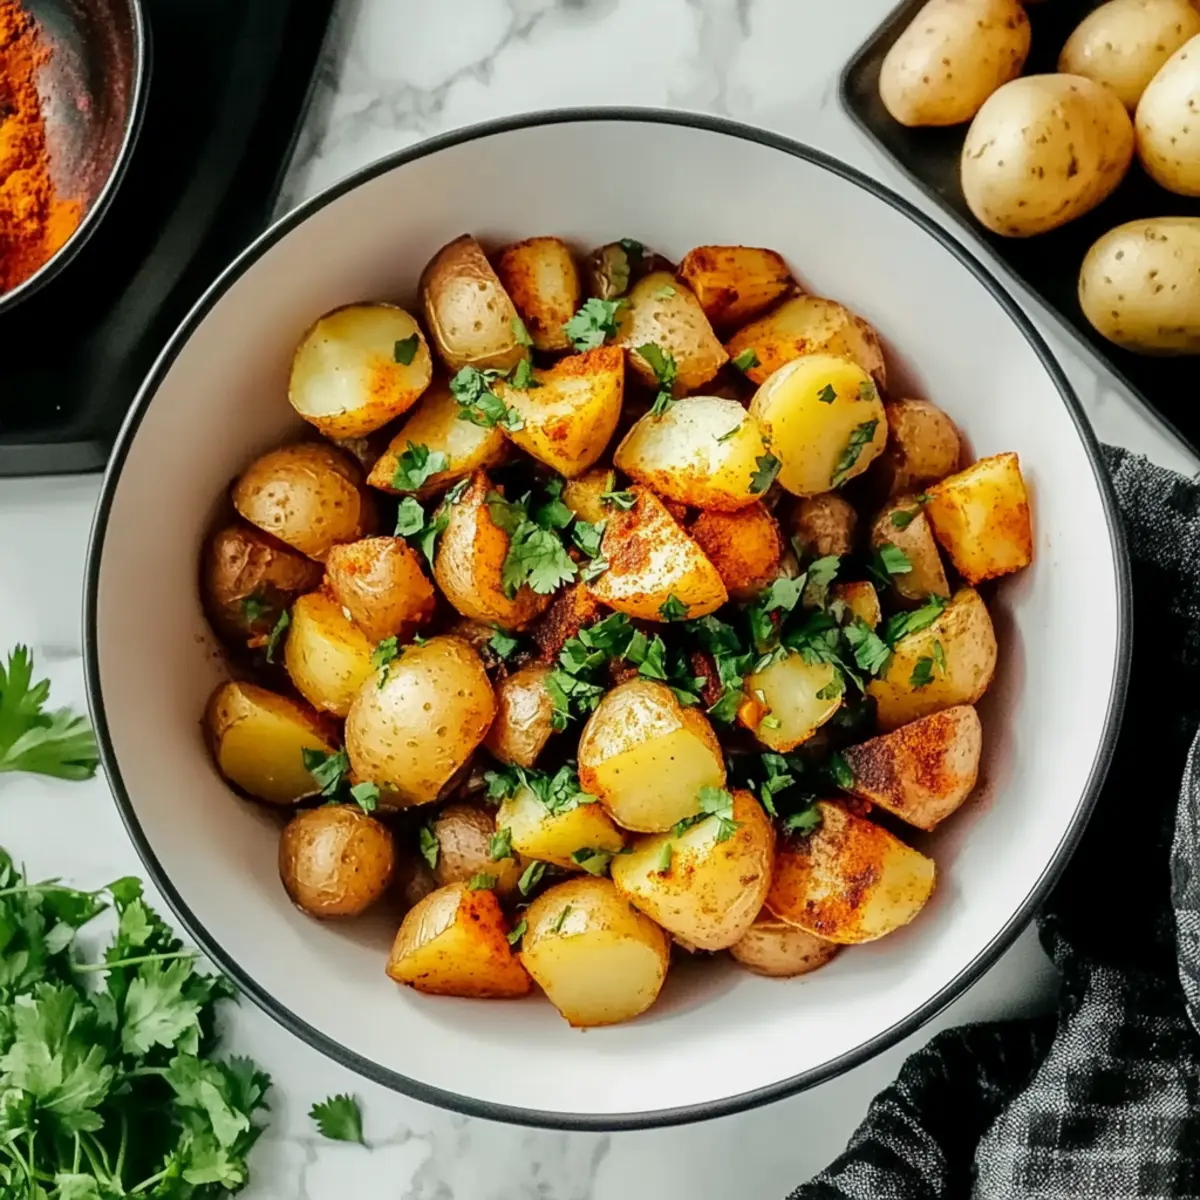
Crispy Perfection: Every bite offers a delightful crunch paired with a fluffy inside, making these Mexican Potatoes impossible to resist.

Flavor Fiesta: Bursting with a vibrant mix of spices, these potatoes bring a taste of Mexico right to your table.

Easy & Quick: With simple prep and just 30 minutes in the oven, this recipe is perfect for weeknight dinners or last-minute gatherings.

Versatile Toppings: Customize your potatoes with your favorite extras like creamy avocado or zesty pico de gallo, enhancing flavor in every bite.

Crowd-Pleasing Side: Perfect for any occasion—serve them with tacos for Taco Tuesday or as a stand-alone snack, and watch them disappear!

Treat yourself to a meal that’s as exciting as it is easy, just like these Smoky Sweet Potatoes or Mexican Wedding Cookies to keep your taste buds on their toes!

Mexican Potatoes Ingredients

These ingredients will help you create the most flavorful, crispy Mexican Potatoes!

For the Potatoes
• Medium Potatoes – Choose waxy potatoes for a buttery texture after baking.
• Olive Oil – Enhances flavor and helps achieve that desirable crispiness. Substitute with vegetable oil if preferred.
• Salt – Essential for seasoning; use sea salt for a more robust flavor.
• Black Pepper – Adds depth and a hint of mild heat.

For the Seasoning
• Paprika – Provides a smoky flavor and a vibrant, inviting color.
• Garlic Powder – Enhances savory notes; fresh garlic is a great substitute.
• Onion Powder – Adds a touch of sweetness and depth of flavor.
• Chili Powder – Infuses spice and warmth; adjust according to your heat preference.
• Cumin – Adds earthy undertones, making the flavor profile rich.
• Dried Oregano – Contributes herby notes that complement the spices.

For Garnishing
• Dried Parsley – Adds a pop of freshness as a garnish.
• Optional Toppings – Consider crumbled feta, diced avocado, or sliced jalapeños to elevate your Mexican Potatoes.

Get ready to savor every bite of these Mexican Potatoes that will transform your meals into a flavorful adventure!

Step‑by‑Step Instructions for Mexican Potatoes

Step 1: Preheat the Oven
Begin by preheating your oven to 400°F (200°C). This crucial step ensures your Mexican Potatoes will achieve that perfect crispy texture. Use a convection setting if available, as this helps to circulate hot air, making for an even cook.

Step 2: Prepare the Potatoes
While the oven warms up, peel and cut your medium potatoes into small, uniform cubes—about 1-inch in size. This ensures that all the pieces cook evenly and develop that golden, delicious exterior. The fluffy interiors will be a delightful contrast once baked.

Step 3: Mix Seasonings
In a large mixing bowl, combine the cubed potatoes with olive oil and sprinkle in salt, black pepper, paprika, garlic powder, onion powder, chili powder, cumin, and dried oregano. Each of these spices plays a vital role in giving your Mexican Potatoes their vibrant flavor, so make sure to measure them accurately.

Step 4: Coat the Potatoes
With clean hands or a spatula, toss the potatoes thoroughly in the seasoning mixture. Ensure every piece is well-coated with the olive oil and spices, creating an enticing flavor profile. You'll want to see a nice sheen on all sides before moving to the next step.

Step 5: Arrange for Baking
Spread the seasoned potatoes in a single layer on a baking sheet lined with parchment paper. It's essential to avoid overcrowding the pan, as this can lead to steaming instead of roasting. Look for a well-spaced arrangement that allows for crispiness all around.

Step 6: Bake to Perfection
Slide the baking sheet into your preheated oven and bake for 30-35 minutes. About halfway through, give the potatoes a good flip with a spatula to ensure even browning. You'll know they are done when they are golden brown and crispy on the outside, with a fluffy interior.

Step 7: Serve and Enjoy
Once baked, take your crispy Mexican Potatoes out of the oven and let them cool for a few minutes. Serve them hot as a side dish or snack, garnished with dried parsley or your favorite toppings like sour cream or fresh herbs for a delightful finish.

What to Serve with Spicy Mexican Potatoes with a Crunchy Twist

Looking to create the perfect meal around these delightful crispy bites? Let’s explore some exciting pairing options!

  • Creamy Avocado Dip: This rich, smooth dip adds a lush creaminess that balances the spicy notes of the potatoes.

  • Zesty Salsa Verde: The bright, tangy flavors of salsa verde elevate the potatoes, bringing a fresh kick to every bite. Serve it on the side for an extra zest!

  • Cilantro Lime Rice: Light and fragrant, this dish brings a refreshing flavor that pairs beautifully with the hearty potatoes, creating a satisfying meal.

  • Grilled Corn Salad: Sweet and smoky grilled corn, tossed with lime and cilantro, complements the crispy potatoes with its juicy texture and vibrant taste.

  • Spicy Black Beans: Hearty black beans seasoned with cumin and cilantro provide a filling protein option, adding wonderful earthiness to your plate.

  • Roasted Vegetables: A medley of roasted bell peppers and zucchini adds a colorful crunch and balances the flavors, making your meal visually appealing and nutritious.

Drink pairing:

  • Classic Margaritas: The citrusy zing and slight sweetness of a margarita perfectly cuts through the richness of the potatoes, enhancing the overall meal experience.

Dessert pairing:

  • Churros with Chocolate Sauce: For a sweet finish, these crispy, sugary treats with a velvety dip create a delightful contrast to the vibrant flavors of the potatoes.

How to Store and Freeze Mexican Potatoes

Fridge: Store leftover Mexican Potatoes in an airtight container for up to 3-4 days. Reheat in the oven to restore crispiness, avoiding a soggy texture.

Freezer: For longer storage, freeze the cooled Mexican Potatoes in a single layer on a baking sheet, then transfer to a freezer-safe bag or container once frozen. They will last up to 2 months.

Reheating: To reheat, place frozen potatoes on a baking sheet and warm in a preheated oven at 400°F (200°C) for about 15-20 minutes until heated through and crispy.

Avoiding Moisture: Ensure the potatoes are completely cool before freezing to prevent ice crystals, which can affect the texture when reheated.

Make Ahead Options

These Crispy Mexican Potatoes are perfect for meal prep enthusiasts! You can peel and cube the potatoes up to 24 hours in advance, storing them submerged in water in the refrigerator to prevent browning. Additionally, you can mix the seasoning blend ahead of time and keep it in a small container for quick access. When you're ready to serve, simply toss the prepared potatoes with olive oil and the seasoning before baking them as directed. This process saves you precious minutes on busy nights while ensuring your Mexican potatoes come out just as delicious and crispy!

Expert Tips for Mexican Potatoes

  • Preheat Matters: Ensure your oven is fully preheated before baking to achieve that crispy, golden-brown exterior on your Mexican Potatoes.

  • Uniform Cuts: Cut your potatoes into even cubes; this ensures they cook simultaneously, avoiding any mushy pieces while keeping the fluffy centers perfectly tender.

  • Don’t Overcrowd: Giving the potatoes space on the baking sheet prevents steaming, allowing each piece to roast beautifully and develop that desired crunch.

  • Flavor Boost: Feel free to add extra spices or herbs according to your taste. Just remember to adjust the chili powder if you want to keep the dish mild—too much can overpower the flavor!

  • Quick Flip: Halfway through baking, flip the potatoes to promote even browning. This small step will enhance their texture and make them irresistibly crispy!

Mexican Potatoes Variations & Substitutions

Want to personalize your dish? Explore these delicious variations to make your Mexican Potatoes even more exciting.

  • Meat Lover’s Delight: Add crumbled chorizo before baking for a savory richness that elevates the dish.

  • Creamy Twist: Drizzle hot potatoes with salsa verde or top with sour cream for added creaminess and flavor depth.

  • Spicy Kick: For those who enjoy a bit of heat, add sliced jalapeños or roasted poblanos either before or after baking.

  • Herb Explosion: Experiment with garnishing using fresh herbs like cilantro, or green onions, adding a burst of freshness to each bite.

  • Cheesy Goodness: Sprinkle shredded cheese during the last few minutes of baking, allowing it to melt beautifully atop the crispy potatoes.

  • Mediterranean Flair: Swap paprika for za'atar and add kalamata olives for an unexpected but delightful twist.

  • Sweet & Spicy: Toss in a sprinkle of cinnamon with chili powder for a unique flavor combination that evokes unexpected warmth.

  • Nutty Crunch: Mix in some toasted pine nuts or almond slivers just before serving to add a fantastic crunch and rich flavor.

With these variations, your Mexican Potatoes will never be the same! Feel free to check out these Roasted Sweet Potatoes or consider a dessert like Mexican Wedding Cookies for a complete and fulfilling meal experience.

Mexican Potatoes Recipe FAQs

What type of potatoes should I use for this recipe?
Medium, waxy potatoes work best for Crispy Mexican Potatoes to achieve a buttery texture after baking. Their moisture content ensures fluffiness inside, while the skin crisps up beautifully when roasted.

How should I store leftover Mexican Potatoes?
Store any leftovers in an airtight container in the refrigerator for up to 3-4 days. Reheat them in the oven at 350°F (175°C) for about 10-15 minutes to maintain their crispiness, avoiding any sogginess that can happen in the microwave.

Can I freeze the Mexican Potatoes after baking?
Absolutely! To freeze your Mexican Potatoes, first allow them to cool completely. Spread them in a single layer on a baking sheet and freeze until solid, about 1-2 hours. Then transfer them to a freezer-safe bag or container. They can be stored for up to 3 months, ensuring you always have a tasty side on hand!

What should I do if my potatoes are not getting crispy?
If your Mexican Potatoes aren’t crisping up, check if the oven temperature is set correctly and whether the potatoes were overcrowded on the baking sheet. Try baking them at a higher temperature or flipping them halfway through baking to promote even browning.

Are there any dietary concerns I should be aware of with this recipe?
This recipe is vegetarian and gluten-free, making it suitable for diverse dietary preferences. However, if you have allergies, ensure that spices like chili powder and garlic powder do not contain any additives. For pet considerations, avoid giving any of the spiced potatoes to dogs or cats, as certain spices can be harmful to them.

How can I customize my Mexican Potatoes?
The sky's the limit! You can add spices according to your taste preferences or introduce fresh ingredients like diced bell peppers or corn for added color and texture. Additionally, toppings such as avocado, queso fresco, or fresh herbs can elevate the flavor profile. Have fun experimenting!

Mexican Potatoes

Crispy Mexican Potatoes That Will Spice Up Your Meals

These crispy Mexican Potatoes are a delightful vegetarian side dish that will spice up your meals.
Print Recipe Pin Recipe
Prep Time 10 minutes mins
Cook Time 30 minutes mins
Total Time 40 minutes mins
Servings: 4 servings
Course: Snacks
Cuisine: Mexican
Calories: 200
Ingredients Equipment Method Nutrition Notes

Ingredients
  

For the Potatoes
  • 4 medium Potatoes Choose waxy potatoes for a buttery texture.
  • 3 tablespoons Olive Oil Enhances flavor and crispiness.
  • 1 teaspoon Salt Use sea salt for better flavor.
  • 1/2 teaspoon Black Pepper Adds depth and mild heat.
For the Seasoning
  • 2 teaspoons Paprika Provides a smoky flavor.
  • 1 teaspoon Garlic Powder Enhances savory notes.
  • 1 teaspoon Onion Powder Adds sweetness and depth.
  • 1 teaspoon Chili Powder Adjust according to heat preference.
  • 1 teaspoon Cumin Adds earthy undertones.
  • 1 teaspoon Dried Oregano Complements the spices.
For Garnishing
  • 1 tablespoon Dried Parsley Adds freshness as a garnish.
  • Optional Toppings Consider crumbled feta, diced avocado, or sliced jalapeños.

Equipment

  • Oven
  • Baking Sheet
  • Mixing Bowl
  • Spatula

Method
 

Step-by-Step Instructions
  1. Preheat the oven to 400°F (200°C).
  2. Peel and cut the medium potatoes into small, uniform cubes, about 1-inch in size.
  3. In a large mixing bowl, combine the cubed potatoes with olive oil, salt, black pepper, paprika, garlic powder, onion powder, chili powder, cumin, and dried oregano.
  4. Toss the potatoes thoroughly in the seasoning mixture until well-coated.
  5. Spread the seasoned potatoes in a single layer on a baking sheet lined with parchment paper.
  6. Bake for 30-35 minutes, flipping halfway through for even browning.
  7. Let them cool for a few minutes before serving, garnished with dried parsley or your favorite toppings.

Nutrition

Serving: 1servingCalories: 200kcalCarbohydrates: 30gProtein: 3gFat: 9gSaturated Fat: 1gPolyunsaturated Fat: 2gMonounsaturated Fat: 5gSodium: 300mgPotassium: 800mgFiber: 4gSugar: 1gVitamin A: 5IUVitamin C: 30mgCalcium: 2mgIron: 10mg

Notes

Cut potatoes into even cubes to ensure they cook simultaneously. Don't overcrowd the baking sheet for optimal crispiness.

Tried this recipe?

Let us know how it was!

Irresistible Peanut Chicken Wrap Recipe for Quick Lunch Bliss

May 12, 2026 by Grace Snow Leave a Comment

As I stood in my kitchen, the tantalizing aroma of seasoned chicken dancing with the crunch of fresh coleslaw filled the air, promising a delightful culinary escape. Today, I'm excited to share my Peanut Chicken Wrap Recipe, a dish that effortlessly combines convenience and flavor for those busy days when fast food just won't do. These wraps are not only quick to throw together but also bursting with nutritious ingredients, making them a fantastic choice for a healthy lunch or a light dinner. With an optional spicy homemade peanut sauce that adds just the right kick, you’ll find yourself reaching for this recipe time and time again. So, are you ready to roll up your sleeves and wrap up something delicious? Let’s dive in!

Why Will You Love This Wrap?

Convenience at Its Best: These Peanut Chicken Wraps come together in under 30 minutes, perfect for those hectic weekdays or lazy weekends.

Flavor Explosion: The combination of tender chicken and zesty, crunchy coleslaw, paired with a creamy, spicy peanut sauce, creates a mouthwatering experience.

Versatile Ingredients: Feel free to switch up the proteins or add veggies like bell peppers or cucumbers, so each wrap can be uniquely yours!

Healthy & Nutritious: Packed with lean protein and fresh veggies, these wraps are not just delicious but also good for you, making them an excellent alternative to fast food.

Satisfying Meal: Each bite delivers a satisfying crunch and rich flavor that will make you feel full and happy—perfect for any time of day.

For another quick meal option, consider trying my Crock Pot Chicken for a cozy dinner!

Peanut Chicken Wrap Recipe Ingredients

For the Wraps

  • Coleslaw Mix – Provides crunch and freshness; use pre-packaged mixes for convenience.
  • Shredded Carrots – Adds natural sweetness and texture; both fresh and pre-shredded work well.
  • Roasted Peanuts – Contributes a delightful crunch and nutty flavor; can substitute with cashews or sunflower seeds for a twist.
  • Cilantro – Adds a fresh, herbaceous note; feel free to omit if you’re not a fan, or switch to parsley.
  • Cooked Chicken Breasts – The protein foundation of the wrap; grill, sauté, or use rotisserie chicken for ease.
  • Large Tortillas – Serve as the wrap base; opt for soft flour tortillas or lettuce wraps for a gluten-free option.

For the Peanut Sauce

  • Honey – Sweetens the sauce; replace with maple syrup or agave for a vegan alternative.
  • Oil (Olive/Vegetable) – Adds richness; any neutral oil can work here.
  • Peanut Butter – The star that gives creaminess; almond or cashew butter can provide interesting flavor variations.
  • Rice Vinegar – Balances the sauce with mild acidity; swap with apple cider vinegar if needed.
  • Soy Sauce – Infuses umami flavor; use tamari or coconut aminos for a gluten-free option.
  • Sesame Oil – Deepens the sauce’s flavor; omit or substitute with olive oil if you’re out.
  • Pepper & Salt – Essential for enhancing flavor; adjust to taste.
  • Crushed Red Pepper Flakes – Optional for a spicy kick; customize according to your heat preference.
  • Fresh Ginger – Brightens the sauce; ground ginger is a suitable substitute if fresh isn’t available.
  • Garlic Clove – Enriches the sauce with depth; garlic powder can be a quick alternative.

Embrace the magic of this Peanut Chicken Wrap Recipe, and savor how easy and delightful healthy homemade meals can be!

Step‑by‑Step Instructions for Peanut Chicken Wrap Recipe

Step 1: Prepare Peanut Sauce
In a medium bowl, combine creamy peanut butter, honey, soy sauce, rice vinegar, sesame oil, crushed red pepper flakes, minced garlic, and fresh ginger. Whisk the mixture until it’s completely smooth and well-blended, about 2-3 minutes. If the sauce appears too thick, add a splash of warm water to reach your desired consistency, ensuring a silky texture perfect for drizzling over your wraps.

Step 2: Cook Chicken
Season your cooked chicken breasts with salt and pepper, ensuring even coverage. Choose to grill, sauté, or bake them at 375°F (190°C) for 20-25 minutes, or until they reach an internal temperature of 165°F (75°C). Let the chicken rest for a few minutes once cooked, then slice it into thin strips, allowing the tender pieces to shine in your Peanut Chicken Wraps.

Step 3: Mix Coleslaw
In a large bowl, combine the coleslaw mix, shredded carrots, chopped cilantro, and roasted peanuts. Drizzle in a generous amount of the prepared peanut sauce and toss everything together until the veggies are evenly coated. This vibrant mixture should be fresh and crunchy, creating a delightful contrast with the tender chicken in your wraps.

Step 4: Assemble Wraps
To soften the tortillas for easier rolling, heat them in the microwave for about 15-20 seconds. Lay each tortilla flat and spoon an even amount of the sliced chicken and coleslaw mixture onto the center. Carefully roll the tortilla tightly from the bottom up, tucking in the sides as you go, ensuring the flavorful filling stays wrapped securely within each Peanut Chicken Wrap.

Step 5: Serve
Slice each wrap in half diagonally for a beautiful presentation and to make them easier to eat. Serve with extra peanut sauce on the side for dipping or drizzling, enhancing the wrap's flavors. Your delicious Peanut Chicken Wraps are now ready to be enjoyed, offering a perfect combination of crunch and savory goodness in every bite.

What to Serve with Easy Peanut Chicken Wraps?

Elevate your meal experience by pairing these crunchy, flavorful wraps with delightful sides and drinks that complement their vibrant flavors.

  • Creamy Avocado Salad: A refreshing mix of ripe avocados, tomatoes, and lime juice adds a rich, creamy contrast to the crispy wraps.
  • Sweet Potato Fries: These sweet, crispy fries provide a lovely balance of sweetness and texture, making each bite irresistibly satisfying.
  • Coconut Rice: The subtly sweet and creamy rice enhances the savory notes of the wraps, creating a comforting combination perfect for lunch or dinner.
  • Asian Cucumber Salad: Crisp cucumbers tossed in rice vinegar create a refreshing, tangy side that brightens the rich flavors of the wraps.
  • Fruit Salad: A light, refreshing fruity mix of berries and melons adds a sweet finish to your meal, offering a vibrant burst of flavor.
  • Iced Green Tea: Served lightly sweetened, this drink offers a refreshing palate cleanse between bites, enhancing the overall dining experience.
  • Mango Salsa: A tangy salsa with chunks of fresh mango pairs beautifully, introducing a tropical twist that complements the wraps’ peanut sauce.
  • Garlic Edamame: Steamed edamame with a hint of garlic brings a protein-rich and savory side, harmonizing with the peanut flavors in the wraps.
  • Chilled Soba Noodles: Tossed with sesame dressing for a nutty touch, these noodles are a delightful addition, offering a cooling contrast to the spicy sauce.
  • Chocolate Chia Pudding: For dessert, this creamy, slightly sweet pudding provides a satisfying and healthy finish to your flavorful meal.

Make Ahead Options

These Peanut Chicken Wraps are ideal for busy home cooks looking to save time during hectic weekdays! You can prepare the peanut sauce and the coleslaw mixture up to 3 days in advance. Simply store the peanut sauce in an airtight container in the fridge, and keep the coleslaw mixture separate to prevent sogginess. When you're ready to serve, just cook the chicken (if not pre-cooked) and assemble the wraps by heating the tortillas and adding the chicken and coleslaw. This way, you’ll enjoy a quick, delicious meal with minimal effort, making your week just a little easier and tastier!

Expert Tips for Making Peanut Chicken Wraps

  • Chicken Perfection: Ensure your chicken is cooked to a perfect 165°F (75°C) for safe and juicy results. Use a meat thermometer to avoid undercooking.

  • Coleslaw Crunch: Let the coleslaw mixture sit for a few minutes after adding the sauce. This helps the flavors meld while keeping that satisfying crunch.

  • Tortilla Technique: Warm tortillas for 15-20 seconds in the microwave to make them pliable. This prevents tearing while rolling your Peanut Chicken Wraps.

  • Make-Ahead Magic: If prepping in advance, store all ingredients separately in airtight containers. Assemble just before serving to avoid soggy wraps.

  • Customization Calls: Don’t hesitate to swap out protein or add unique veggies. Mixing it up keeps your Peanut Chicken Wrap Recipe fresh and exciting!

Peanut Chicken Wrap Recipe Variations

Feel free to customize your wraps to suit your taste buds and dietary needs!

  • Shrimp Swap: Substitute chicken with shrimp for a seafood twist that brings a delightful flavor.

  • Tofu Alternative: Use firm tofu as a plant-based protein option; simply sauté until golden brown for texture.

  • Additional Crunch: Add sliced bell peppers or cucumbers to enhance the freshness and add extra crunch to each bite.

  • Greens Upgrade: Replace coleslaw with a fresh spinach or lettuce base for a lighter, vibrant wrap that’s equally delicious.

  • Spicy Boost: Mix in some jalapeños or a dash of sriracha in the peanut sauce for an exciting, fiery kick.

  • Nut Variations: Instead of roasted peanuts, try cashews or sunflower seeds for a different nuttiness that complements the dish beautifully.

For more quick and flavorful chicken options, explore my recipes for Honey Garlic Chicken Thighs or Honey BBQ Chicken that also cater to adventurous taste buds!

  • Creamy Alternatives: Use almond or cashew butter in place of peanut butter for an interesting flavor profile that's equally rich.

How to Store and Freeze Peanut Chicken Wraps

Fridge: Store assembled wraps in an airtight container for up to 2 days. Keep the wraps tightly sealed to prevent them from becoming soggy.

Freezer: For longer storage, freeze unassembled wraps in a freezer-safe bag for up to 1 month. Wrap each tightly in plastic wrap to avoid freezer burn.

Reheating: Thaw in the fridge overnight before reheating. Microwave for 20-30 seconds or until heated through, then enjoy your Peanut Chicken Wraps fresh and delicious!

Separate Components: If you wish to prepare ahead, store components (chicken, coleslaw, sauce) separately in the fridge. Assemble just before serving for the best texture.

Peanut Chicken Wrap Recipe FAQs

How do I select ripe ingredients for this recipe?
Absolutely! When choosing ingredients, look for vibrant colors and freshness. For the coleslaw mix, select a bag that’s crisp without any brown spots. Fresh carrots should be firm and bright orange. Choose peanuts that are crunchy without any dark spots or rancid smell, and select chicken breasts that are pink and moist, not slimy or discolored.

What’s the best way to store leftover wraps?
Store any assembled wraps in an airtight container in the fridge for up to 2 days. To keep them from getting soggy, place parchment paper between layers, or, if possible, store the filling separately until you're ready to eat. This way, the tortillas remain fresh!

Can I freeze the Peanut Chicken Wraps?
Yes, you can! For freezing, wrap each unassembled wrap tightly in plastic wrap and place them in a freezer-safe bag. They can last up to 1 month in the freezer. To reheat, let them thaw in the fridge overnight and then microwave them for 20-30 seconds until warmed through.

What should I do if my peanut sauce is too thick?
If you find your peanut sauce is too thick, don’t fret! Simply whisk in a small amount of warm water, about a tablespoon at a time, until you reach your desired consistency. The goal is a smooth, pourable sauce that coats your chicken and veggies perfectly.

Are there any dietary considerations for this recipe?
Absolutely! For those with nut allergies, consider using sunflower seed butter as a peanut alternative in the sauce. If gluten is a concern, opt for gluten-free tortillas and use tamari instead of soy sauce. It’s important to check ingredient labels to ensure they align with your dietary needs.

Can I customize the vegetables in the wrap?
Very! Feel free to personalize your Peanut Chicken Wrap by adding sliced bell peppers, cucumbers, or even avocado for an extra creamy texture. You can also substitute the coleslaw for a fresh spinach or mixed greens base to lighten things up while still enjoying that satisfying crunch!

Peanut Chicken Wrap Recipe

Irresistible Peanut Chicken Wrap Recipe for Quick Lunch Bliss

This Peanut Chicken Wrap Recipe combines convenience and flavor for a quick, healthy meal.
Print Recipe Pin Recipe
Prep Time 10 minutes mins
Cook Time 25 minutes mins
Resting Time 5 minutes mins
Total Time 40 minutes mins
Servings: 4 wraps
Course: Snacks
Cuisine: American
Calories: 350
Ingredients Equipment Method Nutrition Notes

Ingredients
  

For the Wraps
  • 1 package Coleslaw Mix Use pre-packaged for convenience.
  • 1 cup Shredded Carrots Fresh or pre-shredded.
  • 1/2 cup Roasted Peanuts Can substitute with cashews or sunflower seeds.
  • 1/4 cup Cilantro Optional; may substitute with parsley.
  • 2 cups Cooked Chicken Breasts Grill, sauté or use rotisserie.
  • 4 large Tortillas Opt for flour or lettuce wraps.
For the Peanut Sauce
  • 2 tablespoons Honey Can replace with maple syrup for vegan.
  • 2 tablespoons Oil Olive or vegetable.
  • 1/2 cup Peanut Butter Almond or cashew butter can be substituted.
  • 2 tablespoons Rice Vinegar Can use apple cider vinegar.
  • 2 tablespoons Soy Sauce Tamari or coconut aminos for gluten-free.
  • 1 teaspoon Sesame Oil Omit or substitute with olive oil if needed.
  • 1 teaspoon Pepper Adjust to taste.
  • 1 teaspoon Salt Adjust to taste.
  • 1/2 teaspoon Crushed Red Pepper Flakes Optional for spiciness.
  • 1 tablespoon Fresh Ginger May use ground ginger if fresh is unavailable.
  • 1 clove Garlic Can substitute with garlic powder.

Equipment

  • medium bowl
  • large bowl
  • Microwave
  • Meat Thermometer

Method
 

Peanut Sauce Preparation
  1. In a medium bowl, combine peanut butter, honey, soy sauce, rice vinegar, sesame oil, crushed red pepper flakes, minced garlic, and fresh ginger. Whisk until smooth, about 2-3 minutes. Add warm water if too thick.
Cook Chicken
  1. Season cooked chicken breasts with salt and pepper. Grill, sauté, or bake at 375°F (190°C) for 20-25 minutes until cooked through. Let rest, then slice into strips.
Mix Coleslaw
  1. In a large bowl, mix coleslaw mix, shredded carrots, chopped cilantro, and roasted peanuts. Drizzle with peanut sauce and toss until coated.
Assemble Wraps
  1. Heat tortillas in the microwave for 15-20 seconds. Lay flat and add sliced chicken and coleslaw mixture to the center. Roll tightly.
Serve
  1. Slice wraps in half diagonally. Serve with extra peanut sauce on the side.

Nutrition

Serving: 1wrapCalories: 350kcalCarbohydrates: 39gProtein: 22gFat: 15gSaturated Fat: 3gPolyunsaturated Fat: 5gMonounsaturated Fat: 7gCholesterol: 70mgSodium: 600mgPotassium: 400mgFiber: 4gSugar: 8gVitamin A: 800IUVitamin C: 20mgCalcium: 40mgIron: 2mg

Notes

Customize wraps by switching proteins or adding unique vegetables for variety.

Tried this recipe?

Let us know how it was!

California Club Wraps: Flavor-Packed, Customizable Goodness

May 11, 2026 by Grace Snow Leave a Comment

As I stood in my kitchen, the aroma of sizzling bacon filled the air, instantly transporting me to sunny California with a bite of nostalgia. The California Club Wraps had become my go-to recipe—not only because they’re quick and easy but also because they effortlessly combine crispy bacon, creamy avocado, and tender chicken, all wrapped snugly in a vibrant spinach tortilla. Perfect for lunch, dinner, or even a snack on the go, these wraps are completely customizable to fit whatever cravings strike. You can swap in your favorite veggies or proteins, making it a delicious adventure each time. What unique twist will you add to your next wrap creation?

Why are California Club Wraps so irresistible?

Versatile Ingredients: You can customize these wraps with your favorite veggies or proteins, making them a delightful surprise every time.
Quick to Prepare: Whip up these California Club Wraps in no time, perfect for busy weeknights or quick lunches.
Flavor Explosion: The combination of crispy bacon, creamy avocado, and juicy tomatoes creates a taste sensation that your taste buds will love!
Healthy Options: Easily make it gluten-free or vegetarian by simply swapping out ingredients—flexibility has never tasted so good!
Crowd-Pleasing Delight: Whether served at a casual get-together or as a simple meal, these wraps are always a hit with family and friends.

California Club Wraps Ingredients

For the Filling

  • Bacon – Provides crispiness and a savory flavor; consider using turkey bacon for a lighter option.
  • Avocados – Creamy texture adds richness; substitute with hummus for a delicious vegan alternative.
  • Lemon juice – Enhances flavor and prevents avocado browning; fresh is ideal but bottled works too.
  • Fine sea salt – Balances flavors; adjust to taste, and kosher salt is a great alternative.
  • Mayonnaise – Adds a smooth creaminess; Greek yogurt can be used for a lighter twist.
  • Honey – Adds a hint of sweetness; maple syrup makes a fantastic vegan option.
  • Onion powder – Provides savory depth; fresh onions can be used but adjust the quantity accordingly.
  • Dried basil – Adds herbal flavor; fresh basil enhances the wrap if it’s on hand.
  • Black pepper – Adds mild heat; freshly ground yields the best flavor in your wraps.
  • Shredded rotisserie chicken – The main protein source; chickpeas or tofu work beautifully for a vegetarian version.

For the Wrap

  • Spinach wraps – The base for these delicious California Club Wraps; regular tortillas or lettuce leaves offer a low-carb option.
  • Green leaf lettuce – Adds crunch and freshness; romaine can also be an excellent alternative.
  • Tomato – Offers freshness and juiciness; feel free to use any favorite tomato variety.
  • Monterey Jack cheese – Provides creaminess and flavor; swap with cheddar or dairy-free cheese for variety.

These California Club Wraps come together with these delightful ingredients, promising a burst of flavor and customizable goodness in every bite!

Step‑by‑Step Instructions for California Club Wraps

Step 1: Prepare Ingredients
Start by cooking the bacon in a skillet over medium heat until it is crispy, usually about 8–10 minutes. While the bacon cooks, chop the tomato into thin slices and tear the green leaf lettuce into manageable pieces. Gather all your ingredients to ensure a smooth assembly process for your delicious California Club Wraps.

Step 2: Mix Avocado Filling
In a medium bowl, mash the ripe avocados with a fork until they reach a creamy consistency. Stir in the fresh lemon juice, mayonnaise, honey, onion powder, dried basil, and sprinkle with fine sea salt and black pepper for seasoning. This flavorful avocado mixture will add a rich layer to your California Club Wraps, enhancing the taste profile beautifully.

Step 3: Assemble Wraps
Lay a spinach wrap flat on a clean surface or cutting board, ensuring it’s easily accessible for filling. Spread a generous layer of the avocado mixture evenly across the wrap, covering about two-thirds of the surface. Next, layer the crispy bacon pieces, shredded rotisserie chicken, fresh lettuce, tomato slices, and a sprinkle of Monterey Jack cheese for that extra creamy touch in your California Club Wraps.

Step 4: Roll and Slice
Carefully roll the populated wrap starting from the side closest to you, tucking in the filling as you go to keep everything secure. Once fully rolled, use a sharp knife to slice the wrap in half diagonally. This not only makes it easier to eat but also gives a beautiful display of the colorful filling inside your California Club Wraps.

Step 5: Serve Immediately
To fully enjoy the flavors and textures, serve your California Club Wraps immediately with a side of fresh fruit, crunchy veggie sticks, or baked chips. This pairing enhances the meal, making it a delightful, complete dining experience. If prepared ahead, remember to slice just before serving to keep the wraps fresh and appetizing.

Make Ahead Options

These California Club Wraps are perfect for busy home cooks looking to save time! You can prepare the avocado filling and even cook the bacon up to 24 hours in advance, storing them in airtight containers in the refrigerator to maintain their freshness. Additionally, you can chop the tomatoes and tear the lettuce a day ahead as well. When you’re ready to enjoy your wraps, simply reassemble by spreading the avocado mixture onto a spinach wrap, layering in the previously prepared components, and rolling tightly. This way, you’ll achieve that delicious, satisfying crunch and creamy texture with minimal effort, making mealtime stress-free and enjoyable!

What to Serve with California Club Wraps

A perfect meal masterpiece deserves equally delightful companions to enhance its freshness and flavor.

  • Crispy Sweet Potato Fries: Their natural sweetness and crunch balance the savory flavors of the wraps, creating a satisfying contrast. Plus, they are a healthier alternative to traditional fries!

  • Fresh Fruit Salad: A medley of seasonal fruits adds a refreshing zing that complements the creamy avocado in the wraps. Think bright berries and juicy melons for color and taste.

  • Zesty Coleslaw: This crunchy side brings a tangy bite, providing a textural variation that elevates your Californian experience. Toss in some apple slices for an extra layer of flavor!

  • Seasoned Quinoa Salad: A nutty quinoa salad, with ingredients like cucumbers and tomatoes, turns your meal into a wholesome feast packed with protein and fresh veggies.

  • Chilled Lemonade: Refreshing and tangy, lemonade can cut through the richness of the wraps, making every bite feel even more invigorating. Perfect for warm days!

  • Mixed Green Salad: Drizzled with a light vinaigrette, a salad adds a crisp finish, brightening the meal with vibrant greens and a dash of zest.

  • Baked Veggie Chips: Their light and crunchy profile provides a snackable side that pairs nicely while keeping the meal light—ideal for a casual lunch or picnic.

  • Chocolate Chip Cookies: For a sweet touch, serve these soft and chewy delights to round out the meal, creating a perfect endnote to a delicious day!

California Club Wraps: Flavorful Ideas to Customize

Feel free to make these wraps your own with delightful variations that cater to your cravings and dietary needs while keeping the joy of fresh flavors alive.

  • Gluten-Free: Swap spinach wraps for gluten-free tortillas or lettuce leaves to enjoy a low-carb option without compromising taste.
  • Vegetarian Twist: Replace the rotisserie chicken with chickpeas or grilled tofu for a protein-packed vegetarian delight. You'll still get that satisfying texture!
  • Avocado Upgrade: Add sliced or smashed avocado to the filling for extra creaminess and richness. Pair it with fresh lime juice for a zesty kick.
  • Cheese Alternatives: Go dairy-free by using vegan cheese options or skip cheese altogether to focus on the fresh flavors of the veggies.
  • Crunchy Add-Ins: Toss in some sliced bell peppers or cucumbers to your wraps for an extra layer of crunch. These veggies bring freshness and vibrancy!
  • Fiery Flavor: Spice it up with jalapeños or a dollop of your favorite hot sauce for a mouthwatering heat that elevates the wrap experience.
  • Herb Boost: Sprinkle fresh herbs like cilantro or parsley throughout your California Club Wraps for a burst of flavor and aromatic love in every bite.
  • Savory Swap: Use smoked turkey or grilled shrimp instead of chicken for a deliciously unique spin that adds depth and intrigue to your wraps.

Try these tasty modifications to discover your ultimate California Club Wrap creation! Don't forget to check out more ideas in our guide on customizable wrap ingredients for endless inspiration. Enjoy the journey of flavor-making!

How to Store and Freeze California Club Wraps

Fridge: Keep assembled California Club Wraps in an airtight container, ideally consuming them within 2–3 hours for the best flavor and texture.

Room Temperature: For short periods (up to 1 hour), you can leave them out if serving, but avoid heat to keep the ingredients fresh.

Freezer: While it’s best not to freeze these wraps due to avocado and lettuce, if you must, tightly wrap them and consume within 1 month; expect changes in texture upon thawing.

Reheating: If you choose to reheat any leftover fillings, warm them gently in the microwave and allow to cool slightly before assembling the wraps again.

Expert Tips for California Club Wraps

  • Perfect Packaging: Use parchment paper to wrap each California Club Wrap for easy transport and to keep everything fresh and together.
  • Prep Ahead: Assemble the wraps up to 2–3 hours before serving; just avoid slicing until you're ready to enjoy them to maintain crunchiness.
  • Ingredient Freshness: Always choose ripe avocados and fresh greens to ensure your wraps taste their absolute best and are visually appealing.
  • Mind the Balance: Don't overload the filling; keeping the right ratio of ingredients makes for a neat wrap that’s easy to eat.
  • Flavor Variations: Don’t hesitate to experiment with different proteins, like grilled chicken or tofu, to give each California Club Wrap a unique twist.
  • Watch the Salt: Adjust salt according to taste, especially if using salty bacon or cheese, to keep the flavors balanced without overwhelming your palate.

California Club Wraps Recipe FAQs

What type of avocado should I use for California Club Wraps?
Absolutely use ripe avocados! Look for avocados that yield slightly when gently pressed; avoid those with dark spots or overly soft areas. If you can't find ripe ones, you could also use hummus for a creamy vegan alternative.

How can I store leftover California Club Wraps?
To keep your wraps fresh, place the assembled California Club Wraps in an airtight container and store them in the fridge. Ideally, consume them within 2–3 hours for the best taste and crunch. If you must prepare them earlier, just keep the tomatoes and lettuce aside until you're ready to serve.

Can I freeze California Club Wraps?
It's generally not recommended to freeze California Club Wraps, as the avocado and lettuce may wilt or become watery when thawed, losing that delightful texture. However, if you wish to freeze them, tightly wrap the whole wrap in plastic wrap or foil, and try to consume it within one month for the best quality. When ready to eat, let it thaw in the fridge overnight before enjoying it.

What if I have dietary restrictions?
Very! These wraps are super customizable! You can easily swap traditional ingredients for gluten-free or vegetarian options. Use turkey bacon or chickpeas instead of pork bacon, Greek yogurt in place of mayonnaise, and be sure to double-check labels on tortillas to find gluten-free variants.

How long can I keep the avocado filling?
The avocado filling should ideally be consumed within 1-2 hours after preparation to maintain its freshness and vibrant green color, but you can store it in an airtight container covered with plastic wrap directly on the surface to minimize browning. This can last about 1 day in the fridge, but be aware it might brown slightly! If you see browning, a quick stir can often revitalize its appearance.

Can I prepare California Club Wraps in advance?
Certainly! You can prepare the wraps up to 2–3 hours before serving. Just keep them in the fridge in an airtight container to maintain freshness. It’s best to slice them just before serving to retain that delightful crunch. Enjoy your tasty creations!

California Club Wraps

California Club Wraps: Flavor-Packed, Customizable Goodness

Discover California Club Wraps, a delicious mix of bacon, avocado, and chicken, easily customizable for any craving.
Print Recipe Pin Recipe
Prep Time 15 minutes mins
Cook Time 10 minutes mins
Total Time 25 minutes mins
Servings: 4 wraps
Course: Snacks
Cuisine: American
Calories: 450
Ingredients Equipment Method Nutrition Notes

Ingredients
  

For the Filling
  • 6 slices Bacon Consider using turkey bacon for a lighter option.
  • 2 medium Avocados Substitute with hummus for a vegan alternative.
  • 1 tablespoon Lemon juice Fresh is ideal but bottled works too.
  • 1 teaspoon Fine sea salt Adjust to taste; kosher salt is a great substitute.
  • 2 tablespoons Mayonnaise Greek yogurt can be used for a lighter option.
  • 1 teaspoon Honey Maple syrup is a great vegan alternative.
  • 1 teaspoon Onion powder Fresh onions can be used but adjust the amount.
  • 1 teaspoon Dried basil Fresh basil enhances the wrap if available.
  • 1 teaspoon Black pepper Freshly ground yields the best flavor.
  • 2 cups Shredded rotisserie chicken Chickpeas or tofu work for a vegetarian version.
For the Wrap
  • 4 large Spinach wraps Regular tortillas or lettuce leaves offer a low-carb option.
  • 1 cup Green leaf lettuce Romaine can also be an excellent alternative.
  • 1 medium Tomato Use any favorite variety for freshness.
  • 1 cup Monterey Jack cheese Swap with cheddar or dairy-free cheese for variety.

Equipment

  • Skillet
  • medium bowl
  • Sharp Knife

Method
 

Preparation
  1. Cook the bacon in a skillet over medium heat until crispy, about 8–10 minutes.
  2. Chop the tomato into thin slices and tear the green leaf lettuce into manageable pieces.
  3. Gather all your ingredients for smooth assembly.
Mixing Filling
  1. In a medium bowl, mash the ripe avocados until creamy. Stir in lemon juice, mayonnaise, honey, onion powder, dried basil, salt, and black pepper.
Assembling Wraps
  1. Lay a spinach wrap flat and spread the avocado mixture evenly across it, covering about two-thirds of the surface.
  2. Layer crispy bacon, shredded chicken, fresh lettuce, tomato slices, and sprinkle Monterey Jack cheese.
Rolling and Serving
  1. Carefully roll the wrap from the side closest to you, tucking in the filling as you go.
  2. Slice the wrap in half diagonally and serve with fresh fruit, veggie sticks, or baked chips.

Nutrition

Serving: 1wrapCalories: 450kcalCarbohydrates: 35gProtein: 20gFat: 25gSaturated Fat: 7gPolyunsaturated Fat: 2gMonounsaturated Fat: 10gCholesterol: 75mgSodium: 700mgPotassium: 600mgFiber: 5gSugar: 3gVitamin A: 1500IUVitamin C: 15mgCalcium: 200mgIron: 2mg

Notes

Use parchment paper for wrapping to keep freshness. Assemble the wraps up to 2–3 hours before serving. Use ripe ingredients for the best flavor.

Tried this recipe?

Let us know how it was!

Crispy Chicken Ranch Snack Wraps That Everyone Will Love

May 11, 2026 by Grace Snow Leave a Comment

As I stood in the kitchen, the smell of sizzling chicken filled the air, instantly transporting me to cozy family dinners and fun gatherings with friends. If you’re longing for a meal that hits all the right notes of comfort and crunch, let me introduce you to my Quick Crispy Chicken Ranch Snack Wraps. These delightful wraps come together in just 20 minutes, making them perfect for those hectic weeknights when time is not on your side. Not only are they incredibly customizable—think grilled chicken or a veggie twist—but they also cater to gluten-free diets, ensuring everyone can enjoy a cozy, homemade meal. So, are you ready to wrap up the day with something that feels like a hug in food form? Let’s dive in!

Why Are These Wraps a Must-Try?

Quick and Easy: With just 20 minutes from start to finish, these Crispy Chicken Ranch Snack Wraps are your go-to for effortless weeknight dinners.

Customizable Delight: Enjoy the freedom to mix and match ingredients—swap in grilled chicken, experiment with different cheeses, or even create a satisfying vegetarian version!

Flavor Explosion: Each bite offers a perfect harmony of crunchy chicken, fresh lettuce, and zesty ranch dressing that is sure to impress taste buds of all ages.

Family-Friendly: This recipe is designed to please everyone at the table, making it ideal for family gatherings or casual get-togethers.

Healthier Alternative: Create a homemade option that rivals fast food, providing a nutritious and gluten-free meal that keeps everyone coming back for more.

For more ways to enjoy chicken, check out my recipes for Honey Garlic Chicken Thighs and Crock Pot Chicken!

Crispy Chicken Ranch Snack Wrap Ingredients

For the Wraps
• Small Flour Tortillas – The soft base for your wraps; consider whole wheat or gluten-free varieties to suit dietary needs.
• Frozen Chicken Tenders – Offers a substantial protein boost; feel free to substitute with pre-cooked grilled chicken or rotisserie for quick preparation.
• Shredded Lettuce – Provides freshness and crunch; can easily be replaced with coleslaw mix for a twist.
• Shredded Cheddar Cheese – Adds creaminess and rich flavor; try switching to Monterey Jack or pepper jack for a bit of spice.

For the Dressing
• Ranch Dressing – Brings all the flavors together with its creamy texture; honey mustard or spicy mayo can be great alternatives for a different zing.

With these ingredients, you can create Crispy Chicken Ranch Snack Wraps that will delight your family and friends!

Step‑by‑Step Instructions for Crispy Chicken Ranch Snack Wraps

Step 1: Cook Chicken
Preheat your oven to 400°F (200°C). Spread frozen chicken tenders on a baking sheet and bake for 20–25 minutes, flipping halfway, until they are golden brown and crispy. Your kitchen will soon be filled with a delightful aroma, signaling that the star of your Crispy Chicken Ranch Snack Wraps is ready!

Step 2: Warm Tortillas
While the chicken is baking, heat small flour tortillas for about 15–30 seconds in a dry skillet or microwave until they are pliable. This step makes them easier to fold and prevents tearing when you assemble your Crispy Chicken Ranch Snack Wraps, ensuring a seamless wrap every time.

Step 3: Prepare Chicken
Once the chicken tenders have cooked and cooled for a few minutes, cut them into bite-sized pieces. This allows for easier assembly and ensures that each bite of your Crispy Chicken Ranch Snack Wraps is packed with delicious chicken flavor.

Step 4: Assemble Wraps
Lay a warmed tortilla flat on a clean surface and layer shredded lettuce, bite-sized chicken pieces, and shredded cheddar cheese down the center. Be generous but careful not to overfill the wrap, allowing ample space to fold and roll. This will ensure your Crispy Chicken Ranch Snack Wraps hold together beautifully.

Step 5: Add Dressing
Drizzle ranch dressing over the fillings in each tortilla, providing that creamy, zesty kick that ties everything together. Use just the right amount to enhance flavor without making the wraps soggy; this is key in achieving the perfect Crispy Chicken Ranch Snack Wraps.

Step 6: Fold and Roll
To wrap, fold the sides of the tortilla inward over the filling, then tightly roll from the bottom to the top. This method keeps all the delicious ingredients secure, resulting in neat, cohesive Crispy Chicken Ranch Snack Wraps that are ready for serving or packing.

Step 7: Serve or Pack
Slice each wrap in half for easy handling and serve immediately for the best taste and texture. If you’re prepping for later, wrap the assembled Crispy Chicken Ranch Snack Wraps in foil and store them in the fridge for up to three days, making them perfect for a quick snack or meal on the go.

Expert Tips for Crispy Chicken Ranch Snack Wraps

  • Chicken Cooling: Always let the chicken cool slightly before cutting it. This helps maintain the integrity of the wrap and prevents sogginess.

  • Drizzle with Care: Use a light drizzle of ranch dressing. Overdoing it can lead to a messy wrap, so less is often more when it comes to flavor!

  • Warm Tortillas: ensure that tortillas are adequately warmed to prevent tearing during assembly. A dry skillet works wonders to make them pliable.

  • Substitutions Made Easy: If gluten is a concern, look for certified gluten-free tortillas and chicken products to keep your Crispy Chicken Ranch Snack Wraps delicious and safe for everyone.

  • Storage Tips: Assemble wraps in an airtight container for up to three days in the fridge. For longer storage, freeze the components separately for freshness and convenience.

What to Serve with Crispy Chicken Ranch Snack Wraps

Elevate your meal experience by pairing these wraps with delightful sides and drinks that complement their vibrant flavors.

  • Garlic Breadsticks: Soft and buttery, they offer a delightful contrast to the crispy wraps and make for a comforting touch.

  • Crunchy Veggie Sticks: A medley of carrots, celery, and bell peppers adds a fresh crunch and balances the richness of the ranch dressing. Serve with a dip for added fun!

  • Creamy Potato Salad: Rich and tangy, this classic side brings a creamy texture that pairs beautifully with the savory crunch of the wraps. It’s a crowd-pleaser for family gatherings.

  • Pickle Chips: The sharp acidity of pickle chips cuts through the creamy ranch, making each bite of the wrap even more satisfying. They add a zesty kick that's simply irresistible.

  • Herbed Quinoa Salad: This light and fluffy salad offers a nutritious boost, with fresh herbs bringing brightness and flavor that perfectly complement the wraps’ hearty filling.

  • Sparkling Lemonade: A refreshing drink that brings an effervescent twist to your meal. The citrus balances the savory notes of the wraps, leaving you feeling refreshed.

  • Chocolate Chip Cookies: Conclude your meal on a sweet note with warm cookies. Their chewy texture and rich flavor will leave everyone smiling!

Make Ahead Options

These Crispy Chicken Ranch Snack Wraps are perfect for busy home cooks looking to save time! You can prepare all the ingredients up to 3 days in advance, ensuring a quick assembly when it’s time to eat. Simply cook the chicken tenders and allow them to cool before cutting into pieces, refrigerating them (along with shredded lettuce and cheese) in airtight containers. For the best results, store the ranch dressing separately to avoid sogginess. When you’re ready to serve, just warm the tortillas, assemble the wraps, and enjoy a delicious homemade meal with minimal effort! Trust me, your family will love them just as much, even when prepped ahead!

Crispy Chicken Ranch Snack Wraps Variations

Feel free to explore these delightful twists on your Crispy Chicken Ranch Snack Wraps for an exciting culinary adventure!

  • Grilled Chicken Swap: Use grilled chicken for a smokier taste that elevates the wraps. Grilled chicken adds a nice char and enhances overall flavor.

  • Rotisserie Chicken Option: Shredded rotisserie chicken can save time on busy evenings. It's pre-cooked and packed with flavor, making your wrap assembly a breeze.

  • Spicy Cheese Choice: Experiment with pepper jack for a spicy kick or gouda for an unexpected flavor twist. These cheeses can transform your wraps into a whole new experience.

  • Vegetarian Version: Swap in creamy avocado or a vibrant mix of roasted vegetables instead of chicken. It makes the wraps just as filling and incredibly flavorful.

  • Herb Infusion: Add fresh herbs like cilantro or basil to brighten up the flavor. A handful of herbs can make all the difference in transforming your wraps.

  • Different Dressings: Try honey mustard or spicy mayo for a unique taste. This simple swap can turn standard wraps into a zesty delight.

  • Crunchy Additions: Toss in some sliced bell peppers or crunchy cucumbers for added texture. This not only boosts the crunch factor but also adds a fresh element.

  • Sweet Twist: A touch of BBQ sauce in place of ranch can provide a sweet and tangy flavor. Just drizzle lightly to keep those wraps perfectly balanced!

For more delicious chicken ideas, try my Honey Garlic Chicken Thighs or indulge in Honey BBQ Chicken for a delightful twist on your meal preparation!

Storage Tips for Crispy Chicken Ranch Snack Wraps

  • Fridge: Store assembled wraps in an airtight container for up to 3 days. This keeps them fresh while ensuring that you can grab a quick meal anytime.

  • Freezer: Freeze components separately—chicken, tortillas, and veggies—for up to 1 month. This makes meal prep a breeze for busy days.

  • Reheating: To reheat, thaw frozen components in the fridge overnight, then warm tortillas in a skillet before assembling. Enjoy that crispy texture like fresh!

  • Leftover Chicken: If you have leftover cooked chicken tenders, store them in the fridge for up to 4 days, ready to toss into your next batch of Crispy Chicken Ranch Snack Wraps.

Crispy Chicken Ranch Snack Wraps Recipe FAQs

What type of tortillas should I use for these wraps?
Absolutely! Small flour tortillas are the standard base for these wraps, but feel free to experiment with whole wheat or certified gluten-free tortillas to accommodate dietary needs. Each type will add a unique touch to your Crispy Chicken Ranch Snack Wraps.

How should I store leftover wraps?
You can store assembled wraps in an airtight container for up to 3 days in the fridge. To maintain freshness, consider wrapping them individually in foil or plastic wrap. This way, they stay easily accessible for quick meals!

Can I freeze the chicken and wrap components?
Yes! For optimal convenience, freeze the wraps' components separately. The chicken can be frozen for up to 1 month, while tortillas and veggies can also join in. When you're ready to use them, thaw the components in the fridge overnight, warm the tortillas in a skillet, and then assemble your wraps!

What should I do if my wraps end up soggy?
Very common! If your wraps are soggy, it may be due to too much dressing. Always drizzle lightly, keeping it minimal to enhance flavor without overwhelming the wrap. You can also use dryer ingredients like shredded veggies for added crunch, which can help balance moisture.

Are these wraps suitable for gluten-sensitive diets?
Absolutely! Just choose gluten-free tortillas and ensure your chicken and dressing are also gluten-free labeled. This way, everyone—regardless of dietary restrictions—can enjoy these Crispy Chicken Ranch Snack Wraps without worry!

Crispy Chicken Ranch Snack Wraps

Crispy Chicken Ranch Snack Wraps That Everyone Will Love

Enjoy Crispy Chicken Ranch Snack Wraps that are quick, customizable, and delicious—perfect for family and friends.
Print Recipe Pin Recipe
Prep Time 5 minutes mins
Cook Time 20 minutes mins
Total Time 25 minutes mins
Servings: 4 wraps
Course: Snacks
Cuisine: American
Calories: 400
Ingredients Equipment Method Nutrition Notes

Ingredients
  

For the Wraps
  • 4 small Flour Tortillas Consider whole wheat or gluten-free varieties
  • 12 ounces Frozen Chicken Tenders Substitute with pre-cooked grilled chicken or rotisserie
  • 2 cups Shredded Lettuce Can replace with coleslaw mix for a twist
  • 1 cup Shredded Cheddar Cheese Try Monterey Jack or pepper jack for spice
For the Dressing
  • 1/2 cup Ranch Dressing Honey mustard or spicy mayo can be alternatives

Equipment

  • Oven
  • Baking Sheet
  • Skillet
  • Cutting Board
  • Knife

Method
 

Step-by-Step Instructions for Crispy Chicken Ranch Snack Wraps
  1. Preheat your oven to 400°F (200°C). Spread frozen chicken tenders on a baking sheet and bake for 20–25 minutes, flipping halfway, until golden brown and crispy.
  2. While the chicken is baking, heat small flour tortillas for about 15–30 seconds in a dry skillet or microwave until pliable.
  3. Once the chicken is cooked and cooled slightly, cut it into bite-sized pieces.
  4. Lay a warmed tortilla flat and layer shredded lettuce, bite-sized chicken pieces, and shredded cheddar cheese down the center.
  5. Drizzle ranch dressing over the fillings in each tortilla.
  6. Fold the sides of the tortilla inward, then tightly roll from the bottom to the top.
  7. Slice each wrap in half for easy handling and serve immediately.

Nutrition

Serving: 1wrapCalories: 400kcalCarbohydrates: 30gProtein: 25gFat: 20gSaturated Fat: 5gPolyunsaturated Fat: 7gMonounsaturated Fat: 5gCholesterol: 60mgSodium: 800mgPotassium: 400mgFiber: 3gSugar: 2gVitamin A: 1500IUVitamin C: 5mgCalcium: 200mgIron: 2mg

Notes

Let chicken cool slightly before cutting to maintain wrap integrity. Use a light drizzle of ranch dressing to avoid sogginess. Warm tortillas adequately to prevent tearing. Store assembled wraps in an airtight container for up to three days. Freeze components separately for up to one month.

Tried this recipe?

Let us know how it was!

Easy Chicken Caesar Wrap: Quick Comfort Food Delight

May 11, 2026 by Grace Snow Leave a Comment

It was a busy Wednesday afternoon, and the fridge was looking a little bleak. As I rummaged through, I stumbled upon some leftover shredded chicken and a few crisp romaine hearts. That's when inspiration struck—what if I turned these humble ingredients into a delicious Chicken Caesar Wrap? This quick and easy dish comes together in just 15 minutes, making it the perfect solution for a satisfying lunch or light dinner. Not only is it family-friendly, but it also offers a comforting nod to the classic Caesar salad, all wrapped up in a delightful tortilla. Ready for a tasty escape from your usual routine? Let’s roll into this flavorful kitchen adventure!

Why Choose This Chicken Caesar Wrap?

Quick and Easy: With just 15 minutes of prep time, this wrap is perfect for busy evenings or a satisfying lunch break.

Family-Friendly: Designed to please both kids and adults, it brings comfort food vibes right to your table.

Versatility: Feel free to mix up ingredients with variations like Buffalo Tofu Caesar or switch up the filling completely based on what you have on hand.

Flavorful Goodness: The combination of creamy Caesar dressing and fresh, crunchy romaine makes every bite a delightful experience.

Meal Prep Hero: Make several wraps in advance for effortless meals all week—just keep the filling and tortillas separate for maximum freshness!

Chicken Caesar Wrap Ingredients

For the Filling
• Cooked Chicken, Shredded – Provides protein and flavor; use pre-cooked or rotisserie chicken for convenience.
• Romaine Lettuce, Chopped (2 cups) – Adds crunch and freshness; baby kale or arugula can be used instead.
• Caesar Dressing (1/2 cup) – Brings creaminess and savory flavor; for a lighter version, mix Greek yogurt with light Caesar dressing.
• Grated Parmesan Cheese (1/4 cup) – Enhances flavor richness; fresh Parmesan is recommended for the best taste.
• Salt and Pepper – For seasoning to taste; adjust according to personal preference.
• Croutons (optional) – For added crunch; sprinkle just before serving for optimal texture.

For the Wrap
• Flour Tortillas (4 large) – Acts as the vessel for the filling; warm briefly if dry to help with rolling.

Feel free to enjoy this Chicken Caesar Wrap as a quick lunch or light dinner, making mealtime a breeze!

Step‑by‑Step Instructions for Chicken Caesar Wrap

Step 1: Prepare the Chicken Mixture
In a large mixing bowl, combine the shredded chicken, chopped romaine lettuce, Caesar dressing, and grated Parmesan cheese. Use a spatula to gently fold the ingredients until they are evenly coated and glossy, ensuring every bite of your Chicken Caesar Wrap is flavorful. This should take about 2-3 minutes.

Step 2: Prepare the Tortillas
Lay the flour tortillas flat on a clean surface or cutting board. If they feel stiff or dry, warm them briefly in the microwave for about 15-20 seconds, just until they're pliable. This will help prevent cracking while rolling the Chicken Caesar Wrap, ensuring a smooth assembly process.

Step 3: Fill the Tortillas
Evenly divide the chicken Caesar mixture among the tortillas, placing it slightly off-center. Press the mixture toward the center, leaving space on the edges to facilitate rolling. This makes it easier to wrap them tightly without spilling any filling during the folding process.

Step 4: Add Optional Croutons
If you’re using croutons for extra crunch, sprinkle them over the chicken mixture at this stage. Doing this before rolling will integrate the texture seamlessly into your Chicken Caesar Wrap while ensuring they maintain their crispness for each delicious bite.

Step 5: Roll the Wraps
Begin rolling each tortilla tightly from one edge, making sure to tuck in the sides as you go. This helps secure the filling and create a compact Chicken Caesar Wrap. Roll it to the opposite edge until it's fully rolled up, using your hands to keep everything in place.

Step 6: Slice and Serve
Once all tortillas are rolled, use a sharp knife to slice each wrap in half diagonally for easier handling. Serve immediately on a platter, or if meal prepping, wrap them in foil to store in the fridge. These delicious Chicken Caesar Wraps can be enjoyed cold or warmed up for a delightful bite!

What to Serve with Chicken Caesar Wrap?

Looking to elevate your meal with delightful sides that complement your Chicken Caesar Wrap perfectly?

  • Garlic Breadsticks: The warm, buttery flavor pairs beautifully with the creamy dressing and adds a comforting crunch.
  • Crisp Veggie Platter: Fresh cucumber and bell pepper sticks provide a refreshing contrast to the rich and savory wrap. Dip them in ranch or hummus for an extra zing!
  • Caesar Salad: Reinforce those classic flavors with a side of Caesar salad; the crisp romaine and tangy dressing mirror the wrap's taste.
  • Sweet Potato Fries: Their sweet, slightly crispy nature creates a delightful balance to the savory chicken and dressing. Enjoy them with a sprinkle of sea salt!
  • Fruit Salad: Bright, fresh fruits like strawberries and oranges add a sweet twist that lightens the meal beautifully. It’s a refreshing palate cleanser!
  • Iced Tea or Lemonade: A chilled drink helps wash down the delicious flavors while adding a crisp, refreshing element to your lunch or dinner.

Chicken Caesar Wrap Variations

Feel free to take this Chicken Caesar Wrap on a delicious detour and customize it to fit your cravings!

  • Lettuce Options: Swap out romaine for baby spinach or arugula for a peppery twist and added color.

  • Dressing Alternatives: Try a Greek yogurt ranch dressing for creaminess while cutting calories. It pairs beautifully with the fresh ingredients.

  • Crunchy Addition: Toss in toasted pine nuts or walnuts for delightful texture and a nutty flavor that elevates your wrap.

  • Spice it Up: Add a few dashes of hot sauce or a sprinkle of red pepper flakes for a warming kick if you love heat.

  • Fresh Herbs: Mix in chopped parsley or basil for an herbal note that brings freshness and complexity to each bite.

  • Wrap it Differently: Go outside the usual with pizza dough or flatbread instead of flour tortillas for a unique flavor experience.

  • Vegetarian Delight: Substitute shredded chicken with chickpeas or grilled vegetables for a hearty, plant-based version that feels just as satisfying.

  • Old Favorite: For an adventurous twist, recreate your favorite meal by adding elements from another recipe, like the robust spices of Chicken Adobo Again. How's that for a flavor combination?

Mix and match these variations to keep your Chicken Caesar Wraps fresh and exciting, making lunchtime a delightful adventure!

Expert Tips for Chicken Caesar Wrap

• Chicken Choice: Always opt for shredded rotisserie chicken for that tender, flavorful base. Avoid overcooked chicken, which can make your wrap dry.

• Tortilla Prep: Warm your tortillas briefly in the microwave before filling to avoid cracking. This ensures a smooth rolling experience.

• Crunch Factor: For the best crunch, add croutons just before serving. If added too early, they'll become soggy and lose their satisfying texture.

• Freshness Matters: Keep the filling and tortillas separate if meal prepping. This prevents sogginess and keeps every wrap fresh for up to two days.

• Seasoning Skills: Don’t forget to taste your filling before rolling. Adjust salt and pepper as needed to ensure your Chicken Caesar Wrap bursts with flavor.

How to Store and Freeze Chicken Caesar Wrap

Room Temperature: Chicken Caesar Wraps are best served fresh. If left out, they should not be at room temperature for more than 2 hours to avoid spoilage.

Fridge: Store wrapped Chicken Caesar Wraps in an airtight container or tightly wrapped in foil for up to 2 days. Keeping the filling and tortillas separate helps maintain freshness.

Freezer: For longer storage, freeze the chicken mixture in a freezer-safe container for up to 2 months. Assemble wraps before serving; thaw in the fridge overnight before rolling.

Reheating: To enjoy leftovers, unwrap and warm in a pan over medium heat for a few minutes until heated through or savor cold for a refreshing meal.

Make Ahead Options

These Chicken Caesar Wraps are perfect for meal prep enthusiasts! You can prepare the chicken filling—combining the shredded chicken, chopped romaine, Caesar dressing, and Parmesan—up to 3 days in advance. Simply store this mixture in an airtight container in the refrigerator to maintain freshness. When you’re ready to serve, warm the tortillas briefly in the microwave (about 15-20 seconds) to make rolling easier. Assemble the wraps by dividing the filling among the tortillas and adding croutons just before rolling to keep them crunchy. This way, your Chicken Caesar Wraps will be just as delicious and satisfying, saving you precious time on busy weeknights!

Chicken Caesar Wrap Recipe FAQs

What type of lettuce is best for my Chicken Caesar Wrap?
Absolutely! While romaine lettuce is a classic choice for its crunch, you can also use baby kale or arugula for a delightful twist in your Chicken Caesar Wrap. Each provides a unique flavor profile that can elevate your dish, so feel free to mix it up based on your taste preferences!

How should I store my Chicken Caesar Wraps?
To maintain their freshness, let your Chicken Caesar Wraps cool completely before wrapping them in foil or placing them in an airtight container. They’ll stay good in the fridge for up to two days. If possible, store the chicken filling and tortillas separately to prevent sogginess.

Can I freeze my Chicken Caesar Wraps?
Absolutely! To freeze your Chicken Caesar Wraps, I recommend prepping the chicken filling first. Place it in a freezer-safe container and freeze for up to two months. When you’re ready to enjoy, move the container to the fridge overnight to thaw, then assemble your wraps and savor the fresh taste!

What if my tortillas are cracking while I roll?
Very! If you notice that your tortillas are cracking, it’s likely because they’re too dry. To remedy this, warm them in the microwave for about 15-20 seconds. This slight warming will make them pliable and easier to roll, resulting in a beautifully wrapped Chicken Caesar Wrap.

Are there any dietary considerations for my Chicken Caesar Wrap?
The Chicken Caesar Wrap is mainly free of common allergens, but it does contain gluten (from the tortillas) and dairy (due to the Parmesan and Caesar dressing). For a gluten-free version, try using gluten-free tortillas. If dairy is a concern, you can easily substitute the cheese with nutritional yeast for a cheesy flavor, and use a non-dairy Caesar dressing alternative. Always check labels for your specific dietary needs!

How long can I keep leftovers?
You can store leftovers in the fridge for about 2 days. If you prepare any extra filling, separate it from the tortillas to keep everything fresh. When you’re ready for that second serving, just reheat the filling lightly in a pan, or enjoy it cold in another wrap for a quick meal!

Chicken Caesar Wrap

Easy Chicken Caesar Wrap: Quick Comfort Food Delight

This Chicken Caesar Wrap offers a quick and easy solution for delicious comfort food, perfect for lunch or dinner.
Print Recipe Pin Recipe
Prep Time 15 minutes mins
Total Time 15 minutes mins
Servings: 4 wraps
Course: Snacks
Cuisine: American
Calories: 350
Ingredients Equipment Method Nutrition Notes

Ingredients
  

For the Filling
  • 2 cups Cooked Chicken, Shredded Use pre-cooked or rotisserie chicken for convenience.
  • 2 cups Romaine Lettuce, Chopped Baby kale or arugula can be used instead.
  • 1/2 cup Caesar Dressing For a lighter version, mix Greek yogurt with light Caesar dressing.
  • 1/4 cup Grated Parmesan Cheese Fresh Parmesan is recommended for the best taste.
  • Salt For seasoning to taste.
  • Pepper For seasoning to taste.
  • Croutons Optional for added crunch; sprinkle just before serving.
For the Wrap
  • 4 large Flour Tortillas Warm briefly if dry to help with rolling.

Equipment

  • Mixing Bowl
  • Spatula
  • Microwave
  • Knife

Method
 

Step‑by‑Step Instructions
  1. In a large mixing bowl, combine the shredded chicken, chopped romaine lettuce, Caesar dressing, and grated Parmesan cheese. Use a spatula to gently fold the ingredients until they are evenly coated.
  2. Lay the flour tortillas flat on a clean surface. If they feel stiff or dry, warm them briefly in the microwave for about 15-20 seconds.
  3. Evenly divide the chicken Caesar mixture among the tortillas, placing it slightly off-center.
  4. If using croutons, sprinkle them over the chicken mixture now.
  5. Begin rolling each tortilla tightly from one edge, tucking in the sides as you go.
  6. Once all tortillas are rolled, use a sharp knife to slice each wrap in half diagonally.

Nutrition

Serving: 1wrapCalories: 350kcalCarbohydrates: 30gProtein: 25gFat: 15gSaturated Fat: 5gPolyunsaturated Fat: 2gMonounsaturated Fat: 8gCholesterol: 70mgSodium: 800mgPotassium: 500mgFiber: 3gSugar: 2gVitamin A: 1500IUVitamin C: 10mgCalcium: 200mgIron: 1.5mg

Notes

Always opt for shredded rotisserie chicken for flavor. Warm tortillas before filling to avoid cracking. Store wrapped wraps properly for freshness.

Tried this recipe?

Let us know how it was!

Pizza Cupcakes Recipe: Fun and Customizable Family Treats

May 10, 2026 by Grace Snow Leave a Comment

The aroma of pizza wafts through the air, but this time, it’s taking a playful twist! My Easy Pizza Cupcakes Recipe is all about transforming a classic favorite into an adorable, handheld delight. These little wonders boast flakey, golden crusts and a melty cheese center that will make your taste buds dance! Perfect for kids and adults alike, they’re not just quick to whip up but also offer a world of customizable toppings to suit every palate. Whether it’s a friendly gathering or a cozy family snack, these Pizza Cupcakes are sure to impress while keeping things fun and mess-free. Curious to see how easy it is to create these tasty bites? Let’s dive in!

Why are Pizza Cupcakes a must-try?

Delightfully Fun: Transform pizza night into an adventurous experience for kids and adults alike with these adorable mini pizzas that bring joy to every bite.
Endless Customization: Whether you prefer classic pepperoni or zesty veggies, these cupcakes adapt to your cravings – perfect for picky eaters or dietary needs.
Quick Preparation: With minimal prep time, you can whip these up in no time, making it the ideal solution for last-minute gatherings or family meals.
Impressive Presentation: Serve them up as finger foods, and watch guests marvel at their cute presentation – they look as great as they taste!
Easy Cleanup: Say goodbye to messy pizza-making; with no dough to roll out, you can enjoy tasty pizza flavors with less hassle! For an extra delicious twist, check out how to make Spatchcock Chicken Flavor for a complete meal option.

Pizza Cupcakes Recipe Ingredients

For the Base

  • Refrigerated flaky layer biscuit dough – Ideal for a quick and sturdy cupcake base; substitute with homemade pizza dough for a personal touch.
  • Non-stick cooking spray or olive oil – Prevents sticking; using butter adds a rich flavor.

For the Sauce

  • Pizza or marinara sauce – Brings moisture and pizzazz to each cupcake; opt for low-sugar varieties for a healthier option.

For the Cheese

  • Low-moisture, part-skim mozzarella cheese – This creamy cheese ensures a deliciously cheesy center; swap for dairy-free cheese for vegan options.
  • Grated Parmesan cheese (optional) – Boosts the flavor profile; nutritional yeast works as a great non-dairy alternative.

For the Toppings

  • Mini pepperoni slices – A classic topping that adds savory goodness; crumbled sausage or turkey pepperoni can lighten up your meal.
  • Finely diced bell peppers – Infuses sweetness and crunch; any color works, or opt for sautéed veggies for softness.
  • Finely diced red onion – Adds a sharp contrast; consider green onions for a milder flavor.
  • Sliced black olives – Offers a briny burst of flavor; feel free to omit them for a nut-free option.
  • Chopped fresh basil or dried oregano – Delivers aromatic depth; Italian seasoning can be a convenient substitute.
  • Optional additions: Cooked & crumbled beef sausage, pre-cooked diced ham, or sautéed mushrooms – Ensure moisture is well-drained from these toppings.

Dive in and customize your Pizza Cupcakes Recipe to suit your tastes!

Step‑by‑Step Instructions for Pizza Cupcakes Recipe

Step 1: Prepare Oven and Muffin Tin
Preheat your oven to 375°F (190°C) to ensure a perfectly baked finish on your Pizza Cupcakes. While the oven heats, take a 12-cup muffin tin and generously grease each cup with non-stick cooking spray or olive oil to prevent sticking and ensure easy removal later.

Step 2: Prepare Biscuit Dough
Open the package of refrigerated flaky layer biscuit dough and separate each biscuit. Using a rolling pin, flatten each biscuit into a circle roughly 4 inches in diameter. This will form the base of your mini pizzas, so aim for even thickness for consistent baking.

Step 3: Form Dough Cups
Once flattened, take each biscuit circle and gently press it into the greased muffin cups. Mold the dough to create a cup shape, ensuring it fits snugly against the sides and bottom. You want a nice, even thickness to hold the delicious fillings of your Pizza Cupcakes.

Step 4: Add Sauce and First Cheese Layer
Spoon 1 tablespoon of pizza or marinara sauce into each dough cup, spreading it evenly. Then, cover the sauce with a generous layer of low-moisture, part-skim mozzarella cheese, which will melt beautifully and create a gooey, cheesy center in your Pizza Cupcakes.

Step 5: Distribute Toppings
Now it’s time to get creative! Evenly distribute your preferred chopped toppings, such as mini pepperoni, diced bell peppers, and red onions, into each cup. Feel free to mix and match ingredients based on your family's tastes, as the customization is part of the fun of these Pizza Cupcakes!

Step 6: Add Final Cheese Layer
Top each filled cup with additional mozzarella cheese and sprinkle grated Parmesan on top if desired. This final cheese layer will create a beautifully golden, bubbly crust as the Pizza Cupcakes bake, enhancing both flavor and presentation.

Step 7: Bake Pizza Cupcakes
Carefully place the muffin tin in the preheated oven and bake for 15-20 minutes. Keep an eye on them; they should turn a lovely golden brown while the cheese bubbles up and becomes deliciously crispy!

Step 8: Cool and Remove
Once they're baked to perfection, remove the muffin tin from the oven and let the Pizza Cupcakes cool in the pan for about 5 minutes. This will allow them to set slightly, making it easier to handle them without breaking.

Step 9: Garnish and Serve
Using a spoon or fork, gently remove the Pizza Cupcakes from the muffin tin and transfer them to a cooling rack. Garnish with fresh basil, a sprinkle of Parmesan, or red pepper flakes for an extra pop of flavor before serving your delightful creations.

Make Ahead Options

These Easy Pizza Cupcakes are fantastic for meal prep! You can prepare the biscuit cups and fill them with sauce and toppings up to 24 hours in advance. Simply assemble the pizza cupcakes in the greased muffin tin, cover them tightly with plastic wrap, and refrigerate until you’re ready to bake. This not only saves you time on busy evenings but ensures your cupcakes stay just as delicious, with minimal effort when it's time to cook. When you're ready to serve, simply preheat your oven, remove the plastic wrap, and bake the cupcakes as directed for 15-20 minutes until golden and bubbly. Enjoy hassle-free, flavorful family treats at your fingertips!

How to Store and Freeze Pizza Cupcakes

Room Temperature: Keep Pizza Cupcakes at room temperature for up to 2 hours. If they need to sit out longer, place them in an airtight container to maintain freshness.

Fridge: Refrigerate any leftover Pizza Cupcakes in an airtight container for up to 3 days. Reheat in an oven at 350°F (175°C) for a few minutes to restore their crispy texture.

Freezer: For longer storage, freeze Pizza Cupcakes for up to 1 month. Place them in a single layer on a tray until frozen solid, then transfer to a freezer bag.

Reheating: To enjoy frozen Pizza Cupcakes, reheat them in the oven at 375°F (190°C) for 15-20 minutes or until hot and crispy. Make sure to let them cool slightly before serving!

Pizza Cupcakes Recipe Variations

Feel free to let your creativity shine and give these pizza cupcakes your unique twist, making every bite a delightful experience!

  • Gluten-Free Base: Use gluten-free biscuit dough for a celiac-friendly option. Your friends and family will love how deliciously satisfying these cupcakes still are!

  • Vegan Delight: Substitute mozzarella with dairy-free cheese and skip the meats for a totally plant-based treat. These cupcakes are adaptable to fit everyone’s taste buds!

  • Zesty Kick: Add sliced jalapeños or a sprinkle of crushed red pepper flakes for some heat. Spice lovers will rejoice with this fiery variation!

  • Cheesy Extravaganza: Mix different cheeses like smoked gouda and sharp cheddar to add depth and richness. Each bite will be a burst of flavor, making them irresistible!

  • Sweet Bell Pepper Medley: Use a mix of diced bell peppers like red, yellow, and green for vibrant color and sweetness. A rainbow of flavors will brighten up your meal!

  • Savory Mushroom Mix: Sautéed mushrooms add an earthy note and pair beautifully with the cheese. Don’t forget to drain them well to keep your cupcakes from getting soggy!

  • Hearty Meat Options: Swap in cooked diced ham or crumbled turkey sausage if you’re craving more protein. You can also try something different like Chicken Adobo Again for a delicious flavor infusion!

  • Pesto Base: Spread a thin layer of pesto instead of sauce for a herby twist. This unexpected swap will elevate your pizza cupcakes to gourmet status!

Dive into these variations and let each savory bite take you on a delicious adventure!

Tips for the Best Pizza Cupcakes

  • Dough Thickness Matters: Ensure the biscuit dough is evenly rolled out. Too thick, and they may not cook through; too thin, and they'll break easily.

  • Moisture Control: Drain excess moisture from toppings like vegetables and cooked sausage. This prevents sogginess in your Pizza Cupcakes.

  • Layering Technique: Start with sauce, followed by cheese, then toppings, and finish with more cheese. This method locks in flavors and keeps the toppings in place.

  • Baking Time Awareness: Keep a close eye on your cupcakes while baking. Ovens vary, so check at the 15-minute mark to avoid overcooking.

  • Customizable Fun: Don’t hesitate to experiment with toppings! Try different cheeses or vegetable combinations to craft a unique Pizza Cupcakes recipe your family will adore.

What to Serve with Easy Pizza Cupcakes?

Creating a delightful meal is a breeze with these playful pizza bites! Here are some scrumptious sides and drinks to elevate your dining experience.

  • Classic Marinara Sauce: A tangy dip that enhances the pizza flavor; perfect for those who love a saucy bite!
  • Crunchy Salad: A fresh mix of greens, cucumbers, and tomatoes adds a refreshing crunch that contrasts nicely with warm cupcakes.
  • Creamy Ranch Dressing: This cool and creamy accompaniment makes for a tasty dip, ideal for both kids and adults alike.
  • Garlic Breadsticks: Soft, buttery, and fragrant, these pair perfectly with the taste of molten cheese in your pizza cupcakes.
  • Mini Caprese Skewers: Juicy cherry tomatoes, fresh mozzarella, and basil provide a bright, refreshing balance to the richness of the cupcakes.
  • Tomato Soup: A warm and comforting soup that complements the pizza theme, making it feel like a cozy pizza party!
  • Sparkling Lemonade: This fizzy, zesty drink refreshes and lightens the meal, cutting through the richness while delighting your taste buds.
  • Fruit Salad: A vibrant mix of seasonal fruits makes for a sweet, healthy side that contrasts wonderfully with savory bites.
  • Chocolate Chip Cookies: For a sweet finish, serve up these nostalgic treats that are always a hit with any crowd!
  • Iced Herbal Tea: A chilled, naturally sweetened herbal tea enhances the meal experience, refreshing your palate between bites.

Pizza Cupcakes Recipe FAQs

What type of biscuit dough should I use for the pizza cupcakes?
I recommend using refrigerated flaky layer biscuit dough for the best results, as it creates a nice, flaky crust. If you’re feeling adventurous, homemade pizza dough or gluten-free dough can also work! Just ensure your dough is rolled out evenly to maintain the texture.

How long can I store leftover pizza cupcakes?
Leftover Pizza Cupcakes can be stored in an airtight container in the refrigerator for up to 3 days. When ready to enjoy, reheat them in an oven at 350°F (175°C) for just a few minutes to bring back their crispy texture. This way, they’ll taste just as delightful as when they were freshly made!

Can I freeze pizza cupcakes, and if so, how?
Absolutely! To freeze your Pizza Cupcakes, first ensure they are completely cooled. Lay them in a single layer on a tray until frozen solid. Then, transfer them to a freezer-safe bag or container. They can stay fresh in the freezer for up to one month. To reheat, simply place them directly in the oven at 375°F (190°C) for about 15-20 minutes or until heated through.

What if my pizza cupcakes turn out soggy?
Sogginess often stems from high-moisture toppings. Drain excess moisture from any vegetables or precooked meats before adding them to your Pizza Cupcakes. Additionally, ensure you don’t overload the cups with sauce as it can make the crust mushy. Aim for a tablespoon of sauce in each!

Are there dietary options for the pizza cupcakes?
Yes! You can easily make these Pizza Cupcakes gluten-free by using gluten-free biscuit dough. For a vegan twist, substitute the cheese with dairy-free alternatives and ensure that any toppings used (like pepperoni) are plant-based. The beauty of this recipe lies in its adaptability to cater to various dietary preferences!

Pizza Cupcakes Recipe

Pizza Cupcakes Recipe: Fun and Customizable Family Treats

This Pizza Cupcakes Recipe transforms classic pizza into adorable handheld bites, perfect for a family treat.
Print Recipe Pin Recipe
Prep Time 20 minutes mins
Cook Time 20 minutes mins
Total Time 40 minutes mins
Servings: 12 cupcakes
Course: Snacks
Cuisine: Italian
Calories: 150
Ingredients Equipment Method Nutrition Notes

Ingredients
  

For the Base
  • 1 can Refrigerated flaky layer biscuit dough Substitute with homemade pizza dough for a personal touch.
  • 1 tablespoon Non-stick cooking spray or olive oil Prevents sticking; using butter adds a rich flavor.
For the Sauce
  • 1/4 cup Pizza or marinara sauce Opt for low-sugar varieties for a healthier option.
For the Cheese
  • 1 cup Low-moisture, part-skim mozzarella cheese Swap for dairy-free cheese for vegan options.
  • 1/4 cup Grated Parmesan cheese Optional; nutritional yeast works as a great non-dairy alternative.
For the Toppings
  • 1/2 cup Mini pepperoni slices A classic topping that adds savory goodness.
  • 1/2 cup Finely diced bell peppers Any color works; opt for sautéed veggies for softness.
  • 1/4 cup Finely diced red onion Consider green onions for a milder flavor.
  • 1/4 cup Sliced black olives Feel free to omit for a nut-free option.
  • 2 tablespoons Chopped fresh basil or dried oregano Italian seasoning can be a convenient substitute.
  • Optional additions Cooked & crumbled beef sausage, pre-cooked diced ham, or sautéed mushrooms.

Equipment

  • Muffin tin
  • Rolling Pin

Method
 

Step-by-Step Instructions
  1. Preheat your oven to 375°F (190°C). Grease a 12-cup muffin tin with non-stick cooking spray or olive oil.
  2. Open the package of biscuit dough and flatten each biscuit into a circle about 4 inches in diameter.
  3. Press each biscuit circle into the greased muffin cups to form a cup shape.
  4. Spoon 1 tablespoon of pizza sauce into each dough cup and cover with mozzarella cheese.
  5. Evenly distribute your preferred chopped toppings into each cup.
  6. Top each cup with additional mozzarella cheese and sprinkle with Parmesan if desired.
  7. Bake in the preheated oven for 15-20 minutes until golden brown.
  8. Allow to cool in the pan for about 5 minutes before removing.
  9. Garnish with fresh basil or red pepper flakes before serving.

Nutrition

Serving: 1cupcakeCalories: 150kcalCarbohydrates: 15gProtein: 5gFat: 8gSaturated Fat: 3gPolyunsaturated Fat: 0.5gMonounsaturated Fat: 4gCholesterol: 15mgSodium: 400mgPotassium: 120mgFiber: 1gSugar: 1gVitamin A: 200IUVitamin C: 2mgCalcium: 150mgIron: 1mg

Notes

Experiment with different toppings for a unique twist on these Pizza Cupcakes.

Tried this recipe?

Let us know how it was!

Homemade Pizza Hut Cheese Sticks for Cheesy Nostalgia

May 10, 2026 by Grace Snow Leave a Comment

As the scent of warm, cheesy goodness wafts through my kitchen, I’m reminded of those carefree evenings spent indulging in Pizza Hut Cheese Sticks with friends and family. This homemade version is not only a delightful trip down memory lane but also incredibly easy to whip up, making it perfect for game nights or cozy get-togethers. The best part? You'll have a customizable treat that caters to your cravings—it’s meal prep friendly and can easily be tailored to fit a gluten-free lifestyle. So, are you ready to recreate that crispy, cheesy bliss right at home? Let’s dive into this irresistible recipe that’s sure to impress!

Why Make Pizza Hut Cheese Sticks?

Cheesy Nostalgia: Relive your favorite memories with a homemade twist on classic cheese sticks that are even better than the original.
Customizable Delight: Tailor the flavors to your liking! Mix in herbs, switch up cheeses, or add spices for a unique kick.
Meal Prep Friendly: Perfect for busy schedules. Make a batch ahead of time and simply reheat for a quick snack that everyone will love.
Crowd-Pleasing Favorite: Expect these cheesy sticks to disappear fast at any gathering, just like they do at parties. Serve with marinara or ranch for dipping, and pair with delicious sides like Garlic Bread or Caesar Salad for the ultimate feast!

Pizza Hut Cheese Sticks Ingredients

For the Dough

  • Granulated Sugar – Adds a hint of sweetness that balances the savory flavors, enhancing the overall taste.
  • All-Purpose Flour – The main structure for your dough, crucial for achieving that perfect cheesy texture; gluten-free flour can be used as a substitute.
  • Active Dry Yeast – Essential for fluffy, risen dough; ensure it's fresh and activated properly for the best results.
  • Kosher Salt – Enhances the overall flavor of the cheese sticks, making every bite irresistible.
  • Unsalted Butter – Adds rich flavor to both dough and topping; can be replaced with margarine for dairy-free options.
  • Large Egg Yolk – Binds the dough and enriches its flavor; omitting will result in a less rich texture.
  • Warm Water (110°F) – Activates the yeast for the perfect dough texture; make sure it's not too hot to harm the yeast.

For the Toppings

  • Shredded Mozzarella Cheese – Provides the delightful gooeyness characteristic of pizza hut cheese sticks; high-moisture mozzarella is recommended for best stretch.
  • Grated Parmesan Cheese – Adds sharpness and depth of flavor; Pecorino can be used as an alternative for a unique twist.
  • Garlic Salt – Infuses the sticks with a savory garlic flavor; opt for fresh minced garlic for a stronger, more vibrant taste.
  • Marinara Sauce – The classic dipping sauce for cheese sticks; can substitute with ranch or a spicy sauce for a fun variation.

Step‑by‑Step Instructions for Homemade Pizza Hut Cheese Sticks

Step 1: Prepare Dough
Begin by dissolving the active dry yeast in half of the warm water (110°F) for about 5 minutes until it becomes foamy. In a large mixing bowl, combine the melted unsalted butter, granulated sugar, kosher salt, and the remaining warm water. Next, stir in the egg yolk and the activated yeast mixture, then gradually add all-purpose flour, mixing until a soft and slightly sticky dough forms.

Step 2: Rest Dough
Grease a 9x13-inch baking dish with 2 tablespoons of melted butter. Transfer the dough into the dish, spreading it evenly across the bottom. Cover the dish tightly with plastic wrap and allow the dough to rest for 15 minutes. While it rests, preheat your oven to 350°F, which will create an ideal environment for the dough to rise slightly.

Step 3: Add Toppings & Bake
After the resting period, remove the plastic wrap from the dough. Gently brush the surface with the remaining melted butter for extra flavor and a golden finish. Evenly sprinkle the shredded mozzarella and grated Parmesan cheese over the dough, then generously dust with garlic salt, adding any optional herbs if desired. Place the dish in the preheated oven and bake for 28-31 minutes, until the cheese is bubbly and the edges are golden.

Step 4: Cool & Slice
Once baked, remove the dish from the oven and allow the Homemade Pizza Hut Cheese Sticks to cool for about 10 minutes. This short cooling time helps the cheese set slightly, making it easier to cut. Use a sharp knife or pizza cutter to slice the cheesy sticks into 8 even pieces.

Step 5: Serve with Dipping Sauce
Serve your freshly baked cheese sticks warm, accompanied by marinara sauce for dipping. Enjoy the delightful gooeyness and crispy exterior of your Homemade Pizza Hut Cheese Sticks, a perfect snack for family gatherings or cozy nights in.

Pizza Hut Cheese Sticks Variations

Customize your cheese sticks for a unique flavor experience, all while enjoying that delightful, cheesy goodness!

  • Cheesy Duo: Mix mozzarella with provolone or gouda for an even creamier flavor profile.
  • Spicy Kick: Add crushed red pepper flakes to the cheese topping for a little heat that doesn't overpower.
  • Gluten-Free Option: Swap all-purpose flour with gluten-free bread flour to enjoy these sticks without the gluten.
  • Herb-Infused: Incorporate fresh herbs such as basil or thyme into the dough for a delightful flavor boost.
  • Veggie Boost: Mix in chopped vegetables like spinach or jalapeños to the dough, adding color, nutrition, and flavor.
  • Cheesy Gourmet: Sprinkle some blue cheese on top for a tangy, gourmet twist that’s sure to impress.
  • Smoky Flavor: Add a dash of smoked paprika to the dough for a subtle, smoky undertone that elevates each bite.
  • Ranch Drizzle: Instead of marinara, set up a delicious ranch dip or replace it with a spicy aioli for a different dipping experience.

Feel free to get creative and tailor these sticks to match your cravings! Enjoy them with sides like Air Fryer Fish Sticks or a cool Jello Salad for a memorable meal.

Make Ahead Options

These Homemade Pizza Hut Cheese Sticks are perfect for busy weeknights or last-minute gatherings! You can prepare the dough up to 24 hours in advance—simply follow the dough preparation steps, cover it tightly with plastic wrap, and refrigerate. If you want to freeze them, allow the baked cheese sticks to cool completely, then store in a freezer-safe bag for up to 2 months. When you're ready to enjoy, just bake straight from the freezer for that fresh-out-of-the-oven taste! Remember to keep them covered to maintain softness, and serve with your favorite dipping sauce for a deliciously hassle-free treat!

Expert Tips for Homemade Pizza Hut Cheese Sticks

  • Water Temperature Matters: Ensure the warm water is exactly 110°F; too hot can kill the yeast, preventing your dough from rising.
  • Yeast Activation: If the dough isn’t rising, double-check that your yeast is fresh and properly activated to achieve that perfect fluffy texture.
  • Cheese Quality: Use high-moisture mozzarella for maximum gooeyness; low-moisture cheese may not stretch well in your Pizza Hut cheese sticks.
  • Avoid Microwave Reheating: For the best texture when reheating, use an oven instead of a microwave; this helps retain the crispiness of the cheese sticks.
  • Customize Flavors: Play with spices and herbs—like dried oregano or crushed red pepper flakes—to add a personal touch to your cheese sticks.

How to Store and Freeze Pizza Hut Cheese Sticks

Fridge: Store leftover Pizza Hut cheese sticks in an airtight container for up to 3 days. To maintain freshness, separate layers with parchment paper.

Freezer: Freeze cooled cheese sticks in a freezer-safe bag for up to 2 months. This method preserves their cheesy goodness and texture effectively.

Reheating: For the best result, reheat directly from frozen in the oven at 350°F for about 10-15 minutes, ensuring they regain their crispy texture.

Make-Ahead Tip: Feel free to prepare a batch ahead of time; they make for a quick snack or appetizer that’s always ready to impress!

What to Serve with Homemade Pizza Hut Cheese Sticks?

Elevate your game night or cozy get-together with these delightful cheese sticks by pairing them with complementary dishes and drinks.

  • Garlic Bread: The buttery, garlicky flavor pairs perfectly with the cheese sticks; it offers a satisfying crunch and aroma.

  • Caesar Salad: A fresh, crisp salad with creamy dressing adds a refreshing contrast, balancing the cheese's richness. Toss in some croutons for added texture!

  • Buffalo Wings: Spice things up with these crispy, tangy wings. The heat from the sauce works wonderfully with the cheesy goodness of your cheese sticks.

  • Marinara Dipping Sauce: Classic and essential, a generous bowl of marinara is a must-have for dipping; enjoy the sweet and tangy flavors that enhance every cheesy bite.

  • Stuffed Mushrooms: These savory bites filled with cheese and herbs add an elegant touch to your meal while complementing the cheesy flavors beautifully.

  • Fresh Veggie Platter: Crisp carrots, cucumbers, and bell peppers offer a refreshing crunch. Pair with a creamy dip for a light balance to the indulgent cheese sticks.

  • Sparkling Lemonade: Quench your thirst with this bubbly drink that’s tangy, sweet, and refreshing. It's a great palate cleanser between cheesy sticks.

  • Chocolate Chip Cookies: Sweeten the deal with warm, gooey cookies for dessert. The blend of savory and sweet will surely delight everyone!

Homemade Pizza Hut Cheese Sticks Recipe FAQs

How do I select the best ingredients for my Homemade Pizza Hut Cheese Sticks?
Absolutely! When choosing your ingredients, opt for high-moisture mozzarella cheese for that perfect gooey texture. Look for fresh active dry yeast, as older yeast might not activate properly. For the flour, all-purpose is best for structure, but if you're gluten-free, there are great gluten-free flour blends available that work well.

How should I store leftover cheese sticks?
To store your Homemade Pizza Hut Cheese Sticks, place them in an airtight container in the refrigerator for up to 3 days. I often separate layers with parchment paper to prevent sticking. This keeps them fresh and delicious for all your snacking needs!

Can I freeze cheese sticks, and what's the best method?
Yes, you can absolutely freeze your cheese sticks! Allow them to cool completely first, then place them in a freezer-safe bag or container. They can be stored in the freezer for up to 2 months. When you're ready to enjoy them, reheat straight from frozen in the oven at 350°F for about 10-15 minutes for optimal crunchiness!

What should I do if my dough doesn’t rise?
If your dough isn’t rising, it’s often due to yeast issues. First, make sure that your yeast is fresh. You can test it by dissolving a bit in warm water with sugar; it should foam up within about 5 minutes. If it doesn’t, the yeast may be dead. Additionally, check that your water temperature was around 110°F when activating the yeast; too hot will kill it while too cold won't activate it.

Are there any dietary considerations to keep in mind for cheese sticks?
Very! If you’re making these cheese sticks for anyone with allergies or dietary restrictions, there are substitutes available. Use gluten-free flour for a gluten-free option and margarine instead of butter for a dairy-free treat. Just be sure to check the labels for any allergens if you're serving them to others.

Pizza Hut Cheese Sticks

Homemade Pizza Hut Cheese Sticks for Cheesy Nostalgia

Enjoy delicious Homemade Pizza Hut Cheese Sticks, a perfect nostalgic snack that’s easy to make and customizable.
Print Recipe Pin Recipe
Prep Time 15 minutes mins
Cook Time 30 minutes mins
Resting Time 15 minutes mins
Total Time 1 hour hr
Servings: 8 sticks
Course: Snacks
Cuisine: American
Calories: 200
Ingredients Equipment Method Nutrition Notes

Ingredients
  

For the Dough
  • 1 tbsp Granulated Sugar Adds sweetness to balance savory flavors.
  • 2 cups All-Purpose Flour Can substitute with gluten-free flour.
  • 1 tbsp Active Dry Yeast Ensure it's fresh and properly activated.
  • 1 tsp Kosher Salt Enhances flavor.
  • 4 tbsp Unsalted Butter Melted, can replace with margarine.
  • 1 large Egg Yolk Binds dough; omitting affects texture.
  • 1 cup Warm Water 110°F to activate yeast.
For the Toppings
  • 2 cups Shredded Mozzarella Cheese High-moisture for best gooeyness.
  • 1/2 cup Grated Parmesan Cheese Can substitute with Pecorino.
  • 1 tsp Garlic Salt Opt for fresh minced garlic for stronger taste.
  • Marinara Sauce Classic dipping sauce.

Equipment

  • 9x13-inch baking dish
  • Mixing Bowl
  • sharp knife or pizza cutter

Method
 

Step by Step Instructions
  1. Dissolve the active dry yeast in half of the warm water for about 5 minutes until foamy. In a bowl, mix melted butter, sugar, salt, and remaining water. Stir in egg yolk and yeast mixture, then gradually add flour until a soft dough forms.
  2. Grease the baking dish with 2 tablespoons of melted butter. Transfer and spread the dough evenly in the dish. Cover tightly with plastic wrap and let rest for 15 minutes while preheating your oven to 350°F.
  3. After resting, brush the dough with remaining melted butter. Sprinkle mozzarella and parmesan cheeses over the dough, then dust with garlic salt. Bake in the preheated oven for 28-31 minutes until bubbly and golden.
  4. Once baked, cool for 10 minutes. Slice into 8 even pieces using a sharp knife or pizza cutter.
  5. Serve warm with marinara sauce for dipping. Enjoy!

Nutrition

Serving: 1stickCalories: 200kcalCarbohydrates: 25gProtein: 8gFat: 8gSaturated Fat: 5gCholesterol: 25mgSodium: 400mgPotassium: 150mgFiber: 1gSugar: 1gVitamin A: 200IUCalcium: 200mgIron: 1mg

Notes

Use high-moisture mozzarella for best results. Avoid reheating in a microwave; opt for an oven to maintain crispiness.

Tried this recipe?

Let us know how it was!

Sourdough Pesto Grilled Cheese that's Unbelievably Gooey and Crispy

May 8, 2026 by Grace Snow Leave a Comment

As I stood in my kitchen, the aroma of freshly toasted bread filled the air, bringing a wave of nostalgia. Today, I'm excited to share my twist on a beloved classic: the Sourdough Pesto Grilled Cheese. This charming sandwich combines the crispy texture of artisan sourdough with the vibrant flavors of homemade basil pesto and melty mozzarella, creating an irresistible comfort food experience. Not only is this recipe quick to whip up, making it perfect for those busy lunch breaks, but it also elevates your typical grilled cheese into a gourmet delight that friends and family will rave about. Plus, the flexibility in ingredients means you can customize it to your taste! Ready to dive into this deliciousness? Let’s get cooking!

Why is this dish a must-try?

Comforting and Gooey: This Sourdough Pesto Grilled Cheese melts in your mouth, blending the gooeyness of mozzarella with the vibrant taste of fresh basil pesto.

Quick Gourmet Delight: Perfect for busy days, this recipe transforms everyday ingredients into a luxurious sandwich that's ready in minutes.

Customizable to Taste: Feel free to swap in your favorite add-ins, like sun-dried tomatoes or crispy bacon, for a personal touch.

Perfect for All Ages: This sandwich is a crowd-pleaser, appealing to both kids and adults alike. Pair it with a classic tomato soup or a refreshing salad to complete your meal.

Elevated Flavor Profile: By using artisan sourdough, you're not just having a sandwich; you're indulging in a culinary experience that speaks to your palate. For more delicious creations, check out my recipes for Grilled Balsamic Steak or Potato Blue Cheese!

Sourdough Pesto Grilled Cheese Ingredients

• This ingredient list is key to mastering your Sourdough Pesto Grilled Cheese!

For the Bread and Cheese

  • Sourdough Bread – Opt for thickly sliced, fresh artisan sourdough for the best crunch and flavor.
  • Mozzarella Cheese – Use fresh mozzarella, drained and patted dry, to prevent a soggy sandwich.

For the Herbed Spread

  • Basil Pesto – Whether homemade or store-bought, this adds a delightful herby touch (spread it sparingly to manage moisture).
  • Sun-Dried Tomatoes (optional) – These add a burst of umami flavor and moisture.

For the Optional Crunch

  • Bacon (optional) – Crispy, crumbled bacon enhances the savory profile of the sandwich.

For Grilling

  • Butter – Generously spread on the outside of each slice to achieve a golden, crispy exterior.

Step‑by‑Step Instructions for Sourdough Pesto Grilled Cheese

Step 1: Preheat the Skillet
Begin by placing a non-stick skillet over medium-low heat. Allow it to warm for about 3-5 minutes, ensuring you have a gentle temperature that will melt the cheese evenly without burning the bread. This careful preheating is essential for achieving that perfectly crispy exterior while keeping your Sourdough Pesto Grilled Cheese deliciously gooey inside.

Step 2: Butter the Bread
Take your thickly sliced artisan sourdough and generously spread butter on one side of each slice. This butter layer should be ample to create that golden-brown crispiness as it grills. Be thorough to ensure even coverage, as this will help enhance the rich flavors once the sandwich is fully cooked, making your Sourdough Pesto Grilled Cheese irresistible.

Step 3: Assemble the Sandwich
With the skillet ready, place the slices of sourdough butter-side down into the pan. Lay 3-4 slices of fresh mozzarella on each slice, ensuring you cover the bread completely for an even melt. This crucial layer of cheese provides that melty goodness we all crave in a grilled cheese sandwich, elevating your Sourdough Pesto Grilled Cheese to comfort food perfection.

Step 4: Add Flavorful Ingredients
Spread about a tablespoon of basil pesto onto each cheese-covered slice, followed by your optional sun-dried tomatoes or crumbled bacon if desired. These ingredients not only add flavor but also moisture, balancing the textures beautifully. Layer another slice of mozzarella on top of the toppings, sealing in the goodness and preparing for a satisfying melt.

Step 5: Press and Finish Assembly
Gently press down on the sandwich to keep all the fillings intact before placing another slice of sourdough on top, buttered side facing out. This press helps all the layers meld together while grilling. By ensuring your Sourdough Pesto Grilled Cheese is well assembled, you reduce the risk of stray ingredients escaping during cooking.

Step 6: Butter the Top Slice
Once assembled, spread additional butter on the top slice of the sandwich. This will help crisp it up wonderfully as it grills and provides that delightful, golden-brown color and deep flavor that defines the best comfort food. Just a thin layer is ideal; you want enough to encourage crisping without overwhelming the sandwich.

Step 7: Grill Until Golden
Carefully transfer your sandwich back into the skillet. Grill for about 3-4 minutes, or until the bottom is golden brown and crispy. Keep an eye on it and adjust the heat if necessary to prevent burning. This step is crucial for achieving the perfect texture in your Sourdough Pesto Grilled Cheese, with a beautifully crusty outside and melty inside.

Step 8: Flip and Continue Cooking
Using a spatula, gently flip the sandwich over to grill the other side, adding another 3-4 minutes to achieve that same lovely golden crust. The cheese should be melting beautifully at this point, creating an enticing aroma that fills your kitchen. Don’t hurry this part; patience pays off in flavor and texture!

Step 9: Serve and Enjoy
Once both sides are crispy and the cheese is ooey-gooey, carefully remove the Sourdough Pesto Grilled Cheese from the skillet. Let it cool for a minute, then slice it in half to reveal the melty layers inside. Serve warm, paired with your favorite sides like tomato soup or salad, and savor every bite of this elevated comfort food experience.

What to Serve with Sourdough Pesto Grilled Cheese

A delightful grilled cheese experience deserves equally delicious companions to create the perfect meal.

  • Classic Tomato Soup: The bright acidity of the soup balances the richness of the grilled cheese, creating a comforting duo.

  • Light Arugula Salad: This refreshing salad adds crispness and a peppery note that cuts through the sandwich's creaminess beautifully.

  • Crispy Sweet Potato Fries: Their natural sweetness and crunchy texture provide an enticing contrast to the gooey, savory grilled cheese.

  • Pickles or Marinated Vegetables: These add a zesty punch that complements the flavors of the sandwich, refreshing your palate with every bite.

  • Roasted Red Pepper Soup: The smokiness enhances the pesto and cheese, offering a warm, inviting bowl that pairs perfectly with the sandwich.

  • Sparkling Lemonade: A fizzy, citrusy drink that cleanses the palate and complements the herby notes from the pesto.

  • Chocolate Chip Cookies: A sweet finish to your meal, these cookies add a nostalgic touch that everyone loves after a comforting lunch.

Make Ahead Options

These Sourdough Pesto Grilled Cheese sandwiches are perfect for busy weeknights when you need a delicious meal in a pinch! You can assemble the sandwiches without cooking them and refrigerate them for up to 24 hours—just wrap them tightly in plastic wrap to prevent the bread from drying out. If you're feeling extra efficient, you can even cook them in advance; cooked sandwiches can be stored in the fridge for up to 2 days. To reheat, simply place them in a skillet over medium-low heat to restore that crispy exterior while making the cheese wonderfully melty. Trust me, they'll taste just as delicious as when freshly made!

Expert Tips for Sourdough Pesto Grilled Cheese

  • Mozzarella Matters: Always pat the mozzarella dry before use to prevent a soggy Sourdough Pesto Grilled Cheese; this ensures a perfectly crispy texture.

  • Mind the Heat: Cook on medium-low heat to allow the cheese to melt evenly without burning the bread; high heat may result in an undercooked center.

  • Don’t Overstuff: Avoid piling on too many ingredients; overcrowding can lead to a messy sandwich that slides apart while grilling.

  • Butter Both Sides: For ultimate crispiness, generously butter both the top and bottom of the bread instead of just the pan surface.

  • Press Gently: Lightly pressing down while grilling helps keep the fillings intact and ensures an even melt, enhancing the delightful experience of your Sourdough Pesto Grilled Cheese.

Sourdough Pesto Grilled Cheese Variations

Feel free to experiment and make this delightful sandwich truly your own!

  • Whole Wheat: Swap sourdough for whole wheat bread for a healthier twist. The nuttiness will complement the flavors beautifully.

  • Vegetarian: omit bacon and replace with roasted red peppers or sautéed spinach. These veggies add color and a satisfying crunch without losing flavor.

  • Spicy Kick: Add thin slices of jalapeños or a sprinkle of red pepper flakes for a zesty heat that elevates your grilled cheese experience.

  • Herb Boost: Mix additional herbs like thyme or oregano into the pesto for an aromatic profile. This little twist can awaken your palate and make each bite even more delightful!

  • Cheese Variety: Experiment with different cheeses, such as sharp cheddar or creamy gouda. Each type brings its unique flavor and texture, transforming your grilled cheese adventure.

  • Flavorful Fats: Instead of butter, try using olive oil or a flavored herb butter for grilling. This will add depth to your crust while giving a hint of extra richness.

  • Savory Add-Ins: Consider adding caramelized onions for a sweet and savory balance that pairs wonderfully with the gooey texture of your grilled cheese.

  • Creamy Upgrade: Drizzle some balsamic reduction inside the sandwich before grilling. It adds a luxurious tang and pairs perfectly with the basil pesto for a flavorful surprise!

For more irresistible options, don’t forget to check out my delectable recipe for Grilled Mushrooms Savory that works wonderfully in any sandwich!

How to Store and Freeze Sourdough Pesto Grilled Cheese

Fridge: Store cooked sandwiches in an airtight container for up to 2 days. Reheat them in a skillet over medium heat for best results, bringing back that crispy exterior and melted cheese.

Freezer: Assembled but uncooked sandwiches can be wrapped tightly in plastic wrap and frozen for up to 1 month. Thaw in the fridge overnight before cooking.

Make-Ahead: Uncooked, assembled Sourdough Pesto Grilled Cheese can be refrigerated for up to 24 hours. Just be sure to wrap them tightly to prevent drying out.

Reheating: For maximum crispiness, reheat cooked sandwiches in a skillet, flipping occasionally until they’re heated through and golden on both sides.

Sourdough Pesto Grilled Cheese Recipe FAQs

What type of sourdough bread should I use for this recipe?
It's best to choose fresh, thickly sliced artisan sourdough bread that's about ½ inch thick. Avoid bread that's too airy or overly sour, as it can result in a less than ideal texture and flavor. Opt for something that has a nice crust to create that perfect crispy exterior.

How long can I store my leftover Sourdough Pesto Grilled Cheese?
You can store cooked sandwiches in an airtight container in the fridge for up to 2 days. When you're ready to enjoy them again, reheat in a skillet over medium heat for maximum crispiness. This method helps restore that lovely golden crust and gooey interior.

Can I freeze Sourdough Pesto Grilled Cheese?
Absolutely! You can freeze assembled but uncooked sandwiches wrapped tightly in plastic wrap for up to 1 month. To cook, simply thaw them in the fridge overnight before grilling as usual, ensuring that you maintain the freshness and flavors of the ingredients.

What if my sandwich falls apart while grilling?
If your Sourdough Pesto Grilled Cheese is sliding apart, it may be due to overcrowding with ingredients or not pressing down gently enough. Next time, keep toppings minimal and remember to press your sandwich down lightly while it grills to help all the ingredients meld together for a satisfying bite.

Are there any dietary considerations I should keep in mind?
If you're accommodating allergies or dietary restrictions, feel free to omit the optional bacon to make this sandwich vegetarian-friendly. Additionally, ensure that all ingredients, like the pesto, fit the dietary needs of your guests, especially for gluten or dairy sensitivities.

How do I avoid a soggy sandwich?
To prevent sogginess, be sure to pat your mozzarella dry before adding it to your sandwich. Use a moderate amount of basil pesto and ensure everything is assembled correctly, with the butter on the outside helping to crisp the bread as it grills. Keeping an eye on the heat is also crucial; too high can burn the bread before the cheese has melted!

Sourdough Pesto Grilled Cheese

Sourdough Pesto Grilled Cheese that's Unbelievably Gooey and Crispy

Indulge in the Sourdough Pesto Grilled Cheese, a comfort food classic featuring gooey mozzarella and vibrant basil pesto.
Print Recipe Pin Recipe
Prep Time 10 minutes mins
Cook Time 10 minutes mins
Total Time 20 minutes mins
Servings: 2 sandwiches
Course: Snacks
Cuisine: American
Calories: 450
Ingredients Equipment Method Nutrition Notes

Ingredients
  

For the Bread and Cheese
  • 4 slices Sourdough Bread Thickly sliced, fresh artisan
  • 6 oz Mozzarella Cheese Fresh, drained and patted dry
For the Herbed Spread
  • 4 tbsp Basil Pesto Homemade or store-bought
  • 1/4 cup Sun-Dried Tomatoes Optional
For the Optional Crunch
  • 4 slices Bacon Crispy, crumbled
For Grilling
  • 4 tbsp Butter Generously spread on the outside

Equipment

  • non-stick skillet

Method
 

Step-by-Step Instructions for Sourdough Pesto Grilled Cheese
  1. Preheat a non-stick skillet over medium-low heat for about 3-5 minutes.
  2. Spread butter on one side of each slice of sourdough bread.
  3. Place bread slices butter-side down into the pan and add mozzarella.
  4. Spread basil pesto on bread, then add optional sun-dried tomatoes or bacon.
  5. Press down on the sandwich, then place another slice of sourdough on top, buttered side facing out.
  6. Spread butter on the top slice of the sandwich.
  7. Grill for 3-4 minutes until the bottom is golden brown.
  8. Flip the sandwich and grill the other side for another 3-4 minutes.
  9. Remove the sandwich, let it cool for a minute, then slice and serve.

Nutrition

Serving: 1sandwichCalories: 450kcalCarbohydrates: 37gProtein: 18gFat: 29gSaturated Fat: 16gPolyunsaturated Fat: 1gMonounsaturated Fat: 10gCholesterol: 70mgSodium: 800mgPotassium: 250mgFiber: 2gSugar: 3gVitamin A: 500IUVitamin C: 2mgCalcium: 400mgIron: 1.5mg

Notes

For maximum crispiness, ensure to pat the mozzarella dry and don't overcrowd the sandwich with fillings.

Tried this recipe?

Let us know how it was!

Cottage Cheese Tots: Crunchy Bites of Cheesy Bliss

May 5, 2026 by Grace Snow Leave a Comment

"Have you ever wished for a snack that perfectly balances ease and flavor? Introducing my crispy, golden Two Ingredient Cottage Cheese Tots! These delightful bites are not only effortless to prepare, but they also offer a satisfying crunch that’s unlike anything you’d find in fast food. With just cottage cheese and panko breadcrumbs, you can whip up a healthy snack that packs protein and is easily customizable to suit your taste. Whether you’re hosting a gathering or in need of a quick weeknight treat, these tots deliver on all fronts, making them a fantastic go-to for anyone looking to enjoy homemade goodness. Curious about how to elevate your snack game and impress your friends with a nutritious twist? Let’s dive in!"

Why Are Cottage Cheese Tots So Irresistible?

Simplicity at Its Best: With only two ingredients, these Cottage Cheese Tots are not only easy to make but can be tailored to your liking—consider swapping in gluten-free breadcrumbs for a healthier option!

Crispy, Cheesy Goodness: Each bite delivers a satisfying crunch with a luxurious cheesy center, making them perfect for any snacking occasion.

Crowd-Pleasing Flavor: Whether served as appetizers at a party or a fun family snack, these tots are sure to please everyone, even the pickiest eaters!

Health-Conscious Delight: High in protein and lower in calories, indulge guilt-free knowing these bites contribute to your wellness journey.

Quick to Prepare: In just 30 minutes, you can enjoy these delectable bites! For further inspiration, why not check out this delicious Jello Salad Cottage recipe to serve alongside your tots?

Cottage Cheese Tots Ingredients

Ready to create your delicious Cottage Cheese Tots? Here’s everything you need for a perfect batch!

For the Tots

  • Cottage Cheese – This creamy base adds richness and a healthy dose of protein, making your tots both tasty and nutritious.
  • Panko Breadcrumbs – These give the tots a light and crispy coating; you can substitute gluten-free breadcrumbs if needed for a gluten-free version.

Optional Flavor Enhancements

  • Spices or Herbs – Adding your favorite spices or fresh herbs can elevate your tots, giving them a personal touch that suits your taste.
  • Dipping Sauces – Serve with your choice of ketchup, ranch, or even a spicy sriracha mayo for an extra kick!

Step‑by‑Step Instructions for Cottage Cheese Tots

Step 1: Preheat the Oven
Begin by preheating your oven to 400°F (200°C). This ensures that your Cottage Cheese Tots will bake evenly and achieve that desired golden brown crispiness. While the oven heats up, prepare a baking sheet by lining it with parchment paper or spraying it lightly with cooking spray to prevent sticking.

Step 2: Mix the Ingredients
In a large mixing bowl, combine the cottage cheese and panko breadcrumbs until they are well integrated. Use a spatula or spoon to fully incorporate the breadcrumbs, ensuring the mixture binds together. If it feels too wet, don’t hesitate to add a little more panko until you achieve a moldable consistency.

Step 3: Shape the Tots
Take about 1 tablespoon of the mixture and gently shape it into a small tot form, resembling a mini potato shape. Place each shaped tot onto the prepared baking sheet, spacing them out to allow room for them to expand during baking. Aim for a uniform size to promote even cooking for all your delicious Cottage Cheese Tots.

Step 4: Bake to Perfection
Carefully place the baking sheet in the preheated oven and bake the tots for 25 to 30 minutes. Halfway through the baking time, flip the tots with a spatula to ensure they brown beautifully on both sides. Watch for a deep golden color, which indicates they’re perfectly crisp outside while soft and cheesy inside.

Step 5: Cool and Serve
Once baked, remove the sheet from the oven and let the Cottage Cheese Tots cool for a few minutes. This cooling period helps the tots firm up slightly for a better texture. Serve warm with your favorite dipping sauces, whether it’s classic ketchup, tangy ranch, or a spicy sriracha mayo for an extra kick to brighten your snacking experience!

What to Serve with Two Ingredient Cottage Cheese Tots

Nothing completes the experience of these crispy, cheesy snacks like a collection of delicious accompaniments!

  • Creamy Ranch Dip: The cool and tangy ranch pairs beautifully with the warm, crunchy tots, enhancing their cheesy flavor.
  • Zesty Sriracha Mayo: For a spicy kick, this luscious dip adds a creamy heat that complements the savory goodness of the tots.
  • Classic Ketchup: A timeless favorite that balances the richness of the Cottage Cheese Tots and brings a sweet tang to each bite.

Imagine serving your Cottage Cheese Tots alongside a vibrant salad tossed in a zesty vinaigrette. The freshness will provide a contrasting texture, creating a delightful meal experience.

  • Fresh Garden Salad: Crisp greens and colorful veggies bring a refreshing crunch, balancing the hearty nature of the tots beautifully.
  • Roasted Vegetable Medley: Earthy roasted veggies add a lovely depth of flavor, making a wholesome side that pairs well with the cheesy bites.
  • Caramelized Onions: Their sweet and savory profile creates a delicious contrast that enhances the flavor of the Cottage Cheese Tots.

For the ultimate indulgence, consider a delightful dessert to finish off the meal.

  • Chocolate Avocado Mousse: This creamy and rich dessert is both healthy and decadent, providing a wonderful sweet ending to a savory meal.
  • Fruit Sorbet: Light and refreshing, a scoop of sorbet rounds out your meal with a burst of fruity flavor and a refreshing coolness.

How to Store and Freeze Cottage Cheese Tots

  • Room Temperature: Cottage Cheese Tots can be stored at room temperature for up to 2 hours after serving. Any longer and they'll start to lose their crispiness.

  • Fridge: Store leftover cooked Cottage Cheese Tots in an airtight container in the refrigerator for up to 3 days. Reheat in the oven for crispiness.

  • Freezer: To freeze uncooked tots, arrange them on a baking sheet and freeze until solid, then transfer to a freezer-safe container. They can be stored for up to 3 months.

  • Reheating: Bake frozen Cottage Cheese Tots directly from the freezer at 400°F (200°C) for an additional 5-10 minutes until golden and hot throughout.

Cottage Cheese Tots: Creative Twists

Feel free to play with these tasty ideas and make the cottage cheese tots your own, bursting with flavors and textures!

  • Gluten-Free: Use gluten-free breadcrumbs instead of panko for a delightful crunch without the gluten.
  • Cheesy Variations: Swap in shredded cheddar or mozzarella for an extra cheesy version that’s even more indulgent.
  • Herb Infusion: Stir in fresh or dried herbs like thyme or basil for a fragrant twist that brightens each bite.
  • Spicy Kick: Add a pinch of cayenne pepper or red pepper flakes to the mixture for a fiery touch, perfect for heat seekers!
  • Zesty Lemon: A squeeze of fresh lemon juice mixed into the cottage cheese can add a lovely zing that cuts through the richness.
  • Veggie Boost: Incorporate finely chopped spinach or grated zucchini into the mix for added nutrition and hidden veggies.
  • Mediterranean Flair: Fold in some feta cheese and black olives for a Mediterranean-inspired snack bursting with flavor.
  • Sweet Treat: Have fun by adding a touch of cinnamon and a drizzle of honey to the mixture, transforming them into a sweet bite perfect for dessert!

For more tasty ideas, consider pairing these cottage cheese tots with sides like a refreshing Jello Salad Cottage or explore other delicious ways to serve them. Enjoy your culinary adventure!

Expert Tips for Cottage Cheese Tots

  • Even Size Matters: Ensure each tot is about the same size for uniform baking; this prevents some from being undercooked while others are overdone.

  • Bind It Right: If your mixture feels too wet, don't hesitate to add more panko breadcrumbs. A dry mixture will form better and lead to crunchier Cottage Cheese Tots.

  • Customize Flavors: Mix in spices or herbs, such as garlic powder or fresh parsley, before shaping the tots to enhance flavor and create a personal touch.

  • Use a Timer: Keep an eye on the baking time; set a timer for both 25 and 30 minutes. When they are golden brown, they are ready to be taken out!

  • Cooling Is Key: Allow the tots to cool briefly after baking. This helps them firm up, resulting in a better texture that maintains its shape when served.

Make Ahead Options

These Cottage Cheese Tots are a fantastic choice for meal prep, allowing busy cooks to save precious time during hectic weeknights! You can mix the cottage cheese and panko breadcrumbs up to 24 hours in advance; simply cover the mixture tightly and refrigerate it. Additionally, you can shape the tots and leave them on the baking sheet, covered with plastic wrap, for up to 3 days in the fridge without losing their delightful texture. To maintain quality, ensure that they are well-sealed to prevent moisture. When you're ready to bake, simply proceed with the cooking instructions, adding an extra few minutes to the baking time if baking from the fridge. Enjoy the ease of having delicious snacks ready to go!

Two Ingredient Cottage Cheese Tots Recipe FAQs

How do I choose the right cottage cheese?
Absolutely! For the best flavor and texture in your Cottage Cheese Tots, opt for full-fat or 2% cottage cheese. Look for a brand with a smooth consistency and minimal curds. Avoid low-fat varieties, as they can make the mixture overly watery.

What is the best way to store leftover Cottage Cheese Tots?
Very well! You can store leftover cooked Cottage Cheese Tots in an airtight container in the fridge for up to 3 days. To reheat, place them in the oven at 350°F (175°C) for about 10-15 minutes until they crisp up again. This helps restore that delicious crunch!

Can I freeze my uncooked Cottage Cheese Tots?
Absolutely! To freeze uncooked tots, arrange them on a baking sheet lined with parchment paper and place them in the freezer until they are solid. Once frozen, transfer the tots to a freezer-safe container or bag, where they can be kept for up to 3 months. When ready to bake, cook them directly from frozen, adding an additional 5-10 minutes to the baking time.

What should I do if my tot mixture is too wet?
Not an issue! If you find that your mixture for the Cottage Cheese Tots feels too wet to shape, just add a little more panko breadcrumbs, about 1-2 tablespoons at a time, until it reaches a moldable consistency. This will help your tots hold their shape and become crisp during baking.

Are Cottage Cheese Tots suitable for kids with allergies?
Yes! These Cottage Cheese Tots can be a great snack for kids, but be mindful of anyone with dairy or gluten allergies. You can easily substitute gluten-free breadcrumbs to make them safe for those who need it. Additionally, for a dairy-free option, replace cottage cheese with a plant-based ricotta or blended tofu.

How can I spice up my Cottage Cheese Tots?
The more the merrier! To enhance the flavor, mix in your favorite spices or fresh chopped herbs, like garlic powder, paprika, or chives, directly into the cottage cheese before adding the breadcrumbs. This customization adds a delightful twist to your Cottage Cheese Tots while pleasing everyone’s palate.

Cottage Cheese Tots

Cottage Cheese Tots: Crunchy Bites of Cheesy Bliss

Cottage Cheese Tots are crispy, protein-packed snacks that are easy to make and deliciously satisfying.
Print Recipe Pin Recipe
Prep Time 10 minutes mins
Cook Time 30 minutes mins
Cooling Time 5 minutes mins
Total Time 45 minutes mins
Servings: 4 tots
Course: Snacks
Calories: 180
Ingredients Equipment Method Nutrition Notes

Ingredients
  

For the Tots
  • 1 cup Cottage Cheese Use full-fat for a creamier texture
  • 1 cup Panko Breadcrumbs Substitute with gluten-free breadcrumbs if desired
Optional Flavor Enhancements
  • Spices or Herbs Add your favorite spices or fresh herbs
  • Dipping Sauces Serve with ketchup, ranch, or sriracha mayo

Equipment

  • Oven
  • Mixing Bowl
  • Baking Sheet
  • Parchment Paper

Method
 

Step-by-Step Instructions for Cottage Cheese Tots
  1. Preheat the oven to 400°F (200°C) and prepare a baking sheet.
  2. In a mixing bowl, combine cottage cheese and panko breadcrumbs.
  3. Shape 1 tablespoon of the mixture into mini tots and place on the baking sheet.
  4. Bake for 25 to 30 minutes, flipping halfway for even browning.
  5. Let the tots cool for a few minutes before serving.

Nutrition

Serving: 4totsCalories: 180kcalCarbohydrates: 20gProtein: 10gFat: 7gSaturated Fat: 4gPolyunsaturated Fat: 0.5gMonounsaturated Fat: 2gCholesterol: 20mgSodium: 300mgPotassium: 200mgFiber: 1gSugar: 1gVitamin A: 500IUVitamin C: 2mgCalcium: 150mgIron: 1mg

Notes

Ensure even-sized tots for uniform baking and consider adding spices for customization.

Tried this recipe?

Let us know how it was!

Cottage Cheese Flatbread: Soft, High-Protein Perfection

May 5, 2026 by Grace Snow Leave a Comment

As I stood in my kitchen, the heavenly scent of baking bread wafted around me, reminding me of my grandmother's cozy home. Today, I’m thrilled to share my go-to recipe: 2-Ingredient Cottage Cheese Flatbread. This delightful creation is not only a breeze to whip up, but it also packs a serious protein punch, making it perfect for those looking to eat healthier without sacrificing flavor. With its tender texture and mild taste, this flatbread can easily transform into wraps, side dishes, or even breakfast bases—something the whole family will love! Plus, it’s gluten-free and requires no yeast, which means no waiting around for dough to rise. Are you ready to bring warm, homemade goodness to your table? Let’s dive into this simple yet satisfying recipe!

Why Is This Flatbread a Game Changer?

Simplicity at Its Best: This recipe calls for just two ingredients—cottage cheese and self-rising flour—making it incredibly easy to prepare even for beginner chefs.

Nutritious Delight: Packed with high-protein goodness, it’s a smart choice for health-conscious eaters who want to reduce carbs without compromising on flavor.

Flavors Galore: Whether you prefer savory herbs or sweet cinnamon, this flatbread can be customized to suit any meal or craving.

Versatile Pairing: Perfect as a wrap for grilled meats, a side to soups, or even a standalone breakfast item, it meets everyone's tastes.

Time-Saving Treat: In just a few minutes, you’ll have fresh, warm flatbreads ready to enjoy—much faster than traditional bread-making methods!

Try it with other vibrant favorites like Jello Salad Cottage for a colorful meal or serve it alongside a rich Potato Blue Cheese dish. Enjoy the endless possibilities!

Cottage Cheese Flatbread Ingredients

For the Flatbread

  • Cottage Cheese – This rich source of protein adds moisture and tenderness to your flatbread; use full-fat for the best texture.
  • Self-Rising Flour – Provides the necessary structure and lightness; you can substitute it with all-purpose flour mixed with baking powder and salt if needed.

For Flavor Variations

  • Dried Herbs or Spices – Add garlic powder or Italian seasoning for a savory twist to your cottage cheese flatbread.
  • Shredded Cheese – Mix in your favorite cheese for a richer taste, elevating the flatbread to a delightful sandwich base.
  • Cinnamon and Butter – Brush melted butter and sprinkle cinnamon for a sweet breakfast treat, perfect for a cozy morning.

Step‑by‑Step Instructions for Cottage Cheese Flatbread

Step 1: Prepare Dough
In a medium-sized mixing bowl, combine 1 cup of cottage cheese and 1 cup of self-rising flour. Stir using a fork until a shaggy dough forms, ensuring no dry flour remains. Gently knead the mixture for 1-2 minutes until it becomes smooth and slightly elastic, leaving it ready for shaping into delightful cottage cheese flatbreads.

Step 2: Shape Portion
Once your dough is ready, divide it into 2-4 equal portions depending on your desired size. Roll each piece into a ball between your palms, then flatten it on a floured surface to about 1/4 inch thick. This thickness is key to achieving the perfect texture and pliability of your cottage cheese flatbreads.

Step 3: Preheat Pan
While shaping your flatbreads, place a nonstick skillet or cast iron pan on the stove over medium heat. Allow the pan to preheat for about 3-4 minutes until it’s hot enough for cooking. Make sure it’s heated properly to create a lovely golden crust on your flatbreads while keeping them tender inside.

Step 4: Cook Flatbread
Carefully place the first flatbread into the preheated pan. Cook it for 2-3 minutes, watching for bubbles to form on the surface. Once you see those bubbles, flip the flatbread and cook for an additional 1-2 minutes until the other side is golden brown. Repeat this process for the remaining portions, ensuring they cook evenly.

Step 5: Serve
After cooking, stack your fresh cottage cheese flatbreads on a clean towel to keep them warm and soft. This will help maintain their delightful texture. You can serve them right away as a tasty wrap, a side dish, or even as a breakfast base, perfect for any meal.

Make Ahead Options

These 2-Ingredient Cottage Cheese Flatbreads are perfect for meal prep enthusiasts! You can prepare the dough up to 24 hours in advance by mixing the cottage cheese and self-rising flour, then storing it in an airtight container in the refrigerator. For even easier meal planning, shape the dough into flatbreads and refrigerate them for up to 3 days, separated by parchment paper to prevent sticking. When you’re ready to serve, simply heat your skillet and cook the flatbreads for 2-3 minutes per side until golden. This way, you’ll enjoy the delightful softness and high-protein goodness of the cottage cheese flatbread with minimal effort, even on the busiest weeknights!

How to Store and Freeze Cottage Cheese Flatbread

Fridge: Keep your cottage cheese flatbread in an airtight container in the refrigerator for up to 3 days. Layer parchment paper between each flatbread to prevent sticking.

Freezer: For longer storage, freeze the flatbread for up to 2 months. Place parchment paper between each flatbread and wrap the container tightly.

Reheating: To enjoy, simply reheat in a skillet over medium heat or microwave for about 30 seconds. This will bring back the soft texture we love.

Room Temperature: If serving immediately, you can leave the flatbread at room temperature for about 1-2 hours; however, they are best enjoyed fresh!

Cottage Cheese Flatbread: Creative Twists Ahead

Feel free to unleash your culinary creativity and customize this flatbread to suit your taste and preferences!

  • Herb-Infused: Mix in dried herbs like oregano or thyme to elevate the flatbread's flavor profile. It’ll offer a wonderful, aromatic kick!

  • Cheesy Delight: Incorporate shredded cheese such as mozzarella or cheddar directly into your dough for a heartier, savory snack. This adds richness and a gooey texture that’s hard to resist.

  • Sweet Touch: Brush melted butter on top and sprinkle with cinnamon and a touch of sugar for a dreamy breakfast option. Perfect for lazy Sunday mornings!

  • Spicy Kick: Add a pinch of cayenne or red pepper flakes to the dough for a delightful heat that you can enjoy with savory or sweet toppings alike. Spice lovers will adore this variation!

  • Vegetable Boost: Fold in finely chopped spinach, zucchini, or bell peppers for extra nutrients and a vibrant touch. These additions bring an extra layer of texture and flavor.

  • Flavorful Dips: Serve your flatbreads with delicious dips like hummus or tzatziki for a well-rounded snack or appetizer. A fabulous complement to any gathering!

  • Gluten-Free Option: Swap self-rising flour with a gluten-free blend to cater to dietary needs while still enjoying the same tender texture. It’s just as delicious!

  • Breakfast Wrap: Use these flatbreads to wrap around scrambled eggs and avocado for a nourishing breakfast that keeps you satisfied throughout the morning. Just imagine that delightful combination!

Explore these variations and let your taste buds dance! Pair them with a refreshing Jello Salad Cottage for a colorful feast or serve alongside a savory Potato Blue Cheese dish for an unforgettable meal experience. Enjoy every bite!

Expert Tips for Cottage Cheese Flatbread

  • Avoid Overworking Dough: Kneading for just 1-2 minutes ensures your flatbread stays tender and soft. Overworking can lead to a tough texture.

  • Heat Management: Always cook on medium heat; too high will cause the outside to brown while the inside remains undercooked.

  • Parchment Between Layers: If storing flatbreads, place parchment paper between each to prevent sticking, maintaining their ideal softness.

  • Flavorful Add-Ins: Experiment with herbs or spices to elevate your cottage cheese flatbread; a little garlic powder can add a delightful savory note!

  • Homemade Flour Mix: If you don’t have self-rising flour, simply mix all-purpose flour with baking powder and a pinch of salt for a convenient homemade substitute.

What to Serve with Cottage Cheese Flatbread

Enhance your meal with delightful sides and flavors that perfectly complement this soft and nourishing flatbread.

  • Creamy Avocado Dip: The rich, buttery texture of avocado pairs beautifully, providing a creamy contrast that’s utterly satisfying. Serve it alongside your flatbread for a fresh twist on a classic.

  • Zesty Cucumber Salad: A crisp cucumber salad with a tangy vinaigrette adds a refreshing crunch, balancing the soft flatbread perfectly. The coolness of the salad awakens the palate, making each bite a little celebration.

  • Savory Grilled Chicken Skewers: Juicy, marinated chicken skewers bring a flavorful protein to your meal, turning your cottage cheese flatbread into a delicious wrap. The smokiness of the grill enhances the overall taste, making it a hit with family!

  • Spicy Hummus: This flavorful dip adds depth and heat, making it a fantastic spread to slather on your flatbread. The earthy flavor of chickpeas combined with spices creates a perfect harmony with the mildness of the flatbread.

  • Roasted Vegetable Medley: Warm, caramelized vegetables provide a heartwarming side, their sweetness beautifully contrasting the flatbread. The mix of textures makes each plate a feast for both the eyes and the stomach.

  • Homemade Tomato Soup: A comforting bowl of tomato soup is perfect for dipping your freshly made flatbread. The warmth and acidity of the soup elevate the dish, turning simple ingredients into a cozy meal.

  • Garlic Butter Shrimp: Succulent shrimp sautéed in garlic butter create an irresistible flavor that pairs seamlessly with cottage cheese flatbread. The richness of the shrimp complements the bread's soft texture, transporting you to a seaside bistro.

  • Chilled White Wine: A glass of chilled white wine can elevate the entire experience, cutting through the richness of the flatbreads and enhancing the freshness of paired sides. Choose a crisp Sauvignon Blanc or a lively Pinot Grigio for the best match.

Cottage Cheese Flatbread Recipe FAQs

What type of cottage cheese should I use?
Absolutely! For a richer and creamier texture, I recommend using full-fat cottage cheese. However, low-fat options can also work. If your cottage cheese seems too wet after mixing, simply add a bit more self-rising flour to achieve the right consistency.

How should I store leftover cottage cheese flatbreads?
To keep your cottage cheese flatbread fresh, store it in an airtight container in the fridge for up to 3 days. I suggest placing parchment paper between each flatbread to prevent them from sticking together, ensuring they stay soft and ready to enjoy.

Can I freeze cottage cheese flatbread?
Yes, you can absolutely freeze your flatbreads for later! To do so, place a piece of parchment paper between each flatbread, then stack them in a freezer-safe container. They can be frozen for up to 2 months. When you're ready to eat, just reheat them in a skillet over medium heat or microwave them for about 30 seconds to bring back their delightful softness.

I’m worried my flatbread didn’t cook evenly. What should I do?
Very! If your flatbread browns too quickly on the outside while remaining doughy inside, make sure to maintain a medium heat while cooking. Additionally, keep an eye on them; as soon as you see bubbles forming on the surface, it's time to flip! If you find your flatbreads are often unevenly cooked, try reducing the heat slightly and extending the cooking time.

Are these flatbreads suitable for my gluten-free diet?
Yes! If you use a gluten-free self-rising flour alternative, your cottage cheese flatbread can easily fit into a gluten-free diet. Just make sure to check the labels to ensure all ingredients align with your dietary needs. These flatbreads are versatile and can cater to various dietary considerations while still being delicious!

Can I add different flavorings to the flatbread?
Absolutely! There are so many delicious possibilities. For a savory kick, try adding herbs like rosemary or spices like paprika to the dough. If you're in the mood for something sweet, brush the flatbreads with melted butter and sprinkle some cinnamon before serving. The more the merrier when it comes to customization!

Cottage Cheese Flatbread (

Cottage Cheese Flatbread: Soft, High-Protein Perfection

Discover the simplicity and high-protein goodness of Cottage Cheese Flatbread, perfect for healthy eating.
Print Recipe Pin Recipe
Prep Time 10 minutes mins
Cook Time 8 minutes mins
Total Time 18 minutes mins
Servings: 4 flatbreads
Course: Snacks
Cuisine: American
Calories: 120
Ingredients Equipment Method Nutrition Notes

Ingredients
  

For the Flatbread
  • 1 cup Cottage Cheese Use full-fat for best texture
  • 1 cup Self-Rising Flour Can substitute with all-purpose flour mixed with baking powder and salt
For Flavor Variations
  • Dried Herbs or Spices Add garlic powder or Italian seasoning for a savory twist
  • Shredded Cheese Mix in your favorite cheese for a richer taste
  • Cinnamon and Butter Brush melted butter and sprinkle cinnamon for a sweet treat

Equipment

  • Mixing Bowl
  • Fork
  • Nonstick skillet
  • Floured surface

Method
 

Step-by-Step Instructions
  1. In a medium mixing bowl, combine 1 cup of cottage cheese and 1 cup of self-rising flour. Stir using a fork until a shaggy dough forms.
  2. Gently knead the mixture for 1-2 minutes until it becomes smooth and slightly elastic.
  3. Divide the dough into 2-4 equal portions and shape into balls, then flatten to about 1/4 inch thick on a floured surface.
  4. Preheat a nonstick skillet or cast iron pan over medium heat for 3-4 minutes.
  5. Cook each flatbread for 2-3 minutes until bubbles form, then flip and cook for an additional 1-2 minutes until golden brown.
  6. Stack cooked flatbreads on a clean towel to keep warm and serve immediately.

Nutrition

Serving: 1flatbreadCalories: 120kcalCarbohydrates: 15gProtein: 8gFat: 3gSaturated Fat: 1gCholesterol: 15mgSodium: 250mgPotassium: 180mgFiber: 1gSugar: 1gVitamin A: 200IUCalcium: 150mgIron: 1mg

Notes

Avoid overworking the dough to keep the flatbread tender. Use parchment paper when storing to prevent sticking.

Tried this recipe?

Let us know how it was!
  • « Previous Page
  • 1
  • 2
  • 3
  • 4
  • 5
  • …
  • 23
  • Next Page »

Welcome!

Hi, I’m Grace, a Sydney-based home cook with a passion for bold flavors and trending ingredients. Whether you’re a busy beginner or a seasoned foodie, you’ll find dishes here that are fresh, fun, and full of flavor.

More about me

Popular Recipes

  • One Pot Keto Tuna Casserole
    One Pot Keto Tuna Casserole: Creamy Comfort in Minutes
  • Ultimate Jalapeno Popper Chicken Salad
    Ultimate Jalapeno Popper Chicken Salad That'll Wow Your Tastebuds
  • Green Chile Cheese Dip
    Mouthwatering Green Chile Cheese Dip for Cozy Gatherings
  • Easy Chimichurri Sauce
    Fresh and Zesty Easy Chimichurri Sauce in Just Minutes

Footer

↑ back to top

About

  • Privacy Policy
  • Disclaimer
  • Terms & Conditions

Newsletter

  • Sign Up! for emails and updates

Contact

  • About me
  • Contact me

Copyright © 2025 TastyTrendIngredients