tastytrendingredients

  • Home
  • Recipes
    • Appetizers
    • Breakfast
    • Dessert
    • Dinner
    • Drinks
    • Salads
    • Snacks
    • Soups
  • About me
  • Contact
menu icon
go to homepage
  • Home
  • Recipes
    • Appetizers
    • Breakfast
    • Dessert
    • Dinner
    • Drinks
    • Salads
    • Snacks
    • Soups
  • About me
  • Contact
search icon
Homepage link
  • Home
  • Recipes
    • Appetizers
    • Breakfast
    • Dessert
    • Dinner
    • Drinks
    • Salads
    • Snacks
    • Soups
  • About me
  • Contact
×

Peach Muffins with Crumb Topping for Blissful Mornings

June 19, 2026 by Grace Snow Leave a Comment

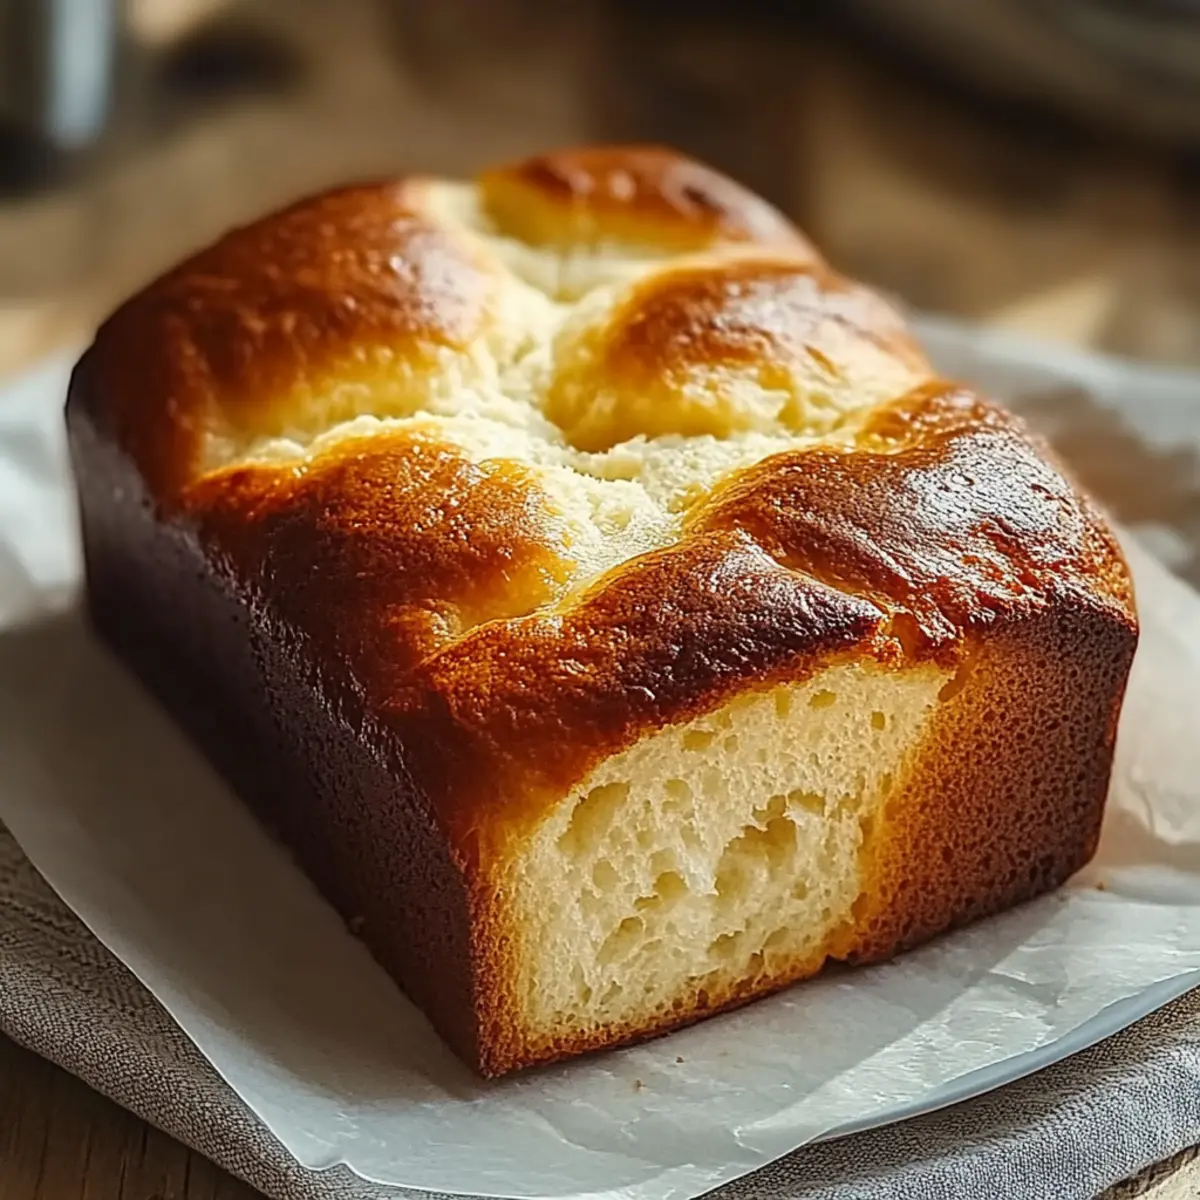
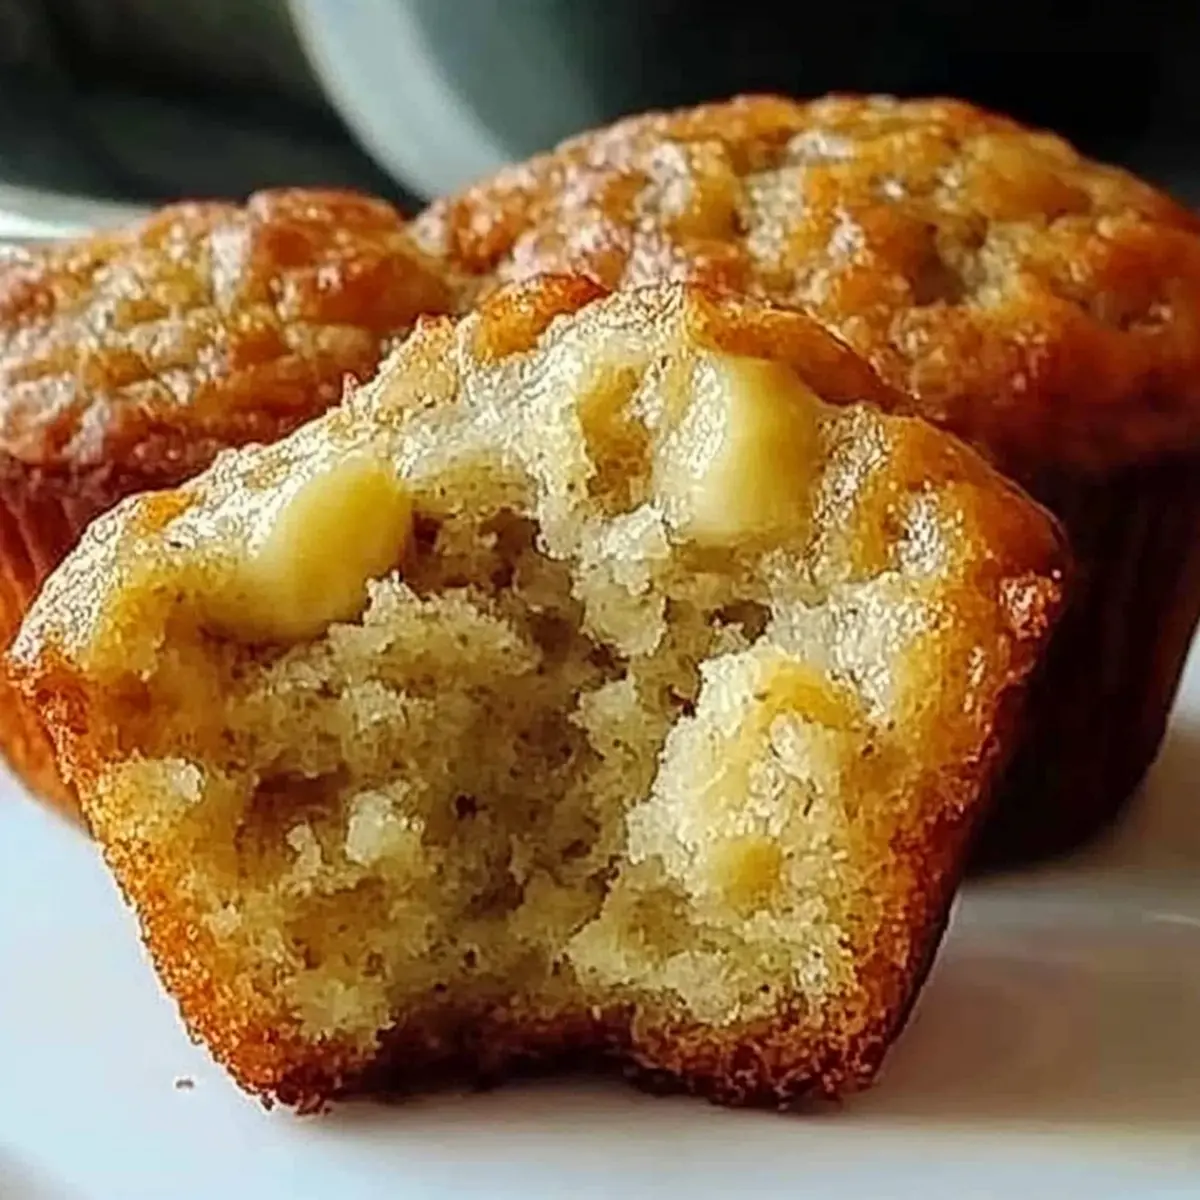
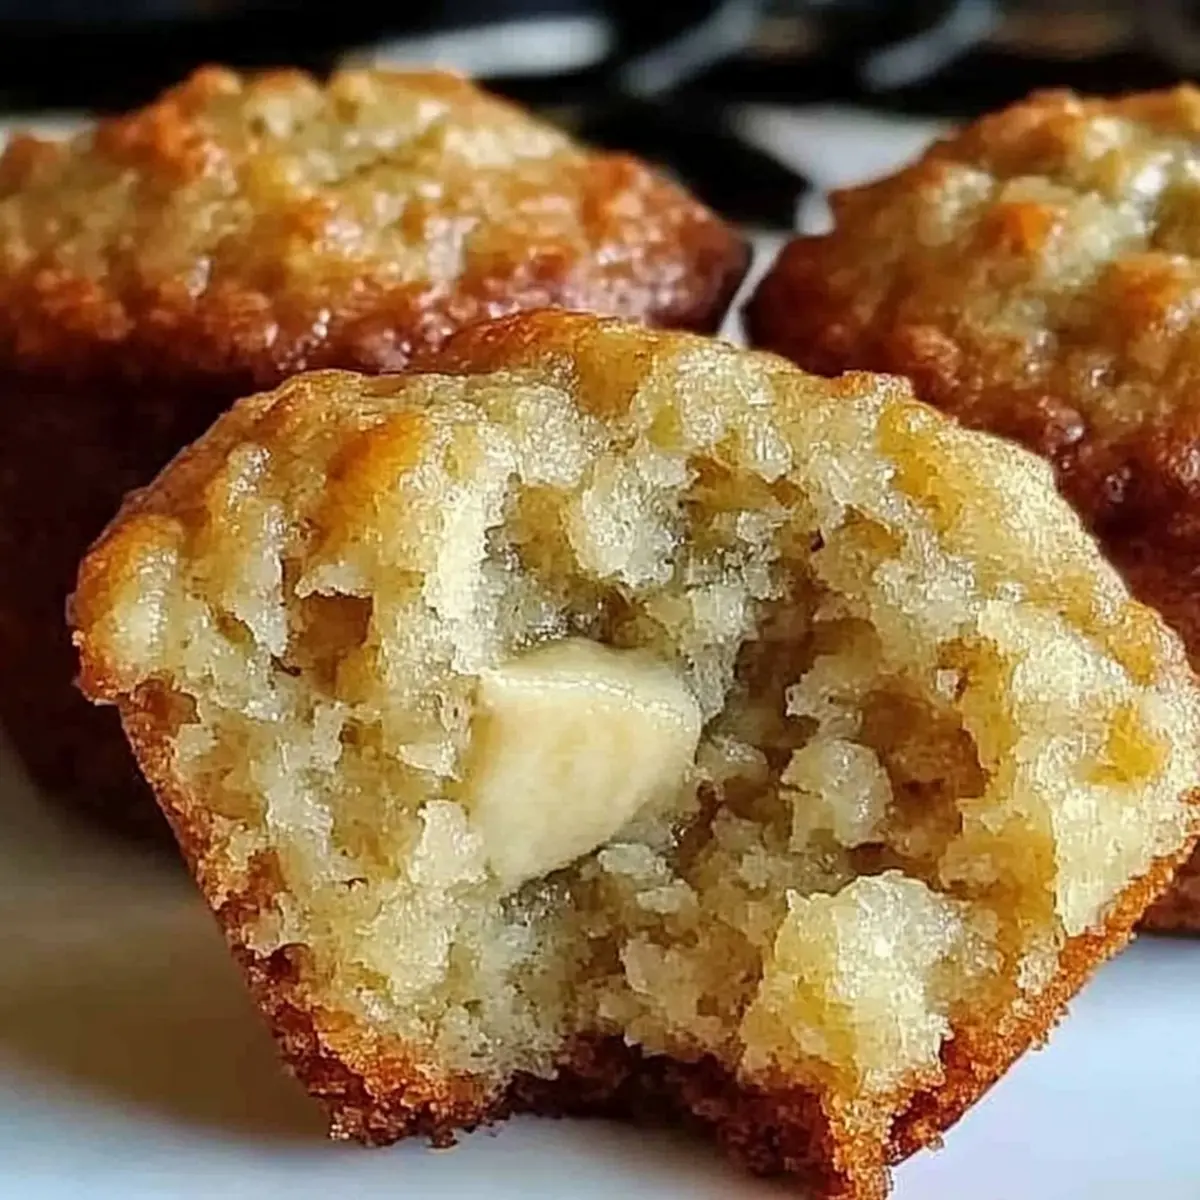
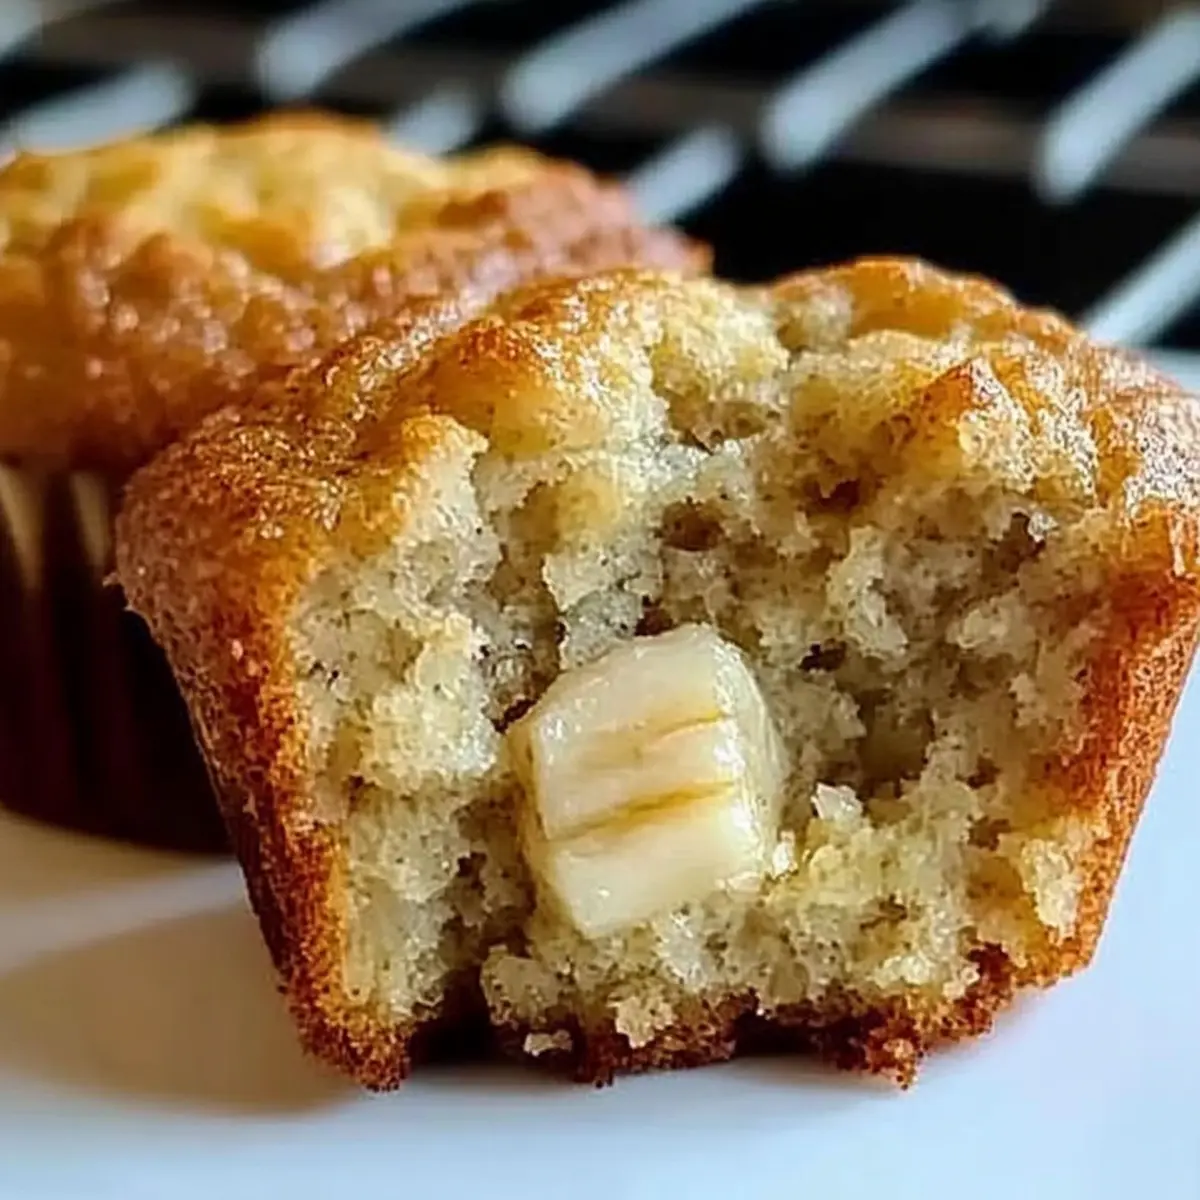
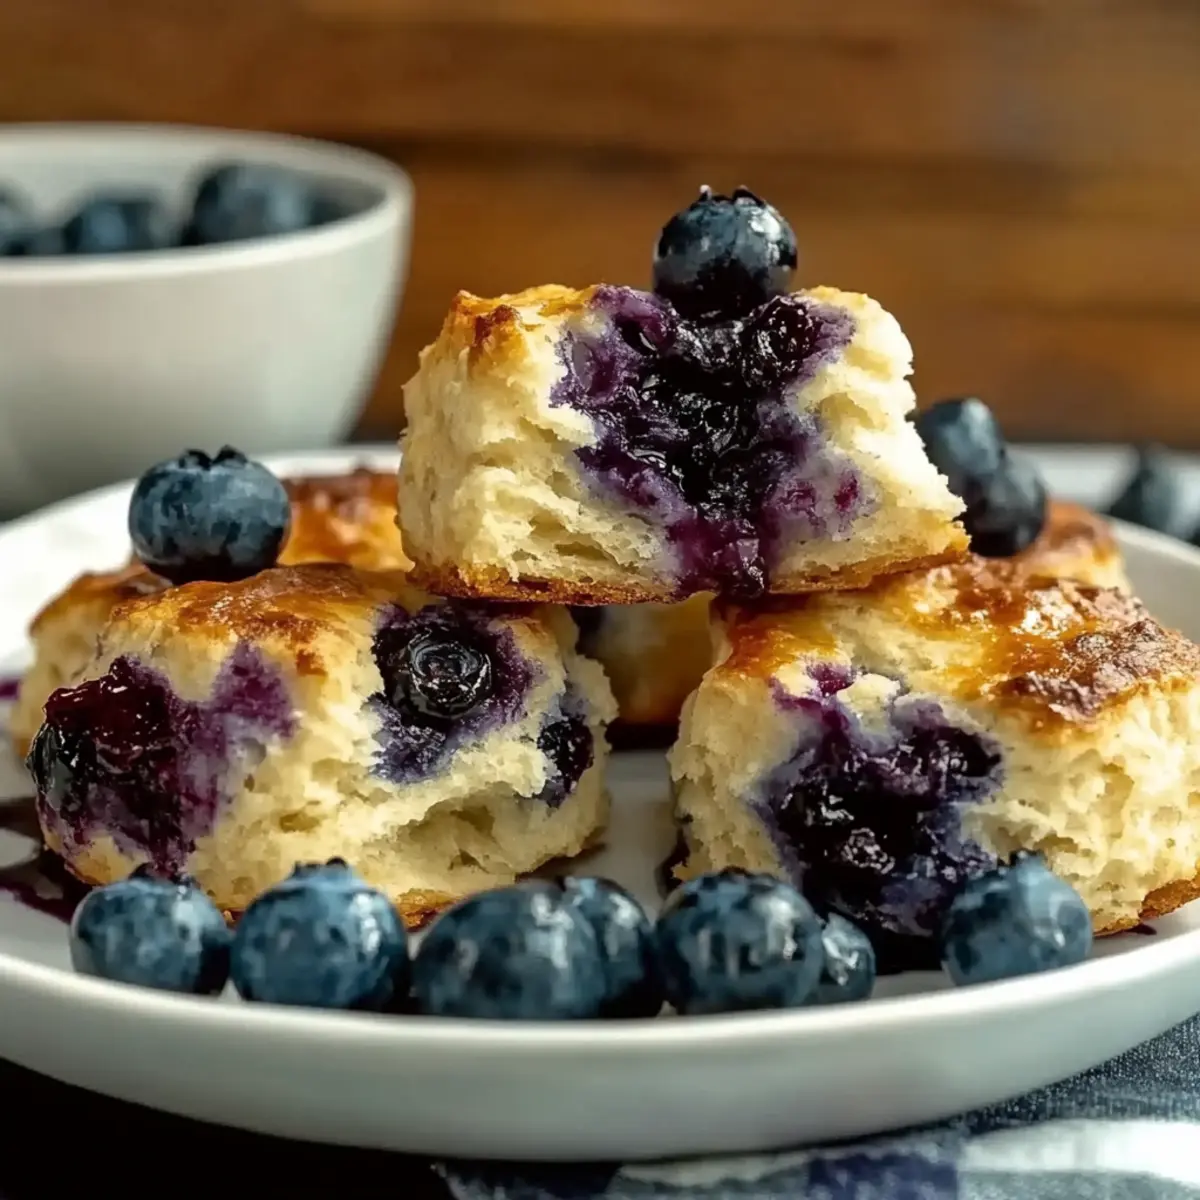
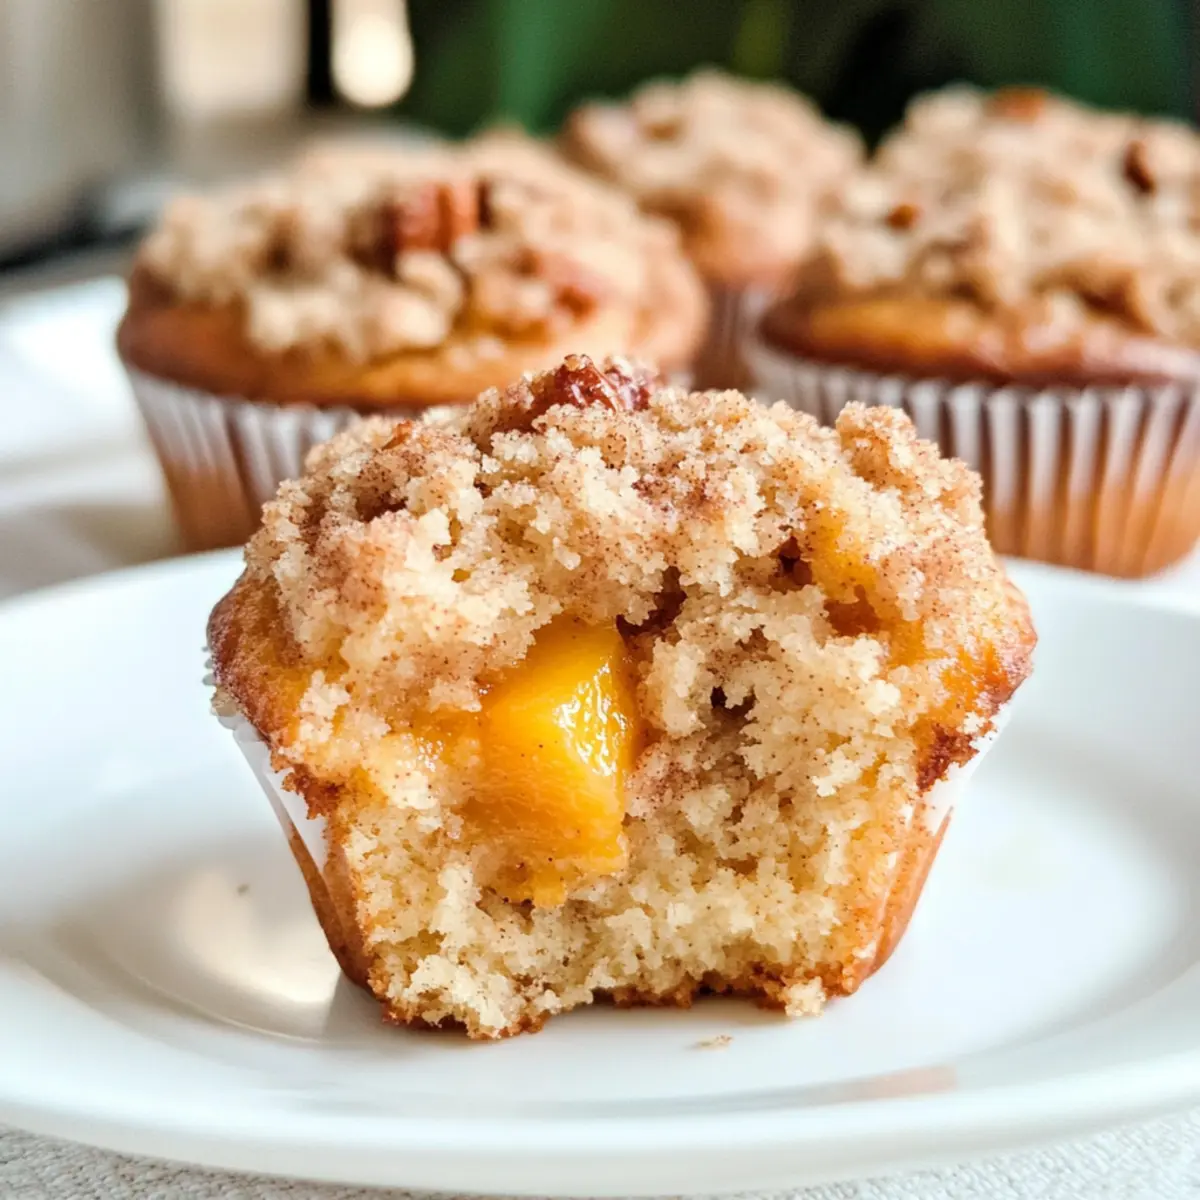
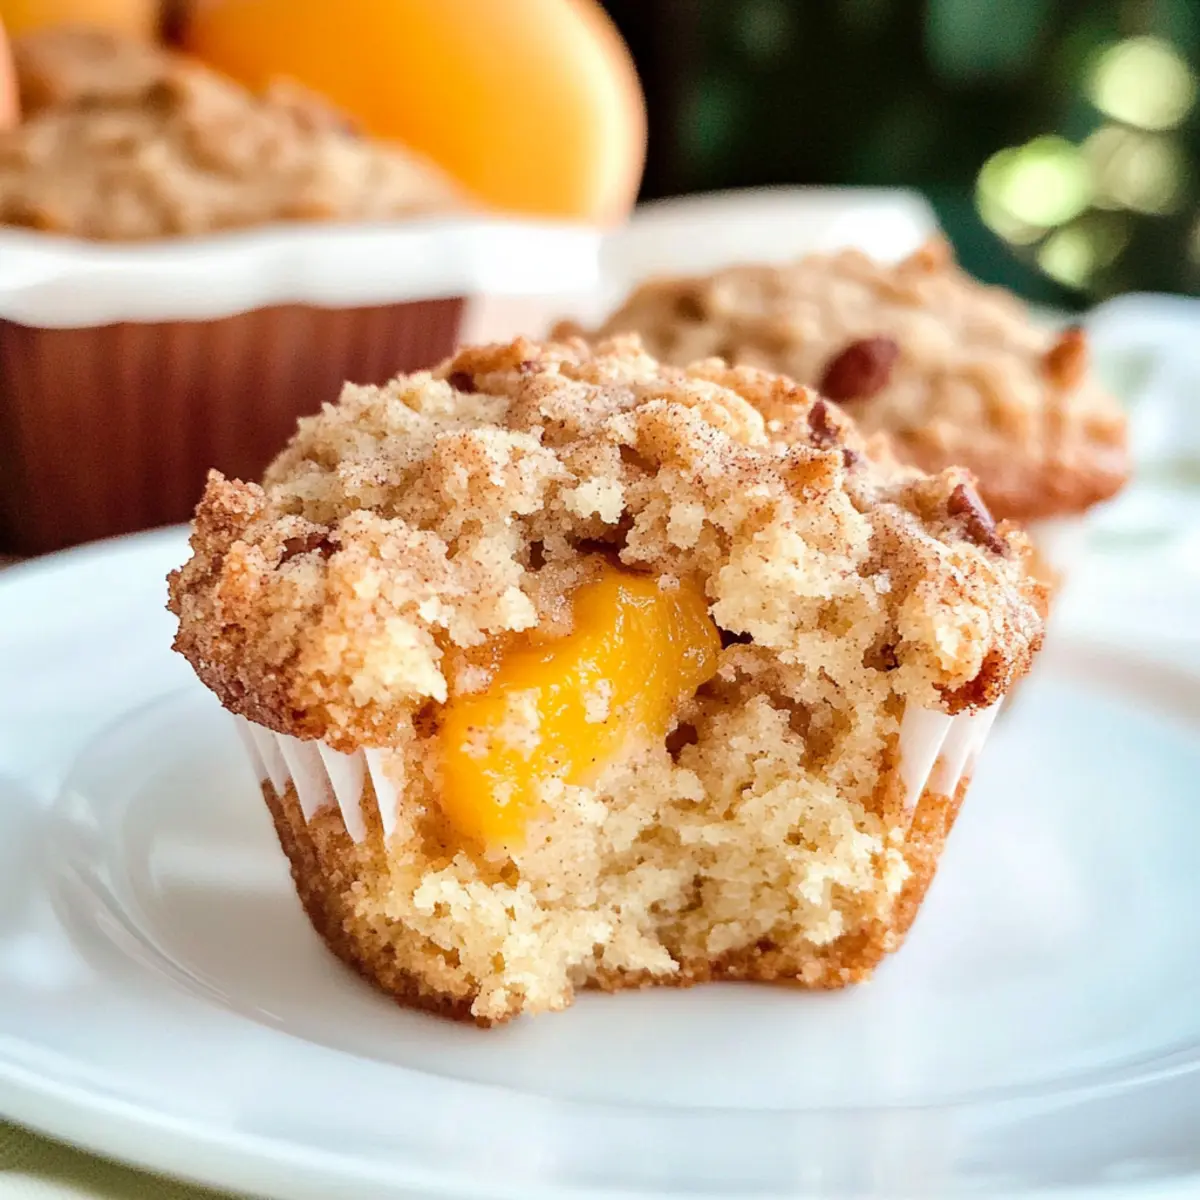
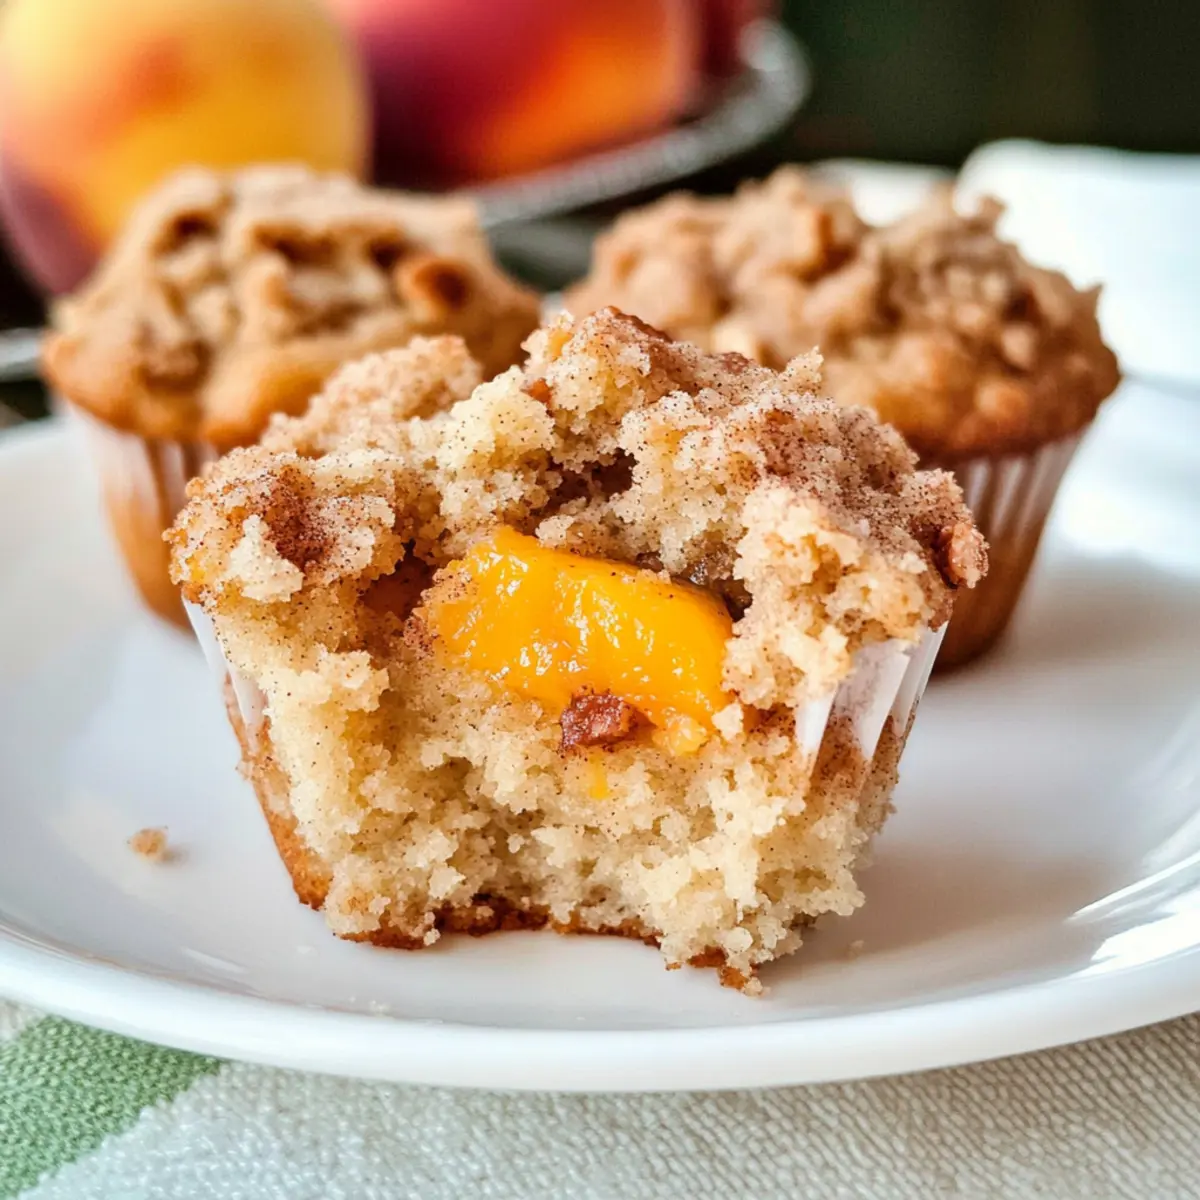
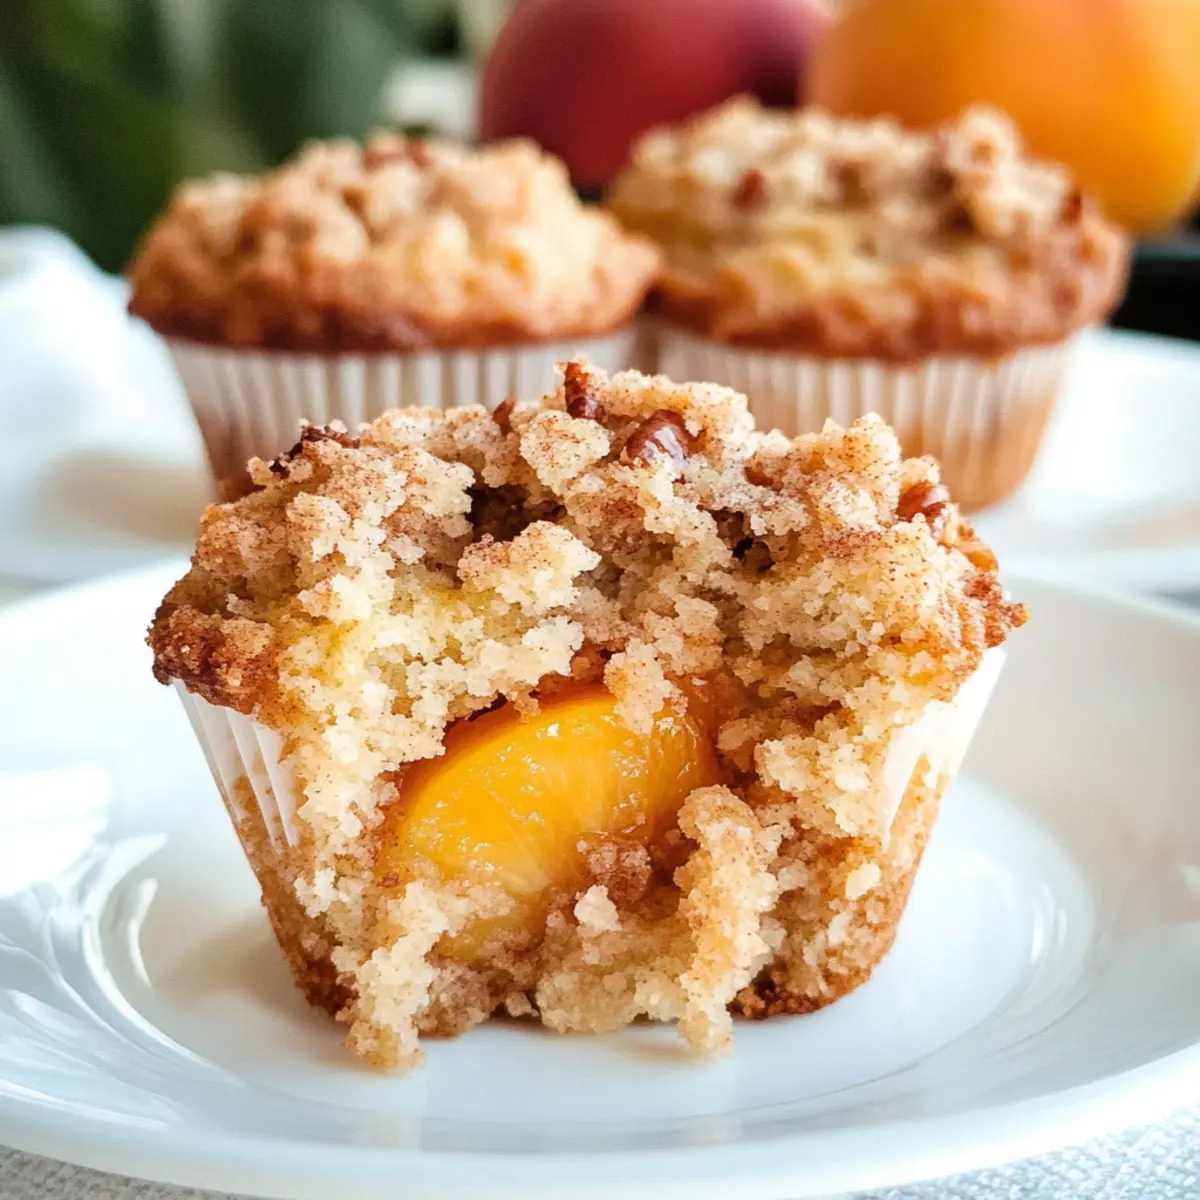
As I stood in my kitchen, the sweet aroma of ripe peaches filled the air, transporting me back to sunny summer days spent at the orchard. That’s when I decided to whip up these Moist and Delicious Peach Muffins with Crumb Topping! They're a perfect way to savor the essence of summer, whether you’re using fresh, frozen, or even canned peaches. What sets these muffins apart is their incredible moisture that pairs beautifully with a crunchy crumb topping. Not only are they quick to prepare, but they also make for a crowd-pleasing breakfast or delightful afternoon snack. With just a few simple ingredients, you can treat yourself and your loved ones to something special. Are you ready to turn those juicy peaches into a deliciously comforting batch of muffins?

Why Are These Muffins So Irresistible?

Heavenly aroma wafts through your kitchen as these muffins bake, filling your home with a nostalgic sweetness. Versatile options allow you to use fresh, frozen, or canned peaches, making this recipe adaptable throughout the year. Tender crumb combined with a crunchy topping creates an irresistible texture that everyone will love. Perfect for breakfast or an afternoon treat, these muffins ensure that every bite is as fulfilling as it is delicious. Enjoy them warm with butter, or consider pairing them with a cup of coffee for a truly blissful start to your day.

Peach Muffins with Crumb Topping Ingredients

Note: Gather these ingredients and prepare to indulge in some delightful Peach Muffins with Crumb Topping!

For the Muffins

  • All-purpose flour – This forms the base; consider whole wheat flour for added nutrition.
  • Granulated sugar – Adds sweetness; you can adjust the amount for a less sugary muffin.
  • Baking powder – Essential for a fluffy texture; ensure it's fresh for optimum rise.
  • Cinnamon – Provides warm flavor notes; swap with nutmeg if you want a different spice profile.
  • Salt – Balances the sweetness; essential for flavor but can be omitted in low-sodium diets.
  • Butter – Ensures richness and moisture; try coconut oil for a dairy-free version.
  • Milk – Keeps your muffins moist; any kind of milk, whether dairy or plant-based, will work.
  • Egg – Binds ingredients together and aids texture; use a flax egg for a vegan substitute.
  • Fresh peaches – The star ingredient here; gives a juicy burst of flavor; frozen or canned peaches work well too, just make sure they're well-drained.
  • Lemon juice – Brightens the peach flavor; can be omitted if using canned peaches.

For the Crumb Topping

  • Chopped pecans – Adds a delightful crunch; walnuts can be used as a substitute or omitted for a nut-free option.
  • Light brown sugar – Brings a hint of molasses flavor to the topping; white sugar is a fine alternative.
  • Additional all-purpose flour – Used to thicken the crumb mixture for a perfect topping.
  • Cinnamon (for topping) – Enhances flavor; a touch more of this spice adds to the warmth of the crumb topping.

Step‑by‑Step Instructions for Peach Muffins with Crumb Topping

Step 1: Preheat Your Oven
Begin by preheating your oven to 400°F (200°C). While the oven heats up, prepare your 12-cup muffin tin by greasing it with butter or oil, or use paper liners for easy cleanup. This step ensures your Peach Muffins with Crumb Topping bake evenly and achieve that golden-brown crust you desire.

Step 2: Combine Dry Ingredients
In a large mixing bowl, whisk together 2 cups of all-purpose flour, 1 cup of granulated sugar, 2 teaspoons of baking powder, 1 teaspoon of cinnamon, and a pinch of salt. Mixing these dry ingredients thoroughly helps evenly distribute the baking powder, which is crucial for the muffins to rise properly.

Step 3: Mix Wet Ingredients
In a separate medium bowl, whisk together 1/2 cup of melted butter, 1 cup of milk, and 1 large egg until the mixture is well combined and smooth. The butter should be at room temperature to avoid cooking the egg. This rich liquid blend will add moisture and flavor to your Peach Muffins.

Step 4: Prepare Peaches
Take 1 to 2 ripe peaches and wash them thoroughly. Next, peel, pit, and chop the peaches into small, bite-sized pieces, then toss them in a bowl with 1 tablespoon of lemon juice. This step brightens their flavor and prevents browning, ensuring juicy pieces within your muffins.

Step 5: Combine Wet and Dry Ingredients
Pour the wet ingredients into the bowl with the dry ingredients. Gently fold the mixture together using a spatula until just combined; the batter should be slightly lumpy. Carefully fold in the chopped peaches, making sure they are evenly distributed without overmixing, which keeps your muffins tender.

Step 6: Fill Muffin Cups
Spoon the muffin batter into your prepared muffin cups, filling each about three-quarters full. This allows room for the batter to rise while baking. Once filled, the batter should create a nice mound on top, promising those lovely, domed Peach Muffins with Crumb Topping.

Step 7: Prepare Crumb Topping
In a small bowl, combine 1/3 cup of chopped pecans, 1/3 cup of light brown sugar, 1/3 cup of all-purpose flour, and 1 teaspoon of cinnamon. Mix in 1/4 cup of softened butter until crumbly. Generously sprinkle this topping over each muffin, ensuring an even distribution for an irresistible crunch.

Step 8: Bake the Muffins
Place the muffin tin in the preheated oven and bake for 20 to 25 minutes. Keep an eye on them; they are ready when a toothpick inserted in the center comes out clean or with moist crumbs, not wet batter. This delightful aroma will fill your kitchen and create excitement as they bake.

Step 9: Cool and Enjoy
Once baked, remove the muffins from the oven and let them cool in the pan for about 5 minutes. After they’ve cooled slightly, transfer the muffins to a wire rack to cool completely. These Peach Muffins with Crumb Topping are best enjoyed warm, with a pat of butter if you desire.

Expert Tips for Peach Muffins

  • Perfect Peaches: Use ripe, in-season peaches for the best flavor. Avoid overripe ones as they may affect muffin texture.

  • Don’t Overmix: Gently combine wet and dry ingredients to keep the muffins tender. Overmixing can lead to dense and tough Peach Muffins with Crumb Topping.

  • Cool Ingredients: Ensure butter is at room temperature and not hot to prevent cooking the egg when mixed, which can affect the rise.

  • Check Doneness: Insert a toothpick into the center of a muffin; it should come out clean or with a few moist crumbs. Avoid wet batter for perfect muffins.

  • Store Wisely: Keep muffins in an airtight container at room temperature for up to three days to maintain their moistness.

Peach Muffins with Crumb Topping Variations

Feel free to personalize these delicious muffins with creative twists and substitutions that cater to your taste buds and pantry!

  • Gluten-Free: Substitute all-purpose flour with a 1:1 gluten-free flour blend for a delightful gluten-free version.

  • Vegan: Replace eggs with a flax egg and use almond or coconut milk in the batter for a plant-based treat. The muffins remain just as moist and flavorful!

  • Seasonal Spices: Swap cinnamon for pumpkin pie spice during the fall for a cozy flavor boost that pairs wonderfully with peaches.

  • Fruit Medley: Mix it up by using a combination of fruits! Consider adding blueberries or raspberries along with peaches for a fruity explosion.

  • Savory Option: Omit sugar and toss in some cheese (like feta) and herbs for a savory snack. These muffins take on a new identity that is wonderfully unique!

  • Bourbon Delight: Drizzle a tablespoon of bourbon into the batter for an adult twist that enhances the richness of the muffins.

  • Cream Cheese Filling: Add a dollop of cream cheese to the center of each muffin before baking for a delicious surprise in every bite.

  • Try a Topping Swap: Instead of pecans, sprinkle chocolate chips or coconut flakes over the crumb topping for a sweet surprise every time.

Feel free to explore these variations, and perhaps while you're at it, consider whipping up a batch of Breakfast Egg Muffins or treat yourself to some sweet Cinnamon Roll Muffins for a delightful brunch spread.

What to Serve with Moist and Delicious Peach Muffins with Crumb Topping

There's something magical about finding the perfect complement to your freshly baked muffins that elevates your breakfast experience to new heights.

  • Creamy Greek Yogurt: This adds a luscious creaminess that balances the sweet, fruity muffins and provides a healthy protein boost.

  • Fresh Fruit Salad: A medley of seasonal fruits will bring a refreshing zest and bright colors to your breakfast table, enhancing the peach experience.

  • Hot Coffee or Tea: A steaming cup of your favorite brew brings out the flavor profile, making a cozy pairing that'll embrace your senses.

  • Honey Drizzle: A touch of honey adds a floral sweetness that contrasts beautifully with the peach flavor, creating a delightful taste explosion.

  • Scrambled Eggs: The fluffy texture and savory flavor of eggs round out your meal, making it hearty enough for breakfast or brunch.

  • Nutty Granola: A sprinkle of granola adds a crunchy texture that harmonizes with the moist muffins, turning your meal into a delightful experience.

  • Savory Bacon or Sausage: Adding crispy bacon or sausage introduces a delicious savory note, creating a balance of sweet and salty that will satisfy any palate.

  • Butter and Jam: Spread some butter and a dollop of your favorite jam on the warm muffins for a classic and indulgent touch to each bite.

Make Ahead Options

These Moist and Delicious Peach Muffins with Crumb Topping are perfect for busy home cooks looking to save time! You can prepare the muffin batter up to 24 hours in advance and refrigerate it. To do this, simply mix the dry ingredients and wet ingredients separately, then combine them and fold in the peaches right before you're ready to bake. The crumb topping can also be made ahead and stored in an airtight container in the fridge for up to 3 days. When you're ready to bake, just scoop the batter into the muffin tin, add the topping, and bake as instructed for fresh muffins that are just as delicious as if made from scratch that day! Enjoy the benefits of homemade goodness with minimal effort.

Storage Tips for Peach Muffins with Crumb Topping

Room Temperature: Store your Peach Muffins with Crumb Topping in an airtight container at room temperature for up to 3 days to retain freshness and moisture.

Fridge: If you prefer to keep them longer, you can refrigerate the muffins for up to 1 week. Make sure they’re sealed tightly to avoid them drying out.

Freezer: For longer storage, freeze the muffins by wrapping each one in plastic wrap and then placing them in a freezer-safe bag. They can last up to 3 months.

Reheating: To enjoy frozen muffins, thaw overnight in the fridge and reheat in the microwave for 15-20 seconds, or in an oven at 350°F (175°C) for about 10 minutes, until warmed through.

Peach Muffins with Crumb Topping Recipe FAQs

What kind of peaches should I use for these muffins?
Absolutely! Fresh, ripe peaches provide the best flavor, but you can also use frozen or canned peaches. If using frozen, make sure to thaw and drain them well. Canned peaches should be well-drained too, to avoid excess moisture in the muffins.

How long can I store my Peach Muffins with Crumb Topping?
You can keep these muffins in an airtight container at room temperature for up to 3 days. If you want to enjoy them longer, you can refrigerate them for up to 1 week or freeze them for up to 3 months. Just ensure they’re well-wrapped to maintain their moisture.

Can I freeze Peach Muffins with Crumb Topping? How?
Very! To freeze, wrap each muffin individually in plastic wrap, then place them in a freezer-safe bag or container. This keeps them from getting freezer burn. They should store well for up to 3 months. When you’re ready to enjoy, simply thaw them in the fridge overnight and reheat as desired.

What should I do if my muffins turn out dense?
If your muffins are dense, it may be due to overmixing the batter. Be sure to fold the wet and dry ingredients gently until just combined. Another tip is to check that your baking powder is fresh, as old leavening agents can affect the rise.

Are these muffins suitable for people with nut allergies?
Yes, you can easily make these muffins nut-free! Just omit the chopped pecans from the crumb topping or substitute them with seeds like pumpkin or sunflower seeds for added crunch without the nuts. Always check for cross-contamination if you’re baking for someone with allergies.

Can I modify the recipe for dietary preferences, like vegan or gluten-free?
Certainly! For a vegan version, substitute the egg with a flax egg (1 tablespoon flaxseed meal mixed with 2.5 tablespoons water) and use plant-based milk and coconut oil instead of butter. You can make a gluten-free version by using a 1:1 gluten-free flour blend.

Peach Muffins with Crumb Topping

Peach Muffins with Crumb Topping for Blissful Mornings

Delight in these Peach Muffins with Crumb Topping, offering a moist texture and crunchy topping for joyous breakfasts.
Print Recipe Pin Recipe
Prep Time 15 minutes mins
Cook Time 25 minutes mins
Cooling Time 5 minutes mins
Total Time 45 minutes mins
Servings: 12 muffins
Course: Breakfast
Cuisine: American
Calories: 200
Ingredients Equipment Method Nutrition Notes

Ingredients
  

For the Muffins
  • 2 cups All-purpose flour Consider whole wheat for added nutrition.
  • 1 cup Granulated sugar Adjust for less sweetness.
  • 2 teaspoons Baking powder Ensure freshness for optimum rise.
  • 1 teaspoon Cinnamon Swap with nutmeg for a different flavor.
  • 1 pinch Salt Can be omitted in low-sodium diets.
  • 1/2 cup Butter Use melted for richness and moisture.
  • 1 cup Milk Dairy or plant-based is acceptable.
  • 1 large Egg Use a flax egg for vegan option.
  • 1 to 2 cups Fresh peaches Frozen or canned can be used, well-drained.
  • 1 tablespoon Lemon juice Omit if using canned peaches.
For the Crumb Topping
  • 1/3 cup Chopped pecans Walnuts can substitute.
  • 1/3 cup Light brown sugar White sugar is a fine alternative.
  • 1/3 cup All-purpose flour Used to thicken topping.
  • 1 teaspoon Cinnamon Enhances the flavor of the crumb.

Equipment

  • Muffin tin
  • Mixing bowls
  • Whisk
  • Spatula

Method
 

Step-by-Step Instructions
  1. Preheat your oven to 400°F (200°C) and prepare your muffin tin.
  2. In a bowl, whisk together flour, sugar, baking powder, cinnamon, and salt.
  3. In a separate bowl, mix melted butter, milk, and egg until smooth.
  4. Prepare peaches by washing, peeling, and chopping; toss with lemon juice.
  5. Combine wet and dry ingredients, folding in the peaches gently.
  6. Fill muffin cups about three-quarters full with batter.
  7. Mix crumbs ingredients and sprinkle over each muffin.
  8. Bake for 20 to 25 minutes or until a toothpick comes out clean.
  9. Cool muffins for 5 minutes before transferring to a wire rack.

Nutrition

Serving: 1muffinCalories: 200kcalCarbohydrates: 30gProtein: 3gFat: 9gSaturated Fat: 4gPolyunsaturated Fat: 1gMonounsaturated Fat: 3gCholesterol: 30mgSodium: 150mgPotassium: 150mgFiber: 1gSugar: 10gVitamin A: 200IUVitamin C: 5mgCalcium: 50mgIron: 1mg

Notes

Use ripe, in-season peaches for best flavor. Store muffins in an airtight container for up to 3 days at room temperature.

Tried this recipe?

Let us know how it was!

Fluffy Cottage Cheese Bread: Healthy, Easy, and Delicious!

June 5, 2026 by Grace Snow Leave a Comment

As I stood in my kitchen, the aroma of baked goods danced in the air, triggering memories of warm breakfasts shared with family. This Easy Fluffy Cottage Cheese Bread has quickly become my go-to recipe for those bustling mornings when I crave something nourishing yet effortless. Packed with high protein and made without flour, this delightful loaf offers a wonderful way to kick-start your day without sacrificing flavor or health. The beauty of this recipe lies not only in its simplicity but also in its versatility—perfect for meal prep or a quick snack throughout the week. Trust me, once you try a slice slathered in almond butter or topped with fresh avocado, you may never reach for that fast-food option again! Curious to see how this easy-to-make bread can transform your mornings? Let’s dive in!

Why is Cottage Cheese Bread a Must-Try?

Deliciously Unique: This Easy Fluffy Cottage Cheese Bread stands apart with its flourless, high-protein base, making it a delightful option for health-conscious food lovers.

Effortless Preparation: With just a few pantry staples and a blender, you can whip up this wholesome loaf in under an hour!

Versatile Enjoyment: Whether you top it with almond butter for a nutritious snack or use it as a base for a savory avocado toast, the possibilities are endless.

Great for Meal Prep: Perfect for busy mornings, slice it up and store it in the fridge for quick breakfasts throughout the week—no need for unhealthy fast food!

Crowd-Pleasing Flavor: Its mild, nutty taste is ideal for everyone in the family, ensuring even the pickiest eaters will ask for seconds. Once you’ve made this loaf, you might also want to check out how to prepare delicious Cheesy Garlic Bread or a wholesome Cornbread Breakfast Casserole for even more breakfast options!

Fluffy Cottage Cheese Bread Ingredients

• Make your mornings special with this nutritious baked delight!

For the Batter

  • Full-Fat Cottage Cheese – Adds moisture and protein for the bread; low-fat can be used but may alter texture.
  • Old-Fashioned Rolled Oats – Serves as the main structure, creating the flour component; avoid steel-cut oats as they won’t blend fine enough.
  • Large Eggs – Help bind the ingredients and support leavening for a light and airy bread.
  • Baking Powder – Essential for the bread to rise and achieve that fluffy texture.
  • Sea Salt – Enhances the overall flavor; feel free to use kosher salt as a substitute.
  • Olive Oil – Imparts moisture and richness; can be swapped with melted coconut oil if preferred.

Step‑by‑Step Instructions for Fluffy Cottage Cheese Bread

Step 1: Preheat and Prepare
Begin by preheating your oven to 350°F (175°C). While it heats up, take a 9x5-inch loaf pan and line it with parchment paper to prevent sticking. This step ensures that your Fluffy Cottage Cheese Bread will easily slide out of the pan after baking, making for a flawless presentation.

Step 2: Blend the Oats
Next, place the old-fashioned rolled oats into a high-speed blender. Blend them on high until they reach a fine flour-like consistency, typically about 30 seconds. This oat flour serves as the foundation of the Fluffy Cottage Cheese Bread, so ensure it's finely ground for the lightest texture.

Step 3: Mix the Batter
Pour the oat flour into the blender and add the full-fat cottage cheese, large eggs, olive oil, baking powder, and sea salt. Blend these ingredients together for about 45-60 seconds until you achieve a smooth, airy batter. The texture should be thick yet pourable, with a few bubbles forming as it blends.

Step 4: Transfer to the Loaf Pan
Carefully pour the smooth batter into the prepared loaf pan, using a spatula to smooth the top if needed. This ensures that your Fluffy Cottage Cheese Bread bakes evenly. Tap the pan gently on the counter to remove any air bubbles that might have formed during mixing.

Step 5: Bake the Bread
Place the loaf pan in the oven and bake for 50 to 55 minutes. You’ll know the bread is done when the top turns golden brown and a toothpick inserted into the center comes out clean. This step is crucial for achieving that fluffy texture you desire in every slice of your Cottage Cheese Bread.

Step 6: Cool and Slice
Once baked, remove the Fluffy Cottage Cheese Bread from the oven and let it cool in the pan for about 15 minutes. After this, carefully transfer it to a wire rack to cool completely. Allowing it to cool thoroughly is essential for optimal slicing, so resist the urge to cut into it too soon!

Expert Tips for Fluffy Cottage Cheese Bread

  • Oat Selection: Use old-fashioned rolled oats for the best texture; steel-cut oats will yield a dense bread that doesn’t rise properly.
  • Blend Correctly: Ensure the batter is well-blended for a smooth and airy consistency, but avoid over-mixing after it becomes smooth.
  • Cooling Time: Patience is key! Let the bread cool completely in the pan to maintain its structure and fluffiness before slicing.
  • Add Flavor: Don’t hesitate to add spices like cinnamon or vanilla to enhance the flavor of your Fluffy Cottage Cheese Bread to suit your taste.
  • Proper Storage: Keep leftover slices in an airtight container in the refrigerator for up to five days to maintain freshness and taste.

Make Ahead Options

These Easy Fluffy Cottage Cheese Breads are a fantastic option for meal prep enthusiasts! You can prepare the batter up to 24 hours in advance by mixing all the ingredients and refrigerating it until you’re ready to bake. This not only saves time but also allows the flavors to meld beautifully. To maintain the bread's fluffy texture, ensure it’s stored in an airtight container and bring it to room temperature before baking. When you're ready to enjoy, simply pour the batter into your prepared loaf pan and bake for 50 to 55 minutes as instructed. With these make-ahead options, you’ll have fresh, nourishing bread ready for busy mornings with minimal effort!

What to Serve with Easy Fluffy Cottage Cheese Bread

Brighten your breakfast table with delightful pairings that enhance the flavors and nutrition of this fluffy baked delight.

  • Creamy Almond Butter: This nutty spread adds richness while offering healthy fats and protein for an energizing snack.
  • Fresh Avocado Slices: The creamy texture of avocado is a perfect counterpoint to the bread’s fluffiness; top with a dash of lemon juice for a zesty kick.
  • Sweet Honey Drizzle: A drizzle of honey brings a touch of sweetness, creating a delightful contrast that elevates your morning toast.
  • Savory Turkey and Sprouts: Layer slices with lean turkey and crunchy sprouts for a filling, protein-packed lunch option that is as nutritious as it is delicious.
  • Greek Yogurt with Berries: A side of Greek yogurt topped with fresh berries enhances breakfast with probiotics and antioxidants, making it a healthy pairing.
  • Chai-Spiced Chia Pudding: Serve a small bowl of this spiced pudding for unexpected flavor and texture, rounding out a cozy breakfast experience.
  • Freshly Squeezed Orange Juice: This bright juice adds a refreshing touch while providing a vitamin C boost, balancing the meal with a fruity freshness.
  • Dark Chocolate Shavings: For a sweet twist that's still on the healthier side, sprinkle dark chocolate on your bread to make each bite a treat—great for special occasions!

Storage Tips for Fluffy Cottage Cheese Bread

  • Room Temperature: If you plan to enjoy the bread within 1-2 days, it can be kept wrapped in a kitchen towel or stored in a bread box to retain moisture.

  • Fridge: Store leftovers in an airtight container in the refrigerator for up to 5 days. This helps maintain the fluffy texture and keeps it fresh for your busy mornings.

  • Freezer: Freeze individual slices wrapped in plastic wrap or parchment paper for up to a month. This way, you can enjoy a quick, nutritious breakfast anytime!

  • Reheating: For a crispy finish, reheat frozen slices in a toaster or oven for a few minutes until warmed through—perfect for reviving that deliciously fluffy cottage cheese bread!

Fluffy Cottage Cheese Bread Variations

Feel free to customize your loaf with these exciting twists and substitutions to elevate your Fluffy Cottage Cheese Bread experience!

  • Greek Yogurt Boost: Replace half the cottage cheese with Greek yogurt for a creamy, tangy flavor and even more protein.

  • Nutty Crunch: Stir in chopped nuts or seeds like walnuts or sunflower seeds to add a delightful crunch and extra nutrition.

  • Spiced Delight: Incorporate your favorite spices, such as cinnamon or nutmeg, for a warm flavor infusion that pairs beautifully with breakfast.

  • Herb Infusion: Add fresh herbs like chives or dill to the batter for a savory twist, making it perfect for a unique brunch option.

  • Sweeten It Up: Drizzle in honey or maple syrup to introduce a hint of sweetness, especially delicious when topped with fresh berries.

  • Dairy-Free Option: Swap out the cottage cheese with a nut-based yogurt for a dairy-free version, ensuring it still holds that fluffy texture.

  • Veggie Packed: Fold in finely chopped vegetables like spinach or bell peppers for a nourishing boost, creating a wholesome meal on its own.

  • Quick Open-Face Sandwich: Use the bread as a base for delicious open-face sandwiches topped with ingredients like smashed avocado and a poached egg—the perfect hearty breakfast!

Feel inspired? You might also enjoy creating a scrumptious Cornbread Breakfast Casserole or try pairing this bread with a slice of tasty Cheesy Garlic Bread to expand your breakfast or brunch offerings!

Fluffy Cottage Cheese Bread Recipe FAQs

What kind of cottage cheese should I use for the bread?
I recommend using full-fat cottage cheese for the best moisture and protein content, which gives the bread its delightful fluffiness. Low-fat cottage cheese can work, but it might slightly change the texture, making it a bit denser.

How should I store leftover Fluffy Cottage Cheese Bread?
Store any leftover slices in an airtight container in the refrigerator for up to 5 days. This will help maintain the bread's fluffy texture and freshness, making it ready for those quick breakfasts or snacks throughout the week!

Can I freeze Fluffy Cottage Cheese Bread?
Absolutely! You can freeze individual slices of the bread wrapped tightly in plastic wrap or parchment paper for up to 1 month. To reheat, just pop them in the toaster or oven for a few minutes until warmed through—this restores that delightful fluffiness perfectly!

What should I do if my bread doesn’t rise properly?
If your Fluffy Cottage Cheese Bread doesn’t rise, it could be due to expired baking powder or that the oat flour wasn’t blended finely enough. Always check your baking powder's expiration date and ensure you blend the rolled oats until they reach a flour-like consistency to allow for proper leavening.

Is this recipe suitable for people with dietary restrictions?
This recipe is flourless and high in protein, making it a great option for low-carb diets. However, ensure to check for any allergies related to eggs or dairy before serving. You can substitute eggs with flaxseed meal or unsweetened applesauce for a vegan option—just remember, it may affect the texture!

Delicious Greek Yogurt Banana Muffins for a Healthy Snack

June 5, 2026 by Grace Snow Leave a Comment

There’s something magical about the aroma of muffins wafting through the kitchen, evoking memories of cozy mornings and sweet indulgence. With my Healthy Greek Yogurt Banana Muffins, you can relive those cherished moments while giving your body the nourishment it deserves. Packed with the natural sweetness of perfectly ripe bananas and the creamy goodness of Greek yogurt, these muffins are a delightful way to kickstart your day or enjoy a snack on the go. What sets them apart? They offer a healthier twist to a beloved classic, making them not only delicious but also a guilt-free option. Plus, they come together quickly, making them perfect for busy mornings or last-minute cravings. Ready to transform your baking game? Let’s dive into this wholesome recipe and discover just how easy and enjoyable healthy baking can be!

Why are Greek Yogurt Banana Muffins a must-try?

Flavorful Bliss: Each bite of these muffins showcases the natural sweetness of ripe bananas combined with the creamy richness of Greek yogurt, making it a perfect treat for all ages.

Healthy Twist: You get all the nostalgia of classic muffins without the guilt—these delightful morsels are packed with protein and fiber, which means they’ll keep you satisfied for longer.

Quick and Easy: With simple ingredients and straightforward instructions, baking never felt so effortless! Perfect for busy mornings or unexpected guests.

Versatile Indulgence: Feel free to mix in chocolate chips, nuts, or even dried fruit, allowing for customization that fits your taste preferences.

Great for Meal Prep: Bake a batch of these muffins ahead of time, and you’ll have a healthy snack ready to grab on the go, just like with my Cinnamon Roll Muffins.

Crowd-pleasing Treat: Whether it’s a brunch gathering or family breakfast, these muffins are sure to impress without needing hours of prep work.

Greek Yogurt Banana Muffin Ingredients

For the Muffins

  • Ripe Bananas – Adds natural sweetness and flavor; the riper, the better!
  • Greek Yogurt – Provides creaminess and boosts protein content; can substitute with plant-based yogurt for a vegan version.
  • Honey – Acts as a natural sweetener; can be omitted for lower sweetness, but may affect flavor.
  • Egg – Binds ingredients together and adds richness; for vegan, use a flax egg.
  • Vanilla Extract – Enhances overall flavor; a key aromatic ingredient in these Greek Yogurt Banana Muffins.
  • All-Purpose Flour – Provides structure and texture; whole wheat flour can be substituted for added fiber.
  • Baking Soda – Helps muffins rise; ensure it's fresh for optimal effectiveness.
  • Salt – Enhances all the flavors; essential to balance sweetness.

Optional Extras

  • Chocolate Chips or Nuts – Mix in for extra flavor and texture; customize to your liking!
  • Dried Fruit – Consider adding cranberries or coconut for variety in your muffins.

Step‑by‑Step Instructions for Healthy Greek Yogurt Banana Muffins

Step 1: Preheat the Oven
Preheat your oven to 375°F (190°C). This is a crucial step for ensuring that your Healthy Greek Yogurt Banana Muffins bake evenly and rise beautifully. As the oven warms up, gather your baking essentials and line a muffin tin with paper liners or lightly grease it to prevent sticking.

Step 2: Mash the Bananas
In a mixing bowl, mash 2 ripe bananas with a fork until smooth and creamy. Aim for a consistency that’s free of large lumps, as this will help your muffins be moist and fluffy. The riper the bananas, the sweeter and more flavorful they will be, so don’t hesitate to use ones with plenty of brown spots!

Step 3: Combine Wet Ingredients
Add 1 cup of Greek yogurt, 1/4 cup of honey, 1 egg, and 1 teaspoon of vanilla extract to the mashed bananas. Mix well until everything is fully incorporated and the mixture is smooth. This combination will add richness and protein to your Healthy Greek Yogurt Banana Muffins, resulting in a delightful texture and flavor.

Step 4: Mix the Dry Ingredients
In another bowl, whisk together 1 1/2 cups of all-purpose flour, 1 teaspoon of baking soda, and 1/2 teaspoon of salt. Mixing these dry ingredients separately ensures the baking soda is evenly distributed, promoting perfect rising. Take a moment to enjoy the aroma of the flour as you whisk for a minute or so until well combined.

Step 5: Combine Wet and Dry Mixtures
Gently fold the wet mixture into the dry ingredients using a spatula, mixing only until the flour is just incorporated. Be careful not to overmix, as this can lead to denser muffins. The batter should remain thick yet slightly lumpy, which is essential for achieving the perfect texture in your Healthy Greek Yogurt Banana Muffins.

Step 6: Optional Mix-Ins
If desired, this is the time to fold in extras like chocolate chips or nuts. Gently stir these ingredients into the muffin batter until evenly distributed. Customize your Healthy Greek Yogurt Banana Muffins according to your taste—add 1/2 cup of chocolate chips for a sweet surprise, or 1/2 cup of walnuts for a nutty crunch!

Step 7: Fill Muffin Cups
Using a spoon or an ice cream scoop, carefully fill each muffin cup about two-thirds full with the batter. This allows room for the muffins to rise without overflowing. Take a moment to admire your beautiful batter; it’s about to transform into delicious Healthy Greek Yogurt Banana Muffins!

Step 8: Bake the Muffins
Place the muffin tin into the preheated oven and bake for 18-20 minutes. To check for doneness, insert a toothpick into the center of a muffin; it should come out clean or with a few moist crumbs. The tops of the Healthy Greek Yogurt Banana Muffins should be golden brown and spring back slightly when touched.

Step 9: Cool and Enjoy
Once baked, remove the muffins from the oven and let them cool in the pan for 5 minutes. After that, transfer them to a wire rack to cool completely. This step is important to avoid soggy bottoms. Take a moment to appreciate the delightful aroma wafting from your kitchen before indulging in your warm, fluffy Healthy Greek Yogurt Banana Muffins.

Make Ahead Options

These Healthy Greek Yogurt Banana Muffins are perfect for meal prep enthusiasts! You can mash the bananas and mix the wet ingredients (1 cup Greek yogurt, 1/4 cup honey, 1 egg, and 1 teaspoon vanilla extract) up to 24 hours in advance for a quick bake when you need it. Store the wet mixture in the refrigerator, and then, when you're ready to bake, simply combine it with the pre-measured dry ingredients (1 1/2 cups flour, 1 teaspoon baking soda, and 1/2 teaspoon salt). To maintain quality, ensure that your muffins are completely cooled before placing them in an airtight container, where they'll stay fresh for up to 3 days. For even longer storage, freeze them, and thaw as needed before serving!

Greek Yogurt Banana Muffins Variations

Feel free to get creative with these muffins and make them your own with delightful twists and substitutions!

  • Dairy-Free: Substitute Greek yogurt with plant-based yogurt for a delicious vegan option that maintains the same creamy texture.

  • Sweetener Swap: Use maple syrup instead of honey for a vegan-friendly sweetness that adds a lovely flavor variation.

  • Whole Wheat Flour: For a healthier option, swap all-purpose flour for whole wheat flour, boosting the fiber content and heartiness.

  • Nutty Delight: Mix in chopped walnuts or pecans to add a satisfying crunch and a distinct nutty flavor to your muffins.

  • Fruity Boost: Toss in dried cranberries or blueberries for a pop of flavor and an extra burst of sweetness in every bite.

  • Chocolate Lovers: Replace the nuts with your favorite chocolate chips or add cocoa powder to the batter for a rich, chocolaty twist.

  • Spiced Up: Add a teaspoon of cinnamon or nutmeg to the dry ingredients for a warm, aromatic flavor that complements the bananas beautifully.

  • Protein Punch: Stir in a scoop of your favorite protein powder to supercharge these muffins with an extra boost of nutrition—perfect for post-workout!

Trying any of these variations can bring a personal touch to your baking! Pair your muffins with a dollop of yogurt or some almond butter, just like with my Breakfast Banana Split, for a delightful start to your day.

Expert Tips for Greek Yogurt Banana Muffins

  • Don’t Overmix: Aim for a lightly combined batter to avoid dense muffins. Overmixing can lead to tough muffins instead of light and fluffy ones.

  • Fresh Ingredients: Ensure your baking soda is fresh for optimal rising. Expired baking soda can result in muffins that don’t rise properly.

  • Customize Wisely: While mix-ins like chocolate chips or nuts are delightful, avoid adding too many extras which can weigh down the batter.

  • Cool Properly: Allow muffins to cool for a few minutes in the pan before transferring them to a wire rack. This prevents sogginess and helps maintain their fluffy texture.

  • Storing Right: Store your Greek Yogurt Banana Muffins in an airtight container for up to 3 days at room temperature. For longevity, freeze them in a single layer before transferring to a freezer-safe bag.

  • Ripe Bananas: The riper the bananas, the better the flavor! Look for bananas with plenty of brown spots for the sweetest muffins.

How to Store and Freeze Greek Yogurt Banana Muffins

Room Temperature: Store muffins in an airtight container at room temperature for up to 3 days. This will keep them fresh and soft for your quick snacks or breakfast.

Freezer: For longer storage, freeze them in a single layer until solid, then transfer to a freezer-safe bag. These Greek Yogurt Banana Muffins can stay fresh for up to 3 months!

Thawing: To enjoy, simply thaw muffins at room temperature for a couple of hours or microwave them for about 20–30 seconds for a warm treat anytime.

Reheating: Enjoy your muffins warm for the best flavor! You can reheat them in the oven at 350°F (175°C) for about 5–10 minutes to regain that fresh-baked goodness.

What to Serve with Healthy Greek Yogurt Banana Muffins

Indulging in these delightful muffins opens the door to creating a complete breakfast or snack experience that feels both wholesome and decadent.

  • Creamy Greek Yogurt: A dollop of fresh Greek yogurt on the side adds a rich creaminess and complements the muffin's sweetness beautifully. It’s perfect for dipping!

  • Almond Butter Swirl: Spread some almond butter on a warm muffin for a nutty twist that adds protein and healthy fats, making it a filling treat.

  • Fresh Fruit Salad: Combine seasonal fruits like berries, melons, and oranges to brighten your plate, adding a refreshing burst of flavors and nutrients.

Enjoy the harmony of flavors by pairing the muffins with coffee or tea. The warmth of your beverage enhances the experience, evoking cozy moments at home!

  • Honey Drizzle: A light drizzle of honey enhances the natural sweetness of the muffins, creating a delightful contrast of textures when enjoyed warm.

  • Smoothie Delight: Blend your favorite fruits with spinach and yogurt for a nourishing smoothie; it complements the muffins perfectly while adding a refreshing element to your meal.

  • Nutty Granola: Serve a side of your favorite homemade or store-bought granola. Its crunchiness adds texture and makes for a satisfying breakfast duo!

Greek Yogurt Banana Muffins Recipe FAQs

How do I know if my bananas are ripe enough to use?
Absolutely! When selecting bananas, you want to look for those with plenty of brown spots. The riper they are, the sweeter and more flavorful they will be, which is crucial for creating delicious Greek Yogurt Banana Muffins. Generally, bananas that are mostly yellow with some brown speckles indicate peak ripeness for baking.

How should I store my Greek Yogurt Banana Muffins to keep them fresh?
To keep your muffins fresh, store them in an airtight container at room temperature for up to 3 days. This will maintain their moistness and flavor. If you have leftovers beyond this period, it's best to freeze them to enjoy later.

Can I freeze Greek Yogurt Banana Muffins for later use?
Very much so! To freeze, let the muffins cool completely. Place them in a single layer on a baking sheet until they’re frozen solid. Then, transfer them to a freezer-safe bag. These muffins can be stored for up to 3 months! When you’re ready to enjoy one, just thaw at room temperature or pop them in the microwave for a quick 20-30 seconds.

What should I do if my muffins come out dense or heavy?
If your muffins turn out dense, don’t fret! Ensure that you’re not overmixing the batter, as this can lead to a tough texture. Mix until just combined and make sure your baking soda is fresh. If the batter seems too thick, consider adding a little more Greek yogurt for a lighter consistency next time.

Are there any dietary considerations for Greek Yogurt Banana Muffins?
Indeed! For a vegan version, swap the egg with a flax egg (1 tablespoon of ground flaxseed mixed with 3 tablespoons of water, let it sit for 5 minutes until gelatinous). You can also use plant-based yogurt instead of Greek yogurt. Always check for any allergies related to ingredients like nuts or gluten, especially if serving to others.

Flaky Easy Homemade Biscuits in Just 30 Minutes!

May 26, 2026 by Grace Snow Leave a Comment

The fragrant aroma of freshly baked biscuits wafting through the kitchen is a feeling like no other. When I whip up a batch of Easy Homemade Biscuits, I’m often transported back to family gatherings where these fluffy delights were the star of the show. Ready in just 30 minutes using simple pantry staples, these biscuits are not only quick to make, but they also boast that melt-in-your-mouth tenderness that makes every bite comfort food bliss. Perfect as a side for breakfast or dinner, they are also a blank canvas for your culinary creativity—feel free to swap whole milk with buttermilk for an extra zing. Ready to fill your home with warmth and elevate a meal effortlessly? Let’s dive into making these irresistible biscuits together!

Why Are These Biscuits So Irresistible?

Quick and Easy: In just 30 minutes, you can enjoy warm, homemade biscuits that require minimal effort. Flaky Layers: The secret is in using cold butter and not overmixing—these biscuits are soft and airy, just like Southern classics should be. Versatile Delight: Perfect for breakfast, dinner, or as a snack, they pair wonderfully with both sweet and savory toppings. Family-Friendly: Kids and adults alike will love these biscuits, whether slathered in butter or dipped in gravy. For a delightful breakfast treat, try them alongside a bowl of Homemade Hot Chocolate. Get your apron on and let’s enjoy this comforting kitchen project together!

Easy Homemade Biscuits Ingredients

For the Biscuit Dough

  • All-Purpose Flour – Gives structure and the perfect texture; use unbleached for a more traditional taste.
  • Baking Powder – A crucial leavening agent; be sure it's fresh for fluffy biscuits.
  • Sugar – A touch of sweetness that can be omitted for savory variations.
  • Salt – Essential for enhancing flavor; don’t skip this step!
  • Unsalted Butter – Use cold, cut into small pieces to create flaky layers; this is your secret weapon!
  • Whole Milk – Moistens and binds the dough; for a fun twist, swap with buttermilk for tangy Easy Homemade Biscuits.

For Serving (Optional)

  • Melted Butter – Brush on top for extra richness and a beautiful golden finish.
  • Honey or Jam – Add a sweet layer of delight that complements the biscuits beautifully.
  • Sausage Gravy – The classic pairing that transforms your biscuits into a hearty meal.

Step‑by‑Step Instructions for Easy Homemade Biscuits

Step 1: Preheat the Oven
Begin by preheating your oven to 425°F (220°C) so it’s hot and ready for baking. While it heats, line a baking pan with parchment paper. This will help prevent the biscuits from sticking and ensure they come out beautifully golden. The aroma of the oven warming will start your delicious journey with Easy Homemade Biscuits!

Step 2: Mix Dry Ingredients
In a large mixing bowl, whisk together 2 cups of all-purpose flour, 1 tablespoon of baking powder, 1 tablespoon of sugar, and 1 teaspoon of salt. These dry ingredients are essential for the perfect biscuit texture. Make sure the baking powder is fresh for maximum rise. The mixture should be well combined, and you should see a light, airy consistency.

Step 3: Incorporate Cold Butter
Cut ½ cup of cold, unsalted butter into small pieces and add them to the flour mixture. Using your fingertips or a pastry cutter, mix until the mixture resembles coarse crumbs, with pea-sized butter pieces throughout. This step is crucial for achieving those flaky layers in your Easy Homemade Biscuits, so take care not to overwork the dough.

Step 4: Add the Milk
Pour in ¾ cup of whole milk (or buttermilk for a tangy twist) into the dry mixture. Gently stir with a spatula until just combined. You’re aiming for a dough that holds together without being over-mixed. Be cautious here, as over-mixing can lead to tough biscuits instead of tender, flaky delights.

Step 5: Shape the Dough
Turn the dough out onto a lightly floured surface. With floured hands, gently pat the dough into a rectangle about ½ to ¾ inch thick. The key is to handle the dough lightly to keep it tender. Visualize the fluffy heights these Easy Homemade Biscuits can reach as you prepare them for cutting!

Step 6: Cut the Biscuits
Using a biscuit cutter, cut out rounds from the dough, pressing straight down without twisting to maintain height. You can also cut the dough into squares if you prefer. Place each biscuit on the prepared baking sheet, spaced out to allow them to rise evenly. Each biscuit should look inviting and ready for the oven!

Step 7: Brush with Butter
Before baking, brush the tops of the biscuits generously with melted butter. This will not only add extra flavor but also help achieve a lovely, golden finish. Watching the melted butter soak into the tops will make you even more excited for the baking process ahead.

Step 8: Bake to Perfection
Place the baking sheet in your preheated oven and bake the biscuits for 15–18 minutes, or until they are golden brown. Keep an eye on them as they bake, and you’ll see them puff up beautifully. When they rise and turn golden, your kitchen will be filled with the irresistible aroma of Easy Homemade Biscuits!

Step 9: Cool and Serve
Once baked, remove the biscuits from the oven and let them cool slightly before serving. This will allow them to firm up just a bit while retaining that soft interior. Serve them warm with butter, honey, or your favorite preserves for a delightful addition to any meal!

Expert Tips for Easy Homemade Biscuits

  • Cold Butter Is Key: Using cold butter is essential for achieving those flaky layers. It creates steam pockets as the biscuits bake.

  • Don’t Overmix: Mix the dough gently. Overmixing can lead to tough biscuits instead of the light and tender Easy Homemade Biscuits you desire.

  • Use Fresh Baking Powder: Check that your baking powder is fresh for the best rise. Old baking powder can leave your biscuits flat and dense.

  • Cut Straight Down: When cutting out your biscuits, press straight down with the cutter, avoiding a twisting motion, which prevents them from rising properly.

  • Brush with Butter: Brushing the tops with melted butter before baking adds flavor and promotes a beautiful golden finish.

How to Store and Freeze Easy Homemade Biscuits

Fridge: Store leftover biscuits in an airtight container for up to 3 days to maintain freshness and prevent drying out.

Freezer: For longer storage, freeze unbaked cut biscuits on a tray until firm, then transfer to a freezer bag. They can be baked from frozen, just increase the baking time by a few minutes.

Reheating: Reheat leftovers in a 350°F (175°C) oven for about 10 minutes, or until warmed through and crisp. Enjoy your tender Easy Homemade Biscuits fresh!

Room Temperature: If serving immediately, keep biscuits covered with a cloth for up to 2 hours to keep them warm and soft.

What to Serve with Easy Homemade Biscuits

The fragrance of fresh biscuits fills your kitchen, inviting the perfect meal companions to join this flaky delight.

  • Sausage Gravy: A traditional pairing that transforms biscuits into a hearty, comforting breakfast. The savory gravy complements the tender, flaky layers beautifully.

  • Honey or Jam: Add a sweet twist by drizzling honey or spreading your favorite jam. This contrast of flavors creates a delightful breakfast treat that warms the soul.

  • Scrambled Eggs: Fluffy scrambled eggs add a protein boost, making for a satisfying breakfast that balances richness with lightness.

  • Creamy Mac and Cheese: The cheesy comfort of mac and cheese pairs wonderfully with biscuits, making it an indulgent side dish for a cozy dinner.

  • Savory Soup: Biscuits dunked in a warm, hearty soup invite a comforting experience. Try them with chicken noodle or tomato bisque for a cozy meal.

  • Fresh Fruit Salad: A refreshing fruit salad adds a splash of color and sweetness, balancing the richness of the biscuits and creating a bright, vibrant meal.

  • Iced Tea or Lemonade: These drinks complement the meal perfectly, offering a refreshing lift to every bite of warm biscuit.

  • Chocolate Gravy: For a sweet surprise, drizzle some chocolate gravy over your biscuits. It’s an unusual, yet delightful twist for brunch enthusiasts!

  • Marinated Chicken: These biscuits pair excellently with juicy marinated chicken, creating a robust and savory dining experience, and elevating your family meals.

Make Ahead Options

These Easy Homemade Biscuits are a fantastic choice for meal prep enthusiasts looking to save time! You can prep the dry ingredients by combining the flour, baking powder, sugar, and salt up to 3 days in advance, storing the mixture in an airtight container to keep it fresh. Additionally, once you've cut the biscuits, freeze them on a baking sheet for about 1-2 hours before transferring them to a freezer bag. This method prevents them from sticking together. When you're ready to enjoy, simply bake from frozen, adding an extra couple of minutes to the cooking time. This way, you can have warm, flaky biscuits any day of the week, just like they were freshly made!

Easy Homemade Biscuits Variations

Feel free to customize these biscuits to suit your taste or dietary needs—let your creativity shine in the kitchen!

  • Buttermilk Swap: Substitute whole milk with buttermilk for a delightful tangy flavor that elevates the biscuits. This simple change can add a rich depth to every bite.
  • Cheesy Goodness: Incorporate 1 cup of grated cheese, like cheddar or pepper jack, into the dough for a savory twist. Imagine biting into a warm, cheesy biscuit—heavenly!
  • Herbed Delight: Add 1-2 tablespoons of fresh herbs, like rosemary or chives, to the flour mixture for an aromatic hit that pairs beautifully with soups or stews.
  • Sweeten the Deal: For a hint of sweetness, mix in 1 tablespoon of honey or maple syrup into the milk before combining it with the dry ingredients. Your breakfast spread just got a delicious upgrade!
  • Heat It Up: Sprinkle in some crushed red pepper flakes or diced jalapeños for a spicy kick that perfectly complements buttery or savory toppings. Spice lovers will rejoice!
  • Gluten-Free Option: Use a 1:1 gluten-free baking flour to replace all-purpose flour. This way, your gluten-sensitive friends can join in on the biscuit feast!
  • Add Fruit: Mix in 1/2 cup of dried fruits like cranberries or blueberries for a sweet surprise in each bite. These can transform your biscuits into a delightful brunch treat, especially when served with cream!
  • Savory Seasoning: Incorporate 1 teaspoon of garlic powder or Italian seasoning into the dry mix. The aroma and flavor will make your biscuits sing, especially when paired with a hearty salad or soup.

If you're thinking of pairing these biscuits with something special, consider serving them alongside a comforting dish like Chicken and Dumplings or a hearty plate of Shakshuka Savor Bold—seriously, you won't regret it!

Easy Homemade Biscuits Recipe FAQs

What kind of flour is best for biscuits?
I recommend using all-purpose flour for a balanced texture in your Easy Homemade Biscuits. If you’re interested in a more traditional taste, unbleached flour can offer a slight edge in flavor and quality.

How should I store leftover biscuits?
Store any leftover biscuits in an airtight container in the fridge for up to 3 days. If you want to keep them fresh, make sure they’re completely cooled first—this way, they won’t get soggy!

Can I freeze unbaked biscuits?
Absolutely! To freeze unbaked biscuits, first cut them out and place them on a tray. Freeze them until they are firm, then transfer to a freezer bag, where they can be stored for up to 3 months. When you're ready to bake, simply add a few extra minutes to the baking time while they bake straight from frozen.

Why did my biscuits turn out dense?
Dense biscuits often result from overmixing the dough or using warm butter. The key is to mix gently and use cold butter to ensure steam pockets form while baking, creating that desired light and flaky texture.

Are these biscuits suitable for dietary restrictions?
Yes, you can make these biscuits dairy-free by using a substitute like almond milk or coconut milk. If you have allergies to gluten, I suggest a gluten-free all-purpose flour blend, which usually works well in such recipes. Always check your ingredient labels to be safe!

How do I know when my biscuits are finished baking?
Your Easy Homemade Biscuits are done when they are golden brown on top, usually around 15-18 minutes in a preheated oven at 425°F (220°C). You can also gently press the top; if it springs back, they are ready to be enjoyed!

Easy Homemade Biscuits

Flaky Easy Homemade Biscuits in Just 30 Minutes!

Enjoy easy homemade biscuits that are fluffy and delicious, perfect comfort food for any meal.
Print Recipe Pin Recipe
Prep Time 10 minutes mins
Cook Time 15 minutes mins
Cooling Time 5 minutes mins
Total Time 30 minutes mins
Servings: 8 biscuits
Course: Breakfast
Cuisine: American
Calories: 180
Ingredients Equipment Method Nutrition Notes

Ingredients
  

For the Biscuit Dough
  • 2 cups all-purpose flour use unbleached for a more traditional taste
  • 1 tablespoon baking powder ensure it's fresh
  • 1 tablespoon sugar can be omitted for savory biscuits
  • 1 teaspoon salt essential for flavor
  • ½ cup unsalted butter cold, cut into small pieces
  • ¾ cup whole milk or buttermilk for a tangy taste
For Serving (Optional)
  • 2 tablespoons melted butter for brushing on top
  • honey or jam as a sweet topping
  • sausage gravy classic pairing

Equipment

  • Mixing Bowl
  • Biscuit cutter
  • Baking Sheet
  • Parchment Paper

Method
 

Step-by-Step Instructions
  1. Preheat your oven to 425°F (220°C) and line a baking pan with parchment paper.
  2. In a large mixing bowl, whisk together the flour, baking powder, sugar, and salt.
  3. Cut the cold butter into the flour mixture until it resembles coarse crumbs.
  4. Stir in the milk until just combined, being careful not to overmix.
  5. Turn the dough onto a floured surface and pat it into a rectangle about ½ to ¾ inch thick.
  6. Cut out rounds using a biscuit cutter and place them on the baking sheet.
  7. Brush the tops with melted butter before baking.
  8. Bake for 15–18 minutes until golden brown.
  9. Allow to cool slightly before serving.

Nutrition

Serving: 1biscuitCalories: 180kcalCarbohydrates: 23gProtein: 3gFat: 8gSaturated Fat: 5gMonounsaturated Fat: 2gCholesterol: 20mgSodium: 250mgPotassium: 100mgFiber: 1gVitamin A: 200IUCalcium: 50mgIron: 1mg

Notes

For best results, use cold butter, do not overmix, and make sure your baking powder is fresh.

Tried this recipe?

Let us know how it was!

4-Ingredient Irish Potato Bread for Cozy Comfort Cooking

May 26, 2026 by Grace Snow Leave a Comment

Have you ever found yourself with leftover boiled potatoes and pondered what culinary magic you can weave? Enter the delightful realm of 4-Ingredient Irish Potato Bread, a recipe that beautifully combines simplicity with comfort. With just four everyday ingredients, this soft and pillowy bread is incredibly quick to prepare, making it the perfect addition to both your breakfast table and cozy dinners. I adore how it soaks up flavors, whether slathered in butter alongside a hearty breakfast or served warm as a side with your favorite stew. Trust me, once you master this easy recipe, those leftover potatoes will never go to waste again! Aren’t you intrigued to discover how this warm, comforting bread will elevate your meals?

Why is this Irish Potato Bread a Must-Try?

Comforting Simplicity: With just four ingredients, this Irish potato bread proves that great flavors don’t need to be complicated.

Quick Preparation: You can whip up this delicious recipe in no time, making it perfect for those busy weeknights or leisurely weekend brunches.

Versatile Delight: Perfect for soaking up sauces and gravies, this bread pairs wonderfully with hearty soups, stews, and a side of Cheesy Garlic Bread for a complete meal.

Perfect for Leftovers: Transform leftover boiled potatoes into a delightful dish that reduces waste while delivering satisfying comfort in every bite.

Crowd-Pleasing: Whether served with breakfast or dinner, you’ll always impress your family and friends with this warm and fluffy bread!

4-Ingredient Irish Potato Bread Ingredients

• A simple way to create cozy comfort!

For the Dough

  • Potatoes – The star of this dish; starchy varieties like russets yield the best moisture and texture.
  • All-Purpose Flour – Essential for structure; King Arthur brand is recommended for the fluffiest bread.
  • Unsalted Butter – Adds a rich flavor; using high-quality butter like Kerrygold enhances the overall taste.
  • Salt – Crucial for balancing flavors in your 4-ingredient Irish potato bread; don't skip it!

For Cooking

  • Black Pepper – A pinch adds warmth; feel free to adjust the amount to suit your taste.

Enjoy making this delectable bread with these easy ingredients!

Step‑by‑Step Instructions for 4-Ingredient Irish Potato Bread

Step 1: Prepare Potatoes
Begin by peeling and cutting 2-3 medium starchy potatoes, such as russets or Yukon golds. Place them in a large pot, cover with salted water, and bring to a boil over high heat. Cook for 15-20 minutes, or until the potatoes are fork-tender. Once done, drain them well and return them to the pot to steam away any excess moisture.

Step 2: Mash Potatoes
Using a potato ricer or a sturdy masher, mash the drained potatoes until they are completely smooth and free of lumps. This step is vital for ensuring a soft texture in your 4-Ingredient Irish potato bread. Allow the potatoes to cool slightly before proceeding, as incorporating hot potatoes will yield the best dough consistency.

Step 3: Mix Ingredients
Add 2 tablespoons of unsalted butter and 1 teaspoon of salt to the warm mashed potatoes, stirring until the butter melts completely. Gradually add 1 cup of all-purpose flour, mixing gently to combine. As you stir, a soft dough should start to form, allowing you to see the beginnings of your comforting Irish potato bread.

Step 4: Knead Dough
Turn the dough out onto a generously floured surface. With floured hands, gently knead the dough for just 1-2 minutes until it becomes smooth. Be careful not to over-knead, as you want to maintain that tender texture essential to the 4-Ingredient Irish potato bread. Once ready, form the dough into a ball and prepare for shaping.

Step 5: Shape Bread
Divide the dough into two equal portions. Roll each portion out to a thickness of about 1/3 inch on a floured surface. Using a sharp knife or a pastry cutter, cut each round into wedges, yielding a total of 8 pieces. These will soon transform into delightful golden wedges that are perfect for sharing.

Step 6: Cook Bread
Heat a large, dry skillet over medium-high heat. Once hot, carefully place each wedge into the skillet. Cook for 3-4 minutes on each side or until golden brown and cooked through. Keep an eye on the wedges to prevent burning, allowing the comforting aroma of the 4-Ingredient Irish potato bread to fill your kitchen.

Step 7: Serve Warm
Remove the cooked wedges from the skillet and let them cool slightly. Serve warm for the best texture, and consider brushing them with melted butter or bacon fat for extra richness. Perfect with breakfast or alongside a hearty stew, these delightful bites of 4-Ingredient Irish potato bread will surely become a family favorite!

Storage Tips for 4-Ingredient Irish Potato Bread

  • Room Temperature: Store the bread wrapped in a kitchen towel or in an airtight container for up to 2 days to maintain freshness without losing moisture.

  • Fridge: If you have leftover bread, refrigerate it in an airtight container for up to 4 days. You may notice slight changes in texture but it will still be delicious.

  • Freezer: For longer storage, freeze the wedges in a single layer on a baking sheet, then transfer to a zip-top bag for up to 3 months, ensuring your 4-ingredient Irish potato bread remains handy whenever you crave comfort.

  • Reheating: To regain that sought-after softness, warm slices in a dry skillet or toaster instead of the microwave, allowing the bread to crisp up while keeping the inside soft.

What to Serve with 4-Ingredient Irish Potato Bread

Warm, fluffy, and oh-so-satisfying, this delightful bread is the perfect companion for your favorite meals!

  • Creamy Soups: Rich, velvety soups like butternut squash or tomato basil make for a wonderfully comforting pairing that complements the bread’s soft texture.

  • Hearty Stews: Pair with beef or vegetable stew for a filling meal. The bread soaks up the flavorful broth, providing a delicious bit of comfort in every bite.

  • Breakfast Eggs: Serve alongside fried or scrambled eggs and crispy bacon for a cozy breakfast that will kickstart your day with warmth and joy.

  • Garlic Butter: Drizzling warm wedges with garlic herb butter elevates the flavors and adds a delicious richness that enhances the simple breads’ natural goodness.

  • Fresh Greens Salad: A light salad with lemon vinaigrette balances the heaviness of the bread, adding a refreshing crunch.

  • Spicy Dips: Enjoy with a side of spicy hummus or harissa dip, where the creamy, rich flavors contrast beautifully with the fluffy bread.

  • Fruit Preserves: Slather your wedges with fruity preserves or honey for a sweet twist that can serve as a delightful dessert or breakfast treat.

4-Ingredient Irish Potato Bread Variations

Feel free to explore and make this recipe your own with these delightful twists!

  • Herb-Infused: Add fresh herbs like chives or rosemary to the dough for a fragrant touch. Fresh herbs elevate the flavor and make every bite more enticing.

  • Cheesy Delight: Mix in 1/2 cup of shredded cheese (like cheddar or mozzarella) for a cheesy version that's perfect as a snack. This brings an extra layer of richness to each wedge.

  • Garlic Butter: Replace regular butter with garlic-infused butter for a savory flavor boost. You'll fall in love with the aromatic allure that fills your kitchen as they cook.

  • Spicy Kick: Incorporate a pinch of cayenne pepper or red pepper flakes into the dough to spice it up. The subtle heat beautifully contrasts the softness of the bread.

  • Sweet Twist: Drizzle some honey or maple syrup into the mashed potatoes for a hint of sweetness. This variation can turn your Irish potato bread into a delightful accompaniment for breakfast.

  • Different Flours: Experiment with whole wheat flour for a nuttier flavor and added fiber. This change will enhance the nutritional value without sacrificing the comforting deliciousness.

  • Veggie Boost: Fold in finely chopped veggies like spinach or bell peppers to increase your fiber intake while adding colorful flair to your bread. The added veggies create a vibrant and appealing look.

  • Leftover Mix: Transform this bread into a sandwich by adding your leftover meats or spreads (like leftover braised beef or hummus), making it an easy meal on the go. The versatility is endless, and it’ll satisfy those cravings!

Excited to try out these variations? Each one opens up a new opportunity for flavor and creativity, just like pairing this bread with hearty soups or a delightful serving of Cornbread Breakfast Casserole to make your meals even more extraordinary!

Make Ahead Options

These 4-Ingredient Irish Potato Bread wedges are perfect for meal prep, allowing you to enjoy them fresh even on the busiest of days! You can prepare the dough up to 24 hours in advance; simply mix it and refrigerate it, tightly wrapped in plastic wrap to maintain moisture. Additionally, you can shape the wedges and refrigerate them for up to 3 days before cooking, but make sure to cover them to prevent drying out. When you're ready to serve, heat a skillet over medium-high heat and cook the wedges straight from the fridge until golden brown. This way, you’ll have warm, comforting bread with minimal effort!

Expert Tips for 4-Ingredient Irish Potato Bread

  • Use Starchy Potatoes: Choose russets or Yukon golds for the best moisture; avoid waxy varieties like red potatoes which can lead to a dense bread.

  • Warm Potatoes: Ensure your potatoes are warm when mixing to achieve the ideal dough consistency; cold potatoes can lead to dry, crumbly bread.

  • Gradual Flour Addition: Incorporate flour slowly to prevent the dough from becoming too dense; keep the texture light and fluffy for your 4-Ingredient Irish potato bread.

  • Don’t Rush Cooking: Cooking at medium-high heat is key; too high a temperature can burn the outside while leaving the inside raw.

  • Knead Gently: A gentle knead is essential; overworking the dough can lead to tough bread, so focus on just 1-2 minutes of light kneading.

4-Ingredient Irish Potato Bread Recipe FAQs

How do I select the best potatoes for this recipe?
Absolutely! For the best results in your 4-Ingredient Irish potato bread, opt for starchy potatoes like russet or Yukon golds. These varieties yield a wonderfully moist texture. Avoid waxy potatoes as they can lead to denser, less fluffy bread.

What’s the best way to store leftover Irish potato bread?
To keep your delicious bread fresh, wrap it in a kitchen towel or place it in an airtight container at room temperature for up to 2 days. If you have leftover bread, feel free to refrigerate it for up to 4 days without losing much flavor, though the texture might change slightly.

Can I freeze the Irish potato bread?
Absolutely! To freeze your 4-Ingredient Irish potato bread, first, place the wedges in a single layer on a baking sheet and freeze until solid. Then, transfer them to a zip-top bag, making sure to remove as much air as possible. This will keep them fresh for up to 3 months, so you can enjoy that comforting bread whenever you crave it!

What should I do if my dough is too sticky or too dry?
If your dough feels too sticky, don’t worry! Simply sprinkle in a bit more flour—start with a tablespoon at a time—until it reaches a soft, manageable consistency. Conversely, if it’s too dry, try adding a teaspoon of warm water or melted butter to soften it up. It’s all about finding that perfect balance!

Are there any dietary considerations for this bread?
Certainly! This recipe is straightforward and vegetarian-friendly as it contains no animal products except for butter. If you are avoiding dairy or have lactose intolerance, you can easily substitute the unsalted butter with a dairy-free alternative like margarine or coconut oil. Just ensure your other ingredients are also free from allergens you might be sensitive to.

4-Ingredient Irish Potatoes Bread

4-Ingredient Irish Potato Bread for Cozy Comfort Cooking

Delight in this 4-Ingredient Irish Potato Bread, a simple and comforting recipe that transforms leftover potatoes into a fluffy treat.
Print Recipe Pin Recipe
Prep Time 20 minutes mins
Cook Time 10 minutes mins
Total Time 30 minutes mins
Servings: 8 pieces
Course: Breakfast
Cuisine: Irish
Calories: 180
Ingredients Equipment Method Nutrition Notes

Ingredients
  

For the Dough
  • 2-3 medium starchy potatoes such as russets or Yukon golds
  • 1 cup all-purpose flour King Arthur brand recommended
  • 2 tablespoons unsalted butter high-quality like Kerrygold
  • 1 teaspoon salt essential for flavor
For Cooking
  • 1 pinch black pepper adjust to taste

Equipment

  • Large pot
  • Potato Ricer or Masher
  • Skillet
  • Knife or Pastry Cutter
  • Floured surface

Method
 

Step-by-Step Instructions
  1. Begin by peeling and cutting 2-3 medium starchy potatoes, such as russets or Yukon golds. Place them in a large pot, cover with salted water, and bring to a boil over high heat. Cook for 15-20 minutes, or until the potatoes are fork-tender. Once done, drain them well and return them to the pot to steam away any excess moisture.
  2. Using a potato ricer or a sturdy masher, mash the drained potatoes until they are completely smooth and free of lumps. Allow the potatoes to cool slightly before proceeding.
  3. Add 2 tablespoons of unsalted butter and 1 teaspoon of salt to the warm mashed potatoes, stirring until the butter melts completely. Gradually add 1 cup of all-purpose flour, mixing gently to combine.
  4. Turn the dough out onto a generously floured surface. With floured hands, gently knead the dough for just 1-2 minutes until it becomes smooth.
  5. Divide the dough into two equal portions. Roll each portion out to a thickness of about 1/3 inch on a floured surface. Cut each round into wedges, yielding a total of 8 pieces.
  6. Heat a large, dry skillet over medium-high heat. Carefully place each wedge into the skillet. Cook for 3-4 minutes on each side or until golden brown and cooked through.
  7. Remove the cooked wedges from the skillet and let them cool slightly. Serve warm for the best texture.

Nutrition

Serving: 1pieceCalories: 180kcalCarbohydrates: 26gProtein: 3gFat: 7gSaturated Fat: 4gPolyunsaturated Fat: 0.5gMonounsaturated Fat: 2gCholesterol: 15mgSodium: 320mgPotassium: 370mgFiber: 2gVitamin A: 300IUVitamin C: 10mgCalcium: 20mgIron: 1.2mg

Notes

This bread is perfect for soaking up sauces and gravies and works great as a side for hearty meals. Store wrapped in a kitchen towel or in an airtight container for maximum freshness.

Tried this recipe?

Let us know how it was!

Fluffy Blueberry Biscuits That Will Brighten Your Mornings

May 26, 2026 by Grace Snow Leave a Comment

The moment I pulled these blueberry biscuits from the oven, the kitchen filled with the warm scent of baked goodness, instantly reminding me of cozy family breakfasts. With their delightfully fluffy texture and pockets of juicy blueberries, these homemade blueberry biscuits are not just another quick and easy recipe; they’re a perfect addition to any brunch table or an irresistible snack for any time of day. The best part? You can whip them up in under 30 minutes using simple pantry staples, making them a go-to solution for busy mornings or spontaneous gatherings. Plus, their customizable nature means you can tweak ingredients to suit your taste or dietary preferences! Ready to discover how to create these delicious treats? Let's get started!

Why Are Blueberry Biscuits a Must-Try?

Quick and Easy: These homemade blueberry biscuits come together in under 30 minutes, perfect for busy mornings.

Fluffy Texture: The biscuits boast a wonderfully fluffy and slightly flaky texture that elevates your breakfast game.

Customizable: Feel free to swap blueberries for raspberries or chocolate chips, making them uniquely yours!

Perfect for Any Occasion: Whether it’s a brunch gathering or a simple snack, these treats are a delightful addition to any table.

Healthier Options: Reduce sugar or opt for whole wheat flour to create a nutritious twist on this classic recipe.

Family Favorite: Bursting with juicy blueberries, they’re sure to be a hit with everyone, making them an irresistible treat you’ll want to bake repeatedly!

Blueberry Biscuits Ingredients

For the Dough
• All-Purpose Flour – Provides structure; you can substitute with whole wheat flour for a healthier option.
• Baking Powder – Essential for rising; make sure it's fresh for optimal fluffiness.
• Salt – Enhances flavors to balance the sweetness; always a necessity for taste.
• Cold Butter – Creates a flaky texture; use very cold butter and a pastry cutter to prevent overworking.
• Granulated Sugar – Adds sweetness; feel free to reduce the quantity for a less sweet biscuit.
• Milk – Moistens the dough; consider almond or oat milk for a dairy-free alternative.

For the Blueberries
• Blueberries – Introduces fruity flavor and moisture; use fresh or frozen (do not thaw) to keep the dough from getting too wet.

Step‑by‑Step Instructions for Blueberry Biscuits

Step 1: Preheat the Oven
Start by preheating your oven to 425°F (220°C). This high temperature ensures your blueberry biscuits will rise beautifully and develop a lovely golden-brown crust. Allow your oven some time to fully heat up while you prepare the dough, ensuring a perfect bake as soon as they hit the hot air.

Step 2: Combine Dry Ingredients
In a large mixing bowl, whisk together 2 cups of all-purpose flour, 2 tablespoons of baking powder, 1 teaspoon of salt, and 2 tablespoons of granulated sugar. Mix these dry ingredients until well combined, creating a light and airy foundation for your blueberry biscuits. A uniform appearance indicates that you're ready for the next step.

Step 3: Cut in the Butter
Add in 1/2 cup of very cold butter, cubed, and use a pastry cutter to cut the butter into the flour mixture. Continue until the blend resembles coarse crumbs, with small bits of butter still visible. This process is key to achieving that flaky texture in your baked blueberry biscuits, so work gently and don’t over-mix.

Step 4: Add Wet Ingredients
Gradually stir in 3/4 cup of milk into the dry mixture, folding gently until just combined. Take care not to overwork the dough; the goal is a moist and slightly sticky texture without any dry flour visible. Once you achieve this consistency, it's time to fold in the stars of the recipe—blueberries!

Step 5: Incorporate Blueberries
Gently fold in 1 cup of fresh or frozen blueberries into the dough. If using frozen blueberries, do not thaw them, as this prevents excess moisture that could affect your biscuit's texture. Aim for an even distribution of blueberries throughout the dough, which will yield delightful bursts of fruit flavor in each biscuit.

Step 6: Shape the Dough
Turn your dough onto a well-floured surface and lightly knead it three to four times until it forms a cohesive ball. Press the dough to a thickness of about 1-inch, then use a biscuit cutter to create rounds. Place the shaped biscuits on a baking sheet lined with parchment paper, ensuring they are close but not touching for even baking.

Step 7: Bake to Perfection
Transfer the baking sheet to your preheated oven and bake the blueberry biscuits for 15-18 minutes, or until they turn golden brown on top. Keep an eye on them towards the end; the perfect biscuit will look puffed and have a light golden hue, indicating they're done and ready to be enjoyed.

Step 8: Cool and Serve
Once baked, remove your blueberry biscuits from the oven, allowing them to cool on the baking sheet for about 5 minutes. After they cool slightly, transfer them to a wire rack to cool completely. Serve these warm to ensure a delightful melt-in-your-mouth experience!

What to Serve with Blueberry Biscuits

Warm blueberry biscuits are a delightful treat, perfectly complementing your breakfast or snack time with a touch of sweetness.

  • Creamy Butter: Spread a generous pat of creamy butter over warm biscuits for rich flavor and amazing melt-in-your-mouth goodness.

  • Honey Drizzle: A light drizzle of honey enhances the natural sweetness of the biscuits, adding a lovely floral touch that pairs beautifully.

  • Fresh Fruit Salad: Brighten your plate with a colorful assortment of fresh fruits. The refreshing flavors balance the richness of the biscuits perfectly.

  • Greek Yogurt: A dollop of tangy Greek yogurt adds creaminess and protein, making your breakfast both satisfying and nutritious.

  • Herbal Tea: Sip on a warm cup of herbal tea, like chamomile or mint, which complements the sweet flavors of blueberry biscuits beautifully.

  • Maple Syrup: For a classic combination, serve with warm maple syrup; its rich sweetness will elevate your biscuit experience to another level.

  • Scrambled Eggs: Pair the biscuits with fluffy scrambled eggs for a delightful breakfast spread that combines savory and sweet elements seamlessly.

  • Iced Coffee: On warmer days, enjoy a refreshing iced coffee alongside the biscuits. The slight bitterness of coffee complements the sweetness wonderfully.

  • Cinnamon Sugar Dusting: Sprinkle a bit of cinnamon sugar on top for a sweet and spicy finish that enhances every delightful bite!

How to Store and Freeze Blueberry Biscuits

Room Temperature: Store leftover blueberry biscuits in an airtight container at room temperature for up to 2 days to maintain their softness.

Fridge: For longer freshness, keep them in the fridge for up to 5 days, ensuring they’re well-wrapped to prevent drying out.

Freezer: Freeze blueberry biscuits in a single layer on a baking sheet, then transfer to a zip-top bag for up to 2 months. Bake directly from frozen, adding a few extra minutes to the baking time.

Reheating: To reheat, place biscuits in a warm oven or microwave for about 20 seconds, restoring their fluffy texture and delightful taste.

Make Ahead Options

These soft and fluffy blueberry biscuits are perfect for meal prep, saving you precious time on busy mornings! You can prepare the dough up to 24 hours in advance; simply follow the recipe, shape the biscuits, and then cover them tightly with plastic wrap before refrigerating. To maintain their light and airy texture, ensure the dough is well-wrapped to prevent drying out. When you're ready to bake, preheat your oven and bake the biscuits directly from the refrigerator for about 18-20 minutes until golden brown. This way, you can enjoy fresh, homemade blueberry biscuits any day of the week with minimal effort!

Blueberry Biscuits Variations & Substitutions

Feel free to play around with this delightful recipe and create your own unique version of blueberry biscuits!

  • Raspberry Surprise: Swap blueberries with fresh raspberries for a tangy twist that brightens your biscuits. Each bite will burst with flavor!
  • Chocolatey Indulgence: Replace blueberries with chocolate chips for a decadent version that satisfies sweet cravings, perfect for dessert or an indulgent breakfast.
  • Whole Wheat Wonder: Use whole wheat flour instead of all-purpose flour to boost the nutritional value without compromising flavor and texture. They’ll be just as fluffy!
  • Dairy-Free Delight: Substitute regular milk with almond or oat milk for a delicious dairy-free option that doesn’t sacrifice taste. Your biscuits will still be wonderfully moist!
  • Nutty Flavor: Incorporate chopped nuts, such as walnuts or pecans, into the dough for added crunch and a nutty flavor profile that enhances every bite.
  • Cinnamon Spice: Add a teaspoon of cinnamon to the dry ingredients for warmth and spice, creating a cozy flavor perfect for chilly mornings.
  • Zesty Lemon: Include a tablespoon of lemon zest into the dough for a bright pop of citrus that elevates the blueberry flavor to new heights!
  • Make Ahead Magic: Prepare the biscuit dough in advance and freeze shaped biscuits for effortless baking on busy mornings; just pop them in the oven straight from the freezer!

Ready to get creative? Discover the fun of personalized baking as you experiment with these variations, turning everyday moments into extraordinary experiences!

Expert Tips for Blueberry Biscuits

  • Cold Butter Is Key: Using very cold butter is essential for achieving that flaky texture. Keep butter in the fridge until you're ready to use it.

  • Avoid Overmixing: Gently combine ingredients; overworking the dough can result in tough biscuits. Aim for a light touch when mixing and folding in blueberries.

  • Frozen Blueberries Only: If using frozen blueberries, don’t thaw them before adding to the dough. This preserves the biscuit's consistency and prevents excess moisture.

  • Stay True to Measurements: Accurately measure your flour and other ingredients. Too much flour can lead to dense biscuits, so spoon it into your measuring cup instead of scooping.

  • Add Zest for Flavor: For an extra layer of taste, consider adding lemon zest to the dough. This brightens up the blueberry flavor and enhances overall enjoyment!

Blueberry Biscuits Recipe FAQs

How do I choose ripe blueberries for the best flavor?
Absolutely! When selecting blueberries, look for plump, firm berries that are deep blue in color. Avoid any that have dark spots or appear shriveled, as these may be overripe. Fresh blueberries should have a slight white bloom, indicating they're fresh and ready to use.

How should I store leftover blueberry biscuits?
For the best results, store your leftover blueberry biscuits in an airtight container at room temperature for up to 2 days. If you want to keep them fresher longer, you can refrigerate them for up to 5 days. Just ensure they're well-wrapped to prevent drying out.

Can I freeze blueberry biscuits, and how do I do it?
Absolutely! To freeze your blueberry biscuits, first allow them to cool completely. Then, place them in a single layer on a baking sheet and freeze until solid. Once frozen, transfer them to a zip-top bag, where they can be kept for up to 2 months. When you're ready to enjoy, you can bake them directly from frozen, adding an extra minute or two to the baking time.

What should I do if my biscuit dough is too sticky?
If your biscuit dough feels too sticky, no problem! Gently sprinkle a little more flour onto your work surface and your hands while you knead it. Just remember not to overdo it; you want to keep that wonderful fluffy texture. If you find the dough too wet after mixing, it’s a sign you may have added too much milk, so decrease the amount next time.

Are blueberry biscuits suitable for people with gluten allergies?
Yes! You can make blueberry biscuits gluten-free by substituting all-purpose flour with a suitable gluten-free flour blend. Look for a 1:1 gluten-free flour mix that includes xanthan gum for optimal texture. This way, everyone can enjoy these delicious treats without worry!

Is there a way to make blueberry biscuits healthier?
Very! To create a healthier version of your blueberry biscuits, consider reducing the sugar amount or swapping in whole wheat flour for all-purpose flour. This not only boosts the nutritional content but also adds a lovely nutty flavor. It's a fantastic way to enjoy these treats while still keeping an eye on health!

Blueberry Biscuits

Fluffy Blueberry Biscuits That Will Brighten Your Mornings

Delight in these fluffy blueberry biscuits, perfect for breakfast or any time of day, made in under 30 minutes for a quick and easy treat.
Print Recipe Pin Recipe
Prep Time 10 minutes mins
Cook Time 18 minutes mins
Cooling Time 5 minutes mins
Total Time 33 minutes mins
Servings: 8 biscuits
Course: Breakfast
Calories: 180
Ingredients Equipment Method Nutrition Notes

Ingredients
  

For the Dough
  • 2 cups all-purpose flour or whole wheat flour for a healthier option
  • 2 tablespoons baking powder make sure it's fresh
  • 1 teaspoon salt enhances sweetness
  • 1/2 cup cold butter very cold for flakiness
  • 2 tablespoons granulated sugar reduce for less sweetness
  • 3/4 cup milk almond or oat milk for dairy-free option
For the Blueberries
  • 1 cup blueberries fresh or frozen, do not thaw

Equipment

  • Mixing Bowl
  • Pastry cutter
  • Baking Sheet
  • Biscuit cutter
  • wire rack

Method
 

Step-by-Step Instructions for Blueberry Biscuits
  1. Preheat your oven to 425°F (220°C).
  2. In a large mixing bowl, whisk together the dry ingredients: flour, baking powder, salt, and sugar.
  3. Cut in the very cold butter until the mixture resembles coarse crumbs.
  4. Gradually stir in milk until just combined, without overworking the dough.
  5. Gently fold in the blueberries, ensuring even distribution.
  6. Turn the dough onto a floured surface and knead lightly before cutting into rounds.
  7. Place biscuits on a baking sheet and bake for 15-18 minutes until golden brown.
  8. Cool on the baking sheet for 5 minutes before transferring to a wire rack.

Nutrition

Serving: 1biscuitCalories: 180kcalCarbohydrates: 28gProtein: 3gFat: 7gSaturated Fat: 4gPolyunsaturated Fat: 0.5gMonounsaturated Fat: 2gCholesterol: 20mgSodium: 250mgPotassium: 150mgFiber: 1gSugar: 3gVitamin A: 300IUVitamin C: 2mgCalcium: 70mgIron: 1mg

Notes

Using very cold butter and avoiding overmixing are key to fluffy biscuits. Frozen blueberries should not be thawed.

Tried this recipe?

Let us know how it was!

Cinnamon French Toast Sticks: Your Easy Morning Delight

May 23, 2026 by Grace Snow Leave a Comment

As I poured the sweet cinnamon-sugar mix onto the warm, golden sticks, I could already imagine the delighted faces around the breakfast table. These irresistible Cinnamon French Toast Sticks are not only a nostalgic nod to the classic brunch favorite but also a quick and easy breakfast option perfect for busy mornings or leisurely weekends. With their crispy edges and soft, fluffy centers, they’re a hit with kids and adults alike, making them an excellent choice for family meal prep. Plus, this recipe lets you get creative with fun variations—think stuffed options or an indulgent chocolate chip twist. Ready to elevate your morning routine with a homemade treat that will have everyone coming back for seconds? Let’s dive into the deliciousness!

Why You'll Love These French Toast Sticks

Kid-Friendly: These Cinnamon French Toast Sticks are a hit with children, making breakfast a fun and tasty experience.
Quick Preparation: Ready in under 20 minutes, they're perfect for busy mornings.
Customizable Options: From stuffed delights to creative flavor twists like pumpkin spice, there's a version for everyone!
Freezer-Friendly: Make a large batch and freeze for effortless breakfasts on-the-go.
Deliciously Sweet: The delightful crunch of cinnamon sugar with a soft interior creates an irresistible texture combination.
Perfect for Meal Prep: These sticks are ideal for those who enjoy prepping meals in advance—store them easily and reheat whenever hunger strikes!

Cinnamon French Toast Sticks Ingredients

For the Batter

  • Thick sliced brioche or challah – Ideal for structure and absorbs custard well without getting soggy.
  • Eggs – Provide richness and help bind the custard mixture together.
  • Whole milk – Enhances creaminess; almond or oat milk can be used for dairy-free versions.
  • Granulated sugar – Adds sweetness to the custard while aiding in caramelization during cooking.
  • Vanilla extract – Imparts a warm aroma and depth of flavor to the mixture.
  • Ground cinnamon – The key spice that defines the irresistible flavor of the Cinnamon French Toast Sticks; using quality cinnamon is crucial.

For Cooking

  • Butter – Necessary for cooking to achieve a rich flavor and a perfect golden crust.

For the Coating

  • Cinnamon sugar – A simple blend of sugar and cinnamon that gives the sticks a sweet, crunchy finish.

Step‑by‑Step Instructions for Cinnamon French Toast Sticks

Step 1: Prepare the Bread
Begin by slicing each piece of thick brioche or challah into 3–4 thick sticks, about 1 inch wide. This will ensure they hold their shape during cooking. Set the sticks aside on a plate while you prepare the custard mixture, allowing them to dry a bit, which helps them soak up flavor without becoming overly soggy.

Step 2: Make the Custard Mixture
In a large mixing bowl, whisk together 4 large eggs, 1 cup of whole milk (or a dairy-free alternative), 2 tablespoons of granulated sugar, 1 teaspoon of vanilla extract, and 1 teaspoon of ground cinnamon until smooth and well combined. The mixture should be uniform in color and creamy. This custard is the heart of your Cinnamon French Toast Sticks, so make sure it’s mixed thoroughly!

Step 3: Dip the Bread Sticks
Take each bread stick and dip it quickly into the custard mixture, ensuring it is completely coated. Let any excess custard drip off before placing it on a separate plate. Be careful not to soak the bread for too long, as this could result in sogginess. Aim for a quick dip—just a second or two will do the trick!

Step 4: Heat the Pan
Place a non-stick skillet over medium heat and add 2 tablespoons of butter. Allow the butter to melt and become foamy without browning, which should take about 1-2 minutes. This hot, buttery foundation will give your Cinnamon French Toast Sticks that perfect golden crust as they cook.

Step 5: Cook the Sticks
Carefully add the dipped bread sticks to the skillet in a single layer without overcrowding. Cook for 2–3 minutes on one side until they turn golden brown and slightly crisp. Gently flip each stick using a spatula and cook for another 2–3 minutes on the opposite side until perfectly browned and cooked through.

Step 6: Coat in Cinnamon Sugar
Once cooked, remove the sticks from the skillet and place them on a plate. While they are still warm, roll them in a mixture of 2 tablespoons of granulated sugar and 1 teaspoon of ground cinnamon until evenly coated. This sugary crust gives your Cinnamon French Toast Sticks an irresistible sweet finish!

Step 7: Serve Immediately
Serve your delightful Cinnamon French Toast Sticks warm and fresh from the skillet. They are best enjoyed with a drizzle of maple syrup or your choice of dipping sauces, such as chocolate sauce or fruit compote. These sticks are a perfect breakfast treat that everyone will love!

Cinnamon French Toast Sticks: Creative Twists

Get ready to unleash your creativity in the kitchen with these irresistible Cinnamon French Toast Sticks, where you can elevate every bite to something special!

  • Baked Version: Bake at 375°F for 15–18 minutes for a lighter, healthier twist. They’ll still be golden and delicious!

  • Stuffed Delight: Insert a luscious filling like cream cheese or sweet Nutella between bread slices before cutting. It adds an exciting surprise in every bite!

  • Pumpkin Spice: Stir in pumpkin spice or a spoonful of pumpkin puree into the custard for that autumn flavor year-round. Your taste buds will thank you!

  • Chocolate Chip Indulgence: Mix mini chocolate chips into the batter for a melty, sweet addition that complements the cinnamon beautifully.

  • Savory Option: Skip the sugar coating and serve the sticks with crispy bacon and a drizzle of maple syrup for a delightful sweet-savory balance. You won't regret this pairing!

  • Dairy-Free Adaptation: Use almond or oat milk instead of whole milk for fluffiness without dairy. Everyone can enjoy these scrumptious treats!

  • Flavor Infusions: Infuse the custard with different extracts like almond or orange for a unique twist on the classic flavor profile.

  • Caramelized Bananas: Top your warm sticks with sliced bananas, caramel sauce, or even a dollop of whipped cream for an indulgent brunch experience!

Feel free to mix and match these variations to create your perfect Cinnamon French Toast Sticks! For an extra level of scrumptiousness, consider checking out our Pumpkin Cinnamon Roll Variations for more ideas!

Expert Tips for Cinnamon French Toast Sticks

  • Choose the Right Bread: Opt for thick sliced brioche or challah, as they absorb the custard well without falling apart. Day-old bread works best!
  • Avoid Sogginess: Limit soak time when dipping the bread into the custard mixture; a quick dip is ideal for crispiness.
  • Perfect Cooking Temperature: Use medium heat when cooking to ensure your Cinnamon French Toast Sticks achieve a golden brown color without burning.
  • Batch Cooking: Cook in smaller batches to maintain the skillet's temperature, which helps keep the sticks crispy and perfectly cooked.
  • Storing Leftovers: Allow cooked sticks to cool on a wire rack before storing in an airtight container. They can be enjoyed within 3-4 days or frozen for up to 2 months.

How to Store and Freeze Cinnamon French Toast Sticks

Room Temperature: Allow cooked sticks to cool on a wire rack for about 10 minutes to avoid steaming. They can sit at room temperature for up to 2 hours.

Fridge: Store in an airtight container in the refrigerator for up to 3–4 days. Simply reheat in a skillet or microwave until warmed through.

Freezer: For longer storage, freeze the cooked sticks in a single layer on a baking sheet, then transfer to a freezer bag. They’ll last for up to 2 months.

Reheating: Reheat from frozen in an air fryer or toaster oven at 350°F for about 5-8 minutes until heated through and crispy. Enjoy your delicious Cinnamon French Toast Sticks any time!

Make Ahead Options

These Cinnamon French Toast Sticks are perfect for busy home cooks who want to enjoy a delicious breakfast without the morning rush! You can prepare the custard mixture and dip the bread sticks up to 24 hours in advance by placing them in an airtight container in the refrigerator to maintain freshness. To avoid sogginess, ensure you dip the sticks just before cooking. When ready to serve, simply heat a skillet with butter, cook the sticks for 2–3 minutes on each side until golden, and coat them in cinnamon sugar. Your family will love that you could whip up restaurant-quality French toast sticks with such minimal effort!

What to Serve With Cinnamon French Toast Sticks

Indulging in warm, cinnamon-kissed delights creates the perfect opportunity to enrich your breakfast table with delightful pairings.

  • Maple Syrup: A classic sweet addition that complements the warm spices, bringing an irresistible sweetness to each bite.

  • Whipped Cream: Light and airy, whipped cream adds a luxurious touch, perfect for dipping and deliciously enhances the flavors.

  • Fresh Berries: Offering a refreshing contrast, strawberries, blueberries, or raspberries provide a burst of color and tangy sweetness, balancing the richness of the sticks.

  • Crispy Bacon: For a savory twist, crispy bacon pairs beautifully, creating a delightful sweet and savory contrast that is sure to please everyone.

  • Chocolate Hazelnut Spread: For a decadent treat, serve with chocolate hazelnut spread for a rich, indulgent twist that takes breakfast to a whole new level.

  • Fruit Compote: A homemade or store-bought fruit compote adds a vibrant, fruity element, complementing the warm spices and enriching the overall experience.

  • Almond Milk Iced Coffee: A refreshing drink to wash it all down, the nutty flavor of almond milk iced coffee pairs wonderfully with the sweet, spiced French toast sticks.

  • Cinnamon Ice Cream: Treat yourself to an ice cream indulgence as a dessert option; the cinnamon flavor echoes delightfully with the French toast sticks for a sweet finish.

Cinnamon French Toast Sticks Recipe FAQs

What type of bread is best for Cinnamon French Toast Sticks?
I recommend thick sliced brioche or challah for the best results. These breads have a rich texture that absorbs the custard mixture without becoming soggy, ensuring your French toast sticks maintain their shape. Day-old or stale bread works wonderfully, too, as it has less moisture.

How should I store leftover Cinnamon French Toast Sticks?
Once cooked, allow the sticks to cool on a wire rack for about 10 minutes. Place them in an airtight container in the fridge, where they can stay fresh for up to 3-4 days. To reheat, a quick stint in a skillet or microwave will bring the warm deliciousness back to life!

Can I freeze Cinnamon French Toast Sticks?
Absolutely! To freeze, first let the cooked sticks cool completely. Then, lay them out in a single layer on a baking sheet and freeze until solid. Transfer the frozen sticks into a freezer bag, and they’ll last up to 2 months. When you're ready to enjoy them, simply reheat in an air fryer or toaster oven at 350°F for 5-8 minutes until they are heated through and crispy again.

What should I do if my French Toast Sticks are soggy?
If your sticks ended up soggy, it could be due to too long of a soak in the custard mixture. To remedy this, ensure you do a quick dip—just a second or two—so the bread absorbs flavor without becoming overly moist. If baking further, consider placing them back in a hot skillet to crisp up the exterior.

Are there any dietary considerations for Cinnamon French Toast Sticks?
Good question! For dairy-free options, simply substitute whole milk with almond or oat milk. If you're making these for little ones, keep allergies in mind—especially if using fillings or toppings. Always check for any nut allergies if you decide to add almond milk or toppings like Nutella.

Can I prepare the custard mixture ahead of time?
Yes! You can prepare the custard mixture a few hours ahead of time and keep it covered in the fridge until you're ready to use it. Just give it a good whisk again before dipping the bread sticks to ensure everything is well combined, and you can start your delicious Cinnamon French Toast Sticks in no time!

Cinnamon French Toast Sticks

Cinnamon French Toast Sticks: Your Easy Morning Delight

These Cinnamon French Toast Sticks are an easy, delightful breakfast option that is perfect for family meal prep.
Print Recipe Pin Recipe
Prep Time 10 minutes mins
Cook Time 10 minutes mins
Cooling Time 10 minutes mins
Total Time 30 minutes mins
Servings: 4 sticks
Course: Breakfast
Cuisine: American
Calories: 300
Ingredients Equipment Method Nutrition Notes

Ingredients
  

For the Batter
  • 4 large eggs
  • 1 cup whole milk or dairy-free alternative
  • 2 tablespoons granulated sugar
  • 1 teaspoon vanilla extract
  • 1 teaspoon ground cinnamon use quality cinnamon for best flavor
  • 1 loaf thick sliced brioche or challah for structure and absorption
For Cooking
  • 2 tablespoons butter
For the Coating
  • 2 tablespoons cinnamon sugar blend of sugar and cinnamon

Equipment

  • non-stick skillet
  • Mixing Bowl
  • Spatula

Method
 

Step-by-Step Instructions
  1. Slice each piece of thick brioche or challah into 3–4 thick sticks, about 1 inch wide, and set aside.
  2. In a large mixing bowl, whisk together 4 large eggs, 1 cup of whole milk, 2 tablespoons of granulated sugar, 1 teaspoon of vanilla extract, and 1 teaspoon of ground cinnamon until smooth.
  3. Dip each bread stick quickly into the custard mixture and let excess drip off.
  4. Place a non-stick skillet over medium heat and add 2 tablespoons of butter. Let it melt without browning.
  5. Add the dipped bread sticks to the skillet in a single layer. Cook for 2–3 minutes until golden brown, then flip and cook for another 2–3 minutes.
  6. Remove sticks from the skillet and roll them in the cinnamon sugar mixture while still warm.
  7. Serve warm with maple syrup or dipping sauces of your choice.

Nutrition

Serving: 2sticksCalories: 300kcalCarbohydrates: 40gProtein: 8gFat: 12gSaturated Fat: 7gPolyunsaturated Fat: 1gMonounsaturated Fat: 4gCholesterol: 120mgSodium: 200mgPotassium: 200mgFiber: 2gSugar: 10gVitamin A: 500IUCalcium: 150mgIron: 1mg

Notes

Best enjoyed fresh, but can be stored for a few days or frozen for later use.

Tried this recipe?

Let us know how it was!

Delicious French Toast Bake: Effortless Brunch Delight

May 23, 2026 by Grace Snow Leave a Comment

The first time I made a French Toast Bake, I was skeptical—could such an easy breakfast really impress my weekend guests? As the aroma filled my kitchen, I was instantly transported to a cozy café, where each fluffy bite melted in my mouth. This recipe is an absolute gem, perfectly suited for busy mornings or relaxed brunches with family and friends. Not only can this dish be prepped the night before to enhance the flavors, but it's also customizable to fit your taste buds. Picture drizzling warm maple syrup over a crisp-topped, gooey interior, with fresh fruit adding a pop of color. Who wouldn't want to dive into such a comforting morning feast? Ready to bring joy to your breakfast table with this Easy Overnight French Toast Bake? Let’s get started!

Why is French Toast Bake a Must-Try?

Ease of Preparation: This dish is a breeze to whip up, perfect for anyone who enjoys homemade meals but is short on time.

Overnight Convenience: Prepare it the night before, and let the flavors meld while you get your beauty sleep—a true time-saver for busy mornings!

Customizable Toppings: Whether you prefer fresh fruit, whipped cream, or a drizzle of maple syrup, this French Toast Bake adapts to your taste and mood effortlessly.

Crowd Pleaser: Perfect for brunch gatherings or family breakfasts, it’s a dish that guarantees smiles and satisfied bellies all around.

Deliciously Soft and Crispy: Experience the best of both worlds with its fluffy interior and lightly crisp edges, reminiscent of your favorite café treats.

Explore more delightful breakfast options like this Cheesy Zucchini Bake or sweet indulgences such as Matcha Baked Doughnuts that promise to elevate your mornings!

French Toast Bake Ingredients

• A delightful combination awaits you!

For the Base

  • Loaf of bread – Choose sturdy bread like challah or brioche to prevent sogginess.
  • Large eggs – Essential for binding the mixture; make sure they’re room temperature for easier blending.
  • Milk – Use whole milk or cream for a rich, creamy flavor.
  • Granulated sugar – Just the right sweetness to balance the dish.
  • Vanilla extract – Adds depth and sweetness to the mixture.
  • Ground cinnamon – Infuses warmth and enhances the overall flavor.
  • Salt – A crucial addition to balance the sweetness.

For Topping

  • Maple syrup (optional) – Drizzle it before serving for that perfect finishing touch.
  • Powdered sugar (optional) – Dust on top for an elegant look and added sweetness.
  • Fresh fruit (optional) – Consider strawberries or blueberries to bring a fresh burst of flavor.

This French Toast Bake is sure to become a cherished recipe in your breakfast repertoire!

Step‑by‑Step Instructions for Easy Overnight French Toast Bake

Step 1: Preheat the Oven
Begin by preheating your oven to 350°F (175°C). This allows your kitchen to warm up, ensuring that your Easy Overnight French Toast Bake bakes evenly. While the oven heats, gather your baking dish and greasing spray or butter to prepare it for the bread cubes.

Step 2: Prepare the Bread
Cut the sturdy loaf of bread into bite-sized cubes, making sure each piece is uniform for even cooking. Gradually place the cubes into a greased 9x13 inch baking dish, filling it up to the top. This step is crucial—using bread like challah or brioche prevents sogginess and creates that delightful texture.

Step 3: Whisk the Egg Mixture
In a spacious mixing bowl, whisk together the large eggs, milk, granulated sugar, vanilla extract, ground cinnamon, and salt. Ensure all ingredients are fully incorporated, and you see a uniform mixture with no streaks. This egg mixture will coat the bread cubes, contributing to your French Toast Bake's rich flavor profile.

Step 4: Soak the Bread
Pour the egg mixture evenly over the bread cubes, using a spatula to gently press down on the cubes, allowing them to soak up the mixture. Ensure every piece is moist, which should take about 5 minutes. This soaking step is essential to achieve that fluffy interior texture you desire in an indulgent French Toast Bake.

Step 5: Cover and Refrigerate
Cover the baking dish tightly with foil and let it sit for 15 to 30 minutes at room temperature, or refrigerate overnight if you prefer. Allowing it to rest overnight helps deepens the flavor and texture, making your Easy Overnight French Toast Bake a true breakfast delight.

Step 6: Bake the French Toast
When ready to bake, place the covered dish in the preheated oven and let it cook for 30 minutes. This initial baking step traps moisture and helps the dish cook evenly. You'll know it's ready for the next step when it’s puffed and slightly set.

Step 7: Uncover and Brown
Carefully remove the foil from the baking dish and continue baking for an additional 15 to 20 minutes. This stage is vital for achieving those beautifully golden brown edges while the interior stays fluffy. Keep an eye on it to avoid over-baking!

Step 8: Serve and Enjoy
Once golden and fragrant, take the Easy Overnight French Toast Bake out of the oven. Allow it to cool slightly, then serve warm with drizzles of maple syrup, a dusting of powdered sugar, and fresh fruit for a burst of color and flavor. Enjoy your delightful creation!

How to Store and Freeze French Toast Bake

Fridge: Keep any leftovers in an airtight container for up to 4 days. This ensures freshness while maintaining the comforting flavors of your French Toast Bake.

Freezer: If you want to store it longer, wrap individual portions tightly and freeze for up to 3 months. Reheat in the oven or microwave straight from the freezer for a quick breakfast option.

Reheating: To reheat, bake in a 350°F (175°C) oven for about 15-20 minutes, covered with foil to retain moisture. This will help restore that fluffy texture beautifully.

Make-Ahead: You can prepare the French Toast Bake up to 24 hours in advance and store it covered in the fridge. Just pop it in the oven when you’re ready to enjoy!

Expert Tips for French Toast Bake

  • Bread Choice Matters: Use sturdy bread like challah or brioche to prevent a soggy texture—don't skimp on quality!

  • Soaking Time: Allow for overnight soaking if possible; it deeply enhances the flavors and ensures perfect consistency in your French Toast Bake.

  • Monitor Baking: Keep an eye on the bake towards the end; golden edges are ideal, but over-baking can lead to dryness.

  • Covering Technique: Always bake covered first to retain moisture, then uncover for a beautiful crisp finish.

  • Flavor Variations: Don’t hesitate to experiment with toppings like nuts or citrus zest to elevate the flavors of your French Toast Bake!

French Toast Bake Variations & Substitutions

Feel free to get creative and make this French Toast Bake your own with these tempting twists that will enhance every bite.

  • Dairy-Free: Swap out milk for almond or oat milk for a deliciously creamy, dairy-free version.
  • Vegan: Replace eggs with a mixture of mashed bananas or flaxseed meal mixed with water, making it perfect for plant-based diets.
  • Chocolate Delight: Add a handful of chocolate chips to the bread mixture for a sweet, indulgent treat that chocolate lovers will adore.
  • Citrus Infusion: Mix in some orange or lemon zest for a refreshing twist that brings brightness to each mouthful.
  • Nutty Crunch: Fold in chopped nuts like pecans or walnuts for an added crunch and a nutty flavor profile.
  • Spice It Up: For a warming kick, include a pinch of nutmeg or substitute the cinnamon with pumpkin pie spice for a seasonal touch.
  • Berry Burst: Layer in fresh berries like raspberries or blackberries among the bread cubes for a tart burst of flavor that complements the sweetness well.

The beauty of this French Toast Bake is in its versatility, much like how a cozy brunch can be made special with just a few thoughtful touches. If you end up loving this breakfast affair, why not explore energizing options like a Cheesy Zucchini Bake or sweet treats such as Cherry Clafoutis French for your next gathering?

Make Ahead Options

These Easy Overnight French Toast Bake recipes are perfect for busy cooks looking to save time! You can assemble the entire dish up to 24 hours in advance, allowing the flavors to meld beautifully. To prep ahead, simply cut the bread, mix the egg mixture, and combine them in your greased baking dish; then cover tightly with foil and refrigerate. For optimal quality, ensure the dish is sealed well to prevent drying out. When you're ready to serve, just pop it in the oven, following the baking instructions to uncover and achieve golden edges. This way, you'll enjoy a delicious, hassle-free breakfast that's just as delightful the next day!

What to Serve with Easy Overnight French Toast Bake?

Indulge in the delightful experience of creating a well-rounded breakfast, where each bite is perfectly paired for maximum joy.

  • Crispy Bacon: The salty, savory notes of crispy bacon provide a delightful contrast to the sweetness of the French toast bake. This classic pairing brings together two beloved breakfast staples.

  • Spiced Sausages: Juicy sausages seasoned with herbs and spices add a hearty element to your meal. They complement the sweet flavors of the French toast bake beautifully, creating a satisfying feast.

  • Fresh Fruit Salad: A colorful mix of seasonal fruits adds a refreshing touch. The bright, juicy flavors enhance the dish, making every bite a celebration of freshness.

  • Yogurt Parfait: Creamy yogurt layered with granola and fruit offers a tangy, crunchy contrast to the soft, sweet French toast. This mini breakfast masterpiece brings extra texture to your table.

  • Maple Syrup Drizzle: Warm maple syrup is a must-have! Its rich sweetness is the perfect finishing touch, elevating your French Toast Bake to heavenly status.

  • Café-Style Coffee: A rich cup of coffee, whether brewed or espresso, enhances the comforting breakfast experience. Its robust flavor balances the sweetness of the dish, making each sip delightful.

  • Cinnamon Sugar Toast: A side of lightly buttered toast dusted with cinnamon sugar brings a sweet crunch. It echoes the flavors of your French toast bake while providing an extra layer of deliciousness.

  • Chai Tea: A warm cup of chai tea with its spiced notes complements the cozy vibe of your breakfast. This aromatic drink enriches your meal and keeps the comforting theme alive.

French Toast Bake Recipe FAQs

What type of bread should I use for French Toast Bake?
Absolutely! For the best results, use sturdy bread like challah or brioche. These varieties hold up well while soaking in the egg mixture and help prevent a soggy texture. Avoid soft breads or those with a high moisture content, as they can lead to disappointment in the final dish.

How long can I store leftover French Toast Bake?
Very! You can keep any leftovers in an airtight container in the refrigerator for up to 4 days. This way, you can enjoy it again without losing any of its delightful flavors. Just reheat in the oven for the best results!

Can I freeze French Toast Bake?
Certainly! If you want to store it for a longer period, wrap individual portions tightly and freeze them for up to 3 months. When you're ready to enjoy it again, just reheat in the oven or microwave straight from the freezer, which makes it a super convenient breakfast option!

What should I do if my French Toast Bake seems soggy?
If you find that your bake is soggy, it may be because the bread was not sturdy enough or not soaked for the right amount of time. To remedy this for future bakes, always opt for challah or brioche, and ensure you press the bread down adequately to soak up the egg mixture evenly. If you ever face a soggy result, try baking it a bit longer until the edges crisp up nicely.

Are there any dietary considerations for this French Toast Bake?
Absolutely! This recipe can be made dairy-free by substituting the milk with almond milk or oat milk, and using vegan eggs or a flaxseed mixture for binding. Make sure to check for any allergies to nuts if you're adding toppings like nuts or chocolate chips. It’s always good practice to customize based on your dietary needs or preferences.

Can I prepare this French Toast Bake in advance?
Yes, you can! You can prepare the French Toast Bake up to 24 hours in advance, covering it and refrigerating it overnight. This allows the flavors to meld beautifully, creating an even more delightful dish when you bake it the following morning.

French Toast Bake

Delicious French Toast Bake: Effortless Brunch Delight

Enjoy a delightful French Toast Bake that impresses with its fluffy texture and customizable toppings, perfect for busy mornings.
Print Recipe Pin Recipe
Prep Time 30 minutes mins
Cook Time 50 minutes mins
Resting Time 30 minutes mins
Total Time 1 hour hr 50 minutes mins
Servings: 8 slices
Course: Breakfast
Cuisine: French
Calories: 350
Ingredients Equipment Method Nutrition Notes

Ingredients
  

For the Base
  • 1 loaf sturdy bread (challah or brioche) to prevent sogginess
  • 6 large eggs room temperature
  • 2 cups whole milk or cream for creamier flavor
  • 1/2 cup granulated sugar for sweetness
  • 2 teaspoons vanilla extract adds depth
  • 2 teaspoons ground cinnamon for flavor
  • 1/4 teaspoon salt to balance sweetness
For Topping
  • 1/4 cup maple syrup optional
  • 1 cup powdered sugar optional
  • 1 cup fresh fruit (strawberries or blueberries) optional

Equipment

  • Oven
  • 9x13-inch baking dish
  • Mixing Bowl
  • Spatula
  • Foil

Method
 

Step-by-Step Instructions
  1. Preheat your oven to 350°F (175°C).
  2. Cut the loaf of bread into bite-sized cubes and place them in a greased baking dish.
  3. Whisk together the eggs, milk, sugar, vanilla, cinnamon, and salt in a mixing bowl.
  4. Pour the egg mixture over the bread cubes, ensuring they're coated.
  5. Cover with foil and let sit at room temperature for 15-30 minutes or refrigerate overnight.
  6. Bake covered in the preheated oven for 30 minutes.
  7. Uncover and bake for another 15-20 minutes until golden brown.
  8. Remove from the oven, cool slightly, and serve with syrup, powdered sugar, and fruit.

Nutrition

Serving: 1sliceCalories: 350kcalCarbohydrates: 45gProtein: 12gFat: 15gSaturated Fat: 7gPolyunsaturated Fat: 1gMonounsaturated Fat: 5gCholesterol: 180mgSodium: 300mgPotassium: 200mgFiber: 2gSugar: 20gVitamin A: 500IUVitamin C: 2mgCalcium: 200mgIron: 2mg

Notes

This French Toast Bake can be prepared ahead of time and offers a deliciously soft and crispy texture.

Tried this recipe?

Let us know how it was!

Brioche French Toast with Blueberry Compote: Morning Bliss Awaits

May 23, 2026 by Grace Snow Leave a Comment

The rich aroma of warm brioche sizzling in a pan is enough to lift anyone's spirits on a chilly morning. I'm thrilled to share my recipe for Easy Brioche French Toast with Blueberry Compote, a family-friendly breakfast that’s as indulgent as it is simple to make. With just a handful of ingredients, you can create a delightful dish that turns any ordinary morning into a luxurious experience. This recipe is perfect for beginners and allows for quick prep, making it an easy go-to for busy weekdays or leisurely weekends. Plus, the vibrant blueberry compote adds a fresh and tangy twist, ensuring that each bite feels special. Have you ever wondered how a simple breakfast can transform your morning ritual? Let’s dive into making this delightful treat!

Why is this Brioche French Toast special?

Luxurious Experience: Indulge in the buttery, fluffy texture of brioche, elevating your breakfast game to a whole new level. Versatile Options: Feel free to experiment with different bread types, like challah or even whole-wheat, catering to your taste preferences or dietary needs. Beginners Welcome: You’ll find this recipe straightforward, perfect for anyone wanting to impress with minimal effort. Crowd-Pleasing Appeal: The sweet and tangy blueberry compote will have everyone asking for seconds. Quick and Easy: With prep time under 15 minutes, delightful mornings are just a whisk away! Enjoy this alongside crispy bacon or a dollop of whipped cream for an extra special touch.

Brioche French Toast with Blueberry Compote Ingredients

For the French Toast

  • Brioche – A rich, buttery bread that creates a soft and fluffy texture; can substitute with challah or artisanal white bread for similar results.
  • Eggs – Adds structure and a creamy richness; opt for free-range or organic for the best flavor.
  • Milk – Provides creaminess; whole milk works great, or consider dairy alternatives for a lighter option.
  • Heavy Cream – Enhances the custard's decadence; feel free to replace it with additional milk if desired.
  • Vanilla Extract – Elevates the flavor profile; almond extract can be used for a unique twist.
  • Cinnamon – Adds warmth and spice; adjust to your taste or omit completely for a milder flavor.

For the Blueberry Compote

  • Blueberries – The star ingredient for the compote, offering bursts of sweetness and tartness; swap with other berries or freeze-dried fruits if needed.
  • Sugar – Balances the compote's acidity; modify the amount depending on the sweetness of your berries.
  • Lemon Zest – Brightens the overall flavor; lime can be used as a substitute for a different zest.
  • Lemon Juice – Complements the sweetness of the blueberries; fresh juice is always preferable.

For Cooking

  • Butter – Ensures a crispy, golden finish on the French toast; consider using a non-stick spray for a lighter option.

Step‑by‑Step Instructions for Brioche French Toast with Blueberry Compote

Step 1: Prepare the Compote
In a medium saucepan, combine 2 cups of fresh blueberries, 1/4 cup of sugar, the zest and juice of one lemon, and 1/4 cup of water. Bring the mixture to a simmer over medium heat. Cook for about 5-7 minutes, stirring occasionally, until the blueberries burst and the sauce thickens slightly. Use a fork to lightly mash some of the berries for a smoother consistency. Remove from heat and set aside to cool.

Step 2: Mix the Custard
In a shallow bowl, whisk together 4 large eggs, 1/2 cup of milk, 1/2 cup of heavy cream, 1 teaspoon of vanilla extract, 1 teaspoon of cinnamon, and a pinch of salt. Make sure the mixture is thoroughly combined and smooth in texture. This custard will soak into the brioche, creating a rich flavor that makes your Brioche French Toast decadent and fluffy.

Step 3: Cook the Toast
Heat a large skillet over medium heat and add 2 tablespoons of butter, allowing it to melt completely and become bubbly. Dip each slice of brioche into the custard, ensuring both sides are well-coated but not soggy. Shake off any excess custard before placing them in the skillet. Cook the slices for 2-3 minutes on each side until they are golden-brown and crispy.

Step 4: Serve
Once the brioche slices are cooked to perfection, remove them from the skillet and transfer them onto serving plates. Generously spoon the blueberry compote over the French toast, allowing the vibrant sauce to cascade down the sides. For an extra touch of brightness, sprinkle with a little more lemon zest or serve with a dusting of powdered sugar if desired.

What to Serve with Easy Brioche French Toast with Blueberry Compote

Transform your breakfast into a delightful experience by pairing your French toast with these mouthwatering options.

  • Crispy Bacon: The savory, salty crunch of bacon perfectly balances the sweetness of the blueberry compote. It adds a satisfying texture and flavor contrast that everyone loves.

  • Whipped Cream: A fluffy dollop of homemade whipped cream enhances the indulgence, creating a sweet, airy finish that complements the rich brioche beautifully.

  • Fresh Fruit Salad: A colorful mix of seasonal fruits adds freshness and brightness, cutting through the richness of the French toast while enhancing your brunch table's visual appeal.

  • Coffee or Espresso: A warm cup of coffee or a shot of espresso rounds out the meal, providing a delicious jolt of energy to kickstart your day. Its robust flavor pairs nicely with the sweet notes of the blueberry sauce.

  • Maple Syrup: For those who enjoy an extra touch of sweetness, a drizzle of pure maple syrup enhances the overall flavor profile and brings a touch of warmth to each bite.

  • Savory Quiche: If you're in the mood for a more hearty brunch, a slice of savory quiche can make the meal more substantial, offering a perfect contrast to the sweet French toast.

Let your imagination run wild and mix and match these delightful sides for a breakfast that your family will rave about!

Brioche French Toast Variations & Substitutions

Feel free to get creative and tailor this delightful recipe to your taste—there’s something special waiting for you.

  • Whole Wheat: Use whole-wheat bread for a healthier twist that still delivers great flavor and texture.
  • Challah: Try substituting with challah for an equally decadent and sweet option that holds up beautifully in the custard.
  • Sweet Touch: Add a splash of maple syrup to the custard for an extra layer of sweetness; it blends perfectly with the blueberries.
  • Nutty Variation: Mix in chopped nuts, like pecans or almonds, into the custard for an added crunch and rich flavor.
  • Dairy-Free: Substitute the heavy cream with coconut milk and use dairy-free butter for a luscious plant-based version.
  • Berry Medley: Experiment with mixed berries in the compote, like raspberries and strawberries, for a vibrant, colorful topping.
  • Spice it Up: Replace cinnamon with pumpkin pie spice or cardamom for a unique twist that brings warmth and depth to your French toast.
  • Savory Option: For a savory flair, add cooked, crumbled bacon or cheese directly into the custard for a sweet and salty combination.

If you’re looking for another comforting dish to explore, check out my delicious Smoky Sweet Potatoes, or perhaps whip up a quick side of Tofu Caesar Salad to accompany your breakfast feast. Enjoy exploring all the flavorful possibilities!

Storage Tips for Brioche French Toast with Blueberry Compote

  • Room Temperature: Enjoy freshly made French toast immediately for the best texture and flavor. If you must leave it out, consume within 2 hours to ensure food safety.
  • Fridge: Store any leftover cooked brioche French toast in an airtight container for up to 3 days. To maintain its softness, place a paper towel inside the container to absorb excess moisture.
  • Freezer: For longer storage, freeze individual slices wrapped tightly in plastic wrap or aluminum foil, then place in a freezer-safe bag. They can be frozen for up to 2 months.
  • Reheating: To reheat, warm frozen slices directly from the freezer in a skillet over low heat for about 5 minutes on each side, or pop them in the toaster for a quick and crispy result. Enjoy with warmed blueberry compote for that fresh taste!

Make Ahead Options

These Easy Brioche French Toast with Blueberry Compote are perfect for meal prep enthusiasts! You can prepare the blueberry compote up to 3 days in advance; simply store it in an airtight container in the refrigerator. When you’re ready to enjoy, reheat the compote gently on the stovetop. Additionally, you can whisk together the custard mixture (eggs, milk, cream, vanilla, and spices) and refrigerate it for up to 24 hours. This way, on busy mornings, all you need to do is dip your brioche slices and cook them in the preheated skillet. Just remember to shake off any excess custard to avoid sogginess, ensuring your French toast remains deliciously crispy!

Expert Tips for Brioche French Toast

  • Prevent Sogginess: Dip brioche slices only until coated and let the excess custard drip off before cooking. This avoids a soggy French toast.
  • Perfect Heat: Make sure your skillet is preheated to around 350-375°F for a crispy texture. If it’s too cool, the bread will absorb excess moisture.
  • Compote Storage: If preparing the blueberry compote in advance, store it in an airtight container in the fridge. Reheat gently to maintain flavor and texture.
  • Egg Quality Matters: Using free-range or organic eggs not only enhances flavor but also adds a richer color to your Brioche French Toast.
  • Customize Flavors: Feel free to adjust spices like cinnamon or experiment with nutmeg for a unique taste. A little creativity can make this dish your own!

Brioche French Toast with Blueberry Compote Recipe FAQs

How do I select the best brioche for French toast?
Absolutely! When choosing brioche, look for a loaf that feels soft and has a rich, buttery aroma. Fresh brioche should not have any dark spots or hard crust edges. Avoid day-old or stale bread, as it won't soak up the custard as effectively. If you're opting for a store-bought version, check the ingredient list for a high butter content for that luxurious taste.

How should I store leftover French toast?
Very! To store cooked Brioche French Toast, place it in an airtight container and keep it in the refrigerator for up to 3 days. To maintain its softness, I recommend adding a paper towel inside the container to absorb extra moisture.

Can I freeze Brioche French Toast?
Certainly! To freeze your French toast, let the slices cool completely. After that, wrap each slice tightly in plastic wrap or aluminum foil and place them in a freezer-safe bag. They will keep well for up to 2 months. When you're ready to enjoy, reheat them directly from the freezer in a skillet or toaster for a quick and crispy breakfast.

What if my compote turned out too thin?
No worries! If your blueberry compote is too thin, you can easily thicken it. Simply return it to the saucepan and let it simmer for an additional 2-3 minutes until it reduces and thickens up. If you're aiming for a thicker consistency, mix 1 tablespoon of cornstarch with 2 tablespoons of water to create a slurry, then stir that into the simmering compote until it reaches your desired thickness.

Are there any allergy considerations with this recipe?
Absolutely! This brioche French toast recipe contains common allergens like eggs and dairy. If you have allergies, consider using egg replacers like flaxseed meal or a store-bought egg substitute. For the dairy, options like almond milk or coconut cream work wonderfully. Always double-check labels on substitutions, especially if you're cooking for someone with a significant food allergy.

Can I use a different type of bread?
Yes, of course! While brioche adds a rich flavor and texture, challah or even whole-wheat bread can also be excellent alternatives for this recipe. Just keep an eye on the soak time – denser breads might require a bit more custard to achieve that perfect, indulgent bite!

Brioche French Toast with Blueberry Compote

Brioche French Toast with Blueberry Compote: Morning Bliss Awaits

Enjoy a luxurious Brioche French Toast with Blueberry Compote, turning an ordinary morning into a delightful breakfast experience.
Print Recipe Pin Recipe
Prep Time 15 minutes mins
Cook Time 10 minutes mins
Total Time 25 minutes mins
Servings: 4 slices
Course: Breakfast
Cuisine: French
Calories: 400
Ingredients Equipment Method Nutrition Notes

Ingredients
  

For the French Toast
  • 1 loaf Brioche Can substitute with challah or artisanal white bread.
  • 4 large Eggs Free-range or organic for best flavor.
  • 1/2 cup Milk Whole milk or dairy alternatives work great.
  • 1/2 cup Heavy Cream Can replace with additional milk.
  • 1 teaspoon Vanilla Extract Almond extract can be used for variation.
  • 1 teaspoon Cinnamon Adjust to taste or omit for milder flavor.
For the Blueberry Compote
  • 2 cups Blueberries Can swap with other berries or freeze-dried fruits.
  • 1/4 cup Sugar Modify depending on berry sweetness.
  • 1 tablespoon Lemon Zest Lime can be used as a substitute.
  • 1 tablespoon Lemon Juice Fresh juice is preferable.
For Cooking
  • 2 tablespoons Butter Non-stick spray can be used for a lighter option.

Equipment

  • Skillet
  • Medium saucepan
  • Shallow Bowl

Method
 

Step-by-Step Instructions
  1. In a medium saucepan, combine blueberries, sugar, lemon zest, lemon juice, and water. Bring to a simmer over medium heat and cook for about 5-7 minutes until sauce thickens. Mash some berries for a smoother consistency and remove from heat.
  2. In a shallow bowl, whisk together eggs, milk, heavy cream, vanilla extract, cinnamon, and a pinch of salt until smooth.
  3. Heat a skillet over medium heat, add butter to melt. Dip brioche slices in custard, coat both sides and cook until golden-brown, about 2-3 minutes per side.
  4. Serve cooked brioche with blueberry compote spooned generously over the top, sprinkle with lemon zest or powdered sugar if desired.

Nutrition

Serving: 1sliceCalories: 400kcalCarbohydrates: 50gProtein: 8gFat: 20gSaturated Fat: 10gPolyunsaturated Fat: 2gMonounsaturated Fat: 6gCholesterol: 200mgSodium: 300mgPotassium: 200mgFiber: 2gSugar: 15gVitamin A: 500IUVitamin C: 10mgCalcium: 150mgIron: 2mg

Notes

For best results, enjoy freshly made French toast immediately. Leftovers can be stored properly in the fridge or freezer as outlined in storage tips.

Tried this recipe?

Let us know how it was!

Irresistible Stuffed Cream Cheese French Toast to Savor

May 23, 2026 by Grace Snow Leave a Comment

As I scrolled through my collection of cherished breakfast recipes, one particular dish caught my eye—the Stuffed Cream Cheese French Toast. It’s a recipe that effortlessly transforms a simple morning into a delightful celebration, thanks to its creamy, dreamy filling nestled between thick slices of rich, buttery bread. Not only is this dish a crowd-pleaser that brings smiles to the breakfast table, but it also allows me to indulge my love for cooking while avoiding the fast-food trap. With easy prep and customizable flavors, it's perfect for anything from a relaxed Sunday brunch to impressing guests during special occasions. Are you ready to unlock the secret to a breakfast experience that's worthy of a café but made in the comfort of your own kitchen? Keep reading!

Why is this French Toast so irresistible?

Decadent Flavor: The creamy filling of cream cheese combined with a hint of vanilla creates a luscious taste that elevates your breakfast routine.

Easy Preparation: With straightforward steps, anyone can master this dish—no culinary expertise required!

Versatile Options: Customize with your favorite fruits or chocolate chips for a personal twist, just as I recommend in my Vegan Cacao Cream recipe!

Crowd-Pleasing Delight: Perfect for serving family or friends, this French toast transforms any gathering into a special event.

Comforting Textures: Experience the satisfying contrast between the crispy exterior and warm, gooey center, making each bite delightful.

Get ready to impress or simply treat yourself to a breakfast that feels like a luxurious escape!

Stuffed Cream Cheese French Toast Ingredients

For the French Toast
• Thick Bread (4 slices) – Choose brioche or challah for a rich flavor that cradles the filling beautifully.
• Cream Cheese (4 oz, softened) – Ensure it's soft for easy mixing, providing a creamy delight with each bite.
• Powdered Sugar (2 tablespoons) – Sweetens the filling; adjust to your taste for the best balance.
• Vanilla Extract (1 teaspoon) – Enhances the flavor of cream cheese; feel free to experiment with almond extract for a twist.
• Eggs (2 large) – Creates a custard coating; whisk until pale to ensure a luxurious texture.
• Milk (1/2 cup) – Moistens the custard; almond or oat milk can be used as a lighter alternative.
• Ground Cinnamon (1/2 teaspoon) – Adds a warm, comforting flavor; nutmeg serves as a lovely alternative.
• Butter or Oil – Essential for frying; helps achieve that golden, crispy perfection.

For Serving
• Powdered Sugar – A final dusting to make your presentation pop!
• Fresh Fruits – Top with berries or sliced bananas for added freshness and flair.
• Syrup (optional) – Drizzle for an extra touch of sweetness on your Stuffed Cream Cheese French Toast.

Prepare this dreamy breakfast delight and enjoy a taste of indulgence right at home!

Step‑by‑Step Instructions for Stuffed Cream Cheese French Toast

Step 1: Prepare the Cream Cheese Filling
In a mixing bowl, combine 4 oz of softened cream cheese with 2 tablespoons of powdered sugar and 1 teaspoon of vanilla extract. Using a hand mixer or a fork, beat the mixture until it’s smooth and creamy. This step should take about 2-3 minutes. The result should be a luscious, spreadable filling that will make your Stuffed Cream Cheese French Toast irresistible.

Step 2: Assemble the Sandwiches
Take 2 thick slices of your chosen bread, such as brioche or challah, and spread the prepared cream cheese filling generously on one side of each slice. Sandwich them together, pressing gently to ensure the filling adheres well. Repeat this process with the remaining slices of bread to make a total of two stuffed sandwiches. Set them aside while you prepare the custard.

Step 3: Make the Custard Mixture
In a medium-sized bowl, whisk together 2 large eggs, 1/2 cup of milk (or your preferred non-dairy milk), and 1/2 teaspoon of ground cinnamon. Continue whisking until the mixture is well blended and slightly frothy, which should take about 1-2 minutes. This custard mixture will provide that lovely, golden coating for your Stuffed Cream Cheese French Toast.

Step 4: Heat the Skillet
Preheat a non-stick skillet or griddle over medium heat, and add a tablespoon of butter or oil. Allow the butter to melt and start to bubble, indicating it’s hot enough for cooking. This should take about 2-3 minutes. Make sure the pan is properly heated to achieve a beautifully golden, crispy exterior on your French toast sandwiches.

Step 5: Cook the Sandwiches
Carefully dip each assembled sandwich into the custard mixture, allowing it to soak for just a few seconds on each side—avoid sogginess. Place the soaked sandwiches into the hot skillet. Cook each side for 2-3 minutes, or until they turn golden brown and slightly crispy. You might want to check the bottom side before flipping to ensure they're perfectly cooked.

Step 6: Serve and Garnish
Once both sides of the stuffed French toast are beautifully golden, remove them from the skillet and let them rest for a minute. Dust generously with powdered sugar for a sweet touch. Serve your Stuffed Cream Cheese French Toast warm, topped with fresh fruits or a drizzle of syrup if desired. Your delightful breakfast is now ready to enjoy!

Stuffed Cream Cheese French Toast Variations

Feel free to explore these delightful twists, ensuring your breakfast is a delicious experience every time!

  • Fruit-Filled: Add sliced strawberries or bananas to the cream cheese mixture for a fruity surprise. It brightens up each bite!

  • Chocolate Lovers: Stir in chocolate chips into the cream cheese filling for a rich and indulgent treat. You’ll feel like you’re indulging in dessert at breakfast!

  • Nutty Crunch: Incorporate chopped nuts like pecans or almonds into your filling for added texture and flavor. The crunch creates a lovely contrast to the creaminess, creating a memorable experience!

  • Herbed Twist: Mix in a touch of fresh herbs like basil or mint into the cream cheese for a savory surprise. Pair it with fresh fruit and experience an unexpected flavor fusion!

  • Spiced Up: For a bit of heat, sprinkle a pinch of cayenne pepper into the custard mixture. It might sound unconventional, but the heat against the sweet filling is exhilarating!

  • Whole Grain Option: Swap the thick bread for whole grain or multigrain varieties to add fiber and nutrients while still keeping that sweet touch. It makes the meal a bit heartier without sacrificing flavor.

  • Vegan Version: Substitute cream cheese with vegan alternatives, use chia eggs instead of regular eggs, and almond milk to create a completely vegan treat. It’s a perfect way to enjoy your mornings while sticking to your dietary preferences!

Customizing your stuffed French toast is a fun way to keep breakfast exciting. Perhaps you’d like to dive into my Herby Ricotta Stuffed recipe for another enjoyable twist to your meals!

Make Ahead Options

These Stuffed Cream Cheese French Toast are perfect for busy mornings and can be prepped ahead to save you time! You can prepare the cream cheese filling and assemble the sandwiches up to 24 hours in advance. Just spread the filling between slices of thick bread and wrap them tightly in plastic wrap before refrigerating. When you're ready to enjoy, simply dip the sandwiches in the custard mixture and cook them in a skillet as directed. This way, you maintain the delicious quality of the French toast while enjoying a delightful breakfast with minimal effort, making your morning routine that much easier!

What to Serve with Stuffed Cream Cheese French Toast

Elevate your breakfast experience by pairing this indulgent treat with delicious sides and beverages that complement its rich flavors.

  • Fresh Fruit Salad: A vibrant mix of berries, melon, and citrus adds a refreshing touch, perfectly balancing sweetness and acidity alongside the creamy toast.

  • Crispy Bacon: The salty crunch of crispy bacon creates a delightful contrast to the sweet, soft French toast, making every bite a heavenly indulgence.

  • Maple Syrup: Drizzling pure maple syrup over the top enhances the flavor, adding a touch of sweetness that harmonizes beautifully with the cream cheese filling.

  • Greek Yogurt Parfait: Layer creamy Greek yogurt with granola and fruits for a nutritious addition that enriches your breakfast spread with protein and crunch.

  • Almond Milk Latte: A warm, nutty almond milk latte pairs wonderfully, bringing a creamy element to your beverage that complements the breakfast flavors.

  • Apple Cinnamon Compote: A warm, spiced apple compote adds a cozy element, enhancing the French toast with its sweet and aromatic notes for a homey feel.

  • Cinnamon Sugar Dusting: Sprinkling a bit of cinnamon sugar adds a delightful sweet crunch, enhancing the already flavorful crust while elevating the visual appeal.

  • Vanilla Ice Cream: For a brunch dessert twist, serve a scoop of vanilla ice cream on the side. The creamy coldness is an indulgent treat perfect for a weekend celebration.

Expert Tips for Stuffed Cream Cheese French Toast

• Softened Cream Cheese: Ensure your cream cheese is fully softened at room temperature for a smooth filling. This avoids lumps and enhances creaminess.

• Avoid Sogginess: Dip bread slices briefly into the custard mixture; soaking for too long can lead to overly soggy French toast.

• Medium Heat Cooking: Maintain a consistent medium heat while cooking to achieve a golden crisp without burning the edges.

• Flavor Variations: Experiment with different extracts or add-ins, like almond or orange extract, to personalize your Stuffed Cream Cheese French Toast.

• Watch Cooking Time: Each side should cook for about 2-3 minutes; keep an eye on them to ensure they’re perfectly golden and not overcooked.

How to Store and Freeze Stuffed Cream Cheese French Toast

Fridge: Store leftover stuffed French toast in an airtight container for up to 3 days. This helps maintain its freshness while easing your morning routine.

Freezer: For longer storage, wrap individual slices in plastic wrap, then foil, to prevent freezer burn. You can freeze them for up to 2 months, ensuring a delightful breakfast on demand.

Reheating: To enjoy, simply reheat in a preheated oven at 350°F (175°C) for about 10-15 minutes or warm in a skillet over low heat until heated through. This keeps your Stuffed Cream Cheese French Toast crispy on the outside and warm inside.

Stuffed Cream Cheese French Toast Recipe FAQs

What kind of bread is best for stuffed French toast?
Opt for thick bread varieties like brioche or challah. They provide a rich flavor and structure that holds the cream cheese filling beautifully. These breads are wonderfully soft yet sturdy enough to withstand the custard without turning mushy.

How should I store leftover stuffed French toast?
Absolutely! Store any leftover stuffed French toast in an airtight container in the refrigerator for up to 3 days. This keeps the texture intact while making your mornings a bit easier!

Can I freeze stuffed French toast?
Yes, you can! To freeze your stuffed cream cheese French toast, wrap individual slices first in plastic wrap and then in foil to prevent freezer burn. They'll stay fresh for up to 2 months. When you’re ready to enjoy, reheat in an oven at 350°F (175°C) for about 10-15 minutes.

What should I do if my stuffed French toast turns out soggy?
If you find your French toast soggy, it's likely due to over-soaking the bread in the custard mixture. To prevent this, only dip the bread for a few seconds on each side, just enough for it to absorb some custard without becoming saturated. Cooking on medium heat also helps ensure a crispy exterior.

Are there any dietary considerations for stuffed French toast?
Yes, if you have allergies or dietary restrictions, consider the ingredients carefully. For a nut-free version, ensure you're using dairy milk and checking for any allergens in the cream cheese. Additionally, you can substitute with dairy-free alternatives like almond or oat milk if needed.

Stuffed Cream Cheese French Toast

Irresistible Stuffed Cream Cheese French Toast to Savor

This Stuffed Cream Cheese French Toast transforms breakfast into a delightful celebration with its creamy filling and rich bread.
Print Recipe Pin Recipe
Prep Time 10 minutes mins
Cook Time 10 minutes mins
Resting Time 1 minute min
Total Time 21 minutes mins
Servings: 2 sandwiches
Course: Breakfast
Cuisine: American
Calories: 400
Ingredients Equipment Method Nutrition Notes

Ingredients
  

For the French Toast
  • 4 slices Thick Bread Choose brioche or challah for rich flavor.
  • 4 oz Cream Cheese Ensure it's softened for easy mixing.
  • 2 tablespoons Powdered Sugar Adjust to taste for sweetness.
  • 1 teaspoon Vanilla Extract Experiment with almond extract for variation.
  • 2 large Eggs Whisk until pale for texture.
  • 1/2 cup Milk Almond or oat milk can be used.
  • 1/2 teaspoon Ground Cinnamon Nutmeg can be an alternative.
  • Butter or Oil Essential for frying.
For Serving
  • Powdered Sugar For dusting.
  • Fresh Fruits Top with berries or sliced bananas.
  • Syrup Optional drizzle for sweetness.

Equipment

  • Mixing Bowl
  • non-stick skillet
  • hand mixer
  • Whisk

Method
 

Step-by-Step Instructions
  1. In a mixing bowl, combine cream cheese, powdered sugar, and vanilla extract. Beat until smooth and creamy, about 2-3 minutes.
  2. Take 2 slices of bread, spread filling on one side of each slice, sandwich together, and set aside.
  3. In a bowl, whisk together eggs, milk, and cinnamon until well blended and slightly frothy, about 1-2 minutes.
  4. Preheat a non-stick skillet over medium heat, add butter or oil, and wait until melted and bubbling, about 2-3 minutes.
  5. Dip each sandwich briefly into the custard, then place in the skillet. Cook each side for 2-3 minutes until golden brown.
  6. Remove from skillet, let rest for a minute, dust with powdered sugar, and serve warm topped with fruits or syrup.

Nutrition

Serving: 1sandwichCalories: 400kcalCarbohydrates: 45gProtein: 12gFat: 20gSaturated Fat: 10gPolyunsaturated Fat: 1gMonounsaturated Fat: 6gCholesterol: 150mgSodium: 300mgPotassium: 250mgFiber: 2gSugar: 15gVitamin A: 500IUVitamin C: 1mgCalcium: 150mgIron: 2mg

Notes

Ensure cream cheese is softened for easy mixing. Dip bread briefly to avoid sogginess, and maintain medium heat for cooking.

Tried this recipe?

Let us know how it was!
  • 1
  • 2
  • 3
  • …
  • 24
  • Next Page »

Welcome!

Hi, I’m Grace, a Sydney-based home cook with a passion for bold flavors and trending ingredients. Whether you’re a busy beginner or a seasoned foodie, you’ll find dishes here that are fresh, fun, and full of flavor.

More about me

Popular Recipes

  • One Pot Keto Tuna Casserole
    One Pot Keto Tuna Casserole: Creamy Comfort in Minutes
  • Ultimate Jalapeno Popper Chicken Salad
    Ultimate Jalapeno Popper Chicken Salad That'll Wow Your Tastebuds
  • Green Chile Cheese Dip
    Mouthwatering Green Chile Cheese Dip for Cozy Gatherings
  • Easy Chimichurri Sauce
    Fresh and Zesty Easy Chimichurri Sauce in Just Minutes

Footer

↑ back to top

About

  • Privacy Policy
  • Disclaimer
  • Terms & Conditions

Newsletter

  • Sign Up! for emails and updates

Contact

  • About me
  • Contact me

Copyright © 2025 TastyTrendIngredients