tastytrendingredients

  • Home
  • Recipes
    • Appetizers
    • Breakfast
    • Dessert
    • Dinner
    • Drinks
    • Salads
    • Snacks
    • Soups
  • About me
  • Contact
menu icon
go to homepage
  • Home
  • Recipes
    • Appetizers
    • Breakfast
    • Dessert
    • Dinner
    • Drinks
    • Salads
    • Snacks
    • Soups
  • About me
  • Contact
search icon
Homepage link
  • Home
  • Recipes
    • Appetizers
    • Breakfast
    • Dessert
    • Dinner
    • Drinks
    • Salads
    • Snacks
    • Soups
  • About me
  • Contact
×

Ultimate Jalapeno Popper Chicken Salad That'll Wow Your Tastebuds

June 19, 2026 by Grace Snow Leave a Comment

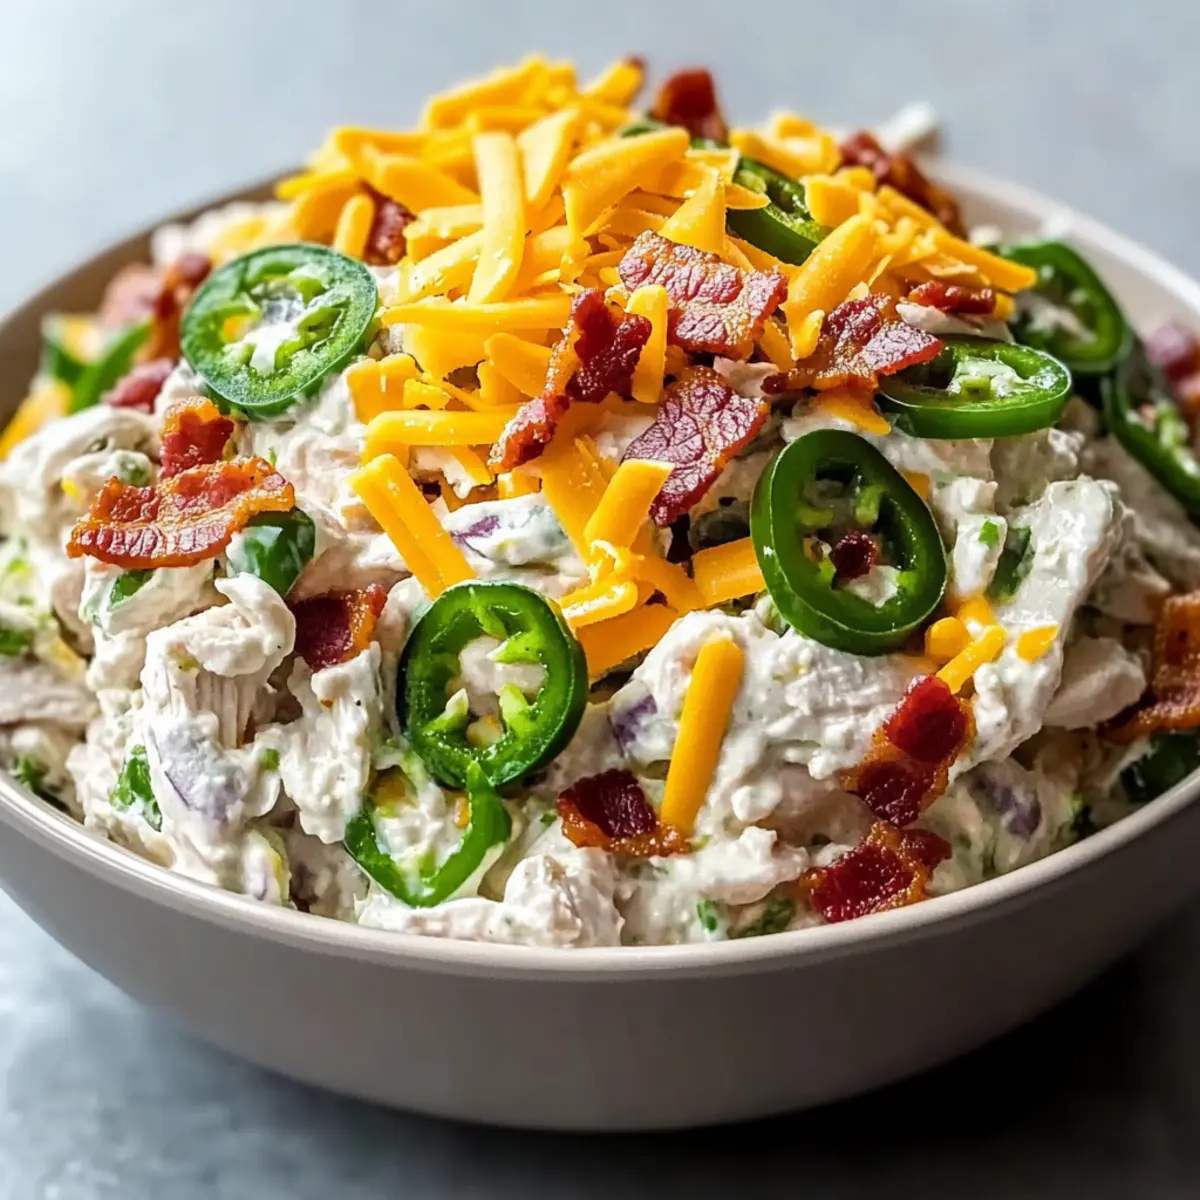
The first time I tasted a jalapeno popper, I was instantly hooked—creamy, cheesy, and just the right amount of kick. Now, imagine those flavors packed into a satisfying salad: welcome to my Ultimate Jalapeno Popper Chicken Salad! This low-carb delight features tender shredded chicken that pairs perfectly with a rich cream cheese dressing, zesty jalapenos, and crispy bacon, making it a fantastic, protein-packed solution for busy weeknights. Whether you’re trying to eat healthier or simply craving a homemade classic with a twist, this recipe is quick to whip up and absolutely crowd-pleasing. So, are you ready to bring the fun back into your meal prep? Let’s dive into the details!

Why is this chicken salad so special?

Deliciously Unique: This Ultimate Jalapeno Popper Chicken Salad reimagines a beloved appetizer into a wholesome meal that bursts with flavor.

Quick and Easy: Whipping this up only takes about 20 minutes—perfect for busy evenings or last-minute gatherings.

Low-Carb Perfection: Enjoying a low-carb or keto lifestyle? This salad satisfies cravings without the carbs, making it a guilt-free indulgence.

Versatile Options: Serve it in crisp lettuce cups, alongside crackers, or layered in a veggie-rich wrap; the possibilities are endless!

Crowd-Pleasing Flavor: With its creamy dressing and rich textures, it’s bound to impress at any potluck or family dinner. It's a delightful twist that rivals traditional dishes like Crock Pot Chicken or Honey Garlic Chicken.

Ultimate Jalapeno Popper Chicken Salad Ingredients

For the Chicken Salad
• Cooked Chicken Breasts – Shredded to ensure the perfect texture in this ultimate Jalapeno Popper Chicken Salad.
• Thick-Cut Bacon – Use crispy, dark brown crumbles to add savory depth and crunch.
• Cream Cheese – Softened to create a rich, creamy dressing that binds the salad beautifully.
• Mayonnaise – Adds creaminess; for a lighter twist, you can substitute sour cream or Greek yogurt instead.
• Garlic Powder – Enhances the overall flavor; feel free to replace with fresh garlic for a bolder taste.
• Onion Powder – Provides depth; mix evenly to avoid any clumps in your salad.
• Kosher Salt – Essential for balancing flavors—adjust according to your taste preferences.
• Black Pepper – Offers a gentle heat; modify the amount based on your spice preference.
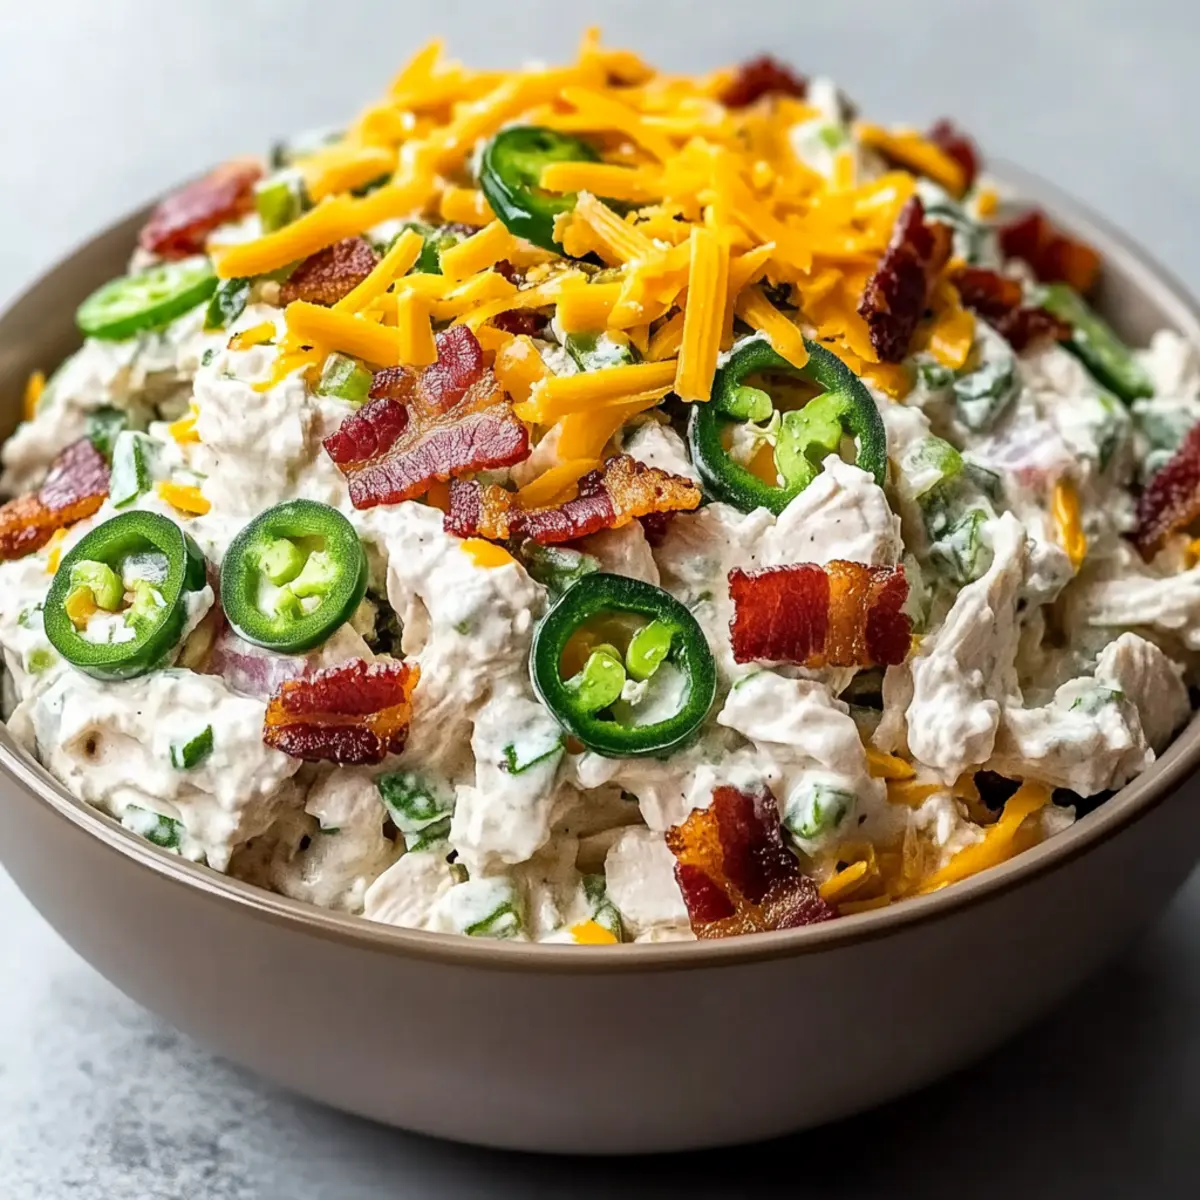
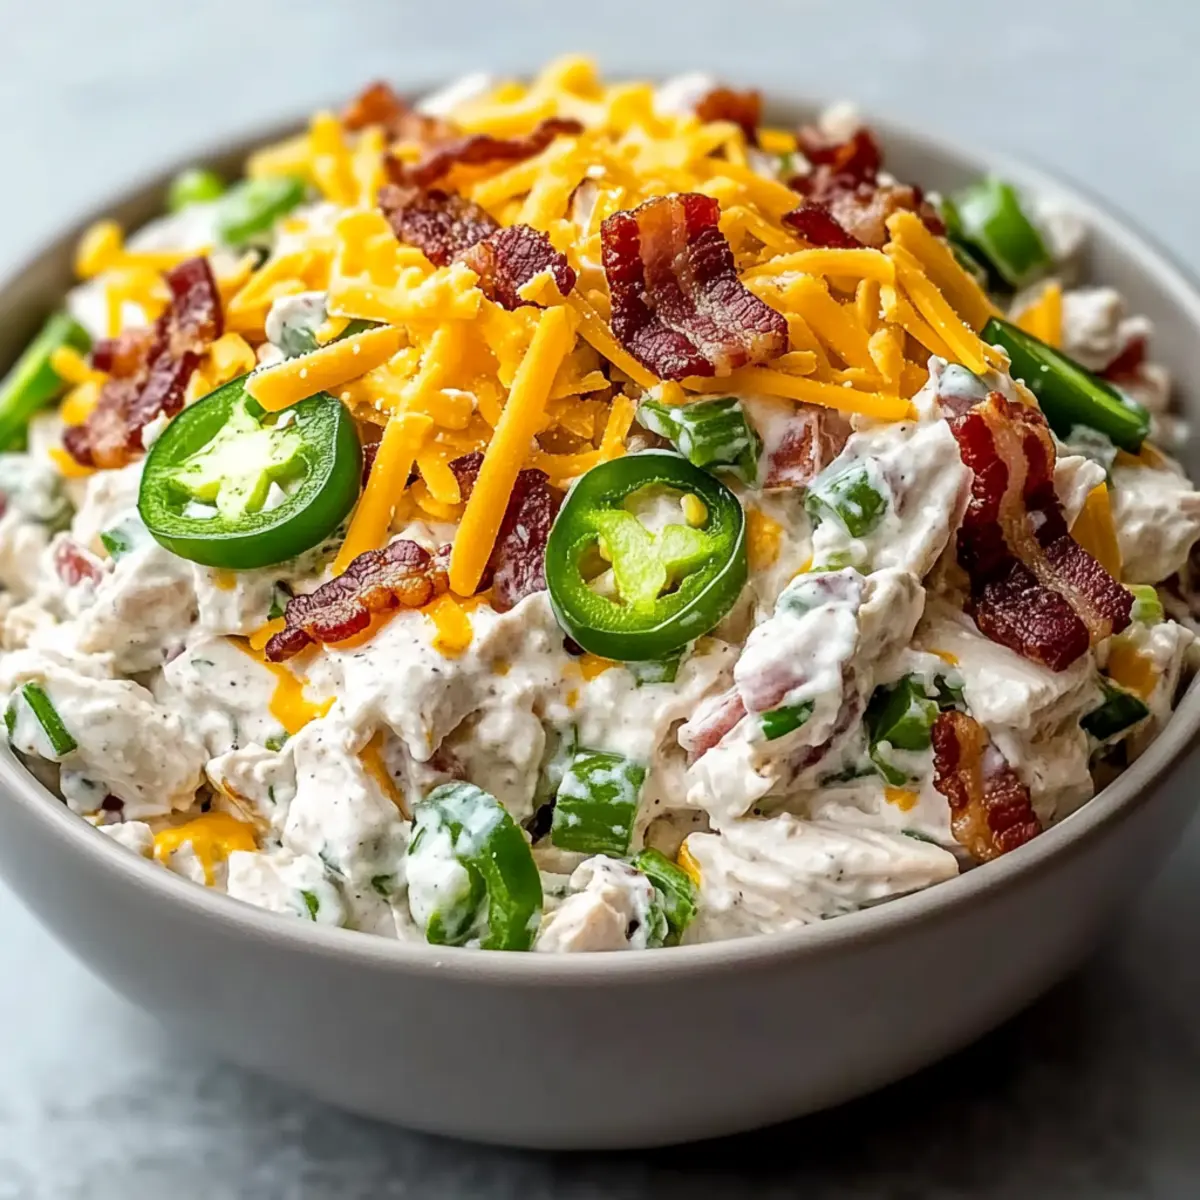
• Fresh Green Jalapenos – Diced for that signature kick—add extra for more heat! Use slices for garnish.
• Orange Cheddar Cheese – Delivers a tangy flavor; reserve some for the topping to elevate presentation.

For Serving
• Lettuce Leaves or Crackers – Great for serving; use fresh greens for a crisp bite or sturdy crackers for crunch!

Step‑by‑Step Instructions for Ultimate Jalapeno Popper Chicken Salad

Step 1: Cook the Bacon
In a skillet over medium heat, cook thick-cut bacon until it becomes crispy, about 8–10 minutes, flipping occasionally for even cooking. Once done, transfer the bacon slices to paper towels to drain excess grease. After they cool slightly, crumble them into bite-sized pieces to add savory crunch to your Ultimate Jalapeno Popper Chicken Salad.

Step 2: Shred the Chicken
Using forks or a stand mixer, shred the cooled cooked chicken breasts into fine pieces, ensuring the texture is tender and easy to mix. This process should take around 5 minutes. Once shredded, set the chicken aside; its warmth should allow for the cream cheese dressing to blend seamlessly when mixed later.

Step 3: Prepare the Dressing
In a large mixing bowl, combine softened cream cheese, mayonnaise, garlic powder, onion powder, kosher salt, and black pepper. Using a hand mixer or a spatula, mix everything until it achieves a smooth, creamy consistency, approximately 2-3 minutes. This rich dressing will bind the flavors in your Ultimate Jalapeno Popper Chicken Salad beautifully.

Step 4: Combine Ingredients
Gently fold the shredded chicken, diced jalapenos, 1 cup of shredded orange cheddar cheese, and ¾ of the crumbled bacon into the creamy dressing. Use a spatula to carefully combine everything until well-coated, ensuring the jalapenos are evenly distributed for that signature kick. This step should take about 3–4 minutes.

Step 5: Assemble the Salad
Transfer the chicken salad mixture to a shallow serving bowl, smoothing the top for an appealing presentation. Garnish with the reserved bacon, additional cheddar cheese, and sliced jalapenos. This vibrant and creamy Ultimate Jalapeno Popper Chicken Salad is now ready to serve, showcasing a delightful mix of flavors and textures that’s sure to impress!

Variations & Substitutions for Ultimate Jalapeno Popper Chicken Salad

Get ready to jazz up your Ultimate Jalapeno Popper Chicken Salad with these fun and tasty tweaks!

  • Dairy-Free: Substitute cream cheese and mayo with dairy-free versions to keep it creamy without the dairy. Coconut milk yogurt works beautifully for a rich consistency.

  • Bacon Alternative: Use turkey bacon or chopped, crispy tempeh for a healthier twist that still adds crunch. This way, you cater to those looking for a lighter meal!

  • Herb Infusion: Add fresh herbs like cilantro or parsley for a burst of freshness. Not only do they brighten up the dish, but they also elevate the flavors to a whole new level.

  • Spicy Kick: Increase the jalapenos or add in some sliced serrano peppers for an extra punch. This meets the craving for heat while keeping all the flavors intact.

  • Crunchy Additions: Toss in sunflower seeds or chopped nuts for added texture and a nutty flavor. This adds an unexpected yet delightful crunch that everyone will love.

  • Smoky Flavor: Incorporate smoked paprika into the dressing for a delicious depth. This gets one step closer to a smoky jalapeno popper experience right in your salad.

  • Meal Prep Shortcut: Use canned chicken for a quick and easy swap. It saves time while still delivering that tender chicken taste—perfect for busy weeknights.

Feel free to mix and match these suggestions! Each variation promises to make your Ultimate Jalapeno Popper Chicken Salad uniquely yours. If you’re looking for other savory chicken inspirations, check out Chicken Adobo Again or Chipotle Lime Chicken. Happy cooking!

Make Ahead Options

These Ultimate Jalapeno Popper Chicken Salad components are perfect for meal prep, saving you time during busy weeknights! You can prepare the shredded chicken and mix the cream cheese dressing up to 24 hours in advance. Simply store the chicken in an airtight container in the refrigerator to maintain its freshness. When you’re ready to enjoy your salad, fold the chicken and jalapeno mixture into the dressing, add the crispy bacon, and sprinkle with cheddar. This way, you'll keep the ingredients vibrant, crunchy, and just as delicious when serving, all while making mealtime a breeze!

What to Serve with Ultimate Jalapeno Popper Chicken Salad

Imagine a lively gathering, where every bite of your creamy chicken salad is perfectly complemented by delightful sides that elevate your meal.

  • Crispy Lettuce Cups: Crisp romaine or butter lettuce leaves provide a refreshing crunch, perfect for scooping up the rich salad and maintaining that low-carb vibe.

  • Garlic Roasted Vegetables: Roasting seasonal vegetables brings out their natural sweetness and creates a hearty side that harmonizes beautifully with the salad's creamy texture.

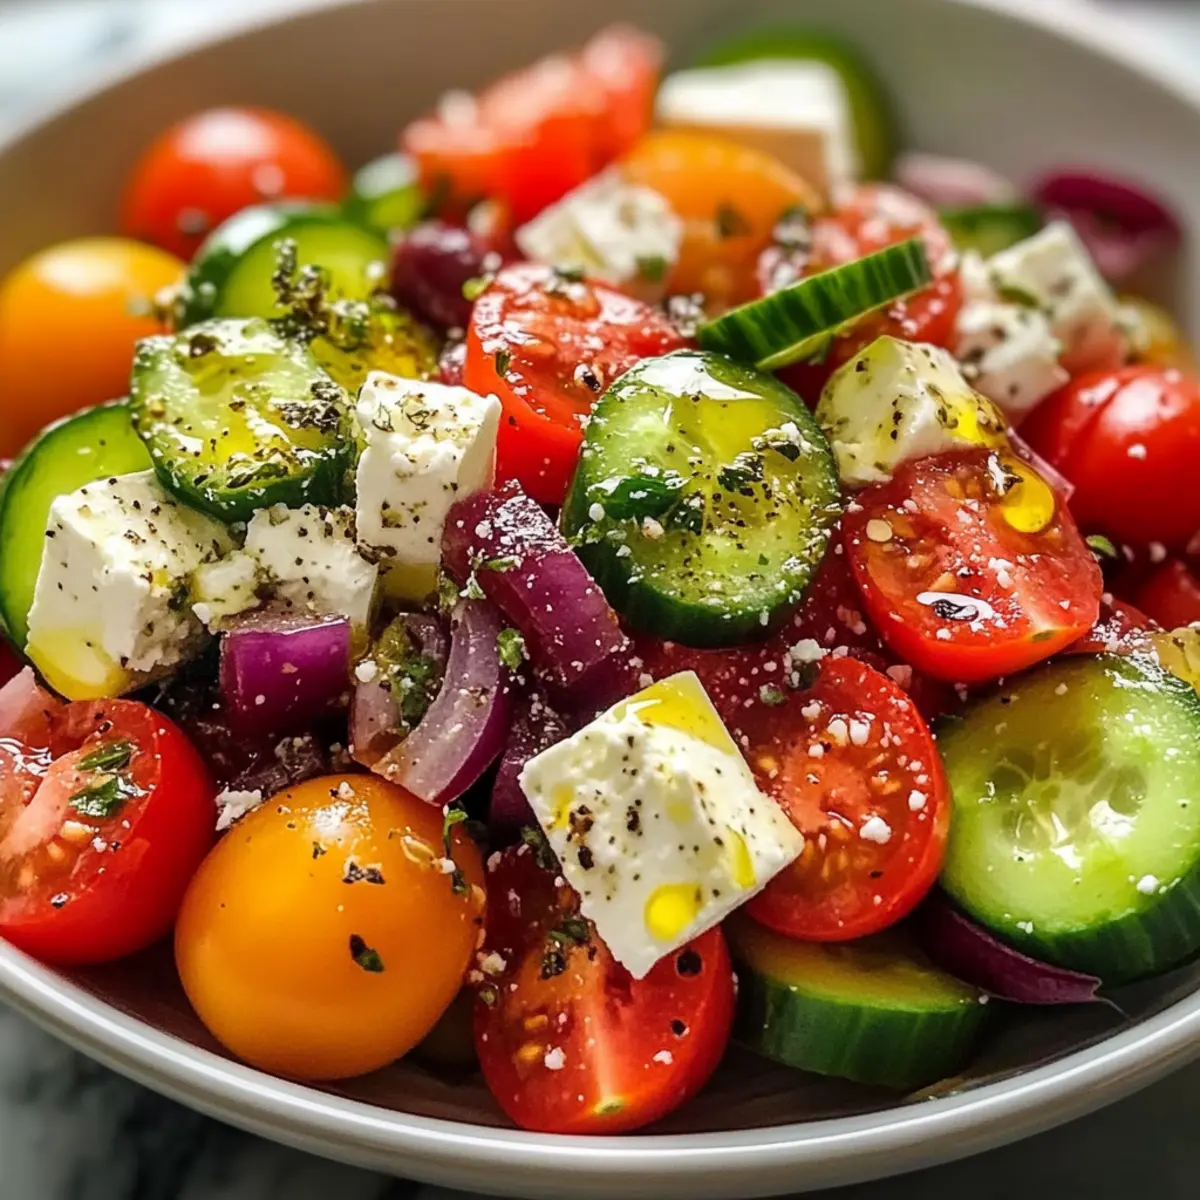
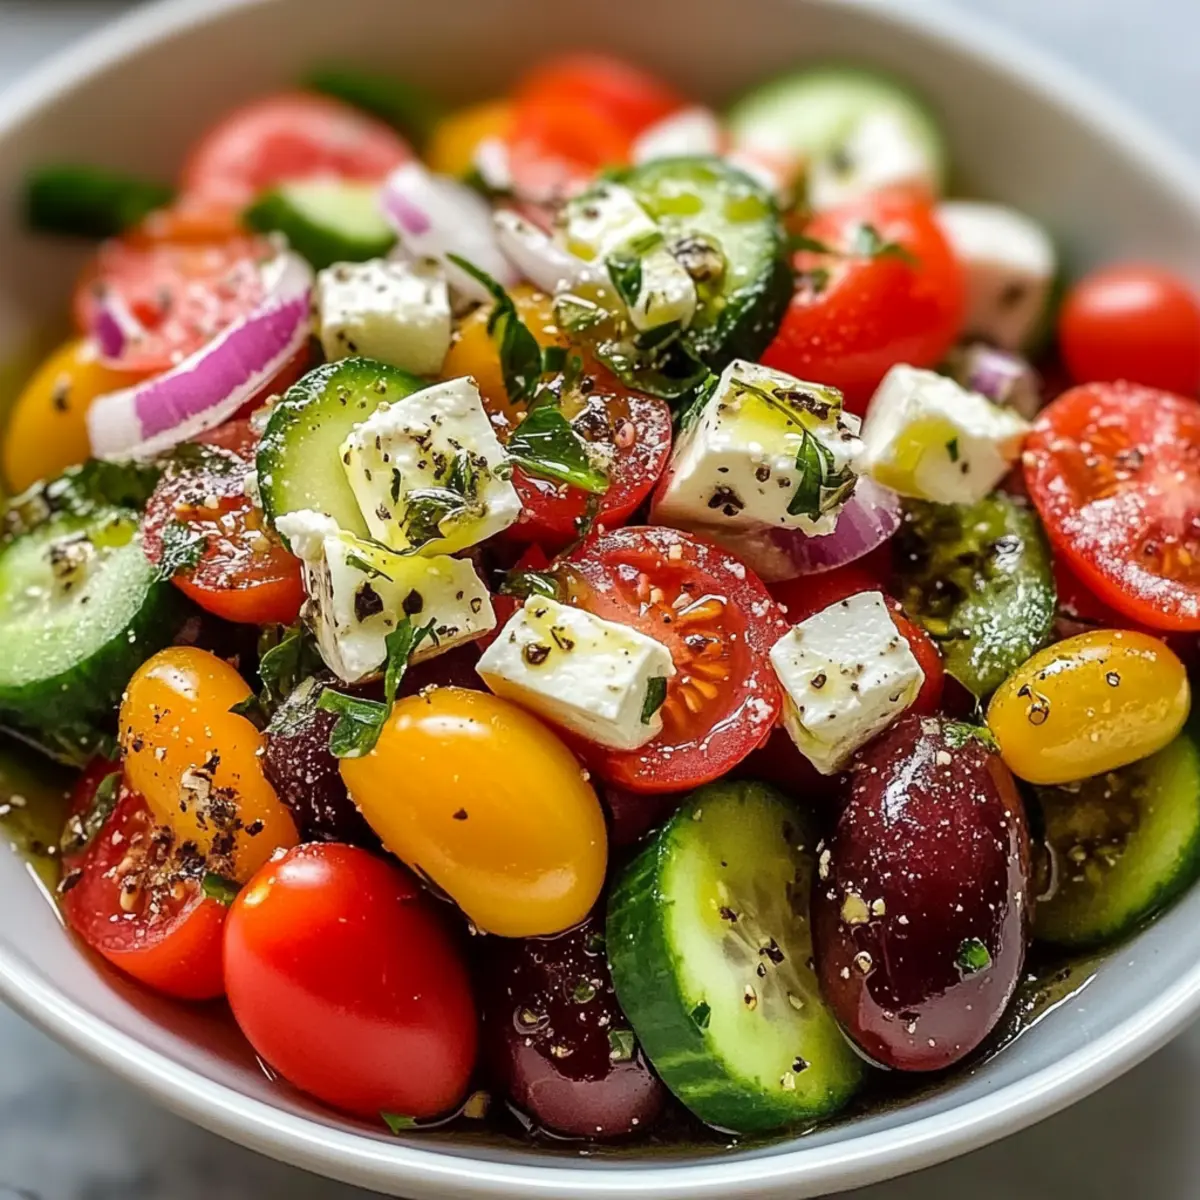
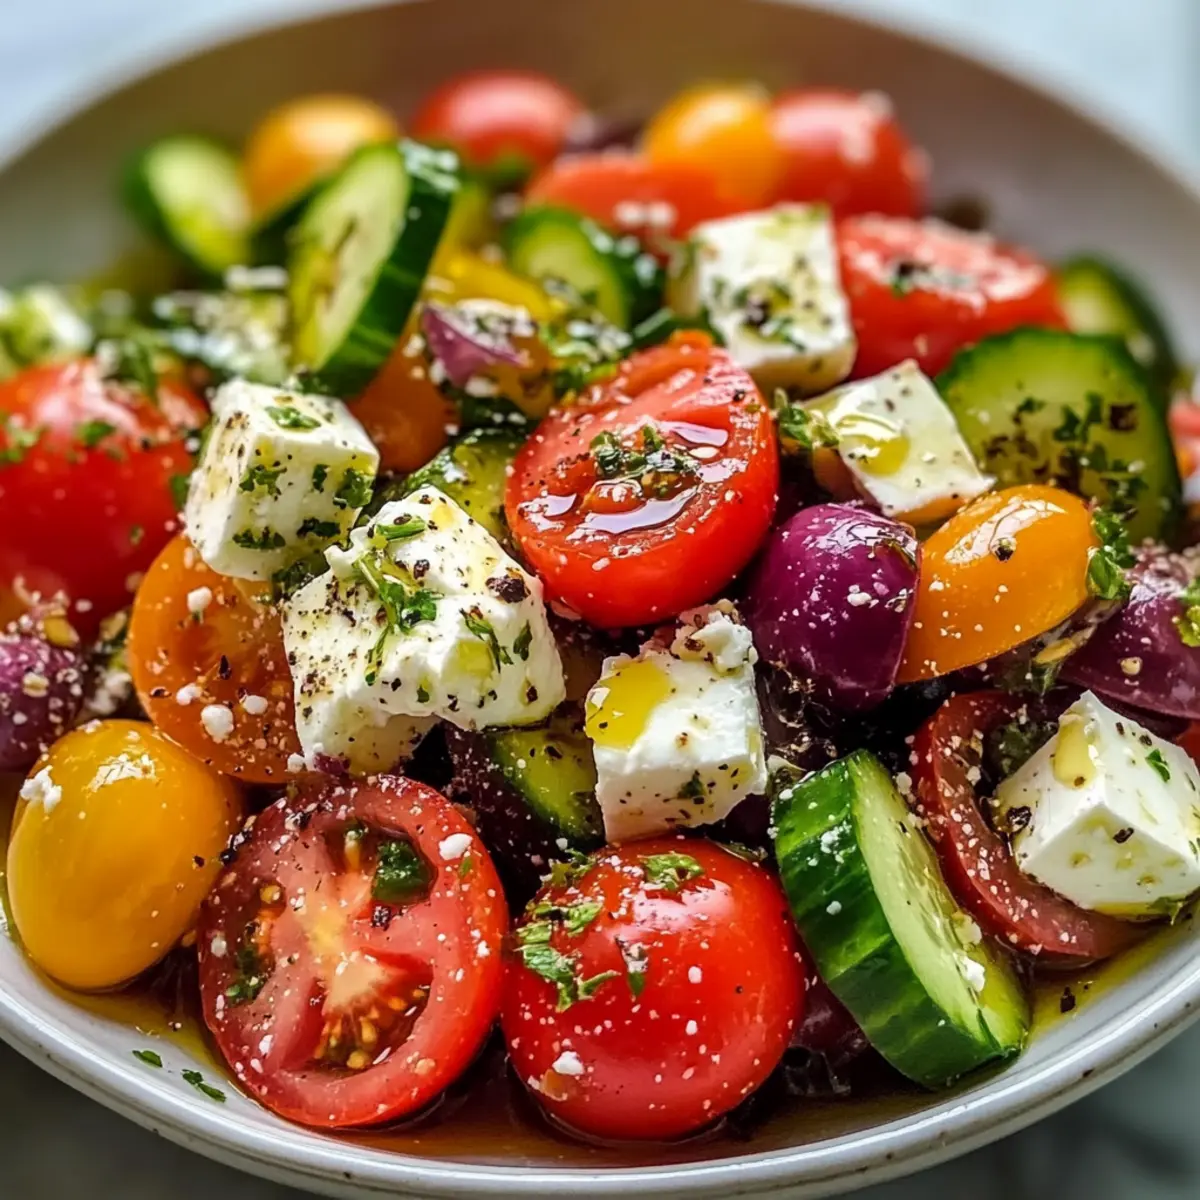
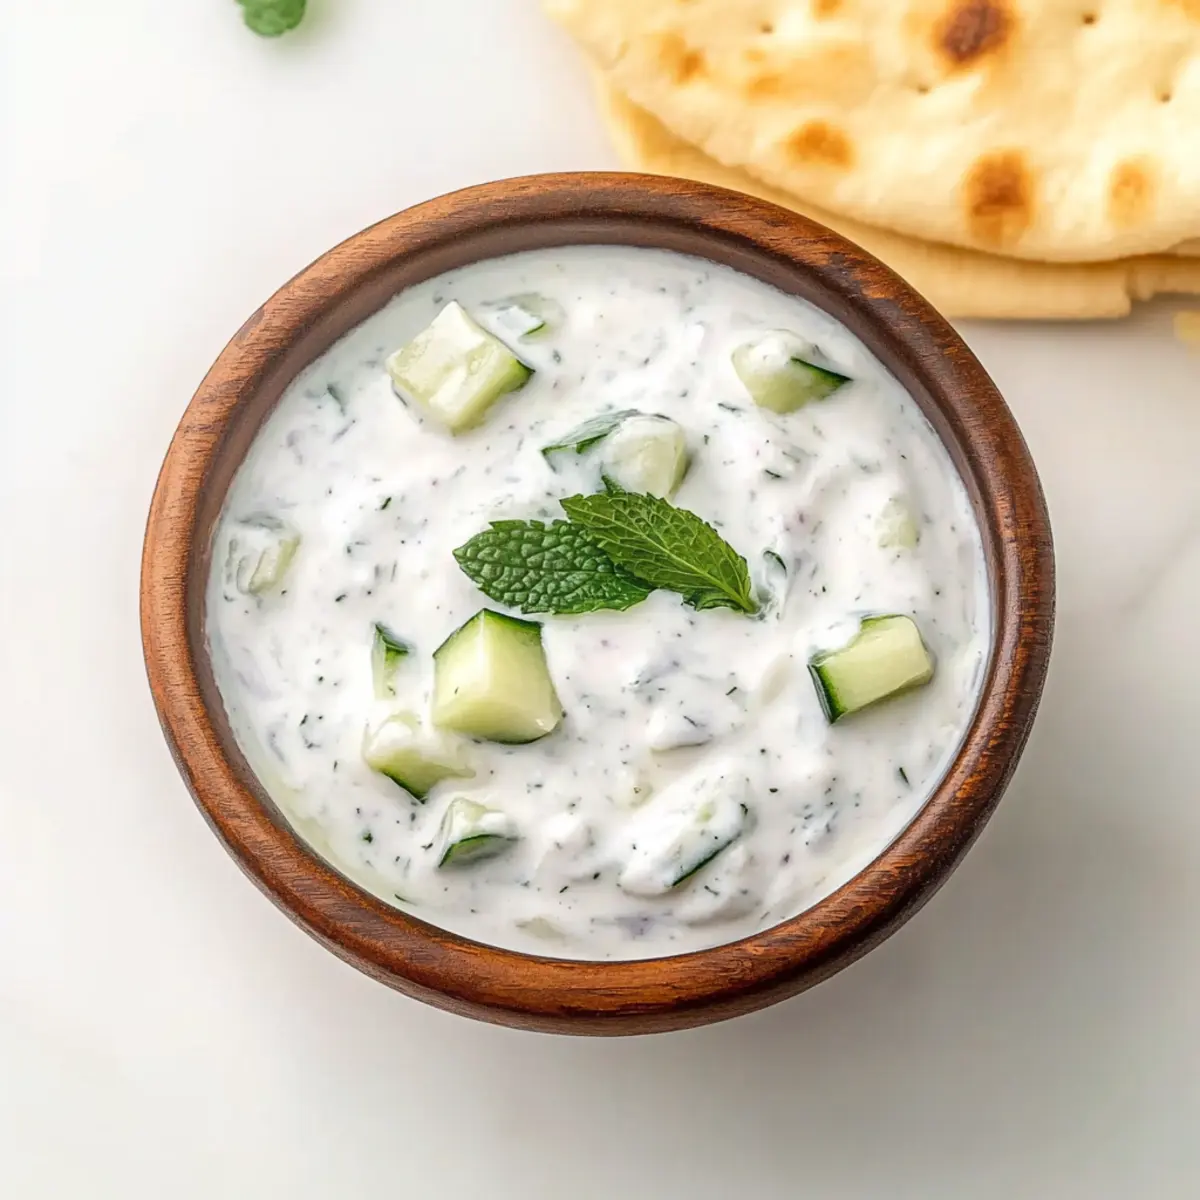
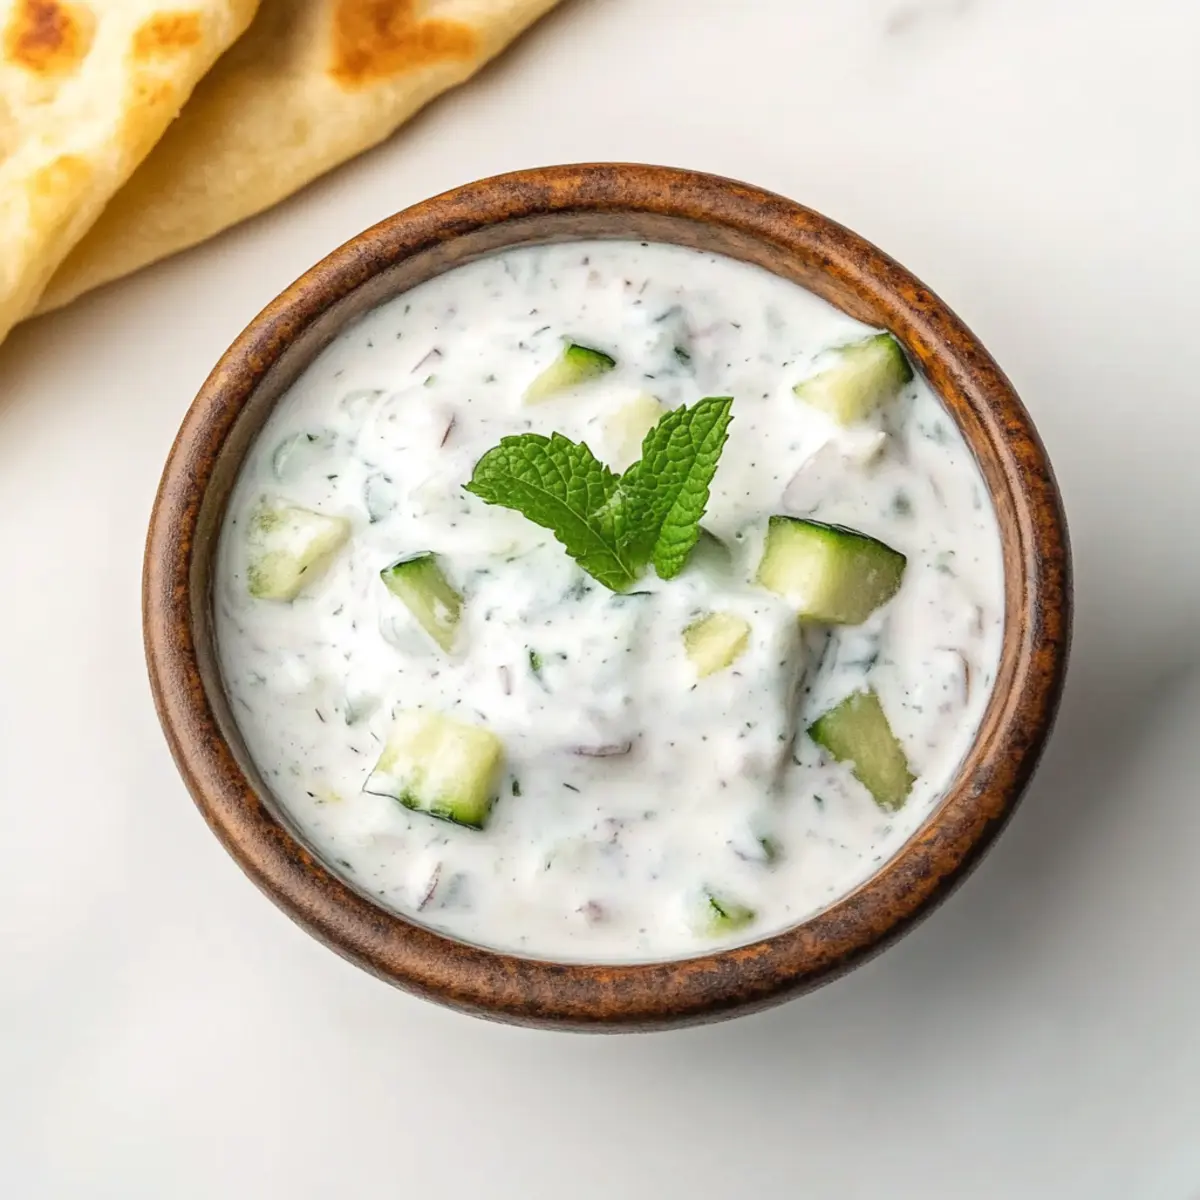
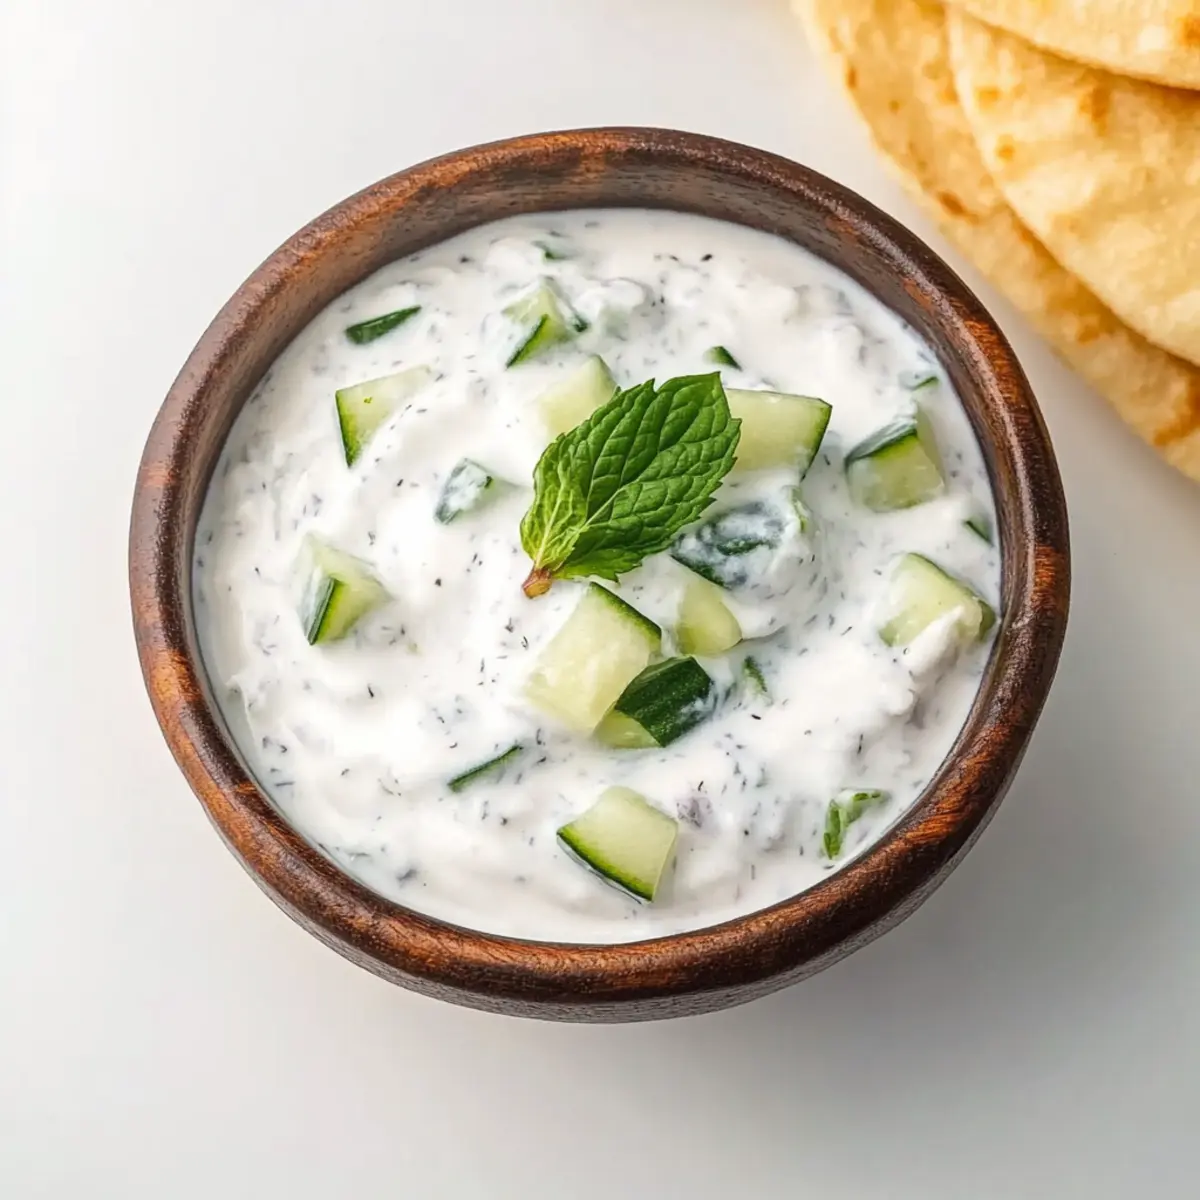
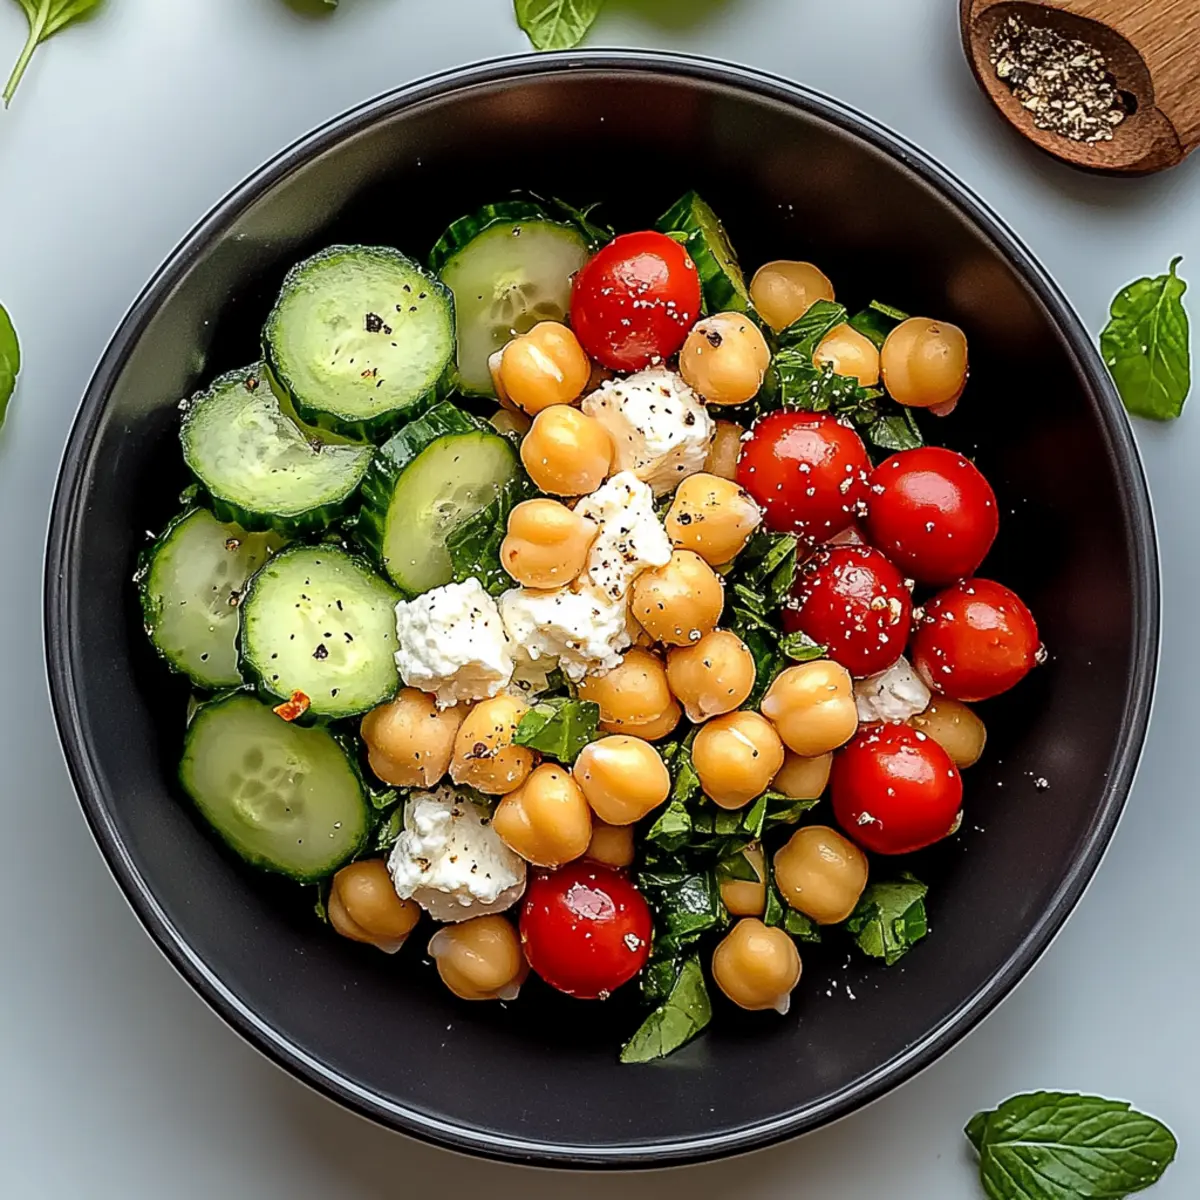
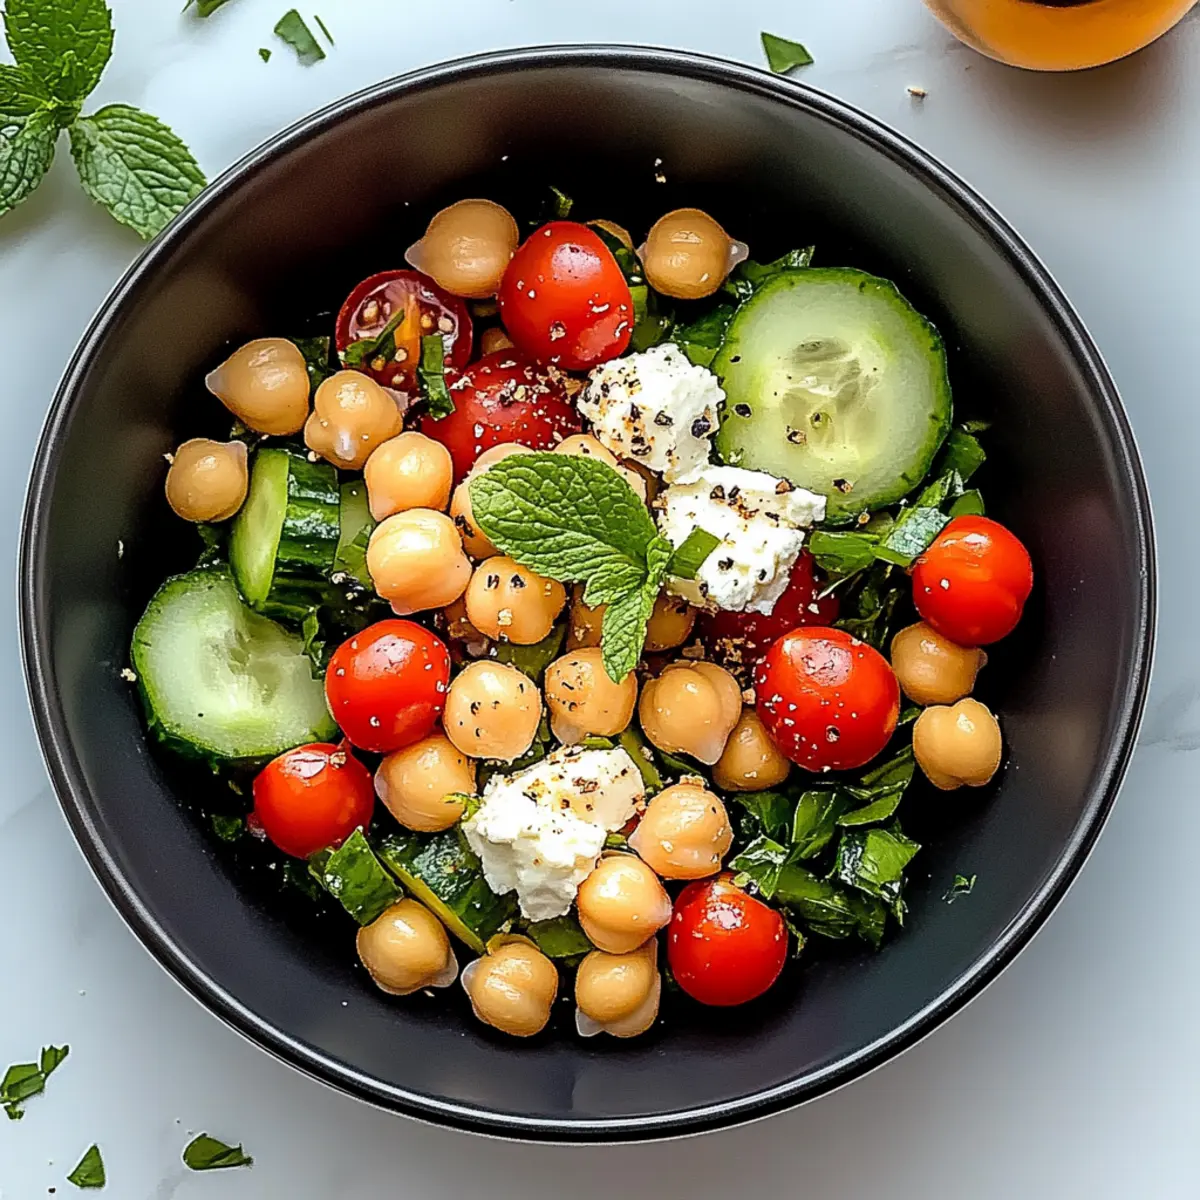
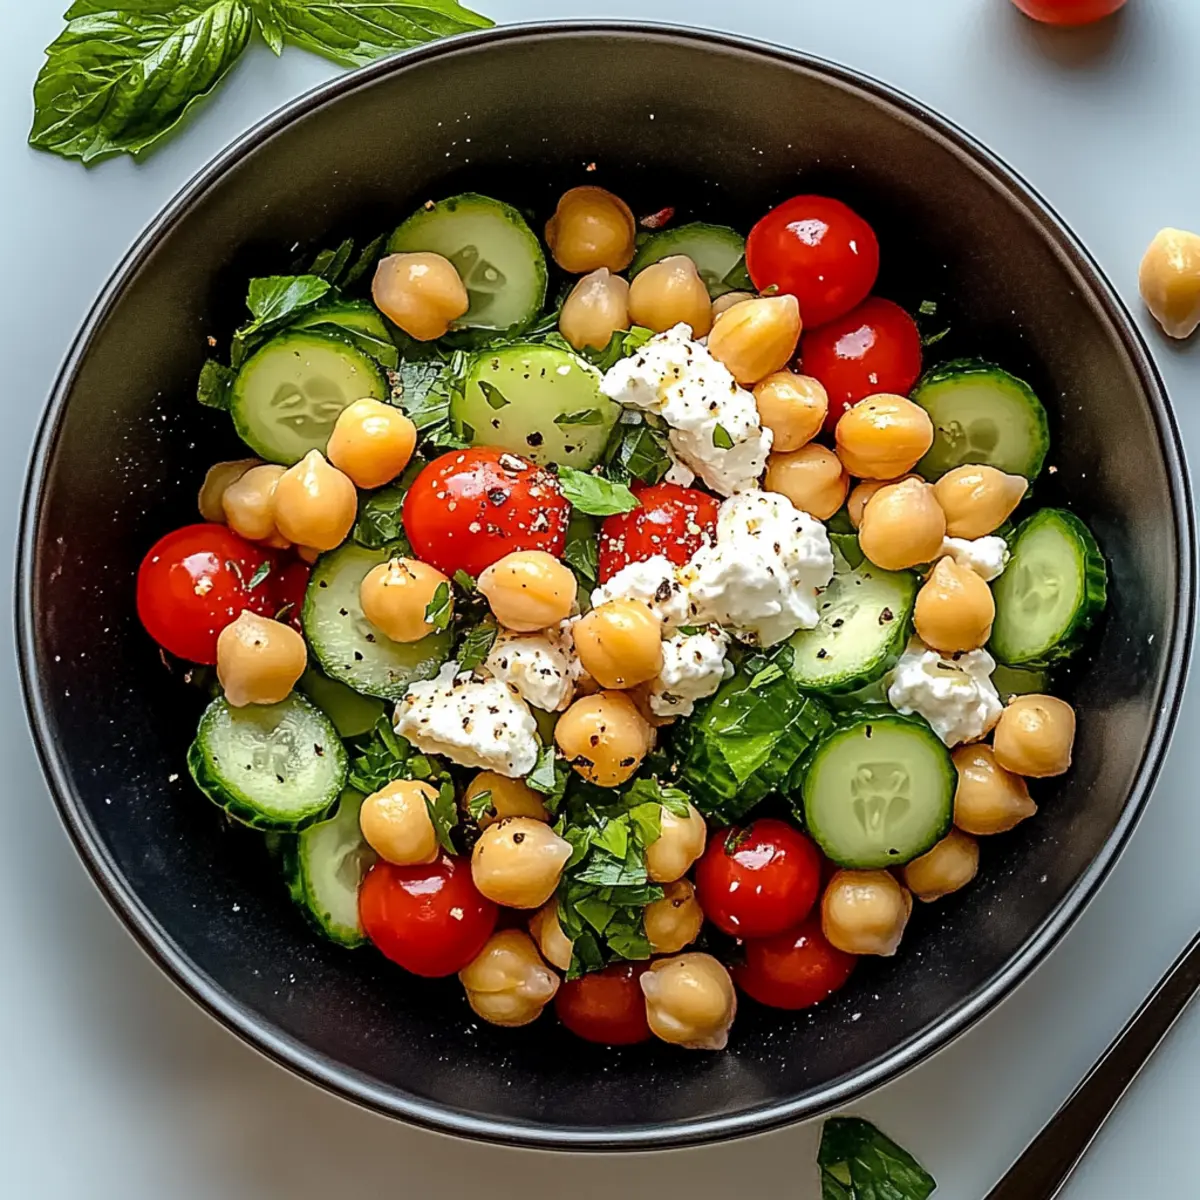
  • Tangy Cucumber Salad: Chilled, tangy cucumber with a light vinaigrette refreshes the palate and enhances the zesty flavor of the jalapenos.

  • Avocado Slices: Rich, creamy avocado offers a smooth texture that pairs wonderfully with the salad's crunch while adding healthy fats to your meal.

  • Spicy Roasted Cauliflower: This smoky, spicy side can cater to heat lovers, echoing the jalapeno kick with its bold flavors and tender crispness.

  • Icy Cold Drinks: A fizzy seltzer or iced tea with a hint of lemon keeps the experience light and invigorating, making every bite of the salad even more enjoyable.

These pairing ideas ensure your Ultimate Jalapeno Popper Chicken Salad becomes the star of your meal, leaving everyone craving more.

Expert Tips for Jalapeno Popper Chicken Salad

  • Cool the Chicken: Ensure the chicken is completely cooled before mixing. This prevents the cream cheese dressing from melting and maintains the salad's creamy texture.

  • Bacon Crunch: For maximum crunch, add crumbled bacon just before serving. This keeps it crisp and prevents sogginess.

  • Use a Stand Mixer: Shredding chicken is a breeze with a stand mixer. It saves time and ensures even shredding, keeping the texture perfect for your Ultimate Jalapeno Popper Chicken Salad.

  • Even Mixing: Make sure to mix the garlic and onion powder well into the dressing. This avoids clumps and guarantees a smooth flavor throughout the salad.

  • Adjust Spice Levels: If you're sensitive to spice, remove seeds from fresh jalapenos or reduce the quantity. This allows everyone to enjoy the flavors without overwhelming heat.

Storage Tips for Ultimate Jalapeno Popper Chicken Salad

Fridge: Store your chicken salad in an airtight container for up to 3-4 days. The flavors will meld beautifully as it sits, creating a delightful taste experience!

Freezer: Avoid freezing this Ultimate Jalapeno Popper Chicken Salad due to the cream cheese dressing; dairy-based ingredients do not thaw well and can change in texture.

Reheating: If you prefer a warm dish, gently reheat the salad in the microwave for about 30 seconds, but keep in mind that it’s best served chilled or at room temperature for the fullest flavor.

Serving Suggestions: Enjoy leftovers in lettuce wraps or alongside your favorite low-carb crackers for a quick snack that retains its deliciousness.

Ultimate Jalapeno Popper Chicken Salad Recipe FAQs

How do I choose the best jalapenos for this salad?
Absolutely! When selecting jalapenos, look for firm peppers with smooth skin and vibrant green color. Avoid any with dark spots or wrinkles, as these can indicate overripeness or spoilage. If you're aiming for a milder flavor, choose smaller peppers, as they tend to be less spicy.

What is the best way to store leftover Jalapeno Popper Chicken Salad?
To keep your Ultimate Jalapeno Popper Chicken Salad fresh, store it in an airtight container in the refrigerator for up to 3-4 days. The flavors are likely to deepen and improve with time. Just give it a gentle stir before serving to mix everything well again!

Can I freeze this chicken salad?
No, I don’t recommend freezing your Ultimate Jalapeno Popper Chicken Salad due to the dairy content in the cream cheese dressing. Freezing can change the texture, making it watery and unappealing upon thawing. Instead, enjoy it fresh or keep it in the fridge for a few days!

What can I do if my salad is too spicy for my taste?
Very! If your Ultimate Jalapeno Popper Chicken Salad ends up spicier than you'd like, there are several tricks you can use. You can add additional cream cheese or mayonnaise to tone down the heat. Alternatively, mix in diced avocado or cucumber to dilute the spicy flavor while adding a refreshing twist!

Is this chicken salad suitable for people with dairy allergies?
Unfortunately, the Ultimate Jalapeno Popper Chicken Salad contains cream cheese and mayonnaise, both of which are dairy products. If you’re catering to someone with a dairy allergy, consider using dairy-free cream cheese alternatives and a dairy-free mayo. Always double-check labels for hidden dairy ingredients to ensure safety!

Ultimate Jalapeno Popper Chicken Salad

Ultimate Jalapeno Popper Chicken Salad That'll Wow Your Tastebuds

Enjoy a low-carb delight with this Ultimate Jalapeno Popper Chicken Salad, featuring tender chicken, zesty jalapenos, and crispy bacon.
Print Recipe Pin Recipe
Prep Time 20 minutes mins
Cook Time 10 minutes mins
Total Time 30 minutes mins
Servings: 4 servings
Course: Salads
Cuisine: American
Calories: 400
Ingredients Equipment Method Nutrition Notes

Ingredients
  

For the Chicken Salad
  • 2 cups Cooked Chicken Breasts Shredded
  • 8 slices Thick-Cut Bacon Crispy, dark brown crumbles
  • 8 oz Cream Cheese Softened
  • 1/2 cup Mayonnaise Or substitute with sour cream or Greek yogurt
  • 1 teaspoon Garlic Powder
  • 1 teaspoon Onion Powder
  • 1 teaspoon Kosher Salt
  • 1 teaspoon Black Pepper
  • 2 pieces Fresh Green Jalapenos Diced, more for heat if desired
  • 1 cup Orange Cheddar Cheese Shredded, reserve some for topping
For Serving
  • 4 leaves Lettuce Leaves Or use crackers

Equipment

  • Skillet
  • Mixing Bowl
  • Spatula
  • hand mixer

Method
 

Step-by-Step Instructions
  1. In a skillet over medium heat, cook thick-cut bacon until crispy, about 8-10 minutes. Transfer to paper towels and crumble after cooling.
  2. Shred the cooled cooked chicken breasts using forks or a stand mixer to ensure the texture is tender.
  3. In a large mixing bowl, combine softened cream cheese, mayonnaise, garlic powder, onion powder, kosher salt, and black pepper. Mix until smooth.
  4. Gently fold shredded chicken, diced jalapenos, 1 cup of shredded cheddar cheese, and ¾ of the crumbled bacon into the dressing.
  5. Transfer the mixture to a serving bowl and garnish with reserved bacon, additional cheese, and sliced jalapenos.

Nutrition

Serving: 1cupCalories: 400kcalCarbohydrates: 5gProtein: 30gFat: 30gSaturated Fat: 10gPolyunsaturated Fat: 5gMonounsaturated Fat: 10gCholesterol: 100mgSodium: 600mgPotassium: 500mgFiber: 2gSugar: 1gVitamin A: 250IUVitamin C: 15mgCalcium: 200mgIron: 2mg

Notes

Cool the chicken completely before mixing. Add crumbled bacon just before serving for added crunch. Adjust jalapenos to control spice level.

Tried this recipe?

Let us know how it was!

Savory Homemade Frito Taco Salad That Kids Will Love

June 12, 2026 by Grace Snow Leave a Comment

As the sun peeks through the kitchen window, the aroma of sizzling ground beef dances through the air, making my mouth water. Today, I’m thrilled to share my favorite recipe: a Homemade Frito Taco Salad that brings a rainbow of flavors to the dinner table. This dish isn’t just any salad; it’s a quick and easy family favorite that transforms simple ingredients into a delightful meal everyone will adore. You’ll love how it gets kids excited about their veggies—after all, who can resist the crunch of Fritos? Plus, the customizable nature of this salad means you can tweak it to suit your family’s tastes or dietary needs. Ready to whip up something truly special? Let’s dive into this deliciously satisfying recipe!

Why Is This Taco Salad a Family Favorite?

Simplicity: This Homemade Frito Taco Salad is a breeze to prepare, making weeknight dinners fun and hassle-free.
Customizable: With flexible ingredients, you can substitute meats or dressings, tailoring the dish to picky eaters or dietary preferences.
Kid-Approved: The crunchy Fritos and vibrant flavors make veggies a hit with children, ensuring they’re excited about mealtime.
Quick: Ready in under 30 minutes, it’s perfect for busy families or unexpected guests, keeping your schedule on track.
Crowd-Pleaser: Serve it at potlucks or gatherings, alongside options like Avocado Egg Salad or Taco Bell Crunchwrap, and watch your friends rave!
Fresh and Flavorful: Each bite bursts with freshness—from crisp lettuce to juicy tomatoes and creamy toppings—making it a standout meal.

Homemade Frito Taco Salad Ingredients

For the Beef
• Ground Beef – Choose lean ground beef (90/10 or 93/7) to keep it flavorful without too much grease.

• Taco Seasoning – A key ingredient for that authentic taste; McCormick Original works wonders.

For the Salad Base
• Iceberg Lettuce – Shredded for maximum crunch and a refreshing start to your salad.

• Tomatoes – Diced into 1/2-inch pieces to add juiciness and a touch of sweetness.

• Green Onions – Thinly sliced to garnish, providing a mild onion flavor and a pop of color.

For the Cheesy Goodness
• Cheddar Cheese – Opt for shredded to blend easily with other salad components and enhance creaminess.

For the Crunch
• Corn Chips (Fritos) – The signature ingredient that brings irresistible crunch and taco flavor; save some for topping!

For the Dressing
• Salsa – A must for moisture and flavor; try using Pace Picante for balanced heat.

• French Dressing – Adds a nice tang to coat your ingredients; Dorothy Lynch is highly recommended.

• Sour Cream – Provides a creamy finish and balances the tanginess, perfect for dolloping on top.

Optional Toppings
• Lime Juice – A splash boosts flavors and keeps those greens fresh; fresh lime juice is best!

This Homemade Frito Taco Salad not only bursts with flavor but also offers you flexibility in customization, making it perfect for the whole family!

Step‑by‑Step Instructions for Homemade Frito Taco Salad

Step 1: Prepare Your Ingredients
Begin by gathering all your ingredients for the Homemade Frito Taco Salad. Shred the iceberg lettuce into thin strips, and dice the tomatoes into 1/2-inch pieces for that perfect bite. Grate your cheddar cheese and thinly slice the green onions, placing everything in individual bowls for easy access while assembling your salad.

Step 2: Cook the Ground Beef
In a large skillet over medium-high heat, add the lean ground beef. Cook for about 5-7 minutes, breaking the meat into small pieces, until it’s browned and no longer pink. Stir occasionally to ensure even cooking. Once browned, drain any excess fat from the skillet to keep your salad light and fresh.

Step 3: Season the Beef
After draining the excess fat, return the skillet to low heat. Sprinkle in the taco seasoning and add 1/4 cup of water to the ground beef. Stir well to combine and let it simmer for about 5 minutes, allowing the flavors to meld beautifully. You’ll know it’s ready when the mixture thickens slightly.

Step 4: Toss the Lettuce
While the beef is simmering, drizzle fresh lime juice over the shredded lettuce in a large bowl. Toss gently to coat the lettuce evenly, which will enhance its brightness and keep it crisp. This step sets a refreshing base for your Homemade Frito Taco Salad and brings a zesty flavor to the dish.

Step 5: Combine the Ingredients
Now, it’s time to combine! Add the seasoned ground beef to your bowl of dressed lettuce, along with the diced tomatoes, shredded cheddar cheese, and half of the corn chips. Toss the ingredients together gently, ensuring each bite is packed with flavor and crunch, creating a delightful layer of textures in your salad.

Step 6: Add the Dressings Just Before Serving
Right before serving, drizzle your preferred amount of salsa and French dressing over the salad. Toss everything together gently to combine the flavors without sogging down the crunchy Fritos. This step is crucial for keeping your Homemade Frito Taco Salad vibrant and appetizing.

Step 7: Serve and Garnish
To finish, scoop your Homemade Frito Taco Salad into individual bowls or a large serving dish. Top each serving with a generous dollop of sour cream, a sprinkle of the reserved corn chips for extra crunch, and a scattering of sliced green onions for freshness. Enjoy right away for the best texture!

Make Ahead Options

These Homemade Frito Taco Salads are perfect for meal prep enthusiasts! You can prepare the seasoned ground beef and refrigerate it for up to 3 days for quick assembly during the week. Simply cook the beef with taco seasoning, let it cool, and store it in an airtight container. Additionally, you can chop the lettuce, tomatoes, and green onions, storing them separately to keep them fresh. On the day you plan to serve, simply toss the salad ingredients with salsa and French dressing to avoid sogginess, and add the crunchy Fritos just before serving for that signature crunch. Enjoy a delicious homemade meal with minimal effort during your busy week!

What to Serve with Homemade Frito Taco Salad

Looking to elevate your Homemade Frito Taco Salad into a full meal? Here are some scrumptious pairing ideas that will delight your family and friends!

  • Warm Flour Tortillas: Perfect for scooping up the salad, these soft tortillas add a comforting touch that complements the crunchy Fritos beautifully.
  • Guacamole: Creamy and rich, guacamole balances the flavors while providing a refreshing twist that kids love. Serve it on the side for dipping!
  • Mexican Street Corn: This sweet and savory side dish adds a nutty flavor and complements the salad’s components, creating a vibrant medley on your table.
  • Black Beans: Creamy black beans provide a hearty protein boost, making your meal even more filling while adding a lovely depth of flavor.
  • Cheesy Nachos: Pile on the cheese and toppings, and serve these crispy nachos alongside to delight the taste buds and fuel some friendly competition over who gets the last chip!
  • Fresh Salsa: Bright and zesty, homemade salsa offers a refreshing contrast to the rich textures of your salad, bringing smiles with every bite.
  • Fruit Salad: Light, sweet, and bursting with seasonal fruits, a fruit salad adds a refreshing end to your meal and balances out all those savory flavors.

How to Store and Freeze Homemade Frito Taco Salad

  • Room Temperature: It's best to avoid leaving your Homemade Frito Taco Salad out for more than 2 hours to prevent foodborne illnesses.

  • Fridge: Store any leftovers in an airtight container for up to 3 days. Keep the Fritos separate to maintain their crunch!

  • Freezer: While it’s not ideal to freeze the salad as is, you can freeze the seasoned ground beef for up to 3 months. Thaw in the fridge before reheating.

  • Reheating: If reheating the beef, warm it in a skillet over medium heat until heated through. Prepare fresh salad components just before serving for the best flavor and texture.

Homemade Frito Taco Salad Variations

Feel free to explore these delightful twists to your Homemade Frito Taco Salad and let your creativity shine!

  • Lean Protein: Substitute ground beef with ground turkey or chicken for a lighter yet still delicious option. The flavor remains hearty, ensuring everyone gets a satisfying bite.

  • Cheese Choice: Switch things up by using Monterey Jack or spicy pepper jack cheese for a unique flavor profile. These cheeses melt beautifully and add a nice kick to your salad.

  • Vegan Version: Replace the ground beef with crumbled tempeh or black beans for a plant-based twist. Adding avocado helps keep the richness while boosting creaminess.

  • Add Some Heat: Incorporate sliced jalapeños or diced green chilies if you enjoy a bit of spice. These fiery bits provide a fun flavor contrast that can enliven every forkful.

  • Crunchy Alternatives: Try using tortilla chips or homemade tortilla strips instead of Fritos for a different crunch and flavor. You can even bake your chips for a healthier option!

  • Exotic Twist: Add canned corn or diced bell peppers for extra color and natural sweetness. This addition brightens your salad and gives a refreshing touch.

  • Creamy Dressing: Swap the French dressing for ranch or a zesty cilantro-lime dressing for a new flavor experience. It can give your salad a whole new level of creaminess and zest.

  • Flavor Boosters: Consider topping your salad with fresh cilantro or avocado slices to elevate the taste. These additions make it fresher and multiply the flavor notes beautifully!

Experimenting with these variations will not only keep meals exciting but also allow your family to express their unique tastes. If you're in the mood for something warming, why not check out other favorites like Homemade Hot Chocolate or a hearty Taco Spaghetti Cheesy dish? Let the flavors and fun begin!

Expert Tips for the Best Homemade Frito Taco Salad

  • Fresh Ingredients: Always use fresh produce to elevate the flavors; wilted lettuce can ruin the crispness of your Homemade Frito Taco Salad.
  • Avoid Sogginess: Add Fritos just before serving to maintain their crunch; soggy chips quickly defeat the purpose!
  • Adjust Dressing: Start with a smaller amount of dressing; you can always add more if needed, keeping your salad from becoming overly soggy.
  • Cool Beef: Allow the seasoned beef to cool slightly before combining with lettuce to avoid wilting; enjoy a refreshing crunch in every bite.
  • Seasoned Beef: Don't skip on simmering the taco seasoning with water—it enhances flavor tremendously and makes the beef irresistible!

Homemade Frito Taco Salad Recipe FAQs

What type of ground beef should I use for my taco salad?
Absolutely! I recommend using lean ground beef with an 80/20 or 90/10 ratio to avoid excess grease. If you're looking for a lighter option, ground turkey or chicken works wonderfully as substitutes.

How can I best store the leftovers of my taco salad?
Very well! Store any leftover Homemade Frito Taco Salad in an airtight container in the fridge for up to 3 days. Keep the Fritos separate to ensure they maintain their crunch—the last thing you want is soggy chips!

Can I freeze the components of my taco salad?
Yes, you can! While it's not ideal to freeze the assembled salad due to the fresh veggies, you can freeze the seasoned ground beef. Place it in a freezer-safe container and it will last for up to 3 months. Thaw it in the fridge overnight before reheating.

What if my salad turns out soggy?
No worries! If your salad turns out a bit soggy, you can add more fresh ingredients like lettuce or additional Fritos. To prevent this in the future, make sure to add the Fritos just before serving and drizzle the dressings lightly to maintain that delightful crunch!

Are there any dietary considerations I should keep in mind?
Definitely! If you have allergies, be cautious of the salsa, French dressing, and cheese, as they may contain ingredients you wish to avoid. For a dairy-free option, skip the cheese and sour cream, and opt for a vegan dressing. Always check ingredient labels to ensure they meet your dietary needs.

How can I personalize my taco salad to suit my family's tastes?
Very easily! The beauty of this Homemade Frito Taco Salad lies in its customization. You can substitute the ground beef with a protein of your choice, use different cheese types like pepper jack or queso fresco, and even top with extras like avocado, black olives, or jalapeños for added flavor and variety!

Homemade Frito Taco Salad

Savory Homemade Frito Taco Salad That Kids Will Love

Enjoy a delightful Homemade Frito Taco Salad, a family favorite bursting with flavor and crunch, that gets kids excited about their veggies.
Print Recipe Pin Recipe
Prep Time 15 minutes mins
Cook Time 15 minutes mins
Total Time 30 minutes mins
Servings: 4 servings
Course: Salads
Cuisine: American
Calories: 450
Ingredients Equipment Method Nutrition Notes

Ingredients
  

For the Beef
  • 1 pound Ground Beef Choose lean ground beef (90/10 or 93/7)
  • 1 packet Taco Seasoning McCormick Original works wonders
For the Salad Base
  • 4 cups Iceberg Lettuce Shredded
  • 2 cups Tomatoes Diced into 1/2-inch pieces
  • 1/2 cup Green Onions Thinly sliced
For the Cheesy Goodness
  • 1 cup Cheddar Cheese Shredded
For the Crunch
  • 4 cups Corn Chips (Fritos) The signature ingredient
For the Dressing
  • 1 cup Salsa Try using Pace Picante
  • 1/2 cup French Dressing Dorothy Lynch is highly recommended
  • 1/2 cup Sour Cream For dolloping on top
Optional Toppings
  • 2 tablespoons Lime Juice Fresh lime juice is best

Equipment

  • Large skillet
  • Cutting Board
  • Chef’s Knife
  • large bowl
  • Serving dish

Method
 

Step-by-Step Instructions
  1. Gather all your ingredients for the Homemade Frito Taco Salad.
  2. In a large skillet over medium-high heat, add the lean ground beef. Cook for about 5-7 minutes, breaking the meat into small pieces, until it’s browned and no longer pink. Drain excess fat.
  3. Return the skillet to low heat. Sprinkle in the taco seasoning and add 1/4 cup of water to the ground beef. Stir well and let it simmer for about 5 minutes.
  4. Drizzle lime juice over the shredded lettuce in a large bowl. Toss gently to coat.
  5. Add the seasoned ground beef to the bowl of dressed lettuce, along with the diced tomatoes, shredded cheddar cheese, and half of the corn chips. Toss gently.
  6. Right before serving, drizzle salsa and French dressing over the salad and toss gently.
  7. Scoop the salad into individual bowls or a large serving dish. Top each serving with sour cream, reserved corn chips, and sliced green onions.

Nutrition

Serving: 1servingCalories: 450kcalCarbohydrates: 45gProtein: 25gFat: 25gSaturated Fat: 10gPolyunsaturated Fat: 2gMonounsaturated Fat: 5gCholesterol: 80mgSodium: 800mgPotassium: 500mgFiber: 3gSugar: 3gVitamin A: 30IUVitamin C: 25mgCalcium: 20mgIron: 15mg

Notes

Always use fresh produce for the best flavor. Add Fritos just before serving to maintain their crunch.

Tried this recipe?

Let us know how it was!

Effortless Simple Doritos Taco Salad for Instant Satisfaction

June 12, 2026 by Grace Snow Leave a Comment

As I stood in my kitchen one busy weeknight, the thought of takeout lingered temptingly. But then a wave of nostalgia hit me—a Simple Doritos Taco Salad that perfectly captures the flavors of my favorite taco night! This dish not only whips up in just 30 minutes but also transforms humble ingredients into a vibrant, crunchy masterpiece. It’s the ideal crowd-pleaser for casual gatherings and can be prepped ahead, keeping that delightful crunch intact. With easy swaps like ground turkey for a lighter protein option, every bite bursts with hearty flavors and a satisfying texture. So, are you ready to spice up your dinner routine with this quick and easy salad? Let's dive in!

Why is this salad a must-try?

Quick Preparation: In just 30 minutes, you can serve a delightful meal that everyone will love, making it perfect for those hectic weeknights.
Flavorful Layers: Combining savory ground beef, fresh veggies, and crispy Doritos creates an explosion of taste that dances on your palate.
Customizable: Feel free to swap in ground turkey or add in ingredients like black olives or avocado for a unique twist.
Ideal for Gatherings: With its vibrant presentation and satisfying crunch, this Simple Doritos Taco Salad is bound to impress at any casual gathering.
Crowd-Pleasing: Enjoyed by all ages, it’s sure to become a favorite among family and friends, just like the flavors in a classic Taco Bell Crunchwrap!

Simple Doritos Taco Salad Ingredients

• Get ready for a crunch-fest!

For the Taco Salad

  • Doritos – Provides a crunchy base; feel free to substitute any similar tortilla chips if you prefer a different texture.
  • Ground Beef – Adds protein and flavor; swapping for ground turkey offers a lighter option.
  • Lettuce – Increases freshness and volume; romaine or iceberg keeps it crisp.
  • Tomatoes – Dices in juiciness and flavor; grape tomatoes are a delightful alternative.
  • Cheese – Brings richness to the dish; try using cheddar or a Mexican blend for an extra kick.
  • Sour Cream – Adds creaminess and tang; Greek yogurt can lighten it up beautifully.
  • Salsa – Infuses moisture and zest; consider pico de gallo or guacamole for a fresh pairing.

Step‑by‑Step Instructions for Simple Doritos Taco Salad

Step 1: Prepare the Base
Begin by crushing the Doritos into bite-sized pieces to form a crunchy base for your Simple Doritos Taco Salad. Place them in a large mixing bowl, ensuring they’re evenly distributed. This will take just a couple of minutes, and you want them to be roughly broken without turning to dust.

Step 2: Cook the Meat
In a skillet over medium heat, cook your ground beef or turkey until it's browned and cooked through, which should take about 7–10 minutes. Make sure to break it up with a spatula as it cooks, and drain any excess fat. Once ready, let it cool slightly before adding it to the salad bowl.

Step 3: Mix Ingredients
Next, layer your chopped lettuce, diced tomatoes, and shredded cheese into the bowl on top of the crushed Doritos and cooked meat. This colorful assembly not only looks appetizing but also adds nutritional value. Aim for visually appealing layers that provide a bounty of flavors and textures.

Step 4: Combine Carefully
Gently stir all the ingredients together using a large spoon. Be careful not to crush the Doritos while mixing to maintain the delightful crunch they're known for. Aim for a cohesive blend of ingredients that showcases the vibrant colors and textures throughout the Simple Doritos Taco Salad.

Step 5: Serve with Toppings
Before serving, top the salad with dollops of sour cream and salsa. This adds a creamy and zesty finish to your dish, elevating the overall flavor experience. You can also offer these toppings on the side for guests to customize their servings according to their preferences.

Make Ahead Options

These Simple Doritos Taco Salad ingredients are perfect for meal prep enthusiasts! You can chop the lettuce, dice the tomatoes, and prepare the meat (ground beef or turkey) up to 3 days in advance. Store each component separately in airtight containers to maintain quality; this prevents the lettuce from becoming soggy. When you’re ready to serve, simply layer the prepped ingredients over the crushed Doritos, mix gently, and top with sour cream and salsa right before enjoying. This way, you can whip up a satisfying meal in no time, giving you more time to relax or focus on the things you love!

How to Store and Freeze Simple Doritos Taco Salad

Fridge: Store any leftovers in an airtight container for up to 2 days. Keep the Doritos separate to maintain their crunchiness and avoid sogginess.

Freezer: It's best not to freeze this salad as it contains fresh ingredients that may not retain their texture. Preparing the components separately allows for easy assembly later.

Reheating: If reheating the meat, do so gently in a skillet or microwave until warmed through. Assemble the salad fresh just before serving for the best experience.

Ingredient Separation: For optimal storage, keep all salad components in separate containers to preserve flavors and textures until you're ready to enjoy your Simple Doritos Taco Salad again.

Expert Tips for the Best Simple Doritos Taco Salad

  • Ingredient Freshness: Use fresh lettuce and ripe tomatoes to enhance the flavors. Wilting or overripe vegetables can dampen the salad's overall taste.

  • Taco Meat Swap: Instead of traditional ground beef, try ground turkey for a lighter option that doesn't skimp on flavor. Just make sure to season well!

  • Crunch Maintenance: Combine all ingredients just before serving. If made in advance, store components separately to keep the Doritos crisp.

  • Layering Matters: Layer ingredients in a way that each bite balances the crunch of Doritos with creamy and savory elements; avoid piling everything in one spot.

  • Customize Your Salad: Don't hesitate to add extras like black olives, corn, or avocado. They can elevate your Simple Doritos Taco Salad and cater to different tastes.

Simple Doritos Taco Salad Variations

Feel free to personalize your Simple Doritos Taco Salad with these delicious twists that can enhance flavor and cater to your preferences!

  • Ground Turkey: Swap ground beef for ground turkey for a lighter take without compromising on taste. This option packs in protein but with fewer calories.

  • Cheese Blend: Use your favorite cheese blend, like pepper jack or Monterey jack, for an extra kick. Melting it over the meat briefly before adding to the salad creates a warm, gooey surprise.

  • Black Olives: Toss in sliced black olives for a salty, savory addition that complements the other flavors beautifully. Not only do they add an excellent flavor dimension, but they also offer a delightful texture.

  • Corn: Stir in sweet corn for a pop of sweetness and a touch of color. It boosts the overall freshness of the salad while providing an appealing crunch.

  • Avocado: Add sliced or cubed avocado for a creamy contrast that enhances the salad’s richness. It's a great source of healthy fats, bringing a new layer of texture and flavor.

  • Spicy Salsa: If you love some heat, choose a spicy salsa or add jalapeños for that extra kick. This brings a fiery touch that elevates the overall taste experience.

  • Dressing Option: Drizzle your favorite ranch or cilantro-lime dressing over the top for a creamy, zesty finish. This adds a new flavor profile while keeping the salad light and refreshing.

  • Guacamole: For a twist on traditional toppings, consider using guacamole instead of sour cream. Its creamy texture perfectly complements the crunch and will transport your taste buds straight to taco night!

And if you're looking to explore more exciting dishes, don’t forget to check out these crowd-favorites like Buffalo Tofu with Caesar Salad or for something heartier, try the Taco Spaghetti Cheesy for a fun spin on taco night!

What to Serve with Simple Doritos Taco Salad

Enhance your dining experience with delightful pairings that elevate this crunchy masterpiece into a full meal.

  • Creamy Guacamole: Its rich, buttery texture contrasts beautifully with the salad's crunch, adding a layer of flavor everyone will love.

  • Black Bean Salsa: This hearty blend of black beans, corn, and tomatoes brings a fresh zing that complements the savory taco salad perfectly. It’s a vibrant addition that gives you a taste of summertime in every bite.

  • Mexican Street Corn Salad: The sweet and creamy elements of this salad balance the savory crunch of Doritos while echoing the classic taco flavors. The coriander and lime zest provide a fresh pop.

  • Zesty Limeade: A refreshingly tangy beverage that cuts through the richness of the salad. Its bright notes will uplift your gathering, leaving your guests feeling rejuvenated.

  • Churros with Chocolate Sauce: For dessert, these sweet treats offer a delightful crunch and a sweet finish to your meal, echoing the textures in your Simple Doritos Taco Salad.

  • Crispy Onion Rings: Their crunch complements the textures of the salad, while their savory flavor adds another dimension to your casual dining experience.

  • Cilantro-Lime Rice: This light and fragrant side dish introduces fresh herbaceous notes that pair beautifully with the bold flavors of the taco salad, making every bit satisfying and aromatic.

  • Spicy Nachos: Stacked high with cheese and jalapeños, these crispy bites echo the Doritos while adding more cheesy goodness that will captivate your guests.

Simple Doritos Taco Salad Recipe FAQs

How do I choose ripe tomatoes for the salad?
Absolutely! Look for tomatoes that are firm yet slightly soft to the touch, with a vibrant color free from dark spots. Ripe tomatoes should feel heavy for their size, indicating juiciness. For a salad, grape or cherry tomatoes are great options as they're typically sweeter and easier to bite into!

How should I store leftovers?
Very good question! Store any leftovers in an airtight container in the fridge for up to 2 days. It's essential to keep the Doritos separate from the other ingredients to maintain their delightful crunch. You can place the salad components in separate containers for easy assembly later.

Can I freeze Simple Doritos Taco Salad?
The more the merrier, but this salad is not suitable for freezing! Fresh ingredients like lettuce and tomatoes don’t fare well in the freezer, as they can become soggy and lose texture. Instead, I recommend preparing the components separately and storing them in the fridge for fresh assembly when you're ready to enjoy again.

What if my ground meat turns out dry?
Don’t fret! If your ground beef or turkey ends up a little dry, it could be due to overcooking. To remedy this, try adding a splash of beef or chicken broth while reheating to restore moisture. Alternatively, if it's already in the salad, add a little extra salsa or sour cream to enhance creaminess and flavor—every bite should be a balance of textures!

Can I make this dish gluten-free?
Absolutely! To create a gluten-free version of the Simple Doritos Taco Salad, simply use gluten-free tortilla chips instead of regular Doritos. Many brands offer delicious alternatives that maintain the crunch and flavor—just check the ingredient label to be safe!

Simple Doritos Taco Salad

Effortless Simple Doritos Taco Salad for Instant Satisfaction

A Simple Doritos Taco Salad that captures the flavors of taco night, perfect for busy weeknights and gatherings.
Print Recipe Pin Recipe
Prep Time 15 minutes mins
Cook Time 15 minutes mins
Total Time 30 minutes mins
Servings: 4 servings
Course: Salads
Cuisine: American
Calories: 450
Ingredients Equipment Method Nutrition Notes

Ingredients
  

For the Taco Salad
  • 1 bag Doritos Provides a crunchy base; feel free to substitute any similar tortilla chips if you prefer a different texture.
  • 1 lb Ground Beef Adds protein and flavor; swapping for ground turkey offers a lighter option.
  • 4 cups Lettuce Increases freshness and volume; romaine or iceberg keeps it crisp.
  • 1 cup Tomatoes Dices in juiciness and flavor; grape tomatoes are a delightful alternative.
  • 1 cup Cheese Brings richness to the dish; try using cheddar or a Mexican blend for an extra kick.
  • 1 cup Sour Cream Adds creaminess and tang; Greek yogurt can lighten it up beautifully.
  • 1 cup Salsa Infuses moisture and zest; consider pico de gallo or guacamole for a fresh pairing.

Equipment

  • Skillet
  • Mixing Bowl
  • Spatula

Method
 

Step-by-Step Instructions
  1. Begin by crushing the Doritos into bite-sized pieces to form a crunchy base for your Simple Doritos Taco Salad. Place them in a large mixing bowl, ensuring they’re evenly distributed.
  2. In a skillet over medium heat, cook your ground beef or turkey until it's browned and cooked through, about 7–10 minutes. Make sure to break it up with a spatula as it cooks, and drain any excess fat. Let it cool slightly before adding it to the salad bowl.
  3. Layer your chopped lettuce, diced tomatoes, and shredded cheese into the bowl on top of the crushed Doritos and cooked meat.
  4. Gently stir all the ingredients together using a large spoon, being careful not to crush the Doritos.
  5. Before serving, top the salad with dollops of sour cream and salsa for a creamy and zesty finish.

Nutrition

Serving: 1bowlCalories: 450kcalCarbohydrates: 30gProtein: 25gFat: 25gSaturated Fat: 10gPolyunsaturated Fat: 2gMonounsaturated Fat: 8gCholesterol: 75mgSodium: 800mgPotassium: 600mgFiber: 3gSugar: 5gVitamin A: 20IUVitamin C: 25mgCalcium: 15mgIron: 10mg

Notes

Use fresh ingredients for best results and customize with additional toppings as desired.

Tried this recipe?

Let us know how it was!

Delicious Orzo Pasta Salad with Lemon-Oregano Twist

June 11, 2026 by Grace Snow Leave a Comment

As I tossed together the ingredients for my latest culinary adventure, the vibrant colors of my Orzo Pasta Salad brought a wave of excitement. This dish combines tender orzo pasta with crisp cucumbers and sweet cherry tomatoes, all draped in a zesty lemon-oregano vinaigrette that dances on the palate. Not only is this Orzo Pasta Salad quick and easy to whip up, but it also serves as a versatile canvas for creativity—add grilled chicken, nuts, or seasonal veggies to make it your own. Perfect for summer picnics or casual family dinners, this salad is bound to be a crowd-pleaser. Are you ready to discover how simple and delicious homemade meals can be?

Why is Orzo Pasta Salad a Must-Try?

Vibrant, Colorful Dish: This Orzo Pasta Salad is a feast for the eyes with its bright vegetables, making it an attractive addition to any table.

Quick Preparation: Whipping up this salad takes hardly any time, perfect for busy weeknights or last-minute gatherings.

Versatile Base: Easily customize with proteins like grilled chicken or shrimp to create a complete meal, just as you can with Seafood Pasta Savory.

Zesty Flavor Explosion: The lemon-oregano vinaigrette really enhances the ingredients, giving each bite a refreshing burst.

Crowd Favorite: Everyone from kids to adults will appreciate its deliciousness, making it ideal for summer barbecues or picnics.

Nutrient-Rich: Packed with veggies and protein from chickpeas, this salad is not just tasty but also adds a nutrient boost to your meal!

Orzo Pasta Salad Ingredients

For the Salad
• Orzo Pasta – The star ingredient that provides a delightful base; make it gluten-free by swapping for alternative pasta.
• Chicken Broth – Adds rich flavor while cooking the orzo; substitute with vegetable broth for a vegetarian option.
• Cucumber – Fresh and crunchy, it brings hydration; feel free to use bell peppers for a similar texture.
• Cherry Tomatoes – These sweet gems add color and bursts of flavor; regular diced tomatoes work if you prefer.
• Chickpeas – A great source of protein and texture; canned or cooked versions both work well.
• Red Onion – Provides a nice sharpness; omit if you want a milder taste.
• Olives – Offer a salty briny punch; any variety you love will enhance the dish.
• Feta Cheese – Creamy and tangy, this cheese adds depth; replace with vegan cheese for dairy-free options.
• Fresh Basil & Parsley – Used for garnishing, these herbs elevate the flavors; customize with herbs that you enjoy.

For the Dressing
• Lemon Juice – Brightens the salad with a zesty kick; fresh juice is best for optimal flavor.
• Olive Oil – Adds richness to the dressing; feel free to substitute with a lighter oil if desired.
• Red Apple Vinegar – Contributes tanginess; white wine vinegar can be used if needed.
• Minced Garlic – Packs robust flavor into the vinaigrette; adjust the amount to suit your taste.
• Oregano – Enhances the overall flavor with herbal notes; fresh oregano elevates the experience.
• Sugar – Balances the acidity, making the dressing smooth; this is optional based on your preference.
• Salt & Pepper – Essential for seasoning; adjust to taste for the perfect finish.

This Orzo Pasta Salad is not only colorful and delicious but also fully customizable to suit any meal occasion.

Step‑by‑Step Instructions for Orzo Pasta Salad

Step 1: Cook the Orzo
In a medium pot, bring 4 cups of chicken broth to a rolling boil. Add 1 cup of orzo pasta, along with a splash of lemon juice and a pinch of salt. Cook for 8–10 minutes until the orzo is al dente, then drain it in a colander and rinse under cold water to stop the cooking process. Set aside to cool while you prepare the dressing.

Step 2: Prepare the Dressing
In a large mixing bowl, whisk together 1/4 cup of olive oil, 2 tablespoons of red apple vinegar, the juice of one lemon, 2 minced garlic cloves, 1 teaspoon of dried oregano, and a teaspoon of sugar. Season the vinaigrette with salt and pepper to taste, creating a smooth and tangy dressing that will elevate your Orzo Pasta Salad beautifully.

Step 3: Combine Ingredients
Once the orzo has cooled, add it to the bowl with the dressing. Incorporate 1 diced cucumber, 1 cup of halved cherry tomatoes, 1 can of rinsed chickpeas, 1/4 cup of chopped red onion, 1/2 cup of sliced olives, and 1/2 cup of crumbled feta cheese. Gently toss everything together until all the ingredients are evenly coated in the flavorful dressing.

Step 4: Chill & Serve
Cover the bowl with plastic wrap and refrigerate the Orzo Pasta Salad for at least one hour to allow the flavors to meld together. Just before serving, sprinkle fresh basil and parsley on top for a burst of freshness and color. This salad is perfect for family gatherings, picnics, or a light meal on its own.

Make Ahead Options

Preparing this Orzo Pasta Salad ahead of time is a game changer for busy home cooks! You can cook the orzo and combine it with your dressing up to 24 hours in advance; just be sure to refrigerate it promptly to maintain freshness. Additionally, you can chop your vegetables like cucumbers and cherry tomatoes a day ahead—store them separately to keep them crisp. If you prefer, you can mix all ingredients except for the feta and fresh herbs, which should be added right before serving to preserve texture and flavor. This way, you’ll have a delicious, ready-to-eat Orzo Pasta Salad that tastes just as vibrant and fresh when you serve it!

Storage Tips for Orzo Pasta Salad

Fridge: Store your Orzo Pasta Salad in an airtight container for up to 3 days. This keeps it fresh and flavorful, making it easy to enjoy again.

Freezer: While not ideal, you can freeze the salad without dressing for up to 2 months. Thaw in the fridge before consuming, and add fresh dressing before serving.

Dressing Separation: If you plan to have leftovers, keep the dressing separate to maintain texture. Just whisk together before serving.

Reheating: If preferred, serve at room temperature. However, do not microwave as it can make the pasta mushy; enjoy it cold for the best taste experience!

Expert Tips for Orzo Pasta Salad

  • Chill for Flavor: Letting the Orzo Pasta Salad chill in the refrigerator for at least an hour enhances the flavors and makes it even more refreshing.

  • Cook Al Dente: Avoid overcooking the orzo; it should be tender yet firm. Perfectly al dente pasta prevents mushiness in your salad.

  • Dress Smartly: If you plan to have leftovers, store the dressing separately. This helps maintain the texture and freshness of the salad.

  • Customize Wisely: Feel free to add proteins like grilled chicken or shrimp, but be sure to balance flavors with the dressing to enhance the overall taste.

  • Fresh Ingredients Matter: Use fresh herbs and vegetables whenever possible to elevate the taste of your Orzo Pasta Salad; they make every bite vibrant and delicious.

What to Serve with Vibrant Orzo Pasta Salad?

As you savor your homemade dish, imagine a delightful spread that enhances every bite of this refreshing salad.

  • Grilled Chicken Skewers: Juicy and marinated, these skewers provide a satisfying protein boost that pairs beautifully with the salad's light flavors.

  • Garlic Breadsticks: Soft and buttery, these add a comforting crunch that balances the crispness of the salad while soaking up any extra vinaigrette.

  • Roasted Vegetables: A colorful medley of seasonal veggies brings a warm, earthy touch, enhancing the freshness of the orzo and creating a harmonious plate.

  • Fresh Fruit Salad: Bursting with sweetness and vibrant colors, a fruit salad offers a refreshing contrast that cleanses the palate and rounds out the meal.

  • Caprese Skewers: Combining fresh mozzarella, basil, and cherry tomatoes, these skewers echo the salad’s ingredients while adding a delightfully cheesy element.

  • Ice-Cold Lemonade: A zesty beverage that mirrors the salad's bright flavors, lemonade brings an inviting chill that refreshes and revitalizes on warm summer days.

Pairing your vibrant Orzo Pasta Salad with these delicious options creates an unforgettable dining experience your family and friends will cherish. Enjoy!

Orzo Pasta Salad Variations & Substitutions

Feel free to add your unique touch to this flavorful Orzo Pasta Salad and make it truly yours!

  • Protein-Packed: Add grilled chicken or shrimp to make this salad more filling. Topped with succulent protein, it's perfect for a hearty lunch or dinner.

  • Vegetable Swap: Try bell peppers or zucchini for a different crunchy texture. Each bite will surprise you with new flavors, adding a fun twist to your Orzo Pasta Salad.

  • Nutty Delight: Incorporate toasted nuts like almonds or pine nuts for added crunch and flavor. The nutty echoes will elevate your dish to a gourmet experience.

  • Gluten-Free: Swap out the orzo for quinoa or couscous. Both offer unique textures while keeping the essence of a hearty salad intact.

  • Cheese Alternatives: For a dairy-free option, replace feta cheese with vegan cheese or simply omit it. It allows the fresh vegetables to shine through brilliantly.

  • Heat it Up: Spice things up by adding diced jalapeños or red pepper flakes. The added heat will give your Orzo Pasta Salad an exciting kick that keeps your palate dancing.

  • Herb Variations: Use fresh dill or cilantro instead of basil and parsley for a different aromatic flair. Each herb brings its own unique brightness and depth to the dish.

  • Sweet Twist: Add diced apples or mango to the salad for a hint of sweetness. These fruits bring a delightful contrast to savory ingredients, creating a refreshing medley.

For more delightful recipes, you might enjoy Avocado Egg Salad as a smashing side or Cauliflower Pasta Ready for another pasta adventure!

Orzo Pasta Salad Recipe FAQs

What type of orzo pasta should I use?
For the best texture, use traditional orzo made from wheat, but if you're looking for a gluten-free option, there are great gluten-free pasta alternatives available that work well as a substitute. Just ensure they are small in size to maintain the salad's overall feel!

How long can I store leftovers of my Orzo Pasta Salad?
You can keep your Orzo Pasta Salad in an airtight container in the refrigerator for up to 3 days. Just remember to separate the dressing if you want the salad to stay fresh and crisp!

Can I freeze Orzo Pasta Salad?
While not ideal for freezing due to the texture changes in the vegetables and pasta, you can freeze the salad without the dressing for up to 2 months. To freeze, place the salad in a freezer-safe container. When you're ready to enjoy it, let it thaw in the fridge overnight, then add fresh dressing before serving.

How can I customize my Orzo Pasta Salad?
Absolutely! You can customize your Orzo Pasta Salad by adding proteins like grilled chicken or shrimp for a complete meal. Feel free to incorporate seasonal vegetables such as bell peppers or zucchini for added color and crunch. I often mix in nuts for a delightful crunch and some healthy fats too!

Are there any dietary considerations for this Orzo Pasta Salad?
Yes, be mindful of those with allergies! This salad contains gluten and dairy from the orzo and feta cheese. For a dairy-free version, substitute the feta with vegan cheese or omit it entirely. Additionally, ensure any added proteins are safe for the dietary needs of your guests. Enjoy crafting your own delicious variations!

What should I do if I overcooked the orzo?
If you accidentally overcooked your orzo, don’t worry! To revive it, quickly rinse it under cold water to stop the cooking process. If the pasta has become a bit mushy, consider using it in a soup or casserole instead of the salad to enjoy it without wasting any food!

Orzo Pasta Salad

Delicious Orzo Pasta Salad with Lemon-Oregano Twist

This Orzo Pasta Salad is vibrant, quick, and customizable, perfect for summer picnics.
Print Recipe Pin Recipe
Prep Time 15 minutes mins
Cook Time 10 minutes mins
Chilling Time 1 hour hr
Total Time 1 hour hr 25 minutes mins
Servings: 4 servings
Course: Salads
Cuisine: Mediterranean
Calories: 350
Ingredients Equipment Method Nutrition Notes

Ingredients
  

For the Salad
  • 1 cup orzo pasta gluten-free option available
  • 4 cups chicken broth substitute vegetable broth for vegetarian
  • 1 piece cucumber diced
  • 1 cup cherry tomatoes halved
  • 1 can chickpeas rinsed
  • 1/4 cup red onion chopped
  • 1/2 cup olives sliced
  • 1/2 cup feta cheese crumbled
  • to taste fresh basil for garnishing
  • to taste fresh parsley for garnishing
For the Dressing
  • 1/4 cup olive oil or substitute with lighter oil
  • 2 tablespoons red apple vinegar or white wine vinegar
  • 1 piece lemon juiced
  • 2 cloves garlic minced
  • 1 teaspoon oregano or use fresh oregano
  • 1 teaspoon sugar optional
  • to taste salt
  • to taste pepper

Equipment

  • Medium pot
  • large mixing bowl
  • Colander

Method
 

Cooking Instructions
  1. In a medium pot, bring 4 cups of chicken broth to a rolling boil. Add 1 cup of orzo pasta, a splash of lemon juice, and a pinch of salt. Cook for 8–10 minutes until al dente, then drain and rinse in cold water. Set aside to cool.
  2. In a large mixing bowl, whisk together 1/4 cup of olive oil, 2 tablespoons of red apple vinegar, the juice of one lemon, 2 minced garlic cloves, 1 teaspoon of dried oregano, and 1 teaspoon of sugar. Season with salt and pepper to taste.
  3. Once cooled, add the orzo to the bowl with the dressing. Incorporate 1 diced cucumber, 1 cup of halved cherry tomatoes, 1 can of rinsed chickpeas, 1/4 cup of chopped red onion, 1/2 cup of sliced olives, and 1/2 cup of crumbled feta cheese. Gently toss to coat evenly.
  4. Cover with plastic wrap and refrigerate for at least one hour. Before serving, sprinkle fresh basil and parsley on top.

Nutrition

Serving: 1cupCalories: 350kcalCarbohydrates: 40gProtein: 12gFat: 16gSaturated Fat: 4gPolyunsaturated Fat: 2gMonounsaturated Fat: 10gCholesterol: 20mgSodium: 500mgPotassium: 600mgFiber: 7gSugar: 2gVitamin A: 500IUVitamin C: 10mgCalcium: 150mgIron: 2mg

Notes

For best flavor, let the salad chill in the refrigerator. Store any leftovers in an airtight container for up to 3 days.

Tried this recipe?

Let us know how it was!

Zesty Quick Southwest Chicken Salad for Easy Meal Prep

June 3, 2026 by Grace Snow Leave a Comment

As I sat down to enjoy a sunny afternoon, the enticing aroma of zesty spices wafted through the air, nudging my taste buds awake. That's when I decided to whip up this Quick Southwest Chicken Salad, a vibrant blend of fresh vegetables and tender chicken that comes together in no time. It's not just an easy meal to prepare; this salad is also a feast for the senses, showcasing bold flavors while being both dairy-free and gluten-free. Perfect for a light lunch or a refreshing dinner, it's the kind of dish that makes meal prep a breeze and is sure to impress even the pickiest of eaters. Curious about how to bring this joyful medley to your table? Let’s dive into the recipe!

Why is this salad a must-try?

Quick and Easy: This Quick Southwest Chicken Salad whips up in a flash, perfect for busy weekdays or lazy weekends.

Zesty Flavor Explosion: With fresh lime juice and spices, every bite delivers a burst of Southwest-inspired goodness.

Meal Prep Friendly: Make it ahead of time! It stores beautifully for up to 5 days, so your healthy meals are sorted.

Versatile and Customizable: Tweak ingredients to fit your taste—swap in chickpeas or add diced avocados for extra creaminess.

Perfect for Any Occasion: Whether it’s a picnic, lunch at work, or a cozy dinner, this salad’s crowd-pleasing appeal shines through, making it a favorite at gatherings.

Elevate your meal prep game with this vibrant dish, and while you’re at it, check out my recipes for Tofu Caesar Salad and Chipotle Lime Chicken for more easy and delicious options!

Quick Southwest Chicken Salad Ingredients

• What do you need?

For the Salad

  • Cooked Shredded Chicken – Adds heartiness and protein; canned chicken is a quick substitute.
  • Black Beans – Offers fiber and plant-based protein; remember to rinse and drain them well.
  • Corn – Contributes sweetness and texture; both canned and frozen corn work great.
  • Jalapeños – Brings in the heat and bold flavor; adjust according to your spice tolerance.
  • Cherry Tomatoes – Provides freshness and juiciness; simply quarter them for easy mixing.
  • Red Onion – Adds crunch and sharpness; swap with green onions for a milder taste.
  • Pepitas (Pumpkin Seeds) – Provides a delightful crunch and healthy fats; sunflower seeds make a fine alternative.

For the Dressing

  • Mayo or Greek Yogurt – Offers creaminess to the salad; Greek yogurt is a lighter, tangy choice.
  • Fresh Lime Juice – Brightens and balances the flavors; it's essential for a refreshing taste.
  • Chili Powder – Introduces warmth and complexity; feel free to adjust based on your desired heat.
  • Garlic Powder, Cumin, Paprika, and Salt – Enhances the depth of flavor; mix to your personal preference.

Now that you’ve gathered the ingredients, you’re just a few steps away from indulging in this delightful Quick Southwest Chicken Salad. Your taste buds will thank you!

Step‑by‑Step Instructions for Quick Southwest Chicken Salad

Step 1: Make the Dressing
In a medium bowl, combine the mayonnaise or Greek yogurt, fresh lime juice, chili powder, garlic powder, cumin, paprika, and a pinch of salt. Whisk these ingredients together until smooth and creamy, ensuring a uniform consistency that brings a zesty kick to your Quick Southwest Chicken Salad. Set this dressing aside to let the flavors meld while you prepare the salad.

Step 2: Prepare the Salad Ingredients
In a large mixing bowl, add the cooked shredded chicken, ensuring it’s tender and well-separated. Next, stir in the rinsed black beans and corn, making sure they’re well-drained to prevent excess moisture. Then, toss in the chopped jalapeños, quartered cherry tomatoes, diced red onion, and pepitas for a delightful crunch. Mix all the ingredients until evenly combined and colorful.

Step 3: Combine the Dressing with the Salad
Pour the prepared dressing over the salad mixture and use a large spoon to gently fold everything together. Take care not to mash the ingredients; you want each element bright and distinct. Continue mixing until every bite of shredded chicken and vegetables is coated with the zesty dressing, creating a vibrant Quick Southwest Chicken Salad that looks as good as it tastes.

Step 4: Serve the Salad
Once everything is combined, it’s time to serve! Spoon the Quick Southwest Chicken Salad onto plates or into bowls for an appealing presentation. You can enjoy it on its own, use it as a filling for a sandwich, or serve it over a bed of crisp lettuce for a refreshing crunch. The colorful medley and delightful flavors are sure to impress!

Expert Tips for Quick Southwest Chicken Salad

  • Fresh Ingredients: Always use fresh vegetables for the best flavor and texture. Wilting or spoilage can dull this vibrant Quick Southwest Chicken Salad.

  • Adjust Spice Levels: Start with a small amount of jalapeños, then taste and increase as desired. This prevents overwhelming heat for those who prefer milder flavors.

  • Store Properly: Keep your salad in an airtight container in the fridge for 4-5 days. Be mindful that excess dressing can lead to sogginess.

  • Mix Up the Protein: For a twist, try substituting black beans for chickpeas or even adding grilled shrimp—this variation keeps the Quick Southwest Chicken Salad exciting.

  • Garnish for Flair: Top with fresh cilantro or sliced avocados just before serving for an eye-catching and delicious finish.

Storage Tips for Quick Southwest Chicken Salad

  • Fridge: Store leftovers in an airtight container for up to 4–5 days, allowing the flavors to meld beautifully as the salad sits.
  • Room Temperature: Keep this salad at room temperature for no more than 2 hours if served at a gathering to ensure freshness.
  • Freezer: Avoid freezing due to potential separation of the dressing, which can affect the texture of the salad upon thawing.
  • Reheating: Although generally best served cold, you can warm the salad slightly in a microwave for 20–30 seconds, but be cautious not to overheat or cook the ingredients.

Quick Southwest Chicken Salad Variations

Feel free to get creative with this Quick Southwest Chicken Salad; the possibilities are endless!

  • Chickpeas: Swap black beans for chickpeas for a nutty twist while maintaining protein and texture.

  • Peppers: Use diced bell peppers instead of jalapeños for a milder, sweet crunch perfect for sensitive palates. Bright colors make the dish pop!

  • Avocado: Add diced avocado for a creamy texture and healthy fats that enhance the salad's heartiness.

  • Vinegar Dressing: Opt for a vinegar-based dressing instead of mayo or yogurt for a tangy flavor profile that lightens up the salad.

  • Fresh Herbs: Incorporate fresh herbs like cilantro or parsley to brighten up the dish and add an aromatic flair.

  • Spicy Kick: Crank up the heat by adding some diced serrano peppers or a splash of hot sauce for those who crave an extra fiery punch.

  • Tahini Dressing: For a unique nutty flavor, drizzle tahini over the salad instead of the mayo or Greek yogurt. It pairs beautifully with the southwest spices!

  • Cheese Add-In: If you’re not strictly dairy-free, sprinkle some feta or cotija cheese for a salty pop that complements the vibrant ingredients wonderfully.

As you experiment, you'll discover delightful new flavors and textures! For additional ideas, try my Crock Pot Chicken or indulge in a savory Chicken Adobo for delightful variations on chicken recipes. Enjoy your kitchen adventures!

What to Serve with Quick Southwest Chicken Salad

Delight in creating a complete meal by pairing this invigorating dish with complementary sides and beverages.

  • Crispy Tortilla Chips: Perfect for scooping up the salad, these chips add a satisfying crunch that balances the salad's textures.
  • Refreshing Fruit Salad: A vibrant mix of seasonal fruits brings sweetness, cleansing your palate between bites of zesty salad.
  • Creamy Avocado Toast: Elevate your meal with smooth avocado on toast, providing a rich and creamy contrast to the spicy salad.
  • Zesty Limeade: This bright, citrusy drink complements the salad's fresh lime flavor while offering a refreshing sip.
  • Grilled Corn on the Cob: Sweet, smoky flavors from the grill enhance the Southwest theme and add a delightful char to your meal.
  • Spinach or Arugula Salad: A simple green salad dressed in light vinaigrette provides a fresh, peppery contrast to the hearty main dish.
  • Chilled Cucumber Soup: When served on the side, this cool soup provides a refreshing counterpoint to the spicy salad, perfect for warm days.
  • Roasted Sweet Potatoes: The natural sweetness of roasted sweet potatoes pairs beautifully with the salad's spicy elements, satisfying your cravings.
  • Chili Lime Popcorn: This adventurous snack brings a tickle of spice and zest, keeping your taste buds excited while enjoying the salad.
  • Chocolate Avocado Mousse: For dessert, indulge in this creamy and rich mousse that intrigues your palate without overwhelming it.

Make Ahead Options

These Quick Southwest Chicken Salad components are perfect for busy meal prep! You can prepare the salad ingredients (shredded chicken, black beans, corn, jalapeños, cherry tomatoes, red onion, and pepitas) up to 3 days in advance. Simply store them in an airtight container in the refrigerator. Additionally, you can make the dressing ahead of time, keeping it in a separate container for up to 24 hours to preserve its creamy texture. When you're ready to serve, just mix the dressing with the salad ingredients for a fresh, vibrant dish that’s as delicious as it is quick. This not only saves you time but also allows the flavors to meld beautifully for an even tastier meal!

Quick Southwest Chicken Salad Recipe FAQs

What should I look for when selecting ripe ingredients for my salad?
Absolutely! When choosing cherry tomatoes, look for ones that are deep red and firm to the touch. For jalapeños, select fresh ones that are vibrant green with a smooth skin—avoid any that have dark spots. As for the lime, pick one that feels heavy for its size; it usually indicates juiciness!

How long can I store leftovers of the Quick Southwest Chicken Salad?
You can refrigerate this salad in an airtight container for up to 4-5 days. I often find that the flavors get even better after a day or two, as they meld together beautifully. Just make sure to keep any excess dressing separate until you're ready to serve!

Can I freeze the Quick Southwest Chicken Salad for later?
Unfortunately, I wouldn't recommend freezing this salad. Freezing can cause the dressing to separate, leading to an unappetizing texture once thawed. Instead, enjoy it fresh, or consider freezing individual components, like the shredded chicken or beans, to use later!

What should I do if my salad dressing seems too thick?
No worries! If your dressing turns out thicker than you'd like, simply whisk in a tablespoon of water or additional lime juice to achieve the desired consistency. This will help it coat the salad ingredients evenly without overpowering them.

Are there any dietary considerations I should be aware of with this salad?
Very! This Quick Southwest Chicken Salad is naturally dairy-free and gluten-free, making it a great option for many dietary needs. However, if you have food allergies, ensure that the ingredients like black beans and corn are free from cross-contamination. If serving to pets, be cautious—some ingredients like onions can be harmful to them.

How can I customize the Quick Southwest Chicken Salad to suit my taste?
The more the merrier! Feel free to swap the black beans for chickpeas or add in diced bell peppers for a sweeter crunch. You can also switch the dressing to a simple vinaigrette for a tangier option. Personalizing it makes it uniquely yours!

Authentic Greek Salad: A Fresh Taste of the Mediterranean

May 29, 2026 by Grace Snow Leave a Comment

In the heart of summer, when ripe tomatoes light up the farmers’ markets like jewels, I’m always drawn to the vibrant simplicity of an Authentic Greek Salad, also known as Horiatiki. This delightful Village Salad captures the essence of Greece with its selection of fresh, crisp vegetables and a luscious slab of feta that pays homage to Mediterranean traditions. The best part? It’s incredibly quick to prepare, making it the ideal dish for those lazy afternoons spent soaking up the sun. Not only does this salad burst with nutrient-rich ingredients, but it’s also gluten-free, catering to various dietary preferences without sacrificing flavor. Whether enjoyed alongside grilled meats or as a refreshing main event, this Authentic Greek Salad is a must-try. Are you ready to bring a taste of the Mediterranean to your kitchen?

Why is This Greek Salad So Special?

Simplicity at Its Best: With minimal ingredients and straightforward steps, you’ll find that whipping up an Authentic Greek Salad is as easy as it is enjoyable.

Fresh, Vibrant Flavors: Featuring juicy tomatoes, crispy cucumbers, and a thick slab of feta, this salad tantalizes your taste buds with a refreshing explosion of Mediterranean goodness.

Perfect for Any Occasion: Whether you're hosting a summer barbecue or enjoying a quiet night in, this Horiatiki pairs beautifully with grilled meats, wraps, or even on its own.

Nutrient-Packed Goodness: This gluten-free salad is not just delicious; it’s loaded with wholesome ingredients that will leave you feeling energized and satisfied.

Crowd-Pleasing Appeal: Ideal for family gatherings or sharing with friends, everyone will love the rustic charm and vibrant colors of this classic village salad. Try serving it alongside our Grilled Balsamic Steak for a complete Mediterranean feast!

Authentic Greek Salad Ingredients

For the Vegetables
• Vine-Ripened Red Tomatoes – Use 4 large (approx. 800g) fresh tomatoes, cut into irregular chunks for a rustic look.
• Cucumber – 1 large unpeeled cucumber (approx. 300g) sliced into thick half-moon pieces for an appealing green contrast.
• Red Onion – 1/2 medium onion (approx. 75g) sliced very thinly for an airy texture.

For the Mix-ins
• Kalamata Olives – Approximately 1/2 cup (75g) of whole, glossy olives ensures a burst of flavor; make sure they are well-drained.
• Feta Cheese – Use 1 thick slab (approx. 200g) of feta, not crumbled, to maintain stunning presentation.

For the Dressing
• Extra Virgin Olive Oil – 1/4 cup (60ml) of high-quality olive oil is essential for authenticity and enhances the overall flavor.
• Dried Oregano – A generous 1 tbsp (2g) sprinkled heavily over the dish elevates the Mediterranean flavor profile.
• Sea Salt – Use about 1/2 tsp to taste, enhancing the sweetness of the tomatoes.

This Authentic Greek Salad brings together fresh, quality ingredients to create a refreshing dish that celebrates the Mediterranean!

Step‑by‑Step Instructions for Authentic Greek Salad:

Step 1: Prepare the Vegetables
Begin by washing and drying 4 large vine-ripened tomatoes, then cut them into irregular chunks for a rustic presentation. Place the tomato pieces in a spacious shallow bowl. Next, slice 1 large cucumber into thick half-moon pieces and add them to the bowl, creating a vibrant contrast with the tomatoes. Using a sharp knife, slice 1/2 medium red onion very thinly, then scatter the translucent rings over the colorful mix.

Step 2: Assemble the Salad
Evenly distribute about 1/2 cup of whole Kalamata olives among the vegetables in the bowl, ensuring you get that delightful briny flavor in every bite. Carefully place a thick slab of feta cheese, approximately 200g, right in the center of the salad, making it the focal point. This presentation not only looks stunning but keeps the creamy texture intact.

Step 3: Dress the Salad
Drizzle a generous 1/4 cup of high-quality extra virgin olive oil over the entire salad, ensuring the luscious oil coats both the feta and the vegetables. This step is crucial for making your Authentic Greek Salad truly shine, enhancing its Mediterranean flavors. The olive oil will meld beautifully with the freshness of the ingredients.

Step 4: Add the Final Touches
Sprinkle a generous 1 tablespoon of dried oregano over the dish, infusing a lovely aromatic note that evokes the essence of Greece. For a finishing touch, season with about 1/2 teaspoon of sea salt to taste, which will elevate the sweetness of the tomatoes and harmonize all flavors. The salad is now ready to be served!

Step 5: Serve and Enjoy
Serve your Authentic Greek Salad at room temperature, allowing the fresh ingredients to shine. This vibrant dish is perfect for summer gatherings or as a delightful side with grilled meats. Remember, for the best experience, avoid mixing too early to maintain that satisfying crunch. Enjoy your healthy, homemade delight!

Authentic Greek Salad Variations

Feel free to mix things up with your Authentic Greek Salad for a personalized touch that'll excite your taste buds!

  • Add Peppers: Incorporate green bell peppers for an extra crunch and slight sweetness that enhances the overall texture.

  • Briny Capers: For a twist, sprinkle in capers to add a brinier flavor that beautifully complements the feta.

  • Dairy-Free Alternative: If you're avoiding dairy, try crumbled tofu seasoned with lemon and herbs as a plant-based feta substitute.

  • Fresh Herbs: Enhance flavor by tossing in fresh basil or mint, providing an aromatic touch that brightens the entire dish.

  • Heat Things Up: Add a pinch of red pepper flakes for a kick of heat that can elevate the salad's excitement, great for those who enjoy spicy bites.

  • Nutty Crunch: Toss in a handful of toasted pine nuts or walnuts for added texture and a delightful nuttiness that pairs well with the olives.

  • Fruit Addition: Include some diced avocado or juicy watermelon cubes for an unexpected refreshing element that contrasts beautifully with the savory ingredients.

  • Flavorful Protein: For a heartier version, top it with grilled shrimp or chicken, creating a wholesome meal that’s delicious and satisfying. Try pairing it with our Grilled Balsamic Steak for a fantastic Mediterranean feast!

Expert Tips for Authentic Greek Salad

  • Ingredient Quality: Use the freshest vine-ripened tomatoes and high-quality extra virgin olive oil to elevate your Authentic Greek Salad's flavors.

  • Prep Timing: Avoid mixing the salad too early; prepare just before serving to maintain the crunch of the vegetables.

  • Feta Presentation: For a stunning look, use a thick slab of feta instead of crumbled—this keeps the texture nice and creamy.

  • Slicing Technique: A sharp knife makes slicing onions easier, resulting in translucent rings that enhance the overall presentation.

  • Keeping It Fresh: Serve the salad at room temperature for the best flavor; chilling can mute the vibrant tastes that define this Mediterranean classic.

Storage Tips for Authentic Greek Salad

  • Fridge: Store leftover salad in an airtight container in the refrigerator for up to 24 hours. Keep in mind that the texture may soften over time, so it's best enjoyed fresh.

  • Refrigeration Method: If you want to prevent the vegetables from becoming soggy, consider separating the dressing, feta, and olives. Store them separately to maintain freshness.

  • Room Temperature: Serve the salad at room temperature for 30 minutes before eating, allowing the flavors to meld without losing their refreshing quality.

  • Freezing: Avoid freezing the Authentic Greek Salad. The high water content in the tomatoes and cucumbers will lead to a mushy texture when thawed, ruining the crispness you love.

What to Serve with Authentic Greek Salad

Elevate your dining experience by pairing this delightful salad with complementary dishes that bring warmth and excitement to your meal.

  • Grilled Chicken Skewers: Juicy and smoky, these tender skewers add protein and a touch of char to balance the salad’s freshness.

  • Pita Bread: Soft and warm, pita bread is perfect for scooping up the salad, making each bite a delightful blend of textures.

  • Tzatziki Sauce: Creamy and refreshing, this yogurt-based dip adds a herby contrast that enhances the Mediterranean experience.

  • Roasted Vegetables: Enrich your plate with roasted seasonal vegetables that offer a savory depth, perfectly harmonizing with the salad’s brightness.

  • Stuffed Grape Leaves (Dolmas): These flavorful bites bring another layer of Mediterranean tradition, combining tangy and earthy notes with the vibrant salad.

  • Lemon Herb Quinoa: Light and zesty, this nutty grain salad provides a wholesome base that beautifully complements the crisp vegetables of your Greek Salad.

  • Sangria: Bright and fruity, a glass of chilled Sangria adds refreshing notes that uplift your dining atmosphere.

Serve your Authentic Greek Salad alongside these tempting options, and watch the smiles bloom around your table!

Make Ahead Options

Preparing your Authentic Greek Salad in advance can save you valuable time on busy weeknights. You can chop the tomatoes, cucumbers, and onions up to 24 hours ahead, storing them in an airtight container in the refrigerator to maintain their freshness. Keep the Kalamata olives and slab of feta separate until you're ready to serve, as this prevents sogginess and allows for that delightful creaminess to shine through. When it's time to enjoy your salad, simply combine all the ingredients in a bowl, drizzle with high-quality olive oil, sprinkle with oregano and sea salt, and you'll have a crisp, refreshing dish ready to impress your family or guests!

Authentic Greek Salad Recipe FAQs

What kind of tomatoes are best for Authentic Greek Salad?
Absolutely! For the best results, use vine-ripened red tomatoes. They should be juicy and fragrant, typically found at farmers’ markets during peak summer months. Look for tomatoes without dark spots all over; they should have a rich red color and yield slightly when pressed.

How do I store leftover Authentic Greek Salad?
Leftovers can be stored in an airtight container in the refrigerator for up to 24 hours. However, for the best taste and texture, try to keep the feta, olives, and dressing separate from the vegetables. This way, you’ll enjoy that crisp freshness even on the next day!

Can I freeze Authentic Greek Salad?
No, I wouldn’t recommend freezing Authentic Greek Salad. The high water content in the tomatoes and cucumbers will lead to a mushy texture once thawed, making it less enjoyable. Instead, I suggest preparing it fresh when you want to serve it to really highlight those lovely Mediterranean flavors.

How can I prevent the vegetables from getting soggy in the salad?
Great question! To maintain the crispness, keep the salad components separate until just before serving. You can store the dressing in a small container, and drizzle it on just before plating. Also, using a thick slab of feta helps minimize moisture release from the cheese into the salad.

Is Authentic Greek Salad suitable for pets or allergy sufferers?
While this salad is packed with healthy veggies, it’s important to note that feta cheese can be high in sodium, and olives may pose a risk for pets due to their salt content. Always check with your veterinarian before sharing any human food with your pets. For allergies, ensure to label olives and any other ingredients clearly if serving to guests with dietary restrictions.

What variations can I try for my Authentic Greek Salad?
The more the merrier! You can sprinkle in green bell peppers for added crunch or include capers for a brinier taste. If you're avoiding dairy, try using a plant-based feta to retain the salad's character without compromising on flavor. Feel free to get creative—your version may just become a family favorite!

Authentic Greek Salad:

Authentic Greek Salad: A Fresh Taste of the Mediterranean

Discover the vibrant flavors of Authentic Greek Salad, a refreshing dish packed with Mediterranean goodness.
Print Recipe Pin Recipe
Prep Time 15 minutes mins
Total Time 15 minutes mins
Servings: 4 portions
Course: Salads
Cuisine: Greek
Calories: 250
Ingredients Equipment Method Nutrition Notes

Ingredients
  

For the Vegetables
  • 4 large vine-ripened red tomatoes cut into irregular chunks
  • 1 large cucumber unpeeled, sliced into thick half-moon pieces
  • 1/2 medium red onion sliced very thinly
For the Mix-ins
  • 1/2 cup Kalamata olives whole and well-drained
  • 1 thick slab feta cheese approximately 200g, not crumbled
For the Dressing
  • 1/4 cup extra virgin olive oil high-quality
  • 1 tbsp dried oregano sprinkled heavily
  • 1/2 tsp sea salt to taste

Equipment

  • Cutting Board
  • Knife
  • Shallow Bowl

Method
 

Step-by-Step Instructions for Authentic Greek Salad
  1. Wash and dry the tomatoes, then cut them into irregular chunks and place in a large bowl.
  2. Slice the cucumber into thick half-moon pieces and add to the bowl.
  3. Slice the red onion very thinly and scatter over the mix.
  4. Distribute the Kalamata olives among the vegetables.
  5. Place a thick slab of feta cheese in the center of the salad.
  6. Drizzle with extra virgin olive oil, ensuring it coats the ingredients.
  7. Sprinkle with dried oregano and season with sea salt.
  8. Serve at room temperature for the best flavor.

Nutrition

Serving: 1portionCalories: 250kcalCarbohydrates: 15gProtein: 6gFat: 22gSaturated Fat: 6gPolyunsaturated Fat: 2gMonounsaturated Fat: 14gCholesterol: 30mgSodium: 600mgPotassium: 800mgFiber: 3gSugar: 6gVitamin A: 1500IUVitamin C: 30mgCalcium: 200mgIron: 2mg

Notes

Use the freshest ingredients for the best flavor. Avoid mixing too early to maintain crunch. Enjoy as a side or main dish.

Tried this recipe?

Let us know how it was!

Authentic Mediterranean Greek Salad: Fresh, Vibrant, and Easy

May 29, 2026 by Grace Snow Leave a Comment

As I tossed together the ingredients for this Authentic Mediterranean Greek Salad, I couldn’t help but feel the warmth of the sun on my skin, the vibrant colors of summer dancing before my eyes. This quick, simple recipe brings together juicy tomatoes, crisp cucumbers, and creamy feta cheese, all drizzled with a zesty lemon dressing that brightens every bite. Not only is it a stunning centerpiece for any meal, but it’s also naturally gluten-free and vegetarian, making it a perfect choice for anyone looking to enjoy wholesome homemade food. Plus, without any cooking involved, this salad can be whipped up in minutes, freeing you up to savor more time outdoors. Are you ready to elevate your salad game and embrace the flavors of the Mediterranean? Let’s dive into this refreshing recipe!

Why is This Greek Salad a Must-Try?

Freshness is at the heart of this salad, bursting with vibrant, sun-kissed flavors that will transport you to a Mediterranean paradise. Effortless preparation means you can whip up this dish in no time, perfect for busy days or last-minute gatherings. Versatile ingredients let you customize your salad easily, whether you prefer it vegetarian or vegan with simple substitutions like tofu. Plus, great for sharing, this crowd-pleaser is a delightful accompaniment to grilled meats or a light stand-alone lunch. Don't forget to check out our Avocado Egg Salad or Balsamic Steak Salad for more fresh options!

Authentic Mediterranean Greek Salad Ingredients

• Discover the flavorful essentials that bring this delightful dish to life!

For the Salad

  • Tomatoes – Use ripe, flavorful varieties for the sweetest and juiciest results.
  • Cucumbers – Fresh and crisp; peel if you prefer a smoother texture.
  • Olives – Kalamata olives add classic brininess; Castelvetrano are sweeter if you want a milder taste.
  • Feta Cheese – Adds a creamy, tangy kick; substitute with marinated firm tofu for a vegan option.
  • Red Onion – Thinly slice for a milder flavor that won't overpower the other ingredients.

For the Dressing

  • Olive Oil – A high-quality extra virgin is best for richness and depth.
  • Red Wine Vinegar – Provides brightness; lemon juice is a great substitute if needed.
  • Salt and Pepper – Essential to enhance all flavors—adjust to your taste!

For Garnishing

  • Fresh Parsley or Oregano – Use fresh herbs to elevate aroma and presentation.

Step‑by‑Step Instructions for Authentic Mediterranean Greek Salad

Step 1: Prepare the Vegetables
Begin by washing 2 cups of ripe tomatoes under cold water; then, chop them into bite-sized pieces. Next, take 1 cup of cucumbers, peel if desired, and dice them into uniform cubes for a refreshing crunch. Finally, thinly slice 1/4 cup of red onion, keeping it as delicate as possible to balance the flavors in your Authentic Mediterranean Greek Salad.

Step 2: Combine Ingredients
In a large mixing bowl, gently combine the chopped tomatoes, diced cucumbers, and the thin slices of red onion. Add 1/2 cup of sliced Kalamata olives for their distinctive flavor, and crumble 1 cup of feta cheese over the top. Using a spatula, carefully toss these ingredients together, ensuring the vibrant colors and textures mix beautifully without crushing the feta.

Step 3: Make the Dressing
In a small bowl, measure out 1/4 cup of high-quality extra virgin olive oil and add 2 tablespoons of red wine vinegar. Season with salt and freshly cracked pepper to taste. Using a whisk, blend the ingredients until emulsified, creating a tangy dressing that will elevate the flavors of your Authentic Mediterranean Greek Salad.

Step 4: Dress the Salad
Once the dressing is ready, drizzle it evenly over the mixed salad ingredients in the large bowl. Gently toss the salad using a pair of salad servers or your hands, being careful not to break apart the feta. This process helps to coat each component with the zesty dressing, enhancing the overall taste of your dish.

Step 5: Garnish & Serve
Allow the salad to rest for about 10-15 minutes at room temperature; this waiting time helps the flavors meld beautifully. Before serving, garnish the salad with a sprinkle of freshly chopped parsley or oregano, adding a touch of color and aroma. Present this stunning Authentic Mediterranean Greek Salad as a delightful centerpiece for your meal.

Authentic Mediterranean Greek Salad Variations

Feel free to let your culinary creativity shine as you explore delightful twists on this classic salad!

  • Vegan Twist: Substitute the feta cheese with marinated firm tofu or a store-bought vegan feta for a creamy texture without the dairy.

  • Zesty Lemon: Replace red wine vinegar with fresh lemon juice for an extra pop of brightness that elevates the overall flavor.

  • Extra Crunch: Add diced bell peppers or radishes to enhance the salad’s texture and color—a crunchy surprise in every bite!

  • Herbal Infusion: Experiment with different herbs like fresh dill or mint instead of parsley or oregano for an aromatic twist.

  • Spicy Kick: Toss in some finely chopped jalapeños or a sprinkle of red pepper flakes to spice things up for those who love a little heat!

  • Artichoke Addition: Incorporate marinated artichoke hearts for a tangy depth of flavor and a Mediterranean touch that's hard to resist.

  • Grain Booster: Mix in some cooked quinoa or farro for added protein and heartiness, turning your salad into a satisfying meal option.

  • Greek-Inspired Twist: Add capers or diced sun-dried tomatoes for a taste reminiscent of traditional Greek dishes, enhancing your salad's Mediterranean flair.

These variations not only cater to different dietary needs but also bring exciting flavors and textures, just like our German Potato Salad or a fresh and zesty Chicken Salad with Apples. Enjoy exploring!

What to Serve with Authentic Mediterranean Greek Salad?

Indulge in a vibrant culinary adventure by exploring delightful pairings that will elevate your meal experience to new heights!

  • Grilled Chicken Skewers: Juicy, herb-marinated chicken complements the salad's freshness, making it a fantastic protein-packed pairing.

  • Quinoa Tabbouleh: This grain salad adds heartiness and a burst of fresh herbs, echoing the Mediterranean theme beautifully.

  • Pita Bread: Soft, warm pita serves as a perfect vehicle for scooping up salad, enhancing the meal's texture without overpowering flavors.

  • Roasted Vegetables: Caramelized seasonal vegetables provide a sweet and savory contrast, harmonizing perfectly with the salad's crispness.

  • Lemon-Herb Grilled Shrimp: Succulent shrimp, kissed by a citrusy glaze, enhances the Mediterranean flair and adds a touch of decadence to your plate.

  • Tzatziki Sauce: Creamy and refreshing, this yogurt dip adds a cool, tangy element that mirrors the salad’s bright flavors while inviting a delightful balance.

  • Sparkling Water with Mint: This lively drink refreshes your palate and complements the salad’s zest without overshadowing its delicate notes.

  • Baklava: For dessert, this sweet nutty pastry will finish off your meal with a delightful sweetness that contrasts with the salad's savory notes.

Pairing these options with your Authentic Mediterranean Greek Salad will create an unforgettable dining experience that invites every forkful to shine!

Make Ahead Options

Making your Authentic Mediterranean Greek Salad ahead of time is a fantastic way to save valuable minutes during busy weeknights! You can chop the tomatoes, cucumbers, and red onion up to 24 hours in advance; just be sure to store them in airtight containers in the refrigerator to keep their freshness. The olives and feta can also be added to these components beforehand without sacrificing quality. However, it's best to reserve the dressing until just before serving to maintain the crispness of the vegetables. When you're ready to enjoy your salad, simply toss everything together, drizzle with the freshly made dressing, and watch as your vibrant creation comes to life effortlessly!

Expert Tips for Authentic Mediterranean Greek Salad

• Tomato Selection: Choose ripe, in-season tomatoes for the sweetest flavor. Avoid overripe or mealy tomatoes, which can affect the salad's texture.

• Cucumber Preparation: Pat diced cucumbers dry after cutting to prevent excess water from making your Authentic Mediterranean Greek Salad soggy.

• Dressing Timing: Dress the salad just before serving to retain the crunch of the vegetables. Pre-dressed salads lose their crispness over time.

• Olive Variety: While Kalamata olives are traditional, feel free to mix in Castelvetrano for a milder sweetness or even artichoke hearts for added flair.

• Herb Freshness: Always opt for fresh parsley or oregano instead of dried, as fresh herbs enhance both flavor and aroma in your salad.

How to Store and Freeze Authentic Mediterranean Greek Salad

Fridge: Store leftover salad in an airtight container in the fridge for up to 24 hours for optimal freshness. Keep components like veggies and dressing separate for longer-lasting crunch.

Freezer: Freezing is not recommended for the entire salad due to the texture of cucumbers and feta. However, you can freeze leftover olives and herbs in an ice cube tray for future salads.

Ingredient Storage: If preparing components ahead, store chopped vegetables and feta in separate containers in the fridge for up to 48 hours. This keeps your Authentic Mediterranean Greek Salad fresh when you're ready to assemble.

Reheating: Since this salad is served cold, simply toss it together and enjoy directly from the fridge or allow it to come to room temperature before serving for the best flavor experience.

Authentic Mediterranean Greek Salad Recipe FAQs

What kind of tomatoes should I use for the salad?
Absolutely, I recommend using ripe, flavorful tomatoes for the best results. Look for varieties like vine-ripened tomatoes or heirloom types. Avoid overripe or mealy tomatoes as they can affect the texture and overall freshness of your Authentic Mediterranean Greek Salad.

How should I store leftover salad?
To maintain freshness, store any leftover salad in an airtight container in the fridge for up to 24 hours. For longer-lasting crunch, keep the components like vegetables and the dressing separate until you're ready to serve. This helps preserve the crispness of the cucumbers and prevents the salad from becoming soggy.

Can I freeze ingredients from the salad?
Freezing the entire salad is not recommended because the cucumbers and feta cheese can become mushy once thawed. However, you can freeze leftover olives or fresh herbs like parsley and oregano in an ice cube tray. Just chop them up, fill the tray, and cover with a bit of water before freezing. They can be added to future salads or dishes!

How can I ensure my salad doesn’t become watery?
To prevent a watery salad, remove excess seeds from juicy tomatoes before chopping them. Additionally, pat your diced cucumbers dry with a paper towel after cutting. This will help maintain the integrity of the salad and enhance its overall texture, making every bite delightful.

Is this salad suitable for specific dietary needs?
Yes, this Authentic Mediterranean Greek Salad is naturally vegetarian and gluten-free, making it a fantastic option for various diets. You can easily make it vegan by substituting feta with marinated firm tofu, and adjusting other ingredients to fit your preferences, ensuring everyone can enjoy this beautiful dish!

How long can I prepare the salad in advance?
If you want to prep ahead, you can chop the vegetables and store them in separate containers in the fridge for up to 48 hours. Keep the dressing in a separate jar as well. When you’re ready to serve, simply combine everything fresh for the best flavor!

Authentic Mediterranean Greek Salad

Authentic Mediterranean Greek Salad: Fresh, Vibrant, and Easy

This Authentic Mediterranean Greek Salad is a fresh and vibrant dish, perfect for any meal and naturally gluten-free and vegetarian.
Print Recipe Pin Recipe
Prep Time 15 minutes mins
Resting Time 15 minutes mins
Total Time 30 minutes mins
Servings: 4 servings
Course: Salads
Cuisine: Mediterranean
Calories: 250
Ingredients Equipment Method Nutrition Notes

Ingredients
  

For the Salad
  • 2 cups ripe tomatoes Use ripe, flavorful varieties for sweetness.
  • 1 cup cucumbers Fresh and crisp; peel if desired.
  • 1/2 cup Kalamata olives For classic brininess.
  • 1 cup feta cheese Substitute with marinated firm tofu for vegan option.
  • 1/4 cup red onion Thinly sliced for milder flavor.
For the Dressing
  • 1/4 cup extra virgin olive oil High-quality for richness.
  • 2 tablespoons red wine vinegar Provides brightness; lemon juice is a substitute.
  • salt Essential to enhance flavors.
  • freshly cracked pepper Adjust to taste.
For Garnishing
  • fresh parsley or oregano Use fresh herbs to elevate aroma and presentation.

Equipment

  • Mixing Bowl
  • Whisk
  • salad servers

Method
 

Step-by-Step Instructions
  1. Wash 2 cups of tomatoes under cold water; chop into bite-sized pieces.
  2. Dice 1 cup of cucumbers into uniform cubes.
  3. Thinly slice 1/4 cup of red onion.
  4. Combine chopped tomatoes, diced cucumbers, and red onion in a large bowl.
  5. Add 1/2 cup of sliced Kalamata olives and crumble 1 cup of feta cheese over the top.
  6. In a small bowl, whisk together 1/4 cup of olive oil, 2 tablespoons of red wine vinegar, salt, and pepper.
  7. Drizzle dressing over the salad and gently toss to coat.
  8. Allow to rest for 10-15 minutes, then garnish with fresh herbs before serving.

Nutrition

Serving: 1saladCalories: 250kcalCarbohydrates: 10gProtein: 6gFat: 22gSaturated Fat: 5gPolyunsaturated Fat: 1gMonounsaturated Fat: 15gCholesterol: 20mgSodium: 480mgPotassium: 400mgFiber: 3gSugar: 4gVitamin A: 500IUVitamin C: 30mgCalcium: 200mgIron: 1mg

Notes

Store leftovers in an airtight container for up to 24 hours. Keep veggies and dressing separate for longer-lasting crunch.

Tried this recipe?

Let us know how it was!

Refreshing Raita Recipe – Your Perfect Cooling Dip for Spicy Meals

May 21, 2026 by Grace Snow Leave a Comment

The sizzling aroma of your favorite Indian dishes is in the air, and what’s missing? The cool, refreshing wave of Easy Cucumber Raita! This creamy yogurt dip is a lovely sidekick, specifically crafted to complement spicy meals like Tandoori chicken or biryani. Not only is this raita quick to whip up, but it also brings a delightful crunch from fresh cucumber, making it a must-have in your kitchen arsenal. Perfect for those warm days when you need a touch of refreshment, this versatile condiment can elevate any meal while remaining incredibly simple to prepare. So, are you ready to dive into the world of flavors with this delightful raita recipe?

Why Is Cucumber Raita a Must-Try?

Cooling, Creamy Delight: Cucumber Raita offers a refreshing contrast to spicy dishes, enhancing your dining experience.
Quick and Easy: This recipe requires minimal ingredients and can be made in just minutes—perfect for busy weeknights or unexpected guests.
Versatile Pairing: Whether with Tandoori chicken or grilled veggies, it complements various meals beautifully. Consider trying it with your favorite starch, like naan, for a satisfying combo!
Healthy Indulgence: With just 31 calories per serving, it's a guilt-free dip that adds flavor without the calories.
Flavor Variations: Customize your raita! Add diced tomatoes for a colorful twist or mix in some grated carrot for sweetness.

Raita Ingredients

• You’ll love how simple it is!

For the Base

  • Whole Milk Plain Yogurt – Adds creaminess and tangy flavor; Greek yogurt can be used for a thicker consistency.
  • Cucumber, finely diced – Provides a refreshing crunch; use English cucumber to minimize seeds and excess water.
  • Minced Red Onion – Adds mild sweetness and sharpness; can be omitted for a milder flavor.
  • Lemon Juice – Offers acidity and brightness to balance the flavors; substitute with lime juice if desired.

For the Freshness

  • Fresh Mint Leaves, chopped – Delivers a cooling herbal note; fresh dill can also be used for a different flavor profile.
  • Fresh Cilantro, chopped – Adds earthy tones and freshness; optional to omit if cilantro is not preferred.

For the Spice

  • Ground Cumin – Provides warm, nutty spice complexity; substitute with ground coriander for a different flavor.
  • Coriander – Enhances the overall flavor profile; fresh coriander leaves can be used instead.

For Seasoning

  • Salt – Balances flavors and enhances taste; adjust to taste.
  • Pepper – Adds a mild kick; adjust quantity according to your preference.

This Easy Cucumber Raita recipe is not just a dip; it's an experience that cools and complements all your spicy meals beautifully!

Step‑by‑Step Instructions for Easy Cucumber Raita

Step 1: Prepare the Yogurt Base
In a mixing bowl, add 2 cups of whole milk plain yogurt. Using a whisk or spatula, stir the yogurt until it becomes smooth and creamy, about 1–2 minutes. This creamy base is essential for your Easy Cucumber Raita, so make sure there are no lumps before moving to the next step.

Step 2: Add Fresh Ingredients
Finely dice one medium-sized English cucumber and add it to the yogurt mixture. If you’re using red onion, mince about ¼ cup and mix that in too, along with the juice of half a lemon. Ensure the cucumber is well-drained to avoid excess moisture. Stir these ingredients together, creating a refreshing foundation for your raita.

Step 3: Incorporate Herbs and Spices
Chop a handful of fresh mint leaves and cilantro, then sprinkle them into the bowl. Also, add ½ teaspoon of ground cumin and a pinch of salt and pepper to taste. These spices will elevate the flavors of your Easy Cucumber Raita, providing that delightful contrast to spicy dishes. Stir all the ingredients gently until well combined.

Step 4: Mix Thoroughly
Continue to mix the raita until all the components are evenly distributed and the colors are vibrant. Aim for a uniform texture, where the yogurt is well-blended with the cucumber and herbs. This step ensures each bite of your Easy Cucumber Raita packs a punch of flavor and freshness.

Step 5: Chill and Meld Flavors
Cover the mixing bowl tightly with plastic wrap or a lid and refrigerate the raita for at least 30 minutes. This chilling time allows the flavors to meld beautifully, enhancing your raita's refreshing qualities. The longer it sits, the better it will taste, so don’t rush this step!

Step 6: Serve and Enjoy
Once chilled, give your Easy Cucumber Raita a quick stir to revive the texture before serving. Spoon it into a serving bowl and garnish with additional chopped mint or cucumber if desired. This creamy dip is best enjoyed cold and should be consumed within 4–5 days for optimal freshness.

What to Serve with Easy Cucumber Raita?

Elevate your dining experience by pairing this refreshing dip with mouthwatering sides that complement its coolness and enhance your meal.

  • Spicy Tandoori Chicken: The fiery, smoky flavors beautifully contrast the cooling raita, making each bite a delightful experience.
  • Fluffy Basmati Rice: This fragrant rice provides a perfect neutral base that harmonizes with the raita, soaking up its creamy goodness.
  • Grilled Veggie Skewers: Charred vegetables add a smoky element, creating a fresh and savory balance with the vibrant flavors of the raita.
  • Crispy Naan Bread: Soften your palate with warm, pillowy naan that’s perfect for dipping into the raita, adding a comforting touch to your meal.
  • Chickpea Salad: A protein-packed salad with crunch and brightness enhances the raita's refreshing notes, ensuring a balanced dish.
  • Mint Lemonade: This cool, refreshing drink echoes the raita's minty profile, making it a perfect match for a hot summer day.
  • Mango Lassi: A sweetened yogurt drink that offers tropical notes, perfectly balancing the spice of your meal and echoing the yogurt's creamiest depths.
  • Pineapple Chutney: The sweet and tangy fruit accompaniment complements the raita's coolness, providing a delightful contrast to spicy dishes.
  • Rosewater Rice Pudding: End your meal on a sweet note with this creamy dessert, harmonizing the cooling effect of the raita while adding a fragrant finish.

Helpful Tricks for Cucumber Raita

  • Chill Time Matters: Allow the raita to chill for at least 30 minutes before serving. This lets the flavors meld beautifully for maximum refreshment.
  • Cucumber Drainage: Ensure the cucumber is well-drained to avoid excess moisture, which can dilute your raita’s creamy texture.
  • Garnish for Appeal: Reserve some diced cucumber or mint for garnish just before serving. This adds a pop of color and enhances visual appeal.
  • Taste Adjustments: Don’t hesitate to tweak the seasonings. If the raita feels bland, a touch more salt or lemon juice can elevate its flavor beautifully.
  • Customize Your Raita: Experiment with different variations by adding diced tomatoes or grated carrots for added texture and sweetness in your cucumber raita!

How to Store and Freeze Raita

Fridge: Store your Cucumber Raita in an airtight container in the refrigerator. It will keep fresh for up to 4-5 days, ensuring you always have this refreshing dip on hand.

Freezer: While it’s best to enjoy raita fresh, you can freeze it for up to a month. Make sure to store it in a freezer-safe container, leaving space for expansion.

Thawing: To thaw, move the raita to the fridge overnight. Stir well before serving, as some ingredients may separate during freezing.

Serving: For the best taste, serve chilled and give it a quick stir to revive its creamy texture. A sprinkle of fresh herbs can brighten the flavors of your raita!

Make Ahead Options

Preparing Easy Cucumber Raita ahead of time is a wonderful way to save precious moments during busy weeknights! You can prepare all the ingredients up to 24 hours in advance—simply mix the yogurt, diced cucumber, minced red onion, and lemon juice together in a bowl, ensuring you drain the cucumber well to prevent excess moisture. Store the mixture in an airtight container in the refrigerator. When you're ready to serve, stir in the fresh mint, cilantro, cumin, and spices just before serving to maintain their vibrant flavors. Your raita will be just as delicious and refreshing, making it the perfect time-saving addition to your meals!

Raita Variations & Substitutions

Feel free to tailor your raita to suit your taste and dietary needs—your culinary creativity is welcome here!

  • Lactose-Free: Substitute whole milk yogurt with a lactose-free yogurt for a digestive-friendly option.
  • Spicy Kick: Add 1-2 finely chopped green chilies to your raita for a flavor boost and extra heat. This adds a wonderful warmth that contrasts beautifully with the cooling cucumber.
  • Herb Swap: Instead of mint and cilantro, try using fresh dill for a twist that adds a unique flavor profile. The fresh dill will offer an aromatic touch that complements well with the yogurt base.
  • Crunchy Surprise: Mix in some finely chopped bell peppers for added crunch and color. This adds a vibrant twist to the traditional raita, making it even more appealing.
  • Fruit Fusion: Incorporate diced mango for a sweet, tropical twist. This delightful choice brings in sweetness and pairs nicely with spicy dishes.
  • Creamier Base: Use Greek yogurt instead of regular yogurt for an extra-thick consistency that enhances richness. The thickness will keep it creamy and satisfying.
  • Nutty Flavor: Mix in a sprinkle of toasted sesame seeds for a subtle nutty flavor and added texture. Just a sprinkle can elevate the raita to new heights.
  • Citrus Zing: Replace lemon juice with fresh lime juice for a brighter flavor; lime adds an invigorating twist that enhances the dish's freshness.

Experimenting with these substitutions allows you to create your perfect raita that’s just right for you—what will you try first? For more options, consider adding some of your favorite veggies or even a splash of yogurt dressing to explore exciting new flavors!

Easy Cucumber Raita Recipe FAQs

How do I select the best cucumber for my raita?
Absolutely! For the best results, choose an English cucumber, which has fewer seeds and less excess water, making it perfect for a crunchy raita. Look for firm cucumbers that are dark green and free from dark spots or blemishes.

How long can I store Cucumber Raita in the refrigerator?
You can store your Cucumber Raita in an airtight container in the refrigerator for up to 4-5 days. Be sure to give it a quick stir before serving, as the ingredients may separate slightly during storage.

Can I freeze Cucumber Raita?
Yes, you can freeze Cucumber Raita! Just make sure to store it in a freezer-safe container, leaving some space for expansion. It can be frozen for up to a month. To thaw, simply move it to the fridge overnight. Stir it well before serving, as some ingredients may separate during freezing.

Why is my raita watery, and how can I fix it?
Very often, excess moisture from cucumbers can lead to a watery raita. To prevent this, make sure to properly drain the cucumbers before mixing them into the yogurt. If your raita turns out watery, try adding some extra yogurt or thickening it with a bit of chilled, strained Greek yogurt until it reaches your desired consistency.

Is Cucumber Raita safe for vegans or those with dairy allergies?
Indeed! Traditional raita is yogurt-based and not suitable for vegans or those with dairy allergies. However, you can easily make a vegan version by using non-dairy yogurt, such as coconut or almond yogurt. It replicates the creamy texture beautifully and still offers that refreshing flavor!

What can I serve with Cucumber Raita?
Cucumber Raita pairs perfectly with spicy Indian dishes, such as Tandoori chicken or biryani. It's also fantastic alongside grilled meats and vegetables or as a dip for fresh pita or naan. Feel free to get creative—you can also use it as a spread on sandwiches for an extra punch of flavor!

Raita

Refreshing Raita Recipe – Your Perfect Cooling Dip for Spicy Meals

This Easy Cucumber Raita is a delicious, cooling dip perfect for enhancing spicy Indian meals.
Print Recipe Pin Recipe
Prep Time 10 minutes mins
Chill Time 30 minutes mins
Total Time 40 minutes mins
Servings: 4 servings
Course: Salads
Cuisine: Indian
Calories: 31
Ingredients Equipment Method Nutrition Notes

Ingredients
  

For the Base
  • 2 cups Whole Milk Plain Yogurt Greek yogurt can be used for thicker consistency.
  • 1 medium English Cucumber, finely diced Use to minimize seeds and excess water.
  • 0.25 cups Minced Red Onion Can be omitted for milder flavor.
  • 0.5 tablespoons Lemon Juice Substitute with lime juice if desired.
For the Freshness
  • 1 handful Fresh Mint Leaves, chopped Fresh dill can also be used.
  • 1 handful Fresh Cilantro, chopped Optional to omit if cilantro is not preferred.
For the Spice
  • 0.5 teaspoon Ground Cumin Substitute with ground coriander for a different flavor.
  • 1 teaspoon Coriander Fresh coriander leaves can be used instead.
For Seasoning
  • to taste Salt Adjust to taste.
  • to taste Pepper Adjust quantity according to your preference.

Equipment

  • Mixing Bowl
  • Whisk or spatula

Method
 

Step-by-Step Instructions
  1. In a mixing bowl, add yogurt and stir until smooth and creamy, about 1–2 minutes.
  2. Finely dice cucumber and add it to the yogurt mixture along with minced red onion and lemon juice.
  3. Chop mint and cilantro, then sprinkle into the bowl with cumin, salt, and pepper.
  4. Mix until all ingredients are evenly distributed.
  5. Cover and refrigerate for at least 30 minutes to allow flavors to meld.
  6. Give the raita a quick stir, spoon it into a serving bowl, and garnish with mint or cucumber if desired.

Nutrition

Serving: 1cupCalories: 31kcalCarbohydrates: 4gProtein: 2gFat: 1gSodium: 50mgPotassium: 120mgSugar: 3gVitamin A: 100IUVitamin C: 2mgCalcium: 100mg

Notes

Chill for at least 30 minutes before serving for best flavor. Will keep fresh in the fridge for up to 4–5 days.

Tried this recipe?

Let us know how it was!

Viral Creamy Asian Cucumber Salad – Your New Favorite Crunch!

May 10, 2026 by Grace Snow Leave a Comment

As I stood in my kitchen, slicing crisp cucumbers and feeling the refreshing coolness wash over me, I couldn’t help but think about how much I love this Viral Creamy Asian Cucumber Salad. This dish is an absolute game-changer for anyone looking for a quick, no-cook recipe that brings a burst of flavor to the table. In just 10 minutes, you can whip up a vibrant, crunchy salad that is not only vegan but also incredibly versatile—perfect for meal prep, picnics, or those busy weekday lunches. With the option to add protein like tofu or shrimp, the choices are endless! Are you ready to discover how easy it is to embrace this delightful salad?

Why is this salad a must-try?

Quick Preparation: You can whip up this salad in just 10 minutes, making it the perfect solution for busy days or spontaneous gatherings.

Flavor Explosion: The combination of creamy dressing and vibrant vegetables offers a delightful contrast that is both refreshing and satisfying, ideal for any palate.

Versatile Options: Adapt it to your taste by adding different proteins like tofu, shrimp, or even grilled chicken, ensuring there's something for everyone.

Meal Prep Friendly: This salad is fantastic for quick lunches or picnics and can be easily made in advance—just layer it in a jar!

Crowd-Pleasing Appeal: With its bright colors and textures, this salad is sure to impress at any gathering, whether you’re serving it as a side dish or a main event.

For more tasty meal ideas, check out my Avocado Egg Salad or the refreshing Tofu Caesar Salad.

Viral Creamy Asian Cucumber Salad Ingredients

For the Salad
• Cucumbers – Provide crunch and hydration; English cucumbers are great for fewer seeds.
• Carrots – Add sweetness and crunch; substitute with bell peppers for extra color.
• Edamame – Offers protein and chewy texture; frozen and shelled edamame can be used directly.
• Tofu (or protein of choice) – A fantastic source of protein; can swap for shrimp or grilled chicken if not vegan.

For the Dressing
• Vegan Cream Cheese – Creates a creamy texture; regular cream cheese can be used for a non-vegan version.
• Vegan Mayo – Adds richness; feel free to use regular mayo for non-vegan.
• Sriracha – Provides some spice; adjust per your heat preference.
• Chili Oil – Adds aromatic heat; it’s optional, so feel free to omit if you don’t have it.
• Soy Sauce – Contributes salty umami flavor; consider using tamari for gluten-free.

For Garnish
• Sesame Seeds – Add a nutty flavor and crunch; perfect as an optional garnish.
• Nori (optional) – Delivers umami flavor; crush it for garnish use.

This Viral Creamy Asian Cucumber Salad is ready to be crafted into a vibrant dish that will be the highlight of your meal!

Step‑by‑Step Instructions for Viral Creamy Asian Cucumber Salad

Step 1: Prepare Vegetables
Begin by washing your cucumbers, carrots, and onions thoroughly. For the cucumbers, slice them thinly; consider using a mandoline for uniform slices. Julienne the carrots into thin strips, and slice the onions as finely as possible. If you’re adding tofu, cube it and pan-crisp in a bit of oil over medium heat for about 5-7 minutes until golden brown, bringing a lovely richness to your Viral Creamy Asian Cucumber Salad.

Step 2: Make Dressing
In a mixing bowl, combine vegan cream cheese, vegan mayo, Sriracha, chili oil, and soy sauce. Whisk together vigorously for 2-3 minutes until the mixture is completely smooth and creamy. This dressing is what brings the salad to life, so ensure all ingredients are well incorporated. Set aside your dressing as you move on to the next steps.

Step 3: Assemble Salad
Layer your salad ingredients in a jar or serving bowl, starting with the sliced cucumbers at the bottom; this helps keep them fresh. Next, add the julienned carrots, followed by the edamame, then the sliced onions. If you prepared tofu, layer that on top, and finish with avocado slices for creaminess and color. Make sure to leave enough space for the dressing.

Step 4: Add Dressing & Garnish
Spoon your freshly made dressing over the top of the salad ingredients. Sprinkle with sesame seeds for added crunch and flavor, and if you're using nori, crush it and add it as an optional garnish. This final touch adds an extra layer of umami that complements the creamy dressing beautifully.

Step 5: Refrigerate
Seal your jar tightly if you’re not serving immediately, ensuring it's upright in the refrigerator. This helps maintain the texture of your salad, especially those crunchy cucumbers. Let it chill for at least 30 minutes to allow the flavors to meld together—though it can stay fresh for up to 1-2 days!

Step 6: Serve
When ready to serve your Viral Creamy Asian Cucumber Salad, shake gently to blend the dressing or transfer it to a bowl and toss thoroughly. This salad can be enjoyed on its own, over rice, or even wrapped in lettuce for a fun, portable meal!

How to Store and Freeze Viral Creamy Asian Cucumber Salad

Fridge: Keep this vibrant salad in an airtight container for up to 1-2 days. Store the dressing separately for optimal crunch and freshness.

Freezer: Not recommended for freezing, as the cucumbers will lose their crisp texture upon thawing. Enjoy the salad fresh!

Reheating: If you've added protein like tofu, feel free to gently heat it before serving, but enjoy the salad chilled for the best experience.

Meal Prep: Ideal for meal prep! Layer your ingredients in jars and add dressing just before serving for delightful, crunchy bites any day of the week.

Make Ahead Options

This Viral Creamy Asian Cucumber Salad is perfect for meal prep enthusiasts looking to save time on busy days! You can slice the cucumbers, carrots, and onions, as well as cube the tofu, up to 24 hours in advance; just store them separately in airtight containers to maintain their freshness. For the dressing, prepare it ahead of time and refrigerate it for up to 3 days; this way, the flavors will deepen wonderfully. When you're ready to serve, simply layer the prepped ingredients in a jar, pour the dressing on top, and give it a gentle shake. You’ll enjoy a crisp, vibrant salad, just as delicious as if you made it fresh!

Expert Tips for Viral Creamy Asian Cucumber Salad

  • Keep It Crunchy: Preserve the salad's crisp texture by layering the dressing on top, away from delicate cucumbers, especially when storing in a jar.
  • Timing is Key: If using avocado, add it right before serving to prevent browning and maintain a vibrant appearance in your Viral Creamy Asian Cucumber Salad.
  • Dressing Consistency: Whisk the dressing thoroughly until smooth, as a well-mixed dressing enhances flavor and ensures even coating of salad ingredients.
  • Veggie Variations: Feel free to substitute carrots with bell peppers or radishes for an extra crunch and flavor burst, making this salad even more versatile.
  • Protein Power: Explore different proteins by swapping tofu for shrimp or grilled chicken, accommodating everyone’s dietary preferences without losing flavor.

What to Serve with Viral Creamy Asian Cucumber Salad

Bright green cucumbers glistening in a creamy dressing create the perfect foundation for a delicious meal, don’t you agree?

  • Chilled Noodles: The refreshing flavors complement the salad's crunch, creating a delightful contrast that’s satisfying and light. Perfect for a warm day!

  • Grilled Tofu Skewers: Adding protein enhances the meal while echoing the salad's savory profile, making every bite a fiesta of taste.

  • Avocado Toast: The creaminess of avocado pairs beautifully, lifting the meal's richness. A great choice for brunch or quick lunches!

  • Quinoa Salad: Nutty and wholesome, a light quinoa salad serves as a hearty side that balances the freshness of your cucumber salad, making for a fulfilling dinner.

  • Sushi Rolls: Sushi introduces additional textures and flavors, making it a fun pairing that echoes the Asian flavors while being great for sharing.

  • Miso Soup: Warm and umami-rich, miso soup not only complements the salad’s freshness but also introduces a comforting element to the meal.

  • Spicy Szechuan Peppers: The heat of Szechuan peppers offers a bold counterpoint, enhancing your dining experience with each exciting bite.

  • Coconut Milk Rice Pudding: For dessert, this creamy, sweet dish contrasts with the salad's crispness, leaving your palate satisfied and delighted.

  • Sparkling Water with Lime: This refreshing drink cleanses the palate and uplifts the meal, while the zesty lime echoes the salad's zingy undertones.

Each pairing offers a unique touch, ensuring your Viral Creamy Asian Cucumber Salad shines at the table!

Viral Creamy Asian Cucumber Salad Variations

Feel free to get creative with this recipe! Each twist will bring delightful new flavors and textures to your salad.

  • Protein Swap: Substitute tofu with shrimp for a seafood twist or grilled chicken for a hearty option. Both add delicious heartiness to the dish.

  • Crunchy Add-ins: Toss in chopped bell peppers or radishes for an extra layer of crunch. The vibrant colors will brighten up your salad!

  • Tangy Pickles: Add chopped pickles to introduce a zesty tang. They can elevate the flavor profile to something truly special.

  • Heat Levels: Adjust the spice by adding more Sriracha or a splash of your favorite hot sauce. For a milder option, omit the chili oil entirely.

  • Creamy Alternatives: For a lighter twist, use Greek yogurt instead of vegan cream cheese. It adds a delightful creaminess with a protein boost.

  • Crunchy Nuts: Add crushed peanuts or cashews for a nutty flavor and delightful crunch. They’re a fantastic way to enhance texture.

  • Herb Infusion: Fresh cilantro or mint can elevate the flavor even more, giving a refreshing note. These herbs pair beautifully with the dressing.

  • Noodle Addition: Consider adding cooked soba noodles for a filling meal, turning your salad into a delicious noodle bowl!

Explore these variations to make your Viral Creamy Asian Cucumber Salad perfect for every occasion. And if you're in the mood for more crunchy delight, check out my German Potato Salad or even a Balsamic Steak Salad to mix it up!

Viral Creamy Asian Cucumber Salad Recipe FAQs

How do I select the best cucumbers for this salad?
Absolutely! When choosing cucumbers, look for firm ones with a bright, glossy skin and no dark spots—these are signs of freshness. English cucumbers are fantastic for this salad due to their thin skin and fewer seeds. However, regular cucumbers will work well too; just ensure they're crisp and vibrant.

How should I store the salad, and how long will it last?
To keep your Viral Creamy Asian Cucumber Salad fresh, store it in an airtight container in the refrigerator for up to 1-2 days. For optimal texture and crunch, separate the dressing from the salad until you're ready to eat. If stored together, the cucumbers may become soggy.

Can I freeze this salad for later use?
Very! However, it's best not to freeze this salad since cucumbers lose their crisp texture after thawing. If you want to meal prep, I recommend preparing the ingredients in advance and refrigerating them, adding the dressing fresh right before serving.

What should I do if my dressing is too thick?
If your dressing is too thick, simply whisk in a teaspoon or two of water or vegetable broth until you reach your desired consistency. If you want to enhance the flavor, add a splash of soy sauce or a bit more Sriracha for an added kick!

Are there any dietary restrictions or considerations I should be aware of?
Very! This salad is naturally vegan, but if you're serving it to someone with specific allergies, always check for potential allergens in the ingredients you use. For those avoiding gluten, swap regular soy sauce for tamari. If you have a pet, keep in mind that some ingredients like onions can be harmful, so best to keep this tasty dish out of their reach.

Viral Creamy Asian Cucumber Salad

Viral Creamy Asian Cucumber Salad – Your New Favorite Crunch!

Discover the Viral Creamy Asian Cucumber Salad, a quick and refreshing vegan dish bursting with flavor.
Print Recipe Pin Recipe
Prep Time 10 minutes mins
Cook Time 7 minutes mins
Chilling Time 30 minutes mins
Total Time 47 minutes mins
Servings: 4 salads
Course: Salads
Cuisine: Asian
Calories: 250
Ingredients Equipment Method Nutrition Notes

Ingredients
  

For the Salad
  • 2 medium Cucumbers English cucumbers are great for fewer seeds.
  • 2 medium Carrots Add sweetness and crunch; substitute with bell peppers for extra color.
  • 1 cup Edamame Frozen and shelled edamame can be used directly.
  • 1 cup Tofu Can swap for shrimp or grilled chicken if not vegan.
For the Dressing
  • 1 cup Vegan Cream Cheese Regular cream cheese can be used for a non-vegan version.
  • 1/2 cup Vegan Mayo Feel free to use regular mayo for non-vegan.
  • 1 tablespoon Sriracha Adjust per your heat preference.
  • 1 tablespoon Chili Oil Optional.
  • 2 tablespoons Soy Sauce Consider using tamari for gluten-free.
For Garnish
  • 1 tablespoon Sesame Seeds Perfect as an optional garnish.
  • 1 sheet Nori Optional; crush it for garnish use.

Equipment

  • mandoline
  • Mixing Bowl
  • Jar or serving bowl

Method
 

Preparation
  1. Wash your cucumbers, carrots, and onions thoroughly. For the cucumbers, slice them thinly using a mandoline. Julienne the carrots into thin strips, and slice the onions as finely as possible. If using tofu, cube it and pan-crisp in oil over medium heat for about 5-7 minutes until golden brown.
  2. In a mixing bowl, combine vegan cream cheese, vegan mayo, Sriracha, chili oil, and soy sauce. Whisk together for 2-3 minutes until completely smooth and creamy. Set aside.
  3. Layer your salad ingredients starting with sliced cucumbers, adding julienned carrots, edamame, sliced onions, tofu if prepared, and finish with avocado slices.
  4. Spoon the dressing over the salad ingredients, sprinkle with sesame seeds and nori if using.
  5. Seal your jar tightly if not serving immediately; let it chill for at least 30 minutes before serving.
  6. Before serving, shake gently to blend the dressing or transfer to a bowl and toss thoroughly.

Nutrition

Serving: 1saladCalories: 250kcalCarbohydrates: 18gProtein: 10gFat: 18gSaturated Fat: 3gPolyunsaturated Fat: 4gMonounsaturated Fat: 7gSodium: 450mgPotassium: 450mgFiber: 5gSugar: 4gVitamin A: 3000IUVitamin C: 20mgCalcium: 75mgIron: 2mg

Notes

This salad can be enjoyed on its own, over rice, or in lettuce wraps. Keep it fresh and crunchy by storing dressing separately until ready to serve.

Tried this recipe?

Let us know how it was!

Cottage Cheese and Chickpeas Salad: A Protein-Packed Delight

May 5, 2026 by Grace Snow Leave a Comment

The first time I tasted a salad that made me rethink my lunch options, it was a simple yet vibrant Cottage Cheese and Chickpeas Salad. With its creamy texture and a burst of zesty lemon dressing, this dish revived my excitement for fresh ingredients and home-cooked meals. Not only is it incredibly quick to prepare—even for the busiest of days—but it's also packed with protein, making it a satisfying choice for anyone looking to ditch fast food without sacrificing flavor. Imagine enjoying this colorful creation while basking in the knowledge that you're treating your body right. Are you ready to bring this refreshing delight into your kitchen?

Why is this salad a must-try?

Freshness in every bite: The combination of creamy cottage cheese and hearty chickpeas creates a delightful textural contrast, while the crisp vegetables add a refreshing crunch.

Quick and Easy: This recipe is a lifesaver for those on-the-go, taking only 15 minutes to whip up.

High in Protein: Packed with protein, you'll feel satisfied and energized—perfect for anyone looking to nourish their body without the fuss.

Versatile Option: Customize your salad with extras like avocado or roasted red peppers to keep things exciting, just as you might enjoy in a flavorful Avocado Egg Salad.

Crowd-Pleaser: Whether it’s lunch at home or a picnic with friends, this salad is sure to impress anyone looking for healthy and delicious choices!

Cottage Cheese and Chickpeas Salad Ingredients

For the Base
• Cottage Cheese – Provides a creamy, tangy base rich in protein; substitute with feta cheese for a tangier flavor or Greek yogurt for a creamier texture.
• Chickpeas – Acts as a hearty, nutty source of vegetarian protein and fiber; dried chickpeas can be used but must be soaked and cooked beforehand.

For the Veggies
• Cherry Tomatoes – Offers sweet-tart juiciness that brightens the dish.
• Cucumber – Delivers refreshing crunch and lightens the overall mouthfeel.
• Red Onion – Adds sharpness and color contrast; finely chopped to prevent overpowering other flavors.
• Fresh Parsley – Provides herbaceous lift and freshness.

For the Dressing
• Lemon Juice – Gives a bright, citrusy kick that enhances other flavors.
• Olive Oil – Adds silky richness and helps distribute flavors evenly.
• Salt and Pepper – Essential seasonings that enhance ingredients' natural flavors.
• Ground Cumin – Adds warm, earthy spice to complement the chickpeas.

Optional Serving Accents
• Lettuce Leaves – For serving; adds presentation appeal and can serve as a low-carb wrap.

This Cottage Cheese and Chickpeas Salad is not just quick to prepare; it's also a delightful way to enjoy a protein-packed, satisfying meal!

Step‑by‑Step Instructions for Cottage Cheese and Chickpeas Salad

Step 1: Prepare the Base
In a large mixing bowl, gently combine 1 cup of creamy cottage cheese and 1 cup of cooked chickpeas. Using a spatula, fold these ingredients together to preserve their texture for the Cottage Cheese and Chickpeas Salad. The mixture should be well combined yet still visible, creating a lovely foundation that merges creaminess with heartiness.

Step 2: Add the Veggies
Next, introduce 1 cup of halved cherry tomatoes, 1 diced cucumber, and half a finely chopped red onion to your bowl. With a gentle folding motion, incorporate the vegetables into the salad base. You'll want to ensure each vibrant addition remains intact and colorful, providing a delightful crunch that complements the creamy chickpeas and cheese.

Step 3: Chop the Fresh Herbs
Finely chop ¼ cup of fresh parsley, and sprinkle it into the mixing bowl. The fresh herbs will enhance the brightness of the cottage cheese and chickpeas salad. Gently toss once more to ensure the parsley is evenly distributed, elevating the visual appeal and adding an inviting aroma to your dish.

Step 4: Make the Dressing
In a separate small bowl, whisk together the juice of one lemon, 2 tablespoons of olive oil, and a pinch of salt and pepper. Add ½ teaspoon of ground cumin for a warm flavor boost. Continue whisking until the dressing is well combined and slightly emulsified, creating a silky mixture that will enhance all flavors in the salad.

Step 5: Toss the Salad
Pour the freshly made dressing over your salad mixture. With a gentle hand, toss the Cottage Cheese and Chickpeas Salad until every ingredient is coated. Aim for a vibrant mix of colors and textures, ensuring that every bite is flavorful and zesty, reflecting the bright lemon notes of the dressing.

Step 6: Adjust Seasoning
Taste the salad and adjust the seasoning as necessary. Consider adding more salt, pepper, or lemon juice according to your preference. This final touch will ensure the salad is perfectly balanced, enhancing the natural flavors of the cottage cheese and other ingredients while inviting your taste buds into a delightful experience.

Step 7: Prepare for Serving
If desired, take a few crisp lettuce leaves and line your serving plates with them. This step adds a lovely presentation while providing a refreshing bite. Spoon generous portions of the Cottage Cheese and Chickpeas Salad onto the lettuce, creating a colorful and appetizing dish that’s ready to impress.

Step 8: Chill or Serve Immediately
You can serve the salad immediately for a quick meal, or for a deeper flavor, cover it and chill in the refrigerator for about 30 minutes. Chilling allows the flavors to meld beautifully, enhancing the experience as you enjoy your refreshing, protein-packed salad later!

What to Serve with Cottage Cheese and Chickpeas Salad

Pair this vibrant salad with delightful sides that enhance its fresh flavors and textures.

  • Warm Pita Bread: Soft, pillowy pita brings a satisfying element that’s perfect for scooping up the salad. The contrast of warm and cool adds comfort to your meal.

  • Quinoa Pilaf: A nutty, fluffy quinoa dish complements the protein-packed salad while providing an additional layer of texture and heartiness. It's a great way to elevate your lunch experience.

  • Grilled Vegetable Skewers: Smoky, charred veggies add a delicious depth and earthiness that balances the creamy and fresh taste of the salad beautifully. Their bold flavors will delight your palate!

  • Greek Yogurt Dip: Creamy and tangy, a side of Greek yogurt dip pairs well, enhancing the salad's flavors while offering a cool and rich texture to contrast with the chickpeas.

  • Cucumber Raita: This cool, refreshing sauce made from yogurt and cucumber complements your salad perfectly and provides a soothing contrast, making each bite even more enjoyable.

  • Chardonnay or Sparkling Water: A glass of crisp Chardonnay can elevate your meal, while sparkling water adds a refreshing effervescence that brightens up the flavors of the dish.

  • Fruit Salad: For a sweet finish, a light and zesty fruit salad featuring citrus and berries will cleanse the palate and balance the savory aspects of your meal wonderfully.

How to Store and Freeze Cottage Cheese and Chickpeas Salad

Fridge: Store the salad in an airtight container in the refrigerator for up to 3 days. Keep the dressing separate until serving to maintain the crispness of the vegetables.

Freezer: Freezing isn't ideal for this salad due to the delicate textures of cottage cheese and fresh veggies, but you can freeze cooked chickpeas separately for future use.

Reheating: If you've prepared and stored this salad, simply allow it to sit at room temperature for about 10 minutes before enjoying. Avoid reheating in the microwave to maintain texture.

Meal Prep Tips: For easy meal prep, consider assembling the salad without dressing in a mason jar. This keeps everything fresh and ready to enjoy—just shake and add the dressing when you're ready to dig in!

Expert Tips for Cottage Cheese and Chickpeas Salad

  • Preserve Freshness: Store the salad in an airtight container for up to 3 days, but keep the dressing separate until serving to avoid sogginess.

  • Texture Matters: Avoid over-mixing the salad; fold gently to maintain the integrity of the chickpeas and crunchy vegetables for optimal texture.

  • Seasoning Check: Always taste before serving! Adjust salt, pepper, and lemon juice to ensure your Cottage Cheese and Chickpeas Salad has a well-balanced flavor.

  • Ingredient Swaps: Don't hesitate to mix in alternative veggies or toppings. Roasted red peppers or olives can elevate the flavor profile in delightful ways!

  • Pre-Meal Prep: For a quick meal, prepare the chickpeas and dressing ahead of time. Combine with fresh ingredients just before serving for maximum crunch and flavor.

Cottage Cheese and Chickpeas Salad Variations

Feel free to make this delightful salad even more your own with these fun and flavorful twists!

  • Dairy-Free: Substitute cottage cheese with cashew cream or silken tofu for a creamy, plant-based alternative. The result is just as satisfying while remaining vegan-friendly.

  • Spicy Kick: Add a pinch of red pepper flakes or diced jalapeños to introduce a spicy twist that warms up your taste buds. It’s a great way to spice things up, especially on a chilly day!

  • Heartier Touch: Mix in quinoa or farro for added texture and substance. This variation elevates the salad into a fuller meal, perfect for satisfying your appetite without the heaviness of fast food.

  • Flavor Burst: Incorporate sun-dried tomatoes or roasted red peppers for an extra burst of flavor. These additions give the salad a Mediterranean flair, reminiscent of sun-kissed summers.

  • Nutty Crunch: Scatter some toasted almonds or walnuts on top for a delightful crunch and richness. The nuttiness pairs beautifully with the creamy cottage cheese and serves as a great texture contrast.

  • Extra Greens: Toss in baby spinach or arugula for added nutrients and vibrant color. This variation not only enhances the health benefits but also makes the salad even more visually appealing!

  • Fruity Twist: Try adding diced apples or pears for a sweet surprise amidst the savory ingredients. This unexpected fruitiness complements the creamy elements, much like in a hearty Chicken Salad with Apples.

  • Zesty Makeover: Replace the lemon juice with lime juice for a refreshing citrus variation. This small change brings a different brightness and pairs beautifully with the existing ingredients.

No matter which variation you choose, this Cottage Cheese and Chickpeas Salad invites you to savor the journey of flavors and textures while nourishing your body. Happy cooking!

Make Ahead Options

These Cottage Cheese and Chickpeas Salad components are perfect for busy home cooks looking to prep ahead! You can prepare the salad base (cottage cheese, chickpeas, and diced vegetables) up to 3 days in advance and store it in an airtight container in the refrigerator. To maintain quality, keep the homemade dressing separate and refrigerate it in a small jar, allowing you to preserve the crispness of the veggies. When ready to serve, simply toss the salad with the dressing, and enjoy a meal that's just as delicious as when freshly made. This way, you'll have a nutritious and satisfying option ready at a moment's notice!

Cottage Cheese and Chickpeas Salad Recipe FAQs

What ripeness should my vegetables and ingredients be?
Absolutely! Using ripe and fresh ingredients makes all the difference. Look for firm, plump cherry tomatoes without any dark spots and cucumbers that are crisp and evenly colored. The cottage cheese should be creamy and fresh—ideally within its expiration date for optimal taste.

How should I store leftovers of the Cottage Cheese and Chickpeas Salad?
To maintain freshness, store the salad in an airtight container in your refrigerator for up to 3 days. I recommend keeping the dressing separate until you're ready to serve to avoid the veggies getting soggy. This way, everything stays crisp and delicious!

Is it possible to freeze Cottage Cheese and Chickpeas Salad?
Freezing isn't recommended for this salad, as the cottage cheese and fresh veggies don't hold up well once thawed. However, you can freeze cooked chickpeas separately for up to 3 months. Just cook, cool, and place them in a freezer-safe bag or container.

What are some common troubleshooting tips when making the salad?
If your salad feels bland, it could be that it needs more seasoning. Don’t hesitate to add a pinch more salt, a dash of pepper, or a squeeze of lemon juice to elevate the flavors. If your cucumber is seeping too much water, make sure to pat it dry after chopping to avoid a watery salad—nobody wants that!

Are there any dietary considerations I should keep in mind?
Very! If you're serving this dish for a group, be aware of common allergens. The primary ingredients—cottage cheese and chickpeas—are dairy and legume-based, so ensure no one at your table has allergies to these. For a vegan option, substitute the cottage cheese with a plant-based alternative like tahini or a nut-based yogurt.

Can I prepare the salad in advance?
Absolutely! To save time, you can prepare the cottage cheese and chickpeas ahead of time and store them in the fridge—a great way to enjoy this protein-packed salad during your busy week! Just remember to chop your veggies and dress right before serving to maintain that delightful crunch.

Cottage Cheese and Chickpeas Salad

Cottage Cheese and Chickpeas Salad: A Protein-Packed Delight

Enjoy a refreshing Cottage Cheese and Chickpeas Salad packed with protein and vibrant flavors, perfect for quick lunches.
Print Recipe Pin Recipe
Prep Time 15 minutes mins
Chilling Time 30 minutes mins
Total Time 45 minutes mins
Servings: 2 cups
Course: Salads
Calories: 300
Ingredients Equipment Method Nutrition Notes

Ingredients
  

For the Base
  • 1 cup Cottage Cheese Substitute with feta cheese for tangier flavor or Greek yogurt for creaminess.
  • 1 cup Cooked Chickpeas Dried chickpeas must be soaked and cooked beforehand.
For the Veggies
  • 1 cup Cherry Tomatoes Halved.
  • 1 medium Cucumber Diced.
  • 0.5 medium Red Onion Finely chopped.
  • 0.25 cup Fresh Parsley Finely chopped.
For the Dressing
  • 1 medium Lemon Juice Freshly squeezed.
  • 2 tablespoons Olive Oil
  • 1 pinch Salt
  • 1 pinch Pepper
  • 0.5 teaspoon Ground Cumin
Optional Serving Accents
  • 2 leaves Lettuce Leaves For serving.

Equipment

  • Mixing Bowl
  • small bowl
  • Spatula
  • Whisk

Method
 

Preparation Steps
  1. In a large mixing bowl, gently combine cottage cheese and cooked chickpeas. Fold together to preserve texture.
  2. Add halved cherry tomatoes, diced cucumber, and finely chopped red onion. Gently fold to incorporate.
  3. Finely chop fresh parsley and add to the bowl. Toss to evenly distribute.
  4. In a small bowl, whisk together lemon juice, olive oil, salt, pepper, and ground cumin until emulsified.
  5. Pour dressing over the salad mixture and toss gently until coated.
  6. Taste and adjust seasoning with additional salt, pepper, or lemon juice as desired.
  7. Line serving plates with lettuce leaves. Spoon salad onto the lettuce for a colorful presentation.
  8. Serve immediately or chill in the refrigerator for about 30 minutes to enhance flavors.

Nutrition

Serving: 1cupCalories: 300kcalCarbohydrates: 36gProtein: 20gFat: 12gSaturated Fat: 2gPolyunsaturated Fat: 2gMonounsaturated Fat: 8gCholesterol: 10mgSodium: 400mgPotassium: 500mgFiber: 8gSugar: 6gVitamin A: 500IUVitamin C: 20mgCalcium: 150mgIron: 3mg

Notes

Store in an airtight container for up to 3 days, keeping the dressing separate until serving. Avoid over-mixing to maintain texture.

Tried this recipe?

Let us know how it was!
  • 1
  • 2
  • 3
  • …
  • 17
  • Next Page »

Welcome!

Hi, I’m Grace, a Sydney-based home cook with a passion for bold flavors and trending ingredients. Whether you’re a busy beginner or a seasoned foodie, you’ll find dishes here that are fresh, fun, and full of flavor.

More about me

Popular Recipes

  • One Pot Keto Tuna Casserole
    One Pot Keto Tuna Casserole: Creamy Comfort in Minutes
  • Ultimate Jalapeno Popper Chicken Salad
    Ultimate Jalapeno Popper Chicken Salad That'll Wow Your Tastebuds
  • Green Chile Cheese Dip
    Mouthwatering Green Chile Cheese Dip for Cozy Gatherings
  • Easy Chimichurri Sauce
    Fresh and Zesty Easy Chimichurri Sauce in Just Minutes

Footer

↑ back to top

About

  • Privacy Policy
  • Disclaimer
  • Terms & Conditions

Newsletter

  • Sign Up! for emails and updates

Contact

  • About me
  • Contact me

Copyright © 2025 TastyTrendIngredients