tastytrendingredients

  • Home
  • Recipes
    • Appetizers
    • Breakfast
    • Dessert
    • Dinner
    • Drinks
    • Salads
    • Snacks
    • Soups
  • About me
  • Contact
menu icon
go to homepage
  • Home
  • Recipes
    • Appetizers
    • Breakfast
    • Dessert
    • Dinner
    • Drinks
    • Salads
    • Snacks
    • Soups
  • About me
  • Contact
search icon
Homepage link
  • Home
  • Recipes
    • Appetizers
    • Breakfast
    • Dessert
    • Dinner
    • Drinks
    • Salads
    • Snacks
    • Soups
  • About me
  • Contact
×

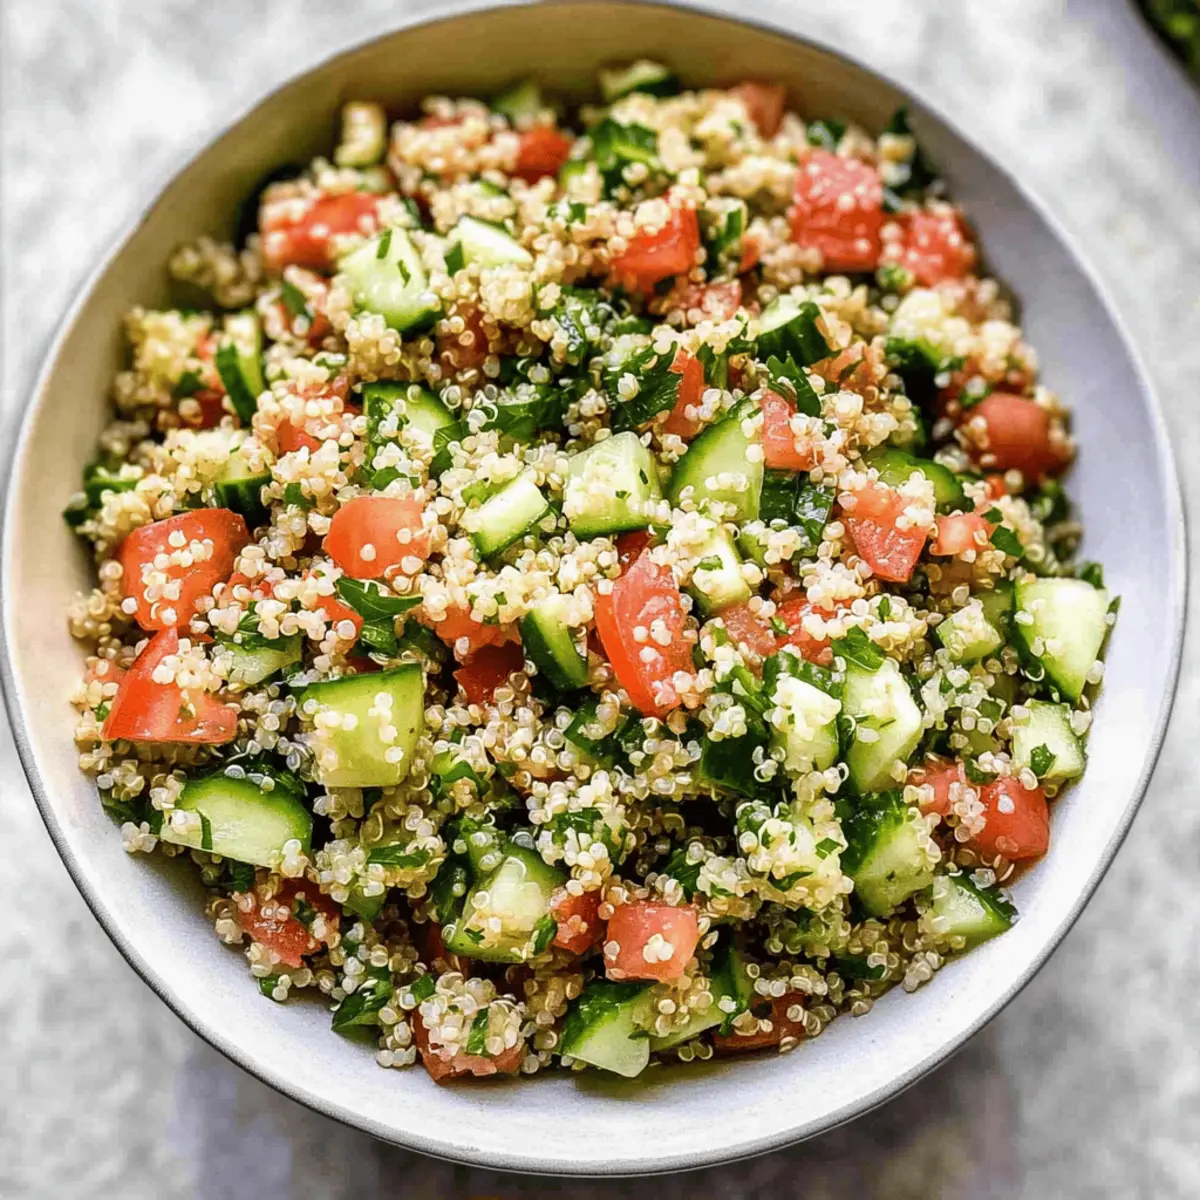
Quinoa Tabbouleh: A Vibrant Twist on a Classic Salad

August 15, 2025 by Grace Snow Leave a Comment

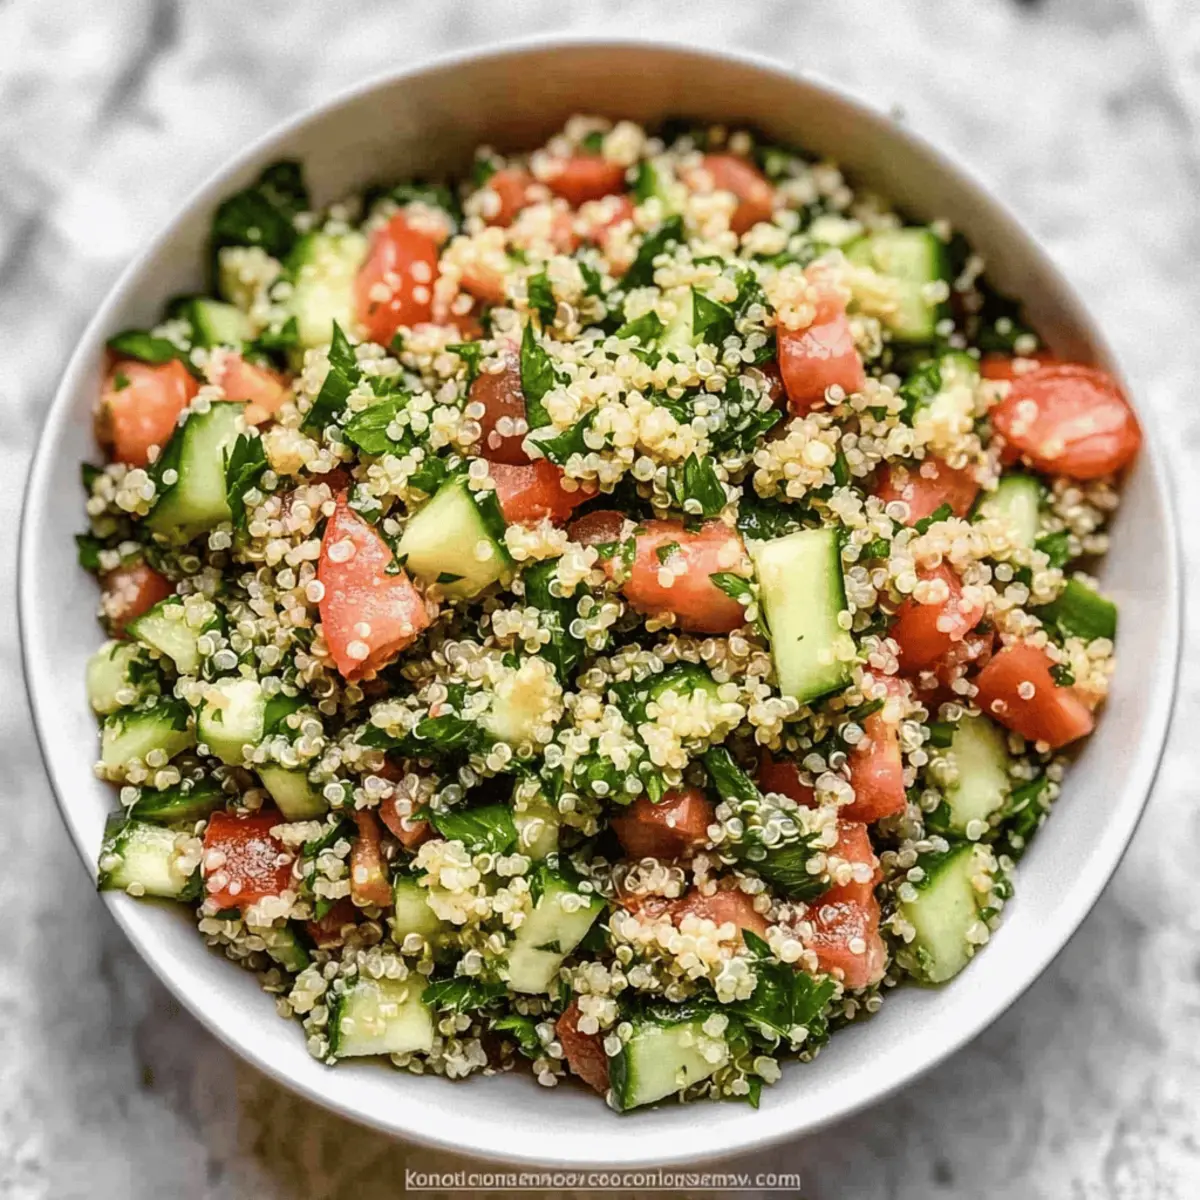
As I found myself shifting from takeout to wholesome meals, I stumbled upon the perfect solution: Quinoa Tabbouleh. This vibrant salad marries hearty quinoa with crisp vegetables, delivering a refreshing crunch that's hard to resist. Swapping traditional bulgur for quinoa not only makes this dish a gluten-free gem but also a splendid choice for those looking to whip up something quick and nourishing. Not to mention, it’s a fantastic meal prep option; it tastes even better after a day in the fridge as the flavors meld beautifully. Are you ready to explore this healthy twist on a classic? Let’s dive into the deliciousness!
Why Is Quinoa Tabbouleh Irresistible?

Freshness reigns supreme in this delightful salad, bringing together a burst of vibrant flavors that awaken your taste buds. Versatile by nature, you can easily adapt this recipe by swapping in your favorite grains, such as bulgur or couscous, to suit your preferences. Quick to prepare, this dish is perfect for busy weeknights or meal prepping for the week ahead. Gluten-free and wholesome, it caters to various dietary needs without sacrificing flavor. Crowd-pleaser status is guaranteed, making it ideal for gatherings, picnics, or simply enjoying at home. If you're looking for more budget-friendly meal ideas, don’t forget to check out our selection of quick and healthy recipes.

Quinoa Tabbouleh Ingredients

• Get ready to create a wholesome dish that highlights gluten-free quinoa!

For the Salad

  • Quinoa – Acts as the hearty base, offering a nutty flavor and delightful texture; if you’re out of quinoa, bulgur or couscous works too!
  • Lemon – Brightens the dish with acidity; fresh lemon juice is key for an authentic zing.
  • Garlic – Infuses the salad with aromatic richness; use freshly minced garlic for the best flavor.
  • Olive Oil – Adds a silky touch to the dressing; avocado oil can be swapped in for a unique twist.
  • Salt – Enhances the natural flavors; adjust according to your taste preference.
  • Tomato – Delivers juiciness and color; feel free to replace with diced bell pepper for a different crunch.
  • Cucumber – Provides a refreshing bite; peeling is optional if you enjoy the extra texture.
  • Curly Leaf Parsley – Lifts the overall flavor and adds visual appeal; substitute with mint for a refreshing change!

Step‑by‑Step Instructions for Quinoa Tabbouleh

Step 1: Rinse Quinoa
Start by rinsing 1 cup of uncooked quinoa under cool running water for about 1-2 minutes. This step is crucial as it removes saponin, the bitter coating on quinoa. Use a fine mesh strainer to ensure all grains are thoroughly cleaned before cooking.

Step 2: Cook Quinoa
In a medium pot, combine the rinsed quinoa with 1.75 cups of water. Bring the mixture to a rolling boil over medium-high heat. Once boiling, reduce the heat to low, cover, and let it simmer for 15 minutes or until all the water is absorbed. Check for fluffiness and ensure the grains are tender when done.

Step 3: Cool Quinoa
Remove the pot from heat and allow the quinoa to cool. Spread the fluffy grains onto a baking sheet or transfer it to a bowl, and let them sit for about 10 minutes. Alternatively, refrigerate the quinoa for a quicker cooling process before mixing it with your vegetables for the Quinoa Tabbouleh.

Step 4: Prepare Dressing
In a small bowl, whisk together 1/4 cup of fresh lemon juice, 1-2 cloves of minced garlic, 1/4 cup of olive oil, and 1 teaspoon of salt. This zesty dressing will elevate the flavors in your Quinoa Tabbouleh. Aim for a smooth consistency, and taste to adjust seasoning as needed.

Step 5: Chop Vegetables
While the quinoa cools, finely chop your vegetables. Dice the tomato and cucumber, and chop a generous bunch of curly leaf parsley. Ensuring uniform sizes enhances the texture and appearance of the salad, making each bite vibrant and refreshing.

Step 6: Combine Ingredients
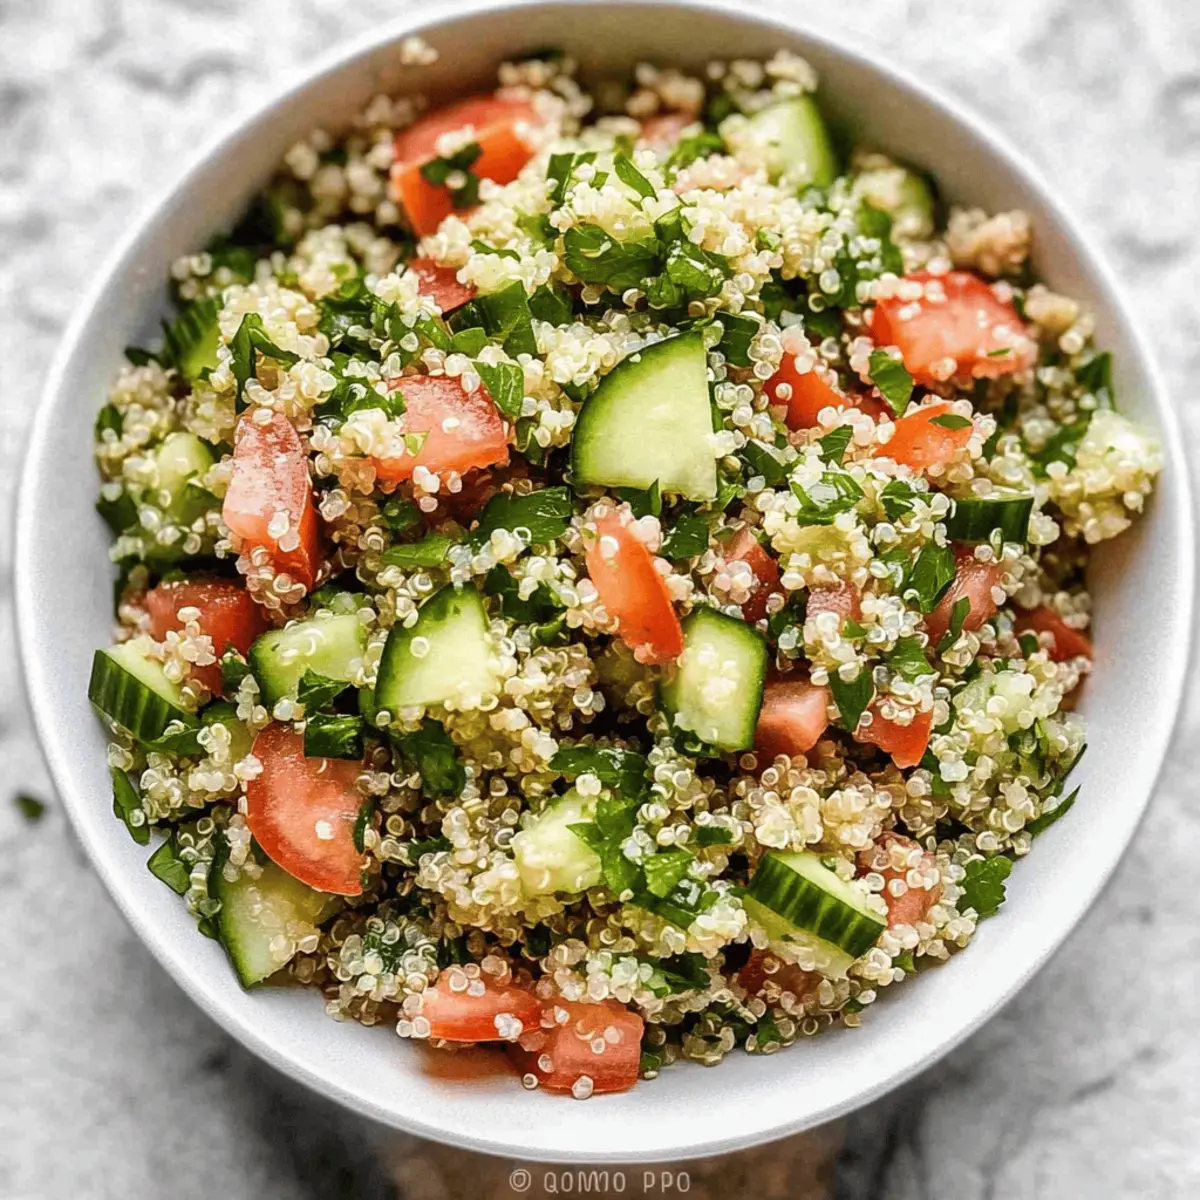
In a large bowl, combine the cooled quinoa with the prepared tomatoes, cucumbers, and parsley. Drizzle the freshly made dressing over the top, and gently stir until all ingredients are evenly coated. This Quinoa Tabbouleh is now ready to shine with color and flavor.

Step 7: Serve
Serve your Quinoa Tabbouleh immediately for a fresh dish, or refrigerate it for at least 1-2 hours to let the flavors meld. If chilled, give it a good stir before serving. Enjoy this healthy and vibrant salad as a side dish or light lunch.
What to Serve with Quinoa Tabbouleh

Elevate your meal with delicious pairings that complement the fresh, zesty flavors of this vibrant salad.

  • Grilled Chicken: Juicy, tender chicken adds protein and pairs beautifully with the lightness of quinoa tabbouleh, enhancing its nutritious appeal.

  • Hummus Platter: Creamy hummus brings a smooth texture and rich flavor, making an inviting dip for fresh veggies or pita bread alongside the salad.

  • Stuffed Grape Leaves: These savory bites offer a delightful combination of textures, echoing the fresh elements of tabbouleh while adding a Mediterranean flair.

  • Roasted Vegetables: A medley of seasonal roasted veggies enhances the meal's wholesome essence while providing warmth and depth against the fresh salad.

  • Pita Chips: Crunchy pita chips serve as a fun delivery method for enjoying tabbouleh, adding a satisfying crunch that contrasts with its fluffiness.

  • Tzatziki Sauce: Cool and tangy, this yogurt-based sauce complements the salad's freshness and provides an extra layer of flavor that is refreshing and vibrant.

  • Sparkling Water with Lemon: This refreshing beverage pairs well with the zesty flavors of the salad while keeping the meal light and invigorating.

  • Greek Yogurt Parfait: Conclude your meal with a light parfait of Greek yogurt, honey, and fresh berries, balancing the savory main with a sweet, creamy finish.

Pair any of these delightful options alongside your Quinoa Tabbouleh for a fulfilling, wholesome meal that’s as satisfying as it is healthy.

Make Ahead Options

These Quinoa Tabbouleh preparations are perfect for busy weeknights and save you precious time! You can cook and cool the quinoa up to 3 days in advance, ensuring it's perfectly fluffy and ready to go. Additionally, chop your vegetables—tomatoes, cucumbers, and parsley—up to 24 hours before serving and store them in an airtight container in the refrigerator to maintain their freshness. When you're ready to enjoy, simply combine the prepped ingredients with the dressing, which can also be whisked together and refrigerated. This way, your Quinoa Tabbouleh will taste just as delicious with minimal effort, making meal prep a breeze!

Storage Tips for Quinoa Tabbouleh

Fridge: Store your Quinoa Tabbouleh in an airtight container in the refrigerator for up to 4 days. The flavors deepen as it sits, but remember, the vegetable crunch will soften over time.

Freezer: If you want to enjoy it later, freeze individual portions of Quinoa Tabbouleh in airtight freezer bags for up to 2 months. Thaw in the fridge overnight before serving.

Reheating: For best results, enjoy chilled or at room temperature. If you must reheat, warm gently in the microwave, but be cautious to maintain texture.

Quinoa Tabbouleh Variations & Substitutions

Feel free to make this Quinoa Tabbouleh your own by experimenting with various ingredients and flavors!

  • Chickpea Boost: Add canned chickpeas for a protein-packed twist. They also bring a delightful creaminess that complements the crisp veggies beautifully.
  • Feta or Chicken: For a heartier meal, crumble some feta cheese or add grilled chicken pieces. This will not only enhance the flavor but also make it more filling.
  • Herb Medley: Incorporate fresh mint or basil alongside parsley for a fragrant flavor explosion. This will brighten the dish, giving it a unique and refreshing character.
  • Bold Bell Peppers: Swap diced tomatoes with colorful bell peppers for a different crunch and sweetness. It's an easy switch that adds a vibrant pop to your edible arrangement.
  • Dairy-Free Dressing: Substitute olive oil with tahini for a creamy, nutty dressing that’s also dairy-free. This adjustment lends a silky richness to the salad without compromising on flavor.
  • Spicy Kick: Add a pinch of red pepper flakes or diced jalapeños if you crave heat. It transforms the mild salad into a tantalizing dish that dances on your palate!
  • Wrap It Up: Serve your Quinoa Tabbouleh as a wrap in pita or lettuce leaves. This playful presentation is perfect for parties or on-the-go meals.
  • Grain Variation: If you prefer a different texture, swap quinoa for bulgur or couscous. Each grain brings its unique flavor while keeping it as delightful as the original!

Feel like more alternatives? Explore our delectable recipes for quick and healthy meals that will inspire your dinner table creativity!

Expert Tips for Quinoa Tabbouleh

  • Rinse Quinoa: Always rinse quinoa thoroughly before cooking to remove saponin, which can give it a bitter taste. This step enhances the overall flavor of your Quinoa Tabbouleh.

  • Allow for Flavor Meld: For the best results, refrigerate the salad for 1-2 hours before serving. This extra time lets the ingredients harmonize and boosts the taste significantly.

  • Herb Balance: Adjust the quantity of parsley based on your preference—too much can overpower the salad, while just enough brings freshness to the Quinoa Tabbouleh.

  • Freshness is Key: Use fresh lemon juice instead of bottled for a bright and zesty punch. This small tweak can transform the flavor profile of your dish.

  • Texture Matters: Chop vegetables evenly to ensure a uniform texture throughout the salad. This creates a delightful crunch in every bite of your Quinoa Tabbouleh.
Quinoa Tabbouleh Recipe FAQs

How do I choose ripe produce for my Quinoa Tabbouleh?
Absolutely! When selecting tomatoes, look for ones that are firm yet slightly yield to pressure and showcase a rich color. For cucumbers, pick ones that are vibrant green and free from dark spots. Fresh parsley should be bright and fragrant, with no wilting leaves. This freshness will really enhance your salad!

What is the best way to store leftover Quinoa Tabbouleh?
You can store your Quinoa Tabbouleh in an airtight container in the refrigerator for up to 4 days. The flavors will develop beautifully, but be mindful that the vegetables may soften as time goes on. Always give it a good stir before serving to reincorporate the dressing!

Can I freeze Quinoa Tabbouleh? If so, how?
Yes, you can freeze it! To freeze your Quinoa Tabbouleh, portion it into airtight freezer bags or containers, ensuring to remove as much air as possible. It can stay good for up to 2 months in the freezer. When you're ready to enjoy it, simply thaw it overnight in the fridge. For the best texture, serve it chilled or at room temperature after thawing.

What should I do if my Quinoa Tabbouleh tastes bland?
If your salad lacks flavor, don’t fret! Start by adding a bit more salt to enhance the overall taste. You can also add a splash more of fresh lemon juice for that zesty brightness. If you love herbs, consider incorporating a bit more parsley or even fresh mint for an extra flavor kick. Lastly, giving your Quinoa Tabbouleh some time in the fridge can allow the flavors to meld beautifully.

Is Quinoa Tabbouleh safe for my dog?
While Quinoa Tabbouleh doesn't contain any toxic ingredients for dogs, it's best to serve them plain quinoa without the dressing or seasonings. Ingredients like garlic and onion can be harmful to dogs, so it's crucial to keep their portion simple if you decide to share.

Does Quinoa Tabbouleh work for common dietary restrictions?
Very! This recipe is naturally gluten-free, making it perfect for those with gluten sensitivities or celiac disease. It's vegetarian and can easily be adapted for vegan diets by ensuring your dressing is entirely plant-based. Just check that your additional ingredients, like chickpeas or feta, align with any dietary preferences you have.
Quinoa Tabbouleh

Quinoa Tabbouleh: A Vibrant Twist on a Classic Salad

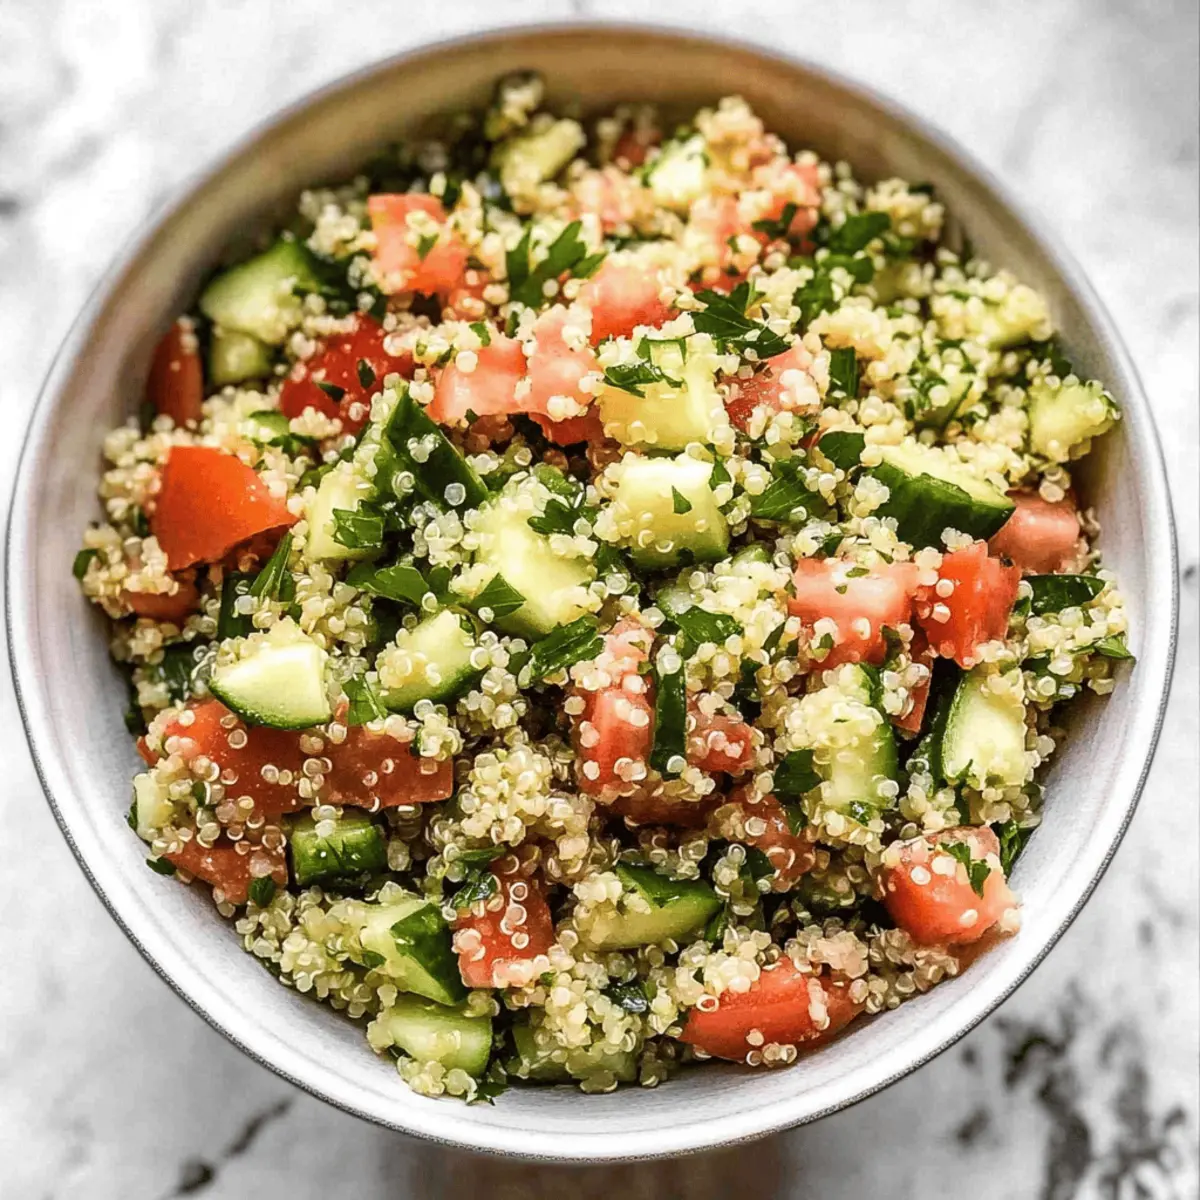
Quinoa Tabbouleh is a refreshing salad blending hearty quinoa and crisp vegetables for a gluten-free delight.
Print Recipe Pin Recipe
Prep Time 20 minutes mins
Cook Time 15 minutes mins
Cooling Time 10 minutes mins
Total Time 45 minutes mins
Servings: 4 servings
Course: Salads
Cuisine: Mediterranean
Calories: 180
Ingredients Equipment Method Nutrition Notes

Ingredients
  

For the Salad
  • 1 cup Quinoa Rinsed
  • 1 cup Water For cooking quinoa
  • 1 whole Lemon Juiced for dressing
  • 1-2 cloves Garlic Minced
  • 1/4 cup Olive Oil Can substitute with avocado oil
  • 1 teaspoon Salt Adjust to taste
  • 1 whole Tomato Diced
  • 1 whole Cucumber Diced, peeling optional
  • 1 bunch Curly Leaf Parsley Chopped

Equipment

  • Medium pot
  • fine mesh strainer
  • Baking Sheet
  • small bowl
  • large bowl

Method
 

Step-by-Step Instructions
  1. Rinse quinoa under cool running water for about 1-2 minutes.
  2. Cook quinoa in a medium pot with water, bringing to a boil, then simmer for 15 minutes.
  3. Cool quinoa by spreading it on a baking sheet or refrigerating for faster cooling.
  4. Prepare the dressing by whisking together lemon juice, garlic, olive oil, and salt.
  5. Chop vegetables: dice tomato and cucumber, and chop parsley.
  6. Combine cooled quinoa with vegetables and drizzle dressing over, stir to combine.
  7. Serve immediately or refrigerate for 1-2 hours to let flavors meld.
Nutrition

Serving: 1servingCalories: 180kcalCarbohydrates: 24gProtein: 5gFat: 8gSaturated Fat: 1gPolyunsaturated Fat: 1gMonounsaturated Fat: 6gSodium: 250mgPotassium: 300mgFiber: 4gSugar: 2gVitamin A: 500IUVitamin C: 30mgCalcium: 30mgIron: 2mg

Notes

Refrigerate leftovers in an airtight container for up to 4 days. Flavors deepen, but vegetable crunch may soften over time.

Tried this recipe?

Let us know how it was!

Refreshing Chicken Salad with Apples for a Summer Treat

August 15, 2025 by Grace Snow Leave a Comment

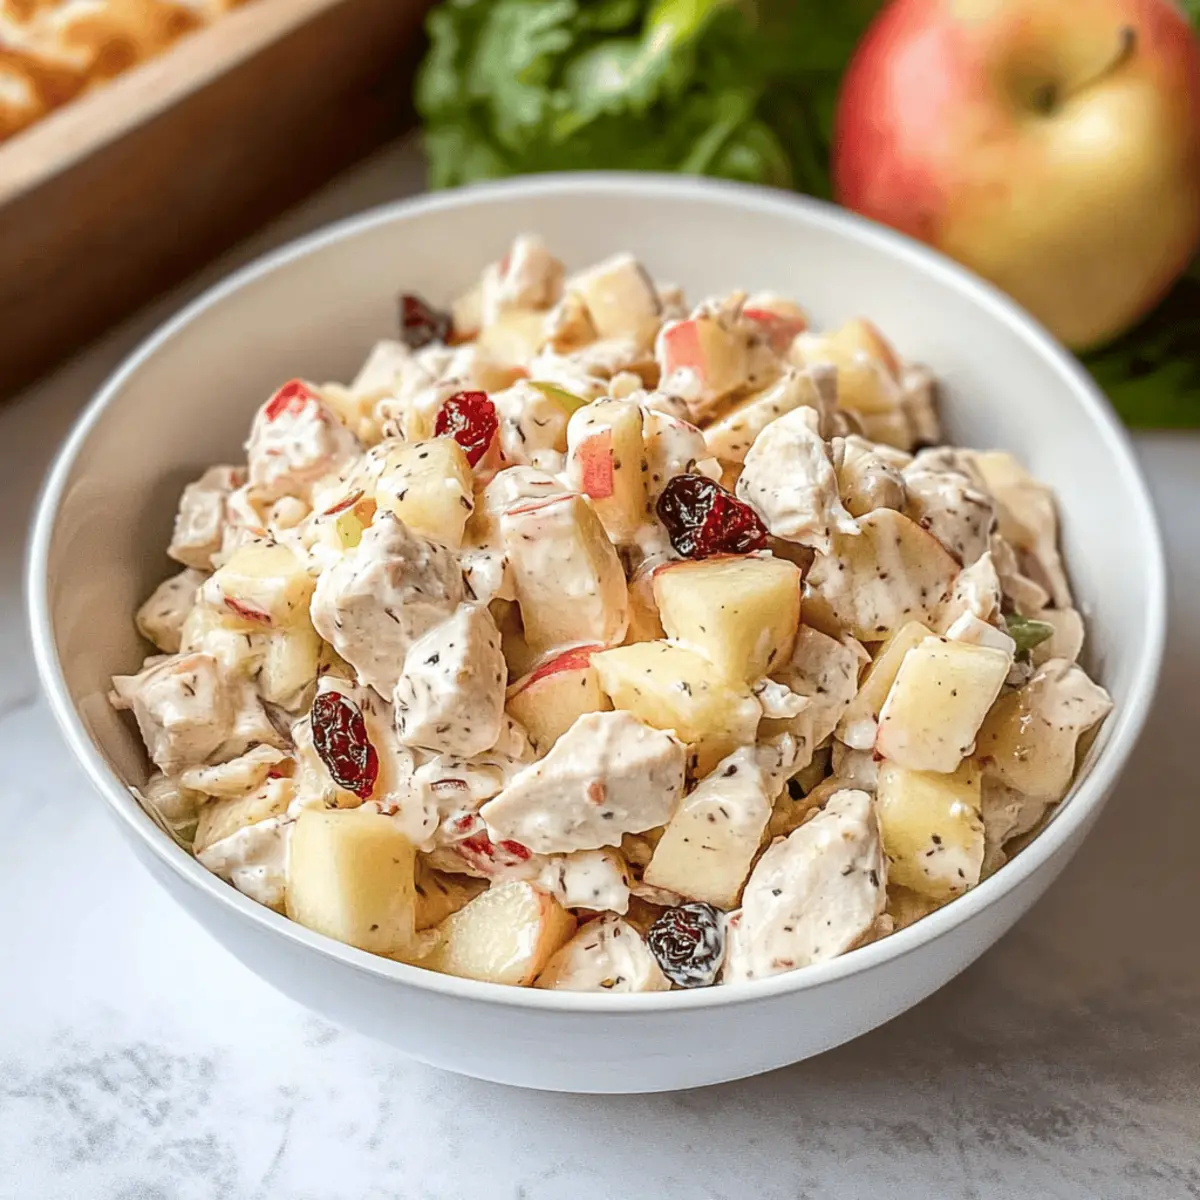
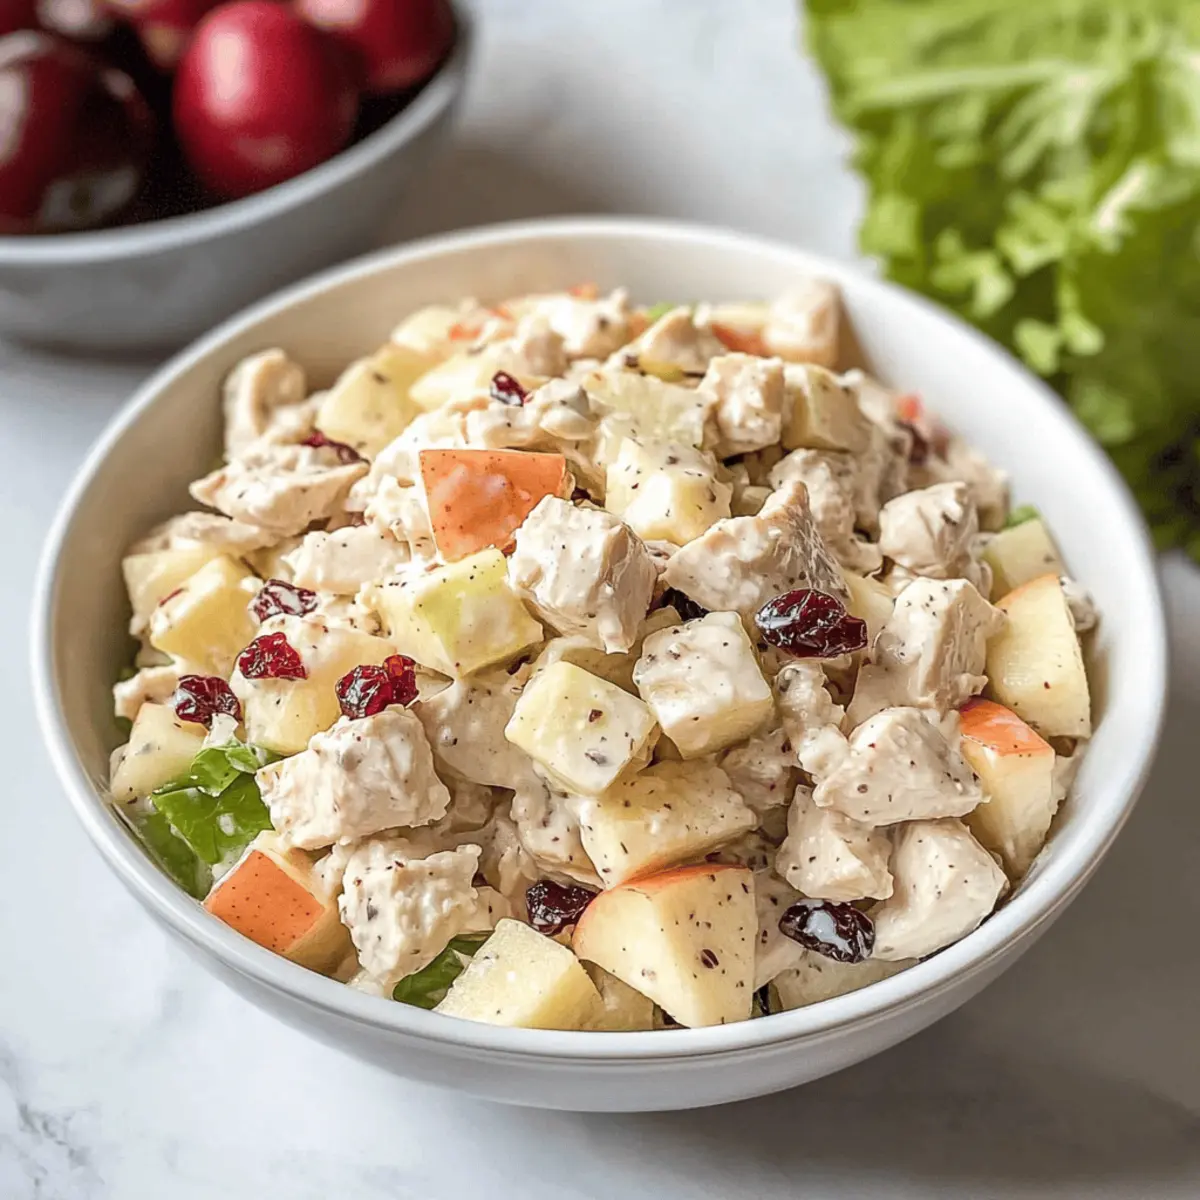
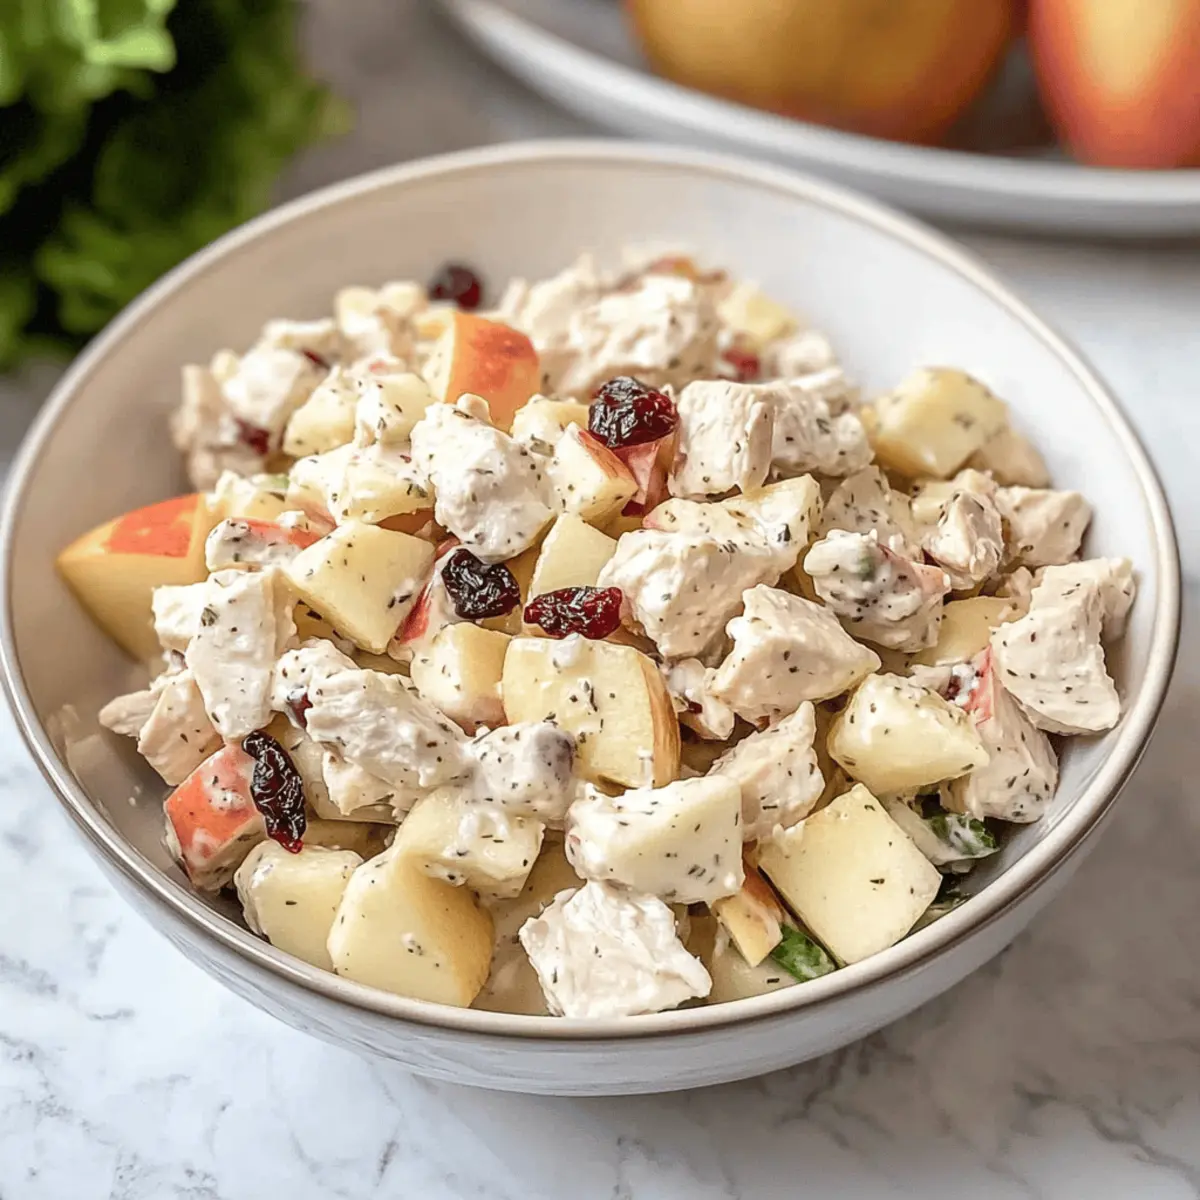
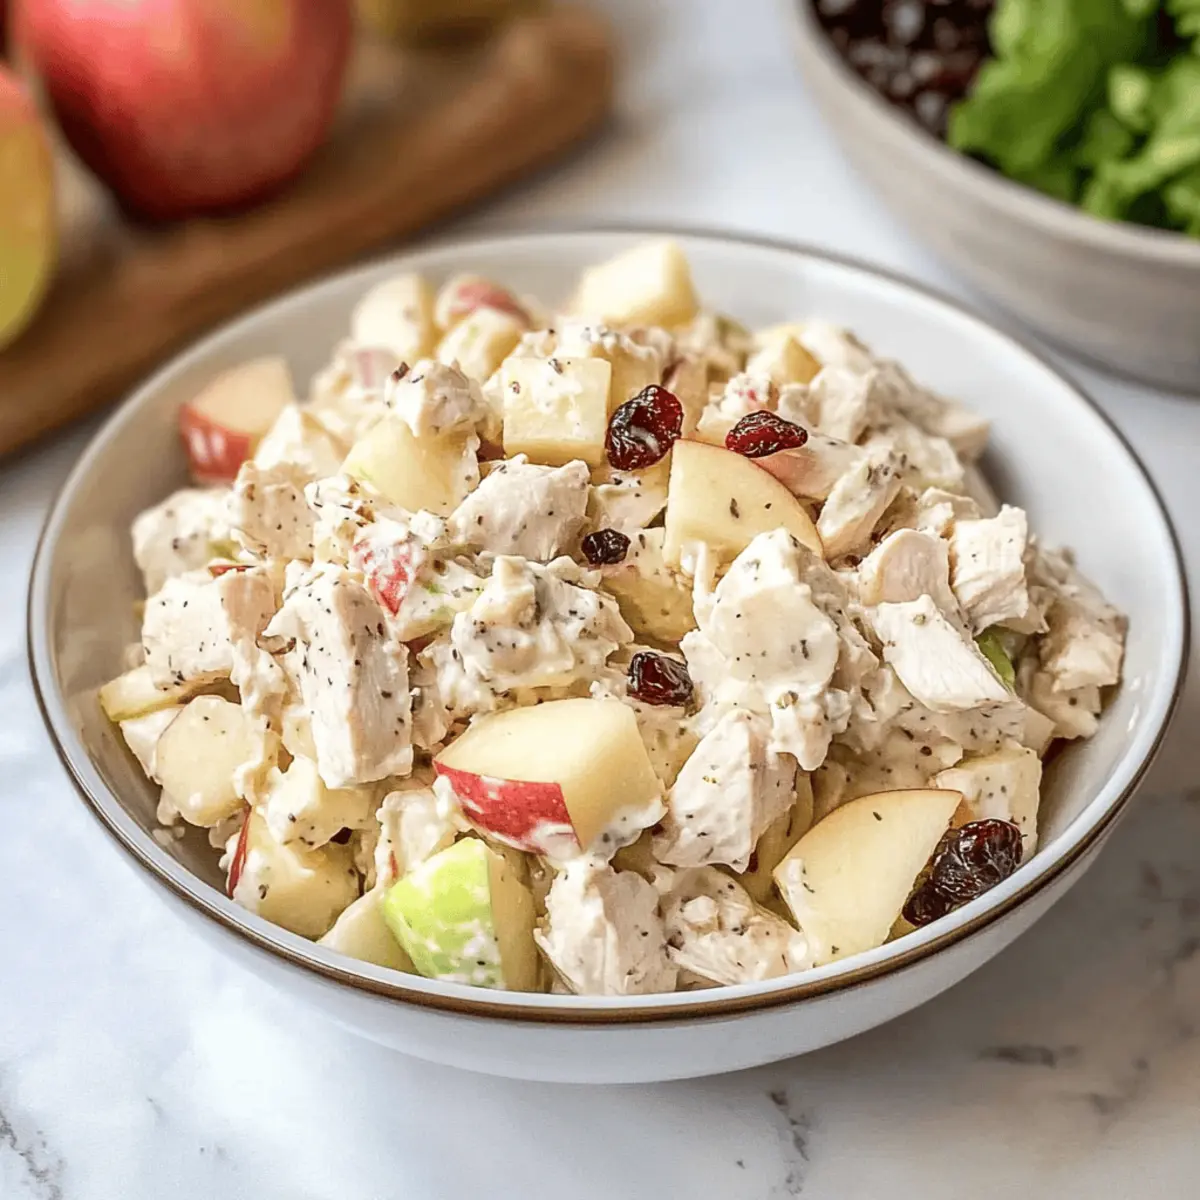
On a sweltering summer’s day, nothing hits quite like a refreshing meal straight from the fridge. My Chunky Chicken Salad with Apples is just the remedy; it marries tender chicken with sweet, crunch-worthy apples and chewy cranberries, all enveloped in a creamy yogurt dressing that feels indulgent but won’t weigh you down. With its quick prep time and budget-friendly ingredients, this dish lets you enjoy the ease of home-cooked goodness without sacrificing flavor or your wallet. Plus, it's easily adaptable—feel free to mix in your favorite nuts or fresh herbs! Would you prefer a satisfying dinner or a picnic-perfect side? Either way, keep scrolling to discover how to whip up this delightful summer staple.

Why is Chicken Salad with Apples a Must-Try?

Simplicity: This recipe is a breeze to prepare, making it perfect for busy weeknights or lazy weekends.

Versatile: Feel free to swap in your favorite nuts, fruits, or even add some diced celery for an extra crunch.

Light yet Satisfying: The combination of creamy yogurt dressing with the sweetness of apples and chewy cranberries ensures each bite is refreshing and fulfilling.

Budget-Friendly: With common ingredients like chicken and apples, you can whip up this delicious meal without breaking the bank.

Crowd-Pleaser: Whether served as a main dish or a side, this salad will impress family and friends at your next gathering. For more summer favorites, don't miss out on our delicious Spatchcock Chicken or a light Avocado Egg Salad.

Chicken Salad with Apples Ingredients

• All the essentials for a flavorful meal!

For the Chicken Salad

  • 3 cups chopped cooked chicken – Use rotisserie chicken for a faster prep or canned chicken if you're in a hurry.
  • 1 apple (1.5 cups chopped) – Adds a delightful sweetness and crunch; Fuji or Gala apples are great choices!
  • 1/4 cup red onion (diced) – Provides a sharp note; consider green onions if you prefer a milder flavor.
  • 1/4 cup dried cranberries – Infuses tartness and chewiness; golden raisins make a lovely alternative.

For the Dressing

  • 1/3 cup mayonnaise – Creates a creamy texture; light mayo can be used for a healthier twist.
  • 1/3 cup plain yogurt – Contributes tanginess; swap for Greek yogurt for additional thickness.
  • 1 Tbsp Dijon mustard – Adds a zesty kick to your dressing.
  • 1 Tbsp red wine vinegar – Balances the flavors with a touch of acidity.
  • 1/4 tsp salt – Enhances the overall taste.
  • 1/4 tsp freshly cracked black pepper – Adds a hint of warmth and depth.

Explore this Chicken Salad with Apples to make your summer meals bright and enjoyable!

Step‑by‑Step Instructions for Chicken Salad with Apples

Step 1: Chop the Ingredients
Begin by chopping 3 cups of cooked chicken into small, bite-sized pieces and place them in a large mixing bowl. Next, core and chop 1 apple into 1.5 cups of cubes, ensuring they’re about the same size as the chicken for even distribution. Finely dice 1/4 cup of red onion, and toss all the ingredients into the bowl, creating a colorful foundation for your Chicken Salad with Apples.

Step 2: Combine the Salad Ingredients
Add 1/4 cup of dried cranberries to the mixture for added tartness and chewiness. Gently fold all the ingredients together with a spatula until evenly mixed. This step should take about 1-2 minutes, allowing you to appreciate the vibrant colors and textures. Set the bowl aside while you prepare the dressing, ensuring the salad retains its fresh appeal.

Step 3: Prepare the Dressing
In a separate bowl, whisk together 1/3 cup of mayonnaise, 1/3 cup of plain yogurt, 1 tablespoon of Dijon mustard, and 1 tablespoon of red wine vinegar. Make sure the mixture is smooth and creamy, taking about 2 minutes. Add 1/4 teaspoon of salt and 1/4 teaspoon of freshly cracked black pepper to enhance the flavors. This light dressing will add a zesty touch to your Chicken Salad with Apples.

Step 4: Mix the Dressing with the Salad
Pour the creamy dressing over the chicken, apple, onion, and cranberry mixture. Use a spatula to gently fold the dressing into the salad, ensuring everything is well-coated. This should take about 2-3 minutes, allowing the ingredients to meld together perfectly. The vibrant combination will be both inviting and satisfying, making it hard to resist.

Step 5: Serve or Chill
Once everything is combined, you can serve the Chicken Salad with Apples immediately for a refreshing meal, or cover the bowl and refrigerate for up to 1 hour to enhance the flavors. If chilling, aim to serve within 3-4 days for optimal freshness. Either way, this delightful salad is ready to impress your family and friends!

Make Ahead Options

These Chicken Salad with Apples are fantastic for meal prep, allowing you to enjoy homemade goodness with minimal last-minute effort! You can chop the chicken, apple, and red onion up to 24 hours in advance, storing them separately in airtight containers to maintain freshness and prevent browning. Furthermore, the creamy dressing can be prepared and refrigerated for up to 3 days before serving. When you’re ready to enjoy your chicken salad, simply combine the prepped ingredients with dried cranberries and the dressing, mix well, and you're set for a quick, delicious meal that feels effortless. Trust me, your busy weeknights will thank you!

Chicken Salad with Apples Variations

Feel free to get creative and make this chicken salad your own! Each twist adds a delightful new dimension.

  • Nutty Crunch: Add chopped almonds or pecans for a satisfying crunch. Their toasty flavor will complement the sweet apples beautifully.
  • Celery Stalk: Incorporate diced celery for an extra layer of freshness, adding a lovely crunch to each bite. This simple enhancement can transform the texture, making it even more delightful.
  • Dried Fruit Swap: Substitute cranberries with Montmorency cherries or omitting dried fruit entirely gives a new flavor profile for those seeking something different. You might discover unexpected favorites!
  • Greek Twist: Use Greek yogurt instead of regular yogurt for a protein-packed dressing with an incredible thickness. It's a subtle change that can create a more robust foundation for the salad's flavors.
  • Herb Infusion: Toss in fresh herbs like dill or parsley into your salad for bursts of flavor that elevate this dish to new heights. The fresh aromas will dance through the ingredients, making your chicken salad sing!
  • Spice It Up: Add a pinch of cayenne pepper or paprika for a gentle kick, transforming the familiar into something exciting. A little heat can really enhance the overall experience!
  • Vegetable Medley: Mix in sweet bell pepper or pea pods for additional crunch and color. The blend of textures and flavors can create a beautiful, vibrant dish that is hard to resist.
  • Zesty Lemon: Squeeze fresh lemon juice over the salad just before serving for a bright, acidic finish that complements the creaminess of the dressing. This twist makes a delightful addition to summer gatherings.

Explore your creativity with these variations! If you’re celebrating summer with a sandwich or a vibrant salad on greens, don’t forget to check out our tasty Fried Shrimp Cabbage for more flavorful ideas!

Expert Tips for Chicken Salad with Apples

  • Cool Chicken First: Let your chicken cool completely before chopping to ensure a fresh, crisp salad without any mushiness.
  • Uniform Chopping: For the best texture, chop your chicken and apple into uniform, bite-sized pieces. This way, each bite is balanced.
  • Substitution Savvy: Feel free to switch up ingredients! Try using walnuts instead of cranberries, or Greek yogurt for extra protein in your Chicken Salad with Apples.
  • Mix Freshly: Prepare the salad no more than a few hours ahead for peak freshness and vibrant flavors—avoid making it too far in advance!
  • Serve Creatively: Enjoy your Chicken Salad with Apples in various ways—serve it on a bed of greens, in a sandwich, or even in hollowed-out tomatoes.
  • Taste and Adjust: Always taste your dressing before mixing; you can add more salt, vinegar, or sweetness to match your flavor preferences.

How to Store and Freeze Chicken Salad with Apples

Fridge: Keep your chicken salad in an airtight container for up to 3-4 days. The flavors will meld beautifully, making it even more delicious!

Room Temperature: It's best to avoid leaving chicken salad out for more than 2 hours to prevent spoilage. Always refrigerate promptly.

Make-Ahead: Prepare the salad a few hours in advance for convenience. Just keep it covered in the fridge until you're ready to serve.

Freezer: Unfortunately, this chicken salad with apples does not freeze well due to the texture of the apples and dressing, which can become watery when thawed.

What to Serve with Chunky Chicken Salad with Apples?

On a hot summer day, it's wonderful to complement your chicken salad with refreshing sides that truly enhance the meal experience.

  • Crispy Green Salad: A light green salad with an assortment of fresh greens and a zesty vinaigrette can elevate the overall meal with vibrant flavors. Toss in some cucumber and cherry tomatoes for extra crunch and color.

  • Avocado Toast: This creamy, buttery option balances the crisp, tart notes of chicken salad perfectly. Top toasted bread with smashed avocado, red pepper flakes, and a sprinkle of sea salt for a delicious bite.

  • Flaky Croissants: Light and buttery, flaky croissants provide a satisfying contrast to the salad. They serve as the perfect vessel for a chicken salad sandwich or simply enjoyed on the side.

  • Fruit Skewers: Bright, colorful fruit skewers add refreshing sweetness and a fun twist to your meal. Combine strawberries, melon, and pineapple to bring a refreshing burst of flavor to the table.

  • Quinoa Pilaf: A nutty, warm quinoa pilaf loaded with fresh herbs and seasonal vegetables complements the savoriness of the chicken salad. The nutty flavor and fluffy texture make this pairing a nourishing delight.

  • Iced Herbal Tea: Quench your thirst with a chilled glass of herbal iced tea. Its subtle sweetness and refreshing notes pair beautifully with the tart flavors of the salad while keeping you cool.

  • Lemon Sorbet: For dessert, consider serving a light lemon sorbet. This refreshing treat is the perfect way to cleanse your palate while echoing the bright lemony notes in the dressing.

Indulging in these delightful pairings turns your simple meal into a full-fledged treat, making each bite memorable!

Chicken Salad with Apples Recipe FAQs

What type of chicken should I use for this salad?
Absolutely! You can use any kind of cooked chicken, such as rotisserie chicken for convenience, or canned chicken if you're in a pinch. Just make sure it’s properly cooked and chopped into bite-sized pieces for the best texture and flavor.

How do I store leftover chicken salad?
Store your chicken salad with apples in an airtight container in the fridge for up to 3-4 days. Make sure it's tightly sealed to keep it fresh and protect it from other odors in the fridge. It’s great to enjoy as leftovers!

Can I freeze chicken salad with apples?
Unfortunately, freezing this chicken salad is not recommended. The texture of the apples and the creamy dressing can become watery once thawed, which may affect the overall quality. It’s best enjoyed fresh!

How can I tell if my apples are ripe for the salad?
Look for apples that are firm with a vibrant color—no dark spots or bruises! I recommend using Fuji or Gala apples for their sweetness and crunch, but Honeycrisp can also work wonderfully. Ripe apples will add that delightful freshness to your dish!

Is this chicken salad suitable for my gluten-free diet?
Yes, indeed! This chicken salad with apples is gluten-free as long as you use gluten-free mayonnaise and ensure any additional ingredients you use are gluten-free as well. Always check labels to be certain.

What can I add if I want a little more crunch in my salad?
The more the merrier! Consider adding chopped nuts like walnuts or pecans for that satisfying crunch. You can also incorporate some diced celery or even sunflower seeds to elevate the texture and flavor further. Enjoy experimenting!

Chicken Salad with Apples

Refreshing Chicken Salad with Apples for a Summer Treat

Enjoy a delightful Chicken Salad with Apples, perfect for summer, combining tender chicken, sweet apples, and a creamy yogurt dressing.
Print Recipe Pin Recipe
Prep Time 15 minutes mins
Total Time 15 minutes mins
Servings: 4 servings
Course: Salads
Cuisine: American
Calories: 320
Ingredients Equipment Method Nutrition Notes

Ingredients
  

For the Chicken Salad
  • 3 cups chopped cooked chicken Use rotisserie chicken for faster prep
  • 1 apple chopped Fuji or Gala apples are great choices
  • 1/4 cup red onion diced; consider green onions for a milder flavor
  • 1/4 cup dried cranberries golden raisins make a lovely alternative
For the Dressing
  • 1/3 cup mayonnaise light mayo can be used for a healthier twist
  • 1/3 cup plain yogurt swap for Greek yogurt for additional thickness
  • 1 Tbsp Dijon mustard adds a zesty kick
  • 1 Tbsp red wine vinegar balances flavors with acidity
  • 1/4 tsp salt enhances overall taste
  • 1/4 tsp freshly cracked black pepper adds warmth and depth

Equipment

  • Mixing Bowl

Method
 

Step-by-Step Instructions
  1. Chop the chicken, apple, and red onion, and place them in a large mixing bowl.
  2. Add dried cranberries to the mixture and gently fold all ingredients together.
  3. In a separate bowl, whisk together mayonnaise, yogurt, mustard, red wine vinegar, salt, and pepper.
  4. Pour the dressing over the salad and fold gently until well-coated.
  5. Serve immediately or chill in the fridge for up to 1 hour before serving.

Nutrition

Serving: 1cupCalories: 320kcalCarbohydrates: 20gProtein: 25gFat: 16gSaturated Fat: 3gPolyunsaturated Fat: 1gMonounsaturated Fat: 12gCholesterol: 70mgSodium: 300mgPotassium: 450mgFiber: 3gSugar: 6gVitamin A: 300IUVitamin C: 10mgCalcium: 40mgIron: 1mg

Notes

For optimal texture, let chicken cool before chopping and serve within 3-4 days for freshness.

Tried this recipe?

Let us know how it was!

Crispy Buffalo Tofu with Caesar Salad for Quick Delight

August 14, 2025 by Grace Snow Leave a Comment

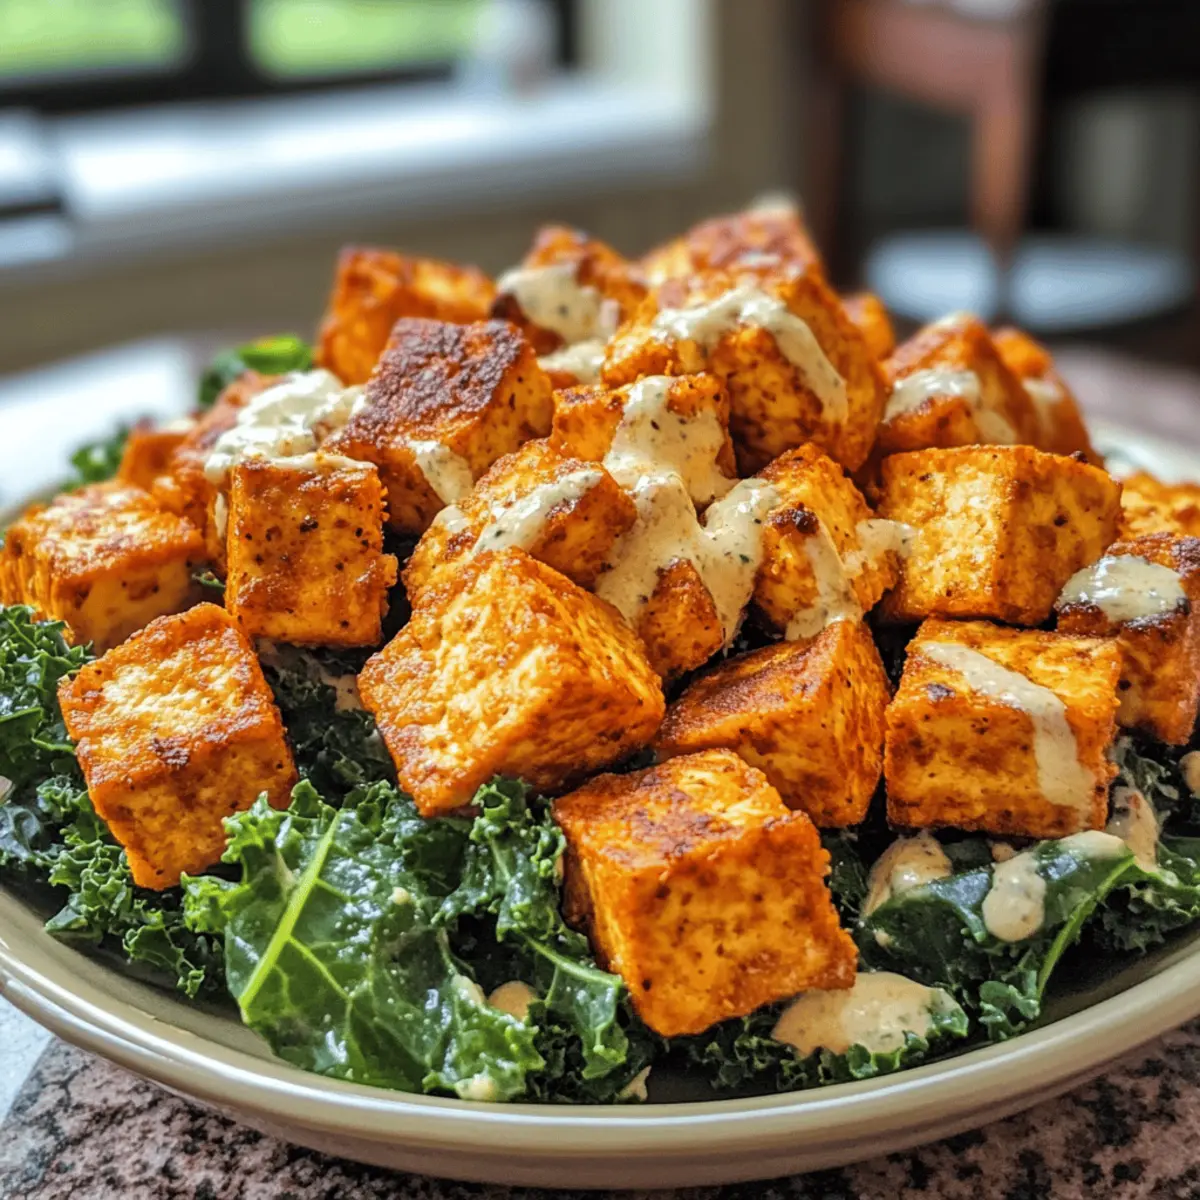
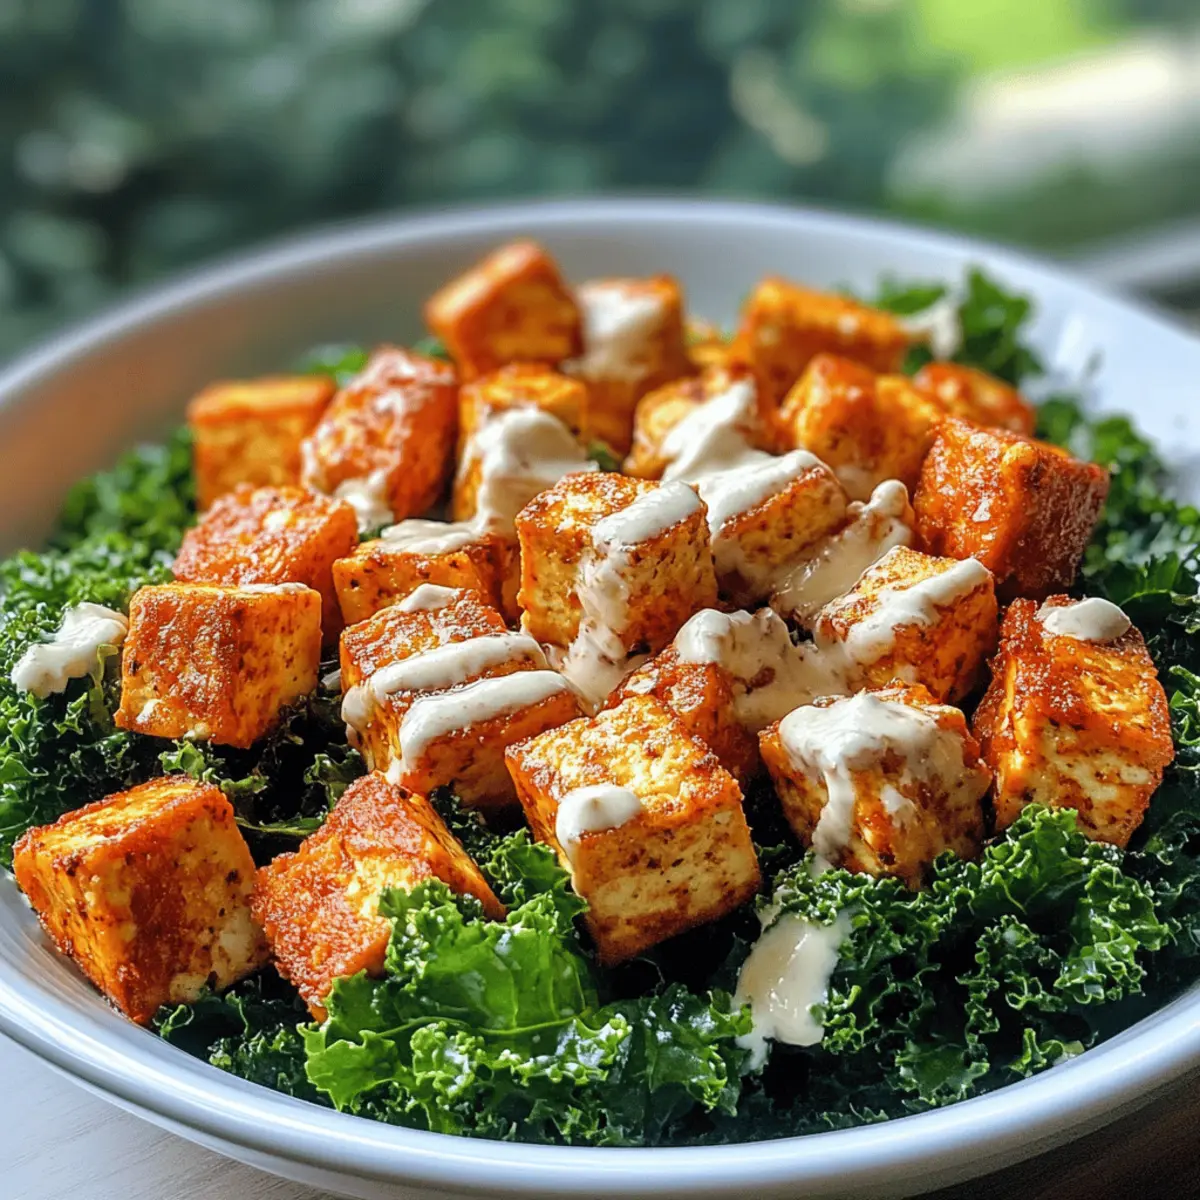
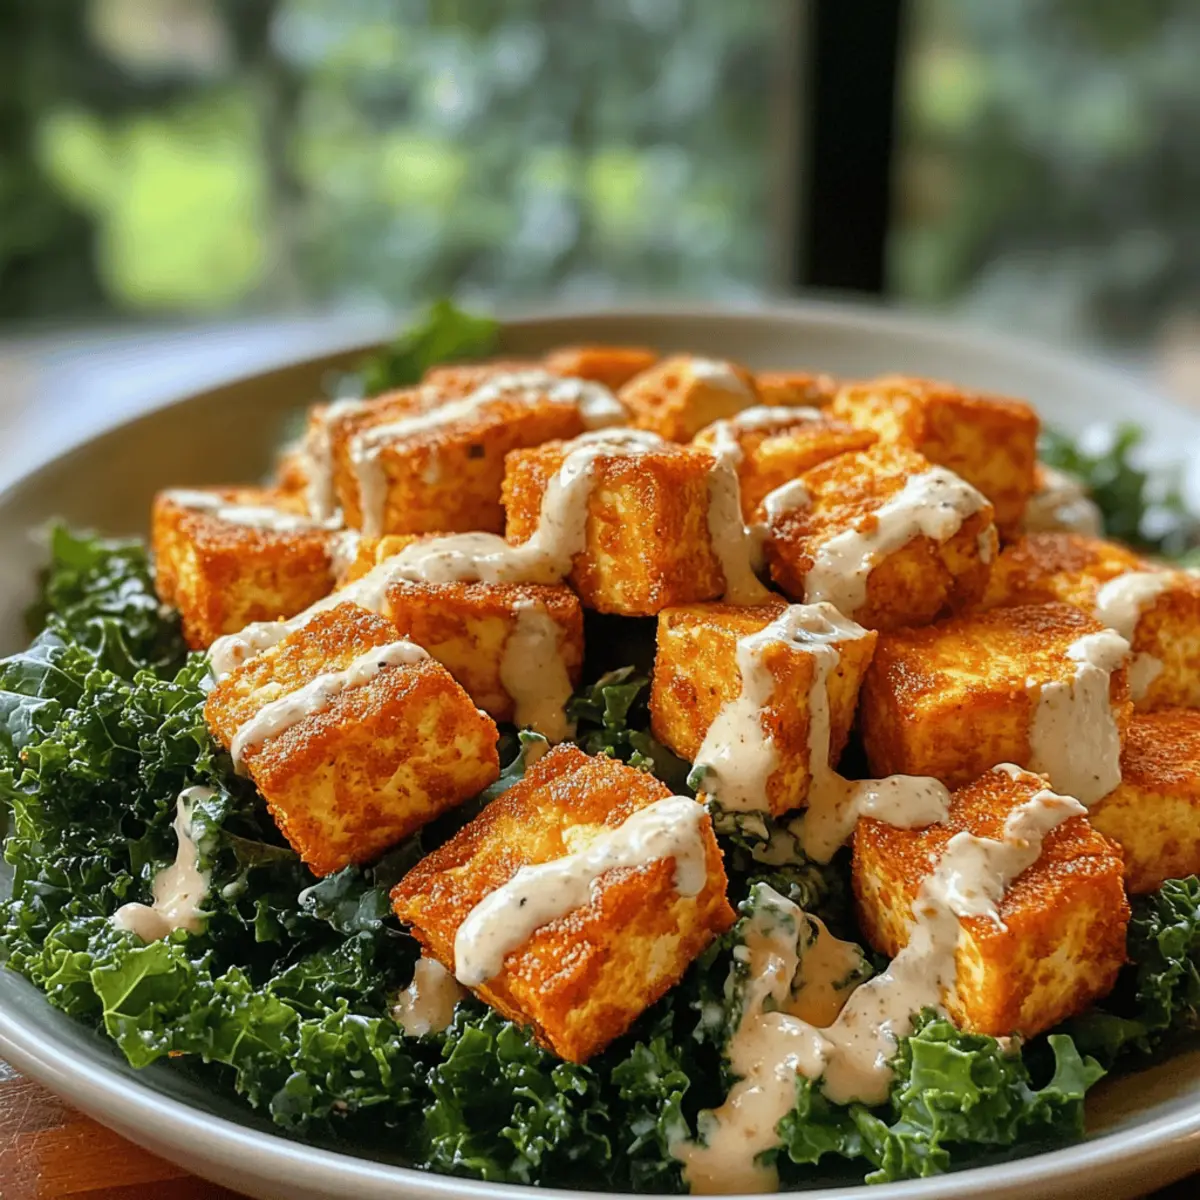
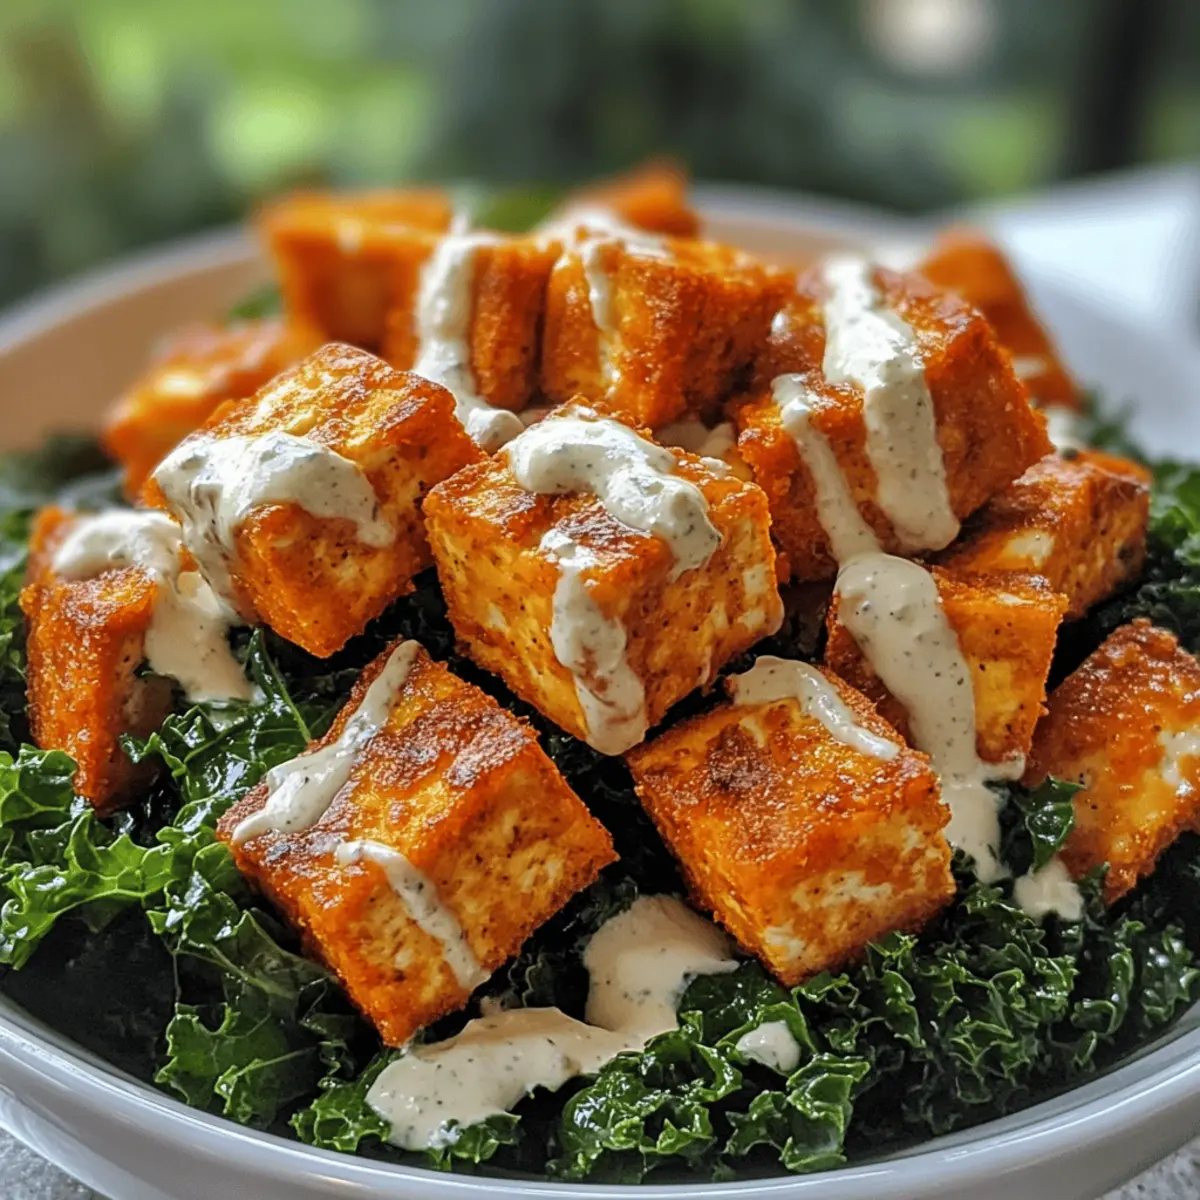
Have you ever faced the dilemma of wanting something indulgent while still eating healthy? Well, here’s a delightful solution: Crispy Buffalo Tofu with Caesar Salad! This quick-prepare dish transforms humble tofu into something crispy and flavorful, all while being completely vegan. Air-fried to golden perfection, this buffalo tofu pairs beautifully with a crunchy kale Caesar salad, creating a meal that feels both satisfying and nourishing. In just 17 minutes, you can enjoy a hearty, plant-based experience that will not only fill you up but also make your taste buds dance with joy. Ready to discover how to whip up this healthy twist on a classic? Let’s dive into the recipe!

Why is crispy buffalo tofu a must-try?

Flavor Explosion: The bold taste of buffalo sauce meets the creamy crunch of Caesar dressing, creating a mouthwatering experience.

Quick Prep: Ready in just 17 minutes, this recipe is perfect for busy weeknights—ideal for anyone craving a speedy yet delicious meal!

Versatile Delight: Pair the crispy tofu with various greens like kale or romaine and let your creativity shine, making it your own.

Crispy Texture: Air-frying gives the tofu a satisfying crunch that mimics traditional buffalo wings, which is sure to impress even meat lovers!

Guilt-Free Satisfaction: This vegan dish satisfies your comfort food cravings without sacrificing health, making it a great addition to any dinner table.

If you're looking for another fantastic recipe, try combining flavors with this Avocado Egg Salad for a delightful side or sandwich option!

Buffalo Tofu with Caesar Salad Ingredients

For the Tofu
• Extra-firm tofu – Ensures the best texture; press it well to remove moisture for a crisp bite.
• Buffalo sauce – The star of this dish, providing that tangy spice that makes it a true Buffalo delight!

For the Kale Caesar Salad
• Kale – A nutrient-rich base; can be swapped for romaine or mixed greens if desired.
• Caesar dressing – Adds creaminess; choose a vegan option to keep the dish entirely plant-based.
• Croutons – Optional crunch; consider crispy chickpeas or nuts as a gluten-free alternative.

Feel free to get creative with these ingredients, and enjoy the process of making this delightful Buffalo Tofu with Caesar Salad!

Step‑by‑Step Instructions for Crispy Buffalo Tofu with Caesar Salad

Step 1: Prepare the Tofu
Begin by draining the extra-firm tofu to remove excess moisture, then wrap it in a clean kitchen towel and press it for about 15 minutes. Once pressed, cut the tofu into bite-sized cubes, ensuring they are uniform for even cooking. This step is crucial for achieving that desired crispy texture in your Buffalo Tofu.

Step 2: Coat the Tofu
In a large bowl, toss the tofu cubes with an enticing mixture of buffalo sauce and melted vegan butter until they are thoroughly coated. Ensure every piece is generously coated for maximum flavor. Set the bowl aside to let it marinate briefly, allowing those bold buffalo flavors to soak in while you prepare the air fryer.

Step 3: Air Fry the Tofu
Preheat your air fryer to 400°F (200°C) while you prepare your tofu. Once ready, arrange the buffalo-coated tofu cubes in a single layer in the air fryer basket, giving them space to crisp up beautifully. Cook for about 12 minutes, shaking the basket halfway through to ensure even cooking and golden-brown perfection in your crispy Buffalo Tofu.

Step 4: Assemble the Salad
While the tofu is air frying, grab a large bowl and add in your chopped kale. Drizzle a generous amount of Caesar dressing over the kale and toss well to ensure each leaf is coated. The creamy dressing will cling to the kale, providing a delightful contrast to the heat of the buffalo tofu and offering a fresh crunch in your Caesar Salad.

Step 5: Top the Salad
Once the buffalo tofu is perfectly air-fried and crispy, remove it from the air fryer and let it cool for a minute. Carefully place the crispy buffalo tofu on top of the dressed kale. If you’d like, add croutons for an extra crunch. This final touch will elevate your dish, making it a luscious Buffalo Tofu with Caesar Salad that’s ready to devour!

How to Store and Freeze Buffalo Tofu with Caesar Salad

Fridge: Store leftover buffalo tofu in an airtight container for up to 3 days. This keeps it fresh while minimizing moisture to maintain some crunch.

Freezer: For longer storage, freeze buffalo tofu in a single layer on a baking sheet until solid, then transfer to a freezer-safe bag. It can last up to 3 months.

Reheating: To restore the crispy texture when reheating, place frozen or refrigerated buffalo tofu in the air fryer at 400°F for about 5-7 minutes. Enjoy with your Caesar salad!

Meal Prep Tip: Prepare the buffalo tofu ahead of time for a quick weeknight meal. Just store it and dress your kale salad fresh right before serving.

Expert Tips for Crispy Buffalo Tofu

  • Press Tofu Well: Make sure to press the tofu thoroughly to eliminate moisture, ensuring perfect crispiness when air-fried. Excess water can prevent the desired texture.

  • Enhance Flavor: For an extra flavor kick, consider mixing spices like garlic powder or smoked paprika into the buffalo sauce before coating the tofu.

  • Air Frying Time: Keep an eye on the cooking time; depending on your air fryer model, slight adjustments may be needed to achieve golden brown crispy buffalo tofu.

  • Salad Greens Swap: If you prefer, feel free to substitute the kale with romaine or mixed greens for a different texture and taste in your Caesar salad.

  • Storage Tip: Leftover buffalo tofu can be kept in an airtight container for up to 3 days. To retain crispiness, reheat it in the air fryer instead of the microwave.

Variations for Buffalo Tofu with Caesar Salad

Don't be shy—experiment with your flavors to create a version of this dish that sings to your taste buds!

  • BBQ Twist: Swap buffalo sauce for your favorite BBQ sauce for a smoky, sweeter flavor profile. Perfect for summer vibes!
  • Creamy Avocado: Add sliced avocado on top of your salad for an extra layer of creaminess that complements the spiciness of the tofu. It’s a match made in heaven!
  • Nutritional Boost: Toss in some cooked quinoa or lentils to the salad for an added protein punch and delightful chew. You’ll be surprised by how satisfying this little twist can be.
  • Greens Variation: Switch kale for romaine or a mixed green salad base if you prefer something lighter. Try adding arugula for a peppery contrast!
  • Spicy Kick: If you love heat, sprinkle some crushed red pepper flakes over the tofu or salad to ignite those taste buds even further. Bring the heat to every bite!
  • Extra Crunch: Instead of croutons, use roasted chickpeas or nuts for a gluten-free option that delivers both crunch and flavor.
  • Dressing Diversions: Try different dressings like tahini or a zesty lemon vinaigrette for an exciting twist that brightens your salad. Pair it with the flavor of your house dressing!
  • Mediterranean Style: Incorporate ingredients like olives, sun-dried tomatoes, or feta cheese for a Mediterranean flair that transforms your salad into a whole new experience.

Feel free to indulge in these creative adaptations, and for an additional tasty dish, check out these lovely recipes for Smoky Sweet Potatoes or a delightful twist on pasta with Tagliatelle Asparagus Peas. Happy cooking!

What to Serve with Crispy Buffalo Tofu with Caesar Salad?

Transform your delightful Buffalo Tofu with Caesar Salad into a full meal experience with these vibrant pairings.

  • Creamy Mashed Potatoes:
    The buttery smoothness of mashed potatoes perfectly contrasts the crispy tofu, adding a comforting element to your plate.

  • Sweet Potato Fries:
    These sweet, tender fries complement the spicy tofu while adding a satisfying crunch and a hint of sweetness.

  • Roasted Garlic Brussels Sprouts:
    Their earthy flavor and crispy edges will elevate your meal while balancing the richness of the Caesar dressing.

  • Zesty Quinoa Salad:
    A light and refreshing option, packed with citrus and herbs that nicely contrast the bold flavors of the buffalo tofu.

  • Crisp Cucumber Salad:
    The cool, refreshing crunch of cucumbers offers a light break from the dish's heat, enhancing its overall texture experience.

  • Minty Lemonade:
    A cool glass of mint-infused lemonade not only refreshes but also complements the spicy notes of your buffalo tofu beautifully.

This delicious medley enriches your dining experience, turning your crispy buffalo tofu with Caesar salad into a memorable meal!

Make Ahead Options

These Crispy Buffalo Tofu with Caesar Salad are an excellent choice for meal prep! You can prepare the tofu by pressing and cutting it into cubes up to 24 hours in advance, storing it in an airtight container in the fridge. The buffalo sauce can also be mixed with the tofu ahead of time to allow for more flavor infusion. Assemble the kale Caesar salad—tossing the kale with the dressing—up to 3 days ahead; just keep the components separate until you’re ready to serve to maintain freshness. When ready to enjoy, air fry the marinated tofu for about 12 minutes and then top it over the kale salad for a quick and delightful meal that tastes just as delicious as when freshly made!

Crispy Buffalo Tofu with Caesar Salad Recipe FAQs

What type of tofu is best for this recipe?
Absolutely! For the best texture, use extra-firm tofu. It holds up well during cooking and becomes crispy on the outside while remaining tender inside. If you only have firm tofu, that'll work too, but you may need to press it longer to remove excess moisture.

How should I store the leftover crispy buffalo tofu?
You can store leftover buffalo tofu in an airtight container in the refrigerator for up to 3 days. Just make sure to minimize moisture to preserve its crispy texture. A trick I often recommend is to place a paper towel in the container to absorb extra moisture!

Can I freeze buffalo tofu for later use?
Yes, you can! To freeze, lay the buffalo tofu on a baking sheet in a single layer until solid, then transfer the pieces to a freezer-safe bag. This method helps prevent them from sticking together and they can last up to 3 months in the freezer. When you’re ready to enjoy, just air fry them directly from frozen for about 5-7 minutes at 400°F for that crispy texture.

What should I do if the tofu isn't getting crispy?
If your tofu is not getting crispy, it's likely due to moisture trapped inside. Make sure to press it well before cutting. If you’ve already done this, increasing the air frying time by a minute or two can help too. Also, ensure you're arranging the tofu in a single layer in the air fryer to allow for optimal air circulation.

Is this dish suitable for vegan diets?
Very! This crispy buffalo tofu with Caesar salad is completely vegan as long as you use a vegan Caesar dressing. If you're concerned about any toppings or additives, double-check the label or consider making your own dressing to ensure it meets dietary preferences.

Buffalo Tofu with Caesar Salad

Crispy Buffalo Tofu with Caesar Salad for Quick Delight

A quick and indulgent dish featuring crispy buffalo tofu and a refreshing Caesar salad.
Print Recipe Pin Recipe
Prep Time 5 minutes mins
Cook Time 12 minutes mins
Marinating Time 2 minutes mins
Total Time 17 minutes mins
Servings: 2 servings
Course: Salads
Cuisine: Vegan
Calories: 350
Ingredients Equipment Method Nutrition Notes

Ingredients
  

Buffalo Tofu
  • 1 block Extra-firm tofu Press well to remove moisture
  • 1/2 cup Buffalo sauce The star of the dish
Caesar Salad
  • 2 cups Kale Can be substituted with romaine
  • 1/4 cup Caesar dressing Use a vegan option
  • 1 cup Croutons Optional; consider gluten-free alternatives

Equipment

  • Air fryer

Method
 

Preparation
  1. Drain the extra-firm tofu to remove excess moisture, then wrap it in a clean kitchen towel and press it for about 15 minutes.
  2. Cut the tofu into bite-sized cubes.
  3. In a bowl, toss the tofu cubes with buffalo sauce and melted vegan butter until thoroughly coated.
  4. Preheat the air fryer to 400°F (200°C). Arrange the tofu in a single layer in the air fryer basket and cook for about 12 minutes, shaking halfway through.
  5. In a large bowl, add chopped kale, drizzle with Caesar dressing, and toss well to coat.
  6. Once the tofu is air-fried, carefully place it on top of the dressed kale and add croutons if desired.

Nutrition

Serving: 1servingCalories: 350kcalCarbohydrates: 25gProtein: 14gFat: 22gSaturated Fat: 4gPolyunsaturated Fat: 8gMonounsaturated Fat: 10gSodium: 800mgPotassium: 600mgFiber: 5gSugar: 2gVitamin A: 2500IUVitamin C: 60mgCalcium: 150mgIron: 3mg

Notes

Pressing tofu eliminates moisture for better crispiness. Leftover tofu can be stored in an airtight container for up to 3 days.

Tried this recipe?

Let us know how it was!

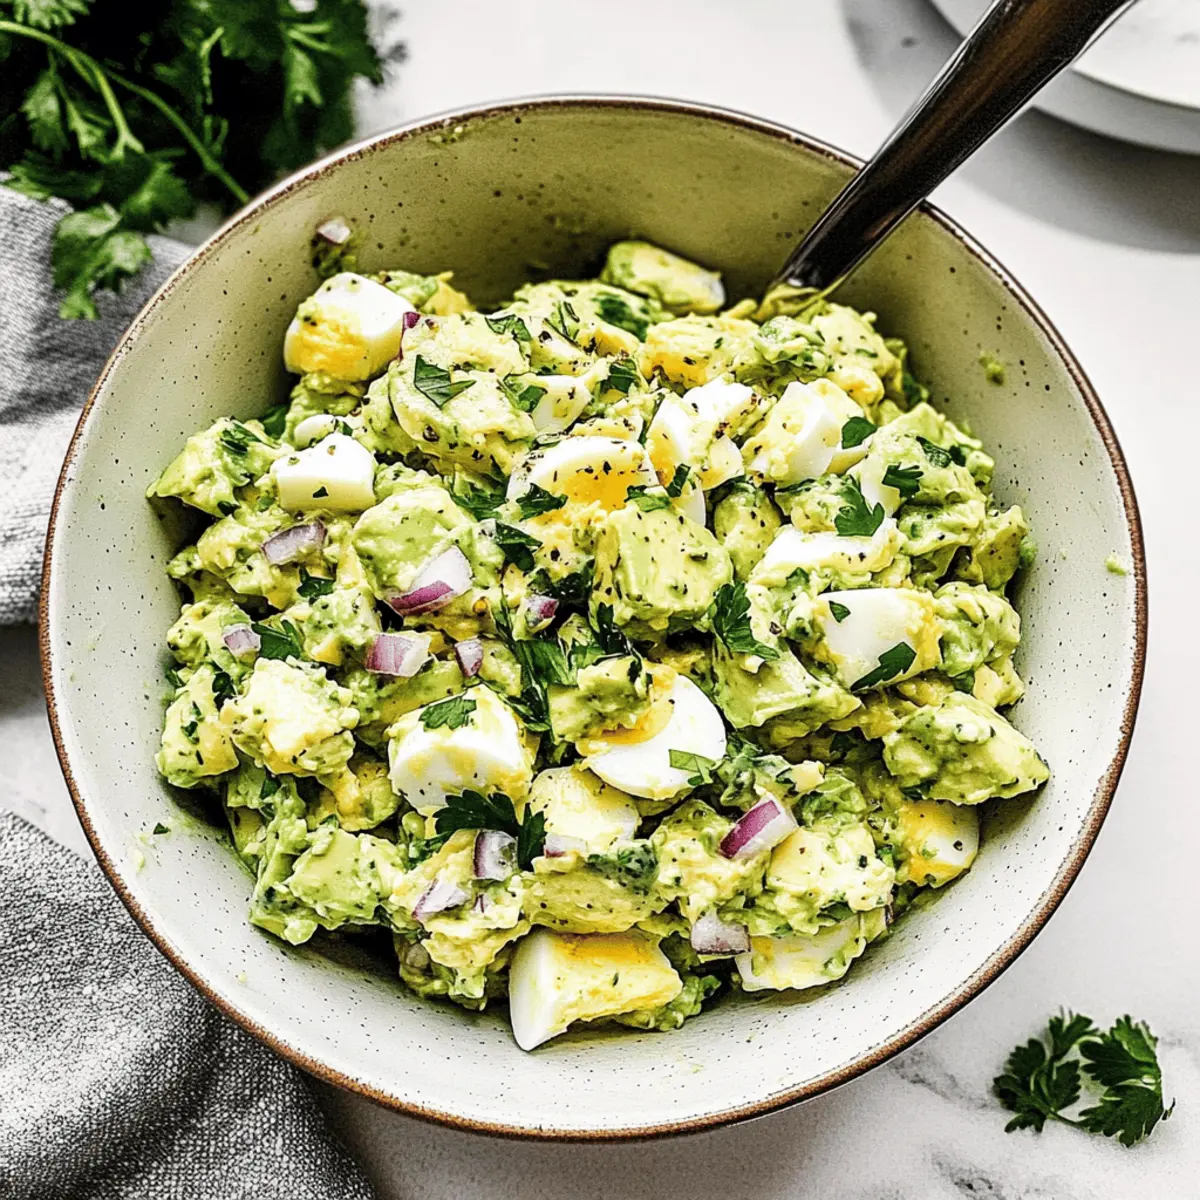
Creamy Avocado Egg Salad that's Healthy and Satisfying

August 12, 2025 by Grace Snow Leave a Comment

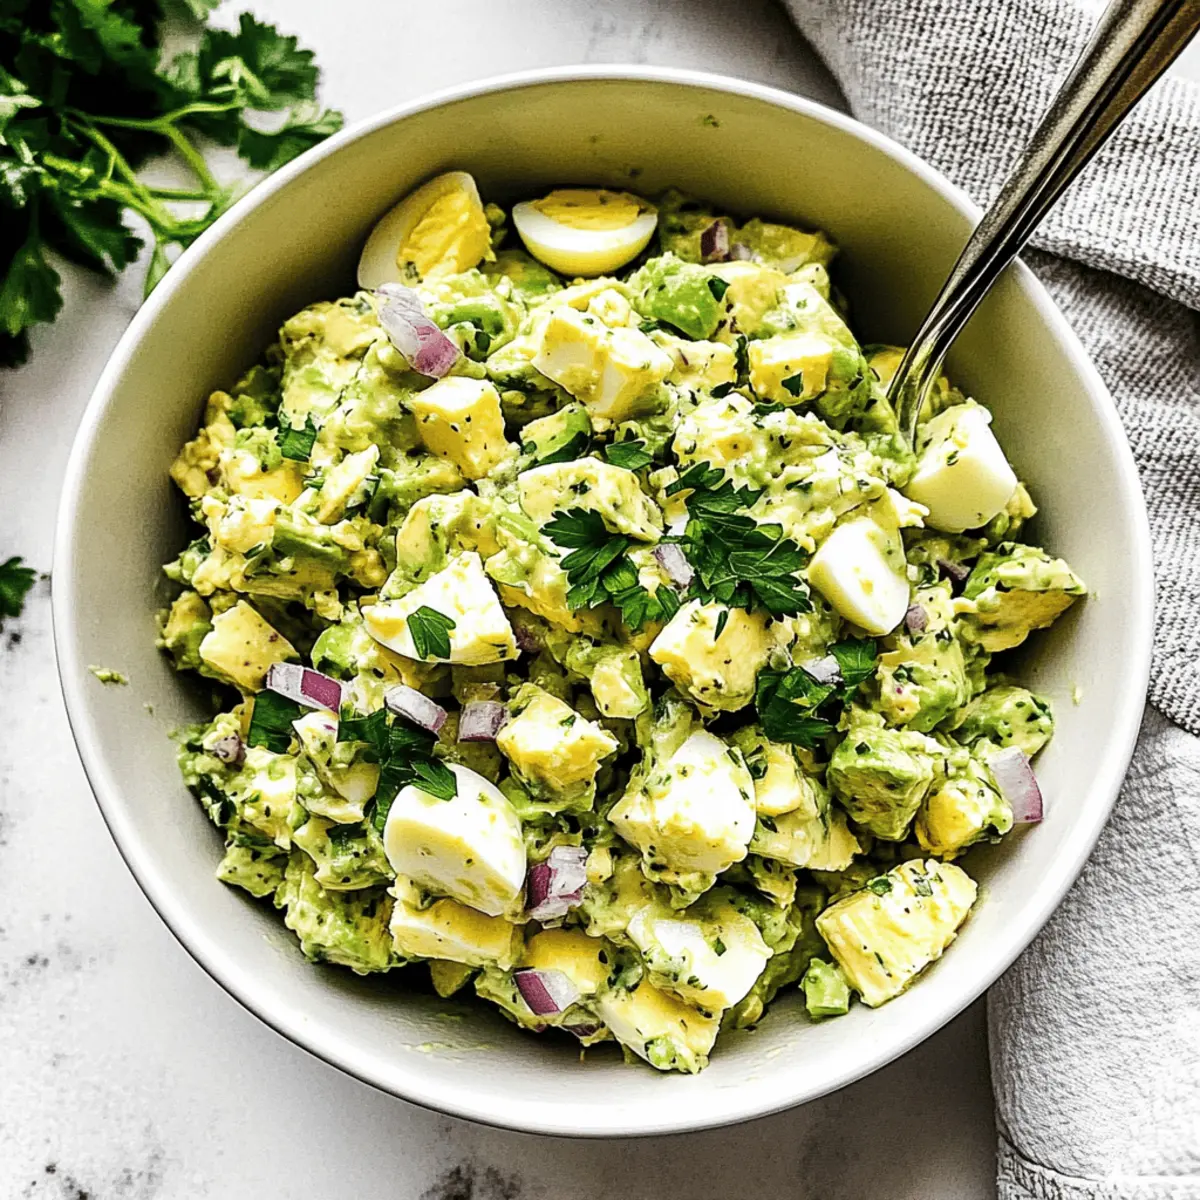
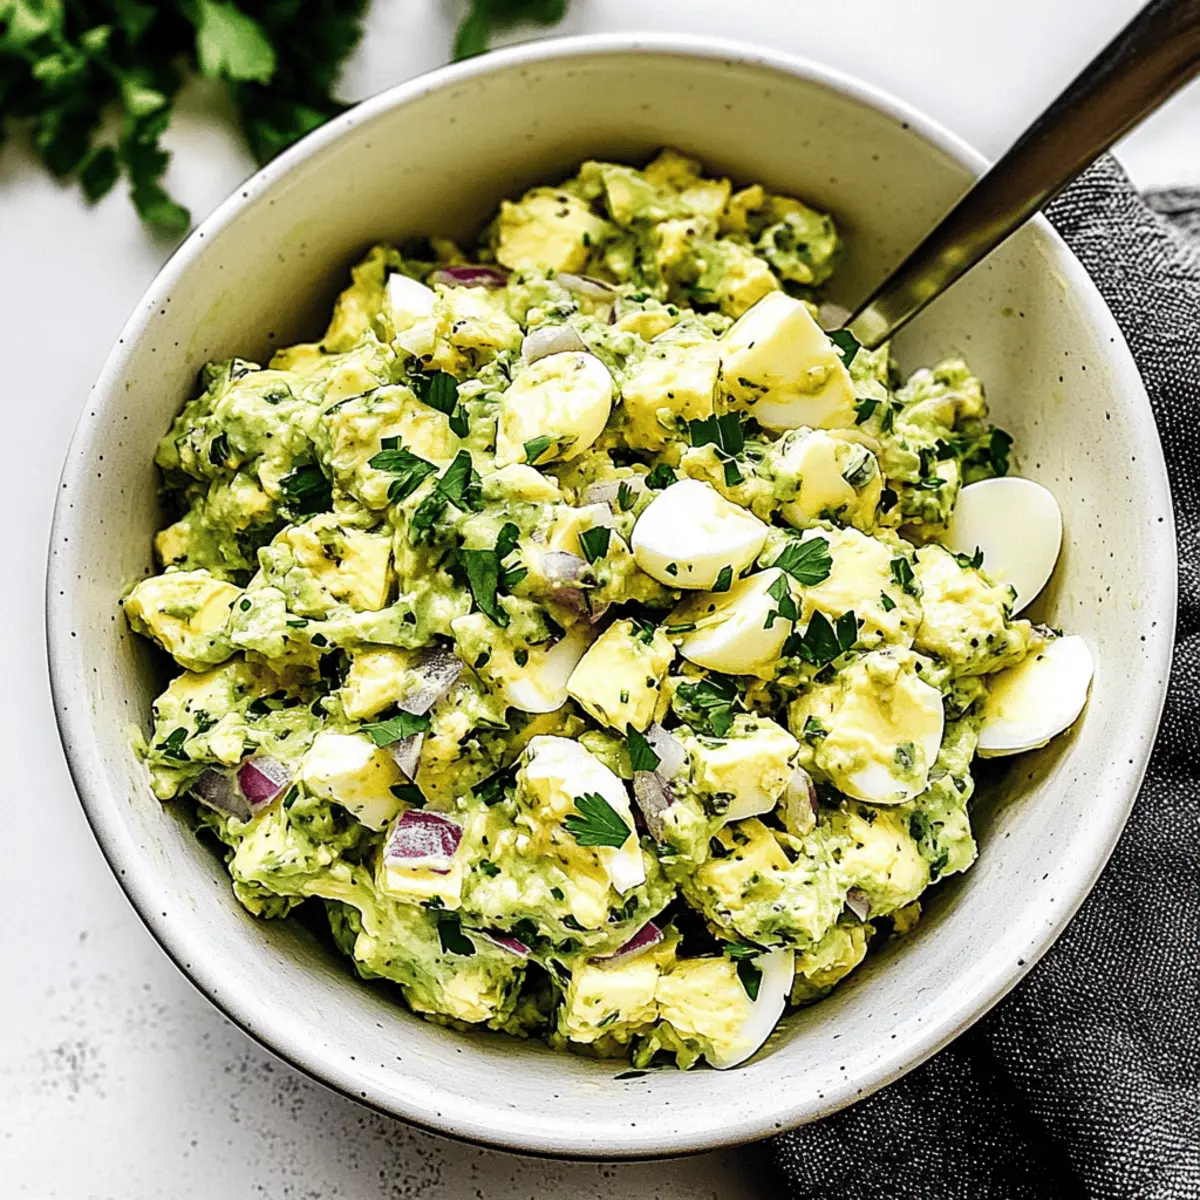
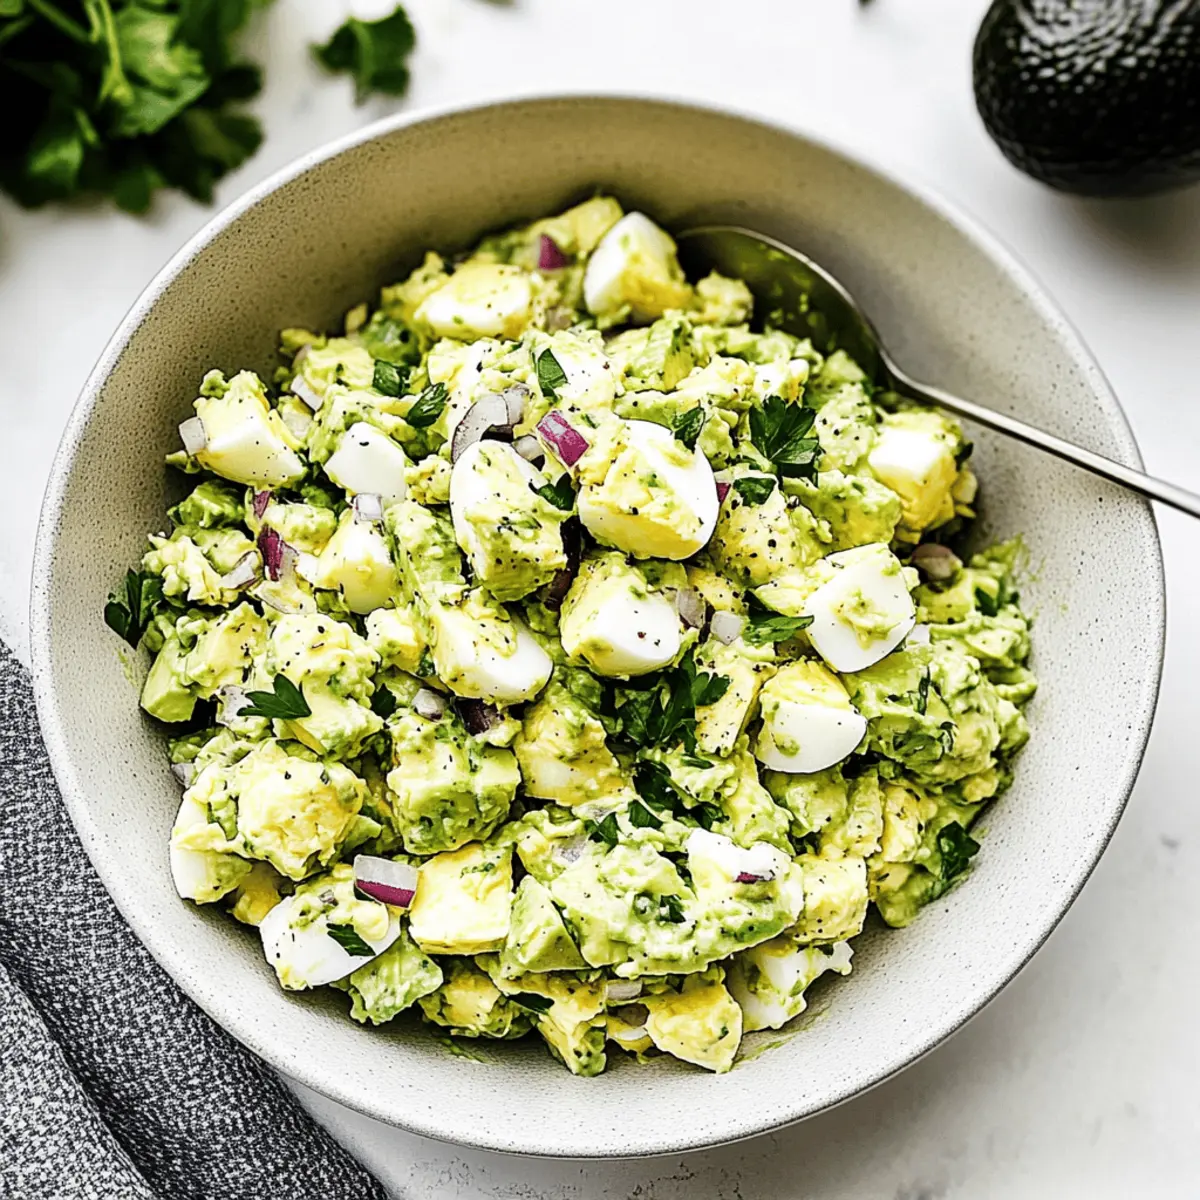
The rich, buttery flavor of ripe avocados always transports me to sun-drenched gardens, where fresh ingredients take center stage. Today, we're diving into a healthier twist on a beloved classic: Creamy Avocado Egg Salad. This vibrant dish seamlessly combines wholesome hard-boiled eggs and creamy avocados, offering a delightful blend of textures and tastes that's not only nutritious but also incredibly satisfying. Perfect for those busy weekdays, this recipe comes together in minutes and makes for a versatile meal, whether you're serving it on crunchy toast, crisp lettuce wraps, or as a refreshing main salad. If you're on a quest for quick, healthy meals that don't compromise on flavor, this Avocado Egg Salad might just become your new favorite. What will you pair it with first—toast or lettuce wraps?

Why is Avocado Egg Salad So Popular?

Creamy, Rich Flavor: The luscious avocado elevates traditional egg salad, replacing mayo with a healthier option.

Quick and Easy: This recipe comes together in just minutes, making it ideal for busy weekdays or last-minute meals.

Nutritious Choice: Packed with proteins and healthy fats, it fits perfectly into keto, low-carb, and gluten-free diets.

Versatile Serving Options: Whether you're enjoying it on whole grain toast, in refreshing lettuce wraps, or as a salad, it adapts beautifully to your needs.

Crowd-Pleaser: Perfect for picnics or gatherings, everyone will appreciate this delightful twist on a classic.

This Avocado Egg Salad is not just delicious; it’s a vibrant addition to your meal prep. If you're looking for a robust breakfast idea, check out Breakfast Egg Muffins, or for a unique breakfast experience, try Turkish Eggs Discover.

Avocado Egg Salad Ingredients

• Dive into the essential components that make this dish a creamy delight!

For the Salad

  • Avocado – Provides creaminess and healthy fats; opt for ripe avocados for the best texture.
  • Hard-Boiled Eggs – Primary protein source and structure of the salad; ensure they're cooked well for optimal results.
  • Red Onion – Adds a sharp, savory flavor; substitute with green onions for a milder taste.
  • Greek Yogurt – Binds the salad while enhancing creaminess; a lighter alternative to traditional mayonnaise.
  • Chives – Adds a subtle onion flavor and freshness; substitute with scallions if chives are unavailable.
  • Fresh Parsley – Contributes color and herbal notes; swap for cilantro for a zesty twist.
  • Lemon Juice – Brightens flavors and prevents avocado oxidation; vinegar can be used as an alternative.
  • Kosher Salt and Ground Black Pepper – To taste, enhancing the overall flavor of the Avocado Egg Salad.

For Serving (Optional)

  • Lettuce Leaves – For serving, providing crunch and a fresh taste in your meal prep or quick lunches.

Step‑by‑Step Instructions for Creamy Avocado Egg Salad

Step 1: Prepare the Ingredients
Begin by gathering your ingredients. Hard boil 4 large eggs in a pot of boiling water for 9-12 minutes, then plunge them into an ice bath for 5 minutes to cool before peeling. While the eggs are cooling, slice 1 ripe avocado in half, remove the pit, and scoop the flesh into a mixing bowl. Add the juice of half a lemon to prevent browning.

Step 2: Chop the Eggs and Vegetables
Once the eggs are cooled and peeled, chop them into bite-sized pieces using a sharp chef’s knife. Finely dice about ¼ cup of red onion and chop 2 tablespoons of fresh parsley and 1 tablespoon of chives. Incorporate the diced eggs, red onion, parsley, and chives into the bowl with the avocado, creating a vibrant medley of colors and textures.

Step 3: Mix the Salad
To enhance the creamy texture of the Avocado Egg Salad, add 3 tablespoons of Greek yogurt or mayonnaise to the bowl. Season with salt and freshly ground black pepper to taste. Gently stir the mixture with a fork or spatula, being careful not to over-mash the avocado. Aim for a well-combined yet chunky salad, allowing the ingredients to shine.

Step 4: Adjust the Flavors
Taste the salad and adjust the flavors as needed. If you prefer more acidity, feel free to add another squeeze of lemon juice or a splash of vinegar for extra brightness. Mix again to ensure any additional ingredients are evenly distributed, creating a harmonious blend of flavors in your Avocado Egg Salad.

Step 5: Serve the Salad
Now that your Creamy Avocado Egg Salad is ready, it's time to serve! You can enjoy it immediately on toasted whole grain bread, or stuff it into crisp lettuce leaves for a fresh wrap. Alternatively, serve it over a bed of mixed greens for a nutritious salad. Garnish with extra chives or parsley if desired and enjoy your delicious creation!

How to Store and Freeze Avocado Egg Salad

  • Fridge: Store the Avocado Egg Salad in an airtight container for up to 2 days. Be mindful that avocado can brown quickly, so consume it as soon as possible for the best flavor.
  • Room Temperature: Avoid leaving the salad out for more than 2 hours, especially on warm days, to prevent spoilage.
  • Freezer: Freezing is not recommended for this salad, as the texture of avocados will change significantly upon thawing.
  • Reheating: This dish is best served cold, so no reheating is necessary. Just give it a gentle stir before serving if it has been refrigerated.

Make Ahead Options

These Creamy Avocado Egg Salad bites are perfect for meal prep enthusiasts! You can prepare the hard-boiled eggs and chop the vegetables (red onion, chives, and parsley) up to 3 days in advance, storing them in airtight containers in the refrigerator. For the avocado, it's best to mix it fresh with lemon juice right before serving to maintain that vibrant color and creamy texture. When you’re ready to enjoy your salad, simply combine the prepped ingredients with the avocado and Greek yogurt or mayonnaise for a quick, delicious meal. This way, you’ll have a wholesome, satisfying dish ready in minutes, perfect for those busy weeknights!

Avocado Egg Salad Variations & Substitutions

Discover how fun and easy it is to make this mouthwatering Avocado Egg Salad your own!

  • Crunchy Celery: Add finely diced celery for an extra crunch in every bite. It perfectly complements the creaminess of the avocado.

  • Bell Pepper Boost: Mix in diced bell peppers for a splash of color and a sweet, crisp flavor that brightens the dish.

  • Greek Yogurt Twist: Swap the mayonnaise for Greek yogurt to lighten up the salad even more while adding a tangy twist.

  • Spice It Up: Sprinkle in a pinch of smoked paprika or cayenne pepper for a subtle heat that elevates your salad experience.

  • Herb Swaps: Try replacing parsley with fresh basil or cilantro for a refreshing change that offers a whole new flavor profile.

  • Nutritional Yeast Addition: For a cheesy flavor without the dairy, stir in a tablespoon of nutritional yeast, perfect for those who are plant-based.

  • Healthy Avocado Conversion: Use smashed avocado in place of the diced for a more cohesive, creamy texture that's equally satisfying.

  • Garnish Options: Top off your salad with sliced radishes or cherry tomatoes for added crunch and a pop of color alongside your lettuce wraps or toast.

Feel free to get creative! Pair this versatile salad with other delightful options like Breakfast Egg Muffins or explore unique flavors with Turkish Eggs Discover. The possibilities are endless!

What to Serve with Creamy Avocado Egg Salad

Elevate your dining experience with delightful pairings that enhance the creamy, vibrant flavors of this wholesome salad.

  • Tartly Sliced Tomatoes: Fresh, juicy tomatoes add a burst of acidity to balance the creaminess, making each bite refreshingly bright.
  • Crunchy Whole Grain Toast: The toasty, hearty texture of whole grain bread complements the smooth avocado, creating a satisfying contrast. Serve it open-faced for a delightful brunch option.
  • Crisp Cucumber Sticks: These crunchy, hydrating bites provide a refreshing, cool element that beautifully contrasts the richness of the egg salad.
  • Mixed Green Salad: A simple green salad with a light vinaigrette rounds out the meal, providing additional freshness and texture to your plate.
  • Savory Sweet Potato Fries: Baked sweet potato fries offer a delicious, sweet crunch that pairs perfectly with the richness of the avocado egg salad.
  • Lemonade Spritzer: Quench your thirst with a refreshing lemonade spritzer, its zesty notes enhancing the flavors of the salad while adding a pop of brightness.
  • Bubbly Sparkling Water: Pair with a splash of citrus for a fun, fizzy drink that cleanses the palate between bites. This lighter option ensures the focus remains on the salad’s delicious flavors.
  • Chocolate Avocado Mousse: Finish with a luscious dessert that echoes the avocado theme, offering a creamy yet guilt-free indulgence everyone will love!

Expert Tips for Avocado Egg Salad

  • Choose Ripe Avocados: Ensure your avocados are ripe for the best creamy texture. Firm avocados can lead to a chunky salad.

  • Perfectly Boil Eggs: Follow a reliable method for hard-boiling eggs; overcooking can create a green ring around the yolk, affecting flavor.

  • Gentle Mixing: When combining ingredients, gently fold them together to maintain chunks of avocado and avoid a mushy salad.

  • Freshness Matters: Serve the Avocado Egg Salad right away for the best flavor. If storing, keep it airtight to minimize oxidation, but consume within 1-2 days.

  • Experiment with Herbs: Add fresh herbs like dill or basil for a unique twist. This can elevate your avocado egg salad and personalize the dish to your liking.

Avocado Egg Salad Recipe FAQs

What type of avocado should I use for my Avocado Egg Salad?
Opt for ripe avocados when making your salad, as they provide the best creamy texture. Look for avocados that yield slightly to gentle pressure, indicating they are ready to be mashed and mixed. Avoid those with dark spots all over or that feel overly soft, as they may be overripe.

How should I store leftover Avocado Egg Salad, and how long does it last?
Store any leftover Avocado Egg Salad in an airtight container in the refrigerator for up to 2 days. Due to the avocado's tendency to brown quickly, it's best to consume it as soon as possible for maximum freshness and flavor. Cover the top with plastic wrap pressed directly against the salad to minimize air contact and oxidation.

Can I freeze Avocado Egg Salad?
Freezing is not recommended for this salad as the texture of avocados changes significantly once thawed, becoming mushy and unappetizing. If you want to prepare ahead, make the salad without the avocado and eggs, then add them fresh when you're ready to serve.

What if my eggs are overcooked?
If your hard-boiled eggs come out overcooked, resulting in a green ring around the yolk, the eggs will still be safe to eat. However, to prevent the green tint, cut down on cooking time. Aim for 9-12 minutes of boiling and immediately cool them in an ice bath for 5 minutes post-cooking. This method helps achieve perfectly cooked eggs.

Are there any dietary considerations I should keep in mind?
Absolutely! If you're catering to those with specific dietary needs, this Avocado Egg Salad is gluten-free and suitable for keto diets, making it a healthy choice for many. However, be cautious with ingredients like Greek yogurt or mayonnaise if anyone has dairy allergies. For a dairy-free version, consider using a plant-based yogurt alternative.

How can I enhance the flavor of my Avocado Egg Salad?
To elevate the flavor, experiment with herbs and spices! Adding fresh dill or a sprinkle of paprika can introduce delightful notes to the salad. You might also consider incorporating diced celery or bell peppers for an added crunch and flavor burst. Taste as you mix and adjust the seasonings to create a blend that suits your palate.

Avocado Egg Salad

Creamy Avocado Egg Salad that's Healthy and Satisfying

This Avocado Egg Salad is a creamy, nutritious twist on a classic, perfect for quick meals.
Print Recipe Pin Recipe
Prep Time 15 minutes mins
Cook Time 12 minutes mins
Cooling Time 5 minutes mins
Total Time 32 minutes mins
Servings: 4 servings
Course: Salads
Cuisine: American
Calories: 250
Ingredients Equipment Method Nutrition Notes

Ingredients
  

For the Salad
  • 2 large ripe avocados Provides creaminess and healthy fats.
  • 4 large hard-boiled eggs Primary protein source.
  • 0.25 cup red onion Adds sharp flavor.
  • 3 tablespoons Greek yogurt A lighter alternative to mayo.
  • 1 tablespoon chives Adds onion flavor.
  • 2 tablespoons fresh parsley Contributes color and herb notes.
  • 0.5 tablespoon lemon juice Prevents oxidation.
  • to taste kosher salt
  • to taste ground black pepper
For Serving (Optional)
  • 4 leaves lettuce For serving.

Equipment

  • pot
  • Mixing Bowl
  • Chef’s Knife
  • Fork or Spatula

Method
 

Step-by-Step Instructions
  1. Begin by gathering your ingredients. Hard boil the eggs in a pot of boiling water for 9-12 minutes.
  2. While the eggs are cooling, slice the avocado in half, remove the pit, and scoop the flesh into a mixing bowl. Add lemon juice.
  3. Chop the cooled eggs and dice the red onion, parsley, and chives. Combine with avocado.
  4. Add Greek yogurt, salt, and pepper to the mixture and stir gently.
  5. Taste and adjust flavors with lemon juice or vinegar as needed. Serve on toast or lettuce wraps.

Nutrition

Serving: 1servingCalories: 250kcalCarbohydrates: 15gProtein: 10gFat: 20gSaturated Fat: 3gPolyunsaturated Fat: 2gMonounsaturated Fat: 15gCholesterol: 200mgSodium: 150mgPotassium: 500mgFiber: 5gSugar: 2gVitamin A: 500IUVitamin C: 10mgCalcium: 50mgIron: 1mg

Notes

Serve immediately for the best flavor. If storing, keep it airtight and consume within 1-2 days.

Tried this recipe?

Let us know how it was!

Hello world!

August 1, 2025 by admin 1 Comment

Welcome to WordPress. This is your first post. Edit or delete it, then start writing!

frzfzrrzberb

  • « Previous Page
  • 1
  • …
  • 19
  • 20
  • 21

Welcome!

Hi, I’m Grace, a Sydney-based home cook with a passion for bold flavors and trending ingredients. Whether you’re a busy beginner or a seasoned foodie, you’ll find dishes here that are fresh, fun, and full of flavor.

More about me

Popular Recipes

  • Honey Sriracha Salmon Bowls
    Delicious Honey Sriracha Salmon Bowls for Quick Dinners
  • Air Fryer Apple Pie Taquitos
    Crispy Air Fryer Apple Pie Taquitos for a Sweet Treat
  • Crispy Parmesan Crusted Cod
    Crispy Parmesan Crusted Cod: A Healthy Flavor Explosion
  • Air Fryer French Toast Bites
    Delicious Air Fryer French Toast Bites for Busy Mornings

Footer

↑ back to top

About

  • Privacy Policy
  • Disclaimer
  • Terms & Conditions

Newsletter

  • Sign Up! for emails and updates

Contact

  • About me
  • Contact me

Copyright © 2025 TastyTrendIngredients