tastytrendingredients

  • Home
  • Recipes
    • Appetizers
    • Breakfast
    • Dessert
    • Dinner
    • Drinks
    • Salads
    • Snacks
    • Soups
  • About me
  • Contact
menu icon
go to homepage
  • Home
  • Recipes
    • Appetizers
    • Breakfast
    • Dessert
    • Dinner
    • Drinks
    • Salads
    • Snacks
    • Soups
  • About me
  • Contact
search icon
Homepage link
  • Home
  • Recipes
    • Appetizers
    • Breakfast
    • Dessert
    • Dinner
    • Drinks
    • Salads
    • Snacks
    • Soups
  • About me
  • Contact
×

Fresh and Zesty Easy Chimichurri Sauce in Just Minutes

June 19, 2026 by Grace Snow Leave a Comment

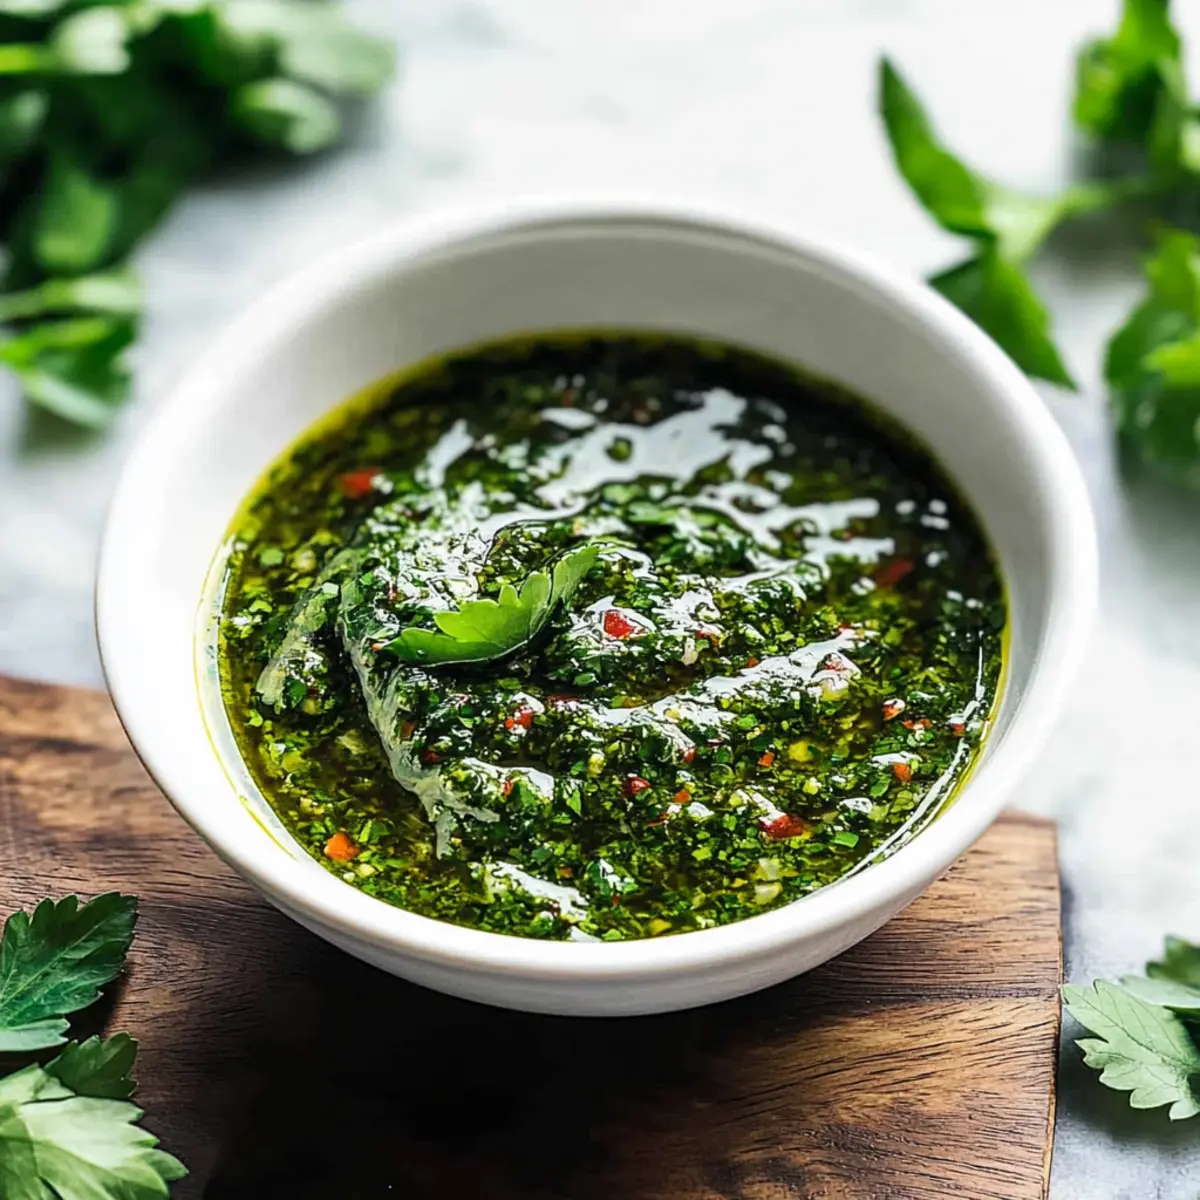
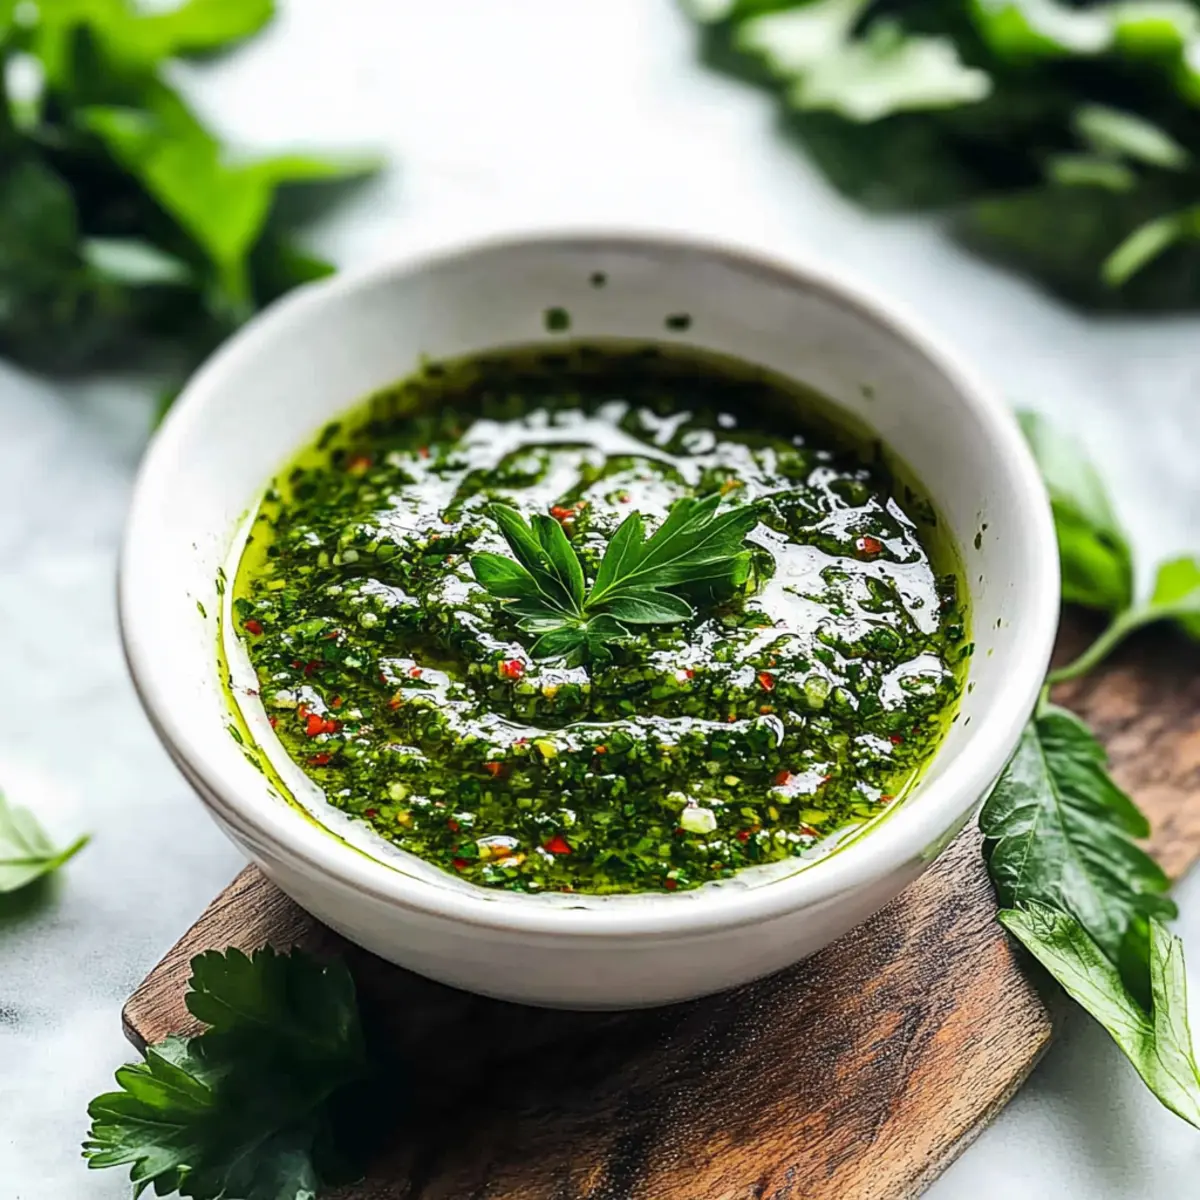
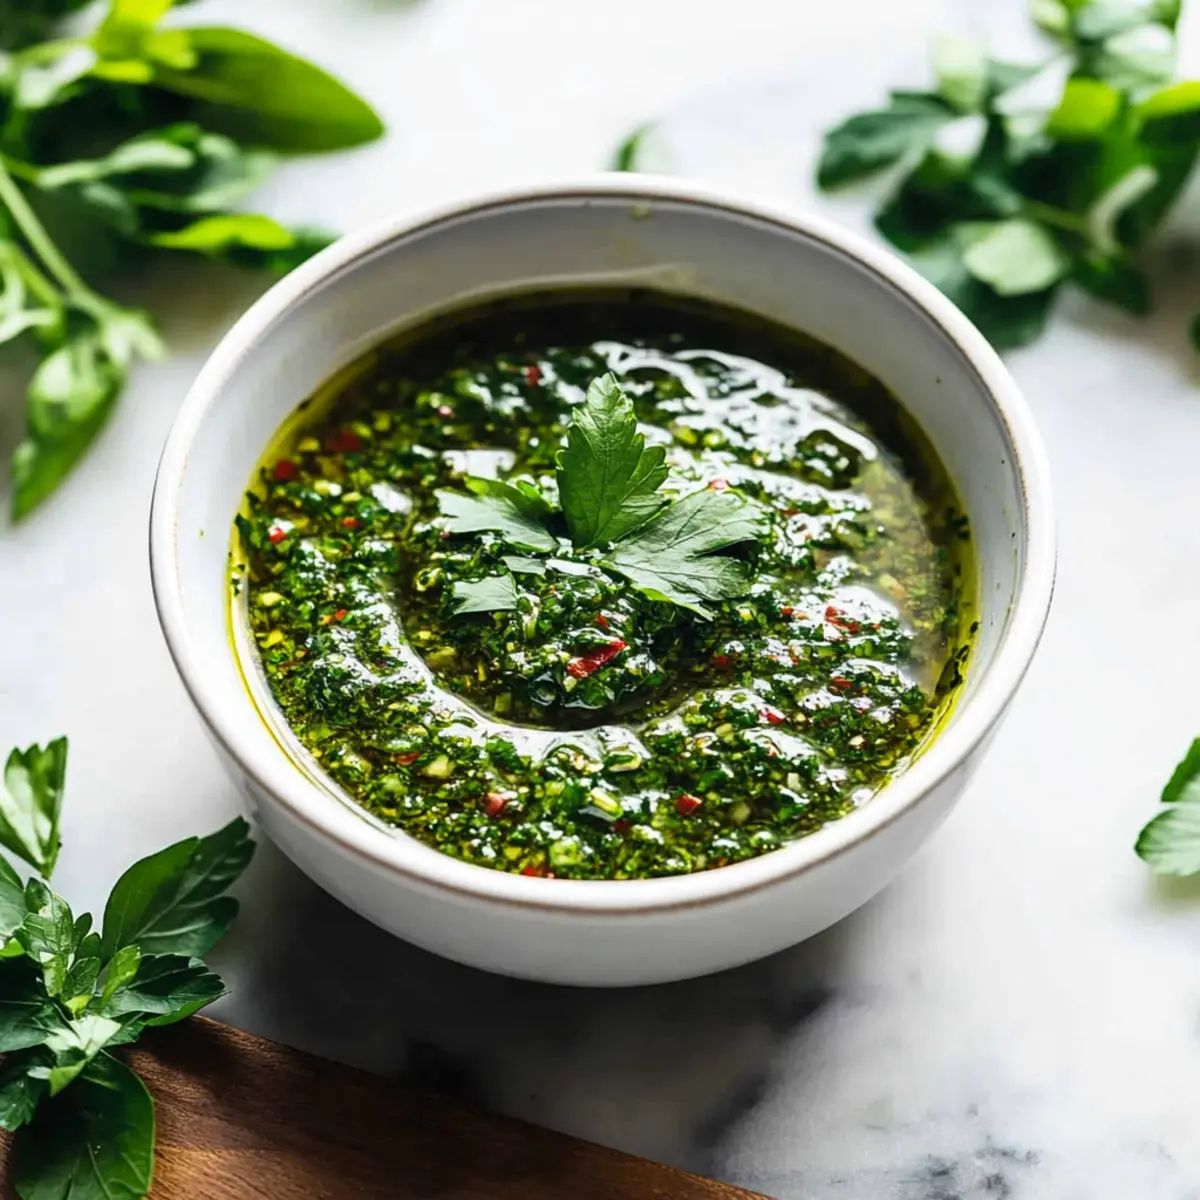
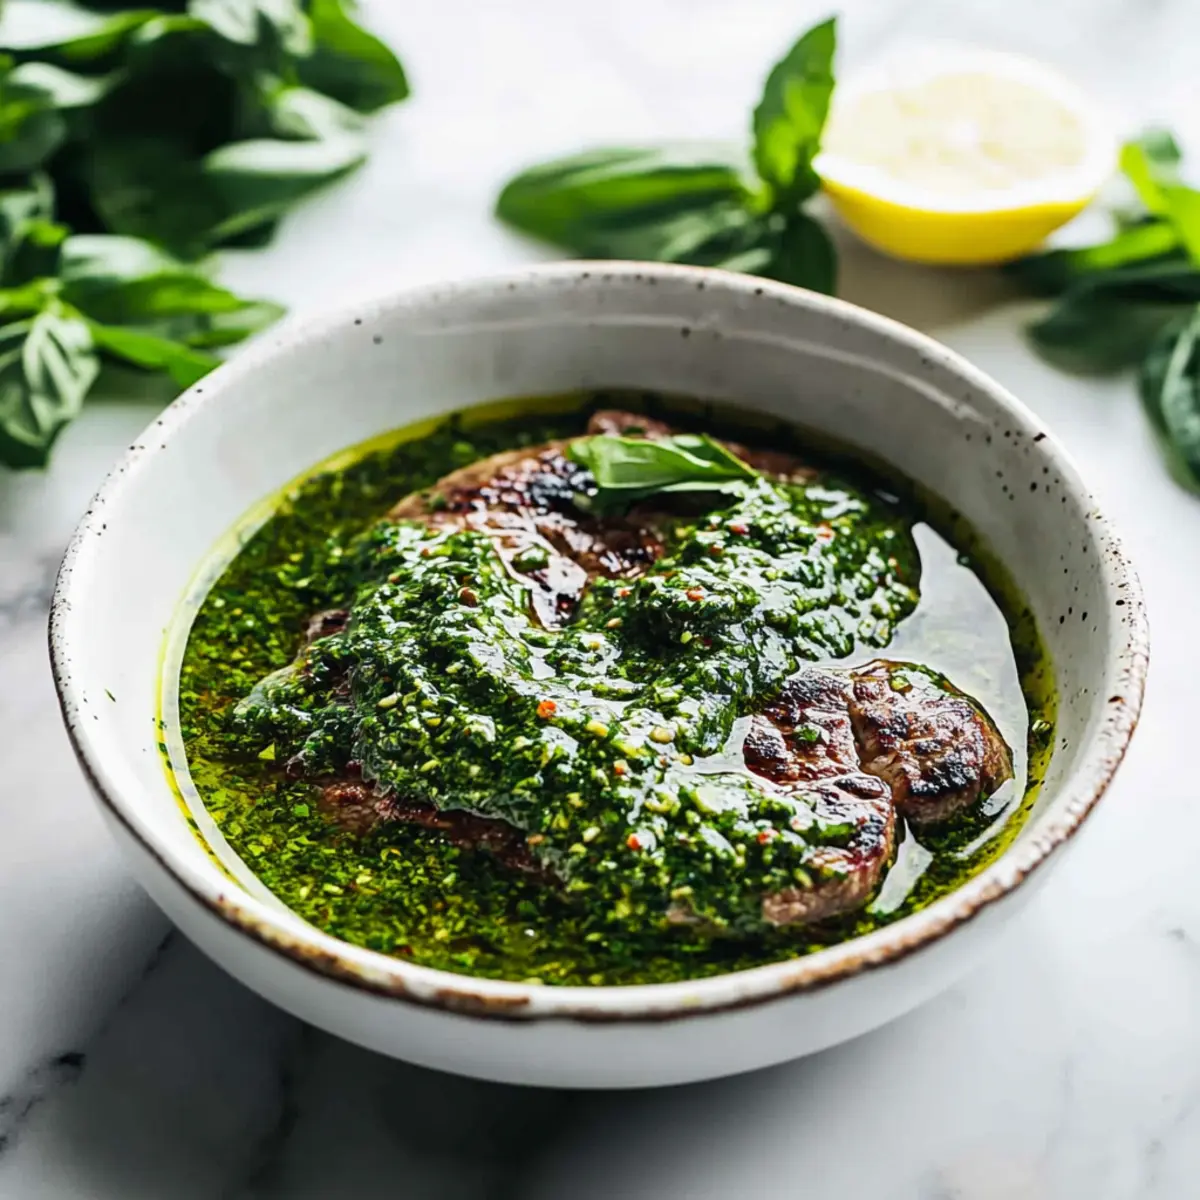
As I stood in my kitchen, the aroma of freshly chopped herbs filled the air, transporting me to sunlit terraces and sizzling summer barbecues. This Quick and Easy Chimichurri Sauce was just the ticket to elevate any meal—whether drizzled over grilled chicken or brightening up roasted vegetables. In just five minutes, you can whip up this vibrant green sauce, packed with zesty flavors from parsley, cilantro, and a hint of garlic. Not only is it a breeze to make, but it’s also the perfect way to add a burst of freshness to your weeknight dinners without any cooking involved. Plus, it keeps well in the fridge, so you can enjoy its deliciousness for days. Ready to transform your meals with this uncomplicated gem? Let’s dive into the recipe!

Why is Chimichurri Sauce so Special?

Freshness Galore: This Easy Chimichurri Sauce bursts with vibrant flavors from fresh herbs, making it a standout in any dish.
Quick Prep: With just five minutes of your time, you're on your way to gourmet-level taste without any fuss!
Versatile: Perfect as a condiment for grilled steak, chicken, shrimp, or even drizzled over roasted vegetables, it's a real crowd-pleaser.
Customization Options: Feel free to swap out herbs based on your preference, or adjust the heat with red pepper flakes, ensuring it's just right for you.
Make-Ahead Convenience: The flavors deepen after a few hours in the fridge, making it an ideal choice for meal prep alongside recipes like Shrimp Tacos or Tagliatelle Asparagus Peas. Enjoy fresh taste that keeps giving!

Easy Chimichurri Sauce Ingredients

  • For the Sauce:
    • Fresh Parsley – This fresh herb acts as the primary flavor base, providing herbal brightness; substitute with curly parsley if necessary.
    • Fresh Cilantro – Adds a citrusy and aromatic note; you can omit or increase parsley for a milder flavor.
    • Garlic – Incorporates a pungent, savory kick; fresh garlic is recommended for a bold taste.
    • Olive Oil – Creates a smooth consistency and carries the flavors; feel free to substitute with avocado oil for a different profile.
    • Red Wine Vinegar – Contributes acidity and brightness; alternatives include champagne vinegar or apple cider vinegar for a unique twist.
    • Dried Oregano – Adds an earthy, slightly peppery undertone; if available, fresh oregano works well too.
    • Red Pepper Flakes – Introduces mild heat; adjust according to your preferred spice level.
    • Salt & Black Pepper – Enhances overall flavor; adjust to your taste for a personal touch.
    • Fresh Lemon Juice – Brings an additional layer of brightness and freshness; don’t skip this for a zesty kick!

This easy chimichurri sauce will elevate your dishes in minutes, perfectly pairing with all your favorites!

Step‑by‑Step Instructions for Easy Chimichurri Sauce

Step 1: Prepare the Herbs
Start by rinsing your fresh parsley and cilantro under cold running water to remove any dirt. Gently pat the herbs dry with a clean kitchen towel or paper towel. Remove the thick stems from both herbs, as you’ll want the tender leaves to shine in your Easy Chimichurri Sauce. Aim for about 1 cup of packed leaves for the best flavor.

Step 2: Blend Ingredients
In a food processor, combine the freshly prepared parsley, cilantro, and a couple of cloves of peeled garlic. Add in dried oregano, red pepper flakes, salt, and black pepper to taste. Pulse the ingredients a few times until they are finely chopped but still maintain a slightly chunky texture. This should take about 15 to 20 seconds, allowing those vibrant flavors to meld together beautifully.

Step 3: Add Liquids
Now it’s time to introduce the liquids that will make your chimichurri sauce come alive. Pour in half a cup of olive oil, ¼ cup of red wine vinegar, and the juice of half a lemon directly into the food processor. Blend the mixture again for about 10 to 15 seconds until just combined, making sure the sauce remains a bit chunky for that perfect homemade feel.

Step 4: Adjust Seasoning
Taste your Easy Chimichurri Sauce and adjust the seasoning as needed. You may want to add a bit more salt, black pepper, or even an extra splash of red wine vinegar for an added zing. Blend for a couple more seconds to incorporate any adjustments. Remember, this is all about finding the flavor balance that you love!

Step 5: Serve or Store
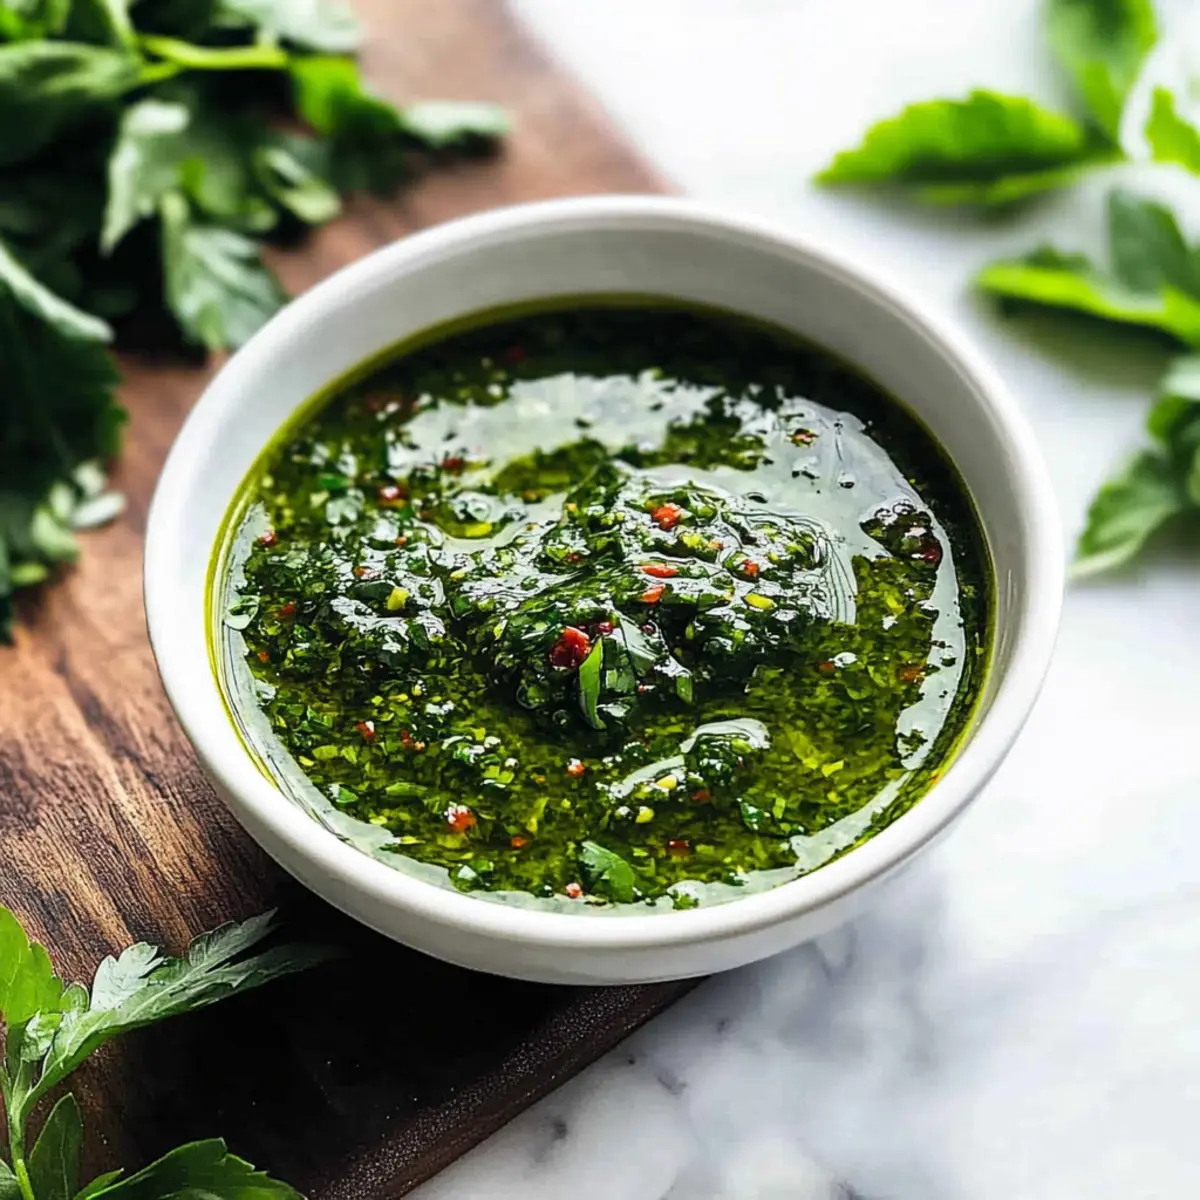
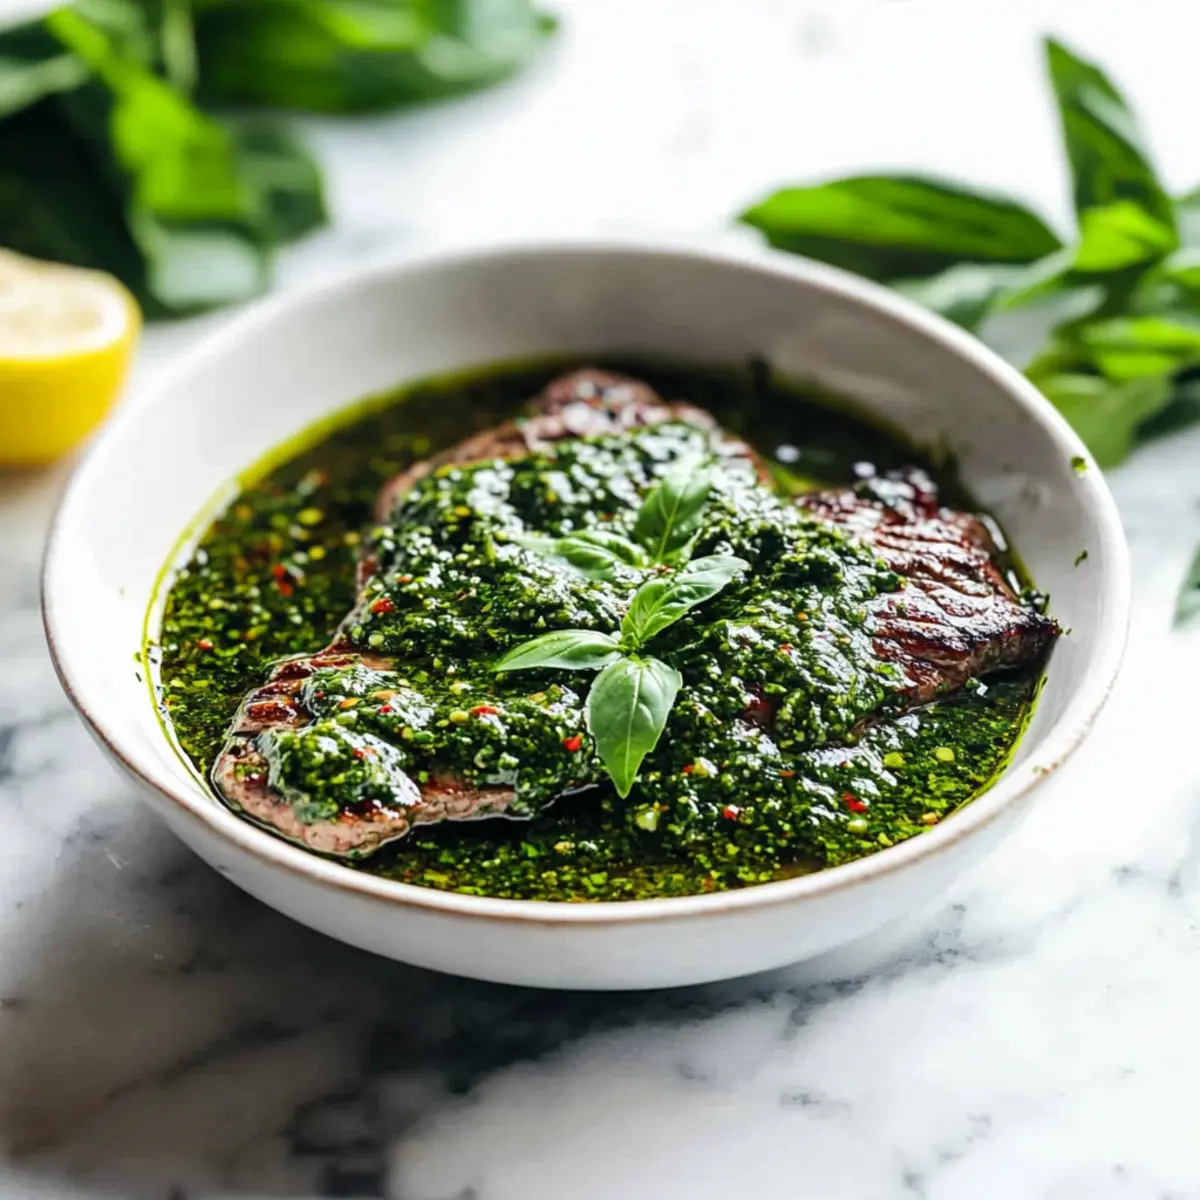
Transfer your vibrant chimichurri sauce to a bowl or an airtight jar. You can enjoy it immediately as a zesty drizzle over grilled chicken, meats, or vegetables. If you’re not using it right away, store it in the refrigerator for up to one week, allowing the flavors to deepen for an even tastier experience later on.

Easy Chimichurri Sauce Variations

Get ready to personalize your chimichurri sauce with these delightful swaps and additions that will elevate your culinary experience!

  • Basil Boost: Swap cilantro for fresh basil for a sweeter, Italian-inspired twist. This aromatic change lends a new depth, perfect for drizzling on grilled vegetables.

  • Spicy Kick: Add a diced jalapeño or more red pepper flakes for an extra kick. Adjust the heat according to your preference, bringing a vibrant intensity to your dish.

  • Dijon Delight: Incorporate a teaspoon of Dijon mustard for a creamy texture and a tangy punch. It complements meats beautifully and adds sophistication to the sauce.

  • Nutty Flavor: Toss in some finely chopped walnuts or almonds for added crunch and richness. This twist not only enhances the texture but also offers a delightful contrast to the sauce's herbiness.

  • Lemon Zest: Add the zest of a lemon in addition to the juice for a more pronounced citrus flavor. This brightens the sauce and adds an invigorating aroma.

  • Vinegar Variety: Experiment with different vinegars like balsamic for a sweeter profile or lime juice for a tropical flair. Each change will create a unique version that pairs wonderfully with various dishes.

  • Herbal Harmony: Mix in fresh mint or dill for a refreshing taste—perfect for summer barbecues! These herbs bring a delightful twist that complements grilled meat and seafood.

No matter which variation you choose, you'll have a chimichurri sauce that suits your taste and adds that special touch to your favorite dishes. Want to explore more ways to use this sauce? Pair it with Spatchcock Chicken Flavor or drizzle it over a vibrant Tagliatelle Asparagus Peas dish to truly savor the burst of freshness!

What to Serve with Quick and Easy Chimichurri Sauce

Looking to elevate your meal? This delightful sauce pairs beautifully with a variety of dishes to create a memorable dining experience.

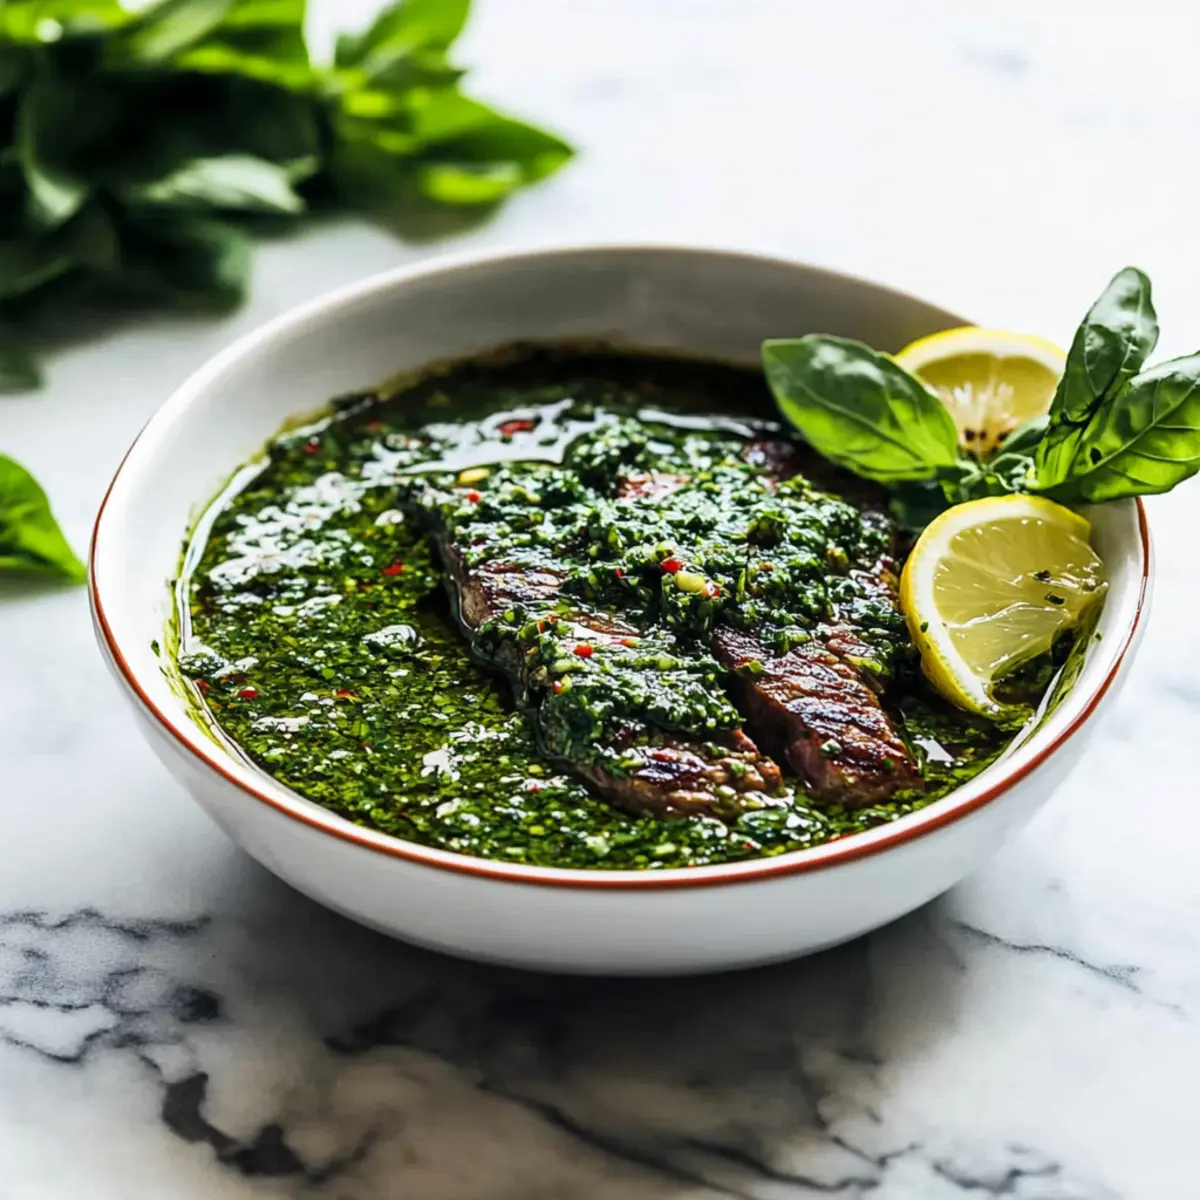
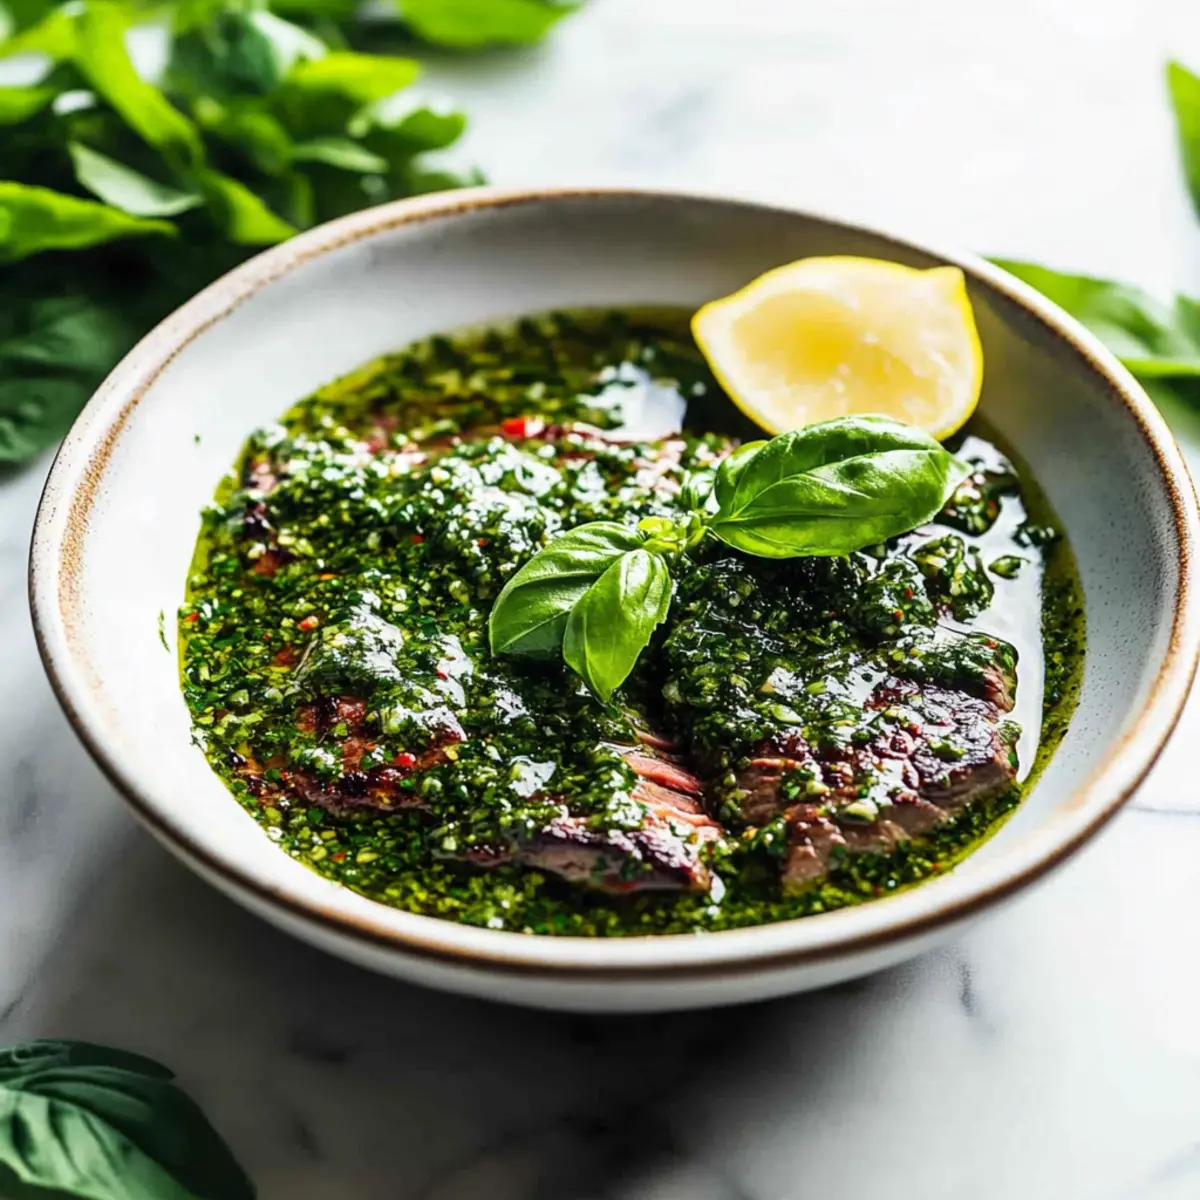
  • Grilled Steak: The bold, zesty flavors of chimichurri enhance the rich taste of grilled steak, creating a harmonious blend.
  • Roasted Vegetables: Brighten up roasted veggies with a drizzle of chimichurri for a fresh, herbaceous kick that complements their sweetness.
  • Chicken Skewers: Serve chimichurri over juicy chicken skewers for a burst of flavor that takes your barbecue to the next level.

Imagine your next gathering, where succulent meats and vibrant greens dance together on the plate, all tied together with this sensational sauce.

  • Pan-Seared Shrimp: A splash of chimichurri on tender shrimp elevates them to gourmet status, making every bite refreshing and flavorful.
  • Grilled Corn on the Cob: Slather chimichurri on grilled corn for a unique twist that balances sweet kernels with herbaceous spice.
  • Fresh Salad: Toss into a crisp salad for a quick dressing that invigorates every bite with its herbal brightness and tang.
  • Quinoa Salad: Mix chimichurri into quinoa for a nutritious side that bursts with flavor and color—an ideal complement to your main dish.
  • Sparkling Water: Pair your meal with a chilled sparkling water to cleanse the palate between bites of herbaceous goodness.

How to Store and Freeze Easy Chimichurri Sauce

Fridge: Store your Easy Chimichurri Sauce in an airtight container in the refrigerator for up to one week; the flavors become even more vibrant as it sits.

Freezer: For longer preservation, freeze the sauce in ice cube trays. Once frozen, transfer the cubes to a resealable bag and store for up to 3 months; perfect for quick meal additions!

Thawing: To use frozen chimichurri, simply thaw overnight in the fridge or let it sit at room temperature for 30 minutes before adding to your favorite dishes.

Reheating: If you prefer to warm it slightly, heat gently on the stovetop over low heat, stirring occasionally to avoid breaking the oils; this brings back that fresh aroma!

Make Ahead Options

Preparing this Easy Chimichurri Sauce ahead of time is a fantastic way to save precious minutes on busy weeknights! You can chop the fresh herbs and mix the dry ingredients up to 24 hours in advance, allowing the flavors to meld beautifully. Just store the mixture in an airtight container in the refrigerator. When you’re ready to serve, simply add the olive oil, red wine vinegar, and lemon juice before blending to finish. This way, you’ll enjoy fresh, zesty flavor that’s just as delicious without the last-minute rush. Remember, the chimichurri sauce intensifies its vibrant flavors with a bit of time, making it perfect for meal prep!

Expert Tips for Easy Chimichurri Sauce

• Chunky Texture: To keep a delightful, slightly chunky texture, avoid over-pureeing the sauce; it should resemble a fresh relish.

• Make Ahead: For maximum flavor, prepare your Easy Chimichurri Sauce a few hours before serving, allowing the herbs to blend beautifully.

• Herb Substitutions: Don’t hesitate to experiment—try using basil or mint if you're short on cilantro, customizing the flavor to your liking.

• Adjust Spice: If you love heat, increase the red pepper flakes gradually; remember, you can always add more, but you can't take it out!

• Storage Secrets: Use an airtight container to keep your chimichurri sauce fresh in the fridge for up to a week; flavors intensify beautifully over time.

Quick and Easy Chimichurri Sauce Recipe FAQs

What kind of herbs should I use for the chimichurri sauce?
Absolutely! Fresh parsley is the cornerstone of chimichurri, but you can also add fresh cilantro for a citrusy kick or even basil for a unique twist. If you're not a fan of cilantro, simply increase the amount of parsley to suit your taste!

How long can I store chimichurri sauce in the refrigerator?
Your Easy Chimichurri Sauce will keep beautifully in an airtight container in the refrigerator for up to one week. Over time, the flavors deepen and become even more vibrant, making it a fantastic make-ahead option for your meals.

Can I freeze chimichurri sauce?
Yes, you can absolutely freeze the chimichurri! Pour the sauce into ice cube trays and freeze until solid. Once frozen, transfer the cubes into a resealable bag and store them for up to 3 months. It’s perfect for quick meal additions; just pop a cube into your dish when you need a flavor boost!

What can I do if my chimichurri sauce is too salty?
No worries! If you find your acidic chimichurri sauce has a bit too much salt, try balancing it out with a splash of vinegar or fresh lemon juice. Adding a few extra chopped herbs can also help dilute the saltiness and enhance that fresh taste!

Is chimichurri sauce safe for my pets?
Very! Chimichurri sauce, especially in moderation, can be safe, but it’s best to avoid giving it to your pets due to the garlic, which can be harmful in larger quantities. Always consult your vet if you're unsure about introducing new foods to your pet's diet.

Easy Chimichurri Sauce

Fresh and Zesty Easy Chimichurri Sauce in Just Minutes

This Easy Chimichurri Sauce offers a vibrant and fresh flavor boost for any dish in just minutes.
Print Recipe Pin Recipe
Prep Time 5 minutes mins
Total Time 5 minutes mins
Servings: 4 servings
Course: Appetizers
Cuisine: Argentinian
Calories: 80
Ingredients Equipment Method Nutrition Notes

Ingredients
  

For the Sauce
  • 1 cup fresh parsley packed leaves, substitute with curly parsley if necessary
  • 1/2 cup fresh cilantro can omit or increase parsley for a milder flavor
  • 2 cloves garlic fresh garlic recommended for bold taste
  • 1/2 cup olive oil can substitute with avocado oil
  • 1/4 cup red wine vinegar alternatives include champagne vinegar or apple cider vinegar
  • 1 teaspoon dried oregano fresh oregano works as well
  • 1/2 teaspoon red pepper flakes adjust according to spice preference
  • to taste salt adjust to your preference
  • to taste black pepper adjust to your preference
  • 1/2 tablespoon fresh lemon juice do not skip for a zesty kick

Equipment

  • Food Processor

Method
 

Step-by-Step Instructions for Easy Chimichurri Sauce
  1. Rinse parsley and cilantro under cold water, then pat dry. Remove thick stems, aiming for 1 cup of packed leaves.
  2. Combine parsley, cilantro, and garlic in a food processor. Add oregano, red pepper flakes, salt, and black pepper. Pulse until finely chopped but chunky.
  3. Pour in olive oil, red wine vinegar, and lemon juice into the processor. Blend again until just combined, keeping it chunky.
  4. Taste and adjust seasoning with more salt, pepper, or vinegar as needed. Blend briefly to mix adjustments.
  5. Transfer chimichurri to a bowl or airtight jar. Enjoy immediately or store in the fridge for up to one week.

Nutrition

Serving: 2tablespoonsCalories: 80kcalCarbohydrates: 1gFat: 9gSaturated Fat: 1gPolyunsaturated Fat: 1gMonounsaturated Fat: 7gSodium: 100mgPotassium: 50mgVitamin A: 100IUVitamin C: 10mgCalcium: 3mgIron: 1mg

Notes

This sauce keeps well and flavors deepen over time—perfect for meal prep.

Tried this recipe?

Let us know how it was!

Keto Beef Taquitos – Crispy, Cheesy, Guilt-Free Delights

June 18, 2026 by Grace Snow Leave a Comment

The sizzle of beef in a hot skillet, mixed with aromatic spices, fills my kitchen every time I make these tempting Keto Beef Taquitos. It’s amazing how a simple roll of cheese and flavorful filling can transform into a crowd-pleasing appetizer that's both gluten-free and low-carb. Perfect for a quick snack or a stylish addition to your dinner table, these taquitos are not just easy to whip up but also a fantastic way to indulge without straying from your dietary goals. With their crispy exterior and melty cheesy center, you'll find yourself savoring each bite. Want to play around? You can swap out the beef for chicken or even add a kick of jalapeños to customize this delightful dish. Are you ready to turn your kitchen into a taquito haven?

Why Will You Crave These Taquitos?

Crispy Texture: Each bite delivers a satisfying crunch, contrasting beautifully with the melty, cheesy interior.

Flavor Explosion: A mix of spices, cheese, and savory ground beef creates an unbeatable flavor profile that's bound to impress.

Quick Preparation: Made in under 30 minutes, these Keto Beef Taquitos fit perfectly into any busy schedule — no more fast food run!

Versatile Delight: Swap ground beef for chicken or mix in cream cheese and jalapeños for a personalized twist.

Crowd-Pleasing Appetizer: Ideal for gatherings, everyone from keto enthusiasts to snack lovers will enjoy these delicious bites!

You might enjoy pairing them with some fresh guacamole or trying out different variations, just like in our Ground Beef Enchiladas. Your friends and family will thank you!

Keto Beef Taquitos Ingredients

For the Cheese Shells
• Shredded Cheddar Cheese – Adds flavor and creaminess; substitute with any sharp cheese for a tangy twist.
• Shredded Mozzarella Cheese – Provides meltiness and structure; can be replaced with provolone for a unique taste.
• Grated Parmesan – Enhances flavor depth; optional but adds a delightful salty bite.

For the Filling
• Ground Beef – Main protein source; feel free to use ground turkey or chicken for a lighter alternative.
• Minced Onion – Adds sweetness and flavor; shallots can be used for a milder aroma.
• Chili Powder – Provides spice and warmth; adjust to taste and consider smoked paprika for an extra layer of flavor.
• Paprika – Adds color and subtle sweetness; optional but enhances the overall dish.
• Cumin – Brings an earthy note, essential for a taco taste; skip if you're not a fan.
• Onion Powder – Boosts onion flavor with no texture; can be omitted if using fresh onion.
• Garlic Powder – Delivers depth of flavor; fresh garlic can also be chopped for extra freshness.
• Salt – Enhances all flavors; adjust based on dietary needs for optimal taste.
• Water – Mixes spices with beef, ensuring even distribution of flavors throughout the filling.

Dive into these delicious Keto Beef Taquitos and satisfy your cravings in a healthier way!

Step‑by‑Step Instructions for Keto Beef Taquitos

Step 1: Brown the Beef
In a skillet over medium heat, brown 1 pound of ground beef with ½ cup of minced onion for about 5–7 minutes, stirring occasionally until the meat is no longer pink and is fully cooked. The beef should be nicely browned, and the onions will become soft and fragrant.

Step 2: Mix the Spices
In a small bowl, combine 1 teaspoon of cumin, 2 teaspoons of chili powder, 1 teaspoon of onion powder, 1 teaspoon of garlic powder, and ½ teaspoon of salt with ½ cup of water. Pour this spice mixture over the cooked beef mixture, stirring well to evenly coat. Allow it to simmer for 5–10 minutes, or until the liquid has evaporated, and the beef is flavorful and slightly thickened.

Step 3: Prepare the Cheese Shells
Preheat your oven to 400°F (200°C). In a mixing bowl, combine 1 cup of shredded cheddar cheese, 1 cup of shredded mozzarella cheese, and ½ cup of grated parmesan. Use parchment paper on a baking sheet to avoid sticking, then form the cheese mixture into six equal balls, spaced out on the sheet.

Step 4: Bake the Cheese Balls
Place the baking sheet in the preheated oven and bake for about 6–8 minutes, or until the cheese shells are bubbling and starting to turn golden brown. Watch closely for doneness to achieve the perfect crispy cheese shell. Once done, remove from the oven and let them cool for a few minutes until manageable.

Step 5: Shape the Taquitos
Once the cheese balls have cooled slightly, carefully flip each one over. Place a spoonful of the seasoned beef mixture on one edge and tightly roll the cheese around the filling. Work quickly to ensure the cheese doesn’t harden before rolling, creating a delicious Keto Beef Taquito with a crispy exterior.

Step 6: Bake Again
Return the assembled Keto Beef Taquitos back to the oven for an additional 5–7 minutes at 400°F (200°C), allowing them to crisp further. Keep an eye on the taquitos until they’re golden and crunchy on the outside, ensuring that the cheese remains melty inside while developing a delightful texture.

What to Serve with Keto Beef Taquitos?

Each bite of these sizzling, cheesy delights pairs perfectly with complementary flavors, enhancing your meal's overall experience.

  • Guacamole: Creamy and flavorful, guacamole adds a refreshing touch that balances the richness of the taquitos.
  • Sour Cream: A dollop of cool sour cream offers a tangy contrast and keeps the moisture in check with every bite.
  • Pico de Gallo: This fresh salsa brings zesty tomatoes and onions, enhancing the overall flavor with a burst of freshness.
  • Mexican Street Corn Salad: The sweet, buttery corn with lime and spices adds a delightful contrast and rounds out the meal beautifully.
  • Crispy Green Salad: A light salad with fresh greens, cucumbers, and a lime vinaigrette provides a crisp texture that complements the crunchy taquitos.
  • Spicy Jalapeño Poppers: For those seeking extra heat, pairing with stuffed jalapeños brings a bold flavor contrast, elevating your snacking experience.
  • Chilled Mexican Beer: A chilled, light beer helps refresh the palate, ensuring every bite of taquito is as enjoyable as the last.
  • Margaritas: These classic cocktails, with their sweet and tart flavor, pair wonderfully with the savory spices of the taquitos, creating a festive atmosphere.
  • Chocolate Avocado Mousse: For a decadent finish, try a rich and creamy chocolate avocado mousse—it's a delightful way to end a fabulous meal!

Make Ahead Options

These Keto Beef Taquitos are perfect for meal prep enthusiasts! To save time on busy weeknights, you can prepare the beef filling up to 3 days in advance. Just brown the ground beef with the minced onion, mix in the spices, and let it cool before placing it in an airtight container in the refrigerator. Additionally, you can shape the cheese shells and freeze them before baking. When you’re ready to enjoy, simply bake the cheese shells from frozen for about 10-12 minutes, and then fill with the beef mixture and bake for another 5-7 minutes. This ensures they remain just as delicious and crispy, making dinner a breeze!

Keto Beef Taquitos Variations

Feel free to get creative with these Keto Beef Taquitos and tailor them to your taste buds for a delightful twist!

  • Chicken Taquitos: Substitute ground beef with shredded cooked chicken for a lighter, yet equally delicious option. The tenderness of chicken offers a delightful contrast to the crispy shell.

  • Spicy Kick: Add diced jalapeños to the beef mixture for an extra layer of heat. Just enough to make your taste buds dance without overwhelming the overall flavor.

  • Creamy Delight: Mix in cream cheese with the beef for a richer, creamier filling. It adds a luscious texture that will leave you craving more.

  • Low-Carb Veggies: Incorporate finely chopped bell peppers and zucchini into the beef mixture to boost nutrition and add a dash of color. It’s a sneaky way to enjoy more vegetables without losing flavor!

  • Smoky Flavor: Swap chili powder with smoked paprika for a smoky twist that enhances the depth of flavors. Just a dash can elevate your Keto Beef Taquitos to gourmet status.

  • Cheese Variations: Experiment with different cheeses, like pepper jack for heat or gouda for a smoky finish. Each variation brings its own unique profile to the dish.

  • Taco Night Upgrade: Use this beef filling for taco night by simply placing it in lettuce wraps instead. It's a great way to bring the taco experience to a fresh and crispy level!

Don't forget, you can also explore other enticing options like our Ground Beef Enchiladas for even more flavor inspiration!

Expert Tips for Keto Beef Taquitos

• Parchment Paper Use: Always use parchment paper for baking the cheese shells to prevent sticking; wax paper will lead to disaster!

• Watch the Cooling: Allow the cheese balls to cool briefly before handling to prevent burns, but roll them quickly for easy shaping.

• Customize Your Spices: Feel free to adjust the chili powder or add smoked paprika for an extra flavor kick—just keep the balance right for your taste!

• Make-ahead Option: Prepare these Keto Beef Taquitos ahead of time; freeze before baking, then add a few extra minutes to your baking time from frozen.

• Cheese Choices: Experiment with different cheeses, like pepper jack for spice or gouda for a smokier flavor—variety keeps it exciting!

How to Store and Freeze Keto Beef Taquitos

Fridge: Store leftover Keto Beef Taquitos in an airtight container for up to 3 days. Ensure they are cool before sealing to avoid moisture buildup.

Freezer: Freeze uncooked, assembled taquitos in a single layer on a baking sheet. Once solid, transfer them to a freezer bag for up to 3 months. Bake from frozen, adding a few extra minutes to the cooking time.

Reheating: To reheat, place baked taquitos in the oven at 350°F (175°C) for about 10-15 minutes until warmed through and crispy again. Enjoy this tasty treat any time!

Keto Beef Taquitos Recipe FAQs

What type of cheese should I use for the taquitos?
Absolutely! I recommend using a mix of shredded cheddar and mozzarella for the best flavor and texture. If you’d like, you can substitute cheddar with a sharp cheese or try using provolone for a different taste. For an extra salty bite, consider adding grated parmesan to the mix.

How should I store leftover Keto Beef Taquitos?
Very! Store any leftover Keto Beef Taquitos in an airtight container in the fridge for up to 3 days. Make sure they are cool before sealing to prevent moisture from making them soggy. You can also reheat them in the oven at 350°F (175°C) for about 10-15 minutes to regain that crispy texture.

Can I freeze Keto Beef Taquitos?
Of course! First, assemble the taquitos without baking them and lay them out on a baking sheet. Freeze them in a single layer until solid, then transfer to a freezer bag. They’ll stay good for up to 3 months. When you’re ready to enjoy, bake them directly from frozen, adding a few extra minutes to the bake time.

What should I do if my cheese shells are sticking to the parchment paper?
Oh no! If your cheese shells are sticking, it's likely due to using wax paper instead of parchment paper, which is a must for this recipe. Be sure to use parchment as it withstands heat and allows for easy release. If they do stick, try carefully sliding a thin spatula underneath to lift them off without breaking.

Are these Keto Beef Taquitos safe for pets?
Great question! While the ingredients in Keto Beef Taquitos are safe for human consumption, keep in mind that some seasonings like garlic and onion can be harmful to dogs. It's best to share only the plain cheese parts with your furry friends, and avoid giving them any of the seasoned beef filling.

Can I customize the filling in the taquitos?
Absolutely! One of the beautiful aspects of this recipe is its versatility. You can use cooked shredded chicken, ground turkey instead of beef, or even add cream cheese for a richer filling. Don't forget to throw in some diced jalapeños for spicy aficionados, or experiment with your favorite spices to make this dish truly your own!

Keto Beef Taquitos

Keto Beef Taquitos – Crispy, Cheesy, Guilt-Free Delights

Enjoy these Keto Beef Taquitos, a delightful gluten-free and low-carb appetizer filled with flavorful beef and cheese.
Print Recipe Pin Recipe
Prep Time 10 minutes mins
Cook Time 20 minutes mins
Cooling Time 5 minutes mins
Total Time 35 minutes mins
Servings: 6 taquitos
Course: Appetizers
Cuisine: Mexican
Calories: 280
Ingredients Equipment Method Nutrition Notes

Ingredients
  

For the Cheese Shells
  • 1 cup Shredded Cheddar Cheese Substitute with any sharp cheese for a tangy twist.
  • 1 cup Shredded Mozzarella Cheese Can be replaced with provolone for a unique taste.
  • ½ cup Grated Parmesan Optional but adds a delightful salty bite.
For the Filling
  • 1 pound Ground Beef Feel free to use ground turkey or chicken for a lighter alternative.
  • ½ cup Minced Onion Shallots can be used for a milder aroma.
  • 1 teaspoon Cumin Essential for a taco taste; skip if you're not a fan.
  • 2 teaspoons Chili Powder Adjust to taste; consider smoked paprika for an extra layer of flavor.
  • 1 teaspoon Onion Powder Can be omitted if using fresh onion.
  • 1 teaspoon Garlic Powder Fresh garlic can also be chopped for extra freshness.
  • ½ teaspoon Salt Adjust based on dietary needs for optimal taste.
  • ½ cup Water Mixes spices with beef, ensuring even distribution of flavors throughout the filling.

Equipment

  • Skillet
  • Oven
  • Baking Sheet
  • Mixing Bowl

Method
 

Preparation
  1. In a skillet over medium heat, brown the ground beef with minced onion for about 5–7 minutes, until fully cooked.
  2. Combine cumin, chili powder, onion powder, garlic powder, and salt with water in a small bowl, then pour over cooked beef mixture.
  3. Preheat your oven to 400°F (200°C) and mix cheddar, mozzarella, and parmesan cheese.
  4. Bake cheese mixture in balls for about 6–8 minutes until golden brown.
  5. Once the cheese balls cool slightly, shape them with seasoned beef in rolls.
  6. Return taquitos to the oven for an additional 5–7 minutes at 400°F (200°C) until crispy.

Nutrition

Serving: 1taquitoCalories: 280kcalCarbohydrates: 3gProtein: 20gFat: 22gSaturated Fat: 10gMonounsaturated Fat: 12gTrans Fat: 1gCholesterol: 60mgSodium: 400mgPotassium: 300mgFiber: 1gSugar: 1gVitamin A: 500IUVitamin C: 2mgCalcium: 250mgIron: 2mg

Notes

Allow the cheese balls to cool briefly before handling. Experiment with different cheeses for variety.

Tried this recipe?

Let us know how it was!

Homemade Garlic Butter Breadsticks That Melt in Your Mouth

May 26, 2026 by Grace Snow Leave a Comment

As I pulled the warm, golden breadsticks out of the oven, the delightful aroma of garlic and butter enveloped my kitchen, instantly transporting me to a cozy Italian bistro. These soft and fluffy Homemade Garlic Butter Breadsticks are not just easy to make—they’re the answer to elevating your family dinners and cozy game nights into something special. With their heavenly buttery glaze and irresistible flavor, they’re bound to be a showstopper at any gathering. Whether you're using them to mop up your favorite pasta sauce or simply enjoying them fresh out of the oven, these breadsticks offer the perfect blend of comfort and simplicity. How do you plan to enjoy these golden delights?

Why Are These Breadsticks Perfect?

Irresistible Aroma: The moment you bake these Homemade Garlic Butter Breadsticks, your kitchen will fill with a mouthwatering garlic scent that draws everyone in.

Easy Preparation: No advanced baking skills required; a few simple steps and you’re set!

Versatile Pairing: Enjoy them alongside soups, salads, or pastas for a delightful addition to your meals. They also pair perfectly with a warm bowl of Homemade Hot Chocolate.

Crowd-Pleaser: These breadsticks always impress guests at gatherings, making them a go-to recipe for entertaining.

Customizable Delight: Feel free to add herbs or cheeses, tailoring the flavor to your liking. Serve alongside Crockpot Butter Chicken for a comforting meal or dip them in marinara for an appetizer.

Get ready to whip up these delightful snacks that everyone will love!

Homemade Garlic Butter Breadsticks Ingredients

For the Dough

  • Warm Water – Activates the yeast; use between 110-115°F for ideal activation.
  • Active Dry Yeast – The leavening agent; ensure it foams in the warm water to confirm it's alive and ready to work!
  • Granulated Sugar – Aids in yeast activation and adds a hint of sweetness to your breadsticks.
  • Unsalted Butter (melted) – Provides richness and flavor; can substitute with plant-based butter for a vegan option.
  • Salt – Enhances flavor and controls yeast activity; opt for fine salt for easy mixing.
  • All-Purpose Flour – Gives structure to your breadsticks; can substitute with gluten-free flour for a gluten-free version.

For the Topping

  • Melted Butter (for brushing) – This is what adds that delicious garlic butter glaze that makes these homemade garlic butter breadsticks irresistible.
  • Salt (to taste) – Elevates the flavor of the buttery glaze; adjust based on your personal preference.
  • Garlic Powder – Delivers that classic garlic flavor; using fresh garlic can give an even bolder taste.
  • Italian Seasoning – Adds a wonderful herby note; optional but recommended for an extra burst of flavor.

Step‑by‑Step Instructions for Homemade Garlic Butter Breadsticks

Step 1: Prepare Yeast
In a stand mixer bowl, combine 1 cup of warm water (110-115°F), 2 ¼ teaspoons of active dry yeast, and 1 tablespoon of granulated sugar. Let the mixture sit undisturbed for about 5-10 minutes until it becomes frothy on top, signaling that the yeast is active. This initial step is crucial for your Homemade Garlic Butter Breadsticks to rise beautifully.

Step 2: Make the Dough
Once the yeast mixture is frothy, add ¼ cup of melted unsalted butter and 1 teaspoon of salt. Gradually add 3 to 4 cups of all-purpose flour, mixing slowly on low speed. As the dough comes together, switch to medium-low speed and knead for 7-10 minutes until the dough is smooth and elastic. If kneading by hand, use a floured surface for the same duration until well combined.

Step 3: Let Dough Rise
Transfer the dough into a lightly oiled bowl, ensuring it is all coated in oil. Cover the bowl with a clean kitchen towel or plastic wrap and let it rise in a warm place for 1 to 1.5 hours. The dough should double in size, developing a soft and airy texture that is perfect for your Homemade Garlic Butter Breadsticks.

Step 4: Shape Breadsticks
Once the dough has risen, gently punch it down to deflate. Divide the dough into 16-18 equal pieces, rolling each piece into a log about 7 inches long. Arrange the shaped logs on a greased baking sheet, allowing for some space between each. This step is essential to ensure even cooking and shape retention for the perfect breadsticks.

Step 5: Second Rise
Cover the shaped breadsticks with a towel and let them rise again for about 1 hour, allowing them to double in size once more. Meanwhile, preheat your oven to 400°F (200°C). Keeping the dough warm ensures a light and fluffy texture for your Homemade Garlic Butter Breadsticks.

Step 6: Bake
After the second rise, lightly brush the tops of the breadsticks with cooking spray and place them in the oven. Bake them for 14-15 minutes or until they turn a beautiful golden brown on top. The enticing smell of baked breadsticks will fill your kitchen, indicating they’re nearly ready to enjoy.

Step 7: Add Topping
While the breadsticks are warm, mix together ¼ cup of melted butter, a pinch of salt, 1 teaspoon of garlic powder, and 1 teaspoon of Italian seasoning in a small bowl. Brush this flavorful mixture generously over the warm breadsticks right after they come out of the oven, ensuring each one is deliciously coated. Serve these Homemade Garlic Butter Breadsticks warm for the best taste experience.

Helpful Tricks for Homemade Garlic Butter Breadsticks

  • Perfect Yeast Activation: Always ensure your yeast is fresh by checking its expiration date. If it doesn’t foam when mixed with water, discard and start over for fluffy breadsticks.

  • Avoid Over-Kneading: Knead just until the dough is smooth and elastic—about 7-10 minutes. Over-kneading can lead to tough breadsticks instead of the desired soft texture.

  • Temperature Matters: Make sure the rising environment is warm, as cold drafts can hinder the dough’s ability to rise. A cozy kitchen will produce the best Homemade Garlic Butter Breadsticks!

  • Don’t Skip the Second Rise: Allowing the shaped breadsticks to rise again contributes to their airy, soft texture. Patience is key for the perfect results!

  • Topping Swap: For enhanced flavor, try adding fresh herbs or a sprinkle of cheese in the butter topping. Experimenting keeps your Homemade Garlic Butter Breadsticks exciting!

Variations of Homemade Garlic Butter Breadsticks

Explore these delightful twists to make your Homemade Garlic Butter Breadsticks your own!

  • Cheesy Addition:
    Mix in shredded mozzarella or cheddar directly into the dough for a cheesy surprise with every bite.

  • Herbed Delight:
    Incorporate fresh herbs like rosemary or thyme into the dough for an aromatic flavor boost that transforms each breadstick into a gourmet treat.

  • Spicy Kick:
    Add a pinch of red pepper flakes or smoked paprika to the dough or topping for a subtle heat that balances perfectly with the garlic.

  • Garlic Lovers Upgrade:
    For an intense garlic flavor, swap garlic powder for fresh minced garlic in the topping. This offers a fragrant and savory punch!

  • Dipping Sauce Idea:
    Serve your breadsticks with a side of marinara or pesto for a fun and flavorful dipping experience. They complement the breadsticks wonderfully.

  • Garlic Parmesan Topping:
    Elevate the butter glaze with grated Parmesan cheese before brushing it over the hot breadsticks for a flavor-packed finish.

  • Sweet Twist:
    For a unique dessert approach, brush the breadsticks with melted butter mixed with cinnamon sugar and serve them warm. Pair with coffee or tea for a cozy treat.

  • Gluten-Free Option:
    Substitute all-purpose flour with gluten-free flour to make these breadsticks accessible for your gluten-sensitive friends. They’ll still taste fluffy and delicious!

Whether you're enjoying these warm with your favorite pasta or dipping them into the Homemade Hot Chocolate for a cozy evening, the possibilities are endless!

Make Ahead Options

These Homemade Garlic Butter Breadsticks are perfect for busy weeknights! You can prepare the dough up to 24 hours in advance by following the first three steps, then wrap it tightly in plastic wrap and refrigerate it to maintain its freshness. When you're ready to bake, simply let the dough come to room temperature for about 30 minutes before shaping and proceeding with the second rise, which will ensure they remain fluffy. For even better time-saving, you can shape the breadsticks and freeze them for up to 3 months. Just thaw them overnight in the refrigerator and allow an additional hour to rise before baking. This way, you'll have homemade goodness with minimal effort, just as delicious as if they were freshly made!

How to Store and Freeze Homemade Garlic Butter Breadsticks

Room Temperature: Store your homemade garlic butter breadsticks in an airtight container at room temperature for up to 3 days to maintain their fluffy texture.

Fridge: If you have any leftovers, you can refrigerate them in an airtight container for up to 5 days. Just reheat in the oven or microwave before serving.

Freezer: For longer storage, freeze the breadsticks in a single layer on a baking sheet before transferring to a freezer-safe bag. They can be stored this way for up to 3 months.

Reheating: To reheat, simply pop the frozen homemade garlic butter breadsticks in a preheated oven at 350°F (175°C) for about 10-15 minutes or until warmed through.

What to Serve with Homemade Garlic Butter Breadsticks

When it comes to creating a delightful meal, these fluffy and buttery breadsticks can be the versatile star of your table.

  • Creamy Tomato Soup: This classic pairing enhances the savory garlic flavors while offering a comforting, warming experience on chilly days.
  • Caesar Salad: The crisp romaine and tangy dressing complement the rich breadsticks, making for a refreshing and balanced meal.
  • Spaghetti Aglio e Olio: The simplicity of this pasta dish amplifies the breadsticks’ garlic essence, perfect for soaking up every flavorful bite.
  • Chicken Alfredo: Rich and creamy, this pasta dish loves a side of breadsticks for mopping up delicious sauces; each bite amplifies comfort.
  • Garlic Parmesan Dip: Pair your breadsticks with this addictive dip for an irresistible, flavor-packed experience; it'll have everyone reaching for more.
  • Bruschetta: Topped with fresh tomatoes, basil, and balsamic drizzle, this refreshingly bright starter mirrors the breadsticks’ buttery charm while adding a vibrant touch.
  • Red Wine: A smooth glass of Chianti or Merlot pairs beautifully with the roasted garlic flavors for a sophisticated dining experience.
  • Frozen Yogurt with Honey: For dessert, whip up a quick frozen yogurt topped with drizzled honey; this adds a sweet finish to your savory meal.

Homemade Garlic Butter Breadsticks Recipe FAQs

How do I know if my yeast is active?
Absolutely! To check yeast activity, combine warm water (between 110-115°F), sugar, and yeast in a bowl. Let it sit for 5-10 minutes. If the mixture becomes frothy and bubbly, your yeast is active and ready to work!

What’s the best way to store leftover breadsticks?
You can keep your Homemade Garlic Butter Breadsticks in an airtight container at room temperature for up to 3 days. If you want to extend their freshness, refrigerate them, and they’ll last up to 5 days. Just warm them before eating for that fresh-out-of-the-oven feel!

Can I freeze these breadsticks? If so, how?
Yes, the more the merrier! To freeze your Homemade Garlic Butter Breadsticks, first cool them completely at room temperature. Then, place them in a single layer on a baking sheet and freeze for about 1-2 hours until firm. Once frozen, transfer them to a freezer-safe bag or container. They can be stored this way for up to 3 months. To reheat, pop them in a preheated oven at 350°F (175°C) for about 10-15 minutes.

What if my dough doesn’t rise?
Oh no! If your dough doesn't rise, it might be due to inactive yeast. Make sure your yeast is fresh and the water temperature is just right. If the initial mixture doesn’t foam, discard it and try again with new yeast! Also, check for drafts in the rising area; a warm and cozy space is essential for a successful rise.

Is there a way to make these breadsticks dairy-free?
Very much so! To cater to a dairy-free diet, simply substitute the unsalted butter with a plant-based butter alternative. This way, you can still enjoy the rich flavor of homemade garlic butter breadsticks without the dairy. Just check ingredient labels to ensure there are no hidden allergens!

Can I use fresh garlic instead of garlic powder?
Absolutely! Using fresh garlic can amp up the flavor significantly. If you choose fresh garlic, I recommend using about 1-2 minced cloves in place of garlic powder. Just mix the minced garlic with the melted butter for brushing to enhance that garlicy aroma and taste in your Homemade Garlic Butter Breadsticks.

Homemade Garlic Butter Breadsticks

Homemade Garlic Butter Breadsticks That Melt in Your Mouth

Homemade Garlic Butter Breadsticks are the perfect addition to elevate your family dinners and game nights with their irresistible flavor.
Print Recipe Pin Recipe
Prep Time 15 minutes mins
Cook Time 15 minutes mins
Rising Time 1 hour hr 30 minutes mins
Total Time 2 hours hrs
Servings: 18 breadsticks
Course: Appetizers
Cuisine: Italian
Calories: 150
Ingredients Equipment Method Nutrition Notes

Ingredients
  

Dough Ingredients
  • 1 cup warm water between 110-115°F
  • 2 ¼ teaspoons active dry yeast ensure it foams in water
  • 1 tablespoon granulated sugar
  • ¼ cup unsalted butter melted
  • 1 teaspoon salt
  • 3-4 cups all-purpose flour can substitute with gluten-free flour
Topping Ingredients
  • ¼ cup melted butter for brushing
  • salt to taste
  • 1 teaspoon garlic powder
  • 1 teaspoon Italian seasoning optional

Equipment

  • Stand Mixer
  • Baking Sheet

Method
 

Preparation Steps
  1. Combine warm water, active dry yeast, and granulated sugar in a bowl; let sit until frothy.
  2. Add melted butter and salt to the yeast mixture, then gradually mix in flour until smooth and elastic.
  3. Transfer the dough to an oiled bowl, cover, and let it rise until doubled in size.
  4. Divide the dough into pieces, shape into logs, and arrange on a greased baking sheet.
  5. Cover shaped breadsticks and let them rise again, then preheat the oven.
  6. Brush with cooking spray and bake until golden brown.
  7. Mix topping ingredients and brush over warm breadsticks before serving.

Nutrition

Serving: 1breadstickCalories: 150kcalCarbohydrates: 22gProtein: 3gFat: 6gSaturated Fat: 3gPolyunsaturated Fat: 0.5gMonounsaturated Fat: 2gCholesterol: 15mgSodium: 200mgPotassium: 50mgFiber: 1gSugar: 1gVitamin A: 5IUCalcium: 1mgIron: 6mg

Notes

For best results, ensure yeast is fresh and don't skip the second rise for light and fluffy breadsticks.

Tried this recipe?

Let us know how it was!

Irresistible Sheet Pan Breadsticks Ready in Just One Hour

May 26, 2026 by Grace Snow Leave a Comment

The tantalizing aroma of garlic wafts through the kitchen, instantly transporting me to a cozy Italian trattoria. This Quick & Easy Garlic Sheet Pan Breadsticks recipe has become a staple in my home, transforming everyday meals into something special. With just under ten ingredients and minimal effort, you can whip up these tender yet chewy breadsticks that are perfect for any occasion. Whether you're hosting guests or looking for a comforting side to complement lasagna, these irresistible snacks are not only quick to prepare but also freezer-friendly, making them ideal for spontaneous cravings. Picture pulling a warm batch from the oven, golden brown and ready for dipping! Curious how to make your own? Let's get baking!

Why are these breadsticks a must-try?

Simplicity at Its Best: This recipe requires minimal ingredients and effort, making it perfect for home cooks at any skill level.

Irresistible Aroma: The smell of freshly baked garlic breadsticks will draw everyone in, creating an inviting atmosphere for your mealtime.

Versatility: Serve them alongside your favorite pasta dishes or warm marinara sauce for a delightful appetizer that pleases any crowd.

Freezer-Friendly: Make a double batch and freeze the extras for times when you crave that homemade comfort without the wait.

Flavorful Finish: The combination of melted butter, parmesan, and Italian seasoning not only enhances the flavor but also creates a golden, crispy topping that everyone will love.

Ready to elevate your meals with these delicious breadsticks? Don’t forget to check out my Panna Cotta Sweet for a perfect dessert to follow!

Sheet Pan Breadstick Ingredients

For the Dough

  • Warm Water – Activates the yeast; ensure it's between 105°-115°F for optimal results.
  • Granulated Sugar – Feeds the yeast for rising; can substitute with honey for a natural sweetener.
  • Salt – Enhances flavor and regulates yeast action; kosher salt works nicely if preferred.
  • Yeast – Essential for texture and rise; rapid-rise yeast can speed things up.
  • All-Purpose Flour – Provides structure; swap for bread flour for a chewier texture.
  • Melted Butter – Adds richness; half goes on the pan and half on the dough; olive oil is a suitable substitute.

For Topping

  • Parmesan Cheese – Adds a delicious flavor and a crispy topping; any hard cheese can be used as a substitute.
  • Garlic Salt – Provides seasoning; fresh minced garlic can be added for a bolder flavor.
  • Italian Seasoning – Offers herby notes; mix oregano, basil, and thyme as an alternative.

These Sheet Pan Breadsticks are sure to be a hit at your next family dinner or gathering!

Step‑by‑Step Instructions for Quick & Easy Garlic Sheet Pan Breadsticks

Step 1: Activate Yeast
In a large mixing bowl, combine 1 cup of warm water (between 105°-115°F), 2 teaspoons of granulated sugar, 1 packet of yeast, and 1 teaspoon of salt. Stir gently to combine and let it rest for 5-10 minutes until it becomes bubbly and frothy. This step is crucial for your Sheet Pan Breadsticks to rise beautifully.

Step 2: Mix Dough
Using a stand mixer with a dough hook, gradually add 3 cups of all-purpose flour to the yeast mixture. Mix on low speed until a loose, shaggy dough forms. Once combined, knead the dough for about 5 minutes, then cover it with a clean kitchen towel. Let it proof in a warm area for 30-45 minutes or until it doubles in size.

Step 3: Prepare Baking Sheet
Preheat your oven to 350°F (175°C). While the oven heats, prepare a sheet pan by lining it with parchment paper. Pour half of the melted butter (about 4 tablespoons) evenly onto the parchment paper, allowing it to coat the bottom of the pan. This step ensures your Sheet Pan Breadsticks bake perfectly golden.

Step 4: Shape Dough
Once the dough has risen, gently punch it down to release air. Transfer it to the prepared sheet pan, pressing it from the center outward to cover the entire bottom. Ensure an even layer so the breadsticks bake uniformly. Drizzle the remaining melted butter over the top of the stretched dough.

Step 5: Season
Sprinkle a generous amount of ½ cup of grated Parmesan cheese, 1 teaspoon of garlic salt, and 1 teaspoon of Italian seasoning evenly across the dough surface. This adds incredible flavor to your Sheet Pan Breadsticks. Allow the dough to sit for 15-20 minutes to rise slightly before baking, which will help achieve a fluffier texture.

Step 6: Cut & Bake
Using a pizza cutter, gently cut the dough into your desired shapes, making sure not to cut all the way through. This will allow the breadsticks to separate easily after baking. Place the sheet pan in the preheated oven and bake for 18-20 minutes or until the breadsticks are golden brown and slightly crispy on the edges. Once done, cool slightly before serving.

What to Serve with Quick & Easy Garlic Sheet Pan Breadsticks

Imagine a table adorned with delightful dishes, all ready to complement your freshly baked breadsticks!

  • Creamy Tomato Soup: A classic pairing that enhances the breadsticks' flavors and provides a comforting, heartwarming meal experience.

  • Zesty Salad: A mix of crisp greens, grape tomatoes, and a tangy vinaigrette adds refreshing contrast to the chewy texture of the breadsticks.

  • Savory Pasta Dish: Elevate your meal by serving these breadsticks alongside any rich pasta, like creamy Alfredo or marinara, for heartiness that’s irresistible.

  • Herb-Infused Olive Oil: Offer a bowl of olive oil infused with herbs for dipping, enhancing each bite of breadstick with aromatic flavors.

  • Cheesy Garlic Dip: Create a decadent dip that echoes the garlic in the breadsticks, making it a warm and indulgent choice for any occasion.

  • Sparkling Lemonade: For a bubbly, refreshing drink, serve sparkling lemonade to cleanse the palate between bites while complementing the herbal notes of the breadsticks.

How to Store and Freeze Sheet Pan Breadsticks

Room Temperature: Store completely cooled breadsticks in an airtight container at room temperature for up to 3 days to maintain their softness and flavor.

Fridge: For longer freshness, keep them in the fridge for up to 1 week; just ensure they're in a well-sealed container to prevent drying out.

Freezer: Freeze leftover sheet pan breadsticks for up to 3 months. Wrap them tightly in plastic wrap followed by aluminum foil to avoid freezer burn.

Reheating: To reheat frozen breadsticks, place them directly on a baking sheet in a preheated oven at 350°F (175°C) for about 10-12 minutes, or until warmed through.

Make Ahead Options

These Quick & Easy Garlic Sheet Pan Breadsticks are perfect for meal prep, allowing you to savor homemade flavors even on the busiest nights! You can prepare the dough up to 24 hours in advance; simply follow the initial steps, then cover the bowl tightly and refrigerate it to prevent it from browning. If time is short, you can also shape the dough and place it in the prepared sheet pan, covering it lightly with plastic wrap; let it rise in the fridge overnight. When you’re ready to enjoy, remove from the fridge, let it sit at room temperature for about 30 minutes, then season and bake as directed. These make-ahead options ensure that your breadsticks maintain their delightful texture and flavor, delivering restaurant-quality results with minimal effort!

Expert Tips for Sheet Pan Breadsticks

  • Garlic Boost: Add fresh minced garlic directly into the dough for an intensified garlic flavor that will elevate your Sheet Pan Breadsticks.

  • Proofing Essentials: Always keep the dough covered while proofing to prevent it from drying out, ensuring a nice, soft texture in your breadsticks.

  • Clean Cuts: Use a pizza cutter for smooth, effortless cuts when shaping your breadsticks—this will help maintain their easy-to-separate design after baking.

  • Resting Time Matters: Don’t rush the resting period after cutting; it aids in achieving a better rise and fluffy texture while baking.

  • Experiment with Cheese: Feel free to swap out Parmesan for cheeses like mozzarella or cheddar to add different flavors to your breadsticks.

Sheet Pan Breadsticks Variations

Feel free to get creative and transform your breadsticks with these fun and delicious twists!

  • Cheesy Twist: Swap the Parmesan for cheddar or mozzarella for a gooey, cheesy delight that will impress any cheese lover in the family. Just imagine pulling apart the warm, stringy goodness.

  • Spicy Kick: Add crushed red pepper flakes into the dough for a delightful heat that lingers on the palate. This twist is perfect for those who love a little spice in their life!

  • Garlic Lovers: Enhance the garlic flavor by mixing fresh minced garlic right into your dough. The aroma will be irresistible while baking and will create a robust garlic profile throughout.

  • Herb Infusion: Incorporate chopped fresh herbs like rosemary or thyme into the dough for added depth and fragrance. Each bite will release lovely earthy flavors, giving your breadsticks a garden-fresh taste.

  • Sweet Surprise: Add a touch of honey to the dough for a hint of sweetness that pairs beautifully with savory dishes. It’s a delicious contrast that will leave your taste buds dancing.

  • Whole Wheat Alternative: Substitute half of the all-purpose flour with whole wheat flour for a heartier texture and boost in nutrition. This slight change offers a nutty flavor, perfect for those seeking a wholesome option.

  • Garlic Butter Dip: Mix softened butter with minced garlic and parsley to create a rich dipping sauce. This elevates your breadsticks even further, creating a heavenly combination with every dip!

  • Warm Parmesan Crust: After baking, sprinkle additional Parmesan on top while the breadsticks are still hot for a delightful, crispy finish that adds a burst of flavor. You can never have too much cheese!

Don’t forget to pair these breadsticks with easy dips like marinara or check out my Ricotta Protein Pancakes for a delightful breakfast option afterwards! Enjoy experimenting with these variations to find your family’s favorite!

Quick & Easy Garlic Sheet Pan Breadsticks Recipe FAQs

How do I know if my yeast is active?
Absolutely! To check if your yeast is active, combine warm water (between 105°-115°F), sugar, and yeast in a bowl. Let it sit for 5-10 minutes. If it becomes bubbly and frothy, your yeast is ready to use. If not, your yeast may be expired, and it's best to start over!

How should I store leftover breadsticks?
Very easy! Store completely cooled sheet pan breadsticks in an airtight container at room temperature for up to 3 days. If you prefer longer storage, refrigerate them for up to 1 week, ensuring they’re well-sealed to prevent drying out.

Can I freeze my breadsticks? If so, how?
Absolutely! To freeze your sheet pan breadsticks, wrap them tightly in plastic wrap followed by aluminum foil to protect against freezer burn. They can be frozen for up to 3 months. When you're ready to enjoy them, reheat directly from the freezer in a preheated oven at 350°F (175°C) for about 10-12 minutes.

What should I do if my dough doesn’t rise?
Very common! If your dough doesn't rise, it might be due to using inactive yeast or not keeping it warm enough during the proofing stage. Ensure your yeast is fresh and that the proofing area is warm (ideal temperature is around 75-80°F). If your dough hasn't doubled in size after 45 minutes, it may be best to start over with new ingredients.

Are these breadsticks suitable for people with dietary restrictions?
While the recipe includes gluten-containing ingredients, it can be modified! You can use a gluten-free flour blend to accommodate those who are gluten-sensitive. Always be sure to double-check all ingredient labels to ensure they fit dietary restrictions, especially for guests with allergies.

Can I use fresh garlic instead of garlic salt?
Absolutely, you can! For a bolder garlic flavor, feel free to add 1-2 cloves of fresh minced garlic into the dough while mixing. This will intensify the aroma and taste of your breadsticks. Just keep in mind that it may alter the cooking time slightly, so watch them closely as they bake!

Sheet Pan Breadsticks

Irresistible Sheet Pan Breadsticks Ready in Just One Hour

These Sheet Pan Breadsticks are tender, chewy, and infused with garlic aroma — a perfect addition to any meal.
Print Recipe Pin Recipe
Prep Time 15 minutes mins
Cook Time 20 minutes mins
Proofing Time 45 minutes mins
Total Time 1 hour hr 20 minutes mins
Servings: 12 breadsticks
Course: Appetizers
Cuisine: Italian
Calories: 150
Ingredients Equipment Method Nutrition Notes

Ingredients
  

For the Dough
  • 1 cup warm water between 105°-115°F
  • 2 teaspoons granulated sugar can substitute with honey
  • 1 teaspoon salt kosher salt works nicely
  • 1 packet yeast rapid-rise yeast can speed things up
  • 3 cups all-purpose flour swap for bread flour for a chewier texture
  • 8 tablespoons melted butter half for the pan, half for the dough
For Topping
  • ½ cup grated Parmesan cheese any hard cheese can be used
  • 1 teaspoon garlic salt fresh minced garlic can be added
  • 1 teaspoon Italian seasoning mix oregano, basil, and thyme as alternative

Equipment

  • Mixing Bowl
  • Stand Mixer
  • Dough Hook
  • sheet pan
  • Parchment Paper
  • Pizza Cutter

Method
 

Step‑by‑Step Instructions
  1. In a large mixing bowl, combine warm water, granulated sugar, yeast, and salt. Let it rest for 5-10 minutes until bubbly and frothy.
  2. Gradually add the all-purpose flour to the yeast mixture and mix on low speed until a shaggy dough forms. Knead for about 5 minutes and let it proof covered for 30-45 minutes.
  3. Preheat your oven to 350°F (175°C) and line a sheet pan with parchment paper. Pour half of the melted butter on the parchment.
  4. Once the dough has risen, punch it down and transfer it to the sheet pan, pressing to cover the bottom evenly. Drizzle remaining melted butter over the top.
  5. Sprinkle the Parmesan cheese, garlic salt, and Italian seasoning evenly across the dough. Let it sit for 15-20 minutes to rise.
  6. Cut the dough into desired shapes with a pizza cutter. Bake for 18-20 minutes or until golden brown.

Nutrition

Serving: 1breadstickCalories: 150kcalCarbohydrates: 20gProtein: 4gFat: 6gSaturated Fat: 3gMonounsaturated Fat: 3gCholesterol: 15mgSodium: 300mgPotassium: 100mgFiber: 1gSugar: 1gVitamin A: 200IUCalcium: 50mgIron: 0.5mg

Notes

These breadsticks are perfect for freezing and can be reheated easily.

Tried this recipe?

Let us know how it was!

Quick and Easy Chimichurri Sauce for Flavor-Packed Dishes

May 21, 2026 by Grace Snow Leave a Comment

The kitchen was alive with the vibrant scents of fresh herbs as I whipped up my go-to condiment, Quick and Easy Chimichurri Sauce. This classic Argentinian sauce is a culinary gem that transforms ordinary dishes into extraordinary meals with just a handful of ingredients. Within five minutes, you’ll have a zesty, herb-packed sauce ready to dip freshly grilled meats, drizzle over roasted veggies, or toss into salads. Not only is it effortless to prepare, but this sauce is also a crowd-pleaser, appealing to everyone at your table. Plus, it's an excellent way to use up those herbs that are just begging to be celebrated. Curious to know how you can elevate your next meal with this fresh concoction? Let's dive into the recipe!

Why is Chimichurri Sauce So Popular?

Versatile Flavor Boost: This quick and easy chimichurri sauce elevates everything from grilled chicken to roasted vegetables, making your dishes unforgettable.

Fresh Ingredients: Bursting with vibrant herbs, garlic, and zesty vinegar, it’s a flavor-packed addition that brightens any meal.

Speedy Preparation: In just 5 minutes, you can whip up this delightful sauce—perfect for those busy nights when you need a tasty lift without the fuss.

Herb Utilization: It’s an ideal recipe to use up your leftover herbs, turning potential waste into a delicious condiment that enhances your cooking creativity.

Crowd-Pleasing Appeal: Whether you're hosting a dinner party or enjoying a casual meal, this chimichurri will impress your guests and family alike—just like my favorite Blue Cheese Pizza!

Quick and Easy Chimichurri Sauce Ingredients

• Perfect for vibrant flavor!

For the Sauce

  • Fresh Parsley – The cornerstone of chimichurri, offering a herby essence; substitute curly parsley if needed.
  • Fresh Cilantro – Adds a refreshing, citrusy aroma; if you're not a fan, just increase the parsley.
  • Garlic – The pungent kick that makes every bite exciting; opt for fresh for the best flavor impact.
  • Olive Oil – Provides a smooth consistency and carries the sauce's flavors beautifully; use extra virgin for richness.
  • Red Wine Vinegar – Brings acidity and brightness; white wine vinegar can work for a softer touch.
  • Dried Oregano – Infuses an earthy tone; if you have fresh at hand, it will work splendidly too.
  • Red Pepper Flakes – Adds a hint of heat; feel free to adjust based on your spice tolerance.
  • Salt & Black Pepper – Essential for enhancing taste; tweak according to your preferences.
  • Fresh Lemon Juice – Lifts the overall flavor with added brightness; adjust to taste for extra zing.

Now, with these ingredients lined up, you’re just a few simple steps away from your own homemade quick and easy chimichurri sauce that can elevate any dish!

Step‑by‑Step Instructions for Quick and Easy Chimichurri Sauce

Step 1: Prepare the Herbs
Start by rinsing a generous bunch of fresh parsley and cilantro under cold water to remove any dirt or grit. Gently pat them dry with a clean kitchen towel or paper towels. Next, remove the thick stems, as they can be tough; use only the tender parts of the herbs for a vibrant and flavorful chimichurri sauce.

Step 2: Blend Ingredients
In a food processor, combine the cleaned parsley, cilantro, a few cloves of fresh garlic, dried oregano, red pepper flakes, salt, and black pepper. Pulse the mixture until it's roughly chopped, allowing the colors and aromas to blend together. Do this for about 15-20 seconds, ensuring not to over-process—the goal is a fresh, herby mixture with some texture.

Step 3: Add Liquids
Pour in half a cup of extra virgin olive oil, 2 tablespoons of red wine vinegar, and the juice of half a fresh lemon into the food processor. Pulse again for another 15-20 seconds until the ingredients are well combined but still maintain a chunky consistency. This step is crucial for achieving the ideal ratios in your quick and easy chimichurri sauce.

Step 4: Adjust Seasoning
After blending, taste your chimichurri sauce to see if it meets your preference. If desired, add more salt, pepper, or a splash of vinegar for extra acidity. Pulse once more for about 10 seconds to mix in any adjustments. Make sure the flavor profile is vibrant and balanced, as it should be bursting with fresh herb goodness.

Step 5: Serve or Store
Transfer your vibrant chimichurri sauce to a serving bowl or a jar with a tight-fitting lid. You can use it immediately for a delicious topping or dipping sauce, or refrigerate it for up to a week. Letting the sauce sit for a couple of hours in the fridge enhances the flavors, making it even more irresistible!

What to Serve with Quick and Easy Chimichurri Sauce

Elevate your mealtime experience by pairing this vibrant sauce with delicious dishes that complement its fresh, zesty flavors.

  • Grilled Steak: The bold flavor of a perfectly grilled steak marries beautifully with chimichurri, enhancing each bite's juiciness and depth.
  • Roasted Vegetables: Drizzling roasted bell peppers, zucchini, and squash with chimichurri brings a fresh contrast, lifting their earthy flavors.
  • Tossed Salads: A splash of chimichurri over greens adds a vibrant kick, turning a simple salad into an aromatic feast for the senses.
  • Chicken Skewers: Grilled chicken skewers dipped in chimichurri create a delightful combination of spice and brightness that will captivate your palate.
  • Fish Tacos: Use chimichurri as a zesty dressing for fish tacos, enhancing the fresh fish with a burst of herbaceous goodness.
  • Crusty Bread: Serve alongside warm, crusty bread for dipping, allowing the sauce's rich herbal notes to soak into each morsel.
  • Quinoa Bowl: Mixed with grains like quinoa, chimichurri adds an exciting layer of flavor, creating a healthy and satisfying meal option.
  • Sangria: Enjoy a glass of refreshing Sangria to balance the sauce's aromatic herbs with a touch of fruity sweetness, making for a well-rounded dining experience.

Expert Tips for Quick and Easy Chimichurri Sauce

  • Chunky Texture: Avoid over-processing the sauce to preserve its delightful chunky consistency. Chimichurri should have a fresh, rustic look rather than being completely pureed.

  • Herb Variations: Don’t hesitate to mix in different herbs! Try adding fresh basil or mint for a unique twist on your quick and easy chimichurri sauce.

  • Adjust to Taste: Always taste and adjust seasoning before serving. A little more salt or a splash of vinegar can elevate the overall flavor balance perfectly.

  • Marinating Magic: For a deeper flavor, let your chimichurri sit for at least an hour before serving. This allows the fresh herbs and spices to meld beautifully.

  • Storage Success: Store in an airtight container in the fridge. The flavors will improve after a couple of hours, and your sauce will last up to a week!

Quick and Easy Chimichurri Sauce Variations

Customize your chimichurri sauce to suit your taste buds and culinary adventures!

  • Basil Twist: Swap cilantro for fresh basil for a slightly sweeter, aromatic flavor profile. It’s delightful and refreshing!

  • Minty Fresh: Add a tablespoon of fresh mint to introduce a cooling note that pairs beautifully with grilled meats. Your guests will love the surprise!

  • Apple Cider Vinegar: Substitute red wine vinegar with apple cider vinegar for a slightly sweeter tang. This twist adds depth while keeping the freshness intact.

  • Heat It Up: For an extra kick, increase the red pepper flakes or toss in a diced jalapeño. Adjust to your heat preference!

  • Lemon Herb Delight: Boost the brightness by adding more lemon juice or zest. The zing will elevate the herbaceous flavors and brighten your dishes.

  • Nutty Addition: Blend in a handful of toasted walnuts or almonds for a richer texture and nutty flavor, perfect for spreading on bread or grilled veggies.

  • Creamy Style: Mix in a dollop of Greek yogurt or sour cream for a creamy chimichurri that works wonderfully as a dip. It’s a delightful twist that adds creaminess without losing the essence!

  • Herb Medley: Combine parsley, cilantro, and arugula for a peppery finish. This burst of greens will add an unexpected but delightful layer of flavor.

Explore these variations and find your favorite way to enjoy this quick and easy chimichurri sauce! It's a fantastic addition to dishes like my delicious Corn Fried Egg or even a zesty topping for grilled shrimp with Pan Fried Mayo.

Storage Tips for Quick and Easy Chimichurri Sauce

  • Fridge: Store your chimichurri sauce in an airtight container in the refrigerator for up to one week. The flavors actually improve as it sits!
  • Freezer: For longer storage, freeze the chimichurri sauce in ice cube trays. Once frozen, transfer the cubes to a zip-top bag and keep for up to 3 months.
  • Thawing: To use frozen chimichurri, simply thaw cubes in the fridge overnight or place them in warm water until they soften.
  • Reheating: When ready to enjoy your chimichurri, give it a gentle stir after thawing to revive its fresh taste. This quick and easy chimichurri sauce is perfect for enhancing all your favorite dishes!

Make Ahead Options

These Quick and Easy Chimichurri Sauce options are perfect for busy home cooks looking to save time during the week! You can prepare the entire sauce up to 3 days in advance by blending all the ingredients and storing the mixture in an airtight container in the fridge. This not only saves you time but also allows the flavors to meld beautifully. Make sure to give it a gentle stir before serving, as the oil may separate slightly when chilled. For added freshness, you might want to mix in a splash of lemon juice just before serving for a zesty kick! Enjoy having this vibrant sauce ready to elevate your meals any night of the week.

Quick and Easy Chimichurri Sauce Recipe FAQs

How do I choose the right herbs for chimichurri?
Absolutely! When selecting herbs for your chimichurri, look for fresh, vibrant parsley and cilantro. The parsley should appear bright green without any dark spots, and the cilantro should be fragrant. If you can only find curly parsley, it can work in a pinch, but flat-leaf has the best flavor for this sauce.

What’s the best way to store chimichurri sauce?
You can store your chimichurri sauce in an airtight container in the refrigerator for up to one week. Just ensure it’s sealed tightly to maintain its vibrant flavors. The sauce actually tastes better after a few hours in the fridge, as the ingredients meld beautifully together!

Can I freeze chimichurri sauce?
Yes, absolutely! To freeze your chimichurri sauce, pour it into ice cube trays and freeze until solid. Once frozen, transfer the cubes to a zip-lock bag for easier storage. These cubes can last up to 3 months in the freezer. When you're ready to use it, simply thaw the desired number of cubes in the fridge overnight or in warm water for a quicker method.

What should I do if my chimichurri is too bitter?
If your chimichurri sauce tastes too bitter, it may be from the herbs. To balance this out, you can add a bit more olive oil or a splash of red wine vinegar to brighten the flavors. Additionally, incorporating a squeeze of lemon juice can help cut through bitterness and enhance the freshness of your sauce.

Is chimichurri safe for pets?
Very! While chimichurri sauce contains fresh herbs and garlic, which can be harmful in large amounts, the small quantity used in the sauce typically won’t pose a risk to pets. However, it’s always a good idea to consult your vet if you have concerns, especially if your pet has any known sensitivities or health issues.

Quick and Easy Chimichurri Sauce

Quick and Easy Chimichurri Sauce for Flavor-Packed Dishes

Quick and easy chimichurri sauce transforms ordinary dishes into extraordinary meals with fresh herbs and zesty vinegar.
Print Recipe Pin Recipe
Prep Time 5 minutes mins
Total Time 5 minutes mins
Servings: 1 cup
Course: Appetizers
Cuisine: Argentinian
Calories: 200
Ingredients Equipment Method Nutrition Notes

Ingredients
  

For the Sauce
  • 1 cup Fresh Parsley Substitute curly parsley if needed.
  • 1/2 cup Fresh Cilantro Increase parsley if not a fan.
  • 3 cloves Garlic Use fresh for best flavor impact.
  • 1/2 cup Olive Oil Extra virgin recommended for richness.
  • 2 tablespoons Red Wine Vinegar White wine vinegar can be used.
  • 1 teaspoon Dried Oregano Fresh can also be used.
  • 1/2 teaspoon Red Pepper Flakes Adjust based on spice tolerance.
  • to taste Salt Enhance taste as needed.
  • to taste Black Pepper Enhance taste as needed.
  • 1 tablespoon Fresh Lemon Juice Adjust to taste for extra zing.

Equipment

  • Food Processor

Method
 

Step-by-Step Instructions
  1. Rinse fresh parsley and cilantro under cold water and pat dry. Remove the thick stems.
  2. In a food processor, combine parsley, cilantro, garlic, oregano, red pepper flakes, salt, and black pepper. Pulse until roughly chopped.
  3. Pour olive oil, red wine vinegar, and lemon juice into the food processor. Pulse again until well combined but chunky.
  4. Taste and adjust seasoning with salt, pepper, or vinegar as needed. Pulse briefly to mix adjustments.
  5. Transfer to a serving bowl or jar. Use immediately or refrigerate for up to a week.

Nutrition

Serving: 1cupCalories: 200kcalCarbohydrates: 4gProtein: 1gFat: 20gSaturated Fat: 3gPolyunsaturated Fat: 2gMonounsaturated Fat: 15gSodium: 50mgPotassium: 200mgVitamin A: 20IUVitamin C: 10mgCalcium: 2mgIron: 2mg

Notes

Letting the sauce sit for a couple of hours enhances the flavors. Store in an airtight container.

Tried this recipe?

Let us know how it was!

Slow Cooker Sweet Hawaiian Teriyaki Meatballs for Effortless Joy

May 18, 2026 by Grace Snow Leave a Comment

"Can you smell that?” my friend exclaimed as the sweet aroma wafted through my kitchen. That's the magic of my Slow Cooker Sweet Hawaiian Teriyaki Meatballs! With their irresistible combination of rich teriyaki sauce and luscious pineapple preserves, these meatballs create a flavor explosion that will have everyone asking for more. The beauty of this dish lies not only in its delightful taste but also in its effortless preparation. Perfect for busy weeknights or entertaining guests, these slow-cooked bites are a family-friendly crowd-pleaser that will bring a festive touch to any gathering. And who wouldn’t love a recipe that allows for more quality time with your loved ones instead of being stuck in the kitchen? Curious about how to bring a taste of the islands to your table? Let’s dive in!

Why are these meatballs a must-try?

Unforgettable Flavor: Each bite of these Slow Cooker Sweet Hawaiian Teriyaki Meatballs is a taste journey filled with tropical sweetness and umami richness, making them a standout choice for any gathering.

Effortless Preparation: With minimal hands-on time, you can set your slow cooker and let it work its magic while you enjoy the party or spend time with family.

Party Perfect: These meatballs serve as a fantastic appetizer or main dish, appealing to both kids and adults alike, ensuring a full plate and happy faces!

Versatile Pairing Options: Enjoy them on their own or alongside rice or noodles for a more substantial meal, just like with my Chicken Teriyaki Noodles.

Make-Ahead Friendly: Prepare them in advance and freeze for when you need a hassle-free solution — simple reheating ensures they’re always a hit.

Slow Cooker Sweet Hawaiian Teriyaki Meatballs Ingredients

For the Meatballs

  • Frozen Meatballs – Using frozen meatballs helps them maintain their shape during slow cooking, allowing for the best texture.

For the Sauce

  • Teriyaki Sauce – This adds that delightful savory and slightly sweet flavor; opt for high-quality sauce for maximum taste.
  • Pineapple Preserves – They provide a burst of sweetness and depth; if desired, you can make your own pineapple sauce for a fresh twist.
  • Minced Garlic – Enhances the overall flavor; fresh garlic brings more oomph, but jarred works perfectly for convenience.

Serving Suggestions

  • Rice or Noodles – Pair these meatballs with rice or noodles for a heartier meal; they complement the tropical flavors beautifully!

Step‑by‑Step Instructions for Slow Cooker Sweet Hawaiian Teriyaki Meatballs

Step 1: Preparation
Begin by gathering all your ingredients and equipment. You will need a slow cooker, measuring cups, a mixing bowl, and a spatula. Take out your frozen meatballs, teriyaki sauce, pineapple preserves, and minced garlic. This organization will streamline the process and ensure that nothing is overlooked as you prepare your Slow Cooker Sweet Hawaiian Teriyaki Meatballs.

Step 2: Mix Sauces
In a mixing bowl, combine the teriyaki sauce, pineapple preserves, and minced garlic. Use a spatula to mix them well until the sauce has a smooth and cohesive texture. This luscious sauce will coat your meatballs beautifully during cooking, so take a moment to ensure that it is thoroughly mixed and ready to drizzle over your meatballs.

Step 3: Coat Meatballs
Place the frozen meatballs in the slow cooker, making sure they are evenly distributed. Pour the prepared sauce over them, ensuring each meatball is well-coated with the delicious mixture. The frozen nature of the meatballs will help them retain their shape while soaking up all the sweet and savory flavors as they cook, setting the stage for delectable Slow Cooker Sweet Hawaiian Teriyaki Meatballs.

Step 4: Cooking
Cover the slow cooker with its lid and set it to cook on high for 2-3 hours or low for 6-7 hours. For even distribution of flavors and to prevent sticking, stir the meatballs once or twice during the cooking process. You'll know they’re done when the meatballs are steaming hot and glazed in a shiny teriyaki sauce, inviting everyone to dig in.

Step 5: Serving
Once the cooking time is complete, carefully remove the lid and serve the meatballs warm. You can present these Slow Cooker Sweet Hawaiian Teriyaki Meatballs as an irresistible appetizer or over a bed of rice for a delightful meal. Their mouthwatering aroma will surely make them a favorite among family and friends, providing a genuine taste of Hawaiian cuisine.

Slow Cooker Sweet Hawaiian Teriyaki Meatballs Variations

Feel free to add your personal touch to these delicious meatballs with these enticing variations!

  • Spicy Kick: Add red pepper flakes or a splash of sriracha to the teriyaki sauce for a fiery twist that’ll excite your tastebuds. Balance the sweet and savory with just the right heat — it’s a sure crowd-pleaser!

  • Gluten-Free: Swap out the teriyaki sauce for a gluten-free version to accommodate dietary needs without compromising flavor. Enjoy the same rich taste of tropical paradise while keeping it friendly for all guests.

  • Homemade Meatballs: Replace frozen meatballs with your favorite homemade recipe for an extra touch of love. Crafting your own meatballs enhances their flavor profile, allowing you to customize spice levels and texture just the way you like!

  • Pineapple Reduction: If you’re a true pineapple lover, reduce fresh pineapple chunks into a syrup and mix this with your sauce for a more intense flavor. This will amplify the sweet-tanginess and add a pleasing texture!

  • Asian-Inspired Veggies: Toss in fresh bell peppers or baby corn into the slow cooker for added color and a nutritious boost. This twist not only enhances the dish visually but also enriches each bite with delightful crunch.

  • Soy Sauce Substitute: Experiment with coconut aminos in place of soy sauce to create a healthier alternative. This swap reduces sodium and adds a hint of natural sweetness, aligning perfectly with those island-inspired flavors.

  • Lime Zest Finish: For a refreshing twist, sprinkle lime zest over the meatballs just before serving. This brightens the dish and ties the flavors together beautifully, making every bite feel like a vacation!

  • Tropical Glaze: Drizzle a little honey or a sprinkle of brown sugar over the finished meatballs for a lovely sticky glaze that’ll leave everyone reaching for more. It's like an island getaway for your taste buds!

Pair these meatballs with rice or noodles, or try them as tantalizing skewers for easy snacking. If you’re inspired by tropical flavors, you may also enjoy making these Smoky Sweet Potatoes or Maple Roasted Sweet Potatoes to accompany your dish!

Make Ahead Options

These Slow Cooker Sweet Hawaiian Teriyaki Meatballs are perfect for meal prep enthusiasts looking to save time! You can prepare the meatballs and sauce up to 24 hours in advance. Simply combine the teriyaki sauce, pineapple preserves, and minced garlic, then coat the frozen meatballs. Store them in an airtight container in the refrigerator to keep them fresh. When you’re ready to cook, just transfer everything to the slow cooker, covering and cooking on high for 2-3 hours or low for 6-7 hours. This method ensures that the meatballs remain just as delicious and flavorful, allowing you to enjoy a stress-free meal with your loved ones!

How to Store and Freeze Slow Cooker Sweet Hawaiian Teriyaki Meatballs

Fridge: Store leftover meatballs in an airtight container for up to 3-4 days. Reheat them in the microwave or on the stovetop until warmed through.

Freezer: Freeze the cooked meatballs in a single layer on a baking sheet, then transfer to a freezer-safe container for up to 3 months. This preserves their delightful flavor.

Reheating: For the best results, reheat the frozen meatballs in the oven at 350°F (175°C) until heated through, or use the microwave, taking care to heat evenly.

Air-tight Storage: Always use an airtight container for both fridge and freezer storage to prevent freezer burn and maintain the luscious taste of the teriyaki sauce.

What to Serve with Slow Cooker Sweet Hawaiian Teriyaki Meatballs

Elevate your culinary experience by exploring delightful pairings that enhance the vibrant flavors of these succulent meatballs.

  • Steamed Jasmine Rice: Its fluffy texture provides a neutral base, perfectly absorbing the rich teriyaki sauce for a harmonious balance.

  • Crispy Green Salad: A refreshing mix of greens and crunchy vegetables adds a crisp contrast, bringing brightness and color to the table.

  • Tropical Fruit Salad: A medley of pineapple, mango, and kiwi offers a sweet, tangy surprise that complements the savory meatballs beautifully.

  • Garlic Noodles: These buttery, savory noodles will tantalize your taste buds, creating a mouthwatering backdrop to your Hawaiian-inspired feast.

  • Coconut Rice: The nutty sweetness of coconut rice enriches the tropical vibe, making every bite feel like a sunny getaway.

  • Pineapple-Colada Smoothies: Serve these creamy, fruity drinks alongside the meatballs for a refreshing sip that echoes the flavors of the islands.

  • Sesame Broccoli: The crunch of lightly steamed broccoli drizzled with sesame oil provides a nutritious side that pairs wonderfully with the meatballs and adds depth to the meal.

  • Hibiscus Iced Tea: A floral, tart beverage that’s both refreshing and visually stunning, making it the ideal drink companion to your flavorful meatballs.

Indulging in these pairings transforms your gathering into a feast of flavors, evoking those sunny shores of Hawaii right in your home.

Expert Tips for Slow Cooker Sweet Hawaiian Teriyaki Meatballs

  • Use Frozen Meatballs: Prevent them from falling apart during cooking by using frozen meatballs; they maintain their shape while soaking in flavor.

  • Mix Thoroughly: Ensure the teriyaki sauce, pineapple preserves, and garlic are well combined before pouring over the meatballs for even coating and maximum flavor.

  • Watch Cooking Times: Different slow cookers may have varying heat levels; monitor the cooking time to avoid overcooking your meatballs.

  • Stir Occasionally: Gently stir the meatballs once or twice during cooking to distribute the sauce evenly and prevent sticking for those perfect Slow Cooker Sweet Hawaiian Teriyaki Meatballs.

  • Pairing Ideas: Serve the meatballs on skewers for easy snacking or over rice for a satisfying dinner, making it a versatile dish for any occasion.

Slow Cooker Sweet Hawaiian Teriyaki Meatballs Recipe FAQs

What type of frozen meatballs should I use?
I recommend using high-quality frozen meatballs, as they help maintain their shape during cooking. Look for ones made with lean meats and minimal fillers for the best results; they soak up the teriyaki sauce beautifully!

How should I store any leftover meatballs?
Store any leftovers in an airtight container in the refrigerator for up to 3-4 days. Make sure they’re completely cooled before sealing the container, as this helps maintain their texture and flavor when reheating.

Can I freeze Slow Cooker Sweet Hawaiian Teriyaki Meatballs?
Absolutely! To freeze, first allow the cooked meatballs to cool completely. Spread them in a single layer on a baking sheet to freeze individually, then transfer them to a freezer-safe container or ziploc bag for up to 3 months. This way, they won’t stick together, and you can enjoy the tropical flavors anytime!

What are some common issues when making these meatballs?
Some people may find the meatballs overcooked or dry if the cooking time is too long. I recommend checking them around the minimum cooking time, especially if using a different slow cooker model. For best results, stir occasionally and adjust cooking times as needed for perfectly tender teriyaki meatballs.

Are there any dietary considerations for this recipe?
If you're looking for a gluten-free option, ensure you use gluten-free teriyaki sauce, which is widely available today. Always check ingredient labels for allergies, especially if you’re serving guests; it’s better to be safe and keep everyone happy.

Slow Cooker Sweet Hawaiian Teriyaki Meatballs

Slow Cooker Sweet Hawaiian Teriyaki Meatballs for Effortless Joy

Enjoy the effortless taste of Slow Cooker Sweet Hawaiian Teriyaki Meatballs, combining rich flavors and simple preparation for any gathering.
Print Recipe Pin Recipe
Prep Time 10 minutes mins
Cook Time 3 hours hrs
Total Time 3 hours hrs 10 minutes mins
Servings: 8 meatballs
Course: Appetizers
Cuisine: Hawaiian
Calories: 120
Ingredients Equipment Method Nutrition Notes

Ingredients
  

For the Meatballs
  • 2 lbs Frozen Meatballs Using frozen helps maintain shape during cooking.
For the Sauce
  • 1 cup Teriyaki Sauce Opt for high-quality for maximum taste.
  • 1/2 cup Pineapple Preserves Homemade is an option for a fresh twist.
  • 2 cloves Minced Garlic Fresh garlic is preferable for more flavor.
Serving Suggestions
  • 4 cups Rice or Noodles Pair these with meatballs for a hearty meal.

Equipment

  • Slow Cooker
  • Mixing Bowl
  • Spatula

Method
 

Preparation
  1. Gather all ingredients and equipment: slow cooker, measuring cups, mixing bowl, and spatula.
  2. Take out your frozen meatballs, teriyaki sauce, pineapple preserves, and minced garlic.
Mix Sauces
  1. In a mixing bowl, combine teriyaki sauce, pineapple preserves, and minced garlic. Mix until smooth.
Coat Meatballs
  1. Place frozen meatballs in slow cooker and pour sauce over them, ensuring they are well-coated.
Cooking
  1. Cover slow cooker and cook on high for 2-3 hours or low for 6-7 hours, stirring occasionally.
Serving
  1. After cooking, serve meatballs warm as an appetizer or over rice.

Nutrition

Serving: 1meatballCalories: 120kcalCarbohydrates: 10gProtein: 6gFat: 5gSaturated Fat: 1gPolyunsaturated Fat: 0.5gMonounsaturated Fat: 2gCholesterol: 20mgSodium: 300mgPotassium: 150mgFiber: 1gSugar: 5gVitamin A: 50IUVitamin C: 1mgCalcium: 20mgIron: 1mg

Notes

These meatballs are perfect for gatherings and can be made ahead of time and frozen. Serve with rice or noodles for a complete meal.

Tried this recipe?

Let us know how it was!

Crispy Salmon Patties Recipe: Quick, Delicious, and Nutritious

May 13, 2026 by Grace Snow Leave a Comment

As the savory aroma wafted through my kitchen, I found myself transported back to those comforting family dinners, where crispy salmon patties took center stage. This Crispy Salmon Patties Recipe is not just a crowd-pleaser—it's a quick solution for those evenings when time is tight but good food is non-negotiable. Ready in just 30 minutes, these patties are rich in protein and versatile enough to serve as a main dish or a tasty appetizer, making them perfect for busy weeknights or casual get-togethers. Plus, with a golden-brown exterior and a moist, flavorful interior, every bite is a delightful experience. You'll also love how customizable this recipe is, allowing you to switch up ingredients based on what you have on hand. Ready to elevate your dinner game and satisfy those cravings? Let's dive into the recipe!

Why are these salmon patties a must-try?

Quick Preparation: In just 30 minutes, you can whip up these delicious patties, perfect for busy weeknights!

Protein-Packed: Each serving delivers a hearty 18 grams of protein, making it a satisfying meal option.

Versatile Ingredients: Feel free to customize with your favorite veggies or spices. Add herbs for a fresh twist, or mix in different spices for a unique flavor!

Crowd-Pleaser: These flavors appeal to everyone, whether served as a main course or an appetizer. Imagine them at your next gathering!

Health-Conscious: They're not only tasty but also a great source of omega-3 fatty acids, contributing to a balanced diet.

For more quick meal ideas, check out my One Pot Salmon or Crispy Fish Taco Bowls recipes. You won't regret it!

Crispy Salmon Patties Ingredients

• Dive into these Crispy Salmon Patties Recipe flavors with the essentials below!

For the Patties

  • Canned Salmon – Provides rich protein; make sure it’s well-drained to avoid a soggy texture.
  • Breadcrumbs – Acts as a binder to hold the patties together; for gluten-free, crushed crackers or oats work great.
  • Mayonnaise – Adds moisture and creaminess; Greek yogurt can be a lighter substitute.
  • Chopped Onion – Contributes a burst of flavor; feel free to replace with green onions or shallots for a different profile.
  • Bell Pepper – Offers crunch and sweetness; use whatever color you love, or swap with zucchini for a unique twist.
  • Dijon Mustard – Enhances flavor with its tangy kick; try honey mustard for a sweeter touch if you prefer.
  • Garlic Powder – Provides depth; fresh minced garlic can be a delightful alternative.
  • Old Bay Seasoning – Adds a classic seafood appeal; optional, but cajun seasoning gives it a spicy flair.
  • Salt and Black Pepper – Essential for flavor; adjust to your liking for the perfect taste.
  • Egg – Binds everything together; for a vegan option, use a flaxseed mixture (1 tbsp flaxseed with 2.5 tbsp water).
  • Olive Oil – Key for frying to achieve that crispy outer layer; can be swapped with vegetable or avocado oil.

Cooking Tips

  • Optional Toppings – Consider serving these patties with lemon wedges, tartar sauce, or aioli for an extra burst of flavor!

These ingredients are the heart of this Crispy Salmon Patties Recipe, ensuring you bring love and warmth from your kitchen to the table. Enjoy every bite!

Step‑by‑Step Instructions for Crispy Salmon Patties Recipe

Step 1: Prepare Salmon
Begin by draining the canned salmon thoroughly, ensuring no excess liquid remains. Flake the salmon into small pieces using a fork, and take a moment to check for any bones that may have been missed. The goal is to create a well-mixed base for your crispy salmon patties, so make sure it’s suitably broken down before moving on to the next step.

Step 2: Mix Ingredients
In a large mixing bowl, combine the flaked salmon with breadcrumbs, mayonnaise, chopped onion, bell pepper, Dijon mustard, garlic powder, Old Bay seasoning, salt, and black pepper. Add the beaten egg to the mixture as a binding agent. Gently stir until just combined—the mixture should feel moist but not overly wet. This balance is essential for the perfect texture in your crispy salmon patties.

Step 3: Shape Patties
With clean hands, take portions of the salmon mixture and shape them into patties approximately 2-3 inches in diameter. Aim to form a total of about eight patties so that they cook evenly and have a satisfying crisp. Arrange the patties on a plate, leaving plenty of space between each to prevent sticking while you prepare to cook.

Step 4: Cook Patties
Heat a generous amount of olive oil in a non-stick skillet over medium heat. Once the oil is shimmering, carefully add the patties, making sure not to overcrowd the pan. Fry each patty for about 4-5 minutes on one side, until golden brown and crispy. You can check for doneness by lifting one to see a nice golden shade before flipping.

Step 5: Drain and Serve
As the crispy salmon patties finish browning on the second side, prepare a plate lined with paper towels. Once cooked, transfer the patties onto the towel-lined plate to absorb any excess oil, ensuring they remain crisp. Serve these delightful crispy salmon patties warm, perhaps with a side of lemon wedges or your favorite dipping sauce for a mouthwatering experience.

Crispy Salmon Patties Variations

Feel free to personalize these salmon patties with delightful twists that cater to your taste buds!

  • Herb-Infused: Add fresh herbs like dill or parsley to amplify the flavor profile and bring a touch of brightness to your patties. Imagine the aromatic goodness filling your kitchen!

  • Veggie Boost: Incorporate grated carrots or finely chopped spinach for extra nutrients and vibrant color. Seasonal veggies can introduce a delightful crunch and freshness to every bite.

  • Baked Version: Swap frying for baking to create a healthier option. Just place them on a baking sheet at 400°F (200°C) for about 15-20 minutes, flipping halfway through for even browning.

  • Spicy Kick: Mix in some chopped jalapeños or a dash of cayenne pepper for those who seek a little heat! This fiery twist will surely awaken your senses.

  • Cheesy Delight: Blend in some shredded cheese, like cheddar or feta, for a creamy texture and fantastic flavor. The gooeyness will elevate the experience to a whole new level!

  • Sweet-Sour Blend: Replace the Dijon mustard with a dollop of honey mustard for a sweet and tangy flavor that pairs beautifully with the salmon. Perfect for those who enjoy a hint of sweetness!

  • Protein Variation: Swap canned salmon for tuna or leftover cooked crab for an exciting change while keeping that protein boost. Think of different seafood stories unfolding with every bite!

Ready to dive into more delectable dishes? Explore my Crispy Parmesan Artichoke Hearts for a delicious appetizer, or try the flavorful Spatchcock Chicken for a hearty dinner alternative!

Expert Tips for Crispy Salmon Patties

  • Oil Temperature: Make sure your oil is hot enough before adding the patties. A sizzle indicates readiness and helps avoid greasiness in your crispy salmon patties.

  • Batch Cooking: Avoid overcrowding the pan when frying. This maintains the oil temperature and ensures all patties cook evenly for that perfect crunch.

  • Gentle Handling: Flip the patties with care to prevent breaking. Use a spatula to support the entire patty for easy turning.

  • Leave Space Between Patties: When shaping the patties, allow enough space to prevent sticking. This will help you form a beautiful, crisp exterior.

  • Moisture Management: Drain salmon thoroughly and mix just until combined. Over-mixing can create a dense texture rather than a light, crispy patty.

  • Customize Flavors: Experiment with spices like cayenne or chipotle for a smoky kick. Personalize your crispy salmon patties to your taste!

What to Serve with Crispy Salmon Patties

Savor the moment with a complete meal that brings warmth and delight to your table.

  • Creamy Garlic Mashed Potatoes: These buttery potatoes pair beautifully with crispy salmon patties, offering a comforting contrast in texture and flavor. The richness of the garlic adds depth, making each bite memorable.

  • Fresh Arugula Salad: Tossed with lemon vinaigrette, peppery arugula brightens the dish and balances the richness of the patties, adding a refreshing crunch.

  • Coleslaw: A side of crisp coleslaw provides a nice crunch and a zesty tang that complements the savory flavors, making every bite a well-rounded experience.

  • Roasted Asparagus: Tender asparagus drizzled with olive oil compliments the meal with its fresh, earthy flavors while also adding a splash of color to your plate.

  • Tartar Sauce: A classic accompaniment, the tangy and creamy tartar sauce enhances the flavor of the salmon patties while providing a sumptuous dip that everyone will love.

  • Crispy Sweet Potato Fries: The sweet and savory combination of crispy sweet potatoes adds a delightful contrast to the patties and is sure to please both kids and adults alike.

  • Lemon Wedges: Brighten every bite with a squeeze of lemon, enhancing the salmon's natural flavors and adding a fresh zing to your meal.

  • Chilled White Wine: A glass of chilled Sauvignon Blanc perfectly complements the crispy salmon patties, balancing the flavors while enhancing your dining experience.

Make Ahead Options

Crispy Salmon Patties are perfect for meal prep, allowing busy cooks to save time during hectic weeknights! You can prepare the salmon mixture up to 24 hours in advance—just mix all ingredients together and store in an airtight container in the fridge. If you're making the patties, shape them and place them on a baking sheet lined with parchment paper, then cover and refrigerate for up to 3 days. To maintain their crispy texture, cook the patties right before serving—heat a skillet until hot and fry them for 4-5 minutes on each side until golden brown. With these make-ahead options, you'll enjoy flavorful Crispy Salmon Patties without the last-minute rush!

How to Store and Freeze Crispy Salmon Patties

Fridge: Store leftover crispy salmon patties in an airtight container for up to 3 days to keep them fresh. Reheat in the oven at 350°F (175°C) for about 10 minutes for optimal crispiness.

Freezer: For longer storage, freeze uncooked patties by laying them on a baking sheet lined with parchment paper and freezing until firm. Transfer to a freezer bag for up to 3 months.

Thawing: When ready to cook, thaw frozen patties in the fridge overnight before frying. This ensures even cooking and retains the flavor of your crispy salmon patties.

Reheating: To reheat cooked patties, place them in a preheated oven at 350°F (175°C) for about 10 minutes, allowing them to regain their crisp texture.

Crispy Salmon Patties Recipe FAQs

What type of canned salmon should I use for the crispy salmon patties?
Absolutely! Opt for wild-caught canned salmon if available, as it typically offers fresher flavors and higher omega-3 content. Make sure to drain it thoroughly to avoid any excess moisture, which can lead to soggy patties.

How should I store leftover crispy salmon patties?
Store your leftover crispy salmon patties in an airtight container in the refrigerator for up to 3 days. When you’re ready to enjoy them again, reheat in a preheated oven at 350°F (175°C) for about 10 minutes. This method helps restore their delightful crispiness, giving you that fresh-out-of-the-pan experience!

Can I freeze crispy salmon patties?
Yes! To freeze uncooked crispy salmon patties, lay them on a baking sheet lined with parchment paper and place them in the freezer until firm. Then, transfer them to a freezer bag or airtight container, where they’ll keep well for up to 3 months. When you're ready to cook, thaw them in the fridge overnight for best results.

Why are my crispy salmon patties falling apart while cooking?
Very! If your patties are breaking apart, it could be due to too much moisture in the mixture. Ensure you drain the salmon thoroughly and mix the ingredients just until combined—overmixing can create a dense texture. Another tip is to make sure the oil is hot enough before adding the patties; a sizzling sound indicates readiness, ensuring a perfect crispy exterior.

Can I modify the recipe to accommodate allergies?
Of course! If you or someone you’re serving has allergies, make simple swaps. For gluten-free options, use gluten-free breadcrumbs or crushed crackers. If you need to remove eggs for an allergy or dietary preference, substitute with a flaxseed mixture (1 tablespoon of flaxseed mixed with 2.5 tablespoons of water). Always check ingredient labels to ensure they meet your dietary needs.

What should I do if I want to enhance the flavor of my patties?
Definitely a great idea! You can elevate the flavor by incorporating fresh herbs like dill, parsley, or cilantro into the mix. Additionally, adding spices such as cayenne pepper or smoked paprika can provide a flavorful kick. Tinkering with the ingredients will make the recipe your own, so feel free to get creative while sticking to the basics of this crispy salmon patties recipe!

Crispy Salmon Patties Recipe

Crispy Salmon Patties Recipe: Quick, Delicious, and Nutritious

This Crispy Salmon Patties Recipe is a quick and nutritious dish that's perfect for busy weeknights, ready in just 30 minutes.
Print Recipe Pin Recipe
Prep Time 15 minutes mins
Cook Time 15 minutes mins
Total Time 30 minutes mins
Servings: 4 patties
Course: Appetizers
Cuisine: American
Calories: 210
Ingredients Equipment Method Nutrition Notes

Ingredients
  

For the Patties
  • 1 can Canned Salmon Make sure it’s well-drained
  • 1 cup Breadcrumbs For gluten-free, crushed crackers or oats work
  • 1/4 cup Mayonnaise Greek yogurt can be a lighter substitute
  • 1/4 cup Chopped Onion Feel free to replace with green onions or shallots
  • 1/4 cup Bell Pepper Use whatever color you love
  • 1 tbsp Dijon Mustard Try honey mustard for a sweeter touch
  • 1 tsp Garlic Powder Fresh minced garlic can be an alternative
  • 1 tsp Old Bay Seasoning Cajun seasoning gives it a spicy flair
  • to taste Salt and Black Pepper Adjust for perfect taste
  • 1 large Egg Binds everything together
  • 2 tbsp Olive Oil For frying

Equipment

  • non-stick skillet

Method
 

Step-by-Step Instructions
  1. Begin by draining the canned salmon thoroughly, ensuring no excess liquid remains. Flake the salmon into small pieces using a fork.
  2. In a large mixing bowl, combine the flaked salmon with breadcrumbs, mayonnaise, chopped onion, bell pepper, Dijon mustard, garlic powder, Old Bay seasoning, salt, and black pepper. Add the beaten egg and stir until just combined.
  3. Shape portions of the mixture into patties about 2-3 inches in diameter, approximately eight patties total.
  4. Heat olive oil in a non-stick skillet over medium heat. Fry each patty for about 4-5 minutes on each side until golden brown.
  5. Transfer the cooked patties onto a towel-lined plate to absorb excess oil and serve warm with lemon wedges or your favorite dipping sauce.

Nutrition

Serving: 1pattyCalories: 210kcalCarbohydrates: 10gProtein: 18gFat: 12gSaturated Fat: 2gPolyunsaturated Fat: 3gMonounsaturated Fat: 7gCholesterol: 60mgSodium: 400mgPotassium: 250mgFiber: 1gSugar: 1gVitamin A: 200IUVitamin C: 10mgCalcium: 50mgIron: 1mg

Notes

Optional toppings include lemon wedges, tartar sauce, or aioli for extra flavor. Ensure to manage oil temperature for best results.

Tried this recipe?

Let us know how it was!

No-Bake Greek Salad Cucumber Cups: Crunchy Fresh Delight

May 2, 2026 by Grace Snow Leave a Comment

Is there anything more refreshing than a vibrant, crunchy bite bursting with Mediterranean flavors? My No-Bake Greek Salad Cucumber Cups are not only a feast for the eyes but also incredibly easy to whip up—perfect for those busy weeknights or impromptu gatherings. With just 20 minutes of prep time, you can create these delightful, keto-friendly appetizers that are both gluten-free and low-carb. Imagine serving a beautiful platter filled with these colorful cups, each one a crisp cucumber shell cradling a savory blend of tomatoes, feta, and olives. They’re not just tasty; they’re the ideal guilt-free indulgence that will impress your dinner guests without keeping you tied to the kitchen. Curious about how to bring this healthy twist to your next snack time?

Why Are These Cucumber Cups a Must-Try?

Vibrant Flavors: Each bite of these No-Bake Greek Salad Cucumber Cups bursts with zesty Mediterranean goodness, combining juicy tomatoes, briny olives, and creamy feta.

Super Simple: With just a 20-minute prep, you’ll be enjoying these eye-catching delights in no time—perfect for busy schedules!

Keto-Friendly: These low-carb treasures make it easy to indulge without guilt, making them an excellent choice for your health-focused gatherings.

Crowd-Pleasing Appeal: Serve them at summer barbecues or potlucks, and watch as they vanish in a flash!

Versatile Filling: Feel free to get creative—try adding bell peppers or even a spicy twist with jalapeños, just as you would in a delicious Tofu Caesar Salad or a Chicken Salad with Apples.

These flavorful cups promise to be a hit with everyone!

No-Bake Greek Salad Cucumber Cups Ingredients

• Create these easy, flavorful bites with fresh ingredients!

For the Cucumber Cups

  • English Cucumbers – The ideal vessel for filling; substitute with field cucumbers if needed.

For the Greek Salad Filling

  • Cherry or Grape Tomatoes – Adds a naturally sweet and colorful touch; be sure to de-seed for best texture.
  • Kalamata Olives – Enhances the flavor with a briny kick; feel free to swap with your favorite olives.
  • Red Onion – Brings a sharp crunch; use green onions for a milder alternative.
  • Feta Cheese – Adds creamy tanginess; try goat cheese or vegan feta for a different taste.
  • Fresh Dill – Infuses a wonderful scent; substitute with parsley if dill isn't available.

For the Dressing

  • Extra Virgin Olive Oil – Elevates the salad’s flavor; a neutral oil can replace this if preferred.
  • Fresh Lemon Juice – Brightens up the entire dish; swap with vinegar if necessary.
  • Dried Oregano – Gives authentic Mediterranean flavor; fresh oregano can enhance this even more.
  • Black Pepper and Sea Salt – Basic seasonings to taste; essential for balancing flavors.

With these ingredients, you're well on your way to creating delicious No-Bake Greek Salad Cucumber Cups that everyone will enjoy!

Step‑by‑Step Instructions for No-Bake Greek Salad Cucumber Cups

Step 1: Prepare the Cucumbers
Start by washing the English cucumbers thoroughly. Slice them into 1-inch thick rounds using a sharp knife, and then carefully scoop out the centers with a small spoon or melon baller to create little cups. Ensure the walls of the cucumbers remain sturdy to hold the filling. Set these prepared cucumber cups aside on a platter, ready for the delicious filling!

Step 2: Dice the Filling Ingredients
Chop the cherry or grape tomatoes, Kalamata olives, and red onion into small, even pieces for balanced flavor in your filling. Use a sharp knife and a cutting board for safety and precision. Finely chop the fresh dill as well. Take a moment to enjoy the vibrant colors and fresh aromas as you prepare these ingredients for the No-Bake Greek Salad Cucumber Cups.

Step 3: Create Greek Salad Mixture
In a medium-sized mixing bowl, combine the diced tomatoes, olives, red onion, and chopped dill. Gently fold in the crumbled feta cheese, ensuring everything is evenly distributed. The mixture will be colorful and fragrant—take a moment to appreciate it! This fresh Greek salad mixture is the heart of your cucumber cups, ready to be dressed.

Step 4: Whisk the Dressing
In a small bowl, whisk together the extra virgin olive oil, fresh lemon juice, dried oregano, sea salt, and black pepper until well combined. You’ll want a smooth consistency; the mixture should feel light and aromatic. This dressing brings everything together and enhances the flavors of your No-Bake Greek Salad Cucumber Cups, making them irresistibly tasty.

Step 5: Combine Filling and Dressing
Pour the homemade dressing over the Greek salad mixture in your bowl. Using a spatula, gently stir the ingredients to ensure every piece is coated beautifully in the dressing, which should cling to the fillings without pooling at the bottom. The colors will deepen, and the dish will smell delightful, making it even more appealing.

Step 6: Fill the Cucumber Cups
Using a spoon, generously scoop the salad mixture into each hollowed cucumber cup. Don’t be shy—fill them to the brim, allowing the delicious mixture to overflow slightly for an enticing presentation. Arrange the filled cups back on the platter, showcasing their vibrant hues to impress anyone who lays eyes on this elegant appetizer.

Step 7: Garnish and Chill
Optionally, sprinkle a little extra fresh dill on top of each cucumber cup for added flair and flavor. If time allows, place the platter in the refrigerator for about 20 minutes—this chilling step enhances the flavors and helps the cucumbers stay crisp for your serving. Get ready to serve your delightful No-Bake Greek Salad Cucumber Cups!

What to Serve with No-Bake Greek Salad Cucumber Cups

Enjoy the refreshing crunch of these delightful bites alongside complementary dishes that elevate your meal experience.

  • Creamy Hummus: This smooth and flavorful dip adds a rich contrast to the crisp cucumber cups, perfect for scooping up between bites.

  • Classic Tzatziki: Cool and tangy, this yogurt-based sauce enhances the Mediterranean theme and provides a refreshing dip for extra flavor.

  • Pita Chips: These crunchy delights bring a satisfying texture, allowing you to scoop up any leftover filling and making your spread more robust.

  • Grilled Chicken Skewers: The savory, spiced chicken perfectly complements the brightness of the salad cups, creating a well-rounded meal that satisfies.

  • Mixed Green Salad: A bed of greens paired with a light vinaigrette adds freshness, balancing the richness of feta and olives in the cups.

  • Greek-Style Quinoa: Fluffy and protein-packed, this quinoa dish sprinkles in feta and olives to tie together the Mediterranean flavors reminiscent of your cucumber cups.

  • Chilled White Wine: A crisp, dry wine like Sauvignon Blanc elevates the dining experience, enhancing the vibrant flavors of your appetizers.

  • Lemon Sorbet: This light, zesty dessert offers a delightful finish, cleansing your palate and echoing the citrusy notes from the salad cups.

Expert Tips for No-Bake Greek Salad Cucumber Cups

  • Freshness First: Assemble the No-Bake Greek Salad Cucumber Cups just before serving. Cucumbers release moisture over time, which can lead to a soggy filling.

  • Avoid Watery Filling: To prevent excess liquid, be sure to adequately de-seed your tomatoes. This small step makes a big difference in texture!

  • Creative Variations: Don’t hesitate to experiment with the filling. Adding bell peppers or even a touch of jalapeño can take your cucumber cups to the next level.

  • Make-Ahead Components: You can prep the filling and dressing a day in advance. Just combine them with the cucumbers shortly before serving for optimal crunch.

  • Presentation Matters: For that extra wow factor, use a variety of colored tomatoes or garnish with additional herbs to make your cucumber cups visually stunning!

Make Ahead Options

These No-Bake Greek Salad Cucumber Cups are perfect for meal prep, allowing you to enjoy fresh flavors without the last-minute rush! You can prepare the filling (diced tomatoes, olives, onions, dill, and feta) up to 24 hours in advance. Store it in an airtight container in the refrigerator to keep it fresh. For the cucumbers, slice and hollow them out just before serving, as this helps maintain their crunch. When you're ready to enjoy, simply mix the dressing with your prepped filling, fill the cucumber cups, and serve for delicious results that are just as vibrant and tasty. This approach saves time and ensures a delightful appetizer every time!

No-Bake Greek Salad Cucumber Cups Variations

Feel free to unleash your culinary creativity with these delicious twists on the classic cucumber cups!

  • Mediterranean Bean Salad: Replace the traditional filling with a delightful medley of chickpeas, diced bell peppers, and red wine vinegar for a hearty vegan option.

  • Spicy Twist: Add diced jalapeños or red pepper flakes to the salad mixture if you’re craving an extra kick that complements the refreshing cucumbers beautifully.

  • Creamy Avocado: For a richer filling, mash ripe avocado into the Greek salad mixture, bringing in a smooth texture while boosting healthy fats.

  • Vegan Feta: Substitute traditional feta cheese with a homemade or store-bought vegan feta for a satisfying dairy-free alternative that still packs a flavorful punch.

  • Italian Blend: Swap out the Mediterranean ingredients for marinated artichokes, sun-dried tomatoes, and basil, creating an Italian-inspired version that’s equally delightful. You could even serve these with a refreshing Avocado Egg Salad.

  • Crunchy Nuts: Sprinkle in toasted pine nuts or walnuts into the filling for an unexpected crunchy element that adds depth and texture to each bite.

  • Herbal Infusion: Instead of dill, try using fresh mint or basil for a fresh twist that will elevate the Mediterranean flavors in a new direction.

  • Mixed Greens: For a heartier version, fill the cucumber cups with a mix of microgreens or arugula before adding the salad mixture, giving it an extra layer of freshness and crunch.

These variations will make your No-Bake Greek Salad Cucumber Cups a versatile and exciting appetizer for any gathering!

How to Store and Freeze No-Bake Greek Salad Cucumber Cups

Fridge: Store any leftover filled cucumber cups in an airtight container in the fridge for up to 4 hours, but they’re best enjoyed fresh for maximum crunch.

Components Separation: Keep prepared cucumber cups and filling stored separately if making ahead—cucumbers can be prepped and the filling can be refrigerated in a container for up to a day.

Freezer: Avoid freezing the filled cups as cucumbers lose their crispness, but you can freeze the salad filling for up to 2 months if well-packed in an airtight freezer bag.

Reheating: If using frozen filling, thaw it in the fridge overnight and gently stir before filling your cucumber cups; assemble right before serving to retain that delightful freshness.

No-Bake Greek Salad Cucumber Cups Recipe FAQs

How do I select ripe cucumbers for the cups?
Absolutely! Look for cucumbers that are firm, with smooth skin and no dark spots all over. English cucumbers are ideal for these No-Bake Greek Salad Cucumber Cups due to their smaller seeds and sweeter taste. If you can't find them, field cucumbers will work too, just peel them first!

How should I store any leftovers?
Very good question! If you have leftover filled cucumber cups, store them in an airtight container in the fridge for up to 4 hours for the best crunch. However, it's always better to enjoy them fresh! If you have leftover filling, place that in a separate container; it can stay fresh in the fridge for about 2 days.

Can I freeze the filling for later use?
The more the merrier! You can freeze the salad filling for up to 2 months if you store it in an airtight freezer bag. To do this, make sure to press out as much air as possible before sealing. Thaw the filling in the refrigerator overnight before using it to fill fresh cucumber cups, giving you a quick, delicious appetizer option anytime!

What if my filling becomes too watery?
No worries—this can happen sometimes! If your filling turns out watery, make sure to properly de-seed the tomatoes before mixing, and try draining the hollowed cucumbers for about 15 minutes. This helps eliminate excess moisture and keeps your cups crisp and delightful.

Are there any dietary considerations for pets or allergies?
Absolutely! Keep in mind that some ingredients like feta cheese or olives might not be suitable for pets, especially dogs, as they can be high in sodium. If you're making these for a gathering with guests who have dietary restrictions, don't hesitate to check for allergies—omitting the cheese or using a dairy-free alternative based on your guests' needs can keep everyone happy!

No-Bake Greek Salad Cucumber Cups

No-Bake Greek Salad Cucumber Cups: Crunchy Fresh Delight

No-Bake Greek Salad Cucumber Cups are refreshing, easy to make, and perfect for gatherings, featuring Mediterranean flavors.
Print Recipe Pin Recipe
Prep Time 20 minutes mins
Chilling Time 20 minutes mins
Total Time 40 minutes mins
Servings: 4 cups
Course: Appetizers
Cuisine: Mediterranean
Calories: 150
Ingredients Equipment Method Nutrition Notes

Ingredients
  

For the Cucumber Cups
  • 2 medium English Cucumbers The ideal vessel for filling; substitute with field cucumbers if needed.
For the Greek Salad Filling
  • 1 cup Cherry or Grape Tomatoes Be sure to de-seed for best texture.
  • 1/2 cup Kalamata Olives Feel free to swap with your favorite olives.
  • 1/4 cup Red Onion Use green onions for a milder alternative.
  • 1/2 cup Feta Cheese Try goat cheese or vegan feta for a different taste.
  • 1 tablespoon Fresh Dill Substitute with parsley if dill isn't available.
For the Dressing
  • 2 tablespoons Extra Virgin Olive Oil A neutral oil can replace this if preferred.
  • 1 tablespoon Fresh Lemon Juice Swap with vinegar if necessary.
  • 1 teaspoon Dried Oregano Fresh oregano can enhance this even more.
  • Black Pepper To taste; essential for balancing flavors.
  • Sea Salt To taste; essential for balancing flavors.

Equipment

  • Sharp Knife
  • Cutting Board
  • medium mixing bowl
  • small bowl
  • Spatula
  • Spoon
  • melon baller

Method
 

Preparation Steps
  1. Wash the English cucumbers thoroughly, slice them into 1-inch thick rounds, and scoop out the centers to create cups.
  2. Chop the cherry or grape tomatoes, Kalamata olives, and red onion into small, even pieces.
  3. In a medium-sized bowl, combine the diced ingredients and gently fold in the crumbled feta cheese.
  4. In a small bowl, whisk together the olive oil, lemon juice, dried oregano, sea salt, and black pepper.
  5. Pour the dressing over the Greek salad mixture and stir gently until coated.
  6. Scoop the salad mixture into each hollowed cucumber cup, filling them generously.
  7. Optionally, sprinkle extra fresh dill on top and chill for 20 minutes before serving.

Nutrition

Serving: 1cupCalories: 150kcalCarbohydrates: 9gProtein: 3gFat: 12gSaturated Fat: 3gPolyunsaturated Fat: 1gMonounsaturated Fat: 7gCholesterol: 10mgSodium: 300mgPotassium: 150mgFiber: 2gSugar: 3gVitamin A: 500IUVitamin C: 15mgCalcium: 120mgIron: 1mg

Notes

Assemble the No-Bake Greek Salad Cucumber Cups just before serving for maximum crunch. Store any leftover filled cups in an airtight container in the fridge for up to 4 hours, but they are best enjoyed fresh.

Tried this recipe?

Let us know how it was!

Sticky Hoisin Meatballs with Scallion Sauce You'll Crave

May 1, 2026 by Grace Snow Leave a Comment

It’s amazing how a single bite can transport you across the globe, isn’t it? These Sticky Hoisin Meatballs with Scallion Sauce do just that, blending sweet and savory notes that are quintessential in Asian cuisine. Made with juicy ground pork or beef, each meatball is coated in a glossy hoisin glaze that not only satisfies your palate but also looks stunning on any serving platter. The best part? They’re incredibly easy to whip up, making them a stress-free option for gatherings or a cozy night in. Plus, they’re perfect for finger-food lovers, so everyone can enjoy them without fuss. Ready to impress your friends and family with a dish that’s as delightful to eat as it is to share? Let’s dive into this recipe together!

Why are these meatballs so irresistible?

Succulent, Flavor-Packed Bites: Each meatball is generously infused with a delightful combination of hoisin sauce, garlic, and ginger, creating a mouthwatering flavor explosion.

Easy Meal Prep: Whip up a batch quickly, making these Sticky Hoisin Meatballs perfect for busy weeknights or last-minute gatherings.

Great for Sharing: They're the ultimate crowd-pleaser, ideal for parties or family dinners. Pair them with a refreshing cucumber salad for an extra touch!

Versatile Options: Swap in ground turkey for a lighter option or experiment with unique dipping sauces to tailor them to your taste.

Gluten-Free Friendly: With simple substitutions, these flavorful meatballs cater to various dietary needs, ensuring everyone can enjoy this tasty dish.

Sticky Hoisin Meatballs Ingredients

For the Meatballs

  • Ground pork or beef – The primary protein source, contributing rich moisture; substitution: use ground turkey for a leaner option.
  • Breadcrumbs – Provides structure and holds the meatballs together; substitution: use ground oats for a gluten-free version.
  • Hoisin sauce – Essential for the glaze, adding sweetness and a unique Asian taste; it’s crucial for that sticky coating.
  • Soy sauce – Enhances umami and saltiness; substitution: use tamari for a gluten-free option.
  • Minced garlic – Adds aromatic flavor; freshly minced delivers the best taste.
  • Minced ginger – Adds warmth and spice; fresh is preferable for a more robust flavor.
  • Egg – Acts as a binder to help hold the meatballs together; important for maintaining texture.
  • Sesame oil – Introduces a nutty aroma; it helps balance the other flavors.
  • Salt and pepper – Enhances overall flavor; adjust according to your taste preferences.

For the Glaze

  • Rice vinegar – Adds acidity to balance the sweetness of hoisin; essential for achieving the perfect glaze consistency.
  • Water – Adjusts the consistency of the glaze; use as needed to reach desired thickness.

For the Scallion Sauce

  • Scallions – Provides freshness and a sharp bite; best when finely chopped for maximum flavor.

These Sticky Hoisin Meatballs with Scallion Sauce are sure to be a hit, tantalizing your guests while catering to a variety of dietary needs!

Step‑by‑Step Instructions for Sticky Hoisin Meatballs with Scallion Sauce

Step 1: Prepare the Meatball Mixture
In a large bowl, combine the ground pork or beef, breadcrumbs, hoisin sauce, soy sauce, minced garlic, minced ginger, egg, sesame oil, salt, and pepper. Use your hands to mix gently until all ingredients are well blended but don’t overdo it; this will keep your meatballs tender. Once mixed, mold into 16-20 golf-ball-sized meatballs, about 1 to 1.5 inches in diameter.

Step 2: Brown the Meatballs
Heat a large skillet over medium-high heat and add a splash of oil. Once the oil is shimmering, carefully add the meatballs in batches, ensuring they are not overcrowded. Cook for about 5-7 minutes, turning occasionally, until they are caramelized on all sides and have that beautiful golden-brown exterior. Remove the browned meatballs and set them aside on a plate.

Step 3: Make the Glaze
In the same skillet, reduce the heat to medium and add hoisin sauce, soy sauce, rice vinegar, sesame oil, and water. Whisk together until the mixture is smooth and glossy. Cook for about 2-3 minutes until it starts to bubble slightly and thicken, creating a luscious glaze that will coat your Sticky Hoisin Meatballs.

Step 4: Coat the Meatballs
Return the browned meatballs to the skillet and carefully toss them in the glaze, ensuring they are evenly coated. Cover the skillet with a lid and let the meatballs simmer in the glaze for about 4-6 minutes, allowing them to absorb the flavors and heat through until they reach an internal temperature of at least 160°F for pork or 165°F for beef.

Step 5: Prepare the Scallion Sauce
While the meatballs are simmering, in a small bowl, whisk together the chopped scallions with a dash of soy sauce or sesame oil, adjusting to taste. This scallion sauce will offer a refreshing contrast to the sticky sweetness of the meatballs, enhancing the overall flavor profile of the dish.

Step 6: Serve and Enjoy
Once the meatballs are cooked through and beautifully glazed, transfer them to a serving platter. Drizzle the fresh scallion sauce over the meatballs and garnish with extra chopped scallions if desired. Serve them hot as delightful finger food that’s perfect for sharing, showcasing the irresistible Sticky Hoisin Meatballs with Scallion Sauce.

Expert Tips for Sticky Hoisin Meatballs

  • Mix Gently: Avoid overmixing the meat mixture to ensure tender and juicy meatballs. A light hand helps maintain their delicate texture.

  • Batch Cooking: Brown meatballs in batches rather than overcrowding the skillet. This prevents steaming and allows for that delicious caramelization.

  • Check Temperature: Use a meat thermometer to ensure meatballs reach the proper internal temperature (160°F for pork; 165°F for beef) for safety and flavor.

  • Perfect Glaze: Adjust the water in the glaze to achieve your desired consistency; it should be sticky but not runny.

  • Storage Tips: Store any leftovers in an airtight container, refrigerating for up to 3 days or freezing for up to 2 months. Reheat gently to maintain moisture in the Sticky Hoisin Meatballs.

Sticky Hoisin Meatballs Variations

Feel free to take this recipe and make it your own—there are countless delicious ways to personalize your meatballs!

  • Ground Turkey: Substitute ground turkey for a lighter, leaner meatball while still keeping all the flavor intact.

  • Spicy Kick: Add your favorite chili sauce or red pepper flakes to the glaze for an exciting heat that complements the sweetness beautifully. Just a pinch can elevate your dish!

  • Herb Infusion: Mix in finely chopped herbs like cilantro or basil to the meatball mixture for a fresh twist. These bright notes create a fusion with a delightful aroma.

  • Alternative Dips: Try serving the meatballs with different dipping sauces such as peanut sauce or sweet chili sauce for an unexpected flavor contrast.

  • Veggie-Loaded: Incorporate finely chopped vegetables like mushrooms, zucchini, or carrots into the meatball mixture for added moisture and a veggie boost. They’re sure to blend right in!

  • Coconut Aminos: Swap soy sauce for coconut aminos for a gluten-free and slightly sweeter option, keeping it tasty for all dietary needs.

  • Fried Rice Side: Instead of serving with scallion sauce, place your meatballs on a bed of fried rice, served alongside steamed broccoli, just like in takeaway restaurants.

For more vibrant meal ideas, consider pairing these meatballs with a refreshing cucumber salad or exploring the delicious options in our Buffalo Tofu Caesar recipe as a satisfying side! Dive into your culinary creativity and have fun experimenting with flavors and textures!

Make Ahead Options

These Sticky Hoisin Meatballs with Scallion Sauce are perfect for meal prep, allowing you to enjoy a restaurant-quality dish any night of the week! You can prepare the meatballs up to 24 hours in advance by mixing all the ingredients and forming them into balls; store them in an airtight container in the refrigerator to maintain their freshness. For added convenience, you can also prepare the scallion sauce ahead of time and refrigerate it for up to 3 days. When you’re ready to serve, simply brown the meatballs as directed and coat them in the glaze. This prep in advance method ensures quick assembly, making busy weeknights a breeze without sacrificing on flavor or quality!

What to Serve with Sticky Hoisin Meatballs with Scallion Sauce

Elevate your meal and delight your guests by pairing these vibrant meatballs with equally delicious sides and drinks.

  • Steamed Jasmine Rice: This fragrant rice absorbs the hoisin glaze beautifully, providing a perfect balance of flavors. Its fluffy texture complements the juicy meatballs wonderfully.

  • Crispy Brussels Sprouts: The slight bitterness of Brussels sprouts, when roasted to crispy perfection, contrasts the meatballs' sweetness while adding a delightful crunch to your plate.

  • Cucumber Salad: A refreshing cucumber salad with sesame oil and rice vinegar not only brightens the meal but also offers a cool crunch that pairs beautifully with the rich meatballs.

  • Asian Slaw: This colorful medley of cabbage, carrots, and a tangy dressing adds a zesty, crunchy element to your meal, enhancing the overall flavor profile.

  • Sichuan Noodles: For those craving something heartier, toss noodles with soy sauce, sesame oil, and chili for an exciting flavor complement that's both satisfying and spicy.

  • Chilled Sake or Green Tea: Sip on chilled sake or green tea to cleanse your palate between bites, enhancing the overall dining experience. Their subtle flavors perfectly complement the tasting notes of the dish.

  • Mango Sticky Rice: As a sweet finish, this classic dessert adds a delightful sweetness to your meal, making it a well-rounded dining experience.

  • Hot-and-Sour Soup: A warm bowl of hot-and-sour soup is a wonderful starter, merging well with the meatballs and adding an extra layer of comforting flavors to your meal.

How to Store and Freeze Sticky Hoisin Meatballs

Fridge: Store leftover Sticky Hoisin Meatballs in an airtight container for up to 3 days to keep them fresh and flavorful.

Freezer: These meatballs freeze beautifully! Place them in a single layer on a baking sheet until frozen, then transfer to a freezer-safe bag for up to 2 months.

Reheating: To reheat, thaw in the fridge overnight and warm gently in a skillet over medium heat, adding a splash of water to maintain moisture.

Serving Tip: Serve the reheated meatballs with fresh scallion sauce drizzled on top for an extra burst of flavor!

Sticky Hoisin Meatballs with Scallion Sauce Recipe FAQs

What type of meat should I use for the meatballs?
Absolutely! You can use ground pork or beef for rich flavor and juiciness. If you're looking for a leaner option, ground turkey works beautifully as a substitute, keeping the meatballs light yet flavorful.

How do I store leftover meatballs?
Very easily! Store your leftover Sticky Hoisin Meatballs in an airtight container in the fridge for up to 3 days. Just make sure they cool down to room temperature first before sealing them up.

Can I freeze Sticky Hoisin Meatballs?
Definitely! To freeze, place the cooked meatballs in a single layer on a baking sheet until they are frozen solid. Then, transfer them to a freezer-safe bag and store for up to 2 months. This method prevents them from sticking together and makes reheating a breeze.

What should I do if my meatballs fall apart while cooking?
No worries! If your meatballs are falling apart, it typically means the mixture is too wet. To fix this, add a little more breadcrumbs or ground oats to help bind them together. Mixing gently and not overhandling the meat is also crucial for keeping them intact.

Are these meatballs suitable for gluten-free diets?
Absolutely! You can make these Sticky Hoisin Meatballs gluten-free by substituting breadcrumbs with ground oats and using tamari sauce instead of regular soy sauce. This makes the dish accessible to those with gluten sensitivities while keeping all the beloved flavors intact!

How do I know when the meatballs are cooked through?
To ensure perfect cooking, use a meat thermometer. For pork meatballs, look for an internal temperature of at least 160°F; for beef, 165°F. Alternatively, you can cut one open—the inside should be no longer pink, and juices should run clear.

Sticky Hoisin Meatballs with Scallion Sauce

Sticky Hoisin Meatballs with Scallion Sauce You'll Crave

Experience a taste of Asia with these Sticky Hoisin Meatballs with Scallion Sauce, blending sweet and savory flavors in every bite.
Print Recipe Pin Recipe
Prep Time 15 minutes mins
Cook Time 20 minutes mins
Total Time 35 minutes mins
Servings: 4 meatballs
Course: Appetizers
Cuisine: Asian
Calories: 250
Ingredients Equipment Method Nutrition Notes

Ingredients
  

For the Meatballs
  • 1 pound ground pork or beef substitution: use ground turkey for a leaner option
  • 1 cup breadcrumbs substitution: use ground oats for a gluten-free version
  • 1/2 cup hoisin sauce crucial for that sticky coating
  • 2 tablespoons soy sauce substitution: use tamari for a gluten-free option
  • 4 cloves minced garlic freshly minced delivers the best taste
  • 1 tablespoon minced ginger fresh is preferable for a more robust flavor
  • 1 large egg important for maintaining texture
  • 1 tablespoon sesame oil helps balance the other flavors
  • to taste salt and pepper adjust according to your taste preferences
For the Glaze
  • 2 tablespoons rice vinegar essential for achieving the perfect glaze consistency
  • 1/4 cup water use as needed to reach desired thickness
For the Scallion Sauce
  • 1/4 cup scallions best when finely chopped for maximum flavor

Equipment

  • large bowl
  • Large skillet

Method
 

Step‑by‑Step Instructions
  1. In a large bowl, combine the ground pork or beef, breadcrumbs, hoisin sauce, soy sauce, minced garlic, minced ginger, egg, sesame oil, salt, and pepper. Mix gently until well blended, then mold into 16-20 meatballs, about 1 to 1.5 inches in diameter.
  2. Heat a large skillet over medium-high heat and add a splash of oil. Add the meatballs in batches and cook for about 5-7 minutes until caramelized on all sides. Remove and set aside.
  3. In the same skillet, reduce heat to medium and add hoisin sauce, soy sauce, rice vinegar, sesame oil, and water. Whisk until smooth and cook for about 2-3 minutes until it starts to thicken.
  4. Return the meatballs to the skillet and toss in the glaze. Cover and let simmer for about 4-6 minutes until heated through.
  5. In a small bowl, whisk together the chopped scallions with a dash of soy sauce or sesame oil to taste.
  6. Transfer the glazed meatballs to a serving platter, drizzle with scallion sauce, and garnish with extra scallions if desired. Serve hot.

Nutrition

Serving: 4meatballsCalories: 250kcalCarbohydrates: 12gProtein: 16gFat: 18gSaturated Fat: 5gCholesterol: 70mgSodium: 600mgPotassium: 300mgFiber: 1gSugar: 5gVitamin A: 500IUVitamin C: 3mgCalcium: 20mgIron: 2mg

Notes

These meatballs are perfect for gatherings or a cozy night in. Store leftovers in an airtight container for up to 3 days or freeze for up to 2 months.

Tried this recipe?

Let us know how it was!

Crispy Rice Paper Crab Rangoons: A Healthy Twist on a Classic

May 1, 2026 by Grace Snow Leave a Comment

The aroma of sizzling appetizers wafted through the air as I ventured out on a quest to reinvent a classic favorite. Enter the Rice Paper Crab Rangoons—a delightful twist on the traditional recipe that swapped out those heavy wonton wrappers for a lighter, healthier alternative. These baked sensations not only cut down on the calories but also maintain that irresistible crunch that’s perfect for snacking or entertaining guests. Easy to whip up with simple, fresh ingredients, they’re a crowd-pleaser that keeps you away from the crowded fast-food scene. Imagine the joy on your friends’ faces as they bite into a creamy, savory filling encased in a golden-brown rice paper wrapper. Ready to impress? Let’s dive into this fusion delight that’s bound to elevate your appetizer game!

Why are Rice Paper Rangoons a must-try?

Crispy, Golden-Brown Perfection: Experience the satisfying crunch paired with a creamy filling that will have everyone reaching for seconds!
Healthy Twist: Enjoy a guilt-free indulgence with baked rice paper instead of traditional fried wrappers—perfect for health-conscious diners.
Endless Versatility: Feel free to experiment! Switch out crab meat for shredded chicken or tofu, or spice things up with some cayenne for extra heat.
Quick Preparation: Whip these up in no time—ideal for both casual get-togethers and festive occasions alike. Plus, if you love easy prep, try these alongside Furikake Fried Rice for a complete meal!
Crowd-Pleaser: Your friends and family will rave about this fusion-inspired dish, making it a staple for your recipe collection.

Rice Paper Crab Rangoons Ingredients

For the Filling
• Cream Cheese – serves as a creamy binder for the filling; ensure it’s softened for easier mixing.
• Crab Meat – this main protein delivers the signature flavor; fresh crab is preferred for taste, but imitation crab works too.
• Green Onions – adds a fresh, mild onion flavor; chop finely for even distribution.
• Soy Sauce – enhances umami depth; tamari can be used for a gluten-free option.

For the Wrappers
• Rice Paper Wrappers – provide a crispy exterior; soak briefly in warm water for pliability before using.

For Baking
• Oil Spray – lightly coat the rangoons to achieve that golden-brown crispiness without excess oil.

Step‑by‑Step Instructions for Rice Paper Crab Rangoons

Step 1: Prep Workstation
Begin by gathering all your ingredients and tools needed for the Rice Paper Crab Rangoons. Clear off a clean countertop and arrange items such as mixing bowls, a baking sheet, and a brush for oil. This will set you up for an organized and enjoyable cooking experience, making the assembly process smooth and efficient.

Step 2: Make the Filling
In a large mixing bowl, combine softened cream cheese, drained crab meat, finely chopped green onions, and soy sauce. Use a fork or spatula to mix these ingredients until thoroughly blended, achieving a smooth, creamy texture. This filling is the star of your rangoons, so take a moment to ensure it’s well combined and full of flavor.

Step 3: Soak Rice Papers
Fill a shallow dish with warm water and carefully dip each rice paper wrapper for 10-15 seconds. Gently coax the wrapper from the water, allowing it to soften yet remain slightly firm to avoid tearing. You want a pliable wrapper that will hold your filling, so keep an eye on the texture as you soak each piece.

Step 4: Assemble Rangoons
Place a soaked rice paper wrapper flat on your clean surface, and add about one tablespoon of the creamy filling right in the center. Fold the wrapper over the filling, pressing the edges together firmly to seal the rangoon shut. Repeat this process, ensuring each filled wrapper is tightly sealed to maintain shape during baking.

Step 5: Bake Rangoons
Preheat your oven to 400°F (200°C) while you arrange the assembled rangoons on a parchment-lined baking sheet. Make sure to leave space between each rangoon to allow for even cooking. Lightly spray or brush the tops with oil to enhance the crispiness. Bake for 15-20 minutes, or until they reach a golden-brown hue and the edges are crispy.

Step 6: Serve
Once baked, remove the Rice Paper Crab Rangoons from the oven and let them cool slightly before transferring to serving plates. These crispy treats are best enjoyed warm, so consider complementing them with your favorite dipping sauce, like sweet and sour or spicy mayo, to elevate your appetizer experience.

Storage Tips for Rice Paper Crab Rangoons

Fridge: Store cooled leftover rangoons in an airtight container for up to 3 days. To keep them crispy, separate layers with parchment paper.

Freezer: Assemble uncooked rangoons and freeze on a baking sheet. Once solid, transfer to freezer-safe bags. Cook from frozen without thawing when you’re ready to enjoy!

Reheating: To regain their crispiness, reheat leftover rangoons in an air fryer or an oven at 375°F (190°C) for about 10 minutes until heated through and crispy.

Room Temperature: It's best to serve Rice Paper Crab Rangoons warm. If left out for more than 2 hours, it's advisable to refrigerate leftovers to maintain freshness.

What to Serve with Healthy Baked Rice Paper Crab Rangoons

Create a delightful spread with dishes that elevate the flavors of this crispy appetizer.

  • Crispy Asian Slaw: A vibrant blend of cabbage, carrots, and a tangy vinaigrette adds crunch and freshness that perfectly balances the rich rangoons.
  • Sweet and Sour Sauce: This classic dipping sauce complements the creamy filling with a burst of tanginess, enhancing every bite.
  • Spicy Mayo: A drizzle of spicy mayo not only amps up the heat but also introduces a silky texture that contrasts the crispy exterior.
  • Coconut Jasmine Rice: Fragrant and slightly sweet, this rice pairs beautifully, allowing the savory crab flavor to shine and rounding out the meal.
  • Grilled Vegetable Skewers: Lightly charred veggies add a smoky flavor and a pop of color to your plate, creating a feast for the eyes as well as the palate.
  • Soda or Iced Tea: Refreshing drinks like ginger ale or lemon iced tea cleanse the palate, ensuring your taste buds are ready for the next bite of the rangoons.
  • Mango Salad: A sweet and tangy mango salad brings brightness, while its juiciness pairs wonderfully with the comforting crunch of the rangoons.
  • Philly Cream Cheese Dip: This creamy dip delivers a rich flavor, making it an inviting companion that complements the crab filling's creaminess in a whole new way.
  • Chocolate Spring Rolls: To finish off the meal on a sweet note, these light desserts echo the crispy theme and provide a satisfying contrast to the savory appetizer.

Expert Tips for Rice Paper Crab Rangoons

• Soaking Time Matters: Ensure rice papers are soaked for just 10-15 seconds. Over-soaking makes them too fragile and hard to work with.

• Fill Smartly: Use only about one tablespoon of filling per rangoon. Overfilling can cause them to burst during baking, leading to a messy result.

• Experiment with Flavors: Don’t hesitate to add spices like garlic powder or herbs for enhanced flavor in your filling. This can elevate the taste of your Rice Paper Crab Rangoons.

• Seal Tightly: Carefully press and seal the edges of the rice paper to prevent any leakage while baking. A well-sealed rangoon will hold its shape beautifully.

• Baking Tips: For extra crispiness, consider lightly spraying the tops of the assembled rangoons with oil before baking. This helps achieve that golden-brown perfection!

Rice Paper Crab Rangoons Variations

Feel free to get creative and customize these lovely rangoons to suit your taste buds!

  • Protein Swap: Replace crab meat with shredded chicken or tofu for a different protein source that still delivers on flavor.

  • Spicy Kick: Add a dash of cayenne pepper or sriracha to the filling for those who love a bit of heat in their appetizers.

  • Veggie Boost: Incorporate finely chopped bell peppers or mushrooms into the filling for added texture and a healthy twist.

  • Herbal Delight: Mix in fresh herbs like cilantro or basil to elevate the freshness and add a fragrant touch to your rangoons.

  • Cheesy Variation: Add a bit of shredded cheese like mozzarella or cheddar to the filling for creaminess and extra flavor. Imagine how gooey and delightful they will be!

  • Asian Flare: Enhance the taste with a splash of sesame oil in the filling, bringing a deeper umami experience to each bite. You could also think about pairing them with Lime Chicken Rice for a lovely meal!

  • Crunchy Texture: Include finely chopped nuts like water chestnuts or cashews to give the filling a delightful crunch, making every bite more exciting.

  • Sweet Twist: Add a sweet element by mixing in some cream cheese with a hint of honey or sugar for a contrast in flavors that’s simply mouthwatering.

With these variations, you can easily elevate your Rice Paper Crab Rangoons to fit any gathering or personal preference!

Make Ahead Options

These delicious Rice Paper Crab Rangoons are perfect for meal prep enthusiasts! You can assemble them up to 24 hours in advance and refrigerate them to save time during busy weeknights. Simply prepare the filling and wrap each rangoon, then store them in an airtight container. For even longer storage, consider freezing them; lay the assembled rangoons on a baking sheet until solid, then transfer them to freezer-safe bags for up to 3 months. To maintain their wonderful crispiness, bake them directly from the freezer—just add an extra 5-7 minutes to the cooking time. When you're ready to serve, bake as instructed, and you’ll have restaurant-quality appetizers waiting at your fingertips!

Rice Paper Crab Rangoons Recipe FAQs

How do I choose the best crab meat for my rangoons?
Absolutely! For the best flavor, I recommend using fresh crab meat as it adds a lovely sweetness and richness to your filling. If fresh is hard to find, you can opt for high-quality canned crab meat or imitation crab as a substitute. Just make sure to drain the meat well to avoid excess moisture in your filling.

How should I store leftover Rice Paper Crab Rangoons?
You’ll want to store your cooled rangoons in an airtight container in the fridge, where they’ll stay fresh for up to 3 days. To maintain some crispiness, consider layering them with parchment paper as a separator. If you're a fan of meal prep, you can assemble uncooked rangoons and freeze them on a baking sheet. Once they are solid, transfer them to freezer-safe bags, and you can cook them directly from frozen when the craving hits!

Can I freeze the assembled rangoons?
Very! Freezing is super easy—after assembling your rangoons, place them on a lined baking sheet and freeze until solid. This usually takes about an hour. From there, pop them in freezer-safe bags for up to 3 months. When you’re ready to bake, just cook them from frozen; there’s no need to thaw beforehand. They’ll turn out just as crispy and delicious!

What can I do if my rice paper wrappers keep tearing?
Don't worry—this happens sometimes! If you find your wrappers tearing, it could be due to over-soaking. Ideally, you should dip them in warm water for only 10-15 seconds until they’re pliable but not too soft. If they’re still fragile, try holding them in the water a little less next time. Additionally, be gentle when handling the wrappers; excessive force can lead to tears. Practicing will give you better control!

Are there any dietary considerations for these rangoons?
Absolutely! These Rice Paper Crab Rangoons can be made gluten-free by using tamari instead of regular soy sauce. If you’re cooking for someone with seafood allergies, you can easily substitute the crab meat with shredded chicken or tofu, making this dish adaptable for various dietary needs. Just ensure all ingredients used are allergy-friendly for your guests!

How long will the rangoons stay crispy after baking?
The first bite is always the best! For optimal crispiness, it’s best to enjoy your Rice Paper Crab Rangoons fresh out of the oven. If you have leftovers, they may lose some crunch, but you can revive them! Reheat in an air fryer at 375°F (190°C) for about 10 minutes, and they should regain some of that delightful crisp texture.

Rice Paper Crab Rangoons

Crispy Rice Paper Crab Rangoons: A Healthy Twist on a Classic

Rice Paper Crab Rangoons are a healthier alternative to traditional appetizers, combining crispy rice paper with a creamy crab filling.
Print Recipe Pin Recipe
Prep Time 30 minutes mins
Cook Time 20 minutes mins
Total Time 50 minutes mins
Servings: 4 rangoons
Course: Appetizers
Cuisine: Fusion
Calories: 150
Ingredients Equipment Method Nutrition Notes

Ingredients
  

Filling Ingredients
  • 8 oz Cream Cheese softened
  • 1 cup Crab Meat fresh or imitation
  • 2 pcs Green Onions finely chopped
  • 1 tbsp Soy Sauce
Wrapper Ingredients
  • 12 pcs Rice Paper Wrappers soaked in warm water
Baking Ingredients
  • 1 tbsp Oil Spray for coating

Equipment

  • Mixing bowls
  • Baking Sheet
  • Brush for oil

Method
 

Preparation Steps
  1. Gather all your ingredients and tools needed for the Rice Paper Crab Rangoons.
  2. In a large mixing bowl, combine softened cream cheese, drained crab meat, finely chopped green onions, and soy sauce.
  3. Fill a shallow dish with warm water and carefully dip each rice paper wrapper for 10-15 seconds.
  4. Place a soaked rice paper wrapper flat on your clean surface, and add about one tablespoon of the creamy filling right in the center.
  5. Preheat your oven to 400°F (200°C) and arrange the assembled rangoons on a parchment-lined baking sheet.
  6. Bake for 15-20 minutes, or until they reach a golden-brown hue and the edges are crispy.
  7. Once baked, let the Rice Paper Crab Rangoons cool slightly before transferring to serving plates.

Nutrition

Serving: 1rangoonCalories: 150kcalCarbohydrates: 15gProtein: 6gFat: 8gSaturated Fat: 4gPolyunsaturated Fat: 1gMonounsaturated Fat: 2gCholesterol: 30mgSodium: 250mgPotassium: 120mgFiber: 1gSugar: 1gVitamin A: 500IUVitamin C: 1mgCalcium: 30mgIron: 1mg

Notes

These crispy treats are best enjoyed warm, complemented with your favorite dipping sauce like sweet and sour or spicy mayo.

Tried this recipe?

Let us know how it was!
  • 1
  • 2
  • 3
  • …
  • 16
  • Next Page »

Welcome!

Hi, I’m Grace, a Sydney-based home cook with a passion for bold flavors and trending ingredients. Whether you’re a busy beginner or a seasoned foodie, you’ll find dishes here that are fresh, fun, and full of flavor.

More about me

Popular Recipes

  • One Pot Keto Tuna Casserole
    One Pot Keto Tuna Casserole: Creamy Comfort in Minutes
  • Ultimate Jalapeno Popper Chicken Salad
    Ultimate Jalapeno Popper Chicken Salad That'll Wow Your Tastebuds
  • Green Chile Cheese Dip
    Mouthwatering Green Chile Cheese Dip for Cozy Gatherings
  • Easy Chimichurri Sauce
    Fresh and Zesty Easy Chimichurri Sauce in Just Minutes

Footer

↑ back to top

About

  • Privacy Policy
  • Disclaimer
  • Terms & Conditions

Newsletter

  • Sign Up! for emails and updates

Contact

  • About me
  • Contact me

Copyright © 2025 TastyTrendIngredients