tastytrendingredients

  • Home
  • Recipes
    • Appetizers
    • Breakfast
    • Dessert
    • Dinner
    • Drinks
    • Salads
    • Snacks
    • Soups
  • About me
  • Contact
menu icon
go to homepage
  • Home
  • Recipes
    • Appetizers
    • Breakfast
    • Dessert
    • Dinner
    • Drinks
    • Salads
    • Snacks
    • Soups
  • About me
  • Contact
search icon
Homepage link
  • Home
  • Recipes
    • Appetizers
    • Breakfast
    • Dessert
    • Dinner
    • Drinks
    • Salads
    • Snacks
    • Soups
  • About me
  • Contact
×

Garlic Shrimp Crostini with Avocado: A Flavorful Delight

May 1, 2026 by Grace Snow Leave a Comment

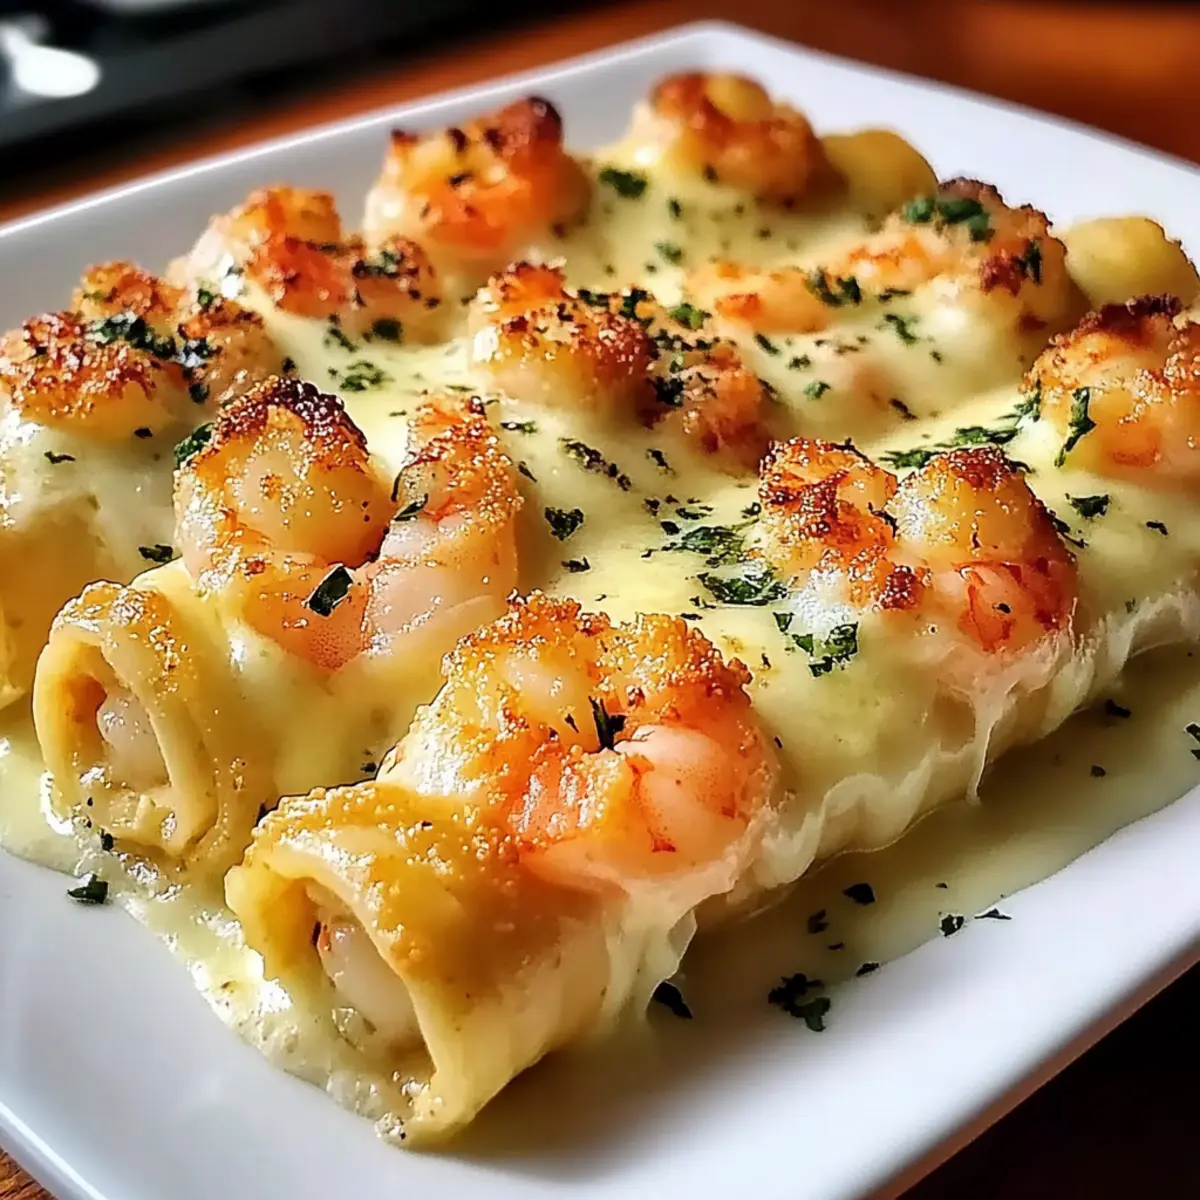
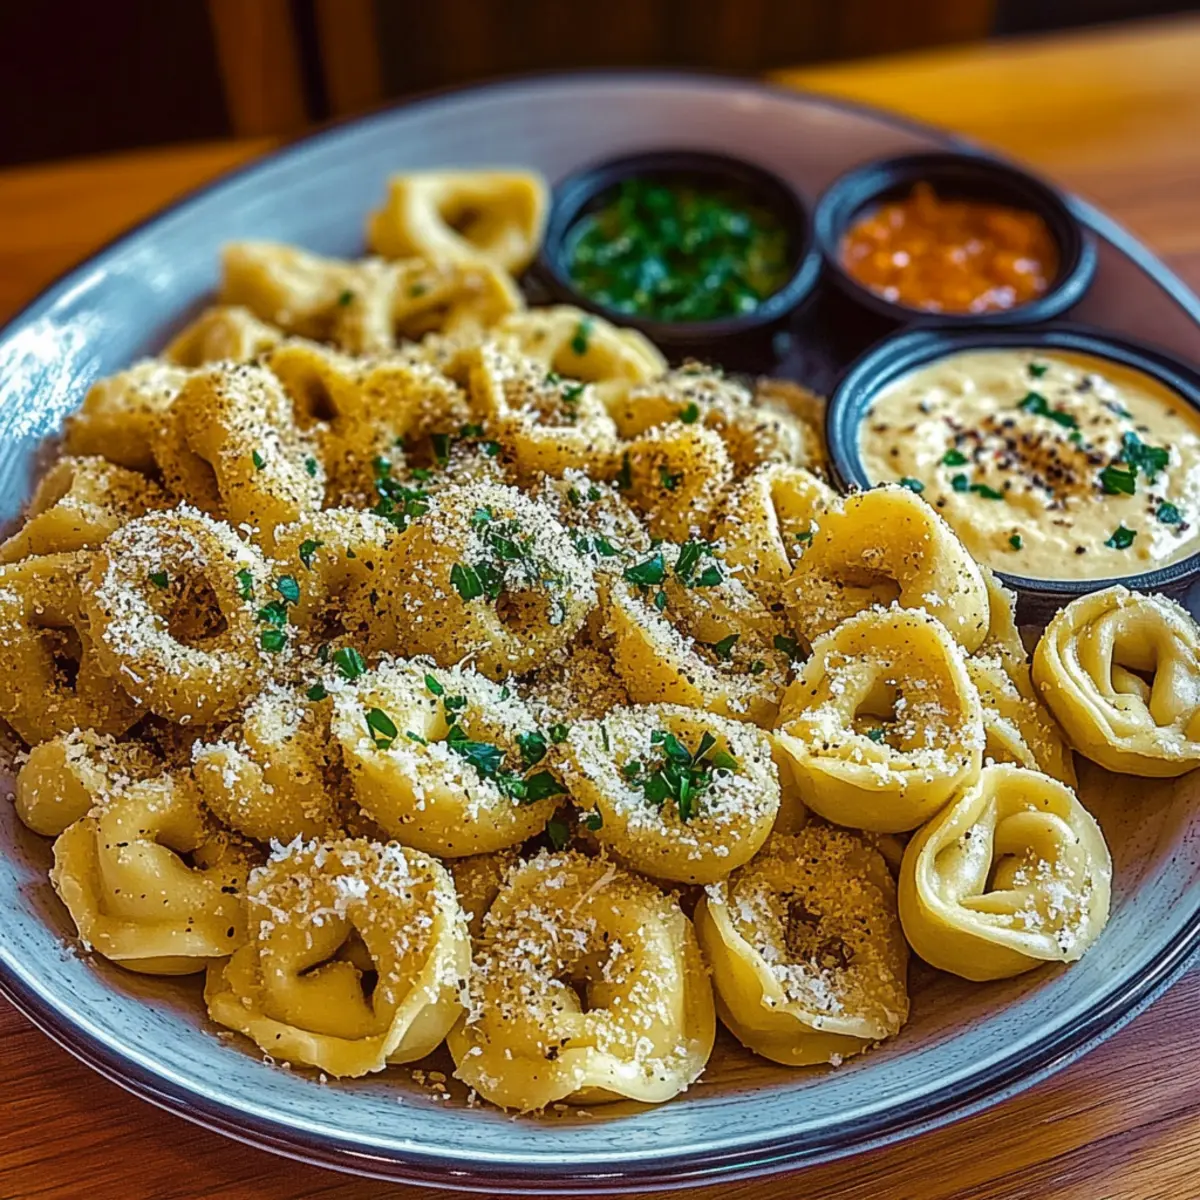
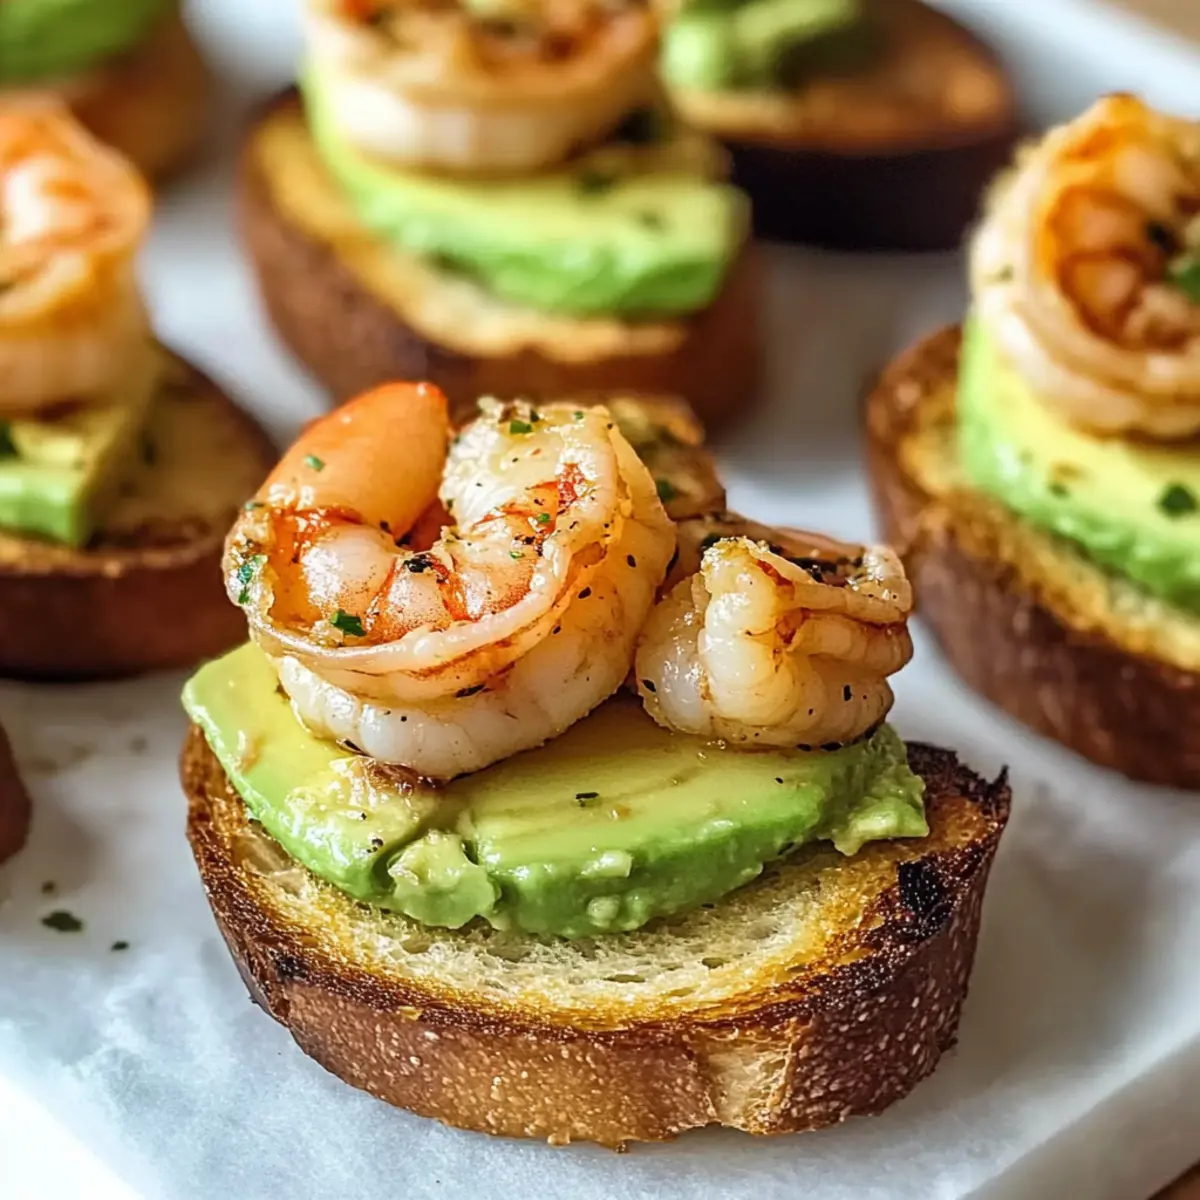
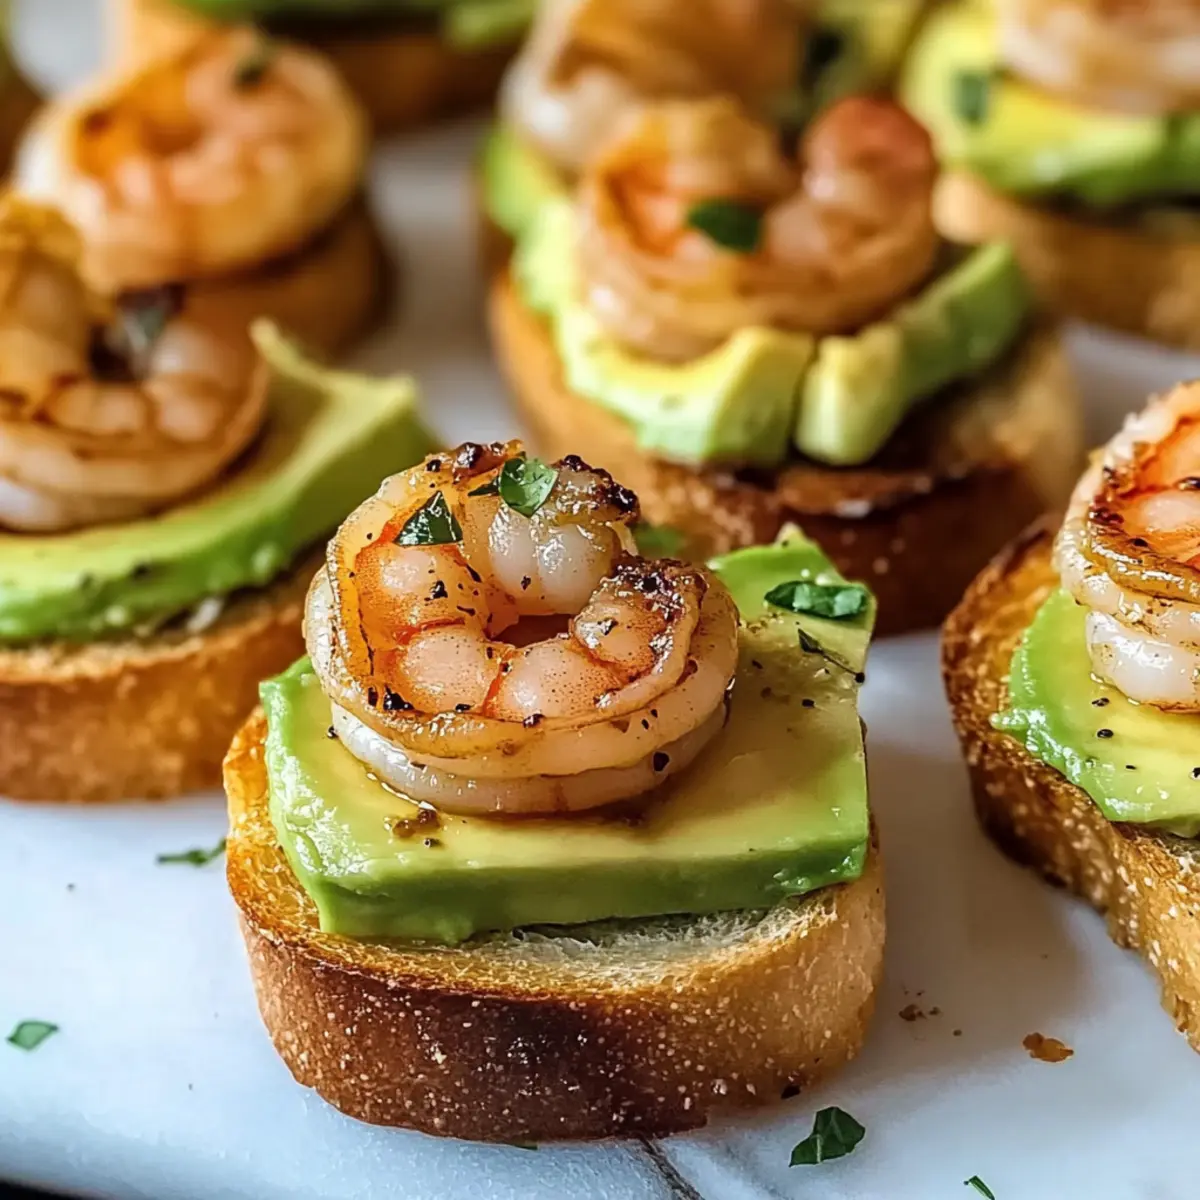
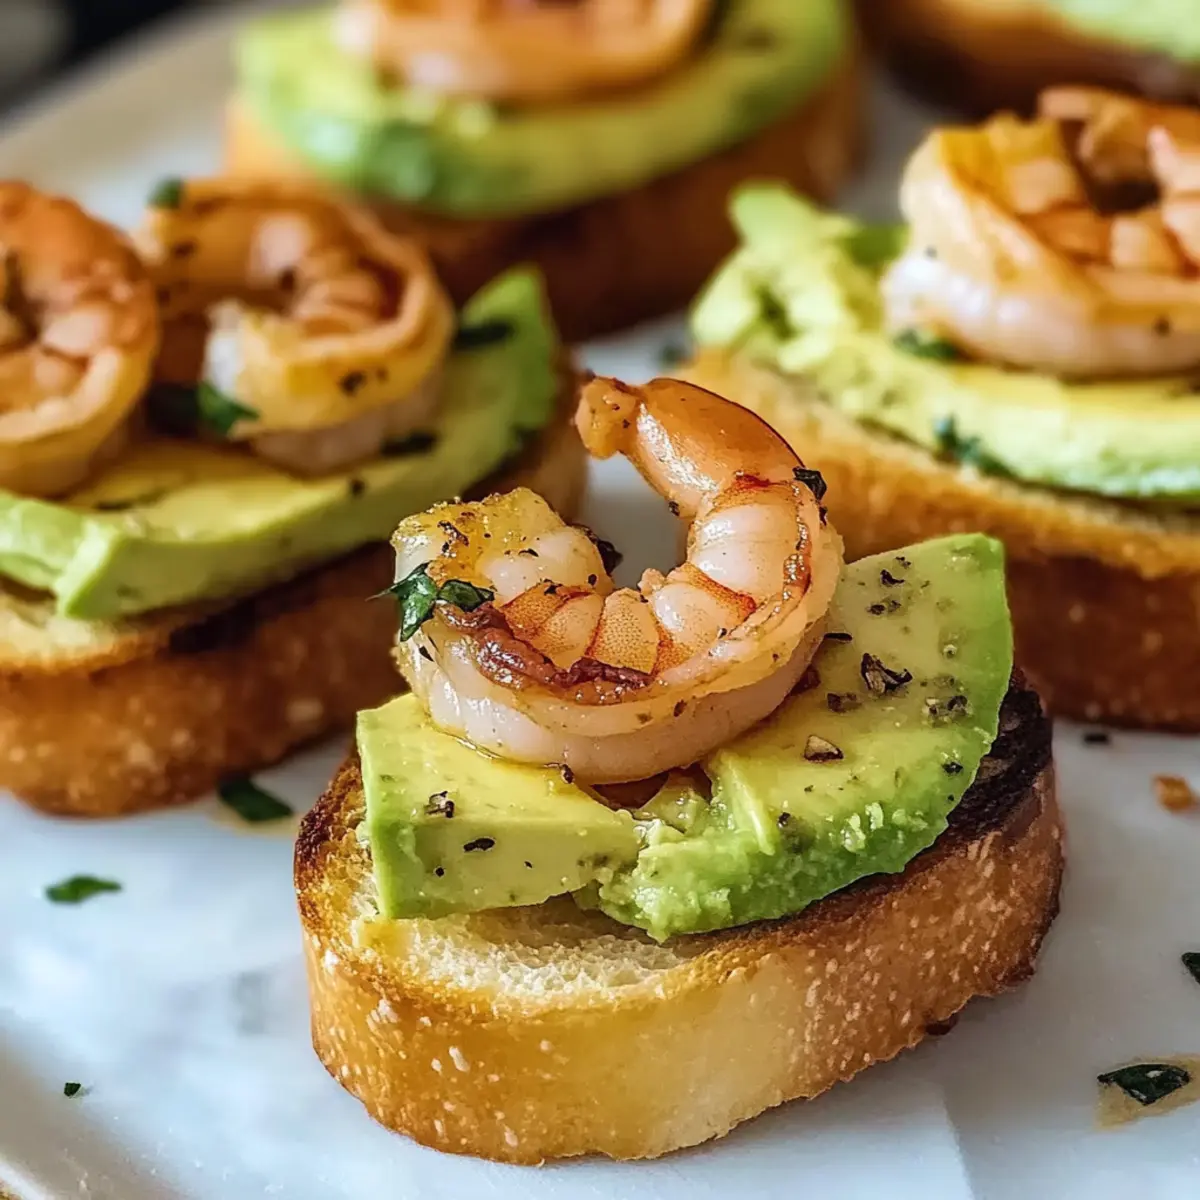
The moment that sizzling garlic meets the rich aroma of shrimp, it feels like a culinary magic trick unfolding in my kitchen. Introducing my Garlic Shrimp Crostini with Avocado, a quick appetizer that packs a delightful punch of flavors. With crispy baguette pieces serving as the perfect vessel for the succulent shrimp and creamy avocado, this dish is an absolute crowd-pleaser that's ready in just 25 minutes! Not only is it easy to whip up, but it also makes a conversation starter at every gathering. Whether you’re hosting friends or enjoying a cozy night in, these bite-sized treats allow you to savor the moment instead of spending hours in the kitchen. Curious about how to create this stunning dish for yourself? Let's dive into the recipe!

Why You'll Love Garlic Shrimp Crostini?

Simplicity at Its Best: This recipe is incredibly easy to put together, allowing even novice cooks to impress their guests with gourmet flair.

Bursting with Flavor: The pairing of savory garlic shrimp and creamy avocado creates a harmonious explosion of taste that is simply irresistible.

Versatile Snack: Perfect for casual gatherings or elegant parties, these crostini fit any occasion, and can even be tailored with variations like Shrimp Tacos Zesty or marinated grilled vegetables for a vegetarian twist.

Healthy Indulgence: With lean protein from shrimp and healthy fats from avocado, this appetizer not only tastes great but is also good for you!

Quick Preparation: Ready in just 25 minutes, this dish allows you to spend time with your loved ones instead of stressing in the kitchen.

Crowd-Pleasing Appeal: Your friends and family will be raving about these delicious bites, making them a guaranteed hit at any gathering!

Garlic Shrimp Crostini with Avocado Ingredients

For the Crostini

• Baguette – the crispy base for your crostini; try gluten-free bread for a suitable alternative.
• Olive Oil – used to coat the bread for wonderful crispiness; avocado oil makes a great substitute.

For the Shrimp

• Shrimp – provides a burst of flavor and protein; fresh shrimp is preferred for the best taste.
• Garlic – enriches the dish with aromatic depth; use fresh garlic for optimal flavor, or garlic powder in a pinch.
• Smoked Paprika – adds warmth and depth; regular paprika can work if smoked isn’t available.
• Cumin – introduces an earthy flavor; it's optional but can enhance the taste.
• Salt & Pepper – essential for seasoning to your liking; adjust to taste.

For the Avocado Mixture

• Avocado – offers creaminess that balances the dish; consider hummus for a unique twist.
• Lime Juice – brightens flavors and balances richness; lemon juice can be used as a substitute.

Experience the delightful blend of flavors that make this Garlic Shrimp Crostini with Avocado an unforgettable dish!

Step‑by‑Step Instructions for Garlic Shrimp Crostini with Avocado

Step 1: Prepare the Crostini
Preheat your oven to 400°F (200°C). Slice the baguette into ½-inch thick pieces and arrange them on a baking sheet. Drizzle each slice with olive oil, coating them evenly. Bake the bread for about 10 minutes or until golden and crispy, keeping an eye on them to avoid burning.

Step 2: Cook the Shrimp
While your crostini bakes, heat a skillet over medium-high heat and add olive oil. Once hot, add minced garlic and sauté for about 30 seconds until fragrant. Then, add the shrimp to the skillet, seasoning with smoked paprika, cumin, salt, and pepper. Cook for approximately 5 minutes, or until the shrimp are pink and opaque, stirring occasionally.

Step 3: Mash the Avocado
In a medium bowl, cut and scoop out the ripe avocado, discarding the pit. Add fresh lime juice, a pinch of salt, and pepper. Using a fork, mash the avocado until it reaches a creamy yet slightly chunky consistency, perfect for spreading on your crostini. This vibrant mixture will complement the garlic shrimp beautifully.

Step 4: Assemble the Crostini
Remove the crostini from the oven and allow them to cool slightly. Top each crispy slice with a generous spoonful of the avocado mixture, ensuring an even distribution. Place a piece of the sautéed garlic shrimp over each avocado-topped crostini, allowing the flavors to meld beautifully as they rest.

Step 5: Serve Immediately
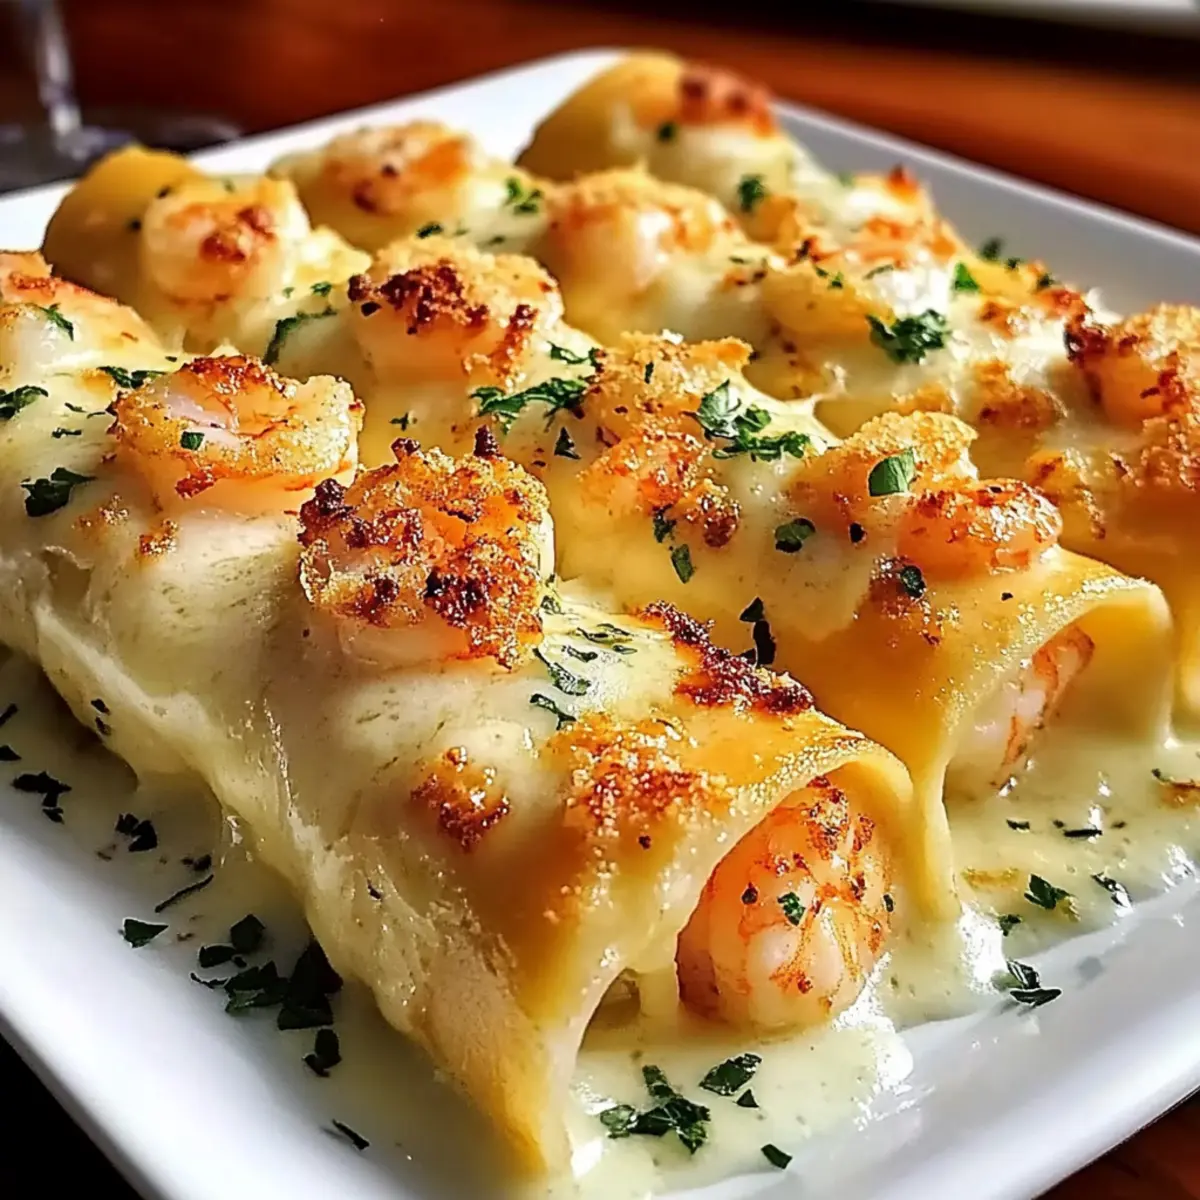
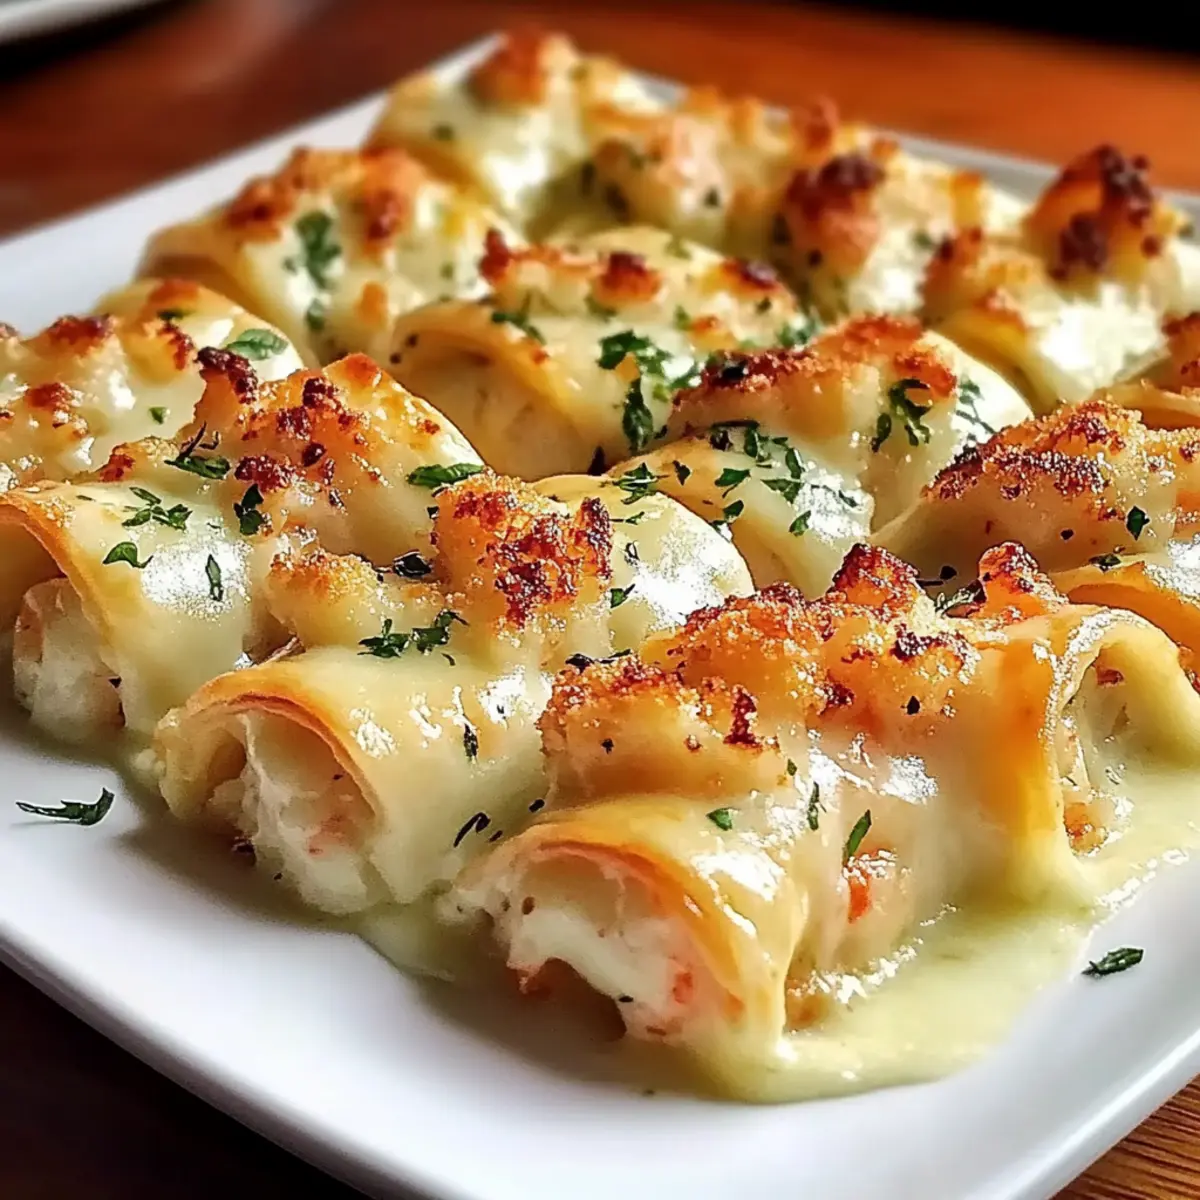
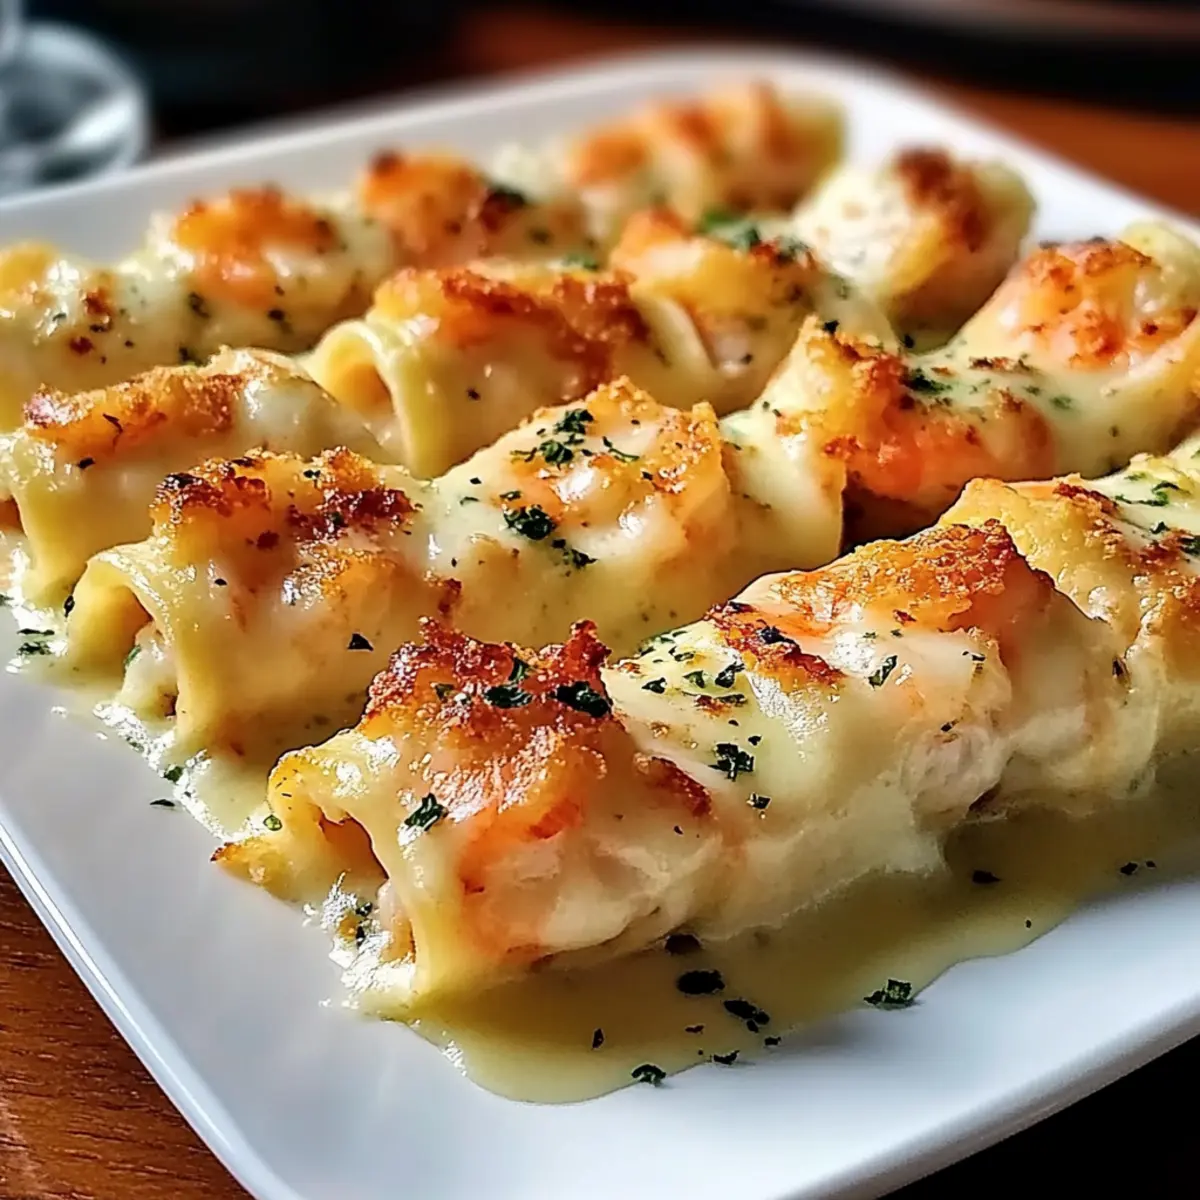
Arrange your irresistible Garlic Shrimp Crostini with Avocado on a platter and serve while warm. The contrast of crunchy bread, creamy avocado, and savory shrimp will surely impress your guests, making this delightful appetizer a fabulous addition to any gathering.

Make Ahead Options

These Garlic Shrimp Crostini with Avocado are perfect for meal prep, allowing you to enjoy a stress-free hosting experience! You can prepare the crostini and avocado mixture up to 2 hours in advance. Slice and bake the baguette until crispy, then store the crostini in an airtight container at room temperature. For the avocado mixture, mash the avocado with lime juice, salt, and pepper, storing it in a sealed container in the refrigerator to prevent browning. When you’re ready to serve, quickly sauté the shrimp and assemble the crostini by topping each with the avocado before serving. This way, you’ll have a delicious appetizer ready with minimal last-minute effort!

Expert Tips for Garlic Shrimp Crostini

  • Fresh Ingredients Matter: Use fresh shrimp and garlic for the most vibrant flavors; frozen options can work but ensure they are properly thawed.

  • Perfectly Crispy Crostini: Avoid overcrowding the baking sheet and flip the crostini halfway through baking to ensure even crispiness while preparing the Garlic Shrimp Crostini.

  • Timing is Key: Assemble the crostini just before serving to retain the crunch of the baguette and the creaminess of the avocado.

  • Don’t Overcook the Shrimp: Remove shrimp from heat as soon as they turn pink to prevent toughness; they cook quickly, so keep an eye on them!

  • Customize Your Flavors: Feel free to add spices like chili flakes or jalapeños to the avocado mixture for an extra kick in your Garlic Shrimp Crostini that will excite your taste buds!

What to Serve with Garlic Shrimp Crostini with Avocado?

Delight your taste buds and complement the vibrant flavors of your crostini with these tempting pairings.

  • Creamy Mashed Potatoes: These buttery potatoes add a smooth contrast to the crispy crostini, enhancing the overall dining experience.

  • Fresh Arugula Salad: A peppery salad brought to life with a tangy vinaigrette, it offers a refreshing crunch that cuts through the richness.

  • Zesty Cilantro Lime Rice: This brightly flavored rice complements the dish beautifully, echoing the vibrant lime and avocado tones in the crostini.

  • Sangria: This fruity, refreshing drink welcomes guests while balancing the savory elements of the garlic shrimp perfectly.

  • Roasted Asparagus: Tender, slightly charred asparagus spears provide a delightful crunch, adding a vibrant color and a nutritious touch to your meal.

  • Chilled Tomato Gazpacho: The cold, refreshing soup elevates the crostini, mixing flavors that sing of summer, and acting as a light starter.

Dive into these tempting sides or sips that create a culinary harmony with your Garlic Shrimp Crostini with Avocado!

Garlic Shrimp Crostini with Avocado Variations

Ready to make this dish uniquely yours? Here are some delightful twists to elevate your Garlic Shrimp Crostini with Avocado!

  • Protein Swap: Replace shrimp with scallops or grilled chicken for a different flavor profile.

  • Vegetarian Delight: For a meat-free option, substitute shrimp with marinated grilled vegetables to keep it vibrant and colorful.

  • Spicy Kick: Add finely chopped jalapeños to the avocado mixture for a zesty twist that will awaken your taste buds.

  • Herbed Avocado: Mix in fresh herbs like cilantro or basil into the avocado for an aromatic lift that’s simply refreshing.

  • Citrus Burst: Swap lime juice with fresh lemon juice or add some zest for a bright, citrusy flavor that complements the shrimp beautifully.

  • Cheesiness Factor: Sprinkle some feta cheese on top for added richness and a tangy contrast to the creamy avocado.

  • Gourmet Touch: Drizzle with balsamic glaze for an elegant finish that balances sweetness and acidity—a treat for the eyes and palate!

  • Crunchy Texture: Top with toasted pine nuts or crushed tortilla chips for an extra layer of crunch that takes the texture to the next level.

Feel free to explore these variations and create your own masterpiece! If you’re craving something different, you might enjoy trying out Shrimp Tacos Zesty or experimenting with Pan Fried Shrimp for another scrumptious spin on shrimp.

How to Store and Freeze Garlic Shrimp Crostini

Fridge: Store any leftover assembled crostini in an airtight container for up to 2 hours. The bread may soften, but the flavors will still be delightful.

Freezer: Freeze the baked crostini slices separately in a single layer for up to 1 month. Once completely frozen, transfer them to a freezer bag for longer storage.

Reheating: To re-crisp baked crostini, place them back in a preheated oven at 375°F (190°C) for about 5-7 minutes. Reheat shrimp in a skillet over low heat until warmed through for your DIY Garlic Shrimp Crostini.

Avocado Mixture: It's best to prepare the avocado mixture fresh, as it doesn’t store well. If necessary, cover with plastic wrap pressed directly onto the avocado to minimize browning, and consume within a few hours.

Garlic Shrimp Crostini with Avocado Recipe FAQs

What type of shrimp should I use for Garlic Shrimp Crostini?
Absolutely! Fresh shrimp are best for this dish, providing the most vibrant flavor and texture. If using frozen shrimp, make sure to thaw them properly beforehand. To do this, place them in the refrigerator overnight or soak them in cold water for about 15-20 minutes. This way, you’ll get that perfect, succulent bite!

How should I store leftover Garlic Shrimp Crostini?
Leftover assembled crostini should be stored in an airtight container in the fridge for up to 2 hours. However, keep in mind that the bread may lose its crispiness. For any remaining ingredients, keep them separate: store the baked crostini and avocado mixture in separate containers for optimal freshness.

Can I freeze Garlic Shrimp Crostini?
Yes, you can freeze the crostini! To do so, lay the baked crostini slices in a single layer on a baking sheet and freeze for about 1 hour until firm. Then, transfer them to a freezer bag for long-term storage of up to 1 month. For re-crisping, just pop them back into a preheated oven at 375°F (190°C) for 5-7 minutes, and they’ll be good as new!

Why did my shrimp turn out tough?
Very easily done! The key to tender shrimp is careful cooking. Shrimp cook quickly, so once they turn pink and opaque (usually about 5 minutes), remove them from the heat immediately. Overcooking causes them to become rubbery. Make sure to also avoid overcrowding the skillet, as this can lower the temperature and lead to uneven cooking.

Is this recipe suitable for those with allergies?
Definitely! As with all recipes, check individual ingredient labels and adjust as necessary. The Garlic Shrimp Crostini can be made gluten-free by using gluten-free bread. For a dairy-free version, the avocado provides all the creaminess needed. If you are serving guests, I recommend asking them about any allergies or dietary restrictions beforehand to ensure everyone can enjoy this delightful appetizer!

Garlic Shrimp Crostini with Avocado

Garlic Shrimp Crostini with Avocado: A Flavorful Delight

Garlic Shrimp Crostini with Avocado is an easy and delicious appetizer that's perfect for any gathering.
Print Recipe Pin Recipe
Prep Time 15 minutes mins
Cook Time 10 minutes mins
Total Time 25 minutes mins
Servings: 4 crostini
Course: Appetizers
Cuisine: Mediterranean
Calories: 150
Ingredients Equipment Method Nutrition Notes

Ingredients
  

For the Crostini
  • 1 loaf Baguette or gluten-free bread for an alternative
  • 2 tablespoons Olive Oil or avocado oil as a substitute
For the Shrimp
  • 1 pound Shrimp fresh shrimp preferred
  • 3 cloves Garlic minced, fresh garlic is best
  • 1 teaspoon Smoked Paprika regular paprika can be used if smoked isn't available
  • 0.5 teaspoon Cumin optional
  • to taste Salt
  • to taste Pepper
For the Avocado Mixture
  • 1 large Avocado ripe
  • 1 tablespoon Lime Juice or lemon juice as a substitute

Equipment

  • Oven
  • Skillet
  • Baking Sheet
  • Mixing Bowl

Method
 

Preparation
  1. Preheat your oven to 400°F (200°C). Slice the baguette into ½-inch thick pieces and arrange them on a baking sheet. Drizzle each slice with olive oil, coating them evenly. Bake the bread for about 10 minutes or until golden and crispy.
  2. While your crostini bakes, heat a skillet over medium-high heat and add olive oil. Once hot, add minced garlic and sauté for about 30 seconds until fragrant. Then, add the shrimp to the skillet, seasoning with smoked paprika, cumin, salt, and pepper. Cook for approximately 5 minutes, or until the shrimp are pink and opaque, stirring occasionally.
  3. In a medium bowl, cut and scoop out the ripe avocado, discarding the pit. Add fresh lime juice, a pinch of salt, and pepper. Using a fork, mash the avocado until it reaches a creamy yet slightly chunky consistency.
  4. Remove the crostini from the oven and allow them to cool slightly. Top each crispy slice with a generous spoonful of the avocado mixture, ensuring an even distribution. Place a piece of the sautéed garlic shrimp over each avocado-topped crostini.
  5. Arrange your Garlic Shrimp Crostini with Avocado on a platter and serve while warm.

Nutrition

Serving: 1crostiniCalories: 150kcalCarbohydrates: 17gProtein: 6gFat: 7gSaturated Fat: 1gPolyunsaturated Fat: 0.5gMonounsaturated Fat: 5gCholesterol: 100mgSodium: 200mgPotassium: 220mgFiber: 2gVitamin A: 200IUVitamin C: 10mgCalcium: 30mgIron: 0.5mg

Notes

Assemble the crostini just before serving to retain the crunch of the baguette and the creaminess of the avocado.

Tried this recipe?

Let us know how it was!

Savory Italian Eggplant Caponata Recipe to Brighten Your Table

April 14, 2026 by Grace Snow Leave a Comment

The aroma of sun-ripened tomatoes and sautéed eggplant wafts through my kitchen, instantly transporting me to the vibrant streets of Sicily. Today, I’m excited to share my Italian Eggplant Caponata recipe, a sweet and sour symphony that perfectly captures the essence of Mediterranean cuisine. This scrumptious dish is not only a crowd-pleaser but also wonderfully versatile: serve it atop crispy crostini, as a flavorful side to grilled meats, or simply savor it as a hearty vegetarian main course. The best part? Its easy preparation ensures you can indulge in a homemade delight without the stress, making it perfect for both busy weeknights and leisurely gatherings. So, are you ready to add a touch of Sicilian warmth to your table? Let's dive in!

Why Is This Caponata So Special?

Bold, Flavorful Experience: Italian Eggplant Caponata combines sweet and sour notes, courtesy of the perfect blend of tomatoes, olives, and capers.

Versatile Serving Options: Serve it as an appetizer on crostini, a side dish with grilled chicken, or a standout veggie main course—there’s no wrong way to enjoy it!

Quick and Easy: This recipe requires minimal preparation and can be made in under an hour, making it ideal for busy weeknights or surprise guests.

Nutritional Powerhouse: Packed with vegetables and healthy fats, this dish offers a satisfying yet guilt-free indulgence for those seeking plant-based options.

Cultural Essence: Immerse yourself in Sicily’s rich culinary heritage as you savor every bite, reminding you of sun-soaked Mediterranean shores. For more Italian excitement, check out my delightful Chicken Adobo Again recipe!

Italian Eggplant Caponata Ingredients

For the Caponata
• Eggplant – provides the main structure and rich texture; use firm, fresh eggplants for the best flavor.
• Olive Oil – essential for roasting and sautéing; ensure using high-quality extra virgin olive oil for added richness.
• Onion – adds sweetness and depth when sautéed; substitute with shallots for a milder flavor if preferred.
• Celery – contributes crunch and freshness; can be replaced with bell pepper for a sweeter touch.
• Garlic – infuses aromatic flavor; opt for fresh minced garlic for the best effect.
• Diced Tomatoes – adds moisture and acidity; use canned or fresh, depending on availability.
• Olives – provides salty, briny notes; green or black olives work well, so choose based on your taste.
• Capers – adds tangy brininess, essential for the characteristic flavor; feel free to omit if desired.
• Red Wine Vinegar – offers acidity and brightness; lemon juice can be a fine substitute in a pinch.
• Sugar – balances the acidity of the vinegar; honey or maple syrup can serve as natural sweeteners.
• Fresh Basil or Parsley – for garnish; adds freshness and an aromatic finish.

Let your kitchen be filled with the enchanting aromas of this Italian Eggplant Caponata recipe as you bring this cherished Mediterranean delight to life!

Step‑by‑Step Instructions for Italian Eggplant Caponata Recipe

Step 1: Preheat the Oven
Start by preheating your oven to 400°F (200°C). This initial step ensures a hot environment for perfectly roasting the eggplant. While the oven warms up, gather your baking sheet and coat it lightly with olive oil to prevent sticking and enhance flavor during roasting.

Step 2: Prepare the Eggplant
Next, wash and cube the eggplant into bite-sized pieces, making sure they are uniform for even cooking. Toss the cubes in a bowl with a generous drizzle of olive oil, salt, and pepper. Spread the eggplant evenly on the prepared baking sheet, ensuring they are in a single layer for optimal roasting.

Step 3: Roast the Eggplant
Place the baking sheet in the preheated oven and roast the eggplant for 25–30 minutes. Halfway through, give the eggplant a gentle stir to ensure even browning. You'll know it’s ready when the cubes are golden and tender, releasing a delightful aroma through your kitchen.

Step 4: Sauté Aromatics
While the eggplant is roasting, heat a couple of tablespoons of olive oil in a large skillet over medium heat. Add the chopped onion and celery, sautéing them for 8–10 minutes until softened and fragrant. Keep stirring occasionally to prevent them from browning too much; you want them tender and sweet.

Step 5: Add Garlic and Tomatoes
Once the onion and celery are ready, stir in the minced garlic. Keep cooking for about 30 seconds, just until aromatic, then add the diced tomatoes, olives, and capers. Allow this mixture to simmer for 5–7 minutes, letting the flavors meld together beautifully.

Step 6: Season the Mixture
Now, stir in the red wine vinegar and sugar, adjusting to taste. Continue to let it simmer for another 3–5 minutes until the sauce thickens slightly. The combination of sweet and sour notes will create the distinctive flavor profile of your Italian Eggplant Caponata.

Step 7: Combine with Roasted Eggplant
With the sauce ready, gently fold the roasted eggplant into the skillet. Allow the mixture to simmer together for an additional 5–10 minutes, letting the eggplant soak up all those delicious flavors from the sauce. This step blends the textures and creates harmony in your caponata.

Step 8: Adjust Seasoning
Taste your Italian Eggplant Caponata, and don’t be shy about adjusting the seasoning as needed. You may want to add more salt, pepper, or a splash of vinegar for extra tang, depending on your preference. This step is crucial for achieving the right balance of flavors in your dish.

Step 9: Serve and Garnish
Once everything is well combined and flavorful, transfer your caponata to a serving dish. Let it cool to room temperature before serving. Just before serving, garnish with fresh basil or parsley to add a touch of color and aroma, enhancing that inviting Mediterranean vibe.

Expert Tips for Italian Eggplant Caponata

  • Roasting Technique: Ensure you roast the eggplant separately to achieve a crispy texture without greasiness, enhancing your Italian Eggplant Caponata recipe.

  • Flavors Intensify: For the best flavor, allow the caponata to sit for several hours or even overnight before serving; it’s worth the wait!

  • Balance Your Taste: Adjust the vinegar and sugar according to your preference to maintain that delightful sweet-sour balance integral to this dish.

  • Ingredient Freshness: Use high-quality, fresh ingredients; the flavor of your caponata will shine through when using vibrant vegetables and good olive oil.

  • Experiment with Herbs: Feel free to incorporate additional herbs like oregano or thyme for extra depth, as this can elevate your Italian Eggplant Caponata recipe to new heights.

What to Serve with Authentic Italian Eggplant Caponata

Bring the Mediterranean to your table with delightful accompaniments that enhance the flavors of this sweet and sour dish.

  • Crispy Crostini: A wonderful way to serve caponata as an appetizer. The crunchy texture pairs beautifully with the creamy, savory medley.
  • Grilled Chicken or Fish: A hearty meat option complements the dish's richness, creating a balanced plate that satisfies all tastes. The grill’s smoky flavors contrast the caponata's sweetness, elevating the meal.
  • Pasta Salad: A fresh, herbaceous pasta salad adds a lovely lightness to your meal. Opt for a lemony dressing to tie in the Mediterranean theme.
  • Roasted Vegetables: Seasonal roasted veggies offer a hearty side, enhancing the dish's earthy tones. Their caramelization brings out natural sweetness that mirrors the caponata.
  • Feta Cheese Crumbles: Sprinkle some feta on top to add a creamy, tangy dimension. The saltiness of the cheese beautifully balances the sweet and sour elements.
  • Chilled White Wine: A crisp Pinot Grigio or Sauvignon Blanc is delightful with caponata. The wine’s acidity cuts through the richness, making every sip refreshing.
  • Artisan Bread: Serve with a crusty loaf to soak up the caponata's juices. The bread's texture adds a wonderful contrast to the soft vegetables.
  • Chocolate Tart: For dessert, a slice of rich chocolate tart completes the meal with an indulgent sweetness that pairs surprisingly well. The contrast will leave your guests happy and satisfied.

Make Ahead Options

These Italian Eggplant Caponata preparations are perfect for busy weeknights! You can roast the eggplant up to 24 hours in advance and refrigerate it in an airtight container to maintain its flavor and texture. Additionally, you can prepare the sautéed aromatic mixture (onion, celery, garlic, tomatoes, olives, and capers) ahead of time and store it for up to 3 days in the fridge. Just combine the roasted eggplant with the sautéed mixture when ready to serve, adding the red wine vinegar and sugar at this time. This way, you can enjoy a rich, homemade Italian Eggplant Caponata recipe with minimal effort, allowing you to savor wonderful Mediterranean flavors straight from your kitchen!

How to Store and Freeze Italian Eggplant Caponata

Fridge: Store your leftover caponata in an airtight container. It will keep well in the refrigerator for up to 5 days, ensuring you can enjoy it again!

Freezer: For longer storage, freeze the caponata in a freezer-safe container for up to 3 months. When ready to eat, thaw overnight in the fridge before reheating.

Reheating: To reheat, gently warm the caponata in a skillet over medium heat until heated through. You can add a splash of olive oil or vinegar to refresh the flavors.

Room Temperature: Let your Italian Eggplant Caponata rest at room temperature for about 30 minutes before serving. This allows the flavors to blossom, making each bite even more delightful!

Italian Eggplant Caponata Recipe Variations

Feel free to get creative with the flavors and textures of this classic dish!

  • Herb-Infused: Add fresh herbs like oregano or thyme during cooking for a fragrant twist. They'll give your caponata a lovely aromatic punch.

  • Spicy Kick: Incorporate red pepper flakes or diced jalapeños if you crave a touch of heat. Just a pinch can elevate your caponata and tantalize your taste buds.

  • Cheesy Delight: Crumble feta cheese over the final dish for a creamy, tangy finish. This adds an enticing richness that complements the sweet and sour notes beautifully.

  • Roasted Peppers: Including roasted bell peppers or zucchini enhances the dish’s texture and introduces a delightful sweetness. Try it with different colors for a vibrant presentation.

  • Nuts for Crunch: Toss in some toasted pine nuts or walnuts just before serving to add crunch. The nutty flavor pairs well with the caponata's creamy elements.

  • Vegan Option: If you prefer it vegan, simply ensure to check the olive oil and sugar brands; some sugars aren’t vegan-friendly. This recipe is inherently plant-based, making it a great choice!

  • Mediterranean Fusion: Serve alongside marinated olives or a fresh caprese salad for a stunning Mediterranean feast. You can create a spread that transports you straight to sunny Italy.

For more culinary delights, don’t miss out on my Spatchcock Chicken recipe, or check out this unique take with Chicken Adobo Again that adds another layer of flavor to your plate!

Italian Eggplant Caponata Recipe FAQs

How do I choose the perfect eggplant for caponata?
Absolutely! When selecting eggplant, look for firm, shiny skins with a vibrant color. Avoid any eggplants that have dark spots or soft blemishes, as these might be overripe. A good rule is to choose a medium-sized eggplant, which typically has the best flavor and texture.

How long can I store leftover caponata in the fridge?
Your caponata will stay fresh in an airtight container in the fridge for up to 5 days. Be sure to let it rest at room temperature for about 30 minutes before serving to really bring out those delicious flavors!

Can I freeze Italian Eggplant Caponata?
Very! To freeze your caponata, allow it to cool completely first. Then transfer it into a freezer-safe container, making sure to leave some space for expansion. It can be frozen for up to 3 months. When you’re ready to enjoy it again, thaw it overnight in the fridge, and then gently reheat it in a skillet, adding a splash of olive oil or vinegar as needed.

What should I do if my caponata is too sour?
If you find your caponata is too sour, don’t worry! Just add a bit more sugar or honey, a teaspoon at a time, until it achieves your desired balance. Alternatively, you can also mix in a little extra roasted eggplant to neutralize the acidity.

Is caponata safe for pets or people with allergies?
While caponata is generally safe for humans, the olives and capers can be high in sodium, so it’s best to serve it to pets in moderation. If someone has allergies, be careful with ingredients—especially olives, capers, and potential cross-contamination with nuts or gluten. Always consult with anyone who may have dietary restrictions before serving.

Can I make any substitutions to the ingredients?
Of course! If you're out of capers, you can continue without them, or try using chopped green pickles for a similar tang. For those who might not love eggplant, zucchini or bell peppers can be great alternatives. Each substitution can lend a unique twist to your Italian Eggplant Caponata recipe!

Italian Eggplant Caponata Recipe

Savory Italian Eggplant Caponata Recipe to Brighten Your Table

Enjoy this Italian Eggplant Caponata recipe, a sweet and sour delight perfect for appetizers or as a hearty vegetarian main dish.
Print Recipe Pin Recipe
Prep Time 15 minutes mins
Cook Time 30 minutes mins
Total Time 45 minutes mins
Servings: 4 servings
Course: Appetizers
Cuisine: Italian
Calories: 150
Ingredients Equipment Method Nutrition Notes

Ingredients
  

For the Caponata
  • 1 medium Eggplant firm, fresh
  • 2 tablespoons Olive Oil extra virgin
  • 1 medium Onion finely chopped
  • 1 stalk Celery chopped
  • 2 cloves Garlic minced
  • 1 can Diced Tomatoes or fresh
  • 0.5 cup Olives green or black
  • 2 tablespoons Capers optional
  • 2 tablespoons Red Wine Vinegar or lemon juice
  • 1 tablespoon Sugar or honey/maple syrup
  • 0.25 cup Fresh Basil or Parsley for garnish

Equipment

  • Oven
  • Baking Sheet
  • Large skillet
  • Mixing Bowl

Method
 

Step-by-Step Instructions
  1. Preheat your oven to 400°F (200°C), coating a baking sheet with olive oil.
  2. Wash and cube the eggplant, toss with olive oil, salt, and pepper. Spread evenly on the baking sheet.
  3. Roast the eggplant for 25–30 minutes, stirring halfway through until golden and tender.
  4. Heat olive oil in a skillet, sauté onion and celery for 8–10 minutes till softened.
  5. Add minced garlic and cook for about 30 seconds, then stir in diced tomatoes, olives, and capers.
  6. Add red wine vinegar and sugar, simmer for 3–5 minutes until thickened.
  7. Gently fold in the roasted eggplant, simmer for 5–10 minutes to blend flavors.
  8. Adjust seasoning with salt, pepper, or vinegar as desired.
  9. Transfer to a serving dish, let cool, and garnish with fresh basil or parsley before serving.

Nutrition

Serving: 1cupCalories: 150kcalCarbohydrates: 15gProtein: 2gFat: 10gSaturated Fat: 1.5gPolyunsaturated Fat: 1gMonounsaturated Fat: 8gSodium: 200mgPotassium: 400mgFiber: 4gSugar: 6gVitamin A: 500IUVitamin C: 15mgCalcium: 40mgIron: 1mg

Notes

Let the caponata sit for several hours or overnight for the best flavor. Store in an airtight container in the fridge for up to 5 days.

Tried this recipe?

Let us know how it was!

Garlic Roasted Eggplant: Crispy, Flavor-Packed Perfection

April 14, 2026 by Grace Snow Leave a Comment

As I stood in my kitchen the other day, the warm aroma of roasting garlic wafted through the air, momentarily transporting me to a sunny Mediterranean terrace. There's something incredibly satisfying about transforming humble ingredients into mouthwatering dishes, and that's exactly what my Garlic Roasted Eggplant recipe accomplishes. In just 30 minutes, you’ll create crispy caramelized bites that are perfect as a side, topping for warm pita, or a delightful addition to pasta. Not only is this vegetarian dish quick to prepare, but it also brings a burst of flavor that even the pickiest eaters will love. Curious about how to whip up this delectable dish that will make your taste buds dance? Let’s dive in!

Why is Garlic Roasted Eggplant a Must-Try?

Flavor Explosion: This dish is a delightful harmony of crispy edges and creamy interiors, all infused with rich garlic essence.

Quick and Easy: With just 30 minutes from prep to table, it’s a fantastic choice for busy weeknights or last-minute gatherings.

Versatile Serving Ideas: Serve it as a side dish, on warm pita with hummus, or tossed in pasta for a Mediterranean flair. It pairs beautifully with dishes like Honey Garlic Chicken or Roasted Corn Fried Tacos.

Healthy Comfort Food: Packed with fiber and healthy fats from olive oil, this vegetarian delight is guilt-free yet satisfying.

Endless Variations: Customize it with chili flakes for heat or a drizzle of balsamic glaze for a tangy twist, making it perfect for any palate!

Garlic Roasted Eggplant Ingredients

For the Eggplant
• Eggplant – Select fresh and firm eggplants for the best texture in your garlic roasted eggplant.
• Olive Oil – This is essential for roasting; it enhances flavor and helps achieve that crispy finish.

For the Seasoning
• Garlic – Always opt for fresh garlic; it caramelizes beautifully and provides a deeper flavor.
• Salt – Adjust according to your taste to perfectly season the roasted eggplant.
• Black Pepper – Freshly ground black pepper adds a subtle heat that elevates the overall flavor.
• Oregano – Adds a lovely herbaceous note; feel free to swap with thyme or basil if preferred.

Optional Enhancements
• Chili Flakes – Sprinkle in for a spicy kick, perfect for those who love heat!
• Balsamic Glaze – Drizzle after roasting for a sweet tang that complements the garlic beautifully.
• Parmesan Cheese – Add a sprinkling before or after roasting for a cheesy crust that takes flavor up a notch.

Step‑by‑Step Instructions for Garlic Roasted Eggplant

Step 1: Preheat the Oven
Begin by preheating your oven to 400°F (200°C). This temperature is crucial for achieving that perfect crispy texture on your garlic roasted eggplant. While the oven heats up, you can prepare the eggplant, ensuring it's ready to go in as soon as the temperature is just right.

Step 2: Prepare the Eggplant
Rinse and dry the eggplant, removing any excess moisture. Cut it into uniform 1-inch cubes to ensure even cooking. As you chop, admire the vibrant color and firm texture of the eggplant—these are signs of freshness, which will enhance your garlic roasted eggplant’s flavor and consistency.

Step 3: Mix the Ingredients
In a large mixing bowl, combine the eggplant cubes with a generous splash of olive oil, minced garlic, salt, black pepper, and oregano. Toss the mixture well, ensuring each piece of eggplant is evenly coated. The oil helps achieve that crispy exterior, while the garlic infuses its aromatic goodness throughout your garlic roasted eggplant.

Step 4: Arrange on Baking Sheet
Spread the eggplant mixture in a single layer on a baking sheet. Make sure the pieces are spaced apart; this prevents steaming and promotes crispiness. The sight of those glistening cubes ready to roast brings anticipation for the flavorful transformation about to happen in your oven.

Step 5: Roast the Eggplant
Place the baking sheet in the preheated oven and roast for 25-30 minutes. Halfway through the roasting time, give the eggplant a gentle stir to ensure even cooking. Keep an eye on them—the edges should turn golden brown, while the centers become soft, indicating your garlic roasted eggplant is nearly done.

Step 6: Check for Doneness
As you approach the 30-minute mark, check the texture of the eggplant cubes. They should feel tender but not mushy. When it reaches this perfect balance, you’ll know your garlic roasted eggplant is ready to come out, bursting with flavor and boasting a delightful crispy finish.

Step 7: Serve and Enjoy
Once roasted, allow the garlic roasted eggplant to cool slightly before serving. You can enjoy it as a side dish, atop a warm pita with hummus, or even tossed in pasta. The warm, inviting aroma and a beautiful golden-brown hue will surely impress anyone at your table!

What to Serve with Garlic Roasted Eggplant

When you're ready to create a feast from this delicious garlic roasted eggplant, the right pairings can elevate your meal to new heights.

  • Creamy Hummus: This smooth dip adds a delightful creaminess that balances the roasted eggplant's texture, making each bite pure heaven. Spread it on warm pita for a heavenly appetizer.

  • Couscous Salad: A light, fluffy couscous salad with fresh herbs and lemon zest offers a refreshing contrast, brightening up the rich flavors of garlic roasted eggplant. The nuttiness of the couscous beautifully complements the earthy eggplant.

  • Grilled Chicken Skewers: Juicy, marinated chicken skewers bring protein to your meal, pairing wonderfully with the smoky garlic notes of the eggplant. Serve them side by side for a satisfying dinner that packs a flavor punch.

  • Tzatziki Sauce: This tangy yogurt-based sauce with cucumber and dill cools down the rich garlic flavors and adds a refreshing twist. Perfect for dipping with roasted eggplant cubes or spreading on pita for a Mediterranean delight.

  • Mediterranean Quinoa Bowl: Combine garlic roasted eggplant with hearty quinoa, fresh spinach, and a drizzle of lemon olive oil for a nourishing and flavorful bowl. This combination is not only filling but also a feast for the eyes!

  • Red Wine: A glass of light red wine, such as Pinot Noir, enhances the overall eating experience, complementing both the garlic and eggplant's flavors with its fruitiness and delicate structure. Enjoy this pairing as you savor each bite.

Expert Tips for Garlic Roasted Eggplant

  • Use Fresh Ingredients: Fresh garlic and firm eggplants are key. Avoid pre-minced garlic as it lacks the depth that fresh provides in your garlic roasted eggplant.

  • Avoid Overcrowding: Make sure the eggplant cubes are spread out on the baking sheet. Overcrowding leads to steaming rather than roasting, preventing that desired crispy texture.

  • Oil Generously: Don’t shy away from the olive oil! It helps the eggplant achieve that beautiful golden finish. Just remember, eggplant loves oil—it’ll absorb a good amount while roasting.

  • Monitor Cooking Time: Roasting times can vary. Begin checking for doneness at the 25-minute mark; perfectly cooked garlic roasted eggplant should be soft inside but have crispy edges.

  • Experiment with Flavors: Have fun customizing! Consider adding chili flakes for heat or a sprinkle of cheese to elevate the flavor of your garlic roasted eggplant.

Garlic Roasted Eggplant Variations

Elevate your cooking experience by customizing your garlic roasted eggplant with delightful variations that will enchant your palate!

  • Spicy Twist: Add chili flakes to the eggplant mixture for a fiery kick that complements the garlic beautifully. Spice lovers will relish this upgrade!

  • Balsamic Burst: Drizzle with balsamic glaze after roasting for a tangy, sweet contrast that enhances the richness of the eggplant. It’s a simple way to add depth.

  • Herbaceous Freshness: Top with fresh herbs like parsley or basil right before serving. These vibrant greens add a pop of color and refreshing flavor, making every bite feel fresh.

  • Cheesy Goodness: Sprinkle grated Parmesan before roasting for a luscious, cheesy crust, or add it afterward to keep that melty goodness on top. The cheese melds beautifully with the garlic.

  • Mediterranean Medley: Mix in roasted bell peppers or zucchini before roasting to create a colorful vegetable medley that turns your dish into a hearty main course.

  • Nutty Delight: Incorporate toasted pine nuts or walnuts after roasting for a delightful crunch and nutty flavor that adds richness and texture.

  • Satisfying Sauté: For a unique twist, sauté the roasted eggplant with cherry tomatoes and a splash of balsamic vinegar before serving. This combination is bursting with flavor and is perfect for a quick pasta topping.

These variations not only provide unique flavors but also encourage creativity in your kitchen! Whether you serve your garlic roasted eggplant alongside a hearty dish like Roasted Bratwurst with Peppers or mix it into a pasta alongside Cheesy Garlic Bread, the possibilities are endless for mouthwatering meals!

How to Store and Freeze Garlic Roasted Eggplant

Fridge: Store leftovers in an airtight container for up to 3 days. Make sure to cool the garlic roasted eggplant completely before sealing to prevent condensation.

Freezer: For longer storage, freeze the garlic roasted eggplant in a single layer on a baking sheet before transferring to an airtight container or freezer bag. It can last for up to 3 months.

Reheating: To enjoy that crispy texture again, reheat in the oven or broiler rather than the microwave. This will help retain the crunch and delicious flavor.

Thawing: When ready to use frozen garlic roasted eggplant, thaw in the fridge overnight for the best results before reheating.

Make Ahead Options

These Garlic Roasted Eggplant bites are perfect for meal prep enthusiasts! You can chop the eggplant and mix it with olive oil, minced garlic, salt, black pepper, and oregano up to 24 hours in advance. Just cover the mixing bowl with plastic wrap and refrigerate to maintain freshness and prevent browning. When you’re ready to enjoy, simply spread the mixture on a baking sheet and roast it in a preheated oven at 400°F (200°C) for 25-30 minutes. This approach not only saves time on busy weeknights but also ensures you’ll have deliciously crispy garlic roasted eggplant with minimal effort when it’s time to serve!

Garlic Roasted Eggplant Recipe FAQs

What kind of eggplant should I use for garlic roasted eggplant?
Absolutely! For the best texture in your garlic roasted eggplant, choose fresh and firm eggplants, ideally with smooth skin and no dark spots. Look for ones that feel heavy for their size; this indicates they are full of moisture, which is perfect for roasting.

How should I store leftovers of garlic roasted eggplant?
Store any leftovers in an airtight container in the refrigerator for up to 3 days. It’s important to cool the garlic roasted eggplant completely before placing it in the container to avoid excess moisture, which could make it soggy.

Can garlic roasted eggplant be frozen?
Yes, it can! To freeze your garlic roasted eggplant, first, let it cool completely. Then, lay the pieces in a single layer on a baking sheet and place them in the freezer for about 1-2 hours until they are frozen. After that, transfer the cubes to an airtight container or freezer bag. It will keep well for up to 3 months! When you're ready to enjoy it again, simply thaw it in the refrigerator overnight before reheating.

Why is my garlic roasted eggplant not crispy?
Very! If your garlic roasted eggplant isn’t turning out crispy, it may be due to overcrowding on the baking sheet. Ensure there’s enough space between the pieces for air to circulate. Alternatively, ensure you're using sufficient olive oil, as it’s crucial for achieving that perfect texture. If you find it’s still not crispy enough, try broiling it for an additional 2-3 minutes at the end of roasting!

Are there any dietary considerations for garlic roasted eggplant?
Of course! Garlic roasted eggplant is naturally vegetarian and gluten-free, which makes it a great option for many diets. Just be mindful of any allergies; for instance, if you or someone at your table is allergic to nightshades, you may need to avoid eggplant altogether. The recipe can easily be modified by using other vegetables for roasting instead, like zucchini or bell peppers.

Garlic Roasted Eggplant

Garlic Roasted Eggplant: Crispy, Flavor-Packed Perfection

Discover the delightful Garlic Roasted Eggplant, a quick and easy vegetarian dish packed with flavor.
Print Recipe Pin Recipe
Prep Time 10 minutes mins
Cook Time 25 minutes mins
Total Time 30 minutes mins
Servings: 4 servings
Course: Appetizers
Cuisine: Mediterranean
Calories: 150
Ingredients Equipment Method Nutrition Notes

Ingredients
  

For the Eggplant
  • 2 medium Eggplant Select fresh and firm eggplants for the best texture.
  • 2 tablespoons Olive Oil Essential for roasting.
For the Seasoning
  • 4 cloves Garlic Fresh garlic is ideal.
  • 1 teaspoon Salt Adjust according to taste.
  • 1/2 teaspoon Black Pepper Freshly ground adds subtle heat.
  • 1 teaspoon Oregano Can be swapped with thyme or basil.
Optional Enhancements
  • 1/4 teaspoon Chili Flakes For a spicy kick.
  • 1 tablespoon Balsamic Glaze Drizzle after roasting.
  • 1/4 cup Parmesan Cheese For a cheesy crust.

Equipment

  • Oven
  • Baking Sheet
  • Mixing Bowl
  • Knife
  • Cutting Board

Method
 

Step-by-Step Instructions
  1. Preheat your oven to 400°F (200°C).
  2. Rinse, dry, and cut the eggplant into uniform 1-inch cubes.
  3. In a large mixing bowl, combine the eggplant cubes with olive oil, minced garlic, salt, black pepper, and oregano. Toss well.
  4. Spread the eggplant mixture in a single layer on a baking sheet.
  5. Roast in the preheated oven for 25-30 minutes, stirring halfway through.
  6. Check for doneness; the eggplant should be tender with crispy edges.
  7. Allow to cool slightly before serving as a side or with pita or pasta.

Nutrition

Serving: 1cupCalories: 150kcalCarbohydrates: 12gProtein: 3gFat: 9gSaturated Fat: 1gPolyunsaturated Fat: 1gMonounsaturated Fat: 6gSodium: 300mgPotassium: 500mgFiber: 5gSugar: 4gVitamin A: 350IUVitamin C: 3mgCalcium: 50mgIron: 1mg

Notes

Use fresh ingredients for the best flavor. Avoid overcrowding the baking sheet.

Tried this recipe?

Let us know how it was!

Creamy Garlic Parmesan Shrimp Roll-Ups for Cozy Nights

April 13, 2026 by Grace Snow Leave a Comment

As I stood in my kitchen, the aroma of garlic sizzling in butter brought me back to evenings spent with family, laughter echoing around the table. Today, I'm excited to share my recipe for Creamy Garlic Parmesan Shrimp Roll-Ups—these cheesy delights are not only rich and savory but also incredibly easy to whip up. A perfect comfort food, they transform simple ingredients into a crowd-pleasing appetizer or a delightful main course when paired with a fresh salad. Plus, the versatility of using either tortillas or crescent dough means you can tailor these roll-ups to your taste. Are you ready to take your cooking to the next level and impress everyone at your next gathering? Let's dive in!

Why You'll Adore This Recipe

Simplicity: With just a handful of ingredients and straightforward steps, you can create a delicious dish without wasting time in the kitchen.

Irresistible Cheese: The cream cheese and freshly grated Parmesan meld perfectly, creating a rich, gooey filling that will keep your friends coming back for more.

Versatile Wraps: Choose between tortillas for an easy, quick experience or crescent dough for a delightful flakiness that elevates these roll-ups to a new level.

Perfect for Gatherings: Whether as an appetizer at your next party or a fun family dinner, these roll-ups are sure to be a hit. Want more crowd-pleasers? Check out my Shrimp Tacos Zesty or Honey Garlic Chicken for more delightful ideas!

Make-Ahead Option: Assemble the roll-ups in advance and pop them in the oven before your guests arrive, making entertaining a breeze!

Transform your cooking experience with these scrumptious roll-ups!

Creamy Garlic Parmesan Shrimp Roll-Ups Ingredients

For the Filling

  • Shrimp – the main protein, providing juicy and flavorful bites; thawed frozen shrimp works beautifully.
  • Cream Cheese – adds richness and creaminess to the filling; Greek yogurt can be a lighter option.
  • Parmesan Cheese – lends a nutty, salty flavor; opt for freshly grated for optimal melting.
  • Garlic – imparts delightful aromatic depth; fresh minced garlic is recommended for the best taste.

For the Wrapper

  • Tortillas or Crescent Dough – the wrap that holds your delicious filling; tortillas are simpler to slice, while crescent dough gives a flaky texture.

Enjoy making these Creamy Garlic Parmesan Shrimp Roll-Ups!

Step‑by‑Step Instructions for Creamy Garlic Parmesan Shrimp Roll-Ups

Step 1: Preheat Your Oven
Begin by preheating your oven to 375°F (190°C) to ensure it's hot and ready for baking. This temperature is ideal for creating that perfect golden brown crust on your Creamy Garlic Parmesan Shrimp Roll-Ups. While the oven heats up, gather all your ingredients to streamline the preparation process.

Step 2: Mix the Filling
In a mixing bowl, combine 8 ounces of softened cream cheese, ½ cup of freshly grated Parmesan cheese, and 2 cloves of minced garlic. Using a hand mixer or a spatula, blend the ingredients together until they are smooth and creamy. This flavorful mixture will serve as the delicious filling for your roll-ups.

Step 3: Incorporate the Shrimp
Next, take 1 pound of thawed shrimp—ensuring they are patted dry to avoid excess moisture—and gently fold them into the cheesy mixture. Mix well until every piece of shrimp is evenly coated with the creamy filling. The shrimp will add a delightful burst of flavor to your Creamy Garlic Parmesan Shrimp Roll-Ups.

Step 4: Prepare the Wraps
Choose either tortillas or crescent dough as your wrap. If using tortillas, lay them flat on a clean surface; for crescent dough, roll out the dough to create a rectangle. Spoon an ample amount of the shrimp filling onto each wrap, making sure to spread it evenly from edge to edge for the best flavor in every bite.

Step 5: Roll Them Up
Carefully roll each tortilla or crescent dough, tucking in the ends to secure the filling inside. Make sure to roll tightly for a compact roll-up that holds together well during baking. Place the finished roll-ups seam-side down on a greased baking sheet, ensuring they’re spaced evenly apart for even cooking.

Step 6: Bake to Perfection
Slide the baking sheet into the preheated oven and bake for approximately 15 to 20 minutes. Keep an eye on your Creamy Garlic Parmesan Shrimp Roll-Ups; they are done when they become golden brown and bubbly with a delightful aroma wafting through your kitchen.

Step 7: Serve Hot
Once baked, remove the roll-ups from the oven and allow them to cool slightly before serving. These delicious morsels are best enjoyed hot, paired with your favorite dipping sauces like spicy mayo or marinara. Gather your family and friends, and get ready to impress them with your delightful creamy shrimp roll-ups!

What to Serve with Irresistible Creamy Garlic Parmesan Shrimp Roll-Ups

Enhance your dining experience with delightful pairings that complement the rich and savory flavors of these creamy roll-ups.

  • Crisp Garden Salad: A fresh salad with mixed greens and a light vinaigrette balances the richness, adding a refreshing crunch.

  • Savory Garlic Bread: Warm, buttery garlic bread is perfect for soaking up any leftover creamy filling, elevating your indulgent experience.

  • Roasted Vegetables: Seasonal roasted veggies provide a delightful contrast in texture and a pop of color, enhancing the meal's appeal.

  • Creamy Potato Soup: A warm bowl of smooth potato soup enriches the comfort food vibes, creating a cozy and satisfying meal.

  • Zesty Coleslaw: The tangy crunch of coleslaw adds brightness and a refreshing palate cleanser, making every bite delightful.

  • Chilled White Wine: A glass of chilled Sauvignon Blanc complements the shrimp's flavors, enhancing the overall dining experience beautifully.

  • Spicy Marinara Sauce: Serve with a side of zesty marinara for dipping, which adds a vibrant flavor contrast to the creamy roll-ups.

  • Mango Salsa: The sweetness of mango salsa provides a fruity kick that pairs wonderfully with the savory shrimp filling, creating a flavor explosion.

  • Chocolate Lava Cake: End your meal on a sweet note with warm, gooey chocolate lava cake, perfectly contrasting the savory flavors of the roll-ups.

Expert Tips for Creamy Garlic Parmesan Shrimp Roll-Ups

  • Thaw Properly: Make sure your shrimp are completely thawed and patted dry to prevent excess moisture, which can make the filling soggy.

  • Cream Cheese Consistency: If your filling seems too thick, add a splash of milk to achieve the right creamy consistency, ensuring easy wrapping.

  • Watch Baking Time: Keep an eye on the roll-ups while baking; baking times can vary depending on whether you use tortillas or crescent dough.

  • Use Fresh Ingredients: Freshly minced garlic and freshly grated Parmesan cheese enhance the flavors significantly. Don't settle for powdered or pre-grated options!

  • Try Dip Pairing: These Creamy Garlic Parmesan Shrimp Roll-Ups are amazing dipped in spicy mayo or tangy marinara; try different dips for a flavor adventure!

How to Store and Freeze Creamy Garlic Parmesan Shrimp Roll-Ups

  • Fridge: Store baked roll-ups in an airtight container for up to 3 days. Reheat in the oven at 350°F for 10 minutes for best results.

  • Freezer: To freeze, place uncooked roll-ups in a single layer on a baking sheet; once frozen, transfer to a zip-top bag for up to 2 months. Bake straight from the freezer, adding 5 minutes to the baking time.

  • Reheating: For best flavor and texture, reheat baked roll-ups in the oven, rather than the microwave, to maintain their crispy exterior.

  • Make-Ahead: Prepare roll-ups ahead of time, refrigerate, and bake just before serving. This keeps your hosting stress-free while still serving fresh, delicious Creamy Garlic Parmesan Shrimp Roll-Ups!

Creamy Garlic Parmesan Shrimp Roll-Ups Variations

Feel free to unleash your creativity and customize these delicious roll-ups to match your taste preferences!

  • Dairy-Free: Substitute cream cheese and Parmesan with store-bought dairy-free alternatives for a creamy filling that caters to lactose sensitivities.

  • Spicy Kick: Add a tablespoon of sriracha or a pinch of red pepper flakes to the filling for an exciting heat that complements the creamy shrimp.

  • Vegetable Medley: Swap the shrimp for a mix of sautéed bell peppers, spinach, and mushrooms for a vibrant vegetarian twist packed with flavor.

  • Herb Explosion: Enhance the flavor profile by mixing in fresh herbs like parsley, dill, or chives into the filling for a fragrant update.

  • Crispy Exterior: Brush the outside of crescent dough with melted butter or olive oil before baking to achieve an extra crispy and golden crust.

  • Cheese Variety: Switch up the cheese! Try adding mozzarella or cheddar for a melty, gooey filling that brings a delightful twist to the classic recipe.

  • Zesty Citrus: Incorporate some lemon zest into the shrimp mixture for a refreshing zing that brightens the overall dish.

  • Garlic Lovers: Increase the garlic quantity to suit your palate, or even roast the garlic beforehand for a sweeter, more mellow flavor profile.

These roll-ups are versatile and perfect for experimenting! If you enjoy shrimp dishes, you might also love my Pan Fried Shrimp or Turmeric Dill Shrimp Stir-Fry for more scrumptious ideas.

Make Ahead Options

These Creamy Garlic Parmesan Shrimp Roll-Ups are perfect for meal prep enthusiasts looking to save time during busy weeknights! You can assemble the roll-ups up to 24 hours in advance. Simply prepare the shrimp filling and roll them in your chosen tortillas or crescent dough. After rolling, tightly wrap them in plastic wrap and refrigerate to maintain freshness. When you're ready to serve, simply pop them in a preheated oven at 375°F for about 15 to 20 minutes, or until golden brown. This way, you can enjoy perfectly baked, hearty roll-ups with minimal effort—just as delicious as when freshly made!

Creamy Garlic Parmesan Shrimp Roll-Ups Recipe FAQs

What kind of shrimp should I use?
Absolutely! I recommend using thawed frozen shrimp for convenience and good flavor. Look for large, peeled, and deveined shrimp to save time. If using fresh shrimp, make sure they have a mild sea breeze scent and a firm texture—avoid any that smell overly fishy or have dark spots on their shells.

How do I store leftover Creamy Garlic Parmesan Shrimp Roll-Ups?
You can store baked roll-ups in an airtight container in the refrigerator for up to 3 days. When reheating, set your oven to 350°F and bake them for about 10 minutes. This will restore their lovely crisp exterior while warming the creamy filling!

Can I freeze the roll-ups, and if so, how?
Yes, you can freeze these tasty roll-ups! Start by arranging the uncooked roll-ups in a single layer on a baking sheet. Freeze them until solid, about 1-2 hours, then transfer them to a zip-top bag. They’ll keep well in the freezer for up to 2 months. When you're ready to enjoy, bake them straight from the freezer, adding roughly 5 extra minutes to the cooking time.

What should I do if my filling is too thick?
Very! If your filling feels thick and hard to spread, just add a splash of milk to loosen it up. Mix it well until you achieve a smooth, creamy consistency that spreads easily on your wraps. This will help ensure everything rolls up nicely without tearing.

Can I make these roll-ups vegetarian?
Definitely! You can swap out the shrimp for a medley of cooked vegetables like bell peppers, spinach, or zucchini for a delightful veggie version. Just sauté your veggies first to remove excess moisture and boost their flavors, then mix them into the cheese filling as you would with the shrimp.

Are there any allergens I should be aware of?
I recommend checking for common allergens, especially if you're serving guests. The main allergens in this recipe are dairy (cream cheese and Parmesan) and shellfish (shrimp). For a dairy-free alternative, you could use a vegan cream cheese and skip the Parmesan, or use nutritional yeast for a cheesy flavor without the dairy.

Creamy Garlic Parmesan Shrimp Roll-Ups

Creamy Garlic Parmesan Shrimp Roll-Ups for Cozy Nights

Creamy Garlic Parmesan Shrimp Roll-Ups are a rich and savory comfort food that transforms simple ingredients into a crowd-pleasing appetizer.
Print Recipe Pin Recipe
Prep Time 15 minutes mins
Cook Time 20 minutes mins
Total Time 35 minutes mins
Servings: 4 roll-ups
Course: Appetizers
Cuisine: American
Calories: 250
Ingredients Equipment Method Nutrition Notes

Ingredients
  

For the Filling
  • 1 pound thawed shrimp patted dry
  • 8 ounces cream cheese softened
  • 1/2 cup freshly grated Parmesan cheese
  • 2 cloves garlic minced
For the Wrapper
  • 4 pieces tortillas
  • 1 package crescent dough alternative

Equipment

  • Mixing Bowl
  • Baking Sheet
  • hand mixer
  • Spatula

Method
 

Step-by-Step Instructions
  1. Preheat your oven to 375°F (190°C).
  2. In a mixing bowl, combine cream cheese, Parmesan cheese, and minced garlic until smooth.
  3. Fold in the thawed shrimp until well coated.
  4. Lay the tortillas flat, or roll out the crescent dough, then spoon filling evenly onto each wrap.
  5. Roll tightly, tucking in the ends, and place seam-side down on a greased baking sheet.
  6. Bake for 15 to 20 minutes or until golden brown and bubbly.
  7. Serve hot with your favorite dipping sauces.

Nutrition

Serving: 1roll-upCalories: 250kcalCarbohydrates: 15gProtein: 19gFat: 15gSaturated Fat: 9gPolyunsaturated Fat: 1gMonounsaturated Fat: 3gCholesterol: 80mgSodium: 500mgPotassium: 200mgFiber: 1gSugar: 2gVitamin A: 500IUVitamin C: 1mgCalcium: 200mgIron: 1mg

Notes

Thaw shrimp properly and use fresh ingredients for the best results.

Tried this recipe?

Let us know how it was!

Garlic Butter Zucchini Skewers: A Grilled Delight for Summer

April 8, 2026 by Grace Snow Leave a Comment

As the searing sun hangs high in the sky, the irresistible scent of summer grilling wafts through the air, nudging me toward a culinary delight: Garlic Butter Zucchini Skewers. With their vibrant colors and smoky essence, these skewers are not just a side dish; they’re a celebration of fresh flavors that elevate any barbecue gathering. The beauty of this recipe lies in its simplicity—perfect for those busy weeknights or impromptu cookouts, it’s quick to prepare and packed with delightful taste. The creamy garlic butter beautifully complements the zucchini's natural freshness, creating a dish that’s healthy and utterly satisfying. Ready to take your summer feasts to the next level? Let’s dive into the delicious world of garlic butter goodness!

Why Are Garlic Butter Zucchini Skewers a Must-Try?

Deliciously Simple: These Garlic Butter Zucchini Skewers are incredibly easy to make, requiring just a handful of ingredients while offering a burst of flavor.

Versatile Enjoyment: Whether served as a side with grilled chicken or enjoyed solo, they adapt seamlessly to any meal.

Healthy, Yet Indulgent: Packed with nutrients, this dish satisfies your cravings without the guilt, making it perfect for health-conscious eaters.

Quick Grilling Delight: With just 8-10 minutes on the grill, you can have these skewers ready to impress your guests in no time, making them perfect for impromptu gatherings.

Crowd Pleaser: Their vibrant appearance and delicious taste make them a favorite at summer barbecues, alongside other dishes like Cheesy Zucchini Bake or Crockpot Butter Chicken.

Elevate your next cookout with these delightful skewers!

Garlic Butter Zucchini Skewers Ingredients

For the Skewers
• Zucchini – the star of this dish, offering fresh flavor and texture; feel free to substitute with bell peppers or cherry tomatoes for a twist.
• Unsalted Butter – brings creaminess and richness; you can opt for salted butter if you prefer a bolder taste.
• Minced Garlic – gives the signature garlic flavor; adjust the amount based on your garlic love.
• Olive Oil – helps coat the zucchini for that perfect grill; avocado oil is a great substitute for a unique taste.
• Salt and Pepper – essential seasonings to elevate flavors; remember to adjust to your personal preference.

Optional Variations
• Grated Parmesan Cheese – adds a savory note that complements the skewers beautifully.
• Fresh Herbs (Thyme, Basil) – sprinkle for an aromatic boost that elevates the entire dish.
• Red Pepper Flakes – for those who crave a hint of spice, just a pinch will do!

Dive into the world of Garlic Butter Zucchini Skewers and let this delightful recipe transform your summer barbecues!

Step‑by‑Step Instructions for Garlic Butter Zucchini Skewers

Step 1: Prepare Zucchini
Begin by washing the zucchini thoroughly under cold water. Slice the zucchini into thick rounds or half-moons, ensuring they are about 1 inch thick for even cooking. This will help create those beautiful grill marks and maintain the vegetable's texture when grilled.

Step 2: Make Garlic Butter
In a small saucepan, melt 4 tablespoons of unsalted butter over low heat. Add 2-3 minced garlic cloves and gently simmer for 2-3 minutes until fragrant, being careful not to let the garlic brown. This step creates a delicious garlic butter mixture that will infuse the zucchini skewers with rich flavor.

Step 3: Season Zucchini
In a large mixing bowl, combine the zucchini slices with 2 tablespoons of olive oil, the garlic butter mixture, and season with salt and pepper to taste. Toss everything together until the zucchini pieces are evenly coated in the rich garlic butter, which will enhance the flavors as they grill.

Step 4: Assemble Skewers
Take wooden or metal skewers and carefully thread the seasoned zucchini pieces onto them, leaving a little space between each piece for even cooking. If using wooden skewers, remember to soak them in water for about 30 minutes prior to prevent burning on the grill.

Step 5: Grill
Preheat your grill to medium-high heat, aiming for around 400°F (200°C). Once ready, place the zucchini skewers on the grill and cook for 8-10 minutes, turning them occasionally. Look for a golden-brown char and tender texture, signaling they are perfectly cooked.

Step 6: Serve
After grilling, remove the skewers from the grill and place them on a serving platter. Drizzle freshly squeezed lemon juice over the skewers for a bright finish. Serve these delightful Garlic Butter Zucchini Skewers warm as a flavorful side dish or a satisfying snack to impress your guests.

Make Ahead Options

These Garlic Butter Zucchini Skewers are perfect for busy home cooks looking to save time during the week! You can prepare the zucchini by washing and slicing it into rounds, then toss it in the garlic butter mixture and store it in the refrigerator for up to 24 hours. This not only enhances the flavors, but it also helps keep the zucchini fresh. When you’re ready to grill, simply thread the prepped zucchini onto skewers and grill as directed. This simple make-ahead step ensures you enjoy delicious, flavorful skewers with minimal effort, allowing you to spend more time relaxing and less time in the kitchen!

How to Store and Freeze Garlic Butter Zucchini Skewers

Fridge: Store leftover Garlic Butter Zucchini Skewers in an airtight container for up to 3 days. Allow them to cool completely before refrigerating to maintain texture.

Freezer: For longer storage, freeze the skewers after grilling by placing them in a single layer on a baking sheet. Once frozen, transfer to a freezer bag for up to 3 months.

Reheating: To reheat, thaw in the fridge overnight, then warm on the grill or in the oven at 350°F (175°C) for 10-15 minutes until heated through.

Make-Ahead Tip: Assemble the skewers ahead of time and coat them in garlic butter. Store them in the fridge for up to 24 hours before grilling for effortless prep at your next gathering.

What to Serve with Garlic Butter Zucchini Skewers

Elevate your barbecue experience by exploring these delightful pairings that complement the vibrant flavors of garlic butter goodness.

  • Grilled Chicken Breast: Juicy and tender, the lightly seasoned chicken adds protein to balance the dish while being perfect for a summer barbecue.

  • Quinoa Salad: A refreshing blend of quinoa with cucumbers and tomatoes adds a nutty texture, making for a healthy and vibrant side dish.

  • Roasted Potatoes: Crispy on the outside and fluffy on the inside, their comforting flavor enhances the buttery richness of the skewers, creating a satisfying meal.

  • Mint Yogurt Dip: This cool, creamy dip not only pairs beautifully with the skewers, but it also refreshes the palate with a delightful hint of mint.

  • Fresh Corn on the Cob: Sweet and juicy, the simplicity of grilled corn complements the skewers perfectly, bringing the essence of summer right to your plate.

  • Lemonade or Iced Tea: A pitcher of these refreshing drinks brings a light, fruity element to your meal, enhancing the bright flavors of the zucchini skewers.

Garlic Butter Zucchini Skewers Variations

Invite your culinary creativity and play with these variations for a truly personalized dish!

  • Bell Peppers: Swap zucchini for vibrant bell peppers, adding a sweet crunch and a burst of color to your skewers.

  • Cherry Tomatoes: For a juicy twist, substitute zucchini with cherry tomatoes. The sweetness of grilled tomatoes complements the garlic perfectly!

  • Dairy-Free: Use vegan butter or coconut oil if dairy is a concern. Your skewers will remain rich without sacrificing flavor.

  • Herb-Infused Garlic Butter: Toss in fresh herbs like thyme or basil into the garlic butter for a fragrant, aromatic kick.

  • Parmesan Topping: Sprinkle grated Parmesan cheese over the skewers before serving for a savory enhancement that takes them up a notch.

  • Spicy Addition: Stir in a pinch of crushed red pepper flakes to the garlic butter for an exciting heat that adds another layer of depth.

  • Grilled Onions: Add chunks of red onion for a sweet and savory contrast that will delight your taste buds, balancing the dish beautifully.

  • Citrus Zest: Enhance flavors with lemon or lime zest in the garlic butter. This tiny addition makes a world of difference in brightness!

To explore even more delicious options, consider pairing these skewers with other crowd favorites like Cheesy Zucchini Bake or serve them alongside the rich flavors of Crockpot Butter Chicken. Enjoy your flavorful adventure!

Expert Tips for Perfect Garlic Butter Zucchini Skewers

• Even Thickness: Ensure that all zucchini pieces are cut to the same thickness to achieve even cooking on the grill.

• Watch the Garlic: Do not let the minced garlic brown in the butter; this will help maintain that fresh, vibrant garlic flavor in your skewers.

• Soak Wooden Skewers: If you're using wooden skewers, soak them in water for about 30 minutes before grilling to prevent them from burning.

• Herb Enhancements: Feel free to add fresh herbs like thyme or basil to the garlic butter mixture for an extra flavor boost in your Garlic Butter Zucchini Skewers.

• Don't Overcrowd: Give each skewer some space on the grill; overcrowding can lead to uneven cooking and steaming rather than grilling.

• Lemon Zest Finish: For an added zing, consider adding lemon zest along with the fresh lemon juice before serving for a refreshing touch.

Garlic Butter Zucchini Skewers Recipe FAQs

What type of zucchini should I use for the skewers?
Absolutely! When shopping for zucchini, look for ones that are firm, with smooth, shiny skin and no dark spots or blemishes. Smaller zucchinis are usually sweeter and more tender, making them perfect for grilling. If you can, opt for organic zucchini to avoid pesticides!

How should I store leftover Garlic Butter Zucchini Skewers?
Leftover skewers can be stored in an airtight container in the refrigerator for up to 3 days. It’s best to allow them to cool completely before sealing to maintain texture. When you’re ready to enjoy them again, you can simply reheat them on the grill or in the oven.

Can I freeze Garlic Butter Zucchini Skewers?
Yes, you can definitely freeze them! Grill the skewers as directed, then let them cool completely. Place them in a single layer on a baking sheet and freeze until firm. Once frozen, transfer them to a freezer bag, where they’ll stay good for up to 3 months. When you're ready to eat, thaw in the fridge overnight and reheat on the grill or in the oven at 350°F (175°C) until warmed through.

What if my zucchini is mushy after grilling?
This can happen if the zucchini is overcooked. To prevent this, make sure you’re grilling on medium-high heat and keep a close eye on the cooking time—typically just 8-10 minutes should be perfect. If your zucchinis are starting to feel too soft before that, it might be time to remove them from the grill!

Are Garlic Butter Zucchini Skewers suitable for people with dietary restrictions?
These skewers are vegetarian-friendly, but if someone has dairy sensitivities or is vegan, you can easily substitute the unsalted butter with vegan butter or olive oil for the garlic mixture. Additionally, always be cautious with garlic if anyone has a garlic allergy.

How can I enhance the flavors of my Garlic Butter Zucchini Skewers?
For a flavor boost, consider adding fresh herbs like thyme or basil to the garlic butter mixture before tossing it with the zucchini. A pinch of red pepper flakes can add a lovely heat, or try topping the skewers with grated Parmesan just before serving for an extra savory touch!

Garlic Butter Zucchini Skewers

Garlic Butter Zucchini Skewers: A Grilled Delight for Summer

Garlic Butter Zucchini Skewers are a must-try summer dish that celebrates fresh flavors and grilling simplicity.
Print Recipe Pin Recipe
Prep Time 10 minutes mins
Cook Time 10 minutes mins
Total Time 20 minutes mins
Servings: 4 skewers
Course: Appetizers
Cuisine: American
Calories: 150
Ingredients Equipment Method Nutrition Notes

Ingredients
  

For the Skewers
  • 4 medium Zucchini Substitute with bell peppers or cherry tomatoes if desired.
  • 4 tablespoons Unsalted Butter Salted butter can be used for a bolder taste.
  • 2-3 cloves Minced Garlic Adjust based on your garlic preference.
  • 2 tablespoons Olive Oil Avocado oil is a great substitute.
  • to taste Salt
  • to taste Pepper
Optional Variations
  • 1/4 cup Grated Parmesan Cheese Adds a savory note.
  • 1/4 cup Fresh Herbs (Thyme, Basil) For an aromatic boost.
  • 1 teaspoon Red Pepper Flakes For a hint of spice.

Equipment

  • Grill
  • Skewers
  • Saucepan
  • Mixing Bowl

Method
 

Step-by-Step Instructions
  1. Wash the zucchini thoroughly and slice into thick rounds or half-moons, about 1 inch thick.
  2. Melt 4 tablespoons of unsalted butter over low heat and add 2-3 minced garlic cloves; simmer for 2-3 minutes until fragrant.
  3. In a large bowl, combine zucchini slices with 2 tablespoons olive oil, the garlic butter mixture, and season with salt and pepper.
  4. Thread zucchini pieces onto skewers, leaving space between each piece.
  5. Preheat grill to medium-high heat (around 400°F). Grill skewers for 8-10 minutes, turning occasionally.
  6. After grilling, drizzle with lemon juice and serve warm.

Nutrition

Serving: 1skewerCalories: 150kcalCarbohydrates: 7gProtein: 2gFat: 14gSaturated Fat: 7gPolyunsaturated Fat: 1gMonounsaturated Fat: 9gCholesterol: 30mgSodium: 200mgPotassium: 300mgFiber: 2gSugar: 2gVitamin A: 500IUVitamin C: 15mgCalcium: 40mgIron: 1mg

Notes

Ensure zucchini pieces are of even thickness for consistent cooking. Soak wooden skewers before grilling to prevent burning.

Tried this recipe?

Let us know how it was!

Delicious Nacho Egg Rolls: A Crispy Snack You'll Crave

April 7, 2026 by Grace Snow Leave a Comment

As I stood in the kitchen, the scent of sizzling ground beef and melting cheese wafted through the air, instantly stirring memories of festive gatherings and joyful celebrations. Today, I'm excited to share my recipe for Delicious Nacho Egg Rolls, an irresistible appetizer that brilliantly combines the beloved flavors of nachos with a delightful crunch. Not only are these egg rolls a guaranteed crowd-pleaser, perfect for game nights or casual get-togethers, but they also come together in a snap, making them an ideal option for busy home cooks. Imagine serving these golden, crispy bites filled with cheesy goodness while your guests rave about them. Ready to take your appetizer game to the next level? Let’s dive into this fun and flavorful recipe together!

Why are Nacho Egg Rolls a Must-Try?

Flavor Explosion: Each bite delivers a savory combination of cheese, beef, and spices, reminiscent of classic nachos.

Crispy Texture: The perfectly fried exterior contrasts beautifully with the gooey, cheesy filling, creating a satisfying crunch.

Quick to Make: In under 30 minutes, you’ll have a delicious snack ready to impress your guests.

Versatile for Any Occasion: Whether it's game day or a family gathering, these egg rolls are a hit. Serve them with salsa or guacamole for an extra kick! If you’re looking for quick bites, you might also enjoy Breakfast Egg Muffins or Avocado Egg Salad.

Crowd-Pleasing Appeal: Both kids and adults will adore this creative twist on a classic favorite!

Delicious Nacho Egg Rolls Ingredients

  • For the Filling

  • Egg Roll Wrappers – These provide the crunchy shell; make sure they're fresh for the best results.

  • Ground Beef – Adds delicious protein and flavor; lean ground beef works well for a healthier choice.

  • Shredded Cheddar Cheese – This gives a rich and creamy texture; opt for sharp cheddar for enhanced taste.

  • Diced Jalapeños – Adds a spicy kick; fresh jalapeños are preferred, but canned will do in a pinch.

  • Black Beans – Boosts protein and fiber; rinse them before use to reduce sodium content.

  • Taco Seasoning – Essential for that authentic nacho flavor; feel free to use store-bought or whip up your own!

  • For Frying

  • Vegetable Oil – Crucial for frying, ensuring that your egg rolls turn out crispy and golden brown.

These Delicious Nacho Egg Rolls are ready to become the star of your next gathering, bringing joy with every crunchy bite!

Step‑by‑Step Instructions for Delicious Nacho Egg Rolls

Step 1: Prepare the Filling
In a medium skillet set over medium heat, brown 1 pound of ground beef, stirring occasionally to ensure even cooking, about 6-8 minutes. Once the beef is cooked through, mix in 1 packet of taco seasoning and 1/2 cup of diced jalapeños, allowing the mixture to become fragrant for an additional 2 minutes.

Step 2: Add Cheese and Beans
Stir in 1 cup of shredded cheddar cheese and one can of rinsed black beans into the beef mixture. Continue to cook on low heat, stirring frequently until the cheese melts completely and the filling becomes cohesive, which should take about 3-4 minutes. This delicious filling is now ready to be rolled up!

Step 3: Assemble the Egg Rolls
Lay an egg roll wrapper in front of you diagonally and spoon approximately two tablespoons of the filling into the center of the wrapper. Carefully fold the bottom corner over the filling, then fold in the two side corners, and roll tightly to seal, ensuring no filling escapes. Repeat this process until all filling is used.

Step 4: Heat the Oil for Frying
In a deep frying pan, heat about 2 inches of vegetable oil to medium heat (around 350°F). To check if the oil is ready, drop in a small piece of leftover egg roll wrapper; it should sizzle immediately. This ensures your Delicious Nacho Egg Rolls will fry to a perfect golden brown.

Step 5: Fry the Egg Rolls
Gently place the assembled egg rolls into the hot oil, making sure not to overcrowd the pan. Fry them for 3-4 minutes, turning occasionally until they are golden brown and crispy on all sides. The sizzling sound will confirm their perfect frying state.

Step 6: Drain and Serve
Using tongs, remove the egg rolls from the oil and place them on a plate lined with paper towels to drain excess oil. Serve these hot and crispy Delicious Nacho Egg Rolls with your favorite dipping sauces like salsa or sour cream for a delightful finish!

Storage Tips for Delicious Nacho Egg Rolls

  • Fridge: Store leftovers in an airtight container for up to 3 days. This keeps your Delicious Nacho Egg Rolls fresh and ready for a quick snack.

  • Freezer: If you want to keep them longer, freeze the egg rolls before frying. Wrap them tightly in plastic wrap and place in a freezer-safe bag for up to 3 months.

  • Reheating: To reheat, bake frozen egg rolls in an oven preheated to 375°F for 15-20 minutes until crispy. This method brings back their delightful crunch!

  • Make-Ahead: Assemble the egg rolls a few hours in advance, refrigerating them until you’re ready to fry. This way, you can enjoy fresh, hot egg rolls without all the prep time!

Helpful Tricks for Delicious Nacho Egg Rolls

  • Seal the Rolls: Tightly seal each roll to prevent any filling from leaking out during frying, ensuring that the flavors stay locked inside.

  • Avoid Overfilling: Stick to about two tablespoons of filling per wrapper to allow for proper rolling and secure sealing. Overfilling can lead to messy egg rolls!

  • Temperature Check: Maintain oil temperature around 350°F for the crispiest results; too low will result in soggy rolls, while too high can cause burning.

  • Quick Serving: Serve your Delicious Nacho Egg Rolls immediately after frying for the best texture. If you need to reheat, use the oven at 375°F for 10 minutes to maintain their crunch.

  • Experiment with Fillings: Don’t hesitate to switch up ingredients! Try adding spices like cumin or using different types of cheese for a unique flavor twist.

Delicious Nacho Egg Rolls Variations

Feel free to customize your egg rolls for a unique twist that suits your taste buds and dietary needs!

  • Lean Protein: Substitute ground turkey or chicken for a lighter, yet equally delicious option.

  • Spice It Up: Use pepper jack cheese instead of cheddar for a spicy kick that will tantalize your taste buds. The creaminess of the cheese will balance the heat perfectly.

  • Veggie Delight: Incorporate chopped bell peppers or corn for extra crunch and flavor. This lively addition enhances both texture and color, making your rolls a true feast for the eyes!

  • Gluten-Free: Opt for gluten-free egg roll wrappers to make a gluten-free version that everyone can enjoy. They'll still be crispy and delightful, perfect for any gathering.

  • Black Bean Boost: Mix in a can of seasoned black beans for extra protein and a little extra flavor; this twist will make them even heartier!

  • Herb Infusion: Add fresh herbs like cilantro or green onions to the filling for an aromatic lift that adds brightness to each bite. The freshness will bring out all those vibrant flavors wonderfully.

  • Smoky Flavor: Try adding a chipotle pepper to the ground beef mix for a smoky, spicy flavor profile that will give your egg rolls a unique twist.

  • Sweet Heat: For an unexpected surprise, drizzle a little honey or agave syrup inside for a sweet and spicy contrast that will have your guests coming back for more!

If you're looking for other fun and delicious ways to enjoy eggs, don't forget to check out my Corn Fried Egg recipe or treat yourself with delightful Cinnamon Roll Muffins. Enjoy diving into these tantalizing variations!

Make Ahead Options

These Delicious Nacho Egg Rolls are perfect for meal prep enthusiasts! You can assemble the egg rolls up to 24 hours in advance. Simply prepare the filling and wrap them tightly in plastic wrap before refrigerating to help maintain their freshness. This allows you to save time on busy days. When you're ready to enjoy them, just heat your oil and fry the egg rolls directly from the fridge for a golden, crispy delight. For optimal quality, avoid leaving them in the fridge for more than 24 hours to ensure they remain just as delicious. Enjoy an effortless appetizer that’s ready to impress with minimal effort!

What to Serve with Delicious Nacho Egg Rolls

These delightful bites are perfect for enhancing your gathering with flavors that dance together in perfect harmony!

  • Salsa Fresca: The fresh ingredients in salsa add a zesty contrast to the cheesy rolls, providing a refreshing kick.
  • Guacamole: Creamy and rich, guacamole balances the crispy texture of the egg rolls, making each bite a delightful experience.
  • Crispy Tortilla Chips: A crunchy side that complements the savory filling, tortilla chips can be paired with any dip for extra fun.
  • Mexican Street Corn: This creamy, tangy dish bursts with flavor, pairing perfectly with the spicy filling of egg rolls for a vibrant meal.
  • Margaritas: A refreshing citrusy cocktail, margaritas add a festive touch to your gathering and enhance the overall dining experience.
  • Mexican Rice: Fluffy rice flavored with spices pairs well with the rich and cheesy egg rolls, completing a satisfying meal.
  • Refried Beans: Creamy and hearty, refried beans provide a comforting side that rounds out the meal beautifully.
  • Churros: For dessert, these sweet, cinnamon-sugar dusted treats are a wonderful way to end the festivities on a sweet note!

Delicious Nacho Egg Rolls Recipe FAQs

How do I choose the best ingredients for my Nacho Egg Rolls?
Absolutely! Opt for fresh egg roll wrappers to ensure they have the right amount of moisture and are easy to seal. Lean ground beef is a fantastic choice, lending flavor without too much grease. When selecting jalapeños, choose fresh ones that are firm and bright green. Avoid any with dark spots or wrinkles.

What’s the best way to store leftover Nacho Egg Rolls?
To keep them fresh, place your leftover Delicious Nacho Egg Rolls in an airtight container. They’ll stay tasty in the fridge for up to 3 days. For longer storage, wrap them tightly in plastic wrap or aluminum foil and freeze in a freezer-safe bag for up to 3 months.

Can I freeze un-fried Nacho Egg Rolls? How do I do it?
Very! You can absolutely freeze your egg rolls before frying. After assembling them, lay the egg rolls in a single layer on a baking sheet and place them in the freezer until solid (about 1-2 hours). Then, wrap them tightly in plastic wrap and store in a freezer-safe bag for up to 3 months. When ready to fry, there’s no need to thaw; just fry them straight from the freezer for about 5-7 minutes until golden brown!

What should I do if my egg rolls burst while frying?
If your Delicious Nacho Egg Rolls burst during frying, they may have been overfilled or not sealed tightly enough. To prevent this, ensure you only use about two tablespoons of filling per wrapper and seal the edges well with a little water. Try pressing the corners tightly with your fingers or a fork to create a nice seal.

Can I make these egg rolls healthier for dietary needs?
Of course! There are plenty of ways to modify these egg rolls. You can substitute ground turkey or chicken for a leaner protein option. If you have cheese intolerances, try dairy-free cheese, and for a vegetarian option, swap out the meat for extra beans and veggies like bell peppers or corn! Always check for allergies related to ingredients like beans or dairy.

What sauces pair well with Nacho Egg Rolls?
I often serve these Delicious Nacho Egg Rolls with a variety of dips to enhance the flavor! Classic salsa and sour cream are always hits, but you can also try guacamole for a creamy touch or even a spicy ranch dip for an unexpected twist. Enjoy exploring flavor combinations!

Delicious Nacho Egg Rolls

Delicious Nacho Egg Rolls: A Crispy Snack You'll Crave

Delicious Nacho Egg Rolls combine the beloved flavors of nachos with a delightful crunch, perfect for any occasion.
Print Recipe Pin Recipe
Prep Time 10 minutes mins
Cook Time 20 minutes mins
Total Time 30 minutes mins
Servings: 6 egg rolls
Course: Appetizers
Cuisine: American
Calories: 250
Ingredients Equipment Method Nutrition Notes

Ingredients
  

For the Filling
  • 1 package Egg Roll Wrappers Make sure they're fresh for the best results.
  • 1 pound Ground Beef Lean ground beef works well for a healthier choice.
  • 1 cup Shredded Cheddar Cheese Opt for sharp cheddar for enhanced taste.
  • 1/2 cup Diced Jalapeños Fresh jalapeños preferred, canned will do in a pinch.
  • 1 can Black Beans Rinse before use to reduce sodium content.
  • 1 packet Taco Seasoning Feel free to use store-bought or whip up your own!
For Frying
  • 2 inches Vegetable Oil Crucial for frying, ensuring crispy and golden brown egg rolls.

Equipment

  • Skillet
  • Deep Frying Pan
  • Tongs

Method
 

Step-by-Step Instructions for Delicious Nacho Egg Rolls
  1. In a medium skillet over medium heat, brown the ground beef for 6-8 minutes.
  2. Mix in taco seasoning and diced jalapeños; cook for 2 more minutes.
  3. Add shredded cheddar cheese and black beans; stir on low heat until cheese melts, about 3-4 minutes.
  4. Lay an egg roll wrapper diagonally, spoon filling in center, fold corners and roll tightly to seal.
  5. Heat vegetable oil in a deep frying pan to around 350°F.
  6. Fry the egg rolls for 3-4 minutes until golden brown.
  7. Remove from oil and drain on paper towels; serve hot with dipping sauces.

Nutrition

Serving: 1egg rollCalories: 250kcalCarbohydrates: 20gProtein: 10gFat: 15gSaturated Fat: 6gPolyunsaturated Fat: 1gMonounsaturated Fat: 7gCholesterol: 40mgSodium: 400mgPotassium: 300mgFiber: 3gSugar: 1gVitamin A: 500IUVitamin C: 10mgCalcium: 200mgIron: 2mg

Notes

Tightly seal each roll to prevent leaking during frying; serve immediately after frying for best texture.

Tried this recipe?

Let us know how it was!

Tortellini Party Snacks: Bite-Sized Joy for Any Gathering

April 7, 2026 by Grace Snow Leave a Comment

As I stood in my kitchen, the tantalizing aroma of herbs wafting through the air, I found myself dreaming about a gathering of friends, laughter filling the room, and an irresistible appetizer that would steal the show—Tortellini Party Snacks. These delightful, bite-sized treats are not only quick to whip up but also adaptable to satisfy every taste bud at your table. Picture tender, cheese-filled tortellini tossed with vibrant seasonings and served with a variety of dipping sauces; it’s a true celebration of flavors! Versatile and fun, these finger foods are perfect for any occasion, whether it’s a cozy night in or lively get-together. Curious about how to impress your guests with this gourmet twist on simple ingredients? Let’s dive in!

Why Are Tortellini Party Snacks So Irresistible?

Simplicity makes these snacks a breeze to prepare, requiring minimal cooking skills for delicious results. Versatile by nature, you can customize them with various dipping sauces like pesto or marinara, ensuring everyone leaves satisfied. Crowd-Pleasing and flavorful, they cater to both kids and adults, making them ideal for any gathering. Plus, they're a time-saver, letting you whip up an impressive appetizer in no time—perfect for spontaneous get-togethers! Want to explore more creative options? Check out other delicious finger foods in our entertaining section for a complete appetizer spread!

Tortellini Party Snacks Ingredients

Here's everything you need to create these delightful bites!

For the Tortellini

  • Tortellini – Choose fresh or frozen, as both options work beautifully for these irresistible Tortellini Party Snacks.

For the Seasoning

  • Italian Herbs – A mix of oregano, basil, and thyme elevates the flavor; feel free to swap with garlic powder for a different twist.
  • Parmesan Cheese (optional) – Adds a creamy richness; omit or substitute with nutritional yeast for a vegan-friendly option.

For the Dipping Sauces

  • Marinara Sauce – A classic choice that complements the tortellini's savory profile and gives a burst of tanginess.
  • Pesto – Bright and aromatic, this sauce adds a herby kick that enhances the overall flavor experience.
  • Alfredo Sauce – Rich and creamy, perfect for those who enjoy a decadent dip with their snacks.

Feel free to mix and match these ingredients to craft your perfect Tortellini Party Snacks!

Step‑by‑Step Instructions for Tortellini Party Snacks

Step 1: Cook the Tortellini
Start by bringing a large pot of salted water to a rolling boil. Add fresh or frozen tortellini and cook according to package instructions, about 3 to 5 minutes for fresh and 7 to 9 minutes for frozen, until they are al dente and float to the surface. Drain the tortellini and let them cool for a few minutes in a colander.

Step 2: Season the Tortellini
Transfer the slightly cooled tortellini into a large mixing bowl. Sprinkle Italian herbs generously over the tortellini and add optional grated Parmesan cheese for extra flavor. Carefully toss the mixture to ensure the seasonings coat the tortellini evenly, giving them a flavorful kick that makes these Tortellini Party Snacks unforgettable.

Step 3: Arrange for Serving
Prepare a vibrant platter or serving tray by spreading the seasoned tortellini in a single layer or arranging them on skewers with colorful vegetables. This not only adds visual appeal but also makes them easy to pick up. Set the platter alongside an array of tasty dipping sauces like marinara, pesto, and Alfredo for your guests to enjoy.

Step 4: Final Touches
To elevate your Tortellini Party Snacks, add a sprinkle of freshly chopped herbs or a dash of crushed red pepper to the platter for a pop of color and extra flavor. Serve immediately while the tortellini are warm, inviting your guests to indulge in these delightful bites while the aromas of the seasonings fill the air.

Tortellini Party Snacks Variations

Feel free to jazz up your Tortellini Party Snacks with these delicious twists that will make them even more special!

  • Gluten-Free: Use gluten-free tortellini made from rice or chickpeas for a friendly adaptation without compromising flavor. You'll find that the textures remain delightful and satisfying!

  • Veggie-Packed: Incorporate cooked spinach, sun-dried tomatoes, or roasted bell peppers into the tortellini mix for a colorful and nutrient-rich addition. These vibrant extras not only enhance flavor but also bring a lovely visual appeal to your platter.

  • Spicy Kick: Add crushed red pepper flakes or a dash of cayenne pepper to the seasoning mix. This will infuse your tortellini with a delightful kick that will excite the taste buds of those who appreciate heat!

  • Creamy Twist: Opt for a creamy garlic aioli or a zesty lemon-tahini sauce instead of standard dipping sauces to elevate the flavor profile. This twist adds a gourmet touch that will leave your guests raving.

  • Cheesy Variety: Mix in different cheeses like goat cheese, feta, or smoked mozzarella into your tortellini before baking for a richer experience. Each cheese brings its unique flavor, turning simple tortellini into a cheese lover's dream.

  • Herb-Infused Oils: Drizzle with fragrant herb oil, like basil or rosemary-infused olive oil, just before serving for an aromatic finish that complements the tortellini beautifully. It's a subtle touch that makes a big difference!

  • Pesto Varieties: Experiment with different types of pesto like sun-dried tomato or arugula pesto to add unique flavors to each party. This allows guests to explore new tastes while enjoying their beloved tortellini.

  • Nutty Garnish: Sprinkle toasted pine nuts or chopped walnuts on the tortellini right before serving. This adds a satisfying crunch and a nutty flavor that contrasts beautifully with the tender pasta.

Consider trying various finger foods alongside these flavorful Tortellini Party Snacks to create a delightful spread that suits all palates!

Make Ahead Options

These Tortellini Party Snacks are perfect for meal prep enthusiasts! You can cook the tortellini a day in advance to save time on the day of your gathering. After cooking, let the tortellini cool, then toss them with the Italian herbs and any optional Parmesan cheese, and refrigerate in an airtight container for up to 3 days. This way, the flavors meld beautifully without losing quality. When ready to serve, simply arrange the tortellini on a platter and add your favorite dipping sauces. Their tender texture will remain just as delicious, ensuring your guests enjoy every bite!

How to Store and Freeze Tortellini Party Snacks

Fridge: Store leftover Tortellini Party Snacks in an airtight container for up to 3 days. Make sure they’re cooled completely before sealing to maintain their texture.

Freezer: If you have cooked tortellini left, freeze them in a single layer on a baking sheet, then transfer to a freezer-safe bag for up to 2 months.

Reheating: To reheat, simply microwave for 30-60 seconds or bake at 350°F (175°C) for about 10 minutes until heated through. Enjoy a quick snack without sacrificing flavor!

Make-Ahead: Prepare the tortellini ahead of time and keep them in the fridge. Reheat before serving, or savor them at room temperature for a delightful party treat.

Expert Tips for Tortellini Party Snacks

  • Well-Drained Tortellini: Ensure tortellini are thoroughly drained after cooking to prevent a soggy texture. Excess water can dilute the flavor of your Tortellini Party Snacks.

  • Season Generously: Don’t be shy with your herbs! A robust sprinkle of Italian herbs enhances the overall taste, ensuring every bite is packed with flavor.

  • Serve Warm: For the best experience, serve your Tortellini Party Snacks warm. This helps to bring out the delicious aromas and makes the cheese filling even more delightful.

  • Dipping Sauce Variety: Offer a selection of dipping sauces to keep your guests excited. A mix of marinara, pesto, and creamy Alfredo allows everyone to find their favorite.

  • Taste Before Serving: Always taste the seasoned tortellini before serving. Adjust the herbs or cheese according to your personal preference for a perfect finish.

What to Serve with Tortellini Party Snacks

Imagine a beautiful spread that complements your bite-sized delights, bringing together flavors and textures to enchant your guests.

  • Crisp Garden Salad: Bright, fresh greens add a refreshing crunch that balances the savory tortellini, making each bite feel light and vibrant.

  • Garlic Breadsticks: Warm, buttery breadsticks create a perfect textural contrast. Dipped in marinara, they elevate your appetizer experience to a whole new level.

  • Cheesy Spinach Dip: Creamy and rich, this spinach dip offers a opulent pairing, inviting guests to spread it on crispy chips or fresh veggies.

  • Roasted Vegetable Platter: Colorful roasted veggies infuse the meal with heartiness and nutrients, providing a delightful array of flavors that complement the tortellini.

  • Sparkling Lemonade: A zesty beverage that enhances the tasting journey, the citrus notes refresh your palate between bites of cheese-filled goodness.

  • Chocolate-Dipped Fruit: Finish on a sweet note with an assortment of berries and bananas dipped in decadent chocolate. It’s a delightful contrast to the savory snacks.

  • Italian Wine Pairing: A fruity Chianti or crisp Pinot Grigio pairs beautifully, enhancing the flavors of your tortellini while setting an inviting, cozy atmosphere for gathering.

Creating a full meal around your Tortellini Party Snacks allows you to indulge in a myriad of flavors that delight all the senses. Enjoy!

Tortellini Party Snacks Recipe FAQs

How do I choose the best tortellini?
Absolutely! For the best Tortellini Party Snacks, opt for either fresh or frozen tortellini. Fresh tortellini usually offers a delightful chewy texture and flavor, while frozen is convenient and tends to have a longer shelf life. Check for any damage or freezer burn if using frozen, and ensure that the package is sealed tightly for freshness.

How should I store leftover tortellini snacks?
After enjoying your delicious tortellini treats, store any leftovers in an airtight container in the fridge for up to 3 days. Make sure they are completely cool before storing to prevent moisture buildup, which can make them soggy. You can also enjoy them cold or warm them up, depending on your preference!

Can I freeze the tortellini after cooking?
Yes! You can freeze your leftover tortellini snacks for up to 2 months. Here’s how: First, spread the cooked tortellini in a single layer on a baking sheet and freeze them until solid. Then, transfer the frozen tortellini to a freezer-safe bag, removing as much air as possible. When you're ready to use them, just reheat them directly from the freezer using the microwave or a preheated oven at 350°F (175°C) for about 10 minutes.

What if my tortellini is too soggy after cooking?
No worries! If your tortellini ends up soggy, it could be due to overcooking or not draining properly. For the next batch, follow package instructions carefully, and once cooked, make sure to drain them thoroughly in a colander. You can also let them sit for a minute to allow any excess water to drip off before seasoning. If they are still too soft, try incorporating them straight into a dish like soup or a pasta primavera where they’ll benefit from more texture.

Are these snacks suitable for gluten-free diets?
Yes! You can absolutely enjoy Tortellini Party Snacks with gluten-free options. Many brands offer gluten-free tortellini made from rice or alternative flours. Just be sure to check the ingredients for any additional allergens, and use certified gluten-free dipping sauces to keep everything safe for those with dietary restrictions. The flavor will still be fantastic!

Tortellini Party Snacks

Tortellini Party Snacks: Bite-Sized Joy for Any Gathering

Tortellini Party Snacks are delicious, bite-sized treats perfect for gatherings, customizable with various dipping sauces to satisfy every palate.
Print Recipe Pin Recipe
Prep Time 10 minutes mins
Cook Time 9 minutes mins
Total Time 19 minutes mins
Servings: 6 snacks
Course: Appetizers
Cuisine: Italian
Calories: 150
Ingredients Equipment Method Nutrition Notes

Ingredients
  

For the Tortellini
  • 1 package Tortellini Fresh or frozen
For the Seasoning
  • 2 teaspoons Italian Herbs Mix of oregano, basil, and thyme
  • 1/4 cup Parmesan Cheese Optional, or substitute with nutritional yeast
For the Dipping Sauces
  • 1 cup Marinara Sauce Classic choice
  • 1 cup Pesto Bright and aromatic
  • 1 cup Alfredo Sauce Rich and creamy

Equipment

  • Large pot
  • Mixing Bowl
  • Colander
  • Platter or serving tray

Method
 

Steps
  1. Step 1: Cook the Tortellini. Boil salted water, add tortellini, and cook for 3-5 minutes if fresh or 7-9 minutes if frozen until al dente. Drain and cool lightly.
  2. Step 2: Season the Tortellini. In a mixing bowl, combine tortellini with Italian herbs and Parmesan cheese, tossing to coat.
  3. Step 3: Arrange for Serving. Spread seasoned tortellini on a platter or arrange on skewers with vegetables. Serve with dipping sauces.
  4. Step 4: Final Touches. Add fresh herbs or crushed red pepper before serving warm.

Nutrition

Serving: 1snackCalories: 150kcalCarbohydrates: 20gProtein: 5gFat: 7gSaturated Fat: 3gPolyunsaturated Fat: 0.5gMonounsaturated Fat: 2gCholesterol: 10mgSodium: 200mgPotassium: 100mgFiber: 1gSugar: 1gVitamin A: 200IUVitamin C: 2mgCalcium: 50mgIron: 1mg

Notes

Ensure tortellini are well-drained to maintain texture. Serve warm for the best flavor experience, and offer a variety of dipping sauces.

Tried this recipe?

Let us know how it was!

Sweet and Spicy Blueberry Brie Jalapeño Poppers Delight

April 7, 2026 by Grace Snow Leave a Comment

What’s better than a pop of flavor that balances sweet and spicy? These Blueberry Brie Jalapeño Poppers bring together fresh jalapeños, gooey brie, and rich blueberry preserves for an appetizer that feels gourmet yet incredibly easy to make. Perfect for gatherings or a cozy night in, this low-calorie delight (just 95–110 calories per popper!) not only satisfies cravings but also impresses guests with its unique flavor combination. Plus, they’re gluten-free when using the right bacon or ham! Whether served at a holiday gathering or as a part of an intimate dinner, you’ll find these delightful poppers add a fun twist to your appetizer spread. Are you ready to heat things up in the kitchen? Let’s dive into the recipe!

Why will you crave these poppers?

Flavor Explosion: Each bite offers a delightful contrast of sweet blueberry preserves and spicy jalapeños, creating a mouthwatering flavor experience.

Easy to Prepare: These Blueberry Brie Jalapeño Poppers come together quickly, making them the perfect last-minute appetizer for any gathering.

Crowd-Pleasing Appeal: Whether you're hosting a party or having a cozy night in, these poppers are sure to impress your guests and leave them wanting more!

Versatile Ingredients: Feel free to experiment with different cheeses or jams. You can even swap brie with goat cheese for a tangier bite that will surprise your taste buds.

Low-Calorie Treat: At just 95–110 calories each, these poppers let you indulge guilt-free! They’re the ideal savory snack without the heavy calories—perfect for health-conscious food lovers.

If you’re looking for more delightful appetizers, check out my quick guide on easy party snacks to impress your friends!

Blueberry Brie Jalapeño Poppers Ingredients

For the Poppers
• Jalapeños – The spicy base; be sure to remove the seeds for a milder experience.
• Brie Cheese – This creamy delight melts beautifully; opt for double-cream brie for the best results.
• Ham/Prosciutto/Bacon – Wraps around the jalapeños for an extra savory kick; consider turkey bacon for a lighter option.

For the Sauce
• Blueberry Preserves – These add a sweet touch to balance the heat; feel free to swap for fig or raspberry jam if you're feeling adventurous.

For Garnishing
• Black Pepper/Flaky Salt – Sprinkle on top before serving for an enhanced flavor profile; this optional touch really elevates the poppers!

Enjoy preparing these Blueberry Brie Jalapeño Poppers that are sure to become a favorite among your friends and family!

Step‑by‑Step Instructions for Blueberry Brie Jalapeño Poppers

Step 1: Preheat the Oven or Air Fryer
Start by preheating your oven to 375°F (190°C) or your air fryer to the same temperature. This ensures an even cook throughout your Blueberry Brie Jalapeño Poppers. Grab a baking sheet or the tray of your air fryer and line it with parchment paper to prevent sticking and make cleanup a breeze.

Step 2: Prepare the Jalapeños
Carefully halve the fresh jalapeños lengthwise and remove the seeds and membranes for a milder flavor. Use a small spoon or knife to scoop them out gently. Pat the jalapeños dry with a paper towel, ensuring there’s no excess moisture that could affect the cooking process, and set them aside.

Step 3: Stuff the Jalapeños
Take your brie cheese and cut it into small chunks that fit snugly into each jalapeño half. Stuff each jalapeño with the brie, making sure not to overfill, as this can cause the cheese to spill out during baking. This creamy cheese will create a rich interior that perfectly complements the flavors of the poppers.

Step 4: Wrap the Jalapeños
Next, select your choice of ham, prosciutto, or bacon. Wrap each stuffed jalapeño securely with a slice of your chosen meat. If using bacon, precook slices for about 2-3 minutes in a skillet until they are slightly crispy, as this will enhance the texture in your Blueberry Brie Jalapeño Poppers.

Step 5: Arrange for Cooking
Once wrapped, place the jalapeño poppers on the prepared parchment-lined baking sheet or the air fryer tray. Ensure they are spaced out enough to allow hot air circulation for even cooking, which will help achieve that crispy exterior while keeping the cheese inside deliciously melty.

Step 6: Bake or Air Fry the Poppers
Bake the poppers in the oven for 15-20 minutes, or air fry them for 12-15 minutes. They’re done when the bacon is golden brown and crispy, and the brie is bubbling and oozing from the sides of the jalapeños. Check halfway through and rotate them to ensure even crispiness.

Step 7: Prepare the Blueberry Sauce
While the poppers are baking, warm the blueberry preserves in a small saucepan over low heat. Stir gently until smooth and slightly runny, perfect for drizzling. For extra flavor, consider mixing in a splash of balsamic vinegar, enhancing the sweet and spicy combination in your poppers.

Step 8: Serve and Garnish
Once your Blueberry Brie Jalapeño Poppers are ready, take them out of the oven or air fryer and allow them to cool for a moment. Drizzle the warmed blueberry preserves over the top and, if desired, sprinkle with a touch of black pepper or flaky salt for added flavor before serving. Enjoy while warm!

Make Ahead Options

These Blueberry Brie Jalapeño Poppers are perfect for meal prep enthusiasts! You can assemble the poppers up to 24 hours ahead of time by following the initial steps of cutting and stuffing the jalapeños, then wrapping them in your choice of ham, prosciutto, or bacon. To maintain quality, cover them tightly in plastic wrap or store in an airtight container in the refrigerator. When you're ready to serve, simply bake or air fry the poppers directly from the fridge for about 20% longer, until the bacon is crispy and the brie is bubbling. This way, you can enjoy these delightful appetizers with minimal effort, making entertaining a breeze!

Expert Tips for Blueberry Brie Jalapeño Poppers

  • Perfectly Stuffed: Avoid overfilling the jalapeños with brie; this prevents spillage during cooking and keeps the flavors intact.

  • Meat Choice Matters: If using bacon, precook it slightly for 2-3 minutes to achieve that crispy texture in your Blueberry Brie Jalapeño Poppers.

  • Prep Ahead: Assemble the poppers in advance and store them in the fridge until ready to cook. This keeps the prep stress-free for hosting!

  • Flavor Experimentation: Try different jams like fig or raspberry as alternatives to blueberry preserves for a unique flavor twist.

  • Serving Tips: Consider providing extra blueberry sauce on the side for dipping; it encourages interaction and adds a fun element to serving.

What to Serve with Blueberry Brie Jalapeño Poppers

As you prepare these delightful poppers, consider these perfect pairings to elevate your appetizer spread.

  • Fresh Greens Salad: A light salad dressed in citrus vinaigrette refreshes your palate after every cheesy, indulgent bite.

  • Creamy Dips: Serve with a creamy ranch or herbed yogurt dip to add a cool contrast to the heat of the jalapeños.

  • Cheese Platter: Complement your poppers with a selection of soft cheeses and crackers, creating a cohesive cheese-centric experience.

  • Grilled Vegetables: Charred zucchini and bell peppers add a smoky flavor that beautifully balances the sweetness of the blueberry preserves.

  • Sparkling Wine: A chilled glass of sparkling wine or Prosecco enhances the occasion, adding a festive touch to your gathering.

  • Savory Fruit Chutney: Offer a tangy fruit chutney on the side for an added layer of sweetness and texture that pairs remarkably with the poppers.

  • Roasted Potatoes: Crispy roasted potatoes seasoned with herbs provide a hearty contrast, making your meal feel complete and satisfying.

  • Chocolate Fondue: For an adventurous dessert pairing, set up a chocolate fondue to dip fresh fruit after indulging in the savory poppers.

  • Herb-Infused Olive Oil: Drizzle some herb-infused olive oil over warm, crusty bread for a delightful way to soak up those irresistible flavors.

Blueberry Brie Jalapeño Poppers Variations

Feel free to get creative and customize these poppers to suit your taste and dietary needs!

  • Dairy-Free: Swap brie cheese for cashew cream or dairy-free cream cheese for a delightful vegan twist. Life’s too short to skip on flavor!

  • Spicy Kick: Add chopped fresh jalapeño or diced serrano pepper to the blueberry preserves for an extra heat boost, perfect for those who crave a fiery experience.

  • Herbed Delight: Incorporate fresh herbs like chives or cilantro into the brie stuffing for an aromatic twist that elevates your poppers. A sprinkle of freshness goes a long way!

  • Different Cheeses: Experiment with goat cheese or smoked gouda instead of brie; each offers its own unique flavor profile and creaminess that can surprise your palate.

  • Veggie Lovers: Replace the meat wrap with a slice of zucchini or eggplant, creating a lighter, vegetarian-friendly version of the poppers without compromising on taste or texture.

  • Fruity Musings: Substitute blueberry preserves with apricot or peach jam for a sweet variation that brings a new fruity flair to your popper experience.

  • Nutty Topper: Sprinkle crushed pistachios or almonds on top before baking for a lovely crunch that pairs beautifully with the creamy cheese and spicy jalapeños.

  • Gourmet Touch: Drizzle with balsamic glaze or honey just before serving to add a sweet finish—a touch of sophistication that will impress your guests!

The possibilities are endless! For more inspiration, check out my easy guide on delicious appetizers that keep your gatherings exciting!

Storage Tips for Blueberry Brie Jalapeño Poppers

Fridge: Store leftover Blueberry Brie Jalapeño Poppers in an airtight container for up to 3 days. Make sure they’re fully cooled before storing to prevent moisture buildup.

Freezer: For longer storage, wrap each popper tightly in plastic wrap and then place them in a freezer-safe bag. They can be frozen for up to 3 months.

Reheating: To reheat, place frozen poppers directly on a baking sheet and bake at 375°F (190°C) for about 20–25 minutes. For best results, reheat freshly made poppers at the same temperature until warm and crispy.

Make-Ahead: Assemble the poppers several hours in advance and keep them in the fridge until you're ready to bake for a stress-free, last-minute snack!

Blueberry Brie Jalapeño Poppers Recipe FAQs

How do I select the best jalapeños for this recipe?
When choosing jalapeños, look for ones that are firm, bright green, and free from dark spots or wrinkles. Avoid any limp or overly soft peppers, as they may be past their prime. If you prefer a milder flavor, opt for younger, smaller jalapeños, as they tend to have less heat.

How do I store leftover Blueberry Brie Jalapeño Poppers?
Store leftover poppers in an airtight container in the fridge for up to 3 days. Ensure they are completely cooled before storing to avoid trapping moisture, which can make them soggy. Reheat them in the oven or air fryer to restore their crispiness!

Can I freeze Blueberry Brie Jalapeño Poppers?
Absolutely! To freeze, wrap each popper tightly in plastic wrap, then place them in a freezer-safe bag. They can be stored for up to 3 months. When you’re ready to enjoy them, bake straight from the freezer at 375°F (190°C) for around 20–25 minutes until warmed through and crispy.

What if my cheese spills out while cooking?
To prevent spills, don’t overstuff the jalapeños with brie. Using slices of cheese rather than chunks can also help prevent melting over. If you do have a bit of spillage, check that your baking sheet is lined with parchment paper to catch the drips and foil any spills that may occur.

Can these poppers accommodate dietary restrictions?
Yes! These Blueberry Brie Jalapeño Poppers can be made gluten-free by using gluten-free bacon or ham options. Additionally, if you're preparing for guests with cheese allergies, you might try substituting brie with goat cheese or a dairy-free cheese alternative for a different yet enjoyable flavor.

How can I make these poppers spicier?
For an extra kick, leave some of the seeds in the jalapeños when preparing them. You can also sprinkle a bit of cayenne pepper or crushed red pepper flakes on the brie before wrapping for added heat. If you want to impress, add finely chopped fresh jalapeños into the blueberry preserves for a sweet yet spicy drizzle!

Blueberry Brie Jalapeño Poppers

Sweet and Spicy Blueberry Brie Jalapeño Poppers Delight

These Blueberry Brie Jalapeño Poppers are a delicious blend of sweet and spicy, making them perfect for gatherings or a cozy night in.
Print Recipe Pin Recipe
Prep Time 20 minutes mins
Cook Time 20 minutes mins
Total Time 40 minutes mins
Servings: 12 poppers
Course: Appetizers
Cuisine: American
Calories: 100
Ingredients Equipment Method Nutrition Notes

Ingredients
  

For the Poppers
  • 12 pieces Jalapeños Halved and seeded
  • 8 ounces Brie Cheese Opt for double-cream brie
  • 6 slices Ham/Prosciutto/Bacon Consider turkey bacon for a lighter option
For the Sauce
  • 1/2 cup Blueberry Preserves Substitute with fig or raspberry jam if desired
For Garnishing
  • to taste Black Pepper/Flaky Salt Optional, for enhanced flavor

Equipment

  • Oven
  • Air fryer
  • Baking Sheet
  • Parchment Paper
  • Saucepan

Method
 

Cooking Instructions
  1. Preheat your oven to 375°F (190°C) or your air fryer to the same temperature. Line a baking sheet or air fryer tray with parchment paper.
  2. Halve the jalapeños lengthwise, remove the seeds and membranes, and pat them dry.
  3. Stuff each jalapeño half with brie cheese.
  4. Wrap each stuffed jalapeño with a slice of ham, prosciutto, or bacon.
  5. Place the wrapped jalapeño poppers on the prepared baking sheet or air fryer tray.
  6. Bake the poppers for 15-20 minutes, or air fry them for 12-15 minutes until the bacon is crispy and the brie is bubbling.
  7. Warm the blueberry preserves in a saucepan over low heat until smooth.
  8. Serve the poppers warm, drizzled with blueberry preserves and garnished with black pepper or flaky salt.

Nutrition

Serving: 1popperCalories: 100kcalCarbohydrates: 5gProtein: 3gFat: 8gSaturated Fat: 4gPolyunsaturated Fat: 1gMonounsaturated Fat: 2gCholesterol: 20mgSodium: 180mgPotassium: 85mgFiber: 1gSugar: 3gVitamin A: 200IUVitamin C: 7mgCalcium: 80mgIron: 1mg

Notes

These poppers can be prepared in advance and stored in the refrigerator until ready to cook. Perfect for last-minute snacks.

Tried this recipe?

Let us know how it was!

Irresistible Mini Egg Salad Sandwiches Ready in 10 Minutes

April 7, 2026 by Grace Snow Leave a Comment

After a long week of busy schedules and takeout dinners, those delightful moments spent in the kitchen are pure joy. I recently whipped up the most charming Mini Egg Salad Sandwiches, and let me tell you, they were a game-changer! These little bites are not only a quick appetizer, ready in just 10 minutes, but they also make marvelous use of leftover hard-boiled eggs, transforming them into a fresh and creamy delight. Perfectly suited for casual gatherings or as a make-ahead dish for picnics, they promise to impress without the fuss. If you love hosting but dread the prep, these sandwiches will have you wondering how something so easy can be so delicious. Are you ready to take your gatherings to the next level?

Why Are Mini Egg Salad Sandwiches a Must-Try?

Quick and Easy: These delightful sandwiches come together in just 10 minutes, making them perfect for last-minute gatherings.

Creamy and Flavorful: With a rich filling of chopped eggs, creamy mayo, and fragrant dill, each bite is a taste of heaven.

Perfect for Leftovers: Transform your leftover hard-boiled eggs into a dish that steals the spotlight!

Versatile Serving Options: Pair them with your choice of dips or salads for a complete meal, or enjoy them on their own as a snack. For a refreshing side, consider adding a quick Tofu Caesar Salad to your spread.

Make-Ahead Magic: Whip up these sandwiches a day in advance to enhance the flavors for stress-free hosting. Store them in an airtight container to maintain freshness.

Low-Cost and Nutritious: With each mini sandwich containing only about 66 calories, they’re a guilt-free treat rich in protein!

Mini Egg Salad Sandwich Ingredients

For the Egg Salad
• 6 hard boiled eggs – The star of the show, providing protein and creaminess; ensure they’re well-peeled.
• 3-4 tablespoons mayonnaise – Adds delicious creaminess; swap with Greek yogurt for a healthier twist.
• 1 tablespoon classic French mustard – Brings a subtle tang to the mix; Dijon works great for a bolder flavor.
• Salt – Simple seasoning that enhances flavor; adjust to your preference.
• Black pepper – Freshly cracked adds depth; it’s worth it for the best taste.
• 1 onion (small, minced) – Offers a nice crunch and flavor; substitute with pickles or chives for a milder note.
• 1 tablespoon fresh dill (chopped) – Key for that fresh flavor; don’t use dried dill if you want the best taste.

For the Sandwiches
• 6 slices crustless toast bread – The perfect base; white or whole grain works beautifully, crusts can be removed easily.

Feel free to mix and match ingredients based on what you have on hand for these Mini Egg Salad Sandwiches!

Step‑by‑Step Instructions for Mini Egg Salad Sandwiches

Step 1: Prepare the Eggs
Start by placing 6 hard-boiled eggs in a bowl. Using a fork, finely chop the eggs until they resemble small pieces. The eggs should be a bright yellow color and firm to the touch. Ensure they are well-peeled for a smooth texture in the egg salad.

Step 2: Mix the Ingredients
In the bowl with the chopped eggs, add 3-4 tablespoons of mayonnaise, 1 tablespoon of classic French mustard, and a sprinkle of salt and black pepper to taste. Toss in 1 small minced onion and 1 tablespoon of fresh chopped dill. Mix everything together gently until well combined, ensuring a creamy and cohesive filling.

Step 3: Assemble the Sandwiches
Take 6 slices of crustless toast bread and spread the creamy egg salad mixture evenly over three of the slices. Leave a generous layer for a rich taste. Carefully lay the other three slices on top to form sandwiches. Press down gently so they hold together without squishing.

Step 4: Cut and Present
Insert toothpicks into each sandwich to secure them, then use a sharp knife to cut them into bite-sized pieces. Aim for six mini sandwiches per slice, ensuring each piece is manageable and visually appealing. The fillings should be vibrant and clearly visible, creating an enticing presentation.

Step 5: Serve or Store
Arrange your Mini Egg Salad Sandwiches on a lovely serving tray or plate, and serve immediately for the freshest flavor. Alternatively, if you prefer to prepare in advance, place the sandwiches in an airtight container and store them in the refrigerator. They can be made up to a day ahead to allow the flavors to meld beautifully.

How to Store and Freeze Mini Egg Salad Sandwiches

Fridge: Store the sandwiches in an airtight container for up to 1 day. They develop even better flavor when allowed to sit overnight.

Freezer: While not ideal for freezing due to the bread texture, if necessary, freeze egg salad mixture in a zipper bag for up to 1 month. Thaw and reassemble before serving.

Reheating: If stored properly, these sandwiches can be enjoyed at room temperature. Reheat in a pan or microwave before serving if desired, but note that bread may become soggy.

Mini Egg Salad Sandwiches Variations & Substitutions

Customize your Mini Egg Salad Sandwiches to suit your cravings and pantry staples for delightful surprises with every bite!

  • Low-Carb Twist: Use lettuce wraps instead of bread for a fresh, keto-friendly alternative. They're crisp, light, and a fun way to enjoy the filling!
  • Extra Crunch: Add chopped celery or bell peppers for a delightful crunch. Both vegetables bring a refreshing texture that elevates every bite.
  • Herb Variations: Swap fresh dill with chives or parsley for a different flavor profile. Each herb offers its own unique touch, making this dish adaptable to your taste!
  • Spicy Kick: Stir in a dash of hot sauce or diced jalapeños for an exciting heat. The spicy contrast pairs beautifully with the creamy egg salad.
  • Substitute Ingredients: Replace mayonnaise with Greek yogurt for a lighter option that’s still creamy and satisfying. This swap adds a tangy touch to the classic recipe.
  • Flavor Boost: Incorporate chopped pickles or capers for a burst of zing in your egg salad. These tangy additions can really uplift the creamy elements!
  • Mini Buns Swap: Instead of traditional bread, use mini buns for a delightful twist. They create perfectly sized sandwiches that are fun and eye-catching!
  • Savory Addition: For a twist on flavor, try adding crumbled bacon to the egg salad mixture. The smokiness adds depth, making them utterly irresistible!

Feel free to explore and let these ideas inspire you to create your signature version. If you're in the mood for another tasty treat, consider pairing your sandwiches with a classic German Potato Salad or a vibrant Balsamic Steak Salad for a delightful meal experience!

Expert Tips for Mini Egg Salad Sandwiches

• Peeling Made Easy: Use the "ice bath" technique to effortlessly peel hard-boiled eggs. This ensures smooth, peel-free eggs for your filling.

• Avoid Overmixing: Gently combine ingredients to maintain a creamy texture. Overmixing can lead to a dry and crumbly egg salad.

• Fresh Herb Focus: Always opt for fresh dill for the best flavor. Dried herbs won’t yield the same delightful taste in your Mini Egg Salad Sandwiches.

• Taste as You Go: Adjust salt and pepper according to your preference, ensuring every bite is perfectly seasoned.

• Delicious Variations: Experiment with adding finely chopped pickles or capers for an extra flavor boost without altering the core recipe!

What to Serve with Mini Egg Salad Sandwiches?

Set the stage for a delightful gathering with accompaniments that enhance the charm of these creamy bites.

  • Crispy Veggie Sticks: Fresh and crunchy, a medley of carrots, celery, and bell peppers provide a refreshing balance to the richness of the egg salad.

  • Classic Potato Chips: The salty crunch of potato chips adds an enjoyable texture contrast, making each bite of your sandwiches even more satisfying.

  • Tangy Cucumber Salad: Light and bright, a cucumber salad dressed in vinegar offers a zesty side that complements the smoothness of the egg salad perfectly. Toss in some herbs for extra freshness!

  • Zesty Hummus Dip: Creamy and flavorful, a side of hummus works beautifully – use it as a spread or a dip, enhancing the savory notes of the sandwiches.

  • Herbed Quinoa Salad: For a wholesome twist, serve with a light quinoa salad mixed with herbs and lemon. It's nutritious, filling, and adds a delightful touch.

  • Iced Tea or Lemonade: Refreshing beverages like iced tea or homemade lemonade beautifully cleanse the palate, balancing the flavors of the sandwiches and keeping your guests cool.

  • Lightly Toasted Baguette Slices: Serve these alongside your sandwiches for an additional crunchy element to enjoy with the creamy filling. A perfect bite-size pairing!

  • Mini Fruit Skewers: Add a touch of sweetness with fruit skewers – mix juicy grapes, strawberries, and melon for a colorful, tasty finish to your meal.

Make Ahead Options

These Mini Egg Salad Sandwiches are ideal for busy home cooks looking to save time! You can prepare the creamy egg salad filling up to 24 hours in advance and store it in an airtight container in the refrigerator. This not only helps the flavors develop but ensures that your filling remains fresh. When you're ready to assemble the sandwiches, simply spread the egg salad on crustless toast bread and slice them into bite-sized pieces. For the best quality, keep the sandwiches covered until just before serving to maintain their softness and prevent them from drying out. These make-ahead sandwiches will be just as delicious, with minimal effort on your part!

Mini Egg Salad Sandwiches Recipe FAQs

How do I choose the right eggs for my Mini Egg Salad Sandwiches?
Absolutely! When selecting eggs, look for fresh ones with no cracks. Ideally, choose eggs with a bright yellow yolk and firm white. If you can, try free-range or organic eggs for superior flavor!

What is the best way to store leftover Mini Egg Salad Sandwiches?
Very! To store your sandwiches, place them in an airtight container in the refrigerator. They will stay fresh for up to 1 day. Allowing them to sit overnight can actually enhance the flavor, making them taste even better the next day.

Can I freeze Mini Egg Salad Sandwiches?
The more the merrier! While the assembly with bread isn't ideal for freezing, you can freeze the egg salad mixture itself. Place it in a zipper bag, removing as much air as possible, and it can last for up to 1 month. When you're ready, thaw it in the fridge, then reassemble the sandwiches with fresh bread just before serving.

What if my egg salad mixture turns out too dry?
No worries! If your mixture feels dry, simply add a bit more mayonnaise or Greek yogurt until it reaches your desired creamy consistency. A touch of mustard can also enhance the flavor without drying it out.

Are there any dietary considerations for these Mini Egg Salad Sandwiches?
Definitely! If you're catering to someone with allergies, ensure they are not allergic to eggs, mustard, or any of the other ingredients. For a gluten-free option, simply swap out the bread for gluten-free or lettuce wraps. Always remember to check labels on pre-made ingredients!

Can I use different herbs instead of dill for the egg salad?
You sure can! While fresh dill gives the best flavor profile, you can experiment with other fresh herbs like chives or parsley for a different twist. Just keep in mind that the flavor will vary, so taste as you go to ensure you love the outcome!

Mini Egg Salad Sandwiches

Irresistible Mini Egg Salad Sandwiches Ready in 10 Minutes

These Mini Egg Salad Sandwiches are a quick, creamy delight perfect for gatherings!
Print Recipe Pin Recipe
Prep Time 10 minutes mins
Total Time 10 minutes mins
Servings: 6 sandwiches
Course: Appetizers
Cuisine: American
Calories: 66
Ingredients Equipment Method Nutrition Notes

Ingredients
  

For the Egg Salad
  • 6 pieces hard boiled eggs Ensure they're well-peeled.
  • 3-4 tablespoons mayonnaise Can swap with Greek yogurt for a healthier twist.
  • 1 tablespoon classic French mustard Dijon works great for a bolder flavor.
  • Salt Adjust to your preference.
  • Black pepper Freshly cracked adds depth.
  • 1 small onion Minced, or substitute with pickles or chives.
  • 1 tablespoon fresh dill Key for that fresh flavor.
For the Sandwiches
  • 6 slices crustless toast bread White or whole grain, crusts can be removed.

Equipment

  • Bowl
  • Fork
  • Sharp Knife
  • toothpicks

Method
 

Step‑by‑Step Instructions for Mini Egg Salad Sandwiches
  1. Start by placing 6 hard-boiled eggs in a bowl. Using a fork, finely chop the eggs until they resemble small pieces.
  2. In the bowl with the chopped eggs, add 3-4 tablespoons of mayonnaise, 1 tablespoon of classic French mustard, and a sprinkle of salt and black pepper to taste. Toss in 1 small minced onion and 1 tablespoon of fresh chopped dill. Mix everything together gently.
  3. Take 6 slices of crustless toast bread and spread the creamy egg salad mixture evenly over three of the slices. Carefully lay the other three slices on top to form sandwiches.
  4. Insert toothpicks into each sandwich to secure them, then use a sharp knife to cut them into bite-sized pieces.
  5. Arrange your Mini Egg Salad Sandwiches on a serving tray or plate, and serve immediately or store in the refrigerator.

Nutrition

Serving: 1sandwichCalories: 66kcalCarbohydrates: 6gProtein: 4gFat: 4gSaturated Fat: 1gPolyunsaturated Fat: 0.5gMonounsaturated Fat: 2gCholesterol: 186mgSodium: 140mgPotassium: 100mgFiber: 1gSugar: 1gVitamin A: 300IUCalcium: 20mgIron: 0.5mg

Notes

These sandwiches can be prepared in advance and stored for better flavors. For best results, use fresh dill and avoid overmixing the egg salad.

Tried this recipe?

Let us know how it was!

Irresistible Goat Cheese and Honey Bites in 15 Minutes

April 7, 2026 by Grace Snow Leave a Comment

A moment captured at a sun-drenched picnic, where I watched friends laugh and share stories over a platter of tantalizing bites. That's how I was inspired to create these 15-Minute Goat Cheese and Honey Bites! They are a perfect embodiment of simplicity and sophistication, offering a delightful balance of creamy goat cheese, sweet honey, and crunchy nuts. Not only are these quick and easy appetizers ready in just 15 minutes, but they're also a crowd-pleaser that caters to both vegetarian diets and gluten-free needs when served without crackers. Picture your next gathering filled with laughter and clinking glasses while guests indulge in these irresistible bites. Are you ready to elevate your entertaining game?

Why are Goat Cheese and Honey Bites special?

Quick Prep Time: In just 15 minutes, you can whip up a stunning appetizer that impresses without stressing.
Flavor Explosion: The creamy goat cheese melds beautifully with the sweetness of honey, creating a delightful harmony.
Versatile Pairing: Enjoy them on their own or serve with fresh fruit slices or your favorite crackers—perfectly adaptable!
Diet-Friendly: These bites can cater to gluten-free and vegetarian needs, making them a fabulous choice for all guests.
Impressive Presentation: Serve them on a wooden cheese board alongside other treats for a visually stunning spread! Try pairing them with Honey Garlic Chicken for a truly memorable feast.

Goat Cheese and Honey Bites Ingredients

For the Bites
• Goat Cheese – A creamy base providing richness and tang; substitute with cream cheese for a milder flavor.
• Honey – Adds sweetness, balancing the tangy goat cheese; maple syrup can be a vegan substitute.
• Walnuts or Pecans – Provides a crunchy texture; choose based on your nut preference, or swap for almonds.
• Fresh Rosemary – Offers a fragrant freshness; optional for those who prefer a lighter flavor; can substitute with thyme or dried herbs.
• Fresh Thyme – Enhances herbaceous notes; this is optional and can be omitted if not available.
• Salt – Essential to elevate the overall flavor of the mixture.

For Serving
• Fresh Fruit Slices (optional) – Complements the bites and adds a refreshing touch; consider apple or pear slices for a delightful contrast.
• Crackers or Toasted Bread (optional) – Provides a crunchy base for serving; choose gluten-free options if needed.

These delicious Goat Cheese and Honey Bites are sure to be the highlight of your next gathering!

Step‑by‑Step Instructions for Goat Cheese and Honey Bites

Step 1: Mix Ingredients
In a medium bowl, use a fork to blend softened goat cheese with finely chopped fresh rosemary, thyme, and a pinch of salt. Aim for a smooth, creamy consistency that is easy to spread. This will take about 2-3 minutes. Ensure the cheese is at room temperature for the best results, making your Goat Cheese and Honey Bites rich in flavor.

Step 2: Form Bites
Next, take small portions of the cheese mixture and roll them into balls, approximately 1-inch in diameter. You should create about 12 to 15 balls from your mixture. Arrange the shaped balls on a parchment-lined platter, ensuring they maintain their round shape. This step should only take about 5 minutes.

Step 3: Coat with Nuts
Spread out the chopped walnuts or pecans on a separate plate. Roll each cheese ball in the nuts, ensuring they are fully coated for a delightful crunch. This coating process not only enhances the texture of your Goat Cheese and Honey Bites but also adds a nutty flavor. This should take around 5 minutes.

Step 4: Drizzle with Honey
Once coated, arrange the cheese bites neatly on a serving platter. Generously drizzle honey over each bite to provide a beautiful glaze and enhance the sweetness of the dish. The honey will elevate the flavors and visually tantalize your guests. This extra touch should take about 2 minutes.

Step 5: Chill (Optional)
For added flavor, consider chilling the bites in the refrigerator for at least 30 minutes before serving. Chilling helps meld the flavors together and makes the bites easier to handle. If time allows, this step is worthwhile for an even tastier experience.

Step 6: Serve
Serve your Goat Cheese and Honey Bites alongside fresh fruit slices, such as apple or pear, and an assortment of crackers or toasted gluten-free bread if desired. This arrangement not only adds variety but also presents an eye-catching platter that will delight your guests. Enjoy sharing this delightful appetizer!

What to Serve with Goat Cheese and Honey Bites

Elevate your next gathering with delightful pairings that enhance the magic of these creamy little bites.

  • Creamy Mashed Potatoes: These smooth potatoes are the ultimate comfort food and provide a rich counterpoint to the bites' tangy brightness.
  • Fresh Arugula Salad: Tossed with lemon vinaigrette, this peppery green salad adds a refreshing crunch that complements the rich bites beautifully.
  • Cherry Tomato Skewers: Colorful and juicy, the tartness of these tomatoes balances the sweetness of honey, creating a playful contrast.
  • Stuffed Mini Peppers: Filled with a creamy cheese spread, these vibrant peppers offer a sweet and savory experience that echoes the goat cheese's depth.
  • Crisp White Wine: A chilled glass of Sauvignon Blanc provides a zesty acidity that brightens the bites, making each flavor pop with every sip.
  • Dark Chocolate Truffles: For dessert, these rich truffles provide a luxurious finish, playing off the sweet notes in the honey while indulging the senses.
  • Mediterranean Olive Tapenade: This briny spread on toasted baguette slices adds a savory dimension that harmonizes with the sweetness of the honey bites.
  • Charcuterie Board: Present your bites on a platter alongside cured meats, cheeses, and seasonal fruits for a visually stunning and delicious centerpiece.
  • Sparkling Water with Citrus: A refreshing, bubbly drink infused with lemon or lime echoes the bright notes in the dish and keeps your palette refreshed.

Make Ahead Options

These Goat Cheese and Honey Bites are a fantastic choice for meal prep enthusiasts! You can mix the goat cheese, herbs, and salt up to 24 hours in advance, ensuring the flavors meld beautifully. After forming the bites, roll each in nuts, and refrigerate them for up to 3 days before serving. To maintain their quality, store the bites in an airtight container; consider drizzling with honey only just before serving to keep the bites fresh and visually appealing. When ready, simply drizzle with honey and present alongside fresh fruit and crackers for an effortlessly impressive appetizer that saves you time on busy nights!

Goat Cheese and Honey Bites Variations

Feel free to get creative with your Goat Cheese and Honey Bites—personalizing them makes them even more special!

  • Cream Cheese: Swap goat cheese for cream cheese for a milder flavor, perfect for those who prefer a softer taste.
  • Maple Syrup: Use maple syrup in place of honey for a vegan-friendly and slightly different sweetness that still delights the taste buds.
  • Nutty Variety: Experiment with other nuts like chopped pecans or macadamia nuts for a new twist that also enhances texture. Feel free to mix or match!
  • Herb Twist: Add a pinch of red pepper flakes to the cheese mixture for a subtle kick, igniting new flavor dimensions and warming up your palate.
  • Seasonal Fruits: Serve with seasonal fruits—like figs or sliced peaches—for a delightful, fresh complement that adds color and sweetness. These bites pair wonderfully with Roasted Corn Fried for extra depth!
  • Gluten-Free Snacks: For gluten-sensitive guests, serve with rice crackers or homemade gluten-free bread to keep everyone happy while keeping it crunchy.
  • Feta Alternative: For a tangier, saltier flavor, substitute goat cheese with crumbled feta, really elevating the taste profile.
  • Fresh Herbs: Try using fresh basil or mint instead of rosemary and thyme for an aromatic twist that feels fresh and bright!

I hope these variations inspire you to make your next gathering unforgettable—with just the right twist, your appetizer game is sure to shine!

How to Store and Freeze Goat Cheese and Honey Bites

Fridge: Store your Goat Cheese and Honey Bites in an airtight container for up to 3 days. This keeps them fresh while maintaining their creamy texture and taste.

Freezer: For longer storage, freeze the bites in a single layer on a parchment-lined plate until firm, then transfer to an airtight container. They will last for up to 3 months.

Reheating: To enjoy frozen bites, thaw them in the fridge overnight and serve cold, or gently reheat in a microwave for a few seconds to maintain the creamy goodness.

Serving Tip: If served from the fridge, let them sit at room temperature for about 10–15 minutes before serving to enhance the flavors.

Expert Tips for Goat Cheese and Honey Bites

• Perfect Consistency: Ensure goat cheese is soft by leaving it out at room temperature for about 30 minutes; this makes mixing easier and ensures creamy bites.

• Flavor Fusion: Chilling the bites for 30 minutes after preparation allows the flavors to meld, enhancing the overall taste of your Goat Cheese and Honey Bites.

• Nut Coating: Don’t rush the coating process. Properly roll each cheese ball in nuts to ensure even coverage; this adds delightful crunch and visual appeal.

• Herb Balance: Avoid overmixing herbs with the cheese to maintain a pleasing texture. Less is more when it comes to flavor and contrast.

• Sweet Drizzle: Drizzle honey generously, but remind guests to take care when biting into the sweet glaze; it can be sticky!

Goat Cheese and Honey Bites Recipe FAQs

What type of goat cheese is best for this recipe?
Absolutely! For the best results, use soft, creamy goat cheese. It should be at room temperature to blend easily with the herbs and salt. If you prefer a mild flavor, feel free to substitute it with cream cheese, which blends well and offers a different texture profile.

How long can I store Goat Cheese and Honey Bites?
You can store your Goat Cheese and Honey Bites in an airtight container in the refrigerator for up to 3 days. Just make sure they are well-sealed to maintain their creamy texture and rich flavors. If you notice any dark spots or unusual smells, it's best to discard them.

Can I freeze Goat Cheese and Honey Bites?
Yes, you can freeze these delicious bites! First, arrange them in a single layer on a parchment-lined baking sheet and freeze until firm, which usually takes about 1-2 hours. Once solid, transfer them to an airtight container or a freezer bag. They can be frozen for up to 3 months. When you're ready to enjoy them, thaw overnight in the fridge and serve them cold or gently warm them in the microwave for just a few seconds.

What can I do if the mixture is too crumbly?
If you're finding that your goat cheese mixture is too crumbly and difficult to form into balls, try adding a small amount of honey or cream cheese to enhance its moisture and richness. This will help bind the ingredients together more effectively. Remember, the key is to blend until you achieve a smooth consistency before shaping them into bites.

Are Goat Cheese and Honey Bites safe for my pet?
While goat cheese in small amounts is generally safe for most dogs and cats, honey should not be given to them, especially to puppies or kittens. Always consult your veterinarian if you're unsure about introducing new foods into your pet's diet. Additionally, keep these bites away from pets to avoid any potential issues with allergies or sensitivity.

Can I customize the nuts used in the recipe?
Very! You can absolutely substitute walnuts or pecans for a variety of nuts such as almonds or even hazelnuts if you're feeling adventurous. Just ensure that whatever nuts you choose, chop them finely so they adhere well to the cheese bites and provide that delightful crunchy texture you're looking for!

Goat Cheese and Honey Bites

Irresistible Goat Cheese and Honey Bites in 15 Minutes

Quick and delightful Goat Cheese and Honey Bites, perfect for any gathering.
Print Recipe Pin Recipe
Prep Time 15 minutes mins
Chilling Time 30 minutes mins
Total Time 15 minutes mins
Servings: 12 bites
Course: Appetizers
Cuisine: American
Calories: 100
Ingredients Equipment Method Nutrition Notes

Ingredients
  

For the Bites
  • 8 oz Goat Cheese Substitute with cream cheese if desired.
  • 4 tbsp Honey Maple syrup can be a vegan substitute.
  • 1 cup Walnuts or Pecans Choose based on preference or swap for almonds.
  • 1 tbsp Fresh Rosemary Optional, can substitute with thyme.
  • 1 tbsp Fresh Thyme Optional, can be omitted.
  • 1 pinch Salt Essential for flavor.
For Serving
  • Fresh Fruit Slices Optional, like apple or pear.
  • Crackers or Toasted Bread Optional, gluten-free options if needed.

Equipment

  • medium bowl
  • Fork
  • platter
  • Parchment Paper

Method
 

Step‑by‑Step Instructions
  1. In a medium bowl, blend softened goat cheese with finely chopped rosemary, thyme, and a pinch of salt until smooth.
  2. Roll small portions of the cheese mixture into 1-inch balls and arrange on a parchment-lined platter.
  3. Coat each cheese ball in chopped walnuts or pecans for added crunch.
  4. Drizzle honey generously over each cheese bite for sweetness.
  5. Consider chilling in the refrigerator for at least 30 minutes before serving.
  6. Serve alongside fresh fruit slices and an assortment of crackers or toasted bread.

Nutrition

Serving: 1biteCalories: 100kcalCarbohydrates: 8gProtein: 3gFat: 6gSaturated Fat: 2gPolyunsaturated Fat: 1gMonounsaturated Fat: 3gCholesterol: 15mgSodium: 90mgPotassium: 100mgFiber: 1gSugar: 5gVitamin A: 200IUVitamin C: 1mgCalcium: 50mgIron: 0.5mg

Notes

Store in an airtight container for up to 3 days in the fridge. For longer storage, freeze for up to 3 months.

Tried this recipe?

Let us know how it was!
  • « Previous Page
  • 1
  • 2
  • 3
  • 4
  • …
  • 16
  • Next Page »

Welcome!

Hi, I’m Grace, a Sydney-based home cook with a passion for bold flavors and trending ingredients. Whether you’re a busy beginner or a seasoned foodie, you’ll find dishes here that are fresh, fun, and full of flavor.

More about me

Popular Recipes

  • One Pot Keto Tuna Casserole
    One Pot Keto Tuna Casserole: Creamy Comfort in Minutes
  • Ultimate Jalapeno Popper Chicken Salad
    Ultimate Jalapeno Popper Chicken Salad That'll Wow Your Tastebuds
  • Green Chile Cheese Dip
    Mouthwatering Green Chile Cheese Dip for Cozy Gatherings
  • Easy Chimichurri Sauce
    Fresh and Zesty Easy Chimichurri Sauce in Just Minutes

Footer

↑ back to top

About

  • Privacy Policy
  • Disclaimer
  • Terms & Conditions

Newsletter

  • Sign Up! for emails and updates

Contact

  • About me
  • Contact me

Copyright © 2025 TastyTrendIngredients