As I strolled through the vibrant farmer's market, the burst of colors from fresh produce instantly lifted my spirits. Among the springtime delights, the idea for an Easter Carrot Cheeseball sparked in my mind—a playful, festive appetizer that perfectly embodies the season. This fun twist on a classic cheeseball isn’t just about looks; it’s creamy, savory, and utterly delicious. Plus, it comes together quickly, making it an ideal choice for busy home chefs during the holiday rush. What really seals the deal is its versatility—it’s suitable for any gathering and can easily be tailored to suit different tastes. Whether you’re serving it at an Easter brunch or a casual get-together, your guests will adore its whimsical design and delightful crunch. Ready to impress your friends with a standout dish that’s as fun to make as it is to eat? Let’s dive into this tasty creation together!
Why is this cheeseball a must-try?
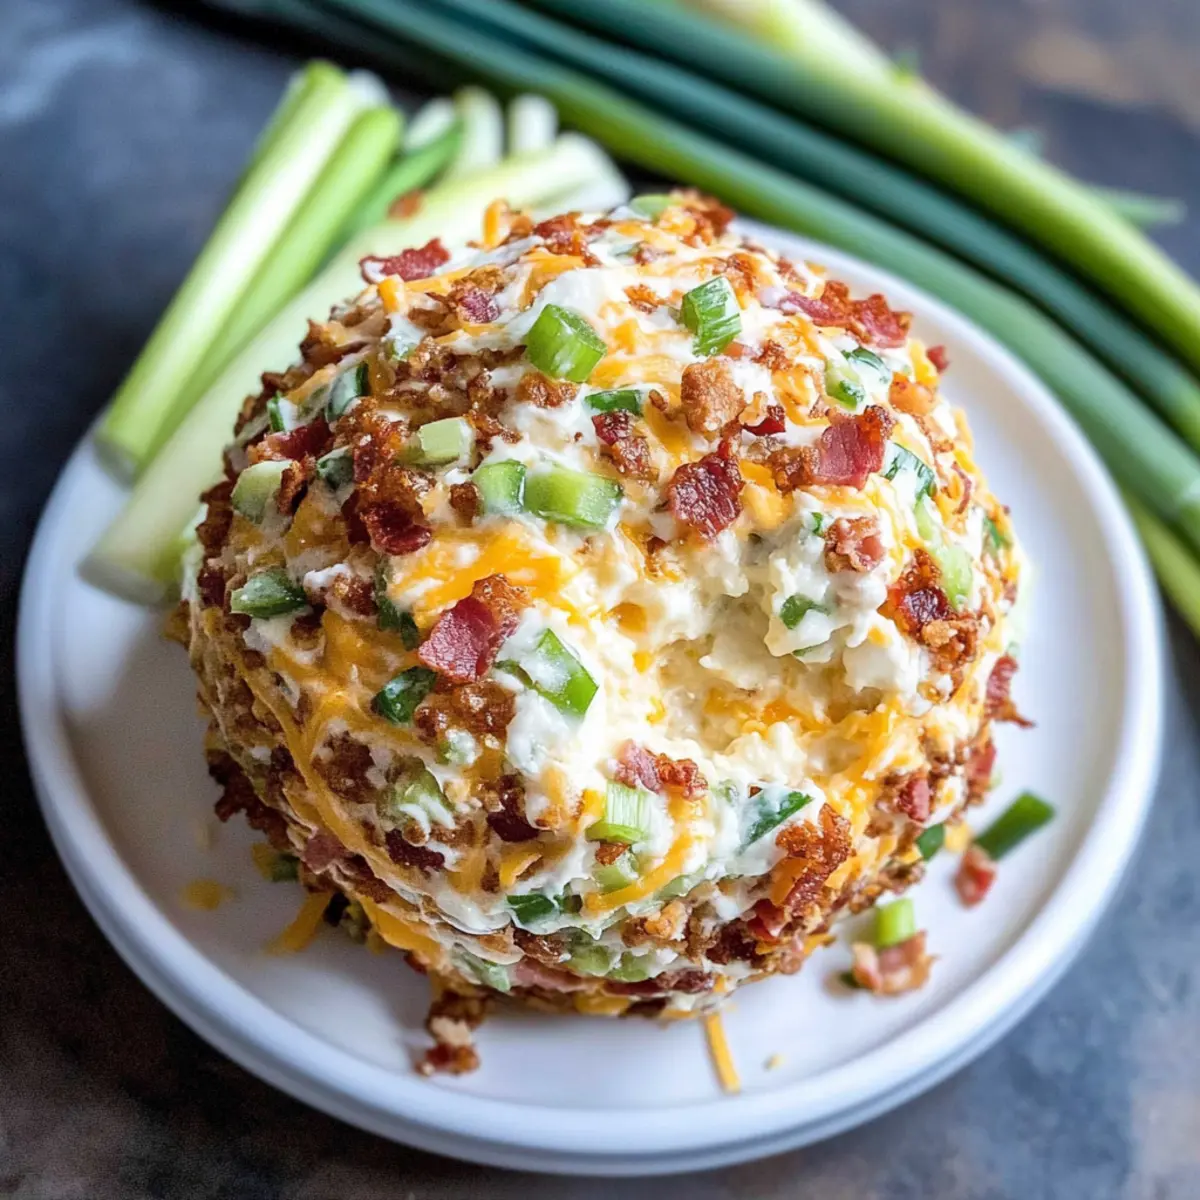
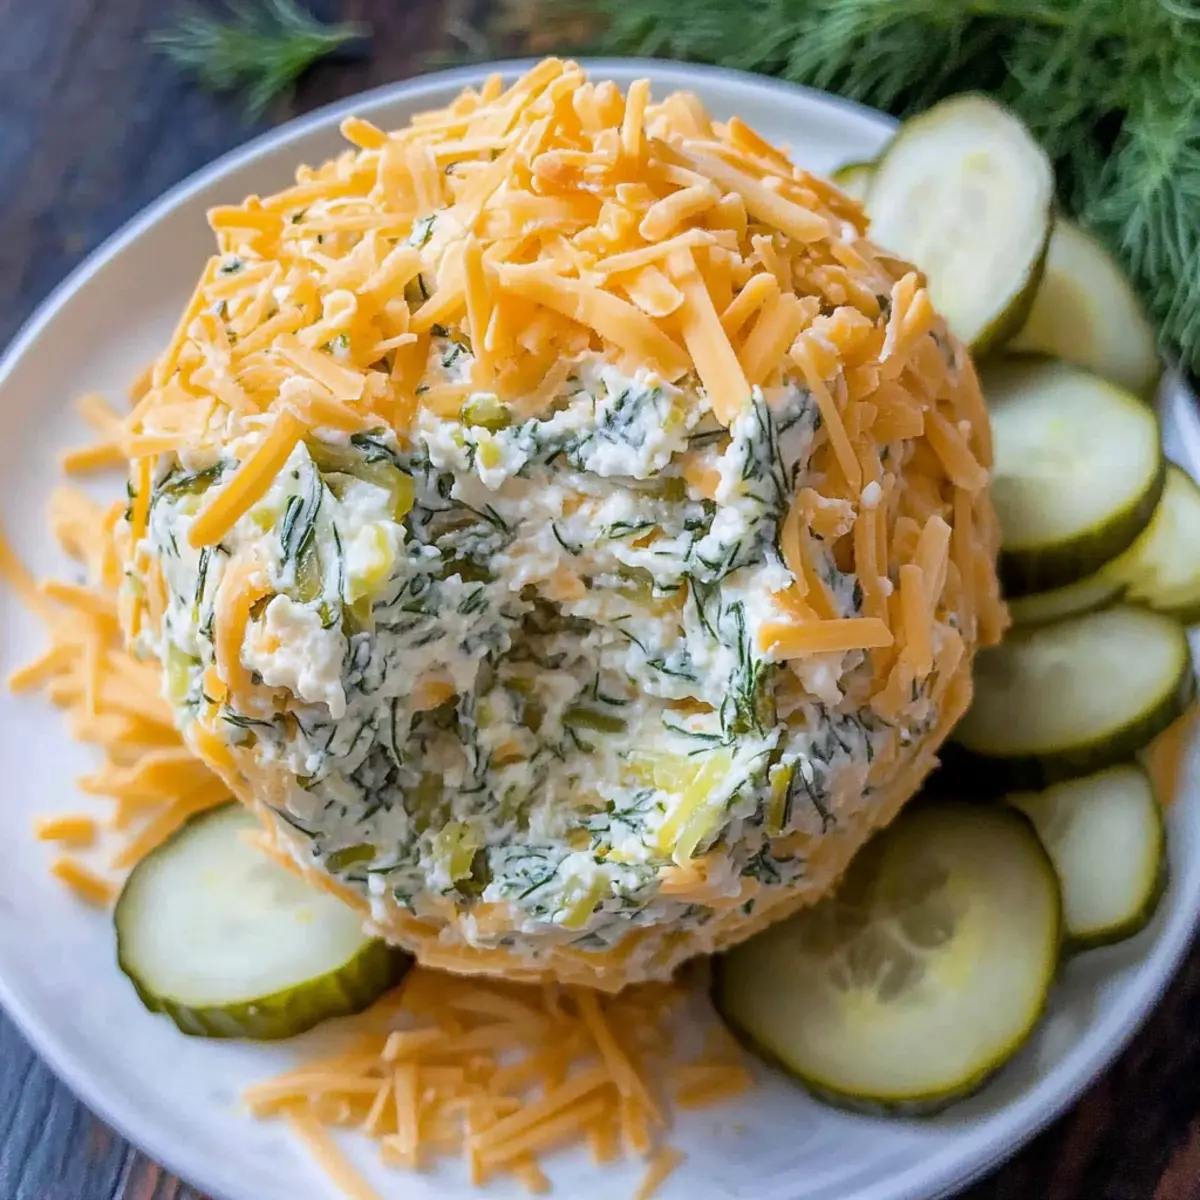
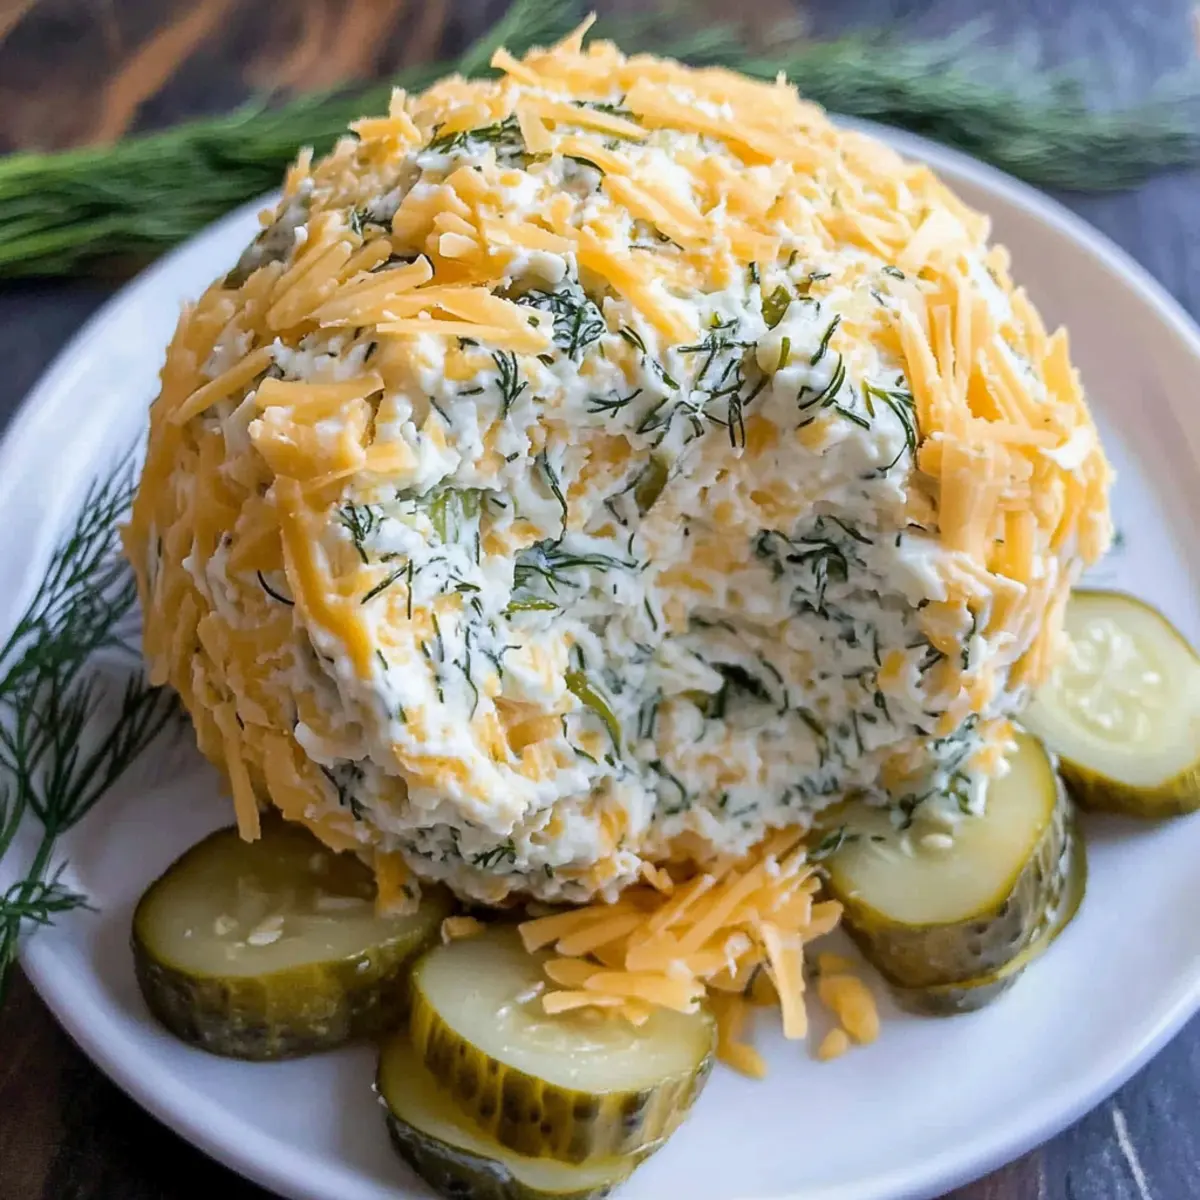
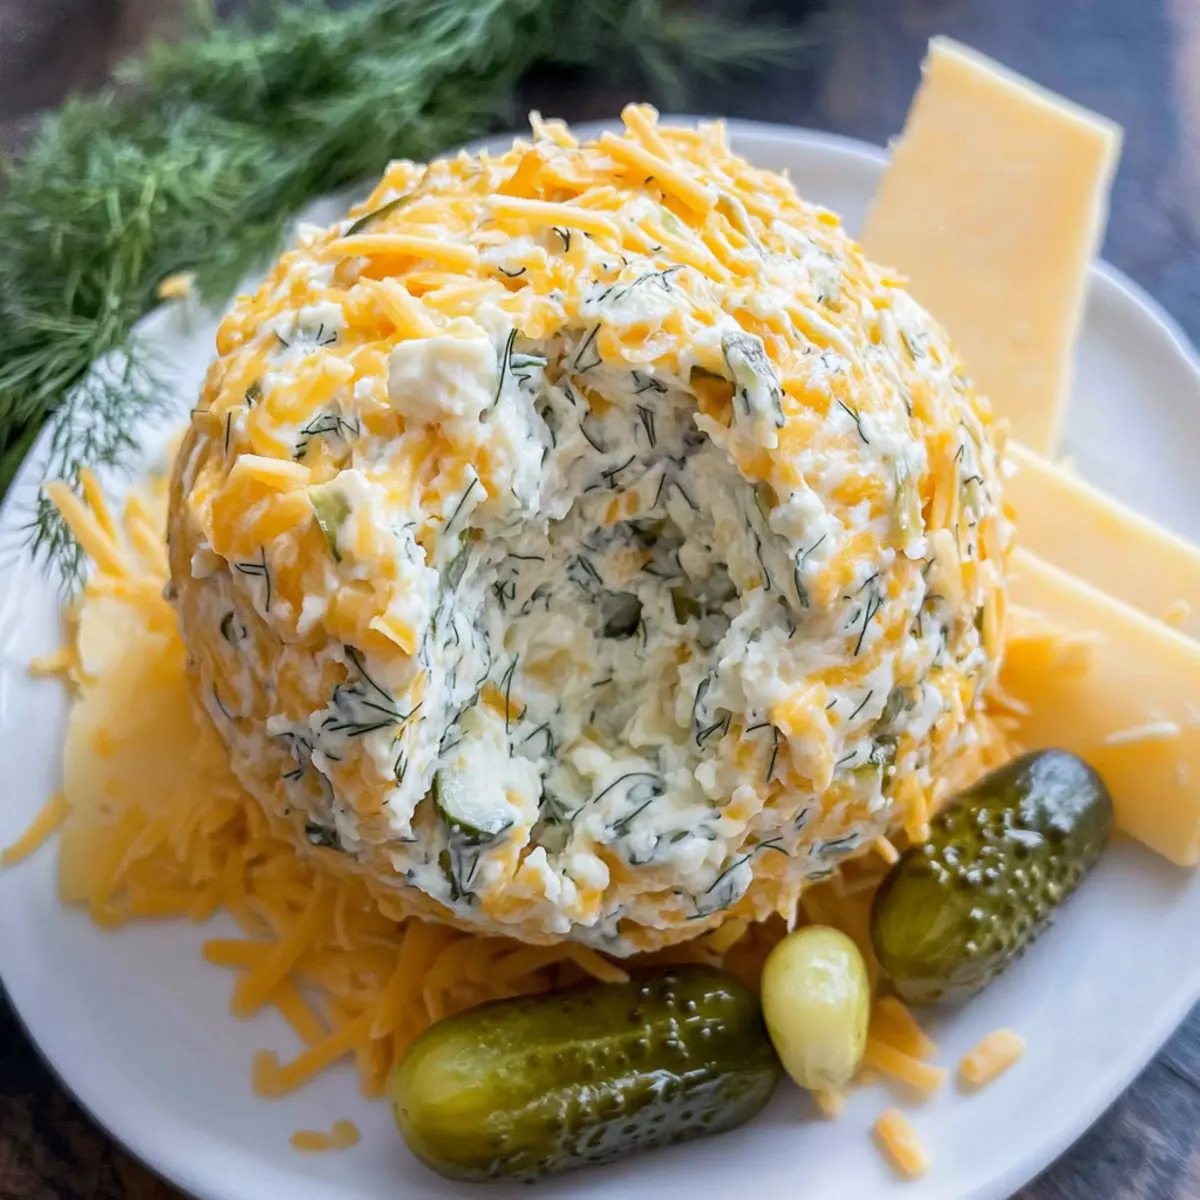
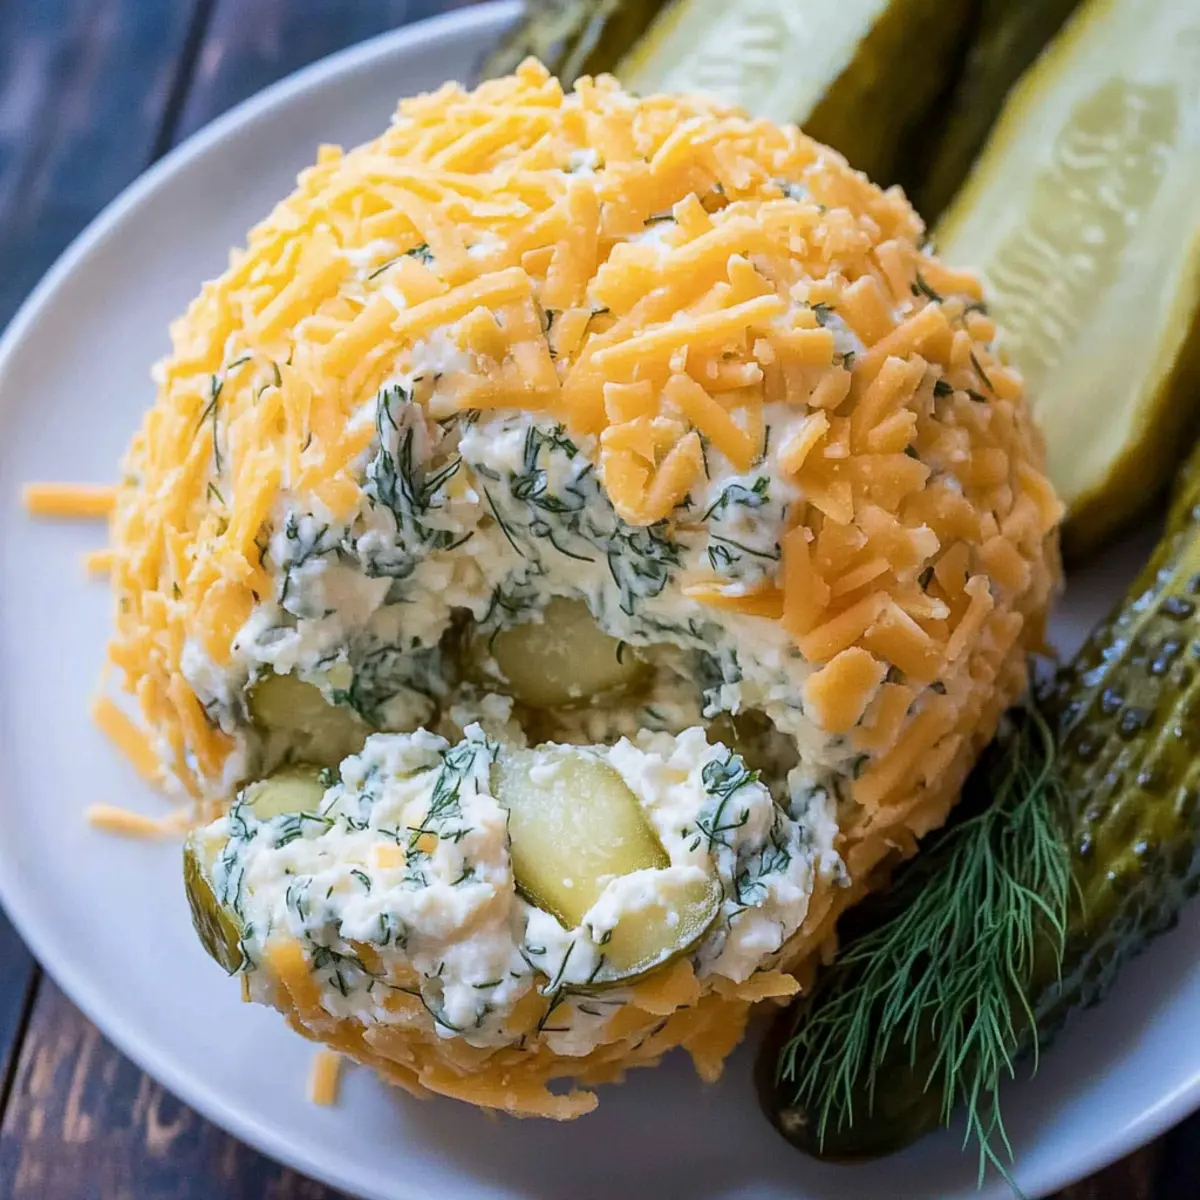
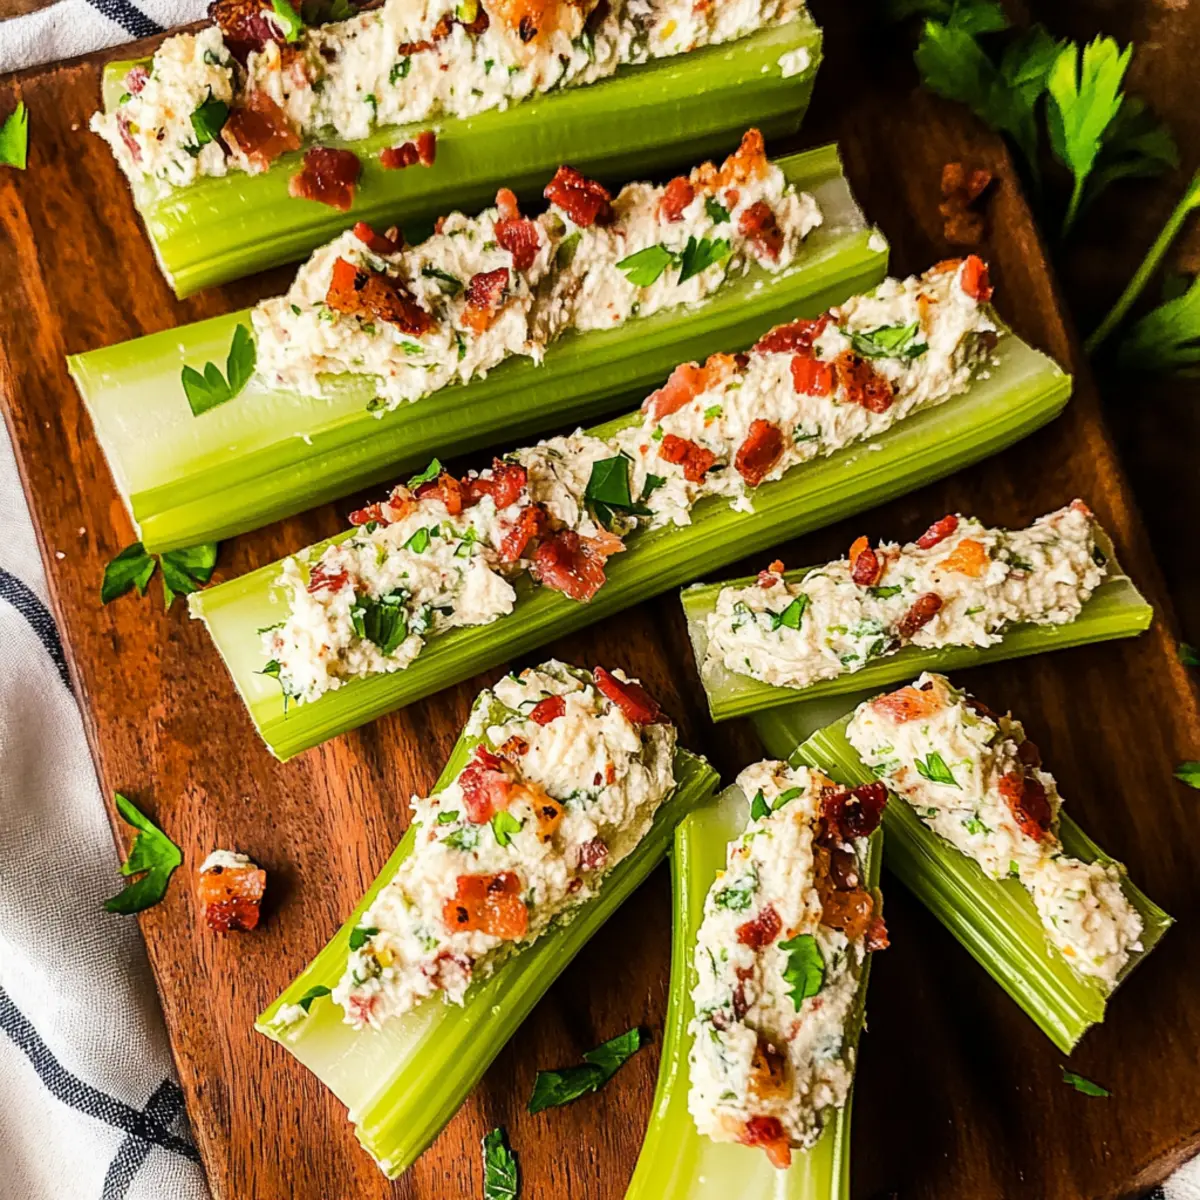
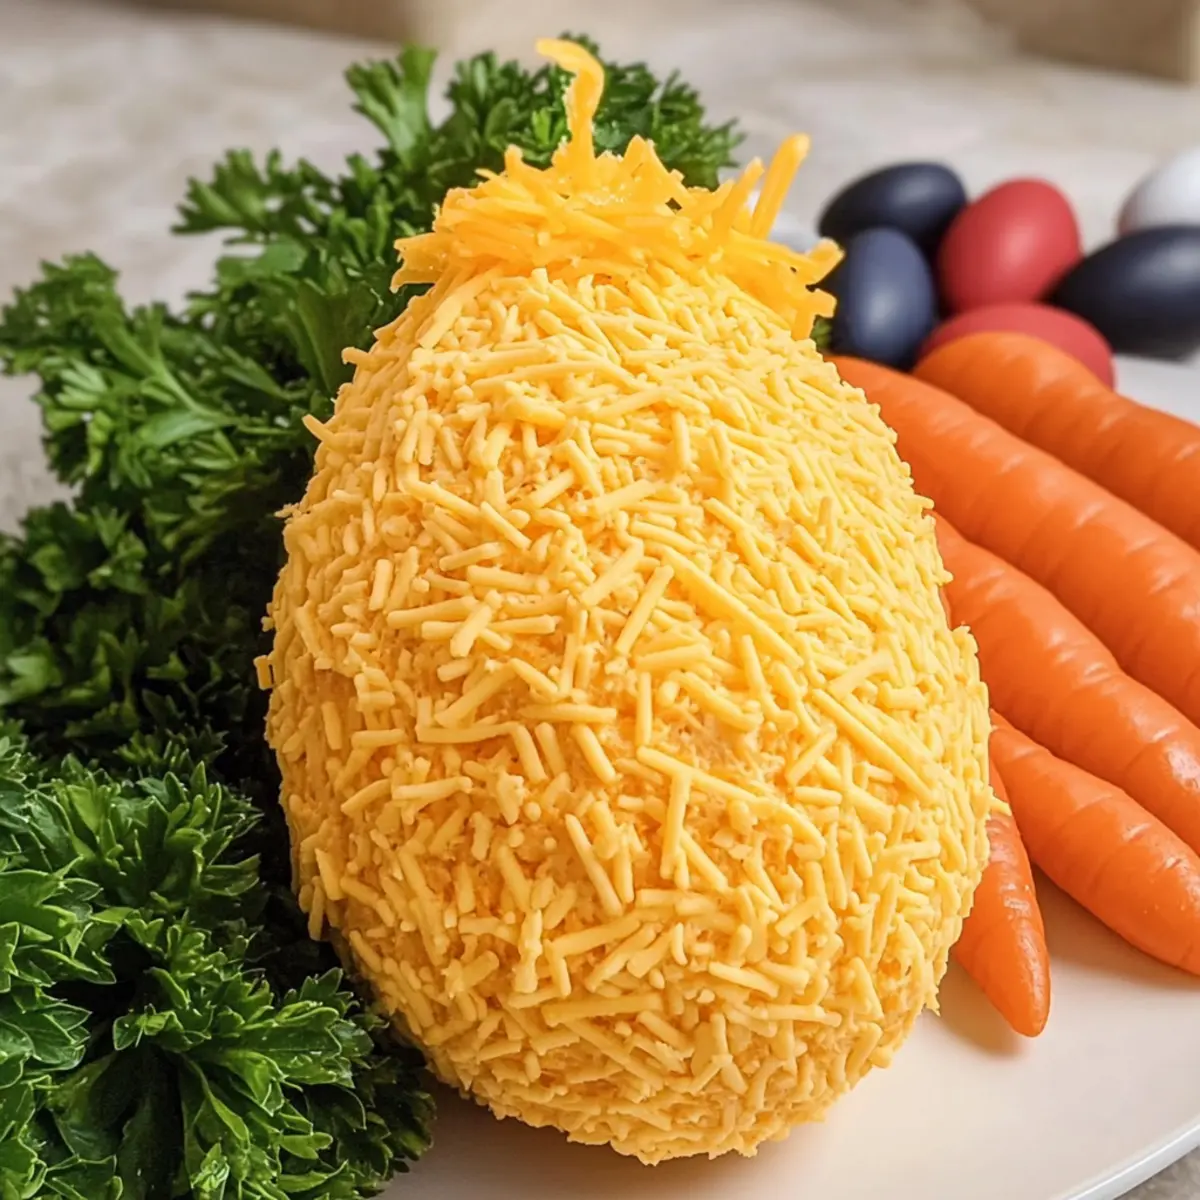
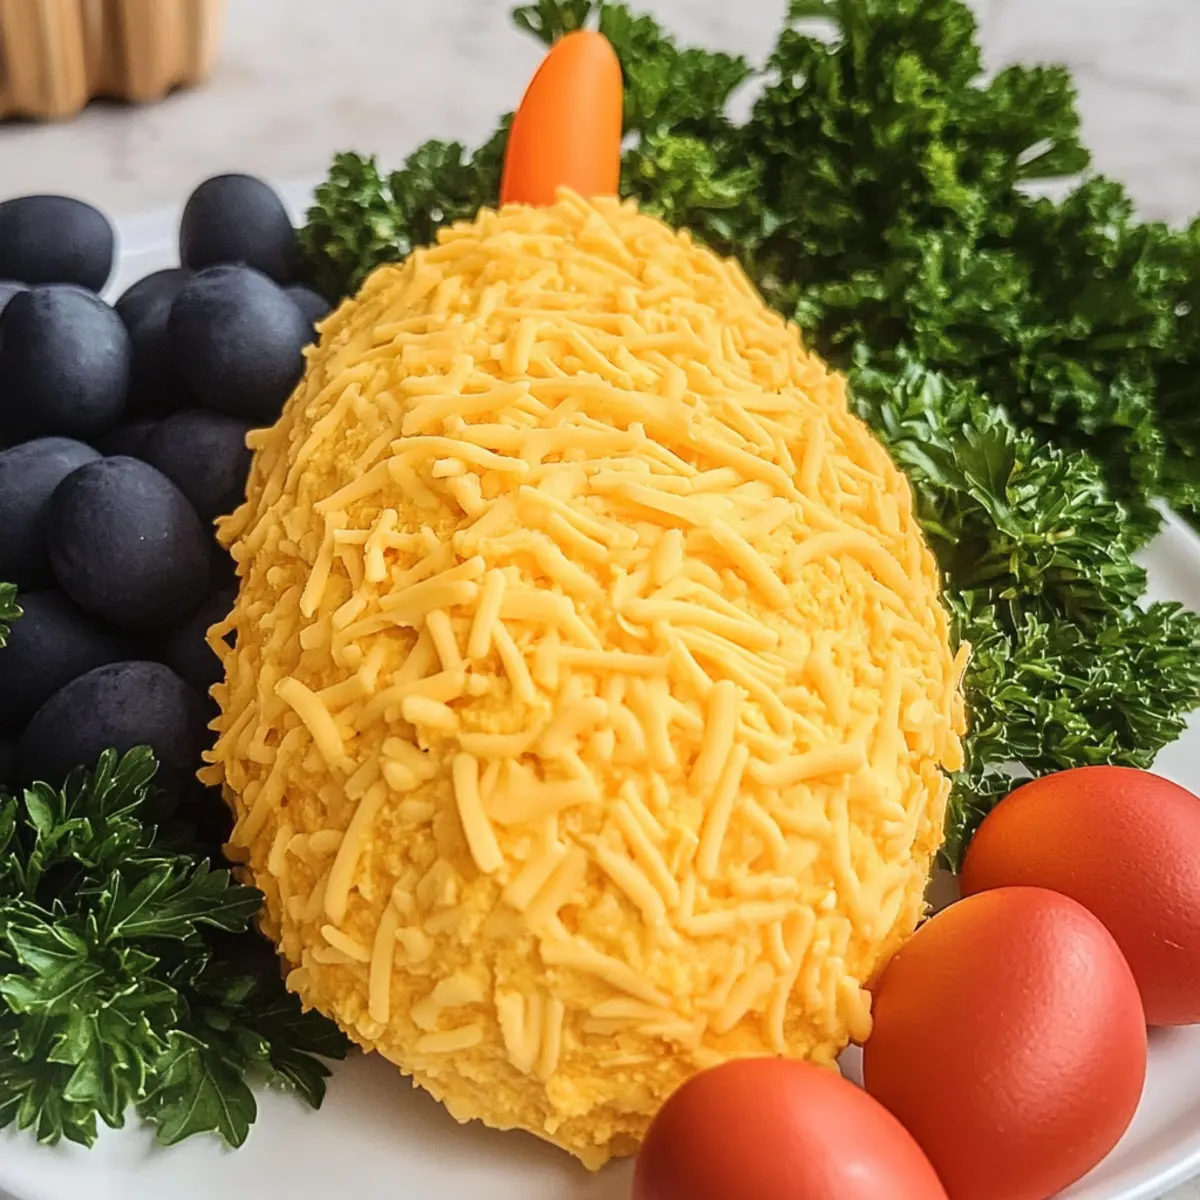
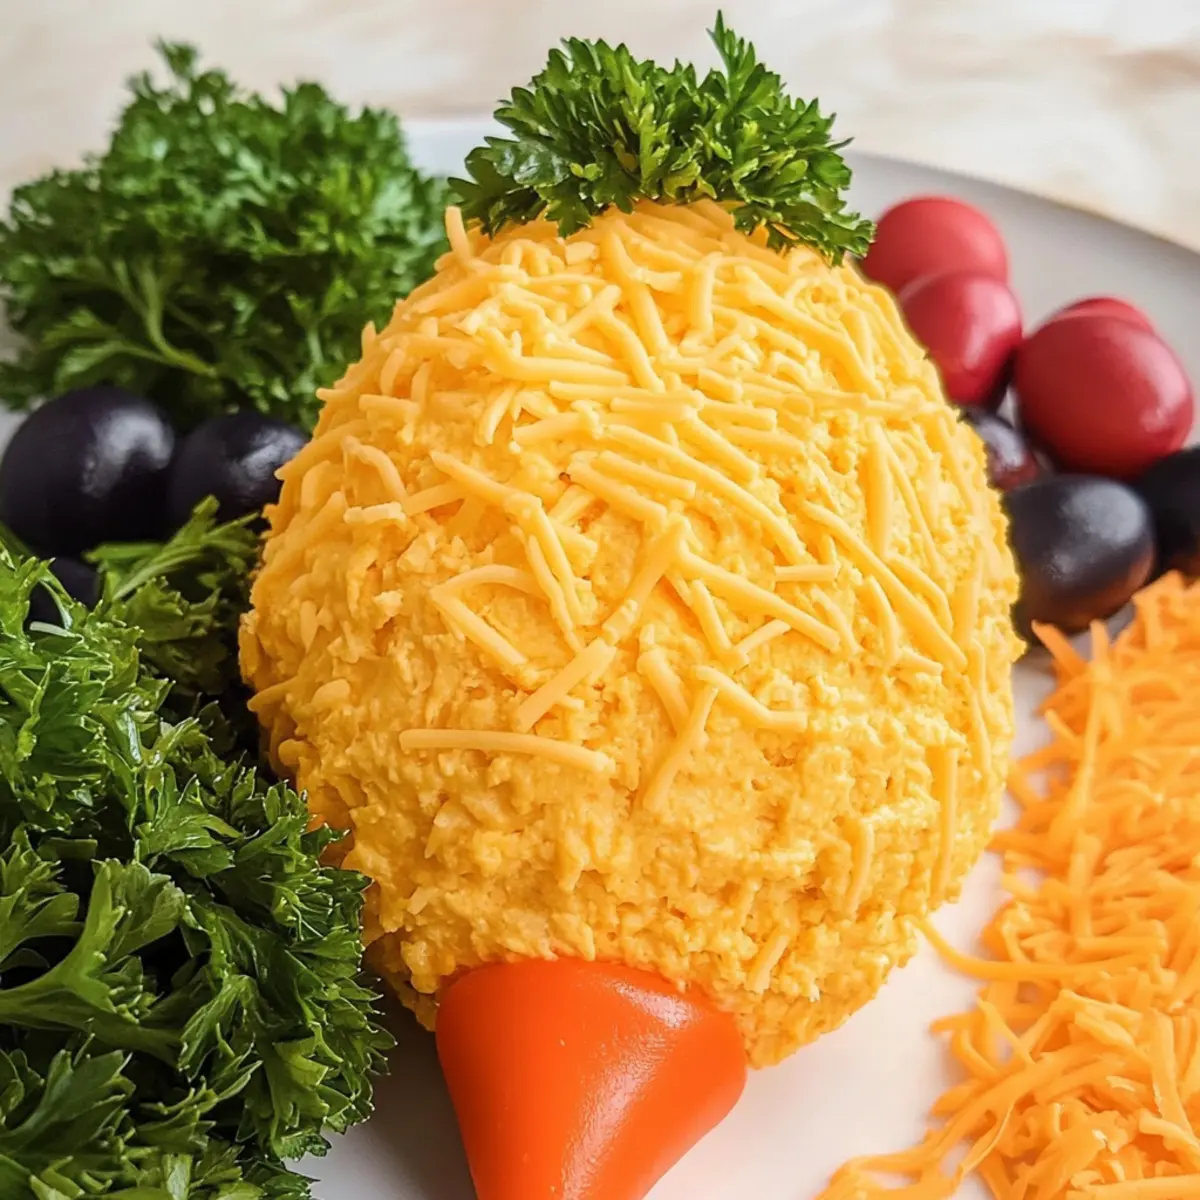
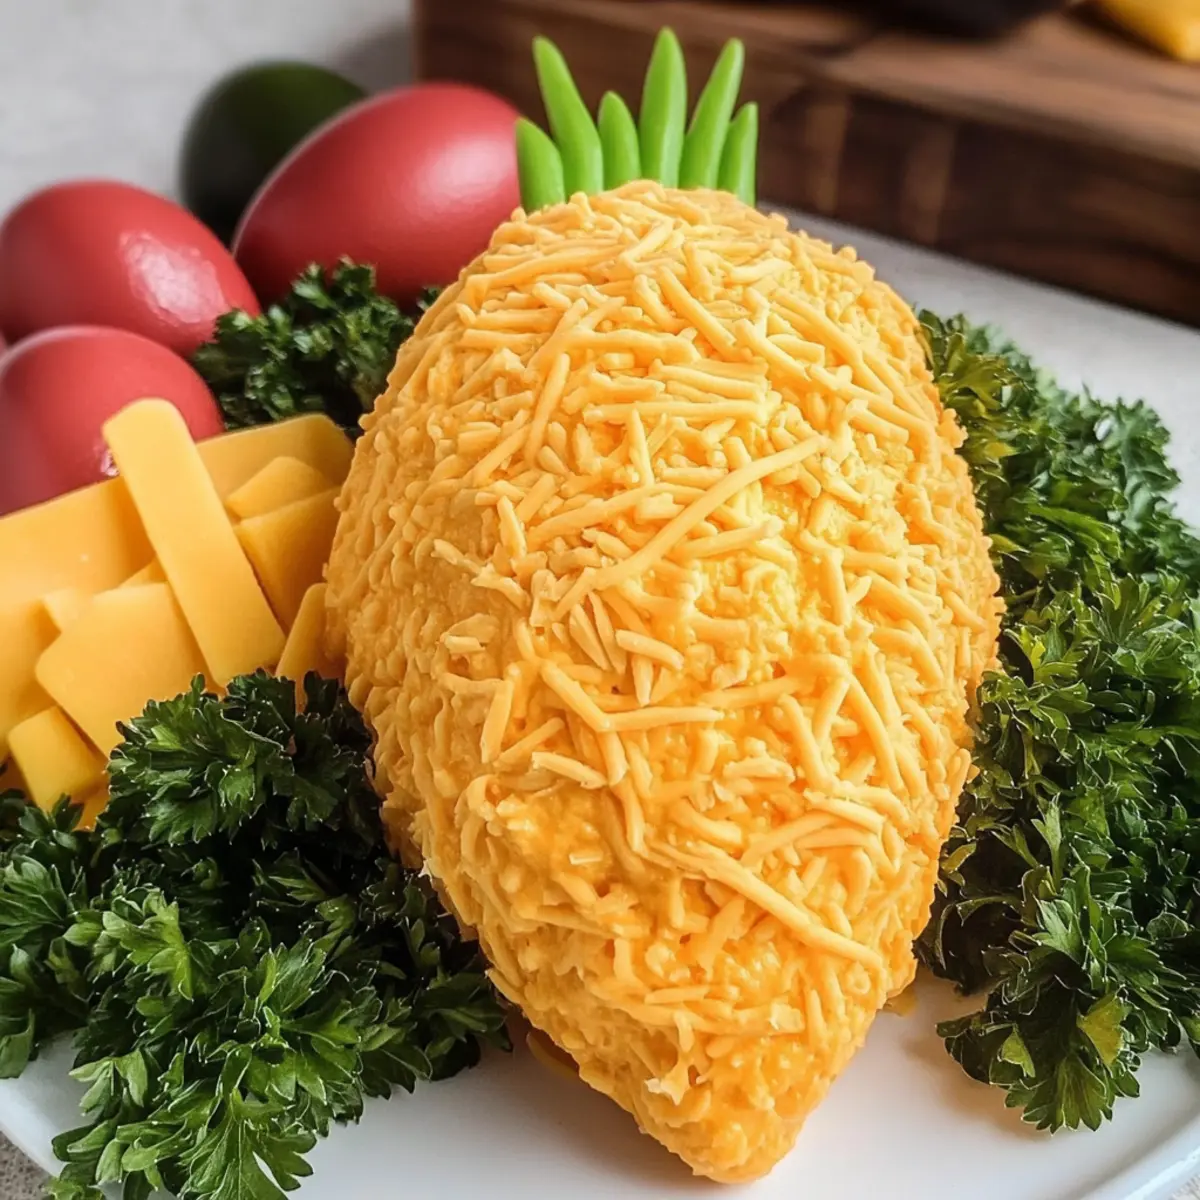
Fun Presentation: This playful Easter Carrot Cheeseball is not just tasty—its charming carrot shape is sure to be the conversation starter at any gathering.
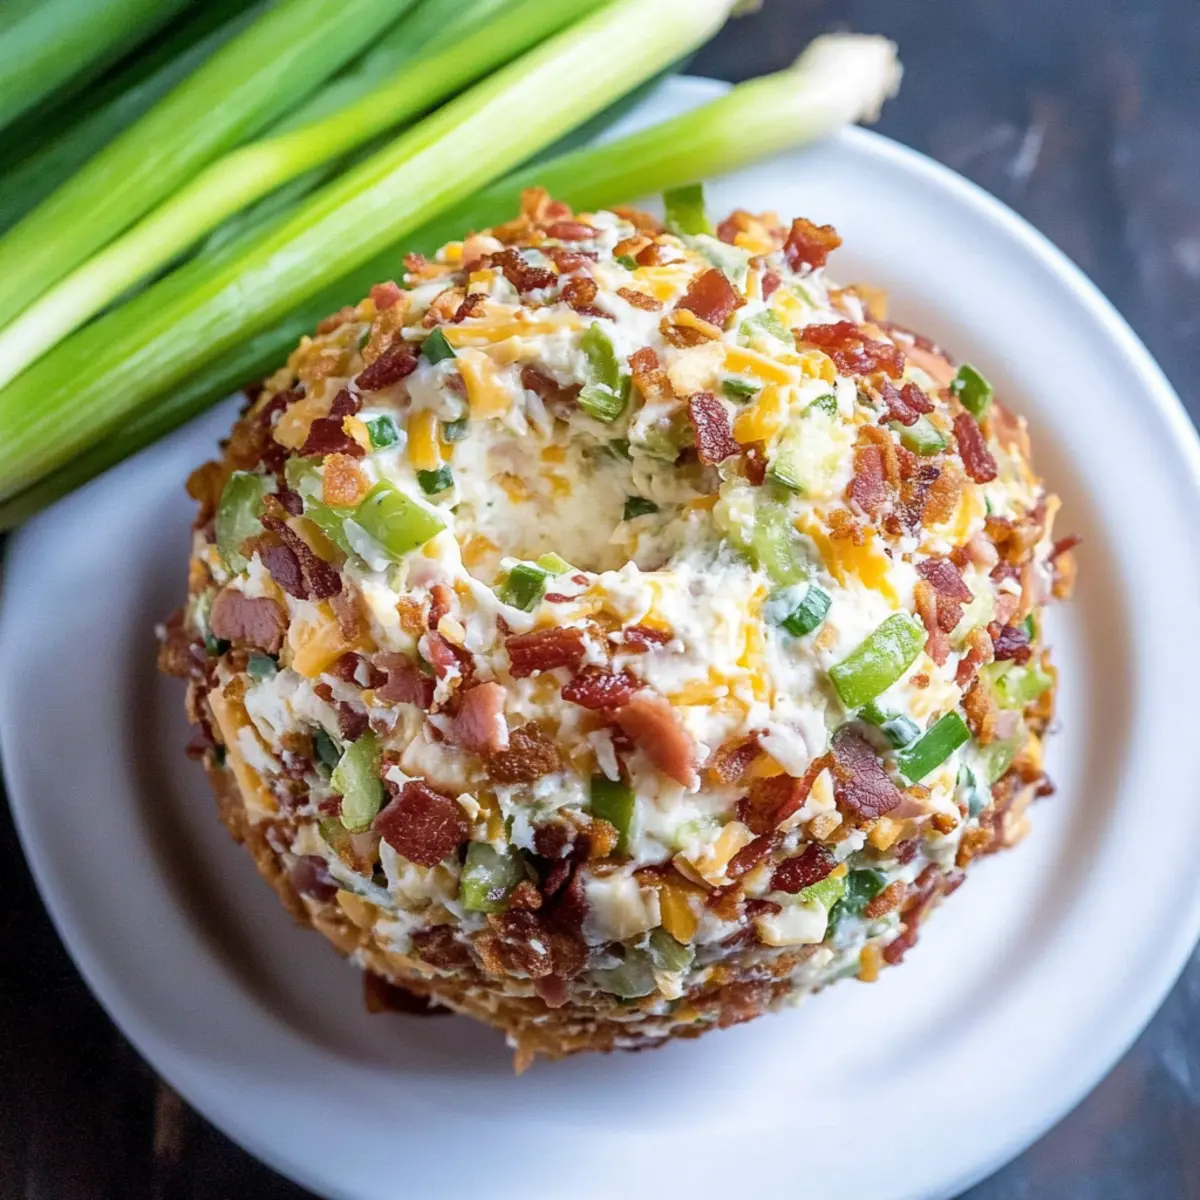
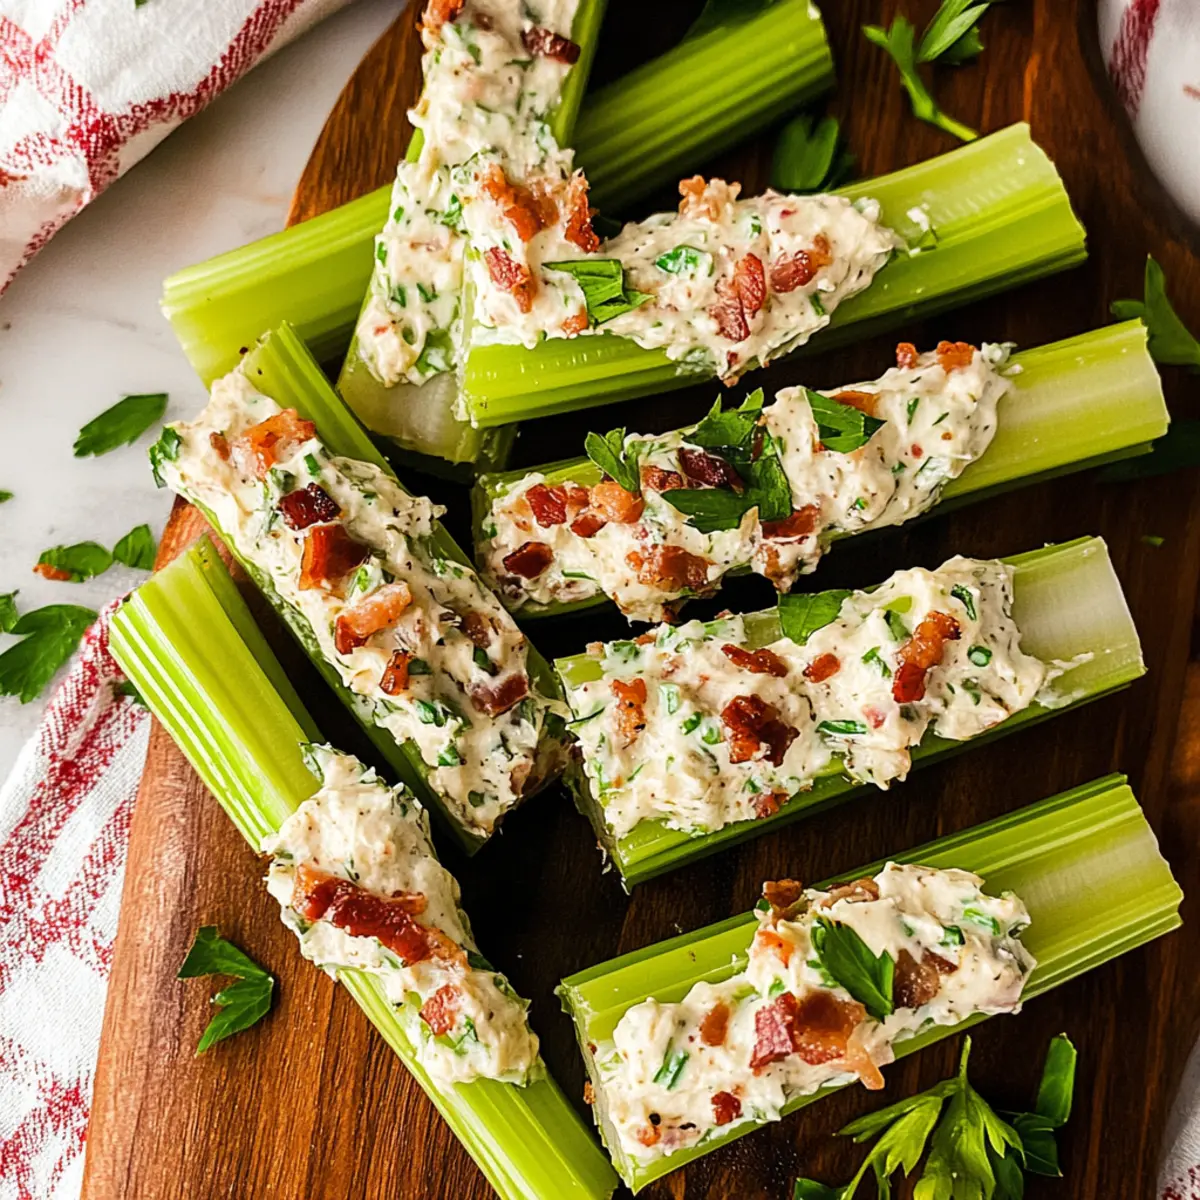
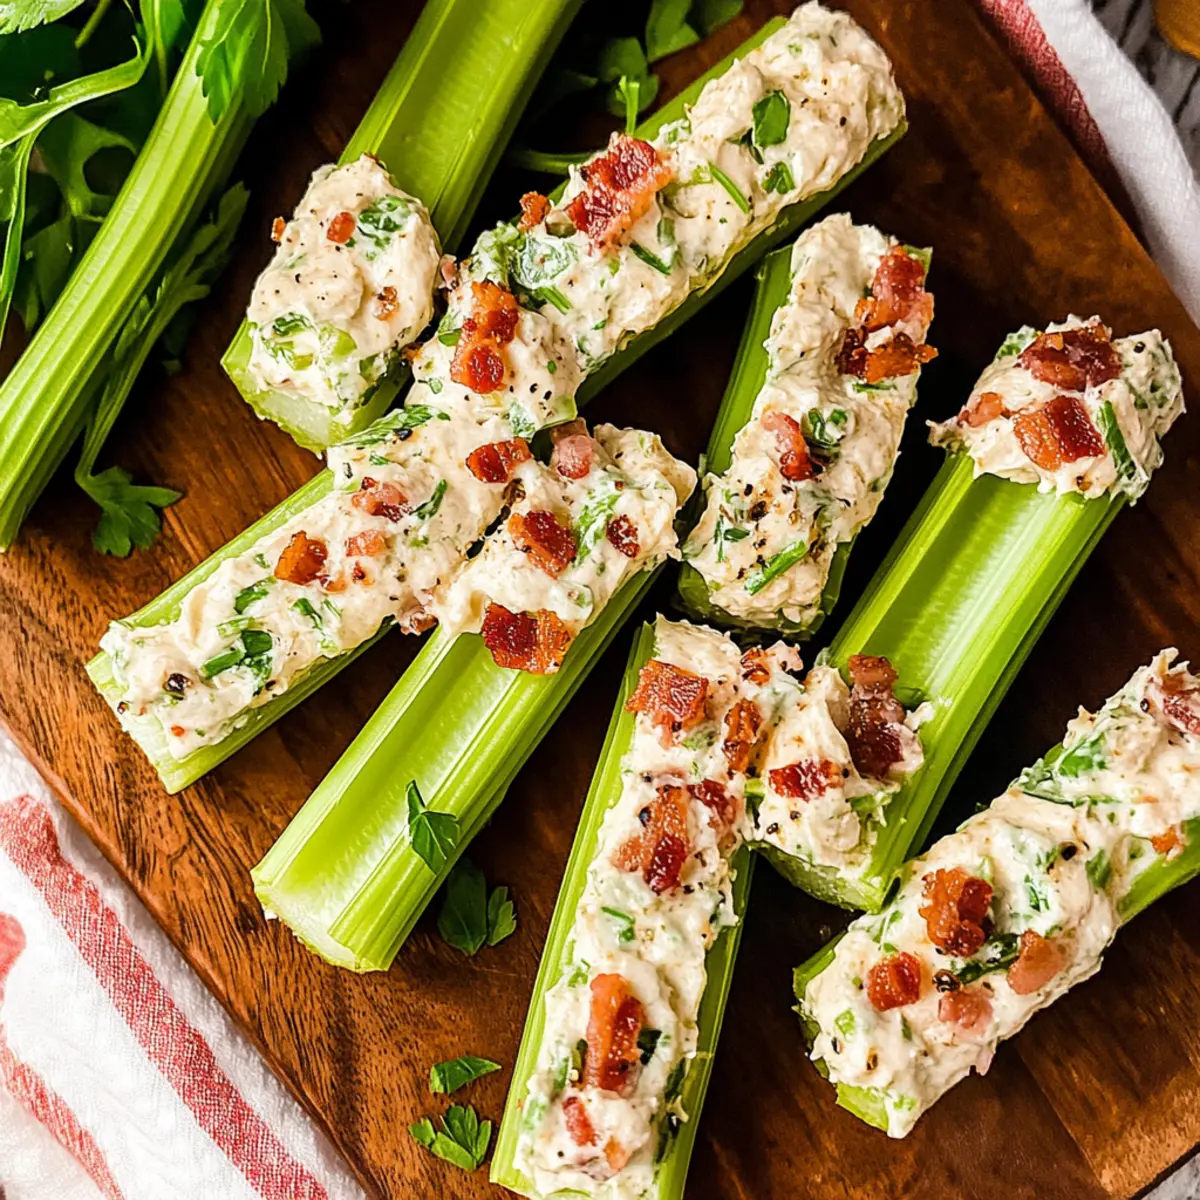
Crowd-Pleasing Flavor: The combination of creamy cheese, savory bacon, and zesty green onions creates a mouthwatering delight the whole family will love.
Quick & Easy: With simple ingredients and straightforward steps, you’ll have a spectacular appetizer ready in no time.
Customizable: Make it your own! This recipe can easily be adapted with different cheeses or spice levels for a personalized touch—a great way to experiment in the kitchen!
Versatile for Any Season: While it's perfect for Easter, this cheeseball works wonderfully at year-round celebrations too; simply shape it differently for any occasion.
Get ready to impress your guests with this unique, delicious treat! For serving ideas, check out my Serving Suggestions.
Easter Carrot Cheeseball Ingredients
For the Cheeseball
- Cream Cheese – This creamy base gives the cheeseball its rich texture; use full-fat for the best flavor.
- Finely Shredded Cheddar Cheese – Provides the delightful “carrot” appearance and adds a savory kick; shred from a block for superior texture.
- Sliced Green Onion – Adds a fresh, mild onion flavor; roughly 3 green onions will yield about ½ cup.
- Bacon Bits or Crumbles – Introduces a savory, salty element to the mix; feel free to use either store-bought or freshly cooked.
- Everything Bagel Seasoning – Enhances the flavor profile with its unique blend of seasonings; indispensable for a taste boost!
- Worcestershire Sauce – Adds depth and umami to the cheeseball, enhancing every bite.
- Fresh Curly Parsley – This vibrant herb garnishes the cheeseball and represents the leaves of your playful carrot creation.
For Serving
- Variety of Crackers – Pair with options like Triscuits, Club crackers, or pretzels for delightful crunch.
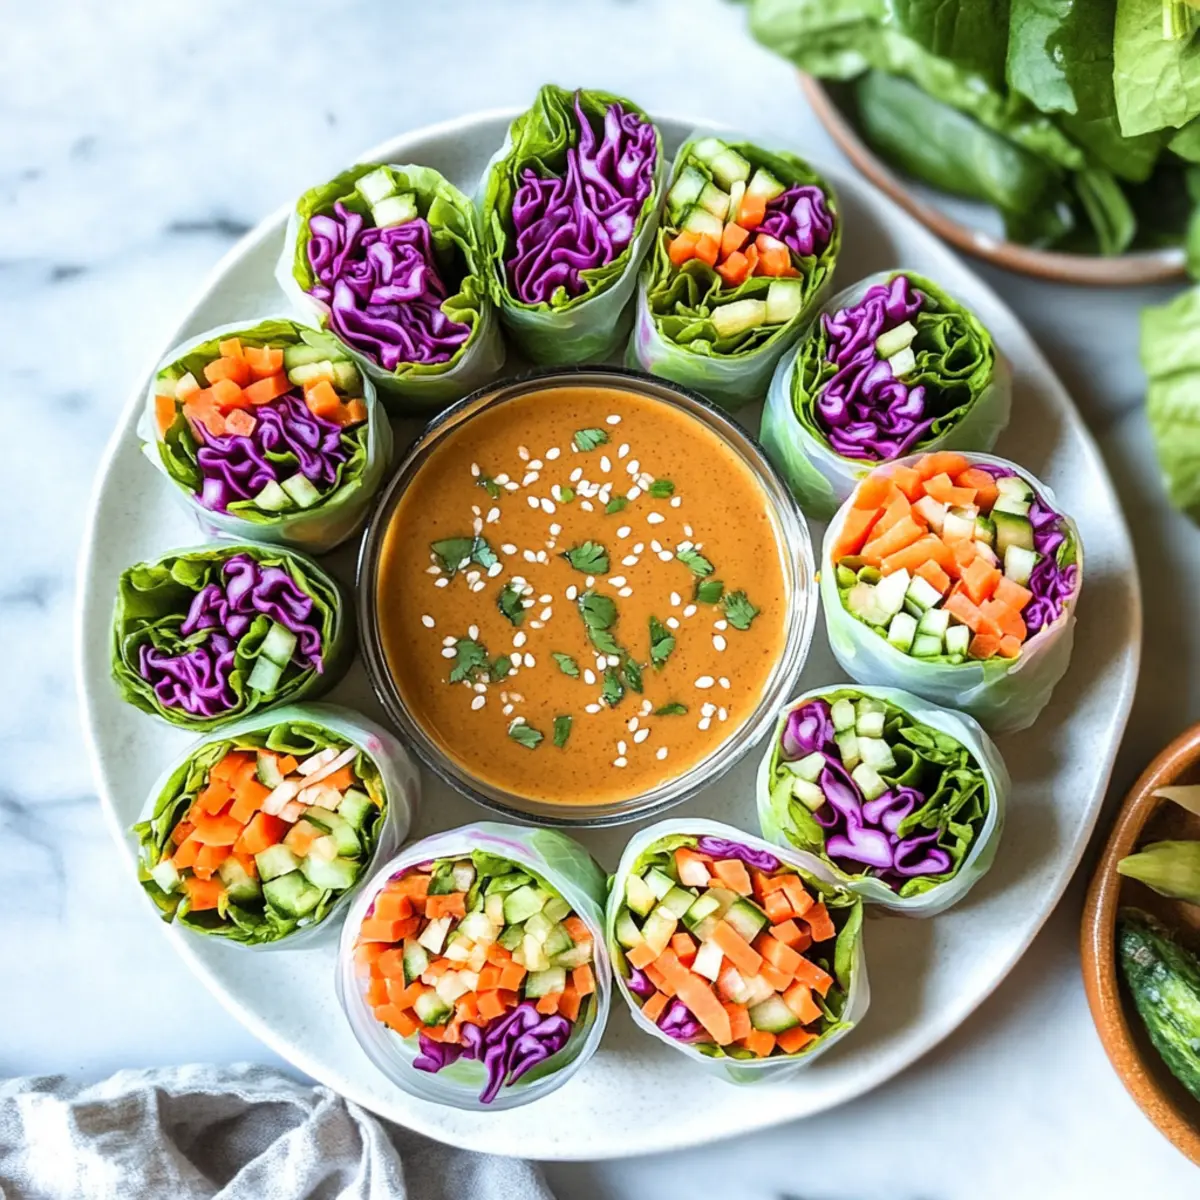
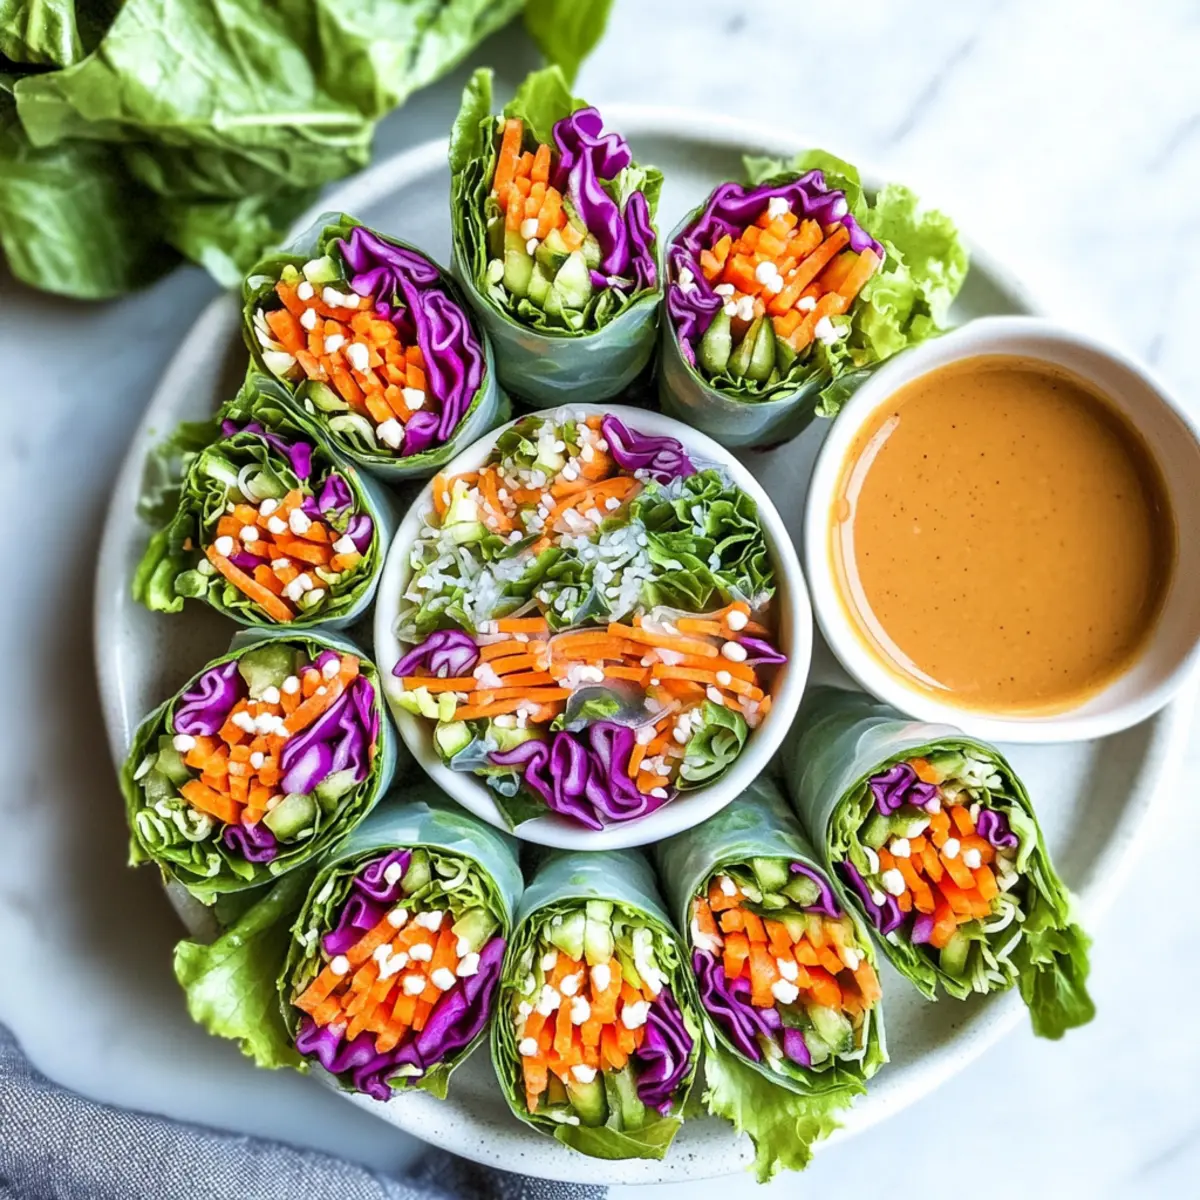
- Vegetable Sticks – Add freshness with carrot, celery, and cucumber slices for dipping—perfect for a well-rounded presentation.
Ready to create your own fun and festive Easter Carrot Cheeseball? Let’s get cooking!
Step‑by‑Step Instructions for Easter Carrot Cheeseball
Step 1: Mix Cream Cheese and Cheddar
Begin by taking your softened cream cheese and placing it in a large mixing bowl. With a spatula or hand mixer, blend in 1 cup of finely shredded cheddar cheese until the mixture is smooth and free of lumps, about 2-3 minutes. You’ll know it's ready when it has a creamy texture and the cheddar is fully integrated into the cream cheese base.
Step 2: Add Remaining Ingredients
Next, add the sliced green onion, bacon bits, everything bagel seasoning, and Worcestershire sauce to the cheese mixture. Stir thoroughly with your spatula until all ingredients are evenly distributed, taking about 1-2 minutes. This step is crucial as it allows the savory flavors to meld, creating a delicious blend that enhances the Easter Carrot Cheeseball's overall taste.
Step 3: Shape Cheeseball
Once mixed, transfer the cheese mixture onto a sheet of plastic wrap laid on your countertop. Shape the mixture into a tapered carrot form—wide at the top and narrow at the bottom—using your hands. Wrap the shaped carrot delicately in the plastic wrap and refrigerate for at least 1 hour, or up to 24 hours, allowing the flavors to develop while firming up the cheeseball.
Step 4: Decorate
After refrigerating, take the cheeseball out and carefully unwrap it. Place the carrot-shaped cheeseball on a serving platter. Insert fresh curly parsley stems into the wide end for garnish, mimicking the carrot's leaves. Finally, cover the entire surface with the remaining shredded cheddar cheese, gently pressing it into place for a delightful finish.
Step 5: Serve
To complete your Easter Carrot Cheeseball, arrange an assortment of colorful crackers and crunchy vegetable sticks, such as carrots, celery, and cucumber, around the platter. This presentation adds variety and enhances the festive theme, ensuring it's not only a tasty treat but also a beautiful centerpiece for your gathering.
Tips for the Best Easter Carrot Cheeseball
-
Soften Cream Cheese: Make sure the cream cheese is well-softened before mixing to achieve a smooth and creamy texture; microwave for 30-40 seconds if needed.
-
Use Fresh Ingredients: Opt for fresh green onions and parsley, as they add vibrant flavor and visual appeal to your Easter Carrot Cheeseball, enhancing both taste and presentation.
-
Shred Your Cheddar: Always shred cheese from a block rather than using pre-packaged versions; this ensures a fresh taste and better melting properties in your cheeseball.
-
Chill for Flavor: Let the cheeseball chill for at least an hour or overnight in the fridge; this allows the flavors to meld beautifully, creating a more delicious appetizer.
-
Customize Your Garnish: Feel free to explore different garnishes and shape options; creating a unique version of the Easter Carrot Cheeseball lets you add personal touches and surprises for your guests!
Make Ahead Options
Preparing the Easter Carrot Cheeseball in advance is a fantastic way to save time and ensure your gathering is stress-free! You can make the cheeseball mixture up to 24 hours ahead, allowing the flavors to meld beautifully. Simply follow the first three steps of the recipe: mix the ingredients, shape the cheeseball, and wrap it tightly in plastic wrap before refrigerating. When you’re ready to serve, simply unwrap, decorate with parsley, and cover with the remaining cheddar cheese. For best results, store it in the refrigerator to maintain its creamy texture and vibrant appearance. Your guests will enjoy a delightful appetizer that's just as delicious as if it were freshly made!
Easter Carrot Cheeseball Variations
Unleash your creativity and tailor the Easter Carrot Cheeseball to perfectly suit your taste buds!
- Non-Carrot Shape: Opt for a standard ball shape for a year-round appetizer that's just as inviting.
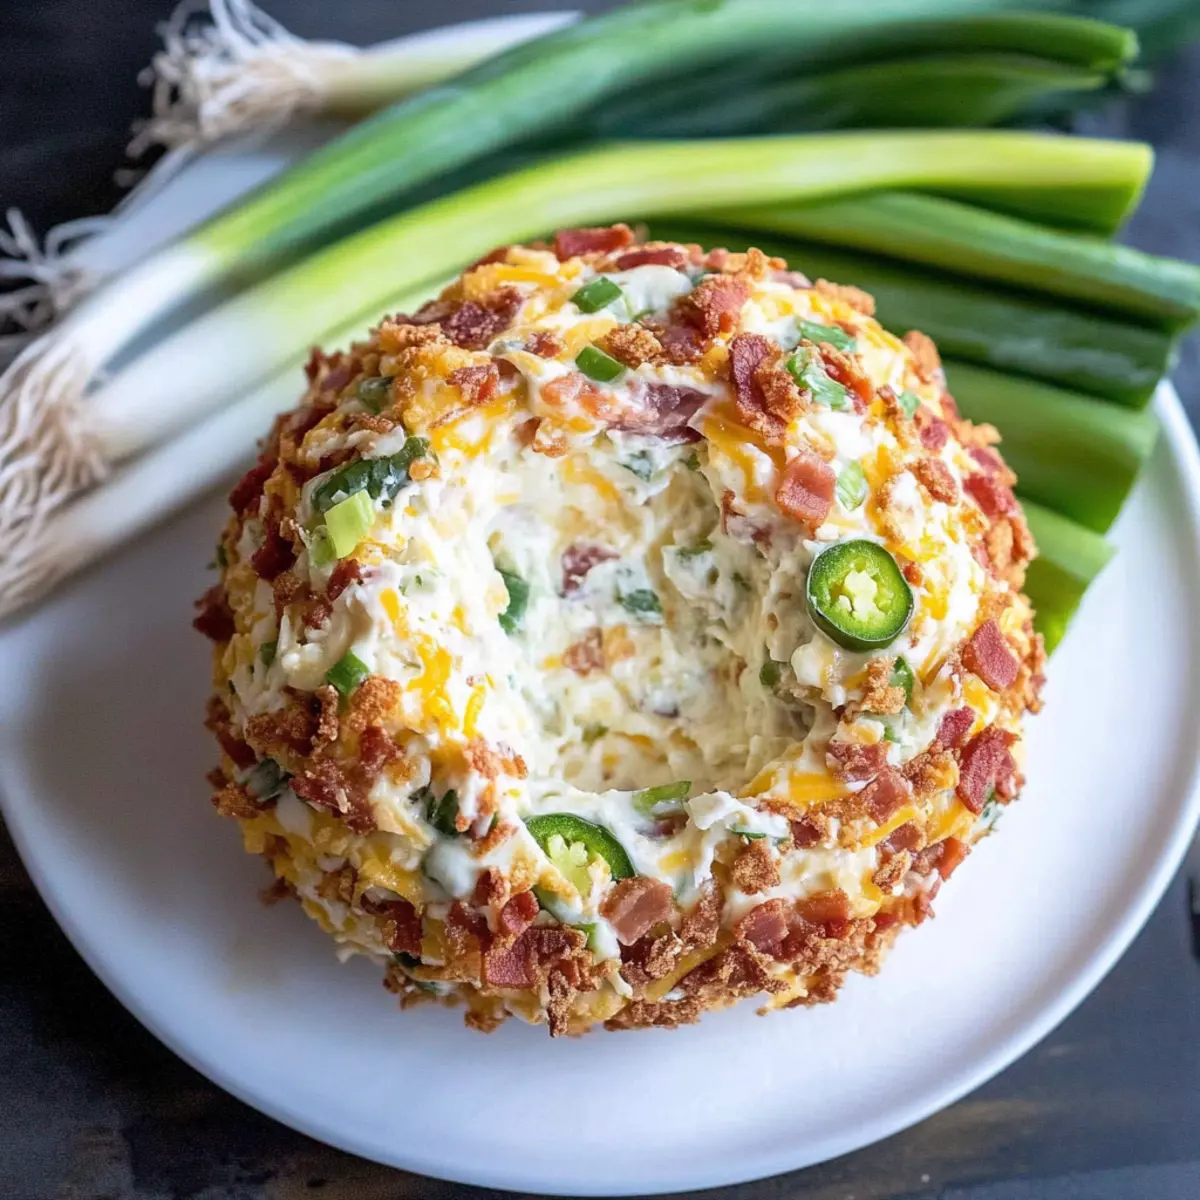
- Spicy Option: For those who crave heat, add a pinch of cayenne pepper or chili powder to elevate the flavor.
- Cheese Variants: Swap out cheddar for cream cheese or pepper jack for a creamy twist packed with extra flavor.
- Herbed Delight: Increase freshness by mixing in finely chopped basil or dill; this brings a garden-fresh taste.
- Nutty Crunch: Fold in finely chopped pecans or walnuts for a crunchy texture that complements the cheeseball's creaminess.
- Plant-Based Version: Use a dairy-free cream cheese and omit bacon for a vegan-friendly alternative that everyone can enjoy.
- Sweet Surprise: For a unique twist, add a tablespoon of honey or maple syrup for a touch of sweetness against the savory flavors.
- Smoky Flavor: Incorporate smoked paprika or chipotle powder for an intriguing smoky depth that pairs perfectly with cheese.
Feel free to mix and match these ideas to create your perfect cheeseball masterpiece! For serving ideas, check out my Serving Suggestions or explore more variations for your appetizers!
What to Serve with Easter Carrot Cheeseball?
Picture a vibrant platter filled with delightful accompaniments that create a harmonious feast alongside your fun Easter appetizer.
-
Crackers Selection: A mix of hearty and light crackers offers varied textures and ensures every bite of the cheeseball is perfectly paired.
-
Fresh Vegetable Sticks: Crisp carrot, cucumber, and celery sticks provide a refreshing crunch, complementing the creamy cheeseball beautifully while adding color to your spread.
-
Fruit Platter: Sweet fruits like strawberry slices or apple wedges offer a delightful contrast that balances the savory flavors of the cheeseball, enticing the palate.
-
Cheese Board: An assortment of cheeses alongside your carrot cheeseball adds depth; the variety not only elevates the appetizer but creates an eye-catching display.
-
Dip Options: Serve with a tangy yogurt or ranch dip for added flavor and creaminess, inviting guests to experiment with different combinations.
-
Sparkling Water: A frothy, fizzy drink refreshes between bites, keeping the vibe lively and encouraging delightful conversations around your gathering.
-
Chocolate Treats: For dessert, consider mini chocolate eggs or mousse cups that provide a touch of sweetness to round out your feast perfectly.
How to Store and Freeze Easter Carrot Cheeseball
Fridge: Store the cheeseball wrapped tightly in plastic wrap or in an airtight container in the refrigerator. It will stay fresh for up to 3-4 days, perfect for enjoying those delicious leftovers.
Freezer: For longer storage, you can freeze the cheeseball before decorating. Wrap it well in plastic wrap and aluminum foil, and it will stay good for up to 2 months. Thaw in the fridge overnight before serving.
Reheating: This cheeseball is best served chilled and should not be heated, as it can compromise its creamy texture and festive appearance.
Make-Ahead Tip: Preparing your Easter Carrot Cheeseball a day in advance not only enhances the flavors but also allows for a stress-free gathering when it’s time to entertain!
Easter Carrot Cheeseball Recipe FAQs
What kind of cream cheese should I use?
Absolutely, I recommend using full-fat cream cheese for the best flavor and texture in your Easter Carrot Cheeseball. Light or reduced-fat options tend to be too watery and may not blend well, leading to a lumpy mix.
How should I store leftovers?
You can store any leftover cheeseball tightly wrapped in plastic wrap or in an airtight container in the refrigerator for up to 3-4 days. Just make sure it's sealed well to keep its creamy texture and flavors intact.
Can I freeze the cheeseball?
Yes, you can freeze your Easter Carrot Cheeseball before decorating it! Simply wrap it tightly in plastic wrap and then in aluminum foil to prevent freezer burn. It will keep well for up to 2 months. When you're ready to serve, thaw it in the fridge overnight and then proceed with the decoration.
What if my cheeseball is too soft?
If your mixture seems too soft to hold its shape while forming the cheeseball, you can refrigerate it for an additional 30 minutes to 1 hour to help firm it up. Alternatively, adding a small amount of extra shredded cheese can also help firm the mixture without compromising the flavor.
Is this recipe suitable for vegetarians?
Yes, the Easter Carrot Cheeseball is vegetarian-friendly! However, if you have vegetarian guests, consider using plant-based bacon bits as a substitute for traditional bacon to ensure everyone can enjoy it. Always double-check the bacon crumbles for any hidden animal products if needed.
How can I customize the flavor?
The beauty of the Easter Carrot Cheeseball lies in its versatility! You can swap out cheddar for a different type of cheese like cream cheese or pepper jack for a spicy kick. Additionally, adding ingredients like diced jalapeños or herbs can easily impart a personalized touch to suit different palates.
Easter Carrot Cheeseball: A Creamy Delight for Every Gathering
Ingredients
Equipment
Method
- Mix cream cheese and shredded cheddar until smooth.
- Add green onion, bacon bits, bagel seasoning, and Worcestershire sauce. Stir thoroughly.
- Shape the mixture into a carrot form and refrigerate for at least 1 hour.
- Unwrap the cheeseball, decorate with parsley, and cover with remaining cheddar.
- Serve with an assortment of crackers and vegetable sticks.