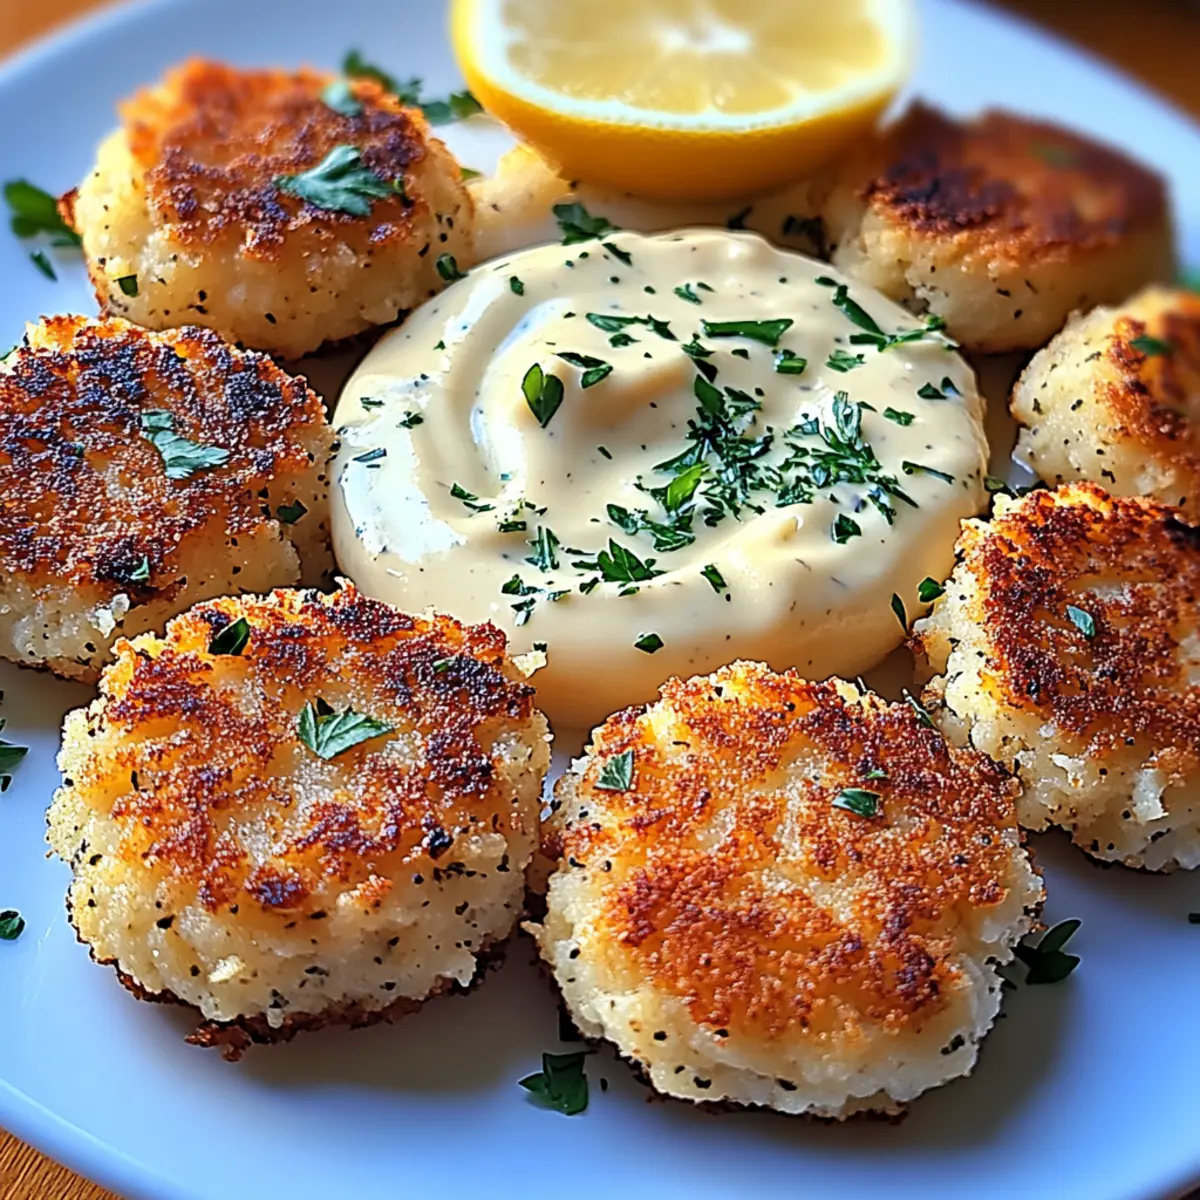
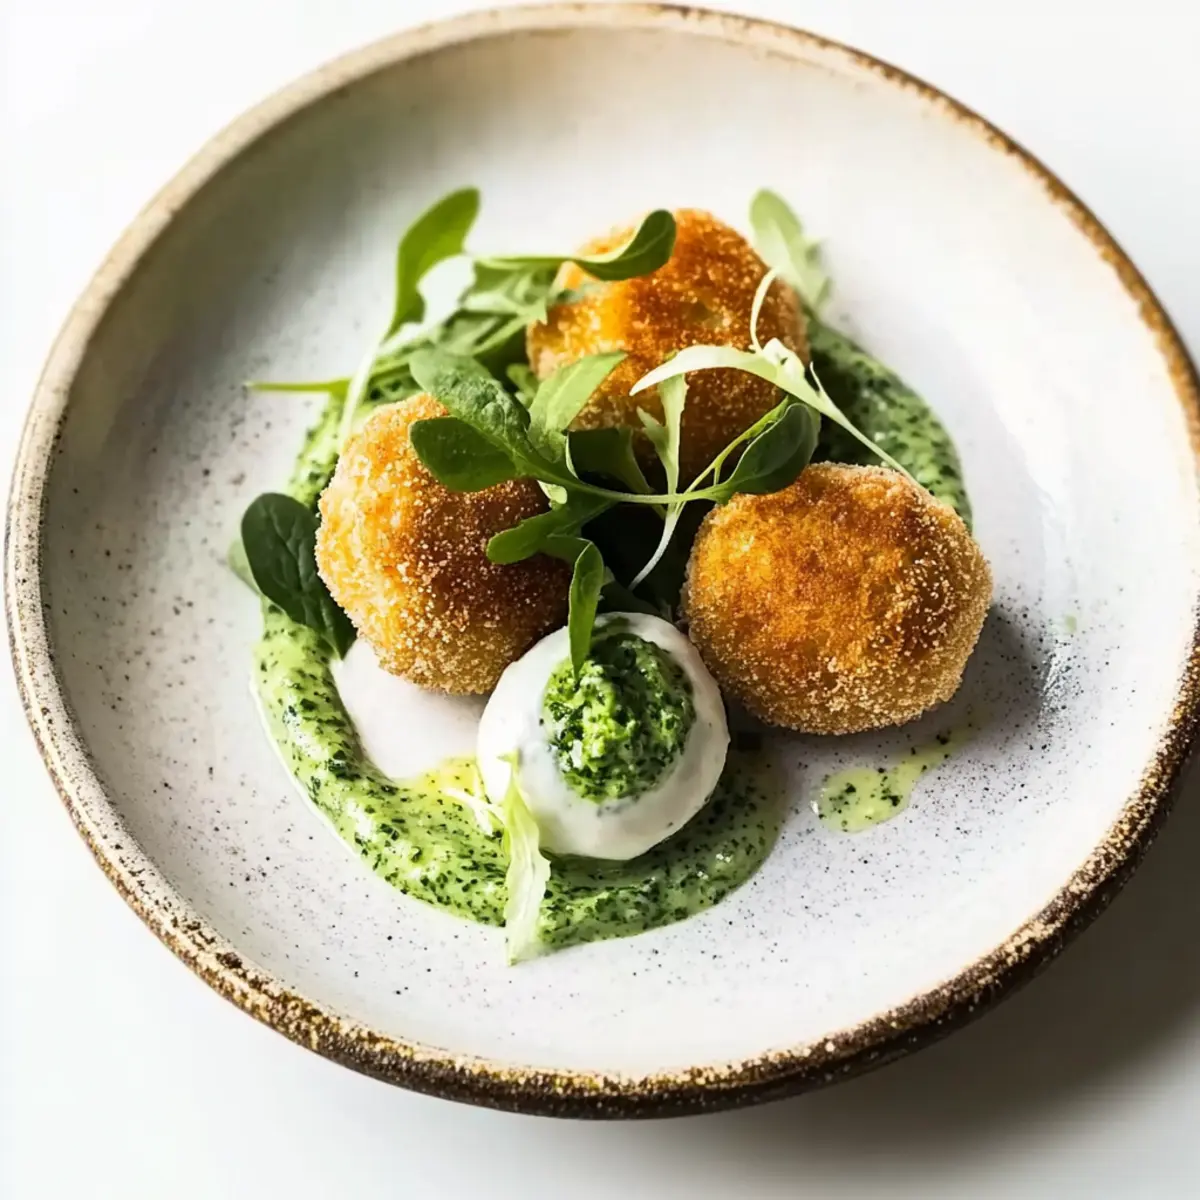
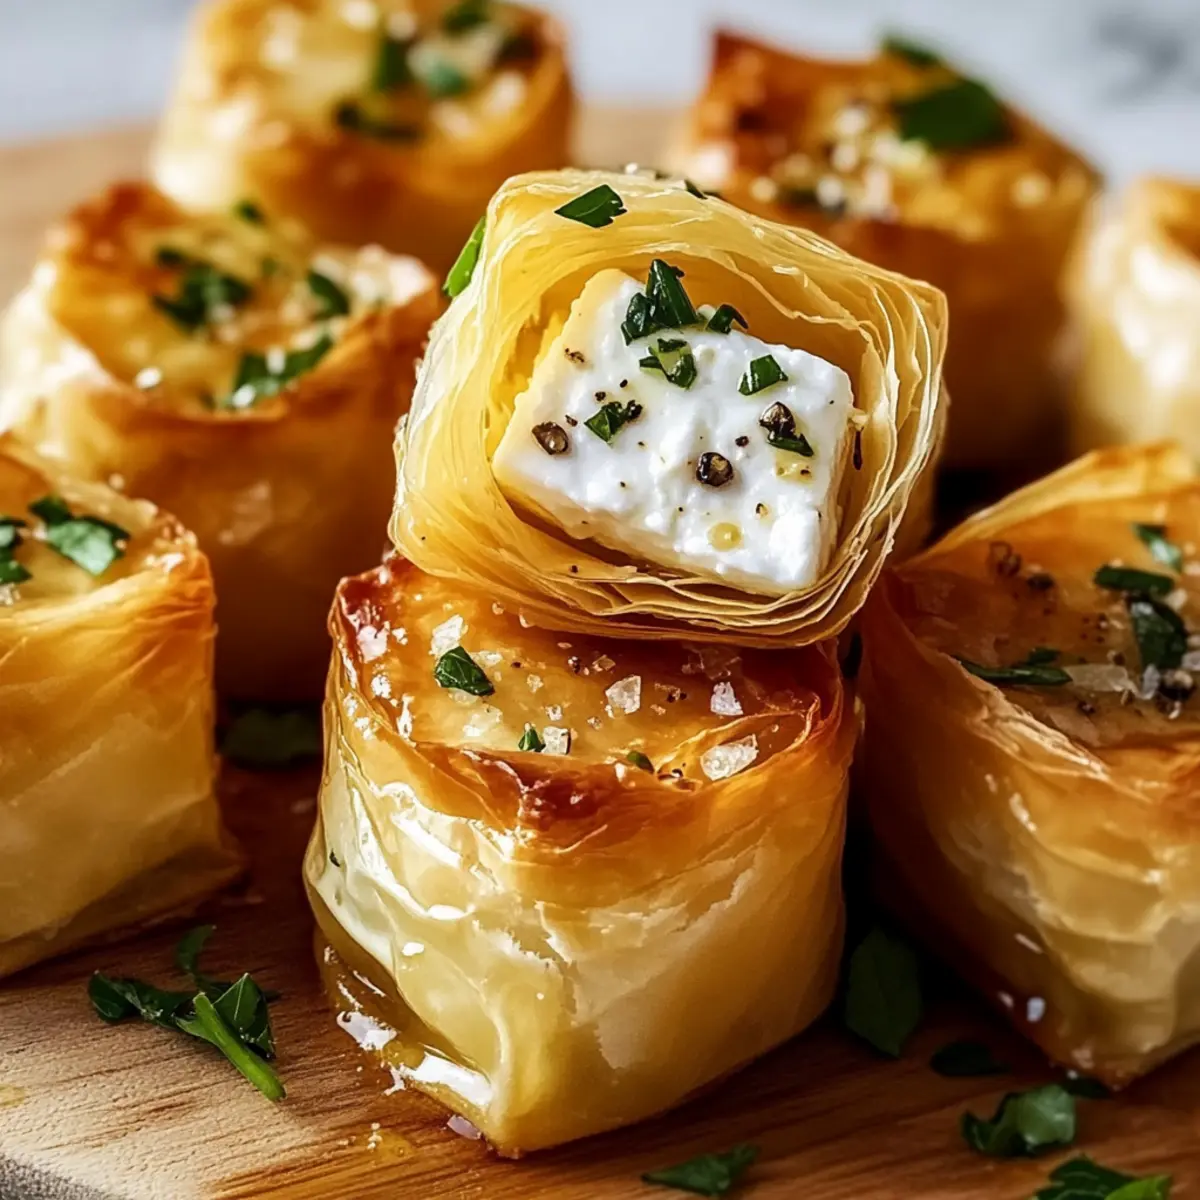
The aroma of sizzling shrimp mingles with herbs and garlic, instantly transporting me to the bustling streets of Portugal. Creating these Crispy Portuguese Shrimp Croquettes at home is not just about enjoying a delicious appetizer; it's a celebration of flavors that invites everyone to the table. These delectable bites offer a perfect blend of savory shrimp, creamy mashed potatoes, and a crunchy breadcrumb coating, making them a standout option for gatherings or a cozy night in. Plus, they’re versatile; you can customize them with spices or even switch up the seafood, ensuring every batch is a delightful surprise. Are you ready to dive into this tempting recipe and elevate your snacking game?

Why are Portuguese Shrimp Croquettes irresistible?
Crispy perfection awaits you as these croquettes deliver a satisfying crunch with every bite. Savory shrimp mixed with creamy mashed potatoes creates a flavor explosion that will impress your guests. Versatile variations allow you to swap seafood or spices, making each batch unique. Easy to prepare, they come together quickly, perfect for busy weeknights or spontaneous gatherings. Enjoy them with tangy dipping sauces for an extra kick, and you'll understand why these croquettes are bound to become a beloved staple in your kitchen!
Portuguese Shrimp Croquettes Ingredients
For the Croquettes
- Shrimp – the heart of the dish, use fresh or thawed frozen shrimp for the best flavor.
- Mashed Potatoes – they provide a creamy, comforting base; opt for instant mashed potatoes for quick prep.
- Herbs (e.g., parsley, cilantro) – add vibrant freshness; dried herbs can work in a pinch if fresh isn’t available.
- Garlic – infuses the croquettes with aromatic goodness; fresh is ideal, but garlic powder can substitute in a hurry.
- Breadcrumbs – ensure a crunchy coating; panko breadcrumbs offer extra crispness, or use gluten-free ones if needed.
- Eggs – essential for binding the ingredients; for an egg-free option, consider a flaxseed mixture.
- Salt and Pepper – key for flavor enhancement; adjust to suit your personal taste.
For Serving
- Lemon wedges – brighten up the dish with a zesty punch.
- Tangy dipping sauce (like aioli or marinara) – a delicious complement to the rich croquettes, enhancing their savory notes.
These Portuguese Shrimp Croquettes will surely become a favorite, providing warmth and comfort with each and every bite!
Step‑by‑Step Instructions for Portuguese Shrimp Croquettes
Step 1: Prepare the Mashed Potatoes
Begin by cooking the mashed potatoes according to the package instructions or by boiling peeled potatoes until fork-tender, about 15-20 minutes. Once they’re soft, drain, mash, and let them cool completely at room temperature. This creamy base is essential for your Portuguese Shrimp Croquettes as it provides the perfect texture and flavor.
Step 2: Cook the Shrimp
In a skillet, heat a tablespoon of oil over medium heat. Add minced garlic and sauté for about 1 minute until fragrant. Toss in the shrimp and cook for 3-4 minutes until they turn pink and opaque, ensuring they are fully cooked but not rubbery. Remove from heat, chop the shrimp finely, and mix them with fresh herbs and a pinch of salt and pepper for added flavor.
Step 3: Combine Mixtures
In a large mixing bowl, combine the cooled mashed potatoes with the shrimp mixture. Stir until thoroughly mixed, ensuring the shrimp and herbs are evenly distributed throughout. This step is crucial to form a unified filling for your croquettes. It should have a thick, cohesive consistency, making it easy to shape into croquettes.
Step 4: Shape the Croquettes
Wet your hands to prevent sticking, then scoop portions of the mixture and shape them into small oval or round croquettes, approximately 2-3 inches in size. Place the formed croquettes on a baking sheet lined with parchment paper. This step allows you to prepare them all at once before frying or baking them for your Portuguese Shrimp Croquettes.
Step 5: Coat the Croquettes
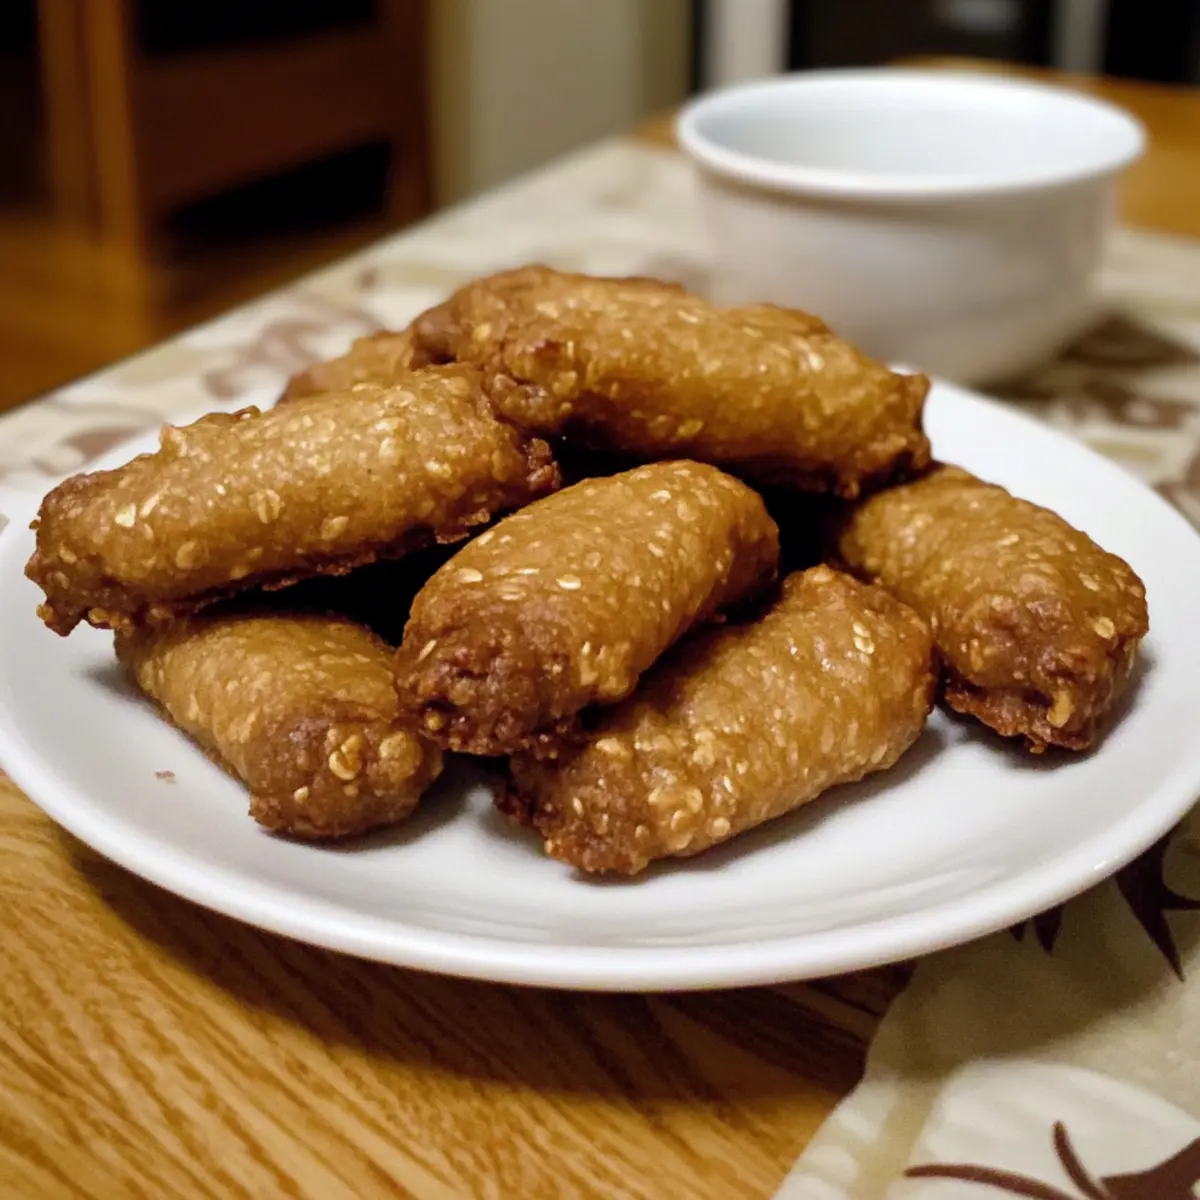
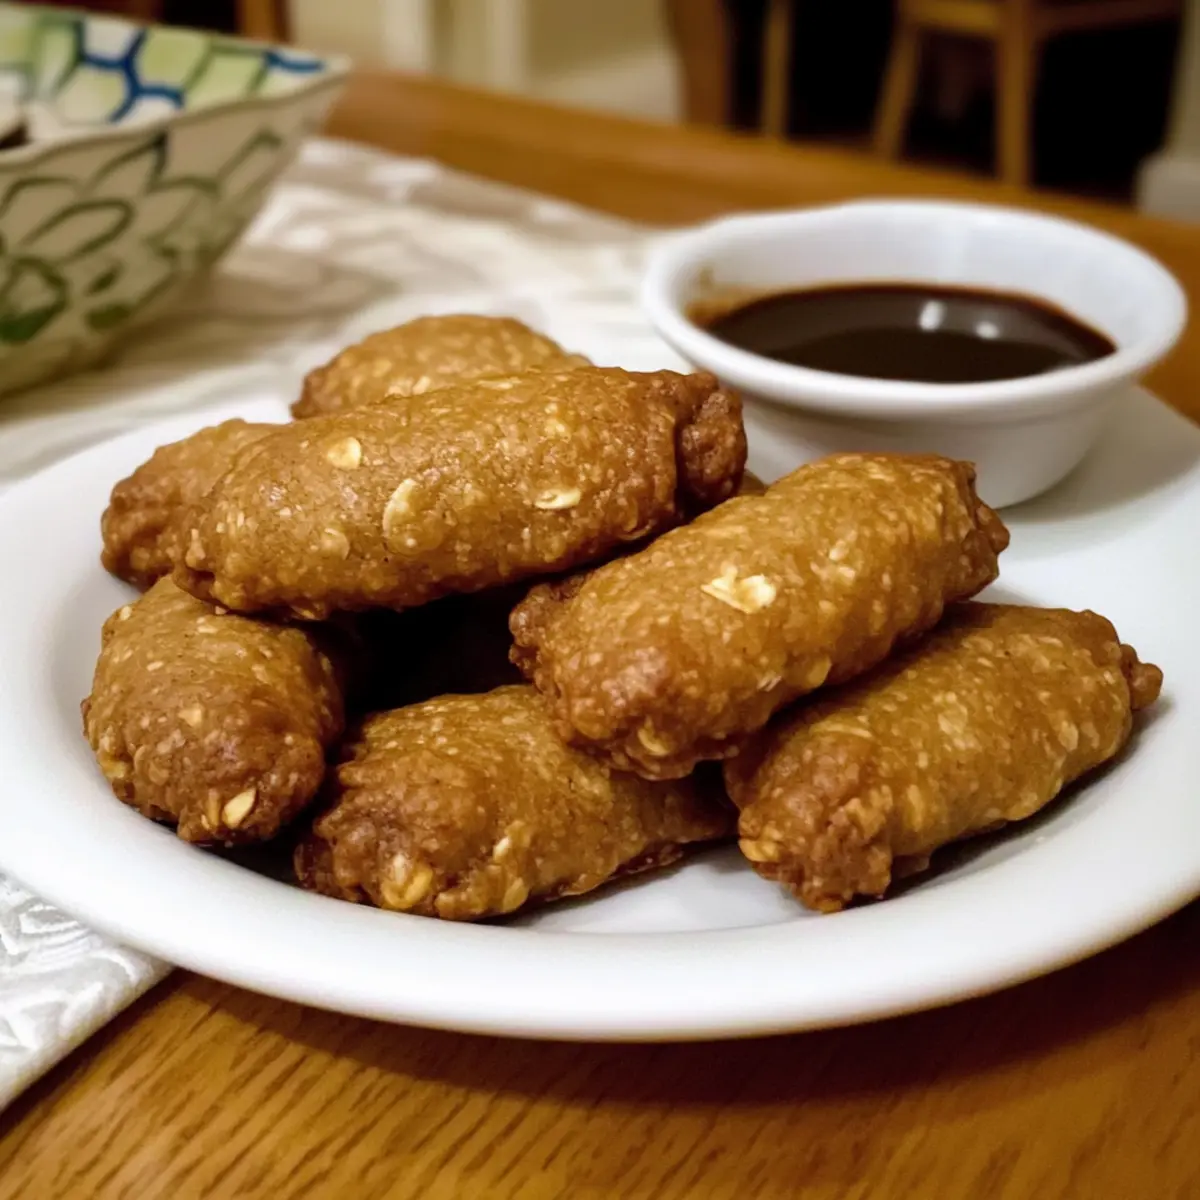
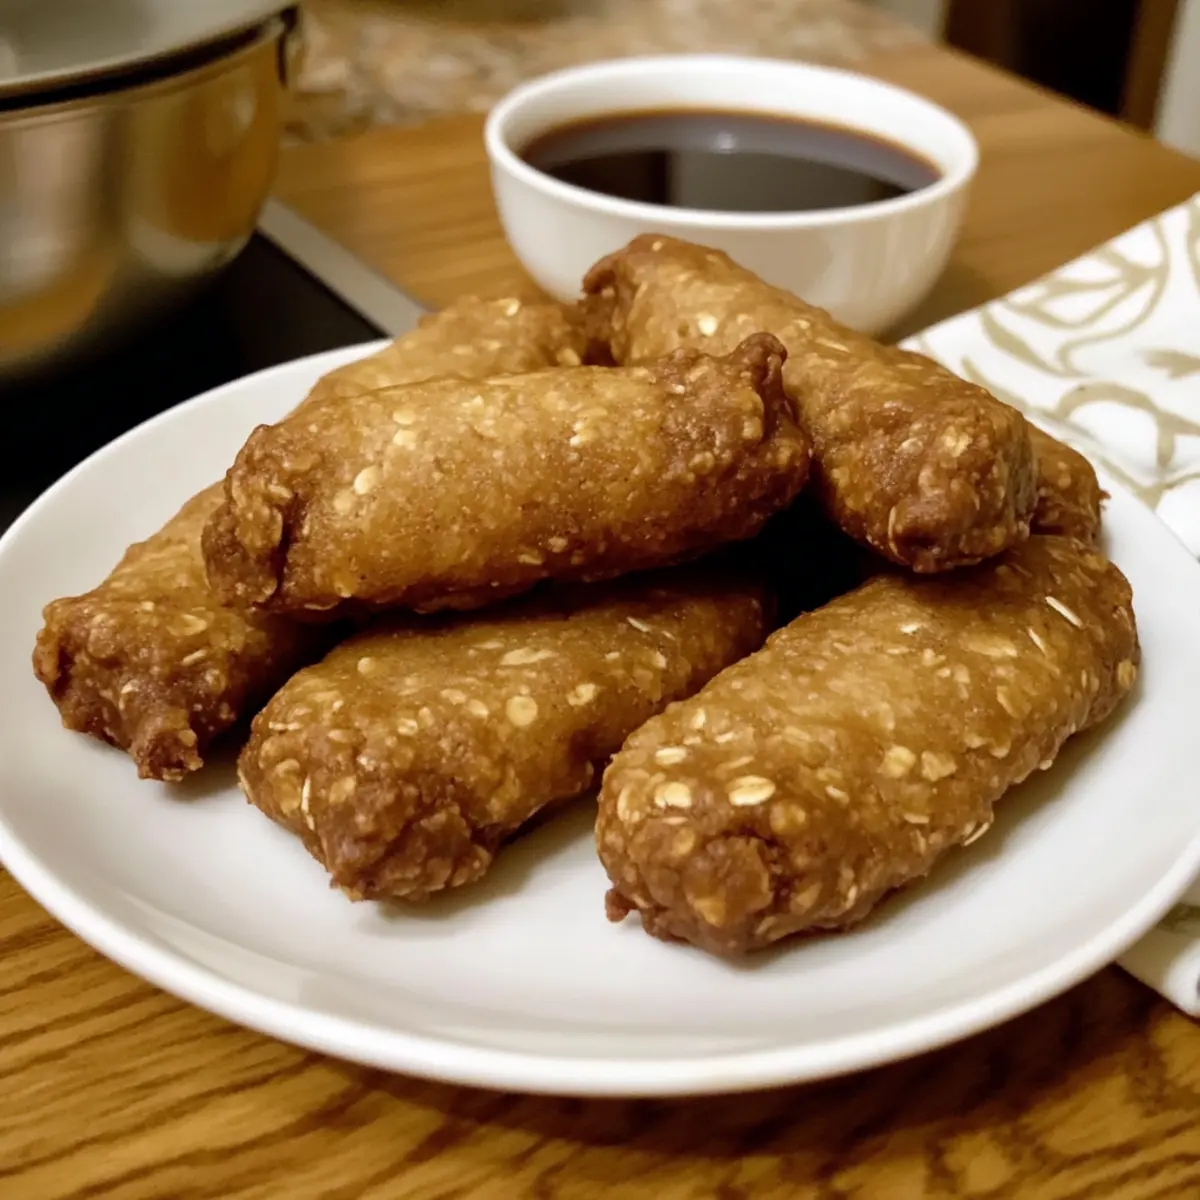
Set up a breading station with one bowl containing beaten eggs and another with breadcrumbs. Dip each croquette first into the egg mixture, letting the excess drip off, then roll it in breadcrumbs, pressing gently to adhere. This double-coating ensures a crunchy and golden exterior. Repeat for all croquettes, then set aside.
Step 6: Fry or Bake the Croquettes
For frying, heat vegetable oil in a deep skillet over medium heat until shimmering. Carefully add the croquettes in batches and fry for about 3-4 minutes per side until golden brown. Alternatively, preheat your oven to 375°F and place the breaded croquettes on a baking sheet. Bake for 15-20 minutes until they’re crisp and golden, turning halfway through for even cooking.
Step 7: Serve Warm
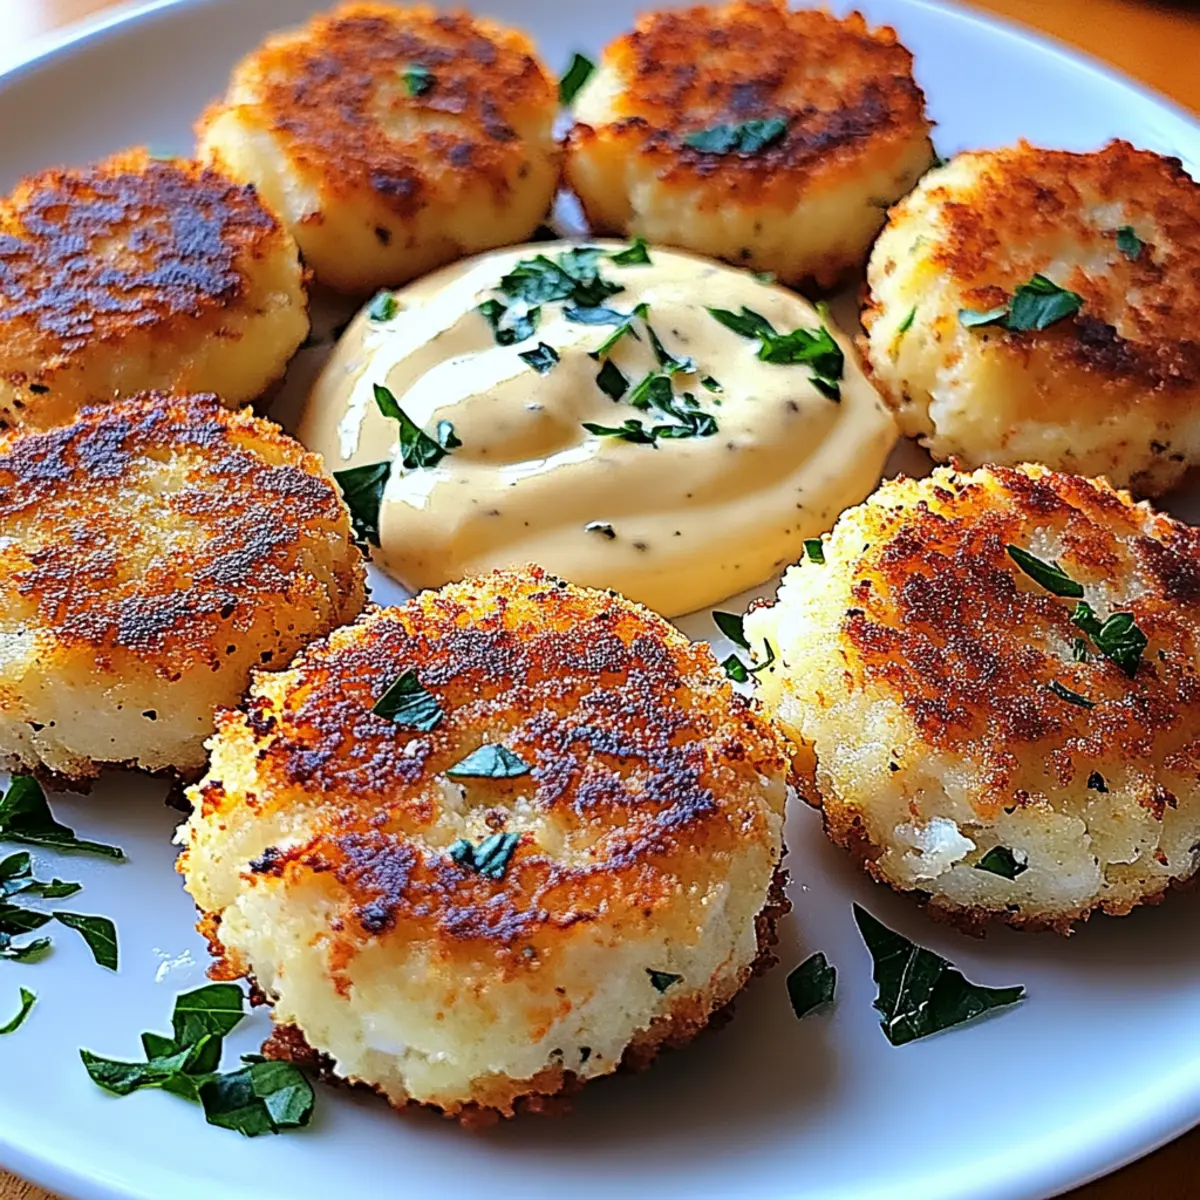
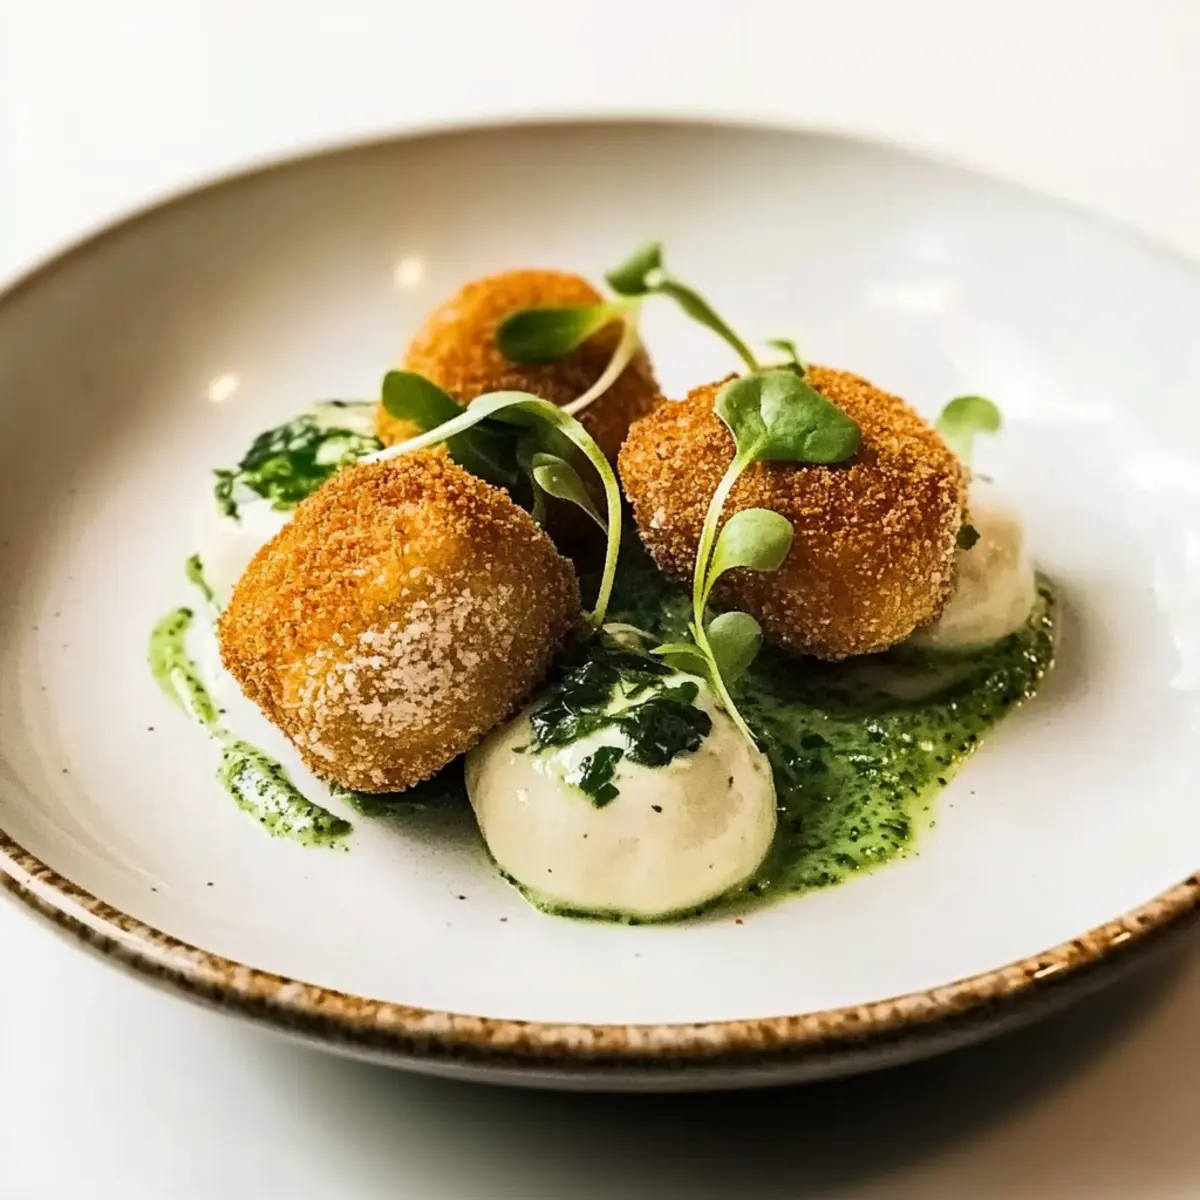
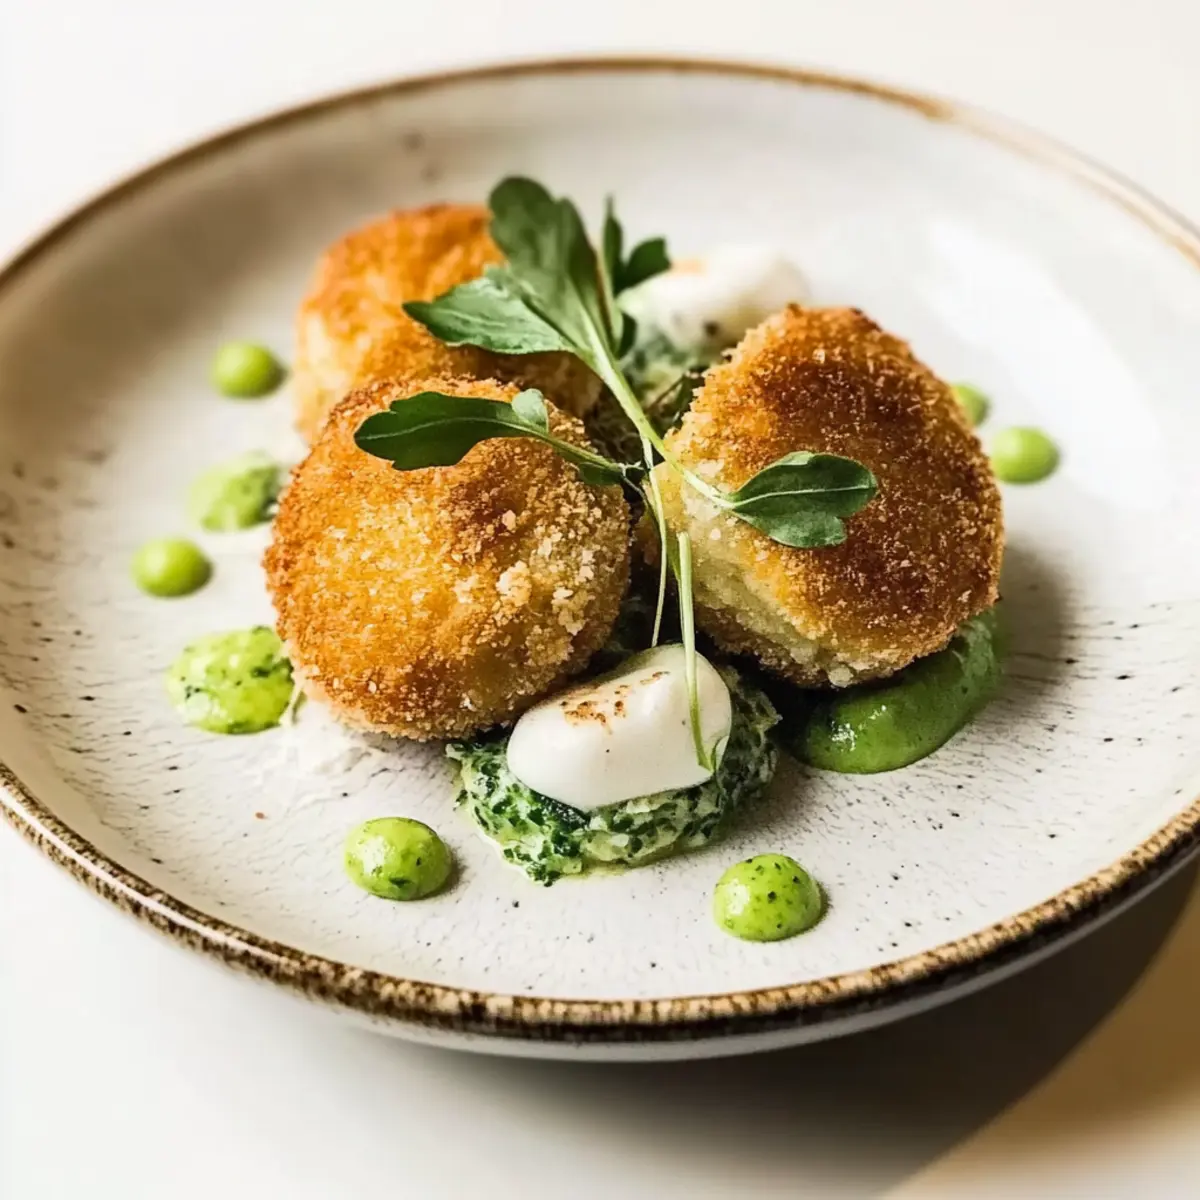
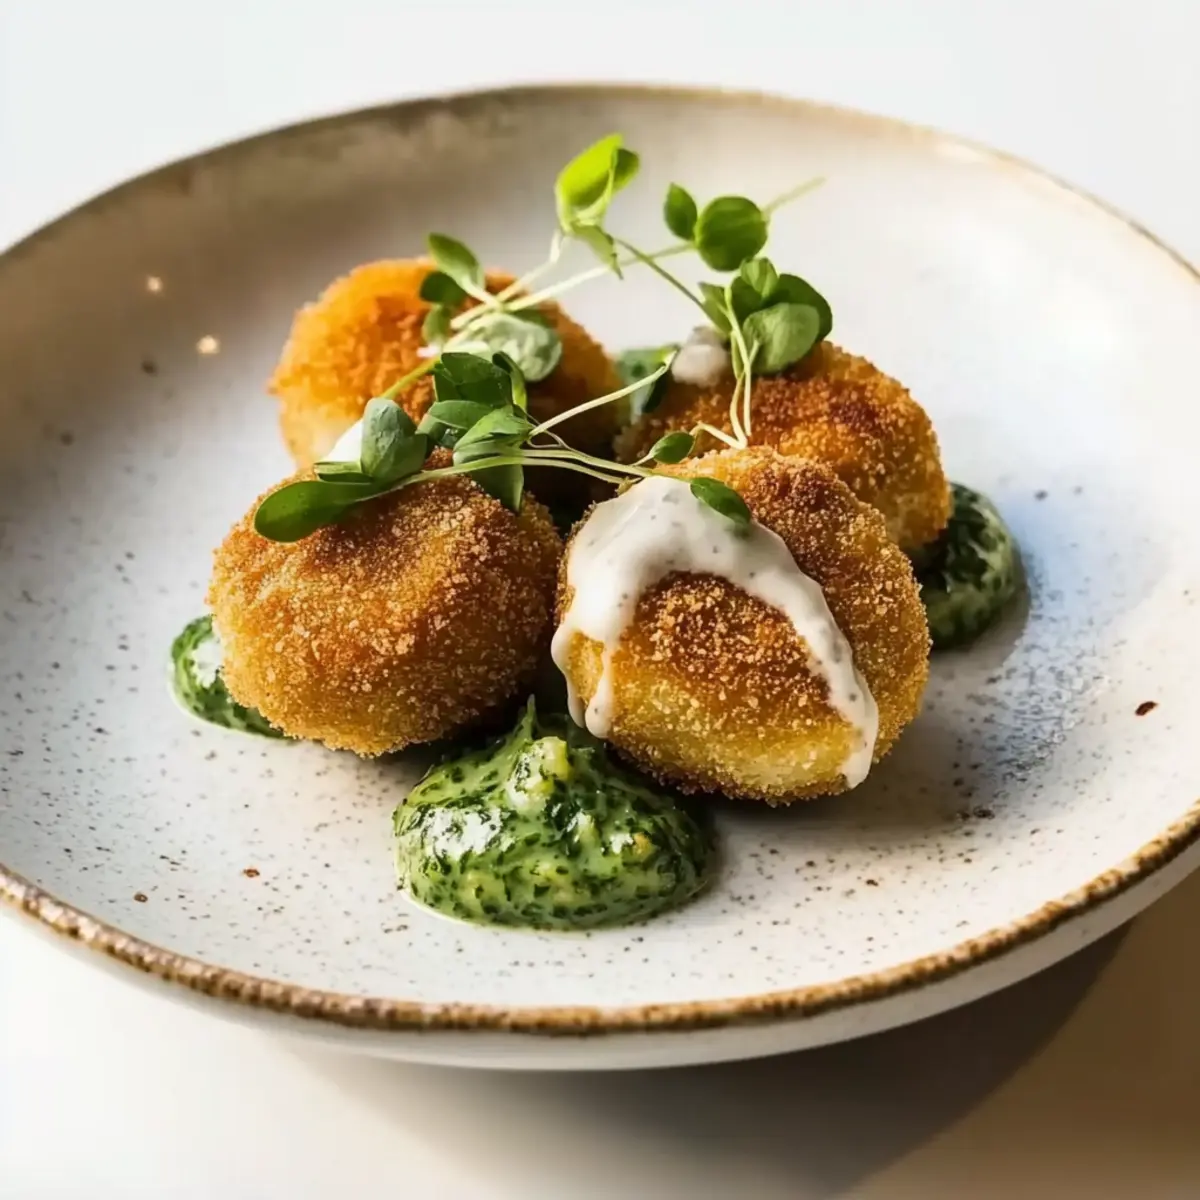
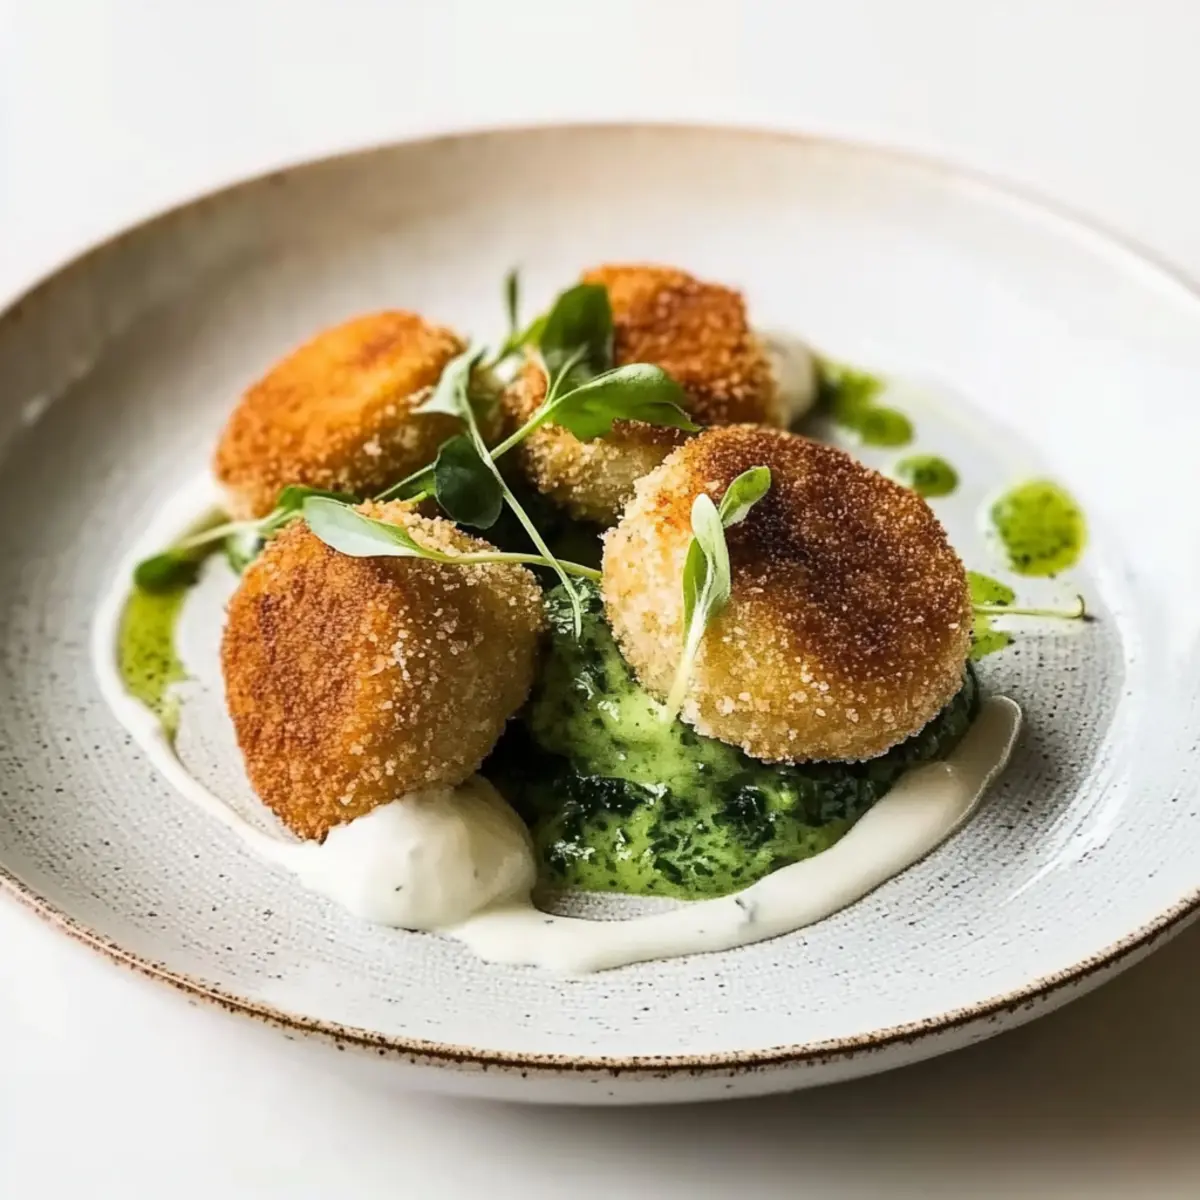
Once the Portuguese Shrimp Croquettes are beautifully golden, transfer them to a plate lined with paper towels to absorb excess oil if fried. Serve them warm with lemon wedges and a tangy dipping sauce like aioli or marinara for an extra burst of flavor. These crispy bites are a delightful treat that you and your guests will come back for time and time again!

Expert Tips for Portuguese Shrimp Croquettes
• Fresh Ingredients: Use fresh shrimp and herbs for the best flavor; frozen options might lack freshness in taste.
• Avoid Overcooking: Make sure to cook the shrimp just until pink; overcooking can result in a rubbery texture in your Portuguese Shrimp Croquettes.
• Crispy Coating: Press the breadcrumbs firmly onto each croquette to ensure a nice golden crust when frying or baking.
• Chill Before Coating: If the mixture feels too soft, chill it in the refrigerator for about 30 minutes; this helps in shaping and coating.
• Spice It Up: Don’t hesitate to add your favorite spices like smoked paprika or cayenne for an extra kick in your croquettes!
Make Ahead Options
These Portuguese Shrimp Croquettes are perfect for meal prep enthusiasts! You can prepare the shrimp mixture and mashed potatoes up to 24 hours in advance, refrigerating them separately to maintain their freshness. To do this, simply cool the mashed potatoes completely before placing them in an airtight container, and store the cooked shrimp mixture in another container. When you're ready to serve, combine the two, shape into croquettes, and coat them just before frying or baking. This way, they retain their delightful texture and flavors, ensuring they come out just as delicious as if made fresh. Enjoy the convenience of having a phenomenal appetizer at your fingertips on busy weeknights!
Portuguese Shrimp Croquettes Variations
Feel free to get creative and customize your croquettes to suit your taste and dietary preferences!
-
Seafood Swap: Use crab or lobster instead of shrimp for a luxurious twist. Both options add a delightful richness!
-
Spicy Kick: Mix in smoked paprika or cayenne pepper for a fun heat that dances on your palate. A small pinch can transform the flavor profile!
-
Cheesy Goodness: Incorporate crumbled feta or shredded cheddar into the filling for added creaminess. Cheese can make these bites extra indulgent.
-
Herb Infusion: Swap traditional parsley for fresh dill or basil to change the herbaceous notes. Each herb offers a unique twist on flavor that can brighten each croquette.
-
Texture Boost: Add finely chopped vegetables like bell peppers or zucchini to the mixture for extra crunch and nutrition. This addition not only brightens the color but also adds a satisfying texture!
-
Vegan Version: Replace shrimp with mashed beans or chickpeas, and use a flaxseed mixture instead of eggs to bind everything together. These flavorful bites still celebrate the spirit of the originals!
-
Baked Variation: Skip the frying and bake your croquettes for a healthier option. Bake at 400°F for 20-25 minutes for a lighter, yet still crispy, result.
-
Dipping Sauces: Elevate your serving experience with different sauces like spicy aioli or a tangy yogurt dip. Experimenting with sauces can change the whole vibe of your meal!
You might find these tips helpful when crafting your perfect croquettes! Explore other delicious options like Shrimp Tacos Zesty or a lively Turmeric Dill Shrimp Stir Fry for even more flavorful ideas.
What to Serve with Crispy Portuguese Shrimp Croquettes
The perfect meal is just a few delightful pairings away, ensuring every bite of these croquettes shines.
- Creamy Garlic Mashed Potatoes: Their rich texture complements the crunch of croquettes, making each mouthful a comforting delight.
- Zesty Coleslaw: A refreshing crunch that adds a tangy contrast, elevating the dish with vibrant flavors.
- Garlic Butter Asparagus: Tender asparagus drizzled with garlic butter brings a touch of elegance and earthiness to the table. Pairing them adds a nutritious boost alongside your crispy bites.
- Lemon Wedges: Freshly squeezed juice brightens the savory shrimp flavors, enhancing the experience with a zesty kick that dances on your palate.
- Aioli Dipping Sauce: A creamy partner that perfectly complements the robust flavors of the croquettes, inviting everyone to dip and savor.
- Crisp White Wine: A chilled glass enhances the seafood notes, offering a refreshing balance to the rich, fried bites while ensuring the meal feels special.
- Marinara Sauce: A classic choice that adds a tangy sweetness, creating a delicious balance with the savory shrimp filling.
How to Store and Freeze Portuguese Shrimp Croquettes
Room Temperature: Store cooked croquettes at room temperature for a maximum of 2 hours. They’re best enjoyed immediately after cooking for optimal taste and texture.
Fridge: Keep leftover croquettes in an airtight container in the fridge for up to 3 days. To reheat, simply warm them in the oven at 350°F for about 10-15 minutes to restore their crispiness.
Freezer: For longer storage, freeze uncooked croquettes on a baking sheet until solid, then transfer them to a freezer bag for up to 3 months. Cook from frozen, adding a couple of extra minutes to the frying or baking time.
Reheating: When reheating cooked Portuguese Shrimp Croquettes, place them on a baking sheet in a preheated oven at 350°F for about 10 minutes to achieve a crispy texture.

Portuguese Shrimp Croquettes Recipe FAQs
How do I select the best shrimp for my croquettes?
Absolutely! When choosing shrimp, look for fresh or previously frozen shrimp that are firm, have a clean, ocean-like smell, and are free of dark spots or strong odor. If you choose frozen shrimp, make sure they are completely thawed before use. Wild-caught shrimp often have a better flavor compared to farmed varieties.
How should I store leftover croquettes?
You can store leftover Portuguese Shrimp Croquettes in an airtight container in the fridge for up to 3 days. To reheat while preserving their crispiness, place them on a baking sheet in a preheated oven at 350°F for about 10-15 minutes. This way, you can enjoy them just as they were when freshly made!
Can I freeze uncooked croquettes?
Yes! To freeze uncooked Portuguese Shrimp Croquettes, arrange them in a single layer on a baking sheet and place them in the freezer until they’re solid, about 1-2 hours. Once frozen, transfer them to a freezer bag for up to 3 months. When you're ready to cook, no need to thaw! Just fry or bake them straight from the freezer, adding a couple of extra minutes to the cooking time.
What should I do if my croquette mixture is too wet to form?
If your mixture seems too wet, don’t worry! You can chill it in the refrigerator for about 30 minutes. This helps firm it up, making it easier to shape into croquettes. Additionally, consider adding a bit more breadcrumbs to absorb excess moisture, but be cautious not to overwhelm the mixture.
Are these croquettes pet-friendly or allergen-free?
While Portuguese Shrimp Croquettes are a delicious human treat, they are not recommended for pets, especially since shrimp can be an allergen for some animals. For allergy concerns, always check for potential allergens in your ingredients, and if serving to guests with specific dietary needs, consider using gluten-free breadcrumbs or substituting shrimp with alternative proteins like chicken or vegetables.
How can I make the croquettes spicier?
Very! You can easily amp up the spice level by incorporating smoked paprika, cayenne pepper, or even finely chopped jalapeños into the shrimp mixture. Start with a small amount and taste the mixture before frying to achieve your desired level of heat. Enjoy experimenting with flavors!

Delicious Portuguese Shrimp Croquettes You’ll Love to Make
Ingredients
Equipment
Method
- Prepare the mashed potatoes by boiling peeled potatoes until fork-tender, drain, mash, and let them cool completely.
- In a skillet, heat oil and sauté minced garlic for 1 minute, add shrimp and cook until pink and opaque, then chop finely.
- Combine cooled mashed potatoes with the shrimp mixture in a large bowl; stir until evenly mixed.
- Wet hands, scoop portions of the mixture, and shape them into small oval or round croquettes.
- Set up a breading station with beaten eggs and breadcrumbs, dip each croquette, and ensure the coating adheres.
- Fry croquettes in vegetable oil until golden brown or bake at 375°F for 15-20 minutes until crisp.
- Serve warm with lemon wedges and a tangy dipping sauce.