tastytrendingredients

  • Home
  • Recipes
    • Appetizers
    • Breakfast
    • Dessert
    • Dinner
    • Drinks
    • Salads
    • Snacks
    • Soups
  • About me
  • Contact
menu icon
go to homepage
  • Home
  • Recipes
    • Appetizers
    • Breakfast
    • Dessert
    • Dinner
    • Drinks
    • Salads
    • Snacks
    • Soups
  • About me
  • Contact
search icon
Homepage link
  • Home
  • Recipes
    • Appetizers
    • Breakfast
    • Dessert
    • Dinner
    • Drinks
    • Salads
    • Snacks
    • Soups
  • About me
  • Contact
×

Hot Honey Ricotta Dip: Creamy Sweetness for Any Gathering

December 30, 2025 by Grace Snow Leave a Comment

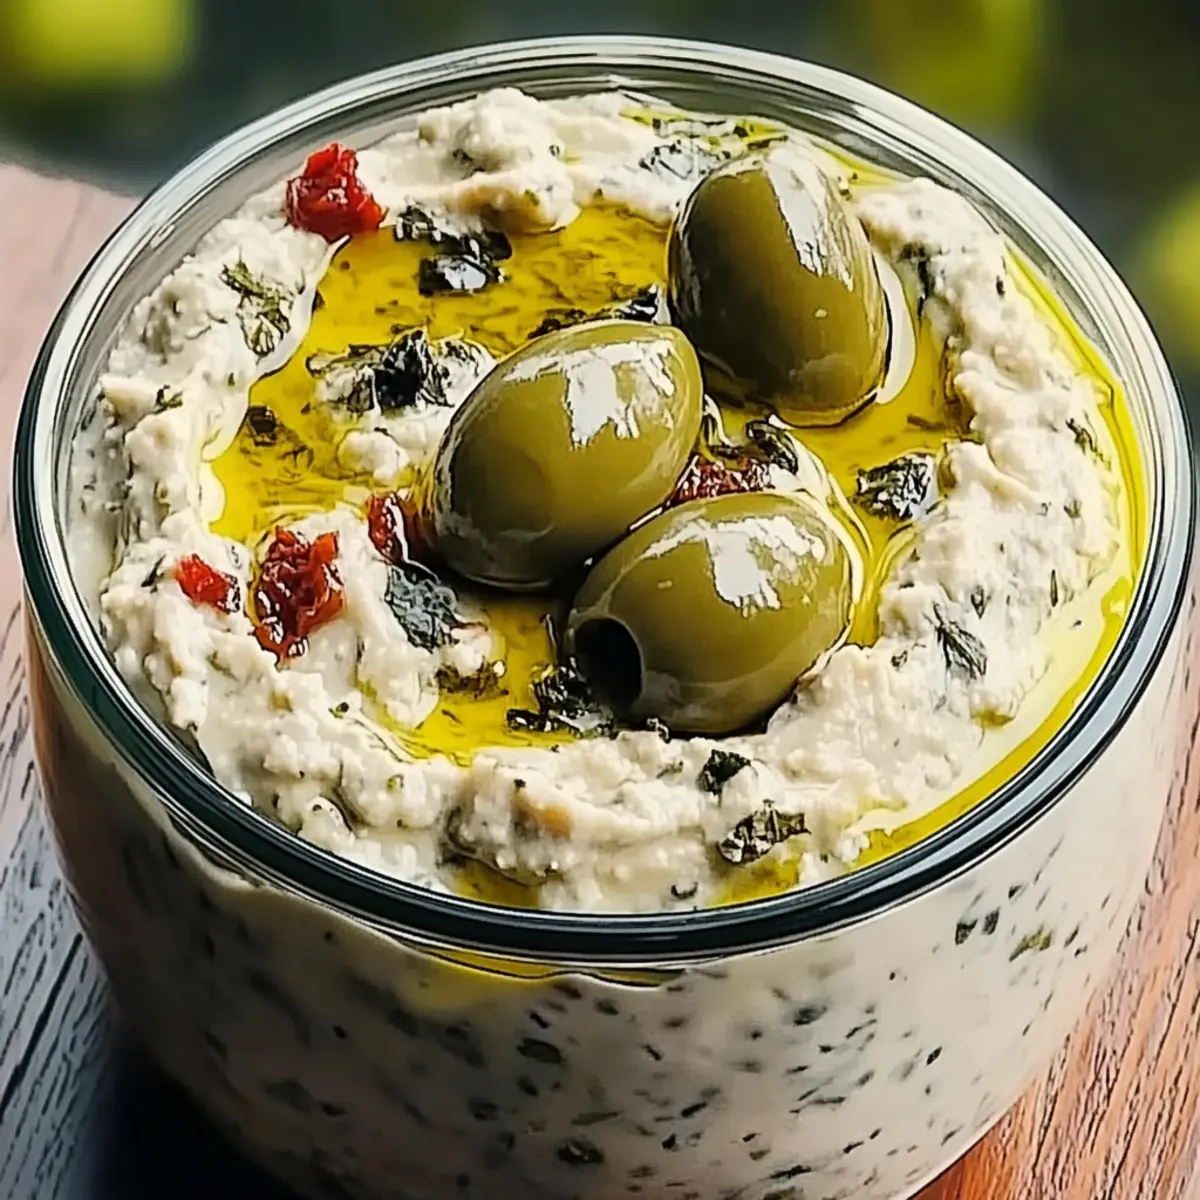
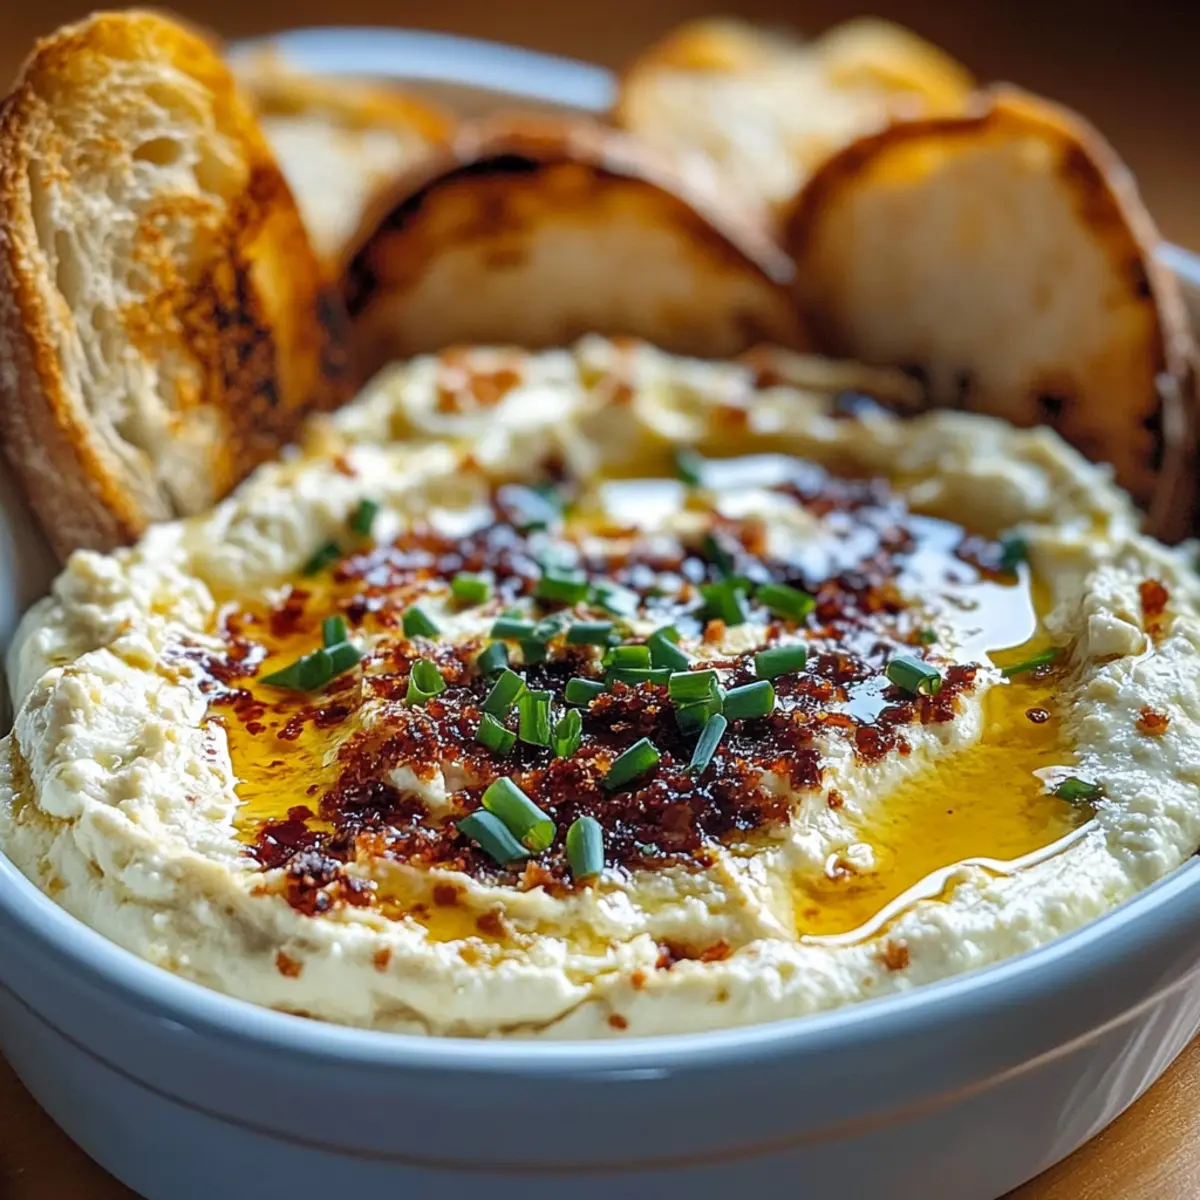
As the oven warms, the savory scent of melting cheese begins to fill the air—it's moments like these that turn an ordinary evening into something memorable. This Hot Honey Ricotta Dip is the perfect answer for those last-minute gatherings when you want to impress without the stress. With just 25 minutes of your time, you’ll whip up a cheesy delight that seamlessly blends creamy ricotta and tangy Parmesan with the exciting kick of hot honey. Not only is it incredibly easy to prepare, but it’s also a vegetarian crowd-pleaser that pairs wonderfully with crusty bread or crunchy crackers. Imagine your friends diving into this gooey, sweet-and-spicy dip, delighting in each bite. Are you ready to elevate your appetizer game? Let’s dive in!

Why is this dip a must-try?

Unforgettable Flavor: The harmonious blend of creamy ricotta and sharp Parmesan creates a taste experience that’s simply irresistible.

Quick and Easy: In just 25 minutes, you’ll have an elegant appetizer ready to impress your guests.

Versatile Pairing: Perfect with crusty bread or crunchy crackers, this dip can also complement fresh veggie sticks for a delightful contrast.

Crowd-Pleaser: Its combination of sweet and spicy flavors ensures everyone will be coming back for more!

Culinary Twist: Inspired by classic Italian cuisine, this dip adds a modern flair that guests will love, whether it's a casual get-together or a fancy soirée. Don’t forget to check out our recipes for Lemon Ricotta Protein and Herby Ricotta Stuffed for more ricotta inspiration!

Hot Honey Ricotta Dip Ingredients

• Prepare yourself for a flavorful experience!

For the Dip

  • Whole Milk Ricotta Cheese – This creamy base ensures a luxurious texture; try part-skim ricotta for a lighter option.
  • Grated Parmesan Cheese – Adds a sharp, savory note; substitute with Pecorino Romano for something even bolder.
  • Extra-Virgin Olive Oil – Enhances the creaminess; melted butter can be a delicious alternative.
  • Lemon Zest – Brightens the dish with citrus notes; fresh lemon juice works in a pinch.
  • Garlic Powder – Brings depth to flavors; fresh minced garlic can be used, though it alters the dip's texture.
  • Kosher Salt – Balances and enhances taste; adjust to your liking.
  • Freshly Ground Black Pepper – Adds a warm kick; consider white pepper for a milder flavor.
  • Hot Honey – Infuses the dip with sweetness and heat; substitute with regular honey and a dash of cayenne if needed.
  • Chopped Fresh Chives – For a fresh garnish; scallions are an easy swap if chives aren't on hand.

For Serving

  • Crusty Bread or Crackers – Perfect for scooping; feel free to use any variety you love!

This Hot Honey Ricotta Dip is guaranteed to impress your guests while being fun and easy to whip up!

Step‑by‑Step Instructions for Hot Honey Ricotta Dip

Step 1: Preheat and Prepare
Begin by preheating your oven to 375°F (190°C). While the oven warms, lightly grease a baking dish or oven-safe skillet with extra-virgin olive oil. This will help prevent sticking and ensure an easy release once your Hot Honey Ricotta Dip is baked. Get ready to savor the delightful combination of flavors that’s about to unfold!

Step 2: Mix the Dip Ingredients
In a medium mixing bowl, combine whole milk ricotta cheese, grated Parmesan cheese, olive oil, lemon zest, garlic powder, kosher salt, and freshly ground black pepper. Using a spatula or wooden spoon, blend the ingredients until the mixture is smooth and creamy, ensuring no lumps remain. This luscious texture is key to enjoying your Hot Honey Ricotta Dip, so take your time to mix well.

Step 3: Spread in Baking Dish
Once your ricotta mixture is perfectly smooth, transfer it into the prepared baking dish. Use a spatula to spread the mixture evenly, smoothing out the top for an inviting presentation. This ensures uniform heating during baking and a deliciously gooey texture all around, ready to be transformed into an irresistible dip.

Step 4: Bake to Perfection
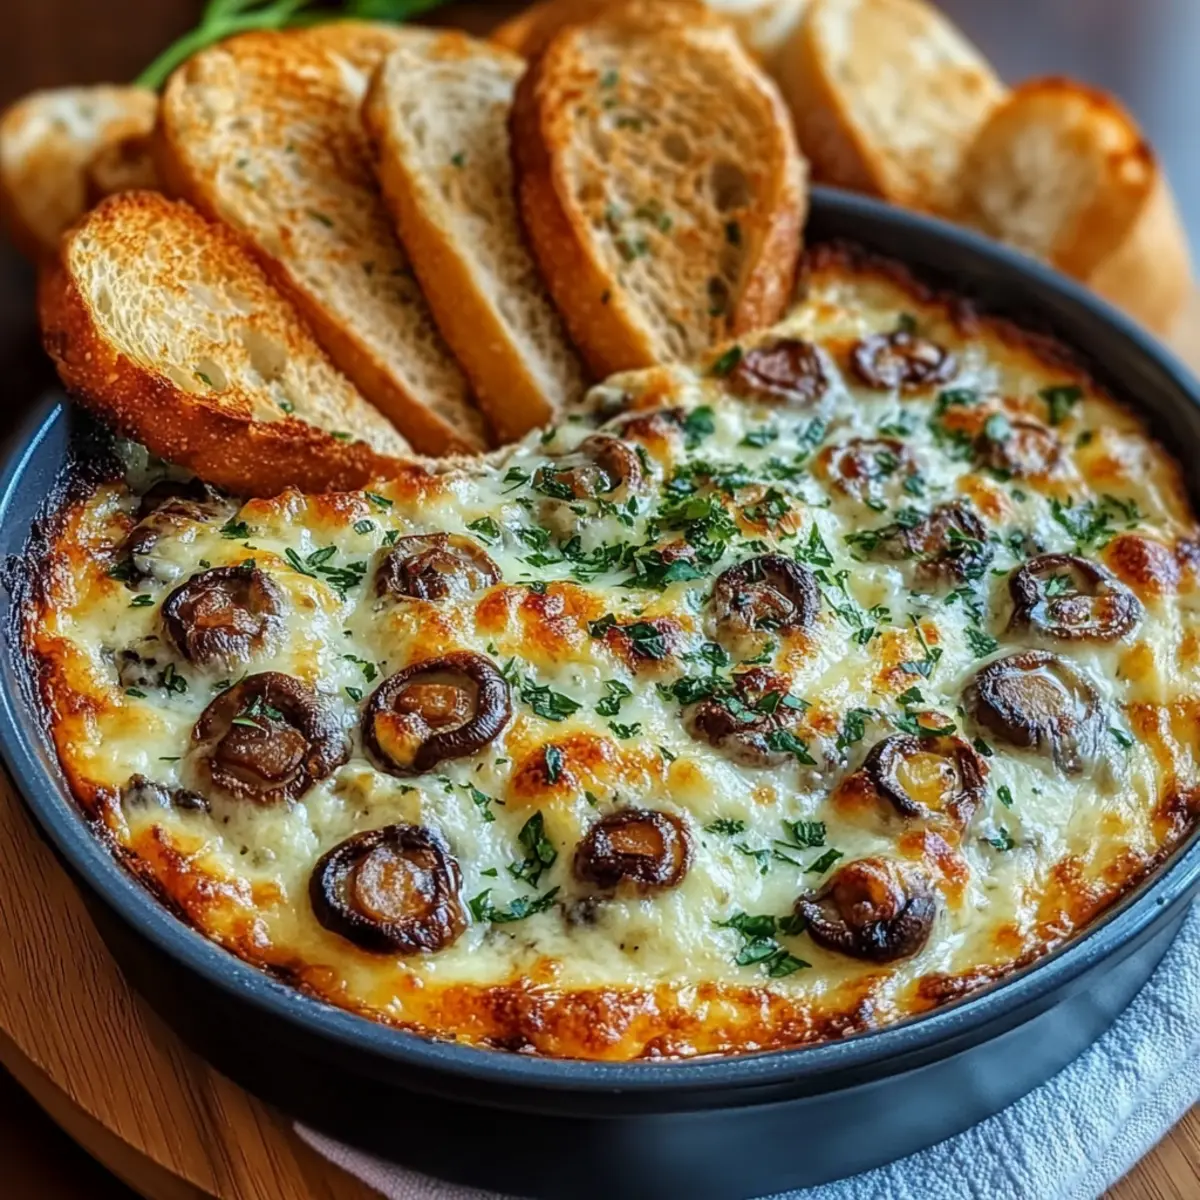
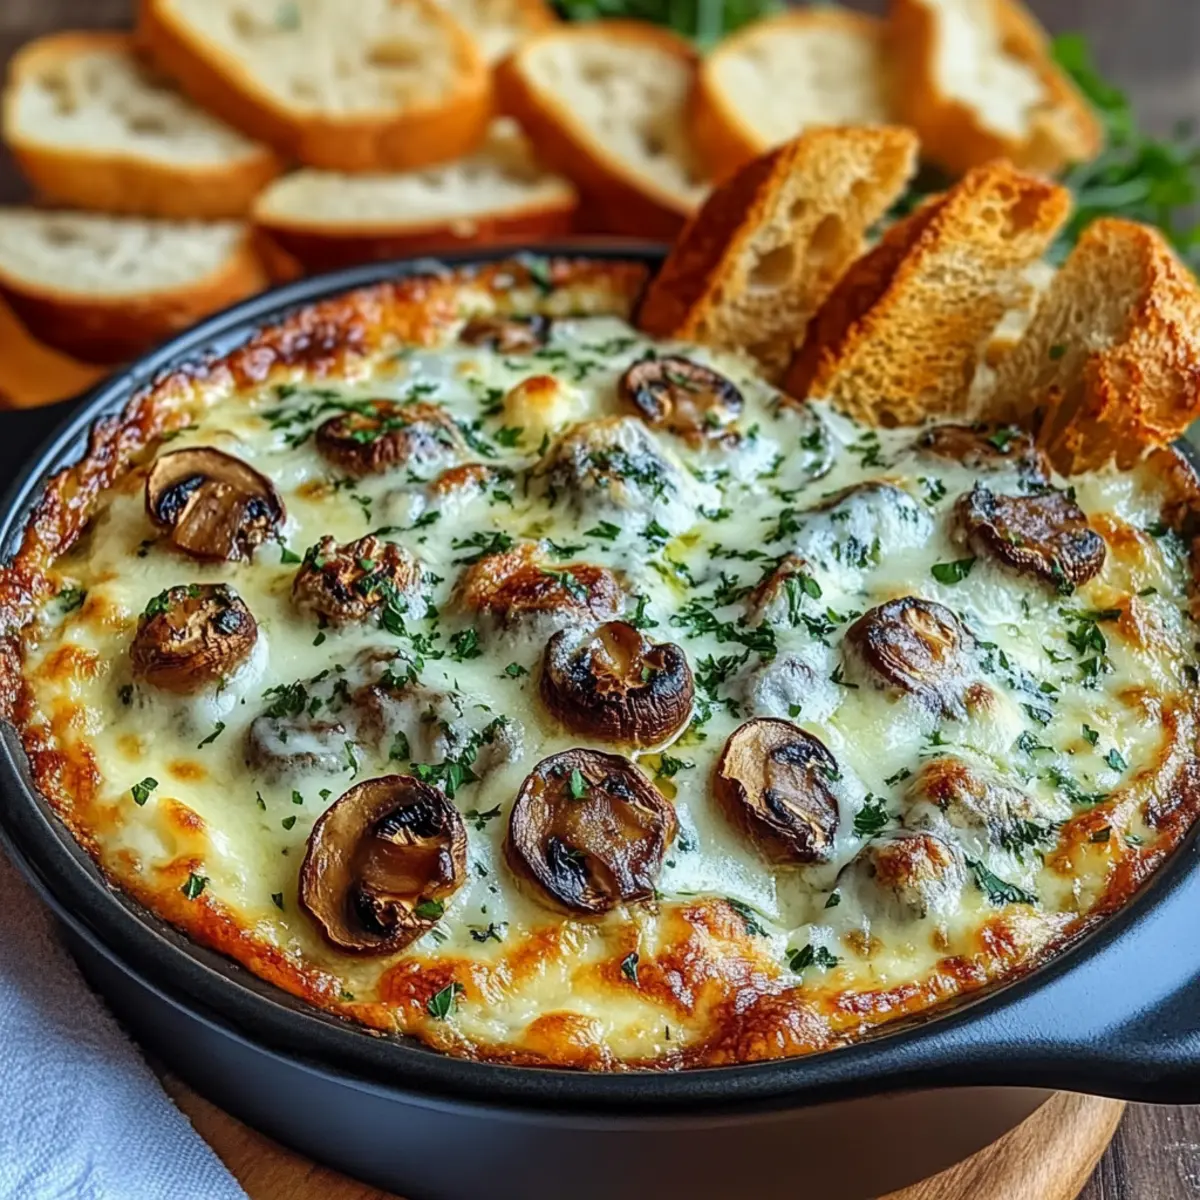
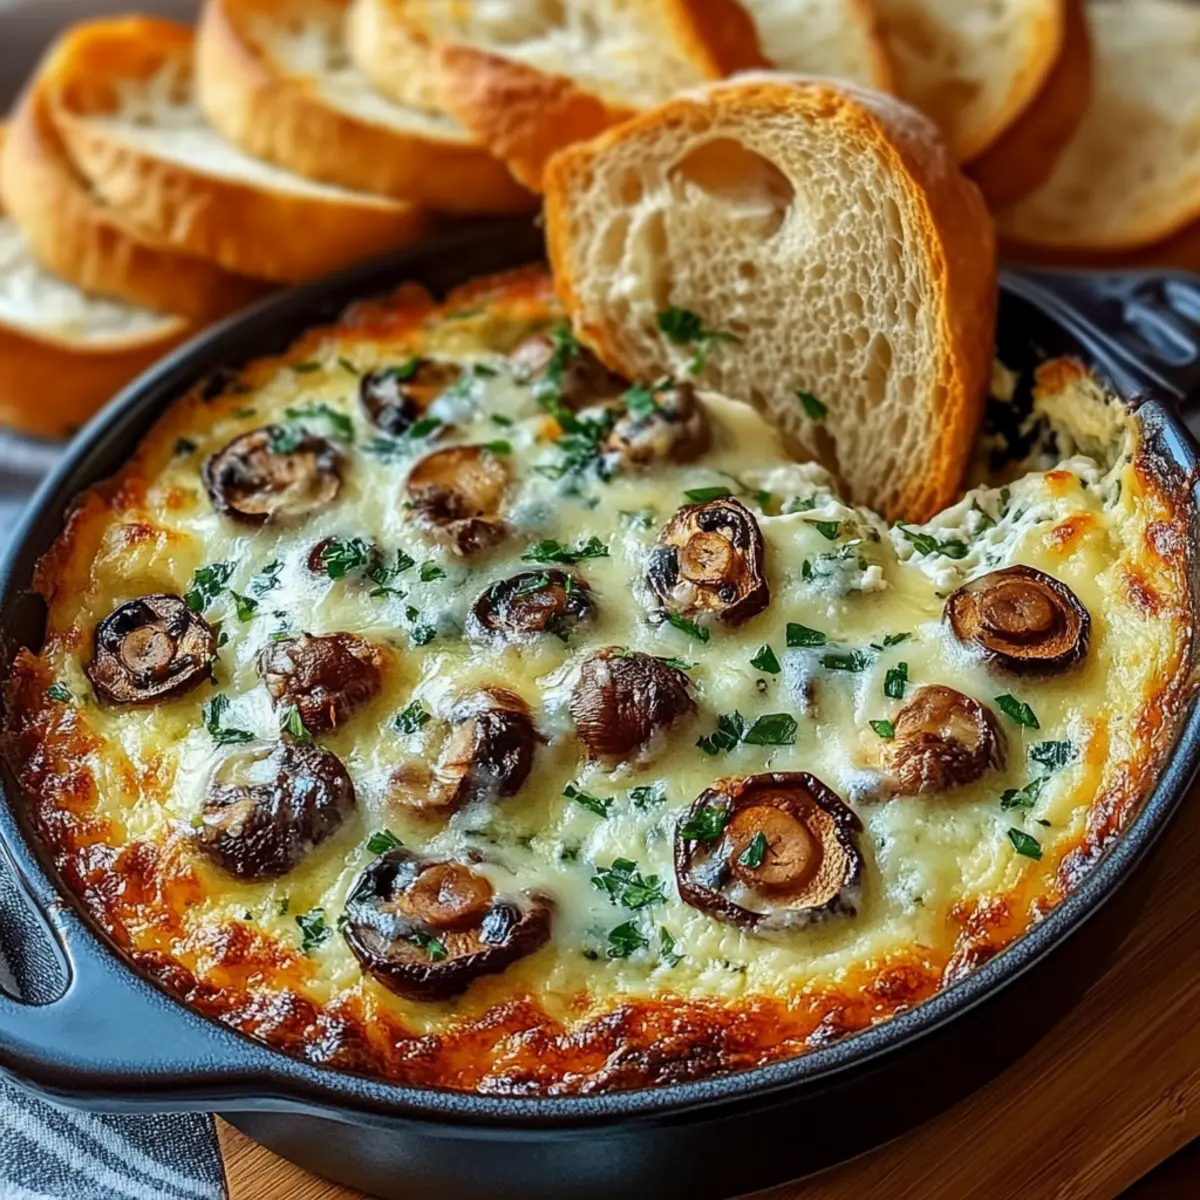
Place the baking dish in the preheated oven and bake for 12-15 minutes. You’ll know it’s ready when the dip is heated through and the top is just beginning to turn golden and bubbly. Keep an eye on it to prevent over-browning, as we want it to be perfectly inviting for dipping into that Hot Honey Ricotta Dip.

Step 5: Drizzle with Hot Honey
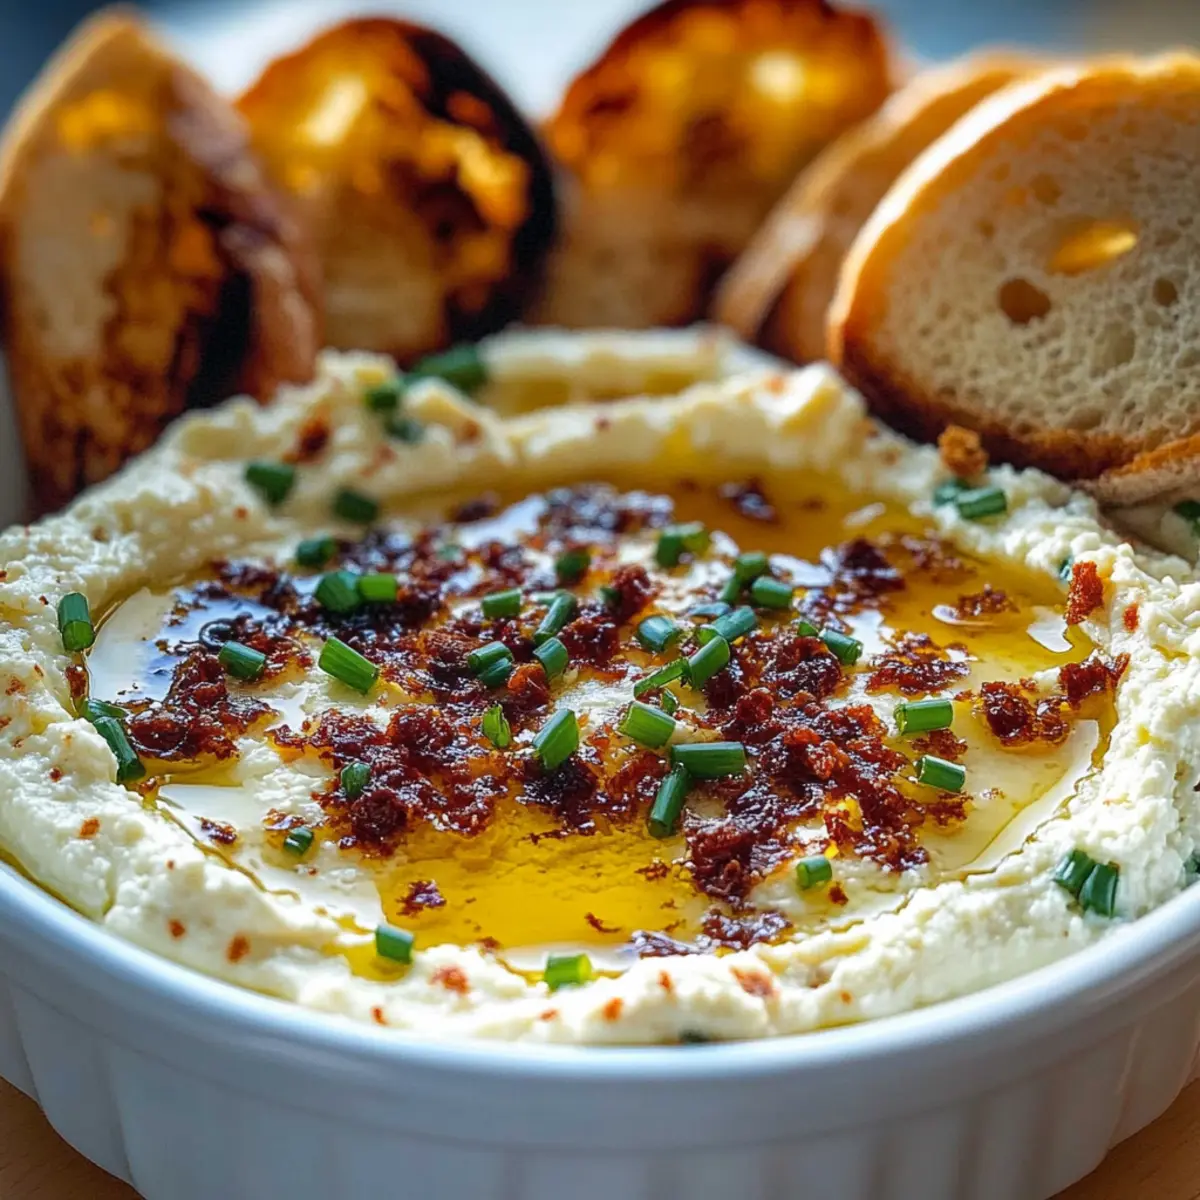
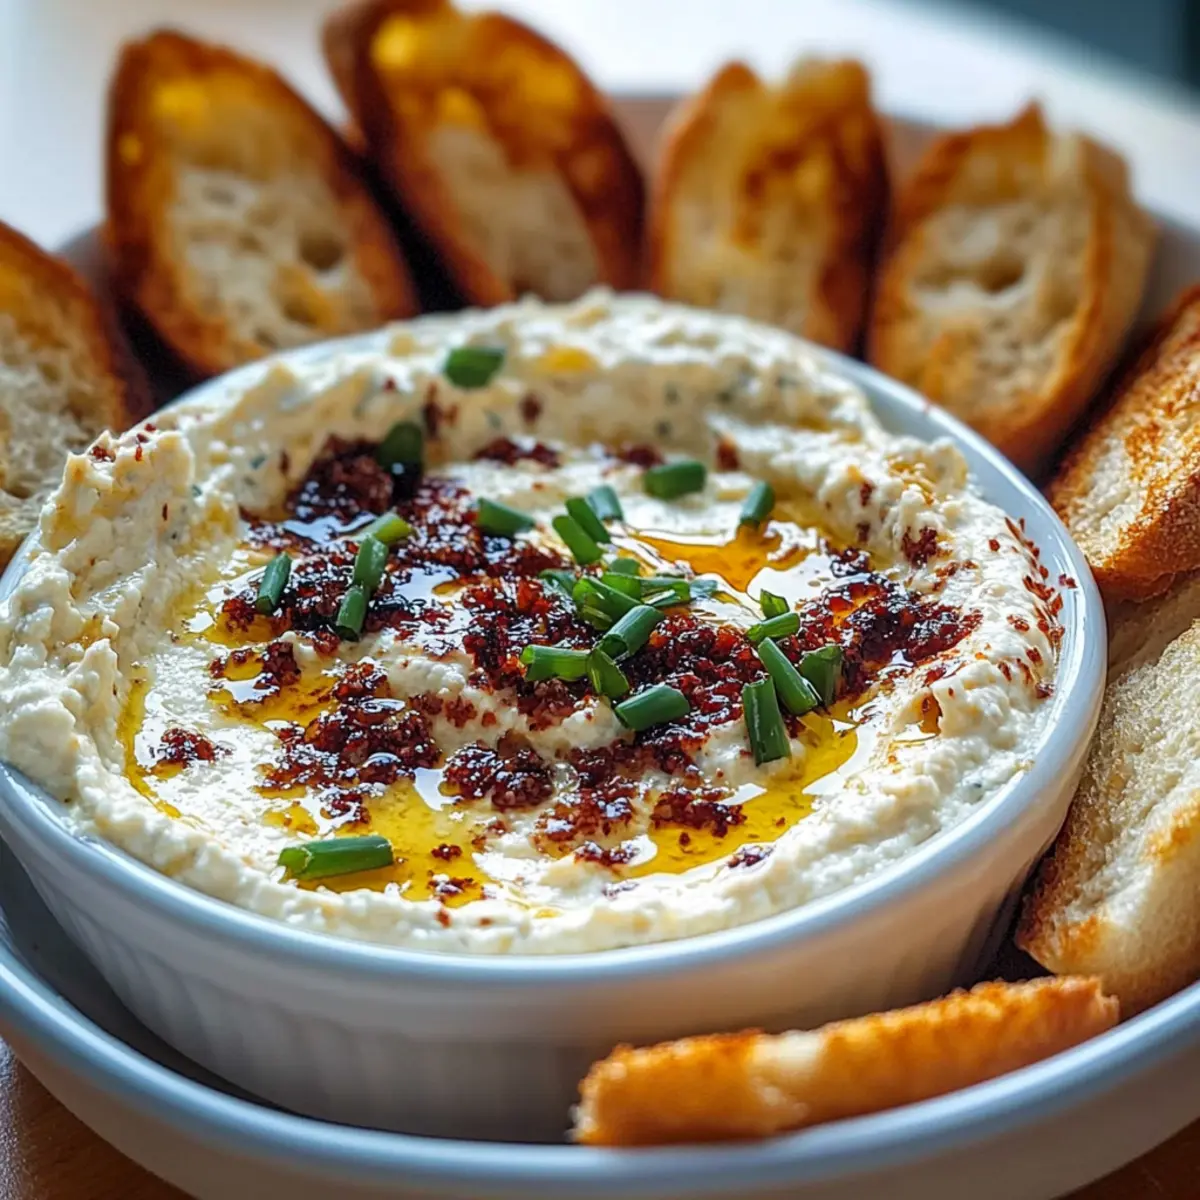
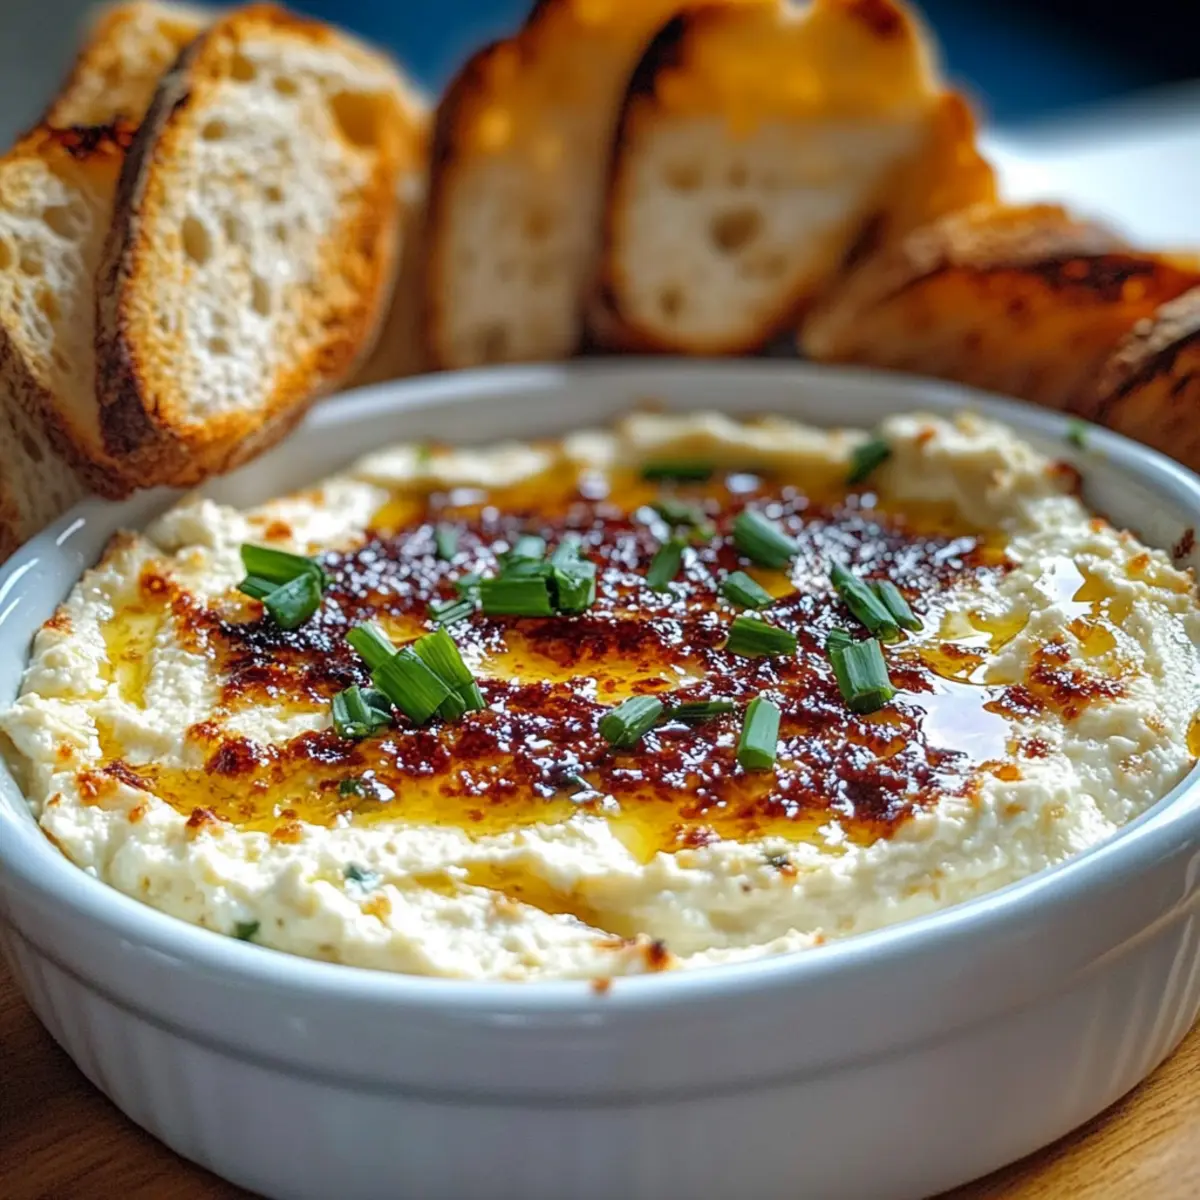
As soon as your dip comes out of the oven, immediately drizzle hot honey over the top. The warmth will enhance its sweet and spicy flavor, creating a beautiful contrast with the creamy cheese. Don’t hold back on that drizzle—this is where the magic happens, adding a gourmet flair to your already delicious Hot Honey Ricotta Dip.

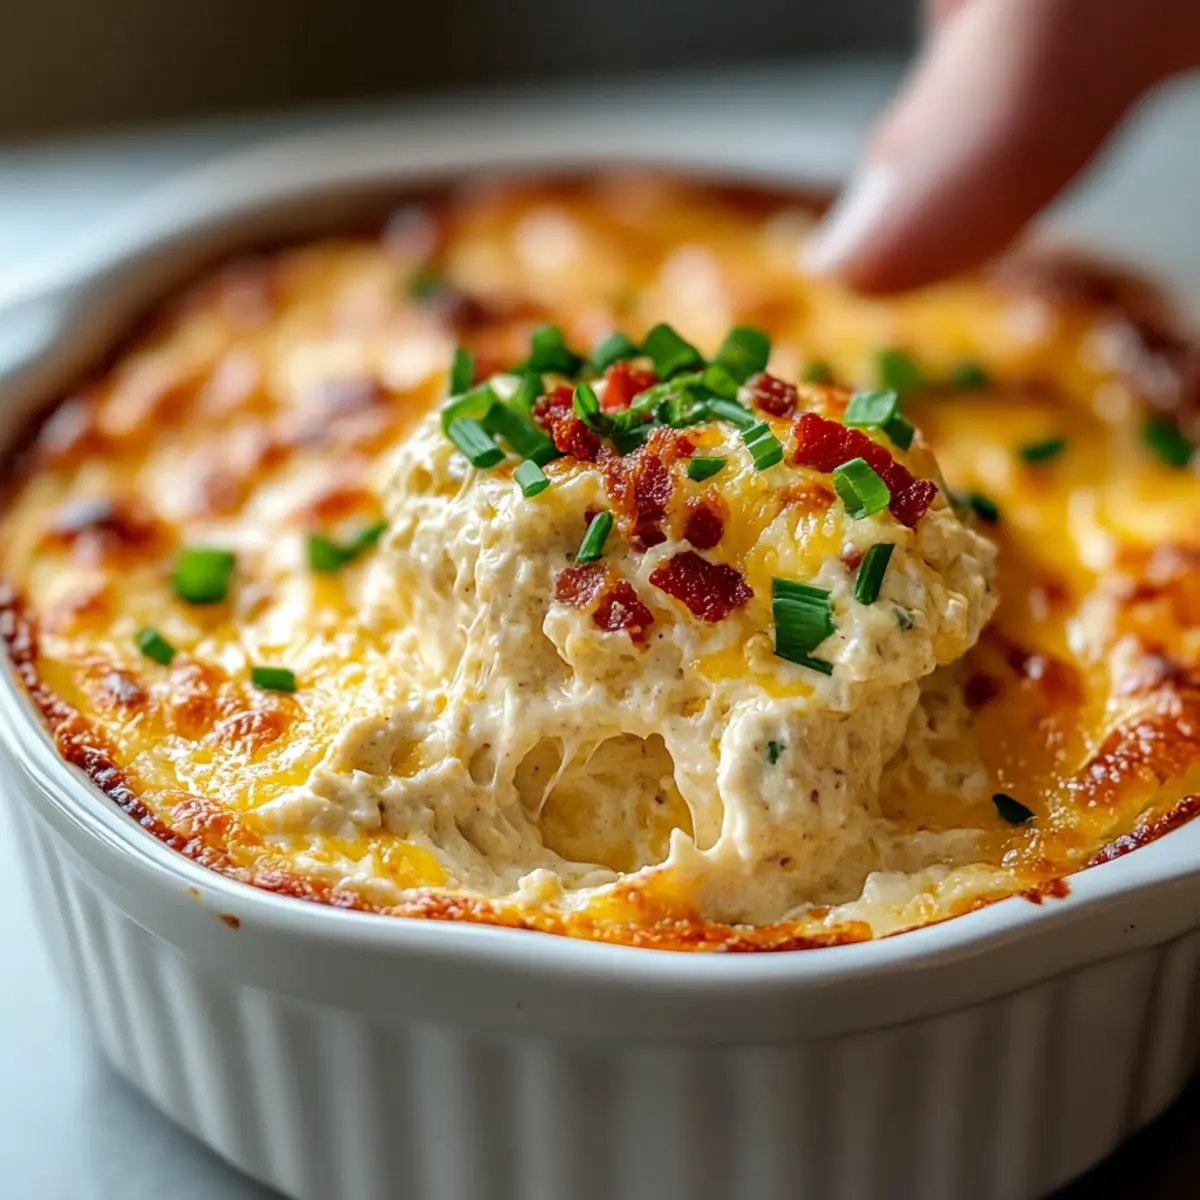
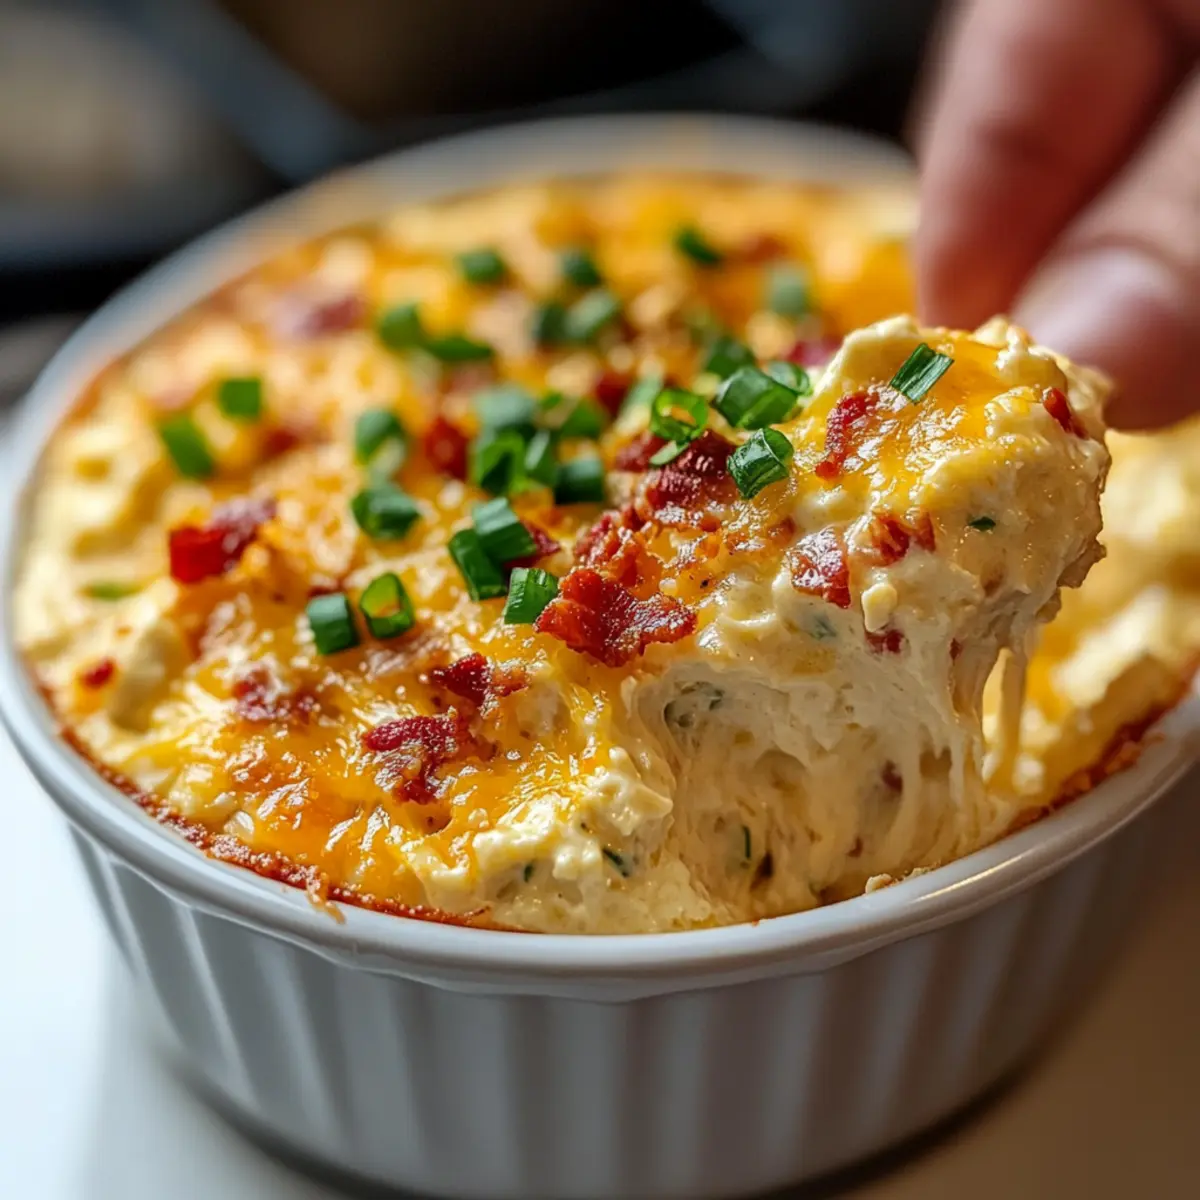
Step 6: Garnish and Serve
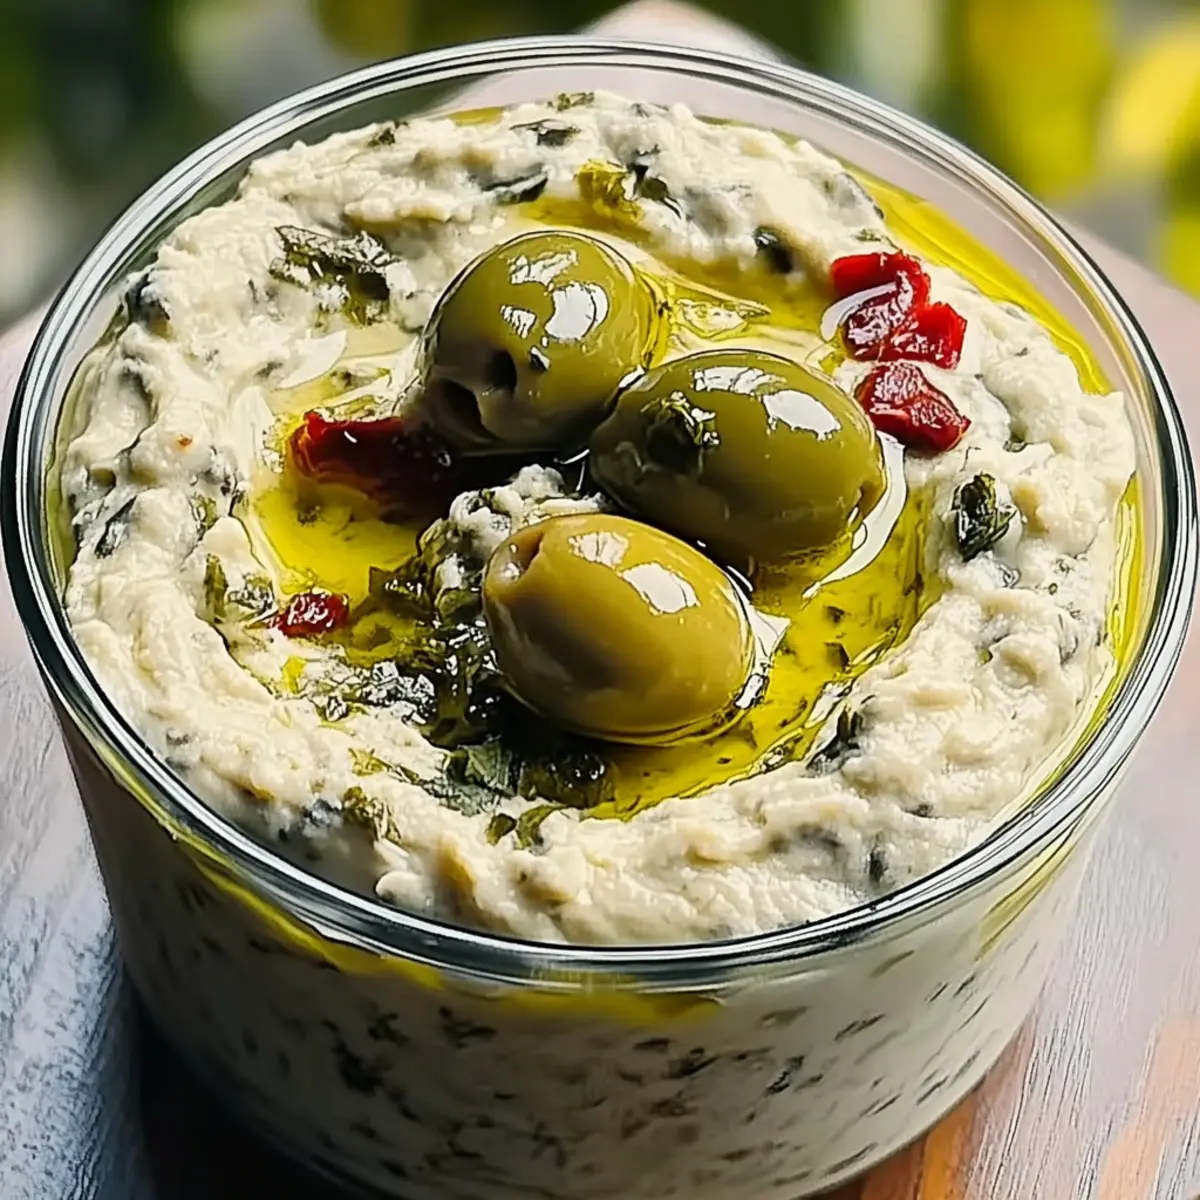
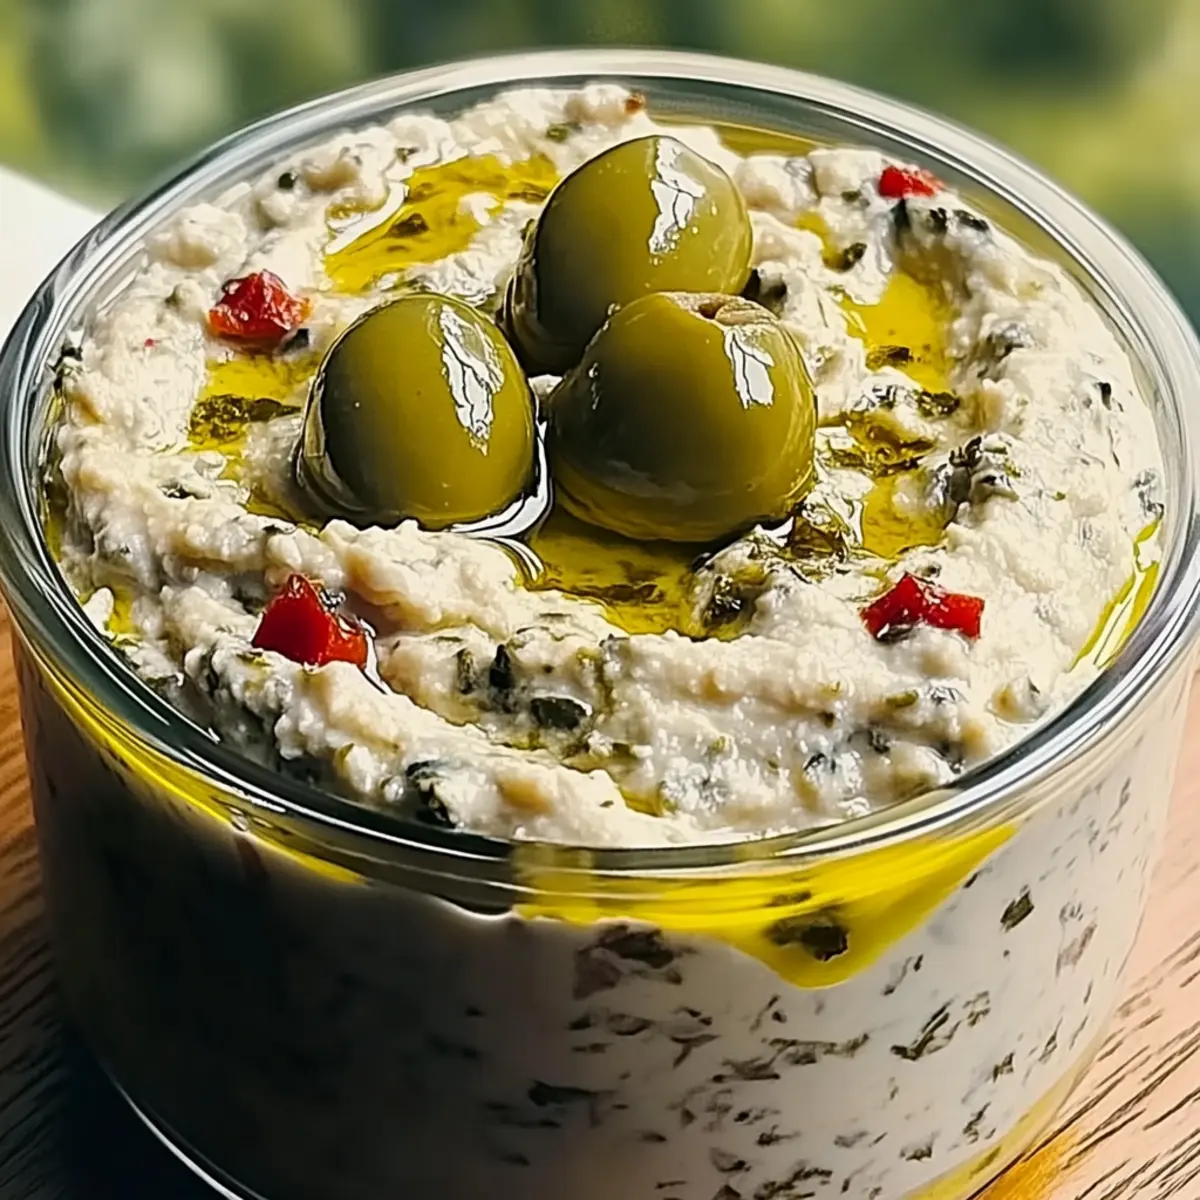
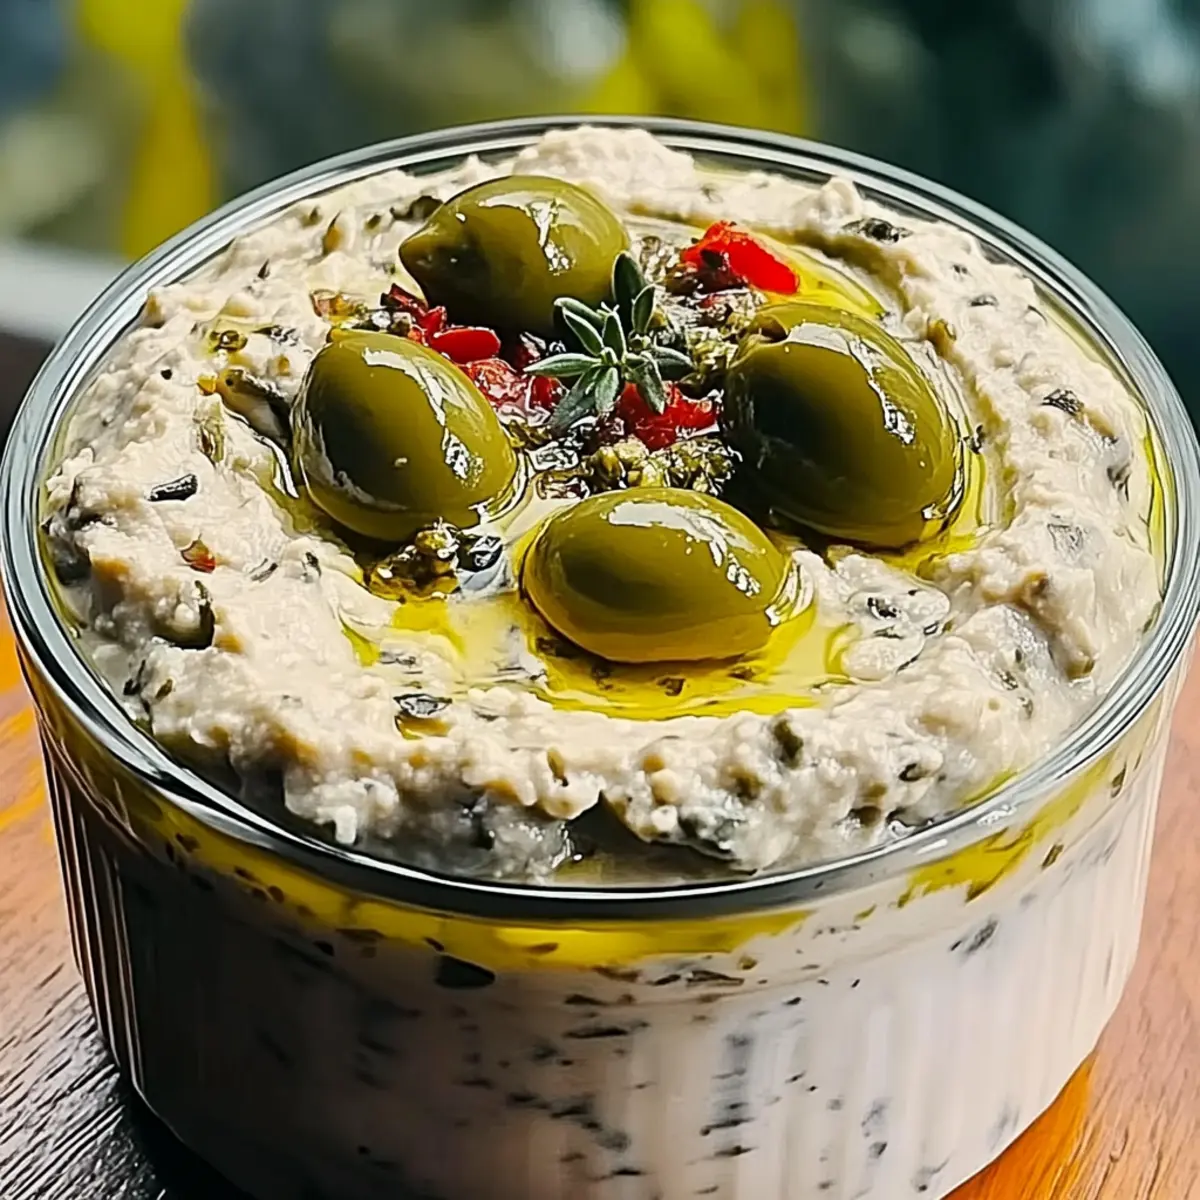
Sprinkle freshly chopped chives over the warm dip for a burst of color and flavor. The chives not only add freshness but also an inviting crunch in every bite. Serve your Hot Honey Ricotta Dip warm alongside crusty bread or crunchy crackers, inviting everyone to dive in and enjoy this delightful appetizer!

Expert Tips for Hot Honey Ricotta Dip

  • Control the Honey Heat: Make sure to monitor the temperature of the hot honey while drizzling it. Scorching can result in bitterness that masks the dip's sweetness.
  • Leftover Storage: Store any leftover Hot Honey Ricotta Dip in an airtight container in the refrigerator. For the best taste, gently reheat before serving.
  • Choose the Right Bread: Opt for crusty bread or thick crackers to scoop this dip—thin crackers may break under the creamy weight, making it tricky to enjoy.
  • Season to Taste: Don’t forget to sample your dip before serving! Adjust salt and pepper to suit your preferences, enhancing the overall flavor.
  • Experiment with Spice: If you love heat, consider adding a sprinkle of crushed red pepper flakes to the mixture before baking for an extra kick in your Hot Honey Ricotta Dip.

Hot Honey Ricotta Dip Variations

Feel free to get creative and make this dip your own with a few simple tweaks!

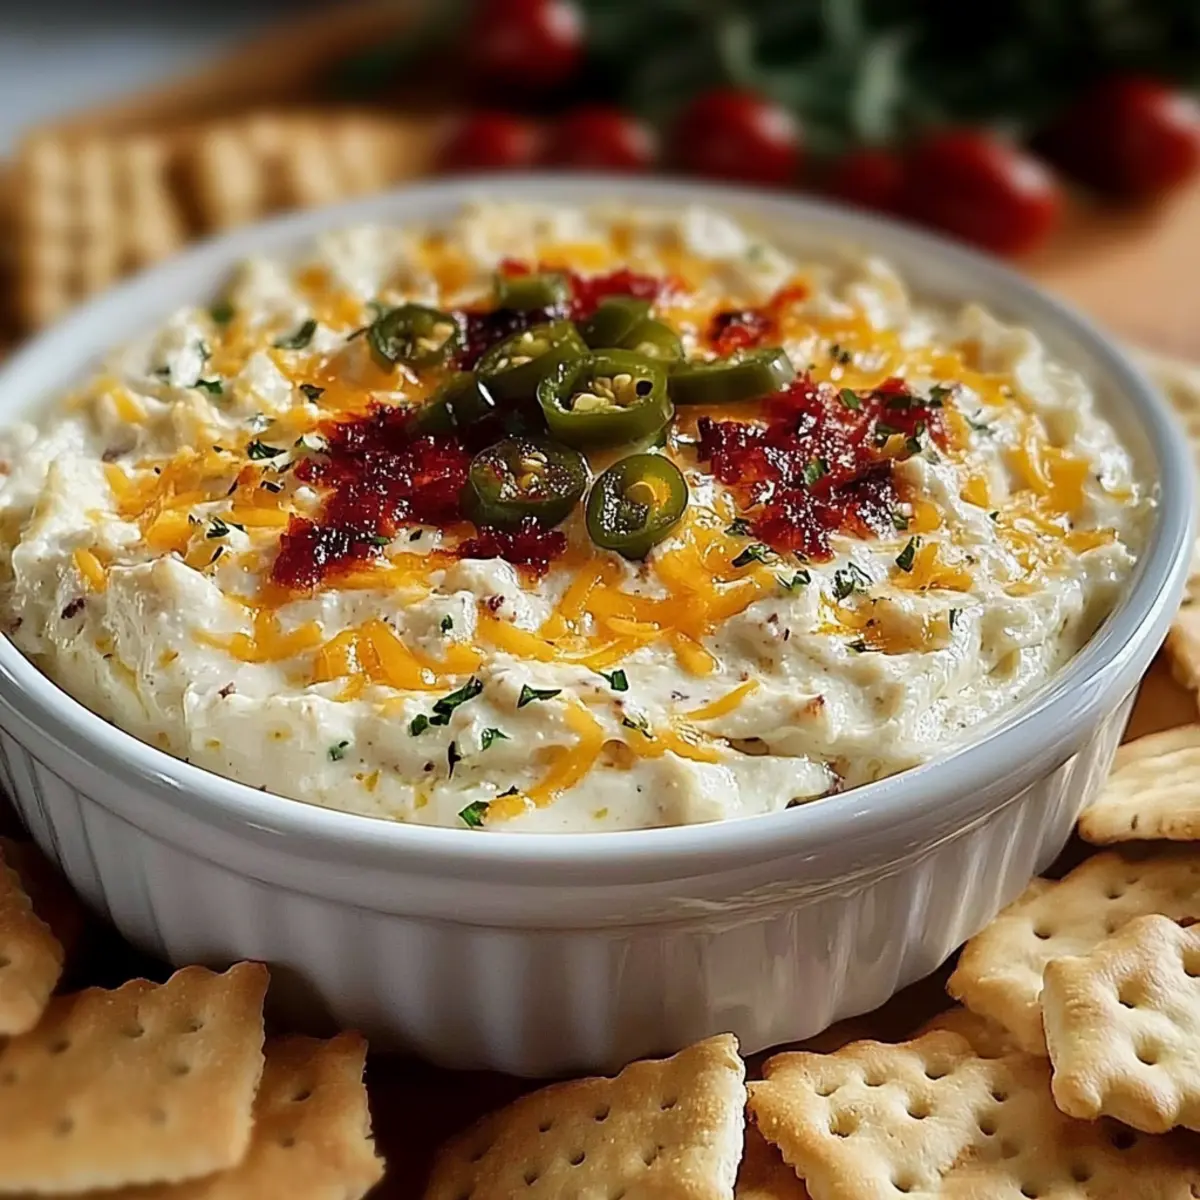
  • Spicy Kick: Add diced jalapeños or a pinch of cayenne pepper to the ricotta mixture for an extra heat boost. Your guests will love the flavorful surprise!
  • Herb-Infused: Toss in fresh herbs like basil or thyme for a fragrant twist. These aromatic additions can elevate the flavor while bringing a fresh, garden-like dimension.
  • Cheese Swap: Replace the grated Parmesan with crumbled feta or tangy goat cheese for an exciting flavor profile. Each cheese adds its unique charm to the creamy dip.
  • Flavorful Mix: Combine regular honey with chili flakes for your own version of hot honey. This custom mixture allows you to control the sweetness and spice levels according to your taste.
  • Creamy Add-In: Blend in some cream cheese for extra richness and a thicker consistency. Your dip will transform into an indulgent treat that's truly irresistible.
  • Zesty Citrus: For an added tang, mix in some orange zest along with the lemon. This additional citrus note can brighten the overall flavor and give a refreshing twist.
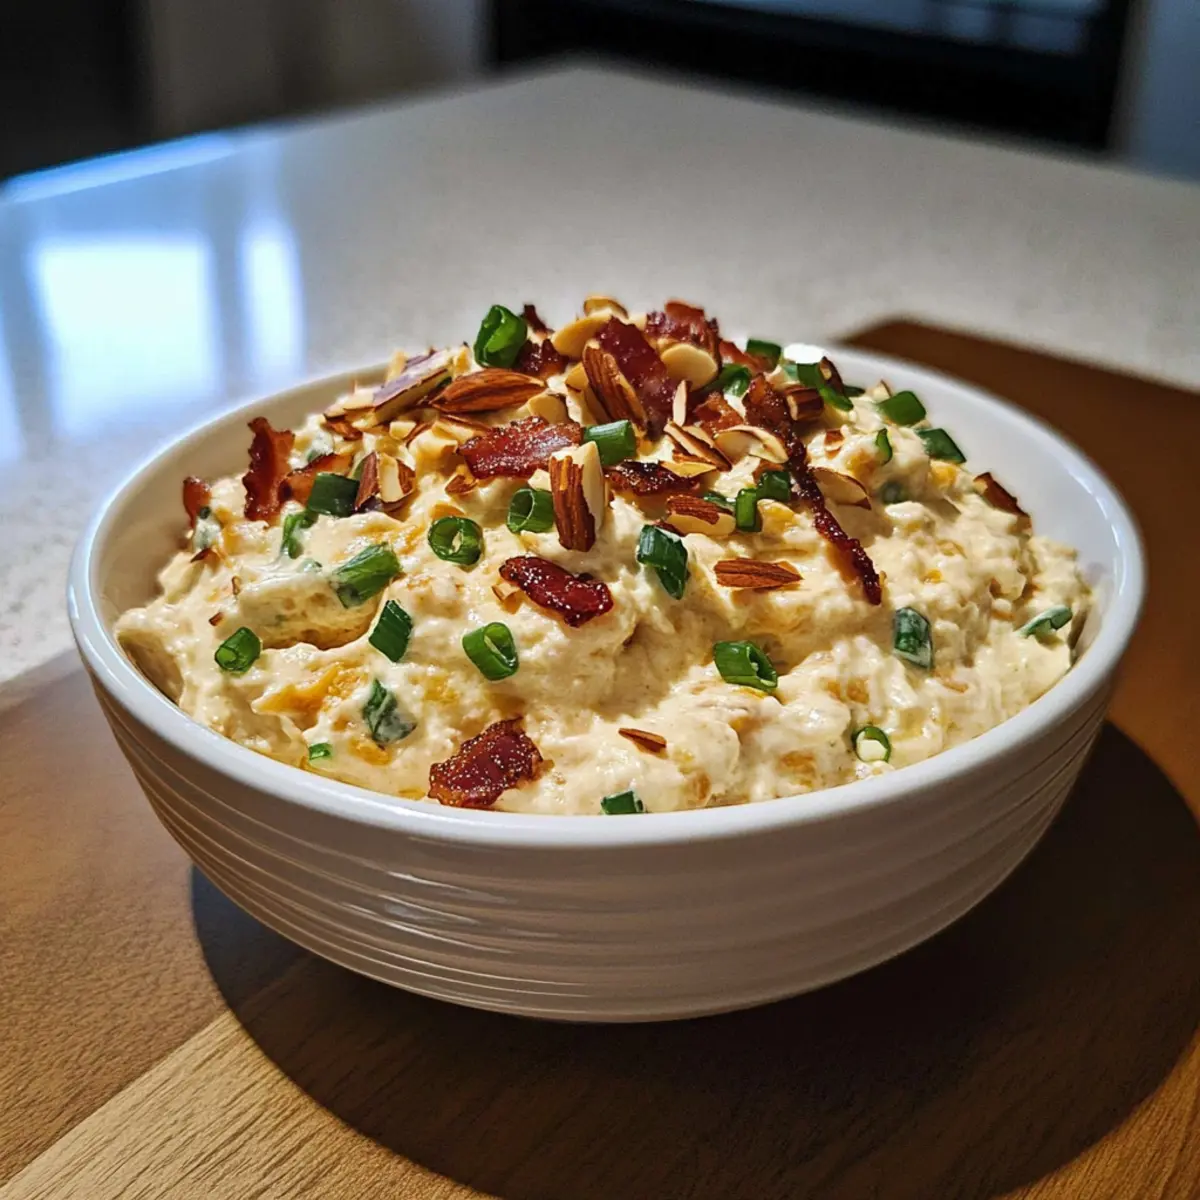
  • Nutty Crunch: Top the dip with toasted nuts like pine nuts or walnuts for a delightful crunch. This texture variation makes every bite interesting and satisfying.
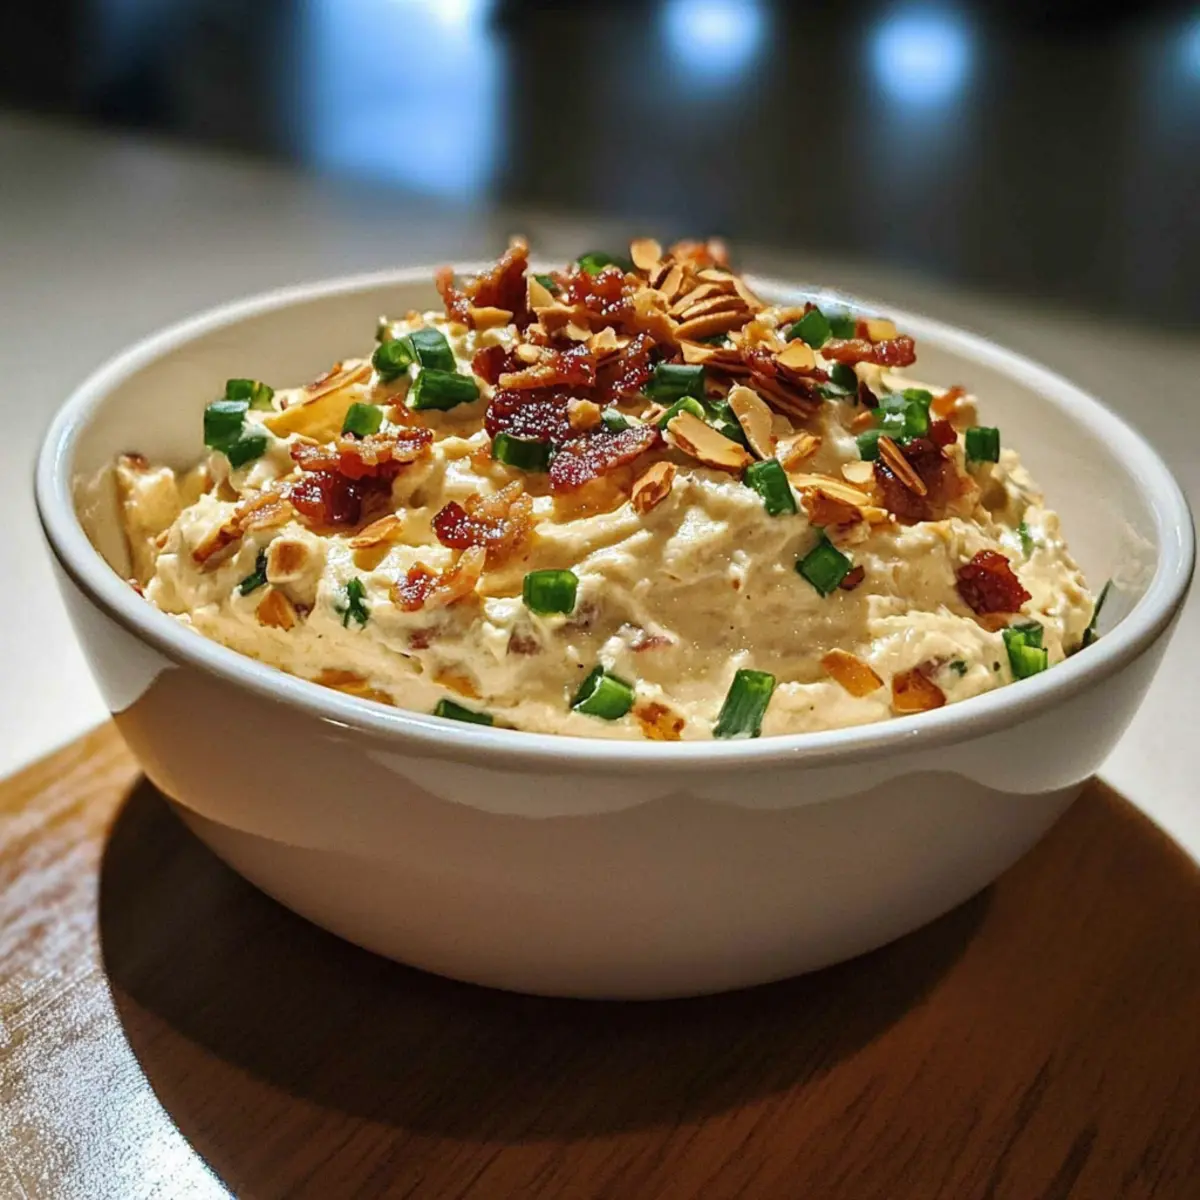
  • Garnish Upgrade: Instead of chives, use crumbled bacon or fried shallots as a crunchy garnish. These savory toppings can enhance the dip's savory aspect while providing a fun contrast.

Before you serve your dip, consider pairing it with suggestions like warm crusty bread, fresh vegetable sticks, or even Homemade Hot Chocolate for a complete experience!

Make Ahead Options

Preparing your Hot Honey Ricotta Dip in advance is a fantastic way to save time on busy weeknights or entertaining occasions! You can mix the ricotta, Parmesan, olive oil, lemon zest, garlic powder, salt, and pepper up to 24 hours in advance, storing it in an airtight container in the refrigerator. To maintain its creamy texture, cover the surface directly with plastic wrap before sealing. On the day you plan to serve, simply spread the mixture in your baking dish and bake in a preheated oven for 12-15 minutes until bubbly. Drizzle with hot honey and sprinkle fresh chives just before serving for that fresh taste! Enjoy the ease of a delicious dip that's just as delightful as if you made it last minute!

What to Serve with Hot Honey Ricotta Dip

As you prepare this creamy delight, consider the perfect pairings that will elevate your gathering into an unforgettable experience.

  • Warm Crusty Bread: The ideal companion, its chewy texture complements the dip's creaminess while adding a satisfying crunch with every bite.
  • Salty Crackers: Crisp and crunchy, these provide a delightful contrast to the rich flavors of the dip, ensuring that each scoop is a satisfying treat.
  • Fresh Vegetable Sticks: Colorful carrots, crisp cucumbers, and crunchy bell peppers deliver freshness and a nice crunch, balancing the dip’s richness wonderfully.
  • Savory Pita Chips: Their unique flavor and texture enhance the sweet and spicy elements of the dip, making for a fun and flavorful experience.
  • Herbed Flatbreads: Soft and aromatic, these breads bring Mediterranean flair and soak up every bit of gooey goodness from the dip for a delightful taste sensation.
  • Chilled Sparkling Wine: The bubbles and acidity in sparkling wine contrast beautifully with the dip's warmth, cleansing the palate while adding elegance to your gathering.
  • Refreshing Lemonade: Sweet and tangy, lemonades make a delightful drink pairing that perks up flavors and complements the kick of hot honey in the dip.
  • Chocolate-Dipped Strawberries: For dessert, these add a touch of sweetness, creating a stunning finish that echoes the sweet notes of the hot honey.
  • Cheese Platter: A medley of cheeses alongside your dip can provide various textures and flavors, creating an indulgent spread for guests to enjoy.
  • Spiced Nuts: Their savory crunch makes for a robust snack option that harmonizes beautifully with creaminess in the dip, perfect for nibbling throughout the evening.

How to Store and Freeze Hot Honey Ricotta Dip

Fridge: Store any leftover Hot Honey Ricotta Dip in an airtight container for up to 3 days. Allow it to cool completely before sealing to maintain freshness.

Freezer: While not recommended for freezing due to texture changes, if needed, you can freeze the dip for up to 1 month. Thaw in the fridge overnight before reheating.

Reheating: To reheat, gently warm in the oven at 350°F (175°C) for 10-15 minutes until heated through. Avoid microwaving unless in small intervals to prevent overheating.

Serving Tip: Always serve the dip warm for the best flavor experience and texture.

Hot Honey Ricotta Dip Recipe FAQs

What kind of ricotta cheese should I use for this dip?
Absolutely! Using whole milk ricotta cheese gives the dip a wonderfully creamy texture. If you're looking for a lighter option, part-skim ricotta will work too, but be aware that it may slightly alter the lusciousness of the dip.

How should I store leftover Hot Honey Ricotta Dip?
Leftovers should be stored in an airtight container and can be kept in the fridge for up to 3 days. Be sure to let it cool completely before sealing to maintain its darling flavors, which may even deepen after resting.

Can I freeze the Hot Honey Ricotta Dip?
While not the best option due to potential texture changes, it is possible to freeze the dip for up to 1 month. To do this, first, allow it to cool entirely. Then transfer it to a freezer-safe container or bag. When you're ready to enjoy it again, thaw it in the fridge overnight and gently reheat in the oven at 350°F (175°C) for about 10–15 minutes until warmed through.

What do I do if the Hot Honey is too hot or too sweet for my taste?
Very! If you prefer less heat, you can substitute with regular honey and skip the spicy elements altogether. Alternatively, if it's too sweet, consider adding a pinch of more garlic powder or a little extra lemon zest to balance the flavors. Always taste as you go and adjust accordingly!

Are there any dietary considerations I should be aware of?
Be mindful of allergies, especially when serving guests. This dip contains dairy (ricotta and Parmesan), so ensure to inform any lactose-intolerant friends. If you have pets, keep this dip away from them, as ingredients like garlic can be harmful to dogs and cats.

Can I make this dip ahead of time?
Absolutely! You can prepare the ricotta mixture ahead of time, store it in the fridge, and bake it just before serving. This method helps save time during your gathering and ensures you still enjoy that warm, gooey dip experience. Just remember to drizzle the hot honey over it after baking for the best flavor!

Hot Honey Ricotta Dip

Hot Honey Ricotta Dip: Creamy Sweetness for Any Gathering

This Hot Honey Ricotta Dip combines creamy ricotta, tangy Parmesan, and hot honey for a delightful appetizer at any gathering.
Print Recipe Pin Recipe
Prep Time 10 minutes mins
Cook Time 15 minutes mins
Total Time 25 minutes mins
Servings: 6 servings
Course: Appetizers
Cuisine: Italian
Calories: 200
Ingredients Equipment Method Nutrition Notes

Ingredients
  

For the Dip
  • 2 cups Whole Milk Ricotta Cheese Part-skim ricotta can be used for a lighter option.
  • 1 cup Grated Parmesan Cheese Pecorino Romano can be substituted for a bolder flavor.
  • 2 tablespoons Extra-Virgin Olive Oil Melted butter can be an alternative.
  • 1 tablespoon Lemon Zest Fresh lemon juice can be used if needed.
  • 1 teaspoon Garlic Powder Fresh minced garlic can be used but may change texture.
  • 1 teaspoon Kosher Salt Adjust to taste.
  • 1 teaspoon Freshly Ground Black Pepper White pepper can be used for a milder flavor.
  • ½ cup Hot Honey Regular honey with a dash of cayenne can be substituted.
  • 2 tablespoons Chopped Fresh Chives Scallions can be used as a substitute.
For Serving
  • 1 loaf Crusty Bread or Crackers Any variety works.

Equipment

  • Baking Dish
  • Mixing Bowl
  • Spatula

Method
 

Step-by-Step Instructions
  1. Preheat your oven to 375°F (190°C). Lightly grease a baking dish with extra-virgin olive oil.
  2. In a medium mixing bowl, combine ricotta, Parmesan, olive oil, lemon zest, garlic powder, salt, and pepper. Mix until smooth and creamy.
  3. Transfer the ricotta mixture to the greased baking dish and smooth the top.
  4. Bake for 12-15 minutes until heated through and the top is golden and bubbly.
  5. Drizzle hot honey over the dip as soon as it's out of the oven.
  6. Garnish with chopped chives and serve warm with crusty bread or crackers.

Nutrition

Serving: 1servingCalories: 200kcalCarbohydrates: 12gProtein: 8gFat: 15gSaturated Fat: 6gPolyunsaturated Fat: 1gMonounsaturated Fat: 8gCholesterol: 30mgSodium: 350mgPotassium: 150mgFiber: 1gSugar: 3gVitamin A: 300IUVitamin C: 2mgCalcium: 200mgIron: 1mg

Notes

Serve warm for the best flavor experience. Monitor the hot honey temperature to prevent bitterness.

Tried this recipe?

Let us know how it was!

Olive Lovers’ Dream Dip: Creamy Bliss for Every Gathering

December 30, 2025 by Grace Snow Leave a Comment

As I stood in my kitchen, the unmistakable aroma of garlic mingled with the zest of fresh lemon and the warm, earthy scent of green olives took me back to sun-drenched Mediterranean markets. That's when I realized it was time to whip up my beloved Olive Lovers’ Dream Dip. This creamy Mediterranean delight not only elevates any gathering but also offers endless possibilities for customization to match your taste. With its quick prep time and crowd-pleasing appeal, it’s the perfect go-to appetizer for both casual evenings and festive celebrations. Plus, the combination of tangy feta and savory olives will have your friends and family yearning for more. Are you ready to dive into a recipe that’s bound to impress? Let’s get started!

Why is this dip a must-try?

Creamy Indulgence: This Olive Lovers’ Dream Dip boasts a luxurious texture, perfectly pairing the tanginess of feta with the earthy notes of green olives.

Endless Customization: Tailor it to your taste! With options to switch olive varieties or add fresh herbs, you can make it uniquely yours.

Easy Preparation: Even novice cooks will shine—this dip comes together quickly in a food processor, making it a hassle-free choice for any gathering.

Crowd-Pleasing Flavor: Its savory and zesty profile will entice both friends and family, ensuring you’re the star of the next event.

Health-Conscious Delight: Made with wholesome ingredients like extra virgin olive oil and real cheese, you can indulge guilt-free.

Incredible right? If you love Mediterranean flavors, check out Mediterranean Pasta Salad for another easy recipe!

Olive Lovers’ Dream Dip Ingredients

For the Dip Base
• Green Olives (200 g, pitted) – The primary flavor component, offering a salty and earthy kick; Castelvetrano or Manzanilla are top choices for best taste.
• Feta Cheese (150 g, crumbled) – This adds tangy creaminess; opt for block feta in brine for a smoother mixture.
• Cream Cheese (100 g, room temperature) – Balances the dip’s saltiness and ensures a velvety texture when blended.
• Extra Virgin Olive Oil (2 tbsp) – A splash of healthy fats that enhances the overall flavor; choose a high-quality oil for the best results.
• Garlic Clove (1, minced) – Provides aromatic depth; using freshly minced garlic will give the dip added potency.

For the Flavor Boost
• Lemon Zest (Zest of 1 lemon) – Brightens the dip and adds acidity; organic lemons are preferred for flavor purity.
• Lemon Juice (Juice of ½ lemon) – Enhances the refreshing taste, balancing the creaminess with a citrus kick.
• Roasted Red Pepper (1, chopped) – Brings sweetness and smokiness; can be store-bought or made fresh at home.
• Dried Oregano (1 tsp) – Infuses a Mediterranean essence; fresh oregano can also be used for a brighter taste.
• Chili Flakes (½ tsp, optional) – Adds a touch of heat; adjust to your liking for a personal kick.
• Freshly Ground Black Pepper – Use to season to taste, rounding out the flavors in the dip.

With a blend of these ingredients, your Olive Lovers’ Dream Dip will be a creamy delight that's perfect for sharing!

Step‑by‑Step Instructions for Olive Lovers’ Dream Dip

Step 1: Blend Basics
In a food processor, combine the green olives, crumbled feta cheese, cream cheese at room temperature, extra virgin olive oil, minced garlic, lemon zest, and lemon juice. Blend for about 30 seconds, stopping when the mix becomes smooth yet retains a slight texture. You want to create a rich base for your Olive Lovers’ Dream Dip that perfectly melds those vibrant Mediterranean flavors.

Step 2: Add Flavor Notes
Next, add in the chopped roasted red pepper, dried oregano, chili flakes, and freshly ground black pepper. Pulse the mixture 2-3 times until everything is well combined, while ensuring you keep some chunkiness for added character. This step enhances the dip's complexity, balancing the creamy elements with the sweet and savory notes that make the Olive Lovers’ Dream Dip truly memorable.

Step 3: Transfer & Garnish
Carefully spoon the blended mixture into a serving jar or bowl. For an inviting presentation, drizzle a little extra virgin olive oil over the top and garnish with a few whole green olives. This beautiful finish makes the Olive Lovers’ Dream Dip look as delightful as it tastes, ready to impress your guests at any gathering.

Step 4: Chill
Cover the dip with plastic wrap or a lid, then refrigerate for at least 30 minutes. This chilling step is crucial as it allows the flavors to meld, resulting in an even more delicious Olive Lovers’ Dream Dip. You'll notice the dip becoming richer and more aromatic as it cools.

Step 5: Serve
Once chilled, your Olive Lovers’ Dream Dip is ready to serve! Pair it with pita chips, crostini, or an assortment of fresh raw vegetables for a delightful snack or appetizer. The combination of creamy textures and savory flavors is sure to be a hit at your next event!

How to Store and Freeze Olive Lovers’ Dream Dip

Fridge: Store your Olive Lovers’ Dream Dip in an airtight container in the refrigerator for up to one week. This keeps it fresh and ready to enjoy whenever you crave a savory snack.

Freezer: For longer storage, you can freeze the dip for up to three months. Be sure to use a freezer-safe container or zip-top bag, leaving some space for expansion as it freezes.

Thawing: When ready to enjoy, transfer the dip to the fridge to thaw overnight. Once thawed, give it a good stir to restore its creamy texture before serving.

Make-Ahead: This dip can be made up to three days in advance, allowing the flavors to develop even more. Just remember to chill it well before serving!

What to Serve with Olive Lovers’ Dream Dip

Dive into a world of flavor as you create the perfect spread for your next gathering, making every bite unforgettable.

  • Pita Chips: These crunchy chips offer a light and airy contrast to the creamy dip, perfect for scooping every last bit.
  • Crostini: Crispy bread rounds provide a delightful crunch and serve as a stylish base for your Olive Lovers’ Dream Dip, enhancing its presentation.
  • Fresh Veggie Sticks: Crisp carrots, bell peppers, and cucumber sticks add a refreshing crunch, balancing the richness of the dip while providing vibrant colors.
  • Stuffed Grape Leaves: These Mediterranean delights complement the flavors of the dip, adding a savory and herbal touch that your guests will adore.
  • Marinated Olives: A bowl of assorted marinated olives brings complementary brininess and an extra bite that pairs beautifully with the dip’s creamy texture.
  • Antipasto Platter: Curate a selection of cured meats, cheeses, and marinated vegetables for a festive display that invites creativity and satisfies every palate.
  • Sparkling Water with Lemon: This refreshing drink cleanses the palate and enhances the flavors of the dip, making every bite indulgent but light.
  • Red Wine: A glass of your favorite red pairs beautifully with the dip’s savory notes, elevating the dining experience.
  • Mini Quiches: These bite-sized treats add a touch of warmth and savory goodness, making your spread feel luxurious and lovingly prepared.

Make Ahead Options

These Olive Lovers’ Dream Dip is a fantastic solution for busy home cooks looking to save time! You can easily prepare the dip up to 3 days in advance. Simply follow the blending instructions and allow it to chill in the refrigerator. Make sure to store it in an airtight container to maintain its creamy texture and vibrant flavors. When you're ready to serve, just give it a quick stir and garnish with a drizzle of olive oil and extra olives. The flavors of the Olive Lovers’ Dream Dip will have further developed, ensuring that it’s just as delicious as when freshly made!

Olive Lovers’ Dream Dip: Customizable Delights

Feel free to let your imagination run wild with this dip, delighting your taste buds with exciting new flavors and textures!

  • Different Olive Varieties: Swap Castelvetrano olives for Kalamata or any favorite green olives to change the dip's flavor profile.
  • Fresh Herbs: Incorporate fresh herbs like basil, parsley, or dill for an aromatic twist that brightens each bite.
  • Add Nuts: For a crunchy texture, blend in chopped nuts, like walnuts or almonds, adding another layer of flavor.
  • Extra Zest: Amp up the citrus notes with an additional splash of lemon juice or zest for a brighter, refreshing taste.
  • Spice It Up: Increase heat by adding diced jalapeños or a dash of hot sauce, turning this dip into a fiery sensation.
  • Creamy Alternative: Use Greek yogurt in place of cream cheese for a tangy and lower-fat option that still maintains creaminess.
  • Smoky Spin: Blend in smoked paprika to add a delicious, smoky depth that complements the olives and feta beautifully.
  • Vegan Option: Replace feta and cream cheese with a blend of silken tofu and nutritional yeast for a creamy, dairy-free alternative.

As you explore these variations, don’t forget to try pairing the dip with delicious platters like the vibrant Mediterranean Pasta Salad or crispy crostini for the ultimate entertaining experience!

Expert Tips for Olive Lovers’ Dream Dip

  • Quality Ingredients: Choose high-quality olives and feta for an exceptional flavor boost; lower quality can compromise your Olive Lovers’ Dream Dip.

  • Room Temperature Cream Cheese: Be sure to have your cream cheese at room temperature; cold cream cheese results in an unevenly blended dip.

  • Chilling is Key: Don’t skip refrigerating the dip for at least 30 minutes. This allows the flavors to marry beautifully, significantly enhancing your final dish.

  • Chunky Texture: Pulse just enough to keep some texture; an overly smooth dip lacks character. Embrace those delicious chunks!

  • Explore Customization: Feel free to get creative with various olive types or fresh herbs to personalize your Olive Lovers’ Dream Dip; each variation can tell a new flavor story.

Olive Lovers’ Dream Dip Recipe FAQs

How do I choose the right green olives?
Absolutely! For the best flavor in your Olive Lovers’ Dream Dip, I recommend Castelvetrano or Manzanilla olives. These varieties have a delightful balance of brininess and sweetness, which enhances the overall taste of the dip. Look for olives that are firm and shiny, avoiding those with dark spots or a dull appearance.

How should I store Olive Lovers’ Dream Dip?
To keep your Olive Lovers’ Dream Dip fresh, store it in an airtight container in the fridge, where it will stay good for up to one week. Ensure the container is tightly sealed to prevent airing out. For the best flavor, enjoy it within the first few days!

Can I freeze Olive Lovers’ Dream Dip?
Yes, you can freeze it for up to three months! To freeze, transfer the dip into a freezer-safe container, leaving some room for expansion. When you’re ready to enjoy it, simply thaw it in the fridge overnight and stir well to restore its creamy texture before serving.

What if my dip is too thick?
If your Olive Lovers’ Dream Dip turns out too thick, simply add a little extra extra virgin olive oil or a splash of lemon juice to achieve your desired consistency. Blend it again for a few seconds to incorporate these additions. Remember, adjusting the texture to your liking ensures the dip remains delicious and enjoyable!

Is this dip suitable for people with dietary restrictions?
Very! This Olive Lovers’ Dream Dip is made from wholesome ingredients, which makes it relatively safe for most diets. However, if you have specific allergies (like dairy), you can substitute cream cheese with a dairy-free alternative. Be sure to read ingredient labels to ensure all components align with your dietary needs.

What can I serve with this dip?
The more, the merrier! Pair your Olive Lovers’ Dream Dip with pita chips, crunchy crostini, or an assortment of raw vegetables like carrots and bell peppers. You can also use it as a spread for sandwich rolls or as a topping for grilled meats. Enjoy exploring different serving options!

Olive Lovers’ Dream Dip

Olive Lovers’ Dream Dip: Creamy Bliss for Every Gathering

Olive Lovers’ Dream Dip is a creamy Mediterranean delight that elevates any gathering with its savory flavor and endless customization options.
Print Recipe Pin Recipe
Prep Time 10 minutes mins
Chilling Time 30 minutes mins
Total Time 40 minutes mins
Servings: 8 servings
Course: Appetizers
Cuisine: Mediterranean
Calories: 120
Ingredients Equipment Method Nutrition Notes

Ingredients
  

For the Dip Base
  • 200 g Green Olives, pitted Castelvetrano or Manzanilla recommended
  • 150 g Feta Cheese, crumbled Opt for block feta in brine
  • 100 g Cream Cheese, room temperature Ensures a velvety texture
  • 2 tbsp Extra Virgin Olive Oil Choose a high-quality oil
  • 1 clove Garlic, minced Freshly minced for added potency
For the Flavor Boost
  • 1 lemon Lemon Zest Organic lemons preferred
  • 0.5 lemon Lemon Juice
  • 1 whole Roasted Red Pepper, chopped Store-bought or homemade
  • 1 tsp Dried Oregano Fresh oregano can also be used
  • 0.5 tsp Chili Flakes Optional, adjust to taste
  • Freshly Ground Black Pepper Use to season to taste

Equipment

  • Food Processor

Method
 

Step-by-Step Instructions
  1. In a food processor, combine the green olives, crumbled feta cheese, cream cheese at room temperature, extra virgin olive oil, minced garlic, lemon zest, and lemon juice. Blend for about 30 seconds to create a smooth yet textured base.
  2. Add in the chopped roasted red pepper, dried oregano, chili flakes, and freshly ground black pepper. Pulse 2-3 times to combine while keeping some chunkiness for added character.
  3. Spoon the blended mixture into a serving jar or bowl. Drizzle with extra virgin olive oil and garnish with whole green olives.
  4. Cover and refrigerate for at least 30 minutes to allow the flavors to meld.
  5. Serve with pita chips, crostini, or fresh raw vegetables.

Nutrition

Serving: 2tablespoonsCalories: 120kcalCarbohydrates: 5gProtein: 3gFat: 10gSaturated Fat: 3gPolyunsaturated Fat: 1gMonounsaturated Fat: 6gCholesterol: 15mgSodium: 300mgPotassium: 50mgFiber: 1gSugar: 1gVitamin A: 100IUVitamin C: 2mgCalcium: 100mgIron: 1mg

Notes

Quality ingredients are crucial for the best flavor. Room temperature cream cheese is key for a smooth dip. Chill for at least 30 minutes for optimal flavor enhancement.

Tried this recipe?

Let us know how it was!

Humpty Dumpty Dip: Irresistibly Cheesy Comfort Food Delight

December 30, 2025 by Grace Snow Leave a Comment

As I rummaged through my pantry, I stumbled upon ingredients that reminded me of a classic gathering treat: Humpty Dumpty Dip. This creamy, cheesy appetizer is the pinnacle of comfort food, transforming ordinary gatherings into extraordinary moments. With gooey layers of flavor and delightful versatility, it's your new go-to dip for parties or cozy nights in. One of the best features of this dip is how quick it is to prepare—ideal for those who want to impress without the stress. Plus, you can easily make it ahead of time, ensuring a seamless showstopper at your next get-together. Ready to dive into the rich, custardy world of Humpty Dumpty Dip? Let’s uncover its magic!

Why is Humpty Dumpty Dip a Must-Try?

Irresistibly Creamy: The blend of mayonnaise, cheese, and eggs makes for a rich, smooth texture that pairs perfectly with any dippable treat.

Impressive Versatility: Easily customize this dip—whether you crave a spicy kick with jalapeños or a hearty version with sausage, options abound!

Make-Ahead Marvel: Prepare this dip a day before your event, bake it just before serving, and watch it disappear!

Crowd-Pleasing Flavor: This delightful blend of cheesy goodness and savory ingredients will satisfy guests of all ages at your next gathering.

Easy Entertaining: With minimal prep time, you can enjoy more moments with friends while this dip bakes to bubbly perfection.

Elevate your next snack spread with Humpty Dumpty Dip that not only delights the taste buds but also turns headsStorage Tips ensure you enjoy every last bite!

Humpty Dumpty Dip Ingredients

• Here’s what you need for this cheesy delight!

For the Dip

  • Large Eggs – Essential for that delightful custardy texture; can’t be substituted!
  • Mayonnaise – Adds creaminess; replace with sour cream or Greek yogurt for a lighter version.
  • Dijon Mustard – Enhances flavor depth; feel free to omit if you're not a mustard fan!
  • Hot Sauce – Optional for a spicy kick; adjust according to your heat preference.
  • Paprika – Provides a mild smokiness; perfect for a pop of color on top.
  • Garlic Powder – Contributes savory notes; fresh garlic can offer even more flavor intensity.
  • Onion Powder – Adds aroma; can be swapped with finely chopped fresh onion for a crunchier texture.
  • Salt and Black Pepper – Essential for seasoning; adjust as needed for personal taste.
  • Shredded Sharp Cheddar Cheese – Brings that irresistible cheesy flavor; combine with mozzarella for a twist.
  • Cooked Bacon – Provides crunch and savory depth; swap it with cooked sausage or leave it out for a vegetarian option.
  • Green Onions – Adds freshness and crunch; chives work well as a substitute if preferred.

For Serving

  • Crackers, Chips, or Bread – Choose your favorite dippers to scoop up the creamy goodness!

Prepare to wow your guests with this Humpty Dumpty Dip that’s not only a joy to eat but also easy to make!

Step‑by‑Step Instructions for Humpty Dumpty Dip

Step 1: Prepare the Eggs
Begin by placing large eggs in a saucepan and covering them with water. Bring the water to a rolling boil over medium-high heat, then cover the pot and remove it from heat. Let the eggs sit for 10-12 minutes to hard-boil, then transfer them to a bowl of ice water to cool for about 5 minutes. Peel the eggs under cold running water and chop them finely, setting them aside for later.

Step 2: Mix the Base
In a large mixing bowl, combine creamy mayonnaise, Dijon mustard, hot sauce, paprika, garlic powder, onion powder, salt, and pepper. Stir these ingredients together until smooth and well-blended, ensuring the flavors meld. Gently fold in the chopped eggs, making sure they’re evenly distributed throughout the mixture, creating the base for your Humpty Dumpty Dip.

Step 3: Incorporate Cheese & Bacon
Next, add the shredded sharp cheddar cheese to your egg mixture, folding gently to combine. To add depth and crunch, fold in half of the crumbled bacon as well. This blend of cheese and savory bacon introduces rich flavors that complement the creamy dip. Ensure everything is well-mixed for an irresistible, hearty filling.

Step 4: Bake
Preheat your oven to 350°F (175°C). Grease a baking dish and carefully spread the dip mixture evenly into the bottom. Bake for 15-20 minutes, or until the top is golden and the dip is hot and bubbly. Keep an eye on it; the edges should be slightly crispy, letting you know it's ready to delight your guests with its warm, cheesy goodness.

Step 5: Garnish and Serve
Once baked, remove the Humpty Dumpty Dip from the oven and let it cool for a minute. Top the warm dip with the remaining crumbled bacon, chopped green onions, and a sprinkle of paprika for color and flavor. Serve this delightful dip warm alongside an assortment of crackers, chips, or toasted bread for dipping, ready to become the star of your gathering!

Humpty Dumpty Dip Variations & Substitutions

Feel free to get creative with this delectable dip and make it your own!

  • Spicy Twist: Add diced jalapeños or a splash of your favorite hot sauce for a delightful kick. The extra heat transforms the dip into a fiery treat perfect for adventurous palates!

  • Heartier Version: Stir in cooked sausage or diced ham to create a more substantial dip. This meaty addition lends a comforting feel, perfect for satisfying the hunger of all your guests.

  • Vegetarian Delight: Swap bacon for sautéed mushrooms or spinach. This variation not only caters to vegetarians but also infuses your dip with earthy flavor and added nutrition.

  • Breakfast Style: Serve Humpty Dumpty Dip on toast points with breakfast sausage pieces. It makes for a cozy brunch option, marrying flavors that are traditionally beloved at breakfast time.

  • Cheesy Combo: Mix in mozzarella cheese or Monterey Jack along with cheddar for a blend of melting goodness. With every scoop, you get a delightful stretch that cheese lovers will adore!

  • Fresh Herb Infusion: Incorporate fresh herbs like thyme or dill for a vibrant twist. These herbs bring an aromatic freshness that elevates the dip from mere comfort food to a culinary delight.

  • Zingy Citrus: Add a squeeze of lemon or lime juice for a fresh zing. The acidity brightens up the creamy dip, creating a delightful flavor balance that’s simply irresistible.

  • Nutty Crunch: Sprinkle toasted walnuts or pecans on top before serving. The added crunch provides an unexpected twist and a delightful texture contrast to the creamy base.

Explore these variations to discover your favorite take on this classic Humpty Dumpty Dip, ensuring it shines at your next gathering. For even more inspiration, consider checking out our Serving Suggestions or dive into our Storage Tips for leftover bliss!

What to Serve with Humpty Dumpty Dip?

As you prepare for your next gathering, let your imagination run wild with these delightful accompaniments that complement this creamy, cheesy dip.

  • Crispy Tortilla Chips: Perfect for scooping, the crunch of tortilla chips offers a satisfying contrast to the dip's creamy texture.

  • Fresh Vegetable Crudité: Bright, crunchy veggies like carrots, celery, and bell peppers add a refreshing touch and a healthy balance to the rich dip.

  • Mini Pita Pockets: These soft pita pockets create a fun way to enjoy your dip. Stuff them with Humpty Dumpty Dip and a sprinkle of fresh herbs for extra flair.

  • Garlic Breadsticks: Serve warm, toasted breadsticks alongside your dip for a delightful combination of buttery goodness and cheesy comfort.

  • Sweet and Spicy Pickles: The tangy and sweet notes of pickles elevate the dip experience, providing a burst of flavor that cleanses the palate between bites.

  • Chilled White Wine: A crisp Sauvignon Blanc or a bubbly Prosecco pairs beautifully. The acidity cuts through the creaminess of the dip, enhancing each mouthful.

  • Savory Meatballs: Bite-sized meatballs make for a hearty pairing. They provide a savory touch that can be dipped into the cheese mixture for a filling treat.

  • Chocolate Brownies: End on a sweet note with fudgy brownies. Their rich, chocolatey goodness creates a wonderful contrast to the savory dip and provides a satisfying finish.

Embrace the fun of flavor combinations as you serve your Humpty Dumpty Dip with these delicious pairings!

Expert Tips for Humpty Dumpty Dip

  • Classic Creaminess: Use high-quality mayonnaise for unbeatable richness! Avoid low-fat options; they can lead to a less creamy dip.

  • Don’t Skip the Eggs: The large eggs are crucial for the dip’s texture, so ensure they are well-cooked and thoroughly chopped for even distribution.

  • Spice It Up: If you love heat, don’t be shy with the hot sauce or add diced jalapeños. Taste as you go to achieve your preferred spice level.

  • Bake It Right: For a perfectly bubbly dip, preheat your oven properly, and watch closely to avoid over-baking, which can cause dryness.

  • Garnish Generously: Adding extra bacon and green onions not only enhances the aesthetic but also boosts flavor and texture. Enjoy the lovely crunch!

  • Make-Ahead Magic: Easily prepare the Humpty Dumpty Dip a day prior and store it covered in the fridge; just bake it right before serving for a hassle-free experience.

How to Store and Freeze Humpty Dumpty Dip

Fridge: Store leftovers in an airtight container for up to 3 days. Ensure the dip is fully cooled before sealing to maintain freshness.

Freezer: For longer storage, freeze the dip tightly wrapped for up to 2 months. Thaw in the fridge overnight before reheating to preserve texture.

Reheating: Reheat the dip in the oven at 350°F (175°C) until warmed through, about 15-20 minutes. Uncover during reheating to keep the top crispy, avoiding any sogginess!

Make-Ahead Tip: Prepare the dip a day in advance, cover, and refrigerate. Simply bake it just before serving for a stress-free gathering!

Make Ahead Options

Humpty Dumpty Dip is a fantastic choice for meal prep, allowing you to enjoy stress-free entertaining. You can prepare the entire dip up to 24 hours in advance by mixing the base ingredients (mayonnaise, mustard, spices, and eggs) and folding in the cheese and bacon. Carefully cover it and refrigerate; this helps the flavors meld beautifully. When you're ready to serve, simply spread the mixture in a greased baking dish and bake at 350°F (175°C) for 15-20 minutes until bubbling and golden. For optimal quality, avoid cooking completely ahead of time to maintain that perfect creamy texture. After baking, garnish with green onions and paprika, and you’ll have a showstopping appetizer that saves you time and impresses your guests!

Humpty Dumpty Dip Recipe FAQs

What type of eggs should I use for Humpty Dumpty Dip?
Absolutely, you'll want to use large eggs as they provide the perfect texture for the dip. Hard-boiling ensures they integrate well into the creamy mixture, adding that essential custardy quality. Avoid using smaller eggs, as they may not deliver the same richness.

How should I store leftover Humpty Dumpty Dip?
Very simple! Transfer any leftovers into an airtight container and store them in the fridge for up to 3 days. Make sure the dip has cooled completely before sealing it to maintain its fresh flavor and texture.

Can I freeze Humpty Dumpty Dip?
Absolutely! You can freeze the dip tightly wrapped for up to 2 months. To do so, let it cool completely, then place it in a freezer-safe container. When you're ready to enjoy it, thaw it in the fridge overnight. Reheat in the oven at 350°F (175°C) for about 15-20 minutes until heated through, uncovering it to keep that lovely crispy top.

What if my dip is too thick?
If your Humpty Dumpty Dip turns out too thick, you can easily adjust it! Simply mix in a tablespoon of milk or extra mayonnaise until you reach your desired consistency. Stir well to ensure everything blends harmoniously, creating that creamy texture we all love!

Is there a vegetarian option for Humpty Dumpty Dip?
Definitely! For a vegetarian twist, you can easily substitute the cooked bacon with sautéed mushrooms or steamed spinach for added flavor. Both options maintain the richness of the dip while catering to a vegetarian diet.

Can I make Humpty Dumpty Dip ahead of time?
Absolutely! You can prepare this delicious dip a day in advance. Just follow the recipe up to the baking step, cover it well, and store it in the refrigerator. When you're ready to serve, bake it just before your guests arrive, and you'll impress everyone with minimal effort!

Humpty Dumpty Dip

Humpty Dumpty Dip: Irresistibly Cheesy Comfort Food Delight

Humpty Dumpty Dip is a creamy, cheesy appetizer perfect for gatherings, combining rich flavors with quick preparation.
Print Recipe Pin Recipe
Prep Time 15 minutes mins
Cook Time 20 minutes mins
Total Time 35 minutes mins
Servings: 8 servings
Course: Appetizers
Cuisine: American
Calories: 250
Ingredients Equipment Method Nutrition Notes

Ingredients
  

For the Dip
  • 6 large Eggs Essential for custardy texture
  • 1 cup Mayonnaise Can replace with sour cream or Greek yogurt
  • 2 tablespoons Dijon Mustard Enhances flavor depth
  • 1 teaspoon Hot Sauce Optional for spice
  • 1 teaspoon Paprika For mild smokiness
  • 1 teaspoon Garlic Powder Savory notes
  • 1 teaspoon Onion Powder Can swap with fresh onion
  • 1 teaspoon Salt Adjust to taste
  • 0.5 teaspoon Black Pepper Adjust to taste
  • 2 cups Shredded Sharp Cheddar Cheese Combine with mozzarella for a twist
  • 8 ounces Cooked Bacon Can swap with sausage or omit
  • 2 stalks Green Onions Can use chives as a substitute
For Serving
  • 1 box Crackers, Chips, or Bread Favorite dippers

Equipment

  • Saucepan
  • Mixing Bowl
  • Baking Dish

Method
 

Step-by-Step Instructions
  1. Prepare the eggs: Place large eggs in a saucepan, cover with water, bring to boil, then let sit off heat for 10-12 minutes before cooling in ice water.
  2. Mix the base: Combine mayonnaise, Dijon mustard, hot sauce, paprika, garlic powder, onion powder, salt, and pepper until smooth. Fold in chopped eggs.
  3. Incorporate cheese & bacon: Add shredded cheddar and half of crumbled bacon, folding gently to combine.
  4. Bake: Preheat oven to 350°F (175°C). Spread the mixture in a greased baking dish and bake for 15-20 minutes until bubbly and golden.
  5. Garnish and serve: Top with remaining bacon and chopped green onions. Serve warm with crackers, chips, or toasted bread.

Nutrition

Serving: 1servingCalories: 250kcalCarbohydrates: 10gProtein: 12gFat: 20gSaturated Fat: 8gPolyunsaturated Fat: 1gMonounsaturated Fat: 10gCholesterol: 150mgSodium: 600mgPotassium: 200mgFiber: 1gSugar: 1gVitamin A: 500IUCalcium: 200mgIron: 1mg

Notes

Use high-quality mayonnaise and ensure eggs are well-cooked for the best texture. Make ahead for easier entertaining.

Tried this recipe?

Let us know how it was!

Alabama Fire Cracker Dip: Must-Try Spicy Creamy Appetizer

December 30, 2025 by Grace Snow Leave a Comment

“Did you hear what the host made?” I overheard a friend ask at the last gathering, making me curious about the secret behind the buzz. Enter the Alabama Fire Cracker Dip—a creamy, spicy delight that can elevate any party spread! With its irresistible combination of tangy notes and zesty heat, this dip is not only a cinch to whip up in just a few minutes, but it also guarantees a crowd-pleaser at potlucks, game days, or casual get-togethers. Whether you're entertaining friends or just looking to spice up your snack game, this recipe provides the perfect way to indulge while impressing your guests. Are you ready to discover how to make this mouthwatering dip that’s sure to steal the spotlight? Let’s dive in!

Why is Alabama Fire Cracker Dip a Must-Try?

Crowd-Pleasing Appeal: This dip is designed to be a hit at any gathering, with its creamy and spicy flavor that leaves everyone wanting more.
Simplicity: It takes just a few minutes to prepare, making it a go-to for busy hosts looking to create something delicious without the fuss.
Versatile Variations: Customize the spice level to suit your taste—whether you prefer it mild or with an extra kick, follow my tips for adjustments!
Dazzling Texture: Enjoy a delightful mix of creamy cheese and crunchy bits of jalapeños and green onions, providing a tantalizing mouthfeel.
Easy Pairing: Serve with a variety of crackers, tortilla chips, or fresh veggies to please all your guests! Check out more party appetizer ideas for inspiration!

Alabama Fire Cracker Dip Ingredients

  • For the Creamy Base
    • Cream Cheese – Provides a creamy base; ensure it’s softened for easy mixing.
    • Mayonnaise – Adds richness and moisture; Greek yogurt can be a lighter substitute.

  • For Flavor Enhancement
    • Dry Ranch Dressing Mix – Offers a savory flavor boost that perfectly complements the dip.
    • Dry Italian Dressing Mix – Enhances the taste profile with a medley of herbs and spices.

  • For a Kick of Heat
    • Chopped Green Chilies – Introduces mild heat and delicious flavor; use canned for convenience.
    • Pickled Jalapeños – Delivers heat and tang; adjust quantity to suit your spice preference.

  • For Texture and Richness
    • Shredded Cheddar Cheese – Adds sharpness and richness; substitute with pepper jack for extra spice.
    • Shredded Monterey Jack Cheese – Provides a creamy texture and mild flavor for balance.

  • For Freshness
    • Chopped Green Onions – Add freshness and a slight crunch to the dip.

  • For Serving
    • Crackers – Perfect for serving alongside the dip; use saltines or tortilla chips for a satisfying crunch.

This Alabama Fire Cracker Dip brings together creamy, spicy flavors that are sure to delight your guests at any gathering!

Step‑by‑Step Instructions for Alabama Fire Cracker Dip

Step 1: Prepare the Cream Cheese
Begin by ensuring your cream cheese is softened to room temperature, making it easier to mix. If needed, microwave the cream cheese in 15-second intervals until just softened—around 30-45 seconds should suffice. This creamy base is essential for your Alabama Fire Cracker Dip, providing the perfect texture.

Step 2: Mix the Base Ingredients
In a large mixing bowl, combine the softened cream cheese and mayonnaise. Using a hand mixer or a sturdy spatula, beat the two together on medium speed until the mixture is smooth and creamy, which takes about 1-2 minutes. This forms the foundation of your delicious dip.

Step 3: Incorporate the Seasonings
Next, sprinkle in the dry ranch dressing mix and dry Italian dressing mix. Stir the mixture thoroughly until all seasonings are fully incorporated and the dip takes on a consistent flavor. You’ll start to notice a delightful aroma; this is the magic of your Alabama Fire Cracker Dip coming together!

Step 4: Add the Chilies
Now, gently fold in the undrained chopped green chilies, ensuring they’re evenly distributed throughout the dip. This step adds a warm touch to the creamy mixture, enhancing the flavor profile with a mild heat that complements the creaminess beautifully. Continue mixing until just combined.

Step 5: Cheese Addition
Incorporate both the shredded cheddar and Monterey Jack cheeses into the mixture. Stir until the cheeses are well blended and you see specks of both throughout the dip. The cheese not only adds richness but also a wonderful texture that makes your Alabama Fire Cracker Dip irresistible.

Step 6: Mix in Fresh Ingredients
Now, it’s time to add the chopped green onions and pickled jalapeños. Stir them in gently, taking care not to overmix, as you want those bits of freshness to remain intact. Adjust the amount of jalapeños according to your preferred spice level, making this dip uniquely yours.

Step 7: Chill the Dip
Cover your bowl with plastic wrap or a lid and place it in the refrigerator. Allow the dip to chill for at least 2 hours, but preferably overnight. Chilling enhances the flavors, allowing the ingredients to meld beautifully together, making your Alabama Fire Cracker Dip a standout treat.

Step 8: Prepare for Serving
Once your dip has chilled, take it out of the fridge and give it a good stir to redistribute the ingredients. Transfer the dip into a serving dish, which makes it more inviting for your guests.

Step 9: Serve with Crackers
Present your delicious Alabama Fire Cracker Dip alongside an assortment of crackers, tortilla chips, or fresh vegetables. The crunch of the crackers perfectly complements the creamy nature of the dip, creating an irresistible snacking experience.

Step 10: Garnish (Optional)
For an elegant finish, consider garnishing your dip with extra shredded cheese, green onions, or even additional jalapeños. This adds a splash of color and extra flavor right before serving, ensuring your dish looks as good as it tastes!

Alabama Fire Cracker Dip Variations

Make this delightful dip your own by exploring the exciting possibilities within this recipe!

  • Spicy Version: Add extra chopped jalapeños or a dash of cayenne pepper to kick the heat up a notch. Just a hint of heat can elevate the experience!
  • Vegetable Variety: For a milder flavor, swap out jalapeños for diced bell peppers. This addition retains crunch while letting everyone enjoy a tasting experience.
  • Protein Addition: Incorporate crumbled bacon or sliced olives into the mix for extra flavor and texture. The savory notes will give your dip a delicious twist that your friends will rave about!
  • Fresh Twist: Stir in some drained diced tomatoes for a bright burst of freshness. The tomatoes enhance the dip’s visual appeal and provide a vibrant burst of flavor!
  • Dairy-Free Alternative: Replace cream cheese and mayonnaise with dairy-free substitutes like avocado or cashew cream. This makes the dip suitable for those avoiding dairy while keeping it rich and creamy.
  • Cheesy Options: Try mixing in a blend of different cheeses, such as gouda or feta, to create unique flavor combinations. Cheese lovers will enjoy the complexity that comes with different textures and tastes!
  • Herb Infusion: Incorporate fresh herbs like cilantro or parsley for added freshness. This small change adds a delightful aroma and elevates the overall taste experience!
  • Tropical Flair: Toss in some crushed pineapple for a hint of sweetness that works beautifully with the spicy elements. This unexpected addition could surprise your guests and leave them asking for your unique secret!

Want more ideas? You can explore additional party appetizer ideas or find some tasty tips to spice up your dip experience!

What to Serve with Alabama Fire Cracker Dip?

Elevate your gathering with a variety of delicious pairings that perfectly complement this creamy, spicy dip.

  • Saltine Crackers: The classic choice for dippable crunch, enhancing the creamy texture without overpowering the flavors.

  • Tortilla Chips: Their sturdy texture stands up to the dip’s richness, providing a satisfying, zesty experience with every scoop.

  • Vegetable Platter: Crisp celery and carrot sticks offer a fresh, crunchy contrast, making each bite refreshing while adding vibrant colors to your spread.

  • Toasted Baguette Slices: These provide an elegant twist, allowing for a delightful crunch and a hint of rustic flavor with every dip.

  • Beer or Sparkling Water: A light beer or refreshing sparkling water can cut through the richness of the dip, elevating the overall enjoyment of this party favorite.

  • Creamy Coleslaw: This tangy, crunchy side balances the heat of the dip and adds a delightful contrast, making every bite an exciting adventure.

Invite your guests to mix and match these pairings for a fun and flavor-packed experience that will keep them coming back for more!

Make Ahead Options

These Alabama Fire Cracker Dip is perfect for meal prep enthusiasts looking to save time! You can prepare the entire dip up to 24 hours in advance, covering it tightly with plastic wrap to refrigerate. The creamy flavors will meld beautifully overnight, making it even more delicious. When you're ready to serve, simply take it out, give it a good stir, and transfer it to your serving dish. If you prefer some extra garnish, consider adding more cheese or green onions right before serving to refresh its appearance. This way, you’ll have a flavorful crowd-pleaser ready with minimal last-minute effort!

How to Store and Freeze Alabama Fire Cracker Dip

Fridge: Store leftovers covered in an airtight container for up to 3 days. This dip improves in flavor as it sits, so don’t hesitate to make it ahead!

Freezer: For longer storage, freeze the dip in a freezer-safe container for up to 2 months. Thaw in the fridge overnight before serving.

Reheating: Reheat gently in the microwave or on the stovetop, adding a splash of milk if needed to restore creaminess. Avoid overheating to preserve texture.

Prep Ahead: You can prepare the Alabama Fire Cracker Dip in advance, letting it chill overnight for optimal flavor development before your gathering!

Expert Tips for Alabama Fire Cracker Dip

  • Softened Cheese: Make sure your cream cheese is fully softened before mixing. This ensures a smooth, creamy texture for the dip.
  • Chill Time Matters: Allow the dip to chill for at least 2 hours, or overnight if possible. This waiting period melds flavors, taking your Alabama Fire Cracker Dip to the next level.
  • Spice Control: Be mindful with jalapeños! Start with a small amount, adjusting to your taste preference to avoid overwhelming heat in the dip.
  • Avoid Overmixing: Carefully mix in the fresh ingredients like green onions and jalapeños. Overmixing can break them down, losing their delightful crunch.
  • Experiment with Variations: Don’t hesitate to customize! Try adding bacon or different cheeses for a twist on this classic Alabama Fire Cracker Dip.

Alabama Fire Cracker Dip Recipe FAQs

What type of cream cheese should I use for Alabama Fire Cracker Dip?
Absolutely! For the best results, use full-fat cream cheese that is softened to room temperature. This allows for easy mixing, creating a smooth and creamy base for your dip. If you find yourself in a pinch, low-fat cream cheese can work too, but it might alter the richness of the dip slightly.

How long can I store leftovers of Alabama Fire Cracker Dip?
You can store any leftover Alabama Fire Cracker Dip in an airtight container in the refrigerator for up to 3 days. Make sure to cover it well to maintain freshness. The dip often tastes even better after sitting for a day, as the flavors meld beautifully together!

Can I freeze Alabama Fire Cracker Dip?
Yes, you can freeze Alabama Fire Cracker Dip for up to 2 months! To freeze, transfer the dip into a freezer-safe container, leaving some space for expansion. When you’re ready to enjoy it, thaw it in the refrigerator overnight. Reheat gently, adding a splash of milk if it becomes too thick.

What can I do if the dip is too spicy for my taste?
If you find the dip is too spicy, no worries! To tone down the heat, you can mix in some additional cream cheese or sour cream to balance out the flavors. You could also add more mayonnaise to dilute the spice. In the future, start with a smaller amount of jalapeños, gradually increasing based on your preference.

Are there any dietary considerations I should be aware of for Alabama Fire Cracker Dip?
Certainly! Alabama Fire Cracker Dip contains dairy and may not be suitable for those who are lactose intolerant. However, you can easily make this dip dairy-free by using plant-based cream cheese and dairy-free mayonnaise. Just check labels to accommodate any allergies your guests may have.

How can I customize the heat level of the dip?
Very easily! To adjust the heat level, you have a few options. Start with a smaller quantity of pickled jalapeños and add more to taste after mixing. For a milder option, replace jalapeños with diced bell peppers. If you want to crank up the heat, include some cayenne pepper or a dash of your favorite hot sauce. Enjoy experimenting with the flavors!

Alabama Fire Cracker Dip

Alabama Fire Cracker Dip

Discover the Alabama Fire Cracker Dip, a creamy, spicy delight perfect for any gathering!
Print Recipe Pin Recipe
Prep Time 10 minutes mins
Chill Time 2 hours hrs
Total Time 2 hours hrs 10 minutes mins
Servings: 8 servings
Course: Appetizers
Cuisine: American
Calories: 250
Ingredients Equipment Method Nutrition Notes

Ingredients
  

For the Creamy Base
  • 8 oz Cream Cheese ensure it's softened for easy mixing
  • 1/2 cup Mayonnaise Greek yogurt can be a lighter substitute
For Flavor Enhancement
  • 1 packets Dry Ranch Dressing Mix
  • 1 packets Dry Italian Dressing Mix
For a Kick of Heat
  • 1 can Chopped Green Chilies use canned for convenience
  • 1/4 cup Pickled Jalapeños adjust quantity to suit your spice preference
For Texture and Richness
  • 1 cup Shredded Cheddar Cheese substitute with pepper jack for extra spice
  • 1 cup Shredded Monterey Jack Cheese provides a creamy texture and mild flavor
For Freshness
  • 1/4 cup Chopped Green Onions add freshness and a slight crunch
For Serving
  • 1 box Crackers use saltines or tortilla chips for a satisfying crunch

Equipment

  • Mixing Bowl
  • hand mixer
  • Spatula
  • plastic wrap

Method
 

Step-by-Step Instructions
  1. Begin by ensuring your cream cheese is softened to room temperature, making it easier to mix.
  2. In a large mixing bowl, combine the softened cream cheese and mayonnaise. Beat together until smooth.
  3. Sprinkle in the dry ranch dressing mix and dry Italian dressing mix. Stir thoroughly.
  4. Gently fold in the chopped green chilies, ensuring they’re evenly distributed throughout the dip.
  5. Incorporate the shredded cheddar and Monterey Jack cheeses into the mixture.
  6. Add the chopped green onions and pickled jalapeños, stirring gently.
  7. Cover your bowl and place it in the refrigerator. Allow the dip to chill for at least 2 hours, preferably overnight.
  8. Once chilled, stir the dip to redistribute the ingredients and transfer to a serving dish.
  9. Serve alongside an assortment of crackers, tortilla chips, or fresh vegetables.
  10. Optionally garnish with extra shredded cheese, green onions, or additional jalapeños before serving.

Nutrition

Serving: 1cupCalories: 250kcalCarbohydrates: 5gProtein: 6gFat: 22gSaturated Fat: 10gPolyunsaturated Fat: 1gMonounsaturated Fat: 8gCholesterol: 40mgSodium: 350mgPotassium: 200mgSugar: 1gVitamin A: 500IUVitamin C: 2mgCalcium: 150mgIron: 1mg

Notes

This dip improves in flavor as it sits, so consider preparing it ahead of time. Store leftovers covered for up to 3 days in the fridge.

Tried this recipe?

Let us know how it was!

Irresistible Million Dollar Neiman Marcus Dip for Your Gatherings

December 30, 2025 by Grace Snow Leave a Comment

At a recent gathering, I witnessed the magic of laughter and community stem from a simple bowl of dip. Enter the Million Dollar Neiman Marcus Dip—a retro classic perfect for any occasion. Combining creamy textures with a savory crunch, this cold dip captivates taste buds and sparks joyful conversations. What I love about this recipe is how quick it comes together, ensuring you can whip it up even on the busiest days. With its blend of familiar ingredients, it’s not just a crowd-pleaser; it’s an invitation for everyone to gather ‘round and indulge. Whether for a spontaneous get-together or a cozy night at home, this dip makes entertaining effortless and enjoyable. So, are you ready to elevate your next snack time with this creamy delight?

Why is this dip a must-try?

Creaminess hits all the right notes with a blend of cream cheese, mayo, and sour cream that creates a luxurious texture. Savory Crunch is brought by cooked bacon and slivered almonds, giving every bite a satisfying crunch. Easy Preparation means you can have this dip ready in no time—perfect for unexpected guests! Versatile Dipper options abound; serve it with crackers, veggies, or even baguette slices. Finally, Crowd-Pleaser status is guaranteed; it never fails to draw a crowd, making it a favorite at gatherings. Elevate your appetizer game with this indulgent dip and treat your guests to a memorable experience!

Million Dollar Neiman Marcus Dip Ingredients

For the Dip

  • Cream Cheese – Essential for creaminess; use full-fat for the best texture.
  • Mayonnaise – Adds richness and creaminess; opt for light mayo for a lower fat option.
  • Sour Cream – Provides tang; Greek yogurt can be used for a healthier twist.
  • Sharp Cheddar Cheese – A flavorful bite; mild cheddar is a good substitute if preferred.
  • Monterey Jack Cheese – Contributes a creamy texture with mild flavor; no common substitutions.
  • Green Onions – Introduces freshness; replace with chives for a similar flavor profile.
  • Cooked and Crumbled Bacon – Adds savory goodness; for a vegetarian version, try chopped toasted pecans or smoked paprika.
  • Toasted Slivered Almonds – Offers a crunchy texture; substitute with other nuts if desired.
  • Salt and Black Pepper – Enhances overall flavor; season to taste.

This Million Dollar Neiman Marcus Dip is a delightful choice for any gathering!

Step‑by‑Step Instructions for Million Dollar Neiman Marcus Dip

Step 1: Mix the Base
In a large mixing bowl, combine 8 ounces of softened cream cheese, 1 cup of mayonnaise, and 1 cup of sour cream. Using a hand mixer or a sturdy spatula, blend these ingredients on medium speed until the mixture is completely smooth and creamy, typically taking about 2-3 minutes. This creamy base will be the heart of your Million Dollar Neiman Marcus Dip.

Step 2: Add the Cheeses
Once the base is well blended, add in 1 cup of shredded sharp cheddar cheese and 1 cup of Monterey Jack cheese. Stir these cheese blends gently into the mixture with a spoon or spatula until they’re evenly distributed. The combination of flavors begins to shine here, giving the dip a rich and indulgent taste that will satisfy any crowd.

Step 3: Incorporate Fresh Ingredients
Next, chop ½ cup of green onions and add them to the cheese mixture, followed by 1 cup of cooked and crumbled bacon. Stir them together until fully incorporated. The touch of green onions enhances freshness, while the bacon adds that irresistible savory crunch, making this Million Dollar Neiman Marcus Dip even more delightful.

Step 4: Fold in the Nuts and Season
Gently fold in ½ cup of toasted slivered almonds to the dip, ensuring they are evenly mixed without losing their crunch. Then, season your dip with salt and black pepper to taste. The almonds contribute a nutty flavor and satisfying texture that complements the creamy elements of the dip perfectly.

Step 5: Chill for Flavor
Transfer the dip to a serving bowl, cover it tightly with plastic wrap, and refrigerate for at least 1 hour, although overnight is even better. This chilling time allows the flavors of your Million Dollar Neiman Marcus Dip to meld beautifully, creating a richer and more harmonious taste experience.

Step 6: Serve and Enjoy
When ready to serve, take the dip out of the fridge and present it with an array of dippers like buttery Ritz crackers, fresh vegetable sticks, or toasted baguette slices. The colorful spread will beckon friends and family to indulge in this oven-free, creamy delight, perfect for any gathering!

Storage Tips for Million Dollar Neiman Marcus Dip

Fridge: Store in an airtight container for up to 4 days. Ensure the dip is properly covered to maintain its creamy texture and prevent drying out.

Make-Ahead: This dip is perfect for preparing in advance. It actually tastes better after chilling overnight, allowing the flavors to meld beautifully.

Freezer: For longer storage, freeze in a freezer-safe container for up to 2 months. Thaw in the fridge overnight before serving, and stir to rehydrate the dip if needed.

Reheating: This dip is best served cold; avoid reheating as it may change the texture. Enjoy straight from the fridge with your favorite dippers!

Make Ahead Options

For busy home cooks, the Million Dollar Neiman Marcus Dip is a fantastic candidate for meal prep! You can prepare the entire dip up to 24 hours in advance. Start by mixing the cream cheese, mayonnaise, sour cream, cheeses, green onions, and bacon as directed in the recipe. Transfer it to an airtight container and refrigerate it until you’re ready to serve. This not only saves you precious time on the day of your gathering but also enhances the flavors as they meld together overnight. When it’s time to serve, simply give it a gentle stir, add the slivered almonds, and enjoy a dip that’s just as delicious as when it was freshly made!

Million Dollar Neiman Marcus Dip Variations

Ready to put your personal touch on this classic dip? Let your creativity flow as you explore these delightful twists!

  • Vegetarian Option: Substitute crumbled bacon with chopped toasted pecans for a satisfying crunch without the meat.
  • Spicy Kick: Swap in pepper jack cheese to take the flavor up a notch with a pleasant heat that lingers just enough.
  • Herb Infusion: Add a tablespoon of fresh dill or parsley for an aromatic burst that brightens the overall taste profile.
  • Creamy Vegan Alternative: Replace cream cheese and sour cream with cashew cream and vegan mayo for a plant-based twist that rivals the original.
  • Fruitiness: Stir in finely chopped fresh pineapple or cranberries for a surprising touch of sweetness that contrasts with the savory elements nicely.
  • Tasty Crunch: Use crispy fried onions instead of slivered almonds for a different crunch that enhances the dip's texture and flavor.
  • Garlic Flavor: Mix in a minced clove of garlic if you’re a fan of bold flavors; it adds a delicious depth that complements the creamy base beautifully.
  • Nut Mix: Experiment with different toasted nuts; walnuts or hazelnuts can give a unique flavor and texture that will intrigue your guests.

Feel free to try these variations or combine them for even more exciting flavors. And if you’re on the lookout for more dip ideas, check out my recipe for a lively and zesty Guacamole that will have everyone raving!

What to Serve with Million Dollar Neiman Marcus Dip

A delicious dip is just the start of an unforgettable meal experience!

  • Buttery Ritz Crackers: Their buttery flavor and crisp texture complement the dip's creamy richness, making every bite luxurious.
  • Fresh Vegetable Sticks: Crunchy carrots, cucumbers, and bell peppers add a refreshing contrast to the dip's bold flavors, pleasing both the palate and the eye.
  • Toasted Baguette Slices: The warm, crunchy bread serves as the perfect vessel, inviting you to scoop up heaping bites of creamy goodness. It’s a delightful pairing!
  • Savory Pretzels: Salty pretzels provide a satisfying crunch that offsets the creaminess of the dip, enhancing your snacking pleasure while creating a fun party vibe.
  • Pita Chips: Their light and airy texture allows the dip to shine, inviting a robust flavor symphony that’s especially lovely with a little crunch.
  • Red Wine: A glass of red wine, like a Merlot, elevates the experience, balancing the flavors beautifully while adding a touch of sophistication to the gathering.
  • Chocolate Chip Cookies: For a sweet finish, pair the dip with homemade chocolate chip cookies; the contrasting flavors will leave your guests eager for more.

Expert Tips for Million Dollar Neiman Marcus Dip

  • Perfect Cream Cheese: Ensure your cream cheese is softened for easy blending; this avoids lumps in your dip's creamy base.

  • Cheese Variety: Feel free to mix and match different cheeses, such as pepper jack for a spicy kick, while still keeping the Million Dollar Neiman Marcus Dip deliciously rich.

  • Crispy Bacon: Always use crispy, crumbled bacon for that ideal savory crunch; undercooked bacon can make the dip greasy.

  • Chill Time Matters: Let the dip chill for at least an hour, but overnight is preferable; this enhances flavor melding for a more satisfying experience.

  • Nutty Texture: Toast your slivered almonds carefully to amplify their nutty flavor, providing an irresistible crunch in every bite of the dip.

  • Seasoning Balance: Be sure to season with salt and black pepper to taste, as the flavors of ingredients can vary and you'll want everything to shine!

Million Dollar Neiman Marcus Dip Recipe FAQs

What kind of cream cheese should I use?
I recommend using full-fat cream cheese for the best texture; it creates a smooth and velvety base. If you're in a pinch, light cream cheese can also work, but it may slightly alter the creaminess of the dip.

How should I store the Million Dollar Neiman Marcus Dip?
Store your dip in an airtight container in the refrigerator for up to 3-4 days. Make sure it’s well-covered to keep its creamy texture intact and to prevent it from drying out.

Can I freeze Million Dollar Neiman Marcus Dip?
Absolutely! If you want to store leftovers, you can freeze the dip in a freezer-safe container for up to 3 months. To thaw, move it to the refrigerator for 24 hours, and give it a good stir before serving to help restore its creamy consistency.

What can I do if my dip is too thick?
If you find your Million Dollar Neiman Marcus Dip is too thick after chilling, don't worry! Simply add a tablespoon of milk or cream at a time, stirring well until you achieve your desired consistency. This little trick will help loosen it up without compromising flavor!

Is this dip safe for my pet?
While the dip contains cream cheese and dairy which are not toxic to pets, it's best to avoid giving them any due to high-fat content and additional ingredients like garlic and onions that can be harmful to dogs. Keep it for your human guests to enjoy!

What can I substitute for the bacon in the Million Dollar Neiman Marcus Dip?
For a vegetarian twist, feel free to replace the cooked bacon with chopped toasted pecans for a wonderful crunch or use smoked paprika to infuse that smoky flavor without the meat. Your friends won’t even miss it!

These FAQs should make your experience with the Million Dollar Neiman Marcus Dip even more enjoyable!

Million Dollar Neiman Marcus Dip

Irresistible Million Dollar Neiman Marcus Dip for Your Gatherings

This Million Dollar Neiman Marcus Dip is a creamy, savory crowd-pleaser perfect for gatherings.
Print Recipe Pin Recipe
Prep Time 15 minutes mins
Chill Time 1 hour hr
Total Time 1 hour hr 15 minutes mins
Servings: 10 dips
Course: Appetizers
Cuisine: American
Calories: 250
Ingredients Equipment Method Nutrition Notes

Ingredients
  

For the Dip
  • 8 ounces Cream Cheese essential for creaminess; use full-fat for the best texture
  • 1 cup Mayonnaise adds richness and creaminess; opt for light mayo for a lower fat option
  • 1 cup Sour Cream provides tang; Greek yogurt can be used for a healthier twist
  • 1 cup Sharp Cheddar Cheese a flavorful bite; mild cheddar is a good substitute if preferred
  • 1 cup Monterey Jack Cheese contributes a creamy texture; no common substitutions
  • ½ cup Green Onions introduces freshness; replace with chives for a similar flavor profile
  • 1 cup Cooked and Crumbled Bacon adds savory goodness; for a vegetarian version, try chopped toasted pecans or smoked paprika
  • ½ cup Toasted Slivered Almonds offers a crunchy texture; substitute with other nuts if desired
  • Salt to taste
  • Black Pepper to taste

Equipment

  • Mixing Bowl
  • hand mixer
  • Spatula

Method
 

Step-by-Step Instructions
  1. In a large mixing bowl, combine 8 ounces of softened cream cheese, 1 cup of mayonnaise, and 1 cup of sour cream. Blend until smooth and creamy, about 2-3 minutes.
  2. Once the base is blended, add in 1 cup of shredded sharp cheddar cheese and 1 cup of Monterey Jack cheese. Stir gently until evenly distributed.
  3. Chop ½ cup of green onions and add them to the mixture, followed by 1 cup of cooked and crumbled bacon. Stir until fully incorporated.
  4. Fold in ½ cup of toasted slivered almonds and season with salt and black pepper to taste.
  5. Transfer the dip to a serving bowl, cover with plastic wrap, and refrigerate for at least 1 hour.
  6. Serve with an array of dippers like crackers, vegetable sticks, or baguette slices.

Nutrition

Serving: 1cupCalories: 250kcalCarbohydrates: 5gProtein: 6gFat: 22gSaturated Fat: 8gPolyunsaturated Fat: 1gMonounsaturated Fat: 5gCholesterol: 30mgSodium: 400mgPotassium: 150mgSugar: 1gVitamin A: 10IUVitamin C: 2mgCalcium: 15mgIron: 2mg

Notes

For best results, chill overnight to enhance flavor melding. Use crispy bacon for ideal texture.

Tried this recipe?

Let us know how it was!

Decadent Stuffed Mushroom Dip that Everyone Will Love

December 30, 2025 by Grace Snow Leave a Comment

As I stood over the stove, the enticing aroma of sautéed mushrooms filled my kitchen, igniting a sense of nostalgia for cozy gatherings filled with laughter and warmth. This Cheesy Stuffed Mushroom Dip is my twist on a beloved classic, blending umami-rich flavors with a creamy texture that's perfect for scooping. Not only is this easy appetizer a guaranteed crowd-pleaser, but it also brings a touch of comfort that transforms any gathering into a heartfelt occasion. Whether you're hosting a game night or enjoying a quiet evening in, this warm dip pairs wonderfully with toasted bread or fresh veggies. Are you ready to elevate your appetizer game and impress your guests with this delightful dish? Let’s dive in!

Why is this Stuffed Mushroom Dip irresistible?

Deliciously creamy and packed with flavor, this Stuffed Mushroom Dip combines sautéed mushrooms and rich cheeses for a mouthwatering experience. Effortlessly simple, even beginner cooks can whip this up in no time, making it a perfect go-to recipe. Crowd-pleaser, it’s ideal for gatherings, bringing everyone together over a shared love for comfort food. Whether served with toasted baguette slices or fresh veggies, this dip shines as a versatile appetizer. Don’t forget to check out our delicious Grilled Mushrooms Savory for more mushroom goodness!

Stuffed Mushroom Dip Ingredients

• Here’s what you need to create this delightful dip!

For the Dip

  • Olive Oil or Butter – Perfect for sautéing mushrooms; olive oil adds a fruity touch, while butter offers rich flavor.
  • Mushrooms (8 ounces, sliced) – The star of this dip; use fresh for the best taste and texture.
  • Garlic (2 cloves, minced) – Adds aromatic depth to the dip; fresh garlic is a must for optimal flavor.
  • Cream Cheese (8 ounces, softened) – This creamy base is essential for that luscious dip consistency; mascarpone can be a fun substitute.
  • Sour Cream (1/2 cup) – Provides a tangy kick; Greek yogurt is a lighter option if you prefer.
  • Mozzarella Cheese (1 cup, divided) – For a gooey texture; consider Fontina or Gruyère for an exciting flavor twist.
  • Parmesan Cheese (1/4 cup, grated) – Offers a nuanced flavor; freshly grated works best for melting.
  • Salt (1/2 teaspoon) – Enhances the overall flavor; adjust according to your taste preferences.
  • Black Pepper (1/4 teaspoon) – Adds a mild heat; freshly cracked ensures the best flavor.
  • Fresh Thyme or Parsley (1 teaspoon, chopped) – A great herb for garnish; chives or oregano can also add their unique flair.

Dive into this delightful Stuffed Mushroom Dip adventure and prepare for an unforgettable taste experience!

Step‑by‑Step Instructions for Stuffed Mushroom Dip

Step 1: Sauté the Mushrooms
Heat 2 tablespoons of olive oil or butter in a large skillet over medium heat. Once hot, add 8 ounces of sliced mushrooms, allowing them to brown and soften for about 8-10 minutes. Stir occasionally until they are tender and have released their moisture, enhancing their rich flavor and aroma.

Step 2: Add Garlic
Stir in 2 minced garlic cloves and cook for an additional minute, until fragrant. Keep the heat on medium and ensure the garlic doesn’t burn, as it can turn bitter. This step adds an aromatic depth that beautifully complements the sautéed mushrooms in your Stuffed Mushroom Dip.

Step 3: Incorporate Creamy Ingredients
Reduce the heat to low and add 8 ounces of softened cream cheese along with ½ cup of sour cream to the skillet. Stir gently until both ingredients melt and combine seamlessly, creating a luscious and creamy base for your dip. The mixture should be smooth with no lumps remaining.

Step 4: Mix in Cheeses
To the creamy mixture, add ½ cup of shredded mozzarella and ¼ cup of grated Parmesan cheese. Stir until the cheeses are fully melted and melded into the dip, creating a gooey texture. This rich combination amplifies the flavor profile, making your Stuffed Mushroom Dip extra delightful.

Step 5: Prepare for Baking
Transfer the dip mixture into a greased baking dish or keep it in your skillet if oven-safe. Sprinkle the remaining ½ cup of mozzarella cheese evenly on top, creating a cheesy layer that will melt and bubble into a golden crust when baked.

Step 6: Bake Until Golden
Preheat your oven to 375°F (190°C) and place the dip in the oven for 15-20 minutes. Bake until the dip is piping hot, bubbly, and golden on top. Keep an eye on it to avoid burning; you want that gooey, inviting appearance that pulls everyone in.

Step 7: Garnish and Serve
Once out of the oven, sprinkle with freshly chopped thyme or parsley for a burst of color and flavor. Serve your warm Stuffed Mushroom Dip immediately with toasted baguette slices, crackers, or fresh vegetable sticks, allowing everyone to enjoy this comforting and scrumptious appetizer!

Expert Tips for Stuffed Mushroom Dip

  • Sautéing Technique: Ensure you sauté the mushrooms over medium heat; too high can burn them, resulting in a bitter flavor in your Stuffed Mushroom Dip.

  • Cream Cheese Softness: Always use softened cream cheese; it combines smoothly into the dip. Take it out of the fridge about 30 minutes before starting.

  • Flavor Boost: For an extra kick, consider adding a splash of white wine while sautéing the mushrooms; it enhances the umami flavor wonderfully.

  • Cheese Variety: Don’t hesitate to mix cheese types! A blend of cheeses, like gouda or sharp cheddar, can elevate the taste of your Stuffed Mushroom Dip.

  • Serving Temperature: Serve the dip immediately after baking for the best texture and flavor, as it’s best enjoyed warm and bubbly.

Make Ahead Options

These Cheesy Stuffed Mushroom Dips are perfect for busy cooks who want to save time without sacrificing flavor! You can prepare the dip up to 24 hours in advance by following the recipe instructions until the baking step. Just cover the bowl with plastic wrap and refrigerate it. To maintain its creamy texture and avoid browning, ensure it is well-sealed. When you're ready to serve, simply preheat your oven to 375°F and bake the dip for 15-20 minutes until it’s bubbly and golden. You’ll have a delicious appetizer that’s just as delightful as if it were freshly made!

Storage Tips for Stuffed Mushroom Dip

Fridge: Store leftover Stuffed Mushroom Dip in an airtight container for up to 3 days. Make sure it's completely cooled before sealing to prevent moisture build-up.

Reheating: To reheat, place in the microwave until warm, or bake in the oven at 350°F (175°C) for 10-15 minutes, until heated through and bubbly.

Freezer: Freezing is not recommended due to potential separation of cheeses upon thawing. Instead, enjoy fresh for optimal flavor and texture.

Make-Ahead: Prepare the dip up to the baking step, refrigerate, and bake when ready to serve for easy entertaining!

Stuffed Mushroom Dip Variations & Substitutions

Explore the comforting world of customization with this delightful dish! Let your creativity shine by adding your personal touch to the flavor profile.

  • Dairy-Free: Replace cream cheese and sour cream with cashew cream and coconut yogurt for a tasty vegan twist. These alternatives will keep the dip creamy and delicious!
  • Extra Cheesy: Add a mix of sharp white cheddar and Gruyère to boost flavor complexity. The result is an unforgettable cheese lover's dream!
  • Vegetarian Protein: Stir in a cup of cooked spinach or chopped artichoke hearts for added texture and nutrition, transforming your dip into a nourishing option that's still indulgent.
  • Taco-Inspired: Incorporate taco seasoning and diced jalapeños for a zesty kick. Serve with tortilla chips instead of crackers for a fun twist on flavors!
  • Hearty Additions: Mix in crispy bacon or crumbled sausage for a meaty version that will satisfy heartier appetites. The smoky flavor pairs beautifully with the rich cheeses!
  • Gluten-Free: Swap out traditional crackers for gluten-free options or serve with sliced veggies for dipping. Consider using Grilled Mushrooms Savory on the side for more mushroom goodness!
  • Mediterranean Flair: Add olives or sun-dried tomatoes for an aromatic surprise. This spin creates a bright, fresh flavor that dances on the palate!
  • Layered Experience: Bake the dip in a pita pocket or serve atop toasted bread for an exciting twist. This not only elevates presentation but also provides delicious dippable vehicles.

Let these variations inspire you as you craft a Stuffed Mushroom Dip that reflects your unique tastes!

What to Serve with Stuffed Mushroom Dip

Create the perfect spread alongside this creamy delight to impress your guests with a delightful meal experience.

  • Toasted Baguette Slices: Simple yet classic, these slices provide a crunchy base that contrasts beautifully with the creamy dip.

  • Pita Chips: Their crisp texture and subtle flavor make them an excellent vehicle for the rich Stuffed Mushroom Dip, inviting every scoop.

  • Fresh Vegetable Sticks: Crisp celery, carrots, and bell peppers add a refreshing and healthy touch, balancing the richness of the dip.

  • Cheesy Garlic Bread: Elevate your appetizer platter with slices of warm, cheesy garlic bread, adding an irresistible aroma and flavor to every bite.

  • Savory Spinach Salad: A light salad with fresh greens, toasted walnuts, and a tangy dressing makes a delightful counterpoint to the creamy dip.

  • Red Wine: A glass of fruity red wine enhances the earthy flavors of the mushrooms, turning your gathering into a cozy celebration.

For a touch of sweetness after enjoying this hearty dip, why not end on a high note with chocolate mousse? Its creaminess pairs just right with the savory notes of the Stuffed Mushroom Dip.

Stuffed Mushroom Dip Recipe FAQs

How do I select the best mushrooms for the Stuffed Mushroom Dip?
To achieve the best flavor and texture in your Stuffed Mushroom Dip, opt for fresh mushrooms that are firm and have a smooth surface. Avoid mushrooms with dark spots all over, as they may be past their prime. If possible, choose baby bella or cremini mushrooms for an earthier taste, but white button mushrooms will work just fine!

What are the best storage methods for leftover Stuffed Mushroom Dip?
Store leftover Stuffed Mushroom Dip in an airtight container in the refrigerator for up to 3 days. Make sure to allow it to cool completely before sealing to avoid moisture build-up. When you're ready to enjoy it again, simply reheat in the microwave or bake at 350°F for about 10-15 minutes until warm and bubbly.

Can I freeze Stuffed Mushroom Dip?
Freezing is not recommended for the Stuffed Mushroom Dip due to the potential for the cheese to separate upon thawing, which can alter the dip's texture. It's best enjoyed fresh! However, you can prepare the dip up to the baking step, refrigerate it, and bake when you're ready to serve it to save time.

What dietary considerations should I keep in mind while making Stuffed Mushroom Dip?
If you're making this dip for guests with dietary restrictions, consider using gluten-free crackers for serving, or opt for fresh vegetables like celery or bell pepper sticks. For those with dairy allergies, you can substitute the cream cheese and sour cream with vegan alternatives. Be sure to double-check the ingredient labels for any allergens.

What should I do if my Stuffed Mushroom Dip doesn’t melt smoothly?
If your dip seems to be clumping rather than melting smoothly, it may be due to the cream cheese being too cold when added. Always ensure your cream cheese is softened prior to mixing. If it still does not combine well, try gradually adding a splash of milk or cream while stirring to help achieve a smoother texture.

How can I enhance the flavor of my Stuffed Mushroom Dip?
To elevate the flavors of your Stuffed Mushroom Dip, consider adding a splash of white wine while sautéing the mushrooms for an extra depth of flavor. Alternatively, experimenting with different cheese combinations, like sharp cheddar or Gruyère instead of mozzarella, can bring a delightful twist to this classic dip.

Stuffed Mushroom Dip

Decadent Stuffed Mushroom Dip that Everyone Will Love

This Stuffed Mushroom Dip is a creamy and cheesy appetizer that's perfect for gatherings, guaranteed to impress every guest.
Print Recipe Pin Recipe
Prep Time 15 minutes mins
Cook Time 20 minutes mins
Total Time 35 minutes mins
Servings: 8 servings
Course: Appetizers
Cuisine: American
Calories: 250
Ingredients Equipment Method Nutrition Notes

Ingredients
  

For the Dip
  • 2 tablespoons Olive Oil or Butter For sautéing mushrooms
  • 8 ounces Mushrooms, sliced Use fresh for best taste
  • 2 cloves Garlic, minced Adds aromatic depth
  • 8 ounces Cream Cheese, softened Essential for dip consistency
  • 1/2 cup Sour Cream Provides tangy kick
  • 1 cup Mozzarella Cheese, divided For gooey texture
  • 1/4 cup Parmesan Cheese, grated Freshly grated works best
  • 1/2 teaspoon Salt Adjust to taste
  • 1/4 teaspoon Black Pepper Freshly cracked ensures best flavor
  • 1 teaspoon Fresh Thyme or Parsley, chopped Herb for garnish

Equipment

  • Large skillet
  • Baking Dish

Method
 

Step-by-Step Instructions
  1. Heat 2 tablespoons of olive oil or butter in a large skillet over medium heat. Add 8 ounces of sliced mushrooms and sauté for about 8-10 minutes until browned and softened.
  2. Stir in 2 minced garlic cloves and cook for an additional minute until fragrant, ensuring garlic doesn’t burn.
  3. Reduce heat to low and add 8 ounces of softened cream cheese and 1/2 cup of sour cream. Stir until smooth and combined.
  4. Add 1/2 cup of shredded mozzarella and 1/4 cup of grated Parmesan cheese to the mixture, stirring until fully melted.
  5. Transfer the dip to a greased baking dish and sprinkle the remaining 1/2 cup of mozzarella cheese on top.
  6. Preheat the oven to 375°F (190°C) and bake the dip for 15-20 minutes until bubbly and golden.
  7. Garnish with freshly chopped thyme or parsley and serve warm with toasted baguette slices, crackers, or fresh veggies.

Nutrition

Serving: 1cupCalories: 250kcalCarbohydrates: 6gProtein: 8gFat: 22gSaturated Fat: 12gPolyunsaturated Fat: 1gMonounsaturated Fat: 6gCholesterol: 60mgSodium: 450mgPotassium: 200mgFiber: 1gSugar: 2gVitamin A: 400IUVitamin C: 2mgCalcium: 200mgIron: 1mg

Notes

Serve immediately for best texture and flavor. Leftovers can be stored in an airtight container for up to 3 days.

Tried this recipe?

Let us know how it was!

Savory Pumpkin Whipped Feta Dip for Every Gathering

December 27, 2025 by Grace Snow Leave a Comment

The aroma of roasted pumpkin and fresh herbs can transport you straight to a cozy autumn gathering, even if it's just a Tuesday night. That's exactly why I love this Creamy Pumpkin Whipped Feta Dip; it captures the essence of fall with every velvety bite. The delightful combination of rich whipped feta with sweet pumpkin and a hint of honey creates an appetizer that's both comforting and elegant, perfect for sharing or indulging all by yourself. Plus, it's incredibly easy to whip up and can be prepped ahead for those busy weeknight dinners. Whether you're slathering it on crusty bread or enjoying it with crunchy veggies, this pumpkin whipped feta dip is bound to become a new favorite. So, are you ready to elevate your dip game and impress your guests?

Why is this dip a must-try?

Irresistible Flavor: The combination of savory feta and sweet pumpkin creates a unique and delightful taste that will have everyone coming back for more.

Quick and Easy: Whip up this creamy dip in just a few minutes! Perfect for a last-minute appetizer or snack without compromising flavor.

Versatile Pairing: Enjoy it with crusty bread, crunchy crackers, or even fresh veggies. It easily complements any gathering's spread, making it suitable for any occasion.

Make-Ahead Friendly: Prepare this dip a day in advance and let the flavors meld in the fridge—a convenient time-saver for busy hosts!

Nutrient-Packed: Rich in vitamins A and C, alongside healthy fats from feta and yogurt, this dip is as good for you as it is delicious. Add a spoonful to your next cheese board or try it drizzled with honey for an extra touch! If you're searching for more pumpkin inspiration, don't miss our Pumpkin Cinnamon Roll or Pumpkin Brownies Decadent.

Pumpkin Whipped Feta Dip Ingredients

For the Dip

  • Feta Cheese – Use a block stored in brine for the creamiest texture in your pumpkin whipped feta dip.
  • Plain Greek Yogurt – Opt for full-fat for extra creaminess and to balance the saltiness of the feta.
  • Canned Pumpkin Puree – Make sure it's unsweetened to preserve the dip's flavor integrity and seasonal essence.
  • Honey – Adjust the amount based on your desired level of sweetness; it's the perfect complement to the feta and pumpkin.
  • Dried Thyme – This aromatic herb adds an earthy note; fresh thyme can be used for a more vibrant flavor profile.
  • Black Pepper – Freshly cracked adds a delightful hint of spice to round out the flavors beautifully.
  • Chopped Walnuts – Optional but recommended for a delightful crunch; can be utilized raw or toasted for an earthy flavor.
  • Crusty Toasted Bread/Crackers – Pair it with sourdough or a baguette for dipping—ideal vehicles for this delicious dip!

Step‑by‑Step Instructions for Pumpkin Whipped Feta Dip

Step 1: Blend the Base
Start by placing your drained block of feta cheese and plain Greek yogurt into a food processor. Blend them at medium speed for about 1 minute until you achieve a smooth and creamy consistency, stopping to scrape down the sides as necessary. This creamy base is crucial for your Pumpkin Whipped Feta Dip, ensuring a luscious texture.

Step 2: Incorporate Pumpkin and Flavorings
Next, add the canned pumpkin puree, a drizzle of honey (adjust based on your sweetness preference), dried thyme, and freshly cracked black pepper to the food processor. Blend everything thoroughly for another 30 seconds or until well combined and smooth. At this stage, the mixture should reflect a vibrant orange hue, combining the earthy flavors of pumpkin with the tanginess of feta.

Step 3: Chill the Dip
Transfer the blended mixture into an airtight storage container, and cover it to prevent exposure to air. Place it in the refrigerator for 30 to 60 minutes. This chill time allows the flavors to meld beautifully while also firming up the texture, ensuring your Pumpkin Whipped Feta Dip is perfectly spreadable when served.

Step 4: Prepare for Serving
Once chilled, remove the dip from the refrigerator and give it a gentle stir to smoothen it out. You can enhance the presentation by transferring the dip into a serving bowl, garnishing it with chopped walnuts, a sprinkle of fresh thyme, and a drizzle of honey on top. This step adds both flavor and visual appeal to your dip.

Step 5: Pair and Enjoy
Serve the Pumpkin Whipped Feta Dip alongside slices of crusty toasted bread or crunchy crackers. Arrange a beautiful platter with your dippers for an inviting display. Enjoy the delightful contrast of the creamy dip with the crunchy textures, making it an ideal appetizer for gatherings or a cozy night in!

Expert Tips for Pumpkin Whipped Feta Dip

• Choose Quality Feta: Use feta cheese stored in brine instead of crumbled feta for the best creamy texture in your Pumpkin Whipped Feta Dip.

• Adjust Sweetness: Start with a small amount of honey and taste as you go, allowing personalization of sweetness to match your preferences.

• Chill Time Matters: Don’t skip the chilling step; letting the dip rest in the fridge for at least 30 minutes allows flavors to meld and improves texture.

• Experiment with Herbs: Fresh thyme can elevate the flavor profile; feel free to mix in other herbs like rosemary or sage for delicious variations.

• Serving Suggestions: For an added crunch, consider sprinkling roasted pecans or sunflower seeds on top before serving alongside vegetables and crackers.

What to Serve with Pumpkin Whipped Feta Dip

Transform your cozy gatherings into culinary celebrations by complementing your delightful dip with these delicious pairings.

  • Creamy Mashed Potatoes: Their smooth, buttery texture creates a delightful contrast with the whipped feta dip's creaminess, ideal for a comforting brunch spread.

  • Crunchy Veggie Platter: Carrot sticks, cucumber slices, and bell peppers dipped in the creamy dip add refreshing flavors and textures, perfect for healthy munching.

  • Savory Crostini: Crispy slices of baguette brushed with garlic and olive oil elevate the dining experience, allowing the dip’s flavors to shine through.

  • Herbed Crackers: Their light crunch and subtle seasoning bring out the dip's savory notes while enhancing the overall flavor profile of your appetizer.

  • Roasted Sweet Potatoes: These earthy, sweet bites complement the pumpkin perfectly, creating a wonderful autumn-inspired pairing that warms the soul.

  • Honey-Drizzled Baked Brie: Indulge in rich cheese that pairs beautifully with the dip, offering a sophisticated touch ideal for entertaining with flair.

  • Sparkling Cider: As a refreshing drink option, its bubbly effervescence and slight sweetness balance the savory notes of the dip, making every bite delightful.

  • Pumpkin Spice Chocolate Cupcakes: For dessert, these treats bring a touch of seasonal charm and satisfy sweet cravings, rounding off your gathering perfectly.

Pumpkin Whipped Feta Dip Variations

Feel free to let your creativity shine as you customize this delightful dip to suit your taste buds!

  • Sour Cream: Swap Greek yogurt for sour cream to create a thicker and tangier dip. This variation adds a delightful creaminess, offering a slightly different flavor profile that some might prefer.

  • Roasted Pumpkin: Use fresh roasted pumpkin instead of canned puree for added earthiness and natural sweetness. Roasting enhances the flavor, making it even more caramelized and delicious.

  • Maple Syrup: If honey isn't your preferred sweetener, try maple syrup for a unique, rich twist. The complimentary flavor enhances the dip and adds an inviting warmth.

  • Herb Indulgence: Mix in additional fresh herbs like basil or parsley for a fresh burst of flavor. The more herbs you add, the brighter and more vibrant your dip will become!

  • Nut-Free Option: Omit walnuts or substitute with sunflower seeds for a nut-free variation. This keeps the texture while ensuring it's safe for those with nut allergies.

  • Spice It Up: Add a pinch of red pepper flakes or cayenne for a hint of heat. Not only does this elevate the flavor profile, but it also adds a delightful kick that might surprise your guests.

  • Cream Cheese Boost: Incorporate a block of softened cream cheese into the base for an ultra-creamy texture. This variation gives an extra richness that is sure to please even the pickiest of eaters.

  • Extra Crunch: Top the dip with crispy bacon bits or crumbled feta for a savory crunch. This surprising addition enhances every creamy bite while adding layers of flavor.

Enjoy experimenting with these tasty variations while embracing the spirit of autumn! And for even more pumpkin inspiration, take a moment to check out our Pumpkin Brownies Decadent or our delightful Pumpkin Cinnamon Roll.

Make Ahead Options

These Creamy Pumpkin Whipped Feta Dip options are fantastic for busy weeknights or entertaining! You can prepare the entire dip up to 24 hours in advance—just blend all the ingredients as directed, then transfer to an airtight container and refrigerate. This chilling time will allow the flavors to meld beautifully, enhancing the dip’s deliciousness. When it’s time to serve, simply give the dip a gentle stir and garnish with chopped walnuts, fresh thyme, and a drizzle of honey. By prepping ahead, you’ll save precious time on the day of your gathering while still delighting your guests with a fabulous, homemade appetizer!

How to Store and Freeze Pumpkin Whipped Feta Dip

Fridge: Store the Pumpkin Whipped Feta Dip in an airtight container in the fridge for up to 5 days. This helps maintain its freshness and creamy texture.

Freezer: You can freeze the dip in a freezer-safe container for up to 2 months. Be sure to leave some space at the top for expansion when freezing.

Thawing: To use, thaw the dip overnight in the fridge, then stir well before serving. You may need to adjust the texture by blending briefly again.

Reheating: While this dip is best served cold, if warmed slightly, do so gently in the microwave, using short bursts to avoid overheating and altering its creamy consistency.

Pumpkin Whipped Feta Dip Recipe FAQs

How do I choose ripe pumpkin for this dip?
Absolutely! When selecting canned pumpkin puree, make sure to choose unsweetened pumpkin for the best flavor. If opting for fresh pumpkin, look for one that feels heavy for its size with a firm skin and no dark spots. A pumpkin that is dull and heavy is usually a sign of freshness, while those that are glossy might be overripe.

How long can I store Pumpkin Whipped Feta Dip in the fridge?
Very! You can store the Pumpkin Whipped Feta Dip in an airtight container in the fridge for up to 5 days. Just be sure to keep it covered to maintain its creamy texture, and give it a gentle stir before serving.

Can I freeze Pumpkin Whipped Feta Dip?
Absolutely! To freeze, transfer the dip into a freezer-safe container, leaving some space at the top for expansion. It will keep well for up to 2 months. When you’re ready to enjoy it, simply thaw it overnight in the refrigerator and stir well before serving. You may wish to blend it again for the best consistency.

What if my dip isn't creamy enough?
If your Pumpkin Whipped Feta Dip isn’t as creamy as you’d like, don’t worry! Blend in an additional tablespoon of Greek yogurt or a splash of cream until you achieve your desired creaminess. Just go slowly, adding a bit at a time, and blend until smooth!

Are there any dietary considerations for this recipe?
Very! This recipe is gluten-free and vegetarian. If you're catering to nut allergies, you can simply omit the walnuts or substitute them with pumpkin seeds for a crunchy garnish. Always check your feta cheese to ensure it aligns with dietary restrictions, as it can contain various additives.

How can I adjust the sweetness of the dip?
I often make adjustments based on personal taste. Start by adding a small amount of honey—around 1 tablespoon—and blend. Taste and build up the sweetness gradually. If honey isn’t suitable for your diet, consider using maple syrup or agave nectar as a wonderful alternative!

Pumpkin Whipped Feta Dip

Savory Pumpkin Whipped Feta Dip for Every Gathering

Indulge in this flavorful Pumpkin Whipped Feta Dip, perfect for gatherings with its creamy texture and delightful taste.
Print Recipe Pin Recipe
Prep Time 10 minutes mins
Chill Time 45 minutes mins
Total Time 55 minutes mins
Servings: 6 servings
Course: Appetizers
Cuisine: American
Calories: 150
Ingredients Equipment Method Nutrition Notes

Ingredients
  

For the Dip
  • 8 oz Feta Cheese Use a block stored in brine for the creamiest texture.
  • 1 cup Plain Greek Yogurt Opt for full-fat for extra creaminess.
  • 1 cup Canned Pumpkin Puree Make sure it's unsweetened.
  • 2 tbsp Honey Adjust the amount based on desired sweetness.
  • 1 tsp Dried Thyme Fresh thyme can be used for a more vibrant flavor.
  • 1/2 tsp Black Pepper Freshly cracked for a hint of spice.
  • 1/4 cup Chopped Walnuts Optional for a crunch.
  • 8 slices Crusty Toasted Bread/Crackers Ideal for dipping.

Equipment

  • Food Processor

Method
 

Step-by-Step Instructions
  1. Start by blending drained feta cheese and Greek yogurt in a food processor until smooth.
  2. Add pumpkin puree, honey, thyme, and black pepper, then blend until well combined and smooth.
  3. Transfer to an airtight container and refrigerate for 30 to 60 minutes to allow flavors to meld.
  4. Remove from the fridge, stir, and transfer to a serving bowl. Garnish with walnuts and honey if desired.
  5. Serve with toasted bread or crackers and enjoy!

Nutrition

Serving: 1servingCalories: 150kcalCarbohydrates: 10gProtein: 6gFat: 10gSaturated Fat: 5gPolyunsaturated Fat: 1gMonounsaturated Fat: 3gCholesterol: 30mgSodium: 350mgPotassium: 200mgFiber: 2gSugar: 3gVitamin A: 1000IUVitamin C: 5mgCalcium: 150mgIron: 1mg

Notes

Prepare in advance for flavor development and serve chilled for best taste.

Tried this recipe?

Let us know how it was!

Gordon Ramsay’s Scotch Eggs: Crispy, Herby Bites of Joy

December 27, 2025 by Grace Snow Leave a Comment

Standing in my kitchen, I was enveloped in the comforting aroma of sausage and herbs, instantly transported to a quaint British pub. These Gordon Ramsay-Inspired Scotch Eggs offer a delightful crunch with a soft, jammy yolk at the center—a beautiful balance of textures that will have your taste buds dancing. Not only are they a crowd-pleaser, but making these savory delights is also quicker and easier than you might think! Perfect for a gathering or a cozy night in, this recipe transforms a traditional appetizer into a homemade masterpiece that even novice cooks can tackle. Are you ready to impress with this delightful twist on an iconic dish? Let’s dive into the delicious world of Scotch Eggs!

Why Are These Scotch Eggs Irresistible?

Unique Twist: Inspired by Gordon Ramsay, this recipe updates the traditional Scotch egg with quality ingredients for depth of flavor.
Crispy Crunch: The panko breadcrumbs deliver an addictively crispy exterior that contrasts beautifully with the soft sausage and yolk inside.
Flavorful Herbs: Packed with fresh chives and parsley, each bite bursts with herby goodness, elevating the taste experience.
Quick & Easy: With straightforward steps, anyone can whip these up in no time, making them a perfect addition for parties or quick snacks.
Versatile Variations: Feel free to mix and match the sausage and herbs—try adding your favorite spices or even cheese for a delightful twist! If you're curious about unique variations, consider exploring Turkish Eggs Discover for inspiration!

Gordon Ramsay’s Scotch Eggs Ingredients

For the Filling

  • Eggs – Large, fresh eggs provide a rich, creamy center for the Scotch eggs.
  • Fresh Chives – Adds a mild onion flavor, enhancing the overall herbaceous notes.
  • Parsley – Offers a fresh, bright taste; you can substitute with dill or cilantro for a twist.
  • Breakfast Sausage – The heart of the filling; opt for high-quality sausage for maximum flavor.

For the Coating

  • All-Purpose Flour – Essential for the coating process, allowing breadcrumbs to adhere nicely.
  • Egg (beaten) – Helps the panko stick; use a vegan egg wash for a plant-based alternative.
  • Panko Breadcrumbs – Key for that signature crispy texture; standard breadcrumbs won't provide the same effect.

For Flavoring

  • Mustard – Dijon or whole grain adds a tangy depth to the sausage mixture.
  • Kosher Salt – Crucial for enhancing flavors; sea salt is also a great alternative.
  • Black Pepper – Freshly cracked gives a subtle warmth that brightens the dish.
  • Nutmeg – Offers warmth and complexity; omit if this flavor isn’t your preference.

For Frying

  • Vegetable Oil – Necessary for frying, creating that golden, crispy exterior; consider using peanut oil for a unique flavor.

Explore these ingredients to create your delicious Gordon Ramsay-style Scotch eggs, perfect for a delightful snack or appetizer that elevates your cooking game!

Step‑by‑Step Instructions for Gordon Ramsay’s Scotch Eggs

Step 1: Boil Eggs
Begin by placing 4 large eggs in a saucepan and covering them with cold water. Bring the water to a gentle boil over medium heat and allow the eggs to cook for about 6 minutes for a jammy yolk. Once done, quickly transfer the eggs to an ice bath to stop the cooking process and cool them completely, ensuring easy peeling.

Step 2: Prepare Sausage Mixture
In a mixing bowl, combine your favorite breakfast sausage with finely chopped fresh chives and parsley, a dollop of mustard, kosher salt, freshly cracked black pepper, and a pinch of nutmeg. Using your hands, mix thoroughly until all ingredients are well incorporated, creating a flavorful herb-infused sausage mixture that will embrace the eggs perfectly.

Step 3: Wrap Eggs
After peeling the cooled eggs carefully, divide the sausage mixture into four equal portions. Flatten each portion in your hand, then gently wrap it around each egg, ensuring it's completely encased. This will form a lovely layer of flavorful sausage around the egg and keep the yummy yolk tucked away inside!

Step 4: Coating Station Setup
Prepare your coating station by arranging three shallow bowls in a sequence: one with all-purpose flour, another with the beaten egg, and the third with panko breadcrumbs. This sets you up for a smooth and quick coating process, ensuring each Scotch egg gets that crispy outer layer.

Step 5: Coat Eggs
Taking each wrapped egg, first roll it in the flour until lightly coated, shaking off any excess. Next, dip it in the beaten egg, allowing any surplus to drip off, and finally roll it in the panko breadcrumbs for that signature crunch. For an extra layer of texture, repeat the egg and panko coating.

Step 6: Fry Eggs
In a deep frying pan or pot, heat vegetable oil to 325°F (165°C). Carefully add the coated Scotch eggs to the hot oil and fry them for about 4–6 minutes, turning occasionally until they are golden brown and crispy. Keep an eye on the temperature; maintaining it is key to achieving perfect texture.

Step 7: Rest and Serve
Once the Scotch eggs have reached that beautiful golden hue, removed them from the oil and let them rest on paper towels for a couple of minutes. This will help absorb excess oil. When ready, slice one open to reveal the glorious jammy yolk inside and serve with your favorite dipping sauce for maximum enjoyment!

Make Ahead Options

Preparing Gordon Ramsay’s Scotch Eggs in advance is a fantastic way to save time on busy weeknights or gatherings! You can boil the eggs and wrap them in the sausage mixture up to 24 hours in advance; just refrigerate them covered to maintain moisture and freshness. The coated Scotch eggs can also be made and then refrigerated for up to 3 days before frying; ensure they are stored in an airtight container to preserve their crunchiness. When you're ready to enjoy them, simply heat your oil and fry the Scotch eggs straight from the fridge, ensuring they are heated through for delightfully crispy and scrumptious results!

Variations & Substitutions for Gordon Ramsay’s Scotch Eggs

Tailor your Scotch Eggs to suit your taste buds—or dietary needs—with some fun, easy variations!

  • Sausage Swap: Use spiced lamb or chicken sausage for a unique twist on the classic flavors. This change adds depth and dimension to each bite.
  • Herb Changes: Experiment with different herbs like tarragon or thyme to create your signature Scotch egg flavor. Fresh herbs elevate these bites to new heights!
  • Cheesy Delight: Add shredded cheese, like cheddar or feta, into the sausage mixture for an extra flavor boost. The melted cheese will create a rich, sumptuous filling.
  • Vegan Option: Replace eggs with firm tofu and use a plant-based sausage alternative, plus a vegan egg wash for coating. Your vegan friends will rave about these!
  • Heat It Up: Incorporate diced jalapeños or crushed red pepper flakes into the sausage mixture if you enjoy a little heat. This twist adds an exciting kick!
  • Nutty Crunch: For added texture, mix in crushed nuts or seeds (like sunflower or pumpkin seeds) with your breadcrumbs. This gives a pleasant crunch and interesting flavor profile.
  • Pork-Free: Use turkey sausage for a leaner option; just keep in mind it may create a slightly different texture but equally tasty!
  • Sauce Pairings: Serve with a tangy tzatziki or spicy sriracha aioli dipping sauce. This perfect pairing elevates your Scotch Eggs to a whole new level!

For more variations on classic flavors, consider diving into the world of inspired dishes like Turkish Eggs Discover or explore other delightful twists!

How to Store and Freeze Gordon Ramsay’s Scotch Eggs

Fridge: Store cooked Scotch eggs in an airtight container for up to 3 days. Allow them to cool completely before refrigerating to maintain texture.

Freezer: For longer storage, wrap each Scotch egg tightly in plastic wrap and place them in a freezer-safe bag. They can be frozen for up to 2 months.

Reheating: To reheat, first thaw in the refrigerator overnight. Bake in a preheated oven at 375°F (190°C) for about 15-20 minutes to restore crispiness.

Make-Ahead: These delightful treats can be made ahead for gatherings, making them a convenient option that stays delicious!

What to Serve with Gordon Ramsay’s Scotch Eggs?

Creating a delightful spread to accompany these golden, crispy bites is the perfect way to elevate your meal!

  • Tangy Dipping Sauce: Pair with a zesty mustard or homemade aioli for a harmonious contrast to the rich sausage and egg. The vibrant flavors enhance each bite, making every mouthful more exciting.

  • Fresh Garden Salad: A light, crisp salad topped with seasonal greens and a tangy vinaigrette will balance the richness of the Scotch eggs nicely, adding texture and freshness to your plate.

  • Sweet Potato Fries: Crispy, sweet potato fries add a deliciously contrasting sweetness and are wonderfully colorful—perfect for dipping and pair wonderfully with the savory Scotch eggs.

  • Traditional Pickles: The crunch and acidity of pickles complement the richness of the Scotch eggs, rounding out the flavors on your plate while providing a satisfying crunch.

  • Cheesy Fondue: For a fun twist, serve with a pot of warm, gooey cheese fondue. The melted cheese offers a luxurious dip that's perfect for these crispy bites!

  • Fruity Cider or Beer: Pair these Scotch eggs with a fruity cider or a light, crisp beer. The carbonation and flavor enhance the experience, making these bites truly irresistible!

  • Herb-Infused Quinoa: A fluffy herb-infused quinoa dish can serve as a wholesome, earthy side, balancing the savory flavors of the Scotch eggs while adding a nutritious element to your meal.

  • Roasted Asparagus: Tender roasted asparagus drizzled with olive oil and lemon zest brings a vibrant, earthy flavor, harmonizing beautifully with the richness of the eggs.

Whether it’s a casual dinner or a festive gathering, each side brings a delightful flair that makes your Gordon Ramsay’s Scotch Eggs even more memorable.

Expert Tips for Gordon Ramsay’s Scotch Eggs

Perfectly Jammy Yolks: Ensure you boil the eggs for exactly 6 minutes for that ideal jammy center; too long can lead to overcooked yolks.

Herb Freshness: Always use fresh herbs like chives and parsley to truly elevate the flavors; dried herbs can dull the overall taste.

Oil Temperature Matters: Use a thermometer to maintain oil at 325°F (165°C); too hot and the outside burns before the inside cooks.

Avoid Overcrowding: Fry only a few Scotch eggs at a time; overcrowding lowers the oil temperature and makes for soggy results.

Double Coating Trick: For extra crunch, consider double-coating the eggs with both egg and panko breadcrumbs—this will give a delightful texture!

Storage Tip: If making ahead, refrigerate Scotch eggs for up to 3 days and reheat in an oven to restore their crispy texture.

Gordon Ramsay’s Scotch Eggs Recipe FAQs

How do I choose the right eggs for Scotch Eggs?
Absolutely! For the best results, opt for large, fresh eggs that are free from cracks. Using fresh eggs ensures a richer flavor and a better texture in your Scotch eggs. If possible, check for eggs that have a smooth shell and avoid any with dark spots or unusual blemishes.

What’s the best way to store leftover Scotch Eggs?
Very! You can store cooked Scotch eggs in an airtight container in the fridge for up to 3 days. Make sure to let them cool completely before placing them in the container to maintain their crispy texture. If you notice any condensation inside the container, it's best to pat them dry with a paper towel before sealing.

Can I freeze Scotch Eggs, and if so, how?
Absolutely! For freezing, wrap each Scotch egg individually in plastic wrap, and then place them in a freezer-safe bag. They can be frozen for up to 2 months. To reheat, first, thaw them in the refrigerator overnight, then bake in a preheated oven at 375°F (190°C) for about 15-20 minutes until crispy. This method helps retain that delightful crunch you love!

What can I do if my Scotch Eggs aren't cooking evenly?
If your Scotch eggs are cooking unevenly, ensure you maintain the oil temperature at 325°F (165°C). Using a thermometer is key to achieving this! Additionally, avoid overcrowding the frying pan, as this lowers the oil temperature and can lead to soggy eggs. Frying in small batches helps ensure they cook evenly and achieve that perfect golden color.

Are there any dietary considerations for this recipe?
Yes! If you or a loved one has dietary restrictions, consider substitutions: use turkey sausage for a lighter option or a vegan egg wash (like a flaxseed mix) to keep it plant-based. If you are making these for pets, it's best to keep them away from the spices and seasonings, as some can be harmful to animals. Always check ingredient labels to ensure they fit your dietary needs.

Gordon Ramsay’s Scotch Eggs

Gordon Ramsay’s Scotch Eggs: Crispy, Herby Bites of Joy

Gordon Ramsay’s Scotch Eggs are crispy, herby bites of joy with a soft, jammy yolk at the center.
Print Recipe Pin Recipe
Prep Time 20 minutes mins
Cook Time 10 minutes mins
Resting Time 5 minutes mins
Total Time 35 minutes mins
Servings: 4 eggs
Course: Appetizers
Cuisine: British
Calories: 300
Ingredients Equipment Method Nutrition Notes

Ingredients
  

For the Filling
  • 4 large Eggs Fresh eggs provide a rich, creamy center.
  • 1/4 cup Fresh Chives Adds mild onion flavor.
  • 1/4 cup Parsley Offers a fresh, bright taste.
  • 1 pound Breakfast Sausage Opt for high-quality sausage.
For the Coating
  • 1/2 cup All-Purpose Flour Essential for coating.
  • 1 large Egg (beaten) Helps the panko stick.
  • 1 cup Panko Breadcrumbs Key for crispy texture.
For Flavoring
  • 1 tablespoon Mustard Dijon or whole grain adds tang.
  • 1 teaspoon Kosher Salt Enhances flavors.
  • 1/2 teaspoon Black Pepper Freshly cracked preferred.
  • 1/4 teaspoon Nutmeg Omit if not preferred.
For Frying
  • 2 cups Vegetable Oil Necessary for frying.

Equipment

  • Saucepan
  • Mixing Bowl
  • Deep Frying Pan
  • Bowls for Coating

Method
 

Preparation Steps
  1. Boil 4 large eggs in a saucepan covered with cold water; bring to boil and cook for 6 minutes. Transfer to an ice bath after cooking.
  2. Combine breakfast sausage, chopped chives, parsley, mustard, salt, pepper, and nutmeg in a bowl; mix thoroughly.
  3. Peel the cooled eggs, divide sausage mixture into 4 portions, and wrap around each egg.
  4. Set up coating station with flour, beaten egg, and panko breadcrumbs in shallow bowls.
  5. Roll each wrapped egg in flour, dip in beaten egg, then coat with panko.
  6. Heat oil in a deep frying pan; fry Scotch eggs for 4-6 minutes until golden brown.
  7. Remove from oil, let rest on paper towels, then serve.

Nutrition

Serving: 1eggCalories: 300kcalCarbohydrates: 20gProtein: 16gFat: 18gSaturated Fat: 5gPolyunsaturated Fat: 2gMonounsaturated Fat: 3gCholesterol: 200mgSodium: 600mgPotassium: 300mgFiber: 1gSugar: 1gVitamin A: 400IUVitamin C: 2mgCalcium: 30mgIron: 2mg

Notes

Perfect for gatherings or a cozy night in, these Scotch eggs can elevate your cooking game!

Tried this recipe?

Let us know how it was!

Thai Basil Beef Rolls: Fresh Flavors Ready in 30 Minutes

December 26, 2025 by Grace Snow Leave a Comment

As I wrapped my first Thai Basil Beef Roll, the scent of fresh basil filled the air, instantly transporting me to the bustling streets of Bangkok. These delicious rolls combine savory lean beef with vibrant vegetables, all neatly enfolded in delicately thin rice paper. Perfect for a quick meal, they come together in under 30 minutes, making them an ideal choice for busy weeknights or last-minute gatherings. Not only are these Thai Basil Beef Rolls customizable to your taste, but they also deliver a delightful crunch that contrasts beautifully with the tender filling. Ready to dive into a culinary adventure that brings a taste of Thailand to your home? Let’s get rolling!

What makes this recipe special?

Quick, Fresh Flavor: Each roll bursts with the essence of Thai street food, showcasing the vibrant tastes of beef, veggies, and fresh basil.
Minimal Prep Time: You can whip up these delightful rolls in just 30 minutes, perfect for those busy evenings when time is tight.
Customizable Delight: Feel free to explore variations—add shrimp or swap in your favorite veggies for a personal touch.
Beautiful Presentation: The translucent rice paper wraps offer an eye-catching look, making these rolls an inviting addition to any table.
Perfect for Sharing: Whether for a family dinner or a casual gathering with friends, the crowd-pleasing nature of these rolls is sure to impress! Pair them with a savory dipping sauce, like our delicious Peanut Sauce for added flavor!

Thai Basil Beef Rolls Ingredients

• Get ready to roll with these simple ingredients!

For the Filling

  • Lean Ground Beef – Provides a rich protein base; may substitute with shrimp for a seafood option.
  • Soy Sauce – Adds a salty umami flavor; opt for low-sodium for a healthier choice.
  • Hoisin Sauce – Balances saltiness with a hint of sweetness; hoisin-style sauce can be used if unavailable.
  • Shredded Carrots – Offers crunch and vibrant color; other vegetables like cucumbers can be swapped in for variety.
  • Chopped Bell Peppers – Contributes freshness and sweetness; any color works well, or use diced celery for a crunchier texture.
  • Fresh Basil Leaves – Imparts the aromatic flavor that defines these rolls; omit only if necessary as it reduces authenticity.

For the Wrapping

  • Rice Paper Wrappers – Essential for encasing the filling; keep them moist while working to prevent cracking.

These Thai Basil Beef Rolls ingredients come together to create a dish that's not only easy to prepare, but also bursting with flavor. A delightful experience awaits you in your kitchen!

Step‑by‑Step Instructions for Thai Basil Beef Rolls

Step 1: Cook the Beef
Heat a large skillet over medium heat and add the lean ground beef. Cook for 5-7 minutes, stirring frequently until the meat is fully browned and cooked through. As it cooks, stir in soy sauce and hoisin sauce, allowing the flavors to meld together and create a savory, glossy mixture that coats the beef.

Step 2: Add Vegetables
Once the beef is browned, stir in the shredded carrots and chopped bell peppers. Sauté for an additional 1-2 minutes, just until the vegetables are tender yet still crisp. This step retains the freshness and crunch that complements the rich flavors of the Thai Basil Beef Rolls, adding both texture and visual appeal.

Step 3: Prepare Rice Paper
In a shallow dish, fill warm water and dip a rice paper sheet in it for about 10-15 seconds until it becomes soft and pliable. Keep the other rice paper sheets covered with a damp cloth to prevent them from drying out. This step is crucial for achieving the perfect wrapping for your Thai Basil Beef Rolls.

Step 4: Assemble the Rolls
Lay the softened rice paper on a clean surface. Place 2-3 fresh basil leaves in the center, followed by a few spoonfuls of the beef mixture. Be careful not to overfill, as it can make rolling difficult. Visualize a small pile of colorful filling that showcases the vibrant ingredients.

Step 5: Roll Tightly
Fold the sides of the rice paper over the filling, then roll it from the bottom up tightly to fully enclose the mixture. Make sure to keep the filling secure within the rice paper without tearing it. Repeat this process with the remaining rice paper sheets and filling, ensuring each roll is as neat and tight as possible.

Step 6: Serve Fresh
Once all the Thai Basil Beef Rolls are assembled, arrange them on a serving platter and serve immediately. Pair them with your favorite dipping sauce, such as a peanut or sweet chili sauce, to enhance the flavors. These rolls are best enjoyed fresh, showcasing their beautiful colors and textures.

Make Ahead Options

These Thai Basil Beef Rolls are perfect for meal prep enthusiasts! You can cook the lean ground beef with the soy and hoisin sauce up to 3 days in advance, allowing the flavors to deepen. Simply store the cooked mixture in an airtight container in the refrigerator. In addition, you can prepare your shredded vegetables (carrots and bell peppers) ahead of time and keep them refrigerated for up to 24 hours. When you’re ready to serve, just dip your rice paper sheets in warm water, layer in your prepared ingredients, and roll them up tightly. This makes for a quick assembly that saves you time while still delivering those fresh, vibrant flavors everyone loves!

Thai Basil Beef Rolls Variations & Substitutions

Feel free to let your creativity shine with these delightful variations that customize your Thai Basil Beef Rolls!

  • Seafood Swap: Substitute ground beef with cooked shrimp for a fresh seafood flavor that adds a delightful twist.

  • Veggie Boost: Add sliced cucumbers or bell pepper for a refreshing crunch that enhances the texture without altering the core flavors.

  • Creamy Addition: Incorporate avocado slices inside for a creamy texture that pairs beautifully with the savory beef mixture.

  • Noodle Twist: Add cooked vermicelli noodles to the filling for a heartier roll that brings additional chewiness and balance to each bite.

  • Spicy Kick: Toss in some sliced jalapeños or crushed red pepper flakes to spice things up and provide that extra zing for heat lovers.

  • Herb Variety: Experiment with fresh mint or cilantro alongside or instead of basil for a unique flavor profile that invigorates your rolls.

  • Gluten-Free Option: Use gluten-free soy sauce or tamari as a substitute to cater to dietary restrictions without compromising the taste.

  • Savory Sauces: Try dipping your rolls in homemade peanut sauce or a tangy soy-lime dressing to elevate the flavors even further, just like with our delicious Peanut Sauce!

Your Thai Basil Beef Rolls should reflect your personal tastes, so don't hesitate to mix things up and enjoy the journey of creating your very own version of this delicious dish!

Tips for the Best Thai Basil Beef Rolls

  • One at a Time: Work with one rice paper sheet at a time to keep them from drying out while you prepare your rolls.

  • Mind the Filling: Avoid overfilling your rolls; just a tablespoon or two of the mixture is enough to make rolling easier without tearing the rice paper.

  • Serve Immediately: For the best texture and flavor, enjoy your Thai Basil Beef Rolls fresh. If prepared in advance, keep them tightly wrapped in plastic wrap in the fridge for up to 2 days.

  • Dipping Sauce Magic: Pair with a homemade peanut sauce, sweet chili sauce, or soy-lime dressing to elevate the flavors of your rolls, adding a delightful zing.

  • Texture Play: Ensure your vegetables are chopped small enough to match the roll’s thickness. This will preserve their crunch and beautifully complement the beef filling.

How to Store and Freeze Thai Basil Beef Rolls

Fridge: Keep your Thai Basil Beef Rolls wrapped tightly in plastic wrap or an airtight container, where they will stay fresh for up to 2 days.

Freezer: For longer storage, freeze the rolls individually by wrapping them in plastic wrap, then place them in a freezer-safe bag. They can be stored for up to 2 months.

Reheating: Thaw the frozen rolls in the fridge overnight before reheating. Gently steam them or place them in a warm skillet for a few minutes to preserve texture.

Serving Fresh: These rolls are best enjoyed fresh to appreciate their crunchy veggies and tender beef, so try to prepare just enough for your meal!

What to Serve with Thai Basil Beef Rolls

Elevate your home dining experience with perfect pairings that beautifully complement these delightful rolls.

  • Peanut Sauce: A creamy, nutty sauce that adds richness, enhancing the savory notes of the beef while balancing the freshness of the veggies.

  • Sweet Chili Sauce: This sweet and spicy dipping sauce introduces a zesty kick, perfect for those who crave a hint of heat alongside their fresh rolls.

  • Crispy Spring Salad: A refreshing salad with mixed greens, cucumber, and a tangy dressing provides a crisp contrast to the warm, savory rolls—ideal for cleansing the palate.

  • Coconut Rice: Luxuriously creamy and slightly sweet, this rice is a delicious side that harmonizes perfectly with the flavors of Thai cuisine.

  • Thai Mango Salad: With its bright flavors and crunchy texture, this salad adds a fruity element that beautifully complements the savory beef rolls.

  • Iced Green Tea: A refreshing drink that soothes the palate, iced green tea offers a gentle taste that pairs wonderfully with the spices of the rolls while keeping things light.

Thai Basil Beef Rolls Recipe FAQs

What kind of beef should I use for these rolls?
Absolutely! For Thai Basil Beef Rolls, lean ground beef is recommended because it provides a rich protein base without being too greasy. If you're looking for a seafood option, shrimp can be a delightful substitute.

How should I store leftover rolls?
Very simple! Wrap your Thai Basil Beef Rolls tightly in plastic wrap or store them in an airtight container in the refrigerator. They’ll remain fresh for up to 2 days. If you want to save them for later, see below for freezing instructions!

Can I freeze Thai Basil Beef Rolls?
Certainly! To freeze, wrap each roll individually in plastic wrap to prevent freezer burn, then place them in a freezer-safe bag. They can be kept frozen for up to 2 months. When ready to enjoy, just thaw them in the refrigerator overnight and reheat gently in a skillet or steam them.

What if my rice paper wrappers are cracking?
No worries! Ensure that you're keeping your rice paper moist by dipping them in warm water for just 10-15 seconds. If they crack while rolling, try to work with one sheet of rice paper at a time to maintain their pliability and avoid drying out. If you notice dark spots or they start to tear, you may need to discard and use a fresh piece.

Are there any dietary considerations for this recipe?
Absolutely! If you’re cooking for someone with allergies, make sure to check labels for your sauces, especially soy sauce and hoisin sauce, as they may contain allergens like wheat or soy. For a gluten-free version, use tamari sauce instead of soy.

How can I customize these rolls?
The more the merrier! These Thai Basil Beef Rolls are incredibly customizable. You can add or swap in your favorite vegetables like cucumbers, avocado, or even cooked vermicelli noodles for a heartier filling. Just remember to keep the flavors balanced so every bite is delicious!

Thai Basil Beef Rolls

Thai Basil Beef Rolls: Fresh Flavors Ready in 30 Minutes

These Thai Basil Beef Rolls are a quick and customizable dish, perfect for busy weeknights or gatherings.
Print Recipe Pin Recipe
Prep Time 15 minutes mins
Cook Time 15 minutes mins
Total Time 30 minutes mins
Servings: 4 rolls
Course: Appetizers
Cuisine: Thai
Calories: 250
Ingredients Equipment Method Nutrition Notes

Ingredients
  

For the Filling
  • 1 lb Lean Ground Beef May substitute with shrimp for a seafood option.
  • 3 tbsp Soy Sauce Opt for low-sodium for a healthier choice.
  • 2 tbsp Hoisin Sauce Hoisin-style sauce can be used if unavailable.
  • 1 cup Shredded Carrots Other vegetables like cucumbers can be swapped in for variety.
  • 1 cup Chopped Bell Peppers Any color works well, or use diced celery for a crunchier texture.
  • 1 cup Fresh Basil Leaves Omit only if necessary as it reduces authenticity.
For the Wrapping
  • 8 Rice Paper Wrappers Keep them moist while working to prevent cracking.

Equipment

  • Large skillet
  • Shallow dish
  • damp cloth

Method
 

Step-by-Step Instructions
  1. Heat a large skillet over medium heat and add the lean ground beef. Cook for 5-7 minutes, stirring frequently until the meat is fully browned and cooked through. As it cooks, stir in soy sauce and hoisin sauce.
  2. Once the beef is browned, stir in the shredded carrots and chopped bell peppers. Sauté for an additional 1-2 minutes until the vegetables are tender yet still crisp.
  3. In a shallow dish, fill warm water and dip a rice paper sheet for about 10-15 seconds until it becomes soft and pliable.
  4. Lay the softened rice paper on a clean surface. Place 2-3 fresh basil leaves in the center, followed by a few spoonfuls of the beef mixture.
  5. Fold the sides of the rice paper over the filling, then roll it from the bottom up tightly.
  6. Once all the Thai Basil Beef Rolls are assembled, arrange them on a serving platter and serve immediately.

Nutrition

Serving: 2rollsCalories: 250kcalCarbohydrates: 30gProtein: 18gFat: 8gSaturated Fat: 3gPolyunsaturated Fat: 1gMonounsaturated Fat: 2gCholesterol: 60mgSodium: 500mgPotassium: 500mgFiber: 2gSugar: 4gVitamin A: 3000IUVitamin C: 60mgCalcium: 30mgIron: 3mg

Notes

These rolls are best enjoyed fresh and can be paired with a homemade peanut sauce or sweet chili sauce.

Tried this recipe?

Let us know how it was!

Delicious Grilled Apples with Prosciutto and Honey Bliss

December 25, 2025 by Grace Snow Leave a Comment

There's something undeniably satisfying about the blend of sweet, salty, and smoky flavors when you bite into a grilled apple wrapped in prosciutto with a drizzle of honey. This cozy combination has quickly become my go-to appetizer for gatherings, showcasing how simple ingredients can transform a dish into something truly special. With just three ingredients—juicy apples, savory prosciutto, and luscious honey—this recipe for Grilled Apples with Prosciutto and Honey is not only easy to whip up but also impressively elegant. It's perfect for those busy weeknights when you want something light yet indulgent, and it’s a delightful way to sneak in some fruit without feeling guilty. Have you ever considered how grilling apples can elevate their natural sweetness? Buckle up, because we're about to explore this deliciously unique creation!

Why Grill Apples with Prosciutto?

Unforgettable Flavor Fusion: The sweet, juicy apples combined with savory prosciutto creates a taste sensation that's both indulgent and satisfying.

Quick and Easy: With only three ingredients, you can whip this dish up in no time, making it a stress-free appetizer for any occasion.

Impressive Presentation: Grilled apples wrapped in prosciutto look stunning on any plate, making it a perfect choice for gatherings or dinner parties.

Healthier Indulgence: Not only does this recipe taste heavenly, but it also incorporates fruit in a delicious way, helping you feel good about your meal choice.

Versatile Pairing: Whether served as an appetizer or dessert, these grilled apples are sure to impress your taste buds, especially when paired with a refreshing drink or alongside something hearty like Bratwurst Peppers Onions.

Crowd Pleaser: Every bite is a delightful balance of flavors, making this dish a hit with friends and family alike!

Grilled Apples with Prosciutto Ingredients

• A tantalizing blend of flavors awaits you!

For the Grilled Apples

  • Apples – Use firm varieties like Granny Smith or Honeycrisp for that perfect crunch and flavor balance.
  • Prosciutto – Choose thinly sliced prosciutto for easy wrapping and maximum flavor infusion.
  • Honey – Opt for a quality honey to enhance the sweetness and elevate your dish to new heights.

Optional Add-Ons

  • Fresh Herbs – Consider adding a sprinkle of fresh thyme or rosemary for an aromatic touch.
  • Nuts – Chopped walnuts or pecans can be added for added texture and nutty flavor if desired.

Grilled Apples with Prosciutto and Honey provide an exciting twist on classic ingredients, bringing simplicity and elegance to your dining experience!

Step‑by‑Step Instructions for Grilled Apples with Prosciutto and Honey

Step 1: Preheat the Grill
Begin by preheating your grill to medium heat, around 350°F (175°C). This crucial step ensures that your grilled apples with prosciutto cook evenly and develop those beautiful grill marks. While the grill is heating, prepare your apples and prosciutto for assembly. You'll be ready to create a delicious dish in no time!

Step 2: Prepare the Apples
Next, wash and core your firm apples, such as Granny Smith or Honeycrisp, ensuring they maintain their shape during grilling. Slice each apple into thick wedges, about ¼ to ½ inch thick. The thickness will allow for a satisfying bite while remaining juicy. Arrange the apple slices on a clean cutting board, ready for wrapping with prosciutto.

Step 3: Wrap the Apples
Now it’s time to wrap your apple slices with thinly sliced prosciutto. Take a slice of prosciutto and gently wrap it around each apple wedge, ensuring the prosciutto overlaps slightly to hold the apples together. This savory layer will infuse flavor into the sweet apples as they grill. Carefully place the wrapped wedges on a plate, ready to hit the grill.

Step 4: Grill the Apples
Once the grill is preheated, place the prosciutto-wrapped apples directly onto the grates, ensuring they are evenly spaced for optimal heat circulation. Grill them for about 5-8 minutes, turning occasionally until the prosciutto turns crispy and the apples become tender. You'll know they’re ready when the prosciutto edges are golden brown and the apples are fragrant.

Step 5: Drizzle with Honey
After grilling, carefully remove the apple wedges from the grill using tongs. Arrange them on a serving platter while they’re still warm. Drizzle a generous amount of honey over the top of each grilled apple. This final touch enhances the flavors, adding a delightful sweetness that contrasts beautifully with the salty prosciutto.

Step 6: Add Optional Toppings
For an extra layer of flavor, consider sprinkling some fresh herbs like thyme or rosemary over the grilled apples with prosciutto and honey. If desired, you can also add chopped nuts for a delightful crunch. This step not only adds visual appeal but also elevates the overall taste profile, making your dish truly memorable.

Step 7: Serve and Enjoy
Your grilled apples with prosciutto and honey are now ready to be served! Present them warm as an elegant appetizer that’s sure to delight your guests. Enjoying these flavorful bites will surely make for a wonderful dining experience, showcasing how simple ingredients can create something extraordinary. Dive in and savor every bite!

Helpful Tricks for Grilled Apples

Choose the Right Apples: Ensure you pick firm apples like Granny Smith or Honeycrisp. They hold their shape well while grilling and enhance the overall taste.

Wrap Tightly: When wrapping the apples in prosciutto, make sure to overlap the slices slightly. This prevents the apple from falling apart and helps the flavors meld beautifully.

Monitor the Grill Time: Keep a close eye while grilling; overcooking can lead to mushy apples. Aim for 5-8 minutes until the prosciutto is crispy.

Use Quality Honey: Opt for a high-quality honey to enhance the natural sweetness of the grilled apples. It truly makes a difference in flavor!

Add Fresh Herbs: For a delicious twist, sprinkle fresh thyme or rosemary after grilling. It elevates the dish and adds aromatic notes that complement the apples and prosciutto.

Serve Warm: Enjoy your grilled apples with prosciutto and honey while they’re still warm for the best texture and fusion of flavors!

Storage Tips for Grilled Apples with Prosciutto

Room Temperature: Enjoy grilled apples at room temperature for optimal flavor; they can be kept out for up to 2 hours before needing to be refrigerated.

Fridge: Store any leftovers in an airtight container in the fridge for up to 3 days. Reheat gently in a microwave or on a grill for best results.

Freezer: If you want to keep them longer, freeze the grilled apples without prosciutto in a single layer on a baking sheet, then transfer to a freezer bag for up to 3 months.

Reheating: For the best taste, gently reheat frozen grilled apples in the oven or on the grill, and consider wrapping them with fresh prosciutto to refresh their flavor before serving.

Make Ahead Options

These Grilled Apples with Prosciutto and Honey are perfect for those busy weeknights when you want to impress without the stress! You can prep the apple wedges and wrap them in prosciutto up to 24 hours in advance. Simply store them in an airtight container in the refrigerator to maintain their freshness. When you’re ready to grill, just take them out and let them sit at room temperature for about 15 minutes before grilling for even cooking. After grilling, drizzle with honey immediately for that irresistible touch, and your elegant appetizer will taste just as delicious as if it were made fresh. Enjoy the time-saving benefits while still delivering an impressive dish!

Variations & Substitutions for Grilled Apples

Give your Grilled Apples with Prosciutto and Honey a personal twist and discover new flavor dimensions!

  • Vegan Alternative: Replace prosciutto with thinly sliced smoked tempeh for a similar savory flavor, keeping it plant-based and delightful.
  • Fruit Fusion: Experiment with different apple varieties like Fuji or Gala, or even mix in pears for a unique twist on sweetness.
  • Sweet Spice: Sprinkle cinnamon or nutmeg over the apples before grilling to add a warm, aromatic kick that tantalizes the senses.
  • Nutty Crunch: Toss in pre-roasted walnuts or crushed pecans before drizzling with honey, introducing delightful crunch and richness.
  • Herb Variations: Swap fresh thyme for mint or basil to bring a refreshing contrast, making for a summer party favorite.
  • Honey Substitutes: Use maple syrup or agave nectar if you're looking for a change in sweetness with a hint of depth.
  • Cheese Pairing: Crumble some feta or goat cheese on top just before serving for a creamy, tangy balance to the sweet apples.
  • Grilled Delight: For a smoky flavor, grill some slices of bacon alongside the apples, then wrap them for an even heartier option.

As you explore these variations, you might also want to consider pairing your apples with something hearty like Bratwurst Peppers Onions to create a complete culinary experience! Each twist adds a personal touch while elevating this delightful treat.

What to Serve with 4-Ingredient Crispy Chocolate Oat Cookies

Indulging in the sweetness of these cookies opens up a world of delightful pairings that can elevate your snacking experience.

  • Almond Milk: This creamy, nutty drink perfectly complements the richness of the chocolate, making every bite feel luxurious.

  • Fresh Berries: Juicy strawberries or raspberries add a refreshing contrast to the cookies’ sweetness, balancing flavors and textures.

  • Greek Yogurt: Creamy and tangy, Greek yogurt makes a wonderful dip, enhancing the wholesome flavors of the cookies and adding protein too.

  • Vanilla Ice Cream: Dreamy ice cream melts beautifully over warm cookies, turning them into a decadent dessert treat that everyone will adore.

  • Chia Seed Pudding: A simple chia pudding adds texture and can be flavored with vanilla or cocoa, making it a nutty partner to your cookies.

  • A Nutty Trail Mix: For a crunchy texture, serve with a trail mix of nuts and dried fruits. The contrasting textures will keep your palate entertained.

Pairing your cookies with these delightful accompaniments promises not only visual appeal but also a multi-layered flavor journey!

Grilled Apples with Prosciutto and Honey Recipe FAQs

How do I choose the best apples for grilling?
Absolutely! When selecting apples for grilling, aim for firm varieties like Granny Smith or Honeycrisp. These apples hold their shape better on the grill and offer a delightful balance of sweetness and tartness. Look for apples that are free from bruises and dark spots, as these can affect texture and flavor.

How should I store leftovers of grilled apples with prosciutto?
Enjoy your grilled apples at room temperature for optimal flavor—just don’t leave them out for more than 2 hours. If you have leftovers, store them in an airtight container in the fridge for up to 3 days. When you’re ready to enjoy them again, gently reheat them in the microwave or on the grill for the best results!

Can I freeze grilled apples with prosciutto?
Sure! If you want to save your grilled apples, I recommend freezing them without the prosciutto. Start by arranging them in a single layer on a baking sheet to freeze solid, then transfer them to a freezer bag. They can last up to 3 months in the freezer! When ready to enjoy, reheat the apples gently and consider wrapping them with fresh prosciutto before grilling again for a delicious touch.

What if I overcook my grilled apples?
Very! Overcooking can lead to mushy apples, but don’t worry. If you find your apples are soft, try using them in a smoothie or a fruit compote instead. You can also mix them into yogurt or oatmeal for added flavor! Moving forward, keep a close eye while grilling and aim for around 5-8 minutes total cooking time, turning them occasionally.

Are there any dietary considerations for this recipe?
Absolutely! This dish is quite versatile. For those with dietary restrictions, you can easily omit the prosciutto for a vegetarian option. If you're looking for a lighter touch, substitute with turkey bacon. Just be aware of honey if you're cooking for pets—avoid feeding them any honey, as it's not suitable for dogs.

Grilled Apples with Prosciutto and Honey

Delicious Grilled Apples with Prosciutto and Honey Bliss

This Grilled Apples with Prosciutto and Honey recipe blends sweet, salty, and smoky flavors into a delightful appetizer.
Print Recipe Pin Recipe
Prep Time 10 minutes mins
Cook Time 8 minutes mins
Total Time 18 minutes mins
Servings: 4 servings
Course: Appetizers
Cuisine: American
Calories: 150
Ingredients Equipment Method Nutrition Notes

Ingredients
  

Grilled Apples with Prosciutto Ingredients
  • 4 medium Apples (Granny Smith or Honeycrisp) Use firm varieties for best texture
  • 8 slices Prosciutto Thinly sliced for easy wrapping
  • 3 tablespoons Honey Opt for quality honey to enhance sweetness
Optional Add-Ons
  • 1 teaspoon Fresh Herbs (thyme or rosemary) For aromatic touch
  • 1/4 cup Chopped Nuts (walnuts or pecans) For added texture if desired

Equipment

  • Grill
  • Tongs
  • Cutting Board
  • Knife

Method
 

Step-by-Step Instructions for Grilled Apples with Prosciutto and Honey
  1. Preheat your grill to medium heat, around 350°F (175°C).
  2. Wash and core the apples, then slice them into thick wedges (¼ to ½ inch thick).
  3. Wrap each apple wedge with a slice of prosciutto, ensuring the slices overlap slightly.
  4. Grill the prosciutto-wrapped apples for about 5-8 minutes, turning occasionally until crispy.
  5. Remove the apples from the grill and drizzle honey over the top while warm.
  6. Sprinkle with fresh herbs or nuts if using, then serve warm and enjoy!

Nutrition

Serving: 1servingCalories: 150kcalCarbohydrates: 20gProtein: 6gFat: 5gSaturated Fat: 1gPolyunsaturated Fat: 1gMonounsaturated Fat: 2gCholesterol: 10mgSodium: 300mgPotassium: 180mgFiber: 2gSugar: 10gVitamin A: 200IUVitamin C: 5mgCalcium: 30mgIron: 0.5mg

Notes

Serve as a warm appetizer for gatherings with a delightful blend of flavors that impress guests.

Tried this recipe?

Let us know how it was!
  • « Previous Page
  • 1
  • …
  • 5
  • 6
  • 7
  • 8
  • 9
  • …
  • 16
  • Next Page »

Welcome!

Hi, I’m Grace, a Sydney-based home cook with a passion for bold flavors and trending ingredients. Whether you’re a busy beginner or a seasoned foodie, you’ll find dishes here that are fresh, fun, and full of flavor.

More about me

Popular Recipes

  • One Pot Keto Tuna Casserole
    One Pot Keto Tuna Casserole: Creamy Comfort in Minutes
  • Ultimate Jalapeno Popper Chicken Salad
    Ultimate Jalapeno Popper Chicken Salad That'll Wow Your Tastebuds
  • Green Chile Cheese Dip
    Mouthwatering Green Chile Cheese Dip for Cozy Gatherings
  • Easy Chimichurri Sauce
    Fresh and Zesty Easy Chimichurri Sauce in Just Minutes

Footer

↑ back to top

About

  • Privacy Policy
  • Disclaimer
  • Terms & Conditions

Newsletter

  • Sign Up! for emails and updates

Contact

  • About me
  • Contact me

Copyright © 2025 TastyTrendIngredients