tastytrendingredients

  • Home
  • Recipes
    • Appetizers
    • Breakfast
    • Dessert
    • Dinner
    • Drinks
    • Salads
    • Snacks
    • Soups
  • About me
  • Contact
menu icon
go to homepage
  • Home
  • Recipes
    • Appetizers
    • Breakfast
    • Dessert
    • Dinner
    • Drinks
    • Salads
    • Snacks
    • Soups
  • About me
  • Contact
search icon
Homepage link
  • Home
  • Recipes
    • Appetizers
    • Breakfast
    • Dessert
    • Dinner
    • Drinks
    • Salads
    • Snacks
    • Soups
  • About me
  • Contact
×

Crispy Shrimp Balls that Will Make You Ditch Fast Food

December 16, 2025 by Grace Snow Leave a Comment

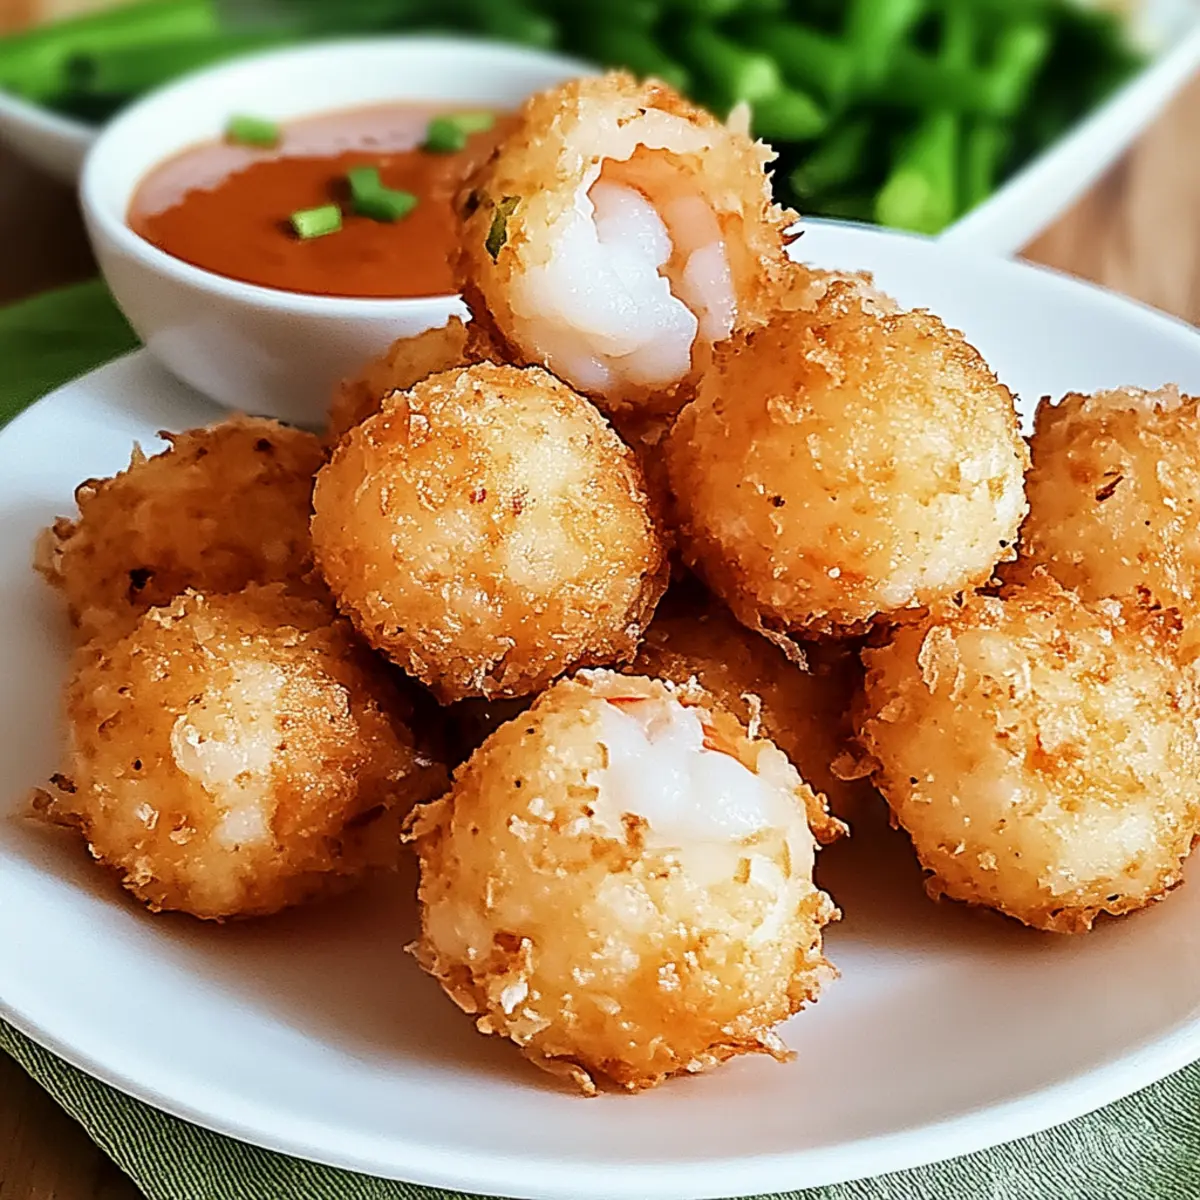
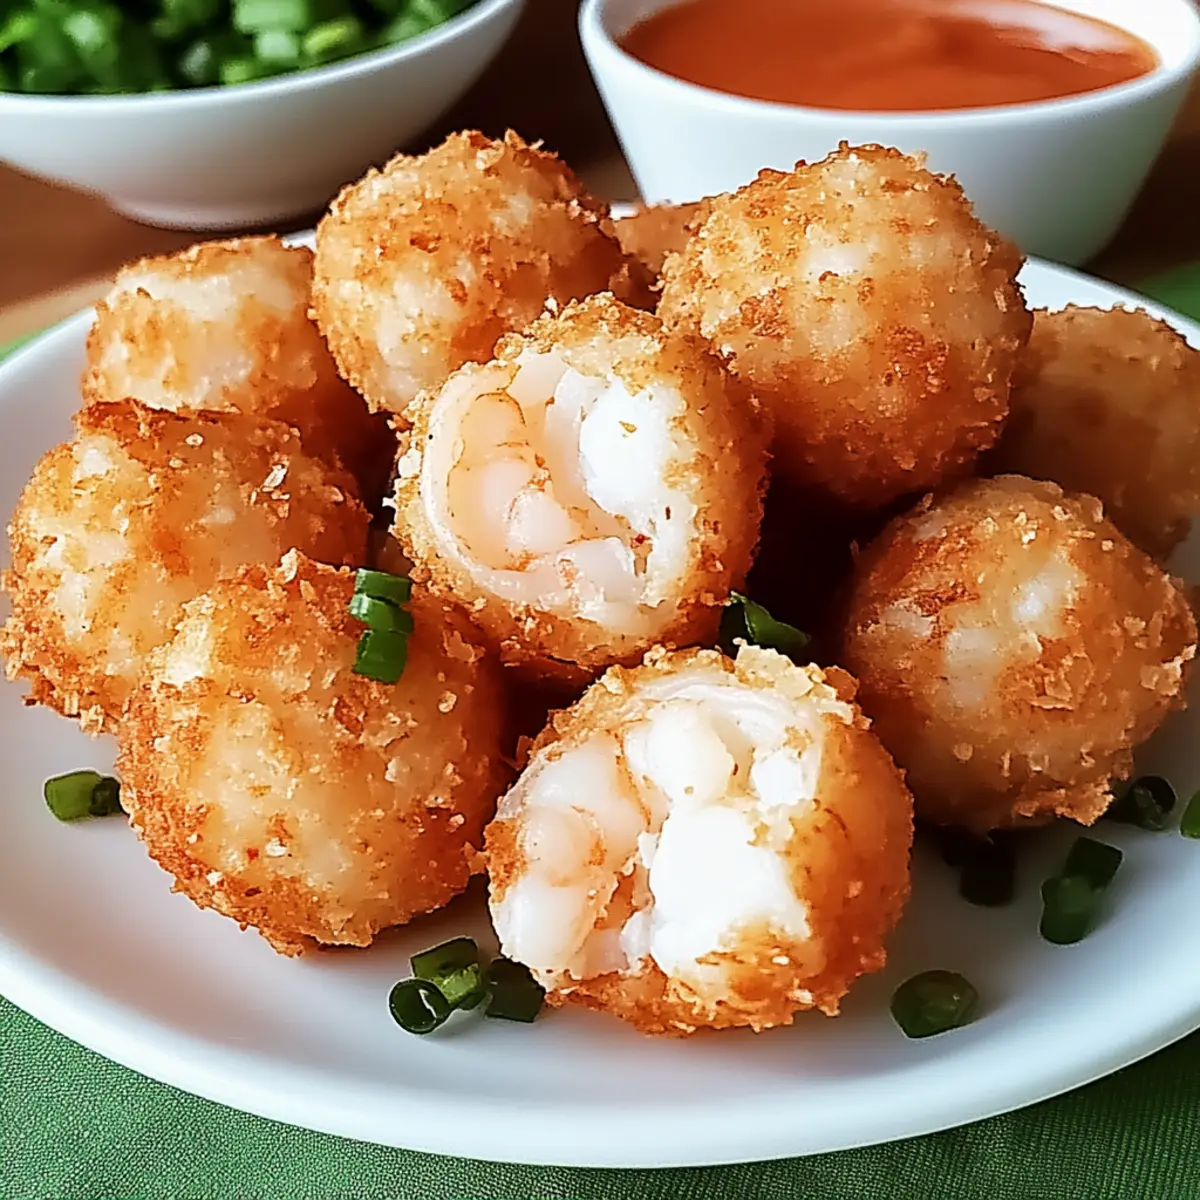
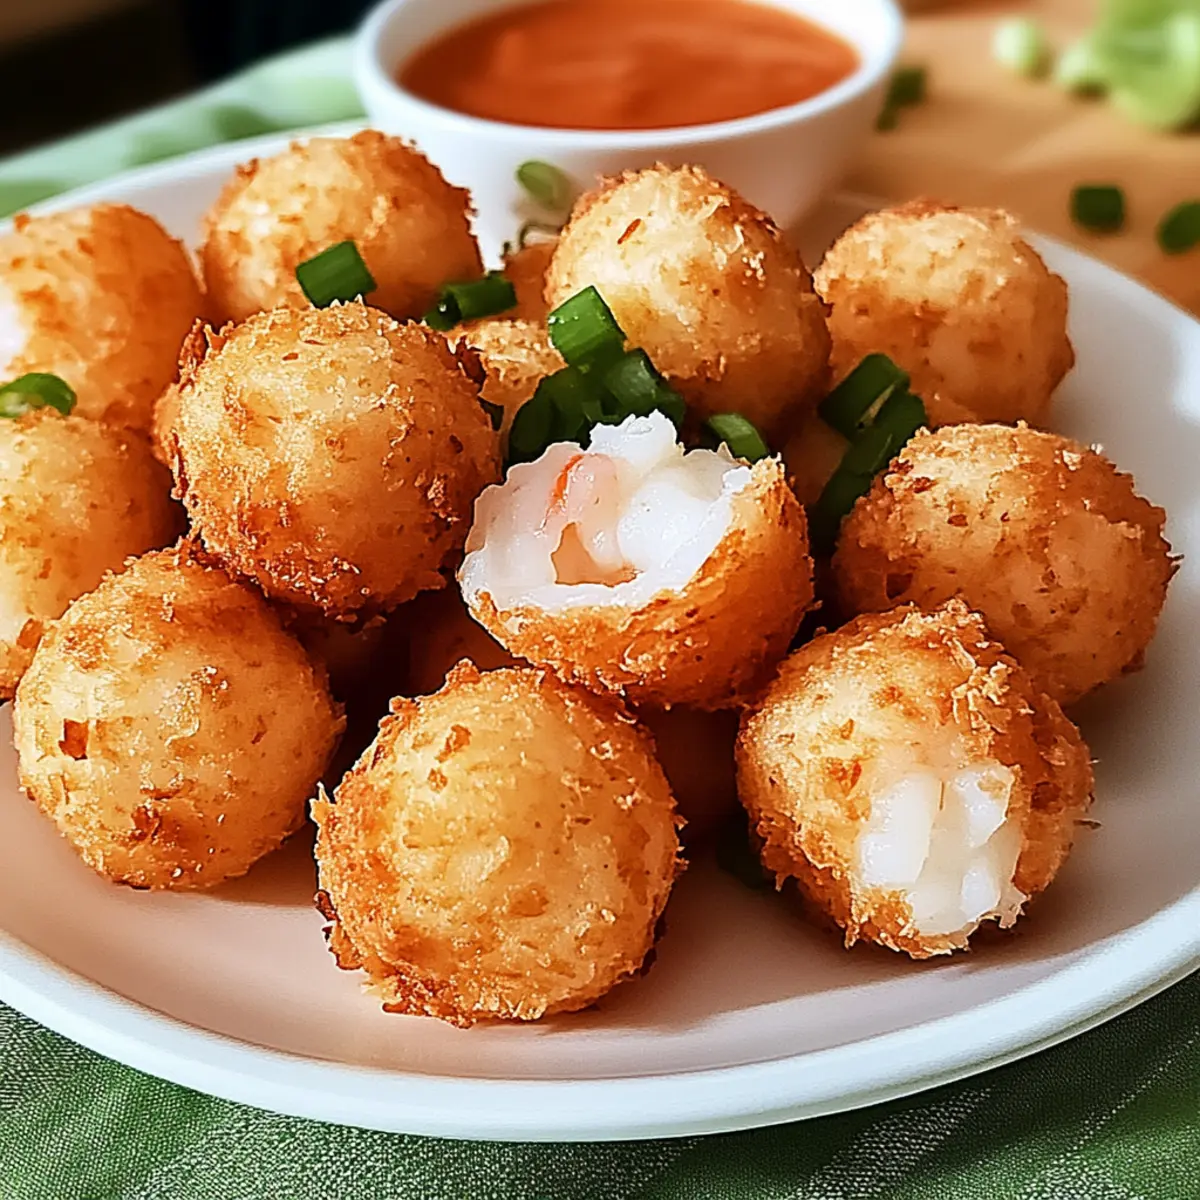
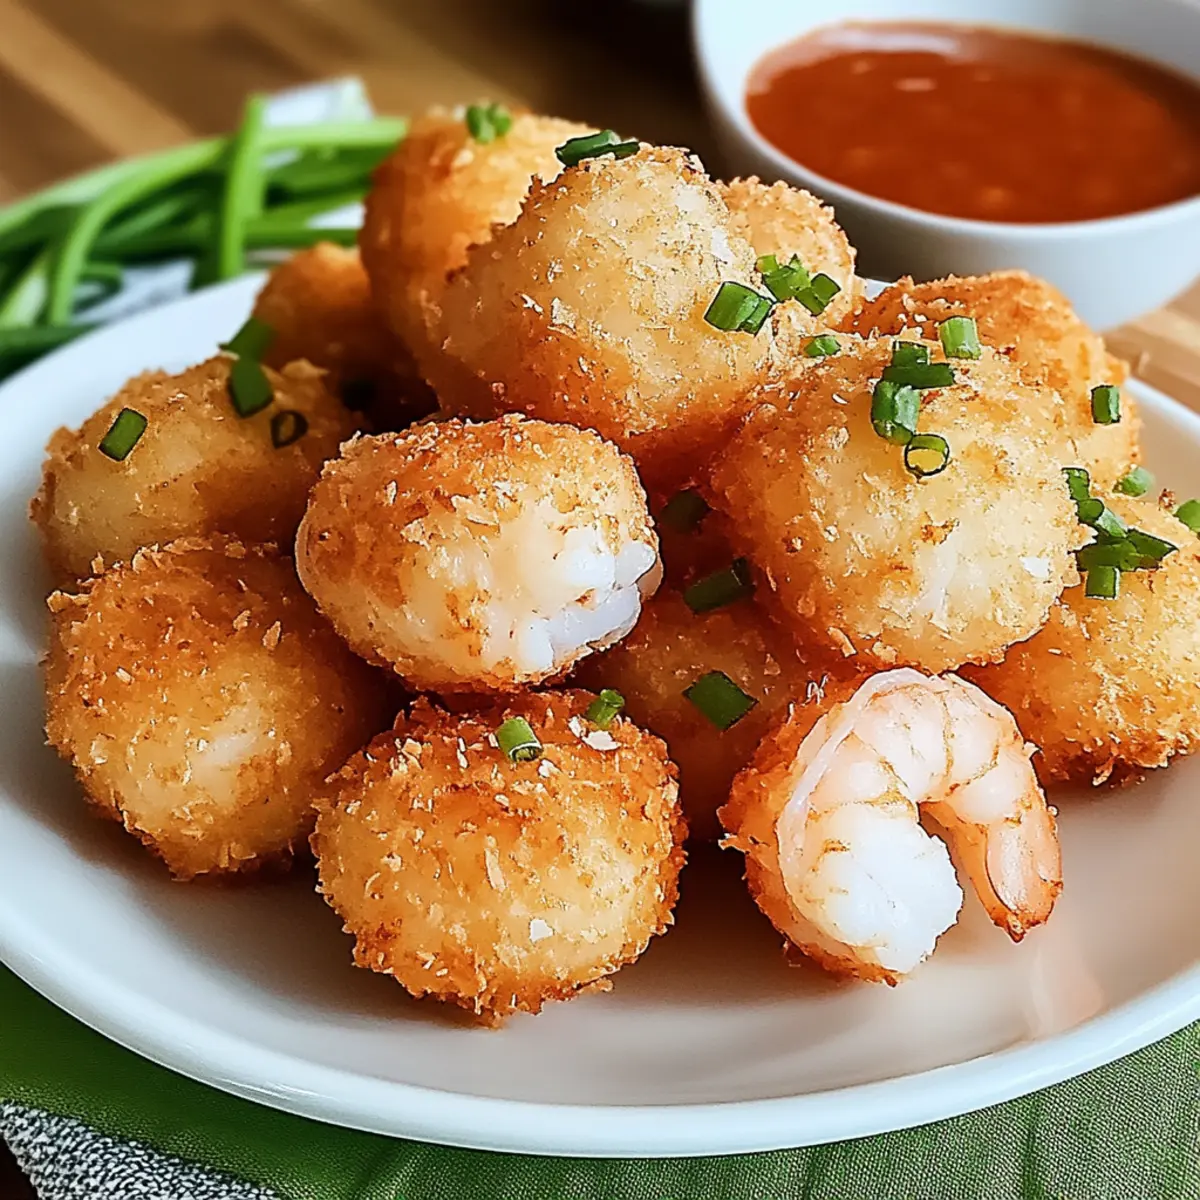
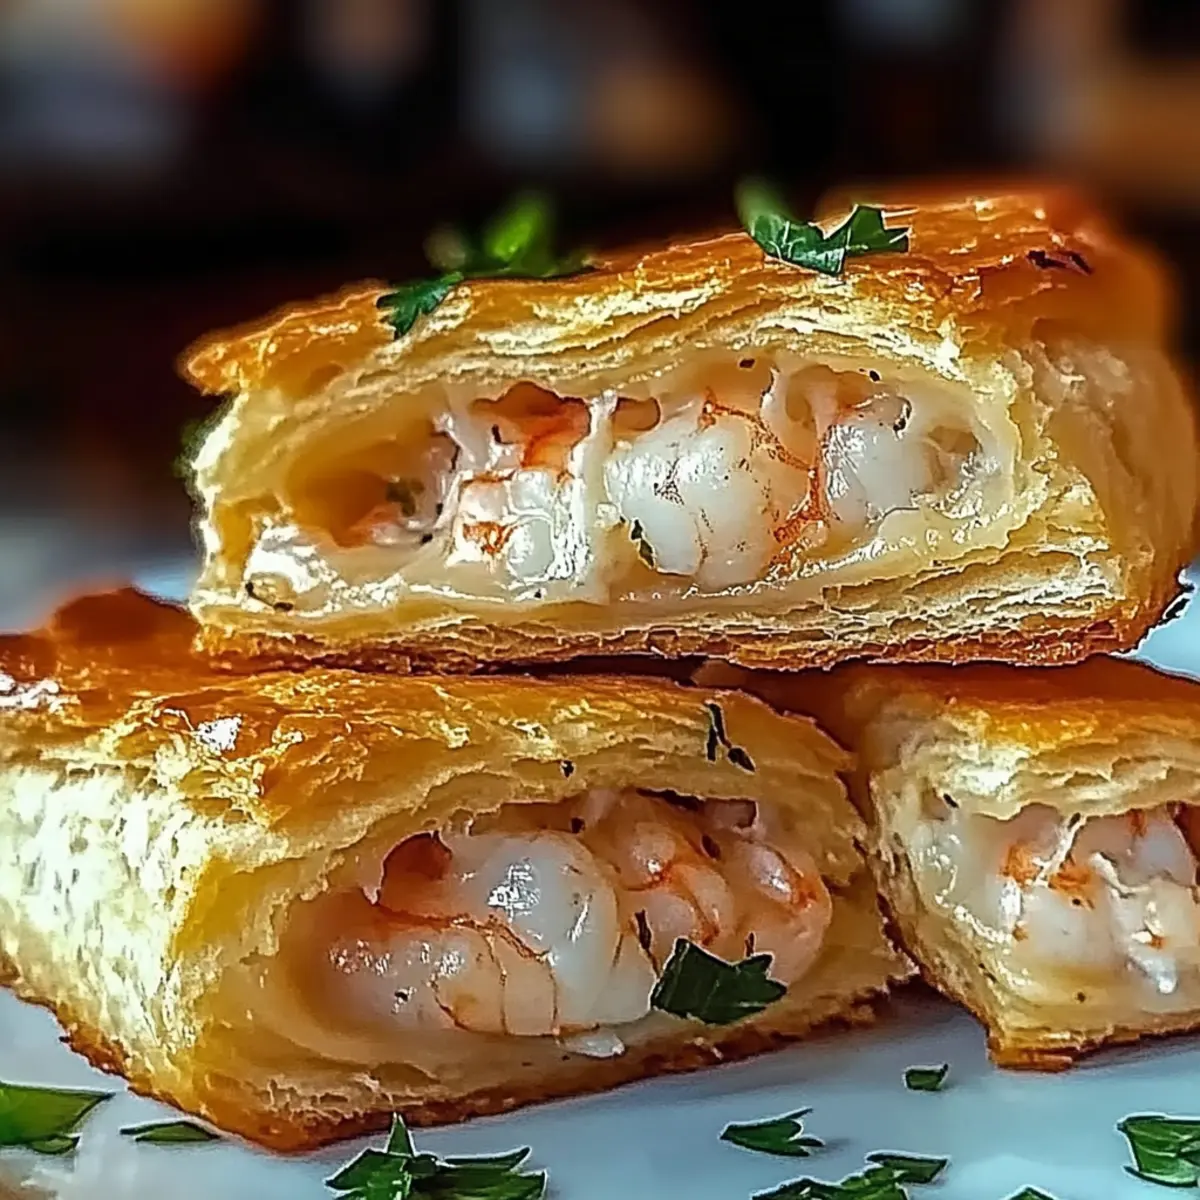
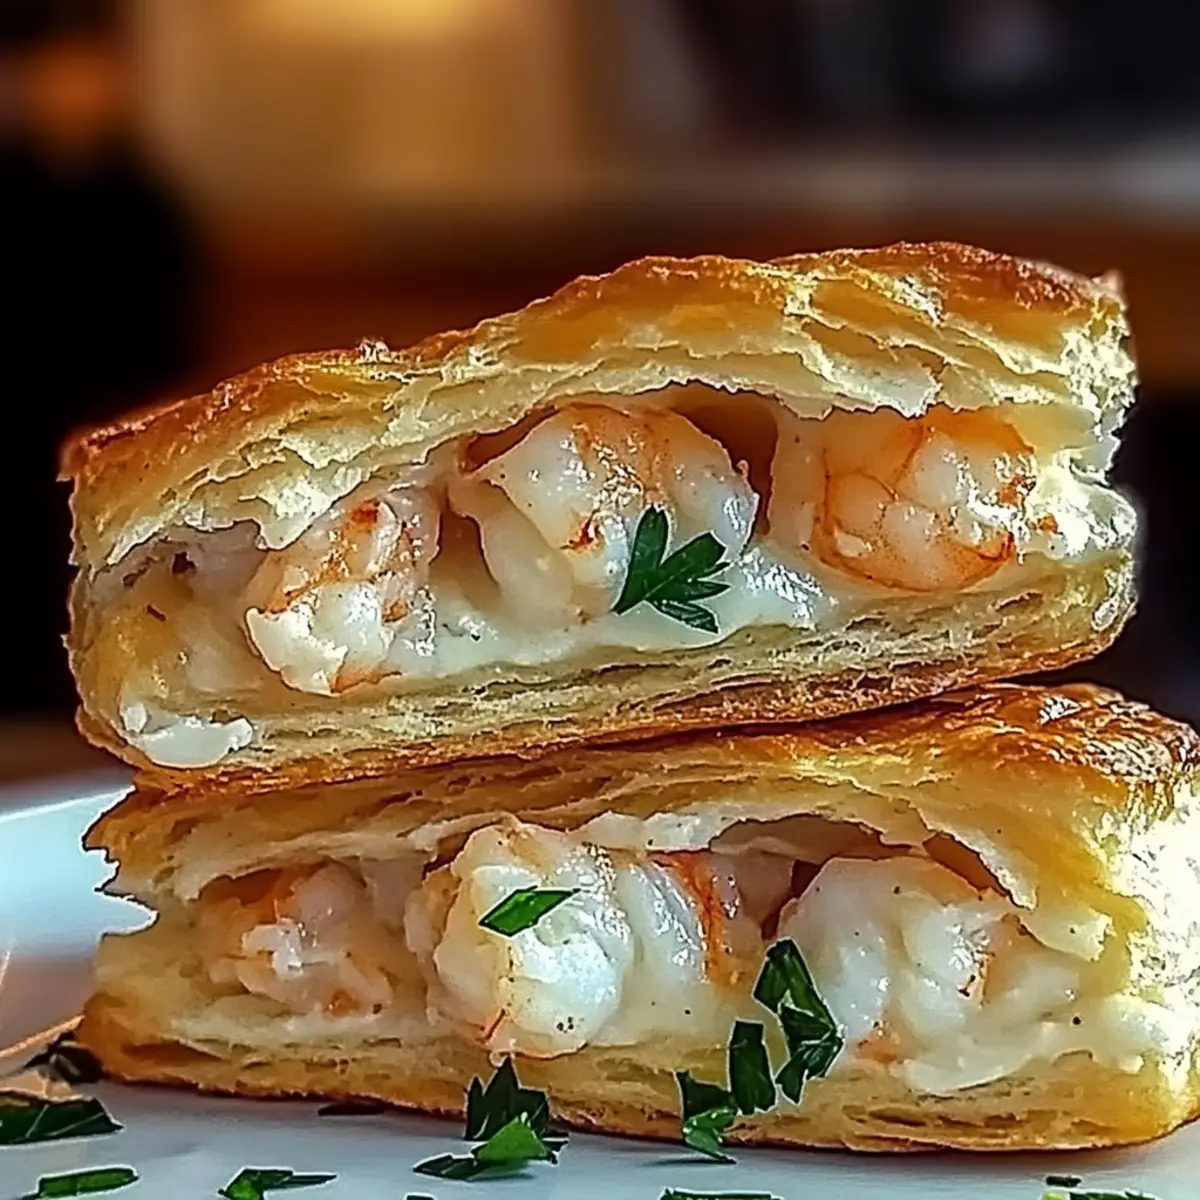
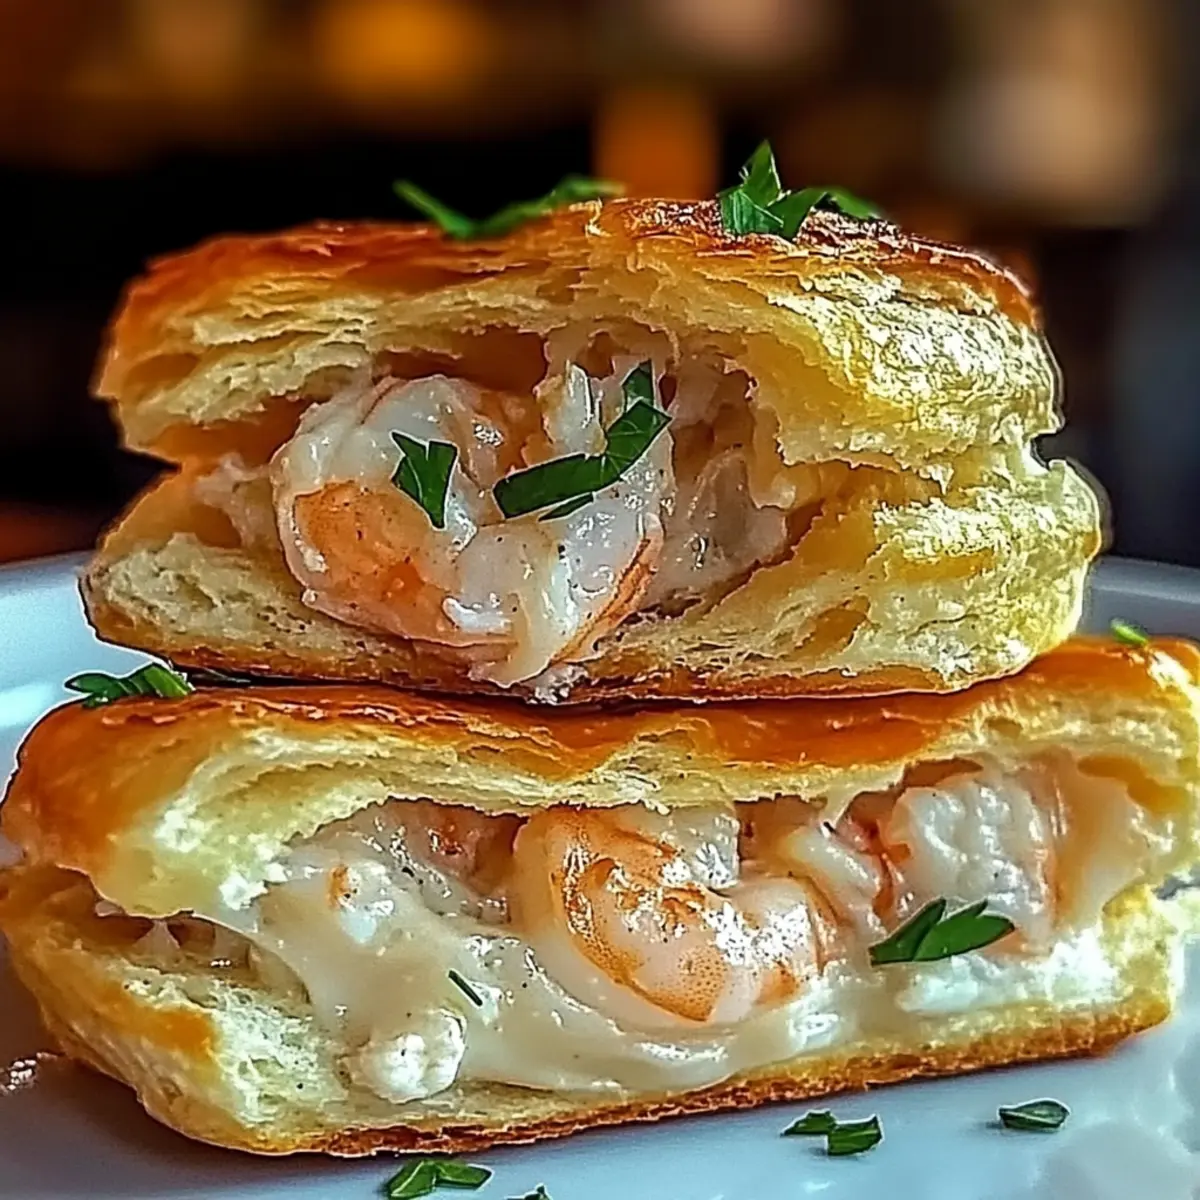
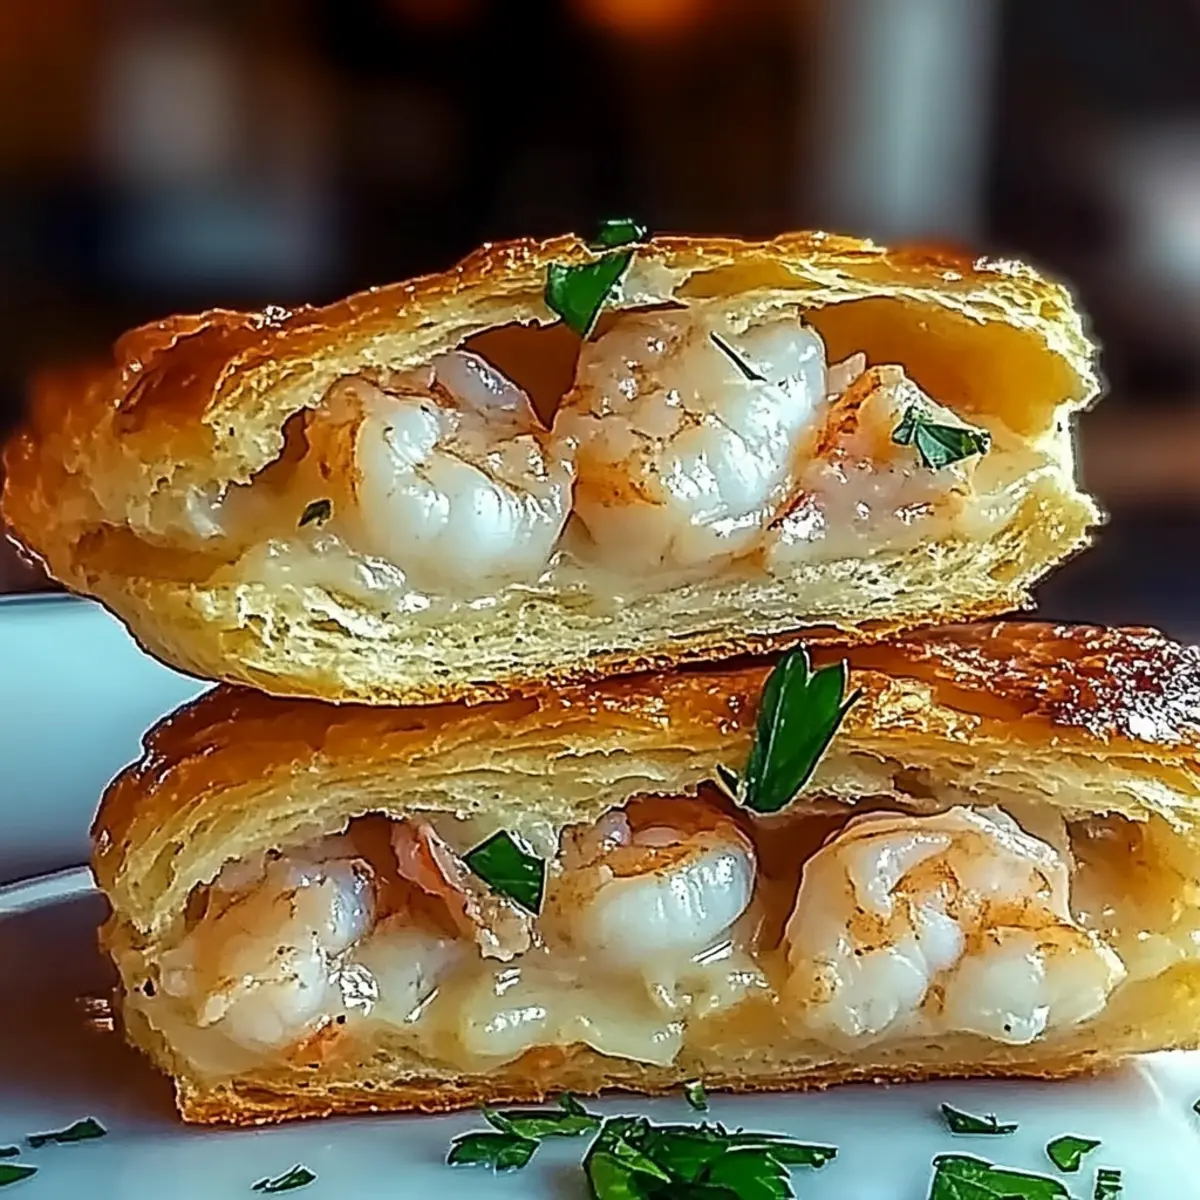
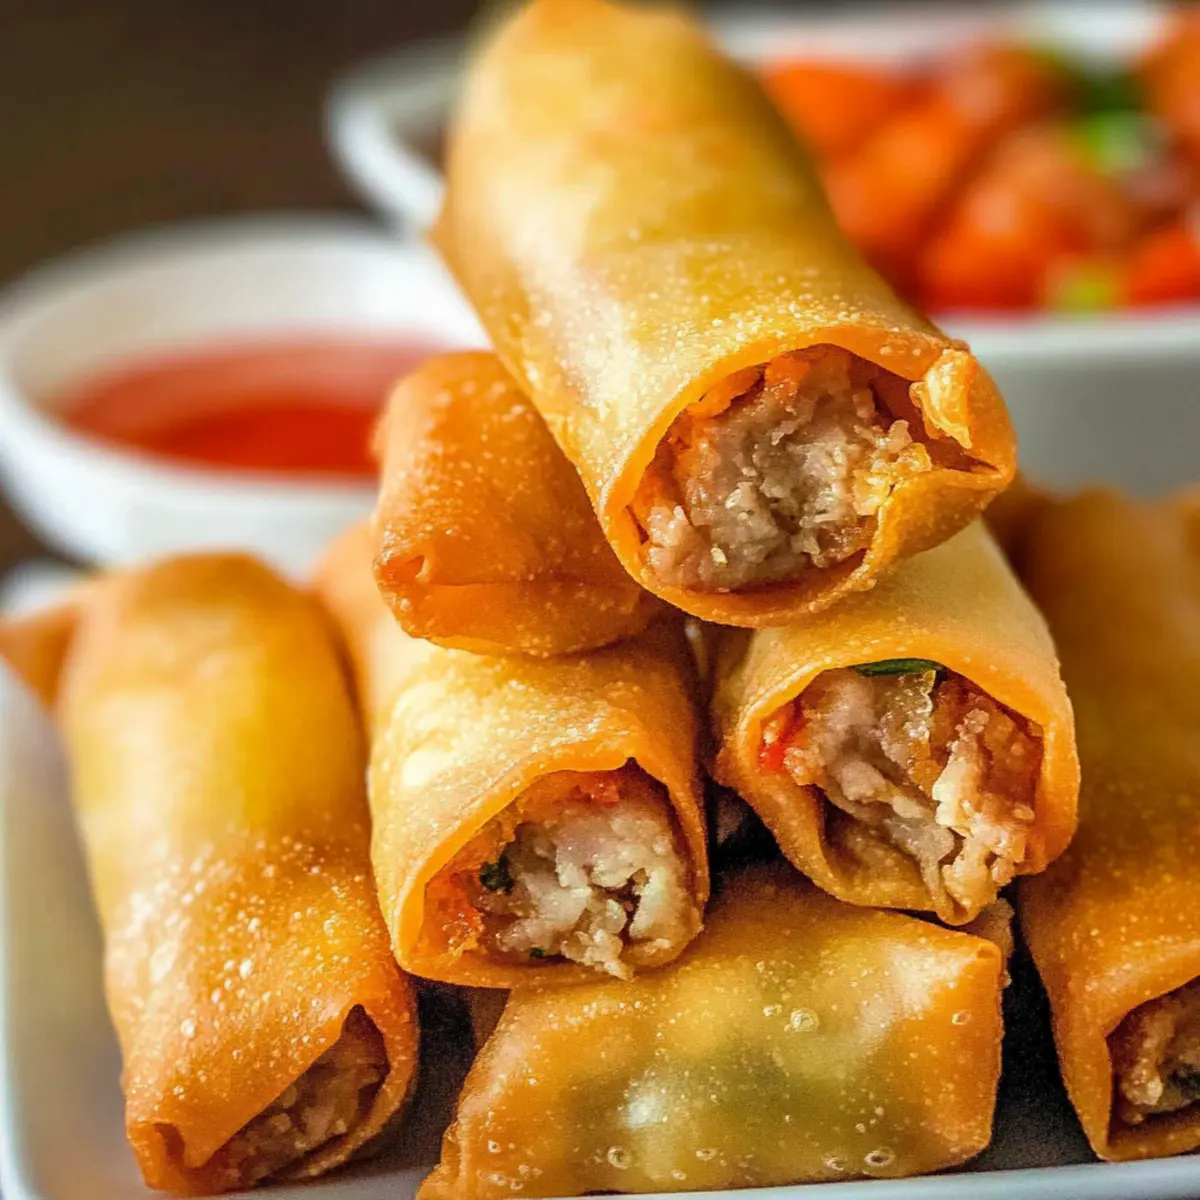
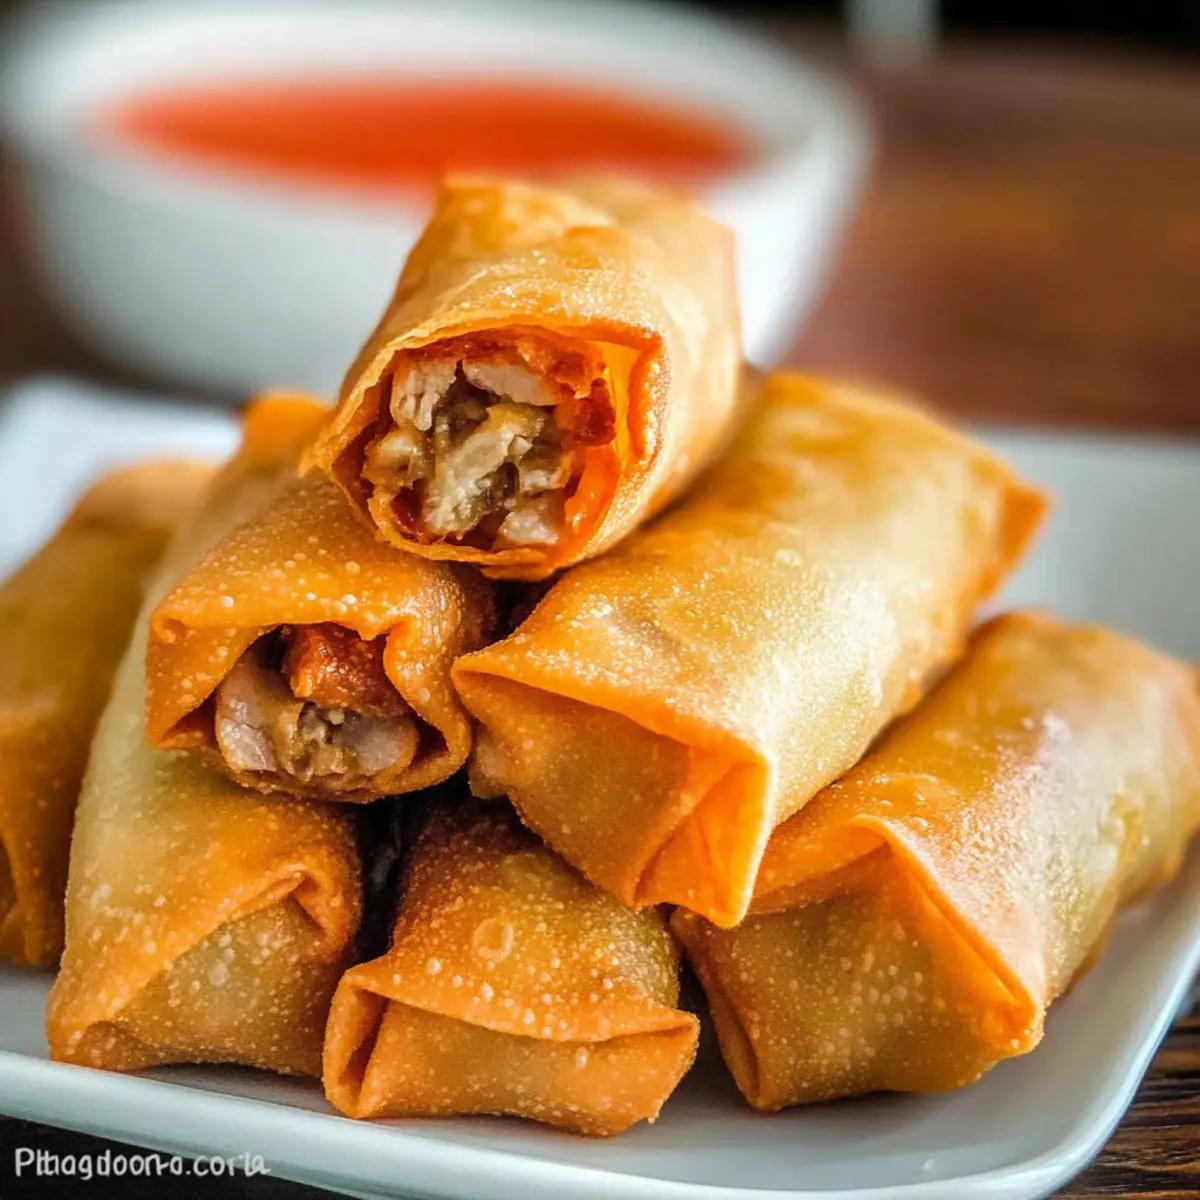
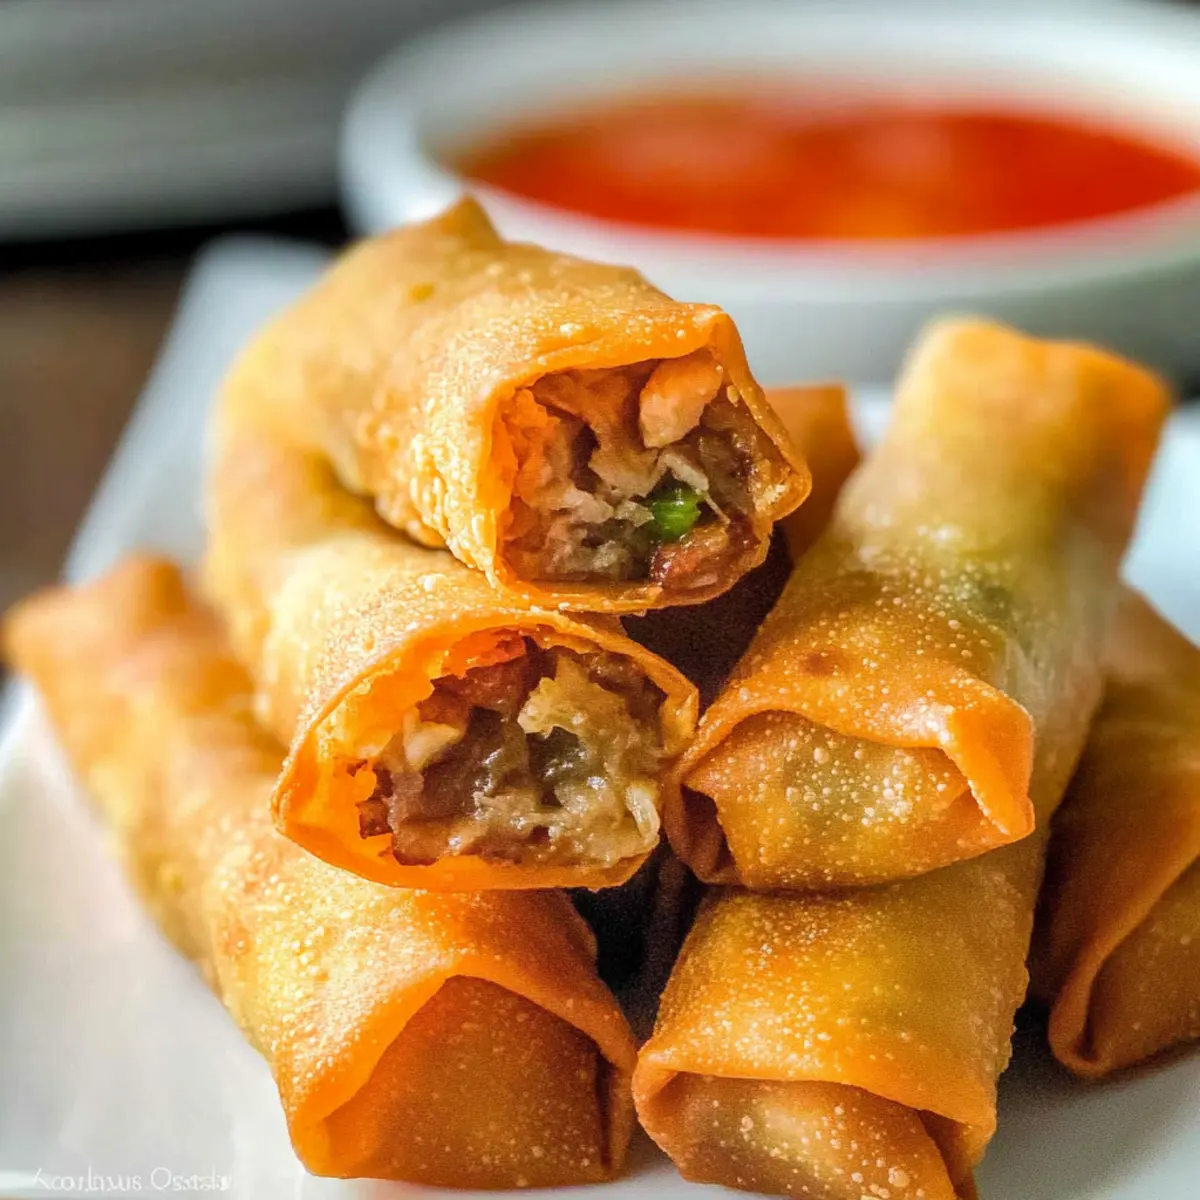
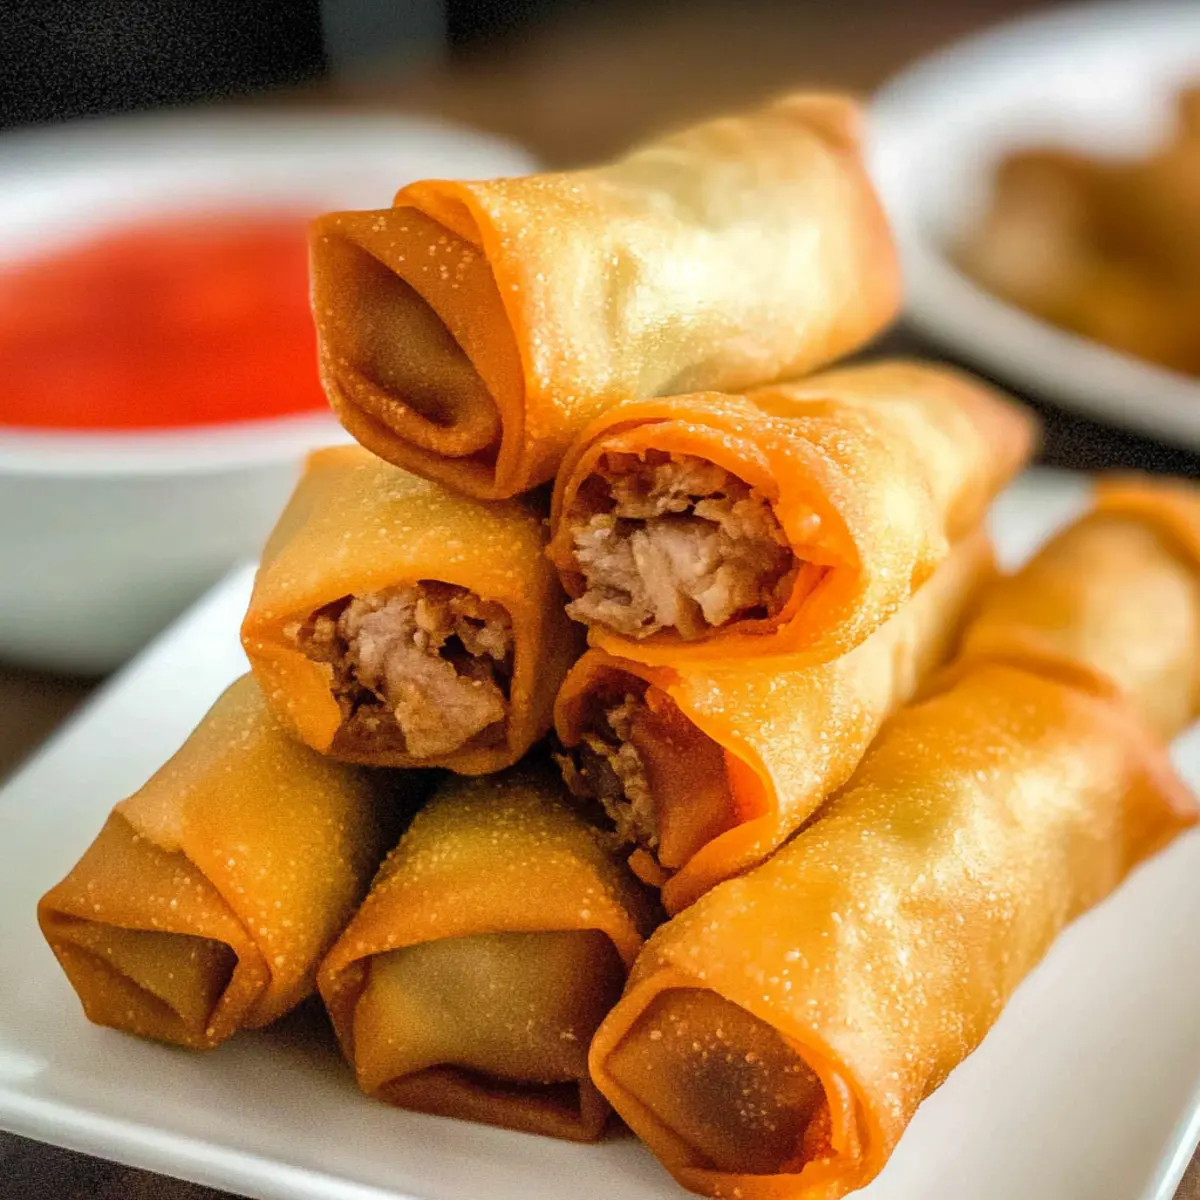
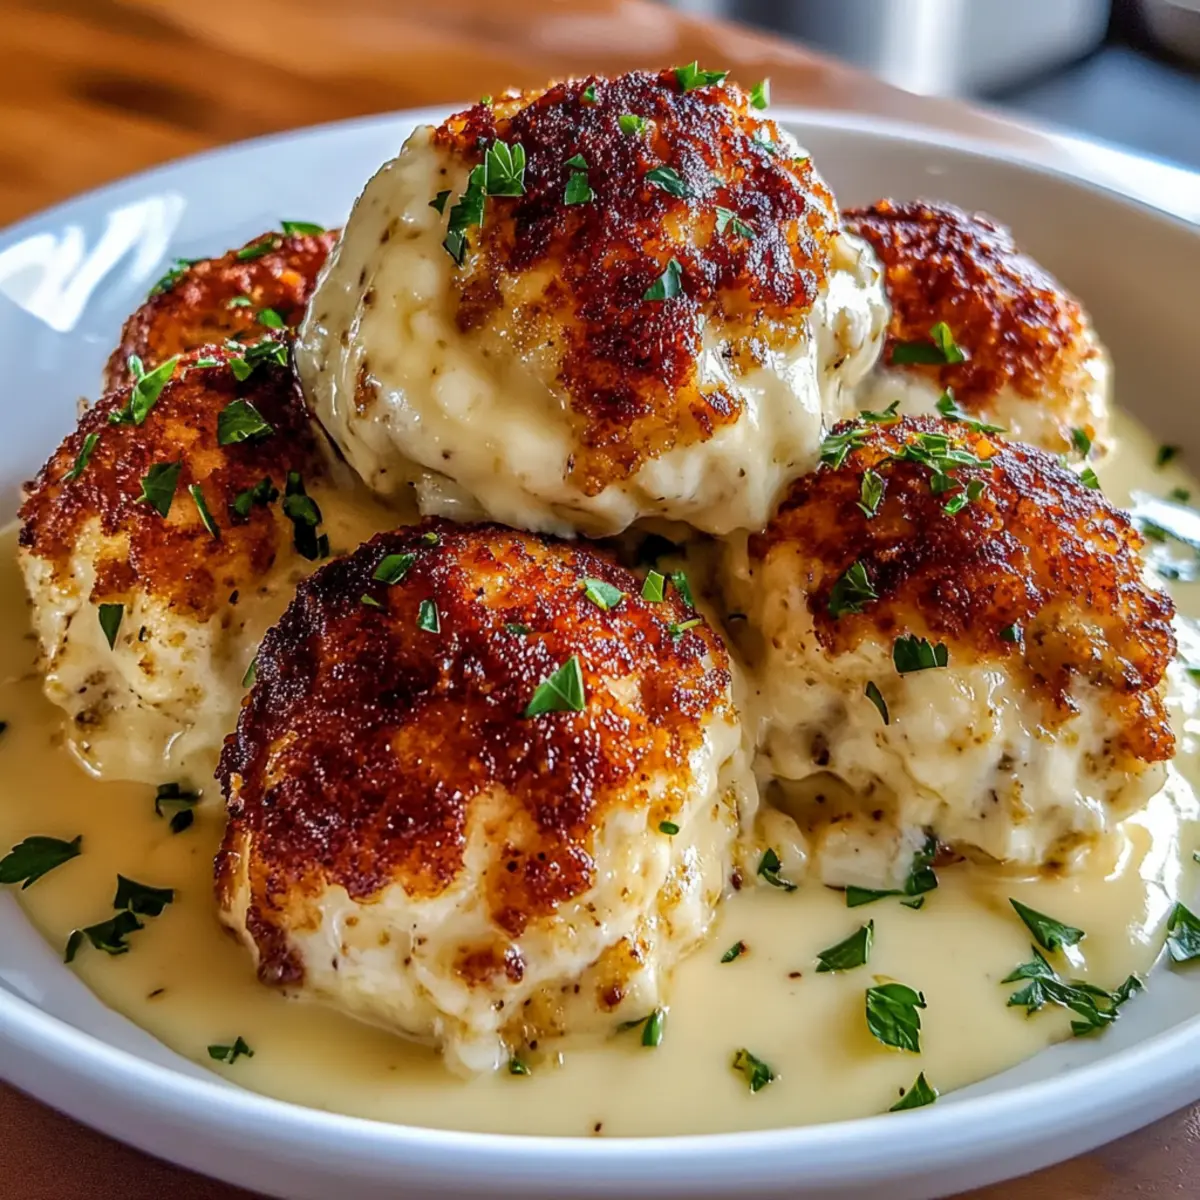
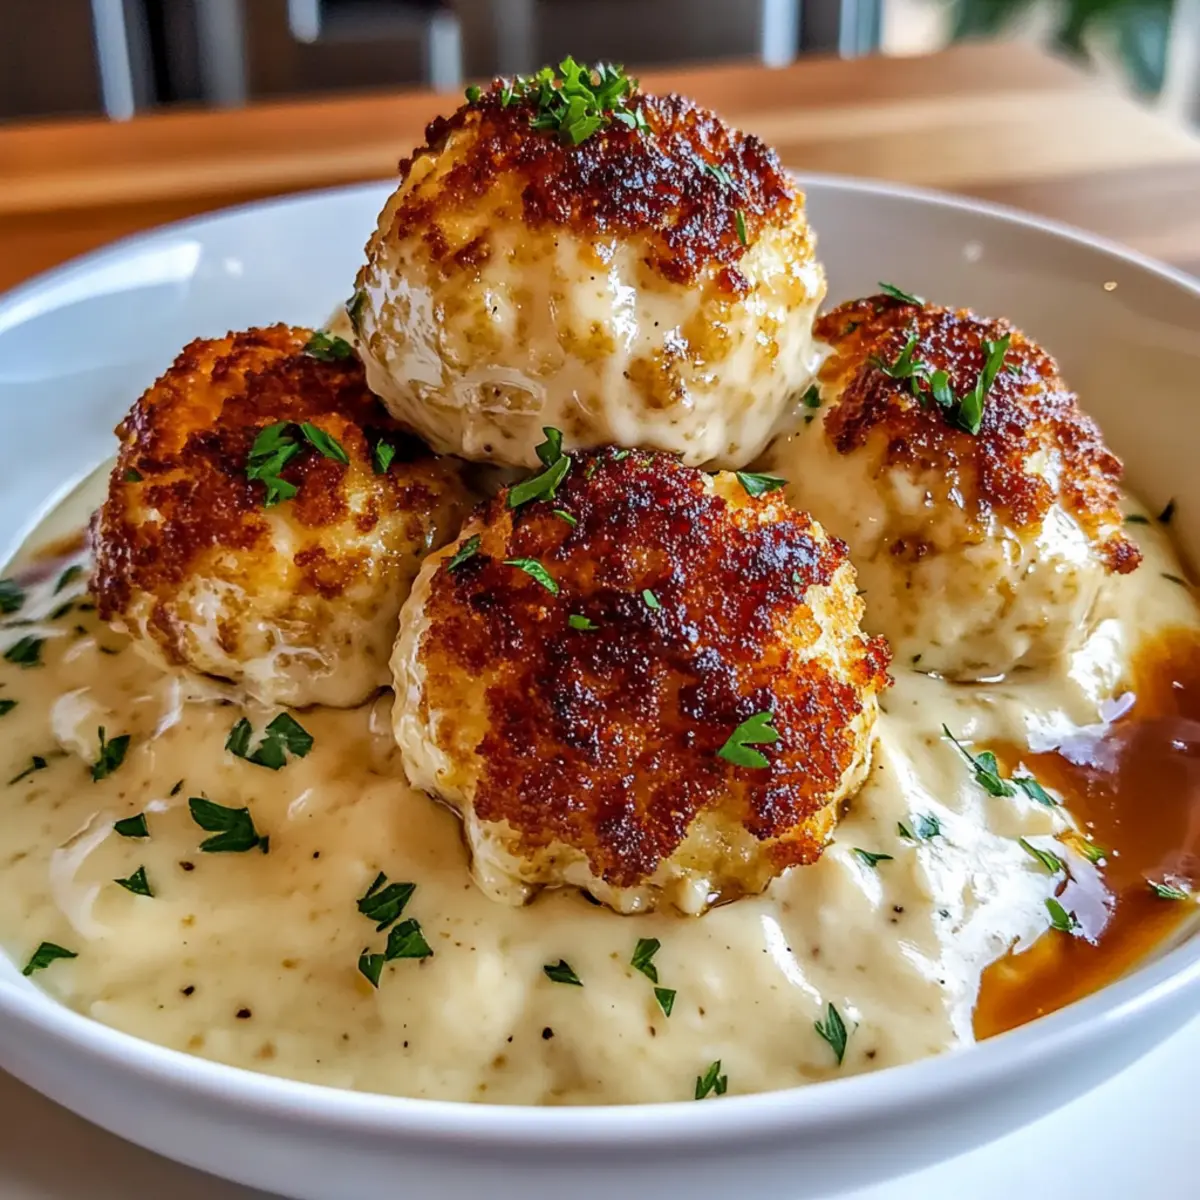
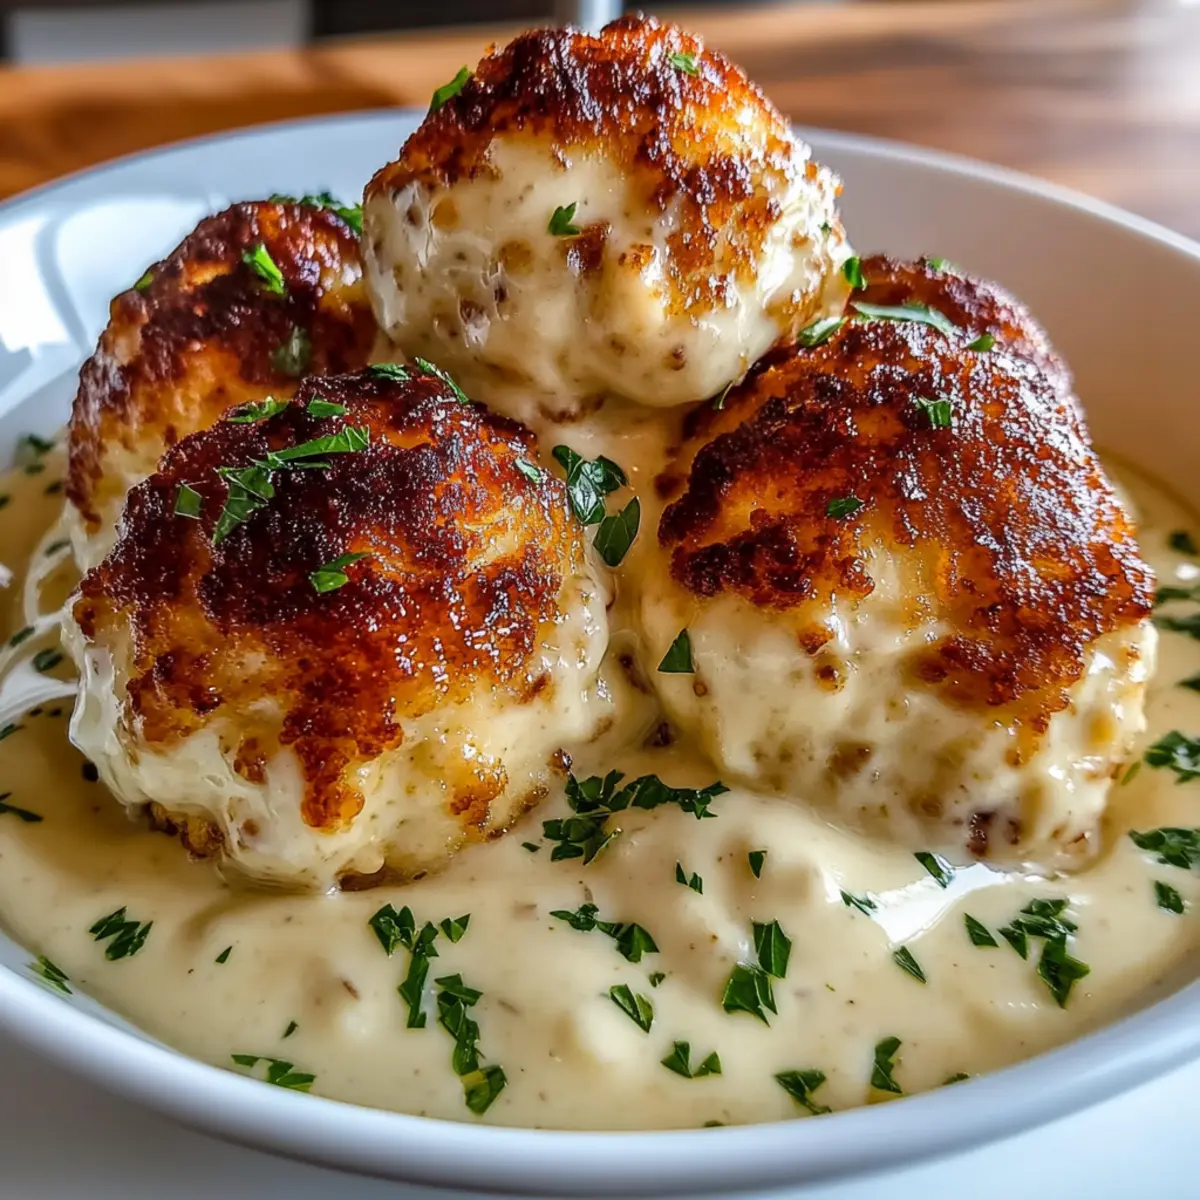
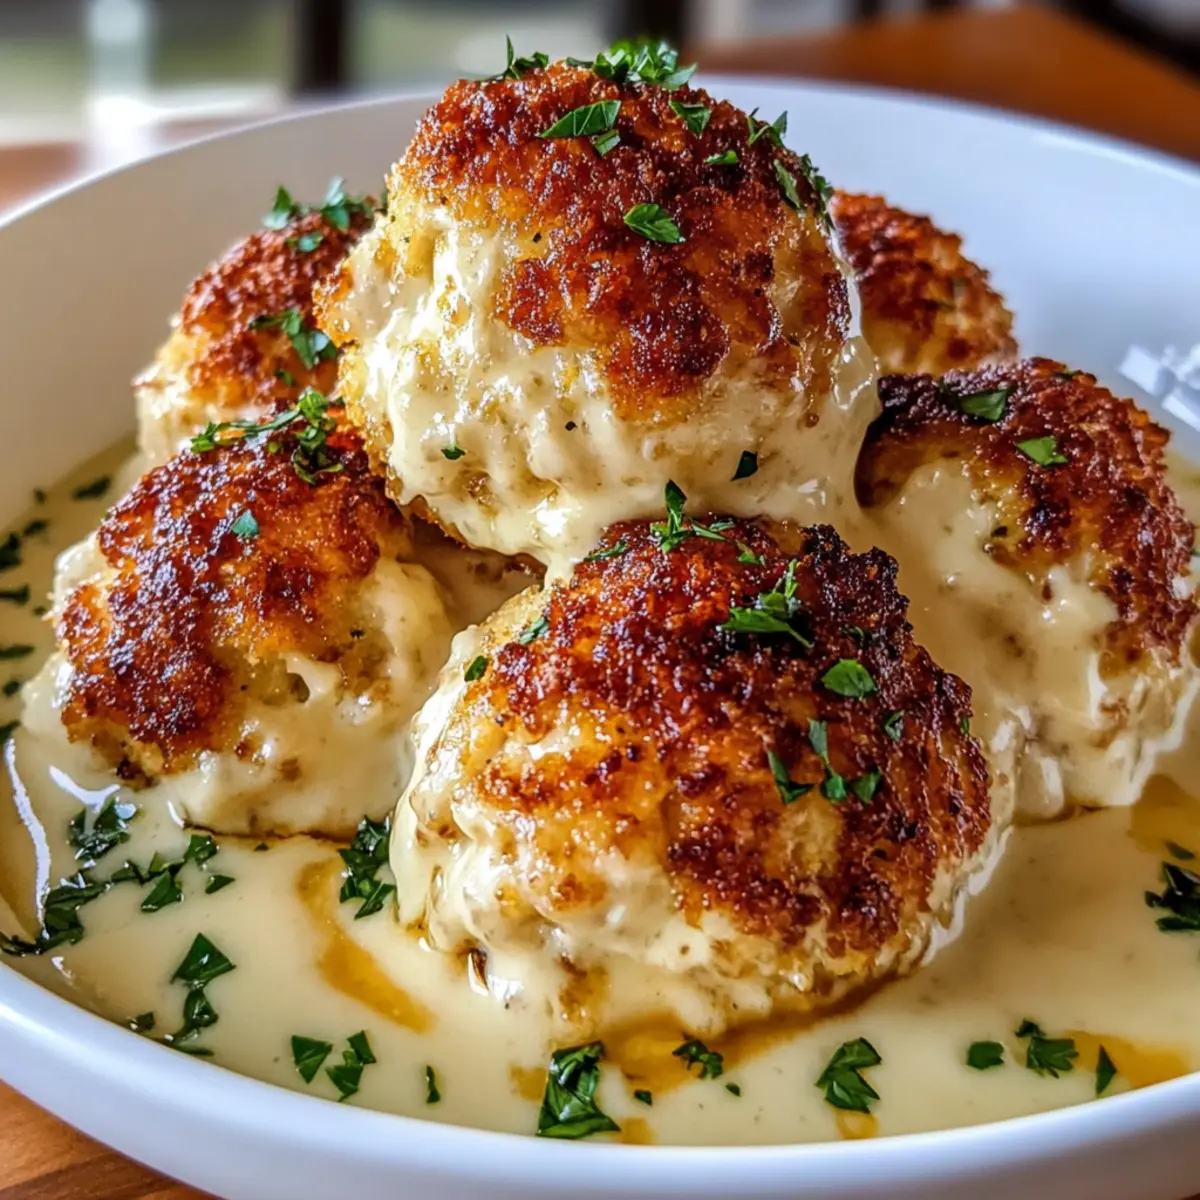
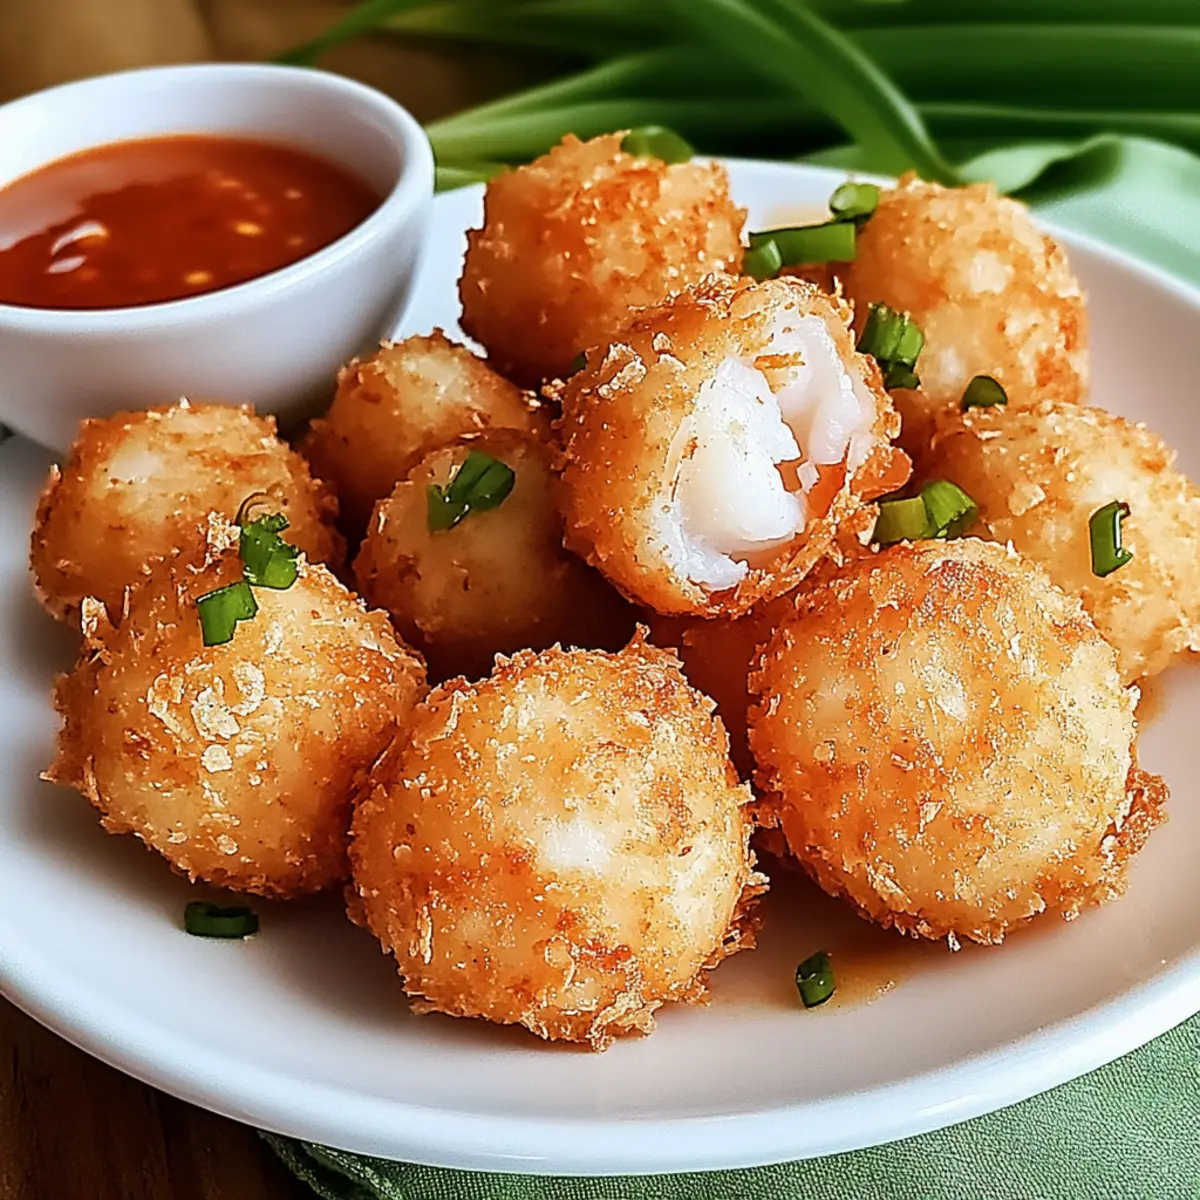
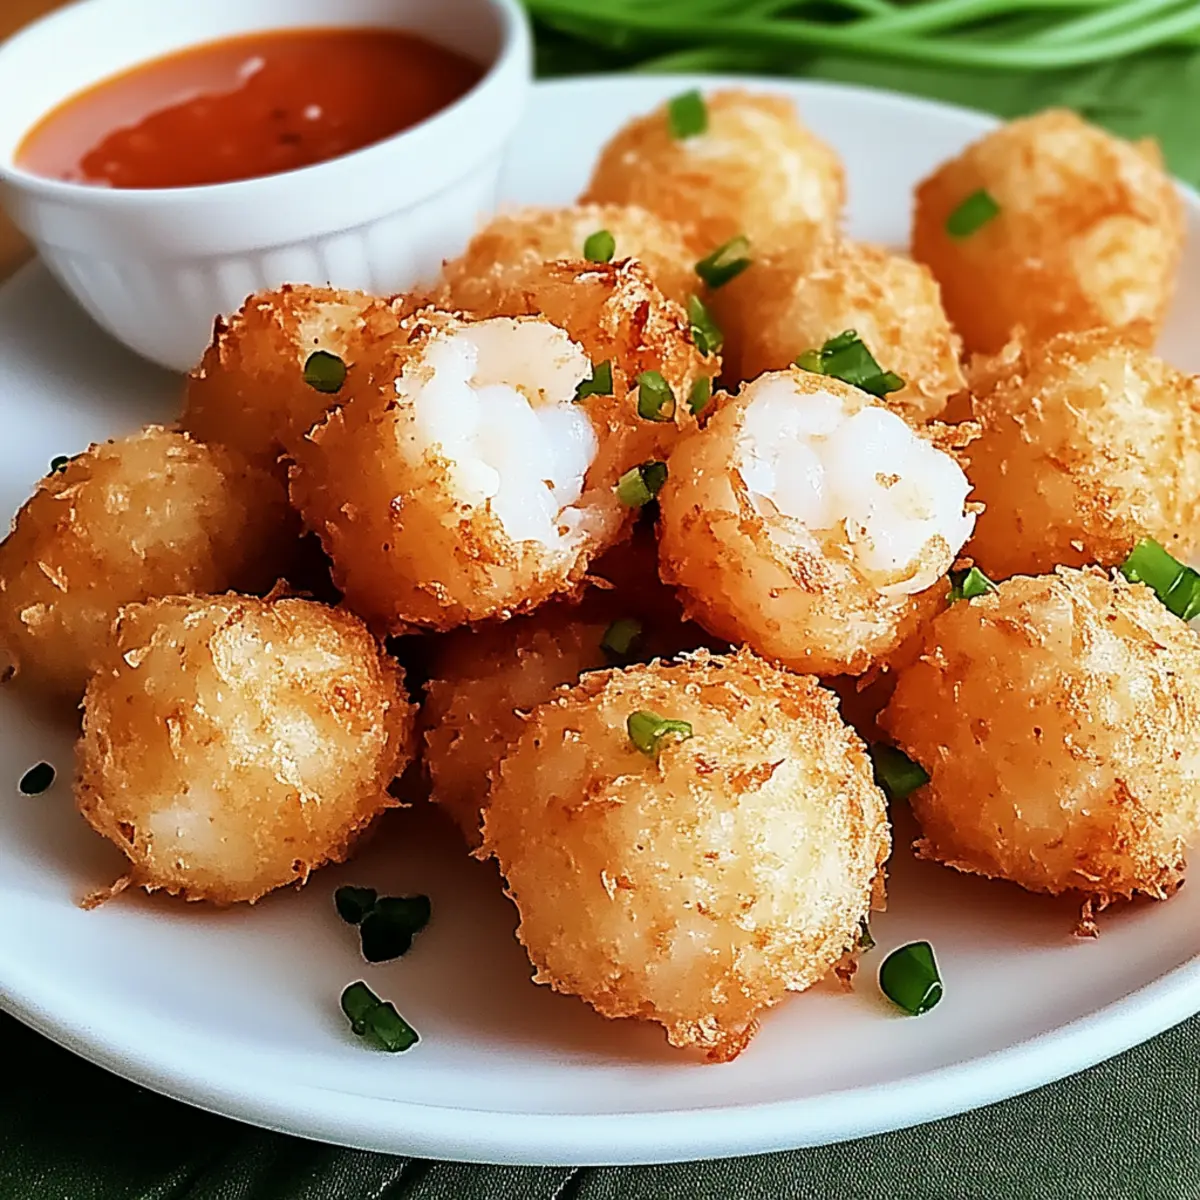
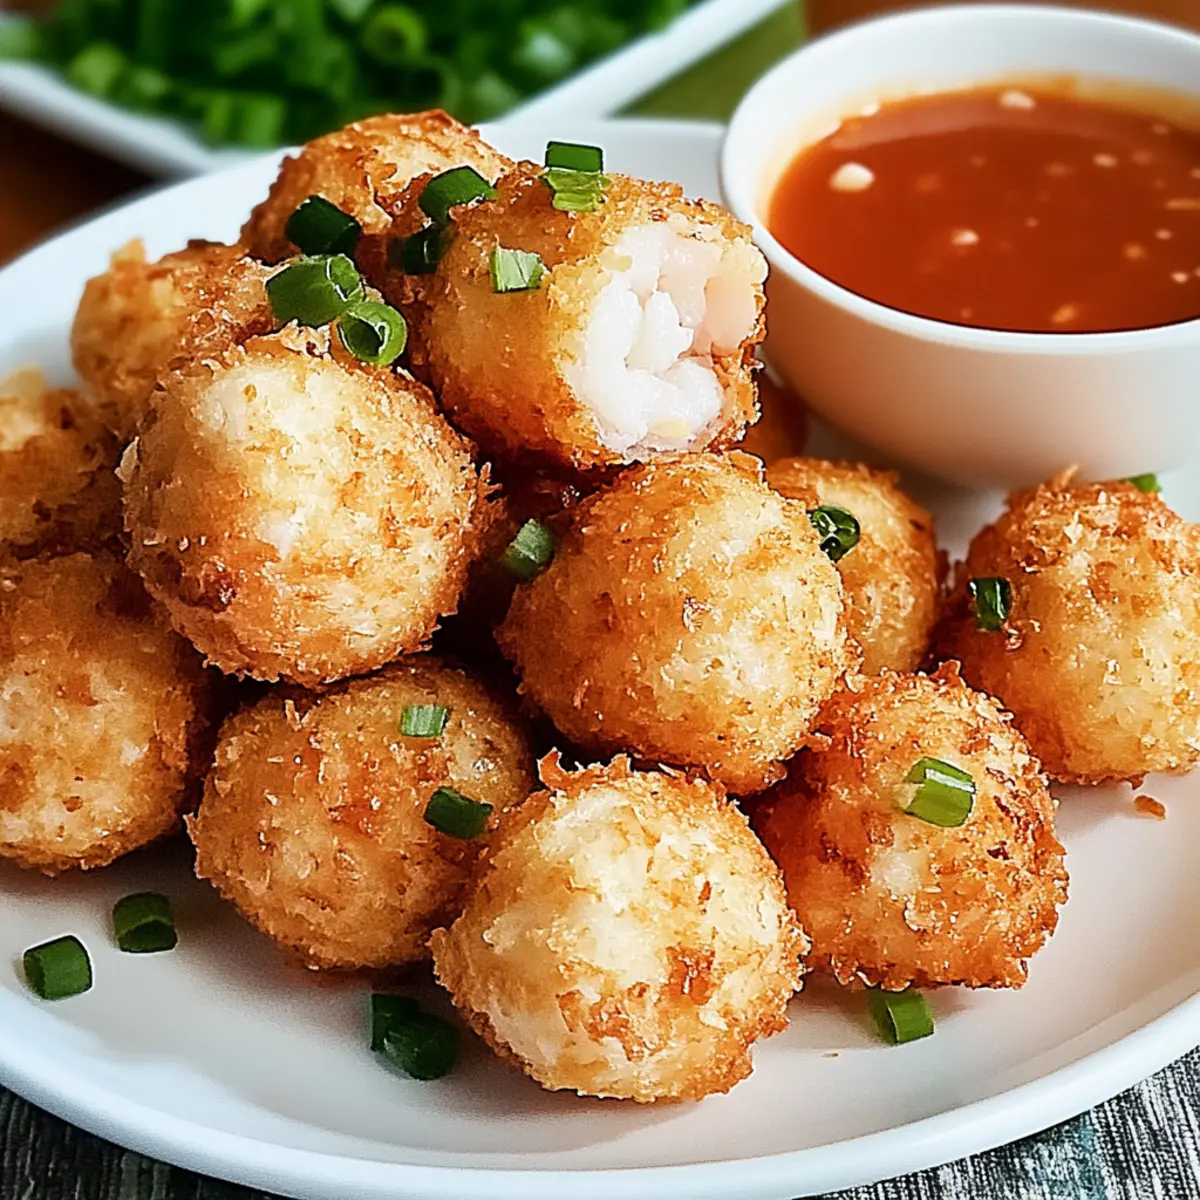
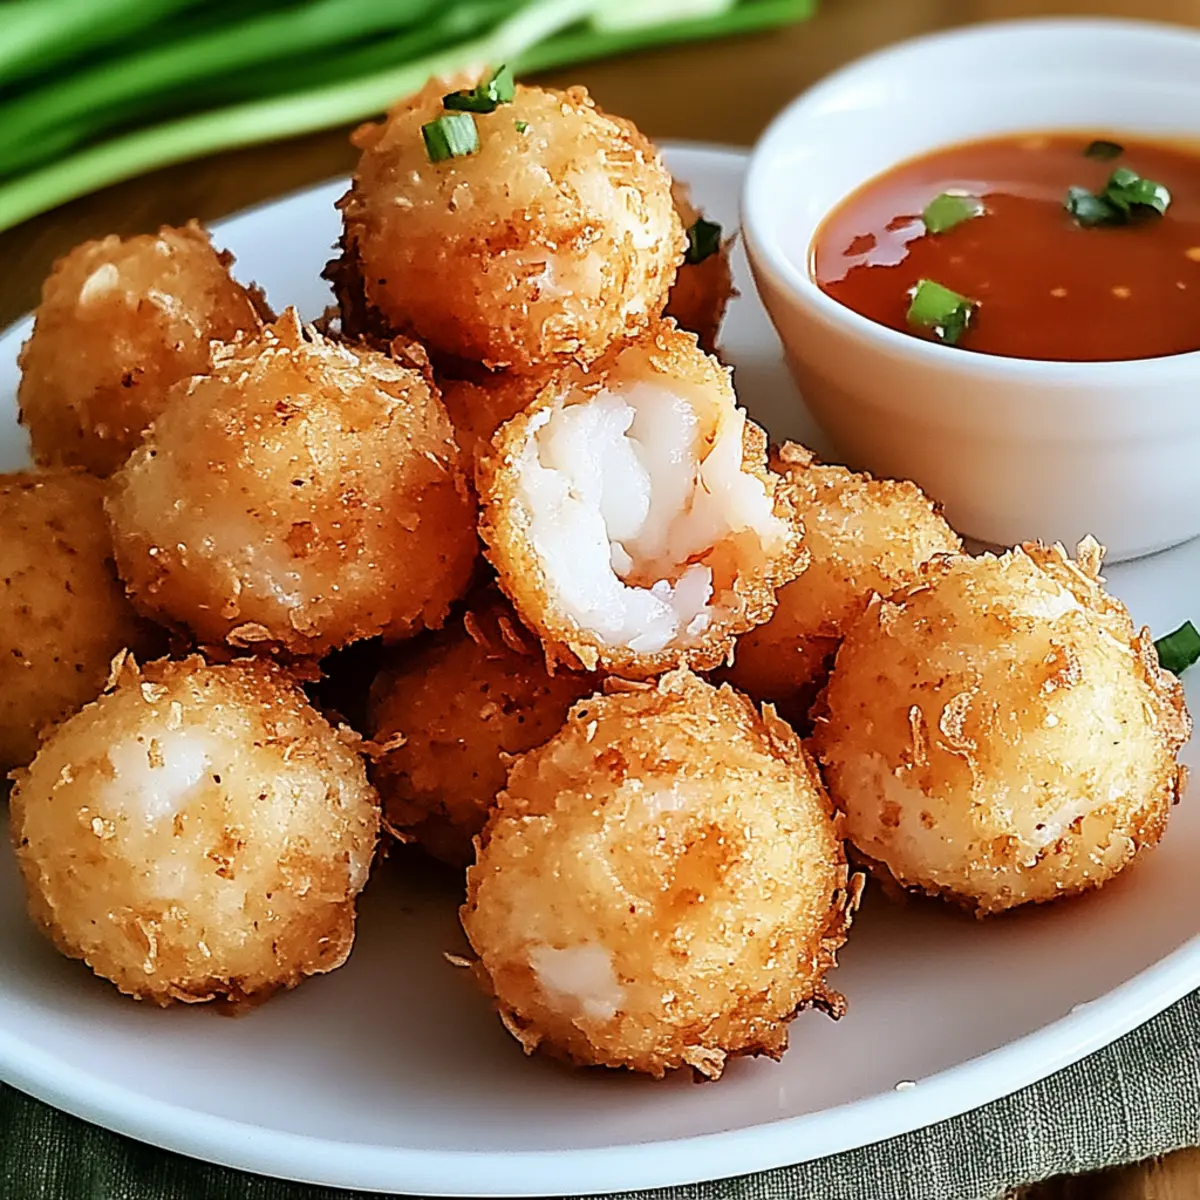
As I stood in my kitchen, the sizzling sound of shrimp balls gently frying quickly transported me to a bustling street market teeming with flavor. These crispy shrimp balls are not just a delightful appetizer; they’re a celebration of seafood that you can easily whip up at home. With the perfect balance of a golden exterior and a juicy, flavorful shrimp filling, this dish is quick to prepare, making it an ideal choice for busy weeknights or gathering with friends. Plus, their versatility means you can customize them with different spices or fillings to suit any occasion. What will you choose to add to your batch?

Why are these shrimp balls irresistible?

Crispy Perfection: The golden, crunchy exterior gives way to a succulent shrimp filling that captivates every bite, enticing even the most discerning food lovers.
Endless Customization: Feel free to experiment! Whether you’re adding cream cheese or opting for spicy herbs, these shrimp balls are a canvas for your creativity.
Quick and Easy: Perfect for those busy evenings, this recipe allows you to whip up a delicious meal in no time.
Perfect Party Pleaser: Serve them as appetizers at your next gathering, and watch how they disappear faster than you can say “shrimp ball!” Pair with a side of fresh salad or a unique dipping sauce like sweet chili for an extra punch. For more delightful seafood options, consider trying Shrimp Tacos Zesty or Turmeric Dill Shrimp.

Shrimp Balls Ingredients

For the Shrimp Mixture
• Shrimp – Freshness is key for flavor and texture; you can substitute with crab or even plant-based alternatives for variations.
• Egg – Binds the ingredients together; an egg replacement can be utilized for vegan versions.
• Garlic – Adds depth and savory flavor; fresh minced garlic is ideal; garlic powder can work in a pinch.
• Green Onions – Offers freshness and a mild onion flavor; can be replaced with chives or omitted if desired.

For the Coating
• Breadcrumbs – Provides a crispy coating; use seasoned or panko breadcrumbs for extra crunch.

For Seasoning
• Spices (e.g., paprika, salt, pepper) – Enhances overall flavor; adjust according to personal taste or dietary restrictions.

For Dipping Sauce
• Dipping Sauce – Complements the dish; sweet chili or soy sauce are fantastic options for enjoying your shrimp balls.

Step‑by‑Step Instructions for Crispy Shrimp Balls

Step 1: Prepare Shrimp
Begin by cleaning and peeling your shrimp, ensuring they are fresh for optimal flavor. Chop the shrimp into small, bite-sized pieces, then pat them dry with paper towels to remove excess moisture. This step is crucial for achieving a perfect texture in your crispy shrimp balls later on.

Step 2: Mix Ingredients
In a large mixing bowl, combine the chopped shrimp with breadcrumbs, beaten egg, minced garlic, chopped green onions, and your chosen spices. Stir the mixture thoroughly until all ingredients are well incorporated and evenly coated. This forms the flavorful base of your shrimp balls, contributing to their irresistible taste.

Step 3: Shape Balls
With your hands, take small portions of the shrimp mixture and shape them into bite-sized balls, roughly the size of a golf ball. Make sure they are compact but not overly tight to allow for even cooking. Place the formed shrimp balls on a tray lined with parchment paper, preparing them for frying.

Step 4: Heat Oil
In a heavy-bottomed frying pan or skillet, pour enough oil to cover the bottom and heat it over medium heat. Allow the oil to heat until it shimmers, which indicates it’s ready for frying. This step is essential for achieving that crunchy exterior on your shrimp balls.

Step 5: Fry Balls
Carefully add the shrimp balls to the hot oil, making sure not to overcrowd the pan. Fry them for about 3 to 4 minutes on each side, or until they turn a beautiful golden brown and are crispy all over. Keep an eye on them, as the cooking time can vary slightly based on your stovetop.

Step 6: Drain
Once golden brown, use a slotted spoon to remove the shrimp balls from the oil and transfer them to a plate lined with paper towels. This helps absorb any excess oil and keeps your shrimp balls crispy. Serve them hot, paired with your favorite dipping sauce for a delightful seafood treat.

Make Ahead Options

These crispy shrimp balls are perfect for meal prep, saving you time on busy weeknights! You can shape the shrimp balls and refrigerate them for up to 24 hours before frying. To do this, simply follow the recipe until shaping, then cover the tray with plastic wrap to prevent drying out. For even longer storage, freeze the uncooked shrimp balls in a single layer on a baking sheet before transferring to a freezer bag, where they can last for up to 3 months. When ready to enjoy, fry them straight from frozen or thaw overnight in the refrigerator before cooking. They’ll still be just as delicious and maintain their crispy exterior!

Expert Tips for Crispy Shrimp Balls

  • Freshness Matters: Always choose the freshest shrimp possible; this enhances flavor and ensures the best texture in your shrimp balls.

  • Pat Dry: Don't skip patting the shrimp dry! Excess moisture can lead to a soggy coating instead of a crispy exterior.

  • Avoid Overcrowding: When frying, keep the shrimp balls spaced apart in the pan to maintain oil temperature, promoting an even, golden crispiness.

  • Baking Alternative: If you prefer a healthier option, bake your shrimp balls! Preheat the oven and spray them lightly with oil for that desired crispiness.

  • Experiment with Spices: Feel free to adjust seasonings according to your preference. Customizing the spices allows you to create unique flavor profiles for your shrimp balls.

What to Serve with Crispy Shrimp Balls

Elevate your meal experience with complementary sides and beverages that enhance the delicious flavors of these golden treats.

  • Zesty Coleslaw: Bright, crunchy coleslaw adds a fresh element, balancing the rich, savory shrimp balls with its tangy flavor.

  • Garlic Butter Rice: This buttery, fragrant rice makes for a comforting addition, allowing the shrimp balls to shine in every bite.

  • Crispy Vegetable Spring Rolls: Add a delightful crunch with these light and crispy rolls, perfect for dipping and enhancing the seafood theme.

  • Sweet Chili Dipping Sauce: Elevate each shrimp ball with this sweet and spicy sauce that perfectly complements the flavors and adds a delightful kick.

  • Cucumber Salad: A cool, refreshing cucumber salad cleanses the palate, offering a light crunch that contrasts beautifully with the crispy shrimp.

  • Mango Salsa: The sweetness of mango salsa brightens up the dish, adding tropical flair while its acidity cuts through the richness of the shrimp balls.

Indulging in these pairings will create a memorable meal that leaves your guests delighted and craving more!

How to Store and Freeze Shrimp Balls

  • Fridge: Store cooked shrimp balls in an airtight container for up to 2 days. Reheat in the oven for optimal crispiness before serving.

  • Freezer: Uncooked shrimp balls can be frozen on a baking sheet for about 1 hour to firm them up. Transfer to a freezer-safe bag and freeze for up to 3 months.

  • Thawing: To prepare frozen shrimp balls, thaw them in the refrigerator overnight before frying, ensuring they cook evenly without excess moisture.

  • Reheating: For leftover shrimp balls, reheat in an oven at 350°F (175°C) for about 10-15 minutes for a perfectly crispy texture.

Shrimp Balls Variations & Substitutions

Get ready to elevate your shrimp balls with these creative twists that will tickle your taste buds!

  • Creamy Surprise: Stuff the shrimp balls with cream cheese for an indulgent and richer flavor that melts delightfully in your mouth.

  • Fresh Herb Boost: Incorporate a handful of fresh herbs like parsley or cilantro for a vibrant flavor profile that brightens every bite.

  • Seafood Medley: Swap shrimp for other seafood like crab or scallops for a luxurious twist or combine shrimp with ground meats like pork for a hearty treat.

  • Spice it Up: Try a Cajun spice blend or Italian herbs to infuse your shrimp balls with unique and bold flavors, perfect for themed gatherings or your family's preference.

  • Gluten-Free Option: Use crushed rice crackers or almond flour instead of breadcrumbs to create a gluten-free crispy coating while retaining that delightful crunch.

  • Baked Goodness: If you prefer a lighter method, bake the shrimp balls instead! Just light spray them with oil and pop them in the oven for a healthier yet crispy version.

  • Heat Level: Add diced jalapeños or a dash of hot sauce to the mixture for a spicy kick that will appeal to heat lovers.

  • Zesty Dipping Enhancements: Pair with zesty dipping sauces like a lemon aioli or a sriracha mayo for an added layer of flavor that perfectly complements your shrimp balls.

Feel free to explore these variations! And if you love shrimp dishes, be sure to check out my Pan Fried Shrimp for another delicious seafood experience.

Shrimp Balls Recipe FAQs

What type of shrimp should I use for shrimp balls?
Absolutely! Fresh shrimp is essential for flavor and texture. Look for medium to large shrimp. If you want a twist, you can even substitute with crab or opt for plant-based alternatives if you’re aiming for a vegan dish.

How should I store leftover shrimp balls?
After cooking, store the shrimp balls in an airtight container in the refrigerator for up to 2 days. To reheat, place them in a preheated oven at 350°F (175°C) for about 10-15 minutes to regain their delightful crispiness.

Can I freeze uncooked shrimp balls?
Yes, you can! Place uncooked shrimp balls on a baking sheet and freeze them for about 1 hour, until firm. Once firm, transfer them to a freezer-safe bag. They can be stored for up to 3 months. For cooking, just thaw in the fridge overnight and fry as usual.

What can I do if my shrimp balls turn out soggy?
Very! Ensure your shrimp are thoroughly patted dry before mixing. Also, avoid overcrowding the frying pan, as this can lower oil temperature. If they are still soggy, try draining them on paper towels immediately after frying to absorb excess oil.

Can I make shrimp balls ahead of time?
Certainly! You can prepare the shrimp balls and refrigerate them for up to 2 hours before frying. This way, they remain fresh and flavorful when ready to cook. Just be sure to handle them gently when forming and frying!

Are shrimp balls safe for those with seafood allergies?
Always take precaution! If someone has a seafood allergy, avoid serving shrimp balls and consider using alternative proteins, like chicken or plant-based products. Always check ingredient labels if using store-bought components.

Shrimp Balls

Crispy Shrimp Balls that Will Make You Ditch Fast Food

Delicious crispy shrimp balls that combine the perfect balance of flavor and texture, ideal for any gathering or weeknight meal. Experience the joy of homemade shrimp balls.
Print Recipe Pin Recipe
Prep Time 15 minutes mins
Cook Time 15 minutes mins
Total Time 30 minutes mins
Servings: 4 balls
Course: Appetizers
Cuisine: Seafood
Calories: 200
Ingredients Equipment Method Nutrition Notes

Ingredients
  

For the Shrimp Mixture
  • 1 pound Fresh shrimp Can substitute with crab or plant-based alternatives.
  • 1 Egg Egg replacement for vegan versions can be used.
  • 2 cloves Garlic Minced garlic is ideal.
  • 2 stalks Green onions Chopped; can be replaced with chives.
For the Coating
  • 1 cup Breadcrumbs Use seasoned or panko for extra crunch.
For Seasoning
  • 1 teaspoon Paprika Adjust according to taste.
  • 1 teaspoon Salt To taste.
  • 1 teaspoon Pepper To taste.
For Dipping Sauce
  • 1 cup Dipping sauce Sweet chili or soy sauce recommended.

Equipment

  • frying pan
  • Mixing Bowl
  • slotted spoon
  • Parchment Paper

Method
 

Step‑by‑Step Instructions for Crispy Shrimp Balls
  1. Begin by cleaning and peeling your shrimp, then chop them into small pieces and pat them dry with paper towels.
  2. In a large bowl, combine the chopped shrimp with breadcrumbs, beaten egg, minced garlic, chopped green onions, and chosen spices. Stir until well incorporated.
  3. Shape the mixture into bite-sized balls, about the size of a golf ball, and place them on a tray lined with parchment paper.
  4. In a frying pan, heat enough oil over medium heat until it shimmers.
  5. Fry the shrimp balls for 3 to 4 minutes on each side until golden brown and crispy. Avoid overcrowding the pan.
  6. Use a slotted spoon to remove the shrimp balls from the oil and drain them on paper towels before serving with your favorite dipping sauce.

Nutrition

Serving: 4ballsCalories: 200kcalCarbohydrates: 15gProtein: 22gFat: 8gSaturated Fat: 2gPolyunsaturated Fat: 2gMonounsaturated Fat: 3gCholesterol: 180mgSodium: 600mgPotassium: 300mgFiber: 1gSugar: 1gVitamin A: 200IUVitamin C: 2mgCalcium: 50mgIron: 1mg

Notes

Always use the freshest shrimp for best results. Patting shrimp dry is crucial to achieving crispy balls. Avoid overcrowding while frying and consider baking for a healthier alternative.

Tried this recipe?

Let us know how it was!

Cajun Shrimp Deviled Eggs That Will Wow Your Guests

December 16, 2025 by Grace Snow Leave a Comment

As I was flipping through an old cookbook, I stumbled upon a page that took me straight to the vibrant streets of New Orleans, where the air is thick with spice and warmth. That's when I knew I had to share my bold and flavorful Cajun Shrimp Deviled Eggs with you! This fabulous appetizer marries creamy, zesty goodness with perfectly blackened shrimp, bringing together an enticing medley of flavors that your guests won’t soon forget. Not only are these deviled eggs a stunning centerpiece for any gathering, but they’re also incredibly make-ahead friendly, giving you more time to enjoy the party. Whether you’re hosting a casual get-together or simply craving a delightful seafood treat, these deviled eggs will surely be a crowd-pleaser. Curious about how to elevate your next appetizer game? Let’s dive into the recipe!

Why Are Cajun Shrimp Deviled Eggs Amazing?

Irresistible Flavor Fusion: The bold Cajun spices combined with creamy filling and smoky shrimp create an explosion of taste.

Make-Ahead Marvel: Prep the eggs and filling up to two days in advance, making party planning a breeze.

Visual Showstopper: These stunning appetizers will steal the spotlight on any plate, impressing both the eyes and the taste buds.

Versatile Indulgence: Feel free to swap the shrimp for crab or smoked salmon to mix things up!

Perfect Pairing Ideas: Serve with a refreshing veggie platter or a delightful charcuterie board for a well-rounded feast.

Quick to Prepare: With straightforward steps, you can whip up these deviled eggs in no time, leaving you free to enjoy your gathering.

Cajun Shrimp Deviled Eggs Ingredients

For the Filling
• Eggs – Fresh eggs provide structure and protein for the dish.
• Mayonnaise – Adds the creamy richness essential for a dreamy filling; substitute with Greek yogurt for a lighter option.
• Dijon Mustard – Elevates the flavor with a hint of tanginess.
• Hot Sauce – Infuses heat and enhances the overall flavor of the Cajun shrimp deviled eggs.
• Smoked Paprika – Offers a deep, smoky flavor and vibrant color; regular paprika can be used as a substitute.
• Cayenne Pepper – Adds a kick of heat; feel free to adjust according to your spice preference.
• Dried Oregano – Imparts pleasant herbal notes to the filling.
• Garlic Powder – Adds delicious savory depth to the filling.
• Onion Powder – Enhances the overall flavor profile beautifully.
• Granulated Sugar – A dash helps balance flavors, though optional.

For the Shrimp
• Shrimp – Choose peeled and deveined shrimp for convenience, adding rich, briny flavor.
• Olive Oil – Necessary for searing the shrimp and achieving that delicious smoky char.

For Toppings
• Jalapeño – Fresh slices for topping; they add crunch and a bit more heat.
• Chives – Freshly chopped for a burst of color and flavor.
• Lemon Wedges – Serve on the side for a bright squeeze of citrus over the eggs.

Step‑by‑Step Instructions for Cajun Shrimp Deviled Eggs

Step 1: Hard Boil the Eggs
In a medium saucepan, place the eggs in a single layer and cover with about an inch of water. Bring the water to a rolling boil over medium heat, then remove from heat and cover the saucepan. Let the eggs stand in the hot water for 12 minutes. Afterward, cool them under cold running water to stop the cooking process, ensuring perfectly hard-boiled eggs for your Cajun Shrimp Deviled Eggs.

Step 2: Prepare Filling
Once the eggs have cooled, carefully peel them and slice them in half lengthwise. Gently scoop the yolks into a mixing bowl and mash them until smooth. Add mayonnaise, Dijon mustard, hot sauce, and the Cajun spices, mixing well until creamy and unified. For the best flavor, chill this zesty filling in the refrigerator while you move on to the next step.

Step 3: Season and Sear Shrimp
In a small bowl, combine the remaining spices to season the shrimp. Heat olive oil in a skillet over medium-high heat until shimmering. Add the seasoned shrimp and cook for about 2 minutes on each side until they turn pink and are slightly charred. Watch for a golden-brown crust forming; this adds flavor! Remove from heat and let the shrimp cool completely before you assemble.

Step 4: Assemble Eggs
Return to the chill-filled yolk mixture and stir to loosen it if needed. Carefully spoon or pipe the creamy filling back into the egg whites, filling each half generously. Top each filled egg with a piece of the seared shrimp and garnish with jalapeño slices and fresh chives for that added pop of flavor and color.

Step 5: Serve and Enjoy
Arrange your beautiful Cajun Shrimp Deviled Eggs on a serving platter, and consider garnishing with lemon wedges on the side for a tangy burst when served. To meld the flavors, it's best to let them rest in the fridge for at least 30 minutes before serving, allowing the delicious taste to shine through at your gathering!

Make Ahead Options

These Cajun Shrimp Deviled Eggs are perfect for meal prep, allowing you to enjoy more time with your guests! You can prepare the eggs and the zesty filling up to 24 hours in advance; just store them separately in airtight containers in the refrigerator to maintain their freshness. The cooked shrimp can also be seasoned and seared ahead of time, keeping them in the fridge for up to 3 days—just be sure to cool them completely before storing. When you're ready to serve, simply assemble the deviled eggs by filling the whites with the chilled yolk mixture, topping with shrimp, and adding jalapeño slices and chives. This way, you'll have a stress-free gathering with your Cajun Shrimp Deviled Eggs tasting just as delicious as if they were freshly made!

What to Serve with Cajun Shrimp Deviled Eggs

Elevate your gathering with vibrant accompaniments that will enhance the flavors of these zesty morsels!

  • Crispy Veggie Platter:
    Fresh, crunchy vegetables like bell peppers and cucumbers add a refreshing contrast, balancing the richness of the deviled eggs.

  • Herbed Garlic Bread:
    Soft, garlicky bread with fresh herbs provides a comforting texture and flavor that complements the spicy notes of the eggs.

  • Savory Charcuterie Board:
    A mix of cured meats, cheeses, and pickles invites diverse flavors to the table, creating an inviting spread, perfect for mingling!

  • Chilled White Wine:
    A crisp sauvignon blanc or tart Pinot Grigio perfectly complements the richness of the shrimp, enhancing the overall dining experience.

  • Sweet Mini Desserts:
    Mini cheesecake bites or fruit tarts offer a delightful, sugary contrast to the savory deviled eggs, leaving guests with a sweet finish.

  • Classic Ceasar Salad:
    The tangy dressing and crunchy romaine pair beautifully with the creamy, spicy deviled eggs, making for a well-rounded meal.

How to Store and Freeze Cajun Shrimp Deviled Eggs

  • Fridge: Store assembled Cajun Shrimp Deviled Eggs in an airtight container in the fridge for up to 2 days to maintain freshness.

  • Freezer: It’s best not to freeze the assembled deviled eggs, as the texture of the shrimp and filling can be affected.

  • Make-Ahead Tips: Prepare the egg whites and filling up to 2 days in advance; simply cook the shrimp and assemble just before serving for the best flavor and texture.

  • Reheating: Enjoy these excellent appetizers chilled without reheating, as they shine best when served cold.

Cajun Shrimp Deviled Eggs Variations

Feel free to put your unique spin on these delightful appetizers and discover new flavor combinations that excite your taste buds!

  • Seafood Swap: Substitute shrimp with crab or smoked salmon for a luxurious twist that adds different textures and flavors.

  • Spice Blends: Use Old Bay or Creole seasoning instead of Cajun spices for a different taste sensation. Each blend brings its own unique history!

  • Veggie Delight: For a vegetarian option, replace shrimp with diced pickles or olives. This will give your deviled eggs a salty, briny flavor profile.

  • Creamy Base: Try using avocado instead of mayonnaise for a dreamy, creamy filling that adds healthy fats and a subtle richness.

  • Cheesy Indulgence: Incorporate crumbled feta or shredded cheddar into your filling for a cheesy variation that will impress cheese lovers.

  • Herbed Infusion: Fresh herbs like dill or cilantro can add bright, fresh notes. Just chop finely and mix them into the filling!

  • Heat Variation: If you want less heat, opt for sweet paprika instead of smoked paprika and reduce the amount of cayenne pepper; this creates a milder version without sacrificing flavor.

For more inspiration, don’t forget to check out our Shrimp Ceviche Zesty or toss together some delicious Shrimp Tacos Zesty with that leftover shrimp!

Expert Tips for Cajun Shrimp Deviled Eggs

  • Perfect Peel: For easy peeling, add 1 teaspoon of baking soda to the water when boiling eggs; it works wonders!
  • Chill Time: Allow the filled eggs to rest for at least 30 minutes in the fridge to meld flavors for the best Cajun shrimp deviled eggs.
  • Taste Test: Always cook extra shrimp for seasoning; this ensures the shrimp have the perfect flavor before topping.
  • Presentation Matters: For a beautiful look, lay shrimp on their sides instead of standing them upright atop the eggs.
  • Adjust the Heat: Tailor the spice level of your deviled eggs by adjusting the amount of cayenne pepper and hot sauce according to your taste preference.

Cajun Shrimp Deviled Eggs Recipe FAQs

What type of eggs should I use for the best results?
Absolutely! Fresh eggs are ideal for this recipe as they provide the best structure and protein. If you're struggling with peeling, I recommend adding 1 teaspoon of baking soda to the cooking water — it truly makes a difference for easy peeling!

How should I store leftover Cajun Shrimp Deviled Eggs?
Store any leftover assembled Cajun Shrimp Deviled Eggs in an airtight container in the fridge. They'll stay fresh for up to 2 days, but they’re best enjoyed within the first day for optimal flavor and texture.

Can I freeze Cajun Shrimp Deviled Eggs?
It’s best not to freeze these delicious deviled eggs, as freezing can affect both the texture of the shrimp and the filling mixture. However, you can prepare the egg whites and the filling in advance and simply cook the shrimp right before you're ready to assemble!

What if the filling is too thick or too thin?
If your filling is too thick, try adding a little more mayonnaise or a splash of lemon juice to loosen it up. Alternatively, if it’s too thin, simply mix in some extra mashed yolks or even a touch of powdered sugar to thicken it up. Taste as you go to ensure you're happy with the consistency!

Are there any dietary considerations with Cajun Shrimp Deviled Eggs?
If you're serving these delicious appetizers to guests with allergies or dietary restrictions, be mindful of the mayonnaise, which contains eggs. You can substitute it with Greek yogurt for a lighter option. Additionally, always ensure your shrimp are peeled and deveined to avoid any issues for those sensitive to shellfish.

Cajun Shrimp Deviled Eggs

Cajun Shrimp Deviled Eggs That Will Wow Your Guests

Experience bold and flavorful Cajun Shrimp Deviled Eggs that your guests won’t forget, perfect for any gathering.
Print Recipe Pin Recipe
Prep Time 30 minutes mins
Cook Time 12 minutes mins
Chill Time 30 minutes mins
Total Time 1 hour hr 12 minutes mins
Servings: 12 pieces
Course: Appetizers
Cuisine: Cajun
Calories: 150
Ingredients Equipment Method Nutrition Notes

Ingredients
  

For the Filling
  • 6 pieces Eggs
  • 1/2 cup Mayonnaise can substitute with Greek yogurt
  • 1 tablespoon Dijon Mustard
  • 1 teaspoon Hot Sauce
  • 1 teaspoon Smoked Paprika can substitute with regular paprika
  • 1/4 teaspoon Cayenne Pepper adjust to taste
  • 1/2 teaspoon Dried Oregano
  • 1/2 teaspoon Garlic Powder
  • 1/2 teaspoon Onion Powder
  • 1 teaspoon Granulated Sugar optional
For the Shrimp
  • 1 pound Shrimp peeled and deveined
  • 2 tablespoons Olive Oil
For Toppings
  • 1 Jalapeño sliced for topping
  • 2 tablespoons Chives freshly chopped
  • 1 Lemon wedges for serving

Equipment

  • Medium saucepan
  • Mixing Bowl
  • Skillet

Method
 

Step-by-Step Instructions
  1. Hard Boil the Eggs: Place eggs in a single layer in a saucepan, cover with water, bring to a boil, remove from heat, cover, and let stand for 12 minutes. Cool under cold running water.
  2. Prepare Filling: Peel and halve the eggs, scoop yolks into a bowl, mash smooth, add mayonnaise, mustard, hot sauce, and spices. Mix well and chill.
  3. Season and Sear Shrimp: Mix spices and season shrimp. Heat olive oil in a skillet and cook shrimp until pink and slightly charred, about 2 minutes each side. Let cool.
  4. Assemble Eggs: Stir yolk mixture, fill egg whites, top with shrimp, jalapeño slices, and chives.
  5. Serve and Enjoy: Arrange on platter, garnish with lemon wedges, and let chill for 30 minutes before serving.

Nutrition

Serving: 1pieceCalories: 150kcalCarbohydrates: 2gProtein: 10gFat: 12gSaturated Fat: 2gPolyunsaturated Fat: 1gMonounsaturated Fat: 9gCholesterol: 150mgSodium: 300mgPotassium: 100mgSugar: 1gVitamin A: 250IUVitamin C: 2mgCalcium: 25mgIron: 1mg

Notes

For easy peeling, add baking soda to the boiling water. Store in an airtight container for up to 2 days in the fridge.

Tried this recipe?

Let us know how it was!

Garlic Knots: Soft, Buttery Bites You Can't Resist

December 13, 2025 by Grace Snow Leave a Comment

As the aroma of freshly baked bread wafts through the kitchen, it's hard not to feel a wave of comfort and nostalgia. These homemade Garlic Knots are your soon-to-be favorite side dish, featuring a delightful combination of soft, buttery dough and a rich garlic flavor that elevates any meal. This easy bread recipe is perfect for those busy weeknights or gatherings with friends, effortlessly transforming your dinner table into a cozy Italian escape. Plus, they’re freezer-friendly, so you can bake a batch and save some for later—no more reaching for takeout! Have you ever imagined the satisfaction of pulling apart a warm, fluffy knot with just the right amount of garlic goodness? Let’s dive into this scrumptious recipe that will have everyone asking for seconds!

Why Make Homemade Garlic Knots?

Simplicity: This easy bread recipe requires just a few simple ingredients and minimal steps, making it perfect for bakers of any skill level.

Flavor-Packed: Each bite is bursting with rich garlic flavor and buttery goodness, which pairs wonderfully with family favorites like Cheesy Garlic Bread or any meal.

Freezer-Friendly: Bake a big batch, freeze, and heat them up whenever you crave a warm, comforting side dish without any fuss—ideal for those busy weeknights!

Crowd-Pleaser: Whether served with pasta, pizza, or as a snack with marinara sauce, these garlic knots never fail to impress and satisfy even the pickiest eaters.

Versatile: Add your favorite herbs or cheese for personalized twists that everyone will love. This recipe invites creativity—why not try them alongside Shrimp Tacos for a delightful flavor combination?

Garlic Knots Ingredients

For the Dough
• Very warm water (⅓ cup / 79g) – Activates yeast for dough rising; use 105°F/40°C water to ensure effectiveness.
• Active dry yeast (2¼ teaspoons) – Leavening agent for the dough; ensure freshness for proper rising.
• Granulated sugar (¼ cup + ¼ teaspoon / 51g total) – Provides sweetness and activates yeast; honey or maple syrup can be used as a substitute.
• Warm milk (1⅓ cups / 332g) – Adds richness and moisture; dairy alternatives like almond or oat milk may be used.
• Butter, softened (5 tablespoons / 76g) – Contributes to the buttery flavor and tender texture; margarine can be used as a substitute.
• Large egg (1) – Provides structure and helps bind the dough; flaxseed meal can replace egg for a vegan alternative.
• Salt (1½ teaspoons) – Enhances flavor and controls yeast activity; sea salt can be used instead.
• All-purpose flour (4–4½ cups / about 500g) – Forms the structure of the dough; whole wheat flour can be mixed in for a healthier option.
• Olive oil (1 tablespoon) – Adds flavor and helps brush on knots; can be replaced with vegetable or sesame oil.

For the Topping
• Butter, melted (1 tablespoon) – For brushing on knots to enhance flavor.
• Garlic powder (1 teaspoon) – Key flavoring for the topping; fresh minced garlic may be used for a stronger flavor.
• Dried parsley flakes (½ teaspoon) – Adds freshness and color to the garlic topping; fresh parsley can be substituted.

For Serving
• Marinara sauce (for dipping) – Optional for serving; it pairs wonderfully with your garlic knots!

Step‑by‑Step Instructions for Garlic Knots

Step 1: Prepare the Dough
In a large mixing bowl, combine ⅓ cup of very warm water (about 105°F/40°C), 2¼ teaspoons of active dry yeast, and ¼ cup plus ¼ teaspoon of granulated sugar. Stir gently and let the mixture sit for about 5-10 minutes until it becomes frothy, indicating that the yeast is active and ready to make your garlic knots dough rise beautifully.

Step 2: Mix the Wet Ingredients
In a separate bowl, whisk together 1⅓ cups of warm milk, 5 tablespoons of softened butter, 1 large egg, and 1½ teaspoons of salt. Once well combined, pour this mixture into the yeast blend, then blend them smoothly together. The warmth of the milk and butter will enhance the softness of your garlic knots, ensuring each bite is rich and buttery.

Step 3: Incorporate the Flour
Gradually add 4 to 4½ cups of all-purpose flour to the wet ingredients, mixing with a wooden spoon until a soft dough begins to form. When the dough starts pulling away from the edges of the bowl, switch to your hands to knead it gently. This step typically takes about 5-7 minutes and should result in a smooth, elastic dough that springs back when poked.

Step 4: Allow the Dough to Rise
Place the kneaded dough into a greased bowl, ensuring it's coated lightly with olive oil to prevent sticking. Cover the bowl with a clean kitchen towel and let it rise in a warm, draft-free area for about 1 hour or until it has doubled in size. This crucial step gives your garlic knots that irresistible fluffiness and texture.

Step 5: Preheat the Oven
While the dough rises, preheat your oven to 375°F (190°C). This temperature is perfect for baking your garlic knots to golden perfection, creating a lightly crispy exterior while retaining a soft, airy inside. Make sure your baking sheets are ready by lining them with parchment paper to prevent sticking.

Step 6: Shape the Garlic Knots
Once the dough has risen, punch it down gently to release any air bubbles. Divide the dough into equal pieces and roll each one into a rope, about 6-8 inches long. Take each rope and tie it into a knot, tucking the ends underneath. Place your beautifully shaped knots on the prepared baking sheets, leaving space between them for expansion.

Step 7: Apply the Garlic Topping
In a small bowl, mix 1 tablespoon of melted butter, 1 tablespoon of olive oil, 1 teaspoon of garlic powder, and ½ teaspoon of dried parsley flakes. Brush this delicious garlic mixture generously over the tops of each knot, ensuring they’re well-coated and ready to burst with flavor when baked in the oven.

Step 8: Bake the Garlic Knots
Slide the baking sheets into the preheated oven and bake for 15-20 minutes, or until the garlic knots are golden brown and puffed up. Keep an eye on them towards the end; they should be beautifully browned and fragrant, creating a delightful aroma that will fill your kitchen and whet your appetite.

Step 9: Serve Warm
Once baked, remove the garlic knots from the oven and let them cool slightly on the baking sheets. Serve these warm, buttery bites on a platter with a side of marinara sauce for dipping if desired. Your homemade garlic knots are now ready to enchant family and friends at any meal!

Garlic Knots: Customization Ideas

Feel free to personalize your garlic knots for an even more delightful experience that matches your taste and dietary needs!

  • Cheesy Garlic Knots: Fold in shredded mozzarella or Parmesan cheese into the dough for a delicious cheesy twist. The gooey cheese elevates each bite, making them irresistible!

  • Herb-Infused: Experiment with fresh or dried herbs like oregano, basil, or thyme in the dough or topping for added flavor. This simple change transforms the knots into a fresh herb delight.

  • Whole Wheat Option: Swap out half of the all-purpose flour with whole wheat for a healthier alternative that is still fluffy and delicious. You won't miss the white flour!

  • Dairy-Free Delight: Use plant-based butter and non-dairy milk to make your garlic knots dairy-free without losing that buttery richness. Your family won’t even notice the difference!

  • Garlic Lovers' Dream: If you adore garlic, add fresh minced garlic to the butter mixture and sprinkle more on top before baking for a delightful punch. Aromatic and flavorful, perfect for garlic enthusiasts!

  • Spice It Up: Add a sprinkle of red pepper flakes to the garlic topping to give your garlic knots a kick of heat that contrasts beautifully with the buttery flavor.

  • Savory Swirls: Roll the dough out and add pesto or roasted red peppers before tying into knots. This creates a colorful and flavorful surprise inside each knot.

  • Serving Suggestions: Pair your garlic knots with creamy dips or sauces like marinara or ranch. They’re perfect alongside your favorite pasta dishes or even as a side to Shrimp Tacos for a fusion meal!

How to Store and Freeze Garlic Knots

Room Temperature: Store baked garlic knots in an airtight container for up to 2 days to maintain their delightful softness and flavor.

Fridge: If you need to extend their freshness, keep the garlic knots in the refrigerator for up to 5 days, wrapped tightly to prevent drying out.

Freezer: For longer storage, freeze baked garlic knots in a freezer-safe bag for up to 2 months. Reheat them in a preheated oven at 350°F (175°C) for about 10-15 minutes until warm and soft.

Reheating: To enjoy leftover knots, you can microwave them for 20-30 seconds, but for the best texture, reheating in the oven is recommended.

Expert Tips for Garlic Knots

Water Temperature: Ensure the water is at the right temperature (105°F/40°C) to effectively activate the yeast for fluffy garlic knots.

Dough Rising: Keep an eye on the dough as it rises; it should double in size. If it doesn’t, your yeast might be inactive.

Kneading Method: Knead the dough for 5-7 minutes until it’s smooth and elastic, which is crucial for the texture of your garlic knots.

Cooling Time: Allow the baked knots to cool slightly before serving. This helps maintain their soft texture and enhances the flavor.

Freezing Tips: After baking, let the garlic knots cool completely before freezing. Store them in a freezer bag for up to 2 months for easy reheating later.

What to Serve with Homemade Garlic Knots?

As you savor the warm, buttery goodness of these delightful bites, elevate your meal with the perfect pairings that complement their rich flavor.

  • Creamy Tomato Soup: The smooth, tangy soup harmonizes beautifully with the knots, creating a comforting experience.

  • Classic Spaghetti: A timeless duo! The garlic knots soak up the rich tomato sauce, enhancing every bite of pasta.

  • Caesar Salad: Crisp romaine and tangy dressing provide a refreshing contrast that balances the richness of the knots.

  • Herbed Pasta Salad: Tossed with fresh veggies and zesty dressing, this side adds a refreshing twist alongside your garlic knots.

  • Garlic Butter Shrimp: For seafood lovers, this dish echoes the garlic flavor while adding a succulent touch to your meal.

  • Marinara Sauce: Perfect for dipping! The tangy sauce adds a delightful twist, making each bite irresistibly flavorful.

  • Pesto Chicken: Juicy chicken tossed in aromatic pesto becomes a flavorful partner, ideal alongside warm, garlic-infused knots.

  • Antipasto Platter: Create a vibrant spread with cured meats, olives, and cheeses that pairs perfectly with the knots for a crowd-pleasing appetizer.

  • Chardonnay: A glass of chilled Chardonnay will enhance the garlic flavor and buttery texture of your knots, making each sip a delightful experience.

Make Ahead Options

These Garlic Knots are perfect for busy home cooks looking to save time! You can prepare the dough up to 24 hours in advance by following the initial steps and placing it in the refrigerator to rise overnight. Just allow the dough to come to room temperature for about 30 minutes before shaping the knots. Alternatively, you can bake and freeze the garlic knots for up to 2 months; reheat them in a preheated oven for about 10 minutes. To maintain their soft texture, store them in an airtight container. When ready to serve, simply brush with your garlic topping and bake, ensuring you enjoy warm, flavorful Garlic Knots without the last-minute rush.

Garlic Knots Recipe FAQs

What type of water should I use for the dough?
Absolutely! Using very warm water at around 105°F (40°C) is essential for activating the yeast effectively. This temperature helps the yeast work its magic, contributing to the fluffiness of your garlic knots.

How should I store leftover garlic knots?
Baked garlic knots can be stored in an airtight container at room temperature for up to 2 days. If you’d like to keep them fresh for a bit longer, refrigerate them for up to 5 days, ensuring they are wrapped tightly to prevent drying out.

Can I freeze garlic knots, and if so, how?
Very! To freeze your baked garlic knots, allow them to cool completely after baking. Then, place them in a freezer-safe bag, removing as much air as possible before sealing. They can be stored for up to 2 months. To reheat, preheat your oven to 350°F (175°C) and bake for about 10-15 minutes until warm and soft.

How do I troubleshoot if my garlic knots don’t rise properly?
If your garlic knots aren’t rising, check if your yeast is still fresh. You can test yeast by adding it to warm water and sugar; it should become frothy within 5-10 minutes. Also, ensure your water isn’t too hot or cold, as that can hinder yeast activation. Additionally, keep the dough in a warm, draft-free location for optimal rising.

Are garlic knots safe for pets?
While garlic knots are a delicious treat for humans, they should be kept away from pets. Garlic can be toxic to dogs and cats in significant amounts. If you want to share a treat with your furry friend, consider plain bread without any seasonings!

Can I make garlic knots vegan or allergy-friendly?
Absolutely! To make these garlic knots vegan, replace the egg with flaxseed meal (1 tablespoon of flaxseed mixed with 2.5 tablespoons of water, let sit for 5 minutes), and use plant-based milk and vegan butter. For gluten-free options, substitute all-purpose flour with a gluten-free flour blend. Just be sure to follow the same measurements!

Garlic Knots

Garlic Knots: Soft, Buttery Bites You Can't Resist

Enjoy homemade Garlic Knots, soft and buttery bites with rich garlic flavor.
Print Recipe Pin Recipe
Prep Time 20 minutes mins
Cook Time 20 minutes mins
Rising Time 1 hour hr
Total Time 1 hour hr 40 minutes mins
Servings: 12 knots
Course: Appetizers
Cuisine: Italian
Calories: 150
Ingredients Equipment Method Nutrition Notes

Ingredients
  

For the Dough
  • ⅓ cup Very warm water Use 105°F/40°C water to ensure effectiveness.
  • 2¼ teaspoons Active dry yeast Ensure freshness for proper rising.
  • ¼ cup Granulated sugar Honey or maple syrup can be used as a substitute.
  • 1⅓ cups Warm milk Dairy alternatives like almond or oat milk may be used.
  • 5 tablespoons Butter, softened Margarine can be used as a substitute.
  • 1 large Egg Flaxseed meal can replace egg for a vegan alternative.
  • 1½ teaspoons Salt Sea salt can be used instead.
  • 4–4½ cups All-purpose flour Whole wheat flour can be mixed in for a healthier option.
  • 1 tablespoon Olive oil Can be replaced with vegetable or sesame oil.
For the Topping
  • 1 tablespoon Butter, melted For brushing on knots to enhance flavor.
  • 1 teaspoon Garlic powder Fresh minced garlic may be used for a stronger flavor.
  • ½ teaspoon Dried parsley flakes Fresh parsley can be substituted.
For Serving
  • Marinara sauce Optional for serving; it pairs wonderfully with your garlic knots!

Equipment

  • Mixing Bowl
  • Wooden spoon
  • Oven
  • Baking Sheets
  • Parchment Paper

Method
 

Step‑by‑Step Instructions for Garlic Knots
  1. In a large mixing bowl, combine ⅓ cup of very warm water, 2¼ teaspoons of active dry yeast, and ¼ cup plus ¼ teaspoon of granulated sugar. Stir gently and let the mixture sit for about 5-10 minutes until it becomes frothy.
  2. In a separate bowl, whisk together 1⅓ cups of warm milk, 5 tablespoons of softened butter, 1 large egg, and 1½ teaspoons of salt. Pour this mixture into the yeast blend and mix until smooth.
  3. Gradually add 4 to 4½ cups of all-purpose flour to the wet ingredients, mixing with a wooden spoon until a soft dough begins to form. Knead gently for 5-7 minutes until smooth and elastic.
  4. Place the kneaded dough into a greased bowl, cover it, and let it rise for about 1 hour until doubled in size.
  5. Preheat your oven to 375°F (190°C). Prepare your baking sheets by lining them with parchment paper.
  6. Once risen, punch the dough down, divide it into equal pieces, roll each into a 6-8 inch rope, and tie into knots.
  7. Mix 1 tablespoon of melted butter, 1 tablespoon of olive oil, 1 teaspoon of garlic powder, and ½ teaspoon of parsley. Brush this mixture over the knots.
  8. Bake in the preheated oven for 15-20 minutes, until golden brown and puffed up.
  9. Let cool slightly before serving warm with marinara sauce for dipping.

Nutrition

Serving: 1knotCalories: 150kcalCarbohydrates: 20gProtein: 3gFat: 6gSaturated Fat: 4gPolyunsaturated Fat: 1gMonounsaturated Fat: 1gCholesterol: 25mgSodium: 250mgPotassium: 100mgFiber: 1gSugar: 1gVitamin A: 5IUCalcium: 2mgIron: 6mg

Notes

For best results, ensure water temperature is correct and monitor dough rising for optimal fluffiness.

Tried this recipe?

Let us know how it was!

Irresistible Shrimp Balls Recipe: Crispy, Flavorful Treats

December 12, 2025 by Grace Snow Leave a Comment

As I stood in my kitchen, the sizzling sound of shrimp balls frying filled the air, instantly transporting me back to a bustling street market I once visited. These crispy shrimp balls are not just an appetizer; they’re a canvas for creativity and flavor! In this shrimp balls recipe, you're invited to embark on a culinary journey where customization knows no bounds—whether you want to spice things up with chili flakes or add a surprise cream cheese filling, the choice is yours. With their golden, crunchy exterior and moist interior, these bite-sized delights are perfect for impressing guests during casual gatherings or simply enjoying on a cozy weeknight. Plus, they’re a breeze to whip up, making them an excellent go-to for those busy evenings. Are you ready to dive into a fun and delicious adventure with this shrimp balls recipe?

Why are Shrimp Balls a must-try?

Versatile and Customizable: Create your perfect shrimp balls with various seasonings and fillings, from cream cheese surprises to fresh herbs.
Crowd-Pleaser: These delightful treats are bound to impress at any gathering, whether you're hosting friends or enjoying family dinner nights.
Crunchy Exterior, Juicy Interior: Experience the satisfying contrast of a crispy outside and a moist, flavor-packed center with every bite.
Easy Preparation: With simple steps, you can whip up a batch in no time—perfect for busy weekdays or spontaneous parties!
Serve with Dipping Sauces: Pair with your favorite sauces like sweet chili or tartar, adding an extra layer of flavor that everyone will love.
Adventure Awaits: As you make this shrimp balls recipe, the kitchen transforms into a culinary playground—get creative and enjoy the journey!

Shrimp Balls Recipe Ingredients

Unlock the secrets to crafting mouthwatering shrimp balls with these essential ingredients!

For the Shrimp Base

  • Shrimp – Use fresh or frozen shrimp that’s peeled and deveined for the best flavor.
  • Egg – Acts as a binder to bring the mixture together; can substitute with a flax egg for a vegan option.

For the Crunch Factor

  • Breadcrumbs – Adds a delightful crunch; panko breadcrumbs can be used for an extra crispy texture.
  • Garlic Powder – Enhances the dish with a savory punch; fresh minced garlic is a great alternative for a bolder flavor.
  • Onion Powder – Provides depth to the shrimp balls; finely chopped onions can freshen up the taste if you prefer.

Seasoning Essentials

  • Salt & Pepper – Basic seasonings to elevate every bite; adjust according to your taste preferences.

For Frying

  • Oil for Frying – Necessary for achieving a crispy exterior; vegetable or canola oil work well for frying these shrimp balls.

Dive into this shrimp balls recipe with confidence, and feel free to experiment with your favorite herbs and spices to customize flavor!

Step‑by‑Step Instructions for Shrimp Balls Recipe

Step 1: Prepare the Shrimp
Begin by finely chopping your shrimp or pulsing it in a food processor until it reaches a smooth paste consistency. This should take about 2 minutes. The shrimp is the heart of your shrimp balls recipe, so ensure it’s well combined for that gorgeous flavor in every bite.

Step 2: Mix Ingredients
In a large mixing bowl, combine the chopped shrimp with breadcrumbs, egg, garlic powder, onion powder, salt, and pepper. Mix until all ingredients are well blended and form a cohesive mixture. This step typically takes about 3-4 minutes. A uniform mixture ensures that each shrimp ball has an even taste and texture.

Step 3: Form Balls
With your hands, take portions of the shrimp mixture and shape them into small balls, roughly the size of a golf ball. Each ball should be compact but not overly tight to allow for cooking expansion. This forming process should take about 5-7 minutes, and you can set them on a tray lined with parchment paper while preparing to fry.

Step 4: Heat Oil
In a large skillet or frying pan, pour enough oil to cover the bottom by about half an inch and heat it over medium heat. Allow the oil to become shimmering and hot, approximately 5 minutes. A good test for readiness is dropping in a small piece of the mixture; it should sizzle immediately when the oil is hot enough.

Step 5: Fry
Carefully place shrimp balls into the hot oil, making sure not to overcrowd the pan to maintain an even cooking temperature. Fry each side for about 3-4 minutes or until they become golden brown and crispy. Flip them gently using tongs to ensure uniform frying. The sizzling sound will give you a delightful confirmation that the shrimp balls are cooking perfectly.

Step 6: Drain and Serve
Once the shrimp balls are golden brown, remove them from the oil and place them onto a plate lined with paper towels to drain excess oil. This should only take a couple of minutes. Serve the shrimp balls warm while they’re crispy, pairing them with your favorite dipping sauces for an added flavor burst that everyone will enjoy.

How to Store and Freeze Shrimp Balls

Fridge: Store leftover shrimp balls in an airtight container for up to 2 days. To keep them fresh, ensure they're completely cooled before sealing.

Freezer: For longer storage, freeze uncooked shrimp balls on a baking sheet. Once frozen, transfer them to a zip-top bag and store for up to 3 months.

Reheating: For the best texture, reheat cooked shrimp balls in the oven at 350°F (175°C) for about 10-15 minutes. This maintains their crispy exterior while warming the inside.

Thawing: If you've frozen shrimp balls, thaw them overnight in the fridge before cooking or reheating, ensuring they're safe and delicious when it's time to enjoy your shrimp balls recipe.

What to Serve with Crispy Shrimp Balls?

Indulge in a fully-rounded meal that enhances the crispiness of your shrimp balls with complementary flavors and textures.

  • Creamy Coleslaw: The cool, crunchy slaw adds a refreshing contrast, balancing the warmth of the shrimp balls perfectly.
  • Garlic Bread: This classic side brings a delightful crunch and garlic flavor, ideal for dipping into sauces.
  • Steamed Rice: A soft and slightly sticky texture acts as a perfect base to soak up the flavors of your shrimp balls.
  • Cilantro Lime Quinoa: Packed with zest and nutrients, this dish's brightness elevates the savory notes of the shrimp balls.
  • Sweet Chili Sauce: A perfect dipping sauce that combines spice and sweetness, enhancing the richness of the shrimp.
  • Tartar Sauce: Creamy and tangy, it wonderfully complements the seafood taste, adding a delightful contrast.
  • Mango Salsa: The fruity, zingy elements bring a tropical touch, creating a vibrant flavor profile with each bite.
  • Chilled White Wine: A crisp Sauvignon Blanc or a fruity Riesling can elevate your dining experience with refreshing acidity.
  • Chocolate Mousse: For dessert lovers, a light and airy chocolate mousse can be the perfect sweet ending after savory bites.

Make Ahead Options

These shrimp balls are perfect for meal prep enthusiasts! You can prepare the shrimp mixture up to 24 hours in advance, allowing the flavors to meld beautifully in the fridge. Simply follow the mixing instructions, shape the mixture into balls, and refrigerate them in an airtight container. When you're ready to enjoy your shrimp balls recipe, heat oil in a pan and fry them directly from the fridge; they will be just as delicious and crispy! To maintain their quality, avoid thawing them, as this could lead to a mushy texture. With this prep method, you'll have a delightful appetizer or quick dinner option ready to go on your busiest nights!

Helpful Tricks for Shrimp Balls Recipe

  • Oil Temperature: Always ensure the oil is hot enough before frying. A good test is to drop in a small piece of the mixture; it should sizzle immediately.
  • Dough Consistency: Make sure your shrimp mixture is neither too wet nor too dry. A well-blended paste will hold the balls together and cook evenly.
  • Avoid Overcrowding: Fry in batches! Overcrowding the pan can lower the oil temperature, resulting in soggy shrimp balls.
  • Experiment with Seasoning: Don't hesitate to adjust seasoning levels according to your taste. Customize your shrimp balls recipe by adding your favorite spices!
  • Serve Warm: For the best experience, serve shrimp balls immediately after frying. Their crispy exterior is most delightful when fresh!

Shrimp Balls Recipe Variations

Feel free to let your creativity shine as you customize this shrimp balls recipe to suit your taste!

  • Herb-Infused: Add fresh chopped herbs like parsley or cilantro for a burst of freshness. A herbal touch elevates these delicious bites to a whole new level.

  • Cheesy Delight: Incorporate cream cheese or shredded cheddar for a rich surprise inside. The melted cheese will create an irresistible gooey center!

  • Spicy Kick: Sprinkle in red pepper flakes or cayenne pepper to bring the heat. Your taste buds will love this extra fiery flavor twist!

  • Savory Surprise: Use finely chopped vegetables such as bell peppers or green onions to add crunch and a new flavor dimension. This variation not only boosts texture but also adds a personalized touch.

  • Asian Elegance: Incorporate ginger or sesame oil for a taste of the East. This will give your shrimp balls a unique and aromatic flavor that transports you to your favorite sushi spot.

  • Nutty Addition: Mix in crushed peanuts or sesame seeds for a delightful crunch and nutty flavor. It’s a simple change that makes a big impact!

  • Fried or Baked: For a healthier twist, try baking the shrimp balls instead of frying. Air frying or oven baking can produce a satisfying crunch with less oil!

Looking for more seafood delights? You might enjoy trying these Shrimp Tacos Zesty or a refreshing Shrimp Ceviche Zesty as part of your culinary adventures. Enjoy experimenting with your shrimp balls!

Shrimp Balls Recipe FAQs

What kind of shrimp should I use for shrimp balls?
Absolutely! Use either fresh or frozen shrimp for the best flavor. If you're using frozen shrimp, be sure to peel and devein them before chopping. Fresh shrimp has a firmer texture and richer taste, but frozen works just as well. The key is ensuring they’re well chopped or pulsed into a paste for that perfect bite.

How should I store leftover shrimp balls?
Very! To keep your shrimp balls fresh, place them in an airtight container in the fridge for up to 2 days. Make sure they are completely cooled before sealing to prevent condensation. This way, they’ll retain their flavor and texture for your next snack attack!

Can I freeze shrimp balls for future use?
Absolutely! For freezing, lay uncooked shrimp balls on a baking sheet and freeze them until solid, about 1-2 hours. Then, transfer them to a zip-top bag and store for up to 3 months. This method prevents them from sticking together, making it easy to grab just what you need for a quick meal!

What if my shrimp balls fall apart while frying?
If you're having trouble with the balls falling apart, it might be because your mixture is too wet. Try adding a bit more breadcrumbs to help bind the ingredients together. Additionally, ensure your oil is hot enough before frying; a good test is dropping in a small piece of the mixture—it should sizzle right away, signaling that it’s ready!

Can I use different seasonings in my shrimp balls?
Of course! Feel free to get creative with your shrimp balls recipe. You can incorporate spices like cayenne for heat or fresh herbs like cilantro or parsley for a refreshing twist. Just remember to start with small amounts of any new seasoning and adjust to your flavor preference!

Are shrimp balls safe for pets?
I recommend avoiding giving shrimp balls to pets, especially if they contain garlic or onion powder, as these ingredients can be harmful to dogs and cats. Always check the ingredients before sharing any human food with your furry friends!

Shrimp Balls Recipe

Irresistible Shrimp Balls Recipe: Crispy, Flavorful Treats

Try this delicious shrimp balls recipe, featuring crispy, flavorful treats that are perfect for any gathering!
Print Recipe Pin Recipe
Prep Time 15 minutes mins
Cook Time 12 minutes mins
Total Time 27 minutes mins
Servings: 4 balls
Course: Appetizers
Cuisine: Asian
Calories: 180
Ingredients Equipment Method Nutrition Notes

Ingredients
  

For the Shrimp Base
  • 1 pound Shrimp fresh or frozen, peeled and deveined
  • 1 large Egg can substitute with a flax egg for vegan
For the Crunch Factor
  • 1 cup Breadcrumbs panko breadcrumbs for extra crispiness
  • 1 teaspoon Garlic Powder or use fresh minced garlic
  • 1 teaspoon Onion Powder or finely chopped onions
Seasoning Essentials
  • 1 teaspoon Salt adjust to taste
  • 1 teaspoon Pepper adjust to taste
For Frying
  • oil Oil for Frying vegetable or canola oil

Equipment

  • Mixing Bowl
  • Food Processor
  • frying pan

Method
 

Step‑by‑Step Instructions for Shrimp Balls Recipe
  1. Finely chop the shrimp or pulse in a food processor until smooth.
  2. In a mixing bowl, combine the chopped shrimp with breadcrumbs, egg, garlic powder, onion powder, salt, and pepper.
  3. Shape the mixture into balls the size of golf balls and set on a tray lined with parchment.
  4. Heat oil in a frying pan over medium heat until shimmering.
  5. Fry each ball for 3-4 minutes per side until golden brown.
  6. Remove the shrimp balls and drain on paper towels. Serve warm.

Nutrition

Serving: 4ballsCalories: 180kcalCarbohydrates: 15gProtein: 12gFat: 10gSaturated Fat: 1gPolyunsaturated Fat: 1gMonounsaturated Fat: 2gCholesterol: 90mgSodium: 400mgPotassium: 250mgFiber: 1gSugar: 1gVitamin A: 5IUVitamin C: 2mgCalcium: 50mgIron: 1mg

Notes

Serve shrimp balls immediately with dipping sauces like sweet chili or tartar for an added flavor burst.

Tried this recipe?

Let us know how it was!

Savory Shrimp and Crab Biscuit Melts for Cozy Gatherings

December 12, 2025 by Grace Snow Leave a Comment

As I sifted through my pantry for something to turn into dinner, my eyes landed on a pack of fluffy biscuit dough. A spark of inspiration hit me, and before I knew it, I was crafting Savory Shrimp and Crab Biscuit Melts that would soon become a family favorite. In just 45 minutes, these delicious morsels come together with juicy shrimp and succulent crab, making them not only a convenient option for busy weeknights but also a hit at gatherings. With their cheesy, seafood filling tucked into golden biscuits, they’re sure to impress anyone who takes a bite. Curious how to transform simple ingredients into a mouthwatering meal? Let’s dive into this delightful recipe!

Why are Biscuit Melts a Game Changer?

Flavor-Packed Combination: Bursting with succulent shrimp and lump crab, these melts marry seafood richness in every bite.

Quick Prep Time: With just 45 minutes from start to finish, they’re perfect for busy evenings or last-minute gatherings!

Crowd-Pleasing Appeal: Ideal as appetizers or part of a seafood-themed dinner, your guests will rave about them!

Versatile Ingredients: Flexibility with the filling allows you to customize with favorite ingredients—try adding bell peppers or seasoning to shake things up.

Savory Satisfaction: A warm biscuit base with a gooey, cheesy center makes every melt a delightful treat that feels indulgent without the fuss.

Serve alongside a fresh salad or some coleslaw for a complete meal, or make a batch ahead and just bake before serving for that fresh-baked aroma!

Savory Shrimp and Crab Biscuit Melts Ingredients

For the Seafood Filling

  • Cooked Shrimp – Adds protein and a tender texture; substitute with cooked lobster or crab if preferred.
  • Lump Crab Meat – Provides rich flavor and a delicate sweetness; imitation crab can be a more budget-friendly alternative.
  • Shredded Cheddar Cheese – Offers creaminess and a savory kick; feel free to use Monterey Jack or pepper jack for added spice.
  • Mayonnaise – Binds the seafood filling, enhancing moisture; Greek yogurt can be a lighter option.
  • Dijon Mustard – Adds a tangy depth of flavor; yellow mustard serves as a mild substitute.
  • Lemon Juice – Brightens the dish with acidity; lime juice is a great alternative.
  • Garlic Powder – Provides a savory, aromatic element; fresh minced garlic can intensify the flavor.
  • Old Bay Seasoning – Infuses a distinct seafood flavor; a mix of celery salt, paprika, and black pepper can be used as a substitute.
  • Salt and Pepper – Enhances the overall flavor; adjust to taste.

For the Biscuit Base

  • Refrigerated Biscuit Dough – Serves as the base for the melts; homemade biscuit dough can also be made if desired.
  • Fresh Parsley – Used as a garnish to add color and freshness.

Step‑by‑Step Instructions for Savory Shrimp and Crab Biscuit Melts

Step 1: Preheat the Oven
Begin by preheating your oven to 375°F (190°C). This temperature is perfect for baking the biscuit dough to a golden hue. While the oven heats, prepare your baking sheet by lining it with parchment paper, ensuring that your Savory Shrimp and Crab Biscuit Melts will bake evenly without sticking.

Step 2: Prepare the Biscuit Dough
Open your refrigerated biscuit dough and carefully separate each biscuit. Arrange them on the parchment-lined baking sheet with enough space between them to allow for rising. This step is essential for creating those fluffy, tender biscuit bases that will cradle your delicious seafood filling.

Step 3: Mix the Seafood Filling
In a large mixing bowl, combine the cooked shrimp, lump crab meat, shredded cheddar cheese, mayonnaise, Dijon mustard, lemon juice, garlic powder, Old Bay seasoning, salt, and pepper. Stir thoroughly until everything is evenly coated and well mixed. The aromatic blend will ensure that your Savory Shrimp and Crab Biscuit Melts are bursting with flavor.

Step 4: Assemble the Melts
Take a spoonful of the seafood mixture and generously place it in the center of each biscuit. Be careful not to overfill to prevent spillage during baking. Press the filling gently into the dough, ensuring that the delicious seafood blend is nestled well within the biscuit rounds for the best flavor distribution.

Step 5: Bake the Melts
Carefully place the baking sheet in the preheated oven and bake for 15–20 minutes. Keep an eye on the melts as they cook; they are ready when the biscuit tops are golden brown and slightly puffed. This visual cue ensures a perfect texture inside and out for your Savory Shrimp and Crab Biscuit Melts.

Step 6: Garnish
Once the biscuits are out of the oven, allow them to cool for a few minutes. Sprinkle the tops with freshly chopped parsley to add a vibrant color contrast and fresh flavor. This garnishing step enhances the visual appeal of your enticing seafood melts.

Step 7: Serve
Let the Savory Shrimp and Crab Biscuit Melts sit for a short while before serving. This brief cooling time allows the interior to set slightly, making them easier to handle. Serve these delightful treats as warm appetizers or part of a cozy dinner spread that your family and friends will adore.

Make Ahead Options

These Savory Shrimp and Crab Biscuit Melts are perfect for meal prep enthusiasts! You can prepare the seafood filling up to 24 hours in advance and store it in an airtight container in the refrigerator; this enhances the flavors as they meld together. Additionally, you can assemble the entire biscuit melts and refrigerate them for up to 3 days before baking. Just keep them covered to maintain moisture and prevent the biscuits from drying out. When you're ready to serve, simply bake them straight from the fridge, adding a few extra minutes if needed for baking time. With this make-ahead plan, you’ll have warm, scrumptious treats ready to impress with minimal effort!

Savory Shrimp and Crab Biscuit Melts Variations

Feel free to make this recipe your own by playing with flavors and textures—let your creativity shine!

  • Dairy-Free: Use a dairy-free cheese alternative and swap mayonnaise for avocado or a cashew cream for a smooth texture.

  • Spicy Kick: Add diced jalapeños to the seafood filling for a zesty punch. This little twist turns the melts into a show-stopping bite.

  • Vegetarian Delight: Substitute the shrimp and crab with a mix of sautéed mushrooms, spinach, and artichokes. It’s packed with flavor and still creamy!

  • Herbal Infusion: Incorporate fresh herbs like dill or thyme into the seafood mixture for an aromatic lift that ties everything together beautifully.

  • Biscuit Upgrade: Instead of the refrigerated biscuit dough, make your own flavored biscuits using garlic or herbs for a gourmet twist, elevating every bite.

  • Add Crunch: Toss in some finely chopped celery or water chestnuts for a delightful crunch that adds a completely new texture to your melts.

  • Gourmet Cheese: Switch out cheddar for a sharper cheese like Gruyère or a tangy blue cheese for an upscale flavor upgrade. Rich and indulgent!

  • Seafood Variety: Swap shrimp for lobster or scallops for luxurious alternatives that impress on special occasions. Plus, you could always add crab to bring in that sweet flavor.

If you're inspired by the sea, you might also enjoy trying out these delightful variations with seafood in mind, like Pan Fried Shrimp or a wonderful Shrimp Ceviche that’s perfect for warm weather gatherings!

What to Serve with Savory Shrimp and Crab Biscuit Melts

These delicious biscuit melts create a wonderful foundation for a cozy meal, tempting your taste buds with layers of flavor and warmth.

  • Creamy Coleslaw: Offers a crunchy, tangy counterpoint to the savory biscuits, brightening the meal and offering a refreshing bite.

  • Garlic Butter Corn on the Cob: The sweetness of the corn paired with garlic butter complements the seafood perfectly; it’s a nostalgic, summer delight.

  • Mixed Greens Salad: Light and peppery arugula tossed in lemon vinaigrette adds a fresh element, balancing the richness of the melts.

  • Roasted Asparagus: Tender yet slightly crispy, asparagus brings earthy flavor and a pop of color, enhancing your dinner presentation.

  • Zesty Tomato Soup: A warm bowl of tomato soup creates a comforting pairing, the acidity of the tomatoes cutting through the creamy filling.

  • Pineapple Mojito: This refreshing cocktail, with its fizzy mint and tart pineapple, brings a tropical twist that beautifully complements the seafood.

  • Fruit Salad: A medley of seasonal fruits provides a sweet, juicy contrast, rounding out the meal with vibrant flavors that sing of summer.

  • Lemon Sorbet: Light and refreshing, this dessert is a wonderful palate cleanser to end your meal with a bright zing after savoring the melts.

Expert Tips for Savory Shrimp and Crab Biscuit Melts

• Fresh Seafood: Always use fresh or properly frozen seafood to enhance flavor. Check for a gentle ocean scent; avoid anything with a strong odor.

• Avoid Overfilling: Don’t overstuff the biscuits with filling; this prevents spillage during baking and guarantees a perfect melt every time.

• Check for Doneness: Ensure biscuits are golden brown on top after 15-20 minutes. Baking too short may leave them doughy inside, which can be unappetizing.

• Custom Seasoning: Feel free to experiment with spices for your filling; add a dash of hot sauce or diced jalapeños for a zesty kick tailored to your taste.

• Garnish for Flavor: A sprinkle of fresh herbs like parsley elevates the dish visually and adds freshness, making your Savory Shrimp and Crab Biscuit Melts even more appealing.

How to Store and Freeze Savory Shrimp and Crab Biscuit Melts

Fridge: Keep leftover melts in an airtight container for up to 3 days to maintain freshness. Reheat in the oven for best results!

Freezer: For longer storage, freeze the assembled, unbaked melts in a single layer on a baking sheet. Once frozen, transfer to a freezer bag, where they can last up to 2 months.

Reheating: Bake frozen melts straight from the freezer at 375°F (190°C) for about 25-30 minutes, until heated through and golden brown. Enjoy the same delicious flavors!

Make-Ahead Tip: Consider prepping the seafood filling ahead of time and storing it in the fridge for a quick assembly when you’re ready to bake your Savory Shrimp and Crab Biscuit Melts!

Savory Shrimp and Crab Biscuit Melts Recipe FAQs

What type of shrimp should I use for Savory Shrimp and Crab Biscuit Melts?
Absolutely! I recommend using cooked shrimp—preferably medium or large—because they add a nice texture and flavor to your melts. If you're feeling a bit adventurous, feel free to substitute with cooked lobster or more crab for a luxurious twist!

How should I store leftover Savory Shrimp and Crab Biscuit Melts?
Leftovers can be stored in an airtight container for up to 3 days in the refrigerator. If possible, reheating them in the oven will help maintain that delightful crispiness on the outside while keeping the filling warm and gooey inside.

Can I freeze the Savory Shrimp and Crab Biscuit Melts?
Yes, you can! To freeze assembled, uncooked melts, arrange them on a baking sheet and freeze in a single layer until solid. Once frozen, transfer them to a freezer bag, where they can last for up to 2 months. When you're ready to enjoy them, bake them straight from the freezer at 375°F (190°C) for about 25-30 minutes until heated through and golden.

What if my biscuits come out doughy?
Very good question! Make sure your biscuits are baked for at least 15-20 minutes or until they are golden brown and slightly puffed. If your melts are doughy, it usually means they didn’t bake long enough. Keep an eye on them, as the baking time can vary depending on your oven!

Are Savory Shrimp and Crab Biscuit Melts suitable for people with shellfish allergies?
Definitely avoid these if you or your guests have shellfish allergies. You can still indulge in the deliciousness by preparing a chicken or vegetarian filling instead. Just make sure to replace the seafood ingredients with a veggie mixture or cooked chicken to maintain that creamy texture and savory flavor.

Can I prepare the filling in advance?
Absolutely! You can prep the seafood filling a day ahead and store it in the fridge. Just assemble the Savory Shrimp and Crab Biscuit Melts just before you’re ready to bake, which makes them an excellent option for last-minute gatherings or busy weeknights!

Savory Shrimp and Crab Biscuit Melts

Savory Shrimp and Crab Biscuit Melts for Cozy Gatherings

Savory Shrimp and Crab Biscuit Melts are a delicious seafood treat perfect for cozy gatherings.
Print Recipe Pin Recipe
Prep Time 15 minutes mins
Cook Time 20 minutes mins
Cooling Time 5 minutes mins
Total Time 40 minutes mins
Servings: 4 melts
Course: Appetizers
Cuisine: Seafood
Calories: 280
Ingredients Equipment Method Nutrition Notes

Ingredients
  

For the Seafood Filling
  • 1 pound Cooked Shrimp Substitute with cooked lobster or crab if preferred.
  • 8 ounces Lump Crab Meat Imitation crab can be a more budget-friendly alternative.
  • 1 cup Shredded Cheddar Cheese Feel free to use Monterey Jack or pepper jack for added spice.
  • 1/2 cup Mayonnaise Greek yogurt can be a lighter option.
  • 1 tablespoon Dijon Mustard Yellow mustard serves as a mild substitute.
  • 1 tablespoon Lemon Juice Lime juice is a great alternative.
  • 1 teaspoon Garlic Powder Fresh minced garlic can intensify the flavor.
  • 1 teaspoon Old Bay Seasoning A mix of celery salt, paprika, and black pepper can be used as a substitute.
  • to taste Salt and Pepper Enhances the overall flavor.
For the Biscuit Base
  • 1 can Refrigerated Biscuit Dough Homemade biscuit dough can also be made if desired.
  • 1/4 cup Fresh Parsley Used as a garnish to add color and freshness.

Equipment

  • Oven
  • Baking Sheet
  • Parchment Paper
  • Mixing Bowl

Method
 

Preparation Steps
  1. Preheat your oven to 375°F (190°C) and line a baking sheet with parchment paper.
  2. Separate the refrigerated biscuit dough and arrange on the baking sheet with space between each.
  3. In a large bowl, mix cooked shrimp, lump crab meat, cheddar cheese, mayonnaise, Dijon mustard, lemon juice, garlic powder, Old Bay seasoning, salt, and pepper until well combined.
  4. Spoon the seafood mixture into the center of each biscuit, being careful not to overfill.
  5. Bake for 15-20 minutes or until the tops are golden brown and puffed.
  6. Sprinkle with fresh parsley before serving.
  7. Allow to cool slightly before serving as warm appetizers.

Nutrition

Serving: 1meltCalories: 280kcalCarbohydrates: 30gProtein: 12gFat: 14gSaturated Fat: 6gPolyunsaturated Fat: 2gMonounsaturated Fat: 4gCholesterol: 45mgSodium: 590mgPotassium: 220mgFiber: 1gSugar: 1gVitamin A: 500IUVitamin C: 3mgCalcium: 200mgIron: 1.5mg

Notes

Serve alongside a fresh salad or coleslaw. These melts can be prepared ahead of time and baked later for fresh aroma.

Tried this recipe?

Let us know how it was!

Ultimate Garlic Parmesan Cheeseburger Bombs for a Flavor Blast

December 10, 2025 by Grace Snow Leave a Comment

As I took a bite of these Garlic Parmesan Cheeseburger Bombs, the delightful combination of savory beef and melty cheese enveloped in fluffy biscuit dough made me feel like I was indulging in the ultimate comfort food. Perfect for game nights or casual gatherings, these little gems come together in a snap, utilizing easy-to-find ingredients that will have your friends and family raving for more. And if you're looking for versatility, swap ground beef for turkey or even a plant-based alternative to cater to different preferences. Imagine serving a warm, gooey treat that’s not just satisfying but also a crowd-pleaser! Ready to impress your guests (or yourself) with this irresistible appetizer? Let's dive into the recipe!

Why Are These Bombs So Irresistible?

Quick and Easy Preparation: These Garlic Parmesan Cheeseburger Bombs can be made in under 30 minutes, perfect for any busy schedule.

Savory Flavor Explosion: Each bite offers a burst of cheesy, garlicky goodness that will have everyone asking for seconds.

Endless Customization: Feel free to swap the ground beef for turkey or a plant-based option, ensuring everyone can join in on the fun.

Crowd-Pleasing Treat: Ideal for game nights or casual gatherings, these bombs are sure to be the highlight of your table, much like my Honey Garlic Chicken.

Perfect for Dipping: Pair them with your favorite sauces like ranch or BBQ to elevate that flavor experience!

With their delightful texture and rich flavors, these cheeseburger bombs are not just an appetizer—they're a guaranteed hit!

Garlic Parmesan Cheeseburger Bombs Ingredients

For the Filling

  • Ground Beef – Provides the juicy, meaty foundation; can be substituted with ground turkey, ground chicken, or plant-based meat alternatives.
  • Salt – Enhances flavor; adjust to taste for your perfect bite.
  • Black Pepper – Adds subtle heat to the mixture.
  • Garlic Powder – Infuses a rich garlic flavor; fresh garlic can be substituted for an even more robust taste.
  • Onion Powder – Offers a mellow onion undertone to balance the flavors.
  • Worcestershire Sauce – Introduces umami richness; soy sauce can effectively replace it for similar depth.
  • Shredded Cheddar Cheese – Creates gooey, cheesy pockets; you can also use mozzarella for different flavors.

For the Dough

  • Refrigerated Biscuit Dough – Serves as the pastry shell; simplifies preparation compared to making dough from scratch.

For the Topping

  • Butter – Adds richness and is brushed on top for a golden finish.
  • Minced Garlic – Freshly adds strong, aromatic flavor to the butter topping; a must for that garlic kick!
  • Grated Parmesan Cheese – Sprinkled on top for a crisp, nutty crust that complements the bombs perfectly.
  • Chopped Fresh Parsley – Adds color and a fresh herbaceous note for an appealing garnish.

These Garlic Parmesan Cheeseburger Bombs are bound to be the star of your next gathering with their delightful combination of flavors and textures!

Step‑by‑Step Instructions for Garlic Parmesan Cheeseburger Bombs

Step 1: Preheat Your Oven
Begin by preheating your oven to 375°F (190°C). While the oven warms up, take a baking sheet and line it with parchment paper to prevent sticking. This prep step is essential for ensuring your Garlic Parmesan Cheeseburger Bombs bake evenly and come out with a perfectly golden crust.

Step 2: Cook the Beef
In a large skillet over medium heat, add the ground beef. Cook it for about 5–7 minutes, breaking it apart with a spatula until it's browned and no longer pink. Once fully cooked, drain any excess fat to keep your bombs flavorful yet not greasy.

Step 3: Season the Meat
Now it's time to infuse your beef with flavor! Add salt, pepper, garlic powder, onion powder, and Worcestershire sauce to the skillet. Stir these seasonings into the beef mixture for about 2 minutes until well combined. Finally, fold in the shredded cheddar cheese, allowing it to melt and create a gooey filling for your bombs.

Step 4: Prepare the Biscuit Dough
Open the refrigerated biscuit dough and separate the biscuits. On a lightly floured surface, roll each biscuit into approximately 1/4 inch thick circles; this thinness helps create a perfectly crisp shell. Once rolled, it’s time to load them with filling.

Step 5: Fill the Biscuits
Scoop about 2 tablespoons of the beef mixture into the center of each rolled biscuit. Gather the edges of the biscuit dough and fold them over the filling. Pinch the edges securely to seal each bomb tightly, ensuring no filling leaks out during baking. Place each sealed bomb seam-side down on your prepared baking sheet.

Step 6: Brush with Garlic Butter
In a small bowl, melt some butter and mix in the minced garlic. Brush this fragrant garlic butter mixture generously over the tops of your unbaked bombs, which will add flavor and help them achieve a beautiful golden finish in the oven.

Step 7: Add the Parmesan Topping
Next, sprinkle a generous amount of grated Parmesan cheese over each garlic butter-brushed bomb. This crispy, nutty topping will not only enhance the flavor but also add a delightful crunch when baked.

Step 8: Bake to Perfection
Place your baking sheet in the preheated oven and bake the Garlic Parmesan Cheeseburger Bombs for 12–15 minutes. Keep an eye on them until they turn a lovely golden brown and are cooked through. The smell will fill your kitchen, enticing everyone to gather around!

Step 9: Garnish and Serve
Once baked, remove the bombs from the oven and allow them to cool slightly. For a fresh touch, garnish with chopped parsley before serving. These delicious Garlic Parmesan Cheeseburger Bombs are now ready to impress your family and friends!

Garlic Parmesan Cheeseburger Bombs Variations

Let your creativity shine with these easy variations that elevate your Garlic Parmesan Cheeseburger Bombs to new heights of flavor and fun!

  • Turkey Twist: Swap ground beef for ground turkey for a lighter, leaner option that's just as delicious.

  • Plant-Based Power: Use a plant-based ground meat substitute for a vegetarian or vegan-friendly version that everyone can enjoy. Trust me, it tastes fantastic!

  • Cheese Swap: Experiment with different cheeses like pepper jack for a touch of heat, or crumbled feta for a unique flavor twist. The options are endless!

  • Veggie Delight: Stir in some finely chopped cooked vegetables, like bell peppers or spinach, into the beef mixture for added nutrition and flavor. You’ll be surprised how good they taste!

  • Spicy Kick: Add a splash of hot sauce to the beef mixture to give your bombs a fiery kick. For those who crave heat, this is a must-try!

  • Gluten-Free Option: Use gluten-free biscuit dough to make these bombs suitable for those with gluten sensitivities, so everyone can join in on the fun.

  • Herb Infusion: Mix fresh herbs such as thyme or basil into the beef for added freshness and complexity in every bite. They’ll have your guests coming back for more!

  • Dipping Sauce Variations: Pair these bombs with different dipping sauces like ranch, spicy sriracha mayo, or even a sweet chili sauce for a delicious flavor contrast. Just imagine the tantalizing combinations!

With these variations, your Garlic Parmesan Cheeseburger Bombs can be even more irresistible, much like my Crispy Parmesan Artichoke Hearts and Cheesy Garlic Bread. Enjoy the adventure!

Expert Tips for Garlic Parmesan Cheeseburger Bombs

  • Drain Excess Grease: Make sure to drain the ground beef well after cooking to prevent greasy bombs that can lose their fluffy texture.

  • Seal Them Tight: Properly pinch the biscuit edges to prevent any filling from leaking out, ensuring every bite is packed with flavor.

  • Uniform Thickness: Roll the biscuit dough to an even thickness of about 1/4 inch to ensure consistent baking; uneven dough can lead to some bombs being undercooked.

  • Customize Your Fillings: Feel free to experiment with different meat options or add cooked veggies to the beef mixture to cater to various dietary preferences while still enjoying delicious Garlic Parmesan Cheeseburger Bombs.

  • Watch the Baking Time: Keep an eye on the bombs as they bake to avoid overcooking; they should be golden brown and cooked through but not dry.

What to Serve with Garlic Parmesan Cheeseburger Bombs

Elevate your dining experience by bringing together complementary flavors and textures that will have everyone coming back for more.

  • Creamy Coleslaw: A tangy, crunchy side that balances the savory flavors of the bombs, providing a refreshing contrast in every bite.
  • Sweet Potato Fries: Their natural sweetness complements the rich cheeseburger bombs, adding a delightful crunch that everyone will love.
  • Classic Potato Salad: Creamy and comforting, this dish brings a familiar touch, making it the perfect accompaniment for your gathering.
  • Garlic Herb Parmesan Breadsticks: These soft, garlicky breadsticks echo the flavors of the bombs, enhancing the meal's overall theme while offering a delightful texture.
  • Spicy Sriracha Mayo: For those who enjoy a kick, this creamy sauce pairs wonderfully with the bombs, adding an exciting dimension to every bite.
  • Refreshing Cucumber Salad: With a lemony dressing, this salad brightens the meal, offering a light and crisp contrast to the rich cheeseburger bombs.
  • Craft Beer: A hoppy brew can amplify flavors, cutting through the richness and adding depth to this delightful appetizer.
  • Chocolate Chip Cookies: End on a sweet note with these classic cookies, providing a nostalgic finish that rounds out the meal beautifully.

Create a meal that tantalizes your taste buds and warms your heart, inviting others to join in the fun!

Storage Tips for Garlic Parmesan Cheeseburger Bombs

Fridge: Store any leftovers in an airtight container in the fridge for up to 3-4 days to maintain freshness and flavor.

Freezer: For longer storage, individually wrap each bomb in plastic wrap, then place them in a freezer-safe bag. They can last in the freezer for up to 2-3 months.

Reheating: To reheat, bake frozen Garlic Parmesan Cheeseburger Bombs at 350°F (175°C) for about 15-20 minutes until heated through and crispy.

Make-Ahead: You can assemble and refrigerate the bombs a day before baking. Just pop them in the oven when you're ready to enjoy!

Make Ahead Options

These Garlic Parmesan Cheeseburger Bombs are perfect for meal prep, saving you time on busy weeknights! You can assemble the bombs and refrigerate them for up to 24 hours before baking, which will keep them just as delicious when cooked. Alternatively, you can freeze them right after assembly: wrap each bomb individually in plastic wrap and store them in a freezer-safe bag for up to 3 months. When you're ready to enjoy, bake the frozen bombs straight from the freezer, adding an extra 3-5 minutes to the baking time. This clever prep method ensures your savory treats are ready to impress with minimal stress!

Garlic Parmesan Cheeseburger Bombs Recipe FAQs

What kind of meat can I use for the filling?
Absolutely! While this recipe calls for ground beef, you can also use ground turkey, ground chicken, or plant-based meat alternatives. Each variation brings a unique flavor profile, catering to different dietary preferences. I often experiment with these options depending on what's in my fridge that day!

How should I store my Garlic Parmesan Cheeseburger Bombs?
After you've indulged, store any leftovers in an airtight container in the fridge for up to 3-4 days. This way, you can enjoy that cheesy goodness again without losing any flavor!

Can I freeze these bombs for later?
Yes, you can! Individually wrap each Garlic Parmesan Cheeseburger Bomb in plastic wrap and place them in a freezer-safe bag. They will last for up to 2-3 months. When you're ready to enjoy one, bake it straight from the freezer at 350°F (175°C) for about 15-20 minutes until heated through and crispy.

What should I do if the biscuit dough tears while filling?
No worries! If your biscuit dough tears, simply patch it up by pinching the edges together gently. You can also use a small bit of extra dough from another biscuit to cover any holes. Just ensure that the filling is securely sealed to prevent any leakage during baking.

Are these bombs suitable for people with gluten allergies?
To make the Garlic Parmesan Cheeseburger Bombs gluten-free, use a gluten-free biscuit dough that you can find at most grocery stores. This way, everyone can enjoy this delightful snack without worry!

Can I prepare these bombs the day before?
Absolutely! You can assemble the bombs and refrigerate them up to a day in advance. Just remember to cover them tightly with plastic wrap to avoid drying out. When you're ready to bake, pop them in the oven to enjoy fresh, hot bombs straight from the oven!

Garlic Parmesan Cheeseburger Bombs

Ultimate Garlic Parmesan Cheeseburger Bombs for a Flavor Blast

Indulge in Garlic Parmesan Cheeseburger Bombs, a savory comfort food bursting with flavor and perfect for gatherings.
Print Recipe Pin Recipe
Prep Time 15 minutes mins
Cook Time 15 minutes mins
Total Time 30 minutes mins
Servings: 6 bombs
Course: Appetizers
Cuisine: American
Calories: 250
Ingredients Equipment Method Nutrition Notes

Ingredients
  

For the Filling
  • 1 pound Ground Beef Can be substituted with ground turkey or plant-based alternatives.
  • 1 teaspoon Salt Adjust to taste.
  • 1 teaspoon Black Pepper
  • 1 teaspoon Garlic Powder Fresh garlic can be substituted.
  • 1 teaspoon Onion Powder
  • 1 tablespoon Worcestershire Sauce Soy sauce can be used as a substitute.
  • 1 cup Shredded Cheddar Cheese Mozzarella can be used for different flavor.
For the Dough
  • 1 can Refrigerated Biscuit Dough Simplifies preparation.
For the Topping
  • 2 tablespoons Butter Brushed on for a golden finish.
  • 2 cloves Minced Garlic Freshly adds flavor.
  • 1/2 cup Grated Parmesan Cheese
  • 2 tablespoons Chopped Fresh Parsley For garnish.

Equipment

  • Skillet
  • Baking Sheet
  • Parchment Paper
  • small bowl

Method
 

Step-by-Step Instructions
  1. Preheat your oven to 375°F (190°C) and line a baking sheet with parchment paper.
  2. In a large skillet over medium heat, cook the ground beef for about 5-7 minutes until browned and no longer pink. Drain excess fat.
  3. Add salt, pepper, garlic powder, onion powder, and Worcestershire sauce to the beef, stirring for about 2 minutes. Fold in the shredded cheddar cheese until melted.
  4. Open the refrigerated biscuit dough and roll each biscuit into approximately 1/4 inch thick circles.
  5. Scoop about 2 tablespoons of beef mixture into each biscuit, gather the edges, and pinch to seal tightly.
  6. Melt butter and mix with minced garlic, then brush over the tops of the unbaked bombs.
  7. Sprinkle grated Parmesan cheese over each bomb.
  8. Bake for 12-15 minutes until golden brown.
  9. Allow to cool slightly and garnish with chopped parsley before serving.

Nutrition

Serving: 1bombCalories: 250kcalCarbohydrates: 15gProtein: 12gFat: 15gSaturated Fat: 7gPolyunsaturated Fat: 1gMonounsaturated Fat: 5gCholesterol: 50mgSodium: 600mgPotassium: 200mgFiber: 1gSugar: 1gVitamin A: 300IUVitamin C: 1mgCalcium: 200mgIron: 2mg

Notes

These bombs can be customized with different meats or veggies. Ensure to seal them tightly to keep the filling inside.

Tried this recipe?

Let us know how it was!

Crispy Egg Roll Recipe That Beats Takeout Every Time

December 10, 2025 by Grace Snow Leave a Comment

As I peeled back the wrappers, the tempting scent of seasoned pork mingled with crisp vegetables flooded my kitchen, instantly transporting me to a bustling street market in Asia. This Ultra-Crispy Pork Egg Roll Recipe not only captures that vibrant essence, but it also brings an element of homemade comfort that's hard to beat. These delicious bites are not just a fun culinary project; they are a true crowd-pleaser, perfect for any gathering and easy to freeze for spontaneous cravings. Plus, you can easily customize the filling for a vegetarian twist or swap out the pork for other proteins. Who knew a simple snack could be this versatile? Ready to roll up your sleeves and dive into a world of crispy goodness?

Why Are These Egg Rolls So Incredible?

Crispy Texture: Each bite boasts an irresistibly crispy exterior that rivals your favorite takeout.

Savory Filling: The combination of seasoned pork, fresh vegetables, and aromatic spices creates a robust flavor explosion.

Customizable: Whether you go vegetarian or switch proteins, this recipe accommodates every dietary preference with ease.

Quick & Easy: Perfect for busy weeknights, these egg rolls are quick to make and can be batch-cooked for effortless snack time.

Freezer-Friendly: Prep a large batch and freeze them for a convenient treat that’s just a fry away!

Crowd-Pleaser: Impress your family and friends with these delicious bites that are sure to disappear at any gathering. Try pairing with a delightful dipping sauce, such as sweet chili or homemade teriyaki, for the ultimate flavor experience!

Egg Roll Recipe Ingredients

For the Wrapper
• Frozen egg roll or spring roll wrappers – The perfect base for these crispy bites; ensure they’re thawed at room temperature for 45 minutes before use.

For the Filling
• Vermicelli rice noodles – Light noodles that enhance the filling; opt for Chinese angel hair rice sticks for the best texture.
• Ground pork – Adds a rich flavor and moisture; feel free to substitute with ground chicken, turkey, or skip it for a vegetarian egg roll recipe.
• Mushrooms (brown or white) – Contributes umami and moisture; adjust with extra veggies if preferred.
• Medium onion – Infuses sweetness and depth; chop finely for even cooking throughout.
• Carrots (grated or matchsticks) – Adds delightful crunch and sweetness; always choose fresh for optimal texture.
• Green cabbage – Provides bulk and crunch; thinly slice for quicker wilting when sautéing.
• Salt – Enhances flavors beautifully; adjust to your personal taste.
• Black pepper – Adds warmth; use according to your spice preference.
• Soy sauce – Imparts that essential savory note; tamari can work as a gluten-free alternative.
• Sesame oil – Offers a nutty flavor to the mix; reduce if you prefer a milder taste.

For Frying
• Peanut or canola oil – Critical for achieving that crispy exterior; maintain oil temperature between 340-350°F for ideal frying results.
• Egg (beaten) – Essential for sealing the wrappers tightly; one egg is typically enough to seal your delicious egg rolls.

Enjoy the process of creating these delightful bites, and don’t hesitate to swap ingredients and make this egg roll recipe your own!

Step‑by‑Step Instructions for Ultra-Crispy Pork Egg Rolls

Step 1: Prep Noodles
Begin by placing vermicelli rice noodles in a bowl of hot water, allowing them to soak for about 5-7 minutes until softened. Once tender, drain the noodles and chop them into 1-inch pieces. This will ensure they blend seamlessly into the egg roll filling, contributing a delightful texture to your Ultra-Crispy Pork Egg Rolls.

Step 2: Cook Filling
In a large skillet over medium heat, add a splash of oil and sauté the ground pork for about 5-7 minutes, until fully cooked and browned. Once done, transfer the pork to a bowl. In the same skillet, cook finely chopped mushrooms, onion, and grated carrots for another 3-4 minutes until soft, then add the thinly sliced cabbage and sauté until wilted, about 2 minutes. Combine all with your seasonings for that rich flavor.

Step 3: Wrap Egg Rolls
Lay an egg roll wrapper on a clean surface in a diamond shape, placing about 2 tablespoons of the pork and vegetable filling near the bottom corner. Roll the wrapper tightly away from you, folding in the sides halfway through, and seal the edge with a brush of beaten egg. Repeat this process until all the filling is wrapped in your crispy egg rolls, ready for frying.

Step 4: Fry Rolls
Heat a deep skillet filled with peanut or canola oil over medium-high heat until it reaches 350°F (175°C). Carefully add 5-7 egg rolls to the hot oil, ensuring not to overcrowd the pan, and fry for about 5-6 minutes, turning occasionally until they are golden brown and crispy. Use a slotted spoon to transfer the cooked egg rolls to a wire rack to drain excess oil.

Step 5: Serve
Allow the freshly fried Ultra-Crispy Pork Egg Rolls to cool slightly before serving. Pair these delectable bites with your choice of dipping sauces, such as sweet chili or homemade teriyaki, to enhance their savory goodness and create a delightful flavor experience. Enjoy these crispy treats warm and watch them disappear at your next gathering!

Make Ahead Options

These Ultra-Crispy Pork Egg Rolls are perfect for busy home cooks looking to save time. You can prepare the filling up to 24 hours in advance—simply cook the pork, vegetables, and seasonings, then let them cool before refrigerating in an airtight container. When ready to serve, wrap the filling in the thawed egg roll wrappers and fry them fresh. Alternatively, you can assemble the egg rolls and freeze them before frying for up to 3 months; just lay them flat on a baking sheet to prevent sticking, then transfer to a freezer bag. To cook from frozen, fry directly without thawing, adding an extra minute or two to cooking time. Enjoy delicious homemade egg rolls with minimal effort any day!

Egg Roll Recipe Variations

Feel free to let your culinary creativity shine by customizing this delightful egg roll recipe!

  • Vegetarian Delight: Substitute ground pork with seasoned tofu or mushrooms for a hearty, meatless option. You won't miss the meat with all those delicious flavors!

  • Crunchy Texture: Add bean sprouts or shredded zucchini to the filling for an extra layer of crunch. These additions not only elevate the texture but also bring a lovely freshness to each bite.

  • Flavor Boost: Incorporate minced garlic or ginger for an aromatic kick that transports your taste buds. A touch of spice can make all the difference in your egg rolls!

  • Heat It Up: Toss in a dash of chili paste or Sriracha for those craving a little heat. Your unsuspecting guests will be delightfully surprised by the fiery twist.

  • Different Proteins: Swap ground pork for ground beef or chicken, or try a fresh crab meat filling for a luxurious seafood twist. Each protein will create a distinctive flavor profile!

  • Color and Sweetness: Mix in diced bell peppers or sweet corn for a pop of color and sweet undertone. This not only enhances the visual appeal but also adds a touch of sweetness to complement the savory filling.

  • Sauce It Up: Serve with different sauces—try sweet chili, homemade teriyaki, or even a tangy peanut sauce to switch up the flavor experience. These dips can truly transform your egg rolls!

  • Make Ahead: Prepare your egg rolls, then freeze them before frying for those times when you're in a hurry. Just fry them frozen; they’ll still taste fresh and delicious! You can also check out my other crowd-pleasing recipes like these Pumpkin Cinnamon Rolls to keep your dessert bid going.

Let each variation inspire a new family favorite that brings your own unique twist to these egg rolls!

What to Serve with Ultra-Crispy Pork Egg Rolls?

Create a delightful meal experience that perfectly complements your crispy bites and enhances your dining pleasure.

  • Sweet Chili Sauce: A sticky, sweet sauce that balances the savory flavors of the egg rolls and adds a refreshing kick.

  • Homemade Teriyaki Sauce: Rich and slightly sweet, this sauce elevates the flavor profile, making each bite even more indulgent.

  • Cucumber Salad: A light, crunchy dish with a hint of tanginess that beautifully contrasts the warm, savory egg rolls.

  • Fried Rice: A satisfying side with its fluffy texture and mixed veggies that combine well with the flavor of pork.

  • Steamed Edamame: This protein-packed snack provides a lush, buttery flavor and makes a delightful complement to the egg rolls.

  • Miso Soup: A warm, umami-rich broth that soothes and balances the meal, enhancing the overall experience of savoring your egg rolls.

  • Light Beer or Sake: A chilled beverage that pairs well with the crunch of the egg rolls and clears the palate perfectly in between bites.

  • Fruit Sorbet: A refreshing dessert option that cleanses the palate with its fruity flavor, rounding off the meal on a light note.

How to Store and Freeze Egg Rolls

Fridge: Store leftover egg rolls in an airtight container for up to 3 days. Reheat in the oven at 375°F for about 10-12 minutes until hot and crispy.

Freezer (before frying): Arrange unwrapped egg rolls on a baking sheet and freeze until firm. Once frozen, transfer them to a freezer bag for up to 3 months.

Freezer (after frying): If you’ve fried them already, let them cool completely before placing in a single layer on a sheet. Once solid, move to a freezer bag and consume within 2 months for best quality.

Reheating: For best results, reheat frozen egg rolls in an air fryer or oven rather than a microwave to retain their crispy texture.

Expert Tips for Ultra-Crispy Pork Egg Rolls

  • Perfect Wrappers: Use thin, frozen egg roll wrappers to achieve the best crispiness; ensure they're fully thawed before use.

  • Don’t Overcrowd: Fry in small batches to maintain oil temperature, preventing soggy egg rolls. This ensures your egg roll recipe has that perfect crunch!

  • Right Oil Temperature: Keep your oil between 340-350°F for optimal frying. Use a thermometer for accurate results.

  • Avoid Wet Filling: Ensure the vegetable filling isn’t too moist to prevent leakage during frying. Strain any excess liquid.

  • Seal Well: Use a generous amount of egg wash to seal the wrappers tightly; this keeps them from opening while cooking.

Ultra-Crispy Pork Egg Rolls Recipe FAQs

How do I select the best frozen egg roll or spring roll wrappers?
Absolutely! Look for thin, well-stacked wrappers that are labeled as "spring roll" for the crispiest results. Make sure they’re fully thawed before use, as this helps them roll more easily—spending about 45 minutes at room temperature should do the trick!

What’s the best way to store leftover egg rolls?
You can store your leftover egg rolls in an airtight container in the fridge for up to 3 days. When reheating, I recommend placing them in the oven at 375°F for about 10-12 minutes to restore their glorious crispiness!

Can I freeze egg rolls, and how do I do it?
Yes, you can absolutely freeze egg rolls! If you freeze them before frying, lay them flat on a baking sheet until firm, then transfer to a freezer bag. They’ll stay fresh for up to 3 months. For pre-fried egg rolls, let them cool completely first, then freeze in a single layer before bagging. Enjoy them within 2 months for the best quality!

What if my egg rolls are soggy after frying?
Very! If your egg rolls come out soggy, this could be due to overcrowding the frying pan, which lowers the oil temperature. Ensure you fry in small batches and maintain that 340-350°F oil temperature. Also, check that your filling isn’t too wet—draining excess moisture helps keep them crunchy.

Are there any dietary considerations I should keep in mind?
For sure! If you or your guests have allergies or dietary restrictions, remember that gluten is present in soy sauce and some wrappers. You can easily make these egg rolls gluten-free by using tamari instead, and swapping out ground pork for ground turkey, chicken, or tofu opens up options for anyone looking for alternatives. Plus, you can always include a variety of fresh vegetables to suit different preferences!

How should I reheat frozen egg rolls for the best texture?
When reheating, aim for the oven or an air fryer rather than a microwave. Preheat your air fryer to 350°F and reheat for about 8-10 minutes, or bake in the oven at 375°F for 10-12 minutes. This method provides the perfect crispy texture, making it seem like they were just freshly made!

Egg Roll Recipe

Crispy Egg Roll Recipe That Beats Takeout Every Time

This Egg Roll Recipe features an irresistibly crispy exterior filled with seasoned pork and fresh vegetables.
Print Recipe Pin Recipe
Prep Time 20 minutes mins
Cook Time 20 minutes mins
Total Time 40 minutes mins
Servings: 4 egg rolls
Course: Appetizers
Cuisine: Asian
Calories: 200
Ingredients Equipment Method Nutrition Notes

Ingredients
  

For the Wrapper
  • 1 package Frozen egg roll or spring roll wrappers Thawed at room temperature for 45 minutes
For the Filling
  • 4 oz Vermicelli rice noodles Opt for Chinese angel hair rice sticks
  • 1 lb Ground pork Can substitute with ground chicken or turkey
  • 1 cup Mushrooms (brown or white) Chopped
  • 1 medium Onion Chopped finely
  • 1 cup Carrots (grated or matchsticks) Choose fresh for best texture
  • 2 cups Green cabbage Thinly sliced
  • 1 tsp Salt To taste
  • 1/2 tsp Black pepper To taste
  • 2 tbsp Soy sauce Tamari can be gluten-free alternative
  • 1 tbsp Sesame oil Reduce if desired
For Frying
  • 2 cups Peanut or canola oil For frying
  • 1 large Egg Beaten for sealing wrappers

Equipment

  • Large skillet
  • Deep skillet
  • slotted spoon
  • wire rack

Method
 

Step-by-Step Instructions for Ultra-Crispy Pork Egg Rolls
  1. Begin by placing vermicelli rice noodles in a bowl of hot water, allowing them to soak for about 5-7 minutes until softened. Once tender, drain and chop into 1-inch pieces.
  2. In a large skillet over medium heat, add a splash of oil and sauté the ground pork for about 5-7 minutes until fully cooked and browned.
  3. Transfer cooked pork to a bowl. In the same skillet, cook chopped mushrooms, onion, and grated carrots for 3-4 minutes until soft.
  4. Add thinly sliced cabbage and sauté until wilted for about 2 minutes, then combine with seasonings.
  5. Lay an egg roll wrapper in a diamond shape, placing about 2 tablespoons of filling near the bottom corner. Roll tightly away, folding in sides halfway, and seal with beaten egg.
  6. Heat oil in a deep skillet over medium-high heat until it reaches 350°F. Fry 5-7 egg rolls for about 5-6 minutes until golden brown and crispy.
  7. Transfer cooked egg rolls to a wire rack to drain excess oil and allow them to cool slightly before serving.
  8. Serve with your choice of dipping sauces such as sweet chili or homemade teriyaki.

Nutrition

Serving: 1egg rollCalories: 200kcalCarbohydrates: 15gProtein: 8gFat: 12gSaturated Fat: 2gPolyunsaturated Fat: 2gMonounsaturated Fat: 8gCholesterol: 30mgSodium: 300mgPotassium: 150mgFiber: 1gSugar: 1gVitamin A: 1000IUVitamin C: 5mgCalcium: 20mgIron: 1mg

Notes

Enjoy the process of creating these delightful bites and feel free to swap ingredients to make the recipe your own.

Tried this recipe?

Let us know how it was!

Deliciously Simple Thai Basil Beef Rolls for Quick Meals

December 9, 2025 by Grace Snow Leave a Comment

While browsing a bustling street market, the scent of fresh basil and savory beef wafted through the air, enticing me to explore the culinary treasures around me. I've always loved the vibrant allure of Thai cuisine, and today I’m excited to share a homemade twist on this classic: Thai Basil Beef Rolls. These delightful wraps are a treat for your taste buds, blending lean ground beef with crisp vegetables, all nestled in delicate rice paper. What makes these rolls so special is not only their incredible flavor but that you can whip them up in under 30 minutes! They’re perfect for a quick lunch or as impressive appetizers for your next gathering. Want to discover just how easy it is to bring gourmet flavors to your kitchen? Let's dive in!

Why are Thai Basil Beef Rolls a Must-Try?

Quick Preparation: With under 30 minutes required to make these rolls, they’re your go-to option for busy weeknights or last-minute guests.

Customizable Flavor: You can easily swap the ground beef for shrimp or chicken, making this dish versatile and suitable for various tastes.

Health Conscious: Each roll is a low-calorie delight, packed with nutritious veggies and lean protein, fitting perfectly into a balanced diet.

Fresh Ingredients: The aromatic basil and crunchy vegetables create a delightful contrast that’s both fresh and satisfying.

Crowd-Pleasing Appetizer: Serve these rolls at gatherings, and watch them disappear—they're always a hit! For more delicious options, check out my recipe for Ground Beef Enchiladas for another crowd favorite.

  1. Ingredients
    • • Thai Basil Beef Rolls Ingredients

  2. For the Filling
    • Lean Ground Beef – The main protein source providing rich flavor; substitute with shrimp for a lighter version.
    • Soy Sauce – Adds a salty, umami kick to the dish; consider using low-sodium soy sauce for a healthier option.
    • Hoisin Sauce – Offers a balance of sweetness to complement the soy sauce; you can substitute with teriyaki sauce for a different flavor profile.
    • Shredded Carrots – Contributes crunch and vibrant color; try julienned cucumbers for added freshness.
    • Chopped Bell Peppers – Provide freshness and slightly sweet notes; any fresh vegetable can work here (like cucumbers or radishes).
    • Fresh Basil Leaves – Essential for the signature aroma and flavor; mint can be used as an alternative but will change the taste.

  3. For Assembling
    • Rice Paper Wrappers – Soft, pliable wrappers that hold the ingredients together; work with one sheet at a time to avoid drying.

  4. Extra Options
    • Dipping Sauce – Serve with peanut sauce, sweet chili, or soy-lime dressing for added flavor; this elevates the Thai Basil Beef Rolls experience.

Enjoy diving into this colorful and nutritious dish that brings a taste of Thailand to your home!

Step‑by‑Step Instructions for Thai Basil Beef Rolls

Step 1: Cook the Beef
In a large skillet over medium heat, add lean ground beef. Sauté, breaking it apart with a spatula, and cook until browned, about 5-7 minutes. Pour in soy sauce and hoisin sauce, stirring well to combine, allowing the flavors to meld for another 2-3 minutes. The beef should be nicely caramelized and fragrant.

Step 2: Add Vegetables
Once the beef is cooked, sprinkle in shredded carrots and chopped bell peppers. Stir the mixture, cooking for an additional 2-3 minutes. This quick sautéing will introduce warmth while keeping the vegetables crisp. Your filling for the Thai Basil Beef Rolls should look vibrant and colorful.

Step 3: Prepare Rice Paper
Fill a shallow dish with warm water. Carefully dip one rice paper wrapper into the water, making sure it's fully submerged for about 10-15 seconds until it becomes soft and pliable. Remove it from the water gently, letting the excess water drip off while you prepare to assemble the rolls.

Step 4: Assemble Rolls
Lay the softened rice paper on a clean, flat surface. Place a few fresh basil leaves and a generous spoonful of the beef mixture in the center. Tightly roll the rice paper, tucking in the sides as you go for a secure wrap. Aim for a snug fit, but avoid overstuffing to ensure easy rolling.

Step 5: Serve
Once the Thai Basil Beef Rolls are assembled, carefully arrange them on a serving platter. Pair the rolls with your choice of dipping sauces such as peanut sauce, sweet chili sauce, or a refreshing soy-lime dressing. These dipping options will elevate the flavors and make your meal even more enjoyable.

Make Ahead Options

These Thai Basil Beef Rolls are perfect for meal prep, saving you time during those busy weeknights! You can prepare the beef filling and chopped vegetables up to 24 hours in advance. Simply cook the ground beef with soy sauce and hoisin sauce, then mix in the vegetables. Store this filling in an airtight container in the refrigerator to maintain its flavor and moisture. When you’re ready to serve, just soften the rice paper wrappers as needed and assemble the rolls fresh—this ensures they stay crisp and flavorful. Enjoy the same deliciousness with half the effort, making your meal planning a breeze!

Thai Basil Beef Rolls Variations & Substitutions

Feel free to get creative and make these Thai Basil Beef Rolls your own with these exciting variations!

  • Dairy-Free: Omit any dairy-based sauces or dips, and opt for coconut aminos for a sweet-savory option.
  • Gluten-Free: Substitute standard soy sauce with tamari to enjoy gluten-free goodness without compromising flavor.
  • Protein Swap: Use shrimp or grilled chicken instead of ground beef for a lighter twist, maintaining the dish’s delightful taste.
  • Creamy Touch: Add slices of avocado for a creamy texture that pairs perfectly with the fresh ingredients.
  • Extra Crunch: Incorporate crispy lettuce leaves into the filling for added crunch and freshness, creating a delightful contrast.
  • Spicy Kick: Toss in sliced jalapeños or Thai bird chilies to add a spicy punch that'll elevate the heat level!
  • Add Noodles: Incorporate cooked vermicelli noodles for a heartier roll that adds delightful texture and makes the rolls more filling.
  • Herb Variations: Swap the fresh basil with cilantro or mint for a unique flavor profile. Each herb brings its own charm to these rolls.

Exploring these alternatives makes preparing your own Thai Basil Beef Rolls even more fun! If you’re interested in other delightful rolls, check out my recipe for Ground Beef Enchiladas for another enticing dish to try.

Expert Tips for Thai Basil Beef Rolls

• Keep It Fresh: Use the freshest ingredients possible to enhance flavors. Fresh basil and crisp vegetables make a notable difference in your rolls.

• Dip with Care: When soaking rice paper, dip only one sheet at a time. This prevents them from drying out and becoming brittle before assembly.

• Proper Portions: Avoid overstuffing your rolls. Keep the filling modest for easier wrapping and to maintain a nice shape.

• Serving Suggestion: Serve immediately after making the rolls for the best texture and taste; they may soften if made too far in advance.

• Flavor Variations: Experiment with a mix of proteins or add a touch of spice with sliced chili peppers, customizing your Thai Basil Beef Rolls to suit your palate.

How to Store and Freeze Thai Basil Beef Rolls

Fridge: Store wrapped rolls tightly in plastic wrap for up to 2 days to maintain freshness and prevent drying.

Freezer: For longer storage, freeze the rolled Thai Basil Beef Rolls in an airtight container or freezer bag for up to 2 months. Defrost in the fridge before reheating.

Reheating: To enjoy leftovers, steam the rolls lightly or microwave for 30 seconds to 1 minute. Avoid using skillet reheating to prevent the wrapper from becoming chewy.

Serving Tip: Freshly prepared Thai Basil Beef Rolls deliver the best flavor—enjoy them as soon as possible for that delightful crunch!

What to Serve with Thai Basil Beef Rolls?

Elevate your meal experience with delightful side dishes that complement the vibrant flavors of these fresh rolls.

  • Zesty Green Salad: A refreshing salad of mixed greens with a tangy vinaigrette brightens the meal and adds crunch.
  • Steamed Jasmine Rice: Light and fragrant, jasmine rice enhances the aromatic profile while balancing the savory richness of the rolls.
  • Crunchy Vegetable Spring Rolls: These crispy bites mirror the texture of the beef rolls, offering a fun contrast and additional dipping sauces.
  • Spicy Peanut Sauce: This creamy, nutty sauce serves as a perfect dip, harmonizing with the flavors and adding a spicy kick.
  • Coconut Rice: The subtle sweetness of coconut rice complements the savory notes of the rolls, creating a delicious harmony of flavors.
  • Mango Salad: A fresh mango salad introduces a sweet element, perfectly balancing the savory beef and herbaceous basil flavors.
  • Fruity Iced Tea: Serve a refreshing mint or mango iced tea; its cool, fruity notes cleanse the palate beautifully.

For dessert, consider light coconut sorbet, which continues the tropical theme and offers a sweet ending to your lovely meal.

Thai Basil Beef Rolls Recipe FAQs

What type of ground beef should I use for the recipe?
Absolutely! I recommend lean ground beef for a flavorful result. It offers the rich taste you want without being too greasy. If you're looking for a lighter option, feel free to swap it for shrimp or ground chicken. Just adjust the cooking time accordingly, as shrimp cooks quicker!

How should I store leftover Thai Basil Beef Rolls?
To keep your rolls fresh and delicious, wrap them tightly in plastic wrap and store them in the refrigerator. They will stay good for up to 2 days. For best results, enjoy them as soon as possible, as the texture is best when fresh!

Can I freeze the Thai Basil Beef Rolls?
Yes, you can! To freeze them, place the rolled Thai Basil Beef Rolls in an airtight container or freezer bag. They can be stored in the freezer for up to 2 months. When you're ready to enjoy them, simply defrost in the fridge overnight before reheating.

How do I reheat the Thai Basil Beef Rolls without losing their texture?
Great question! To reheat, I recommend steaming the rolls lightly for a few minutes to retain their moisture and texture. Alternatively, you can microwave them for about 30 seconds to 1 minute. Avoid skillet reheating, as it can make the rice paper chewy.

Are there any dietary considerations I should keep in mind?
Yes, definitely! If you have dietary restrictions or allergies, be cautious with the soy sauce used in the recipe, as it contains gluten. Opt for a gluten-free soy sauce to make this dish accessible for everyone. Additionally, ensure the hoisin sauce is suitable for your dietary needs, as some varieties may contain peanuts.

What should I look for when selecting fresh basil?
When choosing fresh basil leaves, look for vibrant green leaves without any dark spots or wilting. The leaves should feel firm and fragrant. Fresh basil truly elevates the flavor of the Thai Basil Beef Rolls, enhancing that delightful aromatic quality!

Thai Basil Beef Rolls

Deliciously Simple Thai Basil Beef Rolls for Quick Meals

Thai Basil Beef Rolls are a delightful, quick dish that blends savory beef with fresh ingredients for a tasty, healthy meal.
Print Recipe Pin Recipe
Prep Time 10 minutes mins
Cook Time 15 minutes mins
Total Time 25 minutes mins
Servings: 4 rolls
Course: Appetizers
Cuisine: Thai
Calories: 150
Ingredients Equipment Method Nutrition Notes

Ingredients
  

For the Filling
  • 1 pound Lean Ground Beef substitute with shrimp for a lighter version
  • 2 tablespoons Soy Sauce consider using low-sodium for a healthier option
  • 2 tablespoons Hoisin Sauce you can substitute with teriyaki sauce
  • 1 cup Shredded Carrots try julienned cucumbers for added freshness
  • 1 cup Chopped Bell Peppers any fresh vegetable can work here
  • 1 cup Fresh Basil Leaves mint can be used, but will change the taste
For Assembling
  • 8 pieces Rice Paper Wrappers work with one sheet at a time
Extra Options
  • to taste Dipping Sauce peanut sauce, sweet chili, or soy-lime dressing

Equipment

  • Large skillet
  • shallow dish for soaking rice paper

Method
 

Step‑by‑Step Instructions
  1. In a large skillet over medium heat, add lean ground beef. Sauté and cook until browned, about 5-7 minutes. Add soy sauce and hoisin sauce, stirring well to combine.
  2. Once the beef is cooked, sprinkle in shredded carrots and chopped bell peppers. Stir the mixture, cooking for an additional 2-3 minutes.
  3. Fill a shallow dish with warm water. Dip one rice paper wrapper into the water for about 10-15 seconds until it becomes soft.
  4. Lay the softened rice paper on a clean surface. Place a few fresh basil leaves and a spoonful of the beef mixture in the center. Tightly roll the rice paper.
  5. Carefully arrange the assembled rolls on a serving platter. Pair with your choice of dipping sauces.

Nutrition

Serving: 1rollCalories: 150kcalCarbohydrates: 15gProtein: 20gFat: 5gSaturated Fat: 1gMonounsaturated Fat: 2gCholesterol: 50mgSodium: 600mgPotassium: 200mgFiber: 1gSugar: 2gVitamin A: 500IUVitamin C: 15mgCalcium: 30mgIron: 2mg

Notes

Use the freshest ingredients possible to enhance flavors. Serve immediately for the best texture and taste.

Tried this recipe?

Let us know how it was!

Irresistible Parmesan Cloud Chicken Bombs for Cozy Nights

December 8, 2025 by Grace Snow Leave a Comment

As I prepped my kitchen for a cozy gathering last weekend, a familiar savory aroma filled the air, instantly transporting me to happier times spent around the dinner table. That's when I decided to whip up my beloved Parmesan Cloud Chicken Bombs. These little wonders are more than just a meal; they embody comfort food at its best, with their crispy exterior giving way to tender, juicy chicken enveloped in a creamy Parmesan sauce. Not only are they perfect for busy weeknights, but they also impress guests during intimate dinners. Plus, with a gluten-free adaptation available, everyone can indulge without worry. Ready to bring that delightful aroma into your home? Let’s dive into this delicious recipe that’s as satisfying to make as it is to eat!

Why are these chicken bombs irresistible?

Crispy, golden goodness: Every bite of these Parmesan Cloud Chicken Bombs offers an unbeatable crunch that complements the tender chicken inside.

Creamy, cheesy indulgence: The luscious Parmesan sauce elevates this dish, creating a rich experience that will have everyone reaching for seconds!

Gluten-free option: With simple swaps to keep it gluten-free, this recipe shines in accommodating diverse dietary needs.

Quick and easy: Perfect for weeknight dinners, you can whip up these bombs in no time without sacrificing flavor.

Perfect for gatherings: Whether it’s a cozy night or a special occasion, this dish is sure to impress your guests and spark joy around the table.

Pair them with creamy mashed potatoes or a vibrant green salad for a complete meal that leaves everyone raving!

Parmesan Cloud Chicken Bombs Ingredients

For the Chicken Mixture
• Ground Chicken – Main protein source; provides structure and flavor. Substitution: Can use ground turkey for a lighter option.
• Egg – Binds ingredients together and helps with moisture. No direct substitution; however, a flax egg may work for vegan alternatives.
• Breadcrumbs – Adds texture; helps form the chicken bombs. Substitution: Use gluten-free breadcrumbs to maintain gluten-free integrity.
• Parmesan Cheese – Provides rich flavor and enhances the creamy sauce. Substitution: Nutritional yeast for a vegan option.
• Minced Garlic – Infuses flavor; aromatic component.
• Fresh Parsley – Adds freshness; brightens flavors.
• Onion Powder, Paprika, Salt, and Pepper – Seasoning elements; enhance overall taste profile.

For the Creamy Sauce
• Butter – Base for creamy sauce; adds richness.
• Flour – Thickens the sauce; creates a roux.
• Milk – Forms the sauce base; creaminess.
• Mozzarella Cheese – Enhances creaminess of sauce; provides a melty texture.
• Nutmeg – Adds subtle warmth to the sauce.

Bringing together the flavors and textures in these Parmesan Cloud Chicken Bombs is as rewarding as it is delightful!

Step‑by‑Step Instructions for Parmesan Cloud Chicken Bombs

Step 1: Preheat Oven
Begin your culinary journey by preheating your oven to 200°C (400°F). This temperature is crucial to achieving that perfect golden-brown finish on your Parmesan Cloud Chicken Bombs. While the oven warms up, gather your ingredients and prepare for the fun ahead!

Step 2: Prepare Chicken Mixture
In a large mixing bowl, combine the ground chicken, egg, breadcrumbs, Parmesan cheese, minced garlic, fresh parsley, onion powder, paprika, salt, and pepper. Use your hands or a spatula to gently mix until just combined; be careful not to overmix, as this can make the chicken bombs dense.

Step 3: Shape Chicken Balls
Once your mixture is ready, form medium-sized balls, about the size of golf balls. Place them on a parchment-lined baking tray, ensuring they are evenly spaced—this will help them cook evenly and achieve that irresistible crispiness.

Step 4: Bake
Carefully transfer the baking tray to the preheated oven and bake for 20-25 minutes. The chicken bombs should turn a lovely golden color and an internal temperature of 75°C (165°F) ensures they are fully cooked through.

Step 5: Make Parmesan Sauce
While the chicken bombs are baking, prepare your creamy sauce. In a saucepan over medium heat, melt the butter until bubbly. Whisk in the flour to create a roux, then gradually add the milk while stirring continuously. Cook until the sauce thickens, like a velvety dream, before stirring in the Parmesan, mozzarella, salt, pepper, and a pinch of nutmeg until creamy and luscious.

Step 6: Broil
Once the chicken bombs are out of the oven, it's time to elevate the flavors. Place your chicken bombs in a casserole dish and pour the creamy Parmesan sauce generously over the top. Turn on the broiler and broil for 3-5 minutes, watching closely until the sauce is bubbly and slightly golden.

Step 7: Serve
Your Parmesan Cloud Chicken Bombs are now ready to shine! Plate them with creamy mashed potatoes or a light cauliflower purée for a delightful contrast. Garnish with fresh herbs and a drizzle of olive oil or butter for a touch of elegance. Enjoy this comforting dish that is sure to impress!

Expert Tips for Parmesan Cloud Chicken Bombs

  • Mix Lightly: Avoid tough chicken bombs by mixing your ingredients just until combined. Overmixing will make them denser and chewy.

  • Check Temperature: Use a meat thermometer to ensure the internal temperature reaches 75°C (165°F) to guarantee they're fully cooked and safe to eat.

  • Broil with Care: Stay vigilant while broiling; it only takes a minute or two for the sauce to turn from golden to burnt. Keep an eye on your Parmesan Cloud Chicken Bombs!

  • Make Ahead: Prepare and shape the chicken bombs the day before, then keep them in the fridge. Adjust the baking time if you’re preparing them straight from the fridge.

  • Customize Flavor: Feel free to experiment with different herbs or cheeses to make the sauce uniquely yours. Adding fresh spinach can boost nutrition and flavor!

Parmesan Cloud Chicken Bombs Variations

Feel free to explore these delicious ideas to make the Parmesan Cloud Chicken Bombs your own!

  • Turkey Swap: Substitute ground chicken with lean ground turkey for a lighter twist that still packs flavor.

  • Vegan Option: Use plant-based ground protein in place of chicken, and swap out the egg for a flax egg for a scrumptious vegan delight.

  • Cheese Change: Try cheddar or a dairy-free cheese alternative in the sauce for a different cheesy experience that's equally delightful.

  • Add Veggies: Incorporate fresh spinach or finely chopped bell peppers into the chicken mixture to sneak in some extra nutrition and vibrant colors.

  • Spice It Up: For a bit of heat, mix in some red pepper flakes or jalapeño to the chicken mixture. The added kick will tantalize your taste buds!

  • Herb Infusion: Fresh basil or thyme can elevate the flavor profile. Add chopped herbs to the chicken mixture for an aromatic burst in every bite.

  • Creamy Twist: For a richer sauce, replace half of the milk with heavy cream, adding a decadent touch that's perfect for special occasions.

  • Sauce Variations: Think outside the box! Experiment with sun-dried tomatoes or pesto added to the sauce for a gourmet flair, making it a delightful twist on the classic.

If you're craving more chicken recipes, try these savory dishes: Crock Pot Chicken or Honey Garlic Chicken Thighs. You will find even more inspiration to love cooking at home!

Make Ahead Options

These Parmesan Cloud Chicken Bombs are a fantastic choice for meal prep enthusiasts looking to save time during busy weeknights! You can shape the chicken bombs up to 24 hours in advance and store them in the refrigerator, which helps maintain their flavor and texture. When you're ready to bake, simply pop them in the oven directly from the fridge, adding an extra couple of minutes to the baking time if needed. To keep the creamy sauce just as delicious, prepare it fresh right before serving, but it can be made a day ahead as well; just reheat gently on low while stirring. With this prep strategy, you’ll enjoy a comforting feast with minimal effort!

How to Store and Freeze Parmesan Cloud Chicken Bombs

Fridge: Store leftover Parmesan Cloud Chicken Bombs in an airtight container for up to 3 days. Reheat gently in the oven to maintain their crispy texture.

Freezer: For longer storage, freeze unbaked chicken bombs on a baking tray. Once frozen, transfer them to a freezer bag for up to 2 months. Bake directly from frozen, adding a few extra minutes to the cooking time.

Reheating: To reheat, place them in the oven at 180°C (350°F) for 15-20 minutes or until heated through. Use a meat thermometer to ensure they reach the safe temperature of 75°C (165°F).

Make Ahead: Shape the chicken bombs a day in advance, store them in the fridge, and adjust baking time accordingly for an easy, delicious meal!

What to Serve with Parmesan Cloud Chicken Bombs

Elevate your cozy meal with delightful pairings that complement the rich flavors of these tasty treats.

  • Creamy Mashed Potatoes: These fluffy potatoes soak up the creamy sauce, adding a comforting texture that everyone loves.

  • Garlic Butter Green Beans: Crisp green beans sautéed in garlic butter add a vibrant crunch, balancing the richness of the chicken bombs.

  • Cauliflower Purée: For a gluten-free twist, this velvety side offers a lovely contrast to the crunch of the chicken bombs while maintaining a light profile.

  • Fresh Garden Salad: A bright salad with mixed greens, cherry tomatoes, and a tangy vinaigrette provides a refreshing bite that cuts through the creaminess.

  • Herb-Infused Rice: Light and fragrant, rice seasoned with fresh herbs offers an aromatic base that pairs perfectly with the chicken's flavors.

  • Honey Glazed Carrots: These sweet, roasted carrots bring a touch of sweetness and vibrant color to your plate, enhancing the overall dining experience.

  • Lemonade Spritzers: Serve a light, refreshing drink like sparkling lemonade to cleanse the palate between bites and add a burst of citrus.

Each of these options creates a more rounded and satisfying meal to enjoy with your Parmesan Cloud Chicken Bombs.

Parmesan Cloud Chicken Bombs Recipe FAQs

How do I choose the best ground chicken for this recipe?
Absolutely! When selecting ground chicken, look for packages labeled "lean" without dark spots or excessive liquid. Fresh, pale pink chicken is ideal, while avoid any with a grayish hue or unpleasant smell. If you're aiming for a lighter dish, ground turkey is an excellent substitute, providing similar flavor with less fat.

How should I store leftovers of Parmesan Cloud Chicken Bombs?
Very straightforward! Store your leftover Parmesan Cloud Chicken Bombs in an airtight container in the fridge for up to 3 days. When you're ready to enjoy them again, simply reheat them in the oven at 180°C (350°F) for about 15 minutes to recapture that lovely crispy texture.

Can I freeze Parmesan Cloud Chicken Bombs?
Absolutely! To freeze, arrange the unbaked chicken bombs on a baking tray and freeze them until firm (about 1-2 hours). Afterward, transfer them to a freezer bag and store for up to 2 months. When you’re ready to bake, simply pop them straight from the freezer into the oven, adding a few extra minutes to the cooking time.

What if the sauce becomes too thick when making it?
If your sauce thickens more than you like, don’t worry! Simply add a splash of milk while whisking over low heat until you achieve your desired consistency. Remember, the goal is a velvety sauce that coats your chicken bombs wonderfully. If you prefer a lighter sauce, consider reducing the butter or flour slightly the next time you make it!

Are there any dietary considerations for this recipe?
Of course! For a gluten-free adaptation, just make sure to use gluten-free breadcrumbs and a gluten-free flour option for the sauce. If you’re concerned about allergens, double-check that your cheeses don’t contain any unwanted additives, and for vegan alternatives, nutritional yeast can stand in for Parmesan cheese while using plant-based milk to create your creamy sauce.

Can I prepare the chicken bombs ahead of time?
Absolutely! You can shape the chicken bombs a day in advance, storing them in the fridge until you’re ready to bake. Just be mindful to adjust your baking time if they come straight from the refrigerator. This makes it wonderfully convenient for busy weeknights or when you have guests coming over!

Parmesan Cloud Chicken Bombs

Irresistible Parmesan Cloud Chicken Bombs for Cozy Nights

These Parmesan Cloud Chicken Bombs are the ultimate comfort food, combining crispy chicken and creamy Parmesan sauce. Perfect for gatherings and busy weeknights.
Print Recipe Pin Recipe
Prep Time 15 minutes mins
Cook Time 25 minutes mins
Total Time 40 minutes mins
Servings: 4 bombs
Course: Appetizers
Cuisine: American
Calories: 400
Ingredients Equipment Method Nutrition Notes

Ingredients
  

For the Chicken Mixture
  • 500 grams Ground Chicken Can substitute with ground turkey for a lighter option.
  • 1 large Egg Flax egg may work for vegan alternatives.
  • 1 cup Breadcrumbs Use gluten-free breadcrumbs for gluten-free version.
  • 1 cup Parmesan Cheese Nutritional yeast for a vegan option.
  • 2 cloves Minced Garlic
  • 1 tablespoon Fresh Parsley Chopped, for freshness.
  • 1 teaspoon Onion Powder
  • 1 teaspoon Paprika
  • 1 teaspoon Salt
  • 1 teaspoon Pepper
For the Creamy Sauce
  • 2 tablespoons Butter Base for creamy sauce.
  • 2 tablespoons Flour For thickening the sauce.
  • 1 cup Milk Forms the sauce base.
  • 1 cup Mozzarella Cheese For creaminess in the sauce.
  • 1/4 teaspoon Nutmeg Adds warmth to the sauce.

Equipment

  • Oven
  • Mixing Bowl
  • Baking tray
  • Saucepan

Method
 

Step‑by‑Step Instructions
  1. Preheat your oven to 200°C (400°F). Gather your ingredients in the meantime.
  2. In a large mixing bowl, combine ground chicken, egg, breadcrumbs, Parmesan cheese, minced garlic, parsley, onion powder, paprika, salt, and pepper. Mix until just combined.
  3. Form medium-sized balls, about the size of golf balls, and place them on a parchment-lined baking tray.
  4. Bake chicken bombs in the preheated oven for 20-25 minutes until golden and fully cooked (internal temperature of 75°C or 165°F).
  5. While the chicken bombs are baking, melt butter in a saucepan over medium heat. Whisk in flour to create a roux, then add milk gradually while stirring. Cook until sauce thickens, then stir in Parmesan, mozzarella, salt, pepper, and a pinch of nutmeg.
  6. Once chicken bombs are out of the oven, place them in a casserole dish and pour the creamy Parmesan sauce over the top. Broil for 3-5 minutes until bubbly and slightly golden.
  7. Serve with creamy mashed potatoes or cauliflower purée, garnished with fresh herbs and a drizzle of olive oil or butter.

Nutrition

Serving: 1bombCalories: 400kcalCarbohydrates: 30gProtein: 30gFat: 15gSaturated Fat: 7gPolyunsaturated Fat: 1gMonounsaturated Fat: 8gCholesterol: 80mgSodium: 600mgPotassium: 400mgFiber: 1gSugar: 3gVitamin A: 500IUVitamin C: 2mgCalcium: 250mgIron: 2mg

Notes

Mix ingredients lightly to avoid dense chicken bombs. Use a thermometer for safe cooking temperature. Store leftovers in the fridge or freezer as needed.

Tried this recipe?

Let us know how it was!

Cranberry Brie Sourdough Pull Apart Bread to Wow Guests

December 2, 2025 by Grace Snow Leave a Comment

As I pulled the rich aroma of freshly baked bread from the oven, my heart danced with anticipation. This Cranberry Brie Sourdough Pull Apart Bread isn't just another appetizer; it’s a celebration of flavors that fills your kitchen with warmth and makes your gatherings unforgettable. With its easy preparation, you’ll impress your guests without slaving away in the kitchen. Each gooey pull reveals warm brie mingling with the tangy sweetness of cranberry, all encased in a crusty loaf that beckons to be shared. Perfect for holiday parties or cozy nights in, this vegetarian delight is bound to become your new go-to recipe. What’s your favorite twist on a classic, and are you ready to give this one a try?

Why is this recipe a showstopper?

Irresistible aroma: The moment this bread starts baking, your kitchen fills with a heavenly scent that draws everyone in.

Flavor explosion: Each bite combines creamy brie and tart cranberry, creating a sweet and savory harmony that delights the palate.

Easily customizable: Want to mix things up? You can easily swap brie for goat cheese or add caramelized onions to elevate the flavors.

Crowd-pleaser: Perfect for holiday gatherings or casual get-togethers, this appetizer will impress your guests without the fuss.

Quick and simple: With just a few easy steps, you're on your way to a dish that looks and tastes gourmet. If you enjoy homemade delights, consider pairing it with a side of Cheesy Garlic Bread for an extra treat.

Versatile option: This recipe is not just for gatherings; serve it as a cozy snack while enjoying a glass of wine.

Cranberry Brie Sourdough Pull Apart Bread Ingredients

For the Bread
• Sourdough Bread – Provides structure and a tangy flavor; substitute with any round crusty bread, like French or Italian, if sourdough is not available.

For the Cheese Filling
• Brie Cheese – Adds richness and melts beautifully; can be swapped for goat cheese, gouda, or sharp cheddar for different flavor profiles.
• Cranberry Sauce – Offers a sweet-tart contrast to the brie; alternatives include raspberry or fig jam for unique twists.

For the Flavor Base
• Butter – Essential for richness and flavor; use salted or unsalted based on preference.
• Garlic Powder – Enhances aroma and flavor; fresh garlic can be used as a substitute if preferred.
• Salt – Balances flavors; adjust according to taste.
• Pepper – Adds mild heat; can increase or decrease based on preference.

For the Garnish
• Fresh Parsley – For garnish and a pop of color; omit if unavailable.

This sumptuous Cranberry Brie Sourdough Pull Apart Bread reflects the love for homemade food and makes gatherings even more special!

Step‑by‑Step Instructions for Cranberry Brie Sourdough Pull Apart Bread

Step 1: Preheat the Oven
Begin by preheating your oven to 350°F (175°C). This temperature will ensure that your Cranberry Brie Sourdough Pull Apart Bread bakes evenly, resulting in a golden brown crust and a gooey interior. While the oven warms up, gather your ingredients and get your baking tray ready for the loaf.

Step 2: Prepare the Sourdough Loaf
Place the sourdough loaf on a cutting board and, using a serrated knife, carefully make deep cuts in a grid pattern without slicing all the way through the bottom. This allows the flavors to seep into the bread while maintaining its structure. You should make about 1-inch wide cuts, creating enough space to stuff with brie and cranberry sauce.

Step 3: Mix the Flavor Base
In a small bowl, melt some butter and stir in garlic powder, salt, and pepper to taste. This rich mixture will enhance the flavors of your Cranberry Brie Sourdough Pull Apart Bread. Make sure it’s well combined, as this butter will be drizzled into the cuts of the bread for added moisture and flavor.

Step 4: Drizzle the Butter Mixture
Gently drizzle the butter mixture into the cuts of the loaf, ensuring each crack is filled for maximum flavor infusion. Use a spoon if needed to help it reach the deeper sections. The buttery garlic aroma will start to fill your kitchen, giving you a hint of the deliciousness to come.

Step 5: Stuff the Bread
Now it’s time to stuff your bread! Take small pieces of brie cheese and cranberry sauce and carefully tuck them into each cut of the loaf. The brie should melt beautifully while the cranberry adds a tangy sweetness, creating a delightful contrast. Add a sprinkle of chopped parsley on top for a pop of color and freshness.

Step 6: Bake the Bread
Wrap the entire stuffed loaf in aluminum foil and place it on a baking tray before sliding it into the preheated oven. Bake for 15 minutes, allowing the bread to heat through and the brie to start melting. After 15 minutes, unwrap the foil and bake for an additional 10 minutes to achieve a crispy top and perfectly gooey center.

Step 7: Let Cool and Serve
Once the bread is golden brown and melty, remove it from the oven and let it cool for a few moments. This will allow the cheese to set slightly. Serve your Cranberry Brie Sourdough Pull Apart Bread warm, perfect for pulling apart and savoring each cheesy, sweet bite surrounded by a crunchy crust.

Make Ahead Options

These Cranberry Brie Sourdough Pull Apart Bread are perfect for busy home cooks looking to save time! You can prepare the entire loaf up to 24 hours in advance, just assemble the bread and wrap it tightly in aluminum foil. This keeps it fresh and prevents the bread from drying out. When you're ready to bake, simply remove it from the fridge, unwrap it, and pop it in the preheated oven at 350°F (175°C) for the same baking times. The bread will come out just as delicious, with gooey brie and sweet cranberry waiting to delight your guests. This make-ahead method ensures you'll have a show-stopping appetizer ready with minimal effort!

Cranberry Brie Sourdough Pull Apart Bread Variations

Feel free to take this delectable bread to new heights with a few fun twists and fillings!

  • Goat Cheese: Swap brie for goat cheese to introduce a tangy flavor that pairs wonderfully with cranberry.
  • Caramelized Onions: Add caramelized onions for a sweet and savory depth that elevates the overall taste experience.
  • Nutty Crunch: Incorporate chopped walnuts or pecans into the stuffing for a delightful crunch that contrasts with the melty cheese.
  • Spicy Kick: Mix in crushed red pepper flakes with the butter mixture to add a hint of spice that will tingle your taste buds.
  • Fruit Medley: Use fig jam or raspberry preserves instead of cranberry for a sweet twist that brings in different notes of flavor.
  • Herbed Delight: Experiment with fresh herbs like rosemary or thyme for an aromatic punch that complements the richness of the brie.
  • Smoky Flavor: Add a touch of smoked gouda to the cheese filling for a deep, smoky flavor that transforms each bite.
  • Vegetarian Twist: For a vegetarian-friendly option, combine different seasonal vegetables such as spinach or artichokes with your cheese to make this bread even heartier.

As you're creating these variations, you might enjoy pairing this bread with a comforting side like Cornbread Breakfast Casserole for those cozy nights in, or serve warm alongside some Cheesy Garlic Bread at your next gathering. The possibilities are endless, and it’s all about making it your own!

Expert Tips for Cranberry Brie Sourdough Pull Apart Bread

Prepare the Bread: Allow the sourdough loaf to sit out for about 15 minutes before cutting. This makes it easier to cut without squishing the bread.

Use Fresh Ingredients: Opt for fresh brie and homemade cranberry sauce when possible. They enhance the flavor of your Cranberry Brie Sourdough Pull Apart Bread.

Avoid Overstuffing: While you may be tempted to cram in as much filling as possible, overstuffing can cause the bread to break apart. Aim for balanced stuffing.

Watch Cooking Times: Every oven is different, so keep an eye on your bread towards the end of baking. You want a golden crust, but not overly browned.

Experiment Freely: Don’t hesitate to mix up the cheeses or add ingredients like caramelized onions or nuts based on personal taste. This make it your own signature dish!

Serve Warm: For maximum gooeyness, serve your bread warm. It’s at its best when straight out of the oven, enticing everyone to dig in!

What to Serve with Cranberry Brie Sourdough Pull Apart Bread

Nothing elevates a cozy gathering like the delightful aroma and taste of warm bread paired with exquisite sides.

  • Creamy Mashed Potatoes: Their smooth texture complements the chewy bread, creating a comforting balance of flavors. A dollop of gravy adds an extra layer of indulgence!

  • Garlic Herb Roasted Vegetables: The caramelization adds a savory depth, while the spices and herbs keep things fresh. These vibrant veggies provide a colorful contrast to your bread.

  • Honey-Glazed Carrots: Their natural sweetness pairs beautifully with the tart cranberry and rich brie. Plus, their crunch adds a lovely contrasting texture.

  • Spinach Salad: Light and refreshing, a simple spinach salad topped with a zesty vinaigrette cleanses the palate between bites of the cheesy bread. Consider adding some nuts for crunch.

  • Savory Cheese Plate: A variety of cheeses alongside nuts and fruits will enhance the experience. Think gouda or aged cheddar to create rich, flavorful layers.

  • Sparkling Wine: An effervescent bubbly complements the rich, creamy texture of the melted brie perfectly. It's the ideal accompaniment for any festive occasion.

  • Apple Crisp: For a sweet finish, this warm dessert with a crumbly topping echoes the sweet-tart elements of the pull-apart bread, delivering a satisfying ending to your meal.

Each of these delightful pairings bolsters the sweet and savory notes of the Cranberry Brie Sourdough Pull Apart Bread, transforming it into the star of your table.

How to Store and Freeze Cranberry Brie Sourdough Pull Apart Bread

Room Temperature: Store uneaten bread at room temperature in a paper bag or wrapped in a clean kitchen towel for up to 1 day. This helps maintain its crusty texture.

Fridge: If you have leftovers, place them in an airtight container in the fridge for up to 2 days. This will keep the flavors intact while preventing spoilage.

Freezer: Wrap the bread tightly in plastic wrap and then in aluminum foil to freeze for up to 2 months. When ready to enjoy, thaw overnight in the fridge and reheat.

Reheating: To restore the gooey texture of your Cranberry Brie Sourdough Pull Apart Bread, reheat in a 350°F (175°C) oven for about 10-15 minutes. Enjoy the melty delights once again!

Cranberry Brie Sourdough Pull Apart Bread Recipe FAQs

How do I select the best sourdough bread for this recipe?
Absolutely! Look for a round sourdough loaf that feels firm to the touch and has a crisp crust. The bread should have a pleasant, tangy aroma and a dense structure—this ensures it holds up when you make those deep cuts. If you notice dark spots all over, choose another loaf as it may be past its prime.

How should I store leftovers?
Very! If you have any leftover Cranberry Brie Sourdough Pull Apart Bread, place it in an airtight container and store it in the fridge for up to 2 days. This preserves its flavors while preventing spoilage. To enjoy its gooey goodness again, just reheat it in a 350°F (175°C) oven for about 10-15 minutes, and it'll taste fresh out of the oven!

Can I freeze the bread?
Absolutely! To freeze, wrap the fully baked bread tightly in plastic wrap, then wrap it again in aluminum foil. This protects it from freezer burn and keeps it fresh for up to 2 months. When you're ready to enjoy it, simply thaw it overnight in the fridge and reheat it in the oven for that delightful melty texture.

What should I do if my bread starts to break apart while stuffing?
Oh no! If your bread begins to crack while you’re stuffing it, just be gentle. Make smaller cuts or simply stuff fewer toppings into each slice to keep it intact. If you’re worried about it being too full, remember: it's about balance! You want enough filling to enjoy the flavors without compromising the bread's structure.

Is this recipe safe for pets or those with allergies?
Very! If you have pets, I recommend keeping this bread away from them, especially because of the dairy and potential garlic flavor, which can be harmful to some animals. For allergy considerations, it’s best to double-check with anyone who might have a sensitivity; you can always swap out ingredients to make it nut-free or dairy-free as necessary.

Can I prepare this dish ahead of time?
Absolutely! You can make the Cranberry Brie Sourdough Pull Apart Bread a few hours ahead of time. Just assemble it, wrap it tightly in foil, and refrigerate until you’re ready to bake. When it’s time to serve, pop it into the preheated oven for a delightful, freshly baked appetizer that will impress everyone.

Cranberry Brie Sourdough Pull Apart Bread

Cranberry Brie Sourdough Pull Apart Bread to Wow Guests

This Cranberry Brie Sourdough Pull Apart Bread is a delightful appetizer combining gooey brie and tangy cranberry, perfect for any gathering.
Print Recipe Pin Recipe
Prep Time 20 minutes mins
Cook Time 25 minutes mins
Total Time 45 minutes mins
Servings: 8 pieces
Course: Appetizers
Cuisine: American
Calories: 200
Ingredients Equipment Method Nutrition Notes

Ingredients
  

For the Bread
  • 1 loaf Sourdough Bread Substitute with any round crusty bread if sourdough is not available.
For the Cheese Filling
  • 8 ounces Brie Cheese Can be swapped for goat cheese or gouda.
  • 1 cup Cranberry Sauce Alternatives include raspberry or fig jam.
For the Flavor Base
  • 4 tablespoons Butter Use salted or unsalted based on preference.
  • 1 teaspoon Garlic Powder Fresh garlic can be used as a substitute.
  • 1 teaspoon Salt Adjust according to taste.
  • 1 teaspoon Pepper Increase or decrease based on preference.
For the Garnish
  • 2 tablespoons Fresh Parsley Omit if unavailable.

Equipment

  • Oven
  • Baking tray
  • Cutting Board
  • Serrated knife
  • small bowl
  • Aluminum Foil

Method
 

Step‑by‑Step Instructions
  1. Preheat your oven to 350°F (175°C).
  2. Place the sourdough loaf on a cutting board and make deep cuts in a grid pattern without slicing all the way through the bottom.
  3. In a small bowl, melt some butter and stir in garlic powder, salt, and pepper.
  4. Drizzle the butter mixture into the cuts of the loaf.
  5. Stuff the bread with small pieces of brie cheese and cranberry sauce.
  6. Wrap the stuffed loaf in aluminum foil and place it on a baking tray. Bake for 15 minutes, then unwrap and bake for an additional 10 minutes.
  7. Let it cool briefly, then serve warm.

Nutrition

Serving: 1pieceCalories: 200kcalCarbohydrates: 24gProtein: 6gFat: 10gSaturated Fat: 5gPolyunsaturated Fat: 0.5gMonounsaturated Fat: 3gCholesterol: 25mgSodium: 350mgPotassium: 150mgFiber: 1gSugar: 4gVitamin A: 500IUVitamin C: 2mgCalcium: 100mgIron: 0.5mg

Notes

This recipe is perfect for any gathering and can be customized with different cheeses or additional ingredients like caramelized onions.

Tried this recipe?

Let us know how it was!
  • « Previous Page
  • 1
  • …
  • 7
  • 8
  • 9
  • 10
  • 11
  • …
  • 16
  • Next Page »

Welcome!

Hi, I’m Grace, a Sydney-based home cook with a passion for bold flavors and trending ingredients. Whether you’re a busy beginner or a seasoned foodie, you’ll find dishes here that are fresh, fun, and full of flavor.

More about me

Popular Recipes

  • One Pot Keto Tuna Casserole
    One Pot Keto Tuna Casserole: Creamy Comfort in Minutes
  • Ultimate Jalapeno Popper Chicken Salad
    Ultimate Jalapeno Popper Chicken Salad That'll Wow Your Tastebuds
  • Green Chile Cheese Dip
    Mouthwatering Green Chile Cheese Dip for Cozy Gatherings
  • Easy Chimichurri Sauce
    Fresh and Zesty Easy Chimichurri Sauce in Just Minutes

Footer

↑ back to top

About

  • Privacy Policy
  • Disclaimer
  • Terms & Conditions

Newsletter

  • Sign Up! for emails and updates

Contact

  • About me
  • Contact me

Copyright © 2025 TastyTrendIngredients