As I stood by the smoker, a sweet, smoky aroma enveloped me—taking me back to summer cookouts filled with laughter and delicious bites. One of my absolute favorites? Candied Smoked Salmon Bites. With their rich, caramelized glaze of maple and honey, these little treasures bring a delightful twist to any gathering. What I love most about this recipe is that it’s not only gluten-free and packed with protein, but it’s also incredibly simple to whip up—perfect for both seasoned chefs and kitchen novices alike. Whether you serve them as a charming appetizer or a tasty topping on your favorite salad, these salmon bites are sure to impress. Curious about how to make them at home? Let’s dive in!
Why Are Candied Smoked Salmon Bites Irresistible?
Irresistible Flavor: Each bite bursts with sweet, smoky goodness that will transport your taste buds to a sunny summer gathering.
Easy Preparation: Don't worry if you’re not a master chef! This recipe is simple to follow, making it perfect for home cooks of all skill levels.
Versatile Serving Options: Whether enjoyed as a standalone appetizer or a unique topping on salads, they elevate any dish with flair.
Protein-Packed Delight: With their high-protein content, these bites are not just tasty; they're a wholesome choice for any meal.
Crowd-Pleaser: Bring them to your next get-together, and watch how they disappear! They’re a surefire hit, reminiscent of classic comfort food with a gourmet twist. Enjoy the flavors in these Candied Smoked Salmon Bites and impress your guests!
Candied Smoked Salmon Bites Ingredients
For the Salmon
- Salmon (4-5 lbs) – This is the star ingredient providing rich flavor and texture; using a whole side yields the best results!
- Kosher Salt (¼ cup) – Essential for curing the salmon, it intensifies the flavor and helps with preservation.
For the Sweet Glaze
- Brown Sugar (1 cup) – This adds the necessary sweetness and helps create that irresistible caramelized exterior.
- Maple Syrup (¾ cup) – Infuse your bites with a distinct maple flavor; always opt for 100% pure for the best taste.
- Honey (¼ cup) – Provides extra sweetness and aids in the caramelization process during smoking.
Additional Notes
- Keep these Candied Smoked Salmon Bites gluten-free by ensuring all ingredients used are certified gluten-free.
Step‑by‑Step Instructions for Candied Smoked Salmon Bites
Step 1: Prepare Salmon
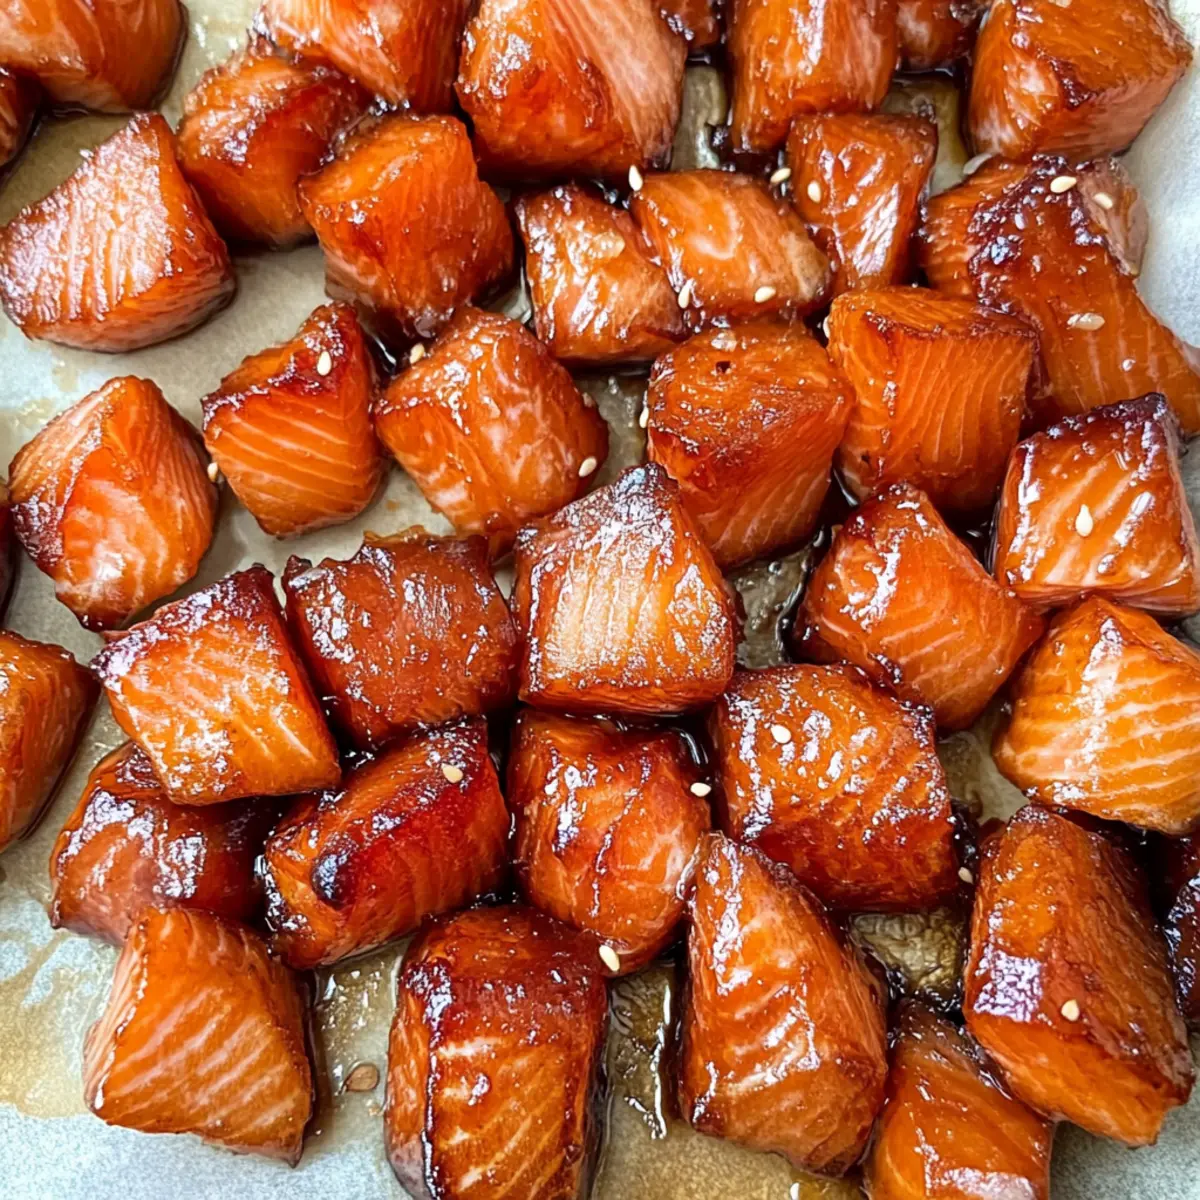
Begin by slicing your fresh salmon into 1-inch cubes, yielding about 35 pieces from a whole side. Ensure each piece is uniform for even curing. Place the cubed salmon into a large bowl, allowing for enough space to mix in the marinade later.
Step 2: Marinate
In a mixing bowl, combine 1 cup of brown sugar, ¼ cup of kosher salt, ¾ cup of maple syrup, and ¼ cup of honey along with 2 cups of water. Stir until the mixture is well blended. Add the salmon cubes, ensuring they are fully submerged in the marinade. Cover the bowl with plastic wrap and refrigerate for at least 3 hours or overnight, allowing the flavors to meld.
Step 3: Preheat Smoker
When you're ready to smoke the salmon, preheat your smoker to 180°F (82°C). This low temperature will ensure the salmon remains moist while absorbing the wonderful smoky flavor. Prepare your grill grate by lining it with aluminum foil, which will help prevent sticking and make cleanup easier.
Step 4: Smoke the Salmon
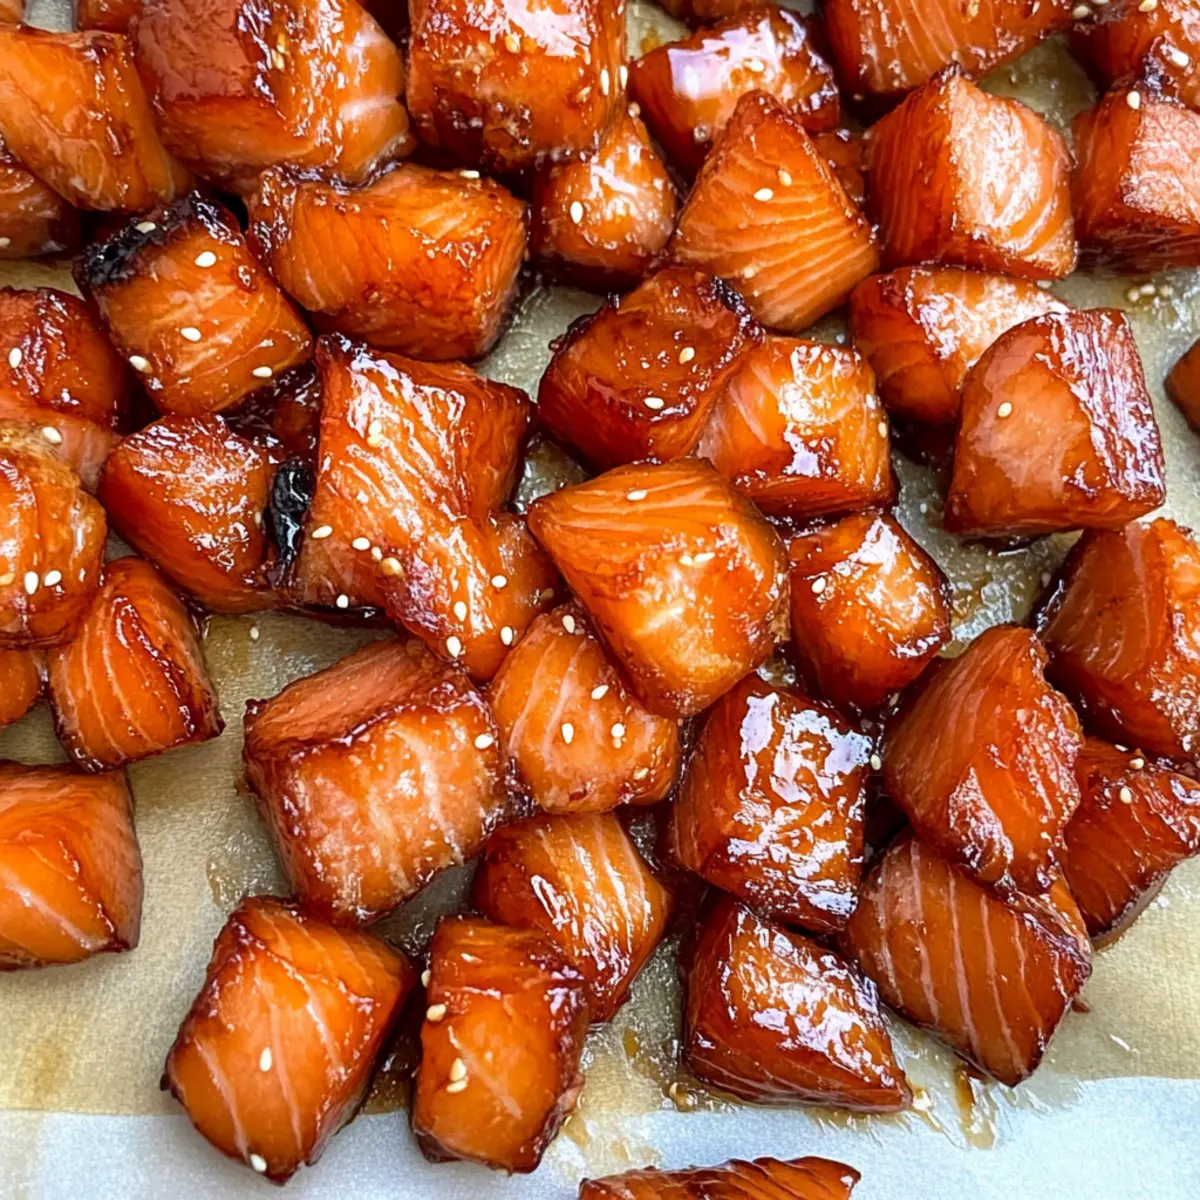
After the smoker is preheated, place the marinated salmon cubes on the foil-lined grates, making sure they are spaced about 1 inch apart to allow for even cooking. Close the smoker lid and let the salmon smoke for 1 hour, during which delectable aromas will begin to fill the air.
Step 5: Make Glaze
While the salmon is smoking, pour the remaining marinade into a small saucepan and simmer over medium heat for about 10 minutes. This will reduce the liquid into a syrupy glaze, perfect for brushing on the salmon later. Keep an eye on the glaze as it thickens to avoid burning.
Step 6: Continue Smoking
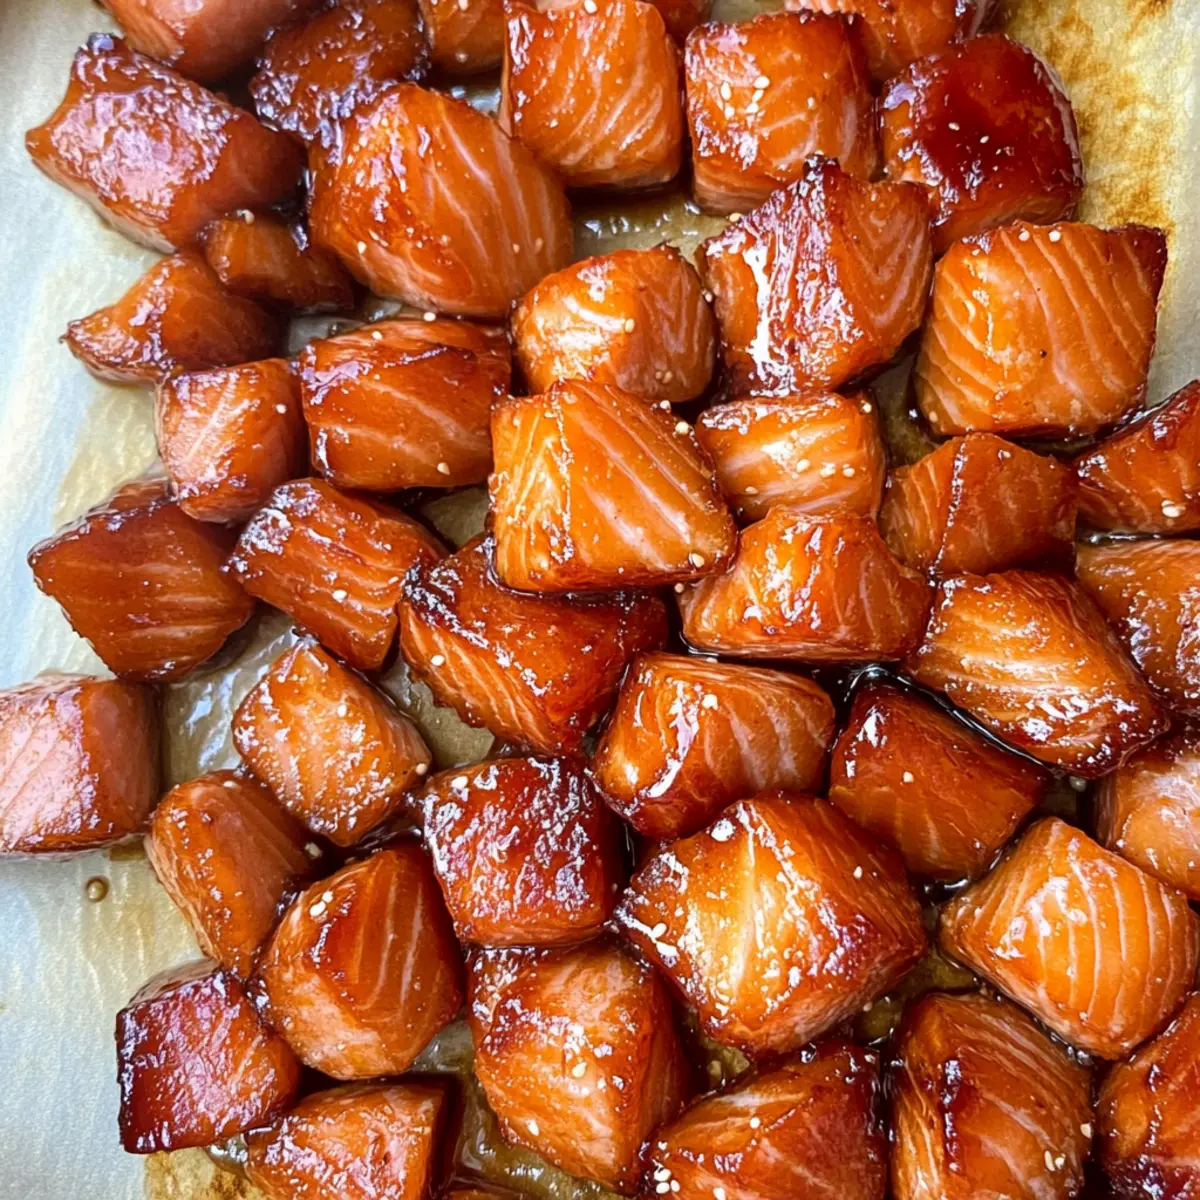
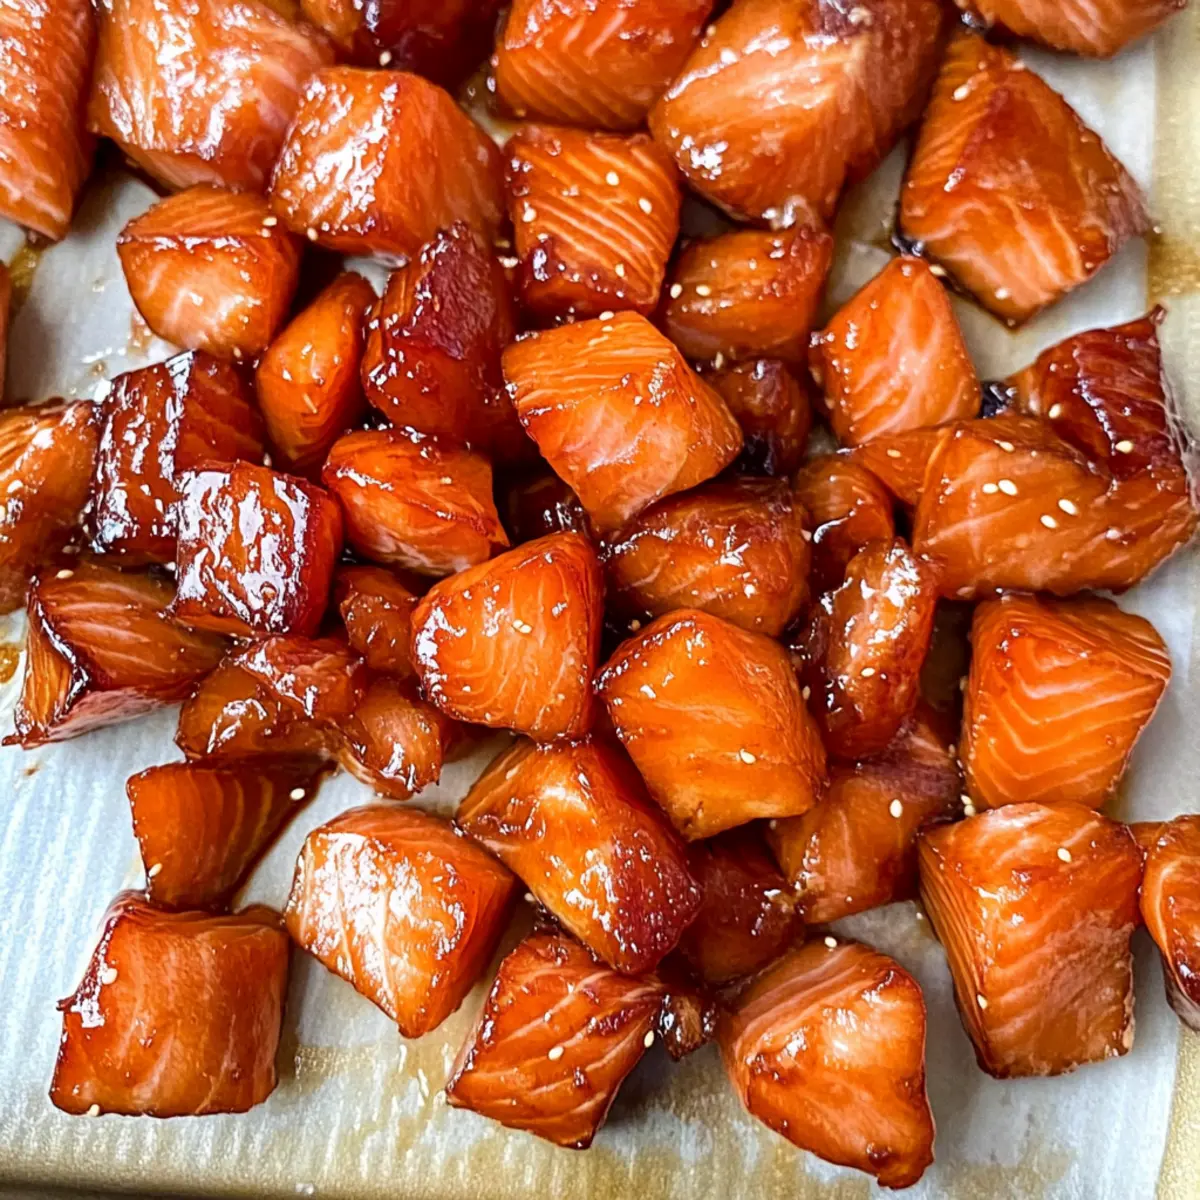
After the initial hour, carefully flip each salmon cube and brush them generously with the glaze you just prepared. Close the smoker lid and continue to smoke for an additional 4-5 hours, brushing with the glaze every 45 minutes. The salmon is done when it becomes caramelized and reaches an internal temperature of at least 160°F (71°C).
Step 7: Serve
Once your Candied Smoked Salmon Bites are perfectly caramelized and smoky, remove them from the smoker and let them cool slightly. Serve them warm as a delicious snack, appetizer, or atop salads for a gourmet touch.
What to Serve with Candied Smoked Salmon Bites
Let your culinary creativity flow as we explore delightful pairings that will elevate your Candied Smoked Salmon Bites to the next level!
-
Creamy Mashed Potatoes: This classic comfort dish balances the smoky sweetness of the salmon with rich, velvety textures. The masher becomes your new best friend here, creating a warming accompaniment.
-
Mixed Green Salad: A fresh salad, drizzled with a light vinaigrette, offers a crisp contrast to the rich salmon. Add sliced cucumbers and ripe avocados for a burst of flavor and creaminess.
-
Crispy Baguette Slices: Toasted baguette slices provide the perfect vehicle for topping with salmon bites. The crunchiness plays beautifully against the tender fish, making each bite a delightful experience.
-
Beer Pairing: A light lager or a fruity wheat beer enhances the smoky essence of the salmon while cleansing the palate beautifully. This dynamic duo celebrates summer gatherings and casual nights in.
-
Honey-Glazed Carrots: Roasted carrots drizzled with honey create a sweet, earthy side that complements the salmon's flavor profile. Their tender sweetness resonates perfectly with each savory bite.
-
Spicy Mango Salsa: Add a zesty tropical twist! The heat from the salsa contrasts nicely with the sweet, smoky bites, creating a vibrant and exciting flavor profile that dances on your tongue.
-
Chilled White Wine: A crisp Sauvignon Blanc or a fruit-forward Pinot Grigio pairs beautifully with the rich salmon bites, enhancing the total flavor experience without overpowering it.
-
Chocolate Mousse: For dessert, a light chocolate mousse brings a creamy, decadent finish to your meal. Its airy sweetness harmonizes with the salmon, leaving your palate satisfied and delighted.
Storage Tips for Candied Smoked Salmon Bites
Fridge: Store leftover Candied Smoked Salmon Bites in an airtight container for up to 1 week. This keeps them fresh and ready for snacking!
Freezer: For longer storage, freeze the salmon bites in a single layer on a baking sheet before transferring them to a freezer-safe container. They can last up to 3 months.
Thawing: When you're ready to enjoy them, thaw in the fridge overnight. Reheat gently in the oven at a low temperature for best results.
Reheating: To retain the flavor and texture, reheat the salmon bites at 350°F (175°C) for about 10 minutes, ensuring they don’t dry out.
Variations & Substitutions for Candied Smoked Salmon Bites
Feel free to get creative and make these delicious bites your own with a few simple adjustments!
- Vegan Version: Substitute the salmon with thin slices of smoked tofu for a plant-based twist that still delivers flavor.
- Sticky Heat: Add a tablespoon of sriracha or your favorite hot sauce to the glaze for a spicy kick. The sweet and spicy combo will delight your taste buds!
- Different Sweeteners: Use agave nectar instead of maple syrup for a lighter sweet option. This swap provides a unique flavor while keeping things vegan-friendly.
- Herb Infusion: Incorporate fresh herbs like dill or thyme into the marinade for an aromatic touch that elevates the bites.
- Wood Chip Variations: Experiment with different smoking wood chips, such as cherry or pecan, to discover new flavor dimensions. Each type offers a distinctive taste experience!
- Crunchy Coating: For added texture, toss the salmon bites in crushed nuts or panko breadcrumbs before smoking. This gives an extra layer of crunch that's irresistible.
- Serving Style: Try serving them over crispy lettuce leaves or alongside an avocado dip for a refreshing pairing! Elevate your appetizer game with this vibrant presentation.
- Gluten-Free Alternatives: Ensure all ingredients, especially the soy sauce for dipping, are certified gluten-free, so everyone can enjoy these delightful bites at your next gathering.
These variations will keep your gatherings fresh and exciting! And if you want to try out other delightful dishes, check out these One Pot Salmon ideas for more inspiration!
Make Ahead Options
These Candied Smoked Salmon Bites are perfect for meal prep enthusiasts! You can marinate the salmon cubes up to 24 hours in advance, soaking them in the sweet maple-honey mixture for maximum flavor development. Simply follow the marination steps and refrigerate the covered bowl. Additionally, you can smoke the salmon up to 3 days ahead; let the bites cool completely, then store them in an airtight container in the refrigerator. When you’re ready to enjoy, gently reheat them in the oven for a few minutes to warm up and crisp up the glaze. This way, you’ll have delicious, smoky bites ready at a moment's notice without compromising quality!
Expert Tips for Candied Smoked Salmon Bites
• Freshness First: Always choose the freshest salmon you can find for the best flavor and texture. Stale fish can ruin your candied bites.
• Marinating Time: For optimum flavor, marinate the salmon cubes overnight. This allows the sugars and spices to fully penetrate the fish, enhancing the taste.
• Temperature Check: Use a meat thermometer to ensure your salmon reaches an internal temperature of 160°F. Consuming undercooked fish can be unsafe, so always verify!
• Glaze Monitoring: Keep an eye on the glaze while it simmers. If it thickens too quickly, lower the heat to prevent burning and ensure a perfect texture.
• Experiment with Wood: Don't hesitate to experiment with different wood chips while smoking! Each wood type offers a unique flavor profile to your Candied Smoked Salmon Bites.
Candied Smoked Salmon Bites Recipe FAQs
What should I look for when selecting salmon?
Absolutely! When choosing salmon, look for fresh, firm fillets that have a bright color and a clean, ocean-like smell. Avoid fish with dark spots or a dull appearance as these may indicate spoilage. For the best results in your Candied Smoked Salmon Bites, choose a whole side of salmon for optimal flavor and texture.
How should I store leftover Candied Smoked Salmon Bites?
Store your leftover Candied Smoked Salmon Bites in an airtight container in the refrigerator for up to 1 week. Make sure they are completely cooled before sealing to prevent condensation, which can create sogginess. Enjoy them straight from the fridge or gently reheat them for a delightful snack!
Can I freeze Candied Smoked Salmon Bites?
Yes, you can! To freeze your Candied Smoked Salmon Bites, lay them out in a single layer on a baking sheet and place them in the freezer for about 1 hour until they are firm. After that, transfer the bites into a freezer-safe container or a zip-top bag. They can last up to 3 months in the freezer. When you’re ready to enjoy them, thaw in the fridge overnight and reheat gently.
What happens if my salmon doesn’t reach the recommended temperature?
It’s very important to check the internal temperature of your salmon bites while smoking. You want them to reach a minimum of 160°F (71°C) for food safety. If they don’t, they could pose a health risk. Use a meat thermometer to check the temperature at the thickest part of the fish. If they're undercooked, you can put them back in the smoker until they reach the appropriate temperature.
Can I make Candied Smoked Salmon Bites if I have allergies?
If you have allergies, especially to fish or any of the ingredients in our glaze, it's best to reconsider this recipe. For those who are looking for alternatives, you can try using firm tofu or eggplant as substitutes. Always be cautious about cross-contamination and consult with a healthcare provider if you're uncertain. Enjoy safely!
Candied Smoked Salmon Bites – A Sweet & Savory Delight
Ingredients
Equipment
Method
- Prepare Salmon by slicing it into 1-inch cubes.
- Marinate the salmon cubes in a mixture of brown sugar, kosher salt, maple syrup, honey, and water for at least 3 hours.
- Preheat the smoker to 180°F.
- Smoke the salmon for 1 hour, making sure the cubes are spaced apart.
- Make the glaze by simmering the remaining marinade until it thickens.
- Continue smoking the salmon for an additional 4-5 hours, brushing with glaze every 45 minutes.
- Serve the Candied Smoked Salmon Bites warm.