tastytrendingredients

  • Home
  • Recipes
    • Appetizers
    • Breakfast
    • Dessert
    • Dinner
    • Drinks
    • Salads
    • Snacks
    • Soups
  • About me
  • Contact
menu icon
go to homepage
  • Home
  • Recipes
    • Appetizers
    • Breakfast
    • Dessert
    • Dinner
    • Drinks
    • Salads
    • Snacks
    • Soups
  • About me
  • Contact
search icon
Homepage link
  • Home
  • Recipes
    • Appetizers
    • Breakfast
    • Dessert
    • Dinner
    • Drinks
    • Salads
    • Snacks
    • Soups
  • About me
  • Contact
×

Vegan Buddha Bowl: A Flavorful Journey to Healthy Eating

October 28, 2025 by Grace Snow Leave a Comment

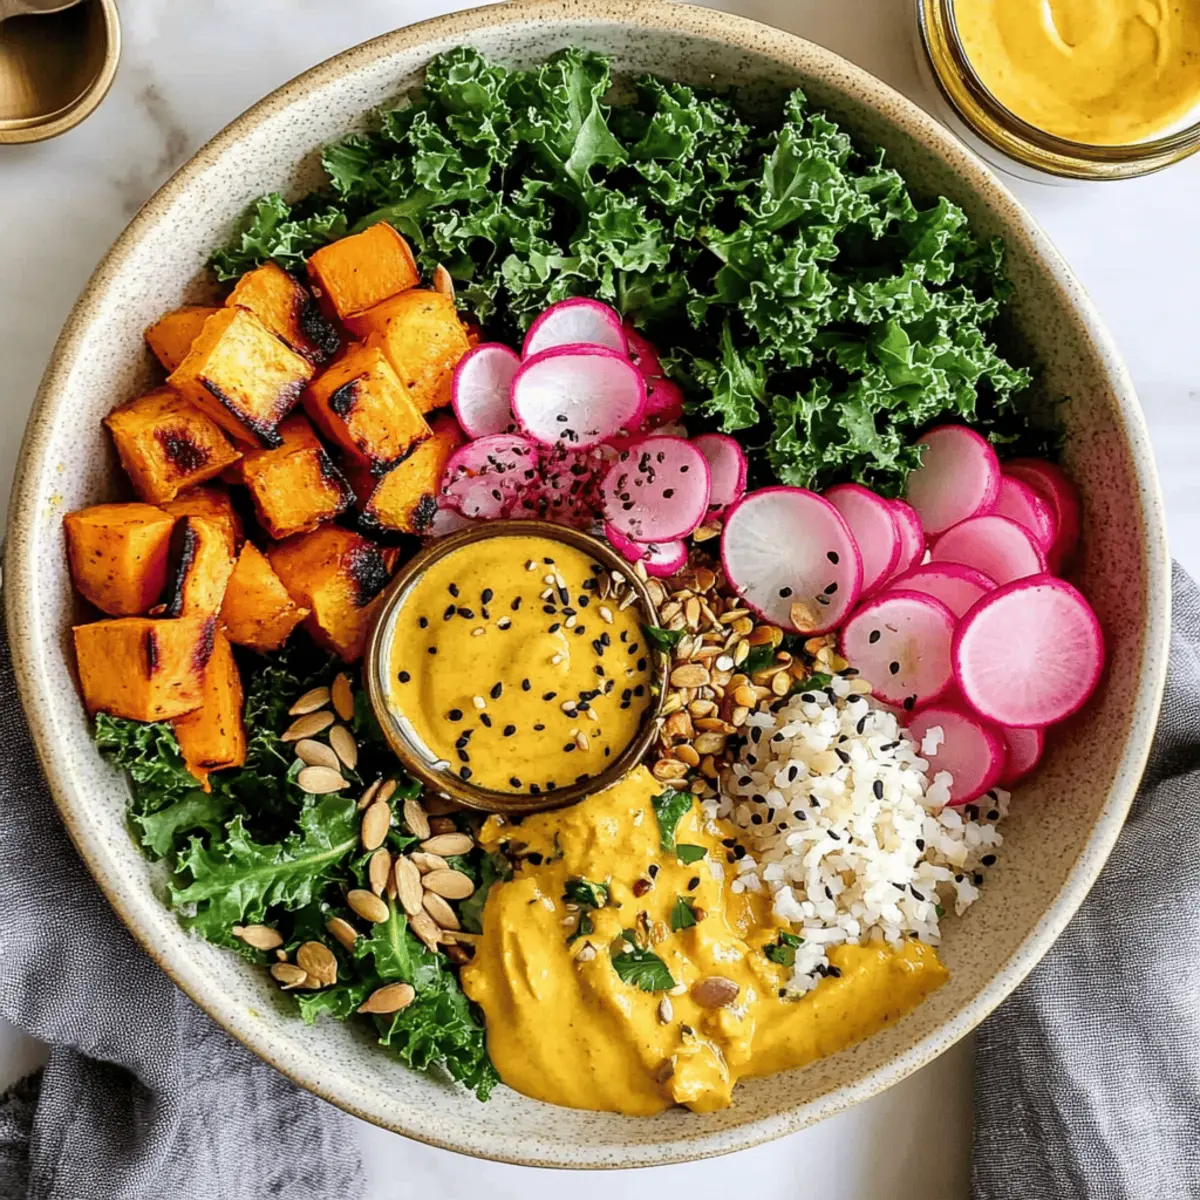
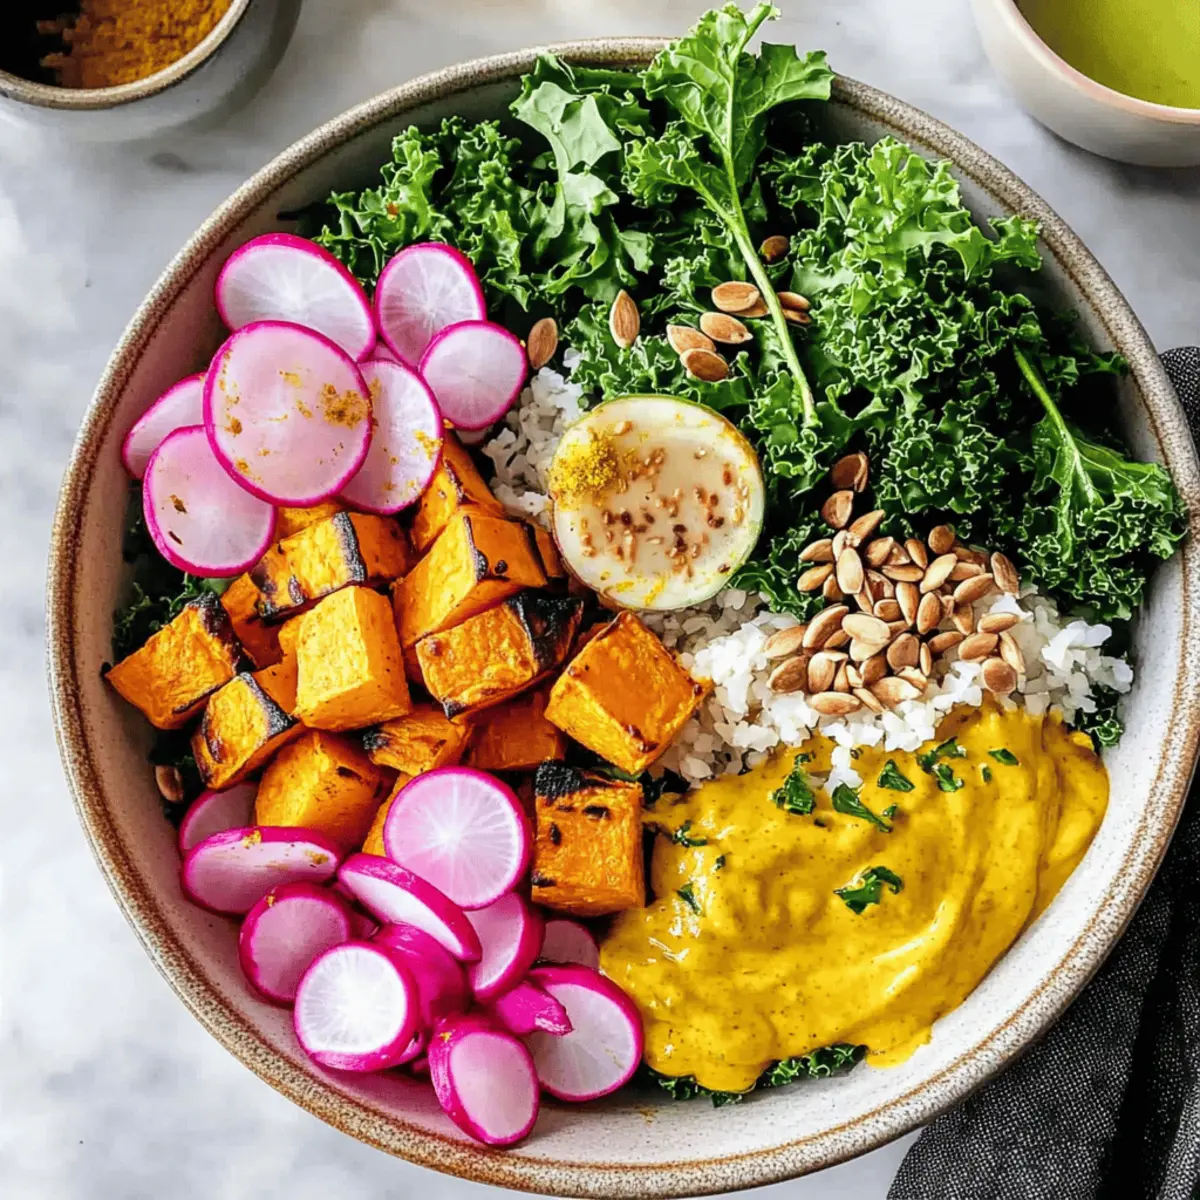
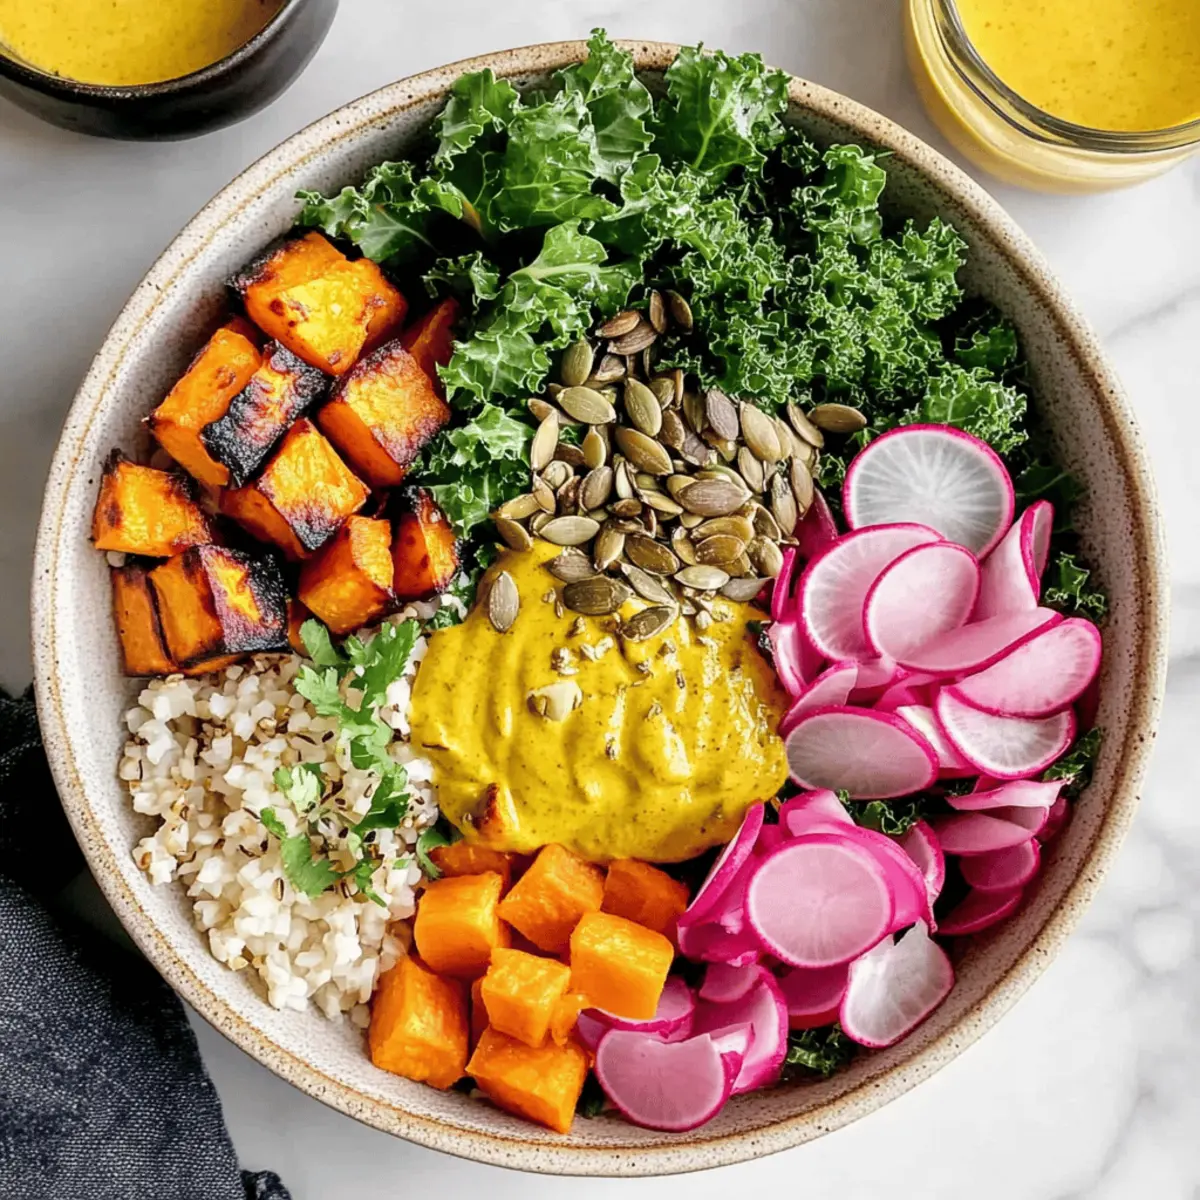
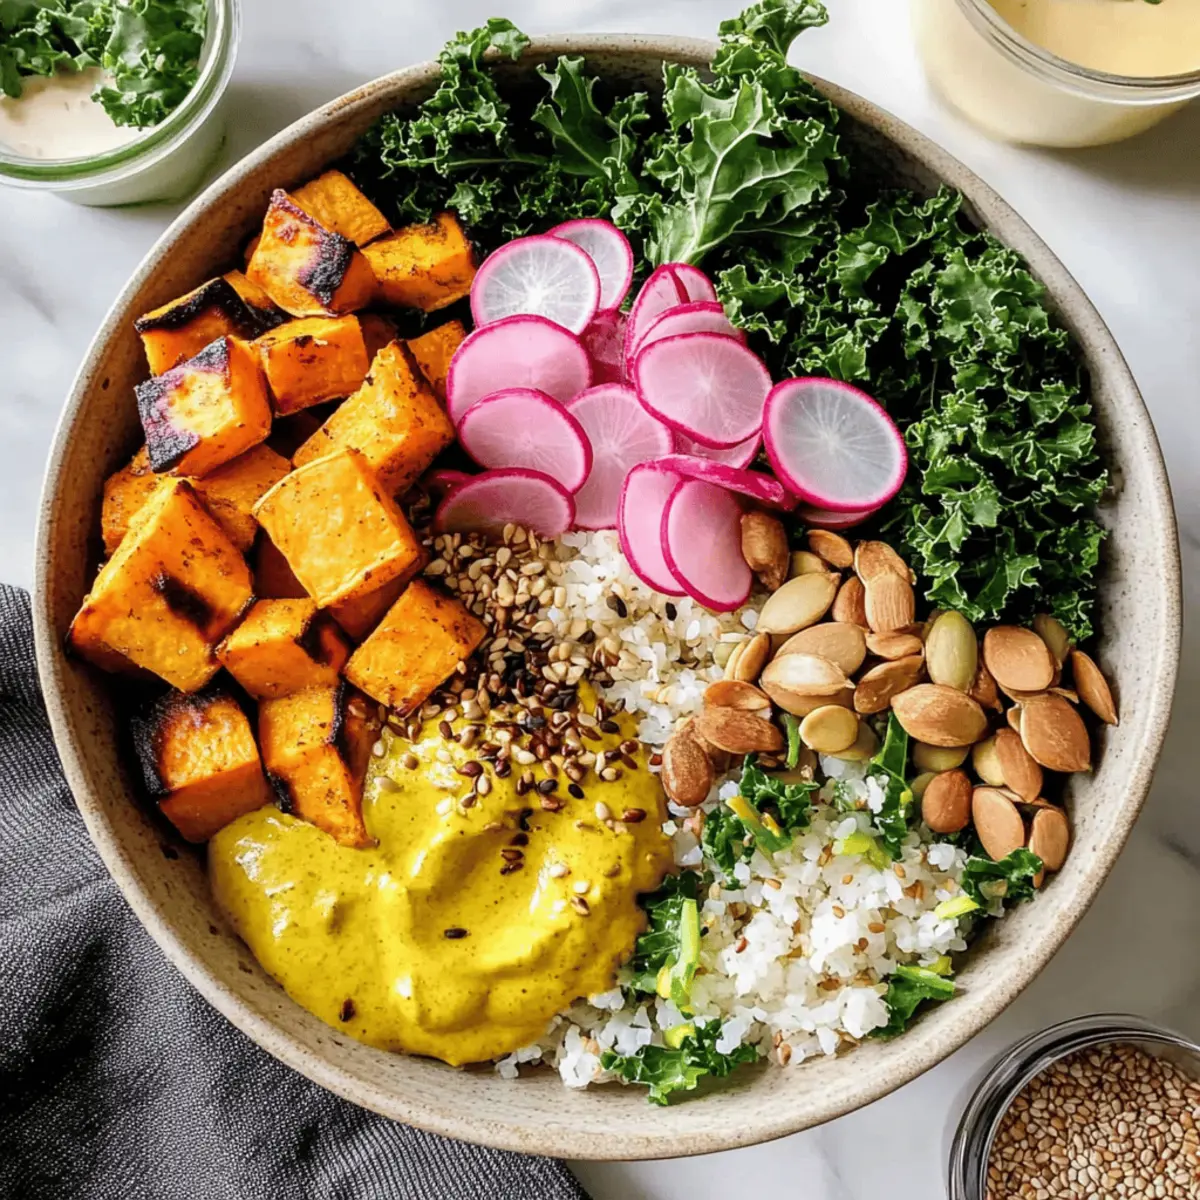
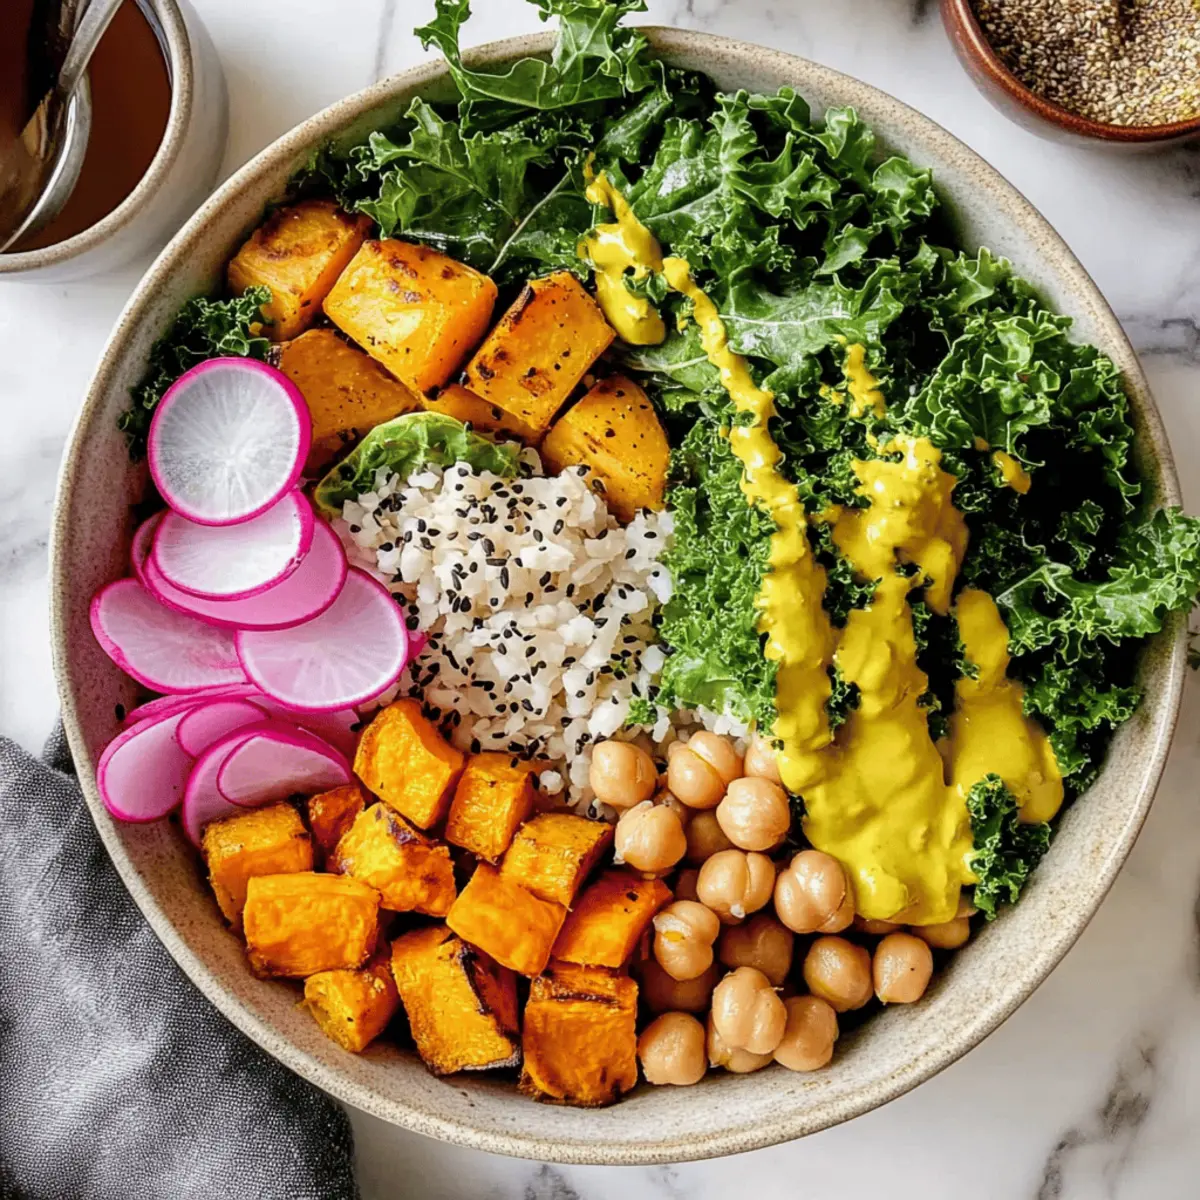
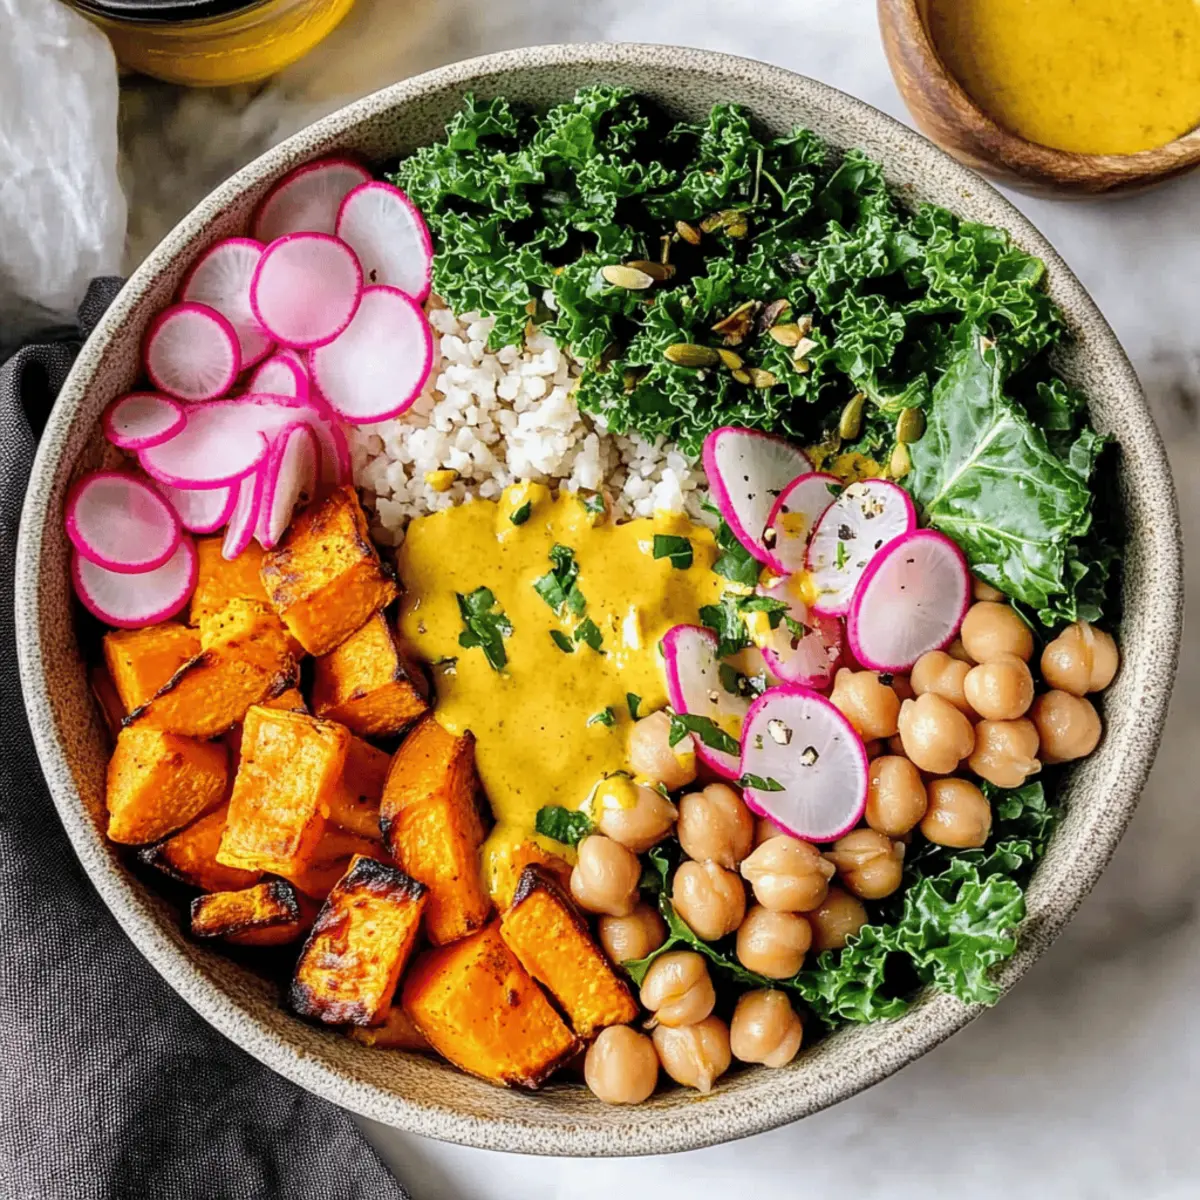
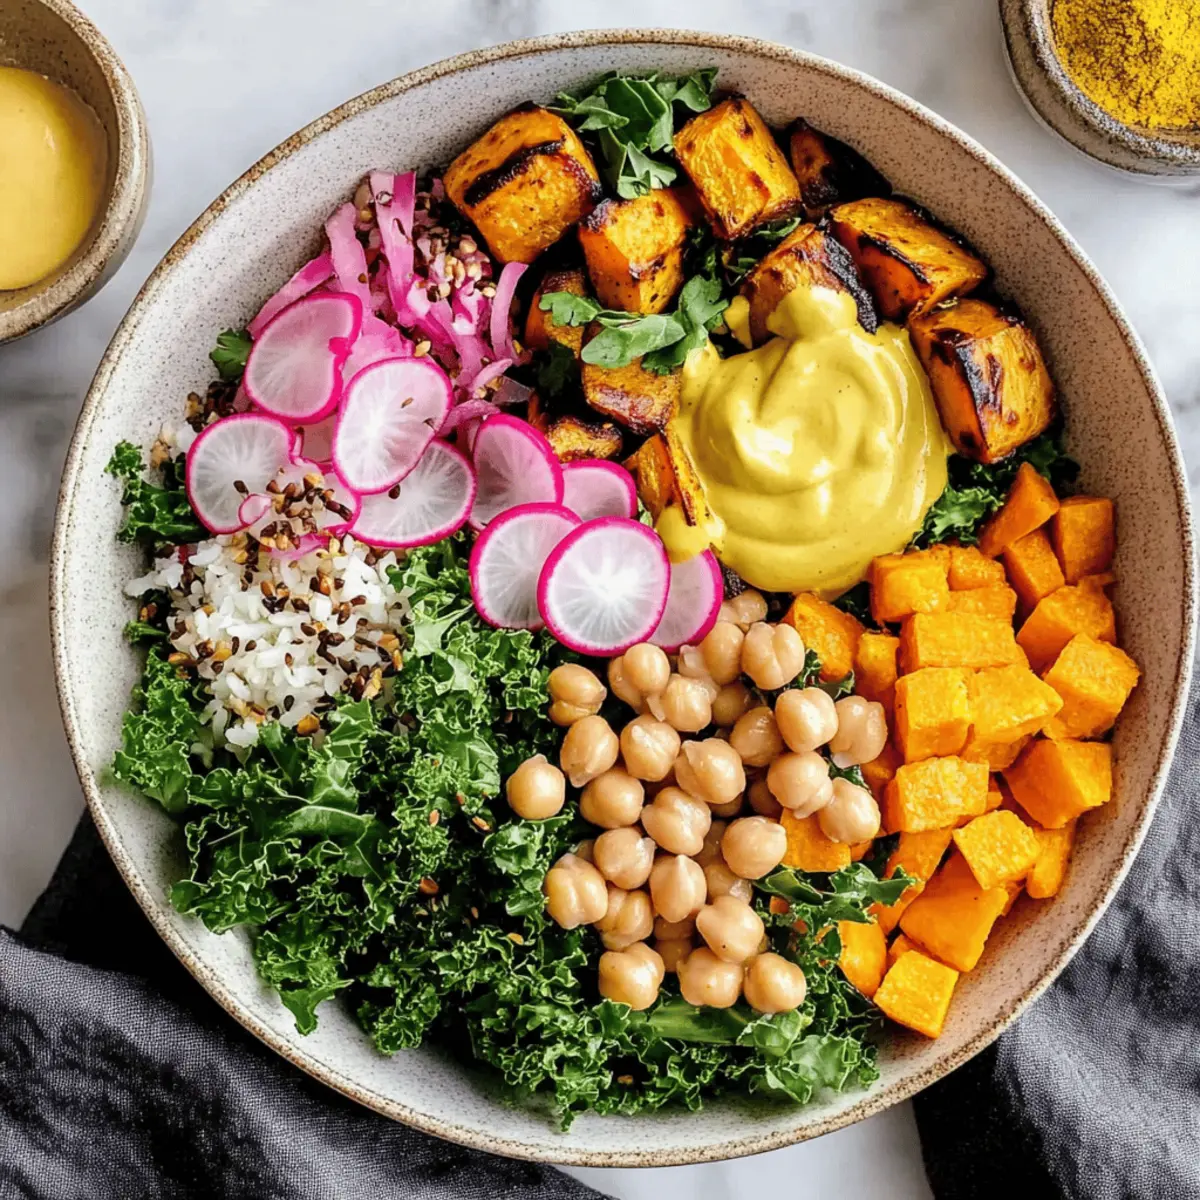
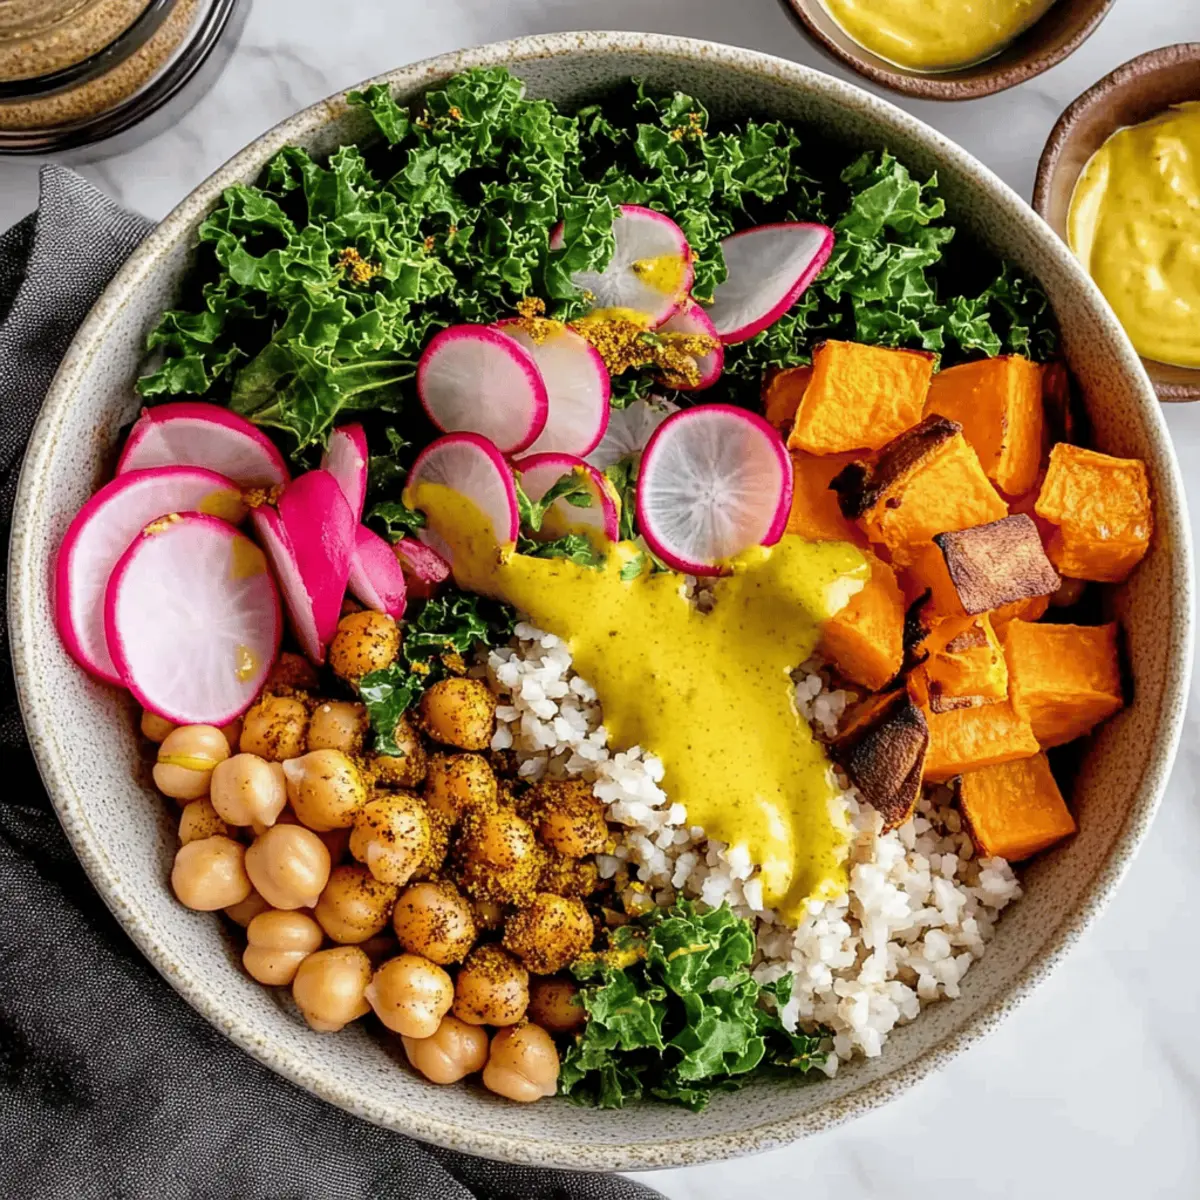
There’s nothing like the vibrant colors of a fresh Vegan Buddha Bowl to brighten up your day. This dish, brimming with crispy roasted chickpeas and a rainbow of seasonal vegetables, instantly transforms simple ingredients into a delightful meal. What I love most is how customizable it is—you can easily adapt the grains and veggies based on what’s in your pantry or what’s currently in season. This Vegan Buddha Bowl not only makes for a nourishing comfort food option, but it’s also a fun way to meal prep for busy days ahead. Whether you're rushing home after work or planning a cozy weekend dinner, you’ll find satisfaction in the flavors and textures that come together beautifully in just minutes. Are you ready to craft your own colorful bowl?

Why is the Vegan Buddha Bowl special?

Customizable: You can easily adapt this recipe to fit your taste and current ingredients in your pantry, ensuring a fresh experience every time.
Nutrient-dense: Packed with protein-rich quinoa and vibrant veggies, each bowl is a powerhouse of essential nutrients to fuel your body.
Meal Prep Friendly: Perfect for busy lifestyles, you can prepare components ahead of time for effortless assembly throughout the week. Pair it with Vegan Sushi Indulge for a delightful variety.
Deliciously Satisfying: The crispy roasted chickpeas add a satisfying crunch, while the creamy tahini dressing ties everything together beautifully.
Crowd-Pleasing Appeal: Whether you’re serving family or hosting friends, this colorful dish is sure to impress everyone at your table!

Vegan Buddha Bowl Ingredients

For the Base
• Quinoa – Provides a protein-packed, fluffy foundation; rinse before cooking to remove bitterness.

For the Protein
• Chickpeas – Adds crunchy texture and protein; use canned and drained for quick prep, or swap for lentils for a different taste.

For the Vegetables
• Seasonal Vegetables – Choose a colorful mix (like sweet potatoes, bell peppers, and broccoli) for nutrients; roast or steam to enhance flavors.
• Avocado – Adds creaminess and healthy fats; slice fresh just before serving to preserve its texture.

For the Dressing
• Tahini Dressing – A rich and creamy topping that elevates flavors; combine tahini with lemon juice, garlic, and spices for best results. Use sunflower seed butter for a nut-free alternative.

This Vegan Buddha Bowl is a beautiful way to enjoy nourishing comfort food with endless customization options!

Step‑by‑Step Instructions for Vegan Buddha Bowl

Step 1: Cook Quinoa
Rinse 1 cup of quinoa under cold water until the water runs clear to remove bitterness. In a medium saucepan, combine the rinsed quinoa with 2 cups of water or vegetable broth. Bring it to a boil over medium-high heat, then reduce to a simmer, covering the pot. Cook for 15 minutes until all the liquid is absorbed, then let it sit, covered, for an additional 5 minutes for fluffiness.

Step 2: Prepare Chickpeas
Preheat your oven to 425°F (220°C) to get it nice and hot. While the oven heats, rinse and thoroughly dry 1 can of chickpeas using a clean kitchen towel. Toss the dried chickpeas in a bowl with olive oil and your choice of spices until well-coated. Spread them evenly on a baking sheet and roast for 25-30 minutes, shaking the tray halfway through until the chickpeas are golden and crispy.

Step 3: Cook Seasonal Vegetables
If you’re roasting your vegetables, lower the oven temperature to 400°F (200°C) after removing the chickpeas. Chop a colorful mix of seasonal vegetables like sweet potatoes, bell peppers, and broccoli, then toss them with olive oil and seasonings. Arrange them on a separate baking sheet and roast for 20-25 minutes until tender and slightly caramelized; alternatively, steam them briefly to maintain vibrant color and crunch.

Step 4: Assemble the Bowl
Start building your Vegan Buddha Bowl by placing a generous scoop of the fluffy quinoa as your base. Layer on the crispy roasted chickpeas, followed by a hearty serving of your roasted or steamed seasonal vegetables. Add fresh avocado slices on top for creaminess, drizzling everything generously with the creamy tahini dressing. Finish with a sprinkle of herbs or seeds for added texture and flair, and enjoy your nourishing creation!

Expert Tips for the Best Vegan Buddha Bowl

  • Perfectly Crispy Chickpeas: Ensure chickpeas are thoroughly dried after rinsing to achieve maximum crispiness while roasting. Wet chickpeas will steam rather than crisp up.

  • Texture Variety: Aim to mix textures in your bowl by combining crunchy chickpeas, creamy avocado, and tender roasted vegetables. This delightful combination makes every bite exciting!

  • Meal Prep Buddy: For ease during the week, store components in airtight containers separately. This way, you can enjoy fresh flavors without compromising quality over time.

  • Freshness is Key: Use seasonal vegetables for the best taste and nutrition. Not only will it enhance the visual appeal of your Vegan Buddha Bowl, but it will also support local farmers and sustainability.

  • Dressing Adjustments: Feel free to play with the tahini dressing! Add a hint of sweetness with maple syrup or a touch of heat with chili flakes to keep things interesting.

Make Ahead Options

These Vegan Buddha Bowls are perfect for those busy weeknights! You can prepare the quinoa and roasted chickpeas up to 3 days in advance. Simply cook the quinoa and store it in an airtight container in the fridge. Roast your chickpeas and let them cool completely before transferring to a separate container. For the best quality, keep the vegetables uncooked until you're ready to serve—chop them and store in a sealed bag, so they stay fresh. When it’s time to eat, reheat the quinoa and chickpeas, assemble your bowl with fresh veggies and avocado, and drizzle with tahini dressing for a delicious meal that feels effortlessly put together!

How to Store and Freeze Vegan Buddha Bowl

Fridge: Store the assembled Vegan Buddha Bowl in an airtight container in the fridge for up to 3 days to keep the ingredients fresh and flavorful.

Components Storage: Store cooked quinoa, roasted chickpeas, and vegetables in separate airtight containers in the fridge for up to 4 days to maintain their crispness and texture.

Freezer: For longer storage, freeze cooked quinoa and roasted chickpeas for up to 3 months. Allow them to cool completely before placing them in freezer-safe bags.

Reheating: To reheat, simply thaw in the fridge overnight, then warm quinoa and chickpeas in the microwave, adding a splash of water to retain moisture.

Variations & Substitutions for Vegan Buddha Bowl

Feel free to elevate your Vegan Buddha Bowl experience with these exciting twists and swaps that will tantalize your taste buds!

  • Grain Alternatives: Swap quinoa for brown rice or farro to experiment with different textures and flavors. Both options can bring a satisfying chew to your bowl.

  • Roasted Veggies: Use any seasonal vegetables available, like zucchini or kale, as delightful substitutes. Mixing in colorful veggies not only enhances visual appeal but also adds refreshing nuances to each bite.

  • Protein Options: If you prefer a different protein source, try edamame or roasted tofu for a savory twist. Tofu, especially when marinated, can add a unique flavor dimension.

  • Spicy Kick: For those who love a bit of heat, add chili flakes or a drizzle of sriracha on top of your bowl. This subtle addition can transform the dish into a zesty delight!

  • Nut-Free Dressing: Substitute tahini with sunflower seed butter or a creamy avocado dressing for a nut-free alternative that still packs a punch. These swaps provide a rich mouthfeel without compromising on flavor.

  • Flavor Boosts: Stir in some nutritional yeast or a sprinkle of smoked paprika to your tahini dressing for an umami flavor infusion. This simple addition can make your sauce sing with depth.

  • Herbs & Garnishes: Enhance freshness by adding chopped fresh herbs like cilantro or basil. A garnish of toasted pumpkin seeds can provide a delightful crunch, complementing the creamy elements beautifully.

Ready to take your Vegan Buddha Bowl to new heights? You could even pair it with a side of Crispy Fish Taco Bowls for a perfect complementary meal!

What to Serve with Customizable Vegan Buddha Bowl

Elevate your meal experience by adding delightful sides that complement the vibrant flavors of this nourishing bowl.

  • Crunchy Side Salad: A fresh salad with mixed greens, cherry tomatoes, and a zesty lemon vinaigrette adds a refreshing crunch.
  • Savory Garlic Bread: Warm, crusty garlic bread offers a satisfying contrast, perfect for sopping up the creamy tahini dressing.
  • Roasted Vegetable Platter: Serve a variety of roasted seasonal vegetables as a side for extra color and nutrition; it's a delicious way to enhance your meal.
  • Refreshing Fruit Salad: A bright fruit salad with seasonal fruits like melon and berries provides a sweet balance to the savory flavors.
  • Creamy Soup: Pair with a silky vegan soup for a comforting duo that's warm and inviting, like roasted red pepper or butternut squash.
  • Herbal Tea: Enjoy a soothing cup of herbal tea post-meal to cleanse your palate and wind down your dining experience.

Vegan Buddha Bowl Recipe FAQs

How do I choose the right ripeness of vegetables for my Vegan Buddha Bowl?
Absolutely! Pick seasonal vegetables that are colorful and firm to the touch—look for bright skins and no dark spots or blemishes. For instance, sweet potatoes should feel heavy and have smooth skins, while bell peppers should be vibrant and crisp. If you can, shop at local markets to find the freshest picks!

How long can I store my Vegan Buddha Bowl in the fridge?
You can store your assembled Vegan Buddha Bowl in an airtight container in the fridge for up to 3 days. However, I recommend keeping the components separate (like quinoa, chickpeas, and veggies) in airtight containers for optimal freshness and texture, which can last up to 4 days.

Can I freeze components of my Vegan Buddha Bowl?
Very! For longer storage, you can freeze cooked quinoa and roasted chickpeas for up to 3 months. Just allow them to cool completely, and then transfer them to freezer-safe bags. When you're ready to enjoy, thaw them in the fridge overnight and warm them in the microwave, adding a splash of water to avoid dryness.

What do I do if my chickpeas aren't crispy after roasting?
If your roasted chickpeas are chewy rather than crispy, it's likely they weren’t dried thoroughly before roasting. Always rinse and dry chickpeas well, and consider increasing the roasting time to 35-40 minutes if needed, checking for crispness. Ensure they're spaced evenly on your baking sheet to promote even cooking.

Are there any common allergens I should be aware of in the Vegan Buddha Bowl?
It's important to consider dietary restrictions! This Vegan Buddha Bowl is plant-based, but be mindful if you're serving it to guests with allergies. Tahini is made from sesame seeds, which can be a concern for those with nut allergies. For a nut-free alternative, you can swap tahini with sunflower seed butter. Always double-check ingredient labels for any hidden allergens!

Can I make this Vegan Buddha Bowl nut-free?
Definitely! To enjoy a nut-free Vegan Buddha Bowl, simply replace the tahini dressing with a creamy sunflower seed butter or a simple lemon and olive oil vinaigrette. This way, you're still delivering on the creamy texture while keeping it safe for those with nut allergies!

Vegan Buddha Bowl: A Flavorful Journey to Healthy Eating

Discover the vibrant Vegan Buddha Bowl, rich in flavors and customizable for a healthy meal that's perfect for any occasion.
Print Recipe
Prep Time 10 minutes mins
Cook Time 40 minutes mins
Resting Time 5 minutes mins
Total Time 55 minutes mins
Servings: 2 bowls
Course: Salads
Cuisine: Vegan
Calories: 500
Ingredients Equipment Method Nutrition Notes

Ingredients
  

For the Base
  • 1 cup Quinoa Rinse before cooking to remove bitterness.
For the Protein
  • 1 can Chickpeas Canned and drained for quick prep.
For the Vegetables
  • 2 cups Seasonal Vegetables A mix of sweet potatoes, bell peppers, and broccoli.
  • 1 medium Avocado Slice fresh just before serving.
For the Dressing
  • 1/4 cup Tahini Dressing Combine tahini with lemon juice, garlic, and spices.

Equipment

  • Medium saucepan
  • Baking Sheet
  • Oven
  • Mixing Bowl
  • Clean kitchen towel

Method
 

Step-by-Step Instructions for Vegan Buddha Bowl
  1. Rinse quinoa under cold water until the water runs clear. Combine with 2 cups of water or vegetable broth in a saucepan and bring to a boil. Reduce to a simmer, cover, and cook for 15 minutes.
  2. Preheat oven to 425°F. Rinse and dry chickpeas. Toss with olive oil and spices. Roast on a baking sheet for 25-30 minutes until golden and crispy.
  3. Prepare vegetables by chopping and tossing with olive oil. Roast at 400°F for 20-25 minutes or steam briefly.
  4. Assemble the bowl: Start with quinoa, add roasted chickpeas, vegetables, avocado, and drizzle with tahini dressing. Top with herbs or seeds.
Nutrition

Serving: 1bowlCalories: 500kcalCarbohydrates: 60gProtein: 15gFat: 25gSaturated Fat: 4gPolyunsaturated Fat: 1gMonounsaturated Fat: 18gSodium: 400mgPotassium: 800mgFiber: 12gSugar: 5gVitamin A: 2000IUVitamin C: 60mgCalcium: 150mgIron: 3mg

Notes

Store components separately for meal prep and freshness. Adjust dressing for personal taste with sweetness or spice.

Tried this recipe?

Let us know how it was!

Butternut Squash and Spinach Salad with Sweet Crunchy Pecans

October 20, 2025 by Grace Snow Leave a Comment

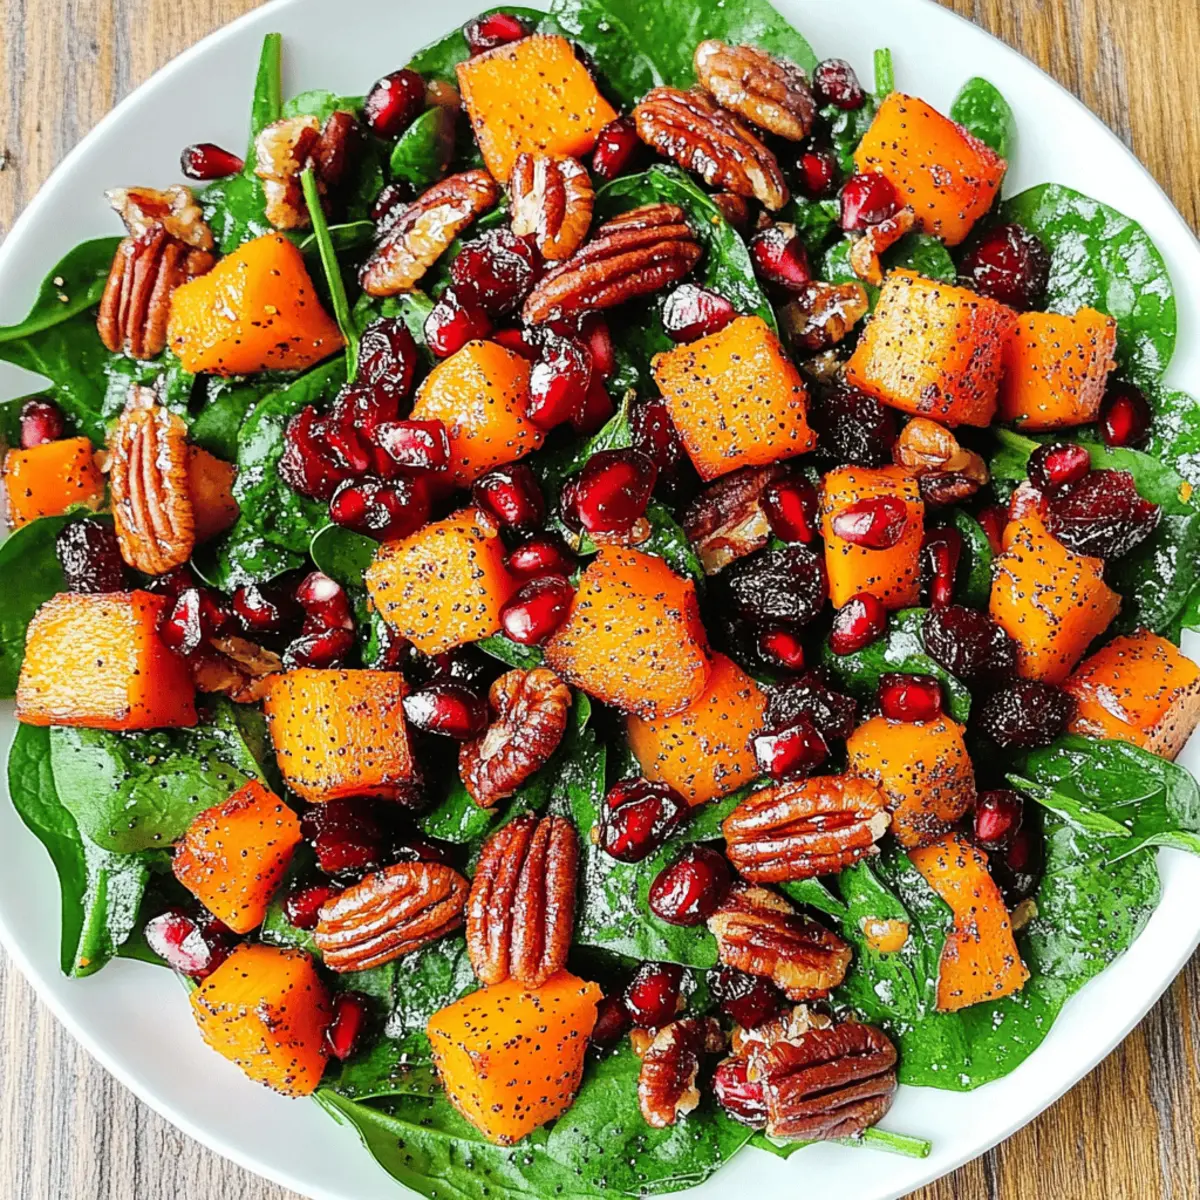
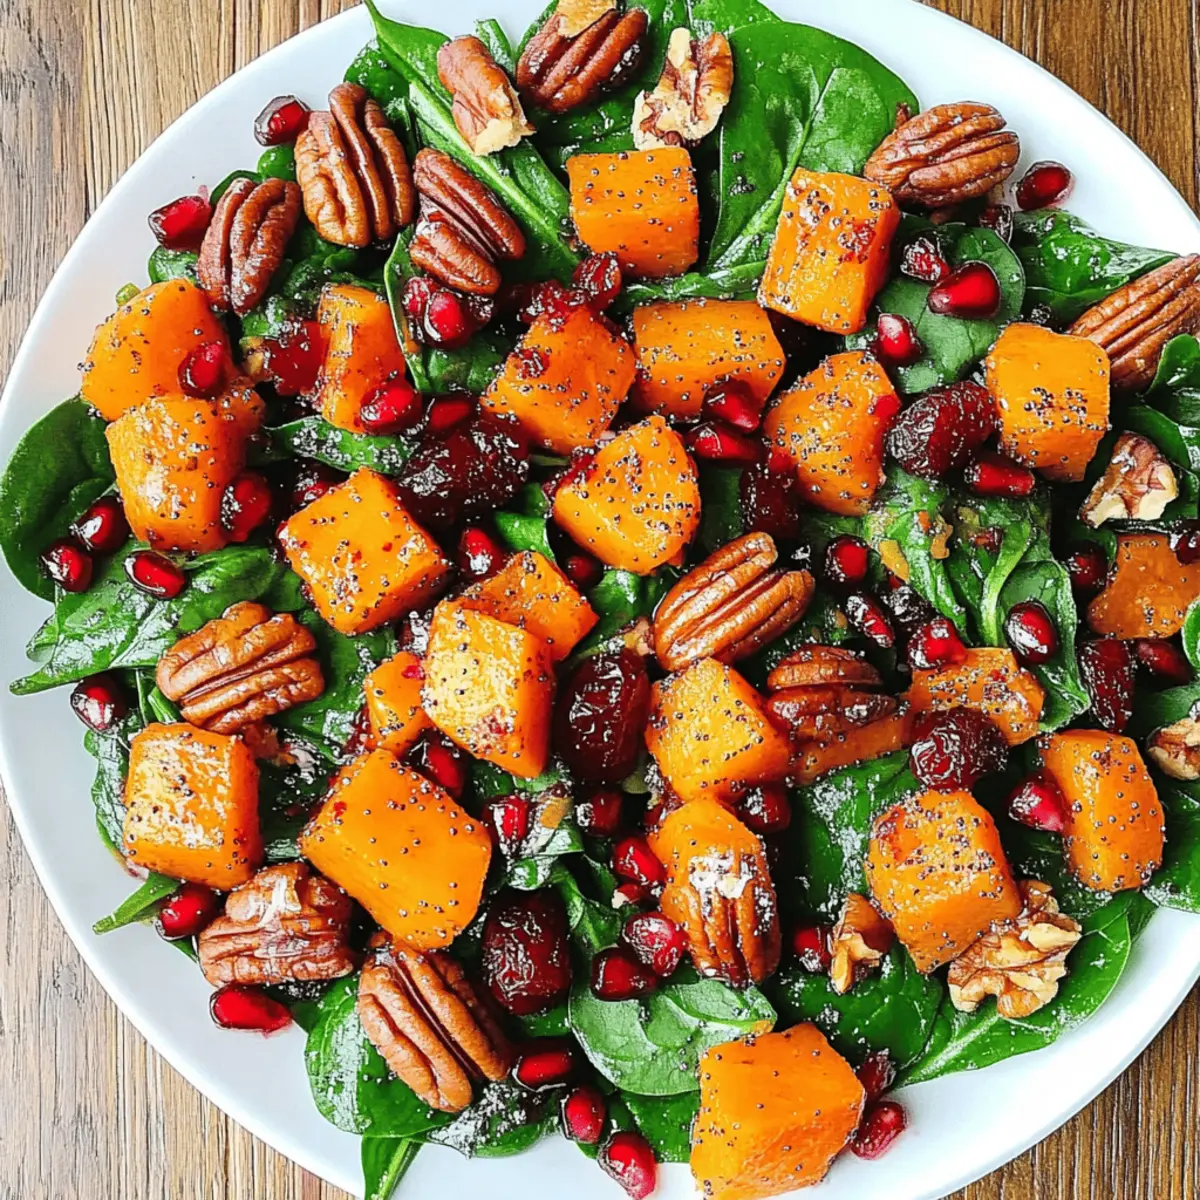
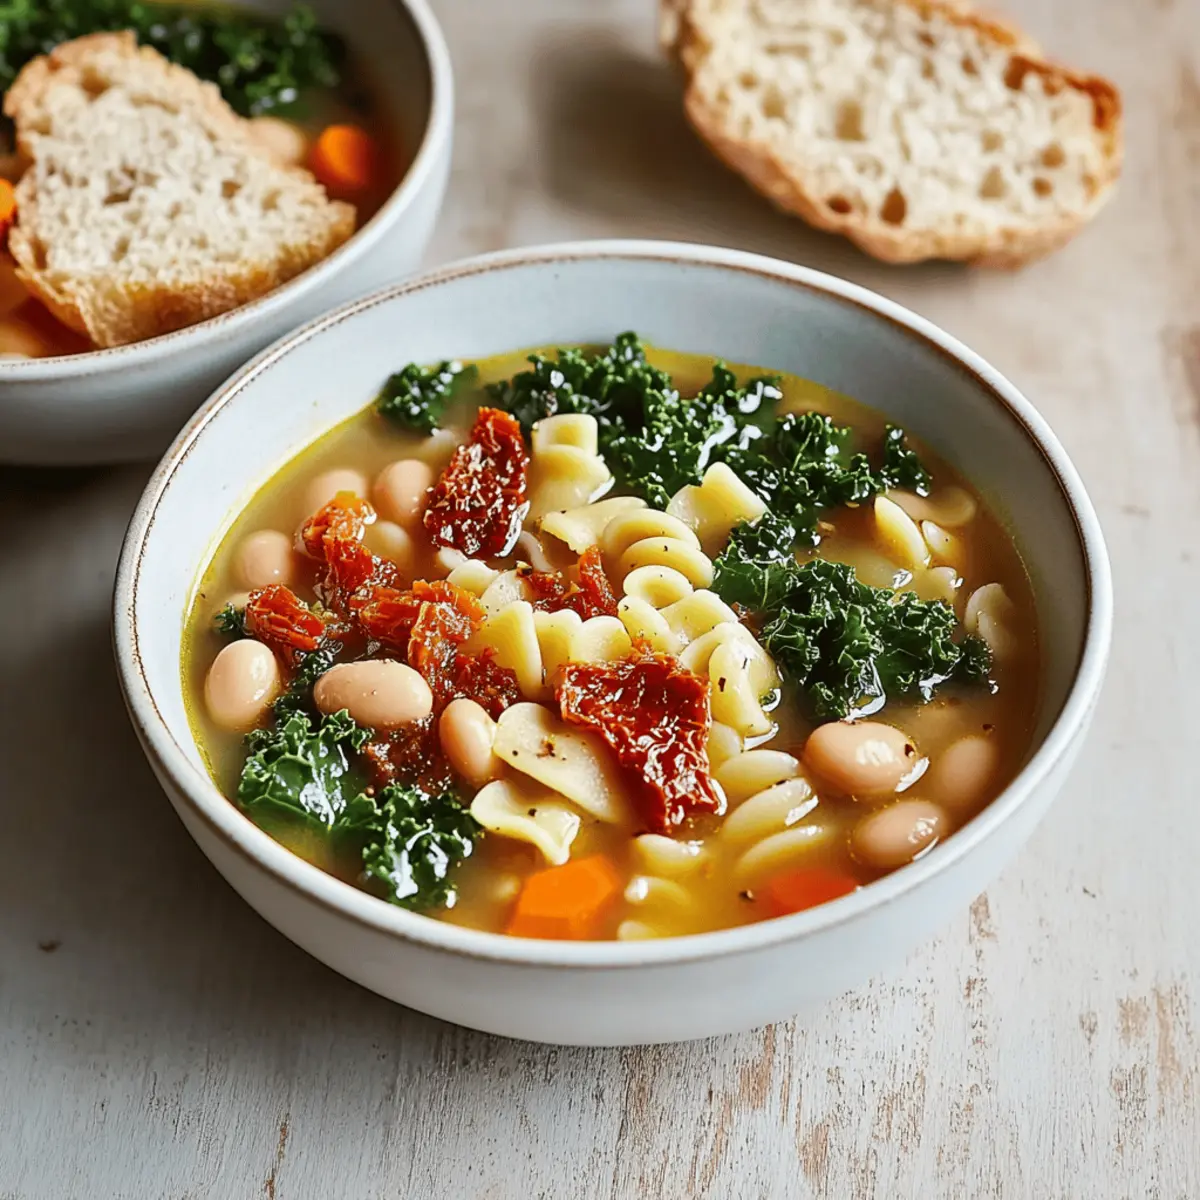
While preparing a meal, I noticed how the autumn sun seemed to warm even the coldest of days. That's when the idea for my Butternut Squash and Spinach Salad sparked to life. This vibrant dish combines the sweetness of roasted butternut squash with the crunch of pecans, the tang of pomegranate seeds, and the freshness of baby spinach—all brought together by a zesty poppy seed honey-lime dressing. It’s not just a healthy and gluten-free option; it’s also a beautiful centerpiece for any gathering, especially as the holidays approach. Whether you serve it as a side or make it the star of your table, it offers a delicious escape from fast food fatigue. Are you ready to dive into this flavorful adventure?

Why is this salad a must-try?

Vibrant flavors: The combination of sweet roasted butternut squash and crunchy pecans brings a delightful contrast.
Nutritious and gluten-free: Packed with vitamins and fiber, it makes healthy eating enjoyable!
Quick preparation: With just a few simple steps, you can create a stunning dish in no time.
Versatile options: Enjoy it as a side or a light main course, and switch up ingredients based on your pantry! This salad would pair beautifully with a comforting Jello Salad Cottage or complement the flavors in a Tofu Caesar Salad.
Crowd-pleaser: Its eye-catching presentation and unique flavors will impress family and friends at your next gathering!

Butternut Squash and Spinach Salad Ingredients

For the Salad

  • Butternut Squash – Roasted for a sweet, caramelized flavor; acorn squash makes a great substitute.
  • Baby Spinach – Provides a fresh and vibrant base; kale or arugula can be swapped in.
  • Pecans – Add lovely crunch and nutty richness; walnuts or pumpkin seeds can be used as alternatives.
  • Dried Cranberries – Introduce a chewy sweetness; raisins or chopped dried cherries work well.
  • Pomegranate Seeds – Offer a pop of color and tartness; you can omit this if unavailable.

For the Dressing

  • Olive Oil – Used for both the roasting and dressing, adding a smooth richness; any neutral oil can substitute.
  • Lime Juice – Adds a zesty acidity that balances the sweet flavors; lemon juice serves as a suitable replacement.
  • Honey – Sweetens the dressing beautifully; opt for maple syrup or agave for a vegan alternative.
  • Dijon Mustard – Braids in depth and flavor; can be skipped for a milder taste.
  • Poppy Seeds – Supply a nice crunch and nutty essence; feel free to omit if not on hand.
  • Salt – Elevates all the flavors; adjust to taste.

Enjoy whipping up this Butternut Squash and Spinach Salad that perfectly elevates any meal!

Step‑by‑Step Instructions for Butternut Squash and Spinach Salad

Step 1: Preheat the Oven
Begin by preheating your oven to 400°F (200°C). This lovely warmth creates the perfect environment for roasting, ensuring your butternut squash becomes beautifully sweet and caramelized. As the oven heats, you can prep your ingredients, setting the stage for an enjoyable cooking experience.

Step 2: Prepare the Butternut Squash
While the oven warms, peel and cube one medium butternut squash into bite-sized pieces. In a mixing bowl, toss the squash cubes with a drizzle of olive oil and a pinch of salt, ensuring each piece is well-coated. Spread the seasoned squash evenly on a baking sheet, allowing space for even cooking, and roast for 20-25 minutes, turning halfway through, until they are fork-tender and golden.

Step 3: Make the Dressing
In a medium bowl, whisk together olive oil, fresh lime juice, honey, poppy seeds, Dijon mustard, salt, and pepper. This sweet and tangy poppy seed honey-lime dressing will perfectly complement the earthy flavors of the butternut squash and the fresh baby spinach. Take a moment to taste and adjust the seasoning if needed, ensuring this dressing is just right for your Butternut Squash and Spinach Salad.

Step 4: Combine the Salad Ingredients
Once your butternut squash is roasted to perfection, remove it from the oven and let it cool slightly. In a large salad bowl, combine the warm butternut squash with baby spinach, two-thirds of the chopped pecans, dried cranberries, and a handful of pomegranate seeds. This blend of textures and flavors will bring your salad to life, creating a colorful and appetizing dish.
Step 5: Toss with Dressing
Drizzle the prepared poppy seed honey-lime dressing over the salad mixture. Gently toss the salad to ensure all the vegetables and toppings are coated with the dressing, allowing every bite to burst with flavor. Be careful not to over-mix; you want to keep the butternut squash intact for that delightful experience in your Butternut Squash and Spinach Salad.

Step 6: Garnish and Serve
Before serving, sprinkle the remaining pecans and pomegranate seeds atop the salad for an eye-catching finish. This final touch adds an extra crunch and vibrant color, making your Butternut Squash and Spinach Salad a feast for both the eyes and taste buds. Serve immediately and enjoy the warm, comforting flavors of this nutritious dish!

Butternut Squash and Spinach Salad Variations

Feel free to get creative with this delightful salad and make it your own!

  • Sweet Potato Swap: Swap roasted sweet potatoes for butternut squash for a sweeter twist on texture and flavor.

  • Creamy Additions: Add crumbled feta or goat cheese for a creamy element that beautifully complements the sweetness of the salad.

  • Nuts & Seeds: Experiment with different nuts like walnuts or pumpkin seeds to enhance the salad's crunch and flavor profile.

  • Herb Infusion: Incorporate fresh herbs like basil or cilantro into the dressing for an aromatic depth that elevates the entire dish.

  • Spicy Kick: Sprinkle red pepper flakes or add diced jalapeños for an exciting heat that contrasts nicely with the sweet ingredients.

  • Grain Boost: Toss in cooked quinoa or farro for an additional layer of texture and a protein boost, making this salad even more filling.

  • Zesty Flavor: Replace lime juice with orange juice for a fruity tanginess that brightens the entire salad.

  • Nut-Free Option: Omit the pecans and replace them with roasted chickpeas for a delicious crunch and a satisfying protein punch.

Whether you opt for a hearty addition like grilled chicken or a nourishing side like a light soup, this Butternut Squash and Spinach Salad can easily be paired with dishes like my cherished Chicken Salad Apples for a fulfilling meal!

Make Ahead Options

These Butternut Squash and Spinach Salad preparations are perfect for busy home cooks looking to save time! You can roast the butternut squash and store it in the refrigerator up to 3 days before serving, which will keep it tender and flavorful. Additionally, the dressing can be prepped up to 24 hours in advance—just be sure to refrigerate it in an airtight container to maintain its zesty brightness. When you're ready to enjoy the salad, simply combine the spinach, roasted squash, pecans, cranberries, and pomegranate seeds in a bowl, drizzle with dressing, and toss gently. This way, you'll have a refreshing, nutritious meal ready with minimal effort!

Expert Tips for Butternut Squash and Spinach Salad

  • Uniform Cutting: Ensure the butternut squash is cut into uniform cubes for even roasting; inconsistently sized pieces may cook at different rates.

  • Avoid Soggy Spinach: Add the dressing just before serving to keep the spinach fresh and crisp. This prevents wilting and preserves some crunch.

  • Toast for Flavor: For a deeper, nuttier taste, toast the pecans in the oven for a few minutes beforehand. Just keep an eye on them to avoid burning!

  • Substitution Sensibility: Feel free to mix and match ingredients based on season or personal taste! Use different nuts or greens in your Butternut Squash and Spinach Salad as desired.

  • Make-Ahead Friendly: If prepping in advance, store the dressing separately to keep flavors fresh and the salad ingredients crisp until serving.

Storage Tips for Butternut Squash and Spinach Salad

  • Fridge: Store leftover salad in an airtight container for up to 3 days. Keep the dressing separate until ready to serve to maintain freshness.
  • Freezer: It's best to avoid freezing this salad, as the spinach and dressing do not freeze well and can become soggy after thawing.
  • Reheating: If you have roasted butternut squash leftovers, you can heat them in a microwave or oven. Toss them back lightly with fresh spinach once warmed for a refreshing salad experience.
  • Ingredient Storage: Store pecans and dried cranberries in a cool, dry place to maintain their crunchiness for longer.

What to Serve with Butternut Squash and Spinach Salad?

Enhance your dining experience by harmonizing flavors and textures alongside this delightful salad.

  • Crispy Roasted Chicken: This savory dish complements the salad’s sweetness perfectly, adding a satisfying protein to the meal. Pair it with a side of garlic mashed potatoes for a comforting touch.

  • Quinoa Pilaf: Light and fluffy, quinoa pilaf adds a nutty flavor and a chewy texture that elevates your salad. It’s a perfect balance, making each bite a delightful experience!

  • Garlic Bread: The crunchy, buttery goodness of garlic bread is an excellent foil to the fresh salad. Its indulgent texture provides a satisfying contrast to the nutritional lightness of the salad.

  • Fruit and Nut Cheese Board: A medley of cheeses with fruits and nuts mirrors the flavors in your salad, elevating your appetizer game. This could be the perfect starter that pairs beautifully with a glass of wine.

  • Honey-Lime Grilled Shrimp: Sweet and zesty shrimp bring a grill-kissed flavor that enhances the fresh elements of the salad. Serve over a bed of rice for a complete dish!

  • Pumpkin Spice Muffins: As a delightful dessert, these muffins offer a warm, comforting finish to your meal. The spicy sweetness harmonizes wonderfully with the autumn flavors of the salad.

Butternut Squash and Spinach Salad Recipe FAQs

How do I choose ripe butternut squash?
Absolutely! When selecting butternut squash, look for ones that are smooth and free from dark spots or blemishes. The skin should be a matte, tan color, and the squash should feel heavy for its size. A ripe squash is typically firm to the touch with no soft spots.

How should I store leftovers from the salad?
You can store leftover salad in an airtight container in the refrigerator for up to 3 days. It's essential to keep the dressing separate until you're ready to serve to maintain the freshness of the spinach and prevent it from becoming soggy.

Can I freeze butternut squash?
Yes, you can freeze roasted butternut squash! To do this, allow it to cool completely after roasting. Then, spread it out on a baking sheet and freeze for about 1-2 hours until solid. Once frozen, transfer the squash to a freezer-safe container or bag. It can be stored for up to 3 months. Just remember, this method is best for roasted squash; the salad itself should not be frozen.

What can I do if my salad turns out soggy?
Very good question! If your salad is soggy, first check if you dressed it too early—this can make the spinach wilt. To remedy it, gently toss the salad with a handful of fresh spinach right before serving to add a crisp texture. Additionally, you can also serve the dressing on the side for guests to add as desired, keeping everything fresher.

Are there any allergies I should consider with this salad?
Indeed! This Butternut Squash and Spinach Salad contains nuts (pecans), which could be a concern for those with nut allergies. For a nut-free option, you can substitute pumpkin seeds or simply omit nuts altogether. Always check for any other dietary restrictions among your guests to ensure everyone can enjoy this delicious dish without worry.

Butternut Squash and Spinach Salad

Butternut Squash and Spinach Salad with Sweet Crunchy Pecans

A vibrant Butternut Squash and Spinach Salad combines roasted squash, crunchy pecans, and tangy pomegranate in a zesty dressing.
Print Recipe Pin Recipe
Prep Time 15 minutes mins
Cook Time 25 minutes mins
Total Time 40 minutes mins
Servings: 4 servings
Course: Salads
Cuisine: American
Calories: 250
Ingredients Equipment Method Nutrition Notes

Ingredients
  

For the Salad
  • 1 medium butternut squash peeled and cubed
  • 5 cups baby spinach fresh
  • 1 cup pecans chopped
  • 1/2 cup dried cranberries
  • 1/2 cup pomegranate seeds optional
For the Dressing
  • 1/4 cup olive oil for dressing and roasting
  • 2 tablespoons lime juice fresh
  • 2 tablespoons honey or maple syrup for vegan
  • 1 tablespoon Dijon mustard
  • 1 tablespoon poppy seeds optional
  • to taste teaspoon salt

Equipment

  • Oven
  • Mixing Bowl
  • Baking Sheet
  • Salad Bowl

Method
 

Preparation Steps
  1. Preheat the oven to 400°F (200°C).
  2. Peel and cube the butternut squash, then toss with olive oil and salt before spreading on a baking sheet.
  3. Roast for 20-25 minutes until fork-tender and golden.
  4. In a bowl, whisk together olive oil, lime juice, honey, poppy seeds, Dijon mustard, and salt to make the dressing.
  5. Combine warm butternut squash, spinach, two-thirds of the pecans, cranberries, and pomegranate seeds in a salad bowl.
  6. Drizzle dressing over the salad and gently toss to coat.
  7. Garnish with remaining pecans and pomegranate seeds before serving.

Nutrition

Serving: 1servingCalories: 250kcalCarbohydrates: 30gProtein: 5gFat: 12gSaturated Fat: 1gPolyunsaturated Fat: 2gMonounsaturated Fat: 8gSodium: 200mgPotassium: 450mgFiber: 5gSugar: 8gVitamin A: 3000IUVitamin C: 15mgCalcium: 70mgIron: 1.5mg

Notes

Add dressing just before serving to keep spinach crisp. For a nuttier flavor, toast pecans before use.

Tried this recipe?

Let us know how it was!

Spooky Halloween Pasta Salad That Kids Will Adore

October 3, 2025 by Grace Snow Leave a Comment

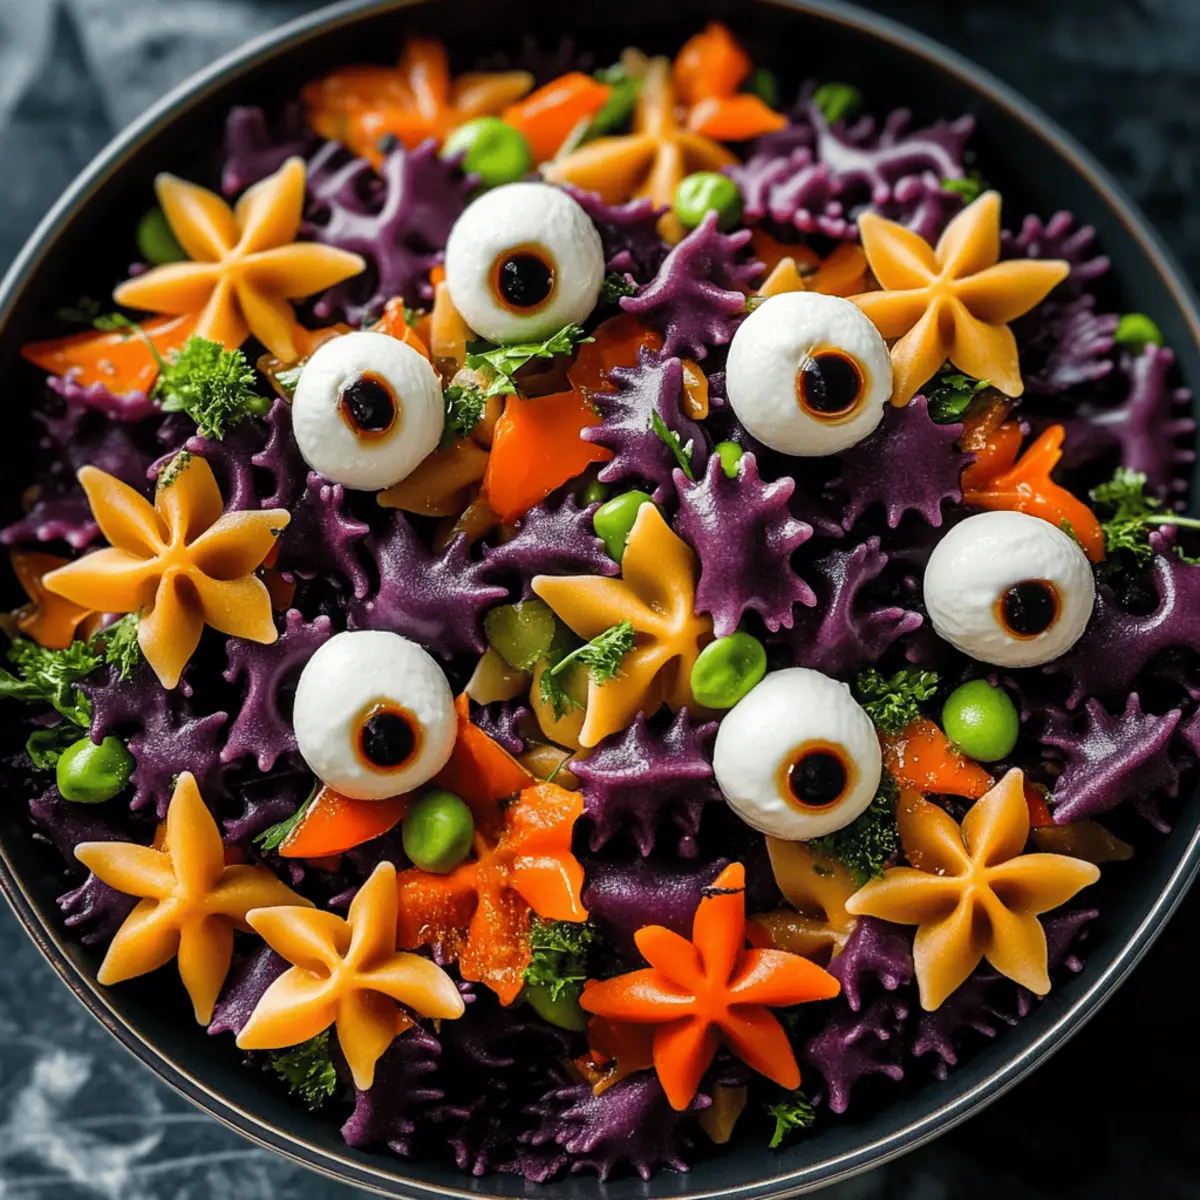
Amidst the laughter and playful chaos of Halloween gatherings, I stumbled upon an unexpected culinary spark: the Creepy Halloween Pasta Salad. Picture this—pasta dressed in deep black, playfully contrasted by vibrant star-shaped peppers, and topped with mozzarella ‘eyeballs’ that delight the eyes as much as the palate. This Halloween Pasta Salad is not just a feast for the senses; it's a quick and spooky addition to any festive spread, taking a mere 20 minutes to whip up. As someone who adores homemade food but can sometimes feel the pinch of time, this recipe effortlessly combines creativity with convenience, making it an instant crowd-pleaser. Your table will not only be colorful but filled with fun flavors that keep everyone coming back for more. Are you ready to conjure up some culinary magic and impress your guests? Let’s dive into the ingredients and bring this spooktacular dish to life!

Why Is This Pasta Salad So Fun?

Whimsical Presentation: The striking contrast of black pasta, bright orange stars, and cheese “eyeballs” creates an eye-catching dish that doubles as decor.
Quick to Prepare: In just 20 minutes, you can whip up this delightful Halloween Pasta Salad, saving you time for other spooky preparations!
Kid-Friendly Fun: Children will love the playful shapes and colors, making it a perfect addition to any Halloween gathering.
Versatile Ingredients: Feel free to mix in other healthy additions like spooky-shaped cucumbers or even add diced chicken for a heartier option.
Crowd-Pleasing Flavor: The tangy Italian dressing, coupled with the crunch of fresh veggies, delights the taste buds while keeping things festive.
Perfect Side Dish: Pair it with other holiday favorites like ghost-shaped appetizers or a spooky punch for a memorable feast that everyone will talk about!

Halloween Pasta Salad Ingredients

For the Pasta
• Farfalle Pasta – The whimsical bowtie shape adds a playful feel to your Halloween Pasta Salad.
• Black Food Coloring – This gives the pasta a spooky hue; no worries if it’s unavailable—dark whole wheat pasta works too!

For the Vegetables
• Orange Bell Pepper – Its vibrant color and star shape bring extra fun to the mix; any color pepper can add a twist to your presentation!
• Red Onion – Introduces a sharp crunch; if you prefer less bite, feel free to leave it out!

For the Protein and Extras
• Mozzarella Balls – These delightful 'eyeballs' make the salad even more festive; substitute with feta or cubed cheese for a different flavor profile.
• Edamame – Adds a pop of protein and green goodness; make sure to use cooked, shelled edamame for ease.
• Black Olives – Great for garnish and a salty bite; sliced green olives can be a tasty alternative!

For the Dressing
• Italian Dressing – Brings moisture and flavor to the salad; if you want a personal touch, homemade vinaigrette is a wonderful option.

Get ready to create a fun, vibrant dish that’s perfect for all your Halloween festivities!

Step‑by‑Step Instructions for Halloween Pasta Salad

Step 1: Cook the Pasta
Bring a large pot of salted water to a boil over high heat. Add the farfalle pasta and cook as per package instructions (usually 8-10 minutes) until al dente. Once cooked, drain the pasta and rinse it under cold water until cool, preventing it from clumping together and preparing the base for your spooky Halloween Pasta Salad.

Step 2: Color the Pasta
Transfer the cooled pasta into a large mixing bowl and add water along with black food coloring. Stir the mixture thoroughly, ensuring the pasta is evenly coated. Let it soak for about 5 minutes, keeping an eye on the color intensity. The longer you soak, the darker it will become, so adjust according to your spooky preference!

Step 3: Rinse the Pasta
After soaking, drain the colored pasta and rinse it again under cold water until the water runs clear. This step is crucial for removing any excess black coloring and ensuring your Halloween Pasta Salad isn’t overly tinted. Pour the pasta back into the large mixing bowl to continue building those creepy flavors.

Step 4: Prepare the Vegetables
While the pasta is cooling, prepare your vibrant vegetables. Cut the orange bell pepper into star shapes using a small cookie cutter for that festive touch. If desired, finely chop the red onion. The contrast of these fresh, colorful ingredients will add vibrancy to your Halloween Pasta Salad, making it visually appealing and delicious!

Step 5: Combine Ingredients
In the same large mixing bowl with the black pasta, add the star-shaped bell pepper, cooked edamame, mozzarella balls, chopped red onion, and black olives. Drizzle in the Italian dressing, then toss everything together gently but thoroughly. You want every ingredient to be coated in flavor and perfectly combined for this delightful Halloween treat.

Step 6: Create the ‘Eyeballs’
For a fun finishing touch, arrange the mozzarella balls on top of the salad and place a slice of black olive on each one to resemble spooky 'eyeballs.' This playful garnish will make your Halloween Pasta Salad a hit, perfect for adding that extra spooky flair to your festive table display.

Step 7: Serve the Salad
Transfer your completed Halloween Pasta Salad to a large serving bowl or individual plates. It's best enjoyed immediately while fresh and vibrant. This quick, delightful dish will not only satisfy hunger but also become a talking point at your Halloween gathering, making it a memorable addition to the celebrations!

Halloween Pasta Salad Variations

Feel free to let your creativity shine by customizing this recipe for Halloween Pasta Salad with these fun twists!

  • Shape Swap: Replace farfalle with rotini or penne for a different twist and a fun texture.
  • Protein Boost: Add diced cooked chicken or turkey to make it a heartier dish that still screams Halloween fun.
  • Veggie Variation: Toss in spooky-shaped cucumbers or carrots for extra crunch and colorful flair.
  • Dressing Switch: Opt for a homemade vinaigrette instead of Italian dressing for a unique flavor profile that can delight the palate.
  • Cheese Change: Swap mozzarella balls for feta or cubed cheese, giving your salad a tangy taste that pairs wonderfully with the sweet peppers.
  • Olive Alternatives: Use sliced green olives instead of black for a milder flavor contrast; they also bring a lovely pop of color!
  • Spicy Option: Add some diced jalapeños or a dash of hot sauce to your dressing if you want to turn up the heat on your spooky creation.
  • Vegetable Medley: Incorporate roasted pumpkin or squash cubes for a fall-inspired touch that honors the season, creating a perfect finishing touch.

For some additional inspiration, you might want to explore delightful offerings like Skillet Pasta Sun or try something different with Cauliflower Pasta Ready. Happy cooking, and enjoy creating your unique Halloween Pasta Salad!

How to Store and Freeze Halloween Pasta Salad

Fridge: Store any leftover Halloween Pasta Salad in an airtight container in the refrigerator for up to 2 days. This keeps the flavors fresh and vibrant while preventing spoilage.

Make-Ahead: You can prepare the salad a few hours in advance. However, it's best to add the mozzarella 'eyeballs' right before serving to maintain their appearance and texture.

Freezer: Freezing is not recommended for this dish, as the pasta and vegetables may become mushy when thawed. It's best enjoyed fresh for optimal taste and visual appeal.

Reheating: If you have cold leftovers, you can allow the salad to sit at room temperature for about 20 minutes before serving. This helps restore some of the textures while enhancing flavors.

Make Ahead Options

Get ready for stress-free hosting with this Halloween Pasta Salad that you can easily prepare in advance! You can cook the farfalle pasta and soak it in black food coloring up to 24 hours before your gathering. Just remember to rinse and cool the pasta thoroughly to keep it from clumping. Additionally, chop the bell peppers and onions ahead of time and store them in airtight containers in the fridge for up to 3 days. When it’s time to serve, simply combine the prepped ingredients with the edamame, mozzarella, olives, and dressing, and toss everything together. This way, you will have more time to enjoy the festivities while still serving up a frightfully delicious dish that everyone will love!

What to Serve with Creepy Halloween Pasta Salad

Amid the spooky fun of your Halloween festivities, consider these delightful pairings that enhance your festive experience.

  • Spooky Punch: A refreshing, colorful drink that ties in Halloween themes. Serve it alongside the pasta salad for a thrilling and festive beverage.

  • Ghost-Shaped Toadstools: Easy-to-make appetizers that not only look cute but also provide a savory contrast to the pasta's sweetness. Your guests will be enchanted by the presentation!

  • Monster Meatballs: Juicy meatballs can add a protein-packed option to your spread, balancing the lightness of the salad and creating a cozy comfort food vibe.

  • Crispy Baked Sweet Potato Fries: Their sweet and crunchy texture complements the creamy flavors of the Halloween Pasta Salad brilliantly. Plus, they're a healthier side option everyone will love!

  • Fruit Skeleton Platter: Fun shapes and vibrant colors from seasonal fruits create a bright contrast, adding freshness to the meal. It's a playful and healthy way to round out the celebration.

  • Chocolate Spider Truffles: For a sweet finish, these spooky treats are the perfect way to indulge after your delicious meal, offering a whimsical and deliciously rich end to the gathering.

Expert Tips for Halloween Pasta Salad

  • Perfect Pasta Cooking: Ensure your farfalle pasta is cooked al dente; overcooking can lead to mushiness and ruin this playful dish's texture.
  • Rinse Thoroughly: Don’t skip rinsing the colored pasta, as this helps prevent clumping and removes excess food coloring for a more appealing appearance.
  • Stir While Soaking: Keep an eye on the pasta during the soaking process and stir frequently to achieve an even, dark hue without patches.
  • Customize with Ease: Feel free to get creative! Incorporate other colorful ingredients or substitute the mozzarella with feta for a distinct flavor twist in your Halloween Pasta Salad.
  • Serve Fresh: For the best presentation and taste, serve this festive dish immediately after preparation; it really shines when it's fresh and vibrant!

Halloween Pasta Salad Recipe FAQs

What type of pasta works best for the Halloween Pasta Salad?
Absolutely! Farfalle pasta is perfect for its whimsical bowtie shape, but you can also use rotini or penne for varied textures and presentations. Each shape brings its own unique charm to your spooky creation!

How should I store leftover Halloween Pasta Salad?
To keep your Halloween Pasta Salad fresh, store it in an airtight container in the refrigerator for up to 2 days. This ensures the flavors and textures remain vibrant, ready to enjoy any leftover spookiness!

Can I freeze the Halloween Pasta Salad?
Freezing this salad isn't recommended, as the pasta and veggies may become mushy once thawed. It's best to relish this dish fresh, ensuring you enjoy its delightful texture and appearance right after preparing!

How can I tell if my ingredients are fresh and ripe?
When selecting your veggies, look for vibrant colors and a firm texture. For example, your orange bell peppers should be free of dark spots, and the mozzarella balls should be smooth and not sticky. Fresh ingredients greatly enhance the taste of your Halloween Pasta Salad!

What can I do if the pasta is clumping together?
If you notice clumping, it may be due to insufficient rinsing after cooking. Always rinse your pasta thoroughly under cold water to cool it and separate any sticky strands. If that happens after serving, gently toss the salad again with a drizzle of dressing to help separate the ingredients.

Are there any dietary considerations for this salad?
Yes! If you're serving it to kids or guests with allergies, keep in mind that the salad contains gluten from pasta and dairy from mozzarella. For gluten-free options, consider swapping the pasta for a gluten-free variety and using dairy-free cheese alternatives for the 'eyeballs.'

Halloween Pasta Salad

Spooky Halloween Pasta Salad That Kids Will Adore

This Halloween Pasta Salad is a colorful and fun addition to any festive spread, taking only 20 minutes to prepare.
Print Recipe Pin Recipe
Prep Time 20 minutes mins
Cook Time 10 minutes mins
Total Time 30 minutes mins
Servings: 4 servings
Course: Salads
Cuisine: American
Calories: 220
Ingredients Equipment Method Nutrition Notes

Ingredients
  

For the Pasta
  • 8 oz Farfalle Pasta The whimsical bowtie shape adds a playful feel.
  • 1 tbsp Black Food Coloring Can substitute with dark whole wheat pasta.
For the Vegetables
  • 1 Orange Bell Pepper Cut into star shapes.
  • 1/4 cup Red Onion Finely chopped, optional.
For the Protein and Extras
  • 1 cup Mozzarella Balls Substitute with feta or cubed cheese.
  • 1 cup Cooked Edamame Shelled for ease.
  • 1/2 cup Black Olives Sliced for garnish.
For the Dressing
  • 1/2 cup Italian Dressing Use homemade vinaigrette for a personal touch.

Equipment

  • Large pot
  • Mixing Bowl
  • Cookie cutter

Method
 

Step-by-Step Instructions
  1. Cook the pasta according to package instructions until al dente, then rinse under cold water.
  2. Color the pasta by mixing it with water and black food coloring, soaking for about 5 minutes.
  3. Rinse the colored pasta again under cold water until the water runs clear.
  4. Prepare the vegetables by cutting the bell pepper into star shapes and chopping the onion.
  5. Combine the colored pasta, bell pepper, edamame, mozzarella, onion, and olives in a bowl. Drizzle with dressing and toss gently.
  6. Garnish with mozzarella balls topped with black olive slices to resemble 'eyeballs'.
  7. Serve immediately in a large bowl or on individual plates.

Nutrition

Serving: 1servingCalories: 220kcalCarbohydrates: 30gProtein: 8gFat: 9gSaturated Fat: 3gPolyunsaturated Fat: 2gMonounsaturated Fat: 3gCholesterol: 15mgSodium: 350mgPotassium: 300mgFiber: 4gSugar: 2gVitamin A: 15IUVitamin C: 30mgCalcium: 10mgIron: 8mg

Notes

This pasta salad is best enjoyed fresh, but leftovers can be stored in the fridge for up to 2 days.

Tried this recipe?

Let us know how it was!

Radish Salad: Crunchy, Creamy & Refreshingly Delicious!

September 26, 2025 by Grace Snow Leave a Comment

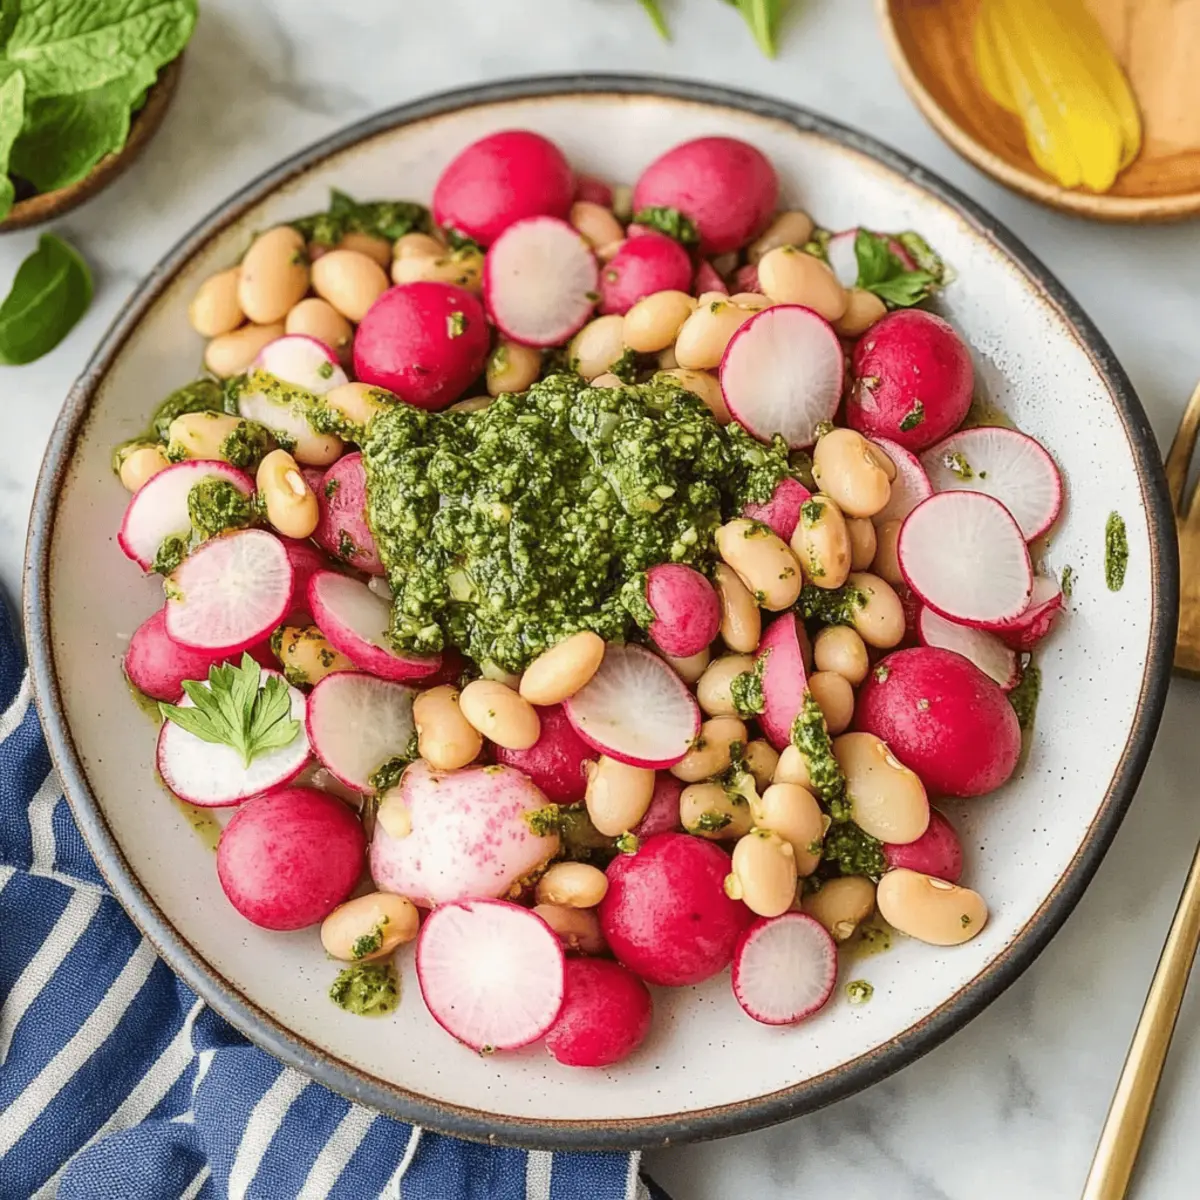
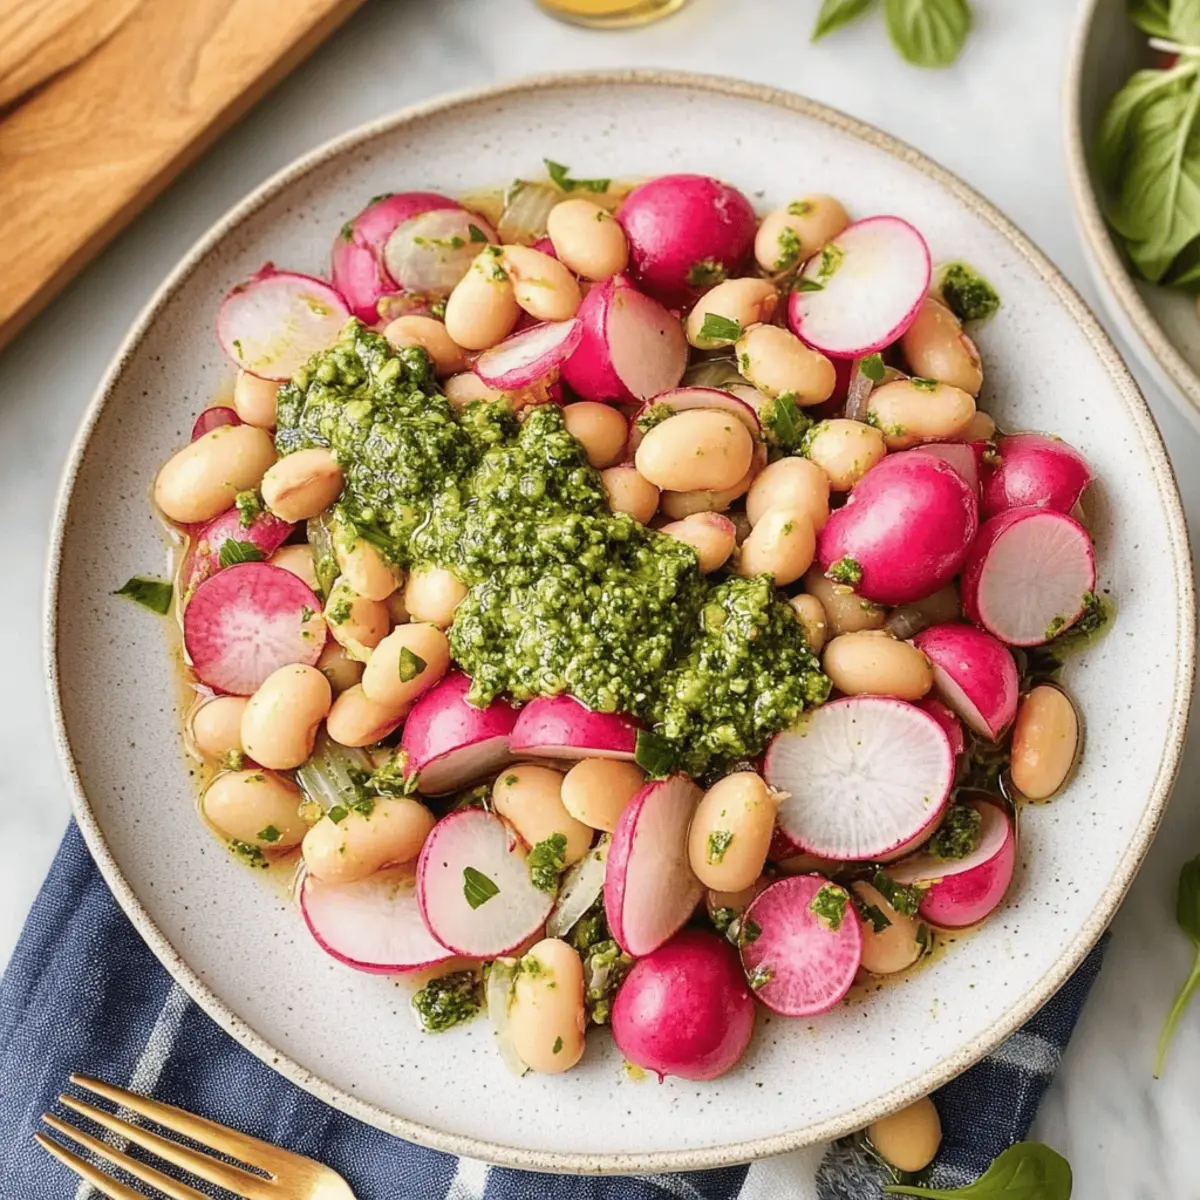
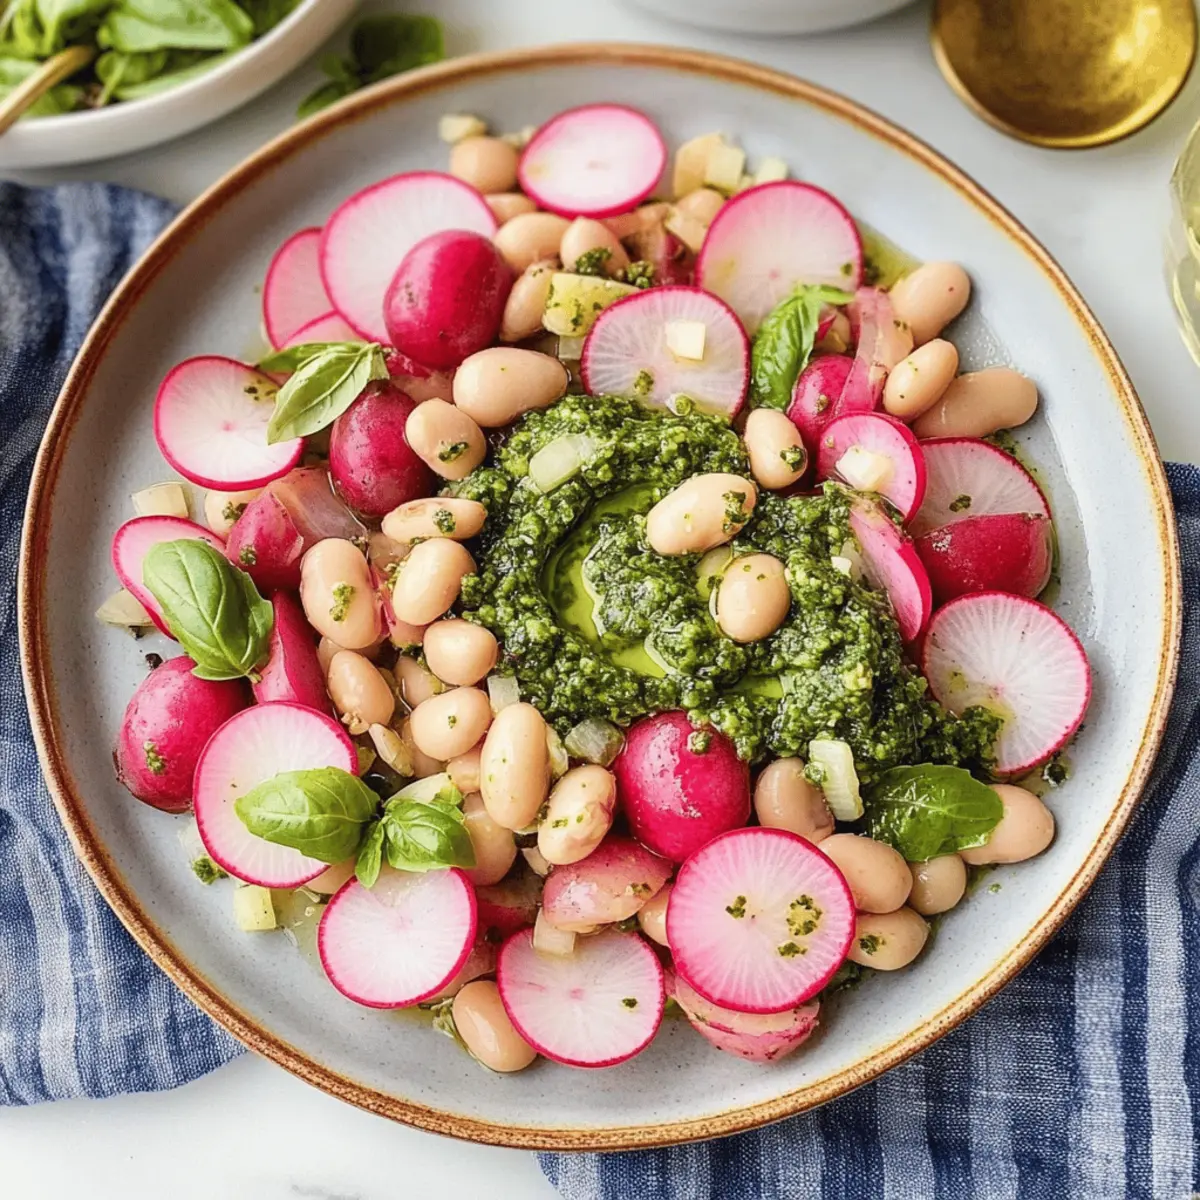
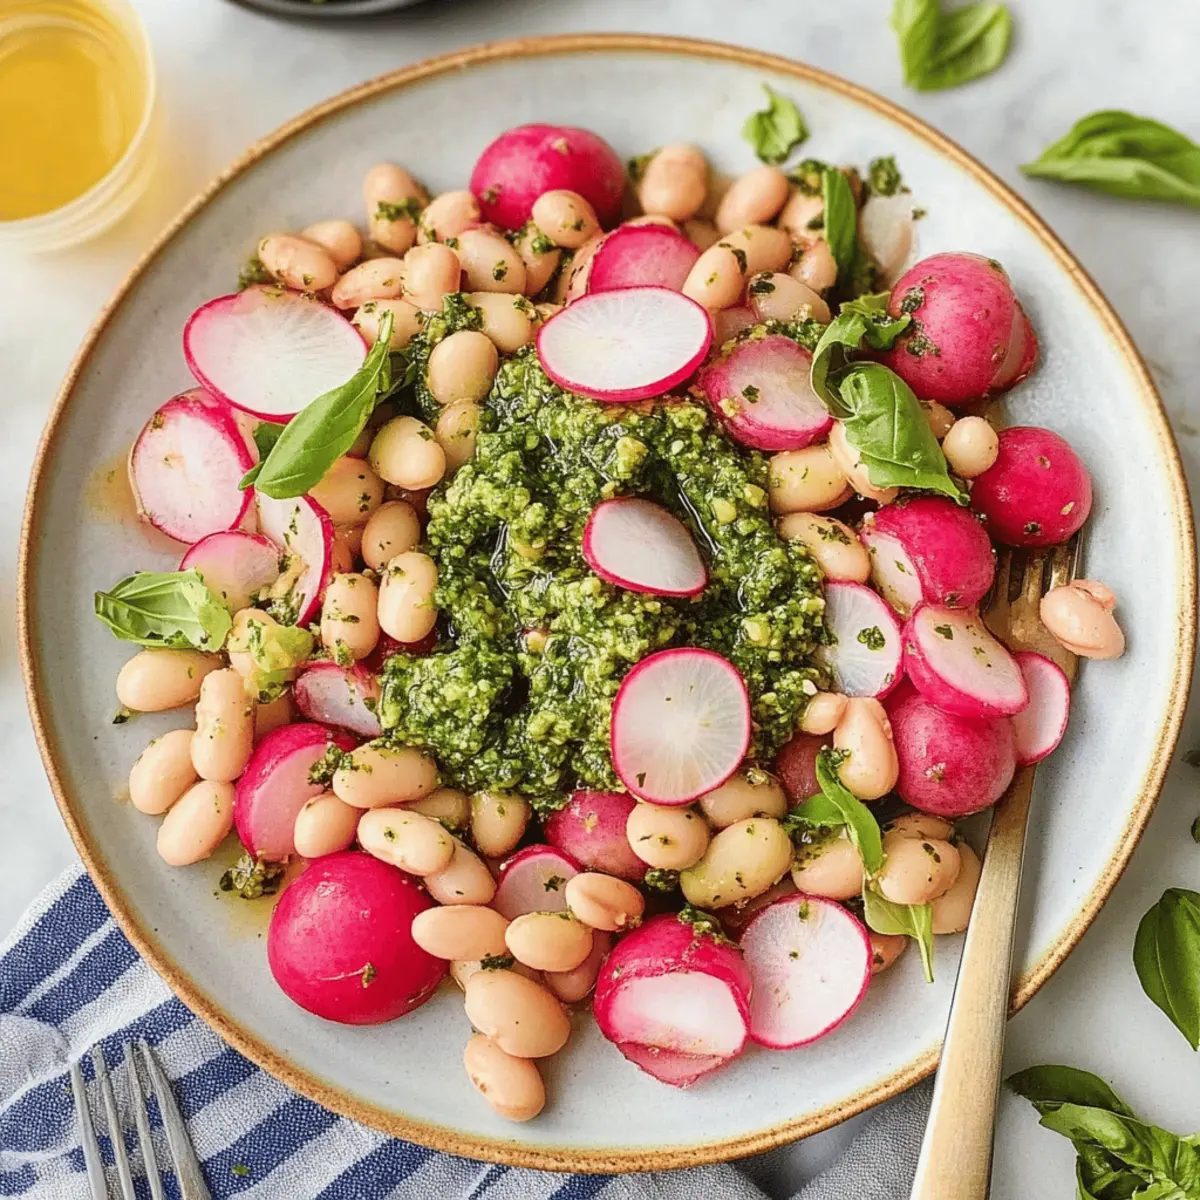
As I rummaged through my fridge, a colorful bounty of radishes caught my eye, sparking a delightful inspiration for a fresh and zesty Radish Salad. This recipe shines by harmonizing the contrasting textures of roasted and raw radishes, giving each bite a delightful crunch and a burst of flavor. Not only is this dish a feast for the eyes, but it's also a healthy option perfect for meal prepping or serving at summer picnics. With a creamy base of white beans and an aromatic radish green pesto, this salad offers a taste of seasonal goodness that will have your guests clamoring for more. Curious about how to elevate your salad game while keeping it simple and delicious? Let’s dive into this vibrant twist on a classic!

Why is Radish Salad a Must-Try?

Flavorful and fresh, this Radish Salad is a celebration of textures that will impress anyone at your table. Nutritious ingredients like navy beans pack protein while radishes deliver crispness and zest. Versatile enough for meal prepping, it can be tossed together in minutes, making it a perfect solution for busy days. Vibrant and visually appealing, it pairs beautifully with homemade focaccia or a refreshing Jello Salad Cottage. Whether you're looking for a light lunch or an impressive side dish, this salad will leave you craving more!

Radish Salad Ingredients

For the Salad

  • Cooked Navy Beans – Provide creaminess and protein; feel free to swap with chickpeas or cannellini beans for different flavors.
  • Roasted Radishes – Roasting brings out sweetness and softens their bite; consider using turnips for a milder alternative.
  • Raw Red Radishes – Offer a crunchy texture and peppery kick; daikon radishes can be used for a unique twist.
  • Pine Nuts – Deliver a nutty crunch; you can substitute with sunflower seeds or sliced almonds for a different taste.
  • Capers – Add a zing with a salty, savory note; use olives if you prefer a heartier briny flavor.
  • Fresh Mint Leaves – Bring a refreshing herbal lift; basil or parsley can be substituted for a different herbaceous touch.

For the Dressing

  • Lemon Vinaigrette – This adds bright tang and enhances overall flavor; a store-bought option works just as well!
  • Radish Green Pesto – A unique layer of flavor that elevates the salad; if needed, any fresh pesto can serve as a substitute.

For Garnishing

  • Pecorino or Parmesan – Adds a savory richness; nutritional yeast can be a wonderful vegan alternative.
  • Sea Salt and Black Pepper – Essential for that final seasoning touch; always adjust according to your taste.

Each ingredient plays a vital role in making this Radish Salad an unforgettable dish!

Step‑by‑Step Instructions for Radish Salad

Step 1: Prepare the Beans
In a mixing bowl, combine the cooked navy beans with 2 tablespoons of lemon vinaigrette. Toss gently until the beans are evenly coated. This will allow the brightness of the vinaigrette to infuse into the beans. Let them marinate while you prepare the radishes, as this will add extra flavor to your Radish Salad.

Step 2: Roast the Radishes
Preheat your oven to 400°F (200°C). Trim and slice half of the radishes into quarters, then place them on a baking sheet lined with parchment paper. Drizzle with olive oil, salt, and pepper, tossing to coat evenly. Roast in the oven for 15-20 minutes until tender and slightly caramelized, stirring halfway through for even cooking. The sweetness of the roasted radishes will enhance your salad.

Step 3: Assemble the Salad Base
While the radishes are roasting, thinly slice the remaining raw radishes to maintain their crunch. On a serving platter, layer the roasted and raw radishes, creating a colorful visual display. Then, add the marinated navy beans on top, interspersing them among the radishes to create a delightful Radish Salad that showcases both textures.

Step 4: Add Flavorful Accents
Sprinkle the salad with the pine nuts and capers, distributing them evenly for that extra layer of flavor. The nutty crunch of the pine nuts and the briny burst from the capers add complexity to your dish. As you build your salad, make sure the ingredients are well mixed so that each bite is packed with surprises.

Step 5: Finish with Pesto and Garnish
Dollop generous spoonfuls of radish green pesto over the top of the assembled salad. This unique element elevates your Radish Salad to a new level of deliciousness. Lastly, scatter fresh mint leaves and optional cheese on top, adding a vibrant pop of color and freshness to the dish, ensuring it’s as visually appealing as it is tasty.

Step 6: Season to Taste
Before serving, give your salad a final drizzle of the remaining lemon vinaigrette. Taste and adjust the seasoning with additional sea salt, black pepper, or lemon juice as needed. This final touch will brighten all the flavors in your Radish Salad, making it a perfect companion for gatherings or a solo, nourishing meal.

What to Serve with Radish Salad with Roasted and Raw Radishes?

Brighten your dining table by complementing your vibrant Radish Salad with these delightful pairings that enhance its fresh flavors.

  • Creamy Avocado Toast: Creamy avocado adds a rich contrast to the peppery crunch of the radishes, creating a perfect balance of textures.

  • Quinoa Pilaf: A warm, fluffy quinoa pilaf adds heartiness to your meal while its nutty flavor pairs harmoniously with the salad's zesty notes.

  • Grilled Vegetable Skewers: Grilled veggies introduce a smoky depth to the menu and bring out the sweetness in the roasted radishes, creating mouthwatering harmony.

  • Homemade Hummus: Dip fresh pita in creamy hummus to add a satisfying element, which wonderfully complements the crispness of your Radish Salad.

  • Crisp White Wine: A chilled glass of Sauvignon Blanc adds a refreshing, zesty kick while marrying beautifully with the salad's vibrant flavors.

  • Pistachio Cake: For dessert, a light pistachio cake offers a nutty sweetness that rounds off the meal, satisfying your sweet tooth without overwhelming the palate.

Each pairing brings out the best in your Radish Salad, making for a memorable dining experience!

Radish Salad Variations & Substitutions

Explore delightful twists on radish salad that will spark your culinary creativity and cater to your family's preferences.

  • Grain-Boosted: Add quinoa or farro for a hearty element that complements the salad beautifully and enhances its texture.

  • Herb Swap: Use fresh dill or cilantro instead of mint to give the salad a new flavor profile that’ll excite your taste buds.

  • Creamy Twist: Substitute white beans with avocado for a creamy, rich addition that brings a buttery texture to the dish.

  • Nutty Crunch: Swap pine nuts for sunflower seeds or sliced almonds to change up the flavor and add a different kind of crunch.

  • Spice It Up: Include sliced jalapeños or crushed red pepper flakes for those who enjoy a little heat in their salads; it adds an unexpected kick!

  • Flavor-Focused: Incorporate roasted turnips instead of radishes for a milder, sweeter flavor that works beautifully with the pesto.

  • Cheesy Option: If you’re feeling indulgent, try crumbled feta or goat cheese for a tangy contrast that enhances the salad's flavor palette.

  • Dressing Variation: Feel free to use a balsamic vinaigrette or any fresh pesto instead of the radish green pesto for a twist that'll keep your palate intrigued.

No matter how you choose to customize, these variations will ensure your radish salad remains a delightful centerpiece, perfect for an impressive meal or a fun picnic! If you love vibrant salads, consider pairing this with a light Balsamic Steak Salad or Chicken Salad Apples. Enjoy your culinary adventure!

Storage Tips for Radish Salad

Fridge: Store the Radish Salad in an airtight container for up to 3 days to maintain freshness. If making ahead, keep the dressing separate until ready to serve.

Freezer: Avoid freezing the Radish Salad, as the textures of the radishes and beans can degrade upon thawing, leading to a mushy consistency.

Reheating: If you've prepared the salad with warm ingredients, reheat gently on the stovetop or in the microwave until just warmed—do not overheat, as this may affect the salad's freshness.

Make-Ahead: This salad can be assembled a day in advance. Just remember to add fresh mint right before serving for that vibrant burst of flavor and color.

Expert Tips for Radish Salad

  • Perfectly Roasted Radishes: Monitor closely while roasting; they should be tender yet retain some firmness to create contrast in your Radish Salad.

  • Make-Ahead Friendly: This salad can easily be prepared a day in advance, allowing the flavors to meld without wilting any greens.

  • Diverse Textures: Feel free to add grains like quinoa or farro for extra heartiness and different textures to your Radish Salad.

  • Freshness is Key: Always add fresh herbs like mint just before serving to keep your salad vibrant and bursting with flavor.

  • Taste Test Seasoning: Adjust the dressing and seasoning at the end; a splash of lemon juice can brighten the flavors immensely in your Radish Salad.

Make Ahead Options

These flavorful Radish Salad components are perfect for meal prep, allowing you to save time during busy weeknights! You can roast the radishes and cook the navy beans up to 24 hours in advance; just let them cool before refrigerating to maintain their texture. The lemon vinaigrette can also be prepped and stored separately for up to 3 days. To keep the salad fresh, assemble it just before serving by layering the roasted and raw radishes with the beans. Drizzle with the vinaigrette and top with radish green pesto right before enjoying—this ensures that every bite remains crisp and vibrant, just as delicious as day one!

Radish Salad Recipe FAQs

How do I select the best radishes for my salad?
When choosing radishes, look for ones that are firm and smooth, without any dark spots or blemishes. The more vibrant the color, the better; fresh radishes should have a crisp, juicy feel. If you're using raw radishes, smaller varieties tend to be sweeter and less bitter, while larger ones often have a stronger peppery flavor.

How long can I store my Radish Salad in the fridge?
You can store your Radish Salad in an airtight container in the fridge for up to 3 days. It's best to keep the dressing separate until you're ready to serve. This will help maintain the freshness of the radishes and avoid any sogginess.

Can I freeze my Radish Salad for later use?
I recommend not freezing the Radish Salad. The textures of the radishes and beans can become mushy once thawed, leading to an unappetizing consistency. Instead, enjoy it fresh or prepare the components ahead of time to assemble when needed.

What do I do if my roasted radishes are overcooked?
If your roasted radishes are overcooked and too mushy, you can blend them into a creamy dip with a touch of olive oil and seasonings. Otherwise, for future batches, keep an eye on them as they're roasting; they should take about 15-20 minutes at 400°F (200°C) until they're tender yet still hold their shape.

Are there any dietary considerations I should keep in mind?
Absolutely! If you're making this Radish Salad for others, consider any allergies guests may have, particularly to nuts or beans. You can substitute pine nuts with sunflower seeds or omit them for a nut-free option. Additionally, check if someone is vegan; simple swaps can make this dish suitable for many dietary preferences.

Is this salad suitable for my pets?
While radishes are safe for pets in small amounts, it’s important to avoid the dressing components like garlic or certain herbs which can be harmful to dogs and cats. Just keep the salad for yourself and share a tiny piece of raw radish with your furry friends if you’d like!

Radish Salad

Radish Salad: Crunchy, Creamy & Refreshingly Delicious!

This Radish Salad harmonizes roasted and raw radishes for a vibrant, nutritious dish perfect for meal prep or summer picnics.
Print Recipe Pin Recipe
Prep Time 20 minutes mins
Cook Time 20 minutes mins
Total Time 40 minutes mins
Servings: 4 servings
Course: Salads
Cuisine: American
Calories: 250
Ingredients Equipment Method Nutrition Notes

Ingredients
  

For the Salad
  • 2 cups cooked navy beans can swap with chickpeas or cannellini beans
  • 1 bunch roasted radishes roasting brings out their sweetness
  • 1 bunch raw red radishes can use daikon for a unique twist
  • 1/4 cup pine nuts can substitute with sunflower seeds or sliced almonds
  • 2 tablespoons capers use olives for a heartier flavor
  • 1/4 cup fresh mint leaves basil or parsley can be substituted
For the Dressing
  • 1/4 cup lemon vinaigrette a store-bought option works too
  • 1/4 cup radish green pesto any fresh pesto can serve as a substitute
For Garnishing
  • 1/4 cup Pecorino or Parmesan nutritional yeast can be a vegan alternative
  • to taste sea salt
  • to taste black pepper

Equipment

  • Mixing Bowl
  • Baking Sheet
  • Oven

Method
 

Step-by-Step Instructions
  1. In a mixing bowl, combine the cooked navy beans with 2 tablespoons of lemon vinaigrette. Toss gently and let marinate.
  2. Preheat your oven to 400°F. Trim and slice half of the radishes, place on a baking sheet, drizzle with olive oil, salt, and pepper. Roast for 15-20 minutes.
  3. Thinly slice the remaining raw radishes and layer them with the roasted radishes and marinated navy beans on a serving platter.
  4. Sprinkle the salad with pine nuts and capers evenly for added flavor.
  5. Dollop radish green pesto over the salad and scatter fresh mint leaves and cheese on top.
  6. Before serving, drizzle with the rest of the lemon vinaigrette and adjust seasoning with sea salt, black pepper, or lemon juice.

Nutrition

Serving: 1servingCalories: 250kcalCarbohydrates: 35gProtein: 10gFat: 10gSaturated Fat: 2gPolyunsaturated Fat: 3gMonounsaturated Fat: 5gCholesterol: 5mgSodium: 300mgPotassium: 500mgFiber: 8gSugar: 2gVitamin A: 500IUVitamin C: 30mgCalcium: 100mgIron: 2mg

Notes

This Radish Salad is visually appealing and packed with flavor. Perfect for meal prepping or serving at gatherings.

Tried this recipe?

Let us know how it was!

Green Bean Potato Salad That's Perfectly Crisp and Refreshing

September 21, 2025 by Grace Snow Leave a Comment

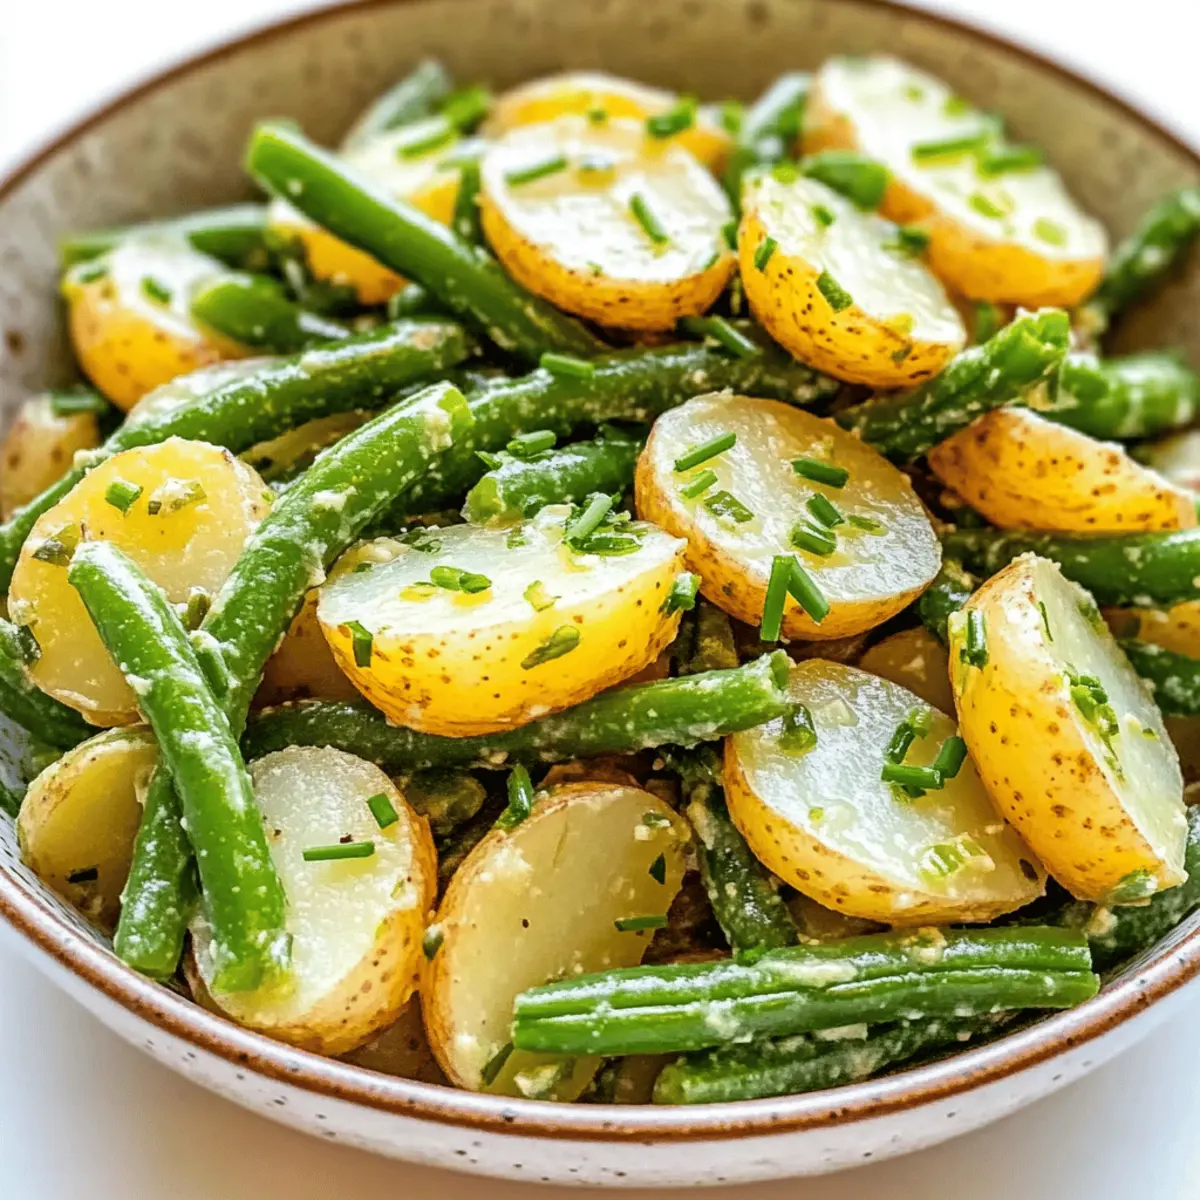
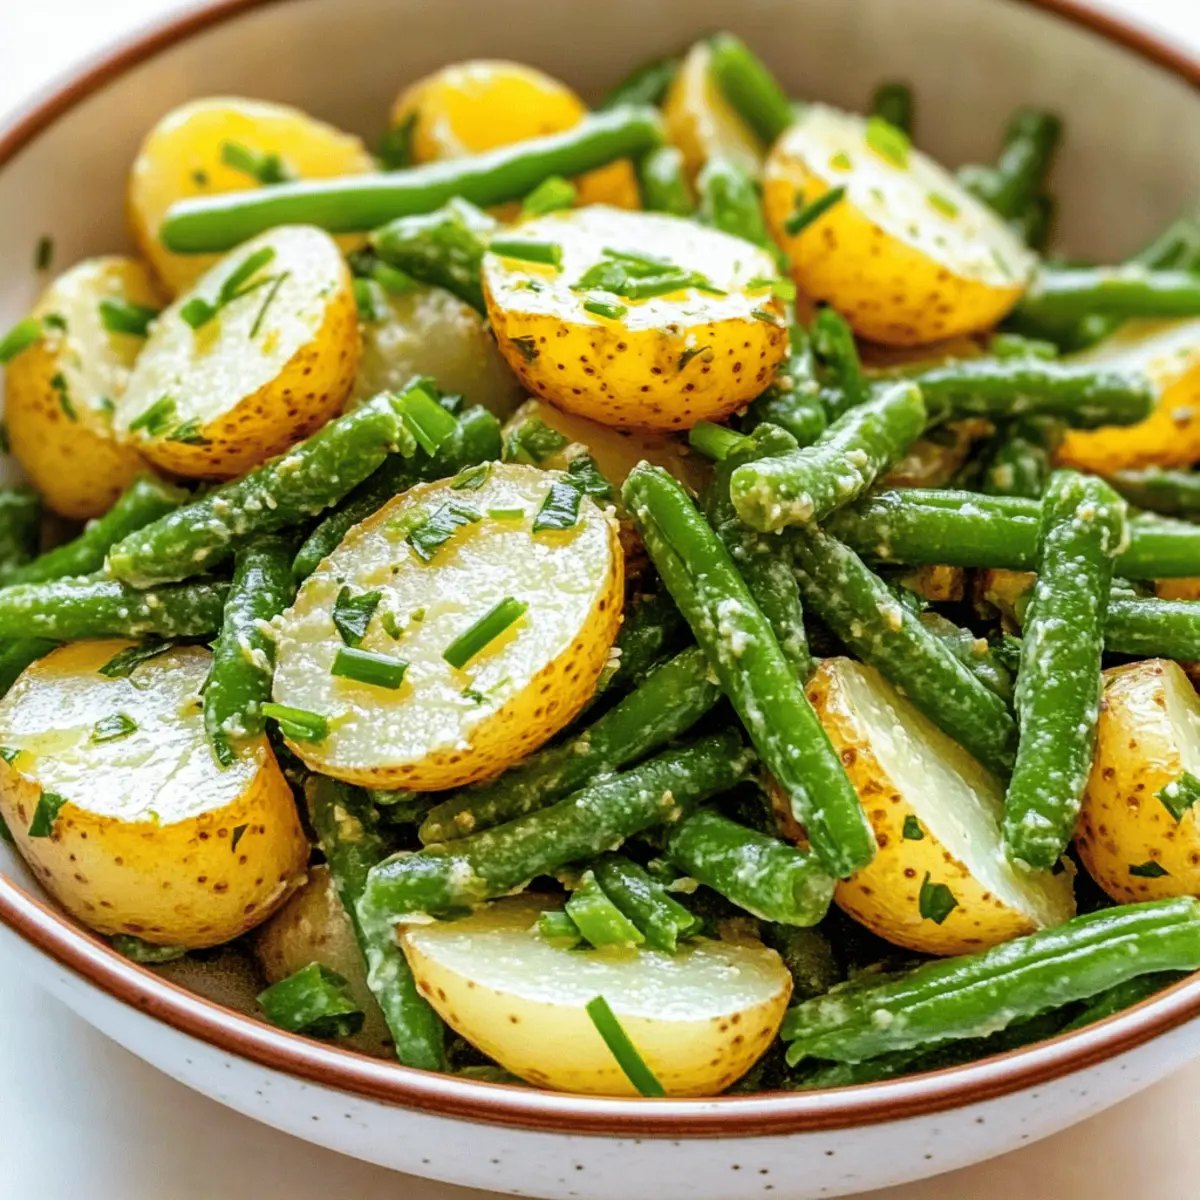
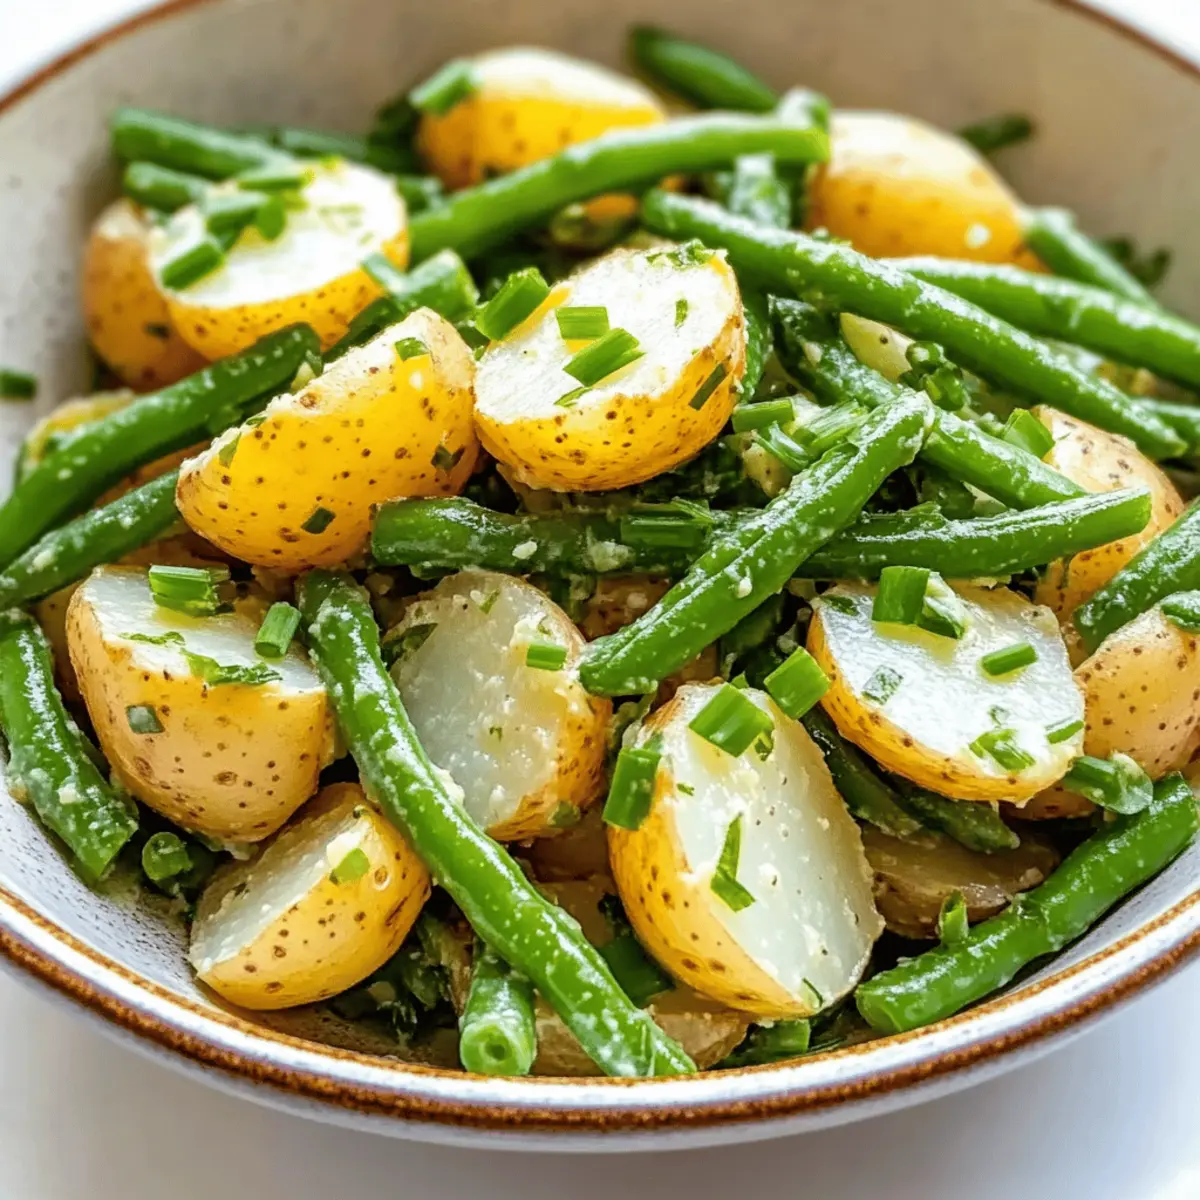
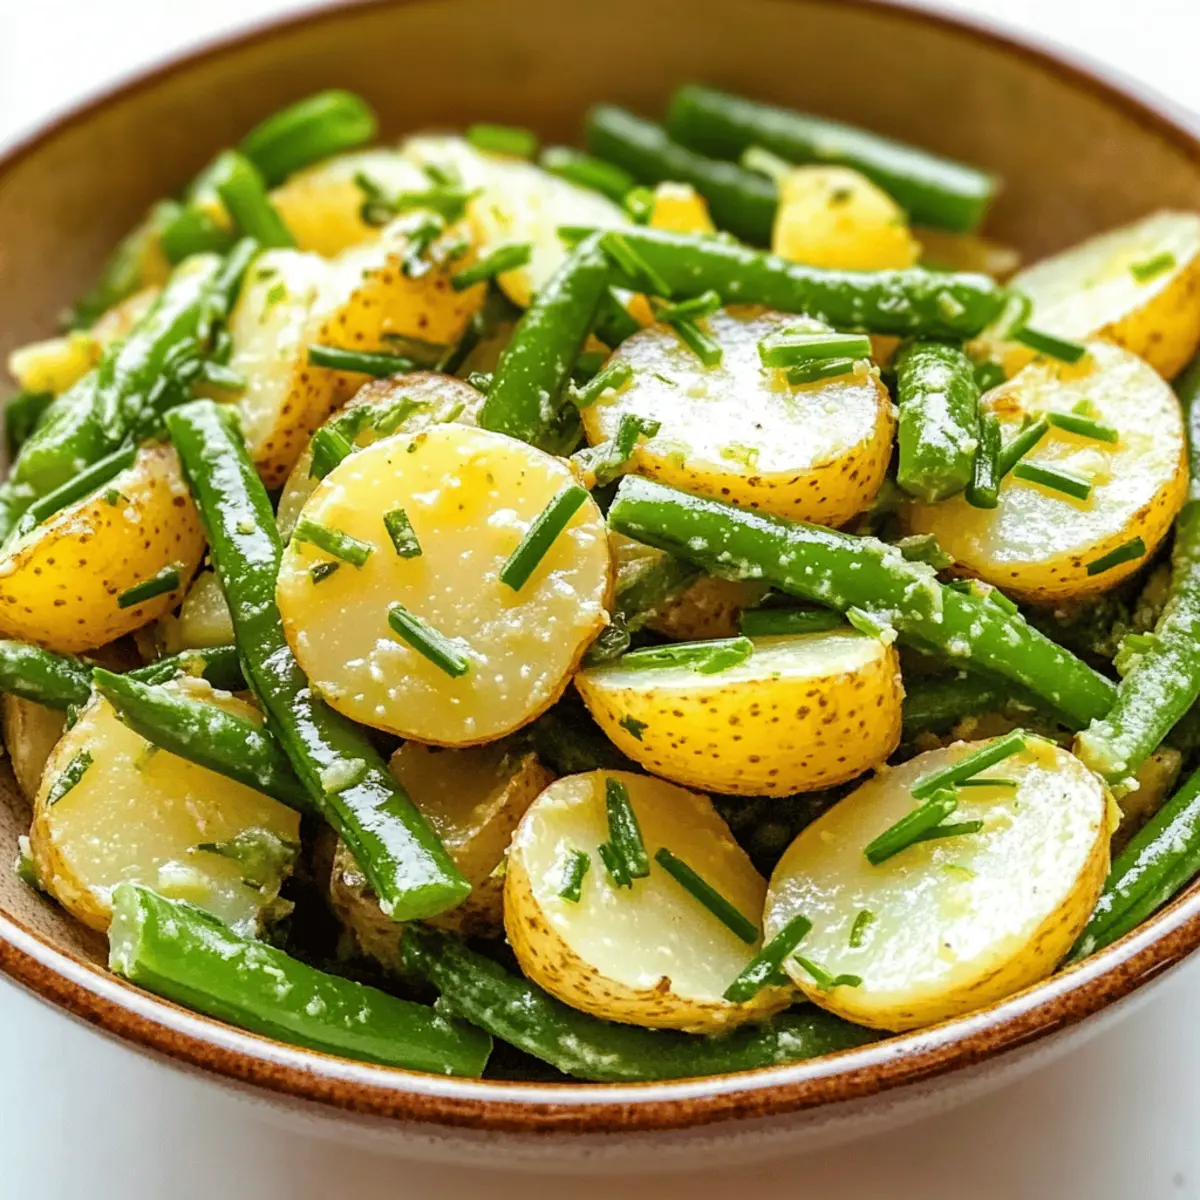
Did you know that a simple summer side dish can elevate your meals? This Quick Green Bean Potato Salad takes the classic potato salad and adds a refreshing twist that’s perfect for warm weather gatherings. With tender potatoes and crisp green beans tossed in a light vinaigrette, this salad is not just a great addition to your summer BBQs but also an ideal make-ahead option that tastes even better after chilling in the fridge. It's the perfect balance of flavors and textures that will impress your guests while keeping you off the fast food track. Whether you’re enjoying it at a picnic or serving it alongside grilled meats, this adaptable recipe caters to various tastes and can handle last-minute ingredient swaps. What unique twist will you add to make it your own?

Why is This Salad a Must-Try?

Freshness is the star of this dish, bringing together crisp green beans and tender potatoes for a delightful bite. Light and Tangy dressing enhances the flavors without overwhelming the ingredients, making it a perfect summer companion. Make-Ahead Magic means this salad improves with time, allowing the flavors to meld beautifully in your fridge. Versatile at its core, swap in your favorite veggies or cheeses for a personal touch. Whether enjoyed alone or alongside grilled meats, this salad is sure to impress your guests and keep you away from fast food. Try it with our Sweet Potato Casserole for a complete meal!

Green Bean Potato Salad Ingredients

• Discover how simple it is to create a delightful Green Bean Potato Salad!

For the Salad

  • Small White Potatoes – Offer a creamy texture; New Potatoes or Yukon Golds work best as they hold their shape.
  • Fresh Green Beans – Add a delightful crunch and vibrant color; blanching keeps them bright and crispy.

For the Dressing

  • White Wine Vinegar – Provides a tangy twist; feel free to substitute with apple cider vinegar if you prefer.
  • Dijon Mustard – Infuses the dressing with a hint of spice and depth.
  • Garlic – Delivers aromatic flavor; fresh is ideal, but garlic powder can serve in a pinch.
  • Olive Oil – Richens the dressing and helps emulsify ingredients; extra virgin provides the best taste.
  • Salt & Pepper – Essential for seasoning; adjust to your preference for a perfect balance.

For Garnishing

  • Chives – Add a mild onion flavor and make for a lovely garnish; green onions can be used as a substitute.

Step‑by‑Step Instructions for Green Bean Potato Salad

Step 1: Prepare the Ice Bath
Fill a medium bowl with ice and water to create an ice bath, which will help maintain the vibrant color and crisp texture of the green beans. This preparation is essential, as the mix will be used to cool the beans immediately after blanching.

Step 2: Blanch the Green Beans
Bring a large pot of salted water to a rolling boil over high heat. Once boiling, add the fresh green beans and let them cook for 3-4 minutes. You want them to be bright green and slightly tender, but still crisp. After blanching, quickly transfer the beans to the prepared ice bath to stop the cooking process and lock in that freshness.

Step 3: Drain and Cool the Green Beans
After a few minutes in the ice bath, remove the green beans and drain them well in a colander. Let them sit to ensure all excess water is gone. This step is crucial for the overall texture of your Green Bean Potato Salad, as any extra moisture can make it soggy.

Step 4: Cook the Potatoes
Using the same boiling water from earlier, add the small white potatoes and cook them for 15-20 minutes, or until they are fork-tender. Start checking them for doneness around the 12-minute mark to avoid overcooking. They should hold their shape yet be soft enough to pierce easily with a fork.

Step 5: Cool and Cut the Potatoes
After draining the potatoes, allow them to cool for a few minutes until they are manageable to handle. Once slightly cooled, cut them in half lengthwise to help them absorb the dressing better. This will enhance the flavors in your Green Bean Potato Salad while keeping each bite delightful.

Step 6: Whisk the Dressing
In a mixing bowl, combine the white wine vinegar, Dijon mustard, garlic, and salt. Whisk these ingredients together until well combined, then slowly drizzle in the olive oil while continuing to whisk until the dressing is emulsified. This light vinaigrette will bring your Green Bean Potato Salad to life with its zesty flavor.

Step 7: Combine Ingredients
In a large mixing bowl, gently combine the halved potatoes and blanched green beans. Pour the homemade dressing over the vegetables and toss everything together gently but thoroughly. Ensure that each piece is coated with the vinaigrette, as this will elevate the overall flavor of the Green Bean Potato Salad.

Step 8: Garnish and Serve
Finish your Green Bean Potato Salad by sprinkling chopped chives and a dash of black pepper on top for a pop of color and added flavor. You can serve it immediately, or for optimal taste, refrigerate it for at least 30 minutes to allow the flavors to meld beautifully together before serving.

Green Bean Potato Salad Variations

Get ready to customize this beloved summer salad with exciting twists that will dazzle your taste buds!

  • Asparagus Swap: Replace green beans with blanched asparagus spears for a unique crunch that’s equally vibrant.
  • Cherry Tomato Burst: Toss in halved cherry tomatoes for a juicy sweetness and a pop of color.
  • Feta Cheese Addition: Crumble feta cheese over the salad for a creamy, tangy flavor that complements the other ingredients beautifully.
  • Heat It Up: Sprinkle in some red pepper flakes for a hint of heat that contrasts well with the salad's freshness.
  • Herb Infusion: Incorporate fresh herbs like parsley or dill for an aromatic touch that elevates the dish.
  • Nutty Crunch: Add toasted almonds or walnuts for a delightful crunch that brings texture and depth to your salad.
  • Creamy Twist: Stir in a dollop of Greek yogurt or sour cream into the dressing for a richer, creamier experience.
  • Vegan Friendly: Replace honey with agave syrup in your dressing and skip the cheese for a fresh, plant-based option.

Feel free to explore these substitutions to make this Green Bean Potato Salad truly yours! Pair it with our Tuscan White Bean pasta for a delightful summer meal, or enjoy it alongside Smoky Sweet Potatoes for a heartier option!

Make Ahead Options

These Quick Green Bean Potato Salad is a lifesaver for busy home cooks looking to save time during the week! You can prep the potatoes and green beans up to 2 days in advance, cooking them separately and refrigerating in airtight containers to maintain their quality. To keep the vibrant colors and textures intact, blanch the green beans right before storing. When you’re ready to serve, simply combine the prepped ingredients with the dressing, which can be whisked together up to 24 hours ahead of time for even deeper flavors. This way, you’ll have a refreshing salad at your fingertips that’s just as delicious as when freshly made, making your mealtimes smoother and stress-free!

Expert Tips for Green Bean Potato Salad

  • Watch the Potatoes: Ensure you don’t overcook them; they should remain tender yet hold their shape well. Start checking for doneness around 12 minutes.

  • Perfectly Blanched Beans: Blanching is crucial! This step preserves the bright green color and crisp texture of the green beans, making your Green Bean Potato Salad visually appealing.

  • Cool Before Dressing: Allow the potatoes to cool slightly before adding the dressing to avoid making the salad mushy; this keeps each element distinct.

  • Season Generously: Don’t skimp on seasoning in the boiling water. A well-salted pot enhances flavor, ensuring your Green Bean Potato Salad is delicious from the very first bite.

  • Make It Yours: Feel free to introduce other flavors—like adding cherry tomatoes for sweetness or swapping out the chives for green onions to make it uniquely yours!

How to Store and Freeze Green Bean Potato Salad

Fridge: Store in an airtight container in the refrigerator for up to 4 days. This salad actually tastes better as it sits, allowing flavors to meld.

Make-Ahead: Prepare the potatoes and green beans up to 2 days in advance. Combine with dressing right before serving to maintain freshness and texture.

Freezer: Avoid freezing your Green Bean Potato Salad, as the potatoes and beans may turn mushy. Best enjoyed fresh!

Reheating: If refrigerating leftovers, enjoy them cold or let them sit at room temperature for about 30 minutes before serving to bring out the flavors.

What to Serve with Quick Green Bean Potato Salad

Elevate your meal with delightful pairings that enhance the vibrant flavors of this refreshing salad.

  • Grilled Chicken: The smoky, charred flavors of grilled chicken contrast beautifully with the crisp salad, making for a well-rounded meal.

  • Savory Burgers: Juicy beef or turkey burgers pair perfectly with this light side, balancing comfort food with your fresh summer vibe.

  • Corn on the Cob: The natural sweetness of freshly grilled corn complements the tangy vinaigrette of the salad while adding delightful crunch.

  • Crusty Bread: Serve with warm, crusty bread to soak up any remaining dressing; it's a comforting addition that adds hearty texture.

  • Chilled White Wine: A crisp Sauvignon Blanc or Pinot Grigio elevates your dining experience, matching the lightness of the salad beautifully.

  • Fruit Salad: A medley of seasonal fruits provides a refreshing contrast and additional sweetness, perfectly rounding out your summer meal.

This Quick Green Bean Potato Salad is a wonderfully versatile dish, bringing together multiple flavors and textures for a satisfying, healthy meal.

Green Bean Potato Salad Recipe FAQs

How do I select the best green beans?
Absolutely! Look for green beans that are firm, bright green, and free from dark spots. The best beans are crispy and snap when bent, indicating freshness. Avoid any that appear wilty or have brown ends.

What’s the best way to store leftover Green Bean Potato Salad?
Very good question! Store your Green Bean Potato Salad in an airtight container in the refrigerator for up to 4 days. The flavors meld beautifully over time, improving the taste with each serving. I often enjoy it cold straight from the fridge!

Can I freeze Green Bean Potato Salad?
It's best to avoid freezing this salad since the potatoes and green beans may become mushy once thawed. Instead, enjoy it fresh or store it in the fridge. If you do have leftovers, they can stay in the fridge for up to 4 days.

What if my potatoes are too soft and mushy?
If your potatoes overcook, they may turn mushy in the salad. To avoid this, make sure to check them for doneness after 12 minutes. If they do become too soft, you can try using a slotted spoon to gently separate them in the salad, though they may not hold their shape as well.

Can I make this salad vegan or gluten-free?
Absolutely! The dressing is naturally gluten-free, and to keep things vegan, simply replace Dijon mustard with a vegan alternative. Additionally, you can swap any non-vegan ingredients with plant-based versions as needed.

How long can I keep the blanched green beans before using them?
You can keep blanched green beans in the fridge for up to 2 days. Just make sure they are well-drained before storing them in an airtight container. They make a great addition to other salads or dishes too!

Green Bean Potato Salad

Green Bean Potato Salad That's Perfectly Crisp and Refreshing

This Green Bean Potato Salad is a refreshing summer side dish, featuring crisp green beans and tender potatoes in a light vinaigrette, perfect for warm gatherings.
Print Recipe Pin Recipe
Prep Time 20 minutes mins
Cook Time 25 minutes mins
Chilling Time 30 minutes mins
Total Time 1 hour hr 15 minutes mins
Servings: 4 servings
Course: Salads
Cuisine: American
Calories: 180
Ingredients Equipment Method Nutrition Notes

Ingredients
  

For the Salad
  • 1 lb Small White Potatoes New Potatoes or Yukon Golds work best
  • 1 lb Fresh Green Beans Blanching keeps them bright and crispy
For the Dressing
  • 3 tbsp White Wine Vinegar Substitute with apple cider vinegar if preferred
  • 2 tbsp Dijon Mustard
  • 1 clove Garlic Fresh is ideal, but garlic powder can serve
  • 1/2 cup Olive Oil Extra virgin provides the best taste
  • to taste Salt
  • to taste Pepper
For Garnishing
  • 1/4 cup Chives Green onions can be used as a substitute

Equipment

  • Large pot
  • medium bowl
  • Colander
  • Mixing Bowl

Method
 

Step-by-Step Instructions
  1. Step 1: Prepare the Ice Bath - Fill a medium bowl with ice and water to create an ice bath for cooling the green beans after blanching.
  2. Step 2: Blanch the Green Beans - Bring a large pot of salted water to a rolling boil, add fresh green beans, and cook for 3-4 minutes. Transfer to the ice bath.
  3. Step 3: Drain and Cool the Green Beans - After a few minutes in the ice bath, drain the green beans well in a colander.
  4. Step 4: Cook the Potatoes - Using the same boiling water, add small white potatoes and cook for 15-20 minutes, or until fork-tender.
  5. Step 5: Cool and Cut the Potatoes - Allow the potatoes to cool, then cut them in half lengthwise.
  6. Step 6: Whisk the Dressing - In a mixing bowl, combine white wine vinegar, Dijon mustard, garlic, and salt. Whisk together and slowly drizzle in olive oil.
  7. Step 7: Combine Ingredients - In a large mixing bowl, gently combine halved potatoes and blanched green beans. Pour dressing over and toss gently.
  8. Step 8: Garnish and Serve - Sprinkle with chopped chives and a dash of black pepper. Refrigerate for at least 30 minutes or serve immediately.

Nutrition

Serving: 1cupCalories: 180kcalCarbohydrates: 22gProtein: 3gFat: 9gSaturated Fat: 1gPolyunsaturated Fat: 1gMonounsaturated Fat: 7gSodium: 210mgPotassium: 500mgFiber: 3gSugar: 2gVitamin A: 500IUVitamin C: 20mgCalcium: 30mgIron: 1mg

Notes

This salad tastes better as it sits, allowing flavors to meld. Serve it cold or let it sit at room temperature before serving for optimal flavor.

Tried this recipe?

Let us know how it was!

Savory Spicy Chipotle Honey Salmon Rice Salad You'll Love

September 18, 2025 by Grace Snow Leave a Comment

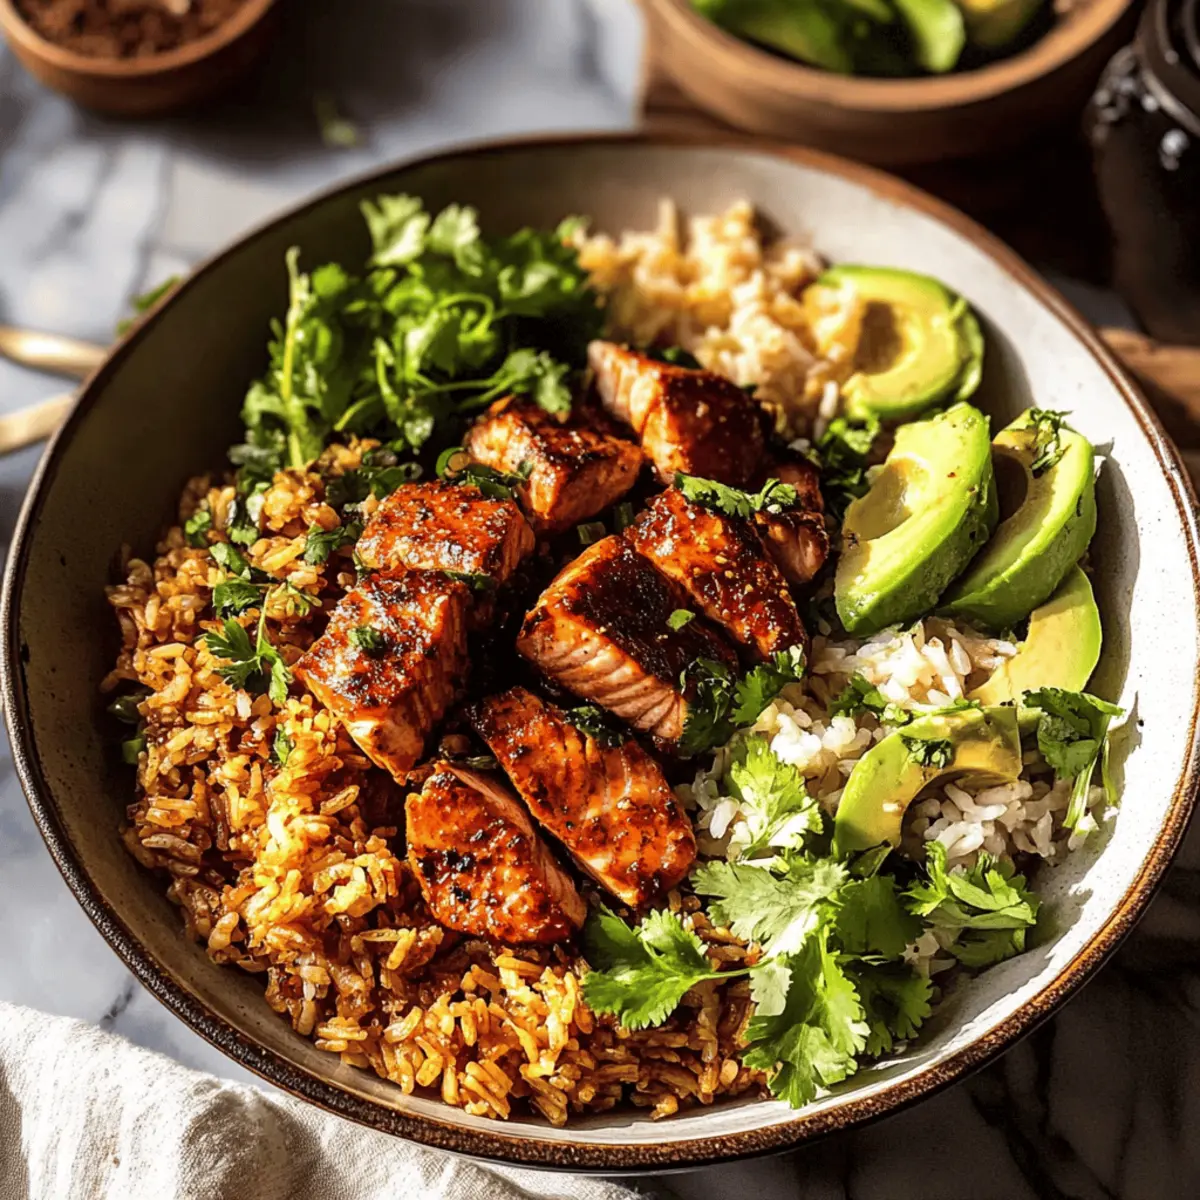
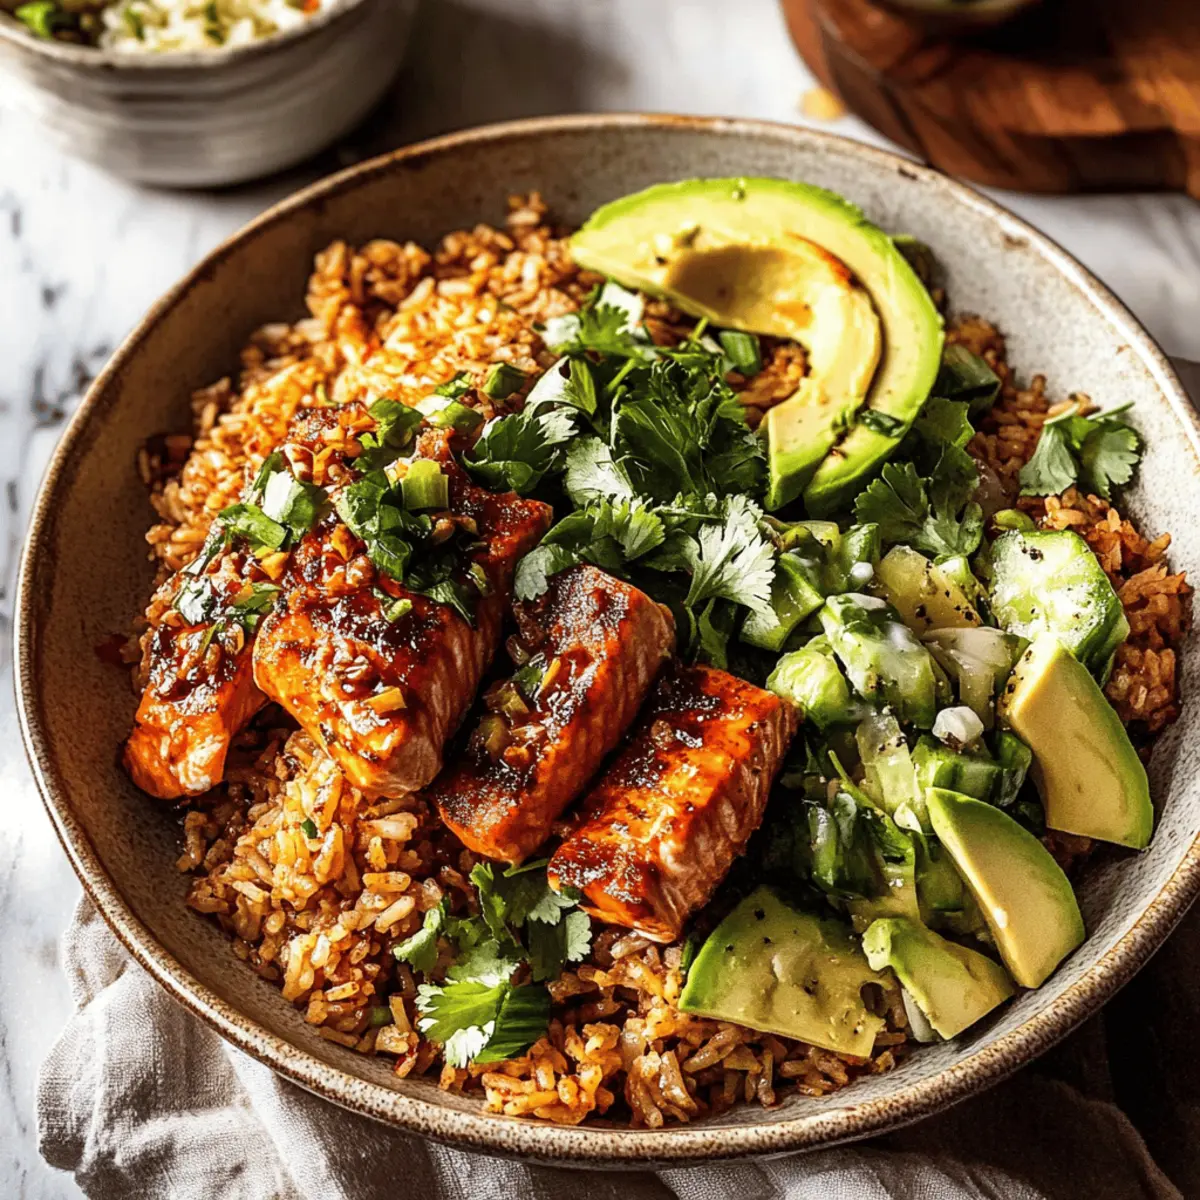
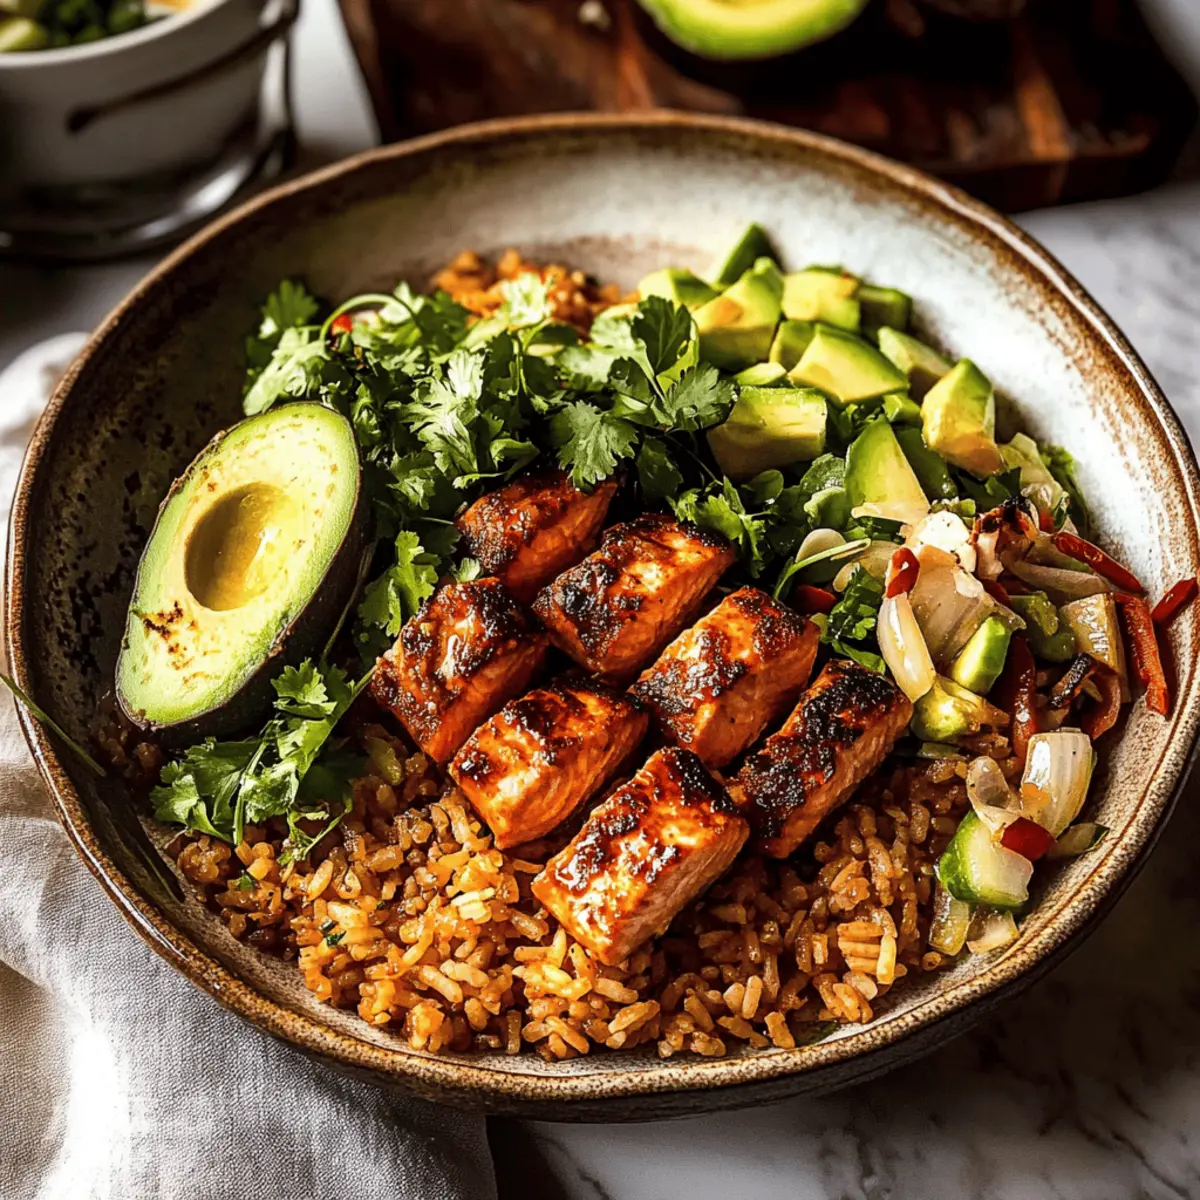
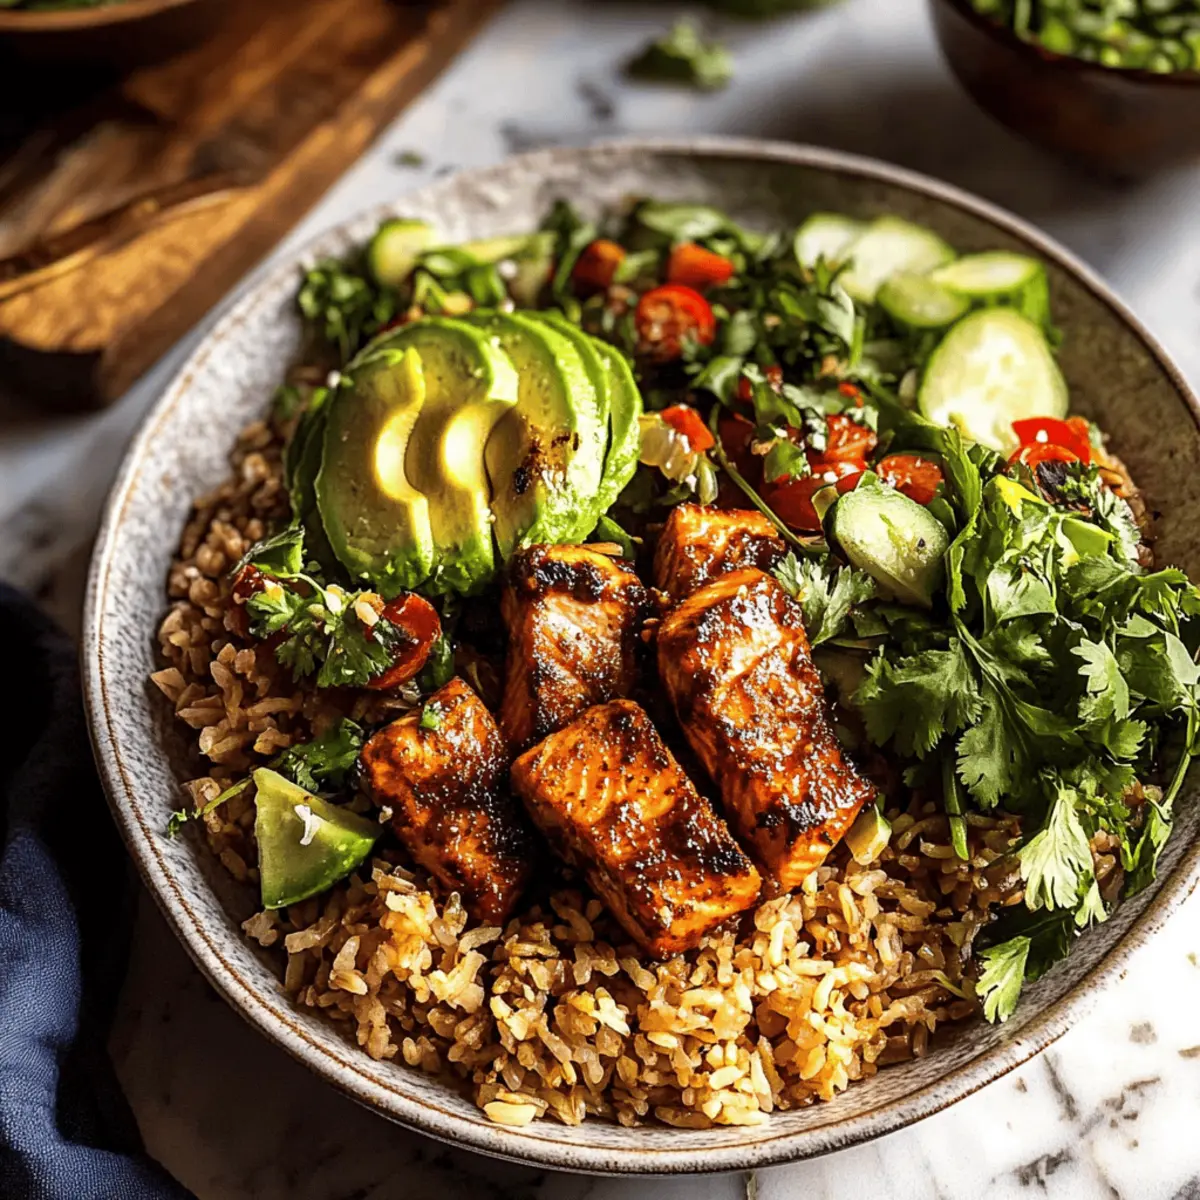
The aroma of smoky, roasted salmon filled the kitchen as I prepared this Spicy Chipotle Honey Salmon Rice Salad, and I couldn't help but feel a swell of excitement. This dish is a vibrant feast for the eyes and the palate, combining the bold heat of chipotle with the sweetness of honey, perfectly complementing each juicy bite of salmon. What makes it even better is that it's super quick to whip up—perfect for busy weeknights or meal prep. Loaded with fresh veggies, creamy avocado, and crispy garlic rice, this gluten-free salad is more than just a meal; it’s a celebration of flavors and textures that’s sure to impress. Are you ready to dive into this delicious adventure?

Why is this salad a must-try?

Unforgettable Flavor: The Spicy Chipotle Honey sauce perfectly balances sweet and heat, ensuring each bite is packed with flavor.

Perfectly Crispy Rice: Bake your rice until it’s crispy for an amazing texture contrast with the tender salmon and creamy avocado.

Quick & Easy: In just 30 minutes, you’ll have a delicious meal that’s perfect for busy weeknights or meal prep.

Gluten-Free Delight: With simple swaps, this salad caters to gluten-free diets, making it inclusive for everyone at the table.

Vibrant and Fresh: Packed with fresh veggies, this salad not only looks appealing but also adds nutrition, similar to other favorites like our Furikake Fried Rice.

Crowd-Pleasing Appeal: Whether it’s for family dinner or a gathering with friends, this salad is sure to impress your guests!

Spicy Chipotle Honey Salmon Rice Salad Ingredients

For the Rice
• Cooked Rice – Use day-old rice for optimal crispiness.
• Salted Butter – This adds richness; substitute with olive oil for a dairy-free version.
• Toasted Sesame Oil – Imparts a nutty flavor; regular sesame oil is a fine alternative.
• Garlic – Fresh garlic enhances the aroma and flavor of the rice.
• Tamari/Soy Sauce – Adds umami; go for gluten-free tamari if needed.

For the Salmon
• Salmon Filets – A rich source of protein; feel free to swap with any firm white fish.
• Chipotle in Adobo – Provides that smoky, spicy kick; adjust to your taste preference.
• Honey – Creates a sweet balance to the spice; maple syrup works as a vegan alternative.

For the Salad
• Shredded Cabbage – Adds a lovely crunch; kale or mixed greens are also great options.
• Avocados – Use ripe avocados for that creamy texture.
• Persian Cucumbers – Offers a refreshing crunch; substitute with regular cucumber if needed.
• Jalapeño – Adds extra heat; adjust quantity as per your spice tolerance.
• Fresh Cilantro – Brightens the dish; parsley can be used as a substitute if desired.
• Roasted Peanuts – For texture and nutty flavor; dry roasted almonds can replace them.

For the Dressing
• Tahini – Provides creaminess to the dressing; sunflower seed butter is a suitable substitute.
• Lemon Juice – Creates acidity for balance; lime juice is also an excellent choice.
• Sesame Seeds – Optional but add a nice touch for garnish.

Dive into this Spicy Chipotle Honey Salmon Rice Salad, and revel in the explosion of flavors and textures that make it a delightful meal. Happy cooking!

Step‑by‑Step Instructions for Spicy Chipotle Honey Salmon Rice Salad.

Step 1: Prepare the Rice
Preheat your oven to 450°F (232°C). On a large sheet pan, combine your cooked rice with melted salted butter, toasted sesame oil, minced garlic, tamari, and a pinch of pepper. Spread the mixture evenly on the pan and bake for about 25 minutes, stirring halfway through, until the rice turns golden and crispy.

Step 2: Cook the Salmon
While the rice is baking, place the salmon filets on a separate sheet pan. In a small bowl, whisk together chipotle in adobo, honey, tamari, and a sprinkle of pepper. Brush this spicy mixture generously over the salmon. Bake for 10-15 minutes, or until the salmon is cooked through and easily flakes with a fork. If desired, broil for an additional 2-3 minutes for that extra crispy finish.

Step 3: Assemble the Salad
In a large mixing bowl, combine shredded cabbage, diced avocados, sliced Persian cucumbers, minced jalapeño, chopped fresh cilantro, and roasted peanuts. Gently toss the ingredients together until evenly mixed, ensuring each bite will be refreshing and crunchy as you create the base for your Spicy Chipotle Honey Salmon Rice Salad.

Step 4: Make the Dressing
In a blender, combine tahini, freshly squeezed lemon juice, honey, tamari, minced garlic, and a splash of water. Blend until smooth, adding more water as needed to reach your desired consistency. This creamy dressing will bring together all the flavors of your Spicy Chipotle Honey Salmon Rice Salad beautifully.

Step 5: Combine and Serve
Once the rice is crisp and the salmon is perfectly cooked, it's time to serve! Spoon hot crispy rice over the salad mixture, then top it with the salmon filets. Drizzle with the tahini dressing, allowing its creamy goodness to coat every bite. Serve immediately and enjoy this vibrant, flavor-packed meal!

How to Store and Freeze Spicy Chipotle Honey Salmon Rice Salad

Fridge: Keep leftover Spicy Chipotle Honey Salmon Rice Salad in an airtight container for up to 2 days to maintain flavor and freshness.

Reheating: If you'd like to enjoy the salad warm, reheat the crispy rice separately in the oven or skillet until hot. The salmon can also be warmed gently to avoid drying out.

Avoid Freezing: It’s best not to freeze this salad as the texture of the avocado and fresh vegetables may become unappealing once thawed.

Assembly Tip: Store the salad ingredients and dressing separately to keep them fresh; combine just before serving for the best taste and texture.

Make Ahead Options

These Spicy Chipotle Honey Salmon Rice Salads are perfect for meal prep enthusiasts! You can cook the rice and salmon up to 24 hours in advance. Simply bake the rice and salmon as directed, and allow them to cool completely before storing them separately in airtight containers in the refrigerator. To maintain that delightful texture, keep the crispy rice stored separately to prevent sogginess. When you're ready to serve, simply reheat the rice in the oven to restore its crispiness, assemble the salad with fresh ingredients, and drizzle with the creamy tahini dressing. This way, you’ll enjoy a vibrant and delicious meal with minimal effort, ideal for busy weeknights!

What to Serve with Spicy Chipotle Honey Salmon Rice Salad

Pair this vibrant salad with complementary sides and drinks for a delightful meal experience.

  • Crispy Tortilla Chips:
    Adds a satisfying crunch that complements the rich flavors of the salad beautifully. Serve them with a zesty salsa for an extra kick!

  • Coconut Jasmine Rice:
    This fragrant rice dish brings a subtle sweetness that balances the spiciness of the salmon, creating a comforting harmony in every bite.

  • Grilled Asparagus:
    Tender and slightly charred, grilled asparagus adds a fresh, smoky flavor. Its crunch perfectly contrasts with the creamy avocado in the salad.

  • Roasted Sweet Potatoes:
    Their natural sweetness works wonderfully against the heat of the chipotle, making for a delicious contrast that’s both satisfying and nutritious.

  • Chilled White Wine:
    A glass of chilled Sauvignon Blanc brightens the experience, offering crisp notes that refresh your palate between bites of rich salmon.

  • Mango Avocado Salsa:
    This fresh salsa brings in a tropical flair with its juicy mango and creamy avocado, enhancing the vibrant flavors of your meal.

  • Spicy Black Bean Soup:
    For a delightful twist, serve alongside a hearty, spicy black bean soup. It’s a comforting side that ties in beautifully with the meal’s flavor profile.

Expert Tips for Spicy Chipotle Honey Salmon Rice Salad

• Crispy Rice Secret: Ensure your rice is day-old and cooled for optimal crispiness; hot, fresh rice can turn out mushy.

• Adjust the Heat: Start with less chipotle and taste-test during cooking; you can always add more spice if you prefer!

• Fresh Ingredients: Opt for the freshest vegetables and herbs—this elevates the flavor and overall enjoyment of your Spicy Chipotle Honey Salmon Rice Salad.

• Avoid Clumping: Fluff your cooled rice with a fork before mixing and baking to ensure every grain crisps nicely and remains distinct.

• Flexible Greens: Feel free to swap the shredded cabbage for spinach or arugula based on what’s available—each adds a unique flavor and crunch.

Spicy Chipotle Honey Salmon Rice Salad Variations

Feel free to add your personal touch to this delightful salad while experiencing its crispy goodness and zesty flavors.

  • Dairy-Free: Swap butter for olive oil in the rice and use a dairy-free dressing. It remains rich and satisfying!
  • Grain Alternatives: Substitute the rice with quinoa or cauliflower rice for a lighter, nutrient-packed base. Quinoa adds a lovely nutty flavor and is gluten-free.
  • Vegetable Variety: Mix in seasonal veggies like bell peppers or shredded carrots for an extra crunch and burst of color. The more, the merrier!
  • Protein Swap: Replace salmon with grilled chicken or marinated tofu for a protein alternative. Both options work beautifully with the bold flavors of chipotle.
  • Nut-Free: Omit peanuts and use seeds like sunflower or pumpkin for added crunch without allergens. You’ll still enjoy that delightful texture.
  • Fruity Twist: Add mango or pineapple chunks for a tropical sweetness that contrasts nicely with the spicy chipotle. A colorful surprise in every bite!
  • Extra Spicy: For those who crave more heat, toss in sliced serrano peppers or a dash of hot sauce! Just be sure to taste as you go.
  • Herb Fusion: Substitute cilantro with fresh basil or mint to change the flavor profile entirely. This makes the dish feel aromatic and vibrant!

If you're looking to explore even more delicious options, why not try our Honey Garlic Chicken Thighs or our flavorful Chipotle Lime Chicken and Rice? Your culinary adventure awaits!

Spicy Chipotle Honey Salmon Rice Salad Recipe FAQs

How do I choose ripe avocados?
Absolutely! Look for avocados that yield slightly to gentle pressure when squeezed, indicating ripeness. A perfectly ripe avocado will be dark green and have minimal indentations. Avoid avocados with dark spots all over or that feel overly soft, as they may be overripe.

What’s the best way to store leftover Spicy Chipotle Honey Salmon Rice Salad?
To keep your salad fresh and flavorful, store leftovers in an airtight container in the refrigerator for up to 2 days. I recommend separating the rice and salad components from the dressing prior to storage. This way, the creamy tahini dressing won't make the veggies wilt.

Can I freeze the Spicy Chipotle Honey Salmon Rice Salad?
It's best to avoid freezing this salad, as the avocado and fresh vegetables can become mushy when thawed. However, you can freeze the crispy rice separately for up to 3 months. To do this, spread the cooled rice on a baking sheet and freeze until firm, then transfer to a freezer bag. Just reheat it in the oven when you're ready to enjoy!

What should I do if my rice isn't getting crispy?
No worries! If your rice isn't crispy after baking, make sure you're using cooled, day-old rice, as hot rice can steam instead of crisp up. If you're already following this, consider increasing the baking time slightly or even using the broil setting for the last few minutes to achieve that delightful crunch.

Is this recipe suitable for Gluten-free diets?
Very! To keep this dish gluten-free, ensure you are using gluten-free tamari instead of soy sauce. All other ingredients are naturally gluten-free. Just double-check any packaged items for gluten-containing additives if you have allergies.

What can I use instead of chipotle in adobo?
If you prefer a milder flavor or don't have chipotle in adobo on hand, I recommend using smoked paprika along with cayenne pepper for a smoky heat. Start with a teaspoon of smoked paprika and half a teaspoon of cayenne, then adjust based on your spice tolerance.

Spicy Chipotle Honey Salmon Rice Salad.

Savory Spicy Chipotle Honey Salmon Rice Salad You'll Love

Experience the bold flavors of Spicy Chipotle Honey Salmon Rice Salad, a quick, gluten-free dish that impresses with every bite.
Print Recipe Pin Recipe
Prep Time 10 minutes mins
Cook Time 30 minutes mins
Total Time 40 minutes mins
Servings: 4 servings
Course: Salads
Cuisine: Global
Calories: 450
Ingredients Equipment Method Nutrition Notes

Ingredients
  

For the Rice
  • 4 cups Cooked Rice Use day-old rice for optimal crispiness.
  • 2 tablespoons Salted Butter Substitute with olive oil for a dairy-free version.
  • 1 tablespoon Toasted Sesame Oil Imparts a nutty flavor.
  • 2 cloves Garlic Minced for flavor enhancement.
  • 2 tablespoons Tamari/Soy Sauce Go for gluten-free tamari if needed.
For the Salmon
  • 4 filets Salmon Filets Firm white fish can be used as a substitute.
  • 2 tablespoons Chipotle in Adobo Adjust to your taste preference.
  • 2 tablespoons Honey Maple syrup can be a vegan alternative.
For the Salad
  • 2 cups Shredded Cabbage Kale or mixed greens are also great options.
  • 2 medium Avocados Use ripe for creamy texture.
  • 1 cup Persian Cucumbers Substitute with regular cucumber if needed.
  • 1 medium Jalapeño Adjust quantity for spice tolerance.
  • 1/2 cup Fresh Cilantro Parsley can be a substitute.
  • 1/4 cup Roasted Peanuts Dry roasted almonds can replace them.
For the Dressing
  • 1/4 cup Tahini Sunflower seed butter is a suitable substitute.
  • 2 tablespoons Lemon Juice Lime juice is also an excellent choice.
  • 1 tablespoon Sesame Seeds Optional garnish.

Equipment

  • Oven
  • sheet pan
  • Mixing Bowl
  • Blender

Method
 

Rice Preparation
  1. Preheat your oven to 450°F (232°C). On a large sheet pan, combine your cooked rice with melted salted butter, toasted sesame oil, minced garlic, tamari, and a pinch of pepper. Spread the mixture evenly on the pan and bake for about 25 minutes, stirring halfway through, until the rice turns golden and crispy.
Cooking Salmon
  1. While the rice is baking, place the salmon filets on a separate sheet pan. In a small bowl, whisk together chipotle in adobo, honey, tamari, and a sprinkle of pepper. Brush this spicy mixture generously over the salmon. Bake for 10-15 minutes, or until the salmon is cooked through and easily flakes with a fork. If desired, broil for an additional 2-3 minutes for that extra crispy finish.
Assembling Salad
  1. In a large mixing bowl, combine shredded cabbage, diced avocados, sliced Persian cucumbers, minced jalapeño, chopped fresh cilantro, and roasted peanuts. Gently toss the ingredients together until evenly mixed.
Making Dressing
  1. In a blender, combine tahini, freshly squeezed lemon juice, honey, tamari, minced garlic, and a splash of water. Blend until smooth, adding more water as needed to reach your desired consistency.
Combining and Serving
  1. Spoon hot crispy rice over the salad mixture, then top it with the salmon filets. Drizzle with the tahini dressing and serve immediately.

Nutrition

Serving: 1bowlCalories: 450kcalCarbohydrates: 30gProtein: 30gFat: 22gSaturated Fat: 5gPolyunsaturated Fat: 5gMonounsaturated Fat: 10gCholesterol: 100mgSodium: 700mgPotassium: 900mgFiber: 6gSugar: 6gVitamin A: 500IUVitamin C: 35mgCalcium: 50mgIron: 3mg

Notes

Keep leftover salad in an airtight container for up to 2 days. Store salad ingredients and dressing separately for freshness.

Tried this recipe?

Let us know how it was!

Best Buddha Bowl: A Flavor-Packed Vegan Delight

September 14, 2025 by Grace Snow Leave a Comment

As I savored each bite of my colorful creation, the warm roasted sweet potatoes and crunchy radishes danced on my palate like a celebration of flavor. This ultimate vegan Buddha bowl is my go-to for a nutrient-packed meal that not only brightens my table but also delights my taste buds. With just 35 minutes of prep, it’s perfect for those busy weeknights when you still crave something homemade and wholesome. Not to mention, it's incredibly versatile, letting you mix and match ingredients to keep things fresh and exciting. Whether you’re meal prepping for the week or looking for a vibrant dish to impress your friends, this bowl offers just the right balance of hearty grains and vibrant veggies. Are you ready to find out how to whip up this delightful dish?

Why is this Buddha Bowl a game changer?

Vibrant, Flavorful Ingredients: This Buddha bowl bursts with color and taste, featuring sweet potatoes, radishes, and kale.

Customizable Options: Feel free to swap ingredients; use quinoa or black rice, and experiment with sauces like sesame ginger for new flavor twists.

Meal Prep Friendly: Quickly assemble your bowl in advance, allowing easy access to a healthy meal throughout the week.

Nutrient-Packed Goodness: Each bowl is loaded with fiber, plant-based protein, and vitamins, fulfilling your nutritional needs deliciously.

Perfect for All Occasions: Whether it's a cozy family dinner or a gathering with friends, this recipe impresses with its eye-catching presentation and satisfying mix of textures.

Dive into this delicious corner of plant-based cuisine, and explore more options like Fish Taco Bowls or Poor Man's Burrito Bowls for diverse meal ideas!

Best Buddha Bowl Ingredients

• Get ready to create deliciousness!

For the Base

  • Sweet Potato – Provides a hearty base and natural sweetness; swap for butternut squash if desired.
  • Cooked Brown Rice or Quinoa – Serves as a filling grain component; feel free to try farro or barley for a different texture.

For the Vegetables

  • Kale Leaves – Offers a nutrient-dense green base; substitute with spinach or swiss chard for variety.
  • Carrots – Adds a touch of sweetness and crunch; baby carrots work well if cut into ribbons.
  • Shredded Red Cabbage – Provides a crunchy texture and vibrant color; green cabbage or a coleslaw mix are great alternatives.
  • Watermelon Radish/Red Radishes – Brings crunch and color to your bowl; regular radishes will do in a pinch.

For the Protein

  • Cooked Chickpeas or Lentils – Packed with protein and fiber; try black beans or kidney beans for a different flavor.
  • Sauerkraut – Contributes tang and aids digestion; replace with kimchi for a spicier kick.

For the Dressing

  • Turmeric Tahini Sauce – Adds creaminess and flavor; a simple mix of tahini, lemon juice, and garlic works wonders too.

For the Toppings

  • Sesame Seeds/Hemp Seeds – Enhance crunch and nutrition; any nuts or seeds can add texture as well.
  • Microgreens (Optional) – Perfect for garnish and extra nutrients; use fresh herbs if you're skipping microgreens.
  • Sea Salt and Black Pepper – Essential for seasoning; adjust to taste for the perfect flavor balance.

Now that you have the best Buddha bowl ingredients, it's time to experiment and create your colorful masterpiece!

Step‑by‑Step Instructions for Best Buddha Bowl

Step 1: Preheat the Oven
Begin by preheating your oven to 400°F (200°C). While the oven warms up, line a large baking sheet with parchment paper to prevent sticking. This step is crucial for roasting the sweet potatoes to golden perfection, ensuring they develop a delicious caramelized flavor as they roast.

Step 2: Roast the Sweet Potatoes
Cube one sweet potato into bite-sized pieces and place them in a bowl. Drizzle with extra-virgin olive oil, and season generously with sea salt and black pepper. Toss to coat and spread the cubes evenly on the prepared baking sheet. Roast in the preheated oven for about 20 minutes, turning halfway through, until they are golden and tender.

Step 3: Prepare the Vegetables
While the sweet potatoes roast, thinly slice watermelon radishes and peel carrots into ribbons using a vegetable peeler. Place these colorful veggies in a bowl, drizzle with a squeeze of fresh lemon juice, and gently toss to combine. Set aside to allow the flavors to mingle, giving your best Buddha bowl a refreshing crunch.

Step 4: Massage the Kale
In a separate bowl, take a handful of kale leaves and remove the tough stems. Tear the leaves into smaller pieces and sprinkle with a little sea salt. Use your hands to massage the kale gently for about 2-3 minutes until the leaves become softer and darker in color. This process enhances the kale's flavor and makes it more palatable in your Buddha bowl.

Step 5: Assemble the Bowl
Once the sweet potatoes are done roasting, it’s time to assemble your colorful Buddha bowl. Start with a base of cooked brown rice or quinoa in individual serving bowls. Top the grains with a generous portion of massaged kale, followed by the roasted sweet potatoes, chickpeas, shredded red cabbage, and the marinated radishes and carrots for a vibrant display.

Step 6: Add the Finishing Touches
To elevate your best Buddha bowl further, top with a dollop of sauerkraut for a tangy kick and sprinkle sesame seeds or hemp seeds for added crunch and nutrition. Finally, drizzle your homemade turmeric tahini sauce generously over the top, and add a pinch of salt and pepper to taste before digging in. Enjoy the harmonious blend of flavors and textures!

What to Serve with Ultimate Vegan Buddha Bowl

Pair your colorful creation with delightful sides and additions that take it to the next level!

  • Creamy Avocado Toast: The smooth creaminess of avocado will perfectly balance the crunchy and hearty textures of your Buddha bowl.
  • Zesty Quinoa Salad: A refreshing salad with lemon flavors adds a bright, acidic touch that beautifully complements the richness of the tahini sauce.
  • Grilled Veggie Skewers: Seasoned and charred, these veggies introduce smoky notes and a hint of char that elevate the experience of your plant-based meal.
  • Chilled Cucumber Soup: Cooling and refreshing, this chilled soup contrasts nicely with warm ingredients, making each bite interesting and flavorful.
  • Crispy Roasted Chickpeas: Add a crunchy kick! These seasoned chickpeas provide delightful texture while staying in tune with the nutrition theme of your Buddha bowl.
  • Herb-Infused Lemonade: A refreshing drink to sip while you enjoy your meal—this zesty beverage enhances the lightness and freshness of the dish.
  • Raw Veggie Platter: Crisp veggies like carrots, bell peppers, and celery provide extra crunch and are perfect for dipping in any leftover tahini sauce.
  • Dark Chocolate Mousse: For dessert, a rich and velvety mousse offers a sweet finish that encapsulates the meal's wholesome nature in a decadent way.

Best Buddha Bowl Variations & Substitutions

Feel free to unleash your creativity and customize this vibrant Buddha bowl with these exciting variations!

  • Nuts & Seeds: Add almonds or walnuts for crunchy texture and healthy fats. Combining a few different nuts can add delightful surprises in every bite.

  • Fruity Twist: Toss in slices of juicy mango or crisp apple for a refreshing sweetness. The fruity notes can beautifully enhance the savory aspects of the bowl.

  • Grain Swap: Try black (forbidden) rice instead of brown rice for a gourmet touch. Its nutty flavor and striking color elevate this bowl to a whole new level.

  • Dressing Variation: Swap the turmeric tahini sauce for a zesty sesame ginger dressing for a flavor-packed twist. This option introduces a delightful zing that complements all the tastes.

  • Spicy Kick: Add pickled jalapeños or a sprinkle of red pepper flakes for a bit of heat. This exciting twist adds an adventurous kick that wakes up every bite.

  • Green Goodness: Replace kale with fresh spinach or mixed greens for a softer texture. Mixing greens adds a tender touch and a different flavor profile to the dish.

  • Creamy Avocado: Top your bowl with creamy avocado slices for additional richness and healthy fats. The smoothness can create a delightful contrast against the crunchy vegetables.

  • Cheesy Delight: For those who enjoy a little indulgence, sprinkle some nutritional yeast over the top for a cheesy flavor without the dairy. This delicious touch adds an umami-rich note that rounds out the meal.

You can explore more delicious ideas like Acai Bowl Nutritious or Pitaya Smoothie Bowl to keep your culinary adventures exciting!

Make Ahead Options

These vibrant Vegan Buddha Bowls are perfect for meal prep enthusiasts! You can roast the sweet potatoes and prepare the turmeric tahini sauce up to 3 days in advance for optimal flavor. Simply store the roasted sweet potatoes in an airtight container in the refrigerator, and whisk the sauce together, refrigerating it as well. You can also chop the veggies and soak the chickpeas or lentils ahead of time, keeping them in separate containers for up to 24 hours. When you're ready to assemble, just reheat the sweet potatoes and combine everything in your bowls. This approach saves you precious time during busy weeknights while ensuring your Buddha bowls remain just as delicious and fresh!

How to Store and Freeze Best Buddha Bowl

Fridge: Store individual components in airtight containers for up to 5 days to maintain freshness and quality. Layer the grains, veggies, and proteins separately for easy assembly.

Freezer: For longer storage, freeze the roasted sweet potatoes and cooked grains in airtight bags for up to 3 months. Thaw in the fridge overnight before use.

Reheating: Reheat the sweet potatoes and grains in the microwave or oven until warmed through, adding a splash of water to prevent drying out. Assemble your best Buddha bowl only right before you eat for the best texture and flavor.

Assembling Freshness: For a delightful meal prep experience, only mix sauces and toppings when ready to eat, ensuring every bite remains vibrant and exciting.

Expert Tips for the Best Buddha Bowl

  • **Kale Massage: ** Massage the kale with salt and lemon juice to soften, making it more agreeable in your Buddha bowl.

  • **Roasting Spread: ** Ensure sweet potatoes and veggies are evenly spread on the baking sheet to prevent steaming and achieve perfect caramelization.

  • **Flavorful Sauces: ** Experiment with diverse sauces like sesame ginger for variety; keep it fresh to avoid meal boredom.

  • **Meal Prep: ** Prepare ingredients in advance and store them separately for easy assembly throughout the week, maintaining freshness and taste.

  • **Customize Proteins: ** Use lentils or chickpeas as protein sources, but don't hesitate to try black beans for an exciting change in your best Buddha bowl.

Best Buddha Bowl Recipe FAQs

How do I choose ripe sweet potatoes for the Buddha bowl?
Absolutely! Look for sweet potatoes that feel firm and have smooth skin. Avoid any with dark spots, blemishes, or soft spots. For the best flavor, I usually opt for medium-sized potatoes since they tend to be sweeter and less starchy.

How should I store leftovers of the Buddha bowl?
Very! Store the individual components in airtight containers in the fridge for up to 5 days. It's best to keep grains, veggies, and proteins layered separately to maintain freshness and texture. When you're ready to enjoy it again, simply assemble right before serving.

Can I freeze the ingredients from the Buddha bowl?
Definitely! For freezing, portion out roasted sweet potatoes and cooked grains in airtight bags. They can be frozen for up to 3 months. Just thaw them in the fridge overnight before using. I recommend reheating in the microwave, adding a splash of water to avoid drying out.

What if my kale isn't as tender as I want it in the Buddha bowl?
No worries! If your kale is a bit tough, massage it for a longer time—around 3-5 minutes with a sprinkle of salt and a squeeze of lemon should work wonders. This process breaks down the fibrous structure, making it tastier and easier to eat.

Are there any allergy considerations for the Buddha bowl?
Absolutely! This vegan recipe is generally safe for many dietary restrictions, but it's essential to consider potential allergies. Some individuals may be allergic to chickpeas or specific seeds. Always check ingredient labels and consult your guests to ensure that all components are safe for everyone involved!
Can I use a different sauce instead of turmeric tahini in the Buddha bowl?
Very! Feel free to switch it up by using a sesame ginger dressing or even a simple olive oil and lemon mix if you want something lighter. The more the merrier when it comes to exploring flavors—experimenting with sauces is a great way to customize your best Buddha bowl!

Best Buddha Bowl

Best Buddha Bowl: A Flavor-Packed Vegan Delight

This ultimate vegan Buddha bowl is a nutrient-packed meal that delights the taste buds. Perfect for cozy dinners or meal prepping, it's colorful and customizable.
Print Recipe Pin Recipe
Prep Time 15 minutes mins
Cook Time 20 minutes mins
Total Time 35 minutes mins
Servings: 2 bowls
Course: Salads
Cuisine: Vegan
Calories: 450
Ingredients Equipment Method Nutrition Notes

Ingredients
  

For the Base
  • 1 medium Sweet Potato Provides a hearty base and natural sweetness; swap for butternut squash if desired.
  • 1 cup Cooked Brown Rice or Quinoa Serves as a filling grain component; feel free to try farro or barley for a different texture.
For the Vegetables
  • 1 cup Kale Leaves Offers a nutrient-dense green base; substitute with spinach or swiss chard for variety.
  • 1 medium Carrot Adds a touch of sweetness and crunch; baby carrots work well if cut into ribbons.
  • 1 cup Shredded Red Cabbage Provides a crunchy texture and vibrant color; green cabbage or a coleslaw mix are great alternatives.
  • 1 small Watermelon Radish/Red Radishes Brings crunch and color to your bowl; regular radishes will do in a pinch.
For the Protein
  • 1 cup Cooked Chickpeas or Lentils Packed with protein and fiber; try black beans or kidney beans for a different flavor.
  • 1/4 cup Sauerkraut Contributes tang and aids digestion; replace with kimchi for a spicier kick.
For the Dressing
  • 1/4 cup Turmeric Tahini Sauce Adds creaminess and flavor; a simple mix of tahini, lemon juice, and garlic works wonders too.
For the Toppings
  • 2 tablespoons Sesame Seeds/Hemp Seeds Enhance crunch and nutrition; any nuts or seeds can add texture as well.
  • Microgreens (Optional) Perfect for garnish and extra nutrients; use fresh herbs if you're skipping microgreens.
  • Sea Salt and Black Pepper Essential for seasoning; adjust to taste for the perfect flavor balance.

Equipment

  • Oven
  • Baking Sheet
  • Mixing Bowl
  • Vegetable Peeler

Method
 

Preparation Steps
  1. Preheat your oven to 400°F (200°C) and line a large baking sheet with parchment paper.
  2. Cube one sweet potato into bite-sized pieces, drizzle with olive oil, season with salt and pepper, toss, and spread on the baking sheet. Roast for about 20 minutes, turning halfway through.
  3. Thinly slice watermelon radishes and peel carrots into ribbons. Drizzle with lemon juice and toss, then set aside.
  4. Remove tough stems from kale, tear leaves into smaller pieces, sprinkle with salt, and massage for 2-3 minutes until softened.
  5. Assemble the bowl starting with a base of cooked brown rice or quinoa, then top with massaged kale, roasted sweet potatoes, chickpeas, shredded red cabbage, and marinated radishes and carrots.
  6. Top with sauerkraut, sesame seeds or hemp seeds, and drizzle with turmeric tahini sauce. Season with salt and pepper to taste before serving.

Nutrition

Serving: 1bowlCalories: 450kcalCarbohydrates: 65gProtein: 15gFat: 18gSaturated Fat: 3gPolyunsaturated Fat: 6gMonounsaturated Fat: 7gSodium: 400mgPotassium: 900mgFiber: 14gSugar: 6gVitamin A: 5500IUVitamin C: 80mgCalcium: 120mgIron: 4mg

Notes

Experiment with different grains and vegetables for variety. Perfect for meal prep; store components separately to maintain freshness.

Tried this recipe?

Let us know how it was!

Tomato Cucumber Avocado Salad: A Refreshing Summer Delight

September 14, 2025 by Grace Snow Leave a Comment

As I stood in my kitchen, the summer sun streaming through the window, I realized I needed a quick and refreshing dish to embrace the season. Enter the Tomato Cucumber Avocado Salad—a vibrant medley that not only dazzles the eyes but also delights the taste buds. This salad is your go-to for those hot days when you crave something light and satisfying without the fuss. With prep time clocking in at just 15 minutes and no cooking required, it’s perfect for lunch or as a colorful side at your next gathering. Imagine crisp cucumbers, juicy tomatoes, and creamy avocados all tossed in a zesty dressing—what's not to love? Are you ready to create a dish that captures the essence of summer? Let’s dive in!

Why is this salad so refreshing?

Fresh ingredients are the heartbeat of this dish, combining crunchy cucumbers, juicy tomatoes, and creamy avocados for a delightful flavor explosion. Quick and easy, this Tomato Cucumber Avocado Salad comes together in just 15 minutes—perfect for busy summer days. Versatile as it is vibrant, serve it as a standalone meal, a side to grilled chicken, or alongside dishes like Tofu Caesar Salad for a satisfying spread. Crowd-pleasing and gluten-free, this salad will appeal to everyone at your table and will have them coming back for seconds. With its bright colors and fresh taste, it's a dish you'll adore making all summer long!

Tomato Cucumber Avocado Salad Ingredients

For the Dressing
• Extra Virgin Olive Oil – Provides richness and flavor; essential for the dressing. Substitution: Any neutral oil can be used, but olive oil adds distinct taste.
• Fresh Lemon Juice – Adds acidity and brightness; enhances the freshness of the vegetables. Substitution: Red wine vinegar can be used.
• Garlic (1 clove, grated) – Adds depth of flavor; be careful not to overpower the dish.

For the Salad
• Avocados (1 to 2, diced) – Brings creaminess and healthy fats; choose ripe but firm avocados for best results.
• Persian Cucumbers (3 to 4, halved and sliced) – Provide crunch; preferred for their lower water content. Substitution: Regular cucumbers (peeled and seeded) or English cucumbers can be used.
• Cherry Tomatoes (2 pints, halved) – Sweetness and juiciness give color and balance. Choose vibrant red or yellow tomatoes.
• Red Onion (½ medium, thinly sliced) – Adds sharpness; use sparingly. Alternate: Green onions can offer a milder taste.
• Kosher Salt (¼ teaspoon, plus more to taste) – Enhances all flavors of the salad.
• Black Pepper (freshly ground) – Provides slight heat; adjust to your preference.
• Feta Cheese (4 to 6 ounces, cubed) – Adds salty flavor and creaminess to the salad. Substitution: Use dairy-free cheese or omit for a vegan version.
• Fresh Herbs (¼ cup, chopped parsley and/or basil) – Freshness and aromatic notes enhance the overall flavor profile.
• Arugula (3 cups, optional) – A peppery green that can serve as a base; also works well with orzo or grilled chicken.

Step‑by‑Step Instructions for Tomato Cucumber Avocado Salad

Step 1: Whisk the Dressing
In a large mixing bowl, combine 3 tablespoons of extra virgin olive oil, the juice of one lemon, and 1 clove of grated garlic. Whisk these ingredients together for about 30 seconds, until emulsified and fragrant. The dressing should appear smooth and glossy, providing a flavorful base for your Tomato Cucumber Avocado Salad.

Step 2: Add the Main Ingredients
Next, gently fold in 1 to 2 diced avocados, halved cherry tomatoes from 2 pints, and 3 to 4 halved and sliced Persian cucumbers into the bowl. Carefully combine these vibrant ingredients for about 1 minute, ensuring that the avocados maintain their shape while the tomatoes and cucumbers lend color and texture to the salad.

Step 3: Season and Stir
Sprinkle in ¼ teaspoon of kosher salt and freshly ground black pepper to taste. Using a large spoon, gently stir to coat all the vegetables evenly with the dressing, allowing the flavors to meld together beautifully. This step should take about 1 minute, creating a colorful and well-seasoned Tomato Cucumber Avocado Salad.

Step 4: Final Touches with Cheese and Herbs
Before serving, fold in 4 to 6 ounces of cubed feta cheese and ¼ cup of chopped fresh herbs like parsley or basil. Toss lightly for an additional minute, allowing the feta to mingle with the veggies, adding a creamy, salty bite without crumbling too much.

Step 5: Plate Up and Serve
Serve your Tomato Cucumber Avocado Salad immediately over a bed of 3 cups of arugula, or enjoy it alone as a refreshing dish. This salad is best enjoyed right away, as the ingredients remain fresh and vibrant. If desired, personalize your serving with grilled chicken or a sprinkle of nuts for extra texture!

Expert Tips for Tomato Cucumber Avocado Salad

  • Use Ripe Avocados: Choose avocados that are ripe but firm to ensure creaminess without becoming mushy in your Tomato Cucumber Avocado Salad.

  • Fresh Ingredients Only: Opt for fresh vegetables and herbs to truly capture the vibrant flavors. Wilted or overripe produce can dull the taste.

  • Add Dressing Just Before Serving: To maintain crunch and freshness, dress the salad right before you serve it, preventing the cucumbers and tomatoes from getting soggy.

  • Taste and Adjust: Always taste the salad before serving. Adjust the seasoning with more salt or pepper based on your preference for a perfectly balanced dish.

  • Experiment with Variations: Feel free to mix things up! Add nuts or swap feta for goat cheese to create unique flavor profiles while keeping the salad light and refreshing.

Storage Tips for Tomato Cucumber Avocado Salad

  • Fridge: Store leftovers in an airtight container for up to 2-3 days. However, for the best taste, it's recommended to enjoy the Tomato Cucumber Avocado Salad fresh.

  • Prevent Browning: To keep avocados from browning, you can add a little extra lemon juice and store the salad right after preparation.

  • Reheating: This salad is best served cold and does not require reheating. Enjoy it straight from the fridge for a refreshing bite!

  • Freezer: Freezing is not recommended, as it can compromise the texture of the fresh ingredients, particularly the avocado and cucumber.

Make Ahead Options

These Tomato Cucumber Avocado Salad ingredients are perfect for meal prep, making your busy weeknights a breeze! You can chop the cucumbers, tomatoes, and onions up to 24 hours ahead; simply store them in an airtight container in the refrigerator to maintain their crunch. Avocados can be diced in advance, but to prevent browning, consider storing them whole until you're ready to serve. When it's time to enjoy your salad, mix the prepped veggies with the dressing, add in the diced avocados, feta cheese, and fresh herbs, and you'll have a refreshing, vibrant dish ready to impress in just minutes!

What to Serve with Tomato Cucumber Avocado Salad

This colorful salad is a delightful starter or side that pairs beautifully with a variety of dishes.

  • Grilled Chicken: The savory flavors of grilled chicken complement the freshness of the salad, making for a hearty meal.

  • Quinoa Pilaf: A light and fluffy quinoa pilaf enhances the texture contrast while adding nutty flavor to the spread.

  • Pita Bread: Soft and warm pita bread serves as a perfect vehicle for scooping up the vibrant salad, making it fun to eat.

  • Roasted Vegetables: The rich, caramelized taste of roasted vegetables adds depth to the meal, balancing the crispness of the salad.

  • Lemon Sorbet: A refreshing lemon sorbet serves as a palate cleanser, rounding off the meal with a touch of sweetness.

  • Chilled White Wine: A glass of chilled Sauvignon Blanc or Pinot Grigio pairs well, enhancing the dish’s bright, zesty flavors.

  • Shrimp Skewers: Grilled shrimp skewers provide a touch of gourmet elegance, enhancing the meal’s fresh and vibrant theme.

  • Corn on the Cob: Sweet grilled corn brings a delightful crunch and natural sweetness that pairs perfectly with the salad's flavors.

Tomato Cucumber Avocado Salad: Customization Options

Feel free to give your Tomato Cucumber Avocado Salad a personal twist, as there are endless ways to enjoy this vibrant dish!

  • Goat Cheese: Swap feta for goat cheese for a creamier and tangier flavor that pairs beautifully with fresh herbs.
  • Nuts & Seeds: Add walnuts or sunflower seeds for a satisfying crunch that complements the creamy avocado.
  • Grilled Veggies: Include grilled corn or zucchini for a smoky sweetness that elevates the salad's flavor.
  • Spice It Up: Toss in sliced jalapeños or a pinch of red pepper flakes to bring an exciting heat to your salad.
  • Herb Variations: Experiment with fresh dill or cilantro instead of parsley or basil for a different aromatic profile.
  • Chickpeas: Stir in canned chickpeas for added protein, turning this salad into a heartier meal option.
  • Citrus Zest: Add a sprinkle of lime or orange zest for an extra zing that brightens the salad beautifully.
  • Balsamic Drizzle: Finish with a balsamic reduction for a sweet and tangy kick that balances the dish perfectly.

Whether you're serving it alongside grilled chicken or pairing it with a light pasta like German Potato Salad, these variations invite creativity. Enjoy crafting your perfect summer salad!

Tomato Cucumber Avocado Salad Recipe FAQs

What type of tomatoes should I use for this salad?
I recommend using cherry tomatoes for their sweetness and juiciness, which balance beautifully with the creaminess of the avocado and crunch of the cucumber. Opt for vibrant red or yellow tomatoes to ensure maximum flavor and visual appeal.

How should I store leftover Tomato Cucumber Avocado Salad?
Store any leftovers in an airtight container in the refrigerator for up to 2-3 days. To maintain freshness, try to add a little extra lemon juice before sealing it, which also helps slow down browning in the avocados. Always give it a quick stir before serving!

Can I freeze this salad?
Freezing is not recommended for Tomato Cucumber Avocado Salad as it can severely affect the texture of the fresh ingredients, especially the avocado and cucumber. It's best enjoyed fresh, so aim to make just what you need for one meal or gathering!

What if my avocados aren’t ripe enough?
If your avocados are not yet ripe, place them in a paper bag at room temperature for a day or two to speed up the ripening process. Check daily by gently squeezing them; they should give a little when ready to eat. Just make sure to use them when they're ripe but still firm to avoid them getting too mushy.

Is this salad suitable for people with dietary restrictions?
Absolutely! This Tomato Cucumber Avocado Salad is naturally gluten-free and vegetarian. If dairy is a concern, you can easily omit the feta cheese or swap it for a dairy-free alternative. Make sure to always check for any allergies with the ingredients, such as nuts if you're adding them for crunch!

Tomato Cucumber Avocado Salad

Tomato Cucumber Avocado Salad: A Refreshing Summer Delight

A quick and refreshing Tomato Cucumber Avocado Salad that combines vibrant flavors and is perfect for summer gatherings.
Print Recipe Pin Recipe
Prep Time 15 minutes mins
Total Time 15 minutes mins
Servings: 4 servings
Course: Salads
Calories: 220
Ingredients Equipment Method Nutrition Notes

Ingredients
  

For the Dressing
  • 3 tablespoons Extra Virgin Olive Oil Provides richness and flavor
  • 1 medium Fresh Lemon Juice Adds acidity and brightness
  • 1 clove Garlic, grated Adds depth of flavor
For the Salad
  • 1 to 2 pieces Avocados, diced Choose ripe but firm avocados
  • 3 to 4 pieces Persian Cucumbers, halved and sliced Preferred for their lower water content
  • 2 pints Cherry Tomatoes, halved Choose vibrant red or yellow tomatoes
  • ½ medium Red Onion, thinly sliced Use sparingly
  • ¼ teaspoon Kosher Salt Enhances all flavors of the salad
  • Black Pepper, freshly ground Adjust to your preference
  • 4 to 6 ounces Feta Cheese, cubed Adds salty flavor and creaminess
  • ¼ cup Fresh Herbs, chopped parsley and/or basil Enhances the overall flavor profile
  • 3 cups Arugula, optional A peppery green that can serve as a base

Equipment

  • Mixing Bowl

Method
 

Step-by-Step Instructions for Tomato Cucumber Avocado Salad
  1. In a large mixing bowl, combine 3 tablespoons of extra virgin olive oil, the juice of one lemon, and 1 clove of grated garlic. Whisk these ingredients together for about 30 seconds, until emulsified and fragrant.
  2. Next, gently fold in 1 to 2 diced avocados, halved cherry tomatoes from 2 pints, and 3 to 4 halved and sliced Persian cucumbers into the bowl.
  3. Sprinkle in ¼ teaspoon of kosher salt and freshly ground black pepper to taste. Gently stir to coat all the vegetables evenly.
  4. Before serving, fold in 4 to 6 ounces of cubed feta cheese and ¼ cup of chopped fresh herbs like parsley or basil.
  5. Serve your Tomato Cucumber Avocado Salad immediately over a bed of 3 cups of arugula, or enjoy it alone as a refreshing dish.

Nutrition

Serving: 1servingCalories: 220kcalCarbohydrates: 14gProtein: 4gFat: 18gSaturated Fat: 3gPolyunsaturated Fat: 1gMonounsaturated Fat: 12gCholesterol: 10mgSodium: 250mgPotassium: 500mgFiber: 5gSugar: 3gVitamin A: 300IUVitamin C: 25mgCalcium: 80mgIron: 1mg

Notes

Best enjoyed fresh, can add grilled chicken or nuts for extra texture. Dress just before serving to maintain crunch.

Tried this recipe?

Let us know how it was!

Best Buddha Bowl Recipe for a Wholesome Flavor Explosion

September 11, 2025 by Grace Snow Leave a Comment

As I stood in my kitchen, the vibrant colors of fresh vegetables danced before me, filling my heart with joy and anticipation. This Best Buddha Bowl not only strikes the perfect balance of flavors and textures, but it also offers a delightful, healthy escape from the mundane fast-food routine. Packed with nutrient-rich ingredients, including sweet potatoes, hearty beans, and a zingy turmeric tahini sauce, this dish is a feast for both the eyes and the body. Plus, it’s a true time-saver, perfect for quick lunches or effortless weeknight dinners. What I love most is its endless adaptability, allowing you to mix and match toppings to suit any craving or leftover you have on hand. Get ready to dive into a bowl of vibrant goodness that nourishes your soul—are you ready to customize your own?

Why Is This Buddha Bowl Irresistible?

Vibrant colors make your plate pop! The fresh veggies not only look stunning but also provide essential nutrients.

Nutrient-dense ingredients like chickpeas and sweet potatoes ensure you're fueling your body right.

Customization is key: Feel free to swap in seasonal fruits, or add nuts for texture—endless options await!

Meal prep-friendly, this recipe saves time throughout the week, whether for a quick lunch or a satisfying dinner.

Crowd-pleaser appeal means it’s perfect for sharing, whether with family or friends who are tired of fast food.

Dive into the adventure of combining flavors with your own spin, just like our Acai Bowl Nutritious or Fish Taco Bowls!

Best Buddha Bowl Ingredients

For the Base
• Sweet Potato – Adds natural sweetness and fiber; you can replace it with butternut squash for a different flavor profile.
• Cooked Brown Rice or Quinoa – Serves as a hearty base; swap it with couscous or any grain you prefer for diversity.
• Cooked Chickpeas or Lentils – A fantastic source of protein and fiber; feel free to use black beans as an alternative.

For the Veggies
• Extra-Virgin Olive Oil – Ideal for roasting; avocado oil works as a flavorful swap.
• Watermelon Radish or Red Radishes – Offers crunch and a pop of color; sliced cucumbers can be a milder alternative.
• Carrots – Bring sweetness and crunch to the dish; bell peppers can be swapped for a different texture.
• Shredded Red Cabbage – Great for added crunch and antioxidants; switch it out for green cabbage or kale.
• Kale – Full of nutrients; spinach can be used for a softer texture.

For the Dressing
• Turmeric Tahini Sauce – Adds creaminess and flavor; a classic tahini dressing can serve as a simple alternative.
• Lemon Wedge – Brightens the dish with acidity; consider using lime if preferred.

For the Toppings
• Sauerkraut or Fermented Veggie – Provides probiotics for gut health; try kimchi for a spicy kick.
• Sesame or Hemp Seeds – Introduce healthy fats and crunch; flaxseeds are another great option.
• Microgreens – For an extra touch of color and nutrients; chopped herbs can also elevate the dish.
• Sea Salt and Freshly Ground Black Pepper – Essential seasonings that enhance flavor; consider flavored salts for an extra pop.

With these Best Buddha Bowl ingredients, you're all set to create a delightful and customizable dish that’s both nourishing and satisfying!

Step‑by‑Step Instructions for Best Buddha Bowl

Step 1: Preheat and Prepare
Begin by preheating your oven to 400°F (200°C). While the oven heats up, line a large baking sheet with parchment paper. This ensures that your roasted vegetables don’t stick and will make cleanup a breeze. Once ready, take your sweet potatoes, peel them, and cut them into uniform cubes for even cooking.

Step 2: Roast the Sweet Potatoes
In a mixing bowl, toss the cubed sweet potatoes with extra-virgin olive oil, sea salt, and freshly ground black pepper. Spread the coated sweet potatoes evenly on the prepared baking sheet. Roast them in the oven for about 20 minutes, flipping halfway through until they are golden brown and tender. This roasting gives your Best Buddha Bowl a delicious depth of flavor.

Step 3: Prepare the Fresh Veggies
While the sweet potatoes roast, thinly slice the watermelon radish and peel the carrots into ribbons using a vegetable peeler. In a separate bowl, mix these vibrant carrot ribbons and radishes with shredded red cabbage and a squeeze of lemon juice. Toss everything well to combine, adding a burst of freshness to your Buddha bowl.

Step 4: Massage the Kale
Next, take your kale, remove the stems, and tear the leaves into bite-sized pieces. In a mixing bowl, drizzle a little lemon juice and sprinkle with salt over the kale. Massage the leaves for a few minutes until they soften and reduce in size. This step enhances the taste and texture, making it a perfect addition to the Best Buddha Bowl.

Step 5: Assemble the Bowl
With your roasted sweet potatoes now slightly cooled, it’s time to assemble your Best Buddha Bowl. Begin by placing a generous scoop of brown rice or quinoa at the bottom of your bowl. Layer it with the wilted kale, chickpeas or lentils, vibrant carrot and radish mixture, shredded cabbage, and finally the roasted sweet potatoes on top.

Step 6: Add Toppings and Dressing
For a finishing touch, sprinkle sauerkraut or your choice of fermented veggies over the assembled ingredients. Drizzle the creamy turmeric tahini sauce generously across the top, and add a sprinkle of sesame or hemp seeds. Season your bowl with additional sea salt and freshly ground black pepper as desired, and feel free to garnish with microgreens for extra color.
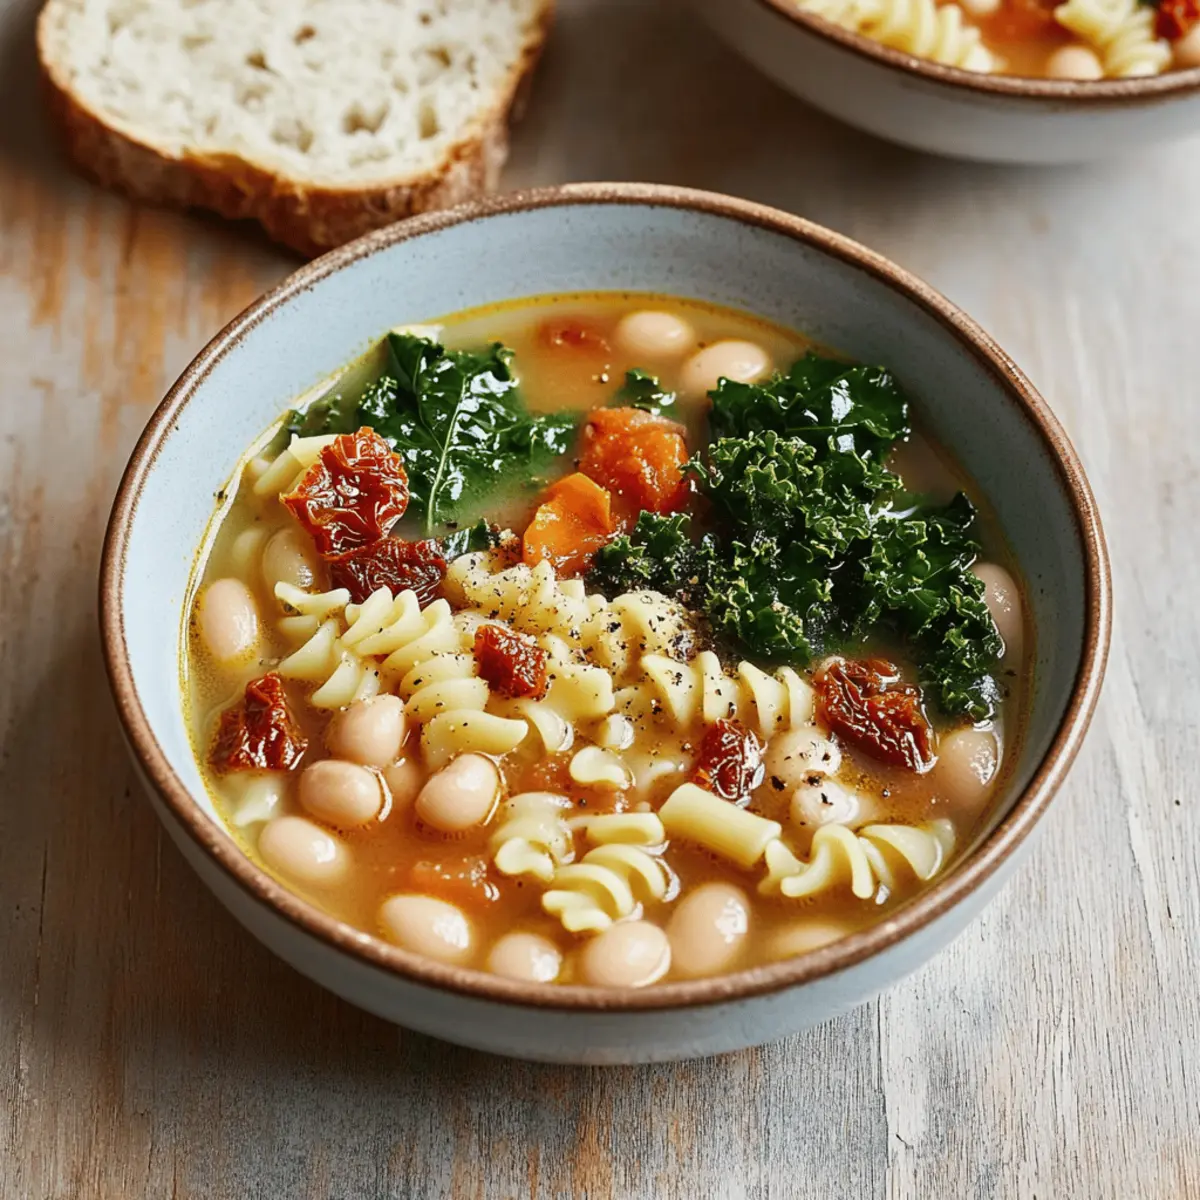
Step 7: Serve and Enjoy
Once you’ve created your masterpiece, serve your Best Buddha Bowl immediately to relish those fresh flavors. The combination of crunchy and creamy elements with the nourishing ingredients makes this dish not only visually appealing but also incredibly satisfying. Enjoy diving into this nutrient-packed meal that’s both hearty and vibrant!

Best Buddha Bowl Variations

Feel free to unleash your creativity and tailor this recipe to your taste buds!

  • Crunchy Nuts: Add walnuts or almonds for a delightful crunch that complements the creamy elements. The nutty texture adds a satisfying contrast in every bite.

  • Cheesy Goodness: Incorporate feta or a vegan cheese alternative for added creaminess. This twist brings a rich, savory element that harmonizes beautifully with fresh veggies.

  • Fruit Fusion: Toss in seasonal fruits like mango or sliced apples for a refreshing hint of sweetness. The fruity addition creates a joyful flavor explosion that brightens up your bowl!

  • Herb-Infused: Mix in fresh herbs like cilantro or parsley to elevate the flavor profile. Their aromatic qualities infuse the dish with a burst of freshness, turning an ordinary meal into something exceptional.

  • Spicy Kick: For those who like it hot, add diced jalapeños or a drizzle of sriracha for extra heat. This fiery twist awakens your taste buds, making each bite an adventure.

  • Crispy Tofu: Swap chickpeas with crispy marinated tofu for a protein-rich alternative. The crispy texture offers a wonderful addition that makes the Buddha bowl even more hearty.

  • Coconut Delight: Don't shy away from adding shredded coconut for a tropical touch. This ingredient introduces a pleasantly chewy texture and a hint of sweetness to balance the savory flavors.

  • Flavorful Dressing: Experiment with alternative sauces like peanut dressing or a lemon-tahini combo for a unique flavor kick. Each dressing brings a different character to your bowl, so feel free to try them all.

With these variations, your Best Buddha Bowl can become a new creation every time you make it! Don't forget to check out our other recipes like the Pitaya Smoothie Bowl to keep your meal prep adventure fresh and exciting!

Expert Tips for the Best Buddha Bowl

  • Prep Ingredients First: Before starting, chop and prep all ingredients. This makes assembly quick and keeps your cooking area tidy.

  • Roast for Flavor: Ensure sweet potatoes are well-coated with oil and seasonings before roasting; this enhances flavor and prevents them from drying out.

  • Kale Matters: A good massage is key! This not only breaks down the fibrous texture, making the kale tender in your Best Buddha Bowl, but it also boosts flavor.

  • Separate Storage: If you're meal prepping, store components separately. This keeps them fresh and prevents sogginess until you're ready to enjoy the bowl.

  • Explore Variations: Don’t hesitate to mix it up! Add seasonal fruits or your favorite nuts to keep your Best Buddha Bowl exciting and tailored to your tastes.

What to Serve with Ultimate Vegan Buddha Bowl

Elevate your dining experience with delightful sides and drinks that create a harmonious meal around this vibrant Buddha bowl.

  • Creamy Avocado Toast: The smooth, buttery texture of ripe avocado complements the bowl's crunch, making it a perfect start. Enjoy your toast as an appetizer while preparing the main dish.

  • Crispy Tofu Nuggets: These savory bites add a satisfying crunch. Marinate and bake them for an extra protein boost that pairs beautifully with the nourishing bowl.

  • Sweet Potato Fries: The sweet and salty notes of crispy fries offer a delightful contrast to the nutrient-dense ingredients, making the meal feel more indulgent without compromising health.

  • Herbed Quinoa Salad: A light and fragrant side, this salad with fresh herbs and citrus enhances the freshness of the Buddha Bowl while providing a unique texture.

  • Coconut Chia Pudding: For a nutritious dessert, this creamy pudding topped with seasonal fruits gently echoes the flavors of the Buddha Bowl and leaves a satisfying finish on your palate.

  • Iced Herbal Tea: Refreshing and light, a glass of iced tea infuses your meal with earthy undertones, complementing the vibrant ingredients while maintaining a healthy vibe.

  • Refreshing Green Smoothie: A burst of greens and fruits brings a nutritious balance. This drink fuels you further while enjoying the hearty bowl.

  • Fruit Medley: A colorful side of freshly chopped fruits, like mango and berries, provides the perfect sweet contrast to the savory flavors of your Buddha bowl.

Explore these wonderful pairings to enrich your dining experience and leave you feeling nourished and satisfied!

Make Ahead Options

These nutrient-packed Vegan Buddha Bowls are perfect for meal prep enthusiasts! You can roast the sweet potatoes and prepare the vegetables (including kale, radishes, and carrots) up to 3 days in advance, ensuring a quick assembly when you’re ready to enjoy. Store the components separately in airtight containers in the refrigerator to maintain their freshness and crunch. The quinoa or brown rice can be cooked up to 4 days ahead as well. When it's time to serve, simply reheat the sweet potatoes and grains, then assemble the bowl by layering all ingredients and drizzling with the creamy turmeric tahini sauce. This way, you'll experience the same deliciousness with minimal fuss on busy weeknights!

How to Store and Freeze Best Buddha Bowl

Fridge: Store leftover components separately in airtight containers for up to 4 days to maintain freshness and prevent sogginess.

Freezer: For longer storage, freeze cooked chickpeas, sweet potatoes, and grains in portions for up to 3 months. Thaw before assembling your bowl for a quick meal.

Reheating: Reheat sweet potatoes and grains in the microwave or oven until warmed through, approximately 2-5 minutes, ensuring they are heated evenly before combining in your Best Buddha Bowl.

Assembly Tip: If preparing ahead, keep fresh veggies like kale and radishes separate until ready to serve to preserve their crunch and vibrant colors.

Best Buddha Bowl Recipe FAQs

What type of sweet potato should I use for the Buddha Bowl?
Absolutely! I recommend using orange-fleshed sweet potatoes as they offer a delightful natural sweetness and creamy texture. If you're looking for a change, butternut squash works wonderfully as a flavorful alternative. Just ensure they are firm with smooth skin, avoiding any with dark spots or blemishes.

How should I store leftover Buddha Bowl components?
Very importantly, to maintain freshness, store each component of your Best Buddha Bowl separately in airtight containers in the fridge. They will stay fresh for up to 4 days. This prevents sogginess and keeps flavors vibrant, making it easy for you to assemble your bowl whenever hunger strikes!

Can I freeze parts of my Buddha Bowl?
Certainly! You can freeze components like cooked chickpeas, roasted sweet potatoes, and grains for up to 3 months. To freeze, portion them into freezer-safe bags or containers. When you're ready to enjoy, simply thaw in the fridge overnight, then reheat them in the microwave or oven until warmed throughout.

What should I do if my kale is tough after massaging?
I understand this concern! If after massaging, your kale still feels tough, it may need a bit more love. Try adding a pinch of salt and a little more lemon juice, then continue massaging for an extra minute or two. This helps break down the fibers, making it tender. The more the merrier!

Are there any dietary considerations for pets or allergies?
For those with allergies or sharing with pets, it’s very important to keep an eye on the toppings. While the base of the Best Buddha Bowl is generally safe, avoid feeding pets ingredients like onions or garlic, and be cautious with nuts due to potential allergies. For a nut-free option, simply substitute nuts and seeds with additional grains or veggies!

Best Buddha Bowl

Best Buddha Bowl Recipe for a Wholesome Flavor Explosion

This Best Buddha Bowl offers a vibrant mix of flavors and nutrients, making healthy eating exciting.
Print Recipe Pin Recipe
Prep Time 15 minutes mins
Cook Time 20 minutes mins
Total Time 35 minutes mins
Servings: 2 bowls
Course: Salads
Cuisine: American
Calories: 450
Ingredients Equipment Method Nutrition Notes

Ingredients
  

For the Base
  • 1 medium Sweet Potato peel and cube
  • 1 cup Cooked Brown Rice or Quinoa or any grain of choice
  • 1 cup Cooked Chickpeas or Lentils or use black beans
For the Veggies
  • 2 tablespoons Extra-Virgin Olive Oil or avocado oil
  • 1 medium Watermelon Radish or Red Radishes sliced
  • 1 medium Carrot peeled into ribbons
  • 1 cup Shredded Red Cabbage or green cabbage/kale
  • 1 cup Kale remove stems and tear leaves
For the Dressing
  • 1/4 cup Turmeric Tahini Sauce or classic tahini dressing
  • 1 whole Lemon Wedge for juice
For the Toppings
  • 1/4 cup Sauerkraut or Fermented Veggie or kimchi
  • 2 tablespoons Sesame or Hemp Seeds or flaxseeds
  • 1 cup Microgreens or chopped herbs
  • to taste Sea Salt and Freshly Ground Black Pepper for seasoning

Equipment

  • Oven
  • Baking Sheet
  • Mixing Bowl
  • Vegetable Peeler
  • Parchment Paper

Method
 

Preparation Steps
  1. Preheat your oven to 400°F (200°C) and line a large baking sheet with parchment paper.
  2. Toss the cubed sweet potatoes with olive oil, salt, and pepper, then roast for 20 minutes, flipping halfway.
  3. Slice the watermelon radish and peel the carrots into ribbons; mix with shredded cabbage and lemon juice.
  4. Massage the kale with lemon juice and salt until softened, then set aside.
  5. Assemble the bowl by layering rice or quinoa, kale, chickpeas/lentils, carrot/radish mixture, and roasted sweet potatoes.
  6. Top with fermented veggies, drizzle the turmeric tahini sauce, and sprinkle with seeds and seasonings.
  7. Serve immediately to enjoy fresh and vibrant flavors.

Nutrition

Serving: 1bowlCalories: 450kcalCarbohydrates: 60gProtein: 15gFat: 20gSaturated Fat: 3gPolyunsaturated Fat: 5gMonounsaturated Fat: 12gSodium: 400mgPotassium: 900mgFiber: 12gSugar: 7gVitamin A: 12000IUVitamin C: 70mgCalcium: 150mgIron: 4mg

Notes

Prep all ingredients ahead for efficiency and keep fresh veggies separate until serving to maintain crunch.

Tried this recipe?

Let us know how it was!

Best Buddha Bowl Recipe: Colorful, Healthy & Customizable

September 11, 2025 by Grace Snow Leave a Comment

At the heart of every vibrant meal lies the magic of fresh ingredients, and that is exactly what my ultimate Vegan Buddha Bowl delivers. Packed with nutrient-rich vegetables, hearty chickpeas, and a creamy turmeric tahini sauce, this dish isn't just visually stunning, it’s also a fantastic way to nourish your body quickly on busy days. Whether you're looking for a healthy lunch or a fuss-free weeknight dinner, the best Buddha Bowl allows for effortless customization; you can mix and match flavors and textures to fit your mood or dietary preferences. Plus, it's perfect for meal prep, ensuring you can savor delicious, wholesome meals throughout the week. What delightful twist will you add to your bowl today?

Why is This Buddha Bowl a Must-Try?

Vibrant Colors: The array of fresh vegetables creates a feast for the eyes and the palate.

Nutrient-Dense: Packed with protein from chickpeas and healthy fats from tahini, it's a wholesome meal.

Customizable Delight: Feel free to swap in your favorite veggies or grains—think quinoa or couscous! Check out my Acai Bowl Nutritious for more customization ideas.

Meal Prep Magic: Make-ahead friendly, store components separately for up to 4 days, ensuring freshness.

Easy and Quick: With just a few simple steps, enjoy a delicious meal that's ready in under 30 minutes.

Best Buddha Bowl Ingredients

Unlock the goodness of a colorful, customizable bowl!

For the Base

  • Cooked Brown Rice or Quinoa – Provides a hearty base packed with carbohydrates; feel free to swap with couscous if you prefer.
  • Cooked Chickpeas or Lentils – A fantastic source of protein and fiber; black beans can be used as an alternative for a different flavor.

For the Roasted Vegetables

  • Sweet Potato – Adds natural sweetness and fiber; butternut squash can be a delightful swap for variety.
  • Extra-Virgin Olive Oil – Perfect for drizzling and roasting; consider avocado oil for a unique taste.
  • Carrots – Brings sweetness and crunch; bell peppers can add a colorful twist if you'd like.
  • Shredded Red Cabbage – Offers crunch and antioxidants; green cabbage or kale are also great options.

For the Fresh Elements

  • Watermelon Radish or Red Radishes – Adds crispness and vibrant color; sliced cucumbers offer a milder alternative.
  • Kale – Nutrient-rich leafy greens; spinach can serve as a softer substitute.
  • Lemon Wedge – Enhances flavor with a zesty kick; lime can be a refreshing switch.

For the Garnishes

  • Sesame or Hemp Seeds – Infuse healthy fats and crunch; flaxseeds are excellent alternatives.
  • Sauerkraut or Fermented Veggie – Provides probiotics for gut health; substitute with kimchi for a spicy zing.
  • Microgreens – An optional garnish for added nutrients and color; fresh herbs work beautifully, too.
  • Sea Salt and Freshly Ground Black Pepper – Essential for seasoning; flavored salts can elevate the taste even more.

For the Dressing

  • Turmeric Tahini Sauce – This creamy dressing ties the bowl together with flavor; a simple tahini sauce can be a great alternative.

With these vibrant ingredients, you are armed to create the Best Buddha Bowl that not only delights your taste buds but is also a nutritious feast for the eyes! Enjoy mixing and matching to discover your personalized favorite!

Step‑by‑Step Instructions for Best Buddha Bowl

Step 1: Preheat and Prepare
Begin by preheating your oven to 400°F (200°C) while you prepare a large baking sheet with parchment paper. This ensures easy cleanup later and prevents sticking. Take your sweet potatoes, peel and cube them into bite-sized pieces, and set them aside for roasting.

Step 2: Roast Sweet Potatoes
In a mixing bowl, toss the cubed sweet potatoes with a generous drizzle of extra-virgin olive oil, salt, and freshly ground black pepper until evenly coated. Spread the seasoned sweet potatoes in a single layer on the prepared baking sheet and roast for 20–25 minutes, or until they are golden and tender, turning them halfway through for even cooking.

Step 3: Prepare Fresh Vegetables
While the sweet potatoes are roasting, thinly slice the watermelon radish and peel the carrots into ribbons using a vegetable peeler. In a bowl, mix these sliced veggies along with shredded red cabbage. Squeeze fresh lemon juice over the vegetables, tossing gently to combine and brighten their flavors, creating a refreshing component for your vegan Buddha bowl.

Step 4: Massage the Kale
Next, rinse your kale and remove the tough stems. Tear the leaves into smaller pieces and place them in a bowl. Drizzle a little lemon juice and sprinkle a pinch of salt over the kale, then massage the leaves with your hands for about 2–3 minutes, until they soften and reduce in size. This step not only improves texture but enhances the flavors in your Best Buddha Bowl.

Step 5: Assemble the Bowl
Once your roasted sweet potatoes are ready, start assembling your Best Buddha Bowl. In each serving bowl, layer a base of cooked brown rice or quinoa, followed by a generous scoop of kale, a portion of roasted sweet potatoes, chickpeas, and the vibrant mix of fresh vegetables. Don’t forget to add a spoonful of sauerkraut or your favorite fermented veggie on top!

Step 6: Finish and Serve
Sprinkle sesame seeds over your assembled Buddha bowl for added crunch and healthy fats. Finally, drizzle the creamy turmeric tahini sauce generously over the entire bowl, seasoning with extra sea salt and black pepper to taste. Your beautifully crafted Best Buddha Bowl is now ready to be enjoyed fresh, packed for lunch, or savored as a delightful dinner!

What to Serve with the Ultimate Vegan Buddha Bowl

Enhance your dining experience with delightful pairings that elevate this colorful and nutritious meal.

  • Creamy Avocado Toast: A side of this smooth toast adds richness and healthy fats, complementing the bowl’s vibrant ingredients.

  • Crispy Tofu Bites: These crunchy morsels add protein and texture, making every bite even more satisfying and hearty.

  • Zesty Cucumber Salad: A refreshing salad provides a crunchy contrast to the bowl's warm elements, brightening up your plate.

  • Roasted Brussels Sprouts: Caramelized and perfectly roasted, they introduce a nutty flavor that beautifully enhances the Buddha Bowl.

  • Chilled Coconut Water: Thirst-quenching and hydrating, this drink infuses a tropical twist to your meal, balancing the savory elements.

  • Fruit Salad Medley: A bowl of colorful seasonal fruits offers a sweet finish, cleansing the palate after your nutrient-packed meal.

  • Herbal Iced Tea: Refreshing and light, it pairs wonderfully without overpowering the flavors, keeping your meal light and invigorating.

Each of these suggested accompaniments will turn your Ultimate Vegan Buddha Bowl into a full-fledged feast, making mealtime a beloved family occasion!

Best Buddha Bowl Variations & Substitutions

Feel free to explore delightful changes to customize your Buddha bowl—each bite can be a new adventure!

  • Nutty Crunch: Incorporate chopped walnuts or almonds for an irresistible crunch and added healthy fats.
  • Cheesy Goodness: Add crumbled feta or a vegan cheese alternative for a creamy touch that enhances flavor.
  • Fruity Twist: Toss in seasonal fruits like juicy mango or sweet apple slices for a delightful contrast to the savory elements.
  • Spicy Kick: Spice things up by drizzling Sriracha or adding sliced jalapeños for a pleasing heat that gets your taste buds tingling.
  • Grain Swap: Replace brown rice or quinoa with farro or millet for a different texture and flavor, perfect for experimenting.
  • Herb-Infused: Mix in fresh herbs like cilantro or parsley for a burst of freshness that brightens the entire bowl.
  • Creamy Alternative: For a different dressing, try a lemon tahini or avocado-based dressing for a creamy finish that varies the flavor profile.
  • Flavorful Marinade: Marinate your chickpeas in lemon juice and garlic for extra zest and depth, transforming the protein component significantly.

With these variations, feel free to also explore more creative dishes, like my Pitaya Smoothie Bowl or Fish Taco Bowls. Let your imagination guide you, and enjoy crafting your perfect Best Buddha Bowl!

Make Ahead Options

These nutrient-packed Vegan Buddha Bowls are perfect for busy home cooks looking to save time! You can prepare most components up to 4 days in advance. Start by roasting the sweet potatoes, which can be refrigerated after cooling to enhance flavors. Chopped vegetables like kale, carrots, and radishes can be prepped and stored in airtight containers, keeping them crisp and fresh. For the best quality, store the turmeric tahini sauce separately and only dress the bowl just before serving. When you're ready to enjoy your Best Buddha Bowl, simply reheat the sweet potatoes and whisk together all the components for a delicious meal that’s just as vibrant and tasty!

How to Store and Freeze Best Buddha Bowl

Fridge: Store any leftovers in an airtight container for up to 4 days. Keep the components separate to prevent sogginess and maintain freshness.

Freezer: You can freeze certain components like roasted sweet potatoes and cooked grains for up to 3 months. Reheat them in the microwave or oven before assembling your Best Buddha Bowl.

Reheating: Gently reheat in the microwave or on the stove when ready to enjoy. Drizzle a bit of extra sauce or lemon juice to freshen the flavors.

Meal Prep: For optimal meal prep, prepare ingredients separately and combine only when ready to eat. This keeps everything fresh and crunchy!

Tips for the Best Buddha Bowl

  • Quality Ingredients: Choose fresh, seasonal vegetables for vibrant flavors and nutritional benefits. Avoid wilted greens or stale grains for the best experience.

  • Cooling Sweet Potatoes: Allow roasted sweet potatoes to cool slightly before adding to the bowl. This prevents them from making the bowl soggy.

  • Kale Massage: Spend extra time massaging the kale for improved texture. It not only softens but also enhances the overall flavor in your Best Buddha Bowl.

  • Layering for Flavor: Assemble your bowl in layers to ensure every bite is a delightful mix of flavors. Don’t forget to drizzle the dressing evenly!

  • Make-Ahead Storage: For meal prep, store components separately in airtight containers to keep them fresh up to four days. This maintains texture and taste.

  • Experiment with Variations: Don’t hesitate to customize your Buddha bowl with different grains, legumes, or sauces. It’s about creating your ideal, personalized dish!

Best Buddha Bowl Recipe FAQs

How do I choose ripe sweet potatoes?
Absolutely! When selecting sweet potatoes, look for those that are firm and smooth, with no dark spots or bruises. The skin should be a rich color, and they should feel heavy for their size, indicating they are fresh. If you notice any dark spots all over, it's best to skip them, as they may be rotten inside.

What’s the best way to store leftovers?
Very! To keep your Best Buddha Bowl fresh, store leftovers in an airtight container in the refrigerator for up to 4 days. Be sure to separate the components like roasted sweet potatoes, fresh vegetables, and grains before storing. This way, each element retains its texture and taste until you’re ready to enjoy your next meal.

Can I freeze parts of the Buddha bowl?
Definitely! You can freeze components like roasted sweet potatoes and cooked grains (brown rice or quinoa) for up to 3 months. To freeze, let them cool completely, then place in airtight freezer bags or containers. When you're ready to enjoy, thaw them overnight in the fridge, then reheat in the microwave or oven until warmed through.

What should I do if my kale is too tough?
Oh no! If you find your kale not as tender as you'd like, you can try massaging it for a few more minutes with lemon juice and a pinch of salt. It’s a simple yet effective method. Start by tearing the leaves into smaller pieces, then squeeze half a lemon over them and sprinkle a dash of salt. Massage firmly until they soften, which can take about 3-5 minutes!

Are there any dietary considerations for pets or allergens?
Absolutely! While the Best Buddha Bowl is packed with nutritious ingredients for humans, be cautious about giving your pets anything seasoned with salt, undercooked grains, or raw cabbage as some can upset their stomach. For allergies, always check for gluten in products like soy sauce or grains, ensuring everything is suitable for those with dietary restrictions.

What can I substitute for tahini if I’m allergic?
Very! If you're allergic to tahini, a simple alternative can be a sunflower seed butter or even a homemade creamy dressing made from Cashew Nut Butter mixed with lemon juice, garlic, and water to achieve a similar consistency. This keeps the creamy aspect of your Best Buddha Bowl while still being delicious and allergen-friendly!

Best Buddha Bowl

Best Buddha Bowl Recipe: Colorful, Healthy & Customizable

Discover the Best Buddha Bowl filled with nutrient-rich vegetables, hearty chickpeas, and creamy turmeric tahini sauce for a healthy meal.
Print Recipe Pin Recipe
Prep Time 10 minutes mins
Cook Time 25 minutes mins
Total Time 35 minutes mins
Servings: 2 bowls
Course: Salads
Cuisine: Vegan
Calories: 450
Ingredients Equipment Method Nutrition Notes

Ingredients
  

For the Base
  • 1 cup Cooked Brown Rice or Quinoa Feel free to swap with couscous if you prefer.
  • 1 cup Cooked Chickpeas or Lentils Black beans can be used as an alternative.
For the Roasted Vegetables
  • 1 medium Sweet Potato Butternut squash can be swapped.
  • 2 tablespoons Extra-Virgin Olive Oil Consider avocado oil for a unique taste.
  • 1 medium Carrots Bell peppers can add a colorful twist.
  • 1 cup Shredded Red Cabbage Green cabbage or kale are also great options.
For the Fresh Elements
  • 1 cup Watermelon Radish or Red Radishes Sliced cucumbers offer a milder alternative.
  • 1 cup Kale Spinach can serve as a softer substitute.
  • 1 wedge Lemon Lime can be a refreshing switch.
For the Garnishes
  • 2 tablespoons Sesame or Hemp Seeds Flaxseeds are excellent alternatives.
  • 1 cup Sauerkraut or Fermented Veggie Substitute with kimchi for a spicy zing.
  • 1 handful Microgreens Fresh herbs work beautifully, too.
  • to taste Sea Salt and Freshly Ground Black Pepper Flavored salts can elevate the taste.
For the Dressing
  • 1/4 cup Turmeric Tahini Sauce A simple tahini sauce can be a great alternative.

Equipment

  • Oven
  • Baking Sheet
  • Mixing Bowl
  • Vegetable Peeler
  • Parchment Paper

Method
 

Step-by-Step Instructions
  1. Preheat your oven to 400°F (200°C) and prepare a large baking sheet with parchment paper.
  2. Toss cubed sweet potatoes with olive oil, salt, and pepper. Roast for 20–25 minutes.
  3. Thinly slice watermelon radish and peel carrots. Mix with shredded red cabbage and lemon juice.
  4. Rinse kale, remove stems, and massage with lemon juice and a pinch of salt for 2–3 minutes.
  5. Assemble bowls with a base of rice or quinoa, kale, roasted sweet potatoes, chickpeas, and fresh veggies.
  6. Top with sesame seeds and drizzle with turmeric tahini sauce. Season with salt and pepper.

Nutrition

Serving: 1bowlCalories: 450kcalCarbohydrates: 60gProtein: 15gFat: 18gSaturated Fat: 2gPolyunsaturated Fat: 4gMonounsaturated Fat: 10gSodium: 400mgPotassium: 800mgFiber: 12gSugar: 5gVitamin A: 150IUVitamin C: 90mgCalcium: 8mgIron: 15mg

Notes

Choose fresh, seasonal vegetables for vibrant flavors. Store components separately for optimal meal prep.

Tried this recipe?

Let us know how it was!
  • « Previous Page
  • 1
  • …
  • 17
  • 18
  • 19
  • 20
  • 21
  • Next Page »

Welcome!

Hi, I’m Grace, a Sydney-based home cook with a passion for bold flavors and trending ingredients. Whether you’re a busy beginner or a seasoned foodie, you’ll find dishes here that are fresh, fun, and full of flavor.

More about me

Popular Recipes

  • Honey Sriracha Salmon Bowls
    Delicious Honey Sriracha Salmon Bowls for Quick Dinners
  • Air Fryer Apple Pie Taquitos
    Crispy Air Fryer Apple Pie Taquitos for a Sweet Treat
  • Crispy Parmesan Crusted Cod
    Crispy Parmesan Crusted Cod: A Healthy Flavor Explosion
  • Air Fryer French Toast Bites
    Delicious Air Fryer French Toast Bites for Busy Mornings

Footer

↑ back to top

About

  • Privacy Policy
  • Disclaimer
  • Terms & Conditions

Newsletter

  • Sign Up! for emails and updates

Contact

  • About me
  • Contact me

Copyright © 2025 TastyTrendIngredients