tastytrendingredients

  • Home
  • Recipes
    • Appetizers
    • Breakfast
    • Dessert
    • Dinner
    • Drinks
    • Salads
    • Snacks
    • Soups
  • About me
  • Contact
menu icon
go to homepage
  • Home
  • Recipes
    • Appetizers
    • Breakfast
    • Dessert
    • Dinner
    • Drinks
    • Salads
    • Snacks
    • Soups
  • About me
  • Contact
search icon
Homepage link
  • Home
  • Recipes
    • Appetizers
    • Breakfast
    • Dessert
    • Dinner
    • Drinks
    • Salads
    • Snacks
    • Soups
  • About me
  • Contact
×

Hawaiian Roll French Toast Recipe for a Tropical Breakfast Bliss

May 18, 2026 by Grace Snow Leave a Comment

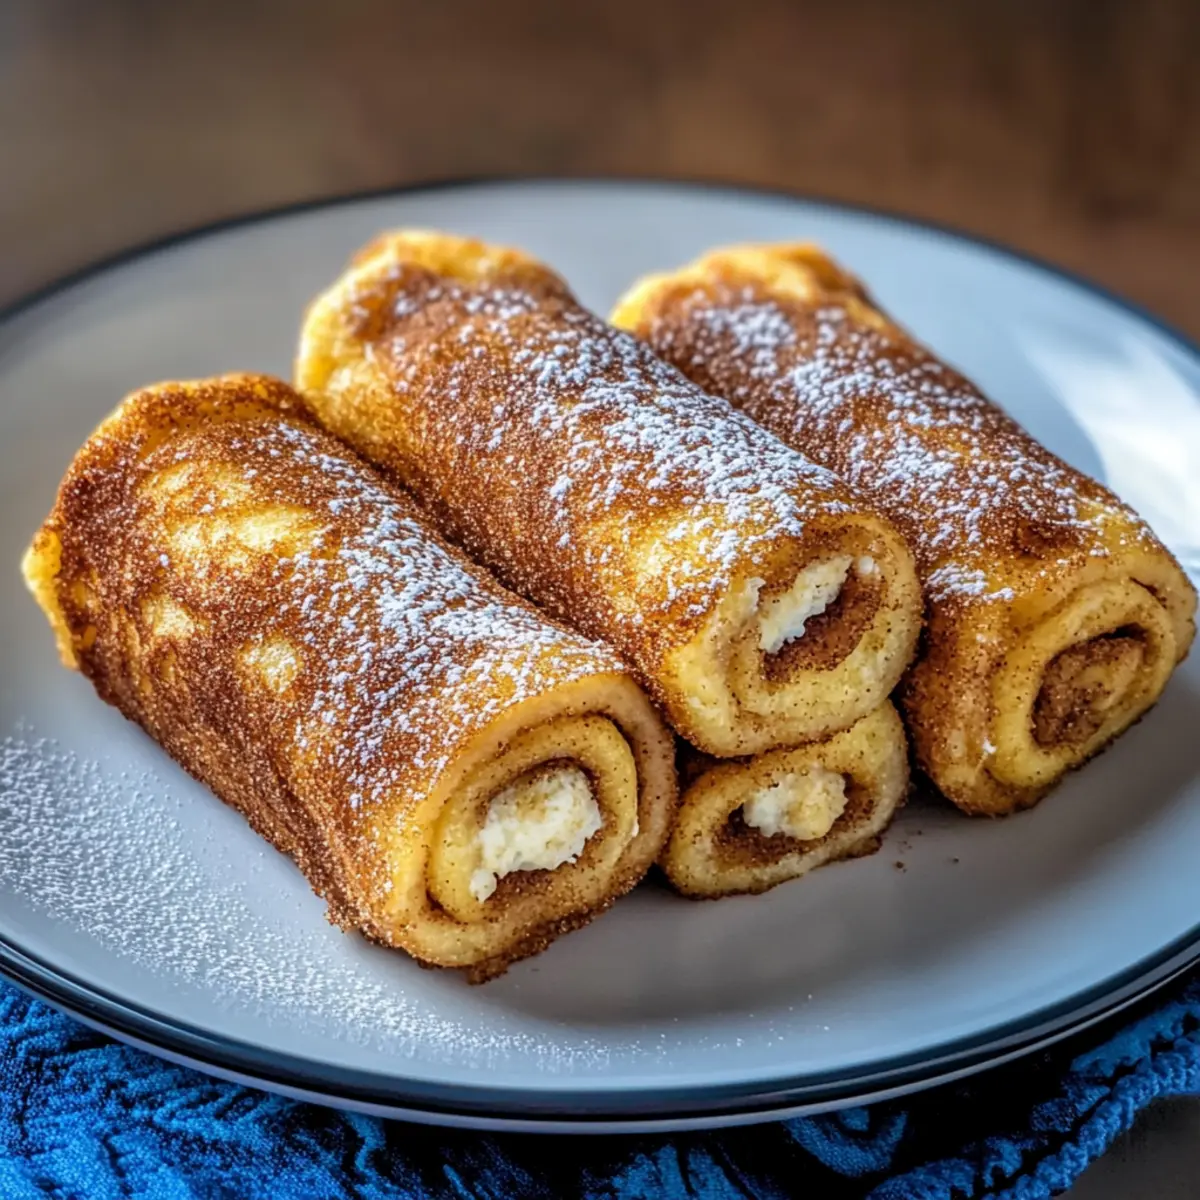
As I stood in my kitchen, the aroma of buttery goodness wafted through the air, instantly transporting me to a sunny paradise. That’s the magic of this Hawaiian Roll French Toast Recipe. It’s not just another breakfast dish; it's a slice of tropical delight that can transform your mornings any day of the week. Whipping up this quick breakfast is such a joy, especially when it becomes a family favorite to please both kids and adults alike. This recipe is all about comfort and ease—perfect for those rushed weekday mornings or those leisurely brunches when you want to impress. Curious about how you can take your breakfast game to a whole new level? Let’s dive into this delicious adventure!

Why is this Hawaiian Roll French Toast special?

Rich, Sweet Flavor: The lush sweetness of Hawaiian rolls combined with the creamy custard creates an irresistible breakfast that’s hard to beat.
Quick & Easy: Ready in just minutes, this recipe is perfect for busy mornings or spontaneous brunches.
Family-Friendly: Even picky eaters will adore this tropical twist on French toast, making it a crowd-pleaser.
Versatile Toppings: Explore unique variations like Coconut Cream French Toast or indulge with fresh berries for a delightful topping experience.
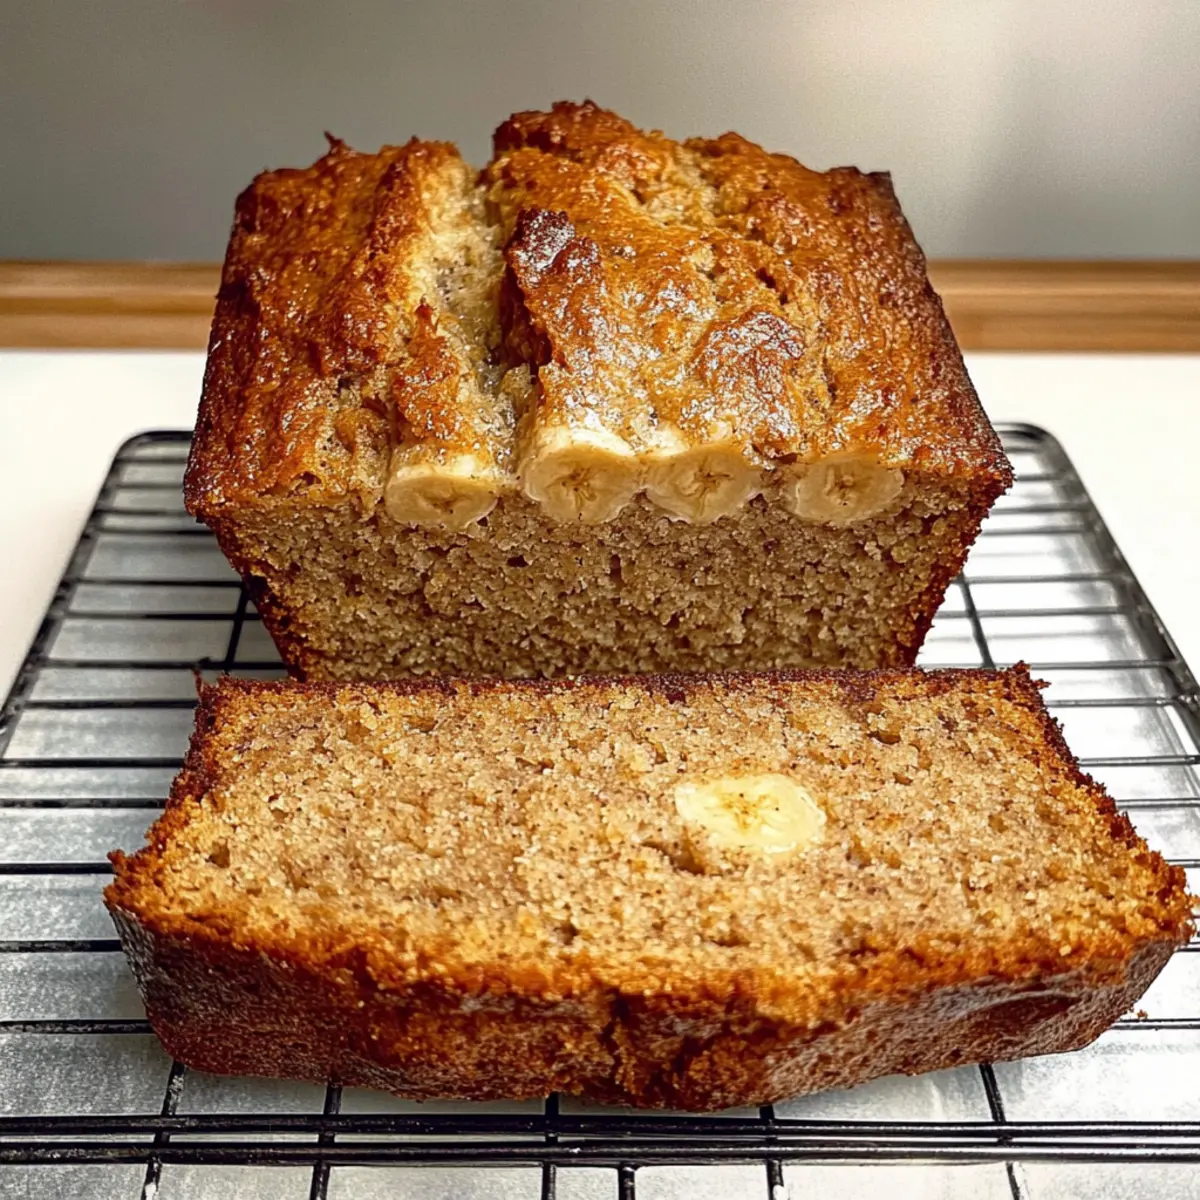
Satisfying Texture: Each bite features a golden-brown exterior that contrasts beautifully with the fluffy, soft interior, offering pure breakfast bliss.
Meal Prep Friendly: Make ahead and enjoy warm or cold; just freeze for a quick breakfast option later!

Hawaiian Roll French Toast Ingredients

• The essential items you'll need for this delightful dish!

For the Batter

  • Hawaiian Rolls – The star of the show, these sweet rolls bring that soft, pillowy texture essential for a heavenly French toast experience.
  • Eggs – Acts as the binding agent in the custard, providing richness and allowing the rolls to soak up all that delicious flavor.
  • Milk – Adds creaminess to the custard; feel free to substitute with any non-dairy alternative for a lighter version.
  • Vanilla Extract – A must-have for enhancing flavor; opt for pure extract for a more robust and aromatic taste.
  • Ground Cinnamon – A warm spice that adds depth; using fresh spices can elevate your dish even more.
  • Nutmeg – Grounds the sweetness with its warm flavor; only a pinch adds a lovely hint to the custard.

For Cooking

  • Butter – Adds richness while cooking; use a non-stick spray if you're looking to cut down on the fat content.

Optional Toppings

  • Syrup – Drizzle on maple syrup to enhance the sweetness of this delightful Hawaiian Roll French Toast; try flavored syrups for an extra twist!
  • Fresh Fruit – Berries or sliced fruit add a refreshing burst and beautiful color, balancing the sweetness perfectly and making it visually appealing.
  • Coconut Cream – Layered on top for a tropical twist, it complements the Hawaiian flavors brilliantly!

With these ingredients, you're on your way to whipping up a fantastic Hawaiian Roll French Toast that will surely become a morning favorite!

Step‑by‑Step Instructions for Hawaiian Roll French Toast Recipe

Step 1: Prepare Custard
In a medium bowl, whisk together four large eggs, one cup of milk, two teaspoons of vanilla extract, and a pinch of ground cinnamon until the mixture is smooth and frothy. Aim for a lovely blend that holds a slight thickness—this custard is the heart of the Hawaiian Roll French Toast. Set the bowl aside, as you’ll be using it shortly.

Step 2: Soak Rolls
Cut the Hawaiian rolls in half, creating mini sandwich shapes. Dip each piece into the custard, ensuring they’re fully coated but not overly saturated; about 30 seconds should do. Lay them on a clean plate, allowing them to absorb the custard while you heat your cooking surface, ensuring maximum flavor infusion.

Step 3: Heat Pan
Preheat a non-stick skillet over medium heat (approximately 350°F). Once warm, add a tablespoon of butter, allowing it to melt and coat the bottom of the skillet. A sizzling sound indicates it's just right for frying, creating that golden exterior we all love in Hawaiian Roll French Toast.

Step 4: Cook Toast
Place the soaked rolls in the skillet, ensuring they don't overcrowd the pan for even cooking. Allow them to cook for about 3-4 minutes on each side, flipping when they turn a perfect golden-brown. Keep an eye out for that caramelized edge; it’s a beautiful sight and a key indicator that they’re ready.

Step 5: Serve
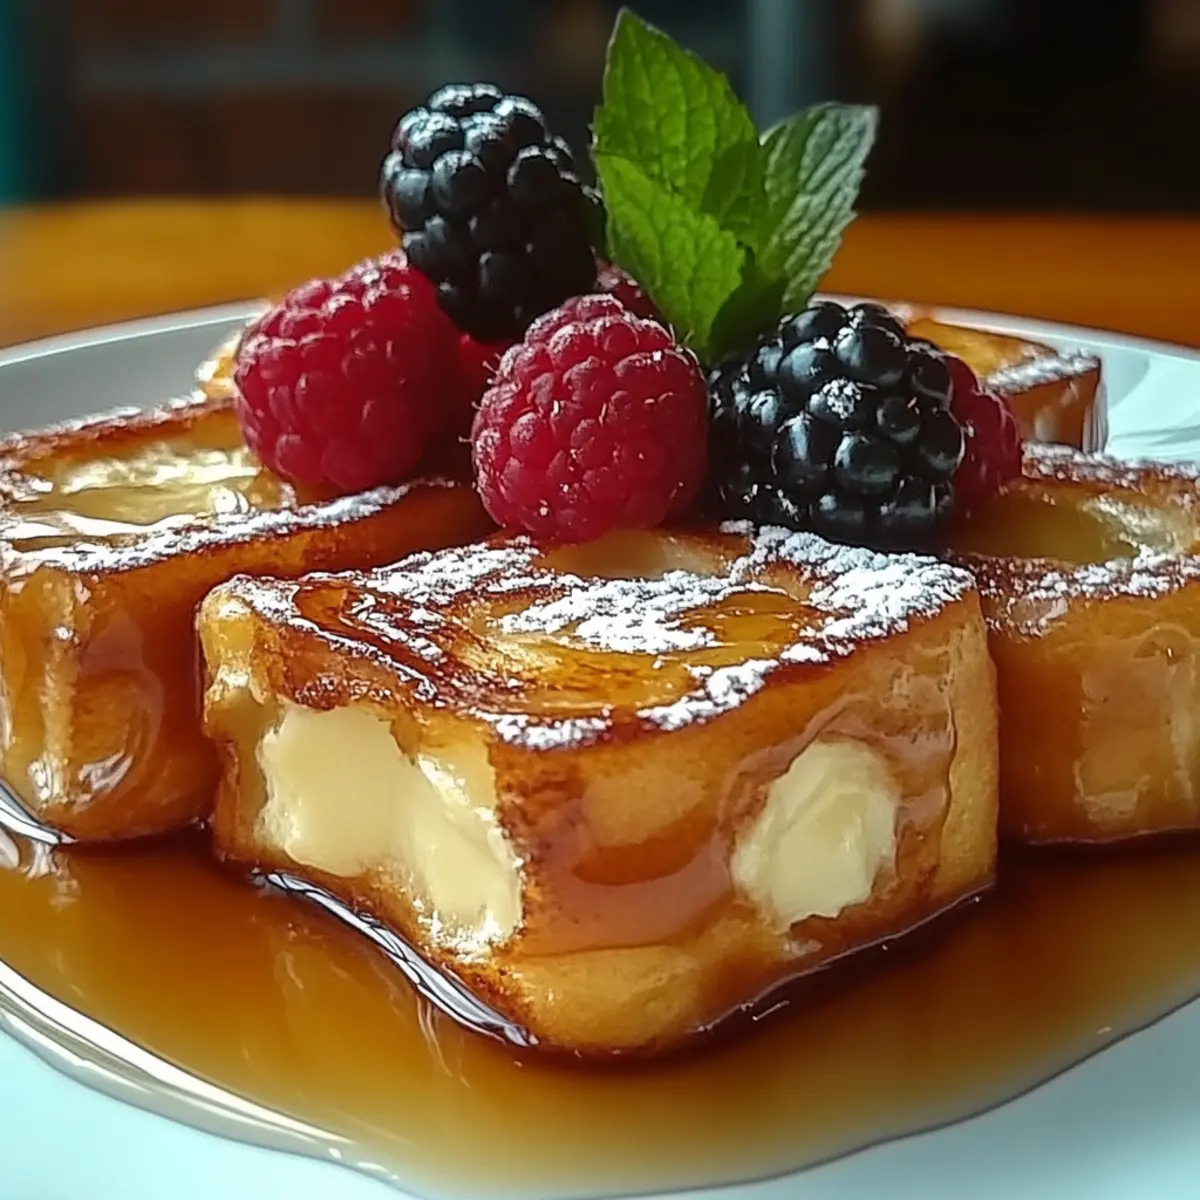
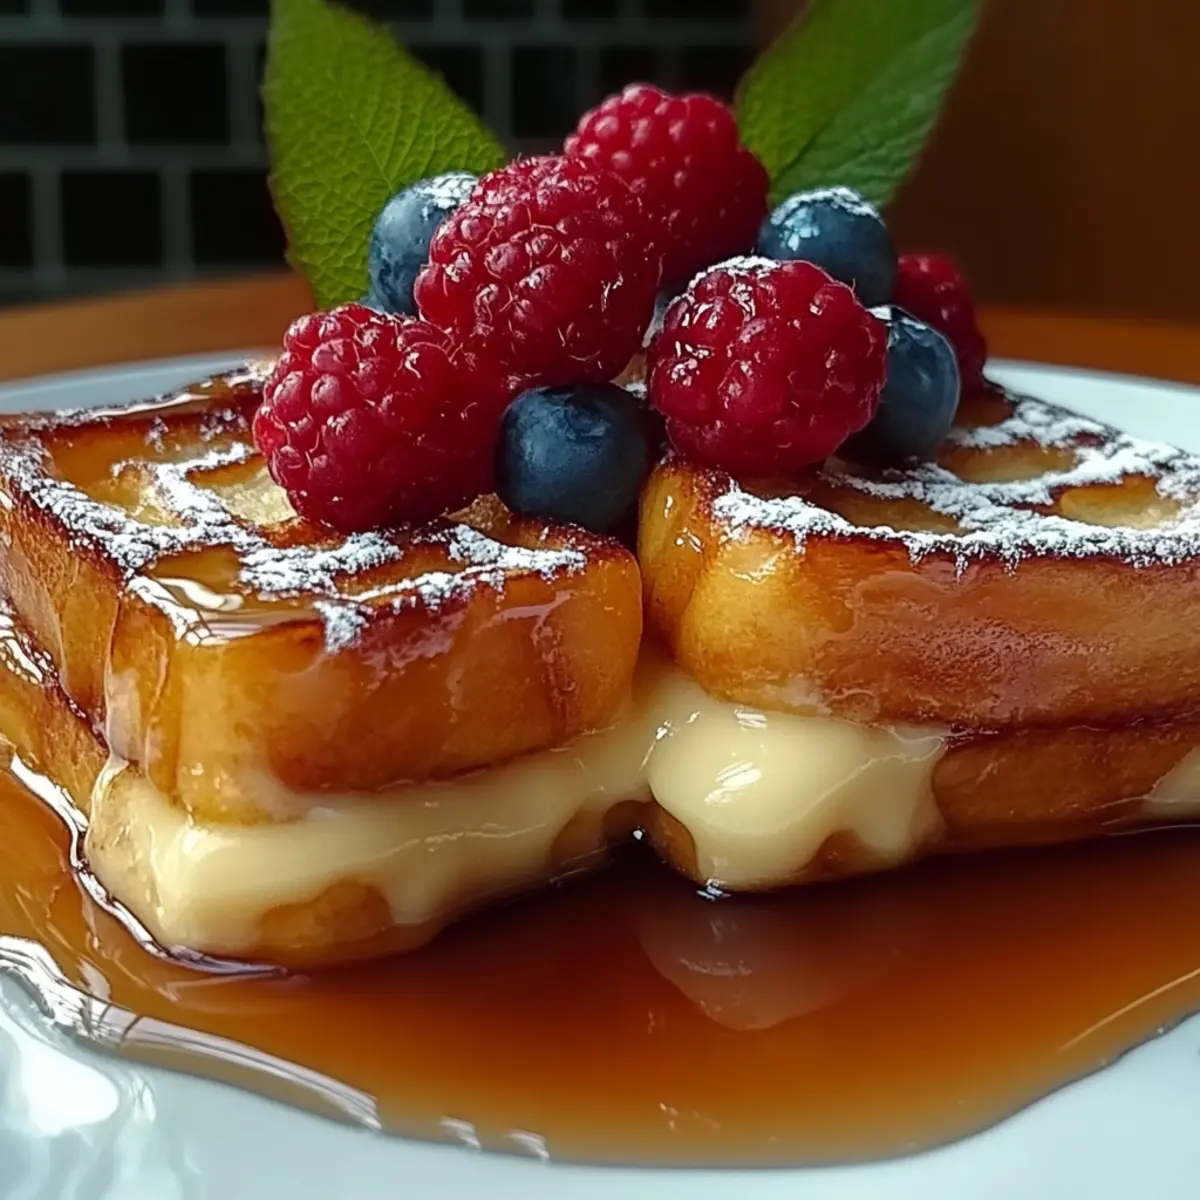
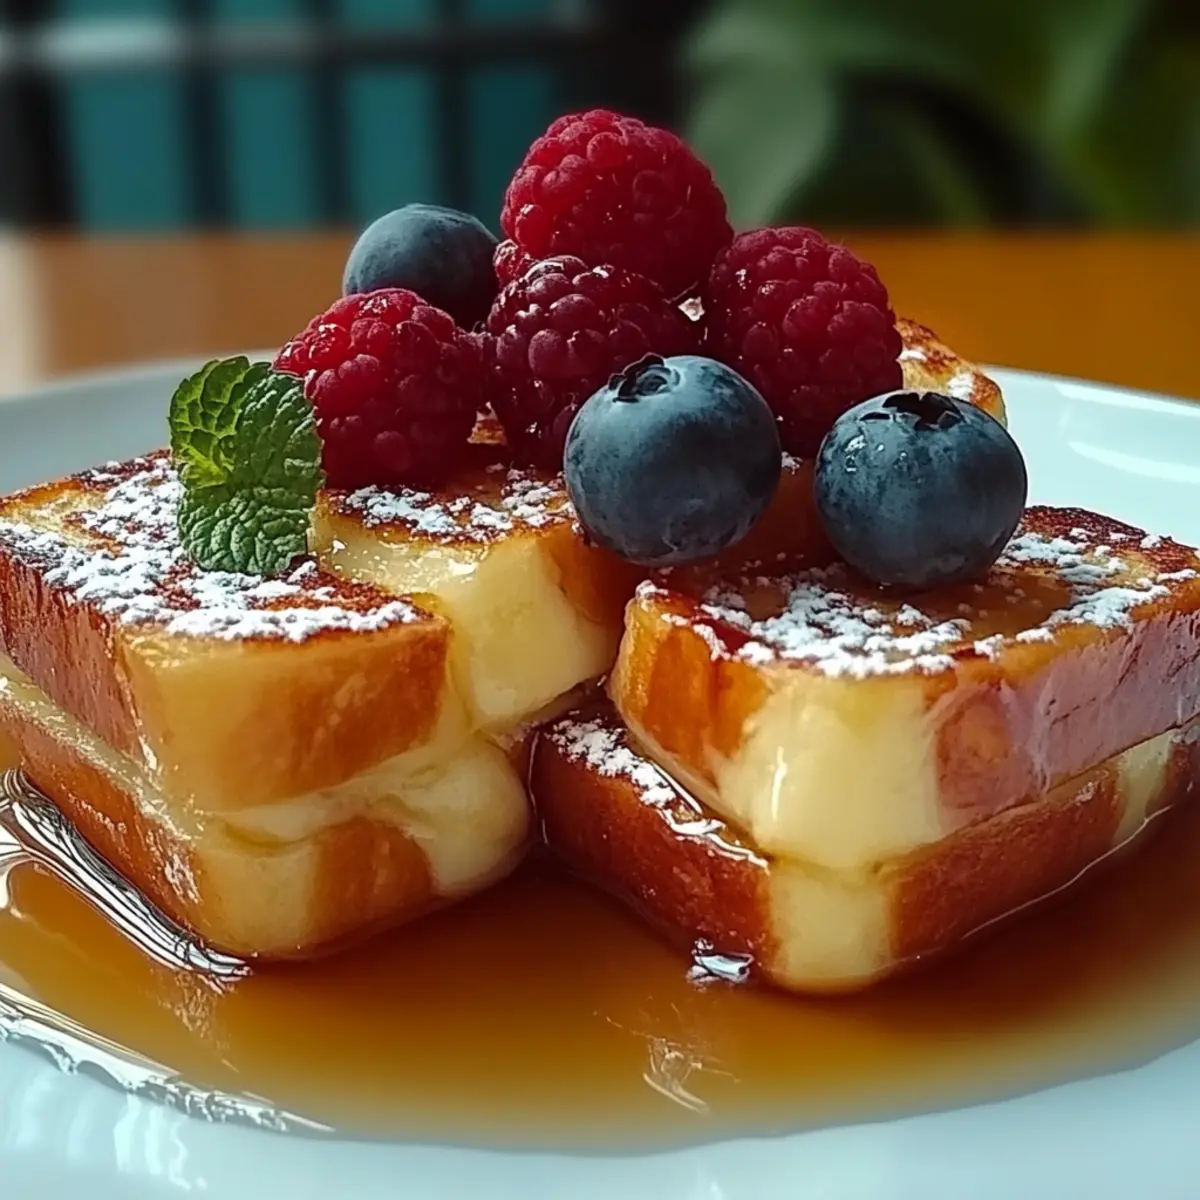
Once cooked, transfer the Hawaiian Roll French Toast to a serving platter while they’re still hot. Feel free to drizzle with maple syrup and add fresh fruit on top for a burst of color and flavor. These indulgent slices bring tropical joy to your breakfast table, promising to be a hit with your family!

What to Serve with Hawaiian Roll French Toast

Imagine a breakfast spread that dances with flavors and colors, perfectly complementing your tropical French toast delight!

  • Crispy Bacon: The salty crunch of bacon provides a savory contrast, enhancing the sweetness of the French toast perfectly. A classic combo that never disappoints!
  • Fresh Fruit Salad: A vibrant mix of seasonal fruits adds brightness and freshness, balancing the richness of the syrupy toast. Consider including strawberries, kiwi, and pineapple for a tropical twist.
  • Coconut Whipped Cream: Light and airy, this sweet topping adds a lush, creamy indulgence that accentuates the tropical vibes of Hawaiian Roll French Toast. A luscious treat!
  • Maple Syrup: Drizzling with rich maple syrup elevates the sweetness while adding depth; choose flavored varieties for an extra dose of fun on your plate.
  • Scrambled Eggs: Light and fluffy scrambled eggs make for a protein-packed pair, creating a well-rounded meal that's satisfying and delicious.
  • Mimosas: A refreshing mimosa adds a celebratory touch to brunch, pairing perfectly with the sweet flavors of your Hawaiian Roll French Toast. Cheers to a relaxing morning!
  • Chocolate Chips: For a decadent twist, sprinkle mini chocolate chips on top for an irresistible indulgence that transforms your breakfast into a treat!
  • Yogurt Parfait: Layering Greek yogurt with granola and fruits creates a delightful contrast; a healthy alternative that brings great texture alongside the French toast's softness.

Hawaiian Roll French Toast Variations

Discover the endless possibilities to delight your taste buds with this Hawaiian Roll French Toast recipe!

  • Gluten-Free: Substitute the Hawaiian rolls with gluten-free bread or rolls for those with dietary restrictions.
  • Coconut Cream French Toast: Incorporate shredded coconut into the custard mix, or lavish with coconut cream for a tropical twist. This adds a rich creaminess that pairs beautifully with the sweet rolls.
  • Nutty Crunch: Toss in some crunchy nuts like pecans or almonds into the batter or sprinkle on top for a satisfying texture. The contrast between the creamy custard and the crunchy topping will surely impress!
  • Berry Explosion: Top your French toast with a medley of fresh seasonal berries like strawberries, blueberries, or raspberries, and drizzle with syrup for a vibrant, fruity flair. It not only brightens your dish but also adds a refreshing burst!
  • Choco-Lovers’ Delight: Fold mini chocolate chips into the custard for a dessert-like treat. This sweet decadence will appeal particularly to the younger palates at your breakfast table.
  • Pumpkin Spice Option: For a fall-inspired version, add pumpkin puree and a touch of pumpkin spice to the custard mixture. It brings warmth and comfort, perfect for chilly mornings.
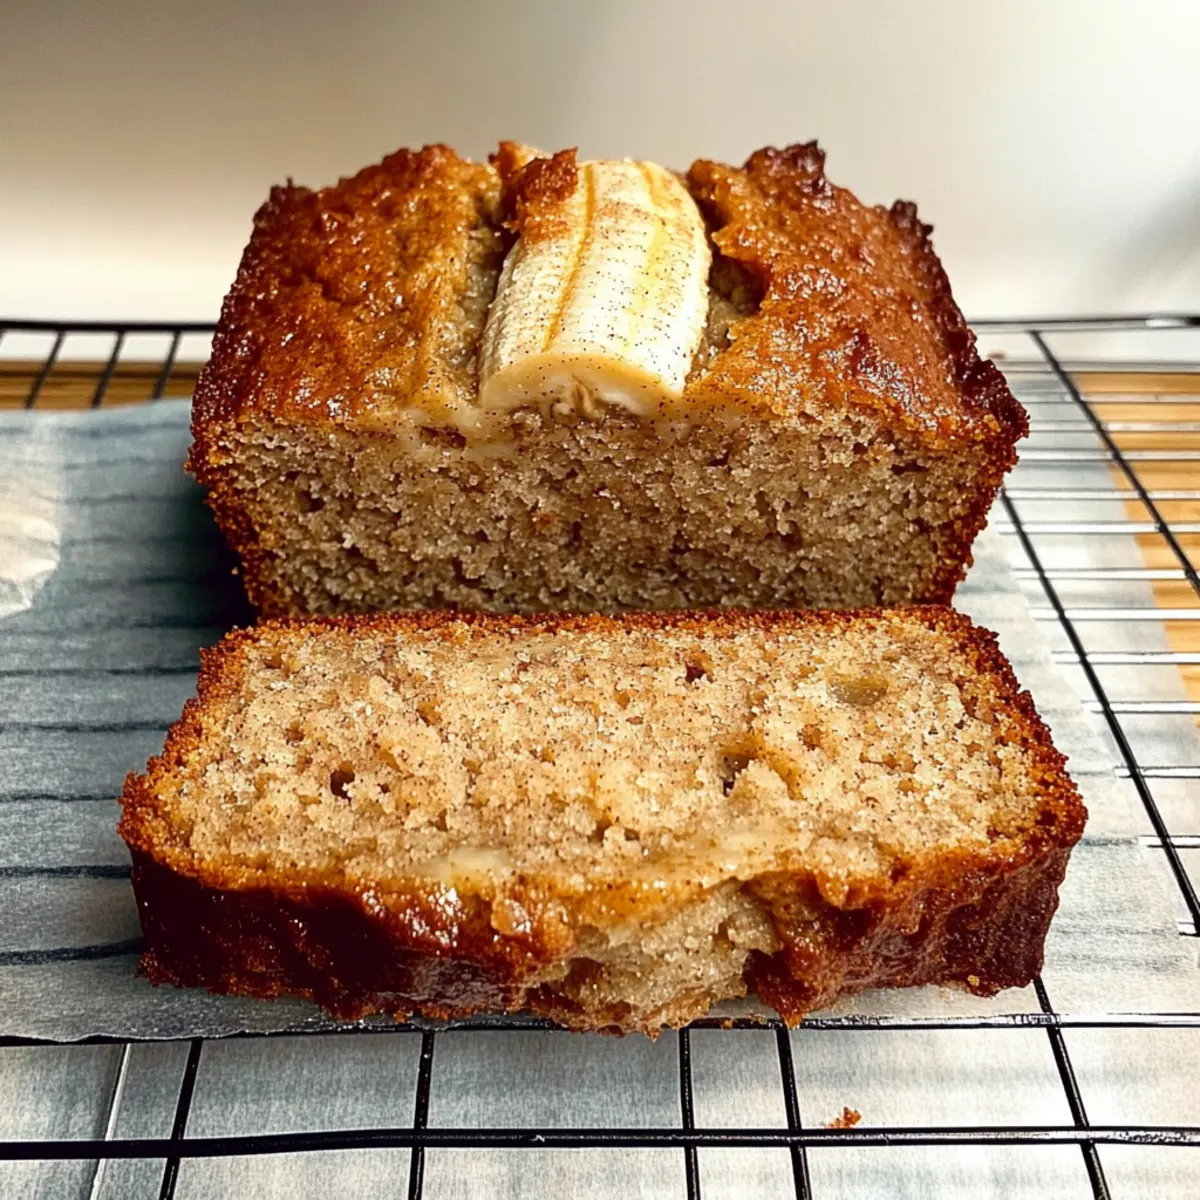
  • Caramelized Banana Topping: Sauté banana slices in butter and brown sugar until caramelized, then layer them on top for a sweet, indulgent finish. The warm bananas add an enticing aroma and flavor that’s hard to resist.
  • Savory Spin: Swap out the vanilla for savory spices, and serve alongside crispy bacon or sausage for a surprising twist on this traditionally sweet dish. It's a blend of flavors that certainly piques the curiosity!

Feel free to personalize your Hawaiian Roll French Toast with these creative ideas, and why not pair it with a refreshing drink like a glass of fresh orange juice or a light mimosa? For more delicious inspirations, explore these delightful Pumpkin Cinnamon Roll options!

Expert Tips for the Best Hawaiian Roll French Toast

  • Proper Soaking: Avoid sogginess: Don’t soak the rolls for more than 30 seconds to keep the texture fluffy and light.

  • Freshness Matters: Use fresh rolls: Stale Hawaiian rolls can become mushy, so opt for fresh ones for the best results.

  • Preheat Correctly: Get the pan ready: Ensure your skillet is hot enough before cooking to achieve that delightful golden-brown crust.

  • Flavor Infusion: Add spices wisely: Incorporating ground cinnamon or nutmeg into the custard enhances the taste of your Hawaiian Roll French Toast recipe.

  • Make It Your Own: Customize toppings: Fresh fruit, flavored syrups, or coconut cream can elevate your dish, making it a fun breakfast for everyone.

Make Ahead Options

These Hawaiian Roll French Toast slices are a dream for meal prep! You can prepare the custard mixture (eggs, milk, vanilla, and spices) up to 24 hours in advance and refrigerate it in a sealed container. Additionally, you can soak the cut Hawaiian rolls in the custard overnight; simply layer them in a dish and cover with plastic wrap to prevent drying out. When you're ready to serve, heat your skillet and cook the soaked rolls directly from the fridge for about 3-4 minutes per side until golden brown. This approach not only saves you precious time on busy mornings but ensures you’ll have the same deliciously fluffy French toast bursting with tropical flavors—every bite just as delightful as if made fresh!

How to Store and Freeze Hawaiian Roll French Toast

Fridge: Store cooked Hawaiian Roll French Toast in an airtight container for up to 3 days to maintain freshness and flavor.

Freezer: Wrap individual slices in plastic wrap and then foil; freeze for up to 2 months. This ensures they remain tasty and easy to reheat.

Reheating: Reheat directly from the freezer in the microwave or oven, warming until heated through. Add a drizzle of syrup for extra flavor!

Make-Ahead Tip: Prepare the custard mixture the night before and soak the rolls in the morning for a quicker breakfast experience.

Hawaiian Roll French Toast Recipe FAQs

What type of Hawaiian Rolls should I use?
Absolutely! Fresh Hawaiian rolls work best for this recipe as they provide the ideal soft and sweet texture. If you can, choose rolls without dark spots or signs of staleness, as stale rolls tend to lead to undesirable mushiness when soaked.

How should I store leftover Hawaiian Roll French Toast?
Very simple! After cooking, store the leftover Hawaiian Roll French Toast in an airtight container in the refrigerator for up to 3 days. To reheat, simply pop the slices in the microwave or toaster oven until warmed through.

Can I freeze Hawaiian Roll French Toast?
Yes, indeed! To freeze, wrap each slice individually in plastic wrap, then in aluminum foil to prevent freezer burn. You can store them in the freezer for up to 2 months. When ready to enjoy, reheat directly from the freezer, either in the microwave for a quick option or in the oven for a crispier texture.

What if my Hawaiian Roll French Toast is too soggy?
No worries! If your French toast turns out soggy, it usually means the rolls were oversoaked. For the perfect flip, aim to soak each piece for about 30 seconds; this allows enough time for flavor infusion without compromising texture. Make sure to preheat your skillet adequately before cooking too!

Is this recipe suitable for dietary restrictions?
Absolutely! You can easily adapt the Hawaiian Roll French Toast Recipe for gluten-free diets by using gluten-free Hawaiian rolls. Additionally, substitute the milk with any non-dairy milk alternatives, like almond or oat milk, to accommodate lactose intolerance or vegan preferences. Just check the labels to avoid any allergens!

Hawaiian Roll French Toast Recipe

Hawaiian Roll French Toast Recipe for a Tropical Breakfast Bliss

Delight in this Hawaiian Roll French Toast Recipe, a sweet and warm breakfast treat that transports you to a tropical paradise.
Print Recipe Pin Recipe
Prep Time 10 minutes mins
Cook Time 15 minutes mins
Total Time 25 minutes mins
Servings: 4 slices
Course: Breakfast
Cuisine: Tropical
Calories: 350
Ingredients Equipment Method Nutrition Notes

Ingredients
  

For the Batter
  • 6 pieces Hawaiian Rolls Cut in half
  • 4 large Eggs Acts as a binding agent
  • 1 cup Milk Can substitute with non-dairy alternative
  • 2 teaspoons Vanilla Extract Use pure for better flavor
  • 1 teaspoon Ground Cinnamon Adds warmth and depth
  • 1 pinch Nutmeg Enhances sweetness
For Cooking
  • 1 tablespoon Butter Can use non-stick spray
Optional Toppings
  • to taste Syrup Maple syrup or flavored syrups
  • to taste Fresh Fruit Berries or sliced fruit for garnish
  • to taste Coconut Cream For a tropical twist

Equipment

  • medium bowl
  • non-stick skillet
  • Whisk

Method
 

Directions
  1. In a medium bowl, whisk together eggs, milk, vanilla extract, and cinnamon until smooth and frothy.
  2. Cut the Hawaiian rolls in half and dip each piece into the custard for about 30 seconds.
  3. Preheat a non-stick skillet over medium heat and melt butter in the skillet.
  4. Place the soaked rolls in the skillet and cook for about 3-4 minutes on each side until golden-brown.
  5. Serve hot, drizzled with syrup and topped with fresh fruit.

Nutrition

Serving: 1sliceCalories: 350kcalCarbohydrates: 40gProtein: 8gFat: 18gSaturated Fat: 10gPolyunsaturated Fat: 1gMonounsaturated Fat: 6gCholesterol: 180mgSodium: 450mgPotassium: 200mgFiber: 1gSugar: 15gVitamin A: 400IUCalcium: 150mgIron: 1mg

Notes

Make sure to use fresh Hawaiian rolls for the best flavor. Enjoy customizing with your favorite toppings!

Tried this recipe?

Let us know how it was!

Cinnamon Sugar French Toast Roll-Ups: Quick, Kid-Friendly Delight

May 18, 2026 by Grace Snow Leave a Comment

As I glanced at the clock and realized it was breakfast time, a slight panic set in—how could I whip up something quick yet delightful? That’s when I remembered my go-to solution: Cinnamon Sugar French Toast Roll-Ups. This tasty twist on a classic breakfast transports you back to comforting mornings, with sweet, fluffy bread rolled up and coated in a warm cinnamon-sugar mix. Perfect for busy weekdays or those laid-back brunches, this recipe takes just under 20 minutes to prepare and is a guaranteed hit with kids and adults alike. Plus, you can customize it effortlessly, making it as simple or indulgent as your heart desires. Ready to indulge in a family favorite that’s as fun to make as it is to eat? Let’s dive into the delicious details of these irresistible roll-ups!

Why Are These Roll-Ups So Irresistible?

Quick and Easy: Whip up these delicious Cinnamon Sugar French Toast Roll-Ups in under 20 minutes—perfect for busy mornings!

Kid-Friendly Fun: Kids love the fun shape and sweet coating, making breakfast time something they look forward to.

Customizable Delight: Use different types of bread, add spices, or top with your favorite garnishes like fresh fruit or whipped cream for a personal touch.

Balanced Breakfast Boost: Packed with protein and carbs, these roll-ups keep everyone fueled for the day ahead.

Crowd-Pleasing Appeal: Whether it’s a weekday breakfast or a lazy Sunday brunch, these roll-ups are sure to delight family and friends. Deliver a dose of nostalgia with every bite!

Cinnamon Sugar French Toast Roll-Ups Ingredients

• For the Roll-Ups

  • Bread – 6 slices; opt for soft varieties like white or brioche for the perfect texture.
  • Eggs – 2 large; fresh eggs add richness and essential binding to the roll-ups.
  • Milk – 1/4 cup; whole milk creates a creamier egg mixture, or swap with almond milk for a dairy-free option.
  • Vanilla Extract – 1/2 teaspoon; a quality extract enhances the sweet flavor profile of the roll-ups.

• For the Cinnamon Sugar Coating

  • Granulated Sugar – 2 tablespoons; this sweetener pairs beautifully with the cinnamon—coconut sugar works for a healthier alternative.
  • Ground Cinnamon – 1 teaspoon; a staple spice that gives these roll-ups their signature taste; use fresh cinnamon for a stronger aroma.

• For Cooking

  • Unsalted Butter – 2 tablespoons, melted; it adds richness and ensures a crispy exterior; consider dairy-free butter for a vegan option.

Feel free to mix and match your ingredients to create the ultimate Cinnamon Sugar French Toast Roll-Ups that your family will adore!

Step‑by‑Step Instructions for Cinnamon Sugar French Toast Roll-Ups

Step 1: Prepare Cinnamon Sugar Mixture
In a small bowl, combine 2 tablespoons of granulated sugar with 1 teaspoon of ground cinnamon. Mix them well until fully blended, creating a fragrant cinnamon sugar mixture. Set this aside as you will roll your French toast roll-ups in it later, lending them a sweet and spiced finish that’s heavenly.

Step 2: Make Egg Mixture
In a shallow dish, whisk together 2 large eggs, 1/4 cup of milk, and 1/2 teaspoon of vanilla extract until smooth and well combined. This rich egg mixture will coat your roll-ups to create a fluffy French toast texture. Make sure the mixture is homogeneous, as you’ll be dipping each roll into it shortly.

Step 3: Assemble Roll-Ups
Take your 6 slices of soft bread and gently flatten each slice with a rolling pin. Brush melted butter over one side of the bread, then sprinkle the cinnamon sugar mixture on top. Carefully roll each slice tightly starting from the buttered side, ensuring to secure the filling by pressing slightly; use a toothpick if necessary to hold them together.

Step 4: Cook Roll-Ups
Preheat a skillet over medium heat and lightly grease it with butter or oil. Dip each roll-up into the egg mixture, allowing any excess to drip off. Place them in the skillet seam-side down and cook until golden brown, about 2-3 minutes per side. Flip the roll-ups carefully to ensure even cooking and a crispy exterior, reveling in the aroma of the Cinnamon Sugar French Toast Roll-Ups.

Step 5: Serve
Once cooked to a beautiful golden brown, remove the roll-ups from the skillet and take out any toothpicks. Serve them immediately while warm, showcasing their delightful texture. Feel free to add a dusting of powdered sugar or fresh fruit on top, and serve with maple syrup for an extra indulgent treat that everyone will adore.

What to Serve with Cinnamon Sugar French Toast Roll-Ups

Looking to complete your breakfast adventure? Here are some delightful pairings that will take your meal to the next level.

  • Fresh Berries:
    Bursting with juiciness, fresh strawberries or blueberries add a bright, fruity contrast and a pop of color on your plate.

  • Maple Syrup:
    The classic sweet companion for French toast, drizzle warm, rich maple syrup over your roll-ups for that extra touch of indulgence.

  • Creamy Yogurt:
    A dollop of Greek yogurt offers a tangy balance to the sweetness, plus a boost of protein to make your breakfast even more satisfying.

  • Scrambled Eggs:
    Fluffy scrambled eggs enhance the breakfast spread, providing a savory element that pairs beautifully with the sweetness of roll-ups.

  • Breakfast Sausages:
    A side of crispy breakfast sausages adds meaty goodness, giving you a hearty and fulfilling start to your day.

  • Chai Tea or Coffee:
    A warm cup of chai tea complements the spiced cinnamon flavor, while coffee gives you that energizing kick to power through your morning.

  • Powdered Sugar Dusting:
    A light dusting of powdered sugar on top of the roll-ups makes for an elegant presentation and adds a touch of sweetness with every bite.

  • Whipped Cream:
    A cloud of whipped cream transforms your roll-ups into a delightful treat, perfect for special weekend brunches or cozy family meals.

  • Nutella Spread:
    For a rich and decadent twist, serve with Nutella for those who crave a little chocolate with their breakfast!

Expert Tips for Cinnamon Sugar French Toast Roll-Ups

  • Avoid Sogginess: Don’t soak the bread for too long in the egg mixture to prevent soggy roll-ups; a quick dip is best.

  • Flatten Bread: Use a rolling pin to flatten the bread before assembling; it makes for tighter roll-ups and enhances texture.

  • Watch the Heat: Maintain medium heat while cooking to avoid burning; adjust accordingly to achieve perfect golden brown results.

  • Customize Flavors: Experiment with different breads or add a pinch of nutmeg to the cinnamon-sugar for a unique twist on the classic recipe.

  • Serve Warm: Enjoy these Cinnamon Sugar French Toast Roll-Ups right after cooking for the best texture and flavors; consider adding toppings like syrup or fruit.

How to Store and Freeze Cinnamon Sugar French Toast Roll-Ups

Fridge: Store leftover roll-ups in an airtight container for up to 2 days. This keeps them fresh and ready for a quick breakfast.

Freezer: For longer storage, freeze roll-ups individually wrapped in plastic wrap and then in a freezer bag for up to 2 months.

Reheating: To regain their delicious texture, reheat roll-ups in a skillet over low heat for a few minutes or in the microwave for about 30 seconds, just until warmed through.

Serving Ideas: Feel free to revive your roll-ups with a sprinkle of cinnamon sugar or a drizzle of syrup when serving after storage for that fresh taste!

Cinnamon Sugar French Toast Roll-Ups Variations

Get ready to add your own flair to these delightful roll-ups, making every bite a unique experience!

  • Gluten-Free: Use gluten-free bread to ensure everyone can enjoy these sweet treats without worry. This simple swap maintains all the flavor and joy!

  • Nutty Flavor: Sprinkle in some chopped nuts, like pecans or almonds, for added crunch and a delightful nutty aroma. They’ll add both texture and heartiness to each roll-up.

  • Spiced Up: Add a pinch of nutmeg or cardamom to the cinnamon-sugar mixture for a new twist on flavors. This subtle spice can elevate your breakfast into something extraordinary.

  • Chocolate Lovers: Drizzle some melted chocolate on top or fill the roll-ups with chocolate hazelnut spread before rolling. This sweet treat is sure to be a hit among kids and adults alike!

  • Fruit-Filled: Instead of just cinnamon sugar, add slices of fresh banana or strawberries inside the roll-ups for a fruity burst. This twist introduces a fresh and vibrant flavor that compliments the cinnamon perfectly.

  • Savory Option: Swap out the sugar for a pinch of salt and add cheese such as mozzarella before rolling up. A savory rendition that’s great for breakfast or brunch!

  • Baked Option: Instead of frying, place the assembled roll-ups in a baking dish, drizzle with melted butter, and bake at 350°F (175°C) for 15-20 minutes. This method creates a light, fluffy texture that’s equally delicious.

Feel free to explore combinations and get creative! For more fun ideas, you might also want to check out these mouthwatering variations in our Pumpkin Cinnamon Roll recipes that embrace autumn flavors!

Make Ahead Options

These Cinnamon Sugar French Toast Roll-Ups are perfect for those busy mornings when time is of the essence! You can prepare the roll-ups up to 24 hours in advance by assembling them, then wrapping tightly in plastic wrap and refrigerating. This allows the flavors to meld beautifully, ensuring they’re just as delightful when cooked. When you’re ready to serve, simply dip them in the egg mixture as instructed and cook them in a skillet for 2-3 minutes per side until golden brown. For optimal freshness, avoid soaking the bread too long in the egg mixture prior to cooking; a quick dip will maintain their delicious texture!

Cinnamon Sugar French Toast Roll-Ups Recipe FAQs

What kind of bread works best for Cinnamon Sugar French Toast Roll-Ups?
Absolutely! For the best results, choose soft bread varieties like white, brioche, or even cinnamon swirl bread. These types will yield fluffy roll-ups that soak up the egg mixture beautifully without becoming too soggy.

How should I store leftover roll-ups?
Very simple! Store any leftover Cinnamon Sugar French Toast Roll-Ups in an airtight container in the fridge for up to 2 days. If you want to keep them fresher for longer, refrigerating is key to maintaining their delightful texture.

Can I freeze Cinnamon Sugar French Toast Roll-Ups?
Yes, you can! To freeze, wrap each roll-up individually in plastic wrap, then place them in a freezer bag. They can be stored like this for up to 2 months. When you're ready to enjoy, simply reheat in a skillet or the microwave until warmed through.

What can I do if my roll-ups turn out soggy?
No worries! To avoid soggy roll-ups, dip the bread slices quickly in the egg mixture—just a quick soak is perfect! Also, flattening the bread before rolling helps create a tighter, more efficient roll that holds its shape.

Are these roll-ups safe for kids with egg allergies?
It’s best to avoid this recipe for children with egg allergies, but you can try using egg substitutes like applesauce or a commercial egg replacer. Each alternative varies in thickness and might need some adjustments in cooking, so be sure to experiment a little!

Can I add toppings after they are cooked?
Of course! Feel free to add any toppings post-cooking, such as a dusting of powdered sugar, fresh fruit, or a drizzle of maple syrup. The more, the merrier when it comes to making these treats even more delicious!

Cinnamon Sugar French Toast Roll-Ups

Cinnamon Sugar French Toast Roll-Ups: Quick, Kid-Friendly Delight

Cinnamon Sugar French Toast Roll-Ups are a delightful breakfast treat, quick to make and perfect for kids.
Print Recipe Pin Recipe
Prep Time 10 minutes mins
Cook Time 10 minutes mins
Total Time 20 minutes mins
Servings: 6 roll-ups
Course: Breakfast
Cuisine: American
Calories: 150
Ingredients Equipment Method Nutrition Notes

Ingredients
  

For the Roll-Ups
  • 6 slices Bread Opt for soft varieties like white or brioche
  • 2 large Eggs Fresh eggs add richness
  • 1/4 cup Milk Whole or almond milk
  • 1/2 teaspoon Vanilla Extract Quality extract enhances flavor
For the Cinnamon Sugar Coating
  • 2 tablespoons Granulated Sugar Coconut sugar works as an alternative
  • 1 teaspoon Ground Cinnamon Fresh cinnamon offers a stronger aroma
For Cooking
  • 2 tablespoons Unsalted Butter Melted; consider dairy-free butter for a vegan option

Equipment

  • Skillet
  • Rolling Pin
  • Shallow dish
  • small bowl

Method
 

Step-by-Step Instructions
  1. In a small bowl, combine 2 tablespoons of granulated sugar with 1 teaspoon of ground cinnamon. Mix well and set aside.
  2. In a shallow dish, whisk together 2 large eggs, 1/4 cup of milk, and 1/2 teaspoon of vanilla extract until smooth.
  3. Flatten each of the 6 slices of bread with a rolling pin. Brush melted butter over one side, then sprinkle with cinnamon sugar. Roll tightly from the buttered side.
  4. Preheat a skillet over medium heat, grease it with butter or oil. Dip each roll-up in the egg mixture and cook seam-side down until golden brown.
  5. Remove roll-ups from the skillet once cooked and serve warm with optional toppings like powdered sugar or fresh fruit.

Nutrition

Serving: 1roll-upCalories: 150kcalCarbohydrates: 20gProtein: 4gFat: 6gSaturated Fat: 3gMonounsaturated Fat: 2gCholesterol: 70mgSodium: 150mgPotassium: 100mgFiber: 1gSugar: 8gVitamin A: 500IUCalcium: 50mgIron: 1mg

Notes

These roll-ups are customizable with different types of bread and toppings to suit your taste.

Tried this recipe?

Let us know how it was!

Baked Cottage Cheese Eggs: Wholesome Comfort on a Plate

May 18, 2026 by Grace Snow Leave a Comment

As I pulled a steaming dish from the oven, the tantalizing scent of baked cheese wafted through my kitchen, evoking memories of cozy breakfasts shared with friends. It was time to introduce my new favorite morning ritual: Baked Cottage Cheese Eggs. This protein-packed dish is not only nurturing and satisfying but also completely customizable, allowing you to throw in your favorite veggies or herbs. With its creamy texture and golden crust, it's a delightful upgrade from typical fast-food breakfasts. Plus, it’s gluten-free, making it a great option for anyone with dietary restrictions. If you're looking for a quick and wholesome start to your day, you've come to the right place! Ready to savor a homemade breakfast that’s as easy as it is delicious? Let’s dive into this recipe!

Why are Baked Cottage Cheese Eggs a Game-Changer?

Protein-packed goodness: Each serving brims with essential nutrients, offering around 18g of protein, perfect for fueling your morning.
Customizable delight: Easily toss in your favorite vegetables or herbs for a personalized touch—consider adding spinach or bell peppers for extra flavor!
Simplicity: The preparation is a breeze, making this dish ideal for busy mornings without sacrificing taste.
Versatile breakfast: Enjoy it warm alone or pair with a fresh salad or fruit for a balanced meal, just like a delicious Turkish Eggs Discover.
Crowd-pleaser: Impress your family and friends with this restaurant-quality dish that’s sure to become a breakfast staple!
Gluten-free option: With gluten-free ingredients, everyone can relish this wholesome recipe without worry.

Baked Cottage Cheese Eggs Ingredients

For the Base

  • 1 cup cottage cheese (4% fat) – Provides creaminess and protein; substitute with low-fat cottage cheese for a lighter option.
  • 4 large eggs – Serves as the base, binding the ingredients and adding protein; no direct substitutions suggested.
  • ¼ cup Parmesan cheese, grated – Adds depth of flavor and a savory note; substitute with cheddar or nutritional yeast for a dairy-free alternative.

For the Flavor

  • 2 tablespoons fresh chives, finely chopped – Introduces freshness and a mild onion flavor; substitute with green onions if chives are unavailable.
  • ½ teaspoon garlic powder – Imparts an aromatic flavor; use fresh garlic for a more robust taste.
  • ¼ teaspoon paprika – Adds subtle warmth; smoked paprika can be used for a smoky flavor.
  • Salt and pepper to taste – Enhances overall flavor.

Feel free to get creative with your Baked Cottage Cheese Eggs by adding vegetables or herbs of your choice!

Step‑by‑Step Instructions for Baked Cottage Cheese Eggs

Step 1: Preheat the Oven
Begin by preheating your oven to 375°F (190°C). This ensures that your Baked Cottage Cheese Eggs cook evenly and achieve that delightful golden crust. While the oven warms up, you can prepare your baking dish and the egg mixture to cut down on overall time.

Step 2: Prepare the Baking Dish
Grease a 9-inch pie dish or an 8x8-inch baking dish with oil or cooking spray. This step is crucial for preventing the Baked Cottage Cheese Eggs from sticking, allowing for easy slicing once they're baked. A well-prepared dish will also enhance the golden, crispy edges you’re looking to achieve.

Step 3: Blend Cottage Cheese
In a food processor, blend the 1 cup of cottage cheese until it reaches a silky smooth consistency. This process will give the mixture a creamy texture that binds beautifully with the eggs. Take a moment to scrape down the sides to ensure every bit is blended for a uniform mix.

Step 4: Combine Ingredients
In a large mixing bowl, whisk together the 4 large eggs, the blended cottage cheese, ¼ cup of grated Parmesan cheese, 2 tablespoons of finely chopped chives, ½ teaspoon of garlic powder, ¼ teaspoon of paprika, and salt and pepper to taste. Mix until fully combined; this will create a flavorful base for your Baked Cottage Cheese Eggs.

Step 5: Pour the Mixture
Carefully pour the egg mixture into the prepared baking dish, ensuring it spreads evenly across the bottom. This step is important for even cooking and to help achieve that desired fluffy consistency throughout. Aim for a level surface for consistent baking.

Step 6: Bake the Dish
Place the baking dish in the preheated oven and bake for 15-17 minutes. Keep an eye out for the top to be set and lightly golden, which indicates that the Baked Cottage Cheese Eggs are ready to come out. A toothpick inserted in the middle should come out clean.

Step 7: Let It Rest
Once out of the oven, allow the Baked Cottage Cheese Eggs to rest for 2-3 minutes. This resting time helps maintain the structure and makes it easier to slice. The delicious aroma will fill your kitchen—an inviting way to conclude the cooking process.

Storage Tips for Baked Cottage Cheese Eggs

Fridge: Store leftovers in an airtight container for up to 3-4 days. This keeps your Baked Cottage Cheese Eggs fresh and ready for a quick breakfast.

Freezer: You can freeze the dish for up to 2 months. Wrap individual slices in plastic wrap and place them in a freezer-safe bag for easy access.

Reheating: To reheat, simply pop a slice in the oven at 350°F (175°C) for about 10-15 minutes, or microwave it for 1-2 minutes until heated through.

Serving: For best flavor, serve warm. Pair with a fresh side salad or some fruit to complete your meal!

What to Serve with Baked Cottage Cheese Eggs

Looking to elevate your breakfast experience? Here are some delightful pairings that complement the creamy goodness of Baked Cottage Cheese Eggs.

  • Fresh Salad: A light, vibrant salad with greens and a zesty vinaigrette balances the richness of the eggs while adding a refreshing crunch.
  • Sliced Avocado: Creamy avocado slices provide a buttery texture that pairs beautifully with the savory baked dish, adding healthy fats to your meal.
  • Roasted Tomatoes: Juicy, roasted tomatoes offer a burst of flavor and sweetness that contrasts perfectly with the savory cottage cheese base.
  • Whole Grain Toast: Toasted bread lends a satisfying crunch and is ideal for scooping up creamy egg goodness—a classic breakfast combo!
  • Herbed Yogurt Sauce: A dollop of herbed yogurt adds a tangy, creamy element, enhancing the dish with aromatic flavors and a soothing touch.
  • Fruit Medley: Fresh fruit, like berries or citrus, offers a sweet and juicy contrast, brightening up your plate and enriching the overall breakfast experience.
  • Chilled Juice or Smoothies: Refreshing beverages like orange juice or a berry smoothie provide a sweet counterpoint and elevate your morning ritual.
  • Coffee or Herbal Tea: A warm cup of your favorite beverage completes the meal, inviting comfort and warmth to your breakfast table.

Make Ahead Options

These Baked Cottage Cheese Eggs are a fantastic choice for busy home cooks looking to save time during hectic mornings! You can prep the egg mixture up to 24 hours in advance; simply blend the cottage cheese, whisk in the eggs, and mix in the remaining ingredients. Store it in an airtight container in the refrigerator. For best quality, keep the mixture away from any strong-smelling foods. When you're ready to bake, simply pour the prepped mixture into your greased baking dish and follow the baking instructions as usual. You’ll enjoy the same deliciousness with minimal effort, allowing you to savor a wholesome homemade breakfast in no time!

Baked Cottage Cheese Eggs Variations

Feel free to personalize your Baked Cottage Cheese Eggs with these delightful twists that enhance flavor and texture!

  • Veggie Boost: Add diced tomatoes or spinach for a nutrition-packed twist. Their fresh flavors complement the dish beautifully, making every bite sensational.

  • Cheesy Variation: Swap Parmesan for feta or goat cheese for a tangy experience. This substitution introduces a lovely creaminess that elevates each mouthful!

  • Savory Addition: Incorporate cooked ham or turkey for a heartier breakfast. It transforms your eggs into a delicious protein power-packed dish that will keep you satisfied all morning.

  • Herbal Delight: Experiment with fresh herbs like basil or parsley instead of chives. Their fragrant notes will enliven your dish, offering a fresh and inviting aroma that fills your kitchen.

  • Flavorful Heat: For a spicy kick, sprinkle in some red pepper flakes or jalapeños. This addition will warm up your breakfast and awaken your taste buds!

  • Smoky Flavor: Use smoked paprika in place of regular paprika for an added depth of flavor. The subtle smokiness will take your Baked Cottage Cheese Eggs to another level.

  • Dairy-Free Option: Substitute cottage cheese with silken tofu for a vegan-friendly version. Just blend it until smooth, and enjoy the creamy texture with zero dairy.

  • Sweet Twist: For a unique take, mix in some vanilla extract and turn it into a sweet breakfast treat. Pair with fresh fruit for a nourishing way to start your day, just like with these delicious Matcha Baked Doughnuts!

No matter how you choose to customize, these variations will surely inspire joy at your breakfast table!

Tips for the Best Baked Cottage Cheese Eggs

Fresh Ingredients: Use the freshest eggs and cottage cheese for a richer flavor and creamier texture—this makes all the difference in your Baked Cottage Cheese Eggs.

Watch the Time: Keep an eye on your baking time to prevent overcooking; a perfectly golden crust is key for a delightful breakfast experience.

Customize Wisely: Be careful not to overload with too many vegetables; this can affect the texture. Stick to 1-2 types for best results.

Blend Thoroughly: Ensure the cottage cheese is well-blended to avoid clumps, achieving that desired creamy consistency in every bite.

Resting Period: Always allow the dish to rest after baking to ensure perfect slicing and to let flavors meld beautifully.

Baked Cottage Cheese Eggs Recipe FAQs

How do I choose the right cottage cheese?
Absolutely! For a creamier texture in your Baked Cottage Cheese Eggs, go for full-fat cottage cheese (4% fat). If you prefer a lighter option, low-fat cottage cheese works well too. Just make sure it’s fresh—look for ones without dark spots or excessive liquid.

What’s the best way to store leftovers?
Very! Store any leftovers of your Baked Cottage Cheese Eggs in an airtight container in the fridge for up to 3-4 days. This keeps them fresh for those busy mornings when you need a quick meal. Just reheat in the oven or microwave when you’re ready to eat!

Can I freeze Baked Cottage Cheese Eggs?
Definitely! You can freeze the dish for up to 2 months. For a successful freezing process, let the dish cool completely after baking. Then, wrap individual slices in plastic wrap and place them in a freezer-safe bag. When you’re ready to enjoy, just reheat in the oven at 350°F (175°C) for about 10-15 minutes or microwave for 1-2 minutes until heated through.

What if my Baked Cottage Cheese Eggs don’t rise properly?
Oh no! If you notice your eggs haven’t risen well, it may be due to overmixing or not whisking the eggs sufficiently. Ensure to whisk them until just combined to keep the mixture airy. Additionally, make sure your oven is adequately preheated before baking to achieve that fluffy texture and golden crust.

Are Baked Cottage Cheese Eggs safe for everyone?
Very! This recipe is gluten-free, making it suitable for those with gluten sensitivities. However, if you or anyone you’re serving has allergies, always double-check ingredients, especially when it comes to substitutes like cheese. You can also use dairy-free cottage cheese if lactose intolerance is a concern.

What vegetables pair well with the recipe?
Absolutely! You can customize your Baked Cottage Cheese Eggs by adding vegetables such as chopped spinach, bell peppers, or zucchini before baking. Just remember to keep it to 1-2 types to avoid excess moisture that could affect the texture. A personal favorite is incorporating sautéed mushrooms for an earthy flavor!

Baked Cottage Cheese Eggs

Baked Cottage Cheese Eggs: Wholesome Comfort on a Plate

Baked Cottage Cheese Eggs are a protein-packed, gluten-free breakfast option, customizable with veggies and herbs.
Print Recipe Pin Recipe
Prep Time 10 minutes mins
Cook Time 17 minutes mins
Resting Time 3 minutes mins
Total Time 30 minutes mins
Servings: 4 slices
Course: Breakfast
Cuisine: American
Calories: 180
Ingredients Equipment Method Nutrition Notes

Ingredients
  

For the Base
  • 1 cup cottage cheese (4% fat) Provides creaminess and protein; substitute with low-fat cottage cheese for a lighter option.
  • 4 large eggs Serves as the base, binding the ingredients and adding protein; no direct substitutions suggested.
  • ¼ cup Parmesan cheese, grated Adds depth of flavor and a savory note; substitute with cheddar or nutritional yeast for a dairy-free alternative.
For the Flavor
  • 2 tablespoons fresh chives, finely chopped Introduces freshness and a mild onion flavor; substitute with green onions if chives are unavailable.
  • ½ teaspoon garlic powder Imparts an aromatic flavor; use fresh garlic for a more robust taste.
  • ¼ teaspoon paprika Adds subtle warmth; smoked paprika can be used for a smoky flavor.
  • Salt and pepper to taste Enhances overall flavor.

Equipment

  • Food Processor
  • 9-inch pie dish or 8x8-inch baking dish
  • Whisk
  • Mixing Bowl

Method
 

Step-by-Step Instructions
  1. Preheat your oven to 375°F (190°C).
  2. Grease a 9-inch pie dish or an 8x8-inch baking dish with oil or cooking spray.
  3. In a food processor, blend the cottage cheese until it reaches a silky smooth consistency.
  4. In a large mixing bowl, whisk together the eggs, blended cottage cheese, Parmesan cheese, chives, garlic powder, paprika, and salt and pepper to taste.
  5. Carefully pour the egg mixture into the prepared baking dish.
  6. Place the baking dish in the preheated oven and bake for 15-17 minutes.
  7. Allow the Baked Cottage Cheese Eggs to rest for 2-3 minutes after removing from the oven.

Nutrition

Serving: 1sliceCalories: 180kcalCarbohydrates: 4gProtein: 18gFat: 10gSaturated Fat: 5gCholesterol: 180mgSodium: 350mgPotassium: 250mgSugar: 3gVitamin A: 400IUVitamin C: 1mgCalcium: 200mgIron: 1mg

Notes

Use the freshest eggs and cottage cheese for a richer flavor. Keep an eye on baking time to achieve a perfectly golden crust. Customize with 1-2 types of vegetables for best results. Always allow the dish to rest to ensure perfect slicing.

Tried this recipe?

Let us know how it was!

Savory Baked Ham and Cheese Croissants You’ll Crave Daily

May 10, 2026 by Grace Snow Leave a Comment

As the sun rises and fills my kitchen with warm light, there's nothing quite like the smell of Baked Ham and Cheese Croissants wafting through the air. The moment those flaky pastries hit the oven, they transform from simple ingredients into a culinary masterpiece. This easy breakfast recipe is not only a crowd-pleaser but also perfect for those lazy weekends when you want something warm and inviting without spending hours in the kitchen. With just a few store-bought components, you'll create a brunch delicacy that impressed friends and family alike. Whether you’re hosting a gathering or just need a quick snack, these golden croissants will surely bring smiles to the table. Ready to uplift your brunch game? Let’s dive into this irresistible recipe!

Why Are These Croissants Irresistible?

Unbelievable Ease: You don’t need to be a professional chef to whip up these delightful pastries—just a few simple steps and you're on your way to brunch bliss.

Mouthwatering Flavor: The smoky ham paired with oozy cheese delivers a savory explosion in every bite, making these croissants a true sensation.

Crowd-Pleaser: Perfect for entertaining guests or family gatherings, everyone will be reaching for seconds once they catch a whiff of these beauties.

Versatile Options: Want to mix it up? Swap the ham for turkey or add some spinach for a boost of veggies, keeping mealtime fresh and exciting.

Make-Ahead Convenience: Assemble them the night before for an effortless morning, or freeze for a quick gourmet treat anytime. With pairs like a fresh salad or Corn Fried Egg on the side, you’ll create a balanced and satisfying meal.

Baked Ham and Cheese Croissants Ingredients

For the Croissants
• Mini Croissants – The flaky base of the dish; can substitute with crescent roll dough for a sweeter option.
• Deli-Cut Ham – Adds a smoky depth; opt for high-quality slices to maintain moisture.
• Smoked Cheddar Cheese – Provides a rich, savory flavor; regular cheddar is a suitable alternative.

For the Flavor Mixture
• Unsalted Butter – Binds flavors and adds moisture; softens croissant edges when baked.
• Yellow Mustard – Enhances flavors and adds tanginess to each bite.
• Honey – Introduces a touch of sweetness; can be omitted if desired.
• Worcestershire Sauce – Provides depth of flavor; optional but recommended for an umami kick.

For the Topping
• Large Egg White – Used for egg wash, giving a golden finish; a whole egg can be used instead.
• Poppy Seeds – Offers a decorative touch and a subtle crunch; can be omitted for allergies.

Get ready to indulge in these Baked Ham and Cheese Croissants, where the delightful flavors come together to create a brunch experience you'll crave daily!

Step‑by‑Step Instructions for Baked Ham and Cheese Croissants

Step 1: Preheat Your Oven
Begin by preheating your oven to 375°F (190°C) to ensure it’s hot enough for perfect baking. While the oven warms up, grab a 9x13-inch baking dish and lightly grease it with cooking spray or butter. This will prevent sticking and allow your Baked Ham and Cheese Croissants to come out easily once baked.

Step 2: Prepare the Croissants
Slice the mini croissants horizontally, making sure not to cut all the way through; they should open like little sandwiches. Nestle in a generous layer of smoked cheddar cheese, followed by slices of deli-cut ham, ensuring each croissant is filled with delightful goodness. This layer of cheese and ham creates a savory core in your delicious pastries.

Step 3: Make the Flavor Mixture
In a small mixing bowl, combine softened unsalted butter, yellow mustard, honey, and Worcestershire sauce. Use a fork or a spatula to blend the ingredients until smooth. This flavorful mixture adds a delightful richness to your Baked Ham and Cheese Croissants as it seeps into the pastry while baking, enhancing the overall flavor.

Step 4: Assemble the Sandwiches
Spread the butter mixture generously on the inside of each croissant sandwich, ensuring a good coating that will melt into the layers during baking. Once you've coated all the sandwiches, arrange them in the greased baking dish, placing them snugly but not overcrowding them, so they can puff up beautifully while they bake.

Step 5: Add the Egg Wash
In a clean bowl, whisk the large egg white with a splash of water until it’s lightly frothy. Brush this egg wash on top of each assembled croissant to give it that golden-brown finish while baking. For an extra touch of crunch and decoration, sprinkle poppy seeds on top of the egg-washed croissants before they head into the oven.

Step 6: Bake to Perfection
Carefully place the baking dish in the preheated oven and bake your Baked Ham and Cheese Croissants for 15-18 minutes. Keep an eye on them; they’re done when the tops are golden brown, and the cheese is wonderfully melted, creating an irresistible aroma that's sure to tempt everyone.

Step 7: Cool and Serve
Once baked, remove the dish from the oven and allow the croissants to cool for a few minutes. This brief cooling period will help the cheese set slightly, making them easier to serve. Dish out these warm, flaky croissants and enjoy them immediately for the best experience.

Make Ahead Options

These Baked Ham and Cheese Croissants are a fantastic option for meal prep! You can assemble the croissants up to 24 hours in advance; simply layer the ham and cheese inside the sliced croissants and spread the flavor mixture before placing them in the baking dish. Cover the dish tightly with plastic wrap or aluminum foil and refrigerate to maintain freshness. When you're ready to serve them, simply bake as directed; you may need to add an extra minute or two to the baking time if they are cold from the fridge. This way, you'll have a delicious brunch ready with minimal effort, just as delightful as if made on the spot!

Expert Tips for Baked Ham and Cheese Croissants

  • Chill Your Pastry: Keeping your puff pastry cold prevents it from tearing during assembly, ensuring beautifully flaky croissants.

  • Don’t Overfill: Avoid the temptation to pile on too much ham and cheese—this can cause uneven baking and sogginess.

  • Check Doneness Early: Start checking the croissants a few minutes before the recommended baking time to avoid burning and ensure ideal crispiness.

  • Experiment with Cheese: While smoked cheddar is delicious, feel free to try different cheese varieties like Gouda or mozzarella to enhance your baked ham and cheese croissants.

  • Egg Wash Benefits: Brushing with egg wash not only gives a golden finish but also helps to keep the layers intact and adds a lovely sheen to the croissants.

How to Store and Freeze Baked Ham and Cheese Croissants

Fridge: Store leftover croissants in an airtight container for up to 3 days. This will help retain their fluffiness while keeping the delicious flavors intact.

Freezer: For longer storage, freeze individual croissants wrapped tightly in plastic wrap, then placed in a freezer bag. They can last up to 2 months, ready to be enjoyed any time.

Reheating: When ready to enjoy, bake from frozen at 375°F (190°C) for 20-25 minutes until warmed through and golden. A delightful way to revive those Baked Ham and Cheese Croissants!

Make-Ahead: You can assemble the croissants up to 24 hours in advance and store them in the fridge until you're ready to bake. This makes morning routines a breeze!

Baked Ham and Cheese Croissants Variations

Feel free to unleash your creativity and customize these scrumptious croissants to suit your taste buds!

  • Turkey Twist: Substitute ham with sliced turkey for a leaner option. Pairs wonderfully with Swiss cheese.
  • Veggie Delight: Add sautéed spinach or roasted bell peppers for a veggie boost. This twist brings freshness and color to your brunch spread.
  • Cheese Swap: Try pepper jack for a spicy kick, or mozzarella for a milder, creamier texture. These cheese variations can change the whole flavor experience!
  • Honey Mustard Glaze: Mix honey with Dijon mustard for a zesty twist on the original flavor mixture. This adds a delightful sweet-and-tangy layer that will have everyone craving more.
  • Herb Infusion: Add fresh herbs like chives or dill to the butter mixture for aromatic flavor. This little addition brings a garden-fresh note to each bite.
  • Spicy Option: Incorporate sliced jalapeños or a touch of hot sauce inside for that unmistakable heat. It’s a perfect contrast against the creamy cheese!
  • Fruit Balance: Serve with a side of fruit preserves or sliced strawberries to cut through the richness. It adds a delightful sweetness that complements the savory croissants beautifully.
  • Mediterranean Style: Use feta cheese, olives, and sun-dried tomatoes for a Mediterranean twist. This playful variation introduces a whole new world of flavors!

With options like these and others like a delicious Chickpea Spinach Curry on the side, you can easily create a delightful and varied brunch that everyone will love.

What to Serve with Baked Ham and Cheese Croissants

Treat your loved ones to a delightful breakfast spread to complement those flaky, savory pastries.

  • Fresh Green Salad: A light and crisp salad adds a refreshing contrast, balancing the rich flavors of the croissants.

  • Fruit Preserves: A dollop of raspberry or apricot preserves introduces a sweet acidity, enhancing each bite with a burst of flavor.

  • Hot Coffee: The comforting warmth of freshly brewed coffee pairs perfectly with the buttery croissants, elevating your brunch experience.

  • Sparkling Juice: For a touch of elegance, serve with sparkling apple or grape juice, adding a celebratory fizz to your meal.

  • Herbed Cottage Cheese: Creamy cottage cheese, sprinkled with fresh herbs, provides a protein-packed, creamy side that complements the flaky pastry beautifully.

  • Scrambled Eggs: Light and fluffy scrambled eggs deliver additional protein and richness, making for a well-rounded breakfast option.

  • Mini Quiches: These bite-sized delights can be filled with vegetables or meat, offering variety alongside your croissants and appealing to diverse tastes.

  • Baked Sweet Potatoes: Their natural sweetness and creamy texture contrast with the savory pastries, bringing a wholesome element to your brunch table.

Baked Ham and Cheese Croissants Recipe FAQs

What is the best way to choose mini croissants?
Absolutely! When selecting mini croissants, look for ones that are golden brown with a flaky exterior and a soft, airy interior. Ensure there are no dark spots on the surface, which could indicate staleness. If opting for puff pastry or crescent roll dough, they should feel cool and not too soft; this helps achieve that perfect flaky texture once baked.

How long can I store baked ham and cheese croissants in the fridge?
Very! Store your leftover Baked Ham and Cheese Croissants in an airtight container for up to 3 days. Make sure they are completely cooled before sealing to prevent moisture buildup, which can make them soggy. Simply reheat in the oven for that fresh-baked taste any time.

Can I freeze baked ham and cheese croissants?
Yes! To freeze, wrap each croissant tightly in plastic wrap, then place them in a freezer bag or airtight container. They can be stored for up to 2 months. When you're ready to enjoy, bake them straight from the freezer at 375°F (190°C) for about 20-25 minutes until heated through and golden—just like fresh out of the oven!

What should I do if my croissants come out soggy?
If you find your croissants are soggy, it could be due to overfilling or insufficient baking time. To avoid this in the future, ensure you don’t overstuff them, which can lead to excess moisture. Additionally, check that your oven is accurately calibrated. Always keep an eye on them during the last few minutes of baking to achieve that ideal golden finish without sogginess.

Are these baked ham and cheese croissants safe for people with allergies?
The ingredients in this recipe include dairy and gluten, so they may not be safe for those with allergies to these components. For a gluten-free version, consider using gluten-free puff pastry, and for dairy-free options, there are plenty of non-dairy cheese alternatives available that work wonderfully! Always remember to check ingredient labels for potential allergens.

Can pets eat ham or cheese from these croissants?
While a small bite of cooked ham or cheese might be safe for pets, it’s best to avoid giving them these croissants. The ingredients—especially butter and mustard—may not sit well with their digestive systems, so keeping these delightful treats for humans is a wise choice!

Baked Ham and Cheese Croissants

Savory Baked Ham and Cheese Croissants You’ll Crave Daily

Enjoy the delightful flavors of Baked Ham and Cheese Croissants, perfect for breakfast and guaranteed to please.
Print Recipe Pin Recipe
Prep Time 15 minutes mins
Cook Time 18 minutes mins
Total Time 33 minutes mins
Servings: 4 croissants
Course: Breakfast
Cuisine: French
Calories: 230
Ingredients Equipment Method Nutrition Notes

Ingredients
  

For the Croissants
  • 12 pieces Mini Croissants or crescent roll dough
  • 8 oz Deli-Cut Ham high-quality slices
  • 8 oz Smoked Cheddar Cheese or regular cheddar
For the Flavor Mixture
  • 4 Tbsp Unsalted Butter softened
  • 2 Tbsp Yellow Mustard
  • 1 Tbsp Honey optional
  • 1 Tbsp Worcestershire Sauce optional
For the Topping
  • 1 large Egg White or whole egg
  • 2 Tbsp Poppy Seeds optional

Equipment

  • Oven
  • Baking Dish
  • Mixing Bowl
  • Whisk

Method
 

Step-by-Step Instructions
  1. Preheat your oven to 375°F (190°C) and grease a 9x13-inch baking dish.
  2. Slice the mini croissants horizontally, then fill each with layers of smoked cheddar cheese and deli-cut ham.
  3. In a mixing bowl, combine softened butter, mustard, honey, and Worcestershire sauce until smooth.
  4. Spread the butter mixture on the inside of each croissant sandwich and arrange them in the greased baking dish.
  5. Whisk the egg white with a splash of water and brush it on top of each croissant. Sprinkle with poppy seeds if desired.
  6. Bake for 15-18 minutes until golden brown and cheese is melted.
  7. Allow to cool for a few minutes before serving.

Nutrition

Serving: 1croissantCalories: 230kcalCarbohydrates: 15gProtein: 10gFat: 15gSaturated Fat: 8gCholesterol: 30mgSodium: 500mgPotassium: 150mgFiber: 1gSugar: 2gVitamin A: 200IUCalcium: 150mgIron: 1mg

Notes

Chilling the pastry helps prevent tearing. Avoid overfilling croissants to ensure even baking.

Tried this recipe?

Let us know how it was!

Homemade Flaky Croissants Recipe: Melt-in-Your-Mouth Magic

May 10, 2026 by Grace Snow Leave a Comment

As I stood in my kitchen, the tantalizing scent of warm, buttery dough filled the air, whisking me away to the charming streets of Paris where croissants are a way of life. This Homemade Flaky Croissants Recipe has become my go-to for transforming any ordinary morning into an extraordinary feast. Not only are these croissants delightfully quick to whip up once you get the hang of it, but they also allow for endless creativity with fillings, from rich chocolate to creamy cheese. There’s something uniquely satisfying about biting into that tender, flaky layer, revealing a world of warm, delicious possibilities inside. Curious about crafting your very own bakery-style croissants at home? Let's bring this French classic into your kitchen!

Why Are These Croissants So Special?

Layers of Delight: Each bite of these croissants delivers a beautifully flaky texture that feels like a warm hug.

Simple Process: The recipe is designed to be approachable, so even novice bakers can achieve pastry perfection.

Sweet or Savory: With options for fillings like chocolate chips or cheese, you can easily customize them to suit any palate.

Perfect for Any Occasion: Whether it’s a quick breakfast or a fancy brunch, these croissants elevate any meal.

Make-Ahead Friendly: You can prepare the dough in advance, saving you precious time on busy mornings. Enjoy these homemade delights fresh out of the oven, paired nicely with a cup of coffee, much like with a cozy homemade hot chocolate for a sweet treat!

Homemade Flaky Croissants Ingredients

For the Dough

  • Instant Yeast – Essential for leavening the dough; substitute with active dry yeast if needed.
  • Warm Water – Activates yeast to ensure the dough rises properly; maintain around 110°F (43°C).
  • All-Purpose Flour – Provides structure; consider whole wheat as a partial substitute for a heartier texture.
  • Sugar – Adds mild sweetness and assists in browning; you may reduce the amount if desired.
  • Salt – Enhances flavor; accuracy is key to avoid an overpowering taste.
  • Milk – Contributes a rich moisture layer; dairy-free options like almond or oat milk work too.
  • Unsalted Butter – Vital for those signature flaky layers; always use cold butter for best results.
  • Egg (for wash) – Creates a beautiful golden sheen once baked; can be replaced with milk for a similar finish.

For the Butter Layer

  • Cubed Butter – Use high-quality, cold butter to pound into layers for optimal flakiness.

This Homemade Flaky Croissants recipe is a delectable journey into the world of baking. Get ready to indulge in the rich, buttery goodness of these delightful pastries!

Step‑by‑Step Instructions for Homemade Flaky Croissants Recipe

Step 1: Activate Yeast
In a mixing bowl, combine instant yeast with warm water (around 110°F/43°C) and let it sit for about 5 minutes until frothy. This crucial step ensures that your Homemade Flaky Croissants will rise properly and achieve that delightful lightness in texture.

Step 2: Prepare Dough
In a large mixing bowl, whisk together the all-purpose flour, sugar, and salt. Gradually add the activated yeast mixture along with milk, stirring until a soft dough forms. The dough should be slightly tacky yet manageable, indicating you're on track to creating those beautiful layers.

Step 3: Knead Dough
Transfer the dough onto a floured surface and knead it gently for about 5 minutes until smooth and elastic. This step is essential to develop gluten, which provides structure to your Homemade Flaky Croissants. It should feel soft and bounce back when touched.

Step 4: Chill Dough
Wrap the kneaded dough in plastic wrap and refrigerate it for at least 2 hours. Chilling is key for ensuring that the butter stays solid during the rolling process, which helps achieve those coveted flaky layers when baking.

Step 5: Prepare Butter Layer
While the dough chills, pound the cold, cubed butter between sheets of parchment paper into a flat rectangle, approximately 8x6 inches. Chilling the butter keeps it firm, allowing it to create distinct, flaky layers in your croissants as they bake.

Step 6: Layering
Roll the chilled dough into a rectangle (about 12x8 inches) on a floured surface. Place the butter slab in the center and fold the dough over like an envelope, sealing the edges. Roll it out again to extend it, and repeat the folding process several times. This creates flaky layers essential for your croissants.

Step 7: Shape Croissants
After completing the folding process, roll the dough out to ¼ inch thickness. Cut triangles using a sharp knife, and roll each triangle from base to tip to form croissants. Make sure the point is tucked underneath to help them hold their shape during baking.

Step 8: Second Rise
Arrange the shaped croissants on parchment-lined baking sheets and brush the tops with an egg wash for a shiny finish. Allow them to rise for about 1 hour in a warm area until puffy and nearly doubled in size. This step is vital for achieving that airy texture.

Step 9: Baking
Preheat your oven to 400°F (200°C). Once hot, bake the croissants for approximately 20 minutes, or until they are golden brown and flaky. Keep an eye on them towards the end—your kitchen will fill with a mouthwatering aroma as they bake to perfection!

How to Store and Freeze Homemade Flaky Croissants

Room Temperature: Store croissants in an airtight container at room temperature for up to 3 days. This keeps them fresh and allows you to enjoy their delicate texture.

Fridge: If you plan to keep them longer, refrigeration is an option. Place croissants in a sealed container to prevent moisture loss, and consume within 5 days.

Freezer: For longer storage, freeze your croissants for up to 2 months. Wrap them individually in plastic wrap and place in an airtight freezer bag.

Reheating: To bring back that fresh-baked warm sensation, reheat from frozen in a preheated oven at 350°F (175°C) for about 10-15 minutes until warm and flaky. Enjoy your delicious Homemade Flaky Croissants straight from your own kitchen!

Expert Tips for Homemade Flaky Croissants

  • Cold Ingredients Matter: Always use cold butter and water to ensure your croissants have those irresistible flaky layers. Warm ingredients can ruin the texture!

  • Chill, Don’t Rush: Chilling your dough is crucial. Allow it to rest properly to let the gluten relax and maintain the solid state of the butter for better layering.

  • Gentle Handling: Take care not to over-knead or overwork the dough. Gently roll it out and handle it with love to keep croissants light and airy.

  • Sharp Knife Essential: Use a sharp knife or pizza cutter for cutting the dough. This maintains clean edges and preserves the layers, ensuring an indulgent bite.

  • Watch the Oven: Keep an eye on your croissants while baking; every oven is different. You want them golden brown—perfectly crispy but not burnt!

With these expert tips, your Homemade Flaky Croissants will shine with warmth and deliciousness!

What to Serve with Homemade Flaky Croissants

Indulging in these delightful pastries is just the beginning of creating a mouthwatering breakfast experience.

  • Creamy Scrambled Eggs: The soft, velvety texture of scrambled eggs pairs perfectly with the flaky layers of croissants for a luxurious breakfast.
  • Fresh Fruit Salad: A colorful mix of strawberries, blueberries, and melon adds a refreshing sweetness that balances the rich buttery flavor of the croissants.
  • Bacon or Sausage Links: Savory, crispy bacon or juicy sausage brings a delightful contrast, adding a hearty element to your light breakfast spread.
  • Herbal Tea or Coffee: A warm cup of herbal tea or freshly brewed coffee enhances the experience with aromatic notes that complement the buttery goodness.
  • Homemade Jam or Preserve: Spread some homemade raspberry or apricot jam to introduce a sweet tang that beautifully contrasts with the croissant's richness.
  • Yogurt Parfait: Layer smooth yogurt with granola and fruits for a delightful texture and a healthy, vibrant side to your flaky croissants.
  • Chocolate Croissant Variation: Want to keep the theme? Try making chocolate-filled croissants as a delightful twist that will please any sweet tooth.
  • Almond Paste Filling: As a filling option, almond paste delivers a nutty sweetness that enhances the croissants' flaky layers, making for an indulgent treat.

Homemade Flaky Croissants Variations

Feel free to surprise your taste buds by customizing this croissant recipe with delightful twists and substitutes.

  • Chocolate Chip: Add chocolate chips in the center for a sweet, melty filling that elevates your breakfast experience.

  • Cheese Lovers: Substitute a blend of Swiss and Gruyère cheese for a savory take—perfect for brunch with a touch of sophistication.

  • Almond Paste: Swap out the filling for a rich almond paste to create a deliciously sweet surprise inside each flaky layer.

  • Herbed Cream Cheese: Mix cream cheese with fresh herbs and spread it onto the dough before rolling for a savory, herby burst in each bite.

  • Whole Wheat Twist: Replace part of the all-purpose flour with whole wheat for a rustic flavor, although the texture will be a bit denser.

  • Spicy Touch: Add a sprinkle of cayenne pepper to the butter layer for a gentle kick, providing an unexpected depth to the buttery croissants.

  • Apple-Cinnamon Filling: For a touch of fall, fold in diced apples mixed with cinnamon and sugar for a sweet, fruity delight.

  • Lemon Zest: Brighten up your croissants by incorporating lemon zest into the dough for a refreshing citrus flavor that complements any filling.

Enhance these Homemade Flaky Croissants even further with a hot cup of Homemade Hot Chocolate or maybe even prepare them alongside the ever-popular Shakshuka Savor Bold for a rounded and satisfying breakfast. Enjoy experimenting!

Make Ahead Options

These Homemade Flaky Croissants are perfect for busy home cooks looking to save time! You can prepare the dough up to 24 hours in advance by following the first four steps and chilling it in the refrigerator. Additionally, the shaped croissants can be placed on baking sheets and covered with plastic wrap for up to 3 days in the fridge before their second rise—just let them come to room temperature and rise before baking. To maintain quality, ensure the dough remains cold and airtight to prevent drying or absorbing odors. When you're ready to enjoy these delightful pastries, simply brush the tops with egg wash, allow to rise until puffy, and bake for fresh, flaky results that are just as delicious as if made that day!

Homemade Flaky Croissants Recipe FAQs

What type of flour should I use for the best croissants?
All-purpose flour is ideal for achieving the perfect texture, but you can swap a portion for whole wheat flour for a heartier result. However, be aware that using whole wheat may affect the flakiness of the croissants.

How should I store homemade flaky croissants?
Store your croissants in an airtight container at room temperature for up to 3 days to maintain freshness. If you wish to keep them longer, refrigerate in a sealed container for up to 5 days.

Can I freeze homemade flaky croissants?
Absolutely! For optimal freezing, wrap each croissant individually in plastic wrap and place them in an airtight freezer bag. They can last in the freezer for up to 2 months. To reheat, bake from frozen in a preheated oven at 350°F (175°C) for about 10-15 minutes until they're warm and flaky.

What should I do if my croissants don’t rise properly?
If your croissants don’t rise, it could be due to inactive yeast. Ensure that your yeast is fresh and have a lively activation by letting it sit in warm water (around 110°F/43°C) until frothy before mixing it with the other ingredients. If the dough becomes too warm while handling, refrigerate it briefly to keep the butter solid, which is crucial for the layering process. If dough handling is suspected to be the issue, be gentle and avoid overworking it.

Are there any dietary considerations I should keep in mind?
If you're dealing with allergies or dietary restrictions, always check your ingredients. You can easily substitute milk with almond or oat milk for lactose-free options. For fillings, ensure that any additions like chocolate or cheese align with your dietary needs. Enjoying homemade flaky croissants can still be a delightful experience, no matter your requirements!

Can I add fillings to my croissants? What are some good options?
Yes! Feel free to get creative by adding fillings such as chocolate chips, almond paste, or even savory cheese. Just ensure to place the filling inside the croissant before rolling it up. You might want to reduce the amount of butter slightly if using richer fillings to maintain the right texture!

Homemade Flaky Croissants Recipe

Homemade Flaky Croissants Recipe: Melt-in-Your-Mouth Magic

This Homemade Flaky Croissants Recipe transforms ordinary mornings into extraordinary feasts with delightful, buttery croissants.
Print Recipe Pin Recipe
Prep Time 25 minutes mins
Cook Time 20 minutes mins
Chilling Time 2 hours hrs
Total Time 2 hours hrs 45 minutes mins
Servings: 12 croissants
Course: Breakfast
Cuisine: French
Calories: 200
Ingredients Equipment Method Nutrition Notes

Ingredients
  

For the Dough
  • 2 teaspoons instant yeast substitute with active dry yeast if needed
  • 1 cup warm water maintain around 110°F (43°C)
  • 4 cups all-purpose flour consider whole wheat as a partial substitute for a heartier texture
  • 1 tablespoon sugar may reduce if desired
  • 1 teaspoon salt accuracy is key
  • 1 cup milk dairy-free options like almond or oat milk work too
  • 1 cup unsalted butter always use cold butter for best results
  • 1 egg for wash can be replaced with milk for a similar finish
For the Butter Layer
  • 1 cup cubed butter high-quality, cold butter

Equipment

  • Mixing Bowl
  • Whisk
  • Rolling Pin
  • Sharp Knife
  • Parchment Paper
  • Baking Sheets
  • plastic wrap

Method
 

Step-by-Step Instructions
  1. In a mixing bowl, combine instant yeast with warm water and let it sit for about 5 minutes until frothy.
  2. In a large mixing bowl, whisk together the all-purpose flour, sugar, and salt. Gradually add the activated yeast mixture along with milk, stirring until a soft dough forms.
  3. Transfer the dough onto a floured surface and knead it gently for about 5 minutes until smooth and elastic.
  4. Wrap the kneaded dough in plastic wrap and refrigerate it for at least 2 hours.
  5. Pound the cold, cubed butter between sheets of parchment paper into a flat rectangle, approximately 8x6 inches.
  6. Roll the chilled dough into a rectangle (about 12x8 inches). Place the butter slab in the center and fold the dough over like an envelope.
  7. Roll the dough out to ¼ inch thickness. Cut triangles and roll each triangle from base to tip to form croissants.
  8. Arrange the shaped croissants on parchment-lined baking sheets and brush the tops with an egg wash. Allow them to rise for about 1 hour.
  9. Preheat your oven to 400°F. Bake the croissants for approximately 20 minutes, or until golden brown and flaky.

Nutrition

Serving: 1croissantCalories: 200kcalCarbohydrates: 24gProtein: 3gFat: 10gSaturated Fat: 6gMonounsaturated Fat: 3gTrans Fat: 0.5gCholesterol: 30mgSodium: 150mgPotassium: 70mgFiber: 1gSugar: 1gVitamin A: 300IUCalcium: 20mgIron: 1mg

Notes

For best results, use cold ingredients and chill the dough adequately. Handle the dough gently to retain airiness.

Tried this recipe?

Let us know how it was!

Cottage Cheese Banana Bread: Moist, Healthy Perfection Awaits

May 6, 2026 by Grace Snow Leave a Comment

Every bite of fresh, warm Cottage Cheese Banana Bread transports me to cozy mornings filled with delicious anticipation. It’s surprising how this simple twist on a classic can come together in no time. With its gluten-free nature and added protein from cottage cheese, this recipe transforms banana bread into a guilt-free snack or a wholesome breakfast option. Not only does it fill your kitchen with an irresistible aroma, but it's also perfect for those seeking healthier alternatives without sacrificing flavor. Imagine indulging in a soft, moist slice that still fits into a balanced lifestyle! Are you ready to whip up a loaf that’s both nutritious and delicious?

Why is Cottage Cheese Banana Bread so special?

Decadent, Yet Healthy: This Cottage Cheese Banana Bread combines the moistness you crave with a protein boost, making it a smart choice for snacking or breakfast.

Guilt-Free Indulgence: With lower sugar content and gluten-free ingredients, it’s perfect for those mindful of their diet but still wanting to enjoy delicious flavors.

Time-Saving Delight: Whip this recipe up in no time, allowing you to savor warm slices fresh from the oven without hours in the kitchen.

Versatile and Fun: Customize your loaf by adding nuts, chocolate chips, or even seasonal flavors like pumpkin for a delightful surprise.

Kitchen Aromas: As it bakes, your home will fill with the sweet, comforting scent that brings everyone running to the kitchen!

Try serving it warm topped with a bit of butter, just like with my popular Cheesy Garlic Bread, or pair it with a fresh fruit spread for an elevated treat. This Cottage Cheese Banana Bread is bound to be the new star of your breakfast table!

Cottage Cheese Banana Bread Ingredients

• Every ingredient plays a crucial role in creating this moist, gluten-free delight!

For the Batter

  • Ripe Bananas – Adds natural sweetness and moisture; substitute with unsweetened applesauce for lower sugar.
  • Eggs – Binds ingredients together and provides structure; for a vegan option, use flax eggs (1 tbsp flaxseed + 2.5 tbsp water = 1 egg).
  • Cottage Cheese – Enhances moisture and boosts protein; you can opt for low-fat or smooth blended cottage cheese for a creamier texture.
  • Maple Syrup – Infuses sweetness and depth; for reduced sugar, try honey or sugar-free syrup.
  • Vanilla Extract – Elevates the overall flavor profile; no substitutions necessary here.
  • Almond Flour – A gluten-free base that adds nutrition; be cautious not to replace it 1:1 with other flours due to its density.
  • Baking Soda – Ensures the bread rises; check freshness for the best results.
  • Ground Cinnamon – Provides warmth and depth; optional, but highly recommended for spice enthusiasts.

With these simple ingredients, the Cottage Cheese Banana Bread will become a household favorite that you'll enjoy making and sharing!

Step‑by‑Step Instructions for Cottage Cheese Banana Bread

Step 1: Preheat the Oven
Begin by preheating your oven to 350°F (175°C). While it warms up, take a moment to grease a loaf pan to ensure your Cottage Cheese Banana Bread slides out easily after baking. This step is crucial for achieving that perfect, tender crust.

Step 2: Mash the Bananas
In a large mixing bowl, mash 2-3 ripe bananas until smooth, leaving some small chunks for texture. Next, add in 2 eggs, 1 cup of cottage cheese, 1/3 cup of maple syrup, and 1 teaspoon of vanilla extract. Mix all the wet ingredients together until they’re well incorporated and creamy, creating a lovely base for your banana bread.

Step 3: Prepare the Dry Ingredients
In a separate medium bowl, whisk together 1 and 1/2 cups of almond flour, 1 teaspoon of baking soda, and 1 teaspoon of ground cinnamon (if using). This mixture is essential for the bread to rise properly and achieve a delightful flavor. Ensure there are no lumps for an even texture throughout your Cottage Cheese Banana Bread.

Step 4: Combine Wet and Dry Ingredients
Gradually add the dry ingredients to the wet mixture, folding them together with a spatula or wooden spoon. Mix just until combined; be careful not to overmix—it’s okay if there are a few small lumps. This technique will keep your Cottage Cheese Banana Bread tender and moist.

Step 5: Transfer to the Loaf Pan
Pour the prepared batter into the greased loaf pan, using a spatula to spread it evenly. By this point, your kitchen should be filled with the sweet aroma of bananas! Make sure the batter reaches the edges of the pan for uniform baking, which helps ensure each slice will be deliciously moist.

Step 6: Bake the Bread
Place your loaf pan in the preheated oven and bake for 50-60 minutes. To check for doneness, insert a toothpick into the center of the bread—if it comes out clean or with a few moist crumbs, it’s ready! The top should be golden brown and spring back gently when pressed.

Step 7: Cool the Bread
Once baked, remove the Cottage Cheese Banana Bread from the oven and let it cool in the pan for 10 minutes. Then, carefully transfer it to a wire rack to cool completely. This cooling period helps set the bread's texture, making it easier to slice without falling apart.

What to Serve with Cottage Cheese Banana Bread

Every slice of this delightful treat can be transformed into an exquisite meal when paired with the right accompaniments.

  • Creamy Yogurt: A dollop of Greek yogurt on the side adds a rich creaminess that balances the banana bread’s sweetness.
  • Fresh Berries: Add a burst of freshness with strawberries, blueberries, or raspberries—these fruits pair beautifully with the banana flavor.
  • Nut Butter Spread: A smear of almond or peanut butter not only enhances the protein content but creates a lovely nutty contrast.
  • Cinnamon Sugar Topping: Sprinkle a light mixture of cinnamon and sugar on toasted slices for a sweet, aromatic treat that's hard to resist!

For a perfect breakfast ensemble, enjoy your Cottage Cheese Banana Bread with a side of lightly scrambled eggs. The fluffy texture of the eggs complements the moist banana goodness and makes for a satisfying morning.

  • Herbal Tea or Coffee: A warm cup of chamomile or a bold brew offers a comforting pairing, enhancing the cozy experience of enjoying the bread.
  • Honeyed Cottage Cheese: Serve a small bowl of cottage cheese drizzled with honey for a nutritious side that complements the bread’s texture.
  • Warm Compote: A spoonful of homemade fruit compote elevates the entire dish, adding warmth and another layer of flavor perfect for weekend brunches.

With these pairings, each bite becomes a delightful experience, inviting family and friends to gather around the breakfast table!

How to Store and Freeze Cottage Cheese Banana Bread

Room Temperature: Store leftover Cottage Cheese Banana Bread in an airtight container for up to 3 days to maintain its delicious moisture and flavor.

Fridge: For slightly longer freshness, you can refrigerate the bread for up to a week, but expect a slight change in texture.

Freezer: Slice the bread and wrap each piece tightly in plastic wrap, then place in a freezer-safe bag for up to 2 months. Thaw in the fridge overnight before enjoying.

Reheating: To serve warm, simply place slices in a toaster or microwave for about 10-15 seconds until heated through—perfect for a quick, comforting snack!

Make Ahead Options

These Cottage Cheese Banana Bread loaves are perfect for meal prep, making busy mornings a breeze! You can mash the ripe bananas and combine them with the wet ingredients (eggs, cottage cheese, maple syrup, and vanilla extract) up to 24 hours in advance, refrigerating the mixture in an airtight container to maintain freshness. The dry ingredients can also be whisked together ahead of time and stored in a separate container for up to 3 days. When you're ready to bake, simply combine the wet and dry ingredients, pour the batter into the prepared loaf pan, and bake as instructed. This way, you'll savor that delicious, freshly-baked Cottage Cheese Banana Bread with minimal effort, even on your busiest days!

Expert Tips for Cottage Cheese Banana Bread

  • Use Ripe Bananas: The sweeter and more speckled the bananas, the better your bread will taste. They contribute natural sweetness, enhancing your Cottage Cheese Banana Bread.

  • Don’t Overmix: Mix just until combined to keep the bread fluffy and moist. Overmixing can lead to a dense texture that no one wants!

  • Check Baking Time: Ovens vary, so start checking for doneness around 50 minutes. Insert a toothpick—it should come out clean but not dry to ensure perfect moisture.

  • Store Properly: Keep leftovers in an airtight container; this helps maintain freshness for up to 3 days. Alternatively, slice and freeze for easy grab-and-go snacks!

  • Customize with Toppings: For added flavor, fold in nuts or dark chocolate chips into the batter. These not only enhance taste, but also provide delightful crunch!

  • Cover if Browning: If the top is browning too fast, cover loosely with foil for the last 15 minutes of baking to prevent burning.

Cottage Cheese Banana Bread Variations

Feel free to get creative with your Cottage Cheese Banana Bread, enhancing flavors and textures to suit your palate!

  • Vegan Option: Replace eggs with flax eggs (1 tbsp ground flaxseed + 2.5 tbsp water per egg) for a plant-based treat. This keeps the deliciousness intact while accommodating dietary preferences.

  • Lower Sugar: Swap maple syrup for honey or a sugar-free syrup, allowing you to enjoy the same delightful taste while keeping sugar levels low.

  • Pumpkin Spice Twist: Substituting some of the bananas for pumpkin puree delivers a cozy seasonal flavor. Add in nutmeg to elevate that autumn-inspired goodness!

  • Nutty Goodness: Fold in walnuts or pecans for an added crunch and lovely nuttiness. The texture contrast enhances each bite, making it perfectly satisfying.

  • Berry Burst: Toss in fresh blueberries for a fruity explosion. These little gems will burst with flavor, complementing the sweetness of the banana beautifully.

  • Chocolatey Delight: Add dark chocolate chips or cacao nibs for a deliciously indulgent twist. This chocolatey addition makes for a delightful surprise in every slice!

  • Flour Alternatives: Try oat or coconut flour instead of almond flour for a different taste and texture, keeping in mind that you may need to adjust the liquid ingredients.

  • Cinnamon Swirl: For a delicious spin, create a simple cinnamon sugar filling by mixing cinnamon and sugar, and swirling it through the batter before baking. A new layer of flavor awaits!

Explore these delightful variations, and don't forget to enjoy your Cottage Cheese Banana Bread warm with a spread of butter or alongside my yummy Cornbread Breakfast Casserole! Let your imagination run wild in the kitchen!

Cottage Cheese Banana Bread Recipe FAQs

How do I select ripe bananas for my Cottage Cheese Banana Bread?
Absolutely! Look for bananas that are fully yellow with brown spots; that’s a sign they’re ripe and sweet! The more brown spots, the sweeter they will be in your bread. If you need a low-sugar option, unsweetened applesauce can also substitute the bananas effectively.

What’s the best way to store leftover Cottage Cheese Banana Bread?
For optimal freshness, keep your leftovers in an airtight container at room temperature for up to 3 days. If you plan to keep it longer, you can refrigerate the bread for up to a week, but be aware that refrigeration can change the texture slightly.

Can I freeze Cottage Cheese Banana Bread? How should I do it?
Yes, you can! To freeze, slice the bread and wrap each piece tightly in plastic wrap. Place them inside a freezer-safe bag, and your Cottage Cheese Banana Bread will be good for up to 2 months. When you're ready to enjoy it, simply thaw slices in the fridge overnight and reheat them in the toaster or microwave!

What if my Cottage Cheese Banana Bread comes out too dense?
No worries! If your bread turns out dense, it may be due to overmixing when combining wet and dry ingredients. Mix just until incorporated and use the right amount of baking soda. Ensure it’s fresh and properly measured for the best rise. Also, be cautious about how much almond flour you use, as other flours behave differently.

Is there a gluten-free alternative for almond flour if I have allergies?
Definitely! If you're allergic to almonds or need a different flour, consider using coconut flour or oat flour. However, remember that coconut flour absorbs more moisture than almond flour, so you’ll need to adjust the liquid in your recipe (about 1/4 cup less bread for each 1/4 cup of coconut flour used).

Is this recipe suitable for pets?
That’s an excellent question! While the ingredients like bananas and eggs are generally safe in small quantities for dogs, other ingredients like maple syrup and cottage cheese should be avoided or limited. Always consult with your vet before sharing human food with your pets!

Cottage Cheese Banana Bread

Cottage Cheese Banana Bread: Moist, Healthy Perfection Awaits

Cottage Cheese Banana Bread is a moist, gluten-free treat packed with protein, perfect for guilt-free snacking or breakfast.
Print Recipe Pin Recipe
Prep Time 15 minutes mins
Cook Time 1 hour hr
Cooling Time 10 minutes mins
Total Time 1 hour hr 25 minutes mins
Servings: 10 slices
Course: Breakfast
Cuisine: American
Calories: 150
Ingredients Equipment Method Nutrition Notes

Ingredients
  

For the Batter
  • 2-3 pieces ripe bananas Adds natural sweetness and moisture; substitute with unsweetened applesauce for lower sugar.
  • 2 large eggs Binds ingredients together; for a vegan option, use flax eggs (1 tbsp flaxseed + 2.5 tbsp water = 1 egg).
  • 1 cup cottage cheese Enhances moisture and boosts protein; opt for low-fat or smooth blended for creaminess.
  • 1/3 cup maple syrup Infuses sweetness; for reduced sugar, try honey or sugar-free syrup.
  • 1 teaspoon vanilla extract Elevates flavor; no substitutions necessary.
  • 1.5 cups almond flour A gluten-free base; do not replace 1:1 with other flours due to density.
  • 1 teaspoon baking soda Ensures the bread rises; check for freshness.
  • 1 teaspoon ground cinnamon Optional, but recommended for spice enthusiasts.

Equipment

  • Loaf pan
  • Mixing Bowl
  • Whisk
  • Spatula

Method
 

Step-by-Step Instructions
  1. Preheat your oven to 350°F (175°C) and grease a loaf pan.
  2. Mash 2-3 ripe bananas in a large bowl, then add 2 eggs, 1 cup cottage cheese, 1/3 cup maple syrup, and 1 teaspoon vanilla extract. Mix until creamy.
  3. In a separate bowl, whisk together 1.5 cups almond flour, 1 teaspoon baking soda, and 1 teaspoon ground cinnamon until no lumps remain.
  4. Gradually fold the dry ingredients into the wet mixture until just combined.
  5. Pour the batter into the greased loaf pan, ensuring it reaches the edges for even baking.
  6. Bake for 50-60 minutes, checking with a toothpick for doneness. Remove once clean or with a few moist crumbs.
  7. Cool in the pan for 10 minutes before transferring to a wire rack to cool completely.

Nutrition

Serving: 1sliceCalories: 150kcalCarbohydrates: 25gProtein: 5gFat: 4gSaturated Fat: 1gPolyunsaturated Fat: 1gMonounsaturated Fat: 2gCholesterol: 50mgSodium: 200mgPotassium: 200mgFiber: 2gSugar: 8gVitamin A: 10IUVitamin C: 15mgCalcium: 6mgIron: 4mg

Notes

Store leftovers in an airtight container for up to 3 days or refrigerate for up to a week. Slice and freeze for up to 2 months.

Tried this recipe?

Let us know how it was!

Cottage Cheese Banana Bread: Moist, Protein-Packed Delight

May 5, 2026 by Grace Snow Leave a Comment

As I stood in my kitchen, the enticing smell of baking bread wafted through the air, making my mouth water. That’s when I knew it was time to whip up my favorite Cottage Cheese Banana Bread. This delightful gluten-free treat not only satisfies my sweet tooth, but it’s also high in protein, making it a nutritious option for breakfast or an afternoon snack. With minimal prep time and no complicated techniques required, this recipe is perfect for both seasoned bakers and kitchen novices alike. Each slice boasts a moist texture with a hint of cinnamon, turning everyday bananas into something truly extraordinary. Curious to see how this simple loaf can transform your mornings? Let’s get baking!

Why Is This Banana Bread So Special?

Nutritious Convenience: Each slice of this Cottage Cheese Banana Bread is not just delicious but also packed with protein, making it a great start to the day. Wholesome Ingredients: Made with ripe bananas and gluten-free almond flour, you can enjoy a guilt-free indulgence that kids love too! Quick & Easy: With just a few simple steps, this bread comes together effortlessly—perfect for busy mornings or spontaneous snack cravings. Versatile Variations: Feel free to customize it with nuts or chocolate chips for a personalized twist! If you’re also looking for tasty breakfast ideas, check out our Cornbread Breakfast Casserole.

Cottage Cheese Banana Bread Ingredients

• Discover what makes this Cottage Cheese Banana Bread so easy and delicious!

For the Bread

  • Ripe Bananas – Use overripe bananas for maximum natural sweetness and moisture.
  • Eggs – Ensure they are at room temperature for easier mixing and better binding.
  • Cottage Cheese – Full-fat or low-fat varieties work; blend until smooth for the best texture.
  • Maple Syrup – This sweetener enhances flavor; feel free to substitute with honey if desired.
  • Vanilla Extract – Adds a warm aroma and elevates the overall taste of the bread.
  • Almond Flour – Offers a gluten-free base; be careful not to directly substitute for all-purpose flour due to moisture absorption.
  • Baking Soda – Provides essential leavening; always check for freshness to ensure a good rise.
  • Cinnamon – This spice adds warmth; consider nutmeg as an alternative for a different flavor twist.

Optional Add-ins

  • Chocolate Chips – Mix in for a delightful sweet surprise with each bite.
  • Nuts (e.g., walnuts) – Add crunch and heartiness; they complement the banana flavor beautifully.
  • Blueberries – Perfect for a burst of fruity flavor and added antioxidants.

Now that you've gathered your ingredients, you're just a few steps away from baking a delicious and nutritious Cottage Cheese Banana Bread that everyone will love!

Step‑by‑Step Instructions for Cottage Cheese Banana Bread

Step 1: Preheat the Oven
Begin by preheating your oven to 350°F (175°C). While the oven heats, prepare a loaf pan by greasing it lightly or lining it with parchment paper for easy removal later. This step sets the stage for baking your Cottage Cheese Banana Bread to perfection.

Step 2: Mix Wet Ingredients
In a large mixing bowl, mash 2-3 ripe bananas until smooth, then add eggs, cottage cheese, maple syrup, and vanilla extract. Use a whisk or a fork to blend everything together until it's creamy and well combined—aim for a homogeneous mixture without any lumps. This blend creates the moist foundation that makes the bread deliciously tender.

Step 3: Combine Dry Ingredients
In a separate medium bowl, sift together the almond flour, baking soda, and cinnamon. Stir these dry ingredients until they are evenly mixed, which ensures a consistent rise in your Cottage Cheese Banana Bread. The almond flour will give your bread a nutty flavor while keeping it gluten-free.

Step 4: Combine Mixtures
Gradually add the dry mixture to the wet ingredients in your large bowl. Using a spatula, gently fold the ingredients together until just combined; a few small lumps are perfectly fine. Be careful not to overmix, as this helps maintain the bread's fluffy texture.

Step 5: Pour into Pan
Pour the batter into your prepared loaf pan, making sure to smooth the top with a spatula. This ensures even baking and creates a lovely surface for your Cottage Cheese Banana Bread. The batter should fill the pan about three-quarters full, allowing room for rising during baking.

Step 6: Bake the Bread
Carefully place the loaf pan in your preheated oven and bake for 50 minutes. Keep an eye on it during the last few minutes; it’s done when a toothpick inserted into the center comes out clean. Your bread should be golden brown, and the aroma wafting through the kitchen will be irresistible!

Step 7: Cool Down
Once baked, remove the pan from the oven and allow it to cool for about 10 minutes. This cooling time in the pan helps set the structure before transferring. Afterward, gently turn the bread out onto a wire rack to cool completely, ensuring it maintains its moist texture as it finishes cooling.

Cottage Cheese Banana Bread Variations

Feel free to let your creativity shine as you explore these delightful twists and adjustments to the recipe!

  • Dairy-Free: Swap the cottage cheese for a plant-based yogurt for a creamy, dairy-free option that still packs a protein punch.

  • Nut-Free: Substitute almond flour for a sunflower seed flour or a gluten-free blend to cater to nut allergies while keeping the texture intact.

  • Sugar-Free: Replace maple syrup with a sugar-free sweetener like erythritol or stevia, making it suitable for a low-sugar treat without sacrificing taste.

  • Pumpkin Spice: For a seasonal twist, replace bananas with mashed pumpkin and add pumpkin spice for a cozy autumn flavor that warms the soul.

  • Chocolate Lovers: Stir in dark chocolate chips and walnuts for a rich, decadent treat—just imagine the delightful contrast of flavors and textures in every bite!

  • Berry Burst: Add a cup of fresh or frozen blueberries or raspberries for a fruity explosion that balances perfectly with the bread's sweetness.

  • Chia or Flax Seeds: Mix in a couple of tablespoons of chia seeds or ground flaxseeds to amp up the fiber and omega-3 content for an even healthier slice.

Enhancing your Cottage Cheese Banana Bread with these variations can turn each experience into a delicious exploration! If you're also looking for more breakfast ideas, consider trying our Breakfast Banana Split for a fun morning boost!

Storage Tips for Cottage Cheese Banana Bread

  • Room Temperature: Store Cottage Cheese Banana Bread in an airtight container for up to 3 days. This keeps the bread fresh and delicious without needing refrigeration.
  • Fridge: If you prefer to extend its life, refrigerate the bread in an airtight container for up to 5 days. This helps retain its moist texture and flavors.
  • Freezer: For long-term storage, slice the bread and wrap individual pieces in plastic wrap before placing them in a freezer bag. It can be frozen for up to 2 months, preserving its taste and nutrients.
  • Reheating: When ready to enjoy, simply thaw at room temperature or warm individual slices in the microwave for about 10-15 seconds for a delightful treat!

What to Serve with Cottage Cheese Banana Bread

As you savor the delightful flavors of this protein-packed banana bread, consider these perfect accompaniments to elevate your meal experience.

  • Creamy Nut Butter: A spread of almond or peanut butter not only adds richness but complements the sweetness of the bread beautifully.

  • Fresh Berries: Juicy strawberries or blueberries create a vibrant contrast, bringing a fresh and tangy note to each bite.

  • Greek Yogurt: Serve a dollop of tangy Greek yogurt alongside for an extra protein boost, perfectly balancing the sweetness of the bread.

  • Honey Drizzle: A light drizzle of honey enhances the natural sweetness, making it an indulgent treat that feels gourmet.

  • Cinnamon Butter: Whip up a batch of cinnamon butter to spread on warm slices, offering a comforting and nostalgic flavor.

  • Chia Seed Pudding: Pairing with a light chia seed pudding offers a textural contrast, combining creamy and chewy elements in a healthful way.

  • Iced Coffee: Sipping on a chilled iced coffee creates a delightful refreshment alongside the warm bread, making for a cozy breakfast or snack.

  • Fruit Preserves: Choose peach or apricot preserves for a deliciously sweet accompaniment that pairs well with the mild flavors of the bread.

Make Ahead Options

These Cottage Cheese Banana Bread loaves are perfect for meal prep enthusiasts! You can mix the wet ingredients (mashed bananas, eggs, cottage cheese, maple syrup, and vanilla) up to 24 hours in advance and refrigerate them (to keep them fresh). Additionally, you can combine the dry ingredients (almond flour, baking soda, and cinnamon) and store them in an airtight container for up to 3 days. When you're ready to bake, simply blend the wet and dry mixtures together, pour the batter into your loaf pan, and bake as instructed. This way, you’ll have scrumptious, high-protein Cottage Cheese Banana Bread at a moment's notice, making your busy mornings just a bit easier!

Expert Tips for Cottage Cheese Banana Bread

  • Choose Perfect Bananas: Make sure your bananas are very ripe. The more spots they have, the sweeter and more flavorful your Cottage Cheese Banana Bread will be!

  • Blend Cottage Cheese: If you prefer a smoother texture, blend the cottage cheese before mixing it in. It avoids any lumps and ensures delicate slices!

  • Check Flour Measurements: Be cautious when measuring almond flour; it absorbs more moisture than all-purpose flour. Use a kitchen scale or spoon it gently into the measuring cup.

  • Avoid Overmixing: When combining wet and dry ingredients, mix just until incorporated. Overmixing can lead to a dense loaf instead of a light and fluffy crumb.

  • Monitor Baking: Keep an eye on your bread as it bakes. If it browns too quickly, cover it loosely with foil to prevent burning while allowing it to bake through.

  • Customize Flavors: Don’t hesitate to get creative! Adding a handful of walnuts or chocolate chips can elevate your Cottage Cheese Banana Bread and make it even more delightful.

Cottage Cheese Banana Bread Recipe FAQs

What type of bananas should I use for the best flavor?
Absolutely! Use overripe bananas with plenty of brown spots for the best flavor and moisture. The riper the bananas, the sweeter and more delicious your Cottage Cheese Banana Bread will be!

How should I store the Cottage Cheese Banana Bread?
Store your Cottage Cheese Banana Bread in an airtight container at room temperature for up to 3 days. If you want it to last longer, refrigerate it for up to 5 days to keep it fresh.

Can I freeze Cottage Cheese Banana Bread?
Yes, you can! Slice the bread and wrap each piece tightly in plastic wrap. Place the wrapped slices in a freezer bag and freeze for up to 2 months. When you're ready to enjoy a slice, simply thaw it at room temperature or warm it in the microwave for about 10-15 seconds.

What should I do if my bread is dense?
If your Cottage Cheese Banana Bread turns out dense, it might be due to overmixing the batter. Be careful not to overmix when combining wet and dry ingredients; mix until just combined for the best texture. Additionally, ensure your baking soda is fresh for proper rise!

Is Cottage Cheese Banana Bread safe for my kids?
Very! With its gluten-free ingredients and low sugar content, this Cottage Cheese Banana Bread is a nutritious option that kids will love. Just keep an eye on any allergies to nuts if you choose to add nuts as mix-ins.

Can I customize this recipe?
The more the merrier! You can absolutely customize your Cottage Cheese Banana Bread by adding chocolate chips, walnuts, or blueberries to create a fun twist. Add about ½ cup of your chosen mix-in when combining the wet and dry ingredients!

Cottage Cheese Banana Bread

Cottage Cheese Banana Bread: Moist, Protein-Packed Delight

This Cottage Cheese Banana Bread is a gluten-free, protein-packed treat perfect for breakfast or snacks.
Print Recipe Pin Recipe
Prep Time 15 minutes mins
Cook Time 50 minutes mins
Cooling Time 10 minutes mins
Total Time 1 hour hr 15 minutes mins
Servings: 10 slices
Course: Breakfast
Cuisine: American
Calories: 180
Ingredients Equipment Method Nutrition Notes

Ingredients
  

For the Bread
  • 3 medium Ripe Bananas Use overripe bananas for maximum natural sweetness and moisture.
  • 2 large Eggs Ensure they are at room temperature for easier mixing and better binding.
  • 1 cup Cottage Cheese Blend until smooth for the best texture.
  • 1/2 cup Maple Syrup Feel free to substitute with honey if desired.
  • 1 teaspoon Vanilla Extract Adds a warm aroma and elevates the overall taste.
  • 2 cups Almond Flour Be careful not to directly substitute for all-purpose flour due to moisture absorption.
  • 1 teaspoon Baking Soda Check for freshness to ensure a good rise.
  • 1 teaspoon Cinnamon Consider nutmeg as an alternative for a different flavor twist.
Optional Add-ins
  • 1 cup Chocolate Chips Mix in for a delightful sweet surprise.
  • 1/2 cup Nuts (e.g., walnuts) Add crunch and heartiness.
  • 1 cup Blueberries Perfect for a burst of fruity flavor.

Equipment

  • Loaf pan
  • Mixing bowls
  • Whisk
  • Spatula
  • Oven

Method
 

Step-by-Step Instructions
  1. Preheat your oven to 350°F (175°C) and prepare a loaf pan by greasing or lining it.
  2. In a large mixing bowl, mash 2-3 ripe bananas until smooth, then add eggs, cottage cheese, maple syrup, and vanilla extract. Blend until creamy.
  3. In a separate bowl, sift together almond flour, baking soda, and cinnamon.
  4. Gradually add the dry mixture to the wet ingredients. Fold gently until just combined.
  5. Pour the batter into the prepared loaf pan, smoothing the top with a spatula.
  6. Bake for 50 minutes, checking with a toothpick. It’s done when it comes out clean.
  7. Allow the bread to cool in the pan for 10 minutes, then transfer it to a wire rack to cool completely.

Nutrition

Serving: 1sliceCalories: 180kcalCarbohydrates: 25gProtein: 5gFat: 6gSaturated Fat: 2gPolyunsaturated Fat: 0.5gMonounsaturated Fat: 4gCholesterol: 40mgSodium: 150mgPotassium: 200mgFiber: 2gSugar: 8gVitamin A: 2IUVitamin C: 6mgCalcium: 6mgIron: 4mg

Notes

For best results, use very ripe bananas and ensure the cottage cheese is blended well for a smoother texture.

Tried this recipe?

Let us know how it was!

Flourless Oat Waffles for a Quick, Healthy Breakfast Boost

May 5, 2026 by Grace Snow Leave a Comment

As I stood in my kitchen one busy morning, the sound of sizzling pancakes felt tempting, but my newfound love for simplicity pulled me towards something healthier. Enter Flourless Oat Waffles! These delightful creations, boasting a crispy exterior and a light, fluffy interior, are here to rescue your breakfast routine from the clutches of fast food. Not only are they gluten-free and made in a flash with just a blender, but they also offer the comforting warmth of cinnamon paired with the sweet hint of maple syrup. This recipe is not only quick to whip up, making it perfect for rushed mornings, but it's also versatile enough to switch things up, whether you prefer them sweet or savory. Are you ready to discover a breakfast that will keep you satisfied and energized? Let’s dive into making these scrumptious Flourless Oat Waffles together!

Why are Flourless Oat Waffles a Must-Try?

Gluten-Free Delight: Enjoy a breakfast that’s both healthy and gluten-free, perfect for those with dietary restrictions.
Quick and Easy: With just a blender and minimal prep, these waffles come together in no time, making them ideal for busy mornings.
Flavorful Comfort: The warm notes of cinnamon and the sweetness of maple syrup add a delightful flavor that will make you crave these waffles again and again.
Versatile Base: Whether you’re in the mood for sweet or savory, these waffles can adapt to your taste by adding fruits or spices. For more ideas check out our post on savory breakfast recipes.
Satisfying Texture: With a crispy exterior and a fluffy interior, these waffles deliver the comforting chewiness you expect from traditional waffles without the flour.
Meal Prep Friendly: Make a batch ahead of time, store in the fridge or freezer, and simply reheat for a quick, nourishing breakfast any day of the week!

Flourless Oat Waffle Ingredients

For the Batter

  • Rolled Oats – Base ingredient providing structure and fiber; be sure to use gluten-free oats if needed.
  • Baking Powder – Adds leavening for fluffiness; ensure it’s fresh for the best results.
  • Sea Salt – Enhances flavor; substitute with kosher salt if you don’t have sea salt on hand.
  • Cinnamon – Adds warmth and spice; feel free to substitute with nutmeg or pumpkin spice for a twist.
  • Water – Hydrates the batter; you can replace it with milk or a milk alternative for added creaminess.
  • Melted Coconut Oil – Provides moisture and flavor; can be swapped with butter or any neutral oil.
  • Egg – Binds the ingredients together; for a vegan option, use a flax or chia egg instead.
  • Maple Syrup – Sweetens the batter and adds flavor; honey or agave syrup are delicious alternatives.
  • Vanilla Extract – Enhances overall flavor; optional but highly recommended.

These Flourless Oat Waffles are not just easy to make, they are versatile enough to satisfy your breakfast cravings any day of the week!

Step‑by‑Step Instructions for Flourless Oat Waffles

Step 1: Blend the Ingredients
Start by adding rolled oats, baking powder, sea salt, cinnamon, water, melted coconut oil, egg, maple syrup, and vanilla extract into a blender. Blend the mixture on medium-high speed until smooth and creamy, about 30-60 seconds. The batter should have a pourable consistency, free of lumps, which will ensure your Flourless Oat Waffles turn out perfectly fluffy.

Step 2: Rest the Batter
Allow the blended batter to rest for 10 minutes. This step is essential as it lets the oats absorb moisture, enhancing the texture of your waffles. Meanwhile, preheat your waffle iron to medium heat and lightly grease it with coconut oil or non-stick spray to prevent sticking, ensuring those crispy edges you desire in each Flourless Oat Waffle.

Step 3: Cook the Waffles
Once preheated, pour ¼ to ½ cup of the batter onto the center of the waffle iron. Close the lid and cook for about 3-5 minutes, or until the waffles are golden brown and crisp. Check for doneness by carefully lifting the lid; the waffles should release easily without sticking. Adjust cooking time as needed based on your waffle iron's performance.

Step 4: Serve Your Waffles
Remove the cooked Flourless Oat Waffles from the waffle iron and transfer them to a plate. Serve immediately while warm, topping them with your favorite fruits, yogurt, or a drizzle of maple syrup. If you have leftovers, let them cool completely before storing in an airtight container for up to 4 days in the fridge or freeze for later enjoyment.

Flourless Oat Waffles Variations

Feel free to let your creativity shine and customize these delicious waffles to suit your taste preferences!

  • Banana Boost: Add 1 ripe mashed banana to the batter for natural sweetness and a hint of banana flavor.

  • Pumpkin Spice: Stir in ½ cup of pumpkin puree along with a dash of pumpkin spice for a seasonal treat that's perfect in the fall.

  • Savory Twist: Incorporate fresh chives or green onions into the batter for a delightful savory version. Pair with yogurt or a poached egg for a complete meal.

  • Nutty Flavor: Fold in a handful of chopped nuts or seeds, toasting them beforehand for added crunch and flavor. Walnuts or pecans work beautifully!

  • Dairy-Free Delight: Swap water with almond milk or oat milk to enrich the batter without adding dairy. You won't miss it!

  • Chocolate Chip Indulgence: Mix in a handful of dark chocolate chips for a decadent touch that pairs perfectly with a morning coffee.

For those days you want even more creativity in your breakfast, consider checking out our guide on breakfast toppings that can elevate your waffles even further.

  • Spicy Kick: Add a pinch of cayenne or chili powder for a surprising and delightful heat that balances the sweetness beautifully.

  • Coconut Infusion: Use coconut milk instead of water for a rich, tropical flavor that pairs wonderfully with fruit toppings or alone!

All of these options will help you create Flourless Oat Waffles that are uniquely yours and satisfying every time!

Make Ahead Options

These Flourless Oat Waffles are perfect for busy home cooks looking to save time during hectic mornings! You can prepare the batter up to 24 hours in advance. Simply blend all the ingredients and store the batter in an airtight container in the refrigerator. This allows the oats to absorb moisture, enhancing the texture and flavor. When you’re ready to cook, just give the batter a quick stir, pour it into the preheated waffle iron, and cook for 3-5 minutes until golden brown. For even greater convenience, you can also cook the waffles ahead of time and store them in an airtight container in the fridge for up to 4 days or freeze them for up to 3 months. To maintain their quality, reheat in a toaster to revive that crispy exterior. Enjoy a delicious and nutritious breakfast with minimal effort!

Expert Tips for Flourless Oat Waffles

  • Preheat Waffle Iron: Always ensure your waffle iron is fully preheated before adding the batter for the crispiest results. This is key to achieving that delightful crunchy exterior.

  • Monitor Cooking Time: Different waffle irons may require varying cooking times. Keep an eye on your waffles, checking for that beautiful golden color to avoid undercooking or burning.

  • Proper Greasing: Use coconut oil or a non-stick spray to grease your waffle iron well. This helps prevent sticking and ensures a smooth release of your Flourless Oat Waffles.

  • Resting the Batter: Don't skip the resting step; allowing the batter to sit for 10 minutes contributes to better texture as the oats absorb moisture.

  • Experiment with Flavors: Feel free to switch things up! Add mashed bananas, pumpkin puree, or savory herbs to your batter for tasty variations that will delight your palate.

What to Serve with Flourless Oat Waffles?

Pairing delicious components with your breakfast can elevate your Flourless Oat Waffles from good to unforgettable.

  • Fresh Berries: Sweet and tart, fresh berries add a burst of color and nutrition, enhancing the wholesome waffle experience. Strawberries, blueberries, or raspberries create a refreshing contrast to your warm waffles.

  • Greek Yogurt: Creamy and tangy, Greek yogurt provides a delightful contrast in texture and richness, making your waffles feel more indulgent without the guilt. Try a dollop topped with honey for extra sweetness!

  • Nut Butter: A spoonful of almond or peanut butter adds a satisfying creaminess and nutty flavor, taking your waffles to the next level. This combination also boosts the protein content, keeping you full longer.

  • Maple Syrup Drizzle: A classic pairing, the rich sweetness of maple syrup complements the nuttiness of the oats. It enhances the flavor profile, turning each bite into a comforting experience.

  • Chopped Nuts: Crunchy walnuts or pecans sprinkle texture and healthy fats over your waffles. They provide a satisfying crunch while also contributing to a heartier meal.

  • Banana Slices: Soft and sweet, banana slices marry well with the crispy waffles, adding natural sweetness and creaminess. This easy addition brings a beloved flavor combination together.

  • Cinnamon Sugar Dusting: A light sprinkle of cinnamon sugar adds warmth and sweetness, giving a delightful spark to the flavor. It’s an easy way to enhance your breakfast with just a touch of magic.

  • Coconut Flakes: Toasted coconut flakes offer a tropical flair and chewiness, beautifully complementing the texture of the waffles. They make a delightful garnish that brings a taste of paradise to your table.

  • Chai Tea Latte: With warming spices, a chai tea latte is an excellent accompaniment that balances the flavors of the waffles perfectly. It creates a cozy mood for your morning indulgence.

How to Store and Freeze Flourless Oat Waffles

Fridge: Store cooled waffles in an airtight container for up to 4 days. Simply reheat in a toaster or microwave when you're ready to enjoy them again.

Freezer: For longer storage, freeze waffles in a single layer on a baking sheet, then transfer to a freezer-safe bag or container after they're frozen solid. They can be stored for up to 3 months.

Reheating: To bring frozen Flourless Oat Waffles back to life, pop them directly into the toaster or warm them in the oven until heated through.

Cooling: Allow waffles to cool completely before refrigerating or freezing to prevent moisture buildup, which can affect their texture.

Flourless Oat Waffles Recipe FAQs

What kind of oats should I use for Flourless Oat Waffles?
For the best results, use rolled oats as the base ingredient. If you're making these waffles gluten-free, be sure to choose certified gluten-free oats to avoid any cross-contamination.

How do I store leftover Flourless Oat Waffles?
Cooled waffles can be stored in an airtight container in the refrigerator for up to 4 days. When you're ready to enjoy them again, simply reheat in a toaster or microwave for that freshly-cooked taste!

Can I freeze Flourless Oat Waffles?
Absolutely! To freeze, place the waffles in a single layer on a baking sheet until solid. Once frozen, transfer them to a freezer-safe container or bag and store for up to 3 months. When you're ready to eat, reheat directly from frozen in the toaster or oven until warmed through.

What should I do if my waffles are soggy?
If your waffles turn out soggy, it may be due to too much liquid in your batter or not cooking them long enough. Be sure to check that your waffle iron is properly preheated and adjust the cooking time accordingly. You can also try letting the batter rest longer, as this allows the oats to absorb more moisture.

Are Flourless Oat Waffles safe for people with nut allergies?
Yes! This recipe is free of nuts, but be cautious when selecting your ingredients. Always check labels on baking powder or any substitutes you use, as some might be processed in facilities that handle nuts. If you're uncertain, make your own oat flour from rolled oats by blending them into a fine powder.

Can I make Flourless Oat Waffles vegan?
Certainly! To create a vegan version, simply replace the egg with a flax or chia egg. To make a flax egg, mix 1 tablespoon of ground flaxseed with 2.5 tablespoons of water and let it sit for about 5 minutes until it thickens. This substitution will help bind the ingredients while keeping your waffles delicious!

Remember, making these Flourless Oat Waffles is a delightful adventure, and tweaks can lead to tasty surprises! Happy cooking!

Flourless Oat Waffles

Flourless Oat Waffles for a Quick, Healthy Breakfast Boost

Delicious Flourless Oat Waffles are a quick, healthy breakfast option, gluten-free and easy to make.
Print Recipe Pin Recipe
Prep Time 10 minutes mins
Cook Time 5 minutes mins
Resting Time 10 minutes mins
Total Time 25 minutes mins
Servings: 4 waffles
Course: Breakfast
Calories: 150
Ingredients Equipment Method Nutrition Notes

Ingredients
  

For the Batter
  • 2 cups Rolled Oats Use gluten-free oats if needed
  • 2 teaspoons Baking Powder Ensure it's fresh
  • 1/2 teaspoon Sea Salt Substitute with kosher salt if needed
  • 1 teaspoon Cinnamon Can substitute with nutmeg or pumpkin spice
  • 1 cup Water Can replace with milk or a milk alternative
  • 2 tablespoons Melted Coconut Oil Can use butter or neutral oil
  • 1 large Egg For vegan option, use flax or chia egg
  • 2 tablespoons Maple Syrup Honey or agave syrup are alternatives
  • 1 teaspoon Vanilla Extract Optional but recommended

Equipment

  • Blender
  • waffle iron

Method
 

Step-by-Step Instructions for Flourless Oat Waffles
  1. Blend the rolled oats, baking powder, sea salt, cinnamon, water, melted coconut oil, egg, maple syrup, and vanilla extract in a blender until smooth and creamy.
  2. Allow the batter to rest for 10 minutes to let the oats absorb moisture, then preheat the waffle iron to medium heat and grease it.
  3. Pour ¼ to ½ cup of batter onto the waffle iron, close the lid, and cook for 3-5 minutes until golden brown and crisp.
  4. Serve the waffles immediately with your choice of toppings, and store leftovers in an airtight container.

Nutrition

Serving: 1waffleCalories: 150kcalCarbohydrates: 28gProtein: 4gFat: 3gSaturated Fat: 1gPolyunsaturated Fat: 0.5gMonounsaturated Fat: 1.5gCholesterol: 60mgSodium: 200mgPotassium: 180mgFiber: 4gSugar: 2gVitamin A: 5IUVitamin C: 2mgCalcium: 2mgIron: 10mg

Notes

These waffles are versatile enough to satisfy your breakfast cravings any day of the week. Experiment with flavors by adding fruits or spices to the batter.

Tried this recipe?

Let us know how it was!

Fluffy Cinnamon Waffles with Dreamy Whipped Cream Bliss

May 5, 2026 by Grace Snow Leave a Comment

On a chilly Sunday morning, the scent of warm cinnamon wafting through the house felt like a cozy embrace. That’s the magic of making Crispy Cinnamon Waffles with Spiced Whipped Cream—an experience that transforms an ordinary breakfast into a delightful celebration. These waffles aren’t just easy to whip up; they deliver a fluffy interior cradled by a golden crispiness that you simply can't resist. Plus, the homemade cinnamon whipped cream adds that luxurious touch without requiring hours spent in the kitchen. Perfect for family gatherings or a quiet morning treat, these waffles will have everyone asking for seconds. Are you ready to make mornings more special with a scrumptious stack of these luscious waffles?

Why Are These Waffles a Must-Try?

Crispy Exteriors, Fluffy Interiors: Experience the perfect balance of texture that makes each bite a delightful journey.
Quick Preparation: With minimal ingredients and straightforward steps, these cinnamon waffles can be ready in a flash!
Homemade Whipped Cream Bliss: The spiced cream elevates your breakfast with a touch of luxury—making it feel special without any fuss.
Crowd-Pleasing Flavor: Whether it’s a cozy family brunch or a festive gathering, these waffles cater to all taste buds.
Versatile Options: Get creative with toppings or mix-ins! Pair them with fresh fruit or a drizzle of maple syrup for an unforgettable experience, just like the ones found in our Pumpkin Cinnamon Roll variations.

Cinnamon Waffle Ingredients

  • For the Waffles
    • Butter – Adds richness and flavor; substitute with coconut oil for a dairy-free version.
    • Milk – Provides moisture for the batter; use non-dairy milk for a dairy-free option but note that texture might slightly vary.
    • Lemon Juice – Slightly curdles milk for a buttermilk effect, enhancing flavor; can be substituted with vinegar or omitted if necessary.
    • Eggs – Contribute structure and moisture; no substitute recommended for best results.
    • White Sugar & Light Brown Sugar – Sweeteners that enhance flavor and aid in browning; can use all white or brown sugar if needed.
    • All-Purpose Flour – Creates the waffle structure; substitute with a gluten-free blend for gluten-free waffles.
    • Baking Powder/Baking Soda – Leavening agents that help achieve fluffiness; ensure both are fresh for optimal results.
    • Salt – Balances sweetness and enhances flavor; do not omit.
    • Vanilla Extract – Adds subtle depth in flavor; use pure vanilla for the best taste.
    • Ground Cinnamon – Primary flavor component giving the waffles their characteristic spiced taste; substitute with other spices, like nutmeg, for variation.

  • For the Cinnamon Whipped Cream
    • Heavy Whipping Cream – The base for whipped cream, needs to be chilled; reduced-fat cream won’t whip as well.
    • Powdered Sugar – Sweetens the cream and helps stabilize it; granulated sugar works too if blended well.
    • Vanilla Extract – Adds flavor to the cream; optional but recommended.
    • Ground Cinnamon – Integrates cinnamon flavor into cream, echoing the waffle flavor, making this homemade whipped cream irresistible alongside cinnamon waffles!

Step‑by‑Step Instructions for Crispy Cinnamon Waffles with Spiced Whipped Cream

Step 1: Prepare the Batter
In a large mixing bowl, start by whisking together 1/2 cup melted butter, 1 cup milk, and 1 tablespoon lemon juice until smooth. Next, beat in 2 eggs, 1/4 cup white sugar, 1/4 cup light brown sugar, 1 teaspoon vanilla extract, and 1 teaspoon ground cinnamon until well combined. In a separate bowl, mix together 2 cups all-purpose flour, 1 tablespoon baking powder, 1/2 teaspoon baking soda, and 1/4 teaspoon salt. Gradually fold the dry mixture into the wet ingredients until just combined; avoid overmixing to ensure fluffy cinnamon waffles.

Step 2: Preheat the Waffle Iron
Prior to cooking, preheat your waffle iron according to the manufacturer’s instructions. Give it a quick spray with non-stick cooking spray or lightly grease it with butter for added crispiness. As the iron heats up, the perfect temperature will yield golden-brown waffles—this usually takes about 5 minutes, and you'll know it's ready when a drop of water sizzles upon contact.

Step 3: Cook the Waffles
Once the waffle iron is hot, carefully pour about 1 cup of batter onto the center of the iron, spreading it evenly without overfilling. Close the lid and let the waffles cook according to your iron's instructions—typically about 3 to 5 minutes. Keep an eye out for a steaming sound to subside and a golden-brown color peeking out; that’s when they're perfectly crispy!

Step 4: Make the Cinnamon Whipped Cream
While the waffles are cooking, you can prepare your cinnamon whipped cream. In a chilled mixing bowl, pour in 1 cup of heavy whipping cream. Using an electric mixer, whip the cream on medium speed until soft peaks begin to form. Gradually add in 1/4 cup powdered sugar, 1 teaspoon vanilla extract, and 1 teaspoon ground cinnamon, then increase the speed to high, whipping until you achieve stiff peaks. This spiced cream will perfectly complement your crispy cinnamon waffles.

Step 5: Serve the Waffles
Once the waffles are cooked to a beautiful golden-brown and crispy texture, carefully remove them from the waffle iron. Serve them warm on a plate and generously top each one with the luscious cinnamon whipped cream. For an extra special touch, consider adding fresh berries or a drizzle of maple syrup to elevate your breakfast experience even further!

Cinnamon Waffles Variations & Substitutions

Feel free to explore these delightful twists that can elevate your Cinnamon Waffles to new heights and cater to your taste!

  • Dairy-Free: Use coconut milk and coconut oil for a rich, creamy feel without dairy.
  • Gluten-Free: Substitute all-purpose flour with a 1:1 gluten-free flour blend for delicious results.
  • Sugar Free: Substitute sugar with your favorite low-calorie sweetener to enjoy guilt-free indulgence.
  • Nutty Crunch: Mix in chopped pecans or walnuts to the batter for a delightful crunch and added nutty flavor.
  • Seasonal Spice: Try adding pumpkin spice or allspice for a seasonal flair that dances on the palate.
  • Chocolate Delight: Fold in chocolate chips to the batter for a decadent chocolate twist that will delight any sweet tooth.
  • Fruit-Filled: Add fresh blueberries or sliced bananas to the batter for a fruity surprise in every bite.
  • Extra Whipped Cream: Experiment with flavored extracts like almond or orange in your cinnamon whipped cream for a fun, zesty twist.

So, whether you prefer the comforting warmth of cinnamon or desire a refreshing fruity bite, these variations will certainly keep your breakfast exciting! Just like those wonderful recipes from our Pumpkin Cinnamon Roll collection, let your creativity shine. Happy cooking!

Make Ahead Options

These Crispy Cinnamon Waffles are perfect for meal prep enthusiasts! You can prepare the batter up to 12 hours in advance by mixing all the wet and dry ingredients separately, then combining them just before cooking. This shift saves precious time on busy mornings while maintaining fluffiness. Additionally, the waffles themselves can be made up to 3 days in advance; just refrigerate them in an airtight container after cooling completely. When ready to serve, simply reheat in a toaster or oven for that fresh-out-of-the-iron crispiness. And don’t forget, the cinnamon whipped cream can be made up to 24 hours ahead—just store it in the fridge, and give it a gentle whisk before serving to ensure it’s just as delightful as when it was freshly made!

How to Store and Freeze Cinnamon Waffles

Fridge: Store leftover cinnamon waffles in an airtight container in the fridge for up to 3 days. Reheat in a toaster or oven to regain crispiness.

Freezer: For longer storage, freeze waffles in a single layer on a baking sheet, then transfer to a freezer-safe bag. They can last for up to 2 months.

Reheating: When ready to enjoy, reheat frozen cinnamon waffles directly in the toaster or an oven preheated to 350°F until heated through, about 5-10 minutes.

Serving Tip: These waffles taste delightful when paired with the homemade cinnamon whipped cream right after reheating!

Expert Tips for Perfect Cinnamon Waffles

  • Batter Resting Time: Allow the batter to sit for about 10 minutes before cooking; this rest period enhances the texture, leading to fluffier cinnamon waffles.

  • Proper Preheating: Make sure your waffle iron is fully preheated before adding the batter. A well-heated iron yields a crispier exterior, ensuring perfect waffles.

  • Avoid Overmixing: Mix the batter until just combined to prevent dense waffles. Overmixing develops gluten and could affect the fluffiness of your cinnamon waffles.

  • Grease for Crispiness: Lightly grease the waffle iron with butter or cooking spray even if it’s non-stick. This helps achieve that golden-brown, crispy finish.

  • Check Freshness: Ensure your baking powder and baking soda are fresh. Stale leavening agents can lead to flat, less airy waffles—no one wants that!

What to Serve with Crispy Cinnamon Waffles with Spiced Whipped Cream

Embrace the warmth and nostalgia of a cozy breakfast by pairing these delightful waffles with equally scrumptious sides and toppings.

  • Fresh Fruit: Add a burst of freshness with berries or sliced bananas; the natural sweetness complements the spiced waffles perfectly. The colorful appeal enhances the morning vibe!
  • Maple Syrup: Drizzle pure maple syrup over your waffles for that ideal sweet and savory contrast; it seeps into every bite, enriching the overall experience profoundly.
  • Crispy Bacon: The salty, crispy bacon creates a delicious balance with the sweet waffles; this classic combination is sure to please everyone at the breakfast table.
  • Yogurt Parfait: Serve with a side of yogurt layered with granola and fruit; it offers a crunchy and creamy texture that enhances the meal without overwhelming it.
  • Nut Butter: Spread almond or peanut butter for a nutty, creamy addition; this protein-rich option not only satisfies but adds a delightful complexity to each bite.
  • Coffee or Tea: Complement your waffles with a steaming cup of coffee or a fragrant herbal tea, creating a warm and inviting atmosphere for leisurely mornings.
  • Chai Latte: The spiced richness of a chai latte mirrors the flavors of the waffles, making every sip a cozy match to the meal.
  • Whipped Cream Delight: Don't forget to serve extra cinnamon whipped cream on the side; it’s a luxurious indulgence that every waffle lover deserves!

Enjoy creating a wonderful breakfast experience filled with love, flavor, and joy!

Cinnamon Waffles Recipe FAQs

What is the best way to choose ripe ingredients for this recipe?
Absolutely! For the best flavor, ensure that your eggs are fresh and your milk hasn’t passed its expiration date. Choose ground cinnamon stored in a cool, dark place for optimal flavor, and always give your butter a sniff to confirm it's fresh.

How should I store leftover cinnamon waffles?
You can store leftover cinnamon waffles in an airtight container in the fridge for up to 3 days. To maintain their crispiness, reheat them in a toaster or oven until warm. If you want to keep them longer, follow the next question!

Can I freeze cinnamon waffles?
Very! To freeze, place the waffles in a single layer on a baking sheet and freeze for 1 to 2 hours, until solid. Then, transfer them to a freezer-safe bag or airtight container for up to 2 months. This way, you can enjoy a warm waffle whenever you like!

I’m having trouble getting my waffles crispy. What should I do?
If your waffles aren't turning out crispy, check the preheating of your waffle iron; a hot iron is key! Also, make sure you’re not overmixing the batter, as this can lead to denser waffles. Lightly greasing the iron before cooking can also enhance crispiness.

Are there any dietary considerations with this recipe?
Certainly! If you have allergies, be cautious of the eggs and dairy used in this recipe. For dairy-free options, substitute milk with almond or oat milk, and use coconut oil instead of butter. Remember, when substituting, the texture might change slightly. Always check labels for any hidden allergens, especially with whipped creams!

How long can I keep the whipped cream?
Homemade cinnamon whipped cream is best consumed fresh, but it can be stored in the fridge in an airtight container for up to 24 hours. If it begins to lose its fluffiness, just rewhip it briefly before serving. Enjoy your indulgent cream with your cinnamon waffles!

Cinnamon Waffles

Fluffy Cinnamon Waffles with Dreamy Whipped Cream Bliss

Delight in these Cinnamon Waffles, combining crispy exteriors and fluffy interiors topped with homemade whipped cream.
Print Recipe Pin Recipe
Prep Time 15 minutes mins
Cook Time 15 minutes mins
Batter Resting Time 10 minutes mins
Total Time 40 minutes mins
Servings: 4 waffles
Course: Breakfast
Cuisine: American
Calories: 350
Ingredients Equipment Method Nutrition Notes

Ingredients
  

For the Waffles
  • 1/2 cup Butter Adds richness and flavor; substitute with coconut oil for a dairy-free version.
  • 1 cup Milk Provides moisture for the batter; use non-dairy milk for a dairy-free option.
  • 1 tablespoon Lemon Juice Enhances flavor; can be substituted with vinegar or omitted.
  • 2 large Eggs Contributes structure and moisture; no substitute recommended.
  • 1/4 cup White Sugar Sweetener that enhances flavor.
  • 1/4 cup Light Brown Sugar Sweetener that aids in browning.
  • 2 cups All-Purpose Flour Creates the waffle structure; substitute with a gluten-free blend.
  • 1 tablespoon Baking Powder Leavening agent that helps achieve fluffiness.
  • 1/2 teaspoon Baking Soda Leavening agent for extra fluffiness.
  • 1/4 teaspoon Salt Balances sweetness and enhances flavor.
  • 1 teaspoon Vanilla Extract Adds subtle depth in flavor; use pure vanilla for best taste.
  • 1 teaspoon Ground Cinnamon Primary flavor component for the waffles.
For the Cinnamon Whipped Cream
  • 1 cup Heavy Whipping Cream The base for whipped cream, needs to be chilled.
  • 1/4 cup Powdered Sugar Sweetens the cream and helps stabilize it.
  • 1 teaspoon Vanilla Extract Adds flavor to the cream; optional but recommended.
  • 1 teaspoon Ground Cinnamon Integrates cinnamon flavor into cream.

Equipment

  • waffle iron
  • Mixing bowls
  • Electric mixer

Method
 

Step‑by‑Step Instructions
  1. In a large mixing bowl, whisk together melted butter, milk, and lemon juice until smooth. Beat in eggs, white sugar, brown sugar, vanilla extract, and ground cinnamon until well combined. In another bowl, mix together flour, baking powder, baking soda, and salt. Gradually fold the dry mixture into the wet ingredients until just combined.
  2. Preheat your waffle iron according to the manufacturer’s instructions and lightly grease with butter or non-stick spray.
  3. Pour about 1 cup of batter onto the center of the hot waffle iron, spread evenly, and cook according to instructions until golden-brown.
  4. In a chilled mixing bowl, whip the heavy cream until soft peaks form. Gradually add in powdered sugar, vanilla extract, and ground cinnamon, and whip until stiff peaks form.
  5. Serve the waffles warm topped with cinnamon whipped cream. Add fresh berries or maple syrup if desired.

Nutrition

Serving: 2wafflesCalories: 350kcalCarbohydrates: 45gProtein: 6gFat: 15gSaturated Fat: 9gPolyunsaturated Fat: 1gMonounsaturated Fat: 4gCholesterol: 80mgSodium: 450mgPotassium: 180mgFiber: 1gSugar: 15gVitamin A: 500IUCalcium: 100mgIron: 1mg

Notes

Allow the batter to rest for 10 minutes before cooking for fluffier waffles. Ensure the waffle iron is fully preheated for a crispier exterior.

Tried this recipe?

Let us know how it was!

Comforting Crustless Zucchini Pie for Effortless Weeknight Dinners

May 3, 2026 by Grace Snow Leave a Comment

As the aroma of baked zucchini fills the kitchen, I can't help but smile at the thought of my favorite Crustless Zucchini Pie. It’s a dish that beautifully showcases the humble zucchini, transforming it into a fluffy, satisfying delight that’s perfect for any occasion. Not only is this recipe quick to prepare, allowing you to spend more time enjoying your meal, but it’s also a wonderful vegetarian option that pleases even the pickiest eaters. Whether served warm at dinner or as a chilled addition to a brunch spread, this pie invites creativity with adaptable ingredients and is sure to become a go-to in your weekly rotation. Ready to dive into the world of savory comfort food with me?

Why is Crustless Zucchini Pie So Special?

Simplicity at its best: This recipe is quick and requires minimal cooking skills, making it ideal for busy weeknights.

Deliciously Versatile: Customize with your favorite cheeses or herbs, like adding Spinach Pie Deliciously for a twist!

Healthy Comfort Food: Low in carbs and high in flavor, this vegetarian dish satisfies cravings without the guilt.

Effortless Cleanup: With just one bowl to mix and a simple baking dish, you'll spend less time washing up and more time enjoying your meal!

Crowd-Pleaser: Serve it warm or cold at gatherings, and watch it disappear—this dish is perfect for potlucks alongside something hearty like Tamale Pie Hearty.

Storage Friendly: Make ahead and freeze for easy lunches or snacks—this pie keeps well in the fridge for up to three days!

Crustless Zucchini Pie Ingredients

• Gather your ingredients for this delightful Crustless Zucchini Pie, perfect for a comforting dinner or brunch!

For the Pie

  • Zucchini – Grate medium zucchinis and squeeze out excess moisture for the best texture.
  • Large Eggs – These bind everything together and are essential for a perfect pie consistency.
  • All-Purpose Flour – This helps achieve the desired fluffy texture; you can use a gluten-free flour blend if needed.
  • Baking Powder – Ensure it’s fresh to help the pie rise beautifully.
  • Salt – Adjust according to your taste to enhance the flavors of the other ingredients.
  • Black Pepper – Use it for a hint of spice; feel free to skip if you prefer a milder pie.

For the Flavor

  • Shredded Cheese – Mozzarella or cheddar adds creaminess; feel free to swap in your favorite cheese!
  • Grated Parmesan Cheese – It gives a delightful salty flavor but can be reduced or left out if desired.
  • Chopped Fresh Herbs – Herbs like basil, parsley, or dill add freshness; fresh is best, but dried can work in a pinch.
  • Onion – Adds depth of flavor; consider shallots as a substitute, or skip if you're not an onion fan.
  • Garlic – Provides aromatic goodness; adjust to taste or omit if you have picky eaters.

This collection of ingredients will create a Crustless Zucchini Pie that feels like a warm hug on your plate!

Step‑by‑Step Instructions for Crustless Zucchini Pie

Step 1: Preheat the Oven
Begin your delightful journey by preheating your oven to 375°F (190°C). This temperature will ensure your Crustless Zucchini Pie bakes evenly, leading to a perfectly fluffy pie. While the oven warms up, you can gather your ingredients and prepare your baking dish for a smooth cooking experience.

Step 2: Prepare the Zucchini Mixture
In a large mixing bowl, combine the grated zucchini, finely chopped onions, and minced garlic. Gently toss these together until they're well mixed. The zucchini adds moisture and flavor, while the onions and garlic will infuse the pie with savory goodness. Allow this mixture to sit for a few minutes to let the flavors meld together beautifully.

Step 3: Mix in the Eggs
In a separate bowl, crack the large eggs and whisk them until they are well beaten. Pour the eggs into the zucchini mixture and stir thoroughly to ensure everything is combined. The eggs are essential for binding the ingredients together, creating a satisfying pie texture. You should see a vibrant mix come together, filled with fresh colors.

Step 4: Add Dry Ingredients
Now, fold in the flour, baking powder, salt, and black pepper. Mix gently until just combined, taking care not to overwork the dough. This step will give your Crustless Zucchini Pie a fluffy base without adding heaviness. The mixture should start to become thicker and more cohesive, forming a batter-like consistency.

Step 5: Incorporate the Cheese
Next, add the shredded cheese to the mixture, folding it in gently until it's evenly distributed. The cheese will melt during baking, creating deliciously gooey bites throughout the pie. Choose mozzarella or cheddar for a creamy texture, while the aroma of melted cheese wafts through your kitchen, raising anticipation.

Step 6: Pour into the Dish
Grease your pie dish to prevent sticking and pour the zucchini mixture into it. Spread the mixture evenly across the dish, ensuring it reaches the edges for uniform cooking. You’ll want to see a vibrant blend of colors and textures across the surface before placing it in the oven.

Step 7: Bake to Perfection
Place the pie in the preheated oven and bake for 25 to 30 minutes. Keep an eye on it, looking for a golden brown top and firm edges. The pie will rise slightly and develop a delightful crust-like texture on the surface while remaining fluffy inside.

Step 8: Cool and Slice
Once baked, remove the Crustless Zucchini Pie from the oven and allow it to cool slightly for about 5 to 10 minutes. This cooling time will make it easier to slice, ensuring clean pieces for serving. The warm, inviting aroma will have everyone eager to dig in as you prepare to serve your delicious creation.

Expert Tips for Crustless Zucchini Pie

  • Moisture Control: Squeeze excess moisture from zucchini before mixing to prevent a soggy pie and ensure it bakes to fluffy perfection.

  • Cheese Variations: Don’t hesitate to experiment! Try different cheese combinations for unique flavors, but remember to keep the balance in mind.

  • Cooling Time: Allow the pie to cool slightly before slicing; this helps maintain its shape and makes for cleaner servings.

  • Herb Options: Fresh herbs bring wonderful flavor; adjust according to your preference and seasonality to personalize your Crustless Zucchini Pie.

  • Make-ahead Magic: This dish stores well! Prepare it ahead and refrigerate for up to three days, perfect for busy weeknights or delicious lunches.

Crustless Zucchini Pie Variations

Feel free to put your personal spin on this delicious Crustless Zucchini Pie – let your creativity shine!

  • Gluten-Free: Substitute all-purpose flour with a gluten-free flour blend for a fabulous alternative.
    You’ll still achieve that wonderful fluffy texture while accommodating dietary needs.

  • Cheesy Delight: Swap in feta or goat cheese for a tangy twist.
    These cheeses will offer a distinctive flavor profile that elevates your pie to new heights!

  • Herb Explosion: Experiment with seasonal herbs like thyme or oregano.
    Changing herbs can significantly alter the flavor and surprise your taste buds each time you bake!

  • Veggie Swap: Use shredded carrots or chopped bell peppers instead of zucchini for a vibrant twist.
    Not only does it change the flavor, but it also adds lovely color to your dish!

  • Spicy Kick: Add diced jalapeños or crushed red pepper flakes for some heat.
    Heat lovers will appreciate this fiery addition elevating the savory flavors!

  • Creamy Addition: Mix in some heavy cream or Greek yogurt for added richness.
    This will create a creamier texture while keeping the dish indulgent yet light!

  • Herbed Yogurt Drizzle: Top with a yogurt sauce infused with garlic and fresh herbs.
    Not only does it add flavor, but it also brings a refreshing contrast to the warm pie!

  • Enjoy Cold: Serve your Crustless Zucchini Pie chilled for a refreshing take, perfect for picnics!
    This makes it a versatile dish, great for any occasion, whether it's a warm meal or a chilled treat.

Ready to create more flavorful dishes? Consider trying out Cheesy Zucchini Bake or experiment with delightful Tamale Pie Hearty too!

Storage Tips for Crustless Zucchini Pie

Fridge: Store leftovers in an airtight container for up to 3 days. This keeps your Crustless Zucchini Pie fresh and ready for quick meals.

Freezer: For longer storage, freeze individual slices wrapped tightly in plastic wrap and then in foil for up to 3 months. Perfect for a grab-and-go lunch!

Reheating: To enjoy leftover pie, reheat in the oven at 350°F (175°C) for about 10-15 minutes, or until warmed through. This helps retain that delightful fluffy texture.

Serving Cold: If you prefer, this pie can be enjoyed cold, making it a fantastic addition to brunch spreads or picnics!

Make Ahead Options

These Crustless Zucchini Pie preparations are perfect for the busy home cook looking to save time during the week! You can prep the zucchini mixture (grated zucchini, chopped onion, minced garlic, and herbs) up to 24 hours in advance, storing it in an airtight container in the refrigerator to maintain freshness. The assembled pie can also be made ahead and refrigerated for up to 3 days. Simply bake it when ready to serve; if baking from the fridge, add an extra 5-10 minutes to the cooking time to ensure it’s warmed through. This way, you can enjoy a delicious slice with minimal effort, keeping weeknight meals hassle-free!

What to Serve with Crustless Zucchini Pie

When the warm aroma of your Crustless Zucchini Pie fills the kitchen, it's time to think about complementing dishes that will elevate your meal experience.

  • Crisp Green Salad: A light salad with mixed greens and a zesty vinaigrette cuts through the richness, providing a refreshing contrast.

  • Roasted Vegetables: Serve these colorful roasted veggies alongside for a hearty yet healthy side that enhances the savory notes of the pie.

  • Sour Cream or Yogurt Dressing: A dollop of tangy sour cream or a creamy yogurt dressing adds a delightful contrast and moisture, enhancing each bite.

  • Garlic Bread: Nothing says comfort like golden, buttery garlic bread. Its crunchiness pairs wonderfully with the fluffy texture of the pie.

  • Quinoa Salad: A protein-packed quinoa salad brings a nutty flavor and chewy texture, making for a lovely balance with the soft pie.

  • Light White Wine: A chilled glass of Sauvignon Blanc or a crisp Pinot Grigio complements the flavors while keeping the meal light and delightful.

  • Fruit Tart for Dessert: Conclude with a refreshing fruit tart to crown your meal. The sweet, fruity goodness is the perfect end to your savory feast.

This collection of pairings transforms your meal into a symphony of flavors, each element harmonizing beautifully with the Crustless Zucchini Pie. Enjoy!

Crustless Zucchini Pie Recipe FAQs

How do I choose the right zucchini?
Absolutely! When selecting zucchini for your pie, look for medium-sized zucchinis that are firm and free of dark spots. They should feel heavy for their size and have a vibrant green color. Smaller zucchinis tend to be more tender, while larger ones can have a more watery texture. For the best results, try to choose ones that are smooth and shiny.

How should I store leftovers of the Crustless Zucchini Pie?
Very good question! You can store any leftover Crustless Zucchini Pie in an airtight container in the refrigerator for up to 3 days. Just let it cool completely before sealing it up. This helps maintain its fluffy texture. To make it even more convenient for those busy nights, slice the pie into portions before storing.

Can I freeze the Crustless Zucchini Pie?
Yes! For freezing, wrap individual slices tightly in plastic wrap, then place them in a sturdy freezer bag. Be sure to label the bag with the date. This way, you can enjoy your pie for up to 3 months! When you're ready to eat, simply reheat in the oven at 350°F (175°C) for about 10-15 minutes, or until warm and fluffy again.

What can I do if my pie is too watery?
If you find your Crustless Zucchini Pie ends up too watery, the likely culprit is excess moisture from the zucchini. To prevent this, grate the zucchini and then squeeze out the moisture using a clean kitchen towel or cheesecloth before adding it to your mixture. You can also include a pinch of extra flour to help absorb any additional liquid. Remember, moisture control is key to achieving that wonderful fluffy texture!

Is this pie safe for my pets or those with allergies?
Great consideration! While this Crustless Zucchini Pie is vegetarian-friendly, keep an eye on specific ingredients if you have allergies in your household. The main ingredients are quite safe for pets; however, the cheese and garlic can be harmful in larger amounts. Always check for food allergies to cheese or gluten if you’re substituting flour. If unsure, consult your vet.

Can I adapt this recipe for gluten-free diets?
Absolutely! To make your Crustless Zucchini Pie gluten-free, simply swap out the all-purpose flour for a gluten-free flour blend. Many blends work well; just make sure to check that they contain a binding agent such as xanthan gum. This simple replacement will allow everyone, including those with gluten sensitivities, to enjoy this delicious pie!

Crustless Zucchini Pie

Comforting Crustless Zucchini Pie for Effortless Weeknight Dinners

Crustless Zucchini Pie is a delicious, fluffy vegetarian dish that's easy to prepare, perfect for any occasion.
Print Recipe Pin Recipe
Prep Time 15 minutes mins
Cook Time 30 minutes mins
Cooling Time 10 minutes mins
Total Time 55 minutes mins
Servings: 8 slices
Course: Breakfast
Cuisine: Vegetarian
Calories: 210
Ingredients Equipment Method Nutrition Notes

Ingredients
  

For the Pie
  • 2 medium Zucchini Grated and excess moisture squeezed out.
  • 4 large Eggs Essential for binding.
  • 1 cup All-Purpose Flour Can use gluten-free flour.
  • 1 teaspoon Baking Powder Ensure it's fresh.
  • 1 teaspoon Salt Adjust according to taste.
  • 1 teaspoon Black Pepper Can be omitted for milder pie.
For the Flavor
  • 1 cup Shredded Cheese Mozzarella or cheddar.
  • 1/2 cup Grated Parmesan Cheese Optional.
  • 1/4 cup Chopped Fresh Herbs Basil, parsley, or dill.
  • 1 medium Onion Finely chopped; consider shallots.
  • 2 cloves Garlic Minced; adjust to taste.

Equipment

  • Mixing Bowl
  • Baking Dish
  • Whisk

Method
 

Step-by-Step Instructions for Crustless Zucchini Pie
  1. Preheat the oven to 375°F (190°C).
  2. In a large bowl, combine grated zucchini, chopped onions, and minced garlic.
  3. In a separate bowl, whisk the eggs and then add to the zucchini mixture.
  4. Fold in flour, baking powder, salt, and black pepper until just combined.
  5. Add shredded cheese and fold gently until evenly distributed.
  6. Grease your pie dish and pour the zucchini mixture into it.
  7. Bake for 25 to 30 minutes, until golden brown on top.
  8. Allow to cool for 5 to 10 minutes before slicing.

Nutrition

Serving: 1sliceCalories: 210kcalCarbohydrates: 15gProtein: 8gFat: 12gSaturated Fat: 6gPolyunsaturated Fat: 1gMonounsaturated Fat: 3gCholesterol: 160mgSodium: 400mgPotassium: 300mgFiber: 2gSugar: 3gVitamin A: 500IUVitamin C: 10mgCalcium: 200mgIron: 1mg

Notes

This pie can be served warm or cold, making it versatile for any meal.

Tried this recipe?

Let us know how it was!
  • « Previous Page
  • 1
  • 2
  • 3
  • 4
  • 5
  • …
  • 24
  • Next Page »

Welcome!

Hi, I’m Grace, a Sydney-based home cook with a passion for bold flavors and trending ingredients. Whether you’re a busy beginner or a seasoned foodie, you’ll find dishes here that are fresh, fun, and full of flavor.

More about me

Popular Recipes

  • One Pot Keto Tuna Casserole
    One Pot Keto Tuna Casserole: Creamy Comfort in Minutes
  • Ultimate Jalapeno Popper Chicken Salad
    Ultimate Jalapeno Popper Chicken Salad That'll Wow Your Tastebuds
  • Green Chile Cheese Dip
    Mouthwatering Green Chile Cheese Dip for Cozy Gatherings
  • Easy Chimichurri Sauce
    Fresh and Zesty Easy Chimichurri Sauce in Just Minutes

Footer

↑ back to top

About

  • Privacy Policy
  • Disclaimer
  • Terms & Conditions

Newsletter

  • Sign Up! for emails and updates

Contact

  • About me
  • Contact me

Copyright © 2025 TastyTrendIngredients