tastytrendingredients

  • Home
  • Recipes
    • Appetizers
    • Breakfast
    • Dessert
    • Dinner
    • Drinks
    • Salads
    • Snacks
    • Soups
  • About me
  • Contact
menu icon
go to homepage
  • Home
  • Recipes
    • Appetizers
    • Breakfast
    • Dessert
    • Dinner
    • Drinks
    • Salads
    • Snacks
    • Soups
  • About me
  • Contact
search icon
Homepage link
  • Home
  • Recipes
    • Appetizers
    • Breakfast
    • Dessert
    • Dinner
    • Drinks
    • Salads
    • Snacks
    • Soups
  • About me
  • Contact
×

Creamy Easy Bang Bang Sauce for Your Flavorful Dishes

May 28, 2026 by Grace Snow Leave a Comment

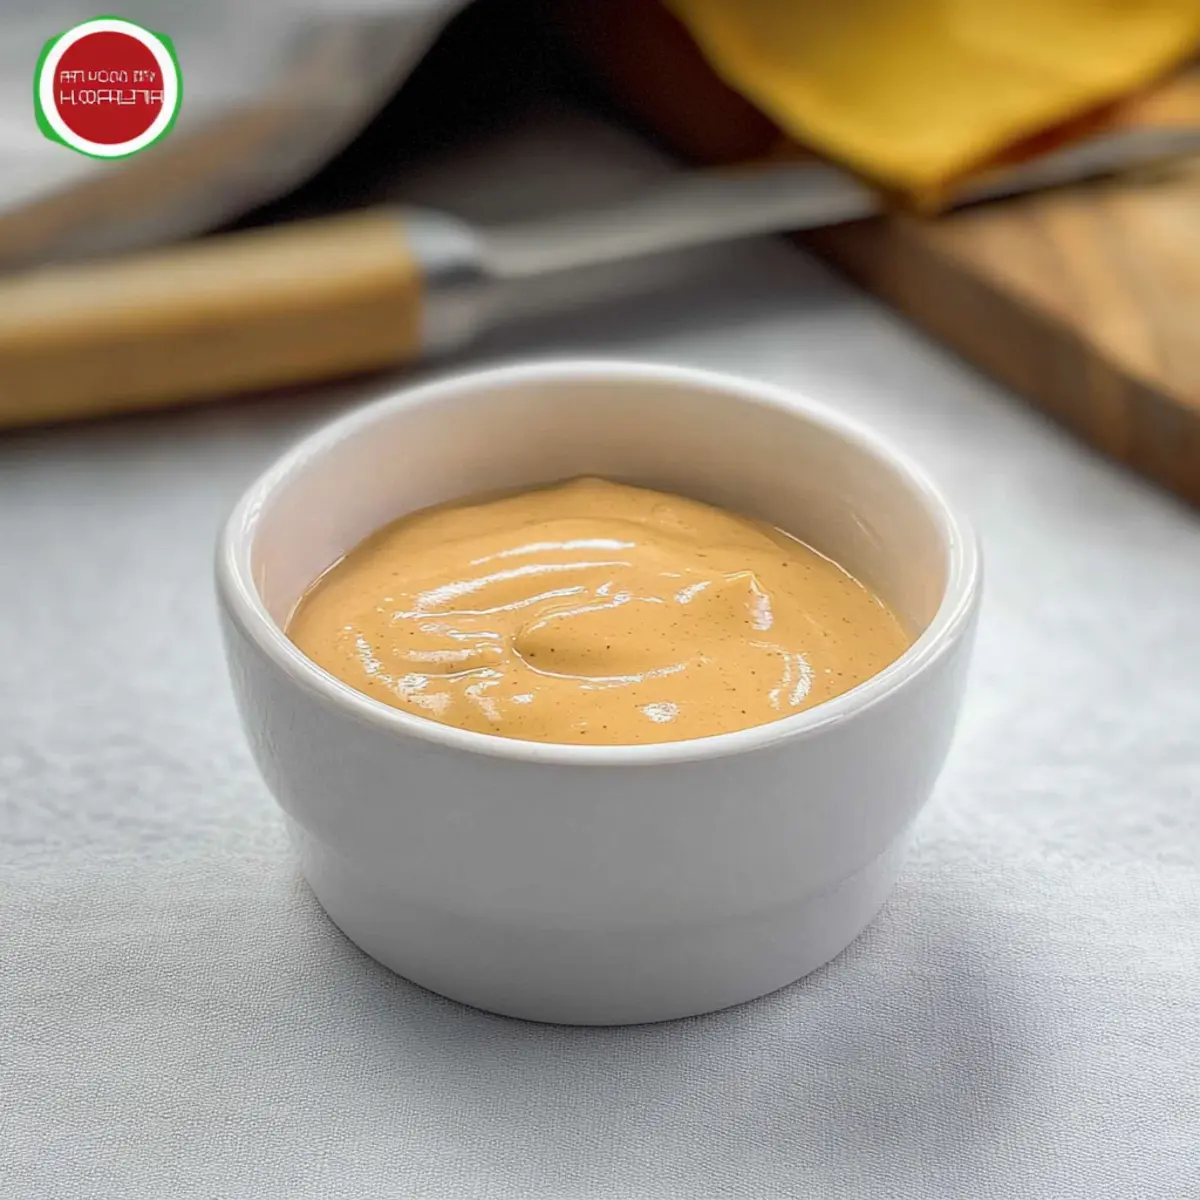
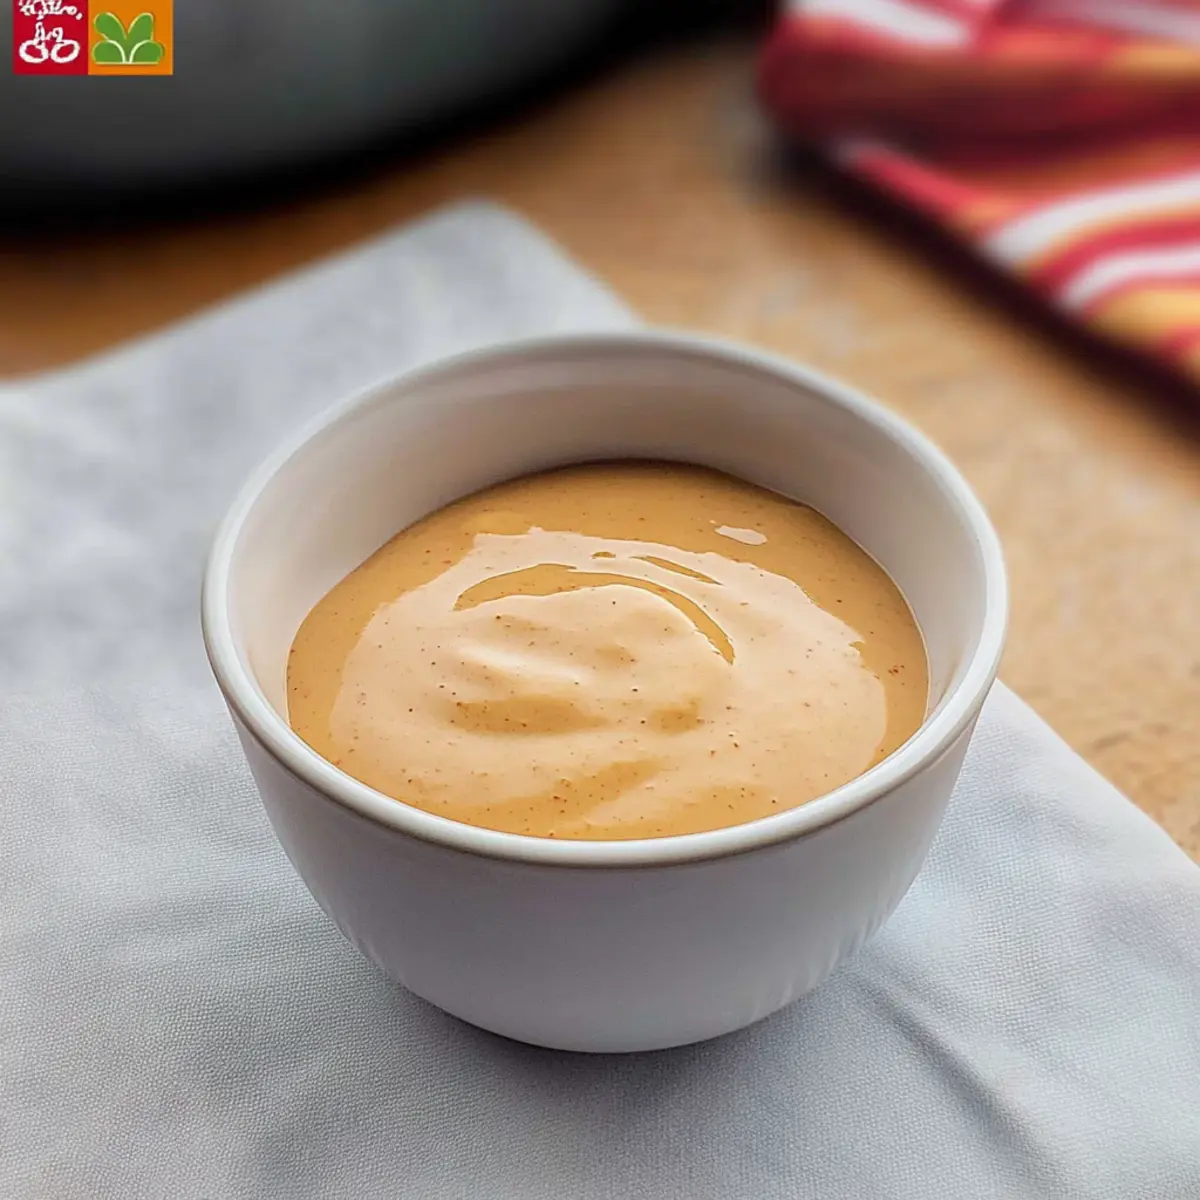
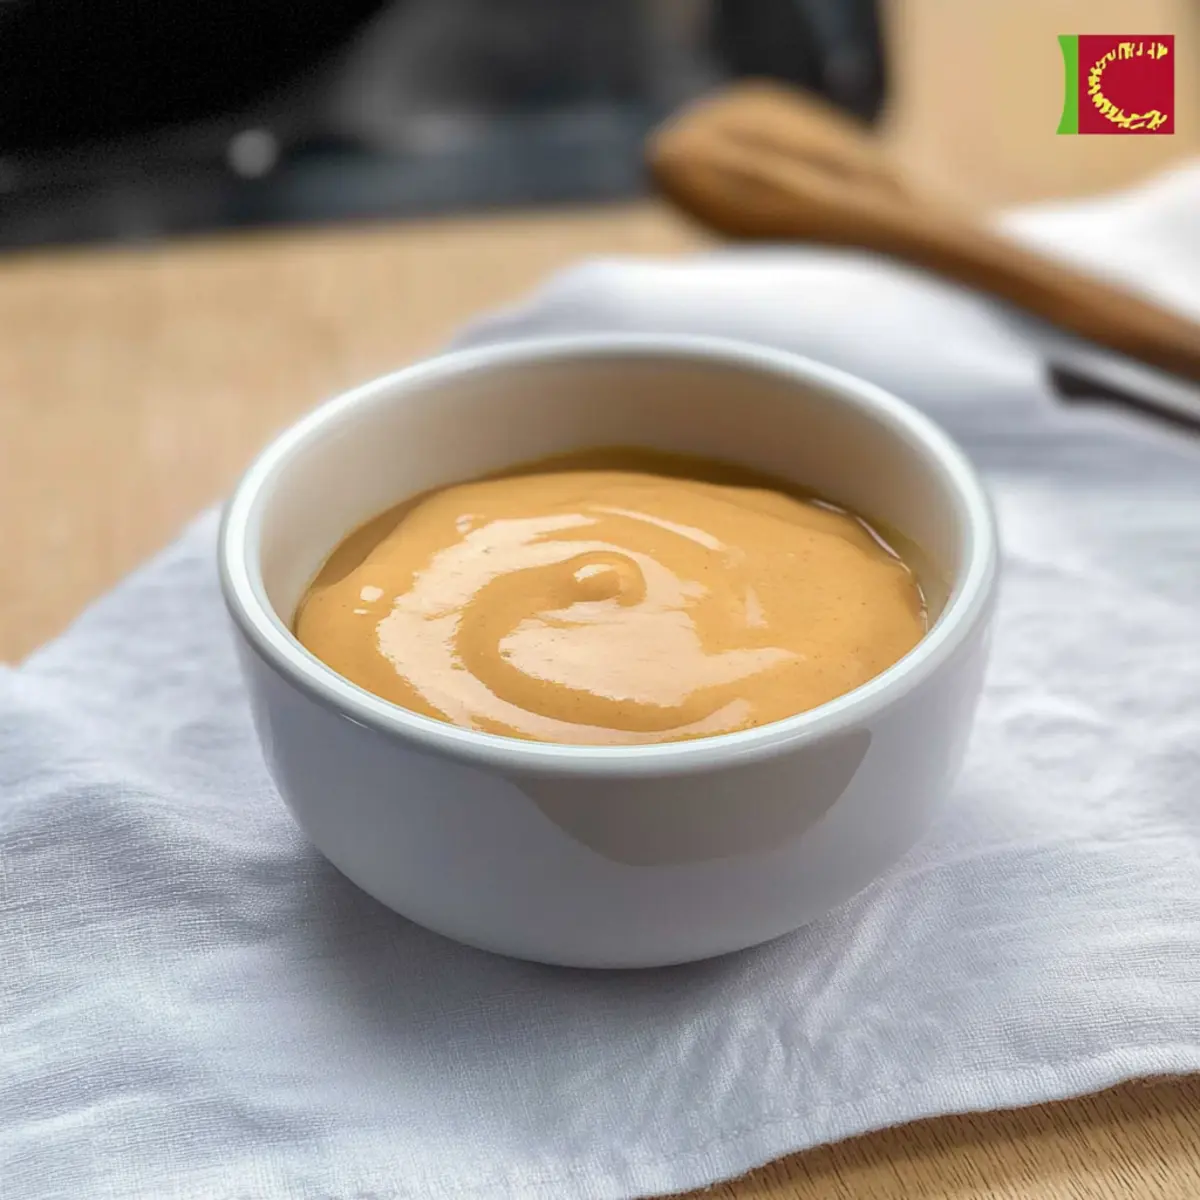
There’s something exhilarating about discovering a quick, creamy sauce that just elevates every dish it graces. My latest obsession? Easy Bang Bang Sauce! This delightful concoction melds mayonnaise, sweet chili sauce, and a kick of sriracha for a flavor profile that’s mildly sweet, tangy, and surprisingly spicy. Not only does it come together in mere minutes, but it's also a versatile dip that can transform boring meals into flavor-filled experiences. Imagine slathering it on grilled chicken, drizzling it over shrimp tacos, or simply using it as a zesty dip for your favorite appetizers. Plus, with just a few basic ingredients typically found in your kitchen, you can whip it up whenever the craving hits. Ready to spice up your culinary game? Let’s dive into how to make this irresistible Easy Bang Bang Sauce!

Why is Easy Bang Bang Sauce a Must-Try?

Quick and Simple: In just minutes, you can prepare this sauce without any complicated steps or hard-to-find ingredients.

Creamy Goodness: The rich mayonnaise base provides an irresistible creaminess that perfectly complements the sweetness of the chili sauce.

Versatile Usage: Perfect for drizzling over grilled meats, enhancing your favorite fried foods, or pairing with Shrimp Tacos for an added burst of flavor.

Customizable Heat: Adjust the sriracha to match your own spice tolerance, or swap it for your favorite hot sauce to change it up.

Crowd-Pleasing Flavor: With its unique blend of sweet and spicy, this sauce is sure to impress family and guests alike at your next gathering, making it a staple for any home cook.

Make-Ahead Option: Prepare a batch in advance and store it for up to a week, ensuring you always have this flavor-packed condiment on hand!

Easy Bang Bang Sauce Ingredients

For the Sauce

  • Mayonnaise – Provides a creamy base for the sauce; Greek yogurt can be used for a lighter option.
  • Sweet Chili Sauce – Adds sweetness and a mild flavor; consider using homemade versions or a splash of honey if needed.
  • Sriracha – Introduces the spicy kick; adjust the amount according to your taste or swap for a preferred hot sauce.
  • Fresh Lime Juice – Contributes a tangy balance; lemon juice is a suitable substitute if lime isn’t available.
  • Salt and Pepper – Enhances the overall flavors; tweak according to your preference for better seasoning.

Step‑by‑Step Instructions for Easy Bang Bang Sauce

Step 1: Combine Base Ingredients
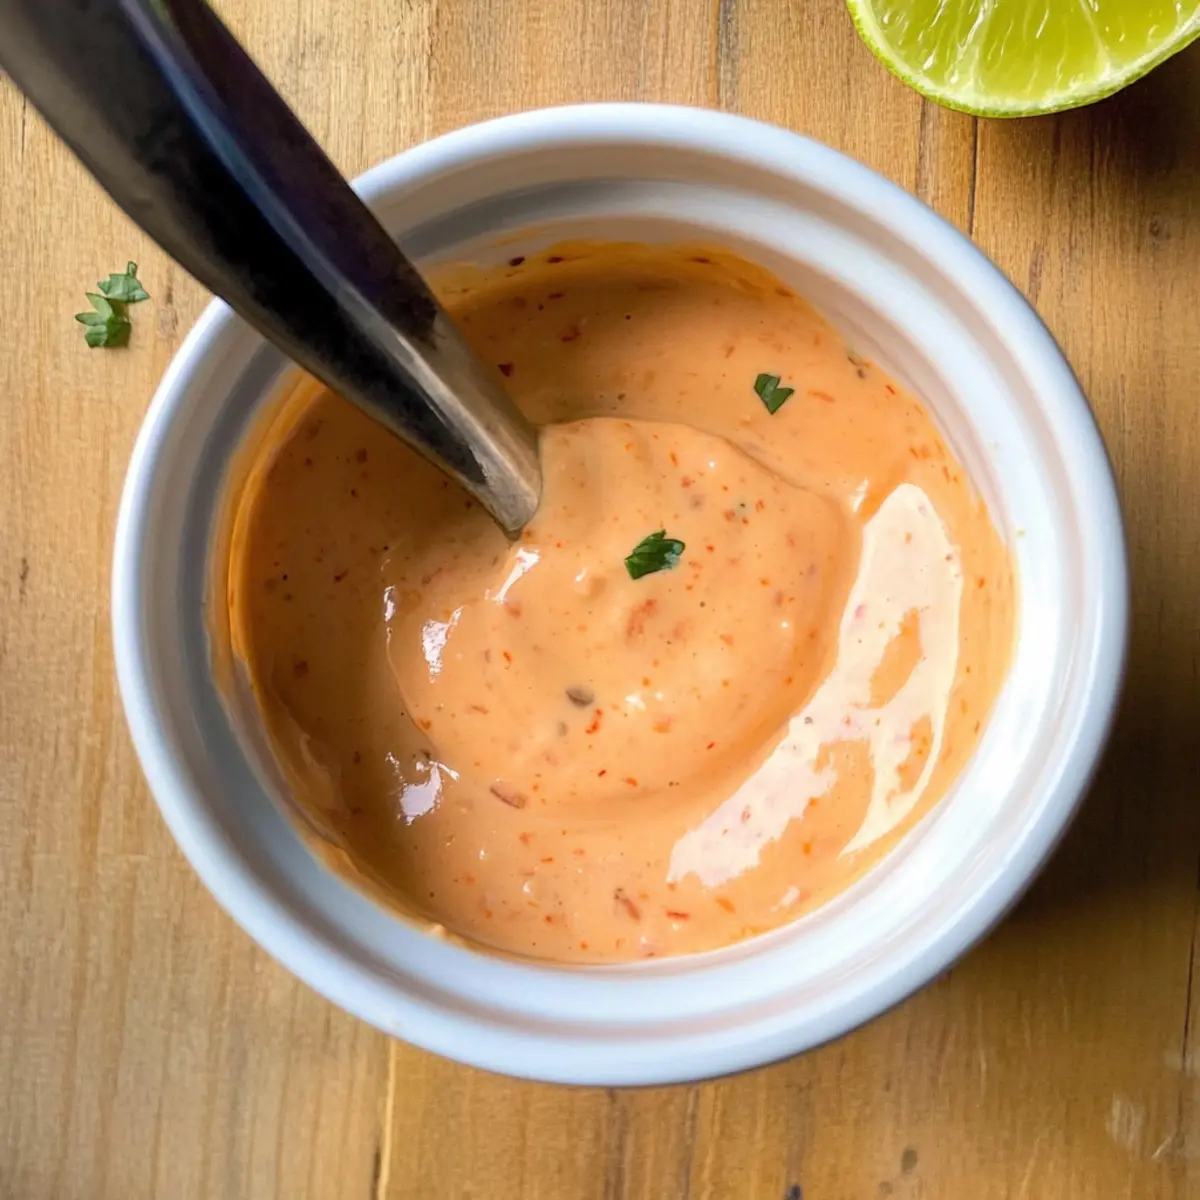
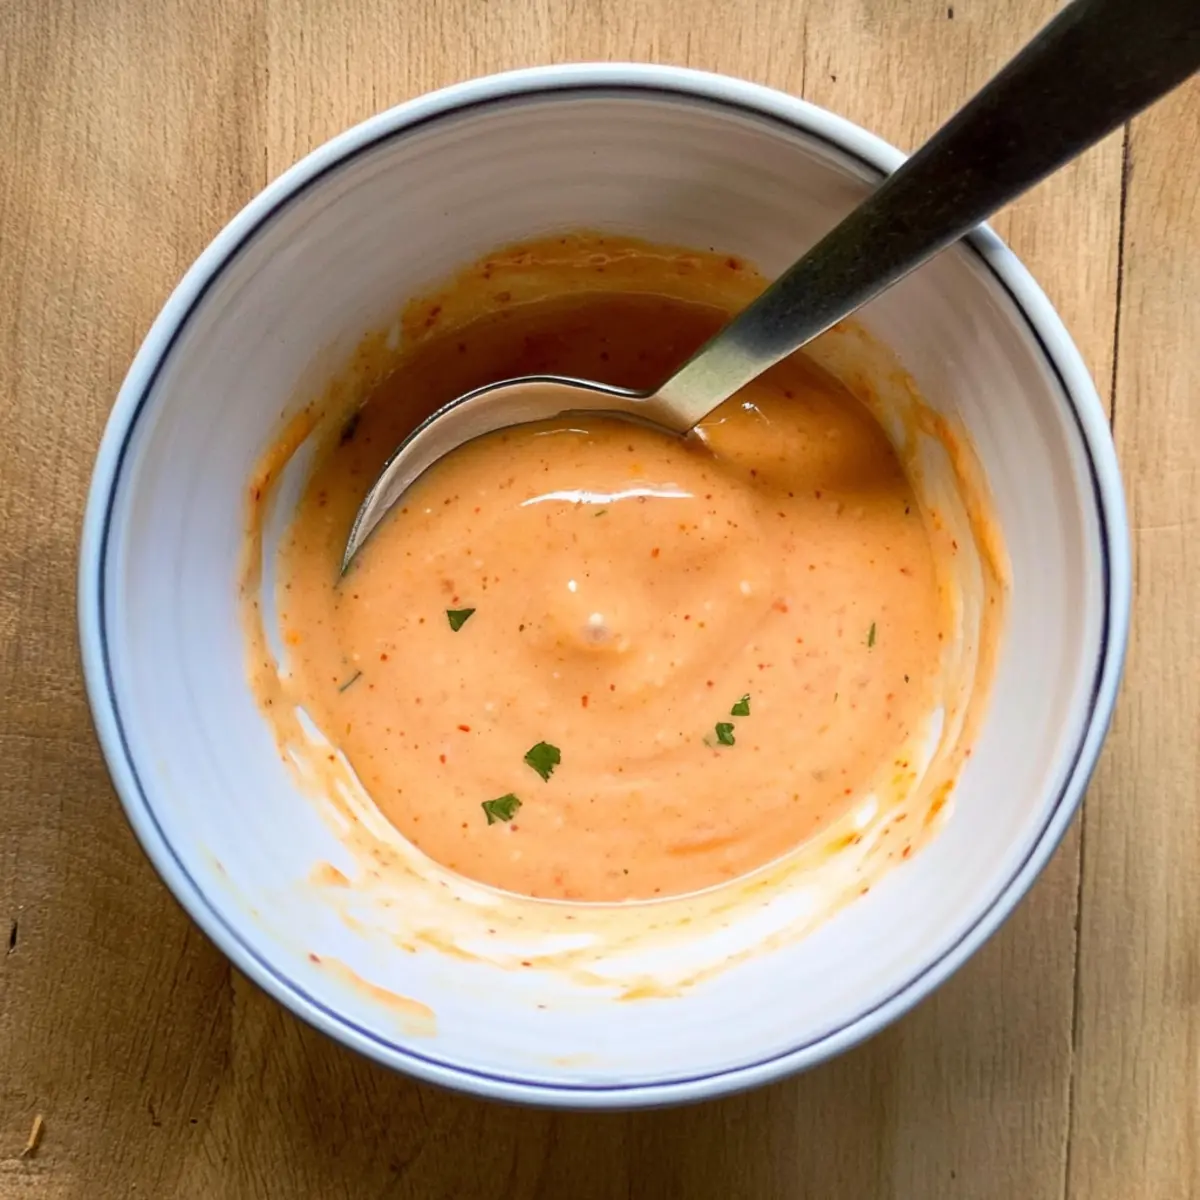
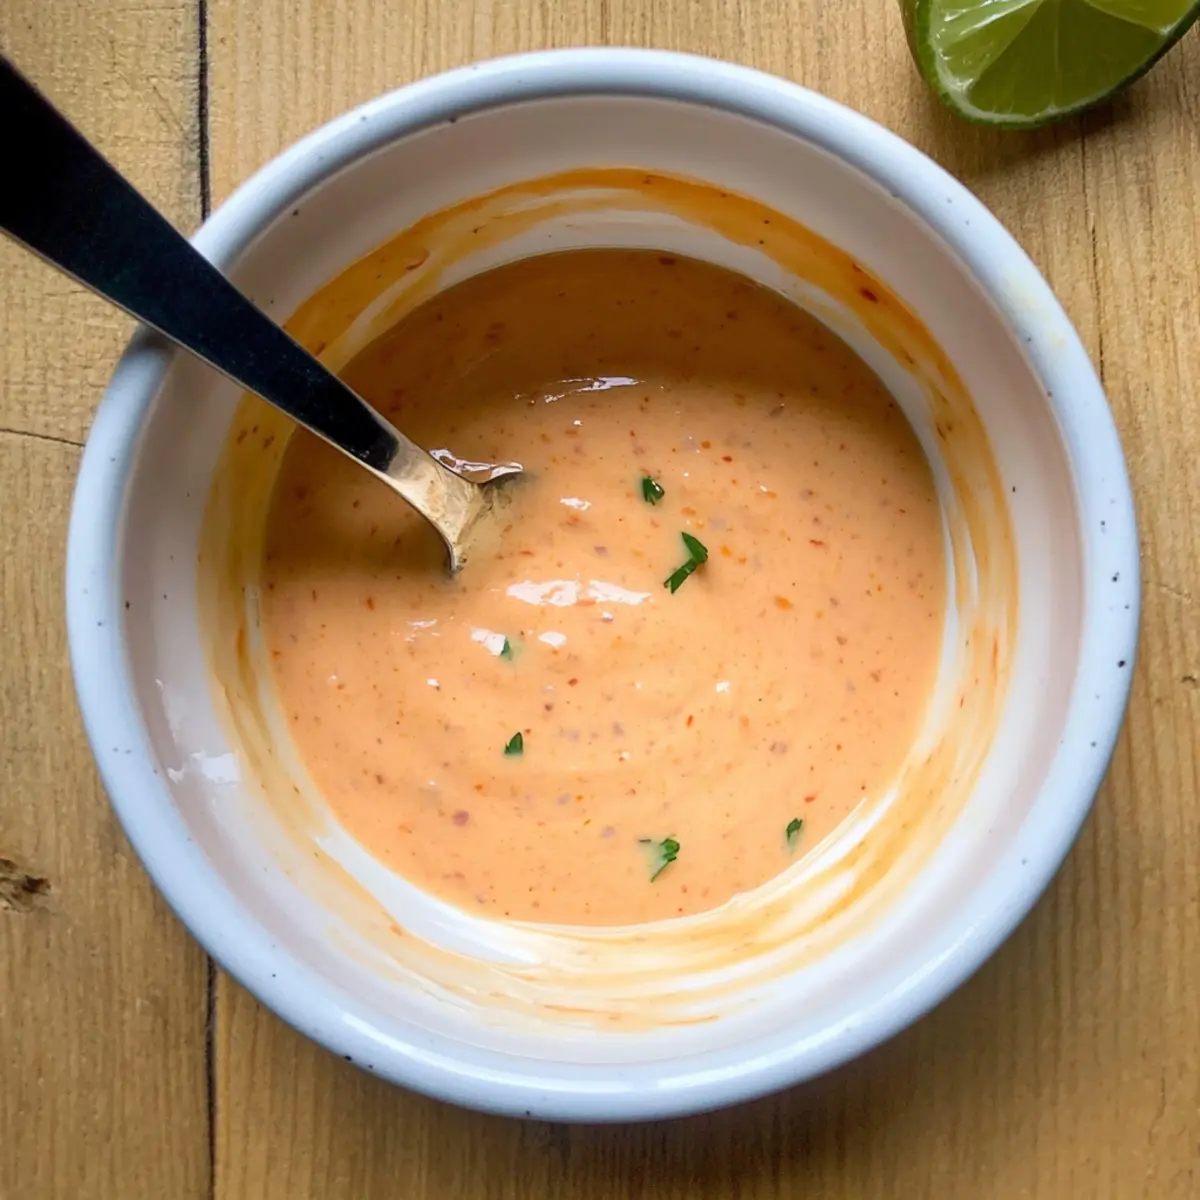
In a small mixing bowl, add ½ cup of mayonnaise and ¼ cup of sweet chili sauce. Using a whisk or a fork, mix the two ingredients together until they form a smooth and creamy base. This should take about 1-2 minutes. You’re looking for a uniform consistency with no streaks of mayonnaise visible.

Step 2: Add Heat Element
Next, incorporate 1-2 tablespoons of sriracha into the mixture, depending on your desired spice level. Stir well for another minute or so until the sriracha is fully integrated. The sauce should now exhibit a slightly reddish hue. This is the moment to taste the sauce, ensuring you balance the flavors as desired.

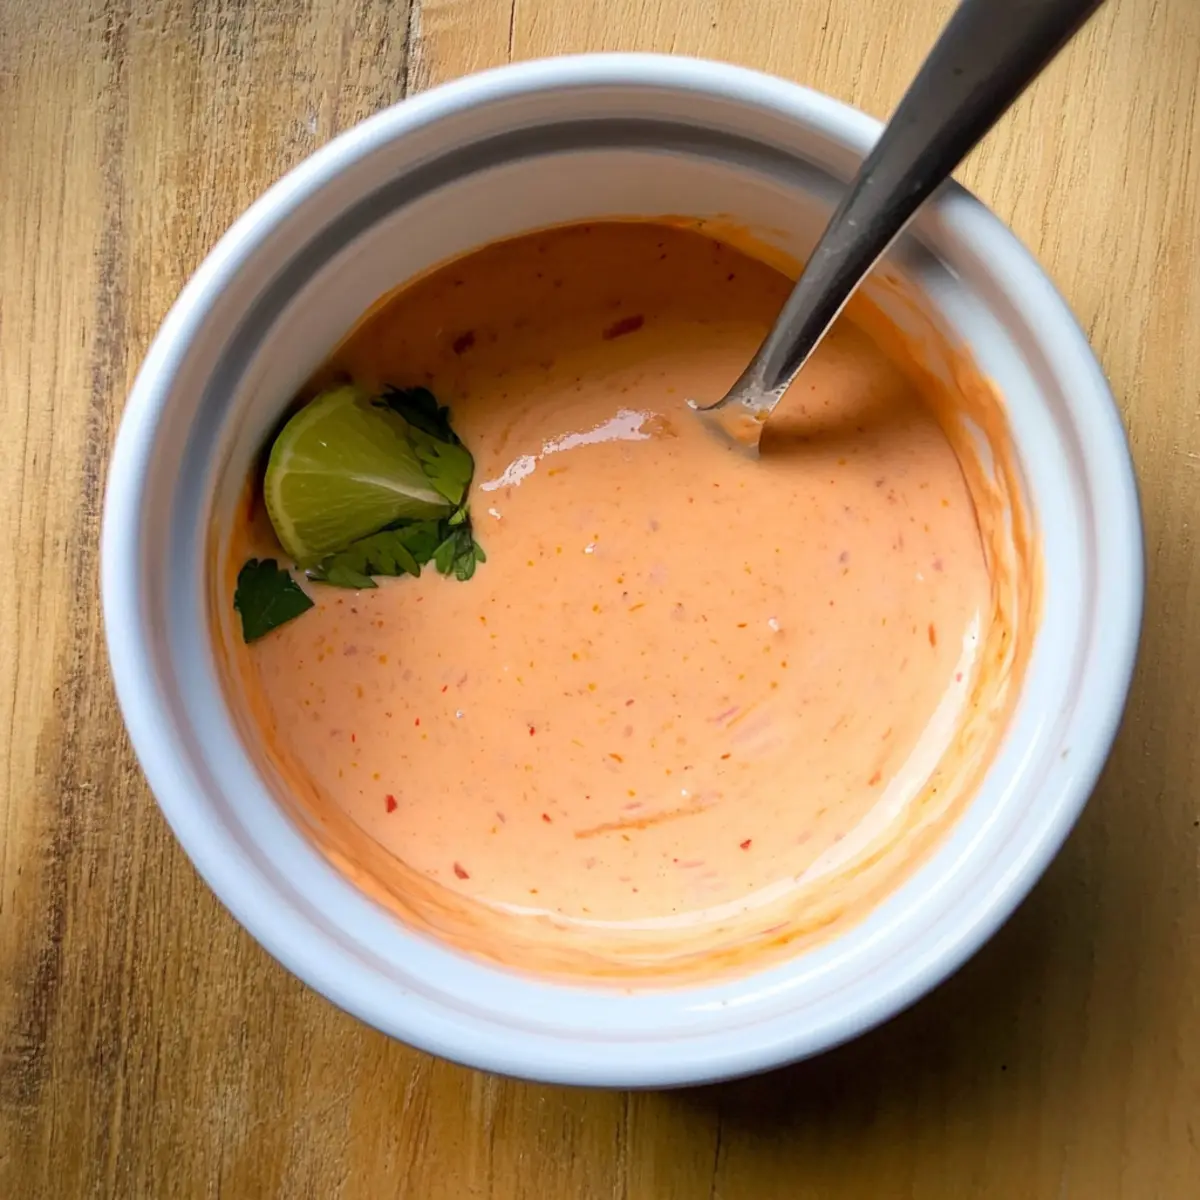
Step 3: Introduce Freshness
Squeeze in the juice of half a lime, which adds a zesty kick to the creamy Easy Bang Bang Sauce. Mix thoroughly for about 30 seconds to ensure the lime juice is well combined. The sauce should now be tangy and vibrant, bringing a fresh layer of flavor that complements the sweetness and spiciness.

Step 4: Season to Perfection
Finally, add a pinch of salt and freshly ground black pepper to enhance the overall flavor. Stir the mixture for another minute, making sure to taste once more to adjust any seasonings as preferred. The finished sauce should be smooth, with a balanced blend of sweet, spicy, and tangy notes.

Step 5: Serve or Store
You can serve your Easy Bang Bang Sauce immediately with your favorite dishes or snacks! Alternatively, store it in an airtight container in the refrigerator for up to one week. The flavors will develop even more after sitting for 5-10 minutes, making it an excellent make-ahead option for your culinary creations.

Tips for the Best Easy Bang Bang Sauce

• Let It Sit: Allow the sauce to chill for 5-10 minutes to let the flavors meld; it will taste even better!

• Adjust Spiciness: Use 1 tablespoon of sriracha for mild heat, or go up to 2 tablespoons for a bolder kick; taste as you go.

• Mix Well: Ensure all ingredients are fully combined to avoid separation; a whisk makes it easier to achieve that smooth texture.

• Storage Matters: Keep it in an airtight container in the fridge for up to a week; just give it a good stir before serving again.

• Flavor Boost: Experiment by adding minced garlic or a splash of rice vinegar for extra depth and tang to your Easy Bang Bang Sauce.

Storage Tips for Easy Bang Bang Sauce

Fridge: Store your Easy Bang Bang Sauce in an airtight container to maintain its freshness for up to one week. Remember to give it a stir before serving, as the ingredients may settle.

Make-Ahead: This sauce is perfect for meal prep! Make a batch in advance and keep it handy for quick flavor additions to your meals throughout the week.

Freezer: For longer storage, consider freezing the sauce in ice cube trays. Transfer the frozen cubes to a freezer bag for easy portioning, and use within 2-3 months for best flavor.

Reheating: If you store it in the fridge, simply take it out to reach room temperature before serving. However, it’s best enjoyed cold or at room temperature, as reheating might alter its creamy texture.

What to Serve with Easy Bang Bang Sauce?

Transform your dining experience into a fiesta of flavors with the perfect companions for this zesty dip!

  • Crispy Fried Shrimp: The crunch of fried shrimp paired with the creamy spice of the sauce creates a delightful contrast that's hard to resist.

  • Grilled Chicken Skewers: Juicy, smoky chicken skewers drizzled with Bang Bang Sauce make for an easy yet impressive dish that both kids and adults will love.

  • Veggie Spring Rolls: Fresh, crunchy spring rolls filled with crisp veggies and paired with this sauce offer a refreshing bite full of flavor and texture.

  • Sweet Potato Fries: The natural sweetness of the fries enhances the salty and spicy notes in the sauce, making every dip a satisfying experience.

  • Taco Night Essential: Use the sauce to elevate shrimp or fish tacos, adding a rich and creamy layer that complements the fresh toppings flawlessly.

  • Garden Salad Topper: As a dressing or dip, the Easy Bang Bang Sauce adds a punch of flavor to a crisp salad, giving even the plain greens a gourmet touch.

  • Cold Beer: Pair your meals with a light lager or pale ale, balancing the heat from the sriracha and enhancing the overall experience of your dish.

  • Chocolate Lava Cake: For dessert, this rich cake provides a sweet contrast to the zesty sauce, rounding off your meal with an indulgent finish.

Easy Bang Bang Sauce Variations

Feel free to personalize this delicious sauce to suit your taste buds and dining preferences!

  • Dairy-Free: Replace mayonnaise with a vegan mayo or silken tofu for a creamy consistency without dairy.

  • Flavorful Garlic: Add 1-2 teaspoons of minced garlic to the mix for a pungent kick. This twist will elevate the overall flavor profile, making it even more exciting!

  • Zesty Addition: A splash of rice vinegar will trade some sweetness for tanginess, creating a more pronounced flavor experience. This little change can be quite refreshing!

  • Heat Variations: Swap out sriracha for your favorite hot sauce or incorporate chipotle for a smoky profile. Adjust according to your spice preference for the perfect kick.

  • Citrus Swap: If limes aren't on hand, try replacing lime juice with fresh lemon juice while maintaining that bright acidity in your sauce.

  • Herb-Infused: Chopped fresh herbs, such as cilantro or parsley, can amp up the freshness. Stir them in right before serving for a burst of color and flavor!

  • Sweetness Levels: For a sweeter touch, add a little honey or maple syrup when mixing the ingredients. This will definitely appeal to those with a sweet tooth!

  • Creamy Twist: For an extra creamy texture, fold in a couple of tablespoons of Greek yogurt. This not only gives a thicker consistency but also adds protein and tang.

Feel inspired? Try pairing this sauce with grilled chicken, fried foods, or even drizzling it over a vibrant salad. It’s versatile enough to bring joy to your meals, just like when you savor a plate of Tagliatelle Asparagus Peas or the umami of Spatchcock Chicken Flavor. Enjoy experimenting!

Make Ahead Options

These Easy Bang Bang Sauce preparations are perfect for busy home cooks looking to save time! You can whip up this creamy dip up to one week in advance; just combine all ingredients as directed and store in an airtight container in the refrigerator. If you're prepping ahead, be sure to give the sauce a quick stir before serving, as the ingredients may settle. For optimal freshness and flavor development, let it chill for at least 30 minutes after preparation (or overnight!) to allow those delightful flavors to meld. This way, you’ll have a delicious condiment ready to enhance any meal with minimal effort, transforming your weeknight dinners into something special!

Easy Bang Bang Sauce Recipe FAQs

How do I choose the right mayonnaise for my Easy Bang Bang Sauce?
Absolutely! The mayonnaise you select impacts the creaminess of your sauce. I recommend using a good quality mayonnaise for the best flavor, but if you prefer a healthier choice, Greek yogurt works wonderfully as a substitute, providing a similar texture with fewer calories.

What’s the best way to store Easy Bang Bang Sauce?
You can store your Easy Bang Bang Sauce in an airtight container in the refrigerator for up to one week. Make sure to give it a good stir before using, as the ingredients may settle. Keeping it cold allows the flavors to meld beautifully, enhancing your culinary experiences.

Can I freeze Easy Bang Bang Sauce for later use?
Yes, indeed! You can freeze your sauce in ice cube trays for easy portioning. Just fill the compartments with the sauce, freeze until solid, and then transfer the cubes to a freezer bag. It’s best to use them within 2-3 months for optimal flavor, allowing you to have this delightful sauce on hand anytime!

What should I do if my Easy Bang Bang Sauce is too spicy?
If you find your sauce to be a bit on the spicy side, don’t worry! You can balance the heat by adding a touch more mayonnaise or Greek yogurt; this will tone down the spice while preserving that creamy goodness. Additionally, a tiny bit of honey can also help mellow out the flavor if you prefer a sweeter touch.

Can I make Easy Bang Bang Sauce suitable for my vegan friends?
Absolutely! To make a vegan version, use a plant-based mayonnaise and ensure that your sweet chili sauce is also vegan-friendly. This way, you can share the deliciousness of Easy Bang Bang Sauce with everyone, filling your gatherings with flavor without any dietary concerns!

How long will the flavors develop in the Easy Bang Bang Sauce after making it?
For the best results, let your sauce sit for 5-10 minutes before serving. This time allows the flavors to meld beautifully, enhancing the overall richness of the sauce. The longer it sits, the more flavorful it becomes—you're in for a real treat!

Easy Bang Bang Sauce

Creamy Easy Bang Bang Sauce for Your Flavorful Dishes

Discover the quick, creamy Easy Bang Bang Sauce that elevates your dishes with its sweet, tangy, and spicy flavor.
Print Recipe Pin Recipe
Prep Time 5 minutes mins
Chilling Time 10 minutes mins
Total Time 15 minutes mins
Servings: 8 dishes
Course: Snacks
Cuisine: American
Calories: 90
Ingredients Equipment Method Nutrition Notes

Ingredients
  

For the Sauce
  • ½ cup mayonnaise Greek yogurt can be used for a lighter option.
  • ¼ cup sweet chili sauce Consider using homemade versions or a splash of honey if needed.
  • 1-2 tablespoons sriracha Adjust according to your taste.
  • ½ lime fresh lime juice Lemon juice is a suitable substitute if lime isn’t available.
  • to taste salt Enhances the overall flavors.
  • to taste pepper Enhances the overall flavors.

Equipment

  • Mixing Bowl
  • Whisk

Method
 

Step-by-Step Instructions for Easy Bang Bang Sauce
  1. In a small mixing bowl, add ½ cup of mayonnaise and ¼ cup of sweet chili sauce. Whisk together until smooth.
  2. Incorporate 1-2 tablespoons of sriracha into the mixture, depending on your desired spice level. Stir well until fully integrated.
  3. Squeeze in the juice of half a lime, mixing thoroughly for about 30 seconds.
  4. Add a pinch of salt and freshly ground black pepper. Stir for another minute to adjust seasonings as preferred.
  5. Serve immediately or store in an airtight container in the refrigerator for up to one week.

Nutrition

Serving: 2tablespoonsCalories: 90kcalCarbohydrates: 3gProtein: 1gFat: 9gSaturated Fat: 1gCholesterol: 5mgSodium: 180mgPotassium: 20mgSugar: 2g

Notes

Let it sit for 5-10 minutes to let flavors meld. Adjust spiciness as desired and mix well before serving.

Tried this recipe?

Let us know how it was!

Homemade Burger King’s Zesty Sauce That's Creamy Goodness

May 28, 2026 by Grace Snow Leave a Comment

As I stood at my kitchen counter, a sudden craving for the irresistible zing of Burger King's Zesty Sauce hit me. It’s that perfect blend of creaminess and tang that makes every bite of burger and onion ring a true delight! With this Burger King's Zesty Sauce copycat recipe, you can recreate that magic at home in just under 10 minutes. This quick recipe offers not only the joy of conjuring classic fast-food flavors but also the satisfaction of knowing exactly what’s in your dip—making it both gluten-free and keto-friendly. Whether you’re slathering it on sandwiches or dipping crunchy veggies, this sauce is bound to elevate your meals. Ready to transform your dining experience? Let’s dive in!

Why is This Sauce a Must-Try?

Creaminess: This recipe delivers a wonderfully smooth texture that perfectly complements your favorite dishes.

Quick Prep: With only 10 minutes needed, you can whip this up without a hassle, perfect for those busy weeknights!

Zesty Flavor: The combination of lemon juice and horseradish provides a vibrant kick, making every bite incredibly delicious.

Versatile Condiment: Ideal as a dip for onion rings, a spread for sandwiches, or even drizzled on salads, it fits seamlessly into your meals.

Health-Conscious: Gluten-free and keto-friendly, this sauce allows you to enjoy fast-food flavors without compromising your dietary choices. If you're also interested in exploring more vibrant flavors, check out these Shrimp Tacos Zesty or try a fresh twist with Shrimp Ceviche Zesty. Enjoy the simple satisfaction of homemade goodness today!

Burger King's Zesty Sauce Ingredients

• Get ready to recreate a fast-food favorite!

For the Base

  • Mayonnaise – Provides creaminess and serves as the base; try Greek yogurt for a lighter option.
  • Prepared Horseradish – Adds that signature zesty kick; or substitute with wasabi for a similar flavor.
  • Prepared Mustard – Enhances tanginess; Dijon mustard can give a gourmet twist.
  • Ketchup – Offers depth and sweetness; opt for sugar-free ketchup for a healthier version.

For the Seasoning

  • Cayenne Pepper – Introduces spice and warmth; adjust to taste or replace with paprika for a milder option.
  • Salt – Enhances flavor; using kosher or sea salt will give you a nice texture.
  • Sugar – Balances the tartness with a hint of sweetness; leave it out for a sugar-free variant or use honey as an alternative.

For the Acidity

  • White Vinegar – Adds acidity that balances the richness; apple cider vinegar is a great substitute.
  • Lemon Juice – Increases zestiness; fresh lemon juice is best but bottled works in a pinch.
  • Soy Sauce – Contributes an umami flavor; tamari is an excellent gluten-free alternative.

This Burger King's Zesty Sauce will elevate your homemade meals, so gather your ingredients and let's get started on this delightful journey together!

Step‑by‑Step Instructions for Burger King's Zesty Sauce

Step 1: Prepare the Base
In a large mixing bowl, combine 1 cup of mayonnaise with 2 tablespoons of yellow mustard and 2 tablespoons of ketchup. Use a whisk or spatula to blend these ingredients together thoroughly until smooth, making sure there are no lumps. This creamy mixture forms the flavorful base for your Burger King's Zesty Sauce.

Step 2: Add Flavor Boosters
Next, stir in 2 tablespoons of prepared horseradish, 1 teaspoon of cayenne pepper, and a pinch of salt. Whisk these additions into the base until well integrated. The horseradish will add that signature zing while the cayenne contributes a gentle kick. Taste and adjust the spice levels according to your preference for the perfect balance.

Step 3: Incorporate Acidity
Pour in 1 tablespoon of white vinegar, the juice of half a fresh lemon, and 1 teaspoon of soy sauce, stirring continuously. These ingredients elevate the zesty flavor profile of your sauce, ensuring a bright, tangy finish. Keep whisking until the mixture is uniform in texture, which should be creamy and slightly thick.

Step 4: Final Touches
Add 1 teaspoon of sugar or honey to balance the acidity, and a touch of black pepper if desired. This will enhance the overall flavor of the Burger King's Zesty Sauce. Whisk again until everything is well combined and smooth, ensuring the sweetness complements the tangy elements perfectly.

Step 5: Chill and Set
Transfer the sauce into an airtight container and refrigerate for at least one hour before serving. This chilling step allows the flavors to meld beautifully, resulting in an even more delicious sauce. When you pull it out, the consistency should be thick and creamy, ready to enhance any dish you choose.

How to Store and Freeze Burger King's Zesty Sauce

Fridge: Store your homemade Burger King's Zesty Sauce in an airtight container in the refrigerator for up to 1 week. Always give it a good stir before using!

Freezer: For longer storage, you can freeze the sauce in a freezer-safe container for up to 3 months. Thaw it in the fridge overnight before use.

Reheating: Although this sauce is best enjoyed cold, if you'd like to warm it up, do so gently in the microwave, heating in short intervals to prevent separation.

Serving Tips: If you have extra sauce after your meal, consider saving it for your next taco night or as a spread for sandwiches!

What to Serve with Burger King's Zesty Sauce

Elevate your mealtime experience with these delightful pairings that bring out the sauce’s tangy goodness.

  • Crispy Onion Rings: The crunchiness of fried onion rings complements the smooth texture of the Zesty Sauce perfectly, making for a classic duo.

  • Juicy Beef Burgers: Slathering this sauce on your favorite burger adds a creamy, zesty kick that transforms every bite into a flavorful journey.

  • Baked Sweet Potato Fries: The sweetness of these fries contrasts beautifully with the tangy sauce, creating a satisfying balance of flavors.

  • Fresh Garden Salad: Drizzle the Zesty Sauce over fresh greens to enhance the salad with a tangy pop, making each bite refreshing.

  • Grilled Chicken Tenders: Marinating chicken in the sauce before grilling adds a delightful zest and keeps the meat juicy and flavorful on the grill.

  • Vegetarian Wraps: Spread the sauce inside a wrap filled with crisp veggies and protein for a fulfilling, flavor-packed meal ideal for any occasion.

  • Chilled Shrimp Cocktail: Dip succulent shrimp in the Zesty Sauce for an elegant appetizer that showcases its tangy, zesty profile beautifully.

  • Savory Tacos: Add a drizzle of the sauce to your tacos for an unexpectedly delicious twist that brings out the best in every ingredient.

  • Chocolate Chip Cookies: For a surprising dessert pairing, try a small dollop of Zesty Sauce with a warm chocolate chip cookie; the tanginess crisps up the sweetness beautifully!

Make Ahead Options

These Burger King's Zesty Sauce preparations are tailor-made for busy home cooks looking to save time in the kitchen! You can whip up the sauce up to 3 days in advance, allowing its flavorful components to meld together beautifully. To prep ahead, simply follow the recipe instructions up to the chilling step, then transfer the sauce to an airtight container and refrigerate it. This will help maintain its creamy texture and zesty kick while letting the flavors develop. When you're ready to serve, give it a quick stir, and enjoy this zesty delight—perfect for enhancing burgers, fries, and sandwiches, all with just a moment of preparation!

Burger King’s Zesty Sauce Variations

Feel free to explore these tempting variations and enjoy the personalized taste that will brighten your meals!

  • Vegan Twist: Substitute mayonnaise with vegan mayonnaise or tahini for a creamy, plant-based delight. This adjustment doesn't sacrifice flavor while making it suitable for everyone at the table!

  • Spicy Kick: Add a dash of sriracha or hot sauce to amp up the heat level. The combination of tangy and spicy creates an unforgettable flavor explosion!

  • Herbed Version: Mix in fresh chopped herbs like dill or cilantro for an aromatic twist. These herbs not only enhance the flavor but add a lovely freshness that elevates the sauce.

  • Sweet & Tangy: Consider adding a tablespoon of honey or maple syrup for a sweet undertone. This naturally balances the acidity, perfect for those who enjoy a touch of sweetness.

  • Chunky Style: Stir in some chopped pickles or relish for a delightful crunch. This texture adds a whole new dimension, making it fun to use for sandwiches or as a dip.

  • Citrusy Fresh: Jazz up the zesty flavor by adding orange juice or zest. The bright notes of orange combine beautifully with the lemon for a refreshing alternative.

  • Umami Boost: Replace soy sauce with Worcestershire sauce or liquid aminos for deep, bold flavor. This swap adds a savory depth, making it a true crowd-pleaser!

  • Nutrient-Rich: Throw in a scoop of Greek yogurt to the mix for an extra protein punch. It's a great way to make the sauce even more nutritious without compromising its creamy texture.

Once you’ve personalized your sauce, you won't want to miss trying it with some delicious dishes like Shrimp Tacos Zesty or as a dipping companion for homemade Shrimp Ceviche Zesty. There’s a whole world of flavor waiting for you!

Expert Tips for Burger King's Zesty Sauce

  • Ingredient Quality: Use fresh lemon juice and high-quality mayonnaise for the best flavor; it makes a big difference in your homemade Burger King's Zesty Sauce.
  • Taste Adjustments: Start with smaller amounts of horseradish and cayenne; you can always add more if you desire extra zing or heat.
  • Chilling Time: Letting the sauce chill for at least an hour is crucial; this resting period allows flavors to combine beautifully.
  • Storage Solution: Keep leftover sauce in an airtight container in the fridge for up to a week; remember to give it a good stir before using!
  • Healthy Swaps: Swap regular mayonnaise for Greek yogurt to create a lighter, creamy version—ideal for those following a keto diet!

Burger King's Zesty Sauce Copycat Recipe FAQs

What ingredients should I look for to ensure freshness?
Absolutely! When selecting your ingredients, opt for high-quality mayonnaise with minimal additives for the best flavor. Look for fresh horseradish that doesn’t have dark spots or a strong vinegar odor. If using lemon juice, preferably choose fresh lemons, as they provide a brighter flavor compared to bottled varieties.

How long can I store Burger King's Zesty Sauce in the refrigerator?
You can keep your homemade Burger King’s Zesty Sauce in an airtight container in the fridge for up to 1 week. Make sure to give it a good stir before each use, as ingredients can settle over time.

Can I freeze Burger King's Zesty Sauce?
Yes, you can! For freezing, transfer the sauce into a freezer-safe container, leaving some room at the top for expansion. It will stay fresh for up to 3 months. When you’re ready to use it, simply move it to the refrigerator the night before you plan to enjoy it, allowing it to thaw slowly.

What if my sauce turns out too tangy or spicy?
If your Burger King's Zesty Sauce is a little too tangy, you can balance it by adding more mayonnaise or a teaspoon of sugar or honey. If it's too spicy, add a bit more of the base ingredients like mayonnaise or a splash more ketchup to mellow the heat. Always taste as you go and adjust!

Is this Zesty Sauce suitable for those with dietary restrictions?
Very much so! This recipe is gluten-free if you use tamari instead of regular soy sauce, and it can easily be made keto-friendly by swapping traditional ketchup for a sugar-free version. If you have allergies, always check the labels of pre-made ingredients like horseradish and mustard to ensure they meet your needs.

Can I make this sauce vegan?
Absolutely! You can create a plant-based version of Burger King's Zesty Sauce by replacing the mayonnaise with vegan mayonnaise or tahini. For a similar tang, choose a vegan sour cream alternative, and enjoy this creamy goodness without any animal products!

Burger King’s Zesty Sauce

Homemade Burger King’s Zesty Sauce That's Creamy Goodness

Recreate Burger King’s Zesty Sauce with this easy recipe—it’s creamy, zesty, and perfect for dips or sandwiches.
Print Recipe Pin Recipe
Prep Time 10 minutes mins
Chilling Time 1 hour hr
Total Time 1 hour hr 10 minutes mins
Servings: 8 tablespoons
Course: Snacks
Cuisine: American
Calories: 70
Ingredients Equipment Method Nutrition Notes

Ingredients
  

Base Ingredients
  • 1 cup Mayonnaise Or Greek yogurt for a lighter option.
  • 2 tablespoons Prepared Horseradish Or substitute with wasabi.
  • 2 tablespoons Prepared Mustard Dijon mustard can be used for a twist.
  • 2 tablespoons Ketchup Opt for sugar-free for a healthier version.
Seasoning Ingredients
  • 1 teaspoon Cayenne Pepper Adjust to taste or replace with paprika.
  • 1 teaspoon Salt Kosher or sea salt for better texture.
  • 1 teaspoon Sugar Leave out for sugar-free or use honey.
Acidity Ingredients
  • 1 tablespoon White Vinegar Apple cider vinegar is a good substitute.
  • 0.5 unit Lemon Juice Use fresh for the best flavor.
  • 1 teaspoon Soy Sauce Tamari is a gluten-free alternative.

Equipment

  • Mixing Bowl
  • Whisk
  • Airtight Container

Method
 

Preparation Steps
  1. In a large mixing bowl, combine 1 cup of mayonnaise, 2 tablespoons of yellow mustard, and 2 tablespoons of ketchup. Blend until smooth.
  2. Stir in 2 tablespoons of prepared horseradish, 1 teaspoon of cayenne pepper, and a pinch of salt. Whisk until integrated.
  3. Pour in 1 tablespoon of white vinegar, the juice of half a lemon, and 1 teaspoon of soy sauce, stirring continuously.
  4. Add 1 teaspoon of sugar or honey, and a touch of black pepper if desired. Whisk until well combined and smooth.
  5. Transfer the sauce into an airtight container and refrigerate for at least one hour before serving.

Nutrition

Serving: 1tablespoonCalories: 70kcalCarbohydrates: 3gFat: 7gSaturated Fat: 1gMonounsaturated Fat: 5gCholesterol: 5mgSodium: 150mgPotassium: 10mgSugar: 1gVitamin A: 5IUVitamin C: 1mgCalcium: 1mg

Notes

Use fresh ingredients for the best flavor and adjust the spice levels to your preference. Store leftovers in the fridge for up to a week.

Tried this recipe?

Let us know how it was!

Savory Carnivore Pizza Muffins: Your New Favorite Meal Prep Snack

May 27, 2026 by Grace Snow Leave a Comment

As the oven hums softly, I can’t help but be drawn in by an irresistible aroma wafting through my kitchen—muffins baking to perfection! Today, I'm thrilled to share my latest obsession: Savory Carnivore Pizza Muffins. These delightful, fluffy bites are not only a delicious spin on pizza but also a quick 30-minute solution for those busy days. With their high protein content and keto-friendly ingredients, they make an ideal snack or meal prep option for anyone wanting to ditch fast food without sacrificing flavor. What’s more, these muffins are endlessly customizable, letting you tailor them to suit your cravings. Ready to dive into a world where pizza meets muffin magic? Let’s get baking!

Why are Carnivore Pizza Muffins a must-try?

Savory, these muffins transform traditional pizza flavors into a portable snack everyone will adore.
Quick cooking time: In just 30 minutes, you can enjoy a delicious homemade treat.
High protein: Each muffin packs a protein punch, perfect for keto enthusiasts.
Customizable: Tailor your ingredients to fit your taste—from spicy jalapeños to creamy avocado salad.
Meal prep friendly: Make a batch at the start of the week for quick snacks or meals, similar to my Breakfast Egg Muffins!
Crowd-pleaser: Ideal for family gatherings or busy weeknights, these muffins satisfy without the carbs.

Savory Carnivore Pizza Muffin Ingredients

  • For the Batter
  • Eggs – Provide structure and lift; opt for free-range eggs for enhanced flavor.
  • Heavy Cream – Adds richness and moisture; substitute with full-fat coconut milk for a dairy-free option.
  • Mozzarella Cheese – Contributes a creamy texture; fresh mozzarella yields the best results.
  • Parmesan Cheese – Provides distinctive flavor and richness; substitute with nutritional yeast for dairy-free.
  • Ground Meat – Serves as the primary protein source; choose cooked ground beef, pork, turkey, or chicken for your savory carnivore pizza muffins.
  • Pepperoni – Adds bold pizza flavor; omit or swap for turkey pepperoni if desired.
  • Salt & Black Pepper – Enhances overall flavor; adjust to your taste.
  • Italian Seasoning – Adds a classic herb blend to the muffins for a homemade touch.
  • Garlic Powder – Boosts the savory profile for a delicious kick.
  • Bacon (optional) – Adds extra richness; can be substituted with diced turkey bacon if desired.

Step‑by‑Step Instructions for Savory Carnivore Pizza Muffins

Step 1: Preheat Oven
Begin by preheating your oven to 375°F (190°C). While the oven warms up, generously grease a standard muffin tin with cooking spray or butter. This step is crucial to prevent sticking, ensuring your Savory Carnivore Pizza Muffins come out effortlessly after baking.

Step 2: Whisk Eggs
In a large mixing bowl, crack the eggs and whisk them vigorously until they become pale and frothy, which should take about 1 minute. This is an essential step to incorporate air into the mixture, yielding light and fluffy muffins. Set the bowl aside once your eggs reach that airy perfection.

Step 3: Combine Cream
Next, add the heavy cream to the whisked eggs, stirring gently until the mixture is smooth and fully combined. The heavy cream adds richness that complements the savory flavors of the muffins. Take a moment to ensure there are no lumps for a creamy batter that promises flavorful Savory Carnivore Pizza Muffins.

Step 4: Fold in Ingredients
Now, it’s time to fold in the delicious ingredients. Gently mix in the mozzarella and parmesan cheeses, cooked ground meat of your choice, pepperoni, Italian seasoning, garlic powder, and optional bacon. Use a spatula to combine everything evenly, ensuring each muffin is packed with flavor.

Step 5: Portion Batter
With your batter ready, carefully fill each muffin cup about ¾ full, leaving some space for rising. This will allow your Savory Carnivore Pizza Muffins to expand beautifully in the oven. Make sure the batter is evenly distributed to promote even baking across all muffins.

Step 6: Bake
Place the muffin tin in the preheated oven and bake for 18-22 minutes. Keep an eye on them; they're done when they're golden brown and firm to the touch. A toothpick inserted into the center should come out clean, indicating a perfectly baked muffin.

Step 7: Cool
After baking, let the muffins cool in the tin for about 5 minutes. This brief cooling period will help them set properly. After this time, gently transfer the muffins to a wire rack to cool completely, allowing you to enjoy them at their best texture and flavor.

Make Ahead Options

These Savory Carnivore Pizza Muffins are perfect for meal prep! You can prepare the batter up to 24 hours in advance by mixing all the ingredients and storing the mixture in an airtight container in the refrigerator. This keeps the muffins fresh and saves you time on busy weeknights. Alternatively, you can bake the muffins and refrigerate them for up to 5 days or freeze them for up to 3 months. Just make sure to cool them completely before storing to maintain their fluffy texture. When you're ready to enjoy, simply reheat in the oven at 350°F (175°C) for about 10 minutes for that freshly baked taste!

What to Serve with Savory Carnivore Pizza Muffins

Imagine serving up a platter of warm muffins alongside mouthwatering sides that complement their rich flavors and textures.

  • Creamy Avocado Salad: A vibrant avocado salad adds freshness and creaminess, balancing the savory richness of the muffins beautifully.

  • Marinara Dipping Sauce: Sweet and tangy marinara provides a nostalgic pizza-like experience, perfect for dipping your muffins or drizzling on top.

  • Garlic Butter Zoodles: Light and flavorful zucchini noodles tossed in garlic butter create a delightful contrast to the heartiness of the muffins, making for a satisfying meal.

  • Crisp Caesar Salad: A crunchy Caesar salad adds a refreshing crunch, and its creamy dressing pairs wonderfully with the savory notes of the pizza muffins.

  • Roasted Veggies: Nutty roasted broccoli or Brussels sprouts bring an earthy, caramelized flavor that enhances the overall experience — a nutritious side, indeed.

  • Sparkling Water with Lemon: A refreshing sparkling water not only cleanses the palate but adds a zesty finish that brightens the rich flavors of the muffins.

How to Store and Freeze Savory Carnivore Pizza Muffins

Fridge: Store muffins in an airtight container for up to 5 days to maintain their freshness and flavor.

Freezer: For longer storage, freeze muffins individually by wrapping them tightly in plastic wrap and placing in a zip-top bag for up to 3 months.

Reheating: To enjoy, reheat from frozen at 350°F (175°C) for about 10 minutes until warmed through, or microwave for a quick snack.

Tip: For best results, let muffins cool completely before storing to prevent moisture buildup and maintain the perfect texture.

Savory Carnivore Pizza Muffin Variations

Feel free to let your creativity shine and transform these muffins with delightful twists that will excite your taste buds!

  • BBQ Chicken: Substitute pepperoni with shredded BBQ chicken for a smoky flavor that enhances the savory profile. Perfect for those who enjoy tangy notes in their meals.

  • Veggie Boost: Add chopped spinach, bell peppers, or mushrooms to the batter for an extra nutritional punch and vibrant color. The veggies bring moisture and flavor, making the muffins even more satisfying.

  • Different Cheeses: Swap out mozzarella and parmesan for gouda, cheddar, or feta to reinvent the taste of your muffins. Each cheese adds its own special twist, creating an exciting surprise with every bite.

  • Spicy Kick: Amp up the heat by incorporating diced jalapeños or red pepper flakes. Ideal for spice lovers, these additions will awaken your senses and elevate your savory experience.

  • Herbs & Aromatics: Experiment with fresh herbs like basil or parsley for an aromatic flair. A splash of Worcestershire sauce can also deepen the umami notes, creating a muffin that's bursting with flavor.

  • Mediterranean Twist: Add olives and sundried tomatoes to create a savory muffin reminiscent of Mediterranean flavors. Serve alongside a fresh salad or on their own for a delicious snack.

  • Mushroom & Bacon Bliss: Fold in sautéed mushrooms and crispy bacon for the ultimate flavor combination. This hearty variation will satisfy anyone's cravings and is perfect for brunch.

To round off your meal, consider pairing these delightful muffins with a creamy avocado salad or even a zesty marinara dipping sauce, similar to what you'd find in my Cinnamon Roll Muffins! Enjoy the delicious possibilities!

Expert Tips for Savory Carnivore Pizza Muffins

  • Meat Matters: Ensure your ground meat is fully cooked before adding it to the batter to maintain food safety and perfect texture.

  • Egg Whipping: Beat the eggs until frothy to achieve a light and fluffy texture in your muffins; this step makes all the difference!

  • Prevent Sticking: Grease the muffin tin thoroughly to avoid any crumbling or sticking when you pop out your Savory Carnivore Pizza Muffins.

  • Don’t Overmix: Gently fold the ingredients together without overmixing to prevent dense muffins; the batter should just come together beautifully.

  • Storage Tips: Store leftovers in an airtight container in the fridge for up to 5 days, or freeze them individually for quick snacks later!

Savory Carnivore Pizza Muffins Recipe FAQs

What is the best way to select ripe eggs?
Absolutely! When choosing eggs, look for ones that have clean shells and are free from cracks. If you can, opt for free-range or organic eggs as they tend to have richer flavor and better nutritional content. Always check the expiration date on the carton to ensure they’re fresh.

How should I store my Savory Carnivore Pizza Muffins?
Very! To keep your muffins fresh, place them in an airtight container in the fridge for up to 5 days. If you want to save some for later, you can freeze them. Just wrap each one tightly in plastic wrap and store them in a zip-top freezer bag.

Can I freeze Savory Carnivore Pizza Muffins?
Absolutely! To freeze, let the muffins cool completely first. Then individually wrap each muffin in plastic wrap and place them in a zip-top bag. They’ll stay fresh for up to 3 months. When you're ready to enjoy, reheat from frozen at 350°F (175°C) for about 10 minutes, or microwave individually for a quick snack.

What should I do if my muffins are too dense?
Don't worry! If your muffins turn out dense, it could be due to not whisking the eggs enough. Make sure to whisk them until pale and frothy. Also, avoid overmixing the batter once you add the dry and wet ingredients together—gentle folding is key to achieving that light texture.

Are there any dietary considerations for pets or allergies?
Absolutely! These muffins contain ingredients like eggs, cheese, and meats that should not be shared with pets. Additionally, be mindful of dietary restrictions; you can substitute cheeses with dairy-free alternatives and use meats according to your preferred protein sources to accommodate allergies.

Savory Carnivore Pizza Muffins

Savory Carnivore Pizza Muffins: Your New Favorite Meal Prep Snack

Savory Carnivore Pizza Muffins are a delicious, high-protein snack perfect for those busy days.
Print Recipe Pin Recipe
Prep Time 10 minutes mins
Cook Time 20 minutes mins
Cooling Time 5 minutes mins
Total Time 35 minutes mins
Servings: 12 muffins
Course: Snacks
Cuisine: American
Calories: 220
Ingredients Equipment Method Nutrition Notes

Ingredients
  

For the Batter
  • 6 large Eggs opt for free-range eggs for enhanced flavor
  • 1 cup Heavy Cream substitute with full-fat coconut milk for dairy-free
  • 1 cup Mozzarella Cheese fresh mozzarella yields the best results
  • 0.5 cup Parmesan Cheese substitute with nutritional yeast for dairy-free
  • 1 lb Ground Meat choose cooked ground beef, pork, turkey, or chicken
  • 0.5 cup Pepperoni omit or swap for turkey pepperoni if desired
  • 1 tsp Salt adjust to your taste
  • 1 tsp Black Pepper adjust to your taste
  • 1 tbsp Italian Seasoning
  • 1 tsp Garlic Powder
  • 0.5 cup Bacon optional; can be substituted with diced turkey bacon

Equipment

  • Muffin tin
  • Mixing Bowl
  • Spatula

Method
 

Step-by-Step Instructions
  1. Preheat your oven to 375°F (190°C) and grease a standard muffin tin.
  2. Whisk the eggs until pale and frothy, about 1 minute.
  3. Combine heavy cream with the whisked eggs until smooth.
  4. Fold in mozzarella, parmesan, ground meat, pepperoni, Italian seasoning, garlic powder, and optional bacon.
  5. Fill each muffin cup about ¾ full with batter.
  6. Bake for 18-22 minutes until golden brown and firm to touch.
  7. Cool in the tin for about 5 minutes, then transfer to a wire rack.

Nutrition

Serving: 1muffinCalories: 220kcalCarbohydrates: 3gProtein: 15gFat: 18gSaturated Fat: 7gPolyunsaturated Fat: 1gMonounsaturated Fat: 8gCholesterol: 120mgSodium: 400mgPotassium: 200mgFiber: 1gSugar: 1gVitamin A: 400IUCalcium: 200mgIron: 1.5mg

Notes

Store leftovers in an airtight container in the fridge for up to 5 days, or freeze them for up to 3 months.

Tried this recipe?

Let us know how it was!

Crispy Cheesy Garlic Parmesan Potato Balls to Delight Your Tastebuds

May 26, 2026 by Grace Snow Leave a Comment

As I stood in my kitchen, the savory aroma of garlic sizzling in butter filled the air, and my taste buds danced with anticipation. That’s when I realized it was time to indulge in a treat that's both comforting and crowd-pleasing: Crispy Cheesy Garlic Parmesan Potato Balls. These delightful morsels combine creamy, garlicky mashed potatoes with a gooey mozzarella center, all wrapped in a crunchy breadcrumb coating, ready to take your snacking game to the next level. Not only are these potato balls a fantastic party appetizer, but they also make for a satisfying family meal that’s quick and easy to prepare. So, are you ready to whip up some crispy goodness that will have everyone coming back for more? Let's dive in!

Why Are These Potato Balls Irresistible?

Crispy Texture: The perfect crunch from the panko coating contrasts beautifully with the creamy potato filling.

Savory Flavor: Fresh garlic and aged Parmesan unite to create a rich, mouthwatering experience that tantalizes your taste buds.

Versatile Indulgence: Serve as a crowd-pleasing appetizer, a satisfying snack, or a hearty side dish alongside German Potato Salad for a comforting meal.

Make Ahead & Freeze: Prepare ahead of time and enjoy the ease of having a delicious treat on hand whenever cravings strike.

Creative Variations: Feel free to spice things up with jalapeños or switch cheeses for a fun spin!

Cheesy Garlic Parmesan Potato Balls Ingredients

• Discover the delightful components of these savory treats.

For the Potato Mixture

  • Russet Potatoes – The ideal base for creamy mashed potatoes; Yukon Gold can be used for a different texture.
  • Fresh Garlic – Infuses a robust, aromatic flavor; garlic powder is a quick substitute if necessary.
  • Unsalted Butter – Adds richness and helps sauté the garlic; swap with olive oil for a dairy-free option.
  • Parmesan Cheese – Brings depth and umami; freshly grated is recommended, but pre-grated will do.
  • Fresh Parsley – Enhances color and freshness; feel free to replace with chives for a different flavor.
  • Salt – A vital ingredient that amplifies all flavors; adjust to your taste preference.
  • Onion Powder – Infuses savory depth; can be omitted if you don’t have it on hand.
  • Ground White Pepper – Adds a subtle heat; black pepper works as a substitute in a pinch.

For the Coating

  • Panko Breadcrumbs – Creates a light and crispy outer layer; regular breadcrumbs are fine if panko isn’t available.
  • All-Purpose Flour – Essential for binding; almond flour or gluten-free blend offers a gluten-free alternative.
  • Eggs – Binds the mixture and coats the balls; consider using flax egg or aquafaba for a vegan option.
  • Filtered Water – Thins the egg mixture; tap water is completely acceptable.

For the Filling

  • Mozzarella Cheese Chunks – Provides that gooey center; other cheeses like cheddar or gouda can be fantastic substitutes.

For Frying

  • Neutral Flavored Oil (e.g., avocado or vegetable oil) – Necessary for frying; avoid olive oil due to its lower smoke point.

These Cheesy Garlic Parmesan Potato Balls are sure to be a hit at your next gathering or family meal!

Step-By-Step Instructions for Cheesy Garlic Parmesan Potato Balls

Step 1: Boil Potatoes
Start by peeling and chopping your russet potatoes into even pieces for uniform cooking. Place them in a large pot of salted water and bring to a boil over high heat. Cook the potatoes for about 10-15 minutes, or until they are fork-tender. Once done, drain the potatoes and let them cool for 15-20 minutes to make mashing easier.

Step 2: Prepare Garlic
In a skillet, melt unsalted butter over medium heat. Add minced fresh garlic and sauté for about 1-2 minutes, or until fragrant but not browned. This aromatic mixture adds a savory depth to your cheesy garlic parmesan potato balls. Set the garlic aside to cool, allowing the flavors to settle before mixing it into your potato mixture.

Step 3: Mash Potatoes
In a large mixing bowl, combine the cooled potatoes with the sautéed garlic, freshly chopped parsley, and grated Parmesan cheese. Add salt, onion powder, and ground white pepper to taste. Use a potato masher or fork to thoroughly mash and mix all the ingredients together until you achieve a smooth, creamy consistency, ensuring that the flavors are well incorporated.

Step 4: Form Balls
Once the potato mixture is prepared, divide it into approximately 10 equal portions. Flatten each portion in your hand, placing a generous chunk of mozzarella cheese in the center. Enclose the cheese with the potato mixture to form a smooth ball. Place the formed balls on a baking sheet lined with parchment paper and freeze for about 1 hour, which helps them maintain their shape during frying.

Step 5: Breading Setup
While the potato balls are freezing, prepare your breading station. Set up three shallow bowls: one with all-purpose flour, another with a mixture of beaten eggs and a splash of filtered water, and the third with seasoned panko breadcrumbs. This setup allows for easy coating of your cheesy garlic parmesan potato balls, helping them achieve that perfect crispiness.

Step 6: Coat Balls
Remove the potato balls from the freezer. Working one at a time, dip each ball into the flour to coat it lightly, shaking off any excess. Next, immerse it in the egg mixture, ensuring it's fully coated, then roll it in the panko breadcrumbs for a crunchy exterior. For an extra crunch, repeat the dipping process, providing a second layer of breadcrumbs.

Step 7: Fry
In a deep skillet or frying pan, heat neutral oil (like vegetable or avocado oil) to 350°F (175°C). Once the oil is hot, carefully add the breaded potato balls in batches—do not overcrowd the pan. Fry them for about 4-5 minutes, or until golden brown on all sides. Use a slotted spoon to remove them, letting excess oil drain on paper towels for a perfect crispy finish.

Step 8: Serve
To finish, arrange the crispy Cheesy Garlic Parmesan Potato Balls on a serving platter. Garnish them with a sprinkle of freshly chopped parsley and additional grated Parmesan cheese if desired. Serve these delightful bites warm and enjoy them with your favorite dipping sauces, such as marinara or aioli, for a tasty snack or appetizer.

How to Store and Freeze Cheesy Garlic Parmesan Potato Balls

Fridge: Store leftover potato balls in an airtight container for up to 3 days. Reheat in a preheated oven for the best results, ensuring they're crispy when warmed.

Freezer: Freeze prepared potato balls before frying. Lay them on a baking sheet until firm, then transfer to a freezer-safe bag or container for up to 3 months.

Reheating: To reheat, bake frozen potato balls at 375°F (190°C) for about 15-20 minutes, or until heated through and crispy again. Avoid microwave reheating for optimal texture.

Make-Ahead: For convenience, consider preparing and freezing the cheesy garlic parmesan potato balls ahead of time, so they're ready to fry whenever the craving strikes!

Expert Tips for Cheesy Garlic Parmesan Potato Balls

  • Oil Temperature: Ensure your oil is preheated to 350°F (175°C) to achieve crispy bites; too low, and they can become greasy.

  • Freezing Time: Don't skip the freezing step! Allowing the formed balls to freeze for at least an hour keeps them intact during frying.

  • Batch Frying: Fry the potato balls in small batches to avoid overcrowding, which can lower the oil temperature and result in sogginess.

  • Double Coat for Crunch: For a thicker, crunchier exterior, double coat the balls in flour, egg mixture, and panko breadcrumbs.

  • Drain Properly: Once fried, let the cheesy garlic parmesan potato balls drain on paper towels or a cooling rack to maintain their crispy texture.

  • Flavor Variations: Experiment with different cheeses or spices to customize your cheesy garlic parmesan potato balls, adding a personal twist to this classic treat!

What to Serve with Crispy Cheesy Garlic Parmesan Potato Balls

These delightful bites are fantastic on their own, but pair them with the right accompaniments to create a memorable meal experience.

  • Marinara Sauce: A classic pairing, its tangy tomato base complements the cheesy richness perfectly, adding a zesty flavor contrast.
  • Ranch Dressing: Creamy and herbaceous, this dip enhances the savory notes of the potato balls while adding a cooling element.
  • Spicy Aioli: With a hint of heat and a creamy texture, this sauce brings an exciting kick that elevates the flavor profile.
  • A Crisp Garden Salad: Fresh greens and colorful veggies provide a refreshing crunch, balancing the heaviness of the fried potato balls.
  • Roasted Veggies: Seasoned with herbs, these add a smoky, earthy flavor that pairs wonderfully with the cheesy goodness.
  • Garlic Bread: For a carb lover’s dream, serve garlic bread alongside to amplify those garlicky flavors in the potato balls.
  • Beer or Sparkling Cider: Both drinks offer a refreshing contrast; the fizz cuts through the creaminess for a balanced sip.
  • Chocolate Fondue: For dessert, consider a sweet treat like chocolate fondue. The contrasting flavors create an unexpected but delightful ending!

Make Ahead Options

Preparing these delightful Cheesy Garlic Parmesan Potato Balls ahead of time is a fantastic way to save precious minutes during busy weeknights! You can assemble the potato balls and freeze them for up to 3 months before frying. Simply complete the steps until you form the balls, then place them on a parchment-lined baking sheet and freeze until firm (about 1 hour). After that, transfer the balls to an airtight container or freezer bag to prevent freezer burn. When you're ready to serve, fry the frozen balls directly from the freezer—just add an extra minute or two to the cooking time for perfectly crispy results! This way, you can enjoy the warm, melty goodness of cheesy potato balls with minimal effort on the day of entertaining or feasting.

Cheesy Garlic Parmesan Potato Balls Variations

Feel free to let your creativity shine as you customize these tasty potato balls to suit your palate!

  • Spicy Kick: Add diced jalapeños or mix in crushed red pepper flakes for a delightful heat that will awaken your taste buds. The balance of creamy and spicy elevates the flavor experience to new heights.

  • Cheesy Surprise: Swap the mozzarella for pepper jack to introduce a zesty twist or use ricotta for a creamy delight that melts in your mouth. Each cheese brings its unique character, allowing you to explore different textures and flavors.

  • Baked Option: Skip the frying and try baking the potato balls at 400°F (200°C) until golden to create a healthier, yet equally satisfying, alternative. Baking provides a lighter option without sacrificing the delightful crunch.

  • Herb Infusion: Replace fresh parsley with a mix of fresh thyme and basil for a fragrant, herby flavor that adds an Italian touch. The aroma is enchanting, making every bite feel like a warm embrace.

  • Veggie Boost: Incorporate shredded zucchini or finely diced spinach into the potato mixture for added nutrition and a pop of color. These veggies blend seamlessly into the mixture, enhancing both texture and flavor.

  • Gluten-Free Delight: Utilize almond flour or a gluten-free breadcrumb blend instead of regular panko and flour. This swap ensures that everyone can enjoy these delightful bites without any dietary concerns.

  • Gourmet Dipping Sauce: Serve your potato balls with truffle aioli or spicy sriracha mayo for a gourmet twist. The right dip adds another layer of flavor that takes your snacking experience to the next level.

  • Sweet and Savory: Infuse a touch of honey or serve with a drizzle of sweet chili sauce for unexpected sweetness that contrasts beautifully with the savory garlicky filling. It's a surprising combo that will keep your guests guessing!

Experimenting with these variations is the perfect way to make these cheesy garlic parmesan potato balls your own while adding a splash of excitement to your table. Let them accompany your next favorite dish like Cheesy Garlic Bread or pair perfectly with the flavors of Honey Garlic Chicken for a delightful culinary adventure!

Cheesy Garlic Parmesan Potato Balls Recipe FAQs

What type of potatoes work best for the recipe?
For the best results, I recommend using Russet potatoes as they provide a creamy texture when mashed. If you prefer a different texture or flavor, you can use Yukon Gold potatoes instead—they’re wonderfully buttery!

How do I store leftover potato balls?
Store any leftover Cheesy Garlic Parmesan Potato Balls in an airtight container in the refrigerator for up to 3 days. Just reheat them in a preheated oven at 375°F (190°C) for about 10-15 minutes to regain their delightful crispiness.

Can I freeze the potato balls, and how should I do it?
Absolutely! You can freeze the Cheesy Garlic Parmesan Potato Balls before frying. After forming the balls, place them on a baking sheet and freeze until firm. Once solid, transfer them to a freezer-safe bag or container. They’ll keep well for up to 3 months! Just remember to label and date your storage bags for easy access.

What if the potato balls are falling apart while frying?
If you’re finding that your potato balls are disintegrating in the oil, it’s likely due to either insufficient chilling or frying at too low a temperature. Make sure to freeze them for at least an hour and ensure the oil is preheated to 350°F (175°C) before adding them to fry. Fry in small batches to avoid lowering the oil temperature.

Are these potato balls suitable for a gluten-free diet?
Certainly! To make these Cheesy Garlic Parmesan Potato Balls gluten-free, simply replace the all-purpose flour with a gluten-free flour blend and use gluten-free panko breadcrumbs. They maintain the same lovely texture and flavor while being safe for those avoiding gluten.

Can I use different cheeses for the filling?
The more the merrier! You can experiment with different cheeses for the filling. Cheddar or gouda would offer a delightful twist to the cheesy center. Mixing in pepper jack could also give them a spicy kick—whatever suits your taste buds!

Cheesy Garlic Parmesan Potato Balls Recipe FAQs

Cheesy Garlic Parmesan Potato Balls

Crispy Cheesy Garlic Parmesan Potato Balls to Delight Your Tastebuds

Indulge in Cheesy Garlic Parmesan Potato Balls that combine creamy mashed potatoes and gooey mozzarella wrapped in a crunchy coating.
Print Recipe Pin Recipe
Prep Time 30 minutes mins
Cook Time 15 minutes mins
Freezing Time 1 hour hr
Total Time 1 hour hr 45 minutes mins
Servings: 10 balls
Course: Snacks
Cuisine: American
Calories: 200
Ingredients Equipment Method Nutrition Notes

Ingredients
  

For the Potato Mixture
  • 4 medium Russet Potatoes or Yukon Gold
  • 3 cloves Fresh Garlic minced
  • 2 tablespoons Unsalted Butter or olive oil
  • 1 cup Parmesan Cheese freshly grated
  • 1/4 cup Fresh Parsley chopped
  • 1 teaspoon Salt
  • 1/2 teaspoon Onion Powder optional
  • 1/4 teaspoon Ground White Pepper or black pepper
For the Coating
  • 1 cup Panko Breadcrumbs or regular breadcrumbs
  • 1/2 cup All-Purpose Flour or gluten-free blend
  • 2 large Eggs beaten
  • 2 tablespoons Filtered Water or tap water
For the Filling
  • 1 cup Mozzarella Cheese Chunks or other cheeses
For Frying
  • 2 cups Neutral Flavored Oil e.g., avocado or vegetable oil

Equipment

  • Large pot
  • Skillet
  • Mixing Bowl
  • potato masher
  • Baking Sheet
  • shallow bowls
  • deep skillet or frying pan

Method
 

Step-by-Step Instructions
  1. Peel and chop russet potatoes into even pieces. Boil in salted water for about 10-15 minutes until fork-tender. Drain and cool for 15-20 minutes.
  2. Melt unsalted butter in a skillet, add minced garlic, and sauté for 1-2 minutes until fragrant. Set aside to cool.
  3. Combine cooled potatoes, sautéed garlic, parsley, and Parmesan in a mixing bowl. Season with salt, onion powder, and white pepper. Mash until smooth.
  4. Divide potato mixture into 10 portions. Flatten each portion and place mozzarella in the center. Enclose the cheese to form a ball. Freeze balls for 1 hour.
  5. Set up three bowls: one with flour, one with beaten eggs and water, and one with seasoned panko breadcrumbs.
  6. Coat each frozen ball in flour, dip in egg, then roll in panko breadcrumbs. For extra crunch, repeat coating process.
  7. Heat oil in a deep skillet to 350°F (175°C). Fry potato balls in batches for 4-5 minutes until golden brown. Drain on paper towels.
  8. Serve warm, garnished with parsley and Parmesan, alongside dipping sauces.

Nutrition

Serving: 1ballCalories: 200kcalCarbohydrates: 20gProtein: 6gFat: 10gSaturated Fat: 5gMonounsaturated Fat: 5gCholesterol: 50mgSodium: 300mgPotassium: 300mgFiber: 2gSugar: 1gVitamin A: 500IUVitamin C: 10mgCalcium: 150mgIron: 1mg

Notes

These potato balls can be made ahead and frozen for later use. Try experimenting with different cheeses for unique flavors.

Tried this recipe?

Let us know how it was!

Crispy Mozzarella Sticks Recipe for the Ultimate Snack Attack

May 26, 2026 by Grace Snow Leave a Comment

There’s something undeniably captivating about the sound of crispy cheese sizzling in hot oil. As I deftly slip a batch of these homemade Crispy Mozzarella Sticks into the fryer, the anticipation builds. This Mozzarella Sticks Recipe is a delightful nod to indulgence, transforming gooey cheese into a perfectly crispy delight, making it an ideal snack or appetizer for parties and gatherings. Not only are they unbelievably easy to whip up, but they're also a fun way to impress your guests—or treat yourself! With a seasoned panko coating that elevates each bite, you’ll find it nearly impossible to stop at just one. So, curious to find out how you can create this cheesy, crunchy wonder at home? Let’s dive in!

Why You’ll Crave These Mozzarella Sticks?

Irresistible Crunch: The panko coating creates an unparalleled crispy exterior that contrasts beautifully with the melty mozzarella inside. Homemade Goodness: Skip the fast food and enjoy a fresh, homemade snack that’s easy to prepare. Customization Galore: Add your favorite herbs and spices to personalize the flavor, making each batch uniquely yours. Perfect as an appetizer, these sticks pair perfectly with Chicken Adobo or a zesty marinara dip. Quick to Make: With simple ingredients and a straightforward process, these mozzarella sticks are just a fryer away!

Mozzarella Sticks Recipe Ingredients

For the Batter
• Fresh Mozzarella Cheese – Provides that gooey, stretchy filling essential for perfect mozzarella sticks.
• All-Purpose Flour – Acts as the initial dredging layer; gluten-free flour works as a great substitute.
• Eggs – Essential binder to help the breadcrumbs adhere—feel free to use a vegan egg replacer for a plant-based option.

For the Coating
• Panko Breadcrumbs – Delivers an airy, extra crispy texture; regular breadcrumbs can be used, but may result in less crunch.
• Italian Herbs (Dried) – Enhances the flavor of your mozzarella sticks; adjust the quantity to suit your taste.
• Smoked Paprika (Optional) – Adds a smoky depth; omit for a cleaner taste or substitute with chili powder for heat.

For Frying
• Vegetable Oil – Ensures crispy perfection while frying; canola or peanut oil can be substituted.

Dive into this mozzarella sticks recipe and enjoy a homemade treat that’ll leave your taste buds singing!

Step‑by‑Step Instructions for Crispy Mozzarella Sticks Recipe

Step 1: Prepare the Mozzarella
Begin by cutting fresh mozzarella cheese into sticks approximately 1/2 inch thick and 3 inches long. This will provide the perfect cheesy filling for your Crispy Mozzarella Sticks. Once cut, place the mozzarella sticks on a baking sheet and freeze them for at least 30 minutes. This step is crucial as it firms up the cheese, ensuring it maintains its shape while frying.

Step 2: Set Up Your Dredging Station
While the mozzarella sticks are freezing, create a dredging station with three shallow dishes. In the first dish, add all-purpose flour; in the second, beat a couple of eggs until well combined. In the third dish, mix panko breadcrumbs with your desired Italian herbs and smoked paprika, lightly tossing to combine. Having everything organized will streamline the coating process for your Crispy Mozzarella Sticks.

Step 3: Coat the Mozzarella Sticks
Once the mozzarella sticks are firm, begin the coating process. First, dredge each stick in the flour, ensuring it’s evenly coated, then dip it into the beaten eggs, allowing any excess egg to drip off. Next, roll the stick in the seasoned panko mixture, pressing gently to help the crumbs adhere well. Repeat this process for all sticks, which will ensure a deliciously crispy exterior when frying.

Step 4: Heat the Oil
In a deep-fryer or a heavy-bottomed pot, pour in enough vegetable oil to submerge the mozzarella sticks. Heat the oil over medium-high heat until it reaches 180°C (350°F). Use a thermometer for accuracy, as maintaining the right temperature is key for crispiness; too low, and the cheese may leak out, too high, and the coating may burn before the cheese melts.

Step 5: Fry the Mozzarella Sticks
Carefully add the coated mozzarella sticks to the hot oil in small batches, ensuring not to overcrowd the pot. Fry each batch for about 2-3 minutes or until they appear golden brown and the cheese inside starts to melt, creating that gooey texture we all love in Mozzarella Sticks. Keep a close eye on them, as they can quickly go from perfectly crispy to overdone.

Step 6: Drain and Serve
Once the mozzarella sticks are golden, carefully remove them from the oil using a slotted spoon, and place them on a plate lined with paper towels to absorb excess oil. While they’re best enjoyed warm, promptly serve them with delicious dipping sauces like marinara or aioli. Each crispy bite promises a wonderful contrast between the crunchy coating and the melty cheese within, making your Mozzarella Sticks Recipe a hit!

Mozzarella Sticks Recipe Variations

Feeling adventurous? Here are some delightful ways to tailor your mozzarella sticks to suit your taste buds.

  • Herb-Infused: Add fresh basil or oregano to the panko mixture for an aromatic twist that will elevate every bite.

  • Spicy Kick: Introduce cayenne pepper or red pepper flakes into the breadcrumb mix for a fiery flavor that will leave you wanting more.

  • Cheesy Surprise: Swap regular panko with Parmesan cheese mixed in for a rich, cheesy crust that adds an umami punch.

  • Nutty Crunch: Consider using crushed almonds or walnuts mixed with panko for a delightful nutty texture and added depth of flavor.

  • Mini-Sticks: For smaller snacks, cut your mozzarella into bite-sized pieces for perfect party treats that are a breeze to enjoy.

  • Dairy-Free: Substitute vegan cheese for a plant-based version that retains that melty goodness while catering to dairy-free diets.

  • Southwestern Style: Incorporate cumin and chili powder into the panko for a Southwest flavor that pairs perfectly with salsa—a fun twist for a gathering!

  • Herbed Marinara Dipping Sauce: Whip up a quick herbed marinara sauce to accompany your mozzarella sticks. A few Italian herbs mixed into your store-bought marinara will add a fresh touch.

These variations let you explore flavors and textures while making delightful dishes! For more delicious ideas, check out how to prepare Fryer Fish Sticks or consider serving these sticks alongside a savory Spatchcock Chicken. Enjoy your cooking journey!

How to Store and Freeze Mozzarella Sticks

Fridge: Store leftover mozzarella sticks in an airtight container; they will keep fresh for up to 3 days. For best texture, reheat in an oven to restore crunch.

Freezer: For long-term storage, freeze uncooked mozzarella sticks on a baking sheet first, then transfer to a zip-top bag. They can last for up to 3 months; fry straight from frozen when ready to serve.

Reheating: To reheat previously fried mozzarella sticks, bake them in the oven at 190°C (375°F) for about 10-12 minutes until crispy again. Avoid the microwave, as it will make them soggy.

Make-Ahead: You can prepare and bread the mozzarella sticks in advance, store them in the freezer, and fry them fresh when you're ready for a delightful snack!

What to Serve with Crispy Mozzarella Sticks?

Imagine a cozy evening, laughter filling the air as you gather with loved ones to enjoy a delightful spread of flavors and textures.

  • Marinara Sauce: A classic dipping partner, its tangy goodness beautifully complements the creamy cheesiness with every bite.
  • Garlic Aioli: This creamy, garlicky dip adds a rich flavor profile to the crunchy mozzarella, enhancing each mouthful with a savory twist.
  • Fresh Salad: A crisp, lightly dressed salad provides a refreshing contrast to the warm, cheesy sticks, balancing indulgence with brightness.
  • Chili Oil Dip: For those who crave heat, a drizzle of chili oil elevates the flavors, bringing a delightful kick to the creamy mozzarella.
  • Pasta Primavera: Pair your mozzarella sticks with a vibrant vegetable-packed pasta for a heartier meal that leaves everyone satisfied.
  • Brewed Iced Tea: The smooth, sweet notes of iced tea make for a refreshing sip that cuts through the richness of the fried cheese perfectly.
  • Spicy Ranch Dressing: The creaminess of ranch, combined with a hint of spice, creates a perfect compliment that elevates your mozzarella experience.
  • Fruit Platter: Offer a mix of sweet and juicy fruits like watermelon and berries, creating a stunning contrast in flavors and textures alongside your cheesy snack.

Make Ahead Options

These Crispy Mozzarella Sticks are perfect for meal prep, making your busy weeknights a little easier! You can prepare the mozzarella sticks up to 24 hours in advance by following your usual coating steps, then place them on a baking sheet and freeze until solid. Once frozen, transfer them to a freezer-safe bag for storage; this will maintain their quality and prevent sticking together. When you're ready to enjoy them, no thawing is necessary—just fry them straight from the freezer for about 2-3 minutes until golden brown. By prepping ahead, you not only save time but also ensure deliciously crispy results whenever the craving strikes!

Expert Tips for the Best Mozzarella Sticks

  • Chill Before Frying: Keep mozzarella sticks firm by freezing them for at least 30 minutes before frying; this helps prevent cheese leakage.
  • Double-Your-Dip: For extra crunch, consider double coating your sticks by repeating the dredging steps, ensuring a thicker crust.
  • Temperature Matters: Maintain oil at precisely 180°C (350°F) for optimal frying; too low may lead to sogginess, while too high can burn the coating before the cheese melts.
  • Batch It Right: Fry in small batches to keep oil temperature steady, allowing even cooking and preventing steaming instead of frying.
  • Serve Fresh: Enjoy your mozzarella sticks right after frying for the best texture; they do lose their crunch over time.

Crispy Homemade Mozzarella Sticks Recipe FAQs

How do I choose the best mozzarella for this recipe?
Absolutely! For the perfect gooeyness, opt for fresh mozzarella cheese packed in water. Look for mozzarella that has a smooth texture without any dark spots or blemishes. Furthermore, ensure it's cut into even sticks to guarantee that it melts uniformly during frying.

How should I store leftover mozzarella sticks?
Very importantly! After frying, let the mozzarella sticks cool down, then place them in an airtight container. They will stay fresh in the fridge for up to 3 days. When you're ready to enjoy them again, reheat in the oven at 190°C (375°F) for about 10-12 minutes to restore their crispy texture.

Can I freeze mozzarella sticks, and how?
Yes, you can! After preparing the mozzarella sticks, freeze them on a baking sheet in a single layer for at least 30 minutes. Once they're firm, transfer them to a zip-top freezer bag and label with the date. They can last up to 3 months in the freezer. When you're ready to fry, you can cook them straight from frozen—just remember to adjust the frying time slightly based on their frozen state.

What should I do if the cheese leaks out during frying?
Don't worry, it happens to the best of us! To prevent cheese leakage, ensure that your mozzarella sticks are well-chilled before frying. Make sure you’re also keeping the oil temperature steady at 180°C (350°F). If they still leak, consider double coating them next time, which adds an extra layer that can help keep the cheese contained.

Are these mozzarella sticks suitable for specific dietary needs?
Very much so! If you're looking to make this recipe gluten-free, simply substitute all-purpose flour with gluten-free flour, and use gluten-free panko breadcrumbs. Additionally, for a plant-based option, you can replace the eggs with a vegan egg substitute like a flax egg or commercial vegan egg replacer. Always ensure to check the ingredients for any allergens, especially if serving to guests.

How long does it take to fry the mozzarella sticks?
Frying takes about 2-3 minutes for each batch! To achieve the perfect crispiness, carefully lower the coated mozzarella sticks into the hot oil and monitor them closely. They should be golden brown and just beginning to ooze cheese—perfect for that delightful gooey bite in your crispy mozzarella sticks recipe!

Mozzarella Sticks Recipe

Crispy Mozzarella Sticks Recipe for the Ultimate Snack Attack

This Mozzarella Sticks Recipe is a delightful nod to indulgence, transforming gooey cheese into a perfectly crispy delight.
Print Recipe Pin Recipe
Prep Time 30 minutes mins
Cook Time 8 minutes mins
Chilling Time 30 minutes mins
Total Time 1 hour hr 8 minutes mins
Servings: 4 sticks
Course: Snacks
Cuisine: American
Calories: 280
Ingredients Equipment Method Nutrition Notes

Ingredients
  

For the Batter
  • 1 cup Fresh Mozzarella Cheese Cut into sticks
  • 1 cup All-Purpose Flour Gluten-free flour works as a great substitute
  • 2 large Eggs Beaten; can use vegan egg replacer
For the Coating
  • 1 cup Panko Breadcrumbs Regular breadcrumbs can be used
  • 1 tbsp Italian Herbs (Dried) Adjust quantity to taste
  • 1 tsp Smoked Paprika Optional; omit for a cleaner taste
For Frying
  • 2 cups Vegetable Oil Canola or peanut oil works too

Equipment

  • Deep fryer
  • Shallow Dishes
  • slotted spoon

Method
 

Step-by-Step Instructions
  1. Cut fresh mozzarella cheese into sticks approximately 1/2 inch thick and 3 inches long. Place on a baking sheet and freeze for at least 30 minutes.
  2. Create a dredging station with shallow dishes: one with flour, one with beaten eggs, and another with the panko breadcrumbs mixed with Italian herbs and smoked paprika.
  3. Dredge each stick in flour, dip into beaten eggs, and roll in the panko mixture. Repeat for all sticks.
  4. Heat vegetable oil in a deep fryer or heavy-bottomed pot until it reaches 180°C (350°F).
  5. Carefully add the coated mozzarella sticks to hot oil in small batches, frying for 2-3 minutes until golden brown and cheese starts to melt.
  6. Remove fried mozzarella sticks using a slotted spoon and place on paper towels to absorb excess oil. Serve warm with dipping sauces.

Nutrition

Serving: 4sticksCalories: 280kcalCarbohydrates: 30gProtein: 12gFat: 14gSaturated Fat: 3gPolyunsaturated Fat: 1gMonounsaturated Fat: 5gCholesterol: 90mgSodium: 450mgPotassium: 180mgFiber: 2gSugar: 1gVitamin A: 5IUCalcium: 250mgIron: 1mg

Notes

For best texture, enjoy immediately after frying. Leftovers can be stored in an airtight container for up to 3 days or frozen for up to 3 months.

Tried this recipe?

Let us know how it was!

Crispy Sliced Potatoes That Will Change Your Side Dish Game

May 26, 2026 by Grace Snow Leave a Comment

As I rummaged through my pantry one evening, a bag of unassuming russet potatoes called to me, just begging for transformation. I decided to whip up Crispy Sliced Potatoes, a dish that elevates humble spuds into a crunchy sensation that perfectly complements any meal. This easy oven-baked recipe not only offers a delightful texture contrast between the golden exterior and fluffy interior but also guarantees satisfaction without the fuss—ideal for hectic weeknight dinners or pop-in guests. Plus, it’s vegetarian and gluten-free, making it a versatile side everyone can enjoy. Curious how a few simple ingredients can lead to such a tasty triumph? Let's dive in!

Why Are These Potatoes So Irresistible?

Simplicity: This recipe is incredibly easy, requiring just a few straightforward steps and basic ingredients that you probably have at home.

Versatile: You can customize the flavor with various herbs and spices, allowing you to switch things up and keep your taste buds entertained. Consider pairing these crispy delights with Parmesan Artichoke Hearts for the ultimate side dish experience!

Crowd-Pleasing: Crispy Sliced Potatoes are sure to impress at any gathering, making them a hit among family and friends.

Quick Cooking: With just 25-35 minutes in the oven, you’ll get a delicious side dish in no time, perfect for those busy weeknights.

Health-Conscious: Enjoy the satisfying crunch without the guilt; these oven-baked beauties are a healthier alternative to fried potatoes.

Textural Joy: The golden, crispy edges combined with fluffy interiors create a delightful eating experience that’s simply irresistible.

Crispy Sliced Potatoes Ingredients

• Curiosity meets flavor with this easy recipe!

For the Potatoes

  • Russet Potatoes – Their low moisture content ensures a crispy texture.

For the Coating

  • Olive Oil – Provides a delicious binding for seasonings and helps achieve that golden-brown exterior.
  • Garlic Granules – Offers a consistent garlic flavor without the chance of burning, making your Crispy Sliced Potatoes perfectly seasoned.
  • Dried Mixed Herbs – This blend of rosemary, thyme, and oregano infuses aromatic depth into the dish; fresh herbs can offer an even more vibrant taste.
  • Salt – Enhances the overall flavor; adjust to your personal preference for a perfect seasoning balance.

Optional Toppings

  • Parmesan Cheese – Add during the last few minutes of baking for a savory finish that elevates your crispy potatoes.
  • Smoked Paprika – Sprinkle for a smoky flavor kick that adds excitement to the classic.

Use these simple ingredients to whip up a dish that transforms your meals into a crispy sensation!

Step‑by‑Step Instructions for Crispy Sliced Potatoes

Step 1: Prepare Potatoes
Begin by washing your russet potatoes under cool running water to remove any dirt. Scrub them gently to ensure they are clean, then pat them dry with a kitchen towel. Next, slice the potatoes uniformly into rounds about 1/8 inch thick. This step is crucial for ensuring even cooking and achieving the perfect crunch in your Crispy Sliced Potatoes.

Step 2: Mix Seasonings
In a large mixing bowl, drizzle the sliced potatoes with olive oil. Add garlic granules, dried mixed herbs, and salt to the bowl. Toss gently to combine the ingredients, ensuring that every slice is generously coated with the oil and seasonings. This thorough mixing enhances the flavor of your Crispy Sliced Potatoes, making every bite delightful.

Step 3: Toss to Coat
Using your hands, carefully toss the potato slices in the bowl until they are evenly coated with the oil and seasonings. This step is essential for achieving optimal flavor and texture. Make sure to separate any slices that may be stuck together so they can bake evenly.

Step 4: Preheat Oven
Preheat your oven to 400°F (200°C) so it reaches the perfect temperature for baking. While the oven is heating up, line a large baking sheet with parchment paper. This will help prevent sticking and ensure that your Crispy Sliced Potatoes achieve that beautiful golden crust.

Step 5: Arrange for Baking
Lay the seasoned potato slices in a single layer on the prepared baking sheet. Be careful to avoid overlapping the slices, as this will prevent them from becoming crispy. Arrange them strategically so that there is enough space for hot air to circulate around each slice for even cooking.

Step 6: Bake
Place the baking sheet in the preheated oven and bake the Crispy Sliced Potatoes for 25 to 35 minutes. Halfway through, carefully flip the slices using a spatula to ensure even browning. Look for a golden-brown color and fork-tender texture as signs that your potatoes are ready.

Step 7: Cool Before Serving
Once baked to perfection, remove the Crispy Sliced Potatoes from the oven and allow them to cool on the baking sheet for a few minutes. This cooling period helps set the crispiness, making them even more enjoyable when served. After cooling slightly, transfer them to a serving dish and savor the crunchy goodness!

Tips for the Best Crispy Sliced Potatoes

• Dry Potatoes Well: Ensure your potato slices are completely dry before coating. Moisture leads to sogginess, while dry potatoes enhance crispiness.

• Even Slices Matter: Aim for uniform thickness (about 1/8 inch) to ensure even cooking. Irregular slices can lead to some being undercooked while others are overdone.

• Avoid Overcrowding: Lay the slices in a single layer without overlapping on the baking sheet. Crowding leads to steaming instead of crisping, impacting your Crispy Sliced Potatoes.

• Tweak Seasonings: Don’t hesitate to experiment with different herbs or spices. A touch of smoked paprika or fresh rosemary can elevate your flavor profile dramatically.

• Monitor Baking Time: Keep an eye on them in the last few minutes of baking. Oven temperatures can vary, so adjust the time as needed for that perfect golden-brown finish.

Make Ahead Options

These Crispy Sliced Potatoes are a fantastic choice for meal prep! You can slice and season the potatoes up to 24 hours in advance—just be sure to store them in an airtight container in the fridge to keep them fresh. If you want to prep even earlier, wash and slice the potatoes, then soak them in cold water (this helps prevent browning) for up to 3 days before cooking. When you’re ready to bake, simply drain and pat them dry, toss them with oil and seasonings, and bake at 400°F (200°C) for 25-35 minutes. With these make-ahead tips, you can enjoy crispy, golden potatoes that are just as delicious as when made fresh, saving you precious time on busy weeknights!

Storage Tips for Crispy Sliced Potatoes

Fridge: Store leftover Crispy Sliced Potatoes in an airtight container for up to 2 days. This helps maintain their flavor and texture.

Reheating: To regain that delightful crunch, reheat the potatoes in a preheated oven at 375°F (190°C) for 10-15 minutes. Avoid microwaving, as it can make them soggy.

Freezer: For longer storage, freeze the baked potatoes in a single layer on a baking sheet. Once frozen solid, transfer them to a freezer-safe bag for up to 2 months.

Thawing: When ready to enjoy, bake straight from frozen at 400°F (200°C) for about 15-20 minutes to crisp them up again, keeping the goodness of these Crispy Sliced Potatoes intact.

Crispy Sliced Potatoes Variations

Feel free to let your creativity shine as you customize these delightful potatoes to match your tastebuds!

  • Smoky Flavor: Add smoked paprika for a smoky flavor kick that tantalizes the senses. This twist offers a warm depth that makes each bite exciting.

  • Cheesy Finish: Top with parmesan cheese during the last few minutes of baking for a savory finish. The rich, nutty flavor enhances the overall taste and adds a crispy, cheesy edge.

  • Herbaceous Twist: Toss with fresh rosemary and garlic for an aromatic variation that fills your kitchen with mouthwatering scents. Fresh herbs can elevate the flavor beautifully!

  • Spicy Kick: Sprinkle on some cayenne pepper or red pepper flakes for a touch of heat that can awaken the palate. This fiery addition contrasts wonderfully with the crispy texture.

  • Veggie Boost: Mix in thinly sliced carrots or zucchini with the potato slices for added nutrition and flavor. It’s a lovely way to sneak some extra veggies into your side dish.

  • Mediterranean Flair: Incorporate a blend of dried oregano, thyme, and lemon zest to evoke a Mediterranean vibe. This fragrance will transport your taste buds to sunny shores.

  • Sweet & Savory: Drizzle with a touch of honey before serving to balance the saltiness with a hint of sweetness, making for a delightful sweet-savory combination that's hard to resist.

To discover more thrilling flavors, consider pairing these crispy gems with Smoky Sweet Potatoes or a delightful Fish Taco Bowl for a memorable meal!

What to Serve With Crispy Sliced Potatoes

These golden, crunchy delights are perfect for completing your favorite meals!

  • Grilled Chicken: Juicy, tender chicken brings a savory contrast that pairs beautifully with the crispy texture of the potatoes.
  • Creamy Coleslaw: The cool, creamy elements of coleslaw provide a refreshing crunch that complements the warm, crispy potatoes perfectly.
  • Tender Steak: The rich, juicy flavors of a well-cooked steak make a hearty pairing—ideally matched with the crunch of your potatoes.
  • Garlic Aioli: Whip up this creamy dip as a flavorful accompaniment; it enhances the potatoes' taste with a touch of garlic and tanginess.
  • Fresh Garden Salad: A bright and colorful salad brings freshness and balance to your plate, contrasting nicely with the crispy slices.
  • Spicy Sriracha Mayo: For those who love a bit of heat, this spicy dipping sauce adds a zesty kick, making your potatoes even more exciting.
  • Roasted Vegetables: Colorful, caramelized veggies provide additional texture and flavor, making your meal more wholesome and satisfying.
  • Sparkling Lemonade: Enjoy this refreshing drink alongside your meal; its citrus notes beautifully lift the savory flavors of the crispy slices.

Crispy Sliced Potatoes Recipe FAQs

What type of potatoes are best for this recipe?
Absolutely! For this recipe, Russet potatoes are preferred due to their low moisture content, which helps them achieve that perfect crispy texture. You can also experiment with Yukon Golds for a creamier flavor, but be aware they may not become as crispy.

How should I store leftover Crispy Sliced Potatoes?
After enjoying your crispy delights, store any leftovers in an airtight container in the fridge for up to 2 days. This helps maintain their flavor and texture, although they are best enjoyed fresh. To reheat, place them on a baking sheet in a preheated oven at 375°F (190°C) for about 10-15 minutes for that crunchy goodness!

Can I freeze Crispy Sliced Potatoes?
Yes, you can! To freeze your baked potatoes, first allow them to cool completely. Then, lay them in a single layer on a baking sheet and freeze until solid. Once frozen, transfer them to a freezer-safe bag, and they can be stored for up to 2 months. When you’re ready to enjoy them, bake straight from frozen at 400°F (200°C) for about 15-20 minutes until crispy.

What should I do if my potatoes aren’t getting crisp?
If your potatoes are coming out soggy, make sure they are entirely dry before coating them with oil. Additionally, avoid overcrowding the baking sheet, as this can cause steaming instead of crisping. Baking them in a single layer provides the necessary air circulation for optimal crispness.

Are Crispy Sliced Potatoes suitable for dietary restrictions?
Very! This recipe is vegetarian and gluten-free, making it an excellent option for a variety of diets. However, if you have specific allergies (like to garlic or certain herbs), feel free to swap those out for alternatives that suit your needs. Always check labels for pre-packaged seasonings as a precaution!

How can I make these potatoes extra flavorful?
Absolutely! You can easily amp up the flavor profile by adding smoked paprika or a sprinkle of Parmesan cheese during the last few minutes of baking. Fresh herbs like rosemary or thyme can also enhance the aroma and taste of your crispy potatoes. Enjoy experimenting!

Crispy Sliced Potatoes

Crispy Sliced Potatoes That Will Change Your Side Dish Game

Crispy Sliced Potatoes are a delicious, gluten-free snack that elevates humble spuds into a crunchy sensation.
Print Recipe Pin Recipe
Prep Time 10 minutes mins
Cook Time 30 minutes mins
Cooling Time 5 minutes mins
Total Time 45 minutes mins
Servings: 4 servings
Course: Snacks
Cuisine: American
Calories: 150
Ingredients Equipment Method Nutrition Notes

Ingredients
  

For the Potatoes
  • 4 medium Russet Potatoes Low moisture content ensures crispy texture.
For the Coating
  • 3 tablespoons Olive Oil Provides binding for seasonings.
  • 1 teaspoon Garlic Granules Consistent garlic flavor.
  • 2 teaspoons Dried Mixed Herbs Blend of rosemary, thyme, and oregano.
  • 1 teaspoon Salt Adjust to personal preference.
Optional Toppings
  • 1/4 cup Parmesan Cheese Add during last few minutes of baking.
  • 1 teaspoon Smoked Paprika For a smoky flavor kick.

Equipment

  • Oven
  • Baking Sheet
  • Mixing Bowl
  • Spatula
  • Kitchen Towel

Method
 

Step‑by‑Step Instructions
  1. Wash the russet potatoes under cool running water, scrub gently, then pat dry.
  2. Slice the potatoes uniformly into rounds about 1/8 inch thick.
  3. In a large bowl, drizzle the sliced potatoes with olive oil, add garlic granules, dried herbs, and salt. Toss to combine.
  4. Carefully toss the potato slices until evenly coated.
  5. Preheat your oven to 400°F (200°C) and line a baking sheet with parchment paper.
  6. Lay the seasoned potato slices in a single layer on the baking sheet.
  7. Bake for 25 to 35 minutes, flipping halfway through for even browning.
  8. Allow the potatoes to cool for a few minutes after removing from the oven.

Nutrition

Serving: 1servingCalories: 150kcalCarbohydrates: 30gProtein: 3gFat: 4gSaturated Fat: 1gPolyunsaturated Fat: 0.5gMonounsaturated Fat: 2.5gSodium: 250mgPotassium: 600mgFiber: 3gSugar: 1gVitamin C: 15mgCalcium: 2mgIron: 6mg

Notes

Ensure potato slices are dry to enhance crispiness. Experiment with different herbs or spices to elevate flavor.

Tried this recipe?

Let us know how it was!

Savory Garlic Cheese Bread Made Easy in Your Bread Machine

May 26, 2026 by Grace Snow Leave a Comment

The aroma wafting from my kitchen was like an invitation to dance – the perfect hint of garlic mingling with melted cheese, promising comfort and delight. My journey to make the ultimate Bread Machine Garlic Cheese Bread changed the way I feel about quick homemade eats forever. With just a handful of basic ingredients and minimal hands-on time, this recipe transforms into a sought-after side or snack that sparks joy at the dinner table. It's incredibly easy to whip up, making it ideal for busy weeknights or special gatherings. Plus, the best part? You can customize it by adding your favorite cheese or herbs to personalize each loaf. Are you ready to dive into this cheesy masterpiece?

Why Is This Garlic Cheese Bread Unique?

Simplicity, Just load your bread machine with a few ingredients, and let it do the hard work! Ideal for busy cooks or anyone craving a homemade touch without the fuss.

Irresistible Aroma, The tantalizing blend of garlic and cheese fills your kitchen with mouthwatering scents, making it impossible to resist serving fresh-baked slices to family and friends.

Customizable, Why settle for ordinary? Experiment with different cheeses, like pepper jack or mozzarella, and add herbs such as basil for a personal twist—your taste buds will thank you!

Versatile Companion, Perfect alongside soups, salads, or even as a snack on its own, this Garlic Cheese Bread adapts to any meal. Try it with our Cornbread Breakfast Casserole for a delightful brunch!

Crowd-Pleasing, This bread is sure to impress guests, making it a hit at gatherings or family dinners. Who can resist the gooey cheese and buttery garlic goodness?

Garlic Cheese Bread Ingredients

• Get ready to create a flavor-packed loaf!

For the Dough

  • Warm Water – Activates yeast; keep the temperature around 110°F for best results.
  • Sugar – Feeds yeast for rising; adjust based on your preferred sweetness.
  • Olive Oil – Adds moisture and richness; can be substituted with melted butter for a different flair.
  • Bread Flour – Provides structure and chewiness; all-purpose flour is softer but will work in a pinch.
  • Salt – Enhances flavor; crucial for balancing the sweetness and aiding yeast activity.
  • Garlic Powder – Infuses the dough with a gentle garlic flavor; fresh minced garlic can elevate the taste even more.
  • Active Dry Yeast – Leavens the bread, ensuring a light, fluffy texture; always check freshness for optimal results.

For the Cheese Filling

  • Shredded Cheese (Cheddar or Mozzarella) – Delivers that creamy flavor; feel free to mix it up with other cheese types for your ideal Garlic Cheese Bread experience.

Enjoy creating this delightful Garlic Cheese Bread that’s set to be a family favorite!

Step‑by‑Step Instructions for Garlic Cheese Bread

Step 1: Combine Wet Ingredients
In your bread machine pan, add 1 cup of warm water (around 110°F), 2 tablespoons of sugar, and 2 tablespoons of olive oil. Gently stir to dissolve the sugar, creating a sweet base for your Garlic Cheese Bread. This mixture will activate the yeast, so ensure the water is not too hot to avoid killing the yeast.

Step 2: Mix Dry Ingredients
In a separate mixing bowl, combine 3 cups of bread flour, 1 teaspoon of salt, 1 teaspoon of garlic powder, and 2 teaspoons of active dry yeast. Stir the dry ingredients well to ensure even distribution, then carefully pour this mixture over the liquid in the bread machine pan. This layering helps with the initial formation of the dough.

Step 3: Set the Bread Machine
Close the lid of the bread machine and select the dough setting. Start the machine and let it knead the mixture for about 1 hour and 30 minutes. Keep an eye on it during the first few minutes to ensure that it forms a smooth, elastic dough without any dry flour lumps.

Step 4: Incorporate Cheese
Once the dough cycle is complete, open the bread machine and add 1 cup of shredded cheese (cheddar or mozzarella) to the dough. Close the lid again and restart the machine for a few more minutes to thoroughly mix the cheese into the dough, resulting in a deliciously cheesy Garlic Cheese Bread.

Step 5: Shape the Dough
Carefully remove the dough from the bread machine onto a floured surface. Shape the dough into a loaf and place it in a greased loaf pan. Cover it with a clean kitchen towel and let it rise in a warm area for about 30 minutes, or until the dough has doubled in size, puffing up beautifully.

Step 6: Preheat and Bake
While the dough is rising, preheat your oven to 350°F. Once the dough has risen, place the loaf pan in the oven and bake for 30–35 minutes. Look for a golden-brown crust and a hollow sound when tapped on the bottom to know your Garlic Cheese Bread is ready.

Step 7: Cool Before Slicing
After baking, remove the loaf from the oven and allow it to cool in the pan for about 10 minutes. Then, transfer the bread to a wire rack to cool completely. Allowing the bread to cool helps set the texture, making it easier to slice into perfect pieces of cheesy goodness.

Tips for the Best Garlic Cheese Bread

Temperature Matters: Ensure your warm water is around 110°F to properly activate the yeast. Too hot can kill it, leading to dense bread.

Choose the Right Flour: Opt for bread flour for a chewier texture. All-purpose flour may yield a softer loaf, which can be tempting but will alter the final result of your Garlic Cheese Bread.

Don’t Rush Cooling: Allow the bread to cool completely before slicing. This prevents a gummy texture and ensures perfect slices every time.

Experiment with Cheese: Try mixing various cheeses like pepper jack for a spicy kick or gouda for a smoky flavor—personalizing your Garlic Cheese Bread adds unforgettable flair!

Watch the Mixing: After adding cheese, ensure it’s evenly mixed into the dough in the bread machine. This distribution enhances flavor and texture throughout.

Check Yeast Freshness: For the best rise, always use fresh active dry yeast. Old yeast can lead to flat, disappointing bread.

Garlic Cheese Bread Variations

Feel free to unleash your creativity in the kitchen and customize your Garlic Cheese Bread to suit your taste buds!

  • Spicy Twist: Add crushed red pepper flakes to the dough for a zesty kick that pairs incredibly well with the gooey cheese.

  • Fresh Herbs: Fold in 2 tablespoons of fresh chopped herbs like parsley or chives for a burst of flavor and vibrant green color.

  • Cheese Variety: Swap out cheddar for a blend of your favorites, like gouda and fontina, to boost the flavor profile. Try combining different cheeses for a delightful surprise in every bite!

  • Garlic Lovers: Amplify the garlic experience by adding 2-3 cloves of minced fresh garlic into the wet mix. The aroma will be more irresistible than ever!

  • Savory Additions: Mix in sun-dried tomatoes or a handful of olives for added richness and a Mediterranean flair. These ingredients make every slice a tasty adventure.

  • Dairy-Free Delight: Experiment with dairy-free cheese alternatives to make a delicious vegan version that everyone can enjoy. Your bread will still be cheesy and flavorful!

  • For a Crunch: Top the dough with a sprinkle of parmesan cheese before baking to create a beautiful golden crust that adds both flavor and texture.

  • Heat Levels: If you love a kick, add jalapeño slices to the dough or drizzle with a spicy garlic oil after baking for enhanced flavor and heat.

Explore these tempting variations, and if you're in the mood for more scrumptious recipes, consider pairing this Garlic Cheese Bread with our Honey Garlic Chicken or a slice of Potato Blue Cheese for a delightful meal!

How to Store and Freeze Garlic Cheese Bread

Room Temperature: Store leftover Garlic Cheese Bread in an airtight container or tightly wrapped in foil at room temperature for up to 3 days to maintain freshness.

Fridge: If you plan to keep it longer, store the bread in the refrigerator for up to 1 week. Wrap it well to prevent it from drying out.

Freezer: For longer storage, slice the bread and wrap individual pieces in plastic wrap, then place them in a freezer bag. Enjoy within 3 months for optimal flavor.

Reheating: To enjoy a warm slice, reheat in the oven at 350°F for about 10 minutes, or toast slices in a skillet to regain that delightful crust.

What to Serve with Easy Bread Machine Garlic Cheese Bread

This garlic-infused, cheesy delight pairs beautifully with a variety of sides, transforming your meal into a heartwarming experience.

  • Creamy Tomato Soup: Its rich, tangy flavors complement the buttery garlic bread while the textures create a comforting duo. Perfect for a cozy night in!
  • Garden Salad: Fresh, crisp greens with a zesty vinaigrette add a refreshing crunch, balancing the richness of the bread beautifully. Every bite offers a garden-fresh moment.
  • Spaghetti Aglio e Olio: The simplicity of this garlic and olive oil pasta enhances the aroma of garlic cheese bread, creating a harmonious Italian-inspired dinner.
  • Roasted Vegetables: Seasonal roasted veggies bring a delightful sweetness and smoky flavor, rounding out your plate while providing vibrant colors.
  • Herbed Butter: A side of herbed butter for slathering on warm slices elevates the flavor experience, perfect for those who love extra decadence.
  • Chardonnay: A chilled glass of chardonnay highlights the cheese's creaminess and balances the garlic's boldness, making each sip delightful.
  • Olive Tapenade: Spread atop crunchy pieces, this savory tapenade adds depth and robust flavor, bringing a Mediterranean touch to your gatherings.
  • Baked Zucchini Fries: Crispy zucchini fries introduce a fun texture contrast and lightness, pairing wonderfully with each cheesy bite.
  • Chocolate Lava Cake: For a sweet finish after your savory meal, serve with a warm chocolate lava cake—richness meets comfort in every forkful!

Make Ahead Options

This Garlic Cheese Bread is perfect for meal prep enthusiasts looking to save time on busy weeknights! You can prepare the dough up to 24 hours in advance by following steps 1 through 4, then storing the shaped loaf in the refrigerator, covered with plastic wrap to prevent drying out. Before baking, allow the bread to come to room temperature for about 30 minutes and let it rise for the recommended time. This ensures that your Garlic Cheese Bread turns out just as delicious and fluffy as if made fresh that day. Whether you’re serving for family dinners or guests, your make-ahead bread will impress everyone with minimal effort!

Garlic Cheese Bread Recipe FAQs

What should I look for when selecting garlic for the recipe?
Absolutely! When choosing garlic, look for firm bulbs without dark spots or sprouting. The cloves should feel dry and not squishy. Fresh garlic will give your Garlic Cheese Bread a robust flavor.

How long does Garlic Cheese Bread stay fresh?
This delightful bread can be stored at room temperature in an airtight container for up to 3 days. If you want it to last longer, it’s best to refrigerate it for up to a week, ensuring it’s tightly wrapped to prevent drying out.

Can I freeze Garlic Cheese Bread?
Yes, you can! To freeze, slice the bread first for easier access later. Wrap each slice in plastic wrap, and then place them in an airtight freezer bag. It can be stored for up to 3 months. When ready to enjoy, simply reheat in the oven for about 10 minutes at 350°F or toast slices directly in a skillet.

What should I do if my dough isn't rising properly?
Very! If your dough isn’t rising, check that your yeast is fresh. The water temperature is crucial too; it should be around 110°F, as using water that is too hot can kill the yeast. If you suspect the yeast is old, try adding a teaspoon of sugar to the warm water and let it sit for 5-10 minutes. If it bubbles, you’re good to go!

Is this Garlic Cheese Bread suitable for people with lactose intolerance?
If someone in your household is lactose intolerant, you can use dairy-free cheese alternatives in this recipe! There are many great lactose-free cheeses available that melt well and will still give you that delicious cheesy flavor.

What can I do to add extra flavor to my Garlic Cheese Bread?
Absolutely! Consider adding herbs like basil or oregano for an Italian flare, or mix in some sun-dried tomatoes or olives to elevate the flavor even more. You could also use different cheeses such as pepper jack for a spicy twist!

Garlic Cheese Bread

Savory Garlic Cheese Bread Made Easy in Your Bread Machine

This Garlic Cheese Bread is an irresistible and easy make in a bread machine, perfect for any snack or side dish.
Print Recipe Pin Recipe
Prep Time 15 minutes mins
Cook Time 35 minutes mins
Rising Time 30 minutes mins
Total Time 1 hour hr 20 minutes mins
Servings: 8 slices
Course: Snacks
Cuisine: American
Calories: 180
Ingredients Equipment Method Nutrition Notes

Ingredients
  

For the Dough
  • 1 cup Warm Water Around 110°F
  • 2 tablespoons Sugar Adjust based on sweetness
  • 2 tablespoons Olive Oil Can substitute with melted butter
  • 3 cups Bread Flour All-purpose flour can work
  • 1 teaspoon Salt Enhances flavor
  • 1 teaspoon Garlic Powder Fresh minced garlic can be used
  • 2 teaspoons Active Dry Yeast Check freshness
For the Cheese Filling
  • 1 cup Shredded Cheese (Cheddar or Mozzarella) Mix with other cheese types if desired

Equipment

  • Bread Machine

Method
 

Step-by-Step Instructions
  1. In your bread machine pan, add warm water, sugar, and olive oil. Stir to dissolve, activating the yeast.
  2. In a separate bowl, combine bread flour, salt, garlic powder, and active dry yeast. Pour over the liquid in the bread machine.
  3. Set the bread machine to dough setting and start. Allow it to knead for about 1 hour and 30 minutes.
  4. Once the dough cycle is complete, add shredded cheese to the dough and restart the machine to mix thoroughly.
  5. Remove the dough from the machine onto a floured surface, shape into a loaf, and place in a greased loaf pan. Let it rise for about 30 minutes.
  6. Preheat your oven to 350°F. Bake the loaf for 30–35 minutes until golden-brown.
  7. Cool the bread in the pan for 10 minutes before transferring it to a wire rack to cool completely.

Nutrition

Serving: 1sliceCalories: 180kcalCarbohydrates: 25gProtein: 6gFat: 5gSaturated Fat: 2gPolyunsaturated Fat: 0.5gMonounsaturated Fat: 3gCholesterol: 10mgSodium: 300mgPotassium: 150mgFiber: 1gSugar: 1gVitamin A: 200IUCalcium: 150mgIron: 1mg

Notes

For the best results, ensure that the water temperature is correct and allow the bread to cool completely before slicing.

Tried this recipe?

Let us know how it was!

Cinnamon Sugar Soft Pretzels: Irresistibly Soft and Sweet

May 25, 2026 by Grace Snow Leave a Comment

As I watched the clouds of flour settle around my kitchen, the warm scent of cinnamon started to weave its way through the air, transporting me back to my childhood. Making Cinnamon Sugar Soft Pretzels has a magical quality, transforming simple ingredients into pillowy, golden delights that are perfect for devouring and sharing. This recipe stands out not only for being beginner-friendly but also for delivering an indulgent treat that makes any occasion special. Picture cozy evenings, festive gatherings, or lazy weekends made sweeter with warm pretzels, crispy on the outside and soft inside. Plus, they’re surprisingly simple to whip up, perfect for anyone looking to ditch fast food for a homemade snack. Curious to dive into this delightful baking adventure? Let’s get started!

Why are these pretzels a must-try?

Beginner-Friendly: Even if you’re new to baking, this recipe guides you step-by-step to success.

Indulgent Flavor: The combination of warm cinnamon and sugar creates an irresistible sweetness that’s hard to resist.

Cozy Atmosphere: The aroma wafting through your kitchen will evoke comforting memories with every batch.

Perfect for Sharing: These pretzels are a hit at any gathering, making them great for movie nights or festive celebrations.

Quick to Make: In less than two hours, you’ll have a warm snack that rivals any store-bought treat.

Ready to explore more delightful recipes? Check out these links to other amazing Pumpkin Cinnamon Roll treats that will keep you baking soft treasures!

Cinnamon Sugar Soft Pretzel Ingredients

For the Dough
• Active Dry Yeast – Essential for dough rise; fresh yeast is key to fluffy pretzels.
• Warm Water – Activates the yeast; ensure it's warm, not hot, to keep the yeast alive.
• Granulated Sugar – Sweetens the dough and feeds the yeast; extra sugar for topping enhances flavor.
• All-Purpose Flour – Provides structure; substitute bread flour for extra chewiness.
• Salt – Enhances flavor and balances sweetness; kosher salt is a great choice.
• Unsalted Butter, Melted – Adds richness and a golden color post-baking; vegetable oil works too.

For the Boiling Solution
• Baking Soda – Crucial for creating that signature chewy crust; don’t skip this step!

For the Egg Wash
• Large Egg, Beaten – Gives a glossy finish to your pretzels; milk can be used instead for a non-shiny look.

For the Coating
• Ground Cinnamon – Offers warm spice flavor that perfectly complements the sweetness; adjust according to personal taste.
• Granulated Sugar – Mix with cinnamon for that irresistible sweet topping after baking.

Get ready to indulge in the wonderfully warm and sweet experience of making Cinnamon Sugar Soft Pretzels!

Step‑by‑Step Instructions for Cinnamon Sugar Soft Pretzels

Step 1: Prepare the Yeast
In a small bowl, combine 1 cup of warm water (about 110°F) and 2 1/4 teaspoons of active dry yeast. Stir in 1 tablespoon of granulated sugar and let the mixture sit for 5 to 10 minutes until it becomes foamy and fragrant—this indicates that the yeast is activated and ready for the dough.

Step 2: Mix Dry Ingredients
In a large mixing bowl, combine 3 1/2 cups of all-purpose flour with 1 teaspoon of salt. Whisk together to ensure even distribution of the salt, which enhances the flavor. This dry mixture is crucial in creating the dough for your Cinnamon Sugar Soft Pretzels, so be thorough in your mixing.

Step 3: Combine Wet and Dry Ingredients
Once your yeast mixture is foamy, pour it into the bowl with the flour and salt. Add 2 tablespoons of melted unsalted butter to enrich the dough. Stir with a wooden spoon or spatula until a shaggy dough forms, which will begin to come together and pull away from the sides of the bowl.

Step 4: Knead the Dough
Transfer the dough to a floured surface and knead it for 5 to 7 minutes, until it is smooth and elastic. The dough should feel soft and slightly tacky but not sticky. Kneading is essential for developing gluten, which gives your pretzels their delightful chewiness.

Step 5: Let the Dough Rise
Place the kneaded dough in a lightly oiled bowl, covering it with a damp towel. Allow the dough to rise at room temperature for 1 to 1.5 hours, or until it has doubled in size. You’ll know it’s ready when you gently poke it and the indentation springs back slowly.

Step 6: Shape the Pretzels
After the dough has risen, punch it down gently to release the air, then divide it into 8 equal portions. Roll each portion into an 18-inch rope, and shape them into traditional pretzel twists. This step gives your Cinnamon Sugar Soft Pretzels their iconic look and form.

Step 7: Preheat and Prepare for Boiling
Preheat your oven to 375°F (190°C) and bring 10 cups of water to a boil in a large pot. Once boiling, carefully add 1/4 cup of baking soda to the water. This alkaline solution is key for achieving that distinctive chewy crust on your pretzels.

Step 8: Boil the Pretzels
Using a slotted spoon, gently lower each pretzel into the boiling water, one at a time, for about 30 seconds. This step helps set the texture of the dough and creates a beautiful crust. After boiling, transfer the pretzels to a parchment-lined baking sheet, ensuring they aren't touching.

Step 9: Apply Egg Wash and Sugar Topping
Brush each boiled pretzel with the beaten egg for a shiny finish. In a small bowl, mix together granulated sugar and ground cinnamon, then generously sprinkle this mixture over the pretzels. This sweet topping transforms your soft pretzels into an irresistible treat.

Step 10: Bake to Perfection
Place the prepared pretzels in the preheated oven and bake for 12 to 15 minutes, or until golden brown. Keep an eye on them; they should look beautifully bronzed with a crispy exterior. The aroma filling your kitchen will signal that your Cinnamon Sugar Soft Pretzels are nearly ready.

Step 11: Cool and Serve
Once baked, allow the pretzels to cool on a wire rack for a few minutes before serving. This cooling period helps them firm up a bit. Enjoy them warm for the best texture, and consider pairing with a sweet dip or just savoring them as they are.

Make Ahead Options

These Cinnamon Sugar Soft Pretzels are fantastic for busy home cooks looking to save time without sacrificing flavor! You can prepare the dough up to 24 hours in advance by mixing it and allowing it to rise, then refrigerate it instead of letting it rise at room temperature. When you're ready to serve, simply let the dough come to room temperature for about 30 minutes before shaping it into pretzels. The pretzels can also be boiled and baked, then cooled and stored in an airtight container for up to 3 days. To maintain their delightful chewiness, reheat them in the oven at 350°F (175°C) for a few minutes before enjoying. With these make-ahead tips, you'll have warm, delicious pretzels ready in no time!

Cinnamon Sugar Soft Pretzels Variations

Feel free to get creative with your Cinnamon Sugar Soft Pretzels by exploring these fun variations that heighten the flavor and joy of this beloved treat!

  • Gluten-Free: Substitute all-purpose flour with a 1:1 gluten-free flour blend to create fantastic soft pretzels suitable for gluten-sensitive diets.
  • Cheesy: Incorporate shredded cheese into the dough before kneading or sprinkle some on top before baking for a savory twist.
  • Spiced Up: Add a pinch of nutmeg or pumpkin spice to the cinnamon sugar topping for an unexpected autumn-inspired flavor that's simply divine!
  • Dairy-Free: Use coconut or almond milk instead of the egg wash for brushing while leaving out the butter for a dairy-free pretzel.
  • Dessert Style: Top your pretzels with a drizzle of royal icing or melted chocolate for an indulgent dessert version that satisfies a sweet tooth.
  • Savory Garlic: Mix minced garlic or garlic powder into the dough, then finish with a sprinkle of sea salt for a savory garlic pretzel that pairs beautifully with marinara sauce.
  • Stuffed: Roll additional toppings like caramel, chocolate chips, or cream cheese into the center of each rope—imagine the lovely surprise when you bite into these soft delights!
  • Pretzel Bites: Cut the dough into bite-sized pieces instead of long ropes for easy snacking; simply adjust the boiling time accordingly.

For even more delightful ideas and recipes, you might want to check out these irresistible Pumpkin Cinnamon Roll creations that are perfect for your baking adventures!

What to Serve with Cinnamon Sugar Soft Pretzels?

To elevate your Cinnamon Sugar Soft Pretzels into a delightful dining experience, here are some perfect pairings that harmonize beautifully with their sweet, spiced flavor.

  • Hot Chocolate: A rich, creamy cup of hot chocolate complements the sweetness, adding warmth to this cozy treat.
  • Caramel Dip: Drizzling warm caramel over the pretzels creates a delightful contrast, intensifying the indulgence.
  • Cinnamon-Honey Butter: This sweet spread is a match made in heaven, enhancing the pretzel's flavor profile with an extra layer of sweetness.
  • Coffee: A steaming cup of freshly brewed coffee cuts through the sweetness, offering a delightful balance to the cinnamon sugar.
  • Apple Slices: Crisp, tart apple slices provide a refreshing contrast that brightens up your pretzel experience.
  • Vanilla Ice Cream: Serve these warm pretzels à la mode, where the ice cream melts slightly into each bite for a truly decadent dessert.
  • Milk: A classic pairing, a cold glass of milk will make you feel like a kid again every time you dip your pretzel in.
  • Chocolate Sauce: Drizzle chocolate over the pretzels for a rich, decadent dessert experience that is hard to resist.
  • Fruit Compote: A homemade berry or apple compote adds a fruity sweetness that pairs wonderfully, creating a fresh palate cleanser after the cinnamon sugar.
  • Sparkling Cider: For a non-alcoholic drink, bubbly sparkling cider brings a festive touch to your pretzel enjoyment, especially during celebrations.

How to Store and Freeze Cinnamon Sugar Soft Pretzels

Room Temperature: Store cooked pretzels in an airtight container at room temperature for up to 2 days for optimal freshness.

Refrigeration: Keep in the fridge for 4-5 days; however, they may lose some crispness. Reheat before serving to revive their delightful texture.

Freezing: Wrap cooled pretzels in plastic wrap or freeze in a zip-top bag for up to 2-3 months. Reheat in the oven at 350°F (175°C) until warmed through.

Reheating: For the best results, reheat your Cinnamon Sugar Soft Pretzels in the oven rather than the microwave to maintain their crispy exterior.

Expert Tips for Cinnamon Sugar Soft Pretzels

Perfect Water Temp: Ensure your warm water is around 110°F; too hot can kill the yeast, affecting rise.

Kneading Essentials: Knead until the dough is smooth and elastic. This builds gluten, essential for the perfect chewy texture.

Boiling Matters: Don’t skip the baking soda water bath; it’s crucial for that signature chewy crust and golden color.

Mind the Egg Wash: Brush evenly with the beaten egg for a shiny finish. For less shine, milk is a suitable substitute.

Serve Warm: Enjoy these Cinnamon Sugar Soft Pretzels fresh out of the oven for the best flavor and texture.

Cinnamon Sugar Soft Pretzels Recipe FAQs

How can I choose the best yeast for this recipe?
Absolutely! Always check the expiration date on your active dry yeast; it should be fresh for optimal rise. If you prefer instant yeast, you can substitute it in a 1:1 ratio. Just remember that instant yeast doesn’t need to be activated in warm water—it can be mixed directly with dry ingredients.

What’s the best way to store leftover pretzels?
For room temperature storage, simply keep your Cinnamon Sugar Soft Pretzels in an airtight container for up to 2 days. If you want to preserve them longer, you can refrigerate them for about 4-5 days, but note they may lose some of their crispiness. A quick reheat in the oven will bring back their delightful texture!

Can I freeze pretzels for later?
Definitely! To freeze your pretzels, wrap each one in plastic wrap, then place them in a zip-top freezer bag. They’ll stay fresh for up to 2-3 months. When you’re ready to enjoy, reheat them in the oven at 350°F (175°C) until heated through, restoring that wonderful crispy exterior.

What should I do if my dough didn’t rise properly?
If your dough hasn’t risen, check a few things: ensure your yeast is fresh and the water you used was at the right temperature (around 110°F, not hot). If the dough still fails to rise after 1.5 hours, try moving it to a warmer location or allowing it to sit a bit longer. Patience is key here! Don’t worry; you can still use the dough for other projects if needed.

Are there any dietary considerations I should keep in mind?
Very! If you have allergies, be cautious with the ingredients. Substitute all-purpose flour with a gluten-free blend if needed, and use non-dairy milk instead of egg for the wash if you prefer a vegan option. Remember to check labels for hidden allergens, especially in your toppings.

How long can I reheat pretzels once they are frozen?
When reheating frozen Cinnamon Sugar Soft Pretzels, bake them at 350°F (175°C) for around 10-15 minutes, until warmed through. This method keeps them crispy on the outside while remaining soft inside—just like they were fresh from the oven!

Cinnamon Sugar Soft Pretzels

Cinnamon Sugar Soft Pretzels: Irresistibly Soft and Sweet

Cinnamon Sugar Soft Pretzels are irresistibly soft and sweet, perfect for sharing at any occasion.
Print Recipe Pin Recipe
Prep Time 30 minutes mins
Cook Time 15 minutes mins
Rising Time 1 hour hr 30 minutes mins
Total Time 2 hours hrs 15 minutes mins
Servings: 8 pretzels
Course: Snacks
Cuisine: American
Calories: 200
Ingredients Equipment Method Nutrition Notes

Ingredients
  

For the Dough
  • 2 1/4 teaspoons active dry yeast Fresh yeast is key for fluffy pretzels.
  • 1 cup warm water Ensure it's warm, not hot, to keep the yeast alive.
  • 1 tablespoon granulated sugar Feeds the yeast; extra sugar for topping enhances flavor.
  • 3 1/2 cups all-purpose flour Substitute bread flour for extra chewiness.
  • 1 teaspoon salt Kosher salt is a great choice.
  • 2 tablespoons unsalted butter Melted; adds richness and golden color.
For the Boiling Solution
  • 1/4 cup baking soda Crucial for creating that signature chewy crust.
For the Egg Wash
  • 1 large egg Beaten; gives a glossy finish.
For the Coating
  • 2 tablespoons ground cinnamon Adjust according to personal taste.
  • 1/4 cup granulated sugar Mix with cinnamon for topping after baking.

Equipment

  • Mixing bowls
  • Wooden spoon
  • slotted spoon
  • Baking Sheet
  • wire rack
  • Pot for boiling

Method
 

Step-by-Step Instructions
  1. Prepare the Yeast: In a small bowl, combine warm water and active dry yeast. Stir in granulated sugar and let it sit for 5 to 10 minutes until foamy.
  2. Mix Dry Ingredients: In a large mixing bowl, combine all-purpose flour and salt. Whisk together thoroughly.
  3. Combine Wet and Dry Ingredients: Pour the yeast mixture into the flour and salt bowl. Add melted unsalted butter and stir until a shaggy dough forms.
  4. Knead the Dough: Transfer the dough to a floured surface and knead for 5 to 7 minutes until smooth and elastic.
  5. Let the Dough Rise: Place the dough in a lightly oiled bowl, cover with a damp towel, and allow it to rise for 1 to 1.5 hours until doubled in size.
  6. Shape the Pretzels: Punch down the dough, divide into 8 portions, roll each into an 18-inch rope, and shape into pretzel twists.
  7. Preheat and Prepare for Boiling: Preheat the oven to 375°F and bring 10 cups of water to boil; add baking soda carefully.
  8. Boil the Pretzels: Lower each pretzel into the boiling water for about 30 seconds using a slotted spoon, then transfer to a parchment-lined baking sheet.
  9. Apply Egg Wash and Sugar Topping: Brush boiled pretzels with the beaten egg, then sprinkle the sugar and cinnamon mixture over them.
  10. Bake to Perfection: Bake for 12 to 15 minutes until golden brown and crispy, enjoying the aroma that fills the kitchen.
  11. Cool and Serve: Let pretzels cool on a wire rack for a few minutes before serving warm.

Nutrition

Serving: 1pretzelCalories: 200kcalCarbohydrates: 35gProtein: 4gFat: 6gSaturated Fat: 3gPolyunsaturated Fat: 1gMonounsaturated Fat: 2gCholesterol: 45mgSodium: 400mgPotassium: 120mgFiber: 1gSugar: 7gVitamin A: 200IUCalcium: 20mgIron: 1.5mg

Notes

Enjoy these pretzels fresh out of the oven for the best flavor and texture.

Tried this recipe?

Let us know how it was!

Mini High Protein Cottage Cheese Pizzas for Guilt-Free Indulgence

May 21, 2026 by Grace Snow Leave a Comment

As the oven warms and fills the kitchen with that irresistible aroma of baking bread, I can’t help but feel a little thrill. Today, I’m whipping up some delightful Mini High Protein Cottage Cheese Pizzas that will have everyone raving about a dish that's both familiar and refreshingly new. These guilt-free goodies are not only quick to prepare, making them a perfect solution for busy nights, but they also pack a wholesome protein punch that keeps you feeling satisfied. With a customizable base and a crispy, cheesy finish, they invite creativity in every bite. Whether you’re dipping into marinara or loading up on your favorite toppings, you'll discover a world of flavor that makes traditional pizza feel like a distant memory. Ready to elevate your snack time? Let’s dive into this simple yet satisfying recipe!

Why Choose High Protein Pizza?

Guilt-Free Indulgence: These Mini High Protein Cottage Cheese Pizzas offer a wholesome alternative to traditional pizza, ensuring you can satisfy your cravings without the guilt.
Quick and Easy: With just a few steps, you can whip these up in no time, making them ideal for those busy weeknights.
Customizable: Tailor your toppings to suit your tastes, whether you're in the mood for fresh veggies or a sprinkle of turkey pepperoni.
Nutritious Delight: Each mini pizza is approximately 180 calories, providing a protein boost for your snack or meal. Explore other light options like Lemon Ricotta Protein pancakes or Garlic Chicken Thighs for a balanced meal.
Perfect Texture: Enjoy a satisfying blend of fluffy crust and gooey cheese, reminiscent of your favorite pizzeria while being lighter on your plate.

Mini High Protein Cottage Cheese Pizzas Ingredients

  • For the Pizza Base

  • Cottage Cheese – Provides a creamy base that's packed with protein; opt for dairy-free yogurt if needed.

  • Eggs – Bind the ingredients together, ensuring the pizzas hold their shape beautifully.

  • Italian Seasoning – Infuses a delightful blend of herbs for extra flavor in each bite.

  • For the Topping

  • Marinara Sauce – Adds rich tomato flavor, creating a tasty base layer for your toppings.

  • Shredded Mozzarella – For a gooey, melty topping that complements the crust perfectly.

  • Optional Pizza Toppings – Customize with turkey pepperoni or fresh veggies for added flavor and texture in your high protein pizza.

Step‑by‑Step Instructions for Mini High Protein Cottage Cheese Pizzas

Step 1: Preheat the Oven
Begin by preheating your oven to 350°F (175°C) while you prepare your muffin pan. Lightly grease the muffin cups using cooking spray or olive oil to ensure your Mini High Protein Cottage Cheese Pizzas release easily after baking. This initial step sets the stage for a perfectly baked base that’s both fluffy and satisfying.

Step 2: Mix the Base Ingredients
In a large mixing bowl, combine cottage cheese and eggs. Use a fork or whisk to blend these ingredients until the mixture is smooth and creamy, which will help create the ideal texture for your pizza base. This step should take about 2-3 minutes, allowing you to enjoy the delightful aroma of fresh ingredients coming together.

Step 3: Add Flavorful Seasoning
Next, sprinkle in Italian seasoning and stir it into the cottage cheese and egg mixture. This infusion of herbs will elevate your Mini High Protein Cottage Cheese Pizzas with flavor, making each bite deliciously aromatic. Take a moment to ensure the seasoning is well-distributed throughout the mixture, which enhances the overall taste.

Step 4: Fill the Muffin Cups
Carefully spoon the cottage cheese mixture into the greased muffin cups, filling them about ¾ full. It’s important not to overfill the cups to allow room for the pizzas to rise during baking. This step ensures a perfect size for individual servings, making them convenient snacks or meals.

Step 5: Bake the Pizza Base
Place the muffin pan in the preheated oven and bake for approximately 35 minutes. You’re looking for a firm texture and a light golden color on top when they are done. The warm aroma wafting through your kitchen will be hard to resist, signaling that your Mini High Protein Cottage Cheese Pizzas are almost ready.

Step 6: Add Toppings for Flavor
Once your base is baked, take it out of the oven and carefully add a spoonful of marinara sauce to each mini pizza. Sprinkle shredded mozzarella cheese on top of the sauce, along with any additional toppings you desire, like turkey pepperoni or fresh veggies, for a burst of flavor and texture.

Step 7: Broil for a Golden Finish
Switch your oven to broil and return the muffin pan for an additional 3 minutes, watching closely as the cheese melts and becomes bubbly. This final step creates a beautiful, golden finish on top of your Mini High Protein Cottage Cheese Pizzas, making them irresistibly appetizing.

Step 8: Cool and Serve
Remove the muffin pan from the oven and let the pizzas cool for a few minutes before gently removing them with a fork. This step is essential for maintaining their shape. Once cooled slightly, your Mini High Protein Cottage Cheese Pizzas are ready to be served and enjoyed, introducing delight to your snack time or meal!

Mini High Protein Cottage Cheese Pizzas Variations

Let your culinary creativity shine with these delightful twists on your Mini High Protein Cottage Cheese Pizzas!

  • Dairy-Free: Substitute cottage cheese with almond or coconut yogurt for a delicious dairy-free version. It preserves the creaminess while catering to dietary needs.
  • Cheese Variations: Experiment with different cheeses like feta or cheddar for an exciting change in flavor. Each cheese brings its own unique taste, taking your mini pizzas to a whole new level!
  • Veggie Loaded: Add fresh veggies, such as spinach, mushrooms, or bell peppers, before baking for added nutrients and a pop of color. Remember, the more, the merrier when it comes to toppings!
  • Spicy Kick: Incorporate crushed red pepper flakes or jalapeños into the batter or as a topping for a zesty twist. Spicing it up can enhance the flavor profile and satisfy those who love a bit of heat.
  • Herb Infusion: Use fresh herbs like basil or rosemary instead of Italian seasoning for a garden-fresh aroma and taste. The fragrant addition will transport your mini pizzas straight to Italy!
  • Meat Lovers: Top with turkey pepperoni, diced ham, or crumbled turkey sausage for a protein boost that meat lovers will cherish. Go wild with flavor combinations, and let your tastebuds take the lead!
  • Mediterranean Flair: Add toppings like olives, sun-dried tomatoes, and a sprinkle of oregano for a Mediterranean spin. These combinations can provide a burst of new flavors that are refreshing and cheerful.
  • Sweet Twist: For a dessert version, swap the marinara for a thin layer of Nutella and top with berries! This was inspired by my kids’ love for dessert pizzas, providing a sweet yet healthy twist that is still fun.

These variations invite endless possibilities, so feel free to mix and match according to your tastes. If you loved the savory flavors of these pizzas, you might also enjoy some Mini Tropical Pavlovas for dessert!

What to Serve with Mini High Protein Cottage Cheese Pizzas

Complete your meal with vibrant sides and delightful pairings that elevate each bite of these delicious pizzas.

  • Fresh Garden Salad: Adds a crisp, refreshing contrast that balances the cheesy richness of the pizzas, enhancing the overall flavor experience. Toss in a zesty vinaigrette for an extra kick.

  • Garlic Breadsticks: These warm, buttery sticks are perfect for sopping up any remaining marinara sauce, making for a comforting, indulgent side that pairs beautifully with the pizza.

  • Roasted Veggies: Caramelized and seasoned to perfection, they bring a wonderful earthiness that complements the pizza’s flavors while adding a nutritious touch to your meal.

  • Zucchini Noodles: A low-carb and fresh alternative to pasta, they provide a light yet satisfying base for any additional sauces or toppings, harmonizing with the hearty mini pizzas.

  • Homemade Tzatziki Sauce: Creamy and tangy, this yogurt-based dip adds a refreshing taste that cuts through the richness, making it a wonderful companion for your pizzas.

  • Fruit Skewers: Sweet and juicy fruit offers a delightful contrast, refreshing your palate after each savory bite. Opt for a mix of berries, melons, or pineapple for colorful flair.

  • Sparkling Water or Iced Tea: A bubbly drink adds a festive touch, rehydrating and cleansing your taste buds between bites while complementing the savory richness of the mini pizzas.

Storage Tips for Mini High Protein Cottage Cheese Pizzas

  • Room Temperature: Allow the pizzas to cool completely before storing; they can sit out for up to 2 hours.
  • Fridge: Store leftovers in an airtight container for up to 3 days to maintain freshness and flavor.
  • Freezer: These Mini High Protein Cottage Cheese Pizzas can be frozen for up to 3 months. Wrap individually in plastic wrap, then place in a freezer bag for optimal storage.
  • Reheating: When you're ready to enjoy, reheat in the oven at 350°F for 10-15 minutes, ensuring they are warmed through and the cheese is melty.

Make Ahead Options

These Mini High Protein Cottage Cheese Pizzas are perfect for meal prep enthusiasts! You can prepare the base mixture (cottage cheese, eggs, and Italian seasoning) up to 24 hours in advance and refrigerate it to save precious time on busy weeknights. Simply mix everything together, then store it in an airtight container. When you're ready to bake, spoon the mixture into the muffin pan and proceed with the baking instructions. For even more convenience, you can bake the pizzas and refrigerate them for up to 3 days; just reheat in the oven for a few minutes before serving to ensure they remain just as delicious and satisfying!

Expert Tips for Mini High Protein Cottage Cheese Pizzas

  • Blend Smoothly: Blend the cottage cheese until completely smooth for the best texture; grainy cheese can result in a less enjoyable base.
  • Don’t Overfill: Fill muffin cups only ¾ full to prevent overflow and allow the Mini High Protein Cottage Cheese Pizzas to rise properly while baking.
  • Experiment with Toppings: Feel free to add chopped vegetables or different cheeses as toppings; just ensure they complement the cottage cheese base for a satisfying flavor.
  • Watch the Broil: Keep an eye on the broiler—cheese can go from bubbly to burnt quickly in just a few minutes, so be ready to take them out!
  • Serve Fresh: Enjoy these delightful pizzas immediately for the best taste and texture; they can lose their charm if left to sit too long.

Mini High Protein Cottage Cheese Pizzas Recipe FAQs

What should I look for when selecting cottage cheese?
Absolutely! When selecting cottage cheese, look for a product that's fresh and has a smooth texture. Avoid containers with an extended shelf life or those that have dark spots or a sour smell. The best options are typically found in the dairy section and should have a short expiration date.

How should I store leftover Mini High Protein Cottage Cheese Pizzas?
Very good question! Allow your Mini High Protein Cottage Cheese Pizzas to cool completely, then store them in an airtight container in the refrigerator. They’ll keep well for up to 3 days, making it perfect for leftover lunches or snacks.

Can I freeze my Mini High Protein Cottage Cheese Pizzas?
Yes, you can! To freeze, wrap each mini pizza individually in plastic wrap and place them in a freezer-safe bag. This will help protect them from freezer burn. They can be stored in the freezer for up to 3 months. When you're ready to enjoy, reheat them in the oven at 350°F for about 10-15 minutes, until heated through.

What can I do if my mini pizzas are too soggy?
If you find your mini pizzas are soggy, it's often because of excess moisture from the cottage cheese or toppings. I recommend blending the cottage cheese until smooth and ensuring you don't overfill the muffin cups. Pre-cooking some toppings, like veggies, and using less marinara sauce can also help if you had a soggy outcome previously.

Are Mini High Protein Cottage Cheese Pizzas safe for those with dietary restrictions?
Absolutely! These pizzas can be tailored to meet various dietary needs. For lactose intolerance, you can substitute with dairy-free yogurt. If you have allergies, be sure to check the labels on ingredients like marinara sauce and shredded cheese to watch for gluten or other allergens. Always consult with your doctor if you have specific dietary restrictions or concerns.

How do I know when my pizzas are done baking?
Look for a firm texture and a light golden color when you check your mini pizzas around the 35-minute mark. If you want that bubbly cheese on top, you’ll broil them for an additional 3 minutes – just keep an eye on them to prevent burning. The delicious aroma wafting through your kitchen will also clue you into their doneness!

Mini High Protein Cottage Cheese Pizzas

Mini High Protein Cottage Cheese Pizzas for Guilt-Free Indulgence

Enjoy these Mini High Protein Cottage Cheese Pizzas for a guilt-free snack that's packed with protein and flavor.
Print Recipe Pin Recipe
Prep Time 10 minutes mins
Cook Time 35 minutes mins
Cooling Time 5 minutes mins
Total Time 50 minutes mins
Servings: 4 pizzas
Course: Snacks
Cuisine: Italian
Calories: 180
Ingredients Equipment Method Nutrition Notes

Ingredients
  

For the Pizza Base
  • 1 cup Cottage Cheese opt for dairy-free yogurt if needed
  • 2 large Eggs
  • 1 tsp Italian Seasoning
For the Topping
  • 1/2 cup Marinara Sauce
  • 1 cup Shredded Mozzarella
  • Optional Pizza Toppings such as turkey pepperoni or fresh veggies

Equipment

  • Muffin Pan
  • Mixing Bowl
  • Whisk

Method
 

Step-by-Step Instructions
  1. Preheat your oven to 350°F (175°C) and grease the muffin cups.
  2. In a large mixing bowl, combine cottage cheese and eggs, blending until smooth.
  3. Add Italian seasoning and stir into the mixture until well-distributed.
  4. Spoon the cottage cheese mixture into the greased muffin cups, filling about ¾ full.
  5. Bake the muffin pan in the oven for approximately 35 minutes until firm and light golden.
  6. After baking, add marinara sauce and shredded mozzarella to each mini pizza.
  7. Broil for an additional 3 minutes until the cheese melts and bubbles.
  8. Let cool for a few minutes before removing with a fork and serving.

Nutrition

Serving: 1pizzaCalories: 180kcalCarbohydrates: 10gProtein: 15gFat: 7gSaturated Fat: 4gPolyunsaturated Fat: 1gMonounsaturated Fat: 1gCholesterol: 70mgSodium: 350mgPotassium: 200mgFiber: 2gSugar: 2gVitamin A: 500IUVitamin C: 1mgCalcium: 200mgIron: 1mg

Notes

Enjoy immediately for the best taste and texture. Store leftovers in the fridge for up to 3 days or freeze for up to 3 months.

Tried this recipe?

Let us know how it was!

Crispy Air Fryer French Fries That Outshine Fast Food

May 20, 2026 by Grace Snow Leave a Comment

A mouthwatering aroma fills the kitchen as I slice through crisp Russet potatoes, preparing for a truly delightful experience. Meet my Homemade Crispy Air Fryer French Fries—a dish that effortlessly rivals your favorite fast-food indulgences! With just a simple cold water soak and some well-chosen seasonings, these fries transform into a golden-brown symphony of flavor and texture. The best part? They’re quick to whip up and offer a healthier alternative to frozen options, making them perfect for any weeknight dinner or gathering. Ready to take your fry game to the next level? Let’s dive into this irresistible recipe that will make your taste buds dance!

Why Choose Air Fryer French Fries?

Crispy Perfection: These fries achieve the ideal crunch thanks to a simple soaking technique that draws out excess starch.

Healthier Choice: With minimal oil, you can enjoy guilt-free fries that outshine takeout options.

Quick & Easy: This recipe is designed for those who crave homemade goodness without spending hours in the kitchen.

Versatile Enjoyment: Pair them with a variety of dips like ketchup or aioli—perfect for parties or casual weeknight meals.

Crowd-Pleaser: They’re sure to impress family and friends with their restaurant-quality taste, making every meal feel special.

Ready for more delicious dishes? Check out my Air Fryer Fish for a perfect meal pairing or indulge your sweet side with Cherry Clafoutis French for dessert!

Air Fryer French Fries Ingredients

• Let's make those tasty fries!

For the Fries

  • Russet Potatoes – The best choice for achieving that classic fry texture and ideal crispiness.
  • Olive Oil – Just a tablespoon helps brown the fries and enhances flavor; don’t skip it or you’ll have pale fries.
  • Salt – Essential for seasoning; adjust according to your personal preference for taste.
  • Garlic Powder – Adds a lovely flavor—feel free to adjust or omit based on your palate.
  • Smoked Paprika – Provides a delightful smoky touch; use regular paprika if you prefer a milder flavor.
  • Black Pepper – For added seasoning; taste and adjust as needed.

Ready to whip up those homemade air fryer French fries? You're going to love the crispy goodness!

Step‑by‑Step Instructions for Air Fryer French Fries

Step 1: Prepare Potatoes
Start by washing and peeling the Russet potatoes if desired. Cut them into ¼–⅓ inch matchsticks to ensure even cooking and maximum crispiness. Lay them out on a cutting board, ensuring all the fries are similar in size, which will help them cook uniformly in the air fryer.

Step 2: Soak
Submerge the cut potatoes in a bowl of cold water and soak them for 25–30 minutes, or up to 2 hours for enhanced crispiness. This soaking process removes excess starch, which is key to achieving that irresistible crunch. You’ll know they’re ready when they appear whiter and have released some starch.

Step 3: Dry
After soaking, drain the water and thoroughly pat the fries dry using kitchen towels. This step is crucial—if moisture remains, your Air Fryer French Fries will turn out soggy instead of crispy. Aim for completely dry fries to allow the oil and seasonings to adhere perfectly.

Step 4: Season
Transfer the dried fries to a large mixing bowl. Drizzle with olive oil and sprinkle on salt, garlic powder, smoked paprika, and black pepper. Toss the fries with your hands until every piece is evenly coated in oil and seasonings. This ensures that every fry is bursting with flavor.

Step 5: Preheat Air Fryer
Set your air fryer to 380°F and preheat it for about 3–5 minutes. Preheating is essential for getting those Air Fryer French Fries perfectly crispy. While it heats, you can finalize the last touches on your fries, making sure they’re ready to go.

Step 6: Cook
Lightly spray the air fryer basket with cooking spray to prevent sticking. Add the seasoned fries in a single layer, ensuring they aren’t overcrowded. Cook at 380°F for 14–18 minutes, tossing halfway through to promote even cooking. They’re ready when they’re golden brown and irresistibly crispy!

Step 7: Serve
Once your fries reach the perfect golden hue, remove them from the air fryer. While still hot, toss them with an extra pinch of salt for added flavor. Optionally, garnish with fresh parsley and serve alongside your favorite dipping sauces. Get ready for a delightful crunch!

What to Serve with Homemade Crispy Air Fryer French Fries

Building a meal that complements the addictive crunch of crispy fries can elevate your dining experience to new heights.

  • Classic Burger: The juiciness of a beef or veggie burger pairs perfectly with the fries, creating a satisfying, comfort-food combo. The richness of a well-cooked burger marries beautifully with the crispy golden fries.

  • Creamy Coleslaw: This crunchy, fresh side adds a refreshing contrast to the fries, enhancing the meal's texture. The tangy dressing in coleslaw brings a delightful brightness.

  • Crispy Chicken Tenders: Dipped in your favorite sauce, these pair perfectly with the fries, satisfying all your cravings. The combination of crunch from both sides makes for a delightful meal.

  • Garlic Aioli: Rich and creamy, this dipping sauce enhances the flavor of each fry, making every bite a culinary treat. The garlic's savory depth complements the fry's crispiness beautifully.

  • Grilled Veggies: Roasted or grilled zucchini, bell peppers, and asparagus introduce a colorful and healthy touch to your plate, balancing the meal with vibrant flavors. Their slight char adds even more complexity to the feast.

  • Cheesy Nachos: For a fun twist, serve your fries alongside cheesy nachos loaded with jalapeños and guacamole. The fusion of flavors will take your taste buds on a delicious adventure!

  • Sparkling Lemonade: This refreshing drink brightens the meal with zesty notes, cleansing the palate while complementing the savory flavors of the fries. Its fizz adds a festive flair to your dining experience.

  • Chocolate Milkshake: For dessert, a rich chocolate shake provides a sweet finish, perfectly balancing the savory elements of your meal. The combo of salty fries and sweet shake is pure, nostalgic bliss.

  • Tartar Sauce: A zesty tartar sauce, especially with a touch of dill, becomes a sumptuous dip that enhances the classic fry experience. This would be particularly delightful if you’re adding seafood to the dinner spread.

Storage Tips for Air Fryer French Fries

Room Temperature: Enjoy your homemade Air Fryer French Fries fresh for the best taste; however, if needed, they can sit at room temperature for up to 1 hour before they begin to lose their crispy texture.

Fridge: If you have leftovers, store them in an airtight container in the fridge for up to 2 days. This will help maintain some of their texture, though they will lose some crispiness.

Freezer: For longer storage, freeze fully cooled fries in a single layer on a baking sheet, then transfer to an airtight freezer bag. They can be stored for up to 3 months.

Reheating: To regain their crispiness, reheat fries in the air fryer at 350°F for about 5–7 minutes. This method will help restore that delightful crunch!

Expert Tips for Air Fryer French Fries

  • Soak for Crispiness: Don’t skip the soaking step! It’s vital for removing excess starch and achieving that desired crispiness in your Air Fryer French Fries.

  • Check Fry Thickness: Cut your fries uniformly to ensure even cooking. If some are thicker, they may require more time, while thinner ones cook faster.

  • Don’t Overcrowd: Fry in batches if needed. Overcrowding the basket can lead to uneven cooking and prevent that glorious crisp texture.

  • Dry Thoroughly: Make sure to pat your fries dry after soaking. Any leftover moisture will result in soggy fries instead of the crispy treat you desire.

  • Adjust Seasonings: Feel free to personalize the seasoning to your taste. Experimenting with spices can elevate your Air Fryer French Fries even further!

Air Fryer French Fries Variations

Feel free to get creative and tailor these crispy delights to your taste buds; the options are endless!

  • Sweet Potato: Swap out Russet potatoes for sweet potatoes for a naturally sweeter, healthier twist. The vibrant color adds a lovely touch too!

  • Seasoned Garlic Fries: Sprinkle in fresh minced garlic or even garlic salt for a robust flavor boost that elevates your fries to gourmet status.

  • Cheesy Fries: Top with shredded cheddar or Parmesan just before they finish cooking for a gooey, cheesy delight. A sprinkle of chives can add a lovely freshness!

  • Spicy Fries: Add chili powder or cayenne pepper to the seasoning mix for a fiery kick. These will surely satisfy those cravings for something with a little heat.

  • Herbed Fries: Mix in dried herbs like thyme or rosemary for an aromatic twist. The combination of herbs creates a delightful flavor harmony.

  • Vegan Poutine: Top your fries with vegan gravy and dairy-free cheese curds for a plant-based twist on the classic poutine. It’s comfort food at its finest!

  • Cajun Fries: Sprinkle Cajun seasoning for a zesty, flavorful take. This spiced up version is vibrant and perfect for adding a pop to any meal.

Looking for additional delicious fare? Try my Air Fryer Fish for a complete meal or indulge in a delightful Cherry Clafoutis French to satisfy your sweet tooth!

Make Ahead Options

These Homemade Crispy Air Fryer French Fries are perfect for meal prep and can save you time during those busy weeknights! You can cut and soak the Russet potatoes in cold water for up to 2 hours in advance to draw out excess starch, improving crispiness. If you need to prep even earlier, wash, peel, and cut the fries, then soak them, and refrigerate them for up to 24 hours. Make sure to dry them thoroughly before tossing with olive oil and seasonings right before cooking. When you're ready to enjoy your fries, simply proceed with the cooking instructions, and you'll still achieve that delightful crunch just like freshly made Air Fryer French Fries!

Air Fryer French Fries Recipe FAQs

How do I choose the right potatoes for crispy fries?
Absolutely! For the crispiest fries, Russet potatoes are the best bet due to their high starch content, which creates that perfect fluffy interior. When selecting them, aim for firm potatoes without any dark spots or blemishes. Yukon Gold potatoes can also work, but they may not get as crispy as Russets.

What’s the best way to store leftover Air Fryer French Fries?
If you have any leftovers, place them in an airtight container and store in the fridge for up to 2 days. To retain as much crispiness as possible, it’s best to use them fresh. When reheating, give them a quick toss in the air fryer at 350°F for about 5-7 minutes. This will help them regain their lovely crunch.

Can I freeze Air Fryer French Fries?
Absolutely! To freeze, first let your fries cool completely after cooking. Then spread them out in a single layer on a baking sheet and place them in the freezer for about an hour until solid. Once frozen, transfer the fries to an airtight freezer bag, squeezing out as much air as possible. They can be stored for up to 3 months. When you’re ready to enjoy them, cook them straight from frozen in your air fryer for about 15-20 minutes at 380°F.

What if my fries aren’t crispy after cooking?
Very! If your fries turn out soft, it may be because they retained moisture before cooking. Ensure you soak your cut potatoes and thoroughly dry them afterward. Additionally, overcrowding the air fryer basket can also cause this issue—so cook in batches for an ideal texture. If you did all this and still end up with soggy fries, you can always pop them back in the air fryer for a few extra minutes for a crisping boost.

Are these fries suitable for a vegan diet?
Absolutely! These Air Fryer French Fries are vegan-friendly as they contain no animal products. Just be mindful of any dipping sauces you use; opt for plant-based options like vegan mayonnaise or chili sauce to keep things deliciously vegan!

Can I use different seasonings for my fries?
The more the merrier! Feel free to experiment with a range of seasonings like chili powder, onion powder, Parmesan cheese (if dairy is okay for you), or even some herb mixes. This way, you can customize your fries to create exciting flavor profiles, and each batch can be a delightful new experience!

Air Fryer French Fries

Crispy Air Fryer French Fries That Outshine Fast Food

Delicious Air Fryer French Fries that are healthier, quick to make, and full of flavor.
Print Recipe Pin Recipe
Prep Time 30 minutes mins
Cook Time 18 minutes mins
Soaking Time 30 minutes mins
Total Time 1 hour hr 18 minutes mins
Servings: 4 fries
Course: Snacks
Cuisine: American
Calories: 150
Ingredients Equipment Method Nutrition Notes

Ingredients
  

For the Fries
  • 4 medium Russet Potatoes Best for classic fry texture
  • 1 tbsp Olive Oil Essential for browning
  • 1 tsp Salt Adjust to taste
  • 1 tsp Garlic Powder Optionally adjust based on preference
  • 1 tsp Smoked Paprika For a smoky flavor
  • 1 tsp Black Pepper To taste

Equipment

  • Air fryer

Method
 

Step-by-Step Instructions
  1. Wash and peel the Russet potatoes if desired. Cut them into ¼–⅓ inch matchsticks.
  2. Soak the cut potatoes in a bowl of cold water for 25–30 minutes.
  3. Drain and pat the fries dry with kitchen towels.
  4. Drizzle fries with olive oil and sprinkle with salt, garlic powder, smoked paprika, and black pepper. Toss until evenly coated.
  5. Preheat your air fryer to 380°F for about 3–5 minutes.
  6. Add seasoned fries in a single layer to the air fryer and cook for 14–18 minutes, tossing halfway through.
  7. Remove fries when golden brown and toss with an extra pinch of salt before serving.

Nutrition

Serving: 1cupCalories: 150kcalCarbohydrates: 30gProtein: 2gFat: 5gSaturated Fat: 1gPolyunsaturated Fat: 2gMonounsaturated Fat: 2gSodium: 200mgPotassium: 600mgFiber: 3gSugar: 1gVitamin C: 10mgCalcium: 2mgIron: 5mg

Notes

For best results, do not skip the soaking step and ensure fries are well dried before cooking.

Tried this recipe?

Let us know how it was!
  • « Previous Page
  • 1
  • 2
  • 3
  • 4
  • …
  • 23
  • Next Page »

Welcome!

Hi, I’m Grace, a Sydney-based home cook with a passion for bold flavors and trending ingredients. Whether you’re a busy beginner or a seasoned foodie, you’ll find dishes here that are fresh, fun, and full of flavor.

More about me

Popular Recipes

  • One Pot Keto Tuna Casserole
    One Pot Keto Tuna Casserole: Creamy Comfort in Minutes
  • Ultimate Jalapeno Popper Chicken Salad
    Ultimate Jalapeno Popper Chicken Salad That'll Wow Your Tastebuds
  • Green Chile Cheese Dip
    Mouthwatering Green Chile Cheese Dip for Cozy Gatherings
  • Easy Chimichurri Sauce
    Fresh and Zesty Easy Chimichurri Sauce in Just Minutes

Footer

↑ back to top

About

  • Privacy Policy
  • Disclaimer
  • Terms & Conditions

Newsletter

  • Sign Up! for emails and updates

Contact

  • About me
  • Contact me

Copyright © 2025 TastyTrendIngredients