tastytrendingredients

  • Home
  • Recipes
    • Appetizers
    • Breakfast
    • Dessert
    • Dinner
    • Drinks
    • Salads
    • Snacks
    • Soups
  • About me
  • Contact
menu icon
go to homepage
  • Home
  • Recipes
    • Appetizers
    • Breakfast
    • Dessert
    • Dinner
    • Drinks
    • Salads
    • Snacks
    • Soups
  • About me
  • Contact
search icon
Homepage link
  • Home
  • Recipes
    • Appetizers
    • Breakfast
    • Dessert
    • Dinner
    • Drinks
    • Salads
    • Snacks
    • Soups
  • About me
  • Contact
×

Revitalize Your Day with Japanese Pink Salt Hydration Drink

August 30, 2025 by Grace Snow Leave a Comment

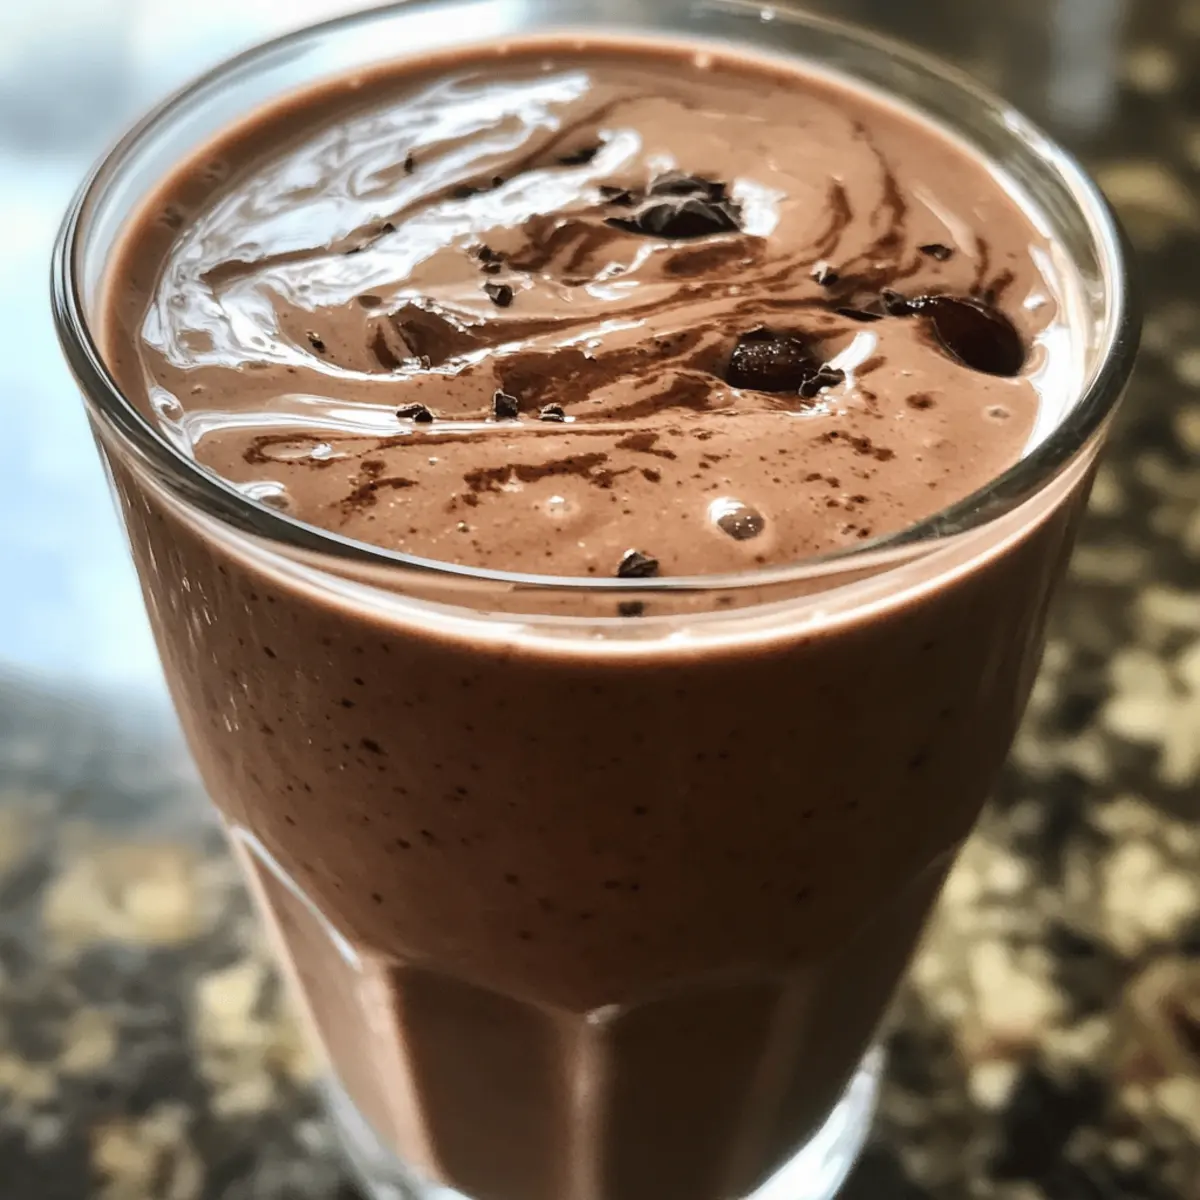
As I stood in my kitchen, the scents of fresh lemon and the fragrant allure of honey danced through the air, reminding me of the simple joys of homemade creations. My latest adventure is the Japanese Pink Salt Hydration Drink, a recipe that not only quenches your thirst but also recharges your body with essential minerals. With just a few wholesome ingredients, this drink transforms into a delightful elixir, perfect for that post-workout refreshment or as a soothing pick-me-up during a hectic day. Not only does it hydrate, but it also offers a nurturing experience that reconnects us with our bodies. So, are you ready to discover how this natural electrolyte boost can elevate your hydration game?

Why Choose Japanese Pink Salt Drink?

Unique Benefits: This hydration drink is packed with natural minerals from Japanese pink salt that replenish your body's electrolytes effectively.
Quick & Easy: You can whip up this refreshing beverage in just a few minutes, perfect for those busy afternoons.
Versatile Flavor: Feel free to customize it by adding your favorite herbs like mint or spicy ginger for extra zest.
Health Boost: Packed with vitamin C from lemon and antioxidants from honey, it's a wholesome choice that supports overall wellness.
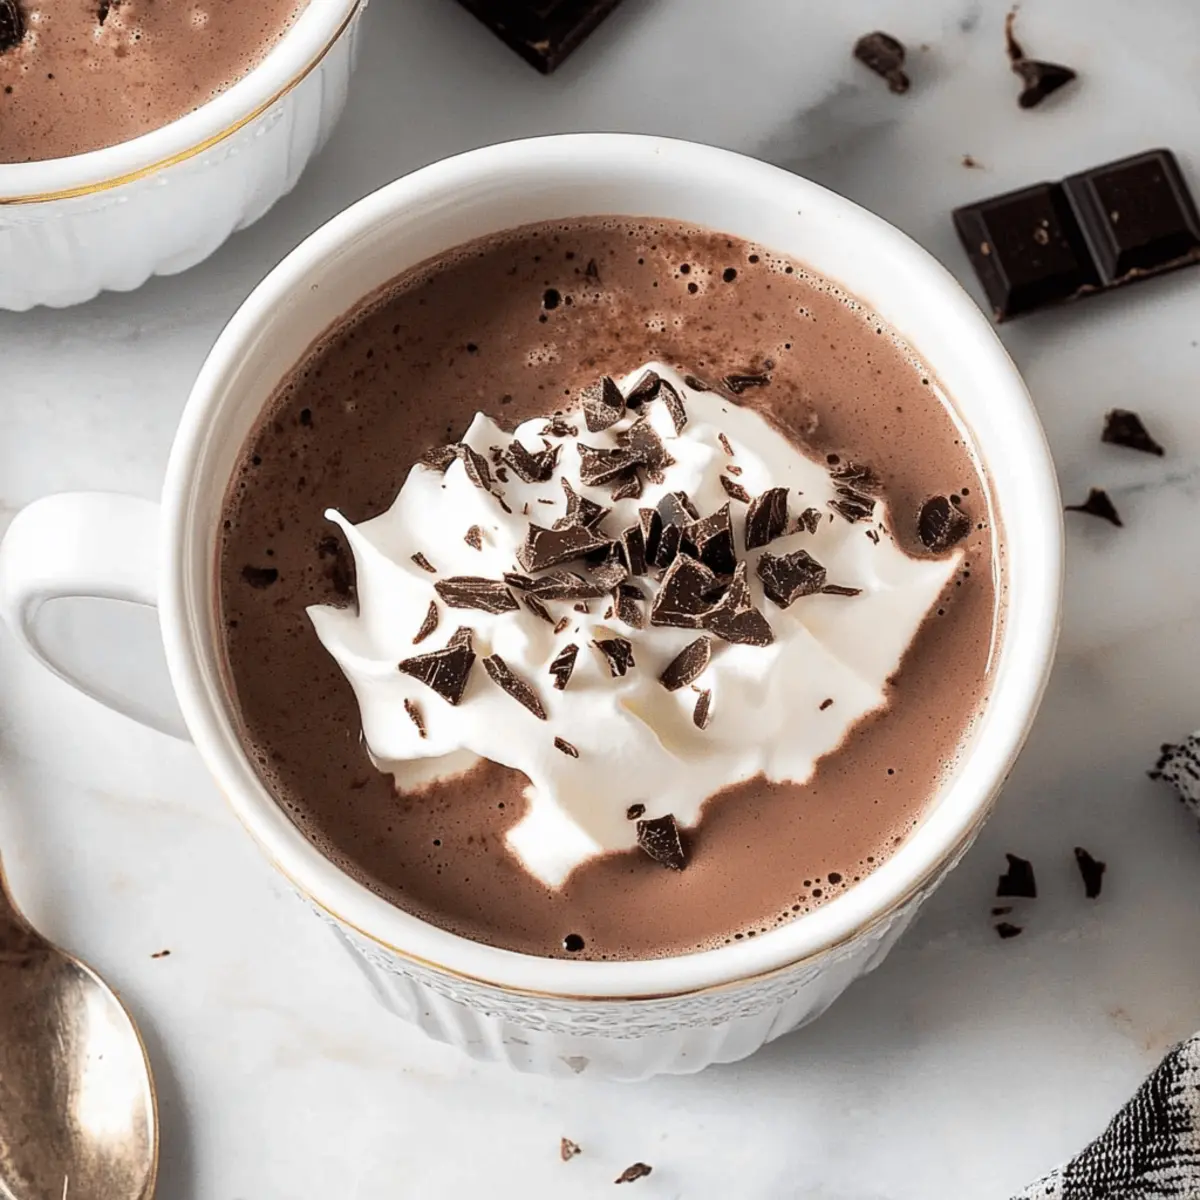
Refreshing Experience: Whether hot or cold, it offers a soothing sip that rejuvenates the spirit and invigorates the body, making it a delightful addition to your meal routine. For a deeper dive into flavor combinations, check out our ideas for enhancing your hydration experience!

Japanese Pink Salt Ingredients

For the Base Drink

  • Japanese Pink Salt – Provides vital minerals and electrolytes for effective hydration; substitute with Himalayan pink salt if needed.
  • Filtered Water – Acts as the essential base for the drink, aiding both hydration and flavor; always use clean water for optimal benefits.
  • Raw Honey – Adds natural sweetness and energy, offering antioxidants; replace with maple syrup for a vegan option or omit for a sugar-free version.
  • Lemon Juice – Infuses vitamin C and brightness; freshly squeezed is recommended for best flavor and health benefits.

Optional Enhancements

  • Ice Cubes – Cool the drink for a refreshing experience, especially in warm weather; not necessary if serving warm.
  • Fresh Mint – Add a refreshing note if you want to elevate the drink's flavor profile.
  • Ginger Slice – Infuses a spicy kick during steeping; perfect for warming up on a cold day.

Feel the rejuvenating embrace of Japanese Pink Salt as you whip up this hydrating drink!

Step‑by‑Step Instructions for Japanese Pink Salt Hydration Drink

Step 1: Boil the Water
Start by pouring 2 cups of filtered water into a small pot. Place it over medium heat and bring the water to a boiling point, watching for small bubbles forming on the surface. Once it reaches a boil, remove the pot from the heat and let it cool for about 1 minute. This step ensures that the water is hot enough to dissolve the ingredients but not scalding.

Step 2: Dissolve the Salt
After letting the water cool slightly, add 1 teaspoon of Japanese pink salt to the pot. Stir gently with a spoon, ensuring that the salt fully dissolves into the warm water. The water should now have a slightly briny aroma, indicating that the salt has melded beautifully with the water, providing the foundation for this revitalizing hydration drink.

Step 3: Incorporate Lemon Juice and Honey
Next, measure out 1 tablespoon of freshly squeezed lemon juice and add it to the pot along with 1 tablespoon of raw honey. Stir again until both the lemon juice and honey are completely combined with the salted water, creating a smooth and harmonious blend. The mixture should now have a refreshing hint of citrus and sweetness—a perfect complement to the Japanese pink salt.

Step 4: Serve Warm or Over Ice
Decide whether you'd like to enjoy your Japanese Pink Salt Hydration Drink warm or chilled. If serving warm, pour the drink into a cozy mug, ready to sip. For a chilled option, fill a glass with ice cubes and then pour the mixture over the ice, allowing it to cool down. Either way, this drink is an inviting and hydrating choice for any time of the day.

Step 5: Add Optional Enhancements
For an extra burst of flavor, consider adding fresh mint leaves or a slice of ginger to your drink. If you choose to infuse with mint, gently muddle the leaves in your glass before pouring in the drink. If using ginger, allow it to steep in the warm drink for a few minutes before serving. These enhancements elevate the Japanese Pink Salt Hydration Drink to a new level of refreshment.

Expert Tips for Japanese Pink Salt Drink

  • Use Quality Ingredients: Always choose high-quality Japanese pink salt and fresh lemon for the best flavor and nutritional benefits.

  • Adjust Sweetness: Start with 1 tablespoon of honey, then taste and adjust to your preference. Remember, you can always add more, but you can't take it out!

  • Mind the Temperature: If serving warm, ensure water isn’t too hot to prevent destroying the nutrients in lemon juice or honey.

  • Customize Flavors: Don’t hesitate to get creative! Infuse your hydration drink with herbs like mint or ginger for added depth without overwhelming saltiness.

  • Check Serving Sizes: While this drink is hydrating, be mindful of salt intake; balance it with a healthy diet and consult your healthcare provider if necessary.

  • Enjoy Fresh: For the best taste and health benefits, consume the Japanese Pink Salt drink fresh. If storing, consume within 24 hours and stir before serving.

Storage Tips for Japanese Pink Salt Hydration Drink

Fridge: Store any leftover hydration drink in an airtight container in the fridge for up to 24 hours. Always stir well before serving to re-mix the ingredients.

Serving Temperature: Enjoy it warm for a soothing effect or chilled for a refreshing drink. If refrigerated, the flavors will meld beautifully but may lose some vibrancy if kept for too long.

Prevent Separation: Due to the natural ingredients, the drink may separate when stored; give it a good stir before serving to reintegrate the ingredients seamlessly.

Make-Ahead Option: This drink can easily be prepared in advance and is ideal for pre-workout hydration or a revitalizing afternoon refreshment, making Japanese Pink Salt a convenient choice for busy lifestyles.

What to Serve with Japanese Pink Salt Hydration Drink

As you savor this delightful hydration boost, consider accompanying it with dishes that enhance your culinary experience.

  • Cucumber Salad: The crispness and refreshment of cucumber cuts through the drink’s salinity, giving your palate a light and rejuvenating experience. Toss in a light vinaigrette for added flavor!

  • Grilled Chicken Skewers: Juicy, smoky chicken pairs beautifully with the salty notes of the drink, creating a balanced and hearty meal ideal for lunch or dinner.

  • Fruit Platter: A burst of sweet, juicy fruits like watermelon and berries serves as a refreshing contrast, delighting your senses and adding natural sweetness to complement the hydration aspect.

  • Vegetable Spring Rolls: Cool and crunchy, these rolls filled with fresh veggies harmonize with the drink, offering added texture and a burst of flavor with each bite.

  • Chilled Green Tea: A subtle earthiness from the tea helps to ground the drink’s saltiness, creating a calming beverage pairing that is delightful on warm afternoons.

  • Zesty Quinoa Salad: Nutrient-rich and vibrant, this salad with lemon dressing brightens the meal while providing a satisfying, wholesome addition.

  • Dark Chocolate Squares: Indulge in the slight bitterness of dark chocolate after sipping your hydration drink for a delectable contrast; it’s a sweet way to end your refreshment ritual.

By thoughtfully pairing these delicious options with your Japanese Pink Salt Hydration Drink, you’ll create a well-rounded culinary experience that both nourishes and delights!

Make Ahead Options

These Japanese Pink Salt Hydration Drinks are fantastic for meal prep, allowing you to enjoy hydration with minimal fuss during your busy days! You can prepare the base of the drink—water, Japanese pink salt, lemon juice, and honey—up to 24 hours in advance. Simply mix these ingredients in a jar and refrigerate the mixture. To maintain quality, make sure to stir well before serving to reintegrate any separation that might occur. When you’re ready to enjoy, just pour the drink over ice or warm it up, and you'll have a revitalizing hydration boost ready in seconds, just as delicious as when freshly made!

Japanese Pink Salt Drink Variations

Dive into a world of exciting customizations for your Japanese Pink Salt hydration drink, tailoring it to your taste buds!

  • Flavor Infusion: Add a handful of fresh mint or basil leaves. Muddling these herbs before pouring in the drink creates a fragrant masterpiece—a refreshing spin on this classic recipe.

  • Ginger Spice: Toss in a slice of ginger while steeping the drink for a warm, spicy kick. The ginger’s earthy notes will balance the sweetness and saltiness beautifully.

  • Citrus Burst: Experiment with other citrus juices like lime or orange for a zesty twist. Each offers unique flavor profiles that can brighten up your hydration experience.

  • Alternate Sweeteners: Switch raw honey for agave syrup or a sugar-free sweetener. Discover your perfect level of sweetness without compromising dietary needs.

  • Chilled Delights: Blend the drink with frozen fruit like strawberries or peaches for a slushy-style treat. The result is a delightful hydration boost that feels indulgent on hot days!

  • Herbal Variations: Try steeping chamomile or hibiscus flowers in your drink for floral notes. These additions will bring soothing elements, perfect for winding down in the evening.

  • Nutty Flavor: Add a splash of almond milk for a creamy texture and nutty flavor. This twist transforms the drink into a comforting, nourishing experience, ideal for any time.

  • Spicy Heat: For those who love heat, a pinch of cayenne pepper can elevate your drink. Just a sprinkle introduces a thrilling kick, perfect for adventurous palates.

Elevate your hydration experience and enjoy the creative avenues this drink offers! For more flavor enhancement ideas, don’t miss our suggestions on creative spice additions or ways to make your drinks feel like a special occasion!

Japanese Pink Salt Hydration Drink Recipe FAQs

How should I choose the right Japanese Pink Salt?
Absolutely! When selecting your Japanese pink salt, look for higher-quality brands that showcase natural color variations and a fine texture. The salt should have a pleasant aroma and not contain artificial additives or additives that may alter its mineral content. If unavailable, Himalayan pink salt or naturally harvested sea salt can be used as substitutes, but keep in mind that they may differ in flavor and mineral composition.

What is the best way to store the Japanese Pink Salt Hydration Drink?
I often recommend storing any leftover hydration drink in an airtight container in the fridge for up to 24 hours. This keeps it fresh and allows the flavors to meld beautifully. Just remember to stir the drink well before serving, as separation can occur due to the natural ingredients.

Can I freeze the Japanese Pink Salt Hydration Drink?
While I generally suggest enjoying this drink fresh, you can freeze it for later use! Pour the mixture into ice cube trays and freeze. Once solid, transfer the cubes to an airtight bag for up to 3 months. When you’re ready to enjoy, pop a few cubes into a glass and let them thaw for a refreshing sprinkle of hydration.

What should I do if my drink tastes too salty?
If you find the hydration drink too salty for your taste, simply dilute it with additional filtered water. Start by adding a quarter cup of water, taste, and continue until you reach the desired balance. You can also increase the amount of lemon or honey to enhance sweetness and acidity, which will help balance that saltiness!

Can I make this a sugar-free option?
Very much so! To enjoy a sugar-free version, simply omit the honey entirely. For a touch of sweetness, consider adding natural sugar alternatives, like stevia or monk fruit sweetener, which can provide that delightful sweetness without the extra calories. Always adjust to taste—everyone's preference varies!

Is this drink suitable for pets or those with allergies?
It's great to be cautious! Generally, the Japanese Pink Salt Hydration Drink contains ingredients like lemon and honey that are not recommended for pets, particularly cats and dogs. As for allergies, if you or anyone else has a citrus allergy, it's best to swap out lemon juice for a splash of apple cider vinegar, or enjoy the drink without any acidic components. Always check with healthcare providers for dietary concerns!

Japanese Pink Salt

Revitalize Your Day with Japanese Pink Salt Hydration Drink

This refreshing Japanese Pink Salt hydration drink replenishes electrolytes and offers a delightful flavor profile.
Print Recipe Pin Recipe
Prep Time 5 minutes mins
Cook Time 5 minutes mins
Cooling Time 1 minute min
Total Time 11 minutes mins
Servings: 2 cups
Course: Drinks
Cuisine: Japanese
Calories: 80
Ingredients Equipment Method Nutrition Notes

Ingredients
  

Base Drink
  • 1 teaspoon Japanese Pink Salt Substitute with Himalayan pink salt if needed.
  • 2 cups Filtered Water Always use clean water for optimal benefits.
  • 1 tablespoon Raw Honey Replace with maple syrup for a vegan option.
  • 1 tablespoon Lemon Juice Freshly squeezed is recommended.
Optional Enhancements
  • 1 Ice Cubes Not necessary if serving warm.
  • 1 sprig Fresh Mint Add for a refreshing note.
  • 1 slice Ginger Infuse a spicy kick during steeping.

Equipment

  • small pot
  • Spoon
  • measuring cups
  • Measuring Spoons
  • glass
  • mug

Method
 

Preparation Steps
  1. Start by pouring 2 cups of filtered water into a small pot. Place it over medium heat and bring the water to a boiling point. Once it reaches a boil, remove the pot from the heat and let it cool for about 1 minute.
  2. After letting the water cool slightly, add 1 teaspoon of Japanese pink salt to the pot. Stir gently, ensuring that the salt fully dissolves.
  3. Next, measure out 1 tablespoon of freshly squeezed lemon juice and add it to the pot along with 1 tablespoon of raw honey. Stir again until combined.
  4. Decide whether to enjoy your drink warm or chilled. If serving warm, pour into a mug; if chilled, fill a glass with ice cubes and pour the mixture over the ice.
  5. For an extra burst of flavor, consider adding fresh mint leaves or a slice of ginger.

Nutrition

Serving: 1cupCalories: 80kcalCarbohydrates: 22gSodium: 350mgPotassium: 100mgSugar: 18gVitamin C: 5mgCalcium: 1mg

Notes

Consume the drink fresh for the best taste and health benefits. If storing, consume within 24 hours and stir before serving.

Tried this recipe?

Let us know how it was!

Honey Bun Latte: Your Morning’s Sweetest Little Secret

August 25, 2025 by Grace Snow Leave a Comment

As I stood in my kitchen, the aroma of freshly brewed coffee wafted through the air, transporting me to a cozy café filled with the warmth of baked goods. That’s when I decided to whip up a Honey Bun Latte—a quick breakfast drink that captures all the comforting flavors of my favorite cinnamon roll. In just five minutes, you can indulge in this dessert-inspired delight that not only saves you from the fast-food rut but also offers a customizable experience to suit your taste. Rich espresso mingles with sweet honey and velvety white chocolate, topped with fluffy foam that brings pure joy with every sip. Are you ready to bring a touch of café magic into your home? Let’s dive into this delightful recipe together!

Why make a Honey Bun Latte?

Delicious fusion: The Honey Bun Latte perfectly melds rich espresso with sweet honey and indulgent white chocolate, creating a comforting drink that feels like a treat.

Quick and easy: In just five minutes, you can whip up this cozy beverage, making it an ideal choice for busy mornings or a sweet afternoon pick-me-up.

Customizable flavors: Feel free to play around with different milk options or even a hint of cinnamon to suit your taste. Why not pair it with a dunkable cookie or a slice of your favorite cake? You can even enjoy it alongside a plate of Honey Garlic Chicken for a full-flavored meal!

Crowd favorite: Whether serving it at brunch or just as a personal treat, this latte is sure to impress friends and family alike. So, grab your ingredients and experience a hug in a mug!

Honey Bun Latte Ingredients

For the Latte

  • Espresso (or strong coffee) – This is the main flavor base that provides boldness; substitute with strong brewed coffee if needed.
  • Honey – A sweetener that adds complexity and depth; can use maple syrup for a different flavor.
  • White chocolate sauce – Essential for that honey bun flavor, adds richness and sweetness; substitute with vanilla syrup if necessary.
  • Oat milk – This creamy base mimics traditional milk and offers a nutty flavor; any milk can serve as an alternative.

For the Foam

  • Heavy cream (or coconut cream) – This creates the whipped foam topping; use full-fat coconut cream for a dairy-free variant.
  • Additional milk (same type as base) – Used to create the foam; ensure it's the same variety as the oat milk for the best results.

With these simple yet flavorful ingredients, you'll have all you need to create your own delightful Honey Bun Latte in no time!

Step‑by‑Step Instructions for Honey Bun Latte

Step 1: Brew the Coffee
Begin by brewing 2 shots of espresso or ½ cup of strong coffee using your favorite coffee maker. Once brewed, pour the hot coffee into a cozy mug, then stir in 1 tablespoon of honey and 1 tablespoon of white chocolate sauce while the coffee is still steaming. This creates a sweet, aromatic base packed with the delightful flavors reminiscent of a honey bun.

Step 2: Add the Milk
Next, stir in ½ cup of creamy oat milk into your warm coffee mixture. If you're craving an iced Honey Bun Latte, feel free to toss in some ice cubes at this point for a refreshing twist. The milk will blend into the coffee beautifully, enhancing the sweetness and adding a smooth texture that perfectly complements the espresso.

Step 3: Prepare the Foam
In a jar or French press, combine 3 tablespoons of heavy cream, 2 tablespoons of the same milk you chose earlier, along with ½ tablespoon each of honey and white chocolate sauce. Secure the lid and shake vigorously for about 30 seconds, or until the mixture becomes fluffy and light. This indulgent foam will top off your Honey Bun Latte, capturing that delightful dessert feel.

Step 4: Top & Finish
Spoon the fluffy foam over your latte, allowing it to rest atop the coffee for a gorgeous layered effect. For an extra touch of sweetness, drizzle additional honey or white chocolate sauce on top. This final step transforms your Honey Bun Latte into an irresistible treat that will brighten up your morning or provide a sweet afternoon lift.

What to Serve with Honey Bun Latte

Indulging in a Honey Bun Latte transforms your mornings into a moment of bliss, and what better way to elevate that experience than with delightful pairings?

  • Shortbread Cookies: These buttery treats add a satisfying crunch to the creamy latte, perfect for dunking in the sweet coffee.
  • Cinnamon Roll Pancakes: Layering flavors of cinnamon and sweetness, these pancakes echo the honey bun vibe and make for a perfect breakfast duo.
  • Fresh Berries: A medley of fresh berries offers a burst of tanginess that balances the sweet richness of the latte. Bring out your inner taste explorer!
  • Oatmeal Muffins: Try these hearty muffins packed with texture. Their wholesomeness complements the silky latte and keeps you comfortably satisfied.
  • Caramel Drizzle Cake: The buttery cake melting in your mouth alongside your latte creates a decadent treat that harmonizes beautifully together.
  • Hazelnut Biscotti: Crunchy and nutty, these biscotti are the ideal companion to your latte for a delightful crunch with every sip.
  • Fruit & Nut Snack Mix: This vibrant mix provides a pop of flavor and a satisfying crunch, making for a delightful contrast to the creamy drink.
  • Vanilla Ice Cream: A scoop of smooth vanilla ice cream creates a dessert-inspired delight that will elevate your Honey Bun Latte experience to new heights.

Expert Tips for the Best Honey Bun Latte

  • Warm Your Glass: Preheating your serving glass keeps the latte nice and hot longer, preventing a lukewarm experience that can dull its flavors.

  • Foam Success: If your foam isn't fluffing up as expected, adding a pinch of sugar can help stabilize it and create the lovely texture you desire for the Honey Bun Latte.

  • Milk Matters: For the best frothing results, opt for barista-style oat milk, which has added fat and proteins that help achieve a creamy, stable foam.

  • Flavor Exploration: Feel free to experiment with flavored coffee to add new dimensions to your Honey Bun Latte. Hazelnut or vanilla can elevate your drink to new heights!

  • Custom Sweetness: Adjust the sweetness to your liking by varying the amounts of honey and white chocolate sauce, ensuring your latte is as decadent as you prefer.

Make Ahead Options

These Honey Bun Lattes are perfect for busy home cooks who love meal prep! You can brew the espresso and mix in the honey and white chocolate sauce up to 24 hours in advance; just refrigerate the mixture in an airtight container. The oat milk can also be measured out ahead of time, keeping it chilled in the fridge. When you're ready to serve, simply reheat the coffee mixture gently on the stove or in the microwave and stir in the oat milk. For the foam, it's best to whip it fresh to maintain its airy texture—this will only take a few moments! With these simple steps, you can enjoy a delicious Honey Bun Latte any time, saving valuable minutes on busy mornings.

Storage Tips for Honey Bun Latte

  • Room Temperature: It's best to enjoy your Honey Bun Latte freshly made. If you need to keep it at room temperature, consume within 1 hour to preserve its taste and texture.

  • Fridge: If you have leftover components, store them separately in the fridge. The brewed coffee can stay fresh for up to 3 days, while the foam mixture is best made fresh.

  • Freezer: Avoid freezing the prepared latte, as it may alter the texture and taste. Instead, you can freeze leftover brewed coffee in ice cube trays to use later in smoothies or other drinks.

  • Reheating: Reheat any leftover coffee on the stove or in the microwave, but be sure to whisk it well to recreate a bit of the original frothiness. Always rewarm slowly to avoid overheating.

Honey Bun Latte Variations

Feel free to make this delightful drink truly your own with these fun and tasty variations!

  • Dairy-Free: Swap oat milk for almond or soy milk for a creamy alternative that still provides delicious flavor.
    Try mixing in coconut cream instead of heavy cream for a tropical twist!

  • Sweetener Swap: Use maple syrup instead of honey for a deeper, caramel-like sweetness.
    This subtle change adds a unique flavor profile you’ll love!

  • Flavored Latte: Opt for hazelnut or vanilla-flavored coffee to add depth to your brew.
    Enhancing the base flavors makes every sip a delight!

  • Cinnamon Twist: Sprinkle some cinnamon into the hot coffee mixture for a spiced kick.
    It adds warmth and complements the honey beautifully!

  • Iced Version: Crush ice and blend with coffee and milk for a refreshing iced Honey Bun Latte.
    Perfect for those hot summer mornings when you still crave that cozy flavor!

  • Chocolate Drizzle: Top your latte with a drizzle of chocolate sauce for an extra indulgent treat.
    It not only makes it visually stunning but also adds a lovely chocolaty layer.

  • Toppings Galore: Get creative with your toppings! Try crushed graham crackers or chopped nuts for added texture.
    These toppings introduce an enjoyable crunch that contrasts with the smooth foam.

  • Pair with a Treat: Serve your latte alongside a slice of Honey BBQ Chicken or one of your favorite pastry treats for a full café-like experience!
    These options beautifully balance sweet and savory flavors, enhancing the coffee experience.

Honey Bun Latte Recipe FAQs

How do I select the best ingredients for my Honey Bun Latte?
Absolutely! For the best flavor, use freshly brewed espresso as it provides a bold base. Look for honey that’s raw or locally sourced for a richer taste, and opt for a high-quality white chocolate sauce. If you're using oat milk, choose barista-style oat milk for frothing. When it comes to your coffee, make sure it has a robust flavor that can stand up to the delightful sweetness of the other ingredients.

How should I store my leftover Honey Bun Latte components?
Very! If you have any brewed coffee left over, it can be stored in the fridge for up to 3 days. Keep it in an airtight container, and for the best experience, consider reheating it slowly on the stove or in a microwave. However, remember that the foam should always be made fresh; storing it will compromise the delightful texture and flavor.

Can I freeze any part of the Honey Bun Latte?
Yes, you can! Although it's best not to freeze the prepared latte due to texture changes, you can freeze any leftover brewed coffee in ice cube trays. This allows you to use the cubes later in smoothies or iced coffee drinks without sacrificing flavor. Just pop them in the freezer for up to 3 months, and when ready to use, toss them into your next drink for a chilled kick!

What should I do if my foam doesn’t fluff up properly?
If your foam isn't fluffing up as expected, don’t worry! You can rescue it by adding a pinch of sugar to the cream mixture before shaking. This will help stabilize the foam and create that delightful, airy texture you want for your Honey Bun Latte. Additionally, make sure you're shaking it vigorously and using barista-style oat milk, which froths up beautifully due to its fat and protein content.

Is this recipe safe for specific dietary needs, like allergies?
Definitely! To accommodate dairy allergies, just replace the heavy cream with full-fat coconut cream, ensuring a luscious foam without the dairy. If you're looking for a sugar-free option, you can substitute the honey with sugar-free syrup or adjust the amount of white chocolate sauce, which can help cater to different dietary requirements. Always check ingredient labels for allergens, especially if serving this delightful drink to guests.

Honey Bun Latte

Honey Bun Latte: Your Morning’s Sweetest Little Secret

Indulge in a Honey Bun Latte, a quick breakfast drink that melds rich espresso with sweet honey and white chocolate.
Print Recipe Pin Recipe
Prep Time 5 minutes mins
Total Time 5 minutes mins
Servings: 1 cup
Course: Drinks
Cuisine: American
Calories: 250
Ingredients Equipment Method Nutrition Notes

Ingredients
  

For the Latte
  • 2 shots Espresso or strong coffee
  • 1 tablespoon Honey
  • 1 tablespoon White chocolate sauce
  • 0.5 cup Oat milk or any milk
For the Foam
  • 3 tablespoons Heavy cream or coconut cream
  • 2 tablespoons Additional milk same type as base
  • 0.5 tablespoon Honey
  • 0.5 tablespoon White chocolate sauce

Equipment

  • coffee maker
  • jar or French press
  • mug

Method
 

Step-by-Step Instructions for Honey Bun Latte
  1. Brew 2 shots of espresso or ½ cup of strong coffee. Pour into a mug and stir in 1 tablespoon of honey and 1 tablespoon of white chocolate sauce.
  2. Stir in ½ cup of creamy oat milk into the coffee mixture. Add ice cubes if making it iced.
  3. In a jar or French press, combine 3 tablespoons of heavy cream, 2 tablespoons of milk, and ½ tablespoon each of honey and white chocolate sauce. Shake vigorously for about 30 seconds.
  4. Spoon the fluffy foam over your latte and drizzle additional honey or white chocolate sauce on top.

Nutrition

Serving: 1cupCalories: 250kcalCarbohydrates: 30gProtein: 5gFat: 12gSaturated Fat: 7gPolyunsaturated Fat: 0.5gMonounsaturated Fat: 1gCholesterol: 40mgSodium: 60mgPotassium: 300mgSugar: 25gVitamin A: 500IUVitamin C: 1mgCalcium: 150mgIron: 0.5mg

Notes

For best frothing, use barista-style oat milk. Adjust sweetness as preferred.

Tried this recipe?

Let us know how it was!

Irresistibly Creamy Chocolate Cherry Smoothie Bliss

August 14, 2025 by Grace Snow Leave a Comment

As I stood in my kitchen, a colorful bowl of frozen cherries beckoned, promising a burst of summer flavor even on the grayest days. This High-Protein Chocolate Cherry Smoothie is my go-to delight when I crave something indulgent yet nourishing. With a tempting blend of cocoa and cherries, it’s not just a treat but also a powerhouse of nutrition, boasting 26 grams of protein to fuel my day. In just 5 minutes, I whip up this creamy beverage that satisfies my sweet tooth while steering me clear of fast food traps. Whether it’s a refreshing breakfast or a post-workout snack, this smoothie has become my secret weapon against cravings. What exciting twist will you give your next smoothie?

Why Make a Chocolate Cherry Smoothie?

Indulgence at its finest: This smoothie combines the decadence of chocolate with the natural sweetness of cherries, creating a blissful treat you won’t be able to resist.

High-protein power: With 26 grams of protein packed in every glass, it’s not only tasty but also incredibly satisfying, making it perfect for breakfast or as a post-workout recovery boost.

Quick to prepare: Ready in just 5 minutes, this smoothie fits seamlessly into your busy lifestyle.

Versatile options: You can easily customize it with non-dairy milk, or try adding a scoop of nut butter for extra creaminess.

Refreshing and nourishing: Say goodbye to fast food and embrace this delightful drink that satisfies cravings while keeping you on track with your health goals! For more delicious smoothie ideas, check out my Pitaya Smoothie Bowl for a tropical twist or my Homemade Hot Chocolate for those cozy evenings.

Chocolate Cherry Smoothie Ingredients

  • For the Smoothie
    • Frozen Cherries – Naturally sweet and fruity, perfect for a refreshing base; fresh cherries can be used if pitted and frozen.
    • Cacao Powder – Provides rich chocolate flavor without added sugars; substitute with unsweetened cocoa powder if needed.
    • Soy Milk (or other milk) – Ensures a smooth blend; try almond or coconut milk for a nutty twist or any preferred non-dairy milk.
    • Vital Proteins Collagen (optional) – Boosts the protein content while keeping the texture silky; swap with unflavored or chocolate protein powder for added nutrition.

Step‑by‑Step Instructions for Chocolate Cherry Smoothie

Step 1: Prepare the Ingredients
Begin by gathering your ingredients. Measure out 1 cup of frozen cherries and place them in your blender. Add 1 tablespoon of cacao powder for a rich chocolate flavor and 1 cup of soy milk to ensure a smooth blend. If you prefer other milks, you can substitute with almond or coconut milk. This vibrant mix is the foundation of your Chocolate Cherry Smoothie.

Step 2: Add Protein Powder
If you're incorporating the optional vital proteins collagen, now's the time to add 1 tablespoon to the blender. This ingredient enhances the protein content to a satisfying 26 grams per serving while maintaining a creamy texture. Ensure all ingredients are looking vibrant and well-distributed before proceeding to blend for that perfect smoothness.

Step 3: Blend Until Smooth
Secure the lid on your blender and blend the mixture on high for about 30 to 60 seconds. Observe as the ingredients transform into a smooth and creamy consistency, with no chunks remaining. You should see a luscious, deep purple hue from the cherries, indicating that your Chocolate Cherry Smoothie is blending perfectly.

Step 4: Taste and Adjust Sweetness
Once blended, pause to taste your smoothie. If you prefer a sweeter flavor, consider adding a touch of honey or maple syrup. Blend for an additional 10 seconds after adding any sweeteners to ensure they are well incorporated. This step is crucial to achieving the perfect flavor balance for your Chocolate Cherry Smoothie.

Step 5: Serve Immediately
Pour your beautiful chocolate cherry smoothie into a tall glass, admiring its silky texture and inviting color. This smoothie is best enjoyed fresh, so take a moment to appreciate the lusciousness before sipping. You can also garnish with a few whole cherries or a sprinkle of cacao for an extra touch. Enjoy the creamy goodness right away!

Expert Tips for Chocolate Cherry Smoothie

  • Thicker Smoothie: If you desire a thicker texture, freeze a banana beforehand or add more frozen cherries for that indulgent creaminess.
  • Proper Blending: When using an immersion blender, make sure cherries are slightly thawed. This will help you achieve a smoother Chocolate Cherry Smoothie without any chunks.
  • Milk Adjustments: Control the smoothie’s thickness by adjusting the milk quantity. Less milk creates a thicker drink, while more yields a lighter consistency.
  • Flavor Tweaks: Don’t hesitate to experiment! Adding a pinch of cinnamon or a scoop of nut butter can elevate your Chocolate Cherry Smoothie into a delightful adventure.
  • Freshness Tip: Although best enjoyed immediately, if you prep ahead, remember to stir well before drinking after storing in the refrigerator for up to 24 hours.

Chocolate Cherry Smoothie Variations

Feel free to let your creativity shine as you customize this delightful smoothie to suit your taste buds even more!

  • Nut Butter: Add a scoop of almond or peanut butter for extra creaminess and a boost of healthy fats.

  • Spinach or Kale: Toss in a handful of fresh spinach or kale for an easy nutrient upgrade without compromising flavor. You'll still enjoy the sweet cherry taste while sneaking in those greens!

  • Coconut Milk: Swap the soy milk for coconut milk to enhance the tropical vibes and add a subtle sweetness that pairs wonderfully with chocolate.

  • Protein Boost: Incorporate unflavored or chocolate protein powder for an even heftier protein punch. It's a perfect solution for those needing an extra boost after a workout.

  • Berry Blend: Mix in a handful of mixed berries for a berry twist. Blueberries or strawberries blend beautifully, adding vibrant color and additional antioxidants!

  • Cinnamon Spice: A sprinkle of cinnamon can transform your smoothie, giving it a warm, comforting depth. It's a simple addition that brings cozy flavor notes.

  • Minty Freshness: Infuse some fresh mint leaves to create a refreshing take on your smoothie. The combination of mint and chocolate is a match made in heaven!

  • Frozen Banana: For a naturally creamy texture, include half a frozen banana. It complements the cherries delightfully while adding sweetness without refined sugars.

For more wonderful smoothie ideas, you may want to try my enriching Pitaya Smoothie Bowl for a vibrant morning treat or indulge in a comforting Homemade Hot Chocolate during cozy evenings.

Make Ahead Options

These Chocolate Cherry Smoothies are perfect for busy home cooks looking to save time! You can prep the ingredients by measuring out 1 cup of frozen cherries, 1 tablespoon of cacao powder, and 1 cup of soy milk up to 24 hours in advance by storing them in an airtight container in the fridge. Just remember to layer the ingredients carefully to maintain their freshness—frozen cherries can help keep everything cool. When you're ready to enjoy your snack, simply blend the prepped ingredients, add the optional vital proteins collagen, and taste to adjust sweetness. You'll have a delicious and nutritious smoothie ready in mere seconds!

Storage Tips for Chocolate Cherry Smoothie

Fridge: Store any leftover Chocolate Cherry Smoothie in an airtight container in the refrigerator for up to 24 hours. Stir well before enjoying, as separation may occur.

Freezer: If you’d like to make it ahead, pour the smoothie into ice cube trays or silicone molds and freeze. These can be blended later for a quick, refreshing treat.

Reheating: This smoothie is best enjoyed cold, but if you prefer it warm, gently heat it in a saucepan over low heat, stirring constantly until warmed through.

Freshness: For maximum flavor and nutrition, aim to consume it fresh. This ensures you’re savoring the rich taste and creamy texture just as intended!

What to Serve with High-Protein Chocolate Cherry Smoothie

A deliciously creamy smoothie deserves equally delightful companions to elevate your meal experience.

  • Granola Parfait: Layer crunchy granola with yogurt and berries for a satisfying breakfast that contrasts beautifully with the smoothie’s smooth texture. The combinations of flavors and textures create a harmonious morning feast.

  • Avocado Toast: Creamy avocado on whole-grain bread adds healthy fats, making it a filling side. Top with a sprinkle of chili flakes for a spicy kick that balances the sweetness of your smoothie.

  • Nutty Energy Bites: Little morsels packed with oats, nut butter, and chocolate chips are a great on-the-go snack. Their chewiness complements the silky smoothie perfectly, providing a boost of sustained energy.

  • Fresh Fruit Salad: A refreshing blend of seasonal fruits brightens the palate, with options like citrus or berries enhancing the smoothie's rich flavors. This vibrant addition is great for a mid-morning snack or a light lunch.

  • Cottage Cheese Bowl: Top cottage cheese with sliced peaches or crushed walnuts for protein and creaminess. The salty-sweet contrast pairs well with your Chocolate Cherry Smoothie, giving more layers to your meal.

  • Matcha Latte: A warm matcha drink rounds out the flavors, delivering a creamy twist with a hint of earthy flavor. The slight bitterness of matcha provides a nice foil to the sweet cherry and chocolate notes.

  • Dark Chocolate Square: Enjoy a square of dark chocolate on the side for a decadent touch. It’s a delightful way to indulge your sweet tooth while embracing the richness that complements your smoothie.

  • Protein Bar: A homemade or store-bought protein bar gives a simple and filling addition packed with flavors. Pairing it with the smoothie keeps you energized and ready for the day!

Chocolate Cherry Smoothie Recipe FAQs

How do I select the best cherries for my smoothie?
Absolutely! When selecting cherries, look for ones that are plump, firm, and brightly colored. Avoid any that have dark spots or are soft, as these may be overripe. Frozen cherries are great because they're typically harvested at peak ripeness, ensuring they're sweet and flavorful.

How should I store my Chocolate Cherry Smoothie?
If you have leftover smoothie, store it in an airtight container in the refrigerator for up to 24 hours. Keep in mind that the ingredients may separate, so give it a good stir before enjoying. It's always best fresh, so enjoy it right after preparation whenever possible!

Can I freeze my Chocolate Cherry Smoothie?
Certainly! If you’d like to freeze your smoothie for later, pour it into ice cube trays or silicone molds. Freeze until solid, which typically takes about 4-6 hours. When you're ready for a refreshing treat, pop the cubes into your blender and blend until smooth. You can also combine them with a splash of milk for a quicker prep!

What if my smoothie turns out too thick?
No worries! If your Chocolate Cherry Smoothie ends up too thick for your liking, simply add more milk (dairy or non-dairy) a little at a time while blending until you reach your desired consistency. Just remember to blend thoroughly to mix in any added liquid evenly.

Are there any dietary considerations for pets with this smoothie?
Great question! While the ingredients in this Chocolate Cherry Smoothie are healthy for humans, it’s important to note that cherries can be harmful to dogs. Always keep pet dietary restrictions in mind. If you're looking for a smooth treat for your furry friend, consider blending up some safe fruits like bananas or blueberries instead!

Can I make this smoothie nut-free?
Absolutely! If you're avoiding nuts, simply stick with soy milk or any other nut-free alternatives like oat or rice milk. Feel free to adjust the recipe to suit your dietary needs. The rich flavors of the chocolate and cherries will still shine through beautifully!

Chocolate Cherry Smoothie

Irresistibly Creamy Chocolate Cherry Smoothie Bliss

Enjoy this delicious Chocolate Cherry Smoothie, a nourishing drink that combines rich chocolate and sweet cherries for a refreshing boost.
Print Recipe Pin Recipe
Prep Time 5 minutes mins
Total Time 5 minutes mins
Servings: 1 serving
Course: Drinks
Cuisine: American
Calories: 200
Ingredients Equipment Method Nutrition Notes

Ingredients
  

For the Smoothie
  • 1 cup Frozen Cherries Fresh cherries can be used if pitted and frozen
  • 1 tablespoon Cacao Powder Substitute with unsweetened cocoa powder if needed
  • 1 cup Soy Milk Try almond or coconut milk for a nutty twist
  • 1 tablespoon Vital Proteins Collagen Optional, boosts protein content

Equipment

  • Blender

Method
 

Step-by-Step Instructions
  1. Gather your ingredients: 1 cup of frozen cherries, 1 tablespoon of cacao powder, and 1 cup of soy milk.
  2. If using, add 1 tablespoon of vital proteins collagen to the blender.
  3. Blend the mixture on high for about 30 to 60 seconds until smooth and creamy.
  4. Taste and adjust sweetness with honey or maple syrup, then blend again for 10 seconds.
  5. Pour into a glass and serve immediately. Enjoy!

Nutrition

Serving: 1servingCalories: 200kcalCarbohydrates: 35gProtein: 26gFat: 5gSaturated Fat: 1gSodium: 150mgPotassium: 300mgFiber: 5gSugar: 18gVitamin A: 2IUVitamin C: 20mgCalcium: 20mgIron: 5mg

Notes

For a thicker smoothie, freeze a banana or add more frozen cherries. Adjust milk quantity for desired thickness.

Tried this recipe?

Let us know how it was!

Rich and Creamy Homemade Hot Chocolate for Cozy Nights

August 13, 2025 by Grace Snow Leave a Comment

On a chilly evening, nothing quite compares to the rich aroma of warm chocolate filling the air. Today, I’m thrilled to share my favorite recipe for Ultimate Creamy Homemade Hot Chocolate, an indulgent treat that warms both your hands and your heart. This delightful beverage is crafted with just a few simple ingredients like melted dark chocolate and almond milk, transforming your winter nights into cozy moments of bliss. With a mere 20 minutes of prep, this recipe is not only quick but also incredibly satisfying, turning your kitchen into a snug chocolate haven. Plus, it’s dairy-free, meaning everyone can enjoy its creamy goodness. So, are you ready to warm up with this delightful cup of chocolatey joy?

Why Is This Hot Chocolate a Must-Try?

Creamy Indulgence: This homemade hot chocolate embraces richness with every sip, crafted from dark chocolate and almond milk for a decadent experience.

Quick Comfort: In just 20 minutes, you can create a cozy beverage that'll chase away the chill and warm your soul.

Dairy-Free Delight: Perfect for everyone, this recipe is simple and dairy-free without sacrificing that luxurious creamy texture.

Personal Touch: You can easily customize your hot chocolate by substituting different milks or adding flavors like a hint of cinnamon or even a splash of bourbon for an adult twist. For more chocolate inspiration, check out our Shakshuka Savor Bold to bring more bliss to your menu!

Topping Temptation: Elevate your drink with whipped cream or chocolate shavings, making this a crowd-pleasing treat that's perfect for sharing with family and friends.

Homemade Hot Chocolate Ingredients

For the Base
• Almond Milk – Use unsweetened almond milk for a creamy, dairy-free option that perfectly blends with chocolate.
• Dark Chocolate (70% Cacao) – Choose high-quality dark chocolate for the richest flavor; milk chocolate can be substituted for a sweeter variant.

For Flavoring
• Vanilla – Use pure vanilla extract to enhance the drink's depth without any artificial flavors.
• Cinnamon – A pinch of this spice warms up the drink and adds a delightful twist; it's optional if you prefer a plain hot chocolate.

For Sweetness
• Maple Syrup – This natural sweetener can be adjusted based on your taste, especially if using sweetened almond milk.

For Adult Bliss
• Bourbon – An optional splash adds complexity to the flavor profile; feel free to skip for a non-alcoholic treat.

For Toppings
• Whipped Cream – Add for a delightful dollop that brings a touch of indulgence to your cozy drink.
• Chocolate Shavings – A beautiful touch that enhances presentation and adds extra chocolate flavor to your cup of homemade hot chocolate.

Step‑by‑Step Instructions for Ultimate Creamy Homemade Hot Chocolate

Step 1: Heat the Almond Milk
In a small saucepan, pour in 2 cups of almond milk and place it over low heat. Allow the milk to warm gently, stirring occasionally, until steam begins to rise but it does not boil—this should take about 5 minutes. The goal is a cozy, inviting warmth that will act as the creamy base for your homemade hot chocolate.

Step 2: Add Chocolate and Flavors
Once the almond milk is warm, add 3 ounces of chopped dark chocolate, ¼ teaspoon of vanilla extract, and a pinch of cinnamon to the saucepan. Continue to cook over low heat, stirring with a whisk until the chocolate is completely melted and the mixture is smooth, which will take around 10 minutes. Watch for a velvety texture that signals it's approaching perfection.

Step 3: Sweeten the Mixture
After the chocolate has melted, stir in 1 tablespoon of maple syrup to introduce a touch of sweetness and balance out the rich chocolate flavor. If you're feeling adventurous, add 2 teaspoons of bourbon for an indulgent twist. Mix well until all elements are combined, creating a luxurious consistency in your hot chocolate.

Step 4: Whisk for Smoothness
Keep whisking the mixture continuously for an additional 5 minutes. This step ensures that every ingredient is thoroughly blended and prevents any chocolate from seizing at the bottom. As you whisk, your homemade hot chocolate will take on a blissful aroma, filling your kitchen with cozy warmth.

Step 5: Serve and Garnish
Once the desired consistency is achieved and the mixture is steaming hot, carefully pour your ultimate creamy homemade hot chocolate into mugs. If desired, top each serving with a generous dollop of whipped cream or sprinkle some chocolate shavings for an appealing finish. Celebrate the warmth and richness of this delightful drink!

Homemade Hot Chocolate Variations

Feel free to get creative with your hot chocolate and make it your own personal delight; this drink is all about indulgence!

  • Almond Milk Alternative: Try oat milk or cashew milk for unique flavors that complement the chocolate beautifully.

  • Flavor Boost: Sprinkle a pinch of sea salt or stir in a dash of cayenne pepper for a warm twist that enhances the rich taste.

  • Seasonal Chocolate: Swap in flavored chocolates, like orange or mint, for a festive holiday essence that adds a seasonal cheer to your cup.

  • Texture Twists: Stir in a tablespoon of peanut butter or Nutella to create a creamier, richer experience that’s truly irresistible.

  • Sweeten It Differently: Use honey or agave instead of maple syrup for a healthier sweetening option that still delivers on flavor.

  • Iced Delight: For warm-weather sipping, make an iced version by chilling your hot chocolate and blending it with ice for a refreshing drink.

  • Bourbon Bliss: Add a splash of coffee liqueur instead of bourbon for a mocha-inspired treat that brings an adult twist to your hot chocolate.

  • Garnish Magic: Top with toasted marshmallows or even a cinnamon stick for stirring—it's these little touches that make all the difference!

Want to try adding even more exciting flavors? You can also check out our Shakshuka Savor Bold for inspiration and delicious enhancements!

How to Store and Freeze Homemade Hot Chocolate

Refrigerator: Store any leftover homemade hot chocolate in an airtight container for up to 3 days. Be sure to let it cool completely before sealing to prevent condensation.

Freezer: For longer storage, freeze the hot chocolate in freezer-safe containers or ice cube trays for up to 1 month. This allows you to enjoy a quick treat later!

Reheating: To reheat, gently warm it in a saucepan over low heat, stirring constantly until smooth. You can also microwave it in short intervals, stirring between, to avoid hot spots.

Flavor Maintenance: Keep in mind that the flavor may change slightly after freezing. Stir well to reincorporate any ingredients when reheating your homemade hot chocolate.

Make Ahead Options

These rich and creamy homemade hot chocolate preparations are perfect for busy weeknights or cozy gatherings! You can prepare the hot chocolate base — combining 2 cups of almond milk, 3 ounces of chopped dark chocolate, ¼ teaspoon of vanilla, and a pinch of cinnamon — and refrigerate it for up to 3 days. Just whisk the mixture well before reheating it gently on the stove or in the microwave to maintain its smooth, velvety texture and prevent the chocolate from seizing. When ready to serve, simply stir in 1 tablespoon of maple syrup and 2 teaspoons of bourbon (if desired) for that indulgent finish. Enjoy the convenience of having this delightful treat prepped and waiting for you!

Expert Tips for Homemade Hot Chocolate

• Whisk Constantly: This prevents the chocolate from burning or seizing, ensuring a silky smooth texture in your hot chocolate.

• Quality Chocolate Matters: Use high-quality dark chocolate (70% cacao) for the richest flavor, avoiding chalky or waxy alternatives.

• Adjust Sweetness: Taste and adjust the maple syrup based on the sweetness of your almond milk, achieving your perfect balance in every cup.

• Thicker Consistency: For a richer, thicker homemade hot chocolate, let the mixture simmer longer to reduce milk and intensify flavors.

• Flavor Additions: Experiment with a dash of cayenne pepper or sea salt for a unique twist, inviting a delightful depth to your drink.

What to Serve with Ultimate Creamy Homemade Hot Chocolate

Cozy up with this homemade hot chocolate and explore delicious pairings that enhance your indulgent experience.

  • Chocolate Chip Cookies: These sweet treats offer a delightful crunch and complement the creaminess of hot chocolate perfectly. Dip them in for a heavenly combination!

  • Pivotal Peanut Butter Brownies: Rich and fudgy brownies add a nutty depth of flavor, enhancing the chocolate experience in your mug.

  • Spiced Muffins: Consider a cinnamon or ginger muffin. Their soft, warmth enhances the cozy nature of the hot chocolate, creating a delightful bite with each sip.

  • Fresh Fruit Skewers: Juicy strawberries or bananas provide a refreshing contrast to the velvety drink, balancing sweetness and texture beautifully.

  • Marshmallow Peeps: These fun, fluffy companions add a playful touch, melting slightly into the hot chocolate for an extra layer of sweetness.

  • Nutty Hot Chocolate Stout: A dark beer with hints of chocolate brings an exciting depth, perfect for adult gatherings. The rich flavors harmonize with your cozy beverage!

  • Almond Biscotti: Crunchy and slightly sweet, these cookies are perfect for dunking and add a subtle nutty flavor to your hot chocolate experience.

Indulge in these pairings for the ultimate homemade hot chocolate experience that warms both your heart and your palate.

Homemade Hot Chocolate Recipe FAQs

How do I choose the right type of chocolate for this recipe?
Absolutely! For the best flavor, go for high-quality dark chocolate with at least 70% cacao. This ensures a rich, chocolatey taste. If you prefer a sweeter hot chocolate, milk chocolate is a great alternative, but it might require reducing the maple syrup to balance the sweetness.

How should I store leftover homemade hot chocolate?
You can keep any leftover hot chocolate in an airtight container in the refrigerator for up to 3 days. Make sure to let it cool completely before sealing it; this prevents condensation, which can alter the taste and texture.

Can I freeze homemade hot chocolate?
Yes, you can freeze your hot chocolate! Pour it into freezer-safe containers or ice cube trays and store it for up to 1 month. When you're ready to enjoy it, just thaw it in the refrigerator overnight, then reheat gently on the stove or in the microwave.

What if my hot chocolate is too thick or not sweet enough?
No worries! If your homemade hot chocolate turns out too thick, you can easily adjust it. Just add a little more warm almond milk until the desired consistency is reached. For sweetness, taste and incrementally add more maple syrup until it suits your palate. Remember, you can always tweak flavors as you go.

Is this recipe suitable for those with allergies?
Yes, this hot chocolate is dairy-free, making it suitable for those who are lactose intolerant or prefer vegan options. However, always check your ingredient labels for any potential allergens, such as certain brands of chocolate or vanilla extract that may contain additives.

Can I add other flavors or ingredients?
Very! Get creative with your hot chocolate by adding a pinch of cayenne pepper for warmth or even a dash of sea salt to enhance the chocolate's flavor. You could also try different types of milk, like oat or cashew, or incorporate flavored chocolate, such as orange or mint, for a seasonal twist. Enjoy experimenting!

Homemade Hot Chocolate

Rich and Creamy Homemade Hot Chocolate for Cozy Nights

Enjoy a delightful cup of Homemade Hot Chocolate, a cozy drink made with dark chocolate and almond milk for a creamy indulgence.
Print Recipe Pin Recipe
Prep Time 20 minutes mins
Cook Time 15 minutes mins
Total Time 35 minutes mins
Servings: 2 cups
Course: Drinks
Cuisine: American
Calories: 250
Ingredients Equipment Method Nutrition Notes

Ingredients
  

For the Base
  • 2 cups Almond Milk Use unsweetened almond milk
  • 3 ounces Dark Chocolate (70% Cacao) Choose high-quality dark chocolate
For Flavoring
  • ¼ teaspoon Vanilla Use pure vanilla extract
  • Cinnamon A pinch, optional
For Sweetness
  • 1 tablespoon Maple Syrup Adjust based on taste
For Adult Bliss
  • 2 teaspoons Bourbon Optional
For Toppings
  • Whipped Cream Optional topping
  • Chocolate Shavings Optional topping

Equipment

  • Saucepan
  • Whisk

Method
 

Step-by-Step Instructions
  1. Heat the Almond Milk: In a small saucepan, pour in 2 cups of almond milk and place it over low heat. Allow the milk to warm gently, stirring occasionally, until steam begins to rise but it does not boil—this should take about 5 minutes.
  2. Add Chocolate and Flavors: Once the almond milk is warm, add 3 ounces of chopped dark chocolate, ¼ teaspoon of vanilla extract, and a pinch of cinnamon to the saucepan. Continue to cook over low heat, stirring with a whisk until smooth, around 10 minutes.
  3. Sweeten the Mixture: After the chocolate has melted, stir in 1 tablespoon of maple syrup and optionally add 2 teaspoons of bourbon. Mix well until all elements are combined.
  4. Whisk for Smoothness: Keep whisking the mixture for an additional 5 minutes to ensure every ingredient is thoroughly blended.
  5. Serve and Garnish: Once the mixture is steaming hot, pour into mugs. Top with whipped cream or sprinkle chocolate shavings if desired.

Nutrition

Serving: 1cupCalories: 250kcalCarbohydrates: 30gProtein: 5gFat: 12gSaturated Fat: 3gPolyunsaturated Fat: 1gMonounsaturated Fat: 8gSodium: 150mgPotassium: 300mgFiber: 4gSugar: 20gVitamin A: 150IUVitamin C: 1mgCalcium: 25mgIron: 3mg

Notes

For a thicker consistency, let the mixture simmer longer. Quality chocolate matters for the best flavor. Adjust sweetness based on almond milk used.

Tried this recipe?

Let us know how it was!

Hello world!

August 1, 2025 by admin 1 Comment

Welcome to WordPress. This is your first post. Edit or delete it, then start writing!

frzfzrrzberb

  • « Previous Page
  • 1
  • …
  • 3
  • 4
  • 5

Welcome!

Hi, I’m Grace, a Sydney-based home cook with a passion for bold flavors and trending ingredients. Whether you’re a busy beginner or a seasoned foodie, you’ll find dishes here that are fresh, fun, and full of flavor.

More about me

Popular Recipes

  • One Pot Keto Tuna Casserole
    One Pot Keto Tuna Casserole: Creamy Comfort in Minutes
  • Ultimate Jalapeno Popper Chicken Salad
    Ultimate Jalapeno Popper Chicken Salad That'll Wow Your Tastebuds
  • Green Chile Cheese Dip
    Mouthwatering Green Chile Cheese Dip for Cozy Gatherings
  • Easy Chimichurri Sauce
    Fresh and Zesty Easy Chimichurri Sauce in Just Minutes

Footer

↑ back to top

About

  • Privacy Policy
  • Disclaimer
  • Terms & Conditions

Newsletter

  • Sign Up! for emails and updates

Contact

  • About me
  • Contact me

Copyright © 2025 TastyTrendIngredients