tastytrendingredients

  • Home
  • Recipes
    • Appetizers
    • Breakfast
    • Dessert
    • Dinner
    • Drinks
    • Salads
    • Snacks
    • Soups
  • About me
  • Contact
menu icon
go to homepage
  • Home
  • Recipes
    • Appetizers
    • Breakfast
    • Dessert
    • Dinner
    • Drinks
    • Salads
    • Snacks
    • Soups
  • About me
  • Contact
search icon
Homepage link
  • Home
  • Recipes
    • Appetizers
    • Breakfast
    • Dessert
    • Dinner
    • Drinks
    • Salads
    • Snacks
    • Soups
  • About me
  • Contact
×

Cozy Apple Chai Latte: Your Perfect Sip for Fall Bliss

September 21, 2025 by Grace Snow Leave a Comment

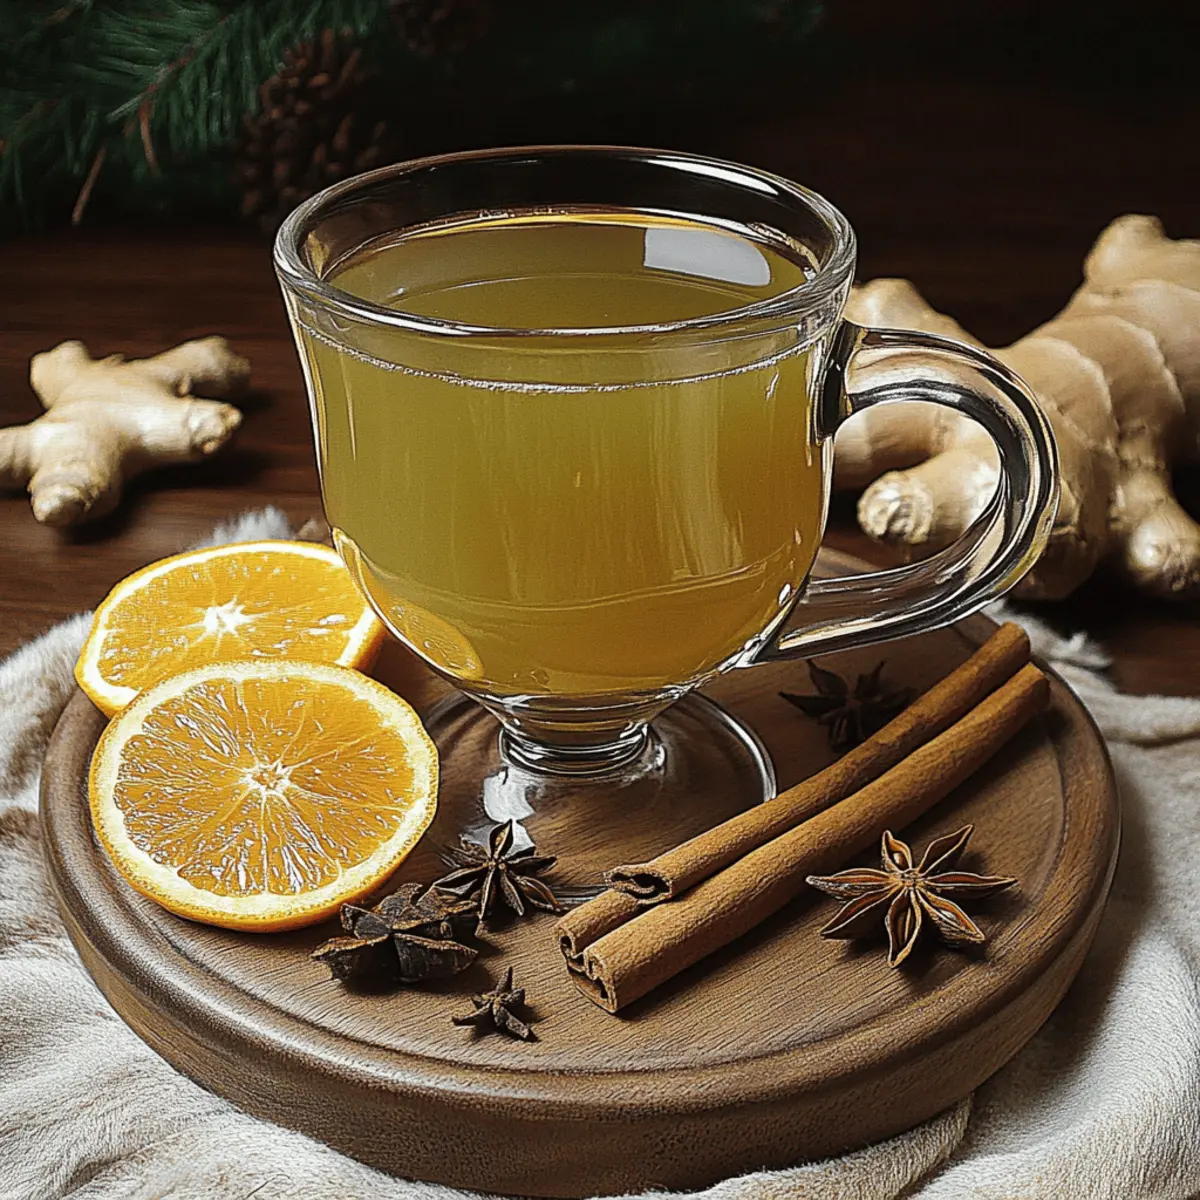
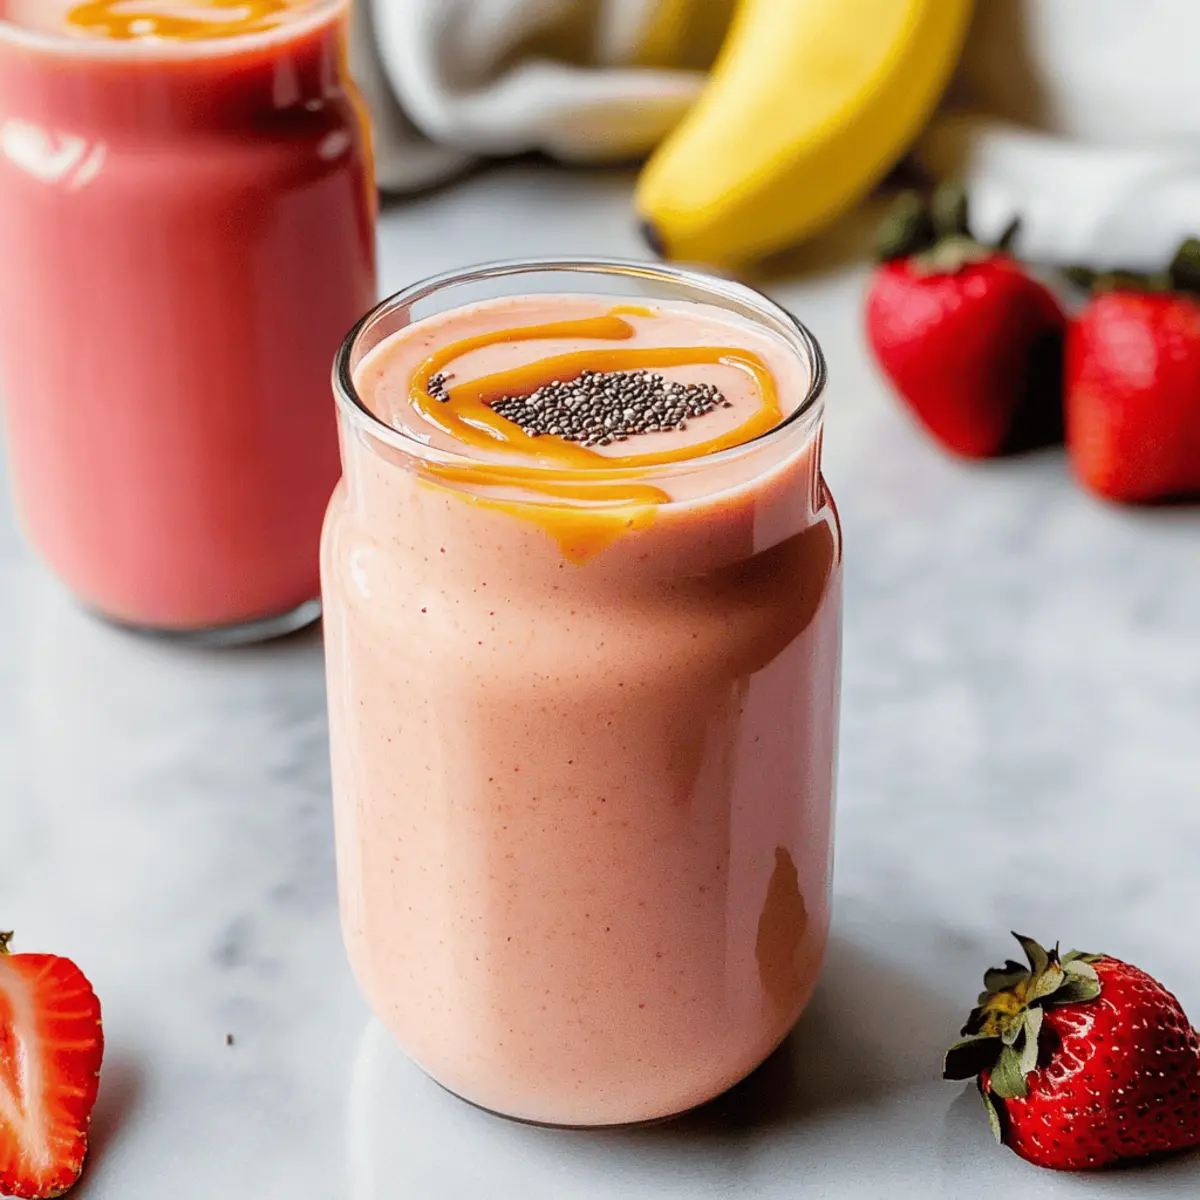
As the first crisp leaves begin to fall, a cozy aroma starts to fill my kitchen—it's the unmistakable scent of my favorite autumn drink: a delightful Apple Chai Latte. This recipe marries the sweet, fruity notes of fresh apple cider with the warmth of traditional chai spices, creating a comforting beverage that’s perfect for cool evenings and holiday gatherings. Not only is this Apple Chai Latte quick to prepare, making it ideal for busy nights, but it also offers a delightful twist on the classic latte, proving to be a crowd-pleaser for friends and family alike. So, why not put the fast food down and treat yourself to the seasonal hug in a mug you deserve? Are you ready to stir up some cozy magic in your kitchen?

Why Is This Apple Chai Latte Special?

Delightful Flavors: The perfect blend of sweet apple cider and aromatic chai spices creates a taste that embodies the essence of fall.

Quick to Make: With just a few easy steps, you can whip up this cozy drink in no time, making it a go-to for those busy evenings!

Customizable: Feel free to swap the milk for your favorite plant-based version or add a touch of sweetness with honey or maple syrup. For those who love variety, check out our Chicken Salad Apples for a flavor-packed culinary adventure.

Holiday Appeal: This drink is not only comforting but also eye-catching, perfect for serving at festive gatherings.

Seasonal Hug in a Mug: Each sip warms your soul, making it a delightful way to embrace the cozy vibes of autumn and winter.

Indulge in this Apple Chai Latte and make your seasonal gatherings even more special!

Apple Chai Latte Ingredients

• Let's gather everything you need for your cozy delight!

For the Base

  • Apple Cider – Choose high-quality, unfiltered cider for depth of flavor.
  • Water – Use to dilute the apple cider and achieve a well-balanced drink.
  • Chai Tea Bags (or Loose Chai Tea) – Infuses the latte with warm spices; chai bags are convenient, while loose tea offers a bolder infusion.

For the Creaminess

  • Milk (Dairy or Plant-Based) – Adds creaminess; almond, oat, or coconut milk are wonderful lighter options.

For Sweetness

  • Honey or Maple Syrup (optional) – Add sparingly for sweetness; honey brings a floral note, while maple syrup adds rich caramel depth.

For Garnish

  • Ground Cinnamon (optional) – Enhances warmth and spice, perfect for that cozy feeling.
  • Cinnamon Stick or Apple Slice (optional) – These decorative garnishes not only elevate the visual appeal but also enhance the aroma.

With this combination of ingredients, you'll create a delightful Apple Chai Latte that’s a hug in a mug for those cool autumn days!

Step‑by‑Step Instructions for Apple Chai Latte

Step 1: Combine Ingredients
In a medium-sized pot, combine 1 cup of high-quality, unfiltered apple cider with 1/2 cup of water. Place the pot over medium heat and bring the mixture to a gentle simmer, stirring occasionally. You'll know it's ready when you see small bubbles forming on the surface, releasing the comforting aroma of apple as it heats.

Step 2: Steep the Chai
Once the apple cider mixture is simmering, add 2 chai tea bags or 2 teaspoons of loose chai tea directly into the pot. Let the chai steep for 3 to 5 minutes, allowing the spices to meld beautifully with the apple flavors. Keep an eye on the color, as it should darken slightly, indicating that the flavors are infusing perfectly.

Step 3: Remove the Tea
After steeping, carefully remove the tea bags or strain out the loose tea from the pot. Discard them, and take a moment to enjoy the rich, fragrant aroma of your blended apple chai, a warm promise of the cozy Apple Chai Latte to come.

Step 4: Add the Creaminess
Pour 1 cup of your preferred milk—whether dairy or plant-based—into the pot with the apple chai mixture. Stir gently as you heat the mixture over low heat, avoiding boiling to ensure the milk doesn’t curdle. You’ll know it’s perfectly warmed when you can see steam rising but no bubbles.

Step 5: Sweeten to Taste
Once the milk is warm, consider sweetening your Apple Chai Latte! Add 1 to 2 teaspoons of honey or maple syrup, depending on your preference. Stir until the sweetener dissolves completely, creating a beautifully rich flavor profile that complements the apple and chai spices.

Step 6: Serve and Garnish
Pour the delightful mixture into your favorite mugs, ready for enjoyment. For a finishing touch, sprinkle a dash of ground cinnamon on top or garnish with a cinnamon stick or a fresh apple slice. This not only adds aesthetic charm but also enhances the cozy aroma as you sip your warm Apple Chai Latte.

What to Serve with Cozy Apple Chai Latte

As the temperatures drop, the comforting aroma of spices and sweet apple fills your home, creating the perfect backdrop for a cozy gathering.

  • Ginger Snaps: These crispy cookies provide a delightful crunch and a spicy contrast that enhances the warmth of your latte—truly a match made in heaven.

  • Pumpkin Muffins: Soft, flavorful muffins bring a seasonal touch while balancing the spiced notes from the Apple Chai Latte. These treats are perfect for sharing!

  • Cheese Board: A selection of sharp cheddar and creamy brie paired with fresh apple slices offers a savory-sweet combination, making your cozy sipping experience even more delightful.

  • Cinnamon Rolls: Warm, gooey rolls drizzled in icing are the ultimate sweet companion. Each fluffy bite pairs beautifully with the warm spices in your drink, especially on chilly mornings.

  • Caramel Popcorn: The buttery, sweet, and slightly salty popcorn adds fun and whimsy to your drink experience. Enjoy snacking while savoring your cozy latte.

  • Apple Crisp: A warm apple crisp topped with vanilla ice cream is a comforting dessert that complements your drink’s apple flavors. It’s a dessert worth indulging in!

  • Maple-Glazed Doughnuts: Soft, sweet doughnuts with a hint of maple echo the cozy flavors of your latte. They make for a delightful breakfast or afternoon treat!

  • Spiced Hot Cider: For those who want to enhance the apple flavor even more, serve a small glass of warm spiced cider alongside. It’s a warming complement for sipping while enjoying your latte.

Expert Tips for the Best Apple Chai Latte

  • Choose Quality Cider: Opt for high-quality, unfiltered apple cider to ensure a rich, authentic flavor that elevates your Apple Chai Latte.

  • Sweetness Balance: Remember, apple cider is naturally sweet. Adjust the honey or maple syrup based on your taste buds and how sweet your cider is.

  • Steeping Time Matters: Don’t oversteep the chai tea! Aim for 3-5 minutes to keep the flavors balanced without bitterness, enhancing your latte's cozy taste.

  • Gentle Heating: Heat the milk slowly to avoid curdling. Your Apple Chai Latte should be warm and creamy, not overheated.

  • Garnish Creativity: Get creative with garnishes! A sprinkle of nutmeg or a star anise can add an unexpected twist to your Apple Chai Latte experience.

  • Make Ahead: Prepare the apple cider and chai mixture ahead of time. Just reheat and add milk when you're ready to enjoy a quick, cozy sip!

Apple Chai Latte Variations

Embrace your creativity in the kitchen with these delightful variations for your Apple Chai Latte!

  • Dairy-Free: Substitute regular milk with almond or oat milk for a light, nut-free option that still delivers creaminess. The nutty flavors intertwine perfectly with apple and chai spices.

  • Spiced Apple Cider: Use spiced apple cider instead of regular for an extra kick. Imagine the warmth of cinnamon and cloves enhancing each sip—it's autumn in a cup!

  • Richness Boost: For a richer flavor, replace part of the apple cider with cream. This decadent twist creates a luxuriously smooth beverage that feels extra indulgent.

  • Sweetener Swaps: Explore different sweeteners by trying agave nectar or coconut sugar instead of honey or maple syrup. Each one adds a unique flavor profile to your drink.

  • Flavorful Mix-Ins: Add a splash of vanilla extract to elevate the taste even further. Just a hint will brighten the flavors and bring harmony to the spices.

  • Garnish Enhancement: Experiment with garnishes like a sprinkle of nutmeg or a star anise. Not only do these enhance visual appeal, but they also add new aromatic layers to your latte.

  • Chai Variety: Swap regular chai for rooibos chai or matcha for a caffeine-free or vibrant alternative. Each variation introduces a unique essence, allowing for a delightful twist.

  • Exploring Heat: Love a little spice? Add a pinch of cayenne pepper or a slice of fresh ginger while steeping the chai. It'll give you a pleasant warmth that complements the apple perfectly.

Ready to try one of these tantalizing twists on your Apple Chai Latte? And for even more delicious ideas, check out our recipe for Chicken Salad Apples that's sure to captivate your taste buds!

Make Ahead Options

These cozy Apple Chai Lattes are perfect for busy home cooks looking to save time during the chillier months! You can prep the apple cider and chai mixture up to 24 hours in advance by combining 1 cup of apple cider and 1/2 cup of water in a pot and steeping the chai tea. After removing the tea, let the mixture cool, then refrigerate it in an airtight container. When you're ready to enjoy, simply reheat the mixture over low heat, stir in 1 cup of your desired milk, and sweeten it to taste. This way, you maintain the rich, comforting flavors, ensuring your Apple Chai Latte is just as delightful as if made fresh!

How to Store and Freeze Apple Chai Latte

Fridge: Store any leftover Apple Chai Latte in an airtight container in the fridge for up to 3 days. Just give it a good stir before reheating.

Freezer: Freeze portions of the Apple Chai Latte in freezer-safe containers for up to 2 months. Thaw in the fridge overnight and reheat gently before serving.

Reheating: Reheat on the stovetop over low heat to maintain creaminess, or use a microwave in short intervals, stirring in between until warmed through.

Make-Ahead Tips: You can prepare the apple cider and chai mixture ahead of time and store it in the fridge. Add milk when you're ready to serve for the freshest taste.

Apple Chai Latte Recipe FAQs

What type of apple cider should I use for the best flavor?
Absolutely! For the best Apple Chai Latte, choose high-quality, unfiltered apple cider. It provides a deep, natural sweetness and rich flavor that elevates your drink. Look for cider that has a fresh aroma and is free from added sugars for the most authentic taste.

How long can I store leftover Apple Chai Latte?
You can store any leftover Apple Chai Latte in an airtight container in the fridge for up to 3 days. Just make sure to give it a good stir before reheating, as the ingredients may separate slightly when chilled.

Can I freeze Apple Chai Latte?
Very! You can freeze portions of the Apple Chai Latte in freezer-safe containers for up to 2 months. To do this, let it cool completely before transferring to containers. When you’re ready to enjoy it, simply thaw in the fridge overnight and reheat gently on the stovetop or microwave until warmed through.

What should I do if my Apple Chai Latte turns out too sweet?
If your Apple Chai Latte is too sweet for your taste, consider adding more milk to balance out the flavors. This not only helps reduce sweetness but also maintains the creamy texture. Alternatively, a pinch of salt can enhance other flavors and offset the sweetness.

Is this Apple Chai Latte safe for children?
Absolutely! This Apple Chai Latte is safe for children. Just make sure to adjust the spice levels according to their taste preferences if you're using a more robust chai blend. The natural apple flavor and creamy texture make it a delightful treat for kids as well.

Can I customize the sweetness of the latte?
Yes, you can absolutely customize the sweetness! Both honey and maple syrup are great options, but start with just a teaspoon, as apple cider itself is naturally sweet. Taste and add more if necessary to achieve your desired flavor. Enjoy experimenting!

Apple Chai Latte

Cozy Apple Chai Latte: Your Perfect Sip for Fall Bliss

Enjoy a delightful Apple Chai Latte that marries sweet apple cider with traditional chai spices, perfect for fall relaxation.
Print Recipe Pin Recipe
Prep Time 10 minutes mins
Cook Time 10 minutes mins
Total Time 20 minutes mins
Servings: 2 cups
Course: Drinks
Cuisine: American
Calories: 150
Ingredients Equipment Method Nutrition Notes

Ingredients
  

For the Base
  • 1 cup Apple Cider Choose high-quality, unfiltered cider for depth of flavor.
  • 1/2 cup Water Use to dilute the apple cider and achieve a well-balanced drink.
  • 2 bags Chai Tea Bags Infuses the latte with warm spices.
For the Creaminess
  • 1 cup Milk (Dairy or Plant-Based) Add creaminess; almond, oat, or coconut milk are wonderful lighter options.
For Sweetness
  • 1-2 teaspoons Honey or Maple Syrup Add sparingly for sweetness; honey brings a floral note, while maple syrup adds rich caramel depth.
For Garnish
  • to taste Ground Cinnamon Enhances warmth and spice.
  • to taste Cinnamon Stick or Apple Slice For decorative garnishes.

Equipment

  • medium-sized pot

Method
 

Step-by-Step Instructions
  1. In a medium-sized pot, combine 1 cup of high-quality, unfiltered apple cider with 1/2 cup of water. Place the pot over medium heat and bring the mixture to a gentle simmer.
  2. Once the apple cider mixture is simmering, add 2 chai tea bags or 2 teaspoons of loose chai tea directly into the pot. Let the chai steep for 3 to 5 minutes.
  3. After steeping, carefully remove the tea bags or strain out the loose tea from the pot.
  4. Pour 1 cup of your preferred milk into the pot with the apple chai mixture. Stir gently as you heat the mixture over low heat.
  5. Once the milk is warm, consider sweetening your Apple Chai Latte. Add 1 to 2 teaspoons of honey or maple syrup.
  6. Pour the mixture into your favorite mugs and garnish with a sprinkle of ground cinnamon or a cinnamon stick.

Nutrition

Serving: 1cupCalories: 150kcalCarbohydrates: 35gProtein: 2gFat: 3gSaturated Fat: 1gCholesterol: 10mgSodium: 50mgPotassium: 200mgFiber: 1gSugar: 30gVitamin A: 200IUVitamin C: 2mgCalcium: 100mgIron: 1mg

Notes

Store any leftover Apple Chai Latte in an airtight container in the fridge for up to 3 days. Can be frozen for up to 2 months.

Tried this recipe?

Let us know how it was!

Spooky Halloween Mimosas with Fun Lychee Eyeballs

September 19, 2025 by Grace Snow Leave a Comment

As I strolled through the vibrant autumn market, a witches' cauldron of ideas began bubbling in my mind. Halloween season calls for creativity, and what better way to celebrate than with a festive Halloween Mimosa? This fun cocktail pairs the crisp effervescence of champagne with the tangy richness of pomegranate juice, making it a perfect choice for lively parties or cozy brunch gatherings. Not only do these mimosas look delightfully spooky with their lychee and blueberry eyeballs, but they also cater to all palates—offering an easy non-alcoholic twist for your guests. Ready to enjoy a sip of Halloween magic and impress your friends? Let’s mix up some spooky delights!

Why Are Halloween Mimosas So Special?

Festive Twist: This Halloween Mimosa brings a playful spin to the classic brunch drink, making it a festive highlight for gatherings.
Visually Stunning: The lychee eyeballs not only add intrigue but also spark conversation, captivating both kids and adults alike.
Simple Preparation: With just a few steps, you can easily whip up these delightful cocktails—perfect for those rushed party prep moments!
Versatile Flavor Options: Feel free to mix and match juices to create your preferred flavor profile, making it enjoyable for every taste bud.
Non-Alcoholic Adaptation: Hosting friends or family who prefer not to drink? Simply swap the champagne for sparkling soda for a delicious non-alcoholic treat!
Serve these fun beverages at your next spooky celebration and watch them fly off the table! Enjoy a delightful twist on a classic with this captivating drink.

Halloween Mimosa Ingredients

• Ready to create your own spooky drink? Here’s what you’ll need!

For the Eyeballs

  • Lychees in Light Syrup – A unique texture and sweetness, perfect for creating "eyeballs." Substitute fresh lychees if unavailable.
  • Blueberries – Bursting with color and flavor, these complete the eyeball look; fresh or frozen work well!

For the Cocktail

  • Pomegranate Juice – The fruity, tangy base for your Halloween Mimosa; cranberry juice is a great substitute if needed.
  • Brut Champagne – Provides the bubbly fizz; can be swapped with sparkling wine or prosecco, or use club soda for a non-alcoholic option.

These ingredients will help you conjure up the perfect festive concoction for your Halloween gatherings!

Step‑by‑Step Instructions for Halloween Mimosas

Step 1: Prepare the Eyeballs
Begin by draining the lychees from the light syrup. Carefully pierce a blueberry into the center of each lychee, creating your spooky eyeballs. Use a cocktail skewer to hold the blueberry in place. As you assemble them, place the finished lychee eyeballs on a serving plate, making sure they are intact and ready for the cocktails.

Step 2: Chill the Glasses
To ensure your Halloween Mimosas are refreshingly cool, chill your champagne glasses in the freezer for about 10 minutes. If you prefer, you can also fill them with ice water while you prepare other ingredients. This step enhances the effervescence of the champagne, making your drinks even more delightful.

Step 3: Pour the Champagne
Once your glasses are chilled, remove them from the freezer or ice water. Gently pour the brut champagne into each glass, filling them about two-thirds full. Look for that pleasant fizz as the bubbles rise, creating a lively atmosphere for your Halloween celebration.

Step 4: Add the Pomegranate Juice
Carefully top each glass of champagne with pomegranate juice, pouring it slowly to maintain the bubbles. Pour until the glass is nearly full, creating a beautiful ombre effect with the dark red juice meeting the golden bubbly champagne. The colors will evoke the spirit of Halloween.

Step 5: Garnish with Eyeballs
Finally, take your cocktail skewers with the lychee eyeballs and place one in each glass. Arrange them so they elegantly float above the liquid, giving your Halloween Mimosas a festive and spooky appearance. The playful presentation will surely delight your guests as they admire their unique, eerie drinks.

Tips for the Best Halloween Mimosa

  • Chill Everything: Ensure your champagne and glasses are well-chilled prior to serving. This helps maintain the effervescence of your Halloween Mimosa.
  • Gentle Assembly: When creating lychee eyeballs, be gentle to avoid breaking the delicate fruit. Patience pays off for an impressive presentation!
  • Flavor Adjustments: Don't hesitate to experiment with different juices! Tasting along the way allows you to customize the sweetness and flavor of your mimosas.
  • Non-Alcoholic Option: If serving guests who prefer not to drink, swap champagne for club soda or a flavored sparkling drink to create a delightful non-alcoholic version.
  • Serve Fresh: Mimosas are best enjoyed fresh to maintain their carbonation, so prepare them just before serving for ultimate enjoyment!

Halloween Mimosa Variations & Substitutions

Feel free to get creative and customize your Halloween Mimosa with these fun twists!

  • Non-Alcoholic: Replace champagne with club soda or a flavored sparkling drink for a bubbly, festive option everyone can enjoy.
    Serving these chilled will keep the fizz lively, ensuring a refreshing experience for all your guests.

  • Juice Swap: If pomegranate juice is not available, cranberry juice makes a delicious alternative, providing similar fruity notes.
    Mixing juices can add an element of surprise in flavor, making your mimosas a talking point around the table!

  • Flavored Champagne: Consider using flavored sparkling wine, like peach or raspberry, to add an exciting twist to the classic taste.
    This is a fun way to enhance the overall flavor profile, transforming your mimosa into a unique seasonal cocktail.

  • Herbal Twist: Infuse your pomegranate juice with fresh mint or basil for a refreshing layer of complexity in each sip.
    A little herb can elevate your drink and add a fresh pop that complements the sweetness wonderfully!

  • Spice it Up: Add a sprinkle of cinnamon or nutmeg to the pomegranate juice for a warm, spiced twist that's perfect for fall.
    These warming spices give your mimosas a cozy touch, inviting warmth to each bubbly sip.

  • Garnish Options: Instead of lychee, use gummy eyeballs or spooky-shaped fruit cutouts for a fun and playful garnish.
    This quick switch can lighten the mood while adding a sweet treat your guests will enjoy after the drink is gone!

  • Colorful Layers: Layer different juices, like orange or pineapple, for a vibrant rainbow effect that adds visual appeal.
    This playful presentation not only looks festive but also gives varied flavors with each sip, delighting both kids and adults alike!

Whether you choose to dive into tropical flavors or spritz up some spookiness, these variations for your Halloween Mimosa ensure everyone's taste buds will be catered to at your celebration!

Make Ahead Options

These Halloween Mimosas are perfect for preparing ahead of time, allowing you to enjoy more time with your guests during the festivities! You can prepare the lychee eyeballs by piercing the blueberries into the lychees and refrigerating them up to 24 hours in advance, ensuring they stay fresh and intact. To serve, simply chill your champagne glasses, pour in the champagne, and top with pomegranate juice just before serving to maintain that lovely fizz. This thoughtful preparation saves you valuable time during busy party moments, allowing your Halloween Mimosas to be just as delicious and festive when served!

What to Serve with Spooky Halloween Mimosas

Elevate your Halloween gathering with delightful pairings that enhance the festive spirit and tantalize the taste buds.

  • Savory Cheese Platter: A variety of cheeses paired with crackers adds a savory contrast to the sweet mimosas, making a perfect handheld bite.
  • Pumpkin Spice Muffins: These warm, spiced treats echo seasonal flavors and offer a cozy feeling, complementing the refreshing cocktails beautifully.
  • Frightful Finger Foods: Mini savory pastries or stuffed mushrooms provide a fun and tasty twist that guests will love while enjoying their mimosas.
  • Halloween Fruit Skewers: Add a splash of color with skewers of seasonal fruits like grapes, oranges, and strawberries for a fresh, vibrant touch.
    Perfect for balancing their sweetness, these fruity bites not only add variety but also refresh the palate.
  • Witch’s Brew Soup: A warm, creamy pumpkin soup serves as a comforting counterpart, embracing the spirit of the season while providing an inviting warmth.
  • Chilling Midnight Brew: For a unique drink option, serve a spooky non-alcoholic punch alongside your Halloween Mimosas, inviting all guests to join in the fun.

Mix and match these options to create an enchanting Halloween feast that guests will remember long after the last toast!

How to Store and Freeze Halloween Mimosas

Fridge: Store any leftover mimosas in the fridge for up to 1 day, covering them tightly with plastic wrap to preserve carbonation.

Lychee Eyeballs: If you prepare lychee eyeballs in advance, keep them refrigerated in an airtight container for up to 3 days before serving.

Make-Ahead Tip: You can mix the juices ahead of time and store them in the fridge, but always add champagne just before serving to enjoy the fizz of your Halloween Mimosa.

Freezer: For no-fuss entertaining, freeze prepared lychee eyeballs in a single layer, then transfer to a bag for up to 1 month.

Halloween Mimosas Recipe FAQs

What are the best lychees to use for the eyeballs?
I recommend using canned lychees in light syrup for their sweet, soft texture, perfect for forming spooky eyeballs. If you can find fresh lychees, they can also work wonderfully—just peel and pit them before inserting the blueberries!

How long can I store leftover mimosas?
Leftover Halloween Mimosas should be stored in the fridge and consumed within 1 day. Make sure to cover them with plastic wrap to help retain some of the bubbles.

Can I make the lychee eyeballs in advance?
Absolutely! You can prepare the lychee eyeballs up to 3 days in advance. Just keep them in an airtight container in the refrigerator to maintain their freshness until it's time to serve.

What’s the proper way to freeze lychee eyeballs?
To freeze lychee eyeballs, first arrange them in a single layer on a baking sheet. Flash freeze them for about 2 hours until solid. Then, transfer the frozen eyeballs to a sealed freezer bag. They can be stored in the freezer for up to 1 month. Simply thaw them in the fridge or at room temperature before using.

Is there a non-alcoholic option for the Halloween Mimosa?
Yes! You can easily create a non-alcoholic Halloween Mimosa by substituting the brut champagne with club soda or a sparkling flavored beverage. This way, everyone can enjoy the festive fun, regardless of their drink preferences.

Can I customize the juice flavors in my mimosas?
Definitely! Feel free to experiment with different juices like cranberry or orange to create a flavor you love. I often mix and match to achieve the perfect blend, ensuring every sip is delightful!

Halloween Mimosa

Spooky Halloween Mimosas with Fun Lychee Eyeballs

These festive Halloween Mimosas feature a delightful combination of champagne and pomegranate juice, topped with lychee eyeballs for a spooky presentation.
Print Recipe Pin Recipe
Prep Time 15 minutes mins
Total Time 15 minutes mins
Servings: 4 mimosas
Course: Drinks
Calories: 150
Ingredients Equipment Method Nutrition Notes

Ingredients
  

For the Eyeballs
  • 1 can Lychees in Light Syrup Substitute fresh lychees if unavailable.
  • ½ cup Blueberries Fresh or frozen both work well.
For the Cocktail
  • 2 cups Pomegranate Juice Cranberry juice is a great substitute if needed.
  • 1 bottle Brut Champagne Can be swapped with sparkling wine or prosecco, or use club soda for a non-alcoholic option.

Equipment

  • champagne glasses
  • cocktail skewers
  • freezer

Method
 

Step‑by‑Step Instructions
  1. Begin by draining the lychees from the light syrup. Carefully pierce a blueberry into the center of each lychee, creating your spooky eyeballs. Use a cocktail skewer to hold the blueberry in place. As you assemble them, place the finished lychee eyeballs on a serving plate.
  2. To ensure your Halloween Mimosas are refreshingly cool, chill your champagne glasses in the freezer for about 10 minutes. If you prefer, you can also fill them with ice water while you prepare other ingredients.
  3. Once your glasses are chilled, remove them from the freezer or ice water. Gently pour the brut champagne into each glass, filling them about two-thirds full.
  4. Carefully top each glass of champagne with pomegranate juice, pouring it slowly to maintain the bubbles. Pour until the glass is nearly full, creating a beautiful ombre effect.
  5. Finally, take your cocktail skewers with the lychee eyeballs and place one in each glass. Arrange them so they elegantly float above the liquid.

Nutrition

Serving: 1mimosaCalories: 150kcalCarbohydrates: 20gSodium: 5mgPotassium: 120mgFiber: 1gSugar: 16gVitamin C: 10mg

Notes

Mimosas are best enjoyed fresh to maintain their carbonation, so prepare them just before serving for ultimate enjoyment.

Tried this recipe?

Let us know how it was!

Black Magic Margarita: Your Spooky Sip for Halloween Fun

September 19, 2025 by Grace Snow Leave a Comment

As the leaves turn a fiery orange and spooky decorations start making their appearance, it’s time to embrace the Halloween spirit with a drink that truly captivates the imagination. Enter the Black Magic Margarita—a cocktail so enchanting, it’s as if it’s conjured from a witch's brew. This quick-to-prepare elixir features captivating flavors of tropical passion fruit, making it a flexible option for any gathering. Whether you’re hosting a themed party or enjoying a cozy movie night, this customizable Halloween cocktail promises to be the highlight of your soirée. Curious to see how you can mix your own magical concoction?

Why is Black Magic Margarita a Must-Try?

Showstopper at Parties: This cocktail is not just a drink; it's a conversation starter. Its striking dark color and shimmering effect wow your guests, making it the perfect centerpiece for your Halloween party.

Quick and Customizable: Whipping up this magical concoction takes only a few minutes! Plus, with options for ingredient swaps like using raspberry liqueur or different flavored salts, you can easily personalize it to suit anyone's taste.

Irresistible Flavor: The combination of passion fruit liqueur and fresh lime creates a delightful balance that is both lively and refreshing. You'll find it hard to resist pouring another!

Versatile Enjoyment: Perfect for any spooky occasion—be it Halloween festivities, themed parties, or cozy movie nights—this margarita adapts to your needs seamlessly.

Fun for All: Whether you're a cocktail aficionado or a casual sipper, this Black Magic Margarita beckons everyone to join the fun. Pair it with your favorite snacks, like Sweet Potatoes Black or Blackberry Crisp Amp, for an unforgettable flavor experience!

Black Magic Margarita Ingredients

For the Margarita
• Passion Fruit Liqueur – This adds fruity sweetness and tropical notes; feel free to substitute with raspberry, cherry, or lemon liqueur!
• Tequila – The backbone of this cocktail, it provides strength and characteristic flavor; no substitutions recommended for this key ingredient.
• Cointreau – Adds a zesty orange flavor and complexity; can be replaced by Triple Sec or any orange liqueur.
• Fresh Lime Juice – Provides that refreshing acidity; if fresh is unavailable, bottled lime juice or sour mix works just fine.
• Simple Syrup – Sweetens the cocktail perfectly; swap it out for agave nectar if you prefer a different sweetness profile.
• Activated Charcoal – Adds that spooky black color; can be replaced with black gel food coloring if desired.

For the Garnish
• Black Lava Salt – Rims the glass for a striking salty kick and visual appeal; black sugar sprinkles can be used as a substitute.
• Edible Silver Glitter or Shimmer – Optional but enhances the visual allure—perfect for adding that magical touch!
• Cup of Ice – To chill the cocktail and achieve the desired dilution.

Unleash your creativity with this Black Magic Margarita, and watch as your Halloween celebrations soar to new heights!

Step‑by‑Step Instructions for Black Magic Margarita

Step 1: Prepare the Glass
Start your Black Magic Margarita by preparing the glass. Run a lime slice along the rim of your chosen glass, making sure to coat it evenly. Then, gently dip the rim into black lava salt for a striking visual effect and a salty kick. Set the glass aside to let the rim dry while you gather the remaining ingredients.

Step 2: Combine Ingredients
Take a cocktail shaker and fill it with a cup of ice. Pour in the passion fruit liqueur, tequila, Cointreau, fresh lime juice, simple syrup, and a pinch of activated charcoal for that signature spooky color. If you're using edible shimmer for an extra magical touch, add it now. Ensure all ingredients are combined in a harmonious blend before moving on.

Step 3: Shake It Up
Secure the lid on your cocktail shaker and shake vigorously for about 15 seconds. This process is essential to chill the Black Magic Margarita and properly incorporate the flavors. You should feel the shaker cool down in your hands. After shaking, it should have a frosty appearance, indicating that it's perfectly mixed.

Step 4: Strain into the Glass
Now, take your prepared glass filled with fresh ice and position a strainer over the top of the shaker. Carefully pour the chilled margarita into the glass, ensuring the rim stays intact. The vibrant dark color should cascade into the glass, showcasing the cocktail's allure and inviting your guests to take a sip.

Step 5: Add the Finishing Touch
To elevate the presentation of your Black Magic Margarita, garnish with a whimsical skull cocktail stirrer or a sprinkle of edible silver glitter atop the drink. This not only enhances the visual appeal but also adds a touch of festive charm—perfect for any Halloween gathering. Serve immediately to enjoy the freshness!

Black Magic Margarita Variations & Substitutions

Feel free to play around with the Black Magic Margarita; unleash your creativity and craft a drink that fits your taste perfectly!

  • Fruity Twist: Swap the passion fruit liqueur for raspberry or cherry liqueur for a different fruity flavor.

  • Zesty Alternative: Use fresh lemon juice instead of lime for a tart and refreshing change that brightens the drink.

  • Sweetener Switch: Replace simple syrup with agave nectar for a richer sweetness and a touch of natural flavor.

  • Rimmed Delight: Try rimming your glass with flavored salts like jalapeño or chili powder for a spicy kick.

  • Add a Pop: Incorporate a splash of club soda for a fizzy lift that adds extra excitement to each sip.

  • Chilly Option: For a frozen Black Magic Margarita, blend the ingredients with ice instead of shaking them for a slushy delight.

  • Lower Sugar: Use a sugar-free sweetener like stevia or monk fruit for a lighter, calorie-conscious option without sacrificing taste.

  • Colorful Variation: Mix it up with food coloring instead of activated charcoal or black gel food coloring for a festive twist that’s still visually enticing.

As you serve these delightful variations, consider pairing your Black Magic Margarita with tempting snacks like Roasted Bratwurst Peppers for a spooky movie night! Embrace this Halloween season with creativity—your guests will thank you!

What to Serve with Black Magic Margarita

To create a truly memorable Halloween gathering, think about pairing your drink with delightful and themed accompaniments.

  • Spooky Cheese Platter: A selection of cheeses with dark grapes and black licorice adds both visual appeal and tantalizing flavors that enhance the margarita's fruity notes. A mix of creamy and sharp cheeses will cater to different taste preferences.

  • Charcoal-Infused Tortilla Chips: These trendy chips lend a perfect crunch and a touch of the theme, making them great for dipping into spooky salsas or guacamole. The added crunch will contrast nicely with the smooth texture of your margarita.

  • Pumpkin Spice Popcorn: Light and flavorful, this sweet treat complements the tropical elements of your drink, while the crunchiness adds a delightful pairing experience. It's an easy snack to whip up and sure to please all your guests!

  • Black Bean Tacos: Stuffed with flavorful fillings like roasted corn and creamy avocado, these tacos bring a savory delight that balances the cocktail's sweetness. Tacos are always a crowd-pleaser, making them perfect for an informal festive gathering.

  • Witch's Brew Fruit Punch: Mix up a refreshing non-alcoholic option with dark berries and a splash of lime to mimic the magical tones of the Black Magic Margarita. This berry twist will cater to non-drinkers and adds to the overall theme.

  • Chocolate Mousse Cups: Rich and luscious, these dark desserts are the perfect sweet treat to finish off your Halloween feast. The decadent chocolate flavor enhances the cocktail while providing a satisfyingly sumptuous end to your meal!

Expert Tips for Black Magic Margarita

  • Perfect Chilling: Shake vigorously: Ensuring your cocktail is well-chilled enhances the overall flavor. A good shake incorporates air, resulting in a lighter texture.

  • Portion Control: Be mindful of activated charcoal: A little goes a long way! Start with less and adjust according to your desired spooky effect to avoid overwhelming your margarita.

  • Taste Adjustments: Customize your sweetness: If you're using alternative liqueurs, taste the mix before serving. You might need to tweak the simple syrup or agave nectar for balance.

  • Visual Appeal: Enhance your garnish: Opt for unique rim styles like flavored sugars or fun embellishments. This touches your Black Magic Margarita with a personal flair that guests will love!

  • Make-Ahead: Prep ingredients in advance: Prepare your lime juice, simple syrup, and liqueurs ahead of time. It'll save you precious time when guests arrive, ensuring a stress-free serving experience.

Make Ahead Options

These Black Magic Margaritas are perfect for busy home cooks looking to simplify their Halloween festivities! You can prep the cocktail base—combining the passion fruit liqueur, tequila, Cointreau, fresh lime juice, simple syrup, and activated charcoal—up to 24 hours in advance and refrigerate it in an airtight container. This way, all the flavors meld beautifully, making your cocktail just as delicious when served. When it’s time to entertain, simply shake the mixture with ice, strain into your prepared glass with the black lava salt rim, and add your optional garnishes. Enjoy stress-free serving, knowing your spooktacular drinks are ready to impress!

How to Store and Freeze Black Magic Margarita

Fridge: Store any leftover Black Magic Margarita in an airtight container in the fridge for up to 3 days. Be sure to keep the ingredients separate for the best taste.

Freezer: If you'd like to prepare a batch in advance, freeze the margarita in an airtight container for up to 1 month. Allow it to thaw in the fridge before serving, giving it a good shake to restore texture.

Garnish Best Practices: Prepare garnishes separately and store in the fridge. Rimming salt, especially black lava salt, should be kept dry and airtight for freshness when serving.

Serving Freshness: For optimum flavor and presentation, always serve your Black Magic Margarita fresh. Mix ingredients on the day of your gathering for a delightful experience.

Black Magic Margarita Recipe FAQs

What type of passion fruit liqueur should I use?
I recommend using a quality passion fruit liqueur to capture that tropical sweetness. If you can't find passion fruit, alternatives like raspberry, cherry, or sour apple schnapps work beautifully. Just be mindful that different flavors may alter the overall taste!

How should I store leftover Black Magic Margarita?
Store any leftover Black Magic Margarita in an airtight container in the fridge, where it will stay fresh for up to 3 days. If you’ve prepared your ingredients separately, keep them stored that way to maintain flavor integrity and freshness until you’re ready to enjoy!

Can I freeze Black Magic Margarita?
Absolutely! If you want to make a batch ahead of time, pour the margarita into an airtight container and freeze it for up to 1 month. To serve, thaw it in the fridge and shake well before enjoying to restore its original texture!

What if I don’t have black lava salt for rimming?
No worries at all! If black lava salt isn't available, you can substitute it with black sugar sprinkles, which will provide a similar visual impact and sweetness. Alternatively, any flavored salt or a mix of regular salt and activated charcoal will also work nicely.

Is activated charcoal safe for everyone?
While activated charcoal gives that enchanting black color, it's important to note that it can interfere with the absorption of certain medications. If you're concerned, I suggest consulting with a healthcare professional, especially if you're planning to serve this cocktail to guests with health considerations.

Can I make this cocktail non-alcoholic?
Absolutely! To craft a non-alcoholic version of the Black Magic Margarita, substitute the spirits with sparkling water or lemon-lime soda, while using passion fruit juice for sweetness and tang. Adjust the flavors to suit your taste, and it’ll still be a spooky delight for everyone!

Black Magic Margarita

Black Magic Margarita: Your Spooky Sip for Halloween Fun

Enjoy the enchanting Black Magic Margarita, a must-try Halloween cocktail with tropical passion fruit and a striking appearance.
Print Recipe Pin Recipe
Prep Time 5 minutes mins
Total Time 5 minutes mins
Servings: 1 cocktail
Course: Drinks
Cuisine: Mexican
Calories: 200
Ingredients Equipment Method Nutrition Notes

Ingredients
  

For the Margarita
  • 1 ounce Passion Fruit Liqueur Or substitute with raspberry, cherry, or lemon liqueur.
  • 2 ounces Tequila No substitutions recommended.
  • 1 ounce Cointreau Can be replaced with Triple Sec or any orange liqueur.
  • 1 ounce Fresh Lime Juice Bottled lime juice or sour mix can also be used.
  • 0.5 ounce Simple Syrup Agave nectar can be used as a substitute.
  • 1 pinch Activated Charcoal Can be replaced with black gel food coloring.
For the Garnish
  • 1 tablespoon Black Lava Salt Black sugar sprinkles can be used as a substitute.
  • 1 teaspoon Edible Silver Glitter or Shimmer Optional.
  • 1 cup Ice For chilling the cocktail.

Equipment

  • cocktail shaker
  • strainer
  • glass

Method
 

Step-by-Step Instructions
  1. Run a lime slice along the rim of your chosen glass and dip it into black lava salt. Set aside to let the rim dry.
  2. Fill a cocktail shaker with ice. Add passion fruit liqueur, tequila, Cointreau, lime juice, simple syrup, and activated charcoal. Mix well.
  3. Shake vigorously for about 15 seconds until well chilled.
  4. Strain the margarita into the prepared glass filled with fresh ice.
  5. Garnish with edible silver glitter and serve immediately.

Nutrition

Serving: 1cocktailCalories: 200kcalCarbohydrates: 25gSodium: 5mgPotassium: 60mgSugar: 20gVitamin C: 15mgCalcium: 3mg

Notes

Mix ingredients fresh for best flavor and visual appeal. Customize sweetness to taste.

Tried this recipe?

Let us know how it was!

Orc Draught: Ignite Your Evenings with this Epic Cocktail

September 18, 2025 by Grace Snow Leave a Comment

As I sifted through my collection of classic cocktails, I stumbled upon a recipe that instantly transported me to Middle Earth—Orc Draught. This exhilarating drink isn't just for fans of J.R.R. Tolkien; it’s a celebration of flavors that beautifully harmonize sweet blackberries and spicy cinnamon whiskey. In just 5 minutes, you can whip up this invigorating cocktail, perfect for cozy evenings or fantasy-themed gatherings. The Orc Draught offers a delightful twist on traditional cocktails with its tipsy warmth and vibrant hues, making it an instant crowd-pleaser. Whether you're a seasoned mixologist or a casual home bartender, you’ll love how effortlessly it elevates any occasion. So, are you ready to embark on this flavor-filled journey?

Why Is Orc Draught So Special?

Unique Experience: The Orc Draught invites you to experience a thrilling flavor adventure inspired by fantasy.
Quick to Make: With just 5 minutes of prep, it's ideal for busy evenings or spontaneous gatherings.
Bursting with Flavor: The blend of sweet blackberries and spicy cinnamon whiskey creates a harmonious, bold taste sensation.
Versatile Options: Customize it with different berries or flavored whiskeys to suit your palate or themed event! Would you like to explore variation ideas?
Crowd-Pleasing Appeal: Perfect for entertaining, this cocktail will thrill fans and newbies alike, making any occasion unforgettable.
Prepare Ahead: Mix the components in advance for a hassle-free serving, allowing you to enjoy the festivities!

Orc Draught Ingredients

• Explore the perfect blend of flavors ready to enchant your palate.

For the Cocktail

  • Blackberries – Fresh and sweet, they bring a vibrant berry flavor; raspberries can be a delightful substitute.
  • Cinnamon Whiskey – Offers a warming sweetness and spice that reflects the fiery essence of Orc Draught; Fireball Whiskey works beautifully here.
  • Blackberry Liqueur – Enhances the depth of berry flavors; feel free to swap with other fruit liqueurs if desired.
  • Fernet-Branca – This herbal liqueur provides a necessary bitterness to balance the sweetness; Amaro is a great alternative.
  • Lemon Juice – Freshly squeezed adds acidity, brightening the overall flavor; always opt for fresh for the best taste.

For Garnish

  • Extra Blackberries – Use these for a stunning presentation; other fruits or herbs can also make great garnishes to suit your taste.

By following these expertly curated Orc Draught ingredients, you're on your way to crafting a cocktail that is as adventurous as the tales of Middle Earth themselves!

Step‑by‑Step Instructions for Orc Draught

Step 1: Prepare the Blackberries
Begin by adding 4 fresh blackberries into a cocktail shaker. With a muddler, gently crush them until they are broken down and juicy, releasing their vibrant color and sweet aroma. This essential first step infuses the foundation of the Orc Draught with rich berry flavor.

Step 2: Combine the Spirits
Next, pour in 1 oz of cinnamon whiskey, 1 oz of blackberry liqueur, ½ oz of Fernet-Branca, and ½ oz of freshly squeezed lemon juice into the shaker with the muddled blackberries. This harmonious combination of ingredients brings forth a balance of sweetness, tartness, and herbal bitterness, essential for the perfect Orc Draught.

Step 3: Add Ice and Shake
Now, fill the shaker with ice, ensuring it’s packed well to chill the mixture effectively. Secure the lid tightly and shake vigorously for about 10 to 15 seconds. You want to feel the shaker get cold and see condensation forming, indicating that your Orc Draught is blending beautifully and getting chilled.

Step 4: Strain into Glassware
Carefully remove the lid from your shaker and strain the cocktail mixture through a fine sieve into a small coupe or Nick and Nora glass. This step is key to achieving a smooth drink, free of pulp, allowing the vibrant colors of the Orc Draught to shine through.

Step 5: Garnish and Serve
Finally, take a few extra blackberries and place them as a garnish on top of your cocktail for a beautiful presentation. Serve the Orc Draught immediately, enjoying its delightful aroma and inviting hues. This warm, invigorating concoction is sure to impress at any gathering!

Tips for the Best Orc Draught

  • Muddle Effectively: Make sure to crush the blackberries well to release their juices, as a good muddle sets the foundation for the flavor of the Orc Draught.

  • Chill Properly: Don’t skip on the shaking! Adequate shaking merges the flavors beautifully while chilling the cocktail, balancing the strength of the alcohol.

  • Adjust Sweetness: For a sweeter drink, consider increasing the blackberry liqueur or the number of muddled blackberries—find your perfect balance in this Orc Draught!

  • Strain Carefully: Use a fine sieve while straining; this ensures a smooth cocktail free from pulp, allowing the vibrant color and flavors to shine.

  • Garnish Creatively: While blackberries are recommended for garnish, feel free to get creative! Try fresh mint or even a slice of lemon for a different aesthetic or flavor twist.

What to Serve with Orc Draught

Enhance your Orc Draught experience with delightful pairings that balance its bold flavors and invigorating notes.

  • Savory Cheese Platter: A selection of aged cheeses, like gouda or cheddar, complements the cocktail's sweetness perfectly, creating a delightful contrast.
  • Spiced Nuts: Roasted nuts with a hint of spice amplify the warmth of cinnamon whiskey, offering crunch and flavor that enhances the drink.
  • Charcuterie Board: Mix cured meats with fruits and honey to build layers of flavor that pair seamlessly with the cocktail’s berry notes.
  • Grilled Skewers: Marinated chicken or vegetable skewers add a hearty element, creating a satisfying bite alongside the vibrant Orc Draught.
  • Chocolate Fondue: Indulge your sweet tooth with rich, dark chocolate that pairs beautifully with the tart blackberries in the cocktail.
  • Berry Tart: A fresh berry tart brings out the fruity essence of the drink, creating a delightful harmony that will please any palate.
  • Sparkling Wine: For an effervescent touch, sip on sparkling wine as a refreshing counterpoint to the rich flavors of the Orc Draught.
  • Cinnamon Sugar Cookies: Sweet, buttery cookies with a hint of cinnamon echo the cocktail’s warmth, creating a comforting dessert pairing.
  • Spiced Apple Cider: This warm drink mirrors the spicy notes of the Orc Draught, making it an excellent complementary beverage for fall gatherings.

How to Store and Freeze Orc Draught

Fridge: Store any unused prepared Orc Draught in the fridge for up to 24 hours in an airtight container to maintain freshness.

Components Storage: Keep individual ingredients like blackberry liqueur and cinnamon whiskey in a cool, dark place. Fresh blackberries should be consumed within 2 days for optimal flavor.

Make-Ahead Tips: You can mix the muddled blackberries with the spirits (avoiding ice) and refrigerate for a few hours before serving, ensuring a delicious cocktail that quickly thrills your guests.

Freezer: While not recommended for the mixed cocktail, you can freeze extra blackberries for later use in future Orc Draughts, extending their life for several months.

Make Ahead Options

These Orc Draught cocktails are perfect for busy home cooks looking to save time without sacrificing flavor! You can muddle the blackberries and combine them with the spirits (cinnamon whiskey, blackberry liqueur, Fernet-Branca, and lemon juice) up to 24 hours in advance. Simply refrigerate the mixture until you’re ready to serve. This not only retains the vibrant flavor but also enhances the infusion of the spirits. When it’s time to enjoy your cocktails, just add ice, shake, strain into glasses, and garnish with extra blackberries. This way, you can relish the festivities with ease, serving up delicious, stress-free Orc Draughts that are just as delightful as when freshly made!

Orc Draught Variations & Substitutions

Feel free to unleash your creativity and customize this cocktail to surprise your taste buds!

  • Berry Switch: Substitute blackberries with raspberries for a tangier twist or try strawberries for a sweeter version. Each berry brings its unique essence to the drink.

  • Spicy Kick: Add a dash of hot sauce or a slice of jalapeño for a spicy kick that contrasts beautifully with the sweetness of the drink. It elevates the flavor profile, making it exciting for the adventurous palate.

  • Non-Alcoholic: Create a delightful mocktail by replacing alcohol with flavored sparkling water and using syrup or fruit extracts. This way, everyone can join in on the fun without the booze!

  • Herbal Infusion: Incorporate fresh herbs like mint or basil into the muddling process to add a refreshing layer of complexity. The addition of herbs can brighten up the drink, merging perfectly with the berry flavor.

  • Flavored Whiskeys: Swap cinnamon whiskey for apple or vanilla whiskey for a unique take that still maintains a comforting, warm essence. Varying the whiskey can totally transform the whole cocktail experience.

  • Citrus Burst: Add a splash of orange or lime juice alongside the lemon for an extra citrusy brightness. It not only enhances the drink's vibrant look but also adds an exciting zing!

  • Garnish Galore: Beyond blackberries, feel free to use colorful citrus slices or edible flowers for a whimsical touch to your garnish. It’s all about creativity and presentation.

  • Chilly Version: Blend the ingredients with ice for a frozen version of Orc Draught that’s perfect for hot days or lively parties. This icy twist offers a refreshing and playful take on the classic drink.

Dive deeper into possible flavors, and don't hesitate to explore! And if you want to know more about serving suggestions or prep tips, I've got your back. Enjoy experimenting!

Orc Draught Recipe FAQs

What kind of blackberries should I use?
Absolutely, using fresh blackberries will yield the best flavor! Look for berries that are firm and plump with a deep color, avoiding any with dark spots all over. If blackberries are unavailable, raspberries can be a delightful substitute—just keep in mind they’re a bit tarter.

How long can I store the Orc Draught after preparing it?
The Orc Draught is best enjoyed fresh, but if you have leftovers, store them in the fridge for up to 24 hours in an airtight container. This will help maintain the flavor, although the vibrancy of the fizz may diminish over time.

Can I freeze the Orc Draught?
It’s not recommended to freeze the mixed cocktail itself, as the texture and flavors won’t hold up well. However, if you have extra blackberries, feel free to freeze them! Just wash, dry, and spread them out on a baking sheet to freeze individually before transferring them to a freezer bag. They can last for up to 3 months!

What if I want to make the Orc Draught non-alcoholic?
Very! To create a non-alcoholic version, use flavored sparkling water in place of the spirits. Combine muddled blackberries with sweet syrups that mimic the flavor profile of whiskey. Add a splash of lemon juice for acidity, and you’ll have a refreshing mocktail that everyone can enjoy!

Are there any dietary considerations with the Orc Draught?
This cocktail is primarily composed of alcohol and blackberries, which should be fine for most diets. However, if you have allergies to berry fruits or particular liqueurs, be sure to check the labels. If you’re serving guests, consider offering a non-alcoholic alternative for designated drivers or those preferring not to drink.

Orc Draught

Orc Draught: Ignite Your Evenings with this Epic Cocktail

Orc Draught: A thrilling cocktail blending sweet blackberries and spicy whiskey for an unforgettable experience.
Print Recipe Pin Recipe
Prep Time 5 minutes mins
Total Time 5 minutes mins
Servings: 1 cocktail
Course: Drinks
Cuisine: Fantasy
Calories: 180
Ingredients Equipment Method Nutrition Notes

Ingredients
  

For the Cocktail
  • 4 fresh blackberries sweet and vibrant
  • 1 oz cinnamon whiskey Fireball Whiskey recommended
  • 1 oz blackberry liqueur can substitute with other fruit liqueurs
  • 0.5 oz Fernet-Branca can use Amaro as alternative
  • 0.5 oz freshly squeezed lemon juice always use fresh for best flavor
For Garnish
  • 3 extra blackberries for beautiful presentation

Equipment

  • cocktail shaker
  • fine sieve
  • measuring jigger

Method
 

Step-by-Step Instructions for Orc Draught
  1. Begin by adding 4 fresh blackberries into a cocktail shaker. Gently crush them until they are broken down and juicy, releasing their vibrant color and sweet aroma.
  2. Next, pour in 1 oz of cinnamon whiskey, 1 oz of blackberry liqueur, ½ oz of Fernet-Branca, and ½ oz of freshly squeezed lemon juice into the shaker with the muddled blackberries.
  3. Fill the shaker with ice, ensuring it’s packed well. Secure the lid tightly and shake vigorously for about 10 to 15 seconds.
  4. Carefully remove the lid and strain the cocktail mixture through a fine sieve into a small coupe or Nick and Nora glass.
  5. Take a few extra blackberries and place them as a garnish on top of your cocktail. Serve immediately.

Nutrition

Serving: 1cocktailCalories: 180kcalCarbohydrates: 22gSodium: 5mgPotassium: 150mgFiber: 1gSugar: 18gVitamin A: 50IUVitamin C: 10mgCalcium: 5mgIron: 0.2mg

Notes

Muddle effectively, chill properly, and adjust sweetness to your taste for the best Orc Draught experience.

Tried this recipe?

Let us know how it was!

Creamy Chestnut Hot Chocolate with Boozy Whipped Cream Bliss

September 16, 2025 by Grace Snow Leave a Comment

I stumbled upon a cozy little coffee shop tucked away in the snowy streets of an Alpine village, where the scent of roasting chestnuts beckoned from the corner. It was there that I first tasted the magic of Chestnut Hot Chocolate, a rich indulgence that wraps you in warmth just like a favorite blanket on a chilly evening. Combining roasted chestnuts with dark chocolate and topped with a cloud of boozy whipped cream, this delightful drink is not only an irresistible winter treat but also quick to whip up—perfect for those evenings filled with laughter and relaxation. Whether you’re entertaining friends or simply treating yourself, this decadent drink promises to elevate your winter gatherings and rekindle your love for homemade comforts. Curious about how to bring this enchanting blend into your own kitchen? Let's dive in!

Why is this chestnut hot chocolate so special?

Indulgent Warmth: Each sip of this chestnut hot chocolate wraps you in a cozy embrace, balancing roasted nuttiness and rich dark chocolate.

Boozy Delight: The addition of boozy whipped cream elevates it to a gourmet experience, making it feel like a celebration in a cup.

Quick and Easy: With simple ingredients and straightforward steps, you'll have this delightful drink ready in no time, perfect for impromptu get-togethers.

Versatility: Feel free to experiment with flavored liqueurs or even swap in hazelnuts for a unique twist.

Perfect for Sharing: Ideal for winter gatherings, this drink invites friends and family to bond over a warm, comforting treat.

Chestnut Hot Chocolate Ingredients

• The secret to this cozy drink lies in its rich and flavorful ingredients.

For the Drink

  • Milk – The base for this chestnut hot chocolate; substitute with almond milk for a dairy-free option.
  • Roasted, Peeled Chestnuts – They add a nutty flavor and creamy texture; using pre-packaged saves you time.
  • Heavy Cream – This contributes to the drink’s richness and is also used in the whipped cream topping; no substitutions are recommended for the topping.
  • Dark Chocolate (70%) – Offers deep chocolate flavor; opt for high-quality chocolate for the best results.
  • Cocoa Powder – Enhances the chocolate depth; Dutch-processed cocoa yields a smoother taste.
  • Sugar – Balances the bitterness of chocolate; adjust to your personal taste.
  • Vanilla Extract – Adds a lovely aromatic flavor; pure vanilla works best for a deeper taste.

For the Boozy Whipped Cream

  • Icing Sugar – Used for sweetening whipped cream as it dissolves better than granulated sugar.
  • Dark Rum – Infuses the whipped cream with a warm, rich flavor; rum extract can be a great substitute for an alcohol-free option.

Indulge in the delightful warmth of this chestnut hot chocolate and whisk up some cozy winter vibes!

Step‑by‑Step Instructions for Creamy Chestnut Hot Chocolate with Boozy Whipped Cream Bliss

Step 1: Simmer the Chestnut Milk
In a medium saucepan, bring 1 ½ cups of milk to a gentle simmer over medium heat, then add the roasted, peeled chestnuts. Stir occasionally and let it simmer for about 5 minutes, allowing the chestnuts to soften and infuse their flavor into the milk. Once heated through, carefully transfer this mixture to a high-speed blender and blend until smooth.

Step 2: Prepare the Chocolate Base
Return the empty saucepan to the stove and pour in the remaining 1 ½ cups of milk and ½ cup of heavy cream. Heat over medium-low until it begins to simmer gently. Stir in the finely chopped dark chocolate, mixing continuously for about 3–5 minutes until completely melted. Then, add the cocoa powder, sugar, and vanilla extract, whisking until the mixture is velvety and well combined.

Step 3: Combine Mixtures
Pour the blended chestnut milk into the chocolate mixture in the saucepan. Use a whisk to combine both mixtures until fully integrated, creating a rich and creamy chestnut hot chocolate. Continue to heat gently over medium-low for an additional 2–3 minutes, stirring occasionally to prevent sticking, until hot but not boiling.

Step 4: Make the Boozy Whipped Cream
In a separate mixing bowl, use an electric mixer to beat 1 cup of heavy cream on medium speed. After 2-3 minutes, or once soft peaks start to form, gradually add in the icing sugar, vanilla extract, and dark rum. Continue to beat on medium-high until stiff peaks form, creating a delightful boozy whipped cream that will crown your hot chocolate.

Step 5: Serve with Style
Pour the creamy chestnut hot chocolate into warm mugs, filling them about three-quarters full. Generously top each mug with a dollop of the boozy whipped cream, allowing it to cascade down the sides. For an extra touch, grate some dark chocolate on top as a garnish, then serve immediately to warm hearts and spirits on a chilly evening.

Make Ahead Options

These creamy chestnut hot chocolates are perfect for meal prep enthusiasts looking to save time! You can prepare the chestnut milk base up to 24 hours in advance; simply blend and refrigerate it in an airtight container. The chocolate mixture can also be made ahead and stored in the fridge for up to 3 days. When you're ready to serve, gently reheat both mixtures on the stove, whisking until smooth. For the boozy whipped cream, it's best to whip it fresh right before serving to maintain its fluffiness, but you can pre-measure ingredients and chill them, making the final step quick and easy. Just follow these tips, and your indulgent chestnut hot chocolate will be just as delightful and inviting!

What to Serve with Chestnut Hot Chocolate with Boozy Whipped Cream

Warm up your winter evenings with delightful pairings that enhance the cozy experience of your hot chocolate.

  • Gingerbread Cookies: These sweet and spiced cookies create a festive contrast, perfect for dunking into your decadent drink.
  • Marshmallow Float: A few pillowy marshmallows on top of your hot chocolate create a nostalgic twist, bringing back childhood memories.
  • Spiced Nuts: Roasted nuts seasoned with warm spices add a crunchy textural contrast, balancing the creamy smoothness of the hot chocolate. Enjoy their tantalizing aroma as you sip.
  • Chocolate Croissants: Flaky, buttery pastries filled with rich chocolate perfectly complement the velvety sweetness of the chestnut hot chocolate. They're a luxurious treat that can elevate any cozy gathering.
  • Fruit Tart: A refreshing fruit tart with a buttery crust can brighten your drink's richness, adding a layer of tartness that harmonizes beautifully with the chocolatey flavors.
  • Mulled Wine: This warm, spiced wine adds a festive touch to any winter evening, pairing beautifully with the cozy flavors of your indulgent hot chocolate.
  • Pecan Pie: The buttery, nutty filling of pecan pie creates a rich sweetness that pairs wonderfully with the deep flavors of your chestnut hot chocolate.
  • Peppermint Bark: The cool mint on top of dark chocolate brings a refreshing contrast, making each sip of hot chocolate feel extra festive and indulgent.
  • Creamy Cheesecake: A slice of rich cheesecake adds a luxurious feel; its tanginess perfectly balances the sweetness of your drink, making it a delightful ending to any winter gathering.

Expert Tips for Chestnut Hot Chocolate

  • Blend Safely: When blending hot liquids, keep the lid tightly secured to prevent splatter, ensuring a mess-free experience.

  • High-Speed Convenience: Use a high-speed blender for a silky smooth texture. If using an immersion blender, finely chop chestnuts first for better incorporation.

  • Taste Before Serving: Always taste and adjust the sugar before serving; the sweetness of the whipped cream can affect the overall flavor of the chestnut hot chocolate.

  • Whipped Cream Whisking: Beat the heavy cream until stiff peaks form. This will ensure your boozy whipped cream holds its shape and doesn’t deflate.

  • Experiment with Toppings: Try adding a sprinkle of cinnamon or a twist of orange zest on top of the whipped cream for a unique flavor boost!

How to Store and Freeze Chestnut Hot Chocolate

Fridge: Store leftover chestnut hot chocolate in an airtight container for up to 3 days. Reheat gently on the stove or in the microwave before serving.

Freezer: If you want to freeze the hot chocolate, pour it into freezer-safe containers and store for up to 3 months. Thaw overnight in the fridge and reheat before enjoying.

Boozy Whipped Cream: This whipped cream is best freshly made, but if you have leftovers, store it in the fridge for up to 2 days. Give it a quick whisk before serving, as it may lose some volume.

Make-Ahead Tip: Prepare the chestnut hot chocolate base in advance, refrigerate, and then just reheat before topping with freshly whipped cream for an effortless serving experience!

Variations & Substitutions for Chestnut Hot Chocolate

Feel free to get creative with this cozy drink! Here are some delightful ideas to customize your chestnut hot chocolate experience.

  • Nutty Twist: Substitute roasted chestnuts with hazelnuts to create a unique flavor. Hazelnuts offer a sweeter, richer taste that pairs beautifully with chocolate.

  • Dairy-Free Delight: Swap the milk for almond or oat milk for a vegan option. These alternatives maintain creaminess while adding a subtle nutty flavor.

  • Flavored Liqueurs: Use flavored liqueurs like hazelnut or vanilla vodka in the whipped cream. This adds an exciting twist that enhances the buttery richness of the drink.

  • Spicy Kick: Introduce a pinch of cinnamon or nutmeg into the chocolate mixture for warmth. This adds depth and coziness, perfect for those chilly nights.

  • Extra Boozy: Try bourbon or Irish cream instead of dark rum for a different flavor profile. Each brings its own richness, making every sip uniquely indulgent.

  • Gourmet Upgrade: Use gourmet chocolate chips or shavings for a luxurious chocolate experience. Choosing high-quality chocolate can elevate your drink from ordinary to extraordinary.

  • Crunchy Topping: Add crushed nuts or chocolate shavings on top of the boozy whipped cream. This contributes an appealing texture and additional flavor.

For even cozier inspirations, check out the warmth found in Homemade Hot Chocolate or explore the indulgent layers of German Chocolate Poke Cake.

Embrace your creativity and make this cozy drink your own!

Chestnut Hot Chocolate with Boozy Whipped Cream Recipe FAQs

What should I look for when selecting chestnuts?
For the best flavor and texture, choose fresh, firm chestnuts that are shiny and free from dark spots or blemishes. The chestnuts should feel heavy for their size, indicating moisture is present. If you’re using pre-packaged roasted chestnuts, check for any signs of spoilage or off smells before purchasing.

How do I store leftover chestnut hot chocolate?
Store any remaining chestnut hot chocolate in an airtight container in the refrigerator for up to 3 days. When ready to enjoy again, gently reheat it on the stove over low heat or in the microwave, stirring occasionally to prevent scorching.

Can I freeze chestnut hot chocolate?
Absolutely! To freeze, pour the cooled chestnut hot chocolate into freezer-safe containers, leaving some space at the top for expansion. It will keep well for up to 3 months. When you’re ready to enjoy it, let it thaw overnight in the fridge, then reheat gently and give it a good stir before serving.

What if my hot chocolate is too bitter?
If the hot chocolate tastes too bitter, simply stir in additional sugar, a tablespoon at a time, until it reaches your preferred level of sweetness. Remember to taste as you go, especially since the boozy whipped cream will add a sweet note too. Another tip is to use a lighter cocoa powder or milk chocolate next time for a milder flavor.

Can I make this recipe dairy-free or vegan?
Yes! You can make this chestnut hot chocolate dairy-free by substituting regular milk with almond milk or any plant-based milk of your choice. For the boozy whipped cream, try using coconut cream or a store-bought dairy-free whipped topping. Just ensure the dark rum or substitute used is vegan-friendly.

Chestnut Hot Chocolate

Creamy Chestnut Hot Chocolate with Boozy Whipped Cream Bliss

Indulge in this Chestnut Hot Chocolate, a cozy drink combining roasted chestnuts, rich dark chocolate, and a delightful boozy whipped cream.
Print Recipe Pin Recipe
Prep Time 15 minutes mins
Cook Time 15 minutes mins
Total Time 30 minutes mins
Servings: 4 mugs
Course: Drinks
Cuisine: Alpine
Calories: 350
Ingredients Equipment Method Nutrition Notes

Ingredients
  

For the Drink
  • 3 cups Milk Substitute with almond milk for dairy-free option.
  • 1 cup Roasted, Peeled Chestnuts Pre-packaged saves time.
  • ½ cup Heavy Cream No substitutions for topping.
  • ½ cup Dark Chocolate (70%) Opt for high-quality chocolate.
  • 2 tablespoons Cocoa Powder Dutch-processed for smoother taste.
  • 2 tablespoons Sugar Adjust to personal taste.
  • 1 teaspoon Vanilla Extract Pure vanilla works best.
For the Boozy Whipped Cream
  • 1 cup Icing Sugar Better than granulated sugar for dissolving.
  • ¼ cup Dark Rum Rum extract can be a non-alcoholic substitute.

Equipment

  • Medium saucepan
  • High-speed blender
  • Mixing Bowl
  • Electric mixer

Method
 

Step-by-Step Instructions
  1. In a medium saucepan, bring 1 ½ cups of milk to a gentle simmer over medium heat, then add the roasted, peeled chestnuts. Stir occasionally and let it simmer for about 5 minutes. Transfer mixture to a high-speed blender and blend until smooth.
  2. Return the saucepan to the stove, pour in the remaining 1 ½ cups of milk and ½ cup of heavy cream. Heat over medium-low until it simmers. Stir in the chopped dark chocolate until melted, then add cocoa powder, sugar, and vanilla extract; whisk until velvety.
  3. Pour the blended chestnut milk into the chocolate mixture in the saucepan. Whisk together until fully combined, and heat gently for an additional 2–3 minutes.
  4. In a separate mixing bowl, beat 1 cup of heavy cream on medium speed until soft peaks form. Gradually add icing sugar, vanilla extract, and dark rum; continue beating until stiff peaks form.
  5. Pour the hot chocolate into warm mugs, top generously with the boozy whipped cream, and grate some dark chocolate on top for garnish. Serve immediately.

Nutrition

Serving: 1mugCalories: 350kcalCarbohydrates: 40gProtein: 5gFat: 20gSaturated Fat: 12gPolyunsaturated Fat: 1gMonounsaturated Fat: 5gCholesterol: 80mgSodium: 120mgPotassium: 300mgFiber: 2gSugar: 25gVitamin A: 600IUVitamin C: 1mgCalcium: 200mgIron: 1.5mg

Notes

Blend hot liquids safely to prevent splatter. Always taste and adjust sugar before serving.

Tried this recipe?

Let us know how it was!

Cozy Up with Mulled Mead: Your Perfect Winter Sip

September 16, 2025 by Grace Snow Leave a Comment

As the cozy aroma of spices fills the air, I can’t help but feel the warmth wash over me with every sip of this Warm Mulled Mead. Inspired by the feasting halls of Rohan from J.R.R. Tolkien’s The Lord of the Rings, this delightful drink brings a rustic charm and comfort to any gathering. With quick preparation and the ability to impress your friends, this enchanting bevy is perfect for chilly evenings or festive celebrations. Each fragrant ingredient—like zesty orange slices and warming ginger—melds beautifully with honey sweetness, creating a drink that feels like a soothing hug. Wondering how to customize it to your taste with different brandy options? Let’s dive into creating your very own mulled mead masterpiece!

Why is Mulled Mead So Special?

Comforting Warmth: This drink wraps you in a cozy embrace with its delightful aroma of spices and honey.

Customizable Flavors: Personalize this recipe easily with various brandy options like apricot or apple, catering to any palate.

Quick Preparation: Ready in just a few steps, it’s perfect for unexpected guests or festive gatherings.

Crowd-Pleasing Drink: Its enchanting flavors make it an instant favorite, sure to impress everyone around the table.

Inspired by Fantasy: Elevate your gatherings with the mythical charm of Rohan, as you sip this drink reminiscent of feasting halls.

With such an enjoyable blend of flavors, this warm mulled mead is a surefire way to elevate your next chilly evening. Don't miss out on exploring other delightful variations that cater to your preferences!

Mulled Mead Ingredients

For the Mead Base
• Sweet Mead – Look for plain sweet mead like Vinum Regum for a mild honey flavor.
• Honey – Adjust sweetness to taste; local honey brings the best flavor.

For the Aromatic Blend
• Orange Slices – Adds a fresh, citrusy note balancing the sweetness.
• Fresh Ginger – Use slices for an aromatic infusion and a hint of spicy warmth.
• Cinnamon Sticks – Imparts warm, sweet spice flavor to the drink.
• Whole Star Anise – Introduces a distinct, slightly sweet licorice-like flavor.
• Whole Cloves – Contributes to the warm spice profile; use sparingly for intense flavor.

For the Spirit
• Apricot Brandy – Enhances the mead's fruity sweetness; feel free to substitute with apple or pear brandy for a twist.

For Garnishing
• Extra Cinnamon Sticks – Use these for a delightful finishing touch.
• Star Anise – Great for presentation and an added hint of flavor.

Step‑by‑Step Instructions for Warm Mulled Mead

Step 1: Combine Ingredients
In a medium saucepan, combine 4 cups of sweet mead, 1 cup of orange slices, several slices of fresh ginger, 2-3 cinnamon sticks, 2 whole star anise, and 4-5 whole cloves. Stir gently to blend the flavors and ensure even distribution of spices. The aromatic blend begins to fill your kitchen as you prepare for the next step.

Step 2: Heat the Mixture
Place the saucepan over medium heat and warm the mixture until it's steaming but not boiling—aim for a temperature around 160°F (70°C). This keeps the alcohol content intact while releasing the delightful scents of the spices and orange. Keep an eye on it, as you want to create a cozy ambiance with enticing aromas.

Step 3: Steep for Flavor
Once heated, reduce the heat to low and allow the mixture to steep gently for 30 to 60 minutes. This step is crucial for letting the flavors meld beautifully together, transforming your sweet mead into a comforting, spiced delight. Stir occasionally, and enjoy the intoxicating scent wafting through your home.

Step 4: Add the Brandy and Honey
After steeping, stir in 1 cup of apricot brandy and honey to taste, adjusting the sweetness as desired. You can add more honey if you'd like a richer flavor profile. Carefully stir until fully blended, ensuring the warmth envelops every ingredient, turning your warm mulled mead into a perfect holiday treat.

Step 5: Strain the Mixture
Using a fine mesh strainer, carefully strain the mulled mead into a heatproof pitcher or bowl. This step removes all the solids, including the spices and fruits, giving you a smooth, luxurious drink. Be cautious as the mixture will be hot—this is the moment your warm mulled mead truly comes to life, ready for serving.

Step 6: Serve and Garnish
Pour the hot mulled mead into cozy mugs, garnishing each with an extra cinnamon stick and a piece of star anise for a charming presentation. Your warm mulled mead is now ready to be enjoyed. Relish each sip with friends or family as you toast to the wonderful flavors that celebrate the spirit of warmth and community.

Make Ahead Options

These Warm Mulled Mead preparations are perfect for busy home cooks looking to save time while still delivering delicious flavors! You can prepare the aromatic blend of mead, orange slices, ginger, cinnamon sticks, star anise, and cloves up to 24 hours in advance. Simply combine these ingredients, cover, and refrigerate. When you're ready to serve, warm it gently on the stove, then stir in the apricot brandy and honey, adjusting sweetness as desired. This way, not only does the infusion deepen if prepared ahead, but the final drink will be just as delightful and soothing—perfect for impressing guests with minimal day-of effort!

Mulled Mead Variations & Substitutions

Explore the endless possibilities to tailor this warm embrace of a drink to your unique taste!

  • Apple Brandy: Swap apricot brandy for apple brandy for a crisp, fruity twist that brightens up the flavor profile.
  • Pear Brandy: Use pear brandy instead of apricot for a softer, sweeter essence, creating a beautifully balanced beverage.
  • Nutmeg Infusion: Add a sprinkle of nutmeg during the steeping process for an extra layer of warmth that spices up each sip.
  • Honey Alternatives: Replace honey with maple syrup for a richer sweetness that adds a new dimension to your mulled mead experience.
  • Fruit Variations: Incorporate different fruits like sliced pears or even a handful of fresh cranberries for a burst of color and flavor.
  • Spicy Kick: Toss in a few slices of jalapeño to heat things up, giving your mulled mead an unexpected and fun heat.
  • Chilled Version: Cool down your mulled mead and serve it over ice for a refreshing summer cocktail that dances on the palate.
  • Vegan Twist: Use agave syrup in place of honey for a vegan-friendly option that still captures that sought-after sweetness.

Feel free to explore these suggestions, and don’t hesitate to combine a few! Your journey with mulled mead can be as inventive and heartwarming as your gatherings themselves. Want to explore more drink inspirations? Check out my guide on delicious spiced ciders or dive into the world of homemade liqueurs for adventurous flavor ideas.

Storage Tips for Mulled Mead

Fridge: Store your warm mulled mead in an airtight container for up to 3 days. This keeps the flavors vibrant while allowing for enjoyable sips later.

Freezer: While mulled mead is best enjoyed fresh, you can freeze it in ice cube trays for up to 2 months, creating handy portions for future steaming beverages.

Reheating: Gently reheat on the stovetop over low heat until steaming, ensuring you never bring it to a boil. This retains the flavor and alcohol content in your mulled mead.

What to Serve with Warm Mulled Mead

As the warm spices of this inviting drink envelop your senses, consider delightful companions that enhance the experience of every sip.

  • Savory Cheese Platter: A selection of robust cheeses like aged cheddar or gouda pairs beautifully with the sweet and spicy notes of the mead.
  • Spiced Nuts: Roasted mixed nuts seasoned with cinnamon and a pinch of salt create a crunchy contrast, perfect for snacking.
  • Homemade Pastries: Flaky pastries, like apple turnovers or cinnamon rolls, bring warmth and sweetness, echoing the flavors of the drink.
  • Roasted Root Vegetables: Seasonal veggies roasted to perfection provide a heartiness that complements the lightness of the mead.
  • Warm Chocolate Cake: Indulge in a rich, fudgy chocolate cake that contrasts wonderfully with the honey sweetness of the mulled mead; an irresistible duo.
  • Hot Spiced Cider: Offer a warm spiced apple cider alongside it for a festive touch; the fruity essence harmonizes with the warm spices.
  • Dark Chocolate Truffles: Rich dark chocolate truffles deliver a delightful melt-in-your-mouth experience, amplifying the drink’s warmth.
  • Gingerbread Cookies: These spiced delights enhance the warmth of the mead; their fragrant sweetness makes them a perfect treat for the holiday season.

With these pairings, you'll certainly create a cozy atmosphere that warms hearts and spirits alike.

Expert Tips for Mulled Mead

  • Maintain Heat: Avoid boiling: Ensure the mixture stays steaming but never reaches a boil to preserve the alcohol in the mulled mead.
  • Sweetness Control: Adjust honey wisely: Start with a small amount and gradually add more to find your ideal sweetness without overwhelming flavors.
  • Flavor Depth: Steeping time matters: For a richer flavor, allow the spices to steep longer—experiment with 30 to 60 minutes based on your preference.
  • Brand Variation: Try different brandies: Substituting apricot brandy with apple or pear can create unique taste twists; feel free to be creative!
  • Storage Solution: Store properly: If making ahead, store the mulled mead in the fridge and gently reheat before serving for the best experience.

Warm Mulled Mead Recipe FAQs

What kind of mead should I use for this recipe?
Absolutely! Look for a plain sweet mead like Vinum Regum, as it provides a mild honey flavor that perfectly complements the spices. Ensure that the mead you choose is not overly sweetened, as this will maintain a balanced taste in your warm mulled mead.

How long can I store my warm mulled mead?
You can store your warm mulled mead in an airtight container in the fridge for up to 3 days. This way, you can enjoy the cozy flavors without needing to make a fresh batch each time. Just remember, the longer it sits, the more the spices may develop, so taste and adjust as needed when you're ready to serve again!

Can I freeze mulled mead for later?
Yes, you can freeze mulled mead, and it's super simple! To do this, pour the cooled drink into ice cube trays and freeze for up to 2 months. When you’re ready to enjoy a cozy beverage, pop out a few cubes and gently reheat them on the stove. Just remember not to boil—aim for a warm, steaming blend that captures the essence of your original recipe.

What if my mulled mead tastes too strong or sweet?
Very! If you find your mulled mead is too intense, you can dilute it by adding a bit of water or unsweetened apple juice to balance the flavors. If it’s too sweet, consider adding a splash of more mead or even a hint of lemon juice to cut through the sweetness. Start with a small adjustment, taste, and go from there!

Is this recipe safe for my pets?
Not at all! Mulled mead contains alcohol and should strictly be enjoyed by adults. Keep it out of reach of pets, as alcohol can be harmful to them. If you're looking for a pet-friendly treat, consider heating some apple or cranberry juice with similar spices (minus the alcohol) to create a warm drink to share with your furry friends.

Mulled Mead

Cozy Up with Mulled Mead: Your Perfect Winter Sip

Warm Mulled Mead is a comforting, spiced drink perfect for winter gatherings, inspired by the feasting halls of Rohan.
Print Recipe Pin Recipe
Prep Time 15 minutes mins
Cook Time 30 minutes mins
Steeping Time 30 minutes mins
Total Time 1 hour hr 15 minutes mins
Servings: 4 cups
Course: Drinks
Cuisine: Cocktail, Fantasy, Winter
Calories: 200
Ingredients Equipment Method Nutrition Notes

Ingredients
  

For the Mead Base
  • 4 cups Sweet Mead Plain sweet mead like Vinum Regum for mild honey flavor
  • 1 cup Honey Adjust sweetness to taste; local honey recommended
For the Aromatic Blend
  • 1 cup Orange Slices Adds a fresh, citrusy note
  • several slices Fresh Ginger For aromatic infusion
  • 2-3 sticks Cinnamon Sticks Imparts warm spice flavor
  • 2 whole Star Anise Distinct licorice-like flavor
  • 4-5 whole Cloves Contributes to the warm spice profile
For the Spirit
  • 1 cup Apricot Brandy Substitute with apple or pear brandy if desired
For Garnishing
  • extra sticks Cinnamon Sticks For a delightful finishing touch
  • 1-2 pieces Star Anise For presentation and added flavor

Equipment

  • Medium saucepan
  • fine mesh strainer
  • heatproof pitcher or bowl

Method
 

Step-by-Step Instructions
  1. Combine 4 cups of sweet mead, 1 cup of orange slices, several slices of fresh ginger, 2-3 cinnamon sticks, 2 whole star anise, and 4-5 whole cloves in a medium saucepan. Stir gently to blend the flavors.
  2. Place the saucepan over medium heat and warm the mixture until it's steaming but not boiling, aiming for a temperature around 160°F (70°C).
  3. Reduce the heat to low and allow the mixture to steep gently for 30 to 60 minutes.
  4. Stir in 1 cup of apricot brandy and honey to taste, adjusting sweetness as desired. Stir until fully blended.
  5. Using a fine mesh strainer, strain the mulled mead into a heatproof pitcher or bowl, removing all solids.
  6. Pour the hot mulled mead into cozy mugs, garnishing with an extra cinnamon stick and a piece of star anise.

Nutrition

Serving: 1cupCalories: 200kcalCarbohydrates: 30gSodium: 5mgPotassium: 100mgSugar: 25gVitamin C: 10mgCalcium: 1mgIron: 1mg

Notes

Maintain heat, adjust sweetness wisely, steep longer for richer flavor, and store properly for future enjoyment.

Tried this recipe?

Let us know how it was!

Knock You Naked Peanut Butter Strawberry Banana Smoothie Bliss

September 14, 2025 by Grace Snow Leave a Comment

As the blender whirred to life, the familiar aroma of peanut butter and fresh strawberries filled my kitchen, instantly transporting me back to carefree childhood mornings. I'm excited to share the recipe for my Knock You Naked Peanut Butter Strawberry Banana Smoothie—an irresistibly creamy concoction that mirrors the classic taste of a PB&J sandwich but in a nutritious, convenient form. With just four simple ingredients, this smoothie can be ready in under five minutes, perfect for busy mornings or a quick pick-me-up. Plus, it’s vegan, gluten-free, and packed with healthy fats and protein, making it a delightful treat for both kids and adults. Want to learn how to whip up this nostalgic drink? Let's dive in!

Why is this smoothie a must-try?

Nostalgic Flavor: This smoothie captures the beloved taste of a PB&J sandwich, rekindling fond childhood memories with each sip. Quick and Easy: Ready in under five minutes, it’s the ultimate busy morning solution. Health Packed: With a blend of vegan ingredients, it’s high in protein and healthy fats, making it a nutritious choice. Kid-Friendly: Perfect for little ones, the delightful sweetness from strawberries and bananas guarantees smiles all around. Meal-Prep Friendly: Whip up a batch in advance and store portions for instant satisfaction anytime! For a similar energy boost, check out the Chocolate Cherry Smoothie to mix things up!

Knock You Naked Peanut Butter Strawberry Banana Smoothie Ingredients

For the Smoothie
• Frozen Strawberries – Provides natural sweetness and a vibrant color; use fresh strawberries frozen at peak ripeness for best flavor.
• Frozen Banana – Adds creaminess and natural sugars; a fresh banana can be used, but may alter the smoothie’s texture.
• Peanut Butter – Offers protein and richness; substitute with peanut butter powder for a lower-calorie option.
• Unsweetened Almond Milk – Acts as the base for blending; any milk of choice can be used, with adjustments based on desired thickness.

Optional Add-ins
• Chia Seeds – Boosts nutrition and fiber content; may require additional milk to maintain the smoothie’s consistency.
• Hemp Hearts – Adds protein and healthy fats without overpowering the flavor; a great complement to the primary ingredients in the Knock You Naked Peanut Butter Strawberry Banana Smoothie.

Step‑by‑Step Instructions for Knock You Naked Peanut Butter Strawberry Banana Smoothie

Step 1: Gather Your Ingredients
Begin by collecting all the ingredients for your Knock You Naked Peanut Butter Strawberry Banana Smoothie. You’ll need frozen strawberries, a sliced frozen banana, peanut butter, and unsweetened almond milk. Have your high-powered blender ready on the countertop, and make sure all ingredients are accessible to streamline the preparation.

Step 2: Add Ingredients to Blender
Carefully add the frozen strawberries, frozen banana slices, and peanut butter into your blender. Pour in the unsweetened almond milk gradually, adjusting based on how thick you like your smoothie. This combination will create a smooth, creamy base full of nostalgic flavors, ready to get blended into perfection.

Step 3: Blend Until Smooth
Secure the blender lid and start blending on low, gradually increasing to high speed. Blend for about 30 to 60 seconds until the mixture is silky smooth and well combined. You should see a beautiful pale pink hue forming as the ingredients come together, resembling a milkshake in texture.

Step 4: Taste and Adjust Consistency
Once blended, stop the blender and taste your smoothie. If you’d like it thinner, add a bit more almond milk and blend again for an additional 15 seconds. This step ensures your Knock You Naked Peanut Butter Strawberry Banana Smoothie has the exact consistency and flavor you desire for a refreshing treat.

Step 5: Serve and Enjoy
Pour the finished smoothie into a tall glass, admiring its creamy texture and vibrant color. If you’re serving two, consider doubling the recipe and splitting it into two glasses. Enjoy the delightful and nostalgic flavors of this smoothie immediately for the best taste and texture.

Make Ahead Options

These Knock You Naked Peanut Butter Strawberry Banana Smoothies are fantastic for meal prep enthusiasts! You can prepare the ingredients up to 24 hours in advance by pre-measuring the frozen strawberries, sliced bananas, and peanut butter, storing them in an airtight container in the freezer. This not only saves time but also ensures the freshness of your ingredients. When you're ready to enjoy, simply blend the prepped ingredients with the unsweetened almond milk and any optional add-ins you like. For a smoother consistency after freezing, add a little extra milk as you blend. You'll have a delicious, nutritious smoothie in minutes, perfect for busy mornings!

Expert Tips for Knock You Naked Peanut Butter Strawberry Banana Smoothie

  • Use Fresh Ingredients: Choose fresh strawberries that are frozen at their peak ripeness for the best flavor in your smoothie.

  • Adjust Thickness: If you prefer a thinner smoothie, gradually add more almond milk after blending to achieve your desired consistency.

  • Watch the Chia Seeds: If you decide to add chia seeds, remember they absorb liquid and can thicken the smoothie significantly; adjust your milk accordingly.

  • Experiment with Flavors: Feel free to swap the strawberries for raspberries or blueberries to customize your Knock You Naked Peanut Butter Strawberry Banana Smoothie.

  • Prep Ahead: For quick mornings, prep your smoothie ingredients in advance and freeze them in portions ready for blending!

How to Store and Freeze Knock You Naked Peanut Butter Strawberry Banana Smoothie

Fridge: Store any leftover smoothie in an airtight container in the fridge for up to 3 days. Just give it a good shake before serving to remix the ingredients.

Freezer: Freeze individual portions of the smoothie in sealed bags or containers for up to 1 month. When ready to enjoy, simply blend with a splash of almond milk for a fresh taste.

Reheating: Avoid reheating; instead, blend with more liquid if the consistency is too thick after freezing. This keeps your Knock You Naked Peanut Butter Strawberry Banana Smoothie creamy and delicious!

Meal-Prep Tip: Prepare the smoothie base in advance by freezing the strawberries and banana together. Add fresh peanut butter and almond milk when ready to blend, ensuring optimal flavor and texture.

What to Serve with Knock You Naked Peanut Butter Strawberry Banana Smoothie

Elevate your smoothie experience with delightful pairings that enhance its creamy, nostalgic goodness.

  • Granola Bar: Crunchy and sweet, a quick granola bar makes for a perfect grab-and-go companion, fueling your day alongside this smoothie.

  • Fresh Fruit Salad: A colorful mix of seasonal fruits adds refreshing brightness and contrast to the smoothie, making it a vibrant breakfast choice. The juicy bites will complement the creamy texture beautifully.

  • Whole Grain Toast: Top with avocado or almond butter for healthy fat and fiber; the toast provides a savory contrast to the sweetness of the smoothie.

  • Oatmeal Bowl: A warm bowl of oatmeal can lend a hearty base to your breakfast. Easily flavored with cinnamon or fresh fruit, it makes a filling meal that pairs perfectly with the smoothie.

  • Yogurt Parfait: Layer dairy-free yogurt with berries and granola for a delightful crunch. The creaminess of the yogurt mirrors the smoothie’s texture, creating a satisfying breakfast experience.

  • Herbal Tea: A light, soothing herbal tea can balance the sweetness of your smoothie. Consider chamomile or mint for a refreshing sip.

  • Savory Veggie Muffins: These wholesome muffins add a savory element, making for an interesting, satisfying contrast to the sweet smoothie.

  • Chocolate Protein Balls: For an extra protein kick, these date and nut-based treats can provide a rich and indulgent flavor, echoing the sweetness of the smoothie.

  • Dark Chocolate Squares: Just a couple of squares provide a rich, slightly bitter complement, perfectly balancing the fruity sweetness of the smoothie.

Knock You Naked Peanut Butter Strawberry Banana Smoothie Variations

Feel free to get creative with this smoothie, enhancing flavors and textures to suit your taste buds!

  • Berry Bliss: Substitute frozen strawberries with frozen raspberries or blueberries for a delightful twist. The tartness will provide a refreshing contrast.

  • Chocolate Delight: Add a tablespoon of cocoa powder or chocolate protein powder for a rich, chocolatey version. It perfectly complements the peanut butter and opens up a world of indulgence!

  • Creamy Banana Boost: Use a fresh banana instead of frozen for a different texture. It will create a lighter, fluffier smoothie that still tastes amazing.

  • Nut-Free Option: Replace peanut butter with almond butter or sunbutter for a nut-free version while maintaining creaminess and flavor. It’s a great way to cater to allergies.

  • Vanilla Twist: Incorporate a dash of vanilla extract for an extra layer of depth. This simple addition can elevate the overall taste and aroma.

  • Protein-Packed: Mix in a scoop of your favorite protein powder for an added boost. Perfect for post-workout nutrition or meal prep for busy days ahead!

  • Spicy Kick: Add a pinch of cayenne pepper or a dash of cinnamon for a surprising warmth that contrasts beautifully with the fruity flavors.

  • Smoothie Bowl: Transform this smoothie into a bowl by reducing the liquid and topping it with fresh fruits, granola, and nuts. Enjoy a heartier breakfast that’s visually appealing and satisfying.

It’s all about finding that perfect combination for you! For a different kind of energy boost, you might also enjoy a Pitaya Smoothie Bowl. Enjoy experimenting!

Knock You Naked Peanut Butter Strawberry Banana Smoothie Recipe FAQs

How do I choose the right frozen strawberries?
Absolutely! For the best flavor in your Knock You Naked Peanut Butter Strawberry Banana Smoothie, choose strawberries that are fresh and frozen at their peak ripeness. Look for berries that are bright red without dark spots or blemishes, as this indicates quality. When buying frozen fruit, check that no additional sugars or preservatives have been added.

What’s the best way to store leftovers?
Very! If you have leftover smoothie, store it in an airtight container in the fridge. It will stay fresh for up to 3 days. When you're ready to enjoy it again, just give it a good shake or stir. If it's thickened, feel free to blend in a bit more almond milk to restore its creamy texture.

Can I freeze this smoothie?
Absolutely! Freezing portions of your Knock You Naked Peanut Butter Strawberry Banana Smoothie is a fantastic meal-prep strategy. Pour your smoothie into individual serving-sized containers or freezer-safe bags, ensuring to remove excess air. It will keep well for up to 1 month. When you're ready to enjoy, simply blend it straight from the freezer with a splash of almond milk to bring it back to life!

What if my smoothie turns out too thick?
No problem! If your smoothie is too thick after blending, just add a little bit more almond milk to loosen it up. Blend for an additional 15 seconds or so until you achieve the desired consistency. Remember, you can always adjust; the more the merrier when it comes to creating your perfect smoothie!

Are there any dietary considerations I should be aware of?
Definitely! This smoothie is vegan and gluten-free, making it a safe choice for those with dietary restrictions. If you have nut allergies, consider using sunflower seed butter instead of peanut butter. Always remember to check labels for allergies, especially with store-bought almond milk, to ensure they fit your dietary needs.

Knock You Naked Peanut Butter Strawberry Banana Smoothie

Knock You Naked Peanut Butter Strawberry Banana Smoothie Bliss

Enjoy a delicious and nutritious Knock You Naked Peanut Butter Strawberry Banana Smoothie, a creamy blend of peanut butter, strawberries, and bananas perfect for busy mornings.
Print Recipe Pin Recipe
Prep Time 5 minutes mins
Total Time 5 minutes mins
Servings: 2 glasses
Course: Drinks
Cuisine: Gluten-Free, Vegan
Calories: 250
Ingredients Equipment Method Nutrition Notes

Ingredients
  

For the Smoothie
  • 1 cup Frozen Strawberries Use fresh strawberries frozen at peak ripeness for best flavor.
  • 1 medium Frozen Banana Sliced. A fresh banana can be used but may alter texture.
  • 2 tablespoons Peanut Butter Substitute with peanut butter powder for a lower-calorie option.
  • 1 cup Unsweetened Almond Milk Adjust based on desired thickness.
Optional Add-ins
  • 1 tablespoon Chia Seeds May require additional milk to maintain consistency.
  • 1 tablespoon Hemp Hearts Adds protein and healthy fats.

Equipment

  • Blender

Method
 

Step-by-Step Instructions
  1. Gather all ingredients for the smoothie.
  2. Add frozen strawberries, sliced banana, and peanut butter into the blender. Pour in almond milk.
  3. Blend on low, then high for 30 to 60 seconds until smooth.
  4. Taste and adjust the consistency with more almond milk if necessary.
  5. Serve in a tall glass and enjoy immediately.

Nutrition

Serving: 1glassCalories: 250kcalCarbohydrates: 30gProtein: 6gFat: 12gSaturated Fat: 1.5gPolyunsaturated Fat: 1gMonounsaturated Fat: 8gSodium: 150mgPotassium: 300mgFiber: 5gSugar: 12gVitamin A: 500IUVitamin C: 30mgCalcium: 200mgIron: 1mg

Notes

Store leftovers in an airtight container in the fridge for up to 3 days. Freeze portions for up to 1 month.

Tried this recipe?

Let us know how it was!

Refreshing Jalapeño Watermelon Margaritas for Summer Vibes

September 14, 2025 by Grace Snow Leave a Comment

As the sun sets and the air warms up, nothing screams summer quite like a vibrant cocktail in hand. When I first paired sweet watermelon with a zingy jalapeño, I knew I had stumbled upon a game-changer: Jalapeño Watermelon Margaritas. This refreshing drink beautifully balances the natural sweetness of fresh watermelon juice with a kick of heat from jalapeños, making it the perfect companion for long, lazy afternoons or lively gatherings with friends. Plus, it’s easy to whip up—whether you’re making a small batch or a pitcher to share. Not only does this cocktail bring a fun twist to traditional margaritas, but it’s also a gluten-free option that keeps the summer vibes flowing. Are you ready to dive into this delightful fusion of flavors? Let’s get mixing!

Why Will You Love These Margaritas?

Refreshing: This drink combines the best of summer with its juicy watermelon base and spicy jalapeño kick, making each sip a delight.

Versatile: Tailor the heat level to your taste by adjusting the jalapeño slices, or switch it up with different fruits like strawberries for a unique spin.

Quick and Easy: With simple ingredients and straightforward steps, you can shake these up in minutes—ready for impromptu gatherings or a cozy night at home.

Perfect for Sharing: Scale this recipe effortlessly from a small batch to a pitcher, allowing you to easily serve friends and family at BBQs or summer parties.

Guilt-Free: This cocktail is not just delicious but also gluten-free, offering a lighter, healthier drink option compared to many sugary alternatives.

Jalapeño Watermelon Margaritas Ingredients

Ready to mix up something delightful? Let's gather our ingredients!

For the Margarita

  • Silver Tequila – Base spirit providing the alcoholic content; substitute with Blanco tequila or mezcal for a smoky flavor.
  • Freshly Squeezed Lime Juice – Adds tartness, balancing the watermelon’s sweetness; fresh is preferred, but bottled can work in a pinch.
  • Fresh Watermelon Juice – The primary flavoring component that brings sweetness and vibrant color; store-bought juice can be used if fresh isn’t available.
  • Jalapeño Slices – Infuses a spicy flavor; adjust the amount based on your desired heat level, or substitute with milder peppers if preferred.
  • Agave Nectar – Provides a touch of sweetness that enhances the overall flavor without overpowering; honey or simple syrup are good alternatives.
  • Ice – Essential for shaking and serving, always use fresh ice for the best experience.
  • Coarsely Ground Sea Salt – Used for rimming the glass, it enhances the cocktail's flavor; Tajín can be used for a spicy kick.

Get ready to savor the summertime bliss with these delicious Jalapeño Watermelon Margaritas!

Step‑by‑Step Instructions for Jalapeño Watermelon Margaritas

Step 1: Prepare the Glass
Start by rimming your glass with coarsely ground sea salt for added flavor. Wet the rim by gently rubbing a lime wedge around the edge, ensuring it's thoroughly moistened. Next, dip the rim into the salt until fully coated. Set the glass aside for now, allowing the salt to adhere as you prepare your Jalapeño Watermelon Margarita.

Step 2: Fill the Shaker with Ice
Grab your cocktail shaker and fill it to the top with fresh ice cubes. This step is vital for chilling your margarita and achieving that refreshing taste. The ice should be firm and not melting, ensuring it doesn’t dilute the drink. Once your shaker is filled, it’s time to add the flavorful ingredients that will make this cocktail shine.

Step 3: Add the Ingredients
Into the shaker filled with ice, pour in 2 ounces of silver tequila, followed by 1 ounce of freshly squeezed lime juice to bring in that zesty kick. Next, add 4 ounces of freshly made watermelon juice, which is the star of the Jalapeño Watermelon Margaritas. For a spicy edge, add 2 or 3 jalapeño slices, adjusting to your heat preference, and finish with a touch of agave nectar to sweeten things up.

Step 4: Shake Vigorously
Secure the lid on your cocktail shaker tightly, ensuring it’s sealed properly to prevent any spills. Shake vigorously for about 15-30 seconds. You want to feel the coldness radiating from the shaker and hear the ice clinking as the ingredients mix. The result should be a beautifully blended, chilled mixture with a vibrant pink hue—the essence of summer in a cocktail.

Step 5: Strain and Serve
Now it’s time to pour your refreshing Jalapeño Watermelon Margarita! Remove the lid from the shaker and, using a strainer, carefully pour the mixture into your prepared glass over fresh ice. This step keeps the jalapeño slices behind, ensuring a smooth drink. To garnish, add a cute wedge of watermelon and, if you dare, a couple of additional jalapeño slices for an extra pop of color and spice.

Step 6: Enjoy Responsibly
Your Jalapeño Watermelon Margaritas are ready to be enjoyed! Serve immediately to relish their fresh flavors. Take a moment to appreciate the lovely rosy color and inviting aroma before diving in. This cocktail is perfect for summer gatherings, lazy afternoons, or simply a delightful treat for yourself—sip, savor, and enjoy!

What to Serve with Spicy Jalapeño Watermelon Margaritas

Elevate your cocktail experience with delightful pairings that complement the vibrant flavors of your margaritas.

  • Grilled Shrimp Tacos: The fresh and spicy shrimp elevate the flavor, echoing the jalapeño while balancing the sweetness of watermelon. Perfect for a summer feast!

  • Avocado Salsa: Creamy and zesty, this salsa adds a refreshing element that enhances both the margaritas and any tortilla chips served alongside.

  • Tortilla Chips with Queso: The crunchy chips and warm, gooey cheese create a mouthwatering contrast to the light, refreshing drink, making it an irresistible pairing.

  • Spicy Cilantro Lime Rice: With its zesty flavor profile and fragrant herbs, this rice dish complements the margarita's burst of sweetness while harmonizing the overall meal.

  • Stuffed Mini Peppers: Sweet mini peppers stuffed with cream cheese or spicy sausage echo the drink's sweet-spicy combo, making for an exciting appetizer.

  • Mango Sorbet: For a refreshing dessert, this fruity sorbet becomes a delightful and cooling counterpart to your spicy cocktail.

  • Lightly Grilled Corn on the Cob: The buttery sweetness of grilled corn bursts with summer flavor, pairing beautifully with the tangy and spicy notes of the margarita.

  • Sparkling Water or Lemonade: Stay refreshed with a non-alcoholic option; both drinks will cleanse the palate and balance the cocktail's vibrant flavor profile.

Expert Tips for Jalapeño Watermelon Margaritas

  • Adjust the Heat: Start with fewer jalapeño slices to gauge the spiciness and increase gradually based on your preference for Jalapeño Watermelon Margaritas.

  • Use Fresh Ingredients: Opt for freshly squeezed lime juice and homemade watermelon juice for maximum flavor. Bottled versions may lack the vibrant taste you desire.

  • Sealing the Shaker: Ensure the cocktail shaker is tightly sealed before shaking to prevent leaks. A good seal will give you a well-mixed margarita without mess.

  • Creating a Frozen Version: Blend all your ingredients with ice instead of shaking for a refreshing frozen margarita perfect for hot summer days.

  • Experiment with Garnishes: Enhance your presentation with fun garnishes such as mint leaves or additional jalapeño slices for that extra touch of flair and flavor.

Make Ahead Options

These Jalapeño Watermelon Margaritas are ideal for busy cooks looking to save time without sacrificing flavor! You can prep the watermelon juice up to 3 days in advance; simply juice fresh watermelon, strain it, and refrigerate in an airtight container to maintain its vibrant taste and prevent oxidation. Likewise, slice the jalapeños and store them in a separate container for up to 24 hours. When it’s time to serve, just shake the prepped ingredients together with tequila, lime juice, and agave nectar, then strain into your salted rim glass over ice. With these make-ahead tips, you’ll enjoy delicious cocktails with minimal effort when it’s time to unwind!

How to Store and Freeze Jalapeño Watermelon Margaritas

Fridge: Store any leftover Jalapeño Watermelon Margaritas in an airtight container for up to 2 days. Just give it a quick shake before serving again.

Freezer: For a long-term option, pour the margaritas into ice cube trays and freeze. Once solid, transfer to a freezer bag for easy blending later—perfect for frozen drinks!

Make Ahead: Prepare the watermelon juice ahead of time and keep it in the fridge for up to 2 days for a quick cocktail whenever the mood strikes.

Reheating: Since this cocktail is best served cold, simply blend or shake any frozen cubes with fresh ice when you're ready to enjoy.

Jalapeño Watermelon Margaritas: Customization Options

Don't be afraid to get creative with your margaritas! Explore these delightful variations to craft a drink that's uniquely yours.

  • Frozen Delight: Blend ingredients with ice until smooth for a cool, slushy version that’s perfect for hot summer days.

  • Herbal Infusion: Add fresh mint or basil to the shaker for an aromatic twist that elevates your margarita’s flavor profile.

  • Fruit Swap: Replace watermelon with juicy strawberries or peaches for a refreshing twist. Each option brings its own sweetness that pairs wonderfully with jalapeño.

  • Sweet and Spicy: Spice things up with a splash of jalapeño-infused vodka for an extra kick of heat that enhances the cocktail's complexity.

  • Citrus Burst: Add a splash of orange or grapefruit juice along with lime for a vibrant citrus explosion that brightens each sip.

  • Low-Sugar Option: Use a sugar-free sweetener in place of agave nectar to cut down on the sweetness while keeping the refreshing flavor intact.

  • Pitcher Perfect: Scale up your recipe to serve a crowd! Prepare a pitcher by multiplying the ingredients to keep the good times flowing effortlessly.

Feel free to visit Watermelon Popsicles Blissful for a refreshing treat that pairs wonderfully with your margaritas! The fun of customizing doesn’t have to stop here—there's always room for a delicious twist!

Jalapeño Watermelon Margaritas Recipe FAQs

How do I choose ripe watermelon for my margaritas?
When selecting a watermelon, look for one that feels heavy for its size, which indicates juiciness. The skin should be firm, with a uniform green color. Avoid watermelons with dark spots or dents, as these can signal overripeness or damage. A well-placed yellow spot where it rested on the ground indicates ripeness.

How should I store leftover Jalapeño Watermelon Margaritas?
Any leftover margaritas can be stored in an airtight container in the refrigerator for up to 2 days. Make sure to give it a gentle shake or stir before serving to mix the ingredients again. For best results, it's ideal to consume them fresh, as the flavors are most vibrant right after mixing.

Can I freeze Jalapeño Watermelon Margaritas?
Absolutely! To freeze your margaritas, pour the mixture into ice cube trays and freeze until solid. Once frozen, transfer the cubes to a freezer bag. When you're ready for a refreshing drink, blend a handful of these frozen cubes with a splash of fresh juice to recreate that tantalizing flavor.

What if my margaritas are too spicy?
If you've accidentally used too many jalapeño slices, don't worry! You can balance the heat by adding more watermelon juice or a splash of soda water to dilute the spice. Another option is to add a little extra agave nectar to enhance sweetness without overwhelming the drink.

Are Jalapeño Watermelon Margaritas safe for pets?
While the watermelon itself is safe for most pets, it's best to avoid sharing the margaritas with them due to the alcohol and jalapeños, which can be harmful. Always keep cocktail ingredients away from your furry friends to ensure their safety.

Can I make these margaritas in advance?
Certainly! You can prepare the watermelon juice ahead of time and store it in the refrigerator for up to 2 days. This way, you can whip up a batch of Jalapeño Watermelon Margaritas on demand with utmost ease. Just remember, the fresh flavors shine brightest when served shortly after mixing!

Jalapeño Watermelon Margaritas

Refreshing Jalapeño Watermelon Margaritas for Summer Vibes

This Jalapeño Watermelon Margaritas recipe perfectly balances sweet watermelon with a spicy kick, ideal for summer fun.
Print Recipe Pin Recipe
Prep Time 10 minutes mins
Total Time 10 minutes mins
Servings: 2 cocktails
Course: Drinks
Cuisine: Mexican
Calories: 180
Ingredients Equipment Method Nutrition Notes

Ingredients
  

For the Margarita
  • 2 ounces Silver Tequila Blanco tequila or mezcal can be substituted for a smoky flavor.
  • 1 ounce Freshly Squeezed Lime Juice Fresh is preferred, but bottled can work in a pinch.
  • 4 ounces Fresh Watermelon Juice Store-bought juice can be used if fresh isn’t available.
  • 2-3 slices Jalapeño Slices Adjust amount based on your desired heat level.
  • 1 tablespoon Agave Nectar Honey or simple syrup can be used as alternatives.
  • ice Ice Always use fresh ice for the best experience.
  • Coarsely Ground Sea Salt Used for rimming the glass.

Equipment

  • cocktail shaker
  • strainer
  • measuring jigger

Method
 

Step-by-Step Instructions
  1. Start by rimming your glass with coarsely ground sea salt. Wet the rim with a lime wedge and dip it in salt. Set aside.
  2. Fill your cocktail shaker with fresh ice cubes to the top.
  3. Pour 2 ounces of silver tequila, 1 ounce of freshly squeezed lime juice, 4 ounces of watermelon juice, 2-3 jalapeño slices, and 1 tablespoon of agave nectar into the shaker.
  4. Secure the lid on the shaker and shake vigorously for 15-30 seconds until well mixed.
  5. Strain the mixture into your prepared glass over fresh ice, leaving jalapeño slices behind. Garnish with a watermelon wedge and additional jalapeño slices if desired.
  6. Enjoy your refreshing Jalapeño Watermelon Margaritas immediately.

Nutrition

Serving: 1cocktailCalories: 180kcalCarbohydrates: 12gSodium: 5mgPotassium: 150mgSugar: 10gVitamin C: 20mgIron: 2mg

Notes

This cocktail is perfect for summer gatherings or a cozy treat for yourself.

Tried this recipe?

Let us know how it was!

Delicious Iced Pumpkin Spice Latte for Cozy Fall Vibes

September 5, 2025 by Grace Snow Leave a Comment

Fall is in the air, and the aroma of pumpkin spice is calling my name! There’s something truly magical about cozying up with a homemade Iced Pumpkin Spice Latte. This recipe brings together rich espresso, creamy milk, and pure pumpkin puree, perfectly balanced with warm spices that evoke memories of crisp autumn afternoons. Not only is this drink an absolute delight for your taste buds, but it’s also a quick and easy way to elevate your coffee routine while ensuring you know exactly what’s in your cup. Whether you're entertaining friends or just treating yourself, this versatile latte can be made vegan or dairy-free, catering to everyone’s preferences. Who can resist a sip of this creamy goodness that’s as comforting as a warm hug? Ready to embrace the season? Let’s get brewing!

Why is this latte a must-try?

Rich, Creamy Texture: The combination of espresso and milk creates a velvety consistency that's simply irresistible.

Warm, Cozy Flavors: Infused with real pumpkin puree and a blend of aromatic spices, it captures the essence of fall in every sip.

Quick Preparation: Whip this up in minutes—perfect for busy mornings or an afternoon pick-me-up!

Customizable: Easily adapt it for vegan or dairy-free diets by choosing your preferred milk, ensuring everyone's happy.

Perfect Pairing: Enjoy alongside your favorite fall treats, like pumpkin muffins or cookies for a complete experience!

Iced Pumpkin Spice Latte Ingredients

For the Latte

  • Espresso – Rich and robust coffee flavor is key; substitute with very strong brewed coffee for a different taste.
  • Milk – Provides a creamy texture; use whole or 2% milk, oat milk for dairy-free, or almond milk for a nutty twist.
  • Pumpkin Puree – Gives the drink its signature taste and texture; opt for pure pumpkin puree without added sugars or spices.
  • Pumpkin Spice – Adds classic fall flavors; can be substituted with individual spices like cinnamon or nutmeg as needed.
  • Maple Syrup – A natural sweetener that enhances the latte; honey or agave syrup can be used if you prefer a different sweetness.
  • Whipped Cream (optional) – Adds decadence; for a vegan version, make whipped cream from coconut milk.

This delightful Iced Pumpkin Spice Latte, packed with cozy flavors, is waiting to be brewed in your kitchen!

Step‑by‑Step Instructions for Iced Pumpkin Spice Latte

Step 1: Brew Espresso
Start by brewing a double shot of rich espresso using your espresso machine or stovetop method, which should take about 5 minutes. The espresso should have a rich, robust flavor, creating the foundation of your Iced Pumpkin Spice Latte. If you prefer, you can also prepare a strong cup of coffee or cold brew concentrate as an alternative.

Step 2: Mix Pumpkin and Spices
In a large glass, combine the freshly brewed espresso with 2 tablespoons of pumpkin puree, 1 teaspoon of pumpkin spice, and 1-2 tablespoons of maple syrup. Stir the mixture vigorously for about 30 seconds, ensuring all ingredients are well incorporated. You should see a smooth blend of coffee and warm, cozy spices, creating a delightful base for your latte.

Step 3: Add Ice
Fill the same glass with ice cubes, leaving just enough space for milk. Use larger ice cubes to minimize dilution as you enjoy your Iced Pumpkin Spice Latte. Visualize the glass half-full of ice, ready to chill the warming flavors of fall we’ve just created.

Step 4: Pour in Milk
Gently pour your choice of milk over the ice until the glass is filled to your liking. Whole, oat, or almond milk will all work beautifully, depending on your preference. Stir the mixture again for about 15 seconds to combine the flavors evenly, resulting in a creamy, smooth texture.

Step 5: (Optional) Top with Whipped Cream
For an indulgent touch, add a generous dollop of whipped cream on top of your latte. This step is optional, but it elevates the experience! Sprinkle a pinch of additional pumpkin spice over the whipped cream for an extra burst of flavor, making your Iced Pumpkin Spice Latte look as good as it tastes.

What to Serve with Iced Pumpkin Spice Latte

Cozy up this fall with delightful pairings that elevate your Iced Pumpkin Spice Latte experience!

  • Pumpkin Muffins: These soft, spice-kissed treats mirror your latte’s flavors, making each sip and bite a harmonious celebration of autumn.
  • Spiced Cookies: Ginger or snickerdoodle cookies add an inviting crunch that perfectly balances the creamy smoothness of the latte.
  • Cinnamon Rolls: Warm, gooey cinnamon rolls with a hint of sweetness are a comforting companion that takes your coffee moment to a whole new level.
  • Apple Crisp: The tartness of baked apples with a crumbly topping creates a delightful contrast to the latte's creamy sweetness, inviting the senses.
  • Autumn Salad: A fresh salad with roasted butternut squash, cranberries, and walnuts introduces vibrant flavors and textures, refreshing your palate alongside the drink.
  • Herbal Tea: For an alternative sip, enjoy a warm herbal tea, such as chamomile or chai, to complement the cozy vibes of your pumpkin spice latte.
  • Hot Cocoa: Perfect for sharing, a cup of rich hot cocoa offers a chocolatey joy that pairs wonderfully with the fragrant spices of fall.
  • Cheesecake Bites: Tiny, delectable bites of cheesecake provide a creamy indulgence that enhances the richness of your latte while ensuring sweet satisfaction.
  • Sparkling Cider: A glass of sparkling apple cider adds a fizzy, refreshing touch and makes for a lovely match on crisp autumn afternoons.

Make Ahead Options

These Iced Pumpkin Spice Lattes are perfect for busy home cooks looking to save time during hectic mornings! You can prepare the espresso and pumpkin mixture up to 3 days ahead by combining 1 double shot of espresso with 2 tablespoons of pumpkin puree, 1 teaspoon of pumpkin spice, and 1-2 tablespoons of maple syrup. Store this concoction in an airtight container in the refrigerator. When you’re ready to enjoy, simply fill a glass with ice, pour in your milk of choice, and stir in the chilled espresso mixture. By prepping in advance, you’ll have all the delicious flavors of this cozy fall beverage with minimal effort, ensuring it’s just as delightful as when freshly made!

Iced Pumpkin Spice Latte Variations

Feel free to explore these delightful twists and substitutions that can transform your Iced Pumpkin Spice Latte into something uniquely yours!

  • Dairy-Free: Swap traditional milk for oat milk or almond milk for a creamy, nutty alternative that’s perfect for a plant-based experience.

  • Sweetener Options: Replace maple syrup with honey or agave syrup for a different level of sweetness—experiment to find your favorite!

  • Spicy Kick: Add a pinch of cayenne or extra pumpkin spice to pump up the flavor for those who enjoy a hint of heat in their drink.

  • Pumpkin Boost: Increase the pumpkin puree for a heartier flavor or even mix in some pumpkin pie filling for extra creaminess and spice.

  • Chai Twist: Substitute pumpkin spice with chai spices (like ginger, cloves, and cardamom) for a unique blend that combines the best of both worlds.

  • Chocolate Delight: Stir in a teaspoon of cocoa powder, creating a luscious mocha-pumpkin hybrid that’s irresistibly rich!

  • Frozen Variety: Blend everything with ice instead of pouring it over ice for a frosty version that’s perfect for warm days.

For more amazing fall-inspired treats, consider trying my luscious pumpkin brownies or fluffy pumpkin cinnamon rolls for a cozy celebration of autumn flavors!

Tips for the Best Iced Pumpkin Spice Latte

  • Quality Espresso: Use high-quality espresso for a richer flavor. Brands like Illy or Starbucks can take your latte to the next level!

  • Right Milk Choice: Whole or oat milk offers creaminess, while almond milk gives a nutty twist. Choose the one that suits your taste.

  • Don’t Over-sweeten: Keep an eye on the sweetness. A tablespoon of maple syrup is generally enough to let the pumpkin flavors shine through without overpowering them.

  • Chill Your Glass: Pre-chill your glass before adding ice; this helps maintain your Iced Pumpkin Spice Latte’s temperature and enhances the refreshing experience.

  • Make Ahead: Mix the espresso and pumpkin blend ahead of time and refrigerate. When you're ready, just add ice and milk for a quick treat!

How to Store and Freeze Iced Pumpkin Spice Latte

  • Fridge: Store any leftover Iced Pumpkin Spice Latte in an airtight container for up to 3 days. Give it a good stir before serving to refresh the flavors.

  • Freezer: You can freeze the espresso and pumpkin spice mixture in ice cube trays for up to 2 months. Use these cubes in your next latte for a quick, frosty treat!

  • Reheating: If you've refrigerated the latte, gently reheat it on the stove or in the microwave until warm, and then add ice for a refreshing cold drink again.

  • Make Ahead: Prepare the pumpkin spice mixture in advance and keep it refrigerated. Shake or stir well before blending with freshly brewed espresso and your choice of milk for a delicious Iced Pumpkin Spice Latte anytime!

Iced Pumpkin Spice Latte Recipe FAQs

What kind of pumpkin puree should I use?
Absolutely use pure pumpkin puree without any added sugars or spices for the best flavor. This ensures you get the authentic taste of pumpkin, which is pivotal for the cozy vibe of your Iced Pumpkin Spice Latte. Canned pumpkin puree works great, but you can also make your own by roasting and blending fresh pumpkin.

How long can I store my Iced Pumpkin Spice Latte in the fridge?
You can store any leftover Iced Pumpkin Spice Latte in an airtight container in the fridge for up to 3 days. Before serving, just give it a good stir to refresh the flavors. However, I recommend enjoying it fresh for the best taste and texture!

Can I freeze my Iced Pumpkin Spice Latte?
Yes! You can freeze the espresso and pumpkin spice mixture in ice cube trays for up to 2 months. This is a fantastic way to have a quick, frosty treat ready. Just pop the cubes into the blender with your choice of milk and blend until smooth! It’s an effortless way to enjoy this delicious latte anytime!

What should I do if my pumpkin spice latte turns out too sweet?
If you find your Iced Pumpkin Spice Latte is too sweet, the good news is you can balance it out! Adding more espresso or a bit more milk can help tone down the sweetness. Alternatively, you might add a pinch of salt, as it can help counteract sweetness and enhance the overall flavors.

Can I make the Iced Pumpkin Spice Latte vegan?
Very! To make your Iced Pumpkin Spice Latte vegan, simply use plant-based milk like oat or almond milk, and skip the whipped cream or use a non-dairy version made from coconut milk. This way, you can enjoy all the cozy flavors without any dairy products!

How can I make the drink spicier if I prefer?
If you’re looking to spice things up, you can definitely increase the amount of pumpkin spice. A pinch of cayenne pepper also adds a lovely warmth. Start with an extra half teaspoon of pumpkin spice, or for heat, one-eighth teaspoon of cayenne, and adjust according to your taste!

Iced Pumpkin Spice Latte

Delicious Iced Pumpkin Spice Latte for Cozy Fall Vibes

Enjoy a homemade Iced Pumpkin Spice Latte, combining rich espresso, creamy milk, and pumpkin puree with warm spices for cozy fall vibes.
Print Recipe Pin Recipe
Prep Time 5 minutes mins
Total Time 5 minutes mins
Servings: 1 cup
Course: Drinks
Cuisine: American
Calories: 240
Ingredients Equipment Method Nutrition Notes

Ingredients
  

For the Latte
  • 2 shots Espresso Rich and robust flavor
  • 1 cup Milk Use whole, 2%, oat, or almond milk
  • 2 tablespoons Pumpkin Puree Pure pumpkin without added sugars or spices
  • 1 teaspoon Pumpkin Spice Can substitute with individual spices like cinnamon or nutmeg
  • 1-2 tablespoons Maple Syrup Can substitute with honey or agave syrup
  • 1 dollop Whipped Cream (optional) Use coconut milk for vegan version

Equipment

  • Espresso machine
  • Large glass

Method
 

Step‑by‑Step Instructions for Iced Pumpkin Spice Latte
  1. Brew a double shot of espresso using your machine or stovetop, about 5 minutes.
  2. In a large glass, combine espresso, pumpkin puree, pumpkin spice, and maple syrup. Stir for 30 seconds until well mixed.
  3. Fill the glass with ice cubes, leaving space for milk.
  4. Pour your choice of milk over the ice until filled to your liking. Stir for 15 seconds.
  5. Top with whipped cream if desired and sprinkle with additional pumpkin spice.

Nutrition

Serving: 1cupCalories: 240kcalCarbohydrates: 30gProtein: 5gFat: 10gSaturated Fat: 5gCholesterol: 15mgSodium: 150mgPotassium: 350mgFiber: 2gSugar: 20gVitamin A: 50IUVitamin C: 1mgCalcium: 250mgIron: 1mg

Notes

This latte can be made vegan or dairy-free. Adjust sweetness to taste and enjoy with fall treats like cookies or muffins.

Tried this recipe?

Let us know how it was!

Cozy Fall Sangria Recipe Bursting with Autumn Flavors

September 5, 2025 by Grace Snow Leave a Comment

As I unbox the colorful bounty from my local farmer's market, the vivid hues of autumn inspire me. One sip of this Cozy Fall Apple Cider Sangria transports me straight to crisp days filled with falling leaves and cozy gatherings. This fall sangria recipe elegantly marries the sweetness of sparkling apple cider with a robust red wine base, brightened by vibrant slices of orange and the warm embrace of cinnamon. Not only is this drink a delightful crowd-pleaser, but it’s also incredibly easy to whip up—perfect for busy hosts or a quiet night in. Plus, it’s a generous nod to plant-based diets, making it an inclusive choice for everyone. Ready to elevate your fall celebrations? Let’s dive into the sweet and spicy magic of this seasonal sip!

Why is this Fall Sangria special?

Fall, Stunning Colors: The vibrant mix of apples, pears, and oranges not only adds visual appeal but also a delightful crunch to each sip.
Warming Spices: With the enticing aroma of cinnamon, this drink captures the essence of cozy autumn gatherings.
Versatile Recipe: Feel free to swap out the fruits or explore variations like pomegranate juice for an unexpected twist!
Crowd-Pleasing: Whether you’re hosting a big get-together or enjoying quiet moments, this sangria is a guaranteed hit that everyone will adore.
Plant-Based Joy: This Cozy Fall Apple Cider Sangria recipe is vegan-friendly, allowing everyone to join in the festive fun without compromise!

Fall Sangria Recipe Ingredients

For the Sangria
• Dry Red Wine – Provides the base and depth of flavor; a Spanish Tempranillo works perfectly here.
• Sparkling Apple Cider – Adds sweetness and effervescence; feel free to choose a non-alcoholic option for a family-friendly version.
• Orange – Offers freshness and citrus zing; use slices to enhance flavor and garnish your drink.
• Apples – Contributes sweetness and texture; opt for firm varieties like Honeycrisp or Granny Smith for the best results.
• Pears – Adds a lush sweetness; again, stick to firm textures to avoid mushiness in your sangria.
• Cinnamon – Infuses the drink with warmth and spice; it can also serve as a beautiful garnish.
• Rosemary (optional) – Introduces a hint of herbal complexity; garnish with sprigs for an aromatic touch.

Enjoy this delightful Fall Sangria Recipe that's sure to elevate your autumn gatherings!

Step‑by‑Step Instructions for Cozy Fall Apple Cider Sangria

Step 1: Prepare the Fruit
Begin by washing and slicing the apples, pears, and orange into thin wedges. Use a sharp knife and a cutting board to ensure uniform pieces, which will help them infuse flavor into your fall sangria more effectively. Aim for about 1 cup each of thinly sliced apples and pears, along with half a sliced orange for a bright pop of citrus.

Step 2: Combine Ingredients
In a large pitcher, combine the prepared fruit slices with your dry red wine and a generous sprinkle of cinnamon. Stir gently with a long spoon to ensure the ingredients mix well, allowing the fruity notes to marry with the spices. This mixture will serve as the flavorful base for your cozy fall apple cider sangria, so make sure everything is evenly distributed.

Step 3: Chill the Sangria
Cover the pitcher with plastic wrap or a lid and place it in the refrigerator for at least one hour. This chilling time allows the flavors to meld beautifully, enhancing the overall taste of your fall sangria. If time permits, letting it steep for up to four hours is even better for a richer flavor profile.

Step 4: Serve the Sangria
Once chilled, fill your glasses with ice, about halfway, to keep the sangria refreshingly cool. Pour the red wine and fruit mixture over the ice, filling each glass about three-quarters full, ensuring guests enjoy the vibrant fruit pieces in each serving of this cozy fall sangria.

Step 5: Add Sparkling Cider
Top off each glass with sparkling apple cider, gently pouring to preserve the bubbles. This adds a delightful effervescence and sweetness that balance the bold notes of the red wine wonderfully. Stir gently with a stirrer to mix the layers before serving, showcasing the beautiful colors.

Step 6: Garnish for Flair
Finally, elevate your presentation by garnishing each glass with a cinnamon stick, a slice of orange, and a sprig of rosemary if desired. These added touches not only beautify your cozy fall apple cider sangria but also enhance the aromatic experience for your guests.

Fall Sangria Recipe Variations

Feel free to take this cozy fall sangria to the next level with these delightful twists that will please any palate.

  • Dairy-Free: Substitute traditional cider with non-alcoholic sparkling cider for a family-friendly option. The fizzy sweetness carries the flavor beautifully!
  • Extra Flavor: Add a few slices of fresh ginger to infuse a spicy kick that perfectly complements the warming cinnamon. The heat will awaken your senses and add a new dimension.
  • Fruity Swap: Try using seasonal fruits like cranberries or diced peaches instead of apples and pears. The tartness from cranberries or the sweetness of peaches can elevate your sangria.
  • Herbal Touch: Incorporate fresh mint or thyme for a refreshing twist. This adds a burst of herbal notes that make the sangria feel truly unique and aromatic.
  • Spicy Version: Infuse a hint of heat by adding a splash of jalapeño or chili pepper. Just a few slices will bring a surprising yet delightful warmth to each sip!
  • Pomegranate Delight: Replace some of the red wine with pomegranate juice for a vibrant color and a tangy flavor. This twist creates a stunning visual and a refreshing taste!
  • Warm & Cozy: For a chilly evening, heat the sangria gently on the stove without boiling, and serve it warm. It’s like a hug in a glass, perfect for those crisp autumn nights!
  • Explore Varieties: Consider trying out different wine types like Pinot Noir or a fruity Merlot to find your perfect balance. Each brings its own flair, and experimenting is half the fun!

These variations can help you personalize your Fall Sangria experience, making it a wonderful addition to any gathering! If you ever seek other delightful ideas, check out our Spatchcock Chicken or the rich flavors of Chicken Adobo. Enjoy the journey of flavor!

What to Serve with Cozy Fall Apple Cider Sangria

Elevate your autumn gatherings by complementing this delightful drink with perfect sides and treats that enhance its seasonal charm.

  • Savory Cheese Platter: A mix of sharp and creamy cheeses paired with crusty bread balances the sangria's sweetness while offering lovely textures.
  • Spiced Nuts: Roasted with cinnamon and a hint of cayenne, these crunchy bites create an irresistible snack that echoes the warming spices in the sangria.
  • Honey-Glazed Roasted Vegetables: Their natural sweetness and caramelization beautifully complement the fruity notes of the sangria, making every bite enjoyable.
  • Autumn Fruit Salad: A refreshing medley of seasonal fruits like pomegranate, persimmons, and kiwi offers a crisp contrast to the drink’s rich flavors.
  • Pecan Pie Bars: Sweet and nutty, these bars introduce a comforting dessert option that pairs nicely with the soothing elements of fall sangria.
  • Cinnamon Sugar Donuts: Soft and fluffy, these treats make a delightful pairing, echoing the cozy warmth of the cinnamon in the cozy fall apple cider sangria.
  • Mulled Wine: For a harmonious beverage experience, consider serving warm mulled wine, which will echo the cozy, rich flavors of your sangria.

How to Store and Freeze Fall Sangria

Fridge: Store any leftover fall sangria in an airtight container in the refrigerator for up to 24 hours. The flavors will remain vibrant, but it's best enjoyed fresh.

Avoid Freezing: Freezing sangria is not recommended, as the texture and flavors will be compromised once thawed. The fruits may become mushy, affecting the drink's overall appeal.

Mixing Ahead: If you wish to prepare in advance, mix the wine, fruits, and spices up to four hours ahead, but only add the sparkling apple cider when you're ready to serve for optimal fizziness.

Reheating: If you prefer a warm version, gently heat the sangria in a pot on low heat without boiling. This creates a cozy, warm drink perfect for chilly evenings!

Make Ahead Options

Preparing this Cozy Fall Apple Cider Sangria ahead of time is an excellent way to save valuable moments during busy gatherings! You can slice the apples, pears, and oranges up to 24 hours in advance and store them in an airtight container in the refrigerator to keep them fresh and prevent browning. Mixing the dry red wine with the prepared fruit and cinnamon can also be done up to 3 days ahead; just cover the pitcher tightly and refrigerate. When you’re ready to serve, simply add ice to your glasses, pour the chilled sangria mixture, top with sparkling apple cider, and garnish. This effortless prep guarantees your fall sangria will be just as delicious and refreshing, making your hosting duties a breeze!

Expert Tips for Fall Sangria Recipe

  • Choose the Right Wine: Opt for a dry red wine to ensure your fall sangria has a balanced flavor profile and isn’t overly sweet.

  • Chill for Flavor: Letting your sangria steep in the fridge for at least an hour helps the flavors meld, making each sip burst with autumn goodness.

  • Prep Ahead: If you're hosting, mix everything except for the sparkling cider ahead of time. Add the cider just before serving to keep the fizz intact.

  • Fruit Selection: Use firm varieties of apples and pears to avoid mushiness, enhancing the texture and overall enjoyment of your fall sangria.

  • Garnish to Impress: Elevate presentation with rosemary, cinnamon sticks, and orange slices—they not only look beautiful but add aromatic notes to each glass.

Cozy Fall Apple Cider Sangria Recipe FAQs

What kind of dry red wine should I use for the sangria?
Absolutely! A Spanish Tempranillo is a fantastic choice for this fall sangria recipe as it provides depth and complexity. However, other dry reds like Merlot or Cabernet Sauvignon can also work well. Just remember to avoid overly sweet wines to maintain a balanced flavor profile throughout the drink.

How should I store leftover fall sangria?
To keep your sangria fresh, store any leftovers in an airtight container in the refrigerator. Ideally, it should be consumed within 24 hours for the best taste and to preserve its vibrant flavors. Be sure to keep any garnishes separate to maintain their freshness until serving!

Can I freeze fall sangria?
Unfortunately, freezing sangria isn’t recommended as it can alter both the texture and flavors of the drink. When thawed, the fruit may become mushy and unappealing. If you want a cozy treat for chilly evenings, consider gently warming your sangria on low heat instead!

What should I do if my sangria tastes too sweet?
Very! If your fall sangria ends up a bit on the sweet side, you can balance it by adding a splash more of dry red wine or a hint of lemon juice. Stir it all together and let it sit for a little while longer before serving, allowing the flavors to harmonize beautifully.

Are there any dietary considerations for this recipe?
Yes! This cozy fall apple cider sangria is vegan-friendly, making it inclusive for different dietary preferences. Just ensure that the sparkling apple cider you choose is also free of animal-derived ingredients. If you're concerned about allergies, review labels for any potential cross-contamination.

What types of fruits can I swap for the apples and pears?
The more the merrier! You can definitely switch things up with fruits like cranberries, pomegranate seeds, or even diced peaches based on what’s seasonal and available. Just stick to firm varieties to avoid a mushy finish, ensuring a delightful crunch in every sip of your fall sangria!

Fall Sangria Recipe

Cozy Fall Sangria Recipe Bursting with Autumn Flavors

This Fall Sangria Recipe combines sparkling apple cider and red wine for a delightful seasonal drink.
Print Recipe Pin Recipe
Prep Time 15 minutes mins
Chilling Time 1 hour hr
Total Time 1 hour hr 15 minutes mins
Servings: 6 glasses
Course: Drinks
Cuisine: American
Calories: 150
Ingredients Equipment Method Nutrition Notes

Ingredients
  

For the Sangria
  • 1 bottle Dry Red Wine Spanish Tempranillo recommended
  • 4 cups Sparkling Apple Cider Choose non-alcoholic option if desired
  • 1 medium Orange Sliced
  • 2 medium Apples Firm varieties like Honeycrisp or Granny Smith
  • 2 medium Pears Firm varieties recommended
  • 1 teaspoon Cinnamon For infusion and garnish
  • 1 sprig Rosemary Optional, for garnish

Equipment

  • Large pitcher
  • Sharp Knife
  • Cutting Board

Method
 

Step‑by‑Step Instructions
  1. Wash and slice the apples, pears, and orange into thin wedges.
  2. In a large pitcher, combine the prepared fruit slices with dry red wine and sprinkle with cinnamon.
  3. Cover the pitcher and chill in the refrigerator for at least one hour.
  4. Fill glasses halfway with ice, then pour in the red wine and fruit mixture.
  5. Top each glass with sparkling apple cider and stir gently.
  6. Garnish with a cinnamon stick, an orange slice, and a sprig of rosemary.

Nutrition

Serving: 1glassCalories: 150kcalCarbohydrates: 22gSodium: 5mgPotassium: 120mgFiber: 1gSugar: 12gVitamin A: 200IUVitamin C: 20mgCalcium: 20mgIron: 0.5mg

Notes

This sangria is best enjoyed fresh and is vegan-friendly, making it perfect for gatherings.

Tried this recipe?

Let us know how it was!
  • « Previous Page
  • 1
  • 2
  • 3
  • 4
  • 5
  • Next Page »

Welcome!

Hi, I’m Grace, a Sydney-based home cook with a passion for bold flavors and trending ingredients. Whether you’re a busy beginner or a seasoned foodie, you’ll find dishes here that are fresh, fun, and full of flavor.

More about me

Popular Recipes

  • One Pot Keto Tuna Casserole
    One Pot Keto Tuna Casserole: Creamy Comfort in Minutes
  • Ultimate Jalapeno Popper Chicken Salad
    Ultimate Jalapeno Popper Chicken Salad That'll Wow Your Tastebuds
  • Green Chile Cheese Dip
    Mouthwatering Green Chile Cheese Dip for Cozy Gatherings
  • Easy Chimichurri Sauce
    Fresh and Zesty Easy Chimichurri Sauce in Just Minutes

Footer

↑ back to top

About

  • Privacy Policy
  • Disclaimer
  • Terms & Conditions

Newsletter

  • Sign Up! for emails and updates

Contact

  • About me
  • Contact me

Copyright © 2025 TastyTrendIngredients