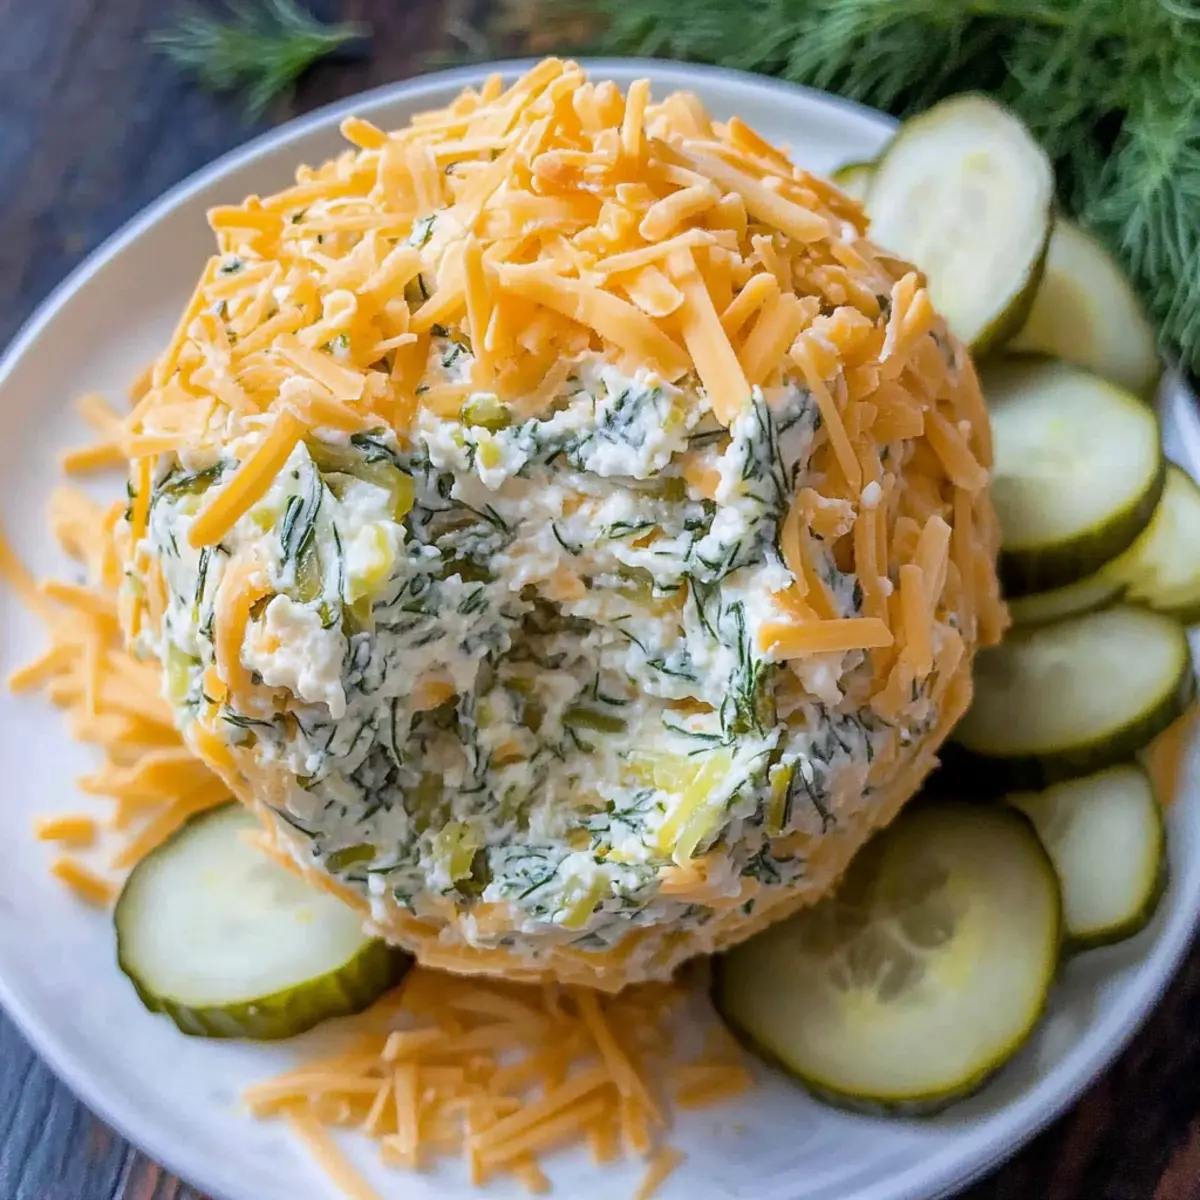
tastytrendingredients

  • Home
  • Recipes
    • Appetizers
    • Breakfast
    • Dessert
    • Dinner
    • Drinks
    • Salads
    • Snacks
    • Soups
  • About me
  • Contact me
menu icon
go to homepage
  • Home
  • Recipes
    • Appetizers
    • Breakfast
    • Dessert
    • Dinner
    • Drinks
    • Salads
    • Snacks
    • Soups
  • About me
  • Contact me
search icon
Homepage link
  • Home
  • Recipes
    • Appetizers
    • Breakfast
    • Dessert
    • Dinner
    • Drinks
    • Salads
    • Snacks
    • Soups
  • About me
  • Contact me
×

Cinnamon Sugar Air Fryer Banana Chips: Crunchy Sweet Bliss

September 29, 2025 by Grace Snow Leave a Comment

I was rummaging through my pantry when I stumbled upon a couple of ripe bananas, just waiting to be turned into something magical. That’s when the idea of making Cinnamon Sugar Air Fryer Banana Chips sparked to life! These crispy delights offer a guilt-free alternative to standard snacks without compromising taste. With their light and airy texture, they’re perfect for satisfying that midday craving or elevating your yogurt and oatmeal. What’s even better? They’re gluten-free, vegan, and super simple to prepare—making them a breeze to whip up whenever those sweet cravings hit. Are you ready to learn the secrets behind creating this deliciously wholesome snack at home? Let’s dive into the recipe!

Why Are These Banana Chips Irresistible?

Healthy snacking never tasted so good! With the perfect balance of cinnamon and sugar, these Cinnamon Sugar Air Fryer Banana Chips are an indulgent yet guilt-free treat. Quick and easy, they require minimal prep time, making them ideal for busy lifestyles. Versatile enough to be enjoyed on their own or as a topping for yogurt or oatmeal, they fit seamlessly into any meal plan. Crispy perfection is just a short air frying session away—no deep frying mess involved! Plus, with their vegan and gluten-free qualities, everyone can join in on the fun!

Cinnamon Sugar Air Fryer Banana Chips Ingredients

Explore the delicious components that make these chips a wholesome snack!

For the Chips
• Bananas – Use ripe but firm bananas for the perfect balance of sweetness and texture.
• Coconut Oil – This not only helps the cinnamon sugar stick, but can also be swapped with butter or olive oil if desired.
• Granulated Sugar – Sweetens the chips and caramelizes beautifully during cooking.
• Ground Cinnamon – Adds a warm, comforting flavor that pairs wonderfully with the bananas; feel free to increase it for more kick.
• Salt – Just a pinch enhances the overall flavors in your Cinnamon Sugar Air Fryer Banana Chips!

Step‑by‑Step Instructions for Cinnamon Sugar Air Fryer Banana Chips

Step 1: Slice Bananas
Begin by peeling two ripe but firm bananas and slicing them into 1/8-inch thick rounds. Try to keep the slices uniform to ensure even cooking and avoid any chewy pieces. Arrange the banana slices on a clean cutting board, and let them sit while you prepare the coating.

Step 2: Prepare Cinnamon Sugar Mixture
In a medium mixing bowl, combine granulated sugar, ground cinnamon, and a pinch of salt. Use about 2 tablespoons of sugar for every banana, adjusting to your sweetness preference. Stir the sugar and spice mixture until thoroughly combined, creating a delightful blend that will add flavor to your Cinnamon Sugar Air Fryer Banana Chips.

Step 3: Coat Banana Slices
Melt about 1 tablespoon of coconut oil and drizzle it over the banana slices in the bowl. Toss gently to coat each slice evenly with the oil. Then, sprinkle the cinnamon sugar mixture over the bananas and toss again to ensure they are fully covered. The coconut oil helps the sugar stick and creates a lovely crisp texture when air fried.

Step 4: Preheat Air Fryer
Preheat your air fryer to 300°F (150°C). This step is crucial as it allows the air fryer to reach the optimal temperature for cooking and ensures that your Cinnamon Sugar Air Fryer Banana Chips will crisp up beautifully. While the air fryer heats up, let the coated banana slices rest for a few minutes.

Step 5: Arrange Bananas in Air Fryer
Once the air fryer is preheated, carefully arrange the banana slices in the fryer basket. Make sure to place them in a single layer without overlapping for the best results. This allows hot air to circulate around each chip, achieving a delightful crunch. Depending on your air fryer’s size, you may need to work in batches.

Step 6: Air Fry Banana Chips
Air fry the banana slices for 15-18 minutes, flipping them halfway through the cooking time. Keep an eye on them as they cook; they should turn golden brown and become crispy. The aroma of cinnamon and sugar will fill the kitchen, making it hard to resist the temptation to sneak a taste!

Step 7: Cool Chips for Crispness
After the cooking time is complete, carefully remove the banana slices from the air fryer and place them on a wire rack. Allow the Cinnamon Sugar Air Fryer Banana Chips to cool completely, as this cooling period enhances their crispness. Avoid stacking them while they cool to ensure they maintain that delightful crunch.

Step 8: Serve and Enjoy
Once your banana chips are cool, they’re ready to be enjoyed! Serve them as a snack, sprinkle them on yogurt, or use them as a topping for oatmeal. These crispy treats are versatile and will satisfy your sweet cravings guilt-free, making them a perfect addition to any healthy snacking routine.

Cinnamon Sugar Air Fryer Banana Chips Variations

Feel free to express your creativity with these delightful twists that elevate your snacking experience!

  • Spicy Twist: Add a pinch of cayenne or chili powder to the sugar mixture for a surprising kick. This spicy note beautifully contrasts the sweetness of the bananas!

  • Choco Delight: For a decadent flavor, drizzle melted dark chocolate over the cooled chips. It creates a rich and irresistible treat that will satisfy your chocolate cravings.

  • Savory Alternative: Skip the sugar and cinnamon, and season the banana slices with salt, smoked paprika, or garlic powder instead. These savory chips are a unique way to enjoy bananas!

  • Nutty Crunch: Toss in some crushed nuts like almonds or pecans before air frying. The added texture and flavor create a satisfying crunch with every bite!

  • Maple Infusion: Swap granulated sugar for maple sugar or syrup to give the chips a deeper, caramel-like flavor. It adds a lovely complexity while keeping them naturally sweet.

  • Coconut Bliss: Sprinkle shredded coconut onto the chips before air frying for an added layer of tropical flavor. The sweet, chewy texture of the coconut complements the crispy chips perfectly.

  • Tropical Medley: Mix in some pineapple pieces with the banana snack. Combine banana and pineapple slices in the air fryer for a fruity explosion of flavors!

  • Herbal Zest: Incorporate finely chopped fresh mint or basil to the banana slices for a refreshing twist. This herbaceous hint will brighten up the sweetness beautifully.

Enjoy experimenting with these variations or serve them alongside your favorite yogurt bowls or Pumpkin Cinnamon Roll Muffins for a delightful breakfast treat! Each twist promises a unique flavor adventure!

What to Serve with Cinnamon Sugar Air Fryer Banana Chips

These crispy bites are just the beginning of a delightful snack experience that can transform your everyday treats.

  • Creamy Yogurt Dip: A velvety yogurt dip adds a refreshing balance to the sweetness of the chips, creating a perfect harmony with every bite. It’s like a mini dessert that feels indulgent yet healthy!

  • Honey-Drizzled Oatmeal: Topping your morning oatmeal with these chips elevates it to a whole new level. The crunch plays beautifully against the warm, comforting oats, while honey adds a touch of sweetness that matches the cinnamon flavor.

  • Mixed Nuts: The salty crunch of mixed nuts provides a striking contrast to the sweet, spiced banana chips, enhancing your snacking experience. Try pairing them for a quick yet satisfying trail mix!

  • Fresh Berries: Juicy berries bring a burst of freshness and acidity that beautifully complements the warm notes of cinnamon in the chips. Plus, the vibrant colors will make your snack bright and appealing!

  • Homemade Granola: Use these delightful chips as a crunchy topping for your granola. The added sweetness and texture of the chips create a gourmet twist that is both satisfying and delicious.

  • Dark Chocolate Drizzle: For a sweet treat, drizzle dark chocolate over the cooled banana chips. This simple addition elevates them to a dessert level, combining that crunchy, sweet experience with a touch of richness.

Storage Tips for Cinnamon Sugar Air Fryer Banana Chips

Room Temperature: Store the chips in an airtight container at room temperature for up to 3 days to maintain their crispness and flavor.

Avoid Refrigeration: Do not refrigerate the chips, as this can lead to moisture build-up, making them lose their delightful crunch.

Re-crisping: If the chips soften over time, simply pop them back in the air fryer at 300°F (150°C) for a few minutes to restore their crispy texture.

Serving Suggestions: Enjoy these delicious Cinnamon Sugar Air Fryer Banana Chips as a snack, a topping for yogurt, or even as an addition to your favorite trail mix!

Make Ahead Options

These Cinnamon Sugar Air Fryer Banana Chips are perfect for meal prep enthusiasts! You can slice the bananas and coat them with coconut oil and cinnamon sugar up to 24 hours in advance. Simply store the coated banana slices in an airtight container in the refrigerator to maintain freshness. When you’re ready to enjoy them, simply preheat your air fryer and arrange the chilled banana slices in a single layer. Cook for 15-18 minutes as directed, flipping halfway for that delightful crispiness. With this make-ahead option, you can have a deliciously healthy snack ready in no time, making your busy weeknights a little more enjoyable!

Expert Tips for Cinnamon Sugar Air Fryer Banana Chips

• Even Slices: Use a mandoline slicer for uniform banana thickness. This helps achieve consistent cooking and ensures every chip turns out perfectly crispy.

• Don’t Overcrowd: Arrange banana slices in a single layer to allow proper air circulation. Overcrowding leads to soggy chips instead of the intended crispiness in your Cinnamon Sugar Air Fryer Banana Chips.

• Monitor Cooking Time: Keep an eye on the cooking process, as air fryers can vary significantly. Check your chips around the 12-minute mark to avoid burning.

• Cool Completely: Once cooked, allow the chips to cool on a wire rack. This crucial step keeps them crispy, preventing moisture build-up during storage.

• Flavor Variations: Experiment with different spices or sweeteners. For a twist, consider adding a pinch of cayenne to the cinnamon mix for a spicy kick in your chips.

Cinnamon Sugar Air Fryer Banana Chips Recipe FAQs

What type of bananas should I use?
Absolutely! For the best Cinnamon Sugar Air Fryer Banana Chips, choose ripe but firm bananas. They should be slightly yellow with minimal dark spots. Overripe bananas are too mushy for this recipe, while unripe ones won't provide the desired sweetness and flavor.

How should I store my banana chips?
For optimal freshness, store the chips in an airtight container at room temperature for up to 3 days. Keep them in a cool, dry place, and avoid refrigeration, as this can trap moisture and make them soggy. If they do soften, simply re-crisp them in the air fryer for a few minutes at 300°F (150°C).

Can I freeze Cinnamon Sugar Air Fryer Banana Chips?
Certainly! To freeze, place the cooled banana chips in a single layer on a baking sheet and freeze for about 1-2 hours. Once solid, transfer them to an airtight freezer bag. They can last up to 3 months in the freezer. When you're ready to enjoy them, re-crisp in the air fryer at 300°F (150°C) for a few minutes.

What can I do if my chips aren’t crispy?
No worries! If your Cinnamon Sugar Air Fryer Banana Chips aren’t as crispy as you'd like, it could be due to overcrowding the air fryer basket or cooking them at a lower temperature. Make sure to arrange the banana slices in a single layer and keep an eye on them during the cooking process. If they don’t crisp up, try increasing the cooking time in 1-2 minute increments until you achieve that desired crunchy texture.

Are these banana chips safe for pets?
While bananas are generally safe for dogs in moderation, it’s essential to avoid offering any chips with added sugar or cinnamon. These added ingredients could upset your furry friend's stomach. Always consult your vet before introducing new snacks into your pet's diet.

Can I adjust the sweetness or flavoring?
Very! Feel free to modify the sugar and cinnamon levels to match your taste. If you prefer a lighter sweetness, reduce the sugar, or try adding spices like nutmeg or a pinch of cayenne for a bit of heat. This flexibility allows everyone to enjoy their Cinnamon Sugar Air Fryer Banana Chips just the way they like!

Cinnamon Sugar Air Fryer Banana Chips

Cinnamon Sugar Air Fryer Banana Chips: Crunchy Sweet Bliss

Cinnamon Sugar Air Fryer Banana Chips are a guilt-free snack that offers a crispy and sweet alternative to standard treats.
Print Recipe Pin Recipe
Prep Time 10 minutes mins
Cook Time 18 minutes mins
Cooling Time 10 minutes mins
Total Time 38 minutes mins
Servings: 4 servings
Course: Snacks
Cuisine: Vegan
Calories: 120
Ingredients Equipment Method Nutrition Notes

Ingredients
  

For the Chips
  • 2 large Ripe Bananas Use ripe but firm bananas for best texture.
  • 2 Tablespoons Coconut Oil A great coating for cinnamon sugar adherence.
  • 2 Tablespoons Granulated Sugar Adds sweetness that caramelizes beautifully.
  • 1 teaspoon Ground Cinnamon Adjust to your taste.
  • 1 pinch Salt Enhances the flavors.

Equipment

  • Air fryer
  • Mandoline Slicer

Method
 

Step-by-Step Instructions
  1. Prepare the Bananas: Peel and slice the bananas into 1/8-inch thick rounds. Set aside.
  2. Mix the Cinnamon Sugar: Combine granulated sugar, ground cinnamon, and salt in a bowl. Stir well.
  3. Coat the Banana Slices: Melt coconut oil, pour over banana slices, toss to coat, then sprinkle the cinnamon sugar mix.
  4. Preheat the Air Fryer: Set the air fryer to preheat at 300°F (150°C).
  5. Arrange the Banana Slices: Place banana slices in a single layer in the air fryer basket.
  6. Air Fry the Chips: Cook for 15 to 18 minutes, flipping halfway through, until golden and crispy.
  7. Cool for Crispness: Transfer chips to a wire rack to cool completely before serving.
  8. Serve and Enjoy: Enjoy the banana chips plain, with yogurt, or as a light dessert.

Nutrition

Serving: 1servingCalories: 120kcalCarbohydrates: 30gProtein: 1gFat: 3gSaturated Fat: 3gSodium: 20mgPotassium: 400mgFiber: 2gSugar: 12gVitamin C: 15mgIron: 2mg

Notes

For the best results, slice bananas evenly using a mandoline and avoid overcrowding the air fryer basket.

Tried this recipe?

Let us know how it was!

Savory Korean Ground Beef Bowl: Quick Comfort in 20 Minutes

September 29, 2025 by Grace Snow Leave a Comment

The vibrant aroma of sizzling ground beef fills the kitchen as I start cooking my Quick & Easy Korean Ground Beef Bowl. This dish is a delightful blend of sweet, savory, and just a hint of heat, all packed into a comforting meal that can be ready in just 20 minutes. Who wouldn’t want to elevate their dinner game without the hassle of complex recipes? With protein-rich ground beef served over warm rice and topped with fresh, colorful vegetables, you get a balanced meal that not only satisfies your cravings but also nurtures your body. Plus, it’s a fantastic way to impress family or friends with minimal effort! Are you ready to explore this easy yet flavorful dish that can rival any takeout meal?

Why is this Korean Ground Beef Bowl a Must-Try?

Quick and Easy: This dish is perfect for busy weeknights, ready in just 20 minutes! Balanced Nutrition: Packed with protein-rich ground beef and fresh vegetables, it’s a wholesome meal the whole family will enjoy. Flavor Explosion: The harmonious mix of sweet and savory will take your taste buds on a delightful journey. Versatile Options: Feel free to swap the ground beef for tofu or add your favorite veggies to make it your own—just like my Ground Beef Enchiladas or Acai Bowl Nutritious. Crowd-Pleasing Comfort: Serve it at your next gathering and watch your guests rave about it!

Korean Ground Beef Bowl Ingredients

• Here are the essentials for a delicious Korean Ground Beef Bowl!

For the Beef Mixture

  • Ground Beef – Use lean ground beef for a flavor-packed protein; substitute with ground turkey for a lighter option.
  • Soy Sauce – Adds that signature umami flavor; opt for low-sodium soy sauce for a healthier choice.
  • Brown Sugar – Balances the savory notes; honey or coconut sugar works as delicious alternatives.
  • Garlic – Fresh garlic provides aromatic depth; avoid garlic powder for the best flavor.
  • Ginger – Fresh ginger adds a zesty kick; use ground ginger in a pinch, but fresh is best!

For the Vegetables

  • Cucumbers – Crunchy and refreshing, they elevate the bowl’s texture; substitute with bell peppers for a different twist.
  • Carrots – Sweet and vibrant, they add color; shredded carrots are a quick prep option.
  • Spinach – Nutrient-rich greens that wilt beautifully; feel free to swap for other leafy greens like kale.

For Serving

  • Rice – A warm, fluffy base that complements the beef; use jasmine rice or brown rice for a hearty choice.
  • Optional Toppings
  • Sesame Seeds – A nutty crunch that ups the flavor profile; sprinkle these for added texture.
  • Chopped Green Onions – Freshness to garnish and brighten the dish; scallions can be a tasty substitute!

Now, you have everything you need to whip up a delightful Korean Ground Beef Bowl that'll quickly become a family favorite! Enjoy these ingredients’ comforting flavors and nurture your cooking spirit.

Step‑by‑Step Instructions for Korean Ground Beef Bowl

Step 1: Brown the Ground Beef
In a large skillet, heat over medium-high heat and add the lean ground beef, breaking it apart with a spatula. Cook for about 5–7 minutes until it’s browned and no longer pink, stirring occasionally to ensure even cooking. Once browned, drain any excess fat to keep the dish light and flavorful.

Step 2: Sauté the Aromatics
Next, add the minced garlic and grated fresh ginger to the skillet, stirring well to combine with the ground beef. Sauté for 1–2 minutes until fragrant, allowing the aromatic flavors to meld beautifully with the beef. Keep a close eye to prevent burning, which enhances the overall taste of the Korean Ground Beef Bowl.

Step 3: Add the Sauce Ingredients
Pour in the soy sauce and sprinkle the brown sugar over the beef mixture. Stir everything together thoroughly, ensuring the beef is coated in the sauce. Allow it to cook for another 2–3 minutes until heated through, letting the flavors combine into a savory-sweet sauce that draws you in for a taste.

Step 4: Prepare the Rice
While the beef mixture is cooking, prepare your rice according to package instructions. Use jasmine rice or brown rice for a delightful base that complements the bold flavors of the Korean Ground Beef Bowl. Aim for a fluffy texture, and once cooked, fluff it with a fork to keep it light and airy.

Step 5: Assemble the Bowl
To serve, scoop a generous portion of warm rice into each bowl. Next, pile on the luscious beef mixture from the skillet, allowing the savory sauce to drizzle over the rice. This layering creates a delicious base that will soak up all the flavors of the dish.

Step 6: Add Fresh Vegetables
Top each bowl with vibrant, sliced vegetables such as cucumbers, carrots, and spinach for added color and nutrition. These fresh elements provide a delightful crunch that contrasts beautifully with the savory beef, enhancing the overall experience of your Korean Ground Beef Bowl.

Step 7: Garnish and Serve
For an elegant touch, garnish each bowl with a sprinkle of sesame seeds and chopped green onions. This final flourish adds a nutty bite and freshness, elevating your dish to restaurant-quality. Serve immediately while warm, and enjoy the comforting taste of homemade Korean Ground Beef Bowl!

Korean Ground Beef Bowl Variations

Feel free to get creative with this dish and make it your own—your taste buds will thank you!

  • Dairy-Free: Consider using coconut aminos instead of soy sauce for a sweeter, soy-free alternative.
  • Vegetarian: Swap ground beef for crumbled tofu or tempeh, marinating them in the sauce for extra flavor.
  • Extra Spicy: Toss in some chili paste or sriracha during cooking for an exciting kick that lingers.
  • Low-Carb: Replace rice with cauliflower rice or zoodles to create a lighter, veggie-packed version of this bowl.
  • Add Crunch: Toss in some chopped nuts or seeds to enhance the texture and introduce a delightful crunch.
  • Sweet Touch: Drizzle some honey or maple syrup into the sauce for a sweeter finish that contrasts beautifully with the spices.
  • Flavor Boost: Enhance the nutrient profile by mixing in your favorite greens like kale or bok choy, which will wilt and meld together nicely.
  • Topping Twists: For an added layer of flavor, finish off with a sprinkle of kimchi or a dollop of spicy mayo for a zesty zing.

Feel inspired to explore these variations, just like you can with my delicious Fish Taco Bowls or hearty Poor Man’s Burrito Bowls. Enjoy every customizable bite!

How to Store and Freeze Korean Ground Beef Bowl

Fridge: Store leftovers in an airtight container for up to 3 days. Reheat gently in a skillet over low heat for best texture.

Freezer: This Korean Ground Beef Bowl can be frozen for up to 3 months. Separate the beef mixture from the rice and store in freezer-safe containers.

Reheating: To reheat, thaw overnight in the fridge and warm in a skillet. Alternatively, use a microwave, but stir occasionally to avoid uneven heating.

Serving Tip: Fresh vegetables can be added just before serving to maintain their crunch and flavor, enhancing your meal's enjoyment!

Tips for the Best Korean Ground Beef Bowl

  • Prepping Wisely: Have all your ingredients ready before you start cooking. This dish cooks quickly, and you want to avoid last-minute scrambling.

  • Perfectly Browned Beef: Take your time to brown the ground beef well. This step enhances the flavor significantly; avoid overcrowding the pan for best results.

  • Taste as You Go: Adjust the sweetness by varying the amount of brown sugar to your preference. You can always add more later, but it’s harder to fix if you overdo it!

  • Fresh Ingredients Matter: Use fresh garlic and ginger for richer flavor. Dried versions may work, but nothing beats the taste and aroma of freshly minced ingredients.

  • Vibrant Vegetables: Include a variety of colorful vegetables for added texture and nutrition. Crisp cucumbers and vibrant carrots add crunch and enhance the dish’s visual appeal.

  • Customize Your Bowl: Feel free to adapt the Korean Ground Beef Bowl to your liking. Swap meats, add more veggies, or try different toppings to make it your own!

What to Serve with Quick & Easy Korean Ground Beef Bowl

Pairing your Korean Ground Beef Bowl with delightful sides enhances the meal experience, inviting everyone to enjoy a comforting feast.

  • Cucumber Salad: A refreshing side that adds crunch and balances the rich flavors of the beef. Toss sliced cucumbers with rice vinegar and sesame oil for a quick, tangy treat.

  • Kimchi: The spicy, fermented cabbage brings a zesty pop that contrasts beautifully with the savory bowl. It’s a classic Korean side that elevates the meal while providing gut-friendly probiotics.

  • Steamed Broccoli: This vibrant green vegetable pairs wonderfully, offering a fresh and crisp texture. Steamed broccoli adds a nutritious boost without overshadowing the main dish’s flavors.

  • Sweet Potato Wedges: Their natural sweetness complements the savory notes of the dish. Roasted until golden and crispy, they provide a hearty contrast that everyone loves.

  • Jasmine Rice: As the perfect base for your beef bowl, fluffy jasmine rice absorbs the flavors beautifully. The warm rice makes every bite comforting and satisfying, ideal alongside the flavorful toppings.

  • Egg Rolls: Crispy and filled with vegetables or meat, these add a delightful crunch to your meal. The contrast in textures enhances the overall dining experience.

  • Sparkling Water with Lemon: A refreshing drink to cleanse your palate between bites. The fizzy element and citrus acidity help balance the savory, sweet flavors of the bowl.

With these delightful pairings, your Korean Ground Beef Bowl becomes a memorable feast that nourishes both body and soul!

Make Ahead Options

These Quick & Easy Korean Ground Beef Bowls are perfect for meal prep enthusiasts! You can sauté the ground beef mixture and store it in an airtight container in the refrigerator for up to 3 days. Additionally, chop your choice of fresh vegetables (like cucumbers and carrots) and keep them in a separate container for maximum crispness; they will stay fresh for 24 hours if refrigerated. When you’re ready to enjoy your meal, simply reheat the beef mixture in a skillet over medium heat and serve it over freshly cooked rice. This method not only saves you time on busy weeknights but ensures that your Korean Ground Beef Bowl remains just as delicious when you serve it!

Korean Ground Beef Bowl Recipe FAQs

How do I choose the best ground beef for this recipe?
Absolutely! When selecting ground beef, look for lean options such as 90% lean or higher to avoid excess fat while still maintaining flavor. Avoid any packages with dark spots or a sour smell, as these can indicate spoilage. If you prefer a lighter option, you can easily substitute with ground turkey or chicken without sacrificing taste.

What's the best way to store leftovers?
Very! Store any leftovers in an airtight container in the fridge for up to 3 days. Make sure to let them cool completely before sealing to prevent condensation, which can make the food soggy. When you're ready to enjoy it again, reheating in a skillet over low heat helps maintain the texture of the beef and rice best.

Can I freeze the Korean Ground Beef Bowl?
Absolutely! To freeze, separate the beef mixture from the rice. Place both in freezer-safe containers and store for up to 3 months. When ready to eat, let them thaw overnight in the fridge. For reheating, warm the beef in a skillet until heated through, while microwaving the rice on defrost mode or gently reheating on the stove with a dab of water; this keeps it fluffy!

What should I do if my beef mixture is too sweet/salty?
If your mixture is a touch too sweet, you can easily balance it by adding a splash of additional soy sauce or even a squeeze of fresh lemon juice. If it’s too salty, adding more vegetables can dilute the saltiness. For a step-by-step adjustment, you can slowly mix in additional ingredients like cooked spinach or shredded carrots until the taste meets your satisfaction.

Are there any dietary considerations I should keep in mind?
Yes, definitely! This recipe can be easily adjusted for various dietary needs. To make it gluten-free, use tamari instead of soy sauce. For those watching carbs, substitute rice with cauliflower rice or zoodles. If you have allergies, make sure to check labels on soy sauce and sugar alternatives for any allergic ingredients. It's always best to personalize each bowl to meet your family’s needs!

Can I prepare the vegetables ahead of time?
Very! Prepping your vegetables a day in advance is a great time-saver. Simply wash, peel, and slice them, then store them in an airtight container in the fridge. This way, they stay fresh for your bowl assembly and add that vibrant crunch you want when serving!

Korean Ground Beef Bowl

Savory Korean Ground Beef Bowl: Quick Comfort in 20 Minutes

Quick and easy Korean Ground Beef Bowl, ready in 20 minutes and packed with flavor.
Print Recipe Pin Recipe
Prep Time 10 minutes mins
Cook Time 10 minutes mins
Total Time 20 minutes mins
Servings: 4 bowls
Course: Dinner
Cuisine: Korean
Calories: 500
Ingredients Equipment Method Nutrition Notes

Ingredients
  

Beef Mixture
  • 1 pound lean ground beef or substitute with ground turkey
  • 1/4 cup soy sauce low-sodium recommended
  • 2 tablespoons brown sugar or substitute with honey or coconut sugar
  • 2 cloves garlic minced
  • 1 tablespoon ginger fresh, grated
Vegetables
  • 1 cup cucumbers sliced
  • 1 cup carrots shredded
  • 1 cup spinach fresh
For Serving
  • 2 cups rice cooked jasmine or brown rice
  • 1 tablespoon sesame seeds optional
  • 2 tablespoons chopped green onions for garnish

Equipment

  • Large skillet

Method
 

Cooking Steps
  1. In a large skillet, heat over medium-high heat and add the lean ground beef, breaking it apart with a spatula. Cook for about 5–7 minutes until browned and no longer pink.
  2. Add the minced garlic and grated fresh ginger to the skillet, stirring well. Sauté for 1–2 minutes until fragrant.
  3. Pour in the soy sauce and sprinkle the brown sugar over the beef mixture. Stir thoroughly and cook for another 2–3 minutes.
  4. While the beef mixture cooks, prepare your rice according to package instructions.
  5. To serve, scoop a generous portion of warm rice into each bowl and pile on the beef mixture.
  6. Top each bowl with sliced cucumbers, shredded carrots, and fresh spinach.
  7. Garnish with sesame seeds and chopped green onions before serving.

Nutrition

Serving: 1bowlCalories: 500kcalCarbohydrates: 55gProtein: 30gFat: 20gSaturated Fat: 7gPolyunsaturated Fat: 2gMonounsaturated Fat: 8gCholesterol: 80mgSodium: 850mgPotassium: 600mgFiber: 3gSugar: 5gVitamin A: 200IUVitamin C: 30mgCalcium: 4mgIron: 15mg

Notes

Customize your bowl with different vegetables or substitute beef for tofu for a vegetarian option.

Tried this recipe?

Let us know how it was!

Savory Cheddar Jalapeño Cornbread Waffles to Spice Up Mornings

September 29, 2025 by Grace Snow Leave a Comment

There's something thrilling about breakfast, especially when it surprises you in the most delicious way. Enter Cheddar Jalapeño Cornbread Waffles—a delightful mashup of fluffy cornbread with a zesty kick that turns your morning routine into a flavorful adventure. Not only are these savory delights quick to whip up, but they also offer a unique twist on breakfast that is sure to please family and friends alike. With a touch of sharp cheddar and just the right amount of jalapeño heat, these waffles can be easily personalized to suit anyone’s taste buds, making them a versatile choice for every meal. Ready to discover the perfect blend of comfort and spice on your plate? Let’s dive into the recipe!

Why are Cheddar Jalapeño Cornbread Waffles special?

Flavorful Fusion: Imagine waking up to waffles that pack a savory punch! These Cheddar Jalapeño Cornbread Waffles beautifully blend traditional cornbread flavors with a spicy twist.

Quick and Easy: Perfect for busy mornings, this recipe comes together in no time, ensuring you can enjoy a homemade breakfast without the hassle.

Customizable: Adjust the spice level to your liking, or swap cheeses for a different kick. Cheese lovers can even explore options like Cornbread Breakfast Casserole to mix things up!

Crowd-Pleasing Option: Serve them as a unique side dish or for brunch; everyone will be asking for seconds!

Hearty and Satisfying: With protein, fiber, and healthy fats, these waffles make for a balanced meal that keeps you energized. Dive into your culinary adventure with these irresistible waffles that redefine breakfast!

Cheddar Jalapeño Cornbread Waffles Ingredients

Get ready to whip up something truly delicious!

For the Batter

  • Cornmeal – Provides the distinctive texture and flavor of cornbread; use coarse cornmeal for that extra crunch.
  • All-Purpose Flour – Essential for structure, ensuring your waffles hold their shape perfectly.
  • Baking Powder – This leavening agent helps your waffles rise and become fluffy.
  • Baking Soda – Reacts with buttermilk for additional lift and a light, airy texture.
  • Salt – Enhances the overall flavor, making each bite savory.
  • Buttermilk – Adds moisture and richness; substitute with milk mixed with vinegar or lemon in a pinch.
  • Unsalted Butter – Creates a rich flavor and contributes to that crispy, golden-brown exterior.
  • Eggs – Acts as a binding agent, providing both moisture and richness to the batter.
  • Sharp Cheddar Cheese – Elevates flavor with its creaminess, melting beautifully to create savory pockets.
  • Pickled Jalapeños – Adds heat and tanginess; adjust per your spice preference or use fresh for a lighter flavor.
  • Honey (optional) – A touch of sweetness balances the savory notes in these Cheddar Jalapeño Cornbread Waffles.

Optional Toppings

  • Honey or Maple Syrup – A drizzle adds delightful sweetness to complement the savory waffles.
  • Greek Yogurt – For creaminess and a refreshing contrast, try a generous dollop on top.
  • Sliced Avocado – Adds creaminess and healthy fats for an extra satisfying bite.
  • Fresh Pico de Gallo – A flavorful topping that brings freshness and zest to your waffles.

Step‑by‑Step Instructions for Cheddar Jalapeño Cornbread Waffles

Step 1: Prepare the Waffle Iron
Begin by preheating your waffle iron according to the manufacturer's instructions, allowing it to reach a hot, ready temperature. To ensure your Cheddar Jalapeño Cornbread Waffles don’t stick, lightly grease the plates with cooking spray or a brush of melted butter for that perfect golden-brown exterior.

Step 2: Mix Dry Ingredients
In a large mixing bowl, whisk together 1 cup of cornmeal, 1 cup of all-purpose flour, 1 tablespoon of baking powder, 1 teaspoon of baking soda, and 1 teaspoon of salt. This blend is essential for a deliciously fluffy texture. Make sure all dry ingredients are fully combined and there are no clumps before moving on to the next step.

Step 3: Mix Wet Ingredients
In a separate bowl, whisk together 1 ½ cups of buttermilk, ¼ cup of melted unsalted butter, and 2 large eggs until the mixture is smooth and well blended. The buttermilk adds moisture and richness, ensuring your Cheddar Jalapeño Cornbread Waffles are soft and flavorful. If you desire a hint of sweetness, consider adding 1 tablespoon of honey at this stage.

Step 4: Combine Mixtures
Gently fold the wet ingredients into the dry mixture using a rubber spatula, being careful not to overmix—some small lumps are okay! Once just combined, carefully fold in 1 cup of shredded sharp cheddar cheese and ½ cup of chopped pickled jalapeños, ensuring they are evenly distributed throughout the batter.

Step 5: Cook the Waffles
Pour about ¾ cup of the batter onto the preheated waffle iron, spreading it slightly for even cooking. Close the lid and cook for 5-7 minutes until the waffles are golden brown and crisp on the outside. Carefully check for doneness and let the waffles rest for a minute before serving, allowing them to firm up slightly for the best texture.

Step 6: Serve and Enjoy
Serve your Cheddar Jalapeño Cornbread Waffles warm, drizzled with honey or maple syrup, or topped with Greek yogurt, sliced avocado, or fresh pico de gallo for an extra flavorful touch. These waffles make for a unique breakfast or an exciting side dish that will impress family and friends alike.

Expert Tips for Cheddar Jalapeño Cornbread Waffles

  • Mix Gently: Avoid overmixing the batter to keep your waffles light and fluffy; small lumps are perfectly fine.
  • Heat Matters: Preheat your waffle iron properly and adjust cooking time according to your specific appliance for that golden finish.
  • Spice Control: Tailor the heat level by adjusting jalapeño amounts; start with fewer for subtle warmth, then build up according to your taste.
  • Storage Savvy: For leftovers, store cooked waffles in the fridge for up to 3 days or freeze them; reheat in a toaster for crispy results.
  • Taste Variations: Experiment with different cheeses like Monterey Jack or spices to personalize your Cheddar Jalapeño Cornbread Waffles!

Make Ahead Options

These Cheddar Jalapeño Cornbread Waffles are perfect for home cooks looking to save time during busy mornings! You can prepare the batter up to 24 hours in advance by mixing the dry and wet ingredients separately, and storing both in the refrigerator. Just be sure to keep the wet ingredients covered to maintain freshness. When you're ready to enjoy, simply combine the dry and wet mixtures, add the cheese and jalapeños, and cook them in your waffle iron. For even more convenience, cooked waffles can be stored in the refrigerator for up to 3 days or frozen for longer storage; reheat them in a toaster or oven for that delightful crispiness! Enjoy freshly made waffles with minimal effort!

Cheddar Jalapeño Cornbread Waffles Variations

Feel free to let your creativity shine and customize these delicious waffles to cater to your taste buds!

  • Cheese Swap: Try Monterey Jack or pepper jack cheese for different flavor profiles. Each cheese will bring its unique spin to the dish, enhancing the overall taste experience.
  • Gluten-Free Option: Use a gluten-free flour blend to make these waffles accessible to everyone. Just ensure your cornmeal is also gluten-free for a safe alternative!
  • Spice Adjustment: For a milder flavor, omit pickled jalapeños or replace them with diced bell peppers. Alternatively, crank up the heat by adding diced serrano peppers for an extra kick.
  • Add Veggies: Mix in some finely chopped spinach or kale for a nutritious boost. This not only adds color but also increases the fiber content, giving your breakfast a hearty feel.
  • Herb Infusion: Incorporate chopped fresh herbs such as cilantro or chives into the batter. This twist will elevate the flavor profile and add freshness to every bite.
  • Sweet Surprise: Add a hint of cinnamon or nutmeg to the batter for a warm, comforting twist. A sprinkle of brown sugar can also enhance the sweetness for those who love a sweet and savory combination.
  • Batter Boost: Fold in some corn kernels for added sweetness and texture. These bits of corn will create delightful bursts of flavor, making each bite even more enjoyable.
  • Savory Sides: Pair these waffles with a dollop of sour cream or Greek yogurt and a sprinkle of fresh herbs for that restaurant-quality touch. Serve with your favorite hot sauce to kick it up a notch!

For more brunch inspiration, consider trying a Cornbread Breakfast Casserole to accompany your Cheddar Jalapeño Cornbread Waffles for a delightful spread!

What to Serve with Cheddar Jalapeño Cornbread Waffles

Transform your breakfast experience by pairing these delicious waffles with delightful sides and toppings.

  • Creamy Avocado Slices: The creaminess of fresh avocado perfectly balances the spicy kick of the waffles, enhancing every bite.

  • Savory Greek Yogurt: A dollop adds a refreshing tang and creaminess, balancing the rich flavors with a light texture.

  • Sweet Maple Syrup: The natural sweetness of syrup complements the savory notes, creating a delightful contrast that will keep you coming back for more.

  • Fresh Salsa: A vibrant pico de gallo or salsa adds a zesty punch, bringing brightness and freshness while cooling the heat.

  • Spicy Sausages: Complement the waffles with spicy breakfast sausages for a hearty meal, providing protein and an added layer of flavor.

  • Fruit Salad: Refreshing chunks of seasonal fruit add brightness and sweetness, enhancing the overall taste experience while balancing the savory waffles.

Enjoy a refreshing beverage like a cold glass of buttermilk or a robust cup of coffee to complete your meal.

How to Store and Freeze Cheddar Jalapeño Cornbread Waffles

Fridge: Store cooked waffles in an airtight container in the fridge for up to 3 days for maximum freshness.

Freezer: For longer storage, freeze the cooled waffles in a single layer on a baking sheet, then transfer to a zip-top bag for up to 2 months.

Reheating: Reheat in a toaster or oven at 350°F (175°C) for about 5-8 minutes until crispy and heated through, ensuring you enjoy the delightful texture of your Cheddar Jalapeño Cornbread Waffles!

Room Temperature: If you have extras, enjoy them at room temperature within a few hours of making for a quick, savory snack.

Cheddar Jalapeño Cornbread Waffles Recipe FAQs

What ingredients should I choose for the best flavor?
Absolutely! For optimal flavor, look for sharp cheddar cheese, which melts beautifully and creates savory pockets in your waffles. Ensure your jalapeños are vibrant and fresh; avoid any that are dull in color or have dark spots. Using coarse cornmeal gives the waffles a fantastic texture—choose one with a golden hue.

How do I store leftover Cheddar Jalapeño Cornbread Waffles?
Cooked waffles can be stored in an airtight container in the refrigerator for up to 3 days. To maintain their delicious crunch, layer parchment paper between the waffles before sealing, preventing them from sticking together!

Can I freeze Cheddar Jalapeño Cornbread Waffles?
Absolutely! Here’s how: first, let the waffles cool completely on a wire rack. Next, place them in a single layer on a baking sheet and freeze until solid. Once frozen, stack them in a zip-top freezer bag, separating each with parchment paper. They can be stored in the freezer for up to 3 months!

What if I want to modify the spice level?
No problem! If you’d like milder waffles, simply omit the pickled jalapeños or use fresh jalapeños without the seeds. For more heat, consider adding diced serrano peppers. Always taste test your jalapeños to gauge their heat level before adding!

Are there any dietary considerations I need to keep in mind?
Very! For a gluten-free option, substitute all-purpose flour with a gluten-free flour blend, ensuring your cornmeal is also gluten-free. If you're sensitive to dairy, you can use a plant-based milk and non-dairy butter instead. Remember to kindly check with guests for any allergies before serving!

Cheddar Jalapeño Cornbread Waffles

Savory Cheddar Jalapeño Cornbread Waffles to Spice Up Mornings

Cheddar Jalapeño Cornbread Waffles are a delightful mashup of cornbread flavors with a zesty twist for breakfast.
Print Recipe Pin Recipe
Prep Time 15 minutes mins
Cook Time 10 minutes mins
Total Time 25 minutes mins
Servings: 4 waffles
Course: Breakfast
Cuisine: American
Calories: 250
Ingredients Equipment Method Nutrition Notes

Ingredients
  

For the Batter
  • 1 cup cornmeal coarse
  • 1 cup all-purpose flour
  • 1 tablespoon baking powder
  • 1 teaspoon baking soda
  • 1 teaspoon salt
  • 1.5 cups buttermilk
  • 0.25 cups unsalted butter melted
  • 2 large eggs
  • 1 cup sharp cheddar cheese shredded
  • 0.5 cups pickled jalapeños chopped
  • 1 tablespoon honey optional
Optional Toppings
  • honey or maple syrup
  • Greek yogurt
  • sliced avocado
  • fresh pico de gallo

Equipment

  • waffle iron

Method
 

Instructions
  1. Preheat your waffle iron according to the manufacturer's instructions and lightly grease it.
  2. In a large bowl, whisk together cornmeal, all-purpose flour, baking powder, baking soda, and salt.
  3. In a separate bowl, whisk buttermilk, melted butter, and eggs until smooth. Optionally add honey.
  4. Gently fold the wet ingredients into the dry mixture and fold in the shredded cheese and chopped jalapeños.
  5. Pour about ¾ cup of batter onto the waffle iron and cook for 5-7 minutes until golden brown.
  6. Serve warm with toppings of your choice.

Nutrition

Serving: 1waffleCalories: 250kcalCarbohydrates: 30gProtein: 8gFat: 10gSaturated Fat: 5gPolyunsaturated Fat: 1gMonounsaturated Fat: 2gCholesterol: 60mgSodium: 400mgPotassium: 200mgFiber: 2gSugar: 3gVitamin A: 500IUVitamin C: 1mgCalcium: 200mgIron: 1mg

Notes

These waffles can be adjusted for spice level and are perfect for breakfast or as a side dish.

Tried this recipe?

Let us know how it was!

Delicious Honey Lime Chicken & Avocado Rice Stack Recipe

September 29, 2025 by Grace Snow Leave a Comment

As I lifted the lid, a wave of citrusy aroma transported me to a sunlit kitchen filled with laughter and good food. That’s the magic of this Honey Lime Chicken & Avocado Rice Stack! This dish is a celebration of vibrant flavors where grilled chicken meets zesty honey-lime marinade, all layered atop fragrant jasmine rice and crowned with creamy avocado. With just an hour of prep and cooking time, it’s a stress-free way to whip up a delightful dinner that’s as healthy as it is hearty. Perfect for impressing guests or enjoying a cozy family meal, this recipe brings comfort and excitement back to home-cooked dining. Are you ready to experience this flavor fiesta?

Why is this recipe a must-try?

Vibrant flavors: Each bite bursts with zesty honey-lime and creamy avocado, making it a flavor-packed experience.

Easy preparation: With just an hour needed from prep to plate, this dish is perfect for busy weeknights.

Healthy comfort: Packed with protein from grilled chicken and healthy fats from avocado, it makes wholesome eating enjoyable.

Versatile options: Want to swap chicken for tofu or add seasonal veggies? Customization is a breeze!

Crowd-pleaser: This colorful stack is perfect for impressing guests, yet simple enough for a family dinner at home.

Elevate your mealtime with this delightful Honey BBQ Chicken or explore more flavor combinations with our Chipotle Lime Chicken and Rice.

Honey Lime Chicken & Avocado Rice Stack Ingredients

For the Chicken Marinade
• Chicken Breasts – Boneless, skinless chicken breasts keep the dish lean and hearty.
• Honey – Adds natural sweetness that balances the tangy lime; agave syrup works as a vegan alternative.
• Lime Juice – Freshly squeezed lime juice brightens up the marinade beautifully.
• Lime Zest – Enhances the citrus aroma and flavor; using a microplane avoids bitterness from the pith.
• Garlic – Fresh minced garlic is recommended for a savory bite; skip the powdered version.
• Ground Cumin – Warm, earthy flavor addition; smoked paprika is a great substitute for a twist.
• Salt & Pepper – Essential for well-rounded seasoning that elevates all flavors.

For the Rice
• Jasmine Rice – Acts as a fragrant base; basmati or long-grain rice can also be used.
• Chicken Broth – Cooking the rice in broth adds a depth of flavor; vegetable broth is a perfect vegetarian substitute.

For the Avocado Mixture
• Avocado – Ripe avocados bring a creamy richness to the stack; choose them carefully for the best texture.
• Red Onion – Adds crispness and a slight bite; shallots can be a milder alternative.
• Cilantro – Fresh cilantro provides herbal notes to enhance the dish; parsley is a substitute if needed.
• Olive Oil – This adds a smooth mouthfeel and binds the avocado mixture wonderfully.

To Serve
• Lime Wedges – Serve alongside for extra acidity to personalize each delicious bite.

Get ready to assemble your Honey Lime Chicken & Avocado Rice Stack and bring a burst of flavor to your dinner table!

Step‑by‑Step Instructions for Honey Lime Chicken & Avocado Rice Stack

Step 1: Prepare Marinade
In a mixing bowl, whisk together honey, freshly squeezed lime juice, lime zest, minced garlic, ground cumin, salt, and pepper until thoroughly combined. This flavorful marinade will enhance the chicken and provide that signature honey lime taste. Make sure to achieve a smooth consistency, and set it aside while you prep the chicken.

Step 2: Marinate Chicken
Place the boneless, skinless chicken breasts in a resealable plastic bag or shallow dish. Pour the honey lime marinade over the chicken, ensuring it's evenly coated. Seal the bag or cover the dish, and refrigerate for 30 minutes to 2 hours. This allows the chicken to absorb all those delicious flavors, making it juicy and tender when cooked.

Step 3: Prepare Rice
While the chicken marinates, rinse 1 cup of jasmine rice under cold water to remove excess starch. In a saucepan, bring 2 cups of chicken broth to a boil. Add the rinsed rice, stir once, cover, and reduce heat to low. Simmer for about 15 minutes, until the rice is tender and all the liquid is absorbed. Fluff with a fork once done.

Step 4: Grill Chicken
Preheat your grill or stovetop pan over medium heat, allowing it to reach a sizzling temperature. Remove the marinated chicken from the fridge, letting any excess marinade drip off. Grill the chicken for about 6-7 minutes on each side until golden brown and cooked through, reaching an internal temperature of 165°F. Watch for the juices to run clear for perfect doneness.

Step 5: Make Avocado Mixture
While the chicken is grilling, prepare the fresh avocado mixture. In a bowl, combine diced ripe avocado, finely chopped red onion, chopped cilantro, and a drizzle of olive oil. Gently toss until combined. This creamy and colorful topping will add a delightful texture to your Honey Lime Chicken & Avocado Rice Stack.

Step 6: Assemble the Stack
Once the chicken is fully cooked, let it rest for a few minutes before slicing it. On each serving plate, layer a generous scoop of the fluffy jasmine rice as a base, followed by sliced chicken atop the rice. Top with the creamy avocado mixture, forming a visually appealing and delicious stack.

Step 7: Serve
To finish off your Honey Lime Chicken & Avocado Rice Stack, add lime wedges on the side for an extra zing of acidity. If you desire, garnish with additional cilantro for a vibrant touch. Serve immediately while the dish is warm, inviting everyone to dive into this delightful meal.

Make Ahead Options

These Honey Lime Chicken & Avocado Rice Stacks are perfect for meal prep enthusiasts! You can marinate the chicken up to 24 hours in advance, allowing it to soak in those vibrant flavors, creating a deliciously tender result. The jasmine rice can be cooked and refrigerated for up to 3 days—just reheat it gently before serving to keep it fluffy. The avocado mixture should ideally be made fresh, but if you need to prepare it ahead of time, drizzle lime juice over the diced avocado to prevent browning. When ready to enjoy, simply grill the marinated chicken, assemble your stacks, and savor those fresh, zesty flavors with minimal effort!

What to Serve with Honey Lime Chicken & Avocado Rice Stack

Imagine a meal that takes your taste buds on a colorful journey, perfectly complemented by these delightful sides and beverages!

  • Crisp Side Salad: A refreshing mix of greens and veggies adds crunch and balances the richness of the avocado.
  • Zesty Corn Salsa: Sweet corn mixed with tomatoes, onions, and a squeeze of lime creates a vibrant, tangy accompaniment.
  • Roasted Vegetables: Seasoned bell peppers and zucchini roasted until caramelized, providing a savory contrast to the chicken stack.
  • Black Bean Tacos: Soft corn tortillas filled with black beans and topped with fresh cilantro offer a healthy, flavorful addition to the meal.
  • Guacamole with Tortilla Chips: Creamy guacamole enhances the flavor profile while crispy chips provide a satisfying crunch; a perfect snack!
  • Chilled White Wine: A glass of crisp Sauvignon Blanc accentuates the citrus notes in the honey lime marinade, making this pairing divine.
  • Mango Lime Sorbet: To end on a sweet note, this light dessert refreshes the palate beautifully after a savory main course.
  • Fruit-Infused Water: Add slices of fruit like cucumber and lime for a refreshing drink that enhances the whole dining experience.

Each of these delightful pairings elevates your Honey Lime Chicken & Avocado Rice Stack into a memorable dining experience!

Variations & Substitutions for Honey Lime Chicken & Avocado Rice Stack

Customize your dish to suit your taste buds and dietary preferences with these fun and flavorful options!

  • Vegan: Substitute chicken with tofu or tempeh. Marinate as you would the chicken for a satisfying plant-based protein boost!

  • Gluten-Free: Use quinoa or cauliflower rice instead of jasmine rice for a gluten-free alternative that’s still packed with flavor.

  • Spicy Kick: Add diced jalapeños or a sprinkle of cayenne pepper to the marinade for a delightful heat that perfectly balances the sweetness of honey.

  • Fruit Twist: Incorporate diced mango or pineapple into the avocado mixture for an extra layer of tropical sweetness and color!

  • Smoky Flavor: Swap ground cumin for smoked paprika or chipotle powder to add a warm, smoky depth to your Honey Lime Chicken.

  • Nutty Texture: Sprinkle chopped nuts, such as toasted almonds or cashews, over the avocado mixture for a satisfying crunch that contrasts beautifully with the creamy avocado.

  • Herbal Variation: Replace cilantro with fresh mint or basil for a refreshing twist that transforms the flavor profile while maintaining brightness.

Feeling adventurous? You might also enjoy pairing your meal with a delicious side like Honey Garlic Chicken Thighs or try the creamy Honey BBQ Chicken Rice for more exciting flavor combinations.

Expert Tips for Honey Lime Chicken & Avocado Rice Stack

  • Marinate Wisely: Ensure chicken is marinated for at least 30 minutes for optimal flavor; longer is even better! This step is crucial for creating that mouthwatering honey lime taste.

  • Check the Heat: Use a meat thermometer to check the chicken's internal temperature and reach 165°F for juicy, safe-to-eat results.

  • Prevent Avocado Browning: Assemble the avocado mix right before serving or add lime juice to combat oxidation and keep it fresh and vibrant.

  • Fluff Your Rice: After cooking, let the jasmine rice sit covered for a few minutes; fluffing it with a fork is key to achieving that light, airy texture.

  • Customize Your Ingredients: Feel free to swap chicken with tofu for a delightful vegetarian option or add your favorite vegetables to enhance the nutritional profile of the Honey Lime Chicken & Avocado Rice Stack.

  • Taste As You Go: Always taste for seasoning, especially with salt and pepper; a pinch can dramatically enhance the overall flavor of your dish!

Storage Tips for Honey Lime Chicken & Avocado Rice Stack

• Room Temperature: It's best to avoid leaving any components of the Honey Lime Chicken & Avocado Rice Stack out for more than 2 hours to ensure food safety.

• Fridge: Store leftover chicken and rice separately in airtight containers for up to 3 days. To keep the avocado fresh, mix it with a splash of lime juice and store in a sealed container.

• Freezer: Chicken can be frozen for up to 3 months. Wrap it tightly in plastic wrap and then place it in a freezer bag, removing as much air as possible. Cooked rice can also be frozen for up to 6 months, stored similarly.

• Reheating: When reheating, thaw frozen chicken in the fridge overnight, then reheat on the grill or stovetop until heated through. Rice can be reheated in the microwave or on the stovetop with a splash of broth or water to regain moisture.

Honey Lime Chicken & Avocado Rice Stack Recipe FAQs

How do I choose ripe avocados for the avocado mix?
Absolutely! When selecting ripe avocados, look for those that yield slightly to gentle pressure but aren't overly soft. A perfectly ripe avocado will have a dark green skin and a little give when squeezed. Avoid any that are hard or have dark spots all over, as they may be overripe or spoiled.

What’s the best way to store leftovers?
Very! Store leftover chicken and rice separately in airtight containers for up to 3 days in the refrigerator. To keep the avocado mixture fresh, add a splash of lime juice while storing and seal well. This helps slow down oxidation, preventing browning.

Can I freeze the Honey Lime Chicken?
Absolutely! To freeze, wrap the grilled chicken tightly in plastic wrap and then place it in a freezer bag, squeezing out as much air as possible. It can be frozen for up to 3 months. For reheating, simply thaw in the refrigerator overnight and rewarm on the grill or in a skillet until heated through.

What should I do if my chicken turns out dry?
If your chicken turns out dry, it might have been overcooked. Always use a meat thermometer to check for doneness, aiming for an internal temperature of 165°F. For next time, consider marinating the chicken longer for deeper flavor and moisture retention or try grilling it on a lower heat for a bit longer to ensure it's cooked through without drying out.

Can this recipe be made vegan or vegetarian?
Very! To make a vegan or vegetarian version of the Honey Lime Chicken & Avocado Rice Stack, simply substitute the chicken with firm tofu or grilled portobello mushrooms. Marinate the tofu or mushrooms in the same honey lime marinade for the best flavor, and follow the same cooking instructions until they are properly sautéed or grilled.

How do I prevent the avocado from browning?
For sure! To prevent avocado browning, you can incorporate a splash of lime juice into the avocado mixture if you're preparing ahead. Additionally, assemble the avocado mixture just before serving to maintain that fresh, vibrant look. Using airtight containers for storage also helps keep it fresh for a longer period.

Honey Lime Chicken & Avocado Rice Stack

Delicious Honey Lime Chicken & Avocado Rice Stack Recipe

Enjoy this flavorful Honey Lime Chicken & Avocado Rice Stack, combining grilled chicken with zesty ingredients atop fragrant rice.
Print Recipe Pin Recipe
Prep Time 30 minutes mins
Cook Time 30 minutes mins
Total Time 1 hour hr
Servings: 4 servings
Course: Dinner
Cuisine: Mexican
Calories: 450
Ingredients Equipment Method Nutrition Notes

Ingredients
  

For the Chicken Marinade
  • 4 pieces Boneless, skinless chicken breasts
  • 1/4 cup Honey or agave syrup for vegan
  • 1/4 cup Lime juice freshly squeezed
  • 1 teaspoon Lime zest avoid the pith
  • 2 cloves Garlic fresh minced
  • 1 teaspoon Ground cumin or smoked paprika
  • to taste Salt & Pepper
For the Rice
  • 1 cup Jasmine rice or basmati/long-grain rice
  • 2 cups Chicken broth or vegetable broth for vegetarian
For the Avocado Mixture
  • 2 pieces Avocado ripe
  • 1/4 cup Red onion finely chopped
  • 1/4 cup Cilantro chopped
  • 1 tablespoon Olive oil
To Serve
  • 2 pieces Lime wedges for garnish

Equipment

  • Mixing Bowl
  • Saucepan
  • Grill or stovetop pan
  • Airtight containers

Method
 

Step-by-Step Instructions
  1. In a mixing bowl, whisk together honey, lime juice, lime zest, minced garlic, ground cumin, salt, and pepper until combined.
  2. Place chicken in a resealable bag, pour marinade over chicken, seal, and refrigerate for 30 minutes to 2 hours.
  3. Rinse jasmine rice under cold water. In a saucepan, bring chicken broth to a boil. Add rice, cover, and simmer for 15 minutes.
  4. Preheat grill or stovetop pan, remove chicken from marinade, and grill for about 6-7 minutes per side until cooked through.
  5. In a bowl, combine diced avocado, red onion, cilantro, and olive oil. Toss until combined.
  6. On each plate, layer rice, then sliced chicken, and top with the avocado mixture.
  7. Serve with lime wedges on the side for added acidity.

Nutrition

Serving: 1servingCalories: 450kcalCarbohydrates: 50gProtein: 30gFat: 15gSaturated Fat: 2gPolyunsaturated Fat: 3gMonounsaturated Fat: 8gCholesterol: 80mgSodium: 600mgPotassium: 800mgFiber: 5gSugar: 10gVitamin A: 500IUVitamin C: 25mgCalcium: 30mgIron: 3mg

Notes

For best results, marinate the chicken longer, check for doneness with a thermometer, and assemble the avocado mix just before serving.

Tried this recipe?

Let us know how it was!

Winter Wonderland Chocolate Chip Cookies You'll Crave

September 29, 2025 by Grace Snow Leave a Comment

As the first snowflakes blanket the ground, a cozy aroma fills the kitchen, signaling the time for baking magic. Today, I’m excited to share my recipe for Winter Wonderland Chocolate Chip Cookies—soft, chewy delights infused with a hint of peppermint that perfectly capture the essence of the holiday season. These cookies are not only a breeze to whip up in just 30 minutes, but they also offer a warm, comforting treat that’ll impress your friends and family at winter gatherings. Perfectly customized, you can even explore gluten-free or reduced sugar options if you want a healthier twist. Are you ready to make this festive indulgence yours? Let’s dive in!

Why are these cookies a must-try?

Softness and Chewiness: The Winter Wonderland Chocolate Chip Cookies deliver an irresistibly soft and chewy texture, making every bite feel comforting and warm.
Quick Prep Time: Created in just 30 minutes, these cookies are perfect for spontaneous baking sessions, ensuring you can whip up a batch before your guests arrive.
Festive Flavor: A delightful hint of peppermint paired with rich chocolate means these cookies truly embrace the holiday spirit, making them an ideal treat for seasonal celebrations.
Customizable Options: With gluten-free and reduced sugar choices available, you can tailor the recipe to cater to various dietary preferences while keeping indulgence in mind. For more variations, check out my Matcha Cookies Soft or Eggnog Cookies Soft!
Crowd-Pleasing Appeal: Whether they’re enjoyed with hot cocoa or gifted as sweet surprises, these cookies are bound to be a hit at any gathering!

Winter Wonderland Chocolate Chip Cookies

• Experience the magic of cozy baking with these irresistible delights!

For the Batter

  • Butter – Provides richness and tenderness; make sure it’s at room temperature for easier creaming.
  • Brown Sugar – Adds moisture and deep flavor; coconut sugar can be used as a healthier substitute.
  • Granulated Sugar – Sweetens the cookies; reduce the amount or substitute with honey for a natural sweetener.
  • Eggs – Bind the ingredients for structure; room temperature eggs work best for mixing.
  • Vanilla Extract – Enhances the cookies’ flavor; try almond extract for a delicious twist.

For the Dry Ingredients

  • All-Purpose Flour – Gives structure to the cookies; substitute a gluten-free blend for gluten-free options.
  • Baking Soda – Helps the cookies rise; use fresh baking soda for the best results.
  • Salt – Balances sweetness and enhances flavor.

For the Mix-Ins

  • Chocolate Chips (Dark and White) – Provide rich chocolate flavor; feel free to mix and match with semi-sweet varieties.
  • Crushed Candy Canes – Adds a festive peppermint crunch; omit or swap with nuts if preferred for a different texture.

Step‑by‑Step Instructions for Winter Wonderland Chocolate Chip Cookies

Step 1: Preheat and Prepare
Begin by preheating your oven to 350°F (175°C) to create the perfect baking environment. While that warms up, prepare your baking sheets by lining them with parchment paper—a crucial step to prevent the cookies from sticking and ensure an easy cleanup later.

Step 2: Cream the Butters and Sugars
In a large mixing bowl, combine softened butter, brown sugar, and granulated sugar. Use a hand mixer on medium speed to cream these ingredients together until the mixture is light and fluffy, about 2-3 minutes. This step is vital, as it incorporates air into the mix, ensuring your Winter Wonderland Chocolate Chip Cookies are tender and delightful.

Step 3: Add the Wet Ingredients
Next, crack in the eggs one at a time, mixing well after each addition to fully incorporate them. Pour in the vanilla extract, and continue blending until the mixture is smooth and glossy. This perfectly blended wet batter will provide the foundational flavor for your holiday cookies.

Step 4: Combine Dry Ingredients
In a separate bowl, sift together your all-purpose flour, baking soda, and salt. Gradually add this dry mixture to the wet ingredients, mixing gently but thoroughly until just combined. Be careful not to overmix; you want to maintain the tender texture that makes these cookies irresistible.

Step 5: Fold in the Chocolate and Peppermint
Now it's time to add fun flavors! Gently fold in the dark and white chocolate chips along with the crushed candy canes. The candy canes will provide a lovely festive crunch and a hint of peppermint, ensuring each bite of your Winter Wonderland Chocolate Chip Cookies is magical.

Step 6: Scoop the Dough
Using a tablespoon or cookie scoop, portion the dough onto the prepared baking sheets, spacing them about two inches apart. This spacing is crucial as the cookies will spread while baking. Make sure the dough looks rounded and plump, ready to transform into delightful treats.

Step 7: Bake to Perfection
Place the baking sheets in the preheated oven and bake for 10-12 minutes or until the edges are golden, while the centers remain soft and slightly underbaked. Keeping an eye on them is important, as overbaking can lead to cookies that are less chewy and tender.

Step 8: Cool and Decorate
Once baked to perfection, remove the cookies from the oven and allow them to cool on the baking sheets for about 5 minutes. This helps them firm up a bit. Then, transfer them to a wire rack. For a festive touch, drizzle melted white chocolate over the cooled cookies and sprinkle with additional crushed candy canes.

Storage Tips for Winter Wonderland Chocolate Chip Cookies

  • Room Temperature: Store cookies in an airtight container at room temperature for up to 3 days to maintain freshness and softness.
  • Fridge: If you prefer, cookies can be stored in the fridge for up to a week, but they may lose some soft texture; be sure to let them come to room temperature before enjoying.
  • Freezer: Freeze cookie dough for up to 3 months, wrapping it tightly in plastic wrap. Thaw in the fridge before baking fresh batches when the craving hits!
  • Reheating: For warm cookies, microwave single pieces for about 10-15 seconds, allowing the chocolate to melt slightly and enhancing that gooey goodness.

Winter Wonderland Chocolate Chip Cookies Variations

Feel free to get creative with these Winter Wonderland Chocolate Chip Cookies and make them your own with these delightful twists!

  • Gluten-Free: Substitute all-purpose flour with a gluten-free flour blend for a cookie that everyone can enjoy.

  • Reduced Sugar: Use mashed bananas or unsweetened applesauce in place of some of the granulated sugar for a healthier treat. The sweetness remains while adding a hint of fruitiness!

  • Dairy-Free: Swap butter for coconut oil and use dairy-free chocolate chips to create a dairy-free dessert without compromising on flavor. The cookies will still be soft and delicious.

  • Nutty Crunch: Mix in chopped walnuts or pecans for an added depth of flavor and delightful crunch. This variation introduces a satisfying texture that complements the sweetness.

  • Flavor Boost: Sprinkle in a teaspoon of cinnamon or a pinch of nutmeg to elevate the cookie’s warmth. These spices add complexity, making each bite more enticing.

  • Peppermint Twist: Rather than crushed candy canes, substitute with peppermint extract for a less crunchy, more intensely peppermint flavor. Just a few drops will infuse the entire batch with festive spirit!

  • Chocolate Variety: Replace half of the chocolate chips with white chocolate, or use salted caramel chips for a unique sweet-and-salty combination. It's an indulgent way to switch up the classic recipe!

  • Frosted Finish: Once cooled, spread a layer of cream cheese frosting on top for an extra indulgent treat. It transforms each cookie into a mini cake-like delight!

Enjoy experimenting with these ideas, and for more delicious cookie recipes, don’t miss my Thumbprint Cookies Melt and German Chocolate Poke for festive treats!

Make Ahead Options

These Winter Wonderland Chocolate Chip Cookies are perfect for busy bakers looking to save time during the holiday hustle! You can prepare the cookie dough up to 24 hours in advance by mixing it as directed, then shaping the dough into balls and refrigerating it in an airtight container. This helps prevent spreading and keeps the cookies just as soft and chewy once baked. When you're ready to enjoy them, simply place the chilled dough on a baking sheet and bake for an extra minute or two, watching for that golden edge to form. You’ll have warm, delicious cookies ready with minimal effort, embodying that comforting holiday spirit!

What to Serve with Winter Wonderland Chocolate Chip Cookies

Indulge in the cozy holiday spirit while creating a complete meal experience that warms the heart and delights the senses.

  • Hot Cocoa: The rich chocolate flavor and warmth of cocoa perfectly complement the peppermint in the cookies, creating a comforting pairing.
  • Creamy Vanilla Chai Latte: This creamy drink enhances the festive flavors of the cookies, adding a fragrant spice that’s perfect for chilly evenings.
  • Cheese Platter: A selection of sharp cheddar and creamy brie provides a savory contrast to the sweetness of the cookies, balancing flavors beautifully.
  • Vanilla Ice Cream: The smooth creaminess of vanilla ice cream drizzled with melted chocolate enhances the cookie’s texture and adds delightful coldness.
  • Peppermint Bark: Add a festive touch with peppermint bark, its crunch and minty flavor echoing the cookie’s hints of peppermint for a cohesive treat experience.
  • Fruit Salad: A light and refreshing side with seasonal fruits balances the sweetness, providing a fresh finish to your holiday gathering.
  • Coffee: A warm cup of coffee, whether black or with cream, contrasts deliciously with the cookies, enhancing their rich chocolate notes.
  • Christmas Cookies: Serve alongside other holiday cookies for a delightful variety, making your dessert table truly festive and inviting.
  • Spiced Apple Cider: The warmth and spices of apple cider offer comfort while perfectly contrasting the sweet, rich flavors of the Winter Wonderland cookies.

Expert Tips for Winter Wonderland Chocolate Chip Cookies

  • Chill the Dough: Always chill the dough for at least 30 minutes before baking to prevent spreading, resulting in thicker cookies.

  • Room Temperature Ingredients: Make sure your butter and eggs are at room temperature for better mixing. Cold ingredients can lead to a lumpy dough.

  • Don’t Overmix: Mix the dry ingredients just until combined with the wet mixture. Overmixing can cause your Winter Wonderland Chocolate Chip Cookies to turn out tough instead of soft and tender.

  • Watch the Bake Time: Keep an eye on your cookies as they bake. Remove them from the oven when the edges are golden and the centers appear slightly soft for the optimal chewy texture.

  • High-Quality Chocolate: Using high-quality chocolate chips enhances the flavor significantly. Opt for a mix of dark and white chocolate for a delightful contrast.

Winter Wonderland Chocolate Chip Cookies Recipe FAQs

What’s the best way to choose ingredients for my Winter Wonderland Chocolate Chip Cookies?
Absolutely! For the best flavor, choose butter that’s at room temperature—it ensures easier creaming with the sugars. When selecting chocolate chips, opt for high-quality brands, as they have a richer taste. If using eggs, make sure they’re room temperature, too, as they blend more smoothly into the batter.

How should I store my cookies to keep them fresh?
To keep your Winter Wonderland Chocolate Chip Cookies soft and delicious, store them in an airtight container at room temperature for up to 3 days. For longer storage, place a slice of bread inside the container; it helps retain moisture and keeps the cookies from drying out. If you decide to refrigerate them, they can last up to a week, but they may lose some of their delightful chewiness.

Can I freeze the cookie dough, and if so, how do I do it?
Yes, you can freeze the dough for up to 3 months! Simply scoop the cookie dough onto a parchment-lined baking sheet and freeze until solid. Then, transfer the dough balls to a freezer-safe bag or container, ensuring they’re well sealed. When you’re ready to bake, just thaw them in the fridge for a few hours and bake as usual, adding a minute or two to the baking time if they’re still a bit cold.

What do I do if my cookies come out too hard or flat?
Oh no! If your cookies are too hard, it could be due to overbaking, so try to watch them closely next time. For flat cookies, make sure your butter is not too warm and that you’ve measured your flour correctly. If your ingredients are too warm or too wet, it can cause the cookies to spread too much during baking. If the dough seems too sticky, add a little extra flour until it holds together better before scooping.

Are there any dietary considerations I should keep in mind?
Certainly! For those with gluten sensitivities, simply substitute the all-purpose flour with a gluten-free blend. Additionally, if you’re looking to reduce sugar, you can cut back on the granulated sugar or use natural sweeteners like honey or maple syrup for a healthier twist. Always check chocolate labels for allergen information if you’re concerned about dairy or gluten.

How long can my baked cookies be kept in the freezer?
Your baked Winter Wonderland Chocolate Chip Cookies can be kept in the freezer for up to 2 months. Just make sure they are fully cooled, then wrap them tightly in plastic wrap or aluminum foil and place them in a freezer-safe container. When you're ready to enjoy, simply let them thaw at room temperature or warm them slightly in the microwave for that fresh-baked feel!

Winter Wonderland Chocolate Chip Cookies

Winter Wonderland Chocolate Chip Cookies You'll Crave

Enjoy the festive flavors of Winter Wonderland Chocolate Chip Cookies—soft, chewy delights with a hint of peppermint.
Print Recipe Pin Recipe
Prep Time 15 minutes mins
Cook Time 12 minutes mins
Chilling Time 30 minutes mins
Total Time 57 minutes mins
Servings: 24 cookies
Course: Dessert
Cuisine: American
Calories: 150
Ingredients Equipment Method Nutrition Notes

Ingredients
  

Batter
  • 1 cup Butter At room temperature
  • 1 cup Brown Sugar Can substitute with coconut sugar
  • 1/2 cup Granulated Sugar Can reduce or substitute with honey
  • 2 large Eggs At room temperature
  • 1 teaspoon Vanilla Extract Almond extract can be used
Dry Ingredients
  • 2 cups All-Purpose Flour Can substitute with gluten-free blend
  • 1 teaspoon Baking Soda Ensure it's fresh
  • 1/2 teaspoon Salt
Mix-Ins
  • 1 cup Chocolate Chips (Dark and White) Can mix with semi-sweet varieties
  • 1/2 cup Crushed Candy Canes Can swap with nuts if preferred

Equipment

  • Oven
  • Mixing Bowl
  • Baking Sheet
  • Parchment Paper
  • hand mixer
  • sifter
  • Cookie Scoop

Method
 

Step-by-Step Instructions
  1. Preheat your oven to 350°F (175°C) and line baking sheets with parchment paper.
  2. In a large mixing bowl, cream together softened butter, brown sugar, and granulated sugar until light and fluffy, about 2-3 minutes.
  3. Add eggs one at a time, mixing well after each addition. Pour in vanilla extract and blend until smooth.
  4. Sift together all-purpose flour, baking soda, and salt in a separate bowl. Gradually add this to the wet ingredients, mixing gently until just combined.
  5. Fold in the dark and white chocolate chips along with crushed candy canes.
  6. Scoop the dough onto prepared baking sheets, spacing them about two inches apart.
  7. Bake for 10-12 minutes until edges are golden but centers remain soft.
  8. Cool on baking sheets for about 5 minutes, then transfer to a wire rack. Drizzle melted white chocolate and sprinkle with additional crushed candy canes if desired.

Nutrition

Serving: 1cookieCalories: 150kcalCarbohydrates: 20gProtein: 1gFat: 7gSaturated Fat: 4gPolyunsaturated Fat: 1gMonounsaturated Fat: 2gCholesterol: 20mgSodium: 100mgPotassium: 50mgFiber: 1gSugar: 10gVitamin A: 250IUCalcium: 10mgIron: 0.5mg

Notes

Chill the dough for at least 30 minutes before baking to prevent spreading, resulting in thicker cookies.

Tried this recipe?

Let us know how it was!

Irresistible Creamy Tuscan Ravioli Soup for Cozy Nights

September 29, 2025 by Grace Snow Leave a Comment

On a chilly evening, nothing quite warms the soul like a bowl of soup. Enter my Comforting Creamy Tuscan Ravioli Soup, a delightful one-pot meal that transforms simple ingredients into a heartwarming dish. This recipe embodies the essence of Italian comfort food, featuring tender cheese ravioli nestled in a velvety cream broth, bursting with the rich flavors of savory Italian sausage, fresh spinach, and tangy sun-dried tomatoes. The beauty of this meal lies in its quick preparation—ready in under an hour—making it perfect for busy weeknights when you crave something satisfying yet easy. Plus, it’s a crowd-pleaser that will have everyone asking for seconds. Curious to learn just how simple it is to create this warm hug in a bowl? Let's dive in!

Why Is This Soup So Irresistible?

Comforting warmth: There’s nothing like a hearty bowl of soup to chase away the chill and lift your spirits.

One-pot convenience: This recipe simplifies dinner time, making clean-up a breeze while delivering impressive flavors.

Creamy richness: The velvety broth, combined with tender ravioli and savory sausage, creates a luxurious experience.

Customizable goodness: Feel free to swap ingredients based on your preferences—make it vegetarian with ground turkey or add in extra veggies, like zucchini!

Perfectly quick: Ready in under an hour, this cozy dish makes weeknight dinners feel special.

Crowd-pleasing flavors: With its delicious blend of Italian herbs and comforting textures, it’s bound to be a family favorite! Pair it with a refreshing side salad or some crusty garlic bread for a complete meal. If you're interested in other delicious soups, check out my Lemon Chicken Soup for a zesty option or explore the creamy goodness of Zuppa Toscana Soup for your next family gathering.

Creamy Tuscan Ravioli Soup Ingredients

For the Soup

  • Olive Oil – Adds richness and flavor; substitute with vegetable oil if needed.
  • Italian Sausage – Provides protein and hearty flavor; can be substituted with ground turkey or vegetarian sausage for a lighter version.
  • Onion – Adds a sweet base flavor; use shallots for a milder taste.
  • Garlic – Enhances the overall flavor profile; fresh is preferred, but garlic powder can work in a pinch.
  • Dried Italian Seasoning – Adds herbal notes; substitute with a mix of oregano and basil if unavailable.
  • Paprika (optional) – Introduces a sweet smokiness; omit if not preferred.
  • Crushed Red Pepper Flakes (optional) – Provides heat; adjust based on spice tolerance.
  • Chicken Broth – Acts as the soup base; vegetable broth can be used for vegetarian versions.
  • Heavy Cream – Contributes creaminess; substitute with full-fat coconut milk for a dairy-free option.
  • Cheese Ravioli – The core ingredient that adds heartiness; use any flavor, fresh or frozen.
  • Sun-Dried Tomatoes – Adds a tangy sweetness; fresh Roma tomatoes could work in spring.
  • Baby Spinach – Adds freshness and nutrition; kale can be used as an alternative.
  • Parmesan Cheese – Provides salty depth; nutritional yeast can be used for a dairy-free substitute.
  • Salt and Pepper – Enhances flavors to taste.
  • Fresh Basil or Parsley (for garnish) – Adds visual appeal and freshness; use any fresh herb on hand.

With these simple ingredients, you’re well on your way to creating a comforting bowl of Creamy Tuscan Ravioli Soup that your loved ones will adore!

Step‑by‑Step Instructions for Creamy Tuscan Ravioli Soup

Step 1: Brown the Sausage
In a Dutch oven, heat a drizzle of olive oil over medium heat. Add the crumbled Italian sausage and cook for about 5–7 minutes, stirring occasionally, until the sausage is beautifully browned and cooked through. The rich aroma will fill the kitchen, hinting at the delicious Creamy Tuscan Ravioli Soup ahead!

Step 2: Sauté Aromatics
Next, add the diced onion to the pot and sauté for 2–3 minutes until it becomes translucent and fragrant. Stir in the minced garlic, dried Italian seasoning, paprika, and crushed red pepper flakes, cooking for an additional minute until the mixture is aromatic. This flavorful base is essential for intensifying the soup's taste.

Step 3: Add Liquids and Simmer
Pour in about 4 cups of chicken broth, raising the heat until the mixture reaches a gentle boil. Once boiling, lower the heat and stir in the heavy cream, allowing the soup to simmer uncovered for 5–7 minutes. You’ll notice the broth thickening slightly, creating that velvety texture synonymous with a comforting Creamy Tuscan Ravioli Soup.

Step 4: Add Ravioli and Tomatoes
Now, carefully add the cheese ravioli and sun-dried tomatoes into the simmering soup. Cook for 5–6 minutes, stirring gently until the ravioli are tender and cooked through. Watch as they soften and mingle with the broth, infusing the soup with delightful flavors.

Step 5: Finish with Spinach and Cheese
Remove the pot from heat, then fold in the fresh baby spinach, stirring just until it wilts beautifully. Finally, sprinkle in the Parmesan cheese and season with salt and pepper to taste. The soup will become rich and creamy, ready to warm your soul.

Step 6: Serve
Ladle the comforting Creamy Tuscan Ravioli Soup into bowls, garnishing with fresh basil or parsley for that touch of color and freshness. Serve hot alongside crusty bread or a crisp side salad for a delightful meal that your family will love!

Creamy Tuscan Ravioli Soup Variations

Invite your culinary creativity to shine as you customize this delightful soup to suit your taste buds!

  • Dairy-Free: Use full-fat coconut milk instead of heavy cream for a rich, creamy texture without the dairy.

  • Vegetarian Delight: Swap out Italian sausage with ground turkey or a plant-based sausage to create a lighter version without sacrificing flavor.

  • Extra Greens: Toss in chopped kale or Swiss chard for added nutrition and texture. The earthy greens complement the soup beautifully!

  • Flavorful Boost: Add a splash of white wine during the simmering step for a touch of acidity that brightens the overall taste. It’s an elegant twist that your guests will love.

  • Savory Veggie Twist: Incorporate diced zucchini or carrots for extra nourishment. These hearty veggies enhance the soup's sweetness while adding interesting textures.

  • Pasta Variations: Substitute ravioli with tortellini or gnocchi for delightful variations on the classic soup. Each option brings a unique touch!

  • Heat Level: Sprinkle in more crushed red pepper flakes for those who enjoy a spicy kick. Adjust to your heat tolerance and embrace the warmth!

  • Protein Power: Consider adding cannellini beans or even shredded rotisserie chicken for a heartier meal that’s protein-packed and delicious.

Whether you choose a comforting classic or explore these exciting twists, your Creamy Tuscan Ravioli Soup will be a memorable hit at the dinner table! For more delightful soups, don’t forget to check out my comforting Lemon Chicken Soup or try a warm bowl of Santa Soup Savory.

What to Serve with Creamy Tuscan Ravioli Soup

Creating a delightful dining experience is as easy as pairing this creamy masterpiece with these complementary sides.

  • Garlic Bread: The crispy, buttery texture balances the soup's creaminess perfectly and is irresistible for dipping.

  • Caesar Salad: A crisp, refreshing salad with crunchy romaine, tangy dressing, and Parmesan adds a bright contrast to the rich soup.

  • Roasted Vegetables: Seasoned and roasted seasonal vegetables lend earthy flavors and a lovely texture, enhancing the overall meal experience.

  • Bruschetta: Toasted bread topped with diced tomatoes, basil, and mozzarella complements the Italian theme and adds a fresh, vibrant touch.

  • Fresh Basil Pesto: Swirling a spoonful of homemade basil pesto into each bowl can energize the flavors and take your soup to the next level.

  • White Wine: A chilled glass of Pinot Grigio or Sauvignon Blanc elevates the meal, offering crispness that balances the soup’s creaminess.

  • Tiramisu: Conclude your meal with this classic Italian dessert that’s airy and subtly sweet—perfect for a cozy night in!

Expert Tips for Creamy Tuscan Ravioli Soup

  • Simmer for Depth: Allow the soup to simmer longer than suggested for a more profound flavor. This extra time elevates the taste of the creamy Tuscan ravioli soup.

  • Stir Regularly: Make sure to gently stir the ravioli as they cook to prevent them from sticking together or clumping.

  • Use a Dutch Oven: For best results, opt for a Dutch oven. This ensures even heat distribution, which is ideal for simmering and rich flavors.

  • Taste and Adjust: Before serving, taste your soup and adjust the seasoning with salt and pepper as needed. Sometimes a pinch of salt can bring out the flavors beautifully.

  • Customize Ingredients: Don’t hesitate to swap ingredients to suit your preference; for example, adding extra veggies or trying ground turkey instead of sausage enhances the creamy Tuscan ravioli soup without losing its essence.

Make Ahead Options

Busy home cooks will love how easy it is to prepare the Creamy Tuscan Ravioli Soup ahead of time! You can prep the soup's base (browning sausage and sautéing aromatics) up to 24 hours in advance; just refrigerate the mixture once cooled. Additionally, chop the spinach and sun-dried tomatoes ahead of time; these can be stored separately in the fridge for up to 3 days. When you’re ready to serve, simply reheat the base on the stove, add the cream and broth, then stir in the ravioli, spinach, and cheese. This way, you guarantee the soup remains just as delicious and comforting, while saving precious time on busy evenings!

How to Store and Freeze Creamy Tuscan Ravioli Soup

Fridge: Store any leftover Creamy Tuscan Ravioli Soup in an airtight container for up to 3 days. To maintain freshness, let it cool before sealing.

Freezer: This soup can be frozen for up to 3 months. Portion it into freezer-safe containers, leaving some space for expansion.

Reheating: To reheat, thaw in the refrigerator overnight, then warm on the stovetop over low heat. Add a splash of broth or cream to adjust the consistency if needed.

Tip: Avoid freezing the soup with ravioli already in it if possible, as they may become mushy upon reheating. Instead, freeze the soup base and add fresh ravioli when you reheat.

Creamy Tuscan Ravioli Soup Recipe FAQs

How do I select the right ingredients for my Creamy Tuscan Ravioli Soup?
When selecting your ingredients, opt for fresh vegetables and high-quality Italian sausage to enhance the flavor. For the cheese ravioli, choose a variety that looks plump and firm. If you’re dealing with spinach, vibrant green leaves are a sign of freshness, while sun-dried tomatoes should be slightly chewy, not overly dried out.

How should I store leftover Creamy Tuscan Ravioli Soup?
Store any leftover soup in an airtight container in the refrigerator for up to 3 days. To keep it fresh, allow the soup to cool to room temperature first before sealing it. When reheating, add a splash of broth or cream to restore its creamy consistency.

Can I freeze Creamy Tuscan Ravioli Soup?
Absolutely! You can freeze this soup for up to 3 months. For best results, portion it into freezer-safe containers, leaving enough room for expansion. However, it’s wise to freeze the soup base without ravioli if possible, as the pasta may become mushy upon reheating. When you're ready to enjoy, thaw it overnight in the fridge and reheat on the stovetop, adding fresh ravioli for the best texture.

What should I do if my soup is too thick?
If your Creamy Tuscan Ravioli Soup is thicker than desired, just add a bit of chicken broth or water to loosen it up. Heat over low to medium heat, stirring frequently, until you reach your preferred consistency. Tasting and adjusting the seasoning after adding liquid is a great way to ensure your flavors remain balanced.

Are there any dietary considerations I should keep in mind?
Yes! If you're cooking for anyone with dietary restrictions, the soup can easily be adapted. Use ground turkey or a plant-based sausage for a lighter or vegetarian option, and swap heavy cream for full-fat coconut milk to make it dairy-free. Also, ensure your ravioli choice aligns with any gluten-free or nut-free needs, as there are many alternative options available nowadays.

Can I add additional ingredients or variations to the recipe?
Very much so! This soup is highly customizable. Consider adding extra vegetables like zucchini or carrots for nutrition. You can also mix in cannellini beans for added protein or switch out ravioli for tortellini or gnocchi to create different textures. The more, the merrier!

Creamy Tuscan Ravioli Soup

Irresistible Creamy Tuscan Ravioli Soup for Cozy Nights

Enjoy a comforting bowl of Creamy Tuscan Ravioli Soup, featuring cheese ravioli in a velvety broth with savory sausage and fresh spinach.
Print Recipe Pin Recipe
Prep Time 15 minutes mins
Cook Time 30 minutes mins
Total Time 45 minutes mins
Servings: 4 servings
Course: Soups
Cuisine: Italian
Calories: 400
Ingredients Equipment Method Nutrition Notes

Ingredients
  

For the Soup
  • 2 tablespoons Olive Oil Adds richness and flavor; substitute with vegetable oil if needed.
  • 1 pound Italian Sausage Provides protein and hearty flavor; can be substituted with ground turkey.
  • 1 medium Onion Adds a sweet base flavor; use shallots for a milder taste.
  • 3 cloves Garlic Enhances overall flavor; fresh is preferred.
  • 1 tablespoon Dried Italian Seasoning Adds herbal notes; substitute with oregano and basil if unavailable.
  • 1 teaspoon Paprika Introduces sweet smokiness; omit if not preferred.
  • 1/2 teaspoon Crushed Red Pepper Flakes Provides heat; adjust to spice tolerance.
  • 4 cups Chicken Broth Acts as soup base; vegetable broth for vegetarian versions.
  • 1 cup Heavy Cream Contributes creaminess; substitute with full-fat coconut milk for dairy-free.
  • 9 ounces Cheese Ravioli Core ingredient that adds heartiness; use any flavor.
  • 1/2 cup Sun-Dried Tomatoes Adds tangy sweetness; fresh Roma tomatoes could work.
  • 4 cups Baby Spinach Adds freshness and nutrition; kale can be used.
  • 1/2 cup Parmesan Cheese Provides salty depth; nutritional yeast can be used for dairy-free.
  • to taste Salt Enhances flavors to taste.
  • to taste Pepper Enhances flavors to taste.
  • Fresh Basil or Parsley for garnish Adds visual appeal and freshness.

Equipment

  • Dutch oven

Method
 

Step-by-Step Instructions
  1. Brown the Sausage: In a Dutch oven, heat olive oil over medium heat. Add crumbled Italian sausage and cook for about 5–7 minutes until browned.
  2. Sauté Aromatics: Add diced onion and sauté for 2–3 minutes until translucent. Add minced garlic, dried Italian seasoning, paprika, and crushed red pepper flakes, cooking for an additional minute.
  3. Add Liquids and Simmer: Pour in chicken broth, raising heat to boil. Lower heat and stir in heavy cream, allowing to simmer uncovered for 5–7 minutes.
  4. Add Ravioli and Tomatoes: Carefully add cheese ravioli and sun-dried tomatoes into the soup. Cook for 5–6 minutes until ravioli are tender.
  5. Finish with Spinach and Cheese: Fold in fresh baby spinach and sprinkle in Parmesan cheese. Season with salt and pepper to taste.
  6. Serve: Ladle the soup into bowls, garnishing with fresh basil or parsley. Serve hot with bread or salad.

Nutrition

Serving: 1bowlCalories: 400kcalCarbohydrates: 30gProtein: 18gFat: 24gSaturated Fat: 12gPolyunsaturated Fat: 2gMonounsaturated Fat: 6gCholesterol: 80mgSodium: 900mgPotassium: 600mgFiber: 3gSugar: 2gVitamin A: 2500IUVitamin C: 15mgCalcium: 200mgIron: 2mg

Notes

For best results, allow soup to simmer longer for depth of flavor and stir regularly as ravioli cooks to prevent clumping.

Tried this recipe?

Let us know how it was!

Pasta alla Sorrentina: Cozy Italian Bake for Family Nights

September 29, 2025 by Grace Snow Leave a Comment

The aroma of fresh basil and rich tomato sauce wafting from the kitchen feels like a warm hug for the senses, doesn’t it? Today, I’m thrilled to share my take on a beloved Italian classic: Pasta alla Sorrentina. This delightful baked pasta dish, featuring hearty rigatoni enveloped in a luscious tomato sauce and topped with bubbling mozzarella, is perfect for cozy family dinners or those busy weeknights when time is of the essence. Not only is it vegetarian-friendly, but it also celebrates simplicity and quality ingredients, making it a true crowd-pleaser. Imagine serving this comforting pasta, bringing smiles and satisfaction with every bite. Are you ready to elevate your home-cooked meal game? Let’s dive in!

Why Is Pasta alla Sorrentina Special?

Cozy Family Meal: This dish is the perfect centerpiece for family gatherings, providing a sense of warmth and togetherness as everyone shares delicious bites.

Simplicity Done Right: With minimal prep and straightforward steps, it proves that homemade doesn’t have to mean complicated.

Flavorful Layering: The combination of creamy mozzarella, sweet tomato sauce, and fragrant basil creates a mouthwatering flavor profile that captivates both young and old.

Meal Prep Hero: Ideal for a quick weeknight dinner or make-ahead meals, just assemble in advance and pop it in the oven when you’re ready!

Versatile Options: Feel free to customize by adding favorite proteins or spices, such as Italian sausage or a bit of spice with crushed red pepper flakes. For other delightful options, check out Skillet Pasta Sun or the tasty Cauliflower Pasta Ready for easy variations.

Pasta alla Sorrentina Ingredients

Get ready to create a rich, comforting dish with these essential ingredients!

For the Pasta

  • Rigatoni or Penne Pasta (400g / 14 oz) – Acts as the hearty base for this dish; you can substitute with gluten-free pasta if needed.

For the Sauce

  • Tomato Passata (500g / 17 oz) – The essential sauce base that provides sweetness and acidity; crushed tomatoes are a good alternative if that's what you have.
  • Garlic Cloves (2, minced) – Adds a lovely aroma and depth of flavor; feel free to adjust based on your family's garlic preference.
  • Extra Virgin Olive Oil (2 tbsp) – Essential for sautéing and infusing richness into your sauce.
  • Salt and Black Pepper (to taste) – Vital for seasoning, ensuring every bite is bursting with flavor.
  • Crushed Red Pepper Flakes (optional) – Sprinkle in some extra heat if you're craving a spicier dish!

For the Topping

  • Fresh Mozzarella Cheese (250g / 9 oz) – This creamy, melty delight takes your Pasta alla Sorrentina to another level; remember to use high-quality mozzarella for the best results.
  • Grated Parmesan Cheese (50g / 1/2 cup) – Finishes the bake with a golden, savory crust that complements the cheesy goodness.
  • Fresh Basil Leaves (Handful, torn) – Brightens the dish with its aromatic herb flavor; if fresh isn’t available, dried basil will do in a pinch.

Ready to indulge in this wonderful Pasta alla Sorrentina? Let's get cooking and delight in every layer of flavor!

Step‑by‑Step Instructions for Pasta alla Sorrentina

Step 1: Boil the Pasta
Begin by bringing a large pot of salted water to a rolling boil over high heat. Carefully add 400g of rigatoni or penne pasta and cook for 2 minutes less than the package instructions, ensuring the pasta remains al dente. Strain and set it aside in a large mixing bowl, while retaining a splash of the cooking water for later use.

Step 2: Sauté the Garlic
In a sizable skillet, heat 2 tablespoons of extra virgin olive oil over medium heat. Add 2 minced garlic cloves and sauté for about 30 seconds, stirring constantly until the garlic turns fragrant and lightly golden. Be attentive to prevent burning, as this can affect the flavor of your Pasta alla Sorrentina.

Step 3: Create the Sauce
Pour 500g of tomato passata into the skillet with the sautéed garlic. Season it generously with salt and black pepper to taste. Allow the sauce to simmer for 10-15 minutes, stirring occasionally until it thickens slightly. Just before removing it from the heat, stir in half of a handful of torn fresh basil to infuse the flavors beautifully.

Step 4: Preheat the Oven
While the sauce simmers, preheat your oven to 400°F (200°C). This ensures your Pasta alla Sorrentina will bake evenly and develop that wonderfully golden, bubbly cheese crust that we're all craving.

Step 5: Combine Pasta and Sauce
Add the cooked pasta to the skillet with the delicious tomato sauce. Gently toss everything together until the pasta is well-coated with the sauce. If needed, mix in a splash of the reserved pasta cooking water to achieve the desired consistency, ensuring every rigatoni is enveloped in that rich tomato sauce.

Step 6: Assemble in Baking Dish
Transfer the pasta and sauce mixture into a generously sized baking dish. Evenly distribute torn pieces of 250g fresh mozzarella cheese on top, followed by a sprinkle of 50g grated Parmesan cheese and the remaining torn basil. This hearty layer will melt beautifully and complement your dish perfectly.

Step 7: Bake to Perfection
Place the baking dish in your preheated oven and bake for 15-20 minutes, or until the cheese is bubbly and golden brown on top. Keep an eye on it during the last few minutes for that perfect golden finish that will make your Pasta alla Sorrentina irresistible.

Step 8: Serve and Enjoy
Once baked to perfection, remove your Pasta alla Sorrentina from the oven and let it cool for a couple of minutes. Serve hot, garnished with extra fresh basil if desired, and watch as your family digs into this comforting, cheesy Italian delight with pure enjoyment.

Variations & Substitutions for Pasta alla Sorrentina

Feel free to get creative and make this Pasta alla Sorrentina your own with these fun variations!

  • Dairy-Free: Swap mozzarella and Parmesan for a plant-based cheese to enjoy a creamy, dairy-free twist.
    Transforming this classic into a dairy-free delight ensures everyone can partake in the comforting goodness.

  • Meaty Addition: For a heartier option, mix in cooked Italian sausage or ground beef into the sauce before baking.
    This variation adds a robust flavor and heartiness that pairs beautifully with the creamy sauce.

  • Spicy Kick: Boost the heat by adding extra crushed red pepper flakes or diced jalapeños to the sauce.
    A spicy version elevates the flavor profile, making it perfect for those who love a bit of fire in their meals.

  • Veggie-Packed: Toss in your favorite vegetables, like spinach, bell peppers, or zucchini, to add extra nutrition and flavor.
    Incorporating colorful veggies not only enhances the dish's healthiness but also adds a delightful texture contrast.

  • Cheesy Twist: Experiment with a blend of cheeses, such as smoked mozzarella or fontina, for a unique flavor twist.
    Different cheeses bring exciting dimension and complexity, ensuring that each mouthful is delectable and surprising.

  • Herb Boost: Fresh herbs like oregano or thyme can be added alongside basil for enhanced aromatic depth.
    A sprinkle of mixed herbs brightens the overall flavor, emphasizing that authentic Italian essence.

  • Gluten-Free: Substitute traditional pasta with gluten-free rigatoni or penne for a safe, gluten-free option.
    This modification allows all to savor the pasta's heartiness, keeping everyone happy at the dinner table.

  • Sundried Tomato Infusion: Add finely chopped sundried tomatoes to the sauce for a tangy and rich flavor.
    This indulgent twist brings out concentrated flavors that will transport your dish to a sunny Italian villa.

Ready to explore these variations? Enjoy your cooking adventure!

Expert Tips for Pasta alla Sorrentina

Quality Ingredients: Use high-quality mozzarella for a creamy melt that elevates your Pasta alla Sorrentina. Fresh ingredients make all the difference!

Undercook Pasta: Slightly undercook the pasta (by 2 minutes) to avoid mushiness during baking. This will keep each bite perfectly al dente.

Season Generously: Don’t skimp on salt and pepper in the sauce! Taste and adjust as you go to ensure every layer is bursting with flavor.

Even Cheese Distribution: Tear mozzarella into smaller, even pieces for a uniform melt across your dish. Avoid overcrowding with cheese to let other flavors shine.

Make-Ahead Friendly: Assemble your Pasta alla Sorrentina ahead of time and refrigerate. Just pop it in the oven when you're ready to serve, making weeknight meals a breeze!

Make Ahead Options

These Pasta alla Sorrentina are a lifesaver for meal prep enthusiasts! You can prepare the entire dish up to 24 hours in advance. Simply cook the rigatoni and allow it to cool. Prepare the sauce by sautéing garlic and mixing in the tomato passata. After assembling everything in the baking dish, cover it tightly with plastic wrap and refrigerate. To maintain quality, ensure the dish is sealed to prevent moisture loss. When you're ready to serve, simply bake from the fridge at 400°F (200°C) for 25-30 minutes, allowing a few extra minutes for a warm and bubbly finish. Enjoy a comforting homemade meal with minimal effort on busy weeknights!

What to Serve with Pasta alla Sorrentina?

When it comes to creating a comforting meal, thoughtful pairings elevate the experience and complement the rich flavors of your dish beautifully.

  • Garlic Bread: This crunchy, buttery delight is perfect for dipping into the warm sauce, enhancing each spoonful of pasta.
  • Simple Green Salad: A fresh mix of greens with a light vinaigrette cuts through the richness of the baked pasta, adding a refreshing balance to your meal.
  • Roasted Vegetables: Seasonal roasted veggies provide a lovely caramelization that adds texture and sweetness, harmoniously pairing with the savory pasta.
  • Italian Wine: A glass of Chianti or Sangiovese elevates the dinner’s authenticity, making every bite feel like a taste of Italy.
  • Cheesy Polenta: Creamy, cheesy polenta serves as a delightful alternative to bread, bringing an extra layer of warmth to the table.
  • Tiramisu: End the meal on a sweet note with this classic Italian dessert; its coffee flavor pairs wonderfully with the savory pasta.

Let each of these pairings create a delightful dining experience filled with comforting flavors and warmth!

How to Store and Freeze Pasta alla Sorrentina

Fridge: Store leftovers in an airtight container for up to 3 days, keeping the pasta moist and delicious for your next meal.

Freezer: Freeze Pasta alla Sorrentina in an airtight container for up to 2 months. For best results, allow it to cool completely before freezing.

Reheating: To reheat, thaw overnight in the fridge and bake in a preheated oven at 350°F (175°C) until heated through, about 20-30 minutes. Enjoy this comforting Pasta alla Sorrentina once again!

Pasta alla Sorrentina Recipe FAQs

How do I know if my tomatoes are ripe enough for Pasta alla Sorrentina?
Absolutely! When selecting tomatoes for your sauce, look for those that are slightly soft to the touch, with a vibrant red color. Avoid any with dark spots all over or a wrinkly skin, as these can affect the taste and texture of your sauce. If you're using canned tomatoes, opt for whole or crushed varieties packed in juice for the best flavor.

What’s the best way to store Pasta alla Sorrentina leftovers?
Very easy! Store any leftovers in an airtight container in the refrigerator for up to 3 days. To maintain moisture, place a damp paper towel in the container before sealing it. When you're ready to enjoy it again, just reheat in the oven, gently warming it through for that freshly-baked taste.

Can I freeze Pasta alla Sorrentina after baking?
The more the merrier! Pasta alla Sorrentina freezes beautifully. Allow the dish to cool completely, then transfer it to an airtight freezer-safe container. It can be kept in the freezer for up to 2 months. When ready to enjoy, thaw it overnight in the refrigerator, and bake at 350°F (175°C) until heated through, around 20-30 minutes.

What should I do if my sauce is too watery?
No worries! If you find that your tomato sauce is too watery before mixing it with the pasta, simply let it simmer a bit longer while stirring frequently. This will help concentrate the flavors and thicken the sauce. Alternatively, you can add a teaspoon of cornstarch diluted in water for a quick fix.

Is there a way to make this recipe gluten-free?
Absolutely! You can substitute the rigatoni or penne pasta with gluten-free pasta options available in stores. Just follow the package instructions for cooking times, as they may differ from traditional pasta. Rest assured, the flavors will still shine through, making it a perfect dish for everyone at the table.

Are there any allergens in this recipe I should be aware of?
Yes, this recipe may contain potential allergens such as dairy (mozzarella and parmesan cheese). If you’re serving someone with a dairy allergy, consider using vegan cheese alternatives that melt well for a similar comforting effect. Always read labels to ensure that your substitutes are free from allergens.

Pasta alla Sorrentina

Pasta alla Sorrentina: Cozy Italian Bake for Family Nights

Pasta alla Sorrentina is a comforting baked pasta dish with rich tomato sauce and melted mozzarella, perfect for family dinners.
Print Recipe Pin Recipe
Prep Time 20 minutes mins
Cook Time 30 minutes mins
Total Time 50 minutes mins
Servings: 4 servings
Course: Dinner
Cuisine: Italian
Calories: 450
Ingredients Equipment Method Nutrition Notes

Ingredients
  

For the Pasta
  • 400 g Rigatoni or Penne Pasta Substitute with gluten-free pasta if needed.
For the Sauce
  • 500 g Tomato Passata Crushed tomatoes are a good alternative.
  • 2 cloves Garlic Minced, adjust according to taste.
  • 2 tbsp Extra Virgin Olive Oil Essential for sautéing.
  • Salt To taste.
  • Black Pepper To taste.
  • Crushed Red Pepper Flakes Optional for extra heat.
For the Topping
  • 250 g Fresh Mozzarella Cheese Use high-quality mozzarella for best results.
  • 50 g Grated Parmesan Cheese For a savory crust.
  • Handful Fresh Basil Leaves Torn, dried basil can be used if fresh is unavailable.

Equipment

  • Large pot
  • Skillet
  • Baking Dish
  • strainer

Method
 

Step-by-Step Instructions
  1. Boil a large pot of salted water and cook pasta for 2 minutes less than package instructions. Strain and set aside.
  2. In a skillet, heat olive oil and sauté minced garlic until fragrant but not burnt.
  3. Add tomato passata to the skillet, season with salt and pepper, and let it simmer for 10-15 minutes.
  4. Preheat oven to 400°F (200°C).
  5. Add cooked pasta to the sauce and mix, adding reserved cooking water if needed.
  6. Transfer to a baking dish, top with mozzarella, Parmesan, and remaining basil.
  7. Bake in oven for 15-20 minutes until cheese is bubbly and golden.
  8. Let cool for a couple of minutes, then serve hot.

Nutrition

Serving: 1servingCalories: 450kcalCarbohydrates: 55gProtein: 20gFat: 20gSaturated Fat: 10gPolyunsaturated Fat: 1gMonounsaturated Fat: 6gCholesterol: 45mgSodium: 600mgPotassium: 600mgFiber: 4gSugar: 10gVitamin A: 500IUVitamin C: 15mgCalcium: 400mgIron: 3mg

Notes

Use high-quality ingredients for the best flavor. Slightly undercooking the pasta helps avoid mushiness during baking.

Tried this recipe?

Let us know how it was!

Mummy Jalapeño Poppers: Spooky, Cheesy Fun for Everyone

September 29, 2025 by Grace Snow Leave a Comment

As I pulled out my baking sheet, a delightful aroma filled the air, instantly transforming my kitchen into a haunted hub of Halloween magic. These Spooky Mummy Jalapeño Poppers are my go-to treat for gathering friends and family, combining the fiery kick of jalapeños with a creamy, cheesy filling wrapped in flaky dough. They’re not just fun to look at—this easy and quick recipe is perfect for those busy autumn evenings, bringing a festive flair to any gathering. Plus, with the option to customize spice levels and cheese choices, you can tailor them to everyone's palate. Ready to add some thrill to your Halloween festivities? Let's get cooking!

Why Are These Mummy Poppers a Must-Try?

Unique Presentation: These spooky treats are an instant hit at any party, delighting both kids and adults with their fun mummy appearance.
Quick to Prepare: In just 30 minutes, you'll have a plateful of cheesy poppers, making them a perfect choice for last-minute gatherings.
Flavorable Options: Experiment with different cheeses or spice levels, allowing everyone to enjoy their perfect bite.
Crowd-Pleasing Appeal: These poppers are the ultimate appetizer—great with your favorite dips like guacamole or salsa!
Vegetarian-Friendly: Want a deliciously festive dish without meat? This recipe ensures no one misses out on the fun! Dive into more festive ideas with our Spooky Snack Recipes.

Mummy Jalapeño Poppers Ingredients

For the Filling

  • Jalapeños – Adds heat and will be the vessel for the filling; substitute mini sweet peppers for a milder flavor.
  • Cream Cheese – Provides a creamy texture; ensure it is softened for easy mixing.
  • Monterey Jack Cheese – Contributes flavor; swap for cheddar or pepper jack for added zing.
  • Garlic Powder – Elevates the flavor; adjust depending on your garlic preference.

For the Wrapping

  • Crescent Roll Dough – The key for creating the spooky ‘mummy’ look; fresh dough is best.

For the Decoration

  • Candy Eyes – Optional for enhancing the spooky presentation; can be replaced with sour cream dots or olives.
  • Salt – Enhances overall flavor; adjust to taste.

Step‑by‑Step Instructions for Mummy Jalapeño Poppers

Step 1: Preheat the Oven
Begin by preheating your oven to 375°F (190°C). This ensures a hot environment for your Mummy Jalapeño Poppers, resulting in a perfectly crispy exterior. While the oven warms, prepare your baking sheet by lining it with parchment paper to prevent sticking and ease cleanup later.

Step 2: Prepare the Jalapeños
Carefully slice the jalapeños in half lengthwise, then remove the seeds and membranes for a milder flavor. Rinse them under cold water to eliminate any lingering heat and pat them dry with a paper towel. Properly drying these little vessels helps the filling stick well for that perfect bite.

Step 3: Make the Creamy Filling
In a mixing bowl, combine the softened cream cheese, Monterey Jack cheese, and garlic powder. Use a sturdy spatula to blend them until the mixture is smooth and creamy, approximately 2-3 minutes. This rich filling will provide a delightful contrast to the spicy jalapeños, ensuring each Mummy Jalapeño Popper is packed with flavor.

Step 4: Fill the Jalapeños
Spoon generous amounts of the creamy filling into each jalapeño half, ensuring they are well-stuffed. The filling should slightly overflow for a more luscious bite. This step is crucial as it forms the heart of your Mummy Jalapeño Poppers, so don’t be shy with the cheese!

Step 5: Wrap with Dough
Open the crescent roll dough and cut it into strips about half an inch wide. Carefully wrap these strips around each filled jalapeño half to create a mummy effect, leaving spaces for the candy eyes to peek through later. Take your time here to achieve a fun and spooky appearance for your poppers.

Step 6: Bake the Poppers
Arrange the wrapped jalapeños on the prepared baking sheet, ensuring they are spaced apart for even cooking. Bake in the preheated oven for 12-15 minutes or until the crescent dough turns golden brown and crispy. Keep an eye on them as they bake, as the aroma will be irresistible!

Step 7: Add the Final Touches
Once out of the oven, let your Mummy Jalapeño Poppers cool for a few minutes before decorating. Place candy eyes on each popper for a spooky effect. If you prefer, you can also create fun dots with sour cream or olives to enhance the decoration before serving.

Make Ahead Options

These Mummy Jalapeño Poppers are fantastic for meal prep, saving you valuable time on busy weeknights or festive gatherings! You can prepare the jalapeños by slicing and cleaning them up to 24 hours in advance—just be sure to pat them dry to maintain their texture. The cheese filling can be mixed ahead and stored in the refrigerator for up to 3 days. To finish, simply stuff the jalapeños and wrap them in dough right before baking. This way, you'll have fresh, crispy poppers that are just as delicious when served from the oven, making your Halloween party or family gathering a breeze!

What to Serve with Mummy Jalapeño Poppers

Elevate your spooky snack experience with fantastic sides and treats that complement the cheesy, spicy goodness of these poppers.

  • Creamy Guacamole: This rich and smooth dip helps balance the heat of the jalapeños, providing a fresh and creamy contrast.
  • Spicy Salsa: A zesty option that adds a burst of flavor; its tanginess pairs perfectly with the rich creaminess of the poppers!
  • Crunchy Veggie Platter: Serving bright, crunchy veggies alongside brings freshness to the table, enhancing the overall dining experience.
  • Chilled Apple Cider: A refreshing drink that balances the spice with its naturally sweet and crisp flavors, making it a perfect party beverage.
  • Homemade Sour Cream Dip: A cool, velvety dip is a fantastic way to mellow out the heat, ensuring everyone gets to enjoy them.
  • Mini Cornbread Muffins: Sweet and fluffy muffins offer a delightful contrast that pairs beautifully with the spicy poppers on your platter.
  • Savory Cheese Platter: A selection of cheeses can elevate your appetizer spread—think sharp cheddar or creamy brie to complement flavors.
  • Pumpkin Ale: Embrace the season with a light, spiced pumpkin ale, which has a perfect autumnal touch that complements the festive theme!
  • Chocolate-Pumpkin Brownies: End the meal on a sweet note by serving these decadent, gooey brownies, creating a well-rounded, autumn-inspired treat.
  • Cinnamon Sugar Churros: For dessert lovers, these sweet, crispy churros add fun and flair, keeping the whimsical spirit alive!

Storage Tips for Mummy Jalapeño Poppers

Fridge: Store leftovers in an airtight container for up to 3 days to maintain freshness and flavor.

Freezer: Uncooked Mummy Jalapeño Poppers can be frozen for up to 2 months. Bake them directly from frozen, adding a few extra minutes to the cooking time.

Reheating: To reheat, place the baked poppers in an oven set to 350°F (175°C) for about 10 minutes, until warmed through and crispy again.

Enjoy Later: These poppers are best enjoyed fresh, but with proper storage, you can savor your Mummy Jalapeño Poppers even after the spooky festivities!

Tips for the Best Mummy Jalapeño Poppers

  • Gloves Required: Always wear gloves when handling jalapeños to prevent skin irritation and accidental spicy surprises.
  • Dry Completely: Rinse jalapeños thoroughly before drying; any moisture can make the filling slide out during baking.
  • Air Fryer Option: For a quicker and lighter version, try cooking at 350°F for 7-9 minutes in an air fryer.
  • Cheese Consistency: If your cheese filling is runny, simply blend in more cream cheese until the mixture thickens and holds together.
  • Creative Variations: Experiment with using blue cheese or pepper jack for a unique twist on the classic Mummy Jalapeño Poppers.

Mummy Jalapeño Poppers: Fun Variations to Try!

These Mummy Jalapeño Poppers are just the beginning! Let's explore how you can customize this recipe to delight every palate.

  • Extra Spicy: Mix in chopped fresh jalapeños or a splash of your favorite hot sauce for a fiery kick. Spice enthusiasts will adore the enhanced heat! Just a few extra ingredients can transform your dish into something thrilling.

  • Bacon Lover’s Delight: Crumble crispy bacon into the cheese filling for a smoky flavor that pairs perfectly with the jalapeños. Alternatively, sauté chopped mushrooms for a delicious vegetarian twist, adding a hearty texture that complements the creamy cheese.

  • Tex-Mex Flair: Stir in some taco seasoning into the cheese blend for a zesty and flavorful popper. This playful twist will transport your taste buds to a taco fiesta, making your appetizers a hit at any gathering.

  • Cheese Swap: Experiment with different cheeses like blue cheese for a bold bite or mozzarella for a milder, stretchier filling. Pairing with cheeses you love can create exciting new combinations that suit everyone's taste.

  • Herb Infusion: Add fresh herbs like cilantro or chives to the filling for an aromatic lift. The fresh flavors will brighten every bite, making these poppers feel light and gourmet at the same time.

  • Crunchy Topping: Sprinkle crushed tortilla chips or panko breadcrumbs over the wrapped poppers before baking for extra crunch. This delightful topping not only adds texture but also an irresistible golden finish.

  • Sweet and Spicy: Try blending in some finely chopped pineapple or mango for a sweet contrast to the heat. This unexpected twist will surprise and delight guests looking for something different.

  • Lower Calorie: For a lighter version, use reduced-fat cream cheese and a thin layer of whole wheat dough for wrapping. This will help you enjoy the flavors without the extra guilt, allowing everyone to dig in!

Feel free to mix and match these variations, and don't forget to check out our tasty Spooky Snack Recipes for more Halloween-inspired treats. The possibilities are endless, so let your creativity shine!

Mummy Jalapeño Poppers Recipe FAQs

What type of jalapeños should I use for Mummy Jalapeño Poppers?
Absolutely! Look for fresh jalapeños that are firm and bright in color. If you're looking for a milder option, consider using mini sweet peppers instead, which still offer a fun shape but with much less heat.

How long can I store Mummy Jalapeño Poppers in the fridge?
These delightful poppers can be stored in an airtight container in the refrigerator for up to 3 days. To keep them fresh, make sure they cool completely before sealing and always check for any signs of spoilage, like dark spots or off-smells.

Can I freeze uncooked Mummy Jalapeño Poppers? How do I do it?
Certainly! To freeze uncooked poppers, prepare them just until the wrapping step. Place them on a baking sheet lined with parchment paper, ensuring they don’t touch. Freeze them for about 2 hours, then transfer them to a freezer-safe bag. They can be kept frozen for up to 2 months. When ready to bake, pop them in the oven straight from the freezer and add a few extra minutes to the cooking time!

What if my cheese filling turns out too runny?
No worries! If you find your filling is too runny, you can easily fix this by incorporating more softened cream cheese into the mixture. Start by adding just a tablespoon at a time, mixing thoroughly until you reach your desired consistency. This thicker filling will hold better in your jalapeños and prevent any messy spills while baking.

Are Mummy Jalapeño Poppers safe for pets?
Very! However, jalapeños can be spicy for pets, so it’s best to keep them away. The cheese filling is safe, but ensure no ingredients such as garlic are included if you plan to share any cooked poppers with your furry friends!

Can I adjust the spice level of my Mummy Jalapeño Poppers?
Definitely! You can control the heat by removing all the seeds and membranes of the jalapeños, as these parts contain the most spiciness. For an extra kick, why not mix in some chopped fresh jalapeños or a splash of hot sauce into the cheese filling? The more the merrier!

Mummy Jalapeño Poppers

Mummy Jalapeño Poppers: Spooky, Cheesy Fun for Everyone

These Mummy Jalapeño Poppers are a spicy and cheesy Halloween treat perfect for gatherings.
Print Recipe Pin Recipe
Prep Time 15 minutes mins
Cook Time 15 minutes mins
Total Time 30 minutes mins
Servings: 12 poppers
Course: Appetizers
Cuisine: American
Calories: 120
Ingredients Equipment Method Nutrition Notes

Ingredients
  

For the Filling
  • 6 medium Jalapeños or mini sweet peppers for milder flavor
  • 8 oz Cream Cheese softened for easy mixing
  • 1 cup Monterey Jack Cheese or cheddar/pepper jack for more flavor
  • 1 tsp Garlic Powder adjust based on garlic preference
For the Wrapping
  • 1 can Crescent Roll Dough fresh dough is recommended
For the Decoration
  • Candy Eyes optional for decoration
  • Salt to taste

Equipment

  • Baking Sheet
  • Mixing Bowl
  • Spatula
  • Parchment Paper
  • Oven

Method
 

Step-by-Step Instructions
  1. Preheat your oven to 375°F (190°C) and prepare a baking sheet lined with parchment paper.
  2. Slice the jalapeños in half lengthwise, remove seeds and membranes, rinse and dry them.
  3. In a bowl, mix cream cheese, Monterey Jack cheese, and garlic powder until smooth.
  4. Fill each jalapeño half generously with the creamy mixture.
  5. Wrap strips of crescent dough around each jalapeño to create a mummy effect.
  6. Bake in the preheated oven for 12-15 minutes until golden brown.
  7. Let them cool, then add candy eyes or dots of sour cream/olives before serving.

Nutrition

Serving: 1popperCalories: 120kcalCarbohydrates: 10gProtein: 4gFat: 8gSaturated Fat: 5gPolyunsaturated Fat: 1gMonounsaturated Fat: 2gCholesterol: 25mgSodium: 200mgPotassium: 120mgFiber: 1gSugar: 1gVitamin A: 5IUVitamin C: 15mgCalcium: 15mgIron: 4mg

Notes

For a lighter version, use an air fryer at 350°F for 7-9 minutes.

Tried this recipe?

Let us know how it was!

Savory Slow Cooker Beef & Noodles for Ultimate Cozy Comfort

September 29, 2025 by Grace Snow Leave a Comment

As I shuffled through my kitchen, the air filled with the warm aroma of spices and simmering beef, I knew something special was about to unfold. This Hearty Beef Noodle Soup is the cozy comfort food that chases away the chill of a cold evening. Within just one pot, you can create a deliciously satisfying meal that warms the heart and belly alike. Made with tender beef chuck and a flavorful broth infused with onion and Worcestershire sauce, this easy recipe also features egg noodles that cradle each bite in pure delight. The best part? It’s not just a simple recipe—it's an effortless one-pot wonder that gets better with time, perfect for busy weeknights or leisurely weekends. Are you ready to dive into a bowl of warm, hearty goodness? Let’s get cooking!

Why is this Beef & Noodles recipe a must-try?

Comforting Flavors: This Hearty Beef Noodle Soup envelops you in a warm, savory embrace, making it the perfect dish for chilly nights.

One-Pot Wonder: Easy preparation means less stress in the kitchen; just toss everything in your slow cooker and let the magic happen.

Tender Beef: With a few hours of simmering, you'll be rewarded with fork-tender beef that melts in your mouth.

Versatile Ingredients: Feel free to customize with vegetables or switch to chicken for a lighter twist! For those craving variety, check out my Gochujang Sesame Noodles or Ground Beef Enchiladas.

Embrace the cozy vibes, and serve alongside some crusty bread for the ultimate comfort meal!

Slow Cooker Beef & Noodles Ingredients

For the Soup

  • Beef Chuck Roast – Adds rich flavor and becomes melt-in-your-mouth tender after slow cooking.
  • Beef Broth – Serves as the savory base; opt for low-sodium for a healthier choice.
  • Onion Soup Mix – Provides easy seasoning without the fuss; try homemade onion seasoning for a personal touch.
  • Worcestershire Sauce – Infuses a tangy umami flavor; coconut aminos can be a gluten-free substitute.
  • Garlic Powder – A must-have for aromatic depth; adjust to your preference.

For the Noodles

  • Egg Noodles – The hearty backbone of the dish, soaking up all those delicious flavors; whole wheat or gluten-free pasta works well too.

Optional Garnishes

  • Fresh Parsley – Adds a burst of color and freshness; use as much or as little as you like.
  • Grated Parmesan Cheese – For a rich, creamy finish that enhances each bowl of Slow Cooker Beef & Noodles.

Perfect for embracing the cozy vibes, this simple yet flavorful recipe awaits you!

Step‑by‑Step Instructions for Savory Slow Cooker Beef & Noodles

Step 1: Prepare the Ingredients
Begin by trimming any excess fat from the beef chuck roast and cutting it into large chunks. In your slow cooker, place the beef alongside the beef broth, onion soup mix, and Worcestershire sauce. Stir gently to combine the flavors. This base will create a rich, savory broth for your Slow Cooker Beef & Noodles.

Step 2: Season the Mixture
Sprinkle in salt, pepper, and garlic powder to taste, adjusting according to your preference for seasoning. Give the mixture another light stir. The aromas will start to blend beautifully, setting the stage for a comforting dish. Now, cover the slow cooker and set it to low heat, letting it work its magic for 6-8 hours.

Step 3: Check the Beef for Tenderness
After about 6 hours, check the beef for doneness. It should be fork-tender and easy to shred. If it’s not there yet, allow it to cook a bit longer. Once tender, carefully remove the beef from the pot using tongs and set it aside to cool slightly before shredding it into bite-sized pieces.

Step 4: Return the Shredded Beef
Once you're done shredding, return the beef to the slow cooker, stirring it back into the savory broth. This infusion of beef adds fantastic flavor to your dish. Cover the slow cooker again, allowing all the flavors to meld beautifully for an additional 30 minutes on low.

Step 5: Cook the Noodles
About 30 minutes before you’re ready to serve, add the egg noodles directly into the slow cooker. Make sure to stir them well into the broth. Cover and cook for around 10-15 minutes, or until the noodles are al dente. Keep an eye on them, as they should be tender but not mushy, soaking up that delightful broth.

Step 6: Serve the Soup
Once everything is cooked perfectly, it’s time to serve your hearty Slow Cooker Beef & Noodles! Ladle the soup into bowls, making sure each serving has a generous portion of beef and noodles. If desired, sprinkle with fresh parsley and grated Parmesan cheese on top for an extra touch of luxury.

Step 7: Enjoy and Store Leftovers
Savor each comforting bite while the soup is hot. If you have leftovers, let them cool slightly before storing in airtight containers. This delicious beef noodle soup can be refrigerated for up to 3 days or frozen for a future cozy meal. Enjoy the warmth of this delightful dish!

What to Serve with Hearty Beef Noodle Soup?

Warm your heart and satisfy your cravings by creating the perfect meal to accompany this delectable dish.

  • Crusty Bread: Perfect for dipping, this bread soaks up the flavorful broth, making each bite even more comforting. Pair your soup with a fresh baguette or rustic sourdough for an irresistible crunch.

  • Simple Side Salad: A light salad with mixed greens, cherry tomatoes, and a tangy vinaigrette offers a refreshing contrast to the rich soup, enhancing your meal's texture.

  • Garlic Breadsticks: Soft, warm, and infused with garlic butter, these breadsticks are an indulgent treat, inviting you to savor every last bite of your soup.

  • Roasted Vegetables: A side of seasonal roasted carrots and broccoli provides an earthy sweetness and delightful crunch, balancing out the hearty flavors of the beef and noodles.

  • Creamy Mashed Potatoes: Creamy and buttery mashed potatoes create a lovely, comforting texture that mirrors the heartwarming qualities of the soup. An absolute crowd-pleaser!

  • Red Wine: A glass of full-bodied red wine enhances the umami flavors, adding a sophisticated touch to your cozy dining experience. Perfectly warming for chilly nights!

Serve your Hearty Beef Noodle Soup with these delightful additions for a meal that warms both body and soul.

Slow Cooker Beef & Noodles Variations

Feel free to play with this recipe to make it your own and explore delightful twists to enhance your meal.

  • Chicken Swap: Replace beef with chicken and use chicken broth for a lighter, equally comforting dish.
  • Pasta Choices: Try using whole wheat or gluten-free noodles for a healthier or dietary-sensitive option.
  • Veggie Boost: Add in vegetables like sliced carrots or celery for a nourishing touch and added texture.
  • Spice It Up: For a little heat, consider adding red pepper flakes or some diced jalapeños to the mix during cooking.
  • Savory Umami: Sneak in some soy sauce or miso paste for an extra depth of flavor in your broth.
  • Herbaceous Delight: Fresh herbs like thyme or rosemary can bring an aromatic twist when added during the last hour of cooking.
  • Creamy Version: Stir in a splash of heavy cream or half-and-half just before serving for a luxurious creamy broth.
  • Leftover Bliss: Use leftover cooked beef, substituting it during the last hour to save time and still enjoy a cozy meal.

Whether you're looking for something a little different or want to elevate the classic taste, these variations will surely do the trick! For more unique ideas, check out my recipe for Gochujang Sesame Noodles or Chicken Teriyaki Noodles.

Expert Tips for Slow Cooker Beef & Noodles

  • Taste the Broth: Always sample the broth before serving to adjust seasonings as needed; this guarantees maximum flavor in your comfort dish.

  • Meat Quality Matters: Use good quality beef chuck roast, as it enhances the overall taste and tenderness of your Slow Cooker Beef & Noodles.

  • Avoid Overcooking: Monitor the beef carefully; check for fork-tenderness around 6 hours. Overcooking can lead to dry or stringy meat.

  • Watch the Noodles: Add noodles in the last 10-15 minutes to avoid mushiness; they should be al dente and well combined with the broth.

  • Garnish for Flavor: Don’t skip the parsley and Parmesan cheese; they brighten flavors and add a delightful finishing touch to your hearty bowl.

How to Store and Freeze Slow Cooker Beef & Noodles

Fridge: Store leftovers in an airtight container for up to 3 days to maintain freshness and flavor.

Freezer: For long-term storage, freeze in portions for up to 3 months. Ensure it's in airtight containers or freezer bags to prevent freezer burn.

Reheating: To reheat, thaw overnight in the fridge, then warm in a pot over low heat until heated through, stirring occasionally. Avoid microwaving if possible, as it can make the noodles mushy.

Tip: The Slow Cooker Beef & Noodles will taste even better after a day in the fridge, as the flavors continue to meld.

Make Ahead Options

Preparing this Savory Slow Cooker Beef & Noodles ahead of time is a fantastic way to save precious minutes during busy evenings! You can cut the beef chuck roast and combine it with the beef broth, onion soup mix, and Worcestershire sauce, refrigerating this mixture for up to 24 hours. This not only enhances the flavors but also streamlines your cooking process. When you’re ready to enjoy your cozy meal, simply add the seasoned beef mixture to the slow cooker, set it to low heat, and let it cook as usual. Remember to check the beef for tenderness before shredding and adding the noodles closer to your serving time for the best quality. Your hearty soup will be just as delicious, ensuring a comforting meal is only a few steps away!

Slow Cooker Beef & Noodles Recipe FAQs

How do I select the best beef chuck roast for this recipe?
Absolutely! When choosing a beef chuck roast, look for one with good marbling—this fat will melt during cooking, adding flavor and tenderness. Ideally, it should have a rich red color with minimal dark spots. Avoid any cuts that look discolored or excessively dry.

What’s the best way to store leftovers of Slow Cooker Beef & Noodles?
Very simple! Allow the soup to cool slightly, then transfer it to an airtight container. You can store it in the refrigerator for up to 3 days. For longer storage, place portions in freezer-safe bags or containers, ensuring all air is removed, and it will keep well for up to 3 months.

Can I freeze Slow Cooker Beef & Noodles?
Absolutely! To freeze this dish, let it cool completely, then ladle it into portions in airtight containers or heavy-duty freezer bags. Be sure to label and date them! When ready to enjoy, thaw overnight in the fridge and reheat gently on the stove for the best texture.

What should I do if the beef isn't tender enough after cooking?
If your beef hasn't reached fork-tenderness after the recommended cooking time, simply cover the slow cooker and continue cooking for additional 30-minute intervals. As you're watching it closely, check periodically to ensure it doesn’t overcook. It helps to note that every slow cooker can vary, so timing may need to be adjusted based on the specific model.

Are there any dietary considerations for this recipe?
Definitely! If you’re looking to make this dish gluten-free, substitute the Worcestershire sauce with coconut aminos and use gluten-free egg noodles. Additionally, if you have any allergies, always read the ingredient labels and opt for low-sodium or homemade versions of sauces and seasoning mixes to ensure they align with your dietary needs.

How can I enhance the flavor of my Slow Cooker Beef & Noodles?
I recommend adding fresh herbs like thyme or rosemary for an aromatic twist. You can also toss in vegetables like carrots or celery at the start of cooking for added nutrition and depth of flavor. Just remember to adjust the broth or seasoning accordingly since the additions can alter the overall taste!

Slow Cooker Beef & Noodles

Savory Slow Cooker Beef & Noodles for Ultimate Cozy Comfort

Experience the warmth of Slow Cooker Beef & Noodles, a deliciously cozy dish perfect for chilly evenings.
Print Recipe Pin Recipe
Prep Time 20 minutes mins
Cook Time 7 hours hrs
Total Time 7 hours hrs 20 minutes mins
Servings: 6 servings
Course: Dinner
Cuisine: American
Calories: 450
Ingredients Equipment Method Nutrition Notes

Ingredients
  

For the Soup
  • 2 pounds Beef Chuck Roast Trimmed and cut into large chunks
  • 4 cups Beef Broth Low-sodium preferred
  • 1 packet Onion Soup Mix Or homemade onion seasoning
  • 2 tablespoons Worcestershire Sauce Coconut aminos for gluten-free option
  • 1 teaspoon Garlic Powder Adjust according to taste
For the Noodles
  • 12 ounces Egg Noodles Whole wheat or gluten-free options available
Optional Garnishes
  • 1/4 cup Fresh Parsley Chopped
  • 1/2 cup Grated Parmesan Cheese For serving

Equipment

  • Slow Cooker

Method
 

Step‑by‑Step Instructions
  1. Trim any excess fat from the beef chuck roast and cut it into large chunks. Place the beef in your slow cooker with the beef broth, onion soup mix, and Worcestershire sauce. Stir gently to combine.
  2. Sprinkle in salt, pepper, and garlic powder to taste. Stir again and cover the slow cooker. Set to low heat and cook for 6-8 hours.
  3. Check the beef after 6 hours for tenderness. If fork-tender, remove it and shred into bite-sized pieces.
  4. Return the shredded beef to the slow cooker and let it meld with the broth for an additional 30 minutes.
  5. Add egg noodles to the slow cooker about 30 minutes before serving. Stir well and cook for 10-15 minutes until al dente.
  6. Serve the soup hot, optionally garnished with fresh parsley and grated Parmesan cheese.
  7. Enjoy and store leftovers in airtight containers. Refrigerate for up to 3 days or freeze for future meals.

Nutrition

Serving: 1bowlCalories: 450kcalCarbohydrates: 40gProtein: 35gFat: 15gSaturated Fat: 6gPolyunsaturated Fat: 1gMonounsaturated Fat: 6gCholesterol: 85mgSodium: 900mgPotassium: 650mgFiber: 2gSugar: 2gVitamin A: 500IUVitamin C: 3mgCalcium: 50mgIron: 3mg

Notes

Taste the broth before serving to adjust seasonings. Use good quality beef chuck for tenderness. Avoid overcooking the beef and add noodles last to maintain texture.

Tried this recipe?

Let us know how it was!

Crispy Rice Paper Egg Wraps for a Flavorful Crunchy Delight

September 29, 2025 by Grace Snow Leave a Comment

Have you ever craved that perfect combination of crispness and warmth, all wrapped up in a delightful package? Enter Crispy Rice Paper Egg Wraps—a versatile delight that brings a whole new level of deliciousness to your table. The beauty of this recipe lies in its simplicity and adaptability; whether you're a seasoned cook or just starting out, you can whip these wraps up in no time. They're not only gluten-free and vegetarian, but they're also perfect for customizing with your favorite fillings, making them a crowd-pleaser for any occasion. Imagine filling these delicate wraps with everything from fresh vegetables to tasty proteins, all while keeping your meal light and healthy. Ready to discover your new go-to recipe that’s sure to impress? Let’s dive into the crunchy goodness of these wraps!

Why Are These Wraps a Must-Try?

Crispy, delightful textures: Each bite offers a satisfying crunch that perfectly contrasts the tender filling, creating a delightful eating experience.
Endless customization: Easily adapt these wraps with your favorite fillings, whether it’s a vibrant veggie mix or a protein-packed option like shrimp.
Quick and simple: With straightforward steps, you can whip up these impressive wraps in no time—a great way to impress without the fuss!
Nutritious and light: These gluten-free wraps shine as a healthy meal choice, keeping your calorie count low while still being filling.
Pair them with delicious dips or serve them alongside a fresh salad for an even more delightful meal—just like my Furikake Fried Rice for an irresistible combo!

Crispy Rice Paper Egg Wrap Ingredients

For the Wraps
• Rice Paper Wrappers – Base component providing structure; Use wide rice paper sheets for easier wrapping.
• Eggs (chicken or duck) – Primary protein source providing richness and flavor; For a vegan version, substitute with tofu or chickpea flour scramble.

For the Filling
• Fresh Vegetables (carrots, bell peppers, cucumbers) – Adds crunch and nutrition; Mix and match with seasonal vegetables or add leafy greens like spinach for extra color.
• Low-Sodium Soy Sauce – Enhances umami flavor of the filling; Tamari is perfect for gluten-free, while coconut aminos make a great soy-free alternative.
• Fresh Herbs (cilantro, mint) – Imparts freshness and aromatic flavors; Try basil or parsley for a delightful twist.

These ingredients come together to create the flavor-packed Crispy Rice Paper Egg Wraps you've been dreaming of! Let’s keep the kitchen energy flowing as you bring your unique twist to this delightful dish!

Step‑by‑Step Instructions for Crispy Rice Paper Egg Wraps

Step 1: Prepare the Filling
In a mixing bowl, whisk together your eggs with a pinch of salt and pepper until well combined. For added texture and nutrition, finely chop your choice of fresh vegetables, such as carrots and bell peppers, and fold them into the egg mixture. Set the bowl aside while you ready the rice paper wrappers, ensuring a flavorful filling for your Crispy Rice Paper Egg Wraps.

Step 2: Soak Rice Paper
Fill a shallow dish with warm water and take one rice paper wrapper. Dip it into the water for 10-15 seconds until it becomes pliable but not overly soft or soggy. You’ll know it's ready when it feels slightly tacky to the touch. Carefully remove the wrapper and lay it flat on a clean surface, preparing for assembly of your Crispy Rice Paper Egg Wraps.

Step 3: Assemble Wraps
Place the soaked rice paper wrapper on the clean surface with the smooth side facing down. Add a spoonful of your prepared egg and vegetable filling to the bottom third of the wrapper. Top the filling with a sprinkle of fresh herbs like cilantro or mint, enhancing the flavors of your Crispy Rice Paper Egg Wraps. Make sure not to overfill to ensure easier rolling.

Step 4: Roll the Wraps
Fold in the sides of the rice paper over the filling, tucking them gently to secure the ingredients. Then, starting from the bottom, roll the wrapper tightly upwards to encapsulate the filling completely, sealing the edges as you go. Aim for a snug roll while being cautious not to tear the delicate rice paper. Continue this process for all the wraps.

Step 5: Cook Wraps
Heat a non-stick skillet over medium heat and add a couple of tablespoons of oil. Once the oil is shimmering, place the wrapped bundles seam-side down in the skillet. Cook each wrap for about 3-4 minutes or until they turn golden brown and crispy on one side. Flip them carefully and cook for an additional 3-4 minutes on the other side to achieve that perfect crunch on your Crispy Rice Paper Egg Wraps.

Step 6: Serve
Once your Crispy Rice Paper Egg Wraps are golden and crispy, transfer them to a plate lined with paper towels to absorb any excess oil. Serve them warm with your favorite dipping sauces, such as sweet chili or soy sauce. Enjoy the delicious combination of textures and flavors that make these wraps a delightful addition to any meal!

Make Ahead Options

Preparing Crispy Rice Paper Egg Wraps in advance is a total game changer for busy weeknights! You can whisk the eggs and mix in your chosen vegetables up to 24 hours ahead of time, storing the filling in an airtight container in the refrigerator. Additionally, you can soak the rice paper wrappers a few hours before assembling, but for the best results and to maintain their texture, it’s ideal to assemble and roll the wraps just before cooking. When you're ready to enjoy your wraps, simply heat the oil in a skillet and cook them seam-side down until crispy—a quick and satisfying meal that tastes just as delicious even when prepped ahead!

What to Serve with Crispy Rice Paper Egg Wraps

The perfect meal is just around the corner with vibrant pairings that will elevate your wrap experience.

  • Fresh Garden Salad: A light salad with mixed greens and a tangy vinaigrette adds a refreshing crunch that complements the savory wraps beautifully.

  • Sweet Chili Sauce: This sauce offers a delightful balance of sweetness and heat, creating a perfect dipping companion that enhances the flavor of each bite.

  • Coconut Rice: Fluffy, aromatic coconut rice brings a creamy texture that contrasts nicely with the crispy wraps, adding a tropical flair to your meal.

  • Spicy Peanut Sauce: A rich and nutty sauce that introduces a hint of spice, making your wraps even more irresistible and deliciously bold.

  • Stir-Fried Vegetables: Colorful stir-fried veggies not only provide a vibrant presentation but also pack in extra nutrients, making your meal feel complete.

  • Miso Soup: Warm and comforting, this soup offers a rich umami flavor that pairs wonderfully with the lightness of the wraps, creating a balanced dining experience.

  • Fruit Platter: A vibrant selection of seasonal fruits serves as a refreshing palate cleanser, balancing the savory notes of your crispy rice paper egg wraps. A perfect way to end your meal!

Each pairing offers a unique adventure that ensures every bite is memorable and satisfying. Enjoy crafting your perfect plate!

How to Store and Freeze Crispy Rice Paper Egg Wraps

Fridge: Store leftover wraps in an airtight container in the refrigerator for up to 3 days. This helps to keep them fresh and prevents them from drying out.

Freezer: For long-term storage, place wrapped and cooled Crispy Rice Paper Egg Wraps in a freezer-safe bag or container. They can be frozen for up to 2 months.

Reheating: When ready to enjoy, reheat them in the oven at 350°F (175°C) for about 10-15 minutes or until warmed through, ensuring they regain that delightful crispiness!

Avoid sogginess: To prevent the wraps from getting soggy during storage, do not stack them directly on top of each other. Instead, use parchment paper between layers for better preservation.

Crispy Rice Paper Egg Wrap Variations

Feel free to let your creativity flow and customize these wraps just how you like them—it's all about your taste and preferences!

  • Vegan Twist: Substitute eggs with a tofu or chickpea flour scramble for a plant-based delight. It’s a fantastic way to enjoy the same satisfying texture while keeping it vegan-friendly.

  • Spicy Kick: Add diced jalapeños or a splash of sriracha to the egg mixture for a fiery flavor boost. The heat beautifully contrasts the wrap's lightness, creating an exciting taste experience.

  • Hearty Add-In: Fold in cooked shrimp or shredded chicken for a more filling option. This protein-packed version transforms your wraps into a meal that is hearty yet still deliciously light.

  • Flavorful Herbs: Experiment with fresh basil or parsley instead of cilantro and mint for a shift in flavor profile. Each herb brings its unique charm, allowing you to taste the wraps in new ways.

  • Savory Sauces: Play with sauces! Drizzle sweet chili sauce or peanut sauce on the filling to elevate the overall taste. It will add a delightful sweetness that perfectly complements the savory elements.

  • Seasonal Veggies: Swap in seasonal vegetables like zucchini or asparagus during their peak. The freshness adds varying textures, giving your wraps even more character.

  • Zesty Citrus: Incorporate a splash of lime juice or zest into the filling for a refreshing, zesty note. This brightens each bite while enhancing the wrap's flavor profile.

  • Nutty Crunch: Add some crushed nuts, like peanuts or cashews, for an added crunch. This tiny twist creates a fascinating texture that will leave you reaching for more!

With these variations, you'll find endless ways to savor your Crispy Rice Paper Egg Wraps. And if you're pairing them with something nice, be sure to try them alongside a vibrant salad or my delicious Honey BBQ Chicken Rice for a cohesive meal!

Expert Tips for Crispy Rice Paper Egg Wraps

  • Soak Just Right: Properly soak the rice paper for 10-15 seconds—too long and it'll become soggy, making your Crispy Rice Paper Egg Wraps prone to tearing.

  • Fresh Ingredients Count: Use only fresh vegetables and herbs. Wilted or old produce can lead to a lackluster filling, diminishing the overall flavor of your wraps.

  • Season Generously: Don’t shy away from seasoning your egg mixture! A pinch of salt, pepper, or your favorite spices can elevate the taste, making your Crispy Rice Paper Egg Wraps truly memorable.

  • Perfectly Tight Rolls: Keep your wraps snug but not overly tight. This prevents leakage while allowing the wraps to cook evenly and maintain their shape.

  • Use High Heat: When cooking, ensure your skillet is adequately heated. This helps achieve a golden-brown crust quickly while keeping the filling tender and flavorful.

Crispy Rice Paper Egg Wraps Recipe FAQs

What kind of rice paper should I use?
For the best results, I recommend using wide rice paper sheets. They make wrapping your Crispy Rice Paper Egg Wraps easier and help prevent tears. Look for sheets that are specifically marked as suitable for spring rolls or rice paper dishes at your local Asian market.

How long can I store leftover wraps in the fridge?
Absolutely! You can store your leftover Crispy Rice Paper Egg Wraps in an airtight container in the refrigerator for up to 3 days. Just be sure to consume them within this time frame for the best taste and texture.

Can I freeze my Crispy Rice Paper Egg Wraps?
Yes, indeed! For freezing, place your cooled wraps in a single layer on a baking sheet lined with parchment paper and freeze them for about 1-2 hours until they are firm. Then, transfer them to a freezer-safe bag or container, ensuring they are sealed tightly. They can be frozen for up to 2 months.

What’s the best way to reheat rice paper wraps?
You have two great options! For a quick method, reheat your wraps in a microwave for about 30-45 seconds, but for the best crispy texture, I recommend preheating your oven to 350°F (175°C) and baking them for 10-15 minutes. This will ensure they regain their delightful crunch while warming through.

Are there any allergies I should be aware of with this recipe?
Yes, if you’re making these wraps, keep in mind that rice paper is generally gluten-free, but always check the packaging to be sure. For those with egg allergies, substitute with tofu or a chickpea flour scramble. Additionally, be cautious with the soy sauce; opt for gluten-free tamari or coconut aminos to accommodate dietary restrictions.

How do I avoid soggy rice paper wraps?
To prevent sogginess, watch your soaking time closely—10-15 seconds is ideal. Also, when storing, do not stack the wraps directly on top of each other; placing parchment paper between layers helps retain their crispness. Avoid reheating in the microwave for long periods, as it can create steam and moisture.

Crispy Rice Paper Egg Wraps

Crispy Rice Paper Egg Wraps for a Flavorful Crunchy Delight

Enjoy these Crispy Rice Paper Egg Wraps—a delightful, gluten-free, and vegetarian treat that's easily customizable with your favorite fillings.
Print Recipe Pin Recipe
Prep Time 15 minutes mins
Cook Time 8 minutes mins
Total Time 23 minutes mins
Servings: 4 wraps
Course: Appetizers
Cuisine: Asian
Calories: 150
Ingredients Equipment Method Nutrition Notes

Ingredients
  

For the Wraps
  • 8 sheets Rice Paper Wrappers Use wide rice paper sheets for easier wrapping.
  • 2 large Eggs (chicken or duck) For a vegan version, substitute with tofu or chickpea flour scramble.
For the Filling
  • 1 cup Fresh Vegetables (carrots, bell peppers, cucumbers) Mix and match with seasonal vegetables or add leafy greens like spinach for extra color.
  • 2 tablespoons Low-Sodium Soy Sauce Tamari is perfect for gluten-free, while coconut aminos make a great soy-free alternative.
  • 1/4 cup Fresh Herbs (cilantro, mint) Try basil or parsley for a delightful twist.

Equipment

  • non-stick skillet
  • Mixing Bowl
  • Shallow dish

Method
 

Step-by-Step Instructions for Crispy Rice Paper Egg Wraps
  1. In a mixing bowl, whisk together your eggs with a pinch of salt and pepper until well combined. Finely chop your choice of fresh vegetables and fold them into the egg mixture.
  2. Fill a shallow dish with warm water and dip one rice paper wrapper into the water for 10-15 seconds until it becomes pliable. Lay it flat on a clean surface.
  3. Place the soaked rice paper wrapper on the clean surface with the smooth side facing down. Add a spoonful of your egg and vegetable filling to the bottom third of the wrapper. Top with fresh herbs.
  4. Fold in the sides of the rice paper over the filling and roll the wrapper tightly upwards to encapsulate the filling completely.
  5. Heat a non-stick skillet over medium heat and add a couple of tablespoons of oil. Place the wraps seam-side down in the skillet and cook for about 3-4 minutes until golden brown, then flip and cook for another 3-4 minutes.
  6. Transfer the crispy wraps to a plate lined with paper towels. Serve warm with your favorite dipping sauces like sweet chili or soy sauce.

Nutrition

Serving: 1wrapCalories: 150kcalCarbohydrates: 20gProtein: 6gFat: 5gSaturated Fat: 1gCholesterol: 120mgSodium: 220mgPotassium: 200mgFiber: 2gSugar: 3gVitamin A: 500IUVitamin C: 15mgCalcium: 20mgIron: 1mg

Notes

Ensure to soak the rice paper for just the right amount of time and use only fresh vegetables for the best flavor.

Tried this recipe?

Let us know how it was!
  • « Previous Page
  • 1
  • …
  • 91
  • 92
  • 93
  • 94
  • 95
  • …
  • 136
  • Next Page »

Welcome!

Hi, I’m Grace, a Sydney-based home cook with a passion for bold flavors and trending ingredients. Whether you’re a busy beginner or a seasoned foodie, you’ll find dishes here that are fresh, fun, and full of flavor.

More about me

Popular Recipes

  • Crispy Dill Chicken Sandwich Recipe
    Crispy Dill Chicken Sandwich Recipe That's a Family Favorite
  • Honey Mustard BLT Chicken Sliders
    Honey Mustard BLT Chicken Sliders for Flavor-packed Bliss
  • Sun-Dried Tomato Romesco Chickpea Salad Sandwich
    Sun-Dried Tomato Romesco Chickpea Salad Sandwich Delight
  • Spinach Artichoke White Bean Sandwich
    Savory Spinach Artichoke White Bean Sandwich Adventure

Footer

↑ back to top

About

  • Privacy Policy
  • Disclaimer
  • Terms & Conditions

Newsletter

  • Sign Up! for emails and updates

Contact

  • About me
  • Contact me

Copyright © 2025 TastyTrendIngredients