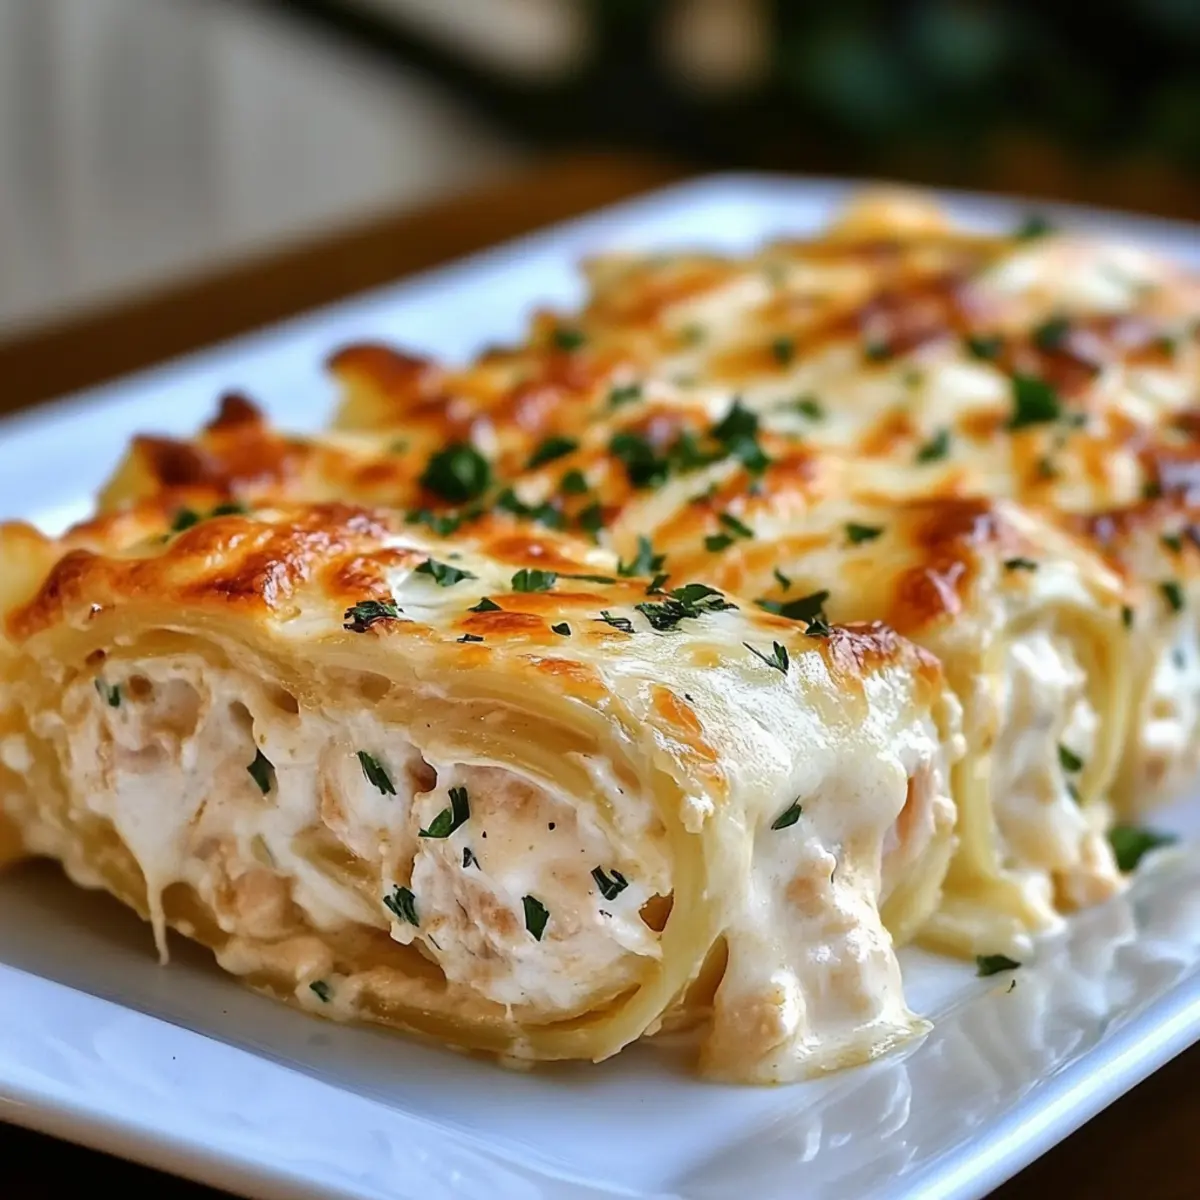
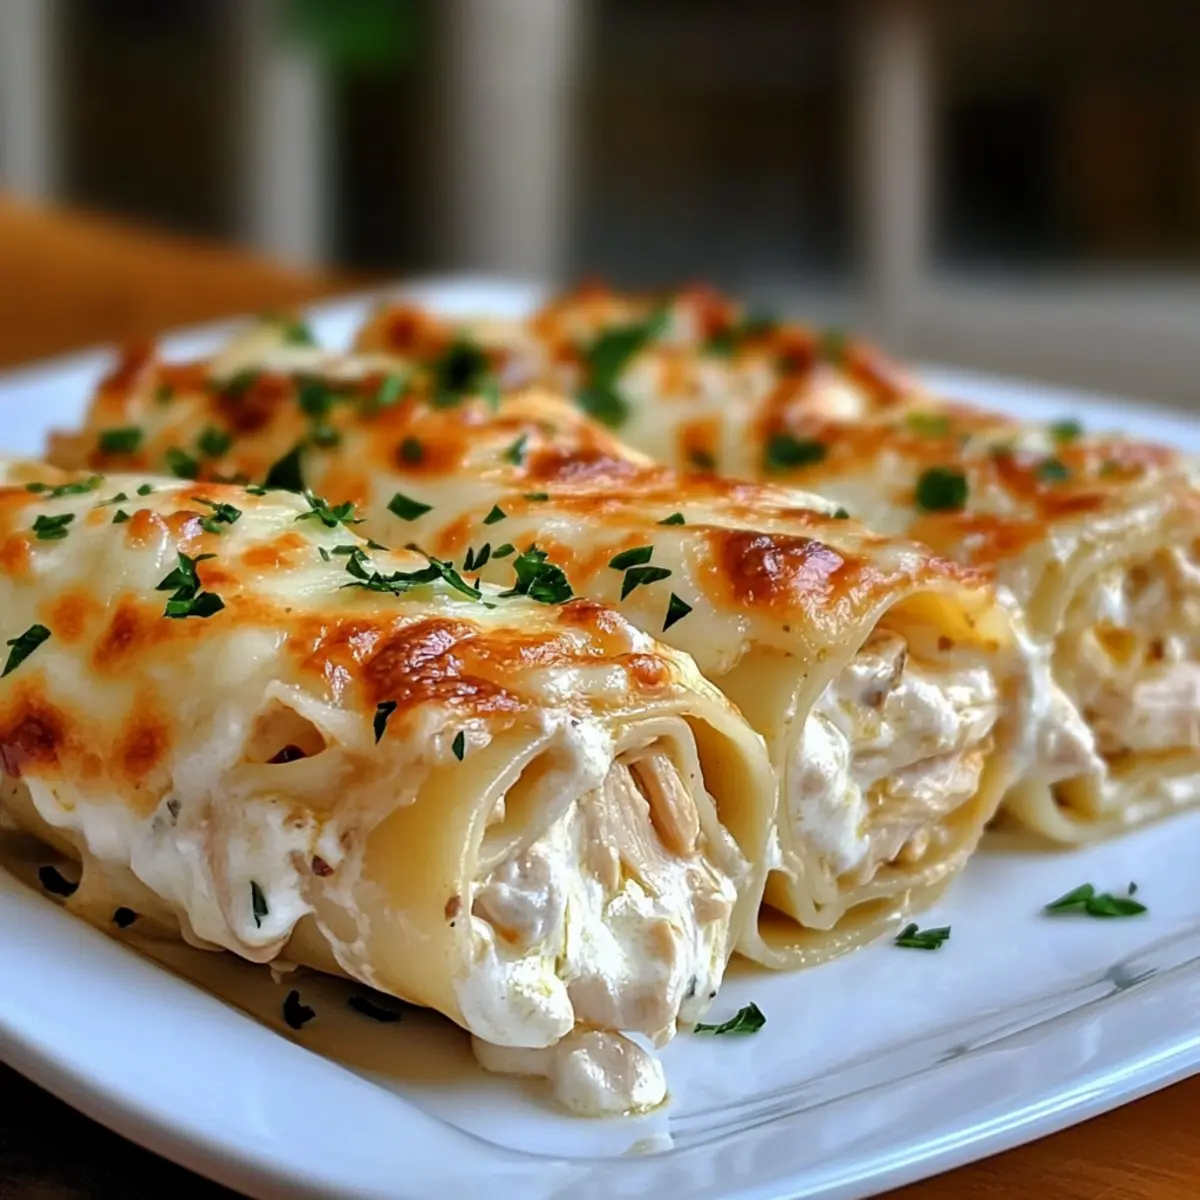
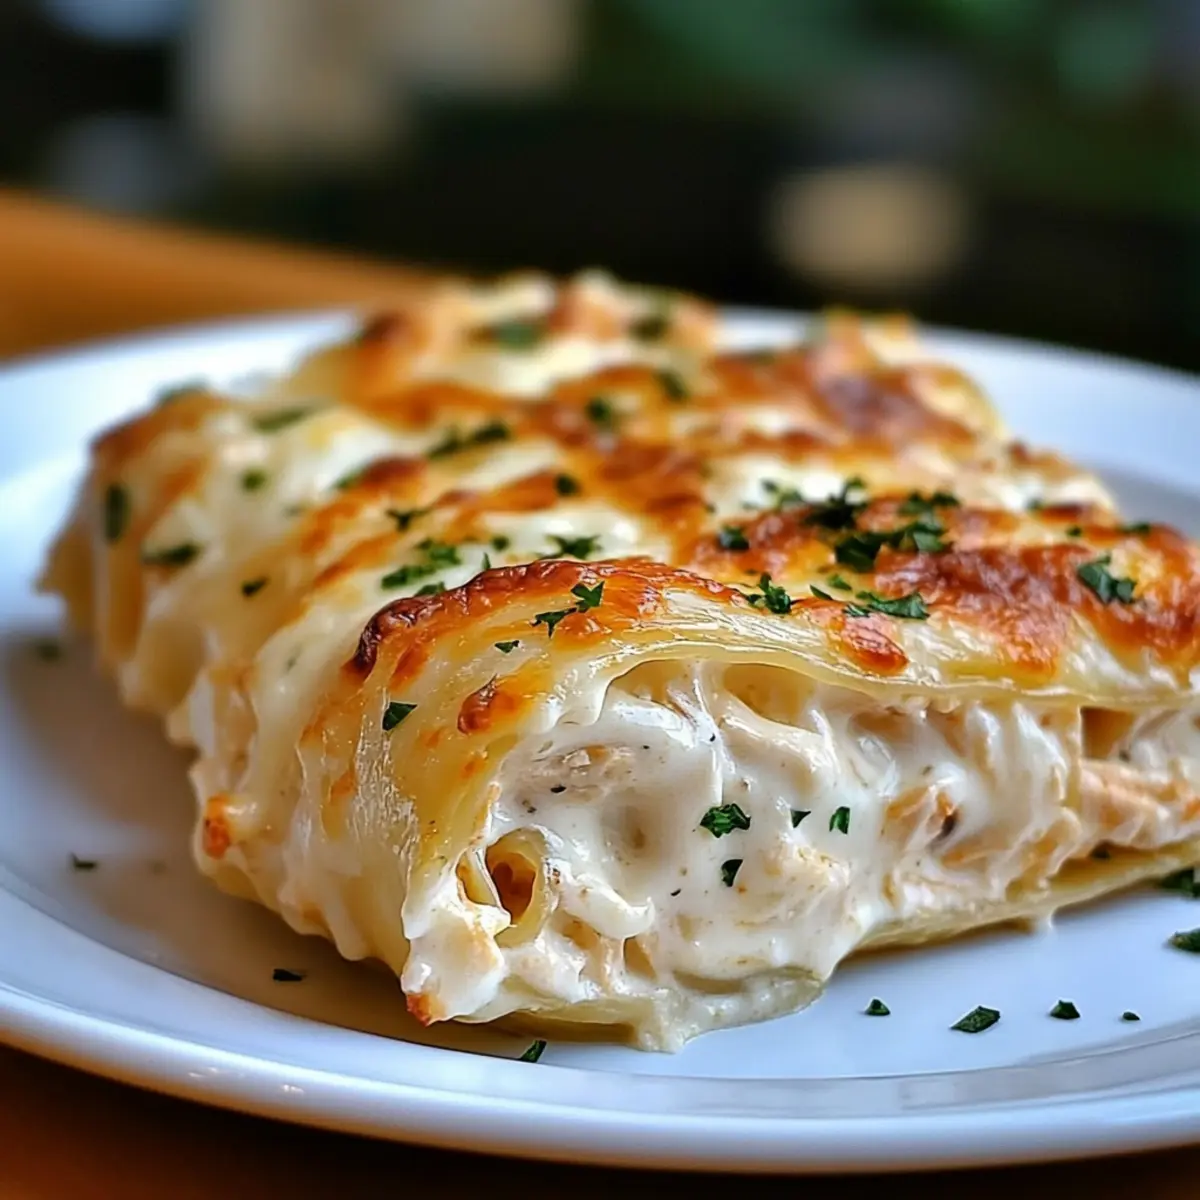
As the aroma of melting cheese and garlic wafts through the kitchen, a sense of warmth and comfort settles in. That's when I knew it was time to indulge in my beloved Chicken Alfredo Lasagna Rolls. This delightful dish combines the classic elements of lasagna with tender chicken and creamy Alfredo sauce, rolled up for easy serving and stunning presentation. Not only are they an impressive centerpiece for gatherings, but these rolls also promise effortless leftovers that can be enjoyed throughout the week. You'll appreciate how simple it is to prepare this comforting meal without sacrificing flavor. Are you ready to roll into a new culinary adventure?
Why Are These Lasagna Rolls Irresistible?
Irresistible Comfort: These Chicken Alfredo Lasagna Rolls bring the cozy vibes you crave, transforming a classic dish into a fun rolled version that’s perfect for any occasion.
Effortless Presentation: Serve up individual servings that not only look gorgeous on your table but are also easy to portion out for guests.
Flavor Fusion: The creamy Alfredo blends beautifully with the tender chicken and cheesy goodness, making every bite packed with flavor.
Time-Saving Convenience: With options like no-boil noodles and easy prep, you'll have a comforting meal ready with minimal fuss!
Endless Variations: Feel free to personalize your rolls! Swap chicken for sausage or toss in some sautéed veggies to fit your family's tastes.
Leftover Perks: Enjoy delightful leftovers that heat up beautifully throughout the week—perfect for busy nights! For more easy chicken dishes, check out our delicious Honey Garlic Chicken Thighs and Crock Pot Chicken.
Chicken Alfredo Lasagna Rolls Ingredients
• For the Pasta
- Lasagna Noodles – Choose no-boil noodles for an easier prep experience.
• For the Filling
- Chicken – Use cooked and shredded or diced for maximum flavor.
- Ricotta Cheese – Provides creaminess; substitute with cottage cheese for lighter options.
- Spinach (optional) – Adds color and nutrition; feel free to replace with other veggies.
- Garlic (optional) – Fresh minced garlic enhances the overall flavor.
- Salt and Pepper – Essential seasonings to brighten all other flavors.
• For the Sauce
- Alfredo Sauce – The luxurious element; go for store-bought or make your own for a personal touch.
• For the Toppings
- Mozzarella Cheese – Opt for fresh mozzarella for that gooey, melty goodness.
- Parmesan Cheese – Freshly grated parmesan adds a nice nutty flavor; don't skimp on this!
Step‑by‑Step Instructions for Chicken Alfredo Lasagna Rolls
Step 1: Preheat the Oven
Begin by preheating your oven to 375°F (190°C). This crucial step ensures an evenly cooked and bubbling Chicken Alfredo Lasagna Rolls. While the oven warms up, gather your ingredients and baking dish. A 9x13-inch dish works wonderfully for this recipe, allowing ample space for all your delicious rolls.
Step 2: Cook the Lasagna Noodles
Next, follow the package instructions to cook your lasagna noodles; typically, this takes about 8-10 minutes. Once cooked, drain them well and lay them flat on a clean surface to cool slightly. This step will help you avoid any sticking while you prepare the filling and assemble your Chicken Alfredo Lasagna Rolls.
Step 3: Prepare the Filling
In a large mixing bowl, combine the cooked chicken, ricotta cheese, half of the mozzarella, and spinach if you choose to include it. Add a pinch of salt and pepper to season the mixture. Stir everything together until it’s well-combined and creamy, ensuring each Chicken Alfredo Lasagna Roll will be packed with flavor.
Step 4: Layer the Baking Dish
Spread a generous layer of Alfredo sauce across the bottom of your prepared baking dish. This will prevent the rolls from sticking and infuse the dish with extra creaminess. Make sure to cover the entire surface evenly, setting the stage for the flavorful Chicken Alfredo Lasagna Rolls that follow.
Step 5: Assemble the Rolls
Now, take one cooked lasagna noodle and lay it flat in front of you. Spoon a generous amount of the chicken and cheese filling onto the noodle, then carefully roll it up from one end to the other. Place the roll seam-side down in the sauce-covered dish. Repeat this process with the remaining noodles and filling, creating a delightful arrangement in the baking dish.
Step 6: Add the Finishing Touches
After all your rolls are in the dish, pour any remaining Alfredo sauce on top. Sprinkle the remaining mozzarella and a healthy amount of grated Parmesan cheese as a finishing touch. This cheesy topping will create a wonderfully golden and bubbly crust as your Chicken Alfredo Lasagna Rolls bake.
Step 7: Bake to Perfection
Cover the baking dish with aluminum foil and bake in your preheated oven for 25 minutes. This prevents the cheese from browning too quickly. After 25 minutes, carefully remove the foil and continue baking for an additional 10-15 minutes, until the rolls are bubbly and the cheese is beautifully melted and golden.
Step 8: Cool Before Serving
Once your Chicken Alfredo Lasagna Rolls are done, remove the dish from the oven and let it cool for about 5-10 minutes. This brief cool-down allows the filling to set a bit, making it easier to serve and more enjoyable to eat. It also enhances the rich flavors that have melded together during baking.
What to Serve with Chicken Alfredo Lasagna Rolls
As the aroma of chicken and creamy sauce fills your kitchen, it's time to think about what else can complete this comforting meal.
-
Garlic Bread: The crunch of garlicky bread pairs perfectly with the creamy rolls, making each bite heavenly. Plus, it's perfect for soaking up any leftover Alfredo sauce.
-
Caesar Salad: Crisp romaine paired with tangy dressing complements the richness of the lasagna rolls, offering freshness and a satisfying crunch. The classic flavors of Caesar create a lovely balance!
-
Roasted Veggies: Colorful, roasted vegetables add a healthful touch and a variety of textures to your meal. Their caramelized sweetness contrasts beautifully with the savory chicken and cheese.
-
Steamed Asparagus: This vibrant vegetable offers a light, elegant touch that enhances the overall dish. Its tender crispness adds a fresh note, making it a delightful side.
-
Creamy Mashed Potatoes: Adding a scoop of fluffy, buttery mashed potatoes brings a comforting element to the table, perfect for those who can’t resist extra creaminess.
-
Sparkling Lemonade: The zesty, refreshing taste of sparkling lemonade cleanses the palate and brightens up your rich main course. It's the ideal drink to uplift the mood!
-
Tiramisu: Finish off your meal on a sweet note with this classic Italian dessert. Its coffee-infused layers and creamy filling will take your dining experience to the next level.
-
Red Wine: A glass of medium-bodied red wine, like Chianti, pairs perfectly, enhancing the flavors of both the chicken and the rich Alfredo sauce.
Each of these options brings something special to the table, inviting your loved ones to savor every moment together.
Expert Tips for Chicken Alfredo Lasagna Rolls
Noodle Prep: Ensure noodles are perfectly soft by cooking just until al dente; overcooking can lead to tears when rolling.
Sauce Layering: Don’t skip the Alfredo sauce layer at the bottom; it keeps the rolls moist and flavorful as they bake.
Cool Time: Allow the finished rolls to rest before serving; this helps flavors meld and makes them easier to cut without falling apart.
Cheese Choice: For a gourmet touch, consider using fresh mozzarella and freshly grated Parmesan, enhancing the overall richness of the Chicken Alfredo Lasagna Rolls.
Filling Variations: Feel free to mix in different veggies or proteins to suit your family’s tastes; customization leads to endless delicious possibilities!
Make Ahead Options
These Chicken Alfredo Lasagna Rolls are an excellent choice for meal prep, allowing you to enjoy a comforting dinner with minimal fuss during busy weeknights! You can assemble the rolls up to 24 hours in advance and refrigerate them before baking. To maintain their delicious quality, cover the baking dish tightly with foil or plastic wrap to prevent them from drying out. When you’re ready to serve, simply bake them directly from the refrigerator; they may require an extra 5-10 minutes in the oven. This make-ahead option ensures that your Chicken Alfredo Lasagna Rolls are just as indulgent, creamy, and satisfying—providing a lovely meal with even less effort.
How to Store and Freeze Chicken Alfredo Lasagna Rolls
Fridge: Store leftover Chicken Alfredo Lasagna Rolls in an airtight container for up to 3 days. Place a layer of parchment paper between layers for optimal freshness.
Freezer: To freeze, wrap individual rolls tightly in plastic wrap and aluminum foil, then place in a freezer-safe bag or container. They can be stored for up to 3 months.
Reheating: To reheat, thaw rolls overnight in the fridge. Warm in the oven at 350°F (175°C) covered with foil for about 20-25 minutes or until heated through.
Make-Ahead Tip: Prepare the rolls a day in advance and store in the fridge before baking to save time on busy days—simply heat and enjoy!
Chicken Alfredo Lasagna Rolls Variations
Inviting a world of flavor into your kitchen is a delightful journey, and these Chicken Alfredo Lasagna Rolls are ready for all your creative twists!
-
Protein Swap: Ditch the chicken and try cooked sausage or ground beef for a heartier option.
-
Veggie Boost: Add sautéed bell peppers or mushrooms to the filling for extra nutrition and texture. These vibrant veggies not only enhance the flavor but also bring a lovely color contrast to your rolls.
-
Cheese Adventure: Mix it up with different cheeses like Gouda or cheddar for a unique, melty experience that invigorates each bite.
-
Low-Fat Alternative: Use low-fat ricotta or cottage cheese to lighten the dish without sacrificing creaminess, making it a great choice for health-conscious eaters. You’ll still get that rich texture everyone loves!
-
Herb Infusion: Toss in some fresh herbs like basil or parsley into the filling to infuse a fresh, aromatic touch that uplifts the flavor profile beautifully.
-
Spicy Kick: Add crushed red pepper flakes or diced jalapeños to the filling for a hint of heat. This twist will give your Chicken Alfredo Lasagna Rolls a warm surprise that’s sure to impress!
-
Alfredo Variations: Experiment with homemade Alfredo sauce by adding garlic and herbs for a richer, elevated taste. Making your sauce may take a bit longer, but the flavor payoff is truly worth the effort.
-
Serving Style: Serve the rolls on a bed of sautéed spinach drenched in olive oil, allowing the richness of the chicken and cheese to shine, while adding a nutritional boost. This simple addition elevates the dish, creating a lovely presentation.
Moreover, if you're inspired to explore different chicken flavors, check out our flavorful Honey Bbq Chicken for a sweet twist!
Chicken Alfredo Lasagna Rolls Recipe FAQs
What type of lasagna noodles should I use?
I recommend using no-boil lasagna noodles for this recipe! They save prep time and will cook beautifully in the oven as the rolls bake, making the assembly much simpler.
How long can I store leftover Chicken Alfredo Lasagna Rolls?
Leftover Chicken Alfredo Lasagna Rolls can be stored in an airtight container in the fridge for up to 3 days. To maintain their freshness, I often place a layer of parchment paper between the rolls.
Can I freeze Chicken Alfredo Lasagna Rolls?
Absolutely! To freeze, wrap each roll tightly in plastic wrap and aluminum foil. Then, place them in a freezer-safe bag or container. They can be kept for up to 3 months. When you're ready, just thaw overnight in the fridge and reheat in the oven!
What should I do if my lasagna noodles tear while rolling?
If your noodles tear, don’t worry! Simply use smaller pieces to fill the rolls or create a layered dish instead. Just layer the torn noodles, filling, and sauce in a baking dish like a classic lasagna; it’ll still taste delicious!
Are there any dietary considerations I should be aware of?
When making Chicken Alfredo Lasagna Rolls, check for allergies if serving to guests. Ingredients like cheese and gluten (in the noodles) may be concerns for some. You can easily substitute ricotta with cottage cheese for lighter options and use gluten-free noodles if needed.
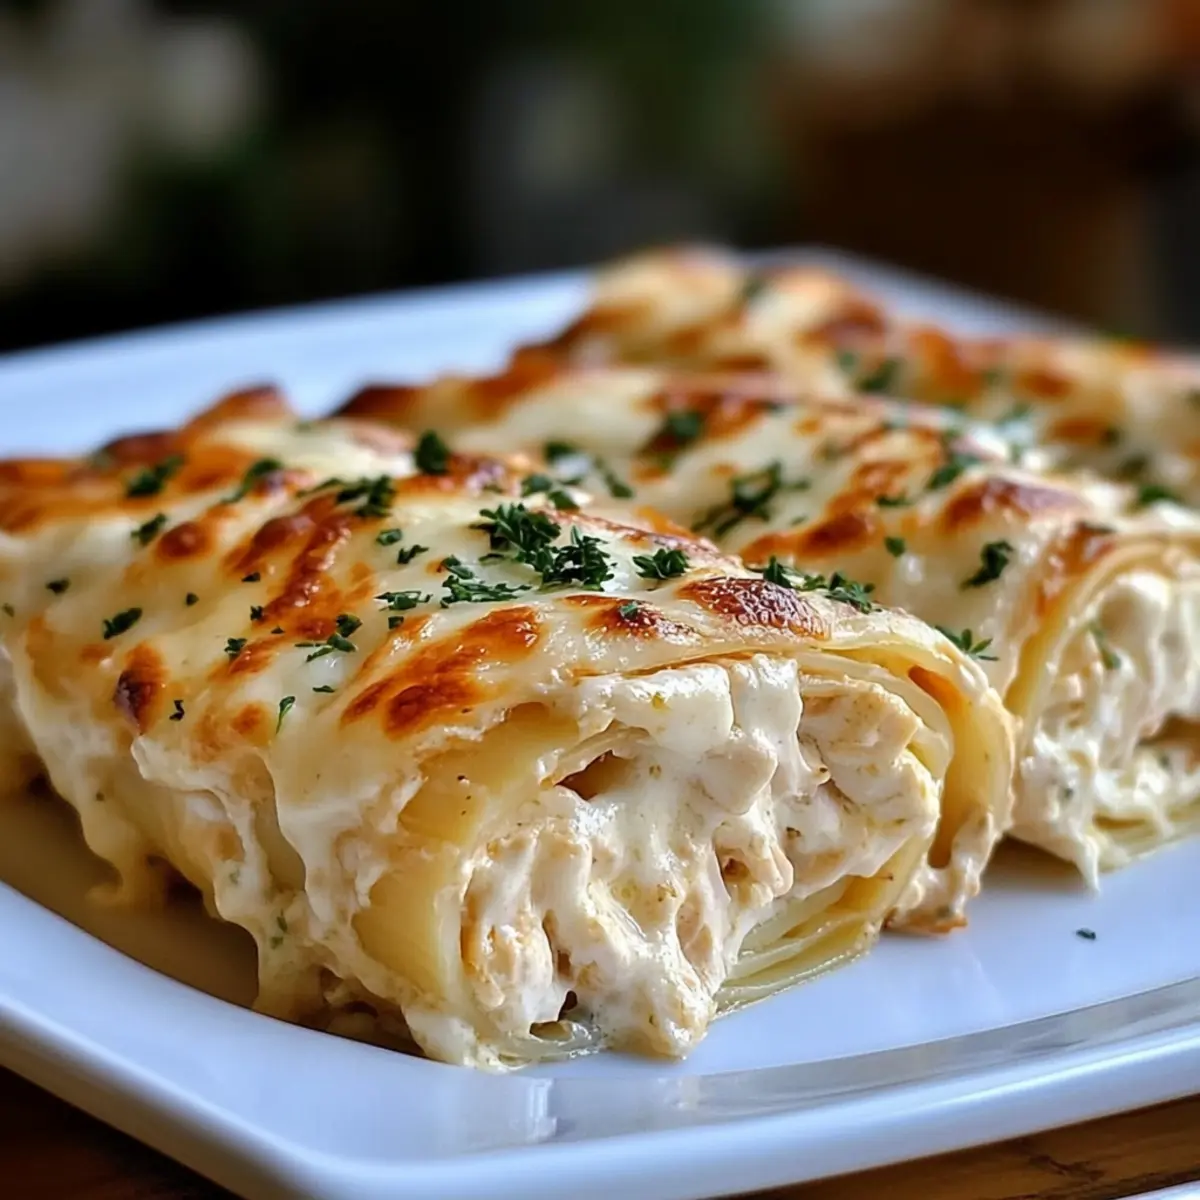
Comforting Chicken Alfredo Lasagna Rolls for Cozy Nights
Ingredients
Equipment
Method
- Preheat your oven to 375°F (190°C).
- Cook the lasagna noodles according to package instructions (about 8-10 minutes). Drain and lay flat to cool.
- Combine cooked chicken, ricotta cheese, half of the mozzarella, and spinach in a bowl. Season with salt and pepper.
- Spread a layer of Alfredo sauce on the bottom of the baking dish.
- Assemble the rolls by placing filling on each noodle, rolling them up, and placing them seam-side down in the dish.
- Pour remaining Alfredo sauce on top and sprinkle with remaining mozzarella and Parmesan.
- Cover with foil and bake for 25 minutes. Remove foil and bake for another 10-15 minutes until bubbly.
- Let cool for 5-10 minutes before serving.