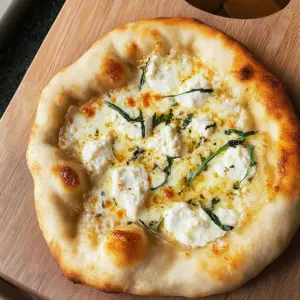
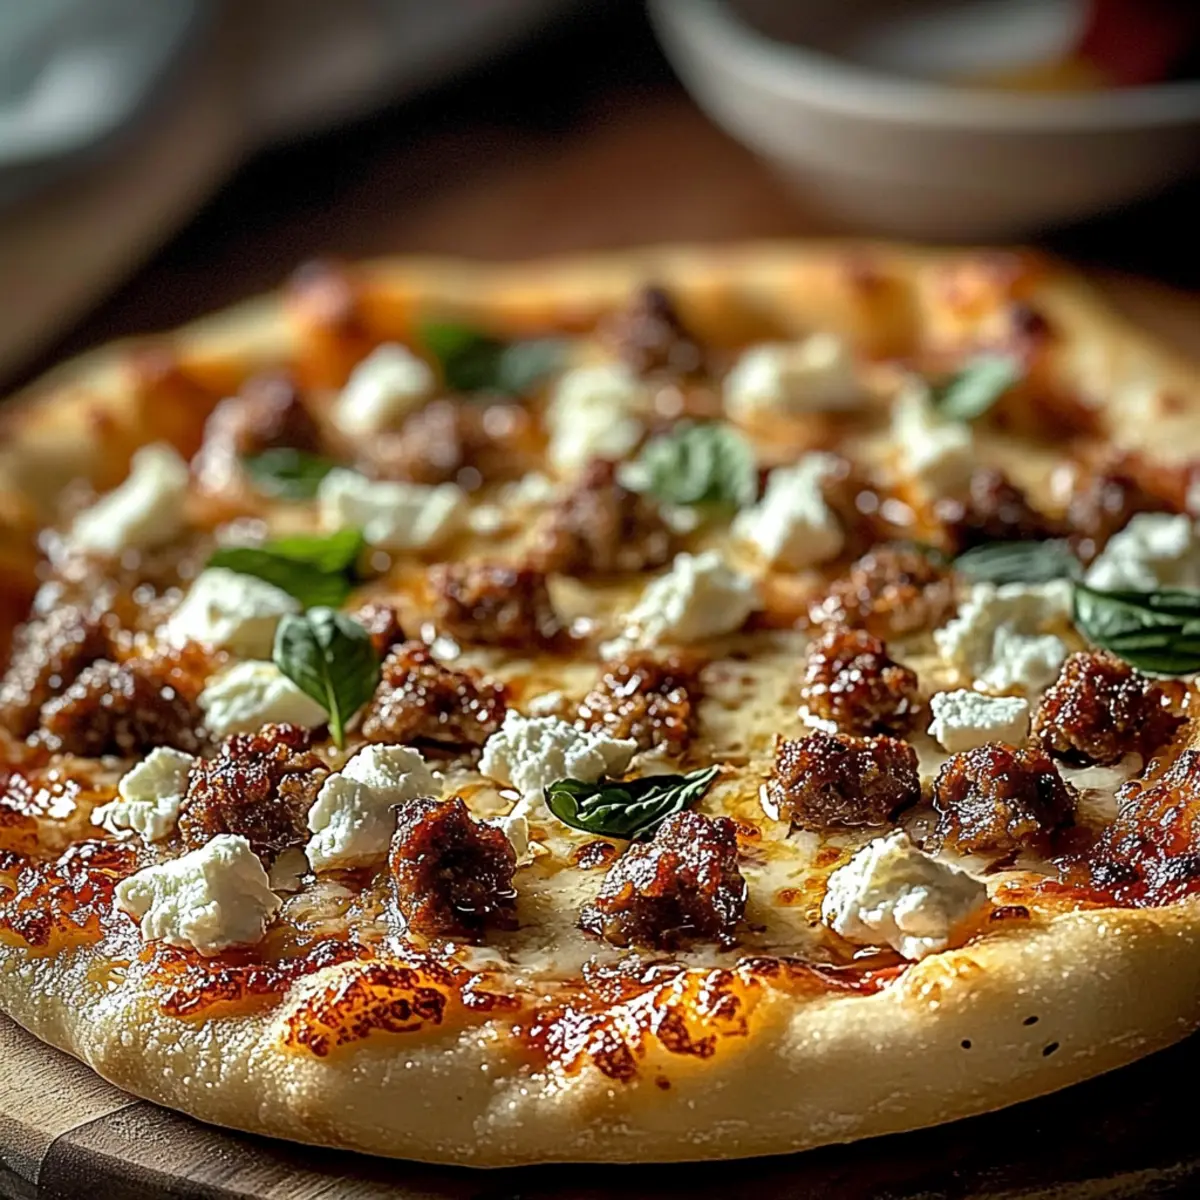
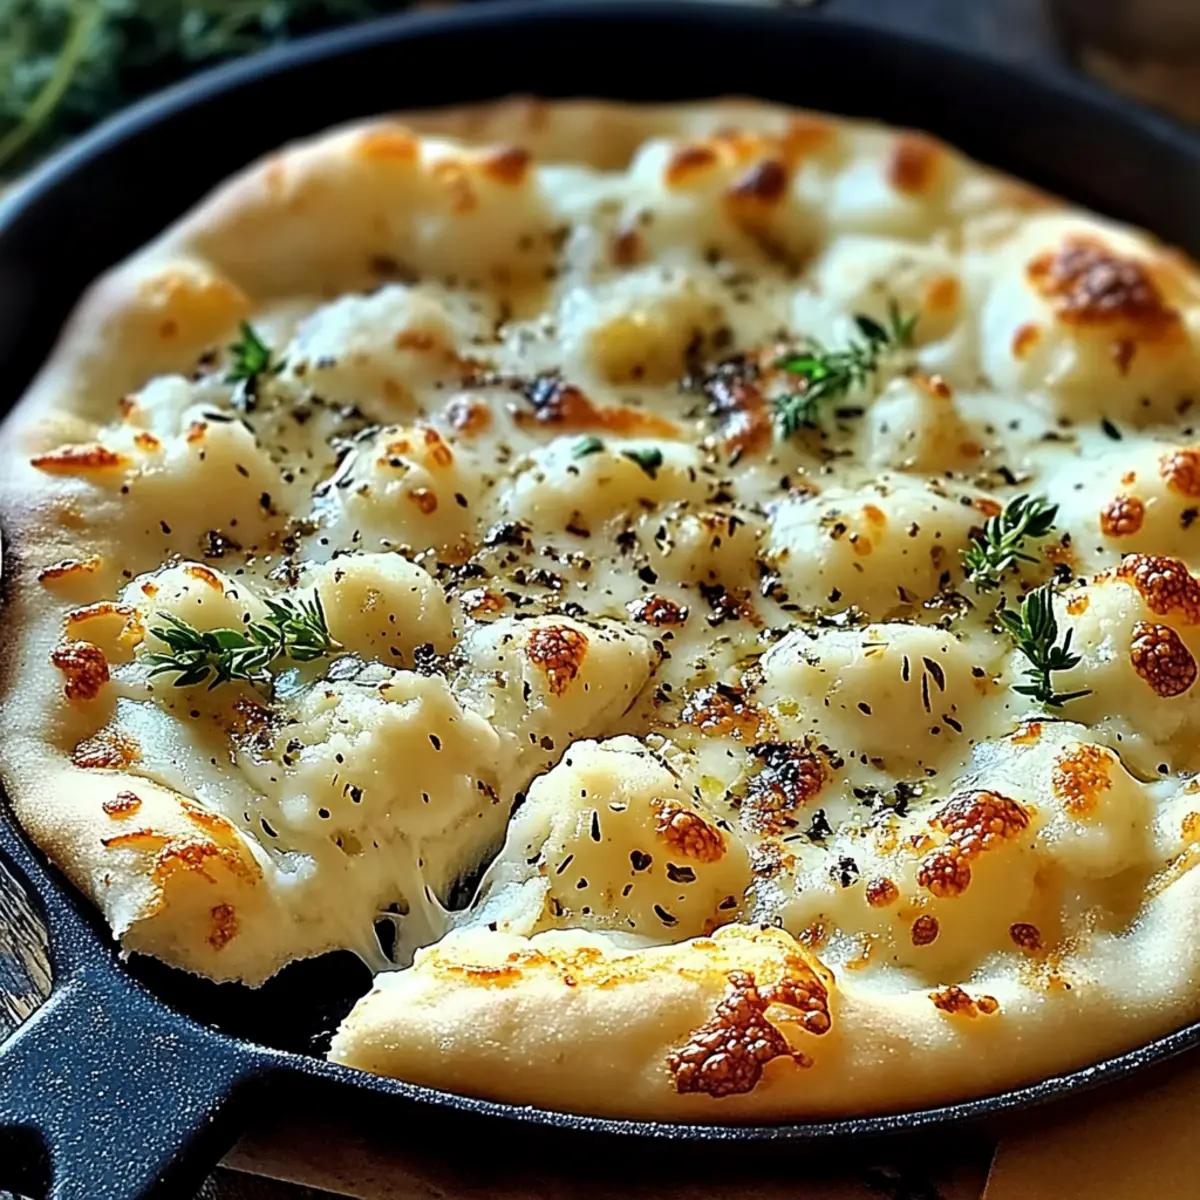
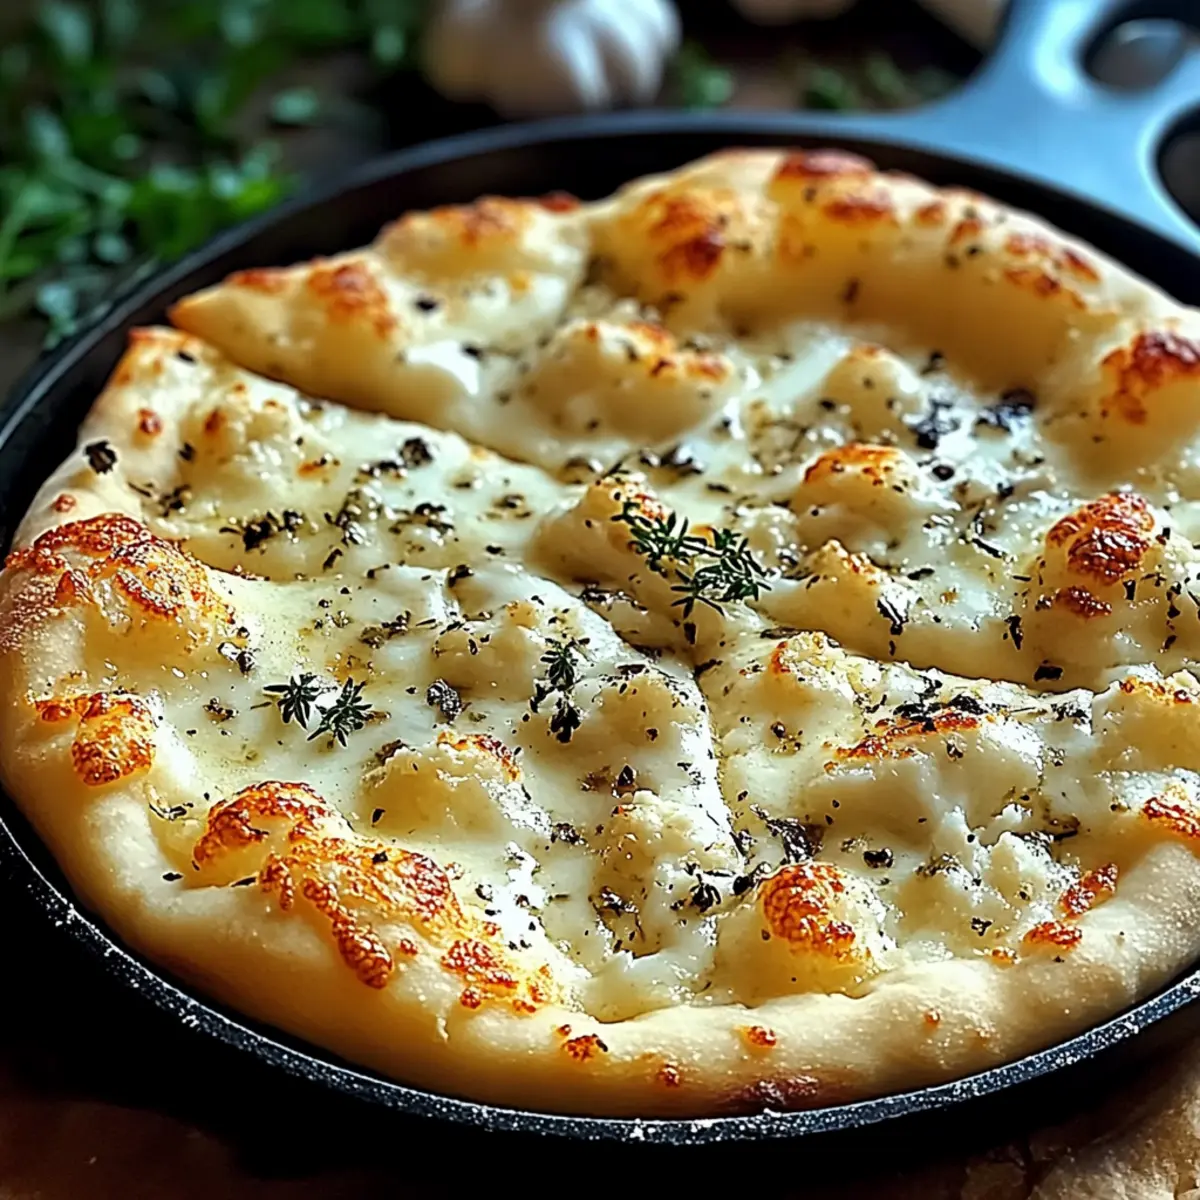
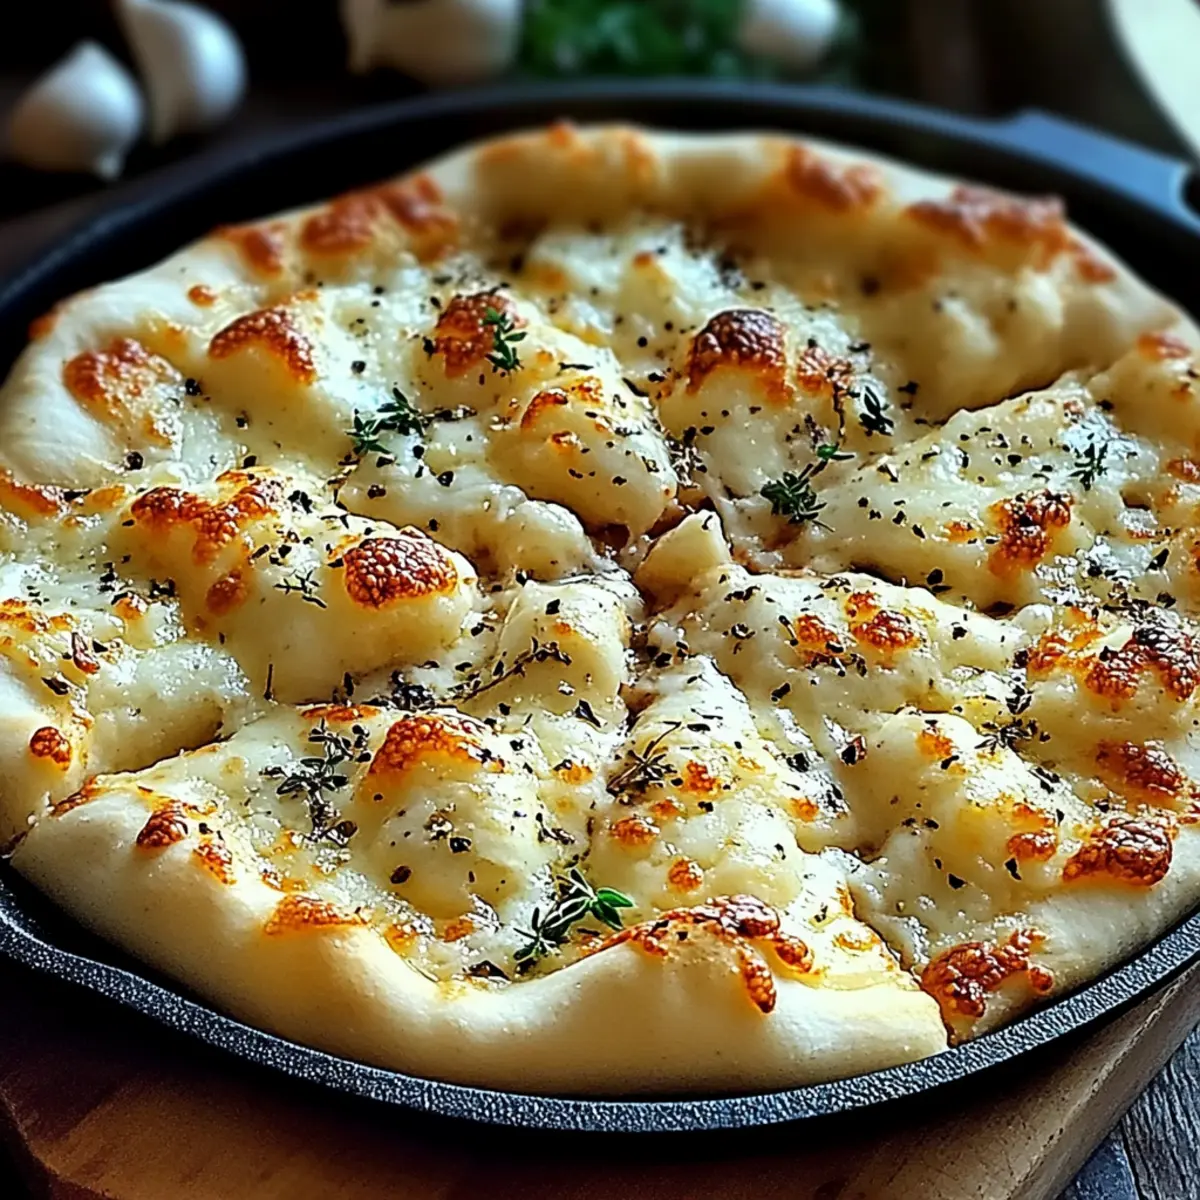
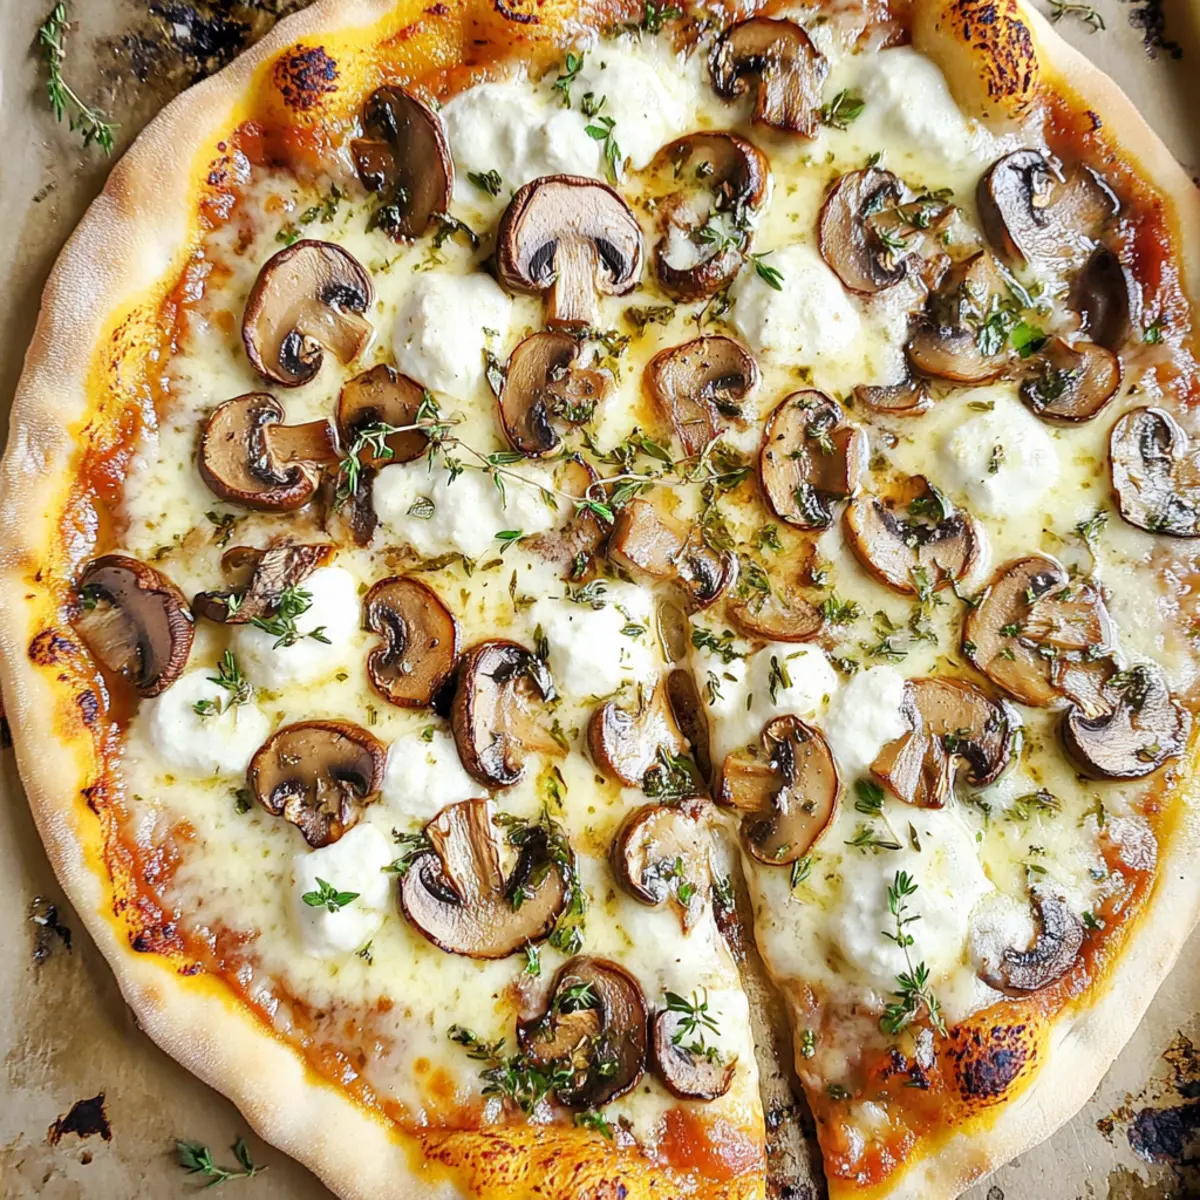
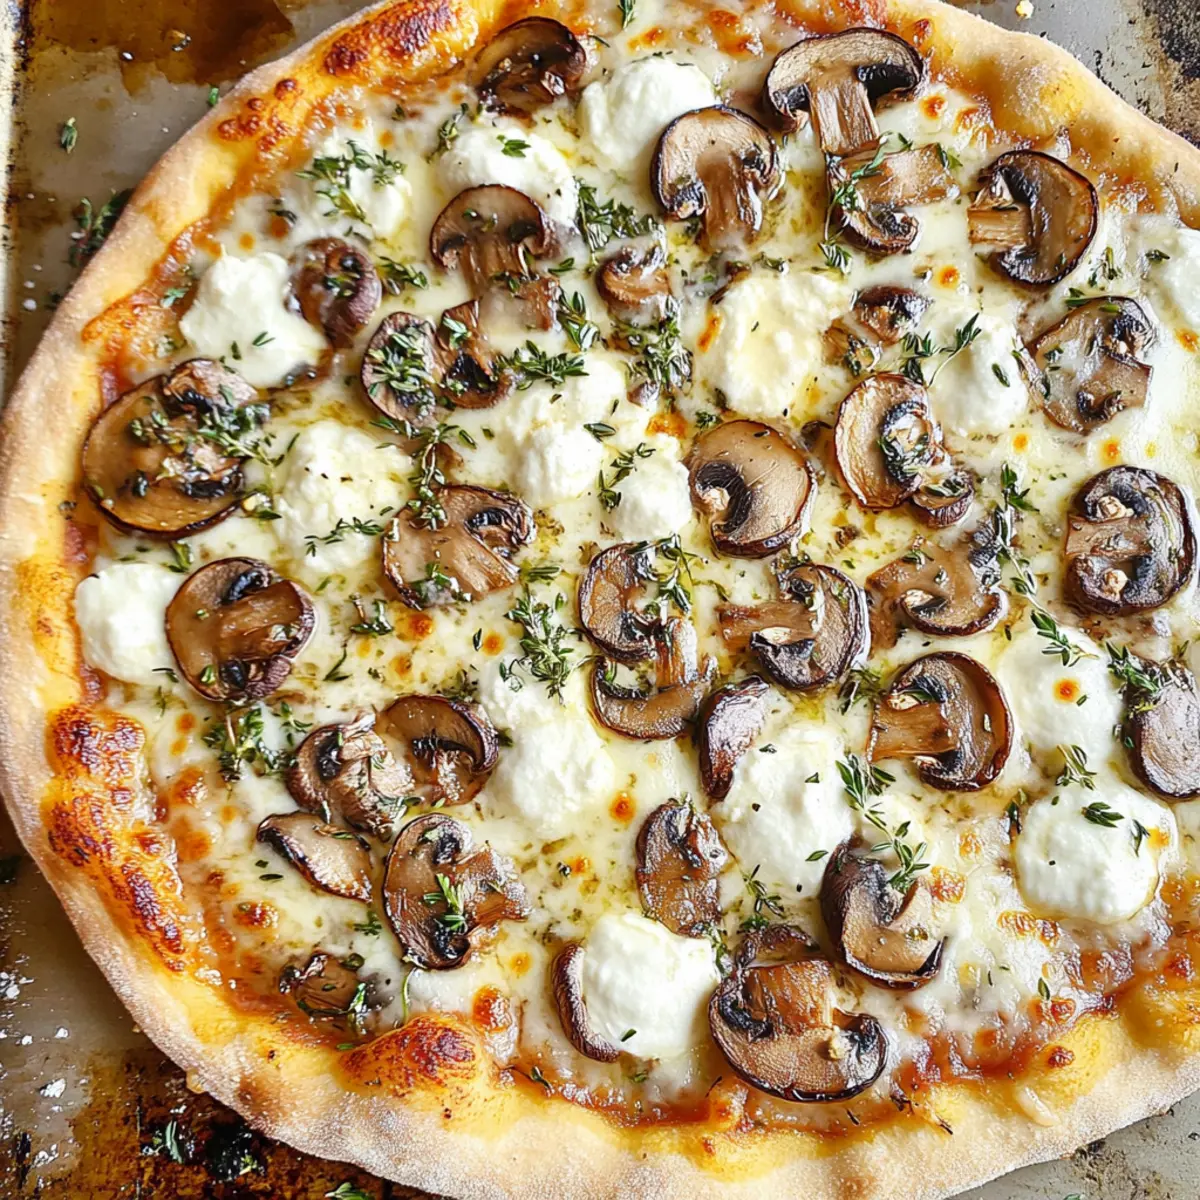
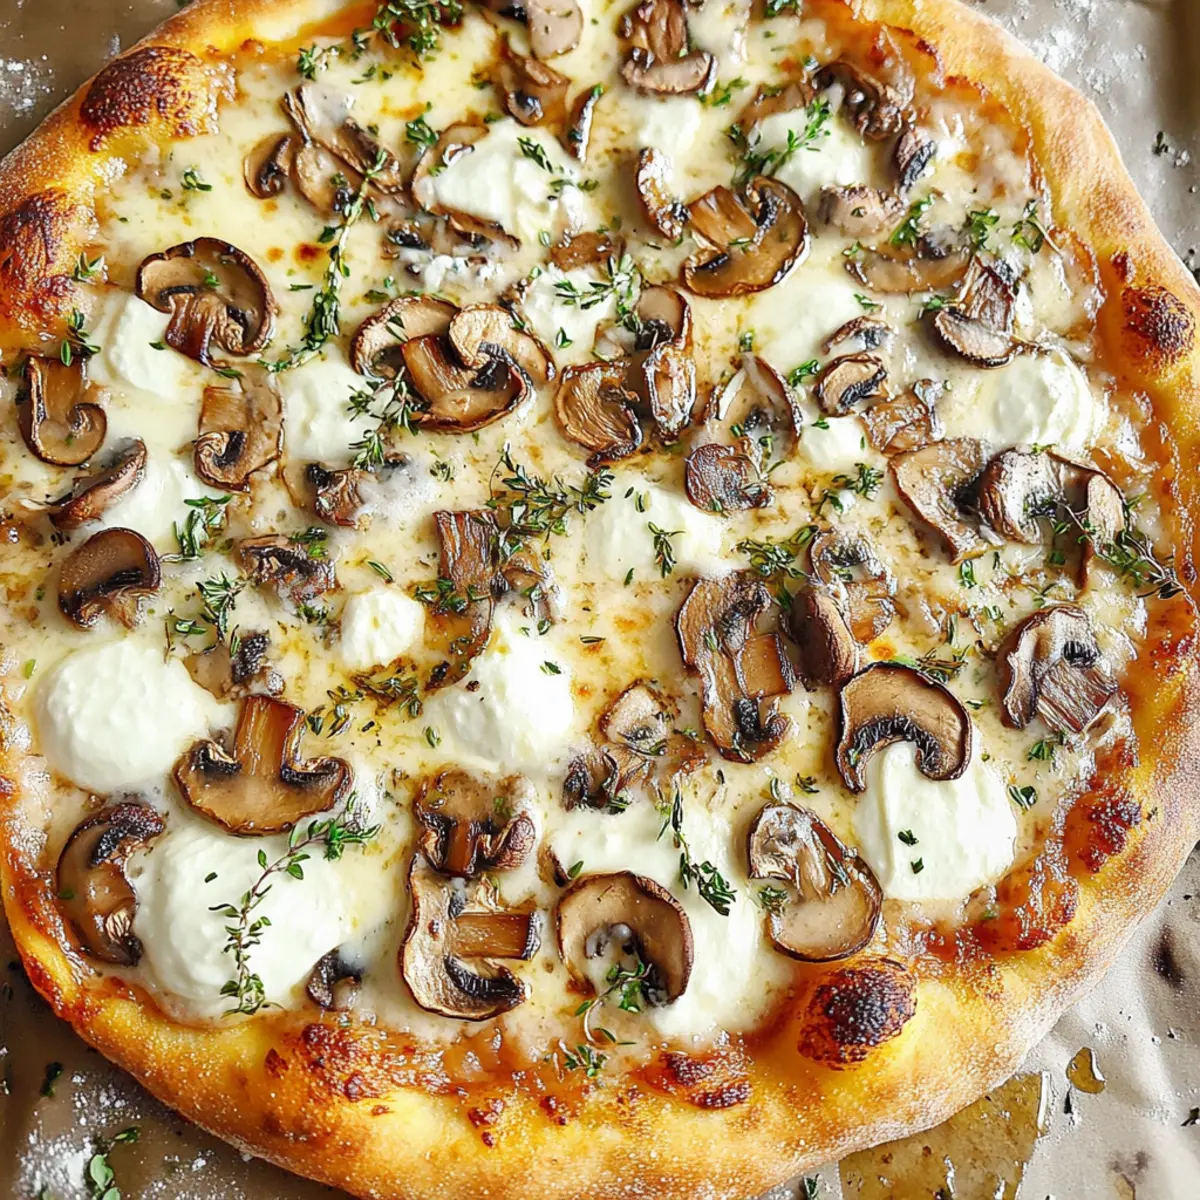
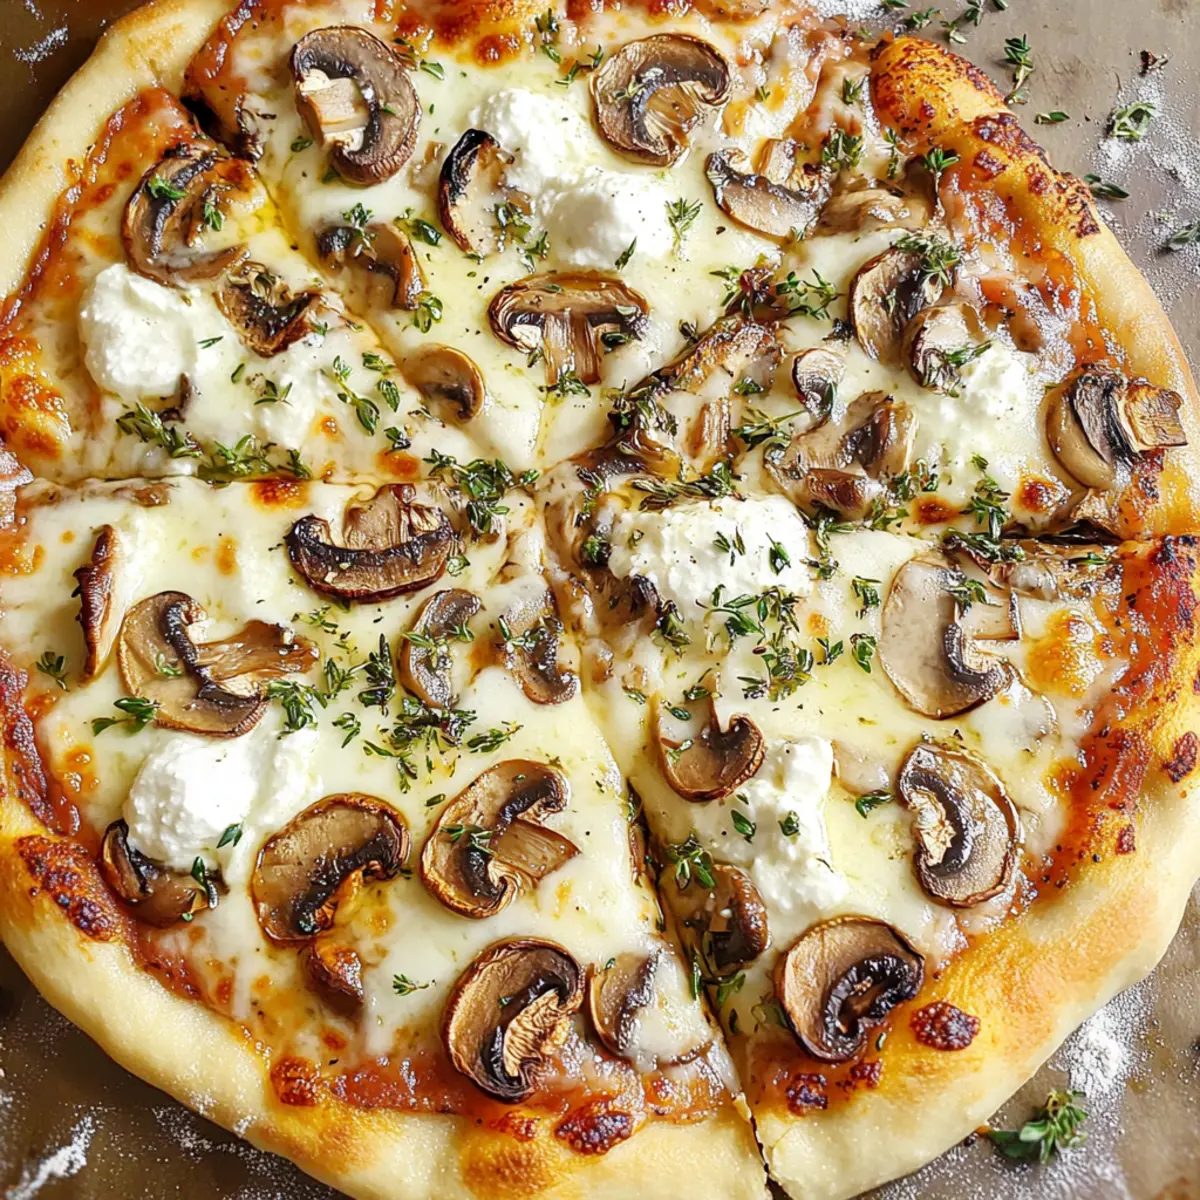
As I pulled my latest creation from the oven, the warm aroma of garlic and sautéed mushrooms filled the kitchen—a comforting hug on a chilly evening. This Creamy White Pizza with Garlic Herb Mushrooms brings together the melty goodness of mozzarella and ricotta, creating an indulgent yet quick meal that will have everyone reaching for seconds. Whether you're hosting a casual get-together or enjoying a cozy night in, this vegetarian delight offers the perfect balance of flavors and textures that make it a true crowd-pleaser. Plus, it’s a fantastic way to elevate your homemade pizza game without breaking a sweat! Ready to discover how to whip up this scrumptious dish? Let’s dive in!
Why is this White Mushroom Pizza a must-try?
Simplicity at Its Best: Not only is this recipe quick to whip up, but it also uses everyday ingredients you likely already have in your kitchen.
Rich, Savory Flavor: The combination of garlic, cremini mushrooms, and two cheeses gives each bite an umami explosion that you won’t forget!
Perfect for Any Occasion: Serve this pizza for casual dinners or special gatherings—it's sure to impress family and friends alike.
Comforting and Satisfying: With its gooey mozzarella and creamy ricotta, this pizza provides a comforting experience, reminiscent of a cozy meal in your favorite Italian restaurant.
Versatile at Heart: Feel free to mix in sautéed spinach or swap cheeses for more variety. For an extra treat, serve it alongside a simple salad or some garlic knots to elevate your meal!
White Mushroom Pizza Ingredients
• Get ready to enjoy this cozy delight!
For the Pizza Base
- Olive Oil – Adds flavor and helps crisp the crust. Can use any neutral oil.
- Pizza Dough (1 pound) – The foundation of your pizza; can be homemade or store-bought. Whole wheat dough is a healthier option.
- Yellow Cornmeal – Sprinkled on the baking surface to prevent sticking and create a crunchy bottom. Flour works as a substitute if needed.
For the Toppings
- Unsalted Butter – Provides richness and enhances the flavor of sautéed garlic and mushrooms. Use additional olive oil for a dairy-free alternative.
- Garlic (minced) – Adds aromatic depth; fresh garlic ensures the best flavor.
- Cremini Mushrooms (thinly sliced) – The main topping; they offer a delicious umami flavor. Substitute with button mushrooms or shiitake if preferred.
- Dried Thyme and Oregano – Give a lovely herbal note to the mushroom mix; fresh herbs can be used for three times the amount.
- Kosher Salt and Freshly Ground Black Pepper – Essential for enhancing overall flavor; adjust to taste.
For the Cheese Layer
- Wisconsin Fresh Mozzarella Cheese (8 ounces) – Melty cheese topping for that gooey texture. Any fresh mozzarella will work too.
- Wisconsin Ricotta Cheese (1 cup) – Creamy dollops that provide a luscious texture; cottage cheese can be a lower-fat substitute.
Add these ingredients to your shopping list for a delightful White Mushroom Pizza that’s sure to impress!
Step‑by‑Step Instructions for Creamy White Pizza with Garlic Herb Mushrooms
Step 1: Preheat and Prepare the Baking Surface
Start by preheating your oven to 450°F (232°C) to ensure a hot environment for your Creamy White Pizza. While the oven heats, generously grease a baking sheet or pizza pan with olive oil, ensuring an even coating that will help create a crispy crust. Sprinkle yellow cornmeal on the surface to prevent sticking and add a delightful crunch to the bottom of the pizza.
Step 2: Sauté the Aromatics and Mushrooms
In a large skillet, melt 2 tablespoons of unsalted butter over medium heat. Once it’s bubbling, add 3 cloves of minced garlic and sauté for about 1-2 minutes until fragrant. Next, toss in 8 ounces of thinly sliced cremini mushrooms, 1 teaspoon of dried thyme, and 1 teaspoon of dried oregano. Season with kosher salt and freshly ground black pepper. Cook for 5-6 minutes, stirring occasionally until the mushrooms soften and take on a lovely golden brown color.
Step 3: Roll Out the Pizza Dough
On a clean, cornmeal-dusted surface, take your 1-pound pizza dough and roll it out into a 12-inch round. Use a rolling pin to achieve a uniform thickness, keeping an eye on the edges for evenness. If the dough resists stretching, let it rest for a few minutes. Prepare for the grand assembly of your delicious White Mushroom Pizza by ensuring it retains a nicely shaped round form.
Step 4: Assemble the Pizza
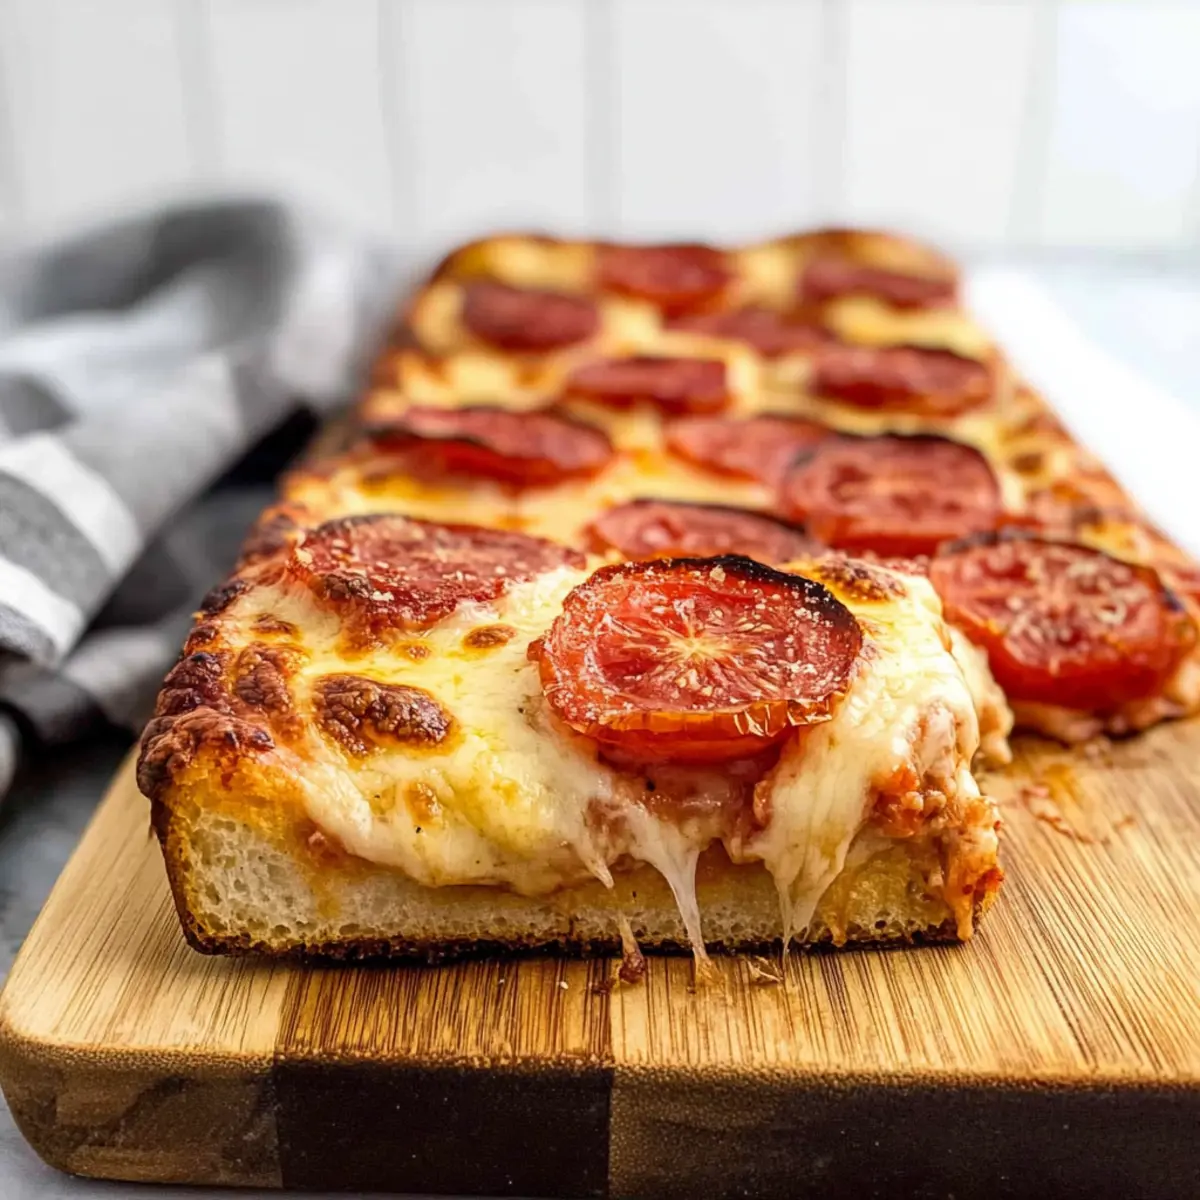
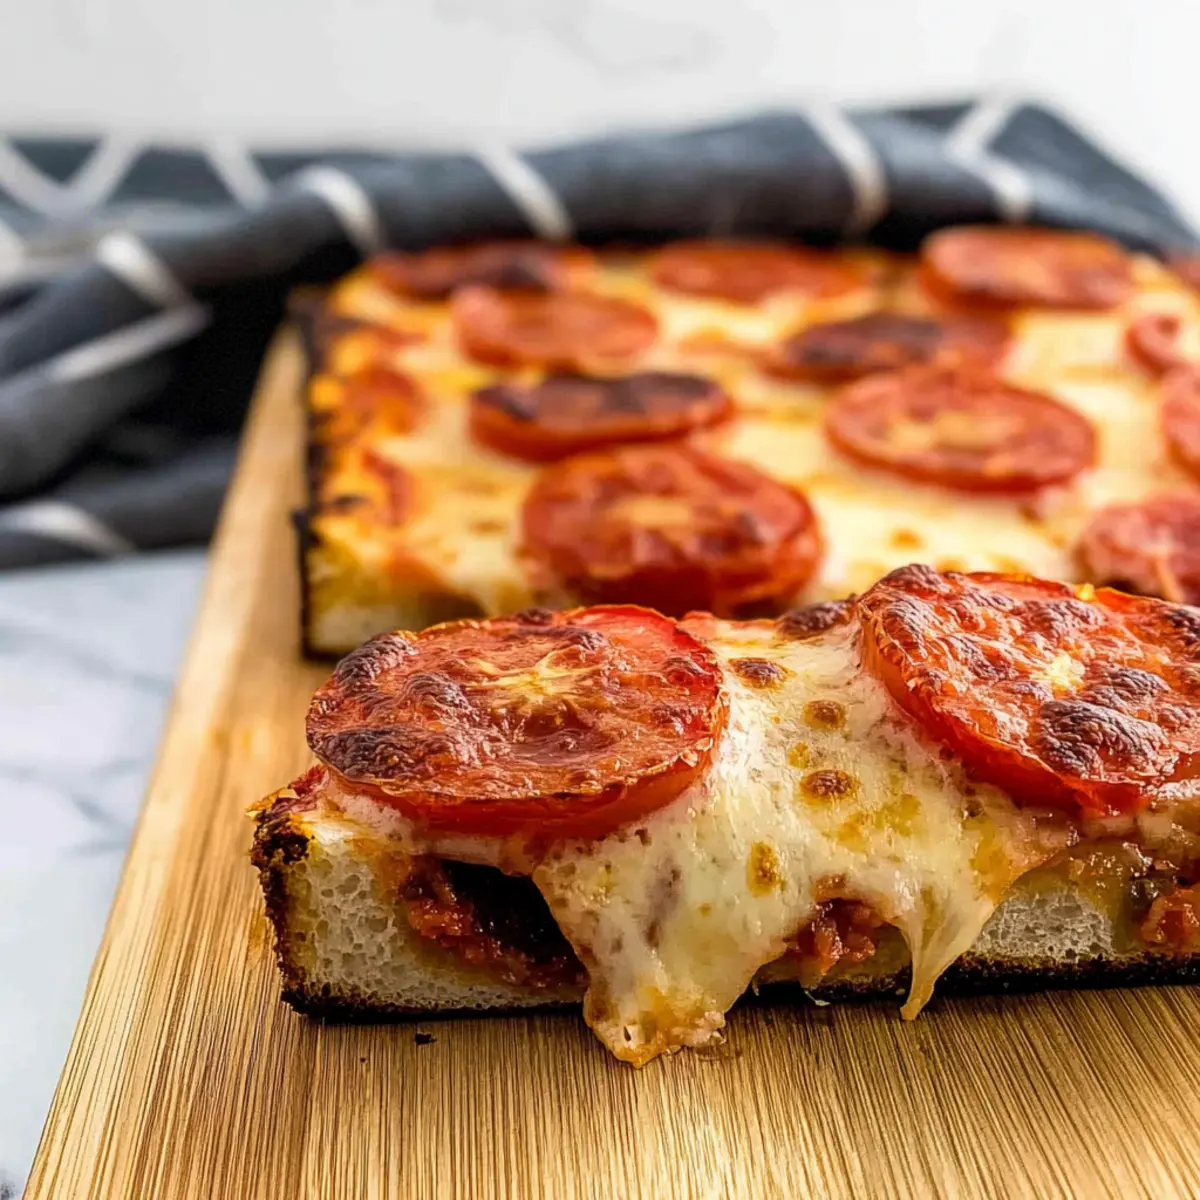
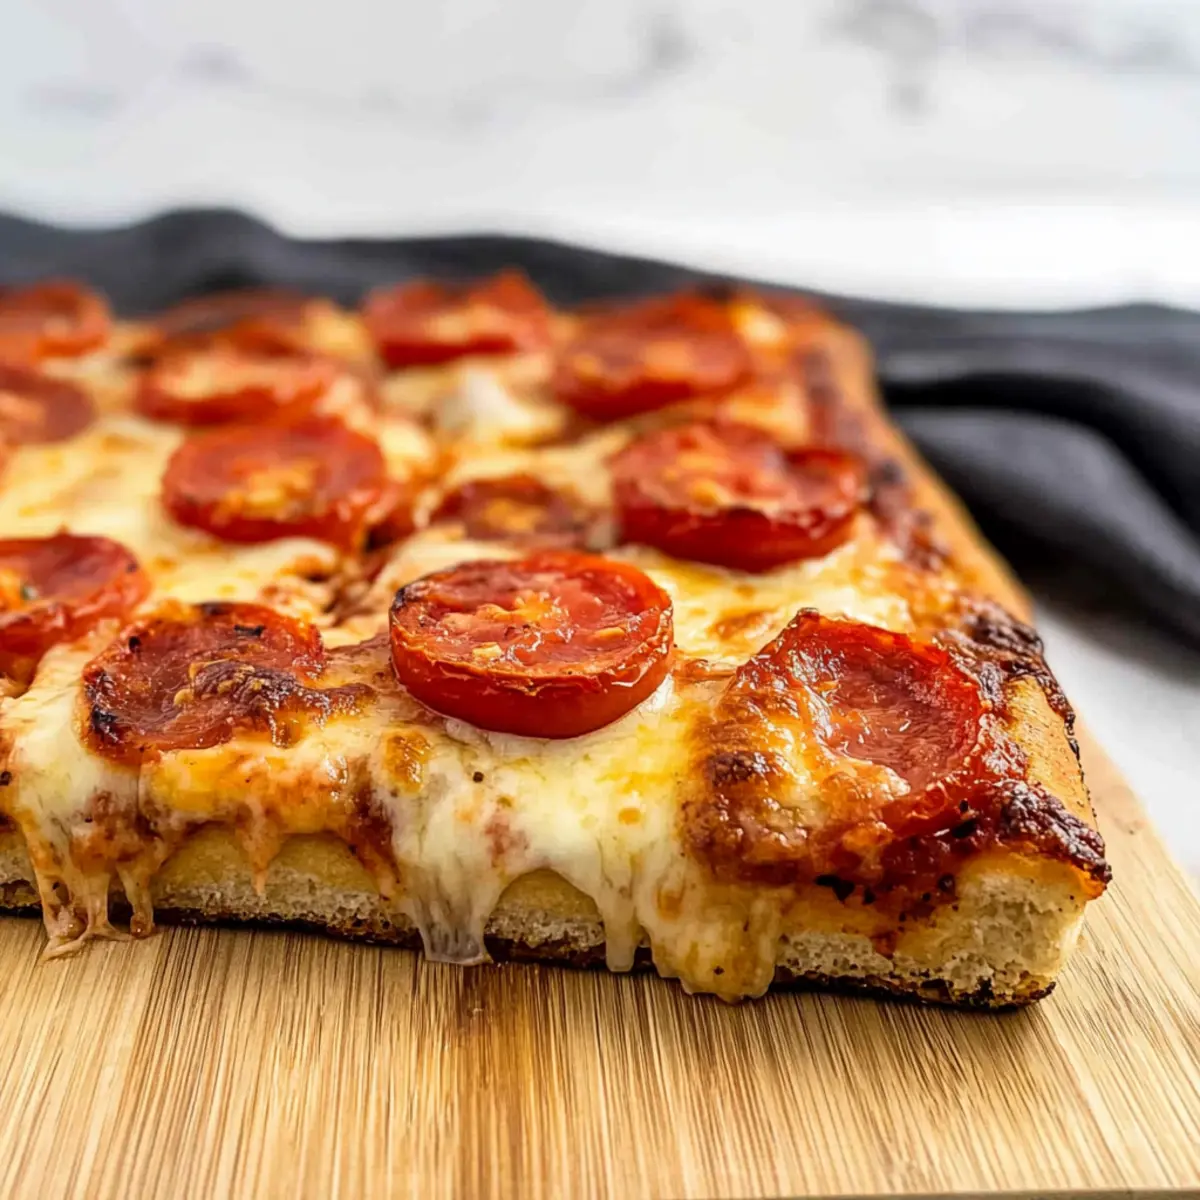
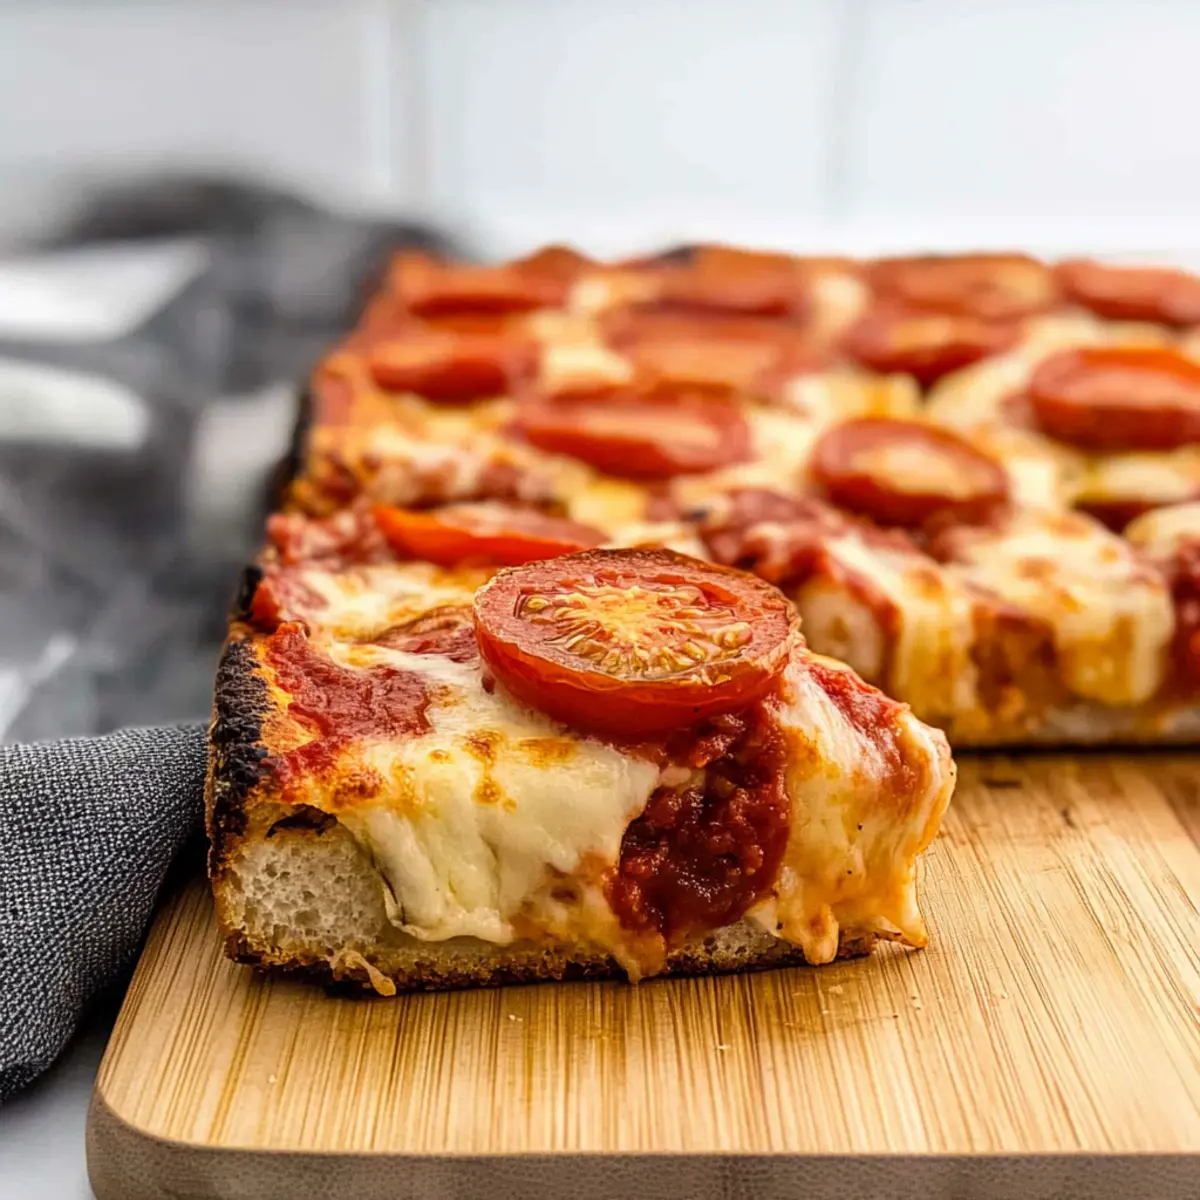
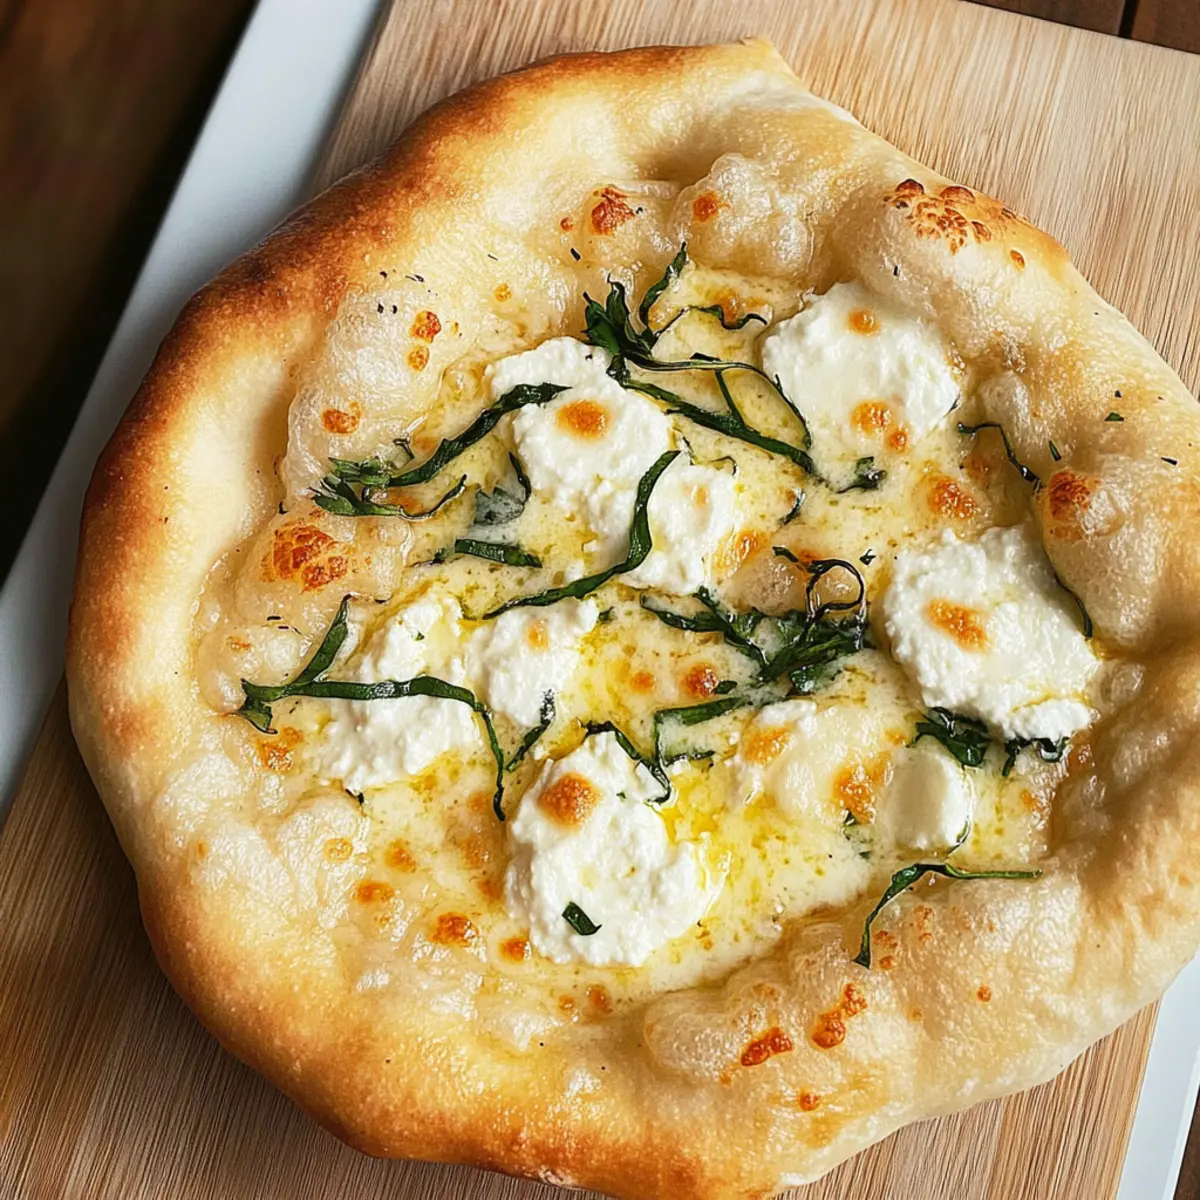
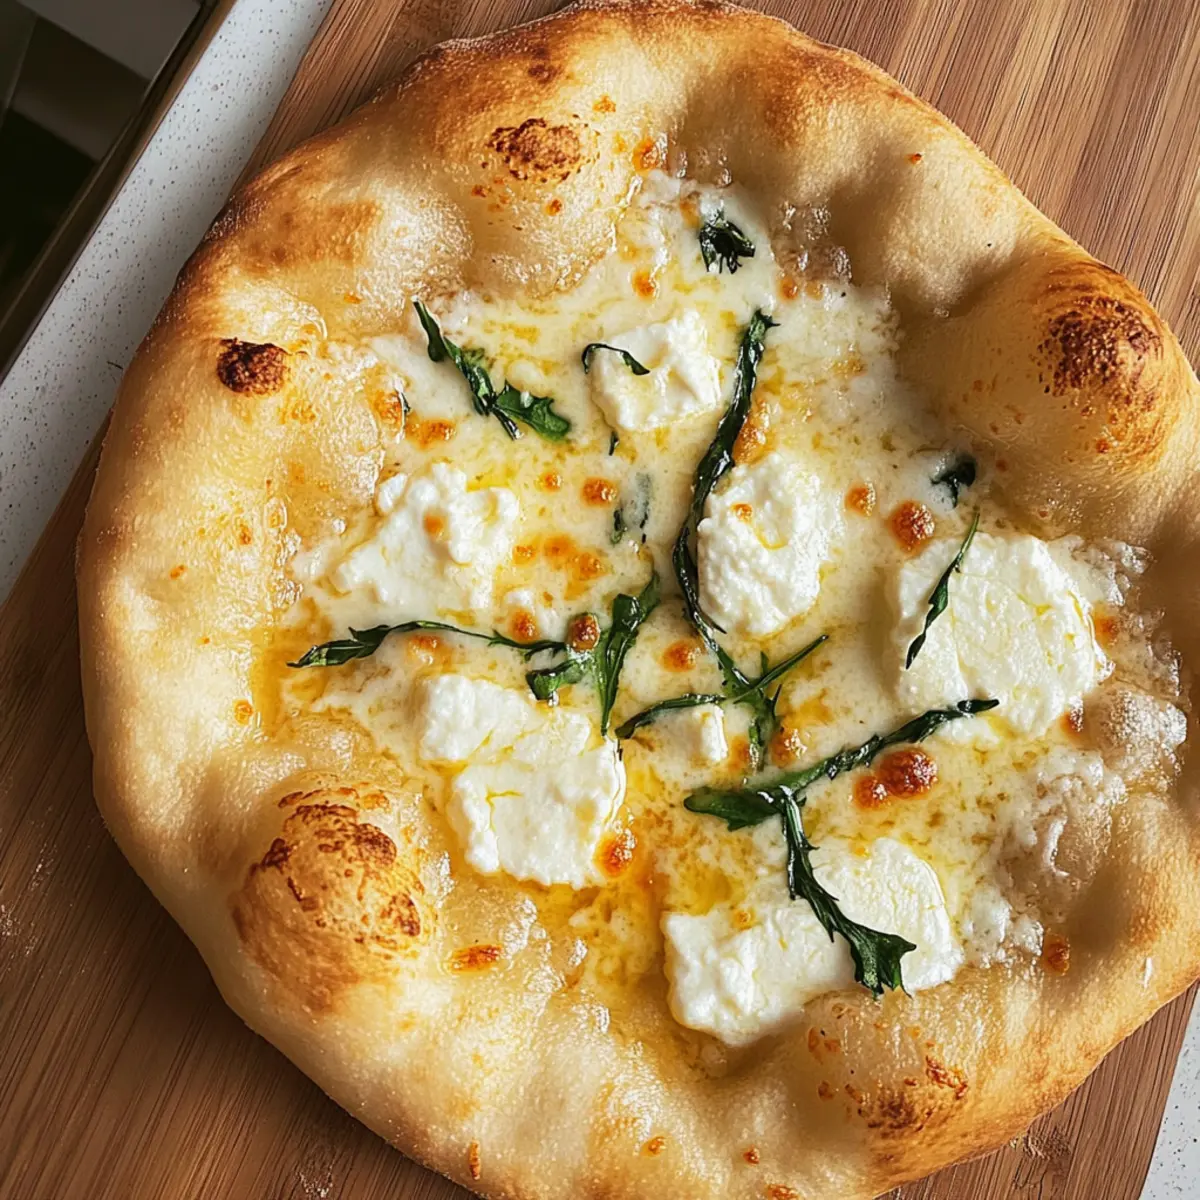
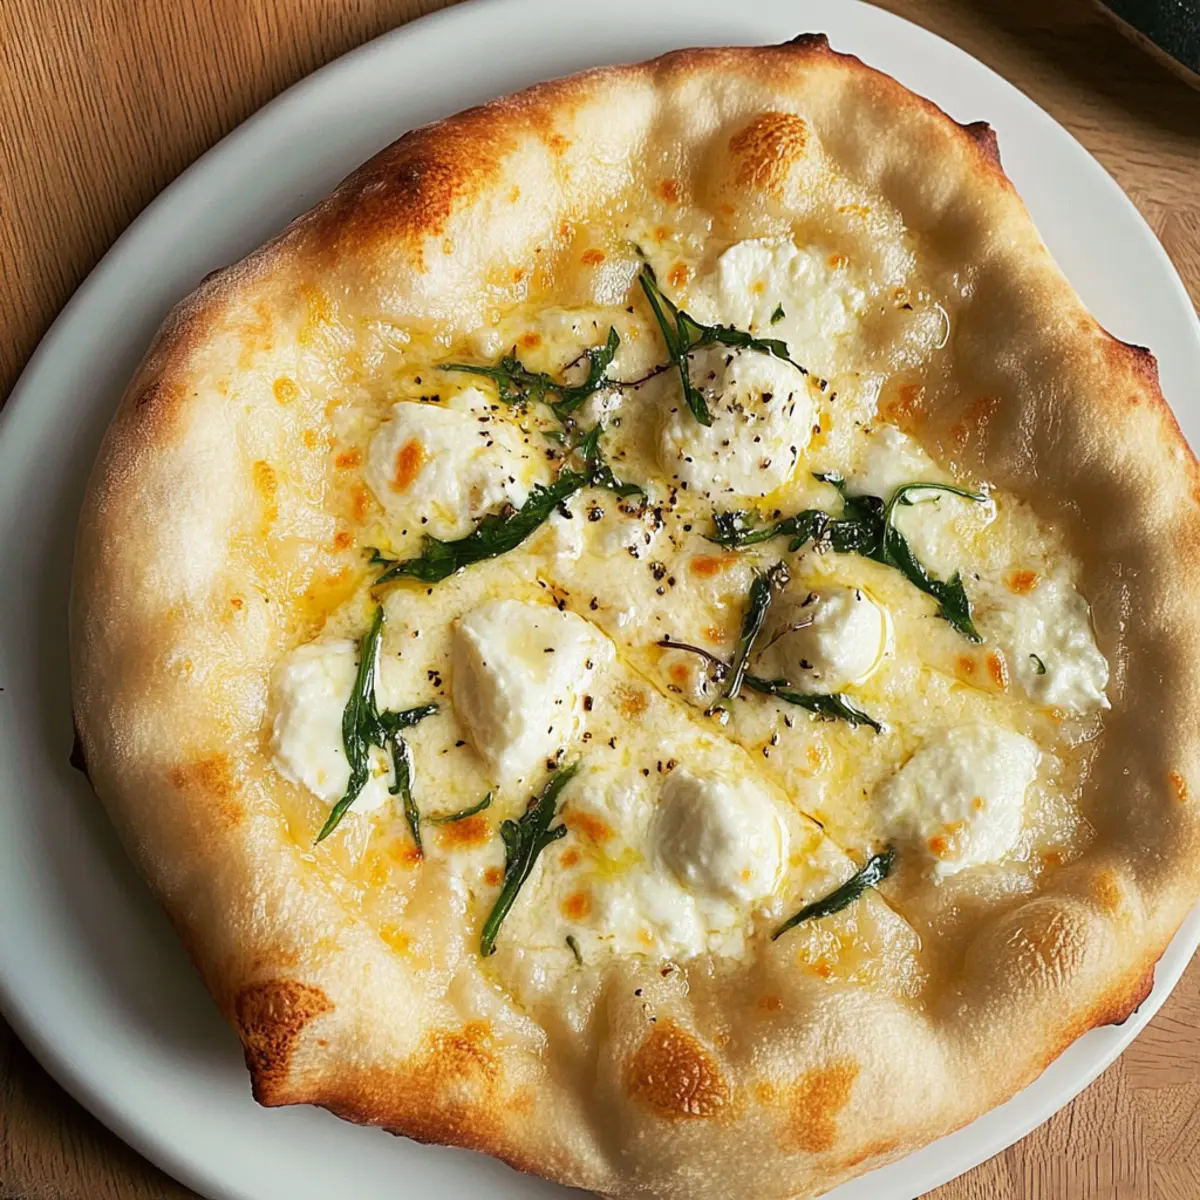
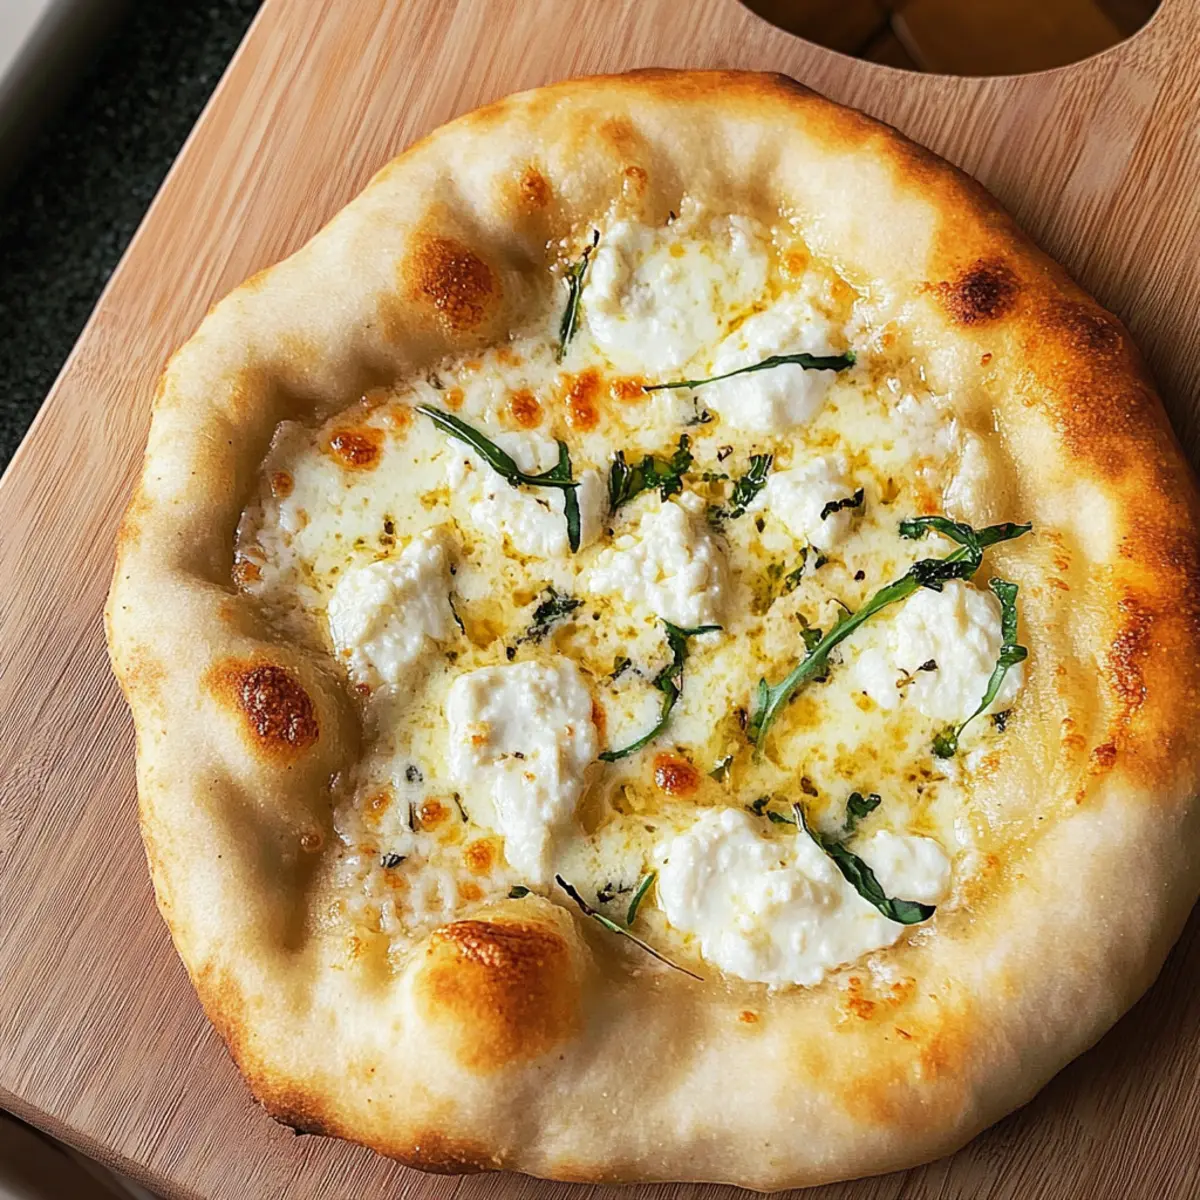
Carefully transfer your rolled-out dough to the prepared baking pan. Begin layering your toppings by evenly spreading 8 ounces of fresh mozzarella cheese across the surface, followed by generous dollops of 1 cup of ricotta cheese. Finally, evenly distribute the sautéed mushroom mixture on top, ensuring each slice will be bursting with flavor.
Step 5: Bake the Pizza
Place the assembled pizza into your preheated oven and bake for 15-20 minutes. Keep an eye on it as it bakes; you're looking for a golden brown crust and bubbling, melted cheeses. The tantalizing aroma of your White Mushroom Pizza wafting through the kitchen will surely whet your appetite as you await the finishing touches.
Step 6: Serve and Enjoy
Once your pizza is baked to perfection, remove it from the oven and let it cool for a minute. Cut the Creamy White Pizza into slices, savoring the gooey mozzarella and creamy ricotta atop the flavorful mushrooms. Serve it hot and enjoy this delightful dish with family or friends, relishing every bite of comfort food joy!
How to Store and Freeze White Mushroom Pizza
Fridge: Store leftovers in an airtight container for up to 3 days. Reheat in the oven at 350°F until warmed through to maintain the pizza's texture.
Freezer: Wrap slices tightly in plastic wrap or foil, then place in a freezer-safe container for up to 2 months. Thaw in the fridge before reheating.
Reheating: For the best taste and texture, reheat in the oven rather than the microwave. Bake at 350°F for about 10-15 minutes until heated.
Freshness Tip: For optimal flavor, consume your White Mushroom Pizza within a few days, and avoid letting it sit out for more than 2 hours to ensure food safety.
Expert Tips for White Mushroom Pizza
-
Mushroom Prep: Ensure mushrooms are well-dried: Pat them dry with paper towels to avoid excess moisture that can make your pizza soggy.
-
Dough Handling: Be gentle with the dough: If it resists stretching, let it rest for a few minutes before rolling to prevent tearing.
-
Flavor Boost: Add greens: Consider mixing sautéed spinach or arugula into the mushroom mixture for added nutrition and flavor.
-
Cheese Variations: Experiment with cheeses: Swap in different cheeses like goat or fontina for unique tastes and textures in your White Mushroom Pizza.
-
Oven Check: Keep an eye on baking time: Ovens can vary, so start checking around 15 minutes to ensure a perfectly golden crust.
Make Ahead Options
These Creamy White Pizza with Garlic Herb Mushrooms are perfect for meal prep enthusiasts! To save time on busy weeknights, you can sauté the mushrooms and prepare the cheese mixture up to 24 hours in advance. Simply store the mushroom mix in an airtight container in the refrigerator until you're ready to assemble the pizza. You can also roll out the dough in advance, just wrap it well to prevent it from drying out. When you're ready to enjoy your White Mushroom Pizza, preheat the oven, assemble with the cheese and mushroom mixture, and bake for 15-20 minutes. This way, you’ll have a delicious homemade pizza that’s ready to delight your family with minimal effort!
What to Serve with Creamy White Pizza with Garlic Herb Mushrooms
Elevate your pizza night by pairing this comforting dish with complementary sides and drinks that enhance its delicious flavors.
-
Simple Side Salad: A light, refreshing salad with mixed greens and a tangy vinaigrette balances the rich, cheesy pizza. The crispness of fresh vegetables adds a contrast that brightens every bite.
-
Garlic Knots: Soft, buttery garlic knots are perfect for sopping up any leftover cheese or sauce, making your meal feel indulgent and complete while keeping it cozy.
-
Roasted Vegetables: Roasted seasonal veggies offer a savory depth that harmonizes with the pizza's creamy texture and earthy mushroom flavor. The delightful caramelization enhances the overall experience.
-
Chilled White Wine: A glass of chilled Sauvignon Blanc pairs beautifully, enhancing the creamy cheese's richness while providing a refreshing, crisp counterpoint to the dish's warmth.
-
Herbed Olive Oil Dip: Serve a small dish of herbed olive oil for dipping your crusts. This simple addition brings an extra layer of flavor and encourages everyone to enjoy every last bite!
-
Chocolate Mousse: For dessert, a light and airy chocolate mousse provides a perfect sweet closure to your meal, with its creamy texture resonating well after the savory pizza.
-
Sparkling Water with Lemon: Quench your thirst with sparkling water adorned with a twist of lemon. Its effervescence refreshes the palate, making it a delightful addition to a cozy dinner table.
White Mushroom Pizza Variations
Feel free to customize this delicious recipe! Let your creativity shine as you explore exciting twists and substitutions for your pizza.
-
Meat Lover's Delight: Add cooked sausage or prosciutto on top for a savory protein boost that complements the rich cheeses beautifully.
-
Fresh Greens: Incorporate sautéed spinach or arugula for a burst of color and a fresh, earthy flavor that brightens each bite.
-
Cheese Swap: Try using goat cheese or fontina instead of mozzarella and ricotta for a unique flavor profile that surprises and delights.
-
Spicy Kick: Sprinkle red pepper flakes or drizzle with hot honey just before serving to introduce a delightful heat that elevates the take on comfort food.
-
Nutty Touch: Add crushed walnuts or pine nuts on top for extra crunch and a nutty flavor that contrasts beautifully with the creamy cheeses.
-
Herbaceous Twist: Fresh basil or thyme added on top just before serving can amplify the aroma, giving a pop of freshness that complements the rich flavors.
-
Veggie Heaven: Mix in roasted bell peppers or zucchini with your mushrooms; it adds flavor and nutrition, making the pizza even more wholesome.
-
Gourmet Touch: Drizzle a bit of truffle oil over the finished pizza for a luxurious finishing touch that elevates the overall flavor experience.
For more ideas on mixing flavors, try pairing this with sautéed greens or additional herbs, and don't forget to enjoy on the side with some of those delectable garlic knots that would make your meal complete!
White Mushroom Pizza Recipe FAQs
What type of mushrooms should I use for this pizza?
Absolutely! Cremini mushrooms are a fantastic choice as they offer a rich umami flavor. However, if they're not available, feel free to use button mushrooms or shiitake mushrooms for a slightly different taste profile.
How should I store leftovers of my White Mushroom Pizza?
Very simple! Just place any leftover slices in an airtight container and store them in the refrigerator for up to 3 days. To reheat, pop them in the oven at 350°F (175°C) until warmed through for a deliciously crispy crust.
Can I freeze this White Mushroom Pizza?
Yes, you can! Wrap individual slices tightly in plastic wrap or foil and store them in a freezer-safe container. It’s good for up to 2 months. When you're ready to enjoy it again, let it thaw in the refrigerator overnight, and reheat in the oven for the best results.
What’s the best way to avoid a soggy pizza?
To prevent sogginess, make sure to dry the sautéed mushrooms well before adding them to the pizza. Pat them down with paper towels to remove excess moisture. Additionally, preheating your oven adequately and using a cornmeal dusting on the baking surface helps keep that crust crispy!
Are there any dietary considerations I should keep in mind?
If you have dietary restrictions, this White Mushroom Pizza is vegetarian. For a dairy-free option, swap the butter with olive oil and use dairy-free cheese alternatives. Be mindful of any specific allergies related to mushrooms or dairy products and adjust accordingly.
Decadent White Mushroom Pizza for Cozy Nights In
Ingredients
Equipment
Method
- Preheat your oven to 450°F (232°C) and grease a baking sheet or pizza pan with olive oil. Sprinkle yellow cornmeal on the surface.
- Melt unsalted butter in a skillet over medium heat. Add garlic and sauté for 1-2 minutes. Stir in sliced mushrooms, thyme, oregano, salt, and pepper. Cook for 5-6 minutes until mushrooms are tender.
- Roll out the pizza dough on a cornmeal-dusted surface to a 12-inch round.
- Transfer the rolled-out dough to the prepared baking pan. Spread mozzarella cheese, followed by dollops of ricotta. Top with the sautéed mushroom mixture.
- Bake in the oven for 15-20 minutes until the crust is golden brown and cheese is bubbling.
- Remove, cool for a minute, slice, and serve hot.