There's nothing quite like the comforting aroma of Chicken Satay Rice Bowls wafting through the kitchen, a dish that brings together the best of vibrant flavors and textures. With tender chicken thighs, fluffy basmati rice, and a luscious peanut sauce, this quick and easy dinner can be on your table in under 40 minutes, making it a lifesaver for those hectic weeknights. Plus, whether you're meal prepping or just seeking a delightful homemade meal, these bowls are perfect for keeping your culinary creativity alive. Trust me, once you take a bite, the explosion of flavors will have you rethinking your fast food habits! Are you ready to dive into this delicious recipe?
Why are Chicken Satay Rice Bowls a must-try?
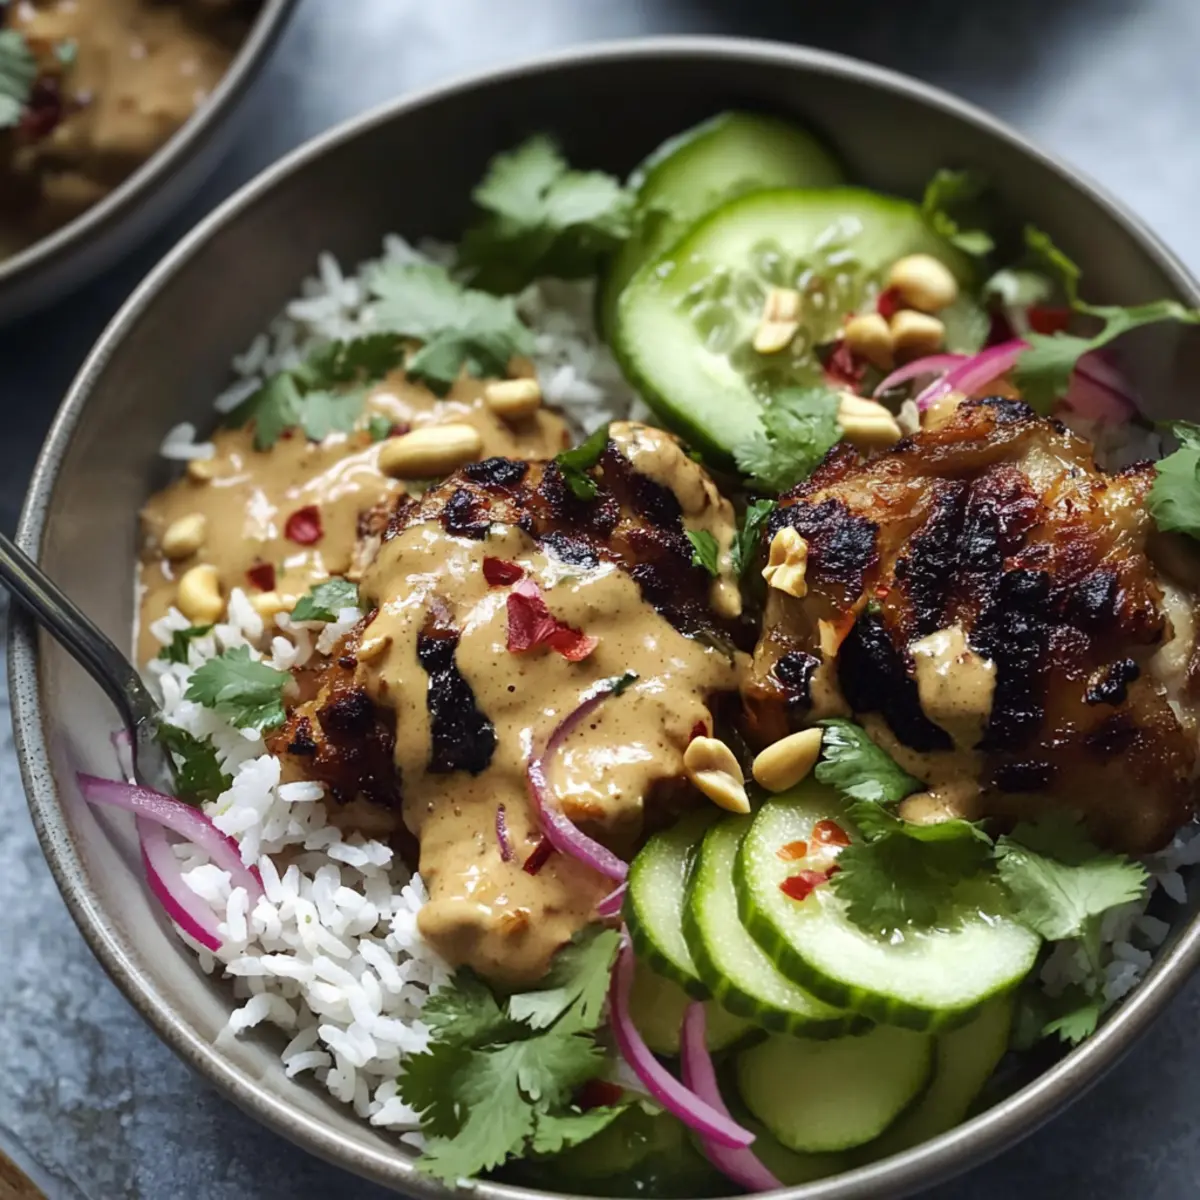
Flavor Explosion: The vibrant mix of savory satay sauce and tender chicken kicks your taste buds into overdrive.
Easy Preparation: With just a few simple steps, you can whip these up in under 40 minutes, making weeknight dinners a breeze.
Versatile Dish: Perfect for meal prep, these bowls are just as delightful with crispy tofu for a vegan twist or leftover chicken for convenience.
Textural Delight: Pair the creamy peanut sauce with fresh cucumber, crunchy peanuts, and pickled onions for a satisfying contrast you won’t forget.
Healthy & Hearty: Each bowl packs in significant protein and flavor, ensuring you won’t miss fast food with a dish this wholesome! Whether served alongside Bbq Chicken Rice or enjoyed on its own, this recipe is sure to impress.
Chicken Satay Rice Bowls Ingredients
For the Marinade
- Garlic – Adds a subtle aromatic flavor; substitute with garlic granules if fresh garlic is unavailable.
- Curry Powder – Provides aromatic, spiced flavor; choose mild, medium, or hot based on spice preference.
- Lime – Balances flavors with acidity; fresh lime juice is recommended for the best taste.
- Soy Sauce – Contributes umami and saltiness; ensure to use low-sodium soy sauce if preferred.
- Peanut Butter – Creates a creamy texture for the marinade and sauce; smooth peanut butter is best; chunky can be used in a pinch.
- Water – Adjusts the consistency of the marinade and sauce; use as needed to achieve desired thickness.
For the Main Dish
- Chicken Thighs – The main protein, known for being tender and flavorful; chicken breasts can be used with adjusted cooking time.
- Coconut Milk – Adds a creamy, nutty flavor to the sauce; full-fat is preferred for richness.
- Red Onion – Provides color and a mild bite to the dish; substitute with thinly sliced white onion if necessary.
- White Wine Vinegar – Used for quick pickling the onions for acidity; other vinegars can be used but will alter the flavor slightly.
- Basmati Rice – A fluffy base for the bowl; microwavable pouches are a convenient alternative.
For Toppings
- Cucumber – Adds refreshing crunch; can be sliced or made into ribbons for presentation.
- Red Chilli – Introduces heat; optional based on spice tolerance.
- Peanuts – For added texture and flavor; can be replaced with other nuts if allergic.
- Coriander – Fresh garnish that enhances flavor; substitute with parsley if cilantro is not preferred.
This Chicken Satay Rice Bowls recipe is a delightful dish that will elevate your weeknight dinner experience!
Step‑by‑Step Instructions for Chicken Satay Rice Bowls
Step 1: Preheat Your Cooking Device
Start by preheating the air fryer to 180°C (356°F) or the oven to 200°C (392°F) using the fan setting. This ensures that your Chicken Satay Rice Bowls cook evenly and achieve that perfect golden finish. While the device warms up, you can prepare the marinade.
Step 2: Make the Marinade
In a mixing bowl, combine minced garlic, curry powder, salt, fresh lime juice, soy sauce, and creamy peanut butter to create a flavorful marinade. Gradually add water until you reach your desired consistency. Once everything is blended well, divide this marinade in half for marinating the chicken and for the satay sauce later.
Step 3: Marinate the Chicken
Take the chicken thighs and coat them thoroughly with one half of the marinade. Ensure each piece is well-covered to soak up all that delicious flavor. Place the marinated chicken in the air fryer basket or on a baking tray and cook for 20 minutes in the air fryer or 25 minutes in the oven, until the chicken is cooked through and no longer pink inside.
Step 4: Prepare the Satay Sauce
While the chicken is cooking, transfer the remaining half of the marinade into a saucepan. Add coconut milk and bring the mixture to a gentle simmer over medium heat. Let it cook for about 5 minutes, stirring occasionally, until it thickens slightly. Remove the saucepan from heat and set it aside.
Step 5: Quick-Pickle the Onions
In a small bowl, combine thinly sliced red onions with white wine vinegar and a splash of water. Let the onions soak for about 20 minutes. This quick pickling will soften their bite and add a tangy zing to your Chicken Satay Rice Bowls.
Step 6: Cook the Rice
While the chicken and onions are preparing, cook the basmati rice according to the package instructions. If using microwaveable pouches, heat them accordingly, usually for about 90 seconds to 2 minutes. Fluff the rice with a fork once cooked, creating a perfect base for your bowls.
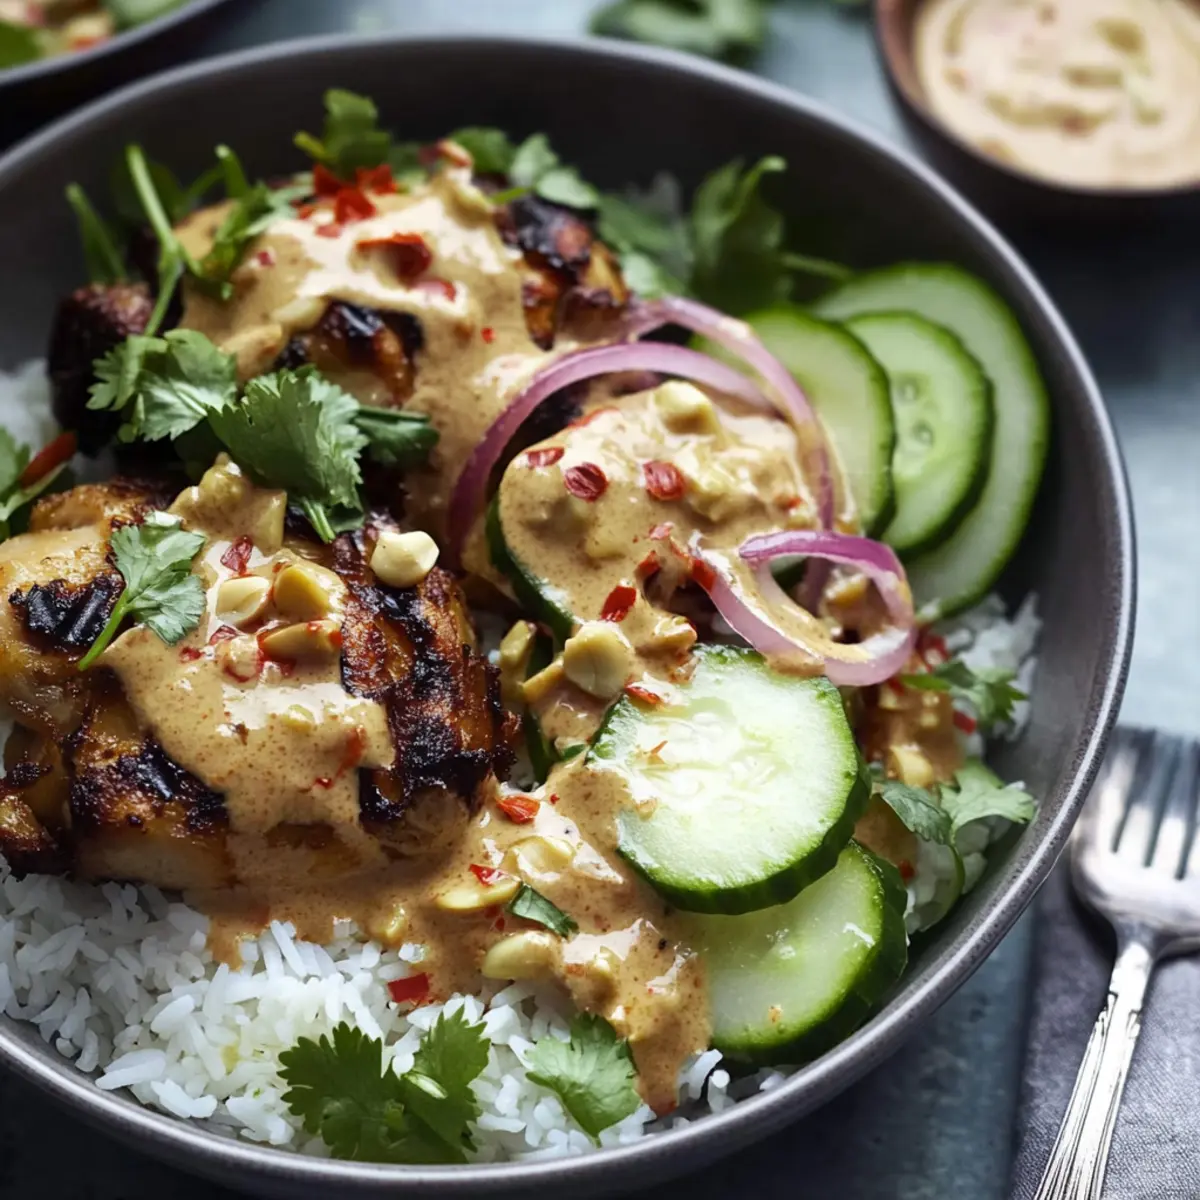
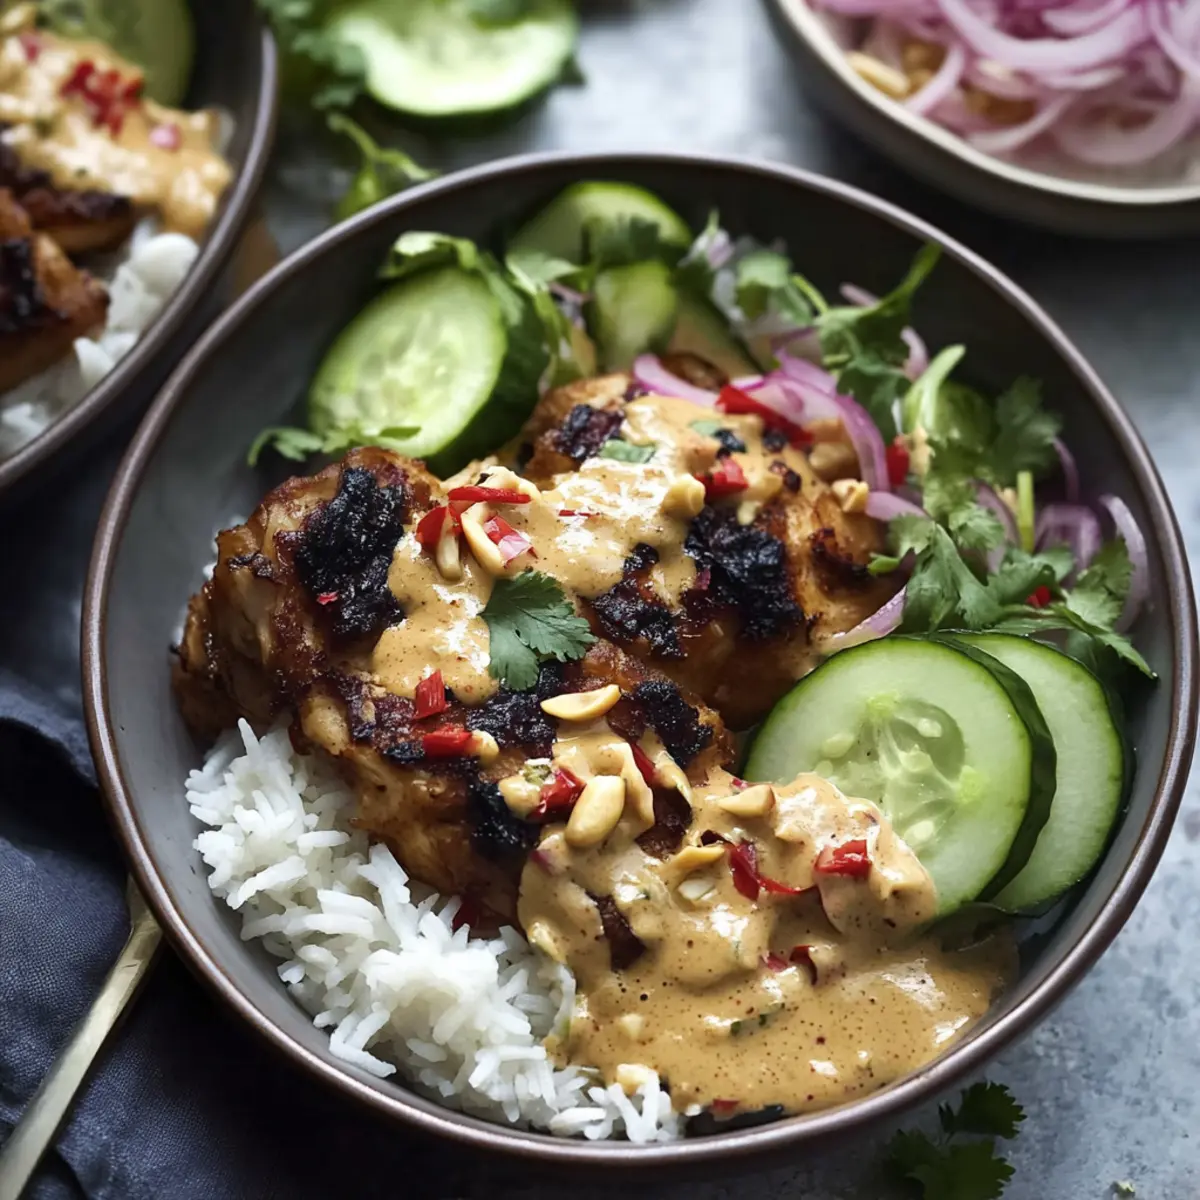
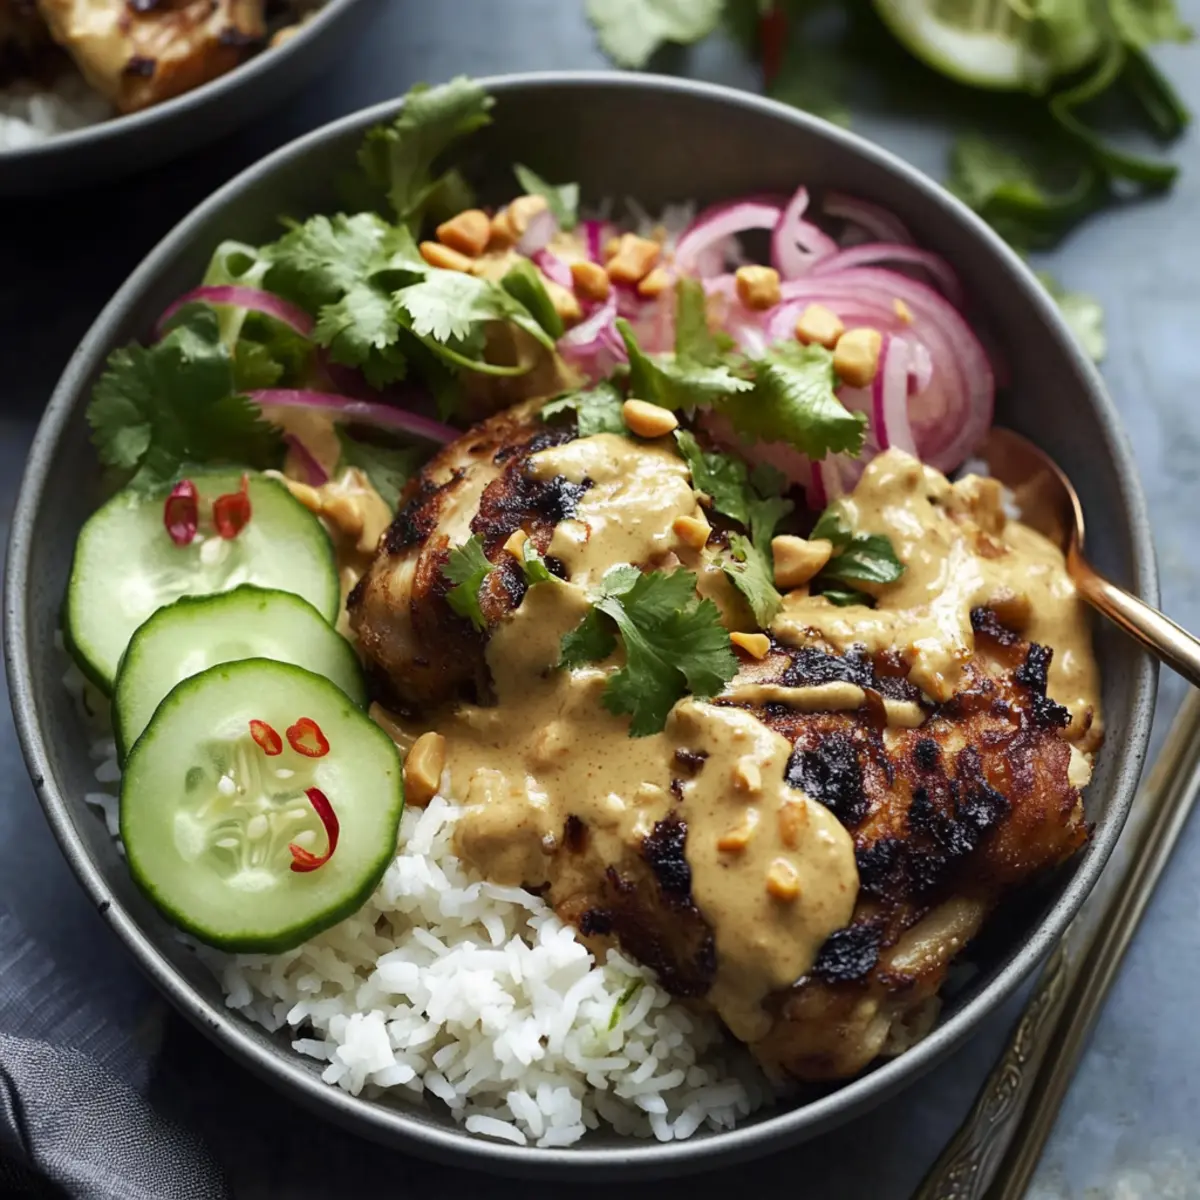
Step 7: Assemble the Bowls
To assemble your Chicken Satay Rice Bowls, start by placing a generous serving of fluffy rice in the bottom of each bowl. Top it with the juicy chicken thighs, and drizzle the thick satay sauce over the chicken.
Step 8: Garnish and Serve
Finish by adding the quick-pickled onions, refreshing cucumber slices or ribbons, a sprinkle of chopped peanuts, and sliced red chili if you like a bit of heat. Garnish each bowl with fresh coriander, and your delicious Chicken Satay Rice Bowls are ready to be savored!
Chicken Satay Rice Bowls Variations
Feel free to make these Chicken Satay Rice Bowls your own by experimenting with delightful twists and substitutions!
-
Vegan Twist: Replace chicken with crispy tofu marinated in the same delicious sauce for a heartwarming vegetarian option. This alternative offers the same satisfaction while being plant-based.
-
Rice Substitute: Instead of basmati rice, opt for fragrant jasmine rice or even sticky rice for a different texture and flavor profile. Both options will complement the creamy satay sauce beautifully.
-
Noodle Base: Swap out the rice for rice noodles or soba noodles, creating a delightful noodle bowl that's equally delicious. This variation brings an exciting twist to the classic!
-
Nut-Free Option: If you or a loved one has a nut allergy, replace peanut butter with sunflower seed butter for the marinade, ensuring a safe and tasty meal.
-
Flavor Burst: Add a splash of coconut aminos in place of soy sauce for a sweeter, less salty flavor that's perfect for a unique twist. Your taste buds will dance with joy!
-
Extra Heat: Love a spicy kick? Toss in some sliced or diced fresh jalapeños or add a sprinkle of red pepper flakes to the satay sauce for an extra layer of zing.
-
Crispy Toppings: For added crunch, consider topping your bowls with panko breadcrumbs sautéed in a little olive oil until golden and crispy, adding delightful texture and richness.
-
Zesty Kick: Include lime zest in the marinade or as a garnish to elevate the citrusy notes of your Chicken Satay Rice Bowls. The aroma will tantalize your senses!
These variations cater to different preferences while making sure you enjoy every bite! And if you're looking for additional inspiration, why not give our Honey Garlic Chicken Thighs or Spatchcock Chicken Flavor a try for your next meal?
Make Ahead Options
These Chicken Satay Rice Bowls are perfect for busy home cooks looking to save time during the week! You can easily prepare the satay sauce and store it in the refrigerator for up to 4 days; just allow it to cool completely before sealing it in an airtight container. Additionally, the marinated chicken can last for up to 3 days, while the cooked basmati rice maintains its quality for about 3 days as well. When you're ready to enjoy this delicious meal, simply reheat the chicken and rice in the microwave or on the stovetop before assembling your bowls with the chilled sauce and fresh toppings. This method ensures every bite is just as flavorful and satisfying!
What to Serve with Chicken Satay Rice Bowls?
Elevate your Chicken Satay Rice Bowls experience with these delightful side dishes that beautifully complement the dish's vibrant flavors and textures.
-
Crispy Fresh Spring Rolls: Bright, crunchy, and filled with fresh veggies, these rolls add a refreshing element that contrasts perfectly with the rich satay sauce.
-
Sweet Coconut Rice: Its subtle sweetness offsets the savory notes of the dish. This sticky and fragrant rice brings that authentic Asian flair to your meal.
-
Asian Slaw: A zesty mix of cabbage, carrots, and sesame dressing introduces a light crunch, enhancing the overall texture party happening in your bowl.
-
Grilled Pineapple Skewers: Their caramelized sweetness and tropical vibes balance the savory flavors of the satay, creating a delightful harmony of tastes.
-
Spicy Thai Basil Chicken: Add some zing with another chicken option, incorporating bold flavors. The heat from the basil pairs beautifully with the peanut notes.
-
Iced Green Tea: Refreshing and subtly sweet, this drink complements the dish and provides a cooling contrast to the spices, revitalizing each bite.
Short, simple side notes keep your meal lively and exciting, offering options that not only pair well with Chicken Satay Rice Bowls but also promise to impress family and friends alike!
Expert Tips for Chicken Satay Rice Bowls
- Check Chicken Doneness: Ensure your chicken thighs are fully cooked by cutting into the thickest part; it should be no longer pink inside for safe eating.
- Meal Prep Mastery: Prepare and store the satay sauce in the fridge for up to 4 days. Cooked chicken and rice can last 3 days; simply reheat before serving.
- Vegan Option: Easily make this dish vegan by replacing chicken with crispy tofu. Marinate the tofu just like the chicken for maximum flavor.
- Consistent Marinade: When mixing the marinade, adjust the water carefully to avoid a too-thin or too-thick consistency, which can affect the overall taste of your Chicken Satay Rice Bowls.
- Fresh Ingredients: Always opt for fresh garlic and lime juice for the best flavor. Ditch the bottled stuff to elevate your dish!
How to Store and Freeze Chicken Satay Rice Bowls
Fridge: Store the assembled Chicken Satay Rice Bowls in an airtight container for up to 3 days. This will keep the chicken, rice, and toppings fresh for your next meal.
Freezer: For longer storage, freeze cooked chicken and rice separately in airtight containers for up to 2 months. When ready to enjoy, thaw in the fridge overnight before reheating.
Reheating: To reheat, warm the chicken and rice in the microwave or on the stovetop until heated through. Drizzle with freshly made satay sauce for maximum flavor!
Satay Sauce: You can store the satay sauce in the fridge for up to 4 days. Reheat gently before serving to maintain its creamy texture and rich flavor.
Chicken Satay Rice Bowls Recipe FAQs
How do I choose ripe ingredients for my Chicken Satay Rice Bowls?
Absolutely! For the best flavor, pick vibrant veggies. Choose firm cucumbers and bright red onions without blemishes. The limes should be slightly soft to the touch, indicating juiciness, and for the chicken, look for shiny skin free of dark spots or unpleasant odors.
What’s the best way to store leftover Chicken Satay Rice Bowls?
Very! Store your Chicken Satay Rice Bowls in an airtight container in the fridge for up to 3 days. This keeps the flavors fresh and is perfect for meal prep. Be sure to keep the toppings separate until ready to serve to maintain their crunch.
Can I freeze the Chicken Satay Rice Bowls?
Absolutely! For longer storage, you can freeze the chicken and rice separately in airtight containers for up to 2 months. When you’re ready to enjoy, simply thaw them in the fridge overnight. Reheat thoroughly before adding the satay sauce to enhance the flavors.
What should I do if my satay sauce is too thick or thin?
No worries! If your sauce ends up too thick, gradually whisk in a little coconut milk or water to achieve your desired consistency. Conversely, if it’s too thin, simmer it on low heat for a few more minutes to thicken it up. Stir frequently to avoid sticking. Adjustments can create the perfect creamy texture!
Are there any dietary considerations for Chicken Satay Rice Bowls?
Yes! This recipe is versatile for dietary needs. For those avoiding gluten, make sure to select gluten-free soy sauce. If you have nut allergies, substitute peanut butter with sunflower seed butter or tahini. Additionally, to make it vegan, replace chicken with crispy tofu, marinating it just like the chicken for that delightful flavor.
How long can I keep satay sauce in the fridge?
Absolutely! You can store your satay sauce in the fridge for up to 4 days. Just make sure it's in an airtight container to preserve its creamy consistency. When you’re ready to use it, gently reheat it on the stovetop to maintain the delicious flavors before drizzling over your Chicken Satay Rice Bowls.
Savor Delicious Chicken Satay Rice Bowls in Just 40 Minutes
Ingredients
Equipment
Method
- Preheat the air fryer to 180°C (356°F) or the oven to 200°C (392°F).
- Combine minced garlic, curry powder, soy sauce, lime juice, and peanut butter in a bowl; mix in water to desired consistency. Divide marinade in half.
- Coat chicken thighs with half of the marinade and cook for 20 minutes in the air fryer or 25 minutes in the oven until cooked through.
- Transfer remaining marinade to a saucepan, add coconut milk, and simmer until slightly thickened for 5 minutes.
- Combine thinly sliced red onions with white wine vinegar and a splash of water; let soak for 20 minutes.
- Cook basmati rice according to package instructions, usually for 90 seconds to 2 minutes if using microwavable pouches.
- Assemble bowls with rice, chicken, and drizzle with satay sauce.
- Garnish with quick-pickled onions, cucumber, chopped peanuts, and coriander; serve.