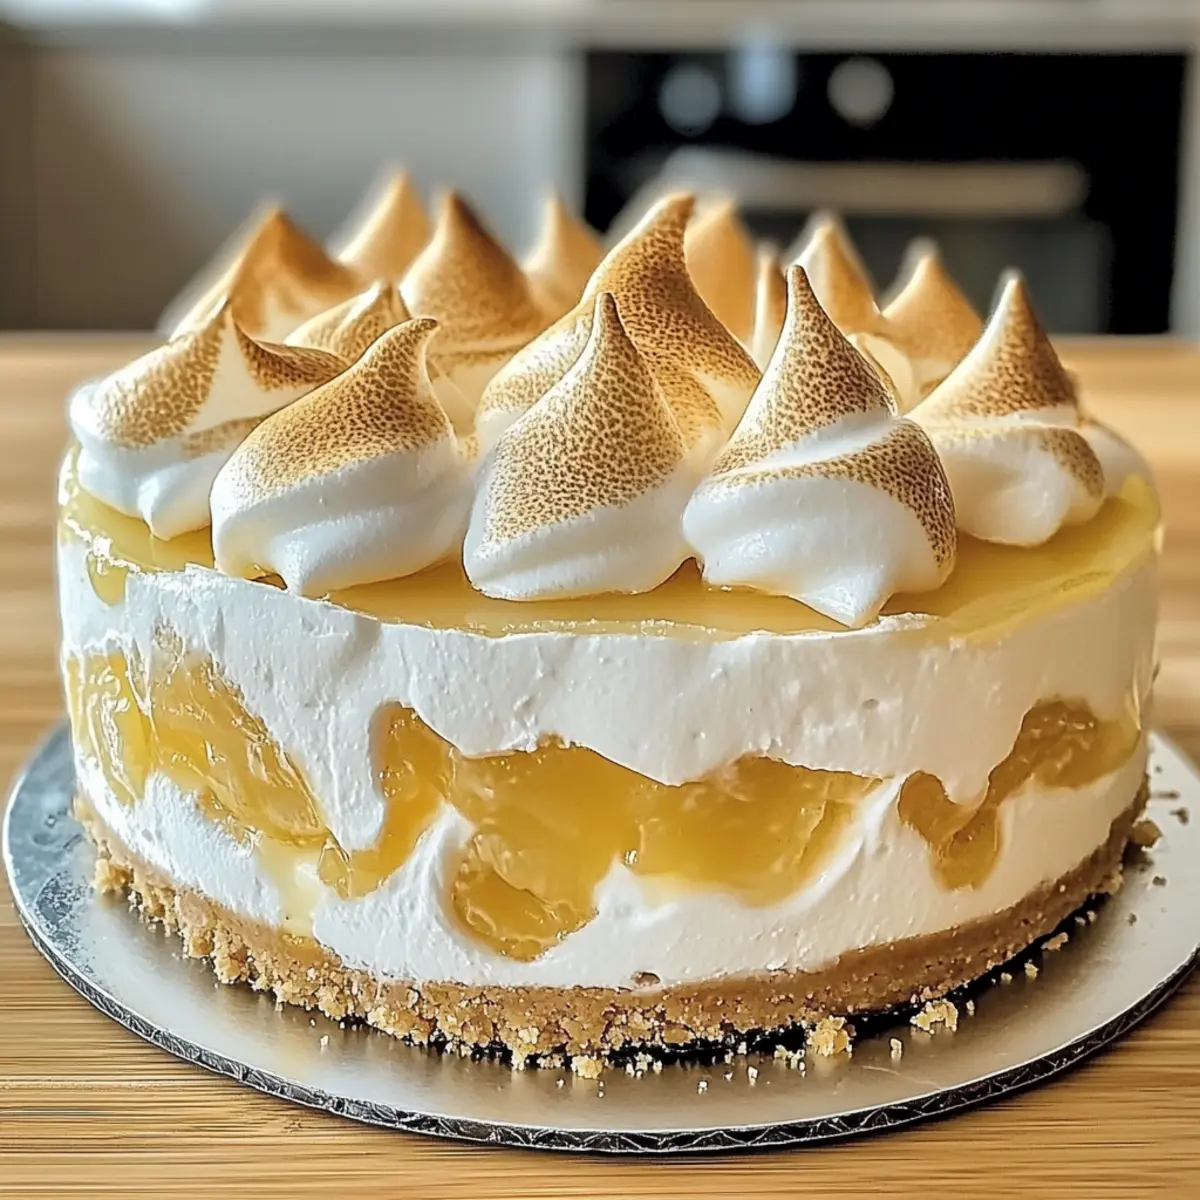
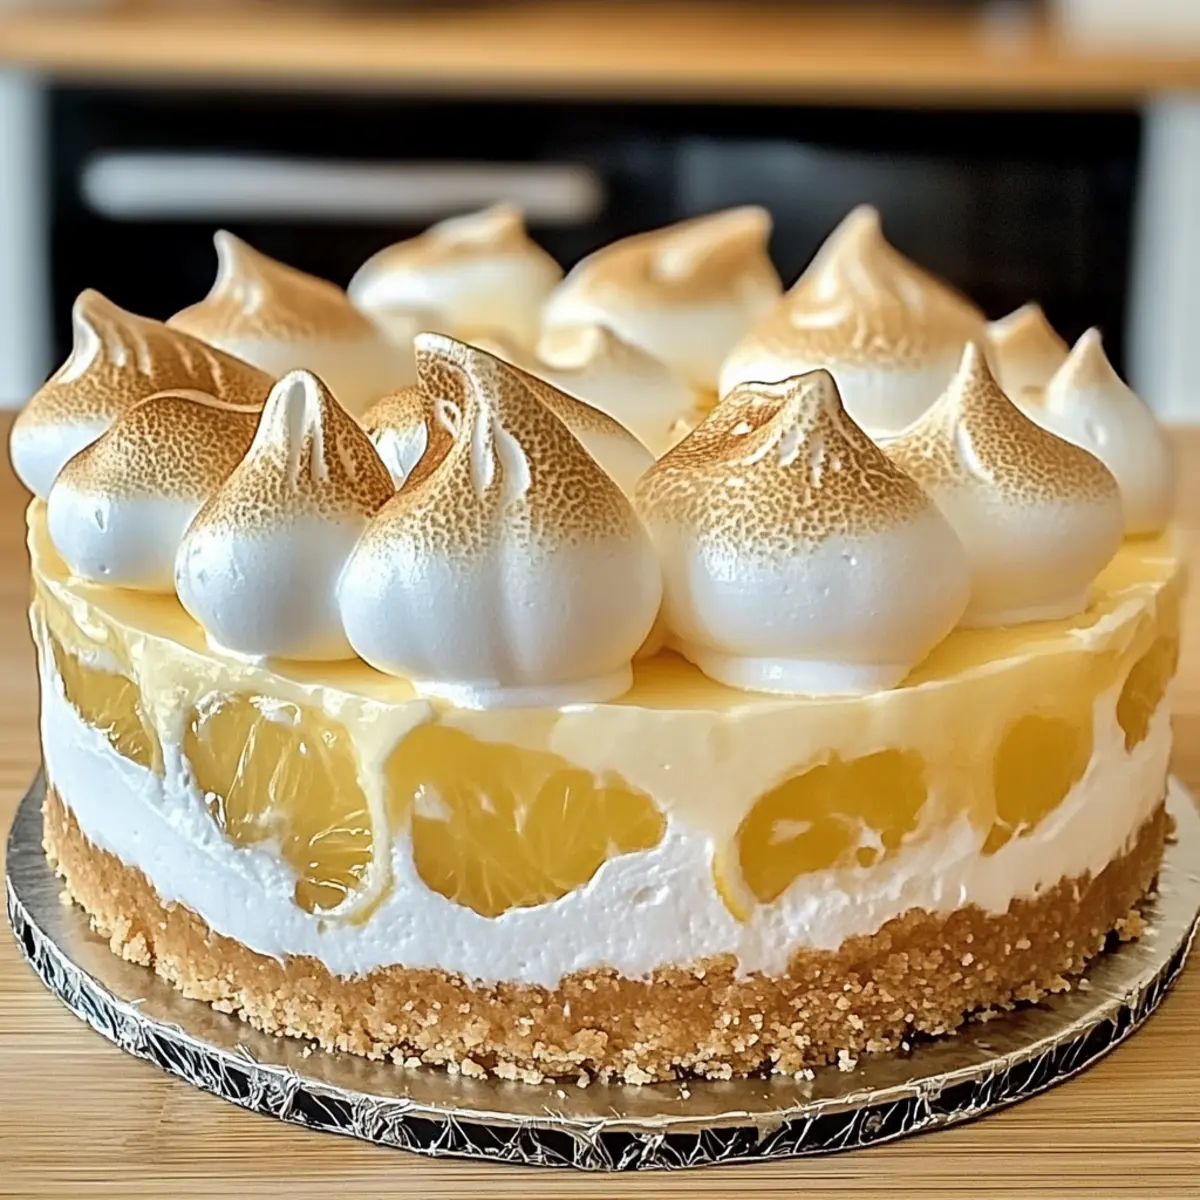
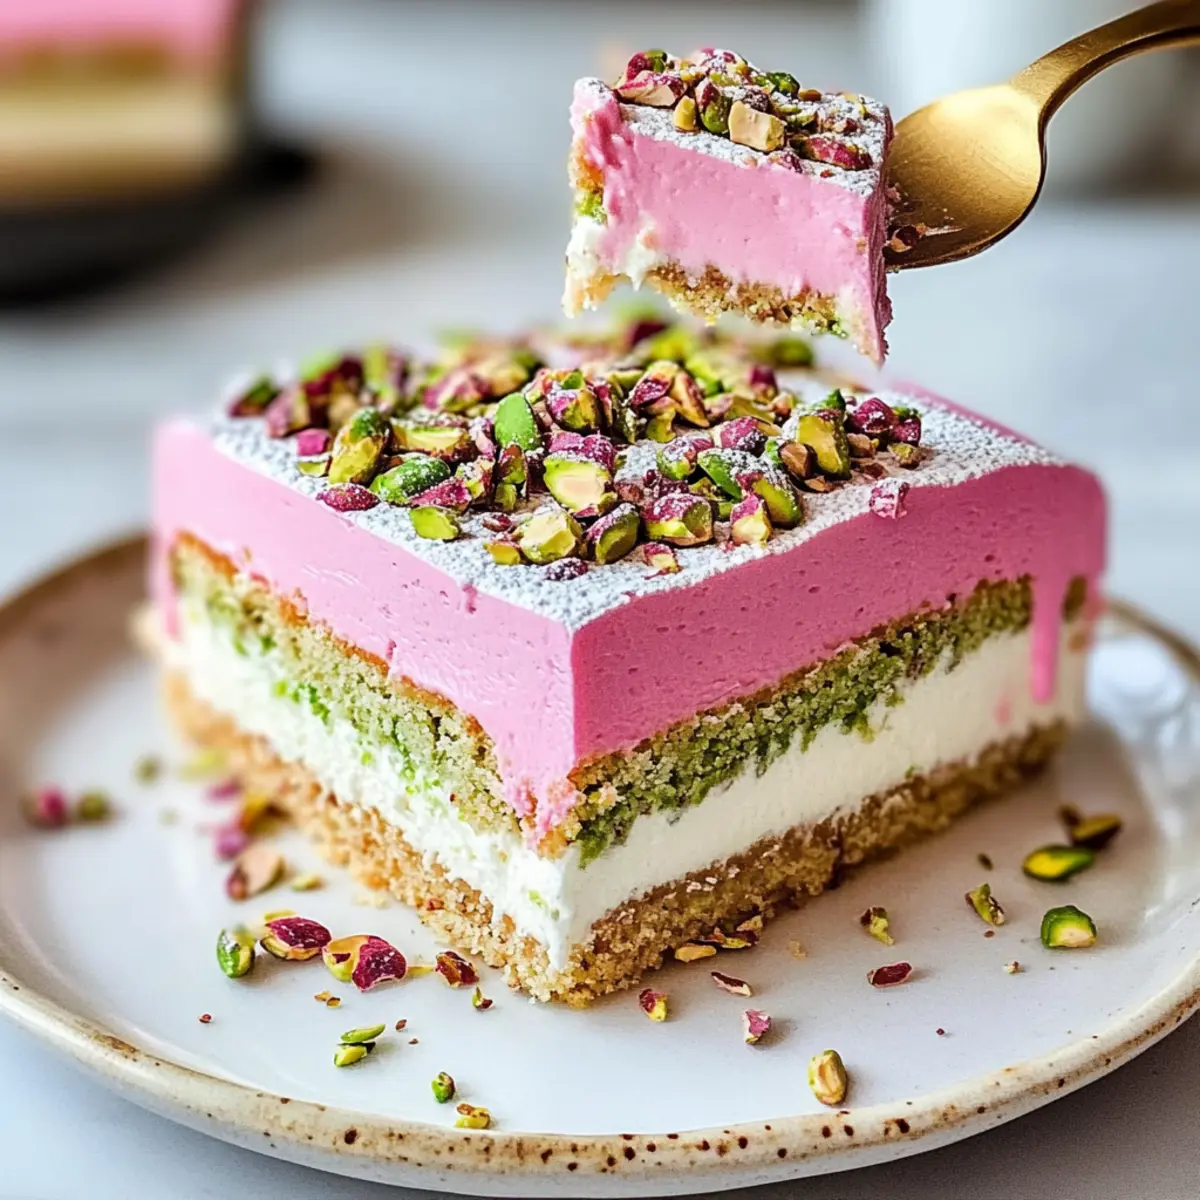
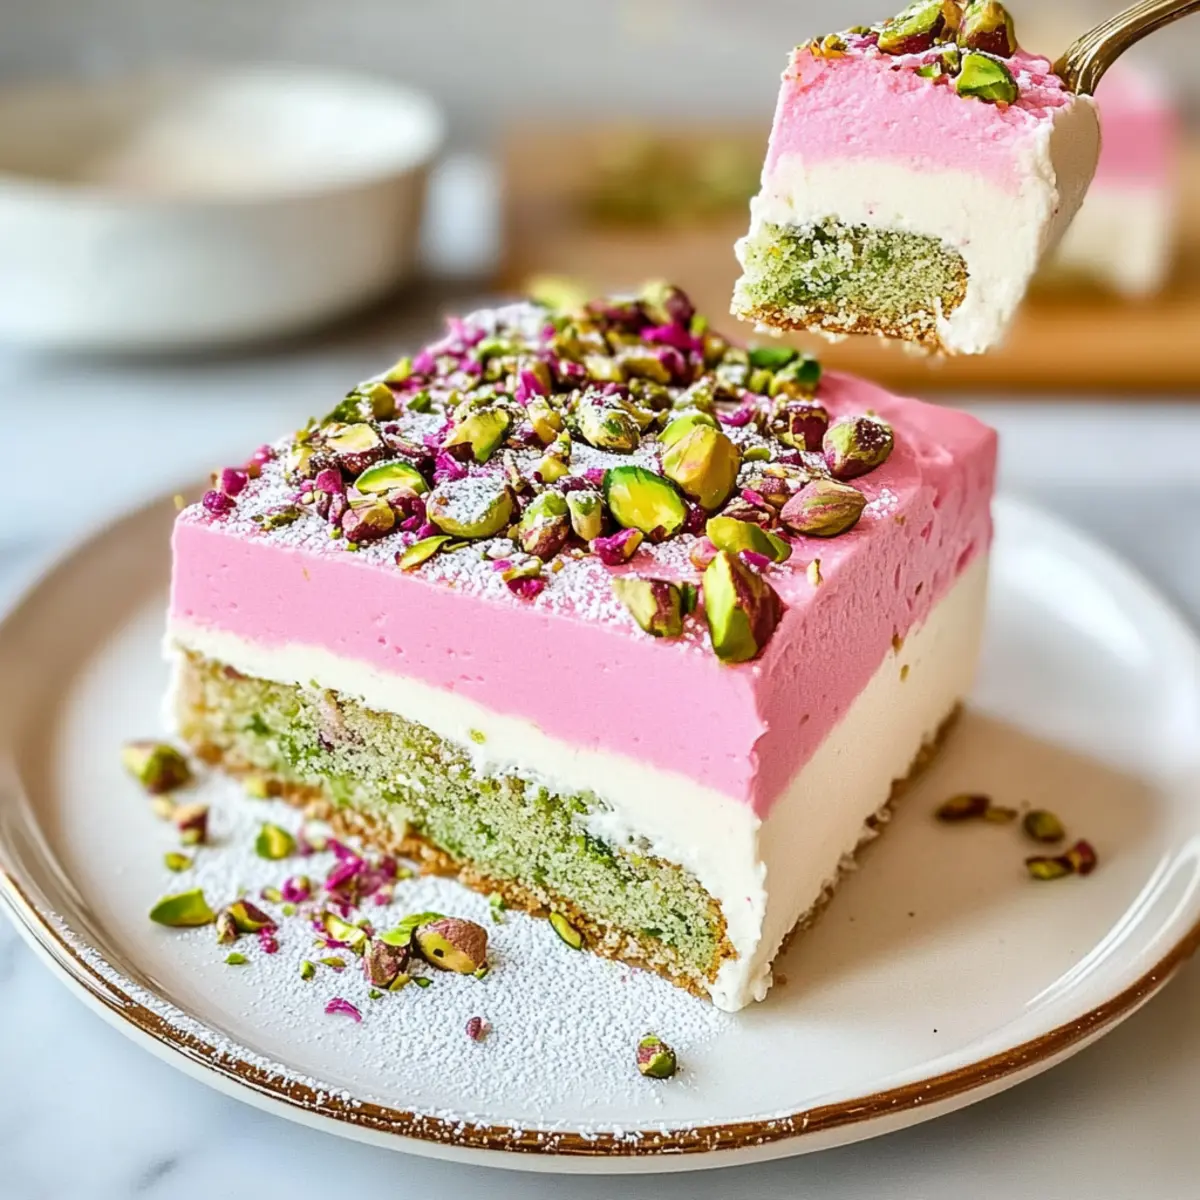
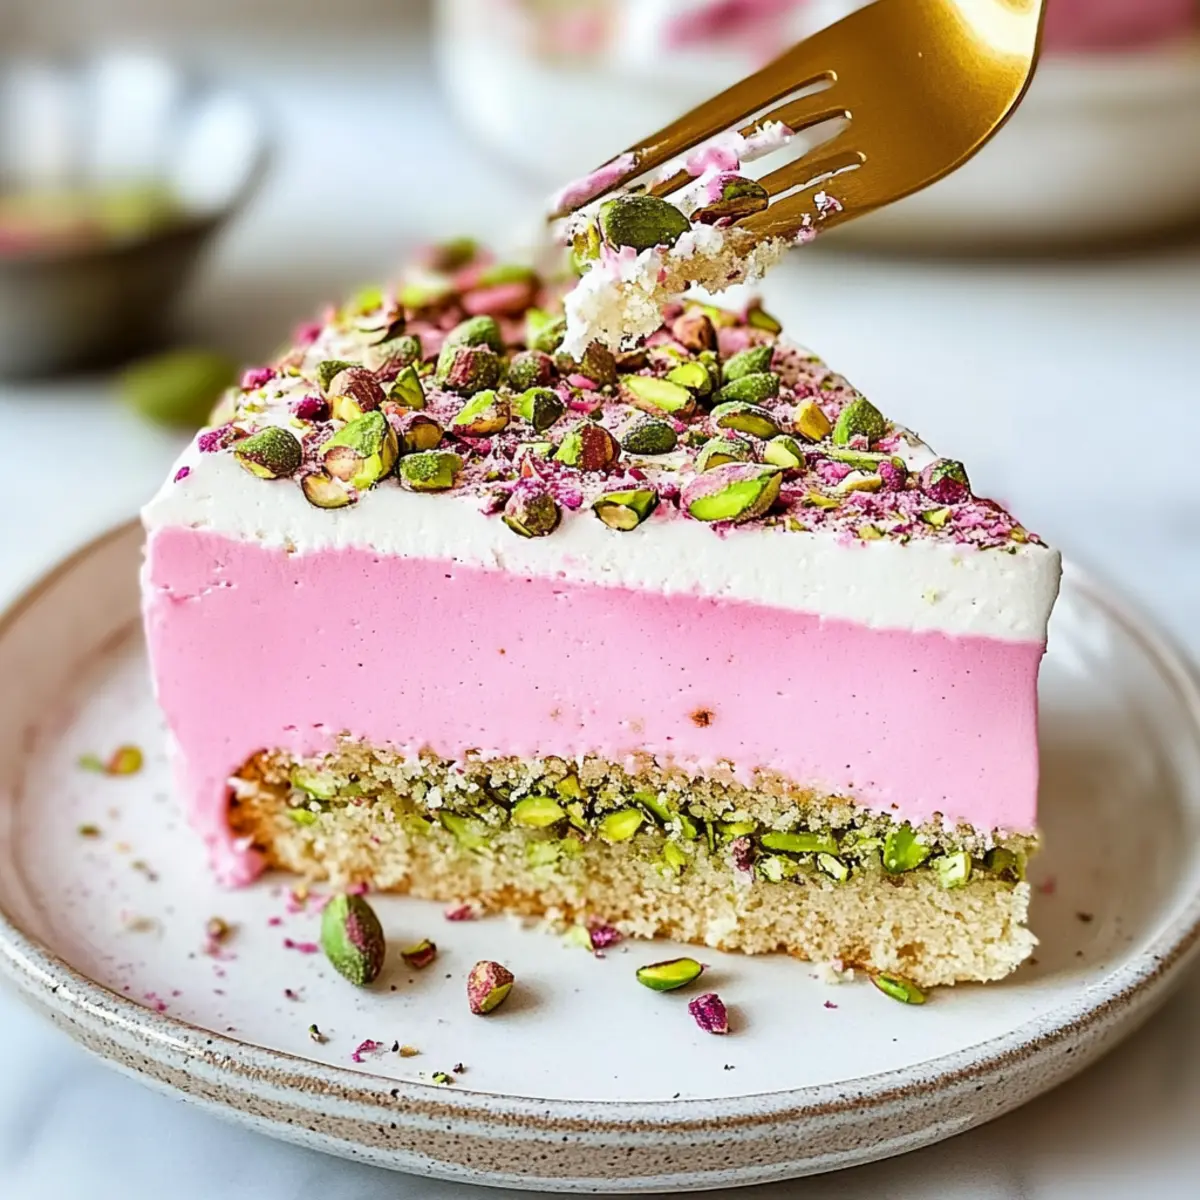
As I strolled through a vibrant market filled with tantalizing scents, something caught my attention—a delicate aroma of rose mingling with the nutty scent of pistachios. That moment inspired me to create my very own Pistachio Rose Milk Cake Recipe, a dessert that embodies both elegance and comfort. Perfect for any occasion, this moist and fluffy cake is not only a feast for the eyes with its beautiful colors, but it also dazzles the palate with its unique flavors. Whether you’re hosting a festive gathering or simply treating yourself to a weekend delight, this cake promises to become a beloved centerpiece. Plus, with just a handful of ingredients and a few simple steps, you’ll be able to whip it up in no time, leaving you with more opportunities to savor those special moments. Ready to discover the magic of this floral delight?
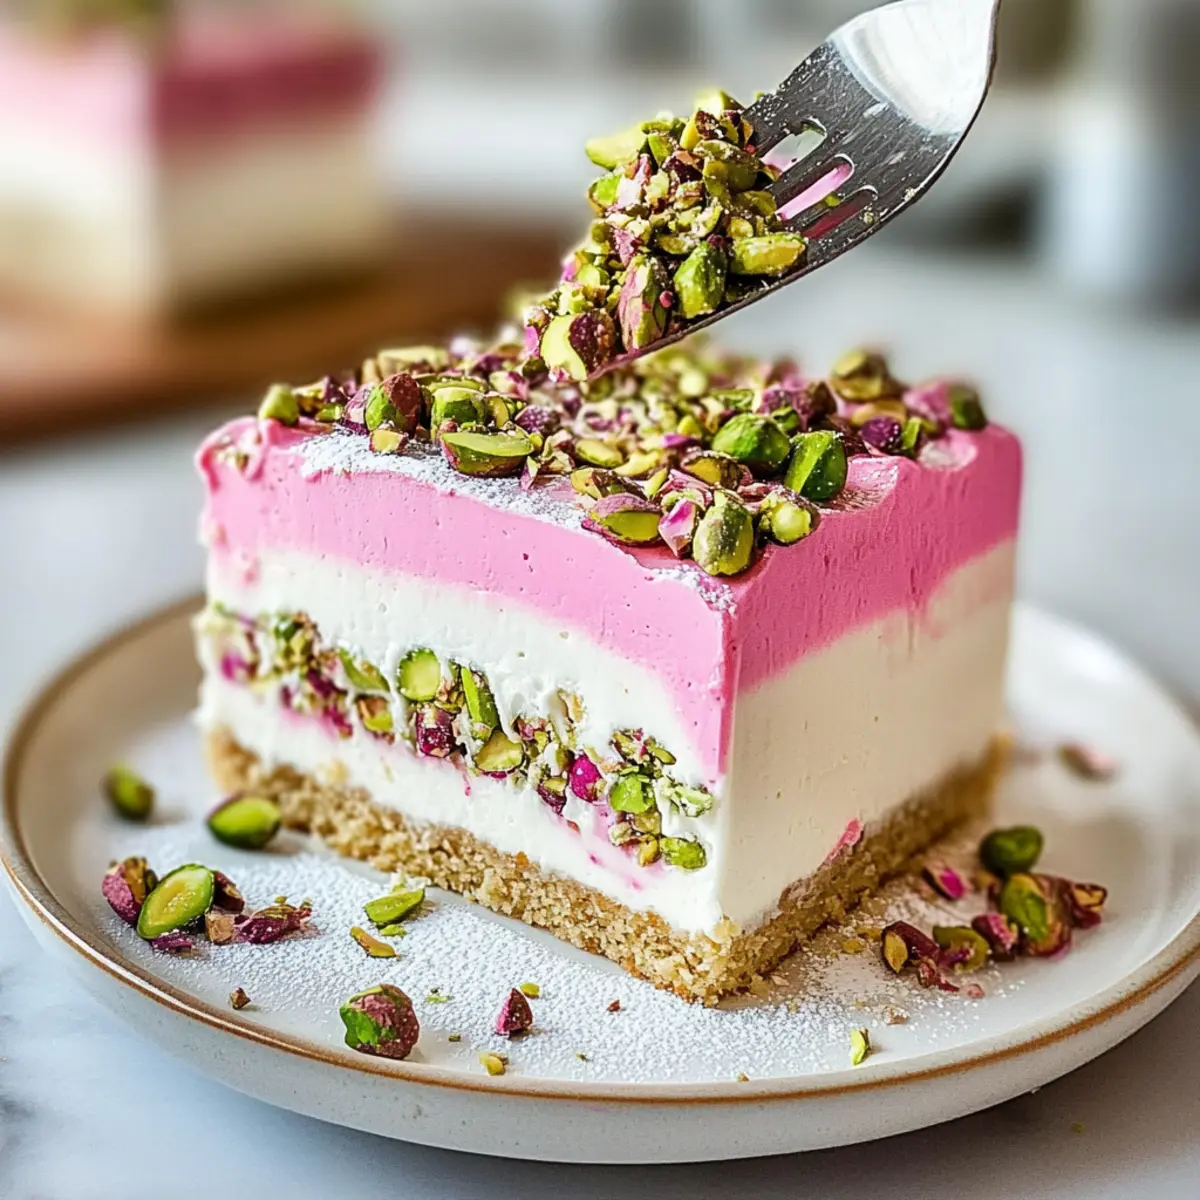
Why is Pistachio Rose Milk Cake Irresistible?
Delightful fusion of flavors: This cake features the exquisite pairing of nutty pistachios and fragrant rose, creating a taste experience that is both unique and comforting.
Simple preparation: With a straightforward process and easily accessible ingredients, even novice bakers can impress their friends and family with minimal effort.
Versatile options: Whether you want to stay traditional or explore variations like a vegan alternative or exotic spices, this recipe allows you to customize it to your preferences.
Visual appeal: The vibrant colors and stunning presentation make this cake a showstopper at any get-together, ensuring your dessert is not only delicious but also a feast for the eyes.
Ideal for celebrations: Perfectly suited for festive gatherings, special occasions, or a leisurely afternoon treat, it perfectly embodies the spirit of shared moments and togetherness.
For another elegant dessert, don't miss out on our delicious Ice Cream Cake that pairs wonderfully with this floral delight!
Pistachio Rose Milk Cake Ingredients
For the Cake
• All-Purpose Flour – Essential for structure; sift well to avoid lumps.
• Granulated Sugar – Provides sweetness that beautifully balances the floral notes.
• Pistachios – Use unsalted, chopped roughly for a nutty flavor throughout the cake.
• Whole Milk – Adds moisture; can substitute almond milk for a delightful nutty flavor.
• Rose Water – Pure rose water is key for an authentic floral taste; use sparingly.
• Baking Powder – Ensure it’s fresh for optimal rise and fluffiness.
• Large Eggs – Bind ingredients and provide moisture; essential for texture.
• Unsalted Butter – Enhances flavor; melt slightly for easy mixing.
• Vanilla Extract – Adds depth to the flavor profile, preferably pure for the best taste.
• Salt – A pinch balances sweetness and enhances overall flavor.
Optional Glaze
• Powdered Sugar – Dust on top to add a sweet finish; ensures a pretty presentation.
• Whipped Cream – Serve alongside for added richness; freshened with a hint of vanilla.
This delightful Pistachio Rose Milk Cake Recipe invites you into a world of flavor that’s perfect for making cherished memories at your table!
Step‑by‑Step Instructions for Pistachio Rose Milk Cake Recipe
Step 1: Preheat and Prepare
Preheat your oven to 350°F (175°C) and gather an 8-inch round baking pan. Grease the pan with unsalted butter and line the bottom with parchment paper for easy release after baking. This preparation will ensure your Pistachio Rose Milk Cake has a beautiful, intact shape when it’s time to serve.
Step 2: Mix Dry Ingredients
In a medium bowl, sift together the all-purpose flour and baking powder, ensuring there are no lumps. This step is crucial as it incorporates air for a light texture in your cake. Once mixed, set this bowl aside while you move on to the wet ingredients, keeping everything organized.
Step 3: Cream Butter and Sugar
In a large mixing bowl, cream together the slightly melted unsalted butter and granulated sugar using a hand mixer or whisk. Beat for about 3 minutes, until the mixture is light and fluffy, revealing a pale color. This fluffy texture will contribute to the moisture and softness of your Pistachio Rose Milk Cake.
Step 4: Incorporate Eggs
Add the large eggs to the creamed mixture one at a time. Mix well after each addition to ensure a smooth and integrated batter. The eggs add moisture and help bind the ingredients together, which is essential for a fluffy cake. Watch for a glossy, homogenous mixture.
Step 5: Blend in Milk and Rose Water
Gradually pour in the whole milk and pure rose water, gently stirring until well combined. This fragrant addition is key to achieving the delicate floral notes in your cake. The batter should have a smooth consistency, ready to receive the dry ingredients in the next step.
Step 6: Combine Wet and Dry Mixtures
Carefully fold the dry flour mixture into the wet ingredients using a spatula. Mix until just combined, being cautious not to over-mix as this can lead to a denser cake. The batter should be smooth and slightly thick, ready for the vibrant pistachios.
Step 7: Fold in Pistachios
Add the roughly chopped unsalted pistachios to your batter, folding them in gently until evenly distributed. This will create delightful nutty bursts in every bite of your Pistachio Rose Milk Cake. Be mindful to avoid over-mixing to maintain a light texture.
Step 8: Pour Batter into the Pan
Pour the prepared cake batter into your greased and lined baking pan, using a spatula to smooth the top. This ensures an even bake and a nice dome shape when it rises. Place the pan in the preheated oven, setting a timer for 30-35 minutes.
Step 9: Bake and Check for Doneness
Bake the cake for 30-35 minutes, or until a toothpick inserted into the center comes out clean. The edges should slightly pull away from the pan, and the top will be golden and spring back gently when touched. This is your cue that the Pistachio Rose Milk Cake is perfectly baked.
Step 10: Cool in the Pan
Once baked, remove the pan from the oven and let it cool in the pan for about 10 minutes. This pause allows the cake to firm up, making it easier to transfer. After the cooling time, gently run a knife around the edges before inverting it onto a wire rack to cool completely.
Step 11: Finish and Serve
Once the cake has cooled completely, dust it with powdered sugar for a lovely presentation or drizzle it with icing if you prefer. Serve slices with fresh berries or a dollop of whipped cream for an exquisite touch. Your delightful Pistachio Rose Milk Cake is now ready to be shared and savored!
What to Serve with Pistachio Rose Milk Cake
The harmonious flavors of this decadent dessert create a delightful experience that's perfect to complement with something extra special.
-
Fresh Berries: Juicy strawberries or tart raspberries add a refreshing contrast, enhancing the floral notes of the cake.
-
Whipped Cream: Light and airy, whipped cream adds a creamy texture that balances the nutty richness of the Pistachio Rose Milk Cake.
-
Cardamom Tea: A warm cup of cardamom-infused tea offers a spicy kick that beautifully complements the cake’s delicate sweetness.
-
Saffron Rice Pudding: This creamy dessert introduces a different texture while echoing the floral elements found in the cake.
-
Mint Parfait: Cool, layered mint yogurt creates a refreshing palate cleanser, perfect after the rich flavors of the cake.
-
Honey Drizzle: A light drizzle of honey brings an added layer of sweetness, enhancing the overall experience of the moist, fluffy cake.
-
Almond Cookies: These crunchy treats provide a delightful contrast in texture, echoing the nutty aspect of the cake while offering a satisfying bite.
-
Lemonade or Mint Lemonade: A glass of zesty lemonade, especially mint-infused, refreshes the palate and pairs beautifully with the floral hints of rose.
Enjoy your meal with delightful combinations that amplify the unique charm of the Pistachio Rose Milk Cake!
Storage Tips for Pistachio Rose Milk Cake
Room Temperature: Keep the cake covered at room temperature for up to 2 days to retain moisture and freshness.
Fridge: Store any leftovers in an airtight container in the refrigerator for up to 5 days. This helps keep the flavors fresh while preventing the cake from drying out.
Freezer: For longer storage, wrap the cake tightly in plastic wrap and freeze for up to 2 months. Thaw overnight in the fridge before serving.
Reheating: Enjoy slices warmed in the microwave for 10-15 seconds, which will restore its moist texture and enhance the flavors of this delightful Pistachio Rose Milk Cake recipe.
Make Ahead Options
These delightful Pistachio Rose Milk Cakes are perfect for meal prep, enabling you to save time on busy weeknights! You can prepare the cake batter up to 24 hours ahead of time by mixing all the wet and dry ingredients and storing the combined batter in the refrigerator. Just be sure to keep it covered to maintain moisture and prevent browning. When you're ready to bake, simply pour the batter into the pan and follow the baking instructions. Alternatively, you can bake the cake a few days in advance, allowing it to cool completely before storing it in an airtight container in the refrigerator for up to 3 days. This way, you’ll have a delicious, homemade dessert ready to serve whenever you need it!
Pistachio Rose Milk Cake Variations
Feel free to let your creativity bloom with this cake, transforming it to match your tastes and dietary needs!
-
Nut Alternative: Swap pistachios for almonds or cashews for a delightful twist on flavor. Each nut brings its character, enhancing the cake in unexpected ways.
-
Vegan Version: Replace eggs with flaxseed meal mixed with water, and use plant-based milk for a completely vegan treat that everyone can enjoy.
-
Spice it Up: Add a pinch of cardamom or cinnamon to the batter for a warm, exotic flair that takes the floral notes up a notch. The combination elevates the cake from classic to captivating!
-
Rose Essence: If rose water isn't available, try using rose syrup or even lavender for an alternative floral essence. Just remember, less is more!
-
Gluten-Free Delight: Substitute all-purpose flour with almond flour or a gluten-free blend. Just remember that the texture might be slightly different but equally tasty!
-
Fruity Touch: Fold in some fresh raspberries or chopped strawberries into the batter. Berries add a juicy burst that complements the floral cake beautifully.
-
Heat Level: Drizzle some chili-infused honey on top before serving for a sweet and spicy kick! It might sound unusual but is absolutely delightful.
-
Decadent Layers: Cut the cooled cake into layers, filling each with whipped cream or a rose-flavored frosting for a stunning layered dessert. A lovely presentation for special occasions!
For more sweet indulgence, consider pairing your cake with our lovely Chocolate Pudding Cake or delightful Ice Cream Cake. Your dessert table will never look so tempting!
Expert Tips for Pistachio Rose Milk Cake
-
Sift Flour: Always sift your flour and baking powder to avoid lumps; this ensures a light and fluffy Pistachio Rose Milk Cake.
-
Gentle Mixing: Avoid over-mixing the batter when combining wet and dry ingredients. This keeps your cake tender and airy.
-
Fresh Baking Powder: Make sure your baking powder is fresh; old baking powder can prevent your cake from rising properly.
-
Cool Completely: Allow your cake to cool completely before frosting. If you rush this step, the frosting may melt and sag.
-
Adjust Sweetness: Taste the batter before baking if you're unsure about the sweetness. Feel free to adjust sugar based on personal preference!
Pistachio Rose Milk Cake Recipe FAQs
What type of pistachios should I use for the cake?
Absolutely! For this Pistachio Rose Milk Cake Recipe, I recommend using unsalted, roughly chopped pistachios to fully realize that nutty flavor throughout the dessert. Avoid roasted ones with added salt, as they can alter the cake's sweetness and delicate balance of flavors.
How should I store the Pistachio Rose Milk Cake?
To keep the cake fresh, store any leftovers in an airtight container at room temperature for up to 2 days. If you want to preserve them longer, refrigerate for up to 5 days. Just remember, the cake is best enjoyed fresh, so consume it within these timeframes for optimal flavor!
Can I freeze the Pistachio Rose Milk Cake?
Yes, you can absolutely freeze it! Wrap the cooled cake tightly in plastic wrap and then in aluminum foil, ensuring it's well-sealed. It can be frozen for up to 2 months. When you're ready to enjoy, simply thaw it overnight in the fridge. Reheat individual slices in the microwave for about 10-15 seconds to restore moisture.
What if my cake doesn't rise properly?
If you're finding that your cake doesn't rise as expected, check if your baking powder is fresh. Old baking powder can significantly impact the fluffiness of your Pistachio Rose Milk Cake. Additionally, make sure you mix the batter gently and do not over-mix after combining wet and dry ingredients. A light hand helps keep the cake airy!
Can I make this cake vegan?
Very! To make a vegan version of the Pistachio Rose Milk Cake Recipe, substitute the eggs with flaxseed meal (1 tablespoon of flaxseed meal mixed with 2.5 tablespoons of water for each egg) and use almond milk or another plant-based milk instead of whole milk. This way, you can enjoy the same delightful flavors while accommodating dietary preferences.
Is rose water safe for everyone?
While pure rose water is generally safe, some individuals may have sensitivities or allergies. If you're serving guests, it's a good idea to let them know the cake contains rose water. For a twist, you can substitute it with a few drops of vanilla extract for a different flavor profile that everyone can enjoy!
Delightful Pistachio Rose Milk Cake Recipe You Must Try
Ingredients
Equipment
Method
- Preheat your oven to 350°F (175°C) and prepare an 8-inch round baking pan by greasing it with unsalted butter and lining the bottom with parchment paper.
- In a medium bowl, sift together the all-purpose flour and baking powder, then set aside.
- In a large mixing bowl, cream together the melted unsalted butter and granulated sugar until light and fluffy, about 3 minutes.
- Add the large eggs to the creamed mixture one at a time, mixing well after each addition.
- Gradually pour in the whole milk and rose water, stirring gently until combined.
- Fold the dry flour mixture into the wet ingredients until just combined, taking care not to over-mix.
- Gently fold in the chopped pistachios until evenly distributed.
- Pour the batter into the prepared baking pan and smooth the top. Bake for 30-35 minutes.
- Check for doneness with a toothpick; it should come out clean when the cake is ready.
- Let the cake cool in the pan for about 10 minutes before inverting it onto a wire rack to cool completely.
- Once cooled, dust with powdered sugar or drizzle with icing. Serve with fresh berries or a dollop of whipped cream.