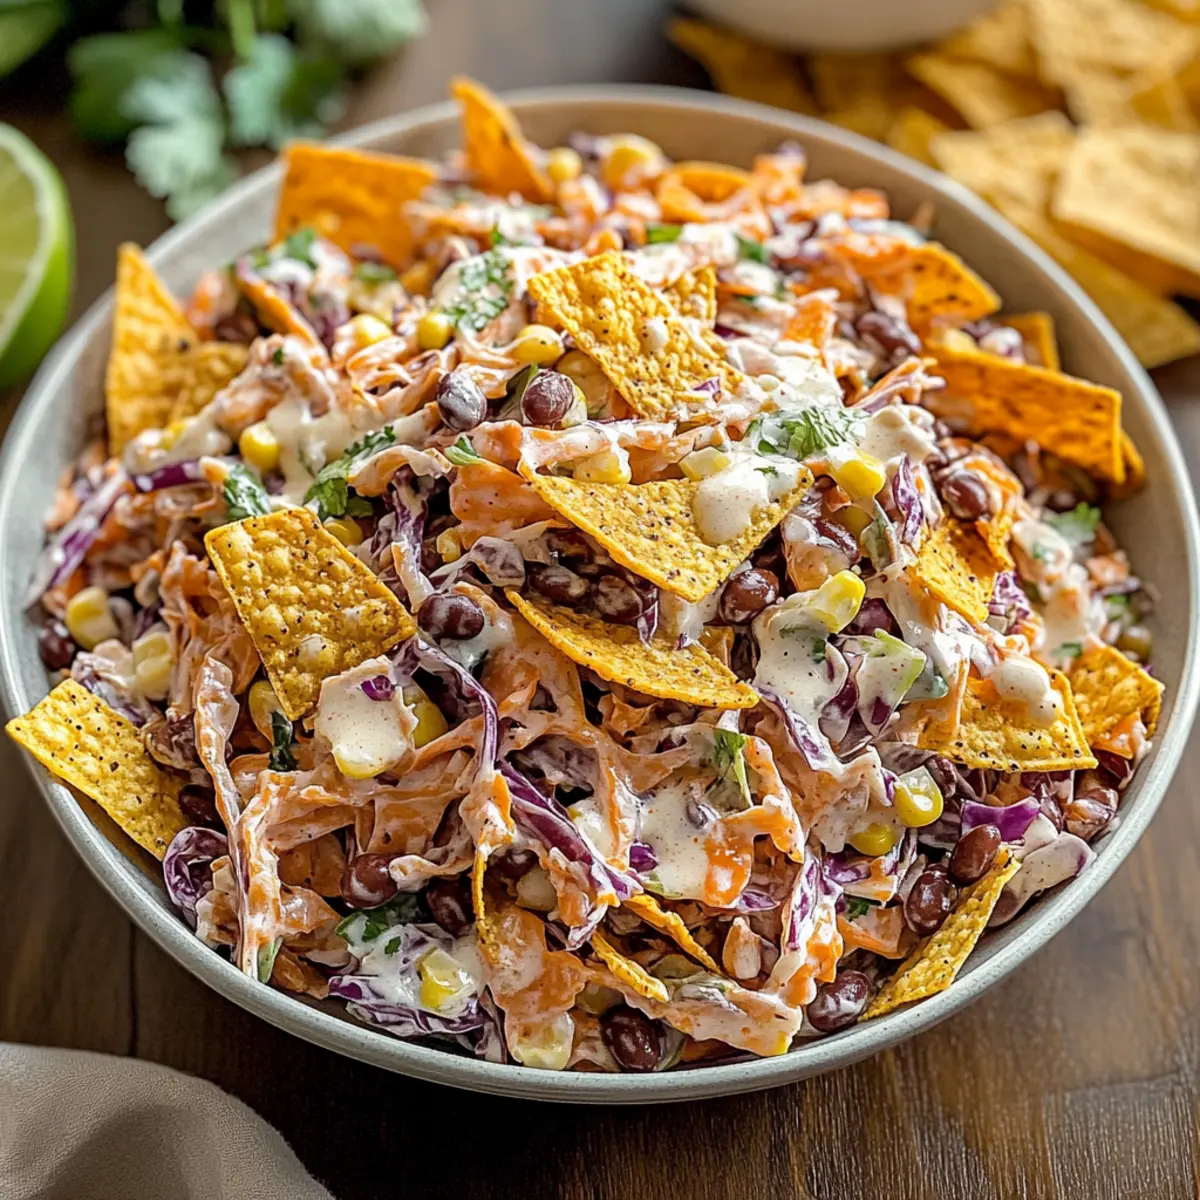
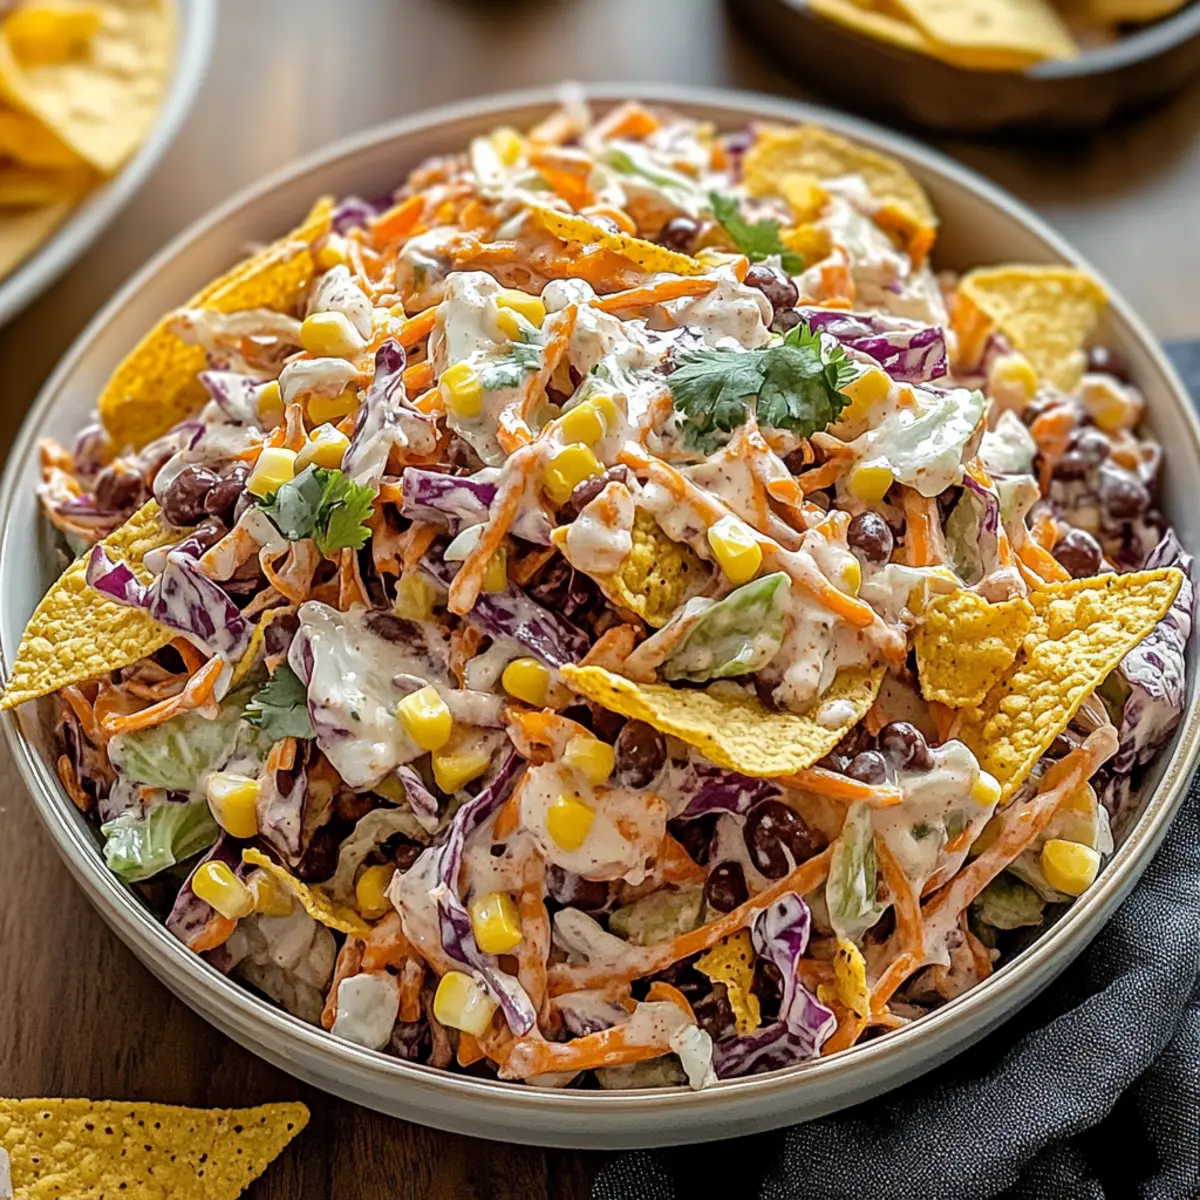
The sun-soaked afternoons of summer always bring back memories of backyard BBQs and lively gatherings, where vibrant flavors and good company make everything taste better. Today, I’m excited to share my Frito Cowboy Cabbage Salad, a delightful twist on classic Tex-Mex fare that’s bound to turn heads at your next potluck or weeknight dinner. With only a few minutes of prep, this no-cook recipe is not only a breeze to whip up, but it also delivers a hearty punch of nutrition and fun, thanks to its crunchy layer of Chili Cheese Fritos. Packed with zesty veggies and protein-rich black beans, this salad is the perfect balance of wholesome and indulgent. Curious what else makes it a must-try? Let’s dive into this colorful creation!
Why is This Salad So Appealing?
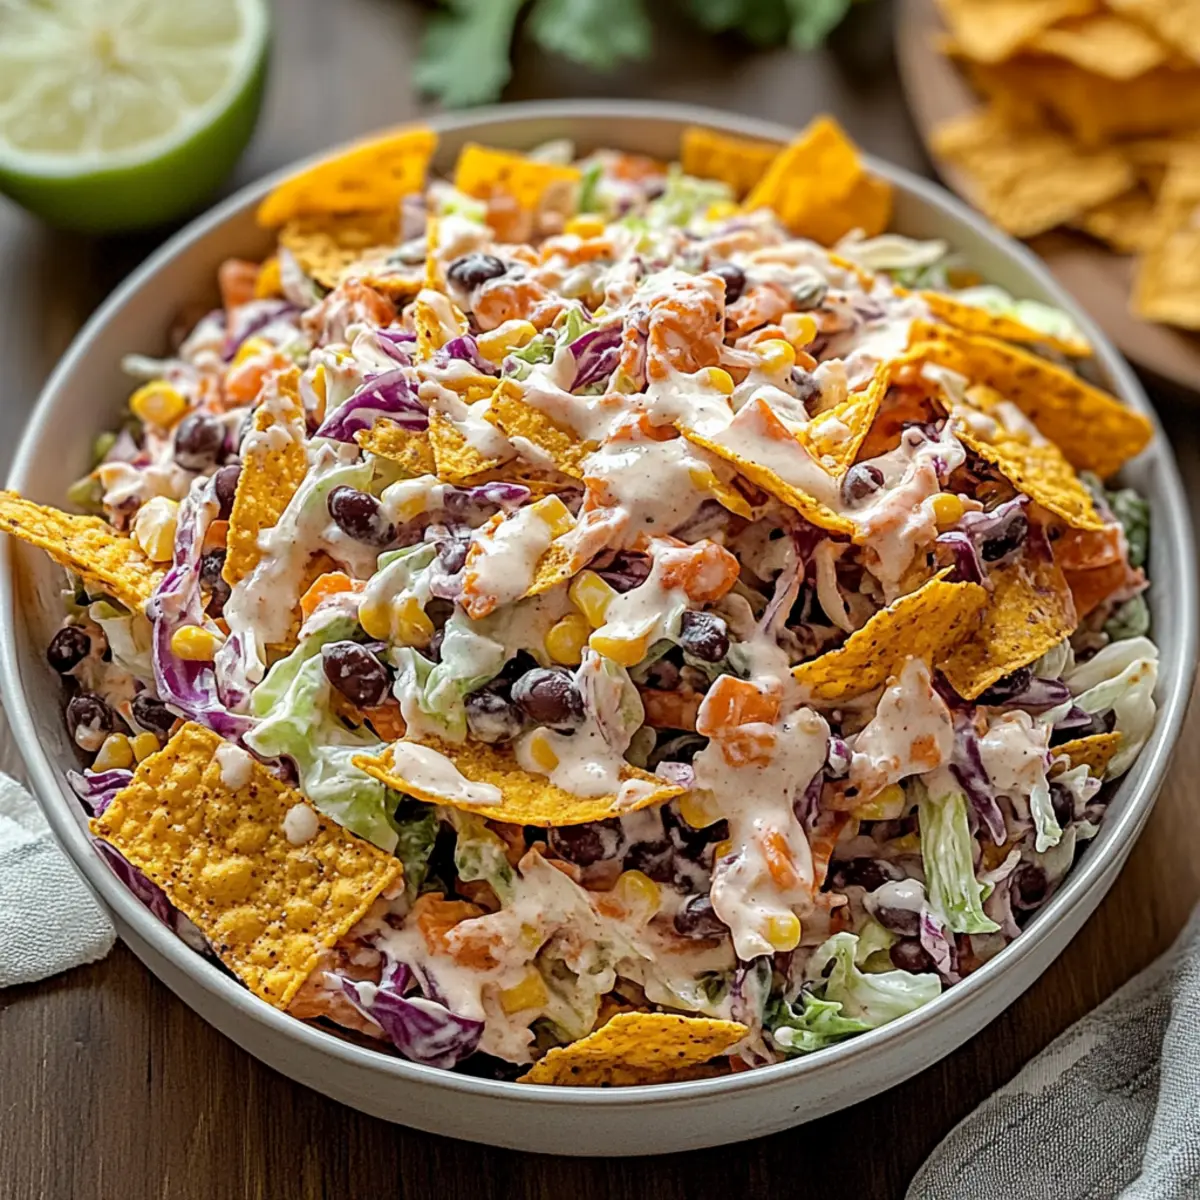
Vibrant Colors: This Frito Cowboy Cabbage Salad is a feast for the eyes, with a blend of colorful veggies that make every serving look like a party on a plate.
Quick Prep: With no cooking required, you can have this salad ready in just a few minutes—perfect for those busy weeknights or last-minute gatherings.
Nutritious and Wholesome: Packed with fiber-rich black beans and fresh vegetables, this salad is as nourishing as it is delicious, giving you all the energy you need.
Crowd-Pleasing Crunch: Topping it off with crunchy Chili Cheese Fritos adds an irresistible texture that makes it a guaranteed hit at any BBQ or potluck.
Versatile and Fun: Feel free to customize with your favorite mix-ins or swaps, like using Chicken Salad Apples for an extra protein boost or a dollop of creamy dressing from our Avocado Egg Salad recipe.
Frito Cowboy Cabbage Salad Ingredients
For the Salad Base
- Coleslaw Mix – Adds crunch and freshness; can substitute with finely shredded fresh cabbage.
- Black Beans – Provides protein and substance; choose canned, rinsed well for the best texture.
- Corn – Gives sweetness and texture; both canned and frozen work perfectly here.
- Red Bell Pepper – Brings sweetness and color; substitute with yellow or orange pepper if desired.
- Jalapeño – Introduces mild heat; omit or reduce for a milder option if you prefer.
- Green Onions – Adds sharpness and freshness; can replace with chives for a milder taste.
- Cilantro – Enhances flavor with herbal notes; omit if you're unsure about cilantro's taste.
For the Chipotle Dressing
- Sour Cream – Provides creaminess; substitute with yogurt for a lighter option.
- Mayonnaise – Adds richness; use vegan mayo for a plant-based version of this dressing.
- Lime Juice – Offers desired acidity; it’s essential for flavor, so don’t skip this!
- Chipotle Sauce – Delivers smokiness and heat; adjust based on your preferred spice level.
This Frito Cowboy Cabbage Salad is the perfect blend of nutrition and crunch, making it an exciting addition to any meal!
Step‑by‑Step Instructions for Frito Cowboy Cabbage Salad
Step 1: Combine the Salad Base
In a large mixing bowl, combine the coleslaw mix, drained black beans, corn, diced red bell pepper, finely chopped jalapeño, sliced green onions, and chopped cilantro. Stir these vibrant ingredients together gently until evenly mixed. You should see a colorful medley—this beautiful mix lays the foundation for your delicious Frito Cowboy Cabbage Salad.
Step 2: Prepare the Chipotle Dressing
In a separate medium bowl, whisk together the sour cream, mayonnaise, fresh lime juice, and chipotle sauce. Aim for a smooth, creamy dressing with a slightly tangy aroma. Taste the mixture to adjust the chipotle sauce to your preferred level of heat; the balance will enhance your Frito Cowboy Cabbage Salad beautifully.
Step 3: Combine Salad and Dressing
Pour the chipotle dressing over the salad ingredients in the large bowl. With a spatula, gently fold the dressing into the salad until every bit of the colorful veggies is coated in that creamy mixture. You'll notice a harmonious blend of flavors coming together, making it a deliciously inviting dish.
Step 4: Add Fritos Just Before Serving
To maintain their irresistible crunch, wait until just before serving to top the salad with Chili Cheese Fritos. Sprinkle a generous amount over the salad for an extra layer of texture and flavor. Mixing these in right before serving ensures your Frito Cowboy Cabbage Salad remains a delightful experience with every bite.
Make Ahead Options
These Frito Cowboy Cabbage Salads are a fantastic option for meal prep, saving you time during busy weeknights! You can prepare the salad base (coleslaw mix, black beans, corn, diced red bell pepper, jalapeño, green onions, and cilantro) up to 24 hours in advance by storing it in an airtight container in the refrigerator. For optimal freshness and to prevent sogginess, wait to mix in the chipotle dressing until just before serving. When ready to enjoy, toss the prepared salad with the dressing and top with Chili Cheese Fritos for that signature crunch. This make-ahead approach ensures your salad stays just as delicious as when freshly made, making meal planning a breeze!
What to Serve with Frito Cowboy Cabbage Salad
Dive into the vibrant world of Tex-Mex culinary delights, and discover the perfect pairings that elevate your meal!
-
Grilled Chicken Tacos: Juicy, seasoned chicken in soft tortillas complements the crunchy salad, creating a delicious blend of textures and flavors.
-
Cornbread Muffins: These slightly sweet, moist muffins add a comforting, homey touch that balances the salad's bold spices beautifully.
-
Spicy Black Bean Soup: Serve a warm bowl alongside for a heartier meal; the flavors from both dishes will harmonize wonderfully.
-
Chilled Fruit Salsa: Fresh fruit salsa, with its bright flavors, offers a refreshing contrast to the savory salad. It's an excellent way to cleanse the palate.
-
Avocado Lime Rice: The creamy avocado and citrusy notes add richness and round out the meal perfectly, enhancing the overall dining experience.
-
Iced Tea with Mint: A chilled mint iced tea adds a refreshing element, cleansing your palate between the hearty bites of salad and sides.
Enjoy these delightful accompaniments to take your Frito Cowboy Cabbage Salad to the next level of deliciousness!
Frito Cowboy Cabbage Salad Variations
Feel free to put your personal spin on this delicious salad and make it your own!
-
Vegan Twist: Substitute sour cream and mayonnaise with cashew cream or avocado for a creamy, dairy-free dressing. It adds a nutty flavor that complements the veggies beautifully.
-
Gluten-Free Option: Opt for gluten-free tortilla strips instead of Fritos to maintain that satisfying crunch while keeping it gluten-friendly. You won’t even miss the original!
-
Protein Packed: Add cooked quinoa or grilled chicken for an extra protein boost. This transformation will take your salad from a side dish to a hearty main course.
-
Spicy Kick: Mix in diced pickled jalapeños or a dash of hot sauce to elevate the heat level and create a zesty explosion of flavor that spicy food lovers will adore!
-
Flavorful Beans: Swap black beans for kidney beans or garbanzo beans to change up the texture and taste. Each type of bean brings its own unique flair to the dish.
-
Creamy Avocado: Incorporate diced avocado for a rich, creamy element that balances the crunch of the salad. The creaminess works harmoniously with the spicy chipotle dressing.
-
Crunchy Toppings: Instead of Chili Cheese Fritos, use crushed tortilla chips or crispy onions for a delightful alternate crunch that's equally satisfying. Try a mix for even more texture!
You might also enjoy how these variations complement other recipes like Jello Salad Cottage or some zingy Fried Shrimp Cabbage to round out your meal beautifully.
Storage Tips for Frito Cowboy Cabbage Salad
- Fridge: Store the Frito Cowboy Cabbage Salad in an airtight container for up to 2 days. Be sure to keep the Chili Cheese Fritos separate until ready to serve to maintain their crunch.
- Freezer: It's best not to freeze this salad due to the fresh vegetables and creamy dressing. However, you can freeze leftover chipotle dressing in an airtight container for up to 1 month.
- Reheating: Since this is a no-cook salad, there's no need for reheating. Simply mix up any leftovers, and refresh with additional coleslaw mix and lime juice for a fresh taste.
- Refreshing Tip: Before serving leftovers, taste and adjust the seasoning to brighten flavors, as they may mellow after storage.
Expert Tips for Frito Cowboy Cabbage Salad
- Serve Immediately: Adding Fritos right before serving keeps them crunchy and prevents sogginess—no one likes a soggy salad!
- Taste First: Adjust the seasoning after mixing to ensure the flavors are just right; different brands of chipotle sauce can vary in saltiness.
- Drain Well: Make sure the black beans and corn are well-drained to avoid excess moisture in your Frito Cowboy Cabbage Salad.
- Customize Flavor: Feel free to experiment with other veggies or beans to make the salad your own; the base is versatile and open to interpretation!
- Chill Before Serving: For enhanced flavor, let the salad chill in the refrigerator for about 30 minutes before serving; it allows the ingredients to marry beautifully.
Frito Cowboy Cabbage Salad Recipe FAQs
What is the best way to select ripe vegetables for this salad?
Absolutely! When choosing vegetables, look for vibrant colors and firm textures. For the red bell pepper, ensure it has shiny skin without blemishes. For the jalapeño, choose ones that are firm with a bright green color. If you're using corn, fresh ears should be plump and tightly wrapped in their husks.
How should I store leftovers of the Frito Cowboy Cabbage Salad?
You can store your Frito Cowboy Cabbage Salad in an airtight container in the fridge for up to 2 days. To keep that delightful crunch of the Chili Cheese Fritos, store them separately. Before serving leftovers, you might want to refresh the salad with extra coleslaw mix and a squeeze of lime juice for a zesty boost!
Can I freeze the Frito Cowboy Cabbage Salad?
It's best not to freeze the Frito Cowboy Cabbage Salad as the fresh vegetables and creamy dressing do not hold up well in the freezer. However, if you have extra chipotle dressing, you can freeze that in an airtight container for up to 1 month. When you’re ready to use it, thaw it in the fridge overnight, stirring well before using!
What should I do if my salad is too watery?
If your salad turns out too watery, it’s likely due to excess moisture from the beans or corn. To fix this, strain the salad to remove excess liquid. After that, you might want to mix in a bit of extra coleslaw mix to absorb some of the moisture. Taste and adjust seasoning afterward; this will help refresh the flavors!
Are there any dietary considerations for this salad?
Very! This Frito Cowboy Cabbage Salad can easily be made vegan by swapping the sour cream and mayonnaise with plant-based alternatives. Additionally, it’s gluten-free if you choose gluten-free versions of the chipotle dressing and Fritos. Just be mindful of cross-contamination if cooking for someone with serious allergies!
How can I customize this salad for different tastes?
The more the merrier when it comes to customization! You could add extra veggies like diced cucumbers or cherry tomatoes for added freshness. For a protein boost, consider adding grilled chicken or diced avocado. You can even swap the black beans for chickpeas or pinto beans to change the flavor profile while still keeping it hearty and delicious!

Crunchy Frito Cowboy Cabbage Salad for Quick Flavor Bliss
Ingredients
Equipment
Method
- Combine the coleslaw mix, drained black beans, corn, diced red bell pepper, finely chopped jalapeño, sliced green onions, and chopped cilantro in a large mixing bowl.
- In a separate bowl, whisk together the sour cream, mayonnaise, lime juice, and chipotle sauce for the dressing.
- Pour the chipotle dressing over the salad ingredients and gently fold until coated.
- Top with Chili Cheese Fritos just before serving to maintain their crunch.