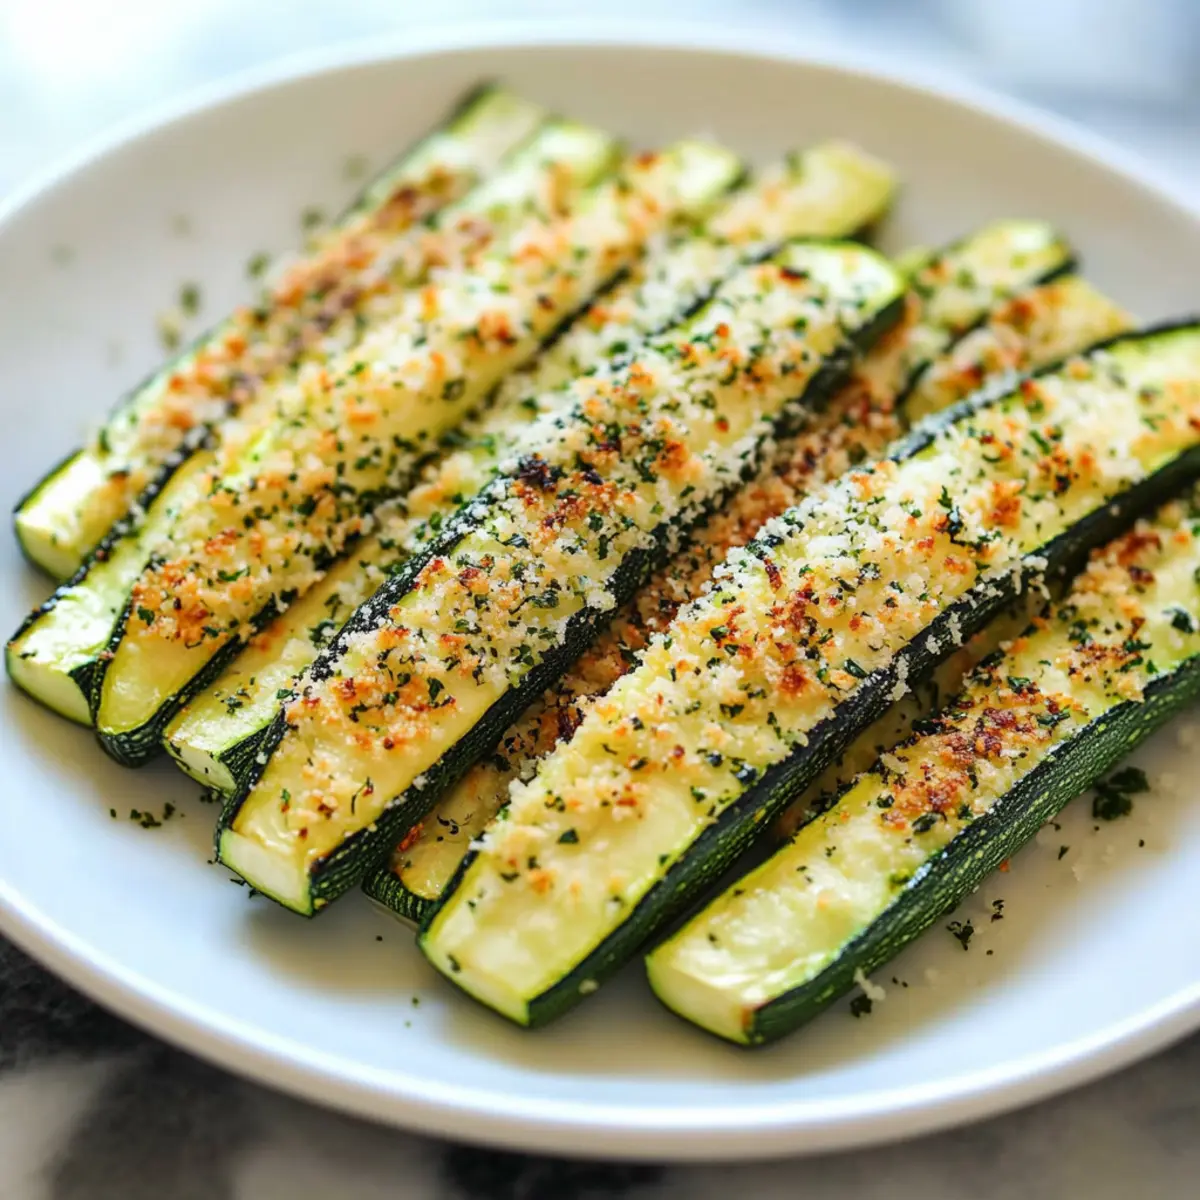
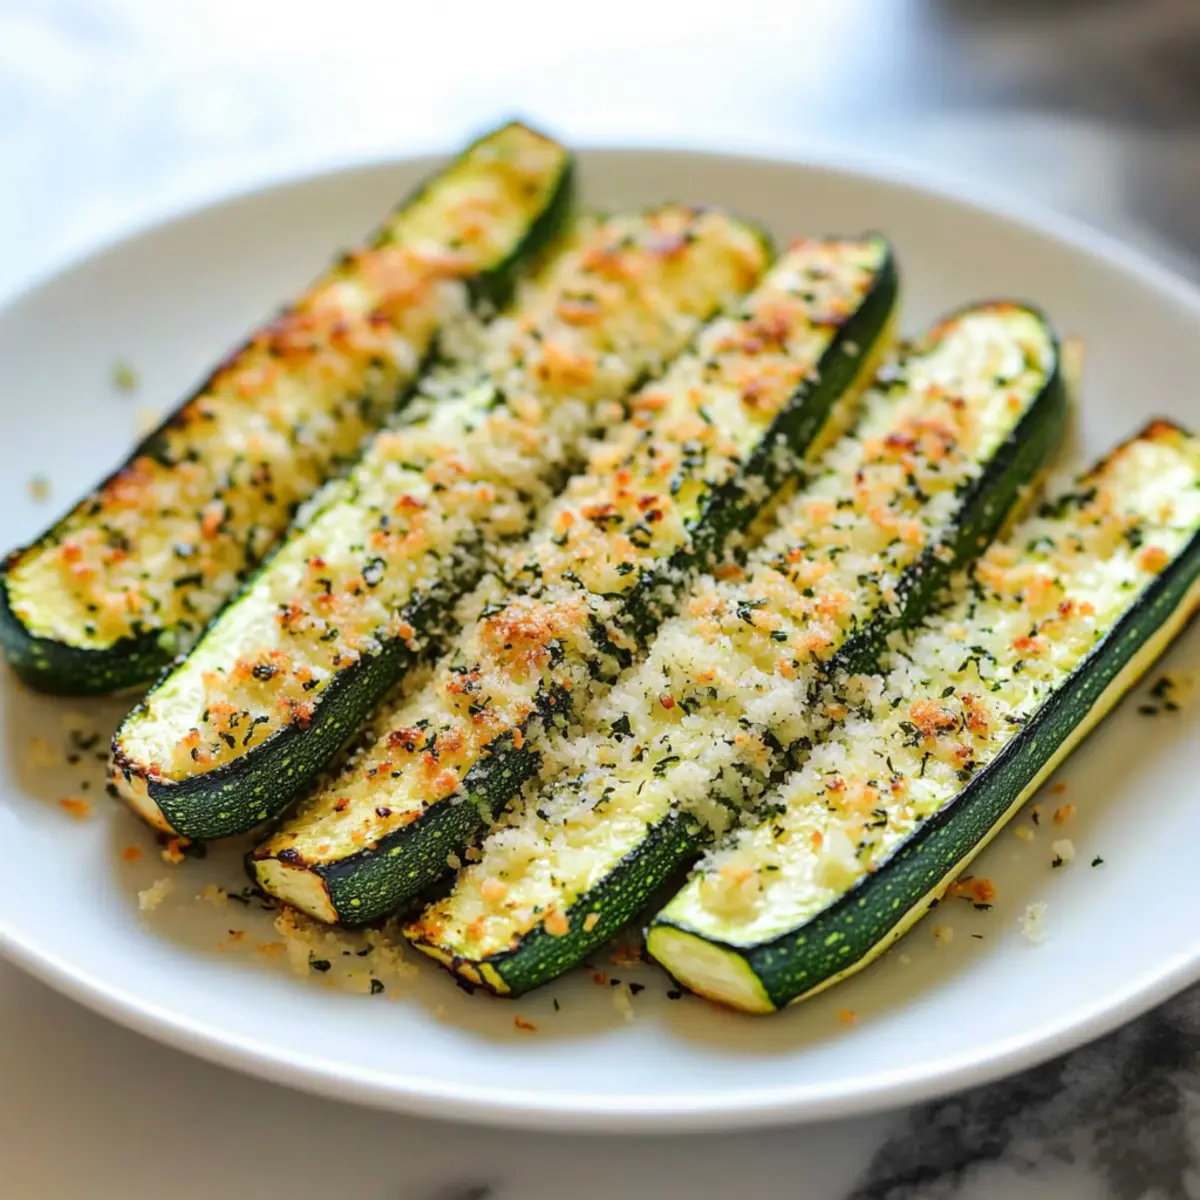
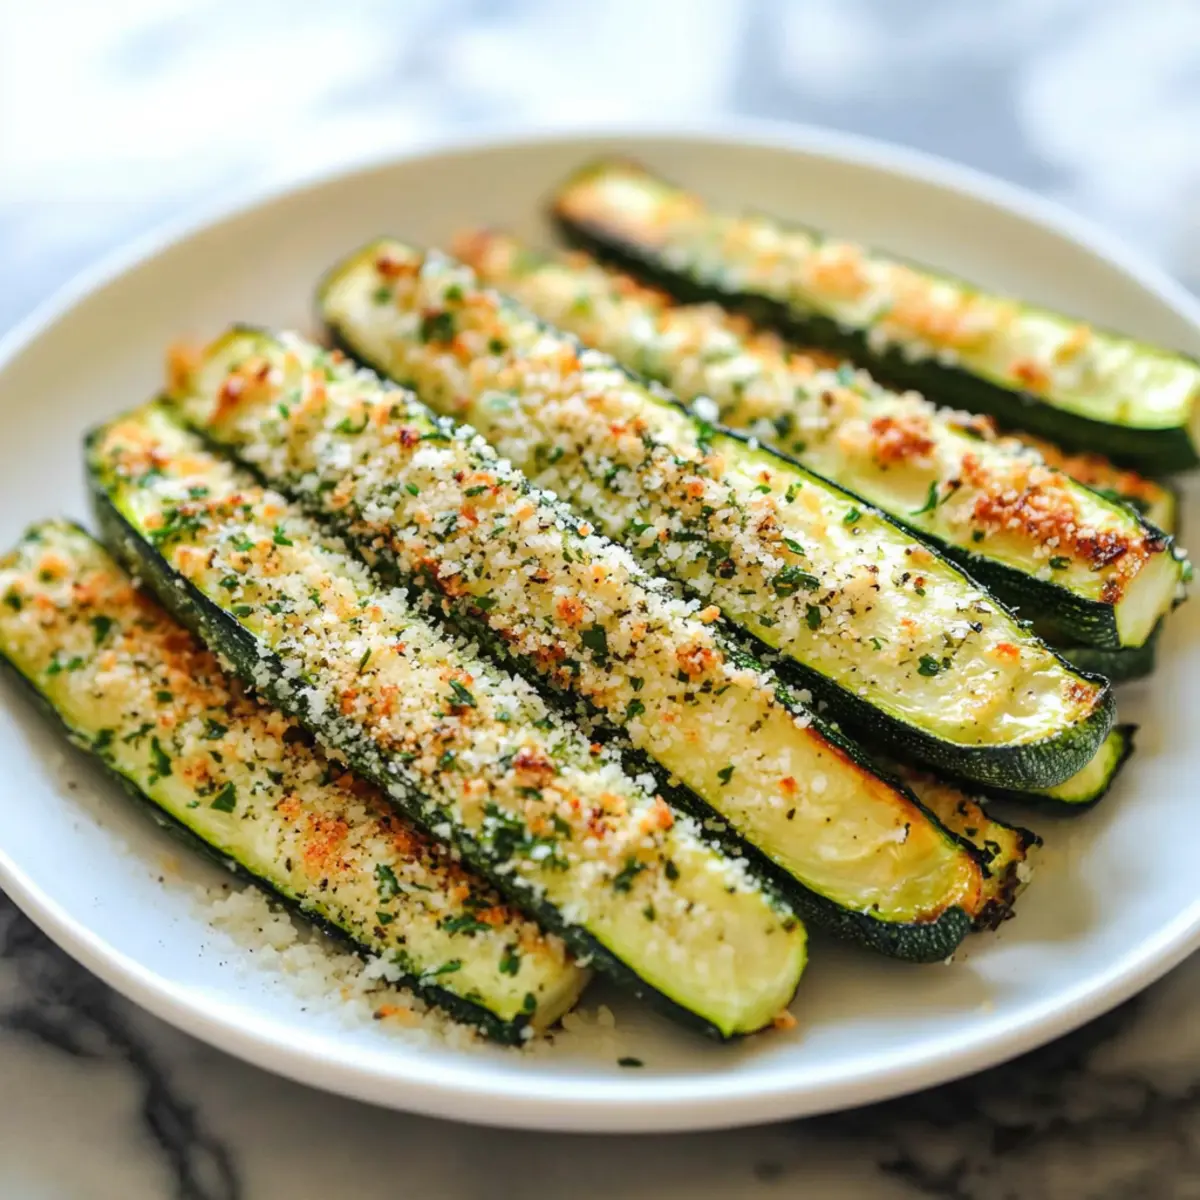
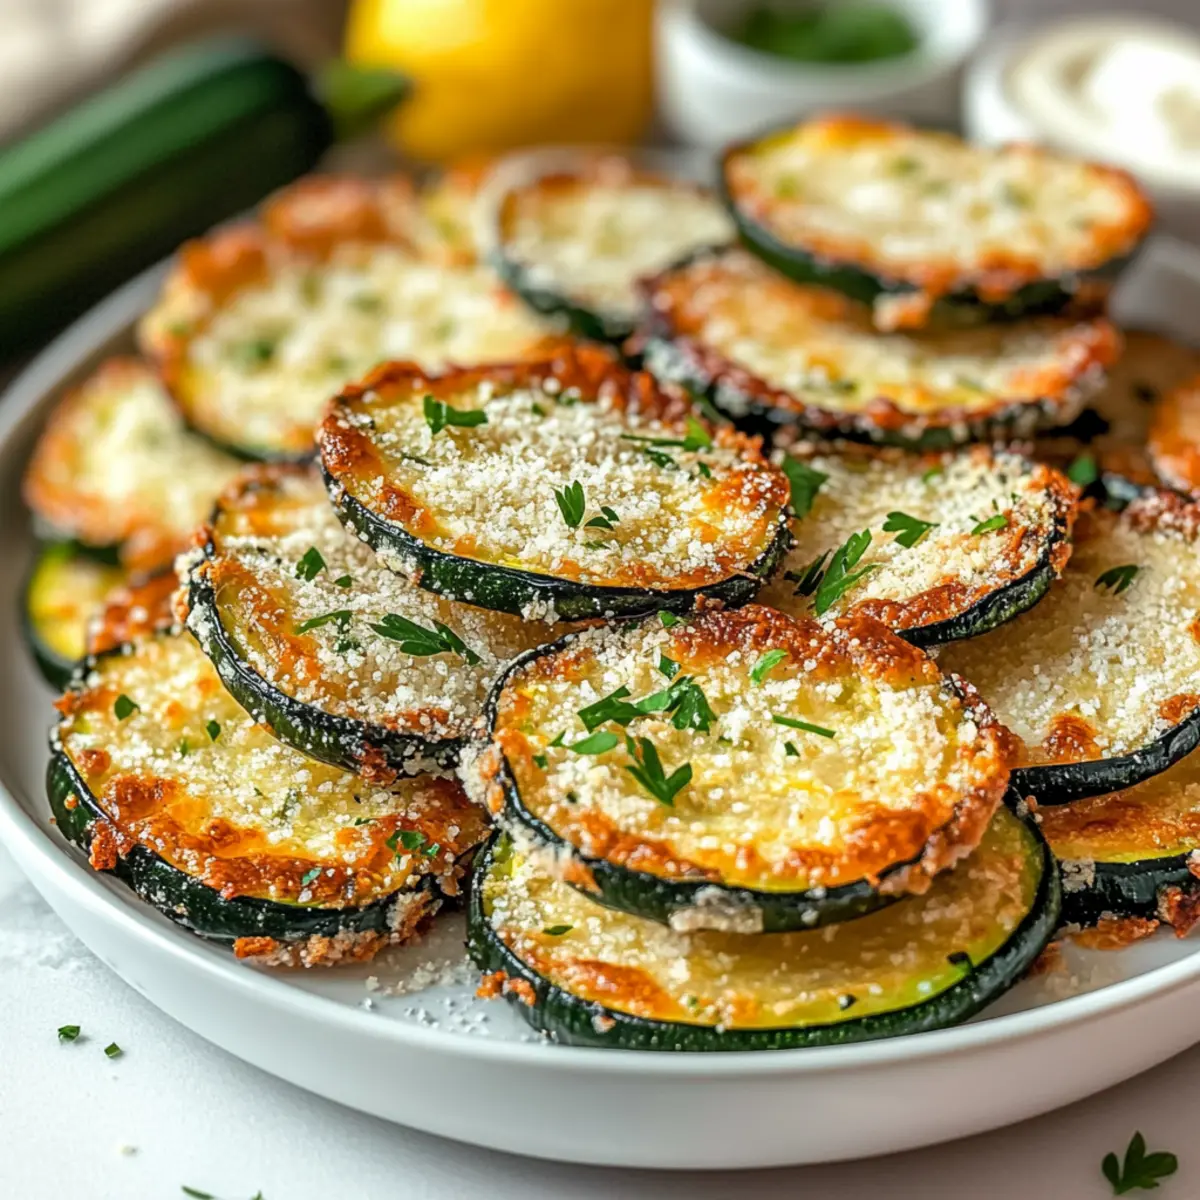
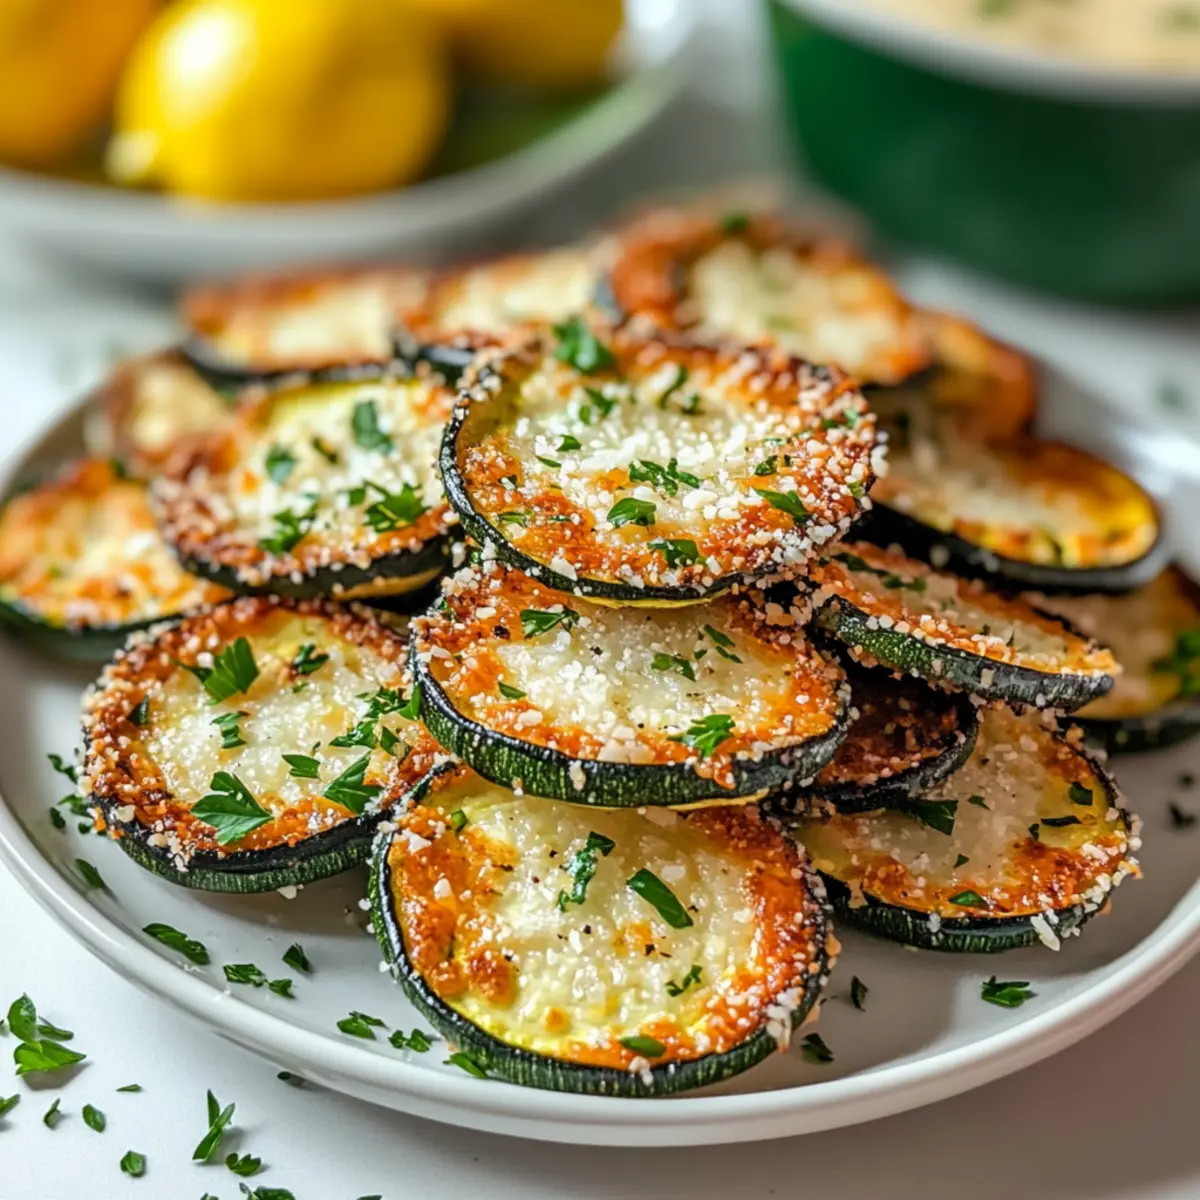
As I prepared to pull dinner together one evening, my craving for a satisfying, healthy crunch clashed with the dull options in my pantry. That's when I decided to whip up these Crispy Baked Parmesan Zucchini Rounds. This delightful recipe not only transforms ordinary zucchini into an irresistible treat, but it also fits snugly into any clean-eating plan. Ready in under 30 minutes and using just a handful of wholesome ingredients, these rounds deliver both taste and nutrition without any guilt. They’re perfectly crispy on the outside, tender on the inside, and are bound to become your new favorite healthy snack or side dish! Curious about how to make this easy and delicious dish? Let’s dive into the recipe!
Why is this zucchini recipe a must-try?
Simplicity: With just a few ingredients, these Crispy Baked Parmesan Zucchini Rounds come together effortlessly. Perfect for busy evenings!
Irresistible Crunch: The zucchini transforms into a deliciously crispy snack, resembling chips without the guilt.
Flavor Packed: Rich Parmesan and savory garlic elevate this dish, making it a hit with kids and adults alike.
Versatile Serving: These rounds can be enjoyed as a healthy snack, a side dish, or paired with your favorite dip, like marinara sauce, for added fun!
Quick Preparation: Whip them up in less than 30 minutes; a great option for those craving a fast yet nourishing meal.
Diet-Friendly: Gluten-free, vegetarian, and low-calorie—these bites effortlessly fit into any clean-eating plan, making them everyone's new favorite!
Crispy Baked Parmesan Zucchini Ingredients
• Make your cooking experience delightful and simple with these essential ingredients!
For the Zucchini Rounds
- Zucchini – Provides the base, low in calories and high in antioxidants; use medium-sized zucchinis for the best results.
- Olive Oil – Aids in browning and enhances flavor; substitute with avocado oil for a different taste.
For the Coating
- Freshly Grated Parmesan Cheese – Adds a rich, cheesy coating that crisps up nicely; avoid pre-shredded cheese for better melting quality.
- Garlic Powder – Infuses flavor into the zucchini; can replace with fresh minced garlic—just adjust quantity to taste.
- Italian Seasoning – Blends herbs to elevate the taste; alternatively, use a mix of dried oregano and basil.
- Sea Salt – Enhances all flavors; adjust to taste depending on dietary needs.
- Black Pepper – Adds a hint of spice; use cayenne for more heat.
For Garnish
- Chopped Parsley or Lemon Zest – Brightens and adds freshness; feel free to use fresh herbs for variety.
Prepare to savor every crispy bite of these Crispy Baked Parmesan Zucchini Rounds! They're a wholesome treat that whisks away the boredom of fast food and embraces the joys of home cooking.
Step‑by‑Step Instructions for Crispy Baked Parmesan Zucchini
Step 1: Preheat and Prepare
Begin by preheating your oven to 425°F (220°C) and lining a baking sheet with parchment paper for easy cleanup. This step is crucial for ensuring your Crispy Baked Parmesan Zucchini rounds achieve that perfect golden crisp. While the oven heats, gather your ingredients to streamline your cooking process.
Step 2: Slice the Zucchini
Carefully slice the zucchinis into even 1/4-inch thick rounds, ensuring uniformity for even cooking. This thickness helps them become perfectly crispy without drying out. Once sliced, pat the rounds dry with a paper towel to remove any excess moisture that may hinder crispiness during baking.
Step 3: Combine Ingredients
In a large mixing bowl, toss the zucchini rounds with olive oil, garlic powder, Italian seasoning, sea salt, and black pepper until each piece is evenly coated. This combination not only enhances the flavor of your zucchini but also helps the coating adhere during baking. Allow the zucchini to marinate for a few minutes to absorb those delicious seasonings.
Step 4: Add Parmesan
Now, it's time to add the freshly grated Parmesan cheese to the bowl. Gently toss the zoodles again to ensure the cheesy goodness is evenly distributed. Keeping a small amount of Parmesan aside will help achieve that extra crispy topping later on, making your Crispy Baked Parmesan Zucchini even more irresistible.
Step 5: Arrange on Baking Sheet
Carefully arrange the zucchini slices in a single layer on the prepared baking sheet, making sure they don't overlap, as this is key to achieving crispiness. If your baking sheet is too crowded, feel free to use a second sheet. This spacing allows the hot air to circulate freely around each piece while baking.
Step 6: Top with Extra Parmesan
Sprinkle the reserved Parmesan cheese over the tops of the arranged zucchini rounds. This adds a delightful cheesy crust that will become wonderfully crisp during baking, enhancing the overall flavor and texture of the Crispy Baked Parmesan Zucchini. Make sure every piece gets its fair share for that cheesy finish!
Step 7: Bake to Perfection
Place the baking sheet in the preheated oven and bake for 18-22 minutes. Halfway through, carefully flip the zucchini slices to ensure even browning and that crisp, golden finish. Keep a close eye on them towards the end; you want them beautifully golden brown without burning.
Step 8: Cool and Garnish
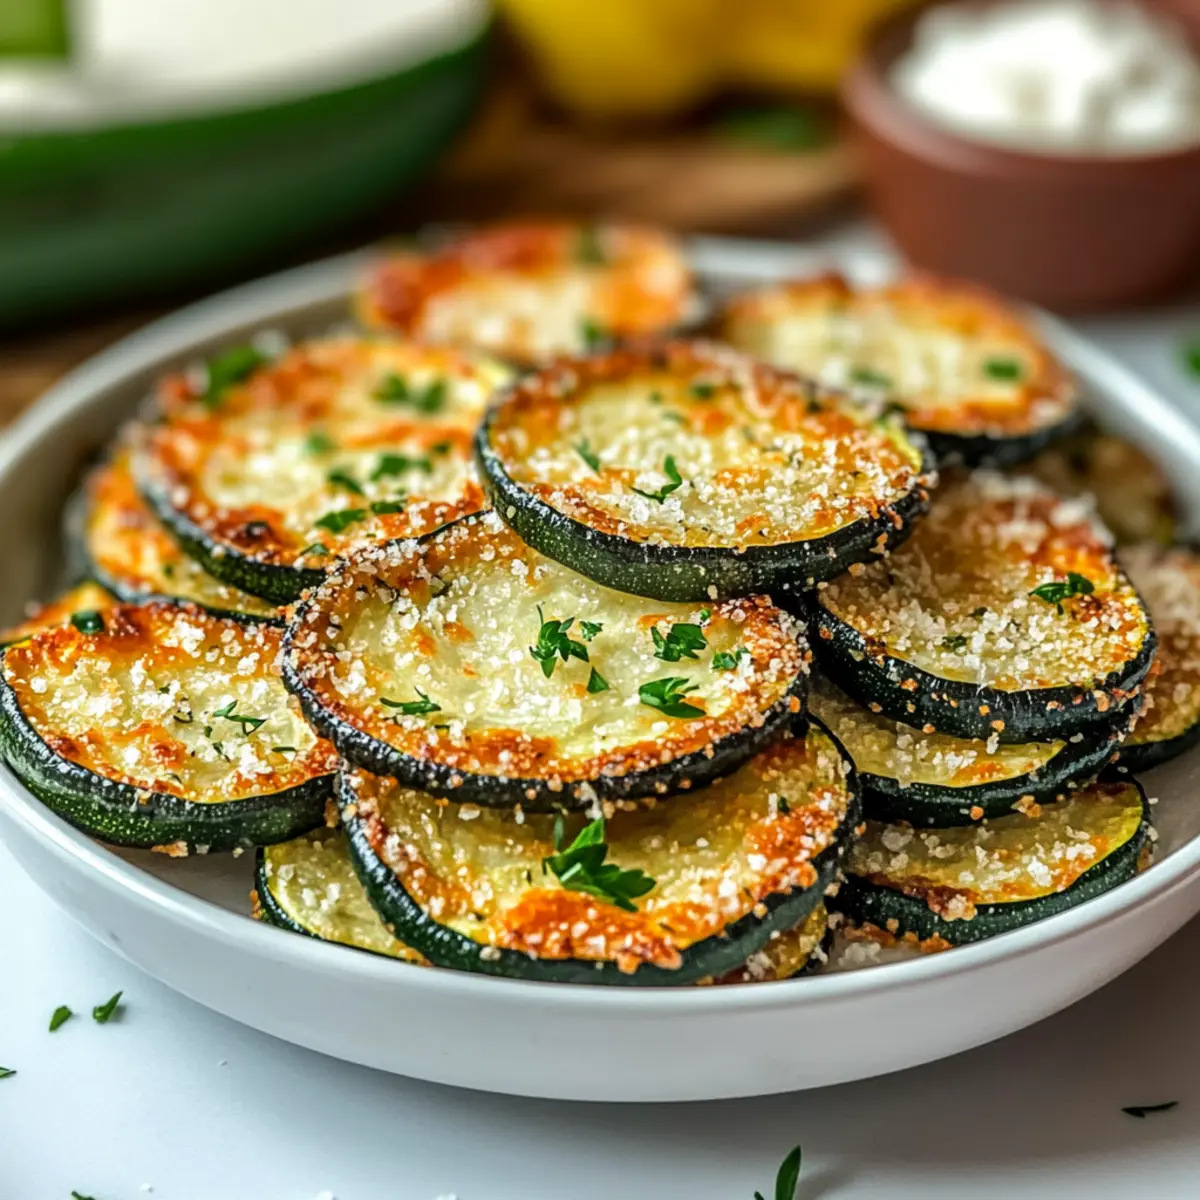
Once finished baking, remove the zucchini from the oven and allow them to cool for a few moments. To elevate the dish, garnish with chopped parsley or a sprinkle of lemon zest for a burst of freshness. Serve your Crispy Baked Parmesan Zucchini warm, and watch them quickly disappear!
What to Serve with Crispy Baked Parmesan Zucchini
Picture a delightful meal where each bite is a celebration, perfectly complementing the crispy goodness of these zucchini rounds!
-
Creamy Garlic Dip: This luscious dip adds a rich layer of flavor, making each bite more irresistible. The creaminess balances the crispiness beautifully.
-
Quinoa Salad: A refreshing side packed with veggies and protein. The nuttiness of quinoa contrasts well with the cheesy zucchini, creating a wholesome dish.
-
Grilled Chicken: Juicy, tender chicken adds heartiness to your meal, while the savory flavor echoes the seasoning in the zucchini rounds, achieving a harmonious balance.
-
Steamed Asparagus: Bright green asparagus not only brings freshness but also a satisfying crunch that complements the texture of the baked zucchini, enhancing your dining experience.
-
Marinara Sauce: This classic pairing creates a perfect dipping experience. The rich tomato sauce wonderfully contrasts the cheesy, savory flavor of the zucchini, making each bite delightfully saucy!
-
Chilled White Wine: A crisp Sauvignon Blanc enhances the meal with its refreshing acidity, elevating the entire dining experience and rounding out the flavors delightfully.
Let your imagination run wild with these pairings; your dinner table will soon become the talk of the family!
Expert Tips for Crispy Baked Parmesan Zucchini
-
Choose Fresh Zucchini: Opt for fresh, whole zucchinis to ensure the best flavor and texture in your Crispy Baked Parmesan Zucchini. Avoid pre-sliced options!
-
Pat Dry Thoroughly: After slicing, pat the zucchini rounds dry to remove moisture. This step is crucial for achieving that ideal crispiness.
-
Single Layer Only: Arrange the zucchini in a single layer on the baking sheet; overcrowding leads to steaming rather than crisping. If needed, use two trays.
-
Extra Crunch: For an added crunchy texture, try broiling the zucchini for the last 1-2 minutes, but keep a close watch to prevent burning.
-
Store Properly: Store leftovers in an airtight container for up to 3 days, and reheat in the oven for a few minutes to regain their crispy texture.
Make Ahead Options
These Crispy Baked Parmesan Zucchini Rounds are ideal for meal prep enthusiasts! You can slice and season the zucchini rounds up to 24 hours in advance; simply store them in an airtight container in the refrigerator to keep them fresh and prevent moisture buildup. Additionally, you can pre-grate the Parmesan cheese and keep it in a separate container. When you're ready to bake, just preheat your oven, toss the seasoned zucchini with the cheese, arrange them on the baking sheet, and bake for 18-22 minutes. This approach saves precious time during busy weeknights while ensuring your dish is just as delicious as if made fresh!
Crispy Baked Parmesan Zucchini Variations
Feel free to customize these crispy treats in ways that excite your taste buds!
-
Gluten-Free Crunch: Mix in gluten-free breadcrumbs with the parmesan for an extra crispy bite. The added texture makes each round uniquely delightful.
-
Spicy Kick: Add red pepper flakes or smoked paprika to bring a zesty heat to your zucchini. The combination of spice and cheese will tantalize your palate!
-
Cheese Twist: Swap out the parmesan for aged cheddar or mozzarella for a different cheesy experience. Each cheese brings a distinct flavor that can shift this dish from comforting to gourmet.
-
Herb Explosion: Use fresh herbs like basil or thyme instead of dried Italian seasoning to enhance freshness. The aroma will fill your kitchen and make this dish even more delightful.
-
Lemon Zing: Drizzle lemon juice over the zucchini rounds before baking for a bright, citrusy flavor. Pair it with a sprinkle of lemon zest after baking for an extra pop!
-
Nutty Flavor: Sprinkle chopped nuts like pine nuts or walnuts on top for added crunch and depth. They’ll introduce a satisfying element of surprise in each bite.
-
Dairy-Free Option: For a vegan twist, substitute cheese with nutritional yeast. It provides a cheesy flavour that won’t disappoint while keeping it plant-based.
-
Dip Delight: Serve with a tasty dip, such as a yogurt-based ranch or spicy marinara. This simple addition can elevate snack time and keep things interesting. Enjoy them alongside your favorite side dishes, like Cheesy Zucchini Bake or Fish Taco Bowls, for a flavorful and satisfying meal!
There you go! With these variations, your Crispy Baked Parmesan Zucchini will become a versatile favorite that can easily adapt to different tastes and occasions. Happy cooking!
How to Store and Freeze Crispy Baked Parmesan Zucchini
Airtight Container: Store leftovers in an airtight container for up to 3 days in the fridge. This helps maintain their flavor and prevent moisture loss.
Freezer: For longer storage, freeze the zucchini rounds in a single layer on a baking sheet, then transfer to a freezer bag. They can be frozen for up to 2 months.
Reheating: Reheat leftovers in the oven at 375°F (190°C) for about 5-7 minutes, or until crispy. Avoid a microwave to ensure they don't become soggy.
Flavor Preservation: When freezing, consider layering parchment paper between zucchini rounds to prevent sticking and ensure they keep the perfect bite when reheated.
Crispy Baked Parmesan Zucchini Recipe FAQs
How do I choose ripe zucchinis for this recipe?
Absolutely! When selecting zucchinis, look for medium-sized ones that are firm and free of dark spots or blemishes on the skin. A fresh zucchini should feel heavy for its size and have a vibrant color, indicating it's packed with flavor and nutrition!
What is the best way to store leftovers of Crispy Baked Parmesan Zucchini?
Very good question! To store leftovers, place them in an airtight container in the fridge for up to 3 days. This keeps them fresh and maintains their flavor. When you're ready to enjoy them again, simply reheat them in the oven at 375°F (190°C) for about 5-7 minutes to restore that crispy texture!
Can I freeze Crispy Baked Parmesan Zucchini?
Yes, you can! To freeze them, first arrange the zucchini rounds in a single layer on a baking sheet and freeze until solid. Once frozen, transfer them to a freezer bag, removing as much air as possible, and store for up to 2 months. When you’re ready to eat, you can bake them from frozen—just increase the cooking time by a few minutes.
What should I do if my zucchini slices aren’t crisping up?
If your Crispy Baked Parmesan Zucchini isn’t as crispy as you'd like, there are a couple of fixes! First, be sure they’re not overlapping on the baking sheet; this can trap moisture and lead to steaming instead. Also, consider broiling them for the last 1-2 minutes of cooking, but keep a close eye to prevent burning. Patting the slices dry before seasoning can also help!
Are there any dietary considerations with this recipe?
Great point! This dish is gluten-free and vegetarian, making it suitable for many dietary preferences. However, if you or your guests have dairy allergies, you can experiment with using a dairy-free cheese alternative. Just ensure that the products you choose align with the dietary requirements of those you’re serving!
Can I adjust the seasonings in this recipe?
Absolutely! The beauty of this recipe is its versatility. You can easily adjust the garlic powder, add red pepper flakes for heat, or swap out the Italian seasoning for your favorite herb mix. Feel free to get creative—make it your own!

Crispy Baked Parmesan Zucchini: Your New Favorite Healthy Snack
Ingredients
Equipment
Method
- Preheat your oven to 425°F (220°C) and line a baking sheet with parchment paper.

- Slice the zucchinis into even 1/4-inch thick rounds and pat them dry with a paper towel.
- In a large bowl, toss the zucchini rounds with olive oil, garlic powder, Italian seasoning, sea salt, and black pepper until evenly coated.
- Add the freshly grated Parmesan cheese and gently toss again to evenly distribute.
- Arrange the zucchini slices in a single layer on the prepared baking sheet.
- Sprinkle reserved Parmesan cheese over the tops of the zucchini rounds.
- Bake in the preheated oven for 18-22 minutes, flipping halfway through.
- Allow to cool slightly before garnishing with chopped parsley or lemon zest and serve warm.