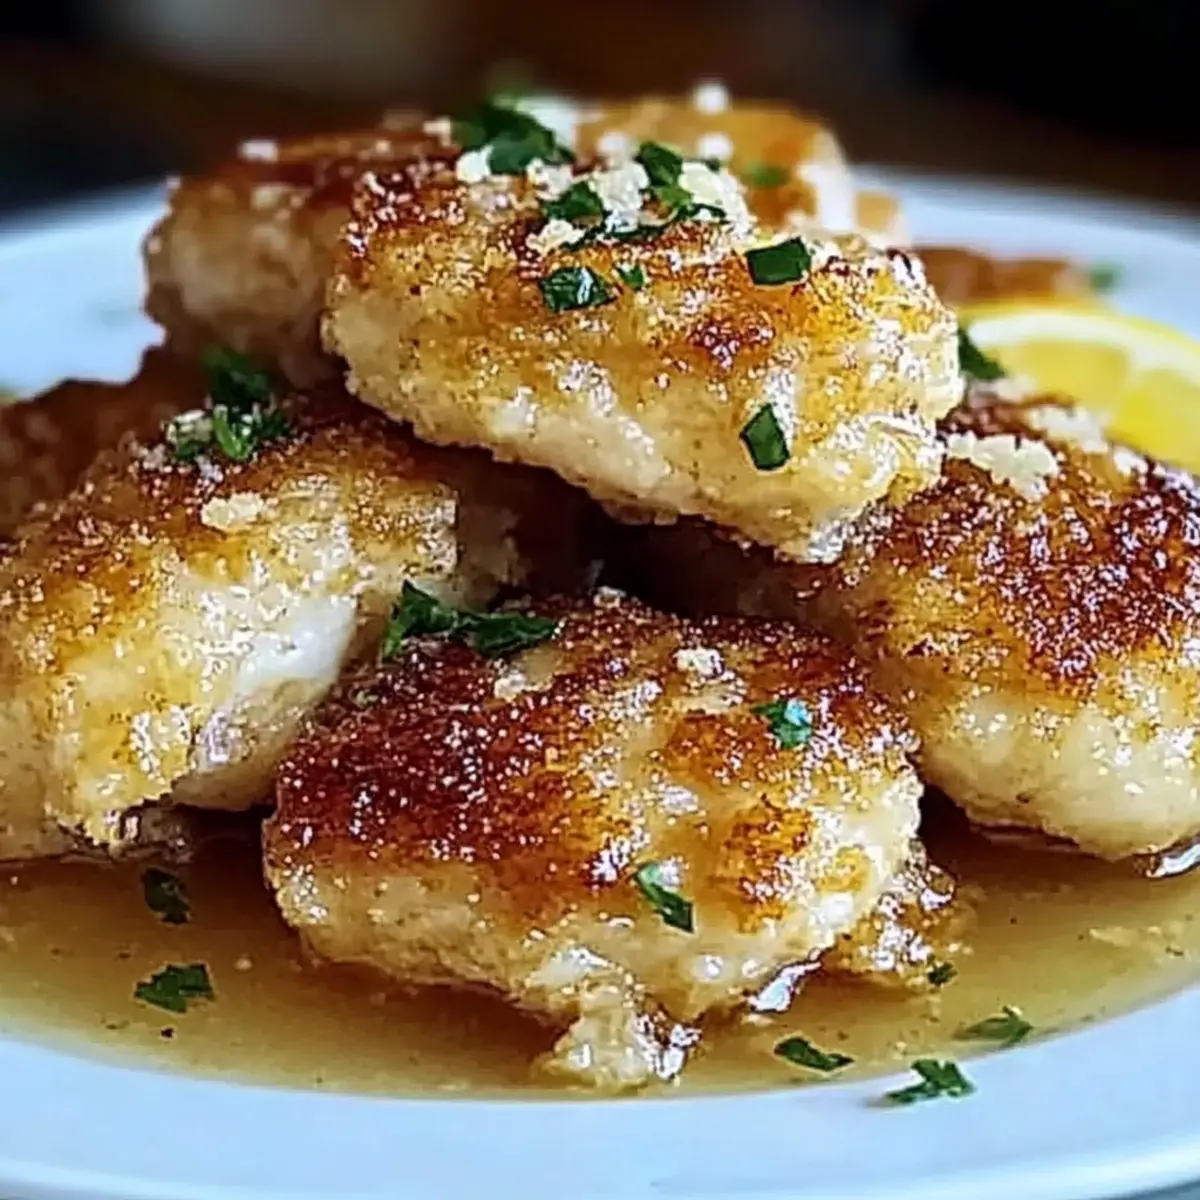
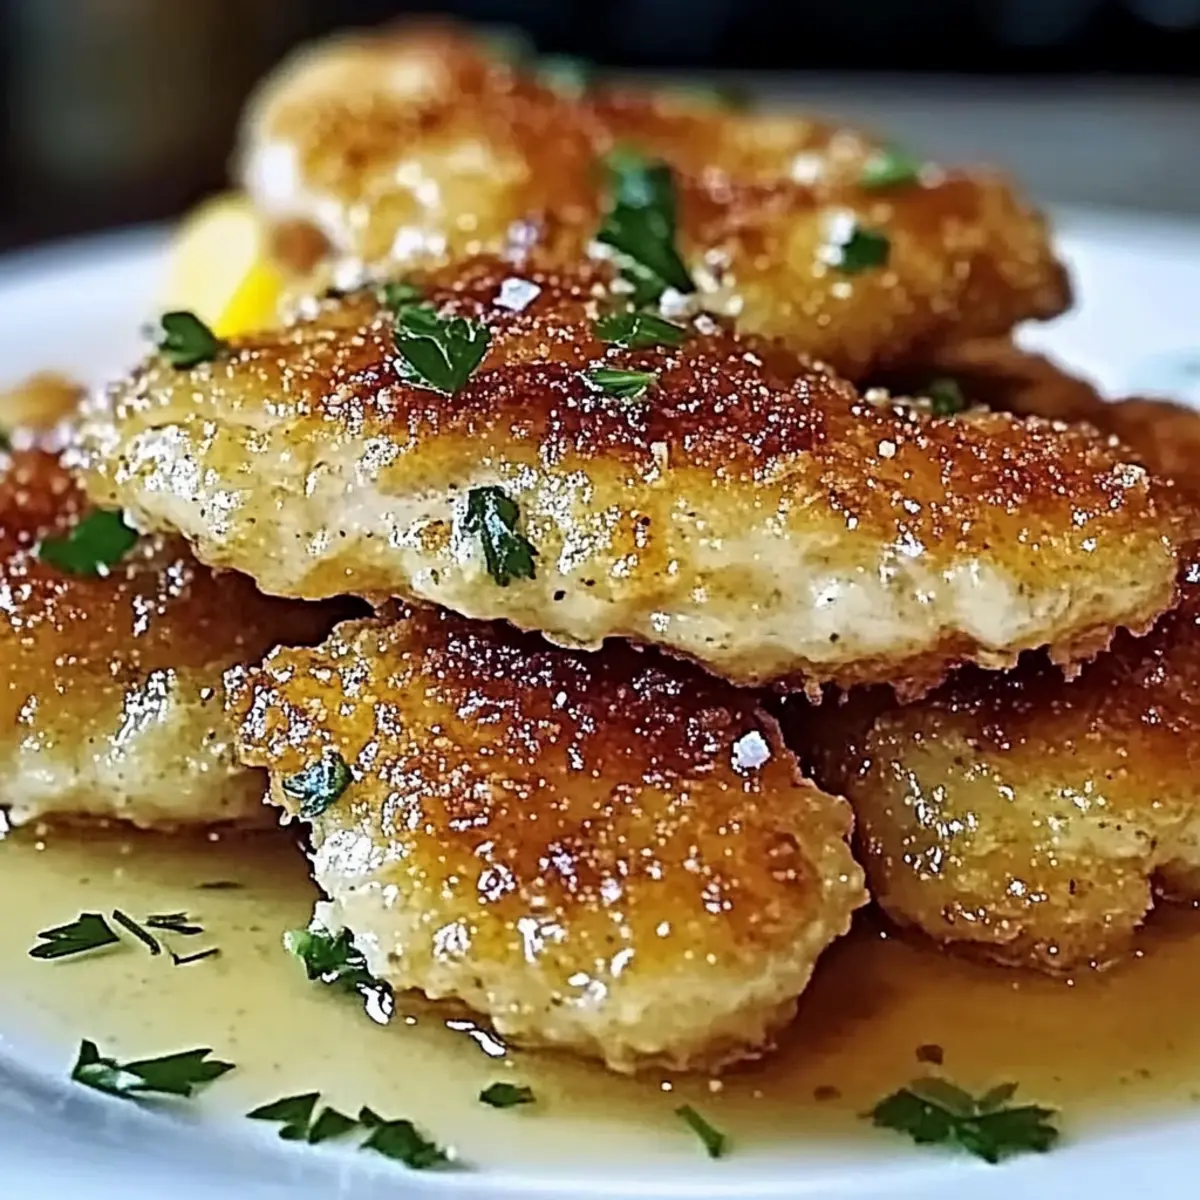
As I shifted through my pantry, searching for the perfect inspiration for dinner, an unexpected craving hit me—something bright, crispy, and utterly fulfilling. This led me to craft an unforgettable dish: Easy Zesty Lemon Pecorino Crispy Chicken. Not only does this recipe deliver a satisfying crunch that’s hard to resist, but it also brings the sunny, invigorating flavor of lemon to the forefront. In just 55 minutes, you can whip up a mouthwatering meal that’s both quick and effortless, making it ideal for those busy weeknights when you want homemade goodness without fuss. Each bite offers a perfectly balanced texture—crispy on the outside and juicy within—transforming your dinner table into a haven of flavorful delight. Are you ready to bring some zest to your evening?
Why is This Chicken Recipe a Must-Try?
Flavor Explosion: The zesty lemon and sharp Pecorino cheese create a heavenly burst of flavor that you'll crave.
Quick and Easy: This recipe is perfect for busy weeknights, taking just 55 minutes from start to finish—ideal for impromptu dinners.
Crispy Delight: Achieve a mouthwatering crispy texture that's both satisfying and visually appealing, sure to impress family and friends.
Versatile Pairing: Serve it alongside roasted vegetables or a fresh green salad for a balanced meal that complements the chicken beautifully.
Meal Prep Friendly: Leftovers stay tasty for days and can be reheated in the oven to maintain that delightful crunch! Don't forget to check out my Lemon Chicken Soup for another refreshing dinner option.
Zesty Lemon Pecorino Crispy Chicken Ingredients
For the Chicken
- Boneless Skinless Chicken Breasts – Ensure even thickness for uniform cooking.
- All-Purpose Flour – Creates a base coating for crispiness; use gluten-free flour if needed.
- Large Eggs – Acts as a binding agent for breadcrumbs; crucial for adherence.
- Breadcrumbs (preferably Panko) – Provides a light and crispy texture; substitute with crushed crackers if desired.
For the Flavoring
- Grated Pecorino Cheese – Adds a sharp, salty flavor that enhances the dish; Parmesan can be used as a substitute.
- Zest of 1 large lemon – Offers bright, fragrant citrus notes; fresh zest is best for flavor.
- Juice of 1 large lemon – Adds acidity that balances the richness of the chicken; fresh juice recommended.
- Garlic, minced – Infuses a robust flavor; garlic powder can substitute in a pinch.
- Salt & Black Pepper – Essential for seasoning; adjust to taste.
- Paprika – Adds depth of flavor and subtle heat; try smoked paprika for a twist.
- Dried Oregano – Introduces herbal notes; fresh oregano can also be used.
For Cooking and Garnish
- Olive Oil (for frying) – Needed for cooking and achieving a golden crust; can substitute with vegetable oil.
- Fresh Parsley, chopped (for garnish) – Adds color and freshness; use other herbs if preferred.
Discover how to bring zesty flavor to your dinner with this Zesty Lemon Pecorino Crispy Chicken recipe that will have everyone asking for seconds!
Step‑by‑Step Instructions for Zesty Lemon Pecorino Crispy Chicken
Step 1: Prep Chicken
Begin by pouncing the boneless skinless chicken breasts to an even thickness of about ½ inch. Place the chicken between plastic wrap and use a meat mallet or rolling pin to ensure uniform cooking. This preparation will help them maintain moisture while cooking, so your Zesty Lemon Pecorino Crispy Chicken is perfectly juicy inside.
Step 2: Set Up Breading Station
Prepare three shallow dishes for the breading process. In the first dish, add all-purpose flour. In the second, whisk the large eggs until smooth. In the third dish, combine the breadcrumbs, grated Pecorino cheese, lemon zest, salt, black pepper, paprika, and dried oregano. This setup will make coating the chicken easy and efficient, ensuring every piece is deliciously crispy.
Step 3: Coat Chicken
Take each chicken breast and dredge it in the flour, shaking off any excess. Next, dip the floured chicken into the egg mixture, ensuring it's fully coated, and then press it into the breadcrumb mixture. Make sure to firmly press the breadcrumbs onto the chicken, which will create that delightful crispy exterior on your Zesty Lemon Pecorino Crispy Chicken.
Step 4: Heat Oil
In a large skillet, heat olive oil over medium-high heat until shimmering, which usually takes about 3-5 minutes. You can test the temperature by dropping a small piece of breadcrumb into the oil—if it sizzles, your oil is ready! Properly heated oil is key to achieving that golden-brown crispiness your chicken deserves.
Step 5: Cook Chicken
Once the oil is hot, carefully place the coated chicken breasts in the skillet. Allow them to cook for 5-6 minutes on each side, flipping them halfway through. The chicken should turn a beautiful golden color and reach an internal temperature of 165°F (74°C). This fragrant sizzling is a sure sign your Zesty Lemon Pecorino Crispy Chicken is cooking perfectly!
Step 6: Add Lemon Juice
After cooking, transfer the crispy chicken to a plate and immediately drizzle it with fresh lemon juice. This step adds brightness and balances the richness of the Pecorino cheese. The warm chicken will absorb some of that zesty flavor, enhancing every bite of your Zesty Lemon Pecorino Crispy Chicken.
Step 7: Rest Chicken
Allow the chicken to rest for about 5 minutes before slicing. This resting period helps retain the moisture, ensuring each bite is succulent and juicy. The aroma of your Zesty Lemon Pecorino Crispy Chicken will surely make your home inviting while it cools just enough for serving.
Step 8: Garnish
Finally, sprinkle the sliced chicken with fresh chopped parsley before serving. This garnish adds color and a burst of freshness, creating a beautiful presentation. Serve your Zesty Lemon Pecorino Crispy Chicken alongside roasted veggies or a salad for a well-rounded meal that’s as delightful to look at as it is to eat!

Expert Tips for Zesty Lemon Pecorino Crispy Chicken
-
Pound Evenly: Ensure the chicken breasts are pounded to an even thickness for consistent cooking. This prevents any pieces from being overcooked while achieving juicy, tender meat.
-
Proper Breading: When breading, press the crumb mixture firmly onto the chicken. This helps the coating stick better, creating that delightful crispy crust on your Zesty Lemon Pecorino Crispy Chicken.
-
Oil Temperature Check: Always test the oil temperature with a breadcrumb before adding chicken. If it sizzles immediately, you’re ready to fry; if not, wait a little longer.
-
Space It Out: Avoid overcrowding the skillet when frying. Cook in batches if necessary, allowing each piece to fry evenly and maintain that perfect crispy texture.
-
Resting Time Matters: Let the chicken rest after cooking. This prevents the juices from escaping, ensuring every bite of your Zesty Lemon Pecorino Crispy Chicken is succulent.
-
Garnish Freshly: Don’t skip the parsley garnish! It adds freshness and a pop of color to your dish, enhancing both flavor and presentation.
What to Serve with Easy Zesty Lemon Pecorino Crispy Chicken
Elevate your dining experience by pairing this flavorful dish with sides that balance its crisp and zesty profile.
-
Creamy Mashed Potatoes: The rich, buttery potatoes provide a delightful contrast to the crispy chicken, creating a comforting bite.
-
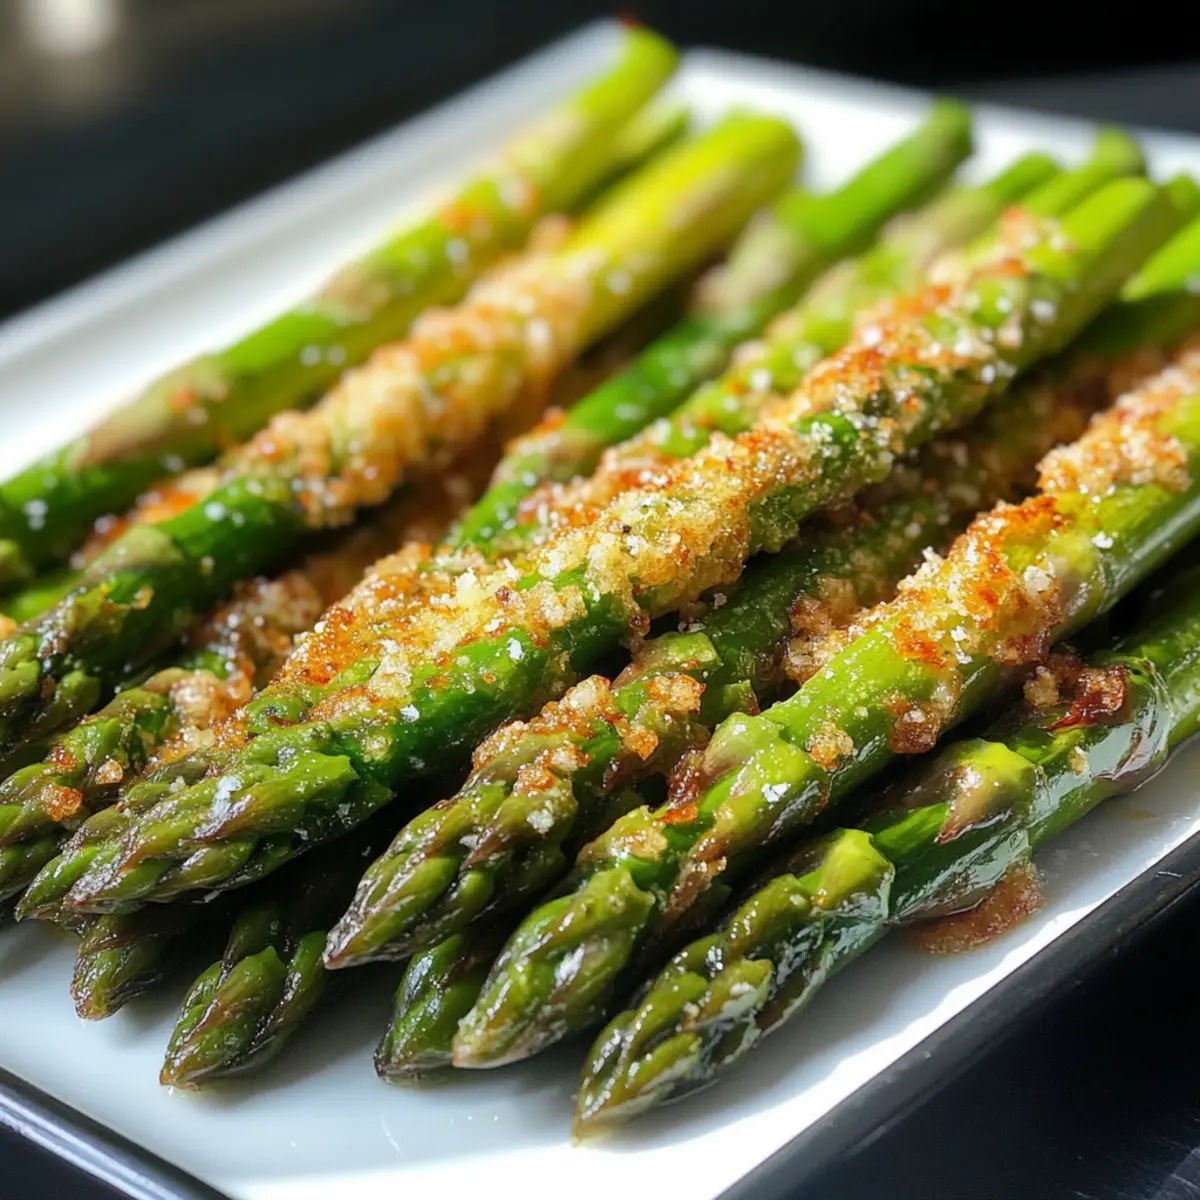
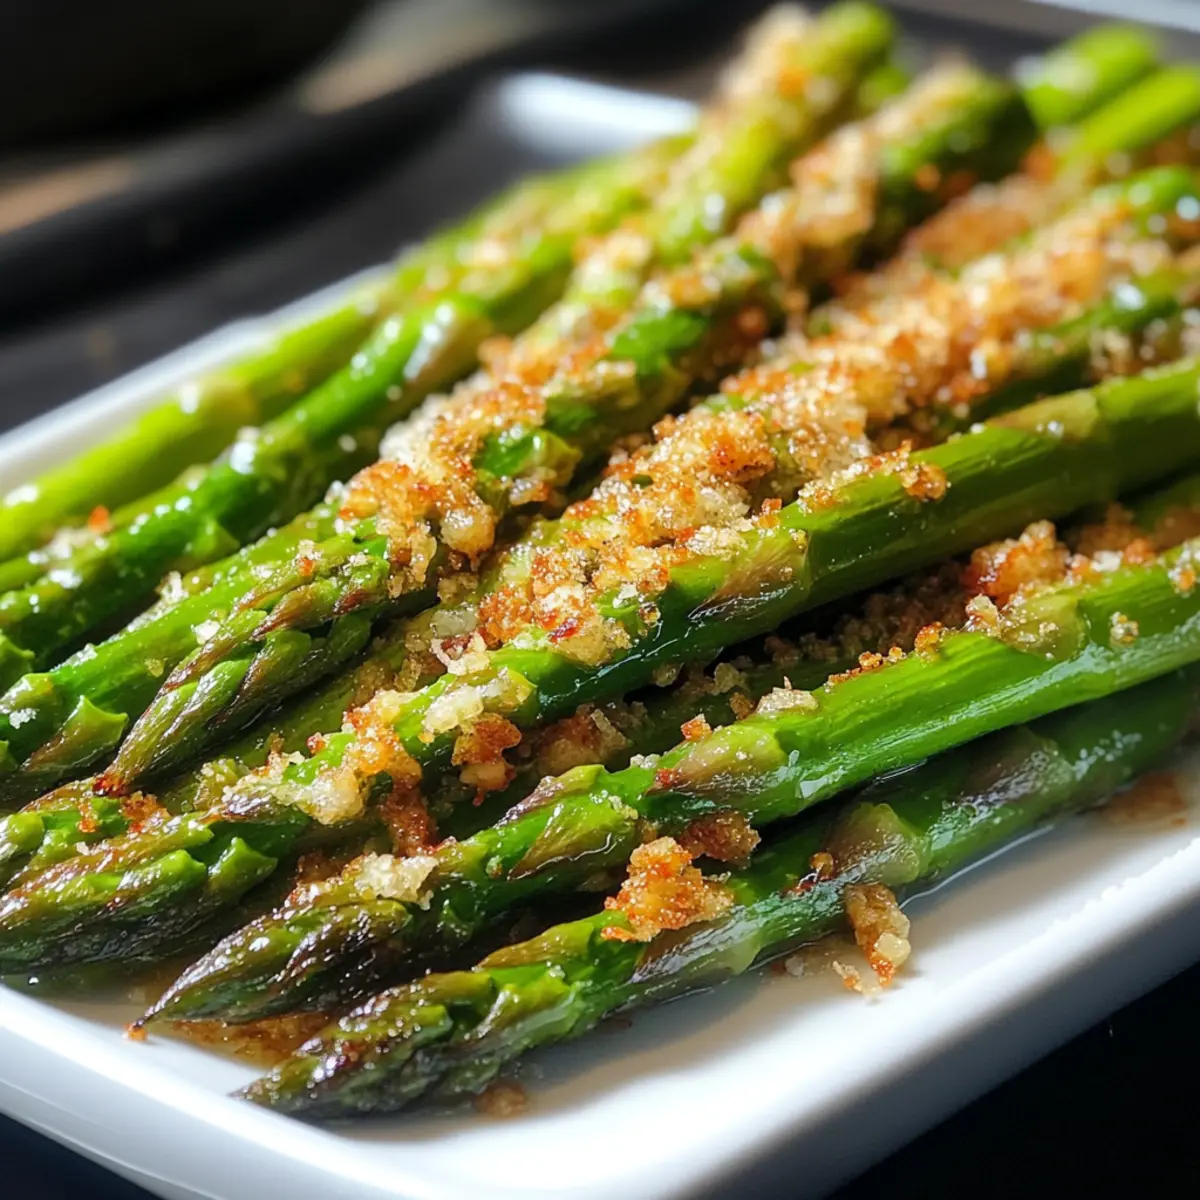
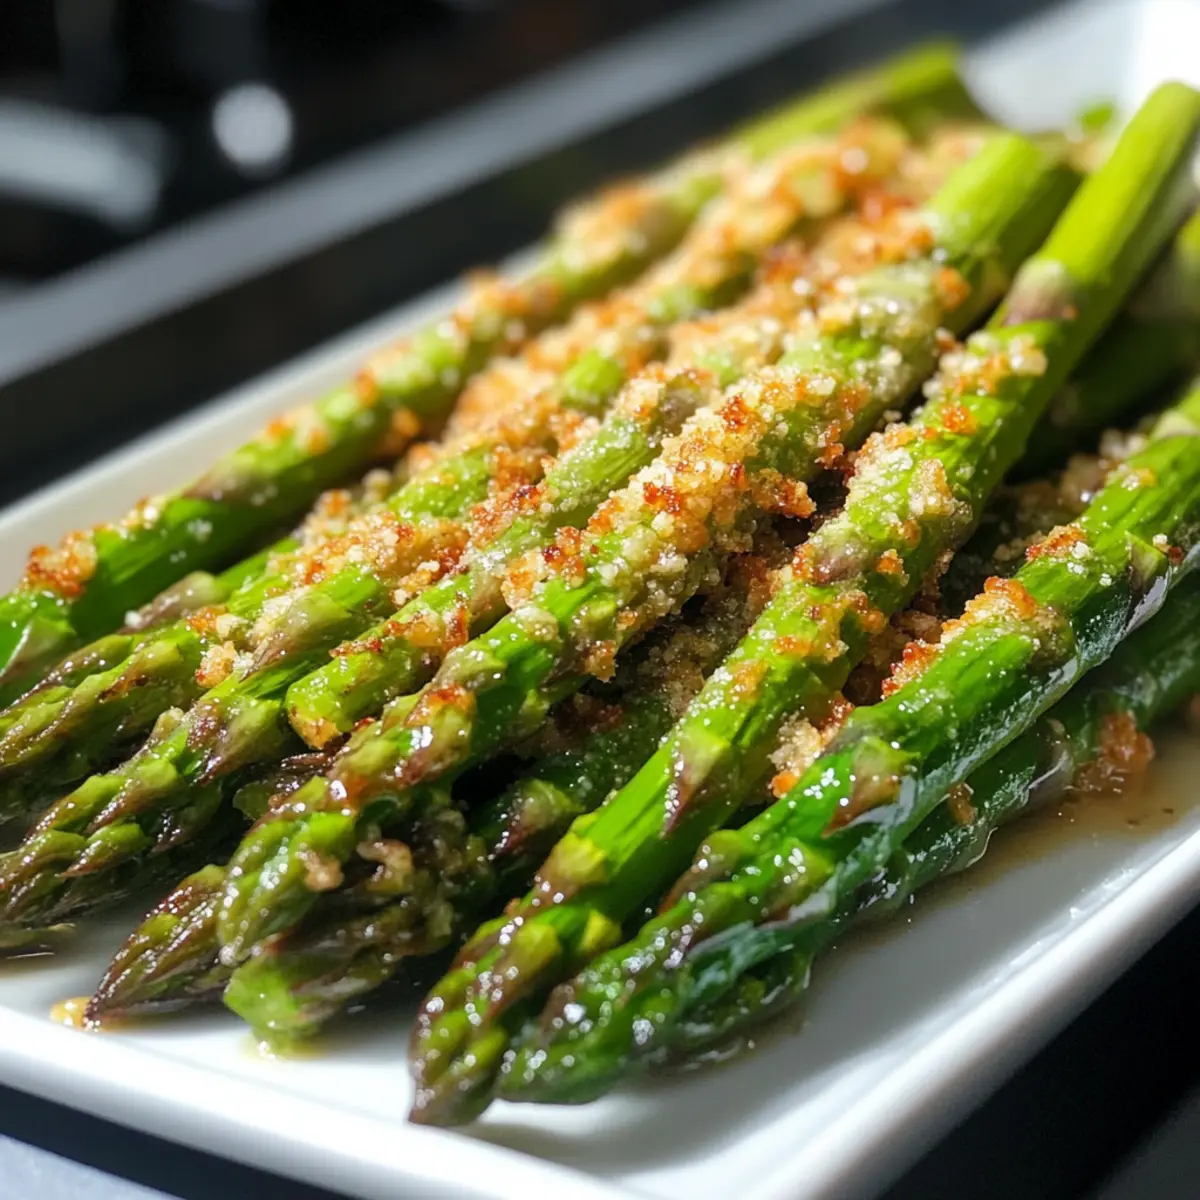
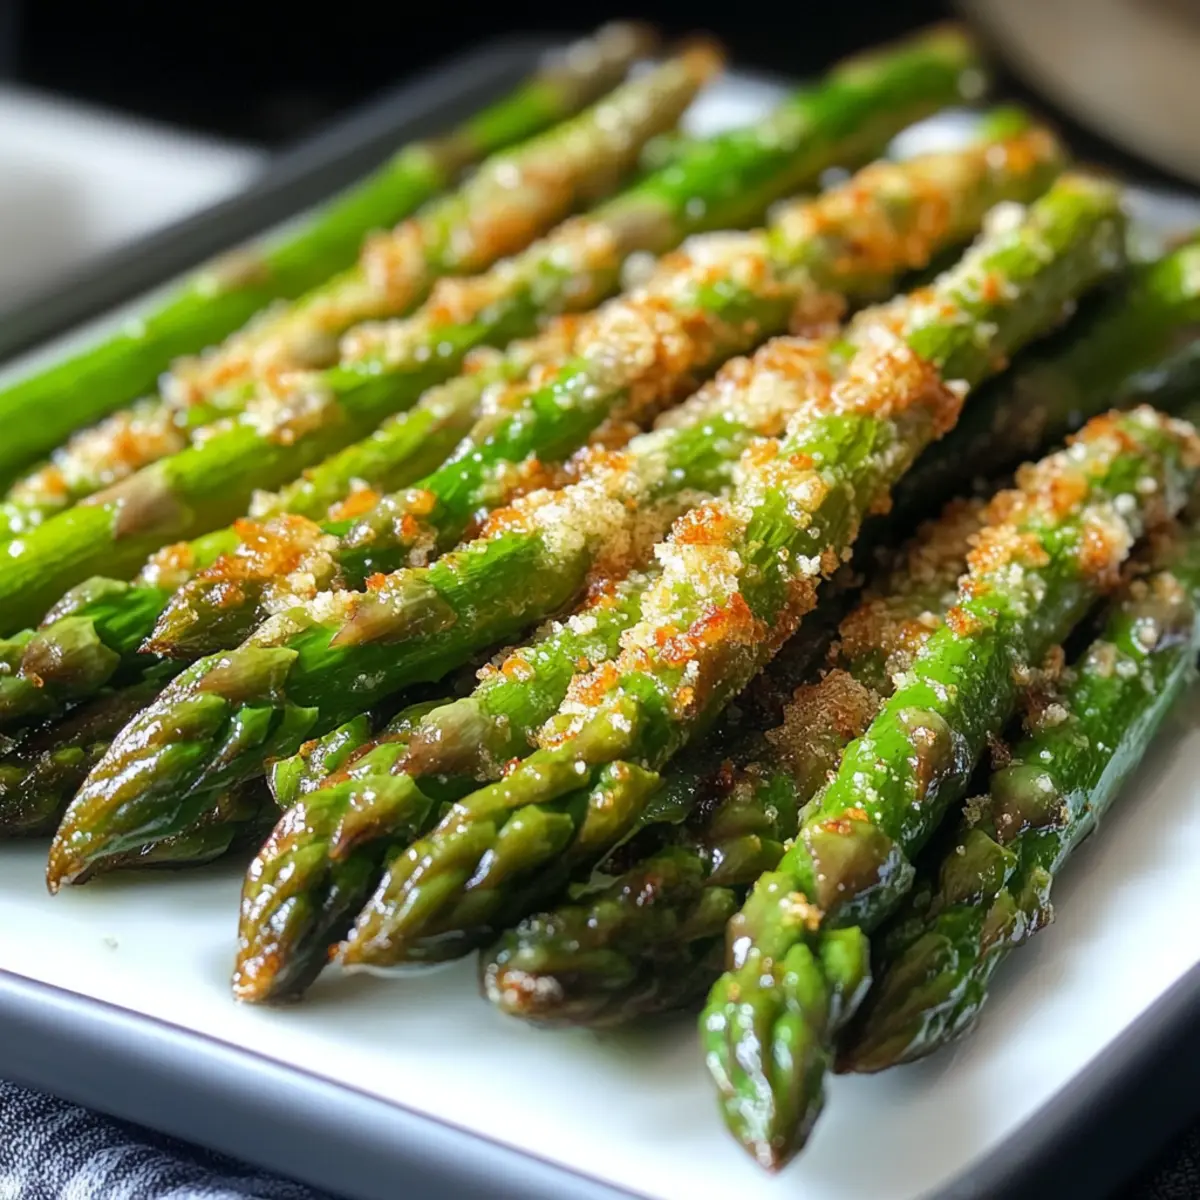
Garlic Roasted Asparagus: The tender, slightly charred asparagus offers a fresh crunch that complements the chicken while adding vibrant color to your plate.
-
Simple Green Salad: A mix of crisp greens, cherry tomatoes, and a light vinaigrette will brighten your meal and enhance that zesty flavor.
-
Lemon Herb Quinoa: The nutty quinoa infused with herbs mirrors the lemony notes of the chicken, making each forkful refreshing and wholesome.
-
Steamed Broccoli with Lemon Zest: This side is an easy way to incorporate greens while echoing the lemony taste, offering a nutritious and colorful addition.
-
Sparkling Lemonade: A chilled glass of sparkling lemonade brings a refreshing zing that pairs perfectly with the crispy, savory notes of the chicken.
-
Lemon Tart for Dessert: End your meal on a sweet note with a tangy lemon tart, making for a harmonious closure to this zesty dining experience.
Zesty Lemon Pecorino Crispy Chicken Variations
Feel free to get creative and make this delightful dish your own, adding flavors and twists that excite your palate!
- Cheese Swap: Swap Pecorino for Parmesan for a milder flavor. Both cheeses add a beautiful salinity to your chicken.
- Dairy-Free Delight: Use a dairy-free cheese alternative to make the recipe suitable for lactose-intolerant family members. You'll enjoy the same crispy goodness with a different twist!
- Panko Alternatives: Instead of Panko breadcrumbs, try crushed crackers or cornflakes for an extra crunch. The texture will differ slightly, but the flavor remains rich and satisfying.
- Herb Infusion: Add fresh herbs, like thyme or basil, directly into the breadcrumb mixture. This brings additional layers of flavor, reminiscent of sunny Mediterranean gardens.
- Heat it Up: Spice things up by adding red pepper flakes to the breadcrumb mix. It’s a simple way to elevate the dish and satisfy those who enjoy a kick of heat!
- Vegetable Option: Substitute chicken with eggplant or portobello mushrooms for a plant-based alternative. The zesty lemon flavor will harmonize beautifully with the veggies.
- Citrus Blast: For a vibrant twist, add lime zest and juice to the mix along with lemon. The combination creates a citrus celebration that’s perfect for a summer dinner.
- Simple Sides: Pair with sides like roasted sweet potatoes or crispy Brussels sprouts. Their flavors complement the zesty chicken while adding a colorful plate.
Looking for more tasty chicken recipes? Try out my Fiesta Lime Chicken for a different flavor profile or my Chipotle Lime Chicken for a spicy twist!
How to Store and Freeze Zesty Lemon Pecorino Crispy Chicken
Fridge: Store leftover Zesty Lemon Pecorino Crispy Chicken in an airtight container for up to 3 days. This helps keep the flavors intact while preventing dryness.
Freezer: For longer storage, freeze the chicken in a single layer, wrapped tightly in plastic wrap and then in foil, for up to 2 months. This ensures the crispy texture is preserved as best as possible.
Reheating: When ready to enjoy, reheat in a preheated oven at 375°F (190°C) for about 15-20 minutes to regain its crispiness. Avoid using a microwave, as it may result in soggy chicken.
Thawing: If frozen, thaw the chicken overnight in the fridge before reheating. This allows for even cooking and helps retain moisture in the chicken.
Make Ahead Options
These Easy Zesty Lemon Pecorino Crispy Chicken pieces are perfect for meal prep enthusiasts! You can pound and coat the chicken up to 24 hours in advance, just remember to refrigerate them in an airtight container to keep them fresh. Additionally, you can mix the breadcrumb mixture (including the Pecorino, zest, and spices) and store it in a separate container for up to 3 days. When it’s time to cook, simply heat the oil and fry the chicken until golden, ensuring a crispy finish that tastes just as delicious as when freshly made. This way, you save precious time during busy weeknights while still enjoying a mouthwatering homemade meal!
Zesty Lemon Pecorino Crispy Chicken Recipe FAQs
What type of chicken should I use for this recipe?
I highly recommend using boneless skinless chicken breasts for this Easy Zesty Lemon Pecorino Crispy Chicken. They cook quickly and remain juicy, especially when pounded to an even thickness of about ½ inch. If you prefer dark meat, boneless skinless thighs can also work wonderfully, providing a richer flavor.
How should I store leftover Zesty Lemon Pecorino Crispy Chicken?
Store any leftover chicken in an airtight container in the refrigerator for up to 3 days. This helps keep the chicken flavorful and prevents it from drying out. Make sure to let it cool before sealing it to maintain its moisture.
Can I freeze Zesty Lemon Pecorino Crispy Chicken?
Absolutely! To freeze, wrap the chicken tightly in plastic wrap, then place it in a freezer-safe bag or container to prevent freezer burn. It can be stored for up to 2 months. When you're ready, thaw in the fridge overnight before reheating for the best results.
What if my breading is falling off during cooking?
This is a common issue, but don't worry! Ensure your chicken is well-coated in flour before dipping in the egg wash and then pressing firmly into the breadcrumb mixture. Additionally, allow the breaded chicken to rest for about 10 minutes before cooking to let the coating set, which will help it stick better during frying.
Can I use gluten-free breadcrumbs for this chicken?
Yes, you certainly can! Substitute the breadcrumbs with gluten-free alternatives like crushed gluten-free crackers or panko-style crumbs. This will allow anyone with gluten sensitivities to enjoy the zesty flavor and crispy texture of this dish. Just ensure that all other ingredients are also gluten-free.
Are there any dietary considerations for serving this dish to kids or pets?
When serving this Zesty Lemon Pecorino Crispy Chicken to kids, ensure that they don’t have any cheese allergies—as Pecorino can be salty for younger children. For pets, it’s best to avoid giving them any chicken that has been seasoned with garlic, as it can be toxic to dogs and cats. Always keep their health in mind before sharing!

Zesty Lemon Pecorino Crispy Chicken for Easy Weeknight Dinners
Ingredients
Equipment
Method
- Begin by pounding the boneless skinless chicken breasts to an even thickness of about ½ inch.
- Prepare three shallow dishes for the breading process: flour in the first dish, whisked eggs in the second, and breadcrumbs mixed with cheese and seasonings in the third.
- Dredge each chicken breast in flour, then dip in eggs, and coat with the breadcrumb mixture.
- Heat olive oil over medium-high heat in a skillet until shimmering.
- Carefully place the coated chicken breasts in the hot oil and cook for 5-6 minutes on each side.
- Drizzle with fresh lemon juice immediately after cooking.
- Let the chicken rest for about 5 minutes before slicing.
- Garnish with fresh chopped parsley before serving.