tastytrendingredients

  • Home
  • Recipes
    • Appetizers
    • Breakfast
    • Dessert
    • Dinner
    • Drinks
    • Salads
    • Snacks
    • Soups
  • About me
  • Contact
menu icon
go to homepage
  • Home
  • Recipes
    • Appetizers
    • Breakfast
    • Dessert
    • Dinner
    • Drinks
    • Salads
    • Snacks
    • Soups
  • About me
  • Contact
search icon
Homepage link
  • Home
  • Recipes
    • Appetizers
    • Breakfast
    • Dessert
    • Dinner
    • Drinks
    • Salads
    • Snacks
    • Soups
  • About me
  • Contact
×

Crispy Baked Asparagus Fries for a Guilt-Free Snack Indulgence

September 26, 2025 by Grace Snow Leave a Comment

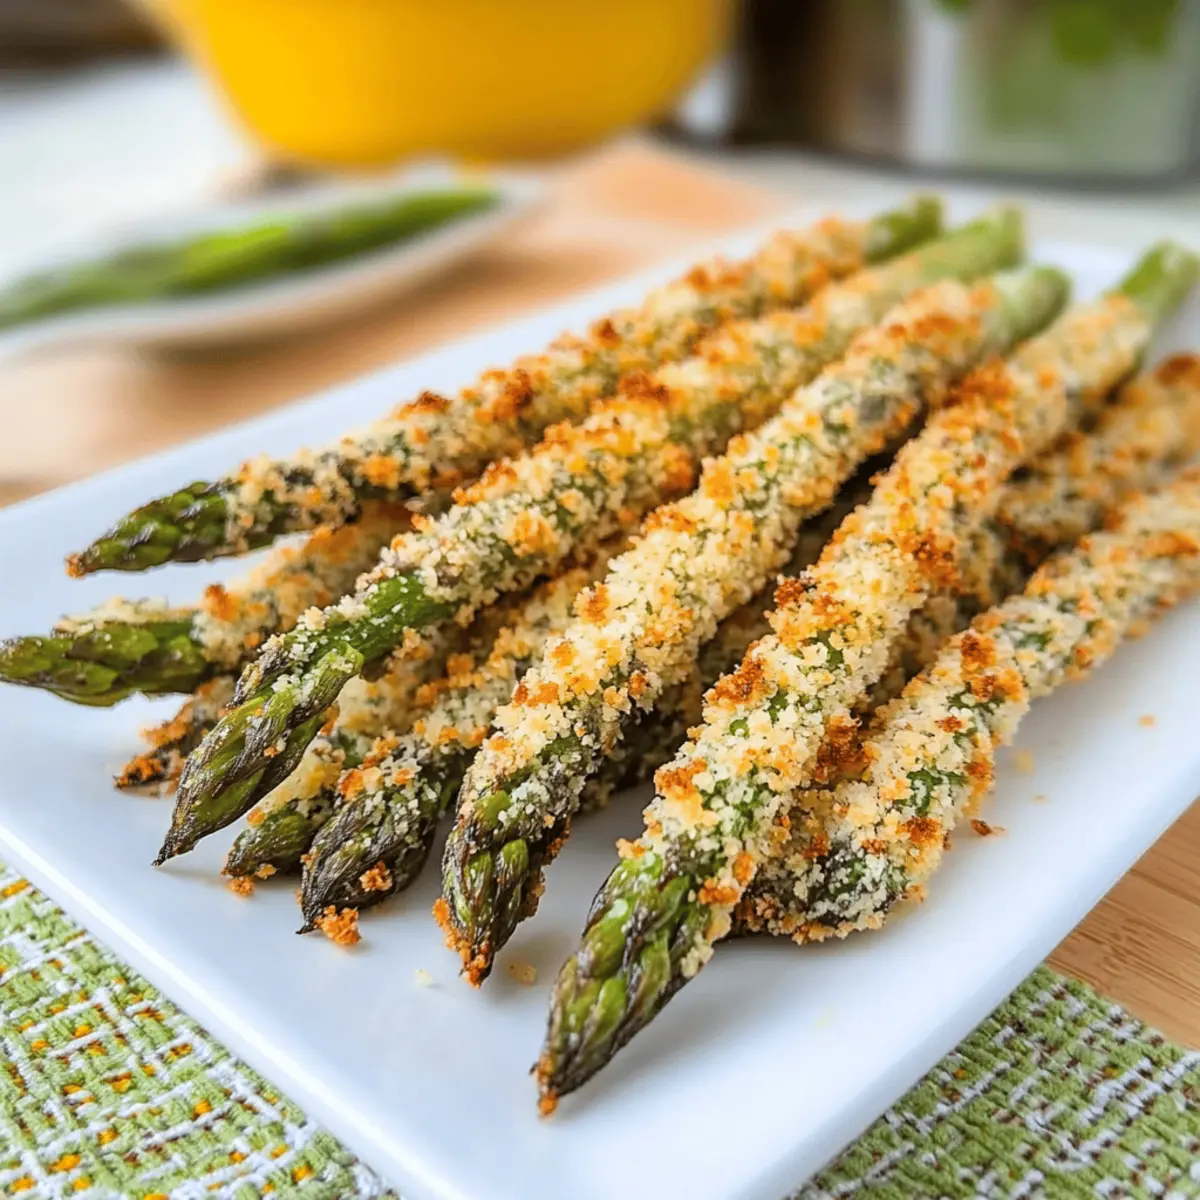
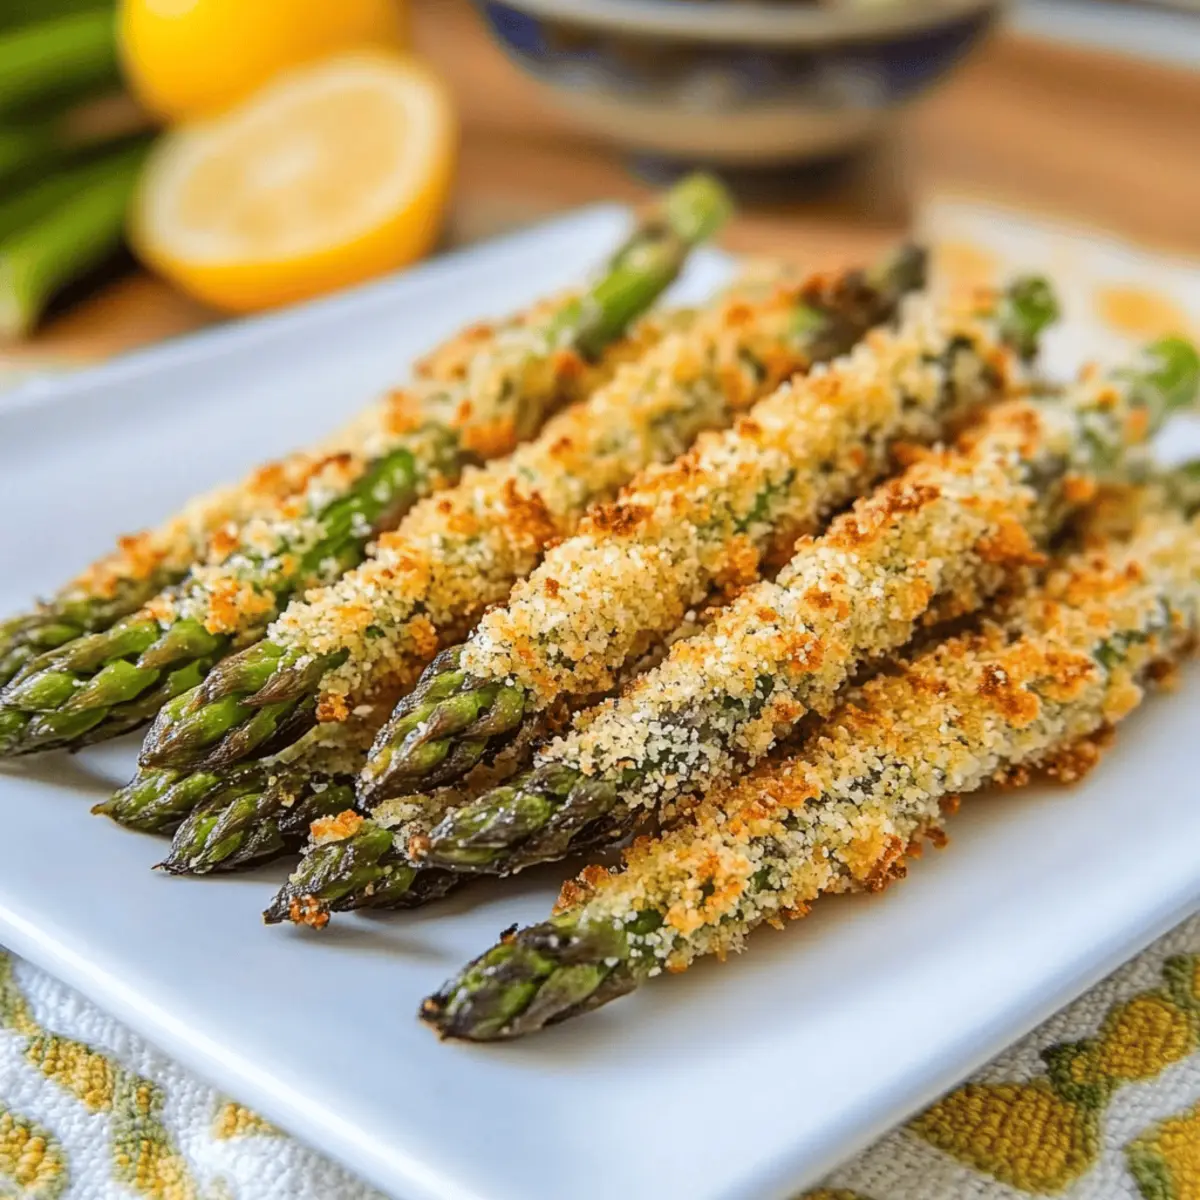
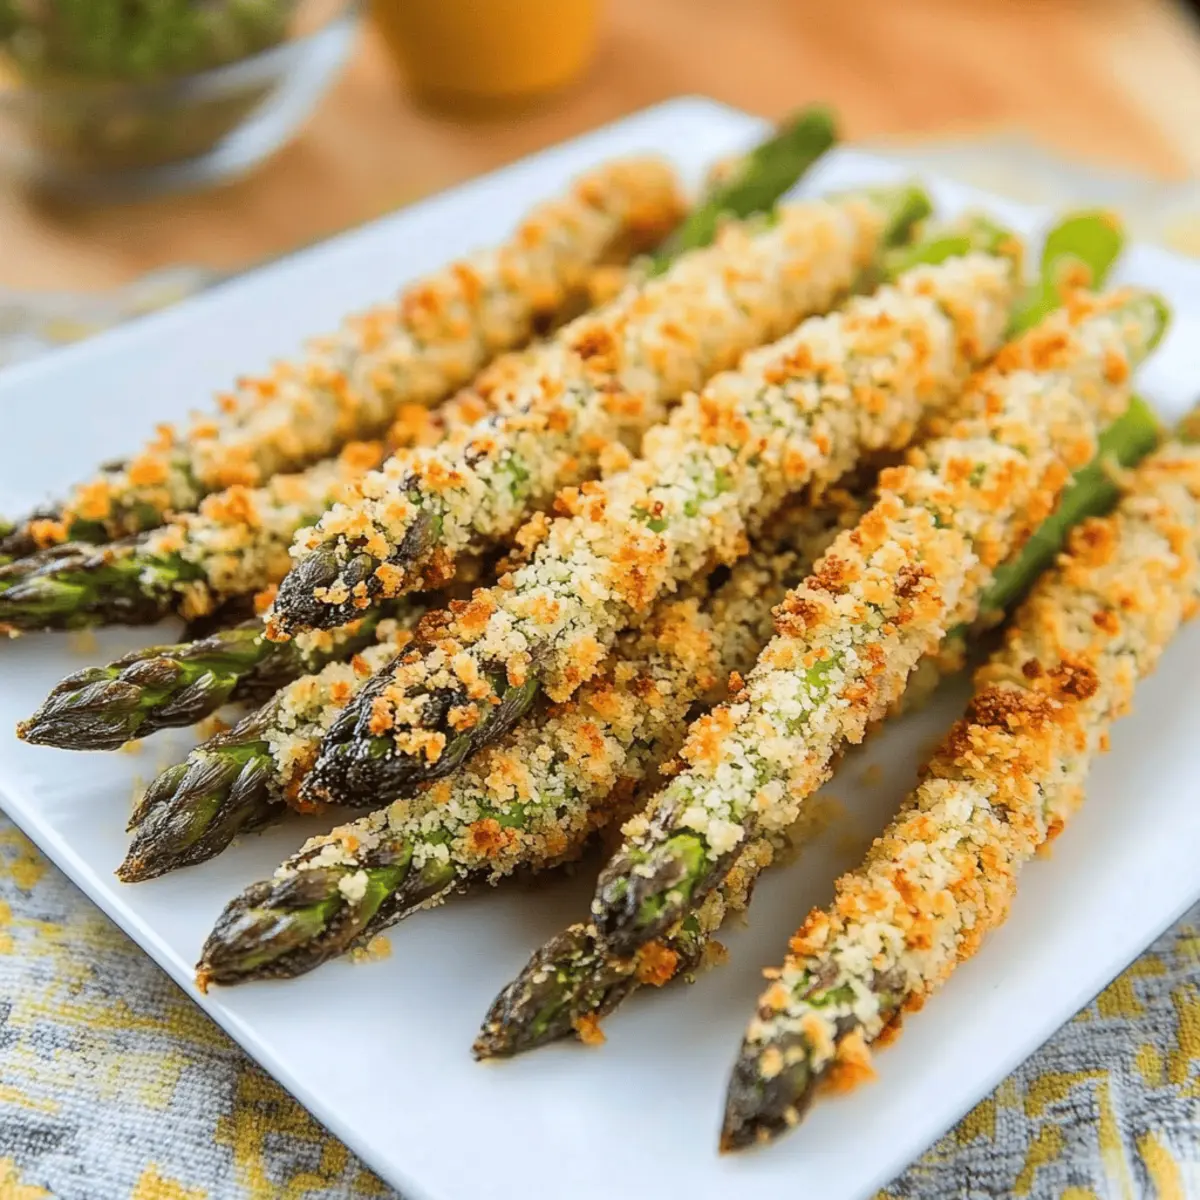
I never anticipated that a simple vegetable could be transformed into a crave-worthy snack, but then I met Crispy Baked Asparagus Fries. With a golden, crunchy panko coating and a tender center, they unite health and comfort in one satisfying bite. Whether you’re looking for a quick alternative to unhealthy fast food or a fun, veggie-packed appetizer for your next gathering, this delight is ready in just 20 minutes! Ideal for those who love homemade goodness, these fries provide both a nourishing crunch and a guilt-free experience. Who knew that snacking could feel so indulgent yet wholesome? What dipping sauce will you pair with your crispy creation?

Why Are These Asparagus Fries Amazing?

Crunchy Perfection: You'll love that these Crispy Baked Asparagus Fries come out golden brown and irresistibly crunchy every time.

Quick & Easy: With just 20 minutes from prep to plate, they fit easily into any busy schedule; perfect for those looking to swap fast food for something healthier.

Nutrient-Rich Goodness: Asparagus is a fiber-packed veggie, making this snack both satisfying and guilt-free. They provide a much-needed veggie boost in your diet!

Customizable Flavor: Feel free to get creative! Add spices or experiment with Crispy Parmesan Artichoke Hearts for a unique twist that suits your palate.

Crowd-Pleasing Appeal: Serve them as appetizers at your next gathering, and watch your guests delight in this fun and tasty veggie treat! Whether you pair them with a homemade dip or serve alongside grilled meats, they're sure to impress!

Crispy Baked Asparagus Fries Ingredients

• Get ready to whip up a crunchy delight!

For the Batter

  • Asparagus – A nutrient-rich vegetable that provides a tender base for your fries.
  • Flour – Helps the egg adhere to the asparagus; you can use gluten-free flour if needed.
  • Eggs – Binds the coating to the asparagus; consider substituting with plant-based milk or yogurt for a vegan option.

For the Coating

  • Panko Breadcrumbs – Lighter than traditional breadcrumbs, they deliver a delightful crunch; gluten-free panko is available too.
  • Parmigiano Reggiano (Parmesan) – Adds a savory depth and enhances crispiness; swap with nutritional yeast for a dairy-free alternative.
  • Salt and Pepper – Essential for seasoning, enhance the flavor of your Crispy Baked Asparagus Fries.

Optional Dipping Sauce

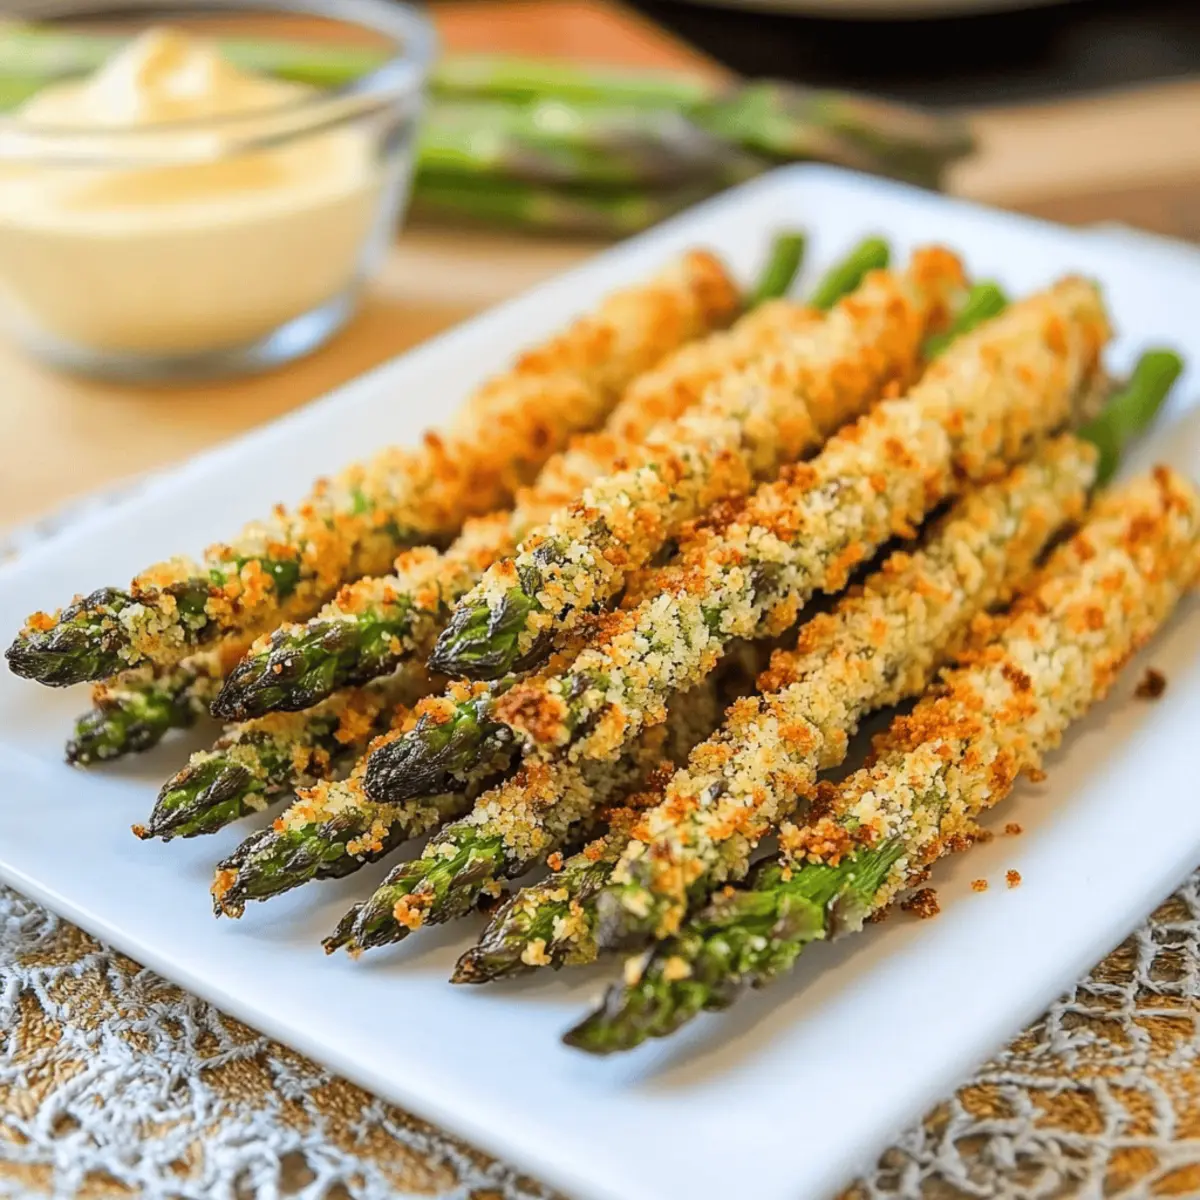
  • Ranch Dressing, Aioli, or Spicy Mustard – A variety of dips to bring out even more flavor in your crispy treat!

Step‑by‑Step Instructions for Crispy Baked Asparagus Fries

Step 1: Preheat the Oven
Start by preheating your oven to 425°F (220°C). This temperature is ideal for giving your Crispy Baked Asparagus Fries that golden, crunchy finish. While the oven warms up, gather your baking sheet and wire rack, which will allow hot air to circulate around the fries for even baking.

Step 2: Prepare the Asparagus
Next, take your fresh asparagus and trim the tough ends about an inch from the bottom. Rinse them under cold water to clean off any dirt. Pat each asparagus spear dry with a paper towel to remove excess moisture, ensuring that the coating adheres perfectly as you move on to the next step.

Step 3: Set Up Your Breading Station
In three separate shallow bowls, create your breading station. In the first bowl, add all-purpose flour for dredging. In the second bowl, beat a couple of eggs until smooth. In the third bowl, mix panko breadcrumbs with grated Parmesan, salt, and pepper for delicious seasoning. This setup makes it easy to coat each spear as you prepare your Crispy Baked Asparagus Fries.

Step 4: Coat the Asparagus
Begin the coating process by dredging each asparagus spear in the flour, ensuring it’s lightly coated. Next, dip it into the beaten eggs, letting any excess drip off. Finally, roll the asparagus in the panko and Parmesan mixture, pressing gently to help it stick. Repeat this with all the asparagus spears until they’re all beautifully coated.

Step 5: Arrange for Baking
Once coated, place the asparagus in a single layer on a wire rack set over a baking sheet. This arrangement allows the hot air to circulate evenly, ensuring your Crispy Baked Asparagus Fries come out perfectly crispy. Make sure not to overcrowd the rack, as this can cause them to steam rather than crisp.

Step 6: Bake to Perfection
Slide the baking sheet into the preheated oven and bake for 7 to 13 minutes. Keep a close eye on the fries as they cook; you’re looking for a golden brown color and a crispy texture. When they reach that visually enticing crispiness, remove them from the oven and let them cool for a few minutes before serving.

Step 7: Serve and Enjoy
Your Crispy Baked Asparagus Fries are now ready to be enjoyed! Serve them warm with your choice of dipping sauce, such as ranch dressing or aioli. These fries make for a perfect snack or a veggie side dish that’s sure to impress family and friends alike.

Expert Tips for Crispy Baked Asparagus Fries

  • Dry Asparagus: Ensure your asparagus is completely dry after rinsing. Excess moisture can prevent the coating from adhering properly, resulting in soggy fries.

  • Even Coating: Use a light hand when dredging in flour and panko. Too much coating can lead to uneven crispiness; aim for a thin, even layer for the best Crispy Baked Asparagus Fries.

  • Avoid Overcrowding: Arrange the asparagus in a single layer, leaving space between each spear. Overcrowding can trap steam, making your fries less crispy.

  • Baking Sheet Prep: Utilize a wire rack on your baking sheet. This allows for airflow underneath, ensuring more uniform cooking and a delightful crunch.

  • Season Generously: Don’t skimp on salt and pepper in your panko mixture. Proper seasoning makes all the difference and brings out the flavor of your Crispy Baked Asparagus Fries.

  • Experiment with Flavors: Don’t hesitate to add your favorite spices or herbs to the breadcrumb mixture. A little garlic powder or paprika can elevate your fries from delightful to extraordinary!

Make Ahead Options

These Crispy Baked Asparagus Fries are truly a lifesaver for meal prep aficionados! You can prep the asparagus by coating them in flour, dipping them in beaten eggs, and rolling them in the panko and parmesan mixture up to 24 hours in advance. Simply cover the coated spears with plastic wrap and refrigerate to preserve their crunch. When you're ready to bake, just place the asparagus on a wire rack and pop them in the oven as directed. This method allows busy cooks to enjoy a delicious, healthy snack with minimal effort on the day of serving, and you can be assured they'll be just as delightful when baked!

How to Store and Freeze Crispy Baked Asparagus Fries

Fridge: Store leftover Crispy Baked Asparagus Fries in an airtight container in the fridge for up to 2 days. Reheat in the oven to restore their crunch.

Freezer: For longer storage, freeze unbaked, coated asparagus on a baking sheet until solid, then transfer them to a freezer bag. They can be stored for up to 3 months.

Reheating: To reheat, bake from frozen at 425°F (220°C) for 12-15 minutes until crispy and heated through.

Room Temperature: If serving at a gathering, enjoy the fries within 2 hours to ensure freshness and taste; otherwise, refrigerate any leftovers.

What to Serve with Crispy Baked Asparagus Fries

These delightful asparagus fries are perfect for building a well-rounded meal that pleases the palate.

  • Creamy Garlic Dip: Enjoy a rich, velvety dip that complements the crunchy texture of the asparagus, enhancing the overall experience.
  • Zesty Lemon Quinoa Salad: This refreshing salad adds bright acidity and a nutty flavor, balancing the richness of the fries.
  • Grilled Chicken Skewers: Juicy marinated chicken brings heartiness to your plate, making it a satisfying main dish alongside the fries.
  • Roasted Cherry Tomatoes: These sweet and juicy roasted treats offer a burst of flavor, pairing beautifully with the savory fries.
  • Caesar Salad: Crisp romaine, tangy dressing, and crunchy croutons create a classic pairing that elevates your snacking experience to new heights.
  • Sweet Potato Wedges: Their natural sweetness contrasts nicely with the asparagus, adding an extra layer of flavor and texture variety.
  • Crisp White Wine: A chilled Sauvignon Blanc or Pinot Grigio brings a refreshing touch to any meal featuring these Crispy Baked Asparagus Fries.
  • Chocolate Mousse: End your meal with a rich dessert that satisfies your sweet tooth, providing a delightful contrast to the savory flavors of your main dish.

Crispy Baked Asparagus Fries Variations

Feel free to explore these tasty twists that will let your creativity shine in the kitchen!

  • Garlic Infusion: Mix garlic powder into the panko breadcrumbs for a savory punch. This aromatic twist makes each bite unforgettable!

  • Zesty Lemon: Add lemon zest to the panko for a fresh, citrusy tone. It brightens the dish and pairs beautifully with the asparagus flavor.

  • Spicy Crispy: Incorporate cayenne pepper or red pepper flakes into the breadcrumb mixture for a delightful kick. Perfect for those who enjoy a bit of heat!

  • Cheesy Delight: Swap out Parmesan for crumbled feta or goat cheese. These cheeses lend a unique, tangy touch that will please your palate.

  • Mixing Veggies: Experiment with zucchini or eggplant for a colorful veggie platter. The same crispy coating will transform these veggies into an exciting side!

  • Herbaceous Twist: Toss in dried herbs like oregano or thyme into the panko for a fragrant and flavorful addition. This elevates your fries to a new level of deliciousness!

  • Nutritional Boost: Add chia or flax seeds to the panko breadcrumb mixture for an extra crunch and a healthy twist. It’s a wonderful way to sneak in some nutrition!

  • Creamy Dips: Consider pairing your crispy treats with zesty dipping sauces like aioli or spicy mustard. A variety will keep every bite exciting and enjoyable!

If you're in a mood for more deliciousness check out our Asparagus Soup Healthy or perhaps try your hand at Tagliatelle Asparagus Peas for another fresh twist!

Crispy Baked Asparagus Fries Recipe FAQs

How do I select the best asparagus for this recipe?
Absolutely! Look for fresh asparagus spears that are firm to the touch, with bright green color and closed tips. Avoid any that are limp or have dark spots all over. The thickness is a matter of preference, but medium-sized spears yield the best results for a balance of tenderness and crunch.

What’s the best way to store leftovers?
Store any leftover Crispy Baked Asparagus Fries in an airtight container in the refrigerator for up to 2 days. To maintain their crunch, reheating in the oven at 350°F (175°C) for about 10 minutes is ideal. This will help crisp them back up!

Can I freeze the asparagus fries before baking?
Definitely! Freeze unbaked, coated asparagus fries on a baking sheet until solid. Once frozen, transfer them to a freezer-safe bag and they’ll stay fresh for up to 3 months. When you're ready to enjoy them, bake directly from frozen at 425°F (220°C) for 12-15 minutes until crispy and heated through.

What if my asparagus fries aren't crisping up?
Very good question! If your fries are coming out soggy instead of crispy, it could be due to overcrowding on the baking sheet or excess moisture on the asparagus. To remedy this, ensure your asparagus is completely dried after washing, and leave some space between the pieces on the rack for airflow. Also, consider baking longer or adjusting the oven temperature slightly if needed.

Are these fries suitable for my gluten-free diet?
Yes, they are! Simply swap regular flour and panko breadcrumbs for gluten-free alternatives, and you're good to go. Many brands offer gluten-free panko, which provides that same delightful crunch without compromising on flavor!

Can I use different vegetables for this recipe?
Absolutely! Get creative with the veggies. Zucchini or eggplant can be prepared similarly for a delicious variation. Just remember to cut them into similar sizes for even cooking, and enjoy experimenting with different dips to complement the flavors!

Crispy Baked Asparagus Fries

Crispy Baked Asparagus Fries for a Guilt-Free Snack Indulgence

Transform simple vegetables into crave-worthy Crispy Baked Asparagus Fries, a guilt-free snack.
Print Recipe Pin Recipe
Prep Time 10 minutes mins
Cook Time 10 minutes mins
Total Time 20 minutes mins
Servings: 4 servings
Course: Snacks
Cuisine: American
Calories: 150
Ingredients Equipment Method Nutrition Notes

Ingredients
  

For the Batter
  • 1 bunch Asparagus
  • 1 cup Flour can use gluten-free flour
  • 2 large Eggs can substitute with plant-based milk or yogurt for a vegan option
For the Coating
  • 1 cup Panko Breadcrumbs gluten-free panko available
  • 1/2 cup Parmigiano Reggiano (Parmesan) can substitute with nutritional yeast
  • to taste Salt
  • to taste Pepper
Optional Dipping Sauce
  • 1 Ranch Dressing
  • 1 Aioli
  • 1 Spicy Mustard

Equipment

  • Oven
  • Baking Sheet
  • wire rack
  • shallow bowls

Method
 

Step‑by‑Step Instructions
  1. Preheat your oven to 425°F (220°C). Gather your baking sheet and wire rack.
  2. Trim the tough ends of the asparagus, rinse under cold water, and pat dry with a paper towel.
  3. Set up your breading station with flour, beaten eggs, and a mixture of panko, Parmesan, salt, and pepper.
  4. Dredge asparagus in flour, dip in eggs, then roll in the panko mixture. Repeat for all asparagus spears.
  5. Arrange the coated asparagus in a single layer on a wire rack over the baking sheet.
  6. Bake for 7 to 13 minutes until golden brown and crispy. Let cool slightly before serving.
  7. Serve warm with your choice of dipping sauce.

Nutrition

Serving: 1servingCalories: 150kcalCarbohydrates: 20gProtein: 6gFat: 5gSaturated Fat: 1gCholesterol: 90mgSodium: 250mgPotassium: 300mgFiber: 2gSugar: 1gVitamin A: 700IUVitamin C: 10mgCalcium: 100mgIron: 2mg

Notes

Ensure asparagus is dry for the coating to adhere. Use a wire rack for even baking and avoid overcrowding the pan.

Tried this recipe?

Let us know how it was!

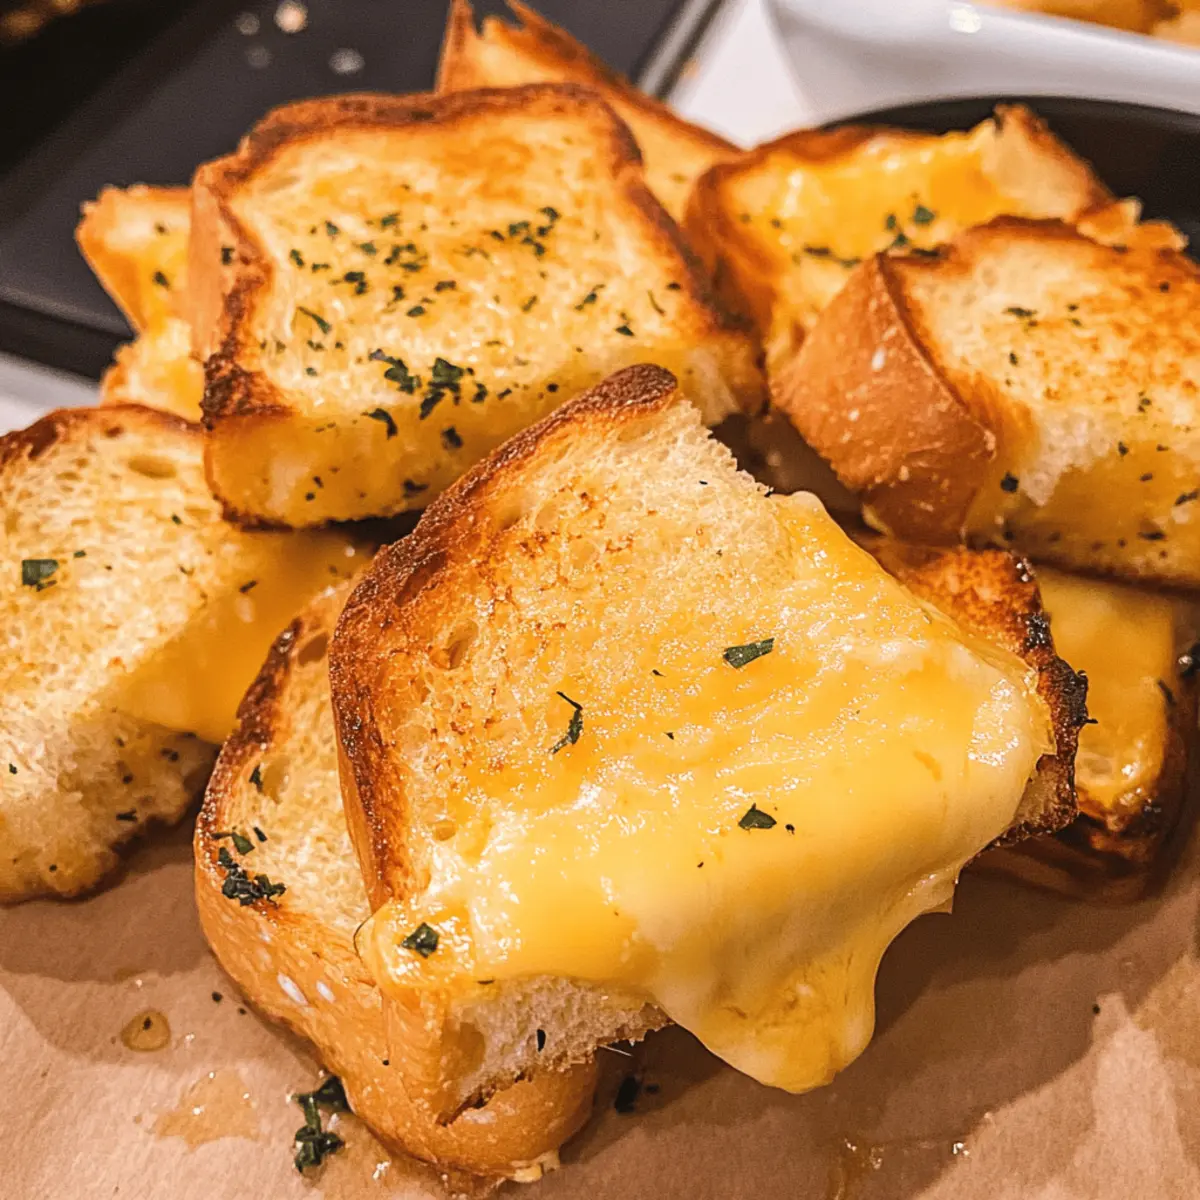
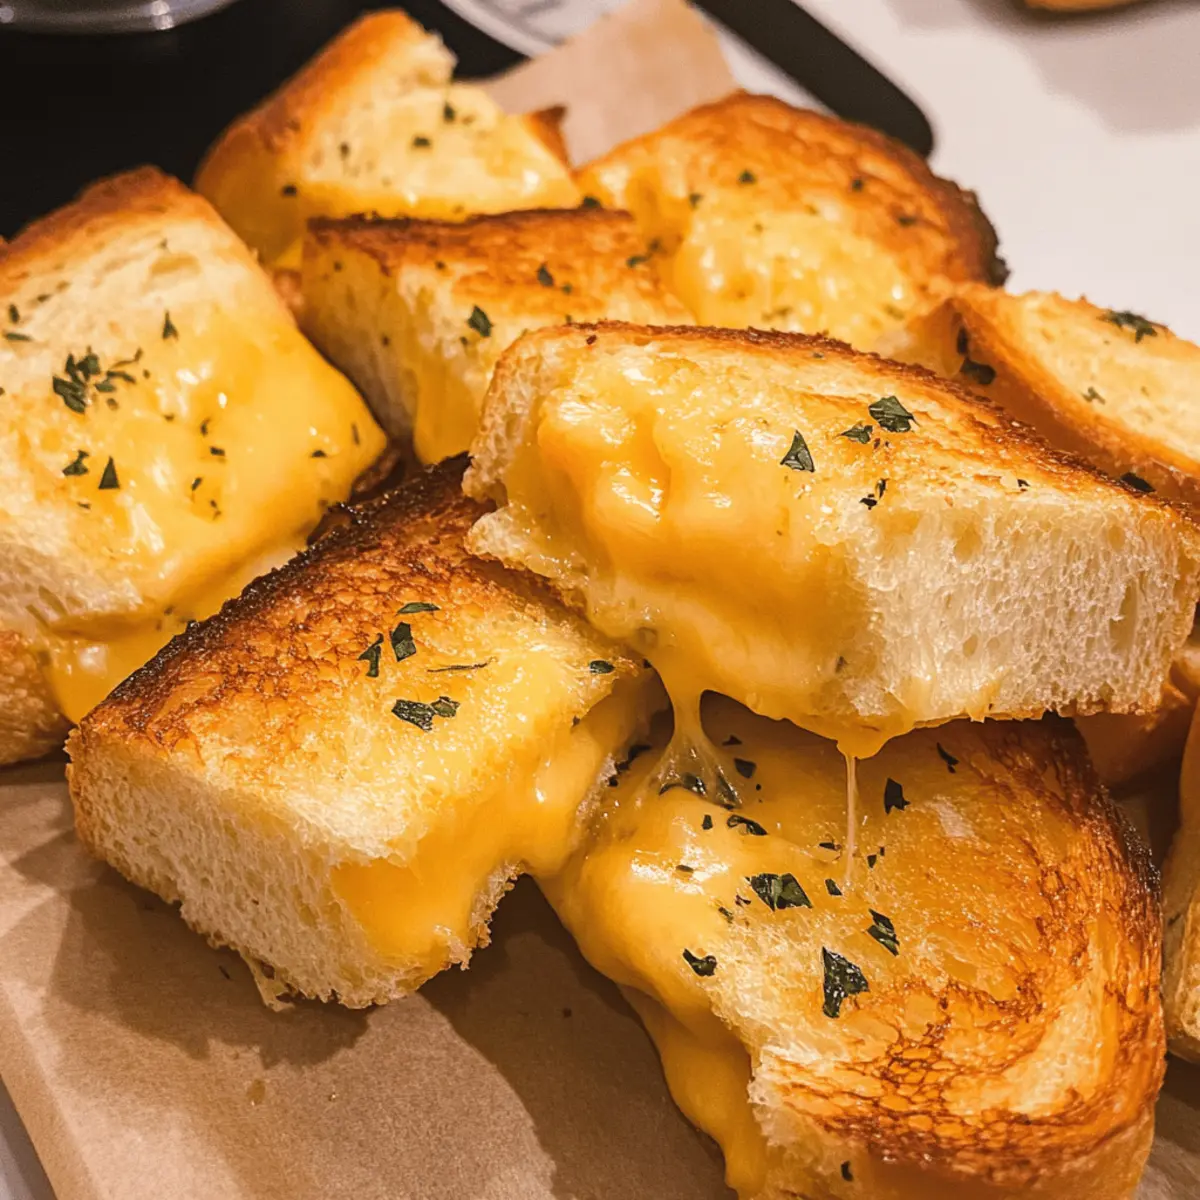
Hawaiian Roll Grilled Cheese That Will Melt Your Heart

September 25, 2025 by Grace Snow Leave a Comment

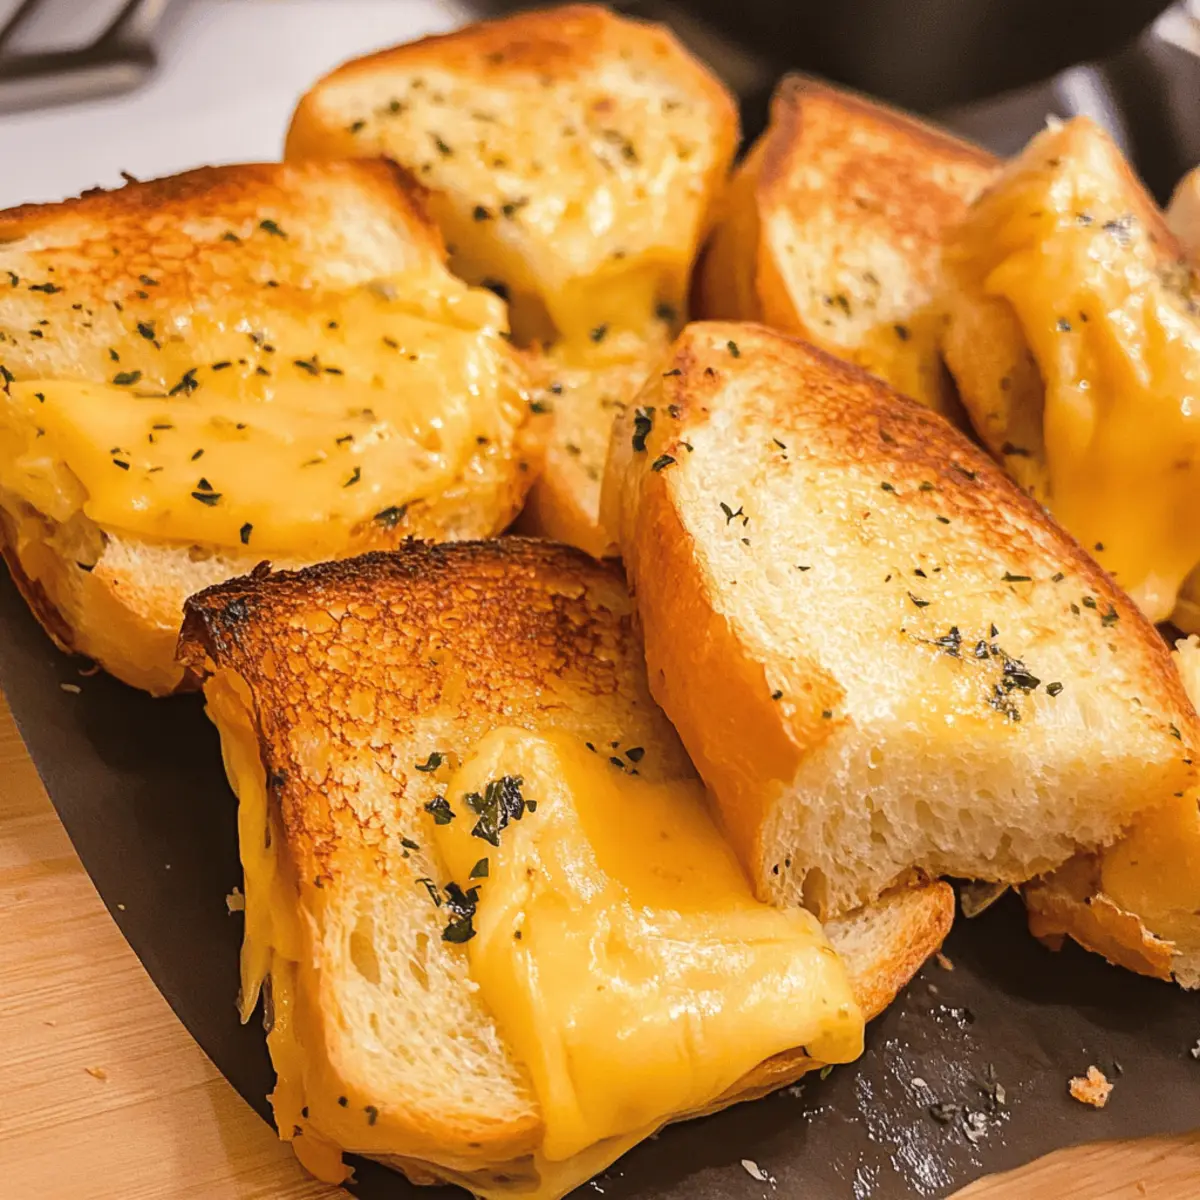
As I toasted the first batch of these Hawaiian Roll Mini Grilled Cheese sandwiches, the aroma of melting cheese and buttery garlic wafted through my kitchen, instantly lifting my spirits. This delightful twist on the classic comfort food makes for an irresistibly kid-friendly meal that everyone will adore. With easy preparation and a charming sweetness from the Hawaiian rolls, these sandwiches are perfect for cozy weeknights or weekend gatherings. Plus, when paired with a comforting bowl of tomato soup, they become an unforgettable treat for anyone seeking a little culinary joy. Don't you just love how simple ingredients can bring so much happiness? Let’s dive into making these cheesy delights!

Why Is This Grilled Cheese Irresistible?

Cheesy Goodness: The delightful blend of melted cheese between sweet Hawaiian rolls creates a mouthwatering experience.

Quick and Easy: With minimal prep time, this recipe is perfect for busy evenings or unexpected guests.

Kid-Friendly: These mini sandwiches are a hit among children, making dinner time fun and enjoyable.

Versatile Flavor: Customize with your favorite cheeses or herbs; the possibilities are endless!

Perfect Pairing: Serve alongside a warm bowl of tomato soup for a comforting, classic combo that everyone loves.

If you're interested in other comforting meals, try pairing these with Pumpkin Cinnamon Roll Muffins for a delightful twist, or enjoy them with a side of Grilled Mushrooms Savory for an added gourmet touch!

Hawaiian Roll Grilled Cheese Ingredients

For the Sandwiches

  • Hawaiian Sweet Rolls – The foundation for this grilled cheese, offering a sweet and soft bite; feel free to use any sweet bread if you prefer.
  • Butter (softened) – Adds a rich flavor and helps achieve that golden-brown crust; substitute with margarine for a dairy-free option.
  • Cheese (various types) – Essential for the gooey filling; think cheddar, mozzarella, or American cheese; customize with your melting cheese of choice!

For the Garlic Herb Butter

  • Oregano – Provides a lovely aromatic flavor; Italian seasoning is a fantastic alternative if you want to mix things up.
  • Garlic Powder – Infuses the butter with savory depth; fresh minced garlic can work as well, but use it sparingly for balance.
  • Parsley – Brightens the dish with freshness and a pop of color; fresh parsley is highly recommended over dried for maximum taste.

These Hawaiian Roll Grilled Cheese sandwiches are not just a meal; they are a heartwarming experience that combines the sweetness of the rolls with the savory goodness of cheese and herbs!

Step‑by‑Step Instructions for Hawaiian Roll Grilled Cheese

Step 1: Preheat the Oven
Begin your culinary journey by preheating your oven to 350°F (175°C). This step is crucial for ensuring that your Hawaiian Roll Grilled Cheese sandwiches turn golden and crispy during baking. While the oven heats up, gather all your ingredients and feel the excitement build for this cheesy creation!

Step 2: Prepare the Garlic Herb Butter
In a mixing bowl, combine the softened butter with oregano, garlic powder, and freshly chopped parsley. Use a fork or spatula to blend these savory ingredients until well-mixed and fluffy. The aroma of the garlic herb butter will start to tantalize your senses, setting the stage for the delicious Hawaiian Roll Mini Grilled Cheese that awaits!

Step 3: Slice the Hawaiian Rolls
Carefully slice the Hawaiian sweet rolls into thirds, creating perfect mini sandwich pieces. Spread a generous amount of the homemade garlic herb butter onto each slice, ensuring even coverage for a rich taste. This step infuses every bite of your Hawaiian Roll Grilled Cheese with that incredible buttery flavor, making it all the more irresistible.

Step 4: Assemble the Sandwiches
Now it’s time to fill those buttery rolls! Layer your choice of cheese between two slices of the buttered Hawaiian rolls, creating delightful mini sandwiches. Press them gently together to ensure the cheese holds during baking. Feel free to mix different types of cheese to elevate your Hawaiian Roll Grilled Cheese experience; the combinations are endless!

Step 5: Bake the Sandwiches
Place your assembled Hawaiian Roll Mini Grilled Cheese sandwiches on a baking sheet, spreading them out to allow even heating. Bake them in the preheated oven for 20-25 minutes, flipping them halfway through to achieve a beautifully golden crust on both sides. Keep an eye on the sandwiches, as you want the cheese to thoroughly melt and the rolls to toast to perfection.

Step 6: Serve and Enjoy
Once baking is complete, remove the sandwiches from the oven and let them cool slightly. The golden brown exterior will beckon for your attention as the gooey melted cheese awaits. Serve these delightful Hawaiian Roll Grilled Cheese sandwiches immediately, perhaps with a side of rich tomato soup for dipping, making it a heartwarming meal perfect for family gatherings or cozy nights in.

Hawaiian Roll Grilled Cheese Variations

Feel free to get creative with this fantastic recipe and make it your own with these delightful twists!

  • Cheese Blend: Use smoked gouda and pepper jack for a smoky, zesty flavor that adds a fun kick. The combination melts beautifully and adds a layer of complexity to the classic taste.

  • Hearty Additions: Add crispy cooked bacon or thinly sliced ham to make your sandwiches even more satisfying. This addition will transform your mini grilled cheese into a meal that even the hungriest kids will love!

  • Herb Variations: Swap oregano for fresh thyme or dill in the garlic herb butter for a new aromatic experience. Each herb will impart its own unique freshness, elevating the flavors in your grilled cheese.

  • Spicy Kick: Toss in a pinch of cayenne pepper or a dash of hot sauce in your garlic butter for a warm, spicy touch. This will give your sandwiches a delightful surprise that complements the sweetness of the rolls.

  • Vegetable Boost: Add slices of ripe tomatoes or fresh spinach leaves for an added layer of nutrition and flavor. Not only will it make the sandwiches more colorful, but it’ll also sneak in some veggies the kids might not notice!

  • Gluten-Free Option: Use gluten-free bread or rolls to create a delicious version for those with dietary restrictions. You won’t lose any of the beloved flavors, and everyone can join in!

  • Sweet Surprise: Drizzle a little honey or maple syrup over the cheese before baking for a sweet and savory combination that’s truly irresistible. This unexpected sweetness plays perfectly with the Hawaiian rolls!

  • Tomato Soup Twist: To elevate your comfort soup, try blending in some roasted red peppers or basil for a gourmet touch. Pairing these sandwiches with a richly flavored soup will create a beautifully balanced meal.

If you enjoy experimenting with flavors, you might also savor the combination of these grilled cheese sandwiches with Pumpkin Cinnamon Roll Muffins. This combination is sure to lift your spirits with its delightful texture and flavor contrasts!

Expert Tips for Hawaiian Roll Grilled Cheese

  • Use Softened Butter: Ensure your butter is softened but not melted to avoid soggy rolls and achieve that perfect golden crust.

  • Mix Cheese Varieties: Experiment by combining different cheese types, like smoked gouda or sharp cheddar, for a richer Hawaiian Roll Grilled Cheese experience.

  • Pre-Bake Assembly: Assemble your sandwiches right before baking to ensure they are crispy and warm when served; this keeps the texture delightful.

  • Utilize Parchment Paper: Line your baking sheet with parchment paper for easier cleanup and to prevent sandwiches from sticking.

  • Check on Doneness: Keep an eye on the sandwiches while baking; you want a perfectly toasted exterior and melted cheese without overdoing it.

How to Store and Freeze Hawaiian Roll Grilled Cheese

Fridge: Store leftover Hawaiian Roll Grilled Cheese in an airtight container for up to 3 days. Reheat in the oven to maintain crispness and meltiness.

Freezer: For longer storage, wrap sandwiches individually in plastic wrap, then place in a freezer bag. They can be frozen for up to 1 month.

Reheating: To reheat, bake from frozen at 350°F (175°C) for 15-20 minutes or until heated through. This prevents them from getting soggy and keeps them delicious.

Prep Ahead: You can prepare the sandwiches up to an hour before baking and keep them in the refrigerator until you're ready to pop them in the oven!

Make Ahead Options

Preparing these Hawaiian Roll Mini Grilled Cheese sandwiches in advance is a fantastic way to save time during busy weeknights! You can assemble the sandwiches up to 24 hours ahead of time; simply place them covered in the refrigerator to keep them fresh. If you want to take it a step further, you can mix the garlic herb butter and store it in the fridge for up to 3 days. Just before baking, spread the butter on the rolls, layer your choice of cheese, and let them sit at room temperature for about 15 minutes to prevent cold centers. When you’re ready to enjoy, bake the sandwiches as instructed, and they will be just as delicious as if freshly made, providing you with the comforting flavors you love!

What to Serve with Hawaiian Roll Mini Grilled Cheese?

These cozy sandwiches are not only delicious on their own; they also shine when paired with complementary sides that enhance every bite.

  • Warm Tomato Soup: The perfect classic pairing; its creamy texture and tangy flavor balance the sweetness of the Hawaiian rolls beautifully. Dip and savor!

  • Crispy Sweet Potato Fries: Their natural sweetness and crunch create a delightful contrast with the cheesy sandwiches, adding a fun twist to your meal.

  • Garden Salad: A fresh medley of leafy greens and colorful veggies adds a light, refreshing touch, making the meal feel more balanced and vibrant.

  • Pickles or Pickled Veggies: The tanginess of pickles cuts through the richness of the grilled cheese, offering a zesty flavor that elevates the entire experience.

  • Fruit Skewers: Fresh fruits such as pineapple, grapes, and strawberries provide a burst of sweetness and freshness, perfect as a light dessert or side.

  • Macaroni and Cheese: For the ultimate comfort food combo, a creamy mac and cheese complements the grilled cheese, creating a nostalgic and hearty meal.

  • Sparkling Lemonade: A refreshing drink to cleanse the palate, its citrusy notes highlight the savory flavors of the grilled cheese so perfectly.

  • Chocolate Chip Cookies: End the meal on a sweet note; warm cookies are the perfect indulgent treat that everyone will love!

Feel free to mix and match these pairings to create a delightful family feast that makes everyone's taste buds sing!

Hawaiian Roll Grilled Cheese Recipe FAQs

How do I select ripe Hawaiian rolls?
Absolutely! When selecting Hawaiian rolls, look for ones that are soft and have a slight sheen on the surface. They should be free of any dark spots or mold; fresh rolls will have a sweet aroma and a fluffy texture. If you can, opt for rolls that are from the bakery section for the best taste.

What is the best way to store leftover Hawaiian Roll Grilled Cheese?
For optimal freshness, store leftover Hawaiian Roll Grilled Cheese sandwiches in an airtight container in the fridge for up to 3 days. If you want to keep them crispy, I recommend reheating them in the oven rather than the microwave, which can make them soggy. Just pop them in a preheated oven at 350°F (175°C) for a few minutes until warm.

Can I freeze Hawaiian Roll Grilled Cheese sandwiches?
Absolutely! To freeze, wrap each assembled sandwich in plastic wrap and place them in a resealable freezer bag. They can be frozen for up to 1 month. When you're ready to enjoy, bake them straight from the freezer at 350°F (175°C) for about 15-20 minutes, flipping halfway through to ensure even warming.

What should I do if my sandwiches are soggy after baking?
Very! If your Hawaiian Roll Grilled Cheese sandwiches turn out soggy, it often means the butter was too melted before baking or the rolls were too moist. For next time, make sure to use softened but not melted butter, and consider using a baking sheet lined with parchment paper to help with crispiness.

Are there any dietary considerations for making Hawaiian Roll Grilled Cheese?
Definitely! If you have dietary restrictions, you can easily adapt this recipe. For a dairy-free option, use margarine for the butter and dairy-free cheese alternatives. Just ensure that the Hawaiian rolls you choose fit your dietary needs, as some may contain milk or eggs. Always check the labels!

Can these sandwiches be prepared ahead of time?
Yes! You can assemble the Hawaiian Roll Grilled Cheese sandwiches up to an hour before baking. Just keep them covered in the refrigerator until you're ready to bake. This makes it super convenient for busy weeknights, allowing you to pop them into the oven right before serving for maximum freshness!

Hawaiian Roll Grilled Cheese

Hawaiian Roll Grilled Cheese That Will Melt Your Heart

This Hawaiian Roll Grilled Cheese will melt your heart with its sweet rolls and gooey cheese.
Print Recipe Pin Recipe
Prep Time 10 minutes mins
Cook Time 25 minutes mins
Cooling Time 5 minutes mins
Total Time 40 minutes mins
Servings: 4 sandwiches
Course: Snacks
Cuisine: American
Calories: 250
Ingredients Equipment Method Nutrition Notes

Ingredients
  

For the Sandwiches
  • 12 rolls Hawaiian Sweet Rolls Feel free to use any sweet bread if preferred.
  • 4 tablespoons Butter (softened) Substitute with margarine for a dairy-free option.
  • 2 cups Cheese (various types) Think cheddar, mozzarella, or American cheese.
For the Garlic Herb Butter
  • 1 teaspoon Oregano Italian seasoning is a good alternative.
  • 1 teaspoon Garlic Powder Fresh minced garlic can work as well.
  • 2 tablespoons Parsley Fresh parsley is recommended.

Equipment

  • Oven
  • Mixing Bowl
  • Baking Sheet
  • Knife

Method
 

Instructions
  1. Preheat your oven to 350°F (175°C).
  2. Combine softened butter with oregano, garlic powder, and chopped parsley in a mixing bowl.
  3. Slice the Hawaiian sweet rolls into thirds and spread garlic herb butter on each slice.
  4. Layer your choice of cheese between two slices of the buttered Hawaiian rolls.
  5. Bake for 20-25 minutes, flipping halfway through to achieve a golden crust.
  6. Remove from oven, let cool slightly, and serve immediately.

Nutrition

Serving: 1sandwichCalories: 250kcalCarbohydrates: 30gProtein: 10gFat: 12gSaturated Fat: 7gPolyunsaturated Fat: 0.5gMonounsaturated Fat: 3gCholesterol: 30mgSodium: 400mgPotassium: 150mgFiber: 1gSugar: 4gVitamin A: 500IUCalcium: 200mgIron: 1mg

Notes

Serve with a side of rich tomato soup for a comforting meal.

Tried this recipe?

Let us know how it was!

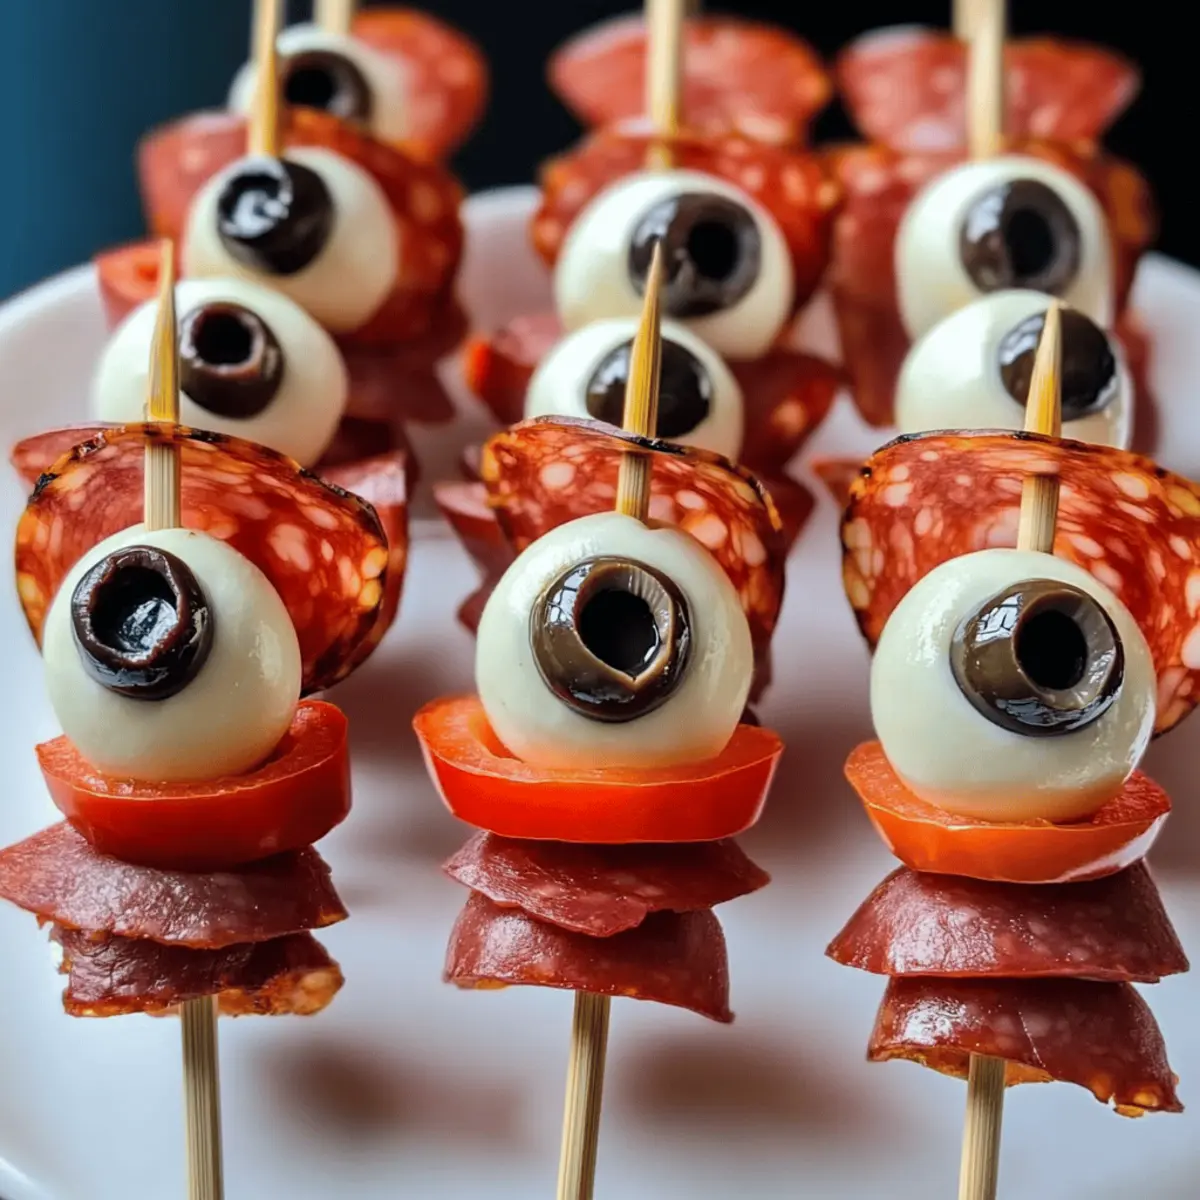
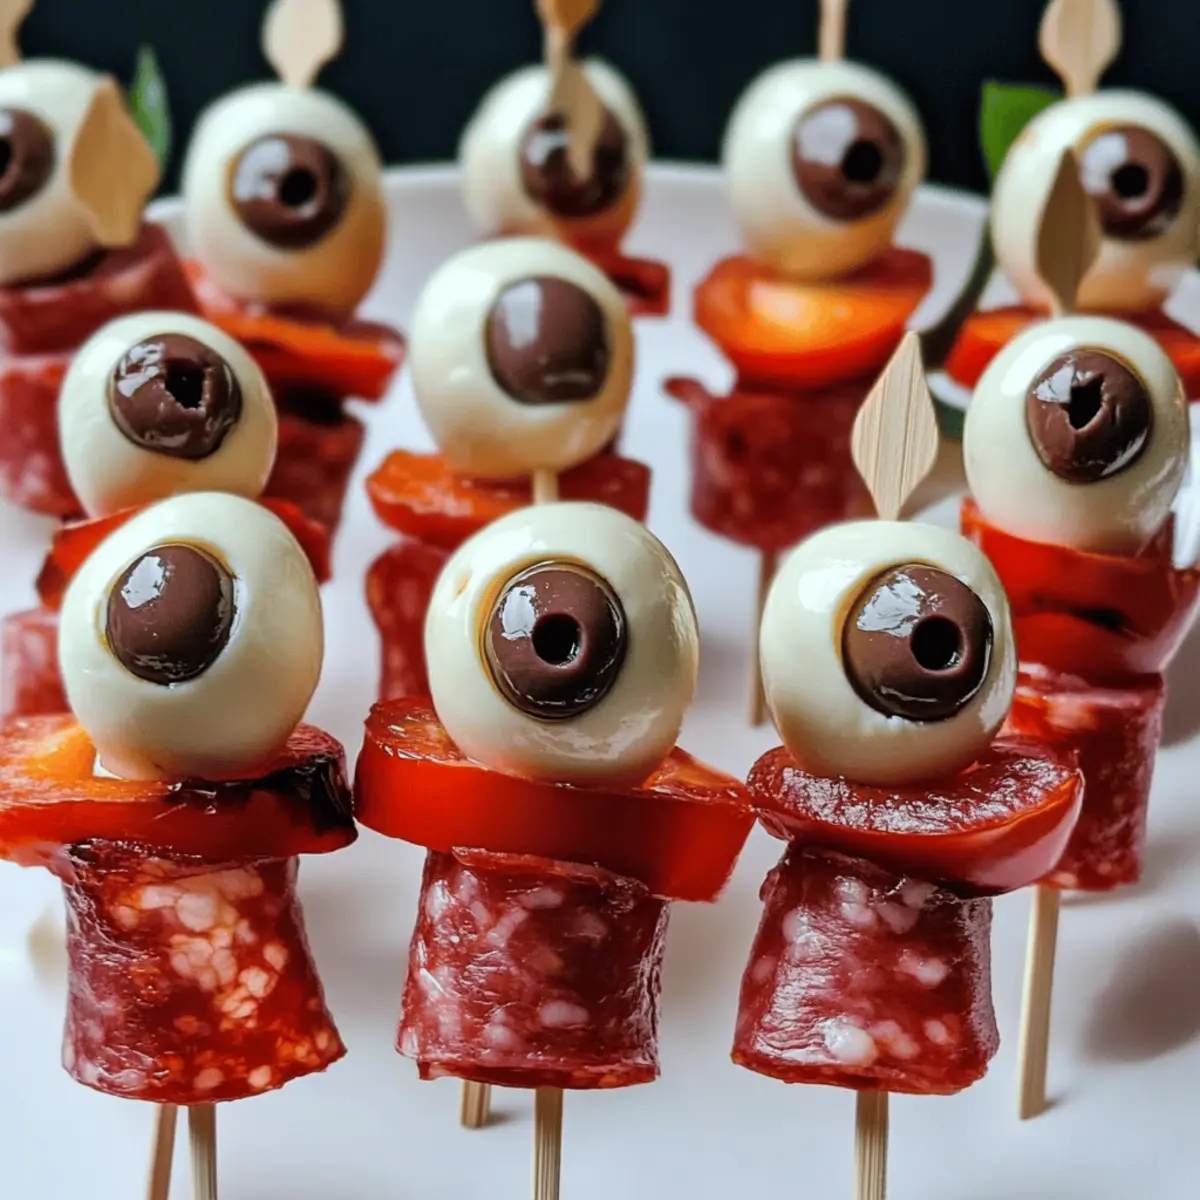
Creepy Skewered Salami Eyeballs: Spooky Fun for Halloween

September 24, 2025 by Grace Snow Leave a Comment

“Have you ever wanted a snack that’s both playful and a little bit creepy?” That’s exactly what you’ll get with these Creepy Skewered Salami Eyeballs, a Halloween appetizer that’s sure to steal the spotlight at your next gathering. Not only are these eye-catching treats quick and easy to prepare, but they also bring a delightful twist to the classic Italian flavors we all love. Picture your guests’ reactions as they enjoy these amusing yet savory snacks - a fantastic way to bridge the gap between fun and flavor! Whether you’re hosting a Halloween party or just want to impress family with a charming surprise, these salami eyeballs will be a hit with both kids and adults. Are you ready to make your spooky spread unforgettable?

Why Are These Eyeballs So Fun?

Eye-catching: These Creepy Skewered Salami Eyeballs are not just a snack; they’re a conversation starter! Their unique presentation will leave your guests both laughing and impressed.

Quick & Easy: With simple ingredients and straightforward steps, whipping up these delightful treats takes hardly any time—perfect for busy hosts!

Savory Satisfaction: Enjoy the rich flavor of pepperoni combined with creamy mozzarella and briny olives—every bite is a tasty treat that appeals to all ages.

Festive Appeal: Ideal for Halloween parties, they can be easily served next to ghostly dips or spooky desserts, adding a playful touch to your spread.

Make-Ahead Magic: Prepare them a few hours in advance and let them chill—less stress for you before the festivities begin! Don’t forget to check out our tips for creating a spooky platter that will wow your guests.

Creepy Skewered Salami Eyeballs Ingredients

For the Eyeballs

  • Mozzarella Balls – Use fresh mozzarella for a creamy texture that forms the base of your eyeballs.
  • Kalamata Olives – Chop these to create the "eyes" that add a briny kick to each eyeball.
  • Pepperoni Stick – Adds savory flavor and structure—pre-sliced is great for convenience.

For the Decoration

  • Red Bell Pepper – This colorful addition enhances the visual appeal; you can substitute with dried chili peppers for added heat.

Assembly Essentials

  • Skewers – Use wooden or bamboo skewers to easily stack your ingredients for the creepy effect.

Get ready to delight your guests with these Creepy Skewered Salami Eyeballs, the perfect Halloween appetizer!

Step‑by‑Step Instructions for Creepy Skewered Salami Eyeballs

Step 1: Prepare Mozzarella
Begin by taking your fresh mozzarella balls and using a small knife to gently carve out indentations on one side of each ball. These will hold the kalamata olives, creating the perfect eye effect. Aim for about a thumbprint-sized indent, ensuring the cheese remains intact. Arrange the mozzarella on a platter and set aside while you prepare the rest of the ingredients.

Step 2: Make Eyes
Now it’s time to mix in the fun! Finely chop your kalamata olives and spoon them into the indentations made in the mozzarella balls. The dark color of the olives will create a striking contrast against the creamy mozzarella, giving each Creepy Skewered Salami Eyeball a lifelike appearance. Set the cheeseballs aside to allow the flavors to meld.

Step 3: Slice Pepperoni
Take your pepperoni stick and slice it into thick disks of about ¾-inch each, then make thin slices between ¼ to ½ inch thick. The variation in size will add extra intrigue to your skewers while providing bites of delightful flavor. Keep these slices handy as you prepare to assemble your skewers.

Step 4: Prepare Red Pepper
Next, grab your red bell pepper and chop it into small wedge-shaped pieces. These will serve as colorful accents between the mozzarella and pepperoni layers on your skewers. Make sure the pieces are uniform in size to ensure even assembly, and keep them close by for when you’re ready to build your Creepy Skewered Salami Eyeballs.

Step 5: Assemble Skewers
With all components ready, take your wooden or bamboo skewers and start assembling! Begin with a wedge of red bell pepper, followed by a chunk of pepperoni, then add a mozzarella ball with an olive eye. Stack a thicker slice of pepperoni next, and finish with another mozzarella ball for balance. Ensure each skewer looks appealing and is sturdy enough to hold together.

Step 6: Chill & Serve
To maximize the creepiness factor, refrigerate your assembled Creepy Skewered Salami Eyeballs for at least 1-2 hours. This chilling time allows the flavors to meld and makes the skewers refreshingly cool for your guests. When ready to serve, present them on a thematic platter that adds to the spooky ambiance of your Halloween gathering!

How to Store and Freeze Creepy Skewered Salami Eyeballs

  • Fridge: Keep leftover Creepy Skewered Salami Eyeballs wrapped in an airtight container in the refrigerator for up to 3 days. This helps maintain their freshness and visual appeal.

  • Freezer: While it's not ideal to freeze these skewers due to the cheese and other ingredients, if necessary, you can store them in a freezer-safe container for up to 1 month. Thaw in the fridge before serving.

  • Preparation Time: If making ahead, prepare the skewers a few hours in advance, allowing them to chill in the fridge to enhance flavor meld and presentation.

  • Reheating: These skewers are best served cold, but if you prefer them warm, lightly microwave them for 10-15 seconds, just enough to take the chill off without melting the cheese completely.

Make Ahead Options

These Creepy Skewered Salami Eyeballs are fantastic for meal prep, allowing you to spend less time in the kitchen on Halloween night! You can prepare the mozzarella and olives up to 24 hours in advance; simply carve the indents in the mozzarella and fill them with chopped olives, then store them in an airtight container in the refrigerator. The pepperoni and red bell pepper can also be prepped ahead, cutting them into pieces and keeping them refrigerated until assembly. When you’re ready to serve, just assemble the skewers with the prepped ingredients and chill them for at least 1-2 hours to ensure they’re refreshingly cool and visually striking. This means you can enjoy a stress-free soirée while still impressing your guests!

Creepy Skewered Salami Eyeballs Variations

Feel free to unleash your creativity and customize these spooky snacks to match your taste!

  • Cheese Twist: Swap mozzarella for feta or goat cheese for a tangy variation that adds an exciting flavor profile.
    The creaminess of goat cheese paired with the savory elements will create an intriguing balance.

  • Spicy Kick: Use spicy pepperoni or add jalapeños for an extra heat bomb in every bite.
    This twist will appeal to spice lovers and adds a daring twist to your Halloween appetizers.

  • Vegetable Medley: Replace red bell pepper with other colorful veggies like cherry tomatoes, cucumbers, or yellow bell peppers.
    Incorporating a variety of colors not only enhances your presentation but also keeps things fresh and vibrant.

  • Olive Options: Opt for green olives stuffed with pimentos for a fun, cartoonish effect instead of kalamata.
    These can give your eyeballs a lighter, whimsical feel that’s just as charming in appearance.

  • Herb Infusion: Sprinkle a touch of dried herbs like oregano or basil on your mozzarella for a flavor boost that nods to Italian cuisine.
    Enhancing the cheese will add an unexpected layer of deliciousness!

  • Meat Choices: Swap out pepperoni for alternative meats like salami, chorizo, or even prosciutto if you want a gourmet take.
    Each of these meats brings its own unique flavor that can elevate your appetizer game.

  • Sweet & Savory: Add a drizzle of balsamic glaze or honey over the finished skewers to contrast the savory elements with a hint of sweetness.
    It’s a delightful surprise that will leave your guests wanting more!

  • Garnishing Greatness: Top each skewer with fresh herbs like basil or parsley for a pop of color and freshness.
    This final touch will not only enhance the aesthetic but also provide a refreshing element to each bite.

Feel free to explore these variations and let your inner chef shine! Whether aiming for a festive look or a flavor twist, the possibilities are endless. As you create these delightful snacks, remember to pair them with other spooky treats like our spider cupcakes or themed dips for an unforgettable Halloween spread!

What to Serve with Creepy Skewered Salami Eyeballs

Delight your guests by complementing these amusing snacks with vibrant sides and enchanting flavors.

  • Spooky Spider Cupcakes: These eye-catching cupcakes add a sweet contrast, with their dark chocolate base and playful spider decorations echoing the Halloween spirit.

  • Witch's Brew Dip: A creamy spinach-artichoke dip brings a comforting yet festive element, perfect for scooping alongside your skewers.

  • Crispy Vegetable Platter: Fresh, colorful veggies like carrots and cucumbers provide a refreshing crunch, balancing the richness of the salami and mozzarella.

  • Pomegranate Salad: With its bright, jewel-like seeds, this salad adds a sweet-tart burst, beautifully contrasting the savory flavors of your Creepy Skewered Salami Eyeballs.

  • Hauntingly Good Cheese Board: Offering a mix of textures and flavors, a cheese board with assorted cheeses, crackers, and figs complements the amuse-bouche vibes of your eyeballs.

  • Chilling Fruit Punch: Serve a refreshing, spooky fruit punch infused with citrus and berries, invigorating guests while enhancing the playful mood of your gathering.

  • Ghoulish Garlic Bread: Add an irresistible savory touch with garlic bread, providing a warm and comforting pairing to the fun-filled atmosphere.

These items not only enhance the experience but also create a memorable Halloween spread that guests will rave about long after the festivities are over!

Expert Tips for Creepy Skewered Salami Eyeballs

  • Fresh is Best: Always opt for fresh mozzarella, as it ensures a creamier texture that complements the savory salami and olives beautifully.

  • Chill for Creepiness: Don’t skip the chilling step! Keeping the Creepy Skewered Salami Eyeballs refrigerated makes them visually striking and refreshing during your spooky gathering.

  • Color Contrast: Make sure to use kalamata olives for a rich color contrast with the mozzarella. If swapping for green olives, aim for vibrant, high-quality ones for visual impact.

  • Assembly Precision: To prevent skewers from falling apart, ensure each layer is stacked securely. Use thicker slices of pepperoni in the center for sturdiness and drama.

  • Time Savers: For quicker prep, buy pre-sliced pepperoni and mozzarella balls. It allows you more time to enjoy the Halloween fun rather than slaving in the kitchen!

Creepy Skewered Salami Eyeballs Recipe FAQs

What kind of mozzarella balls should I use?
I recommend using fresh mozzarella balls for the best results. They provide a creamy texture and hold up well during assembly. Look for those packed in water, which have a milder flavor and a delightful creaminess that pairs perfectly with the salami and olives.

How should I store leftover Creepy Skewered Salami Eyeballs?
Store any leftover skewers in an airtight container in the refrigerator for up to 3 days. This helps them stay fresh and maintains the visual appeal. Be sure to keep them tightly wrapped to prevent moisture loss!

Can I freeze Creepy Skewered Salami Eyeballs?
While it’s not recommended to freeze these skewers because the cheese might alter in texture, if you must, here’s how: place them in a single layer in a freezer-safe container, separated by parchment paper, and freeze for up to 1 month. To serve, thaw them in the refrigerator overnight before enjoying them!

What’s the best way to prevent the skewers from falling apart?
To ensure your Creepy Skewered Salami Eyeballs remain sturdy, start by using larger slices of pepperoni in the center and securing each ingredient well on the skewer. This way, the stronger components will hold the other ingredients in place, preventing wobbly skewers!

Can pets eat the ingredients used in these skewers?
While mozzarella and pepperoni can be enjoyed by pets in small quantities, moderation is key. Be cautious with kalamata olives, as they contain pits and can be harmful. If you have concerns about your pets and specific ingredients, please consult your veterinarian for advice.

What can I substitute for kalamata olives if I have an allergy?
If you or your guests have an olive allergy, you can substitute finely chopped pickles or capers for a similar briny kick. Green olives with pimentos can also serve as a fun alternative, giving your skewers a colorful cartoonish effect!

Creepy Skewered Salami Eyeballs

Creepy Skewered Salami Eyeballs: Spooky Fun for Halloween

Creepy Skewered Salami Eyeballs are a playful Halloween snack that combines savory flavors and eye-catching presentation.
Print Recipe Pin Recipe
Prep Time 30 minutes mins
Chilling Time 2 hours hrs
Total Time 2 hours hrs 30 minutes mins
Servings: 6 skewers
Course: Snacks
Cuisine: Italian
Calories: 90
Ingredients Equipment Method Nutrition Notes

Ingredients
  

For the Eyeballs
  • 12 oz Mozzarella Balls Use fresh mozzarella for best texture
  • 10 olives Kalamata Olives Chopped for the 'eyes'
  • 1 stick Pepperoni Stick Pre-sliced for convenience
For the Decoration
  • 1 medium Red Bell Pepper Chopped into wedges
Assembly Essentials
  • 6 pieces Skewers Wooden or bamboo

Equipment

  • Skewers

Method
 

Step-by-Step Instructions
  1. Prepare Mozzarella: Carve indentations in mozzarella balls to hold olives.
  2. Make Eyes: Fill the indentations with chopped kalamata olives.
  3. Slice Pepperoni: Cut pepperoni stick into thick and thin slices.
  4. Prepare Red Pepper: Chop red bell pepper into small wedges.
  5. Assemble Skewers: Layer red pepper, pepperoni, mozzarella with olive, and finish with more mozzarella.
  6. Chill & Serve: Refrigerate skewers for at least 1-2 hours before serving.

Nutrition

Serving: 1skewerCalories: 90kcalCarbohydrates: 3gProtein: 5gFat: 7gSaturated Fat: 3gMonounsaturated Fat: 2gCholesterol: 20mgSodium: 350mgPotassium: 140mgSugar: 1gVitamin A: 500IUVitamin C: 5mgCalcium: 150mgIron: 0.5mg

Notes

Always use fresh ingredients for the best taste and presentation. Chill the skewers to enhance flavor and appeal.

Tried this recipe?

Let us know how it was!

Frankenstein Kiwi Pops: A Fun and Healthy Halloween Treat

September 24, 2025 by Grace Snow Leave a Comment

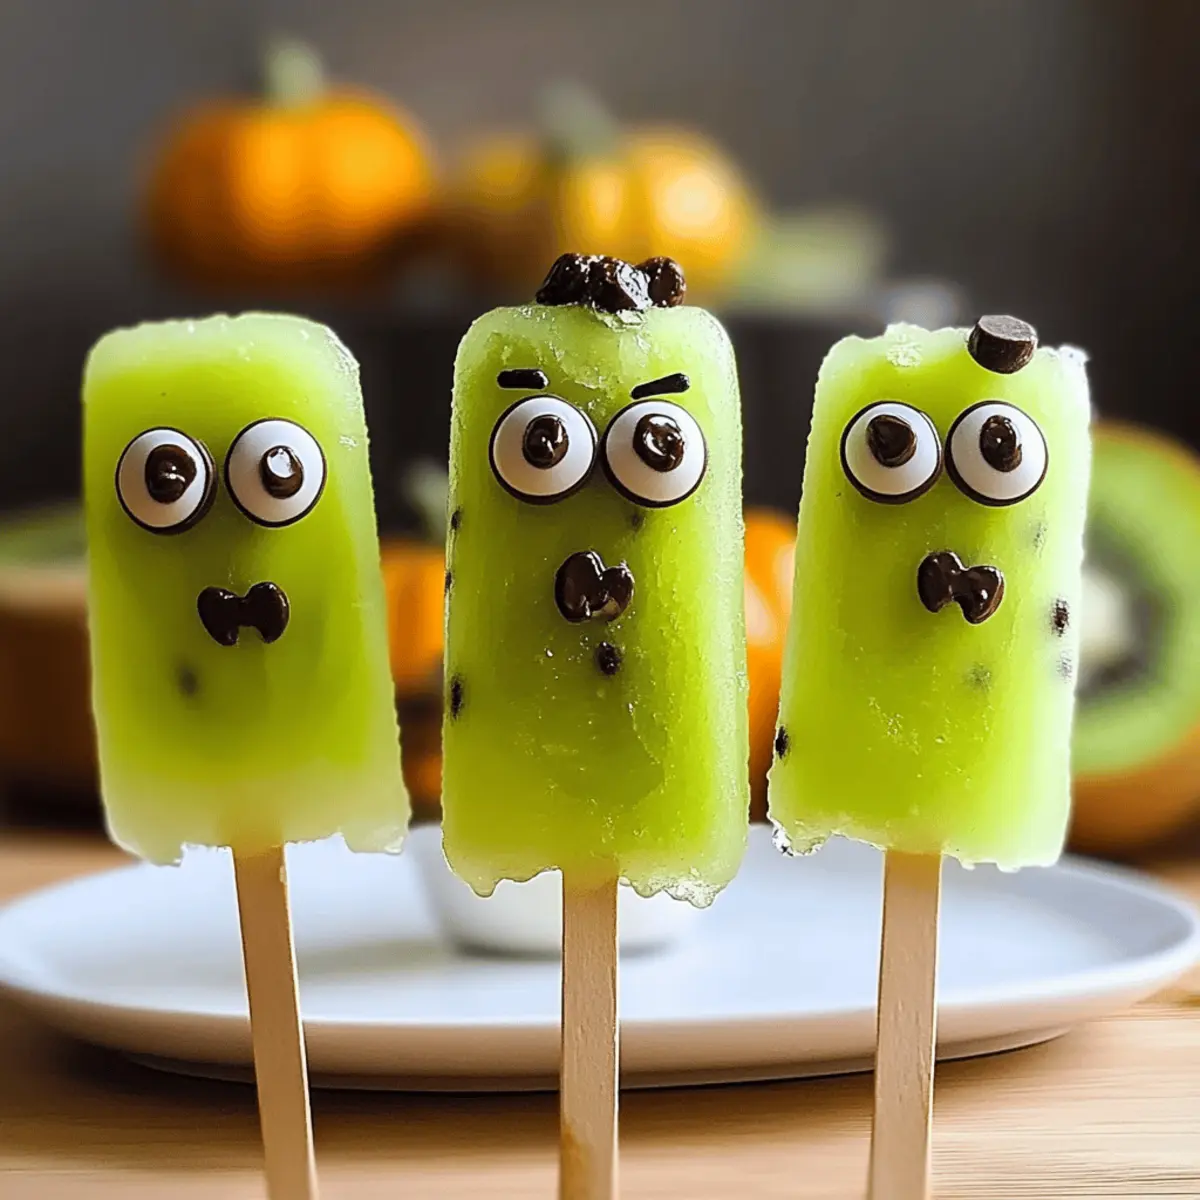
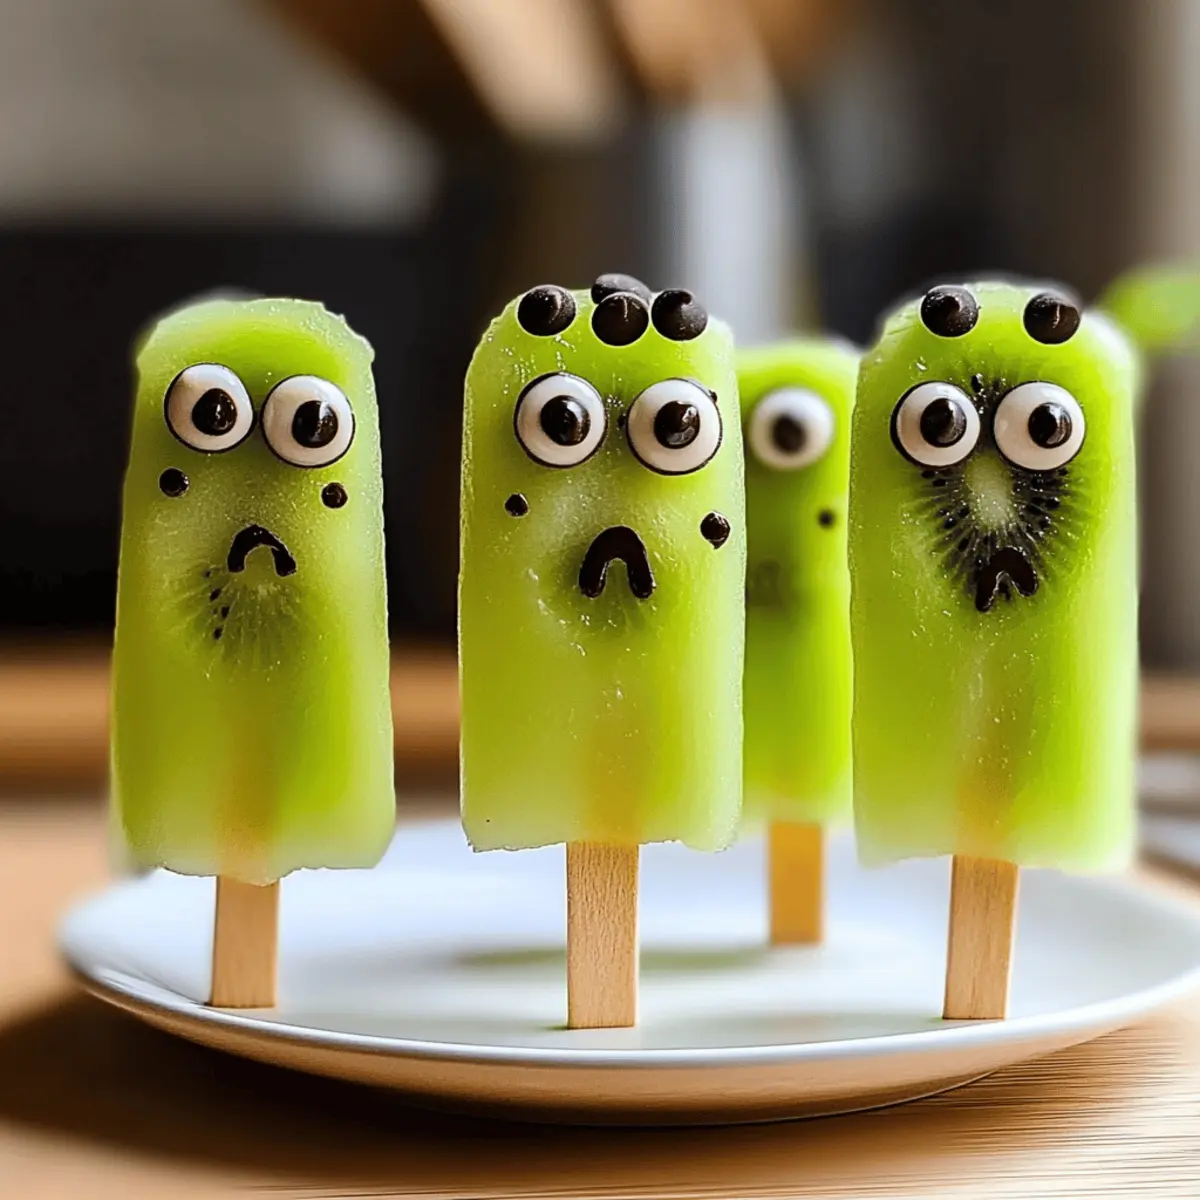
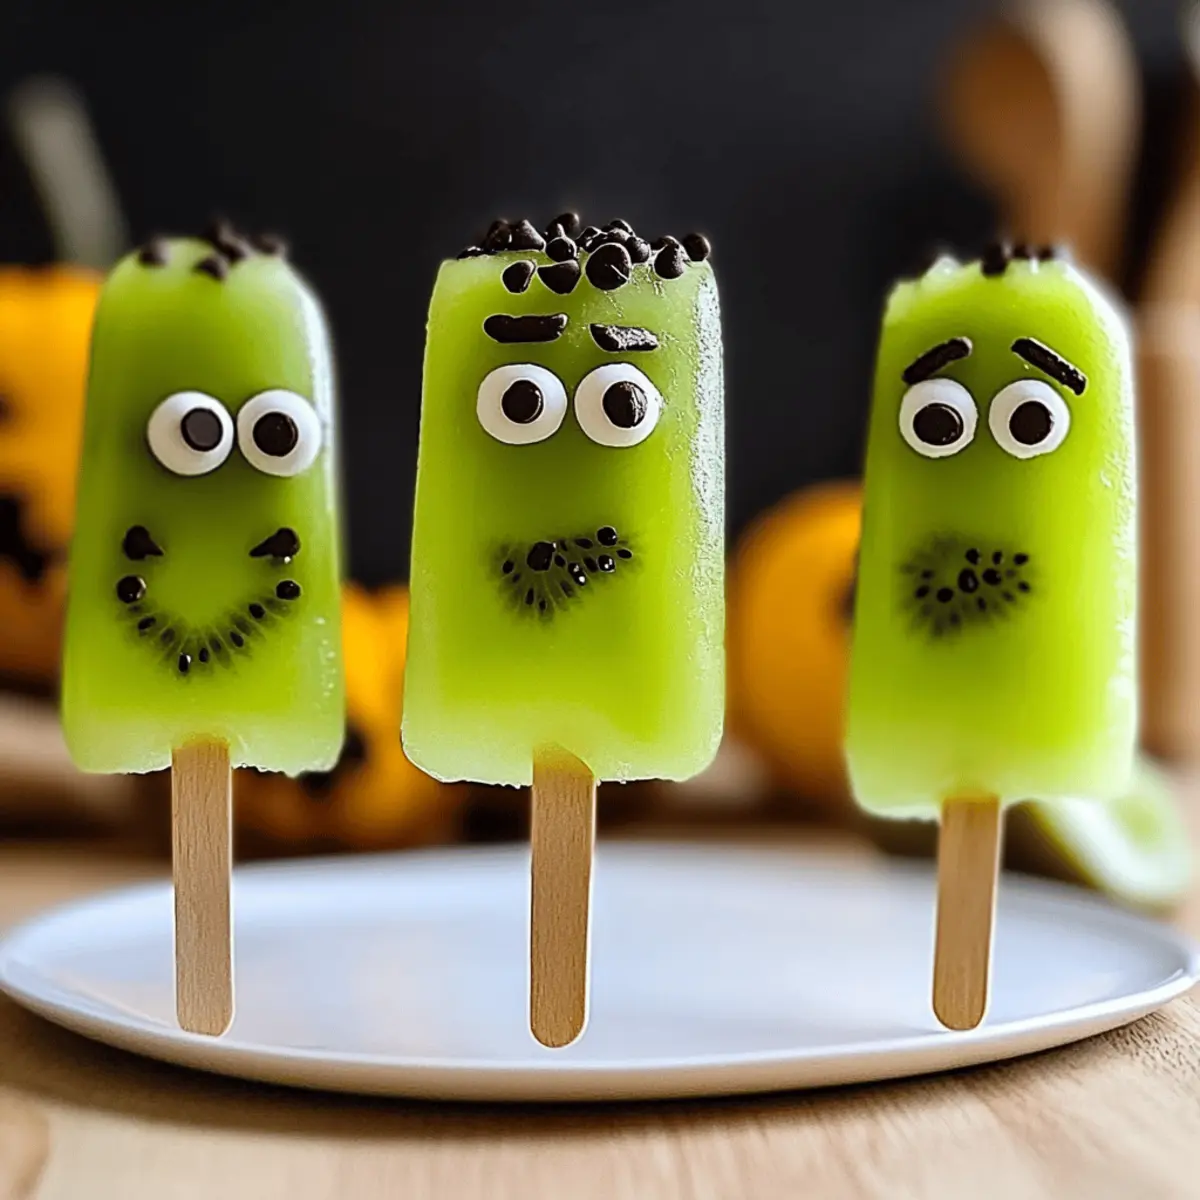
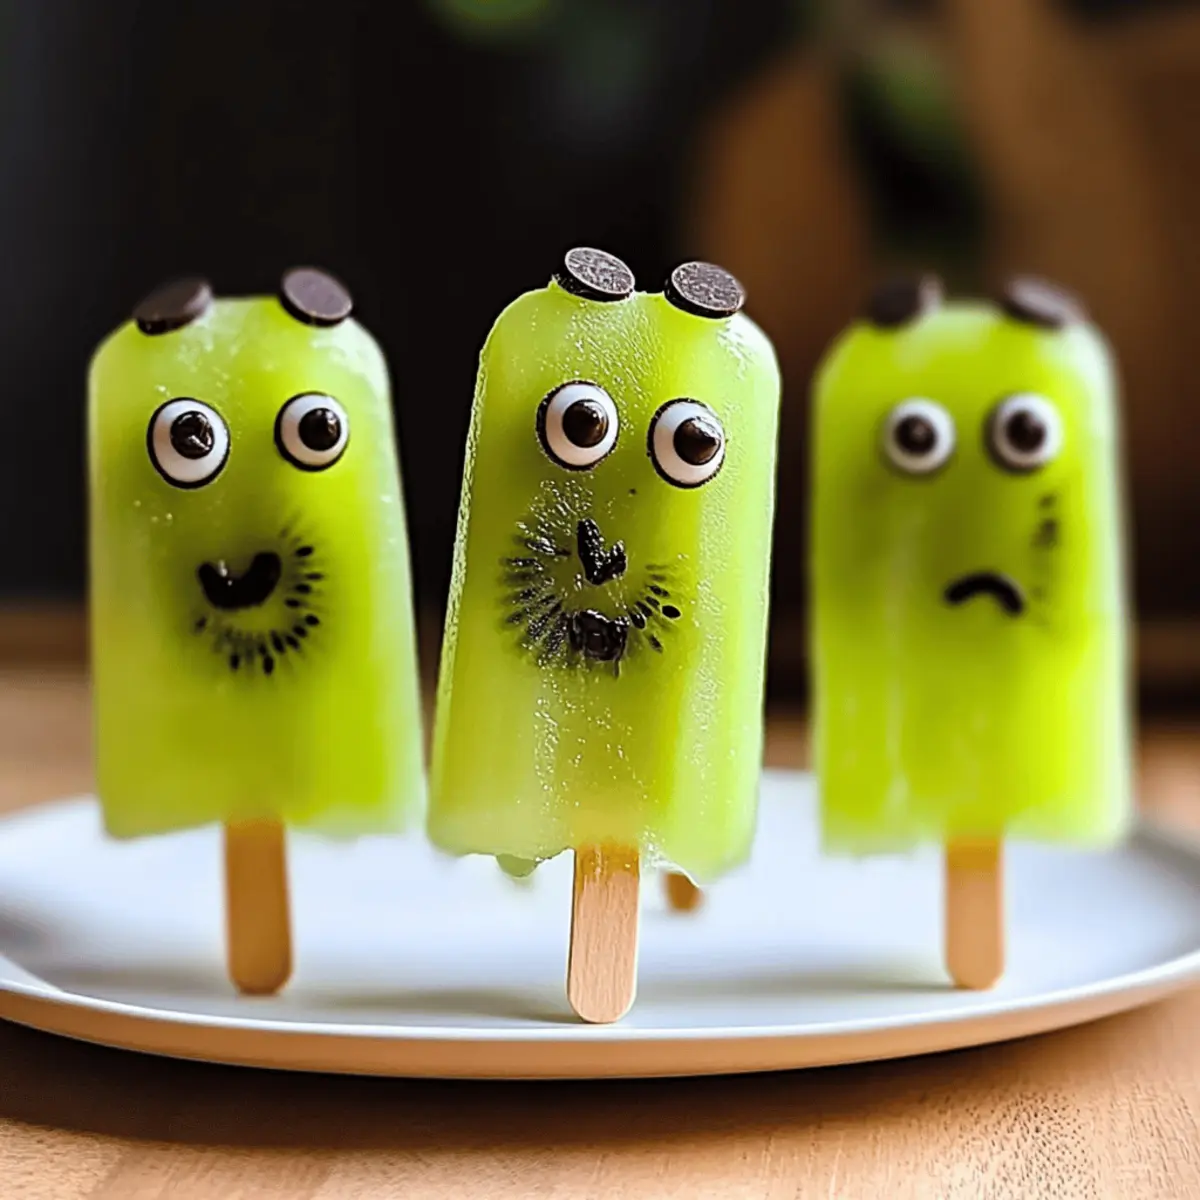
“Wanna hear something amusing? I had a minor kitchen mishap when trying to whip up a spooky Halloween treat, and instead of the usual sugary snacks, I ended up creating these fun Frankenstein Kiwi Pops! With their vibrant green color and adorable chocolate chip eyes, these healthy Halloween treats are not only a hit with kids but also a delightful way for us adults to reclaim a bit of festive joy without the guilt. Made with tangy kiwi and creamy Greek yogurt, this quick and easy recipe transforms nutritious ingredients into a frozen delight that feels like a special treat. Whether you’re gearing up for a Halloween gathering or just want to impress the little ones with something fun, these pops are sure to pique your curiosity—who knew healthy could look this cute?”

Why Are These Kiwi Pops So Special?

Delightful Fun: Kids will love the playful appearance of these pops, complete with chocolate chip eyes that make healthy eating exciting.
Nutrient-Packed: With kiwi's natural sweetness and Greek yogurt's creaminess, you're serving up a treat that's as nutritious as it is tasty.
Quick & Easy: The simple steps make it easy to whip up a batch in no time, perfect for busy parents.
Versatile Variations: Feel free to create your own version by using different fruits or yogurts, or even adding greens like spinach for a color boost—check out Watermelon Popsicles Blissful for another refreshing treat!
Guilt-Free Indulgence: No need to sacrifice flavor for health; these pops are a delicious way to enjoy Halloween without the extra sugar.
Crowd-Pleaser: Serve them at parties, and watch them disappear—everyone, adults included, will reach for these fun, fruity delights!

Frankenstein Kiwi Pops Ingredients

• Get ready for a spooky treat!

For the Base

  • Kiwi – Use ripe, soft kiwis for optimal sweetness and color.
  • Greek Yogurt – Adds creaminess and a protein boost; substitute with your favorite flavored yogurt for a twist.
  • Honey – A natural sweetener to enhance flavor; maple syrup is great for a vegan option.

For the Eyes

  • Mini Chocolate Chips – Perfect for creating Frankenstein's iconic eyes; try dark chocolate chips for a richer taste.

These Frankenstein Kiwi Pops are not only visually appealing but also a nutritious choice that kids will love!

Step‑by‑Step Instructions for Frankenstein Kiwi Pops

Step 1: Prep Kiwis
Begin by peeling and slicing the ripe kiwis into rounds about 1/4 inch thick, aiming for approximately 2 cups of kiwi slices. Lay them flat on a cutting board for a tidy workspace. Make sure the kiwis are bright green and soft to ensure maximum sweetness, as these will form the colorful base of your Frankenstein Kiwi Pops.

Step 2: Blend Ingredients
In a blender, combine the sliced kiwis, creamy Greek yogurt, and a drizzle of honey. Blend the ingredients on high until you achieve a smooth, vibrant mixture devoid of lumps, which should take about 30–45 seconds. The blended concoction’s bright green color will get your taste buds tingling, setting the stage for delightful pops that are both tasty and nutritious.

Step 3: Pour Mixture
Carefully pour the smooth kiwi-yogurt mixture into pop molds, filling them to about three-quarters full. Leave a quarter-inch of space at the top to allow for expansion during freezing. You might want to tap the molds gently on the counter to eliminate any air bubbles, ensuring your Frankenstein Kiwi Pops are perfectly formed and ready for the next step.

Step 4: Add Eyes
Take mini chocolate chips and gently press them into the mixture in each mold to create frighteningly cute "eyes." Position them to resemble Frankenstein’s iconic look—let your creativity flow! This step not only enhances the visual appeal of your pops but also adds a fun snackable element that kids will surely love during Halloween festivities.

Step 5: Insert Sticks & Freeze
Place sticks into each mold carefully, ensuring they stand straight and centered. After securing the sticks, cover the molds with a lid or plastic wrap to keep them clean and prevent ice formation. Now, pop them into the freezer for at least 4 hours, or ideally overnight, allowing the mixture to transform into icy treats.

Step 6: Remove from Molds
When ready to serve your Frankenstein Kiwi Pops, remove them from the freezer and let them sit for a minute for easier removal. Briefly run the molds under warm water for about 15-20 seconds to loosen the pops without melting them. With this gentle heat, the fun pops should slip out easily, revealing their vibrant green delight!

Step 7: Serve and Enjoy
Your Frankenstein Kiwi Pops are now ready to be shared! Serve them immediately to enjoy their refreshing and creamy texture. These spooky yet healthy treats can be enjoyed right away, or kept in an airtight container in the freezer for up to two weeks for a perfect grab-and-go snack that everyone can enjoy!

How to Store and Freeze Frankenstein Kiwi Pops

  • Fridge: Keep any remaining pops in the fridge for up to 2 days before they start losing their texture. However, these frozen treats are best enjoyed fresh from the freezer!
  • Freezer: Store the Frankenstein Kiwi Pops in an airtight container or wrap each pop in plastic wrap to prevent freezer burn, allowing them to stay fresh for up to 2 weeks.
  • Reheating: There’s no need to heat these pops! Just run the molds under warm water for a few seconds to release the pops when you're ready to enjoy them again.
  • Visual Appeal: For a fun presentation, consider placing the pops upright in a cup or bowl while serving to showcase their spooky charm.

What to Serve with Frankenstein Kiwi Pops?

These delightful pops are not just treats; they can inspire a whimsical and nutritious Halloween feast that excites both kids and adults alike.

  • Crunchy Veggie Platter: Pair with an assortment of colorful vegetables like carrots, bell peppers, and cucumbers. The crunch offers a satisfying contrast to the creamy texture of the pops, making snacking healthy and fun!

  • Coconut Whipped Cream: A dollop of coconut whipped cream adds a rich, tropical flavor that's irresistible. This creamy topping will make your Kiwi Pops feel even more indulgent while keeping the treat light and refreshing.

  • Cheesy Mini Quesadillas: Serving warm, gooey quesadillas next to these icy treats strikes a perfect balance of savory and sweet. The cheesy goodness warms you up, while the pops cool you down—ideal for excitement on Halloween night!

  • Sparkling Fruit Punch: A refreshing, fizzy fruit punch serves as a delightful drink option. Combining juice, sparkling water, and floating fruit slices creates a festive drink that enhances the overall celebration.

  • Frozen Yogurt Bark: Whip up a quick frozen yogurt bark covered in nuts and bits of dried fruit. This light dessert complements the fruity pops perfectly and offers a fun alternative to candy or sweets.

  • Nutty Energy Bites: Healthy, no-bake energy bites made from oats and nut butter work well as a protein-packed snack alongside the Kiwi Pops. Their chewy texture provides a delightful contrast, keeping everyone satisfied and energized!

Frankenstein Kiwi Pops Variations & Substitutions

Feel free to let your creativity flow as you customize these delightful pops—there’s a world of flavor waiting to be explored!

  • Fruity Twists: Substitute kiwis with other fruits like strawberries or peaches for a sweet, fruity explosion. Each fruit brings its unique taste and vibe—you can create a fruity rainbow of flavors!
  • Yogurt Choices: Try different yogurt flavors like vanilla, berry, or even coconut. This simple swap can transform the overall taste profile, making each batch uniquely delicious!
  • Healthy Additions: Add a handful of spinach or kale for an extra boost of nutrients while keeping the flavor intact. It’s a sneaky way to sneak in more greens, and kids won’t even notice!
  • Nutty Crunch: Toss in a sprinkle of chopped nuts like almonds or walnuts for added texture and healthy fats. This added crunch can elevate the pops, bringing a satisfying contrast to the creamy yogurt.
  • Sweetener Swaps: Use maple syrup instead of honey for a vegan-friendly option that delivers a lovely depth of flavor. Just a slight change can make all the difference in taste!
  • Spooky Swirls: Incorporate some pureed beetroot for a fun pink swirl effect, making your pops even more festive. The bright color will excite kids and make the Halloween theme pop!
  • Dessert Sauces: Drizzle melted dark or white chocolate over the finished pops for an indulgent treat. This twist adds a decadent touch and makes them even more visually enticing, perfect for Halloween parties!
  • Frozen Yogurt Pops: For a creamier texture, consider using frozen Greek yogurt instead of fresh for richness. This twist turns your pops into a mini ice cream treat!

If you're looking for more fruity inspirations, don't forget to explore Watermelon Popsicles Blissful for a juicy alternative that kids will adore!

Expert Tips for Frankenstein Kiwi Pops

  • Choose Ripe Kiwis: Make sure the kiwis are ripe and soft for optimal sweetness; bruised fruits will lead to disappointing flavor.
  • Smooth Blending: Blend the kiwi mixture until completely smooth—lumpy mixtures can result in a less appealing texture in your pops.
  • Tap Molds: After pouring the mixture into molds, gently tap them on the counter to release any trapped air bubbles; this ensures smooth edges.
  • Creative Eyes: Experiment with mini chocolate chip placements to add character—try different configurations for fun variations!
  • Freeze Time: Aim to freeze overnight for the best results; longer chilling ensures that your Frankenstein Kiwi Pops are perfectly solid.
  • Storage Tips: Wrap pops individually in plastic wrap before placing them back in the freezer for optimal freshness and flavor retention.

Make Ahead Options

These Frankenstein Kiwi Pops are ideal for those busy weeknights when you need to whip up a quick, healthy treat! You can prepare the kiwi-yogurt mixture up to 24 hours in advance and store it in an airtight container in the refrigerator, ensuring the vibrant color stays intact. To make the pops even easier, you can fill the molds with the mixture and insert the sticks, then cover them and freeze for up to 3 days. Just remember to run the molds under warm water for a few seconds when it's time to serve; this keeps the pops from sticking and ensures they come out perfectly every time. With these make-ahead tips, you'll have deliciously spooky snacks ready to go!

Frankenstein Kiwi Pops Recipe FAQs

How do I know when my kiwis are ripe?
Absolutely! Ripe kiwis should be slightly soft to the touch but not mushy. When you gently squeeze them, they should yield a bit but still feel firm. Look for vibrant green skin without any dark spots or bruises, which may indicate overripeness.

How long can I store my Frankenstein Kiwi Pops in the freezer?
I often recommend enjoying your Kiwi Pops fresh, but you can store them in the freezer for up to 2 weeks. Just wrap them individually in plastic wrap to prevent freezer burn, and keep them in an airtight container for the best flavor!

Can I freeze the Kiwi Pops for longer than two weeks?
While it’s best to consume them within 2 weeks for optimal freshness, you can freeze the pops for up to 3 months. Just make sure to package them carefully in airtight containers to avoid freezer burn. To serve, simply let them sit a few minutes at room temperature before enjoying!

What if the mixture turns out lumpy when I blend?
No worries! If your mixture is lumpy, just blend it on high for an additional 30 seconds, making sure to scrape down the sides of the blender to incorporate all the ingredients. A smooth texture is key for a delightful pop experience, so take your time with this step.

Are these pops safe for my child with allergies?
Yes! The Frankenstein Kiwi Pops are generally safe for children, but if your child has allergies, check each ingredient carefully. You can easily substitute Greek yogurt with a dairy-free alternative, and ensure the chocolate chips are allergy-friendly. Always consult your pediatrician if you're unsure about new foods!

What variations can I make with different fruits?
The more the merrier! You can swap kiwis for other fruits like strawberries, peaches, or even mangos for delightful variations. Just follow the original steps and blend your chosen fruits with Greek yogurt and honey, creating a fun twist for these healthy treats. Enjoy exploring new flavors together!

frankenstein kiwi pops

Frankenstein Kiwi Pops: A Fun and Healthy Halloween Treat

Enjoy these fun Frankenstein Kiwi Pops, a healthy Halloween treat packed with kiwi and Greek yogurt.
Print Recipe Pin Recipe
Prep Time 15 minutes mins
Freezing Time 4 hours hrs
Total Time 4 hours hrs 15 minutes mins
Servings: 6 pops
Course: Snacks
Calories: 70
Ingredients Equipment Method Nutrition Notes

Ingredients
  

For the Base
  • 2 cups Ripe kiwis Peeled and sliced
  • 1 cup Greek yogurt Can substitute with flavored yogurt
  • 2 tablespoons Honey Can substitute with maple syrup for vegan option
For the Eyes
  • 1/4 cup Mini chocolate chips For creating eyes

Equipment

  • Blender
  • Pop molds
  • Cutting Board
  • Knife

Method
 

Step-by-Step Instructions
  1. Prep Kiwis: Peel and slice kiwis into rounds about 1/4 inch thick, aiming for 2 cups.
  2. Blend Ingredients: Combine kiwis, Greek yogurt, and honey in a blender and blend until smooth.
  3. Pour Mixture: Pour the mixture into pop molds, filling them to three-quarters full.
  4. Add Eyes: Press mini chocolate chips into the mixture in each mold for eyes.
  5. Insert Sticks & Freeze: Insert sticks and freeze for at least 4 hours or overnight.
  6. Remove from Molds: Remove pops from molds by running them under warm water.
  7. Serve and Enjoy: Serve immediately or store in an airtight container for up to two weeks.

Nutrition

Serving: 1popCalories: 70kcalCarbohydrates: 15gProtein: 2gSodium: 5mgPotassium: 180mgFiber: 2gSugar: 10gVitamin C: 50mgCalcium: 4mgIron: 2mg

Notes

These pops can be customized with different fruits or yogurt flavors. Great for parties and gatherings!

Tried this recipe?

Let us know how it was!

Cottage Cheese Wraps: Soft, Protein-Packed and So Versatile

September 23, 2025 by Grace Snow Leave a Comment

As I stood in my kitchen, the rich aroma of garlic and Italian herbs mingled with the anticipation of a new recipe that would soon become a staple in my home—Cottage Cheese Wraps. These delightful wraps are not only soft and flexible, but they pack a punch with over 12g of protein per serving. Perfectly suited for low-carb diets, they offer a delicious alternative to traditional bread and tortillas. The beauty of these wraps lies in their versatility; you can fill them with anything from creamy avocado to savory grilled chicken, making them an ideal choice for quick lunches or meal prep. With minimal ingredients and simple instructions, you'll find yourself reaching for this recipe again and again. Ready to elevate your wrap game? Let’s dive into how to create these high-protein delights!

Why Are Cottage Cheese Wraps So Special?

Versatile Cooking: These wraps are a blank canvas, ready for your favorite fillings, whether it’s a savory Jello Salad Cottage or a Mediterranean-inspired delight.

Protein-Packed: With over 12g of protein per serving, they’re perfect for a satisfying meal that fuels your day!

Low-Carb Delight: As a low-carb alternative to bread, they fit seamlessly into a health-conscious lifestyle.

Quick & Easy: Just blend, bake, and roll! These wraps are a breeze to prepare, making them a go-to for busy weeknights.

Storage Friendly: Meal prep is a cinch—store them in the fridge or freeze for later use!

Cottage Cheese Wraps Ingredients

For the Wraps

  • Full-fat cottage cheese – Provides moisture and protein for the wraps; note that substituting low-fat may alter texture.
  • Large eggs – Act as a binder, helping the wrap hold together; substitute with flaxseed meal mixed with water for a vegan version.
  • Grated Parmesan cheese – Adds flavor and structure; you can use mozzarella or a dairy-free alternative for substitution.
  • Garlic powder – Infuses a savory depth; can be replaced with fresh minced garlic for an intense flavor.
  • Italian seasoning – Enhances flavor profile; Herbs de Provence or oregano could also work well.

Serving Suggestions

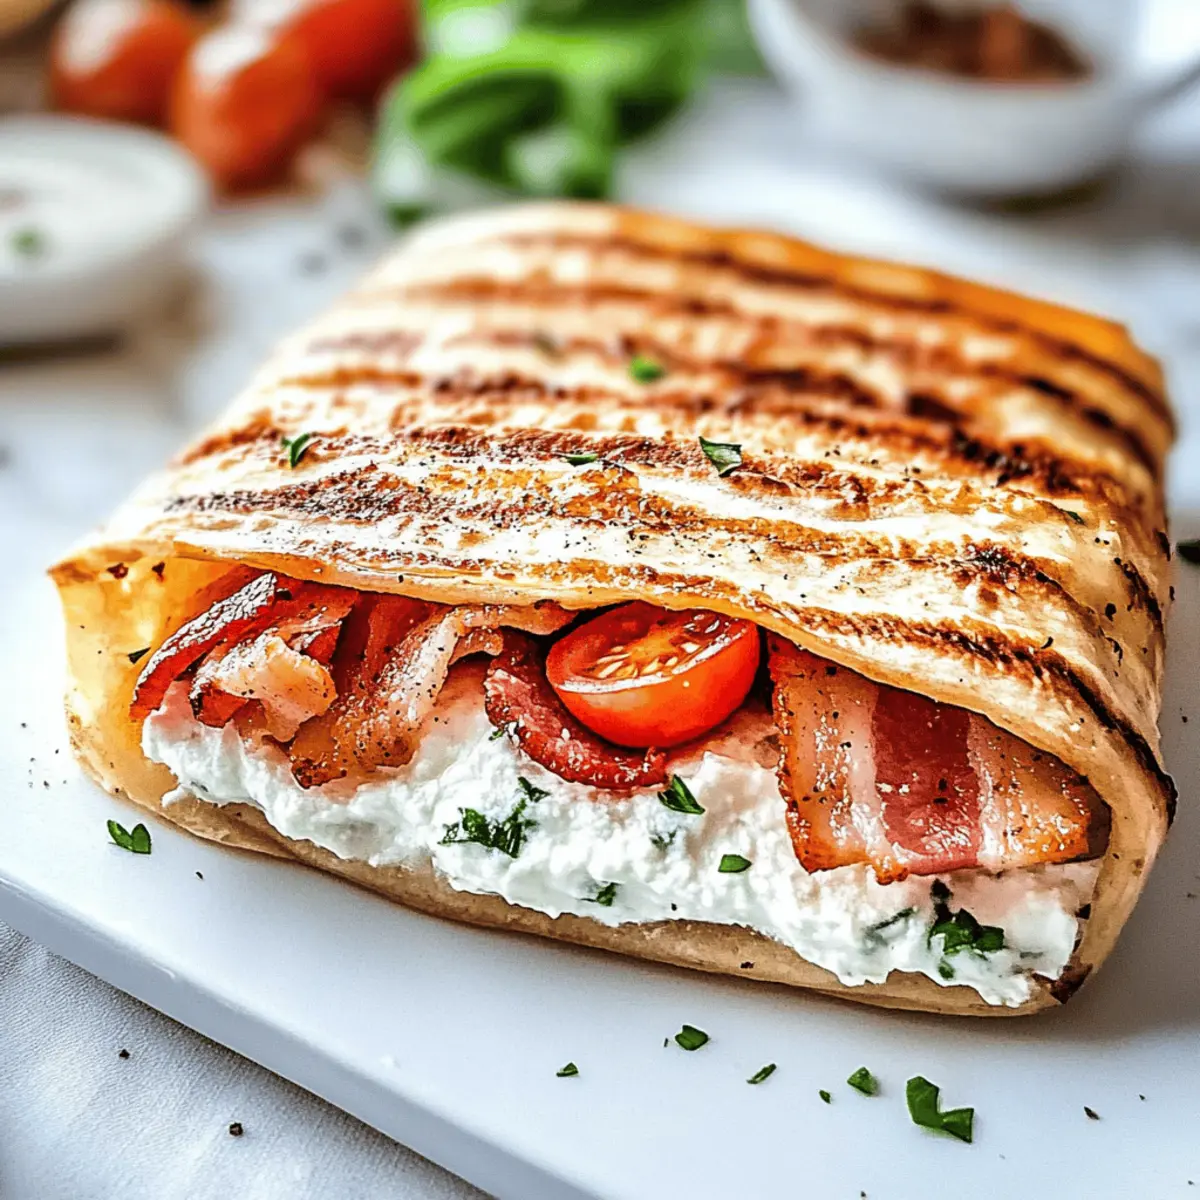
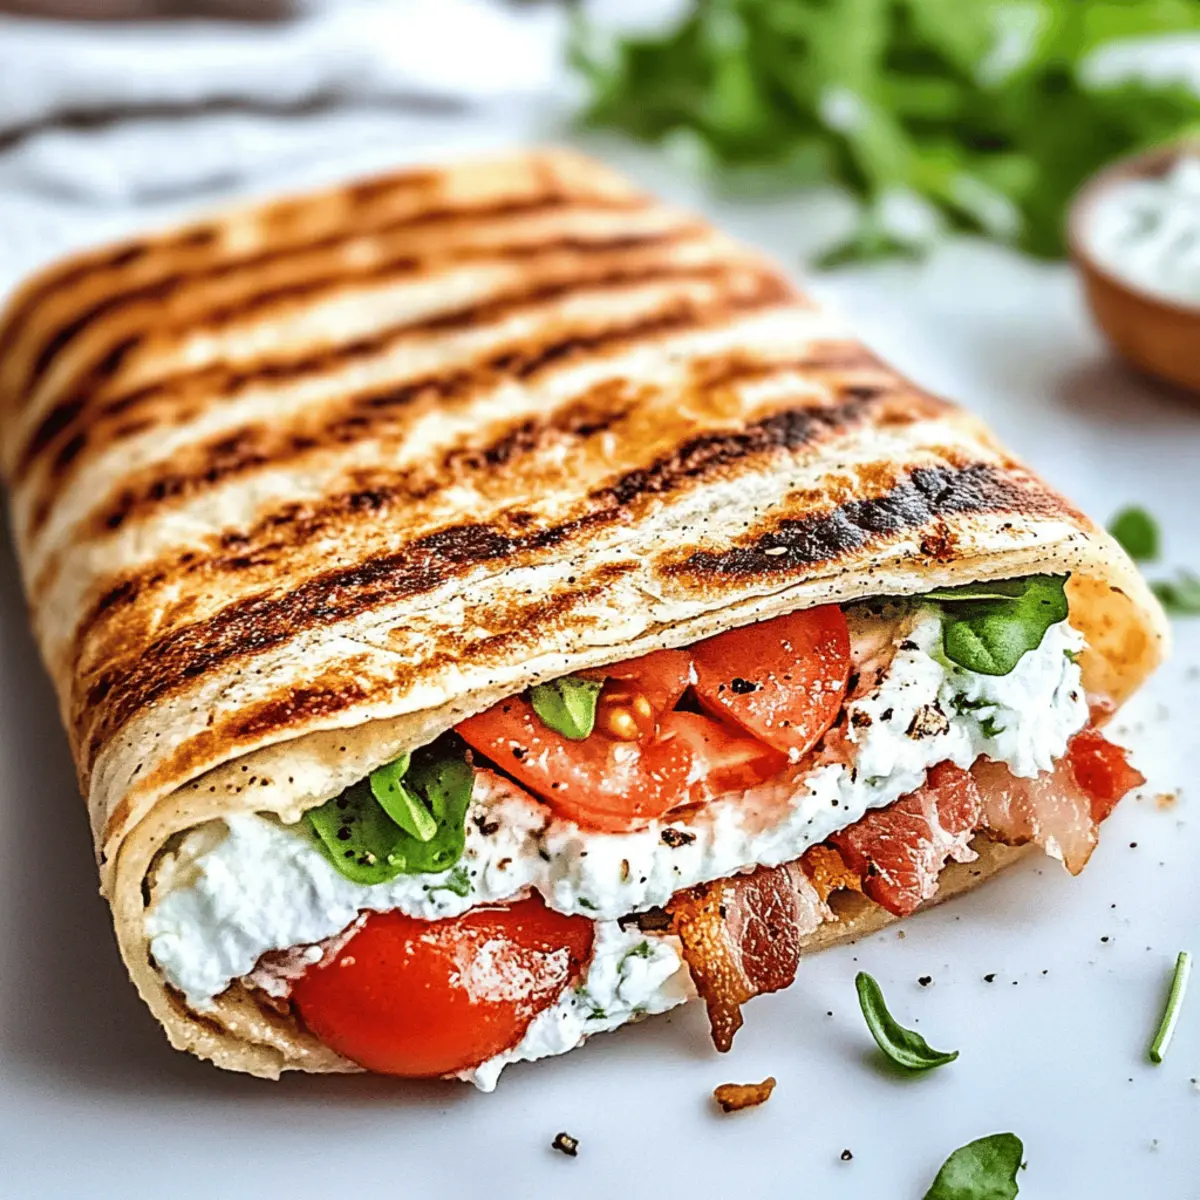
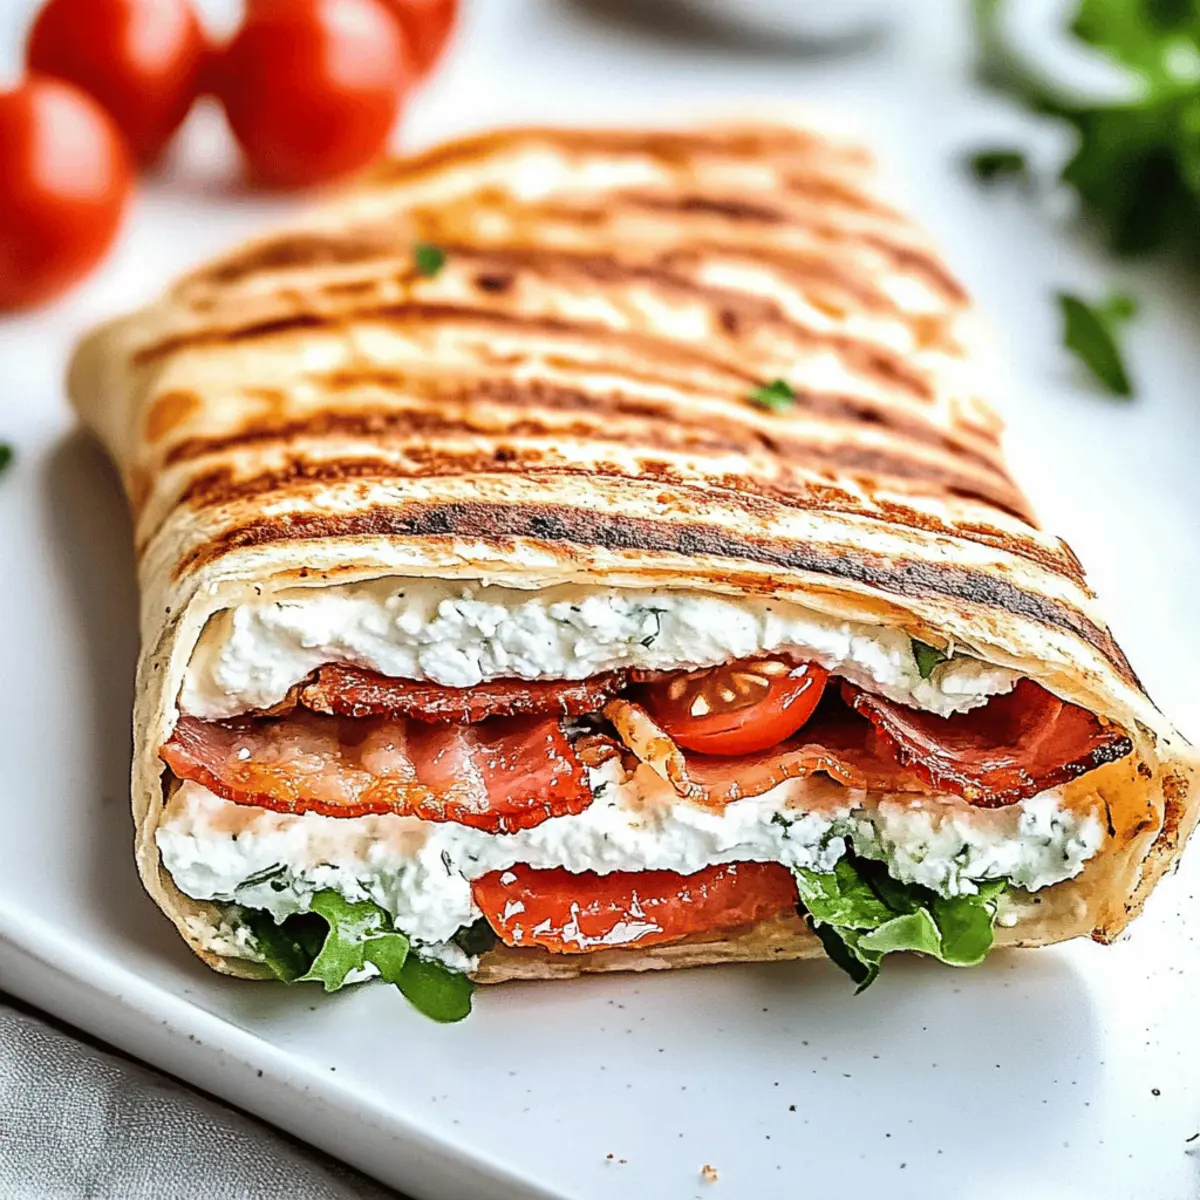
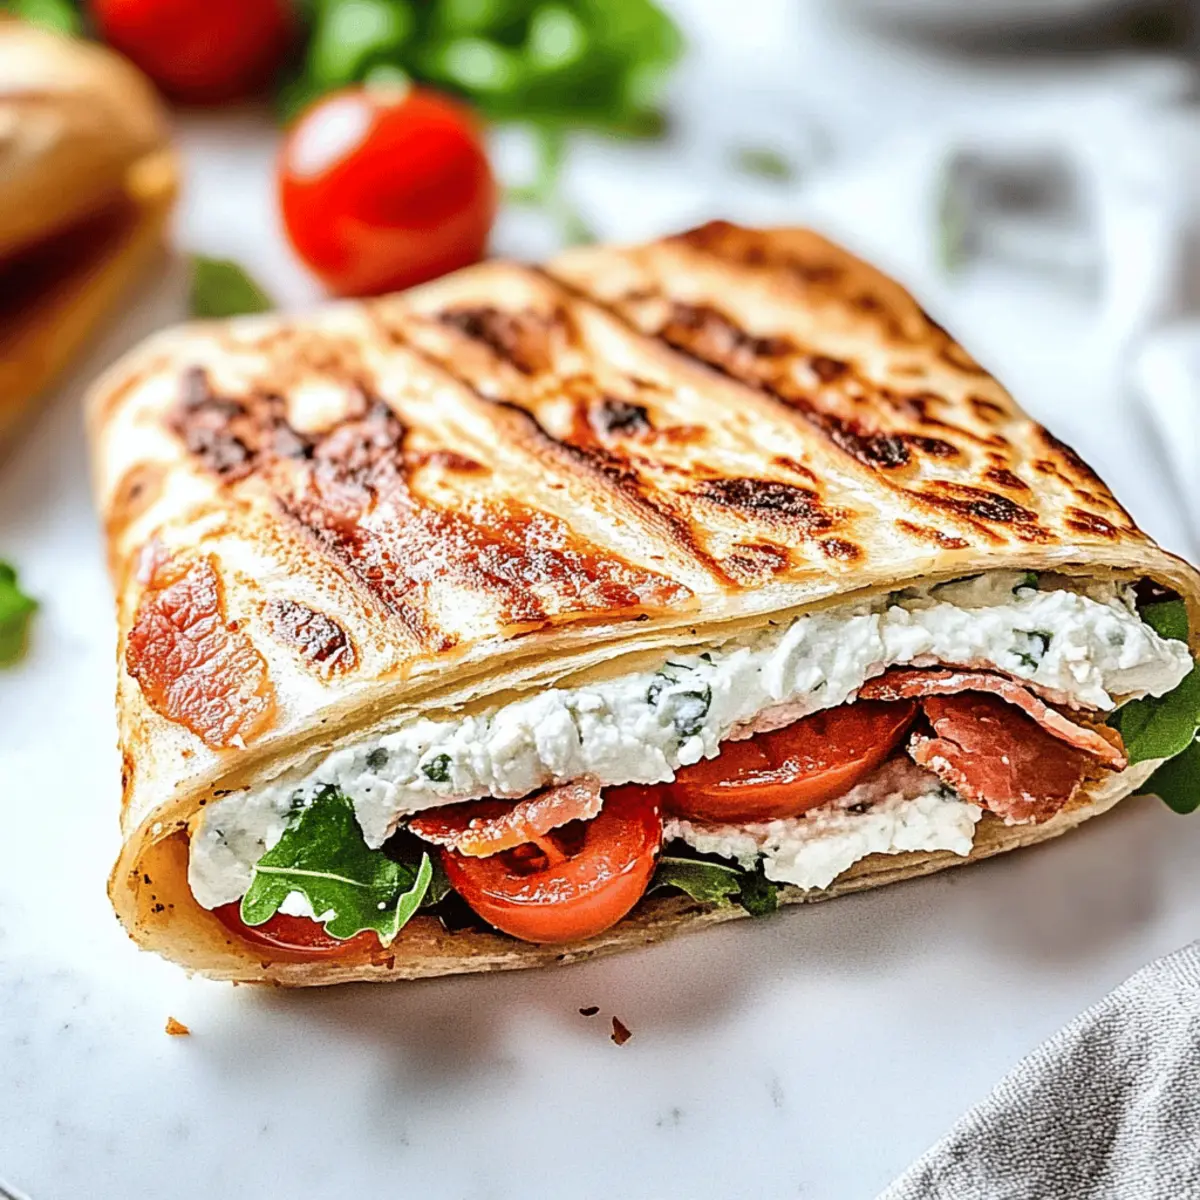
  • Fillings – Choose combinations like cream cheese with crispy bacon and cherry tomatoes for breakfast, or grilled chicken with avocado for lunch.
  • Stand-alone snack – Enjoy the wraps warm as a satisfying, low-carb treat!

Step‑by‑Step Instructions for Cottage Cheese Wraps

Step 1: Preheat the Oven
Begin by preheating your oven to 350°F (175°C). While the oven is warming up, line a baking sheet with parchment paper to prevent sticking. This step is crucial for ensuring that your Cottage Cheese Wraps come out perfectly and can be easily removed after baking without any hassle.

Step 2: Blend the Ingredients
In a blender, combine the full-fat cottage cheese, large eggs, grated Parmesan cheese, garlic powder, and Italian seasoning. Blend the mixture on medium speed until it reaches a smooth and creamy consistency, which should take about 30 seconds. This will create a batter that forms the base of your delightful wraps.

Step 3: Prepare the Baking Sheet
Once the mixture is blended, pour it onto the prepared baking sheet. Using a spatula, gently spread the batter into a thin rectangle, aiming for an even thickness across the surface. This ensures that your Cottage Cheese Wraps cook uniformly and achieve the perfect texture—soft yet sturdy.

Step 4: Bake the Wraps
Place the baking sheet in the preheated oven and bake for 30-35 minutes. You’ll know your wraps are ready when they feel dry to the touch and are lightly golden on top. This is a vital step to achieving that soft yet pliable texture that makes these wraps so enjoyable.

Step 5: Cool the Wraps
After baking, remove the tray from the oven and let the wraps cool completely on the tray for about 10-15 minutes. This cooling process helps firm up the wraps, making them easier to handle and less likely to tear as you prepare to serve them.

Step 6: Remove and Slice
Once cooled, carefully peel the Cottage Cheese Wraps off the parchment paper. Use a sharp knife to slice them into pieces or keep them whole for filling. At this point, you can load them with your favorite ingredients, such as savory grilled chicken or fresh veggies, to create a delicious meal.

What to Serve with Cottage Cheese Wraps

These wraps are a delightful starting point for a delicious meal that packs in flavor and nutrition.

  • Creamy Avocado Dip: A rich, buttery complement that enhances the wraps' soft texture while adding healthy fats.
  • Savory Grilled Chicken: Perfectly seasoned, juicy chicken adds a protein boost, turning your wrap into a filling meal.
  • Fresh Cucumber Salad: Crisp cucumbers tossed with vinaigrette provide a refreshing crunch that lightens every bite of the wrap.
  • Roasted Red Pepper Hummus: Creamy and flavorful, this dip adds a zesty twist that pairs beautifully with the wraps' mild taste.
  • Crispy Bacon Bits: Adding a smoky crunch, bacon elevates the flavor profile of the wraps while introducing delightful texture.
  • Zesty Italian Dressing: Drizzle over the fillings for a tangy kick that brightens the overall flavor of your wraps.
  • Mixed Berry Smoothie: A sweet, fruity drink that balances the savory flavors of your meal, rounding off your dining experience perfectly.
  • Chocolate Chia Pudding: For dessert, this indulgent yet healthy treat satisfies your sweet tooth while keeping the meal light.

Expert Tips for Cottage Cheese Wraps

  • Grease the Parchment: Ensure to grease the parchment well; this will prevent the wraps from sticking and make removal easy.

  • Cool Completely: Allow the baked wrap to cool completely on the tray to prevent tearing when you move or slice them.

  • Blend Texture: For a softer wrap, blend the mixture a little less. A smoother texture firms up better during baking, ensuring perfect Cottage Cheese Wraps.

  • Contrasting Fillings: When choosing fillings, combine contrasting textures for an enjoyable bite. Pair creamy ingredients with something crispy for the best experience.

  • Customization: Feel free to experiment with herbs and spices in your batter; this can elevate the flavor profile and make your Cottage Cheese Wraps uniquely yours!

Make Ahead Options

These Cottage Cheese Wraps are a fantastic choice for meal prep, allowing you to save time during busy weeknights! You can bake the wraps up to 3 days in advance and store them in an airtight container in the refrigerator. To maintain their soft texture, place a layer of parchment paper between each wrap to prevent sticking. When you're ready to serve, simply reheat them in the oven for about 5-10 minutes at 350°F (175°C). Whether you're filling them with grilled chicken or fresh veggies, you'll enjoy delicious, hassle-free Cottage Cheese Wraps that taste just as wonderful as when freshly made!

Storage Tips for Cottage Cheese Wraps

Fridge: Store your Cottage Cheese Wraps in an airtight container for up to 5 days. To prevent sticking, place parchment paper between each wrap.

Freezer: For longer storage, freeze the wraps with parchment paper between them, keeping them fresh for up to 2 months.

Defrosting: When ready to enjoy, thaw the wraps overnight in the fridge or at room temperature for a few hours before use.

Reheating: Reheat in a skillet over low heat or microwave for a quick warm-up, ensuring they remain soft and pliable.

Cottage Cheese Wraps: Customize to Your Taste!

Feel free to unleash your creativity and tailor these wraps to suit your palate perfectly!

  • Dairy-Free: Substitute full-fat cottage cheese with a dairy-free Greek yogurt for a plant-based option that still feels rich and creamy.

  • Herb-Infused: Add fresh or dried herbs like basil or chives directly into the batter for an aromatic twist. They'll uplift the flavor and add a vibrant touch.

  • Spicy Kick: Mix in a pinch of cayenne pepper or chopped jalapeños for a delightful heat that complements your fillings. It’s a fun way to spice things up!

  • Veggie Boost: Incorporate finely chopped spinach or kale into the batter for added nutrition and a pop of color. You'll hardly notice they're there, but your body will thank you!

  • Sweet Delight: Turn the wraps into a sweet treat by adding a dash of vanilla extract and cinnamon. Fill them with yogurt and fresh berries for a delightful breakfast or dessert option.

  • Cheesy Variety: Experiment with different cheeses like feta, gouda, or even a smoked cheese for an exciting flavor profile. Each cheese brings a unique taste that can redefine your wraps.

  • Texture Twist: For a crunchier bite, add crushed nuts or seeds to the batter. They’ll provide satisfying texture alongside the softness of the wrap.

And if you’re looking for great filling ideas, why not try a savory Potato Blue Cheese mix, or perhaps wrap them around a refreshing salad like a classic Jello Salad Cottage? The possibilities are endless!

Cottage Cheese Wraps Recipe FAQs

What type of cottage cheese is best for these wraps?
I recommend using full-fat cottage cheese for the best texture and moisture content. Low-fat options may result in a drier wrap, affecting the overall taste. If you want to go dairy-free, look for plant-based alternatives that mirror the texture.

How should I store leftover Cottage Cheese Wraps?
Store your wraps in an airtight container in the fridge for up to 5 days. To prevent them from sticking, place parchment paper between each wrap. This will keep them fresh and easy to access for that midday snack or next meal!

Can I freeze Cottage Cheese Wraps?
Absolutely! For longer storage, freeze the wraps by placing parchment paper between each one. This way, they won’t stick together. They will stay good for up to 2 months. When you’re ready to enjoy them, thaw overnight in the fridge or at room temperature for a few hours, then reheat as desired.

What if my wraps are too soft or tear easily?
If your wraps turn out too soft, it’s likely a blending issue or they may not have baked long enough. Be sure to let them cool completely on the tray as cooling firms them up. For a firmer wrap, blend the mixture less to keep some structure, ensuring they firm up well in the oven.

Are there any dietary restrictions I should consider?
If you're concerned about allergens, make sure to check for dairy allergies, as the wraps contain both cottage cheese and Parmesan. For vegan options, substitute the eggs with a mixture of flaxseed meal and water (1 tablespoon of flaxseed meal mixed with 2.5 tablespoons of water for each egg) to help bind the ingredients together effectively.

Cottage Cheese Wraps

Cottage Cheese Wraps: Soft, Protein-Packed and So Versatile

Cottage Cheese Wraps are soft, protein-packed snacks perfect for low-carb diets and versatile fillings.
Print Recipe Pin Recipe
Prep Time 10 minutes mins
Cook Time 35 minutes mins
Cooling Time 15 minutes mins
Total Time 1 hour hr
Servings: 4 wraps
Course: Snacks
Cuisine: American
Calories: 150
Ingredients Equipment Method Nutrition Notes

Ingredients
  

For the Wraps
  • 1 cup full-fat cottage cheese Substituting low-fat may alter texture.
  • 2 large eggs Can substitute with flaxseed meal mixed with water for a vegan version.
  • 1/2 cup grated Parmesan cheese Mozzarella or a dairy-free alternative can be used.
  • 1 teaspoon garlic powder Can be replaced with fresh minced garlic for more flavor.
  • 1 teaspoon Italian seasoning Herbs de Provence or oregano can be used.
Fillings
  • cream cheese Can be paired with crispy bacon and cherry tomatoes for breakfast.
  • grilled chicken Pair with avocado for a fulfilling lunch.

Equipment

  • Blender
  • Baking Sheet
  • Parchment Paper
  • Spatula
  • Sharp Knife

Method
 

Step-by-Step Instructions for Cottage Cheese Wraps
  1. Preheat the oven to 350°F (175°C) and line a baking sheet with parchment paper.
  2. Blend the cottage cheese, eggs, Parmesan, garlic powder, and Italian seasoning until smooth.
  3. Pour the mixture onto the baking sheet and spread into a thin rectangle.
  4. Bake for 30-35 minutes until lightly golden and dry to the touch.
  5. Cool on the tray for 10-15 minutes before removing.
  6. Slice or keep whole for filling as desired.

Nutrition

Serving: 1wrapCalories: 150kcalCarbohydrates: 6gProtein: 12gFat: 8gSaturated Fat: 4gPolyunsaturated Fat: 1gMonounsaturated Fat: 2gCholesterol: 130mgSodium: 250mgPotassium: 100mgFiber: 2gSugar: 2gVitamin A: 300IUCalcium: 150mgIron: 1mg

Notes

Grease the parchment and allow baking wrap to cool completely for easier handling. Feel free to customize the herbs and spices in your batter.

Tried this recipe?

Let us know how it was!

Frozen Greek Yogurt Peanut Butter Bites for Healthy Snacking

September 23, 2025 by Grace Snow Leave a Comment

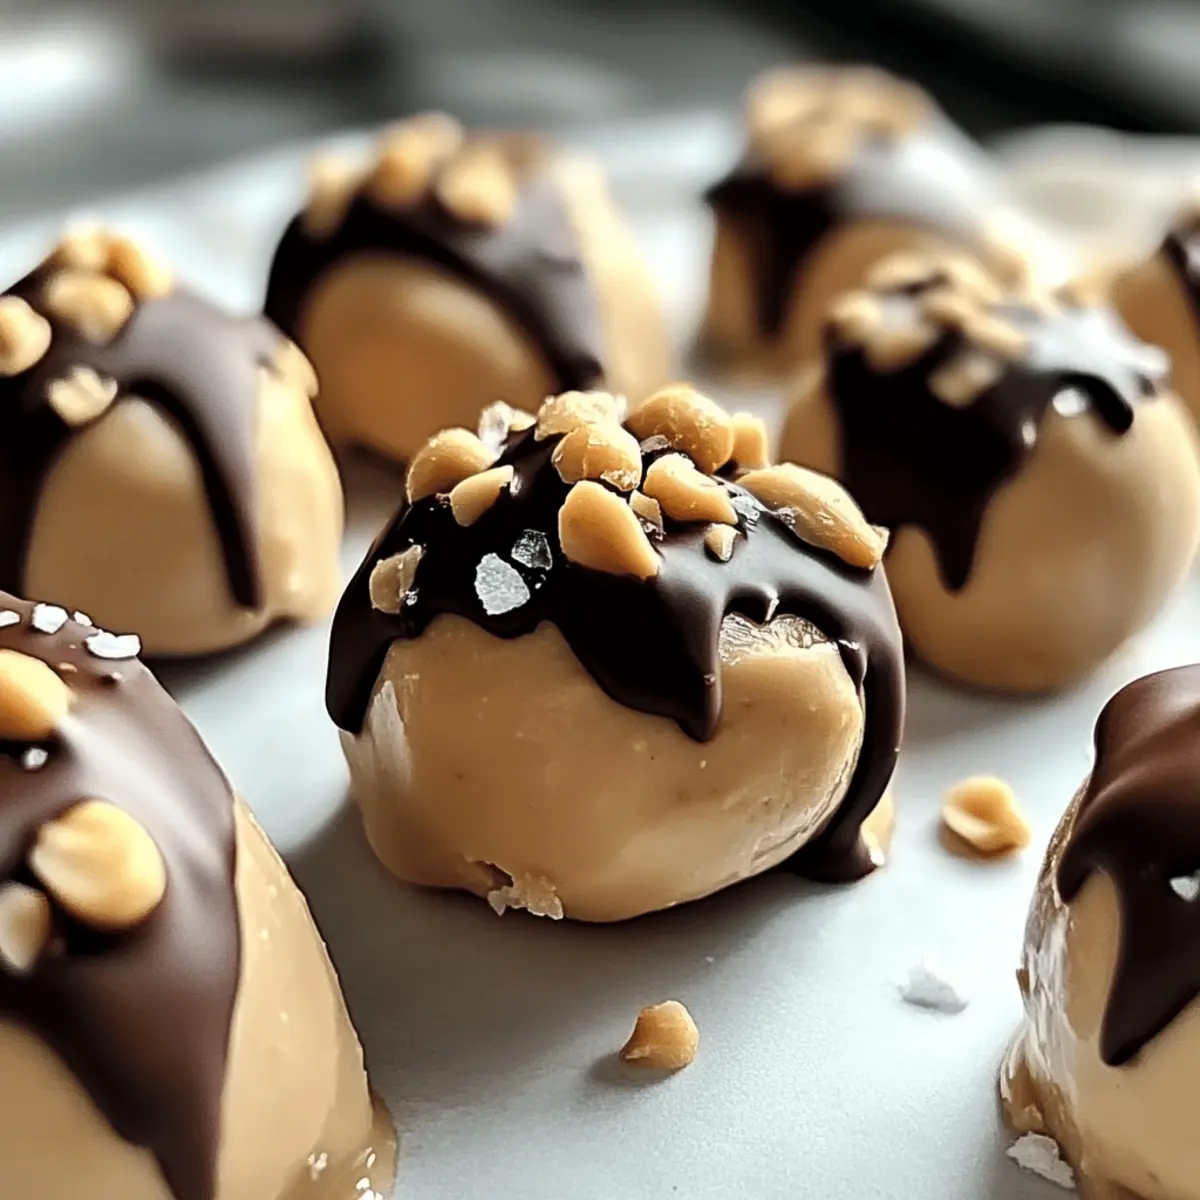
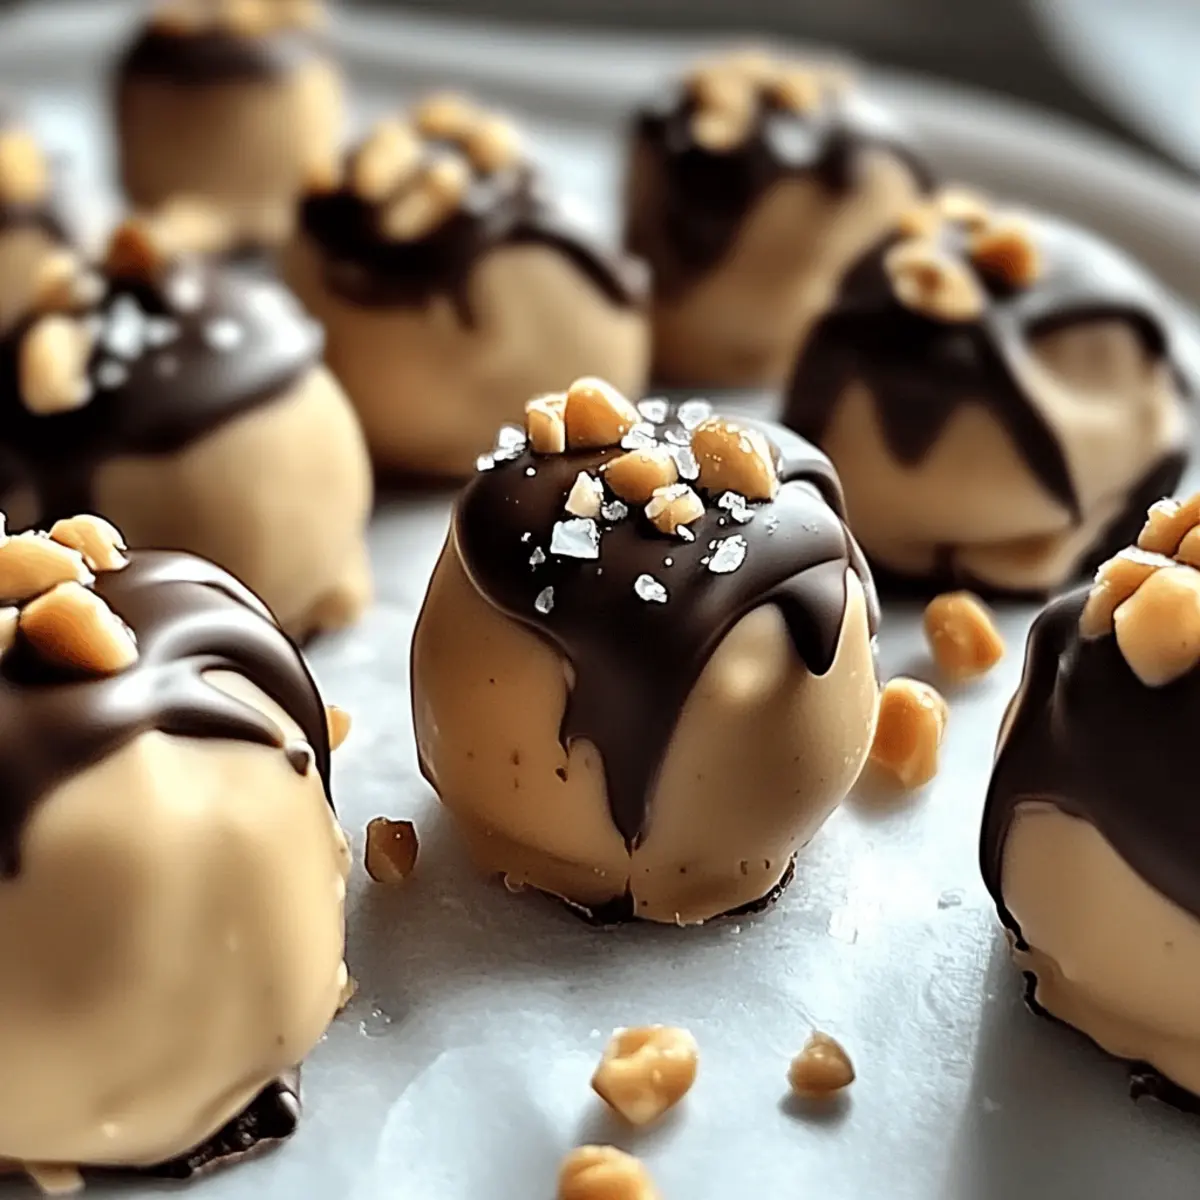
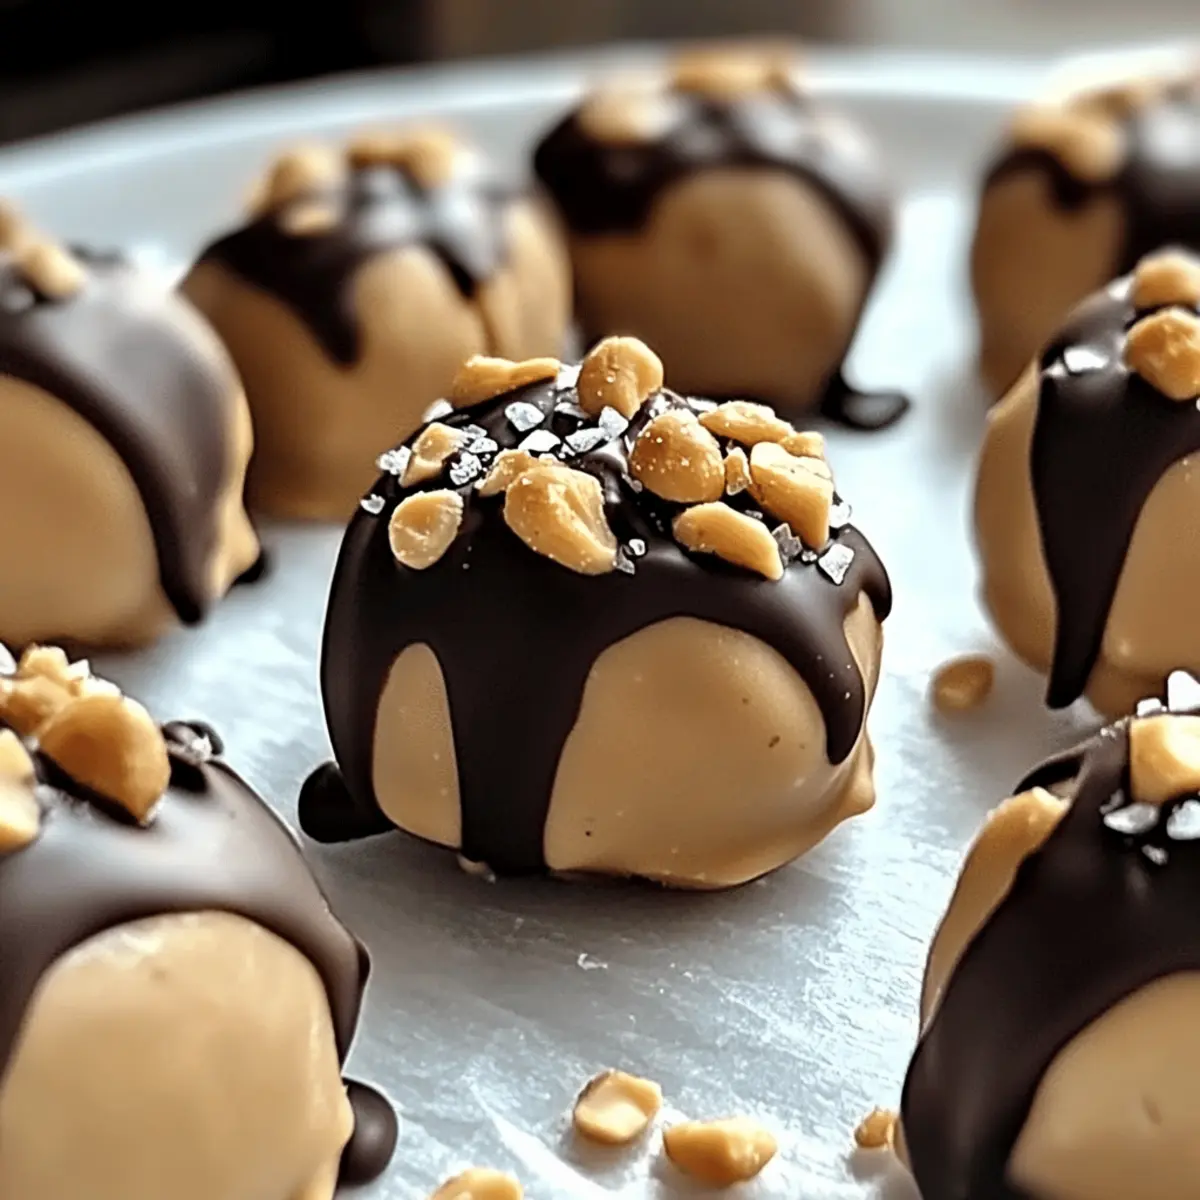
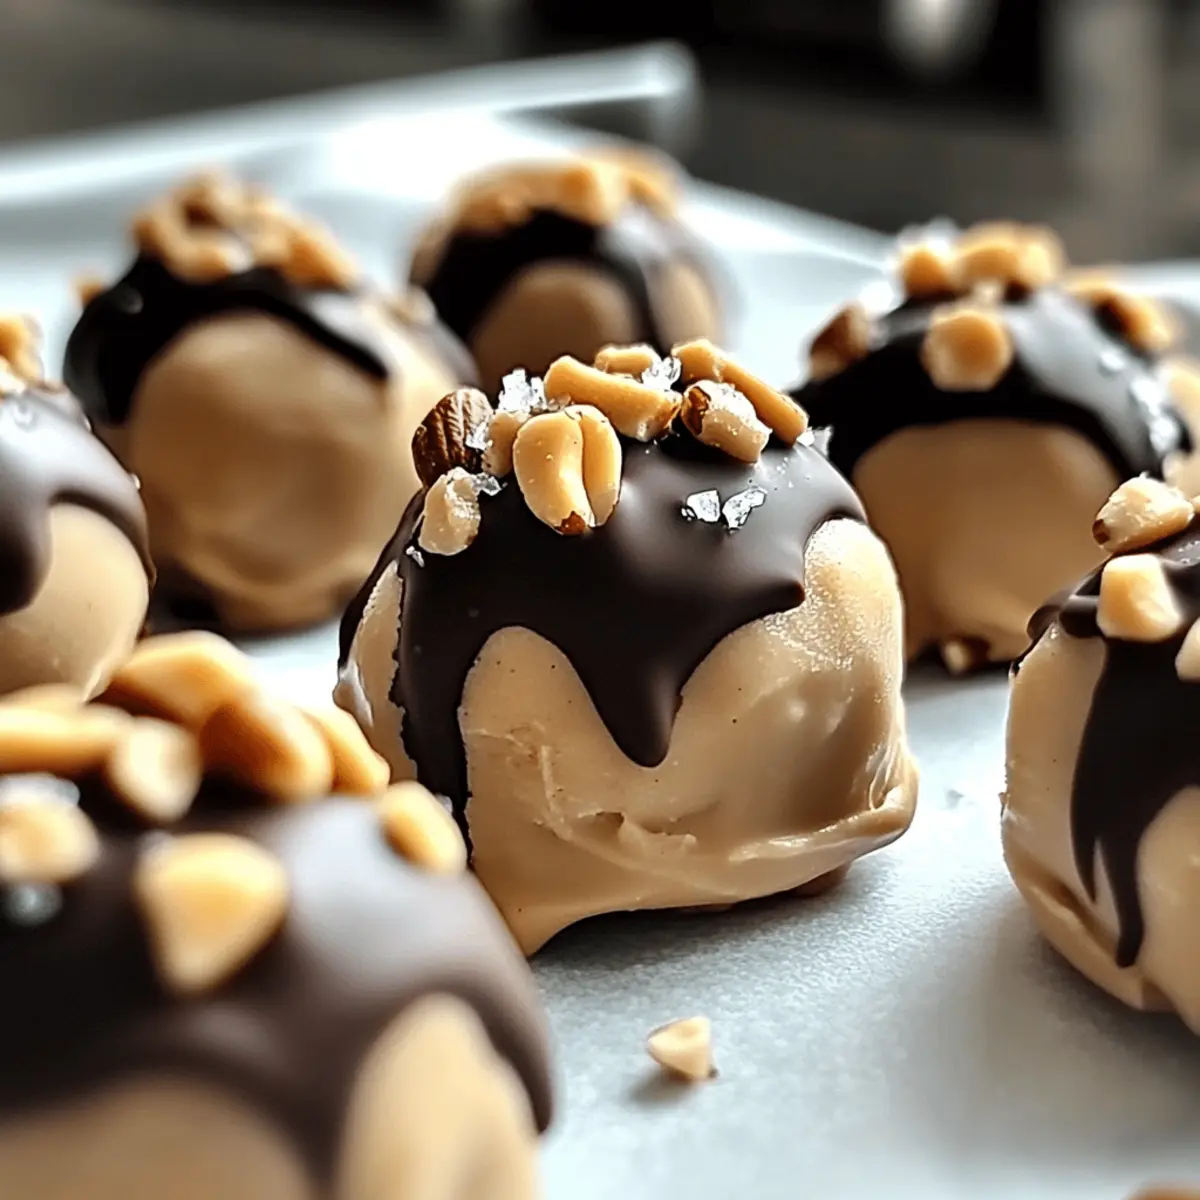
As I rummaged through my pantry, searching for a satisfying snack, I stumbled upon the perfect ingredients to create a treat that embodies both indulgence and health. These Frozen Greek Yogurt Peanut Butter Bites are not only a deliciously creamy and nutty delight topped with rich chocolate, but they're also a quick and easy no-bake recipe that even the busiest home chefs can whip up. Packed with wholesome goodness, they're versatile enough to customize according to your taste, whether you’re craving a bit of almond butter instead of peanut or looking for a vegan option. Perfect for a post-workout pick-me-up or a guilt-free dessert, these bites are sure to become a staple in your snack rotation. Would you dare to add your own twist to these delightful morsels?

Why Choose Frozen Greek Yogurt Peanut Butter Bites?

Healthier snacking never tasted so good! These Frozen Greek Yogurt Peanut Butter Bites are like a dessert masquerading as a nutritious snack. Quick and easy to prepare, they require no baking, making them an effortless addition to your routine. Customizable to your tastes, simply swap out the peanut butter for almond or cashew and add your favorite toppings. Packed with protein, they're great for post-workout fuel or a sweet treat that won’t derail your healthy habits. Plus, if you enjoy these, you might love making comparable recipes like Crockpot Butter Chicken for a wholesome meal.

Frozen Greek Yogurt Peanut Butter Bites Ingredients

For the Base

  • Plain Greek Yogurt – Creamy and packed with protein; use full-fat for richness or nonfat for a lighter option.
  • Creamy Peanut Butter – Adds a nutty flavor and smooth texture; substitute with almond or cashew butter for variation.
  • Honey – Sweetens the bites naturally; swap with maple syrup for a vegan-friendly choice.
  • Vanilla Extract – Enhances the overall flavor profile, adding warmth to each bite.

For the Coating

  • Mini Chocolate Chips – Provide delightful sweetness and texture; regular chocolate chips work if mini aren’t available.
  • Dark Chocolate Chips – Used to coat the bites, giving a rich contrast; semi-sweet chocolate can be a perfect alternative.
  • Coconut Oil (optional) – Ensures the chocolate melts smoothly; if not on hand, you can skip this ingredient.

Optional Toppings

  • Crushed Peanuts – Enhances crunch and flavor; sprinkle on while chocolate is wet for stickiness.
  • Sea Salt Flakes – Provide a delicious savory contrast to the sweet chocolate.
  • Shredded Coconut – Adds tropical flavor and texture; a delightful addition to customize your Frozen Greek Yogurt Peanut Butter Bites.

These ingredients combine to create a healthy, frozen delight that’s perfect for snacking!

Step‑by‑Step Instructions for Frozen Greek Yogurt Peanut Butter Bites

Step 1: Mix Base
In a medium bowl, combine 1 cup of plain Greek yogurt, ½ cup of creamy peanut butter, ¼ cup of honey, and 1 teaspoon of vanilla extract. Stir the mixture thoroughly until it becomes smooth and well-blended, with a creamy consistency. Fold in half of the mini chocolate chips, and set aside the remaining for topping later.

Step 2: Portion & Freeze
Prepare a baking sheet by lining it with parchment paper for easy cleanup. Using a tablespoon, scoop out the mixture and roll it into tablespoon-sized balls, slightly flattening them as they go on the sheet. Place the baking sheet in the freezer and allow the bites to freeze for 1 to 2 hours, or until firm enough to handle easily.

Step 3: Prepare Chocolate Coating
While the bites are freezing, prepare the chocolate coating. In a microwave-safe bowl, combine 1 cup of dark chocolate chips with 1 teaspoon of coconut oil, if using. Microwave in 30-second bursts, stirring in between until the chocolate is completely melted and smooth, achieving a silky consistency perfect for dipping.

Step 4: Dip & Decorate
Once your Frozen Greek Yogurt Peanut Butter Bites are firm, take them out of the freezer. Using a fork or dipping tool, dip each bite into the melted chocolate, allowing any excess to drip off. Place the dipped bites back onto the parchment-lined baking sheet and immediately sprinkle with the reserved mini chocolate chips or any other toppings you desire.

Step 5: Final Freeze
Return the baking sheet with the coated bites back to the freezer for an additional 15 to 20 minutes, or until the chocolate has fully set and becomes crisp. This step ensures that each bite of your Frozen Greek Yogurt Peanut Butter Bites is encased in a deliciously firm shell of chocolate.

Step 6: Store
Once the chocolate coating has hardened, carefully transfer the Frozen Greek Yogurt Peanut Butter Bites to an airtight container, layering them with parchment paper if desired. Store in the freezer for up to three weeks, and let them sit at room temperature for 2-3 minutes before serving to achieve that wonderfully creamy texture.

How to Store and Freeze Frozen Greek Yogurt Peanut Butter Bites

  • Room Temperature: These treats are best enjoyed directly from the freezer. If left out, they should not sit at room temperature for longer than 15 minutes to maintain their texture.
  • Fridge: While refrigeration is not ideal, you can store them in the fridge for up to 3 days if necessary, but they may lose their signature frozen crunch.
  • Freezer: For optimal freshness, place your Frozen Greek Yogurt Peanut Butter Bites in an airtight container to prevent freezer burn, and they can stay good for up to 3 weeks. Layering the bites with parchment paper keeps them from sticking together.
  • Reheating: No reheating is needed; simply let them sit at room temperature for 2-3 minutes before enjoying for a creamier texture.

Make Ahead Options

These Frozen Greek Yogurt Peanut Butter Bites are a fantastic meal prep solution for busy weeks! You can prepare the base mixture (Greek yogurt, peanut butter, honey, and vanilla) in advance up to 24 hours before you need the snacks. Just mix everything in the bowl, cover it, and refrigerate it until you’re ready to shape the bites. Additionally, once you’ve portioned and frozen the bites, they can be stored in the freezer for up to three weeks. When it’s time to finish, simply melt the chocolate coating, dip the frozen bites, and let them set. This way, you’ll have delicious, healthy snacks ready anytime you need a quick treat or post-workout fuel, remaining just as delightful and creamy!

What to Serve with Frozen Greek Yogurt Peanut Butter Bites?

Treat yourself and your loved ones to a delightful culinary experience by pairing these creamy bites with tantalizing accompaniments.

  • Fresh Berries: Bursting with flavor, berries offer a juicy contrast to the creamy bites. Their vibrant colors add a cheerful touch to your snack plate.

  • Granola: The crunchiness of granola provides a satisfying texture that pairs perfectly with the smoothness of the bites. Sprinkle some on top for added flavor and crunch!

  • Nutty Trail Mix: A handful of trail mix blends earthy nuts with dried fruits, enhancing the bites’ nutty essence while adding a delightful chewiness.

  • Chia Seed Pudding: This healthy, silky companion adds an extra layer of creaminess and a boost of fiber, making for a well-rounded snack that feels indulgent yet nutritious.

  • Iced Coffee: The bold, smooth flavors of iced coffee balance the sweetness of the bites beautifully, making it an ideal refreshing drink to accompany your snack.

  • Dark Chocolate Dipped Fruit: Elevate your snack game with the luxurious addition of fruit dipped in dark chocolate, creating a harmonious balance of sweetness and richness.

  • Coconut Water: Refreshing and hydrating, coconut water provides a light, tropical twist that complements the creamy, nutty bites wonderfully, making for a satisfying afternoon treat.

  • Cinnamon-Spiced Apples: Warm, baked cinnamon apples contrast the cold bites perfectly, offering a cozy, inviting flavor combination that will make you feel right at home.

  • Mint Tea: A soothing beverage, mint tea cleanses the palate while bringing a fresh finish to your sweet bites, making each experience more refreshing.

Enjoy experimenting with these delightful pairings, and soon, they'll become your go-to companions for these delectable Frozen Greek Yogurt Peanut Butter Bites!

Useful Tips for Frozen Greek Yogurt Peanut Butter Bites

  • Smooth Coating: Use a fork or dipping tool to easily coat each bite in chocolate without making a mess.

  • Freeze Firm: Make sure your bites are fully frozen before dipping; this prevents a gooey chocolate disaster during coating.

  • Reheat Chocolate: If your chocolate thickens while dipping, take a moment to reheat it briefly in the microwave for a smoother consistency.

  • Add Protein: For an extra protein boost, consider folding in a scoop of protein powder into the yogurt mix.

  • Experiment with Flavors: Don’t hesitate to get creative with different nut butters or toppings to customize your Frozen Greek Yogurt Peanut Butter Bites to your liking!

Frozen Greek Yogurt Peanut Butter Bites Variations

Feel free to let your creativity shine by customizing these delightful bites with your unique twists and twists!

  • Nut Butter Swap: Substitute creamy peanut butter with almond or cashew butter for a different flavor profile that's equally delicious.
  • Vegan Delight: Use plant-based yogurt and vegan chocolate chips to make a completely dairy-free version that everyone will enjoy.
  • Crunchy Texture: Opt for crunchy peanut butter instead of creamy, adding delightful texture to every bite. For an extra crunch, toss in some oats or granola!
  • Sweet & Savory: Add a pinch of sea salt or a dash of cinnamon to elevate the flavor and provide a sweet-savory balance.
  • Tropical Vibe: Mix in shredded coconut and top your bites with coconut flakes for a refreshing, tropical twist. Perfect for summer snacking!
  • Chocolate Lover's Haven: Incorporate mini chocolate chips into the yogurt mix for double chocolate goodness. Who can resist that?
  • Fruit Fusion: Fold in some dried fruits like cranberries or chopped dates for an energy boost and a touch of natural sweetness. If you want to try a fruity taste, you can even dip the bites in white chocolate for a delicious combination!
  • Almond Joy-Inspired: Get inspired by the classic candy by substituting almond butter, mixing in shredded coconut, and topping with chopped almonds.

These variations will not only keep your taste buds excited but also inspire you to explore even more delightful adaptations; you might find yourself loving creations like Crockpot Butter Chicken next!

Frozen Greek Yogurt Peanut Butter Bites Recipe FAQs

How do I choose the right Greek yogurt?
Absolutely! For the creamiest results in your Frozen Greek Yogurt Peanut Butter Bites, I recommend using full-fat Greek yogurt. It provides a rich texture and flavor. If you prefer a lighter option, nonfat or low-fat varieties can work too—just expect a slightly different consistency.

How should I store my Frozen Greek Yogurt Peanut Butter Bites?
Very well! Transfer your bites into an airtight container, layering parchment paper between them to prevent sticking. They can be stored in the freezer for up to 3 weeks. If they sit out at room temperature for longer than 15 minutes, they may start losing their delightful frozen crunch.

Can I freeze the Greek Yogurt Peanut Butter Bites?
Absolutely! In fact, freezing is essential for achieving that perfect bite. After coating them with chocolate, return them to the freezer for 15-20 minutes to ensure the chocolate sets. Keeping them frozen will maintain their delightful texture, allowing you to enjoy them as a quick snack whenever you need a healthy treat.

What if my chocolate gets thick while I’m dipping?
Not to worry! If your chocolate starts to thicken during the dipping process, simply reheat it in the microwave in 30-second bursts, stirring between until it becomes smooth again. This ensures an even coat on your Frozen Greek Yogurt Peanut Butter Bites, keeping them looking as good as they taste!

Are these snacks safe for people with nut allergies?
Very much so! If you have nut allergies, feel free to substitute the creamy peanut butter with a seed butter like sunflower seed butter or pumpkin seed butter. This keeps the recipe safe for those with nut allergies while still delivering a deliciously creamy texture.

Can I make these bites vegan?
Of course! To create vegan Frozen Greek Yogurt Peanut Butter Bites, simply swap plain Greek yogurt for a plant-based yogurt and use dairy-free chocolate chips. You can also substitute honey with maple syrup for sweetness. These adjustments will still give you a delightful treat without any animal products!

Frozen Greek Yogurt Peanut Butter Bites

Frozen Greek Yogurt Peanut Butter Bites for Healthy Snacking

Frozen Greek Yogurt Peanut Butter Bites are a delicious, no-bake healthy snack packed with protein and customizable flavors.
Print Recipe Pin Recipe
Prep Time 15 minutes mins
Freezing Time 2 hours hrs
Total Time 2 hours hrs 15 minutes mins
Servings: 12 bites
Course: Snacks
Cuisine: American
Calories: 90
Ingredients Equipment Method Nutrition Notes

Ingredients
  

For the Base
  • 1 cup plain Greek yogurt use full-fat for richness or nonfat for a lighter option
  • ½ cup creamy peanut butter substitute with almond or cashew butter for variation
  • ¼ cup honey swap with maple syrup for a vegan option
  • 1 teaspoon vanilla extract
For the Coating
  • 1 cup mini chocolate chips regular chocolate chips work if mini aren’t available
  • 1 cup dark chocolate chips semi-sweet chocolate can be a perfect alternative
  • 1 teaspoon coconut oil optional for smooth melting
Optional Toppings
  • crushed peanuts sprinkle on while chocolate is wet
  • sea salt flakes provides a savory contrast
  • shredded coconut a delightful addition

Equipment

  • medium bowl
  • Baking Sheet
  • Parchment Paper
  • Microwave-safe bowl
  • fork or dipping tool

Method
 

Step-by-Step Instructions
  1. In a medium bowl, combine 1 cup of plain Greek yogurt, ½ cup of creamy peanut butter, ¼ cup of honey, and 1 teaspoon of vanilla extract. Stir until smooth and well-blended, then fold in half of the mini chocolate chips.
  2. Prepare a baking sheet lined with parchment paper. Scoop out tablespoon-sized balls of the mixture and flatten them slightly. Freeze for 1 to 2 hours.
  3. In a microwave-safe bowl, combine 1 cup of dark chocolate chips with 1 teaspoon of coconut oil. Microwave in 30-second bursts, stirring until melted and smooth.
  4. Dip each bite into the melted chocolate, allowing excess to drip off. Place on the baking sheet and sprinkle with reserved mini chocolate chips or other toppings.
  5. Return to the freezer for an additional 15 to 20 minutes, or until the chocolate is set.
  6. Transfer to an airtight container, layering with parchment paper if desired. Store in the freezer for up to three weeks.

Nutrition

Serving: 1biteCalories: 90kcalCarbohydrates: 9gProtein: 4gFat: 4gSaturated Fat: 1.5gPolyunsaturated Fat: 1gMonounsaturated Fat: 2gSodium: 20mgPotassium: 50mgFiber: 1gSugar: 5gCalcium: 20mgIron: 0.5mg

Notes

These treats are best enjoyed directly from the freezer. If left out, they should not sit at room temperature for longer than 15 minutes.

Tried this recipe?

Let us know how it was!

Cinnamon Apple Cottage Cheese Bites: Warm, Healthy Delights

September 21, 2025 by Grace Snow Leave a Comment

As I stood in my kitchen, the warm aroma of cinnamon wafted through the air, instantly transporting me back to cozy afternoons spent with my grandmother. Her magic touch inspired these delightful Cinnamon Apple Cottage Cheese Bites, which perfectly blend sweet apples and creamy cottage cheese into bite-sized treasures. Not only are these high-protein snacks a healthier alternative to the usual fast food, but they’re also an absolute breeze to whip up—ideal for meal prep on busy weekdays. Whether you’re looking for a wholesome breakfast or a nutritious treat for after-school munchies, these bites deliver both flavor and nourishment. Curious about how to create these little delights? Let’s dive in!

Why are Cinnamon Apple Cottage Cheese Bites a must-try?

Flavorful, Warm Comfort: These bites offer a taste that evokes nostalgic memories of apple pie, wrapped in warm, cinnamon goodness—perfect for any time of day.
Protein-Packed: With cottage cheese as the star ingredient, each bite is a delicious way to up your protein intake, making it a great post-workout snack.
Quick Preparation: In just a few simple steps, you can have these bites ready to bake, making them perfect for busy lifestyles.
Versatile Variations: Feel free to adapt the recipe! Swap in bananas or add chocolate chips for a different twist.
Health-Conscious Choice: Enjoy guilt-free munching knowing that they are low in refined sugars and full of fiber thanks to the oats. You might also like them with a side of fruits or as part of a balanced meal alongside a glass of milk!

Cinnamon Apple Cottage Cheese Bites Ingredients

For the Bites
• Cottage Cheese – Adds creaminess and a high dose of protein; you can substitute with Greek yogurt for a different texture.
• Rolled Oats – Provides structure and fiber; quick oats can be used for a quicker version but may affect texture.
• Applesauce or Grated Apple – Supplies moisture and natural sweetness; a mashed banana can be substituted for similar consistency.
• Large Egg – Acts as a binder for the ingredients; use a flax egg to make it vegan.
• Cinnamon – Adds warmth and flavor, also linked to better blood sugar control; consider adding nutmeg for variation.
• Honey or Maple Syrup (optional) – Provides additional sweetness; can be completely omitted for a low-sugar version.
• Baking Powder – Helps the bites rise; ensure it’s fresh for best results.
• Salt (a pinch) – Enhances flavor.

These Cinnamon Apple Cottage Cheese Bites are designed for easy preparation and can be a delightful addition to your healthy snack repertoire! Enjoy experimenting with different flavors and your favorite add-ins!

Step‑by‑Step Instructions for Cinnamon Apple Cottage Cheese Bites

Step 1: Preheat and Prepare
Begin by preheating your oven to 350°F (175°C). While the oven warms, gently grease a mini muffin pan with cooking spray or line it with mini muffin liners. This ensures the Cinnamon Apple Cottage Cheese Bites do not stick, making for an easy and enjoyable baking experience.

Step 2: Mix the Ingredients
In a large mixing bowl, combine the cottage cheese, rolled oats, applesauce or grated apple, egg, cinnamon, honey or maple syrup (if using), baking powder, and a pinch of salt. Mix thoroughly until all ingredients are well incorporated and a cohesive batter forms, creating a delightful blend of flavors that captures the essence of your tasty bites.

Step 3: Let the Batter Rest
Allow the mixture to sit for 5 minutes. This step is crucial as it lets the oats absorb moisture, resulting in a tender texture for your Cinnamon Apple Cottage Cheese Bites. During this time, feel free to clean up your workspace or prepare your toppings for the next step.

Step 4: Scoop into Muffin Pan
Using a cookie scoop or spoon, evenly distribute the batter into the prepared mini muffin pan, filling each cup almost to the top. This will ensure that the bites bake evenly and rise beautifully, becoming fluffy and satisfying. You can optionally sprinkle some oats or nuts on top for added texture before baking.

Step 5: Bake to Perfection
Place the mini muffin pan in the preheated oven and bake for 18–20 minutes. You’ll know the Cinnamon Apple Cottage Cheese Bites are ready when they are set and lightly golden on top, filling your kitchen with a warm, inviting aroma that’s hard to resist.

Step 6: Cool Down
Once baked, remove the pan from the oven and let it cool for a few minutes. Afterward, gently transfer the bites to a wire rack to cool completely. This step is essential to prevent them from becoming soggy and helps them maintain the perfect chewy texture.

Step 7: Store or Serve
Enjoy your Cinnamon Apple Cottage Cheese Bites warm, or store them in an airtight container in the fridge for up to 4 days. For longer storage, freeze them, ensuring they are in single layers separated by parchment paper for easy reheating later. These bites make for a convenient healthy snack anytime!

How to Store and Freeze Cinnamon Apple Cottage Cheese Bites

Fridge: Store your Cinnamon Apple Cottage Cheese Bites in an airtight container for up to 4 days to keep them fresh and delicious.

Freezer: For longer storage, freeze the bites for up to a month. Layer them between parchment paper in an airtight container to prevent sticking.

Reheating: When ready to enjoy, simply microwave for about 25–30 seconds or bake at 350°F (175°C) for a few minutes until warmed through.

Room Temperature: These bites are best stored in the fridge or freezer, but if left out, consume them within a few hours to maintain quality.

What to Serve with Cinnamon Apple Cottage Cheese Bites

As you savor the cozy warmth of these delightful bites, consider how to round out your meal with complementary flavors and textures.

  • Greek Yogurt: Serve with a dollop of Greek yogurt to enhance the creaminess and add extra protein, turning a simple snack into a satisfying breakfast.
  • Fresh Berries: A side of mixed berries brings a burst of freshness and tartness, contrasting beautifully with the sweet, warm bites. They also add vibrant color to your plate.
  • Superfood Smoothie: Blend spinach, banana, and almond milk into a refreshing smoothie. It’s a great way to incorporate greens while enjoying a naturally sweet drink.
  • Nut Butter Drizzle: Drizzle almond or peanut butter over the bites for added flavor and healthy fats, creating a deliciously rich experience that enhances their sweetness.
  • Cinnamon-Spiced Oatmeal: A warm bowl of cinnamon-spiced oatmeal complements the flavors of the bites, offering varied textures and even more heartiness for your breakfast spread.
  • Chai Tea or Herbal Infusion: Pair with a warm cup of chai tea or an herbal infusion for a cozy beverage that enhances the spices in the bites, perfect for a chilly day.
  • Fruit Salad: A light fruit salad with seasonal fruits can add a refreshing crunch and additional hydration, balancing out the richness of the cottage cheese.
  • Dark Chocolate Squares: For a sweet finish, add a couple of dark chocolate squares. The slight bitterness pairs beautifully with the sweetness of the bites, creating a balanced dessert experience.
  • Nutty Granola: A sprinkle of crunchy nutty granola not only adds texture but also makes an excellent topping to turn your snack into a delightful dessert.

Make Ahead Options

These Cinnamon Apple Cottage Cheese Bites are perfect for meal prep, allowing you to enjoy healthy snacks throughout the week with minimal fuss! You can prepare the batter up to 24 hours in advance by mixing all the ingredients and storing them covered in the fridge. This not only saves time but also lets the flavors meld beautifully. For longer storage, bake the bites and refrigerate them for up to 4 days or freeze for up to a month. Just remember to let them cool completely before transferring to an airtight container. When you’re ready to enjoy, simply reheat in the microwave for a warm treat that’s just as delicious as freshly baked!

Cinnamon Apple Cottage Cheese Bites Variations

Feel free to let your creativity flourish as you adapt these delightful bites to match your taste buds and dietary needs!

  • Nutty Boost: Add chopped walnuts or pecans for a crunchy texture and rich flavor that pairs perfectly with the sweetness of cinnamon.
  • Dried Fruits: Toss in some raisins or cranberries to introduce natural sweetness and a chewy texture that contrasts beautifully with the creamy bites.
  • Banana Twist: Substitute applesauce with mashed banana for a tropical twist that adds a hint of sweetness and creaminess.
  • Vegan-Friendly: Swap the egg for a flax egg made from one tablespoon of ground flaxseed mixed with three tablespoons of water for a wholesome, plant-based option.
  • Spice It Up: Include a teaspoon of nutmeg or a splash of vanilla extract to enhance the warming flavors and take your bites to the next level.
  • Chocolate Indulgence: Mix in some mini chocolate chips to satisfy your sweet tooth while adding a comforting chocolatey touch.
  • Pumpkin Spice: Replace applesauce with pumpkin puree for a seasonal twist reminiscent of fall, full of flavors like nutmeg and clove. You can find inspiration in these Pumpkin Cinnamon Roll Muffins for even more cozy flavors!
  • Low-Sugar Option: Omit honey or maple syrup entirely for a guilt-free snack that highlights the natural sweetness of apples and cinnamon.

Explore these variations to keep each batch exciting! Enjoy your variations of these vibrant Cinnamon Apple Cottage Cheese Bites, and don't hesitate to share your own twists in the comments!

Expert Tips for Cinnamon Apple Cottage Cheese Bites

  • Batter Rest: Allowing your batter to sit for 5 minutes is key for tender bites; it helps the oats absorb moisture for a perfect texture.
  • Uniform Portions: Use a cookie scoop for evenly-sized bites. This ensures they bake at the same rate without any mess in the kitchen.
  • Check Freshness: Make sure your baking powder is fresh for optimal rise. An expired powder can lead to dense, flat bites!
  • Storage Savvy: For freezing, layer the bites between parchment paper to prevent sticking, making it easy to grab just what you need later.
  • Flavor Variations: Don’t hesitate to experiment! Adding nuts or chocolate chips to your Cinnamon Apple Cottage Cheese Bites can elevate flavor and texture.

Cinnamon Apple Cottage Cheese Bites Recipe FAQs

How do I choose ripe apples for this recipe?
Absolutely! For the best flavor, choose firm apples like Granny Smith or Honeycrisp. They should be free of dark spots or blemishes. If you're using grated apple, look for ones that are crisp and juicy, as they'll provide great moisture to your bites.

How long can I store the Cinnamon Apple Cottage Cheese Bites in the fridge?
You can store these delightful bites in an airtight container in the fridge for up to 4 days. Just make sure they are fully cooled before sealing to avoid moisture buildup.

Can I freeze Cinnamon Apple Cottage Cheese Bites?
Very much so! You can freeze these bites for up to a month. Arrange them in a single layer on a baking sheet, then flash freeze for about an hour. Once they're firm, transfer them to an airtight container with parchment paper between layers to prevent sticking.

What should I do if my batter is too runny?
If your batter seems too wet, it might need some additional oats or a longer resting time to absorb the moisture. Start by letting it sit for another 5 minutes. If it’s still not thickening up, gradually add rolled oats a tablespoon at a time until you reach the desired consistency.

Are these bites suitable for people with dietary restrictions?
Absolutely! These Cinnamon Apple Cottage Cheese Bites can cater to various dietary needs. To make them vegan, substitute the egg with a flax egg (mix 1 tablespoon of ground flaxseed with 2.5 tablespoons of water and let it sit for 5 minutes). You can also adjust the sweetness by omitting honey or maple syrup for a low-sugar version. Always check labels when it comes to allergies, especially with cottage cheese or any additional mix-ins you might add.

Cinnamon Apple Cottage Cheese Bites

Cinnamon Apple Cottage Cheese Bites: Warm, Healthy Delights

Delicious Cinnamon Apple Cottage Cheese Bites full of flavor and protein, perfect for snacks or breakfast.
Print Recipe Pin Recipe
Prep Time 10 minutes mins
Cook Time 20 minutes mins
Resting Time 5 minutes mins
Total Time 35 minutes mins
Servings: 12 bites
Course: Snacks
Cuisine: American
Calories: 70
Ingredients Equipment Method Nutrition Notes

Ingredients
  

For the Bites
  • 1 cup Cottage Cheese or Greek yogurt as a substitute
  • 1 cup Rolled Oats quick oats can be used for faster preparation
  • 1/2 cup Applesauce or Grated Apple or mashed banana
  • 1 large Egg flax egg for vegan option
  • 1 tsp Cinnamon nutmeg can be added for variation
  • 1 tbs Honey or Maple Syrup optional
  • 1 tsp Baking Powder ensure it’s fresh
  • a pinch Salt enhances flavor

Equipment

  • Oven
  • Mini muffin pan
  • Mixing Bowl
  • Cookie Scoop

Method
 

Step-by-Step Instructions
  1. Preheat your oven to 350°F (175°C) and prepare a mini muffin pan.
  2. In a large bowl, mix cottage cheese, rolled oats, applesauce, egg, cinnamon, honey or maple syrup, baking powder, and salt until well combined.
  3. Allow the batter to rest for 5 minutes to let the oats absorb moisture.
  4. Scoop the batter into the mini muffin pan, filling each cup nearly to the top and optionally adding oats or nuts on top.
  5. Bake for 18–20 minutes or until golden on top and set.
  6. Let cool for a few minutes before transferring to a wire rack to cool completely.
  7. Serve warm or store in an airtight container in the fridge for up to 4 days.

Nutrition

Serving: 1biteCalories: 70kcalCarbohydrates: 10gProtein: 5gFat: 2gSaturated Fat: 1gCholesterol: 20mgSodium: 100mgPotassium: 90mgFiber: 1gSugar: 3gVitamin A: 200IUVitamin C: 2mgCalcium: 70mgIron: 0.5mg

Notes

Experiment with different variations like adding nuts or chocolate chips for extra flavor.

Tried this recipe?

Let us know how it was!

Create a Spooky White Skull Snack Board for Halloween Fun

September 19, 2025 by Grace Snow Leave a Comment

As I stood in my kitchen, a swirl of creativity mixed with the anticipation of Halloween fun, I stumbled upon the perfect way to delight my guests: the White Skull Snack Board! This playful and visually striking spread not only delivers a fun Halloween vibe but also whisks you away on a flavor adventure with creamy peanut butter cups and crunchy popcorn. Best of all, it takes just 10 minutes to assemble, so you can focus on enjoying the festivities rather than slaving away in the kitchen. This easy party snack is sure to impress, making it a must-have for your spooky gatherings. Are you ready to join me in creating this delectable Halloween treat?

Why Make a White Skull Snack Board?

Simplicity in Assembly: Even with its stunning presentation, this board takes just 10 minutes to put together, making it a stress-free addition to any party.

Visually Striking: The mix of dark and white elements creates an eye-catching display that will spark conversations and delight your guests.

Flavor Explosion: With creamy peanut butter cups, crunchy popcorn, and soft marshmallows, the flavor combination is truly irresistible.

Versatile Options: You can easily customize the ingredients to suit your preferences, or try adding seasonal treats like Matcha Cookies Soft for extra flair.

Perfect for Sharing: Designed to be enjoyed with friends, this snack board brings people together, making it an ideal centerpiece for your Halloween celebrations.

White Skull Snack Board Ingredients

For the Base

  • Dark Chocolate Chips – For a rich, chocolaty base. Substitution: Use semi-sweet chocolate for a less intense flavor.
  • Popped Popcorn – A crunchy element that complements the sweetness. Substitution: Use caramel corn for added sweetness.

For the Mixed Treats

  • Mini-Marshmallows – Adds lightness and a fluffy texture. Substitution: Use colored marshmallows for a festive twist.
  • Mini-Peanut Butter Cups – Provides a creamy, peanut butter flavor. Substitution: Use chocolate-covered almonds for a nut-free option.
  • White Chocolate Chips – For a sweet, contrasting richness. Substitution: Could use yogurt-covered treats for a tangy flavor.

For the Decorative Elements

  • White Chocolate-Covered Pretzels – Adds a sweet-salty crunch. Substitution: Regular pretzels can be used for less sweetness.
  • Powdered Donuts – For a whimsical touch that resembles skulls. Substitution: Mini muffins can provide a similar shape.

This White Skull Snack Board not only satisfies the taste buds but also serves up a festive aesthetic that will be the highlight of your Halloween gathering!

Step‑by‑Step Instructions for White Skull Snack Board

Step 1: Prepare the Base
Begin by taking a large, flat serving board or platter. Spread the popped popcorn evenly in the center, creating a fluffy base that will anchor your White Skull Snack Board. Aim for a generous layer, roughly 1–2 cups, as this will add structure and volume, setting the stage for the delightful treats to come.

Step 2: Add Sweet Treats
Now, grab your dark chocolate chips, mini-marshmallows, and mini-peanut butter cups. Scatter these goodies around the edge of the popcorn base, creating a colorful and inviting display. Take your time to ensure each treat pops visually against the white of the popcorn; this should take about 5 minutes to achieve a festive look.

Step 3: Incorporate White Elements
Next, add the white chocolate chips and white chocolate-covered pretzels to the board. These elements add a sweet, contrasting richness that complements the darker treats. Tuck powdered donuts into the gaps to form whimsical skull-like shapes, enhancing the spooky aesthetic essential for your White Skull Snack Board.

Step 4: Final Touches
Step back and evaluate the arrangement of your snack board. Distribute the treats evenly, ensuring no spots appear sparse. Adjust the layout by pressing in any ingredients as needed to give an overflowing effect, which not only maximizes visual impact but also invites guests to dig in.

Step 5: Serve Immediately
Once your Halloween masterpiece is complete, present the White Skull Snack Board to your guests. The vibrant colors and diverse textures will entice everyone to gather around. Serve right away to keep the popcorn crispy and the treats fresh, letting the spooky fun begin as everyone enjoys this delightful assembly!

Storage Tips for White Skull Snack Board

  • Room Temperature: If leftovers remain, cover the board with plastic wrap or foil and store at room temperature for up to 4 hours; this keeps the popcorn crunchy and treats fresh.
  • Fridge: If not consumed within a few hours, transfer treats to an airtight container in the fridge for up to 1 day. The popcorn may lose some crunch but the flavors will remain intact.
  • Freezer: For longer storage, seal individual ingredients (like chocolate and pretzels) in freezer bags and freeze for up to 1 month. Thaw in the fridge before reassembling.
  • Reheating: If using refrigerated popcorn, briefly pop it in the microwave for 10–15 seconds to restore some crunch before serving again; however, the overall aesthetic may be affected.

What to Serve with Halloween White Skull Snack Board

Bring your Halloween festivities to life by pairing this playful snack board with delightful accompaniments that enhance the flavors and create a memorable gathering.

  • Festive Apple Cider: The sweet, tangy flavors of apple cider perfectly complement the rich chocolates and bring a seasonal touch to your spread.

  • Spooky Punch: Create a themed cocktail with orange soda, cranberry juice, and floating gummy worms for a fun drink that excites both kids and adults alike.

  • Crispy Celery Sticks: These provide a refreshing crunch that contrasts with the sweetness of the board, offering a lighter palate cleanser between treats.

  • Gourmet Cheese Platter: Adding a selection of cheeses introduces a savory element that balances the sweetness, elevating your snack board to a gourmet experience.

  • Chocolate-Covered Apples: Their silky texture mimics the chocolate from the snack board while adding a fresh fruity twist; everyone will appreciate the maneuver between sweet and tart.

  • Pumpkin Spice Cookies: Embrace the autumn vibe with these soft cookies, their spices harmonizing beautifully with the flavors of your snack board.

  • Creamy Vanilla Dips: Pair with fresh fruit like bananas or strawberries, allowing guests to indulge in a creamy contrast to the board's rich elements.

With these delightful pairings, your Halloween celebration will not only be visually stunning but also a feast of flavors that guests will remember long after the spookiness fades!

White Skull Snack Board Variations

Feel free to get creative and personalize your White Skull Snack Board to match your Halloween vibe!

  • Nut-Free Delight: Swap mini-peanut butter cups with chocolate-covered almonds for a similar crunch but nut-free option. This keeps inclusivity in mind for all your guests!

  • Seasonal Candy Boost: Add candy corn for a pop of vibrant color and that classic fall flavor. It’s a must-have during Halloween and can elevate the festive spirit!

  • Chewy Addition: Toss in some dried fruits like cranberries or apricots. This chewiness balances the board and brings a little tartness to the mix, making it even more enjoyable.

  • Fruity Twist: Use themed cookie cutters to create cheese or fruit shapes. Not only will this add cute designs to your board, but it also introduces fresh elements that complement the sweets.

  • Caramel Craze: Substitute regular popcorn with caramel corn for an extra sweet treat. This will enhance the indulgence of your snack board, making it a winner in the sweet stakes!

  • Yogurt Delight: Replace white chocolate chips with yogurt-covered treats for a slightly tangy flavor. These give a refreshing contrast without sacrificing sweetness, making them a hit with both kids and adults.

  • Playful Pretzels: Use regular pretzels instead of white chocolate-covered ones for a less sweet crunch. This swap introduces a savory element that works beautifully with the sweeter items on the board.

  • Endless Options: For more adventure, consider incorporating some spooky gummy candies or even mini pumpkin-shaped chocolates to boost the Halloween theme. If you’re feeling fancy, try adding colorful elements like Tuscan White Bean for a twist on tradition!

Make Ahead Options

The White Skull Snack Board is perfect for meal prep, allowing you to save time on the day of your Halloween gathering! You can prepare the chocolate, popcorn, and mixed treats up to 24 hours in advance. Simply store individual components in airtight containers in the refrigerator to maintain their freshness. For instance, keep popped popcorn in a sealed bag to prevent it from becoming stale, and store chocolate treats separately to avoid melting. When you're ready to serve, just assemble the board by layering your prepped ingredients for a stunning visual display. This way, you can enjoy a stress-free celebration while still impressing your guests!

Expert Tips for the Best White Skull Snack Board

  • Pre-Pop Popcorn: Ensure your popcorn is fresh and unsalted to prevent overpowering the sweetness of the other treats.
  • Layer Creatively: Use varying heights and textures for an appealing look, keeping the White Skull Snack Board visually enticing.
  • Balance Flavors: Combine sweet and salty elements thoughtfully to ensure everyone finds a treat they love, avoiding an overly sweet board.
  • Keep it Fun: Personalize the snack board with favorite treats or seasonal candies, making it unique and exciting for guests.
  • Serve Fresh: For best results, serve the board soon after assembling to keep popcorn crispy and toppings fresh.

White Skull Snack Board Recipe FAQs

How do I select the best ingredients for my White Skull Snack Board?
Absolutely! For the best flavors, choose ingredients at peak freshness. Look for dark chocolate chips without any bloom (white spots) for a smooth taste. Mini-marshmallows should be soft and fluffy, not stale. When selecting popped popcorn, aim for a fresh batch—air-popped is ideal. You can even make your popcorn at home to control the saltiness!

What are the best ways to store a White Skull Snack Board?
Very good question! If you end up with leftovers, it’s best to cover the board with plastic wrap and store it at room temperature for up to 4 hours, which helps to keep the popcorn crispy. For longer storage, you can transfer leftover treats into an airtight container and keep it in the fridge for 1 day. Just remember, the popcorn may lose some crunch, but the flavors will remain delightful!

Can I freeze the ingredients for my White Skull Snack Board?
Definitely! To freeze, you can seal individual components like chocolate and pretzels in freezer bags and store them for up to 1 month. When you’re ready to use, simply thaw in the fridge overnight. For optimal freshness, I recommend freezing chocolate-covered items separately to prevent any changes in texture.

What if my popcorn gets soggy before serving?
Common issue! If you suspect that your popcorn might lose its crunch, consider reheating it briefly in the microwave for about 10–15 seconds. This can help regain some of the crunchiness. However, keep in mind that if your popcorn is refrigerated, it might not look as visually appealing, so assemble the board as close to serving time as possible.

Are there any dietary considerations I should keep in mind?
Absolutely! If you have guests with allergies, consider using nut-free substitutes like chocolate-covered almonds in place of mini-peanut butter cups. For gluten-free options, make sure any pretzels or candies are labeled gluten-free. Also, check the ingredients of store-bought chocolate and marshmallows to avoid any allergens, helping everyone enjoy this fun treat without concerns!

How can I make my White Skull Snack Board even more festive?
For an extra spooktacular touch, think about using edible decorations like candy corn, themed cookie cutters to create spooky fruit shapes, or even adding dried fruits for color and texture. Personalizing your board with seasonal treats will surely create a unique visual appeal and entice your guests even more!

White Skull Snack Board

Create a Spooky White Skull Snack Board for Halloween Fun

Delight your guests this Halloween with a fun and visually striking White Skull Snack Board that is easy to assemble and delicious.
Print Recipe Pin Recipe
Prep Time 10 minutes mins
Total Time 10 minutes mins
Servings: 8 servings
Course: Snacks
Calories: 200
Ingredients Equipment Method Nutrition Notes

Ingredients
  

For the Base
  • 1 cup Dark Chocolate Chips Substitution: Use semi-sweet chocolate for a less intense flavor.
  • 2 cups Popped Popcorn Substitution: Use caramel corn for added sweetness.
For the Mixed Treats
  • 1 cup Mini-Marshmallows Substitution: Use colored marshmallows for a festive twist.
  • 1 cup Mini-Peanut Butter Cups Substitution: Use chocolate-covered almonds for a nut-free option.
  • 1 cup White Chocolate Chips Substitution: Could use yogurt-covered treats for a tangy flavor.
For the Decorative Elements
  • 1 cup White Chocolate-Covered Pretzels Substitution: Regular pretzels can be used for less sweetness.
  • 3 pieces Powdered Donuts Substitution: Mini muffins can provide a similar shape.

Equipment

  • Large flat serving board or platter

Method
 

Step-by-Step Instructions for White Skull Snack Board
  1. Begin by taking a large, flat serving board or platter. Spread the popped popcorn evenly in the center, creating a fluffy base that will anchor your White Skull Snack Board.
  2. Now, grab your dark chocolate chips, mini-marshmallows, and mini-peanut butter cups. Scatter these goodies around the edge of the popcorn base.
  3. Next, add the white chocolate chips and white chocolate-covered pretzels to the board. Tuck powdered donuts into the gaps to form whimsical skull-like shapes.
  4. Step back and evaluate the arrangement of your snack board. Distribute the treats evenly, ensuring no spots appear sparse.
  5. Once your Halloween masterpiece is complete, present the White Skull Snack Board to your guests. Serve right away.

Nutrition

Serving: 1servingCalories: 200kcalCarbohydrates: 25gProtein: 3gFat: 10gSaturated Fat: 3gPolyunsaturated Fat: 1gMonounsaturated Fat: 3gCholesterol: 5mgSodium: 150mgPotassium: 120mgFiber: 1gSugar: 12gVitamin A: 100IUVitamin C: 1mgCalcium: 40mgIron: 1mg

Notes

For best results, serve soon after assembling to keep popcorn crispy and toppings fresh.

Tried this recipe?

Let us know how it was!

Delightful Ghost Pretzels: No-Bake Halloween Fun for Everyone

September 19, 2025 by Grace Snow Leave a Comment

As Halloween approaches, the excitement of crafting unique treats fills the air. This year, I wanted to create something both fun and effortless, and that’s when I conjured up these delightful Ghost Pretzels. These whimsical no-bake goodies turn ordinary mini pretzels into spooky little figures coated in creamy white chocolate, all topped with playful candy eyeballs. Not only are they a quick and easy treat to whip up, making them perfect for unexpected guests or festive gatherings, but they also provide a delightful mix of salty and sweet. Kids (and adults!) will love seeing these little ghosts come to life, transforming any Halloween snack table into a festive spectacle. Ready to add some spirit to your seasonal celebrations? Let's dive into this simple recipe!

Why Are Ghost Pretzels So Fun?

Easy and Quick: Preparing these Ghost Pretzels takes just minutes, making them perfect for last-minute Halloween gatherings.

Kid-Friendly Fun: Kids will love the hands-on process, from dipping to decorating—creating spooky snacks has never been this entertaining!

Endless Customization: Feel free to experiment with toppings, sprinkles, or even different chocolate varieties, allowing everyone to personalize their ghostly creations.

Crunchy Meets Creamy: Enjoy the delightful contrast of crunchy pretzels with a rich, sweet chocolate coating, creating a festive flavor combination that’s simply irresistible.

Party Pleaser: These delightful treats are guaranteed to be a hit at any Halloween party or school event, capturing smiles and cheers from partygoers of all ages.

If you enjoy easy, creative recipes, check out more of our no-bake treats perfect for festive celebrations!

Ghost Pretzel Ingredients

For the Pretzels

  • Mini Pretzels – The crunchy base that gives your ghostly treats structure; substitute with gluten-free pretzels if needed.

For the Chocolate Coating

  • Guittard Vanilla Milk Chips (6 oz) – Perfect for dipping, adding a sweet, creamy layer; can be swapped with white candy melts for a different taste.
  • Coconut Oil (½ tsp) – Helps to thin the chocolate for smooth dipping; use shortening as an alternative if needed for allergies.

For the Decoration

  • Wilton Candy Eyeballs (0.88 oz) – These cute little eyes add character to your ghostly pretzels; any edible candy eyes available will work wonderfully as well.

Step‑by‑Step Instructions for Ghost Pretzels

Step 1: Prepare the Baking Sheet
Begin your fun Ghost Pretzels by lining a baking sheet with wax paper, parchment paper, or a silicone mat. This will prevent the pretzels from sticking and provide a clean surface for decoration. Make sure to smooth out any wrinkles to create an even workspace, so your delightful ghosts come out looking perfect.

Step 2: Melt the Chocolate
In a microwave-safe bowl, combine the Guittard vanilla milk chips and coconut oil. Heat in the microwave in short bursts of 10-20 seconds, stirring after each interval until the mixture becomes smooth and melted. The chocolate should be shiny and fluid, making it perfect for dipping. Take care not to overheat!

Step 3: Dip the Pretzels
Once your chocolate is ready, take a mini pretzel and dip it into the melted chocolate, ensuring to coat it evenly. Aim especially to cover the bottom hole of the pretzel, which creates an adorable open-mouthed ghost effect. Shake off any excess chocolate gently as you lift it out, maintaining the structural integrity of your Ghost Pretzels.

Step 4: Decorate with Eyeballs
Now, place the dipped pretzel on your lined baking sheet. Immediately press two candy eyeballs onto each chocolate-coated pretzel, positioning them while the chocolate is still wet to ensure they adhere well. This step adds a playful touch and finishes off your spooky ghost design, making them even more inviting for Halloween treats.

Step 5: Let Them Set
Allow your Ghost Pretzels to harden at room temperature for about 20 minutes, or speed up the process by placing them in the freezer for just 10 minutes. You’ll know they’re ready when the chocolate has set, appearing firm and glossy, ensuring your little ghosts will hold their shape beautifully.

Step 6: Serve and Enjoy
Once your chocolate has fully set, carefully peel each Ghost Pretzel from the baking sheet. The removal should be smooth and easy thanks to your lined surface. Serve them up on a festive platter or in colorful bowls, and watch as they become the star of your Halloween party—each bite a perfect mix of salty and sweet!

Storage Tips for Ghost Pretzels

Room Temperature: Store your Ghost Pretzels in an airtight container at room temperature for up to a week, ensuring they stay fresh and delightful for your Halloween celebrations.

Fridge: If you prefer a cooler treat, you can also refrigerate them for a firmer texture. Just make sure to keep them in a sealed container to prevent them from absorbing moisture and odors.

Freezer: Freezing is not recommended as it may alter the chocolate's creamy texture, causing it to become grainy. For the best experience, enjoy them fresh!

Reheating: If you need to soften any stored pretzels, let them sit at room temperature for a few minutes before serving, allowing the chocolate to regain its lovely consistency.

Tips for the Best Ghost Pretzels

  • Coating Consistency: Ensure the chocolate is smooth and not too thick, which can lead to uneven coating and a clumpy appearance on your Ghost Pretzels.

  • Quick Eyeball Placement: Work swiftly when placing candy eyeballs on the pretzels before the chocolate sets; it secures them perfectly and keeps your ghosts playful.

  • Use Quality Ingredients: Opt for quality chocolate and pretzels for the best flavor and texture, enhancing the taste of your Ghost Pretzels and making them irresistible.

  • Experiment with Toppings: Feel free to add sprinkles or pumpkin-shaped candies for added flair. Customizing your ghosts makes the fun endless and visually appealing!

  • Avoid Overheating Chocolate: Heat the chocolate in short intervals to avoid scorching. A smooth melting process is key to achieving the perfect coating for your Ghost Pretzels.

What to Serve with Ghost Pretzels?

Add some festive flair to your Halloween gatherings with delightful sides that complement these whimsical treats.

  • Pumpkin Spice Dip: This creamy and spiced dip adds a seasonal touch, enhancing the sweet and salty flavors of the pretzels. Serve alongside for a delightful scoop!

  • Caramel Apple Slices: The crispness of fresh apple slices paired with rich caramel is a perfect contrast to the crunchy pretzels, creating a balanced mix of flavors.

  • Chocolate-Covered Strawberries: These juicy, sweet strawberries add a touch of elegance while harmonizing with the sweetness of the white chocolate ghosts. Dispose of any leftover chocolate by dipping strawberries next!

  • Halloween Fruit Salad: A colorful mix of seasonal fruits like oranges, grapes, and kiwi can bring a refreshing brightness to your snack table, refreshing palate between the hearty treats.

  • Spooky Punch: Create a festive beverage with a mixture of fruit juices and sparkling soda, garnished with gummy worms—this playful drink will be a hit with the kids!

  • Boo-tiful Cupcakes: Decorate cupcakes as mini ghosts, using white frosting and candy eyes for a fun dessert that ties in seamlessly with your Ghost Pretzels, making your treat table enchanting!

  • Monster Cheese Platter: A variety of cheeses shaped into monsters or ghosts, paired with crackers, can serve as a savory contrast while still keeping the spooky theme alive.

Make Ahead Options

These delightful Ghost Pretzels are perfect for meal prep and can save you time during the festive season! You can prepare the pretzels up to 24 hours in advance by dipping them in chocolate and setting them on the baking sheet. Just store the pretzels in an airtight container at room temperature to maintain their crunchiness. It’s essential to wait until just before serving to add the candy eyeballs, as this will ensure they stick and keep the ghosts looking lively. When you’re ready to impress your guests, simply place the pretzels on a beautiful platter, and they’ll taste as fresh and fun as the day you made them!

Ghost Pretzels: Fun Variations Await

If you're in the mood for a little creativity, these ghostly delights are ready for your personal touch!

  • Gluten-Free: Substitute mini pretzels with gluten-free varieties to make these treats friendly for everyone!
  • Choco-Mint: For a refreshing change, use mint-flavored chocolate to dip your pretzels. The blend of mint and chocolate provides a delightful twist on traditional flavors.
  • Nutty Ghosts: Add crushed nuts on top of the chocolate before it sets. This nutty crunch perfectly complements the sweet coating and enhances texture.
  • Spooktacular Sprinkles: Customize your ghosts with Halloween-themed sprinkles! Colorful or themed sprinkles can really bring your pretzels to life, adding both vibrancy and fun.
  • Caramel Drizzle: Drizzle melted caramel on top of your ghost pretzels for extra indulgence. This layer of sweetness can take the treat to a whole new level.
  • Dark Chocolate Dip: Swap out the white chocolate for dark chocolate. The deep, rich flavor adds a more sophisticated touch that adult palettes will appreciate.
  • Pumpkin Spice: Incorporate pumpkin spice into the melted chocolate for a fall-inspired twist, making each bite a warm embrace of autumn flavors.
  • Spicy Ghosts: For those who love a kick, sprinkle a tiny bit of cayenne pepper or chili powder into the chocolate before dipping. The heat adds an unexpected but delightful contrast!

Feel free to dive deeper into more exciting creations, like our delicious no-bake treats that bring joy to any festive occasion!

Ghost Pretzels Recipe FAQs

What type of pretzels work best for Ghost Pretzels?
Absolutely! Mini pretzels are ideal for this recipe as they provide the perfect base for your ghostly treats. If you're looking for gluten-free options, feel free to swap the mini pretzels with gluten-free pretzels, which work just as wonderfully!

How do I store my Ghost Pretzels?
You can keep your Ghost Pretzels in an airtight container at room temperature for up to a week. This helps maintain their delightful crunchiness and flavor, making them a tasty treat for last-minute guests or Halloween parties.

Can I freeze Ghost Pretzels?
It’s best to avoid freezing Ghost Pretzels, as doing so might alter the smooth and creamy texture of the chocolate coating. Instead, enjoy them fresh! If you do happen to have leftovers, keep them stored in an airtight container at room temperature.

What should I do if my chocolate coating is too thick?
If your chocolate is becoming too thick during the melting process, you can reheat it in the microwave in short increments of 10-15 seconds, adding a little more coconut oil if necessary to thin it out. The ideal consistency should be smooth and glossy, making for easy dipping and a nice finish.

Are there any allergy considerations with the ingredients?
Yes! Be sure to check labels for any potential allergens in coconut oil and the chocolate chips you choose. If coconut oil isn’t suitable, you can substitute it with shortening to keep the coating nice and smooth. Always consider your guests' dietary needs when creating your treats!

Ghost Pretzels

Delightful Ghost Pretzels: No-Bake Halloween Fun for Everyone

These Ghost Pretzels make for a fun and easy Halloween treat, combining salty pretzels with creamy chocolate and playful candy eyeballs.
Print Recipe Pin Recipe
Prep Time 10 minutes mins
Setting Time 20 minutes mins
Total Time 30 minutes mins
Servings: 12 pretzels
Course: Snacks
Cuisine: American
Calories: 100
Ingredients Equipment Method Nutrition Notes

Ingredients
  

For the Pretzels
  • 6 oz Mini Pretzels Substitute with gluten-free pretzels if needed.
For the Chocolate Coating
  • 6 oz Guittard Vanilla Milk Chips Can be swapped with white candy melts for a different taste.
  • ½ tsp Coconut Oil Use shortening as an alternative if needed for allergies.
For the Decoration
  • 0.88 oz Wilton Candy Eyeballs Any edible candy eyes available will work.

Equipment

  • Microwave-safe bowl
  • Baking Sheet
  • Wax paper or parchment paper

Method
 

Step-by-Step Instructions for Ghost Pretzels
  1. Prepare the baking sheet by lining it with wax paper, parchment paper, or a silicone mat to prevent sticking.
  2. Melt the chocolate by combining the Guittard vanilla milk chips and coconut oil in a microwave-safe bowl. Heat in short intervals of 10-20 seconds, stirring until smooth.
  3. Dip each mini pretzel into the melted chocolate, ensuring even coverage, especially the bottom hole to create a ghost effect. Shake off excess chocolate.
  4. Place the dipped pretzel on the lined baking sheet and immediately press two candy eyeballs onto each one while the chocolate is still wet.
  5. Let the pretzels harden at room temperature for about 20 minutes or in the freezer for 10 minutes until the chocolate is firm.
  6. Peel the Ghost Pretzels from the baking sheet and serve on a festive platter or in colorful bowls.

Nutrition

Serving: 1pretzelCalories: 100kcalCarbohydrates: 15gProtein: 1gFat: 5gSaturated Fat: 3gMonounsaturated Fat: 2gSodium: 200mgPotassium: 50mgSugar: 9gCalcium: 2mgIron: 2mg

Notes

For best results, ensure the chocolate is smooth and not too thick. Quick placement of the eyeballs before the chocolate sets is important for securing them.

Tried this recipe?

Let us know how it was!

Werewolf Kibble: Spooky Crunchy Treat for Halloween Fun

September 18, 2025 by Grace Snow Leave a Comment

As the air turns crisp and leaves begin to shimmer with the colors of fall, I can't help but feel that familiar thrill of Halloween excitement. This year, I’m sharing a crowd-pleaser that’s as fun to make as it is to eat: Werewolf Kibble! Combining the rich goodness of chocolate and peanut butter with a crunchy medley of cereals, this easy no-bake treat is perfect for both kids and adults. Not only does it whip up in minutes, but it’s also a great way to engage kids in the kitchen—creating spooky memories together. So grab your mixing bowls and let’s conjure up a sweet sensation that will leave everyone howling for more! Are you ready to unleash some Halloween magic?

Why is Werewolf Kibble a Must-Try?

Simplicity: You’ll be amazed at how quickly this no-bake treat comes together! Just a few simple steps and ingredients make delicious Werewolf Kibble a breeze to create.

Crowd-Pleaser: With irresistible chocolate and peanut butter flavors, it's a hit with kids and adults alike, perfect for Halloween parties or cozy movie nights.

Versatile: Feel free to customize with your choice of cereals or mix-ins for a personal touch. It’s all about fun and creativity!

Unique Presentation: Serve them in festive bowls or gift them in decorative bags for a charming touch that adds to your celebration.

Memorable Moments: Engage your kids in the kitchen and create spooky memories together while making this festive treat. Who knew cooking could be this fun?

Werewolf Kibble Ingredients

• Get ready to create a Halloween masterpiece!

For the Kibble

  • Cocoa Puffs® cereal – Acts as the chocolatey base for the kibble; no direct substitute needed, but feel free to swap with similar chocolate cereals.
  • Rice Chex cereal – Adds a crispy, light crunch to the mix; Corn Chex can be used for a different flavor profile.
  • Peanut butter – The creamy binding agent that enhances flavor; can be substituted with almond butter for nut allergies or sunflower seed butter for a nut-free treat.

For the Coating

  • Powdered sugar – Sweetens the mixture and helps achieve that signature coating; reducing the amount can balance out sweetness but will change the texture.
  • Chocolate chips (optional) – Adds a drizzle of chocolatey goodness when melted; choose dark chocolate for richness or white chocolate for a fun contrast.

Let the Halloween fun begin with these amazing ingredients for your Werewolf Kibble!

Step‑by‑Step Instructions for Werewolf Kibble

Step 1: Prepare the Cereals
In a large mixing bowl, combine 4 cups of Cocoa Puffs and 4 cups of Rice Chex cereal. Gently stir the cereals together with a spatula until well mixed. The Cocoa Puffs will bring a rich chocolate flavor while the Rice Chex adds a delightful crunch. Set the bowl aside as you prepare the melting mixture.

Step 2: Melt the Chocolate and Peanut Butter
In a small saucepan, over low heat, add 1 cup of peanut butter and 1 cup of chocolate chips. Stir continuously until both ingredients are melted and fully combined, about 3-5 minutes. Remove the pan from heat before the mixture starts to bubble; you want it smooth and creamy. This will be the delicious binding for your Werewolf Kibble!

Step 3: Coat the Cereals
Pour the warm chocolate and peanut butter mixture over the cereal blend. Use a large spatula to gently fold the mixture into the cereal until every piece is evenly coated—this takes about 1-2 minutes. The combination should look shiny and chocolatey, showcasing the irresistible flavors of the Werewolf Kibble coming together.

Step 4: Shake with Powdered Sugar
Transfer the coated cereal mixture into a large resealable plastic bag. Add 2 cups of powdered sugar, seal the bag tightly, and shake energetically for about 1 minute. This step will coat the kibble with a sweet, snowy finish. Open the bag to reveal the fluffy, sugary surprise—this will make your Werewolf Kibble look extra spooky!

Step 5: Cool and Serve
Spread the coated mixture onto a baking sheet lined with parchment paper. Allow the Werewolf Kibble to cool completely for about 30 minutes at room temperature. As it cools, the pieces will firm up and become extra crunchy. Once cool, serve it in festive bowls or pack it into decorative bags for some Halloween treats!

Werewolf Kibble: Fun Halloween Variations

Feel free to let your creativity shine and personalize this tasty treat in delightful ways!

  • Dairy-Free: Swap peanut butter for almond or sunflower seed butter, ensuring everyone can enjoy this spooky snack without dairy concerns.

  • Different Cereals: Try using Fruity Pebbles or Cinnamon Toast Crunch for a vibrant twist; mix colors and flavors for a playful bite!

  • Extra Crunch: Add in pretzel bites or nuts for a delightful crunch that balances the sweetness and makes each handful exciting.

  • Candy Crunch: Toss in a handful of Halloween-themed candies, like M&M's or candy corn, for pops of color and extra fun in every bite!

  • Spooky Sprinkles: Top your Werewolf Kibble with edible glitter or seasonal sprinkles for a festive look that will charm kids and adults alike.

  • Flavor Boost: Drizzle with caramel sauce after mixing for a deliciously sweet layer that will elevate your Werewolf Kibble to new heights.

  • Heat It Up: Add a pinch of cayenne pepper or chili powder to the melted chocolate mixture for a surprising kick that balances the sweetness.

  • Nut-Free Twist: Instead of peanut butter, use tahini or another seed butter to keep the treat allergen-free while still achieving that creamy consistency.

Embrace your inner chef and enjoy making these Werewolf Kibble variations that suit your taste and those you’re sharing with! Looking for another Halloween-inspired treat? Check out our approach on festive Halloween cupcakes for more delicious fun!

What to Serve with Werewolf Kibble?

Elevate your Halloween celebrations with delicious pairings that perfectly complement this spooky snack!

  • Crispy Apple Slices: The crisp sweetness of fresh apples balances the richness of the Werewolf Kibble, making it a refreshing contrast. Serve with a drizzle of caramel dip for an added treat.

  • Pumpkin Spice Muffins: These warm, spiced muffins add a soft and moist texture to your spread. Their seasonal flavor pairs brilliantly with the sweet crunch of the kibble.

  • Hot Chocolate: A steaming mug of creamy hot chocolate offers a cozy accompaniment on chilly Halloween nights. The chocolate flavors enhance the Werewolf Kibble, creating a delightful indulgence.

  • Popcorn Mix: A sweet and salty popcorn mix sprinkled with Halloween-themed candies adds texture and sweetness. It’s a fun and festive way to nibble alongside your Werewolf Kibble at movie night!

  • Trick-or-Treat Trail Mix: Combine nuts, dried fruits, and chocolate for a nutty crunch that beautifully contrasts the sweetness of the cereal snack. This makes a delightful addition to party bags or bowls.

  • Spooky Sugar Cookies: Soft and chewy sugar cookies decorated with colorful icing can bring an extra festive touch to your Halloween event. They are a fun, sweet treat that kids will adore!

  • Chilled Cider: A glass of chilled apple cider adds a refreshing touch and echoes the fall flavors of Halloween. Its sweetness pairs nicely, bringing a fruity note to your snack table.

  • Gummy Worms: For a playful touch, add some gummy worms alongside your Werewolf Kibble. The chewy texture contrasts the crunchiness and adds to the Halloween fun!

Storage Tips for Werewolf Kibble

  • Room Temperature: Store Werewolf Kibble in an airtight container at room temperature for up to one week. This keeps the treats fresh while preventing them from becoming stale.

  • Fridge: If you prefer a cooler snack, you can refrigerate the Kibble in an airtight container, which will keep it good for up to 10 days. Just be aware it may lose some crunchiness.

  • Freezer: For longer storage, freeze the Werewolf Kibble in a freezer-safe bag or container. It can last up to three months. Thaw at room temperature before serving for best results.

  • Reheating: There's no need to reheat Werewolf Kibble, as it's best enjoyed cold or at room temperature. Just give it a gentle shake to redistribute any powdered sugar before serving!

Make Ahead Options

These Werewolf Kibble are perfect for busy home cooks looking to save precious time during the Halloween festivities! You can prepare the kibble mix up to 3 days in advance, allowing the flavors to meld beautifully while keeping that irresistible crunch intact. Simply follow the recipe instructions up to the point of cooling the coated mixture; after that, store it in an airtight container at room temperature. When you're ready to serve, just spread it onto a baking sheet to air out for about 30 minutes if needed. With this make ahead option, you'll savor all the fun of Halloween without the last-minute rush, and your Werewolf Kibble will be just as delicious!

Expert Tips for Werewolf Kibble

  • Melt Carefully: Always melt the peanut butter and chocolate mixture on low heat, stirring continuously to prevent burning or clumping, ensuring your Werewolf Kibble is perfectly smooth.

  • Coating Technique: When shaking the kibble with powdered sugar in the bag, make sure to seal it tightly to avoid spills. This step is crucial for a uniform coating!

  • Flavor Variations: Experiment with different cereals or add-ins like mini marshmallows or candies for a customized Werewolf Kibble that offers unique textures and fun surprises.

  • Even Spreading: Spread the kibble evenly on the baking sheet to enhance cooling. This prevents clumping and ensures all pieces become equally crunchy for your Halloween treat.

  • Storing Secrets: Keep your Werewolf Kibble in an airtight container to maintain its freshness and crunch. Storing it in a cool, dry place will prolong its delightful flavor!

Werewolf Kibble Recipe FAQs

How should I choose my cereals for Werewolf Kibble?
When selecting your cereals, aim for a good balance of flavor and crunch. Cocoa Puffs are essential for that chocolatey taste, while Rice Chex adds a delightful crunch. If you’re feeling adventurous, swap them for similar cereals like Corn Chex for a different twist. Just avoid using any that might become too soggy.

What is the best way to store Werewolf Kibble, and how long will it last?
Store your Werewolf Kibble in an airtight container at room temperature to keep it fresh for up to one week. If you wish for it to last a bit longer, you can refrigerate it for up to 10 days. Be cautious, though, as chilling can lead to some loss of crunchiness.

Can I freeze Werewolf Kibble? If so, how should I do it?
Absolutely! To freeze Werewolf Kibble, place it in a freezer-safe bag or container. Make sure to remove as much air as possible from the bag before sealing it. It will remain fresh for up to three months. When you're ready to enjoy it, simply thaw the kibble at room temperature; there’s no need to reheat.

What should I do if my peanut butter and chocolate mixture gets too thick?
If your mixture becomes too thick while melting, don’t fret! Simply add a teaspoon of vegetable oil or a splash of milk to the pot, stirring it in with low heat until it smoothens out. This should help create a more pourable consistency for coating the cereals effectively.

Are there any dietary concerns with Werewolf Kibble?
Yes, if you or your guests have nut allergies, consider substituting peanut butter with sunflower seed butter or a nut-free chocolate option for the chocolate chips. If you’re looking to control sugar intake, reduce the powdered sugar in the mix, but note that this will affect texture and sweetness. Always check labels for allergens in your chosen products!

Can I add extra layers of flavor or texture to my Werewolf Kibble?
Definitely! You can mix in mini marshmallows, fun Halloween-themed candies, or sprinkle edible glitter for that festive flair. I often enjoy adding dried fruit or crushed pretzels for an extra crunch and a hint of saltiness that complements the sweetness beautifully. Just remember—be creative!

Werewolf Kibble

Werewolf Kibble: Spooky Crunchy Treat for Halloween Fun

Werewolf Kibble is a crowd-pleasing, no-bake treat combining chocolate, peanut butter, and crunchy cereals, perfect for Halloween fun.
Print Recipe Pin Recipe
Prep Time 15 minutes mins
Cook Time 5 minutes mins
Cooling Time 30 minutes mins
Total Time 50 minutes mins
Servings: 12 treats
Course: Snacks
Calories: 150
Ingredients Equipment Method Nutrition Notes

Ingredients
  

For the Kibble
  • 4 cups Cocoa Puffs® cereal Acts as the chocolatey base
  • 4 cups Rice Chex cereal Adds a crispy, light crunch
  • 1 cup Peanut butter Creamy binding agent
For the Coating
  • 2 cups Powdered sugar Sweetens the mixture
  • 1 cup Chocolate chips Optional drizzle of chocolatey goodness

Equipment

  • large mixing bowl
  • small saucepan
  • Spatula
  • Resealable plastic bag
  • Baking Sheet
  • Parchment Paper

Method
 

Step-by-Step Instructions
  1. In a large mixing bowl, combine 4 cups of Cocoa Puffs and 4 cups of Rice Chex cereal. Gently stir until well mixed.
  2. In a small saucepan over low heat, add 1 cup of peanut butter and 1 cup of chocolate chips. Stir until melted and combined, about 3-5 minutes.
  3. Pour the warm mixture over the cereal blend and gently fold until every piece is coated.
  4. Transfer to a resealable bag, add 2 cups of powdered sugar, seal the bag tightly, and shake for about 1 minute.
  5. Spread the mixture onto a baking sheet lined with parchment paper and allow to cool completely for about 30 minutes.

Nutrition

Serving: 1treatCalories: 150kcalCarbohydrates: 25gProtein: 3gFat: 6gSaturated Fat: 1.5gPolyunsaturated Fat: 0.5gMonounsaturated Fat: 3gSodium: 50mgPotassium: 50mgFiber: 1gSugar: 12gCalcium: 1mgIron: 3mg

Notes

Store Werewolf Kibble in an airtight container at room temperature for up to one week or refrigerated for up to 10 days.

Tried this recipe?

Let us know how it was!
  • « Previous Page
  • 1
  • …
  • 19
  • 20
  • 21
  • 22
  • 23
  • …
  • 25
  • Next Page »

Welcome!

Hi, I’m Grace, a Sydney-based home cook with a passion for bold flavors and trending ingredients. Whether you’re a busy beginner or a seasoned foodie, you’ll find dishes here that are fresh, fun, and full of flavor.

More about me

Popular Recipes

  • Honey Lime Chicken & Avocado Rice Bowl
    Honey Lime Chicken & Avocado Rice Bowl for a Flavor Burst
  • Tasty Italian Pasta Salad
    Delight in this Easy Tasty Italian Pasta Salad for Summer Fun
  • Garlic Butter Chicken Pasta
    Garlic Butter Chicken Pasta That’ll Wow Your Family Tonight
  • Creamy, Spicy Chicken Pasta
    Creamy, Spicy Chicken Pasta with Fresh Summer Veggies

Footer

↑ back to top

About

  • Privacy Policy
  • Disclaimer
  • Terms & Conditions

Newsletter

  • Sign Up! for emails and updates

Contact

  • About me
  • Contact me

Copyright © 2025 TastyTrendIngredients