tastytrendingredients

  • Home
  • Recipes
    • Appetizers
    • Breakfast
    • Dessert
    • Dinner
    • Drinks
    • Salads
    • Snacks
    • Soups
  • About me
  • Contact
menu icon
go to homepage
  • Home
  • Recipes
    • Appetizers
    • Breakfast
    • Dessert
    • Dinner
    • Drinks
    • Salads
    • Snacks
    • Soups
  • About me
  • Contact
search icon
Homepage link
  • Home
  • Recipes
    • Appetizers
    • Breakfast
    • Dessert
    • Dinner
    • Drinks
    • Salads
    • Snacks
    • Soups
  • About me
  • Contact
×

Spooky Skull Potatoes: A Fun and Creamy Halloween Treat

September 18, 2025 by Grace Snow Leave a Comment

As the air turns crisp and Halloween approaches, it’s time to conjure up some enchanting eats! Nothing sets a festive mood quite like a spooky twist on a classic comfort dish, and these Spooky Skull Potatoes are just the ticket. Transforming ordinary mashed potatoes into playful skull-shaped delights, this recipe not only adds a creative touch to your Halloween feast but also delivers on the creamy goodness we all crave. Perfect for impressing guests or simply adding some fun to family dinners, these potatoes are sure to evoke smiles and laughter around the table. So, are you ready to put a spooky spin on your next meal? Let’s dive into this deliciously eerie experience!

Why Are Spooky Skull Potatoes Unforgettable?

Creativity Unleashed: Transform your holiday gathering with these whimsical skull-shaped potatoes that are as fun to make as they are to eat.

Creamy Texture: The combination of heavy cream and butter creates a rich, velvety mash that's simply irresistible.

Perfectly Spooky: These mashed potatoes are not just a side dish; they’re a conversation starter!

Easy to Prepare: With straightforward steps, you’ll have creepy (yet delicious) skulls ready in no time—ideal for busy hosts.

Crowd-Pleasing Appeal: Children and adults alike will love these playful potatoes, making them a hit at any Halloween party. Why not pair them with additional festive favorites like Roasted Sweet Potatoes for a colorful spread?

Spooky Skull Potatoes Ingredients

For the Base

  • Large Russet Potatoes – The starchy goodness ensures a creamy texture perfect for shaping into skulls.
  • Heavy Cream – This rich addition elevates the dish to comfort food status; feel free to swap with milk for a lighter option.
  • Unsalted Butter – Adds a deep richness and smooth consistency; consider margarine or oil for a dairy-free option.
  • Salt and Pepper – These simple seasonings unlock the flavors; adjust to your taste for the perfect balance!

For the Decoration

  • Black Olives – Create spooky eyes for your skulls; substitute with cherry tomatoes if you prefer a sweeter touch.
  • Fresh Chives or Green Onions (optional) – A dash of color and a mild onion flavor to garnish and elevate the plate.

These Spooky Skull Potatoes promise not just to partake in your Halloween feast but to become the star attraction!

Step‑by‑Step Instructions for Spooky Skull Potatoes

Step 1: Prepare Potatoes
Begin by peeling and chopping the large russet potatoes into 2-inch chunks. Place the cubed potatoes into a large pot, covering them with cold salted water. Bring the water to a boil over high heat, then reduce to a simmer. Cook the potatoes for 15-20 minutes until they are fork-tender, ensuring they are soft enough to mash but not falling apart.

Step 2: Mash
Once the potatoes are cooked, carefully drain them and return them to the pot. Add the heavy cream, melted unsalted butter, salt, and pepper to the potatoes. Using a potato masher or a hand mixer, mash the potatoes until they are creamy and smooth without any lumps. Taste the mixture and adjust seasoning if needed, allowing your Spooky Skull Potatoes to shine with flavor.

Step 3: Shape into Skulls
Now comes the fun part! If you have skull molds, pack the potato mixture tightly into each mold to create the spooky shape. If you don't have molds, you can shape the mashed potatoes by hand into skull forms, ensuring they are tightly packed to hold together. Place the shaped skulls on a baking sheet lined with parchment paper, ready for decoration.

Step 4: Decorate
Take the black olives and slice them into halves for eyes. Carefully place the olive halves onto the skulls to create eerie eyes. Get creative! Use additional pieces of olives to make mouths or other facial features, giving each Spooky Skull Potato its unique character. Make sure your designs stick well to enhance their ghoulish appeal during baking.

Step 5: Bake
Preheat your oven to 375°F (190°C). Once heated, place the decorated Spooky Skull Potatoes in the oven and bake them for about 15-20 minutes. Watch closely as they transform; you're looking for a golden, crispy exterior while keeping the inside creamy. The delightful aroma will fill your kitchen and hint at the deliciousness to come.

Step 6: Serve
After baking, remove your Spooky Skull Potatoes from the oven and allow them to cool slightly. For a festive touch, garnish with fresh chives or green onions. These playful skulls can be served warm, making them a perfect centerpiece for your Halloween feast, sure to evoke smiles from both children and adults alike!

Make Ahead Options

These Spooky Skull Potatoes are perfect for meal prep enthusiasts! You can prepare the mashed potato base up to 24 hours in advance by boiling, mashing, and shaping the potatoes, then refrigerating them tightly covered to maintain their creamy texture. Additionally, you can prep the decorations by slicing black olives and storing them in an airtight container for easy access. When you're ready to serve, simply follow the baking step—preheat your oven to 375°F (190°C) and place your chilled skulls in the oven for about 15-20 minutes. This efficient prep not only saves you time but guarantees that your Spooky Skull Potatoes are just as delicious and fun, making your Halloween festivities seamless and enjoyable!

How to Store and Freeze Spooky Skull Potatoes

Fridge: Store any leftover Spooky Skull Potatoes in an airtight container for up to 3 days. Reheat in an oven at 350°F (175°C) for a crispy texture.
Freezer: If you've made extra, freeze the uncooked skulls by placing them on a baking sheet to firm up first, then transfer to a freezer bag. They’ll last up to 2 months.

Reheating: Bake frozen potatoes directly from the freezer at 375°F (190°C) for 25-30 minutes until hot and crispy. Perfect for a quick Halloween treat!

Spooky Skull Potatoes Variations & Substitutions

Get ready to unleash your creativity in the kitchen! With just a few tweaks, you can make this Halloween dish even more thrilling.

  • Garlic Infusion: Add minced garlic or garlic powder to the mashed potatoes for a bold flavor twist that will entice your taste buds.
    It's the perfect way to turn your potatoes from spooky to spectacular with a savory kick!

  • Cheesy Delight: Mix in shredded cheese, like cheddar or mozzarella, before shaping the skulls for a gooey, melty surprise.
    Every bite will be filled with molten goodness, adding a comforting cheese factor that’s sure to please.

  • Colorful Mashed Potatoes: Use food coloring to dye the potato mixture black, green, or even purple for a more vibrant Halloween look.
    Imagine a plate of vividly colored skulls that will thrill both kids and adults—spooky, fun, and visually captivating!

  • Pumpkin Spice Skull Potatoes: Blend in some pumpkin puree and a sprinkle of cinnamon for a unique fall-inspired mash.
    This twist adds a subtle sweetness and warmth, transforming your dish into a seasonal favorite for all!

  • Plant-Based Option: Swap heavy cream with coconut milk and butter with dairy-free margarine for a vegan-friendly version.
    You won't miss the dairy as the creamy coconut milk adds a delightful richness while still being perfectly spooky.

  • Sweet Potato Alternative: Replace russet potatoes with sweet potatoes for a naturally sweeter and colorful variation.
    Their vibrant orange color and slightly sweeter taste will create a delicious contrast that’s both nutritious and fun!

  • Spicy Kick: Add diced jalapeños or a sprinkle of cayenne pepper for those who love a bit of heat with their spooky bites.
    This fiery twist will be a hit and give your skulls a thrilling surprise for adventurous eaters!

  • Savory Topping: Consider topping these skulls with crispy bacon bits or caramelized onions before baking for added flavor.
    These toppings not only boost flavor but add a satisfying crunch that will elevate your spooky creations!

For more delicious inspiration, why not explore these Smoky Sweet Potatoes or enjoy some Roasted Sweet Potatoes? Each twist offers a unique flavor experience that will keep your holiday gatherings lively!

Tips for the Best Spooky Skull Potatoes

Avoid Overcooking: Test potatoes for doneness with a fork; overcooking can lead to gummy potatoes, ruining your creamy texture.

Seasoning is Key: Don't hesitate to taste during the mashing process. Proper seasoning elevates flavor and ensures your Spooky Skull Potatoes delight everyone.

Pack Firmly: Whether using molds or shaping by hand, ensure the potato mixture is tightly packed to prevent them from collapsing during baking.

Decorate Creatively: Get imaginative with your olive decorations! Different shapes and features can bring each skull to life, adding playful charm to your Halloween spread.

Serve Freshly Baked: For the best texture and flavor, serve these spooky delights right out of the oven while they’re warm and crispy on the outside.

What to Serve with Spooky Skull Potatoes

Imagine the delight around your gathering as you build a festive feast with these charming skull-shaped delights!

  • Crispy Brussels Sprouts: Their earthy crunch adds a perfect contrasting texture, complementing the creaminess of the skull potatoes.
  • Garlic Bread: The warm, buttery flavors of garlic bread can enhance the meal, inviting everyone to savor every bite.
  • Pumpkin Soup: This velvety soup brings a seasonal flair, creating a delightful balance with the heartiness of the mashed potatoes.
  • Roasted Carrots: Sweet and tender, roasted carrots bring brightness and natural sweetness alongside the cozy skull potatoes.
  • Autumn Salad: A mix of greens, nuts, and cranberries will add freshness and a touch of seasonal zest to your Halloween table.
  • Pinot Noir: A light-bodied red wine like Pinot Noir pairs beautifully, offering a fruity contrast to the savory potatoes.
  • Chocolate Graveyard Cake: End the meal with a whimsical dessert that echoes the Halloween theme, sure to send everyone home smiling!
  • Spiced Apple Cider: Warm and aromatic, spiced apple cider provides a comforting drink that enhances the festive atmosphere.

Spooky Skull Potatoes Recipe FAQs

What kind of potatoes should I use for Spooky Skull Potatoes?
Absolutely, I recommend using large russet potatoes as they are starchy and create a creamy texture perfect for mashing. Make sure to choose potatoes that are firm and smooth with no dark spots, as these are ideal for achieving that delightful mash.

How should I store leftover Spooky Skull Potatoes?
After enjoying your spooky treat, store any leftovers in an airtight container in the fridge for up to 3 days. To keep them crispy when reheating, place them in the oven at 350°F (175°C) until heated through. This method revives their lovely texture!
Can I freeze uncooked Spooky Skull Potatoes?
Certainly! To freeze your Spooky Skull Potatoes, start by shaping the skulls and placing them on a baking sheet lined with parchment paper. Freeze them for about an hour until firm, then transfer to a freezer-safe bag. They can be frozen for up to 2 months.

What if my mashed potato mixture is too lumpy?
If you find your potato mixture isn’t smooth enough, don’t worry! Simply add a touch more heavy cream or melted butter to loosen it up, then keep mashing! If some lumps persist, you can always use a hand mixer for a fluffier consistency. Remember to taste and adjust seasoning!

Are Spooky Skull Potatoes safe for kids with allergies?
Always consider your guests' dietary restrictions. If you’re serving children, check for any allergies related to the ingredients—like dairy or olives. You can easily substitute heavy cream with non-dairy milk and use allergen-free toppings, ensuring everyone can enjoy these festive treats.

Spooky Skull Potatoes

Spooky Skull Potatoes: A Fun and Creamy Halloween Treat

Transform ordinary mashed potatoes into playful skull-shaped delights with these Spooky Skull Potatoes, perfect for your Halloween feast.
Print Recipe Pin Recipe
Prep Time 20 minutes mins
Cook Time 20 minutes mins
Total Time 40 minutes mins
Servings: 4 skulls
Course: Snacks
Cuisine: American
Calories: 250
Ingredients Equipment Method Nutrition Notes

Ingredients
  

For the Base
  • 4 large Russet Potatoes The starchy goodness ensures a creamy texture perfect for shaping into skulls.
  • 1 cup Heavy Cream Feel free to swap with milk for a lighter option.
  • 4 tablespoons Unsalted Butter Adds richness and smooth consistency.
  • to taste Salt Adjust to your taste for the perfect balance.
  • to taste Pepper Unlock the flavors for the perfect match.
For the Decoration
  • 1 cup Black Olives Create spooky eyes; substitute with cherry tomatoes if desired.
  • optional Fresh Chives or Green Onions A dash of color and mild onion flavor to garnish.

Equipment

  • Large pot
  • potato masher
  • skull molds
  • Baking Sheet
  • Parchment Paper

Method
 

Step‑by‑Step Instructions
  1. Begin by peeling and chopping the large russet potatoes into 2-inch chunks. Place the cubed potatoes into a large pot, covering them with cold salted water. Bring the water to a boil over high heat, then reduce to a simmer. Cook the potatoes for 15-20 minutes until fork-tender.
  2. Once cooked, drain the potatoes and return them to the pot. Add the heavy cream, melted unsalted butter, salt, and pepper. Mash until creamy and smooth.
  3. Pack the potato mixture tightly into skull molds or shape by hand, ensuring they hold together. Place on a baking sheet lined with parchment paper.
  4. Slice black olives in half for eyes and place onto the shaped skulls. Get creative with additional olive pieces for mouths and features.
  5. Preheat oven to 375°F (190°C). Bake the decorated skull potatoes for 15-20 minutes until golden and crispy.
  6. Remove from oven, allow to cool slightly, and garnish with fresh chives or green onions. Serve warm.

Nutrition

Serving: 1skullCalories: 250kcalCarbohydrates: 35gProtein: 4gFat: 12gSaturated Fat: 7gMonounsaturated Fat: 5gCholesterol: 30mgSodium: 400mgPotassium: 600mgFiber: 3gSugar: 1gVitamin A: 200IUVitamin C: 12mgCalcium: 30mgIron: 1mg

Notes

Serve these delights fresh from the oven for the best texture and flavor. Overcooking potatoes can lead to a gummy texture, so test for doneness carefully.

Tried this recipe?

Let us know how it was!

Delicious Cornbread Spiders: Fun for Halloween and Beyond

September 18, 2025 by Grace Snow Leave a Comment

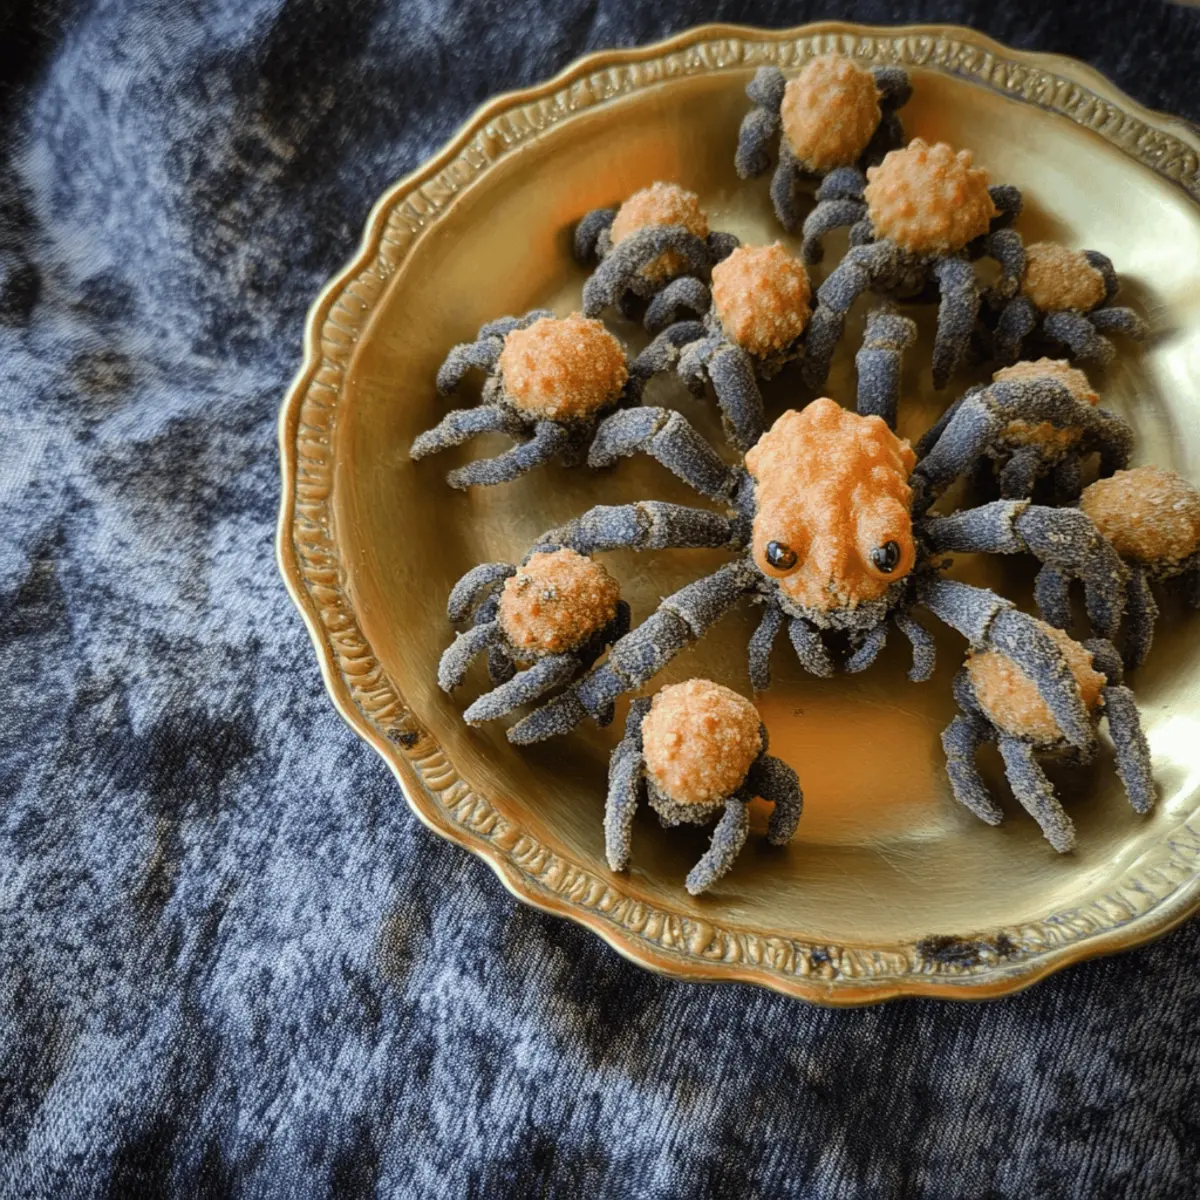
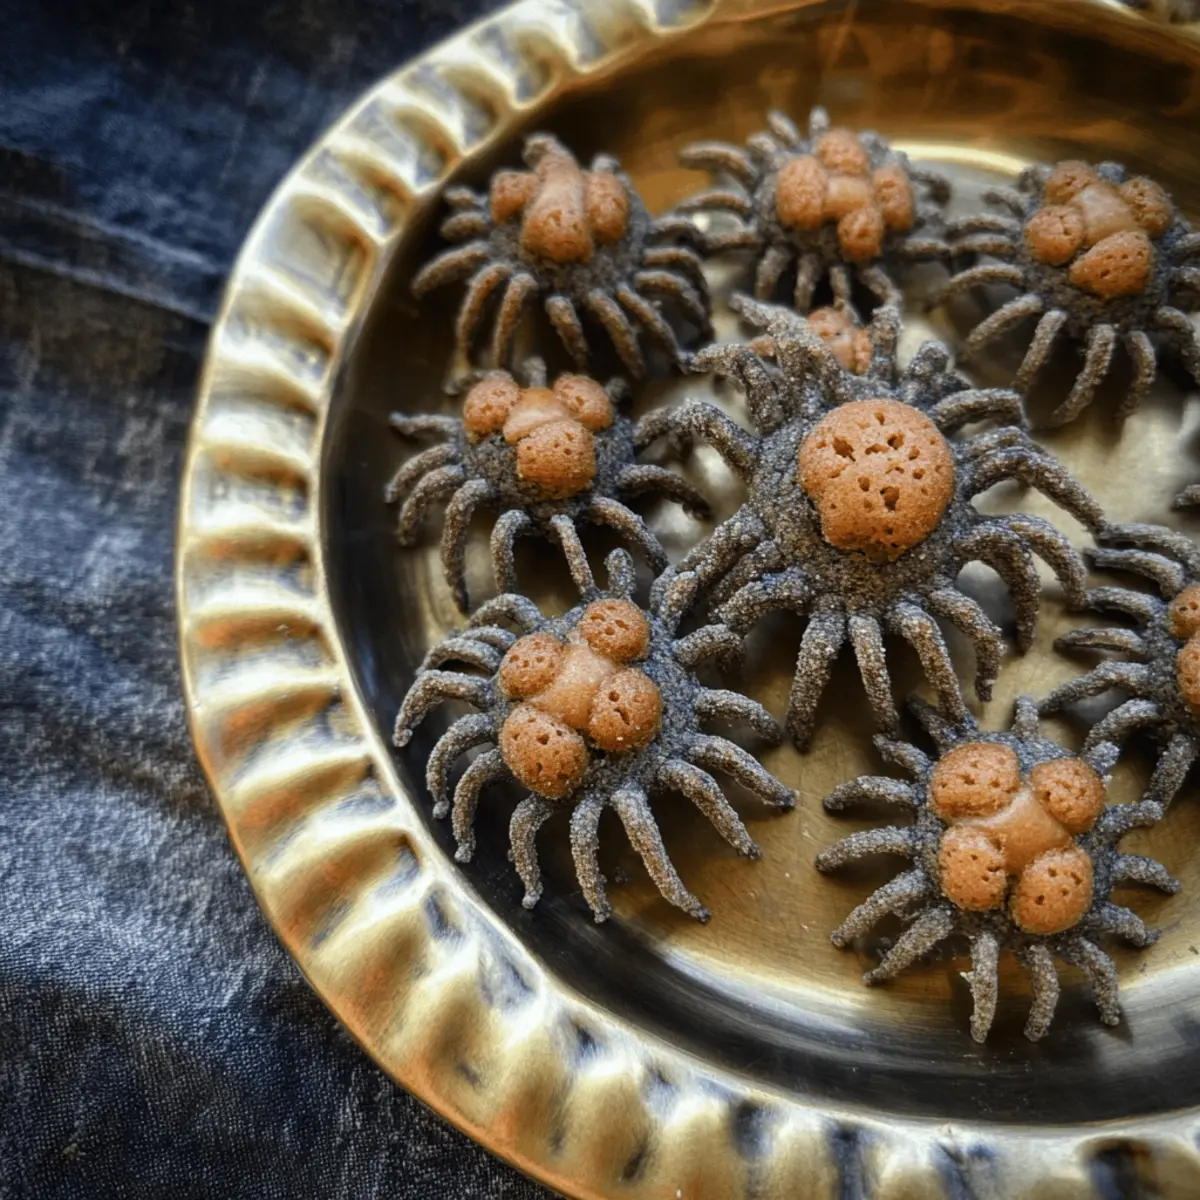
As I rummaged through my pantry, the vibrant blue cornmeal caught my eye, sparking a burst of creativity that transformed into a playful culinary adventure. Enter the Creepy Crawly Cornbread Spiders—a fun kid-friendly recipe perfect for Halloween gatherings or whimsical family dinners. These delightful morsels not only bring a savory, moist texture to your table, but their unique spider shape will steal the show at any event. What I love most is how quickly they come together, allowing you to whip up a memorable dish without any fuss. Plus, with a gluten-free option depending on the cornmeal you choose, they cater to various dietary preferences, making them an inclusive treat. Are you ready to make your next gathering spooktacular? Let’s dive into the recipe!

Why Are Cornbread Spiders So Fun?

Unique Experience: These delightful cornbread spiders are not just a treat for the taste buds; they offer a playful twist that excites both kids and adults.

Quick to Prepare: Whip up these spiders in no time, making them an excellent choice for spontaneous gatherings or festive celebrations.

Versatile Flavor: Feel free to customize with spicy jalapeños or rich cheese—there's no limit to the delicious variations.

Healthy Option: Benefit from the nutritional advantages of blue cornmeal, offering more antioxidants for a fun yet wholesome snack.

Perfect for Sharing: Serve them alongside chili or at Halloween parties, and watch how quickly they disappear! This recipe is sure to impress and delight, ensuring your gathering is memorable. Enjoy more comforting dishes like Cornbread Breakfast Casserole for any time of day!

Cornbread Spiders Ingredients

For the Batter

  • Blue Cornmeal – Provides base structure and a rich, nutty flavor; a gluten-free option depending on the brand used.
  • Baking Powder – Helps the cornbread rise and achieve a light texture.
  • Salt – Enhances flavor and balances sweetness.
  • Egg – Acts as a binder and gives structure to the cornbread.
  • Milk – Adds moisture, producing a tender crumb; substitute with plant-based milk for a dairy-free version.
  • Vegetable Oil – Adds moisture and contributes to a soft texture; can substitute with melted butter for a richer flavor.
  • Honey – Adds sweetness and a hint of complexity; hot honey or smoked honey recommended for extra flair.

Optional Ingredients

  • Jalapeños – Add for a spicy twist and an exciting flavor boost.
  • Cheese – Mix in shredded cheese for a savory profile that complements the sweetness.
  • Brown Sugar – Swap the honey for brown sugar if desired for a different type of sweetness.

These Cornbread Spiders are not only fun to make but also deliver a deliciously memorable experience for your family and friends!

Step‑by‑Step Instructions for Cornbread Spiders

Step 1: Preheat the Oven
Begin by preheating your oven to 425°F (220°C). This temperature ensures that your cornbread spiders develop a lovely golden-brown crust while remaining moist inside. As the oven heats, gather all your ingredients and prepare your silicone baking mold on a sturdy baking sheet to prevent spills while transferring to and from the oven.

Step 2: Mix the Dry Ingredients
In a large mixing bowl, combine the blue cornmeal, baking powder, and salt. Whisk these dry ingredients together until they’re well blended, ensuring an even distribution of the baking powder. The vibrant blue cornmeal will add a unique twist to your cornbread spiders, so take a moment to admire the beautiful color!

Step 3: Blend the Wet Ingredients
In a separate bowl, whisk together the egg, milk, vegetable oil, and honey until the mixture is smooth and uniform. This blend is crucial for the texture of your cornbread spiders, so be thorough. The wet ingredients introduce moisture that will keep your cornbread tender and delicious, ensuring it satisfies both kids and adults alike.

Step 4: Combine Wet and Dry Mixtures
Carefully pour the wet mixture into the bowl with the dry ingredients. Stir gently until just combined, being cautious not to overmix, as this could lead to tough cornbread. The batter should be somewhat lumpy, which is perfect for achieving the airy texture you want for your cornbread spiders.

Step 5: Fill the Molds
Now it’s time to pour the batter into your prepared silicone baking mold. Fill each mold almost to the top, leaving a little space to allow the cornbread spiders to rise as they bake. This step is essential, as an even fill will ensure all your cornbread creations cook uniformly and look delightful.

Step 6: Bake the Cornbread Spiders
Carefully place the filled mold into the preheated oven and bake for 10–12 minutes. Keep an eye on them, and look for a light golden color and a toothpick inserted into the center coming out clean. This visual cue indicates your cornbread spiders are perfectly cooked and ready to impress!

Step 7: Cool and Check
Once baked, carefully remove the baking sheet from the oven and allow the cornbread spiders to cool slightly in the mold for a few minutes. This cooling time helps them set properly, making it easier to remove them without breakage. If you’re using a non-silicone mold, be sure to check that it’s greased well to avoid sticking.

Step 8: Serve and Enjoy
Finally, gently pop the cornbread spiders out of the mold and arrange them on a serving platter. They’re perfect warm or at room temperature, making them ideal for any gathering. Whether paired with chili or showcased at a Halloween party, these charming cornbread spiders are sure to bring joy and flavor to your table!

Make Ahead Options

These Cornbread Spiders are perfect for busy home cooks looking to save time during hectic weeknights! You can prepare the batter up to 24 hours in advance—simply mix the wet and dry ingredients separately, and combine them just before baking to maintain the best texture. The batter can be stored in the refrigerator in an airtight container. Alternatively, you can bake the Cornbread Spiders and keep them in an airtight container for up to 3 days at room temperature. To serve, just reheat them in the oven for a few minutes until warmed through, ensuring they're just as delightful and fluffy as when they were first made. Enjoy the convenience of meal prep while still serving a fun, tasty dish that's sure to please everyone!

What to Serve with Cornbread Spiders

These cute, whimsical treats make every meal feel like a celebration, adding a touch of fun to your dining table.

  • Chili Con Carne: A warm, hearty bowl of chili complements the sweetness of cornbread spiders while providing a satisfying contrast in texture.
  • Roasted Vegetables: The earthy flavors of seasoned roasted veggies can elevate the meal, balancing the sweetness of the cornbread with their savory notes.
  • Creamy Macaroni and Cheese: This classic dish brings a rich and creamy texture that pairs beautifully with the cornbread's fluffiness, making each bite delightful.
  • Honey Drizzle: A light drizzle of hot honey not only enhances flavor but can create a fun experience as the sweetness mingles with the savory cornbread.
  • Fruit Salad: A refreshing fruit medley offers a vibrant contrast, cleansing the palate and adding a touch of brightness to your plate.
  • Apple Cider: A warm mug of spiced apple cider brings seasonal comfort and warmth, perfectly complementing the cozy flavors of the cornbread spiders.
  • Pumpkin Soup: Serve these cornbread spiders with a rich pumpkin soup for a delightful, fall-inspired meal that’s both hearty and nourishing.
  • Salsa Verde: A zesty salsa adds a burst of flavor and tanginess, enhancing the overall experience of the meal without overpowering the spider’s sweetness.

Cornbread Spiders Variations & Substitutions

Let your imagination run wild while customizing these delightful cornbread spiders!

  • Gluten-Free: Use certified gluten-free blue cornmeal to make this recipe safe for those with gluten sensitivities.
  • Dairy-Free: Substitute regular milk with your favorite plant-based milk, like almond or oat, for a creamy texture.
  • Add Some Heat: Toss in diced jalapeños or a pinch of cayenne pepper to give your cornbread spiders a spicy kick that will thrill your taste buds.
  • Sweet & Smoky: For a unique flavor twist, try hot honey or smoked honey instead of regular honey for a hint of complexity.
  • Savory Cheese: Mix in some shredded cheese, like cheddar or pepper jack, into the batter for a gooey, delicious addition that makes them irresistible.
  • Mixed Cornmeal: Experiment with different cornmeal types, like white or yellow, offering varied textures and flavors for a refreshing twist on tradition.
  • Herbs and Spices: Infuse the batter with dried herbs like thyme or rosemary for an aromatic burst, making these spiders a conversation starter.
  • Cute Additions: Consider topping with edible decorations—like chocolate chips for eyes—to enhance the spooky look at Halloween or simply to delight the kiddos.

Dive into the full experience and enjoy the comforting taste of cornbread with more fun recipes like Cornbread Breakfast Casserole!

How to Store and Freeze Cornbread Spiders

Fridge: Store leftover cornbread spiders in an airtight container in the refrigerator for up to 3 days. This keeps them fresh while maintaining their delicious texture.
Freezer: For longer storage, wrap cornbread spiders individually in plastic wrap and place them in a freezer-safe bag or container. They can be frozen for up to 3 months.

Reheating: To reheat, place frozen cornbread spiders in a preheated oven at 350°F (175°C) for 10-15 minutes or until warm. This warms them back to perfect, fluffy goodness.

Counter: If you plan to eat them within a day, you can leave cornbread spiders at room temperature for up to 24 hours, ensuring they stay soft and tasty.

Expert Tips for Cornbread Spiders

  • Gentle Mixing: Avoid overmixing your batter to keep the cornbread soft and fluffy; a few lumps are perfectly fine for this recipe.

  • Oven Check: Every oven differs slightly in temperature, so start checking your cornbread spiders a minute or two early to ensure they don’t over-brown.

  • Mold Safety: If using a non-silicone mold, make sure to grease it adequately to allow for easy removal of your cornbread spiders after baking.

  • Flavor Twists: Feel free to experiment! Adding jalapeños or shredded cheese can elevate your cornbread spiders into a savory delight.

  • Cooling Time: Allow the baked cornbread spiders to sit in the mold for a few minutes before removing them; this step enhances their structure and prevents breakage.

Cornbread Spiders Recipe FAQs

What type of cornmeal should I use for cornbread spiders?
Absolutely! I recommend using blue cornmeal for its rich, nutty flavor and aesthetic appeal. It’s also gluten-free if you check the label. If you can’t find blue cornmeal, yellow cornmeal will also work, though the flavor will be slightly different.

How should I store leftover cornbread spiders?
You can store leftover cornbread spiders in an airtight container in the refrigerator for up to 3 days. Just make sure they are completely cooled before sealing to maintain their soft texture.

Can I freeze cornbread spiders?
Very! To freeze, wrap each cornbread spider individually in plastic wrap, then place them in a freezer-safe bag or container. They’ll stay fresh for up to 3 months. When you’re ready to enjoy them, simply reheat in a preheated oven at 350°F (175°C) for 10-15 minutes until warmed through.

What can I do if my cornbread spiders turn out dry?
If your cornbread spiders come out dry, it might be due to overmixing the batter or baking for too long. Be sure to mix the wet and dry ingredients until just combined to achieve that fluffy texture. If you notice they’re too dry after baking, consider adding a touch more milk next time, or serve them with a drizzle of honey or butter to enhance moisture.

Are cornbread spiders suitable for kids with gluten allergies?
Absolutely! By using gluten-free blue cornmeal, these cornbread spiders can be enjoyed by those with gluten sensitivities. Always double-check labels to ensure all other ingredients, like baking powder and milk, are gluten-free as well.

How can I make cornbread spiders more nutritious?
You can easily enhance the nutritional profile by adding ingredients like shredded cheese for calcium or finely chopped vegetables such as spinach or bell peppers for added vitamins. Incorporating these heartier ingredients not only boosts flavor but also infuses more nutrients into your cornbread spiders!

Cornbread Spiders

Delicious Cornbread Spiders: Fun for Halloween and Beyond

These Cornbread Spiders are a fun, kid-friendly treat perfect for Halloween and gatherings.
Print Recipe Pin Recipe
Prep Time 15 minutes mins
Cook Time 12 minutes mins
Cooling Time 5 minutes mins
Total Time 32 minutes mins
Servings: 12 spiders
Course: Snacks
Cuisine: American
Calories: 150
Ingredients Equipment Method Nutrition Notes

Ingredients
  

For the Batter
  • 1 cup Blue Cornmeal Gluten-free option depending on the brand
  • 2 teaspoons Baking Powder
  • 1 teaspoon Salt
  • 1 large Egg
  • 1 cup Milk Substitute with plant-based milk for dairy-free
  • 1/4 cup Vegetable Oil Can substitute with melted butter
  • 2 tablespoons Honey Hot or smoked honey recommended
Optional Ingredients
  • 1/2 cup Jalapeños Add for a spicy twist
  • 1 cup Cheese Shredded, for a savory profile
  • 1/4 cup Brown Sugar Swap with honey if desired

Equipment

  • Baking Sheet
  • Silicone Baking Mold
  • Mixing Bowl
  • Whisk

Method
 

Step-by-Step Instructions
  1. Preheat your oven to 425°F (220°C) and prepare your silicone baking mold on a sturdy baking sheet.
  2. In a large mixing bowl, combine blue cornmeal, baking powder, and salt. Whisk until well blended.
  3. In another bowl, whisk together egg, milk, vegetable oil, and honey until smooth.
  4. Pour the wet mixture into the dry ingredients and stir gently until just combined.
  5. Fill the silicone baking mold nearly to the top with the batter.
  6. Bake for 10-12 minutes until golden and a toothpick comes out clean.
  7. Allow to cool slightly in the mold for a few minutes before carefully removing.
  8. Serve warm or at room temperature, perfect for any gathering!

Nutrition

Serving: 1spiderCalories: 150kcalCarbohydrates: 20gProtein: 3gFat: 6gSaturated Fat: 1gPolyunsaturated Fat: 0.5gMonounsaturated Fat: 4gCholesterol: 30mgSodium: 200mgPotassium: 130mgFiber: 1gSugar: 2gVitamin A: 150IUCalcium: 50mgIron: 1mg

Notes

Avoid overmixing for a light, fluffy texture. Feel free to experiment with flavors like jalapeños or cheese.

Tried this recipe?

Let us know how it was!

Irresistible Buffalo Cheddar Soft Pretzel Twists for Game Day

September 16, 2025 by Grace Snow Leave a Comment

The tantalizing aroma of freshly baked pretzels fills the air, taking me back to game days filled with laughter and cheer. My go-to snack for these occasions has transformed into a showstopper: Buffalo Cheddar Soft Pretzel Twists with Everything Spice. These delectable bites combine the comforting chewiness of homemade pretzels with the bold zing of buffalo sauce and rich, melty cheddar cheese. Not only are they easy to whip up, making them a perfect last-minute appetizer, but they’re also a crowd-pleaser that will leave your friends raving. Whether you’re hosting a sports gathering or simply indulging in comfort food, these twists deliver the warmth and satisfaction we all crave. Curious about how to make these delightful treats your new favorite snack? Let’s dive in!

Why are Buffalo Pretzel Twists irresistible?

Bite-Sized Bliss: Each twist offers a perfect balance of chewy softness and crispy exterior, embodying the best of homemade pretzels.
Bold Flavor Fusion: The combination of creamy cheddar and zesty buffalo sauce creates an unforgettable taste explosion.
Game Day Essential: These pretzels are the ultimate crowd-pleaser, ensuring that your guests keep coming back for more.
Versatile Snack: Feel free to experiment with flavors; jalapeños or different cheeses can tailor the twists to fit any occasion!
Easy and Quick: With simple ingredients and straightforward steps, you can whip these up in no time, making hosting stress-free.
Comfort Food at Hand: Whether it’s game day or a cozy night in, these Buffalo Cheddar Soft Pretzel Twists will always satisfy your cravings, just as the Eggnog Cookies Soft do during the holidays!

Buffalo Cheddar Soft Pretzel Twists Ingredients

For the Dough
• Warm Water – Hydrates the dough; should be comfortable to touch, around 110°F to activate yeast.
• Light Brown Sugar – Adds sweetness and helps yeast activation; granulated sugar can be used as a substitute.
• Active Dry Yeast – Provides leavening for the pretzels; ensure it’s active and not expired for best results.
• Unsalted Butter (melted) – Contributes moisture and richness; can swap for oil, but flavor will differ.
• Kosher Salt – Enhances the overall flavor of the pretzels.
• All-Purpose Flour – Creates structure; using bread flour will give a chewier texture.

For the Filling
• Buffalo Sauce – Delivers heat and flavor; adjust the amount depending on your preferred spice level.
• Cheddar Cheese Sticks – Provides gooey, melty filling; mozzarella sticks can replace cheddar for a milder flavor.

For Boiling and Topping
• Baking Soda – Used in the boiling water bath for pretzels, giving them that distinct crust.
• Egg (beaten) – Adds sheen when brushed on pretzels before baking.
• Toasted White Sesame Seeds – Adds crunch and flavor; poppy seeds can be used alone or in combination.
• Dried Onion & Garlic – Enhances the flavor profile; using fresh variants will yield a stronger flavor.

These Buffalo Cheddar Soft Pretzel Twists are not just mouth-watering; they also bring fun and joy to any gathering!

Step‑by‑Step Instructions for Buffalo Cheddar Soft Pretzel Twists

Step 1: Dough Preparation
In a mixing bowl, combine 1½ cups of warm water (about 110°F), ½ cup of light brown sugar, and 2 packets of active dry yeast. Let it sit for about 5 minutes until the mixture is foamy. Then, stir in ¼ cup of melted unsalted butter and 1 teaspoon of kosher salt. Gradually add 4 cups of all-purpose flour until a soft dough forms.

Step 2: Knead Dough
Transfer the dough onto a floured surface and knead it for about 5-7 minutes until it becomes smooth and elastic. The right consistency should be soft but not sticky; if it feels sticky, incorporate a bit more flour. Once kneaded, form it into a ball, which will be the base of your Buffalo Cheddar Soft Pretzel Twists.

Step 3: First Rise
Place the kneaded dough in a lightly oiled bowl, covering it with a clean kitchen towel or plastic wrap. Let it rise in a warm, draft-free area for about 1 hour, or until it has doubled in size. This is crucial for achieving that deliciously chewy texture in your pretzels, so be patient!

Step 4: Shape Pretzels
Once the dough has risen, punch it down gently to release air. Roll the dough out into a rectangle about ½-inch thick. Spread a generous layer of your preferred buffalo sauce over the surface, then lay out the cheddar cheese sticks in rows. Cut the dough into strips and twist each piece into a pretzel shape, ensuring the cheese is tucked inside.

Step 5: Pre-Boil and Bake
To create that iconic pretzel crust, bring a large pot of water to a boil and add ⅓ cup of baking soda. Working in batches, boil each pretzel twist for about 30 seconds before removing them with a slotted spoon. Place the boiled twists on a parchment-lined baking sheet, brush them with a beaten egg, and sprinkle with toasted sesame seeds, dried onion, and garlic.

Step 6: Bake until Golden
Preheat your oven to 425°F (220°C). Bake the pretzel twists for 12-15 minutes, until they’re golden brown and fragrant. Keep an eye on them; the beautiful golden color means they’re perfectly baked and ready to delight your taste buds!

Step 7: Serve
Let the Buffalo Cheddar Soft Pretzel Twists cool for a few minutes before serving. They are best enjoyed warm, paired with extra buffalo sauce for dipping. Gather your friends and family to indulge in these flavorful bites, perfect for any occasion or game day!

What to Serve with Buffalo Cheddar Soft Pretzel Twists

The delightful crunch of perfectly baked pretzel twists pairs beautifully with delicious sides that enhance their flavor and bring warmth to any gathering.

  • Creamy Spinach Dip: This rich, velvety dip complements the pretzels with its creamy texture, ideal for scooping and serving.

  • Zesty Buffalo Cauliflower: For a vegetarian twist, spicy roasted cauliflower mimics the pretzel’s bold buffalo flavor, creating a harmonious dish.

  • Classic Coleslaw: The cool, crispness of coleslaw cuts through the richness of the pretzel twists, providing a refreshing contrast.

  • Savory Cheese Platter: A selection of cheeses like gouda and pepper jack alongside some olives and nuts adds finesse and variety to your spread. Pair it with some crackers for crunch!

  • House-made Honey Mustard: The sweetness of honey and tang of mustard create a delightful dipping sauce that enhances the flavors of buffalo cheddar.

  • Icy Lemonade or Beer: A cold, refreshing lemonade or a crisp lager offers the perfect sip, balancing the warmth and spice of the pretzel bites.

Imagine a table filled with these delightful complements, transforming your game day into an unforgettable feast that friends and family will cherish!

Storage Tips for Buffalo Cheddar Soft Pretzel Twists

Room Temperature: Store pretzel twists in an airtight container at room temperature for up to 2 days to maintain freshness and softness.

Fridge: If keeping longer, refrigerate them in a tightly sealed container for up to 5 days. Just note that the texture may change slightly.

Freezer: For longer preservation, freeze the pretzel twists in a single layer on a baking sheet, then transfer to a ziplock bag, storing for up to 3 months.

Reheating: To enjoy the Buffalo Cheddar Soft Pretzel Twists, reheat in the oven at 350°F (175°C) for about 10 minutes to restore their chewiness and crispiness.

Buffalo Cheddar Soft Pretzel Twists Variations

Feel free to indulge your creativity and make these pretzel twists your own with these exciting variations!

  • Spicy Kick: Add diced jalapeños to the cheese filling for extra heat. This fiery twist will have your taste buds dancing!

  • Cheese Swap: Experiment with different cheese types, like pepper jack or gouda, for unique flavor profiles. Each cheese offers its distinct taste, so try them all!

  • Whole Wheat Twist: Substitute all-purpose flour with whole wheat flour for a healthier version. You'll enjoy a nutty flavor that complements the buffalo sauce perfectly.

  • Veggie Delight: Incorporate chopped spinach or kale into the dough for added nutrients and a pop of color. This variation gives a fresh twist and makes each bite feel wholesome.

  • Herb Infusion: Mix dried herbs like rosemary or thyme into the dough for a fragrant upgrade. These flavors beautifully enhance the pretzels and provide a delightful aroma.

  • Sweet Touch: Brush with honey butter before baking for a hint of sweetness that contrasts with the spiciness. This blend creates a wonderful balance, making each bite irresistible!

  • Dipping Sauce Heaven: Serve with a variety of dips like ranch, blue cheese, or even a zesty avocado dip. These paired bites turn your pretzels into a complete flavor experience.

Now, if you find yourself intrigued by other delightful recipes, don’t miss our delicious Buffalo Tofu Caesar or decadent Matcha Cookies Soft for your next homemade treat. The possibilities are endless!

Make Ahead Options

These Buffalo Cheddar Soft Pretzel Twists are ideal for meal prep, allowing you to enjoy delicious snacks without the last-minute rush! You can prepare the dough up to 24 hours in advance; simply mix, knead, and let it rise, then refrigerate it until you’re ready to shape and boil the pretzels. Alternatively, you can shape the pretzels and freeze them for up to 3 days. When you're ready to bake, just cook them straight from the freezer, adding a minute or two to the boiling time for the perfect chewy texture. To maintain quality, ensure they’re covered tightly while refrigerating or freezing, and keep the egg wash and toppings ready for a fresh oven-baked finish!

Expert Tips for Buffalo Cheddar Soft Pretzel Twists

  • Yeast Activation: Ensure your yeast is fresh and foamy after mixing with warm water; no foam means it won’t rise properly.
  • Kneading Consistency: Knead until the dough is smooth and elastic, adding flour gradually if it feels sticky to achieve the perfect texture for the Buffalo Cheddar Soft Pretzel Twists.
  • Uniform Size: For evenly baked pretzels, cut all dough pieces to the same size before twisting. This will also ensure consistent cooking times!
  • Boiling Time: Don’t over-boil your pretzels; 30 seconds is sufficient for that ideal chewy texture.
  • Crust Finishing Touch: Brush on the egg wash right before baking for a beautiful sheen and sprinkle spices on top for added flavor and crunch.

Buffalo Cheddar Soft Pretzel Twists Recipe FAQs

What should I look for when selecting ingredients for Buffalo Cheddar Soft Pretzel Twists?
Absolutely! For the best results, choose fresh active dry yeast; it should be foamy when mixed with warm water. The warm water should be around 110°F, comfortable to touch. When selecting cheese sticks, look for high-quality cheddar that melts beautifully. Avoid cheese that’s too rubbery, as it won’t provide that delightful gooey filling.

How should I store leftover Buffalo Cheddar Soft Pretzel Twists?
I recommend storing these twists in an airtight container at room temperature for up to 2 days. If you need to keep them longer, you can refrigerate them for about 5 days, but be aware that the texture may change slightly. Just make sure they’re well-sealed!

Can I freeze Buffalo Cheddar Soft Pretzel Twists?
Yes, you can enjoy these delicious bites long after making them! To freeze, first, allow the pretzel twists to completely cool. Then, lay them in a single layer on a baking sheet to freeze them quickly. Once frozen, transfer them to a ziplock bag and store for up to 3 months. When you’re ready to enjoy them again, simply reheat in the oven!

What should I do if my pretzel dough is too sticky?
Oh, that can happen! If your dough is sticky, add a little extra flour, about 1 tablespoon at a time, while kneading until it reaches the right consistency. You want the dough to be soft and slightly tacky but not overly sticky. It should pull away from your hands and the surface easily.

Are these Buffalo Cheddar Soft Pretzel Twists suitable for people with dietary restrictions?
Absolutely! These pretzels are vegetarian-friendly. However, if you have gluten allergies, you can try using a gluten-free all-purpose flour blend to make them safe for gluten-intolerant individuals. For a dairy-free version, use dairy-free cheese sticks and substitute the butter with a plant-based oil alternative.

How do I achieve a nice crust on my Buffalo Cheddar Soft Pretzel Twists?
A great question! To get that signature crust, make sure to boil the pretzels in a baking soda solution before baking. This step is crucial, and just 30 seconds is enough! Then, brush them with a beaten egg wash right before baking for a gorgeous golden sheen. The combination of boiling and egg wash will create that perfect texture and flavor!

Buffalo Cheddar Soft Pretzel Twists

Irresistible Buffalo Cheddar Soft Pretzel Twists for Game Day

Enjoy these Buffalo Cheddar Soft Pretzel Twists, a perfect game day snack that combines chewiness with bold flavor.
Print Recipe Pin Recipe
Prep Time 30 minutes mins
Cook Time 15 minutes mins
Rising Time 1 hour hr
Total Time 1 hour hr 45 minutes mins
Servings: 12 twists
Course: Snacks
Cuisine: American
Calories: 210
Ingredients Equipment Method Nutrition Notes

Ingredients
  

For the Dough
  • 1.5 cups warm water about 110°F
  • 0.5 cups light brown sugar can substitute with granulated sugar
  • 2 packets active dry yeast ensure it’s active
  • 0.25 cups unsalted butter (melted) can swap for oil, flavor may differ
  • 1 teaspoon kosher salt
  • 4 cups all-purpose flour can use bread flour for chewier texture
For the Filling
  • 0.5 cups buffalo sauce adjust for spice level
  • 8 sticks cheddar cheese can substitute with mozzarella
For Boiling and Topping
  • 0.33 cups baking soda for boiling water bath
  • 1 large egg (beaten) for brushing
  • 2 tablespoons toasted white sesame seeds
  • 1 tablespoon dried onion or use fresh for stronger flavor
  • 1 tablespoon dried garlic or use fresh for stronger flavor

Equipment

  • Mixing Bowl
  • Floured surface
  • Parchment-lined baking sheet
  • Large pot

Method
 

Dough Preparation
  1. In a mixing bowl, combine warm water, light brown sugar, and active dry yeast. Let it sit for about 5 minutes until foamy.
  2. Stir in melted unsalted butter and kosher salt. Gradually add all-purpose flour until soft dough forms.
Knead Dough
  1. Transfer the dough onto a floured surface and knead for about 5-7 minutes until smooth and elastic.
First Rise
  1. Place the dough in a lightly oiled bowl, cover, and let it rise in a warm area for about 1 hour.
Shape Pretzels
  1. Punch down the dough, roll into a rectangle, spread buffalo sauce, and lay cheddar cheese sticks. Cut into strips and twist.
Pre-Boil and Bake
  1. Boil water and baking soda. Boil each pretzel twist for about 30 seconds, then place on a baking sheet.
  2. Brush with beaten egg and sprinkle with toppings.
Bake until Golden
  1. Preheat oven to 425°F (220°C) and bake for 12-15 minutes until golden brown.
Serve
  1. Let cool for a few minutes before serving, ideally with extra buffalo sauce.

Nutrition

Serving: 1twistCalories: 210kcalCarbohydrates: 30gProtein: 7gFat: 8gSaturated Fat: 4gPolyunsaturated Fat: 1gMonounsaturated Fat: 2gCholesterol: 30mgSodium: 350mgPotassium: 110mgFiber: 1gSugar: 2gVitamin A: 200IUCalcium: 150mgIron: 1mg

Notes

Store pretzel twists in an airtight container at room temperature for up to 2 days. For longer preservation, refrigerate for up to 5 days or freeze for up to 3 months.

Tried this recipe?

Let us know how it was!

Savory Gruyère Cheese Twists for Effortless Entertaining

September 16, 2025 by Grace Snow Leave a Comment

As I stood in my kitchen, the aroma of melting cheese wafted through the air, bringing a rush of delightful memories—of cozy gatherings and laughter-filled evenings. It’s in these moments that I whip up my quick and easy Gruyère Cheese Twists, or Torsades au Fromage, to elevate any occasion, be it a dinner party or a casual get-together. These flaky pastries are a breeze to prepare, transforming puff pastry and cheese into an irresistible party appetizer that impresses without the fuss. Plus, they make perfect finger foods that leave guests reaching for more! When you take your first bite, you'll appreciate the buttery, cheesy goodness that’ll keep you coming back for another twist. Isn’t it time you treated yourself to a little culinary indulgence? Let’s dive into this delightful recipe together!

Why Are Gruyère Cheese Twists Irresistible?

Quick Preparation: This recipe takes only minutes to assemble, making it perfect for last-minute gatherings or unexpected guests.

Flaky Goodness: With all-butter puff pastry, each bite offers a delightful crunch, transporting your taste buds to a French café.

Versatile Flavor: Swap the Gruyère for Emmental or other cheeses, and experiment with herbs to create a unique twist every time.

Crowd-Pleasing Appetizer: Warm, cheesy, and beautifully golden—these twists are sure to be the star of your appetizer spread, alongside dishes like Potato Blue Cheese or Jello Salad Cottage.

Perfect for Entertaining: Serve them warm, and watch as your friends and family reach for just one more—what’s not to love?

Gruyère Cheese Twists Ingredients

For the Pastry
• All-butter puff pastry – This forms the flaky base of our Gruyère Cheese Twists, ensuring a rich buttery flavor.

For the Filling
• Gruyère cheese (or Emmental) – A nutty cheese that melts beautifully, elevating the flavor of the twists; look for an AOP seal for quality.
• Freshly ground black pepper – Adds a hint of spice to enhance the cheesy goodness; feel free to experiment with herbs for extra flavor!
• Sea salt flakes – These enhance the overall taste and provide a delightful crunch with each bite.

For the Glaze
• Egg yolk – Creates a shiny, golden finish on the pastry when brushed with an egg wash; essential for that appealing look.
• Milk – Mixed with the egg for the wash, it helps the pastry brown beautifully in the oven.

These Gruyère Cheese Twists are not only easy to make but are also a delightful addition to any gathering or special occasion!

Step‑by‑Step Instructions for Gruyère Cheese Twists

Step 1: Preheat and Prepare Your Workspace
Begin by preheating your oven to 400°F (205°C). While the oven heats, line two baking sheets with parchment paper to ensure easy cleanup later. This setup will allow your Gruyère Cheese Twists to bake evenly and get that lovely golden hue. Organize your ingredients within reach to streamline the preparation process.

Step 2: Roll Out the Puff Pastry
Take the thawed all-butter puff pastry and place it on a lightly floured surface. Using a rolling pin, roll the pastry into an 18"x18" square, aiming for about 1/8-inch thick. This thickness is key for achieving those delicate, flaky layers in your Gruyère Cheese Twists, so take your time for even rolling.

Step 3: Add Cheese and Seasoning
Sprinkle grated Gruyère cheese generously over one half of the rolled-out pastry, leaving a 1-inch border. Add about 1 teaspoon of freshly ground black pepper to the cheese for a hint of spice. Brush the border with a little milk to help seal the pastry when folded. This enhances flavor and ensures a good seal for your cheesy filling.

Step 4: Fold and Seal
Carefully fold the uncheesed half of the pastry over the cheesy side to create a pocket. Press the edges firmly to seal, ensuring that no cheese escapes during baking. This step is crucial for maintaining the savory filling and creating that delightful crunch when baked—a hallmark of perfect Gruyère Cheese Twists.

Step 5: Apply the Egg Wash
In a small bowl, whisk together the egg yolk and ½ tablespoon of milk to create the egg wash. Use a pastry brush to gently apply this mixture over the top of the folded pastry. This will give your Gruyère Cheese Twists a beautiful, shiny, golden finish as they bake in the oven, making them even more appetizing.

Step 6: Sprinkle with Seasonings
Once the egg wash is applied, sprinkle the remaining freshly ground black pepper and a few sea salt flakes over the top. These additional seasonings will enhance the overall flavor and create a delightful crunch on the surface. It’s these little touches that elevate your Gruyère Cheese Twists from simple snacks to gourmet treats.

Step 7: Cut and Twist the Pastry
Using a sharp knife or pizza cutter, slice the pastry into ½-inch wide strips. Grab each strip by the ends and gently twist them several times to create that signature twisted shape before placing them onto the prepared baking sheets. Make sure to space them out adequately, as they will puff up while baking.

Step 8: Bake to Perfection
Place your baking sheets in the preheated oven and bake for 12-14 minutes, watching closely for that glorious golden-brown color. The Gruyère Cheese Twists are done when they are beautifully golden, puffed, and crisp. Remove them from the oven and let them cool slightly before serving to allow flavors to meld together.

Step 9: Serve and Enjoy
Transfer the warm Gruyère Cheese Twists to a serving platter and serve immediately. These delightful pastries are perfect for snacking or as finger foods for any gathering. Their flaky, cheesy goodness is sure to impress your guests, ensuring they come back for seconds!

What to Serve with Quick and Easy Gruyère Cheese Twists

Creating the perfect culinary ensemble to accompany your delightful twists can elevate any gathering into a memorable feast.

  • Crisp Green Salad: A fresh salad with mixed greens and a light vinaigrette balances the rich, cheesy flavors, refreshing your palate. Toss in some cherry tomatoes for a burst of sweetness!

  • Savory Tomato Soup: Warm, smooth tomato soup pairs beautifully, providing a comforting contrast to the flaky textures of the Gruyère Cheese Twists, making for a heartwarming meal.

  • Sparkling White Wine: The effervescence of a chilled sparkling wine complements the buttery layers, enhancing the experience with each bubbly sip at your soirée.

  • Creamy Dips: Serve with rich dips like garlic aioli or a zesty herb cream cheese for an indulgent twist. These dips provide a creamy contrast that is irresistible.

  • Charcuterie Board: A carefully curated board with meats, cheeses, and fruits provides an array of textures and flavors, making the Gruyère twists feel even more gourmet on your platter.

  • Herbed Quinoa: A light quinoa salad with fresh herbs will elevate your meal's nutritional profile while its subtle flavors pair wonderfully with the cheesy twists. It's both satisfying and light!

  • Vanilla Ice Cream: For dessert, the creaminess of vanilla ice cream contrasts with the savory flavors of the twists, offering a sweet finale to your indulgent experience.

  • Herbal Tea: A fragrant herbal tea, like chamomile or mint, serves as a soothing beverage choice, rounding off the meal beautifully while cleansing your palate.

How to Store and Freeze Gruyère Cheese Twists

Room Temperature: Enjoy your Gruyère Cheese Twists fresh from the oven, but if you have leftovers, they should be eaten within 2 hours at room temperature to ensure quality.

Fridge: Store leftover twists in an airtight container for up to 4-5 days. Reheat them briefly in the oven to maintain their delightful crunch.

Freezer: For longer storage, freeze the baked twists in a single layer on a baking sheet first, then transfer to a freezer bag. They can be kept for up to 3 months.

Reheating: To enjoy frozen Gruyère Cheese Twists, simply bake them in a preheated oven at 375°F (190°C) for 10-12 minutes or until warmed through and crispy.

Gruyère Cheese Twists Variations

Feel free to customize your Gruyère Cheese Twists to suit your taste and dietary preferences for an even more delightful experience!

  • Cheese Swap: Try aged cheddar for a sharper flavor or a smoked gouda for a smoky twist. Each cheese brings its unique character to the table, making the twists truly your own!

  • Herb Infusion: Add chopped fresh thyme, rosemary, or chives into the cheese mixture for a fragrant boost. The addition of herbs will leave your kitchen smelling wonderful while elevating the flavor profile.

  • Add a Kick: For those who enjoy heat, sprinkle in some crushed red pepper flakes or cayenne pepper. This subtle spice in your twists will surprise and delight your guests.

  • Chopped Add-ins: Incorporate finely chopped sun-dried tomatoes or olives for a Mediterranean touch. These ingredients add bursts of flavor that transform the twists into something memorable!

  • Nutty Crunch: Introduce a whole new texture by adding a sprinkle of finely chopped walnuts or pecans over the cheese before sealing the pastry. It’s a crunchy surprise in every bite!

  • Dairy-Free: Use a vegan cheese alternative or cashew cheese to make these twists dairy-free. Serve them at gatherings to ensure everyone can enjoy this delicious snack.

  • Pesto Perfection: Spread a thin layer of pesto on the pastry before adding cheese for an Italian-inspired twist. The aromatic flavor of basil and garlic will shine through.

  • Sweet Twist: For a dessert-style treat, swap cheese for Nutella and sprinkle crushed hazelnuts. These sweet twists are perfect for ending a lovely meal on a high note!

Don’t hesitate to explore these variations and elevate your Gruyère Cheese Twists into delightful culinary experiences. Whether you're serving them at a gathering or enjoying them on your own, these twists are bound to please!

Expert Tips for Gruyère Cheese Twists

  • Choose Quality Pastry: High-quality all-butter puff pastry makes a world of difference in texture; avoid greasy options for the best crunchy bites.

  • Thaw Properly: Thaw frozen puff pastry overnight in the fridge to avoid cracking and ensure easy handling during preparation.

  • Watch the Oven: Keep an eye on your Gruyère Cheese Twists as they bake; they should puff up golden, but can burn quickly if left unattended.

  • Serve Immediately: For that fresh, flaky texture, serve your twists right after baking, as they can lose crispness over time.

  • Experiment with Flavors: Don’t hesitate to mix up the cheese or add herbs to the filling for unique twists on this classic appetizer!

Make Ahead Options

These Gruyère Cheese Twists are fantastic for meal prep and can save you time on busy entertaining days! You can prepare the pastry and twist them up to 24 hours in advance. Simply follow the steps until the baking point and then place the shaped twists on a baking sheet lined with parchment paper. Cover them tightly with plastic wrap and refrigerate. When you're ready to serve, just preheat your oven and bake fresh from the fridge, adding a couple of extra minutes to the original baking time to ensure they puff up perfectly. This way, you’ll enjoy the same delightful, golden crunch that makes these twists a favorite, without the last-minute rush!

Gruyère Cheese Twists Recipe FAQs

How do I choose the right puff pastry?
Absolutely! For Gruyère Cheese Twists, I recommend using high-quality all-butter puff pastry as it ensures the flakiness and buttery flavor that makes these twists so special. If you’re opting for store-bought, look for brands that specify “all-butter” on the packaging to avoid a greasy texture.

How should I store leftover Gruyère Cheese Twists?
For the best results, store any leftovers in an airtight container at room temperature for up to 2 hours. If you want to extend their freshness, transfer them to the fridge, where they can last for 4-5 days. Just remember to reheat them in the oven for a few minutes to regain that crispy texture!

Can I freeze Gruyère Cheese Twists?
Yes, you can freeze them! To preserve their delightful crunch, first arrange your baked cheese twists in a single layer on a baking sheet and freeze them for about 1-2 hours. Once frozen, transfer them to a freezer bag and store for up to 3 months. When you're ready to enjoy, bake them straight from the freezer at 375°F (190°C) for 10-12 minutes.

What if my cheese twists are not puffing up in the oven?
Very good question! If your Gruyère Cheese Twists aren’t puffing up, it could be due to a few reasons. Make sure your puff pastry is well-thawed and at room temperature before rolling it out, as cold pastry may not puff properly. Also, ensure you're not overloading the filling, as too much cheese can weigh the pastry down. Lastly, monitor the oven temperature; if it’s not hot enough, you might get dense twists instead of airy ones.

Are Gruyère Cheese Twists suitable for those with gluten allergies?
Unfortunately, traditional Gruyère Cheese Twists are not gluten-free as they are made with puff pastry, which contains wheat flour. However, you can look for gluten-free puff pastry options at specialty stores. Just be sure to double-check the packaging to confirm it's safe for your dietary needs!

Gruyère Cheese Twists

Savory Gruyère Cheese Twists for Effortless Entertaining

Delicious Gruyère Cheese Twists, perfect as appetizers for any gathering!
Print Recipe Pin Recipe
Prep Time 10 minutes mins
Cook Time 14 minutes mins
Total Time 24 minutes mins
Servings: 12 twists
Course: Snacks
Cuisine: French
Calories: 120
Ingredients Equipment Method Nutrition Notes

Ingredients
  

For the Pastry
  • 1 package all-butter puff pastry
For the Filling
  • 1 cup Gruyère cheese (or Emmental), grated Look for an AOP seal for quality
  • 1 teaspoon freshly ground black pepper Add more if desired
  • 1 teaspoon sea salt flakes
For the Glaze
  • 1 large egg yolk For the egg wash
  • 0.5 tablespoon milk Mixed with the egg for the wash

Equipment

  • Oven
  • Rolling Pin
  • Baking Sheets
  • Parchment Paper
  • Pastry brush
  • Knife or pizza cutter

Method
 

Preparation Steps
  1. Preheat your oven to 400°F (205°C) and line two baking sheets with parchment paper.
  2. Roll the thawed puff pastry into an 18"x18" square, about 1/8-inch thick.
  3. Sprinkle grated Gruyère cheese over one half of the pastry, leaving a 1-inch border. Add black pepper and brush the border with milk.
  4. Fold the pastry over to create a pocket and press edges to seal.
  5. Whisk together the egg yolk and milk, then brush the mixture over the top.
  6. Sprinkle with remaining black pepper and sea salt flakes.
  7. Slice the pastry into ½-inch wide strips, twist each strip, and place on baking sheets.
  8. Bake for 12-14 minutes until golden and puffed, then cool slightly before serving.
  9. Serve warm on a platter for immediate enjoyment.

Nutrition

Serving: 1twistCalories: 120kcalCarbohydrates: 6gProtein: 3gFat: 8gSaturated Fat: 4gPolyunsaturated Fat: 0.5gMonounsaturated Fat: 2.5gCholesterol: 37mgSodium: 150mgPotassium: 50mgVitamin A: 200IUCalcium: 90mgIron: 0.5mg

Notes

These twists are best enjoyed fresh but can be stored for a few days in an airtight container.

Tried this recipe?

Let us know how it was!

Yudane Charcoal Bread: Soft, Cheesy Braided Pretzel Delight

September 16, 2025 by Grace Snow Leave a Comment

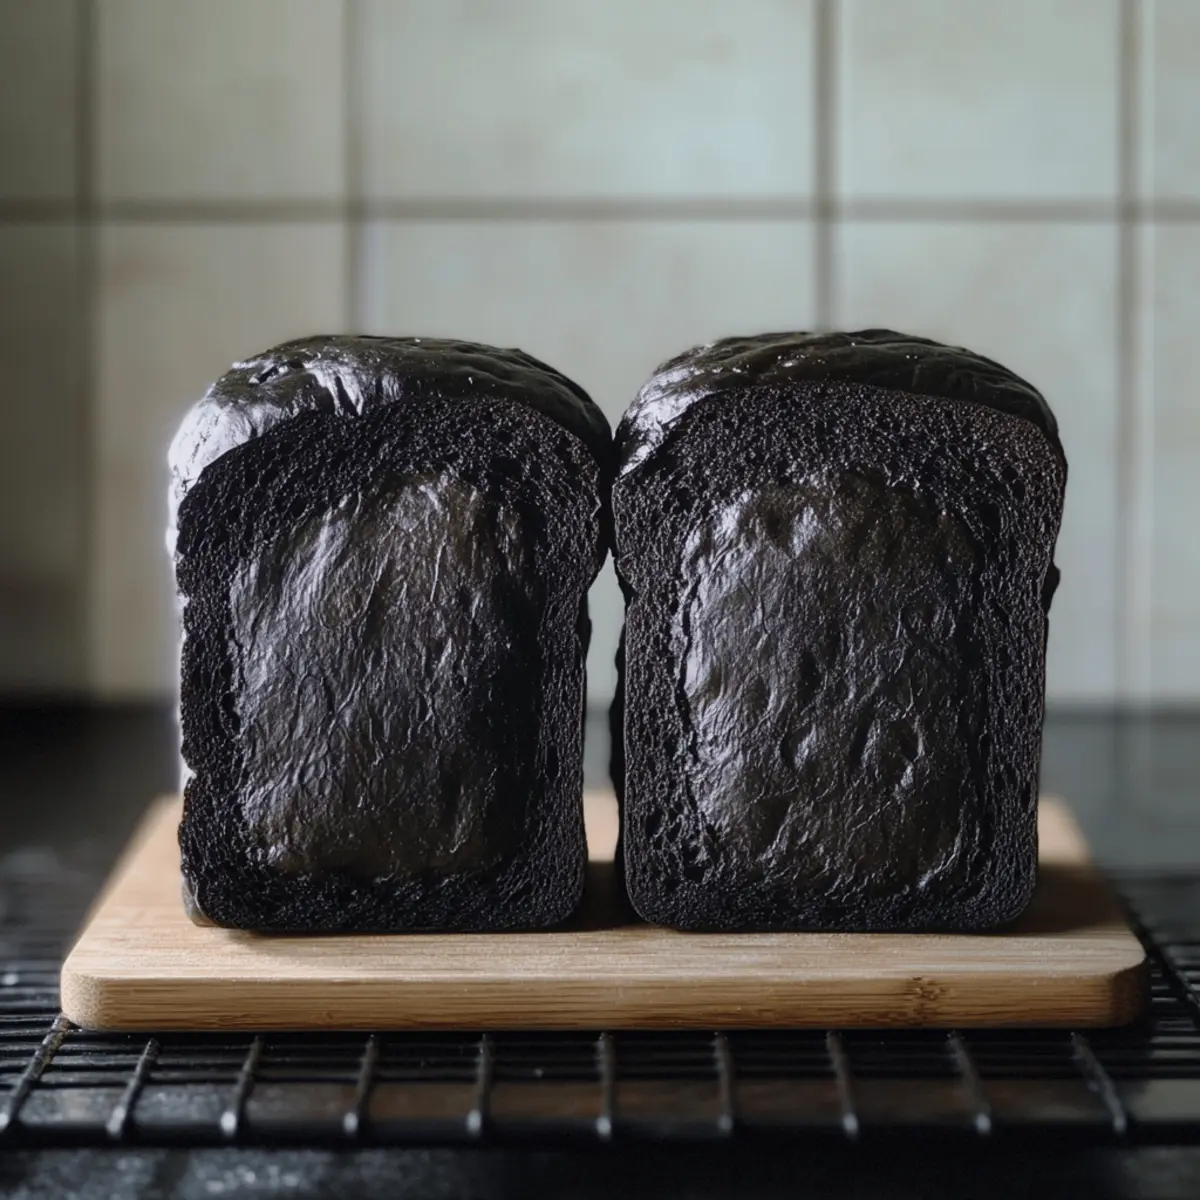
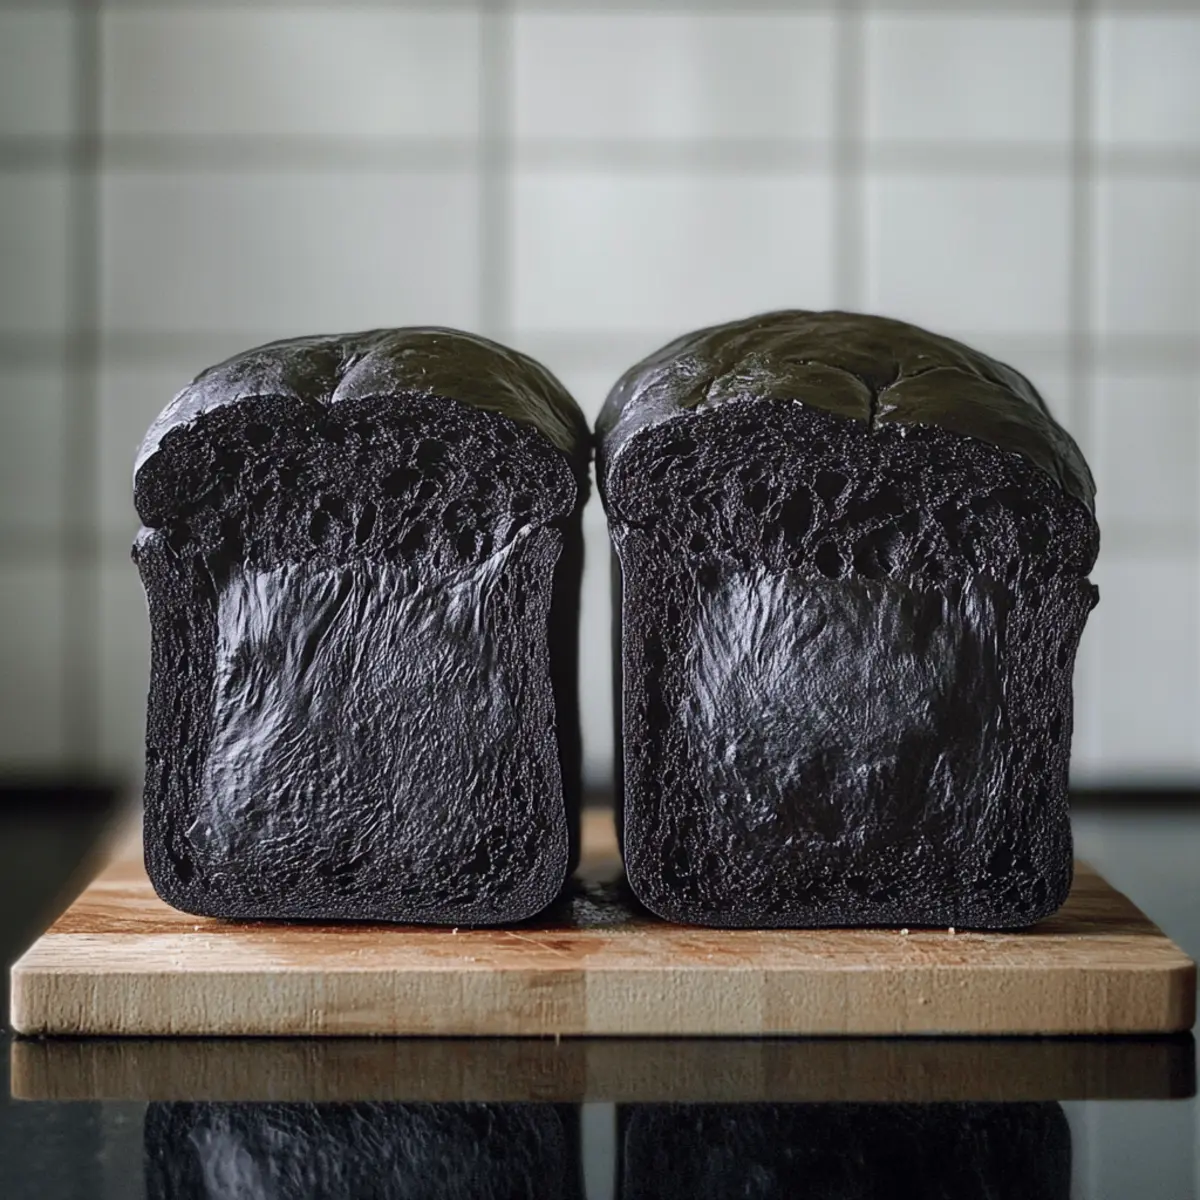
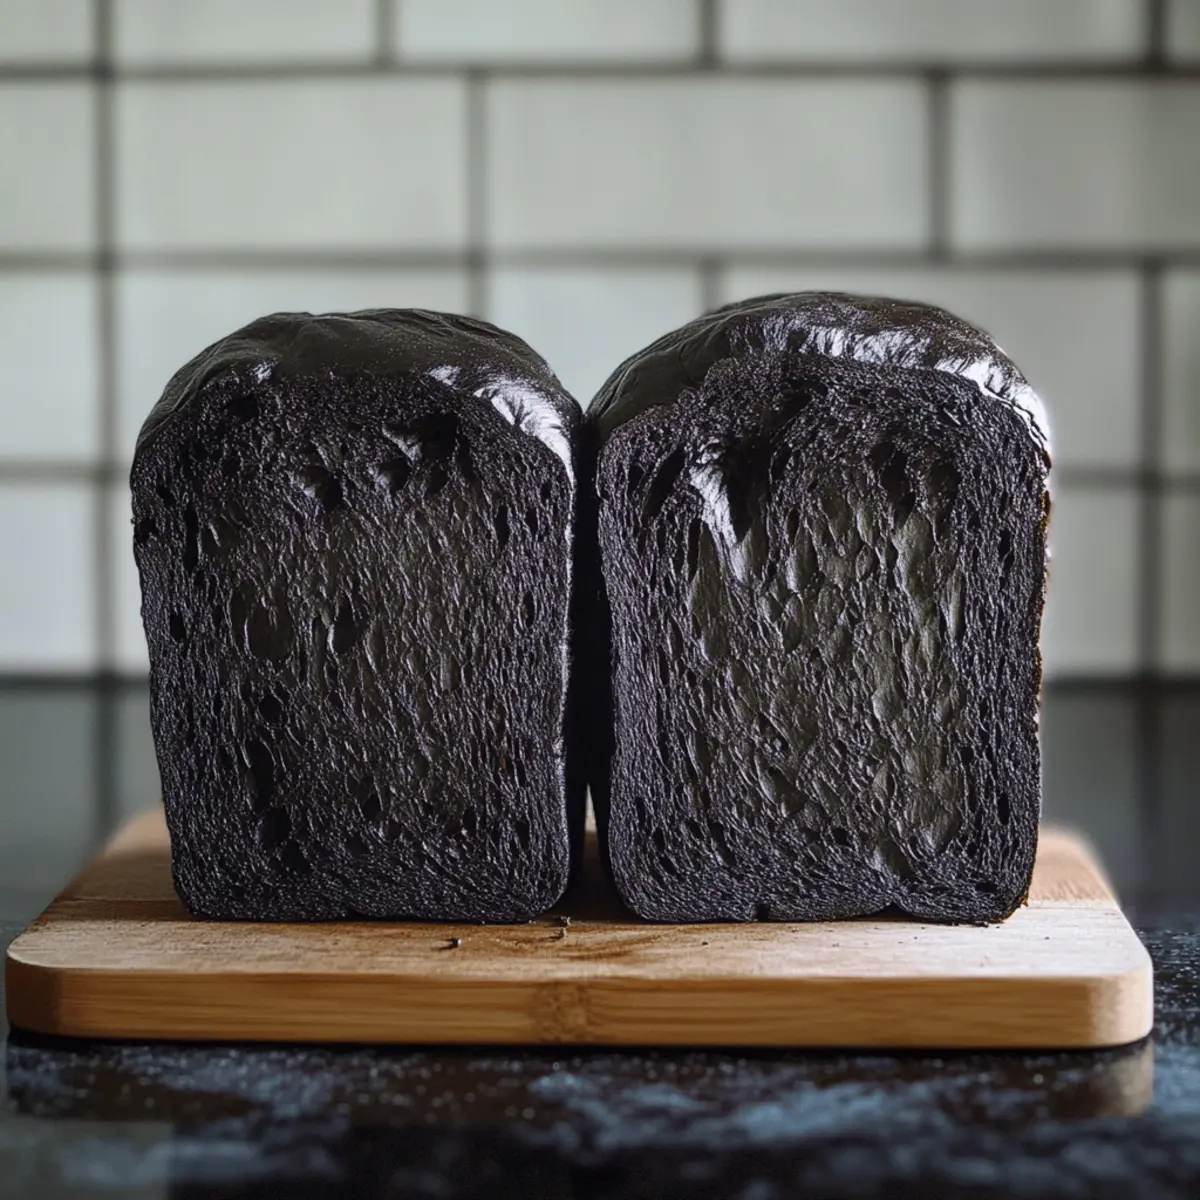
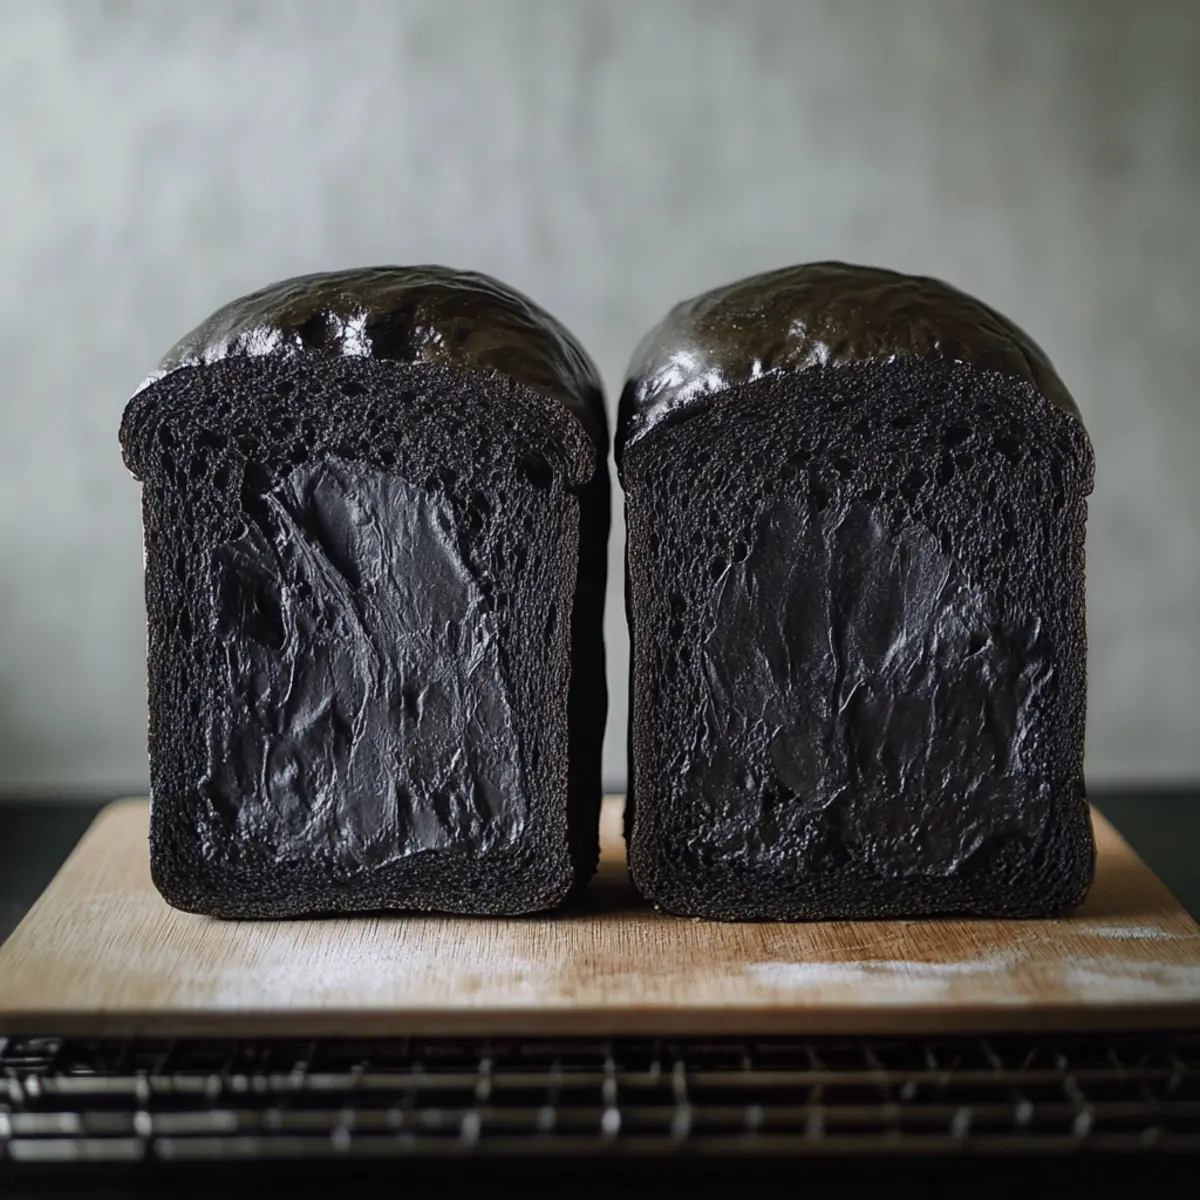
One bite of the Yudane Charcoal Bread transports me to a cozy bakery tucked away in the backstreets of Japan, where the air is filled with the comforting scent of fresh bread. This strikingly dark loaf, with its soft, moist interior, not only looks beautiful on the table but is also the secret weapon for your sandwich game. The Yudane method ensures it stays fresh for days, making it a fantastic choice for meal prep. Plus, the addition of bamboo charcoal gives your bread a unique twist, inviting curiosity and flavor at every meal. Ready to elevate your baking skills and impress your family with this delightful bread? Let’s dive in!

Why is Yudane Charcoal Bread Special?

Unique Appearance: The striking black color makes this bread a standout on any table, intriguing guests and sparking conversation.
Moisture Retention: Thanks to the Yudane method, this loaf stays fresh and soft for days, perfect for meal prep or last-minute sandwiches!
Versatile Use: Enjoy it for breakfast with a spread of rich cheeses or as the base for gourmet sandwiches. Similarly, if you love fun recipes, try the Cheesy Garlic Bread for another delicious twist!
Easy to Make: Even baking novices will find this recipe approachable with clear steps and guidance.
Flavorful Twist: The addition of bamboo charcoal not only elevates the visual appeal, but adds a mild, unique flavor that complements a wide range of ingredients.

Yudane Charcoal Bread Ingredients

• Here’s everything you need for your flavorful Yudane Charcoal Bread!

For the Yudane

  • High Protein Bread Flour – Provides structure for a beautifully risen loaf; essential for the Yudane method.
  • Boiling Water – Activates starches in the flour for that soft, tender texture.

For the Dough

  • Dried Instant Yeast – Fuels the rise of your bread; can be substituted with fresh yeast if needed.
  • Brown Sugar – Adds a hint of sweetness while enhancing the golden crust; white sugar is a valid alternative.
  • Salt – Essential for enhancing flavor and strengthening the gluten structure; don’t skimp on this!
  • Fresh Milk – Ensures a moist, soft crumb; alternatives include plant-based milk with slight adjustments to liquids.
  • Butter – Adds richness for a tender loaf; replace with margarine for a dairy-free option.

For the Charcoal

  • Bamboo Charcoal Powder – Imparts a stunning black hue and a unique flavor; try matcha powder for a vibrant green spin.

With these carefully selected ingredients, you’re on your way to baking an extraordinary Yudane Charcoal Bread that will not only impress but deliver delightful meals. Happy baking!

Step‑by‑Step Instructions for Yudane Charcoal Bread: Soft, Cheesy Braided Pretzel Delight

Step 1: Prepare Yudane Dough
In a small bowl, combine 60g of high protein bread flour with 55g of boiling water, stirring well until fully mixed. Cover the bowl with plastic wrap and place it in the refrigerator to rest overnight; alternatively, allow it to cool at room temperature for about 4 hours, which helps develop the unique texture of the Yudane Charcoal Bread.

Step 2: Dough Prep
Once the Yudane has rested, bring it to room temperature to ensure proper mixing. In a Thermomix or large mixing bowl, combine the remaining main dough ingredients, excluding the butter. Knead for approximately 4 minutes at a medium speed, allowing the dough to begin developing elasticity and incorporating the essential flavors needed for your soft, cheesy bread.

Step 3: Incorporate Butter
After the initial kneading, add the softened butter to the dough, mixing thoroughly. Knead for an additional minute or until the butter is fully integrated into the dough, creating a rich and smooth mixture. This step is crucial for achieving the tender texture that characterizes the Yudane Charcoal Bread.

Step 4: First Proofing
Transfer the dough to a lightly floured pastry mat and shape it into a smooth ball. Cover the dough with a damp cloth and let it proof in a warm environment until it doubles in size, approximately 45 to 60 minutes. You’ll know it’s ready when it feels puffy and airy to the touch.

Step 5: Shape Loaf
Once the dough has risen, gently deflate it and divide it into two equal portions. Shape each piece into ovals, allowing them to rest for about 10 minutes under a cloth. Then, roll each oval into a cylinder and place them seam side down in a prepared loaf pan, ensuring the shaping is even for a uniform baking result.

Step 6: Second Proofing
Cover the loaf pan with plastic wrap or a damp cloth and allow the shaped dough to rise again until it reaches about 80% of the height of the pan, which typically takes around 40 minutes. As it rises, the dough should expand and fill the pan beautifully, preparing for the final bake.

Step 7: Preheat Oven
During the last 15 minutes of the second proofing, preheat your oven to 190°C (374°F). This ensures that the internal temperature is just right for baking your Yudane Charcoal Bread, leading to a perfect rise and great crust development when it is time to bake.

Step 8: Bake
Carefully place the loaf in the preheated oven and bake for 25 to 30 minutes, or until the bread turns a golden brown color on top. You can check for doneness by tapping the bottom of the loaf; if it sounds hollow, it’s ready! After baking, cool the bread completely on a wire rack before slicing to maintain its soft texture.

How to Store and Freeze Yudane Charcoal Bread

Room Temperature: Store the bread in a cool, dry place for up to 5 days in an airtight container to maintain its wonderful softness.

Fridge: While refrigeration can extend freshness, it may dry out the bread. If you must refrigerate, wrap it tightly and consume within 3 days for the best flavor.

Freezer: Freeze the Yudane Charcoal Bread by wrapping it tightly in plastic wrap and then placing it in a freezer bag. It can be stored for up to 3 months without losing its unique taste.

Reheating: To enjoy frozen slices, thaw them overnight in the fridge and gently reheat in the oven at 180°C (350°F) for about 10 minutes to bring back its delightful texture.

Yudane Charcoal Bread Variations

Feel free to explore these creative twists and substitutions to make your Yudane Charcoal Bread truly your own!

  • Matcha Magic: Substitute bamboo charcoal powder with matcha powder for a vibrant green loaf that brings an earthy flavor.
  • Herb Infusion: Add dried herbs such as rosemary or thyme directly into the dough for an aromatic touch that elevates your bread.
  • Cheesy Delight: Fold shredded cheese, like cheddar or mozzarella, into the dough for a melty, savory surprise in every slice. Imagine pulling apart your bread to reveal that gooey goodness!
  • Spice It Up: Mix in spices like smoked paprika or cumin to give your loaf a warm, inviting character. A pinch of heat can transform your sandwich experience!
  • Nutty Crunch: Throw in chopped nuts or seeds to add texture and a delightful crunch. Think sunflower seeds sprinkled throughout—it’s an exciting surprise with each bite!
  • Sweet Twist: For a sweeter variation, include dried fruits like cranberries or apricots, making it perfect for breakfast or as a snack. Just picture slathering your butter on a slice enveloped in fruity sweetness.
  • Plant-Based Option: Swap fresh milk with almond or oat milk and butter with coconut oil to create a dairy-free loaf that everyone can enjoy. Your loved ones won’t even notice the difference!
  • Bread Maker Friendly: Adapt the recipe for a bread maker using the soft bread setting to simplify the process. Try pairing it with a garlicky dip for a fun appetizer!

Each of these variations invites creativity while ensuring your Yudane Charcoal Bread remains a delicious centerpiece. Enjoy the journey as you bake!

Make Ahead Options

These Yudane Charcoal Bread loaves are perfect for busy home cooks looking to save time! You can prepare the Yudane dough up to 24 hours in advance; just mix 60g of high protein bread flour with 55g of boiling water, then refrigerate overnight. Additionally, once you’ve completed the first proofing (Step 4), you can shape the loaves and then refrigerate them for up to 3 days before the final bake. Just make sure to cover them well to maintain moisture. When you're ready to finish, allow the dough to rise until puffy, preheat your oven, and bake as directed for delicious and freshly baked bread without the stress!

What to Serve with Yudane Charcoal Bread

The beauty of this striking black loaf is its versatility, making it the perfect canvas for delightful pairings.

  • Fresh Salad: A light, crisp salad with a tangy dressing complements the soft, moist texture of the bread perfectly, balancing flavors beautifully.
  • Savory Soups: Pairing your Yudane Charcoal Bread with a rich, creamy soup can create a comforting meal experience, warming the soul with every bite.
  • Cheese Platter: A selection of rich, flavorful cheeses will enhance the unique character of the bread, offering a delightful stark contrast to its earthiness.
  • Grilled Vegetables: Roasted veggies bring a smoky sweetness that harmonizes wonderfully with the bread, creating a colorful, healthful addition to your meal.
  • Egg Sandwiches: Create filling breakfast sandwiches with eggs, fresh greens, and a fragrant spread for a delightful morning treat that’s both satisfying and nourishing.
  • Charcuterie Board: A striking charcuterie board adorns your table, where the bold color of the Yudane Charcoal Bread elevates the spread, making it visually stunning.
  • Herbed Butter: Serve with whipped herbed butter for a delightful twist that adds an extra layer of flavor to each slice.
  • Sparkling Wine: A crisp sparkling wine provides a refreshing contrast to the rich flavors of the bread, perfect for special occasions or a casual evening with friends.

Expert Tips for Yudane Charcoal Bread

  • Kneading Time Matters: Adjust your kneading time based on your flour’s protein content and the machine used for optimal dough elasticity.

  • Environmental Awareness: Monitor rising times, as temperature and humidity can greatly affect the dough's behavior.

  • Oven Accuracy Check: Use an oven thermometer to verify your oven’s temperature accuracy; adjusting slightly may enhance your baking results.

  • Texture Exploration: Try alternating between Yudane and Tangzhong methods to experience diverse textures in your Yudane Charcoal Bread.

  • Ingredient Quality: Opt for high-quality bamboo charcoal powder to truly elevate the visual and flavor aspects of your loaf.

Yudane Charcoal Bread Recipe FAQs

How do I choose the right bamboo charcoal powder?
Absolutely! When selecting bamboo charcoal powder, look for food-grade products that are specifically labeled for culinary use. This ensures quality and safety. The powder should have a fine texture, with a consistent black color. Avoid any brands that have added fillers or artificial ingredients, as these can alter both the flavor and safety of your bread.

How should I store Yudane Charcoal Bread?
To maintain its soft texture, store the Yudane Charcoal Bread in an airtight container at room temperature for up to 5 days. A good tip is to wrap the bread in parchment paper before placing it in a container to avoid it getting too dry. If it’s in humid conditions, consider freezing it to lock in moisture for longer preservation.

Can I freeze the Yudane Charcoal Bread, and how?
Very! To freeze your Yudane Charcoal Bread, make sure it has cooled completely after baking. Then, wrap it tightly in plastic wrap to prevent freezer burn, followed by placing it in a freezer bag. It can be stored for up to 3 months. When you're ready to enjoy it, simply thaw overnight in the fridge, then reheat in the oven at 180°C (350°F) for about 10 minutes to restore its delightful softness.

What can I do if my dough isn’t rising?
If your dough isn’t rising, there could be a couple of reasons. First, check your yeast; make sure it's fresh and active. You can test this by adding it to warm water with a pinch of sugar—if it bubbles, it’s good! Next, ensure your proofing environment is warm enough, ideally around 75°F (24°C). You can create a warm space by turning on your oven for a minute, then turning it off and placing the dough inside.

Is this recipe safe for those with dietary restrictions?
The Yudane Charcoal Bread can be adjusted for dietary preferences! If you're looking for dairy-free options, simply substitute the butter with margarine or a plant-based butter. For anyone allergic to wheat, consider using alternative flours like spelt or gluten-free flour mixes, but do note that the texture may differ slightly. Always check the ingredient labels to ensure they fit your dietary needs.

How do I know when my Yudane Charcoal Bread is fully baked?
To determine if your bread is fully baked, tap the bottom of the loaf gently; it should sound hollow when it’s done! Additionally, if the crust is a beautiful golden brown, that’s a great sign. Use an instant-read thermometer to check the internal temperature; it should ideally be around 90°C (194°F) for perfectly baked bread.

Cheese Stuffed Braided Pretzel RingYudane Charcoal Bread

Yudane Charcoal Bread: Soft, Cheesy Braided Pretzel Delight

Discover the unique Yudane Charcoal Bread, a soft and cheesy braided pretzel delight that's perfect for sandwiches and meal prep.
Print Recipe Pin Recipe
Prep Time 25 minutes mins
Cook Time 30 minutes mins
Resting Time 4 hours hrs
Total Time 4 hours hrs 55 minutes mins
Servings: 8 slices
Course: Snacks
Cuisine: Japanese
Calories: 180
Ingredients Equipment Method Nutrition Notes

Ingredients
  

For the Yudane
  • 60 g high protein bread flour Provides structure
  • 55 g boiling water Activates starches
For the Dough
  • 7 g dried instant yeast Can be substituted with fresh yeast
  • 30 g brown sugar Adds sweetness
  • 8 g salt Enhances flavor and gluten structure
  • 250 ml fresh milk Can use plant-based alternatives
  • 30 g butter Adds richness; margarine is a substitute
For the Charcoal
  • 10 g bamboo charcoal powder For color and unique flavor

Equipment

  • Mixing Bowl
  • Thermomix
  • Loaf pan

Method
 

Step-by-Step Instructions for Yudane Charcoal Bread
  1. Prepare Yudane Dough: Combine 60g of high protein bread flour with 55g of boiling water, stir well until mixed. Cover and refrigerate overnight or cool for 4 hours.
  2. Dough Prep: Bring Yudane to room temperature. In a mixing bowl, combine remaining dough ingredients, knead for 4 minutes.
  3. Incorporate Butter: Add softened butter, knead for an additional minute until fully integrated.
  4. First Proofing: Shape dough into a ball, cover, and proof in a warm place until it doubles in size (45-60 minutes).
  5. Shape Loaf: Deflate dough, divide into two pieces, shape into ovals, rest for 10 minutes, then roll into cylinders.
  6. Second Proofing: Place shaped dough in loaf pan, cover, and rise until it reaches 80% of the pan height (about 40 minutes).
  7. Preheat Oven: Preheat oven to 190°C (374°F) during the last 15 minutes of second proofing.
  8. Bake: Bake for 25-30 minutes until golden brown. Cool on a wire rack before slicing.

Nutrition

Serving: 1sliceCalories: 180kcalCarbohydrates: 35gProtein: 5gFat: 3gSaturated Fat: 1gMonounsaturated Fat: 1gCholesterol: 10mgSodium: 200mgPotassium: 150mgFiber: 1gSugar: 5gVitamin A: 100IUCalcium: 100mgIron: 1mg

Notes

Kneading times may vary based on flour and equipment. For best results, use an oven thermometer for accuracy.

Tried this recipe?

Let us know how it was!

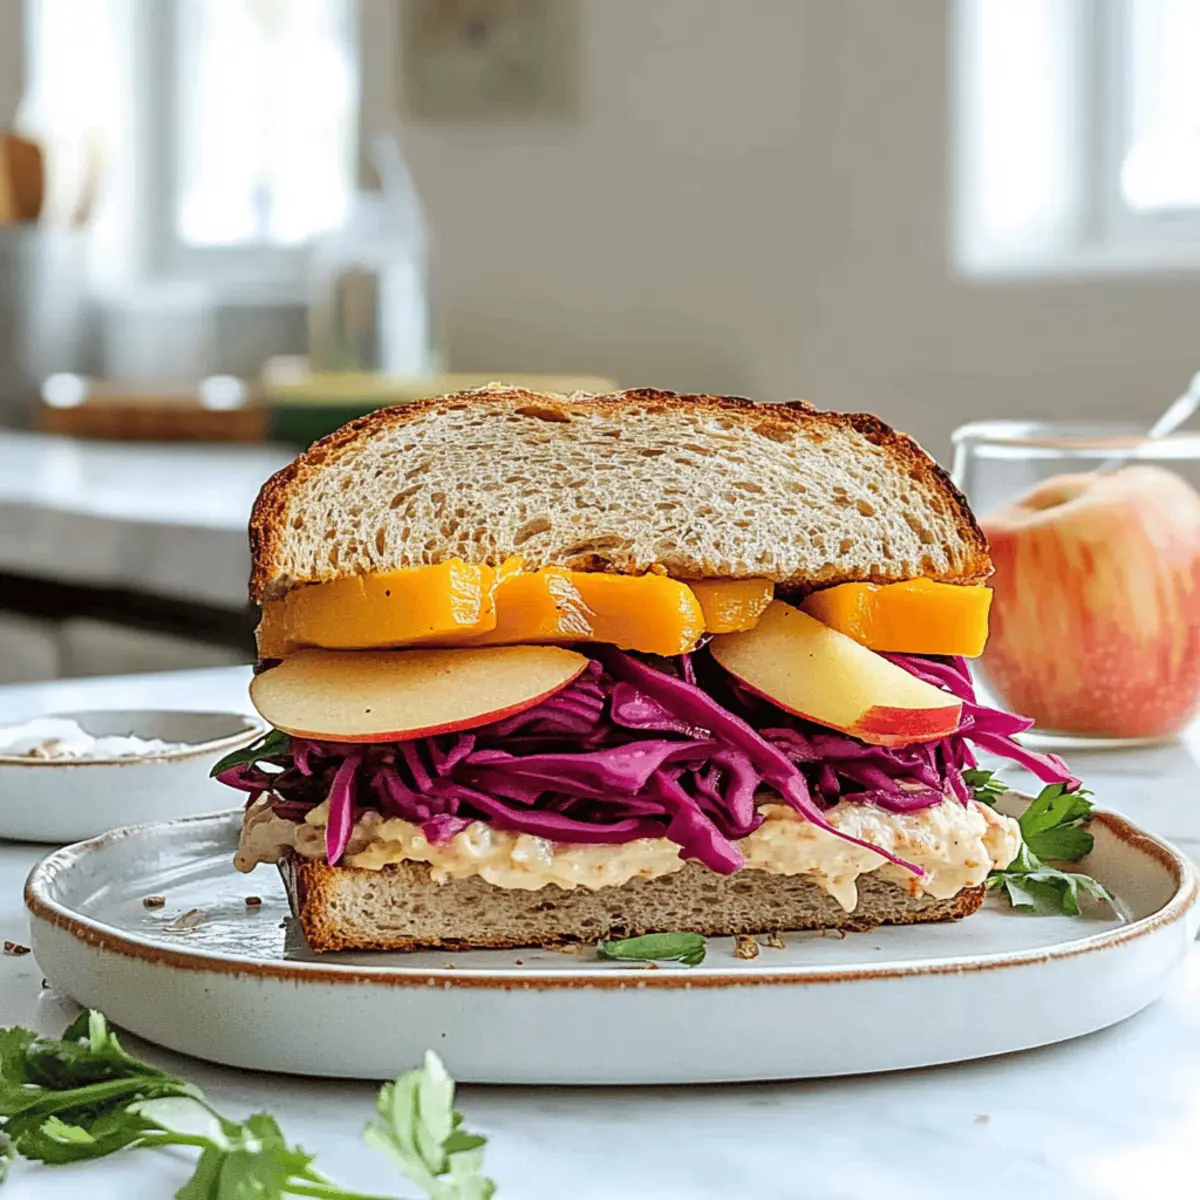
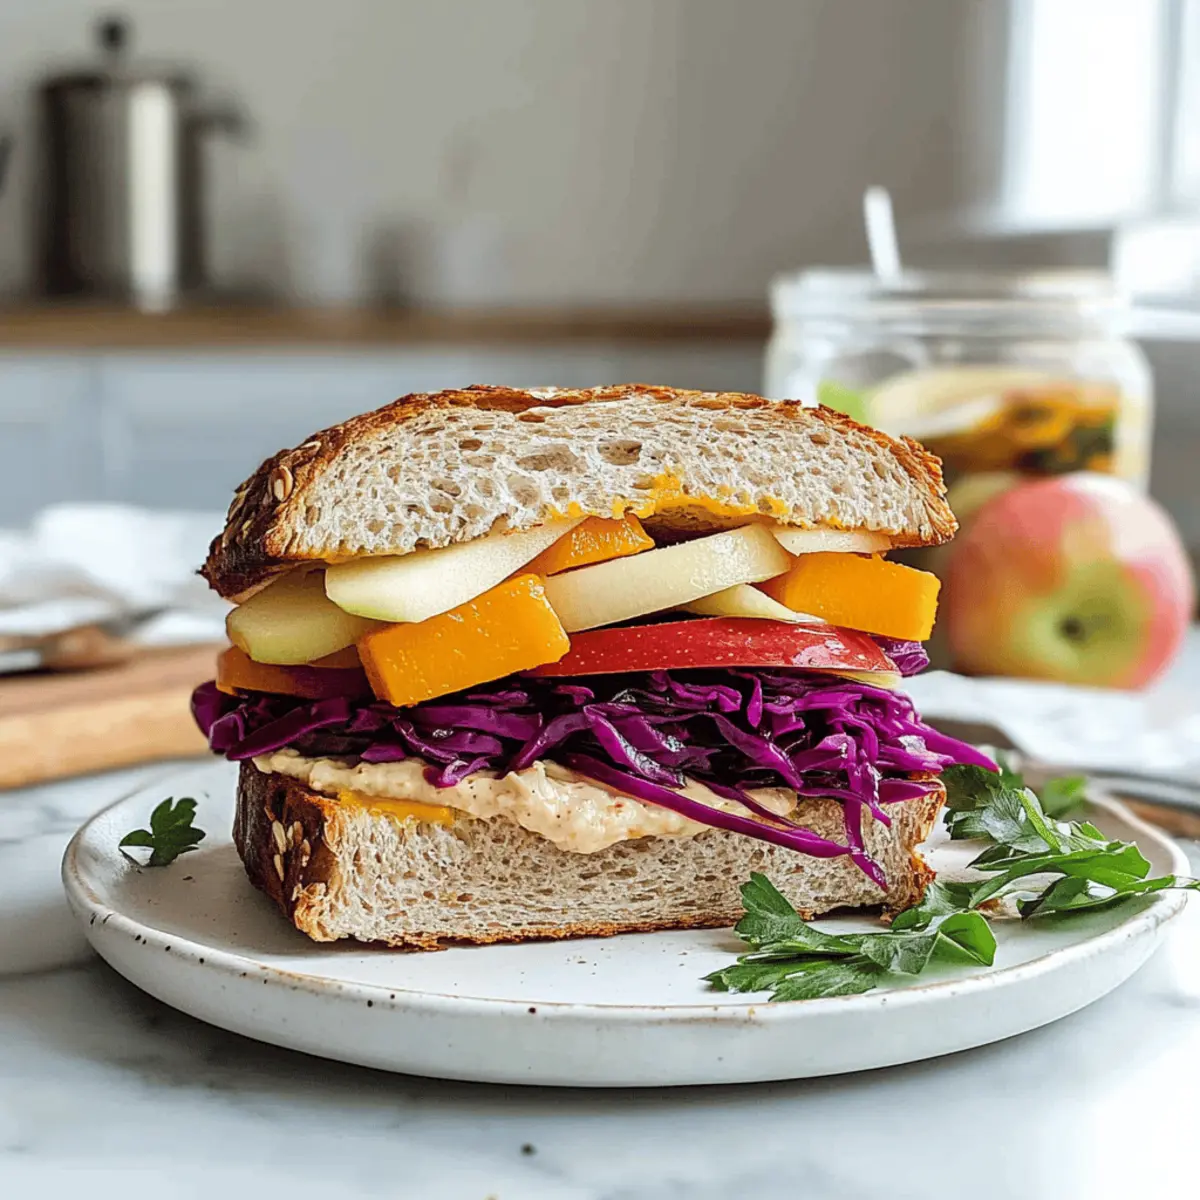
Butternut Apple Cranberry Sandwich: A Cozy Fall Delight

September 14, 2025 by Grace Snow Leave a Comment

As the leaves begin to crunch beneath my feet, I can’t help but crave those cozy flavors of fall. Enter the Roasted Butternut Apple Cranberry Sandwich—a delightful twist on the traditional sandwich that elevates seasonal ingredients into something truly special. Picture layers of tender roasted butternut squash, crisp apple, and vibrant tangy cranberries, all nestled between hearty slices of whole grain bread. This vegetarian sandwich not only dazzles the taste buds but also makes for easy meal prep; perfect for cozy lunches or transforming holiday leftovers. Plus, with its wonderful texture and rich flavors, it’s bound to be a hit at your next gathering. Curious how to assemble this scrumptious creation? Let’s dive into the recipe!

Why is This Sandwich a Must-Try?

Flavor Explosion: The Roasted Butternut Apple Cranberry Sandwich brings together sweet, tangy, and savory elements for a taste experience you'll love.

Healthy Comfort Food: Packed with nutrient-rich ingredients, this sandwich is not just satisfying but a great way to nourish your body.

Make-Ahead Magic: Easily prepare the filling in advance, making lunch or dinner a breeze when you're busy—as perfect for lunchboxes as for holiday gatherings.

Versatile Ingredients: Substitute with your favorite greens or cheeses, such as adding gorgonzola for a delightful twist; the possibilities are endless!

Seasonal Appeal: Celebrate fall flavors with this warm, cozy sandwich that embodies the season, perfect for using up Thanksgiving leftovers or warming up on a chilly day.

Pair this with a light salad or a comforting soup for an ideal meal combo. For more vibrant flavors, check out Chicken Salad Apples as a complementary side!

Butternut Apple Cranberry Sandwich Ingredients

For the Roasted Filling

  • Butternut Squash – A sweet and nutty base; use thick planks for the best sandwich texture.
  • Extra-virgin Olive Oil – Essential for roasting; adds flavor and moisture to the squash.
  • Minced Rosemary – Infuses a lovely herbal aroma that elevates the squash's sweetness.
  • Sea Salt and Black Pepper – Fundamental seasonings that enhance the overall taste of ingredients.

For the Pickled Cabbage

  • Shredded Red Cabbage – Provides a crisp and colorful contrast; marinate for a zesty twist.
  • Apple Cider Vinegar – Acts as a pickling agent, giving the cabbage a delightful tang.
  • Maple Syrup – Adds a touch of sweetness that balances the pickled acidity.

For the Sandwich Assembly

  • Whole Grain Bread – Offers structure; a gluten-free option works wonderfully too.
  • Dijon Mustard – A tangy spread that enhances the sandwich's flavor profile.
  • White Cheddar – Creamy and rich; complements the sweetness of the squash and apple.
  • Apple – Freshly sliced for a crisp bite and sweet flavor.
  • Dried Cranberries – Tart and chewy bursts that elevate the roasted flavors.
  • Arugula – Adding freshness and a peppery hint to the sandwich.
  • Mayonnaise – Optional for extra creaminess; adjust according to taste.

With these fresh and seasonal ingredients, your Butternut Apple Cranberry Sandwich will be a delightful and nourishing addition to your meals!

Step‑by‑Step Instructions for Butternut Apple Cranberry Sandwich

Step 1: Preheat the Oven
Begin by preheating your oven to 425°F (220°C). Prepare a baking sheet by lining it with parchment paper to prevent sticking and ensure easy cleanup. This step sets the stage for roasting the butternut squash, which is the heart of the Butternut Apple Cranberry Sandwich.

Step 2: Prepare the Butternut Squash
Slice the butternut squash into thick planks, about 1 inch, for optimal roasting. In a bowl, toss the squash with extra-virgin olive oil, minced rosemary, sea salt, and black pepper until evenly coated. Arrange the seasoned planks on the prepared baking sheet, ensuring they are in a single layer for even cooking.

Step 3: Roast the Squash
Place the baking sheet in your hot oven and roast the butternut squash for 17 to 20 minutes. Check for doneness; the squash should be golden brown and tender when pierced with a fork. This roasting process caramelizes the natural sugars, enhancing the flavor for your sandwich.

Step 4: Make the Pickled Cabbage
While the squash roasts, prepare the pickled cabbage. In a jar, combine shredded red cabbage, apple cider vinegar, maple syrup, a pinch of salt, and pepper. Seal the jar tightly and shake vigorously until well mixed. Allow the cabbage to marinate while assembling the rest of the Butternut Apple Cranberry Sandwich, letting the flavors meld beautifully.

Step 5: Assemble the Sandwich
Lay out your bread slices on a clean workspace. Spread a generous layer of Dijon mustard on one slice, then layer with white cheddar cheese, fresh apple slices, two pieces of roasted butternut squash, and the tangy pickled cabbage. Sprinkle dried cranberries and a handful of arugula on top for added texture and freshness.

Step 6: Complete the Sandwich
Take the second slice of bread and spread mayonnaise on one side, if desired, for extra creaminess. Place it on top of the assembled sandwich to finish. Press gently to combine the flavors, then slice the sandwich in half for easy serving, showcasing the beautiful layers of flavor in your Butternut Apple Cranberry Sandwich.

Butternut Apple Cranberry Sandwich Variations

Feel free to explore these delightful twists on the recipe, making your sandwich even more tailored to your taste!

  • Greens Options: Substitute arugula for spinach or kale for a different flavor profile and added nutrients.

  • Cheese Swap: Add gorgonzola or goat cheese for a more robust and creamy taste that will elevate your sandwich.

  • Texture Boost: Incorporate crispy fried sage leaves to introduce a fantastic crunch and earthy flavor to your creation.

  • Vegan Delight: Use vegan cheese and mayonnaise for a plant-based version that still delivers on taste and satisfaction.

  • Nutty Flair: Sprinkle chopped pecans or walnuts for a crunchy texture and a nutty flavor that complements the sweetness of squash and apples.

  • Heat It Up: Add sliced jalapeños or drizzle hot sauce to bring some spice to your savory sandwich experience!

  • Fruit Variation: Replace dried cranberries with dried cherries or apricots for a different fruity twist; the sweetness will still shine through beautifully.

  • Wrap it Up: Switch to a whole grain wrap or tortilla for a lighter, portable version that’s perfect for lunches on the go.

Feel inspired by these variations to make your own Butternut Apple Cranberry Sandwich! For additional flavor inspiration, consider trying this fantastic Chicken Salad Apples as a refreshing side dish!

Expert Tips for Butternut Apple Cranberry Sandwich

  • Cut Correctly: Ensure butternut squash is sliced into thick planks (about 1 inch) for proper roasting; thinner slices can dry out or burn.

  • Prep Ahead: Prepare the roasted squash and pickled cabbage in advance; simply assemble the sandwich right before serving for maximum freshness.

  • Fresh Ingredients: Use fresh apples and arugula for the best texture and flavor. Slice apples just before assembly to prevent browning.

  • Customize Flavor: Don’t hesitate to add different cheeses like gorgonzola for a bolder taste. Experimenting can lead to delightful new variations of your Butternut Apple Cranberry Sandwich.

  • Serve Warm: This sandwich is best enjoyed warm, paired with a light salad or soup to complement the cozy flavors.

Make Ahead Options

These Butternut Apple Cranberry Sandwiches are perfect for busy home cooks looking to save time during the week! You can prep the roasted butternut squash and pickled cabbage up to 3 days in advance. Simply roast the squash, allow it to cool, then store it in an airtight container in the refrigerator. Prepare the pickled cabbage by mixing the ingredients in a jar, which can be made and stored for up to a week. When you’re ready to enjoy your sandwich, assemble the layers on fresh whole grain bread, adding the squash, apple, cheese, and cranberries just before serving to keep everything deliciously fresh and vibrant. This way, you’ll have a hearty, flavorful meal with minimal effort!

Storage Tips for Butternut Apple Cranberry Sandwich

Room Temperature: Enjoy your sandwich fresh! If kept at room temperature, consume within 2 hours to ensure safety and taste.

Fridge: Store any leftover components separately in airtight containers for up to 3 days to maintain freshness; reassemble just before eating.

Freezer: For longer storage, freeze roasted butternut squash and pickled cabbage in airtight bags for up to 3 months. Thaw overnight in the fridge before assembling your Butternut Apple Cranberry Sandwich.

Reheating: If you've stored the sandwich, reheat the squash in a microwave or oven until warm, then assemble to retain that delightful texture.

What to Serve with Butternut Apple Cranberry Sandwich

Create a cozy meal experience that complements the vibrant flavors of this seasonal delight.

  • Simple Green Salad: A light and refreshing salad with mixed greens brightens the meal, adding freshness and texture.

  • Creamy Tomato Soup: The rich and tangy soup perfectly contrasts the sandwich’s sweetness, creating a warm and comforting serving duo.

  • Sweet Potato Fries: Crispy and slightly sweet, they add a delightful crunch to the meal, amplifying those autumn-inspired flavors.

  • Roasted Root Vegetables: Caramelized carrots, parsnips, and beets harmonize beautifully with the sandwich’s roasted butternut squash, enhancing the earthy notes.

  • Spiced Apple Cider: This warm beverage offers a seasonal hug in a cup, delighting your senses with sweet and spiced aromas.

  • Pumpkin Bread: A slice of moist pumpkin bread brings a delightful sweetness, echoing the seasonal flavors found in the sandwich.

You can mix and match these sides for a truly heartwarming meal that will put a smile on everyone’s face!

Butternut Apple Cranberry Sandwich Recipe FAQs

What is the best way to select a butternut squash for this sandwich?
Absolutely! When choosing a butternut squash, look for a thick-necked squash with a smooth, tan skin and no dark spots or blemishes. The weight should feel substantial, indicating ripeness. If possible, opt for smaller squashes as they are often sweeter and more flavorful.

How should I store leftover ingredients for the Butternut Apple Cranberry Sandwich?
To keep your sandwich ingredients fresh, store each component in separate airtight containers in the refrigerator. The roasted butternut squash and pickled cabbage can last up to 3 days. Make sure to reassemble the sandwich just before eating to maintain texture and flavor.

Can I freeze the components of the sandwich?
Very! To freeze the roasted butternut squash and pickled cabbage, place them in airtight freezer bags, removing as much air as possible. They will freeze well for up to 3 months. When ready to use, thaw them overnight in the fridge, and they can be used in your Butternut Apple Cranberry Sandwich.

What should I do if my squash ends up too dry or burnt?
If your roasted butternut squash is dry or burnt, it’s likely cut too thin or cooked too long. For best results, cut the squash into 1-inch thick planks and keep a close eye while roasting; a good indicator is a golden-brown color without charring. If you do happen to over-roast it, adding more creamy ingredients like mayonnaise or additional cheese can help balance the flavors and moistness in your sandwich.

Are there any dietary considerations I should be aware of for this sandwich?
Definitely! This Butternut Apple Cranberry Sandwich is vegetarian-friendly, but if you are catering to dietary restrictions, consider gluten-free bread for gluten sensitivities. Always check the cheese for possible allergens, such as dairy. For pet owners, avoid sharing any leftover sandwich components that contain onions or garlic, as these can be harmful to pets.

How can I prevent my apple slices from browning before assembly?
To keep your apple slices fresh and prevent browning, try tossing them in a little lemon juice or dipping them in a mixture of water and vinegar before assembling your sandwich. This not only maintains their crispness but also adds an extra hint of flavor that complements the other ingredients beautifully!

Butternut Apple Cranberry Sandwich

Butternut Apple Cranberry Sandwich: A Cozy Fall Delight

Enjoy this delightful Butternut Apple Cranberry Sandwich featuring roasted butternut squash, crisp apple, and tangy cranberries for a cozy fall treat.
Print Recipe Pin Recipe
Prep Time 15 minutes mins
Cook Time 20 minutes mins
Total Time 35 minutes mins
Servings: 2 sandwiches
Course: Snacks
Cuisine: American
Calories: 450
Ingredients Equipment Method Nutrition Notes

Ingredients
  

For the Roasted Filling
  • 1 medium Butternut Squash sliced into thick planks
  • 2 tablespoons Extra-virgin Olive Oil for roasting
  • 1 teaspoon Minced Rosemary
  • 1/2 teaspoon Sea Salt
  • 1/4 teaspoon Black Pepper
For the Pickled Cabbage
  • 1 cup Shredded Red Cabbage
  • 1/4 cup Apple Cider Vinegar
  • 1 tablespoon Maple Syrup
For the Sandwich Assembly
  • 4 slices Whole Grain Bread use gluten-free if desired
  • 2 tablespoons Dijon Mustard
  • 4 ounces White Cheddar sliced
  • 1 medium Apple sliced
  • 1/3 cup Dried Cranberries
  • 1 cup Arugula
  • 2 tablespoons Mayonnaise optional

Equipment

  • Oven
  • Baking Sheet
  • Jar for pickling

Method
 

Step-by-Step Instructions
  1. Preheat your oven to 425°F (220°C) and prepare a baking sheet lined with parchment paper.
  2. Slice the butternut squash into thick planks, about 1 inch, and toss with olive oil, rosemary, sea salt, and black pepper.
  3. Roast the squash in the oven for 17 to 20 minutes until golden brown and tender.
  4. Prepare the pickled cabbage by combining shredded red cabbage, apple cider vinegar, maple syrup, salt, and pepper in a jar. Shake to mix and let marinate.
  5. Assemble the sandwich by spreading Dijon mustard on a slice of bread, layering with white cheddar, apple slices, roasted squash, and pickled cabbage, then topping with cranberries and arugula.
  6. Spread mayonnaise on the other slice of bread if desired and place on top to complete the sandwich. Slice in half for serving.

Nutrition

Serving: 1sandwichCalories: 450kcalCarbohydrates: 60gProtein: 12gFat: 20gSaturated Fat: 5gCholesterol: 25mgSodium: 600mgPotassium: 500mgFiber: 10gSugar: 12gVitamin A: 1800IUVitamin C: 20mgCalcium: 15mgIron: 10mg

Notes

This sandwich is best served warm for a cozy meal experience.

Tried this recipe?

Let us know how it was!

Butternut Apple Cranberry Sandwich: Fall's Cozy Flavor Bliss

September 11, 2025 by Grace Snow Leave a Comment

As I stood in my kitchen, the scent of roasted butternut squash filled the air, instantly transporting me to a cozy fall afternoon. I couldn’t help but experiment with flavors to create the perfect bite. Enter the Butternut Apple Cranberry Sandwich, a showstopper that brilliantly combines the earthiness of roasted squash, the crunch of fresh apples, and the creaminess of cheddar cheese, all tucked between hearty slices of bread. Not only is this vegetarian delight quick to whip up, but it's also a make-ahead masterpiece that allows you to savor those wonderful autumn flavors throughout the week. The sweet-tart cranberries and tangy pickled cabbage bring everything together, creating a delicious medley that’s just too good to resist. Ready to dive into fall with this culinary delight? Let’s get started!

Why is this sandwich a fall favorite?

Comforting, Cozy Flavors: This sandwich brilliantly captures the essence of fall, bringing together roasted butternut squash, crisp apples, and savory cheddar.

Make-Ahead Magic: Prep the squash and cabbage in advance, making this a perfect option for quick lunches throughout the week.

Textures to Love: Experience the delightful contrast between creamy squash, crunchy cabbage, and chewy bread, creating a memorable mouthfeel.

Versatility at Its Finest: Customize with different cheeses or add a layer of crispy sage for a new twist on this savory delight.

Perfect for Gatherings: Impress family and friends with this unique twist on a classic sandwich, ideal for seasonal gatherings and autumn picnics.

Butternut Apple Cranberry Sandwich Ingredients

• For the Roasted Squash

  • Butternut Squash – Provides a sweet, smooth texture; if unavailable, use pumpkin for a similar taste.
  • Extra-Virgin Olive Oil – Ideal for drizzling over squash for roasting; melted coconut oil makes a great substitute.
  • Minced Rosemary – Infuses a fragrant herbal note; thyme or sage can work well as alternatives.
  • Sea Salt & Black Pepper – Essential for enhancing flavors; no substitutions needed.

• For the Pickled Cabbage

  • Shredded Red Cabbage – Adds crunch and vibrant color; green cabbage is a suitable substitute.
  • Apple Cider Vinegar – Provides tanginess to the cabbage; white wine vinegar can replace it if necessary.
  • Maple Syrup – Acts as a sweetener for the cabbage pickle; honey or agave syrup works wonderfully too.

• For the Sandwich Assembly

  • Sliced Bread – The perfect base for your sandwich; opt for hearty grainy bread or gluten-free options.
  • Dijon Mustard – Introduces a zesty flavor; yellow mustard is appropriate if you prefer a milder taste.
  • White Cheddar Cheese – Adds creaminess and sharp flavor; consider vegan cheese for a dairy-free version.
  • Apple (thinly sliced) – Provides a fresh, crisp bite; sweet varieties like Fuji or Gala are excellent choices.
  • Dried Cranberries – Deliver a sweet and chewy contrast; substitute with raisins if desired.
  • Arugula – Gives a peppery freshness; spinach can replace it for a milder flavor.
  • Mayo – A creamy spread that enhances the sandwich; Greek yogurt is a healthier alternative.

With this well-rounded Butternut Apple Cranberry Sandwich ingredient list, you're set to create a delicious, fall-inspired meal that bursts with vibrant flavors and textures!

Step‑by‑Step Instructions for Butternut Apple Cranberry Sandwich

Step 1: Preheat the Oven
Begin by preheating your oven to 425°F (220°C). While the oven warms up, take a baking sheet and line it with parchment paper. This will help prevent sticking and make cleanup a breeze later. A properly preheated oven ensures that your roasted butternut squash develops a beautiful golden brown exterior, adding depth to the flavors of your Butternut Apple Cranberry Sandwich.

Step 2: Prepare the Butternut Squash
Slice the butternut squash into 8 planks, about half an inch thick. Place the sliced squash in a mixing bowl and drizzle with extra-virgin olive oil. Sprinkle with minced rosemary, sea salt, and black pepper. Toss everything together until the squash is evenly coated. Arrange the squash planks on the prepared baking sheet and roast them for 17 to 20 minutes, or until they are tender and lightly caramelized.

Step 3: Make the Pickled Cabbage
While the squash roasts, grab a jar and add the shredded red cabbage. Pour in the apple cider vinegar and maple syrup; this is where the tangy kick comes from. Sprinkle a pinch of salt and shake the jar vigorously to combine. Let this mixture marinate for about 10 minutes. This quick pickling enhances the crunchiness and adds a flavorful tang to your Butternut Apple Cranberry Sandwich.

Step 4: Assemble the Sandwich
Once the butternut squash is ready, it’s time to assemble your delicious sandwich. Take a slice of hearty bread and spread a generous layer of Dijon mustard on one side. Layer on a slice of white cheddar cheese, followed by the roasted squash, thin apple slices, and the marinated cabbage. Don’t forget to sprinkle dried cranberries and a handful of arugula for extra flavor and crunch.

Step 5: Finish and Serve
Slather the other slice of bread with mayo, then press it down firmly on top of the assembled sandwich. Now it's time to enjoy the fruits of your labor! For extra warmth, consider grilling your sandwich on a skillet for a couple of minutes on each side until the bread is toasted and the cheese melts. Your Butternut Apple Cranberry Sandwich is ready to indulge in!

Butternut Apple Cranberry Sandwich Variations

Feel free to elevate and customize this delicious sandwich with these enticing variations!

  • Sweet Potato: Swap out butternut squash for roasted sweet potatoes for a different sweet profile. You'll enjoy a similar creamy texture with a subtle sweetness.

  • Crispy Sage: Add crispy fried sage leaves for an extra layer of aromatic flavor. This savory twist beautifully complements the sweetness of the squash and apples, offering a delightful crunch.

  • Cheese Upgrade: Incorporate gorgonzola or goat cheese for a tangy twist if desired. These cheeses add a luxurious creaminess that pairs perfectly with the sandwich’s autumn flavors.

  • Spicy Kick: For those who like a bit of heat, add sliced jalapeños or a spread of spicy aioli. This brings a fun contrast to the sweetness of the cranberries.

  • Nutty Crunch: Mix in some toasted walnuts or pecans to the filling for added texture. The nuttiness beautifully rounds out the flavors and adds a satisfying crunch.

  • Vegan Delight: Use vegan cheese and plant-based mayo to create a fully vegan version. You can still savor all the flavors without sacrificing taste!

  • Fruit Variations: Instead of apples, use pears for a softer, juicier bite, or go for dried cherries to intensify the sweetness. These swaps inject a fresh twist to your already delectable creation.

  • Herb Infusion: Swap fresh arugula for spinach or add fresh basil to the mix for a new herbal note. This simple change can refresh the entire sandwich, bringing bright flavors that sing alongside the other ingredients.

Feel free to mix and match these ideas or even experiment with your own twists! For more delicious inspiration, check out our Chicken Salad Apples recipe for a tasty twist on autumn flavors.

What to Serve with Autumn Butternut Apple Cranberry Sandwich

As the leaves turn and the air gets crisp, pairing your delightful sandwich with complementary sides can make for a comforting autumn feast.

  • Creamy Tomato Soup: The tangy flavors of tomato soup balance the sweetness of the sandwich, creating a classic pairing perfect for fall.
  • Harvest Salad: A mix of mixed greens, roasted nuts, and pumpkin seeds offers crunch and freshness, rounding out the meal beautifully.
  • Sweet Potato Fries: Their crispy texture and natural sweetness harmonize with the earthy squash and the tartness of cranberries.
  • Roasted Brussels Sprouts: Seasoned with balsamic glaze, they add a delicious depth and an extra layer of seasonal flavor to your table.
  • Mulled Cider: Warming and fragrant, this spiced drink complements the cozy flavors of the sandwich, enhancing your autumn experience.
  • Apple Crisp: For dessert, this warm, spiced treat echoes the apple in your sandwich and creates a delightful ending to the meal.
  • Maple-infused Carrots: Their sweet and savory notes tie in with the maple syrup in the pickled cabbage, making for a cohesive dish.
  • Pumpkin Ale: This seasonal brew adds a festive touch, echoing the flavors of fall and perfectly pairing with the richness of the sandwich.
  • Savory Quinoa Bowl: Packed with roasted vegetables and a drizzle of tahini, it adds protein and a different texture to your meal.
  • Ginger Tea: A soothing finish, its warmth and spice elevate the flavors and create a comforting end to your autumn-inspired lunch.

Tips for the Best Sandwich

  • Squash Selection: Choose a thick-necked butternut squash for easier slicing; this ensures uniform planks that roast evenly for your Butternut Apple Cranberry Sandwich.

  • Crispy Bread: Opt for crusty, hearty bread to hold all your delicious fillings without falling apart. This adds a satisfying texture to each bite.

  • Prep Ahead: Roast the butternut squash and prepare the pickled cabbage a day in advance. This not only saves time but allows the flavors to deepen, enhancing your sandwich experience.

  • Layer Wisely: When assembling, place the cheese next to the mustard and the pickled cabbage on top to create a flavor barrier, preventing soggy bread.

  • Toast for Warmth: For an extra touch, grill your assembled sandwich on a skillet for a few minutes to achieve a warm, melty perfection that elevates the Butternut Apple Cranberry Sandwich.

  • Keep it Fresh: If you're making this for a picnic or lunch, store all the components separately to maintain their freshness, then assemble just before eating.

Make Ahead Options

These Butternut Apple Cranberry Sandwiches are perfect for busy home cooks looking to save time during the week! You can prepare the roasted butternut squash and pickled cabbage up to 3 days in advance. Simply roast the squash and store it in an airtight container in the refrigerator. As for the pickled cabbage, allow it to marinate and refrigerate as well to intensify the flavors. When you're ready to enjoy your sandwich, layer the ingredients—sliced bread, cheese, squash, apples, marinated cabbage, cranberries, and arugula—just before serving to keep everything fresh and crunchy. This way, you’ll have a delicious meal ready to go with minimal effort!

How to Store and Freeze Butternut Apple Cranberry Sandwich

Fridge: Store leftovers in an airtight container for up to 3 days, keeping the sandwich fresh and the flavors delicious.

Freezer: You can freeze the roasted butternut squash separately for up to 2 months; just thaw and reheat before assembling your sandwich.

Reheating: For a delightful crunch, reheat the sandwich in a skillet over medium heat for about 3-4 minutes on each side until warmed through and the cheese is melted.

Prep Ahead: The squash and pickled cabbage can be prepped and stored in the fridge for up to a week, making the Butternut Apple Cranberry Sandwich a quick meal option during busy days.

Butternut Apple Cranberry Sandwich Recipe FAQs

Which butternut squash should I use?
Absolutely! Choose a thick-necked butternut squash for easier slicing into planks. This ensures uniform pieces that roast evenly, enhancing the flavor of your Butternut Apple Cranberry Sandwich.

How should I store the sandwich?
For optimal freshness, store any leftover sandwich in an airtight container in the fridge for up to 3 days. If you're planning to enjoy it later, consider keeping the components separate until you're ready to assemble to avoid sogginess.

Can I freeze components of the sandwich?
Yes, you can freeze the roasted butternut squash separately for up to 2 months. To freeze, let the squash cool completely, then transfer it to a freezer-safe container. When you're ready to enjoy your sandwich, simply thaw the squash in the fridge overnight and reheat it before assembling.

What if my sandwich gets soggy?
No worries! If your sandwich is soggy, it's likely due to moisture from the pickled cabbage or apples. To avoid this, layer the cheese next to the mustard and place the marinated cabbage on top when assembling. This creates a moisture barrier, keeping your bread crisp and delightful!

Is this recipe suitable for vegetarians?
Very! The Butternut Apple Cranberry Sandwich is fully vegetarian, packed with wholesome ingredients. If you have specific dietary concerns, you can easily substitute the cheese with vegan options and skip the mayo for a dairy-free version.

How long can the prepared squash and cabbage be stored?
I recommend prepping the roasted butternut squash and pickled cabbage in advance; you can store them in the fridge for up to a week. This makes your Butternut Apple Cranberry Sandwich a hassle-free meal option during busy days, letting those delicious flavors meld together!

Butternut Apple Cranberry Sandwich

Butternut Apple Cranberry Sandwich: Fall's Cozy Flavor Bliss

Delve into the cozy flavors of fall with this Butternut Apple Cranberry Sandwich, featuring roasted butternut squash, crisp apples, and creamy cheddar.
Print Recipe Pin Recipe
Prep Time 20 minutes mins
Cook Time 20 minutes mins
Total Time 40 minutes mins
Servings: 2 sandwiches
Course: Snacks
Cuisine: American
Calories: 500
Ingredients Equipment Method Nutrition Notes

Ingredients
  

For the Roasted Squash
  • 1 medium Butternut Squash or pumpkin
  • 2 tablespoons Extra-Virgin Olive Oil or melted coconut oil
  • 1 teaspoon Minced Rosemary or thyme/sage
  • 1 teaspoon Sea Salt
  • 1 teaspoon Black Pepper
For the Pickled Cabbage
  • 2 cups Shredded Red Cabbage or green cabbage
  • 1/4 cup Apple Cider Vinegar or white wine vinegar
  • 2 tablespoons Maple Syrup or honey/agave syrup
For the Sandwich Assembly
  • 4 slices Sliced Bread hearty grainy or gluten-free
  • 2 tablespoons Dijon Mustard or yellow mustard
  • 4 slices White Cheddar Cheese or vegan cheese
  • 1 medium Apple thinly sliced, sweet varieties like Fuji or Gala
  • 1/2 cup Dried Cranberries or raisins
  • 1 cup Arugula or spinach
  • 2 tablespoons Mayo or Greek yogurt

Equipment

  • Oven
  • Baking Sheet
  • Mixing Bowl
  • jar

Method
 

Step-by-Step Instructions
  1. Preheat your oven to 425°F (220°C) and line a baking sheet with parchment paper.
  2. Slice the butternut squash into 8 planks and coat them with olive oil, rosemary, salt, and pepper. Roast for 17-20 minutes until tender.
  3. Combine shredded cabbage, apple cider vinegar, maple syrup, and salt in a jar. Shake and let it marinate for 10 minutes.
  4. Spread Dijon mustard on a slice of bread, layer with cheese, roasted squash, apple slices, and marinated cabbage. Top with cranberries and arugula.
  5. Spread mayo on another slice of bread and press down on the assembled sandwich. Optional: grill until toasty and cheese melts.

Nutrition

Serving: 1sandwichCalories: 500kcalCarbohydrates: 65gProtein: 12gFat: 22gSaturated Fat: 7gPolyunsaturated Fat: 2gMonounsaturated Fat: 9gCholesterol: 30mgSodium: 600mgPotassium: 600mgFiber: 8gSugar: 15gVitamin A: 1000IUVitamin C: 15mgCalcium: 250mgIron: 2mg

Notes

For best results, prepare the squash and pickled cabbage in advance. Store all components separately for optimal freshness if meal prepping.

Tried this recipe?

Let us know how it was!

Cozy Butternut Apple Cranberry Sandwich for Fall Flavor

September 11, 2025 by Grace Snow Leave a Comment

As I stood in my kitchen, the crisp aroma of autumn wafted through the air, and the vibrant colors of fall inspired my latest creation: the Butternut Apple Cranberry Sandwich. This delightful combo of roasted butternut squash, juicy apple slices, and creamy cheddar is a seasonal hug between two slices of hearty bread. One of the best things about this recipe is its ease of preparation—perfect for busy afternoons, and it makes for an ideal make-ahead lunch option. Not only does it celebrate the flavors of the season, but it also transforms simple ingredients into a comforting, flavorful feast. Are you ready to dive into this cozy fusion of tastes and textures that will make your fall lunches feel a little more special?

Why Is This Sandwich a Fall Favorite?

Unique Flavor Profile: This Butternut Apple Cranberry Sandwich is packed with mouthwatering layers of roasted squash, tangy cranberries, and creamy cheddar that celebrate autumn in every bite.

Make-Ahead Convenience: Perfect for busy weeks, prepare the butternut squash and pickled cabbage in advance for quick assembly.

Versatile Ingredients: Swap ingredients as needed! Not a fan of cheddar? Use your favorite vegan cheese or even a tangy goat cheese to personalize your sandwich.

Filling and Satisfying: With a blend of veggies and fruits, it’s a rich, hearty meal that offers much more than your typical lunch, ensuring you stay full and happy.

Hearty and Wholesome: This recipe celebrates the comfort of homemade meals, ideal for chilly days when you crave warm, nourishing flavors. Need something lighter on the side? Pair it with a vibrant salad, like this delicious Chicken Salad with Apples, to round out your lunch!

Butternut Apple Cranberry Sandwich Ingredients

• These essentials will bring your sandwich to life!

For the Squash

  • Butternut Squash – Provides a sweet, smooth texture; substitute with pumpkin if needed.
  • Extra-Virgin Olive Oil – Ideal for drizzling over squash before roasting; melted coconut oil works as a substitute.
  • Minced Rosemary – Adds a fragrant herbal note; thyme or sage can be used in its place.
  • Sea Salt & Black Pepper – Enhances flavor; no specific substitutions needed.

For the Pickled Cabbage

  • Shredded Red Cabbage – Offers crunch and vibrant color; green cabbage can be swapped if desired.
  • Apple Cider Vinegar – Contributes tanginess to the cabbage; white wine vinegar serves as a good alternative.
  • Maple Syrup – Acts as a sweetener for the cabbage pickle; honey or agave syrup can be used as well.

For the Sandwich Assembly

  • Sliced Bread – The sturdy base of the sandwich; opt for hearty grainy bread or gluten-free if preferred.
  • Dijon Mustard – Adds a delightful zesty flavor; yellow mustard can be substituted if you like.
  • White Cheddar Cheese – Provides creaminess and sharpness; vegan cheese is a great dairy-free alternative.
  • Apple (thinly sliced) – Adds a fresh, crisp bite; use sweet varieties like Fuji or Gala for the best flavor.
  • Dried Cranberries – Offers a sweet and chewy contrast; raisins can be used as a substitute.
  • Arugula – Adds peppery freshness to the sandwich; spinach can replace it for a milder flavor.
  • Mayo – A creamy spread that ties everything together; swap it with Greek yogurt for a healthier alternative.

Step‑by‑Step Instructions for Butternut Apple Cranberry Sandwich

Step 1: Preheat the Oven
Begin by preheating your oven to 425°F (220°C). While the oven heats, line a baking sheet with parchment paper to prevent sticking and facilitate easy cleanup. This initial step sets the scene for roasting the butternut squash, which will become the star of your Butternut Apple Cranberry Sandwich.

Step 2: Prepare the Butternut Squash
Slice the butternut squash into 8 planks, ensuring they are roughly equal in size for even cooking. Toss the planks in a mixing bowl with a drizzle of extra-virgin olive oil, minced rosemary, sea salt, and black pepper. Spread the seasoned squash on the prepared baking sheet and roast in the preheated oven for 17 to 20 minutes, until golden brown and tender, and an intoxicating aroma fills your kitchen.

Step 3: Make the Pickled Cabbage
While the squash roasts, take a jar and combine shredded red cabbage, apple cider vinegar, maple syrup, and a pinch of sea salt. Secure the lid and shake vigorously to ensure the cabbage is well-coated. Let this mixture marinate for at least 10 minutes, allowing the flavors to meld beautifully, yielding a refreshing contrast for your Butternut Apple Cranberry Sandwich.

Step 4: Assemble the Sandwich
Once the squash is roasted and the cabbage has marinated, it's time to build your sandwich. Spread a layer of Dijon mustard on one slice of hearty bread. Next, layer on a slice of white cheddar cheese, followed by thin apple slices, the roasted butternut squash, marinated cabbage, a sprinkle of dried cranberries, and a handful of arugula—this delicious combination brings together autumn's finest flavors.

Step 5: Complete Your Sandwich
To finish your Butternut Apple Cranberry Sandwich, generously slather the second slice of bread with creamy mayo, then gently press it down onto the layered ingredients. This step not only seals the flavors inside but also adds a rich, smooth texture that complements the crunchiness of the veggies and the softness of the cheese.

Step 6: Serve and Savor
Carefully slice the sandwich in half to showcase the colorful layers and serve immediately. For an extra cozy experience, consider warming the sandwich in a skillet for a couple of minutes on each side until the bread is toasty and the cheese starts to melt. Pair your creation with a side salad or soup for a complete, heartwarming meal.

What to Serve with Autumn Butternut Apple Cranberry Sandwich

Elevate your cozy meal experience with these delightful side dishes that complement the flavors of fall.

  • Mixed Green Salad: A light salad with fresh greens and a tangy vinaigrette adds a refreshing contrast to the rich sandwich.

  • Sweet Potato Fries: Crispy, sweet potato fries bring a comforting bite and pair beautifully with the sandwich’s roasted flavors.

  • Pumpkin Soup: A warm, creamy pumpkin soup enhances the autumn experience, providing a smooth and velvety spoonful alongside your meal.

  • Apple Crisp: Delight in the sweetness of homemade apple crisp for dessert, where warm spices and tender apples perfectly mirror the sandwich’s apple slices.

  • Hot Apple Cider: A cozy beverage choice that offers a sweet, spiced warmth, wonderfully complementing the sandwich and enhancing the autumnal theme.

  • Roasted Brussels Sprouts: Crispy Brussels sprouts with a hint of balsamic glaze provide earthy flavors and a delightful crunch that contrast beautifully with the sandwich's textures.

Make Ahead Options

Preparing the Butternut Apple Cranberry Sandwich is a breeze for busy weeknights! You can roast the butternut squash and prepare the pickled red cabbage up to 3 days in advance, storing them separately in airtight containers in the refrigerator to maintain their freshness and prevent the squash from becoming soggy. When you're ready to enjoy your sandwich, simply layer the cold roasted squash and cabbage on your bread with the remaining ingredients. For the best results, assemble the sandwich right before serving to enjoy the crisp textures and vibrant flavors just as intended. This way, you’ll have a satisfying, delicious meal ready in an instant!

Expert Tips for the Best Butternut Apple Cranberry Sandwich

  • Choose the Right Squash: Opt for a thick-necked butternut squash for easier slicing and maximum sweetness. Avoid small ones that may be harder to work with.

  • Bread Matters: Select a crusty, hearty bread that can support the sandwich’s filling. A thin or soft bread may make it soggy too quickly.

  • Make Ahead: The butternut squash and pickled cabbage can be prepared a day in advance and stored in the refrigerator, enhancing the flavors.

  • Balancing Flavors: Be mindful of the sweetness from the apples and cranberries. Adjust the amount of maple syrup in the cabbage pickle based on your taste preference.

  • Layer with Care: When assembling, layer ingredients evenly to maintain a perfect bite every time. This ensures the delicious flavors of the Butternut Apple Cranberry Sandwich shine through!

  • Warm It Up: For a toasted sandwich experience, consider grilling your sandwich on a skillet after assembly for that extra melty, cozy feeling.

Butternut Apple Cranberry Sandwich Variations

Feel free to get creative and make this delightful sandwich your own with these fun twists!

  • Sweet Potato Swap: Replace butternut squash with roasted sweet potatoes for an earthier flavor and creamy texture. You’ll be surprised at how well they complement the other ingredients.

  • Crispy Sage Addition: Add crispy fried sage leaves for a fragrant, crunchy topping that enhances the fall flavors beautifully. Each bite will burst with a delightful herbal aroma.

  • Cheese Variants: Swap white cheddar for gorgonzola or goat cheese for an added tang that contrasts beautifully with the sweetness of the apples and cranberries.

  • Spicy Kick: Toss in a few slices of jalapeño or a spread of spicy mustard to give your sandwich a little heat. This added zing pairs surprisingly well with the sweetness of the cranberries.

  • Nutty Crunch: Sprinkle some toasted walnuts or pecans in the sandwich for an extra crunch. The nuttiness elevates the overall flavor and adds another layer of texture.

  • Vegan Twist: For a plant-based option, replace cheese with your favorite vegan cheese and swap mayo with avocado spread. It's just as creamy and delicious!

  • Fruit Fusion: Try adding thinly sliced pears or figs for a different fruity vibe. This unexpected ingredient will lend your sandwich a unique sweetness.

  • Double Decker Delight: Stack it high or turn it into a pinwheel sandwich by rolling all the ingredients in a wrap for a fun, portable version. Perfect for picnics or lunch on the go!

These variations not only cater to different dietary preferences but also make it easy to play with flavors. Want a refreshing side? Pair your sandwich with this zesty Chicken Salad with Apples for a complete feast!

How to Store and Freeze Butternut Apple Cranberry Sandwich

Fridge: Store assembled sandwiches in an airtight container for up to 3 days. For best flavor, keep pickled cabbage separate until ready to eat.

Freezer: If you want to freeze, wrap the assembled sandwich tightly in plastic wrap and then place it in a freezer bag. Use within 1 month for best taste.

Reheating: To enjoy, thaw overnight in the fridge, then reheat in the oven or a skillet until warm and the cheese is melted. This helps preserve the delicious layers of the Butternut Apple Cranberry Sandwich.

Make-Ahead: Prepare roasted squash and pickled cabbage in advance and store them separately in the fridge for up to 1 week, allowing for quick assembly on busy days!

Butternut Apple Cranberry Sandwich Recipe FAQs

How do I select the best butternut squash?
Absolutely! Look for a butternut squash with a thick neck and smooth, unblemished skin. The skin should be a consistent tan color with no dark spots all over, indicating ripeness. A heavier squash suggests a sweeter flesh, making the perfect choice for your sandwich!

What is the best way to store prepared sandwiches?
Very! To keep your assembled Butternut Apple Cranberry Sandwich fresh, store it in an airtight container in the fridge for up to 3 days. For optimal flavor, I recommend keeping the pickled cabbage separate until you’re ready to eat to prevent the bread from getting soggy.

Can I freeze the sandwich?
Definitely! To freeze your sandwich, wrap it tightly in plastic wrap, then place it in a freezer bag. For the best taste, try to enjoy it within 1 month. When you're ready to indulge, thaw it overnight in the fridge, then reheat in the oven or a skillet until warm and the layers meld beautifully!

What if the butternut squash doesn't roast well?
No worries! If your squash isn’t getting golden and tender, it could be because the slices are too thick or not coated well with oil. Ensure the planks are evenly cut and well-drenched in olive oil for that lovely caramelization. If they're undercooked, give them a little longer, checking every few minutes.

Are there any dietary considerations for this sandwich?
Absolutely! This Butternut Apple Cranberry Sandwich is vegetarian, but be mindful of allergies. Always check for potential cross-contamination with nuts and dairy if you’re serving it to guests with specific dietary restrictions. For a dairy-free version, simply substitute white cheddar with your favorite vegan cheese!

How do I reheat the sandwich without making it soggy?
Very! To reheat your sandwich while keeping it crispy, place it in a skillet on medium heat. Cover it with a lid for a couple of minutes to allow the cheese to melt while crisping the bread. Flip carefully, toasting each side for a minute or two until warmed through and delightfully crispy.

Butternut Apple Cranberry Sandwich

Cozy Butternut Apple Cranberry Sandwich for Fall Flavor

Delightful Butternut Apple Cranberry Sandwich combines roasted butternut squash, juicy apples, and creamy cheddar for an easy, hearty fall meal.
Print Recipe Pin Recipe
Prep Time 20 minutes mins
Cook Time 20 minutes mins
Total Time 40 minutes mins
Servings: 2 sandwiches
Course: Snacks
Cuisine: American
Calories: 450
Ingredients Equipment Method Nutrition Notes

Ingredients
  

For the Squash
  • 1 medium Butternut Squash Substitute with pumpkin if needed.
  • 2 tablespoons Extra-Virgin Olive Oil Melted coconut oil works as a substitute.
  • 1 tablespoon Minced Rosemary Thyme or sage can be used in its place.
  • to taste Sea Salt
  • to taste Black Pepper
For the Pickled Cabbage
  • 2 cups Shredded Red Cabbage Green cabbage can be swapped if desired.
  • 1/4 cup Apple Cider Vinegar White wine vinegar serves as a good alternative.
  • 2 tablespoons Maple Syrup Honey or agave syrup can be used as well.
For the Sandwich Assembly
  • 4 slices Sliced Bread Opt for hearty grainy bread or gluten-free if preferred.
  • 2 tablespoons Dijon Mustard Yellow mustard can be substituted if you like.
  • 4 slices White Cheddar Cheese Vegan cheese is a great dairy-free alternative.
  • 1 medium Apple (thinly sliced) Use sweet varieties like Fuji or Gala for best flavor.
  • 1/4 cup Dried Cranberries Raisins can be used as a substitute.
  • 1 handful Arugula Spinach can replace it for a milder flavor.
  • 2 tablespoons Mayo Swap it with Greek yogurt for a healthier alternative.

Equipment

  • Oven
  • Baking Sheet
  • Mixing Bowl
  • Jar with Lid

Method
 

Step-by-Step Instructions
  1. Preheat your oven to 425°F (220°C) and prepare a baking sheet with parchment paper.
  2. Slice the butternut squash into 8 planks, season with olive oil, rosemary, salt, and pepper, and roast for 17 to 20 minutes.
  3. Mix shredded red cabbage, apple cider vinegar, maple syrup, and a pinch of salt in a jar, and shake to combine. Let marinate for at least 10 minutes.
  4. Spread Dijon mustard on one slice of bread, layer with cheddar, apple slices, roasted squash, marinated cabbage, dried cranberries, and arugula.
  5. Spread mayo on the second slice of bread, press together, and slice the sandwich in half before serving.
  6. Optionally, warm the sandwich in a skillet for a couple of minutes on each side before serving.

Nutrition

Serving: 1sandwichCalories: 450kcalCarbohydrates: 54gProtein: 10gFat: 22gSaturated Fat: 5gPolyunsaturated Fat: 3gMonounsaturated Fat: 12gCholesterol: 20mgSodium: 450mgPotassium: 400mgFiber: 8gSugar: 10gVitamin A: 5000IUVitamin C: 20mgCalcium: 200mgIron: 2mg

Notes

For best flavor, store pickled cabbage separately and assemble sandwiches just before serving.

Tried this recipe?

Let us know how it was!

Crispy Smoked Haddock Pakoras for a Healthy Snack Delight

September 10, 2025 by Grace Snow Leave a Comment

As I stood in my kitchen, the tantalizing aroma of spices mingled with the subtle smokiness of haddock, instantly transporting me to market streets filled with the sound of sizzling snacks. These Easy Air Fryer Smoked Haddock Pakoras are not just a delightful treat; they’re your new go-to recipe for satisfying that craving for crispy, homemade food without the guilt of deep frying. This dish is gluten-free and packed with flavor, and you can whip it up in no time, making it perfect for an impromptu gathering or a simple weeknight dinner. Paired with a zesty lemon and mint yoghurt dip, every bite offers a refreshing contrast that keeps you coming back for more. Curious about how to make this deliciously crispy delight? Let’s dive into the recipe!

Why are these pakoras a must-try?

Crispy Texture: Each pakora emerges from the air fryer with a golden-brown crust that perfectly contrasts the tender haddock inside.

Quick Preparation: With just a few straightforward steps, you can have a delicious snack ready in no time, making it ideal for busy days.

Gluten-Free Delight: Made with gram flour, these pakoras cater to gluten-free diets without sacrificing taste or texture.

Flavor Explosion: The fusion of curry powder and fresh herbs infuses each bite with vibrant flavors, complemented by the zesty lemon and mint dip.

Versatile Dish: Enjoy them as an appetizer, snack, or light meal alongside a fresh salad or as part of a mezze spread.

These Easy Air Fryer Smoked Haddock Pakoras are sure to impress at any gathering, delighting both friends and family.

Smoked Haddock Pakoras Ingredients

• Discover the essential components for your delightful smoked haddock pakoras!

For the Pakora Mixture

  • Peeled New Potatoes (1 x 567g tin) – Provides starchiness and structure; fresh or frozen potatoes work as substitutions.
  • Curry Powder (3 tsp) – Adds warmth and spice; opt for a milder curry powder if you're looking for less heat.
  • Gram Flour (5 tbsp) – The binding agent for pakoras; can be substituted with regular or chickpea flour.
  • Red Onion (1 small) – Offers sweetness and crunch; yellow onion can be an alternative, with a slight difference in flavor.
  • Fresh Green Chilli (1) – Introduces a touch of heat; omit for milder pakoras or switch to a less spicy pepper.
  • Coriander (½ bunch, 15g) – Adds a burst of freshness; parsley can be used instead for a different herbal tone.
  • Boneless Smoked Haddock (2 x 140g fillets) – The star protein that brings rich flavor; feel free to use another firm, flaky fish if needed.
  • Olive Oil – Enhances crispiness; you can also use other oils like vegetable or sunflower oil.

For the Mint Yoghurt Dip

  • Mint (½ bunch, 15g) – Complements the dip beautifully; basil can be swapped for a wonderfully unique taste.
  • Natural Yoghurt (100g) – Acts as a creamy dip base; Greek yoghurt provides a thicker consistency if preferred.
  • Lemon (1) – Adds that zesty acidity; lime can be used instead for a fresh twist.

Feel ready to create these scrumptious smoked haddock pakoras? Your air fryer is about to become your new best friend!

Step‑by‑Step Instructions for Easy Air Fryer Smoked Haddock Pakoras

Step 1: Prep and Batter
Start by draining the peeled new potatoes and mashing them in a bowl until smooth. In the same bowl, mix in the curry powder, gram flour, finely chopped red onion, minced green chili, and chopped coriander. Season generously with salt, creating a thick batter that binds together beautifully and enhances the flavor of your smoked haddock pakoras.

Step 2: Fish Preparation
Take your boneless smoked haddock fillets and slice them into bite-sized pieces. Gently fold the haddock into the prepared batter, ensuring that the pieces are well-coated but careful not to break them apart. This delicate process ensures that every bite of the smoked haddock pakoras is packed with flavor and texture.

Step 3: Pre-Heating Air Fryer
Before you shape your pakoras, preheat your air fryer to 200°C (390°F). This will ensure that your pakoras start cooking immediately when placed inside, allowing them to crisp up beautifully. Keep an eye on the temperature as preheating is crucial for achieving that perfect golden-brown crunch on your smoked haddock pakoras.

Step 4: Form Pakoras
Once the batter and haddock are perfectly mixed, scoop out small portions and shape them into fritters or balls with your hands. Aim for a size that is easy to manage in the air fryer, about the size of a golf ball. This shaping helps them cook evenly and ensures a delightful crunch around every piece of smoked haddock pakora.

Step 5: Cooking
Place the formed pakoras into the air fryer basket in a single layer, leaving space for air circulation. Lightly brush or spray them with olive oil to encourage a crispy exterior. Cook for about 12-15 minutes, shaking the basket halfway through to ensure even cooking. Look for a golden brown color on the outside to signal that your smoked haddock pakoras are ready.

Step 6: Prepare Dip
While your pakoras are air frying, prepare the refreshing mint yoghurt dip. In a bowl, combine 100g of natural yoghurt with the chopped mint and a squeeze of fresh lemon juice. Stir well to blend the flavors together, creating a creamy and zesty accompaniment that complements the smoked haddock pakoras perfectly.

Step 7: Serve
Once the pakoras are golden and crispy, carefully remove them from the air fryer and place them on a serving platter. Serve hot alongside the mint yoghurt dip for a delightful snack or light meal. The contrast of textures and flavors will surely make your Easy Air Fryer Smoked Haddock Pakoras a favorite at any gathering!

Make Ahead Options

These Easy Air Fryer Smoked Haddock Pakoras are perfect for meal prep enthusiasts! You can prepare the batter mixture (without the haddock) up to 24 hours in advance, storing it in an airtight container in the refrigerator to maintain freshness. The diced smoked haddock can also be prepped a day in advance and kept refrigerated separately. When you're ready to serve, gently fold the haddock into the batter, shape the pakoras, and air fry them as directed. This way, you'll enjoy crispy, homemade pakoras with minimal effort on busy weeknights, ensuring they are just as delicious as if you made them fresh!

Expert Tips for Smoked Haddock Pakoras

  • Cooking Temperature: Air fryers can vary; always check for doneness at the 10-minute mark to avoid burning.

  • Batter Consistency: Ensure your batter is thick enough to hold the fish without being too wet; this prevents sogginess in your pakoras.

  • Space Them Out: Avoid overcrowding the air fryer basket, as this allows hot air to circulate evenly, ensuring your pakoras crisp up beautifully.

  • Serve Fresh: For the best texture, serve your smoked haddock pakoras immediately after cooking; they can get soggy if left too long.

  • Vegetable Boost: Consider mixing in diced vegetables for added nutrition and flavor, creating a spin on the classic smoked haddock pakoras.

Smoked Haddock Pakoras Variations to Try

Feel free to explore these exciting twists that can take your smoked haddock pakoras to the next level!

  • Vegetable-Loaded: Add finely diced vegetables like carrots or spinach to the batter for added nutrition and color. Each bite will burst with freshness and flavor, making the pakoras even more delightful.

  • Different Fish: Experiment with other flaky fish such as cod or pollock if haddock isn't available. Each fish offers a unique flavor profile, giving you the freedom to switch things up!

  • Crispy Coating: For extra crunch, coat the pakoras in breadcrumbs before air frying. This simple twist can elevate the texture, making them even more satisfying.

  • Spicy Kick: Increase the heat by adding more chopped green chillies or a splash of your favorite hot sauce into the dip. Spice lovers will appreciate this fiery upgrade!

  • Herbal Infusion: Experiment with different herbs, like dill or chives, instead of mint in your yoghurt dip. The change will create a fresh twist that complements the smoky fish beautifully.

  • Nutty Taste: For an added depth of flavor, mix in a tablespoon of toasted sesame oil into the batter. This subtle nutty flavor can bring an exciting new layer to your pakoras!

  • Zesty Citrus: Swap out lemon for lime in the dip for a bright, tropical twist that pairs wonderfully with the smoked haddock. A little zest goes a long way!

  • Baked Version: If you're looking for a lighter option, bake the pakoras in the oven instead of using an air fryer. Toss them with a bit of olive oil and bake until golden for a healthier alternative.

These variations offer something for everyone, ensuring your smoked haddock pakoras become a beloved family favorite! If you're looking for more fish-inspired ideas, don't forget to check out my crispy air fryer fish recipes for more delicious inspiration!

How to Store and Freeze Smoked Haddock Pakoras

Fridge: Store leftover pakoras in an airtight container for up to 2 days. Ensure they are cooled completely before sealing to maintain their crispy texture.

Freezer: For longer storage, freeze the pakoras on a baking sheet until solid, then transfer to a freezer bag. They will keep well for up to 3 months.

Reheating: To restore crispiness, reheat frozen pakoras in the air fryer at 180°C (350°F) for about 8-10 minutes, or until heated through.

Prepping Ahead: If making ahead of time, you can prepare the batter and freeze it separately, then shape and cook right before serving for fresh, delicious smoked haddock pakoras.

What to Serve with Easy Air Fryer Smoked Haddock Pakoras

There's nothing like a meal that dances on your taste buds, and enhancing your pakoras with the right sides can create a delightful dining experience.

  • Crispy Green Salad: A refreshing salad with mixed greens and a citrus vinaigrette balances the richness of the pakoras, adding a crisp texture to your meal. Toss in some avocado slices for creaminess!
  • Steamed Basmati Rice: Fluffy rice serves as a perfect base, soaking up the flavors of the pakoras while providing a comforting texture. It's a light and wholesome pairing you'll love.
  • Mint Chutney: Intensify the flavors with a spicy mint chutney for dipping. This fresh condiment amplifies the herbs in your dish, enhancing each crunchy bite with vibrant zest.
  • Roasted Vegetables: Sweet, caramelized roasted veggies like bell peppers and zucchini provide a colorful contrast to the pakoras, making the meal more wholesome and nutritious.
  • Coconut Rice: The mild sweetness of coconut rice complements the savory flavors of the pakoras, creating a delightful, tropical escape on your plate. Add a sprinkle of toasted coconut for texture!
  • Lemonade or Iced Tea: Quench your thirst with a refreshing glass of lemonade or iced tea. The acidity and brightness of these drinks cut through the richness, making every mouthful more enjoyable.
  • Tzatziki Sauce: Swap your dip for a creamy tzatziki sauce; its yogurt base and cucumber notes provide a cooling effect that beautifully contrasts the spicy pakoras.
  • Fruit Chaat: A tangy fruit chaat adds a playful element, with its vibrant spices and zesty flavors complementing the savory bites of the pakoras. Each spoonful is a refreshing twist!

Easy Air Fryer Smoked Haddock Pakoras Recipe FAQs

What type of potatoes should I use for the pakoras?
I recommend using peeled new potatoes as they provide a great texture and structure. If you prefer, you can substitute them with fresh or frozen potatoes, depending on what you have on hand!

How should I store leftover smoked haddock pakoras?
Store your leftover pakoras in an airtight container in the fridge for up to 2 days. Be sure to let them cool completely before sealing the container to keep them as crispy as possible.

Can I freeze the pakoras? How do I do it?
Absolutely! First, place the cooked pakoras on a baking sheet in a single layer to freeze until solid. Then, transfer them to a freezer bag or an airtight container. They can be frozen for up to 3 months. When you're ready to enjoy them, reheat in the air fryer at 180°C (350°F) for about 8-10 minutes or until heated through for that perfect crunch.

What if my pakora batter is too wet?
If you notice your batter is too wet, simply add a little more gram flour until it reaches a thicker consistency. Aim for a texture that holds together without being runny; this will help deliver that delightful crispiness when cooked.

Are these pakoras suitable for those with allergies?
These smoked haddock pakoras are gluten-free since they use gram flour instead of wheat flour. However, always double-check your ingredients to ensure they don't contain allergens specific to your dietary needs, especially considering the fish and any additional ingredients you may choose to include in the dip.

Can I make the pakora batter ahead of time?
Yes, you can prepare the batter ahead and keep it in the fridge for a few hours. To maintain freshness and flavor, cook the pakoras right before serving; this way, they'll stay crispy and delicious!

Smoked haddock pakoras

Crispy Smoked Haddock Pakoras for a Healthy Snack Delight

These Smoked Haddock Pakoras are a gluten-free snack explosion of flavor with a crispy texture.
Print Recipe Pin Recipe
Prep Time 15 minutes mins
Cook Time 15 minutes mins
Total Time 30 minutes mins
Servings: 4 pakoras
Course: Snacks
Cuisine: Indian
Calories: 200
Ingredients Equipment Method Nutrition Notes

Ingredients
  

For the Pakora Mixture
  • 1 tin Peeled New Potatoes 567g; fresh or frozen work as substitutions
  • 3 tsp Curry Powder opt for a milder variety if less heat is desired
  • 5 tbsp Gram Flour can be substituted with regular or chickpea flour
  • 1 small Red Onion yellow onion can be an alternative
  • 1 Fresh Green Chilli omit for milder pakoras
  • ½ bunch Coriander 15g; parsley can be used instead
  • 2 fillets Boneless Smoked Haddock 140g each; can substitute with another firm fish
  • Olive Oil for brushing; other oils can be used
For the Mint Yoghurt Dip
  • ½ bunch Mint 15g; basil can be swapped
  • 100 g Natural Yoghurt Greek yoghurt for thicker consistency
  • 1 Lemon lime can be used as an alternative

Equipment

  • Air fryer

Method
 

Step-by-Step Instructions
  1. Start by draining the peeled new potatoes and mashing them in a bowl until smooth. In the same bowl, mix in the curry powder, gram flour, finely chopped red onion, minced green chili, and chopped coriander. Season generously with salt.
  2. Take your boneless smoked haddock fillets and slice them into bite-sized pieces. Gently fold the haddock into the prepared batter, ensuring that the pieces are well-coated.
  3. Preheat your air fryer to 200°C (390°F). This will ensure that your pakoras start cooking immediately.
  4. Scoop out small portions of the batter-haddock mixture and shape them into fritters or balls, about the size of a golf ball.
  5. Place the formed pakoras into the air fryer basket in a single layer. Lightly brush or spray them with olive oil and cook for about 12-15 minutes, shaking halfway through.
  6. While your pakoras are air frying, prepare the mint yoghurt dip by combining natural yoghurt, chopped mint, and a squeeze of lemon juice in a bowl.
  7. Once the pakoras are golden and crispy, carefully remove them and serve hot alongside the mint yoghurt dip.

Nutrition

Serving: 3pakorasCalories: 200kcalCarbohydrates: 30gProtein: 10gFat: 5gSaturated Fat: 1gPolyunsaturated Fat: 1gMonounsaturated Fat: 3gCholesterol: 40mgSodium: 300mgPotassium: 500mgFiber: 3gSugar: 2gVitamin A: 100IUVitamin C: 5mgCalcium: 50mgIron: 1mg

Notes

Serve immediately for the best texture as the pakoras can get soggy if left for too long.

Tried this recipe?

Let us know how it was!

Crispy Sweet Potato Rosti with zesty Summer Salad Delight

September 10, 2025 by Grace Snow Leave a Comment

As I was tossing some vibrant summer salad ingredients together, the thought of crispy Sweet Potato Rosti popped into my mind—a dish that perfectly complements sunny days. With its delightful crunch and fluffy interior, this rosti is an easy recipe that not only satisfies cravings but also ensures you hit your 5-a-day. Packed with nutrients and a dash of natural sweetness, it’s the ideal choice for a quick, healthy meal. Plus, its gluten-free and vegetarian-friendly nature makes it a hit with diverse dietary preferences. Imagine gathering your loved ones around the table to enjoy this colorful feast—how can you resist? Want to learn how to make this delicious dish? Let’s dive in!

Why is Sweet Potato Rosti a Must-Try?

Crispy Texture: The outside of the rosti has a satisfying crunch, while the inside remains fluffy and tender, giving it a delightful contrast.
Healthy Ingredients: Packed with nutrient-rich sweet potatoes, your taste buds and body will thank you.
Quick Prep: This recipe comes together swiftly, making it perfect for busy lunch or dinner ideas.
Versatile Side: Pair it with the Quick Summer Salad or even some crispy Roasted Sweet Potatoes for a delightful meal.
Crowd-Pleaser: Whether you’re hosting a family gathering or a casual dinner, this dish is sure to impress everyone!
Dietary-Friendly: Gluten-free and vegetarian, making it an ideal choice for various dietary needs.

Sweet Potato Rosti Ingredients

  • For the Rosti

  • Sweet Potatoes – Provides the base and natural sweetness; swap with regular potatoes for a different flavor.

  • Large Free-range Egg – Binds the ingredients together; any egg can substitute if needed.

  • Self-Raising Gluten-Free Flour – Ensures a light, fluffy texture; can be replaced with regular flour for those not avoiding gluten.

  • Mixed Seeds – Adds a nutty crunch and nutrition; feel free to use your favorite nuts or seeds instead.

  • Mature Cheddar Cheese – Delivers rich flavor; opt for a dairy-free cheese for a vegan option.

  • Extra Virgin Olive Oil – Used for frying to achieve that perfect crisp; any cooking oil works well too.

  • For the Salad

  • Red Wine Vinegar – Offers a tangy kick to the salad; apple cider vinegar works as a great substitute.

  • Cucumber – Adds freshness and a lovely crunch; you can substitute with other salad vegetables.

  • Little Gem Lettuce – Provides crispy, refreshing bites; use any leafy greens you prefer.

  • Cottage Cheese – Introduces creaminess and protein; Greek yogurt is a great alternative if you're looking for a swap.

  • Chili Sauce (Optional) – Adds a spicy kick; leave it out for a milder dish, or use sriracha for extra heat.

This Sweet Potato Rosti not only brings delightful flavors to your table, but also caters beautifully to your dietary preferences with its gluten-free and vegetarian credentials!

Step‑by‑Step Instructions for Sweet Potato Rosti

Step 1: Prep Sweet Potatoes
Begin by peeling 2 large sweet potatoes, ensuring you remove all skin. Next, grate the sweet potatoes using a box grater or food processor, aiming for fine shreds. This will create a tender texture in your Sweet Potato Rosti. Set the grated sweet potatoes aside in a bowl, allowing them to release excess moisture while you prepare the mixture.

Step 2: Combine Ingredients
In a mixing bowl, add the grated sweet potatoes, 1 large free-range egg, and ½ cup of self-raising gluten-free flour. Stir in ¼ cup of mixed seeds and ½ cup of grated mature cheddar cheese. Mix everything until combined; look for a sticky and cohesive texture. This will ensure that your Sweet Potato Rosti holds together beautifully during frying.

Step 3: Fry the Rosti
Heat 2 tablespoons of extra virgin olive oil in a non-stick frying pan over medium-low heat. Once the oil is shimmering, shape the potato mixture into patties, about 2–3 inches in diameter. Carefully place 2-3 patties in the pan, ensuring there’s enough space for them to fry without overcrowding. Cook for 3–4 minutes until golden and crisp on the underside.

Step 4: Melt Cheese
After flipping the patties, sprinkle extra grated cheddar cheese on top of each one. Continue to cook for another 2 minutes, allowing the cheese to melt beautifully and create a savory layer on your rosti. At this point, you should see a lovely golden color on both sides—this is when the Sweet Potato Rosti is at its best!

Step 5: Prepare Salad
While the last batch of rostis cooks, prepare a fresh salad by tossing together chopped little gem lettuce, diced cucumber, and ½ cup of cottage cheese. Drizzle everything with 1 tablespoon of red wine vinegar and a touch of salt. This bright summer salad will perfectly complement the flavors of your crispy Sweet Potato Rosti.

Step 6: Serve
Once the rostis are crispy and the cheese has melted, carefully transfer them onto plates. Serve the golden Sweet Potato Rosti alongside a generous portion of the vibrant salad. Enjoy this delightful meal as a light yet satisfying dinner or lunch, showcasing the delicious contrast of textures and flavors.

What to Serve with Crispy Sweet Potato Rosti?

Elevate your dining experience with complementing dishes that enhance the delightful crunch of your rosti.

  • Creamy Avocado Dip: Rich and smooth, it adds a creamy texture that pairs beautifully with the crispy rosti.
  • Zesty Lemon Quinoa: Light and refreshing, this nutty grain dish provides a wholesome balance to the sweetness of the sweet potato.
  • Roasted Asparagus: The savory, slightly charred flavor offers a perfect contrast to the rosti's sweetness and adds a lovely crunch.
  • Grilled Halloumi Slices: Salty and chewy, grilled halloumi brings richness and a robust taste that matches the rosti perfectly.
  • Crisp White Wine: A chilled Chardonnay or Sauvignon Blanc beautifully complements the dish, cleansing your palate with every sip.
  • Berry Salad: A bright mix of berries with a honey-lime dressing adds a sweet and tangy freshness, rounding out the meal.
  • Lemon Garlic Hummus: This vibrant dip is perfect for spreading on your rosti, adding creamy, garlicky goodness with every bite.
  • Chocolate Mousse: A silky dessert can be a delightful surprise, creating a satisfying sweet end to your meal.
  • Spicy Tomato Salsa: Adding a zesty kick, this fresh salsa enhances both the rosti and salad while inviting more texture and flavor.
  • Coconut Chia Pudding: A light yet creamy dessert option that complements the meal's vibrant summer theme and satiates your sweet tooth.

Expert Tips for Sweet Potato Rosti

  • Hot Pan Matter: Ensure your frying pan is hot enough before adding the patties to achieve that perfect crispy texture.
  • Space It Out: Avoid overcrowding the pan, which can lead to steaming rather than frying your sweet potato rosti.
  • Make Ahead Magic: For an easy meal prep, batch-cook the rostis and freeze them. Simply reheat in a hot oven for a quick serving.
  • Grating Technique: Use a box grater for fine shreds of sweet potatoes; this helps create a delicate and tender rosti that holds together well.
  • Customize Ingredients: Don’t hesitate to mix and match seeds, cheeses, or veggies based on your preference—this makes the dish more personal and delightful!

Make Ahead Options

These flavorful Sweet Potato Rosti are perfect for meal prep, allowing you to save time during your busy weeknights! You can prepare the grated sweet potatoes, combine them with the egg, flour, seeds, and cheese, and refrigerate the mixture up to 24 hours in advance. To ensure freshness and prevent browning, store it in an airtight container. When you’re ready to enjoy your meal, simply shape the mixture into patties and fry them as directed. Alternatively, you can make the rostis and freeze them for up to 3 months; just reheat in a hot oven for a quick, delicious dinner that tastes just as amazing as when freshly made!

How to Store and Freeze Sweet Potato Rosti

  • Room Temperature: Store cooked Sweet Potato Rosti at room temperature for up to 2 hours after cooking. If left out longer, it's best to refrigerate or freeze to ensure food safety.
  • Fridge: Keep the rostis in an airtight container in the fridge for up to 3 days. Reheat in the oven for 10-15 minutes at 350°F (175°C) for crispy results.
  • Freezer: Freeze uncooked or cooked rostis by wrapping them individually in plastic wrap or parchment paper, then transfer to a freezer bag. They can last up to 2 months.
  • Reheating: For best results, reheat from frozen in a preheated oven at 400°F (200°C) for about 20-25 minutes, or until heated through and crispy again.

Sweet Potato Rosti Variations

Feel free to make this delicious Sweet Potato Rosti your own with these easy and enticing variations!

  • Regular Potatoes: Swap sweet potatoes for regular potatoes for a classic twist or try zucchini for a lighter version.
    Enjoy every bite with a different taste experience. These options enhance versatility while maintaining that delightful rosti base.

  • Spicy Kick: Incorporate spices like cumin or smoked paprika into the mixture for an added flavor dimension.
    This little change can awaken your taste buds, transforming each rosti into a flavor fiesta that excites your palate.

  • Cheese Alternatives: Use a dairy-free cheese for a vegan twist or other cheese varieties like feta for distinct flavor notes.
    Incorporating different cheeses can elevate the richness of your rosti while catering to diverse preferences.

  • Seed Swaps: Replace mixed seeds with your favorite nuts or seeds for different textures and nutritional benefits.
    Experimenting with various nuts adds an interesting crunch and can make each rosti feel like a new creation.

  • Roasted Veggies: Toss in some finely chopped roasted vegetables into the rosti mixture for added flavors and textures.
    This twist combines the savory taste of rostis with the lovely sweetness of seasonal veggies, making every bite a surprise.

  • Vegan Option: Use flax eggs instead of traditional eggs to make this dish entirely plant-based while maintaining its binding quality.
    A simple yet effective swap that ensures everyone can enjoy this delicious rosti, regardless of dietary preference.

  • Tangy Salad Swap: Experiment by using lemon juice instead of red wine vinegar in the salad for a fresh and zesty taste.
    This minor alteration brightens the entire plate, perfectly balancing the hearty flavors of the rosti with refreshing notes.

Add your own flair to this dish with these variations, and don’t hesitate to mix and match until you find your family’s favorite version! If you're looking for more ideas, you might want to check out my recipe for Giant Veg Rösti, which is another delightful way to enjoy the goodness of potatoes.

Sweet Potato Rosti with a Quick Summer Salad Recipe FAQs

What type of sweet potatoes should I use for the rosti?
Absolutely! Look for firm sweet potatoes with smooth skin. Avoid those with dark spots or wrinkles, as they might be overly ripe. If you prefer, you can also use regular potatoes for a different flavor profile.

How long can I store cooked Sweet Potato Rosti in the fridge?
You can keep your cooked Sweet Potato Rosti in an airtight container in the fridge for up to 3 days. When you're ready to enjoy them again, just reheat in the oven at 350°F (175°C) for about 10-15 minutes to bring back that crispy texture!

Can I freeze Sweet Potato Rosti?
Yes, you can! For freezing, I recommend wrapping the uncooked or cooked rostis individually in plastic wrap or parchment paper, then placing them in a freezer bag. They will stay delicious for up to 2 months. When ready to eat, simply reheat from frozen in a preheated oven at 400°F (200°C) for about 20-25 minutes until heated through and crisp again.

What if my rosti mixture feels too wet?
If your mixture seems too wet, don't worry! You can add a little more gluten-free flour, about a tablespoon at a time, until it reaches a sticky but manageable consistency. It’s also helpful to let the grated sweet potatoes drain a bit, absorbing some moisture, making the frying process easier.

Is this recipe suitable for those with allergies?
Good question! The Sweet Potato Rosti is naturally gluten-free when using gluten-free flour, but always double-check your flour brand for any cross-contamination. If anyone in your household has allergies to eggs or dairy, I often suggest using a flax egg as an egg substitute and opting for dairy-free cheese or yogurt to ensure everyone can enjoy this delightful dish!

How can I make Sweet Potato Rosti more flavorful?
The more the merrier, indeed! Consider adding spices such as cumin or smoked paprika to the potato mixture for added flavor. You can also try mixing in chopped herbs like parsley or chives, giving your rosti an extra zing!

Sweet potato rosti

Crispy Sweet Potato Rosti with zesty Summer Salad Delight

This Sweet Potato Rosti recipe is a must-try for its crispy texture and healthy ingredients, perfect for a vibrant summer meal.
Print Recipe Pin Recipe
Prep Time 15 minutes mins
Cook Time 15 minutes mins
Total Time 30 minutes mins
Servings: 4 patties
Course: Snacks
Cuisine: Vegetarian
Calories: 240
Ingredients Equipment Method Nutrition Notes

Ingredients
  

For the Rosti
  • 2 large Sweet Potatoes Provides the base and natural sweetness; swap with regular potatoes for a different flavor.
  • 1 large Free-range Egg Binds the ingredients together; any egg can substitute if needed.
  • ½ cup Self-Raising Gluten-Free Flour Ensures a light, fluffy texture; can be replaced with regular flour for those not avoiding gluten.
  • ¼ cup Mixed Seeds Adds a nutty crunch and nutrition; feel free to use your favorite nuts or seeds instead.
  • ½ cup Grated Mature Cheddar Cheese Delivers rich flavor; opt for a dairy-free cheese for a vegan option.
  • 2 tablespoons Extra Virgin Olive Oil Used for frying to achieve that perfect crisp; any cooking oil works well too.
For the Salad
  • 1 tablespoon Red Wine Vinegar Offers a tangy kick to the salad; apple cider vinegar works as a great substitute.
  • 1 medium Cucumber Adds freshness and a lovely crunch; you can substitute with other salad vegetables.
  • 2 cups Little Gem Lettuce Provides crispy, refreshing bites; use any leafy greens you prefer.
  • ½ cup Cottage Cheese Introduces creaminess and protein; Greek yogurt is a great alternative if you're looking for a swap.
  • to taste Chili Sauce (Optional) Adds a spicy kick; leave it out for a milder dish, or use sriracha for extra heat.

Equipment

  • frying pan
  • Box grater
  • Mixing Bowl
  • Food Processor

Method
 

Step‑by‑Step Instructions for Sweet Potato Rosti
  1. Begin by peeling the sweet potatoes, ensuring you remove all skin. Next, grate the sweet potatoes using a box grater or food processor, aiming for fine shreds. Set aside to release excess moisture.
  2. In a mixing bowl, add the grated sweet potatoes, egg, flour, mixed seeds, and grated cheese. Mix everything until combined for a sticky texture.
  3. Heat the olive oil in a non-stick frying pan over medium-low heat. Shape the mixture into patties, then fry 2-3 patties for 3-4 minutes until golden and crisp.
  4. After flipping, sprinkle extra cheese on top and cook for another 2 minutes until the cheese melts and creates a savory layer.
  5. Prepare the salad by tossing lettuce, cucumber, and cottage cheese together, drizzling with vinegar and salt to taste.
  6. Serve the crispy rostis alongside the vibrant salad and enjoy this delightful meal.

Nutrition

Serving: 1pattyCalories: 240kcalCarbohydrates: 32gProtein: 8gFat: 10gSaturated Fat: 3gPolyunsaturated Fat: 4gMonounsaturated Fat: 2gCholesterol: 75mgSodium: 300mgPotassium: 500mgFiber: 4gSugar: 4gVitamin A: 900IUVitamin C: 20mgCalcium: 200mgIron: 1.5mg

Notes

Ensure your frying pan is hot enough before adding the patties to achieve a perfect crispy texture. Avoid overcrowding the pan to prevent steaming.

Tried this recipe?

Let us know how it was!
  • « Previous Page
  • 1
  • …
  • 20
  • 21
  • 22
  • 23
  • 24
  • 25
  • Next Page »

Welcome!

Hi, I’m Grace, a Sydney-based home cook with a passion for bold flavors and trending ingredients. Whether you’re a busy beginner or a seasoned foodie, you’ll find dishes here that are fresh, fun, and full of flavor.

More about me

Popular Recipes

  • Honey Lime Chicken & Avocado Rice Bowl
    Honey Lime Chicken & Avocado Rice Bowl for a Flavor Burst
  • Tasty Italian Pasta Salad
    Delight in this Easy Tasty Italian Pasta Salad for Summer Fun
  • Garlic Butter Chicken Pasta
    Garlic Butter Chicken Pasta That’ll Wow Your Family Tonight
  • Creamy, Spicy Chicken Pasta
    Creamy, Spicy Chicken Pasta with Fresh Summer Veggies

Footer

↑ back to top

About

  • Privacy Policy
  • Disclaimer
  • Terms & Conditions

Newsletter

  • Sign Up! for emails and updates

Contact

  • About me
  • Contact me

Copyright © 2025 TastyTrendIngredients