tastytrendingredients

  • Home
  • Recipes
    • Appetizers
    • Breakfast
    • Dessert
    • Dinner
    • Drinks
    • Salads
    • Snacks
    • Soups
  • About me
  • Contact
menu icon
go to homepage
  • Home
  • Recipes
    • Appetizers
    • Breakfast
    • Dessert
    • Dinner
    • Drinks
    • Salads
    • Snacks
    • Soups
  • About me
  • Contact
search icon
Homepage link
  • Home
  • Recipes
    • Appetizers
    • Breakfast
    • Dessert
    • Dinner
    • Drinks
    • Salads
    • Snacks
    • Soups
  • About me
  • Contact
×

Easy Stuffed Dates to Wow Your Taste Buds Instantly

September 6, 2025 by Grace Snow Leave a Comment

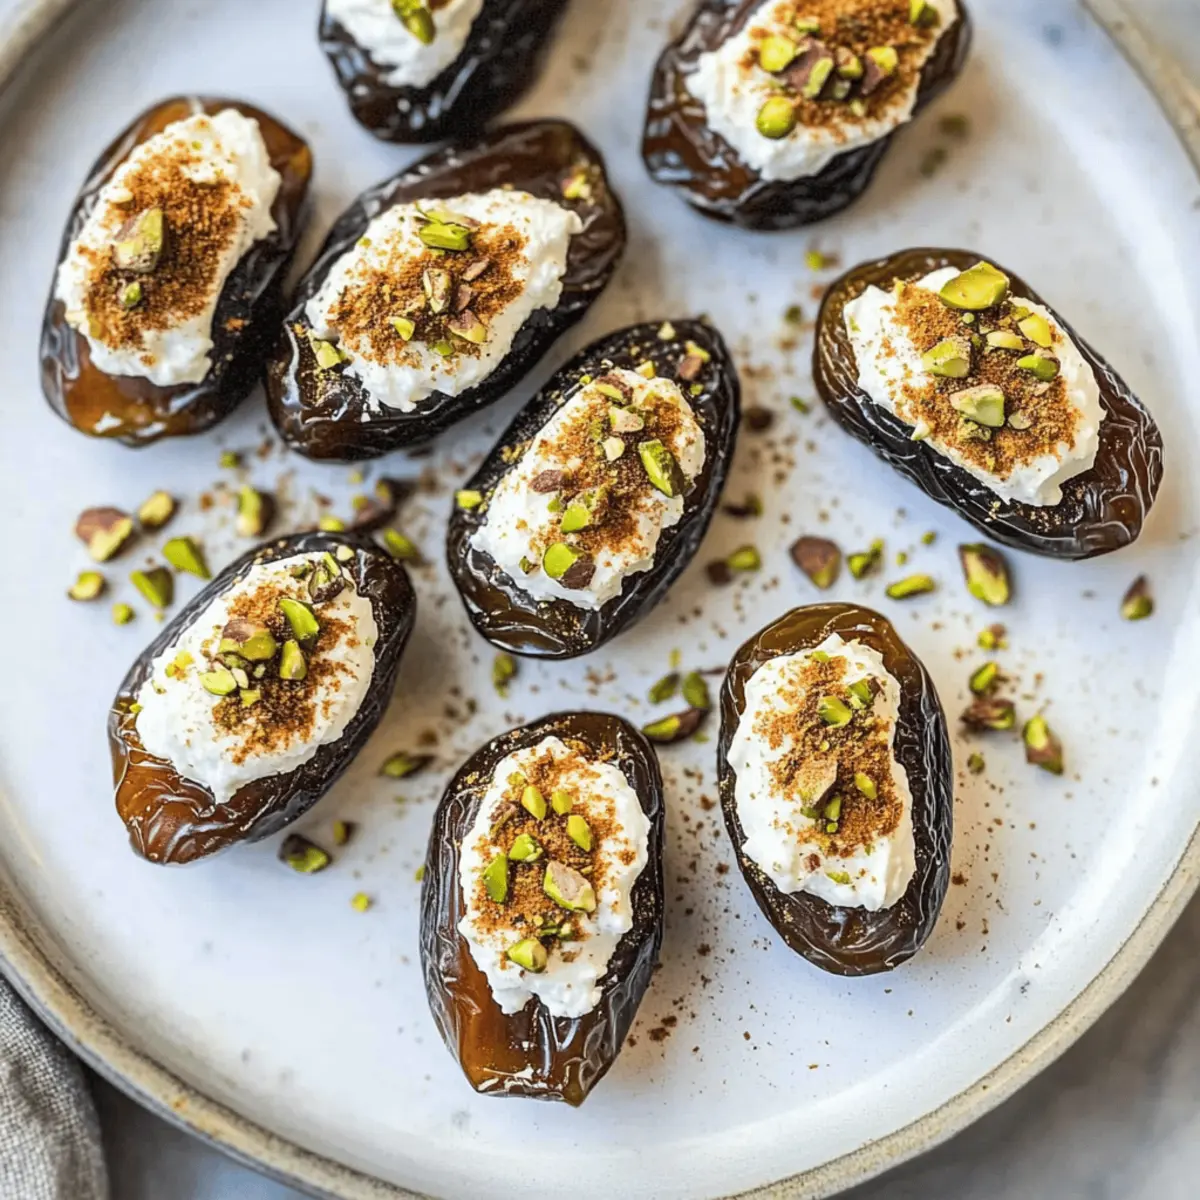
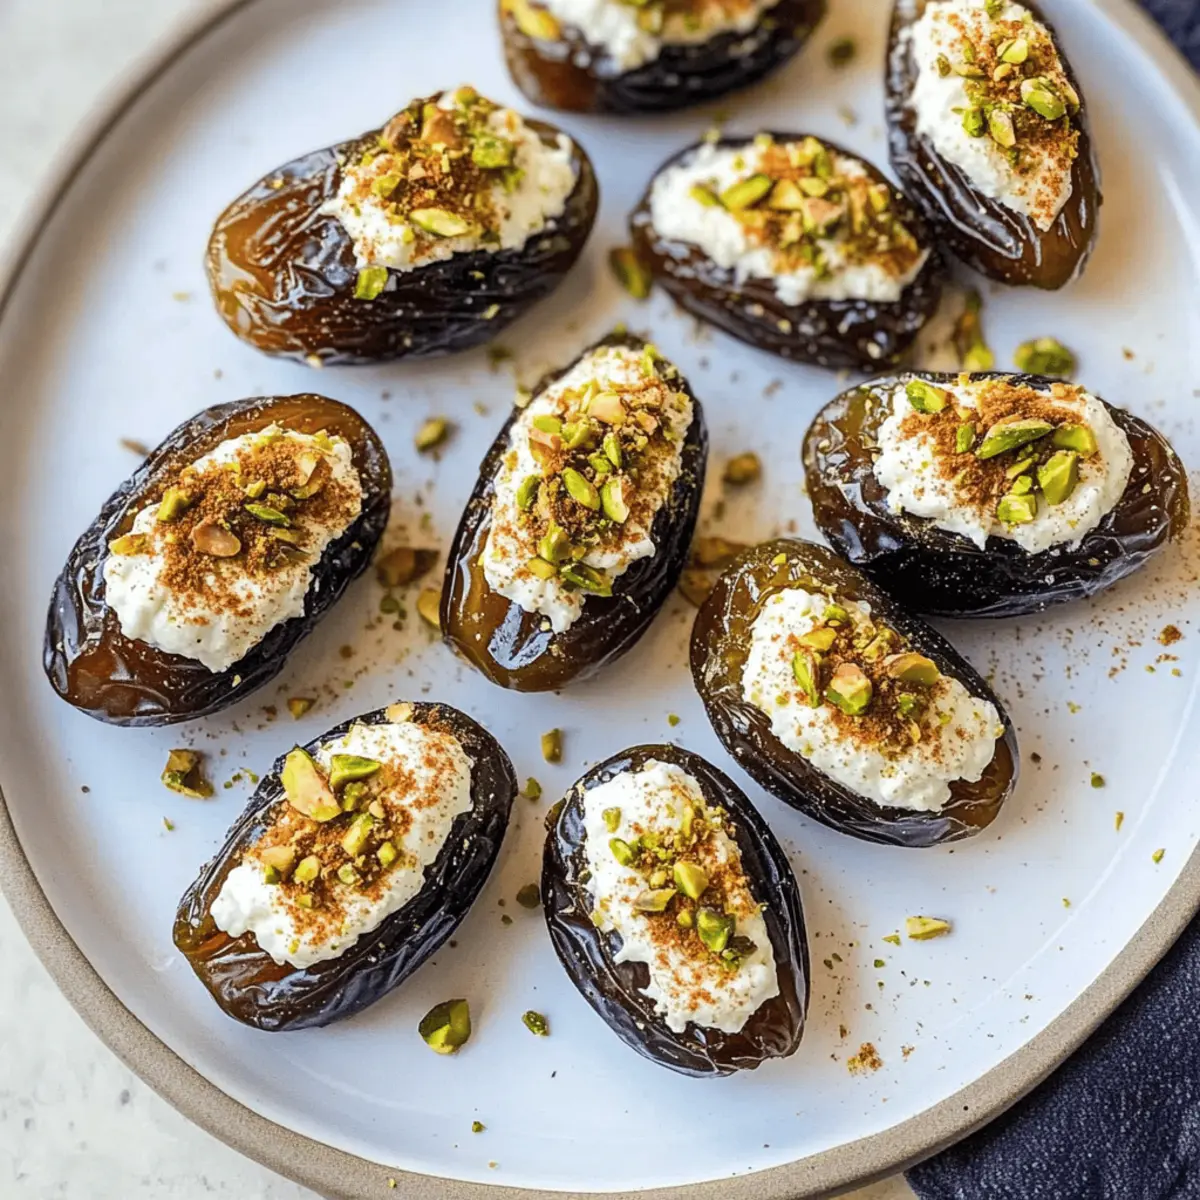
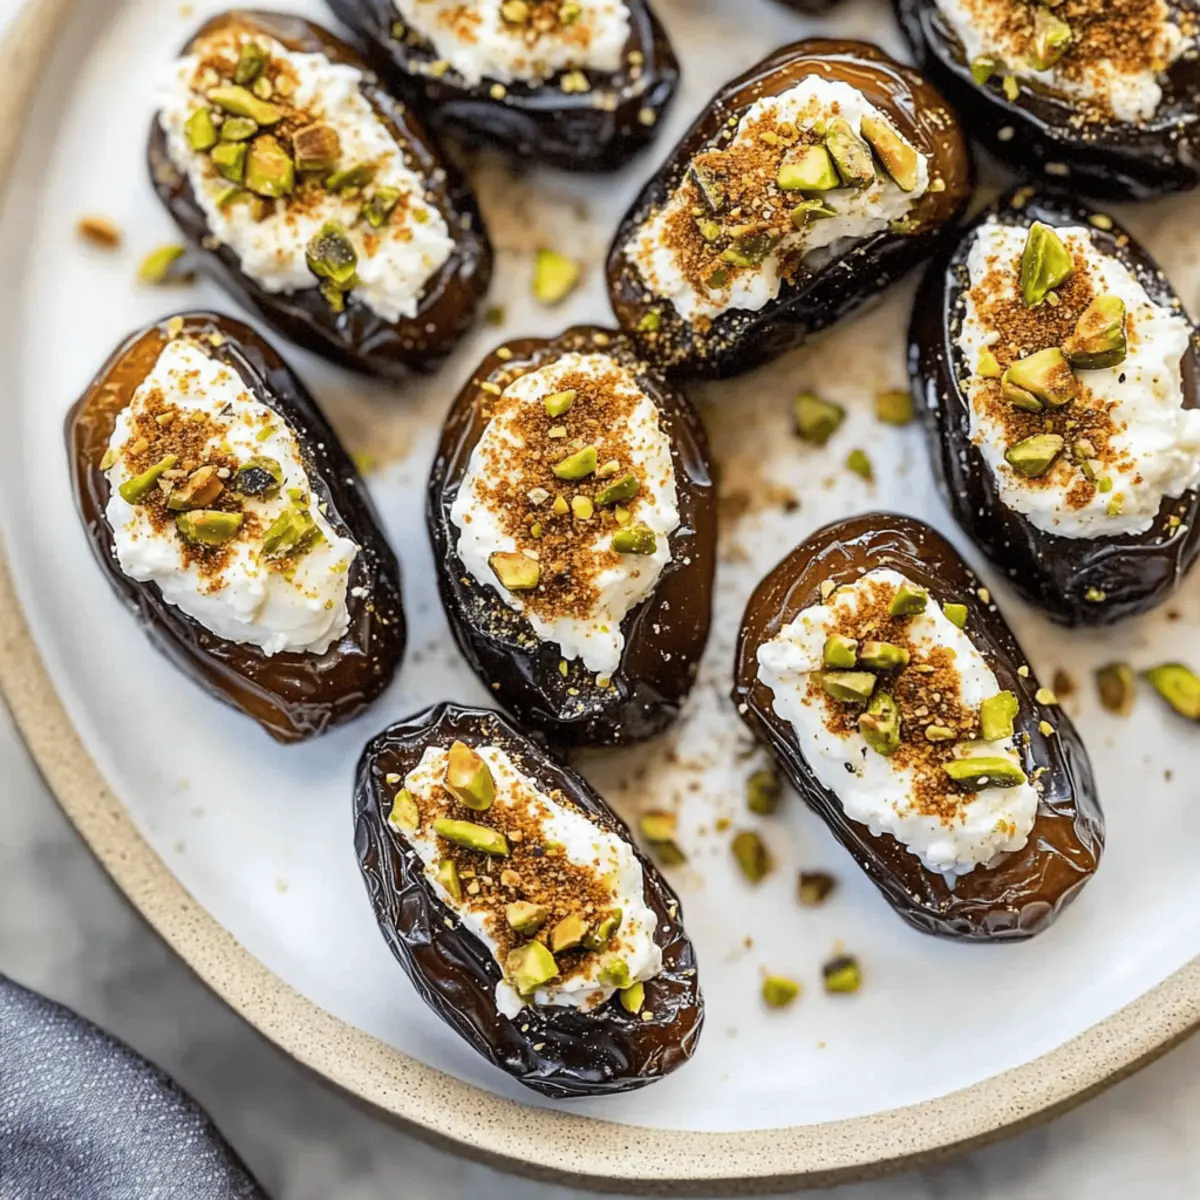
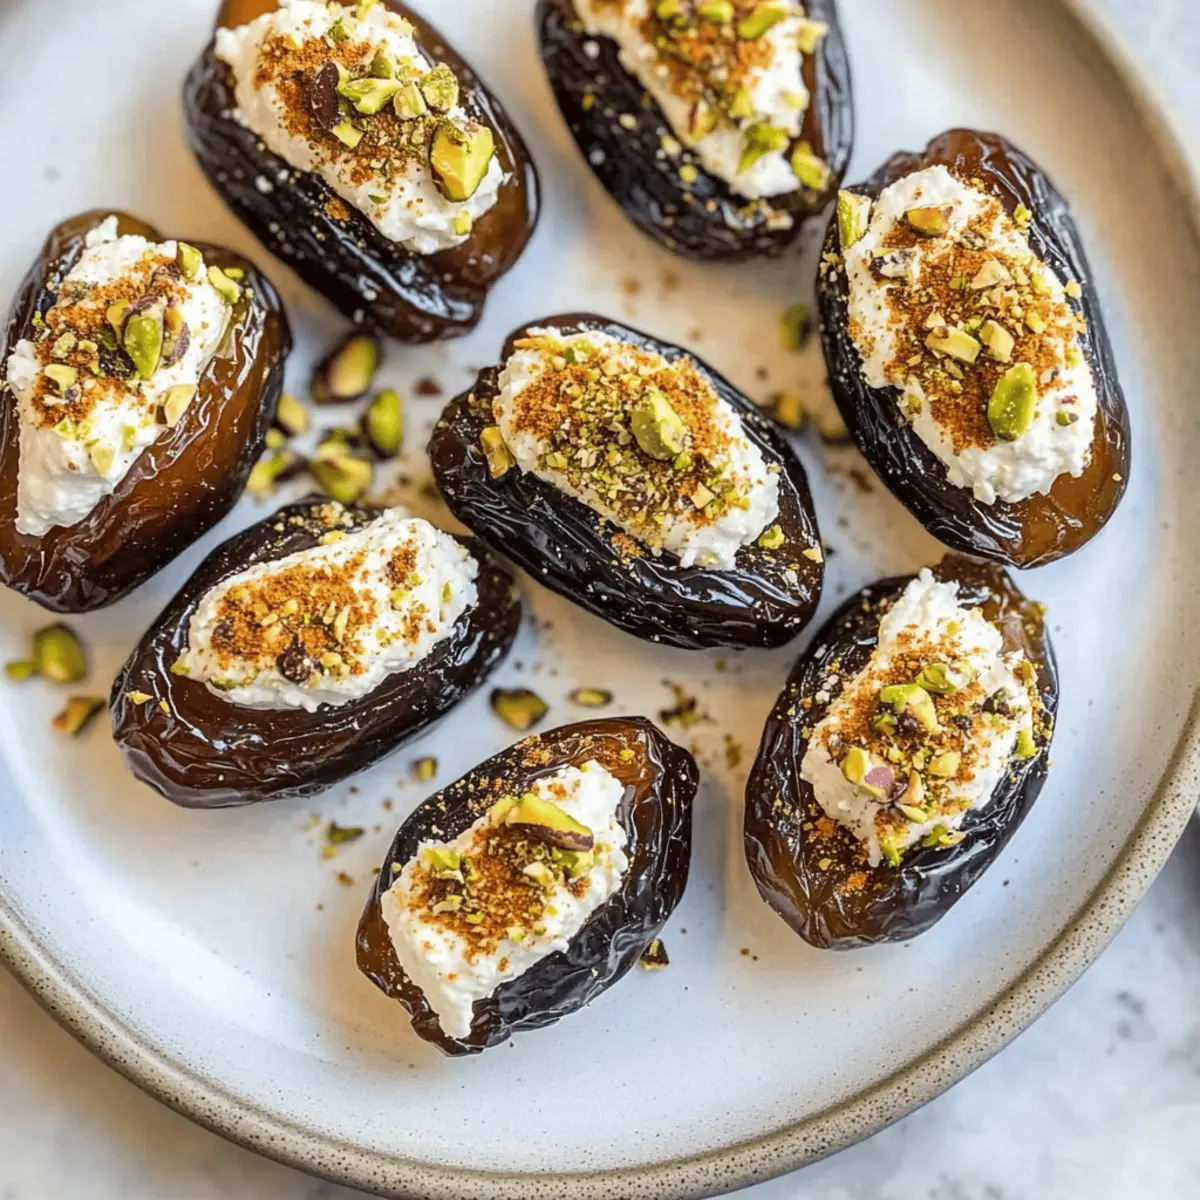
Have you ever found yourself in a pinch for a crowd-pleasing appetizer? These easy stuffed dates are about to become your new go-to! Imagine the wonderful combination of sweet Medjool dates filled with creamy goat cheese, then topped with a sprinkle of crunchy pistachios and a hint of smoked paprika. Not only do these delightful bites require no cooking, making them a breeze to whip up, but they also make for an impressive dish that will have your guests raving. Perfect for parties or a cozy night in, these quick bites can even be tweaked for vegan diets by swapping in your favorite nut butter. Are you ready to elevate your snacking game? Let's dive into this delicious recipe!

Why Are These Stuffed Dates a Must-Try?

Convenience at Its Finest: Just a few minutes are all you need to create this show-stopping appetizer without turning on the oven.

Irresistibly Delicious: The sweet Medjool dates combined with tangy goat cheese and a crunchy topping offer a flavor experience that’s both surprising and memorable.

Vegan-Friendly Options: Easily adaptable, these easy stuffed dates can be switched up with nut butters, making them suitable for various dietary preferences.

Perfect for Any Occasion: Whether it's a fancy soirée or a casual get-together, these dates fit right in. Pair them with a charcuterie spread or serve alongside Breakfast Egg Muffins for a complete experience.

Crowd-Pleasing Appeal: Your guests won’t be able to resist coming back for seconds—these sweet-savory bites are bound to be a hit!

Easy Stuffed Dates Ingredients

For the Dates
• Medjool Dates – These provide the sweet and chewy base; for a vegan option, try using large dried figs or prunes.

For the Filling
• Goat Cheese – The tangy, creamy star of the show; swap for nut butter like almond or cashew for a delicious dairy-free delight.

For the Topping
• Pistachios – Adds a delightful crunch; feel free to replace them with crushed walnuts or omit entirely for a nut-free variant.
• Smoked Paprika – A pinch of this spice adds depth and warmth; in a pinch, chili powder can work as a substitute.

Enjoy these easy stuffed dates as a comforting appetizer at your next gathering!

Step‑by‑Step Instructions for Easy Stuffed Dates

Step 1: Prep Dates
Start by carefully pitting each Medjool date to create a small opening for stuffing. Use a sharp knife to gently slice along one side of the date, being cautious not to cut all the way through. This should take about 10 minutes for 12 dates. Once done, lay the prepared dates out on a clean cutting board for easy filling.

Step 2: Fill Dates
Scoop out room temperature goat cheese with a small spoon and gently fill each date to the brim. If the goat cheese is too firm, use your fingers to mash and soften it until it's pliable. This step should take about 5-7 minutes. Make sure the cheese is evenly distributed for that perfect creamy bite in your easy stuffed dates.

Step 3: Top
Sprinkle crushed pistachios and a dash of smoked paprika on top of each filled date for added flavor and crunch. Use about 1 tablespoon of pistachios for all dates, distributing them evenly. This topping not only enhances the visual appeal but also provides a wonderful texture contrast to the sweetness of the dates. Aim to complete this topping step in approximately 5 minutes.

Step 4: Serve
Carefully arrange your easy stuffed dates on a serving platter, spacing them apart for an inviting presentation. This no-cook appetizer can be served immediately or chilled for a short while in the refrigerator to enhance their flavors. If chilling, allow them to sit at room temperature for a few minutes before serving so they are perfectly bite-worthy.

Expert Tips for Easy Stuffed Dates

• Room Temperature Cheese: Ensure goat cheese is at room temperature for smoother filling, making the process much easier and mess-free.

• Storage Smart: If preparing ahead, keep stuffed dates in an airtight container in the fridge. Allow them to come to room temperature before serving to avoid hard dates.

• Check for Sugar Crystals: The white powder appearing on Medjool dates is natural sugar crystallization, not mold. Don't worry about it!

• Nut-Free Options: If you're serving guests with nut allergies, simply omit the pistachios and enjoy the creamy goodness of the goat cheese in these easy stuffed dates.

• Customize Your Flavors: Have fun with variations! Add herbs like basil or mint into the cheese filling for a fresh twist that elevates your appetizer.

Easy Stuffed Dates Variations and Substitutions

Feel free to explore different twists and turns on this delicious dish—your tastebuds will thank you!

  • Vegan Option: Replace goat cheese with nut butter, like almond or cashew, for a creamy, dairy-free delight.

  • Herby Delight: Mix fresh basil or mint into the nut butter or cheese filling for a refreshing flavor burst that elevates each bite.

  • Nut-Free Choice: Skip the pistachios entirely to keep it nut-free; consider using sunflower seeds for a similar crunch.

  • Sweet Upgrade: Drizzle a touch of honey or maple syrup over the top before serving for an added layer of sweetness that complements the dates beautifully.

  • Spicy Kick: Add a dash of cayenne pepper to the filling for those who crave a little heat mixed with the sweet.

  • Texture Twist: Swap the crushed pistachios for crispy fried onions for a fun and unexpected topping that adds a savory crunch.

  • Alternative Fruits: Experiment with figs or prunes instead of dates for a different sweet base; each brings its unique flavor profile to the dish.

  • Choco-Lover’s Treat: For dessert lovers, consider stuffing the dates with a blend of melted dark chocolate and nut butter, creating a rich and decadent treat.

These delightful variations can add even more sparkle to your gatherings, ensuring everyone finds a version they love. And if you're looking for more inspiration, don't hesitate to check out Herby Ricotta Stuffed Peppers for another tasty twist or explore the savory depths of Spatchcock Chicken Flavor for your next culinary adventure! Enjoy your creative cooking!

What to Serve with Easy Stuffed Dates

Elevate your gathering by complementing these creamy, sweet bites with delightful additions that promise to tantalize the palate.

  • Creamy Hummus: A smooth and rich spread that balances the sweetness of the dates while adding a savory touch. Its hearty texture invites dipping and sharing, making it an instant crowd favorite.

  • Charcuterie Board: Create a vibrant platter featuring cheeses, cured meats, and seasonal fruits to enhance the variety of flavors. The contrasting textures and taste profiles will bring out the best in your stuffed dates.

  • Crispy Garlic Bread: Bake slices of baguette tossed in olive oil and garlic for a crunchy side. Its bold flavor will beautifully offset the sweetness in the dates, creating a delightful textural experience.

  • Fresh Arugula Salad: Toss arugula with a light lemon vinaigrette for a peppery, fresh counterpart. The greens will provide a refreshing bite that cleanses the palate between sweet flavors.

  • Nutty Rice Pilaf: A warm side of rice pilaf with nuts adds a hearty, earthy flavor that complements the richness of the goat cheese. This combination creates a balance of comfort and intrigue.

  • Fragrant White Wine: Offer a chilled glass of Sauvignon Blanc or a light Pinot Grigio to enhance the sweet-savory experience of the stuffed dates. The wine’s crispness will refresh your guests' taste buds.

  • Decadent Chocolate Fondue: For a sweet ending, serve with a pot of melted chocolate. Dipping fruits or pretzels into the chocolate creates a fun, interactive dessert that will surely wow your guests.

  • Zesty Lemon Sorbet: A light and refreshing palate cleanser that brightens up your meal. Its citrus notes harmonize beautifully with the sweet medjool dates, leaving taste buds tingling.

  • Roasted Vegetable Skewers: Skewers featuring seasonal veggies add a smoky flavor that pairs perfectly with the sweet dates. This side not only looks appealing but also brings color and nutrition to the table.

Storage Tips for Easy Stuffed Dates

Fridge: Store any leftover stuffed dates in an airtight container in the fridge for up to 3 days. Allow them to return to room temperature before serving for the best flavor and texture.

Make-Ahead: These easy stuffed dates can be prepared a day in advance. Just keep them in the refrigerator and bring them to room temperature for optimal taste before serving.

Freezer: For longer storage, freeze the stuffed dates on a baking sheet, then transfer to an airtight container. They can be frozen for up to a month. Thaw overnight in the fridge before enjoying.

Reheating: If you've stored them in the freezer, allow the easy stuffed dates to come to room temperature after thawing. Enjoy them cold, as reheating may alter their texture.

Make Ahead Options

These easy stuffed dates are perfect for meal prep enthusiasts! You can pit the Medjool dates and fill them with goat cheese or your chosen nut butter up to 24 hours in advance. To maintain their delightful flavor and texture, store the stuffed dates in an airtight container in the refrigerator. When you're ready to serve, simply allow them to sit at room temperature for about 15 minutes to soften and enhance their taste. Adding the crushed pistachios and smoked paprika should be done just before serving to keep the topping fresh and crunchy. This way, you’ll not only save time on busy days but also ensure your appetizer is just as delicious and impressive!

Easy Stuffed Dates Recipe FAQs

What type of dates are best for this recipe?
For the best results, I recommend using Medjool dates. They are plump, sweet, and chewy, making them the perfect base for stuffing. If you're looking for a vegan option, large dried figs or prunes can also work splendidly, providing a similar texture and sweetness.

How should I store leftover stuffed dates?
Absolutely! Store any unused easy stuffed dates in an airtight container in the refrigerator for up to 3 days. To enjoy the best flavor and texture, allow them to come to room temperature before serving. If you're making them in advance, they can be prepared a day ahead and stored in the fridge without loss of quality.

Can I freeze stuffed dates? If so, how?
Yes, you can freeze them! To freeze easy stuffed dates, first lay them out on a baking sheet in a single layer and pop them in the freezer until they're firm—about 2 hours. Then, transfer them to an airtight container or a freezer bag. They can be frozen for up to 3 months. When you're ready to enjoy, thaw them overnight in the fridge and let them come to room temperature before serving.

What can I do if my goat cheese is too hard?
No worries there! If you find your goat cheese is a bit on the hard side, simply take it out of the fridge and let it sit at room temperature for 20-30 minutes. If you're in a pinch and need it to soften quicker, you can use a microwave. Warm it up in 5-second intervals while stirring until it's soft and spreadable. This will make filling the dates much easier!

Are there any dietary concerns I should consider?
Yes, if you have guests with nut allergies, feel free to omit the pistachios and enjoy the creamy goat cheese by itself. For a completely nut-free version, swap in a sunflower seed butter for the filling. Always check labels for allergens, especially if using processed ingredients to ensure everyone can enjoy these delicious easy stuffed dates!

Can I customize the filling for these dates?
Very much so! Personalize your easy stuffed dates by adding herbs like finely chopped basil or mint into the cheese before stuffing. You can also mix in a dash of honey for a sweeter tone or even use different nut butters for a unique flavor twist. The more the merrier in experimenting with flavors!

Easy Stuffed Dates

Easy Stuffed Dates to Wow Your Taste Buds Instantly

These easy stuffed dates are a crowd-pleasing appetizer, combining sweet Medjool dates, creamy goat cheese, and crunchy toppings.
Print Recipe Pin Recipe
Prep Time 10 minutes mins
Total Time 10 minutes mins
Servings: 6 dates
Course: Snacks
Cuisine: American
Calories: 90
Ingredients Equipment Method Nutrition Notes

Ingredients
  

For the Dates
  • 12 Medjool Dates For vegan, substitute with large dried figs or prunes.
For the Filling
  • 4 oz Goat Cheese Swap for almond or cashew nut butter for a vegan option.
For the Topping
  • 1 tbsp Pistachios Can be replaced with crushed walnuts or omitted for nut-free.
  • 1 tsp Smoked Paprika Chili powder can be used as a substitute.

Equipment

  • Sharp Knife
  • Spoon
  • Cutting Board
  • Serving Platter

Method
 

Step-by-Step Instructions for Easy Stuffed Dates
  1. Start by carefully pitting each Medjool date to create a small opening for stuffing. Use a sharp knife to gently slice along one side of the date, being cautious not to cut all the way through. This should take about 10 minutes for 12 dates. Once done, lay the prepared dates out on a clean cutting board for easy filling.
  2. Scoop out room temperature goat cheese with a small spoon and gently fill each date to the brim. If the goat cheese is too firm, use your fingers to mash and soften it until it's pliable. This step should take about 5-7 minutes. Make sure the cheese is evenly distributed for that perfect creamy bite in your easy stuffed dates.
  3. Sprinkle crushed pistachios and a dash of smoked paprika on top of each filled date for added flavor and crunch. Use about 1 tablespoon of pistachios for all dates, distributing them evenly. This topping not only enhances the visual appeal but also provides a wonderful texture contrast to the sweetness of the dates. Aim to complete this topping step in approximately 5 minutes.
  4. Carefully arrange your easy stuffed dates on a serving platter, spacing them apart for an inviting presentation. This no-cook appetizer can be served immediately or chilled for a short while in the refrigerator to enhance their flavors. If chilling, allow them to sit at room temperature for a few minutes before serving so they are perfectly bite-worthy.

Nutrition

Serving: 1dateCalories: 90kcalCarbohydrates: 12gProtein: 2gFat: 4gSaturated Fat: 2gPolyunsaturated Fat: 0.5gMonounsaturated Fat: 1.5gCholesterol: 10mgSodium: 60mgPotassium: 120mgFiber: 1gSugar: 7gVitamin A: 200IUCalcium: 100mgIron: 0.5mg

Notes

Ensure goat cheese is at room temperature for easier filling and storage in an airtight container in the fridge for up to 3 days.

Tried this recipe?

Let us know how it was!

Irresistible Spiced Nuts Recipe for Your Next Gathering

September 6, 2025 by Grace Snow Leave a Comment

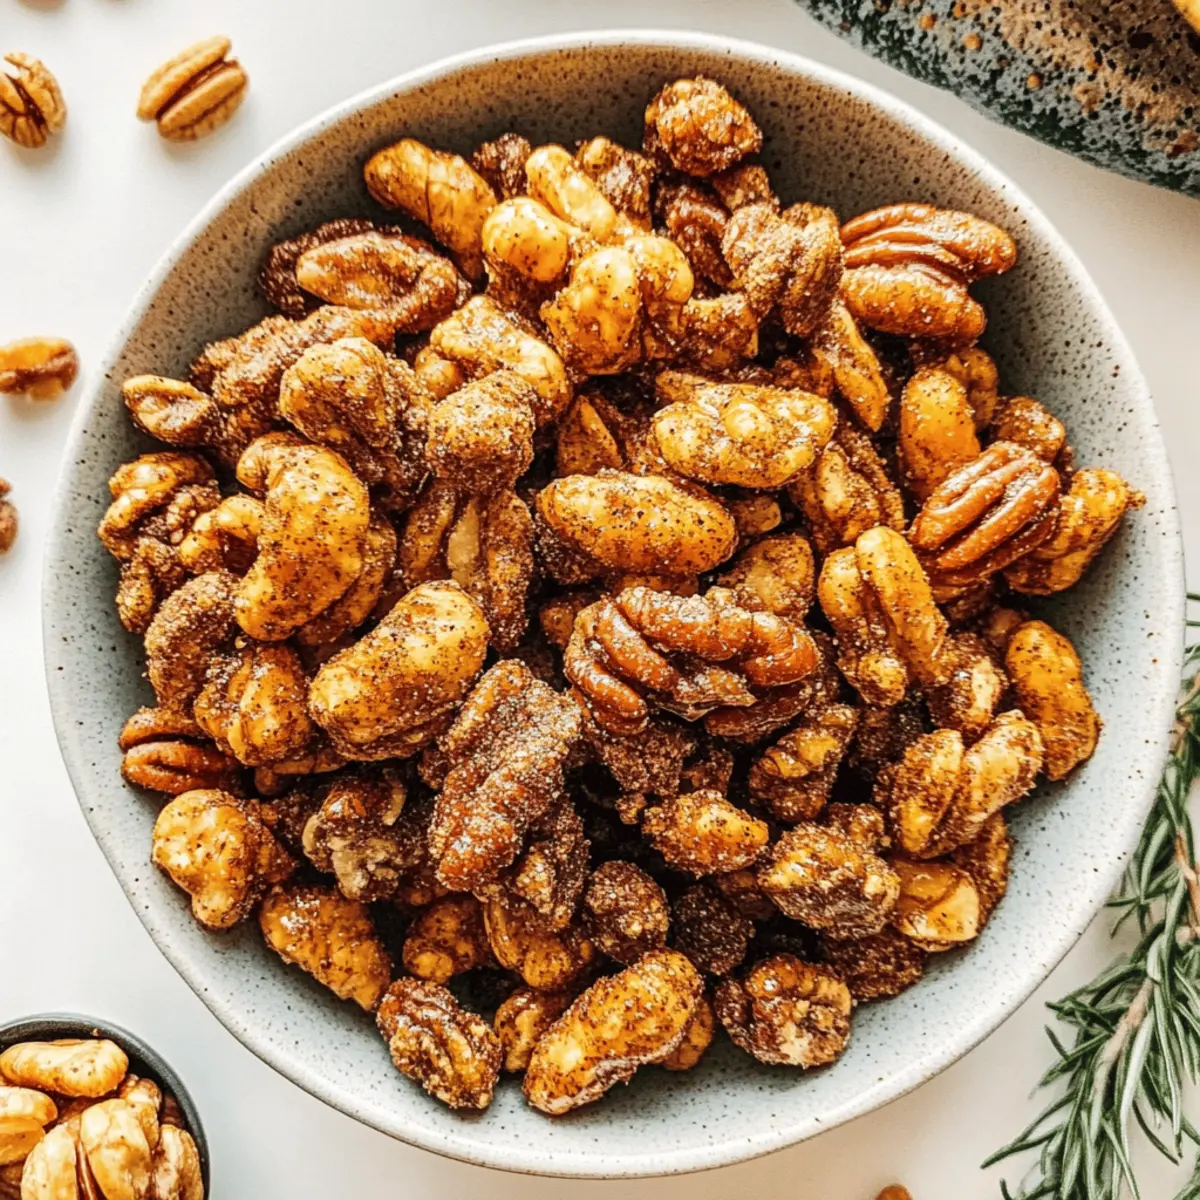
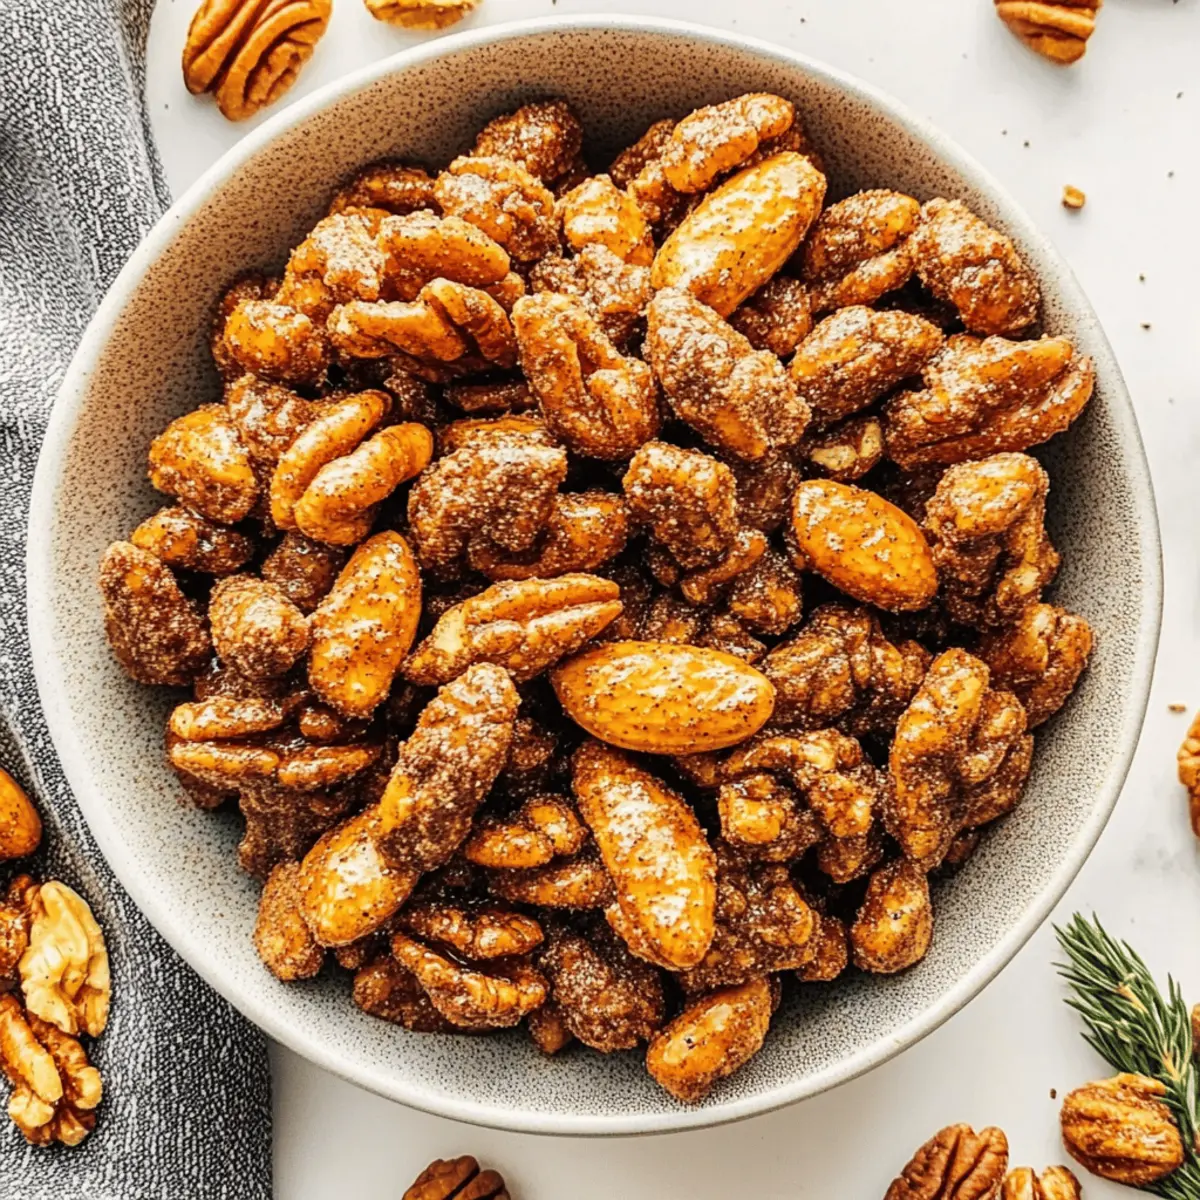
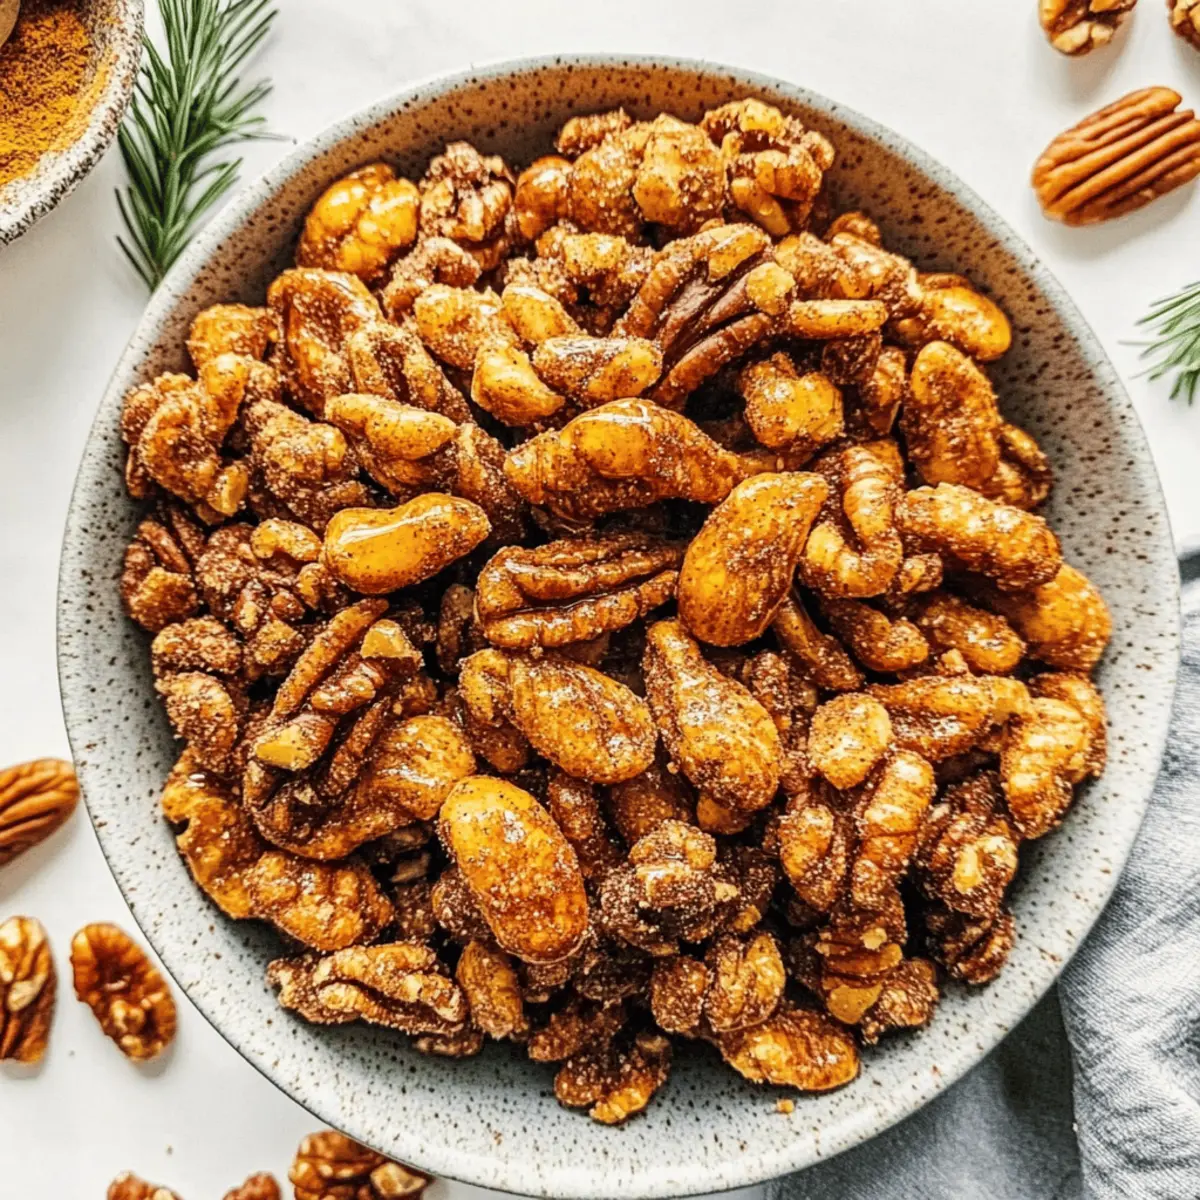
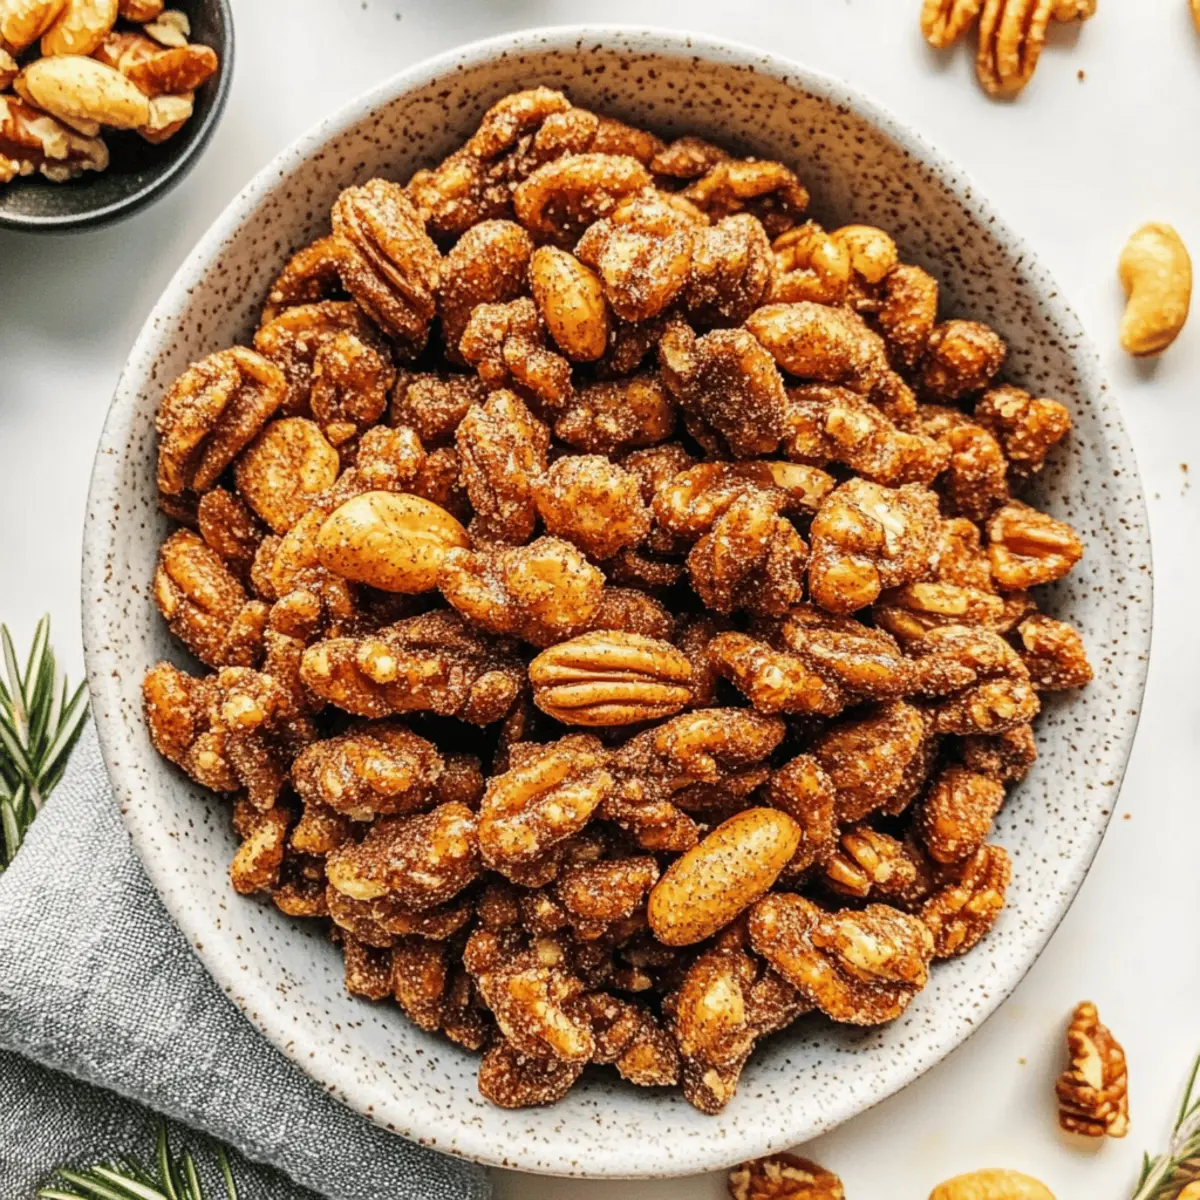
As the aroma of spices wafts through my kitchen, I can’t help but feel a wave of excitement—today, I’m preparing Crunchy Spiced Nuts, the ultimate party snack that never fails to impress. With a delightful crunch and an irresistible balance of sweet, savory, and just the right amount of spice, these nuts are perfect for grazing tables or cozy nights in. One of the best parts? They’re incredibly easy to whip up, making them a go-to for last-minute entertaining. Plus, they store beautifully, so you can prepare a batch ahead of time and bring them out when friends come over. Fancy a twist? You can use any nut you love, creating a unique flavor profile every time. Ready to elevate your snacking experience? Let’s dive in!

Why You'll Love Spiced Nuts

Irresistible Flavor: Each handful bursts with a delicious mix of sweet, spicy, and savory notes, perfect for any palate.

Easy to Make: With minimal prep and just a short baking time, you can create a snack that looks and tastes gourmet.

Customizable: Use a variety of nuts or add unique spices, resembling my favorites like Matcha Baked Doughnuts for fun variations!

Perfect for Sharing: Spice these nuts up for your next gathering, or have them on hand as a beloved alternative to fast food—just like my Skillet Pasta with Sun-Dried Tomatoes, Walnuts, and Feta!

Great for Storage: They keep well in an airtight container, making them ready for impromptu parties or cozy nights in!

Spiced Nuts Ingredients

• Dive into creating these irresistible spiced nuts that your guests will crave!

For the Nuts

  • Nuts (Pecans, Walnuts, Peanuts, Almonds) – Choose any blend of nuts you adore; you can easily swap in cashews or hazelnuts for a different taste sensation!
  • Granulated Sugar – This magic ingredient brings sweetness and helps form that lovely crunchy coating.

For the Spices

  • Cinnamon – Adds a warm, cozy flavor that perfectly complements the sweetness of the sugar.
  • Chili Powder – Introduces a mild heat that elevates the overall flavor, giving a delightful kick without overwhelming.
  • Cayenne Pepper – This optional spicy addition allows you to customize the heat level; use more for an extra zing in your spiced nuts!

For Binding

  • Egg White – This is the secret ingredient that helps the spices and sugar stick beautifully to the nuts, creating a glossy finish you’ll love.

Step‑by‑Step Instructions for Crunchy Spiced Nuts

Step 1: Preheat the Oven
Start by preheating your oven to 325°F (163°C). This temperature is essential for achieving that perfect golden-brown color and crispy texture in your spiced nuts. Allow the oven some time to heat evenly while you prepare the nut mixture.

Step 2: Combine Ingredients
In a large bowl, combine your choice of nuts—such as pecans, walnuts, and almonds—with granulated sugar, egg white, cinnamon, chili powder, and cayenne pepper. Stir well until all nuts are thoroughly coated with the sticky mixture, ensuring every nut glistens with the spice blend.

Step 3: Prepare the Baking Sheet
Line a baking sheet with parchment paper for easy cleanup. Spread the nut mixture evenly in a single layer on the prepared baking sheet. This arrangement allows the nuts to bake evenly and achieve a delightful crunch without overcrowding.

Step 4: Bake the Nuts
Place the baking sheet in the preheated oven and bake your spiced nuts for about 30 minutes. Remember to stir the mixture halfway through to promote even cooking and avoid burning. You’ll know they’re done when they turn a lovely golden brown and your kitchen fills with a mouthwatering aroma.

Step 5: Cool Completely
Once baked, remove the spiced nuts from the oven and allow them to cool completely on the baking sheet. This cooling period is crucial for reaching that satisfying crunch. Trust me, the glossy finish will set beautifully as they cool.

Step 6: Store and Enjoy
After they've cooled, transfer the crunchy spiced nuts to an airtight container. They can be stored at room temperature for up to two weeks, making them a perfect snack ready for impromptu gatherings. These spiced nuts are sure to be a hit at your next party!

Make Ahead Options

These Crunchy Spiced Nuts are perfect for meal prep, saving you precious time during busy weeks or last-minute gatherings! You can prepare the nut mixture (nuts, sugar, spices, and egg white) up to 24 hours in advance. Simply combine all the ingredients in a bowl, cover it, and refrigerate until you're ready to bake. This prepped mixture not only saves time but keeps the flavors melded together beautifully. When you’re ready to serve, just spread the mixture on a baking sheet and bake as directed. Allow them to cool completely before storing in an airtight container, so they remain just as delicious and crunchy as the day you made them!

What to Serve with Crunchy Spiced Nuts

These delightful spiced nuts make any occasion more festive, perfectly complementing a variety of dishes that burst with flavor and excitement.

  • Cheese Board: A selection of cheeses like brie and aged cheddar contrast beautifully with the spiced nuts' sweetness, creating a balance of textures and flavors.
  • Fresh Fruit Platter: The bright, juicy notes of fruits like apples and grapes provide a refreshing offset to the rich, warm flavors of the nuts.
  • Charming Charcuterie: Pair with cured meats, olives, and artisanal crackers to elevate your snacking experience and entice your guests with diverse tastes.
  • Savory Salads: Add the crunchy spiced nuts atop mixed greens or quinoa salads. Their unique texture and flavor will surely enhance each bite.
  • Cocktails and Wines: Serve with a light, crisp white wine or a refreshing cocktail to complement the spice without overpowering the palate.
  • Mini Desserts: Delight in mini desserts like chocolate-covered strawberries or bite-sized pastries, which can harmonize well with the sweet notes in the nuts.
  • Homemade Dips: Enjoy alongside creamy dips such as hummus or tzatziki for a satisfying and flavorful grazing table for your guests.
  • Vegetable Platter: Crisp vegetables like bell peppers and cucumbers offer a nice crunch and refreshing contrast to the richness of the spiced nuts.

How to Store and Freeze Spiced Nuts

Room Temperature: Keep your spiced nuts in an airtight container at room temperature for up to 2 weeks to maintain their delightful crunch and flavor.

Fridge: If you prefer, you can store them in the fridge for an extra layer of freshness, but ensure they are sealed tightly to avoid moisture.

Freezer: For longer storage, freeze your spiced nuts in a freezer-safe bag or container for up to 3 months. Just remember to let them thaw at room temperature before enjoying!

Reheating: If you want to refresh your spiced nuts, simply spread them on a baking sheet and warm them in a preheated oven at 300°F (150°C) for about 10 minutes.

Expert Tips for Spiced Nuts

  • Watch the Bake: Keep a close eye on your nuts while baking; remove them from the oven as soon as they reach a golden brown to prevent burning.

  • Ensure Even Coating: Stir the nut mixture well before baking, ensuring each nut is evenly coated with sugar and spices for maximum flavor.

  • Cool Before Storing: Allow the spiced nuts to cool completely on the baking sheet. This step is key for maintaining their delightful crunch.

  • Experiment with Nuts: Don’t hesitate to try different nuts, like cashews or hazelnuts, for a unique spin on your spiced nuts recipe!

  • Storage Tips: Store your nuts in an airtight container at room temperature for up to two weeks, or freeze for extended freshness.

Spiced Nuts Variations & Substitutions

Feel free to let your creativity shine in the kitchen and customize these spiced nuts to your heart’s desire!

  • Nut Variety: Swap out pecans for cashews or hazelnuts for a completely new flavor experience.
  • Savory Herbs: Add chopped rosemary or thyme to give your nuts a delightful savory twist; it’s a flavor combination that’s simply exquisite!
  • Sweetener Swap: Use brown sugar or maple syrup instead of granulated sugar for a richer, deeper sweetness that complements the spices beautifully.
  • Add Some Zest: Incorporate citrus zest from oranges or lemons for a refreshing hint that brightens each bite.
  • Dried Fruits: Toss in some dried cranberries or raisins after baking for a chewy and fruity contrast to the crunchy nuts.
  • Spicy Kick: Amp up the heat by adding more cayenne pepper, or even a dash of your favorite hot sauce to the egg white mixture.
  • Nut-Free Option: For a nut-free snack, try this recipe with sunflower seeds or pumpkin seeds; the flavors will still shine brightly!
  • Asian Flair: Infuse some sesame oil or a sprinkle of five-spice powder for an Asian-inspired twist that will take your taste buds on an adventure.

These crunchy delights can be enjoyed alongside my delicious Eggnog Cookies or as a topping on salads like my vibrant Skillet Pasta with Sun-Dried Tomatoes, Walnuts, and Feta. Happy snacking!

Spiced Nuts Recipe FAQs

How do I choose the best nuts for my spiced nuts?
Absolutely! When selecting nuts, look for fresh, high-quality options. If possible, choose unsalted nuts for a better balance of flavors. Avoid those with dark spots or a rancid smell, as these can point to spoilage. I often mix pecans, walnuts, and almonds for a delightful texture and taste, but feel free to experiment with your favorites!

How should I store my spiced nuts for freshness?
To keep your spiced nuts fresh, store them in an airtight container at room temperature for up to 2 weeks. If you prefer an extra amount of freshness, you can refrigerate them, but ensure they’re tightly sealed to prevent moisture. I personally enjoy them straight out of the pantry, but the fridge is a good alternative!

Can I freeze my spiced nuts, and if so, how?
Yes, you can freeze your spiced nuts! For optimal results, place them in a freezer-safe bag or a tightly sealed container. They can be stored in the freezer for up to 3 months. When you're ready to enjoy them, simply let them thaw at room temperature. If you want to refresh their crunch, warm them in the oven at 300°F (150°C) for about 10 minutes.

What should I do if my spiced nuts don't get crispy?
Very! If you find your spiced nuts aren't as crispy as you'd like, a few adjustments can help. Ensure the nut mixture is spread out in a single layer on the baking sheet for efficient baking. If they come out soft, after cooling, you can try baking them again at a lower temperature for a bit longer. Watching them closely is key; they should be golden brown and fragrant!

Are there any dietary considerations for pets or allergies?
It’s essential to be cautious! While spiced nuts can be a delicious snack for people, many nuts are not safe for pets. For example, macadamia nuts are toxic to dogs. Additionally, for those with nut allergies, use seeds (like pumpkin or sunflower) or omit nuts altogether and enjoy the spices! Always consider your guests' dietary preferences, and perhaps label the nut blends clearly.

Can I adjust the spice levels in my recipe?
Absolutely! If you like a bit more heat, you can increase the cayenne pepper up to 1 teaspoon or add your favorite spices, like smoked paprika for a smoky flavor. On the other hand, if you're sensitive to heat, feel free to reduce or omit chili powder altogether. The more the merrier when customizing your spiced nuts!

Spiced Nuts

Irresistible Spiced Nuts Recipe for Your Next Gathering

A delightful mix of sweet, savory, and spicy notes, these Spiced Nuts are the perfect snack for any gathering.
Print Recipe Pin Recipe
Prep Time 10 minutes mins
Cook Time 30 minutes mins
Cooling Time 15 minutes mins
Total Time 55 minutes mins
Servings: 8 servings
Course: Snacks
Cuisine: American
Calories: 200
Ingredients Equipment Method Nutrition Notes

Ingredients
  

For the Nuts
  • 2 cups Nuts (Pecans, Walnuts, Peanuts, Almonds) Choose any blend of nuts you adore
  • 1/2 cup Granulated Sugar For sweetness and crunch
For the Spices
  • 1 teaspoon Cinnamon Adds warm flavor
  • 1/2 teaspoon Chili Powder For mild heat
  • 1/4 teaspoon Cayenne Pepper Optional for extra zing
For Binding
  • 1 large Egg White Helps spices and sugar stick to nuts

Equipment

  • Baking Sheet
  • Parchment Paper
  • large bowl

Method
 

Preparation Steps
  1. Preheat your oven to 325°F (163°C).
  2. In a large bowl, combine your choice of nuts with granulated sugar, egg white, cinnamon, chili powder, and cayenne pepper. Stir well to coat.
  3. Line a baking sheet with parchment paper. Spread the nut mixture evenly in a single layer.
  4. Bake for about 30 minutes, stirring halfway through.
  5. Allow to cool completely on the baking sheet.
  6. Transfer to an airtight container and enjoy!

Nutrition

Serving: 1cupCalories: 200kcalCarbohydrates: 10gProtein: 5gFat: 15gSaturated Fat: 1gPolyunsaturated Fat: 5gMonounsaturated Fat: 9gSodium: 50mgPotassium: 200mgFiber: 2gSugar: 4gCalcium: 5mgIron: 6mg

Notes

These spiced nuts can be stored at room temperature for up to 2 weeks. Feel free to experiment with different types of nuts and spices to create your favorite flavor profile.

Tried this recipe?

Let us know how it was!

Healthy Apple Nachos That Will Make Snacking Fun Again

September 5, 2025 by Grace Snow Leave a Comment

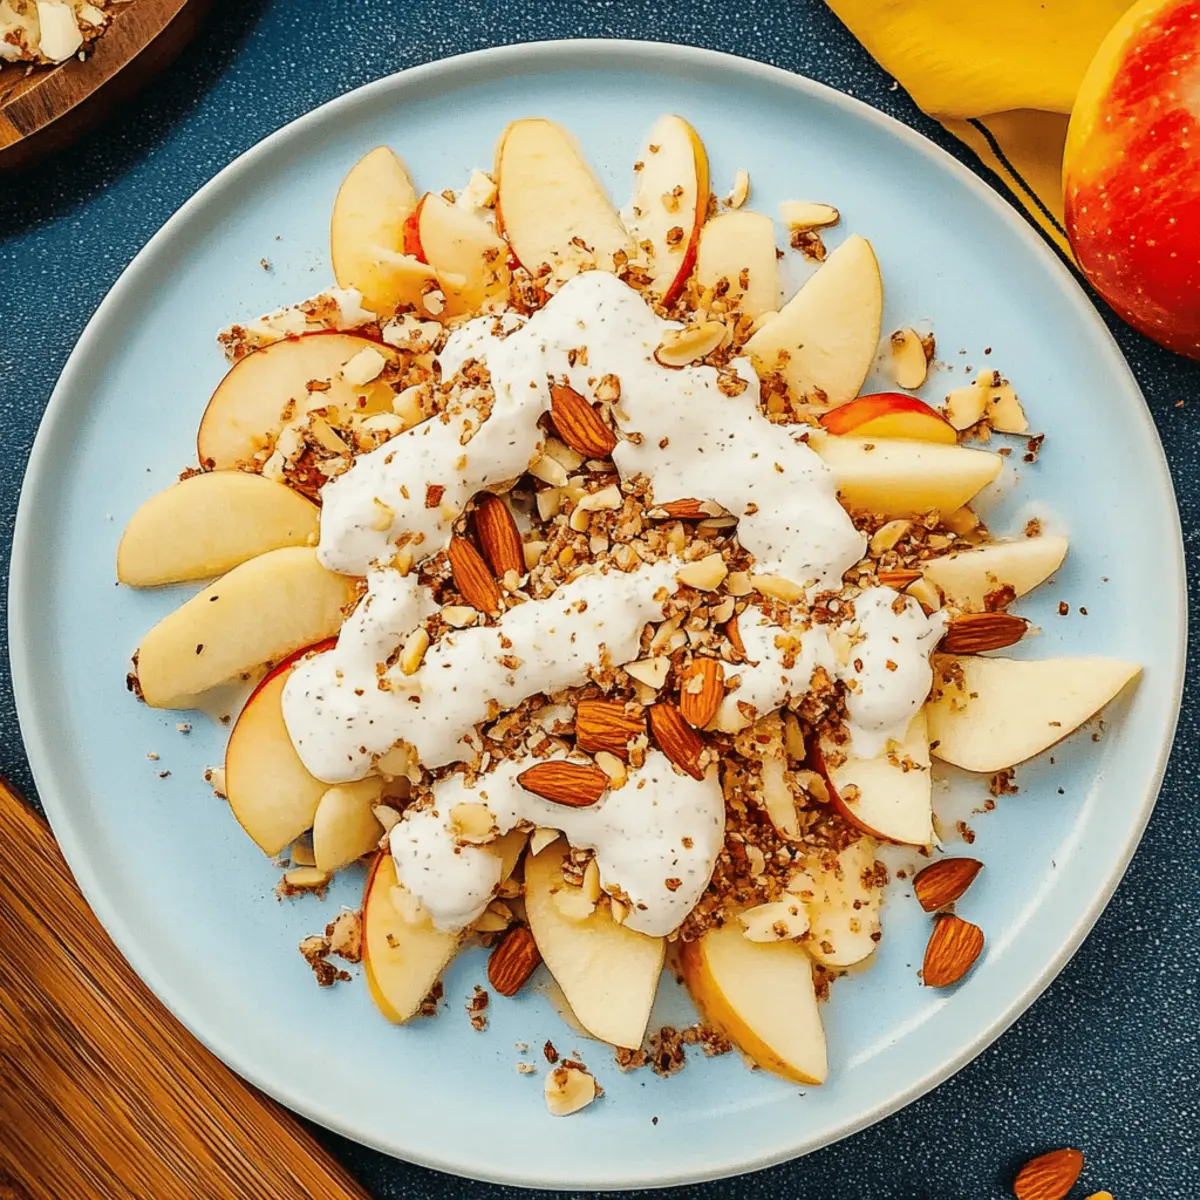
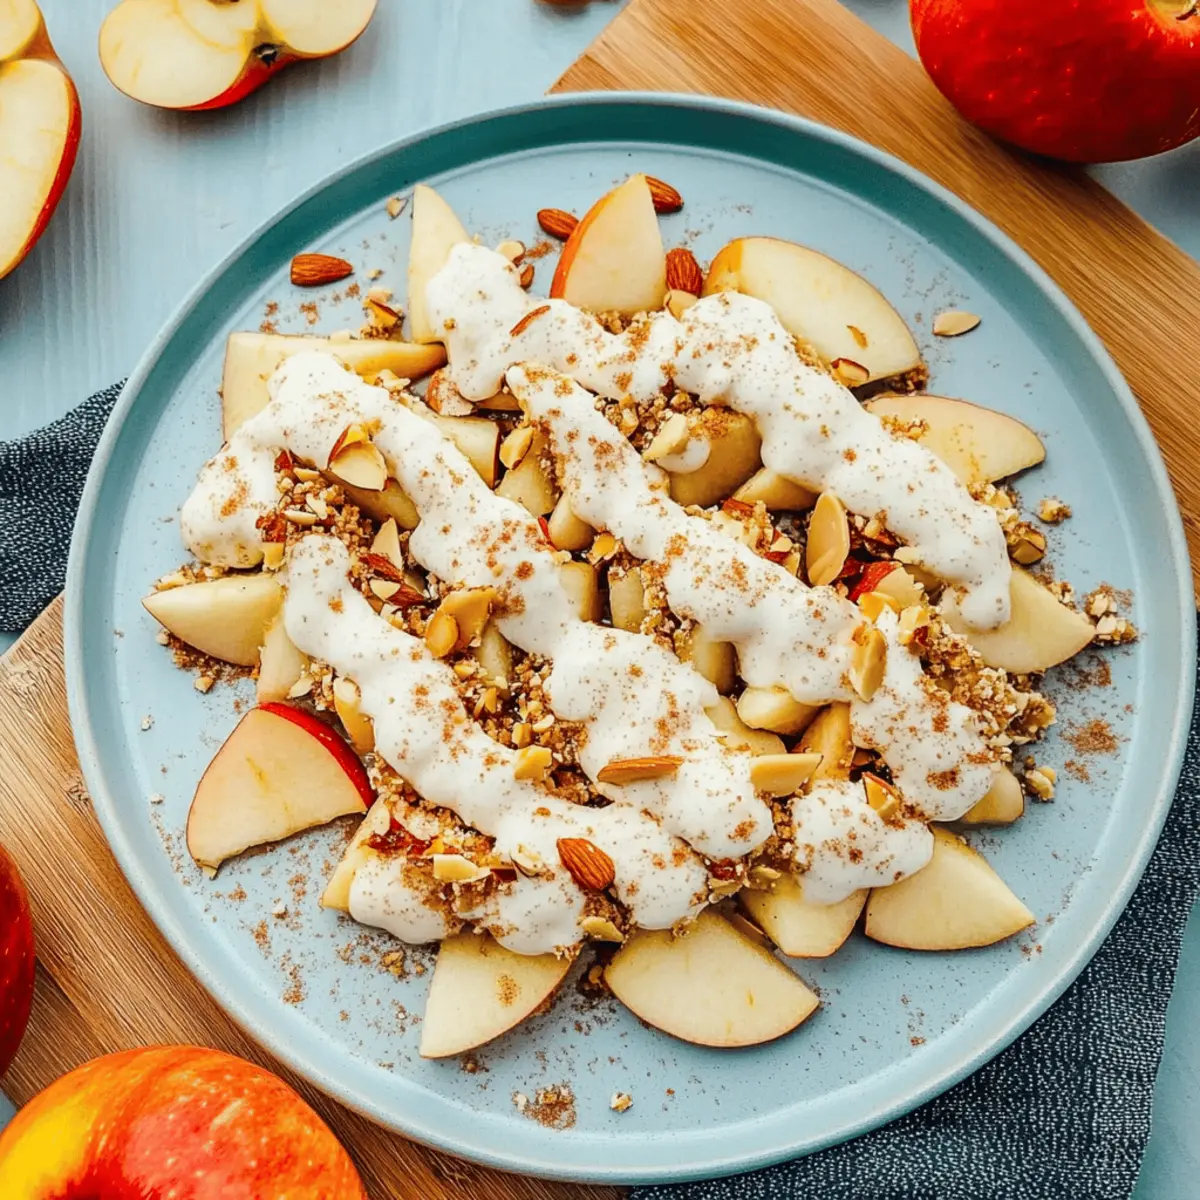
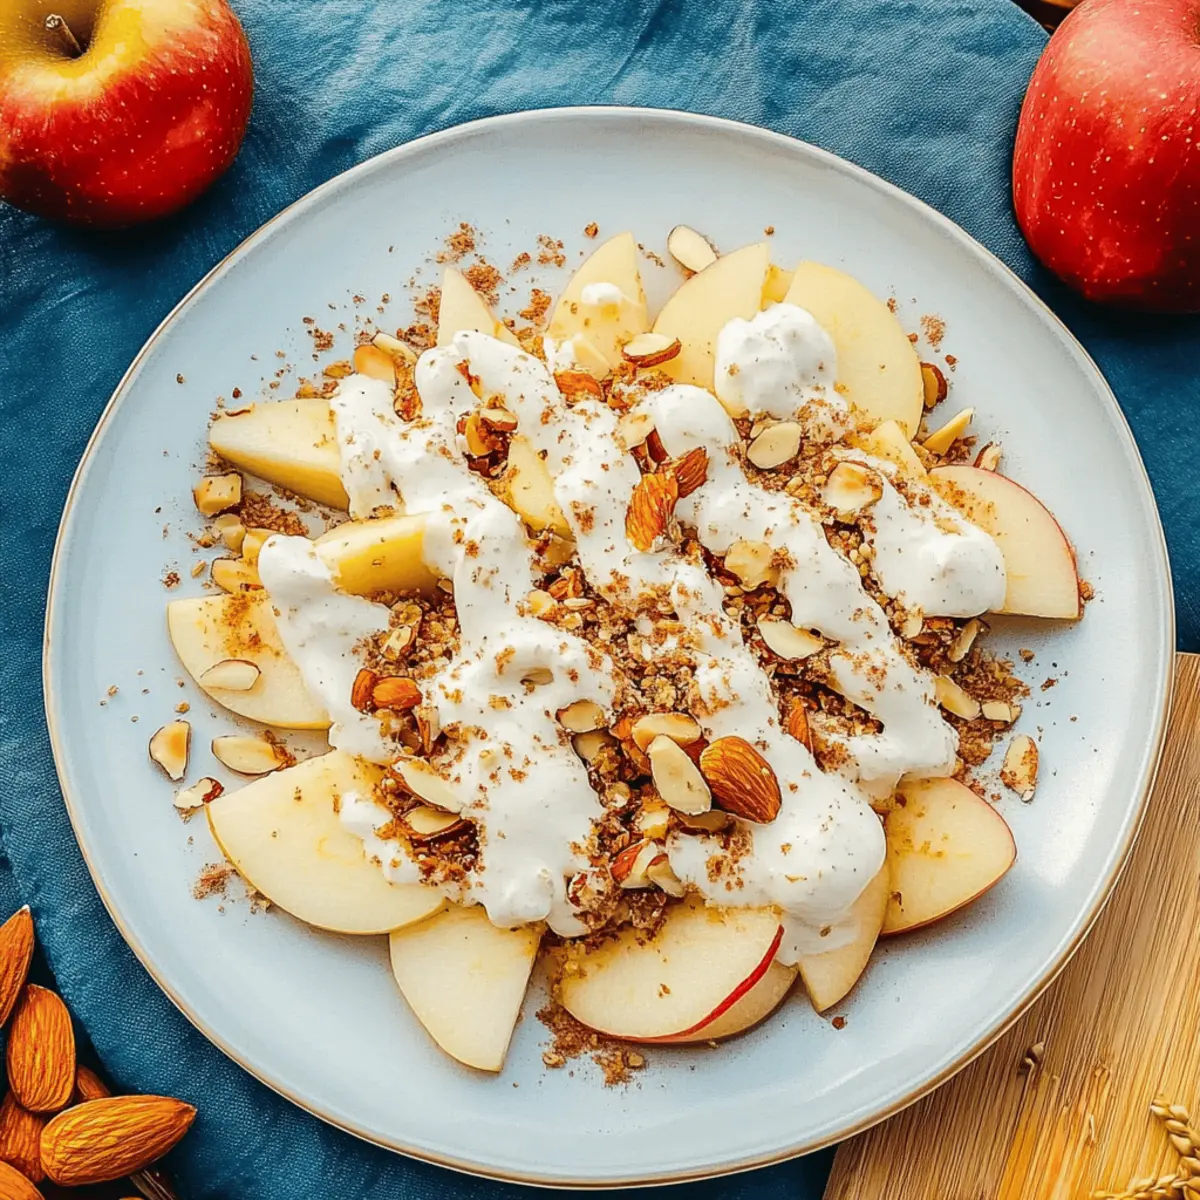
There's something magical about transforming everyday ingredients into a fun, shareable treat. That's exactly what these Healthy Apple Nachos deliver! With crisp apple slices topped with a creamy yogurt drizzle and crunchy nuts, this easy-to-make snack is perfect for both kids and adults alike. Not only does this recipe offer a quick and satisfying solution for those hungry moments, but it's also a guilt-free way to indulge in a nutritious bite. You can easily personalize it with your favorite toppings, making it a crowd-pleaser for parties or a delightful dessert alternative for those trying to eat healthier. Ready to take your snacking game to the next level? Let's dive into the world of Apple Nachos!

Why Are Apple Nachos So Irresistible?

Flavorful and Fun: These Apple Nachos are a delightful twist on traditional snacking, transforming healthier options into a playful treat.
Versatile Toppings: Create your own masterpiece with options like granola or chocolate chips, ensuring everyone finds their favorite combination.
Quick and Easy: With minimal prep time, this recipe is perfect for busy individuals or families wanting a swift yet satisfying snack.
Nutritious Delight: Packed with vitamins from apples and protein from yogurt, Apple Nachos are a guilt-free indulgence.
Kid-Approved: This playful and colorful dish is sure to be a hit with kids, making healthy eating an enjoyable experience for the whole family.
For other healthy snacking ideas, check out Chicken Salad Apples.

Apple Nachos Ingredients

For the Base

  • Apples – Choose sweet varieties like Fuji or Honeycrisp for a refreshing and crunchy foundation.
  • Yogurt – Adds a creamy flavor and protein boost; opt for Greek yogurt for extra thickness or vegan yogurt for a plant-based option.

For the Crunch

  • Almonds – Provide a delightful crunch and nutty flavor; feel free to substitute with peanuts, walnuts, or leave them out for a nut-free version.

For the Extras

  • Optional Toppings – Get creative by adding granola, chocolate chips, or dried fruit to elevate your Apple Nachos with extra flavor and texture!

Step‑by‑Step Instructions for Apple Nachos

Step 1: Slice Apples
Begin by washing your chosen sweet apples, such as Fuji or Honeycrisp, thoroughly under cool water. Using a sharp knife, core and slice the apples into thin wedges, keeping the skin on for extra texture. Aim for uniform thickness of about 1/4 inch to ensure even distribution of toppings and ease of handling. Arrange the slices on a large plate for the next step.

Step 2: Prepare Drizzle
In a mixing bowl, combine your yogurt of choice—Greek or vegan—with any sweeteners like honey or a sprinkle of cinnamon, depending on your flavor preference. Stir until the mixture is smooth and well-blended. This creamy yogurt drizzle will complement the fresh apple slices beautifully, adding a delightful richness to your Apple Nachos.

Step 3: Assemble
Take your arranged apple slices and start drizzling the prepared yogurt mixture generously over them. Use a spoon or a squeeze bottle for precision, ensuring each slice gets a lovely coating of the creamy treat. This step makes your Apple Nachos look appealing and brings out their fresh flavors, setting the stage for the next exciting addition.

Step 4: Top with Nuts
Sprinkle your choice of chopped almonds or other nuts, such as peanuts or walnuts, over the drizzled apples for that perfect crunch. Aim for an even distribution to ensure every bite has some nutty goodness. The nuts not only add texture but also a boost of healthy fats, enhancing the overall appeal of your Apple Nachos.

Step 5: Add Optional Toppings
Now, get creative with optional toppings! Consider sprinkling granola, chocolate chips, or dried fruit over your Apple Nachos for extra flair and flavor. These additions can elevate the dish, giving it a unique twist that caters to everyone’s taste preferences. This step makes your snack not only nutritious but also visually stunning.

Step 6: Serve Immediately
Serve the Apple Nachos right away to enjoy their freshness and crispness. If you need to store them, cover the plate with plastic wrap and place it in the refrigerator, but try to consume within 2 hours for the best texture. Present these delightful Apple Nachos at your next gathering or enjoy them as a quick, healthy snack at home—either way, they’re sure to impress!

Expert Tips for Apple Nachos

  • Choose Crisp Apples: Select firm types like Fuji or Honeycrisp for the best texture; avoid soft apples to prevent sogginess in your Apple Nachos.
  • Prep Ahead: If making in advance, toss apple slices in lemon juice to prevent browning; this keeps them looking fresh longer.
  • Customize Toppings: Feel free to mix and match toppings; be cautious with sweet additions like chocolate chips to maintain a healthy balance.
  • Correct Portion Sizes: Aim for thin apple wedges (about 1/4 inch) to make them easy to handle and dip, ensuring every bite is delightful.
  • Serve Fresh: For best texture and flavor, serve Apple Nachos immediately after assembling; if necessary, store in an airtight container for no more than 2 hours.

What to Serve with Healthy Apple Nachos

Transform your Apple Nachos into a vibrant meal that delights the senses with complementary dishes and beverages.

  • Crispy Pita Chips: These crunchy, salty chips provide a delightful contrast to the sweetness of apple nachos, perfect for dipping into yogurt.
  • Mixed Green Salad: A refreshing side that balances sweetness with crisp greens and a tangy vinaigrette, elevating the overall meal experience.
  • Fruit Salad: A colorful blend of seasonal fruits will harmonize with the apple flavor, adding variety and additional nutrients to your snack.
  • Cheese Platter: Pairing with a selection of cheeses like sharp cheddar or creamy brie offers a delightful contrast in flavors and textures.
  • Nut Butter Dips: A bowl of peanut or almond butter creates a creamy dip that adds richness and pairs excellently with the apple’s crunch.
  • Sparkling Water: A refreshing drink option that cleanses the palate, making it an ideal choice to accompany the sweet and tangy flavors of the apple nachos.
  • Dark Chocolate Dipped Strawberries: These add a touch of indulgence and naturally complement the fruitiness of apple nachos for a sweet finish.
  • Homemade Trail Mix: Craft a mix with nuts, seeds, and dried fruits that mirrors the toppings on your nachos, providing an exciting crunch alongside.
  • Vitamin-Boosting Smoothie: A smoothie with spinach and banana pairs well, as it adds nutrients, making your snack feel complete without feeling heavy.

Apple Nachos: Exciting Variations Await!

Feel free to get creative and customize your Apple Nachos to match your tastes and dietary needs!

  • Nut-Free: Omit the almonds and replace them with sunflower seeds for added crunch without the nuts.

  • Vegan Twist: Use coconut yogurt instead of traditional yogurt for a delightful plant-based option that still packs flavor.

  • Dessert Delight: Drizzle a bit of melted dark chocolate over the toppings for a decadent twist, perfect for satisfying sweet cravings.

  • Berry Boost: Top your Apple Nachos with mixed berries like strawberries or blueberries for an additional layer of freshness and nutrition.

  • Spicy Kick: Add a sprinkle of cayenne pepper or chili powder to the yogurt mix for a surprising and delightful heat contrast.

  • Snack on Granola: Instead of nuts, use your favorite granola for a chewy texture that offers a delicious hidden crunch.

  • Chocolate Hazelnut: Swap out the yogurt drizzle entirely for a luscious layer of chocolate hazelnut spread to create an indulgent dessert version.

  • Cinnamon Sugar: Dust the finished dish with a light sprinkle of cinnamon sugar for an extra touch of sweetness that complements the apples beautifully.

For more inspiration, check out how to elevate your snack game with other fun ingredients like those in Chicken Salad Apples. Enjoy these delicious variations as you create your perfect Apple Nachos!

Storage Tips for Apple Nachos

Fridge: Store any leftovers in an airtight container for up to 2 hours to maintain freshness and crunch; the apples will brown if left longer.

Room Temperature: Best enjoyed immediately after preparation; if left out, consume within 30 minutes for optimal taste and texture.

Reheating: If the yogurt drizzle becomes too thick in the fridge, simply mix in a little extra yogurt before serving to restore its creamy consistency; avoid reheating the apple slices to keep them crisp.

Pro Tip: To prolong the life of leftover apple slices, spritz them with lemon juice before storing them; this can help maintain their vibrant color and crunch in your delicious Apple Nachos.

Make Ahead Options

Apple Nachos are perfect for meal prep, allowing you to enjoy a quick and healthy snack at any time! You can slice your apples and toss them with lemon juice to prevent browning up to 24 hours in advance. Store the apple slices in an airtight container in the refrigerator to maintain their freshness. Additionally, you can prepare the yogurt drizzle by mixing it with sweeteners and refrigerating it for up to 3 days. When it's time to serve, simply arrange your apples on a plate, drizzle with yogurt, and top with nuts and your choice of optional toppings for a delightful treat that’s just as delicious as when freshly made!

Apple Nachos Recipe FAQs

What kind of apples should I use for Apple Nachos?
Absolutely! You can use sweet varieties like Fuji or Honeycrisp, as they provide the perfect balance of sweetness and crunch. Avoid softer apples, as they may become mushy and unappealing in your Apple Nachos.

How should I store leftover Apple Nachos?
For the best crunch and flavor, store any leftovers in an airtight container in the refrigerator for up to 2 hours. If left out, try to consume them within 30 minutes to prevent the apples from browning and becoming soggy.

Can I freeze Apple Nachos?
While it’s best to consume Apple Nachos fresh, you can freeze the individual ingredients for later use. Slice apples and toss them in lemon juice to prevent browning, then freeze them in a single layer on a baking sheet for about 1-2 hours. Once frozen, transfer them to a freezer bag. They can be stored for up to 3 months; however, the texture may change upon thawing, so it’s ideal to prepare the yogurt and toppings fresh when you're ready to enjoy.

What if I want to make Apple Nachos nut-free?
Very! You can simply omit the almonds or substitute them with seeds like pumpkin or sunflower seeds for that delightful crunch without the nuts. Additionally, consider using a nut-free yogurt to keep the recipe allergy-friendly.

What can I use as a substitute for yogurt in Apple Nachos?
If you’re looking for alternatives, you can use a dairy-free yogurt, or even try a drizzle of honey or maple syrup if you prefer a sweeter bite. For a creamy texture without yogurt, consider blending a banana with a splash of almond milk and drizzling that over your apple slices!

How do I prevent the apples from browning after slicing?
I often recommend using lemon juice to prevent browning. After slicing your apples, toss them in a mixture of water and 1-2 tablespoons of lemon juice. This simple step keeps them looking fresh and crisp for your Apple Nachos!

Apple Nachos

Healthy Apple Nachos That Will Make Snacking Fun Again

Delightful Healthy Apple Nachos are a fun, nutritious treat perfect for snacking.
Print Recipe Pin Recipe
Prep Time 15 minutes mins
Total Time 15 minutes mins
Servings: 4 servings
Course: Snacks
Cuisine: American
Calories: 180
Ingredients Equipment Method Nutrition Notes

Ingredients
  

For the Base
  • 3 medium Apples (Fuji or Honeycrisp) Choose sweet varieties for best flavor.
  • 1 cup Yogurt Greek or vegan yogurt for a creamy drizzle.
For the Crunch
  • 1/2 cup Almonds Can substitute with peanuts or walnuts.
For the Extras
  • 1/4 cup Optional Toppings Granola, chocolate chips, or dried fruit.

Equipment

  • Knife
  • Mixing Bowl
  • Spoon
  • Plate
  • squeeze bottle

Method
 

Step-by-Step Instructions for Apple Nachos
  1. Slice the apples into thin wedges after washing them. Aim for uniform thickness of about 1/4 inch.
  2. In a mixing bowl, combine yogurt with sweeteners and stir until smooth.
  3. Drizzle the yogurt mixture generously over the sliced apples.
  4. Sprinkle chopped almonds or other nuts over the drizzled apples.
  5. Add optional toppings like granola or chocolate chips for extra flavor.
  6. Serve immediately to enjoy freshness; store covered in the fridge if needed.

Nutrition

Serving: 1servingCalories: 180kcalCarbohydrates: 30gProtein: 5gFat: 6gSaturated Fat: 1gPolyunsaturated Fat: 0.5gMonounsaturated Fat: 4gSodium: 50mgPotassium: 200mgFiber: 5gSugar: 15gVitamin A: 200IUVitamin C: 10mgCalcium: 100mgIron: 1mg

Notes

Best texture and flavor achieved when served immediately. Spritz apples with lemon juice if prepping ahead to prevent browning.

Tried this recipe?

Let us know how it was!

Savory Focaccia Bread That Will Impress Your Family

September 5, 2025 by Grace Snow Leave a Comment

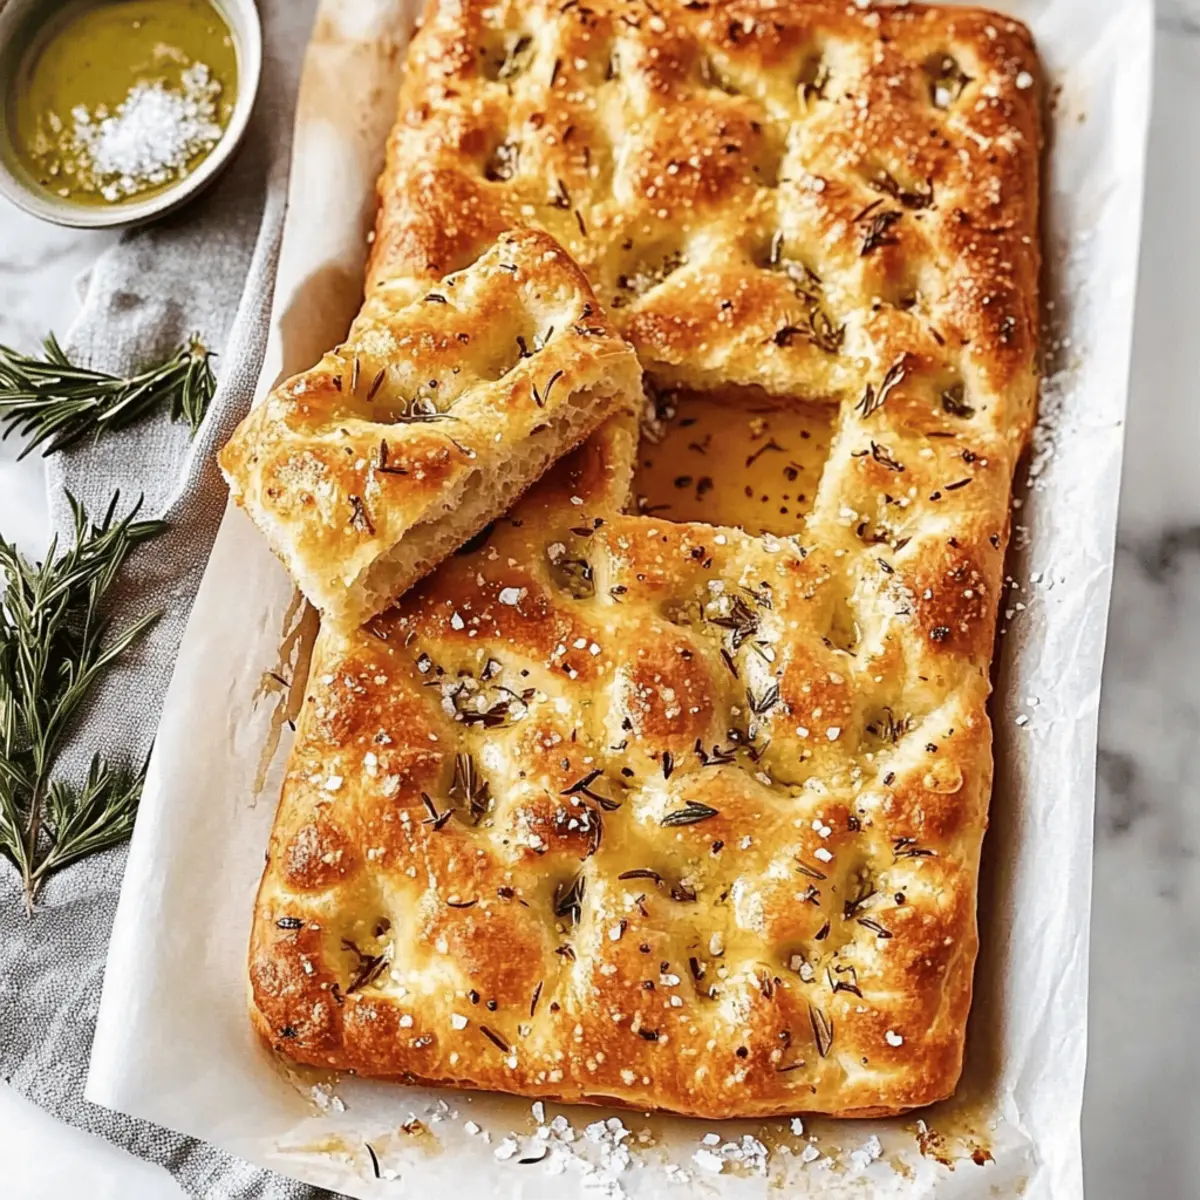
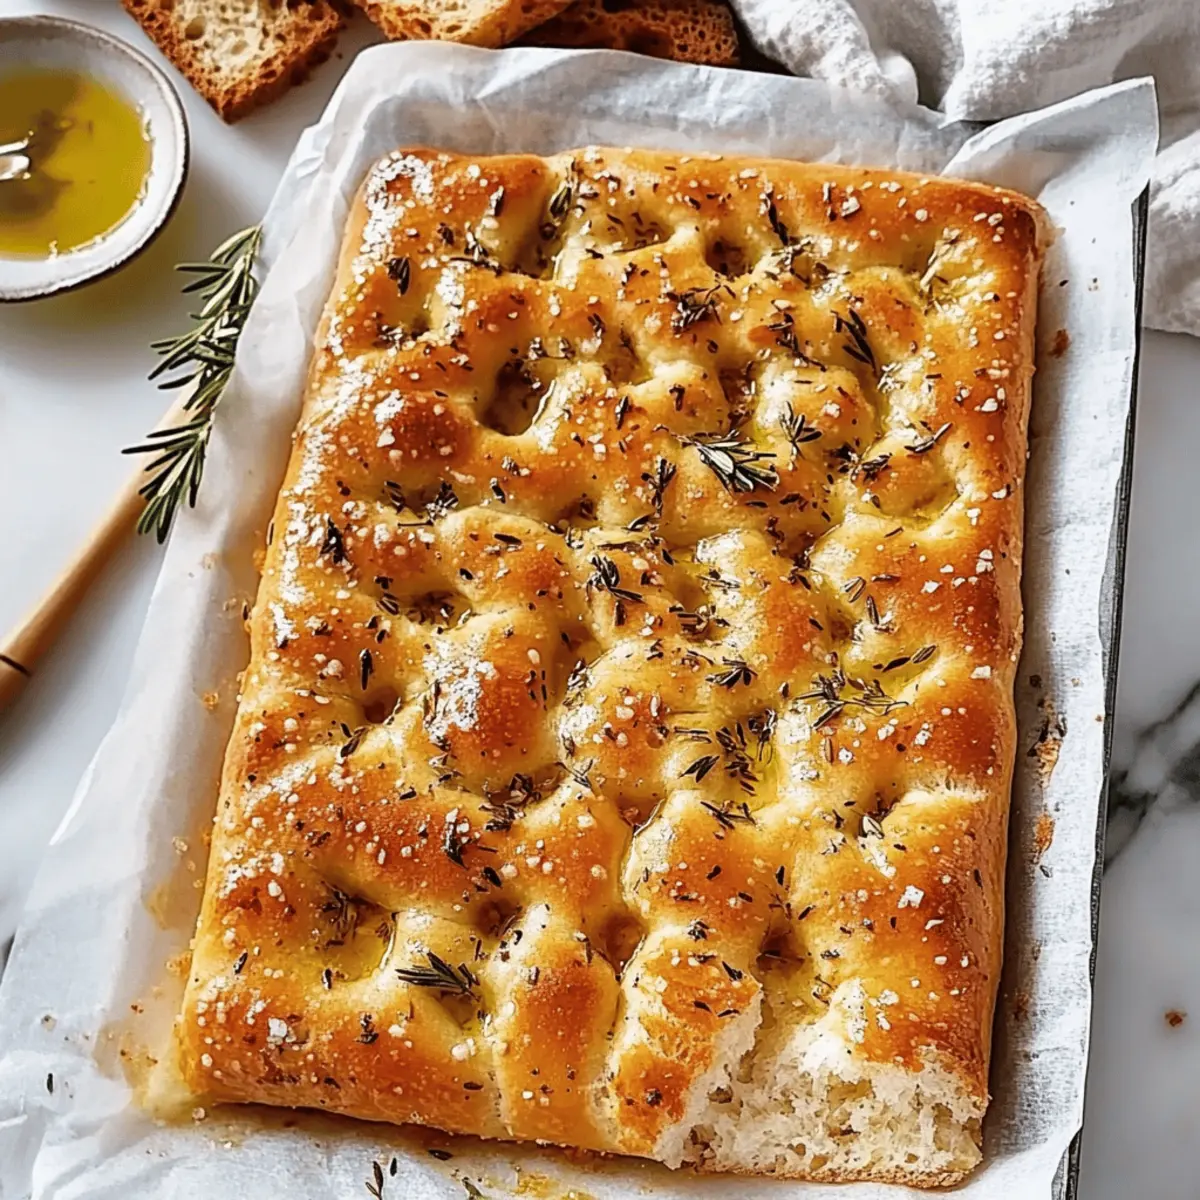
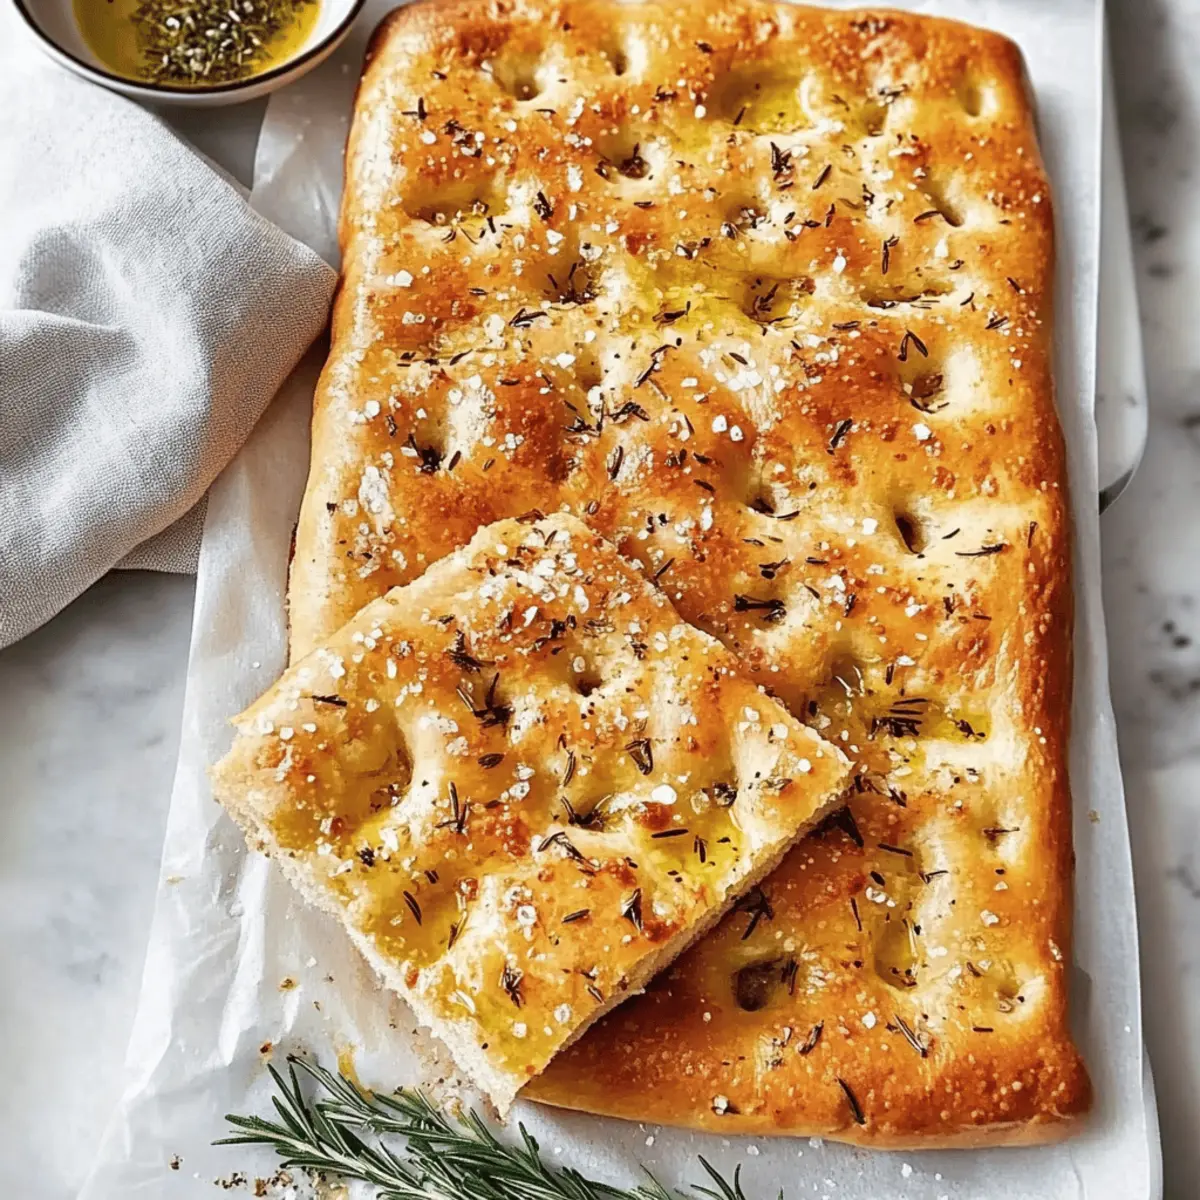
As I stood in my kitchen, the comforting aroma of freshly baked bread wafted through the air, instantly transporting me to the heart of Italy. Today, I'm sharing my homemade Focaccia Bread recipe, a deliciously beginner-friendly delight with a joyfully soft center and perfectly crispy edges. This easy recipe doesn’t just promise satisfaction; it invites you to unleash your creativity by experimenting with toppings like sea salt and rosemary, making each loaf as unique as you are. Not only will your loved ones be impressed by your baking skills, but this warm, flavorful bread also doubles as a centerpiece for any meal, enticing even the pickiest eaters. Curious about how to create this Italian masterpiece in your own kitchen? Let’s dive in!

Why Is Focaccia Bread So Irresistible?

Soft, Chewy Texture: The dough rises beautifully, resulting in a pillowy, airy center that's perfect for tearing apart.
Savory Flavor: Drizzled with olive oil and sprinkled with sea salt, every bite is a burst of flavor.
Versatile Toppings: From classic rosemary to inventive options like cheese or cherry tomatoes, you can customize it to your taste.
Beginner-Friendly: Even novice bakers can achieve stunning results with minimal effort—no fancy equipment needed!
Crowd-Pleasing: Serve it warm as an appetizer or side, and watch it disappear faster than you can say "focaccia." If you're looking for more delightful bread recipes, be sure to check out our Cheesy Garlic Bread or Cornbread Breakfast Casserole.

Focaccia Bread Ingredients

For the Dough
• Warm Water – Essential for activating the yeast; aim for a temperature between 105° to 115°F.
• Cane Sugar – Helps to proof the yeast, enhancing fermentation; you can substitute with regular granulated sugar.
• Active Dry Yeast – This leavening agent is crucial for the dough's rise; ensure it's fresh for best results.
• All-Purpose Flour – Provides the primary structure of the bread; feel free to mix in whole wheat flour for a heartier flavor.
• Sea Salt – Enhances flavor and strengthens gluten, vital for a good rise; consider using kosher salt if you prefer.
• Extra-Virgin Olive Oil – Adds moisture and flavor to the dough; melted butter can be used for a richer taste.

For the Topping
• Flaky Sea Salt (optional) – Sprinkling this on top adds a burst of salty flavor; kosher salt works just as well.
• Chopped Fresh Rosemary (optional) – Infuses the bread with aromatic goodness; other herbs or toppings like olives can be delightful too.

Step‑by‑Step Instructions for Easy Homemade Focaccia Bread

Step 1: Proof the Yeast
In a small bowl, combine 1 cup of warm water (between 105° to 115°F) with 1 tablespoon of cane sugar. Sprinkle in 2¼ teaspoons of active dry yeast, stirring gently. Allow the mixture to sit for about 5 minutes, or until it becomes bubbly and foamy. This indicates that the yeast is active and ready to help your focaccia bread rise beautifully.

Step 2: Prepare the Dough
In a large mixing bowl, combine 3 cups of all-purpose flour and 1 tablespoon of sea salt. Pour in the proofed yeast mixture and mix with a spatula on low speed until the dough starts to come together. Increase to medium speed and knead for about 5 minutes, until you achieve a sticky and elastic dough that pulls away from the sides of the bowl easily.

Step 3: First Rise
Lightly grease a clean bowl with extra-virgin olive oil and transfer your focaccia dough into it. Cover the bowl tightly with plastic wrap or a kitchen towel, and place it in a warm spot. Let it rise until doubled in size, which should take about 1 to 1.5 hours. The dough should look puffy, signaling that it’s ready for the next step.

Step 4: Shape the Focaccia
Once the dough has risen, gently punch it down to release the air. Transfer it to a generously oiled 9x13-inch baking pan. Use your fingers to stretch and shape the dough to fit the edges of the pan. Cover it again and let it rise for another 45 minutes while preheating the oven to 425°F, allowing for a beautiful airy texture.

Step 5: Dimple the Dough
After the second rise, drizzle the surface of the focaccia bread generously with extra-virgin olive oil. Using your fingers, create deep indentations all over the dough to hold in toppings. Sprinkle with flaky sea salt and chopped fresh rosemary if desired, embracing the classic flavors of homemade focaccia and readying it for baking.

Step 6: Bake
Place the baking pan in the preheated oven and bake the focaccia for 20 to 30 minutes, or until it turns a lovely golden brown and feels crusty on the edges. Keep an eye on it; you want it to develop a beautiful color while maintaining a soft interior. Once baked, remove it from the oven and allow it to cool slightly before slicing and serving.

Focaccia Bread Variations & Substitutions

Feel free to get creative as you customize your focaccia bread to match your tastes and dietary needs!

  • Herb Swaps: Replace rosemary with thyme, oregano, or fresh basil for an aromatic twist. Each herb brings its unique flavor, adding depth to your bread.

  • Cheesy Delight: Sprinkle grated Parmesan or mozzarella on top before baking for a cheesy crust. This addition elevates the bread to a savory delight that your family will crave.

  • Veggie Toppings: Add cherry tomatoes, olives, or caramelized onions for a colorful and flavorful focaccia. These toppings not only beautify your bread but also infuse it with vibrant flavors.

  • Sweet Focaccia: Drizzle the dough with honey or maple syrup and top with thin apple slices before baking. This slightly sweet version is perfect for brunch or dessert!

  • Gluten-Free Option: Substitute regular flour with a gluten-free all-purpose blend. Ensure it contains xanthan gum to help maintain the bread's structure.

  • Heat It Up: Add sliced jalapeños or crushed red pepper flakes for a spicy kick. This spicy variation will thrill those who enjoy a little heat in their meals.

  • Simple Fondue Basis: Use the focaccia as a base for a warm bread fondue by toasting slices and pairing them with melted cheese and fresh vegetables. Perfect for a cozy gathering!

  • Artisan Touch: Experiment with a drizzle of flavored olive oil, like garlic-infused or chili oil, before baking, adding an extra layer of intensity. This delicious touch will impress anyone you serve it to!

Explore these variations and make your focaccia uniquely yours! With its soft and airy interior, it's a bread that complements various flavors. Whether you’re whipping up a quick snack or an elegant appetizer, this focaccia pairs beautifully with a warm bowl of soup or a side salad. Consider it the ultimate crowd-pleaser, perfect for any occasion.

How to Store and Freeze Focaccia Bread

Room Temperature: Store your focaccia bread at room temperature in an airtight container for up to 2 days to maintain its soft, chewy texture.

Fridge: If you live in a humid climate, you can refrigerate the bread for 3 to 5 days. Wrap it well to prevent it from drying out, but note this may alter the texture slightly.

Freezer: For longer storage, wrap the focaccia tightly in plastic wrap or aluminum foil, then place it in a freezer-safe bag. It can be frozen for up to 3 months.

Reheating: To enjoy your focaccia after freezing, thaw overnight in the fridge, then reheat in a 350°F oven for about 10-15 minutes to restore its delightful crispiness.

What to Serve with Easy Homemade Focaccia Bread

As the warm aroma of focaccia fills your kitchen, consider pairing it with delicious accompaniments that will elevate your dining experience.

  • Fresh Tomato Salad: Juicy tomatoes combined with basil and mozzarella create a refreshing contrast, enhancing the savory notes of the focaccia.

  • Creamy Garlic Dip: A rich blend of garlic and cream pairs perfectly, inviting you to savor each bite. This indulgent dip complements the bread's texture beautifully.

  • Roasted Vegetables: Caramelized veggies add sweet and savory flavors that balance perfectly with the focaccia's crispy edges. The added colorful presentation makes your meal visually appealing.

  • Bruschetta Topping: Light and zesty, a classic bruschetta topping of diced tomatoes and basil offers a bright burst that harmonizes with the focaccia’s rich flavor.

  • Italian Antipasto Platter: Piled high with olives, cured meats, and cheeses, an antipasto platter turns your focaccia into a communal dining experience, perfect for sharing and exploring savory flavors.

  • Homemade Pesto: The vibrant herbal notes of basil pesto create a delightful pairing, offering a fresh and zesty taste that can be spread or dipped.

  • Buttery Herb Spread: A whipped mix of butter and your favorite herbs adds an enticing layer of flavor, making every bite of focaccia more delicious and satisfying.

  • Chardonnay or Chianti: A crisp Chardonnay or fruity Chianti offers the perfect drink pairing, enhancing the overall meal with delightful acidity and aromatic undertones.

Helpful Tricks for Focaccia Bread

Water Temperature Matters: Make sure your warm water is between 105° to 115°F. Too hot can kill the yeast, preventing your focaccia bread from rising.

Proper Rising Conditions: Place the dough in a warm, draft-free area to rise. A cozy kitchen corner is perfect! Cold environments can slow down fermentation.

Avoiding Sticking: If your baking pan isn't nonstick, generously grease it with both olive oil and a touch of butter. This ensures easy release and a beautiful crust.

Experiment with Toppings: Feel free to try different herbs and toppings; just remember to keep the base recipe intact for consistent results.

Check for Doneness: Keep an eye on your focaccia as it bakes. It’s ready when golden brown and crusty on the edges, showing that lovely contrast you crave!

Cool Before Slicing: Let the focaccia cool slightly before slicing. This allows the texture to set, enhancing that delightful chewy experience!

Make Ahead Options

These Easy Homemade Focaccia Bread loaves are perfect for meal prep! You can mix and knead the dough and let it rise up to 24 hours in advance by covering it tightly and placing it in the refrigerator to slow down fermentation. This allows the flavors to deepen while preventing over-proofing. Once you’re ready to bake, simply bring the dough back to room temperature before shaping and allowing it to rise for about 45 minutes. For even more convenience, you can bake the focaccia and cool it before storing in an airtight container for up to 3 days. Simply warm it in the oven before serving, ensuring every bite remains just as delicious and fresh!

Homemade Focaccia Bread Recipe FAQs

How do I choose the perfect ingredients for my focaccia bread?
For the best focaccia, opt for active dry yeast that's fresh and bubbly when proofed. When selecting flour, all-purpose works wonderfully, but a high-protein bread flour can give extra chewiness. If using olive oil, go for high-quality extra-virgin for the best flavor. As for toppings, fresh rosemary is a classic, but the sky's the limit—get creative with your favorite herbs and spices!

How should I store focaccia bread?
To keep your focaccia fresh, store it at room temperature in an airtight container for 2 days. If you live in a humid climate, refrigerate it for up to 5 days, but wrap it well to avoid drying out. Just remember, each way might slightly alter that delightful texture.

Can I freeze focaccia bread?
Absolutely! To freeze, wrap your focaccia tightly in plastic wrap or foil, then place it in a freezer-safe bag. It can be frozen for up to 3 months. When you’re ready to enjoy, thaw it overnight in the fridge, then reheat at 350°F for about 10-15 minutes to regain that crispy crust!

What if my dough isn't rising?
This can happen if the yeast was too old or the water was too hot. Ensure your proofing water is between 105° to 115°F, as water that's too hot can kill yeast. If still struggling, try placing your dough in a warmer spot, like an oven with the light on. Sometimes even a warm sunny windowsill can work wonders—just don’t let it dry out!

Can focaccia be made gluten-free?
Yes! To make gluten-free focaccia, use a gluten-free all-purpose flour blend that contains xanthan gum for structure. Make sure your yeast is labeled gluten-free as well, and follow the same proofing and rising instructions. The taste may vary a bit, but you’ll still enjoy a delicious bread!

What toppings work best on focaccia bread?
Focaccia is incredibly versatile! While sea salt and rosemary are classics, try adding toppings like caramelized onions, garlic, sun-dried tomatoes, or olives. For a cheesy twist, sprinkle shredded mozzarella or parmesan before baking. Don’t forget to dimpling the dough to hold in all those delicious flavors!

Focaccia Bread

Savory Focaccia Bread That Will Impress Your Family

This delightful Focaccia Bread recipe combines a soft, chewy texture with savory flavors, perfect for impressing your family.
Print Recipe Pin Recipe
Prep Time 1 hour hr 30 minutes mins
Cook Time 25 minutes mins
Rising Time 45 minutes mins
Total Time 2 hours hrs 35 minutes mins
Servings: 8 slices
Course: Snacks
Cuisine: Italian
Calories: 200
Ingredients Equipment Method Nutrition Notes

Ingredients
  

For the Dough
  • 1 cup warm water between 105° to 115°F
  • 1 tablespoon cane sugar can substitute with granulated sugar
  • 2.25 teaspoons active dry yeast ensure fresh for best results
  • 3 cups all-purpose flour can mix in whole wheat for a heartier flavor
  • 1 tablespoon sea salt kosher salt can be used
  • 1/4 cup extra-virgin olive oil melted butter can be used for a richer taste
For the Topping
  • to taste flaky sea salt optional, kosher salt works too
  • to taste chopped fresh rosemary optional, can use other herbs or toppings

Equipment

  • Mixing Bowl
  • Baking pan
  • Spatula
  • plastic wrap
  • Kitchen Towel
  • Oven

Method
 

Step-by-Step Instructions
  1. In a small bowl, combine warm water with cane sugar. Sprinkle in active dry yeast, stir gently, and let sit for 5 minutes until bubbly.
  2. In a large mixing bowl, combine flour and sea salt. Pour in the proofed yeast mixture and mix with a spatula on low speed until the dough begins to form.
  3. Knead the dough on medium speed for 5 minutes until sticky and elastic, pulling away from the bowl's sides.
  4. Grease a bowl with olive oil, place the dough in it, cover tightly, and let rise in a warm spot for 1 to 1.5 hours.
  5. Punch down the risen dough, transfer to a greased 9x13-inch pan, and shape it to fit. Let it rise for another 45 minutes while preheating the oven to 425°F.
  6. Drizzle the dough with olive oil, create indentations with fingers, sprinkle with sea salt and rosemary, and prepare for baking.
  7. Bake in the preheated oven for 20 to 30 minutes or until golden brown and crusty on the edges. Cool before slicing.

Nutrition

Serving: 1sliceCalories: 200kcalCarbohydrates: 30gProtein: 4gFat: 8gSaturated Fat: 1gPolyunsaturated Fat: 1gMonounsaturated Fat: 6gSodium: 300mgPotassium: 150mgFiber: 1gSugar: 1gCalcium: 1mgIron: 4mg

Notes

Store focaccia at room temperature in an airtight container for up to 2 days. Refrigerate for 3 to 5 days in humidity or freeze for up to 3 months.

Tried this recipe?

Let us know how it was!

Mummy Brie: A Spooky and Cheesy Halloween Delight

September 4, 2025 by Grace Snow Leave a Comment

As the sun begins to set on Halloween night, the air fills with excitement and a tinge of mischief. This year, I’ve whipped up a treat that’s sure to steal the show at any spooky soirée: Mummy Brie. Not only is this delightfully eerie appetizer a crowd-pleaser, but it's also incredibly easy to prepare, making it perfect for both seasoned home chefs and kitchen novices alike. Imagine flaky pastry wrapped around creamy Brie, tricked out to look like a mummy—delicious and festive, it lets you enjoy the spirit of Halloween without any culinary stress. So, are you ready to impress your guests and tap into your creative side this Halloween? Let's dive into these Scary Delicious Halloween Treats!

Why Try Mummy Brie This Halloween?

**Delightful **Mummy Brie: This dish combines flaky pastry and rich, creamy Brie, making it a cheesy delight everyone will love.

Simple Preparation: With just a few ingredients, even novice cooks can create this spooky masterpiece.

Perfect for Sharing: This appetizer is designed for gathering; its bite-sized pieces encourage sharing and conversation.

Eye-Catching Presentation: Who can resist a cheese platter that looks like it just walked out of a horror film?

Pairing Fun: Serve with a pumpkin spice dip or cranberry sauce for an extra festive touch! For more Halloween-inspired dishes, check out my collection of spooky snacks.

Fun for All Ages: Kids will love the mummy theme, making it the perfect party treat that appeals to the young and young at heart!

Mummy Brie Ingredients

• Get ready to create a spooky yet scrumptious appetizer!

For the Mummy Wrap

  • Puff pastry – This flaky pastry creates a delicious outer shell that complements the creamy cheese perfectly.
  • Egg wash – A mixture of egg and water gives the pastry a beautiful golden color as it bakes.

For the Filling

  • Brie cheese – The star of this dish, the rich and creamy Brie adds a delightful flavor that balances beautifully with the pastry. Suggestion: You can also use Camembert for a similarly creamy texture.

For Decoration

  • Olives – Cut into small pieces, these serve as spooky eyes for your Mummy Brie, adding a fun touch! Alternative: You can use pimento-stuffed olives or capers for a different look.

Optional Dipping Sauce

  • Cranberry sauce – This sweet and tangy sauce pairs wonderfully with the savory flavors of the Mummy Brie.
  • Pumpkin spice dip – Add a festive twist; perfect for giving guests a taste of the season!

Feel free to get creative with these ingredients and make your Mummy Brie as spooky as possible!

Step‑by‑Step Instructions for Mummy Brie

Step 1: Prepare the Puff Pastry
Start by preheating your oven to 400°F (200°C). While it warms, roll out the thawed puff pastry on a lightly floured surface until it’s about 1/8 inch thick. Cut the pastry into long strips—these will form the mummy wrap. Make sure to have plenty of strips to wrap around the Brie, ensuring a spooky and delicious outer layer.

Step 2: Assemble the Brie
Place the brie cheese in the center of a baking sheet lined with parchment paper. Carefully drape the prepared pastry strips over the brie, creating a mummy-like appearance. Leave gaps in the strips to give it an authentic look, allowing the cheese to peek through. For a nice touch, connect the strips, making sure to cover the top and sides well.

Step 3: Apply the Egg Wash
In a small bowl, whisk together an egg with a tablespoon of water to create the egg wash. With a pastry brush, generously brush this mixture all over the puff pastry to promote a beautiful golden color as it bakes. The shiny finish will make your Mummy Brie look irresistibly inviting, perfect for any Halloween gathering.

Step 4: Bake to Perfection
Carefully place the baking sheet with your assembled Mummy Brie into the preheated oven. Bake for about 20-25 minutes, or until the pastry is puffed and golden brown. Keep an eye on it; once the pastry is crispy and the cheese is oozing out (a delightful sight!), it’s time to take it out of the oven.

Step 5: Add Spooky Eyes
While the Mummy Brie cools for a few moments, prepare the "eyes." Slice olives into small rounds, or use pimento-stuffed olives if you prefer. Gently press them onto the surface of the baked pastry to create the mummy's eyes. This small detail will add a fun spooky factor to your delicious creation!

Step 6: Serve with Dipping Sauce
Transfer the Mummy Brie onto a serving platter, and clear a space for your dipping sauces. Set out cranberry sauce or pumpkin spice dip to accompany this festive appetizer. The combination of savory brie and sweet sauces will delight your guests, making this Halloween treat a memorable addition to your spooky soirée!

How to Store and Freeze Mummy Brie

Room Temperature: Let Mummy Brie cool completely before storing at room temperature for up to 2 hours. If not serving immediately, wrap it tightly in plastic wrap to keep it fresh.

Fridge: Store leftover Mummy Brie in an airtight container in the fridge for up to 3 days. Reheat in the oven at 350°F (175°C) for about 10 minutes to regain its crispy texture.

Freezer: For longer storage, freeze the unbaked Mummy Brie wrapped tightly in plastic wrap and aluminum foil for up to 2 months. When ready to bake, thaw in the refrigerator overnight, then apply the egg wash and bake as directed.

Reheating: If reheating cooked Mummy Brie, gently warm it in the oven at 350°F (175°C) for about 15-20 minutes until heated through. This way, you can enjoy this spooky appetizer without losing its cheesy goodness!

What to Serve with Mummy Brie

Indulge your guests by pairing this delightful cheesy treat with a variety of delicious accompaniments that enhance the spooky experience.

  • Cranberry Sauce: This sweet and tangy dip complements the creamy Brie perfectly, balancing flavors while adding a pop of color to your plate.
  • Pumpkin Spice Dip: A seasonal favorite, this dip provides a warm and spicy note that ties in the Halloween spirit. Dip away!
  • Vegetable Platter: Crunchy carrots, celery, and bell peppers offer a fresh contrast to the richness of the Mummy Brie, creating a well-rounded appetizer spread.
  • Spooky Cocktails: Craft themed cocktails such as a “Witch’s Brew” with blue Curacao and lemon-lime soda to invigorate the party atmosphere.
  • Cheese Board: Enhance your spread with assorted cheeses, crackers, and nuts, creating a visually stunning display that invites mingling.
  • Spiced Pumpkin Seeds: For a fun and crunchy topping, these seeds add a delightful texture and hint of spice, appealing to the seasonal theme.
  • Garlic Breadsticks: Cozy and warm, these breadsticks can be dipped in the melted cheese for a heavenly combination of flavors and textures.
  • Gloomy Grapes: Offer dark grapes or blueberries for a sweet yet eerie touch; their deep color aligns perfectly with the Halloween ambiance.

Make Ahead Options

These Mummy Brie treats are perfect for busy home cooks looking to save time! You can prepare the puff pastry wraps up to 24 hours in advance. Simply cut and shape the pastry strips, then store them in an airtight container in the refrigerator to maintain their freshness. The Brie cheese can also be placed in the center of the baking sheet and covered with plastic wrap until you are ready to bake. When ready to serve, simply drape the chilled pastry strips over the Brie, brush with egg wash, and bake as directed. This way, you’ll enjoy deliciously spooky results without the last-minute rush!

Mummy Brie Variations & Substitutions

Customize your Mummy Brie and make it even more delightful with these fun and easy variations!

  • Herb-Infused Cheese: Replace Brie with herbed goat cheese for a fresh flavor twist. The tangy zest adds a delightful surprise.

  • Spicy Mummy: Add a sprinkle of crushed red pepper flakes to the egg wash for a hint of heat. It’ll tantalize the taste buds while still being a spooky treat!

  • Gluten-Free Option: Use gluten-free puff pastry to accommodate dietary restrictions. You'll still enjoy that flaky texture while keeping it inclusive.

  • Sweet Surprise: Fill the base with a layer of cranberry sauce before wrapping the Brie. This sweet touch pairs beautifully with the creamy cheese for a festive flavor.

  • Veggie Mummy: Swap olives for sliced cherry tomatoes or bell peppers for a colorful presentation. These fresh veggies add a burst of flavor and fun!

  • Avocado Twist: Add a slice of avocado under the pastry for a creamy, flavorful addition. It not only enhances taste but also provides a unique texture contrast.

  • Mini Mummies: Create bite-sized versions of the Mummy Brie using small rounds of cheese. Perfect for an appetizer spread or kids' party snacks!

  • Pumpkin Spice Filling: For a seasonal twist, mix some pumpkin puree and spices with the cheese filling. It's a cozy, autumn-inspired version that brings the Halloween spirit to life.

Feel inspired? Try exploring other festive treats and snacks during your Halloween gatherings, such as spooky snacks.

Tips for the Best Mummy Brie

  • Perfect Pastry Prep: Make sure the puff pastry is fully thawed to avoid tearing, allowing for easy wrapping around the Brie.

  • Egg Wash Magic: Don’t skip the egg wash! It gives the pastry a beautiful golden hue, making your Mummy Brie irresistible and picture-perfect.

  • Cheese Choice: Choose a good quality Brie; it should be creamy and flavorful. Alternatively, Camembert works wonderfully for a similar taste and texture.

  • Spooky Eyes: Use olives or capers for eyes to give your Mummy Brie character. Add them after baking for that perfect creepy touch without losing their shape.

  • Bake Wisely: Keep an eye on your oven; baking times can vary! Remove the Mummy Brie once the pastry is crisp and golden, ideally with melted cheese oozing out.

  • Serve Fresh: Mummy Brie is best enjoyed warm, fresh from the oven, paired with your dipping sauce for a delightful taste experience!

Mummy Brie Recipe FAQs

How do I choose the best Brie cheese?
The perfect Brie should be creamy, soft, and have a rich flavor. Look for a cheese that is well-rounded and not too hard; ideally, it should have a slight give when pressed. If you're not a fan of Brie, Camembert is an excellent alternative with a similar texture and taste.

How should I store leftover Mummy Brie?
After serving, let your Mummy Brie cool completely before storing it. You can keep it at room temperature for up to 2 hours. For longer storage, move it to the fridge using an airtight container, where it will last for up to 3 days. When you're ready to enjoy it again, simply reheat in the oven at 350°F (175°C) for about 10 minutes to restore its delightful crispiness.

Can I freeze Mummy Brie?
Absolutely! To freeze your unbaked Mummy Brie, wrap it tightly in plastic wrap followed by aluminum foil. It can stay in the freezer for up to 2 months. When you’re ready to bake it, simply thaw it in the refrigerator overnight. Then, apply the egg wash and bake as directed — the same delicious flavor awaits you!

Why is my puff pastry not puffing up?
If your pastry isn't puffing well, it could be due to a few reasons. Ensure that your pastry is properly thawed but still cool, as warm dough can become too sticky. Avoid overworking the pastry when wrapping, and brush it with the egg wash generously; this promotes browning and puffing as it bakes. Lastly, make sure your oven is preheated to the right temperature to create that lovely steam action in the pastry.

What can I serve with Mummy Brie?
Mummy Brie is versatile and pairs wonderfully with a variety of dips! I recommend serving it with cranberry sauce for a sweet-and-savory experience, or for something more festive, a pumpkin spice dip adds seasonal flair. You could also offer a selection of crackers or fresh fruits to embellish your appetizer spread. The more, the merrier when it comes to flavor!

Are there any dietary considerations for Mummy Brie?
If you're preparing Mummy Brie for guests with dietary restrictions, you can make adjustments! For lactose intolerance, consider using lactose-free cheese options. For a vegan version, explore plant-based cheeses that mimic the creamy texture of Brie, although the pastry will still require adjustments. Always check for allergens, especially if serving olives, as some people may have sensitivities to certain varieties.

Mummy Brie

Mummy Brie: A Spooky and Cheesy Halloween Delight

Mummy Brie is a delightful Halloween appetizer featuring creamy Brie wrapped in flaky pastry, perfect for spooky gatherings.
Print Recipe Pin Recipe
Prep Time 15 minutes mins
Cook Time 25 minutes mins
Cooling Time 5 minutes mins
Total Time 45 minutes mins
Servings: 8 pieces
Course: Snacks
Cuisine: Halloween
Calories: 250
Ingredients Equipment Method Nutrition Notes

Ingredients
  

For the Mummy Wrap
  • 1 sheet Puff pastry thawed
  • 1 large Egg for egg wash
  • 1 tbsp Water for egg wash
For the Filling
  • 1 wheel Brie cheese can substitute with Camembert
For Decoration
  • 4 pieces Olives sliced for eyes
Optional Dipping Sauce
  • 1 cup Cranberry sauce
  • 1 cup Pumpkin spice dip for a festive touch

Equipment

  • Baking Sheet
  • Parchment Paper
  • Pastry brush
  • Mixing Bowl

Method
 

Step-by-Step Instructions for Mummy Brie
  1. Preheat your oven to 400°F (200°C). Roll out the thawed puff pastry on a lightly floured surface until it's about 1/8 inch thick, and cut into strips.
  2. Place the brie cheese on a parchment-lined baking sheet and drape pastry strips over it, leaving gaps for an authentic mummy look.
  3. In a bowl, whisk together the egg with water for the egg wash. Brush it generously over the pastry.
  4. Bake in the preheated oven for 20-25 minutes until puffed and golden brown; keep an eye on it to ensure it doesn't burn.
  5. Slice olives to prepare the eyes, and gently press them onto the cooled pastry.
  6. Transfer to a serving platter, and serve with cranberry sauce or pumpkin spice dip.

Nutrition

Serving: 1pieceCalories: 250kcalCarbohydrates: 20gProtein: 6gFat: 19gSaturated Fat: 10gPolyunsaturated Fat: 1gMonounsaturated Fat: 6gCholesterol: 65mgSodium: 300mgPotassium: 130mgSugar: 2gVitamin A: 800IUVitamin C: 1mgCalcium: 150mgIron: 1mg

Notes

Ensure the puff pastry is fully thawed before use. Serve warm for best flavor.

Tried this recipe?

Let us know how it was!

No-Bake Banana Cinnamon Energy Bites for Sweet Fuel Anytime

September 2, 2025 by Grace Snow Leave a Comment

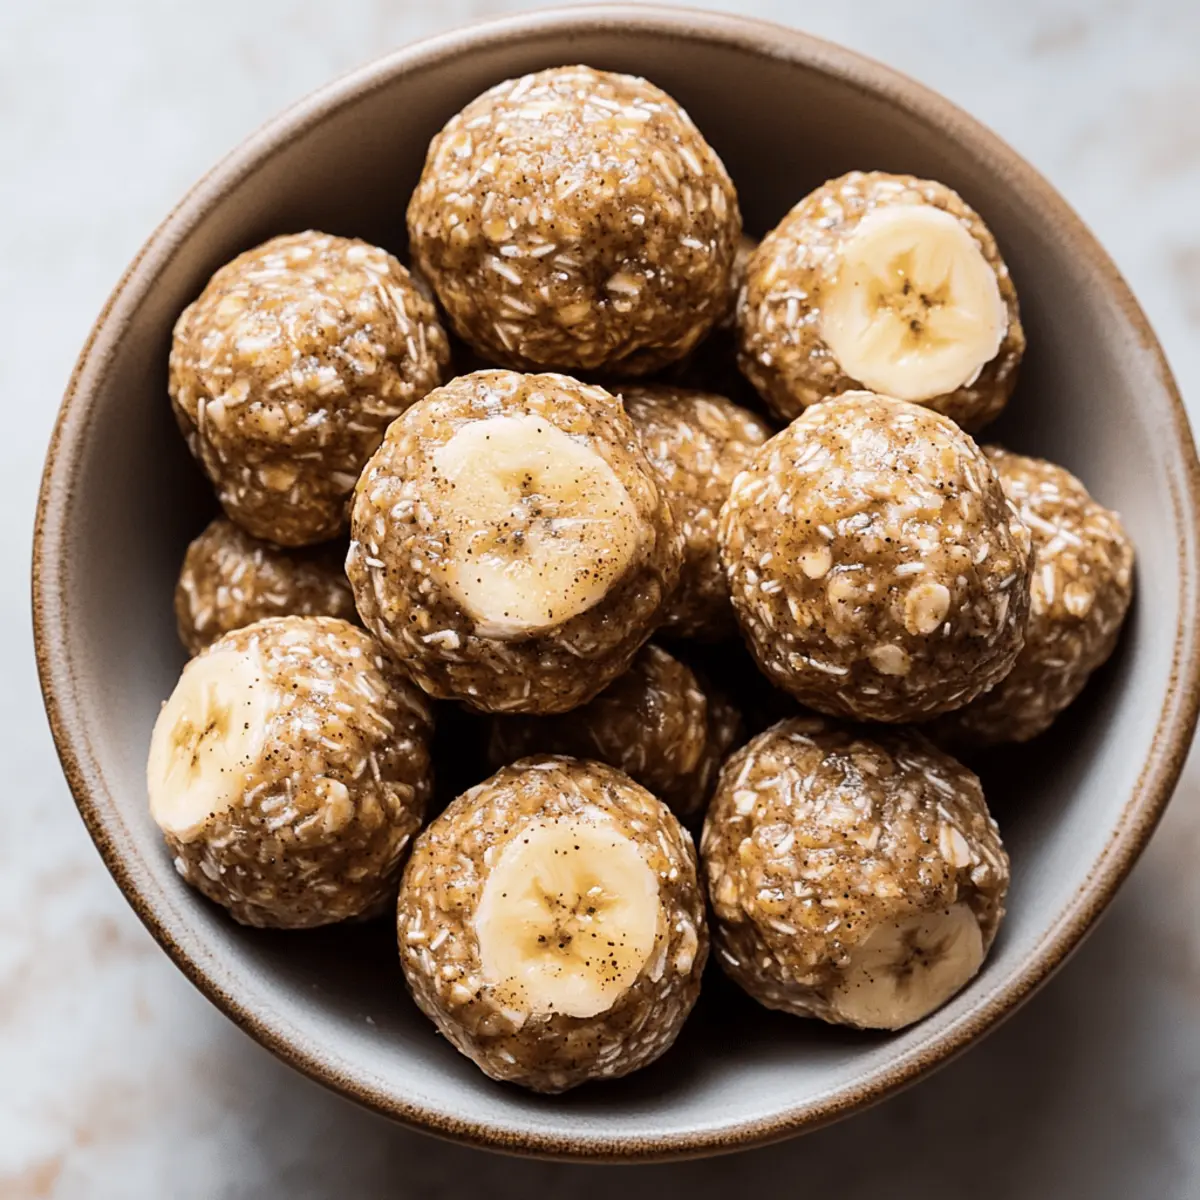
As I stood in my kitchen, the aroma of cinnamon wafted through the air, instantly wrapping me in a comforting embrace. It was time to whip up my No-Bake Banana Cinnamon Energy Bites, a delightful recipe that never fails to brighten my day. In just 10 minutes, these chewy morsels transform wholesome ingredients into a snack that’s perfect for busy mornings or that post-workout pick-me-up. With the heartiness of oats and the natural sweetness of ripe bananas, they merge the nostalgic goodness of banana bread with the convenience of quick snacks. Not only are these energy bites a healthier alternative to store-bought options, but they’re also customizable; toss in some chocolate chips or nuts for an extra pop of flavor! Ready to fuel your day with a homemade touch? Let’s dive into this simple and satisfying recipe!

Why are No-Bake Energy Bites Perfect?

Convenience at Its Core: You’ll whip up these No-Bake Banana Cinnamon Energy Bites in just 10 minutes, making it an ideal recipe for busy lifestyles.
Nutrient-Packed Satisfaction: With wholesome oats and ripe bananas, these bites are a nutritious treat that keep you energized throughout the day.
Customizable Goodness: Feel free to mix in chocolate chips or nuts for added textures, ensuring every batch is uniquely yours.
No-Bake Wonder: Skip the oven! These bites come together without any baking, keeping your kitchen cool and cleanup easy.
Crowd-Pleasing Snack: Whether for post-workout fuel or an afternoon treat, these bites are sure to make friends and family smile, much like my Pumpkin Cinnamon Roll Muffins do!
Great for Meal Prep: Make a batch ahead of time and store them in the fridge for snacks all week long—much simple than reaching for fast food!

No-Bake Banana Cinnamon Energy Bites

• Let’s get cooking!

For the Bites

  • Rolled Oats – Provides the essential chewy texture; stick with old-fashioned oats for the best results.
  • Mashed Ripe Banana – Adds natural sweetness and moisture, making each bite delightful; you can use ½ cup of applesauce for a different twist.
  • Peanut Butter or Almond Butter – Brings creaminess and a protein punch; for nut-free options, swap it with sunflower seed butter.
  • Honey or Maple Syrup – Acts as a sweetener and a binder to hold everything together; agave syrup or brown rice syrup can serve as great alternatives.
  • Ground Cinnamon – Infuses the bites with warm flavor; feel free to adjust the quantity to suit your taste.
  • Vanilla Extract – Elevates the overall flavor; opt for high-quality vanilla for the best results.
  • Pinch of Salt – Enhances the overall sweetness and balance; it really makes the flavors pop.
  • Optional: Mini Chocolate Chips or Chopped Nuts – For added crunch and sweetness; consider using dried fruit instead for an extra chewiness.

With these simple ingredients, you're just moments away from enjoying your very own No-Bake Banana Cinnamon Energy Bites!

Step‑by‑Step Instructions for No-Bake Banana Cinnamon Energy Bites

Step 1: Mix Wet Ingredients
In a medium mixing bowl, combine 1 mashed ripe banana, ½ cup of peanut butter (or your preferred nut butter), 2 tablespoons of honey (or maple syrup), 1 teaspoon of vanilla extract, 1 teaspoon of ground cinnamon, and a pinch of salt. Use a fork or spatula to mix until the ingredients blend smoothly, creating a creamy, cohesive texture that looks inviting.

Step 2: Add Oats
Next, fold in 1 cup of rolled oats using a spatula. Stir gently to ensure each oat is coated with the sticky mixture. If you're including add-ins like mini chocolate chips or chopped nuts, now’s the perfect time to add about ¼ cup of your choice. Mix until everything is evenly distributed, creating a deliciously fragrant mixture that’s begging to be rolled.

Step 3: Chill
To make rolling easier, cover your bowl with plastic wrap and refrigerate for 15–20 minutes. This step helps firm up the mixture, allowing it to hold together better as you shape it into bites. You'll know it’s ready when the mixture is slightly stiff but still pliable, creating the perfect foundation for your No-Bake Banana Cinnamon Energy Bites.

Step 4: Roll
Once chilled, use a tablespoon to scoop out portions of the mixture. Roll each portion into your hands to form small balls, about the size of a golf ball. If the mixture feels sticky, dampen your hands lightly with water to make rolling easier. Place each ball on a parchment-lined tray, and admire your progress as they take shape!

Step 5: Store
After rolling out all the energy bites, transfer them to an airtight container. Store in the refrigerator for up to one week for a quick grab-and-go snack, or freeze them for 2–3 months to enjoy later. As you pop the lid on your container, feel satisfied knowing you’ve created a healthy, homemade treat that’s ready whenever you need a little fuel!

No-Bake Banana Cinnamon Energy Bites Variations

Feel free to get creative and make these energy bites your own with delightful swaps and added flavors.

  • Espresso Boost: Add 1 tablespoon of espresso powder for a subtle coffee kick to energize your day. Coffee lovers will adore how it enhances the flavor profile!

  • Citrus Zest: Incorporate the zest of one orange or lemon for a refreshing citrus twist that brightens each bite. It’s a fantastic way to wake up your taste buds!

  • Nut Butter Swap: Substitute almond butter for peanut butter or use sunflower seed butter for a nut-free version, capturing the same creamy goodness without the nuts.

  • Vegan Sweetener: Replace honey with agave syrup or brown rice syrup to easily make this recipe vegan-friendly without compromising on sweetness.

  • Flavorful Spices: Experiment with a pinch of nutmeg or ginger for an aromatic depth that pairs perfectly with cinnamon, adding warmth and complexity to each bite.

  • Dried Fruit Addition: Mix in ¼ cup of dried cranberries, raisins, or apricots for a sweet and chewy surprise that makes these energy bites even more satisfying.

  • Extra Crunch: Toss in ¼ cup of chia seeds or flaxseeds for added nutrition and a delightful crunch that complements the texture of the oats beautifully.

  • Chocolate Lovers Delight: Fold in dark chocolate chunks or cocoa nibs to satisfy your chocolate cravings, turning these bites into a decadent treat that feels indulgent yet wholesome.

As you substitute ingredients or add new elements, remember to keep it fun—just like in my recipes for Pumpkin Cinnamon Roll muffins or Pumpkin Cinnamon Roll cupcakes. Let your taste preferences guide you, and happy snacking!

Expert Tips for No-Bake Energy Bites

  • Use Ripe Bananas: Ensure your bananas are fully ripe to maximize natural sweetness and binding; under-ripe bananas will make rolls crumbly.

  • Chill Thoroughly: Don’t skip the chilling step! This helps the mixture firm up, making it easier to roll into perfect bites without sticking to your hands.

  • Choose the Right Oats: Stick to old-fashioned rolled oats for the best texture; quick oats can lead to a gummy consistency in your No-Bake Banana Cinnamon Energy Bites.

  • Experiment with Flavors: Don’t hesitate to get creative! Adding extras like dark chocolate chips or spices can elevate your energy bites to a new level of deliciousness.

  • Rolling Technique: If the mixture is too sticky, moisten your hands with water; this simple trick can make the rolling process much smoother and more enjoyable.

What to Serve with No-Bake Banana Cinnamon Energy Bites

These delightful energy bites create a wholesome snack experience that goes beyond just sweetness and flavor.

  • Greek Yogurt Parfait: Layer creamy Greek yogurt with fresh fruit and granola for a delightful breakfast that complements the chewy bites.

  • Fresh Berries: Serve a bowl of vibrant strawberries or blueberries to add a juicy freshness that balances the richness of the energy bites.

  • Nutty Granola: A sprinkle of crunchy granola adds a delightful texture contrast, enhancing the flavors of both the energy bites and your morning routine.

Imagine a cozy breakfast table graced with these flavors—perfect for kick-starting your day!

  • Herbal Tea: Sip on a warm cup of chamomile or peppermint tea, offering a cozy sip to pair with your energy bites for an afternoon delight.

  • Apple Slices with Almond Butter: Crisp apple slices drizzled with almond butter create a satisfying combo that adds a dose of fiber to your snacking routine.

  • Dark Chocolate Treats: How about a few pieces of dark chocolate on the side? The bitterness of the chocolate heightens the sweetness of the energy bites for a decadent touch.

  • Milk or Plant-Based Drink: Pair with a tall glass of cold milk or almond milk to wash down the bites and keep you feeling refreshed.

These pairing ideas not only complement your No-Bake Banana Cinnamon Energy Bites but elevate them into a delightful and complete snacking experience!

How to Store and Freeze No-Bake Banana Cinnamon Energy Bites

Fridge: Keep your energy bites in an airtight container in the fridge for up to 1 week. This allows you to grab a delicious snack on the go!

Freezer: For longer storage, freeze the energy bites for 2–3 months. Layer them between parchment paper in an airtight container to avoid sticking.

Thawing: When ready to enjoy, simply remove the desired amount from the freezer and let them thaw in the fridge for a few hours or at room temperature for about 30 minutes.

On-the-Go: You can also pack a few bites in a zip-top bag for a quick snack, making it easy to fuel your day whenever you need it!

Make Ahead Options

These No-Bake Banana Cinnamon Energy Bites are perfect for meal prep enthusiasts! You can mix all the ingredients and chill the mixture up to 24 hours in advance; this allows the flavors to meld beautifully and makes for easier rolling later. For optimal quality, refrigerate the prepared mixture in an airtight container. When you're ready to serve, simply roll the chilled mixture into bite-sized balls—if the mixture feels too soft, refrigerate for an additional 15 minutes before rolling. These energy bites store well in the fridge for up to 1 week or can be frozen for 2–3 months, ensuring you always have a wholesome snack at hand!

No-Bake Banana Cinnamon Energy Bites Recipe FAQs

What type of bananas should I use?
Absolutely! It's best to use fully ripe bananas for this recipe. Look for those that are slightly speckled with brown spots, as they will be sweeter and easier to mash, ensuring your energy bites have the perfect texture and flavor.

How should I store my energy bites?
For optimal freshness, keep your No-Bake Banana Cinnamon Energy Bites in an airtight container in the fridge for up to 1 week. If you prefer longer storage, you can freeze them for 2–3 months. Just layer them between parchment paper in your container to prevent sticking!

Can I freeze these energy bites?
Yes, you can! To freeze your energy bites, make sure they are rolled into balls first. Place them on a parchment-lined baking sheet and freeze until firm. Then, transfer them to an airtight container or freezer bag, separating layers with parchment paper. When ready to enjoy, thaw at room temperature for 30 minutes or in the fridge for a few hours.

What if my mixture is too sticky to roll?
Very! If your mixture feels too sticky, simply dampen your hands lightly with water before rolling. This helps keep the mixture from adhering to your palms and allows you to form perfect little bites with ease. If the mixture is still too warm, chill it for an additional 10 minutes to firm it up.

Are these energy bites safe for all dietary needs?
While the No-Bake Banana Cinnamon Energy Bites are naturally vegetarian, adjustments can be made for various dietary needs. For nut allergies, you can easily substitute peanut or almond butter with sunflower seed butter. If you're looking for a vegan option, replace honey with agave syrup or maple syrup. Always check ingredient labels for any potential allergens!

How long do they take to prepare?
You’ll be delighted to know that making these No-Bake Banana Cinnamon Energy Bites takes just about 10 minutes! Plus, with the chilling time, you're only looking at a total of around 30 minutes before they’re ready to enjoy. Perfect for quick snack prep!

No-Bake Banana Cinnamon Energy Bites

No-Bake Banana Cinnamon Energy Bites for Sweet Fuel Anytime

Delight in No-Bake Banana Cinnamon Energy Bites, the perfect sweet fuel for anytime snack.
Print Recipe Pin Recipe
Prep Time 10 minutes mins
Chill Time 15 minutes mins
Total Time 25 minutes mins
Servings: 12 bites
Course: Snacks
Calories: 90
Ingredients Equipment Method Nutrition Notes

Ingredients
  

For the Bites
  • 1 cup Rolled Oats Use old-fashioned oats for best results.
  • 1 large Mashed Ripe Banana Can substitute with ½ cup of applesauce.
  • ½ cup Peanut Butter or Almond Butter Can use sunflower seed butter for nut-free option.
  • 2 tablespoons Honey or Maple Syrup Agave syrup or brown rice syrup can be used as alternatives.
  • 1 teaspoon Ground Cinnamon Feel free to adjust to taste.
  • 1 teaspoon Vanilla Extract Opt for high-quality vanilla for best results.
  • 1 pinch Salt Enhances sweetness and balance.
  • ¼ cup Optional Mini Chocolate Chips or Chopped Nuts Can substitute with dried fruit for chewiness.

Equipment

  • Mixing Bowl
  • Spatula
  • tablespoon
  • plastic wrap
  • Airtight Container

Method
 

Step-by-Step Instructions
  1. In a medium mixing bowl, combine 1 mashed ripe banana, ½ cup of peanut butter, 2 tablespoons of honey, 1 teaspoon of vanilla extract, 1 teaspoon of ground cinnamon, and a pinch of salt. Mix until smooth.
  2. Fold in 1 cup of rolled oats gently using a spatula until each oat is coated. Stir in any add-ins like mini chocolate chips or nuts if desired.
  3. Cover the bowl with plastic wrap and refrigerate for 15–20 minutes to firm up the mixture.
  4. Scoop portions of the mixture and roll into small balls. If sticky, moisten your hands with water. Place on a parchment-lined tray.
  5. Transfer rolled energy bites to an airtight container and store in the fridge for up to one week or freeze for 2–3 months.

Nutrition

Serving: 1biteCalories: 90kcalCarbohydrates: 10gProtein: 3gFat: 4gSaturated Fat: 1gMonounsaturated Fat: 3gSodium: 50mgPotassium: 100mgFiber: 1gSugar: 4gVitamin C: 2mgCalcium: 2mgIron: 4mg

Notes

Use ripe bananas for maximum sweetness. Chilling the mixture is essential for easy rolling. Customize with various add-ins for unique flavors.

Tried this recipe?

Let us know how it was!

Mouthwatering Basic Soft Pretzels for Your Homemade Snack Joy

September 1, 2025 by Grace Snow Leave a Comment

As I stood in my kitchen, the warm scent of baking dough enveloped me, instantly transporting me to bustling street fairs where vendors serve up golden-brown delights. Today, I’m excited to share my recipe for Basic Soft Pretzels—your new go-to for an impressive yet simple snack. These homemade pretzels are not only fantastically fluffy and chewy, but they also come together in a breeze, making them perfect for last-minute gatherings or cozy movie nights in. You’ll love how easy they are to whip up, and trust me, your family and friends will be asking for seconds! Want to learn the secrets to achieving that delectable crust and tender interior? Let’s dive into the magic of pretzel-making together!

Why are These Soft Pretzels Irresistible?

Homemade Perfection: There's nothing quite like the satisfaction of making soft pretzels from scratch—warm, fluffy, and oh-so-chewy.

Easy to Make: With simple ingredients, this recipe is perfect for beginners or anyone looking for a quick baking fix.

Endless Flavor Possibilities: Add toppings like coarse salt, garlic, or shredded cheese to customize your pretzels. You can even serve them with a dip, just like with Eggnog Cookies Soft!

Crowd Pleaser: Whether it's movie night or a party, these pretzels will impress your guests every time.

Homestyle Comfort: Enjoy the nostalgic flavors that remind you of street fairs, making every bite a delightful experience!

Discover the joy of homemade snacks—it's time to get baking!

Basic Soft Pretzels Ingredients

  • For the Dough
    • Warm Water – Essential for activating yeast; ensure it's not too hot to avoid killing the yeast.
    • Sugar – Adds sweetness and helps activate the yeast; use brown sugar for a hint of molasses flavor.
    • Active Dry Yeast – Leavens the dough for a fluffy texture; can substitute with instant yeast by adjusting activation time.
    • All-Purpose Flour – Provides structure and chewiness; bread flour can be used for an even chewier result.
    • Salt – Enhances flavor; sea salt or kosher salt can work well as alternatives.

  • For the Baking Process
    • Baking Soda – Used in the water bath to give pretzels their distinctive brown color and flavor; do not substitute with other ingredients.
    • Melted Butter – Adds richness and flavor; can be brushed on top for an extra buttery finish.

Dive into creating scrumptious Basic Soft Pretzels, the perfect addition to your homemade snack repertoire!

Step‑by‑Step Instructions for Basic Soft Pretzels

Step 1: Activate the Yeast
In a mixing bowl, combine 1 ½ cups of warm water (not too hot) with 1 tablespoon of sugar and 2 ¼ teaspoons of active dry yeast. Stir gently and let it sit for about 5 minutes until frothy, indicating the yeast is alive and ready to create those fluffy textures characteristic of Basic Soft Pretzels.

Step 2: Form the Dough
Once the yeast mixture is frothy, gradually add 4 cups of all-purpose flour and 1 teaspoon of salt to the bowl. Mix with a wooden spoon until a shaggy dough forms. Knead the dough on a floured surface for 10-15 minutes until it becomes smooth and elastic, which is crucial for that perfect chewy bite you want in your pretzels.

Step 3: Let the Dough Rise
Place the kneaded dough in a lightly greased bowl, covering it with a kitchen towel or plastic wrap. Let it rise in a warm spot for about 1 hour, or until it has doubled in size. This step is essential for achieving the light and airy interior of your Basic Soft Pretzels.

Step 4: Preheat the Oven
While your dough is rising, preheat your oven to 450°F (232°C). This high temperature is crucial for creating that golden-brown crust on your pretzels. Prepare a baking sheet by lining it with parchment paper to ensure your pretzels don’t stick during baking.

Step 5: Shape the Pretzels
Once the dough has risen, punch it down and divide it into 8 equal pieces. Roll each piece into long ropes, approximately 24 inches in length. Shape the ropes into classic pretzel shapes by forming a U, twisting the ends together, and folding them back to the bottom of the U. Place the shaped pretzels on your prepared baking sheet.

Step 6: Prepare the Baking Soda Bath
In a large pot, bring 4 cups of water to a gentle boil. Stir in ¼ cup of baking soda—this is what gives your Basic Soft Pretzels their signature color and flavor. Carefully lower each pretzel into the boiling water for about 30 seconds, then remove and place them back on the baking sheet.

Step 7: Sprinkle and Bake
Immediately after dipping, sprinkle each pretzel with coarse salt for that classic salty finish. Bake your pretzels in the preheated oven for 12-15 minutes, or until they are deep golden brown and your kitchen is filled with the delightful aroma of freshly baked bread.

Step 8: Brush with Butter
Once baked, remove the pretzels from the oven and allow them to cool slightly on a wire rack. For an extra touch of richness and flavor, brush the warm pretzels generously with melted butter. This final step enhances their taste, making your Basic Soft Pretzels irresistible!

Basic Soft Pretzels: Delicious Variations

Feel free to get creative with your soft pretzel adventure—these delightful variations will tantalize your taste buds!

  • Cheesy Twists: Add shredded cheese into the dough for a gooey and savory flavor. Just imagine taking a bite and pulling away that delicious cheese stretch!

  • Garlic Herb: Mix in garlic powder, dried oregano, and rosemary for a fragrant herbaceous twist. These pretzels will transport you to a cozy Italian kitchen.

  • Sweet Cinnamon Sugar: Before baking, sprinkle the shaped pretzels with a mixture of cinnamon and sugar for a sweet treat. Perfect for dessert or a cozy morning snack!

  • Spicy Kick: Incorporate cayenne pepper or crushed red pepper flakes into the dough for a hint of heat. Pair these spicy pretzels with creamy ranch dip for a fun party snack.

  • Caramelized Onions: Sauté some finely chopped onions until caramelized and fold them into your dough. The sweetness of the onions will deepen the flavor and make these pretzels stand out.

  • Dipping Delight: Serve with various dips like cheese sauce, honey mustard, or spicy ketchup for a fun dipping experience. Who doesn't love a little variety?

  • Gluten-Free Option: Substitute all-purpose flour with a gluten-free flour blend. This way, those with dietary restrictions can enjoy the same fluffy goodness!

  • Chocolate-Covered Pretzels: After baking and cooling, dip your pretzels in melted chocolate and sprinkle with crushed nuts. A decadent twist that will delight both kids and adults alike!

Explore the endless possibilities and make these Basic Soft Pretzels a unique addition to your homemade snacks. Don’t forget to check out my delightful Matcha Cookies Soft for another sweet treat!

What to Serve with Basic Soft Pretzels?

Indulging in homemade soft pretzels invites a delightful experience perfect for casual gatherings and cozy nights in.

  • Creamy Cheese Dip: This rich dip enhances the pretzels’ flavor, offering a decadent contrast to their chewy texture.

  • Mustard Medley: A zesty mustard selection gives a tangy hit, balancing the warm, fluffy pretzels perfectly. Consider a whole grain mustard for extra texture!

  • Charcuterie Board: Pairing the pretzels with cured meats and cheeses creates a fun, shareable spread that’s sure to please guests.

  • Beer Cheese Soup: The combination of soft pretzels and this creamy, savory soup makes for a comforting, satisfying meal.

  • Pickled Vegetables: A crunchy, tangy side of pickled veggies adds brightness and contrast, making your snack plate more vibrant.

  • Sweet Cinnamon Sugar: For a delightful dessert twist, sprinkle your pretzels with cinnamon sugar and serve with a side of chocolate or caramel sauce for dipping.

Let your imagination run wild with these pairings and truly elevate your soft pretzel experience!

How to Store and Freeze Basic Soft Pretzels

  • Room Temperature: Store cooked pretzels in an airtight container for up to 2 days to maintain their freshness and texture.

  • Fridge: If you want to keep them longer, you can refrigerate the pretzels for up to 5 days. Just make sure they are in a tightly sealed container to prevent drying out.

  • Freezer: For longer storage, freeze the pretzels by wrapping them individually in plastic wrap, then placing them in a freezer bag or container for up to 3 months.

  • Reheating: To reheat, simply bake from frozen at 350°F (175°C) for about 10-15 minutes until warmed through, reviving that delightful texture of your Basic Soft Pretzels!

Expert Tips for Basic Soft Pretzels

  • Knead Well: Ensure you knead the dough thoroughly to develop gluten, which gives the pretzels their desired chewy texture.

  • Watch the Water Temperature: Use lukewarm water to activate the yeast; overheated water can kill the yeast, leading to flat pretzels.

  • Dissolve Yeast First: If using active dry yeast, dissolve it in warm water before mixing; this helps activate it effectively for better results.

  • Don’t Crowded the Baking Sheet: Make sure the pretzels are spaced appropriately on the baking sheet; overcrowding can lead to uneven baking and browning.

  • Enhance Flavor: Brush your pretzels with melted butter right after baking for an extra burst of flavor that makes these Basic Soft Pretzels unforgettable!

Make Ahead Options

These Basic Soft Pretzels are truly perfect for meal prep, saving you time on busy weeknights! You can prepare the dough up to 24 hours in advance by kneading it and refrigerating it after the first rise. When you're ready to enjoy your pretzels, simply remove the dough from the fridge and let it come to room temperature for 30-60 minutes before shaping. To ensure they remain fluffy and delightful, be sure to store the dough in an airtight container. If you have leftover baked pretzels, you can keep them in an airtight container for up to 2 days and reheat them in the oven for a few minutes before serving, ensuring they taste just as delicious as when they were freshly baked!

Basic Soft Pretzels Recipe FAQs

What kind of flour should I use for the best texture?
I recommend using all-purpose flour for a classic soft pretzel, but if you're seeking extra chewiness, bread flour is an excellent alternative. It has a higher protein content, which helps to develop gluten and gives the pretzels that perfect bite.

How should I store leftover pretzels?
Store your cooked Basic Soft Pretzels in an airtight container at room temperature for up to 2 days. If you need to keep them longer, refrigerate them for about 5 days in a sealed container to prevent drying out.

Can I freeze homemade pretzels?
Absolutely! To freeze your Basic Soft Pretzels, wrap each one individually in plastic wrap and place them in a freezer bag. They can be frozen for up to 3 months. When you're ready to enjoy them, simply bake from frozen at 350°F (175°C) for 10-15 minutes until warmed through.

What should I do if my dough doesn’t rise?
If your dough doesn’t rise, it could be due to the yeast being inactive. Make sure the water is warm but not too hot, as temperatures above 120°F (49°C) can kill the yeast. If this happens, don’t worry! You can add a new packet of yeast to warm water and let it sit until frothy, then combine it with your existing dough to salvage your pretzels.

Can I make pretzels ahead of time?
Yes, you can prepare the dough the night before! After kneading, refrigerate the dough. When you're ready to shape and bake, bring it back to room temperature and then continue with the shaping and baking steps. This is a great time-saver for parties and gatherings.

Are there any dietary considerations I should keep in mind?
If you have allergies, be cautious with the ingredients. The Basic Soft Pretzels contain gluten due to the flour, and the baking soda bath should not be modified. For those watching their sodium intake, you can control the amount of coarse salt you sprinkle on top, or even leave it off entirely.

Basic Soft Pretzels

Mouthwatering Basic Soft Pretzels for Your Homemade Snack Joy

Enjoy making Basic Soft Pretzels that are fluffy, chewy, and perfect for snacks.
Print Recipe Pin Recipe
Prep Time 15 minutes mins
Cook Time 15 minutes mins
Rising Time 1 hour hr
Total Time 1 hour hr 30 minutes mins
Servings: 8 pretzels
Course: Snacks
Cuisine: American
Calories: 250
Ingredients Equipment Method Nutrition Notes

Ingredients
  

For the Dough
  • 1.5 cups warm water not too hot
  • 1 tablespoon sugar can use brown sugar
  • 2.25 teaspoons active dry yeast can substitute with instant yeast
  • 4 cups all-purpose flour can use bread flour for chewier result
  • 1 teaspoon salt can use sea or kosher salt
For the Baking Process
  • 0.25 cups baking soda do not substitute with other ingredients
  • 3 tablespoons melted butter for brushing on top

Equipment

  • Mixing Bowl
  • Wooden spoon
  • Floured surface
  • Baking Sheet
  • Parchment Paper
  • Large pot
  • wire rack

Method
 

Step-by-Step Instructions for Basic Soft Pretzels
  1. In a mixing bowl, combine warm water with sugar and yeast. Stir gently and let it sit for about 5 minutes until frothy.
  2. Gradually add flour and salt. Mix with a wooden spoon until a shaggy dough forms. Knead on a floured surface for 10-15 minutes until smooth.
  3. Place the kneaded dough in a greased bowl and cover. Let it rise in a warm spot for about 1 hour, or until doubled.
  4. Preheat your oven to 450°F (232°C) and prepare a baking sheet lined with parchment paper.
  5. Punch down the dough and divide into 8 pieces. Roll each piece into long ropes and shape into pretzel forms.
  6. Bring 4 cups of water to a gentle boil and stir in baking soda. Lower each pretzel into the boiling water for about 30 seconds.
  7. Sprinkle pretzels with coarse salt immediately after boiling. Bake for 12-15 minutes until golden brown.
  8. Allow to cool slightly on a rack, then brush with melted butter for extra flavor.

Nutrition

Serving: 1pretzelCalories: 250kcalCarbohydrates: 40gProtein: 6gFat: 8gSaturated Fat: 4gPolyunsaturated Fat: 0.5gMonounsaturated Fat: 3gCholesterol: 15mgSodium: 480mgPotassium: 200mgFiber: 2gSugar: 1gVitamin A: 200IUCalcium: 20mgIron: 2mg

Notes

Ensure to knead well and watch water temperature for best results.

Tried this recipe?

Let us know how it was!

Loaded Turkey Panini: A Cozy Twist on Thanksgiving Leftovers

September 1, 2025 by Grace Snow Leave a Comment

As I rummaged through my fridge, memories of Thanksgiving flooded back—family gatherings, laughter, and the unforgettable spread of food. With leftovers piled high, I felt a mini crisis unfolding: what to do with all that turkey? Enter the Loaded Turkey Panini, a delightful solution that transforms your holiday remnants into a mouthwatering sandwich. This recipe is not only a celebration of flavors but also a quick and satisfying way to repurpose your Thanksgiving feast. Crisp, golden-brown bread encases layers of savory turkey, melted cheese, sweet cranberries, and crispy bacon, turning those leftover morsels into a crowd-pleaser. Perfect for busy weeknights, it’s a hearty option that brings warmth and joy back to the table. Curious how this festive creation comes together? Let’s dive in!

Why is the Loaded Turkey Panini a Must-Try?

Simplicity, making this Loaded Turkey Panini is a breeze, requiring just a few fresh ingredients and minimal prep time!
Layer upon layer of flavor creates an indulgent experience, blending savory turkey with tangy cranberries and creamy cheese.
Versatile options mean you can mix and match leftovers to make it your own—whether it’s incorporating stuffing or swapping proteins.
Crowd-pleasing appeal makes it perfect for the whole family; even the pickiest eaters will love this twist on traditional flavors!
Comfort in every bite, the crispy, golden-brown crust wrapped around warm, gooey fillings is like a cozy hug for your taste buds!
Quick and fulfilling, you can whip this up in under 30 minutes, ideal for busy weeknights or last-minute gatherings.

Loaded Turkey Panini Ingredients

• Dive into the delightful layers of flavor with this essential ingredient list for your Loaded Turkey Panini!

For the Bread

  • Sourdough or Ciabatta – A robust bread enhances griddling and holds all the fillings neatly together.

For the Filling

  • Leftover Roasted Turkey – Provides the foundation of flavor and moisture; any cooked turkey meat will do!
  • Muenster Cheese – Melts beautifully, offering a creamy texture; try Monterey Jack or Pepper Jack for a spicy twist.
  • Cranberry Sauce – Adds a lovely sweet and tangy flavor; you can substitute with fruit jam if needed.
  • Bacon – Gives a salty crunch; for a lighter alternative, consider using turkey bacon.
  • Goat Cheese – Contributes a tangy creaminess; you can swap this for cream cheese for a milder taste.

For the Flavor Boost

  • Fresh or Dried Sage – A aromatic herb that adds depth; fry it in bacon fat for an extra flavor punch.

With these ingredients, crafting your unforgettable Loaded Turkey Panini will be as enjoyable as savoring each delightful bite!

Step‑by‑Step Instructions for Loaded Turkey Panini

Step 1: Prep Ingredients
Start by gathering all your ingredients for the Loaded Turkey Panini. Heat a skillet over medium heat and fry the bacon until crispy, about 5-7 minutes. Once done, remove the bacon and set it aside on a paper towel to absorb excess grease. This step ensures a savory crunch in your sandwich.

Step 2: Layer Sandwich
Take one slice of your chosen bread, either sourdough or ciabatta, and layer it with generous slices of roasted turkey. Next, add a slice of Muenster cheese, a spoonful of cranberry sauce, crispy bacon, and a sprinkle of fried sage. Crumble goat cheese on top for an added creamy texture, then crown it with another slice of bread.

Step 3: Grill Panini
Preheat your panini press or skillet over medium-high heat. If you're using a skillet, you may want to add a drizzle of olive oil for an extra crispy finish. Place the sandwich in the press or skillet and grill it for about 3-5 minutes, until the bread is golden brown and the cheese is nicely melted. If using a skillet, flip the sandwich halfway through for even heating.

Step 4: Serve Hot
Once your Loaded Turkey Panini is beautifully crispy on the outside, remove it from the heat. Slice the panini in half to reveal the gooey, delicious interior and serve immediately. For an extra treat, offer additional cranberry sauce on the side or a light salad to balance the flavors, making it a delightful meal option.

Expert Tips for Loaded Turkey Panini

  • Bread Choice Matters: Choose sturdy bread like sourdough or ciabatta; it holds fillings better and ensures a crispy crust without falling apart.
  • Don’t Overstuff: Less is more! Overloading the panini can prevent it from grilling evenly. Balance your ingredients for the best results.
  • Preheat for Perfection: Always preheat your panini press or skillet to achieve that golden-brown crust and melted cheese inside—no one likes a soggy sandwich!
  • Flavor Boost with Sage: For a fragrant touch, fry fresh or dried sage in the bacon fat. Just watch them closely to avoid burning!
  • Customize Your Creation: Use your favorite Thanksgiving leftovers; this Loaded Turkey Panini is versatile, so let your imagination run wild!

Loaded Turkey Panini Variations

Feel free to get creative and personalize the Loaded Turkey Panini to suit your taste buds and dietary preferences!

  • Stuffing Boost: Mix in leftover stuffing for an extra hearty sandwich that's packed with comforting flavors. The layers of turkey and stuffing create a delightful bite reminiscent of Thanksgiving dinner.

  • Chicken or Ham Swap: If turkey's not your thing, swap it out for leftover chicken or ham. Both options lend a different charm, and you can explore new flavor profiles with each choice.

  • Spicy Kick: For those who enjoy a little heat, add jalapeños or a zesty pepper jack cheese. The spiciness will complement the savory ingredients and take your panini to the next level.

  • Vegetable Delight: Roast some seasonal vegetables like butternut squash or Brussels sprouts. Their earthy sweetness pairs beautifully with the savory turkey for a wholesome, veggie-packed twist.

  • Sweet Apple Addition: Thinly slice fresh apples to add a crisp, refreshing crunch. The sweetness of the apples will balance the savory elements and create a lovely contrast in every bite.

  • Avocado Creaminess: Spread fresh avocado on the inside of the bread for added creaminess and healthy fats. This twist not only enhances the flavor but also adds a silky texture.

  • Herb Infusion: Experiment with different herbs like rosemary or thyme instead of sage for a unique aroma and flavor. Toss them into the pan to mellow out and savor the fresh essence they bring.

Curious about other delightful recipes? Check out our delicious cranberry sauce to pair with your panini or discover how to use up leftovers with our creative stuffing recipes. Enjoy the journey of culinary exploration!

Make Ahead Options

These Loaded Turkey Panini are perfect for meal prep aficionados looking to save time during busy weeknights! You can prepare the fillings (turkey, cheese, cranberry sauce, and bacon) up to 3 days in advance; simply store them in separate airtight containers in the refrigerator to maintain freshness and prevent sogginess. When you're ready to enjoy these delicious paninis, assemble the sandwich just before grilling. Preheat your panini press or skillet, then grill for about 3-5 minutes until golden brown and melty. This method ensures that every bite is just as satisfying and flavorful as when made fresh, giving you a comforting meal with minimal effort!

How to Store and Freeze Loaded Turkey Panini

Fridge: Store any leftover Loaded Turkey Panini in an airtight container for up to 3 days. This helps maintain its freshness and prevents sogginess.

Freezer: If freezing, wrap individual paninis tightly in plastic wrap or aluminum foil, then place them in a freezer-safe bag. They can last up to 2 months in the freezer.

Reheating: To enjoy, thaw if frozen, then reheat in a skillet over medium heat for 5-7 minutes, flipping occasionally, or place it in a panini press until warmed through.

Make-Ahead: If preparing in advance, consider storing the fillings separately from the bread to maintain texture until you’re ready to assemble the Loaded Turkey Panini.

What to Serve with Loaded Turkey Panini

Bring the joy of your Thanksgiving feast to the table with these delightful pairings that elevate your Loaded Turkey Panini experience!

  • Crispy Sweet Potato Fries: Their natural sweetness complements the savory flavors of the panini, adding a satisfying crunch to each bite.

  • Fresh Green Salad: A light, crisp salad provides a refreshing contrast, balancing the richness of the panini with vibrant veggies and a zesty vinaigrette.

  • Creamy Tomato Soup: This classic pairing warms the soul, with the acidity of the tomatoes cutting through the richness of the melted cheese and turkey.

  • Garlic Butter Roasted Brussels Sprouts: These tender sprouts add a nutty, caramelized flavor, harmonizing beautifully with the savory elements of the sandwich.

  • Homemade Cranberry Sauce: A side of extra cranberry sauce amplifies the sandwich’s sweetness and tang, enhancing those festive flavors with every bite.

  • Savory Stuffing Bites: Crispy on the outside, fluffy on the inside, these delightful bites echo the flavors of the holiday while adding texture to your meal.

  • Herbed Grilled Cheese: For extra indulgence, serve mini herbed grilled cheese sandwiches alongside your panini; they’re perfect for dipping and elevate comfort food to new heights!

  • Sparkling Apple Cider: This bubbly drink has the perfect balance of sweetness and tartness, making it a refreshing complement to the hearty flavors of the panini.

  • Chocolate Chip Cookies: Finish your meal on a sweet note with warm cookies that provide a delightful contrast, treating your taste buds to a nostalgic end.

Loaded Turkey Panini Recipe FAQs

What type of bread works best for a Loaded Turkey Panini?
For the best results, I recommend using a robust bread like sourdough or ciabatta. These types hold up well when grilling and provide a lovely crispy crust, ensuring your panini doesn’t fall apart. Avoid airy or soft breads, as they may get soggy and won't provide that satisfying crunch.

How should I store leftover Loaded Turkey Panini?
Store any leftover Loaded Turkey Panini in an airtight container in the refrigerator for up to 3 days. This will help to maintain its freshness and prevent sogginess. If you're slightly pressed for time, you can place the sandwich directly into the container and enjoy it swiftly later.

Can I freeze Loaded Turkey Panini?
Absolutely! To freeze, wrap individual paninis tightly in plastic wrap or aluminum foil, then place them in a freezer-safe bag. They can last up to 2 months in the freezer. When you're ready to enjoy, let them thaw in the fridge overnight, then reheat in a skillet or panini press until warmed through—about 5-7 minutes on medium heat.

How can I prevent my panini from getting soggy?
To avoid a soggy Loaded Turkey Panini, store the components separately. Keep the fillings and bread apart until you're ready to grill. That way, the bread remains crisp, and you can enjoy a delicious panini without the unwanted moisture ruining your creation.

Are there any dietary considerations I should be aware of with this recipe?
Yes! If you or your guests have dietary restrictions, you can easily adapt this recipe. Swap in turkey bacon for a lighter option or use gluten-free bread to make it suitable for those with gluten sensitivities. Additionally, while this recipe contains dairy from the cheeses, you can opt for dairy-free alternatives for a vegan-friendly version!

What do I do if my cheese isn’t melting in the panini?
If your cheese isn't melting as you’d like, ensure your panini press or skillet is preheated adequately—this is crucial! Grilling the sandwich for longer over low heat can also help achieve that gooey texture that we crave. Just keep an eye on the bread to avoid burning!

Loaded Turkey Panini

Loaded Turkey Panini: A Cozy Twist on Thanksgiving Leftovers

Transform your Thanksgiving leftovers into a delicious Loaded Turkey Panini, combining savory turkey, melted cheese, and crispy bacon for a perfect snack.
Print Recipe Pin Recipe
Prep Time 10 minutes mins
Cook Time 10 minutes mins
Total Time 20 minutes mins
Servings: 2 paninis
Course: Snacks
Cuisine: American
Calories: 600
Ingredients Equipment Method Nutrition Notes

Ingredients
  

For the Bread
  • 2 slices Sourdough or Ciabatta Robust bread for filling
For the Filling
  • 4 oz Leftover Roasted Turkey Any cooked turkey meat will do
  • 1 slice Muenster Cheese Can substitute with Monterey Jack or Pepper Jack
  • 2 tbsp Cranberry Sauce Can substitute with fruit jam
  • 2 slices Bacon Use turkey bacon for a lighter option
  • 2 tbsp Goat Cheese Can swap for cream cheese
For the Flavor Boost
  • 1 tsp Fresh or Dried Sage Fry in bacon fat for flavor

Equipment

  • Skillet
  • panini press

Method
 

Step-by-Step Instructions
  1. Gather all ingredients. Heat a skillet over medium heat and fry the bacon until crispy, about 5-7 minutes. Remove bacon and set aside.
  2. Layer one slice of bread with turkey, Muenster cheese, cranberry sauce, bacon, and fried sage. Top with goat cheese and another slice of bread.
  3. Preheat panini press or skillet over medium-high heat. Grill the sandwich for 3-5 minutes until golden brown and cheese melts.
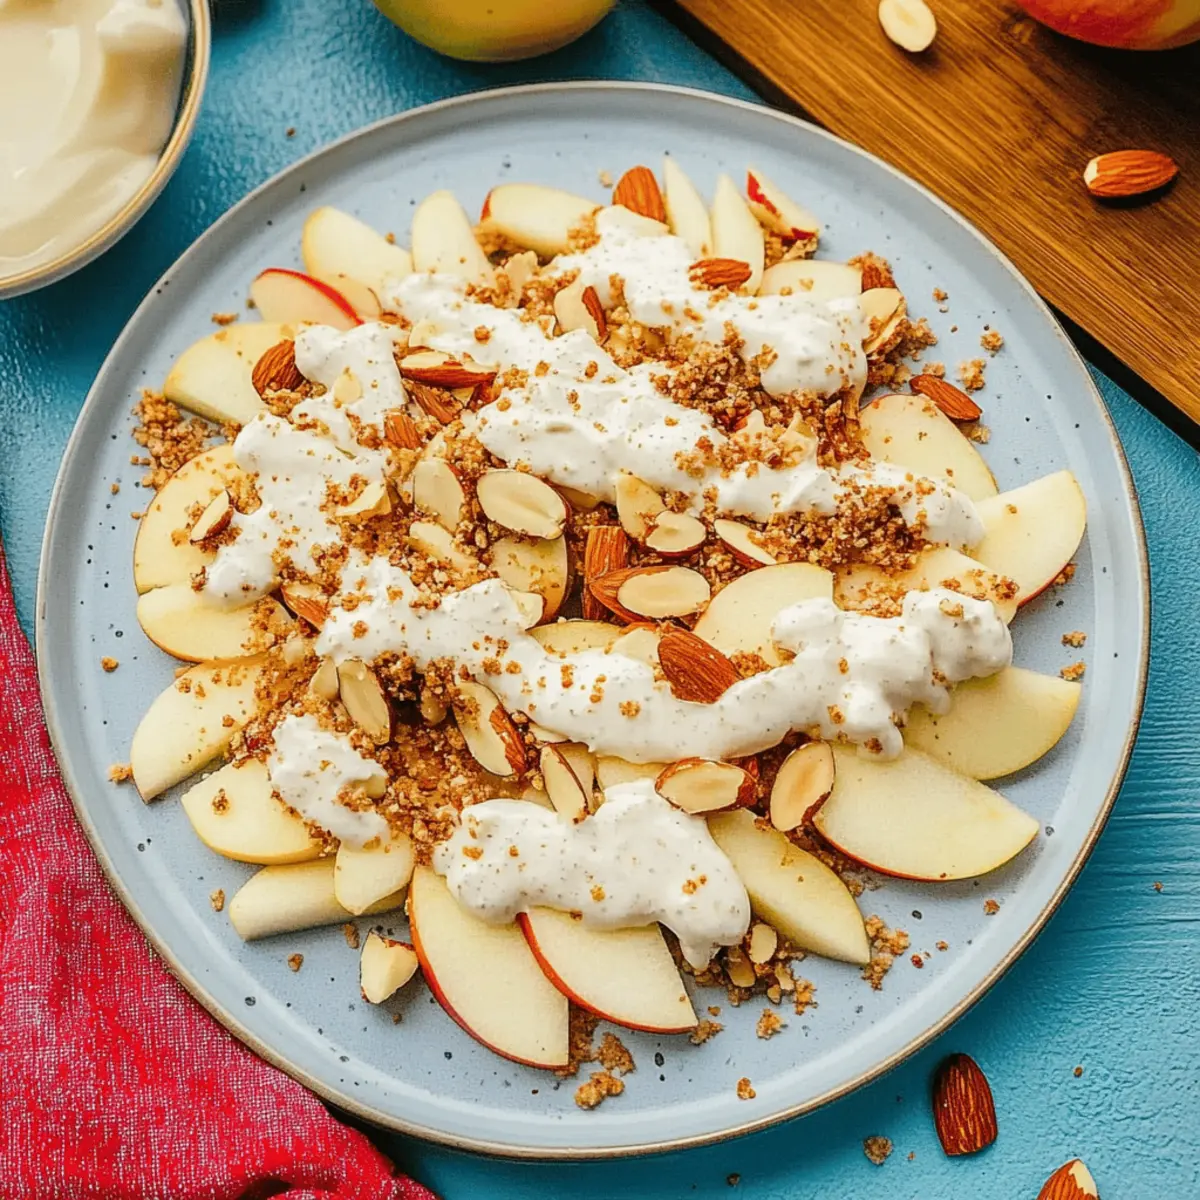
  4. Remove from heat, slice in half, and serve immediately. Optionally, offer additional cranberry sauce on the side.

Nutrition

Serving: 1paniniCalories: 600kcalCarbohydrates: 45gProtein: 30gFat: 35gSaturated Fat: 15gPolyunsaturated Fat: 5gMonounsaturated Fat: 10gCholesterol: 80mgSodium: 900mgPotassium: 700mgFiber: 2gSugar: 6gVitamin A: 500IUVitamin C: 2mgCalcium: 200mgIron: 2mg

Notes

Customize with your favorite leftovers for a unique twist.

Tried this recipe?

Let us know how it was!

Creamy Chili Cheese Black Bean Dip for Quick, Tasty Snacking

September 1, 2025 by Grace Snow Leave a Comment

As I stood in my kitchen, the tantalizing aroma of chili wafted through the air, pulling me back to countless gatherings filled with laughter and joy. If you’re searching for a crowd-pleaser that promises to elevate your next party, look no further than this 5-Ingredient Chili Cheese Black Bean Dip. With its creamy, cheesy texture and a delightful kick of flavor, it’s the perfect companion for crunchy tortilla chips. Not only is this dip incredibly quick to whip up, taking merely 10 minutes to prepare, but it also combines vegetarian goodness with the warmth of classic comfort food. Whether you’re hosting friends for game night or simply craving a satisfying snack, this dip is sure to impress. Ready to dive into a recipe that’s as delicious as it is easy? Let’s get started!

Why is this dip a must-try?

Quick Prep: In just 10 minutes, you can whip up this delicious dip, making it perfect for last-minute gatherings.
Crowd-Pleasing Flavor: The combination of creamy cheese and spicy chili creates a rich flavor profile that everyone will love.
Versatile Use: Perfect for game day, potlucks, or as a movie night snack, this dip adapts to any occasion.
Easy Variations: Swap black beans for pinto or kidney beans, or add some jalapeños for a spicy twist! If you're craving more bean recipes, check out this Coconutty Beans Greens option.
Hearty and Satisfying: With protein-packed black beans and cheesy goodness, it’s both fulfilling and indulgent without being heavy.

Chili Cheese Black Bean Dip Ingredients

This is everything you need for a tasty dip!

For the Dip
• Black Beans – Adds protein and a creamy texture; use canned for convenience.
• Chili – Provides the essential flavor and heat; choose your favorite type—mild or spicy!
• Velveeta Cheese – Delivers creaminess that binds the dip together; feel free to use gluten-free cheese if needed.
• Sour Cream – Adds a nice tang; Greek yogurt makes a great healthy substitute.
• Tortilla Chips – Perfect for dipping; opt for gluten-free chips if desired.

Step‑by‑Step Instructions for Chili Cheese Black Bean Dip

Step 1: Combine Ingredients
In a mini-crockpot or slow cooker, start by adding one can of black beans (drained and rinsed), your choice of chili (canned or homemade), and 8 ounces of diced Velveeta cheese. Ensure everything is evenly spread out in the pot, creating a colorful base that hints at the rich flavor to come.

Step 2: Heat the Mixture
Cover the slow cooker and set it to low. Allow the mixture to cook for about 5 minutes, keeping an eye out for the cheese to begin melting and for a fragrant aroma to fill your kitchen. Stir gently to ensure even melting as the cheese transforms into a gooey delight.

Step 3: Stir Until Smooth
Once the cheese has completely melted and the mixture is heated through, remove the lid and stir the ingredients together until you achieve a smooth, creamy consistency. This blend of flavors in your Chili Cheese Black Bean Dip should be inviting, with the rich color reflecting the comforting warmth of a satisfying appetizer.

Step 4: Serve Warm
Transfer the dip to a serving bowl, presenting it warm and inviting. Arrange crunchy tortilla chips alongside for dipping, showcasing that beautiful creamy texture ready to scoop. This delightful assembly is perfect for game night or any festive gathering, ready to impress your guests with its simple yet bold flavors.

Expert Tips for Chili Cheese Black Bean Dip

  • Chili Selection: Choose your chili wisely: The type of chili you use will influence the overall spice level. Opt for mild if serving to a diverse crowd.
  • Bean Prep: Rinse and drain: If using canned black beans, always rinse and drain them to reduce sodium content and improve texture.
  • Cheese Choice: Velveeta vs. alternatives: While Velveeta gives a great melt, feel free to experiment with homemade cheese blends or vegan options for dietary preferences.
  • Heat Monitoring: Avoid overcooking: Keep a close watch on the dip while it heats, as overcooking can lead to a rubbery cheese texture in your Chili Cheese Black Bean Dip.
  • Serving Creativity: Dipping ideas: Instead of just tortilla chips, consider serving with fresh vegetable sticks or bread for a unique dipping experience.
  • Make-ahead Option: Prep ahead: You can prepare the dip the day before and just warm it up before serving, making entertaining stress-free!

How to Store and Freeze Chili Cheese Black Bean Dip

Fridge: Store leftovers in an airtight container for up to 3 days. Make sure it's cooled completely before sealing to prevent moisture buildup.

Freezer: For longer storage, freeze the dip in a freezer-safe container for up to 2 months. Thaw overnight in the fridge before reheating.

Reheating: Gently reheat the thawed Chili Cheese Black Bean Dip in the microwave or on the stovetop over low heat, stirring frequently until it's warm and creamy again.

Serving Tip: If the dip thickens after freezing or reheating, add a splash of milk or sour cream while stirring to restore its creamy texture.

Make Ahead Options

Preparing this flavorful Chili Cheese Black Bean Dip ahead of time is a great way to save precious minutes on busy days! You can combine all the ingredients—black beans, chili, Velveeta cheese, and sour cream—up to 24 hours in advance and store them in the refrigerator in an airtight container. This not only enhances the flavors but keeps the dip fresh and delicious. When you’re ready to serve, simply heat the mixture in a mini-crockpot or slow cooker on low for about 5 minutes until everything is warmed through and smooth. Stir and enjoy your dip, which will be just as delightful as if it were made fresh!

What to Serve with 5-Ingredient Chili Cheese Black Bean Dip

Ready to elevate your snacking experience? Let’s explore what pairs beautifully with this comforting dip!

  • Crunchy Tortilla Chips: The classic choice: their sturdy structure is perfect for scooping up the warm, creamy dip.

  • Fresh Veggie Platter: A vibrant selection of bell peppers, carrots, and celery adds a refreshing crunch that balances the dip's richness.

  • Spicy Jalapeño Poppers: For those seeking a kick, these fiery bites complement the dip’s flavor, creating an indulgent flavor journey.

  • Guacamole: Creamy and luscious, guacamole brings a buttery flavor that contrasts delightfully with the zesty chili notes.

  • Crispy Nachos: Layered with melted cheese and topped with the dip, nachos create a deliciously messy treat that's perfect for sharing.

  • Creamy Coleslaw: The tanginess from coleslaw enhances the robust flavors of the dip, offering a pleasing textural contrast.

  • Chilled Beverages: Pair with a light beer or refreshing limeade to cleanse your palate between bites, enhancing the overall experience.

Take your gathering to the next level by combining these delightful options with your 5-Ingredient Chili Cheese Black Bean Dip!

Chili Cheese Black Bean Dip Variations

Customize your Chili Cheese Black Bean Dip to suit your taste buds and elevate your snacking experience!

  • Bean Swap: Use pinto beans or kidney beans instead of black for a different, yet equally delicious, flavor profile. Explore how each bean brings its unique character to the dish.

  • Spicy Kick: Add diced jalapeños for a burst of heat. This simple addition will take your dip from mild to exhilarating, enhancing the overall flavor.

  • Breakfast Bliss: Serve over scrambled eggs for a breakfast twist that’s loaded with flavor. This unexpected pairing will surprise and delight your taste buds!

  • Creamy Alternative: Replace sour cream with Greek yogurt for a healthier version that still packs a creamy punch. This swap will also provide extra protein for a nourishing boost.

  • Flavor Boost: Stir in some cumin or chili powder for added depth. These spices will enhance the existing flavors, making each bite a little more exciting.

  • Texture Twist: Mix in some corn for a delightful crunch and sweetness that perfectly complements the dip. This addition adds a fun twist and extra nutrients!

  • Herb Freshness: Top with chopped cilantro or green onions for a fresh finish. This pop of color and flavor makes it visually appealing and more vibrant.

  • Gourmet Touch: Drizzle with sriracha or a spicy sauce for an extra layer of flavor and heat. This zingy addition will satisfy those with a penchant for all things spicy!

For more delicious bean recipes, don't miss out on this delightful Coconutty Beans Greens dish that brings warmth and comfort too!

Chili Cheese Black Bean Dip Recipe FAQs

What type of black beans should I use?
Absolutely! You can use canned black beans for convenience or cook your own from dried beans. If you go the canned route, just remember to rinse and drain them first to remove excess sodium and improve the overall texture.

How should I store leftovers?
To keep your dip fresh, store leftovers in an airtight container in the fridge for up to 3 days. Make sure to let it cool completely before sealing to prevent moisture buildup, which can affect its creamy consistency.

Can I freeze Chili Cheese Black Bean Dip?
Very! For longer storage, freeze the dip in a freezer-safe container for up to 2 months. When you're ready to enjoy it again, simply thaw it overnight in the fridge. For reheating, warm it gently in the microwave or on the stovetop over low heat, stirring frequently until it's nice and creamy.

What if the dip is too thick after freezing?
No worries! If your dip thickens after being frozen or during reheating, simply stir in a splash of milk or sour cream while warming it up. This will help restore that luscious, creamy texture that makes this Chili Cheese Black Bean Dip so enjoyable.

Is this dip suitable for vegetarians and those with dietary restrictions?
Absolutely! This recipe is vegetarian-friendly, and you can tailor it to fit specific dietary needs. Use gluten-free cheese and tortilla chips to accommodate gluten sensitivities, and substitute sour cream with Greek yogurt for a lighter option. Always check labels for any intolerances or allergies.

How can I jazz up the flavor of the dip?
If you're looking to spice things up, consider adding some diced jalapeños or even a dash of hot sauce to the mix. You might also experiment with other types of beans or additional spices for a personal twist on the original recipe. The more, the merrier!

Chili Cheese Black Bean Dip

Creamy Chili Cheese Black Bean Dip for Quick, Tasty Snacking

Try this 5-Ingredient Chili Cheese Black Bean Dip, a quick and crowd-pleasing snack, perfect for any gathering.
Print Recipe Pin Recipe
Prep Time 10 minutes mins
Cook Time 5 minutes mins
Total Time 15 minutes mins
Servings: 8 servings
Course: Snacks
Cuisine: American
Calories: 250
Ingredients Equipment Method Nutrition Notes

Ingredients
  

For the Dip
  • 1 can Black Beans drained and rinsed
  • 1 cup Chili your choice of type—mild or spicy
  • 8 ounces Velveeta Cheese diced
  • 1 cup Sour Cream can substitute with Greek yogurt
  • 1 bag Tortilla Chips opt for gluten-free if desired

Equipment

  • Slow Cooker

Method
 

Step-by-Step Instructions for Chili Cheese Black Bean Dip
  1. Combine Ingredients: In a mini-crockpot or slow cooker, add black beans, your choice of chili, and Velveeta cheese evenly.
  2. Heat the Mixture: Cover and set slow cooker to low for about 5 minutes until cheese begins melting.
  3. Stir Until Smooth: Once melted and heated through, stir the mixture until smooth and creamy.
  4. Serve Warm: Transfer to a serving bowl and arrange tortilla chips for dipping.

Nutrition

Serving: 1cupCalories: 250kcalCarbohydrates: 30gProtein: 10gFat: 12gSaturated Fat: 6gPolyunsaturated Fat: 2gMonounsaturated Fat: 4gCholesterol: 30mgSodium: 500mgPotassium: 350mgFiber: 5gSugar: 2gVitamin A: 10IUVitamin C: 15mgCalcium: 20mgIron: 8mg

Notes

You can prepare the dip a day ahead and reheat before serving. Store leftovers in an airtight container for up to 3 days in the fridge or freeze for up to 2 months.

Tried this recipe?

Let us know how it was!

Smoky Paprika Croutons for Crunchy Home-Cooked Goodness

September 1, 2025 by Grace Snow Leave a Comment

As I rummaged through my pantry one rainy afternoon, I stumbled upon a forgotten loaf of bread that was begging for attention. That's when I decided to whip up these smoky paprika croutons. Not only are they incredibly easy to make, but they also transform any soup or salad into a culinary delight with their crunchy texture and bold flavor. Whether you’re looking to elevate a simple salad or add a finishing touch to your favorite creamy soup, these croutons bring a comforting homemade aspect to your meals, all while being super quick to whip up. So, why reach for store-bought when you can create a scrumptious and satisfying topping at home? Ready to dive into this easy crouton adventure? Let’s get cooking!

Why make smoky paprika croutons?

Quick and Easy: These croutons can be prepared in just 15 minutes, making them a hassle-free addition to any meal.
Bold Flavor: With the smoky paprika, your croutons will boast a mouthwatering taste that enhances any dish.
Versatile Topping: Perfect for soups, salads, or even as a crunchy snack on their own, these croutons adapt to your cravings.
Fresh Ingredients: Unlike store-bought options, you can control the quality and flavor of every ingredient, ensuring they’re homemade goodness.
If you're searching for more ways to complement your dishes, try adding these croutons to your next batch of Smoky Sweet Potatoes for extra texture!

Smoky Paprika Crouton Ingredients

For the Croutons

  • Bread – The base of the croutons; any stale bread works wonders, adding texture and heartiness.
  • Olive Oil – Provides rich flavor and encourages that perfect crispy texture; try melted butter for a different twist.
  • Smoky Paprika – Infuses a robust flavor and delightful color; regular paprika can substitute but will miss the smoky essence.
  • Salt – Enhances the flavor profile; adjust to your personal taste for the best results.

  • Pepper – Adds a dash of heat; optional, depending on your preferences.

Step‑by‑Step Instructions for Smoky Paprika Croutons

Step 1: Preheat Your Oven
Begin by preheating your oven to 375°F (190°C). This initial step is crucial as it ensures that the heat is evenly distributed when you place the croutons inside. While the oven warms up, you can prepare your bread, maximizing efficiency and minimizing wait time for your delicious smoky paprika croutons.

Step 2: Prepare the Bread
Take your stale bread and cut it into bite-sized cubes, about 1-inch in size, ensuring they are uniform for even cooking. The crust will add a delightful crunch, so you can use any type of bread, such as sourdough or whole grain. Place the cubes in a large mixing bowl, ready to absorb the flavorful seasonings.

Step 3: Season the Bread
Drizzle the bread cubes with olive oil and sprinkle in the smoky paprika, salt, and optional pepper. With your hands or a large spoon, toss everything until each piece of bread is beautifully coated. You’ll want to achieve an even distribution so that your smoky paprika croutons are bursting with flavor in every bite.

Step 4: Bake the Croutons
Spread the seasoned bread cubes in a single layer on a baking sheet, ensuring they aren't crowded. Place the baking sheet in the oven and bake for 10-15 minutes. Halfway through, give them a gentle toss to promote even browning. Watch closely, as they should turn a lovely golden brown and become crispy, ready for your soups and salads.

Step 5: Cool Before Serving
Once your smoky paprika croutons are baked to perfection, remove them from the oven and let them cool on the baking sheet for a few minutes. This cooling time helps to lock in that fantastic crunch. Afterward, they’re ready to be added to your favorite dishes, elevating them with delightful texture and flavor.

Smoky Paprika Crouton Variations

Get creative with these smoky paprika croutons to match your taste or dietary needs!

  • Gluten-Free: Use gluten-free bread to make these croutons a delightful option for those with gluten sensitivities. The flavors remain just as vibrant!

  • Herb-Infused: Toss in fresh or dried herbs like rosemary or basil along with the seasonings for an aromatic twist. Each bite will transport you to a sunny Italian garden.

  • Cheesy Croutons: Add grated parmesan or nutritional yeast for a cheesy flavor that complements your smoky paprika wonderfully. This twist provides a savory richness to your toppings!

  • Spicy Kick: Mix in cayenne pepper or chili powder for a fiery version. If you like heat, this variation will elevate the crunch to a whole new level!

  • Sweet and Savory: For a unique contrast, drizzle a bit of honey or maple syrup over the bread cubes before baking. The sweetness balances the smokiness and adds depth.

  • Garlic Lovers: Incorporate garlic powder or even minced fresh garlic into the seasoning. This addition creates a fragrant and flavorful crouton that pairs perfectly with any soup or salad.

  • Switch Up the Bread: Experiment with different breads like ciabatta or baguette for varying textures and flavors. Sourdough, in particular, offers a delightful tang that enhances the overall taste experience.

  • Packed with Seeds: If you're looking for extra crunch and nutrition, sprinkle some sesame or flaxseeds on your croutons before baking. They add an inviting texture and are a nutritious bonus!

For more inspiring flavors, you can always mix these croutons with dishes like Smoky Sweet Potatoes to discover new delicious combinations that your whole family will love!

Make Ahead Options

These smoky paprika croutons are perfect for meal prep enthusiasts! You can prepare the bread cubes and toss them with olive oil, smoky paprika, salt, and pepper up to 24 hours in advance. Once seasoned, simply store the mixture in an airtight container in the refrigerator to maintain freshness. When you're ready to serve, spread the seasoned cubes on a baking sheet and bake at 375°F (190°C) for 10-15 minutes until golden and crispy. This method not only saves time on busy weeknights but ensures that your croutons are just as delicious and crunchy as when making them fresh. Enjoy the convenience of homemade croutons without the last-minute rush!

Expert Tips for Smoky Paprika Croutons

  • Baking Watchfulness: Keep a close eye on the croutons as they bake, as they can transition from golden to burnt in a matter of seconds.

  • Flavorful Add-ins: Experiment by adding garlic powder or dried herbs like oregano or thyme to amplify the taste of your smoky paprika croutons.

  • Bread Variety: Use a mix of bread types, such as rustic sourdough or hearty whole grain, to add unique flavors and textures to your croutons.

  • Storage Strategy: Store the croutons in an airtight container for up to a week, and re-toast them briefly in the oven to revive their crispness before serving.

  • Tossing Technique: Don’t skip the halfway toss while baking. This ensures even browning and prevents any croutons from being overly toasted or burnt.

How to Store and Freeze Smoky Paprika Croutons

Room Temperature: Store your smoky paprika croutons in an airtight container at room temperature for up to 1 week. This will help maintain their crunchiness and flavor.

Fridge: If you prefer extended freshness, you can refrigerate them for up to 2 weeks. Make sure to place them in a sealed bag or container to prevent moisture from softening them.

Freezer: For longer storage, freeze the croutons in a single layer on a baking sheet before transferring them to a freezer bag. They can last for up to 3 months. Reheat in the oven to restore crispness.

Reheating: To bring back the crunch, re-toast the croutons in a preheated oven at 350°F (175°C) for about 5-10 minutes before serving them again.

What to Serve with Smoky Paprika Croutons

These delicious croutons not only elevate your favorite dishes but also create a well-rounded meal experience that’s comforting and satisfying.

  • Creamy Tomato Basil Soup: The luscious texture of this classic soup pairs beautifully with the crunchy croutons, enhancing every spoonful. It's a delightful play of flavors and textures.

  • Mixed Greens Salad: A fresh salad drizzled with vinaigrette benefits from the added crunch of smoky paprika croutons, making it feel hearty and robust. You’ll love how the croutons absorb the dressing!

  • Roasted Butternut Squash Soup: The sweetness of this soup contrasts nicely with the smoky spice of the croutons, creating a harmonious balance that warms the soul.

  • Caesar Salad: Tossing croutons into a Caesar salad adds an extra crunch that complements the creamy dressing and crispy romaine, enhancing the classic dish.

  • Lentil Soup: The hearty nature of lentils combined with the crunchy texture of croutons makes for a filling and well-rounded meal that's both nutritious and satisfying.

  • Savory Cheese Board: Gracing a cheese board with these croutons invites a new texture alongside creamy cheeses and fruity spreads, turning your appetizer spread into something memorable.

  • Sparkling Water with Lime: A light and zesty drink complements the rich flavors of the croutons, refreshing your palate between bites.

  • Chocolate Mousse: For dessert, the richness of chocolate mousse pairs surprisingly well with the smoky flavors of the croutons, offering an unconventional yet delightful end to your meal.

Smoky Paprika Croutons Recipe FAQs

How can I ensure my bread is the right type for croutons?
Absolutely! Any stale bread works wonderfully for making smoky paprika croutons. Look for bread that is firm and has a crunchy crust, like sourdough, whole grain, or even baguettes. Fresh bread can also work, but keep in mind that staleness contributes to a better crunch when baked.

How should I store my smoky paprika croutons?
To store your croutons, place them in an airtight container at room temperature for up to 1 week. This will help maintain their signature crunch. If you want to keep them longer, you can refrigerate them for up to 2 weeks; just ensure they're well-sealed to prevent moisture.

Can I freeze smoky paprika croutons for later use?
Absolutely! For freezing, first lay the croutons in a single layer on a baking sheet and freeze them until solid. Once frozen, transfer them into a freezer bag, squeezing out any excess air. They’ll last for up to 3 months. To enjoy, simply reheat in the oven at 350°F (175°C) for 5-10 minutes to restore their crunch.

What should I do if my croutons are browning unevenly?
If you notice uneven browning, don't fret! This can happen if the bread cubes are packed too tightly on the baking sheet. During baking, toss the croutons halfway through to promote even cooking. If some are browning faster than others, you can remove the overdone pieces early to avoid burning them.

Are there any dietary considerations for smoky paprika croutons?
Yes! If you're cooking for someone with a gluten intolerance, you can easily swap out traditional bread for gluten-free varieties. Just ensure that your olive oil and seasonings are also gluten-free to keep the recipe safe for those with dietary restrictions. Always check labels for any added allergens.

Smoky Paprika Croutons

Smoky Paprika Croutons for Crunchy Home-Cooked Goodness

Delicious smoky paprika croutons that enhance soups and salads with a crunchy texture and bold flavor.
Print Recipe Pin Recipe
Prep Time 15 minutes mins
Cook Time 15 minutes mins
Cooling Time 5 minutes mins
Total Time 35 minutes mins
Servings: 4 cups
Course: Snacks
Cuisine: American
Calories: 150
Ingredients Equipment Method Nutrition Notes

Ingredients
  

For the Croutons
  • 4 cups stale bread cut into 1-inch cubes
  • 1/4 cup olive oil or melted butter for a twist
  • 1 tablespoon smoky paprika
  • 1 teaspoon salt adjust to taste
  • 1/2 teaspoon pepper optional

Equipment

  • Oven
  • Baking Sheet
  • Mixing Bowl
  • Knife
  • Cutting Board

Method
 

Step-by-Step Instructions
  1. Preheat your oven to 375°F (190°C).
  2. Cut the stale bread into bite-sized cubes and place them in a mixing bowl.
  3. Drizzle the bread cubes with olive oil, then sprinkle with smoky paprika, salt, and pepper. Toss to coat evenly.
  4. Spread the seasoned bread cubes on a baking sheet in a single layer and bake for 10-15 minutes, tossing halfway through.
  5. Remove from the oven and let cool for a few minutes before serving.

Nutrition

Serving: 1cupCalories: 150kcalCarbohydrates: 20gProtein: 3gFat: 7gSaturated Fat: 1gPolyunsaturated Fat: 0.5gMonounsaturated Fat: 5gSodium: 200mgPotassium: 150mgFiber: 2gSugar: 1gVitamin A: 100IUCalcium: 20mgIron: 1mg

Notes

Store croutons in an airtight container for up to 1 week at room temperature. Can be refrigerated for up to 2 weeks or frozen for up to 3 months.

Tried this recipe?

Let us know how it was!
  • « Previous Page
  • 1
  • …
  • 21
  • 22
  • 23
  • 24
  • 25
  • Next Page »

Welcome!

Hi, I’m Grace, a Sydney-based home cook with a passion for bold flavors and trending ingredients. Whether you’re a busy beginner or a seasoned foodie, you’ll find dishes here that are fresh, fun, and full of flavor.

More about me

Popular Recipes

  • Honey Lime Chicken & Avocado Rice Bowl
    Honey Lime Chicken & Avocado Rice Bowl for a Flavor Burst
  • Tasty Italian Pasta Salad
    Delight in this Easy Tasty Italian Pasta Salad for Summer Fun
  • Garlic Butter Chicken Pasta
    Garlic Butter Chicken Pasta That’ll Wow Your Family Tonight
  • Creamy, Spicy Chicken Pasta
    Creamy, Spicy Chicken Pasta with Fresh Summer Veggies

Footer

↑ back to top

About

  • Privacy Policy
  • Disclaimer
  • Terms & Conditions

Newsletter

  • Sign Up! for emails and updates

Contact

  • About me
  • Contact me

Copyright © 2025 TastyTrendIngredients