tastytrendingredients

  • Home
  • Recipes
    • Appetizers
    • Breakfast
    • Dessert
    • Dinner
    • Drinks
    • Salads
    • Snacks
    • Soups
  • About me
  • Contact
menu icon
go to homepage
  • Home
  • Recipes
    • Appetizers
    • Breakfast
    • Dessert
    • Dinner
    • Drinks
    • Salads
    • Snacks
    • Soups
  • About me
  • Contact
search icon
Homepage link
  • Home
  • Recipes
    • Appetizers
    • Breakfast
    • Dessert
    • Dinner
    • Drinks
    • Salads
    • Snacks
    • Soups
  • About me
  • Contact
×

Sausage Mummies: Fun Halloween Treats Kids Will Love

October 3, 2025 by Grace Snow Leave a Comment

As the sun begins to set on October evenings, there’s a certain magic in the air that whispers of ghosts and goblins. This time of year, I love transforming our kitchen into a mini haunted house with recipes that are both spooky and scrumptious. Enter the delightful Sausage Mummies—a dish that wraps flavorful pork sausages in crispy puff pastry, creating easy, kid-friendly bites that are perfect for Halloween gatherings. With their charming edible eyes peeking out, these little phantoms are sure to bring a smile to faces both young and old. The best part? They come together in no time, making them a spectacular addition to your festive spread without the hassle. So, are you ready to make this Halloween extra fun by whipping up a batch of these deliciously creepy treats? Let's dive into the recipe!

Why Will Kids Adore These Sausage Mummies?

Kid-Friendly Fun: With their spooky look and playful edible eyes, these Sausage Mummies make cooking an exciting adventure for children.
Quick & Easy: The straightforward preparation ensures you'll be in and out of the kitchen in no time, leaving more room for Halloween festivities.
Flaky Texture: The crispy puff pastry wrapping adds a delightful crunch to each bite, making them irresistible.
Savory Goodness: Juicy sausage packed inside brings a burst of flavor that kids—and adults—can’t resist!
Versatile Options: Feel free to switch things up by using vegetarian sausages or different pastry styles, keeping the excitement going at your Halloween party!
Crowd-Pleaser: These treats are suitable for gatherings, ensuring everyone will have a creepy good time!

Sausage Mummies Ingredients

Get ready to transform your Halloween snacks with these fun and easy Sausage Mummies!

For the Mummies

  • Pork Sausages – The star of the show; tender and rich in flavor. Substitute with chicken or turkey sausages for a healthier option.
  • Ready-Rolled Puff Pastry – Provides the perfect flaky wrap; if unavailable, refrigerated dough can do the trick.

For Decoration

  • Edible Eyes – The whimsical touch that brings these mummies to life; can be replaced with black sesame seeds or small olives for a fun twist.
  • Honey (optional) – Acts as a glue for those adorable eyes; feel free to swap with maple syrup for a hint of sweetness.

Make sure you have these ingredients ready, and let's create some creepy culinary magic this Halloween!

Step‑by‑Step Instructions for Sausage Mummies

Step 1: Preheat the Oven
Begin by preheating your oven to 180°C (350°F). While the oven warms up, line a baking tray with parchment paper to ensure the Sausage Mummies don’t stick during baking. This is an important step for achieving that crispy, flaky exterior that everyone will love.

Step 2: Prepare the Puff Pastry
Unroll the ready-rolled puff pastry on a clean surface. Using a sharp knife or pizza cutter, slice the pastry into long strips about 1 cm wide. This uniform cutting is essential for wrapping, allowing the pastry to encase the sausages evenly and create that adorable mummy appearance.

Step 3: Wrap the Sausages
Take a pork sausage and place it at one end of a puff pastry strip. Wrap the strip around the sausage, overlapping slightly as you go, and cut off any excess pastry. This not only keeps them looking neat but also ensures that there's enough pastry to cook thoroughly, giving your Sausage Mummies their signature look.

Step 4: Bake the Mummies
Carefully place the wrapped sausages on the prepared baking tray, spacing them evenly apart. Slide the tray into the preheated oven and bake for 20 minutes, or until the pastry is golden brown and puffed up. Keep an eye on them; you'll know they're ready when they look delightfully crispy and golden.

Step 5: Crisp Up the Pastry
After the initial baking time, increase the oven temperature to 220°C (430°F) and continue baking for an additional 5 minutes. This extra heat will ensure your Sausage Mummies get that irresistible golden finish. The higher temperature will also help make the pastry extra flaky and delicious.

Step 6: Add the Edible Eyes
Once the Sausage Mummies are out of the oven, allow them to cool slightly. While they’re warm, apply a small dab of honey on each sausage where you want to place the edible eyes. This tasty glue will help them stick and complete the spooky look of your festive treats just in time for serving.

Step 7: Serve and Enjoy
It’s time to dig into your delightful creation! Arrange the Sausage Mummies on a serving platter while they’re warm for the best texture and flavor. Pair them with ketchup or mustard for dipping, and watch as they disappear from the plate during your Halloween celebrations!

Sausage Mummies: Customization Ideas

Feel free to let your creativity shine by customizing these delightful Sausage Mummies to suit your taste or dietary needs!

  • Vegetarian Options: Use vegetarian sausages for a meat-free alternative that everyone can enjoy. They still pack a punch of flavor and a fun, spooky appearance!

  • Cheesy Delight: For a flavor explosion, tuck some shredded cheese between the sausage and pastry. As it melts, it adds a creamy texture that complements the flaky pastry beautifully.

  • Spicy Twist: Add a dash of hot sauce or diced jalapeños to your sausage mixture for a spicy kick. This twist will elevate the flavor profile and impress those who love a bit of heat in their snacks.

  • Different Pastry Types: Try using different pastry styles like shortcrust or phyllo for an interesting texture. Each pastry brings its own unique crunch, giving a fun variation in your Halloween spread.

  • Seasoned Sausages: Use flavored sausages like apple and sage or spicy garlic for an extra layer of taste. These unique flavors can turn your mummies into mouthwatering bites that stand out at any gathering.

  • Dipping Sauces: Serve your Sausage Mummies with different dipping sauces like barbecue sauce or zesty ranch dressing. This addition turns your easy snack into a delightful tasting experience!

  • Halloween Decor: For an extra spooky flair, create a “blood” sauce using ketchup and sriracha to drizzle on the platter. It adds an eerie touch to your Halloween presentation that guests will love!

  • Healthy Sides: Pair these with fresh veggies or a fruit platter to balance the meal. Simple carrot sticks or grapes make for a colorful and healthy accompaniment that contrasts well with the savory mummies.

Remember, the goal is to have fun while cooking and enjoy the process! Whether you stick to the traditional recipe or explore these variations, your Sausage Mummies are sure to be a hit!

Make Ahead Options

These Sausage Mummies are perfect for meal prep enthusiasts looking to save time on festive gatherings! You can wrap the sausages in puff pastry and refrigerate them for up to 24 hours before baking. To do this, simply follow the wrapping instructions and place the uncooked mummies on a baking tray lined with parchment paper, then cover them tightly with plastic wrap. This prevents the pastry from drying out and helps maintain its flakiness. When ready to serve, preheat the oven and bake them directly from the fridge for the same times indicated in the recipe. Enjoy delicious, effortless treats that are just as tasty when prepped ahead!

Expert Tips for Sausage Mummies

  • Sausage Selection: Choose savory pork sausages for best flavor; you can also try turkey or chicken for a lighter option.
  • Perfect Pastry Strips: Use a pizza cutter for even, uniform strips, ensuring they wrap neatly around the sausages for that "mummy" appearance.
  • Avoid Excess Pastry: Cut off any extra pastry after wrapping to prevent overly long wrappings, which could hinder baking and presentation.
  • Gauge Doneness: Watch for a golden, flaky finish while baking; this indicates the Sausage Mummies are perfectly cooked and ready to enjoy.
  • Serve Fresh: For optimal crispness, serve the Sausage Mummies immediately after baking, as they tend to lose their flaky texture if stored.

What to Serve with Sausage Mummies

As these spooky bites emerge from the oven, you'll want to create a vibrant spread that makes your Halloween gathering memorable.

  • Crispy Vegetable Sticks: Crunchy carrots, celery, and bell peppers bring a refreshing contrast to the savory Sausage Mummies, lightening up your meal.
  • Creamy Dip Trio: A mix of ranch, mustard, and ketchup gives your guests fun and flavorful choices for dipping, enhancing every mummy bite.
  • Halloween Fruit Platter: A colorful assortment of fruits like grapes and clementines adds a sweet touch, balancing out the savory treats on your table.
  • Fluffy Mashed Potatoes: Creamy, buttery potatoes provide a comforting side that pairs well with the flaky texture of the Sausage Mummies, making for a hearty meal.
  • Spooky Salad: Toss together spinach, sliced apples, and walnuts drizzled with a honey vinaigrette for a fresh and seasonal side that’s both delicious and festive.
  • Witch’s Brew Punch: A fizzy, fruity drink that adds a fun twist to your meal—think cranberry juice mixed with soda for that perfect Halloween spirit!

Storage Tips for Sausage Mummies

Fridge: Store your Sausage Mummies in an airtight container for up to 2 days. This helps retain their flavor, but serve them soon for the best crispiness.

Freezer: If you're prepping in advance, freeze the unbaked Sausage Mummies on a baking tray, then transfer to a freezer bag for up to 2 months. Bake from frozen, adding extra time.

Reheating: To restore that lovely crunch after storage, reheat the Sausage Mummies in the oven at 180°C (350°F) for about 10 minutes. Avoid microwaving, which can make them soggy.

Avoid Room Temperature: For food safety, keep them out of the danger zone. Never leave the Sausage Mummies at room temperature for more than 2 hours, especially during those spooky gatherings!

Sausage Mummies Recipe FAQs

How can I select the best pork sausages for this recipe?
Absolutely! Look for sausages that are firm to the touch and have a nice color—deep pink or reddish hues. Avoid any with dark spots, which may indicate spoilage. If you're after a leaner option, turkey or chicken sausages work wonderfully, providing great flavor without excess fat.

How should I store leftover Sausage Mummies?
Very! To ensure they stay delicious, place your leftover Sausage Mummies in an airtight container and refrigerate them. They can be kept for up to 2 days. Remember, they taste best fresh out of the oven, so enjoy them soon after you make them!

Can I freeze Sausage Mummies for later?
Absolutely! If you want to prepare them in advance, wrap the unbaked Sausage Mummies on a tray and flash freeze them for about an hour. Once they’re firm, transfer them to a freezer bag and keep them in the freezer for up to 2 months. When you're ready to bake, don’t thaw them; simply bake from frozen, adding 5-10 minutes to the baking time.

What if my pastry isn't crisp after baking?
Very! To achieve a nice crispy texture, it’s important to bake the Sausage Mummies until they are golden brown. If they’re not crisping up, it could be due to too much pastry. When wrapping, ensure that you cut off excess pastry; also, increase the oven temperature towards the end of baking for that delightful crunch.

Are Sausage Mummies safe for kids with allergies?
Absolutely! Since this recipe primarily uses pork sausages, if there are concerns around allergies, consider checking the ingredient labels or opting for vegetarian sausages. Always consult with an expert if there are specific allergy issues to ensure safe enjoyment for all little ghouls and goblins at your Halloween gathering!

Sausage Mummies

Sausage Mummies: Fun Halloween Treats Kids Will Love

Sausage Mummies are easy, kid-friendly Halloween treats that combine flavorful pork sausages wrapped in crispy puff pastry.
Print Recipe Pin Recipe
Prep Time 20 minutes mins
Cook Time 25 minutes mins
Cooling Time 5 minutes mins
Total Time 50 minutes mins
Servings: 12 mummies
Course: Snacks
Cuisine: American
Calories: 120
Ingredients Equipment Method Nutrition Notes

Ingredients
  

For the Mummies
  • 12 pieces Pork Sausages Substitute with chicken or turkey for a healthier option.
  • 1 roll Ready-Rolled Puff Pastry Refrigerated dough can be used if unavailable.
For Decoration
  • 12 pieces Edible Eyes Can replace with black sesame seeds or small olives.
  • 1 tablespoon Honey Optional; can substitute with maple syrup.

Equipment

  • Oven
  • Baking tray
  • Parchment Paper
  • Sharp Knife
  • Pizza Cutter

Method
 

Step-by-Step Instructions for Sausage Mummies
  1. Preheat your oven to 180°C (350°F) and line a baking tray with parchment paper.
  2. Unroll the ready-rolled puff pastry and slice into long strips about 1 cm wide.
  3. Wrap each sausage with a strip of puff pastry, overlapping slightly, and cut off excess pastry.
  4. Place the wrapped sausages on the baking tray and bake for 20 minutes or until golden brown.
  5. Increase the oven temperature to 220°C (430°F) and bake for an additional 5 minutes for a crispy finish.
  6. Allow the pastries to cool slightly, then use honey to attach the edible eyes.
  7. Serve warm on a platter, accompanied by ketchup or mustard for dipping.

Nutrition

Serving: 1mummyCalories: 120kcalCarbohydrates: 8gProtein: 6gFat: 8gSaturated Fat: 3gPolyunsaturated Fat: 1gMonounsaturated Fat: 4gCholesterol: 20mgSodium: 300mgPotassium: 150mgSugar: 1gIron: 1mg

Notes

For best results, serve fresh after baking to maintain crispness. Store in an airtight container for up to 2 days in the fridge or freeze unbaked for up to 2 months.

Tried this recipe?

Let us know how it was!

Ghost Taco Hand Pies: A Fun Twist for Taco Lovers Everywhere

October 2, 2025 by Grace Snow Leave a Comment

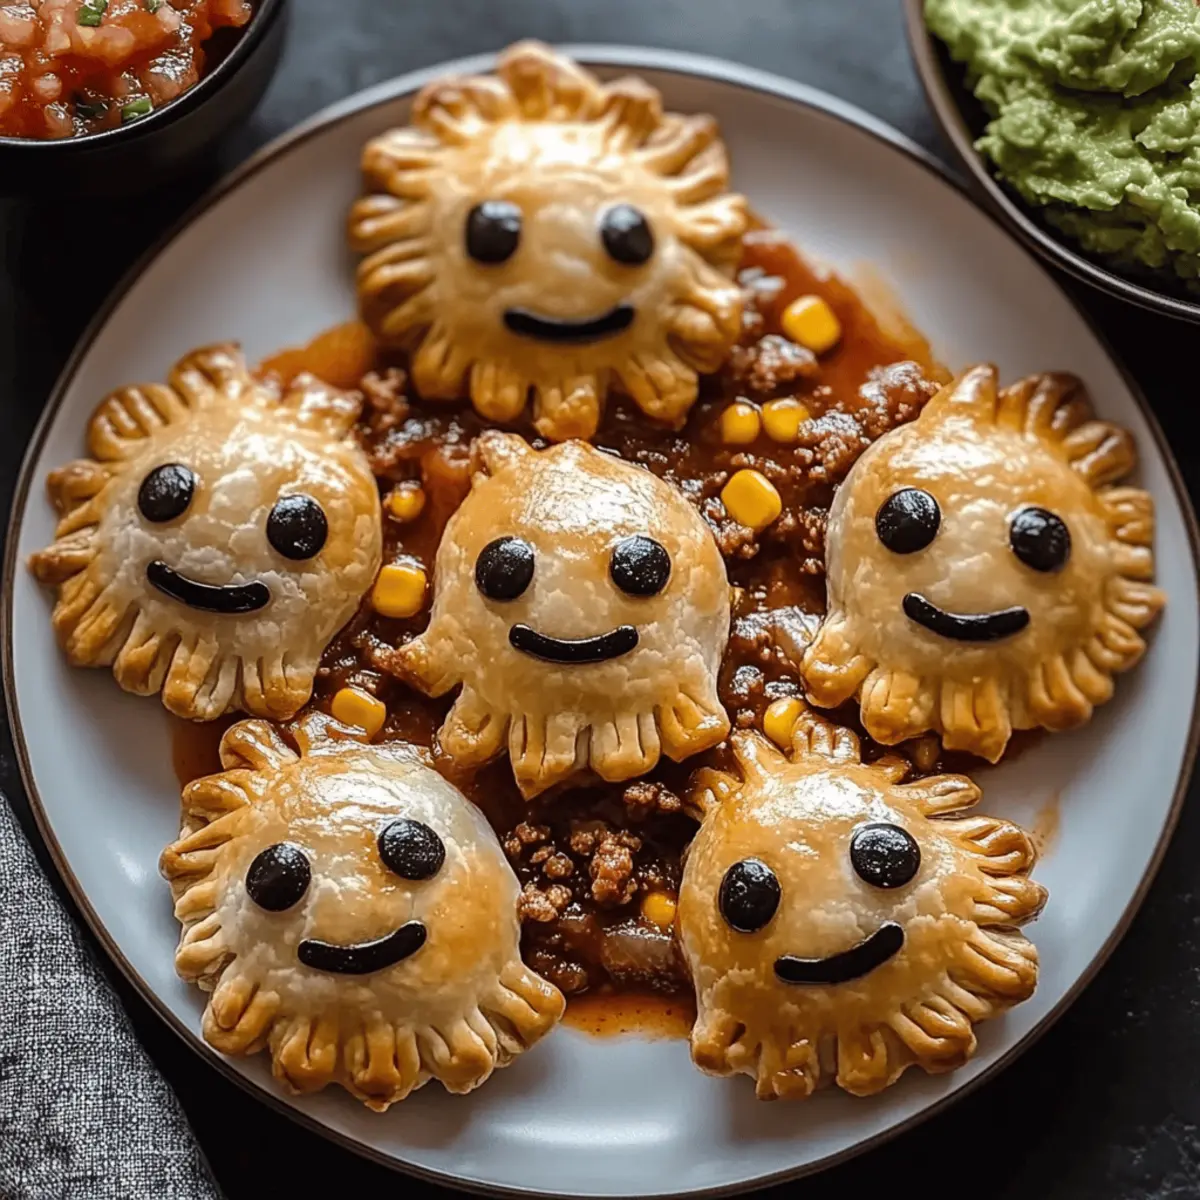
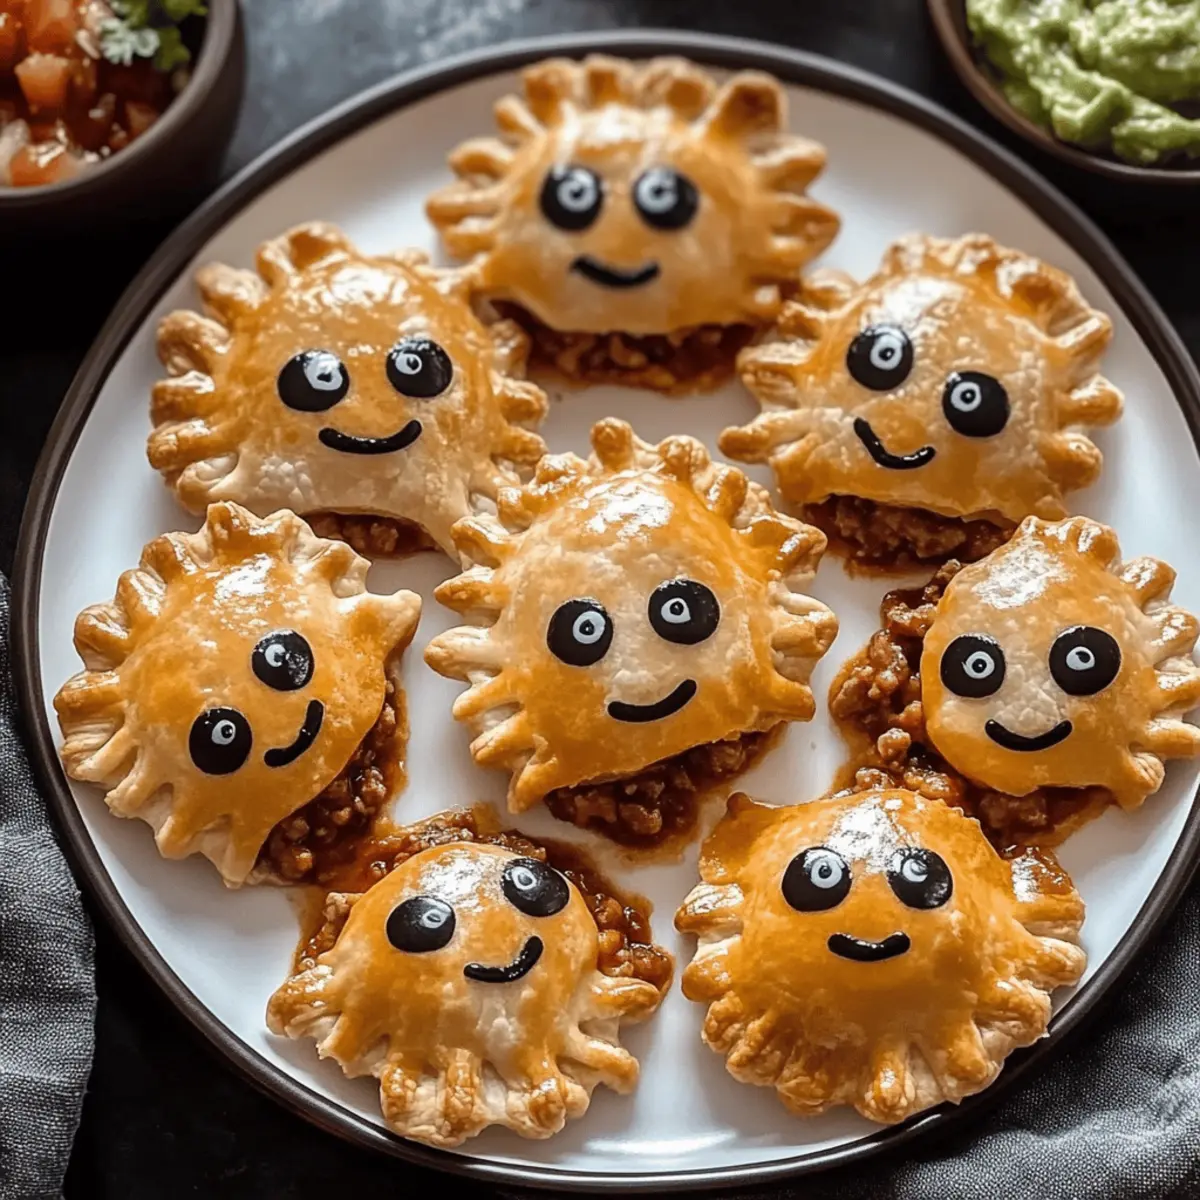
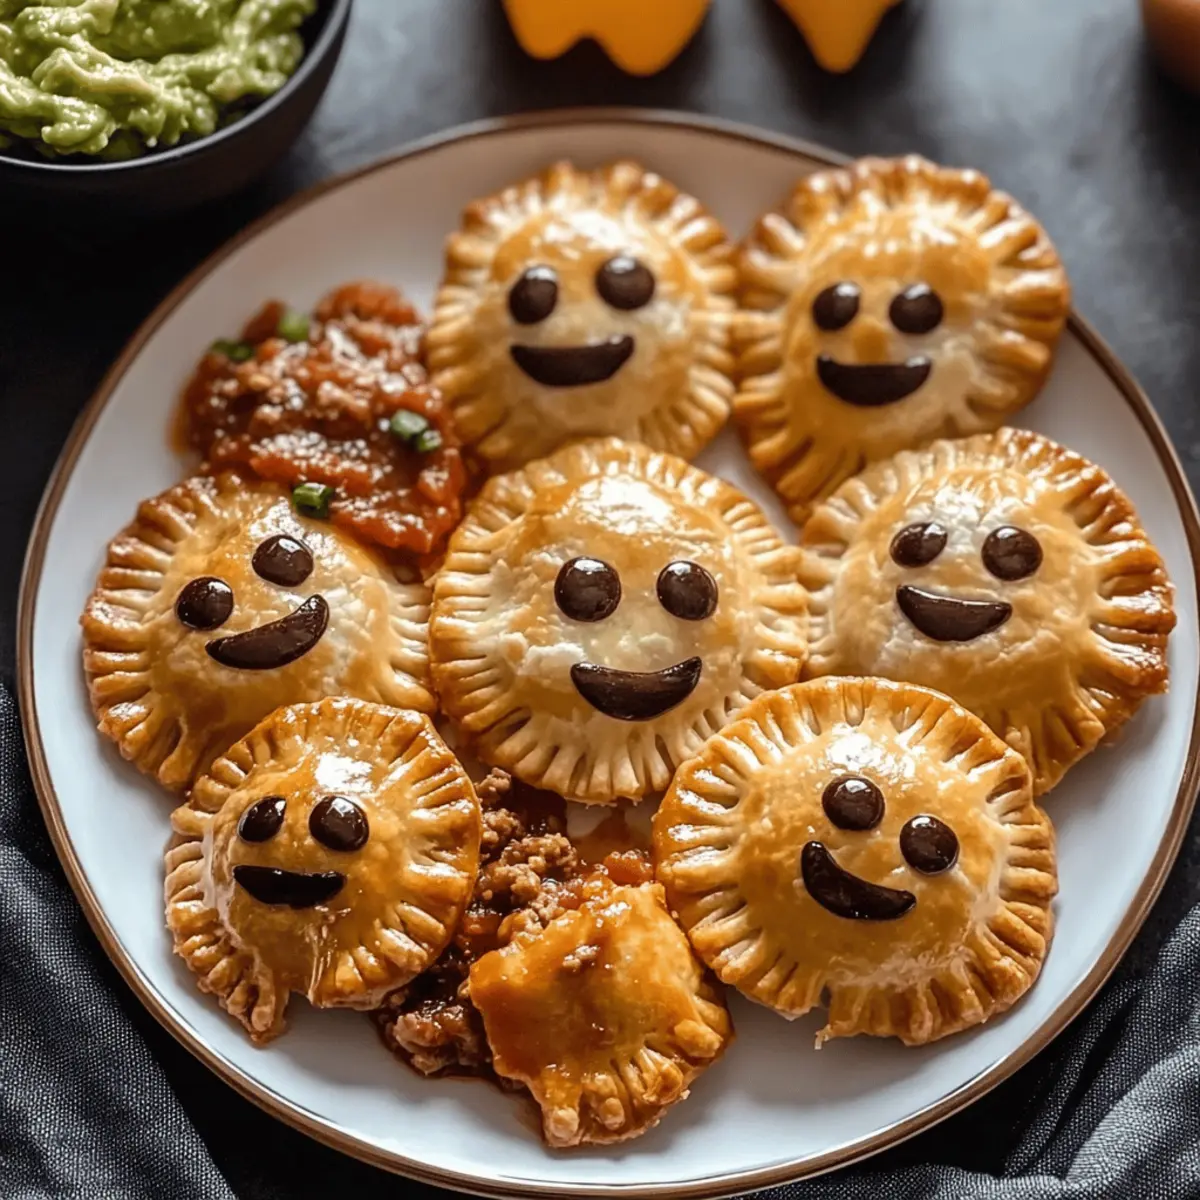
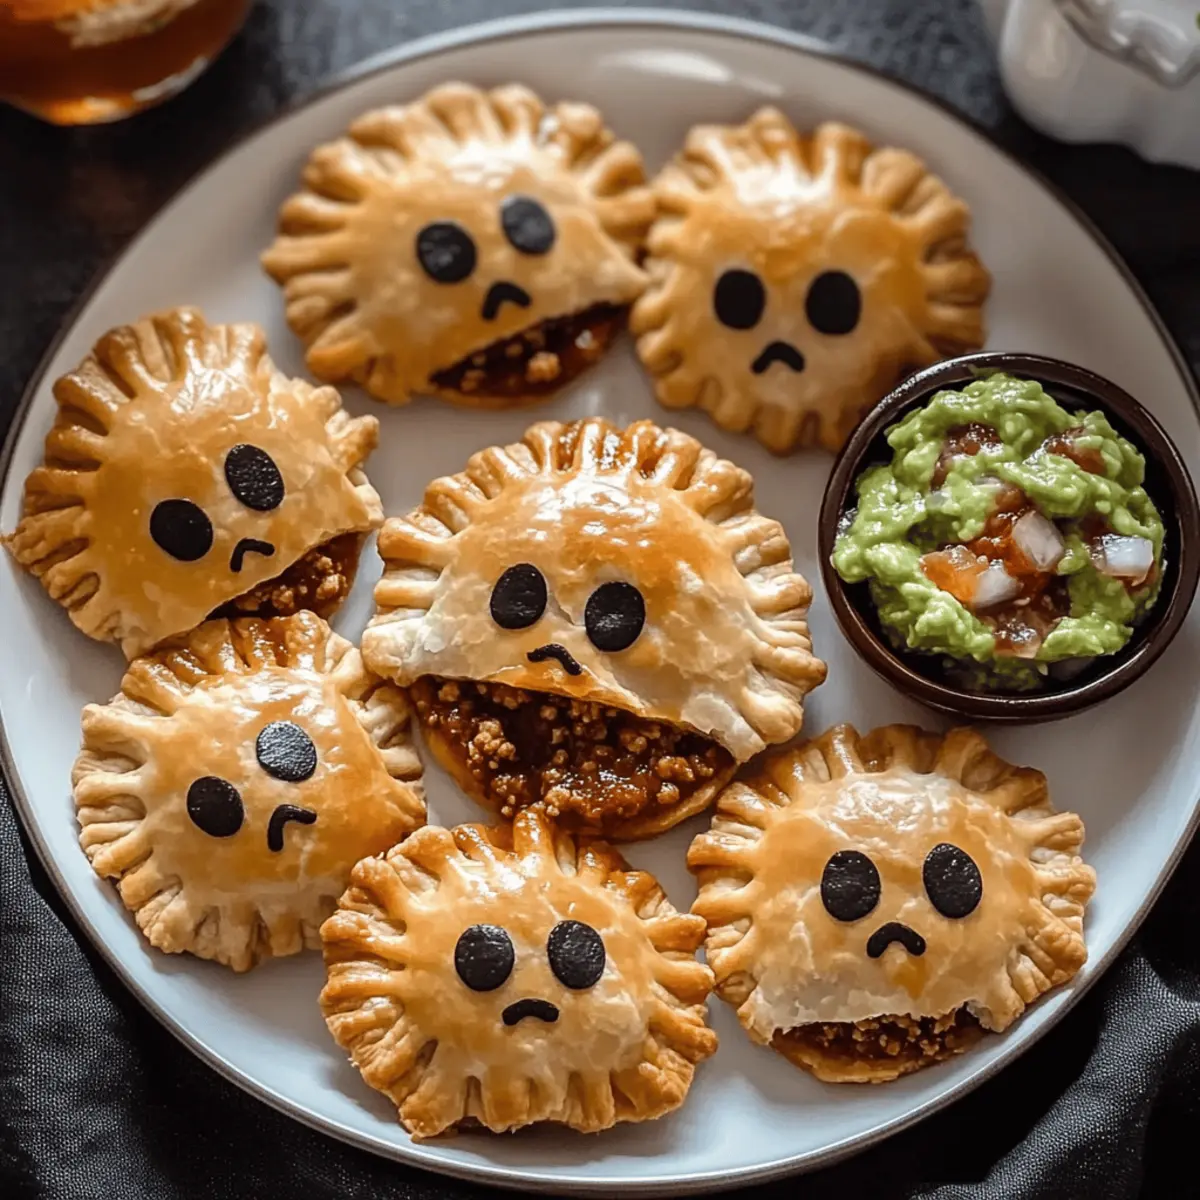
As I was rummaging through my pantry the other day, I stumbled upon some unfashionably cute pie crusts just waiting to be revived! That’s when the magic of Ghost Taco Hand Pies hit me—these delightful, customizable treats blend all the spicy joy of taco night into flaky, whimsical shapes. In just 40 minutes, you’ll transform simple ingredients into a fun meal that both kids and adults will adore. Plus, the best part? These hand pies are not only quick to prepare but also leave room for your creativity—swap in your favorite fillings or make them vegetarian! Paired with zesty salsa or creamy guacamole, each bite promises a cozy adventure. Ready to bring a little spook-tacular flavor to your dinner table?

Why Are Ghost Taco Hand Pies Unique?

Quick to prepare: Ready in just 40 minutes, making weeknight dinners a breeze!
Customizable: Tailor the fillings to your taste, whether you love spicy jalapeños or prefer a veggie-packed version with black beans.
Kid-Friendly Fun: Their playful ghost shapes are perfect for getting kids involved in cooking, making mealtime a delightful experience.
Versatile: Enjoy them as a main dish, or serve as snacks at parties or Halloween get-togethers. For a delicious twist on taco aesthetics, check out Taco Spaghetti Cheesy.
Satisfying Crunch: The flaky crust locks in gooey, flavorful filling, ensuring every bite is a delightful combination of textures. Don’t forget to dip them in some fresh salsa or guacamole for an extra layer of flavor!

Ghost Taco Hand Pie Ingredients

Elevate your taco night with these delightful hand pies!

For the Filling

  • Lean Ground Beef, Turkey, or Chicken – This serves as the main protein for filling; feel free to substitute with black beans or lentils for a vegetarian option.
  • Taco Seasoning – Essential for that classic taco flavor; you can use store-bought or whip up your own to control the spice level.
  • Shredded Carrot (optional) – Adds subtle sweetness and color; try replacing it with zucchini or corn for another tasty twist.
  • Chopped Bell Pepper or Baby Spinach (optional) – Provides crunch and nutrients; other leafy greens or diced tomatoes work just as well.

For the Crust

  • Pie Crusts (defrosted but unbaked) – This is the shell for your hand pies; opt for store-bought for ease or make your own for a personal touch.

For the Cheese

  • Shredded Mexican Cheese – Melts wonderfully to create a creamy texture; substitute with dairy-free cheese for a lactose-free alternative.

For the Glaze

  • Egg (for brushing) – This creates a gorgeous golden finish; substitute with a plant-based egg wash for a vegan version if desired.

For Serving

  • Salsa – A must-have dipping sauce that adds a flavor contrast; choose from spicy or mild varieties to suit your taste!

With these ingredients, you'll have everything you need to create delicious, customized Ghost Taco Hand Pies that everyone will love!

Step‑by‑Step Instructions for Ghost Taco Hand Pies

Step 1: Cook the Meat
In a large skillet, heat over medium-high heat, adding your choice of lean ground beef, turkey, or chicken. Cook until browned, about 6-8 minutes. Stir in taco seasoning and any optional vegetables like shredded carrots or chopped bell peppers. Allow the mixture to cook for an additional 3-5 minutes, ensuring everything is combined and heated through.
Step 2: Preheat the Oven
While your filling is cooking, preheat your oven to 425°F (220°C). Prepare your baking sheets by lining them with parchment paper, creating a non-stick surface for your Ghost Taco Hand Pies. This is a perfect time to get your ingredients ready and organized for assembly.

Step 3: Prepare Pie Crust
Roll out the defrosted pie crusts on a lightly floured surface. Using ghost-shaped cookie cutters, cut out the dough into fun shapes. You should have an equal number of cutouts for the bottom and top of your hand pies. Keep the extra dough aside, as you can re-roll it to create more shapes.

Step 4: Assemble Pies
Place half of the ghost-shaped cutouts onto your prepared baking sheets. Spoon the meat mixture onto each cutout, leaving a small border around the edges. Sprinkle shredded Mexican cheese over the filling, creating a gooey layer that melts beautifully. Now, it’s time to top them!

Step 5: Create Faces
Using the remaining pie crust cutouts, cut out eyes and mouths to decorate your Ghost Taco Hand Pies. Carefully place these face cutouts on top of the filled pies, ensuring they fit nicely. This adds a playful touch to your hand pies, making them even more inviting for family and friends.

Step 6: Seal Edges
To prevent any filling from escaping during baking, use a fork to crimp the edges of each pie. Press down firmly along the border, ensuring a secure seal. This step is crucial for maintaining the delicious filling within each Ghost Taco Hand Pie.

Step 7: Brush with Egg Wash
In a small bowl, whisk together an egg with a splash of water to create an egg wash. Lightly brush this mixture over each pie, giving them a beautiful golden finish as they bake. An egg wash also enhances the overall appearance, making them look enticing and appetizing.

Step 8: Bake
Transfer the baking sheets to the preheated oven and bake the pies for 10-14 minutes. Keep an eye on them, looking for a golden-brown color and a puffed appearance. Once they’re perfectly baked, remove them from the oven and let them cool for a few minutes before serving.

Step 9: Serve
Allow your Ghost Taco Hand Pies to cool slightly on the baking sheet. Serve them warm alongside zesty salsa or creamy guacamole for dipping, enhancing their delightful flavors. Gather around the table and enjoy this fun, delicious twist on taco night!

Expert Tips for Ghost Taco Hand Pies

  • Sealing is Key: Ensure the edges are tightly crimped to prevent any filling from leaking during baking. A thorough seal means more gooey goodness inside!
  • Monitor Bake Time: Keep an eye on the pies as they bake. Overbaking will leave you with dry hand pies instead of that delightful flaky texture.
  • Chill the Dough: If the pie crusts get too soft while cutting out shapes, refrigerate them for about 15 minutes. This makes it easier to handle and cut clean shapes.

  • Filling Variety: Don't hesitate to get creative! You can switch up the fillings according to your family’s preferences. Use the customizable aspect of Ghost Taco Hand Pies to add seasonal veggies for bonus nutrition.
  • Make It Spicy: If you love heat, consider adding chopped jalapeños or a pinch of cayenne pepper to the filling for a zesty kick.

Storage Tips for Ghost Taco Hand Pies

  • Room Temperature: Store baked hand pies in an airtight container for up to 2 days to maintain their freshness while allowing them to remain slightly warm.
  • Fridge: Keep any leftover Ghost Taco Hand Pies in a sealed container for up to 5 days. Reheat in the oven or microwave for a quick meal.
  • Freezer: Unbaked hand pies can be frozen for up to 3 months. Simply bake from frozen, adding a few extra minutes to the cooking time for that perfect golden-brown finish.
  • Reheating: To revive your hand pies, heat them in a preheated oven at 350°F until warmed through, about 10-15 minutes for a crispy texture.

Ghost Taco Hand Pies Variations & Substitutions

Feel free to get creative with your Ghost Taco Hand Pies—your kitchen journey begins with your imagination!

  • Vegetarian: Replace meat with seasoned black beans or lentils for a plant-based delight.

  • Spicy: Add chopped jalapeños or a sprinkle of cayenne pepper to spice things up! Feel the heat embracing each bite as your taste buds dance.

  • Southwestern Style: Incorporate corn and diced tomatoes into the filling for a fresh flavor twist. This adds a pop of sweetness that perfectly complements the seasonings.

  • Breakfast Edition: Swap the meat for scrambled eggs and add breakfast sausage for a morning treat. Imagine feasting on these while sipping a warm cup of coffee!

  • Dessert Version: Fill with a mixture of cream cheese and pumpkin puree, and sprinkle with cinnamon sugar for a sweet surprise. Who knew hand pies could bring a charming twist to dessert?

  • Gluten-Free: Use a gluten-free pie crust for a tasty alternative that everyone can enjoy. The flakiness will still shine through, ensuring no one misses out on the fun!

  • Crunchy Twist: Experiment with using crushed tortilla chips or fried onions in your filling for an added crunch. The textural contrast will surprise and delight!

  • Flavor Boost: Change up the cheese—try pepper jack for a little extra kick, or go dairy-free with your favorite plant-based cheese. Each variation will bring a new flavor to your Ghost Taco Hand Pies!

For even more customizable ideas, consider checking out these delightful recipes like Taco Bell Crunchwrap or indulge in Fish Taco Bowls for inspiration!

Make Ahead Options

These Ghost Taco Hand Pies are perfect for busy home cooks looking to save time during the week! You can pre-cook the filling and prepare the crust shapes up to 3 days in advance. Simply cook your choice of meat with taco seasoning, allow it to cool, and store it in an airtight container in the refrigerator. Additionally, roll out and cut your pie crusts into ghost shapes, stacking them between parchment paper to prevent sticking. When you're ready to serve, simply assemble the hand pies, brush with egg wash, and bake as directed. This way, you'll enjoy delicious, fun-filled meals with minimal effort on hectic nights!

What to Serve with Ghost Taco Hand Pies

Pairing your delightful Ghost Taco Hand Pies with the right sides can turn dinner into a feast bursting with flavors and textures.

  • Creamy Guacamole: This velvety dip complements the savory filling of the pies perfectly, adding a fresh and rich contrast.

  • Zesty Salsa: A classic pairing that provides a refreshing punch—choose a mild or spicy version tailored to your taste for a delightful kick.

  • Crispy Tortilla Chips: Their satisfying crunch balances the flaky hand pies, making for a fun and interactive eating experience that everyone will enjoy.

  • Spanish Rice: Fluffy and flavorful, it rounds out the meal beautifully, offering a heartwarming base that hugs the flavors of your hand pies.

  • Corn Salad: A burst of sweetness and crunch, this salad brightens up the plate and adds a delightful freshness to each bite.

  • Mixed Green Salad with Lime Vinaigrette: Light and zesty, the salad cleanses the palate and adds a nice refreshing balance to the richness of the pies.

  • Margaritas: For an adult twist, pair your meal with sweet and tangy margaritas that echo the fiesta vibes and elevate the dining experience.

Serving these alongside your Ghost Taco Hand Pies not only creates a visually appealing spread but also ensures every bite is an adventure full of deliciousness!

Ghost Taco Hand Pies Recipe FAQs

How do I select the best ingredients for my Ghost Taco Hand Pies?
Absolutely! For the best results, choose lean ground meats like beef, turkey, or chicken that are fresh and free from dark spots. If opting for a vegetarian filling, pick high-quality black beans or lentils that are firm and plump. When selecting vegetables, ensure they're vibrant in color and free from any softness or wilting. Fresh taco seasoning can elevate flavor; if using a store-bought option, check the expiration date!

What is the best way to store leftover Ghost Taco Hand Pies?
Very! Baked hand pies can be stored at room temperature in an airtight container for up to 2 days. If you have leftovers, place them in a sealed container in the refrigerator where they’ll stay fresh for about 5 days. Reheat them gently in the oven for that freshly baked taste!

Can I freeze Ghost Taco Hand Pies?
Absolutely! Unbaked Ghost Taco Hand Pies can be frozen for up to 3 months. To freeze, assemble the pies, ensuring they’re well sealed, and place them on a baking sheet without touching. Freeze until solid, then transfer to an airtight freezer bag. When ready to bake, simply cook them from frozen, adding an extra 3-5 minutes to the baking time!

What can I do if my pie crusts are too soft to cut?
Very! If you find your pie crusts becoming too soft during preparation, just chill them in the refrigerator for about 15 minutes. This will firm them up, making them easier to cut and handle. If time allows, work with one crust at a time to keep the others cool.
Are Ghost Taco Hand Pies suitable for people with dietary restrictions?
Absolutely! You can customize your Ghost Taco Hand Pies to fit various dietary needs. For those avoiding gluten, simply use gluten-free pie crusts and be mindful of your spices and other ingredients. For lactose intolerance, dairy-free cheese options work beautifully. Always double-check labels to ensure the ingredients meet specific dietary requirements.

How can I get creative with the fillings for my Ghost Taco Hand Pies?
The more the merrier! There are endless options to enrich your fillings. Try adding chopped jalapeños for heat, diced tomatoes for freshness, or even corn for sweetness. For a breakfast twist, substitute the meat with scrambled eggs and breakfast sausage. Don't shy away from experimenting—every filling brings a unique flavor profile to your hand pies!

Ghost Taco Hand Pies

Ghost Taco Hand Pies: A Fun Twist for Taco Lovers Everywhere

Ghost Taco Hand Pies are delightful, customizable treats blending the joy of taco night into whimsical shapes, perfect for kids and adults alike.
Print Recipe Pin Recipe
Prep Time 20 minutes mins
Cook Time 20 minutes mins
Total Time 40 minutes mins
Servings: 4 p pies
Course: Snacks
Cuisine: Mexican
Calories: 300
Ingredients Equipment Method Nutrition Notes

Ingredients
  

For the Filling
  • 1 lb Lean Ground Beef, Turkey, or Chicken Optional: substitute with black beans or lentils for a vegetarian version.
  • 1 tbsp Taco Seasoning Store-bought or homemade.
  • 1 cup Shredded Carrot Optional; can replace with zucchini or corn.
  • 1 cup Chopped Bell Pepper or Baby Spinach Optional; other leafy greens or diced tomatoes can also be used.
For the Crust
  • 1 pkg Pie Crusts (defrosted but unbaked) Store-bought or homemade.
For the Cheese
  • 1 cup Shredded Mexican Cheese Substitute with dairy-free cheese for lactose-free option.
For the Glaze
  • 1 large Egg (for brushing) Substitute with plant-based egg wash for vegan version.
For Serving
  • 1 cup Salsa Choose spicy or mild varieties to taste.

Equipment

  • Large skillet
  • Baking Sheets
  • Parchment Paper
  • Cookie Cutters
  • Mixing Bowl

Method
 

Step-by-Step Instructions
  1. In a large skillet, heat over medium-high heat, adding your choice of lean ground beef, turkey, or chicken. Cook until browned, about 6-8 minutes. Stir in taco seasoning and any optional vegetables. Cook for an additional 3-5 minutes, ensuring everything is combined and heated through.

  2. While your filling is cooking, preheat your oven to 425°F (220°C). Prepare your baking sheets by lining them with parchment paper.
  3. Roll out the defrosted pie crusts on a lightly floured surface. Using ghost-shaped cookie cutters, cut out the dough into fun shapes.
  4. Place half of the ghost-shaped cutouts onto your prepared baking sheets. Spoon the meat mixture onto each cutout, leaving a small border around the edges. Sprinkle shredded Mexican cheese over the filling.
  5. Using the remaining pie crust cutouts, cut out eyes and mouths to decorate your Ghost Taco Hand Pies. Carefully place these on top, ensuring they fit nicely.
  6. To seal, use a fork to crimp the edges of each pie, ensuring a secure seal.
  7. In a small bowl, whisk together an egg with a splash of water. Lightly brush this mixture over each pie.
  8. Transfer the baking sheets to the preheated oven and bake for 10-14 minutes until golden brown.
  9. Allow the Ghost Taco Hand Pies to cool slightly on the baking sheet. Serve warm with salsa or guacamole for dipping.

Nutrition

Serving: 1hand pieCalories: 300kcalCarbohydrates: 25gProtein: 15gFat: 15gSaturated Fat: 7gPolyunsaturated Fat: 1gMonounsaturated Fat: 2gCholesterol: 100mgSodium: 350mgPotassium: 250mgFiber: 2gSugar: 1gVitamin A: 500IUVitamin C: 5mgCalcium: 200mgIron: 2mg

Notes

Ensure the edges are tightly crimped to prevent leakage, and feel free to customize the fillings according to preference.

Tried this recipe?

Let us know how it was!

Crispy Zucchini Fritters Side Dish That Everyone Will Love

October 2, 2025 by Grace Snow Leave a Comment

A quick fix for my recent cooking crisis became a life-changer in my kitchen—crispy gluten-free zucchini fritters. As I shuffled through my fridge, half a wilting zucchini caught my eye, and I knew I had to get creative. These delicious Zucchini Fritters make for a delightful side dish that’s not just healthy but also packed with protein and fiber to keep you satisfied. In just minutes, you can whip up these versatile bites, perfect for meal prep or a post-workout snack. Plus, they’re completely customizable; you can throw in your favorite herbs or even sneak in some cheese for a touch of indulgence. Curious about how to elevate your healthy eating game without sacrificing flavor? Let’s dive into this easy recipe!

Why Are Zucchini Fritters So Loved?

Crispiness: These fritters deliver a delightful crunch with every bite, making them irresistible.

Healthy Treat: Packed with protein and fiber, they provide a nutritious option without skimping on flavor.

Meal Prep Friendly: Perfect for make-ahead meals, they're as convenient as they are delicious.

Versatile Flavors: Customize them with your favorite herbs, or try variations like adding cheese for extra richness. Pair them with a light salad or serve alongside Cheesy Corn Fritters for a fun twist!

Fast and Easy: Ready in no time, they make for a quick side dish that can impress any crowd.

Zucchini Fritters Side Dish Ingredients

These zucchini fritters are not only delicious but easy to whip up!

For the Fritters

  • Zucchini – Remove excess moisture for crispy fritters; this ingredient is the star!
  • Eggs – Binds the fritters, giving them structure and stability.
  • Oat Flour/Almond Flour – Gluten-free alternative to regular flour; provides a nice texture.
  • Parmesan Cheese (optional) – Adds a rich flavor; nutritional yeast can be used for a vegan option.
  • Greek Yogurt/Cottage Cheese – Increases protein content and adds moisture; opt for dairy-free if needed.
  • Minced Garlic – Enhances the overall flavor; adjust to your taste!
  • Fresh Herbs (e.g., parsley, dill) – Brightens the dish; feel free to switch up with your favorites.
  • Salt & Pepper – Essential seasonings to elevate the flavors; taste as you go.

Step‑by‑Step Instructions for Crispy Gluten-Free Zucchini Fritters Side Dish

Step 1: Prep Zucchini
Start by washing your zucchini thoroughly and trimming the ends. Use a box grater or food processor to shred the zucchini into fine pieces, creating a mountain of vibrant green shreds. This key ingredient will provide moisture and flavor in your Crispy Zucchini Fritters.

Step 2: Remove Moisture
To achieve the perfect fritter texture, it's essential to remove excess moisture from the grated zucchini. Place the shredded zucchini in a clean kitchen towel, gather the edges, and squeeze it tightly to release as much water as possible. This step helps ensure your fritters are delightfully crispy.

Step 3: Mix Ingredients
In a large mixing bowl, combine the drained zucchini with beaten eggs, your choice of oat flour or almond flour, and optional cheese for added flavor. Stir in Greek yogurt or cottage cheese, minced garlic, chopped herbs, and season with salt and pepper. Mix until you have a smooth, cohesive batter ready for frying.

Step 4: Heat Skillet
Preheat a non-stick skillet over medium heat and add a drizzle of olive oil, ensuring the bottom is lightly coated. Allow the oil to heat for about 2-3 minutes until shimmering. This step is crucial for developing that beautiful golden brown exterior on your Zucchini Fritters.

Step 5: Form Fritters
Using a 2-tablespoon scoop, portion out the batter and shape each scoop into a round patty. Gently flatten the patties slightly for even cooking as you place them into the skillet. Ensure enough space between each fritter to promote proper crisping and browning.

Step 6: Cook Fritters
Let the fritters cook for 3-4 minutes until the edges start to turn golden and crispy. Carefully flip each fritter using a spatula, then cook for an additional 2-3 minutes on the other side. They should have a beautiful, crunchy exterior, making them irresistible!

Step 7: Drain Oil
Once cooked, transfer the fritters to a plate lined with paper towels to absorb any excess oil. This step will help maintain the fluffy texture inside while keeping the outside crispy. Allow them to cool slightly as you repeat the cooking process with the remaining batter.

Step 8: Air Fry Option
For a healthier alternative, preheat your air fryer to 400°F (200°C). Arrange the patties in a single layer within the air fryer basket and cook for 8-10 minutes, flipping them halfway through. This method delivers a satisfying crunch while keeping the vegetable goodness intact.

Step 9: Serve
Serve your Crispy Gluten-Free Zucchini Fritters hot, garnished with your favorite toppings like a dollop of Greek yogurt or slices of creamy avocado. These delightful bites can be enjoyed on their own, as a side dish, or as a snack, inviting smiles all around!

Zucchini Fritters Side Dish Variations

Feel free to sprinkle your culinary magic and transform these zucchini fritters into something uniquely yours!

  • Meal-Boosting Addition: Add shredded chicken or canned tuna for a protein-packed variant that turns these fritters into a complete meal. It’s a satisfying way to keep hunger at bay!

  • Dairy-Free Delight: Swap Greek yogurt or cottage cheese with your favorite plant-based alternative, like cashew yogurt or silken tofu, to create an equally creamy texture without dairy.

  • Spicy Kick: For those who love heat, add red pepper flakes or chopped jalapeños to the mixture. This adds just the right amount of zing to your bite-sized beauties!

  • Herb-Infused Goodness: Want a flavor boost? Experiment with different fresh herbs like basil, cilantro, or chives for a new twist in each batch. Your taste buds will appreciate the variety!

  • Cheesy Indulgence: Incorporate shredded cheddar or feta cheese into the batter to achieve an extra layer of rich flavor. Mixing cheeses can create delightful taste surprises in every fritter.

  • Nutty Crunch: For added texture, toss in a handful of chopped nuts such as walnuts or almonds. The crunch will surely elevate your fritters, making each bite exciting.

  • Vegan Version: Use flaxseed meal or chia seeds mixed with water as an egg replacement for a vegan take on this recipe. This keeps them plant-based without sacrificing texture!

  • Zesty Zucchini Fritters: Brighten up your fritters by adding a splash of lemon zest to the mix. This simple addition makes a world of difference, imparting a fresh and zesty flavor profile!

By embracing these variations, you’ll discover countless ways to enjoy these delightful zucchini fritters. If you’re in the mood to pair them with other delicious recipes, consider serving alongside a fresh salad or the colorful Succotash for a delightful meal or snack!

How to Store and Freeze Zucchini Fritters

Fridge: Store cooked zucchini fritters in an airtight container in the fridge for up to 4 days. This keeps them fresh and ready for a quick snack or side dish.

Freezer: For longer storage, freeze fritters on a baking sheet until solid, then transfer them to a freezer bag. They can be kept for up to 3 months.

Reheating: When you’re ready to enjoy the fritters, reheat them in a skillet or air fryer for the best texture. Avoid the microwave to prevent sogginess.

Thawing: For frozen zucchini fritters, thaw them in the fridge overnight before reheating, or cook from frozen, adjusting the cooking time as necessary.

What to Serve with Crispy Gluten-Free Zucchini Fritters

A delightful combination of textures and flavors will elevate your meal experience, making it unforgettable.

  • Minted Yogurt Dip: A refreshing yogurt dip with fresh mint complements the fritters’ savory notes and adds a cooling effect.
  • Garlic Lemon Quinoa: Fluffy quinoa tossed with garlic and lemon brightens the dish, enhancing the delightful flavors of the fritters.
  • Crisp Green Salad: A light salad with mixed greens, cucumbers, and a citrus vinaigrette provides a perfect balance and refreshing crunch.
  • Roasted Cherry Tomatoes: Sweet and tangy roasted cherry tomatoes bring a burst of flavor that pairs beautifully with the fritters' savory taste.

Elevate your meal further by serving alongside a chilled white wine or sparkling water infused with lemon for a refreshing beverage.

  • Avocado Toast: A slice of whole-grain avocado toast topped with radish and microgreens adds creaminess and earthy flavors to your plate.
  • Sweet Potato Fries: Crispy, slightly sweet fries provide a delightful contrast to the savory zucchini fritters, making each bite an adventure.
  • Herbed Couscous: Fluffy couscous with fresh herbs and a drizzle of olive oil enhances the meal with an aromatic touch and pleasant texture.

Expert Tips for Zucchini Fritters Side Dish

  • Drain Zucchini Well: Ensure excess moisture is removed after grating to avoid soggy fritters and achieve that desired crispy texture.

  • Use Right Flour: Stick with oat or almond flour for gluten-free options; experiment with other flours if desired, but results may vary.

  • Adjust Cooking Time: Thicker fritters may need slightly longer to cook, so keep an eye on them for even browning.

  • Perfect Portioning: Use a 2-tablespoon scoop for uniform patties, as this helps in even cooking and ensures consistent crispiness.

  • Store Safely: Keep cooked zucchini fritters in an airtight container in the fridge for up to 4 days; reheat in a skillet for the best texture.

  • Flavor Boost: Don't shy away from enhancing your fritters with spices or fresh herbs—this customization elevates your Zucchini Fritters Side Dish to the next level!

Make Ahead Options

These Crispy Gluten-Free Zucchini Fritters are perfect for meal prep! You can prepare the batter up to 24 hours in advance by mixing the grated zucchini with eggs, flour, and seasonings. Store the mixture in an airtight container in the refrigerator to maintain freshness. Alternatively, you can also cook the fritters in advance and refrigerate them for up to 4 days. When you're ready to enjoy them, simply reheat the fritters in a skillet or air fryer for that crispy texture on the outside. This way, you'll have a delicious, homemade side dish ready for busy weeknights without any hassle!

Zucchini Fritters Side Dish Recipe FAQs

How do I choose the best zucchini?
Absolutely! When selecting zucchini, look for firm, glossy skin without any dark spots. Small to medium zucchinis tend to have a sweeter flavor and less seeds, perfect for fritters. If you find any zucchini with soft spots, it's best to avoid those as they may be past their prime.

How should I store leftover zucchini fritters?
Very! Store your cooked zucchini fritters in an airtight container in the fridge for up to 4 days. Make sure they are completely cool before sealing to prevent condensation, which can make them soggy.

Can I freeze cooked zucchini fritters?
Of course! To freeze, place the fritters in a single layer on a baking sheet until solid. Once frozen, transfer them to a freezer bag or container. They can be stored for up to 3 months. Just remember to label the bag with the date!

What should I do if my zucchini fritters are soggy?
If your fritters turn out soggy, don't worry! This can often happen due to excess moisture in the zucchini. Next time, try squeezing out even more water with a clean kitchen towel after grating. You can also cook them a little longer in the skillet, making sure to give them enough space to crisp up.

Are zucchini fritters suitable for my gluten-free diet?
Absolutely! These zucchini fritters are gluten-free when made with oat or almond flour. Just ensure that any additional ingredients, like cheese or yogurt, are also gluten-free for total peace of mind.

Can I make these fritters vegan?
Yes, indeed! To make these zucchini fritters vegan, substitute the eggs with a flax egg (1 tablespoon ground flaxseed mixed with 2.5 tablespoons water—let it sit for a few minutes to thicken), and replace any dairy ingredients with plant-based alternatives like nutritional yeast or dairy-free yogurt.

Zucchini Fritters Side Dish

Crispy Zucchini Fritters Side Dish That Everyone Will Love

A delightful and healthy Zucchini Fritters side dish packed with protein and fiber.
Print Recipe Pin Recipe
Prep Time 15 minutes mins
Cook Time 15 minutes mins
Total Time 30 minutes mins
Servings: 4 fritters
Course: Snacks
Cuisine: American
Calories: 120
Ingredients Equipment Method Nutrition Notes

Ingredients
  

For the Fritters
  • 2 cups Zucchini Remove excess moisture for crispy fritters; this ingredient is the star!
  • 2 large Eggs Binds the fritters, giving them structure and stability.
  • 1 cup Oat Flour Gluten-free alternative to regular flour; provides a nice texture.
  • 1/2 cup Parmesan Cheese Optional; adds a rich flavor.
  • 1/2 cup Greek Yogurt Increases protein content and adds moisture; opt for dairy-free if needed.
  • 2 cloves Minced Garlic Enhances the overall flavor; adjust to your taste!
  • 1 cup Fresh Herbs (e.g., parsley, dill) Brightens the dish; feel free to switch up with your favorites.
  • 1 teaspoon Salt Essential seasoning to elevate the flavors.
  • 1 teaspoon Black Pepper Essential seasoning to elevate the flavors.

Equipment

  • non-stick skillet
  • Box grater
  • Mixing Bowl
  • scooper

Method
 

Preparation Steps
  1. Start by washing your zucchini thoroughly and trimming the ends. Use a box grater or food processor to shred the zucchini into fine pieces.
  2. Remove excess moisture from the grated zucchini by squeezing it in a clean kitchen towel.
  3. In a large mixing bowl, combine the drained zucchini with beaten eggs, oat or almond flour, and optional cheese. Stir in yogurt, minced garlic, chopped herbs, and season with salt and pepper.
  4. Preheat a non-stick skillet over medium heat and add a drizzle of olive oil, allowing it to heat until shimmering.
  5. Using a 2-tablespoon scoop, portion out the batter and shape each into a round patty. Gently flatten the patties slightly.
  6. Cook the fritters for 3-4 minutes on one side until golden, then flip and cook for another 2-3 minutes.
  7. Transfer cooked fritters to a plate lined with paper towels to absorb excess oil.
  8. For a healthier option, air-fry the patties at 400°F for 8-10 minutes, flipping halfway through.
  9. Serve hot, garnished with toppings like Greek yogurt or avocado, and enjoy!

Nutrition

Serving: 1fritterCalories: 120kcalCarbohydrates: 10gProtein: 5gFat: 8gSaturated Fat: 3gPolyunsaturated Fat: 1gMonounsaturated Fat: 4gCholesterol: 70mgSodium: 150mgPotassium: 150mgFiber: 2gSugar: 2gVitamin A: 500IUVitamin C: 10mgCalcium: 100mgIron: 1mg

Notes

For optimal crispiness, ensure zucchini is well-drained and use a 2-tablespoon scoop for uniform fritters.

Tried this recipe?

Let us know how it was!

Crispy Zucchini Fritters Side Dish for Guilt-Free Snacking

October 2, 2025 by Grace Snow Leave a Comment

Walking through the farmers' market, the vibrant green zucchinis caught my eye, whispering promises of delicious possibilities. These Crispy Gluten-Free Zucchini Fritters are not just a treat for the taste buds; they strike a perfect balance between healthy eating and sheer satisfaction. Packed with protein and fiber, these fritters make a fantastic Zucchini Fritters side dish for any meal, whether you're prepping for a busy week or looking for a nourishing snack post-workout. The best part? They’re so customizable that you can easily switch up the ingredients to match your mood or pantry. Who knew that clean eating could feel this good? Ready to bring some crunch into your kitchen?

Why Choose Zucchini Fritters for Snacking?

Crispy Delight: These fritters are wonderfully crispy on the outside, giving you that satisfying crunch you crave.

Healthy Indulgence: Packed with protein and fiber, they are a guilt-free snack you can enjoy any time.

Versatile Uses: Perfect as a Zucchini Fritters side dish or as a stand-alone snack, they fit seamlessly into your meal plan.

Customizable Ingredients: Feel free to adapt the recipe with extra herbs or proteins like chicken or tuna for added nourishment.

Time-Saving Meal Prep: Make a batch ahead of time, storing them in the fridge or freezer, so you're always ready for a quick, healthy option.

Family-Friendly Appeal: These fritters will be a hit with everyone; serve them with dipping sauces or avocado for extra flavor! Consider pairing them with a fresh salad or alongside dishes like Cheesy Zucchini Bake for a complete meal.

Zucchini Fritters Side Dish Ingredients

For the Fritters
• Zucchini – Important to remove excess water for a crispy texture.
• Eggs – Acts as a binder, helping to hold the fritters together.
• Oat Flour/Almond Flour – Gluten-free option that adds a lovely texture; substitute with a different gluten-free flour as needed.
• Parmesan Cheese (optional) – Brings in richness and flavor; feel free to swap with nutritional yeast for a vegan alternative.
• Greek Yogurt/Cottage Cheese – Boosts protein content and ensures moisture; choose dairy-free alternatives for a vegan recipe.
• Minced Garlic – Elevates the flavor profile; adjust the amount based on your preference for garlic intensity.
• Herbs (e.g., parsley, dill) – Provides a fresh touch; you can customize with favorite herbs like basil or chives for a unique flavor.
• Salt & Pepper – Essential for enhancing flavors; adjust to match your taste preferences.

Step‑by‑Step Instructions for Crispy Zucchini Fritters Side Dish

Step 1: Prep Zucchini
Begin by washing the zucchinis thoroughly and trimming off the ends. Using a box grater or food processor, shred the zucchinis into fine pieces. You should have about 2-3 cups of grated zucchini, ready for transformation into delicious crispy zucchini fritters.

Step 2: Remove Moisture
Place the grated zucchini in a clean kitchen towel and twist to squeeze out as much excess moisture as possible. This crucial step helps achieve that crispy texture in the final fritters, so don’t skip it. You want the zucchini to feel dry yet still retain its vibrant flavor.

Step 3: Mix Ingredients
In a large mixing bowl, add the drained zucchini along with the eggs, oat or almond flour, Parmesan cheese (if using), Greek yogurt, minced garlic, and any herbs you prefer. Mix everything thoroughly until you have a smooth and cohesive batter. The luscious blend is the heart of your zucchini fritters side dish.

Step 4: Heat Skillet
Place a non-stick skillet on the stovetop over medium heat and drizzle in about 2 tablespoons of olive oil. Allow the oil to heat for approximately 2 minutes until shimmering but not smoking. This perfect temperature is crucial for achieving those golden, crispy edges when frying the fritters.

Step 5: Form Fritters
Once the skillet is ready, scoop about 2 tablespoons of the zucchini mixture and gently shape it into a patty. Flatten it slightly before placing it in the hot skillet. Repeat this process, ensuring the fritters have enough space to cook evenly. You’re just moments away from scrumptious zucchini fritters!

Step 6: Cook Fritters
Let the fritters cook for about 3-4 minutes on one side until they turn a beautiful golden brown. Carefully flip each fritter with a spatula and cook for an additional 2-3 minutes on the other side. They should be crisp on the outside but tender and flavorful inside—just like the perfect zucchini fritters side dish should be!

Step 7: Drain Oil
Once cooked, transfer the fritters to a paper towel-lined plate to absorb any excess oil. This step helps maintain their delightful crispiness. Allow them to cool slightly while you continue cooking the remaining fritters, ensuring each one has that coveted crunch.

Step 8: Air Fry Option
If you’d prefer a healthier cooking method, preheat your air fryer to 400°F (200°C). Arrange the fritters in a single layer in the air fryer basket, cooking them for 8-10 minutes and flipping halfway through. This will give you a wonderfully crispy batch without any additional oil.

Step 9: Serve
Serve your crispy zucchini fritters hot, garnished with a dollop of Greek yogurt or sliced avocado, if desired. Enjoy them as a delightful side dish or snack, perfect for any occasion, and relish the crunchy, savory goodness of these zucchini fritters.

How to Store and Freeze Zucchini Fritters

Fridge: Keep cooked zucchini fritters in an airtight container for up to 4 days. Make sure they are completely cooled before storing to maintain texture.

Freezer: For longer storage, freeze fritters on a baking sheet until solid, then transfer them to a freezer bag. They can be stored for up to 3 months.

Reheating: Reheat fritters in a skillet over medium heat or in an air fryer at 400°F (200°C) for 5-7 minutes for best texture. Avoid using a microwave to maintain crispiness.

Batch Cooking: To save time, consider preparing a double batch of zucchini fritters to enjoy as a quick snack or side dish on busy days.

Make Ahead Options

These Crispy Gluten-Free Zucchini Fritters are perfect for meal prep enthusiasts! You can grate and drain the zucchini up to 24 hours in advance, storing it in an airtight container in the refrigerator to maintain its freshness. Mix the remaining ingredients and combine them into a cohesive batter a few hours before you plan to cook; just remember to refrigerate it until you're ready to fry. For optimal quality, cook the fritters the same day for the best texture, but they can also be cooked and stored in the refrigerator for up to 4 days. Simply reheat in an air fryer or skillet to bring back that delightful crispiness before serving. Enjoy stress-free weeknight meals with these tasty zucchini fritters side dish!

Helpful Tricks for Zucchini Fritters

  • Drain Zucchini Well: To avoid soggy fritters, remember to thoroughly squeeze out any excess moisture from the grated zucchini before mixing.

  • Batch Cooking: Consider making a larger batch and freezing the extras. Just reheat them in the air fryer for a quick and crispy Zucchini Fritters side dish on busy days.

  • Even Cooking: Use a consistent size for your fritters, about 2 tablespoons each, to ensure even cooking and perfect crispiness every time.

  • Herb Variations: Feel free to experiment with different herbs in the batter. Fresh basil or chives can elevate the flavors and add a delightful twist to your fritters.

  • Watch the Heat: Keep the skillet at medium heat; too high can burn the fritters outside while leaving them undercooked inside. Patience is key for that perfect golden crust!

  • Storage Solutions: Store any leftovers in an airtight container in the fridge for up to four days. These fritters also make a fantastic addition to salads or wraps!

What to Serve with Crispy Gluten-Free Zucchini Fritters?

These delightful fritters are the perfect starting point for a full, satisfying meal that your family will love.

  • Creamy Avocado Dip: A smooth avocado dip adds a rich, buttery element that complements the fritters’ crunch perfectly.

  • Refreshing Salad: A crisp side salad, filled with vibrant veggies and a zesty dressing, provides a colorful contrast and freshness that brightens the dish.

  • Garlic Yogurt Sauce: Tangy Greek yogurt mixed with minced garlic and herbs offers a cooling effect, enhancing the fritters’ taste with every bite.

  • Roasted Veggies: Pairing the fritters with roasted carrots or bell peppers brings in a delicious caramelized flavor and adds a healthy touch to your plate.

  • Sweet Potato Fries: Their natural sweetness and crunchy exterior create a heavenly balance with the savory fritters, making them an irresistible combo.

  • Herb-Infused Quinoa: A side of fluffy quinoa, cooked with fresh herbs, not only boosts nutrition but also provides a lovely texture contrast to the crispy fritters.

  • Sparkling Lemonade: Refreshing and lightly tangy, a glass of sparkling lemonade elevates the meal, making it a vibrant experience that everyone will enjoy.

  • Dark Chocolate for Dessert: End the meal on a sweet note with a small piece of dark chocolate; its richness beautifully complements the lightness of zucchini fritters.

Zucchini Fritters Variations & Substitutions

Feel free to let your creativity shine and adjust this recipe to suit your taste buds!

  • Protein-Packed: Add shredded chicken or canned tuna for a heartier fritter that turns these snacks into a full meal. The combination both nourishes and satisfies, making them perfect for busy days.

  • Dairy-Free: Substitute Greek yogurt and cheese with plant-based options like cashew cream and nutritional yeast for a vegan twist. This keeps the flavors intact while catering to dairy-free lifestyles.

  • Spicy Kick: For those who crave a bit of heat, toss in red pepper flakes or chopped jalapeños to the batter. A little spice livens up the dish, enhancing the zucchini's natural sweetness.

  • Herb Variations: Experiment with different herbs such as fresh basil, cilantro, or chives to create unique flavor profiles. Each herb brings its zest, transforming your fritters into delightful surprises every time.

  • Cheesy Indulgence: Swap Parmesan for your favorite cheese like feta or goat cheese for a richer taste. The creaminess takes the fritters to another level, perfect for cheese lovers!

  • Paleo-Friendly: Replace oat or almond flour with coconut flour for a lower-carb option. Just remember to adjust the amount since coconut flour absorbs more moisture—start with a smaller amount and add gradually.

  • Savory Additions: Toss in finely chopped bell peppers, onions, or spinach to add color and texture. These extra veggies enhance the nutritional value while giving an exciting crunch in each bite.

  • Sweet Twist: For a fun variation, try adding some grated carrots or a touch of shredded sweet potato. This adds a slight sweetness that perfectly complements the savory notes, making them a delicious snack at any time.

Looking to pair these with something delightful? Consider serving them alongside a fresh salad, or elevate the dish by adding them to a hearty meal like Succotash Colorful Side for an irresistible combination!

Zucchini Fritters Side Dish Recipe FAQs

How do I select ripe zucchini for fritters?
Absolutely! When choosing zucchini, look for ones that are firm, without dark spots or soft areas. They should be a vibrant green, around 6-8 inches in length for optimal flavor and moisture content. If you find any with large seeds, they might be overripe, so it’s best to avoid those.

What’s the best way to store leftover zucchini fritters?
Very! To store cooked zucchini fritters, place them in an airtight container in the refrigerator for up to 4 days. Make sure they are completely cooled to prevent moisture buildup. For the best texture, reheat in a skillet or air fryer rather than a microwave.

Can I freeze zucchini fritters?
Absolutely! To freeze, first cool the fritters entirely. Then, spread them in a single layer on a baking sheet and place them in the freezer for about 1-2 hours until solid. Once frozen, transfer them to a freezer bag. They can be kept in the freezer for up to 3 months.

What should I do if my fritters turn out soggy?
Don't worry; it happens! Ensure that you've adequately drained the zucchini by squeezing out as much moisture as possible before mixing it with other ingredients. If they still turn out soggy, try frying them in a hotter pan or adding a bit more flour to the mixture to help absorb excess moisture.

Are zucchini fritters safe for dietary restrictions?
Yes! These fritters can be tailored to suit various dietary needs. For a gluten-free option, use oat flour or almond flour, and you can make them vegan by substituting eggs with chia seeds or flaxseed meal mixed with water. Always check the ingredient labels to avoid allergens and adapt as needed!

How long can I keep cooked fritters in the fridge?
Keep them fresh! Cooked zucchini fritters stored properly in an airtight container can last in the refrigerator for up to 4 days. Reheat them gently in a skillet or air fryer for the best texture; avoid the microwave, as it will make them soggy.

Zucchini Fritters Side Dish

Crispy Zucchini Fritters Side Dish for Guilt-Free Snacking

These Crispy Zucchini Fritters make a fantastic Zucchini Fritters side dish, balancing healthy eating and satisfaction for guilt-free snacking.
Print Recipe Pin Recipe
Prep Time 15 minutes mins
Cook Time 15 minutes mins
Cooling Time 5 minutes mins
Total Time 35 minutes mins
Servings: 4 fritters
Course: Snacks
Cuisine: American
Calories: 150
Ingredients Equipment Method Nutrition Notes

Ingredients
  

For the Fritters
  • 2-3 cups zucchini, grated remove excess water
  • 2 eggs acts as a binder
  • 1 cup oat flour or almond flour gluten-free option
  • 1/4 cup Parmesan cheese (optional) for richness and flavor
  • 1/2 cup Greek yogurt or cottage cheese for moisture and protein
  • 2 cloves minced garlic adjust amount to taste
  • 1 tablespoon herbs (e.g., parsley, dill) customize with favorite herbs
  • to taste salt enhances flavor
  • to taste pepper enhances flavor

Equipment

  • Box grater
  • non-stick skillet
  • Mixing Bowl
  • Air fryer

Method
 

Step-by-Step Instructions
  1. Prepare the zucchini by washing thoroughly and shredding into fine pieces using a box grater or food processor.
  2. Remove moisture from the grated zucchini by placing it in a clean towel and squeezing out excess water.
  3. In a large bowl, mix the drained zucchini with eggs, oat or almond flour, Parmesan cheese (if using), Greek yogurt, minced garlic, and herbs until smooth.
  4. Heat a non-stick skillet over medium heat with about 2 tablespoons of olive oil until shimmering.
  5. Shape 2 tablespoons of the zucchini mixture into a patty and place it in the skillet. Repeat to create more fritters, ensuring they have space.
  6. Cook each fritter for 3-4 minutes until golden brown, then flip and cook the other side for 2-3 minutes.
  7. Transfer the cooked fritters to a paper towel-lined plate to drain excess oil.
  8. For a healthier option, preheat the air fryer to 400°F, place fritters in a single layer, and cook for 8-10 minutes, flipping halfway.
  9. Serve the crispy zucchini fritters hot, optionally garnished with Greek yogurt or sliced avocado.

Nutrition

Serving: 2frittersCalories: 150kcalCarbohydrates: 15gProtein: 8gFat: 7gSaturated Fat: 2gPolyunsaturated Fat: 1gMonounsaturated Fat: 4gCholesterol: 60mgSodium: 200mgPotassium: 300mgFiber: 3gSugar: 2gVitamin A: 500IUVitamin C: 20mgCalcium: 150mgIron: 1mg

Notes

Drain zucchini well and store leftovers in an airtight container for up to four days. Fritters can also be frozen for up to three months.

Tried this recipe?

Let us know how it was!

Maggoty Apples: Spooky No-Bake Treat for Halloween Fun

September 30, 2025 by Grace Snow Leave a Comment

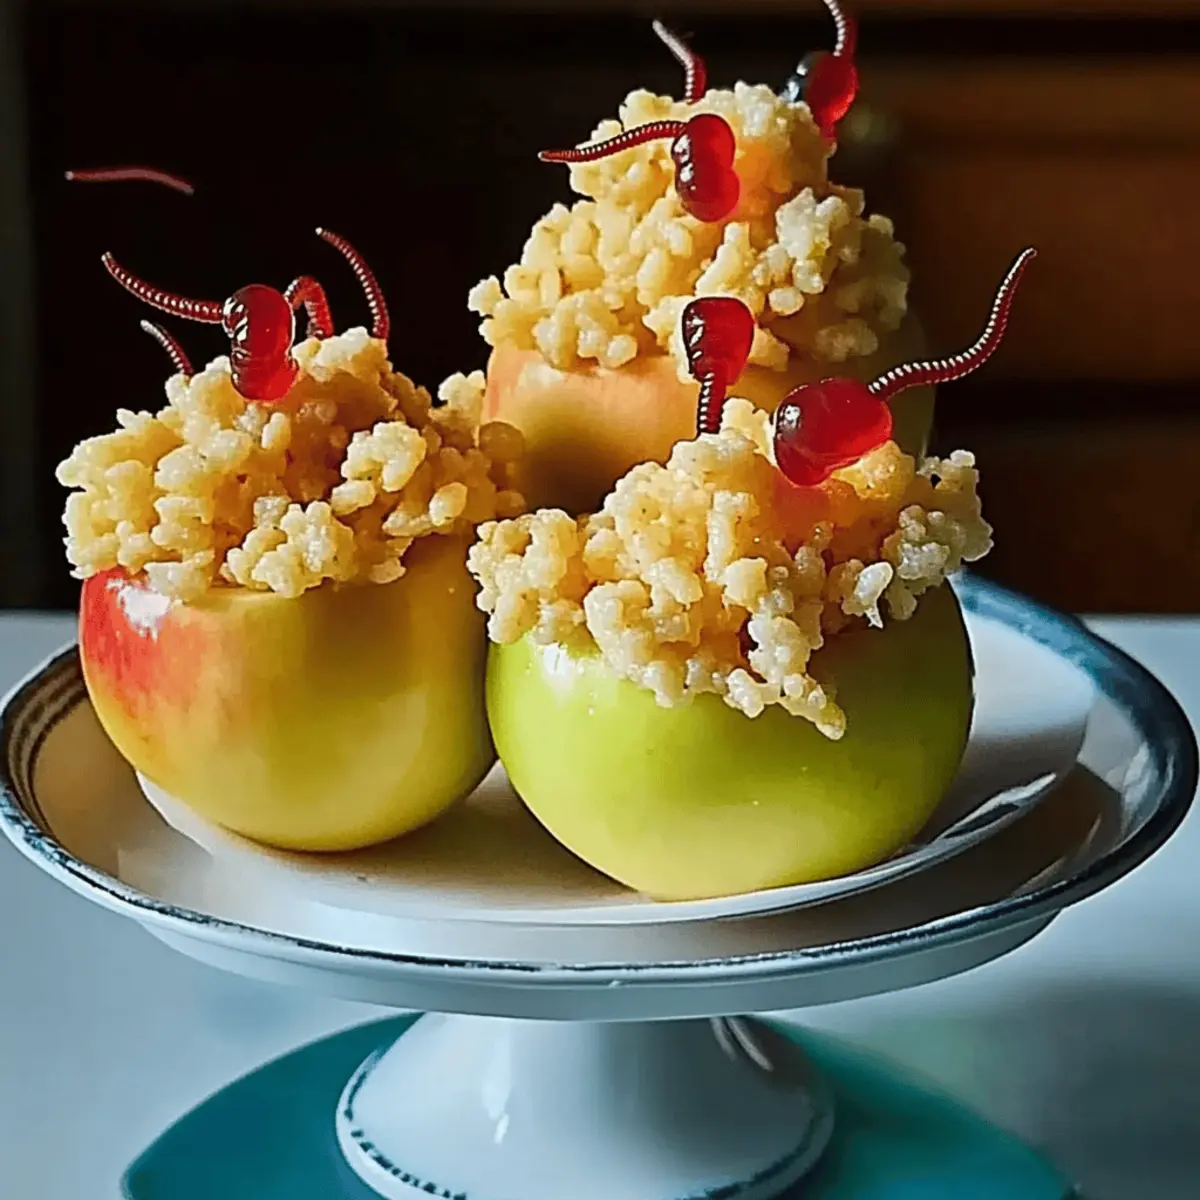
As the autumn leaves change and the air takes on that unmistakable chill, I always find myself in the kitchen, ready to whip up something festive. This year, I'm diving into a spooktacular delight: Maggoty Apples! These no-bake treats are perfect for Halloween gatherings, combining juicy apples with the crunch of puffed rice coated in luscious white chocolate. Not only are they a fun hands-on project for the little ghouls in the house, but they also promise to be a crowd-pleaser at any spooky celebration. Plus, they’re incredibly easy to make—no culinary wizardry required! Are you ready to impress your friends and family with these eerie yet delicious snacks? Let’s get started!

Why Are Maggoty Apples a Must-Try?

Unique Halloween Flare: These Maggoty Apples add a playful twist to your seasonal festivities, delighting both kids and adults alike.

Simple Preparation: With no baking required, you can easily whip up this spooky treat, saving you time for other Halloween fun!

Crunchy Meets Juicy: The combination of crunchy puffed rice and juicy apple creates an unforgettable texture that will have everyone coming back for more.

Engaging Family Activity: Get the little monsters involved! This recipe is perfect for spending quality time in the kitchen together, creating memories while crafting the ultimate Halloween snack.

Versatile Flavor Options: Want a richer taste? Swap white chocolate for dark chocolate. The flavor possibilities are endless and always delicious!

So, gather your ingredients and dive into the festive spirit with these spooky bites that are sure to impress at any celebration! For more scrumptious ideas, check out my Chicken Salad Apples for a refreshing twist on a classic.

Maggoty Apples Ingredients

For the Apples
• Apples – Firm varieties like Braeburn work best to hold their shape and flavor.
• Lemon Juice – Fresh lemon juice prevents browning and adds a zesty touch to the apples.

For the Filling
• White Chocolate – Melts smoothly for coating puffed rice; dark chocolate can offer a richer taste if preferred.
• Puffed Rice – Adds an irresistible crunch; feel free to substitute with other cereals, though they may change the texture.

For the Decoration (Optional)
• Jelly Worm Sweets – Enhance the spooky look of your Maggoty Apples with these fun gummy treats; skip if you prefer a simpler presentation.

Step‑by‑Step Instructions for Maggoty Apples

Step 1: Core the Apples
Begin by coring the apples at the base, making sure to keep the stalks intact for a spooky look. Use a melon baller or skewer to gently create holes in each apple, spacious enough to hold the filling but careful not to break the skin. This step sets the stage for your delightful Maggoty Apples.

Step 2: Prevent Browning
To maintain the fresh appearance of your Maggoty Apples, brush the exposed apple flesh with fresh lemon juice. This will not only prevent browning but also add a zesty touch to complement the fruit's natural sweetness. Make sure to cover all the cut surfaces evenly and set the apples aside.

Step 3: Melt the Chocolate
In a heatproof bowl, melt the white chocolate over simmering water, stirring until it reaches a smooth, creamy consistency. Be sure to monitor the temperature to prevent burning. Once melted, carefully remove the bowl from heat, as you will soon mix in the puffed rice to create the “maggot” filling.

Step 4: Mix the Filling
Once the chocolate is melted and glossy, fold in the puffed rice gently, making sure each piece is coated evenly. This mixture should be chunky yet cohesive, ideal for creating a lively texture in your Maggoty Apples. The combination of puffed rice and chocolate will provide a fun and unexpected crunch!

Step 5: Fill the Apples
Using a spoon, carefully fill the apple cores with the chocolate-puffed rice mixture, ensuring to pack it tightly and even out the tops for an appealing finish. This step creates the signature look of your Maggoty Apples, so take your time to make each apple look as spooky as possible!

Step 6: Chill to Set
Place the filled Maggoty Apples in the refrigerator for about 20 minutes to allow the chocolate to set firmly. While they chill, the puffed rice will hold its shape beautifully within each apple, enhancing the overall presentation. Keep an eye on them!

Step 7: Prepare the “Maggot Balls”
Spoon any leftover chocolate and puffed rice mixture into mini muffin cases and refrigerate until set. These fun treats mimic the “maggots” and will add an extra spooky detail to your presentation. Once set, gently remove them from their cases, ready for decoration.

Step 8: Assemble for Spookiness
To finish your ghoulish Maggoty Apples, carefully place the “maggot balls” around the apples for a creepy effect. If desired, add gummy jelly worms on top or nestled among the balls for an extra festive touch. Now your Maggoty Apples are ready to impress at your Halloween gathering!

How to Store and Freeze Maggoty Apples

Fridge: Store your Maggoty Apples in an airtight container in the refrigerator for up to 1 day. This will keep them fresh and prevent browning.

Freezer: For longer storage, freeze the chocolate-filled apples individually wrapped in plastic wrap. They can last up to 2 weeks in the freezer, but the texture may change slightly when thawed.

Reheating: If you're serving leftovers, let the frozen Maggoty Apples thaw in the fridge overnight before enjoying them. Avoid heating, as it can make them soggy.

Serving Fresh: These spooky treats are best served fresh for maximum texture and flavor. Prepare them close to your Halloween festivities to wow your guests!

What to Serve with Ghoulish Maggoty Apples?

As you prepare these delightful Maggoty Apples, consider pairing them with some fun and festive sides or drinks to elevate your Halloween celebration!

  • Crispy Veggie Sticks: Serve with a zesty dip like ranch or hummus. The crunch of fresh veggies balances out the sweet treat perfectly.

  • Spooky Cheese Platter: Create a selection of assorted cheeses, crackers, and spooky-themed snacks. This pairing adds a savory element to your spread, keeping guests satisfied.

  • Witch's Brew Fruit Punch: A vibrant fruit punch with floating ghost-shaped ice cubes adds a whimsical and refreshing drink option. Perfect for both kids and adults!

  • Chocolate-Dipped Pretzels: The salty and sweet combination of chocolate-dipped pretzels complements the sweetness of the Maggoty Apples while providing a fun crunch.

  • Pumpkin Spice Cupcakes: Soft, fluffy cupcakes topped with cream cheese frosting and a dash of pumpkin spice offer a seasonal dessert that enhances the festive mood.

  • Gummy Eyeballs: These whimsical gummies make for a fun snack that ties in with the Halloween theme, adding a playful, spooky touch to your dessert table.

Remember, creating a well-rounded spread will not only impress your guests but also enhance their enjoyment of the deliciously eerie Maggoty Apples!

Maggoty Apples: Spooky Treat Variations

Feel free to get creative and customize your Maggoty Apples for a spooktacular twist that thrills your guests!

  • Pears Instead: Swap apples for pears to create a softer texture that complements the sweet filling.

  • Dark Chocolate Delight: For a richer flavor, use dark chocolate instead of white chocolate to coat the puffed rice. It's a deliciously dark transformation!

  • Nutty Twist: Add crushed nuts or seeds to the chocolate mixture for an extra crunchy surprise. The blend of flavors will elevate the experience!

  • Cereal Switch: Experiment with different crunchy cereals for the filling. Try sprinkling in some Frosted Flakes for added sweetness!

  • Spicy Kick: Toss in a pinch of cayenne pepper or chili powder to the chocolate blend for a surprising kick that contrasts wonderfully with the sweetness.

  • Fruit Flavored Treats: Use fruit-flavored candy worms instead of traditional jelly worms for a fun, fruity twist on your spooky decor.

  • Vegan Version: Substitute white chocolate with dairy-free chocolate and use maple syrup for a sweet binding agent. Your vegan friends will be thrilled!

  • Coconut Crunch: Mix unsweetened shredded coconut into the puffed rice coating for a tropical twist and added flavor complexity.

These variations will not only keep things exciting but will also charm the Halloween spirit in every bite! And if you're on the hunt for more fruit-filled inspiration, you might enjoy trying my Chicken Salad Apples for a refreshing alternative.

Expert Tips for Maggoty Apples

Gentle Coring: Be careful when coring the apples to prevent breaking the skin. Firm apples like Braeburn hold up best.

Use Fresh Lemon Juice: Always opt for fresh lemon juice to prevent browning of the apples and enhance their natural flavor.

Watch the Chocolate Temperature: Ensure the melted chocolate mixture isn’t too hot before filling the apples; this will avoid softening the fruit.

Experiment with Chocolates: Don't hesitate to get creative! Mixing in dark or milk chocolate can provide a rich twist to your Maggoty Apples.

Chill Before Serving: Allow the filled apples to chill adequately for at least 20 minutes; this helps the mixture firm up for easier handling.

Make Ahead Options

These delightful Maggoty Apples are perfect for meal prep, allowing you to save time during your busy Halloween festivities! You can core and prepare the apples up to 24 hours in advance, brushing the flesh with lemon juice to prevent browning. Additionally, you can melt the chocolate and mix in the puffed rice ahead of time—just store the mixture in an airtight container in the refrigerator for up to 3 days. When you’re ready to serve, simply fill the prepped apples and let them chill for about 20 minutes to set. This way, your eerie treats are fresh, spooky, and just as delicious as if made on the spot, making your Halloween gathering a breeze!

Maggoty Apples Recipe FAQs

How do I choose the best apples for making Maggoty Apples?
Absolutely! For the best results, select firm apple varieties like Braeburn or Honeycrisp. These types hold their shape well and maintain a crisp texture, making them ideal for this recipe. Avoid overly ripe apples, as they may become mushy when filled.

How should I store Maggoty Apples once they’re made?
To preserve freshness, store your Maggoty Apples in an airtight container in the refrigerator for up to 1 day. Keeping them chilled helps prevent browning while allowing the crispness of the apple to remain intact. Make sure to consume them quickly for the best flavor!

Can I freeze Maggoty Apples, and how?
Yes, you can freeze your Maggoty Apples! Wrap each filled apple individually in plastic wrap and place them in a sturdy freezer-safe bag or container. These can be frozen for up to 2 weeks. To enjoy them, thaw in the refrigerator overnight, but avoid reheating as it may make them soggy.

What if the chocolate mixture is too hot when filling the apples?
Very! If the chocolate is too hot, it can soften the apples, ruining their crisp texture. To prevent this, allow the melted chocolate to cool slightly before mixing in the puffed rice. You want it to be warm, but not hot; this way, your apples stay firm and delightful!

Are Maggoty Apples suitable for those with allergies?
Yes, but with caution! Since the recipe contains chocolate and sometimes jelly worms, check for allergy information on those ingredients. If you're concerned about allergies, consider substituting with allergy-friendly chocolate and omitting the jelly worms. Always prioritize safety when serving to children and guests.

Maggoty apples

Maggoty Apples: Spooky No-Bake Treat for Halloween Fun

Maggoty Apples are playful Halloween treats made with apples and crunchy puffed rice, perfect for festive gatherings.
Print Recipe Pin Recipe
Prep Time 20 minutes mins
Chilling Time 20 minutes mins
Total Time 40 minutes mins
Servings: 8 treats
Course: Snacks
Calories: 200
Ingredients Equipment Method Nutrition Notes

Ingredients
  

For the Apples
  • 4 pieces Braeburn Apples Firm varieties work best
  • 2 tablespoons Fresh Lemon Juice Prevents browning
For the Filling
  • 8 ounces White Chocolate Can substitute with dark chocolate
  • 4 cups Puffed Rice Adds crunch, can use other cereals
For the Decoration (Optional)
  • 1 cup Jelly Worm Sweets Optional for decoration

Equipment

  • melon baller
  • Heatproof bowl
  • Spoon

Method
 

Step-by-Step Instructions for Maggoty Apples
  1. Begin by coring the apples at the base, keeping the stalks intact for a spooky look.
  2. Brush the exposed apple flesh with fresh lemon juice to prevent browning.
  3. Melt the white chocolate over simmering water, stirring until smooth.
  4. Fold in the puffed rice gently until each piece is coated evenly.
  5. Fill the apple cores with the chocolate-puffed rice mixture, packing it tightly.
  6. Chill the filled Maggoty Apples in the refrigerator for about 20 minutes.
  7. Spoon leftover mixture into mini muffin cases and refrigerate until set for decoration.
  8. Place the 'maggot balls' around the apples and optionally add gummy jelly worms for decoration.

Nutrition

Serving: 1treatCalories: 200kcalCarbohydrates: 30gProtein: 2gFat: 10gSaturated Fat: 5gCholesterol: 15mgSodium: 50mgPotassium: 150mgFiber: 2gSugar: 18gVitamin C: 10mgCalcium: 2mgIron: 4mg

Notes

These spooky treats are best served fresh. Store in an airtight container in the fridge for up to 1 day or freeze individually for up to 2 weeks.

Tried this recipe?

Let us know how it was!

Creepy-Crawly Halloween Spider Pizzas for Spooky Fun

September 30, 2025 by Grace Snow Leave a Comment

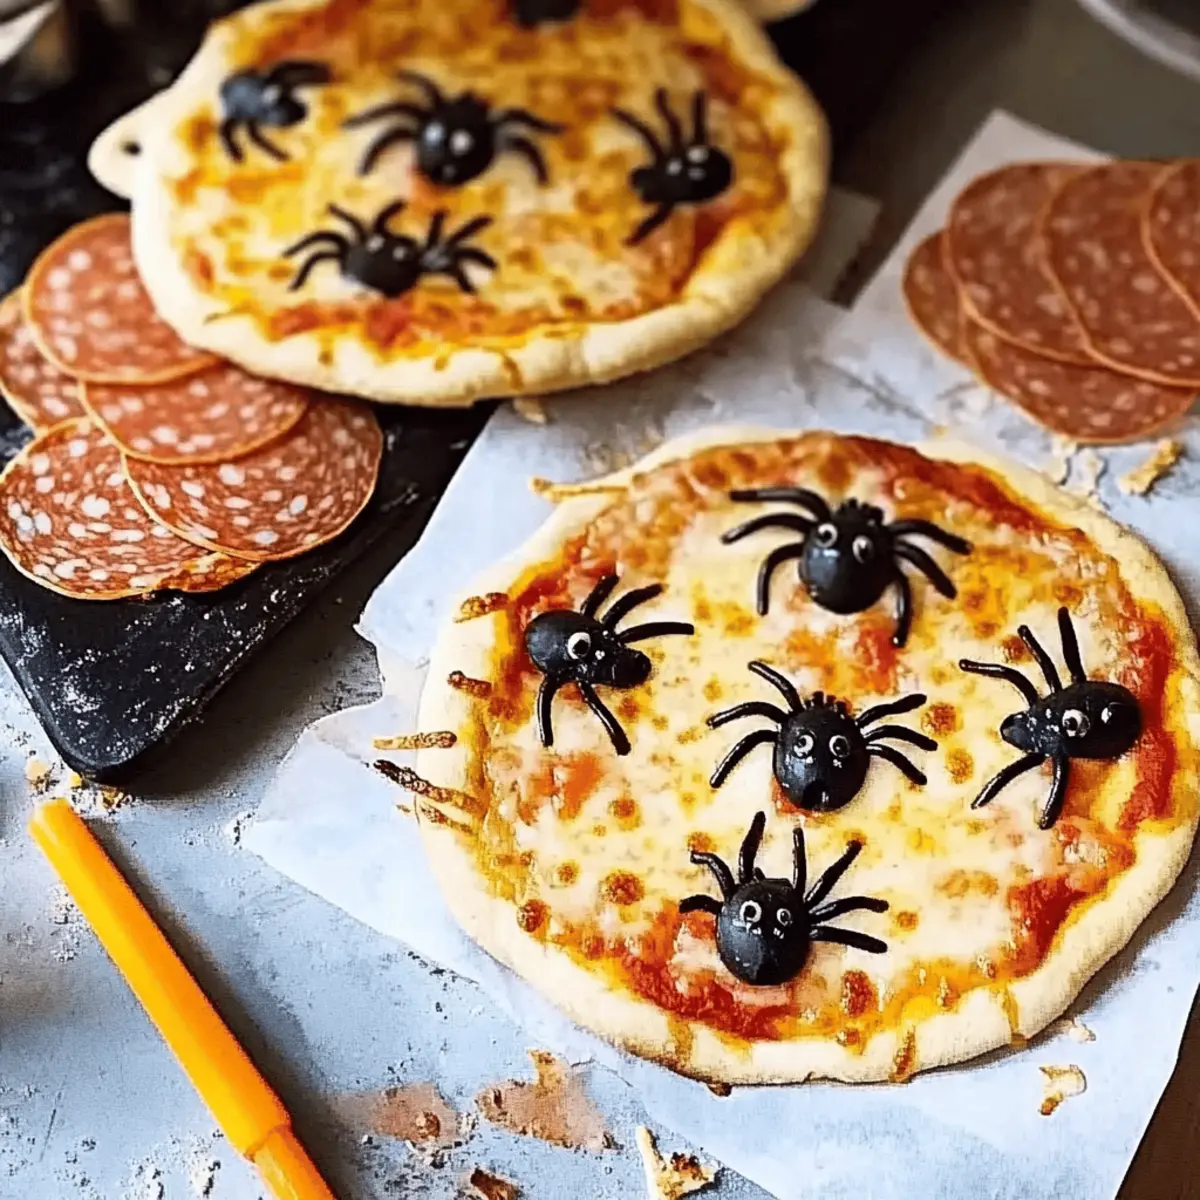
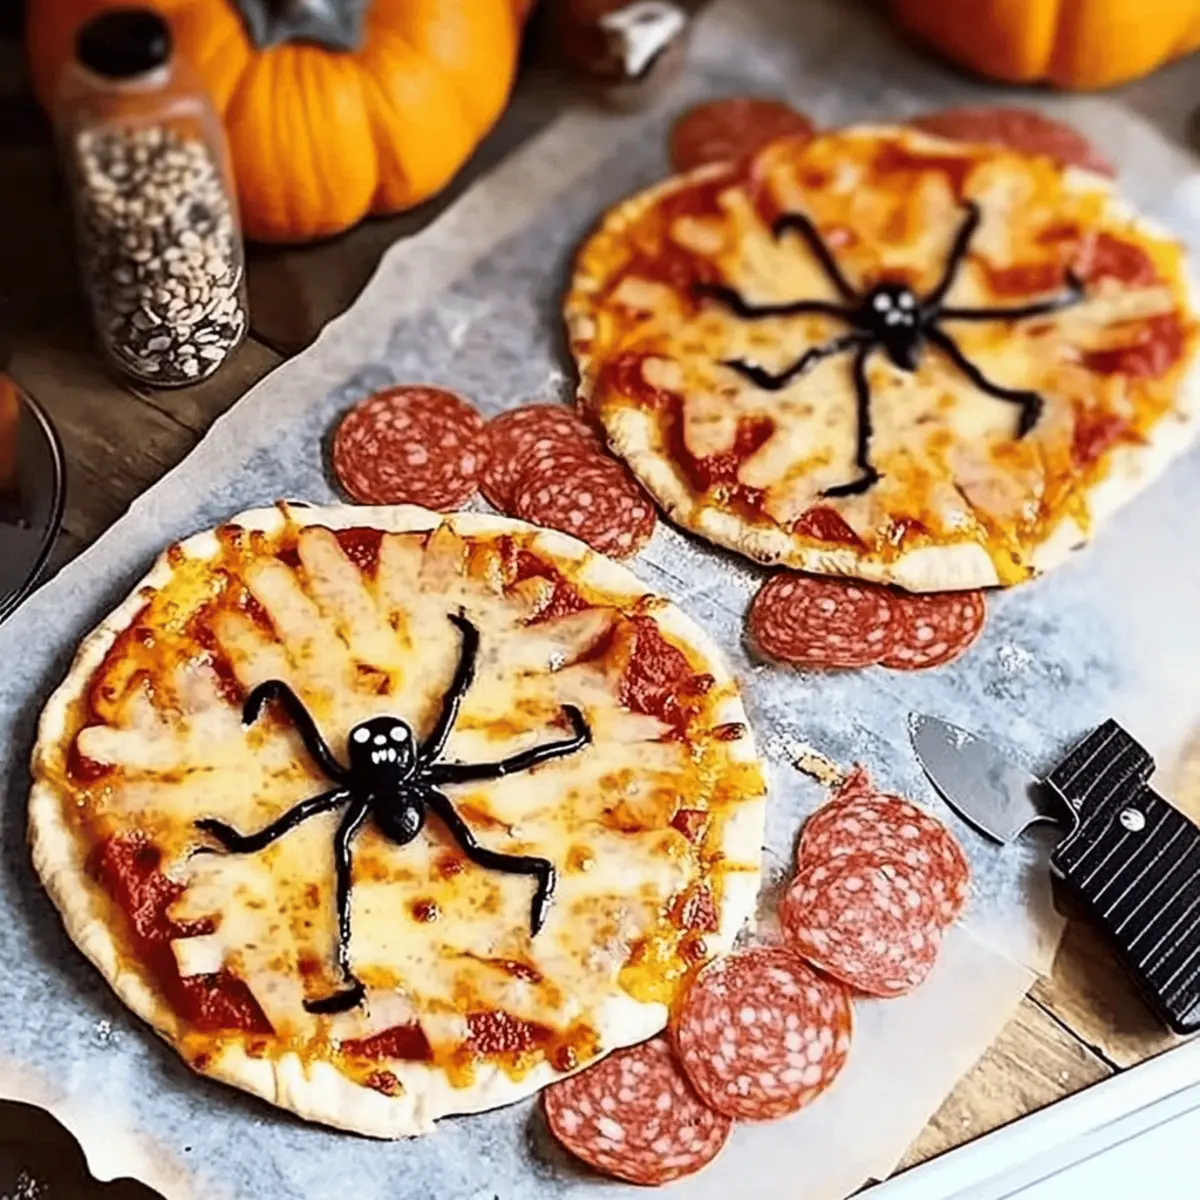
As the leaves turn and the air cools, Halloween creeps closer, bringing with it a delightful sense of playful mischief. This year, why not turn your kitchen into a frightfully fun hangout with Halloween spider pizzas? These eye-catching treats are not only easy to make but also a fantastic way to involve your kids (if you dare!). With soft pizza dough, zesty tomato sauce, and a mix of gooey cheese accented by creepy-crawly olive and salami spiders, they’re bound to become a highlight of your festive gatherings. Whether you’re hosting a spooky soirée or just looking for a new family favorite, these kid-friendly pizzas promise to delight both the young and the young-at-heart. Ready to get your creative juices flowing and your oven preheated? Let's dive into this eerie culinary adventure!

Why Are Halloween Spider Pizzas a Must-Make?

Fun for Everyone: These Halloween spider pizzas are not just treats; they're an exciting project for the entire family, encouraging creativity during the spooky season.

Easy to Assemble: With simple ingredients and straightforward steps, this recipe guarantees tasty results without the stress—perfect for busy days filled with Halloween activities.

Creepy-Crawly Appeal: The whimsical spider design using olives and salami transforms an ordinary pizza into a showstopper, ensuring your gathering is festive and memorable.

Customizable Delight: Use your favorite toppings! Whether you stick to traditional cheese or opt for veggies, the flexibility of this recipe means everyone gets a pizza tailored to their taste.

Kid-Friendly Fun: While maintaining flavor, these pizzas encourage kids to get hands-on in the kitchen, making cooking an enjoyable experience. So why not explore other fun ideas with your kids, such as Halloween-themed treats?

Perfect for Parties: Their eye-catching look and delightful flavors make these spider pizzas a hit at any Halloween gathering, ensuring your friends and family will be buzzing about them long after the celebration is over!

Halloween Spider Pizza Ingredients

For the Pizza Base

  • Pizza Base Mix – Easy and convenient; using a ready-made mix saves you time!
  • Plain Flour – Perfect for dusting; prevents sticking while rolling out your dough.

For the Sauce

  • Passata or Tomato Pasta Sauce (120ml) – Provides moisture and flavor; homemade adds a personal touch.
  • Garlic Clove (1, crushed) – Boosts overall flavor; garlic powder works in a pinch if needed.

For the Toppings

  • Grated Mozzarella (150g) – Melts beautifully and binds the toppings for a cheesy delight.
  • Grated Parmesan (25g-50g) – Adds a rich, salty finish; substitute with pecorino for a different kick.

For the Creepy Decor

  • Large Pitted Black Olives (4) – Spin your spiders with these; green olives can bring a fresh twist!
  • Small Slices of Salami or Chorizo (6) – Gives your spiders a savory touch; feel free to swap for veggies for a meatless option.
  • Small Capers (8, drained) – Craft adorable spider eyes; feel free to omit if there’s an allergy.

Get ready to create some hauntingly delicious Halloween spider pizzas!

Step‑by‑Step Instructions for Halloween Spider Pizzas

Step 1: Prepare the Dough
Begin by making the pizza dough using your chosen base mix, following the package instructions. Knead the dough gently until it feels soft and bouncy, then place it in a warm area and cover with a clean kitchen towel. Allow it to rise for about 1 hour, or until it has doubled in size, which will create a lovely fluffy texture for your Halloween spider pizzas.

Step 2: Preheat the Oven
While the dough rises, preheat your oven to 240°C (220°C fan) or gas mark 9. As the oven heats, prepare two baking sheets by dusting them lightly with plain flour to prevent sticking. This step is crucial for achieving crispy Halloween spider pizzas, so make sure they're ready for the dough once it's risen.

Step 3: Shape the Pizza Bases
Once your dough has risen beautifully, divide it into eight equal pieces. Roll four pieces into thin circles, roughly 25 cm wide, and place them onto the prepared baking sheets. Don’t worry about perfection; a slightly rustic look adds to the fun of your Halloween spider pizzas!

Step 4: Add the Sauce and Cheese
Spread a thin layer of passata or tomato pasta sauce over each pizza base, ensuring you leave a small border around the edges. Sprinkle the grated mozzarella and parmesan cheese generously on top, allowing the flavors to meld together beautifully. This cheesy layer is essential for a delightful taste and helps hold the creepy-crawly toppings in place.

Step 5: Create the Spider Bodies
Halve the large pitted black olives and place the cut sides down on the cheese, positioning them to resemble spider bodies. Use strips of the remaining olive halves to add eight legs for each spider, letting your imagination run wild. The whimsical design of your Halloween spider pizzas will surely delight everyone at your gathering!

Step 6: Decorate with Salami
For the remaining four pizza bases, scatter small slices of salami or chorizo across the cheese, arranging them in a way that allows for additional spider legs. You can also add small capers for eyes next to the salami, creating a fun and spooky appearance. Get creative with this stage, personalizing each spider pizza to reflect the tastes of your guests.

Step 7: Bake to Perfection
Place both trays in the preheated oven and bake for about 12 minutes, or until the edges are golden and crispy, and the cheese is beautifully melted and bubbly. Keep a close eye on the pizzas in the last few minutes to achieve that perfect golden crust on your Halloween spider pizzas, making them irresistibly festive.

Step 8: Serve and Enjoy
Once baked, carefully remove the Halloween spider pizzas from the oven and let them cool for a couple of minutes on a wire rack. This will allow the cheese to set slightly. Serve the pizzas warm, cutting them into slices to share at your Halloween celebration, and watch as everyone admires your delightful, spooky creations!

Halloween Spider Pizzas: Customization Ideas

Get ready to unleash your creativity in the kitchen! These spooky spider pizzas are perfect for putting your own twist on a classic favorite.

  • Gluten-Free Base: Substitute regular pizza dough with a gluten-free mix to accommodate dietary needs while still enjoying all the fun!
  • Dairy-Free: Swap mozzarella and parmesan with vegan cheese to create a cheesy blissful experience for those avoiding dairy.
  • Spicy Pop: Add crushed red pepper flakes on top before baking for a tasty kick that adults will love. Spice up your gatherings with this delightful twist!
  • Veggie-Loaded: Pile on colorful bell peppers, mushrooms, or zucchini to enhance nutrition and add vibrant colors to your spooky creations. These veggies will make your pizzas even more appealing!
  • Herbaceous Flavor: Sprinkle fresh basil or oregano over the cheese before baking to infuse these Halloween spider pizzas with a fragrant kick! It beautifully balances the savory elements.
  • Sweet Surprise: Drizzle balsamic glaze over the finished pizzas for a sweet counterbalance that tantalizes the taste buds without compromising the Halloween theme.
  • Child-Friendly: For a more playful appeal, use pepperoni slice shapes or create other fun figures instead of spiders to make it a whimsical experience for younger chefs.

With these variations, your Halloween spider pizzas can become an even more thrilling treat for all ages. Don't forget to explore other fun ideas like Halloween-themed snacks to keep the spooky spirit alive!

What to Serve with Halloween Spider Pizzas

These spooky treats will steal the show, but pairing them with complementary sides and drinks can elevate your festive feast.

  • Crispy Garlic Bread: Perfect for scooping up extra sauce or cheese, this buttery delight enhances the pizza experience.

  • Vibrant Salad: A refreshing green salad with cucumbers and cherry tomatoes balances the richness of the pizzas, adding a burst of color to your table.

  • Spooky Dips: Serve with themed dips like ghostly white bean hummus or a bubbling cauldron of guacamole to keep the fun alive while enhancing flavors.

  • Halloween Fruit Skewers: Sweet, colorful fruit skewers can appease those with a sweet tooth and bring a touch of sweetness to your spooky spread.

  • Witch’s Brew Punch: A spooky drink made from lime sherbet and lemonade, this fizzy concoction is a hit for all ages, adding a festive spirit to your gathering.

  • Chocolate Mousse Cups: End on a sweet note with these creamy, rich desserts topped with whipped cream. Their silky texture perfectly contrasts the crispy pizzas.

Make Ahead Options

These Halloween spider pizzas are perfect for busy cooks looking to save time during the festive season! You can prepare the pizza dough and shape the bases up to 24 hours in advance; simply roll out the dough, place the uncooked bases on floured baking sheets, and cover tightly with plastic wrap in the fridge to maintain freshness. The spider toppings can also be prepped in advance—slice the olives, salami, and capers, and store them in airtight containers for up to 3 days. When you're ready to serve, spread a thin layer of sauce and top with cheese and the prepared decorations, then bake as instructed for delicious, spooky results just in time for your gathering!

Expert Tips for Halloween Spider Pizzas

Warm Environment: Ensure your dough rises in a warm spot, as this helps it become fluffy and gives your Halloween spider pizzas the best texture.

Avoid Sogginess: Use a thin layer of sauce on each pizza base to prevent them from becoming soggy after baking, ensuring a delightful crunch.

Creative Toppings: Feel free to substitute traditional toppings with your family’s favorites—adding veggies or different cheeses can keep your Halloween spider pizzas exciting and versatile.

Watch the Oven: Keep an eye on the pizzas as they bake to prevent overcooking; a golden-brown crust is the goal for perfect creepy-crawly presentations.

Decorate Together: Involve the kids in arranging the spider toppings; it turns cooking into a fun family bonding activity while bringing creativity to your Halloween festivities!

How to Store and Freeze Halloween Spider Pizzas

Room Temperature: Enjoy your Halloween spider pizzas fresh for the best taste. If any leftovers remain, they can sit out for up to 2 hours at room temperature.

Fridge: Store leftover pizzas in an airtight container in the fridge for up to 2 days. Reheat in the oven for a crisp texture or microwave them if preferred.

Freezer: For longer storage, freeze individual pizzas wrapped in plastic wrap and then aluminum foil for up to 1 month. Reheat directly from frozen at 180°C (350°F) for 15-20 minutes.

Reheating: To retain the crispy crust, reheat your Halloween spider pizzas in the oven for best results. Avoid the microwave, as it may make the crust soggy.

Halloween Spider Pizzas Recipe FAQs

What type of olives should I use for Halloween spider pizzas?
You can use large pitted black olives for the spider bodies, but green olives are a great alternative if you're after a different flavor profile. Whichever you choose, just make sure they are pitted to ensure easier assembly!

How should I store leftover Halloween spider pizzas?
If you have any leftovers, store them in an airtight container in the fridge for up to 1-2 days. To reheat, the oven is your best friend! Simply place them back in a preheated oven at 180°C (350°F) for about 8-10 minutes to restore their crispy texture.

Can I freeze Halloween spider pizzas?
Absolutely! If you’d like to save some for later, wrap each individual pizza in plastic wrap and then in aluminum foil before placing them in the freezer. They can last up to 1 month. When you're ready to enjoy, reheat them straight from frozen in a preheated oven at 180°C (350°F) for approximately 15-20 minutes, keeping an eye on them to ensure a crispy crust.

What if my pizza dough doesn’t rise properly?
If your pizza dough doesn't rise sufficiently, it might be due to a cold environment. To troubleshoot, ensure your dough is kept in a warm, draft-free area. You can even place it in a slightly warmed oven with just the light on. Kneading it a bit more can also help activate the yeast. If it still fails to rise, you may want to consider starting with a new batch if it looks dense or firm.

Are Halloween spider pizzas suitable for kids with allergies?
You can certainly make Halloween spider pizzas safer for kids with allergies! If a child is allergic to olives or salami, consider substituting these toppings with safe alternatives like sliced bell peppers or thinly sliced zucchini to create "spider legs." Always check labels on packaged foods like pizza base mixes and sauces for potential allergens.

Can I prepare the Halloween spider pizzas in advance?
Yes, you can prepare them in advance! Assemble the pizzas without baking them and store them covered in the fridge for up to 24 hours. When you're ready to serve, simply pop them in the oven as per the baking instructions. They'll be as fresh and tasty as if you made them right before the party!

Halloween spider pizzas

Creepy-Crawly Halloween Spider Pizzas for Spooky Fun

These Halloween spider pizzas are a fun, easy treat perfect for Halloween gatherings, featuring creepy-crawly designs that kids will love.
Print Recipe Pin Recipe
Prep Time 1 hour hr
Cook Time 12 minutes mins
Total Time 1 hour hr 12 minutes mins
Servings: 8 pizzas
Course: Snacks
Cuisine: Italian
Calories: 300
Ingredients Equipment Method Nutrition Notes

Ingredients
  

For the Pizza Base
  • 1 pack Pizza Base Mix Easy and convenient.
  • 150 g Plain Flour For dusting.
For the Sauce
  • 120 ml Passata or Tomato Pasta Sauce Homemade adds a personal touch.
  • 1 clove Garlic Clove Crushed; garlic powder works in a pinch.
For the Toppings
  • 150 g Grated Mozzarella Melts beautifully.
  • 25-50 g Grated Parmesan Can substitute with pecorino.
For the Creepy Decor
  • 4 Large Pitted Black Olives Spin your spiders with these.
  • 6 slices Small Slices of Salami or Chorizo Gives savory touch.
  • 8 Small Capers For spider eyes; omit if allergic.

Equipment

  • Oven
  • Mixing Bowl
  • Baking Sheets
  • Rolling Pin

Method
 

Step-by-Step Instructions
  1. Prepare the dough using your chosen base mix, follow the package instructions, knead gently, rise until doubled in size.
  2. Preheat your oven to 240°C (220°C fan) or gas mark 9 and prepare baking sheets with flour.
  3. Divide risen dough into eight, roll four pieces into thin circles (25 cm) on prepared baking sheets.
  4. Spread tomato sauce over pizza bases, leaving a border; sprinkle mozzarella and parmesan evenly.
  5. Halve olives, place them on the cheese for spider bodies and use strips for legs.
  6. For other pizza bases, add salami slices and capers for additional decoration.
  7. Bake in the oven for about 12 minutes until golden and crispy.
  8. Let cool slightly, slice, and serve warm.

Nutrition

Serving: 1pizzaCalories: 300kcalCarbohydrates: 35gProtein: 10gFat: 12gSaturated Fat: 5gPolyunsaturated Fat: 1gMonounsaturated Fat: 4gCholesterol: 25mgSodium: 600mgPotassium: 200mgFiber: 2gSugar: 3gVitamin A: 500IUVitamin C: 2mgCalcium: 200mgIron: 1.5mg

Notes

Use warm environment for dough rising and thin sauce application for crunch. Involve kids in decoration for fun bonding.

Tried this recipe?

Let us know how it was!

Cinnamon Sugar Air Fryer Banana Chips: Crunchy Sweet Bliss

September 29, 2025 by Grace Snow Leave a Comment

I was rummaging through my pantry when I stumbled upon a couple of ripe bananas, just waiting to be turned into something magical. That’s when the idea of making Cinnamon Sugar Air Fryer Banana Chips sparked to life! These crispy delights offer a guilt-free alternative to standard snacks without compromising taste. With their light and airy texture, they’re perfect for satisfying that midday craving or elevating your yogurt and oatmeal. What’s even better? They’re gluten-free, vegan, and super simple to prepare—making them a breeze to whip up whenever those sweet cravings hit. Are you ready to learn the secrets behind creating this deliciously wholesome snack at home? Let’s dive into the recipe!

Why Are These Banana Chips Irresistible?

Healthy snacking never tasted so good! With the perfect balance of cinnamon and sugar, these Cinnamon Sugar Air Fryer Banana Chips are an indulgent yet guilt-free treat. Quick and easy, they require minimal prep time, making them ideal for busy lifestyles. Versatile enough to be enjoyed on their own or as a topping for yogurt or oatmeal, they fit seamlessly into any meal plan. Crispy perfection is just a short air frying session away—no deep frying mess involved! Plus, with their vegan and gluten-free qualities, everyone can join in on the fun!

Cinnamon Sugar Air Fryer Banana Chips Ingredients

Explore the delicious components that make these chips a wholesome snack!

For the Chips
• Bananas – Use ripe but firm bananas for the perfect balance of sweetness and texture.
• Coconut Oil – This not only helps the cinnamon sugar stick, but can also be swapped with butter or olive oil if desired.
• Granulated Sugar – Sweetens the chips and caramelizes beautifully during cooking.
• Ground Cinnamon – Adds a warm, comforting flavor that pairs wonderfully with the bananas; feel free to increase it for more kick.
• Salt – Just a pinch enhances the overall flavors in your Cinnamon Sugar Air Fryer Banana Chips!

Step‑by‑Step Instructions for Cinnamon Sugar Air Fryer Banana Chips

Step 1: Slice Bananas
Begin by peeling two ripe but firm bananas and slicing them into 1/8-inch thick rounds. Try to keep the slices uniform to ensure even cooking and avoid any chewy pieces. Arrange the banana slices on a clean cutting board, and let them sit while you prepare the coating.

Step 2: Prepare Cinnamon Sugar Mixture
In a medium mixing bowl, combine granulated sugar, ground cinnamon, and a pinch of salt. Use about 2 tablespoons of sugar for every banana, adjusting to your sweetness preference. Stir the sugar and spice mixture until thoroughly combined, creating a delightful blend that will add flavor to your Cinnamon Sugar Air Fryer Banana Chips.

Step 3: Coat Banana Slices
Melt about 1 tablespoon of coconut oil and drizzle it over the banana slices in the bowl. Toss gently to coat each slice evenly with the oil. Then, sprinkle the cinnamon sugar mixture over the bananas and toss again to ensure they are fully covered. The coconut oil helps the sugar stick and creates a lovely crisp texture when air fried.

Step 4: Preheat Air Fryer
Preheat your air fryer to 300°F (150°C). This step is crucial as it allows the air fryer to reach the optimal temperature for cooking and ensures that your Cinnamon Sugar Air Fryer Banana Chips will crisp up beautifully. While the air fryer heats up, let the coated banana slices rest for a few minutes.

Step 5: Arrange Bananas in Air Fryer
Once the air fryer is preheated, carefully arrange the banana slices in the fryer basket. Make sure to place them in a single layer without overlapping for the best results. This allows hot air to circulate around each chip, achieving a delightful crunch. Depending on your air fryer’s size, you may need to work in batches.

Step 6: Air Fry Banana Chips
Air fry the banana slices for 15-18 minutes, flipping them halfway through the cooking time. Keep an eye on them as they cook; they should turn golden brown and become crispy. The aroma of cinnamon and sugar will fill the kitchen, making it hard to resist the temptation to sneak a taste!

Step 7: Cool Chips for Crispness
After the cooking time is complete, carefully remove the banana slices from the air fryer and place them on a wire rack. Allow the Cinnamon Sugar Air Fryer Banana Chips to cool completely, as this cooling period enhances their crispness. Avoid stacking them while they cool to ensure they maintain that delightful crunch.

Step 8: Serve and Enjoy
Once your banana chips are cool, they’re ready to be enjoyed! Serve them as a snack, sprinkle them on yogurt, or use them as a topping for oatmeal. These crispy treats are versatile and will satisfy your sweet cravings guilt-free, making them a perfect addition to any healthy snacking routine.

Cinnamon Sugar Air Fryer Banana Chips Variations

Feel free to get creative and customize these delightful chips to suit your taste buds!

  • Spicy Cinnamon: Add a pinch of cayenne pepper or chili powder to the cinnamon sugar mix for an unexpected kick. It's a bold twist that can awaken your palate and elevate your snack game!

  • Chocolate Drizzle: After cooling, drizzle some melted dark chocolate over the chips for a rich, decadent treat. This combination adds depth to the flavor and is sure to satisfy any chocolate lover’s cravings.

  • Savory Alternative: Skip the sugar and cinnamon entirely by using a sprinkle of salt, garlic powder, or smoked paprika instead for a savory twist. These savory banana chips can be enjoyed as a unique snack or paired with dips!

  • Nutty Addition: Brush the banana slices with a little peanut butter or almond butter before air frying them, adding a touch of creaminess and protein. It's a nourishing combination that brings on the flavor and elevates nutrition!

  • Cinnamon Vanilla Boost: Mix a touch of vanilla extract into your melted coconut oil before coating the banana slices. This subtle addition enhances the sweetness and lifts the overall flavor profile of your chips.

  • Coconut Sugar Swap: Use coconut sugar instead of granulated sugar for a lower-glycemic option that compliments the bananas beautifully. Its mild caramel flavor pairs perfectly with cinnamon, creating a well-rounded sweetness.

  • Herbal Infusion: Sprinkle a bit of dried rosemary or thyme over the banana chips before air frying for a fragrant herbal twist. The aromatic herbs can create a surprisingly tasty contrast with the natural sweetness of the bananas!

  • Fruit Coating: Try tossing your banana slices in powdered freeze-dried fruit, like strawberries or raspberries, before air frying for a fruity twist. This will impart vibrant flavor and color, making your snack visually appealing!

These variations will not only brighten your snacking routine but can also be delightful accompaniments when enjoying your homemade chips with yogurt or a sprinkle over oatmeal. For more exciting dishes, check out these Pumpkin Cinnamon Roll Muffins to satisfy those sweet cravings!

Make Ahead Options

These Cinnamon Sugar Air Fryer Banana Chips are perfect for busy home cooks looking to save time during the week! You can slice bananas and prepare the cinnamon sugar mixture up to 24 hours in advance. Simply store the banana slices in an airtight container with a splash of lemon juice to prevent browning and set aside the sugar mixture in a separate container. When you're ready to enjoy a delicious snack, mix the bananas with melted coconut oil and the cinnamon sugar, then air fry as instructed. This prep method ensures that your chips are just as delicious and crispy while allowing you to whip up a tasty treat in no time!

How to Store and Freeze Cinnamon Sugar Air Fryer Banana Chips

Airtight Container: Store your Cinnamon Sugar Air Fryer Banana Chips in an airtight container at room temperature for up to 3 days to maintain their crispiness.

Avoid Refrigeration: Do not refrigerate the chips, as moisture can make them soft and chewy instead of crisp.

Re-crisping: If your chips lose their crunch, simply pop them back in the air fryer for a few minutes to re-crisp them to perfection.

Freezing Option: For longer storage, freeze the banana chips in a single layer on a baking sheet, then transfer to an airtight freezer bag for up to 2 months. Thaw and re-crisp for best results.

What to Serve with Cinnamon Sugar Air Fryer Banana Chips

These delightful chips not only satisfy your sweet tooth but also create a wonderful opportunity to craft a full meal experience.

  • Creamy Yogurt Parfait: Top your favorite yogurt with these banana chips, adding a creamy texture that perfectly contrasts their crispy crunch. Layer in some berries for a vivid splash of color and flavor!

  • Oatmeal Toppings: Sprinkle these chips over your bowl of oatmeal for a sweet touch, making breakfast feel like a luxurious treat rather than a routine meal. The warmth of oatmeal complements the cinnamon perfectly!

  • Nut Mix: Pair the chips with a handful of unsalted nuts or seeds for a satisfying protein boost, bringing together a mix of crunchy textures and wholesome goodness.

  • Fresh Fruit Salad: Serve alongside a vibrant fruit salad to enhance the sweetness of the banana chips, creating a refreshing medley that bursts with freshness and flavor.

  • Dark Chocolate Dips: For an indulgent treat, drizzle melted dark chocolate over the cooled banana chips. The rich chocolate contrasts beautifully with the cinnamon sweetness, elevating your snacking game.

  • Chai or Herbal Tea: Enjoy these chips with a comforting cup of chai or herbal tea. The warm spices in the drink harmonize delightfully with the cinnamon sugar, creating a cozy snack time experience.

Expert Tips for Cinnamon Sugar Air Fryer Banana Chips

• Slice Evenly: Making uniform 1/8-inch slices ensures that your Cinnamon Sugar Air Fryer Banana Chips cook evenly, preventing some from being overcooked while others remain chewy.

• Don’t Overcrowd: Place banana slices in a single layer in the air fryer basket; overcrowding can lead to steaming instead of crisping, resulting in less crunchy chips.

• Keep an Eye on Time: Each air fryer can vary in cooking times, so check your chips towards the end of the cooking period. Adjust as necessary to achieve a perfect golden hue.

• Cool to Crisp: Allow your chips to cool completely on a wire rack after cooking. This crucial step helps enhance their crunchy texture and ensures they’re delightful when you bite in.

• Store Properly: To maintain freshness, keep your Cinnamon Sugar Air Fryer Banana Chips in an airtight container at room temperature. Avoid refrigeration, which can introduce moisture and make them soft.

Cinnamon Sugar Air Fryer Banana Chips Recipe FAQs

What kind of bananas should I use for the best results?
Absolutely! For the Cinnamon Sugar Air Fryer Banana Chips, it's best to use ripe but firm bananas. They should be yellow with a few brown spots; this indicates great sweetness while still holding shape during cooking. Avoid overly brown or mushy bananas, as they may turn too soft and won't achieve that perfect crispy texture.

How should I store my banana chips, and how long will they last?
To keep your Cinnamon Sugar Air Fryer Banana Chips crispy, store them in an airtight container at room temperature. They will last for up to 3 days this way. Make sure to keep them in a cool, dry place away from moisture, which can make them chewy. Avoid refrigeration as it can introduce humidity and ruin the crispiness.

Can I freeze the banana chips, and how do I go about it?
Very! To freeze your Cinnamon Sugar Air Fryer Banana Chips, first lay them out in a single layer on a baking sheet and place it into the freezer for about 1-2 hours until they are completely frozen. Once frozen, transfer the chips into an airtight freezer bag or container. They can be kept in the freezer for up to 2 months. To enjoy, simply thaw them at room temperature and re-crisp in the air fryer for a few minutes for that fresh crunch!

What should I do if my banana chips don’t come out crispy?
If your Cinnamon Sugar Air Fryer Banana Chips are not as crispy as you hoped, there are a few things to check. First, ensure your banana slices are uniform in thickness (1/8 inch works best!). If you overcrowded the air fryer basket, that could lead to steaming rather than crisping, so always keep them in a single layer. If they still aren't crispy after cooking for the full time, you can simply pop them back into the air fryer for an additional couple of minutes.

Are these banana chips suitable for allergies or dietary restrictions?
Absolutely! The Cinnamon Sugar Air Fryer Banana Chips are vegan and gluten-free, making them a suitable option for many dietary needs. However, if you or someone you’re serving has specific allergies, always double-check any substitutions (like using coconut oil) to ensure they fit within those restrictions. Feel free to customize the recipe by using alternative sweeteners or oils as needed!

Cinnamon Sugar Air Fryer Banana Chips

Cinnamon Sugar Air Fryer Banana Chips: Crunchy Sweet Bliss

Delight in crunchy, sweet Cinnamon Sugar Air Fryer Banana Chips—a healthy vegan snack that's simple to prepare.
Print Recipe Pin Recipe
Prep Time 10 minutes mins
Cook Time 18 minutes mins
Cooling Time 5 minutes mins
Total Time 33 minutes mins
Servings: 2 servings
Course: Snacks
Cuisine: Healthy, Vegan
Calories: 150
Ingredients Equipment Method Nutrition Notes

Ingredients
  

For the Chips
  • 2 bananas Ripe Bananas Use ripe but firm bananas for the perfect balance of sweetness and texture.
  • 1 tablespoon Coconut Oil Can be swapped with butter or olive oil if desired.
  • 4 tablespoons Granulated Sugar Adjust sweetener for personal preference.
  • 1 teaspoon Ground Cinnamon Feel free to increase for more flavor.
  • 1 pinch Salt Enhances overall flavors.

Equipment

  • Air fryer
  • Mixing Bowl
  • Cutting Board
  • wire rack

Method
 

Step-by-Step Instructions
  1. Begin by peeling the bananas and slicing them into 1/8-inch thick rounds.
  2. In a mixing bowl, combine sugar, cinnamon, and salt.
  3. Melt coconut oil and drizzle over banana slices; toss to coat.
  4. Preheat air fryer to 300°F (150°C).
  5. Arrange banana slices in a single layer in the air fryer basket.
  6. Air fry banana slices for 15-18 minutes, flipping halfway.
  7. Remove chips and cool on a wire rack.
  8. Serve as a snack or topping for yogurt or oatmeal.

Nutrition

Serving: 1servingCalories: 150kcalCarbohydrates: 36gProtein: 1gFat: 3gSaturated Fat: 2gPolyunsaturated Fat: 0.5gMonounsaturated Fat: 1gSodium: 5mgPotassium: 500mgFiber: 2gSugar: 14gVitamin C: 10mgCalcium: 1mgIron: 2mg

Notes

Store in an airtight container at room temperature for up to 3 days. Avoid refrigeration to maintain crispness.

Tried this recipe?

Let us know how it was!

Cinnamon Sugar Air Fryer Banana Chips: Crunchy Sweet Bliss

September 29, 2025 by Grace Snow Leave a Comment

I was rummaging through my pantry when I stumbled upon a couple of ripe bananas, just waiting to be turned into something magical. That’s when the idea of making Cinnamon Sugar Air Fryer Banana Chips sparked to life! These crispy delights offer a guilt-free alternative to standard snacks without compromising taste. With their light and airy texture, they’re perfect for satisfying that midday craving or elevating your yogurt and oatmeal. What’s even better? They’re gluten-free, vegan, and super simple to prepare—making them a breeze to whip up whenever those sweet cravings hit. Are you ready to learn the secrets behind creating this deliciously wholesome snack at home? Let’s dive into the recipe!

Why Are These Banana Chips Irresistible?

Healthy snacking never tasted so good! With the perfect balance of cinnamon and sugar, these Cinnamon Sugar Air Fryer Banana Chips are an indulgent yet guilt-free treat. Quick and easy, they require minimal prep time, making them ideal for busy lifestyles. Versatile enough to be enjoyed on their own or as a topping for yogurt or oatmeal, they fit seamlessly into any meal plan. Crispy perfection is just a short air frying session away—no deep frying mess involved! Plus, with their vegan and gluten-free qualities, everyone can join in on the fun!

Cinnamon Sugar Air Fryer Banana Chips Ingredients

Explore the delicious components that make these chips a wholesome snack!

For the Chips
• Bananas – Use ripe but firm bananas for the perfect balance of sweetness and texture.
• Coconut Oil – This not only helps the cinnamon sugar stick, but can also be swapped with butter or olive oil if desired.
• Granulated Sugar – Sweetens the chips and caramelizes beautifully during cooking.
• Ground Cinnamon – Adds a warm, comforting flavor that pairs wonderfully with the bananas; feel free to increase it for more kick.
• Salt – Just a pinch enhances the overall flavors in your Cinnamon Sugar Air Fryer Banana Chips!

Step‑by‑Step Instructions for Cinnamon Sugar Air Fryer Banana Chips

Step 1: Slice Bananas
Begin by peeling two ripe but firm bananas and slicing them into 1/8-inch thick rounds. Try to keep the slices uniform to ensure even cooking and avoid any chewy pieces. Arrange the banana slices on a clean cutting board, and let them sit while you prepare the coating.

Step 2: Prepare Cinnamon Sugar Mixture
In a medium mixing bowl, combine granulated sugar, ground cinnamon, and a pinch of salt. Use about 2 tablespoons of sugar for every banana, adjusting to your sweetness preference. Stir the sugar and spice mixture until thoroughly combined, creating a delightful blend that will add flavor to your Cinnamon Sugar Air Fryer Banana Chips.

Step 3: Coat Banana Slices
Melt about 1 tablespoon of coconut oil and drizzle it over the banana slices in the bowl. Toss gently to coat each slice evenly with the oil. Then, sprinkle the cinnamon sugar mixture over the bananas and toss again to ensure they are fully covered. The coconut oil helps the sugar stick and creates a lovely crisp texture when air fried.

Step 4: Preheat Air Fryer
Preheat your air fryer to 300°F (150°C). This step is crucial as it allows the air fryer to reach the optimal temperature for cooking and ensures that your Cinnamon Sugar Air Fryer Banana Chips will crisp up beautifully. While the air fryer heats up, let the coated banana slices rest for a few minutes.

Step 5: Arrange Bananas in Air Fryer
Once the air fryer is preheated, carefully arrange the banana slices in the fryer basket. Make sure to place them in a single layer without overlapping for the best results. This allows hot air to circulate around each chip, achieving a delightful crunch. Depending on your air fryer’s size, you may need to work in batches.

Step 6: Air Fry Banana Chips
Air fry the banana slices for 15-18 minutes, flipping them halfway through the cooking time. Keep an eye on them as they cook; they should turn golden brown and become crispy. The aroma of cinnamon and sugar will fill the kitchen, making it hard to resist the temptation to sneak a taste!

Step 7: Cool Chips for Crispness
After the cooking time is complete, carefully remove the banana slices from the air fryer and place them on a wire rack. Allow the Cinnamon Sugar Air Fryer Banana Chips to cool completely, as this cooling period enhances their crispness. Avoid stacking them while they cool to ensure they maintain that delightful crunch.

Step 8: Serve and Enjoy
Once your banana chips are cool, they’re ready to be enjoyed! Serve them as a snack, sprinkle them on yogurt, or use them as a topping for oatmeal. These crispy treats are versatile and will satisfy your sweet cravings guilt-free, making them a perfect addition to any healthy snacking routine.

Cinnamon Sugar Air Fryer Banana Chips Variations

Feel free to express your creativity with these delightful twists that elevate your snacking experience!

  • Spicy Twist: Add a pinch of cayenne or chili powder to the sugar mixture for a surprising kick. This spicy note beautifully contrasts the sweetness of the bananas!

  • Choco Delight: For a decadent flavor, drizzle melted dark chocolate over the cooled chips. It creates a rich and irresistible treat that will satisfy your chocolate cravings.

  • Savory Alternative: Skip the sugar and cinnamon, and season the banana slices with salt, smoked paprika, or garlic powder instead. These savory chips are a unique way to enjoy bananas!

  • Nutty Crunch: Toss in some crushed nuts like almonds or pecans before air frying. The added texture and flavor create a satisfying crunch with every bite!

  • Maple Infusion: Swap granulated sugar for maple sugar or syrup to give the chips a deeper, caramel-like flavor. It adds a lovely complexity while keeping them naturally sweet.

  • Coconut Bliss: Sprinkle shredded coconut onto the chips before air frying for an added layer of tropical flavor. The sweet, chewy texture of the coconut complements the crispy chips perfectly.

  • Tropical Medley: Mix in some pineapple pieces with the banana snack. Combine banana and pineapple slices in the air fryer for a fruity explosion of flavors!

  • Herbal Zest: Incorporate finely chopped fresh mint or basil to the banana slices for a refreshing twist. This herbaceous hint will brighten up the sweetness beautifully.

Enjoy experimenting with these variations or serve them alongside your favorite yogurt bowls or Pumpkin Cinnamon Roll Muffins for a delightful breakfast treat! Each twist promises a unique flavor adventure!

What to Serve with Cinnamon Sugar Air Fryer Banana Chips

These crispy bites are just the beginning of a delightful snack experience that can transform your everyday treats.

  • Creamy Yogurt Dip: A velvety yogurt dip adds a refreshing balance to the sweetness of the chips, creating a perfect harmony with every bite. It’s like a mini dessert that feels indulgent yet healthy!

  • Honey-Drizzled Oatmeal: Topping your morning oatmeal with these chips elevates it to a whole new level. The crunch plays beautifully against the warm, comforting oats, while honey adds a touch of sweetness that matches the cinnamon flavor.

  • Mixed Nuts: The salty crunch of mixed nuts provides a striking contrast to the sweet, spiced banana chips, enhancing your snacking experience. Try pairing them for a quick yet satisfying trail mix!

  • Fresh Berries: Juicy berries bring a burst of freshness and acidity that beautifully complements the warm notes of cinnamon in the chips. Plus, the vibrant colors will make your snack bright and appealing!

  • Homemade Granola: Use these delightful chips as a crunchy topping for your granola. The added sweetness and texture of the chips create a gourmet twist that is both satisfying and delicious.

  • Dark Chocolate Drizzle: For a sweet treat, drizzle dark chocolate over the cooled banana chips. This simple addition elevates them to a dessert level, combining that crunchy, sweet experience with a touch of richness.

Storage Tips for Cinnamon Sugar Air Fryer Banana Chips

Room Temperature: Store the chips in an airtight container at room temperature for up to 3 days to maintain their crispness and flavor.

Avoid Refrigeration: Do not refrigerate the chips, as this can lead to moisture build-up, making them lose their delightful crunch.

Re-crisping: If the chips soften over time, simply pop them back in the air fryer at 300°F (150°C) for a few minutes to restore their crispy texture.

Serving Suggestions: Enjoy these delicious Cinnamon Sugar Air Fryer Banana Chips as a snack, a topping for yogurt, or even as an addition to your favorite trail mix!

Make Ahead Options

These Cinnamon Sugar Air Fryer Banana Chips are perfect for meal prep enthusiasts! You can slice the bananas and coat them with coconut oil and cinnamon sugar up to 24 hours in advance. Simply store the coated banana slices in an airtight container in the refrigerator to maintain freshness. When you’re ready to enjoy them, simply preheat your air fryer and arrange the chilled banana slices in a single layer. Cook for 15-18 minutes as directed, flipping halfway for that delightful crispiness. With this make-ahead option, you can have a deliciously healthy snack ready in no time, making your busy weeknights a little more enjoyable!

Expert Tips for Cinnamon Sugar Air Fryer Banana Chips

• Even Slices: Use a mandoline slicer for uniform banana thickness. This helps achieve consistent cooking and ensures every chip turns out perfectly crispy.

• Don’t Overcrowd: Arrange banana slices in a single layer to allow proper air circulation. Overcrowding leads to soggy chips instead of the intended crispiness in your Cinnamon Sugar Air Fryer Banana Chips.

• Monitor Cooking Time: Keep an eye on the cooking process, as air fryers can vary significantly. Check your chips around the 12-minute mark to avoid burning.

• Cool Completely: Once cooked, allow the chips to cool on a wire rack. This crucial step keeps them crispy, preventing moisture build-up during storage.

• Flavor Variations: Experiment with different spices or sweeteners. For a twist, consider adding a pinch of cayenne to the cinnamon mix for a spicy kick in your chips.

Cinnamon Sugar Air Fryer Banana Chips Recipe FAQs

What type of bananas should I use?
Absolutely! For the best Cinnamon Sugar Air Fryer Banana Chips, choose ripe but firm bananas. They should be slightly yellow with minimal dark spots. Overripe bananas are too mushy for this recipe, while unripe ones won't provide the desired sweetness and flavor.

How should I store my banana chips?
For optimal freshness, store the chips in an airtight container at room temperature for up to 3 days. Keep them in a cool, dry place, and avoid refrigeration, as this can trap moisture and make them soggy. If they do soften, simply re-crisp them in the air fryer for a few minutes at 300°F (150°C).

Can I freeze Cinnamon Sugar Air Fryer Banana Chips?
Certainly! To freeze, place the cooled banana chips in a single layer on a baking sheet and freeze for about 1-2 hours. Once solid, transfer them to an airtight freezer bag. They can last up to 3 months in the freezer. When you're ready to enjoy them, re-crisp in the air fryer at 300°F (150°C) for a few minutes.

What can I do if my chips aren’t crispy?
No worries! If your Cinnamon Sugar Air Fryer Banana Chips aren’t as crispy as you'd like, it could be due to overcrowding the air fryer basket or cooking them at a lower temperature. Make sure to arrange the banana slices in a single layer and keep an eye on them during the cooking process. If they don’t crisp up, try increasing the cooking time in 1-2 minute increments until you achieve that desired crunchy texture.

Are these banana chips safe for pets?
While bananas are generally safe for dogs in moderation, it’s essential to avoid offering any chips with added sugar or cinnamon. These added ingredients could upset your furry friend's stomach. Always consult your vet before introducing new snacks into your pet's diet.

Can I adjust the sweetness or flavoring?
Very! Feel free to modify the sugar and cinnamon levels to match your taste. If you prefer a lighter sweetness, reduce the sugar, or try adding spices like nutmeg or a pinch of cayenne for a bit of heat. This flexibility allows everyone to enjoy their Cinnamon Sugar Air Fryer Banana Chips just the way they like!

Cinnamon Sugar Air Fryer Banana Chips

Cinnamon Sugar Air Fryer Banana Chips: Crunchy Sweet Bliss

Cinnamon Sugar Air Fryer Banana Chips are a guilt-free snack that offers a crispy and sweet alternative to standard treats.
Print Recipe Pin Recipe
Prep Time 10 minutes mins
Cook Time 18 minutes mins
Cooling Time 10 minutes mins
Total Time 38 minutes mins
Servings: 4 servings
Course: Snacks
Cuisine: Vegan
Calories: 120
Ingredients Equipment Method Nutrition Notes

Ingredients
  

For the Chips
  • 2 large Ripe Bananas Use ripe but firm bananas for best texture.
  • 2 Tablespoons Coconut Oil A great coating for cinnamon sugar adherence.
  • 2 Tablespoons Granulated Sugar Adds sweetness that caramelizes beautifully.
  • 1 teaspoon Ground Cinnamon Adjust to your taste.
  • 1 pinch Salt Enhances the flavors.

Equipment

  • Air fryer
  • Mandoline Slicer

Method
 

Step-by-Step Instructions
  1. Prepare the Bananas: Peel and slice the bananas into 1/8-inch thick rounds. Set aside.
  2. Mix the Cinnamon Sugar: Combine granulated sugar, ground cinnamon, and salt in a bowl. Stir well.
  3. Coat the Banana Slices: Melt coconut oil, pour over banana slices, toss to coat, then sprinkle the cinnamon sugar mix.
  4. Preheat the Air Fryer: Set the air fryer to preheat at 300°F (150°C).
  5. Arrange the Banana Slices: Place banana slices in a single layer in the air fryer basket.
  6. Air Fry the Chips: Cook for 15 to 18 minutes, flipping halfway through, until golden and crispy.
  7. Cool for Crispness: Transfer chips to a wire rack to cool completely before serving.
  8. Serve and Enjoy: Enjoy the banana chips plain, with yogurt, or as a light dessert.

Nutrition

Serving: 1servingCalories: 120kcalCarbohydrates: 30gProtein: 1gFat: 3gSaturated Fat: 3gSodium: 20mgPotassium: 400mgFiber: 2gSugar: 12gVitamin C: 15mgIron: 2mg

Notes

For the best results, slice bananas evenly using a mandoline and avoid overcrowding the air fryer basket.

Tried this recipe?

Let us know how it was!

Witch’s Cauldron with Glow-in-the-Dark Goo: Spooktacular Dip

September 27, 2025 by Grace Snow Leave a Comment

As the leaves turn and the air becomes crisp, a certain magic fills the kitchen. This Halloween, I found myself in a culinary spell, conjuring up a whimsical Witch’s Cauldron with Glow-in-the-Dark Goo that’s not just a feast for the eyes but also for the taste buds. Imagine a hollowed-out loaf of bread standing proudly, filled with a warm, inviting spicy tomato dip that pairs beautifully with crispy toasted pitta and fresh veggies. Not only is this dish a showstopper for family gatherings and parties, but it’s also a breeze to whip up, allowing you to focus on fun rather than fuss during your seasonal celebrations. So, are you ready to brew some spooky magic in your kitchen? Let’s dive in!

Why is this dip a Halloween must-try?

Spectacular presentation: This dip, served in a charming cauldron, is sure to be the centerpiece of your Halloween gathering. Irresistible flavor: The combination of zesty spices, creamy butternut squash, and savory tomato creates a dip that's as delicious as it is colorful. Kid-friendly fun: The gooey texture and spooky look will delight children and adults alike, making it a hit at any party. Make-ahead magic: Prepare the dip a day in advance and enjoy stress-free entertaining—perfect for busy hosts! Pair it with Sausage Mummies for an unforgettable snack spread.

Witch’s Cauldron with Glow-in-the-Dark Goo Ingredients

For the Cauldron
• Large round loaf of bread – This serves as the base structure for your cauldron; sourdough adds extra flavor!
• Egg – Acts as a binding agent for the poppy seeds; olive oil works great for a vegan substitute.
• Poppy seeds – They provide a unique crunch and spooky look; try black sesame seeds for a twist!

For the Dip
• Butternut squash (1kg) – The star ingredient that creates a creamy base; pumpkin can be a delightful substitute.
• Onion (1) – It brings sweetness and depth to the dip; shallots can be a milder alternative.
• Garlic cloves (2) – Enhances overall flavor; reduce for a subtler taste if preferred.
• Cream of tomato soup (400g) – This serves as the dip's base; using homemade tomato puree elevates the flavor.
• Ground cumin (1 tsp) – Adds warmth and earthiness; smoked paprika or coriander can make a nice swap.
• Ground coriander (1 tsp) – Complements the cumin while enhancing the tomato flavor; you can omit if needed.
• Chilli sauce (2 tbsp) – Brings heat and depth; substitute with hot sauce to adjust the spice level.

For Serving
• Toasted pitta bread – Perfect for dipping; you can easily make homemade versions or opt for store-bought.

This Witch’s Cauldron with Glow-in-the-Dark Goo is not just delicious; it’s a fun centerpiece for your Halloween festivities!

Step‑by‑Step Instructions for Witch’s Cauldron with Glow-in-the-Dark Goo

Step 1: Preheat the Oven
Begin by preheating your oven to 200°C (or 180°C for fan ovens) or gas mark 6. This step is crucial for achieving the crispy exterior of your bread cauldron. While the oven warms up, gather your ingredients and equipment, ensuring everything is within reach. The anticipation will build as you prepare for this enchanting dish!

Step 2: Prepare the Bread Cauldron
Carefully slice the top off the large round loaf of bread and gently scoop out the inside, leaving a crust thickness of about 2.5 cm. This hollowed bread will act as your cauldron. Set aside the bread pieces for later use, perhaps for croutons or snacking. Ensure the crust is intact for holding your delicious dip.

Step 3: Dress the Cauldron
In a small bowl, beat an egg (or olive oil for a vegan option). Brush the exterior and the lid of the hollowed bread with this mixture. Next, roll the bread in poppy seeds until well coated, adding a spooky texture. Place the cauldron on a baking sheet and bake for about 10 minutes, or until it turns golden and crispy—this will enhance its visual appeal!

Step 4: Cook the Dip Base
While the cauldron is baking, bring a pot of salted water to boil. Carefully add the diced butternut squash, onion, and garlic cloves. Simmer everything together for about 15-20 minutes, or until the squash is fork-tender and the onion is translucent. This aromatic mixture will form the flavorful foundation of your Witch’s Cauldron with Glow-in-the-Dark Goo.

Step 5: Blend the Ingredients
Once cooked, drain the vegetable mixture and transfer it to a blender or food processor. Add the cream of tomato soup, ground cumin, and ground coriander. Blend until smooth and creamy; this vibrant mixture should have a inviting color and texture. Taste and adjust seasoning if needed, ensuring the dip is both flavorful and festive.

Step 6: Heat and Serve
In a saucepan over medium heat, warm the blended dip until it's bubbling gently, keeping the flavors fresh and delicious. Pour the hot dip into your crispy bread cauldron, and place the bread lid on top. This whimsical presentation will unleash the spooky spirit of your dish as a centerpiece for your Halloween spread.

Step 7: Dipping Delights
Serve your Witch’s Cauldron with Glow-in-the-Dark Goo immediately alongside crispy toasted pitta and fresh cucumber sticks. The contrast of the warm, creamy dip and the crunchy pitta will be a delightful combination. Watch your guests dive into this spooky treat, making it the star of your Halloween festivities!

What to Serve with Witch’s Cauldron with Glow-in-the-Dark Goo

Elevate your Halloween gathering with delightful accompaniments that bring both flavor and festivity to your table.

  • Sausage Mummies: These cute, wrapped sausages add a fun and savory element, perfectly contrasting with the creamy dip.

  • Toasted Pitta Chips: Crunchy and warm, these are fantastic for scooping up the dip, enhancing the textural experience.

  • Fresh Veggie Sticks: Offering a crisp, refreshing bite, carrots and cucumbers balance the richness of the dip and add vibrant colors.

  • Creepy Cheese Platter: Assorted cheeses shaped like bats or ghosts can be a whimsical addition, complementing the savory flavors and pleasing the crowd.

  • Halloween Fruit Skewers: Simple and healthy, these spooky-shaped fruits bring a sweet touch that contrasts the savory cauldron dip.

  • Spooky Mocktails: Brightly colored beverages, like a bubbling witch’s potion made from lemonade and ginger ale, will enchant your guests and refresh their palates.

Pairing these treats with the Witch's Cauldron with Glow-in-the-Dark Goo will create a festive atmosphere that your guests won’t soon forget!

Storage Tips for Witch’s Cauldron with Glow-in-the-Dark Goo

Fridge: Store any leftover dip in an airtight container for up to 3 days. Reheat gently on the stove over low heat to bring back its smooth texture.

Freezer: If you wish to freeze the dip, transfer it to a freezer-safe container for up to 3 months. Thaw in the fridge overnight before reheating.

Bread Cauldron: For best results, assemble the bread cauldron shortly before serving. If making in advance, store the hollowed loaf at room temperature, wrapped tightly in plastic wrap, for up to 1 day.

Reheating: When ready to serve, reheat the dip separately and pour it into the bread cauldron just before presentation. Enjoy your spooky Witch’s Cauldron with Glow-in-the-Dark Goo fresh and warm!

Witch’s Cauldron with Glow-in-the-Dark Goo Variations

Feel free to let your creativity run wild and customize this spooky dip to suit your taste!

  • Spicy Kick: Add a dash of cayenne pepper or diced jalapeños to bring the heat and complement the creamy dip perfectly.

  • Dairy-Free: Swap the cream of tomato soup for a dairy-free version or homemade tomato puree to keep it lighter and plant-based. It’s all about crafting a healthier option while keeping the flavor.

  • Flavor Boost: Toss in some fresh herbs like basil or cilantro after blending for a bright, refreshing twist. This addition truly enhances the taste and makes the dip stand out joyfully.

  • Nutty Delight: Blend in a tablespoon of tahini for a richer, creamier texture and a nutty depth of flavor. Your guests will love this unique spin!

  • Veggie Variety: Replace the butternut squash with roasted red peppers for a new flavor profile and stunning color. The sweetness from the peppers pairs beautifully with the other ingredients.

  • Crunchy Toppings: Add crispy fried onions or sautéed mushrooms on top just before serving for extra texture and visual appeal. These toppings make each bite even more delectable!

  • Halloween Fun: Use a mix of colored bell peppers alongside cucumber sticks to add a festive flourish to your presentation. Colorful veggies can liven up your table and draw in the kids!

  • Cheesy Twist: Stir in some shredded cheese (like mozzarella or cheddar) to the dip before heating for a gooey, cheesy experience. Think of it as adding a delicious, stretchy surprise!

Don’t forget to enjoy this delightful dish with sides like Sausage Mummies or crispy veggies for a complete Halloween feast!

Make Ahead Options

These Witch’s Cauldron with Glow-in-the-Dark Goo are perfect for busy home cooks looking to save time during Halloween festivities! You can prepare the creamy tomato dip up to 24 hours in advance by cooking and blending the butternut squash, onion, and garlic mixture, then refrigerating it in an airtight container. When it’s time to serve, simply reheat the dip on the stovetop until warmed through. Meanwhile, you can carve and bake the bread cauldron a few hours before your guests arrive, ensuring it stays crisp. By preparing these components ahead of time, you'll have more moments to enjoy the party, without sacrificing taste or presentation!

Expert Tips for Witch’s Cauldron Dip

  • Keep the Crust Thick: Ensure the bread crust is at least 2.5 cm thick; a thinner crust will lead to leaks and a less enjoyable serving experience.

  • Flavor Enhancements: Experiment with different spices like smoked paprika or Italian seasoning to create a unique twist on the witch’s cauldron with glow-in-the-dark goo.

  • Reheat with Care: If preparing your dip in advance, reheat slowly over low heat to prevent curdling and maintain its silky texture.

  • Freshly Toasted Pitta: For the best crunch and flavor, always toast your pitta bread right before serving. This adds an irresistible freshness to your dish.

  • Adjust Spice Levels: Modify the amount of chilli sauce based on your guests’ preferences. Start with less and add more as needed to keep it family-friendly!

Witch’s Cauldron with Glow-in-the-Dark Goo Recipe FAQs

What kind of bread should I use for the cauldron?
I recommend a large round loaf of sourdough for its flavor and sturdiness. The thicker crust will help contain your dip better, preventing any leaks. If sourdough isn’t available, look for a round, firm bread that can hold its shape after hollowing out.

How should I store any leftover dip?
Absolutely! Once you’ve enjoyed your Witch’s Cauldron with Glow-in-the-Dark Goo, store any leftovers in an airtight container in the refrigerator for up to 3 days. When you're ready to enjoy it again, reheat it gently over low heat to maintain that smooth texture.

Can I freeze the dip for later use?
Very much so! To freeze your dip, place it in a freezer-safe container where it can sit for up to 3 months. Remember to let it cool completely before covering it. When ready to use, thaw it in the refrigerator overnight and reheat on the stove until warmed through.

What if the dip is too spicy for children?
If you find the dip a bit too spicy, don’t fret! You can reduce the amount of chilli sauce used, or substitute it with a milder hot sauce. Additionally, consider adding a dollop of sour cream or Greek yogurt to the blend to tone down the heat while adding creaminess.

How do I know when the butternut squash is cooked properly?
Great question! You’ll know your butternut squash is ready when it’s fork-tender, usually after about 15-20 minutes of simmering. The onions will also turn translucent. If you can easily pierce the squash with a fork, it’s perfect for blending into your dip!

Is this recipe suitable for vegans?
Certainly! You can easily make this recipe vegan by substituting the egg with olive oil when brushing the bread and using plant-based cream of tomato soup. Your spooky creation can still be delicious and visually striking without losing flavor!

Witch’s cauldron with glow-in-the-dark goo

Witch’s Cauldron with Glow-in-the-Dark Goo: Spooktacular Dip

Experience the magic of Halloween with this Witch’s cauldron filled with glow-in-the-dark goo – a delicious and visually captivating dip.
Print Recipe Pin Recipe
Prep Time 30 minutes mins
Cook Time 30 minutes mins
Total Time 1 hour hr
Servings: 8 people
Course: Snacks
Cuisine: Halloween
Calories: 250
Ingredients Equipment Method Nutrition Notes

Ingredients
  

For the Cauldron
  • 1 large round loaf of bread Sourdough adds extra flavor.
  • 1 large egg Olive oil works great for a vegan substitute.
  • 1 cup poppy seeds Try black sesame seeds for a twist.
For the Dip
  • 1000 g butternut squash Pumpkin can be a delightful substitute.
  • 1 onion Shallots can be a milder alternative.
  • 2 garlic cloves Reduce for a subtler taste if preferred.
  • 400 g cream of tomato soup Using homemade tomato puree elevates the flavor.
  • 1 tsp ground cumin Smoked paprika or coriander can make a nice swap.
  • 1 tsp ground coriander You can omit if needed.
  • 2 tbsp chilli sauce Substitute with hot sauce to adjust the spice level.
For Serving
  • 1 toasted pitta bread You can easily make homemade versions or opt for store-bought.

Equipment

  • Oven
  • Blender or food processor
  • Saucepan
  • Baking Sheet

Method
 

Step‑by‑Step Instructions
  1. Preheat your oven to 200°C (or 180°C for fan ovens) or gas mark 6.
  2. Carefully slice the top off the large round loaf of bread and gently scoop out the inside, leaving a crust thickness of about 2.5 cm.
  3. In a small bowl, beat an egg (or olive oil for a vegan option) and brush the exterior and the lid of the hollowed bread with this mixture. Roll the bread in poppy seeds until well coated and bake for about 10 minutes.
  4. Bring a pot of salted water to boil. Carefully add the diced butternut squash, onion, and garlic cloves, and simmer for about 15-20 minutes until tender.
  5. Drain the mixture and blend with cream of tomato soup, ground cumin, and ground coriander until smooth.
  6. In a saucepan, warm the blended dip until bubbling gently, then pour it into your crispy bread cauldron and place the lid on top.
  7. Serve immediately alongside crispy toasted pitta and fresh cucumber sticks.

Nutrition

Serving: 1cupCalories: 250kcalCarbohydrates: 30gProtein: 6gFat: 12gSaturated Fat: 3gPolyunsaturated Fat: 1gMonounsaturated Fat: 8gCholesterol: 70mgSodium: 600mgPotassium: 800mgFiber: 4gSugar: 5gVitamin A: 3000IUVitamin C: 20mgCalcium: 50mgIron: 1mg

Notes

Ensure the bread crust is at least 2.5 cm thick to avoid leaks. Reheat the dip slowly to maintain its silky texture.

Tried this recipe?

Let us know how it was!

Mummy Hot Dogs: Spooky Treats Everyone Will Love!

September 27, 2025 by Grace Snow Leave a Comment

The aroma of freshly baked pastry wafts through the air as Halloween approaches, and I can't help but get excited about creating playful snacks for the season. Enter my Spooky Mummy Hot Dogs—an inventive twist on traditional finger foods that will charm guests of all ages! These mummy hot dogs are not only a delight to prepare but also take mere minutes to whip up, making them ideal for busy party planners. Wrapped in flaky croissant dough, each bite reveals juicy sausages hiding inside, ensuring that these treats will be the star of any Halloween gathering. Ready to add a touch of eerie fun to your snacks? Let’s dive into this creepy-cool recipe that’s perfect for your next festive celebration!

Why Are Mummy Hot Dogs a Must-Try?

Delightful Presentation: These mummy hot dogs are not only delicious but also visually captivating, making them a centerpiece on any Halloween table. Quick and Easy: You can whip them up in just 20 minutes! Perfect for your busy schedule, they’re a breeze to make. Kid-Friendly Fun: Kids love to help wrap the sausages, turning cooking time into family bonding moments. Flavorful Savory Bites: The combination of flaky croissant dough and juicy chipolatas creates a seriously satisfying treat. Don't forget to check out our Homemade Hot Chocolate for a cozy drink pairing! Versatile Dipping Options: Serve them with a variety of dips, from zesty salsa to creamy ranch, ensuring there’s something for everyone. These spooky snacks will undoubtedly become your new Halloween favorite!

Mummy Hot Dogs Ingredients

For the Hot Dogs
• Oil – Use it for greasing the baking trays to prevent sticking during baking.
• 12 Chipolatas – The star protein for this dish; opt for flavorful sausage variants that your family loves.

For the Wrappings
• Tube of 6 Ready-to-Roll Croissant Dough – This creates the perfect flaky wrappings; make sure to buy the pre-made version in the chilled aisle.

For the Brush Mixture
• 1 tbsp Honey – Adds a touch of sweetness to balance the savory flavors; you can substitute with maple syrup if needed.
• 1 tbsp Ketchup – Provides moisture and a hint of tangy flavor; feel free to use your favorite brand.
• 2 tsp Yellow Mustard – Perfect for seasoning and decorating the mummies' eyes; substitute with Dijon for a gourmet twist.

These Mummy Hot Dogs ingredients will have you on your way to creating a spooktacular snack in no time! Enjoy the prep—happy cooking!

Step‑by‑Step Instructions for Mummy Hot Dogs

Step 1: Preheat the Oven
Start by preheating your oven to 200°C (or 180°C for fan ovens), ensuring it's hot and ready for baking your Mummy Hot Dogs. While the oven heats up, take two baking trays and grease them lightly with oil to prevent sticking. This step is crucial for achieving that golden, flaky texture on your mummies.

Step 2: Prepare the Brush Mixture
In a medium-sized bowl, combine one tablespoon of honey, one tablespoon of ketchup, and two teaspoons of yellow mustard. Mix these ingredients well until uniform. This will create a flavorful glaze. Once blended, set the bowl aside for the next step, ensuring you have everything ready to generously brush your sausages.

Step 3: Season the Chipolatas
Take the 12 chipolatas and evenly coat them with the honey-ketchup-mustard mixture using a brush. Make sure to cover every inch for maximum flavor! This glaze will not only add taste but also help the pastry adhere better when wrapping. Once fully coated, it’s time to move on to the croissant dough.

Step 4: Prepare the Croissant Dough
Unroll the tube of ready-to-roll croissant dough on a clean surface. Divide it into three rectangles by pinching the seams together to create one uniform piece. From each rectangle, slice long, thin strips, about 16 per rectangle. Keep these strips handy, as they will form the spooky wrappings for your Mummy Hot Dogs.

Step 5: Wrap the Sausages
Carefully take each strip and wrap it around the chipolatas, leaving a small gap at one end to create a 'head' for the mummies. Be creative with the wrapping, as this will give your Mummy Hot Dogs their unique spooky appearance. Make sure to wrap them snugly but not too tight, allowing the dough to puff up during baking.

Step 6: Bake the Mummies
Place your beautifully wrapped Mummy Hot Dogs on the greased baking trays and transfer them to the preheated oven. Bake for approximately 20 minutes, or until the pastry turns golden brown and crisp. Keep an eye on them; you want that perfect flaky and slightly crispy texture for the ultimate Halloween treat.

Step 7: Create Mummy Eyes
Once the Mummy Hot Dogs are out of the oven, let them cool for a few minutes. Now, using your remaining mustard, dot tiny eyes on each mummy to bring them to life! This final touch adds to the fun and spooky appeal, making your hot dogs even more festive for your Halloween gathering.

Step 8: Serve and Enjoy
Serve your Mummy Hot Dogs warm with your favorite dipping sauces for an extra treat. Whether it's zesty salsa, creamy ranch, or your own concoction, these spooky snacks are perfect for sharing at your Halloween celebrations. Gather your guests and enjoy the playful and delicious spirit of Halloween!

Mummy Hot Dogs Variations & Substitutions

Get excited to personalize your Mummy Hot Dogs with these fun and delicious twists that offer something special for everyone!

  • Vegetarian Version: Swap out chipolatas for veggie sausages, perfect for plant-based diets without sacrificing flavor. These hearty alternatives still deliver on taste!
  • Cheesy Mummies: Add slices of cheese underneath the croissant dough to create gooey, melty centers. The combination of savory sausage and cheese is simply irresistible!
  • Spicy Twist: Use spicy chipolatas for a kick, or drizzle with hot sauce before serving. It’s a surefire way to spice up your Halloween feast! Don’t forget to pair it with a comforting Homemade Hot Chocolate to balance out the heat!
  • Different Pastry: For a unique twist, use puff pastry instead of croissant dough. This will provide a different texture while still being wonderfully flaky and delicious.
  • Creative Dipping Sauces: Experiment with various sauces like ranch, barbecue, or spicy mayo for dipping. Each concoction will add its own delightful flavor profile to your spooky treat!
  • Mini Mummies: Use mini sausages or cut larger sausages in half for bite-sized mummies, perfect for little hands or as delightful party appetizers.
  • Top with Seeds: Before baking, sprinkle sesame seeds on the dough for an extra crunchy texture and visual appeal. It adds a touch of surprise to each bite.
  • Ghostly Eyes: Instead of yellow mustard, use black olive slices to create spooky eyes. They add an unexpected flavor and make your mummies look even more frightful!

The creativity you inject into these Mummy Hot Dogs will ensure they are adored by all. Enjoy exploring the possibilities!

What to Serve with Mummy Hot Dogs

The festive fun doesn't have to stop with these spooky treats; enhance your Halloween spread with these delectable pairings.

  • Crispy Sweet Potato Fries: Their natural sweetness and crunch elevate the savory flavors of the mummy hot dogs, making each bite a delight.

  • Creamy Garlic Dip: This rich, zesty dip provides a perfect contrast to the flaky pastry and juicy sausage, intensifying the overall flavor experience.

  • Ghostly Guacamole: A vibrant green avocado dip not only looks great on your Halloween table but also adds fresh creaminess that complements the heat of the sausages.

  • Chilling Blood Orange Soda: The bright, tangy fizz brings a refreshing taste that cuts through the richness of the mummy hot dogs, keeping your guests refreshed!

  • Mini Pumpkin Pies: For a sweet ending, these tiny pies balance the savory with a warm spice that evokes the essence of fall festivities.

  • Veggie Skeleton Platter: A fun, colorful array of cut veggies and dips not only looks inviting but encourages healthy snacking amidst the treats.

  • Festive Candy Corn: This seasonal candy adds a touch of nostalgia and sweetness to counterbalance the savory bites, creating the ultimate Halloween candy platter.

Pair these delicious sides and drinks with your Mummy Hot Dogs, and your Halloween gathering will be both tasty and memorable!

Expert Tips for Mummy Hot Dogs

• Dough Handling: Make sure to handle the croissant dough gently, as aggressive tearing can lead to uneven wrap and a less appealing look.

• Pinch Those Seams: Don’t skip pinching the seams of the croissant dough tightly. This essential step prevents the dough from unraveling during baking, ensuring that your mummy hot dogs stay intact!

• Mind the Timing: Keep an eye on the baking time. If your mummies are browning too quickly, lower the temperature slightly to ensure a perfect bake without burnt spots.

• Customize Creatively: Feel free to get creative with the sauce and add-ins! You can incorporate spicy mustard or even different veggies for a color pop to the mummy's eyes.

• Stay Warm: These mummy hot dogs are best served warm. If you're making them ahead of time, consider briefly reheating them in the oven before serving to maintain that flaky texture.

Enjoy your Mummy Hot Dogs, a spooktacular treat sure to be a hit!

How to Store and Freeze Mummy Hot Dogs

Fridge: Store leftover Mummy Hot Dogs in an airtight container for up to 3 days. This helps keep the flaky croissant dough from becoming too soggy.

Freezer: For long-term storage, freeze the baked Mummy Hot Dogs individually wrapped in plastic wrap for up to 2 months. This ensures they stay fresh for future parties or snacking!

Reheating: To reheat, bake the frozen Mummy Hot Dogs directly from the freezer at 180°C (350°F) for about 15-20 minutes until heated through and the pastry is crispy again.

Prepping Ahead: If you want to prep ahead of time without baking, wrap the chipolatas in croissant dough and store them covered in the fridge for up to 24 hours before baking. Enjoy your Mummy Hot Dogs!

Make Ahead Options

These Mummy Hot Dogs are perfect for meal prep enthusiasts looking to save time during busy Halloween festivities! You can prepare the chipolatas wrapped in croissant dough up to 24 hours in advance; just cover them tightly with plastic wrap and refrigerate to maintain freshness. The glaze mixture can also be prepared ahead and stored in an airtight container for up to 3 days. When you're ready to bake, simply preheat your oven, brush the prepped sausage wraps with your glaze, and bake as instructed. This way, you’ll have deliciously spooky treats ready to wow your guests with minimal effort! Enjoy the extra time you save!

Mummy Hot Dogs Recipe FAQs

How do I choose the best chipolatas for my Mummy Hot Dogs?
Absolutely! Look for chipolatas with rich flavors and good quality. Avoid those with dark spots or an off-putting smell. Freshness is key, and I recommend checking the expiration date on the package for optimal taste.

How should I store leftover Mummy Hot Dogs?
To keep your leftovers fresh, store them in an airtight container in the fridge for up to 3 days. This helps maintain the flaky texture of the croissant dough, preventing it from getting soggy. When ready to enjoy, reheat them in the oven for that fresh-baked feel!

Can I freeze Mummy Hot Dogs for later?
Yes, you can! For best results, wrap each baked Mummy Hot Dog individually in plastic wrap and place them in a freezer-safe bag. They can be frozen for up to 2 months. To reheat, bake from frozen at 180°C (350°F) for 15-20 minutes until heated through and crispy.

What should I do if the croissant dough unravels while baking?
If you find the dough unravels, it likely wasn’t pinched or wrapped tightly enough. Next time, be sure to secure the seams snugly. Additionally, you can try wrapping the sausages in smaller amounts of dough, which may help them stay together better during baking.

Are Mummy Hot Dogs suitable for guests with dietary restrictions?
Very! For a vegetarian version, swap the chipolatas for your favorite veggie sausages. Always check the ingredient labels on the croissant dough and sauces for any allergens. This way, everyone can enjoy a taste of these spooky treats!

Can I prepare Mummy Hot Dogs in advance?
Definitely! You can wrap the chipolatas in croissant dough and store them in the fridge for up to 24 hours before baking. This makes party prep easier! Just remember to bake them fresh for the best texture, and enjoy the delightful aroma wafting through your kitchen as they cook!

Mummy hot dogs

Mummy Hot Dogs: Spooky Treats Everyone Will Love!

These Mummy hot dogs are a quick and playful Halloween snack that delights all ages.
Print Recipe Pin Recipe
Prep Time 10 minutes mins
Cook Time 20 minutes mins
Total Time 30 minutes mins
Servings: 12 hot dogs
Course: Snacks
Cuisine: Halloween
Calories: 180
Ingredients Equipment Method Nutrition Notes

Ingredients
  

For the Hot Dogs
  • 12 pieces Chipolatas opt for flavorful sausage variants
  • tablespoon Oil for greasing the baking trays
For the Wrappings
  • 1 tube Ready-to-Roll Croissant Dough buy the pre-made version in the chilled aisle
For the Brush Mixture
  • 1 tablespoon Honey can substitute with maple syrup
  • 1 tablespoon Ketchup use your favorite brand
  • 2 teaspoon Yellow Mustard substitute with Dijon for a gourmet twist

Equipment

  • Baking trays
  • Medium-sized Bowl
  • Brush

Method
 

Step-by-Step Instructions
  1. Preheat your oven to 200°C (or 180°C for fan ovens) and grease two baking trays lightly with oil.
  2. In a medium-sized bowl, combine honey, ketchup, and yellow mustard to create a brush mixture.
  3. Coat the chipolatas evenly with the brush mixture using a brush.
  4. Unroll the croissant dough and slice it into long, thin strips for wrapping.
  5. Wrap each strip around the chipolatas, leaving a small gap for a 'head'.
  6. Bake the wrapped Mummy Hot Dogs in the preheated oven for about 20 minutes until golden brown.
  7. Dot tiny eyes on each mummy with the remaining mustard after cooling.
  8. Serve warm with your favorite dipping sauces.

Nutrition

Serving: 1hot dogCalories: 180kcalCarbohydrates: 15gProtein: 10gFat: 9gSaturated Fat: 3gPolyunsaturated Fat: 1gMonounsaturated Fat: 4gCholesterol: 30mgSodium: 400mgPotassium: 150mgFiber: 1gSugar: 1gVitamin A: 100IUCalcium: 30mgIron: 1mg

Notes

Handle the croissant dough gently to prevent uneven wrapping. Pinch the seams tightly to avoid unraveling during baking.

Tried this recipe?

Let us know how it was!
  • « Previous Page
  • 1
  • …
  • 18
  • 19
  • 20
  • 21
  • 22
  • …
  • 25
  • Next Page »

Welcome!

Hi, I’m Grace, a Sydney-based home cook with a passion for bold flavors and trending ingredients. Whether you’re a busy beginner or a seasoned foodie, you’ll find dishes here that are fresh, fun, and full of flavor.

More about me

Popular Recipes

  • Honey Lime Chicken & Avocado Rice Bowl
    Honey Lime Chicken & Avocado Rice Bowl for a Flavor Burst
  • Tasty Italian Pasta Salad
    Delight in this Easy Tasty Italian Pasta Salad for Summer Fun
  • Garlic Butter Chicken Pasta
    Garlic Butter Chicken Pasta That’ll Wow Your Family Tonight
  • Creamy, Spicy Chicken Pasta
    Creamy, Spicy Chicken Pasta with Fresh Summer Veggies

Footer

↑ back to top

About

  • Privacy Policy
  • Disclaimer
  • Terms & Conditions

Newsletter

  • Sign Up! for emails and updates

Contact

  • About me
  • Contact me

Copyright © 2025 TastyTrendIngredients