tastytrendingredients

  • Home
  • Recipes
    • Appetizers
    • Breakfast
    • Dessert
    • Dinner
    • Drinks
    • Salads
    • Snacks
    • Soups
  • About me
  • Contact
menu icon
go to homepage
  • Home
  • Recipes
    • Appetizers
    • Breakfast
    • Dessert
    • Dinner
    • Drinks
    • Salads
    • Snacks
    • Soups
  • About me
  • Contact
search icon
Homepage link
  • Home
  • Recipes
    • Appetizers
    • Breakfast
    • Dessert
    • Dinner
    • Drinks
    • Salads
    • Snacks
    • Soups
  • About me
  • Contact
×

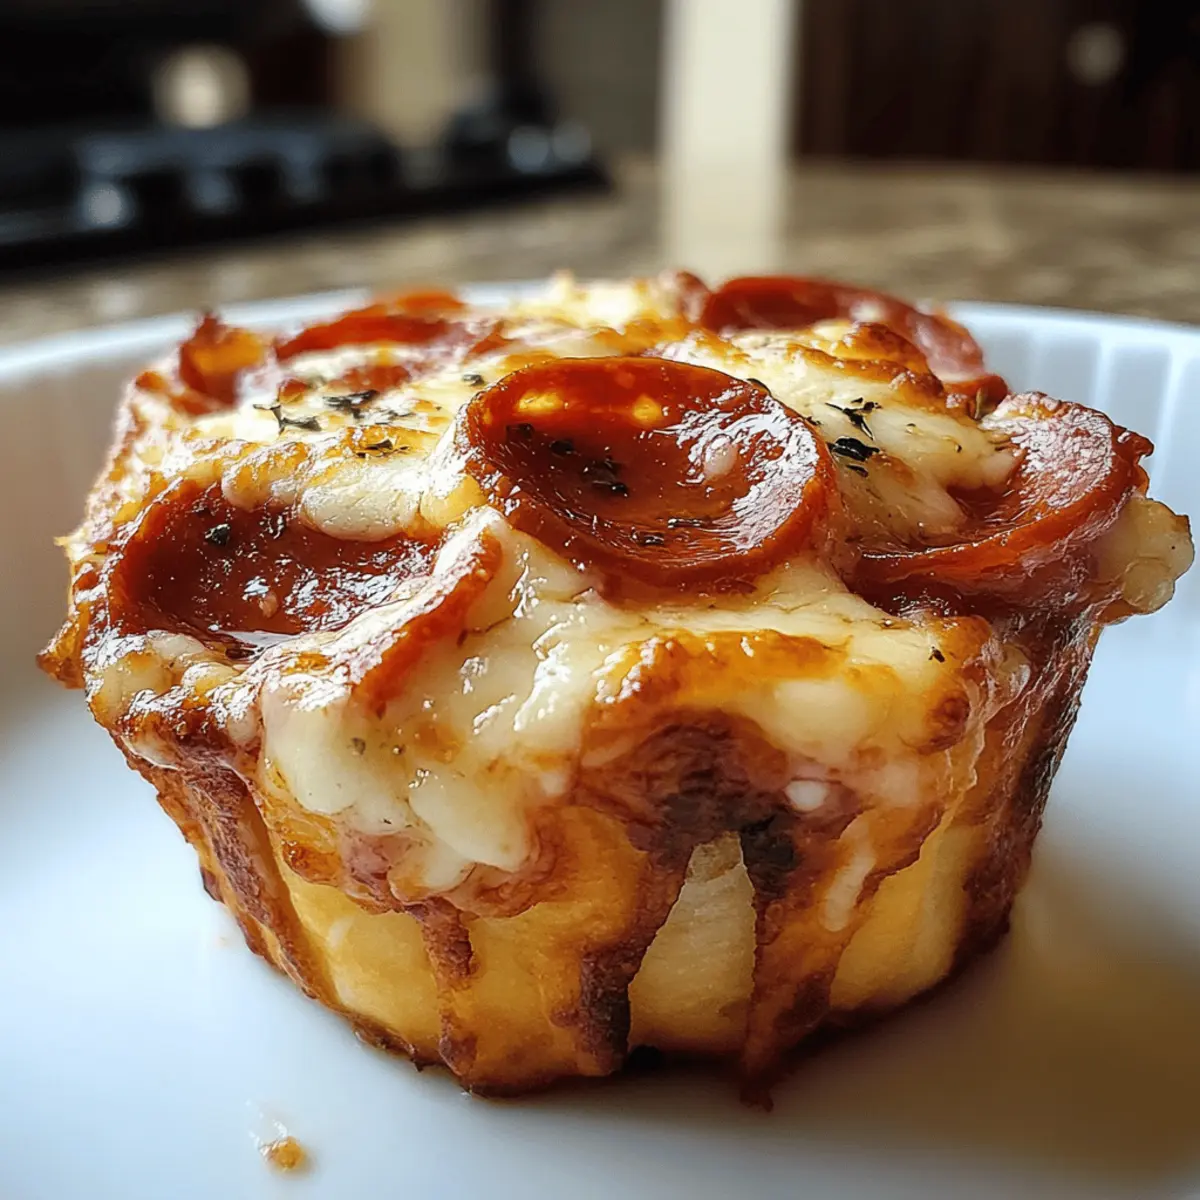
Delicious Pizza Rolls with Crescent Rolls for Quick Snacking

November 11, 2025 by Grace Snow Leave a Comment

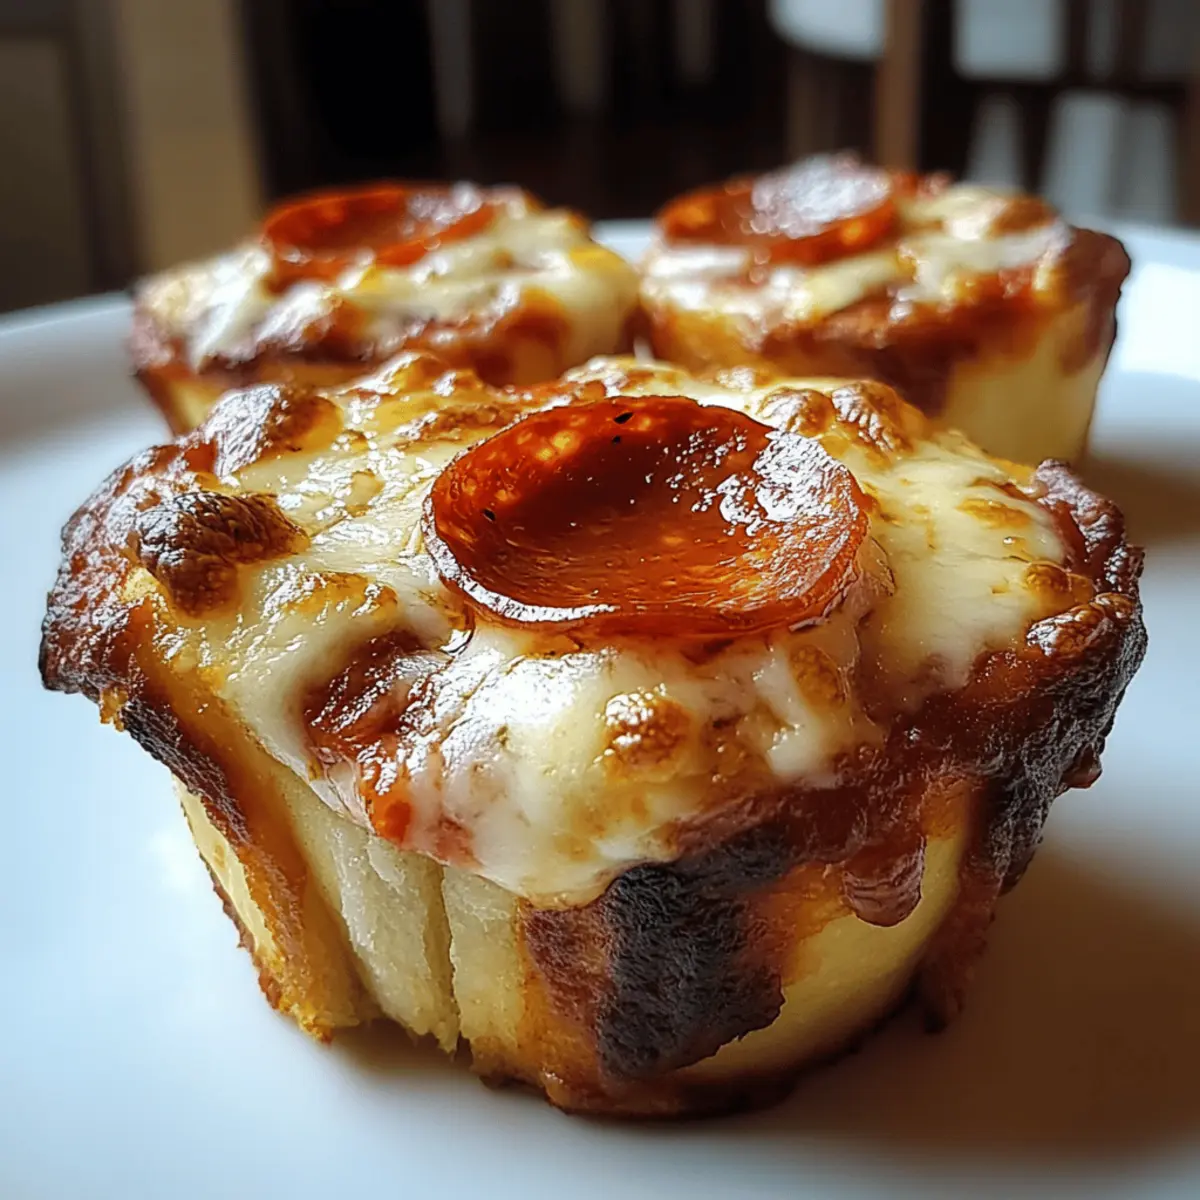
As I rummaged through my pantry on a lazy afternoon, I stumbled upon a roll of crescent dough, and suddenly, inspiration struck! What better way to elevate ordinary ingredients than by crafting irresistible pizza rolls with crescent rolls? These fun, customizable snacks are not only a surefire way to please a crowd but can also be made in under 30 minutes—perfect for unexpected guests or movie night cravings. Just imagine each golden, flaky bite oozing with gooey mozzarella and savory pepperoni, paired with your favorite dipping sauce. Whether you choose to stick to the classic or get creative with various fillings, this easy recipe will transform any gathering into a memorable feast. Ready to whip up something special? Let’s dive in!

Why Try Pizza Rolls with Crescent Rolls?

Easy to Make: The simplicity of this recipe means you can whip them up even on a busy weeknight. Just roll, bake, and enjoy!

Customizable Options: Mix and match your fillings—think zesty veggies or different cheeses like cheddar or feta. Our Buffalo Tofu with Caesar Salad offers another delicious spin on customization!

Crowd-Pleasing Snack: Perfect for parties or family movie nights, these delicious bites are always a hit.

Golden Perfection: Each roll is golden brown on the outside, providing a delightful contrast to the melty cheese and savory toppings inside.

Quick Cooking Time: Done in under 30 minutes, they're a fast fix for any craving. Want more quick recipes? Check out our Sweet Potatoes Black for another simple yet delectable dish!

Pizza Rolls with Crescent Rolls Ingredients

For the Filling

  • Crescent Roll Dough – This flaky pastry serves as the perfect base; feel free to swap it for puff pastry if desired.
  • Shredded Mozzarella Cheese – Grants that gooey, melted texture; cheddar or feta can also bring unique flavors.
  • Pepperoni Slices – Adds a classic savory bite; cooked sausage or assorted chopped veggies work as delicious alternatives.
  • Pizza Sauce – Essential for flavor and moisture; marinara sauce can make a tasty substitute when you’re out of pizza sauce.

For Dipping

  • Additional Pizza Sauce – Serves as a delightful accompaniment; optional for those who prefer their pizza rolls drier.

Get ready to create your unforgettable pizza rolls with crescent rolls!

Step‑by‑Step Instructions for Pizza Rolls with Crescent Rolls

Step 1: Preheat the Oven
Begin by preheating your oven to 375°F (190°C). While the oven warms up, take a baking sheet and line it with parchment paper to ensure the pizza rolls don't stick during baking. This preparation sets the stage for a perfectly baked treat!

Step 2: Prepare the Dough
Unroll the crescent roll dough flat on a clean surface, ensuring that the triangles are all facing the same direction. Gently press the seams together to avoid any gaps, which will help keep the delicious fillings secure inside the rolls. You’re already on the way to creating those irresistible pizza rolls!

Step 3: Assemble the Fillings
Place about 1 tablespoon of shredded mozzarella cheese at the center of each dough triangle, then add 2 slices of pepperoni atop the cheese. Finally, spoon a small dollop of pizza sauce on top of the pepperoni. This combination creates a mouthwatering filling that perfectly complements the flaky crescent roll exterior.

Step 4: Roll Up the Dough
Starting from the wide end of each triangle, carefully roll the dough toward the point, ensuring the filling is snugly enclosed. As you roll, make sure to pinch the edges to seal them securely, preventing any delicious cheese from oozing out during baking. Now, arrange the rolls seam-side down on the prepared baking sheet.

Step 5: Bake to Golden Perfection
Pop the baking sheet into the preheated oven and allow the pizza rolls to bake for 12-15 minutes. Keep a close eye on them; they’re done when they turn golden brown and are bubbling slightly at the edges. This golden crust signals that your pizza rolls with crescent rolls are ready to be devoured!

Step 6: Serve and Enjoy
Once baked, take the pizza rolls out of the oven and let them cool for a few minutes on the baking sheet. This resting time enhances the flavors and allows for safe handling. Serve them warm alongside additional pizza sauce for dipping, and watch as these tasty bites steal the show!

How to Store and Freeze Pizza Rolls with Crescent Rolls

Fridge: Place leftover pizza rolls in an airtight container. They can be stored in the fridge for up to 3 days, keeping their delicious flavors intact.

Freezer: Wrap each roll individually in plastic wrap, then place them in a freezer-safe bag. They can be frozen for up to 3 months, ready for a quick snack anytime.

Reheating: For optimal crispness, reheat pizza rolls in the oven at 350°F (175°C) for about 10 minutes. This method revives that golden exterior and gooey interior.

Make-Ahead: Assemble your pizza rolls with crescent rolls and freeze them before baking. This allows you to enjoy freshly baked treats whenever the craving strikes!

What to Serve with Irresistible Pizza Rolls with Crescent Rolls?

When planning the perfect snack spread, consider pairing these delightful bites with a variety of delicious sides to enhance your culinary experience.

  • Classic Caesar Salad: Crisp romaine, creamy dressing, and crunchy croutons add a fresh crunch that balances the richness of the pizza rolls.

  • Garlic Breadsticks: These warm, buttery sticks complement the savory flavors beautifully, perfect for dipping in pizza sauce.

  • Caprese Skewers: Juicy tomatoes, fresh basil, and mozzarella balls provide a refreshing contrast—ideal for a light bite between pizza roll indulgences.

  • Veggie Platter: Fresh carrots, celery, and bell peppers served with hummus or ranch dip offer a colorful, healthy side that brightens your snack table.

  • Tangy Coleslaw: The crisp and creamy elements of coleslaw create a satisfying texture contrast, making it a fun addition to your snack lineup.

  • Creamy Ranch Dip: A tangy, herby ranch dip will elevate your pizza rolls, providing a cool, creamy counterpart to the warm, cheesy goodness.

  • Sparkling Lemonade: A bubbly, refreshing drink perfectly complements the savory richness of pizza rolls, cleansing the palate with every sip.

  • Chocolate Chip Cookies: To satisfy your sweet tooth, these gooey treats make a delightful ending to your savory feast, creating a beautiful balance of flavors.

Choose a few of these options, and you’ll create an unforgettable spread that goes beyond just the irresistible pizza rolls with crescent rolls!

Expert Tips for Pizza Rolls with Crescent Rolls

  • Sealing the Dough: Ensure each roll is tightly sealed to prevent any cheese from leaking out while baking. Pinch the seams firmly before placing them on the baking sheet.

  • Flavor Boosters: Don't hesitate to add herbs like oregano or basil to your cheese mix for heightened flavor. Just a sprinkle can enhance your pizza rolls with crescent rolls dramatically!

  • Check Cooking Time: Ovens can vary, so check your pizza rolls a minute or two early to avoid burning, especially if you're using smaller rolls.

  • Cooling Time Counts: Allow the rolls to cool slightly before serving. This not only improves the taste but also helps prevent burning your mouth on hot cheese!

  • Experiment with Fillings: Mix up your fillings according to your family's taste preferences. Sauteed veggies or different proteins can add delicious variety.

Make Ahead Options

These irresistible pizza rolls with crescent rolls are perfect for meal prep enthusiasts! You can assemble the rolls up to 24 hours in advance; simply prepare them, place them on your baking sheet, cover tightly with plastic wrap, and refrigerate. For optimal quality, be sure to press the seams well to prevent leaks during baking. When you're ready to bake, no need to thaw—just pop them directly in the oven and add a couple of extra minutes to the baking time. Alternatively, you can freeze the assembled pizza rolls for up to 3 months. When you’re ready to enjoy, bake them straight from the freezer for a freshly baked snack that's just as delicious!

Pizza Rolls with Crescent Rolls Pairings

Looking to elevate your pizza rolls experience? Let’s explore some delightful sides and dips to complement these tasty snacks!

  • Marinara Dipping Sauce: A classic pairing that never fails. Rich and tangy, it brings out the best in your pizza rolls.
  • Garlic Butter Sauce: Melt some butter with minced garlic and parsley for a rich and aromatic dip. Perfect for enhancing those flaky, buttery flavors!
  • Fresh Salad: Serve your pizza rolls with a crisp garden salad drizzled with a zesty vinaigrette. The freshness balances out the indulgence of the rolls.
  • Stuffed Peppers: Add some variety with stuffed peppers as a side. They offer a pop of color and a different textural experience!
  • Veggie Platter: A tray of fresh veggies like carrots, cucumbers, and bell peppers can add a crunchy contrast to your cheesy pizza rolls, inviting more flavors into the mix.
  • Cheesy Garlic Bread: Why not lean into the cheesy goodness? A few slices of cheesy garlic bread can make this meal even more decadent!

These pairings will not only enhance the flavor of your pizza rolls but will create an immersive dining experience that satisfies all your senses. Enjoy making extraordinary memories around the table!

Pizza Rolls with Crescent Rolls Recipe FAQs

How do I select the best crescent roll dough?
Absolutely! When choosing crescent roll dough, look for packages that are fresh, without any visible dents or tears. Ensure there are no dark spots or leaks, which can compromise the dough's integrity. If you're feeling adventurous, you can also opt for reduced-fat versions or even make your own dough for a unique touch!

How should I store leftover pizza rolls?
Very simply! Place any leftover pizza rolls in an airtight container and store them in the refrigerator for up to 3 days. This helps to maintain their delicious flavors and flaky texture. When you're ready to enjoy them again, preheat your oven to 350°F (175°C) and bake for about 10 minutes to restore their golden crispiness.

Can I freeze pizza rolls with crescent rolls?
Absolutely! To freeze, wrap each assembled roll individually in plastic wrap to keep them protected from freezer burn. Then, place them all in a freezer-safe zip-top bag or container. They’ll be good for up to 3 months, and you can bake them directly from frozen—just add an extra 2-3 minutes to the baking time!

What should I do if my pizza rolls spill out during baking?
No worries—this can happen! If you notice cheese or filling leaking out while baking, it's likely because the seams weren’t sealed snugly. To prevent this, be sure to pinch the seams tightly before placing them on the baking sheet. If some do leak out, simply remove those bits once they cool a little; the rest will still be delicious!

Can I use different toppings or ingredients?
The more the merrier! Experimenting with different cheeses like cheddar or feta, or trying out veggies such as bell peppers or spinach adds fantastic variety to your pizza rolls. If you're accommodating dietary preferences or allergies, just consider alternatives like turkey pepperoni or plant-based cheese for a delightful twist that everyone can enjoy!

Pizza Rolls with Crescent Rolls

Delicious Pizza Rolls with Crescent Rolls for Quick Snacking

These Pizza Rolls with Crescent Rolls are a quick and customizable snack perfect for movie nights.
Print Recipe Pin Recipe
Prep Time 10 minutes mins
Cook Time 15 minutes mins
Total Time 25 minutes mins
Servings: 4 rolls
Course: Snacks
Cuisine: American
Calories: 250
Ingredients Equipment Method Nutrition Notes

Ingredients
  

For the Filling
  • 1 roll Crescent Roll Dough Can substitute with puff pastry
  • 1 cup Shredded Mozzarella Cheese Cheddar or feta can be used as alternatives
  • 10 slices Pepperoni Slices Cooked sausage or assorted chopped veggies are alternatives
  • 1/2 cup Pizza Sauce Marinara sauce can be a substitute
For Dipping
  • 1/2 cup Additional Pizza Sauce Optional for those preferring drier rolls

Equipment

  • Oven
  • Baking Sheet
  • Parchment Paper

Method
 

Step-by-Step Instructions
  1. Preheat the oven to 375°F (190°C) and line a baking sheet with parchment paper.
  2. Unroll the crescent roll dough flat on a clean surface and press the seams together.
  3. Place about 1 tablespoon of mozzarella cheese in the center of each triangle, top with pepperoni slices and a dollop of pizza sauce.
  4. Roll the dough from the wide end to the point and pinch the edges to seal.
  5. Bake for 12-15 minutes until golden brown and bubbling at the edges.
  6. Allow to cool slightly, then serve warm with additional pizza sauce.

Nutrition

Serving: 2rollsCalories: 250kcalCarbohydrates: 20gProtein: 10gFat: 15gSaturated Fat: 7gPolyunsaturated Fat: 1gMonounsaturated Fat: 3gCholesterol: 25mgSodium: 550mgPotassium: 200mgFiber: 1gSugar: 2gVitamin A: 300IUCalcium: 200mgIron: 1.5mg

Notes

Sealing the dough well prevents cheese leakage. Experiment with fillings to suit your taste.

Tried this recipe?

Let us know how it was!

Mediterranean Box: A Flavorful High-Protein Lunch You’ll Love

November 10, 2025 by Grace Snow Leave a Comment

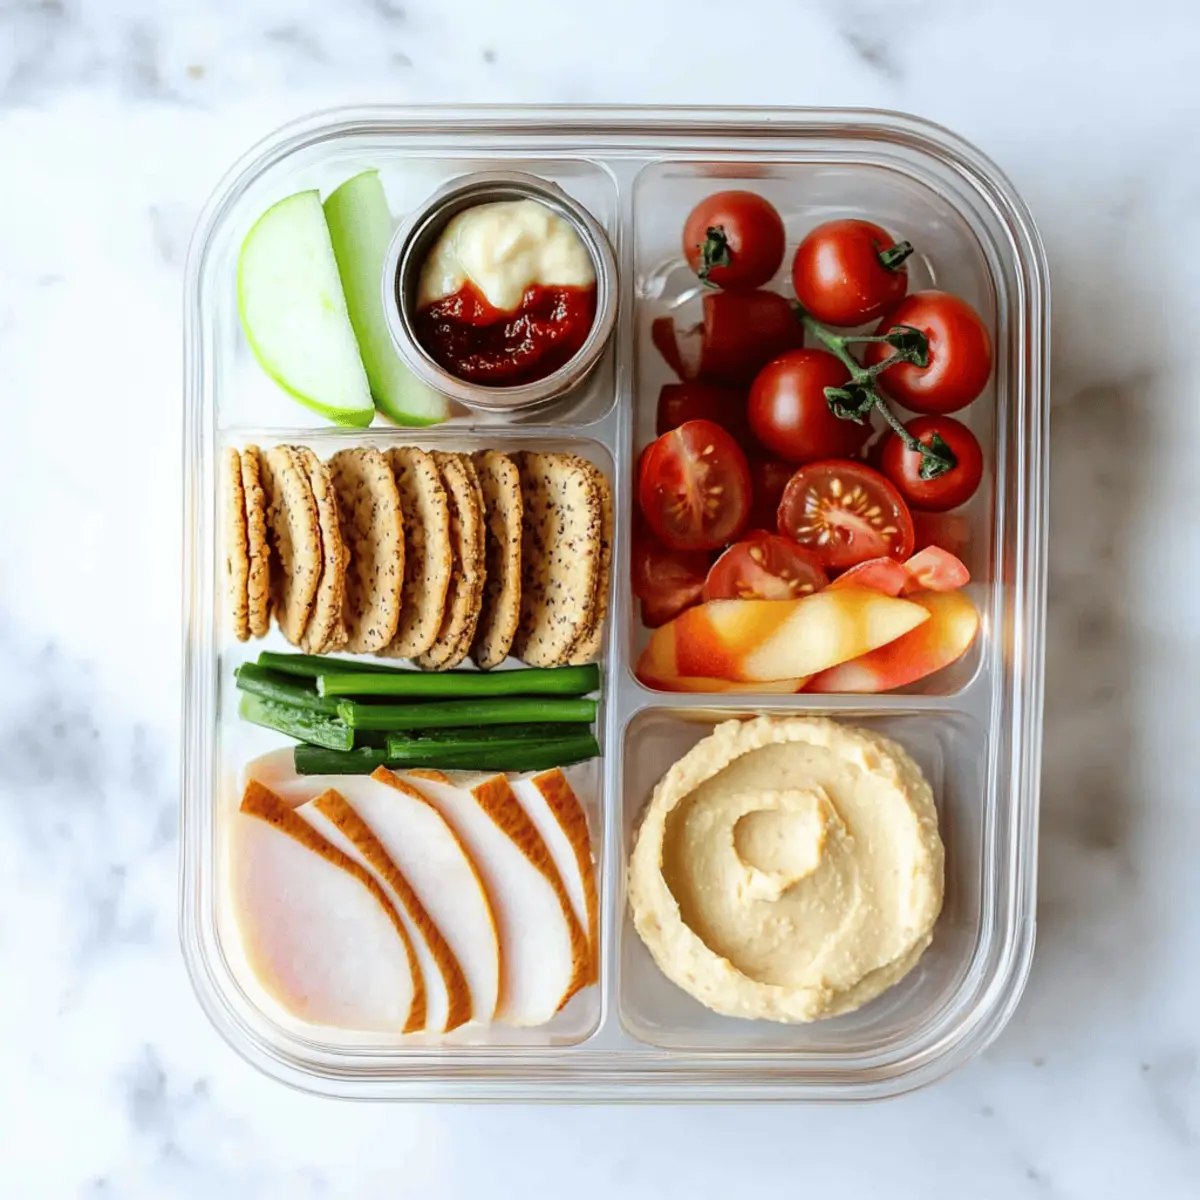
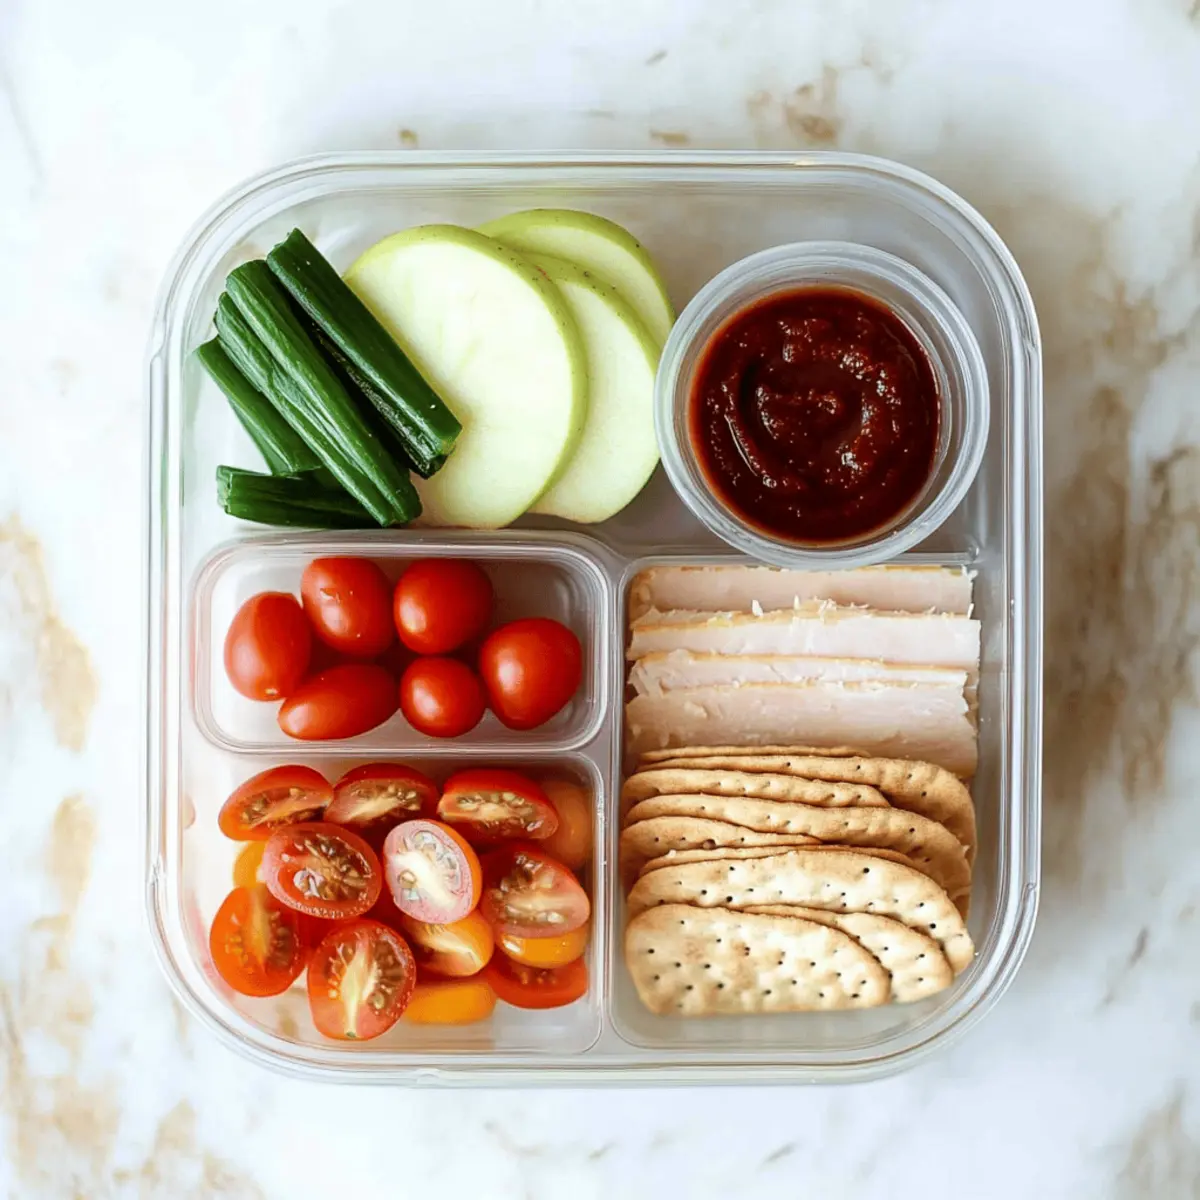
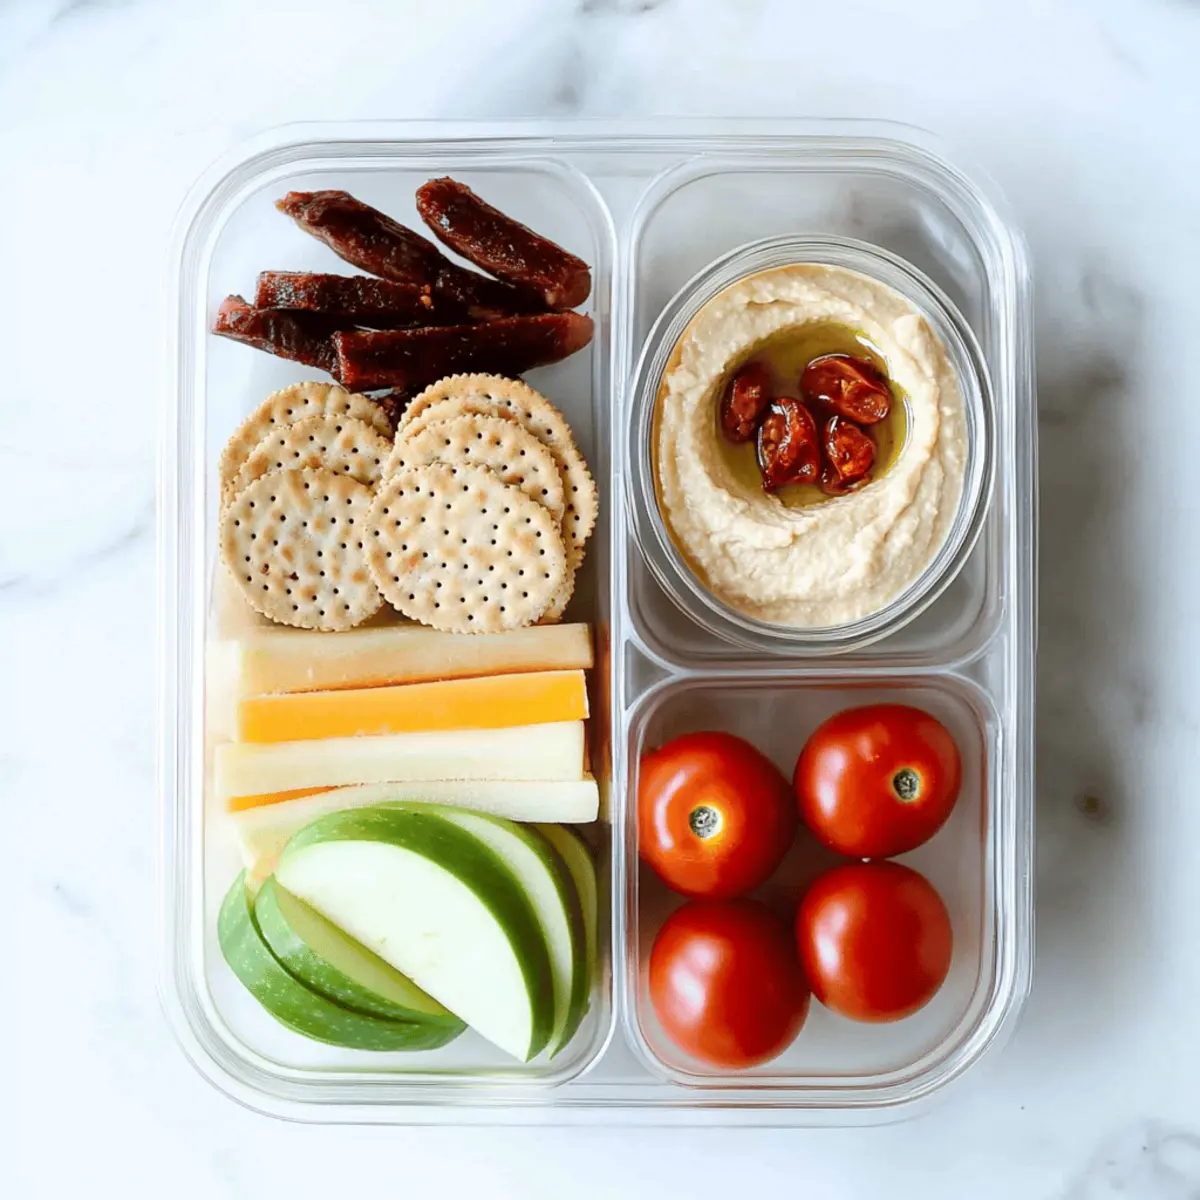
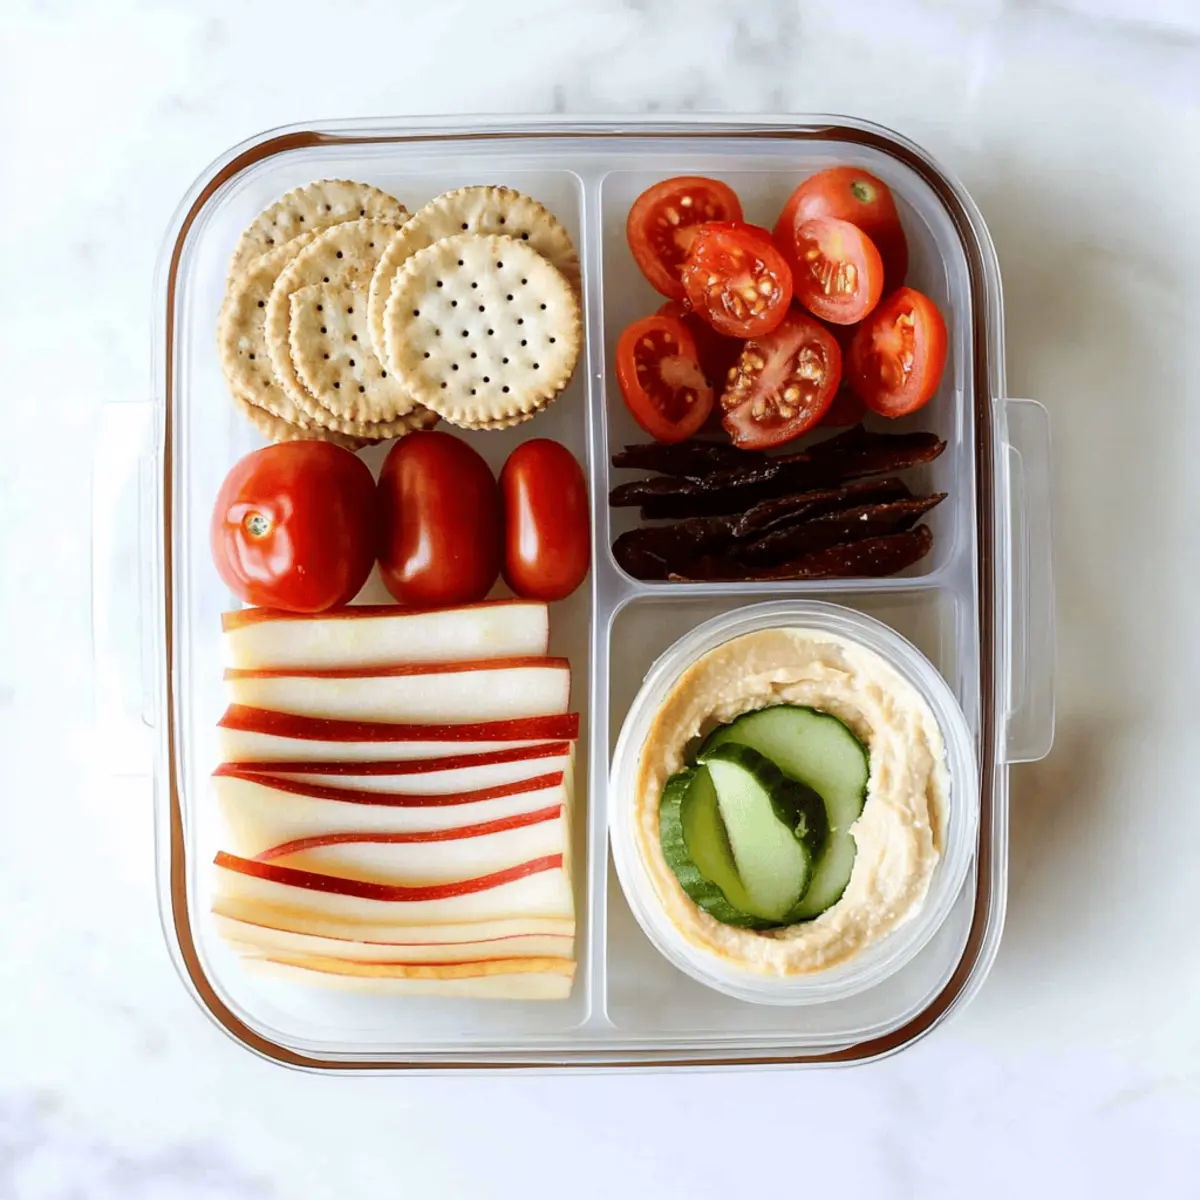
As I stood in the kitchen, contemplating my lunch, a wave of nostalgia hit me—remember those delightful, kid-friendly lunchables? Today, we’re giving them a grown-up makeover with these high-protein Mediterranean Box ideas! Perfectly crafted for busy schedules, these vibrant combinations are not only quick to assemble but also brimming with nutrition. Imagine enjoying a delicious mix of fresh veggies, savory proteins, and zesty dips, all packed into an easy-to-carry bento box. These adult lunchables make meal prep a breeze, ensuring you're fueled with energy and flavor throughout your busy day. Ready to elevate your lunch game and bring a touch of Mediterranean flair to your meals? Let’s dive into these scrumptious combinations!

Why Try a Mediterranean Box Lunch?

Bold flavors: The Mediterranean Box combines rich tastes from olives, tzatziki, and feta cheese that can transport your lunch from mundane to marvelous.
Nutrient-packed: Each bite offers a powerhouse of vitamins and protein—ideal for keeping hunger at bay.
Easy assembly: Who doesn’t love a no-cook meal? These lunchables assemble in under 10 minutes, perfect for those hectic mornings!
Versatile combinations: Mix and match your favorite ingredients, ensuring you never get bored. For ideas on other variations, check out our Adult Lunchables guide.
Crowd-pleaser: Whether at the office or a picnic, this lunch will impress friends and coworkers alike!

Mediterranean Box Ingredients

• Dive into vibrant flavors with these high-protein Mediterranean Box ingredients!

For the Protein

  • Grilled Chicken – Ideal for adding lean protein; marinate in olive oil and lemon for extra zest.
  • Hummus – A creamy source of protein and flavor; try different varieties like roasted red pepper or garlic.
  • Feta Cheese – Crumbled for a tangy kick; it pairs perfectly with veggies and adds richness.

For the Crunch

  • Whole Wheat Pita Chips – A satisfying crunch that complements dips; choose whole grain for added fiber.
  • Olives – Briny bites that enhance flavor profiles; they’re also a great source of healthy fats.

For the Veggies

  • Cucumber Slices – Crisp and refreshing; they provide hydration along with crunch.
  • Cherry Tomatoes – Sweet and juicy; a delightful addition that adds color and vitamins to your box.

For the Dips

  • Tzatziki – This yogurt-based sauce adds creaminess and Greek flair; it’s perfect for dipping veggies or pita chips.
  • Baba Ganoush – A smoky alternative to hummus; packed with flavor and nutritious eggplant.

For the Sweet Touch

  • Grapes – A natural sweet treat that balances savory flavors; choose red or green for extra pop!
  • Dried Figs – A chewy, sweet addition full of fiber and nutrients; they pair well with cheese and meats.

This Mediterranean Box offers a nutritious and delightful way to enjoy a high-protein lunch that’s both quick and easy to prepare!

Step‑by‑Step Instructions for Mediterranean Box

Step 1: Prepare the Proteins
Start by slicing your grilled chicken into bite-sized pieces for easy assembly in the Mediterranean Box. If using hummus, make sure it’s ready to go in a small container. Crumbled feta cheese also should be measured out, giving you colorful, protein-rich options that’ll delight your taste buds. Set these aside, ready for the next steps.

Step 2: Select the Crunch
Grab whole wheat pita chips and olives, placing them neatly in one section of your bento box. This combination adds satisfying crunch and a burst of flavor that pairs beautifully with your proteins. For an extra layer of nutrition, opt for whole grain pita chips that will complement the delicious dips you’re about to add.

Step 3: Slice the Veggies
Use a sharp knife to slice fresh cucumbers and cherry tomatoes. Aim for thin cucumber rounds and halved cherry tomatoes for easy picking. These colorful, refreshing veggies will not only enhance the visual appeal of your Mediterranean Box but also add a crunchy, hydrating element perfect for dipping in your sauces.

Step 4: Prepare the Dips
Take out tzatziki and baba ganoush, serving them in separate small containers. Their creamy textures and rich flavors create a perfect contrast to the crunchy pita chips and fresh veggies. Make sure to use a portion control container so you don't go overboard; each dip should be around two tablespoons.

Step 5: Add the Sweet Touch
Toss in a handful of grapes and a few dried figs into your Mediterranean Box for that sweet touch that balances out the savory flavors. These fruits will add natural sweetness and vital nutrients, making your lunch not only more enjoyable but also well-rounded and satisfying.

Step 6: Pack and Serve
Carefully arrange all the components in your bento box, keeping the proteins, crunch, veggies, dips, and sweet elements in separate sections. Ensure everything is well-contained for easy transport, and if desired, chill in the fridge until you’re ready to enjoy your homemade Mediterranean Box.

Mediterranean Box Variations & Substitutions

Feel free to get creative and make these Mediterranean Box ideas your own, bringing a burst of flavor and nutrition to your lunch!

  • Vegetarian Protein: Swap chicken for chickpeas tossed in olive oil and herbs for a hearty, plant-based option. Chickpeas add a satisfying texture and nutrition while keeping things simple and delicious.

  • Gluten-Free Crunch: Use gluten-free pita chips or carrot sticks for crunch if you’re avoiding gluten. This swap not only keeps the meal friendly for all dietary needs but also brings a nice freshness.

  • Spicy Kick: Add sliced jalapeños or a sprinkle of red pepper flakes to your hummus for an extra kick. This little touch of heat will transform your Mediterranean Box into a flavor explosion!

  • Herby Twist: Mix chopped parsley or dill into your feta cheese for a fresh herbaceous note. This simple addition brightens up the dish and adds a lovely garden aroma.

  • Different Dips: Try swapping tzatziki with a spicy harissa dip for a North African flair. This change can transport your taste buds while keeping protein levels high.

  • Seasonal Veggies: Use seasonal vegetables like bell peppers or radishes based on availability. They add vibrant colors and different textures, making every Mediterranean Box a new adventure.

  • Sweet Alternative: If grapes aren't your style, consider using apple slices or dried apricots for a different touch of sweetness. Each brings its unique flavor profile, keeping your lunches exciting.

Feel inspired? Discover even more ideas with our Adult Lunchables guide to keep your meals fresh and fun. Happy cooking!

What to Serve with Mediterranean Box?

Elevate your lunch experience with delightful pairings that complement the vibrant flavors of the Mediterranean Box.

  • Couscous Salad: Offers a fluffy, nutty texture; toss with veggies and herbs for added freshness.
  • Roasted Vegetables: Sweet and caramelized, these medleys enhance the earthy flavors of your box.
  • Chickpea Hummus Platter: Pair with colorful crudités for an extra protein punch and a refreshing crunch.
  • Greek Yogurt Parfait: A creamy dessert layered with fruits and nuts; it provides a perfect sweet end to your meal.
  • Sparkling Water with Lemon: Refreshing and zesty, this drink cleanses the palate and complements the Mediterranean theme.
  • Stuffed Grape Leaves: These savory bites packed with rice and herbs add a traditional touch to your lunch.
  • Mint Tea: A fragrant herbal drink that pairs beautifully with the spices and flavors found in your Mediterranean Box.
  • Pistachio and Apricot Mix: A sweet and salty snack that brings a delightful contrast to your savory lunch!
  • Dark Chocolate Squares: For a healthy post-lunch treat, rich and satisfying bites balance the vibrant meal beautifully.

Expert Tips for Mediterranean Box

  • Variety is Key: Rotate between different proteins like grilled chicken, chickpeas, or shrimp to keep your Mediterranean Box exciting and nutritious.

  • Pre-Prep Ingredients: Spend a little time on the weekend prepping your proteins and veggies. Having everything ready makes your busy weekdays a breeze.

  • Portion Control: Use small containers for dips to avoid overindulgence; aim for about two tablespoons per serving to keep calories in check while enjoying your high-protein lunch.

  • Freshness Focus: Keep your Mediterranean Box refrigerated until you're ready to eat, ensuring your fruits and veggies stay crisp and delicious.

  • Customize to Taste: Don’t hesitate to swap in your favorite ingredients or add new flavors. A touch of spicy feta or a sprinkle of herbs can elevate your Mediterranean Box to a gourmet treat.

Make Ahead Options

These Mediterranean Boxes are perfect for meal prep lovers! You can prepare all the components up to 3 days in advance, giving you the convenience of having ready-to-assemble lunches for your busy week. Start by slicing the grilled chicken and cucumbers, and crumbling the feta cheese. Store each component in separate airtight containers in the refrigerator to maintain freshness. When it’s time to serve, simply assemble your Mediterranean Box by placing the prepped proteins, crunch, veggies, and dips together. This simple prep not only saves you time but ensures you enjoy a delicious, nutritious lunch that tastes just as fresh, making it an ideal choice for anyone looking to prepare ahead.

How to Store and Freeze Mediterranean Box

Fridge: Keep your Mediterranean Box refrigerated and consume within 5 days to maintain freshness and flavor. Use airtight containers to prevent moisture loss and keep ingredients crisp.

Room Temperature: If you plan to eat your lunchables within 2 hours, they can safely sit at room temperature. However, avoid leaving them out longer to prevent spoilage.

Freezer: While it's not recommended to freeze the entire Mediterranean Box, individual components like the dips can be frozen for up to 2 months. Thaw in the fridge before use to retain quality.

Reheating: No reheating needed! Just assemble your Mediterranean Box right before you're ready to eat, and enjoy the fresh, vibrant flavors of a high-protein meal!

Mediterranean Box Recipe FAQs

What proteins work best for my Mediterranean Box?
You can choose from a variety of proteins such as grilled chicken, hummus, or feta cheese. For a vegetarian option, try chickpeas or a mix of beans. Marinating grilled chicken in olive oil and lemon enhances flavor. Don’t hesitate to mix and match based on your preferences!

How long can I store my Mediterranean Box in the fridge?
Absolutely! Keep your Mediterranean Box refrigerated and consume it within 5 days for the best freshness and flavor. Store everything in airtight containers to prevent moisture loss, ensuring that your vegetables remain crisp and your dips stay fresh.

Can I freeze components of my Mediterranean Box?
Yes! While the entire Mediterranean Box isn't suitable for freezing, you can freeze individual items, specifically the dips like tzatziki and baba ganoush. Place them in airtight containers or freezer bags, and they’ll keep well for up to 2 months. Thaw them in the fridge overnight before using them to maintain quality.

How do I keep my Mediterranean Box fresh during the day?
If you plan to eat your Mediterranean Box within 2 hours, you can safely keep it at room temperature. However, if you’ll be out longer, it’s best to keep it chilled in a cooler or insulated lunch bag with ice packs. This way, your fruits and vegetables won't lose their crunch, and everything stays delicious!

What if I have food allergies or dietary restrictions?
Very! Feel free to customize your Mediterranean Box to fit dietary needs. If you're lactose intolerant, swap feta cheese for a dairy-free option or omit it altogether. If gluten is an issue, choose gluten-free pita chips. Remember to double-check all ingredient labels for allergens!

What should I do if my dips are too watery?
If your dips like tzatziki or baba ganoush are too watery, you can thicken them up easily. For tzatziki, strain the yogurt using cheesecloth to remove excess moisture. Alternatively, blend in a small amount of chickpea flour or cornstarch to the mix, stirring it until you achieve your desired consistency. This can elevate the texture, making your Mediterranean Box even more enjoyable!

Mediterranean Box

Mediterranean Box: A Flavorful High-Protein Lunch You’ll Love

Discover the Mediterranean Box, a high-protein lunch option that combines vibrant flavors and nutrition, perfect for busy lifestyles.
Print Recipe Pin Recipe
Prep Time 10 minutes mins
Total Time 10 minutes mins
Servings: 2 boxes
Course: Snacks
Cuisine: Mediterranean
Calories: 450
Ingredients Equipment Method Nutrition Notes

Ingredients
  

For the Protein
  • 1 cup Grilled Chicken Marinate in olive oil and lemon for extra zest.
  • 1/2 cup Hummus Try different varieties like roasted red pepper or garlic.
  • 1/4 cup Feta Cheese Crumbled for a tangy kick.
For the Crunch
  • 1 cup Whole Wheat Pita Chips Choose whole grain for added fiber.
  • 1/2 cup Olives A great source of healthy fats.
For the Veggies
  • 1 cup Cucumber Slices Crisp and refreshing.
  • 1/2 cup Cherry Tomatoes Sweet and juicy.
For the Dips
  • 1/4 cup Tzatziki Perfect for dipping veggies or pita chips.
  • 1/4 cup Baba Ganoush Packed with flavor and nutritious eggplant.
For the Sweet Touch
  • 1 cup Grapes Choose red or green.
  • 4 pieces Dried Figs Pairs well with cheese and meats.

Equipment

  • bento box

Method
 

Step-by-Step Instructions for Mediterranean Box
  1. Start by slicing your grilled chicken into bite-sized pieces for easy assembly in the Mediterranean Box. If using hummus, make sure it’s ready to go in a small container. Crumbled feta cheese also should be measured out.
  2. Grab whole wheat pita chips and olives, placing them neatly in one section of your bento box.
  3. Use a sharp knife to slice fresh cucumbers and cherry tomatoes.
  4. Take out tzatziki and baba ganoush, serving them in separate small containers.
  5. Toss in a handful of grapes and a few dried figs into your Mediterranean Box.
  6. Carefully arrange all the components in your bento box, keeping the proteins, crunch, veggies, dips, and sweet elements in separate sections.

Nutrition

Serving: 1boxCalories: 450kcalCarbohydrates: 40gProtein: 25gFat: 20gSaturated Fat: 5gPolyunsaturated Fat: 3gMonounsaturated Fat: 10gCholesterol: 50mgSodium: 800mgPotassium: 800mgFiber: 10gSugar: 8gVitamin A: 8IUVitamin C: 20mgCalcium: 15mgIron: 10mg

Notes

This Mediterranean Box provides a nutritious and delightful way to enjoy a high-protein lunch that’s both quick and easy to prepare.

Tried this recipe?

Let us know how it was!

Baked Broccoli Cheese Balls: Crispy Cheesy Goodness Awaits

November 10, 2025 by Grace Snow Leave a Comment

While rummaging through my fridge the other day, I stumbled upon a small bag of broccoli lurking in the back. Instantly, inspiration struck! What if I transformed this humble vegetable into something extraordinary? Enter my Baked Broccoli Cheese Balls—a delightful fusion of crunchy, cheesy goodness, designed to convert even the pickiest eaters. Not only are they super easy to whip up in just 15 minutes, but they also make for a mouthwatering appetizer or satisfying snack that everyone will love. The combination of sharp cheddar and Parmesan encasing tender broccoli centers brings joy to family dinners and gatherings alike. Ready to indulge in this cheesy adventure with me? Let’s dive into the recipe!

Why Are These Cheese Balls a Must-Try?

Crispy Exterior: These baked broccoli cheese balls boast a perfectly crunchy outside that gives way to a gooey, cheesy center. Flavor-Packed: With a delightful mix of cheddar and Parmesan, each bite bursts with savory goodness. Super Easy: Ready in just 15 minutes, they’re a quick fix for any craving. Versatile Delight: Serve them as appetizers, snacks, or even sides for your favorite meals. Crowd-Pleaser: Loved by kids and adults alike, they’re a fantastic way to sneak in some veggies! If you’re inspired by transforming veggies into fun bites, you might also want to check out Potato Blue Cheese or Matcha Baked Doughnuts for more culinary adventures.

Baked Broccoli Cheese Balls Ingredients

For the Base
• Broccoli florets – Finely chopped; provides a healthy base and texture.
• Breadcrumbs – For binding; can substitute with gluten-free breadcrumbs for a gluten-free version.
• Shredded cheddar cheese – Adds creaminess and flavor; substitute with any cheese that melts well, like mozzarella.
• Grated Parmesan cheese – Enhances the savory flavor profile; nutritional yeast can be used for a vegan alternative.

For Binding
• Eggs – Binds the ingredients together; flax eggs can be used as a vegan substitute.
• All-purpose flour – Aids in binding; can use almond flour for a gluten-free option.

For Seasoning
• Garlic powder – Adds essential flavor; fresh minced garlic can enhance taste even more.
• Onion powder – For seasoning; fresh minced onion can also be used for added depth.
• Salt & Pepper – To taste; essential for flavor enhancement.

For Preparation
• Cooking spray – To grease the baking sheet for easy removal after cooking.

These Baked Broccoli Cheese Balls are a fantastic way to incorporate veggies into your snacking repertoire, ensuring everyone will love them!

Step‑by‑Step Instructions for Baked Broccoli Cheese Balls

Step 1: Preheat the Oven
Start by preheating your oven to 400°F (200°C). This temperature is ideal for achieving a crispy, golden-brown exterior on your baked broccoli cheese balls. While the oven warms up, you can prepare the other ingredients, ensuring everything is ready for assembly.

Step 2: Prep the Broccoli
In a saucepan, steam the finely chopped broccoli florets for 3 to 5 minutes until they are tender-crisp and vibrant green. This quick steaming process enhances the broccoli's flavor while retaining its nutrients. Allow it to cool slightly before chopping it more finely, which will help distribute the flavor in your baked broccoli cheese balls.

Step 3: Combine Ingredients
In a large mixing bowl, combine the cooled, finely chopped broccoli with breadcrumbs, shredded cheddar cheese, grated Parmesan cheese, eggs, and all-purpose flour. Sprinkle in the garlic powder, onion powder, salt, and pepper to enhance the flavor. Use a spatula or your hands to mix everything together until it's well combined, creating a cohesive mixture that will hold its shape.

Step 4: Form the Balls
Take small portions of the mixture and roll them into 1-inch balls using your hands. Place each ball on a parchment-lined or lightly greased baking sheet, ensuring they are evenly spaced to allow for proper air circulation. The formed balls should be compact to prevent them from falling apart during baking.

Step 5: Bake to Perfection
Slide the baking sheet into the preheated oven and bake the broccoli cheese balls for 20 to 25 minutes, or until they are golden brown and crispy around the edges. For an extra crunchy texture, you can turn on the broiler for an additional 1 to 2 minutes—just keep an eye on them to avoid burning.

Step 6: Cool & Serve
Remove the baking sheet from the oven and let the baked broccoli cheese balls cool for a few minutes. This brief cooling time allows them to firm up. Serve these delightful bites warm, paired with marinara or ranch dip for an irresistible treat that's sure to please everyone!

How to Store and Freeze Baked Broccoli Cheese Balls

Fridge: Place leftover baked broccoli cheese balls in an airtight container and store them in the fridge for up to 3 days. This keeps them fresh and ready for quick snacking.

Freezer: To freeze, allow the cheese balls to cool completely, then arrange them in a single layer on a baking sheet. Once frozen solid, transfer them to a freezer-safe bag or container for up to 3 months.

Reheating: For the best texture, reheat from frozen in an air fryer at 350°F (175°C) for about 5-7 minutes, or bake in a preheated oven at 375°F (190°C) for 10-15 minutes until heated through.

Thawing: If you prefer to thaw, let the cheese balls sit in the fridge overnight before reheating, ensuring they maintain their delightful texture.

What to Serve with Baked Broccoli Cheese Balls

Elevate your snacking experience with these versatile bites that pair beautifully with an array of delicious accompaniments.

  • Creamy Ranch Dip: The cool, tangy flavor of ranch complements the cheesy goodness, making every bite a delightful adventure.

  • Marinara Sauce: This classic pairing enhances the savory element of the cheese balls, providing a rich, satisfying dip that kids and adults will adore.

  • Garlic Bread: Crispy, buttery garlic bread adds a robust layer of flavor and texture that balances the lightness of the cheese balls. Slice up a loaf for a hearty side!

  • Fresh Salad: A crunchy salad with a zesty vinaigrette refreshes the palate and brings a vibrant contrast to the richness of the cheese balls.

  • Steamed Green Beans: Tender, lightly seasoned green beans add color and a pleasant crunch, completing your meal with a healthy touch.

  • Sweet Potato Fries: The natural sweetness of crispy, roasted sweet potato fries creates a wonderful contrast to the savory cheese balls, perfect for a playful side dish.

  • Wine Pairing: A chilled Sauvignon Blanc or a light Pinot Grigio can enhance the flavors and turn your snack into an elegant affair.

  • Chocolate Chip Cookies: For a fun dessert finale, serve up soft, warm cookies that contrast the savory bites you've just enjoyed, satisfying every sweet tooth!

Baked Broccoli Cheese Balls Variations

Feel free to get creative with this recipe and tailor it to your taste preferences!

  • Gluten-Free: Swap breadcrumbs for gluten-free alternatives to keep it celiac-friendly without sacrificing flavor.
  • Spicy Kick: Add red pepper flakes or a diced jalapeño for a delightful heat that’ll excite your taste buds.
  • Herb-Infused: Incorporate fresh herbs like basil or dill into the mix for a refreshing flavor twist that brightens the cheese balls.
  • Cheesy Twist: Experiment with different cheeses, such as pepper jack or goat cheese, for unique flavor variations. The melting style and taste can transform these cheese balls!
  • Oven-Fried Texture: For an extra crispy experience, dip the balls in egg wash followed by cornmeal before baking. This creates a delicious crunch!
  • Mix-in Veggies: Enhance the nutrition by adding finely diced carrots or bell peppers to the mix. The extra color and taste will elevate the overall experience.
  • Zesty Dips: Serve with a lemon-garlic yogurt dip or a spicy sriracha-honey mayo to complement the cheesy bites perfectly.
  • Make Ahead: Prepare and freeze before baking for quick snacks later. You can pop them in the oven anytime for warm, crispy goodness!

As you explore these variations, don’t forget that you can pair these delicious bites with a refreshing Jello Salad Cottage for a colorfully vibrant meal! Or perhaps try serving them alongside some exquisite Potato Blue Cheese as a delightful trio for your next gathering!

Expert Tips for Baked Broccoli Cheese Balls

  • Prep Ahead: Prepare the mixture and shape into balls up to 8 hours prior. Just bake straight from the fridge for quick serving.
  • Use a Food Processor: Save time and effort by pulsing your broccoli florets in a food processor for a consistent chop, ensuring even distribution in your baked broccoli cheese balls.
  • Freezing Secrets: After baking, cool your cheese balls completely. Freeze them individually on a sheet, then reheat in an air fryer at 350°F for that fresh-out-of-the-oven taste.
  • Don’t Overmix: Mix just until combined to keep the texture light and airy. Overmixing can lead to dense cheese balls.
  • Perfect Seasoning: Adjust garlic and onion powder according to your taste; fresh ingredients might require slight changes in quantity for the best flavor.

Make Ahead Options

These Baked Broccoli Cheese Balls are perfect for meal prep! You can prepare the mixture and shape it into balls up to 8 hours in advance. Simply store them in the fridge on a baking sheet covered with plastic wrap to keep them fresh. When you're ready to bake, just pop them straight into the preheated oven without thawing—this helps maintain their crispy texture. For longer storage, you can freeze formed balls for up to 3 months; reheat them from frozen in an air fryer at 350°F for about 5-7 minutes, ensuring they’re just as delicious as when freshly made. Enjoy hassle-free snacking any time!

Baked Broccoli Cheese Balls Recipe FAQs

What are the best ways to select fresh broccoli?
Absolutely! Look for bright green broccoli florets with tight, compact heads. Avoid any that have dark spots all over or yellowing leaves, as these can indicate over-ripeness. Fresh broccoli should feel firm to the touch, ensuring you're getting the best flavor for your Baked Broccoli Cheese Balls.

How should I store leftover Baked Broccoli Cheese Balls?
I recommend placing your leftover cheese balls in an airtight container in the fridge. They will stay fresh for up to 3 days. Just make sure they are completely cool before sealing the container to prevent condensation, which can make them soggy.

Can I freeze Baked Broccoli Cheese Balls?
Yes! After baking, allow the cheese balls to cool completely. Then, lay them in a single layer on a baking sheet and freeze until solid—about 1-2 hours. Once frozen, transfer them to a freezer-safe bag or container, and they can last for up to 3 months. This method makes reheating easy and keeps them crispy!

What should I do if my cheese balls fall apart while baking?
Very! If your Baked Broccoli Cheese Balls fall apart, it may be due to the mixture being too wet. Always make sure to drain excess moisture from the steamed broccoli. You can also add a bit more flour or breadcrumbs to help bind the ingredients together. Forming the balls tightly before baking can also help!

Are Baked Broccoli Cheese Balls suitable for those with dietary restrictions?
Absolutely! For a gluten-free option, simply use gluten-free breadcrumbs and almond flour. If you’re looking for a vegan alternative, you can switch out the eggs for flax eggs (1 tablespoon of ground flaxseed mixed with 2.5 tablespoons of water, set for 5 minutes) and use nutritional yeast instead of cheese. Always check the packaging of all ingredients to ensure they meet dietary needs.

How long can I keep Baked Broccoli Cheese Balls in the freezer?
I often find that these cheese balls hold up beautifully in the freezer! Stored correctly, they can last up to 3 months. Just remember to reheat from frozen for that optimal crispiness!

Baked Broccoli Cheese Balls

Baked Broccoli Cheese Balls: Crispy Cheesy Goodness Awaits

Discover the delicious Baked Broccoli Cheese Balls, a perfect blend of broccoli, cheeses, and spices that transforms veggies into a delightful snack.
Print Recipe Pin Recipe
Prep Time 15 minutes mins
Cook Time 25 minutes mins
Total Time 40 minutes mins
Servings: 4 balls
Course: Snacks
Calories: 180
Ingredients Equipment Method Nutrition Notes

Ingredients
  

For the Base
  • 2 cups Finely chopped broccoli florets Provides a healthy base and texture.
  • 1 cup Breadcrumbs Can substitute with gluten-free breadcrumbs for a gluten-free version.
  • 1 cup Shredded cheddar cheese Adds creaminess and flavor; substitute with mozzarella for variation.
  • 0.5 cup Grated Parmesan cheese Enhances the savory flavor profile; use nutritional yeast for a vegan alternative.
For Binding
  • 2 large Eggs Binds the ingredients; flax eggs can be used as a vegan substitute.
  • 0.5 cup All-purpose flour Can use almond flour for gluten-free option.
For Seasoning
  • 1 teaspoon Garlic powder Essential flavor addition.
  • 1 teaspoon Onion powder Adds depth to seasoning.
  • to taste Salt & Pepper Essential for flavor enhancement.
For Preparation
  • as needed Cooking spray To grease the baking sheet for easy removal.

Equipment

  • large mixing bowl
  • Baking Sheet
  • Saucepan
  • Parchment Paper

Method
 

Step-by-Step Instructions
  1. Preheat your oven to 400°F (200°C).
  2. Steam the finely chopped broccoli florets for 3 to 5 minutes until tender-crisp.
  3. Combine the broccoli, breadcrumbs, cheddar cheese, Parmesan cheese, eggs, and flour in a mixing bowl. Add garlic powder, onion powder, salt, and pepper.
  4. Roll the mixture into 1-inch balls and place on a baking sheet.
  5. Bake for 20 to 25 minutes or until golden brown. Optionally broil for an extra 1 to 2 minutes.
  6. Let cool for a few minutes before serving with marinara or ranch dip.

Nutrition

Serving: 4ballsCalories: 180kcalCarbohydrates: 15gProtein: 7gFat: 10gSaturated Fat: 5gPolyunsaturated Fat: 1gMonounsaturated Fat: 2gCholesterol: 70mgSodium: 300mgPotassium: 200mgFiber: 2gSugar: 1gVitamin A: 500IUVitamin C: 30mgCalcium: 200mgIron: 1mg

Notes

These Baked Broccoli Cheese Balls are a fantastic way to incorporate veggies into your snacking repertoire, ensuring everyone will love them!

Tried this recipe?

Let us know how it was!

Irresistible Irish Rarebit: Your New Favorite Comfort Food

October 28, 2025 by Grace Snow Leave a Comment

As I stood in my kitchen, the aroma of melting cheese started to swirl around me, evoking memories of cozy afternoons spent indulging in comforting meals. Today, I’m excited to share my take on Irish Rarebit, an irresistible twist on the classic cheese-on-toast dish. This delightful recipe combines rich Irish cheddar with zesty mustard and crunchy gherkins, creating a quick meal that’s perfect for light lunches or as a warming appetizer. Not only is it a crowd-pleaser that embraces the art of simplicity, but it’s also incredibly versatile; you can easily customize it to suit your taste. Whether you’re treating yourself on a cozy night in or celebrating St. Patrick’s Day with friends, this plate of creamy goodness is bound to bring smiles. Ready to elevate your cheese game? Let’s dive into making this scrumptious Irish Rarebit together!

Why Is Irish Rarebit So Irresistible?

Comforting: This dish offers a warm, cheesy embrace, perfect for those chilly evenings when you crave a taste of home.
Quick to Make: With minimal prep and cook time, this recipe can be ready in a flash, making it ideal for busy weeknights or spontaneous gatherings.
Customizable: Feel free to experiment with toppings and variations; add crispy bacon or switch cheeses for a unique flavor twist.
Crowd-Pleasing: Serve it at your next get-together or special occasion, and watch as your guests relish every last bite! Enhance it with a side salad for a balanced meal or keep it simple as a delightful snack. Trust me, this is a dish you won’t soon forget!

Irish Rarebit Ingredients

For the Cheese Sauce
• Irish Cheddar – Gives a sharp and rich flavor; consider using mature cheddar for a similar taste.
• Mustard – Adds a nice heat and acidity; you can try Dijon or wholegrain mustard based on what you like.
• Gherkins – Provides crunch and tang; dill pickles can be a great substitute or you can omit them for milder flavor.

For the Base
• Bread – Serves as the foundation; opt for whole-grain for added fiber and nutrients.
• Butter (optional) – Enhances the richness of the dish; switch to olive oil for a healthier alternative if desired.

Feel free to customize these ingredients to create a unique version of Irish Rarebit that suits your palate!

Step‑by‑Step Instructions for Irish Rarebit

Step 1: Prepare the Cheese Sauce
Start by melting 2 tablespoons of butter in a medium saucepan over low heat. Once melted, whisk in 1 tablespoon of your chosen mustard until well combined. Gradually add 1 cup of grated Irish cheddar, stirring continuously for about 3-4 minutes until the cheese completely melts into a creamy sauce. Remove from heat once you have a smooth mixture, which should be gooey and luscious.

Step 2: Add Gherkins
Next, chop about 2-3 gherkins into small pieces and stir them into the cheese sauce. This will introduce a delightful crunch and tanginess to the Irish Rarebit. Give the mixture a good stir to ensure the gherkins are evenly distributed, enhancing the flavor profile. Set the sauce aside while you prepare the bread.

Step 3: Toast the Bread
While the cheese sauce cools slightly, preheat your oven's broiler. Take 2-4 slices of whole-grain bread and lightly toast them in a toaster or under the broiler for 2-3 minutes. The goal is to achieve a golden brown hue on both sides of the bread, providing a sturdy base for the creamy cheese sauce that will follow.

Step 4: Assemble the Toast
Once the bread is toasted, place the slices on a baking sheet lined with parchment paper. Carefully spoon the cheesy mixture over each slice, making sure to thoroughly cover them for that delicious cheesy experience. Don’t be shy with the sauce—it’s the star of the show and should look indulgent and appetizing.

Step 5: Broil
Slide the baking sheet under the broiler and cook for 1-2 minutes. Keep a close eye on the bread, as the cheese should bubble up and develop a golden crust. Remove the Irish Rarebit from the oven when the cheese is beautifully golden and bubbly, perfect for enjoying soon after!

Step 6: Serve
Allow the Irish Rarebit to cool for just a minute before serving. Optionally, garnish with freshly chopped herbs such as parsley or chives for an extra touch of flavor and color. You can pair it with a simple green salad or extra pickles on the side to balance the richness, and enjoy!

What to Serve with Irish Rarebit

Elevate your dining experience with delightful side dishes that complement the irresistible warmth of this cheesy comfort food.

  • Simple Green Salad: A fresh, crisp salad with light vinaigrette provides a refreshing contrast to the richness of the rarebit.
  • Crispy Fried Potatoes: Golden, fluffy fries add a satisfying crunch, making an indulgent pairing that enhances the cozy feel of your meal.
  • Pickled Vegetables: Bright, tangy pickles or a medley of pickled veggies cut through the creaminess, giving a delightful pop of flavor.
  • Roasted Brussels Sprouts: Seasoned and caramelized, these veggies add a savory note, balancing the richness of the cheese beautifully.
  • Tomato Soup: A classic pairing, this warming soup provides both comfort and a dose of acidity that complements the savory toast.
  • Guinness Stout: For a perfect drink pairing, enjoy the deep flavors of Guinness, enhancing the experience with hints of malt and cream.

These side options not only create a full meal, but they also invite your family and friends to gather around the table, sharing laughter and warmth over mouthwatering bites!

Expert Tips for Irish Rarebit

• Perfect Timing: Watch the broiling closely—it's easy to overcook! The cheese should be bubbly but not burnt for the best Irish Rarebit experience.

• Cheese Matters: Use finely grated Irish cheddar for a smoother melting sauce. This prevents clumping and ensures each bite is creamy.

• Sauce Variability: Don't hesitate to tweak the cheese sauce! Adding a splash of Guinness gives extra depth of flavor—perfect for a festive twist.

• Bread Choice: Choose sturdier bread, like whole-grain, to hold the weight of the rich cheese. Avoid soft white bread, which can get soggy.

• Batch Prep: Make the cheese sauce in advance, refrigerate, and reheat for quick assembly. This way, a delicious Irish Rarebit is always just moments away!

• Texture Balance: Add crunch by serving with a salad or fried onions as a topping, enhancing the creamy goodness with satisfying textures.

Make Ahead Options

These Irish Rarebit sandwiches are perfect for meal prep enthusiasts! You can prepare the cheese sauce up to 3 days in advance; simply follow the instructions to melt the butter, whisk in the mustard, and add the grated Irish cheddar, then allow it to cool before storing it in an airtight container in the refrigerator. As you prepare to serve, toast your bread as directed, reheat the cheese sauce on low until warm, then assemble and broil for just a couple of minutes. This way, you'll enjoy the same rich, creamy goodness without the last-minute rush, making your mealtime as delightful as it is effortless!

Storage Tips for Irish Rarebit

Fridge: Store any leftover Irish Rarebit in an airtight container for up to 3 days. Reheat in the oven to restore that inviting cheesiness.

Freezer: You can freeze the cheese sauce separately for up to 2 months. Thaw in the fridge overnight and reheat gently before serving over fresh toast.

Toast Storage: Avoid storing assembled rarebit with the toast, as the bread will become soggy. Instead, keep it separate until ready to enjoy!

Reheating: For best results, reheat under the broiler for about 1-2 minutes until bubbly and golden, just like the first time!

Irish Rarebit Variations & Substitutions

Feel free to get creative with your Irish Rarebit and make it your own with these delicious options!

  • Cheese Swap: Use Gruyère or smoked cheese for a deeper flavor that adds an exciting twist to the classic dish.

  • Bacon Lover: Crumble crispy cooked bacon into the cheese sauce for a savory, smoky flavor that will delight meat lovers.

  • Vegetarian Delight: Replace gherkins with caramelized onions for a naturally sweet counterpart that complements the richness of the cheese.

  • Heat It Up: Add a pinch of red pepper flakes or jalapeños for a spicy kick, perfect for those who enjoy a bit of heat in their comfort food.

  • Herbaceous Boost: Incorporate fresh herbs like thyme or rosemary into the cheese sauce for a fresh aroma and taste that elevates this simple dish.

  • Creamier Texture: Mix in a splash of heavy cream or sour cream to the cheese sauce before broiling for an extra luscious finish.

  • Whole Grain Upgrade: Opt for multigrain or sourdough bread instead of whole-grain to enhance flavors and add a chewy texture that balances the creaminess.

  • Try Guinness: Add a dash of Guinness to the cheese sauce for an authentic Irish flavor that gives a delightful depth to your Rarebit experience.

Discovering variations is part of the joy of cooking! If you want more ideas, check out these tasty alternatives or side dishes to create the perfect meal to remember. Enjoy your cooking adventure!

Irish Rarebit Recipe FAQs

What type of bread is best for Irish Rarebit?
I recommend using whole-grain bread for its sturdiness and added fiber, which perfectly supports the rich cheese topping. Avoid soft white bread, as it tends to become soggy under the creamy sauce.

How should I store leftover Irish Rarebit?
Store any leftover Irish Rarebit in an airtight container in the fridge for up to 3 days. If you want to preserve that delightfully cheesy texture, reheat it in the oven. Just be patient and allow the cheese to warm up slowly; it’ll be worth the wait!

Can I freeze the cheese sauce for later use?
Absolutely! You can freeze the cheese sauce separately for up to 2 months. Simply place it in an airtight container, and when you’re ready to enjoy it, thaw it in the fridge overnight. When reheating, do so gently on the stovetop until it's warmed through and creamy again.

What if my cheese sauce is too thick?
If you find your cheese sauce is thicker than desired, don’t worry! Just add a splash of milk or cream while reheating to thin it out. Stir continuously until you achieve that luscious and smooth texture again.

Can I modify the ingredients for dietary restrictions?
Very! This recipe is quite flexible. For a vegetarian option, it's perfect as is, but if you're dairy-free, you can experiment with plant-based cheese alternatives. Just ensure you adjust the cooking times and methods as needed for the best results.

What kind of cheese can I use instead of Irish cheddar?
If you’re looking to switch it up, try using Gruyère for a nutty flavor or smoked cheese for a twist of richness. Each variety will bring a unique depth to your Irish Rarebit while keeping it comforting and delicious. Enjoy experimenting!

Irish Rarebit

Irresistible Irish Rarebit: Your New Favorite Comfort Food

Discover this quick and comforting Irish Rarebit recipe that combines rich cheese and tangy gherkins for an irresistible snack.
Print Recipe Pin Recipe
Prep Time 10 minutes mins
Cook Time 10 minutes mins
Cooling Time 5 minutes mins
Total Time 25 minutes mins
Servings: 4 slices
Course: Snacks
Cuisine: Irish
Calories: 250
Ingredients Equipment Method Nutrition Notes

Ingredients
  

For the Cheese Sauce
  • 1 cup Irish Cheddar grated
  • 1 tablespoon Mustard Dijon or wholegrain
  • 2-3 pieces Gherkins chopped
  • 2 tablespoons Butter optional
For the Base
  • 2-4 slices Whole-grain Bread for better fiber content

Equipment

  • Medium saucepan
  • toaster or broiler
  • Baking Sheet

Method
 

Step‑by‑Step Instructions for Irish Rarebit
  1. Melt butter in a saucepan, whisk in mustard, and add cheese, stirring until melted.
  2. Chop gherkins, stir into the cheese sauce.
  3. Toast the bread until golden brown.
  4. Spoon cheese mixture over toasted bread on a baking sheet.
  5. Broil until cheese bubbles and turns golden.
  6. Serve warm, optionally garnished with herbs.

Nutrition

Serving: 1sliceCalories: 250kcalCarbohydrates: 30gProtein: 10gFat: 12gSaturated Fat: 6gPolyunsaturated Fat: 1gMonounsaturated Fat: 4gCholesterol: 30mgSodium: 500mgPotassium: 250mgFiber: 3gSugar: 2gVitamin A: 250IUVitamin C: 1mgCalcium: 250mgIron: 1mg

Notes

Customize your rarebit with additional toppings like crispy bacon. Serve with a salad for a balanced meal.

Tried this recipe?

Let us know how it was!

Cheesy Pizza Pockets: Your New Favorite Homemade Snack

October 27, 2025 by Grace Snow Leave a Comment

As I rolled out the dough, the aroma of buttery warmth filled my kitchen, instantly transporting me to childhood days of indulging in handheld delights. These Homemade Easy Cheesy Pizza Pockets capture that same joyful spirit, but with a creative twist that makes them perfect for any occasion. What I love about these cheesy treasures is how customizable they are—load them up with your favorite ingredients, and they transform into a meal tailored just for you. Plus, they’re freezer-friendly, ensuring a quick go-to option for busy nights or surprise guests. Crispy on the outside and gooey on the inside, these delicious pockets are bound to become a family favorite. Ready to dive into a world of cheesy bliss? Let’s get started!

Why Are Cheesy Pizza Pockets Amazing?

Customizable Options: The beauty of these pizza pockets lies in their versatility—mix and match your favorite cheeses and toppings to create a dish that suits any palate.
Quick & Easy: With simple steps and minimal prep time, you can whip these up for a last-minute snack or meal.
Kid-Friendly: Perfect for little hands, these pockets make a fun and tasty lunchbox treat or after-school snack.
Make Ahead: Freeze uncooked pockets for those busy days when you need a homemade meal in a snap! Try pairing them with our Cheesy Garlic Bread for a delightful spread.
Satisfying Texture: Enjoy the delightful contrast of a flaky crust with a gooey, cheesy filling that satisfies every craving!

Cheesy Pizza Pockets Ingredients

For the Dough
• Dough – Choose crescent or pizza dough for the perfect texture.

For the Filling
• Mozzarella Cheese – This provides that classic gooey melt; feel free to mix in some cheddar for extra flavor.
• Marinara Sauce – Use this as your flavor base—it keeps the filling moist and delicious; substitute with pesto for a fresh twist.
• Toppings – Get creative! Add pepperoni, spinach, or mushrooms to personalize your cheesy pizza pockets.

For the Finish
• Egg – An egg wash gives your pockets a beautiful golden finish; this is optional if you're keeping it lighter.

Now that you have the essentials, let’s craft those delightful cheesy pizza pockets that promise to be your new favorite homemade snack!

Step‑by‑Step Instructions for Cheesy Pizza Pockets

Step 1: Prepare the Dough
Start by rolling out your chosen dough on a lightly floured surface. If using crescent dough, gently press the seams together to create a single sheet. For pizza dough, stretch it until it’s about ¼ inch thick. This will serve as the foundation for your cheesy pizza pockets, so ensure it’s evenly rolled out for consistent cooking.

Step 2: Assemble the Filling
In a mixing bowl, combine the mozzarella cheese with marinara sauce and any additional toppings you desire. Stir until everything is well mixed, creating a cohesive filling that will bring the cheesy pizza pockets to life. Aim for a balance of flavors—don’t shy away from adding your favorite ingredients like pepperoni or vegetables for extra taste!

Step 3: Form the Pockets
Using a sharp knife or pizza cutter, cut the dough into squares, about 4 inches per side. In the center of each square, place a generous spoonful of the cheese filling. Carefully fold the dough over to form triangles or rectangles, then pinch and seal the edges firmly with your fingers or a fork to prevent any filling from escaping during baking.

Step 4: Apply Egg Wash
To achieve that golden, glossy finish on your cheesy pizza pockets, whisk an egg in a small bowl and use a pastry brush to gently coat the tops of each pocket. This step is optional, but it adds a beautiful touch to your culinary creation, making them look as good as they taste. Make sure to get an even layer for consistent coloring.

Step 5: Bake
Preheat your oven to 375°F (190°C) to ensure it’s nice and hot before baking. Arrange the pizza pockets on a baking sheet lined with parchment paper, making sure they are spaced apart. Bake in the preheated oven for about 15 minutes or until they turn a lovely golden brown. Keep an eye on them as they cook to ensure they don’t overbake.

Step 6: Serve
Once your cheesy pizza pockets are perfectly baked, remove them from the oven and allow them to cool for a few minutes. This will help the cheesy filling set slightly and make them easier to handle. Serve them warm with extra marinara sauce on the side for dipping, enhancing the delightful experience of your homemade snack.

Make Ahead Options

These Homemade Easy Cheesy Pizza Pockets are perfect for meal prep enthusiasts! You can easily prepare the filling (cheese, marinara, and toppings) up to 3 days in advance and store it in an airtight container in the refrigerator. For even more convenience, you can form the pizza pockets and refrigerate them for up to 24 hours; just make sure to cover them well to prevent drying out. When you’re ready to bake, simply preheat your oven and add a few extra minutes to the cooking time to ensure they’re heated through. This way, you’ll have delicious, gooey cheesy pizza pockets ready in no time, perfect for busy weeknights or unexpected guests!

Expert Tips for Cheesy Pizza Pockets

  • Dough Choice: Use refrigerated crescent or homemade pizza dough for the best texture; both offer different levels of flakiness.
  • Sealing Edges: Be sure to pinch or press the edges firmly; this prevents any cheese from leaking out during baking, ensuring your cheesy pizza pockets stay intact.
  • Filling Amount: Avoid overfilling each pocket; use about 1-2 tablespoons of filling to ensure they seal well and cook evenly.
  • Baking Time: Keep an eye on the baking time; if they start browning too quickly, reduce the oven temperature slightly to avoid burning the crust.
  • Freezing Tips: Prepare uncooked pockets and freeze them on a baking sheet; once frozen solid, transfer them to a freezer bag for easy later baking.

How to Store and Freeze Cheesy Pizza Pockets

Fridge: Store cooked cheesy pizza pockets in an airtight container for up to 3 days. Reheat in the oven or microwave to maintain their crispy texture.

Freezer: Uncooked pizza pockets can be frozen for up to 2 months. After assembling, freeze them on a baking sheet, then transfer to a freezer bag. Bake directly from frozen, increasing cooking time by a few minutes.

Reheating: To reheat cooked pizza pockets, place them in a preheated oven at 350°F (175°C) for about 10-15 minutes or until heated through. This keeps the crust crispy while warming the gooey filling.

What to Serve with Homemade Easy Cheesy Pizza Pockets

Imagine the comforting aroma of your kitchen as you enjoy the delightful crunch of pizza pockets alongside these perfect pairings.

  • Crispy Side Salad: A fresh and colorful salad adds a delightful crunch and brightness, balancing the richness of the cheesy pockets.
  • Garlicky Breadsticks: Soft and chewy with a hint of garlic, these make for a fantastic dipping companion with marinara sauce.
  • Creamy Coleslaw: The creamy texture and tangy flavor create a refreshing contrast to the warm, cheesy pockets, enhancing the overall meal experience.
  • Seasoned Potato Wedges: Crispy potato wedges sprinkled with herbs and spices bring a hearty element that complements the pizza pockets beautifully.
  • Roasted Veggies: Add nutritional value and vibrant color with roasted zucchini, bell peppers, or asparagus; their caramelization pairs perfectly with cheesy goodness.
  • Marinara Dipping Sauce: Serve extra marinara for dipping; it enhances each bite and invites a burst of flavor that keeps you coming back for more!
  • Sparkling Lemonade: A refreshing glass of sparkling lemonade’s citrusy notes cuts through the richness of the cheese, leaving you refreshed after every bite.
  • Chocolate Chip Cookies: End your meal on a sweet note; warm cookies provide satisfaction that mirrors the joy of the cheesy pockets.

Cheesy Pizza Pockets Variations & Substitutions

Feel free to get creative as you whip up your cheesy pizza pockets—there are endless ways to personalize this recipe!

  • Dairy-Free: Use dairy-free cheese alternatives for a vegan version, ensuring everyone can enjoy the gooey goodness.
  • Different Dough: Substitute crescent dough with whole wheat or gluten-free pizza dough for a different flavor and texture experience.
  • Savory Sauces: Swap the marinara sauce for BBQ sauce or ranch dressing; each will impart a unique twist to your filling.
  • Zesty Add-ins: Toss in some diced jalapeños or crushed red pepper flakes for a delightful kick that will awaken your taste buds!
  • Breakfast Style: Transform these into breakfast pockets by adding scrambled eggs, cheese, and crumbled sausage or veggies—a great way to start your day.
  • Extra Flavor: Add herbs like oregano and basil to the cheese filling for an aromatic and flavorful boost, reminiscent of classic Italian pizza.
  • Crunchy Coating: For an added crunch, sprinkle the tops with breadcrumbs before baking; it creates a delightful texture contrast.
  • Pizza Dough: If you want a chewier crust, try using homemade pizza dough or store-bought for a contrasting texture to the smooth filling.

Ready for more cheesy delights? Pair your pizza pockets with our Cheesy Garlic Bread for a perfect snack combo, or explore our Cheesy Zucchini Bake for another creative way to enjoy cheese!

Cheesy Pizza Pockets Recipe FAQs

How do I choose the right dough for my pizza pockets?
Absolutely! For a softer texture, I recommend using crescent dough. If you prefer a chewier bite, opt for traditional pizza dough. Both options yield delicious results, so choose based on your personal preference for that perfect cheesy pizza pockets experience!

What’s the best way to store leftover cheesy pizza pockets?
Cooked cheesy pizza pockets can be stored in an airtight container in the fridge for up to 3 days. To reheat, simply pop them in a preheated oven at 350°F (175°C) for about 10-15 minutes to restore their crispy texture. You can also use the microwave, but the oven is best for keeping that delightful crunch!

Can I freeze cheesy pizza pockets?
Certainly! You can freeze uncooked pizza pockets for up to 2 months. After assembling, place them on a baking sheet lined with parchment paper and freeze until solid. Then, transfer the frozen pockets to a freezer bag. When ready to bake, you can pop them straight from the freezer into the oven, simply adding a few extra minutes to the baking time.

How can I prevent my pizza pockets from leaking during baking?
Very good question! To avoid leaks, ensure the edges of your pizza pockets are sealed very well. After placing the filling in the center, pinch the edges firmly together or use the tines of a fork to press and seal them tightly. Additionally, be cautious not to overfill, using just 1-2 tablespoons of filling per pocket should do the trick!

Are these pizza pockets gluten-free?
If you're following a gluten-free diet, you can certainly make these cheesy pizza pockets by using gluten-free pizza dough or wraps. Just make sure to read the ingredient labels to ensure they comply with your dietary needs. Also, be cautious about cross-contamination if allergies are a concern!

Can I serve these pizza pockets to my kids’ friends?
Absolutely! These cheesy pizza pockets are very kid-friendly and make for a fantastic snack or lunch option. Kids love the fun, handheld shape and the gooey cheese filling, plus you can customize them to suit any taste preferences. They're great for parties or casual get-togethers!

Cheesy Pizza Pockets

Cheesy Pizza Pockets: Your New Favorite Homemade Snack

Cheesy Pizza Pockets are customizable, quick, and kid-friendly snacks perfect for any occasion.
Print Recipe Pin Recipe
Prep Time 15 minutes mins
Cook Time 15 minutes mins
Cooling Time 5 minutes mins
Total Time 35 minutes mins
Servings: 4 pockets
Course: Snacks
Cuisine: American
Calories: 250
Ingredients Equipment Method Nutrition Notes

Ingredients
  

For the Dough
  • 1 pack crescent or pizza dough
For the Filling
  • 1 cup mozzarella cheese feel free to mix in cheddar for extra flavor
  • 1/2 cup marinara sauce substitute with pesto for a fresh twist
  • 1 cup toppings e.g., pepperoni, spinach, or mushrooms
For the Finish
  • 1 egg for egg wash, optional

Equipment

  • Mixing Bowl
  • Baking Sheet
  • Pizza Cutter
  • Pastry brush

Method
 

Step‑by‑Step Instructions for Cheesy Pizza Pockets
  1. Roll out your chosen dough on a lightly floured surface to about ¼ inch thick.
  2. In a mixing bowl, combine the mozzarella cheese with marinara sauce and any additional toppings.
  3. Cut the dough into squares, about 4 inches per side, and place a generous spoonful of the filling in the center of each square. Fold the dough over to form triangles or rectangles, then pinch and seal the edges.
  4. Whisk an egg in a small bowl and use a pastry brush to coat the tops of each pocket.
  5. Preheat your oven to 375°F (190°C). Arrange the pizza pockets on a baking sheet and bake for about 15 minutes until golden brown.
  6. Allow the pizza pockets to cool for a few minutes before serving them warm with extra marinara sauce on the side.

Nutrition

Serving: 1pocketCalories: 250kcalCarbohydrates: 30gProtein: 8gFat: 12gSaturated Fat: 5gPolyunsaturated Fat: 1gMonounsaturated Fat: 4gCholesterol: 70mgSodium: 500mgPotassium: 180mgFiber: 1gSugar: 2gVitamin A: 400IUVitamin C: 2mgCalcium: 200mgIron: 1mg

Notes

Store cooked cheesy pizza pockets in an airtight container for up to 3 days. Uncooked pizza pockets can be frozen for up to 2 months. Bake directly from frozen, increasing cooking time by a few minutes.

Tried this recipe?

Let us know how it was!

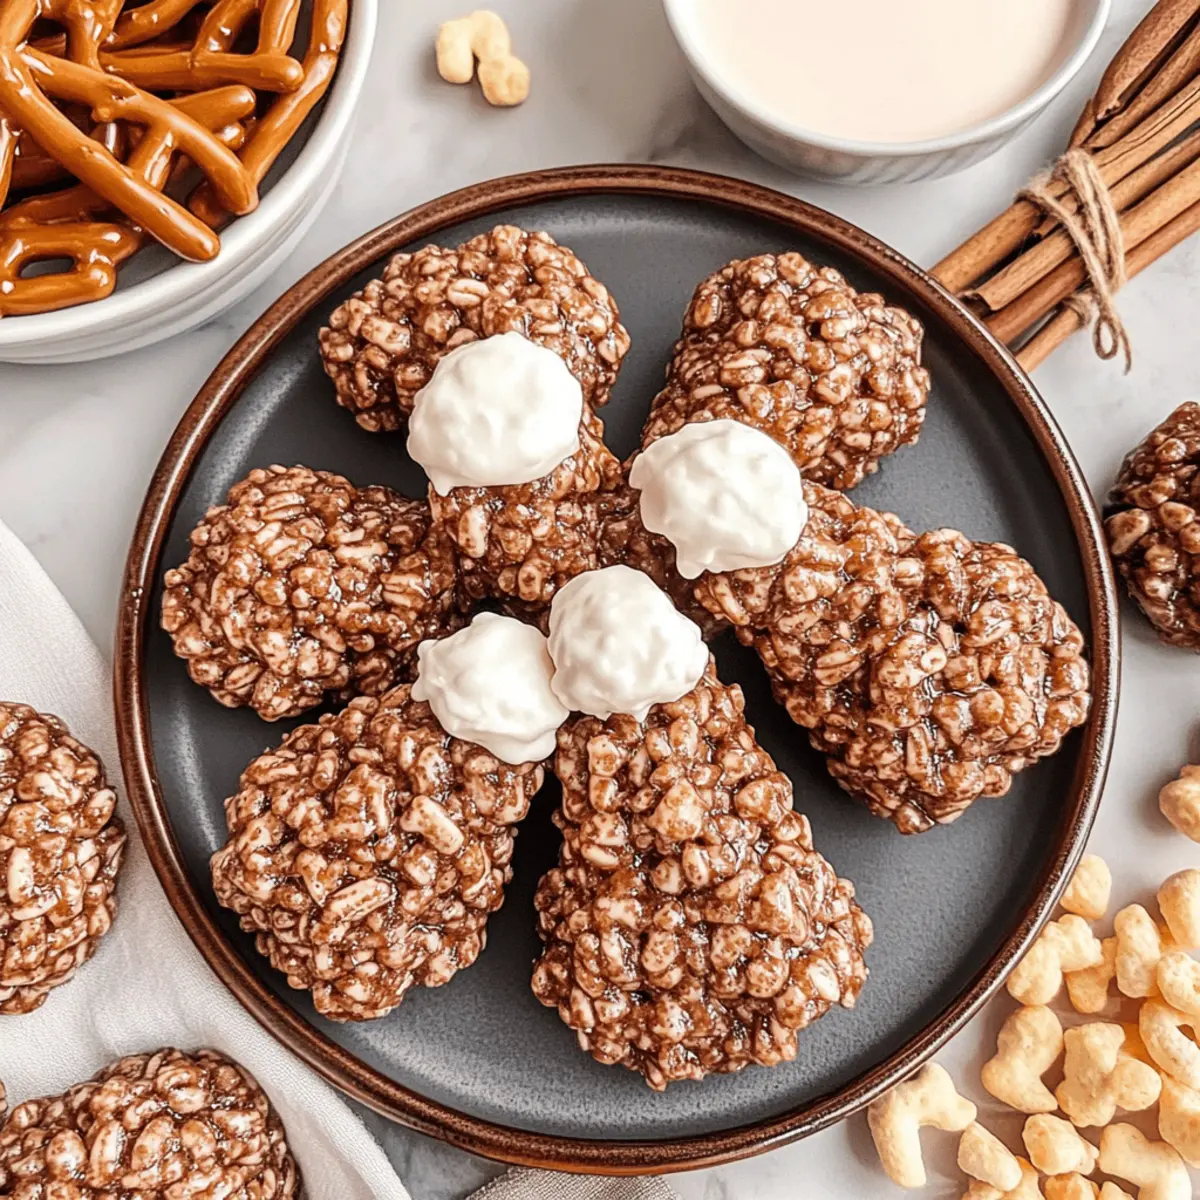
Delicious Rice Krispie Turkey Legs for a Fun Holiday Treat

October 20, 2025 by Grace Snow Leave a Comment

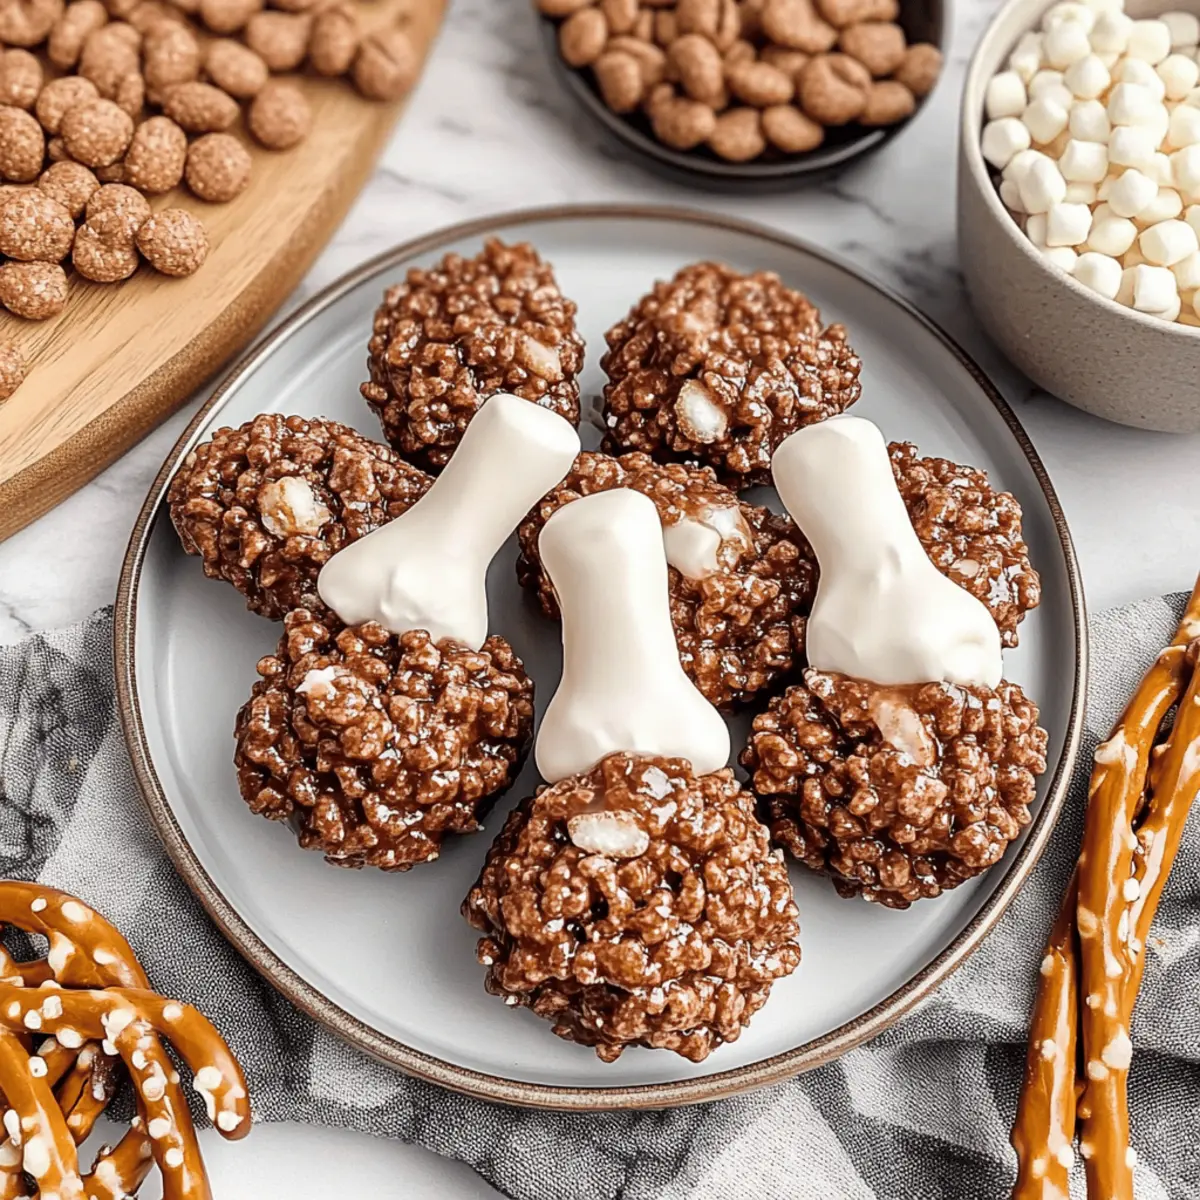
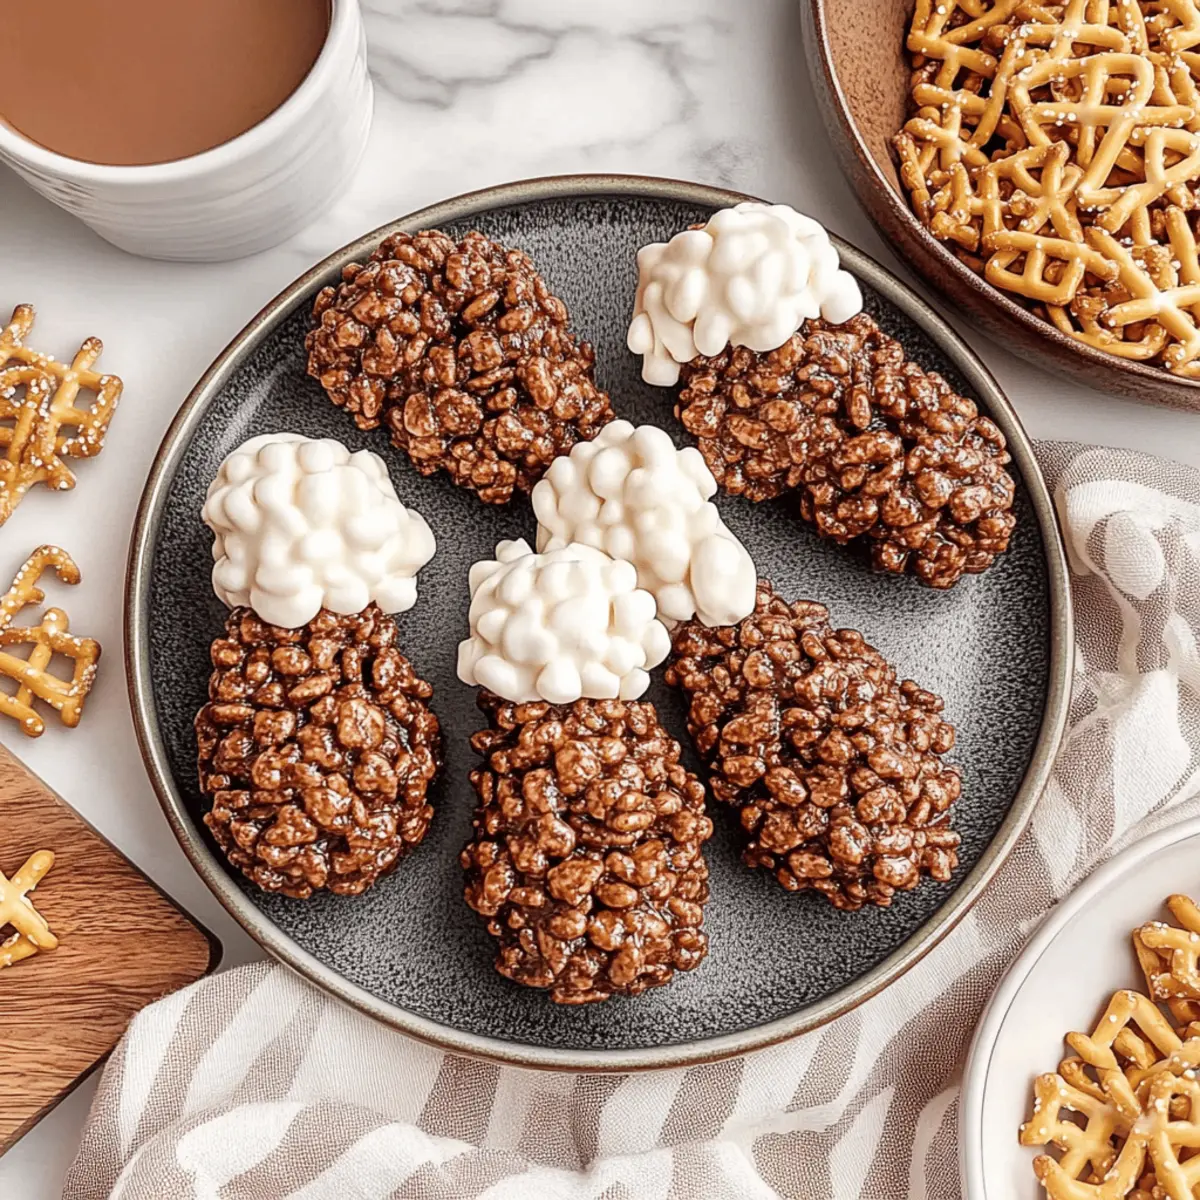
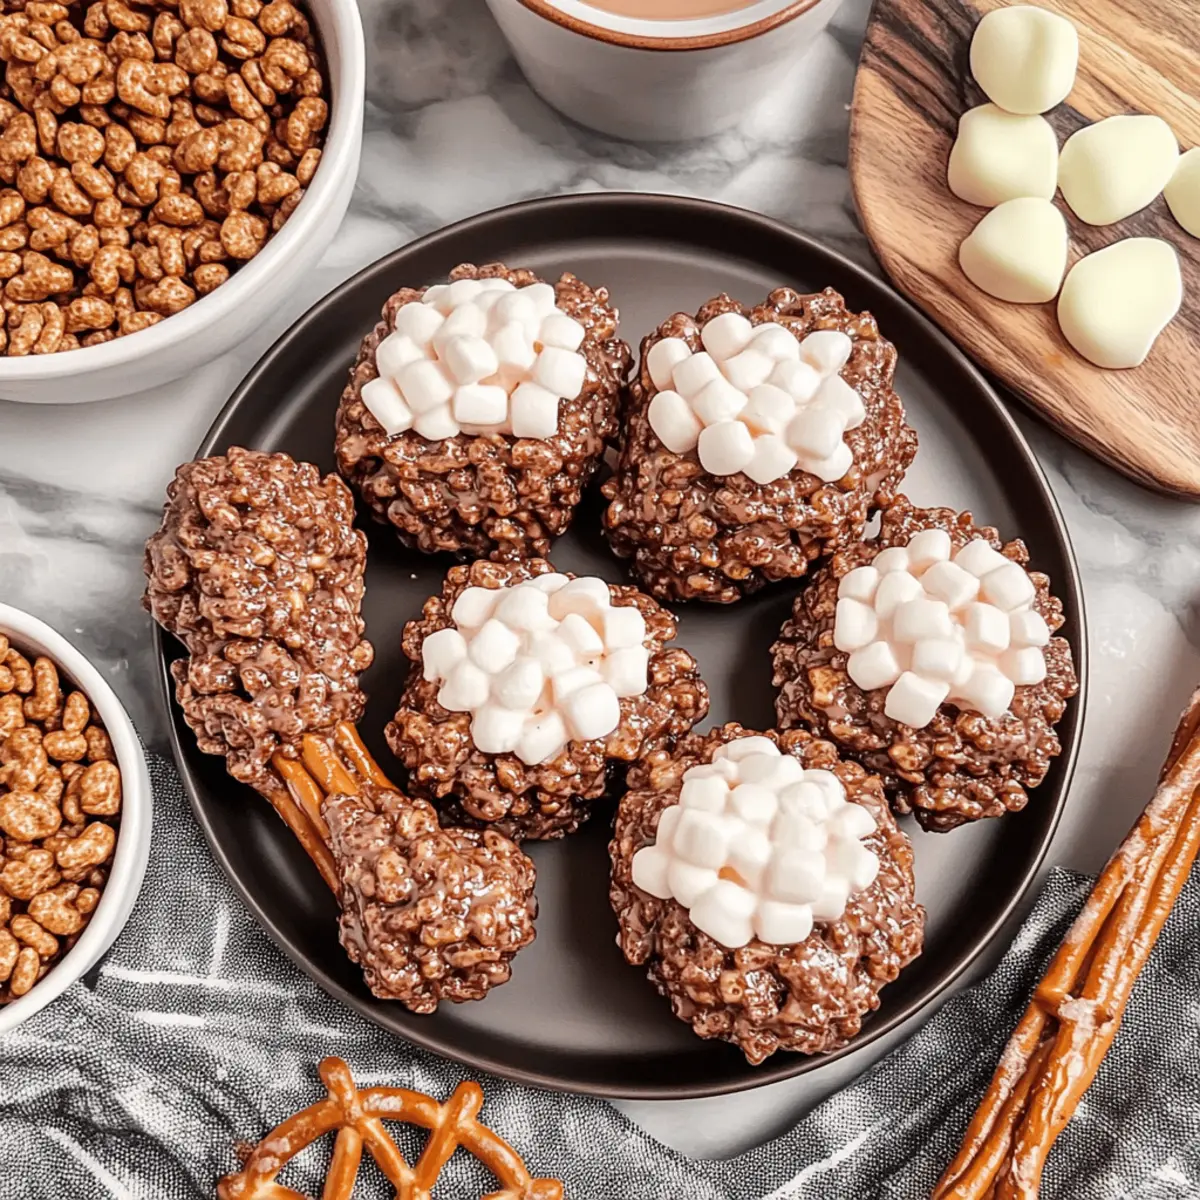
As I wandered through the bustling aisles of my local market, I stumbled upon a delightful sight: a gaggle of joyful kids, eyes wide with wonder, crafting their own Thanksgiving treats. That's when it hit me—these adorable Rice Krispie Turkey Legs are just what we need to bring a sprinkle of magic to our holiday celebrations! These kid-friendly snacks not only look like mini drumsticks but are also incredibly easy to whip up using simple ingredients like marshmallows and pretzels. In no time, you’ll have a festive treat that’s perfect for both young chefs and big kids at heart. What's even better? They lend themselves to gluten-free options, making them a guilt-free indulgence for everyone at your table. Ready to impress your loved ones? Let's dive into this fun recipe that will surely become a cherished staple on your holiday dessert spread!

Why Are Rice Krispie Turkey Legs a Hit?

Kid-Friendly Fun: These delightful treats turn snack time into a creative adventure for both kids and adults. Quick to Make: With just a few easy steps, you can have a festive dessert ready in no time. Visual Appeal: Their cute, drumstick appearance will make them the star of your holiday table. Customizable: Feel free to use gluten-free pretzels or change the flavor of melting wafers to suit your taste preferences. Crowd-Pleaser: Kids and adults alike will love these sweet, crunchy creations, making them a hit at any gathering. Pair them with pumpkin s’mores cookies for an extra festive touch!

Rice Krispie Turkey Legs Ingredients

For the Turkey Legs
• Pretzel Rods – The main structure for turkey leg bones; substitute with gluten-free pretzels for dietary needs.
• Vanilla Melting Wafers – Provides a smooth coating and sweet flavor; any brand can be used.
• Vanilla Extract – Enhances the vanilla flavor; can be replaced with vanilla paste for a more intense taste.
• Salt – Balances sweetness; can reduce or omit if desired, especially if using salted butter.
• Mini Marshmallows – Used for shaping the bone ends and coating the legs; keep extra on hand for adjustments.
• Unsalted Butter – Offers richness; substitute with salted butter by halving the added salt.
• Cocoa Krispies Cereal – Gives the turkey legs an appealing brown color and crunchy texture; consider using gluten-free cereal for a gluten-free version.

Step‑by‑Step Instructions for Rice Krispie Turkey Legs

Step 1: Melt Candy Wafers
Begin by placing your vanilla melting wafers in a microwave-safe bowl. Heat in the microwave on low power for 30 seconds at a time, stirring after each interval until the mixture is smooth and glossy. This process should take about 1-2 minutes total. Set the melted wafers aside as you prepare to dip the pretzel rods.

Step 2: Dip and Shape Pretzel Rods
Take your pretzel rods and gently dip them halfway into the melted candy wafers, allowing any excess to drip off. While the coating is still soft, firmly press two mini marshmallows onto the ends of each rod to create the “bone” of your turkey leg. Place the dipped pretzel rods on a parchment-lined tray and chill in the refrigerator for about 5 minutes, or until the coating has set.

Step 3: Prepare Rice Krispie Mixture
In a large pot over low heat, melt the unsalted butter. Once melted, add the remaining mini marshmallows, stirring continuously until they are completely melted and the mixture is smooth. Remove from heat, then stir in a pinch of salt and vanilla extract for added flavor. This mixture will be the sweet base for your Rice Krispie turkey legs.

Step 4: Combine Cereal
Once the marshmallow mixture is smooth, gently fold in the Cocoa Krispies cereal with a spatula. Be careful to mix thoroughly but gently to avoid breaking the cereal pieces. Allow the mixture to cool for a few minutes, which will make it easier to shape as you prepare to form the turkey legs.

Step 5: Shape Turkey Legs
With your hands slightly greased to prevent sticking, take about ½ cup of the Rice Krispie mixture and mold it around each pretzel bone, forming the shape of a turkey leg. Ensure that the mixture adheres well to the pretzel rod. Repeat this process for all the pretzel rods and set each shaped leg on the same parchment-lined tray.

Step 6: Final Setting
Once all the turkey legs are shaped, set them aside to cool completely at room temperature for 10-20 minutes. This time allows the Rice Krispie mixture to firm up, creating a delightful crunchy texture that perfectly complements the creamy marshmallow coating. Now they're ready to serve and impress during your festive celebrations!

How to Store and Freeze Rice Krispie Turkey Legs

  • Room Temperature: Keep your Rice Krispie turkey legs in an airtight container at room temperature for up to 2-3 days to maintain their freshness and crunch.

  • Fridge: If you want to extend their shelf life, you can refrigerate them for up to 5 days. Just be aware that the texture may firm up slightly, so let them sit at room temperature for a few minutes before enjoying.

  • Freezer: For longer storage, wrap individual turkey legs tightly in plastic wrap and place them in a freezer-safe container. They can be frozen for up to 3 months. Thaw in the refrigerator overnight before serving.

  • Reheating: There's no need to reheat these treats; simply enjoy them at room temperature for the best taste and texture!

Expert Tips for Rice Krispie Turkey Legs

• Nonstick Spray: Use nonstick spray on your hands to prevent the Rice Krispie mixture from sticking while shaping the turkey legs.

• Cooling Time: Make sure the Rice Krispie mixture cools for a few minutes before molding; if it's too warm, it can become gooey and difficult to handle.

• Quick Work: After coating the pretzels in melted wafers, shape the Turkey Legs quickly to maintain the best presentation. Don't let the coating set up too much before molding.

• Texture Balance: If using salted butter, be sure to adjust the amount of added salt to maintain the sweet-salty balance in your Rice Krispie Turkey Legs.

• Customization Options: Feel free to experiment with different melting wafer flavors for unique looks and tastes; chocolate and colorful candy melts can add fun variations!

What to Serve with Thanksgiving Rice Krispie Turkey Legs

Add a delightful touch to your holiday feast by pairing these whimsical treats with complementary flavors and textures.

  • Pumpkin S’mores Cookies: The warm, spiced flavor of pumpkin cookies provides a cozy contrast to the sweet crunch of the Rice Krispie turkey legs.
  • Festive Fruit Salad: Bright, juicy fruits offer a refreshing palette cleanser, balancing the sweetness of the turkey legs while adding a burst of color to your table.
  • Whipped Cinnamon Butter: Spread this creamy, spiced butter on warm rolls for a mouthwatering side that enhances the sweet notes of your Rice Krispie legs.
  • Chocolate-Dipped Strawberries: The rich chocolate paired with tart strawberries makes for a joyful bite that pairs beautifully with the playful theme of the turkey legs.
  • Warm Apple Cider: This fragrant drink adds an aromatic warmth, echoing the delectable flavors of the season while providing a comforting sip alongside your treats.
  • Mini Pumpkin Spice Lattes: A small but flavorful coffee treat that ties in the festive spirit, offering a cozy drink option to accompany your playful dessert.
  • Marshmallow Fluff Dip: Serve this sweet and creamy dip on the side, allowing guests to dunk their turkey legs for an extra marshmallowy indulgence.

Make Ahead Options

These Rice Krispie Turkey Legs are perfect for meal prep enthusiasts looking to save time during the busy holiday season! You can prepare the pretzel rods dipped in melted wafers and shaped with marshmallows up to 24 hours in advance. Simply store them in an airtight container at room temperature to maintain their crunch. Additionally, the Rice Krispie mixture can be made ahead and stored in the refrigerator for up to 3 days; just make sure it's tightly covered. When you're ready to finish, mold the cooled mixture around the pretzel bones and allow them to set for about 10-20 minutes before serving. This way, you'll have delightful, homemade treats ready with minimal effort—just as delicious as when freshly made!

Rice Krispie Turkey Legs Variations

Feel free to get creative with these fun Rice Krispie turkey legs to match your family's preferences or dietary needs!

  • Gluten-Free: Substitute pretzel rods with gluten-free pretzels to keep this tasty treat accessible for everyone.
  • Flavorful Wafers: Use chocolate or colored melting wafers for a unique taste and festive flair that’ll wow your guests.
  • Nutty Twist: Add crushed nuts, like peanuts or almonds, to the Rice Krispie mixture for an extra crunch and delicious flavor.
  • Dipping Delight: Serve with a side of melted chocolate or caramel sauce for dipping, adding a luscious layer of flavor.
  • Marshmallow Fluff: Incorporate marshmallow fluff into the Rice Krispie mixture for an even chewier texture that kids will love.
  • Fruit Fusion: Mix in dried fruits such as cranberries or cherries to add a sweet, chewy burst that complements the treat.
  • Spicy Surprise: If you're feeling adventurous, sprinkle a little cayenne pepper on the melted wafers for a sweet-and-spicy combo that'll thrill your taste buds.
  • Crispy Coating: Roll the shaped turkey legs in crushed graham crackers or coconut for an extra layer of texture and flavor.

Feel inspired? Pair these fun Rice Krispie turkey legs with a delicious batch of pumpkin s’mores cookies or festive Lime Chicken Rice for the perfect holiday spread!

Rice Krispie Turkey Legs Recipe FAQs

How do I know when my pretzel rods are fresh?
Absolutely! Look for pretzel rods that are crisp and free from any dark spots or peculiar odors. Fresh pretzels should be firm to the touch and maintain their shape, which ensures your turkey legs will have a solid structure.

Can I store Rice Krispie turkey legs?
Yes, you can store your Rice Krispie turkey legs! Keep them in an airtight container at room temperature for up to 2-3 days. If you want to keep them longer, refrigerate them for up to 5 days, but be aware that they may become a bit firmer in texture.

How do I freeze Rice Krispie turkey legs?
Absolutely! To freeze your Rice Krispie turkey legs, first wrap each turkey leg tightly in plastic wrap to prevent freezer burn. Place them in a freezer-safe container, and they can last up to 3 months. When you're ready to enjoy them, simply thaw overnight in the refrigerator, and let them come to room temperature before serving.

What should I do if my Rice Krispie mixture is too sticky?
Very! If your Rice Krispie mixture feels sticky and hard to mold, try letting it cool for a few minutes longer. You can also lightly grease your hands with nonstick spray to prevent sticking while shaping the legs. If all else fails, add a handful of extra Cocoa Krispies to the mixture to tone down the stickiness.

Can I make Rice Krispie turkey legs gluten-free?
Absolutely! Substitute regular pretzel rods with gluten-free pretzels to make the entire treat gluten-free. Additionally, ensure you use gluten-free Cocoa Krispies, and you’re all set for a delightful, inclusive dessert that everyone can enjoy!

Are there any allergy considerations for this recipe?
Very! This recipe contains common allergens like dairy (from butter and marshmallows) and gluten (from traditional pretzels and Cocoa Krispies). If preparing for someone with allergies, opt for dairy-free butter and ensure all ingredients are certified gluten-free to keep your Rice Krispie turkey legs safe for all your loved ones!

Rice Krispie Turkey Legs

Delicious Rice Krispie Turkey Legs for a Fun Holiday Treat

Delightful Rice Krispie Turkey Legs are a fun holiday treat that kids will love making and eating.
Print Recipe Pin Recipe
Prep Time 20 minutes mins
Cook Time 10 minutes mins
Cooling Time 20 minutes mins
Total Time 50 minutes mins
Servings: 12 legs
Course: Snacks
Cuisine: American
Calories: 160
Ingredients Equipment Method Nutrition Notes

Ingredients
  

For the Turkey Legs
  • 12 pieces Pretzel Rods Substitute with gluten-free pretzels for dietary needs.
  • 12 ounces Vanilla Melting Wafers Any brand can be used.
  • 1 teaspoon Vanilla Extract Can be replaced with vanilla paste for a more intense taste.
  • 1 pinch Salt Can reduce or omit if desired.
  • 4 cups Mini Marshmallows Used for shaping the bone ends and coating the legs.
  • 4 tablespoons Unsalted Butter Substitute with salted butter by halving the added salt.
  • 6 cups Cocoa Krispies Cereal Consider using gluten-free cereal for a gluten-free version.

Equipment

  • Microwave-safe bowl
  • Large pot
  • Spatula
  • Parchment Paper

Method
 

Step-by-Step Instructions for Rice Krispie Turkey Legs
  1. Begin by placing your vanilla melting wafers in a microwave-safe bowl. Heat in the microwave on low power for 30 seconds at a time, stirring after each interval until the mixture is smooth and glossy. This process should take about 1-2 minutes total. Set the melted wafers aside as you prepare to dip the pretzel rods.
  2. Take your pretzel rods and gently dip them halfway into the melted candy wafers, allowing any excess to drip off. While the coating is still soft, firmly press two mini marshmallows onto the ends of each rod to create the 'bone' of your turkey leg. Place the dipped pretzel rods on a parchment-lined tray and chill in the refrigerator for about 5 minutes, or until the coating has set.
  3. In a large pot over low heat, melt the unsalted butter. Once melted, add the remaining mini marshmallows, stirring continuously until they are completely melted and the mixture is smooth. Remove from heat, then stir in a pinch of salt and vanilla extract for added flavor.
  4. Once the marshmallow mixture is smooth, gently fold in the Cocoa Krispies cereal with a spatula. Be careful to mix thoroughly but gently to avoid breaking the cereal pieces. Allow the mixture to cool for a few minutes.
  5. With your hands slightly greased, take about ½ cup of the Rice Krispie mixture and mold it around each pretzel bone, forming the shape of a turkey leg. Ensure that the mixture adheres well to the pretzel rod.
  6. Once all the turkey legs are shaped, set them aside to cool completely at room temperature for 10-20 minutes.

Nutrition

Serving: 1legCalories: 160kcalCarbohydrates: 24gProtein: 1gFat: 7gSaturated Fat: 4gMonounsaturated Fat: 2gCholesterol: 15mgSodium: 100mgPotassium: 30mgSugar: 10gVitamin A: 5IUCalcium: 10mgIron: 1mg

Notes

Use nonstick spray on your hands to prevent the Rice Krispie mixture from sticking while shaping the turkey legs. Store in an airtight container at room temperature for up to 2-3 days.

Tried this recipe?

Let us know how it was!

Delicious Pumpkin Apricot and Macadamia Balls for Kids

October 17, 2025 by Grace Snow Leave a Comment

As the crisp autumn air settles in, I find myself longing for festive flavors that capture the essence of the season. Enter the delightful Pumpkin Apricot and Macadamia Balls! These little bites are not only a healthy Halloween snack option, but also a no-bake treat, making them a hit with both kids and parents alike. With their chewy texture and a savory crunch from the macadamia nuts, they are perfect for those moments when you crave something sweet yet nourishing. Whipping up these energy balls is surprisingly simple and quick, making them an easy addition to your holiday celebrations. Ready to swap out those sugary treats for a more wholesome option that still feels like a celebration? Let’s dive into this delightfully easy recipe together!

Why are these Pumpkin Apricot Balls amazing?

Healthy: Packed with nutritious ingredients, these balls offer a guilt-free way to indulge during Halloween.

No-Bake: Enjoy an effortless preparation process—just blend, roll, and chill!

Kid-Friendly: Kids will love these chewy, sweet bites that resemble tiny pumpkins, making snacking fun.

Versatile: Feel free to mix in your favorite nuts or spices to customize these treats.

Quick: Whip them up in minutes, perfect for busy parents looking for healthy snack options.

With just a few simple steps, you'll have a delightful batch of Pumpkin Apricot and Macadamia Balls to enjoy!

Pumpkin Apricot and Macadamia Balls Ingredients

For the Base

  • Dried Sulphate-Free Apricots – Provide natural sweetness and moisture to bind the mixture; opt for unsweetened for a healthier choice.
  • Pumpkin Puree – Adds vibrant flavor and moisture; homemade puree can elevate freshness.
  • Vanilla Extract – Enhances the overall flavor; use pure extract for a more robust taste.

For the Crunch

  • Macadamia Nuts – Contribute a rich, crunchy texture; can be swapped with cashews or almonds for a different experience.
  • Sultanas – Add little bursts of sweetness; they are optional for those avoiding added sugars.

These delightful Pumpkin Apricot and Macadamia Balls come together with these wholesome ingredients for a healthy Halloween snack that your kids will love!

Step‑by‑Step Instructions for Pumpkin Apricot and Macadamia Balls

Step 1: Blend the Base
Start by placing the dried sulphate-free apricots and pumpkin puree in a high-speed food processor. Blend on medium until the mixture is finely chopped and well combined, about 1-2 minutes. You want it to reach a sticky consistency that binds together without any large chunks remaining. This step ensures the base for your Pumpkin Apricot and Macadamia Balls is flavorful and cohesive.

Step 2: Add Flavor Enhancements
Next, scrape down the sides of the processor to collect any mixture. Pour in the vanilla extract and the macadamia nuts, then blend again for another 1-2 minutes. The goal here is to achieve a uniform texture where the macadamia nuts are chopped evenly but still provide some crunch. This will add depth and richness to your energy balls, bringing out the delightful flavors of pumpkin and apricot.

Step 3: Shape the Balls
Once the mixture is well-blended, use a clean spoon to scoop out about one teaspoon of the mixture. With your hands, roll it into a small ball shape. Repeat this process, placing each ball on a parchment-lined tray, until all the mixture is formed into Pumpkin Apricot and Macadamia Balls. Ensure they are tightly packed and uniform in size for consistency in every bite.

Step 4: Create Pumpkin Features
To give your energy balls a festive touch, take a toothpick and gently press an indentation on top of each ball, resembling the shape of a pumpkin. Next, place a sultana in the center of each indentation to act as the pumpkin stem. This added detail not only enhances presentation but makes these treats visually appealing for kids during Halloween.

Step 5: Chill to Set
Finally, refrigerate the tray of Pumpkin Apricot and Macadamia Balls for at least 30 minutes. This allows them to firm up and makes them easier to handle. Once chilled, you can serve them immediately or store them in an airtight container. Chilling helps to bring out the flavors and gives them a perfect chewy texture, ready to be enjoyed by kids and adults alike.

Make Ahead Options

These Pumpkin Apricot and Macadamia Balls are perfect for busy home cooks looking to simplify meal prep! You can prepare the mixture up to 24 hours in advance by blending the dried apricots, pumpkin puree, vanilla extract, and macadamia nuts as directed. Once blended, simply shape the balls and refrigerate them for later use. To maintain their quality, store the balls in an airtight container in the fridge, or freeze them for up to 3 months. When you're ready to serve, just take them out of the fridge or freezer, add the final touches like the sultana "stems," and enjoy these tasty treats that are just as delicious!

Expert Tips for Pumpkin Apricot and Macadamia Balls

  • Evenly Sized Balls: Use a measuring spoon to scoop exact amounts; this ensures uniform size for even texture and consistency in your Pumpkin Apricot and Macadamia Balls.

  • Texture Troubles: If the mixture is too crumbly, add a little more pumpkin puree; conversely, if too sticky, a sprinkle of coconut flour can help firm it up.

  • Mix It Up: Don’t hesitate to experiment! Substitute macadamia nuts with walnuts or pecans for different flavors while keeping the healthy essence intact.

  • Storing Secrets: For optimal freshness, store the energy balls in an airtight container in the refrigerator for up to one week; they also freeze well for longer-term enjoyment.

  • Festive Fun: Enhance the Halloween spirit by decorating your Pumpkin Apricot and Macadamia Balls with colored sultanas or edible glitter to make them more exciting for kids!

Pumpkin Apricot and Macadamia Balls Variations

Feel free to enhance your Pumpkin Apricot and Macadamia Balls with these delightful twists that will tantalize your taste buds!

  • Nut-Free: Replace macadamia nuts with sunflower seeds for a nut-free option that still offers crunch.
  • Spicy Kick: Add a pinch of cayenne or chili powder to the mixture for a surprising heat that contrasts with the sweetness.
  • Chocolate Lovers: Fold in dairy-free chocolate chips to the mixture for an indulgent twist perfect for chocolate enthusiasts.
  • Extra Fruit: Mix in dried cranberries or raisins to add bursts of flavor and an extra chewy texture.
  • Herbal Infusion: Incorporate fresh herbs like mint or basil for a refreshing flavor that balances the sweetness of the energy balls.
  • Coconut Delight: Roll the finished balls in shredded coconut for an added layer of flavor and visual appeal, enhancing their festive look.
  • Protein Packed: Add a scoop of your favorite protein powder to the mixture to boost nutritional value without compromising taste.
  • Pumpkin Spice Boost: Stir in a teaspoon of pumpkin spice mix for a heightened flavor that celebrates the season.

These variations allow you to adjust the recipe according to your preferences while maintaining the joy and healthiness of this festive treat. Looking for more pumpkin-inspired ideas? Check out my delicious Pumpkin Brownies Decadent or try these cozy Pumpkin Cinnamon Roll recipes for a perfect autumn experience!

What to Serve with Pumpkin Apricot and Macadamia Balls

As you prepare to treat your family to these delightful snacks, consider pairing them with complementary dishes that enhance their flavors and satisfy your guests.

  • Fresh Fruit Platter: A colorful assortment of seasonal fruits will add vibrant flavor contrasts and refreshing textures to your snack spread. Juicy slices of apple or pear, alongside berries, provide a sweet balance to the chewy energy balls.

  • Yogurt Dip: A creamy yogurt dip offers a lovely tanginess that complements the nuttiness of the macadamia and the sweetness of the apricot. Consider a hint of honey and cinnamon for an autumn twist.

  • Nutty Granola: Sprinkling a handful of crunchy granola around your Pumpkin Apricot and Macadamia Balls can add a delightful texture while reinforcing the nutty flavors. It transforms your healthy snack into a fun, interactive treat.

  • Herbal Tea: A warm cup of chamomile or mint tea serves as a soothing beverage to accompany your energy balls, creating a cozy atmosphere. The herbal notes pair beautifully with the natural sweetness of the ingredients.

  • Mini Pumpkin Muffins: These mini muffins echo the flavors of your energy balls while offering a fluffy texture. They provide another great option for sweet snacking that children will love.

  • Dark Chocolate Squares: For those who appreciate a touch of indulgence, pairing with a couple of squares of dark chocolate can be heavenly. The rich cocoa enhances the overall experience and feels festive for the season.

  • Vegetable Sticks: Offer some crudité alongside the energy balls for a refreshing crunch. Carrots, celery, and bell peppers provide a healthy, crisp contrast that rounds out your snack options.

  • Apple Cider: A glass of warm or chilled apple cider perfectly captures the essence of autumn and complements the sweet and nutty notes of the energy balls, creating a delightful festive vibe.

How to Store and Freeze Pumpkin Apricot and Macadamia Balls

Fridge: Store in an airtight container in the refrigerator for up to one week to maintain freshness and flavor.

Freezer: For longer storage, freeze the pumpkin apricot and macadamia balls in a single layer; transfer to an airtight container after solidifying. They can be frozen for up to three months.

Reheating: Enjoy them directly from the fridge or freezer; no need to thaw! Just give them a minute at room temperature for optimal texture.

Tip: Label your containers with the date to ensure you know when they were made, keeping your wholesome treats organized and enjoyable!

Pumpkin Apricot and Macadamia Balls Recipe FAQs

What should I look for when selecting dried apricots?
Absolutely! When choosing dried apricots, look for ones that are sulphate-free and unsweetened. They should be pliable and have a vibrant orange color. Avoid apricots with dark spots or a hard texture, as these may indicate they are over-dried or past their prime.

How long can I store these energy balls?
You can store your Pumpkin Apricot and Macadamia Balls in an airtight container in the refrigerator for up to one week. This keeps them fresh and delicious, making them a perfect go-to snack throughout the week!

Can I freeze Pumpkin Apricot and Macadamia Balls?
Yes! To freeze them, lay the balls out in a single layer on a baking sheet until firm, usually about 1-2 hours. Then, transfer them to an airtight container or a freezer bag, where they can stay fresh for up to three months. When you're ready to enjoy, simply take them out and let them sit at room temperature for about a minute.

What if my mixture is too sticky when forming the balls?
No worries! If the mixture feels too sticky, you can sprinkle in a little coconut flour or add a few more chopped macadamia nuts, then blend again. This should help firm up the mixture, making it easier to roll into neat balls. It’s all about finding that perfect consistency!

Can my kids eat these energy balls if they're allergic to nuts?
Important consideration! If your kids have nut allergies, simply substitute the macadamia nuts with seeds like sunflower or pumpkin seeds. You’ll still get that delightful crunch without compromising on health or safety. Always check for any other allergies related to the ingredients used, such as dried fruits.

What's the best way to serve these for Halloween?
For a festive touch, serve your Pumpkin Apricot and Macadamia Balls on a colorful platter alongside seasonal fruits. You can even set up a DIY decorating station where kids can add embellishments like edible glitter or sprinkles to their energy balls. It’s a fun and engaging way to make healthy snacking exciting!

Pumpkin apricot and macadamia balls

Delicious Pumpkin Apricot and Macadamia Balls for Kids

These healthy Pumpkin Apricot and Macadamia Balls make for a perfect no-bake Halloween snack option for kids.
Print Recipe Pin Recipe
Prep Time 10 minutes mins
Chilling Time 30 minutes mins
Total Time 40 minutes mins
Servings: 12 balls
Course: Snacks
Cuisine: American
Calories: 100
Ingredients Equipment Method Nutrition Notes

Ingredients
  

For the Base
  • 1 cup Dried Sulphate-Free Apricots Opt for unsweetened for a healthier choice.
  • 1 cup Pumpkin Puree Homemade puree can elevate freshness.
  • 1 teaspoon Vanilla Extract Use pure extract for a more robust taste.
For the Crunch
  • 1/2 cup Macadamia Nuts Can be swapped with cashews or almonds.
  • 1/4 cup Sultanas Optional for those avoiding added sugars.

Equipment

  • High-speed food processor

Method
 

Step-by-Step Instructions
  1. Blend the dried apricots and pumpkin puree in a food processor on medium until finely chopped and sticky, about 1-2 minutes.
  2. Add vanilla extract and macadamia nuts, blend until uniform but still crunchy, about 1-2 minutes.
  3. Scoop out about one teaspoon, roll into a ball, and place on a parchment-lined tray.
  4. Use a toothpick to make an indentation on top of each ball and place a sultana in the center as a stem.
  5. Refrigerate for at least 30 minutes to firm up, then serve or store in an airtight container.

Nutrition

Serving: 1ballCalories: 100kcalCarbohydrates: 15gProtein: 2gFat: 4gSaturated Fat: 1gPolyunsaturated Fat: 0.5gMonounsaturated Fat: 2gSodium: 1mgPotassium: 100mgFiber: 2gSugar: 8gVitamin A: 200IUVitamin C: 1mgCalcium: 20mgIron: 0.5mg

Notes

For uniform size, use a measuring spoon. Adjust pumpkin puree or coconut flour if the mixture is too crumbly or sticky.

Tried this recipe?

Let us know how it was!

Create an Inviting Halloween Candy Charcuterie Board Delight

October 17, 2025 by Grace Snow Leave a Comment

As the crisp autumn breeze whispers through the trees, I find myself enchanted by the idea of creating a Spooky Halloween Candy Charcuterie Board. This whimsical creation not only serves as a stunning centerpiece for your gatherings, but it also offers a delightful and flexible way to indulge in your favorite treats. With a mishmash of colorful candies, playful cupcakes, and fun surprises, this board transforms any Halloween celebration into a sweet adventure. Plus, it’s super easy to assemble, allowing you to focus more on enjoying the company around you and less on the kitchen chaos. Curious about how to craft this festive delight that’s sure to impress your guests? Let’s dive in!

Why is this Halloween Candy Board special?

Impressive Presentation: With its vibrant array of colors and textures, your board will be the talk of the party!

Simple Assembly: Easy to put together—this recipe requires no baking, making it perfect for last-minute gatherings.

Creative Customization: Tailor it to your taste by mixing in favorite candies or themed decorations, letting your personality shine through!

Fun for All Ages: This festive board invites both kids and adults to enjoy, ensuring smiles all around.

Versatile Enjoyment: Perfect for Halloween parties, movie nights, or even as a whimsical treat at home.

By following my expert tips, you can elevate your presentation and impress every guest with this delightful treat!

Halloween Candy Charcuterie Board Ingredients

For the Candy Selection

  • Gummy Worms – A classic Halloween candy that adds a squiggly, spooky touch to your board.
  • Chocolate Bars – Perfect for those chocolate lovers; choose fun-sized varieties to mix and match.
  • Candy Corn – This iconic seasonal treat brings nostalgia and vibrant colors, enhancing the festive feel.
  • Skittles – Their fruity flavors and bright colors create a lively and cheerful addition to balance out the chocolate.
  • Seasonal Treats – Consider including themed candies like pumpkin-shaped chocolates or ghost gummies for extra flair.

For the Cupcakes

  • Mini Cupcakes – Opt for a mix of flavors and decorate with Halloween-themed icing like orange and black.
  • Sprinkles – Choose spooky sprinkles (like bats and pumpkins) to sprinkle on top of your cupcakes for that festive touch.

For Serving

  • Small Bowls – Ideal for serving smaller candies like M&Ms, which keep your board organized and visually appealing.
  • Large Tray or Board – Make sure it’s spacious enough to fit all your treats. A black tray works beautifully for the Halloween vibe!

For Decorations

  • Spooky Toppers – Think plastic spiders, mini skeletons, or festive cake toppers to enhance the Halloween theme.
  • Themed Containers – Use Halloween-themed tins or jars for certain candies to add character and charm to your setup.

With these ingredients in hand, your Halloween Candy Charcuterie Board will not only look impressive but also taste scrumptious! Get ready to create a fun, festive centerpiece that guests of all ages will love!

Step‑by‑Step Instructions for Halloween Candy Charcuterie Board

Step 1: Prepare Your Board
Start by selecting a large black tray or board that complements the Halloween theme. Ensure the surface is clean and dry, which helps to showcase the treats beautifully. Lay it on a flat surface, such as your dining table or countertop, where guests can easily access the goodies.

Step 2: Layer Larger Items
Begin by arranging bowls of candy and larger treats like chocolate bars and gummy worms on the board. Aim for a balanced distribution across the surface, making sure to create focal points with these eye-catching items. Leave enough space in the center for additional items that will add texture and contrast.

Step 3: Add Variety with Small Bowls
Once larger items are in place, fill small bowls with candies like M&Ms and candy corn, then place them strategically around the board. This not only keeps the presentation organized but also adds height and dimension. Play with colors and shapes to draw the eye and keep guests excited about what’s next.

Step 4: Fill Gaps with Smaller Treats
Next, fill any gaps on the board by adding smaller candies and treats, like mini cupcakes adorned with Halloween-themed icing. Use these delightful bites to create layers, making the board look fuller and more inviting. Mix in seasonal treats like pumpkin-shaped chocolates for a whimsical touch.

Step 5: Create a Cohesive Look
As you continue building your Halloween Candy Charcuterie Board, focus on mixing different shapes and sizes. Place softer items next to crunchier treats to create a pleasing contrast. Play with the arrangement until each element feels perfectly placed, inviting guests to indulge.

Step 6: Add Decorative Touches
Incorporate themed decorations like plastic spiders, mini skeletons, or spooky toppers to enhance the board's festive vibe. Tuck these decorations between treats or place them as a centerpiece to create visual interest. This final touch emphasizes the Halloween spirit and makes your board a true conversation starter.

Step 7: Final Arrangement and Adjustments
Step back and assess your Halloween Candy Charcuterie Board. Adjust the positions of the candies and treats as needed, ensuring a beautiful flow that is both appealing and fun. Don’t hesitate to rearrange elements until everything feels balanced and harmonious, creating a delightful presentation that will impress your guests.
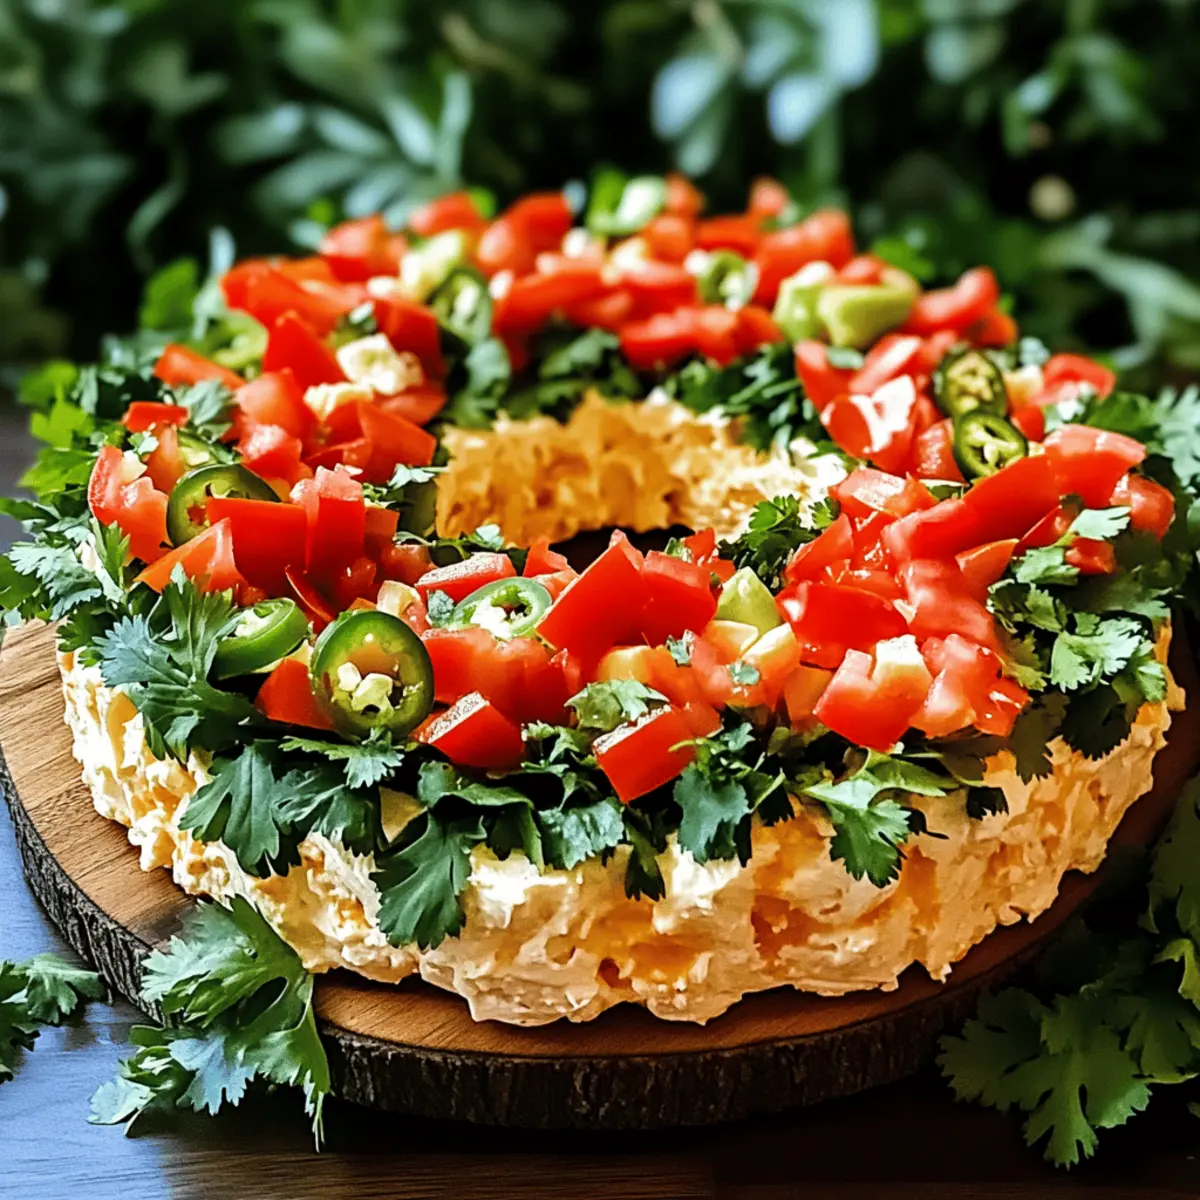
Expert Tips for Halloween Candy Charcuterie Board

Visual Balance: Ensure a well-distributed color palette to create a visually appealing board that draws guests in instantly.

Layering Matters: Build with larger candies and containers first, then fill in with smaller treats for a structured and inviting arrangement.

Texture Variety: Combine different textures—soft, chewy candies with crunchy items—while creating your Halloween Candy Charcuterie Board to keep it interesting.

Keep It Fresh: Use airtight containers for leftover candies to maintain freshness, allowing your board to last throughout the festivities.

Theme Integration: For added fun, customize your board with decorations based on your favorite Halloween movies or characters.

What to Serve with Spooky Halloween Candy Charcuterie Board

Indulging in a whimsical Halloween Candy Charcuterie Board opens the door to endless pairing possibilities that enhance the festive experience.

  • Spooky Punch: A vibrant drink mixed with fruit juices and colorful candies echoes the fun of the board, providing a refreshing sip between treats.

  • Popcorn Monster Munch: Sweet and salty popcorn mixed with candy corn and chocolate drizzles creates a crunchy contrast that kids will love. It's easy to grab and enjoy between bites!

  • Mini Pumpkin Pies: These bite-sized desserts offer a rich, spiced flavor, bringing a classic autumn taste to your spread that guests will savor.

  • Caramel Apples: The sweet and tart combination of crispy apples coated in gooey caramel fits perfectly with the theme and adds a surprisingly healthy option to your dessert table.

  • Chocolate-Covered Pretzels: Their salty crunch contrasts beautifully with the sweetness of the board, making them the perfect snack to balance the sugar rush.

  • Witch’s Brew Hot Chocolate: Serve this rich and creamy drink in cauldron-shaped mugs for a festive touch. It pairs wonderfully with the fun flavors on the board and keeps spirits high during chilly October nights.

Creating a full Halloween experience through these delightful pairings will enhance your Spooky Halloween Candy Charcuterie Board, leaving guests enchanted and happy.

Make Ahead Options

Creating a Halloween Candy Charcuterie Board in advance is a fantastic time-saver for busy home cooks! You can prep your decorative elements, such as themed toppers and small bowls, up to 24 hours ahead. For optimal freshness, arrange the candies into their respective bowls, but leave the cupcakes to be added just before serving to maintain their delightful texture. When ready to impress your guests, all you need to do is assemble the prepped items on the board and add any last-minute decorations. With this approach, your Halloween Candy Charcuterie Board will still look just as festive and inviting, allowing you to spend more time enjoying the festivities!

Storage Tips for Halloween Candy Charcuterie Board

Fridge: Store any leftovers in airtight containers in the refrigerator for up to a week to keep them fresh and flavorful.

Room Temperature: Unwrapped candies can stay at room temperature in a cool, dry place for about 3 days, but be sure to cover or seal them to prevent them from hardening.

Freezer: If you want to save any leftover cupcakes or soft candies, you can freeze them for up to 2 months. Make sure they are well-wrapped to prevent freezer burn.

Reheating: When ready to serve again, allow the frozen items to thaw in the fridge overnight. Avoid reheating the candies; instead, let the board come back to room temperature to maintain the best texture for your Halloween Candy Charcuterie Board.

Halloween Candy Charcuterie Board Variations

Embrace the spirit of creativity and make this festive board your own with some delightful customizations!

  • Healthier Swap: Substitute candies with fresh fruits like apple slices or grapes for a refreshing twist.
    This not only adds nutrition but also a pop of color that harmonizes beautifully with the Halloween theme.

  • Nutty Crunch: Incorporate assorted nuts or trail mix for a delightful crunch and unique flavor profile.
    Mixed nuts provide a great contrast to the sweetness of candies, perfect for those who enjoy both sweet and savory tastes.

  • Spicy Surprise: Add a few spicy snacks like chili-lime popcorn or spicy chocolate for a thrilling heat level.
    This unexpected kick can tantalize your taste buds and surprise your guests, stirring up a delicious adventure in every bite.

  • Themed Containers: Use festive containers shaped like pumpkins or ghosts to hold your treats.
    This not only adds charm but enhances the visual appeal, encouraging guests to indulge without hesitation.

  • Cupcake Variety: Experiment with cupcake flavors—try red velvet or pumpkin spice to match the occasion!
    These seasonal flavors can elevate your board into a true festive showcase everyone will adore.

  • Movie Magic: Base your board's theme on a favorite Halloween movie, like "Hocus Pocus," featuring candies that represent the film.
    This personalized touch will resonate with fans and ignite wonderful conversations among guests.

  • Gourmet Touch: Replace standard chocolates with gourmet options, like artisan truffles or flavored caramels for a sophisticated flair.
    Your guests will appreciate this elevated experience, adding a touch of elegance to your festive board.

  • Decorative Edibles: Incorporate edible flowers or spooky-themed chocolate-covered fruits for a whimsical look that’s truly unique.
    This will make your board not just a treat to eat, but also a feast for the eyes!

Let your imagination run wild as you explore these variations! Check out some expert tips to enhance your presentation even further and ensure your Halloween Candy Charcuterie Board is a showstopper at your next gathering.

Halloween Candy Charcuterie Board Recipe FAQs

What kinds of candies should I choose for my Halloween Candy Charcuterie Board?
Absolutely! Aim for a mix of textures and flavors to please every palate. Seasonal favorites like gummy worms, candy corn, chocolate bars, and Skittles are excellent choices. You can also spice up your board by incorporating themed treats like pumpkin-shaped chocolates or ghost gummies for that extra festive flair!

How should I store leftovers from my Halloween Candy Charcuterie Board?
Keep your delicious extras fresh by placing them in airtight containers. You can store them in the fridge for up to a week, which helps maintain their flavor and texture. If you’re dealing with unwrapped candies, keep them in a cool, dry spot at room temperature for around 3 days. Just remember to seal them to prevent any hardening!

Can I freeze items from my Halloween Candy Charcuterie Board?
Absolutely! If you have leftover cupcakes or soft candies, you can freeze them for up to 2 months. To freeze, make sure they’re wrapped tightly to prevent freezer burn. When you’re ready to enjoy them again, simply let them thaw in the fridge overnight, and they'll be ready to go!

What if my board looks too empty or disorganized?
Very common concern! If your board feels sparse or chaotic, just rearrange to your heart’s content. Start by layering larger items first, followed by smaller treats to add dimension. Play around with colors and textures—mixing soft candies with crunchier options adds visual balance. Trust your instincts, and don't hesitate to shift things until it looks just right!

Are there any dietary considerations I should keep in mind?
Definitely! While this board is a fun treat, consider your guests' dietary needs. Always be mindful of allergies; for example, nut allergies are common, so select candies carefully. If you want to substitute some treats for a healthier option, try adding fruits or nuts. This way, everyone can join in the fun and enjoy your Halloween Candy Charcuterie Board!

Halloween Candy Charcuterie Board

Create an Inviting Halloween Candy Charcuterie Board Delight

This Halloween Candy Charcuterie Board is a festive and flexible centerpiece for your gatherings, showcasing a delightful array of treats.
Print Recipe Pin Recipe
Prep Time 15 minutes mins
Total Time 15 minutes mins
Servings: 10 pieces
Course: Snacks
Cuisine: American
Calories: 250
Ingredients Equipment Method Nutrition Notes

Ingredients
  

For the Candy Selection
  • 1 bag Gummy Worms
  • 5 pieces Chocolate Bars Fun-sized varieties
  • 1 cup Candy Corn
  • 1 cup Skittles
  • 1 cup Seasonal Treats Pumpkin-shaped chocolates or ghost gummies
For the Cupcakes
  • 12 pieces Mini Cupcakes Mix of flavors with Halloween-themed icing
  • 1 cup Sprinkles Spooky sprinkles like bats and pumpkins
For Serving
  • 3 pieces Small Bowls For serving smaller candies like M&Ms
  • 1 piece Large Tray or Board A black tray works beautifully
For Decorations
  • 3 pieces Spooky Toppers Plastic spiders or mini skeletons
  • 2 pieces Themed Containers Halloween-themed tins or jars

Equipment

  • Large black tray or board
  • Small bowls

Method
 

Step-by-Step Instructions
  1. Prepare Your Board: Select a large black tray and ensure it's clean and dry.
  2. Layer Larger Items: Arrange bowls of candy and larger treats like chocolate bars and gummy worms.
  3. Add Variety with Small Bowls: Fill small bowls with candies and place them around the board.
  4. Fill Gaps with Smaller Treats: Add smaller candies and treats to create layers.
  5. Create a Cohesive Look: Mix different shapes and sizes for a balanced arrangement.
  6. Add Decorative Touches: Incorporate themed decorations to enhance the festive vibe.
  7. Final Arrangement and Adjustments: Assess and rearrange elements for a delightful presentation.

Nutrition

Serving: 1board pieceCalories: 250kcalCarbohydrates: 30gProtein: 2gFat: 12gSaturated Fat: 7gCholesterol: 5mgSodium: 100mgPotassium: 100mgFiber: 1gSugar: 20gCalcium: 2mgIron: 4mg

Notes

This board is perfect for Halloween parties, movie nights, or as a whimsical treat at home.

Tried this recipe?

Let us know how it was!

Spooky Chorizo Hand Pies That Will Wow Your Halloween Guests

October 16, 2025 by Grace Snow Leave a Comment

Every October, as the leaves turn crisp and the air fills with excitement, my kitchen transforms into a hub of spooky creativity. This year, I’m thrilled to share my Spooky Chorizo Hand Pies—fun, savory snacks that are sure to delight both kids and adults. With a flaky, golden crust enveloping a perfectly spicy and cheesy filling, these hand pies not only bring a festive flair to any Halloween gathering but also make for an enjoyable cooking project to tackle with family. They're easy to whip up and can even be made ahead of time, allowing you to focus on the fun of trick-or-treating and spooky celebrations. Curious to learn how to bring a little Halloween magic into your kitchen? Let’s dive into this delicious recipe!

Why Are Spooky Chorizo Hand Pies Delicious?

Savory Satisfaction: The rich combination of spicy chorizo and creamy cheese makes for a filling snack that is bursting with flavor.

Fun to Make: It's a fantastic cooking project to share with kids or friends—shaping the pies into festive pumpkin faces adds playful creativity!

Perfect for Sharing: These hand pies are best served warm, making them a crowd-pleaser during Halloween parties, and they pair wonderfully with your favorite dipping sauces like salsa or guacamole.

Make Ahead Convenience: They can be prepared in advance, allowing you to save time on the big night—just bake fresh before serving for the ultimate crispy texture.

Versatile Choices: Feel free to experiment with various fillings or cheese alternatives, making these hand pies suitable for any palate.

Embrace the spirit of the season and check out other delicious Halloween recipes, like easy homemade empanada dough, to keep the festivities rolling!

Spooky Chorizo Hand Pie Ingredients

For the Dough
• All-Purpose Flour – Provides structure to the dough; can substitute with gluten-free flour for a gluten-free version.
• Sea Salt – Enhances overall flavor, making each bite more satisfying.
• Unsalted Butter – Contributes to a flaky texture; use chilled butter for best results.
• Chilled Water – Essential for forming the dough; adjust water amount as needed for the right consistency.
• Egg – Acts as a binding agent and helps achieve a golden-brown finish when used for egg wash.
• Apple Cider Vinegar or Lemon Juice – Adds slight acidity which improves the dough's texture.

For the Filling
• Ground Chorizo – The key ingredient that adds spice and flavor to the filling; choose beef or pork chorizo based on preference.
• Minced Pork – Adds texture and protein; can easily be swapped with beef, chicken, or turkey if desired.
• Paprika – Deepens the flavor of the filling, enhancing its savory profile.
• Onion – Provides a base flavor; finely chop for even cooking and distribution.
• Garlic – Complements the chorizo with aromatic notes.
• Cayenne Pepper (optional) – Adds an extra kick; adjust the amount based on your spice preference.
• Oaxaca Cheese – Delivers a creamy, melty texture; substitute with Monterey Jack if needed.
• Manchego Cheese – Offers a nutty flavor; can be replaced with any aged cheese that shares a similar flavor profile.

For Assembly
• Room Temperature Water – Used for sealing the edges of the pies to ensure a tight closure.

With these ingredients ready to go, you'll be well on your way to creating delightful Spooky Chorizo Hand Pies that will impress your guests this Halloween!

Step‑by‑Step Instructions for Spooky Chorizo Hand Pies

Step 1: Prepare the Dough
In a large mixing bowl, whisk together 2 cups of all-purpose flour and 1 teaspoon of sea salt. Cut in 1 cup of chilled unsalted butter using a pastry cutter until the mixture resembles coarse crumbs. In a separate bowl, combine 1 beaten egg, 6 tablespoons of chilled water, and a splash of apple cider vinegar. Create a well in the flour mixture and pour in the egg mixture, mixing gently until a dough forms. Wrap the dough in plastic and chill for at least 1 hour.

Step 2: Make the Filling
While the dough chills, heat a skillet over medium heat. Add 1 finely chopped onion and sauté until translucent, about 5 minutes. Next, stir in 6 ounces of ground chorizo and ½ cup of minced pork, cooking until browned, approximately 7-10 minutes. Add 1 teaspoon of paprika, 2 minced garlic cloves, and optional cayenne pepper to taste, mixing well. Remove from heat and let the filling cool.

Step 3: Assemble the Hand Pies
Once the dough is chilled, preheat your oven to 375°F (190°C) and prepare a baking tray lined with parchment paper. Roll out the dough on a floured surface to about ¼ inch thick. Using a pumpkin-shaped cookie cutter, cut out shapes, reserving half for the tops. On each base shape, place a spoonful of the chorizo filling and a sprinkle of Oaxaca and Manchego cheese. Moisten the edges with water, then top with a cutout and press to seal tightly. Crimp the edges for an extra touch!

Step 4: Bake the Hand Pies
Arrange the assembled Spooky Chorizo Hand Pies on the prepared baking tray. For a beautiful golden finish, brush them with egg wash made from 1 beaten egg. Bake in the preheated oven for 20-30 minutes, or until the tops are golden brown and flaky. Keep an eye on them to ensure they don’t over-bake. Once done, remove them from the oven and let cool slightly before serving.

Step 5: Serve Warm
Serve the Spooky Chorizo Hand Pies warm, showcasing their crispy, flaky crust and spicy filling. Pair them with your favorite dipping sauces like salsa or sour cream for added flavor. These delightful hand pies make a perfect Halloween treat, ready to be enjoyed by kids and adults alike.

Make Ahead Options

These Spooky Chorizo Hand Pies are perfect for meal prep, making your Halloween festivities smoother! You can prepare the dough and filling up to 3 days in advance. Simply follow the initial steps for making the dough and storing it wrapped in plastic in the refrigerator. For the filling, cool it thoroughly before placing it in an airtight container. Then, when it’s time to bake, roll out the chilled dough, assemble the hand pies, and brush them with egg wash. Bake them fresh for 20-30 minutes until golden and flaky, ensuring they remain just as delicious as if they were made on the spot!

How to Store and Freeze Spooky Chorizo Hand Pies

Room Temperature: Store baked hand pies at room temperature in an airtight container for up to 2 days. This keeps them fresh without losing their delightful crispiness.

Fridge: If you have leftovers, refrigerate the hand pies in an airtight container for up to 3 days. Reheat in the oven to regain their flaky texture.

Freezer: These Spooky Chorizo Hand Pies can be frozen before or after baking. Wrap each pie in plastic wrap and store in a freezer-safe bag for up to 3 months.

Reheating: To reheat, place frozen pies directly in a preheated oven at 375°F (190°C) for about 25-30 minutes, or until heated through and crispy. Enjoy these savory snacks any time!

Spooky Chorizo Hand Pies Variations

Feel free to unleash your creativity in the kitchen with these fun twists and substitutions to personalize your hand pies!

  • Shredded Chicken: Swap chorizo for shredded chicken mixed with taco seasoning for a milder, yet flavorful filling.

  • Vegetarian Option: Use spiced black beans or lentils instead of meat for a delicious veggie-packed alternative that’s satisfying and wholesome.

  • Cheese Combo: Try pepper jack cheese in place of Oaxaca for a zesty kick that adds extra excitement to each bite.

  • Add Veggies: Incorporate finely chopped bell peppers or corn into the filling for a burst of color and texture; it rounds out the flavors beautifully!

  • Gluten-Free Dough: Substitute all-purpose flour with a gluten-free blend to keep these tasty hand pies accessible for everyone at your gathering.

  • Heat Boost: Add jalapeños or crushed red pepper flakes to the filling to turn up the heat and excite taste buds—perfect for spice lovers!

  • Sweet Twist: For a sweeter version, mix in a dollop of pumpkin puree or applesauce with your chorizo filling for a delightful autumn-inspired twist.

  • Nutty Flavor: Opt for aged Gouda instead of Manchego to introduce a unique, nutty flavor that complements the spiciness of the chorizo.

With these variations, there’s a Spooky Chorizo Hand Pie for everyone! And for more culinary inspirations, don’t miss out on other:easy homemade empanada dough to keep the festivities rolling.

Expert Tips for Spooky Chorizo Hand Pies

  • Chilled Ingredients: Always use chilled butter and water for your dough to achieve that flaky texture everyone loves in Spooky Chorizo Hand Pies.

  • Don’t Overfill: Avoid the temptation to fill your pies too much! Overfilling can lead to bursting during baking, so stick to a spoonful for the best results.

  • Creative Shapes: Use various cookie cutters to create fun shapes, not just pumpkins. This will elevate your presentation and keep your family engaged in the cooking process.

  • Watch the Bake: Keep an eye on your hand pies as they bake. The baking time can vary, so look for a beautiful golden brown to ensure they don’t overcook.

  • Adjust Spice Levels: If you're cooking with kids, consider reducing the cayenne pepper so everyone can enjoy the smoky chorizo flavor without too much heat.

  • Make Ahead: These hand pies can be made in advance! Assemble them and freeze until you're ready to bake for a fresh, crowd-pleasing snack whenever you need it.

What to Serve with Spooky Chorizo Hand Pies

Transform your Halloween celebration into a culinary feast by pairing these delightful hand pies with complementary bites and sips!

  • Creamy Guacamole: This smooth avocado dip adds a cool, creamy contrast to the spicy filling of the hand pies, enhancing every bite.

  • Salsa Verde: A zesty green salsa packs a punch of flavor that balances the richness of the chorizo, making for a refreshing accompaniment.

  • Crispy Tortilla Chips: Perfect for dipping into salsa or guacamole, crunchy tortilla chips add a satisfying texture that enhances the overall snacking experience.

  • Sweet Corn Salad: This fresh, sweet salad brings contrasting flavors to the savory pies, with bursts of sweetness that play beautifully off the spices.

  • Roasted Vegetables: A medley of sweetness from roasted bell peppers, zucchini, and onions offers a colorful and flavorful side that rounds out your meal.

  • Hot Apple Cider: Warm, spiced apple cider is a comforting drink choice, infusing the spirit of fall into your Halloween gathering and providing a lovely contrast to the hand pies.

Serving these delightful options alongside your Spooky Chorizo Hand Pies creates a festive and memorable Halloween feast that everyone will enjoy!

Spooky Chorizo Hand Pies Recipe FAQs

What should I look for when selecting chorizo?
Absolutely! When choosing chorizo, look for quality brands with a high meat content. The color should be vibrant red, indicating good seasoning. Avoid chorizo with excessive fat or fillers. Fresh chorizo can also have a softer texture, while cured Spanish chorizo will be firmer and ready to eat.

How should I store my Spooky Chorizo Hand Pies?
To enjoy your hand pies at their best, store them in an airtight container at room temperature for up to 2 days. If you have leftovers, place them in the refrigerator for up to 3 days. To maintain their crispiness, it's best to reheat them in the oven!

Can I freeze the Spooky Chorizo Hand Pies?
Yes! You can freeze them before or after baking. For freezing before baking, wrap each assembled pie in plastic wrap and place them in a freezer-safe bag. They’ll stay fresh for up to 3 months. When you're ready to bake, remove the plastic wrap and bake directly from frozen, adding an extra 5-10 minutes to the baking time.

What if my dough is too crumbly?
If your dough is too crumbly, don't worry! Add a tablespoon of chilled water gradually while mixing to help bring it together. Make sure the butter is cold and you're mixing just until combined to achieve that flaky texture.

Are these hand pies suitable for gluten-free diets?
Absolutely! To make these Spooky Chorizo Hand Pies gluten-free, simply substitute the all-purpose flour with a 1:1 gluten-free flour blend. I highly recommend checking the label to ensure it includes xanthan gum for the best results in texture.

Can I make these in advance?
Very! You can prepare the hand pies ahead of time. Assemble them, then either freeze them for later baking or refrigerate them for baking the next day. Bake just before your gathering for that fresh, warm deliciousness!

Spooky Chorizo Hand Pies

Spooky Chorizo Hand Pies That Will Wow Your Halloween Guests

These Spooky Chorizo Hand Pies are fun, savory snacks perfect for Halloween gatherings, bursting with spice and flavor.
Print Recipe Pin Recipe
Prep Time 1 hour hr
Cook Time 30 minutes mins
Chilling Time 1 hour hr
Total Time 2 hours hrs 30 minutes mins
Servings: 12 pies
Course: Snacks
Cuisine: American
Calories: 250
Ingredients Equipment Method Nutrition Notes

Ingredients
  

For the Dough
  • 2 cups All-Purpose Flour Can substitute with gluten-free flour.
  • 1 teaspoon Sea Salt Enhances flavor.
  • 1 cup Unsalted Butter Chilled for best results.
  • 6 tablespoons Chilled Water Adjust amount as needed.
  • 1 large Egg For binding and egg wash.
  • 1 tablespoon Apple Cider Vinegar or Lemon Juice Adds slight acidity.
For the Filling
  • 6 ounces Ground Chorizo Choice of beef or pork.
  • ½ cup Minced Pork Can substitute with any protein.
  • 1 teaspoon Paprika Enhances the flavor.
  • 1 medium Onion Finely chopped.
  • 2 cloves Garlic Minced.
  • 1 teaspoon Cayenne Pepper Optional, adjust to taste.
  • 1 cup Oaxaca Cheese Can substitute with Monterey Jack.
  • ½ cup Manchego Cheese Substitute with any similar aged cheese.
For Assembly
  • 3 tablespoons Room Temperature Water For sealing the edges.

Equipment

  • Mixing Bowl
  • Skillet
  • Rolling Pin
  • Baking tray
  • Parchment Paper

Method
 

Dough Preparation
  1. In a large mixing bowl, whisk together flour and sea salt. Cut in chilled unsalted butter until mixture resembles coarse crumbs. In another bowl, combine beaten egg, chilled water, and vinegar. Pour into flour mixture and mix gently until dough forms. Wrap in plastic and chill for at least 1 hour.
Filling Preparation
  1. Heat a skillet over medium heat. Sauté finely chopped onion until translucent, about 5 minutes. Add ground chorizo and minced pork, cooking until browned, approximately 7-10 minutes. Mix in paprika, minced garlic, and cayenne pepper to taste. Remove from heat and let cool.
Assembly
  1. Preheat oven to 375°F (190°C). Roll out chilled dough on floured surface to about ¼ inch thick. Cut out pumpkin shapes, reserving half for tops. On each base, place a spoonful of filling and a sprinkle of cheeses. Moisten edges, top with cutout, and seal tightly.
Baking
  1. Arrange hand pies on baking tray. Brush with egg wash made from beaten egg. Bake for 20-30 minutes until tops are golden brown and flaky. Let cool slightly before serving.
Serving
  1. Serve warm with favorite dipping sauces like salsa or sour cream.

Nutrition

Serving: 1pieCalories: 250kcalCarbohydrates: 30gProtein: 12gFat: 12gSaturated Fat: 7gPolyunsaturated Fat: 1gMonounsaturated Fat: 4gCholesterol: 50mgSodium: 400mgPotassium: 200mgFiber: 2gSugar: 1gVitamin A: 300IUVitamin C: 2mgCalcium: 150mgIron: 2mg

Notes

Use chilled ingredients for a flaky texture. Avoid overfilling the pies to prevent bursting during baking. Assemble and freeze hand pies for later use for convenience.

Tried this recipe?

Let us know how it was!

Halloween Witch Chips and Guacamole: A Spooky Snack Delight

October 15, 2025 by Grace Snow Leave a Comment

The air is alive with anticipation, and the scent of autumn fills the room. With Halloween just around the corner, I couldn't resist creating a dish that transforms this festive season into a healthier celebration. Meet my Halloween Witch Chips and Guacamole — a fun and visually delightful snack that’s perfect for all ages! These whimsical blue corn tortilla chips shaped like witches’ hats paired with creamy, nutritious guacamole not only look adorable but also offer a satisfying crunch. As a vegetarian and vegan-friendly option, this spooky treat is an absolute crowd-pleaser at any gathering. Whether you're hosting a Halloween party or simply looking for a fun way to enjoy healthy snacks, this recipe is a game changer. Isn’t it time to spice up your Halloween festivities with a bite that’s both fun and nurturing? Let’s dive into this enchanting creation!

Why Are Witch Chips So Fun?

Playful Presentation: These Halloween Witch Chips are not just snacks; they're a visual delight that sparks joy and creativity. Children and adults alike will love the whimsical design of witch faces made from guacamole and veggies.

Healthy Treats: By using fresh ingredients like creamy avocados and vibrant vegetables, you can enjoy a nutritious option instead of typical Halloween sweets, helping you maintain a healthy lifestyle.

Versatile Ingredients: This recipe is easily customizable! Feel free to swap out veggies or even try different dipping sauces to cater to the crowd. If you enjoyed these, don’t miss out on the delicious Pan Fried Shrimp for another festive recipe!

Quick and Easy: With straightforward steps for both guacamole preparation and assembly, you can whip these up in no time for last-minute gatherings.

Crowd Favorite: Perfect for parties, this dish allows you to impress guests with your creativity while ensuring everyone can enjoy a veggie-packed snack that keeps the mood festive!

Halloween Witch Chips and Guacamole Ingredients

For the Guacamole
• Avocados – Creaminess and rich flavor; you can swap with ripe bananas for a different texture.
• Garlic clove – Adds savory depth; optional for those sensitive to strong flavors.
• Roma tomatoes – Contributes freshness and acidity; regular tomatoes may be used instead.
• Onion – Adds sharpness and texture; shallots can be a milder alternative.
• Lime juice – Offers acidity to balance flavors; lemon juice is a viable substitution.
• Fresh cilantro – Enhances the guacamole's freshness; omit if you dislike coriander.
• Jalapeño – Adds heat; can be left out for a milder taste.

For the Witch Chips
• Blue corn tortilla chips – Serve as the witch's hat, adding crunch; use regular chips if blue corn is unavailable.
• Black olive – Functions as the witch's eyes; any dark olive variety will work.
• Slice of avocado – Forms the nose for a matching hue; extra pieces of cucumber can alternatively serve this role.
• Slice of red bell pepper – Represents the mouth's bold color; any other colorful peppers may be suitable.
• Carrot sticks – Create an interesting hair effect; broccoli or zucchini can replace them for varying textures.

Step‑by‑Step Instructions for Halloween Witch Chips and Guacamole

Step 1: Prepare the Guacamole
Begin by mashing five ripe avocados in a large mixing bowl using a potato masher or fork until smooth and creamy, about 2-3 minutes. Next, mix in minced garlic, diced Roma tomatoes, finely chopped onion, fresh lime juice, chopped cilantro, and jalapeño (if using). Stir until all ingredients are well combined and vibrant in color. You can serve immediately or cover the guacamole with lime juice to prevent browning while refrigerating.

Step 2: Shape the Witch’s Face
On a large plate, spoon the creamy guacamole and shape it into a whimsical face, smoothing it with the back of a spoon. Make sure to leave enough guacamole for facial features. Position a halved black olive for the eyes, a slice of avocado as the nose, and a slice of red bell pepper to create a bright mouth. The arrangement should be playful and inviting, resembling a friendly witch.

Step 3: Create Colorful Hair
Next, grab your carrot sticks and arrange them around the top of the guacamole face to form the witch's hair, ensuring they stick out playfully. For more variety, feel free to mix different vegetable options, like broccoli or zucchini, to add interesting textures and colors. Make sure the hair looks full and vibrant to enhance the visual appeal of your Halloween Witch Chips and Guacamole.

Step 4: Assemble the Witch’s Hat
Now it's time to adorn the witch's head! Carefully arrange blue corn tortilla chips on the top of the guacamole face to form a charming witch's hat. Ensure the chips are placed at different angles for a whimsical look, just like a classic witch's hat. The crunchy texture of the chips will create a delicious contrast with the creamy guacamole, making this spooky snack delightful both to see and to taste.

Step 5: Serve and Enjoy
Finally, present your Halloween Witch Chips and Guacamole masterpiece at your gathering! This creative dish will surely wow your guests as an appetizer. For added flair, consider serving with additional slices of vegetables or a side of your favorite salsa for dipping. Remember, the key is to have fun while preparing this festive treat, creating lasting memories around the Halloween table!

What to Serve with Halloween Witch Chips and Guacamole

Elevate your Halloween festivities with delightful accompaniments to make this fun and flavorful dish truly memorable.

  • Crispy Veggie Platter: A colorful array of fresh vegetables like bell peppers, cucumbers, and celery will add crunch and contrast to the creamy guacamole.
  • Spicy Salsa: A zesty and tangy salsa complements the flavors brilliantly, uplifting the overall experience of your spooky snack. Choose mango salsa for a fruity twist!
  • Homemade Tortilla Chips: Boost the fun factor by crafting your own chips from corn tortillas—seasoned and baked, they'll be the perfect crunchy base for your guacamole.
  • Seasoned Popcorn: Lightly salted popcorn sprinkled with paprika or nutritional yeast creates a surprising snack that’s perfect for munching in between!
  • Apple Slices with Almond Butter: For a bit of sweetness, serve crisp apple slices with a drizzle of almond butter, balancing the savory witch chips with natural sweetness.
  • Sparkling Water with Lime: A refreshing drink option, sparkling water dressed up with lime slices adds a fizzy lift to your Halloween gathering, keeping everyone hydrated!
  • Pumpkin Spice Cookies: End on a sweet note with soft and chewy pumpkin spice cookies that resonate with the season, providing comfort alongside the delightful savory flavors.
  • Roasted Chickpeas: For a healthy crunch, offer roasted chickpeas seasoned with your favorite spices; they'll add a protein punch and a satisfying crunch to your buffet.
  • Fall-themed Cocktails: For adults, consider serving festive cocktails like spiked apple cider or pumpkin margaritas, enhancing the celebration atmosphere!

Halloween Witch Chips and Guacamole Variations

Inviting you to sprinkle your own creativity into this spooky treat, let’s explore some delightful adjustments!

  • Dairy-Free: Replace any cheese with nutritional yeast for a cheesy flavor without dairy.
  • Spicy Twist: Add diced jalapeños directly into the guacamole for an extra kick. It will give your dish a fiery surprise that thrill seekers will adore.
  • Herbaceous Hues: Swap cilantro with fresh basil or parsley for a unique flavor profile; both herbs bring freshness while complementing the guacamole beautifully.
  • Nutty Finish: Stir in a tablespoon of tahini for added creaminess and a rich, nutty taste. This subtle change will add depth to your guacamole.
  • Colorful Chips: Use beet or spinach chips instead of blue corn for a vibrant, eye-catching look. Kids will be fascinated, and you'll enjoy the added nutrients!
  • Crunchy Alternatives: Instead of tortilla chips, try pita chips or crunchy veggie sticks for a different texture that's just as fun for dipping.
  • Seasonal Surprise: Mix in pumpkin puree with the guacamole for a fall-inspired twist. This adds creaminess and a touch of seasonal flavor.
  • Salsa Boost: Enhance your guacamole with a scoop of your favorite salsa for extra flavor. You might love the kick of a fresh mango salsa!

No doubt that you’ll find something in this mix to elevate your own Halloween festivities! For more savory ideas, don't miss the delicious Chickpea Spinach Curry or the rewarding flavors in Roasted Corn Fried. Happy cooking!

How to Store and Freeze Halloween Witch Chips and Guacamole

Fridge: Store leftover guacamole in an airtight container with plastic wrap pressed against the surface to minimize air exposure. It will stay fresh for up to 3 days.

Freezer: If you want to freeze guacamole, make sure to place it in an airtight container, pressing out as much air as possible to prevent browning. It can be frozen for up to 3 months.

Reheating: While the Halloween Witch Chips should be consumed fresh for optimal crunch, guacamole can be thawed overnight in the fridge. Stir well before serving for best results.

Tips: For best results, prepare the Halloween Witch Chips just before serving, as they can lose their crispness when stored.

Make Ahead Options

These Halloween Witch Chips and Guacamole are perfect for meal prep and can save you a lot of time on the big day! You can prepare the guacamole up to 24 hours in advance by mashing the avocados and mixing in the rest of the ingredients, then store it in an airtight container with a layer of lime juice on top to prevent browning. The veggies can also be prepped in advance—slice your carrots, peppers, and avocado up to 3 days beforehand and keep them refrigerated in separate containers. When you're ready to serve, simply assemble the witch's face using the prepped components and crown it with the blue corn tortilla chips for a fun and fresh presentation that’s just as delicious as if you made it all on the day!

Expert Tips for Halloween Witch Chips and Guacamole

• Ripeness Matters: Ensure your avocados are perfectly ripe for creamy guacamole; use slightly soft ones, but not mushy, for the best texture.

• Color Variation: Feel free to mix up the vegetables used for the witch’s face; colorful peppers, radishes, or even cherry tomatoes can add fun to your Halloween Witch Chips and Guacamole.

• Layering for Freshness: If not serving immediately, protect your guacamole from browning by layering it with lime juice; this keeps it looking fresh and appetizing.

• Crunchy Contrast: For added texture and flavor, consider baking your own tortilla chips from corn tortillas, giving your witch’s hat a homemade touch.

• Mix It Up: Experiment with your guacamole's flavors by adding spices like cumin or smoked paprika, or mixing in different herbs instead of cilantro for a unique twist.

Halloween Witch Chips and Guacamole Recipe FAQs

What kind of avocados should I use for the best guacamole?
Absolutely! For the creamiest guacamole, look for avocados that are slightly soft to the touch but not mushy. Hass avocados are my go-to; they have a rich flavor and creamy texture that's perfect for this spooky snack.

How can I store leftover guacamole?
To keep your guacamole fresh, transfer it into an airtight container and press a piece of plastic wrap directly onto the surface before sealing the lid. This minimizes air exposure and allows it to stay fresh in the fridge for up to 3 days. Don't forget about that lime juice to slow down browning!

Can I freeze guacamole?
Yes, you can! To freeze guacamole, place it in an airtight container—be sure to press out as much air as possible to prevent browning. It can be frozen for up to 3 months. Thaw it overnight in the refrigerator and stir well before serving. It's a great way to enjoy this tasty dip later on!

What if I want to make the witch's features gluten-free or accommodate allergies?
No problem at all! For gluten-sensitive guests, simply use gluten-free corn tortilla chips instead of regular ones. Additionally, if you're accommodating people with allergies, consider using alternative vegetables for facial features, such as cucumber for the nose or omitting the jalapeño if someone is sensitive to spice.

How can I ensure my tortilla chips stay crunchy when serving?
To retain the crunchiness of your Halloween Witch Chips, it's best to prepare and serve them just before your event. If you must prepare them in advance, store them in an airtight container at room temperature and avoid refrigeration, which can make them soggy. Enjoy the festive crunch!

Halloween Witch Chips and Guacamole

Halloween Witch Chips and Guacamole: A Spooky Snack Delight

Enjoy Halloween with these Halloween Witch Chips and Guacamole, a fun and nutritious snack perfect for all ages!
Print Recipe Pin Recipe
Prep Time 15 minutes mins
Total Time 15 minutes mins
Servings: 6 servings
Course: Snacks
Cuisine: American
Calories: 200
Ingredients Equipment Method Nutrition Notes

Ingredients
  

For the Guacamole
  • 5 ripe avocados can substitute with ripe bananas
  • 1 clove garlic optional
  • 2 medium Roma tomatoes can use regular tomatoes
  • 1 small onion can substitute with shallots
  • 1 tablespoon lime juice can substitute with lemon juice
  • 0.5 cup fresh cilantro omit if disliked
  • 1 small jalapeño leave out for milder taste
For the Witch Chips
  • 1 bag blue corn tortilla chips can use regular chips
  • 1 small black olive use any dark olive
  • 1 slice avocado cucumber can be used instead
  • 1 slice red bell pepper other colorful peppers may be used
  • a few carrot sticks can replace with broccoli or zucchini

Equipment

  • Mixing Bowl
  • potato masher
  • Spoon
  • Plate

Method
 

Step-by-Step Instructions
  1. Mash the ripe avocados in a bowl until smooth. Mix in garlic, tomatoes, onion, lime juice, cilantro, and jalapeño. Stir well.
  2. On a plate, shape the guacamole into a whimsical face. Use black olives for eyes, avocado slice for the nose, and red pepper for the mouth.
  3. Arrange carrot sticks around the guacamole for hair, or use broccoli/zucchini for variety.
  4. Place blue corn tortilla chips on top of the guacamole to create a witch's hat, varying angles for a whimsical look.
  5. Serve the Halloween Witch Chips and Guacamole at your gathering, optionally with vegetable slices or salsa for dipping.

Nutrition

Serving: 1servingCalories: 200kcalCarbohydrates: 20gProtein: 3gFat: 12gSaturated Fat: 2gPolyunsaturated Fat: 1gMonounsaturated Fat: 9gSodium: 200mgPotassium: 400mgFiber: 6gSugar: 1gVitamin A: 10IUVitamin C: 30mgCalcium: 2mgIron: 4mg

Notes

Ensure avocados are ripe for the best texture and taste. Consider layering with lime juice if not serving immediately to maintain freshness.

Tried this recipe?

Let us know how it was!
  • « Previous Page
  • 1
  • …
  • 16
  • 17
  • 18
  • 19
  • 20
  • …
  • 25
  • Next Page »

Welcome!

Hi, I’m Grace, a Sydney-based home cook with a passion for bold flavors and trending ingredients. Whether you’re a busy beginner or a seasoned foodie, you’ll find dishes here that are fresh, fun, and full of flavor.

More about me

Popular Recipes

  • Honey Lime Chicken & Avocado Rice Bowl
    Honey Lime Chicken & Avocado Rice Bowl for a Flavor Burst
  • Tasty Italian Pasta Salad
    Delight in this Easy Tasty Italian Pasta Salad for Summer Fun
  • Garlic Butter Chicken Pasta
    Garlic Butter Chicken Pasta That’ll Wow Your Family Tonight
  • Creamy, Spicy Chicken Pasta
    Creamy, Spicy Chicken Pasta with Fresh Summer Veggies

Footer

↑ back to top

About

  • Privacy Policy
  • Disclaimer
  • Terms & Conditions

Newsletter

  • Sign Up! for emails and updates

Contact

  • About me
  • Contact me

Copyright © 2025 TastyTrendIngredients