tastytrendingredients

  • Home
  • Recipes
    • Appetizers
    • Breakfast
    • Dessert
    • Dinner
    • Drinks
    • Salads
    • Snacks
    • Soups
  • About me
  • Contact
menu icon
go to homepage
  • Home
  • Recipes
    • Appetizers
    • Breakfast
    • Dessert
    • Dinner
    • Drinks
    • Salads
    • Snacks
    • Soups
  • About me
  • Contact
search icon
Homepage link
  • Home
  • Recipes
    • Appetizers
    • Breakfast
    • Dessert
    • Dinner
    • Drinks
    • Salads
    • Snacks
    • Soups
  • About me
  • Contact
×

Lemon Blueberry Cottage Cheese Protein Bites: Guilt-Free Treats

November 24, 2025 by Grace Snow Leave a Comment

As I opened my fridge and spotted the last of my fresh blueberries, a citrusy idea struck me: why not whip up some Lemon Blueberry Cottage Cheese Protein Bites? These little gems marry the delightful tang of lemon with the sweet burst of blueberries, all while giving your body a protein-packed boost. What I love most about these bites is how effortlessly they fit into a busy lifestyle—perfect for meal prepping and ready in no time! Plus, they cater to a variety of dietary needs, whether you’re gluten-free or seeking a vegan twist. Whether you’re heading out for a workout or just need a quick snack, these bites will keep you fueled and satisfied. Curious how these simple ingredients blend together for a tasty treat? Let’s dive into the recipe!

Why are these protein bites irresistible?

Nutritious Delight: Packed with protein from cottage cheese, these Lemon Blueberry Cottage Cheese Protein Bites are perfect for fueling your day.

Versatile Options: Easily adaptable for dietary needs, you can swap in Greek yogurt or plant-based alternatives, ensuring everyone can enjoy these treats.

Quick and Easy: With minimal prep time, they're a fantastic choice for busy individuals looking for healthy snacks.

Fruity and Fresh: The combination of sweet blueberries and zesty lemon creates a vibrant flavor profile that tantalizes your taste buds.

Meal Prep Friendly: Make a batch in advance for on-the-go snacking, or pair with Lemon Chicken Soup for a wholesome meal.

Guilt-Free Indulgence: Satisfy your cravings without any guilt—each bite is just 70 calories and offers a delicious balance of taste and nutrition!

Lemon Blueberry Cottage Cheese Protein Bites Ingredients

  • For the Protein Base
    Cottage Cheese – Provides protein and creaminess; substitute with Greek yogurt for a thicker texture or plant-based yogurt for a dairy-free option.

  • For the Flavor
    Fresh Blueberries – Adds natural sweetness and texture; ensure they are firm and fresh to avoid mushiness.
    Lemon Zest – Imparts a refreshing tang; use more zest for a stronger lemon flavor.
    Honey – Acts as a natural sweetener; substitute with maple syrup or agave for a vegan option.
    Vanilla Extract – Adds depth of flavor; ensure it's pure for the best taste.
    Salt – Enhances flavor; a pinch is sufficient.

  • For the Bulk
    Almond Flour – Gives structure and a nutty flavor; coconut flour can be used for a lower-carb option.

These delightful Lemon Blueberry Cottage Cheese Protein Bites are bound to be a staple in your healthy snacking repertoire!

Step‑by‑Step Instructions for Lemon Blueberry Cottage Cheese Protein Bites

Step 1: Mix the Base
In a large mixing bowl, combine 1 cup of cottage cheese, 1 cup of fresh blueberries, 2 tablespoons of lemon zest, 2 tablespoons of honey, 1 cup of almond flour, 1 teaspoon of vanilla extract, and a pinch of salt. Gently fold the ingredients together using a spatula, being careful not to crush the blueberries, until well-combined. Aim for a thick, cohesive mixture that still features whole blueberries.

Step 2: Chill the Mixture
Cover the mixing bowl with plastic wrap and refrigerate the mixture for 15–20 minutes. This chilling time allows the flavors to meld while firming up the mixture, making it easier to shape the protein bites. You'll know it’s ready when the mixture is slightly firm but still pliable, perfect for rolling into balls.

Step 3: Shape the Bites
Once the mixture is chilled, remove it from the refrigerator. Using a tablespoon, scoop out portions of the mixture and roll them into tight balls between your palms. Place each formed ball onto a parchment-lined baking sheet, ensuring they are spaced apart for easy handling. You should be able to make about 12-15 bites, depending on your scoop size.

Step 4: Optional Baking
If you prefer your Lemon Blueberry Cottage Cheese Protein Bites with a firmer texture, preheat your oven to 325°F (160°C). Once heated, bake the bites for 8–10 minutes or until the exterior feels slightly firm to the touch. Keep an eye on them and take them out when they just start to turn golden, as this will prevent them from drying out.

Step 5: Cool and Garnish
After baking, allow the protein bites to cool on the baking sheet for about 5 minutes. Then, transfer them to a wire rack to cool completely. For an extra touch, you can drizzle some additional honey over the bites and garnish with extra blueberries or a sprinkle of lemon zest for added freshness and visual appeal.

Step 6: Store or Serve
Once cooled, these Lemon Blueberry Cottage Cheese Protein Bites can be enjoyed immediately or stored in an airtight container. Keep them in the refrigerator for up to 3 days or freeze them for longer storage. Perfect for quick snacks or as a nutritious addition to your meal prep, these bites are ready to fuel your day!

Make Ahead Options

These Lemon Blueberry Cottage Cheese Protein Bites are perfect for meal prep, saving you time on busy days! You can prepare the mixture and refrigerate it for up to 24 hours before rolling it into bites. Simply combine all the ingredients, cover the bowl, and let it chill—this helps the flavors develop and keeps the mixture fresh. Once you're ready to serve, scoop and shape the bites, and bake them if you prefer a firmer texture. If you want to enjoy these delicious snacks later, store them in an airtight container in the fridge for up to 3 days, or freeze for up to 1 month. Just remember to thaw overnight before enjoying your delicious Lemon Blueberry Cottage Cheese Protein Bites!

Storage Tips for Lemon Blueberry Cottage Cheese Protein Bites

  • Room Temperature: These Lemon Blueberry Cottage Cheese Protein Bites are best enjoyed fresh, but if left out, they should not exceed 1 hour at room temperature to maintain their flavor and texture.

  • Fridge: Store in an airtight container in the refrigerator for up to 3 days. This keeps the bites fresh and ready for a quick grab-and-go snack!

  • Freezer: For longer storage, freeze the protein bites in a sealed container for up to 1 month. Thaw in the fridge overnight before enjoying to retain their delightful texture.

  • Reheating: If you prefer warm bites, you can reheat them in the microwave for 10-15 seconds before serving to bring back their soft, chewy goodness.

Expert Tips for Lemon Blueberry Cottage Cheese Protein Bites

  • Gentle Mixing: Avoid overmixing the batter to maintain the blueberries' integrity. A gentle touch ensures each bite has delightful bursts of berry flavor.

  • Chill Before Shaping: Always chill the mixture for 15–20 minutes before rolling. This firms it up, making it easier to handle and preventing flattening during baking.

  • Fresh Ingredients: Use only fresh, firm blueberries and freshly zested lemons for the best flavor in your Lemon Blueberry Cottage Cheese Protein Bites.

  • Baking Option: If you opt to bake, monitor closely to prevent drying out. Baking just until slightly golden helps keep them moist and chewy.

  • Flavor Variations: Don’t hesitate to customize your bites—consider adding nuts or dark chocolate chips for added texture and flavor to suit your taste preferences!

What to Serve with Lemon Blueberry Cottage Cheese Protein Bites

These delightful bites are not only a nutritious snack on their own but also pair wonderfully with various dishes and treats to create a satisfying meal!

  • Greek Yogurt Bowl: A creamy bowl of Greek yogurt enhances the protein content and complements the flavor profile with its tartness.

  • Fresh Fruit Salad: Crisp apples and juicy melons alongside your bites create a refreshing and vibrant meal, perfect for sunny days.

  • Nut Butter Toast: Spread almond or peanut butter on whole-grain toast for a satisfying crunch that balances the soft texture of the bites.

  • Green Smoothie: A spinach and banana smoothie elevates the healthy theme while adding a refreshing green boost, making it a perfect pairing.

  • Granola: Enjoy the protein bites with a dollop of granola for an added crunch and sweet contrast, perfect for breakfast or a snack.

  • Coconut Chia Pudding: For an indulgent treat, pair them with chia pudding infused with coconut milk, offering a tropical twist that complements the lemon flavor.

  • Herbal Iced Tea: A refreshing glass of mint or lemon-infused iced tea provides a cool sip that beautifully offsets the sweet-tartness of the protein bites.

Each pairing enhances the flavors and textures of the Lemon Blueberry Cottage Cheese Protein Bites, making your snacking experience even more enjoyable!

Lemon Blueberry Cottage Cheese Protein Bites Variations

Feel free to get creative with these scrumptious Lemon Blueberry Cottage Cheese Protein Bites and tailor them to your taste buds!

  • Dairy-Free: Substitute cottage cheese with a plant-based yogurt alternative to make it dairy-free while keeping it creamy.

  • Vegan Sweetener: Replace honey with maple syrup or agave nectar to keep these bites truly vegan-friendly.

  • Nut-Free: Swap almond flour for oat flour to create a nut-free version; it gives a delightful texture while keeping them gluten-free.

  • Add Texture: Fold in chopped nuts like walnuts or pecans for a delightful crunch, elevating both texture and taste.

  • Choco-Lovers Delight: Mix in dark chocolate chips to add a rich sweetness that contrasts beautifully with the tangy lemon.

  • Tropical Twist: Throw in some shredded coconut to give your protein bites a tropical vibe; it pairs wonderfully with the lemon and blueberries.

  • Extra Zest: For lemon enthusiasts, add a bit more lemon zest or a splash of lemon juice to amplify that fresh citrus flavor.

  • Heat It Up: Add a pinch of cayenne pepper or cinnamon for those who enjoy a little warmth to their sweet snacks—perfect for an unexpected flavor twist.

Each of these variations can help you discover new ways to enjoy these healthy snacks. If you're looking for even more inspiration, check out my delicious Potato Blue Cheese recipe or the refreshing element from a Jello Salad Cottage for a fun party treat!

Lemon Blueberry Cottage Cheese Protein Bites Recipe FAQs

What’s the best way to choose fresh blueberries?
Always look for blueberries that are firm, plump, and have a deep, rich color. Avoid any that show signs of mold or dark spots all over, as these indicate overripeness. Fresh blueberries should have a slight sheen and be free of wrinkles—this ensures you get that sweet burst of flavor in every bite!

How should I store Lemon Blueberry Cottage Cheese Protein Bites?
Store your Lemon Blueberry Cottage Cheese Protein Bites in an airtight container in the refrigerator for up to 3 days. This keeps them fresh and ready for a quick snack. If you’ve made a larger batch, they can be frozen in a sealed container for up to 1 month. Just be sure to thaw them in the fridge overnight before enjoying!

Can I freeze these protein bites? How?
Absolutely! To freeze your Lemon Blueberry Cottage Cheese Protein Bites, first place them in a single layer on a parchment-lined baking sheet and pop them in the freezer for about an hour. Once they're firm, transfer them to a sealed container or freezer-safe bag. This method prevents them from sticking together, allowing you to enjoy them individually later!

What if my bites come out too crumbly?
If your Lemon Blueberry Cottage Cheese Protein Bites are crumbly, it may be due to not enough moisture or overmixing the dry ingredients. To fix this, add a bit more cottage cheese or a splash of water to the mixture before refrigerating. This will help bind everything together and should create a firmer, cohesive texture.

Are there any allergy considerations for this recipe?
Yes, if you or someone is allergic to dairy, consider substituting the cottage cheese with a plant-based yogurt. You can also check for nut allergies regarding the almond flour and use oat flour as a gluten-free alternative. Always read labels to avoid cross-contamination and ensure the ingredients are safe for your dietary needs!

How can I make these bites vegan?
To make the Lemon Blueberry Cottage Cheese Protein Bites vegan, substitute the cottage cheese with a plant-based yogurt or tofu for a creamy texture. Use maple syrup or agave syrup in place of honey to keep it vegan-friendly. Ensure that all ingredients, like vanilla extract, are also vegan-certified for the best results!

Lemon Blueberry Cottage Cheese Protein Bites

Lemon Blueberry Cottage Cheese Protein Bites: Guilt-Free Treats

Delicious Lemon Blueberry Cottage Cheese Protein Bites for a guilt-free snack packed with protein and vibrant flavors.
Print Recipe Pin Recipe
Prep Time 15 minutes mins
Cook Time 10 minutes mins
Chilling Time 20 minutes mins
Total Time 45 minutes mins
Servings: 12 bites
Course: Snacks
Cuisine: American
Calories: 70
Ingredients Equipment Method Nutrition Notes

Ingredients
  

For the Protein Base
  • 1 cup Cottage Cheese Provides protein and creaminess; substitute with Greek yogurt for a thicker texture or plant-based yogurt for a dairy-free option.
For the Flavor
  • 1 cup Fresh Blueberries Adds natural sweetness and texture; ensure they are firm and fresh to avoid mushiness.
  • 2 tablespoons Lemon Zest Imparts a refreshing tang; use more zest for a stronger lemon flavor.
  • 2 tablespoons Honey Acts as a natural sweetener; substitute with maple syrup or agave for a vegan option.
  • 1 teaspoon Vanilla Extract Adds depth of flavor; ensure it's pure for the best taste.
  • 1 pinch Salt Enhances flavor; a pinch is sufficient.
For the Bulk
  • 1 cup Almond Flour Gives structure and a nutty flavor; coconut flour can be used for a lower-carb option.

Equipment

  • Mixing Bowl
  • Spatula
  • Baking Sheet
  • Parchment Paper
  • Refrigerator
  • Oven

Method
 

Step-by-Step Instructions
  1. In a large mixing bowl, combine cottage cheese, fresh blueberries, lemon zest, honey, almond flour, vanilla extract, and salt. Gently fold until well-combined.
  2. Cover the mixing bowl and refrigerate the mixture for 15–20 minutes until slightly firm but still pliable.
  3. Remove the mixture from the refrigerator and scoop out portions, rolling them into tight balls. Place on a parchment-lined baking sheet.
  4. Optionally, preheat the oven to 325°F (160°C) and bake the bites for 8–10 minutes until slightly firm.
  5. Allow the bites to cool on the baking sheet for 5 minutes before transferring to a wire rack to cool completely.
  6. Enjoy immediately or store in an airtight container in the refrigerator for up to 3 days.

Nutrition

Serving: 1biteCalories: 70kcalCarbohydrates: 8gProtein: 5gFat: 2gCholesterol: 5mgSodium: 45mgPotassium: 100mgFiber: 1gSugar: 2gVitamin C: 2mgCalcium: 50mg

Notes

These Lemon Blueberry Cottage Cheese Protein Bites are perfect for quick snacks and healthy meal prep. Adjust sweetness and texture to your liking by experimenting with ingredients.

Tried this recipe?

Let us know how it was!

Delicious Banana Oatmeal Bars: Healthy & Customizable Treats

November 24, 2025 by Grace Snow Leave a Comment

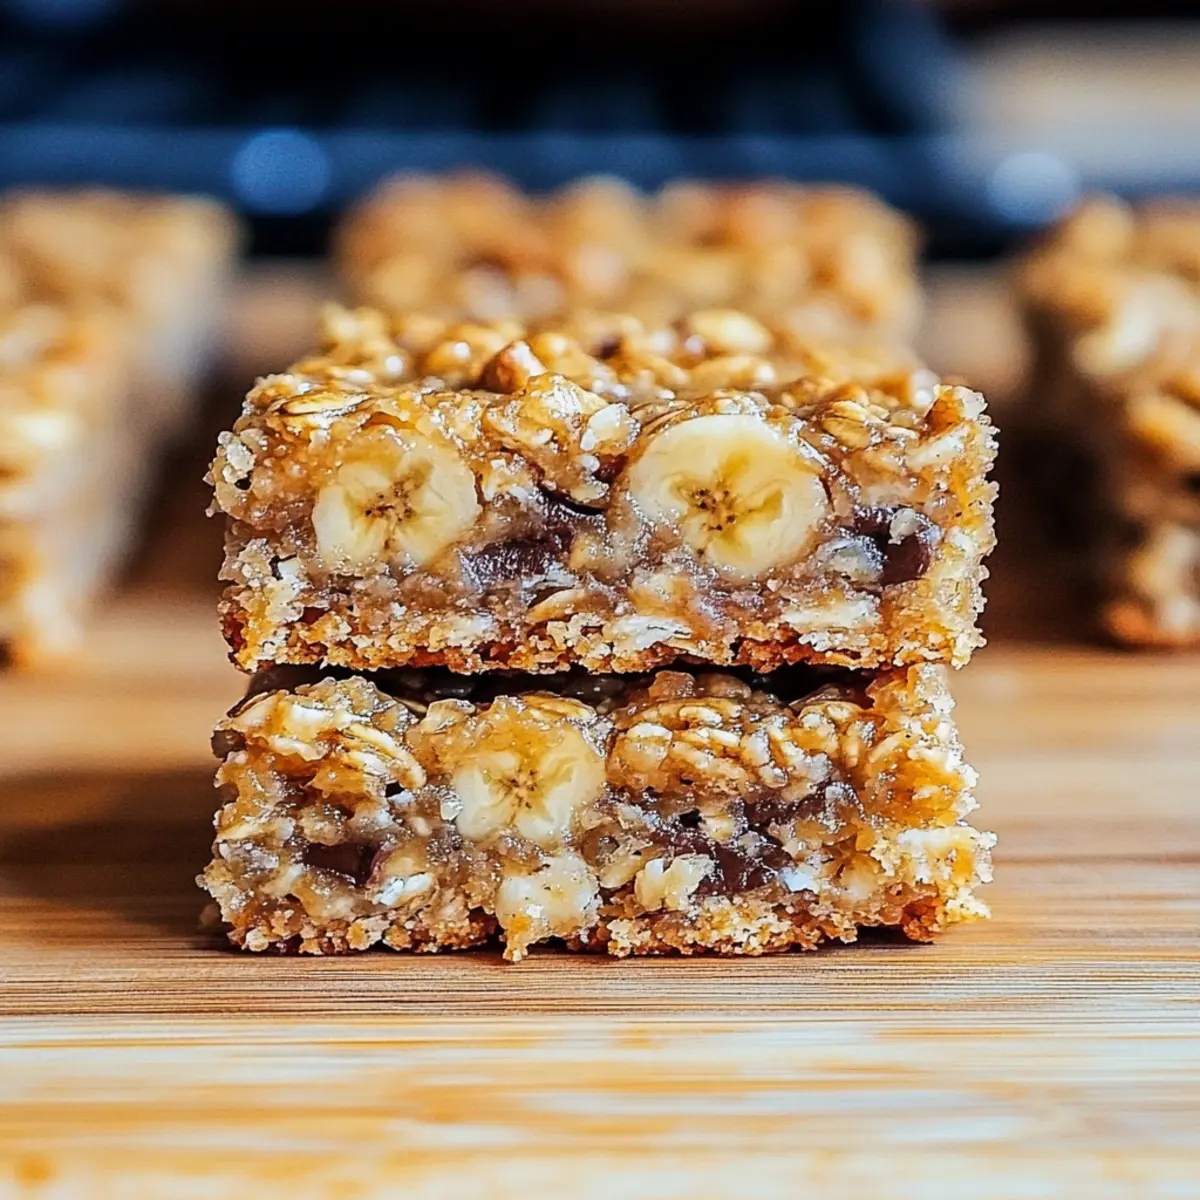
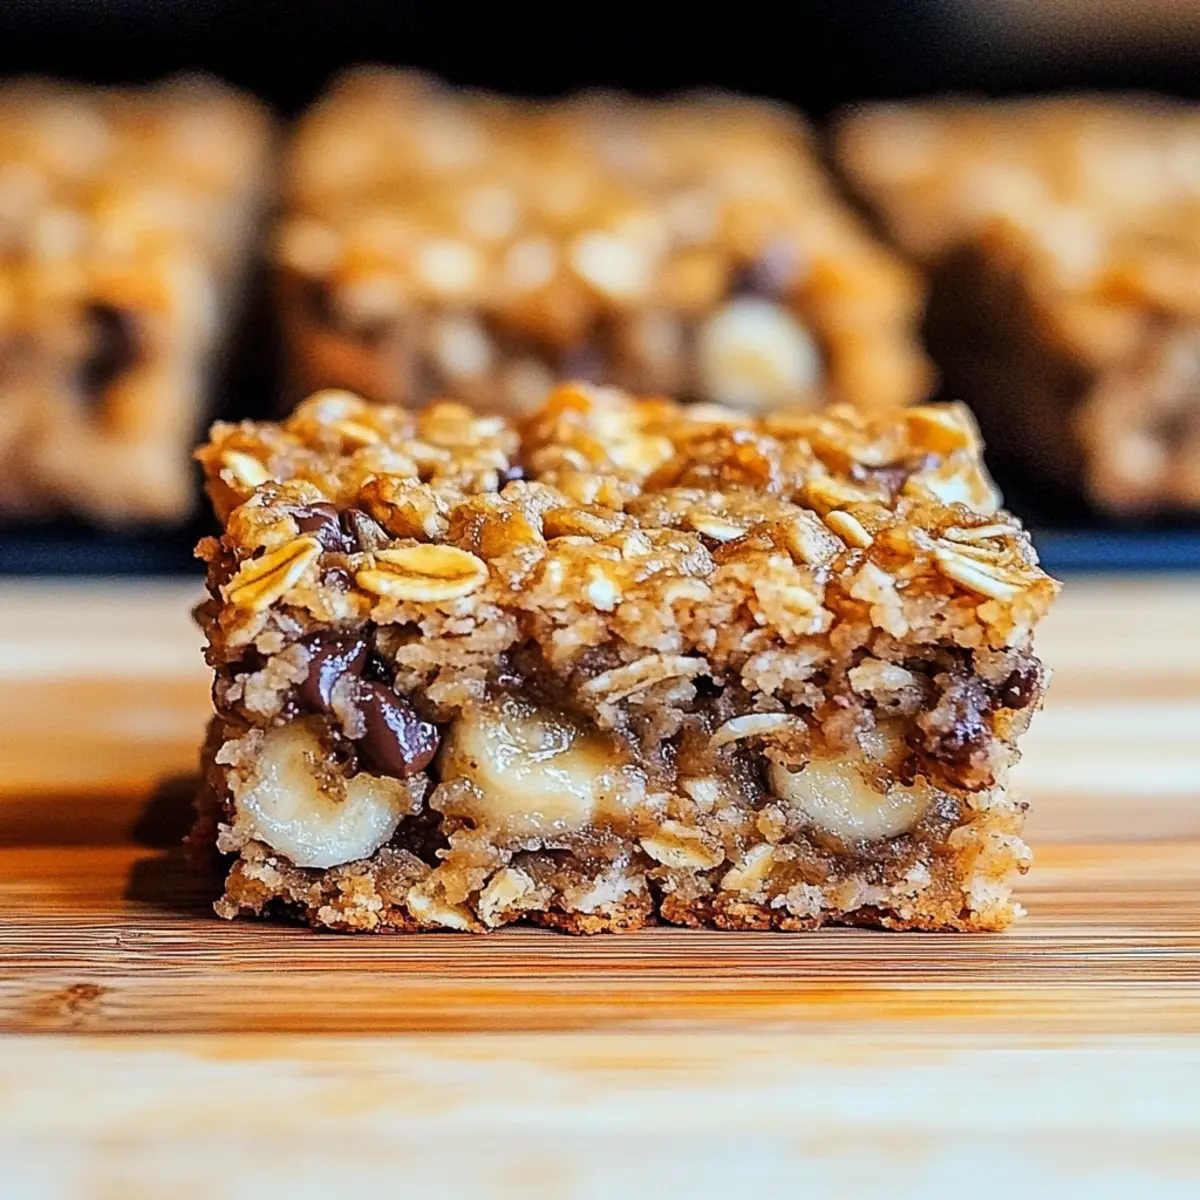
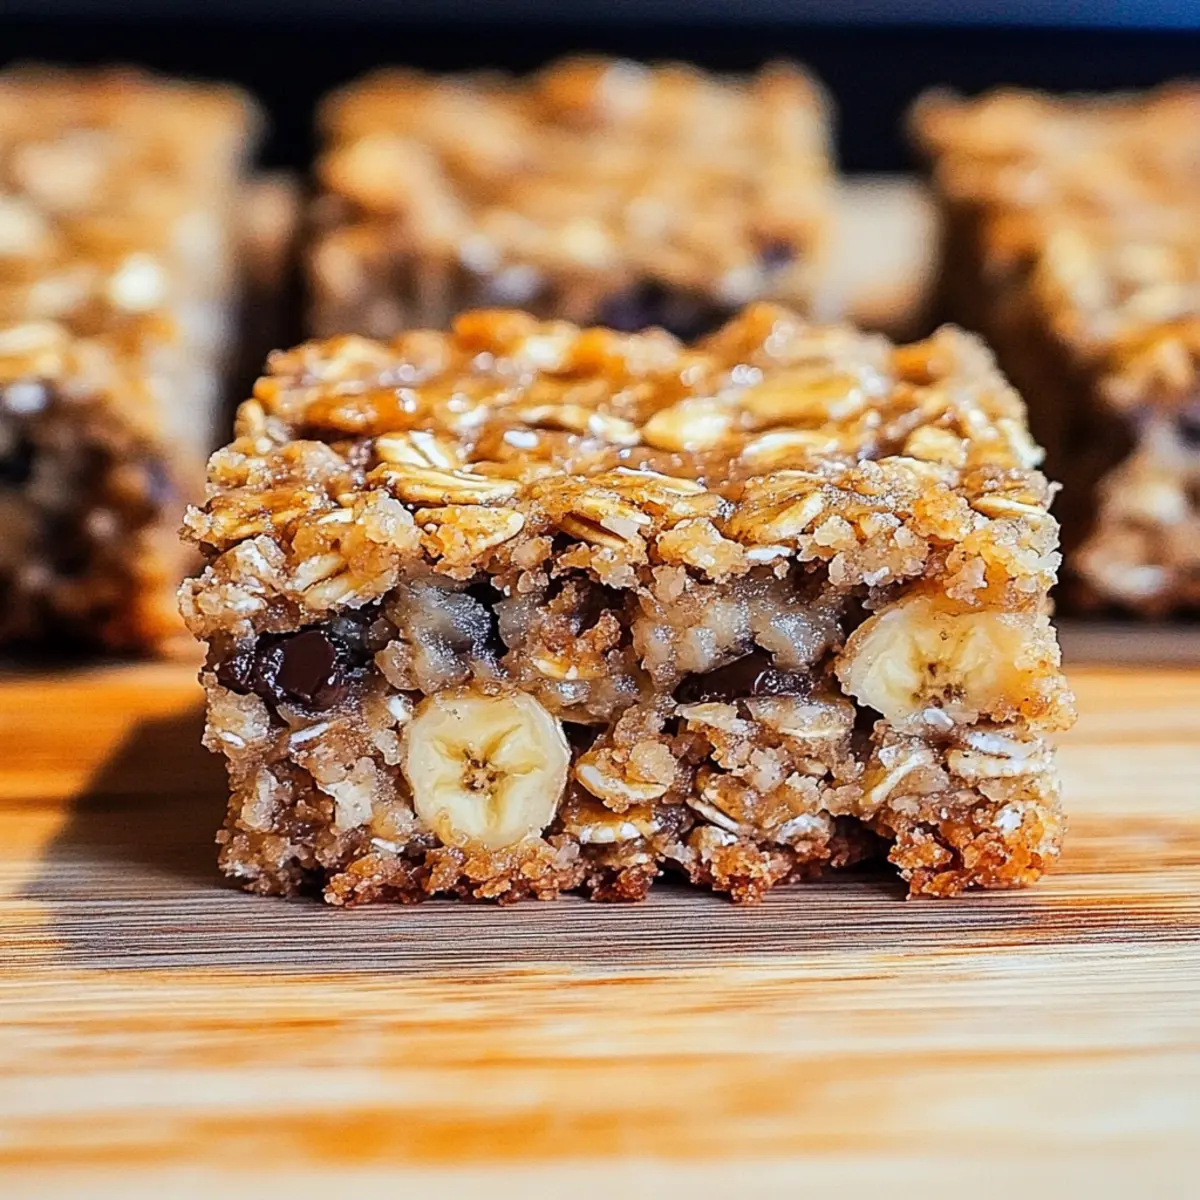
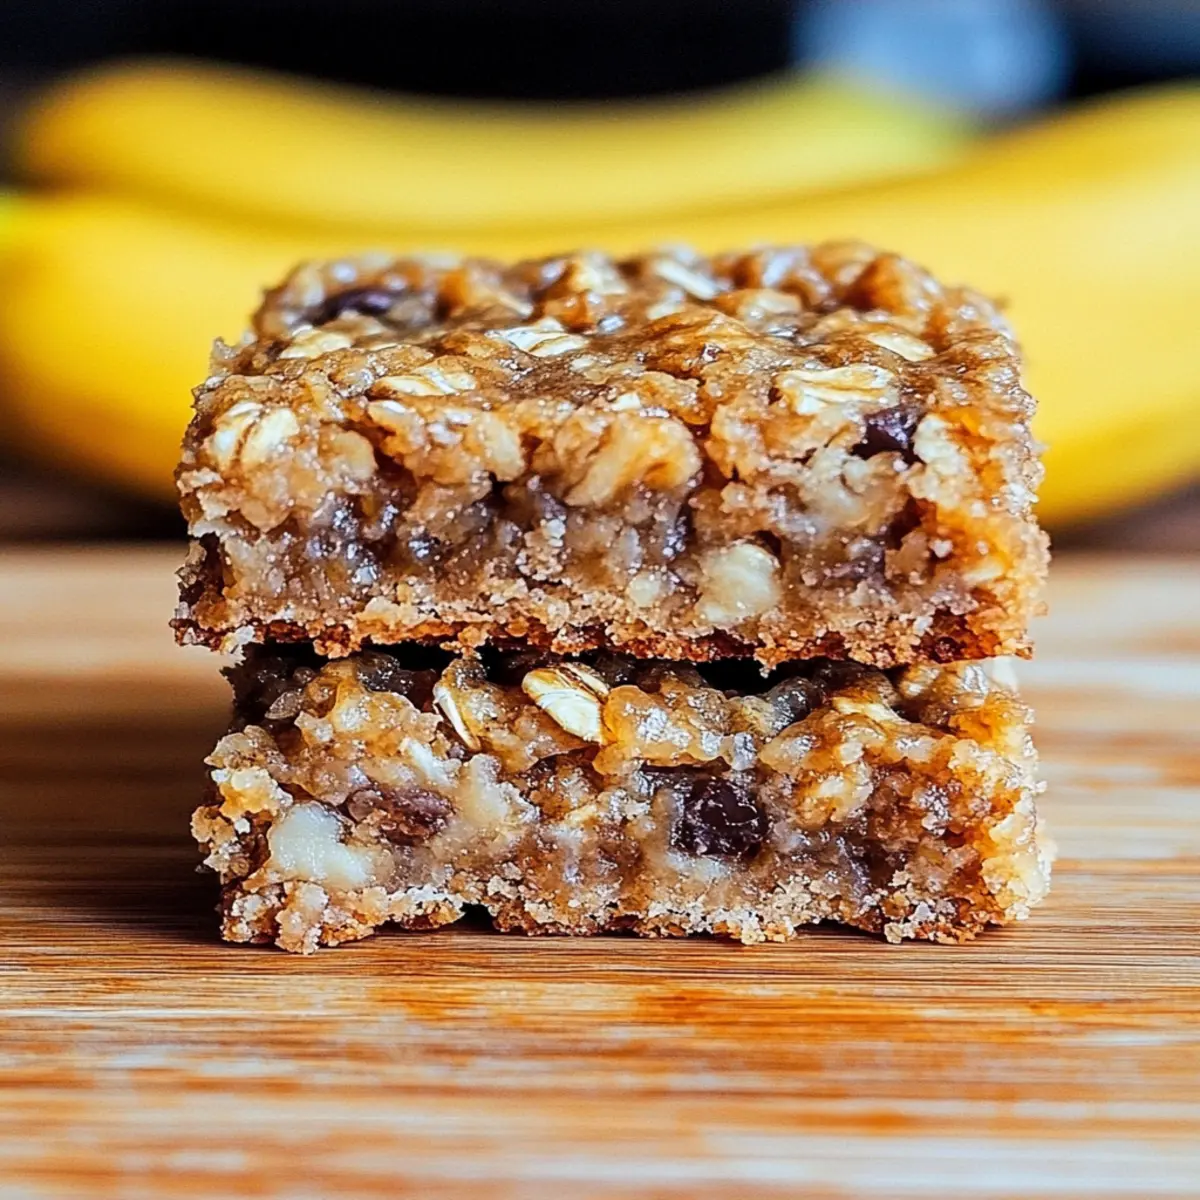
The aroma of freshly baked goods has this magical ability to transport me to my childhood kitchen, filled with laughter and warmth. Today, I'm excited to share my go-to recipe for Banana Oatmeal Bars, a delightful blend of gooey ripeness and hearty oats that brings that same comfort home. These bars aren’t just easy to whip up—they’re a wholesome, healthy snack that can satisfy cravings without the guilt. They’re incredibly versatile, allowing you to customize them with chocolate chips, nuts, or spices to create your own unique version. Whether you're in need of a quick breakfast or a mid-afternoon energy boost, these bars are here to rescue your day. What flavor twist will you add to yours?

Why Will You Love These Bars?

Nutrient-Packed Goodness: Each bite is filled with wholesome ingredients, making these bars a perfect choice for health-conscious snackers.
Customizable Creations: You can easily tailor these bars with your favorite mix-ins like chocolate chips or nuts, allowing you to create a new flavor profile every time.
Quick and Easy: With just a few simple steps, you'll have a delicious treat ready in no time, making it an ideal recipe for busy days.
Bursting with Flavor: The combination of ripe bananas and hearty oats delivers a sweet, chewy experience that satisfies any craving.
Perfect for Any Time: Whether you enjoy them as a quick breakfast, a snack post-workout, or a sweet treat, these bars will fit seamlessly into your day.

Banana Oatmeal Bars Ingredients

• Discover the essentials for creating delectable Banana Oatmeal Bars.

For the Batter

  • Ripe Bananas – Sweetness and moisture; ensure they are overripe for maximum flavor.
  • Rolled Oats – Structure and fiber; use certified gluten-free oats for a gluten-free version.
  • Honey or Maple Syrup – Natural sweetener; substitute with agave syrup for a vegan option.
  • Eggs – Binding agent; can be replaced with flaxseed meal mixed with water for a vegan twist.
  • Baking Powder – Leavening agent for lightness; ensure it's fresh to achieve the right rise.
  • Vanilla Extract – Flavor enhancer; optional but it significantly boosts the overall taste.

Optional Mix-Ins

  • Chocolate Chips – Add for a sweet, indulgent treat; use dark chocolate for a richer flavor.
  • Nuts – Introduce a crunchy texture; walnuts or almonds work beautifully.
  • Dried Fruits – Incorporate cranberries or raisins for a sweet and chewy surprise.
  • Spices – Sprinkle in cinnamon or nutmeg for a warm, comforting twist.

Step‑by‑Step Instructions for Banana Oatmeal Bars

Step 1: Preheat the Oven
Begin by preheating your oven to 350°F (175°C) to ensure it's at the perfect temperature for baking. This step is crucial for achieving the beautifully golden and aromatic Banana Oatmeal Bars you’re aiming for. While the oven warms up, gather your ingredients to prepare for mixing.

Step 2: Mash the Bananas
In a medium-sized mixing bowl, take your ripe bananas and mash them with a fork until they reach a smooth consistency. Aim for a creamy texture with no large lumps, as this will help distribute the sweetness evenly throughout the bars. This step generally takes about 2-3 minutes.

Step 3: Combine Ingredients
Add the rolled oats, honey (or maple syrup), eggs, baking powder, and vanilla extract to the mashed bananas. Using a spatula or wooden spoon, mix everything together until fully incorporated. You should see a thick batter forming, which is a good sign that your Banana Oatmeal Bars will have a lovely chewy texture.

Step 4: Prepare the Baking Dish
Take an 8x8-inch baking dish and grease it lightly with cooking spray or line it with parchment paper for easy removal. This will ensure your bars come out flawlessly and don’t stick to the sides. Once done, set the dish aside while you prepare the batter for baking.

Step 5: Bake the Mixture
Pour the banana oat mixture into the prepared baking dish, spreading it evenly with your spatula. Place it in the preheated oven and bake for 25-30 minutes, or until the top is golden brown, and a toothpick inserted in the center comes out clean. The delightful aroma should fill your kitchen during this time.

Step 6: Cool and Cut the Bars
Once baked, remove the dish from the oven and let the Banana Oatmeal Bars cool in the pan for at least 10 minutes. This cooling time will help them set up properly, making them easier to cut. Once cooled, slice into squares and serve for a nutritious snack or breakfast option.

Banana Oatmeal Bars: Customization Ideas

Feel free to let your creativity shine as you customize these delicious bars with delightful flavors and textures!

  • Dairy-Free: Substitute honey with maple syrup for a completely vegan experience, adding a rich sweetness without any animal products.
  • Nut-Free: Use sunflower seed butter in place of peanut or almond butter to accommodate nut allergies without sacrificing flavor.
  • Extra Crunch: Mix in crispy rice cereal or granola for an added texture that contrasts beautifully with the chewy bars. The crunch will make every bite exciting!
  • Zesty Twist: Add a teaspoon of lemon or orange zest to the batter for a refreshing citrus touch that brightens the overall flavor. It’s a refreshing twist that enhances the sweetness.
  • Chocolate Delight: Fold in dark chocolate or cacao nibs to satisfy your sweet tooth and make every bite feel indulgent. Just imagine the melty goodness with each chewy bite!
  • Spicy Flavor: Sprinkle ground ginger or a pinch of chili powder for an unexpected kick that pairs surprisingly well with the sweetness of bananas.
  • Fruity Fusion: Incorporate diced fresh apples or pears to enhance the bar's moisture and introduce additional layers of flavor. These additions can take your bars to the next level, making it versatile for any craving!
  • Protein-Packed: Mix in a scoop of protein powder or chia seeds for a protein boost that turns these bars into an energizing snack—perfect post-workout fuel!

No matter how you choose to customize, each variation offers a deliciously unique twist! And if you're looking for fun breakfast recipes, you might also enjoy checking out my Breakfast Banana Split for an extra treat!

Helpful Tricks for Banana Oatmeal Bars

  • Ingredient Temperature: Ensure your eggs are at room temperature; this helps create a smoother batter and better texture.
  • Mixing Method: Avoid overmixing once the wet and dry ingredients combine, as this can lead to tough bars instead of the chewy texture you desire.
  • Storage Solutions: Store your Banana Oatmeal Bars in an airtight container to keep them fresh, but allow them to cool completely first to avoid sogginess.
  • Baking Dish Choice: For a thinner bar, use a larger baking dish; for thicker bars, stick with the 8x8-inch size. Adjust baking time accordingly!
  • Taste Testing: Before baking, taste your batter—if you'd like it sweeter, add a touch more honey or maple syrup to suit your palate!

How to Store and Freeze Banana Oatmeal Bars

Room Temperature: Keep these bars in an airtight container at room temperature for up to 3 days, ensuring they remain fresh and chewy.

Fridge: For extended freshness, store in the refrigerator for up to a week. Just make sure they are well wrapped to prevent drying out.

Freezer: Freeze individual bars in plastic wrap and then place in a freezer-safe bag for up to 3 months, allowing for a quick grab-and-go snack anytime.

Reheating: When ready to enjoy, thaw at room temperature or microwave for 15-20 seconds to regain that warm, comforting texture of your Banana Oatmeal Bars.

Make Ahead Options

These Banana Oatmeal Bars are a fantastic option for meal prep enthusiasts looking to save time during busy weeks! You can mix the batter up to 24 hours in advance; simply cover it tightly and refrigerate it to keep the ingredients fresh. If you prefer, you can also bake the bars and store them for up to 3 days at room temperature or refrigerate for up to a week. To maintain their chewy texture and prevent them from drying out, make sure to use an airtight container for storage. When you’re ready to enjoy, simply cut the bars into squares and grab them for a quick, nutritious snack or breakfast on the go!

What to Serve with Irresistible Banana Oatmeal Bars

Imagine a nourishing spread of flavors that perfectly complements your gooey bars, inviting you to a wholesome experience.

  • Greek Yogurt: A dollop of creamy Greek yogurt adds a tangy contrast and extra protein, elevating your snack to a fulfilling meal.
  • Fresh Berries: The burst of sweet-tart berries like strawberries or blueberries brightens the palate, enhancing the natural sweetness of your bars.
  • Nut Butter Drizzle: A drizzle of almond or peanut butter adds a rich, nutty flavor and a delightful creaminess that pairs beautifully with the soft texture.
  • Nutty Granola: The crunchy texture of granola not only adds a satisfying contrast but also enhances the wholesome vibe of your Banana Oatmeal Bars.
  • Banana Smoothie: Whip up a banana smoothie with almond milk and spinach for a refreshing drink that echoes the star ingredient of your bars. This tasty pairing leaves you feeling energized and happy.
  • Homemade Chia Seed Pudding: For a light but filling side, chia seed pudding adds a unique texture and makes your meal feel more gourmet, with added nutrients to boot.
  • Herbal Tea: A warm cup of herbal tea can enhance the cozy vibe of enjoying your bars, making it a comforting way to wind down after a long day.
  • Dark Chocolate Square: For a sweet finish, a piece of dark chocolate offers a decadent contrast to the chewy bars, satisfying any lingering cravings.
  • Almond Milk Latte: Pair your bars with an almond milk latte for a creamy and energizing boost, perfect for elevating your snack time experience.

Banana Oatmeal Bars Recipe FAQs

What kind of bananas should I use?
Absolutely! For the best flavor and moisture, make sure to choose overripe bananas with plenty of brown spots. The sweeter the bananas, the more delicious your Banana Oatmeal Bars will be!

How should I store the bars?
Store your Banana Oatmeal Bars in an airtight container at room temperature for up to 3 days. If you want them to last longer, placing them in the refrigerator can extend their freshness for up to a week. Just ensure they're well-wrapped to keep them from drying out.

Can I freeze the Banana Oatmeal Bars?
Yes! For longer storage, you can freeze your bars. Wrap each bar individually in plastic wrap and then place them in a freezer-safe bag. They can be frozen for up to 3 months. When you’re ready to enjoy them, just thaw at room temperature or pop them in the microwave for about 15-20 seconds for that fresh-baked taste.

What if my bars turn out dry or crumbly?
Very! If your bars are dry, it might be due to overbaking or not enough moisture from the bananas. Make sure you bake until they are just golden brown and firm but still soft to the touch. If you find they could use more moisture, consider adding an extra mashed banana into the batter next time!

Are these bars suitable for dietary restrictions?
Definitely! These Banana Oatmeal Bars can be made gluten-free by using certified gluten-free oats. For a vegan option, simply substitute the eggs with 1 tablespoon of flaxseed meal mixed with 2.5 tablespoons of water, letting it sit for a few minutes to thicken before adding to your mixture. Always double-check for any specific allergies related to your chosen mix-ins.

Can I add extra ingredients to my bars?
The more the merrier! Customize your bars with nuts, chocolate chips, or even spices like cinnamon or nutmeg. Don’t hesitate to experiment with dried fruits like cranberries or raisins for a sweet twist—they’ll enhance the flavor and nutritional value of your snacks!

Banana Oatmeal Bars

Delicious Banana Oatmeal Bars: Healthy & Customizable Treats

These Banana Oatmeal Bars are nutrient-packed and customizable treats perfect for a healthy snack.
Print Recipe Pin Recipe
Prep Time 10 minutes mins
Cook Time 30 minutes mins
Cooling Time 10 minutes mins
Total Time 50 minutes mins
Servings: 16 bars
Course: Snacks
Cuisine: American
Calories: 150
Ingredients Equipment Method Nutrition Notes

Ingredients
  

For the Batter
  • 3 medium ripe bananas overripe for maximum flavor
  • 2 cups rolled oats use certified gluten-free oats for gluten-free version
  • 1/2 cup honey or maple syrup substitute with agave syrup for a vegan option
  • 2 large eggs can be replaced with flaxseed meal mixed with water for a vegan twist
  • 1 teaspoon baking powder ensure it's fresh for the right rise
  • 1 teaspoon vanilla extract optional but boosts flavor
Optional Mix-Ins
  • 1/2 cup chocolate chips dark chocolate for richer flavor
  • 1/2 cup nuts walnuts or almonds work beautifully
  • 1/2 cup dried fruits cranberries or raisins for chewy surprise
  • 1 teaspoon spices cinnamon or nutmeg for warmth

Equipment

  • Mixing Bowl
  • Spatula
  • Baking Dish
  • Fork

Method
 

Step-by-Step Instructions
  1. Preheat your oven to 350°F (175°C).
  2. Mash the bananas in a mixing bowl until smooth.
  3. Combine the oats, honey (or maple syrup), eggs, baking powder, and vanilla extract with the mashed bananas.
  4. Prepare an 8x8-inch baking dish by greasing it or lining it with parchment paper.
  5. Pour the mixture into the prepared dish and bake for 25-30 minutes until golden brown.
  6. Let the bars cool in the pan for at least 10 minutes before slicing and serving.

Nutrition

Serving: 1barCalories: 150kcalCarbohydrates: 30gProtein: 3gFat: 2gCholesterol: 20mgSodium: 60mgPotassium: 150mgFiber: 3gSugar: 8gVitamin A: 2IUVitamin C: 5mgCalcium: 2mgIron: 4mg

Notes

Ensure eggs are at room temperature and avoid overmixing to maintain texture. Store in an airtight container to keep them fresh.

Tried this recipe?

Let us know how it was!

Delicious Cereal Bars: Quick, Easy, and Family-Friendly Snacks

November 24, 2025 by Grace Snow Leave a Comment

Amidst the chaos of busy mornings, a little triumph can feel monumental. That’s exactly what these 3-Ingredient Easy Cereal Bars bring to the table: a homemade solution for healthy snacking that’s ready in just five minutes! These nutritious bars are perfect for anyone seeking a quick breakfast or kid-friendly treat—no more reaching for the packaged snacks that leave you feeling unsatisfied. With their chewy texture and endless flavor combinations, from rich chocolate to delightful cookie dough, there's something to please every family member. Plus, they’re wonderfully customizable, vegetarian-friendly, and can even be made vegan. Are you ready to transform your snacking routine into something wholesome and delicious?

Why are Cereal Bars a Must-Try?

Quick and Easy: These cereal bars require just three ingredients, making them perfect for anyone short on time.

Kid-Friendly: Packed with flavor, they're a hit with children and adults alike!

Customizable: Enjoy endless flavor possibilities—try chocolate, cookie dough, or strawberry!

Healthy Alternative: Ditch the processed snacks and indulge in a homemade option that’s both nutritious and satisfying.

Make-Ahead Convenience: Prepare a batch in advance and store them for a quick breakfast or snack on busy days.

Transform your snacking experience today and discover more about the health benefits of these delightful cereal bars!

Cereal Bars Ingredients

For the Base

  • Cereal of Choice – Choose cereals like Cheerios or Rice Krispies for ideal crunch and structure.
  • Nut Butter (Peanut, Almond, or Cashew) – Acts as a binding agent and adds a rich, creamy texture.
  • Sweetener (Agave, Honey, or Brown Rice Syrup) – Adds sweetness and helps hold the bars together.

For Optional Enhancements

  • Salt (optional) – Enhances the flavors and adds a touch of balance to the sweetness.
  • Protein Powder (optional) – Boosts the nutritional value, making your cereal bars even healthier.

Keep these ingredients in mind, and you're on your way to making delicious cereal bars that everyone will love!

Step‑by‑Step Instructions for 3-Ingredient Easy Cereal Bars

Step 1: Prepare the Pan
Start by lining an 8-inch square pan with parchment or wax paper, allowing some excess to hang over the edges for easy removal later. If you plan to make a larger batch, use a 9x13-inch pan and double the recipe. This step is important as it prevents the cereal bars from sticking to the pan and aids in cut portions.

Step 2: Warm the Nut Butter
If your chosen nut butter is too thick or hard to mix smoothly, place it in a microwave-safe bowl and heat it in the microwave for 15 to 20 seconds. Stir gently to achieve a creamy consistency. This warming ensures an easier blend with the other ingredients, providing that perfect binding for your cereal bars.

Step 3: Mix the Ingredients
In a large mixing bowl, combine your favorite cereal, the warmed nut butter, your choice of sweetener, and optional salt and protein powder. Stir vigorously with a wooden spoon or a spatula until everything is well incorporated, and you see a uniform mixture that should stick together easily when pressed.

Step 4: Transfer to Pan
Carefully pour the cereal mixture into the lined pan. Using a second sheet of parchment paper, press down firmly to compact the mixture, ensuring it's tightly packed into the corners. This pressing step is crucial; it prevents the bars from crumbling and creates a chewy texture that’s both satisfying and delicious.

Step 5: Chill to Set
Place the pan in the freezer and chill for about 30 minutes, or until the mixture is firm enough to hold its shape when cut. This chilling process helps the sweetener and nut butter to solidify, locking in that chewy consistency that makes these cereal bars so enjoyable.

Step 6: Slice and Store
Once the bars have set, remove them from the pan using the overhanging parchment paper. Use a sharp knife to slice them into desired bar sizes. Store your homemade cereal bars either in an airtight container at room temperature, in the refrigerator, or freeze them for longer-lasting goodness.

Cereal Bars: Delicious Variations Await

Explore the delightful possibilities these easy cereal bars offer to elevate your snacking game while enjoying their chewy goodness.

  • Chocolate Twist: Mix in cocoa powder and a dash of vanilla extract, and top with melted chocolate for a chocolate lover's dream.
  • Peanut Butter Bliss: Use creamy peanut butter for a smooth texture, or go crunchy for an extra bite! The earthiness brings out a rich flavor.
  • Cookie Dough Delight: Replace nut butter with cashew butter and fold in mini chocolate chips. It delivers that nostalgic cookie dough flavor everyone adores.
  • Berry Burst: Stir in freeze-dried strawberries or blueberries for a fruity twist and a splash of color that brightens your snack time.
  • Nut-Free Version: Substitute sunflower seed butter for any nut butters, making these bars safe and delish for allergy concerns.
  • Marshmallow Magic: Fold in mini marshmallows before setting in the pan for an extra chewy, kid-friendly surprise!
  • Protein Power: Add a scoop of your favorite protein powder for an extra nutritional boost while keeping that delightful chew intact.
  • Spicy Kick: For an adventurous twist, add a sprinkle of cinnamon or a pinch of cayenne to ignite your taste buds with a hint of warmth.

Feel free to mix and match these variations to create your signature cereal bar recipe! If you enjoy experimenting, you might also like trying out some mini chocolate chips or even some dried fruit for a new flavor experience. Happy snacking!

What to Serve with Easy Cereal Bars?

These delightful, chewy bars make a perfect centerpiece for a wholesome breakfast or snack, inviting a savory spread to complement their sweetness.

  • Fresh Fruit Salad: Bright, juicy fruit adds a refreshing burst, balancing the cereal bars' sweetness with vibrant flavors and textures.

  • Greek Yogurt Parfait: Creamy yogurt mixed with berries and granola provides a rich contrast, elevating your snack or breakfast with protein and crunch.

  • Nutty Trail Mix: Combine nuts, seeds, or dried fruit for a savory crunch. This snack keeps the wholesome vibe strong while adding satisfying textures.

  • Smoothie: Blend fruits and greens for a refreshing drink that pairs beautifully with the bars. The creamy texture amplifies the experience while adding nutrients.

  • Nut Butter Dip: Serve with almond or peanut butter as a dip, enhancing the bars' flavors and delivering an extra protein punch for a healthy treat.

  • Chocolate Milkshake: Indulge in a creamy chocolate shake, offering a nostalgic touch that makes the wholesome bars even more enjoyable for your family.

  • Spiced Chai Tea: A warm cup of spiced chai creates a cozy pairing. The aromatic flavors harmonize with the bars, making snack time a soothing ritual.

  • Honey Drizzle: A drizzle of honey over the bars enhances sweetness, providing a beautiful finish that's both visually appealing and deliciously satisfying.

  • Coconut Water: Offering hydration, coconut water adds a tropical twist, refreshing your palate and complementing the nutty flavors of the cereal bars.

How to Store and Freeze Cereal Bars

Room Temperature: Store the cereal bars in an airtight container at room temperature for up to 3 days for optimal freshness.

Fridge: For an extended shelf life, keep the bars in the refrigerator, where they'll stay fresh for up to one week.

Freezer: Place the sliced cereal bars in a freezer-safe container, separated by parchment paper, for up to 3 months. Simply thaw at room temperature when ready to enjoy.

Reheating: If you prefer a warm snack, microwave the bars for 10-15 seconds for a delightful, chewy treat.

Expert Tips for Cereal Bars

  • Press Firmly: It's essential to press the cereal mixture down very firmly in the pan, as this prevents the bars from crumbling apart when cut.

  • Storage Wisdom: For the freshest taste, keep your cereal bars in the refrigerator. They can also be frozen for long-term storage.

  • Experiment Freely: Don’t be afraid to explore different cereals or add-ins, like mini chocolate chips or dried fruits. This is a great way to customize your cereal bars to suit various tastes!

  • Warm Up the Nut Butter: If your nut butter is too thick, warming it slightly helps to blend it better with the other ingredients, ensuring a smoother final product.

  • Adjust Sweetness: Taste your mix before pressing into the pan; if you enjoy a sweeter bar, feel free to add a bit more sweetener to make those cereal bars just right for you.

Make Ahead Options

These Easy Cereal Bars are a fantastic option for meal prep enthusiasts! You can mix the ingredients and press the mixture into the pan up to 24 hours in advance, storing it tightly covered in the refrigerator. Just remember to wrap it well to maintain that incredible chewy texture and prevent any unwanted drying out. When you’re ready to enjoy your cereal bars, simply chill them in the freezer for about 30 minutes to firm them up before slicing. This way, you’ll have delicious, homemade snacks on hand that are just as delightful as freshly made, saving you precious time on busy mornings or after-school cravings!

Cereal Bars Recipe FAQs

What type of cereal should I use?
Absolutely! It's best to choose small flake cereals like Cheerios, Rice Krispies, or other puffed cereals to give your bars the ideal structure and crunch. You can even opt for gluten-free or vegan brands if you want to cater to specific dietary needs.

How should I store cereal bars for freshness?
For optimal freshness, store your cereal bars in an airtight container at room temperature for up to 3 days. If you want them to last longer, keep them in the refrigerator for up to one week. Just make sure they are covered to prevent them from drying out.

Can I freeze cereal bars, and if so, how?
Yes, you can! To freeze your cereal bars, place the sliced bars in a freezer-safe container, separating them with parchment paper to prevent sticking. They can be frozen for up to 3 months. When you're ready to enjoy, just thaw at room temperature for a few minutes or microwave for 10-15 seconds for that delicious chewy texture.

What if the cereal bars are falling apart?
Don’t worry, it happens! If your bars crumble, it's usually because the mixture wasn't pressed down firmly enough in the pan or was too dry. Next time, make sure to press the mixture very firmly and consider adding a bit more nut butter or sweetener to help bind everything together. If they do fall apart, you could even serve them as a granola topping for yogurt or ice cream!

Are cereal bars safe for young children and pets?
Yes, these cereal bars are generally kid-friendly! Just keep in mind any specific allergies your children may have—like nuts or gluten. For pets, it’s best to avoid giving them cereal bars, especially if they contain nut butters or sweeteners like xylitol, which can be harmful to dogs. Always consult with a vet to ensure safety.

Can I make these cereal bars vegan?
Very much so! To keep your cereal bars vegan, simply choose plant-based nut butters (like almond or sunflower seed) and use agave or brown rice syrup instead of honey. This way, you can enjoy the same delicious and nutritious treat without any animal products!

Cereal Bars

Delicious Cereal Bars: Quick, Easy, and Family-Friendly Snacks

Wholesome 3-Ingredient Easy Cereal Bars are perfect for quick breakfasts and healthy snacks.
Print Recipe Pin Recipe
Prep Time 5 minutes mins
Chill Time 30 minutes mins
Total Time 35 minutes mins
Servings: 8 bars
Course: Snacks
Calories: 150
Ingredients Equipment Method Nutrition Notes

Ingredients
  

For the Base
  • 3 cups Cereal of Choice Choose cereals like Cheerios or Rice Krispies for ideal crunch and structure.
  • 1 cup Nut Butter (Peanut, Almond, or Cashew) Acts as a binding agent and adds a rich, creamy texture.
  • 1/2 cup Sweetener (Agave, Honey, or Brown Rice Syrup) Adds sweetness and helps hold the bars together.
Optional Enhancements
  • 1/4 teaspoon Salt Optional, enhances flavors.
  • 1/2 cup Protein Powder Optional, boosts nutritional value.

Equipment

  • 8-inch square pan
  • Microwave
  • Mixing Bowl
  • Wooden spoon or spatula
  • Parchment Paper

Method
 

Step-by-Step Instructions
  1. Prepare the pan by lining an 8-inch square pan with parchment or wax paper, allowing some excess to hang over the edges.
  2. Warm the nut butter in a microwave-safe bowl for 15 to 20 seconds if too thick, then stir to achieve a creamy consistency.
  3. In a large mixing bowl, combine your cereal, warmed nut butter, sweetener, optional salt, and protein powder. Stir until well incorporated.
  4. Transfer the mixture to the lined pan, pressing down firmly with a second sheet of parchment paper to compact it tightly.
  5. Chill in the freezer for about 30 minutes, or until firm enough to hold its shape when cut.
  6. Remove from pan using overhanging parchment, slice into desired sizes, and store as preferred.

Nutrition

Serving: 1barCalories: 150kcalCarbohydrates: 20gProtein: 4gFat: 7gSaturated Fat: 1gMonounsaturated Fat: 6gSodium: 50mgPotassium: 120mgFiber: 2gSugar: 8gCalcium: 2mgIron: 4mg

Notes

Press the mixture down firmly to prevent crumbling. These bars are customizable with various cereals or add-ins.

Tried this recipe?

Let us know how it was!

Cinnamon-Sugar Air Fryer Banana Chips for Guilt-Free Snacking

November 17, 2025 by Grace Snow Leave a Comment

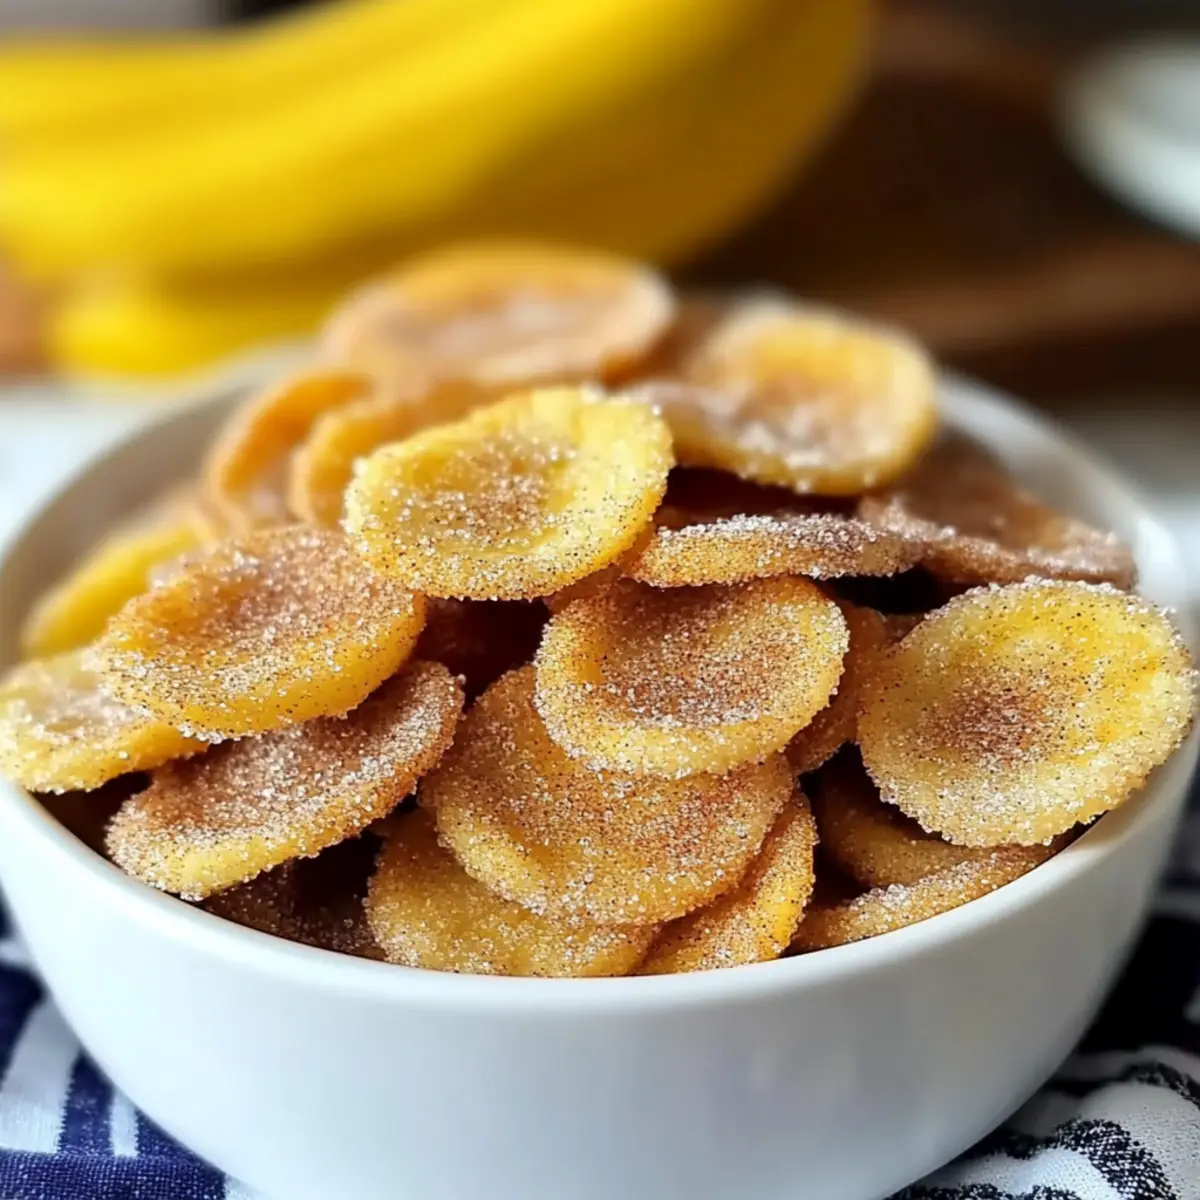
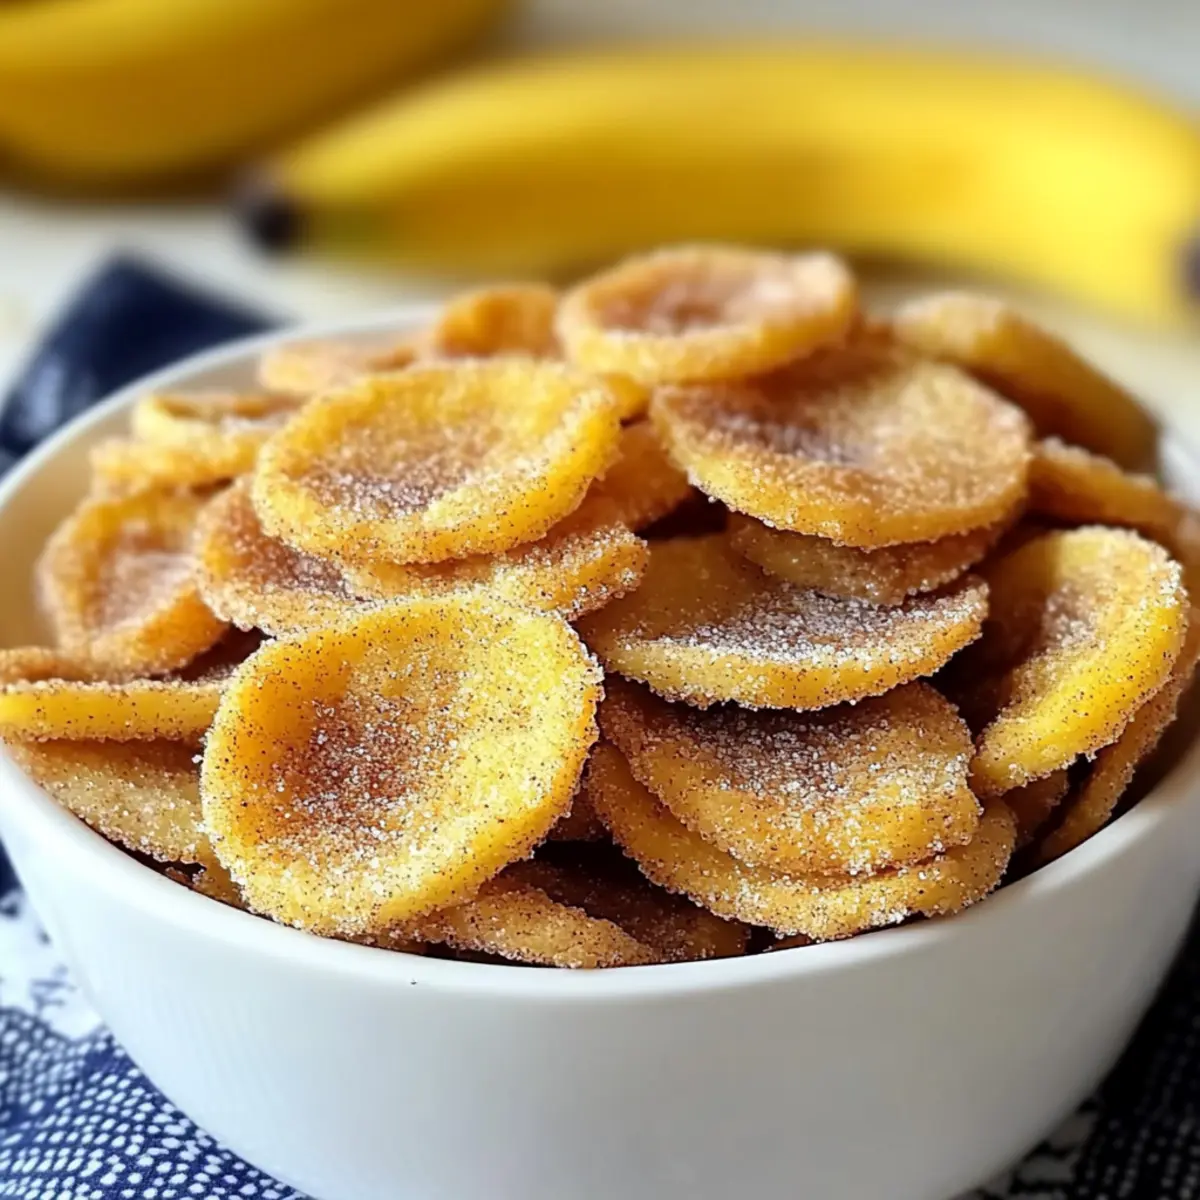
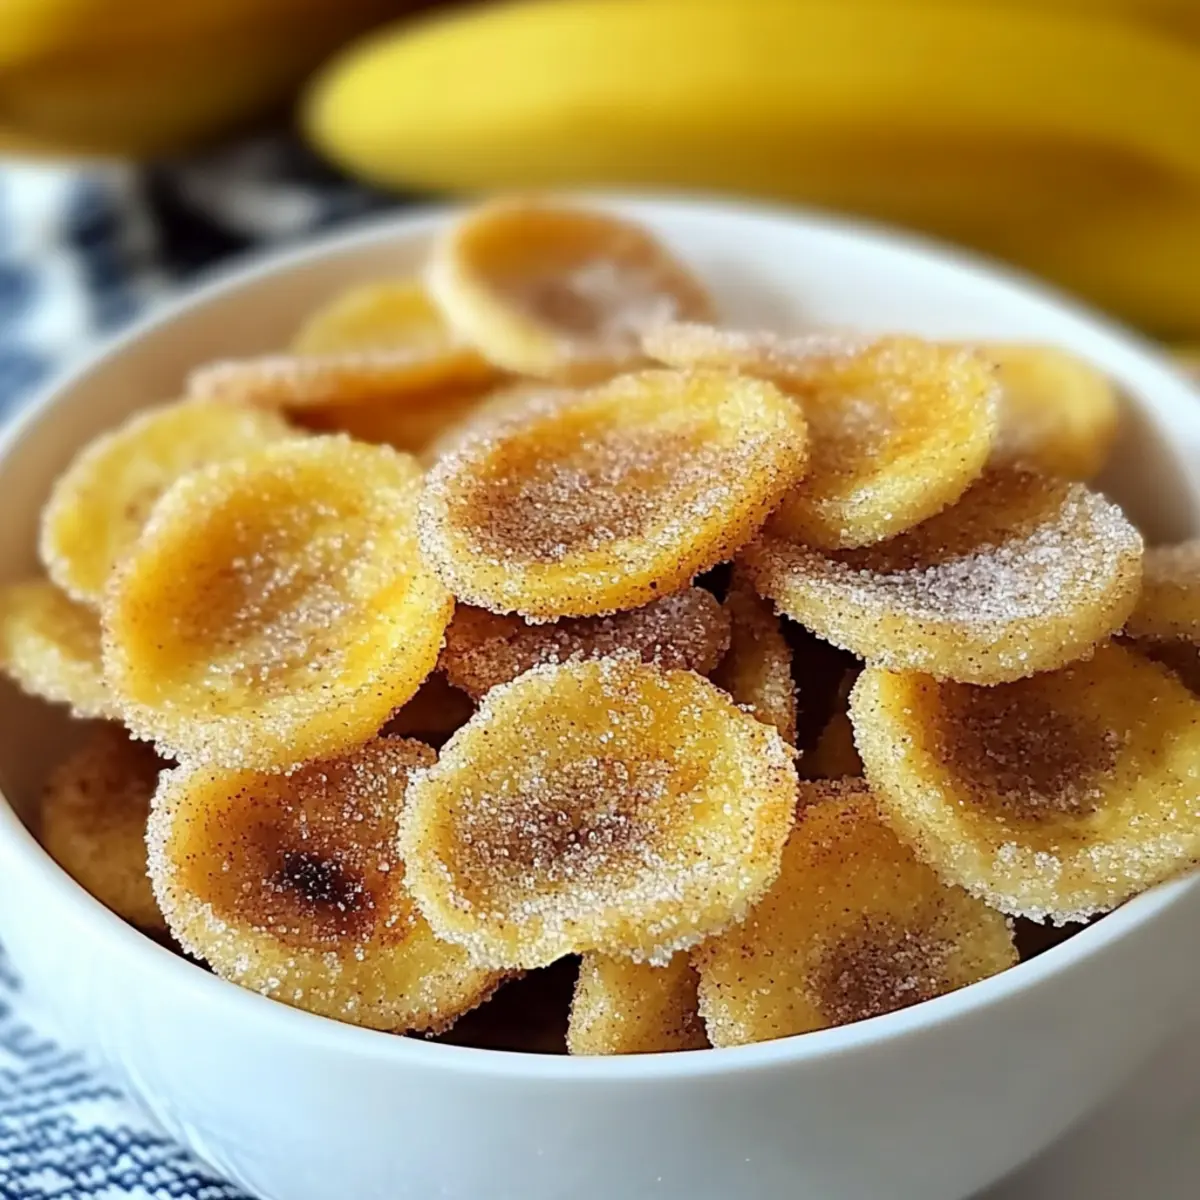
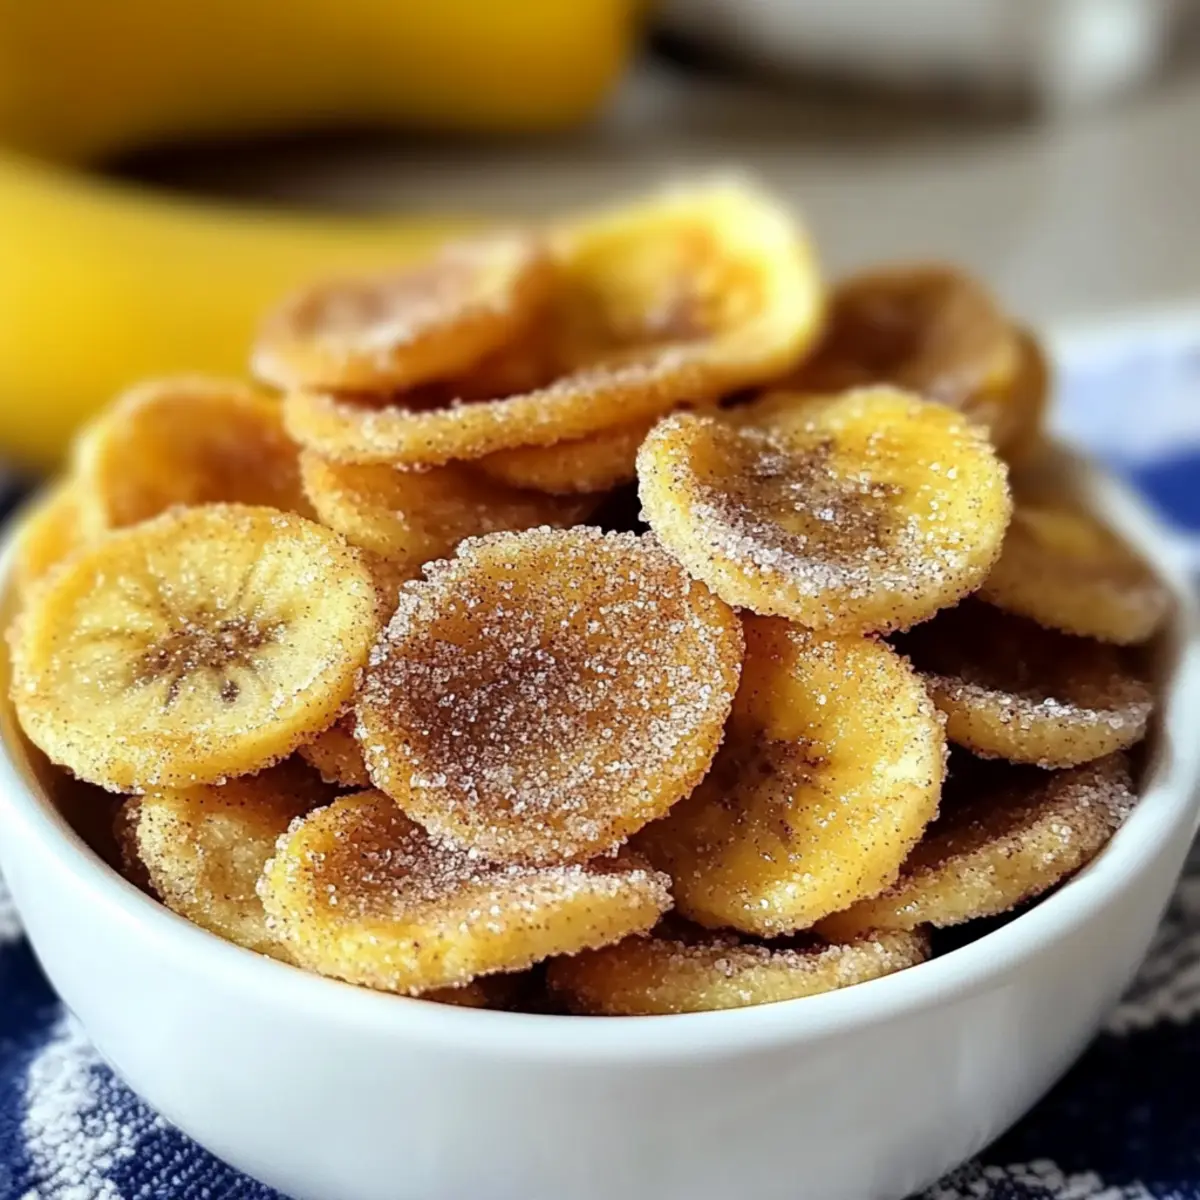
Strolling through the local market, I stumbled upon a vibrant display of bananas, their bright yellow skin begging to be transformed into something delightful. That moment sparked the creation of my Cinnamon-Sugar Air Fryer Banana Chips, a snack that's as easy to make as it is satisfying to munch on. With just three simple ingredients, these crispy treats provide a guilt-free way to indulge without sacrificing flavor. They're not only vegan and gluten-free but also a quick and healthy alternative to typical store-bought snacks. Whether you're looking to satisfy your sweet tooth or simply need a fun recipe for your next gathering, these air fryer chips deliver the perfect crunch and warmth of cinnamon that'll keep everyone reaching for more. Curious about how to make these delectable delights? Let’s dive in!

Why are these chips a must-try?

Crispy Delights: The Cinnamon-Sugar Air Fryer Banana Chips offer an irresistibly crunchy texture that will leave your taste buds thrilled.

Guilt-Free Indulgence: With only three ingredients, this recipe is not just simple but a healthy alternative to traditional snacks, making it a perfect choice for everyone.

Endless Versatility: Feel free to customize; add a splash of your favorite spices, or check out how to whip up a Breakfast Banana Split for a fun twist!

Quick and Easy: With minimal prep time and the air fryer doing the heavy lifting, you’ll have a delicious snack in no time!

Crowd-Pleasing Appeal: Whether you’re hosting a get-together or enjoying a quiet evening, these chips are sure to impress and leave your guests asking for the recipe!

Cinnamon-Sugar Air Fryer Banana Chips Ingredients

Prepare for a delightful treat with these simple ingredients!

For the Chips

  • Bananas – Use firm, slightly green bananas for the best texture to avoid mushiness.
  • Avocado Oil – This light oil helps achieve the perfect crispiness; feel free to substitute with coconut oil for added flavor.
  • Cinnamon – Sprinkle this warming spice to enhance the sweetness of the banana chips; adjust to taste or try nutmeg for a twist.

Enjoy making these Cinnamon-Sugar Air Fryer Banana Chips a part of your healthy snacking routine!

Step‑by‑Step Instructions for Cinnamon-Sugar Air Fryer Banana Chips

Step 1: Prep Bananas
Start by peeling 2–3 firm bananas and slice them into uniform ¼-inch thick rounds. This thickness ensures even cooking and crispiness when making your delicious Cinnamon-Sugar Air Fryer Banana Chips. Arrange the slices on a cutting board to prepare for the next steps.

Step 2: Mix Coating
In a medium-sized bowl, combine 1–2 tablespoons of avocado oil with 1 teaspoon of cinnamon. Stir until well blended and then gently toss the banana slices in the mixture, ensuring each piece is lightly coated. This coating is essential for achieving that scrumptious flavor and texture in your air fryer banana chips.

Step 3: Preheat Air Fryer
Preheat your air fryer to 350°F (175°C) for about 3–5 minutes. Preheating is crucial for even cooking and helps your banana chips turn out perfectly crispy. While the air fryer is warming, take a moment to check that your banana slices are well-coated with the cinnamon mixture.

Step 4: Arrange Slices
Once preheated, carefully place the banana slices in a single layer in the air fryer basket. Ensure there's space between them for proper airflow, which promotes even cooking and crispiness. Depending on your air fryer size, you may need to cook in batches to keep the chips from overcrowding.

Step 5: Air Fry
Set your air fryer to cook the banana slices at 350°F (175°C) for 25–28 minutes. Halfway through the cooking time, about 12–14 minutes in, pause the air fryer to flip the banana chips for even browning. Monitor closely during the final minutes, as the chips should turn golden brown and become crispy.

Step 6: Cool & Serve
Once your Cinnamon-Sugar Air Fryer Banana Chips have reached a crispy texture, carefully remove the basket and allow them to cool for 5–10 minutes. They will crisp up even more as they cool. Serve them up as a delightful snack, great for pairing with yogurt or enjoying on their own!

Make Ahead Options

These Cinnamon-Sugar Air Fryer Banana Chips are wonderfully adaptable for busy home cooks looking to save time! You can prep the banana slices—about 2-3 firm bananas—up to 24 hours in advance by slicing them and tossing them in the avocado oil and cinnamon mixture. Store the coated slices in an airtight container in the refrigerator to maintain quality and prevent browning. When you're ready to enjoy these crunchy delights, simply preheat your air fryer and cook the prepped slices as directed, adjusting for any moisture that may have formed. This way, you’ll have a delicious, healthy snack ready with minimal effort, perfect for those hectic days!

What to Serve with Cinnamon-Sugar Air Fryer Banana Chips

Indulging in these delightful chips opens up a world of appetizing possibilities to create a memorable snack experience.

  • Creamy Yogurt Dip: A smooth, tangy yogurt dip provides a refreshing contrast to the sweet chips and adds a protein boost.

  • Oatmeal Bowl: Sprinkle these banana chips over a warm bowl of oatmeal for an added crunch and natural sweetness that elevates your breakfast.

  • Trail Mix: Combine these crispy delights with nuts and dried fruits for a satisfying, energy-packed snack that’s great for on-the-go munching.

  • Nut Butter Spread: Pair your chips with almond or peanut butter for a delicious yet healthy treat that’s rich in flavor and nutrients.

The blend of textures and tastes makes each combination uniquely enjoyable, turning your snacking moment into something special!

Cinnamon-Sugar Air Fryer Banana Chips Variations

Inviting creativity into your kitchen is half the fun! Discover delightful twists to elevate your Cinnamon-Sugar Air Fryer Banana Chips.

  • Nutty Delight: Sprinkle 1 tablespoon of chopped nuts, like walnuts or almonds, for added crunch and flavor. The nutty elements will complement the sweet cinnamon beautifully.

  • Spicy Kick: Add a pinch of cayenne pepper to the coating mix for a surprising heat that perfectly balances the sweetness. Just a little will transform your snack into an exciting treat.

  • Cacao Bliss: Dust the chips with cacao powder after cooking for a chocolatey twist. Pairing chocolate with banana is always a winning combination that chocolate lovers can't resist!

  • Fruit Medley: Thinly slice apples or pears and air fry alongside bananas for a colorful fruit medley. Each fruit brings its own unique flavor and texture for a delightful snack.

  • Pumpkin Spice: Swap the cinnamon for pumpkin spice for a seasonal spin that's perfect for chilly fall days. This twist captures the essence of autumn in each bite!

  • Maple Sweetness: Drizzle maple syrup over the banana slices before air frying for a deliciously sweet alternative. The syrup caramelizes beautifully, creating a decadent treat.

  • Yogurt Dip: Serve with a side of yogurt mixed with honey and a sprinkle of cinnamon for a creamy dip. It’s a perfect way to add a nutritious touch and enhance the overall experience.

  • Try with Other Fruits: Don’t stop at bananas! Experiment with other fruits like mango or peach for a tropical twist on these chips, just be sure to adjust cooking time as needed.

These variations will make your air fryer chip experience even more delightful! If you love the simplicity of three ingredients, you might also enjoy a refreshing Breakfast Banana Split for a fun brunch idea or a tasty addition to your snack repertoire. Happy cooking!

Expert Tips for Cinnamon-Sugar Air Fryer Banana Chips

  • Banana Choice: Use firm, slightly green bananas for the best texture. Overripe bananas can become overly mushy and won’t crisp up well.

  • Coating Consistency: Ensure even coating by tossing banana slices gently in the oil and cinnamon mixture. This prevents uneven crispiness.

  • Air Fryer Space: Don't overcrowd the air fryer basket. Give each chip enough space for airflow, or fry in batches to avoid soggy chips.

  • Monitoring Time: Keep an eye on the chips as they cook. Cooking times may vary, so check during the last few minutes to prevent burning.

  • Storage Tips: Allow the chips to cool completely before storing them in an airtight container to maintain their crunchiness and freshness.

How to Store and Freeze Cinnamon-Sugar Air Fryer Banana Chips

Room Temperature: Store the banana chips in an airtight container at room temperature for up to 1 week. This keeps them crispy and delectable!

Fridge: While refrigeration is possible, it may result in a loss of crispiness. If you must, use a container lined with paper towels for moisture absorption, ensuring they’re consumed within 3 days.

Freezer: For longer storage, freeze the banana chips in a single layer on a baking sheet, then transfer to a freezer-safe bag. They can last for up to 2 months, but may lose some crunch.

Reheating: To revive the chips, simply pop them back into the air fryer at 350°F (175°C) for 3–5 minutes, until they regain their crispiness, allowing you to enjoy your Cinnamon-Sugar Air Fryer Banana Chips once more!

Cinnamon-Sugar Air Fryer Banana Chips Recipe FAQs

How do I know if my bananas are ripe enough for chips?
You should use firm, slightly green bananas for the best texture when making your Cinnamon-Sugar Air Fryer Banana Chips. Avoid overly ripe bananas, as they can become mushy and may not crisp up properly during the air frying process.

What’s the best way to store leftover banana chips?
Store the banana chips in an airtight container at room temperature for up to one week. This helps keep them crispy and tasty! If you refrigerate them, they may lose their crunch, so it's best to eat them fresh!

Can I freeze my banana chips for longer storage?
Absolutely! To freeze your banana chips, arrange them in a single layer on a baking sheet and place them in the freezer until solid. Once frozen, transfer the chips to a freezer-safe bag, removing excess air. They can be stored this way for up to two months. When you’re ready to enjoy some, simply reheat in your air fryer at 350°F (175°C) for about 3–5 minutes to restore their crispiness.

What should I do if my banana chips burn during cooking?
If your banana chips burn, it usually means they were too thick or overcrowded in the air fryer. To avoid this, ensure your slices are uniformly ¼-inch thick and keep them in a single layer with space around each chip. Next time, monitor them closely, especially in the last few minutes of cooking, to achieve that perfect golden-brown color without burning.

Are these banana chips suitable for pets or those with allergies?
While the Cinnamon-Sugar Air Fryer Banana Chips are made from simple, natural ingredients, it's important to note that bananas are generally safe for dogs and cats in small amounts. However, avoid giving them any added sugar or spices from the recipe! If you're concerned about allergies, ensure that everyone is aware of the ingredients, particularly if making for a group or kids.

Cinnamon-Sugar Air Fryer Banana Chips

Cinnamon-Sugar Air Fryer Banana Chips for Guilt-Free Snacking

Delight in these Cinnamon-Sugar Air Fryer Banana Chips, a healthy, vegan snack that's easy to make and irresistibly crunchy.
Print Recipe Pin Recipe
Prep Time 10 minutes mins
Cook Time 28 minutes mins
Cooling Time 10 minutes mins
Total Time 48 minutes mins
Servings: 4 servings
Course: Snacks
Cuisine: Vegan
Calories: 150
Ingredients Equipment Method Nutrition Notes

Ingredients
  

For the Chips
  • 2-3 medium Bananas Use firm, slightly green bananas for the best texture.
  • 1-2 tablespoons Avocado Oil Can be substituted with coconut oil for added flavor.
  • 1 teaspoon Cinnamon Adjust to taste or try nutmeg for a twist.

Equipment

  • Air fryer

Method
 

Step-by-Step Instructions
  1. Peel and slice bananas into uniform ¼-inch thick rounds.
  2. In a bowl, mix avocado oil and cinnamon, then toss banana slices to coat.
  3. Preheat air fryer to 350°F (175°C) for 3-5 minutes.
  4. Place banana slices in a single layer in the air fryer basket.
  5. Cook at 350°F (175°C) for 25-28 minutes, flipping halfway through.
  6. Let cool for 5-10 minutes before serving.

Nutrition

Serving: 1servingCalories: 150kcalCarbohydrates: 30gProtein: 1gFat: 7gSaturated Fat: 1gMonounsaturated Fat: 6gSodium: 5mgPotassium: 300mgFiber: 3gSugar: 12gVitamin C: 10mgCalcium: 20mgIron: 0.5mg

Notes

Store in an airtight container at room temperature for up to 1 week. Refrigerating may affect crispiness. For longer storage, freeze in a single layer and transfer to a freezer-safe bag.

Tried this recipe?

Let us know how it was!

Monster Cookie Energy Balls: Your Sweet, Healthy Snack Fix

November 17, 2025 by Grace Snow Leave a Comment

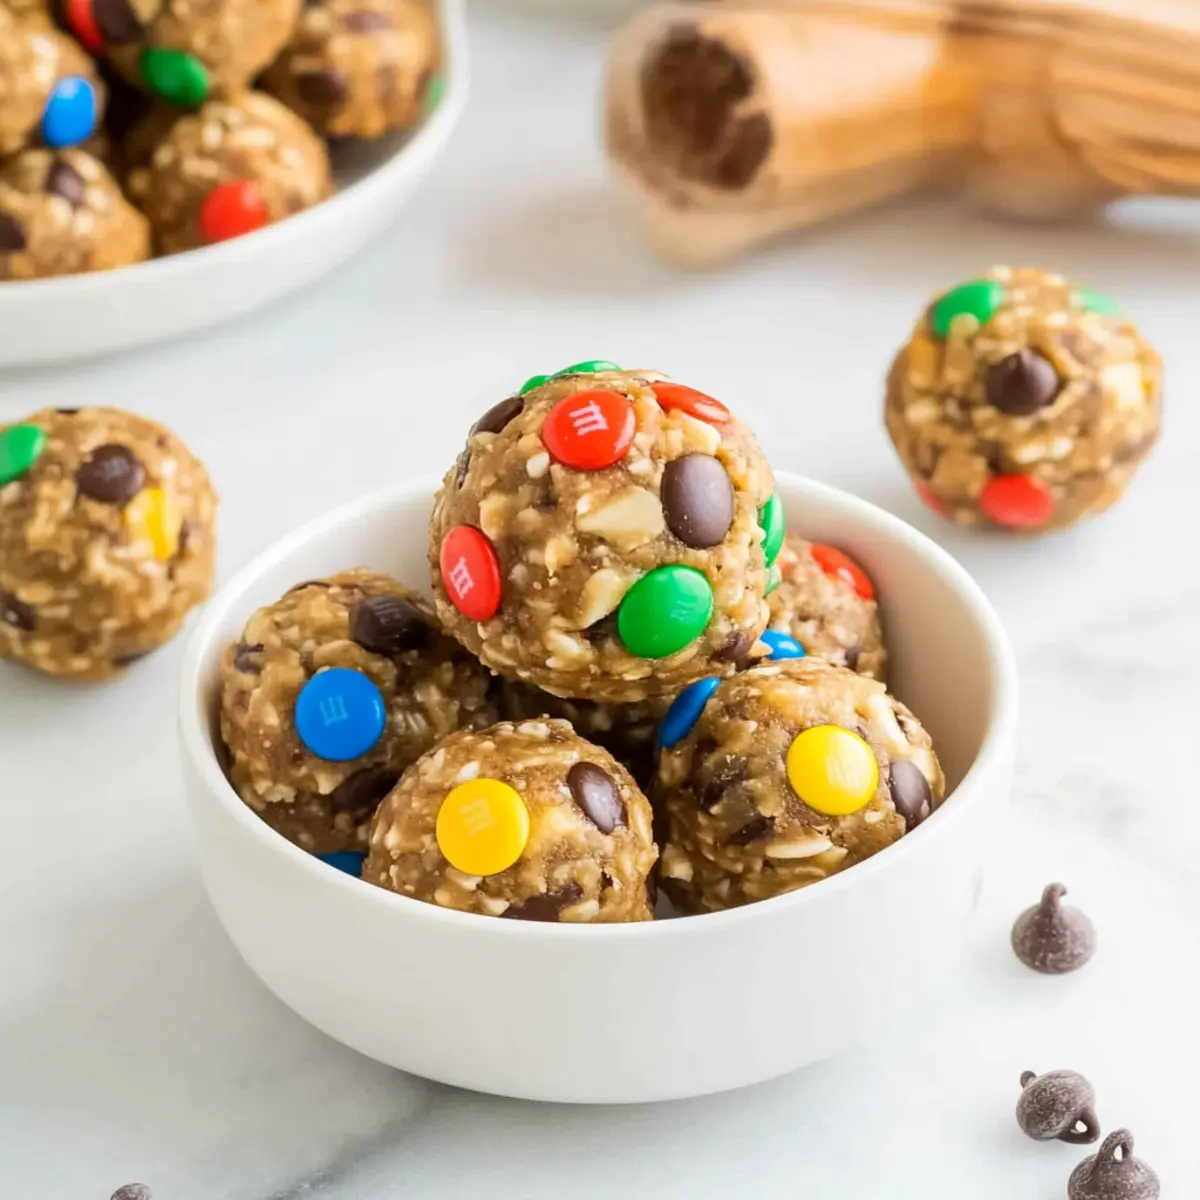
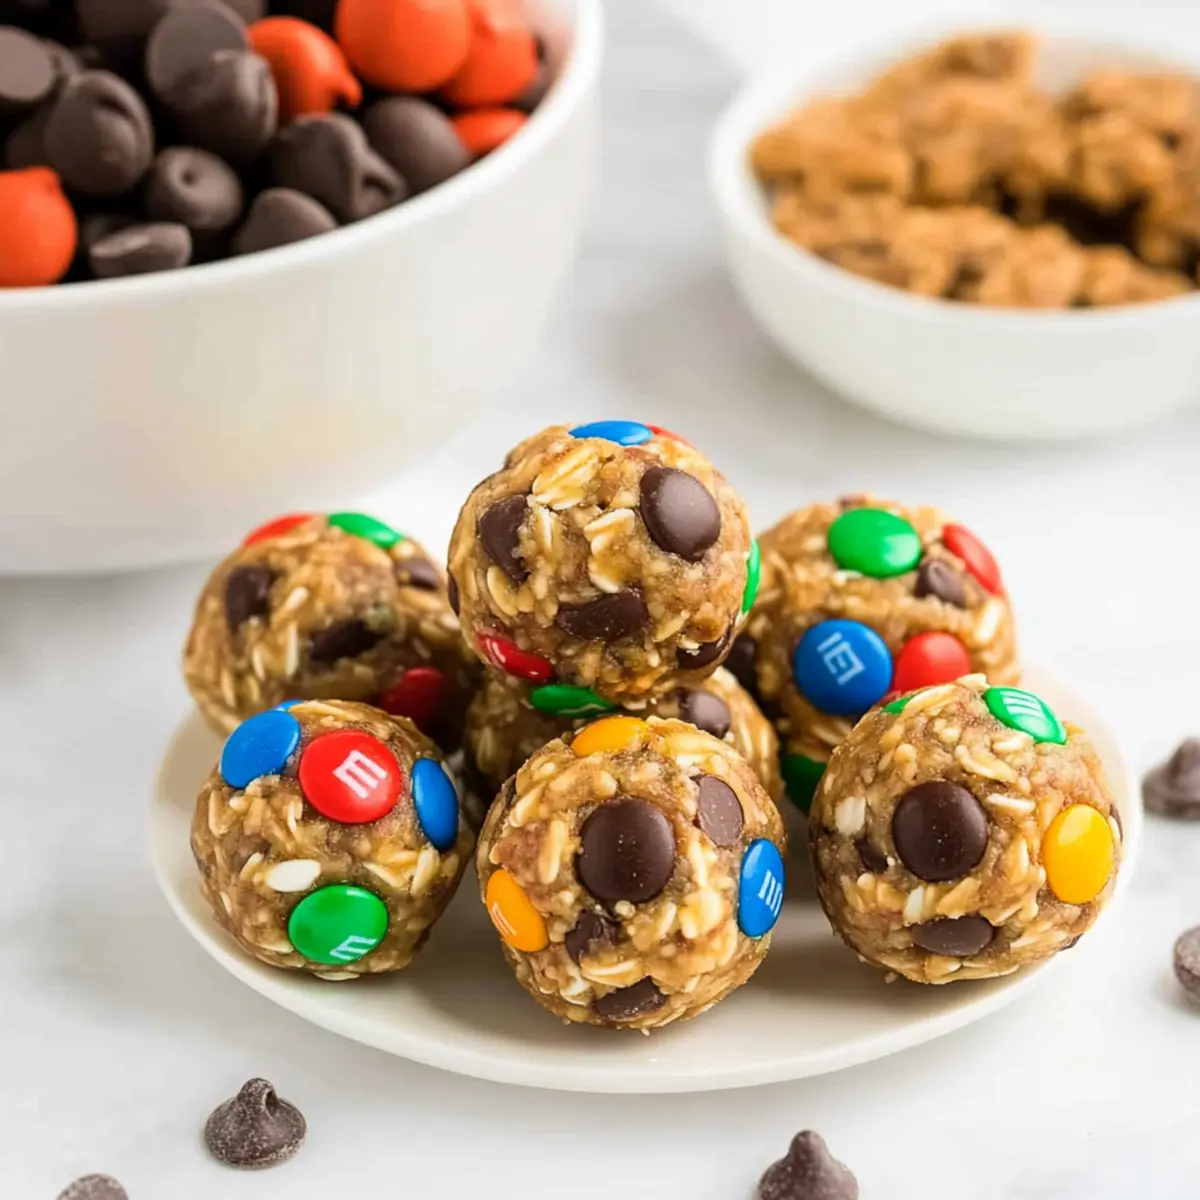
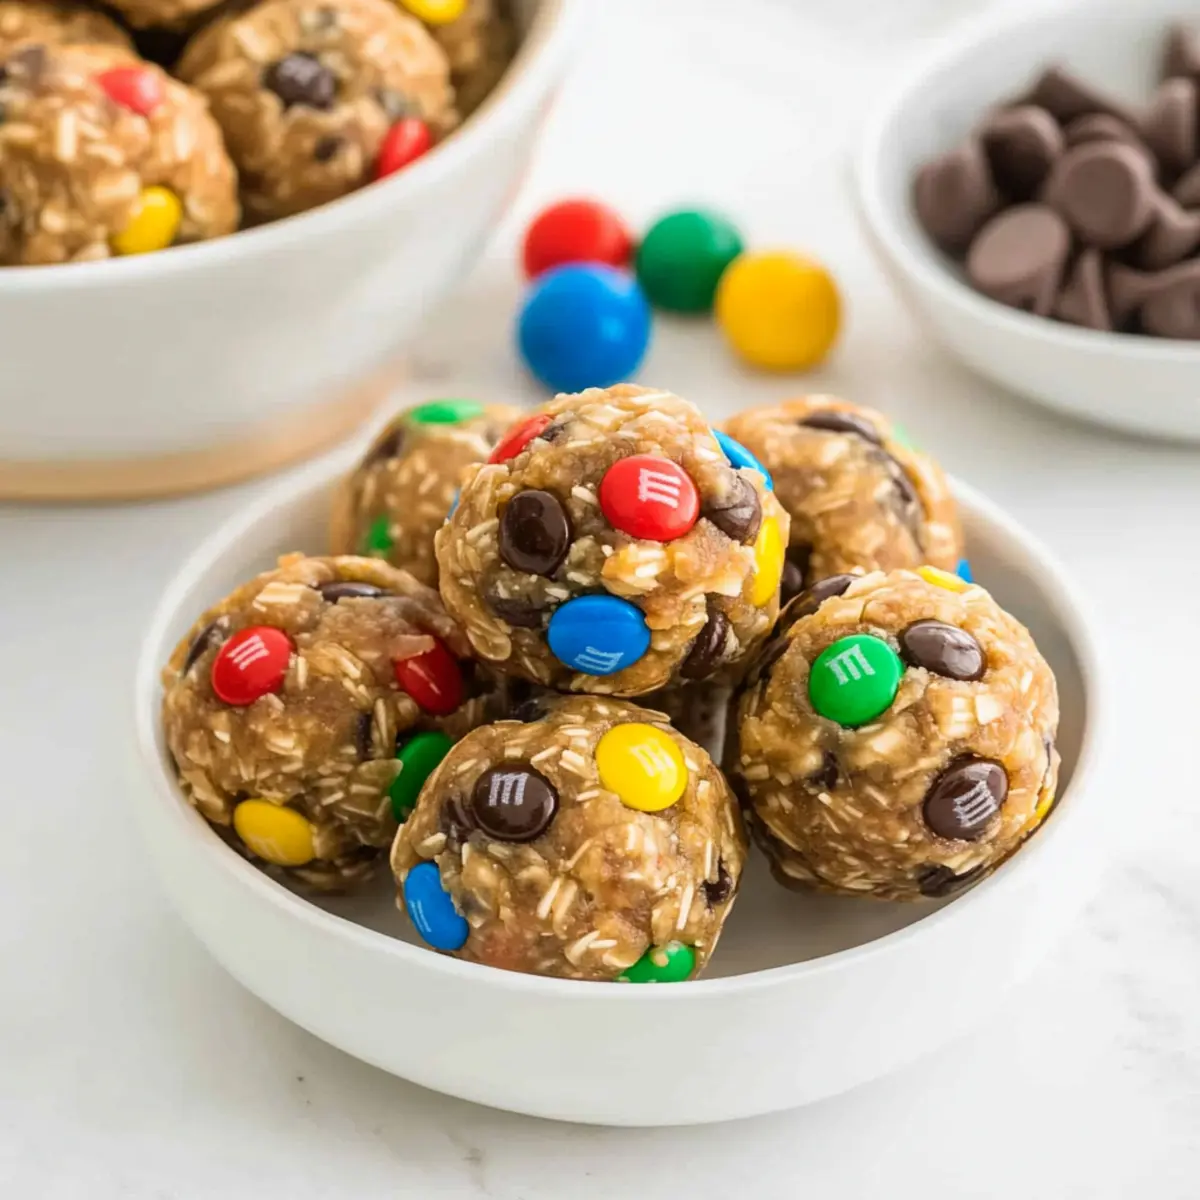
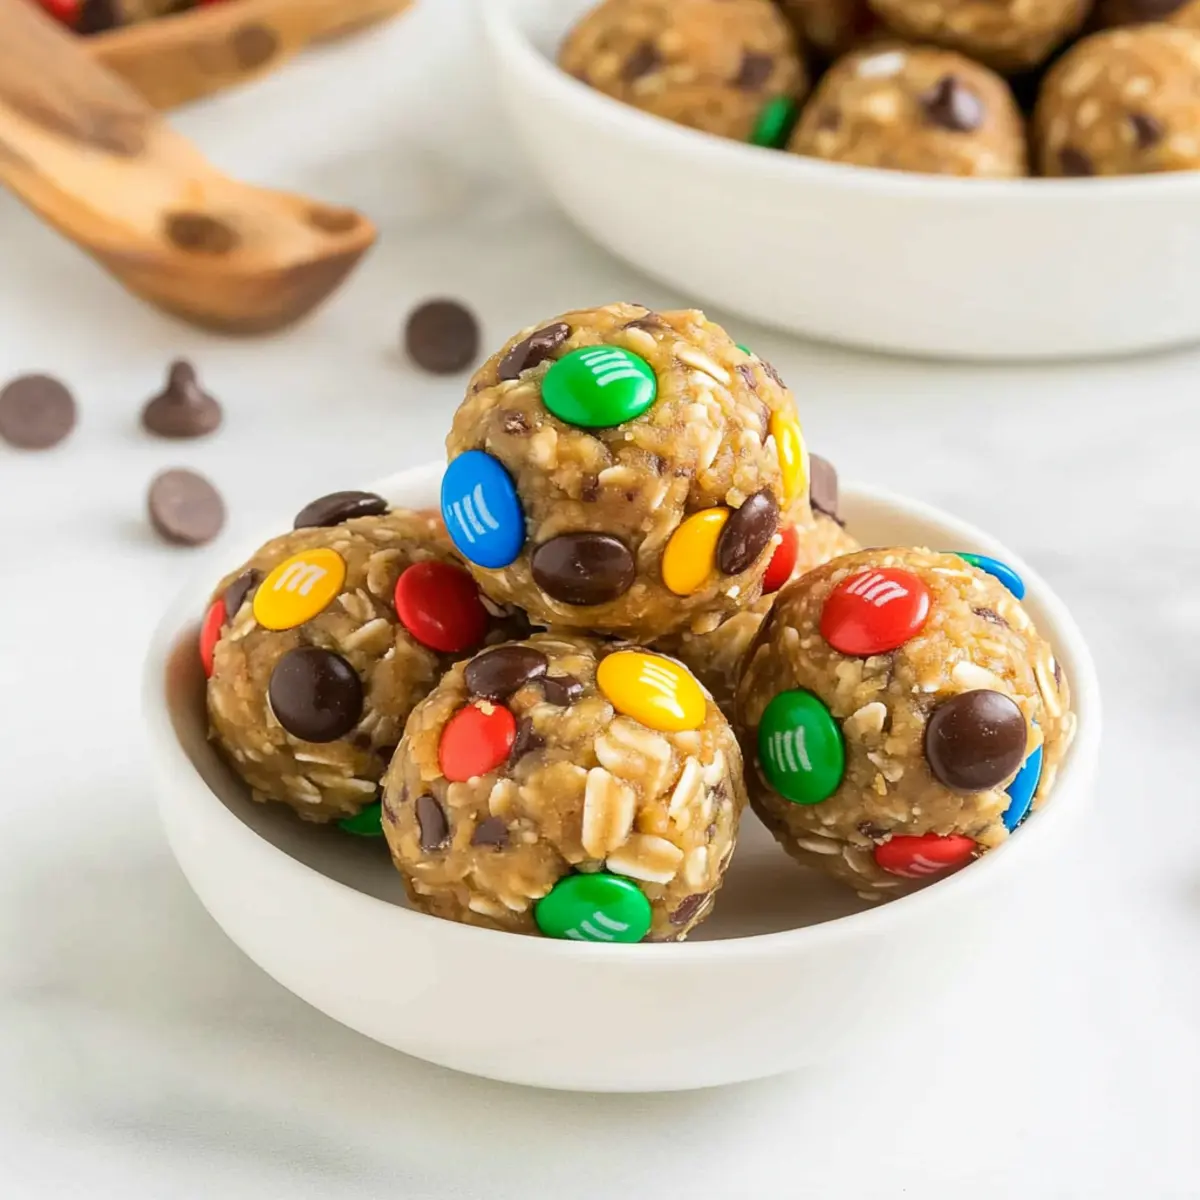
Standing in my kitchen, I found myself on a mission to break free from the endless cycle of takeout and fast food. That’s when I stumbled upon a delightful solution: No-Bake Monster Cookie Energy Balls. These little gems are a perfect blend of hearty oats and creamy peanut butter, sweetened with honey and sprinkled with the fun crunch of mini M&Ms. Ideal for those hurried mornings or busy afternoons, they not only pack a nutritious punch but are also super quick to prepare. Imagine having a healthy, kid-friendly snack waiting for you that’s ready to grab and go! Whether you need a pick-me-up or a lunchbox treat, these energy balls are bound to become a favorite. Curious about how to whip up these delicious bites? Let’s dive into the recipe!

Why Choose Monster Cookie Energy Balls?

Quick and Easy: Whip these up in just minutes with no baking required! It's the ultimate time-saver for busy days.

Nutritious Energy Boost: Packed with oats and peanut butter, these energy balls fuel your day with wholesome ingredients.

Kid-Approved: With the fun crunch of mini M&Ms, even picky eaters will love these tasty bites!

Versatile Snacks: Customize your energy balls with different mix-ins—try swapping chocolate chips with dried fruits for a healthier option!

Perfect for Any Occasion: Great for breakfast, post-workout snacks, or a lunchbox treat; they fit seamlessly into your busy routine.

Whether you're looking for a delightful breakfast item or a satisfying snack, these Monster Cookie Energy Balls are sure to impress!

Monster Cookie Energy Balls Ingredients

• Get ready for a delicious treat!

For the Energy Balls

  • Old-Fashioned Oats – Provides bulk and structure; feel free to substitute with quick oats for a finer texture.
  • Creamy Peanut Butter – Binds ingredients and adds richness; you can use almond butter, cashew butter, or sunflower seed butter to accommodate nut allergies.
  • Mini M&Ms – Adds sweetness and crunch; swap them out with dried fruits for a healthier flavor.
  • Mini Chocolate Chips – Enhances sweetness and texture; try using flavored chips like peanut butter or white chocolate for a twist.
  • Honey – Acts as a sweetener and binder; you can replace it with maple syrup or agave nectar, just be sure to adjust quantities for consistency.

Step‑by‑Step Instructions for Monster Cookie Energy Balls

Step 1: Prepare the Baking Sheet
Start by lining a cookie sheet with parchment paper, ensuring a smooth layer that makes removing the energy balls easy later. This will be your staging area for these delicious Monster Cookie Energy Balls. Set it aside while you mix the ingredients; this will keep everything organized and ready to go.

Step 2: Mix the Ingredients
In a large mixing bowl, combine 2 cups of old-fashioned oats, 1 cup of creamy peanut butter, ½ cup of mini M&Ms, ½ cup of mini chocolate chips, and ⅓ cup of honey. Use a sturdy spatula or wooden spoon to mix until everything is well combined and sticky. The mixture should hold together without falling apart—your cue that it’s ready for the next step!

Step 3: Portion the Mixture
Using a cookie scoop or tablespoon, portion the mixture into equal sizes onto your lined baking sheet. Aim for about 1-ounce portions to create uniform Monster Cookie Energy Balls. Space them out at least an inch apart to allow for ease of handling and to prevent sticking, providing a clear visual indication of your tasty treats-to-be.

Step 4: Shape the Energy Balls
After portioning, take each scoop of the mixture and roll it into a ball shape between your palms. Squeeze firmly but gently to compact the mixture, ensuring they hold their shape. The fun begins here as you create those delightful Monster Cookie Energy Balls, which should resemble tightly packed granola balls.

Step 5: Chill Before Serving
Once all the balls are shaped, place the baking sheet in the refrigerator and let them chill for about 30 minutes. This helps the energy balls firm up and makes them easier to handle. While you wait, imagine the chewy, sweet goodness waiting for you once they’re ready to enjoy as a nutritious snack or breakfast option.

Step 6: Store for Enjoyment
After chilling, your Monster Cookie Energy Balls are ready to enjoy! For storage, keep them in an airtight container in the refrigerator for up to one week or freeze them for up to two months. Flash freeze them on the sheet first to avoid sticking when bagged, so you have a delicious, grab-and-go snack whenever you need a boost!

Make Ahead Options

These No-Bake Monster Cookie Energy Balls are perfect for busy home cooks looking to save time during hectic weeks! You can mix the ingredients and form the energy balls up to 24 hours in advance, simply refrigerate them in an airtight container until you're ready to serve. Alternatively, you can prepare the mixture without rolling them into balls, storing it in the fridge for up to 3 days. Just remember to keep the mixture tightly sealed to maintain freshness and prevent any drying out. When you're ready to enjoy, roll the chilled mixture into balls and chill for another 30 minutes, ensuring they’re just as delicious and satisfying as when they were freshly made!

Monster Cookie Energy Balls Variations

Feel free to get creative with your Monster Cookie Energy Balls to suit your tastes or dietary needs!

  • Protein Boost: Add a scoop of protein powder to the mix for an extra energy kick, perfect for post-workout recovery.

  • Different Nut Butters: Swap creamy peanut butter for almond or cashew butter to switch up the flavor and accommodate allergies.

  • Dried Fruit Surprise: Replace mini M&Ms with dried fruits like cranberries or apricots for a naturally sweet and chewy addition.

  • Flavorful Extracts: Add a few drops of vanilla or almond extract to enhance the overall flavor profile of your energy balls.

  • Seed Power: Sprinkle in some flax seeds or chia seeds for a nutritious crunch. These tiny seeds are packed with omega-3 fatty acids, adding a health boost.

Imagine the delightful combinations you could create, such as pairing almond butter with dried cherries for a sweet twist! For a more indulgent option, consider swapping out chocolate chips for caramel or butterscotch chips. Experimenting has never tasted so good, whether you pair these energy balls with a protein smoothie or enjoy them alongside a healthy breakfast. Your taste buds will thank you! If you're feeling adventurous, check out our Peaches Cream Cookies or whip up some delightful Thumbprint Cookies Melt for an exciting treat!

Storage Tips for Monster Cookie Energy Balls

Fridge: Keep your Monster Cookie Energy Balls in an airtight container in the refrigerator for up to one week to maintain freshness.

Freezer: For longer storage, freeze the energy balls for up to two months. Make sure to flash freeze on a sheet first to prevent sticking when bagged.

Thawing: To enjoy from the freezer, simply transfer the desired number of energy balls to the fridge to thaw overnight or allow them to sit at room temperature for about 20 minutes before eating.

Reheating (Optional): If you prefer a slightly softened texture, you can warm them briefly in the microwave for 5-10 seconds.

Expert Tips for Monster Cookie Energy Balls

  • Choose the Right Peanut Butter: Make sure to use creamy peanut butter for better binding. Natural varieties can separate and affect texture.

  • Adjusting Texture: If the mixture feels crumbly, add a bit more honey or peanut butter. Blending some oats into flour can also improve binding.

  • Portioning with Ease: Use a cookie scoop to ensure even portions. This helps maintain uniformity in size, making your Monster Cookie Energy Balls visually appealing.

  • Chilling Necessity: Don’t skip the refrigeration step! Chilling helps the balls firm up and makes them easier to handle, enhancing the overall experience.

  • Storage Tips: Store in an airtight container in the fridge for up to one week. For longer storage, flash freeze them before bagging to prevent sticking.

What to Serve with Monster Cookie Energy Balls?

Get ready to elevate your snack game while balancing flavors and textures for a delightful meal experience!

  • Fresh Fruit Salad: A vibrant mix of seasonal fruits adds a refreshing brightness that balances the sweetness of the energy balls. The natural sweetness complements the chocolate and honey beautifully.

  • Greek Yogurt Parfait: Layer creamy Greek yogurt with granola and berries for a quick breakfast or snack. The creaminess contrasts perfectly with the chewy texture of the energy balls.

  • Nutty Trail Mix: Pair these energy balls with a crunchy trail mix for added texture and flavor. The mix of nuts and dried fruits offers a satisfying blend of savory and sweet.

  • Dark Chocolate Dipped Strawberries: The richness of dark chocolate complements the sweet and nutty flavor of the energy balls. This indulgent treat adds a touch of elegance to your snack time.

  • Smoothie Bowl: Blend your favorite fruits and a splash of almond milk into a smoothie bowl, then top it with granola and a few energy balls for a delicious, balanced meal.

  • Iced Herbal Tea: Serve these energy balls with a refreshing iced herbal tea, which adds a soothing element. The herbal notes contrast nicely with the rich flavors of the snacks, providing a perfect beverage pairing.

  • Cheese and Crackers: Include a simple platter of sharp cheese and whole-grain crackers for extra protein and crunch. This pairing turns snack time into a delightful mini-meal.

  • Veggie Sticks and Hummus: Add a light crunch with fresh veggie sticks dipped in hummus. The savory flavors of hummus and the sweetness of the energy balls create a naturally delicious contrast.

Monster Cookie Energy Balls Recipe FAQs

What type of oats should I use for the Monster Cookie Energy Balls?
Absolutely! Old-fashioned oats provide the best texture and bulk for these energy balls. However, if you're in a pinch, you can substitute quick oats for a finer texture. Just keep in mind that the flavor and chewiness may vary slightly.

How should I store Monster Cookie Energy Balls?
For optimal freshness, store your Monster Cookie Energy Balls in an airtight container in the refrigerator where they'll last for up to one week. If you want to save them for later, you can also freeze them for up to two months. Just be sure to flash freeze them on a baking sheet first before transferring them to a bag, so they don’t stick together.

Can I freeze Monster Cookie Energy Balls, and how?
Yes, you can definitely freeze these energy balls! After rolling them into shape, lay them on a lined baking sheet in a single layer and freeze them for about 1-2 hours, until firm. Then, transfer them to a freezer-safe bag or container for up to two months. This method keeps them from sticking together and makes for easy grab-and-go snacks later!

What can I do if my energy ball mixture is too crumbly?
Very! If you find that the mixture is crumbling and not holding together, don’t worry! Simply add an extra tablespoon of honey or peanut butter to make it stickier. Another trick is to blend a portion of the oats into a flour-like consistency, and then mix it back into the main mixture to improve binding.

Are Monster Cookie Energy Balls safe for kids with nut allergies?
Yes, they can be! If you’re preparing Monster Cookie Energy Balls for someone with nut allergies, I recommend substituting the peanut butter with sunflower seed butter or a nut-free butter alternative. Just make sure to check the labels for any hidden allergens.

How long does it take to prepare Monster Cookie Energy Balls?
Making these delightful snacks is quick and easy! The active preparation time is usually about 10-15 minutes. After rolling the balls, chilling them in the fridge for about 30 minutes can help them firm up nicely. So, in about 45 minutes total, you could be enjoying your delicious Monster Cookie Energy Balls!

Monster Cookie Energy Balls

Monster Cookie Energy Balls: Your Sweet, Healthy Snack Fix

Monster Cookie Energy Balls are a quick, nutritious snack perfect for busy days, featuring oats, peanut butter, honey, and mini M&Ms.
Print Recipe Pin Recipe
Prep Time 15 minutes mins
Chilling Time 30 minutes mins
Total Time 45 minutes mins
Servings: 12 balls
Course: Snacks
Calories: 150
Ingredients Equipment Method Nutrition Notes

Ingredients
  

For the Energy Balls
  • 2 cups old-fashioned oats Feel free to substitute with quick oats for a finer texture.
  • 1 cup creamy peanut butter Almond butter, cashew butter, or sunflower seed butter can be used for nut allergies.
  • ½ cup mini M&Ms Can swap with dried fruits for a healthier flavor.
  • ½ cup mini chocolate chips Flavored chips like peanut butter or white chocolate can be used.
  • ⅓ cup honey Maple syrup or agave nectar can be used; adjust quantities for consistency.

Equipment

  • large mixing bowl
  • Cookie Sheet
  • Spatula
  • cookie scoop or tablespoon

Method
 

Step‑by‑Step Instructions
  1. Prepare the Baking Sheet: Line a cookie sheet with parchment paper and set aside.
  2. Mix the Ingredients: In a large mixing bowl, combine oats, peanut butter, mini M&Ms, chocolate chips, and honey until well combined.
  3. Portion the Mixture: Use a cookie scoop or tablespoon to portion the mixture onto the lined baking sheet, aiming for about 1-ounce portions.
  4. Shape the Energy Balls: Roll each portion into a ball shape between your palms, compacting them to hold their shape.
  5. Chill Before Serving: Place the baking sheet in the refrigerator for about 30 minutes to firm up the energy balls.
  6. Store for Enjoyment: Keep in an airtight container in the refrigerator for up to a week or freeze for longer storage.

Nutrition

Serving: 1ballCalories: 150kcalCarbohydrates: 18gProtein: 4gFat: 7gSaturated Fat: 1gPolyunsaturated Fat: 1gMonounsaturated Fat: 4gSodium: 80mgPotassium: 150mgFiber: 2gSugar: 8gCalcium: 30mgIron: 1mg

Notes

For easier portioning, use a cookie scoop. Chilling helps the balls firm up and enhances the overall experience.

Tried this recipe?

Let us know how it was!

Crispy Baked Cream Cheese Rangoon Rolls for Any Occasion

November 17, 2025 by Grace Snow Leave a Comment

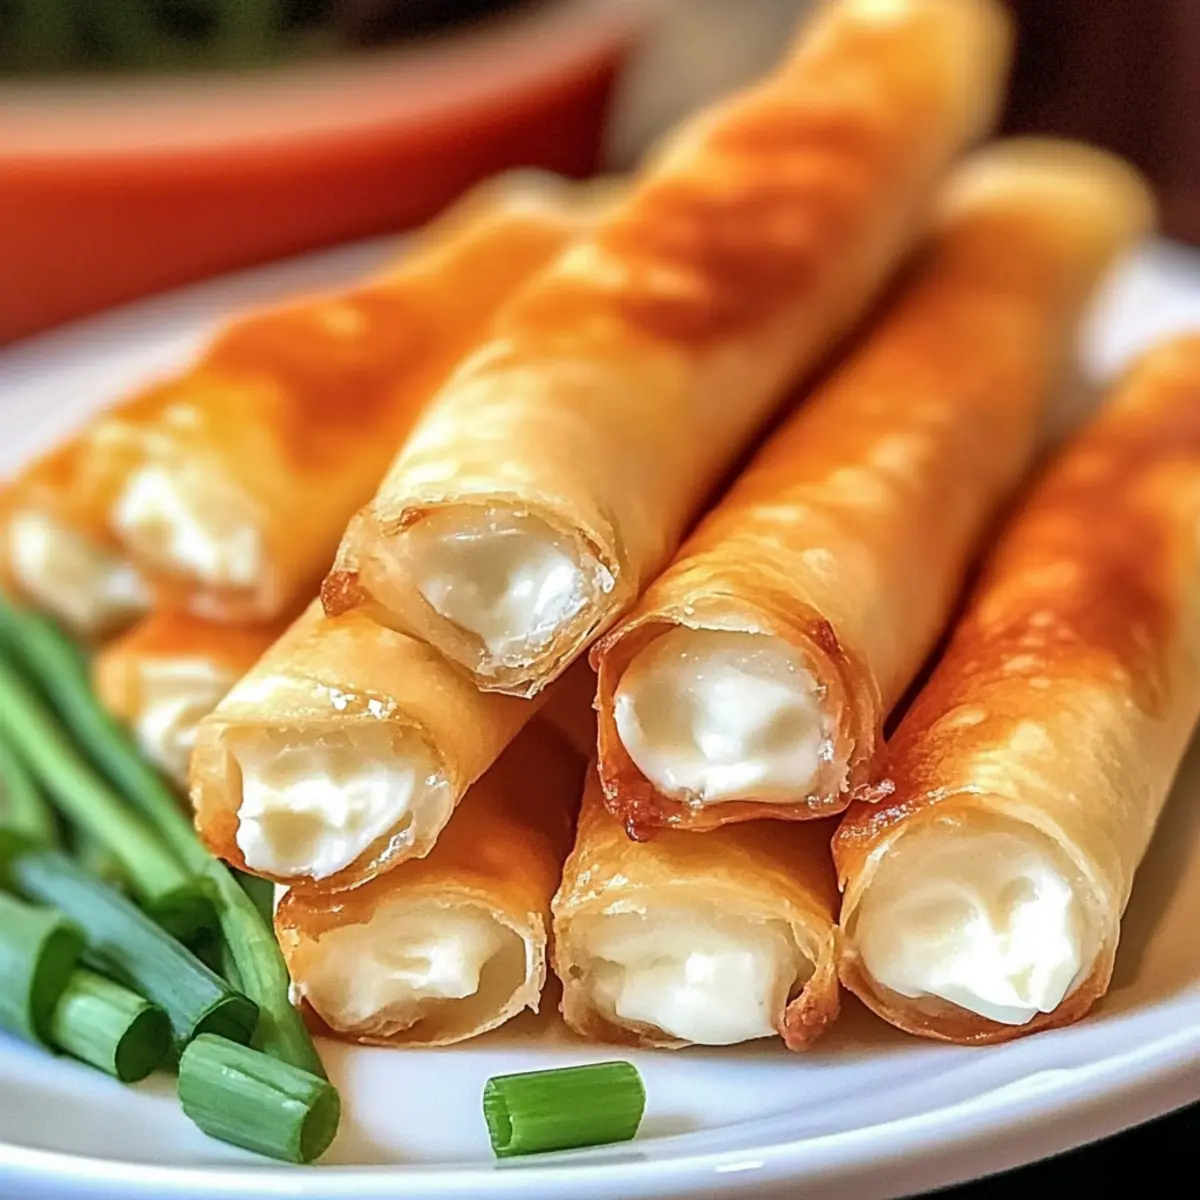
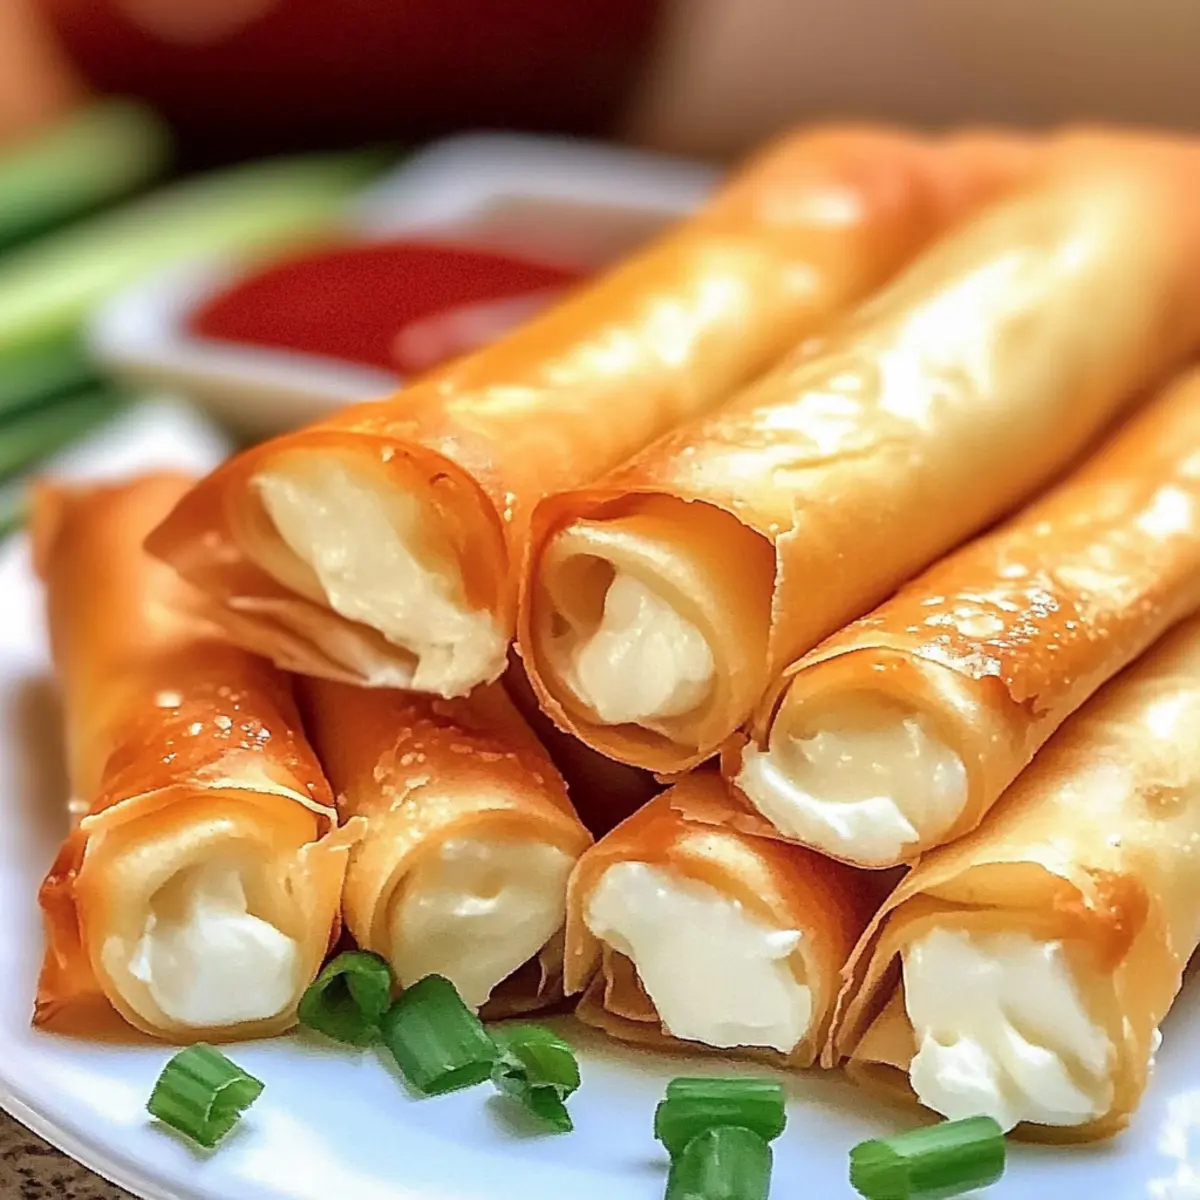
As I opened the oven door, the tantalizing aroma of golden-brown pastries enveloped my kitchen, teasing my senses with a promise of deliciousness. These Easy Baked Cream Cheese Rangoon Rolls are my secret weapon when it comes to impressing guests or satisfying late-night cravings. Unlike their fried counterparts, these rolls offer a crispy exterior that’s perfect for snacking or serving at parties, while the creamy filling steals the spotlight with its rich, dreamy texture. What I love most is how easy they are to make, meaning I can whip them up on a whim or customize them with fun ingredients like buffalo chicken for a spicy twist. Ready to create your new favorite appetizer? Let’s dive into this irresistible recipe!

Why are these Rangoon Rolls a must-try?

Deliciously Crispy: With their golden-brown exterior, these rolls deliver a satisfying crunch that everyone loves.
Incredibly Versatile: Feel free to get creative! Add buffalo chicken or crab meat to the creamy filling for a flavorful twist.
Effortless Preparation: Just a few simple steps and basic ingredients yield stunning results, making this an ideal choice for busy days.
Perfect for Any Gathering: Whether it's a party appetizer or a cozy movie night snack, these rolls are sure to please a crowd! Want more delicious twists on snacks? Check out my Vegan Cacao Cream or Peaches Cream Cookies!

Baked Cream Cheese Rangoon Rolls Ingredients

For the Filling

  • Cream Cheese – Provides a rich, creamy filling; full-fat yields the best texture.
  • Garlic Salt – Enhances the flavor profile; regular salt can be used in a pinch.
  • Green Onions – Adds freshness and a mild onion flavor; chives can be used as a substitute.

For the Wrappers

  • Egg Roll Wraps – Creates a crispy exterior; spring roll wrappers are a great alternative.

For Coating and Baking

  • Vegetable or Canola Oil – Adds crispiness and helps with browning; olive oil is a healthier choice.

For Dipping

  • Sweet and Sour Sauce – A classic for dipping; buffalo sauce can provide a fun spicy kick for your Baked Cream Cheese Rangoon Rolls.

Step‑by‑Step Instructions for Baked Cream Cheese Rangoon Rolls

Step 1: Prep Cream Cheese
Begin by allowing the cream cheese to soften at room temperature for 30 minutes. Alternatively, you can microwave it on the defrost setting for about 15 seconds, making sure it's soft but not melted. Softened cream cheese is easier to mix and will yield a smoother filling for your Baked Cream Cheese Rangoon Rolls.

Step 2: Preheat Oven
Preheat your oven to 375°F (190°C) and prepare a baking sheet by lining it with parchment paper. This will prevent the rolls from sticking and ensure they bake evenly. Take this time to set out all your ingredients, making the next steps smoother and more enjoyable.

Step 3: Mix Filling
In a medium-sized bowl, combine the softened cream cheese, garlic salt, and finely chopped green onions. Stir until the mixture is smooth and well-blended, ensuring all ingredients are thoroughly incorporated. This creamy filling will bring delightful flavor inside your Baked Cream Cheese Rangoon Rolls, making them irresistible.

Step 4: Prepare Wrappers
Lay out the egg roll wraps on a clean, flat surface, like a cutting board. Using a spoon, place about 2 tablespoons of the cream cheese mixture at the bottom of each wrap. This will be the tasty filling that provides a delicious contrast to the crispy exterior, setting the stage for a delightful snack.

Step 5: Seal Rolls
To seal the rolls, moisten the top edge of each wrap with a little water using your fingers or a pastry brush. Carefully roll each wrap tightly around the filling and press down the edges firmly to secure them closed. This step is crucial to prevent the cream cheese filling from leaking during baking.

Step 6: Oil Coating
Once all the rolls are sealed, lightly brush or dip each one in vegetable oil, ensuring the edges are coated well. This step enhances the crispiness of your Baked Cream Cheese Rangoon Rolls. For a healthier alternative, you can use olive oil, which adds flavor while giving that perfect golden-brown finish.

Step 7: Bake
Arrange the oil-coated rolls on the prepared baking sheet, ensuring they are spaced out to allow for even baking. Place them in the preheated oven and bake for 12-15 minutes. Flip the rolls halfway through the baking time to ensure they turn golden brown and crispy on all sides, creating the perfect party appetizer.

Step 8: Cool and Serve
Once golden and crispy, remove the Baked Cream Cheese Rangoon Rolls from the oven and let them cool for a couple of minutes. Serve warm, paired with sweet and sour or buffalo sauce for dips. The warm, creamy filling against the crisp exterior makes for a delightful treat that everyone will adore!

What to Serve with Easy Baked Cream Cheese Rangoon Rolls

Create a delightful meal around these crispy, creamy indulgences, perfect for any occasion!

  • Sweet and Sour Sauce: A classic pairing that complements the richness of the cream cheese filling, adding a tangy contrast.
  • Spicy Buffalo Sauce: For those who crave heat, this sauce heightens the flavor profile of the rolls and adds a kick.
  • Crispy Asian Slaw: A fresh, crunchy salad that balances the creamy texture of the Rangoon rolls, adding vibrant flavors and colors.
  • Garlic Butter Noodles: Satisfying and flavorful, these noodles provide a cozy complement, drawing out the savory elements in the rolls.
  • Roasted Veggies: Lightly seasoned and caramelized, they bring a wholesome touch that enhances the overall meal experience.
  • Mini Egg Rolls: For added variety, serve these as another crispy appetizer that pairs wonderfully with the dipping sauces.
  • Chilled White Wine: A refreshing drink that cuts through the creaminess while enhancing your dining experience.
  • Coconut Milk Tapioca Pudding: A creamy dessert that ties into the smoothness of the rolls, rounding off the meal perfectly.
  • Homemade Spring Rolls: Keep up the Asian theme with these fresh, veggie-packed delights—a light and refreshing option alongside your Rangoon rolls.
  • Pineapple Salsa: Sweet and tangy, this delightful topping adds a burst of tropical brightness that pairs beautifully with the Rangoon rolls.

Helpful Tricks for Baked Cream Cheese Rangoon Rolls

  • Seal Securely: Ensure the edges of your rolls are well-sealed to avoid any filling leakage during baking. A little water works wonders!

  • Oil Generously: Use a good amount of oil for a crispy exterior; brushing them ensures even distribution. Too little oil can lead to soggy rolls.

  • Bake Right: Flip the rolls halfway through baking to achieve that perfect golden-brown color all around. This not only enhances appearance but texture too.

  • Serve Warm: Enjoy your Baked Cream Cheese Rangoon Rolls fresh out of the oven. They’re at their best when warm and crispy!

  • Experiment with Fillings: Don’t hesitate to get creative! Spice things up by incorporating proteins like buffalo chicken or even veggies for a delightful twist.

Storage Tips for Baked Cream Cheese Rangoon Rolls

Fridge: Store leftover rolls in an airtight container for up to 3 days. Make sure they are completely cooled to prevent condensation.

Freezer: For longer storage, freeze unbaked rolls on a baking sheet until solid, then transfer to a freezer bag. They can be kept for up to 2 months.

Reheating: To reheat, place rolls in a preheated oven at 375°F (190°C) for about 10 minutes, ensuring they stay crispy on the outside. Avoid microwaving to maintain crunchiness.

Dipping Sauce: If you have leftover sweet and sour or buffalo sauce, store it in the fridge for up to 1 week, ready to enjoy with your Baked Cream Cheese Rangoon Rolls!

Make Ahead Options

These Easy Baked Cream Cheese Rangoon Rolls are perfect for meal prep enthusiasts looking to save time on busy weeknights! You can make the filling (cream cheese, garlic salt, and green onions) up to 3 days in advance and store it in an airtight container in the refrigerator. Additionally, you can assemble the rolls and keep them tightly wrapped on a baking sheet in the fridge for up to 24 hours before baking. To maintain the crispiness of your rangoon rolls, make sure to light-coat them with oil just before baking. When you’re ready to serve, simply pop them in the preheated oven and bake as directed, enjoying delicious, freshly baked rolls with minimal effort!

Baked Cream Cheese Rangoon Rolls Variations

Feel free to spice things up! Customize your rolls with these fun and flavorful twists.

  • Buffalo Chicken: Add shredded buffalo chicken to the cream cheese filling for a spicy flavor bomb. Perfect for those who enjoy a little heat!
  • Crab Meat: Introducing crab meat into the filling brings a touch of elegance and a delightful seafood twist to your rolls.
  • Vegan Version: Swap cream cheese for a cashew or tofu-based alternative for a plant-based treat that everyone can enjoy!
  • Herbed Cream Cheese: Flavor the filling with fresh herbs like dill or basil to elevate the richness of the cream cheese.
  • Spicy Garlic Sauce: Mix in some spicy garlic sauce to give your rolls an extra kick; it pairs beautifully with a cool ranch dip.
  • Crispy Veggie Version: Add diced bell peppers and carrots to bring a crunch and vibrant color to the filling without any meat.
  • Cheesy Explosion: Incorporate shredded cheddar or mozzarella cheese for a gooey, cheesy surprise inside your rolls.
  • Different Wrappers: Try using phyllo dough instead of egg roll wraps for an ultra-flaky, delicate texture that complements the creamy filling beautifully.

These variations allow everyone to find their perfect match! If you're in the mood for more scrumptious ideas, don’t miss out on my Matcha Baked Doughnuts or an indulgent Ice Cream Cake.

Baked Cream Cheese Rangoon Rolls Recipe FAQs

What type of cream cheese is best for these rolls?
I highly recommend using full-fat cream cheese for the richest and creamiest filling. This ensures that your Baked Cream Cheese Rangoon Rolls have that indulgent texture that everyone loves. If you’re looking for a lighter option, you can try reduced-fat cream cheese, but the texture may be slightly different.

How should I store leftover Baked Cream Cheese Rangoon Rolls?
Store leftover rolls in an airtight container in the fridge for up to 3 days. Make sure they are completely cooled before sealing. To maintain their crispiness, I suggest reheating them in the oven instead of the microwave, allowing them to regain that delightful crunch.

Can I freeze Baked Cream Cheese Rangoon Rolls?
Absolutely! You can freeze unbaked rolls for up to 2 months. Just arrange them on a baking sheet to freeze individually until solid, then transfer them to a freezer bag. When you're ready to bake, there's no need to thaw—just add a few extra minutes to the baking time!

What should I do if my rolls are leaking filling while baking?
To prevent leaking, make sure the edges are well-sealed before baking. A little water on the edge of the wrap can help. If you see some filling escaping, don’t worry too much—it happens! Make sure to check that each roll is tightly sealed next time to keep all that creamy goodness inside.

Can I use different ingredients for the filling?
Very much so! Feel free to customize your filling by adding shredded buffalo chicken, crab meat, or even finely chopped vegetables for a vegetarian option. The possibilities are endless, and it’s a great way to make it your own!

Baked Cream Cheese Rangoon Rolls

Crispy Baked Cream Cheese Rangoon Rolls for Any Occasion

Baked Cream Cheese Rangoon Rolls are an easy, crispy delight perfect for impressing guests and satisfying cravings.
Print Recipe Pin Recipe
Prep Time 30 minutes mins
Cook Time 15 minutes mins
Cooling Time 2 minutes mins
Total Time 47 minutes mins
Servings: 12 rolls
Course: Snacks
Cuisine: American
Calories: 150
Ingredients Equipment Method Nutrition Notes

Ingredients
  

For the Filling
  • 8 oz Cream Cheese full-fat yields the best texture
  • 1 teaspoon Garlic Salt regular salt can be used in a pinch
  • 2 stalks Green Onions finely chopped; chives can be used as a substitute
For the Wrappers
  • 1 pack Egg Roll Wraps spring roll wrappers are a great alternative
For Coating and Baking
  • 2 tablespoons Vegetable or Canola Oil olive oil is a healthier choice
For Dipping
  • 1 cup Sweet and Sour Sauce buffalo sauce can provide a fun spicy kick

Equipment

  • Oven
  • Baking Sheet
  • Parchment Paper
  • Mixing Bowl
  • Spoon
  • Pastry brush

Method
 

Step-by-Step Instructions
  1. Begin by allowing the cream cheese to soften at room temperature for 30 minutes or microwave it on the defrost setting for about 15 seconds.
  2. Preheat your oven to 375°F (190°C) and prepare a baking sheet by lining it with parchment paper.
  3. In a medium-sized bowl, combine the softened cream cheese, garlic salt, and finely chopped green onions. Stir until smooth.
  4. Lay out the egg roll wraps and place about 2 tablespoons of the cream cheese mixture at the bottom of each wrap.
  5. Moisten the top edge of each wrap with water and roll tightly around the filling, pressing down the edges to seal.
  6. Lightly brush or dip each roll in vegetable oil, ensuring the edges are coated well.
  7. Arrange the oil-coated rolls on the prepared baking sheet and bake for 12-15 minutes, flipping halfway through.
  8. Once golden and crispy, remove from the oven and let them cool for a couple of minutes before serving.

Nutrition

Serving: 1rollCalories: 150kcalCarbohydrates: 10gProtein: 3gFat: 10gSaturated Fat: 3gPolyunsaturated Fat: 2gMonounsaturated Fat: 4gCholesterol: 20mgSodium: 300mgPotassium: 50mgFiber: 1gVitamin A: 500IUVitamin C: 1mgCalcium: 30mgIron: 1mg

Notes

Ensure the edges of your rolls are well-sealed to prevent leakage during baking. Use a good amount of oil for a crispy exterior.

Tried this recipe?

Let us know how it was!

Festive Taco Cheese Ball: The Ultimate Party Appetizer

November 13, 2025 by Grace Snow Leave a Comment

Amid the twinkling lights and cheerful music of the holiday season, I found myself dreaming of the perfect festive appetizer. Enter the Christmas Taco Cheese Ball Wreath—a delightful twist on holiday snacks that promises to wow your guests and keep the conversations flowing. This vegetarian wonder combines creamy cheeses, fresh herbs, and zesty taco seasoning, making it a delicious and visually stunning addition to any gathering. Not only is it quick to prepare, but this eye-catching centerpiece is sure to be a crowd-pleaser, setting the tone for a fun and festive atmosphere. Imagine the smiles as you unveil this colorful creation! Are you ready to impress your family and friends with a holiday appetizer they'll never forget?

Why Choose This Taco Cheese Ball?

Simplicity: This recipe is a breeze to whip up, making it the perfect choice for busy holiday schedules.

Eye-Catching Appeal: With its vibrant colors and festive shape, this Taco Cheese Ball Wreath doubles as a stunning centerpiece for your table.

Flavorful Burst: The creamy cheeses combined with zesty taco seasoning create a mouthwatering flavor that everyone will love.

Versatile Serving Options: Pair it with your favorite crackers, pretzels, or even fresh veggies like in my Fish Taco Bowls for a delightful twist!

Make-Ahead Magic: Prepare this delicious appetizer 1-2 days in advance, allowing the flavors to meld while saving you time on the day of your gathering.

Vegetarian-Friendly: This delightful snack is perfect for guests with dietary preferences, ensuring everyone gets to enjoy a taste of holiday cheer!

Taco Cheese Ball Ingredients

For the Cheese Mixture

• Cream Cheese – 1 package (16 oz) for that creamy base; opt for full-fat to enhance richness.
• Monterey Jack Cheese – 8 oz, shredded; if you're craving more zing, switch to Pepper Jack.

For the Flavor Boost

• Taco Seasoning – 1/2 packet; this adds a zesty kick, and you can make homemade seasoning for an extra fresh flavor.
• Fresh Cilantro – 1 bunch, stems removed for a burst of freshness; parsley can be used for a milder taste.

For the Crunch

• Green Onions – 4, roughly chopped; these provide a mild onion flavor, while yellow or red onions work too.
• Diced Green Chile Peppers – 1 (4 oz can) for a spicy touch; consider using mild green chiles or omit for less heat.
• White Onion – 2 tbsp, finely chopped; enhances flavor; shallots can substitute for a milder kick.

For Color and Juiciness

• Roma Tomato – 1 medium, cored and diced; adds nice color and juiciness, but you can swap it with any fresh variety or omit it.
• Jalapeno Pepper – 1 medium, seeded and finely chopped; brings a spicy element; feel free to skip it for a mild touch or use pickled ones for tanginess.

This Taco Cheese Ball is not only delicious but will also impress your guests with its vibrant look and flavor!

Step‑by‑Step Instructions for Taco Cheese Ball

Step 1: Prepare the Bowl
Start by lining a 16-ounce bowl with plastic wrap, ensuring the wrap extends over the edges for easy unmolding later. This simple step will help you easily remove the Taco Cheese Ball after chilling. Set the bowl aside as you gather the rest of your ingredients and equipment.

Step 2: Mix Cheese Base
In a food processor, combine the softened cream cheese, shredded Monterey Jack cheese, and half a packet of taco seasoning. Pulse the mixture until it's smooth and well-combined, but take care not to over-process it—this keeps the cheese texture creamy and delightful. Aim for a unified blend with no lumps.

Step 3: Add Fresh Ingredients
Next, gently incorporate half of the fresh cilantro, chopped green onions, and diced green chiles into the mixture. Use the pulse function for this step to maintain some visible flecks of color and flavor. This will enhance the visual appeal of your Taco Cheese Ball and ensure a burst of fresh taste.

Step 4: Chill
Transfer the cheese mixture into the prepared bowl, smoothing the surface with a spatula. Cover the bowl with plastic wrap and refrigerate for at least 4 hours, or ideally overnight. Chilling allows the flavors to meld beautifully and helps the mixture solidify, making it easier to shape later into a stunning wreath.

Step 5: Shape the Wreath
Once chilled, carefully unmold the Taco Cheese Ball by lifting the wrapped edges. Place it on a serving platter, and create a hole in the center with a shot glass or spoon to mimic a wreath shape. Smooth the outer edges if needed to retain its beautiful form for your holiday gathering.

Step 6: Garnish
Sprinkle the remaining chopped cilantro generously over the top of the cheese ball for a fresh touch. In a separate bowl, combine the diced Roma tomato, finely chopped white onion, and jalapeno, then arrange this zesty mixture around the wreath. This not only adds flavor but also creates a vibrant presentation that will impress your guests.

Expert Tips for Taco Cheese Ball

  • Proper Lining: Make sure to line your bowl effectively with plastic wrap so that the Taco Cheese Ball unmolds easily and retains its shape.

  • Taste Adjustments: Feel free to modify the amount of jalapeño or green chilies depending on your guests' spice preferences. Start with a small amount and add more as needed.

  • Flavor Infusion: For an extra flavor boost, chill the cheese mixture overnight. This allows the flavors to meld beautifully, enhancing the overall taste.

  • Presentation Matters: When shaping the wreath, create a slight indentation in the center for a more authentic look. Use a shot glass to achieve the perfect shape.

  • Garnishing Secrets: Use a mix of fresh herbs and colorful veggies for garnishing to add both flavor and visual appeal. It will elevate your Taco Cheese Ball into a festive centerpiece!

  • Storage Tip: If you have leftovers, store any unused Taco Cheese Ball in an airtight container in the refrigerator for up to 3 days to preserve its deliciousness.

What to Serve with Christmas Taco Cheese Ball Wreath

Imagine a festive gathering filled with laughter, delicious bites, and a cozy atmosphere that wraps around you like a warm blanket.

  • Fresh Veggie Platter: Crisp vegetables like carrots and bell peppers add crunch and a refreshing contrast to the creamy cheese ball.
  • Assorted Crackers: A mix of textures in crunchy and soft crackers provides the perfect base to scoop up the zesty Taco Cheese Ball, enhancing every bite.
  • Spicy Salsa: The vibrant flavors of salsa pair effortlessly with the taco seasonings and offer a delightful dip that bursts with freshness.
  • Guacamole: Smooth and rich, guacamole balances out the spiciness of the cheese ball, creating a harmonious blend of flavors that guests will love.
  • Warm Tortilla Chips: Crunchy chips provide an irresistible vehicle for the mixture, making it a go-to option for a satisfying bite.
  • Sparkling Cider: A bubbly drink like sparkling cider elevates the festive spirits and makes for a delightful, non-alcoholic pairing.
  • Chili Lime Popcorn: This unique snack brings added flavor and crunch while offering a lighter yet zesty option to enjoy alongside the creamy cheese ball.
  • Mini Stuffed Peppers: Stuffed mini peppers can add another layer of flavor while tying in beautifully with the tortilla and cheese theme.
  • Chocolate Dipped Pretzels: End on a sweet note with these treats; the salty-sweet combination is a delightful contrast to the savory flavors of your main appetizer.

Make Ahead Options

This Christmas Taco Cheese Ball Wreath is perfect for meal prep, making busy holiday gatherings much easier! You can prepare the cheese mixture up to 24 hours in advance. Simply follow the mixing and chilling instructions, then cover the bowl tightly with plastic wrap to maintain freshness. The flavors will meld beautifully while it sits in the refrigerator. When you're ready to serve, unmold the wreath onto a platter, and garnish with the remaining cilantro and optional toppings. This approach saves you time on the day of your party, ensuring your festive appetizer is just as delicious and vibrant as if made fresh!

How to Store and Freeze Taco Cheese Ball

Fridge: Store the Taco Cheese Ball tightly wrapped in plastic wrap or in an airtight container for up to 3 days. This keeps it fresh and ready for your next snacking session.

Freezer: If you need to freeze the Taco Cheese Ball, wrap it securely in plastic wrap, then in aluminum foil. It can be frozen for up to 2 months. Thaw it in the fridge overnight before serving.

Make-Ahead: This appetizer is perfect for preparing 1-2 days ahead of your event. Just assemble it, refrigerate, and it will be ready to impress your guests!

Reheating: There's no need to reheat the Taco Cheese Ball; it's best enjoyed cold or at room temperature. Just garnish before serving for a beautiful presentation.

Variations & Substitutions for Taco Cheese Ball

Feel free to add your personal touch to this delightful appetizer and make it your own!

  • Cheese Swap: Replace Monterey Jack with cheddar or pepper jack for a different flavor profile. This simple swap introduces a bold twist that cheese lovers will truly appreciate.

  • Add-Ins: Toss in chopped black olives or bell peppers for an extra pop of color and delightful crunch. These additions not only enhance texture but also add layers of flavor that make each bite even more exciting.

  • Greek Yogurt Blend: Combine Greek yogurt with cream cheese for a lighter version of this dish. The tangy flavor of Greek yogurt beautifully complements the cheese while maintaining creaminess.

  • Spice Levels: Adjust the heat by substituting regular jalapeños with milder green bell peppers or even sweet peppers. This way, you cater to everyone's spice preferences, ensuring your Taco Cheese Ball remains a hit!

  • Herb Choices: Swap cilantro for fresh parsley if you’re looking for a milder herb flavor. The freshness of parsley still brightens the dish without overpowering the other flavors.

  • Vegetable Remix: Include finely diced red or yellow bell peppers instead of tomatoes for added sweetness and color. The vibrant hues will enhance the wreath's festive presentation!

  • Crunchy Texture: Add some crushed tortilla chips on top for an added crunch. This twist will create a delightful contrast between creamy and crispy textures, perfect for trendy appetizers.

Don’t forget to explore other delicious options like my Taco Bell Crunchwrap or Taco Spaghetti Cheesy to elevate your taco-themed feast!

Christmas Taco Cheese Ball Wreath Recipe FAQs

What type of cheese should I use for the Taco Cheese Ball?
Absolutely, the classic choice is cream cheese combined with shredded Monterey Jack for a mild flavor. If you want to spice things up, opt for Pepper Jack cheese instead!

How long can I store the Taco Cheese Ball in the fridge?
You can keep your Taco Cheese Ball in the refrigerator for up to 3 days. Just wrap it tightly in plastic wrap or place it in an airtight container to maintain its flavors and freshness.

Can I freeze the Taco Cheese Ball?
Yes! To freeze your Taco Cheese Ball, wrap it securely in plastic wrap, followed by aluminum foil. It will last in the freezer for up to 2 months. When you're ready to serve, thaw it in the fridge overnight.

What if my Taco Cheese Ball is too soft?
If your mixture turns out too soft, consider adding more shredded cheese, which can help it firm up. Chilling the mixture longer before shaping it into a wreath can also lead to a sturdier texture.

Is this recipe suitable for my vegetarian friends?
Yes, this Taco Cheese Ball is vegetarian-friendly, making it perfect for gatherings! Just check the taco seasoning to ensure it doesn’t include any animal-derived ingredients.

Can I make this Taco Cheese Ball ahead of time?
Definitely! I often make it 1-2 days in advance. Just assemble, refrigerate, and your flavorful appetizer will be ready to impress your guests when the time comes!

Taco Cheese Ball

Festive Taco Cheese Ball: The Ultimate Party Appetizer

This Taco Cheese Ball is a festive and delicious appetizer that is sure to impress your guests.
Print Recipe Pin Recipe
Prep Time 20 minutes mins
Chilling Time 4 hours hrs
Total Time 4 hours hrs 20 minutes mins
Servings: 10 servings
Course: Snacks
Cuisine: Mexican
Calories: 150
Ingredients Equipment Method Nutrition Notes

Ingredients
  

For the Cheese Mixture
  • 1 package Cream Cheese 16 oz, opt for full-fat for richness
  • 8 oz Monterey Jack Cheese shredded, can substitute with Pepper Jack
For the Flavor Boost
  • 0.5 packet Taco Seasoning adds zesty kick, homemade option available
  • 1 bunch Fresh Cilantro stems removed, can substitute with parsley
For the Crunch
  • 4 Green Onions roughly chopped, yellow or red onions can be used
  • 1 can Diced Green Chile Peppers 4 oz can, can use mild or omit
  • 2 tbsp White Onion finely chopped, can substitute with shallots
For Color and Juiciness
  • 1 Roma Tomato medium, cored and diced
  • 1 Jalapeno Pepper medium, seeded and finely chopped

Equipment

  • Food Processor
  • 16-ounce Bowl
  • plastic wrap
  • Spatula
  • Shot Glass

Method
 

Step-by-Step Instructions for Taco Cheese Ball
  1. Start by lining a 16-ounce bowl with plastic wrap, ensuring the wrap extends over the edges for easy unmolding later.
  2. In a food processor, combine the softened cream cheese, shredded Monterey Jack cheese, and half a packet of taco seasoning. Pulse until smooth.
  3. Gently incorporate half of the chopped cilantro, green onions, and diced green chiles into the cheese mixture.
  4. Transfer the cheese mixture into the prepared bowl and refrigerate for at least 4 hours or overnight.
  5. Carefully unmold the Taco Cheese Ball onto a serving platter, creating a hole in the center to mimic a wreath shape.
  6. Sprinkle the remaining chopped cilantro over the top and arrange diced Roma tomato, finely chopped white onion, and jalapeno around the wreath.

Nutrition

Serving: 1servingCalories: 150kcalCarbohydrates: 4gProtein: 5gFat: 13gSaturated Fat: 8gPolyunsaturated Fat: 0.5gMonounsaturated Fat: 4gCholesterol: 30mgSodium: 300mgPotassium: 100mgSugar: 1gVitamin A: 5IUVitamin C: 15mgCalcium: 15mgIron: 2mg

Notes

Store any leftovers in an airtight container for up to 3 days in the fridge. This appetizer can be made 1-2 days ahead of time.

Tried this recipe?

Let us know how it was!

Savory Pigs in a Blanket: Easy & Irresistibly Delicious!

November 13, 2025 by Grace Snow Leave a Comment

As I rummaged through my kitchen, the delightful aroma of nostalgia enveloped me—reminding me of joyful gatherings filled with laughter and loving hearts. That’s when I decided to whip up a classic favorite: Pigs in a Blanket. These easy snacks are not just quick to prepare; they’re also the perfect crowd-pleaser for any occasion, whether it’s a cozy family lunch or a lively party. Imagine sinking your teeth into flaky crescent rolls wrapping luscious cocktail weenies, paired delightfully with a zesty homemade honey mustard dipping sauce that elevates the flavor to a whole new level. If you’re tired of fast food and looking for something homemade that will bring smiles to both kids and adults, this recipe is your go-to solution. Are you ready to create a delicious memory with these irresistible bites?

Why are Pigs in a Blanket so beloved?

Irresistible Comfort: These Pigs in a Blanket are the ultimate comfort food, bringing warmth and happiness to any gathering.

Super Simple: Just a few ingredients and minimal effort make whipping up these delicious snacks easy—perfect for busy weeknights or last-minute parties.

Crowd-Pleasing: Whether for kids or adults, everyone loves these savory bites, making them a guaranteed hit at family events or game day celebrations.

Customizable: Feel free to experiment! You can swap in different proteins or cheese to create unique flavors that cater to everyone's taste preferences.

Serve Warm: Enjoy them fresh out of the oven with a homemade honey mustard dipping sauce, which takes the experience to a whole new level—talk about a flavor explosion!

Pigs in a Blanket Ingredients

• Dive into the delightful world of Pigs in a Blanket with these essential ingredients!

For the Dough
• Crescent Rolls – The flaky base that creates an inviting, crispy exterior. Substitution: Use crescent roll sheets if you want a seamless dough.

For the Filling
• Cocktail Weenies – Juicy and tender, they’re the heart of this recipe. Substitution: Mini sausages work beautifully as an alternative.

For the Glaze
• Butter (melted) – Enhances richness and promotes a golden, appetizing finish. Tip: Brush generously for that perfect bake.

For the Dipping Sauce
• Dijon Mustard – Infuses the sauce with a tangy kick that pairs wonderfully with the savory bites. Substitution: Yellow mustard can be used for a milder flavor.
• Mayonnaise – Adds creaminess to the dipping sauce, making it irresistible. Tip: Combine with mustard for a rich texture.
• Honey – Sweetens the sauce, harmonizing with the mustard’s tang. Tip: Swap in maple syrup for a unique twist.
• Cayenne Pepper – A pinch introduces a delightful hint of heat to the mixture. Substitution: Omit if you prefer a milder flavor profile.
• Salt – Essential to enhance the overall flavor; adjust to your taste preferences. Tip: Always taste and season as needed.

Step‑by‑Step Instructions for Pigs in a Blanket

Step 1: Preheat and Prepare
Begin by preheating your oven to 375°F (190°C). While the oven heats up, line a baking sheet with parchment paper to prevent sticking and simplify cleanup. This will be the perfect base for your delightful Pigs in a Blanket.

Step 2: Roll Out the Dough
Open the package of crescent rolls and gently roll out the dough onto a clean surface. If using individual triangles, press the seams together firmly to create a seamless sheet. The dough should appear smooth and ready to be cut into triangles for wrapping the cocktail weenies.

Step 3: Cut the Dough
Using a pizza cutter or knife, cut the dough into approximately 7 to 8 equal triangles. Aim for a good size that will wrap snugly around each cocktail weenie. This step ensures you have the perfect portions for your Pigs in a Blanket.

Step 4: Wrap the Weenies
At the wider end of each triangle, place a cocktail weenie. Carefully roll the dough around the weenie, tucking in the edges to secure it. This creates a neat and appetizing bite-sized piece. Repeat until all weenies are wrapped, ensuring a scrumptious outcome.

Step 5: Arrange on Baking Sheet
Place the rolled Pigs in a Blanket on the prepared baking sheet, making sure to leave space between them for even baking. This allows the dough to puff up and achieve that enticing golden-brown finish as they bake.

Step 6: Butter the Tops
Brush the tops of your assembled Pigs in a Blanket with melted butter. This not only adds richness but also promotes a beautifully golden crust. Be generous, as this step is crucial for enhancing flavor and texture.

Step 7: Bake to Perfection
Now, bake in the preheated oven for about 15 minutes. Keep an eye on them as they transform; they should turn a lovely golden brown and puff up enticingly. The aroma will fill your kitchen, building anticipation for these delectable bites.

Step 8: Prepare the Honey Mustard Sauce
While your Pigs in a Blanket bake, whisk together Dijon mustard, mayonnaise, honey, cayenne pepper, and a pinch of salt in a bowl. This simple dipping sauce will complement the savory flavors beautifully. Mix until smooth for a delightful dipping experience.

Step 9: Serve and Enjoy
Once baked, allow the Pigs in a Blanket to cool slightly before transferring them to a serving platter. They are best served warm alongside your homemade honey mustard sauce. Delight in the flakiness of the dough and the juicy flavor within each bite!

Helpful Tricks for Pigs in a Blanket

  • Perfect Spacing: Always leave some space between each Pigs in a Blanket on the baking sheet to prevent them from sticking together during baking.

  • Seamless Dough: If using crescent roll sheets, skip pressing seams together for a smoother process; it saves time and ensures an even bake.

  • Advance Prep: You can wrap the weenies ahead of time and store them in the refrigerator for up to a day. Just pop them in the oven when you’re ready to serve!

  • Leftover Storage: If you have any Pigs in a Blanket left, store them tightly covered in the refrigerator for up to 4-5 days or freeze them for up to 3 months, perfect for quick snacks later!

  • Experiment with Fillings: Don’t hesitate to get creative by adding cheese slices or trying different proteins like turkey or vegetarian sausages—there’s no wrong way to enjoy Pigs in a Blanket!

What to Serve with Easy Pigs in a Blanket

Add a burst of flavor and joy to your gatherings with these delightful pairings that complement your savory bites beautifully.

  • Creamy Coleslaw: The crunchy freshness provides a perfect contrast, balancing the warm and flaky Pigs in a Blanket. This light dish brightens your plate and brings a delightful crunch.

  • Crispy Potato Wedges: Seasoned and baked to perfection, these fluffy on the inside and crispy on the outside wedges make for a comforting side. Their homemade charm enhances the whole meal experience.

  • Garden Salad: A mix of colorful greens and tangy dressings add a refreshing touch to your spread. The bright flavors and textures create a great balance with the savory bites.

  • Mac and Cheese: Creamy and cheesy, this classic comfort food wraps you in warmth just like your Pigs in a Blanket. It’s a nostalgic pairing that’s eagerly craved at any gathering.

  • Fruit Skewers: Fresh fruits drizzled with a hint of honey or citrus add a sweet contrast to the savory tones. This playful presentation is a feast for the eyes as well as the palate.

  • Spicy BBQ Sauce: For those who enjoy a bit of a kick, serve this alongside to elevate the flavor profile. The rich, smoky taste draws out the savory notes of your Pigs in a Blanket beautifully.

  • Sparkling Lemonade: A refreshing drink option that provides a zesty sweetness, brightening up your meal. The effervescence perfectly cuts through the richness, complementing each bite wonderfully.

  • Ice Cream Sundaes: End the meal on a sweet note with this classic dessert. The creamy sweetness of ice cream topped with chocolate or caramel sauce creates a delightful close to your savory feast.

Storage Tips for Pigs in a Blanket

Fridge: Store tightly covered in the refrigerator for up to 4-5 days. This keeps them fresh and ready for quick snacks anytime!

Freezer: For longer storage, freeze your Pigs in a Blanket for up to 3 months. Ensure they are wrapped well to prevent freezer burn.

Reheating: Reheat in the oven at 350°F (175°C) for about 10 minutes to restore that crispy texture, or use the microwave for a quicker option.

Make-Ahead: You can prepare the Pigs in a Blanket ahead of time. Store them raw in the refrigerator and bake just before serving for optimal freshness!

Pigs in a Blanket Variations & Substitutions

Feel free to unleash your culinary creativity with these delightful twists that can elevate your Pigs in a Blanket experience!

  • Vegetarian Option: Swap cocktail weenies for plant-based sausages or roasted veggies for a delicious vegetarian delight.
  • Cheesy Surprise: Place a small slice of cheese inside each blanket before adding the weenie for a gooey, cheesy treat.
  • Bacon-Wrapped Bliss: For an indulgent twist, wrap each cocktail weenie in a slice of bacon before encasing it in dough. Who can resist bacon?
  • Herb Infusion: Add minced fresh herbs like dill or chives to the butter you brush on top for an aromatic boost that elevates the flavor.
  • Spicy Kick: Mix a pinch of jalapeño or sriracha into your honey mustard for a zesty dipping sauce that adds a bit of heat!
  • Sweet Twist: Brush the dough with honey or maple syrup before baking for a sweet and savory flavor that is simply irresistible.
  • Savory Seasoning: Sprinkle garlic powder, onion powder, or Italian seasoning on top of the dough before baking for added depth of flavor.
  • Different Dips: Besides honey mustard, try barbecue sauce or a creamy ranch dip to serve alongside for a variety of flavors that cater to everyone’s palate.

Explore these tantalizing variations to make your Pigs in a Blanket not just a dish, but an exciting culinary adventure! If you’re feeling adventurous, consider pairing them with homemade dipping sauces or adding a side of crispy veggies to make the meal even more appealing. Enjoy crafting your unique flavors!

Make Ahead Options

These Pigs in a Blanket are perfect for meal prep enthusiasts looking to save time during busy weeknights! You can wrap the cocktail weenies in the crescent rolls up to 24 hours in advance; simply keep them tightly covered in the refrigerator to maintain freshness and prevent drying out. This way, all you need to do when it's time to serve is preheat your oven and bake them for about 15 minutes until golden brown. Additionally, you can make the honey mustard dipping sauce ahead of time and refrigerate it in an airtight container for up to 3 days. Just give it a good stir before serving, and you'll enjoy the same delicious flavors with minimal effort!

Pigs in a Blanket Recipe FAQs

What kind of crescent rolls should I use?
Look for refrigerated crescent roll dough, which comes in a tube at your grocery store. For a smoother result, I recommend using crescent roll sheets, as they don't have seams to press together, making it easier to wrap around the cocktail weenies.

How long can I store Pigs in a Blanket leftovers?
You can refrigerate the leftovers for up to 4-5 days. Make sure to store them in an airtight container to maintain freshness. When you're ready to enjoy them again, just pop them in the oven or microwave for quick reheating.

Can I freeze Pigs in a Blanket?
Absolutely! You can freeze Pigs in a Blanket for up to 3 months. To do this, place them on a parchment-lined baking sheet and freeze until solid. Afterward, transfer them to a freezer-safe bag. When you're ready, bake from frozen at 375°F (190°C) for about 20-25 minutes.

What should I do if the dough doesn't roll out easily?
If your dough feels too sticky or difficult to roll out, make sure it's properly chilled. Refrigerate for about 10-15 minutes before rolling. This helps the dough firm up and makes it much easier to work with.

Are there any dietary considerations for Pigs in a Blanket?
When it comes to dietary preferences or allergies, look for gluten-free crescent rolls or sub the cocktail weenies with turkey or vegetarian sausages. Always check labels for potential allergens like soy or dairy in the ingredients, especially when preparing for kids or guests with specific dietary restrictions.

Can I prepare Pigs in a Blanket ahead of time?
Yes, you can absolutely prepare them in advance! Simply wrap the cocktail weenies in the dough, place them in a baking dish covered with plastic wrap, and store them in the refrigerator. When you're ready to bake, just remove the wrap and pop them in the oven. They will be just as delicious and fresh!

Pigs in a Blanket

Savory Pigs in a Blanket: Easy & Irresistibly Delicious!

Pigs in a Blanket are easy snacks that are perfect crowd-pleasers for any occasion, combining flaky crescent rolls and luscious cocktail weenies for irresistible flavor.
Print Recipe Pin Recipe
Prep Time 15 minutes mins
Cook Time 15 minutes mins
Total Time 30 minutes mins
Servings: 8 pieces
Course: Snacks
Cuisine: American
Calories: 150
Ingredients Equipment Method Nutrition Notes

Ingredients
  

For the Dough
  • 1 package Crescent Rolls Use crescent roll sheets for a seamless dough.
For the Filling
  • 1 package Cocktail Weenies Mini sausages can be used as an alternative.
For the Glaze
  • 2 tablespoons Butter Melted, for brushing.
For the Dipping Sauce
  • 1/2 cup Dijon Mustard Yellow mustard can be used for a milder flavor.
  • 1/2 cup Mayonnaise Combine with mustard for a rich texture.
  • 2 tablespoons Honey Maple syrup can be used for a unique twist.
  • 1/4 teaspoon Cayenne Pepper Omit for a milder flavor profile.
  • to taste Salt Always taste and season as needed.

Equipment

  • Oven
  • Baking Sheet
  • Parchment Paper
  • Pizza cutter or knife

Method
 

Step-by-Step Instructions
  1. Preheat your oven to 375°F (190°C) and line a baking sheet with parchment paper.
  2. Open the package of crescent rolls and roll out the dough on a clean surface.
  3. Cut the dough into approximately 7 to 8 equal triangles.
  4. At the wider end of each triangle, place a cocktail weenie and roll it up tightly.
  5. Arrange the wrapped weenies on the prepared baking sheet, leaving space between them.
  6. Brush the tops with melted butter generously.
  7. Bake in the preheated oven for about 15 minutes until golden brown.
  8. Whisk together Dijon mustard, mayonnaise, honey, cayenne pepper, and salt for the dipping sauce.
  9. Allow to cool slightly and serve warm with the honey mustard sauce.

Nutrition

Serving: 1pieceCalories: 150kcalCarbohydrates: 10gProtein: 3gFat: 12gSaturated Fat: 6gPolyunsaturated Fat: 1gMonounsaturated Fat: 4gCholesterol: 20mgSodium: 300mgPotassium: 100mgSugar: 1gCalcium: 1mgIron: 2mg

Notes

Perfect spacing on the baking sheet and seamless dough help in achieving the best results. You can store them in the fridge or freeze for later use.

Tried this recipe?

Let us know how it was!

Craft the Perfect Thanksgiving Charcuterie Board for Festive Flavors

November 13, 2025 by Grace Snow Leave a Comment

As the golden leaves flutter to the ground, it’s the perfect time to gather friends and family around a table brimming with seasonal delights. Enter the Thanksgiving Charcuterie Board—your ultimate answer to easy entertaining during the most festive time of the year. This assembly of fall flavors showcases sharp cheddar, crunchy apples, and savory meats, turning your get-together into a memorable feast. Not only is it a visual stunner, but the variety of snacks promotes mingling, allowing everyone to savor each bite while the turkey cooks in the oven. Plus, it’s a breeze to put together, so you can focus on more exciting aspects of the holiday. Ready to create a centerpiece that’s as fun to assemble as it is delicious? Let’s dive into the colorful layers and delightful arrangements that will leave your guests talking long after the last cracker is gone!

Why is a Thanksgiving Charcuterie Board Perfect?

Visual Feast: The Thanksgiving Charcuterie Board is a stunning centerpiece that showcases the vibrant colors of fall, inviting your guests to dig in.
Effortless Assembly: With just a few simple steps, this board can be put together quickly, giving you more time to enjoy the festivities.
Flavor Combos: Experience the delightful blend of creamy cheeses, crisp fruits, and savory meats that capture the essence of the season.
Versatile Choices: Easily adapt the board to accommodate dietary preferences by swapping types of cheese, meats, or dips—making it perfect for any crowdExplore more variations.
Creative Touches: From decorative mini pumpkins to fresh herbs, you'll have fun personalizing the board to celebrate the holidayCheck out tips for seasonal decorations and flavor pairings!

Thanksgiving Charcuterie Board Ingredients

For the Cheese and Meats
• Cheddar Cheese – Provides a sharp flavor that serves as a rich base; can substitute with Gouda for a milder taste.
• Salty Turkey or Salami – Offers protein and saltiness to balance the sweetness of fruits; replace with ham or prosciutto if preferred.

For the Fruits
• Sliced Apples – Adds sweetness and a crisp texture; pears can be used as a substitute for variety.

For the Base
• Crackers – Act as the foundational element for guests to combine bites; gluten-free options are available for dietary restrictions.

For the Dips
• Cranberry Dip – Enhances autumn flavor profiles; use fig or apple chutney as an alternative.

For Crunch and Decoration
• Nuts (e.g., walnuts, pecans) – Add crunch and heartiness; omit for nut allergies or substitute with seeds.
• Fresh Herbs (e.g., rosemary) – Provides aroma and a decorative touch; thyme or sage can serve as suitable substitutes.
• Mini Pumpkins or Edible Flowers – Serve purely for decoration, adding a festive visual element.

This Thanksgiving Charcuterie Board is designed to delight your taste buds while sparking conversations among your guests!

Step‑by‑Step Instructions for Thanksgiving Charcuterie Board

Step 1: Set the Foundation
Begin by selecting a large, sturdy wooden or slate board as your base for the Thanksgiving Charcuterie Board. Place it on a cleared surface, ensuring enough room for assembly. Start by arranging an even layer of sliced cheddar cheese in the center, creating a visually appealing focal point that will anchor the rest of your ingredients.

Step 2: Add Crackers and Fruits
Next, place an assortment of crackers around your cheese, allowing for easy nibbling. Aim for a mix of textures, such as crunchy and soft. Fill in the gaps with vibrant slices of apples, ensuring they are visually appealing and varied in color to complement the cheese. This combination of flavors will encourage guests to dive right in.

Step 3: Layer in the Meats
Now, it’s time for the savory elements! Neatly arrange slices of salty turkey or salami between the cheese and fruits. For a festive touch, tuck the meat into a turkey shape or layer them flat. This variety not only introduces delicious flavors but also adds richness to your Thanksgiving Charcuterie Board.

Step 4: Introduce the Dips
To enhance the flavors further, incorporate small jars of cranberry dip or your chosen alternative. Position them strategically in the gaps, ensuring they’re easily accessible for your guests to scoop their favorites onto crackers or fruit. This balancing act of dips adds an inviting aroma, drawing everyone to the board.

Step 5: Garnish with Nuts and Herbs
Elevate your board's appearance by sprinkling nuts such as walnuts or pecans around the edges, adding crunch and heartiness. Complement this with sprigs of fresh herbs like rosemary for a fragrant and visually appealing garnish. The combination of colors and textures will create an inviting and festive scene.

Step 6: Add Decorative Touches
For a last flourish, place mini pumpkins or edible flowers intermittently across the board. These decorative elements will not only enhance the festive spirit but also introduce new visual dimensions, making your Thanksgiving Charcuterie Board a true centerpiece.

Step 7: Final Adjustments and Balance
Take a step back and assess your board, adjusting the placements to ensure a balanced look without overcrowding. Make sure that all elements are easily reachable, and there are no gaps left behind. Your beautifully arranged Thanksgiving Charcuterie Board is now ready to entice guests and elevate your holiday gathering!

Tips for the Best Thanksgiving Charcuterie Board

  • Color Balance: Aim for a harmonious mix of colors. Incorporate vibrant fruits like red apples and green herbs, making your Thanksgiving Charcuterie Board visually appealing.
  • Texture Variety: Combine different textures, from creamy cheeses to crunchy nuts. This delightful contrast will enhance the overall experience for your guests.
  • Avoid Overcrowding: While it’s tempting to fill every space, overcrowding can make it challenging for guests to navigate. Leave space for easy access to snacks.
  • Seasonal Ingredients: Use seasonal fruits and flavors to keep the theme cohesive. Think about swapping in pears or quince when apples aren't in season.
  • Interactive Dips: Ensure dips are easily reachable and scoop-friendly. This makes it fun for guests to mix and match flavors without any mess!

Make Ahead Options

The Thanksgiving Charcuterie Board is perfect for meal prep, allowing you to gather flavors ahead of time for a stress-free holiday gathering. You can slice cheeses and fruits up to 24 hours in advance; simply refrigerate them in airtight containers to maintain their freshness. You can also prep and arrange the crackers and dips in advance—just keep them separate until party time to prevent sogginess. When ready to serve, lay everything out on your board and garnish with nuts and herbs to add that fresh touch. This way, you can enjoy quality time with your loved ones while your beautiful Thanksgiving Charcuterie Board stands ready to impress!

Thanksgiving Charcuterie Board Variations

Feel free to experiment and make this Thanksgiving Charcuterie Board uniquely yours, enhancing flavors and textures along the way!

  • Dairy-Free: Use nut-based cheeses like almond or cashew to keep flavors rich without the dairy.
  • Fruity Twist: Swap out apples for seasonal pears or roasted persimmons, adding a twist to the classic sweetness.
  • Savory Addition: Incorporate smoky gouda or blue cheese for a complex flavor profile that excites the palate.
    This twist introduces depth to the board, giving your guests something special to talk about.
  • Spiced Dips: Add unique dips like roasted garlic or pumpkin hummus to bring festive warmth and complimentary flavors.
    The right dip can make all the difference, transforming basic bites into an exciting culinary adventure.
  • Gluten-Free: Select gluten-free crackers or veggie sticks to ensure everyone can join in on the fun.
  • Nuts & Seeds: Opt for sunflower seeds or pumpkin seeds, especially if you're accommodating nut allergies.
  • Herb Infusion: Try adding fresh herbs like thyme or sage to mimic traditional Thanksgiving stuffing flavors, creating an aromatic experience.
    It’s amazing how fresh herbs can elevate the overall scent and enjoyment of your board.
  • Heat It Up: Introduce spicy elements like pepper jack cheese or jalapeño-infused meats for those who love a kick.
    This adds an unexpected surprise that keeps guests reaching for more!

Enhancing your Thanksgiving Charcuterie Board opens up a world of flavors that will delight your guests and create memorable moments around the table.

What to Serve with Thanksgiving Charcuterie Board

The perfect accompaniment can elevate your Thanksgiving gathering, creating an unforgettable feast that dazzles the senses.

  • Creamy Mashed Potatoes: Their buttery texture and rich flavor create a comforting contrast to the savory bites on your board.
  • Roasted Brussels Sprouts: Crispy on the outside and tender within, these bring a delightful earthiness that plays beautifully with the season’s flavors.
  • Warm Bread Rolls: Soft and pillowy, these rolls are perfect for mopping up dips, adding a cozy warmth to your festive spread.
  • Pumpkin Soup: A velvety autumn classic, its creamy sweetness will harmonize with the sharpness of the cheeses and the saltiness of the meats.
  • Spiced Apple Cider: Offering a touch of warmth with fragrant spices, this drink adds a lovely seasonal twist that pairs well with the charcuterie.
  • Pecan Pie: For dessert, this nutty, sweet favorite rounds off the meal with a rich contrast to the savory elements on the board.

Creating a full meal around your Thanksgiving Charcuterie Board means thinking of flavor, texture, and seasonality; these selections do just that!

How to Store and Freeze Thanksgiving Charcuterie Board

Airtight Container: Store any leftover ingredients in an airtight container in the fridge for up to 3 days to maintain freshness.
Fridge: Keep assembled boards in the fridge, but note that fruits and crackers may get soggy; best to store them separately.
Freezer: While not ideal for freezing, uncut cheeses and meats can be frozen for up to 2 months; thaw in the fridge before using.
Reheating: If warming any meats, heat them gently in a microwave or oven to retain flavor, but serve cold items fresh for best taste.

Thanksgiving Charcuterie Board Recipe FAQs

How do I select the best fruits for my Thanksgiving Charcuterie Board?
Absolutely! When choosing fruits, look for vibrant colors and firm textures. Crisp and sweet options like apples should be free of dark spots and bruises. Pears can be a lovely alternative if you're after variety. Remember that freshness is key, so select fruits that are in season for the best flavor!

What’s the best way to store leftovers from the Thanksgiving Charcuterie Board?
You can easily store any leftover ingredients in an airtight container in the fridge for up to 3 days. To maintain the freshness of fruits and crackers, I recommend keeping them separate from other components. If you're dealing with an assembled board, be aware that it may not hold up well, as fruits can get mushy and crackers may become soggy.

Can I freeze ingredients from my Thanksgiving Charcuterie Board?
While it's not ideal to freeze an assembled charcuterie board, you can freeze uncut cheeses and meats. Wrap them tightly in plastic wrap and then place them in a freezer-safe bag. They can last for up to 2 months in the freezer. When you're ready to use them, simply thaw them in the fridge overnight for best results.

What if my cheeses or meats start to smell or look odd?
Very! If you notice any undesirable odors—whether an off-smell from the cheese or discoloration in the meats—it's best to discard them. Always trust your instincts! For fresh items like fruits, look out for any mushiness or dark spots that indicate spoilage.

Are there any dietary considerations for my Thanksgiving Charcuterie Board?
When serving guests, consider dietary restrictions such as nut allergies and gluten intolerance. You can easily provide gluten-free crackers or omit nuts altogether and substitute with seeds for added crunch. Additionally, I often make a point to label each item on my board so everyone can avoid allergens and enjoy the festivities worry-free.

Thanksgiving Charcuterie Board

Craft the Perfect Thanksgiving Charcuterie Board for Festive Flavors

Create a stunning Thanksgiving Charcuterie Board filled with seasonal delights to impress your guests during the festive season.
Print Recipe Pin Recipe
Prep Time 15 minutes mins
Total Time 15 minutes mins
Servings: 8 people
Course: Snacks
Cuisine: American
Calories: 250
Ingredients Equipment Method Nutrition Notes

Ingredients
  

For the Cheese and Meats
  • 8 oz Cheddar Cheese Can substitute with Gouda for a milder taste.
  • 8 oz Salty Turkey or Salami Replace with ham or prosciutto if preferred.
For the Fruits
  • 2 medium Sliced Apples Pears can be used as a substitute.
For the Base
  • 1 box Crackers Gluten-free options are available.
For the Dips
  • 1 cup Cranberry Dip Use fig or apple chutney as an alternative.
For Crunch and Decoration
  • 1 cup Nuts (e.g., walnuts, pecans) Omit for nut allergies or substitute with seeds.
  • 2 tablespoons Fresh Herbs (e.g., rosemary) Thyme or sage can serve as substitutes.
  • 3 pieces Mini Pumpkins or Edible Flowers Purely for decoration.

Equipment

  • Large wooden or slate board

Method
 

Step‑by‑Step Instructions
  1. Begin by selecting a large, sturdy wooden or slate board as your base. Arrange an even layer of sliced cheddar cheese in the center.
  2. Place an assortment of crackers around your cheese. Fill in gaps with vibrant slices of apples.
  3. Neatly arrange slices of salty turkey or salami between the cheese and fruits.
  4. Incorporate small jars of cranberry dip or your chosen alternative in the gaps.
  5. Sprinkle nuts around the edges, adding crunch and complement with sprigs of fresh herbs for garnish.
  6. Place mini pumpkins or edible flowers intermittently across the board for decoration.
  7. Assess your board for balance and ensure all elements are easily reachable.

Nutrition

Serving: 1servingCalories: 250kcalCarbohydrates: 30gProtein: 10gFat: 12gSaturated Fat: 4gPolyunsaturated Fat: 2gMonounsaturated Fat: 6gCholesterol: 20mgSodium: 500mgPotassium: 200mgFiber: 3gSugar: 5gVitamin A: 500IUVitamin C: 5mgCalcium: 200mgIron: 1mg

Notes

This Thanksgiving Charcuterie Board is designed to delight your taste buds while sparking conversations among your guests.

Tried this recipe?

Let us know how it was!

Mini Deep Dish Crescent Roll Pizzas: Customizable Comfort Treats

November 11, 2025 by Grace Snow Leave a Comment

As I pulled my first batch of these Mini Deep Dish Crescent Roll Pizzas from the oven, the aroma wafted through the kitchen, instantly turning my home into a cozy pizzeria. In just 25 minutes, I had created these delectable treats—perfectly buttery, cheesy, and begging for your favorite toppings. This quick and easy recipe is not only a lifesaver for busy weeknights but also a fun canvas for your culinary creativity. Whether you’re hosting a spontaneous gathering or simply craving an indulgent snack, these customizable mini pizzas are sure to please everyone. Just think of the possibilities: the classic pepperoni or a veggie medley could make a lively appearance! Are you ready to elevate your snack game? Let’s dive in!

Why are Mini Deep Dish Pizzas a Hit?

Customization Galore: These mini deep dish crescent roll pizzas let you personalize every bite, making them perfect for picky eaters or impressive guests.

Quick Creation: In just 25 minutes, you can deliver these delicious bites to the table, making them an excellent choice for busy evenings or last-minute gatherings.

Kid-Approved Fun: Even the most discerning little palates will appreciate this fun, hands-on meal; everyone can choose their favorite toppings.

Guilty Pleasure Made Healthy: Swap in veggies or reduced-fat cheese for your toppings without sacrificing flavor, giving you a chance at a healthier yet indulgent snack.

Crispy & Gooey Perfection: Each mini pizza features a delightful contrast of crispy crust and gooey cheese, making them irresistible from the first bite!

Consider serving them with a side of ranch dressing, or for another scrumptious idea, check out the delightful flavors of a Pumpkin Cinnamon Roll as a sweet finish to your meal. Explore and enjoy!

Mini Deep Dish Crescent Roll Pizza Ingredients

For the Crust
• Crescent Roll Dough – This tender dough creates the perfect flaky crust; feel free to substitute with homemade pizza dough if you prefer a hand-crafted touch!

For the Sauce
• Marinara Sauce – A rich and flavorful base for your pizzas; you can switch it up with traditional pizza sauce for a different twist!

For the Cheese
• Shredded Mozzarella Cheese – Provides that delightful, gooey texture; consider using reduced-fat cheese for a lighter version without skimping on flavor.

For the Toppings
• Pepperoni (or favorite protein) – Add a savory kick with this classic topping; customize according to your taste with vegetables or other proteins to make your own version of mini deep dish crescent roll pizzas!

Step‑by‑Step Instructions for Mini Deep Dish Crescent Roll Pizzas

Step 1: Preheat the Oven
Begin by preheating your oven to 350°F (175°C) to ensure a perfectly baked crust. As the oven warms up, gather your ingredients and equipment, including a muffin tin, to prepare the mini deep dish pizzas. Make sure to position your oven rack in the middle for even cooking.

Step 2: Prepare the Crescent Dough
Unroll the crescent roll dough onto a clean surface and gently flatten it with your hands or a rolling pin. Cut the dough into squares that are large enough to fit inside the muffin tin cups, about 3 inches each. This will form a delightful crust for your mini deep dish crescent roll pizzas, ensuring every bite is perfectly buttery.

Step 3: Form the Crusts
Carefully press each square of dough into the muffin tin, molding it to create a little cup that rises above the rim. Make sure the dough is pressed firmly against the sides to avoid any leaks during baking. This step builds the foundation for your mini pizzas and gives them that characteristic deep dish shape.

Step 4: Add the Marinara Sauce
Spoon a dollop of marinara sauce into the center of each dough-filled cup, ensuring it's evenly distributed. Aim for a generous amount without overflowing, as this will add fantastic flavor to your mini deep dish crescent roll pizzas. The vibrant red sauce will contrast beautifully with the crust.

Step 5: Cheese Up
Sprinkle a generous handful of shredded mozzarella cheese on top of the marinara sauce in each muffin cup. The more cheese, the better! As it melts, it will create that luscious, gooey texture everyone loves. Don’t be shy—your mini pizzas will be irresistibly cheesy and delicious.

Step 6: Customize Your Toppings
Now it’s time to add your favorite toppings! Place slices of pepperoni, or any desired proteins or vegetables, atop the cheese layer. This is your chance to let your culinary creativity shine with the toppings on your mini deep dish crescent roll pizzas, ensuring everyone gets their own favorite flavors.

Step 7: Bake to Perfection
Place the muffin tin in the preheated oven and bake for approximately 12-15 minutes. Keep a close eye on the mini pizzas as they bake; you'll know they're ready when the crescent dough is golden brown and the cheese is bubbly and slightly browned. Your kitchen will be filled with a tempting aroma!

Step 8: Cool and Serve
Once baked, remove the muffin tin from the oven and allow the mini deep dish crescent roll pizzas to cool for a few minutes. This helps set the cheese and makes them easier to remove. Serve them warm, perhaps with a side of marinara for dipping, elevating your snack game to new heights!

Storage Tips for Mini Deep Dish Crescent Roll Pizzas

Fridge: Keep leftover mini deep dish crescent roll pizzas in an airtight container for up to 3 days to maintain freshness and flavor.

Freezer: For longer storage, wrap individual pizzas in plastic wrap and place them in a freezer-safe bag. They can last up to 2 months!

Reheating: To enjoy leftovers, preheat the oven to 350°F and bake the pizzas for about 10-12 minutes until heated through, ensuring the cheese is bubbly and delicious. Always store the mini deep dish crescent roll pizzas properly to keep them tasting great!

Room Temperature: If you plan to serve mini pizzas at a gathering, try to keep them out for no longer than 2 hours to ensure food safety.

Make Ahead Options

These Mini Deep Dish Crescent Roll Pizzas are perfect for busy home cooks looking to save time during the week! You can prep the crescent roll crusts and fill them with marinara sauce and cheese up to 24 hours in advance. Simply assemble your mini pizzas in the muffin tin, cover with plastic wrap, and refrigerate until you're ready to bake. When it's time to serve, just add your favorite toppings and pop them in the oven, baking for about 12-15 minutes until golden brown and bubbly. This way, you’ll have delicious, comforting snacks ready to impress with minimal effort!

What to Serve with Mini Deep Dish Crescent Roll Pizzas

Imagine a bustling dinner table filled with flavors and textures that perfectly complement your delightful mini pizzas, elevating your meal into a memorable feast.

  • Fresh Green Salad: A crisp salad with a tangy vinaigrette adds brightness and freshness, balancing the richness of the cheesy pizzas.
  • Garlic Breadsticks: Soft and buttery, these complement the marinara sauce beautifully and create a comforting, carb-laden duo everyone will love.
  • Veggie Platter: A mix of colorful raw vegetables served with ranch dressing provides a refreshing crunch, enticing everyone to nibble alongside their pizzas.
  • Stuffed Mushrooms: Savory stuffed mushrooms bring a burst of flavor that pairs well with the buttery crust, creating a delightful bite-sized experience to share.
  • Fruit Salad: A light and sweet fruit salad offers a refreshing contrast to the savory mini pizzas, cleansing the palate in between bites.
  • Craft Beer: The hoppy notes of a craft beer enhance the flavors of the pizzas while cooling them down, making it a perfect drink for casual gatherings.
  • Chocolate Chip Cookies: For a sweet finish, classic chocolate chip cookies bring comfort and satisfaction to the end of the meal, wrapping up the experience beautifully!
  • Iced Tea: A chilled glass of iced tea, whether sweetened or unsweetened, serves as a refreshing beverage that pairs perfectly with pizza night.
  • Spicy Marinara Dipping Sauce: Serve a little extra marinara on the side with a kick of spice, so guests can indulge in the flavor explosion!

Expert Tips for Mini Deep Dish Crescent Roll Pizzas

• Proper Pressing: Ensure the crescent roll dough is pressed firmly in the muffin tin to prevent leaks and achieve a truly deep-dish crust.

• Watch the Bake: Baking times may vary based on your oven; look for a golden brown color and bubbly cheese to know when they're done.

• Creative Toppings: Don’t hesitate to mix and match toppings! Try using a medley of vegetables or different proteins to make each batch of mini deep dish crescent roll pizzas exciting.

• Easy Removal: Allow the mini pizzas to cool slightly before removing from the tin. This helps the cheese set, making them easier to lift out without falling apart.

• Storage Solutions: Store any leftovers in an airtight container in the fridge for up to 3 days; simply reheat in a 350°F oven for the best texture.

Mini Deep Dish Crescent Roll Pizzas Variations

Feel free to let your creativity shine as you customize these delightful mini deep dish crescent roll pizzas!

  • Vegetarian Delight: Replace pepperoni with colorful bell peppers, mushrooms, or spinach for a fresh twist. This version is not only vibrant but also packed with wholesome goodness!

  • Cheesy Alfredo: Swap marinara for creamy Alfredo sauce for a rich, indulgent flavor. Add grilled chicken and broccoli to turn your mini pizza into a comforting meal.

  • BBQ Chicken: Use barbecue sauce instead of marinara and top with shredded chicken and red onions. This sweet-savory combo is a crowd-pleaser that’s perfect for gatherings.

  • Spicy Kick: Sprinkle crushed red pepper flakes on top or add jalapeños for a fiery touch. If you’re feeling adventurous, a drizzle of Sriracha could elevate your mini pizzas to new heights!

  • Herbed Infusion: Mix dried Italian herbs such as oregano and basil into the cheese for an aromatic boost. The added flavor will transform your mini deep dish crescent roll pizzas into a gourmet treat.

  • Gluten-Free Option: Use gluten-free crescent roll dough or a gluten-free pizza crust to make these delicious treats accommodating for special diets. Your friends with dietary restrictions will thank you!

  • Dessert Twist: For a sweet finishing touch, swap out savory toppings for a blend of Nutella, bananas, and mini marshmallows. It’s a fun, unexpected dessert that will wow family and friends!

And if you're looking to add a touch of sweetness to finish your meal, don't forget to try the delightful Pumpkin Cinnamon Roll as a perfect conclusion to your pizza night! Enjoy the fun of exploring these variations and make them your own!

Mini Deep Dish Crescent Roll Pizzas Recipe FAQs

What kind of crescent roll dough should I use?
You can use store-bought crescent roll dough for convenience, but if you're feeling adventurous, homemade pizza dough is a fantastic alternative! Just be sure to adjust the baking time slightly, typically adding an extra 5 minutes to ensure it's fully cooked.

How should I store leftover mini deep dish crescent roll pizzas?
To keep your leftovers fresh, place them in an airtight container and store them in the fridge. They’ll last up to 3 days! When you're ready to enjoy them again, reheat the pizzas in a preheated 350°F oven for about 10-12 minutes. This method helps revive that crispy crust and gooey cheese.

Can I freeze mini deep dish crescent roll pizzas?
Absolutely! Freezing them is simple. First, wrap each mini pizza in plastic wrap, then place them in a freezer-safe bag. They will stay fresh for up to 2 months. When you crave them, just pull out as many as you like and bake them from frozen at 350°F for around 15-20 minutes, or until heated through and the cheese is bubbly.

What if the crust is too tough or chewy?
If you find the crust is tough, it may be due to overworking the dough when pressing it into the muffin tins. Try gently pressing it into place without stretching too much—this will help keep it tender and light. Also, ensure not to overbake; keep an eye on it as baking times may vary.

Can I make these mini pizzas vegetarian?
Absolutely! Substitute meat toppings with an array of colorful vegetables like bell peppers, mushrooms, or olives to create delightful vegetarian mini pizzas. You can also use plant-based proteins if you'd like to add a savory bite without meat.

Are mini deep dish crescent roll pizzas safe for pets?
It's best to avoid giving mini deep dish pizzas to pets, especially those containing onions or garlic, which can be toxic to them. The ingredients in these mini pizzas—like cheese and dough—might upset their stomach, so it’s safest to keep these tasty bites to humans only.

Mini Deep Dish Crescent Roll Pizzas

Mini Deep Dish Crescent Roll Pizzas: Customizable Comfort Treats

Mini Deep Dish Crescent Roll Pizzas are customizable, buttery, and cheesy delights perfect for quick snacks.
Print Recipe Pin Recipe
Prep Time 10 minutes mins
Cook Time 15 minutes mins
Cooling Time 5 minutes mins
Total Time 30 minutes mins
Servings: 12 pizzas
Course: Snacks
Cuisine: Italian
Calories: 220
Ingredients Equipment Method Nutrition Notes

Ingredients
  

For the Crust
  • 1 package Crescent Roll Dough Substitute with homemade pizza dough if preferred.
For the Sauce
  • 1 cup Marinara Sauce Can substitute with traditional pizza sauce.
For the Cheese
  • 2 cups Shredded Mozzarella Cheese Use reduced-fat cheese for a lighter option.
For the Toppings
  • 1 cup Pepperoni Or any favorite protein or vegetables.

Equipment

  • Muffin tin
  • Oven

Method
 

Step-by-Step Instructions
  1. Preheat your oven to 350°F (175°C). Gather your ingredients and muffin tin.
  2. Unroll the crescent roll dough onto a surface, flatten it, and cut into 3-inch squares.
  3. Press each square of dough into the muffin tin to form little cups.
  4. Spoon a dollop of marinara sauce into each cup, aiming for a generous amount without overflowing.
  5. Sprinkle shredded mozzarella cheese on top of the sauce in each muffin cup.
  6. Add your favorite toppings like pepperoni, veggies, or other proteins.
  7. Bake in the preheated oven for approximately 12-15 minutes or until golden brown.
  8. Allow to cool for a few minutes before serving warm with marinara for dipping.

Nutrition

Serving: 1pizzaCalories: 220kcalCarbohydrates: 24gProtein: 10gFat: 10gSaturated Fat: 5gPolyunsaturated Fat: 1gMonounsaturated Fat: 2gCholesterol: 20mgSodium: 320mgPotassium: 200mgFiber: 1gSugar: 2gVitamin A: 200IUVitamin C: 2mgCalcium: 150mgIron: 1mg

Notes

Store leftovers in an airtight container for up to 3 days, or freeze for longer storage.

Tried this recipe?

Let us know how it was!
  • « Previous Page
  • 1
  • …
  • 15
  • 16
  • 17
  • 18
  • 19
  • …
  • 25
  • Next Page »

Welcome!

Hi, I’m Grace, a Sydney-based home cook with a passion for bold flavors and trending ingredients. Whether you’re a busy beginner or a seasoned foodie, you’ll find dishes here that are fresh, fun, and full of flavor.

More about me

Popular Recipes

  • Honey Lime Chicken & Avocado Rice Bowl
    Honey Lime Chicken & Avocado Rice Bowl for a Flavor Burst
  • Tasty Italian Pasta Salad
    Delight in this Easy Tasty Italian Pasta Salad for Summer Fun
  • Garlic Butter Chicken Pasta
    Garlic Butter Chicken Pasta That’ll Wow Your Family Tonight
  • Creamy, Spicy Chicken Pasta
    Creamy, Spicy Chicken Pasta with Fresh Summer Veggies

Footer

↑ back to top

About

  • Privacy Policy
  • Disclaimer
  • Terms & Conditions

Newsletter

  • Sign Up! for emails and updates

Contact

  • About me
  • Contact me

Copyright © 2025 TastyTrendIngredients