tastytrendingredients

  • Home
  • Recipes
    • Appetizers
    • Breakfast
    • Dessert
    • Dinner
    • Drinks
    • Salads
    • Snacks
    • Soups
  • About me
  • Contact
menu icon
go to homepage
  • Home
  • Recipes
    • Appetizers
    • Breakfast
    • Dessert
    • Dinner
    • Drinks
    • Salads
    • Snacks
    • Soups
  • About me
  • Contact
search icon
Homepage link
  • Home
  • Recipes
    • Appetizers
    • Breakfast
    • Dessert
    • Dinner
    • Drinks
    • Salads
    • Snacks
    • Soups
  • About me
  • Contact
×

BBQ Chicken Coleslaw Wraps: A Quick, Flavor-Packed Delight

December 5, 2025 by Grace Snow Leave a Comment

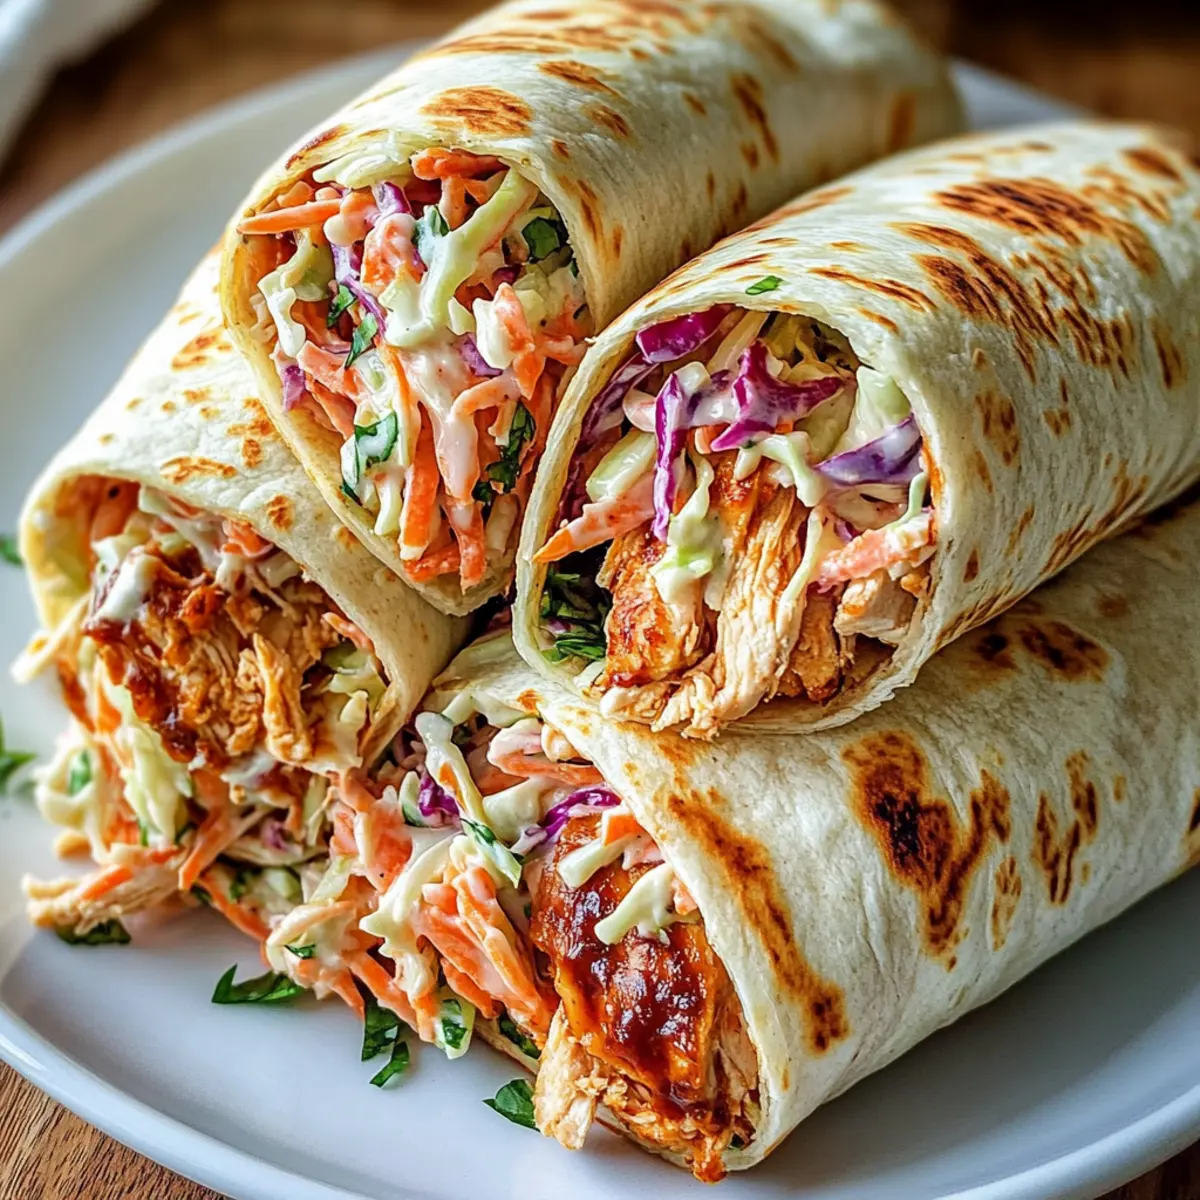
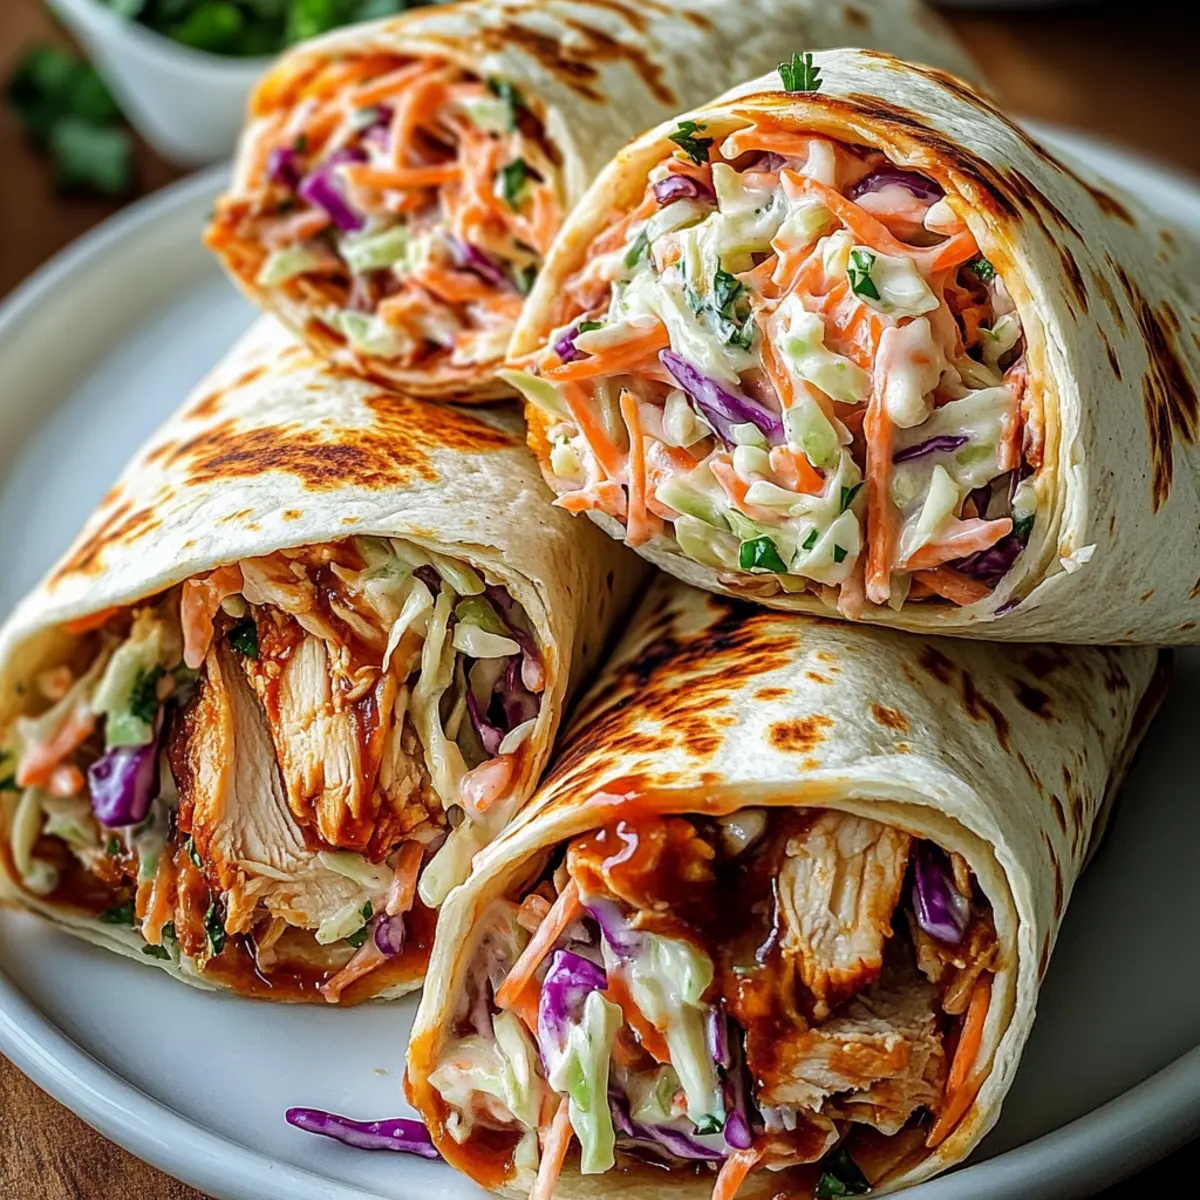
As I carefully unwrap the first BBQ Chicken Coleslaw Wrap, the sweet, smoky scent dances around me, awakening my taste buds and imagination. This easy recipe transforms leftover chicken into a superstar dish, perfect for anyone craving a quick lunch that doesn’t compromise on flavor. Picture tender, shredded chicken bathed in tangy BBQ sauce, harmoniously topped with a crunchy, creamy slaw—all snuggled in a soft tortilla. Not only are these wraps beginner-friendly, but they also come together in just 15 minutes, making them perfect for busy weekdays or laid-back dinners. Plus, they’re versatile enough to accommodate any dietary needs! Curious to see how effortlessly delicious your next meal could be?

Why are these wraps a must-try?

Quick and Easy: With only 15 minutes of assembly time, you can whip up these BBQ Chicken Coleslaw Wraps in no time, perfect for those hectic lunch breaks.
Flavor Explosion: The combination of smoky BBQ chicken with crunchy slaw creates an enticing harmony of taste that will leave you wanting more.
Versatile Options: Feel free to substitute the chicken with pulled pork, turkey, or even tofu for a vegetarian twist—there’s a delicious option for everyone!
Crowd-Pleaser: Ideal for family gatherings or casual get-togethers, these wraps will impress your guests and keep them coming back for seconds.
Meal Prep Friendly: Make them ahead and store in the fridge for a quick grab-and-go option, or freeze for later—convenience never tasted this good!
Try serving with lime wedges or homemade chips for a complete meal experience! If you have some leftover chicken, why not check out my Honey Garlic Chicken Thighs for another quick meal idea?

BBQ Chicken Coleslaw Wraps Ingredients

For the Chicken Filling

  • Cooked Chicken Breast – Provides a tender protein base to keep you satisfied.
  • BBQ Sauce – Infuses a smoky-sweet flavor into the chicken; opt for gluten-free if needed.

For the Wrap

  • Flour Tortillas – Soft and pliable carriers for your filling; swap for gluten-free tortillas if desired.
  • Coleslaw Mix – Adds refreshing crunch and color to your wraps; pre-packaged is a quick option!

For the Slaw

  • Mayonnaise – Acts as a creamy binder for slaw; Greek yogurt can lighten it up.
  • Apple Cider Vinegar – Adds bright acidity to balance flavors; white vinegar is a great alternative.
  • Sugar – Balances the vinegar’s sharpness; consider honey or agave syrup for natural sweetness.
  • Salt and Pepper – Essential to enhance overall flavor.

Optional Enhancements

  • Chopped Fresh Cilantro – Adds a burst of herbal freshness.
  • Sliced Green Onions – Introduces a mild onion flavor and vibrant visual appeal.

These BBQ Chicken Coleslaw Wraps are a delightful blend of flavors and textures, ensuring a fulfilling bite every time!

Step‑by‑Step Instructions for BBQ Chicken Coleslaw Wraps

Step 1: Prepare the BBQ Chicken
Begin by shredding the cooked chicken breast into bite-sized pieces in a medium bowl. Pour your favorite BBQ sauce over the chicken and mix well until all pieces are generously coated. The chicken should look rich and glossy with the deep, smoky hue of the sauce. Set aside for about 5 minutes to let the flavors blend.

Step 2: Make the Coleslaw
In a separate large bowl, combine the coleslaw mix, mayonnaise, apple cider vinegar, sugar, salt, and pepper. Gently fold the ingredients together until the slaw is well-coated and colorful. The mixture should be creamy and crunchy, with a delightful balance of flavors. Allow it to rest for about 5 minutes so the cabbage can soften slightly.

Step 3: Add Optional Ingredients
For added flavor, stir in chopped fresh cilantro and sliced green onions into the coleslaw, if desired. Mix until evenly distributed, adding bursts of color and freshness. This step enhances the overall flavor profile of your BBQ Chicken Coleslaw Wraps with bright herbal notes.

Step 4: Assemble the Wraps
Lay a flour tortilla flat on a clean surface or plate. Spoon a generous amount of the BBQ chicken mixture into the center, followed by a scoop of coleslaw. Ensure you don’t overfill, as this will make rolling difficult. The vibrant colors of the chicken and slaw will entice your appetite.

Step 5: Roll the Tortilla
Fold the sides of the tortilla inward, then start rolling from the bottom tightly upwards to enclose the filling securely. The wraps should feel snug, but be careful not to tear the tortilla. Once rolled, the wraps should be easy to hold and transport, loaded with delicious BBQ chicken and crunchy slaw.

Step 6: Repeat Assembly
Continue the process with the remaining tortillas and fillings until all the BBQ Chicken Coleslaw Wraps are made. Keep the wraps covered with a clean kitchen towel or plastic wrap to avoid drying out while you finish assembling.

Step 7: Cut for Serving
Carefully cut each wrap in half diagonally with a sharp knife for easier handling and a more appealing presentation. You’ll reveal the colorful filling inside, inviting everyone to dive into these delicious BBQ Chicken Coleslaw Wraps.

Step 8: Serve or Store
Serve the wraps immediately for the best texture or refrigerate wrapped tightly for later. They can also be stored uncut in the refrigerator for up to two days. If making ahead, keep the chicken and slaw separate until you’re ready to enjoy a satisfying and quick meal.

How to Store and Freeze BBQ Chicken Coleslaw Wraps

Fridge: Store assembled wraps wrapped tightly in plastic wrap or in an airtight container for up to 2 days. This keeps them fresh while avoiding sogginess.

Freezer: For longer storage, freeze uncut wraps individually wrapped in aluminum foil or freezer-safe bags for up to 1 month. Thaw in the fridge before serving.

Reheating: To enjoy warm, microwave each wrap for about 30-60 seconds or until heated through. Alternatively, warm them in a skillet over low heat for a couple of minutes.

Prevent Sogginess: Keep the BBQ chicken and coleslaw separate until you're ready to assemble if making ahead—this keeps the wraps crisp and delicious!

Make Ahead Options

These BBQ Chicken Coleslaw Wraps are perfect for busy home cooks looking to save time! You can prepare the BBQ chicken filling and coleslaw mix up to 24 hours in advance; store them in separate airtight containers in the refrigerator to maintain freshness and prevent sogginess. When meal time arrives, simply grab your tortillas and roll up the prepared fillings. If you want to enjoy these wraps later, they can be assembled and wrapped tightly for up to 2 days in the fridge, or stored uncut in the freezer for up to a month. Just remember to let them thaw overnight in the refrigerator before serving for delicious, quick meals anytime!

What to Serve with BBQ Chicken Coleslaw Wraps

Elevate your meal experience with delightful sides and drinks that accentuate the flavors of your BBQ Chicken Coleslaw Wraps.

  • Homemade Potato Chips: Crunchy and salty, these chips provide a satisfying contrast to the tender wraps, enhancing the overall texture of your meal.

  • Crispy Sweet Potato Fries: The sweet, earthy flavor of sweet potato fries pairs beautifully with the smoky BBQ chicken, adding a slightly sweet note to balance out the dish.

  • Fresh Fruit Salad: A zesty fruit medley of berries and citrus not only refreshes the palate, but the natural sweetness complements the savory elements of the wrap.

  • Mexican Street Corn Salad: This creamy and tangy corn salad brings a burst of flavor, with its crunchy texture enhancing the fresh, vibrant experience of your wraps.

  • Lime Wedges: A squeeze of zesty lime juice over your wraps adds a bright acidity that cuts through the richness of the BBQ sauce for an uplifting finish.

  • Iced Tea: Refreshing and lightly sweetened, iced tea provides a cooling effect that works harmoniously with the smoky flavors in the wraps.

  • Chocolate Chip Cookies: For a sweet ending, pair your meal with warm, gooey chocolate chip cookies that will round off the experience beautifully, inviting smiles all around.

BBQ Chicken Coleslaw Wraps Variations

Customize your BBQ Chicken Coleslaw Wraps to create the perfect meal for your taste buds!

  • Swap Chicken: Replace cooked chicken with pulled pork, turkey, or shredded tofu for a different protein base that maintains the wraps' essence.
  • Gluten-Free Upgrade: Use gluten-free tortillas to accommodate dietary needs while enjoying a deliciously satisfying experience.
  • Whole Wheat Option: Opt for whole wheat tortillas for extra fiber and added nutrients without sacrificing flavor.
  • Spicy Kick: Infuse the slaw with diced jalapeños or a splash of hot sauce to spice things up and add an exciting heat.
  • Creamy Twist: Substitute regular mayonnaise with Greek yogurt for a lighter, healthier slaw that’s still creamy and flavorful.

For a fresh take, why not try my Chipotle Lime Chicken and Rice recipe, which offers a zesty flavor profile and works wonderfully with similar ingredients!

  • Crunchy Additions: Add chopped nuts, such as toasted almonds or sunflower seeds, for a delightful crunch and extra texture in your coleslaw.
  • Herbaceous Flavor: Introduce herbs like dill or parsley into the coleslaw for a burst of freshness that complements the BBQ chicken beautifully.

Feel free to let your creativity soar while making these wraps great for any occasion!

Expert Tips for BBQ Chicken Coleslaw Wraps

  • Flavor Boost: Add a pinch of smoked paprika or chipotle powder to the BBQ chicken for a smoky, spicy kick that elevates the wraps.
  • Keep it Crisp: Store the coleslaw mix and BBQ chicken separately until assembly to prevent sogginess in your BBQ Chicken Coleslaw Wraps.
  • Tortilla Selection: Choose soft flour or whole wheat tortillas, or opt for gluten-free ones for a dietary-friendly option that everyone can enjoy.
  • Homemade Slaw: If you have extra time, making homemade coleslaw with fresh veggies can enhance taste and texture.
  • Easy Cleanup: Use parchment paper or wax paper to wrap your prepared wraps for easy handling and less mess during meals.

BBQ Chicken Coleslaw Wraps Recipe FAQs

What type of chicken is best for BBQ Chicken Coleslaw Wraps?
Absolutely! The best option is shredded cooked chicken breast, as it remains tender and absorbs the BBQ sauce beautifully. However, you can also use pulled pork, turkey, or even shredded tofu for a vegetarian twist—there's something for everyone if you’re feeling creative!

How can I store leftover BBQ Chicken Coleslaw Wraps?
Store assembled wraps tightly wrapped in plastic wrap or in an airtight container in the refrigerator for up to 2 days. This method keeps them fresh and prevents them from getting soggy, ensuring they are ready to grab for lunch or a quick snack.

Can I freeze BBQ Chicken Coleslaw Wraps for later?
Very! For longer storage, freeze uncut wraps by individually wrapping them in aluminum foil or placing them in freezer-safe bags. They can last up to a month in the freezer. Thaw them in the refrigerator overnight before serving. Reheat in the microwave for 30-60 seconds or warm them in a skillet over low heat.

What should I do if my wraps are soggy?
If your wraps end up soggy, it's often due to the coleslaw or chicken being prepared too far in advance. To avoid this, store the BBQ chicken and coleslaw separately until you're ready to assemble the wraps. Alternatively, you can keep the coleslaw drier by reducing the mayonnaise or adding ingredients like shredded carrots or extra cabbage to balance moisture.

Are BBQ Chicken Coleslaw Wraps suitable for gluten-free diets?
The more the merrier! You can easily make BBQ Chicken Coleslaw Wraps gluten-free by substituting regular flour tortillas with gluten-free ones. Just ensure your BBQ sauce is gluten-free as well. These wraps can fit into various dietary preferences without losing their delicious flair!

Can I use homemade coleslaw instead of a pre-packaged mix?
Absolutely! If you prefer to make your own coleslaw, simply combine shredded cabbage, carrots, and your desired dressing (mayonnaise, vinegar, and seasonings). Homemade slaw often enhances the flavor and texture of your wraps, making them even more delightful!

BBQ Chicken Coleslaw Wraps

BBQ Chicken Coleslaw Wraps: A Quick, Flavor-Packed Delight

BBQ Chicken Coleslaw Wraps are a quick and delicious lunch option, combining shredded chicken, tangy BBQ sauce, and crunchy slaw wrapped in a soft tortilla.
Print Recipe Pin Recipe
Prep Time 15 minutes mins
Total Time 15 minutes mins
Servings: 4 wraps
Course: Snacks
Cuisine: American
Calories: 320
Ingredients Equipment Method Nutrition Notes

Ingredients
  

For the Chicken Filling
  • 2 cups Cooked Chicken Breast shredded
  • 1 cup BBQ Sauce opt for gluten-free if needed
For the Wrap
  • 4 pieces Flour Tortillas or gluten-free tortillas
  • 2 cups Coleslaw Mix pre-packaged is a quick option
For the Slaw
  • 1/2 cup Mayonnaise can use Greek yogurt
  • 2 tablespoons Apple Cider Vinegar or white vinegar as alternative
  • 1 tablespoon Sugar can use honey or agave syrup
  • 1 teaspoon Salt
  • 1/2 teaspoon Pepper
Optional Enhancements
  • 1/4 cup Chopped Fresh Cilantro
  • 2 tablespoons Sliced Green Onions

Equipment

  • medium bowl
  • large bowl
  • Sharp Knife
  • Clean kitchen towel

Method
 

Step-by-Step Instructions for BBQ Chicken Coleslaw Wraps
  1. Begin by shredding the cooked chicken breast into bite-sized pieces in a medium bowl. Pour your favorite BBQ sauce over the chicken and mix well until all pieces are generously coated. Set aside for about 5 minutes.
  2. In a separate large bowl, combine the coleslaw mix, mayonnaise, apple cider vinegar, sugar, salt, and pepper. Gently fold together until well-coated. Allow it to rest for about 5 minutes.
  3. For added flavor, stir in chopped fresh cilantro and sliced green onions into the coleslaw, if desired.
  4. Lay a flour tortilla flat on a clean surface. Spoon a generous amount of the BBQ chicken mixture into the center, followed by a scoop of coleslaw.
  5. Fold the sides of the tortilla inward, then start rolling from the bottom tightly upwards to enclose the filling securely.
  6. Continue the process with the remaining tortillas and fillings until all wraps are made. Keep covered with a towel or plastic wrap.
  7. Carefully cut each wrap in half diagonally for easier handling and presentation.
  8. Serve the wraps immediately or refrigerate tightly for later. They can also be stored uncut in the refrigerator for up to two days.

Nutrition

Serving: 1wrapCalories: 320kcalCarbohydrates: 32gProtein: 22gFat: 15gSaturated Fat: 2gPolyunsaturated Fat: 2gMonounsaturated Fat: 10gCholesterol: 70mgSodium: 700mgPotassium: 350mgFiber: 3gSugar: 5gVitamin A: 500IUVitamin C: 20mgCalcium: 60mgIron: 2mg

Notes

Store the chicken and slaw separately until assembly to prevent sogginess. Optional toppings like lime wedges or homemade chips enhance the meal experience.

Tried this recipe?

Let us know how it was!

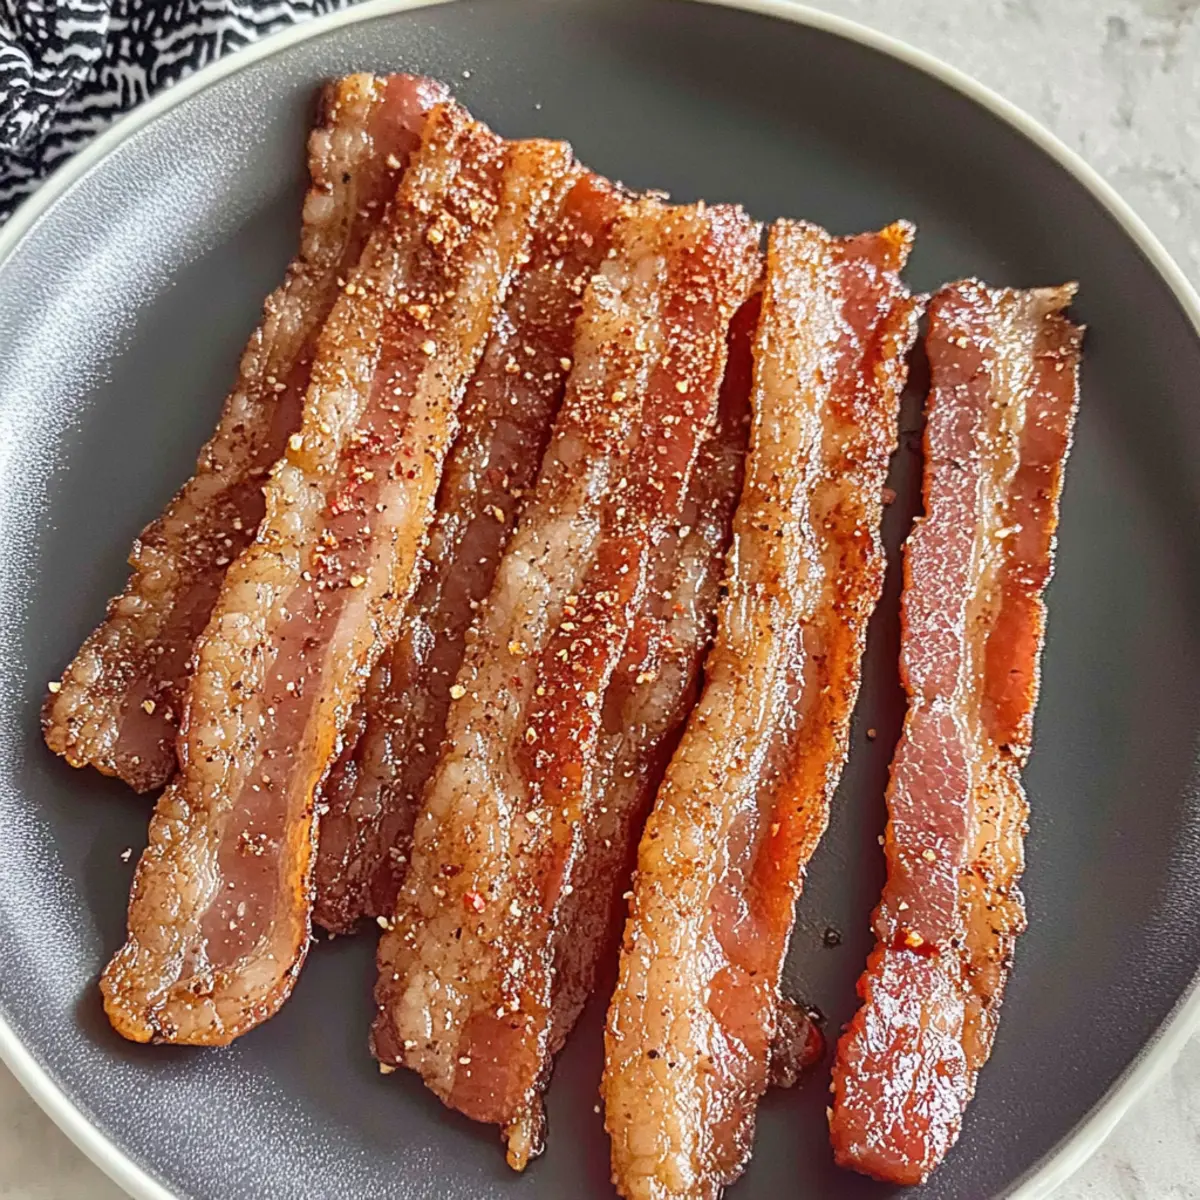
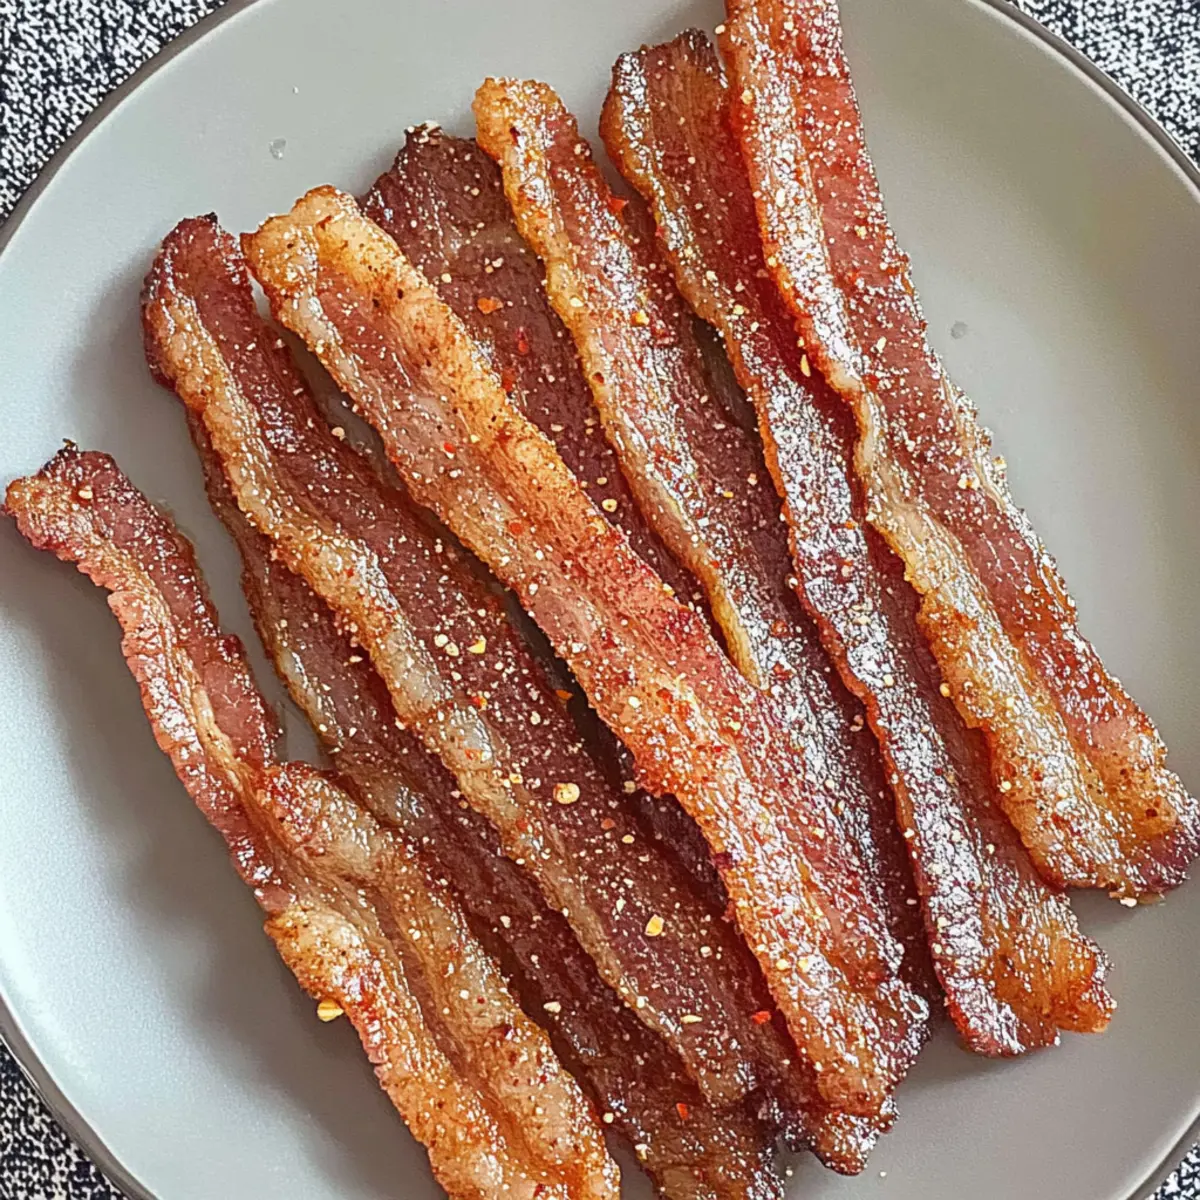
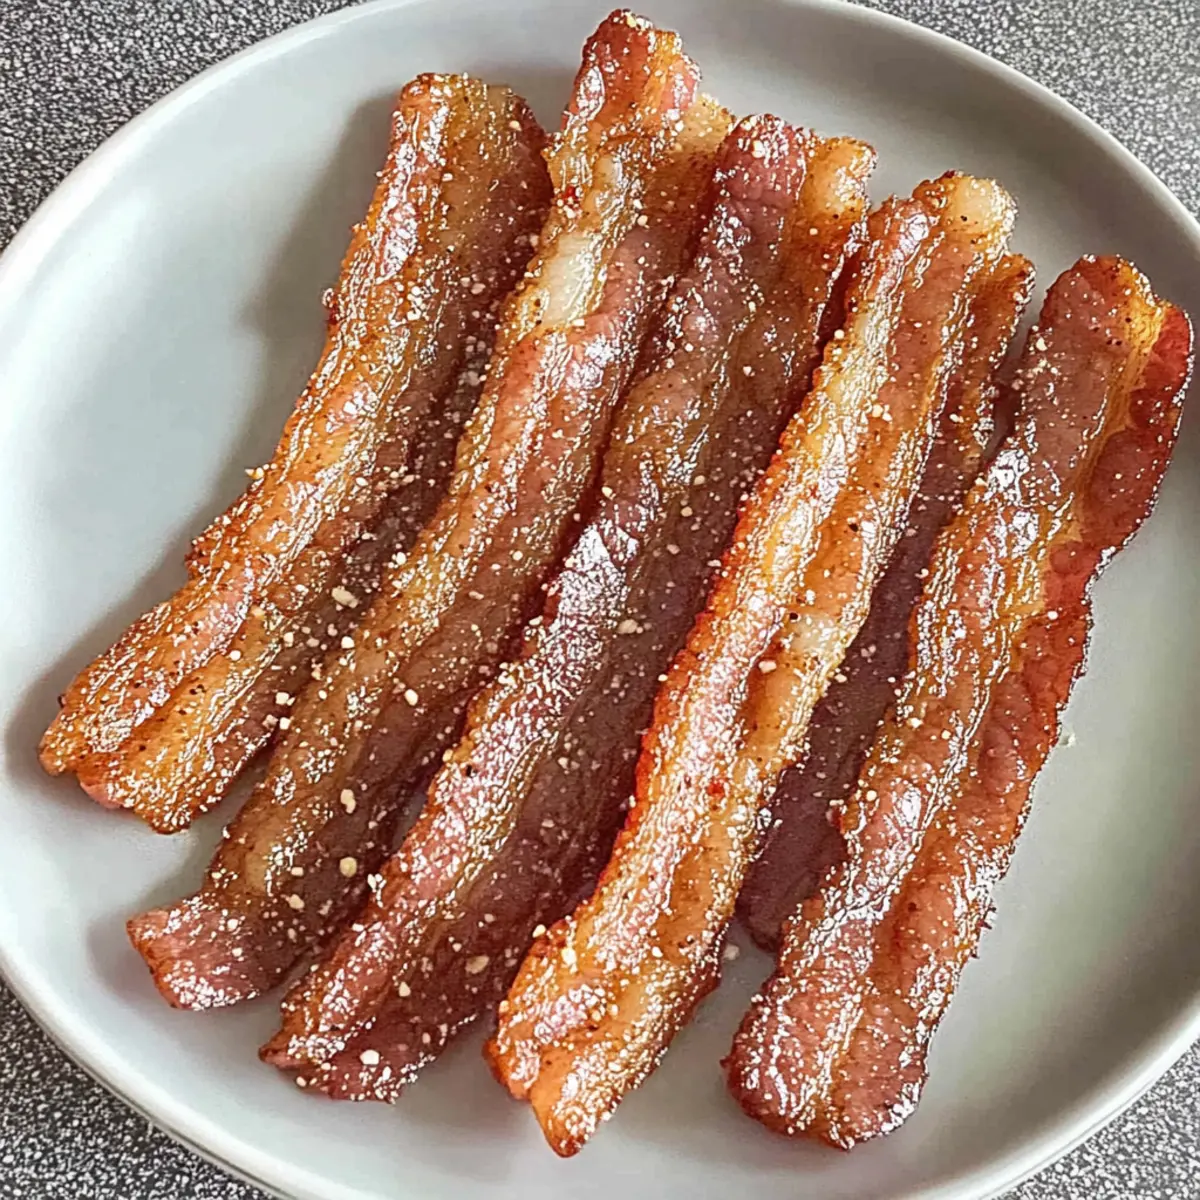
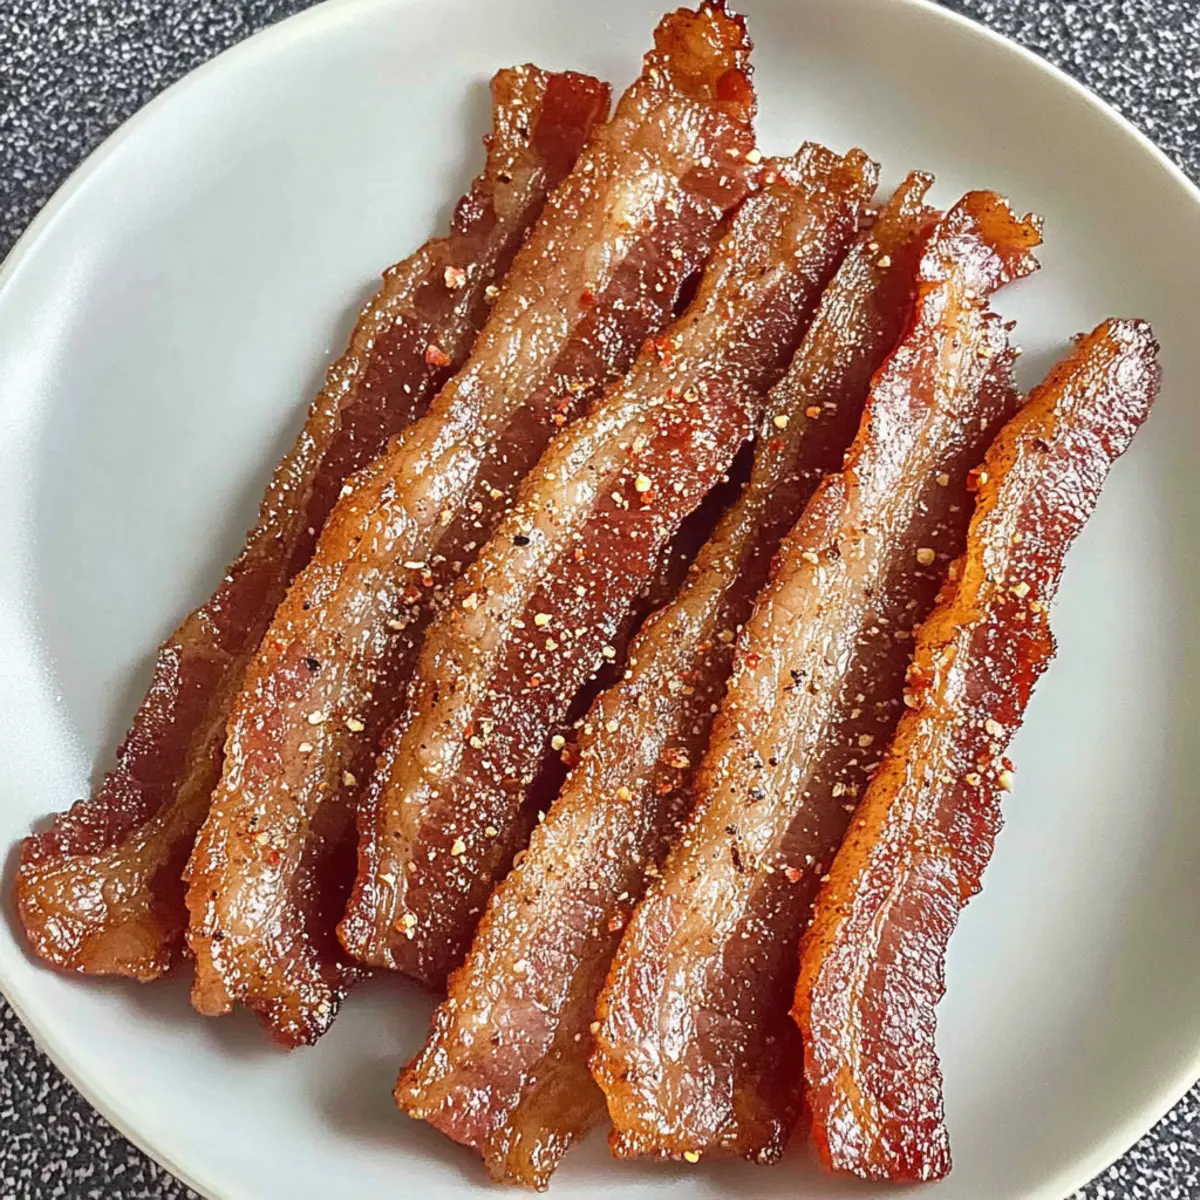
Billionaire Bacon: Sweet & Spicy Bliss for Your Brunch Spread

December 3, 2025 by Grace Snow Leave a Comment

There’s a reason they call it Billionaire Bacon, and once you take a bite, you’ll see why! Drawing inspiration from Snoop Dogg's famous cookbook, "From Crook to Cook," this delightful recipe delivers an unbeatable combination of sweet and spicy flavors that’s sure to captivate your taste buds. Perfect for brunch, parties, or simply as a savory snack, this candied bacon boasts an irresistible crispy texture coated in a luscious glaze. Not only is it a crowd-pleaser that brings star power to your dinner table, but it's also remarkably easy to whip up, allowing you to spend less time in the kitchen and more time with friends and family. Are you ready to elevate your bacon game and bring a little celebrity flair to your next meal? Let’s dive into the deliciousness!

Why Is Billionaire Bacon So Irresistible?

Flavor Fusion: The combination of sweet brown sugar and spicy red pepper flakes creates a taste sensation that will have everyone reaching for more.

Effortless Preparation: Simply coat and bake! This recipe is super easy, requiring minimal cooking skills, making it perfect for both novice cooks and seasoned chefs.

Perfect for Any Occasion: Whether for brunch, snacks, or parties, Billionaire Bacon effortlessly fits every gathering, offering a delightful shareable treat.

Celebrity Inspiration: Bringing Snoop Dogg's flair to your kitchen, this dish adds star quality to your meals, impressing family and friends alike.

Versatile Variations: Customize your bacon by mixing in smokiness with smoked paprika or dialing down the heat for a milder version.

Transform your next brunch spread with this mouthwatering dish, and pair it with some refreshing fresh fruits or even a hearty German Potato Salad for a delightful contrast.

Billionaire Bacon Ingredients

• Get ready to treat yourself!

For the Coating

  • Brown Sugar – Adds sweetness and caramelizes beautifully during baking; choose light or dark based on your preference.
  • Crushed Red Pepper Flakes – Provides a delightful spice; you can remove the seeds for a milder flavor if desired.
  • Freshly Ground Black Pepper – Elevates the taste with a subtle kick that complements the sweet.

For the Bacon

  • Thick-Sliced Bacon – The star of the show; ensure you use thick slices for that perfect crispy texture.

For Baking

  • Nonstick Cooking Spray – Essential for preventing sticking, making cleanup a breeze after your Billionaire Bacon is done.

Step‑by‑Step Instructions for Billionaire Bacon

Step 1: Preheat and Prepare
Begin by preheating your oven to 350°F (175°C). While it’s warming up, line a baking sheet with aluminum foil for easy cleanup, and place a baking rack on top. This will allow the heat to circulate evenly around the bacon, helping it to cook crispy. Ensure the rack is secured on the baking sheet to catch any drippings during baking.

Step 2: Spritz the Rack
Generously spray the baking rack with nonstick cooking spray. This crucial step will prevent the bacon from sticking while it bakes, ensuring that your delicious Billionaire Bacon comes off the rack effortlessly and maintains its beautiful shape. The glossy finish is just a bonus to the careful preparation.

Step 3: Mix the Coating
In a small mixing bowl, combine brown sugar, crushed red pepper flakes, and freshly ground black pepper. Stir the mixture until well blended; the brown sugar should be clumpy and fragrant. This sweet and spicy coating is what gives the Billionaire Bacon its irresistible flavor, so take a moment to savor the enticing aroma as you mix.

Step 4: Coat the Bacon
Take each thick-sliced bacon strip and generously coat both sides with the brown sugar mixture. Use your hands to press the mixture firmly onto the bacon to ensure it adheres well. The goal is to have every inch covered end-to-end, enhancing the flavor and creating that signature glaze as it bakes.

Step 5: Arrange on the Rack
Carefully place the coated bacon strips onto the prepared baking rack in a single layer, ensuring they don’t overlap. This arrangement is key for even cooking and crisping. As you place each strip, admire how the glaze is glistening—that visual cue represents the delightful future you’re about to enjoy with your Billionaire Bacon!

Step 6: Bake to Perfection
Slide the baking sheet into the preheated oven and allow the bacon to bake for around 30 minutes. Start checking for doneness at the 20-minute mark. You’re looking for a golden brown color and crunchy texture. Depending on your oven, it may take a few more minutes, so keep an eye on this delectable treat!

Step 7: Cool and Drain
Once your Billionaire Bacon has achieved a beautiful caramelized glaze, remove it from the oven and allow it to cool on the pan for about 10 minutes. This cooling period lets the glaze firm up, making the bacon easier to handle. Use paper towels to blot any excess grease, ensuring each piece remains crispy and has that perfect bite.

Step 8: Serve and Enjoy
Now that your Billionaire Bacon is ready, serve it warm as a show-stopping addition to your brunch spread or a tasty snack. This sweet and spicy treat will surely win everyone over, making it a darling at any gathering. Enjoy every crispy morsel of this delightful dish you've created!

What to Serve with Billionaire Bacon

Picture a cozy brunch table, where delicious aromas dance in the air and every bite feels like a little celebration of flavor.

  • Fluffy Scrambled Eggs: The creamy texture of scrambled eggs balances the crispy sweetness of Billionaire Bacon, making for a delightful pairing. They soak up the glaze beautifully, enhancing every bite.

  • Fresh Fruit Salad: A refreshing fruit salad brings a vibrant, juicy counterpoint to the savory dish, offering a burst of natural sweetness and color that invites everyone to dig in.

  • Buttermilk Biscuits: Flaky, buttery biscuits are perfect for mopping up any leftover glaze and provide a comforting, soft texture that complements the crunchy bacon splendidly.

  • Simple Greens Salad: A light mixed greens salad tossed in a lemon vinaigrette offers a fresh, zesty contrast to the rich bacon, ensuring a well-rounded meal.

  • Brunch Cocktails: Serve with mimosas or Bloody Marys, whose bright flavors elevate the occasion and enhance the flavor profiles of both the bacon and any accompanying dishes.

  • Gourmet Toast: Avocado toast topped with feta adds a creamy and savory element, creating a sophisticated contrast that pairs well with the sweet and spicy notes of the bacon.

Transform your meal into a star-studded affair by combining your Billionaire Bacon with these fantastic sides and drinks!

Make Ahead Options

These Billionaire Bacon strips are a fantastic choice for meal prep, allowing you to savor their sweet and spicy flavors while saving time during busy mornings or brunch gatherings. You can coat the bacon in the brown sugar mixture up to 24 hours ahead of time—simply place the coated strips in an airtight container and refrigerate. For the best results, bake it fresh right before serving; this way, you'll achieve that perfectly crispy texture. When you’re ready to enjoy, just preheat your oven and bake the bacon for about 30 minutes. With these make-ahead options, you'll have a deliciously prepared dish that will impress your guests without the last-minute fuss!

Storage Tips for Billionaire Bacon

Room Temperature: Allow the Billionaire Bacon to cool completely before storing. It can be left at room temperature for up to 2 hours after cooking.

Fridge: Place any leftover bacon in an airtight container or wrap it tightly in plastic wrap. It will remain fresh for up to 2 days in the fridge.

Freezer: For longer storage, you can freeze Billionaire Bacon. Wrap individual pieces in plastic wrap and then place them in a freezer-safe bag. They can last up to 2 months.

Reheating: To reheat, place the bacon on a foil-lined baking sheet and warm it in a preheated oven at 350°F for about 7 minutes, ensuring it crisps up beautifully again.

Billionaire Bacon: Delicious Customizations

Feel free to make this recipe your own, experimenting with flavors and textures that excite your palate!

  • Dairy-Free: Swap out the thick-sliced bacon for turkey bacon to create a lighter version without compromising taste.
  • Smoky Delight: Add smoked paprika to the sugar mix for a deeper, smoky flavor that elevates your bacon to the next level.
  • Extra Kick: Toss in some cayenne pepper if you're looking to spice things up even more—a little goes a long way!

Transform your brunch by pairing this with options like a classic German Potato Salad or a fresh fruit salad.

  • Sweet and Savory: Mix in some maple syrup alongside the brown sugar for added sweetness that complements the savory bacon beautifully.
  • Herbal Infusion: Fresh rosemary or thyme can be sprinkled on the bacon before baking, imparting a lovely aroma and depth of flavor.
  • Nutty Crunch: After baking, sprinkle on some chopped pecans for added texture and a nutty contrast to the crispy bacon.
  • Citrus Zing: Finish with a squeeze of lime or lemon juice just before serving to brighten the rich flavors and add an exciting twist.

Remember, the sky's the limit with Billionaire Bacon—flavor combinations are a fun way to create a unique dish every time!

Expert Tips for Billionaire Bacon

  • Watch the Clock: Keep an eye on your bacon during baking, especially after 20 minutes. The edges can crisp up faster than the center, so rearranging may be necessary.

  • Cool Properly: Allow the Billionaire Bacon to cool undisturbed for at least 10 minutes. This helps the glaze solidify and ensures maximum crunchiness.

  • Storage Savvy: Store any leftover bacon in an airtight container for up to 2 days. Enjoy it cold or reheat it in a foil-lined baking sheet for optimal texture.

  • Adjust the Spice: If you prefer a milder flavor, simply skip the crushed red pepper flakes. You can still enjoy the sweet magic of the bacon!

  • Experiment with Flavor: Feel free to customize your Billionaire Bacon by adding smoked paprika for a deeper flavor or cayenne for an extra kick.

Billionaire Bacon Recipe FAQs

What type of bacon is best for Billionaire Bacon?
I recommend using thick-sliced bacon for this recipe. Thick slices not only provide a more satisfying crunch but also hold up well to the sweet and spicy glaze, giving you the perfect balance of flavors and texture.

How can I tell if the bacon is ripe or fresh?
Look for fresh bacon that is firm to the touch and has a pinkish-red color. Avoid any packages with dark spots or unpleasant odors. If the bacon has a slimy texture, it's better to pass on it.

What’s the best way to store leftover Billionaire Bacon?
Make sure to cool the bacon completely before storing it. Place it in an airtight container or wrap it tightly with plastic wrap. You can keep it in the fridge for up to 2 days. If you want to enjoy it later, freezing is also an option!

Can I freeze Billionaire Bacon?
Absolutely! To freeze, wrap each piece of bacon with plastic wrap and then place them in a freezer-safe bag. This way, they won’t stick together. Billionaire Bacon can last up to 2 months in the freezer. When you're ready to enjoy, just reheat it straight from the freezer!

What should I do if my Billionaire Bacon is not crispy enough?
If your bacon isn't as crispy as you'd like, it may need a bit more time in the oven. Try adding an extra 5 minutes, but keep an eye on it to ensure it doesn’t burn. Remember, each oven is different, so the cooking time can vary.

Are there any dietary considerations with Billionaire Bacon?
This recipe contains bacon, which is not suitable for vegetarians or vegans. If you have dietary restrictions due to allergies, make sure to review the ingredient labels, especially for the spices, as some brands might contain allergens. Enjoy it responsibly, and feel free to customize with your favorite alternatives!

Billionaire Bacon

Billionaire Bacon: Sweet & Spicy Bliss for Your Brunch Spread

Billionaire Bacon is a delightful blend of sweet and spicy flavors that will elevate your brunch experience!
Print Recipe Pin Recipe
Prep Time 10 minutes mins
Cook Time 30 minutes mins
Cooling Time 10 minutes mins
Total Time 50 minutes mins
Servings: 4 slices
Course: Snacks
Cuisine: American
Calories: 200
Ingredients Equipment Method Nutrition Notes

Ingredients
  

For the Coating
  • 1 cup Brown Sugar Light or dark based on preference
  • 1 teaspoon Crushed Red Pepper Flakes Remove seeds for less heat
  • 1/2 teaspoon Freshly Ground Black Pepper
For the Bacon
  • 12 slices Thick-Sliced Bacon Use thick slices for better texture
For Baking
  • 1 can Nonstick Cooking Spray Essential for preventing sticking

Equipment

  • Oven
  • Baking Sheet
  • Baking Rack
  • Mixing Bowl
  • Spray Bottle

Method
 

Step-by-Step Instructions
  1. Preheat your oven to 350°F (175°C) and line a baking sheet with aluminum foil.
  2. Spray the baking rack generously with nonstick cooking spray.
  3. Mix brown sugar, crushed red pepper flakes, and black pepper in a bowl until blended.
  4. Coat each bacon strip with the brown sugar mixture on both sides.
  5. Arrange the coated bacon strips on the prepared baking rack in a single layer.
  6. Bake for around 30 minutes, checking for doneness starting at 20 minutes.
  7. Allow the bacon to cool on the pan for about 10 minutes before handling.
  8. Serve warm as a delicious addition to your brunch or as a snack.

Nutrition

Serving: 2slicesCalories: 200kcalCarbohydrates: 15gProtein: 10gFat: 14gSaturated Fat: 5gPolyunsaturated Fat: 2gMonounsaturated Fat: 6gCholesterol: 30mgSodium: 400mgPotassium: 200mgSugar: 10gCalcium: 20mgIron: 1mg

Notes

Store leftovers in an airtight container for up to 2 days. Reheat in the oven to maintain crispiness.

Tried this recipe?

Let us know how it was!

High Protein Pepperoni Pizza Rolls: Guilt-Free Comfort Bites

December 3, 2025 by Grace Snow Leave a Comment

As I stood in my kitchen, the aroma of pepperoni and melted cheese wafted through the air, instantly transporting me to cherished pizza nights with family. Today, I'm thrilled to share my versatile recipe for High-Protein Pepperoni Pizza Rolls—a delightful twist on a classic comfort food that promises satisfaction without the guilt. Perfect for meal prep or a quick post-workout snack, these rolls are crispy on the outside while offering a cheesy, savory surprise inside. With a high-protein boost and customizable filling options, they cater to fitness enthusiasts and taste enthusiasts alike. Ready to elevate your pizza game? Let's dive into this deliciously healthy adventure together!

Why are these pizza rolls a must-try?

Deliciously Healthy: These High-Protein Pepperoni Pizza Rolls offer a guilt-free way to enjoy your favorite flavors without the extra calories.
Customization: With multiple filling options, you can make these rolls your own—try sautéed vegetables for a vegetarian twist or spicy buffalo chicken!
Meal Prep Friendly: Perfect for busy weeks, prepare a batch ahead of time and enjoy on-the-go snacks or post-workout treats.
Satisfying Crunch: The crispy exterior contrasts beautifully with the melty cheese and savory filling, creating a delightful texture you won't forget.
Protein Power: Each roll packs a punch with 15-20g of protein, making it an ideal choice for fitness enthusiasts. Enjoy them with a side of marinara or Greek yogurt for extra flavor!

High Protein Pepperoni Pizza Rolls Ingredients

For the Rolls
• High-Protein Tortillas or Wraps – These serve as the base, so look for options providing 8-10g of protein per serving. Whole wheat or cauliflower wraps can also be a great substitution.
• Lean Ground Turkey or Chicken – This ingredient provides the rolls with protein and substance. Opt for ground meat with minimal fat for the best results.
• Reduced-Fat Mozzarella Cheese – Melting beautifully, this cheese adds creaminess without the guilt. Mix in light ricotta or cottage cheese for extra creaminess if desired.
• Turkey Pepperoni Slices – These slices give that classic pizza flavor while keeping fat content lower. For a vegetarian option, consider plant-based pepperoni.
• Marinara Sauce (No Sugar Added) – This sauce adds moisture and flavor without unnecessary sugars. You can replace it with crushed tomatoes mixed with herbs if you prefer.
• Garlic Powder & Oregano – Essential spices that enhance the overall flavor profile without adding calories.
• Olive Oil Spray or Egg Wash – This is used to achieve that perfect crispiness on the outside of the rolls.

For Serving
• Marinara Sauce – Perfect for dipping, adds an extra layer of flavor to each bite.
• Greek Yogurt – Mix with fresh herbs for a delicious and healthy dip option.

These High Protein Pepperoni Pizza Rolls are not just a feast for your taste buds, but also a smart choice for maintaining your nutrition goals. Enjoy bringing these delightful bites to your home!

Step‑by‑Step Instructions for High Protein Pepperoni Pizza Rolls

Step 1: Cook the Meat
In a skillet over medium heat, brown the lean ground turkey or chicken, stirring occasionally for about 5–7 minutes until fully cooked. Season with garlic powder and oregano to infuse the meat with flavor. Once cooked, drain any excess fat and allow the meat to cool slightly while you prepare the filling.

Step 2: Assemble the Filling
In a mixing bowl, combine the cooked meat, reduced-fat mozzarella cheese, turkey pepperoni slices, and marinara sauce. Mix gently until all ingredients are evenly coated. This delightful blend will form the heart of your high-protein pepperoni pizza rolls, so ensure everything is well combined for maximum flavor.

Step 3: Fill the Wraps
Take your high-protein tortillas or wraps and lay them flat on a clean surface. Spoon a generous amount of the filling into the center of each tortilla, making sure not to overstuff. Fold the sides in towards the center, then roll them tightly from the bottom up, much like a burrito, to securely encase the delicious filling inside.

Step 4: Seal and Crisp
Preheat your air fryer to 375°F (190°C) or oven to 400°F (200°C). Brush the outside of each rolled wrap lightly with olive oil or an egg wash for added crispiness. This step will ensure a beautiful golden color and a satisfying crunch when baked, enhancing the overall enjoyment of your high-protein pepperoni pizza rolls.

Step 5: Cook
If using an air fryer, arrange the filled rolls in a single layer and cook for 8–10 minutes, flipping halfway through for even crisping. For the oven, place the rolls on a baking sheet and bake for 12–15 minutes until they are golden brown and crispy. Both methods will yield wonderfully textured rolls that are best served hot.

Step 6: Serve
Once cooked, remove the rolls from the air fryer or oven and allow them to cool for a few minutes. These high-protein pepperoni pizza rolls are delightful when served with a side of marinara sauce for dipping or a dollop of Greek yogurt mixed with fresh herbs for a refreshing touch.

Make Ahead Options

These High-Protein Pepperoni Pizza Rolls are ideal for those who want to save time while enjoying delicious homemade food! You can prepare the filling (cooked meat, cheese, turkey pepperoni, and marinara) up to 3 days in advance; simply store it in an airtight container in the refrigerator. The assembled rolls can be made and refrigerated for up to 24 hours before baking, ensuring they stay fresh and flavorful. To maintain quality, brush the rolls with olive oil or egg wash just before cooking, making sure not to overload on sauce to avoid sogginess. When you're ready to serve, preheat the air fryer or oven, and bake for the recommended time until crispy and golden, resulting in a satisfying meal with minimal effort!

What to Serve with High Protein Pepperoni Pizza Rolls

These delightful rolls deserve a vibrant meal to accompany their cheesy goodness, so let's explore some perfect pairings.

  • Classic Marinara Sauce: A side of marinara enhances the pizza flavor and adds a zesty deliciousness for dipping.
  • Creamy Greek Yogurt Dip: Mix Greek yogurt with fresh herbs for a refreshing alternative to traditional ranch dressing, offering a light and tangy contrast.
  • Crispy Side Salad: Perhaps a fresh arugula salad topped with cherry tomatoes and a light vinaigrette—it adds a crisp texture and balances the meal beautifully.
  • Garlic Parmesan Roasted Vegetables: Roasted broccoli or cauliflower drizzled with garlic and Parmesan cheese provides a savory, crunchy side that complements the rolls perfectly.
  • Sweet Potato Fries: Baked sweet potato fries bring a hint of sweetness and a satisfying crunch, creating a delightful contrast with the savory rolls.
  • Fruit-Centric Dessert: Serve with fresh berries or a fruit salad for a refreshing finish that adds a light, sweet note to round off your meal.

Expert Tips for High Protein Pepperoni Pizza Rolls

  • Drain the Meat: Make sure to drain the cooked meat well to prevent soggy rolls that can compromise your high-protein pepperoni pizza rolls' texture.

  • Mind the Saucing: Avoid over-saucing the filling; too much marinara can make the rolls difficult to seal and eat, impacting the overall experience.

  • Crisp to Perfection: Cook until the rolls are golden brown for that delightful crunchy exterior. A few extra minutes can elevate your dish!

  • Experiment with Fillings: Don’t hesitate to play with different protein sources or vegetables—this helps customize your high-protein pepperoni pizza rolls while keeping the deliciousness intact.

  • Storage Smartly: If making ahead, ensure the rolls are completely cooled before storing. They stay fresh for up to 4 days in the fridge or up to 2 months in the freezer.

  • Serving Styles: Pair with a zesty dipping sauce or herb-infused Greek yogurt to elevate flavors and keep every bite exciting.

High Protein Pepperoni Pizza Rolls Variations

Feel free to get creative with your High-Protein Pepperoni Pizza Rolls and make them uniquely yours!

  • Vegetarian Delight: Swap the meat for sautéed mushrooms or spinach for a delightful and hearty twist. The earthy flavor of the mushrooms brings a richness that pairs beautifully with cheese.

  • Spicy Buffalo: Use shredded buffalo chicken with low-fat cream cheese and a sprinkle of cheddar for a fiery kick. The heat will awaken your taste buds and turn up the excitement at your dinner table!

  • Hawaiian Style: Create a sweet and savory Hawaiian version with turkey ham, pineapple chunks, and mozzarella. This tropical touch adds a surprising zing that’s perfect for a laid-back evening.

  • Tex-Mex Fiesta: Opt for black beans, corn, diced jalapeños, and cheddar for a Tex-Mex flair. This zesty combination offers a delightful crunch and a burst of flavors that will make you crave more!

  • Breakfast Roll: For a morning twist, fill the rolls with scrambled eggs, turkey sausage, and a sprinkle of cheese. It's breakfast on the go, keeping your protein levels up and your mornings bright!

  • Cheesy Spin: Introduce different types of cheese, like pepper jack for a kick, or a blend of mozzarella and fontina for extra creaminess. Each cheese adds a unique melt-in-your-mouth experience.

  • Mediterranean Medley: Incorporate feta cheese, olives, and sundried tomatoes for a refreshing Mediterranean touch. This variation brings an explosion of flavors that your friends will talk about beautifully!

These High-Protein Pepperoni Pizza Rolls are not only delicious but can also be tailored to match your cravings and dietary preferences. Ready to dive into these tasty transformations? Enjoy your delicious adventure!

Don't forget to check out these delightful recipes for more inspiration: Lemon Ricotta Protein, or if you’re in the mood for a savory dish, try some Garlic Chicken Thighs.

Storage Tips for High Protein Pepperoni Pizza Rolls

Fridge: Store your rolls in an airtight container for up to 4 days. Allow them to cool completely before sealing to maintain crispness.

Freezer: For longer storage, freeze these delicious high-protein pepperoni pizza rolls for up to 2 months. Wrap each roll tightly in plastic wrap, then place them in a freezer bag.

Reheating: Reheat in an air fryer at 375°F (190°C) for about 5–7 minutes for a crispy finish. Alternatively, bake in a preheated oven at 400°F (200°C) for 10–12 minutes, until warmed through.

Make-Ahead Tips: Prepare a batch in advance to enjoy as quick snacks or post-workout meals. Just be sure to follow proper storage methods to keep them fresh!

High-Protein Pepperoni Pizza Rolls Recipe FAQs

How do I select the best ingredients for my High-Protein Pepperoni Pizza Rolls?
Absolutely! When choosing high-protein tortillas or wraps, look for those that offer 8-10g of protein per serving; this will keep the rolls satisfying. For the meat, opt for lean ground turkey or chicken with minimal fat—around 93% lean is ideal. Fresh toppings like reduced-fat mozzarella should just melt beautifully, enhancing that cheesy goodness!

What are the best storage methods for leftover High-Protein Pepperoni Pizza Rolls?
These rolls can be stored in an airtight container in the refrigerator for up to 4 days. To maintain their crispiness, allow them to cool completely before placing them in the container. If you want to enjoy them later, they can also be frozen for up to 2 months, which I often do for a handy snack!

Can I freeze High-Protein Pepperoni Pizza Rolls? If so, how?
Yes, absolutely! To freeze, wrap each roll tightly in plastic wrap and place them in a freezer-safe bag—this prevents freezer burn. They can be stored for up to 2 months. When you're ready to enjoy, just reheat them straight from the freezer in an air fryer at 375°F (190°C) for around 5–7 minutes or bake at 400°F (200°C) for 10–12 minutes until heated through.

Any common troubleshooting tips for my High-Protein Pepperoni Pizza Rolls?
Very! One common issue can be sogginess—make sure to drain any excess fat from your cooked meat and avoid over-saucing the filling. If your rolls aren't sealing properly, try rolling them a bit tighter or using a bit of the marinara sauce as a 'glue' to help them stay closed during cooking.

Are there any dietary considerations I should keep in mind with these rolls?
Definitely! If you or anyone eating these rolls has allergies, consider substituting turkey pepperoni with plant-based options or eliminating cheese for a dairy-free version. Additionally, make sure your marinara sauce is free from added sugars for a healthier choice. These modifications also make the rolls friendly for various dietary needs!

High Protein Pepperoni Pizza Rolls

High Protein Pepperoni Pizza Rolls: Guilt-Free Comfort Bites

High Protein Pepperoni Pizza Rolls offer a deliciously healthy way to enjoy comfort food without guilt.
Print Recipe Pin Recipe
Prep Time 20 minutes mins
Cook Time 15 minutes mins
Cooling Time 5 minutes mins
Total Time 40 minutes mins
Servings: 4 rolls
Course: Snacks
Cuisine: American
Calories: 200
Ingredients Equipment Method Nutrition Notes

Ingredients
  

For the Rolls
  • 4 pieces High-Protein Tortillas or Wraps Whole wheat or cauliflower wraps can also be a great substitution.
  • 1 pound Lean Ground Turkey or Chicken Opt for ground meat with minimal fat for the best results.
  • 1 cup Reduced-Fat Mozzarella Cheese Mix in light ricotta or cottage cheese for extra creaminess if desired.
  • 4 ounces Turkey Pepperoni Slices For a vegetarian option, consider plant-based pepperoni.
  • 1 cup Marinara Sauce (No Sugar Added) Can replace it with crushed tomatoes mixed with herbs if you prefer.
  • 1 teaspoon Garlic Powder
  • 1 teaspoon Oregano
  • 1 tablespoon Olive Oil Spray or Egg Wash
For Serving
  • 1 cup Marinara Sauce Perfect for dipping.
  • 1 cup Greek Yogurt Mix with fresh herbs for a delicious and healthy dip option.

Equipment

  • Skillet
  • Mixing Bowl
  • Air fryer
  • Oven
  • Baking Sheet

Method
 

Step-by-Step Instructions
  1. In a skillet over medium heat, brown the lean ground turkey or chicken, stirring occasionally for about 5–7 minutes. Season with garlic powder and oregano. Drain excess fat and cool slightly.
  2. In a mixing bowl, combine the cooked meat, reduced-fat mozzarella cheese, turkey pepperoni slices, and marinara sauce. Mix gently until evenly coated.

  3. Take your high-protein tortillas or wraps and lay them flat. Spoon a generous amount of filling into the center, fold the sides in, and roll tightly from the bottom up.
  4. Preheat your air fryer to 375°F (190°C) or oven to 400°F (200°C). Brush each rolled wrap lightly with olive oil or egg wash.
  5. If using an air fryer, arrange the rolls in a single layer and cook for 8–10 minutes, flipping halfway through. For the oven, bake for 12–15 minutes until golden brown.
  6. Remove the rolls from the air fryer or oven and allow them to cool for a few minutes. Serve with marinara sauce or Greek yogurt mixed with fresh herbs.

Nutrition

Serving: 1rollCalories: 200kcalCarbohydrates: 20gProtein: 15gFat: 7gSaturated Fat: 3gPolyunsaturated Fat: 0.5gMonounsaturated Fat: 2gCholesterol: 35mgSodium: 450mgPotassium: 250mgFiber: 3gSugar: 2gVitamin A: 10IUVitamin C: 5mgCalcium: 15mgIron: 10mg

Notes

These rolls stay fresh for up to 4 days in the fridge or up to 2 months in the freezer. Reheat in an air fryer or oven for a crisp finish.

Tried this recipe?

Let us know how it was!

Delicious Garbage Bread: Your New Go-To Comfort Food!

December 3, 2025 by Grace Snow Leave a Comment

At the end of a long day, there’s something wonderfully satisfying about taking whatever you have on hand and turning it into a cozy meal. Enter Garbage Bread, a dish that’s as adaptable as it is delicious. Whether you’re hosting friends for game night or simply trying to use up leftovers from the week, this recipe is the ultimate solution. Picture a warm, golden crust bursting with your favorite fillings—meat, veggies, cheese—you name it! Plus, it’s not just quick to prep; it’s also a crowd-pleaser that invites everyone to customize their slice. Are you ready to roll up your sleeves and create a unique version of this comfort food classic?

Why is Garbage Bread a Must-Try?

Versatile and Customizable: Garbage Bread is the ultimate canvas for your culinary creativity—swap fillings to suit your taste, whether you prefer hearty meats, vibrant veggies, or gooey cheeses.

Quick Preparation: With just a few simple steps, you can have a mouthwatering dish ready to enjoy in no time, making it perfect for weeknight dinners or last-minute gatherings.

Crowd-Pleasing Appeal: This recipe is guaranteed to delight family and friends, as everyone can personalize their slice with their favorite ingredients.

Delicious Leftover Solution: Transform yesterday's odds and ends into a scrumptious meal, helping to reduce food waste while you indulge in comfort food bliss.

Perfect for All Occasions: From game nights to cozy dinners, this Garbage Bread shines as an appetizer or main course, easily pairing with a fresh salad or your favorite dipping sauces.

Try it alongside a homemade Cornbread Breakfast Casserole for a full feast experience!

Garbage Bread Ingredients

• Unlock the secrets to an unforgettable family favorite!

For the Dough

  • 1 lb pizza dough – The base of the Garbage Bread, offering a perfect structure; use store-bought for ease or homemade for authenticity.

For the Filling

  • 1/2 lb ground beef, cooked – Adds savory depth and richness; feel free to substitute with turkey or plant-based meat for a lighter version.
  • 1/2 lb bacon, cooked and crumbled – Infuses flavor and richness; omit for a vegetarian touch or substitute with cooked sausage.
  • 1 cup mozzarella cheese, shredded – Melts beautifully for that gooey, cheesy goodness; explore other options like cheddar or pepper jack for a flavor kick.
  • 1/2 cup marinara sauce – Provides moisture and a burst of flavor; try BBQ sauce for a fun twist!
  • 1 onion, diced and sautéed – Adds aromatic sweetness to your filling; shallots work perfectly for a milder taste.
  • Optional vegetables (peppers, mushrooms) – Enhances taste and texture, while using up any veggies you have on hand; sauté moisture-rich varieties first to prevent sogginess.

Enjoy making your delicious Garbage Bread with this flexible ingredients list that allows for endless customization!

Step‑by‑Step Instructions for Garbage Bread

Step 1: Prepare Dough
Roll out the pizza dough on a lightly floured surface into a large rectangle, about ¼ inch thick. Ensure the dough is even and smooth, making it easier to fill and roll later. Preheat your oven to 375°F (190°C), so it’s ready for baking once the Garbage Bread is assembled.

Step 2: Cook Fillings
In a skillet over medium heat, brown the cooked ground beef until it's heated through, then add crumbled bacon and sauté until crispy. Next, toss in the diced onion and any optional vegetables like peppers or mushrooms, cooking until the onions are translucent and everything is tender. This fragrant filling will add depth to your Garbage Bread.

Step 3: Assemble
Spread the marinara sauce evenly across the rolled-out pizza dough, leaving a small border around the edges. Next, layer the cooked beef, bacon, mozzarella cheese, and any sautéed vegetables on top of the sauce, creating a colorful display of ingredients that will make every bite delicious.

Step 4: Roll
Starting from the edge closest to you, carefully roll the dough around the fillings to create a tight log shape. Make sure to keep the filling inside as you roll, and pinch the edges together to seal it securely. This step is crucial for ensuring your Garbage Bread holds together during baking.

Step 5: Bake
Transfer the rolled Garbage Bread to a baking sheet lined with parchment paper, seam side down. Place it in the preheated oven and bake for 25 minutes, or until the bread is golden brown and crisp to the touch. Keep an eye on it as it cooks to achieve that perfect crunchy exterior.

Step 6: Cool & Slice
Once baked, remove the Garbage Bread from the oven and let it cool for about 10 minutes on the baking sheet. This resting period is essential for the fillings to set slightly and makes slicing easier. Use a serrated knife to cut into thick slices, revealing the gooey, cheesy interior bursting with flavor.

How to Store and Freeze Garbage Bread

Fridge: Store leftover Garbage Bread in an airtight container for up to 3 days. This helps maintain its delicious flavors while preventing it from drying out.

Freezer: Wrap slices or the whole loaf tightly in plastic wrap followed by aluminum foil, and freeze for up to 2 months. This locks in freshness and keeps your bread ready for future cravings.

Reheating: To enjoy, reheat slices in a toaster oven at 350°F (175°C) for about 10-15 minutes, restoring that crispy crust and gooey interior.

Make-Ahead Tip: Assemble the Garbage Bread ahead of time and refrigerate overnight or freeze before baking; adjust the baking time depending on whether it's chilled or frozen.

Make Ahead Options

Garbage Bread is fantastic for meal prep, allowing you to enjoy homemade goodness without the last-minute rush! You can assemble the entire bread up to 24 hours in advance. Simply prepare it through the rolling step, then tightly wrap it in plastic wrap and refrigerate. To maintain quality, make sure there's minimal air exposure to prevent drying out. When you're ready to bake, simply remove it from the fridge, let it sit for about 10-15 minutes while the oven preheats to 375°F (190°C), then bake as directed. This way, you’ll still get that crunchy, golden crust and gooey filling—just as delicious as if freshly made!

What to Serve with Ultimate Garbage Bread?

Pairing a delightful spread with your warm, cheesy creation can elevate your meal into an unforgettable feast.

  • Fresh Green Salad: A crisp salad with mixed greens provides a refreshing contrast to the richness of the Garbage Bread, adding vibrant flavors. Toss in some cherry tomatoes and a light vinaigrette for a delightful balance.

  • Garlic Breadsticks: The extra crunch of buttery garlic breadsticks pairs beautifully, enhancing the whole experience with aromatic flavors. They're perfect for dunking in marinara or ranch sauce on the side.

  • Steamed Vegetables: Bright, colorful steamed veggies keep the meal light while offering a nutritious pop of flavor. Broccoli or asparagus drizzled with lemon will complement the underlying richness of the bread.

  • Chilled Antipasto Platter: A selection of olives, marinated artichokes, and cheeses make for an enticing appetizer spread. The variety presents great textures and flavors that mingle well before diving into the main dish.

  • Spicy Buffalo Wings: For those who crave spice, the heat from buffalo wings perfectly contrasts the cheesy goodness of the Garbage Bread. Enjoy them together for a fun flavor explosion.

  • Craft Beer or Red Wine: A chilled craft beer or a glass of bold red wine completes the meal, enhancing the flavors within the Garbage Bread and balancing the savory notes perfectly.

  • Chocolate Chip Cookies: End your evening on a sweet note! Warm, gooey cookies offer a satisfying finish and contrast with the savory bread experience. They’ll leave you with that cherished homemade comfort food feeling.

Expert Tips for Garbage Bread

  • Proper Sealing: Ensure edges are well-sealed while rolling; if not, the filling may leak out, making a mess during baking.
  • Ingredient Balance: Avoid using excessive wet ingredients like marinara; too much moisture can lead to a soggy Garbage Bread.
  • Even Slicing: Use a serrated knife to slice through the bread neatly without squashing the filling, preserving the delightful presentation.
  • Pre-cook Fillings: Sauté vegetables before adding; moisture-rich veggies should be cooked to prevent a soggy consistency.
  • Versatile Options: Don't hesitate to experiment with fillings; swap meats and cheeses or try vegetarian ingredients to make your Garbage Bread unique!

Garbage Bread Variations & Substitutions

Feel free to get creative and customize your Garbage Bread, making it even more delicious with these exciting twists!

  • Vegetarian Delight: Swap the ground beef and bacon for a medley of your favorite sautéed vegetables like zucchini, spinach, and bell peppers for a vibrant and wholesome version. Embrace the colorful flavors!

  • Healthy Makeover: Opt for whole wheat pizza dough, plenty of fresh veggies, and low-fat cheese to make a guilt-free, nutritious version that doesn’t skimp on taste. Your body will thank you for this nutritious twist!

  • Spicy Kick: Add jalapeños or crushed red pepper flakes to the filling to spice things up. Just a bit of heat can elevate the whole experience and make it more memorable!

  • Cheesy Explosion: Mix in different cheeses like sharp cheddar or pepper jack to amplify the flavor of your Garbage Bread. The gooey, melted goodness will have everyone coming back for more.

  • BBQ Bliss: Substitute the marinara sauce with BBQ sauce for a smoky twist. This unique combination will delight your taste buds and give the bread a whole new character.

  • Mushroom Medley: Incorporate a mix of mushrooms, sautéed until golden brown, for an earthy flavor boost. Their meaty texture adds substance without any meat in the mix.

  • Dippable Version: Arrange your filling ingredients into smaller logs for individual servings that are perfect for dipping. Pair them with marinara, ranch, or a spicy aioli for added flavor with each delicious bite.

Have fun exploring these ideas, and don’t forget to enjoy your creations with a side of delicious Cheesy Garlic Bread or a hearty Cornbread Breakfast Casserole. Mix and match to suit your taste, and savor every memorable bite!

Garbage Bread Recipe FAQs

What type of vegetables work best in Garbage Bread?
Absolutely! You can use any vegetables you have on hand. Popular choices include bell peppers, mushrooms, or spinach. I often sauté moisture-rich vegetables before adding them to prevent sogginess in the final bake.

How should I store leftover Garbage Bread?
Store leftover Garbage Bread in an airtight container in the fridge for up to 3 days. This helps maintain its delicious flavors and prevents it from drying out. If you notice any dark spots or unusual texture, it’s best to discard it.

Can I freeze Garbage Bread? How?
Yes! To freeze Garbage Bread, wrap slices or the whole loaf tightly in plastic wrap followed by aluminum foil, then freeze for up to 2 months. This locks in freshness. When you're ready to enjoy, just thaw it in the fridge overnight, then reheat in a toaster oven at 350°F (175°C) for about 10-15 minutes for that crispy texture.

What if my Garbage Bread is too soggy?
To prevent sogginess, try to avoid using too many wet ingredients, and always sauté your vegetables before adding them. If your Garbage Bread turns out soggy, let it cool slightly, then pop it in the oven for a few extra minutes to help crisp up the crust.

Are there any dietary considerations for Garbage Bread?
Yes, be mindful of allergies! If you're serving guests, offer vegetarian options and be cautious with ingredients like cheese and meats that may not suit everyone's dietary preferences. Always check labels if you're unsure about allergens.

Can I make Garbage Bread ahead of time?
Very! You can assemble Garbage Bread ahead of time and refrigerate it overnight or even freeze it before baking. Just remember to adjust the baking time if it’s chilled or frozen—start checking for doneness a bit earlier to avoid overcooking!

Garbage Bread

Delicious Garbage Bread: Your New Go-To Comfort Food!

Garbage Bread is a versatile and crowd-pleasing dish perfect for using up leftovers and satisfying cravings.
Print Recipe Pin Recipe
Prep Time 15 minutes mins
Cook Time 25 minutes mins
Cooling Time 10 minutes mins
Total Time 50 minutes mins
Servings: 8 slices
Course: Snacks
Cuisine: American
Calories: 350
Ingredients Equipment Method Nutrition Notes

Ingredients
  

For the Dough
  • 1 lb pizza dough Use store-bought for ease or homemade for authenticity.
For the Filling
  • 1/2 lb ground beef, cooked Can substitute with turkey or plant-based meat.
  • 1/2 lb bacon, cooked and crumbled Omit for a vegetarian option or use cooked sausage.
  • 1 cup mozzarella cheese, shredded Cheddar or pepper jack can be used for a flavor kick.
  • 1/2 cup marinara sauce BBQ sauce can be a fun twist.
  • 1 unit onion, diced and sautéed Shallots work for a milder taste.
  • optional vegetables (peppers, mushrooms) Sauté moisture-rich varieties to prevent sogginess.

Equipment

  • Skillet
  • Baking Sheet
  • Parchment Paper
  • Rolling Pin

Method
 

Step‑by‑Step Instructions
  1. Roll out the pizza dough on a lightly floured surface into a large rectangle, about ¼ inch thick. Preheat your oven to 375°F (190°C).
  2. In a skillet over medium heat, brown the cooked ground beef until heated through, then add crumbled bacon and sauté until crispy. Add the diced onion and any optional vegetables, cooking until the onions are translucent.
  3. Spread the marinara sauce evenly across the rolled-out pizza dough. Layer the cooked beef, bacon, mozzarella cheese, and any sautéed vegetables on top.
  4. Starting from the edge closest to you, carefully roll the dough around the fillings to create a tight log shape. Pinch the edges together to seal it.
  5. Transfer the rolled Garbage Bread to a baking sheet lined with parchment paper, seam side down. Bake for 25 minutes, or until golden brown and crisp.
  6. Let the Garbage Bread cool for about 10 minutes on the baking sheet before slicing with a serrated knife.

Nutrition

Serving: 1sliceCalories: 350kcalCarbohydrates: 30gProtein: 20gFat: 15gSaturated Fat: 7gPolyunsaturated Fat: 2gMonounsaturated Fat: 5gCholesterol: 50mgSodium: 800mgPotassium: 300mgFiber: 2gSugar: 2gVitamin A: 10IUVitamin C: 5mgCalcium: 20mgIron: 15mg

Notes

Ensure edges are well-sealed while rolling to prevent leaks during baking. Sauté vegetables before adding to prevent sogginess. Experiment with fillings for uniqueness.

Tried this recipe?

Let us know how it was!

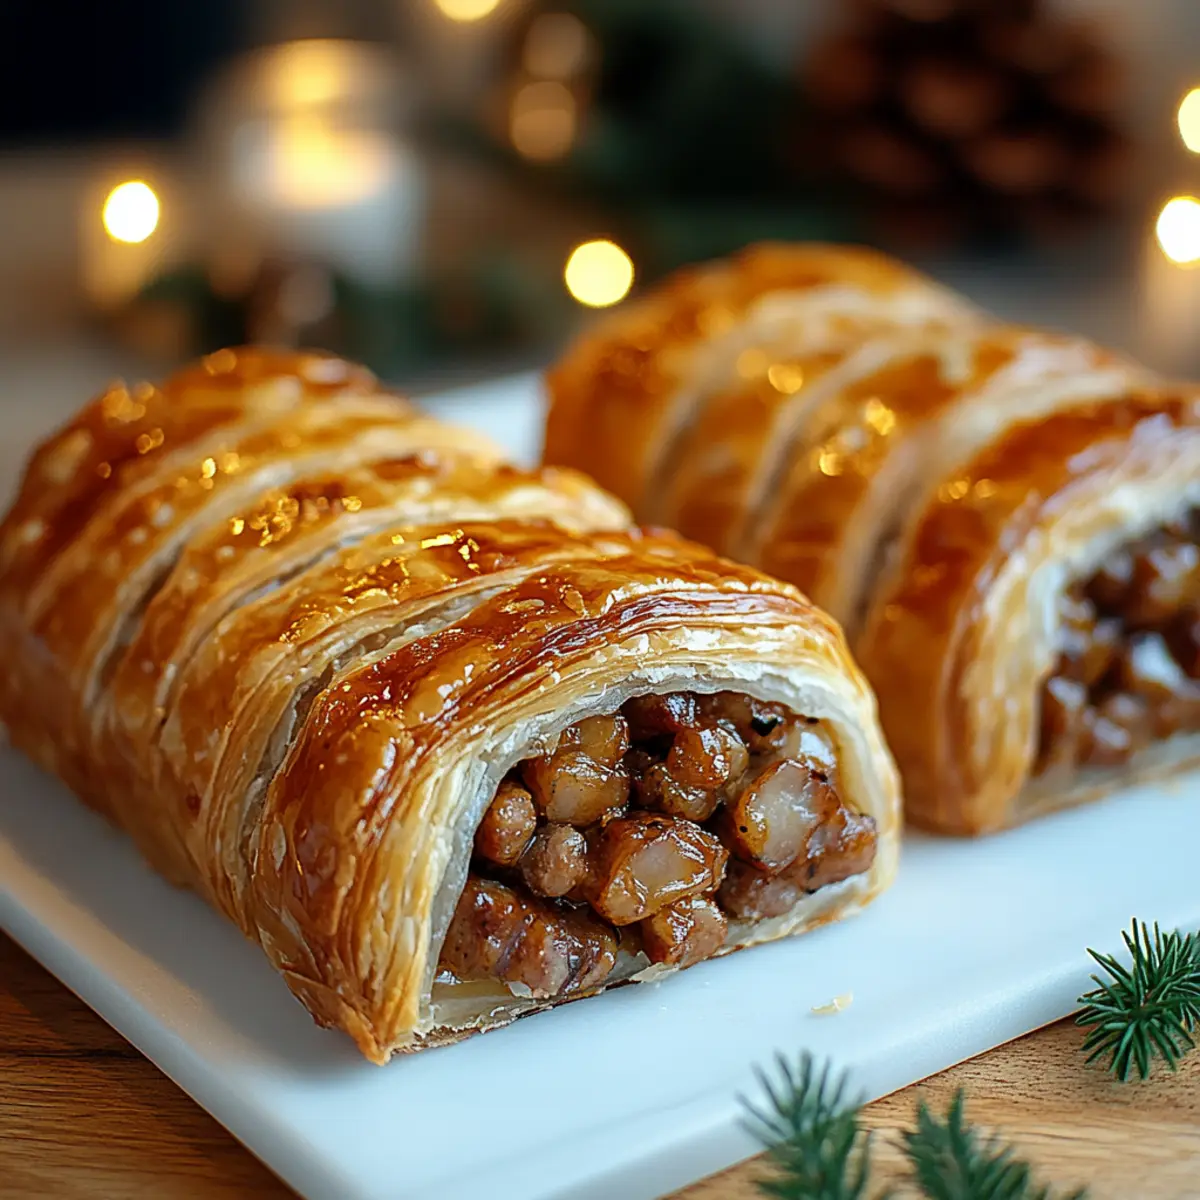
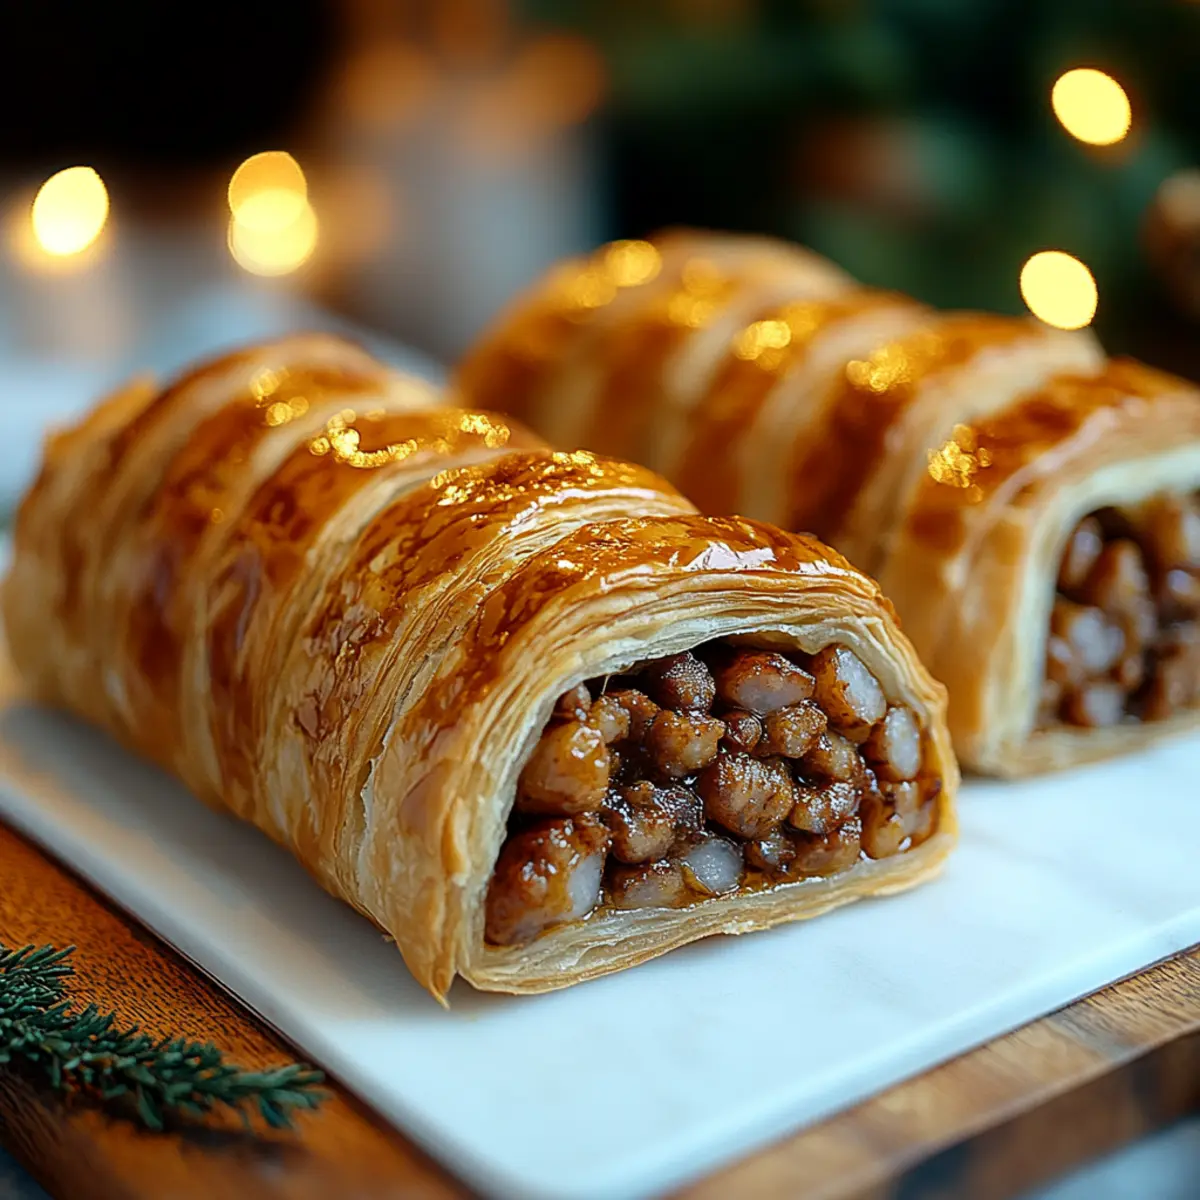
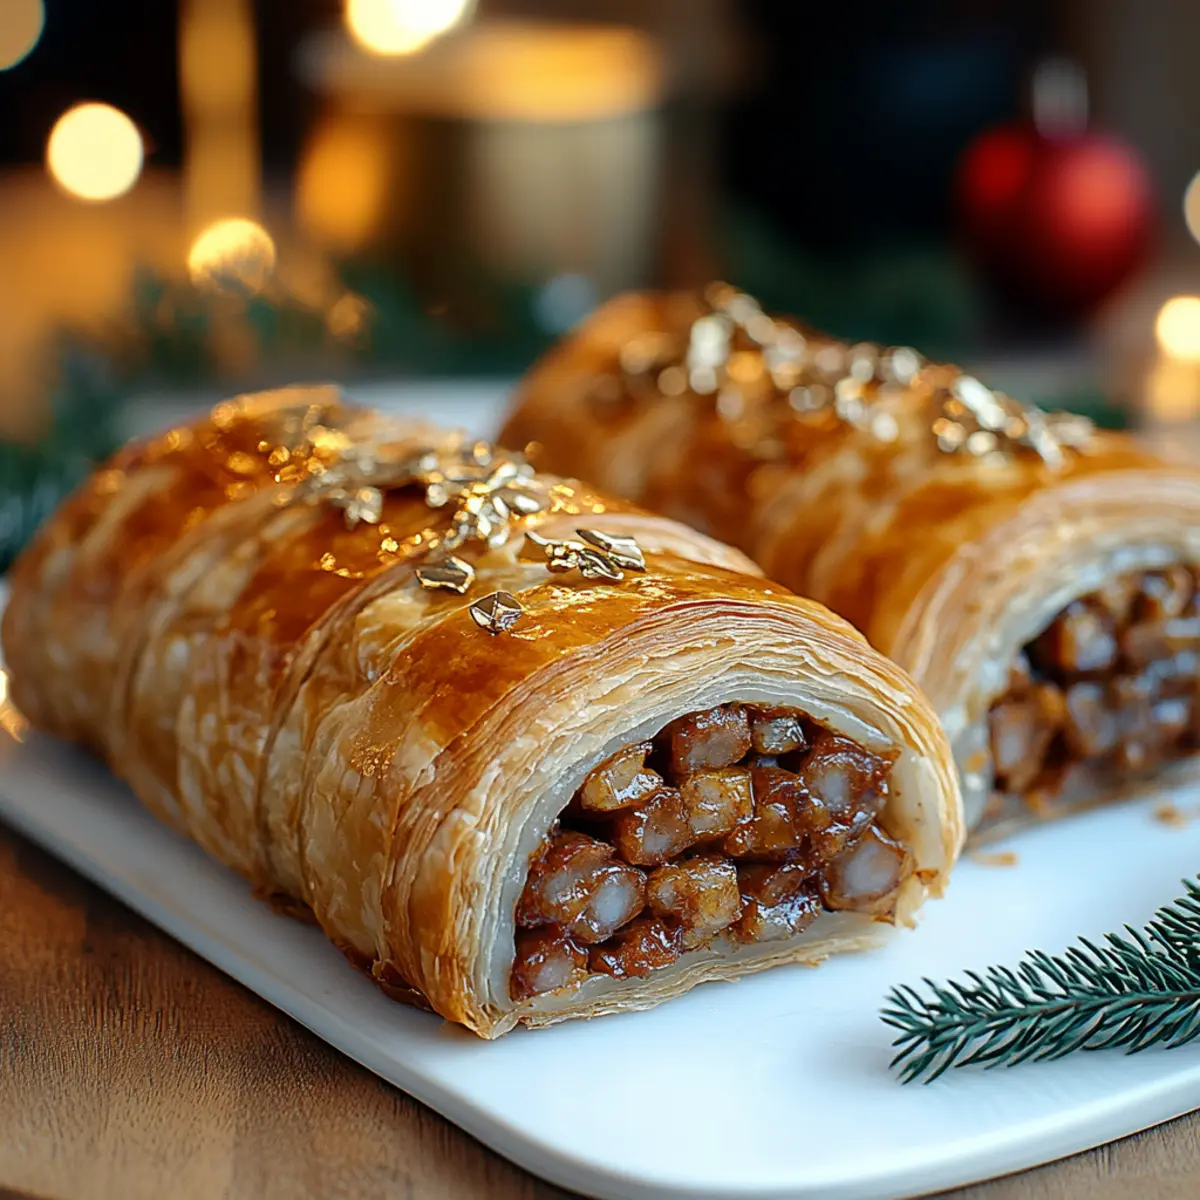
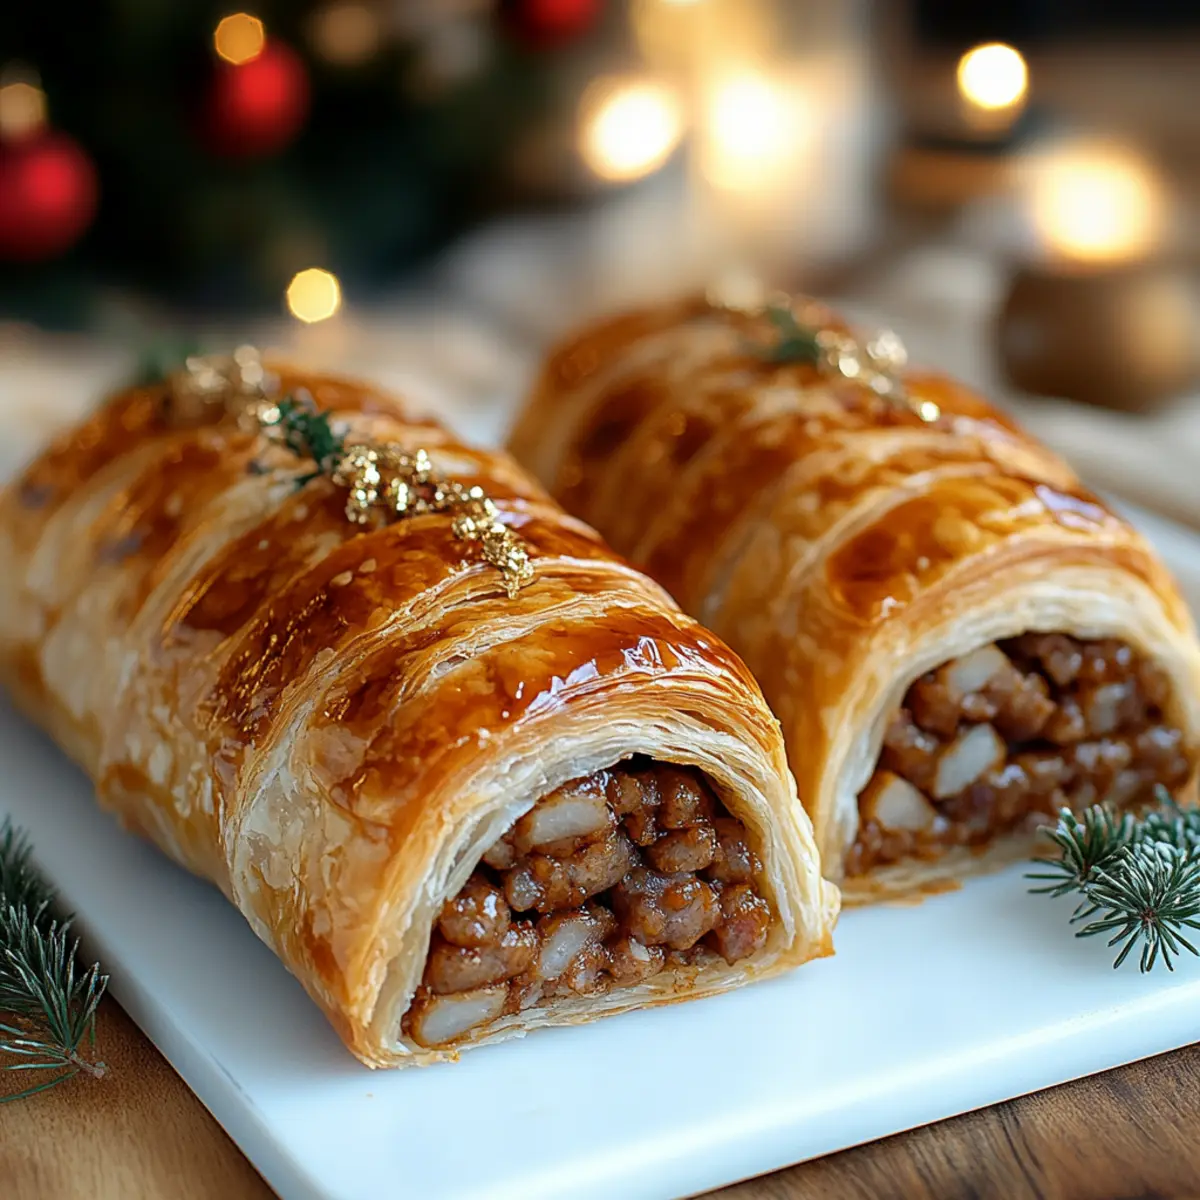
Melt-in-Your-Mouth Christmas Sausage Rolls for Holiday Bliss

November 29, 2025 by Grace Snow Leave a Comment

As I stepped into my kitchen, the scent of warm pastries danced in the air, reminding me that the holidays are just around the corner. There’s something truly magical about holiday cooking, and these Christmas Sausage Rolls are a delightful way to share that spirit with family and friends. Wrapped in flaky puff pastry, these savory morsels are not only easy to whip up but also a guaranteed crowd-pleaser at any festive gathering. Perfect as a finger food or appetizer, they bring a touch of tradition and warmth that makes every bite special. With just a handful of ingredients and little preparation time, you can create a mouthwatering experience that elevates your holiday spread. Curious how to craft these irresistible treats? Let’s dive into the recipe that will make your festivities even merrier!

Why are Christmas Sausage Rolls a must-have?

Irresistible Flavor: These rolls are packed with perfectly seasoned sausage, offering a burst of savory goodness in every bite.

Quick to Prepare: With minimal prep time required, you can have these festive delights ready to bake in no time.

Crowd-Pleasing Appetizer: Their finger-food nature makes them ideal for holiday gatherings, ensuring your guests will keep coming back for more.

Versatile Options: Feel free to switch up the filling with plant-based sausage or add veggies for a twist!

Baking Bliss: The sight of golden-brown rolls emerging from the oven is a holiday moment you'll cherish. For more festive ideas, be sure to check out our ideas on holiday appetizers.

Christmas Sausage Rolls Ingredients

For the Filling
• 1 lb (450g) sausage meat or ground sausage – The main protein source that provides the delicious flavor and hearty texture. Substitution: Use plant-based sausage for a vegetarian option.
• ½ cup finely diced onion – Adds a touch of sweetness and depth to the filling. Substitution: Shallots can be used for a milder taste.
• 1 clove garlic, minced – Enhances the overall flavor profile; fresh garlic packs a punch! Note: Garlic powder can be used if fresh is not available.
• 1 tsp dried sage – This herb gives your rolls a delightful aroma and flavor boost. Substitution: Thyme can replace sage for a different herb profile.
• 1 tsp dried thyme – Complements the sausage perfectly and adds warmth to the taste. Substitute by omitting it if you need to adjust other herbs.
• ¼ tsp ground black pepper – Provides a subtle kick; adjust to taste! White pepper can be used if you prefer milder flavors.
• ¼ tsp salt – Enhances the taste of the filling; reduce if using pre-seasoned sausage.

For the Pastry
• 1 sheet puff pastry, thawed – Key to a flaky and crisp exterior that holds all the deliciousness inside. Substitution: Homemade pastry works beautifully if preferred.
• 1 egg, beaten (for egg wash) – Ensures a golden-brown finish that looks as good as it tastes! Note: Omit for a vegan version or use a plant-based egg substitute.

For Sautéing
• 1 tbsp olive oil – Used for sautéing onion and garlic, bringing out their flavors. Substitution: Any neutral oil is acceptable for this step.

Step‑by‑Step Instructions for Christmas Sausage Rolls

Step 1: Preheat the Oven
Begin by preheating your oven to 400°F (200°C). This ensures a perfectly crispy exterior on your Christmas Sausage Rolls when they bake. While the oven heats up, gather your ingredients and prepare your workspace so that you're ready for the fun of rolling and filling the pastry.

Step 2: Sauté the Aromatics
In a skillet over medium heat, add 1 tablespoon of olive oil. Once the oil shimmers, toss in ½ cup of finely diced onion and 1 clove of minced garlic. Sauté for about 4-5 minutes until the onions are soft and translucent, releasing a delightful aroma. This will form the flavorful base for your sausage filling.

Step 3: Prepare the Sausage Filling
In a mixing bowl, combine 1 pound of sausage meat, the sautéed onion and garlic, along with 1 teaspoon each of dried sage and dried thyme, ¼ teaspoon of ground black pepper, and ¼ teaspoon of salt. Mix thoroughly until all ingredients are evenly blended, ensuring every bite of your Christmas Sausage Rolls bursts with flavor.

Step 4: Roll Out the Puff Pastry
Now, take your thawed sheet of puff pastry and lay it on a lightly floured surface. Using a rolling pin, gently roll it out to smoothen any creases. Cut the pastry into rectangles, approximately 4 inches by 6 inches, which will serve as your canvas for creating the savory rolls that will be the star of your holiday spread.

Step 5: Assemble the Rolls
Take a rectangle of pastry and place a generous amount of the sausage filling along one edge, leaving some space at the sides. Carefully roll the pastry over the filling, tucking it in as you go. Seal the edges by pinching them together, ensuring none of that delicious filling escapes during baking.

Step 6: Create Vents and Brush with Egg
Once all the rolls are shaped, use a sharp knife to make a few diagonal slits on top of each roll. This will allow steam to escape while baking. Then, brush the tops with the beaten egg for that beautiful golden-brown finish. This step is key in making your Christmas Sausage Rolls mouthwateringly appealing.

Step 7: Bake to Perfection
Place the sausage rolls on a baking sheet lined with parchment paper, spaced evenly apart. Bake them in your preheated oven for 20-25 minutes, or until they are golden brown and puffed up beautifully. Keep an eye on them as they bake, and prepare to savor the delicious aromas wafting through your home.

Step 8: Serve and Enjoy
Once baked, remove the Christmas Sausage Rolls from the oven and let them cool slightly before serving. These delectable treats are best enjoyed warm, alongside your favorite dipping sauces like sweet chili or mustard. Gather your loved ones, and enjoy the delightful flavors of the season together!

Expert Tips for Christmas Sausage Rolls

• Thawing Matters: Ensure the puff pastry is completely thawed for easy handling and to prevent tearing during assembly.

• Perfect Filling Ratio: Don’t overfill the sausage rolls. A generous yet mindful amount of filling will allow for even cooking and prevent bursting.

• Sharp Knife for Slicing: Use a sharp knife to make clean cuts in the rolls before baking. This ensures proper venting and a polished look for your Christmas Sausage Rolls.

• Golden Finish: Brush the tops with the beaten egg generously—this will give your sausage rolls that irresistible golden-brown sheen.

• Watch the Baking Time: Keep an eye on the rolls as they bake, as ovens vary. Remove them when golden brown for the best flavor and texture.

Christmas Sausage Rolls: Delicious Variations

Feel free to mix it up and tailor these delightful sausage rolls to your taste preferences!

  • Turkey or Chicken: Swap the sausage meat with ground turkey or chicken for a leaner spin on this classic favorite. The flavor remains delicious while keeping it lighter, perfect for those who are health-conscious.

  • Vegetarian Delight: Use plant-based sausage in place of traditional meat for a family-friendly, vegetarian option. Everyone will appreciate a delicious roll that suits their dietary needs!

  • Cheesy Indulgence: Add shredded cheese to the filling for extra rich flavor. Cheese melts beautifully, making each bite even more satisfying and indulgent.

  • Veggie Boost: Toss in some diced bell peppers, spinach, or mushrooms for added texture and nutrition. These extra veggies will not only enhance the taste but also brighten up each roll with color.

  • Herb Garden Twist: Experiment with herbs! You can substitute thyme or sage with fresh parsley or rosemary for a fresh and aromatic note, inviting the essence of a holiday garden into your kitchen.

  • Spicy Kick: For those who love a bit of heat, add a pinch of crushed red pepper flakes to the filling. This little addition can elevate the flavor profile, ensuring a warm bite that excites the palate.

  • Dipping Sauces: Pair your sausage rolls with various dipping sauces. Classic options like sweet chili or tangy mustard are fantastic, or try homemade garlic aioli for an elevated touch.

Feel free to explore these variations and find your favorite! If you're in the mood for even more festive ideas, don’t miss our collection of mouthwatering holiday appetizers.

How to Store and Freeze Christmas Sausage Rolls

Fridge: Store leftover Christmas Sausage Rolls in an airtight container for up to 3 days. This helps maintain their delightful flavor and flaky texture.

Freezer: Place cooled sausage rolls in a single layer on a baking sheet, then freeze until solid. Transfer to a freezer-safe bag for up to 3 months for easy, ready-to-bake treats.

Reheating: For the best results, reheat in a preheated oven at 375°F (190°C) for 10-15 minutes, or until heated through and crispy on the outside.

Make-Ahead: You can prepare sausage rolls a day in advance, assembling and refrigerating them until it's time to bake, ensuring freshness and flavor for your holiday gathering.

Make Ahead Options

These Christmas Sausage Rolls are perfect for meal prep enthusiasts looking to save time during the busy holiday season! You can assemble the rolls up to 24 hours in advance, simply wrap them tightly in plastic wrap and refrigerate to maintain freshness. To prevent the pastry from becoming soggy, avoid brushing with egg wash until just before baking. When you're ready to serve, place the rolls on a baking sheet, brush the tops with the beaten egg, and bake in a preheated oven for 20-25 minutes until golden brown. This way, you'll have the same delicious results, all with minimal last-minute effort!

What to Serve with Christmas Sausage Rolls

Elevate your festive meals by pairing these scrumptious bites with delicious accompaniments that enhance their flavors.

  • Sweet Chili Sauce: The sweet and tangy notes of this sauce create a delightful contrast to the savory sausage, making each bite even more enjoyable.
  • Creamy Mustard Dip: A rich mustard-based dip adds a creamy texture that complements the flaky pastry, balancing the richness of the filling perfectly.
  • Fresh Garden Salad: Crisp greens tossed with a light vinaigrette brighten your plate and provide a refreshing contrast to the warmth of the rolls.
  • Savory Cheese Platter: A selection of cheeses, such as sharp cheddar and creamy brie, pairs beautifully with the sausage rolls and invites indulgence.
  • Herbed Roasted Vegetables: Roasted carrots, potatoes, and Brussels sprouts bring hearty earthiness and vibrant colors, elevating your meal with complementary flavors.
  • Spicy Tomato Chutney: A zesty chutney provides bold flavors that enhance the sausage's spices and add a delightful kick to every bite.
  • Mulled Wine or Cider: Warm and spiced drinks like mulled wine or apple cider create a cozy atmosphere, enhancing the overall holiday experience.
  • Chocolate Mint Brownies: For dessert, these fudgy brownies with a hint of mint are the perfect sweet finish to your savory spread, leaving guests wanting more.
  • Classic Eggnog: Rich and creamy, eggnog makes a delicious holiday beverage that pairs well with the festive goodness of the sausage rolls.

Christmas Sausage Rolls Recipe FAQs

What type of sausage should I use for the best flavor?
Absolutely! The best flavor comes from using high-quality sausage meat or ground sausage that’s well seasoned. For a unique twist, consider trying gourmet sausage varieties like apple and sage or spicy Italian. If you prefer a vegetarian option, plant-based sausage works wonderfully and still offers a great taste to your Christmas Sausage Rolls.

How should I store leftover Christmas Sausage Rolls?
Very good question! After enjoying your delicious sausage rolls, let any leftovers cool completely. Store them in an airtight container in the fridge, and they will stay fresh for up to 3 days. To maintain their delightful crunch, it’s best to reheat them in the oven rather than the microwave.

Can I freeze Christmas Sausage Rolls?
Definitely! Freezing is a great way to make these rolls ahead of time. First, let your baked sausage rolls cool completely, then place them in a single layer on a baking sheet and freeze until solid (about 1-2 hours). After they're solid, transfer them to a freezer-safe bag. They can be frozen for up to 3 months! When it's time to enjoy them, just bake directly from the frozen state.

What should I do if my sausage rolls burst while baking?
Don’t worry, this is a common issue! If your Christmas Sausage Rolls burst during baking, it’s usually because they were overfilled. Next time, try using a moderate amount of filling to ensure they don’t overflow. Additionally, making vent slits with a sharp knife before baking helps release steam and prevents bursting.

Can my pets eat these sausage rolls?
I recommend that you don’t share these rolls with your pets. Ingredients like onions and garlic are toxic to dogs and cats, which could cause health issues. If you would love to treat them, consider making pet-friendly snacks with safe ingredients just for them!

Is there a way to make these rolls gluten-free?
Absolutely! If you're looking to keep your Christmas Sausage Rolls gluten-free, you can substitute the regular puff pastry with a gluten-free version available in many grocery stores. Just be sure to check the ingredients for any allergens that might affect your dietary needs. Enjoy baking!

Christmas Sausage Rolls

Melt-in-Your-Mouth Christmas Sausage Rolls for Holiday Bliss

Delightful Christmas Sausage Rolls wrapped in flaky pastry, perfect for holiday gatherings and guaranteed to impress!
Print Recipe Pin Recipe
Prep Time 15 minutes mins
Cook Time 25 minutes mins
Total Time 40 minutes mins
Servings: 12 rolls
Course: Snacks
Cuisine: British
Calories: 250
Ingredients Equipment Method Nutrition Notes

Ingredients
  

For the Filling
  • 1 lb sausage meat Substitution: Use plant-based sausage for a vegetarian option.
  • 0.5 cup finely diced onion Substitution: Shallots can be used for a milder taste.
  • 1 clove garlic, minced Note: Garlic powder can be used if fresh is not available.
  • 1 tsp dried sage Substitution: Thyme can replace sage for a different herb profile.
  • 1 tsp dried thyme Substitute by omitting if needed.
  • 0.25 tsp ground black pepper Adjust to taste; white pepper can be used for milder flavors.
  • 0.25 tsp salt Reduce if using pre-seasoned sausage.
For the Pastry
  • 1 sheet puff pastry, thawed Substitution: Homemade pastry works beautifully if preferred.
  • 1 egg beaten (for egg wash) Omit for vegan version or use a plant-based egg substitute.
For Sautéing
  • 1 tbsp olive oil Substitution: Any neutral oil is acceptable for this step.

Equipment

  • Oven
  • Skillet
  • Mixing Bowl
  • Rolling Pin
  • Baking Sheet
  • Sharp Knife

Method
 

Step-by-Step Instructions for Christmas Sausage Rolls
  1. Preheat the oven to 400°F (200°C). Gather ingredients and prepare your workspace.
  2. In a skillet, heat 1 tablespoon of olive oil over medium heat. Add ½ cup of finely diced onion and 1 minced garlic clove. Sauté for 4-5 minutes until onions are soft.
  3. In a bowl, combine 1 lb of sausage meat with the sautéed onion and garlic, 1 tsp each of dried sage and thyme, ¼ tsp ground black pepper, and ¼ tsp salt. Mix well.
  4. Roll out the thawed puff pastry on a floured surface and cut into rectangles (approximately 4x6 inches).
  5. Take a rectangle of pastry, place a generous amount of filling along one edge, and roll the pastry over the filling. Seal the edges.
  6. Make a few diagonal slits on top of each roll for steam to escape and brush with beaten egg.
  7. Place rolls on a baking sheet and bake for 20-25 minutes until golden brown and puffed.
  8. Remove from oven and let cool slightly. Serve warm with dipping sauces.

Nutrition

Serving: 1rollCalories: 250kcalCarbohydrates: 10gProtein: 12gFat: 18gSaturated Fat: 7gPolyunsaturated Fat: 1gMonounsaturated Fat: 10gCholesterol: 45mgSodium: 300mgPotassium: 200mgFiber: 1gSugar: 1gVitamin A: 2IUVitamin C: 2mgCalcium: 1mgIron: 10mg

Notes

For best results, ensure puff pastry is thawed, do not overfill rolls, use a sharp knife for venting, and keep an eye on baking time.

Tried this recipe?

Let us know how it was!

Delicious Ritz Cracker Party Sandwiches That Everyone Loves

November 29, 2025 by Grace Snow Leave a Comment

As I sat down to enjoy a relaxed evening with friends, the faint crunch of Ritz Crackers reminded me of simpler times. That's when the idea for Ritz Cracker Party Sandwiches sparked—delicious, bite-sized treats that capture both nostalgia and grown-up flavors. These easy, customizable appetizers deliver a delightful mix of buttery crunch, creamy textures, and a choice between savory or sweet fillings. Perfect for everything from game days to festive gatherings, they require minimal prep and can be served warm or chilled. So, if you’re looking to elevate your entertaining game effortlessly and impress your guests, stay tuned! What filling will you choose to surprise everyone with?

Why are Ritz Cracker Sandwiches irresistible?

Easy to Make: With just a handful of ingredients and minimal prep, these sandwiches come together in no time.

Customizable Delights: From savory treats to sweet surprises, you can mix and match fillings to cater to any taste preference.

Crowd-Pleasing Snack: Whether it's game day or a holiday gathering, these appetizers are sure to be a hit with guests of all ages.

Perfectly Crisp: Baked to golden perfection, the buttery crackers offer a satisfying crunch paired with melty, flavorful fillings.

Versatile Serving Options: Serve them warm or at room temperature; they adapt to your party's needs while remaining delicious.

So gather your favorite ingredients, and let your imagination run wild with these savory or sweet variations.

Ritz Cracker Party Sandwiches Ingredients

For the Sandwiches

  • Ritz Crackers – The star of the recipe, providing a buttery crunch; feel free to substitute with any round butter cracker if desired.
  • Cheese – Sliced cheddar, Swiss, or provolone adds creaminess; cream cheese works well for a soft filling.
  • Deli Meat – Choose ham, turkey, roast beef, or chicken; for a lighter option, smoked salmon or prosciutto is delightful.

For the Topping

  • Butter – Melted butter enhances flavor and promotes browning; add garlic powder or dried herbs for an extra kick.

Optional Add-Ins

  • Mustard, Mayonnaise, Honey, Cranberry Sauce, or Pickles – These comfort flavors elevate taste and moisture in fillings; mix and match for unique combinations.

For Sweet Variations

  • Peanut Butter, Nutella, Marshmallow Fluff, or Caramel – These sweet delights transform your Ritz Cracker Party Sandwiches into decadent dessert bites.

Now that you have your ingredients ready, you can create irresistible Ritz Cracker Party Sandwiches that will impress every guest at your gathering!

Step‑by‑Step Instructions for Ritz Cracker Party Sandwiches

Step 1: Preheat and Prep
Begin by preheating your oven to 350°F (175°C). While the oven warms up, line a baking sheet with parchment paper to ensure your Ritz Cracker Party Sandwiches don’t stick. This simple preparation step sets the stage for easy clean-up and helps maintain the perfect crunchiness of the crackers when baked.

Step 2: Assemble the Sandwiches
Take half of the Ritz crackers and lay them flat on the prepared baking sheet. For each cracker, add a slice of your favorite cheese and a piece of deli meat, such as ham or turkey. Complete the sandwiches by placing another Ritz cracker on top of each filled cracker, creating delightful bite-sized treats that combine rich flavors.

Step 3: Brush with Butter
In a small bowl, melt some butter and mix in any desired seasonings, such as garlic powder or dried herbs for added flavor. Using a pastry brush, generously coat the tops of the assembled Ritz Cracker Party Sandwiches with the melted butter mixture. This step is vital for achieving that golden-brown finish and enhancing the overall taste.

Step 4: Bake
Carefully transfer the baking sheet to your preheated oven and bake the sandwiches for 8–10 minutes. Keep an eye on them during baking; they’re ready when the crackers are golden and the cheese inside is beautifully melted. The delicious aroma will fill your kitchen, signaling that they’re almost done!

Step 5: Cool and Serve
Once baked, remove the Ritz Cracker Party Sandwiches from the oven and let them cool for a few minutes on the baking sheet. This cooling period helps them set. Afterward, transfer the sandwiches to a serving platter. These delightful bites can be enjoyed warm or at room temperature, offering flexibility for your gathering.

Make Ahead Options

Ritz Cracker Party Sandwiches are perfect for busy home cooks looking to save time while still impressing guests! You can assemble the sandwiches and refrigerate them up to 3 hours in advance, ensuring the flavors meld beautifully. To maintain that delightful crunch, be sure to place cheese between any moist ingredients and crackers as a barrier. When it's time to serve, simply bake the prepped sandwiches for 8–10 minutes at 350°F (175°C) until golden and melty. For longer storage, freeze unbaked sandwiches, allowing you to have fresh, warm Ritz Cracker Party Sandwiches ready for any spontaneous gathering or planned event with minimal fuss!

Expert Tips for Ritz Cracker Party Sandwiches

Make Ahead: Prepare your sandwiches a few hours in advance and refrigerate them. Bake right before serving for optimal flavor and texture.

Avoid Sogginess: Place cheese on the cracker before adding wet ingredients like mustard or mayonnaise to create a moisture barrier.

Storage Guidance: Enjoy these delicious Ritz Cracker Party Sandwiches fresh within 24 hours, or refrigerate for up to 3 days; reheat briefly in the oven for best results.

Experiment with Fillings: Don’t be afraid to mix up fillings! Try a combo like pepperoni and cheese or sweet peanut butter and banana for a fun twist.

Beware of Overbaking: Keep an eye on your sandwiches while baking; they should be golden brown, not overly crunchy. Trust your senses for the perfect bake!

Serve with Dips: Enhance your party spread by offering dips such as ranch or honey mustard alongside your Ritz Cracker Party Sandwiches for a delightful pairing.

How to Store and Freeze Ritz Cracker Party Sandwiches

Fridge: Keep leftover Ritz Cracker Party Sandwiches in an airtight container in the refrigerator for up to 3 days. Reheat in the oven for a few minutes to restore crispness.

Freezer: For longer storage, freeze unbaked sandwiches by placing them in a single layer on a baking sheet, then transfer to a freezer-safe bag once frozen. Use within 3 months for the best quality.

Reheating: To reheat baked sandwiches, pop them back in a preheated oven at 350°F (175°C) for 5-7 minutes until warmed through; this helps maintain their crispy texture.

What to Serve with Ritz Cracker Party Sandwiches

Planning a full feast to accompany your delightful sandwich creation is a great way to impress your guests.

  • Classic Veggie Tray: A colorful assortment of fresh vegetables adds a crisp, refreshing contrast to the richness of the sandwiches. Serve with a zesty dip for extra flavor.

  • Creamy Potato Salad: This comforting side dish complements the buttery crunch of Ritz Cracker Party Sandwiches, offering a creamy, tangy contrast that's always a crowd-pleaser.

  • Savory Charcuterie Board: Elevate your presentation with a selection of cheeses, cured meats, and olives alongside the sandwiches, making for an entertaining grazing experience.

  • Sweet Fruit Platter: The natural sweetness of fresh fruits balances the savory flavors of the sandwiches, providing a refreshing palate cleanser between bites. Plus, it adds vibrant color to your table!

  • Sparkling Lemonade: Pairing your sandwiches with a bubbly, refreshing drink like sparkling lemonade will quench your guests’ thirst and add a fun element to the menu.

  • Chocolate Dipped Pretzels: For a delightful dessert, offer chocolate dipped pretzels which combine sweet and salty, satisfying a range of cravings and keeping the party atmosphere festive!

  • Mini Quiches: These bite-sized savory treats perfectly complement the flavors of the sandwiches, creating a diverse spread that will tantalize every taste bud at your gathering.

By blending these options with your Ritz Cracker Party Sandwiches, you’ll create a memorable meal that’s appealing to all ages!

Ritz Cracker Party Sandwiches Variations & Substitutions

Feel free to let your creativity shine as you personalize your Ritz Cracker Party Sandwiches with these delightful twists!

  • Spicy Kick: Add sliced jalapeños or a sprinkle of crushed red pepper to your savory fillings for an extra heat boost that makes each bite exciting.

  • Herbed Cream Cheese: Swap out regular cheese for herbed cream cheese to deliver a burst of flavor and freshness. Enjoying these sandwiches with a hint of herbs can elevate their taste beautifully.

  • Gluten-Free: Substitute Ritz crackers with a gluten-free variety of round crackers to make these tasty sandwiches suitable for gluten-sensitive guests.

  • Vegetarian Delight: Load your sandwiches with roasted veggies like bell peppers or zucchini, complemented with feta cheese for a vibrant vegetarian option.

  • Nutty Crunch: Incorporate a thin layer of crunchy peanut butter in your sweet variations for an added texture that beautifully complements sweeter ingredients like banana or honey.

  • Smoky Flavor: Use smoked turkey or gouda cheese instead of regular options to introduce a delightful smoky element, perfect for adding depth to your savory sandwiches.

  • Chutney Twist: Experiment with using a fruity chutney instead of sauces for an intriguing sweet-sour taste. It pairs incredibly with cheeses and adds a gourmet flair!

  • Decadent Dessert: Combine Nutella with sliced strawberries on the Ritz for a dreamy dessert sandwich that’s sure to satisfy your sweet tooth and impress guests alike.

Feel inspired to explore these ideas or check out the easy serving suggestions that will have your gatherings buzzing with delight!

Ritz Cracker Party Sandwiches Recipe FAQs

How do I choose the best Ritz Crackers for this recipe?
Absolutely! When selecting Ritz Crackers, look for those that have a fresh and crunchy texture, preferably without any visible dark spots or damage. Fresh crackers will help maintain that desirable buttery crunch. If you prefer, any round butter cracker can be substituted, but Ritz is the classic and preferred choice.

How should I store leftover Ritz Cracker Party Sandwiches?
For sure! Place your leftover sandwiches in an airtight container and store them in the refrigerator for up to 3 days. If you want to maintain their crispiness, reheat them in a preheated oven at 350°F (175°C) for about 5-7 minutes before serving. This short bake will help bring back that delightful crunch!

Can I freeze Ritz Cracker Party Sandwiches and, if so, how?
Yes, you can! To freeze unbaked Ritz Cracker Party Sandwiches, assemble them as usual, then lay them out in a single layer on a baking sheet and freeze until solid. Once frozen, transfer them to a freezer-safe bag or airtight container. They can be stored for up to 3 months. When you're ready to bake, you can cook them directly from the freezer, adding a few extra minutes to the baking time.

What should I do if my sandwiches turn out soggy?
Oh no! To avoid sogginess, ensure that you place a cheese slice on the cracker before adding any wet ingredients, such as mustard or mayonnaise. This acts as a moisture barrier. If you notice sogginess after baking, serve your sandwiches immediately to prevent any further moisture absorption, and make a note for next time to stick with drier fillings.

Are there any dietary considerations for pets regarding this recipe?
Very! It's important to be cautious if you plan to share any leftover sandwiches with pets. The ingredients like cheese and deli meat may not be suitable for all pets and could cause digestive issues. Always check with your veterinarian when introducing new foods to your pet's diet.

Ritz Cracker Party Sandwiches

Delicious Ritz Cracker Party Sandwiches That Everyone Loves

These Ritz Cracker Party Sandwiches are bite-sized treats perfect for any gathering, combining buttery crunch with creamy fillings that cater to all tastes.
Print Recipe Pin Recipe
Prep Time 15 minutes mins
Cook Time 10 minutes mins
Cooling Time 5 minutes mins
Total Time 30 minutes mins
Servings: 12 sandwiches
Course: Snacks
Cuisine: American
Calories: 150
Ingredients Equipment Method Nutrition Notes

Ingredients
  

For the Sandwiches
  • 1 box Ritz Crackers Or any round butter cracker
  • 8 slices Cheese Sliced cheddar, Swiss, or provolone. Cream cheese can also be used.
  • 8 slices Deli Meat Ham, turkey, roast beef, or chicken.
For the Topping
  • 1/2 cup Butter Melted; add garlic powder or dried herbs for extra flavor.
Optional Add-Ins
  • Mustard
  • Mayonnaise
  • Honey
  • Cranberry Sauce
  • Pickles
For Sweet Variations
  • 1/2 cup Peanut Butter
  • 1/2 cup Nutella
  • 1/2 cup Marshmallow Fluff
  • 1/2 cup Caramel

Equipment

  • Oven
  • Baking Sheet
  • Parchment Paper
  • Pastry brush

Method
 

Preparation Steps
  1. Preheat your oven to 350°F (175°C) and line a baking sheet with parchment paper.
  2. Assemble the sandwiches by placing half of the Ritz crackers on the baking sheet, topping each with a slice of cheese and a piece of deli meat, then adding another cracker on top.
  3. Melt some butter and mix in any desired seasonings, then brush this mixture generously over the tops of the sandwiches.
  4. Bake for 8-10 minutes or until the crackers are golden and the cheese is melted.
  5. Let them cool for a few minutes before transferring to a serving platter.

Nutrition

Serving: 1sandwichCalories: 150kcalCarbohydrates: 10gProtein: 4gFat: 10gSaturated Fat: 5gPolyunsaturated Fat: 0.5gMonounsaturated Fat: 2gCholesterol: 20mgSodium: 200mgPotassium: 50mgSugar: 1gVitamin A: 200IUCalcium: 100mgIron: 0.5mg

Notes

Make ahead by preparing a few hours in advance and refrigerating. Serve warm or at room temperature. Store in an airtight container for up to 3 days.

Tried this recipe?

Let us know how it was!

BBQ Chicken Coleslaw Wraps for a Flavor-Packed Meal

November 27, 2025 by Grace Snow Leave a Comment

As I sifted through my fridge, I stumbled upon some leftover BBQ chicken and a vibrant bag of coleslaw mix. Suddenly, a lightbulb went off—BBQ Chicken Coleslaw Wraps! This quick, no-cook recipe is a game-changer, combining tender chicken and crunchy slaw all wrapped up in a soft tortilla. In just 15 minutes, you can whip up a delicious meal that’s perfect for lunch, dinner, or even casual picnics with friends. Not only are these wraps beginner-friendly, but they also offer a delightful, guilt-free alternative to fast food cravings. Whether you're a passionate home-chef or just tired of takeout, you're bound to love these easy, satisfying wraps. So, are you ready to dive into this fun and tasty adventure?

Why Are These Wraps So Irresistible?

Ultimate Convenience: With just 15 minutes of assembly time, these wraps are a lifesaver for busy weekdays.

Satisfying Flavor: The tangy BBQ chicken dances perfectly with the crunchy coleslaw, creating a mouthwatering experience in every bite.

Endless Versatility: Feel free to switch up the proteins—pulled pork or tofu work wonderfully, letting you cater to various dietary preferences.

Health-Conscious Deliciousness: Packed with fresh ingredients, they offer a lighter alternative to greasy fast food.

Crowd-Pleaser: Serve them at picnics or gatherings, and you’ll have everyone asking for the recipe!

Give them a try alongside Honey BBQ Chicken for a flavor adventure or explore the delightful Crock Pot Chicken options for meal prepping ideas.

BBQ Chicken Coleslaw Wraps Ingredients

Get ready to create a flavor-packed meal with these easy-to-find ingredients!

For the Chicken Mixture
• Cooked Chicken Breast – Lean protein that serves as the hearty base; swap for pulled pork, beef, turkey, or shredded tofu for vegetarian options.
• BBQ Sauce – Provides that signature tangy-sweet flavor; choose a gluten-free brand if necessary.

For the Wrap
• Flour Tortillas – Soft carriers for your delicious filling; gluten-free tortillas work well for dietary restrictions.
• Coleslaw Mix – Adds crunch and a burst of color; feel free to use homemade coleslaw for extra freshness.

For the Creamy Slaw Dressing
• Mayonnaise – Acts as a creamy binder for the slaw; Greek yogurt is a lighter alternative.
• Apple Cider Vinegar – Brings acidity to balance out flavors; white vinegar can be used as a substitute.
• Sugar – Helps round out the vinegar's tang; adjust to taste based on your sweetness preference.
• Salt and Pepper – Essential for seasoning; use to enhance flavors as desired.

Optional Flavor Boosters
• Fresh Cilantro – Adds a herbal freshness; can be replaced with parsley if preferred.
• Green Onions – Provide an oniony flavor and visual appeal; consider red onions for a sharper taste.

These BBQ Chicken Coleslaw Wraps ingredients are sure to create a delicious experience that beats any fast food alternative!

Step‑by‑Step Instructions for BBQ Chicken Coleslaw Wraps

Step 1: Prepare the BBQ Chicken Mixture
In a medium bowl, combine your shredded cooked chicken breast with BBQ sauce, using a spatula to stir until every piece is well coated and glistening. This should take about 2 minutes. Aim for a thick, saucy consistency that clings to the chicken, making it flavorful. Set aside to allow the flavors to meld while you prepare the coleslaw.

Step 2: Mix the Coleslaw Dressing
In another bowl, add the coleslaw mix, mayonnaise, apple cider vinegar, sugar, salt, and pepper. Stir the ingredients together until the mixture is creamy and well combined, which should take about 1-2 minutes. The dressing should evenly cover each piece of coleslaw, creating a vibrant and enticing mixture that will balance perfectly with the BBQ chicken.

Step 3: Enhance the Coleslaw Flavor
(Optional) For an extra burst of flavor, fold in chopped fresh cilantro and sliced green onions into the coleslaw mixture. Gently mix until the herbs are evenly distributed, enhancing the texture and presentation of the slaw. This step adds freshness and visual appeal, making your BBQ Chicken Coleslaw Wraps even more delightful.

Step 4: Assemble the Wraps
Lay a soft flour tortilla flat on a clean surface or plate. Spoon about 1/4 of the BBQ chicken mixture in the center, followed by 1/4 of the coleslaw mixture on top. Make sure not to overfill, as you want to wrap them easily. This initial arrangement should take about 1 minute per wrap, ensuring you have enough space to fold.

Step 5: Roll the Tortillas
To fold the tortillas, start by bringing the sides inwards towards the center, then roll from the bottom up, tightly enclosing the delicious filling inside. This should look like a neat burrito. Hold it gently to maintain its shape while you continue to roll the remaining wraps in this manner, taking about 30 seconds for each one.

Step 6: Slice and Serve
Once all your BBQ Chicken Coleslaw Wraps are assembled, cut each wrap diagonally in half using a sharp knife or kitchen scissors. This will create manageable portions, making them easier to handle and eat. Place them on a plate and get ready to serve, whether for a family meal or a social gathering.

Step 7: Store Leftovers Properly
If you have any leftovers or want to prepare your wraps in advance, be sure to wrap them tightly in parchment or plastic wrap. This will help maintain their freshness for up to 2-3 days in the refrigerator. Alternatively, uncut wraps can be frozen for longer storage, ready for quick meals whenever you need them!

Make Ahead Options

These BBQ Chicken Coleslaw Wraps are perfect for meal prep! You can prepare the BBQ chicken mixture and coleslaw up to 24 hours in advance, storing them separately in airtight containers in the refrigerator to maintain freshness. Simply mix the shredded chicken with BBQ sauce and let it chill, while the coleslaw should be combined with mayonnaise, vinegar, and sugar. When you’re ready to serve, just warm the chicken if desired, assemble the wraps in tortillas, and enjoy a delicious, hassle-free meal, just as flavorful as when made fresh! This approach not only saves you time during busy weeknights but ensures delightful quality every time.

Storage Tips for BBQ Chicken Coleslaw Wraps

Fridge: Wrap any leftover BBQ Chicken Coleslaw Wraps tightly in plastic wrap or store in an airtight container for optimal freshness. They will be good for up to 2-3 days.

Freezer: For longer storage, freeze the uncut wraps. Place them in a freezer-safe bag or container and enjoy for up to 2 months. Thaw in the fridge before serving.

Reheating: To maintain the wraps' texture, reheat in a microwave or a skillet for a few minutes until warmed through, ensuring the chicken mixture stays moist.

Prevent Moisture: Avoid soggy tortillas by wrapping each wrap separately in parchment paper before storing. This helps keep them crisp and ready for delicious meals!

What to Serve with BBQ Chicken Coleslaw Wraps

Transform your meal into a delightful spread that blends freshness, flavor, and fun!

  • Homemade Potato Chips: Crisp and salty, these chips add a satisfying crunch, perfect for balancing the wraps' flavors.
  • Fresh Veggie Platter: A colorful assortment of carrots, cucumbers, and bell peppers brings a refreshing contrast and is great for dipping.
  • Sweet Potato Fries: These naturally sweet fries add a delightful twist, complementing the BBQ’s smoky notes with their earthy sweetness.
  • Lime Wedges: A splash of lime juice can brighten the flavors of the wraps, adding a zesty kick that elevates the entire meal.
  • Fruit Salad: A mix of seasonal fruits provides a sweet, juicy balance and a burst of color that makes the table inviting.
  • Iced Tea or Lemonade: Refreshing drinks that cleanse the palate and enhance the overall dining experience with their light, crisp flavors.

These ideas will help you create a memorable meal around your BBQ Chicken Coleslaw Wraps, ensuring every bite is enjoyed to its fullest!

BBQ Chicken Coleslaw Wraps Variations

Feel free to get creative and customize your wraps to match your taste buds!

  • Protein Swap: Replace chicken with pulled pork, beef, turkey, or shredded tofu for a delightful twist. Each option offers its own unique flavor!

  • Gluten-Free: Choose gluten-free tortillas if you follow a gluten-free diet. This simple swap ensures everyone can enjoy these wraps without worry.

  • Spicy Kick: Add diced jalapeños or a drizzle of hot sauce for a zesty burst of heat. Imagine the warmth dancing across your palate with every bite!

  • BBQ Sauce Variety: Experiment with different BBQ sauces for unique flavor profiles like apple cider, honey mustard, or smoky chipotle. The possibilities are endless!

  • Herb Boost: Fresh herbs like basil or mint can lighten the flavors and add a refreshing twist to the coleslaw. Consider folding in these fragrant options for an aromatic experience.

  • Extra Crunch: Sprinkle in some sunflower seeds or crushed peanuts for added texture and crunch. They bring a delightful surprise in every mouthful, enhancing the overall experience!

  • Coleslaw Twist: Try using different slaw bases such as kale or broccoli slaw for a distinctive flavor and nutritional boost. It's a fun and healthy way to change things up.

Whether you mix and match or stick to a signature twist, these variations will keep your BBQ Chicken Coleslaw Wraps fresh and exciting every time. You might also enjoy pairing them with Honey Garlic Chicken for a delicious meal combo!

Expert Tips for BBQ Chicken Coleslaw Wraps

  • Texture Matters: To achieve the best wraps, ensure your BBQ chicken mixture isn’t too wet. Excess moisture can make tortillas soggy and hard to handle.
  • Season Wisely: Taste your coleslaw dressing before mixing it with the coleslaw mix. Adjust the sugar or vinegar as needed to avoid overwhelming flavors.
  • Wrap Properly: When rolling the tortillas, make sure to tuck in the sides firmly to prevent spills while eating. This keeps each wrap neat and enjoyable.
  • Customize Freely: Don’t hesitate to swap proteins! Whether you choose pulled pork, beef, turkey, or tofu, the BBQ Chicken Coleslaw Wraps will remain delicious.
  • Serve Fresh: For the best taste and texture, serve these wraps immediately after assembly. If you need to prepare them in advance, store them tightly wrapped to avoid drying out.

BBQ Chicken Coleslaw Wraps Recipe FAQs

What type of chicken should I use for BBQ Chicken Coleslaw Wraps?
Absolutely! You can use any cooked chicken breast that’s shredded. If you're looking for alternatives, pulled pork, beef, turkey, or even shredded tofu work beautifully as substitutes. This allows for customization based on your dietary preferences or what's available in your kitchen.

How should I store leftover BBQ Chicken Coleslaw Wraps?
For the best freshness, wrap any leftover BBQ Chicken Coleslaw Wraps tightly in plastic wrap or place them in an airtight container. They can be stored in the refrigerator for up to 2-3 days. This way, you can enjoy them for lunch or a quick dinner without losing any flavors or textures.

Can I freeze BBQ Chicken Coleslaw Wraps?
Yes, you can! To freeze, I recommend wrapping the uncut wraps in plastic wrap and then placing them in a freezer-safe bag or container. They can last up to 2 months in the freezer. When you're ready to eat, simply thaw them in the fridge overnight, then reheat in a microwave or skillet for a few minutes.

Why did my wraps become soggy after storing?
Good question! Sogginess can occur if there's excess moisture from the BBQ chicken mixture or coleslaw. To prevent this, ensure that you let any excess sauce drain before assembling the wraps. Additionally, wrap each one in parchment paper before storing to keep them crisp!

Are these wraps suitable for kids or adults with dietary restrictions?
Yes, these BBQ Chicken Coleslaw Wraps are quite adaptable! You can make them gluten-free by opting for gluten-free tortillas and BBQ sauce. They are beginner-friendly and fulfilling for both kids and adults, with the option to adjust the spice level or protein to suit any palate.

What’s the best way to add extra flavor to the coleslaw?
You can enhance your coleslaw by mixing in fresh herbs like cilantro or parsley. For a bolder taste, consider adding diced jalapeños or a touch of hot sauce. Mix these flavor boosters into your coleslaw mixture after combining all the original ingredients for a delightful twist!

BBQ Chicken Coleslaw Wraps

BBQ Chicken Coleslaw Wraps for a Flavor-Packed Meal

Quick and delicious BBQ Chicken Coleslaw Wraps for a satisfying meal, perfect for lunch or casual gatherings.
Print Recipe Pin Recipe
Prep Time 15 minutes mins
Total Time 15 minutes mins
Servings: 4 wraps
Course: Snacks
Cuisine: American
Calories: 350
Ingredients Equipment Method Nutrition Notes

Ingredients
  

For the Chicken Mixture
  • 2 cups Cooked Chicken Breast Shredded
  • 1/2 cup BBQ Sauce Gluten-free if necessary
For the Wrap
  • 4 large Flour Tortillas Gluten-free tortillas work as well
  • 4 cups Coleslaw Mix Store-bought or homemade
For the Creamy Slaw Dressing
  • 1/2 cup Mayonnaise Greek yogurt for a lighter option
  • 2 tablespoons Apple Cider Vinegar White vinegar can be substituted
  • 1 tablespoon Sugar Adjust based on sweetness preference
  • 1 teaspoon Salt
  • 1/2 teaspoon Pepper
Optional Flavor Boosters
  • 1/4 cup Fresh Cilantro Can be replaced with parsley
  • 2 tablespoons Green Onions Consider red onions for a stronger flavor

Equipment

  • medium bowl
  • Spatula
  • Sharp Knife
  • kitchen scissors

Method
 

Step‑by‑Step Instructions
  1. In a medium bowl, combine shredded cooked chicken breast with BBQ sauce and stir until well coated, about 2 minutes.
  2. In another bowl, add coleslaw mix, mayonnaise, apple cider vinegar, sugar, salt, and pepper. Stir until creamy and well combined, about 1-2 minutes.
  3. Optional: Fold in chopped fresh cilantro and sliced green onions into the coleslaw mixture and mix until evenly distributed.
  4. Lay a flour tortilla flat, spoon about 1/4 of the BBQ chicken mixture and then 1/4 of the coleslaw mixture on top, ensuring not to overfill.
  5. Roll the tortillas by bringing the sides inwards and rolling from the bottom up, tightly enclosing the filling.
  6. Cut each wrap diagonally in half using a sharp knife or kitchen scissors.
  7. Wrap any leftovers tightly in plastic wrap or store in an airtight container.

Nutrition

Serving: 1wrapCalories: 350kcalCarbohydrates: 40gProtein: 25gFat: 15gSaturated Fat: 3gPolyunsaturated Fat: 1gMonounsaturated Fat: 3gCholesterol: 70mgSodium: 900mgPotassium: 400mgFiber: 3gSugar: 5gVitamin A: 500IUVitamin C: 20mgCalcium: 100mgIron: 2mg

Notes

Serve fresh for best taste. Adjust seasonings in the dressing to preference.

Tried this recipe?

Let us know how it was!

Caramel Apple Puppy Chow Recipe: A Sweet Fall Delight

November 25, 2025 by Grace Snow Leave a Comment

Autumn is a symphony of scents and colors, and just as the leaves change, so do our cravings. As the air turns crisp, there's nothing quite like diving into a bowl of comfort that evokes the essence of the season. Enter my Caramel Apple Puppy Chow Recipe—a playful, crunchy treat that effortlessly blends the rich sweetness of caramel with the refreshing pop of apple. This whimsical snack mix not only promises a delightful twist on the classic Muddy Buddies, but it’s also a crowd-pleaser at fall gatherings or cozy nights in. Plus, with its quick prep and gluten-free options, you can indulge guilt-free while enjoying every bite of this nostalgic flavor combo. Ready to make your taste buds dance? Let’s get started!

Why is This Snack a Must-Try?

Irresistible Crunch: Each bite of this Caramel Apple Puppy Chow offers a satisfying texture that keeps you coming back for more.

Nostalgic Flavor: The delightful blend of caramel and apple brings back warm memories of fall festivals and caramel apple treats.

Quick and Easy: With just a few simple steps, you can whip up this delicious mix in no time—perfect for those busy autumn days!

Customizable Touch: Feel free to experiment with different dried fruits or nuts to suit your taste. Try adding some chopped pecans for a delightful crunch!

Festive Appeal: Whether it's for Halloween parties or cozy movie nights, this snack is bound to be a hit, captivating kids and adults alike.

Plus, if you're looking for a hint of savory to balance the sweetness, consider pairing it with some Chicken Salad Apples for a delightful contrast!

Caramel Apple Puppy Chow Ingredients

For the Snack Mix

  • Rice Chex Cereal – The perfect crunchy base that holds everything together.
  • White Chocolate Chips – Adds a velvety sweetness; can substitute with dairy-free chocolate for dietary needs.
  • Caramel Bits – Infuses that signature caramel flavor; homemade caramel sauce can enhance richness.
  • Dried Apple Chips – Offers chewiness and an extra apple punch; try cranberries for a tasty twist.

For the Sweet Coating

  • Powdered Sugar – Sweetens the mix and gives it an appealing finish.
  • Granulated Sugar – Offers a delightful texture and sweetness.
  • Apple Pie Spice – Complements the fall flavor profile; ground cinnamon is a good alternative.
  • Vanilla Extract – Enhances overall sweetness and flavor depth.
  • Pinch of Salt – Balances the sweetness, making each bite perfect.

Dive into making this Caramel Apple Puppy Chow Recipe and enjoy a delightful fall treat that's sure to please!

Step‑by‑Step Instructions for Caramel Apple Puppy Chow Recipe

Step 1: Prepare the Cereal Base
Start by measuring 9 cups of Rice Chex cereal into a large mixing bowl. Make sure to break up any clumps so that each piece is distinct and ready for coating. Set the bowl aside in a safe spot while you move on to the next steps for this delightful Caramel Apple Puppy Chow.

Step 2: Melt the Chocolate and Caramel
In a microwave-safe bowl, combine a generous amount of white chocolate chips and caramel bits. Microwave the mixture in 30-second intervals, stirring in between until it melts smoothly, which usually takes about 1-2 minutes. Keep an eye on it to prevent overheating, as the goal is a velvety consistency that will coat your cereal.

Step 3: Add Flavor Enhancements
Once the chocolate and caramel are fully melted and combined, mix in a teaspoon of vanilla extract and a pinch of salt. Stir until everything is well incorporated, enhancing the flavor profile of your Caramel Apple Puppy Chow. The mixture should be glossy and inviting, making your taste buds tingle with anticipation.

Step 4: Coat the Cereal
Carefully pour the melted chocolate and caramel mixture over the prepared Rice Chex cereal. Using a spatula, gently stir to ensure all the cereal pieces are evenly coated. This step is crucial for achieving that perfect sweetness in every bite of your Puppy Chow, so take your time and be thorough.

Step 5: Prepare the Sweet Coating
In a separate bowl, whisk together apple pie spice, powdered sugar, and granulated sugar until well blended. This sugary mixture will be the finishing touch that transforms your caramel-coated cereal into a delightful treat. The sweet aroma of apple and spice will add to the fall-themed ambiance as you work.

Step 6: Mix the Coatings Together
Now, pour the sugar mixture over the coated Rice Chex cereal. Gently toss the cereal again using a spatula or wooden spoon, ensuring every single piece is covered in that sweet, spiced goodness. This step is vital for achieving the signature taste of the Caramel Apple Puppy Chow you’re creating.

Step 7: Add Dried Apple Chips
Next, fold in a handful of crushed dried apple chips into the mixture. Their chewy texture and fruity flavor provide a perfect contrast to the crunch of the cereal. Be careful as you mix, aiming to distribute the apple chips evenly throughout the Puppy Chow for every taste of autumn in each bite.

Step 8: Cool and Crisp
Spread the entire mixture onto parchment-lined baking sheets in an even layer, making sure to break apart any clumps. Allow it to cool completely at room temperature, which typically takes about 30 minutes. This cooling time is essential for the final texture, leaving you with that desired crunch in your Caramel Apple Puppy Chow.

Step 9: Store for Enjoyment
Once the Caramel Apple Puppy Chow has cooled, transfer it into an airtight container for storage. Keep it at room temperature to maintain freshness and crispness, allowing this delightful snack mix to be readily available for your autumn cravings. Enjoy indulging in this festive treat whenever you like!

Caramel Apple Puppy Chow Variations

Feel free to let your creativity shine as you customize this delightful recipe to suit your tastes!

  • Gluten-Free: Substitute Rice Chex with Corn Chex or Crispix for a gluten-free version that's just as delicious.
  • Spice It Up: Add a pinch of nutmeg or ginger to the apple pie spice for a unique flavor twist. These warm spices will enhance the autumn vibe beautifully.
  • Rich Chocolate: Swap white chocolate for dark chocolate for a deeper, richer flavor that pairs wonderfully with the sweetness of caramel.
  • Butterscotch Drizzle: Top with melted butterscotch before serving for an extra layer of sweetness that takes this treat to new heights.
  • Nutty Crunch: Incorporate chopped pecans or walnuts for added texture and a lovely nutty flavor. Nuts make a great complement to the sweetness of caramel.
  • Fruit Fusion: Instead of dried apple chips, use dried cranberries or cherries to introduce a tangy contrast that will surprise your taste buds.
  • Salted Caramel: Drizzle with a bit of sea salt caramel for an exquisite sweet-salty balance that elevates every bite.
  • Apple Extract Boost: Consider adding apple extract to elevate that fresh apple flavor even more. A little goes a long way in enhancing the overall taste!

For some exciting serving options, why not pair this indulgence with a savory dish like Chicken Salad Apples to create delightful contrasts? Or, for a fuller experience, try serving alongside a hearty Spatchcock Chicken, perfect for festive gatherings!

What to Serve with Caramel Apple Puppy Chow Recipe

As you dive into the delightful crunch of this autumn-inspired snack, think about how to elevate your culinary experience.

  • Hot Apple Cider: A warm cup of spiced apple cider perfectly complements the caramel and apple flavors, creating a cozy fall atmosphere.
  • Cheese Platter: Offer a variety of cheeses—sharp cheddar or creamy brie—with nuts and seasonal fruits for a savory contrast that balances the sweetness of the Puppy Chow.
  • Autumn Salad: A fresh salad with mixed greens, dried cranberries, and a tangy vinaigrette adds a vibrant touch and a dose of freshness, rounding out the meal beautifully.
  • Pumpkin Spice Latte: Sip on this classic fall beverage to enhance your snacking experience with its warming spices, harmonizing delightfully with the Puppy Chow's flavors.
  • Caramel Dipping Sauce: Serve alongside sliced apples or pretzels for dipping, amplifying that irresistible caramel taste in a fun and interactive way for your guests.
  • Nutty Granola Bars: A chewy granola bar offers a different texture and wholesome goodness, making for a lovely balance when paired with the crunchy Puppy Chow.

Each suggestion adds its own warmth and comfort, inviting you to fully embrace the season's spirit. Enjoy your delicious treat and raise your fall flavors to new heights!

Storage Tips for Caramel Apple Puppy Chow

Room Temperature: Store your Caramel Apple Puppy Chow in an airtight container at room temperature to keep it fresh and crunchy for up to 3 days.

Fridge: If you want to extend the shelf life, you can keep it in the fridge, where it will last for about a week; just be aware it may lose some crunch.

Freezer: For longer storage, freeze the Puppy Chow in an airtight container for up to 2 months. Thaw at room temperature before enjoying.

Reheating: There’s no need to reheat; simply enjoy it straight from the container, or toss it in the oven for a few minutes at 300°F for extra crispness!

Expert Tips for Caramel Apple Puppy Chow

Perfectly Melted: Ensure you microwave the chocolate and caramel in short intervals, stirring often to avoid burning and achieve a smooth consistency.

Boost the Flavor: For a richer apple taste, add a splash of apple extract or increase the amount of apple pie spice to the mix.

Crunch Factor: Incorporate chopped nuts like pecans or walnuts for added crunch and to elevate your Caramel Apple Puppy Chow experience.

Storage Wisdom: Always allow your Puppy Chow to cool completely before transferring it to an airtight container; this keeps it crisp and fresh for longer.

Stay Creative: Don't hesitate to swap in dried fruits or different spices to customize the flavor of your snack mix; the possibilities are endless!

Make Ahead Options

These Caramel Apple Puppy Chow treats are perfect for meal prep enthusiasts! You can prepare the cereal and coat it with the melted chocolate and caramel mixture up to 24 hours in advance; just refrigerate it in an airtight container to maintain freshness. Additionally, combine the sugar and spice mixture ahead of time and store it separately to keep its texture intact. When you're ready to serve, simply toss the prepped cereal with the sugar mixture, fold in the dried apple chips, and allow it to cool completely. This way, you can savor the delightful flavors of your Caramel Apple Puppy Chow without the last-minute rush, providing you with a sweet, crunchy fall treat whenever you need it!

Caramel Apple Puppy Chow Recipe FAQs

How do I choose the right apples for this recipe?
Absolutely! For this Caramel Apple Puppy Chow, opt for apples that are crisp and sweet, like Honeycrisp or Fuji. Look for apples that have a vibrant color and firm texture without dark spots, which indicate overripeness. Dried apple chips are wonderful too; choose those that are chewy and fragrant for the best flavor.

What is the best way to store leftover Caramel Apple Puppy Chow?
Very simple! Keep your Caramel Apple Puppy Chow in an airtight container at room temperature. This will maintain its crunchiness for up to 3 days. If you prefer, you can also refrigerate it for about a week, though note that it may lose some of its signature texture.

Can I freeze Caramel Apple Puppy Chow?
Absolutely! To freeze your Caramel Apple Puppy Chow, transfer it into an airtight container or a resealable freezer bag, ensuring all the air is removed. It can be frozen for up to 2 months. When you're ready to enjoy it, simply let it thaw at room temperature for about 30 minutes and it will be good as new!

What should I do if my Puppy Chow is too sticky?
If your Caramel Apple Puppy Chow turns out sticky, it’s likely due to the mixture not being mixed thoroughly or the caramel being too hot when poured over the cereal. To fix this, try gently tossing it with a bit of powdered sugar to absorb some moisture. Next time, be cautious not to overheat the caramel, and allow it to cool slightly before mixing.

Does this recipe contain allergens?
Great question! The Caramel Apple Puppy Chow does contain ingredients that some may be allergic to, such as dairy (from white chocolate) and potential gluten (if not using certified gluten-free Rice Chex). If you have specific dietary needs, try using dairy-free chocolate and ensure all ingredients, especially the Chex cereal, are labeled gluten-free. Always examine labels for nuts or other allergens if you’re serving this to guests.

Caramel Apple Puppy Chow Recipe

Caramel Apple Puppy Chow Recipe: A Sweet Fall Delight

Delight in this Caramel Apple Puppy Chow Recipe that blends caramel sweetness with refreshing apple, perfect for fall gatherings.
Print Recipe Pin Recipe
Prep Time 15 minutes mins
Cook Time 10 minutes mins
Cooling Time 30 minutes mins
Total Time 55 minutes mins
Servings: 8 cups
Course: Snacks
Calories: 220
Ingredients Equipment Method Nutrition Notes

Ingredients
  

For the Snack Mix
  • 9 cups Rice Chex Cereal The perfect crunchy base that holds everything together.
  • 2 cups White Chocolate Chips Adds a velvety sweetness; can substitute with dairy-free chocolate for dietary needs.
  • 1 cup Caramel Bits Infuses that signature caramel flavor; homemade caramel sauce can enhance richness.
  • 1 cup Dried Apple Chips Offers chewiness and an extra apple punch; try cranberries for a tasty twist.
For the Sweet Coating
  • 1 cup Powdered Sugar Sweetens the mix and gives it an appealing finish.
  • 1/2 cup Granulated Sugar Offers a delightful texture and sweetness.
  • 1 tablespoon Apple Pie Spice Complements the fall flavor profile; ground cinnamon is a good alternative.
  • 1 teaspoon Vanilla Extract Enhances overall sweetness and flavor depth.
  • 1 pinch Salt Balances the sweetness, making each bite perfect.

Equipment

  • Microwave-safe bowl
  • Mixing Bowl
  • Spatula
  • Whisk
  • Baking Sheets
  • Parchment Paper

Method
 

Step-by-Step Instructions
  1. Measure 9 cups of Rice Chex cereal into a large mixing bowl. Break up any clumps and set aside.
  2. In a microwave-safe bowl, combine white chocolate chips and caramel bits. Microwave in 30-second intervals, stirring until melted smoothly, about 1-2 minutes.
  3. Mix in a teaspoon of vanilla extract and a pinch of salt to the melted chocolate and caramel mixture.
  4. Pour the melted chocolate and caramel over the Rice Chex cereal and stir gently to coat evenly.
  5. In a separate bowl, whisk together apple pie spice, powdered sugar, and granulated sugar until blended.
  6. Pour the sugar mixture over the coated Rice Chex cereal and toss gently to cover each piece.
  7. Fold in crushed dried apple chips into the mixture evenly.
  8. Spread the mixture onto parchment-lined baking sheets in an even layer to cool for about 30 minutes.
  9. Once cooled, transfer the Caramel Apple Puppy Chow into an airtight container for storage.

Nutrition

Serving: 1cupCalories: 220kcalCarbohydrates: 29gProtein: 2gFat: 10gSaturated Fat: 6gMonounsaturated Fat: 2gCholesterol: 10mgSodium: 100mgPotassium: 50mgFiber: 1gSugar: 18gVitamin A: 200IUVitamin C: 1mgCalcium: 50mgIron: 1mg

Notes

Customize by adding different dried fruits or nuts to suit your taste. Perfect for fall gatherings or cozy nights in.

Tried this recipe?

Let us know how it was!

Delicious Cranberry Cream Cheese Crescent Bites for Fall

November 25, 2025 by Grace Snow Leave a Comment

As the leaves begin to fall and the air turns crisp, I find myself craving bites that capture the essence of autumn. These Cranberry Cream Cheese Crescent Bites are my go-to recipe, perfectly blending sweet and tart flavors into a flaky, buttery treat. With just 20 minutes of prep and minimal clean-up, they’re an effortless addition to any gathering—be it a cozy family dinner or a festive holiday party. Not only are these bite-sized wonders quick to whip up, but they also bring comfort and nostalgia to the table, making them the ideal seasonal snack. Are you ready to elevate your autumn snacking with these delightful treats?

Why are Cranberry Cream Cheese Crescent Bites a must-try?

Unforgettable Flavors: The blend of creamy cream cheese and tart cranberry sauce creates a delightful taste explosion that embodies the spirit of fall.

Wholesome Ingredients: Made with simple, fresh components, these bites are a wholesome choice that delivers on comfort without sacrificing taste.

Quick and Easy: Ready in just 20 minutes, this recipe is perfect for those busy fall days when you want delicious without the hassle.

Perfect for Any Occasion: Whether it's a holiday gathering or a cozy night in, these bites are sure to impress family and guests alike.

Versatile Treat: Feel free to experiment by swapping cranberries for other fruit preserves or adding spices like cinnamon—perfect for tailoring to your taste!

With this recipe, you can also explore other festive desserts like Peaches Cream Cookies or indulge in a refreshing Cajeta Ice Cream after enjoying these bites!

Cranberry Cream Cheese Crescent Bites Ingredients

For the Pastry

  • Crescent Roll Dough – Provides the flaky, buttery base; use store-bought for convenience.

For the Cream Filling

  • Cream Cheese – Adds creaminess and richness; ensure it's softened for easier mixing.
  • Powdered Sugar – Creates a sweet balance for the cream cheese; substitute with granular sugar if needed, but expect a texture change.
  • Vanilla Extract – Enhances the flavor depth; almond extract can be a delightful substitute for a twist.

For the Topping

  • Whole Berry Cranberry Sauce – Offers tartness and vibrant color; use homemade or canned, and avoid jellied versions for better texture.
  • Optional Toppings – Chopped pecans or orange zest add both crunch and zest; feel free to substitute with walnuts or omit for a simpler finish.

Step‑by‑Step Instructions for Cranberry Cream Cheese Crescent Bites

Step 1: Preheat the Oven
Begin your culinary journey by preheating your oven to 375°F (190°C). While it heats up, take a moment to prepare your workspace by greasing or lining a mini muffin tin with parchment paper, ensuring easy removal later. This sets the stage for perfectly baked Cranberry Cream Cheese Crescent Bites that won’t stick.

Step 2: Mix the Cream Cheese Filling
In a mixing bowl, combine softened cream cheese, powdered sugar, and vanilla extract. Use a hand mixer or spatula to blend these ingredients until the mixture is smooth and creamy, about 2-3 minutes. This delicious cream filling will provide a rich contrast to the tartness of the cranberry sauce, making your bites truly delightful.

Step 3: Prepare the Crescent Dough
Unroll your crescent roll dough onto a clean surface and slice each triangle in half to create smaller pieces. Gently press each dough piece into the prepared muffin cups, ensuring they reach the edges to form a little cup that will hold your fillings. This flaky base is essential for the overall texture of your Cranberry Cream Cheese Crescent Bites.

Step 4: Add Filling to Dough Cups
Using a spoon or small cookie scoop, place approximately 1 teaspoon of the cream cheese mixture into the center of each dough cup. Follow this by adding another teaspoon of whole berry cranberry sauce on top of the cream cheese filling. The vibrant red sauce will not only add flavor but also a beautiful pop of color to your bites.

Step 5: Finish with Optional Toppings
If desired, sprinkle the tops of your filled dough cups with chopped pecans or a dash of orange zest. This step adds extra crunch and a hint of citrus freshness that complements the rich cream cheese and tart cranberries, elevating your Cranberry Cream Cheese Crescent Bites into a delightful seasonal treat.

Step 6: Bake to Perfection
Place the mini muffin tin in your preheated oven and bake for 11-13 minutes, or until the crescents are golden brown and puffed. Keep an eye on them as they bake, enjoying the enticing aroma filling your kitchen. Once done, remove them from the oven and allow them to cool slightly before serving, ensuring they are just the right temperature for tasting.

Step 7: Serve and Enjoy
Carefully remove the bites from the muffin tin, and arrange them on a rustic serving platter. These Cranberry Cream Cheese Crescent Bites are best enjoyed warm, with a comforting blend of flavors and textures that will make them a hit at any gathering. Let the festivities begin!

Make Ahead Options

These Cranberry Cream Cheese Crescent Bites are perfect for meal prep, allowing you to enjoy the delightful flavors without the last-minute rush. You can prepare the cream cheese filling and refrigerate it for up to 3 days in advance, ensuring that flavors meld beautifully while saving you time. Additionally, you can unroll and cut the crescent dough, storing the pieces in an airtight container in the fridge for up to 24 hours. When you're ready to bake, simply press the dough into the mini muffin tins, add the filling and cranberry sauce, and bake as directed. Following these steps not only enhances flavor but also keeps your bites just as delicious, letting you savor autumn’s essence with minimal effort!

Storage Tips for Cranberry Cream Cheese Crescent Bites

Room Temperature: These bites are best enjoyed fresh, but can be left at room temperature for up to 2 hours if serving at a gathering.

Fridge: Store any leftovers in an airtight container in the refrigerator for up to 3 days. Reheat in the oven for a few minutes to restore their flakiness.

Freezer: Freeze unbaked bites on a tray until solid, then transfer to a freezer bag. They can be stored for up to 2 months. Bake from frozen, adding 2-3 minutes to bake time.

Reheating: For best results, reheat baked Cranberry Cream Cheese Crescent Bites in the oven at 350°F for about 5-7 minutes to regain their crispy texture.

What to Serve with Easy Cranberry Cream Cheese Crescent Bites

Elevate your gathering with delightful accompaniments that perfectly complement the sweet and tart flavors of these irresistible bites.

  • Savory Garlic Bread: A crunchy, buttery slice filled with roasted garlic brings a wonderful contrast to the creamy sweetness of the bites. Serve as a delightful starter alongside your pastries.

  • Crisp Garden Salad: A fresh salad with mixed greens, walnuts, and a light vinaigrette balances the richness of the bites, adding a splash of color and health to your table.

  • Creamy Butternut Squash Soup: This velvety soup, infused with warming spices, creates a cozy pairing and enhances the autumnal feel of your meal. Perfect for a fall gathering!

  • Honey-Glazed Carrots: The sweetness of lightly caramelized carrots harmonizes beautifully with the tart cranberry, creating a colorful and wholesome side.

  • Apple Cider Mimosa: Spice up your drink menu with this light, bubbly cocktail that pairs the flavors of fall together, offering a refreshing sip alongside your snacks.

  • Maple Pecan Pie: End your gathering on a sweet note! The rich, nutty flavors of this pie will echo the cozy feeling of the Cranberry Cream Cheese Crescent Bites, providing a perfect dessert match.

Indulging in these pairings not only enhances your dinner experience but also takes your autumn gathering to the next level!

Expert Tips for Cranberry Cream Cheese Crescent Bites

Room Temperature Cream Cheese: Ensure your cream cheese is softened for easy mixing; cold cream cheese can lead to lumps in your filling.

Prevent Sticking: Don’t skip greasing the muffin tin! A well-greased or lined pan will help your Cranberry Cream Cheese Crescent Bites release effortlessly.

Perfect Cutting: Use a sharp knife or pizza cutter to cut the crescent roll dough; clean edges will make for beautiful, uniform bites.

Watch the Bake Time: Keep an eye on them towards the end—I recommend checking around 11 minutes to prevent over-baking, which can dry them out.

Experiment with Flavors: Feel free to try alternative fruit preserves or add spices to the cream cheese for a personal twist that suits your palate!

Cranberry Cream Cheese Crescent Bites Variations

Feel free to make these bites your own with these delightful twists that add flavor and flair!

  • Fruit Preserve Swap: Replace cranberry sauce with raspberry or apricot preserves for a different fruity twist. Each option offers a unique sweetness that complements the cream cheese beautifully.

  • Spiced Cream Cheese: Add a pinch of cinnamon or nutmeg to the cream cheese filling for a warm, cozy flavor. The spices will elevate your bites to a new level of comfort, perfect for chilly fall evenings.

  • Savory Option: Switch out the cranberry sauce for spinach and feta for a savory spin on these bites. This version is great for brunch or as an elegant appetizer at your next gathering.

  • Nut-Free Version: Omit the nuts or substitute with sunflower seeds if allergies are a concern. This way, you keep the texture without compromising anyone’s dietary restrictions.

  • Gluten-Free: Use gluten-free crescent roll dough to adapt the recipe for gluten-sensitive friends. They’ll enjoy the same flaky goodness without the worry.

  • Cream Cheese Variations: Try flavored cream cheese, like chive and onion or herb. This twist can transform the taste and create a unique bite that surprises your guests.

  • Extra Crunch: Top with crispy breadcrumbs mixed with dried herbs before baking for a delightful crunch. This addition will add a textural contrast that keeps every bite interesting.

  • Dessert Version: Drizzle with chocolate sauce or caramel after baking for a sweet finish. It’s a fun way to turn these savory treats into a dessert, catering to the sweet tooth in all of us!

Ready to explore even more delightful recipes? After enjoying these bites, why not indulge in some Peaches Cream Cookies or a refreshing scoop of Vegan Cacao Cream?

Cranberry Cream Cheese Crescent Bites Recipe FAQs

What type of cranberries should I use?
For the best flavor and texture, I recommend using whole berry cranberry sauce—either homemade or canned. Avoid jellied versions, as they tend to have a more processed texture and won’t give you the delightful tartness you want in these bites.

How long can I store leftovers?
Store any leftover Cranberry Cream Cheese Crescent Bites in an airtight container in the refrigerator for up to 3 days. To retain their flakiness, I suggest reheating them in a preheated oven at 350°F for about 5-7 minutes. This helps restore that freshly baked crunch!

Can I freeze these bites?
Absolutely! To freeze unbaked bites, place them on a tray until fully frozen, then transfer them to a freezer bag for up to 2 months. When you’re ready to bake, simply add an extra 2-3 minutes to the baking time when cooking from frozen. It’s a convenient way to have a delightful snack on hand anytime!

What should I do if the dough sticks to the muffin tin?
This can happen if the muffin tin isn't greased properly. Always ensure that your mini muffin tin is well-greased or lined before pressing in the dough. If you do encounter sticking, gently run a small knife around the edges to loosen the bites before attempting to remove them.

Can I make these bites vegan or gluten-free?
Absolutely! For a vegan version, you can substitute the cream cheese with a plant-based cream cheese alternative, and use vegan crescent roll dough. For a gluten-free option, look for gluten-free crescent roll dough available in many grocery stores. Just be sure to check the ingredients to suit your dietary needs.

How can I add more flavor to the cream cheese filling?
For a flavorful twist, consider adding 1/2 teaspoon of cinnamon or nutmeg to the cream cheese mixture or swap out half the vanilla extract for almond extract. Both options lend a warm, comforting taste that complements the cranberry beautifully. Experiment and find your perfect blend!

Cranberry Cream Cheese Crescent Bites

Delicious Cranberry Cream Cheese Crescent Bites for Fall

Cranberry Cream Cheese Crescent Bites are a delightful autumn snack, blending sweet and tart flavors into a flaky, buttery treat.
Print Recipe Pin Recipe
Prep Time 20 minutes mins
Cook Time 13 minutes mins
Total Time 33 minutes mins
Servings: 12 bites
Course: Snacks
Cuisine: American
Calories: 80
Ingredients Equipment Method Nutrition Notes

Ingredients
  

For the Pastry
  • 1 can Crescent Roll Dough Use store-bought for convenience.
For the Cream Filling
  • 8 oz Cream Cheese Ensure it's softened for easier mixing.
  • 1/2 cup Powdered Sugar Substitute with granular sugar if needed.
  • 1 tsp Vanilla Extract Almond extract can be a delightful substitute.
For the Topping
  • 1 cup Whole Berry Cranberry Sauce Use homemade or canned, avoid jellied versions.
  • Optional Toppings Chopped pecans or orange zest.

Equipment

  • mini muffin tin
  • Mixing Bowl
  • hand mixer

Method
 

Step‑by‑Step Instructions
  1. Preheat your oven to 375°F (190°C) and prepare a mini muffin tin by greasing or lining it with parchment paper.
  2. In a mixing bowl, combine softened cream cheese, powdered sugar, and vanilla extract. Mix until smooth and creamy, about 2-3 minutes.
  3. Unroll the crescent roll dough and slice each triangle in half. Press each piece into the prepared muffin cups.
  4. Place approximately 1 teaspoon of the cream cheese mixture into each dough cup, followed by another teaspoon of cranberry sauce.

  5. Sprinkle with optional toppings like chopped pecans or orange zest, if desired.
  6. Bake for 11-13 minutes or until golden brown. Allow to cool slightly before serving.
  7. Carefully remove the bites from the muffin tin and serve warm.

Nutrition

Serving: 1biteCalories: 80kcalCarbohydrates: 10gProtein: 1gFat: 4gSaturated Fat: 2gCholesterol: 10mgSodium: 150mgPotassium: 20mgSugar: 3gVitamin A: 200IUVitamin C: 1mgCalcium: 10mg

Notes

These bites are versatile; feel free to experiment with different fruit preserves or spices to suit your taste.

Tried this recipe?

Let us know how it was!

Delicious Berry Oat Bars for Healthy Snack Lovers

November 24, 2025 by Grace Snow Leave a Comment

As I reached into the pantry, a wave of nostalgia washed over me—those sweet smells of baking from my childhood danced through my mind. Today, I’m excited to recreate that warmth with my Healthy Berry Oat Bars! Perfect as a nutritious grab-and-go breakfast or a delightful after-dinner snack, these bars are not only gluten-free and refined sugar-free but also whip up in just 30 minutes. With a tender texture complemented by a subtly sweet maple syrup flavor, they boast a balance of chewy oats and luscious fruit preserves that will have the whole family asking for seconds. Curious how you can customize these bars to suit your taste or dietary needs? Let’s dive in!

Why are Berry Oat Bars a must-try?

Wholesome Ingredients: Each bite is packed with nutritious elements, making these bars a guilt-free snack option for kids and adults alike.
Quick to Prepare: You can enjoy these delicious bars in just 30 minutes—perfect for busy mornings or spontaneous cravings.
Customizable Flavors: Try different variations, such as using fresh strawberries or Nut Butter Oat Bars, ensuring there's something for everyone.
Health-Conscious: With no refined sugars and gluten-free options, this recipe aligns with various dietary preferences without compromising on flavor.
Perfect for Any Occasion: These berry oat bars are great as a breakfast treat, a lunch box addition, or a delightful dessert, making them an all-round crowd-pleaser!

Berry Oat Bars Ingredients

For the Base
• Coconut Oil – Provides moisture and binds the ingredients. Substitution: Can use butter or avocado oil, but should be solid at room temperature for best results.
• All-Purpose Flour (or Gluten-Free Substitute) – Gives structure to the bars. Note: For gluten-free, use a 1:1 gluten-free flour blend such as King Arthur Measure for Measure.
• Quick Oats – Adds chewiness and a hearty texture. Note: Can substitute with rolled oats but expect slight texture variation.
• Maple Syrup – Sweetens the bars naturally and adds moisture. Note: Honey or agave syrup could be used as alternatives, but may alter flavor profile.
• Coconut Sugar (or Granulated Sugar) – Adds additional sweetness and creates a golden color. Substitution: Will work fine with other sweeteners like brown sugar if desired.
• Baking Powder – Helps the bars rise slightly during baking. Note: Be mindful of the amount to avoid an off-taste.
• Salt – Enhances flavor balance.

For the Filling
• Raspberry Preserves – Provides fruity filling with natural sweetness. Substitution: Can use other fruit preserves or fresh berries for variety.

Step‑by‑Step Instructions for Berry Oat Bars

Step 1: Preheat the Oven
Begin by preheating your oven to 350°F (175°C). While the oven warms up, prepare an 8x8 inch baking pan by lightly greasing it with non-stick spray or lining it with parchment paper for easy removal. This will ensure your delicious berry oat bars don’t stick and can be perfectly sliced after baking.

Step 2: Combine the Ingredients
In a large mixing bowl, combine the melted coconut oil with the all-purpose flour, quick oats, maple syrup, coconut sugar, baking powder, and salt. Stir the mixture thoroughly until all ingredients are evenly incorporated and form a cohesive dough. This mixture will serve as the base for your berry oat bars, providing a delightful foundation to hold everything together.

Step 3: Form the Base Layer
Take about two-thirds of the mixture and press it firmly into the bottom of your prepared baking pan. Aim for an even layer, about ½ inch thick; this helps create a sturdy base. Use your fingers or a flat spatula to smooth it down, ensuring it’s well packed to prevent crumbliness in the final product.

Step 4: Add the Raspberry Preserves
Spread the raspberry preserves gently over the pressed base, leaving about a ½-inch margin around the edges to prevent burning during baking. This fruity filling adds a burst of natural sweetness that beautifully complements the chewiness of the oats. Feel free to use a spoon or spatula to create an even layer of preserves to maximize flavor in each bite.

Step 5: Top with Remaining Mixture
Crumble the remaining one-third of the oat mixture evenly over the raspberry preserves. Gently press it into the top layer to help it adhere while baking. This step not only enhances the texture of your berry oat bars but also provides that delightful crunch on top, balancing the soft filling perfectly.

Step 6: Bake to Perfection
Place the pan in your preheated oven and bake for 25 to 30 minutes. Keep an eye on the bars as they bake; you’ll know they’re ready when the top is lightly browned and aromatic. The edges may crisp slightly, adding to the overall texture, so don’t rush this crucial step of creating the perfect berry oat bars.

Step 7: Cool and Slice
Once baked, remove the pan from the oven and allow it to cool on a wire rack. This cooling period is essential for the bars to set properly. After they have cooled for at least 15-20 minutes, take a sharp knife and cut them into evenly-sized bars or squares. You can now serve your berry oat bars fresh or store them for later enjoyment!

Make Ahead Options

These Healthy Berry Oat Bars are a fantastic choice for meal prep, saving you precious time during busy mornings. You can prepare the base mixture for the bars up to 24 hours in advance; simply combine the melted coconut oil, flour, oats, maple syrup, coconut sugar, baking powder, and salt and store it in an airtight container in the refrigerator. Additionally, you can spread the raspberry preserves over the base layer in advance, allowing the flavors to meld beautifully. When you’re ready to bake, just press the mixture into the pan and crumble the top layer before baking for 25 to 30 minutes at 350°F. Rest assured, these bars will still be just as delicious and satisfying!

How to Store and Freeze Berry Oat Bars

Room Temperature: Keep baked berry oat bars in an airtight container at room temperature for up to 5 days to maintain freshness and flavor.

Fridge: For longer shelf life, refrigerate your berry oat bars in an airtight container for up to 8 days, ensuring they remain chewy and delicious.

Freezer: Freeze your berry oat bars by wrapping them individually in plastic wrap, then place them in a resealable freezer bag. They can be stored for up to 3 months for a quick snack later.

Reheating: When you’re ready to enjoy them, simply thaw the bars at room temperature or heat them in the microwave for a few seconds to regain their soft texture.

Expert Tips for Berry Oat Bars

  • Firm Base Packing: Ensure to pack the base mixture firmly to avoid crumbliness; it should hold together when pressed. A well-packed base results in sturdy bars.

  • Use Parchment Paper: For effortless removal, use parchment paper in the baking pan. This prevents sticking and allows for clean cuts after baking your delicious berry oat bars.

  • Monitor Baking Time: Bake until the top is lightly browned for the best flavor and texture. Keeping an eye on the bars helps to avoid over-baking, which can result in dryness.

  • Cooling is Key: Allow the bars to cool in the pan on a wire rack for at least 15-20 minutes. This step is crucial for the bars to set properly before slicing.

  • Storage Tips: Store your berry oat bars in an airtight container at room temperature for up to 5 days or refrigerate for up to 8 days to maintain freshness.

What to Serve with Healthy Berry Oat Bars

These delectable bars are not just a snack on their own; they can elevate your entire meal experience with the right pairings.

  • Greek Yogurt: Creamy and tangy, it adds a pleasant contrast to the sweet berry oat bars, turning them into a wholesome breakfast option.

  • Fresh Fruit Salad: A vibrant mix of seasonal fruits provides a refreshing crunch, enhancing the overall fruity flavor of the bars.

  • Nut Butter Spread: Drizzling almond or peanut butter on top delivers an extra layer of richness and healthy fats, perfect for a satisfying snack.

  • Warm Milk or Plant Milk: Sipping on a warm drink beside your bars wraps you in comfort that balances the herbal notes of maple syrup with creamy texture.

  • Chia Seed Pudding: This nutritious side adds a delightful twist in texture and nutrition, making for a balanced and filling meal.

  • Smoothie Bowl: Blend your favorite fruits and greens into a smoothie bowl for a delicious and healthy breakfast spread, pairing beautifully with the chewy oat bars.

  • Homemade Granola: Crumble your favorite granola on top to add extra crunch and a touch of sweetness, providing a delightful contrast to the chewy bars.

Berry Oat Bars: Endless Options!

Feel free to let your creativity shine as you explore different delicious twists on these berry oat bars.

  • Nut Butter Oat Bars: Add your favorite nut butter to the base for a rich, creamy flavor. The addition not only enhances taste but also boosts nutrition. Pairing your oat bars with the creaminess of nut butter creates an indulgent treat that’s hard to resist.

  • Flaxseed Boost: Incorporate 1 tablespoon of ground flaxseed into the mixture for added nutrients and fiber. This subtle addition not only enriches the bars but also adds a nutty flavor that pairs beautifully with berries.

  • Chocolate Chip Delight: Toss in a handful of dairy-free or dark chocolate chips for a delightful chocolatey touch. Not only does chocolate elevate the sweetness, but it also provides that little bit of extra happiness in every bite.

  • Coconut Flakes: Mix in unsweetened shredded coconut for a tropical twist. This will give your bars a chewy texture and a hint of coconut flavor that beautifully complements the fruit.

  • Spicy Kick: Sprinkle in a dash of cinnamon or a pinch of ground ginger for a warm, spicy flavor. These spices can elevate the flavor profile of your bars to make them even more comforting and delicious.

  • Berry Mix: Swap out raspberry preserves for a medley of mixed berry preserves. Using a variety of berries will create a burst of tartness and sweetness throughout the bars, ensuring that each bite is a flavor explosion! You can also try fresh berries for an even fresher taste.

  • Chia Seed Crunch: Add a tablespoon of chia seeds to enhance both texture and health benefits. Chia seeds absorb moisture, adding a slight crunch while also making your bars more filling.

  • Savory Herb Infusion: For a zesty twist, experiment with herbs like rosemary or thyme in the oat mixture. This could make your berry oat bars a great pair for savory breakfasts or brunch gatherings.

These variations not only add flavor but also create endless possibilities for every palate. Dive into the fun of customization, and don’t forget to explore our delightful Nut Butter Oat Bars and other treats!

Berry Oat Bars Recipe FAQs

How do I choose the right ripeness for the berries?
For the best flavor in your berry oat bars, look for berries that are plump, firm, and brightly colored. Avoid any with dark spots or signs of mold. If using preserves, opt for those made with real fruit and no added sugars for a healthier option.

What’s the best way to store berry oat bars?
Store your berry oat bars in an airtight container at room temperature for up to 5 days. If you want them to last longer, refrigerate them for up to 8 days. Be sure that they are completely cooled before storing to prevent them from becoming soggy.

Can I freeze berry oat bars?
Absolutely! To freeze your berry oat bars, allow them to cool completely first. Then, wrap each bar individually in plastic wrap and place them in a resealable freezer bag. They will stay fresh for up to 3 months. When you want to enjoy one, simply thaw it at room temperature or warm it in the microwave for a few moments.

What if my bars are crumbling?
If your berry oat bars are crumbling, it might be due to not packing the base mixture firmly enough. Next time, make sure to press the base down well into the pan; it should feel compact rather than loose. Additionally, if you find they crumble even after baking, try adding a bit more coconut oil or using a little less flour.

Can I make these bars vegan?
Yes, you can absolutely make these bars vegan! Use maple syrup as your sweetener and coconut oil instead of butter. Ensure that the fruit preserves you choose are also free from any animal products, and you’ll have a delightful vegan treat that everyone can enjoy.

Are these bars safe for my pets?
While the berry oat bars are healthy for humans, they aren't suitable for pets. Ingredients like coconut sugar and certain fruits may not be safe for pets, so it's best to keep these bars for human enjoyment only. If you're looking for a pet-friendly treat, consider making them a separate, tailored snack using ingredients specifically approved for animals.

Berry Oat Bars

Delicious Berry Oat Bars for Healthy Snack Lovers

These Berry Oat Bars are a healthy, gluten-free snack option perfect for busy mornings or a delightful treat.
Print Recipe Pin Recipe
Prep Time 10 minutes mins
Cook Time 30 minutes mins
Cooling Time 20 minutes mins
Total Time 1 hour hr
Servings: 12 bars
Course: Snacks
Calories: 150
Ingredients Equipment Method Nutrition Notes

Ingredients
  

For the Base
  • 1/2 cup Coconut Oil Substitution: Can use butter or avocado oil.
  • 1 cup All-Purpose Flour Note: For gluten-free, use a 1:1 gluten-free flour blend.
  • 2 cups Quick Oats Note: Can substitute with rolled oats but expect slight texture variation.
  • 1/2 cup Maple Syrup Note: Honey or agave syrup could be used as alternatives.
  • 1/4 cup Coconut Sugar Substitution: Will work fine with other sweeteners like brown sugar.
  • 1 teaspoon Baking Powder Be mindful of the amount to avoid an off-taste.
  • 1/4 teaspoon Salt
For the Filling
  • 1/2 cup Raspberry Preserves Substitution: Can use other fruit preserves or fresh berries.

Equipment

  • 8x8-inch baking pan
  • Mixing Bowl
  • Spatula

Method
 

Step-by-Step Instructions for Berry Oat Bars
  1. Preheat your oven to 350°F (175°C) and prepare an 8x8 inch baking pan by lightly greasing or lining it.
  2. In a large mixing bowl, combine melted coconut oil, all-purpose flour, quick oats, maple syrup, coconut sugar, baking powder, and salt.
  3. Press about two-thirds of the mixture into the bottom of your prepared baking pan to create a base layer.
  4. Spread raspberry preserves over the pressed base, leaving about a ½-inch margin around the edges.
  5. Crumble the remaining mixture over the raspberry preserves and gently press it down.
  6. Bake the bars for 25 to 30 minutes or until the top is lightly browned and aromatic.
  7. Allow to cool in the pan on a wire rack for at least 15-20 minutes before slicing.

Nutrition

Serving: 1barCalories: 150kcalCarbohydrates: 20gProtein: 2gFat: 7gSaturated Fat: 6gPolyunsaturated Fat: 0.5gMonounsaturated Fat: 0.5gSodium: 50mgPotassium: 120mgFiber: 2gSugar: 8gCalcium: 2mgIron: 5mg

Notes

Ensure to pack the base mixture firmly and use parchment paper for easy removal.

Tried this recipe?

Let us know how it was!
  • « Previous Page
  • 1
  • …
  • 14
  • 15
  • 16
  • 17
  • 18
  • …
  • 25
  • Next Page »

Welcome!

Hi, I’m Grace, a Sydney-based home cook with a passion for bold flavors and trending ingredients. Whether you’re a busy beginner or a seasoned foodie, you’ll find dishes here that are fresh, fun, and full of flavor.

More about me

Popular Recipes

  • Honey Lime Chicken & Avocado Rice Bowl
    Honey Lime Chicken & Avocado Rice Bowl for a Flavor Burst
  • Tasty Italian Pasta Salad
    Delight in this Easy Tasty Italian Pasta Salad for Summer Fun
  • Garlic Butter Chicken Pasta
    Garlic Butter Chicken Pasta That’ll Wow Your Family Tonight
  • Creamy, Spicy Chicken Pasta
    Creamy, Spicy Chicken Pasta with Fresh Summer Veggies

Footer

↑ back to top

About

  • Privacy Policy
  • Disclaimer
  • Terms & Conditions

Newsletter

  • Sign Up! for emails and updates

Contact

  • About me
  • Contact me

Copyright © 2025 TastyTrendIngredients