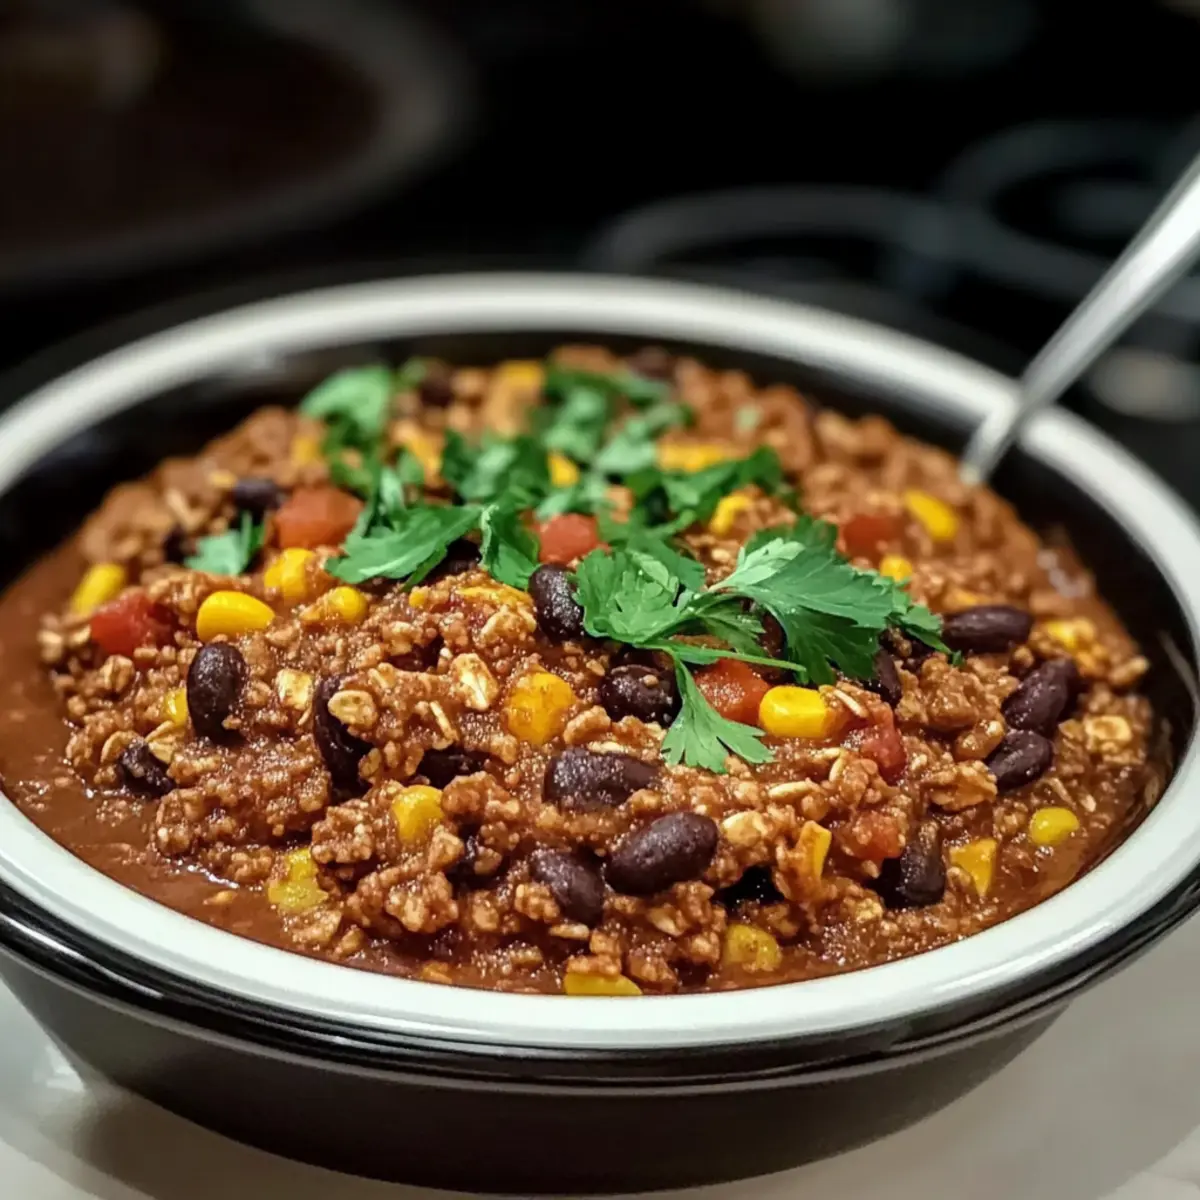
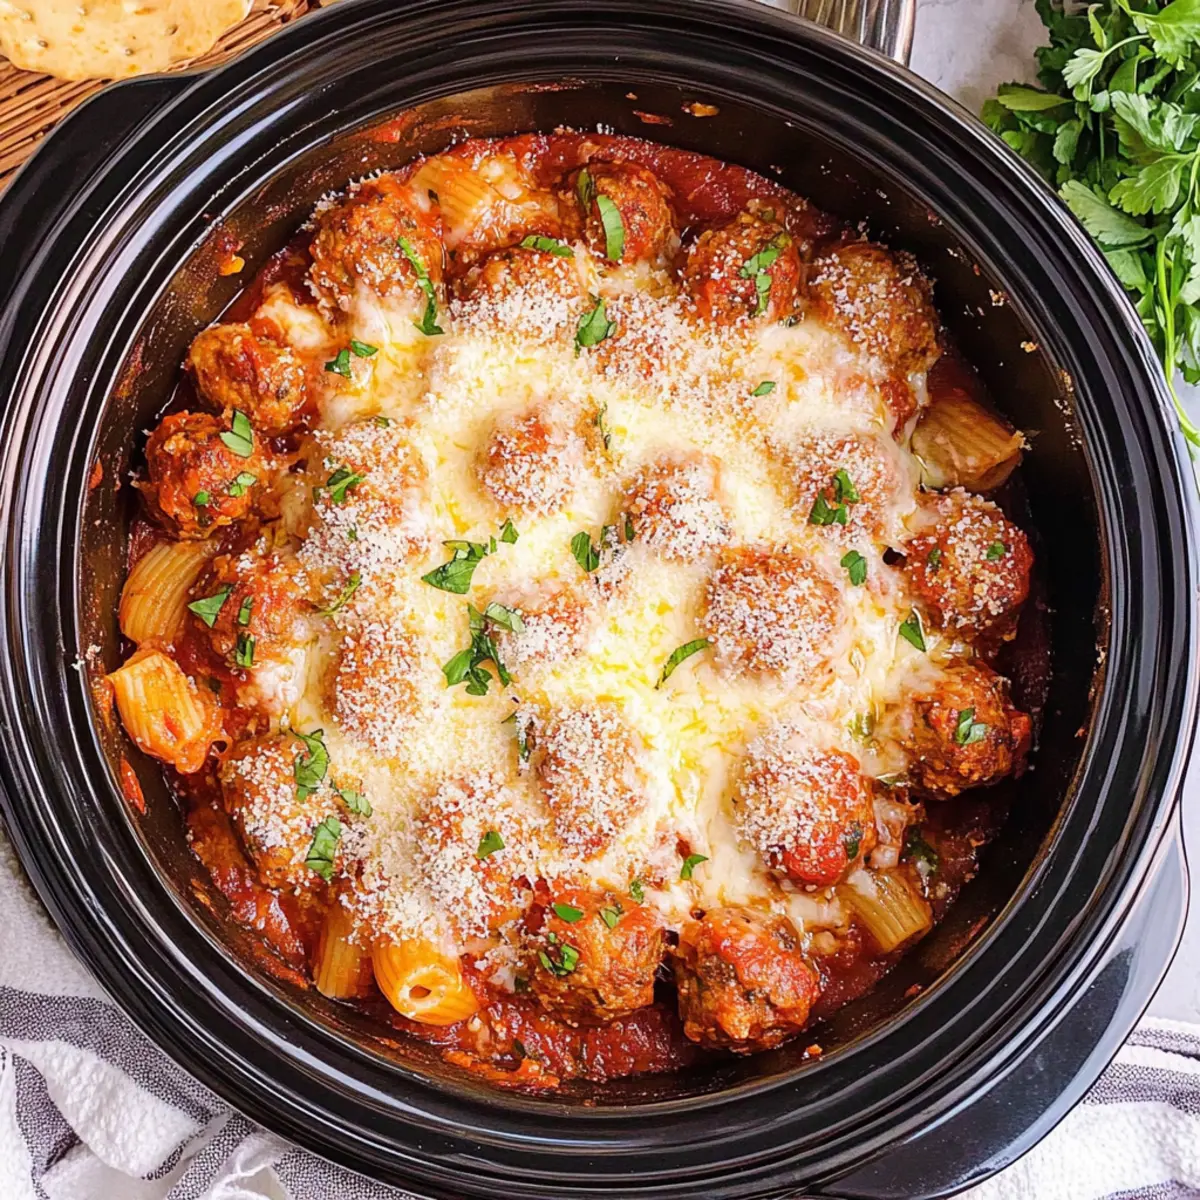
As I stirred the bubbling pot of sauce, a warm, inviting aroma wafted through my kitchen, unraveling fond memories of family dinners and shared laughter. This Slow Cooker Meatball Casserole is my go-to comfort food that effortlessly combines the heartiness of meatballs with the satisfying chew of pasta. Perfect for those busy weeknight dinners, it not only saves you precious time but also allows you to customize flavors with spicy or veggie twists, keeping dinner exciting. Just imagine coming home to this rich, cheesy delight, ready to be served with minimal effort! Are you curious about how to whip up this hassle-free, mouthwatering meal? Let’s dive in!
Why Is It So Easy to Love?
Simplicity: With just a few steps, this Slow Cooker Meatball Casserole makes meal prep a breeze, allowing you to focus on what matters most—spending time with loved ones.
Versatility: This recipe shines when it comes to customization. From a spicy twist with red pepper flakes to sneaking in extra veggies like spinach or zucchini, the options are endless!
Flavorful: The robust combination of marinara, tender meatballs, and ooey-gooey cheese offers a mouthwatering experience that caters to everyone’s taste buds. If you're looking for more comfort food inspiration, check out my delicious Cornbread Breakfast Casserole!
Time-Saving: Just set it and forget it! Cooking in the slow cooker means you can go about your day while it works its magic, providing you with an effortless dinner when you return home.
Crowd-Pleasing: This casserole is sure to impress guests and family alike, making it a fantastic choice for gatherings or cozy weeknight dinners.
Slow Cooker Meatball Casserole Ingredients
For the Casserole
• Frozen Meatballs – a time-saving option that delivers delicious protein in every bite; feel free to use beef or turkey.
• Short Pasta (e.g., Penne or Rotini) – holds up beautifully in the sauce while providing the ideal comfort food texture; avoid long noodles to prevent clumping.
• Marinara Sauce – adds rich flavor; choosing a high-quality jarred or homemade option with herbs will elevate your dish.
• Chicken or Beef Broth – keeps everything moist while cooking; in a pinch, you can substitute with water.
• Italian Seasoning – a blend of herbs that enhances the dish’s flavor; adjust according to your personal preference.
• Garlic Powder – provides savory depth without needing to chop fresh garlic.
• Onion Powder – adds an extra layer of flavor effortlessly.
• Shredded Mozzarella Cheese – melts perfectly for that gooey topping; mix some into the casserole for added flavor.
• Grated Parmesan Cheese – a finishing touch that lends a nutty flavor; sprinkle generously!
• Fresh Basil or Parsley (optional) – these herbs brighten up the dish and enhance its visual appeal.
Optional Variations
• Vegetables – feel free to sneak in some bell peppers, spinach, or mushrooms for a nutritious boost.
• Spicy Elements – spice it up with red pepper flakes or spicy Italian sausage meatballs for an exciting twist.
• Gluten-Free Adaptation – substitute with gluten-free pasta to accommodate dietary needs, ensuring all ingredients align with your plan.
• Different Cheeses – experiment with provolone or fontina for diverse flavors; it’s a fun way to customize your dish!
Creating your own Slow Cooker Meatball Casserole not only nourishes the body but also the soul, allowing for those special moments around the dinner table with your loved ones!
Step‑by‑Step Instructions for Slow Cooker Meatball Casserole
Step 1: Prepare the Slow Cooker
Begin by lightly greasing the inside of your slow cooker with cooking spray or a thin layer of oil. This ensures easy release and cleaning later. Set the stage for your Slow Cooker Meatball Casserole by making sure the slow cooker is plugged in and ready to go.
Step 2: Combine Ingredients
In a large mixing bowl, combine the frozen meatballs, uncooked short pasta, marinara sauce, and broth. Make sure the pasta is well-coated with sauce to absorb all those delicious flavors. Gently stir everything together until it is thoroughly mixed, then transfer the mixture into the greased slow cooker.
Step 3: Add Seasonings
Sprinkle the Italian seasoning, garlic powder, and onion powder over the contents in the slow cooker. With a gentle but thorough stirring motion, ensure that the seasonings are evenly distributed throughout the mixture. This step enriches the Slow Cooker Meatball Casserole with savory notes and aromatic flavors.
Step 4: Set the Slow Cooker
Cover the slow cooker with its lid and set it to cook on LOW for 4 to 5 hours. During this time, the pasta will become perfectly tender, and the meatballs will be thoroughly heated. Stir occasionally to prevent sticking and to keep everything blended beautifully together.
Step 5: Melt the Cheeses
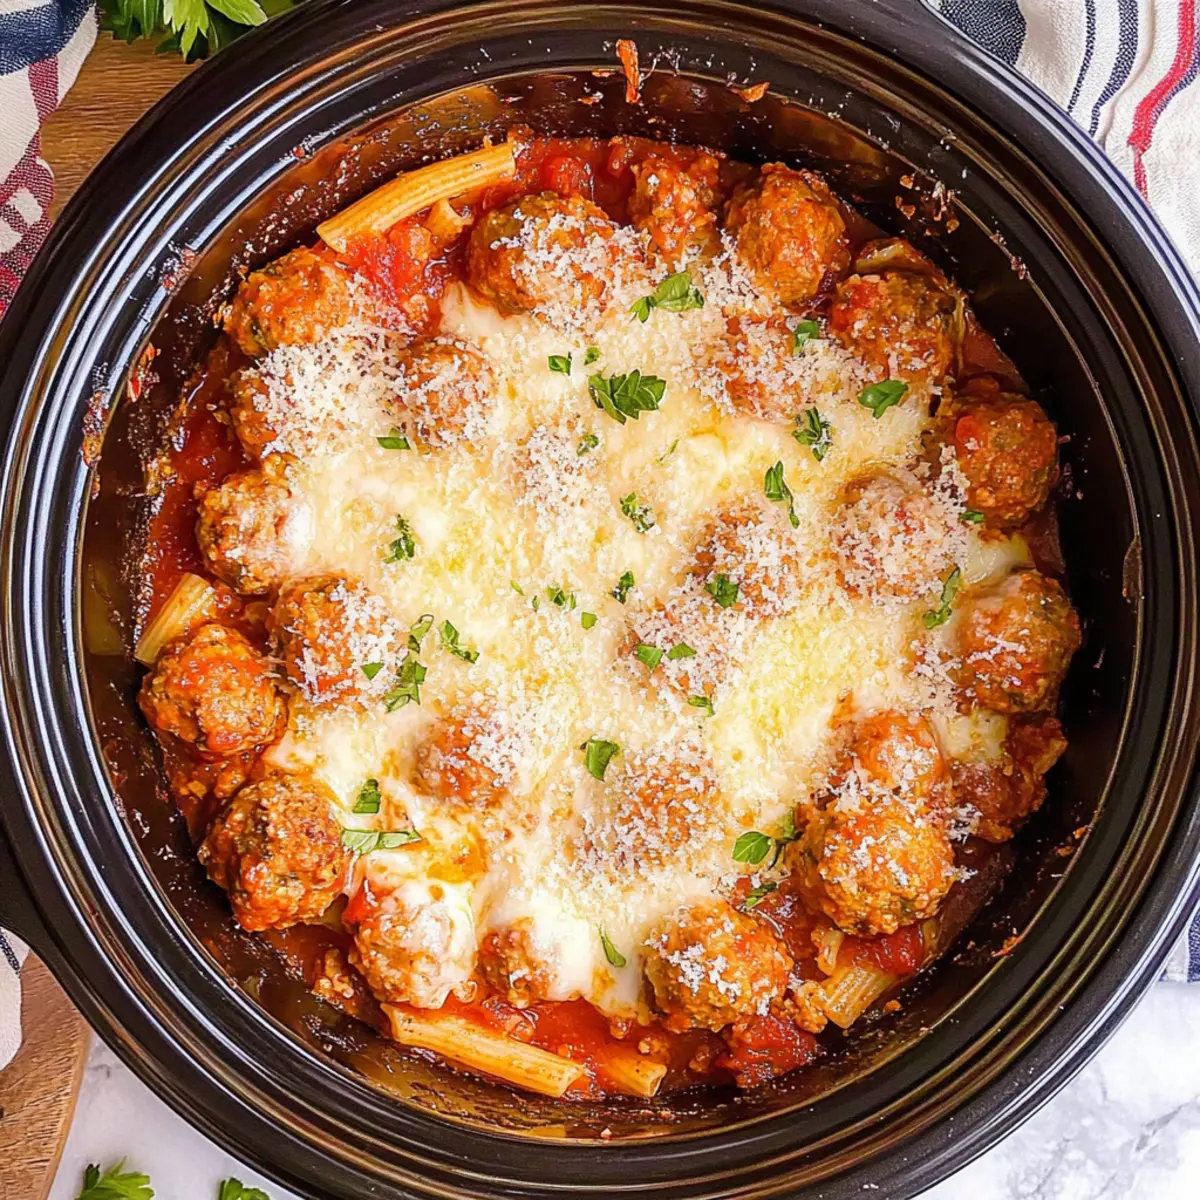
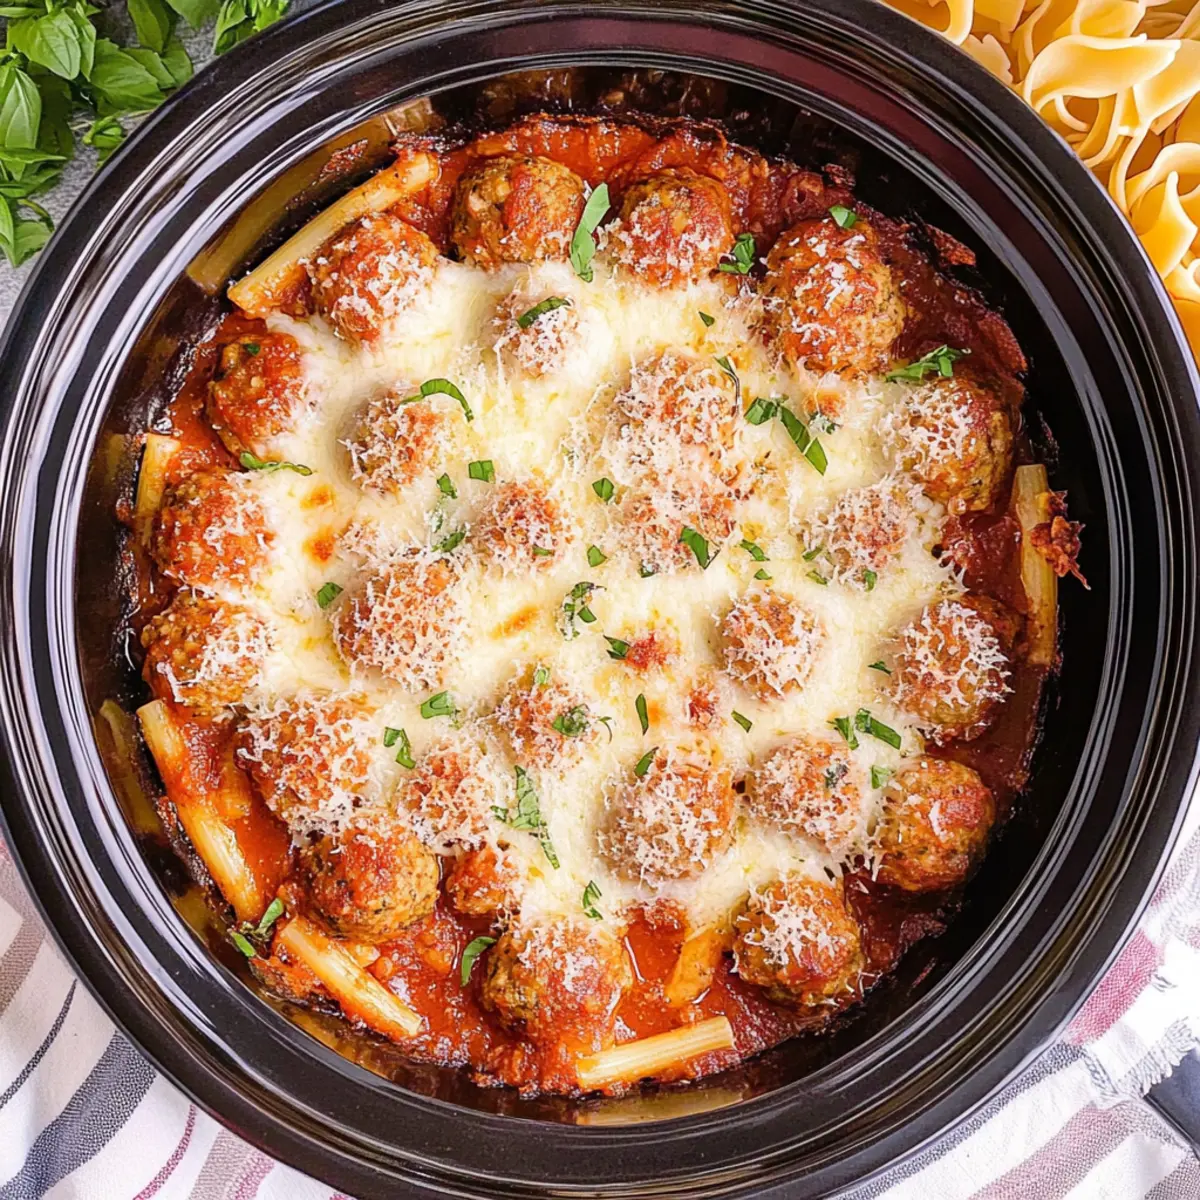
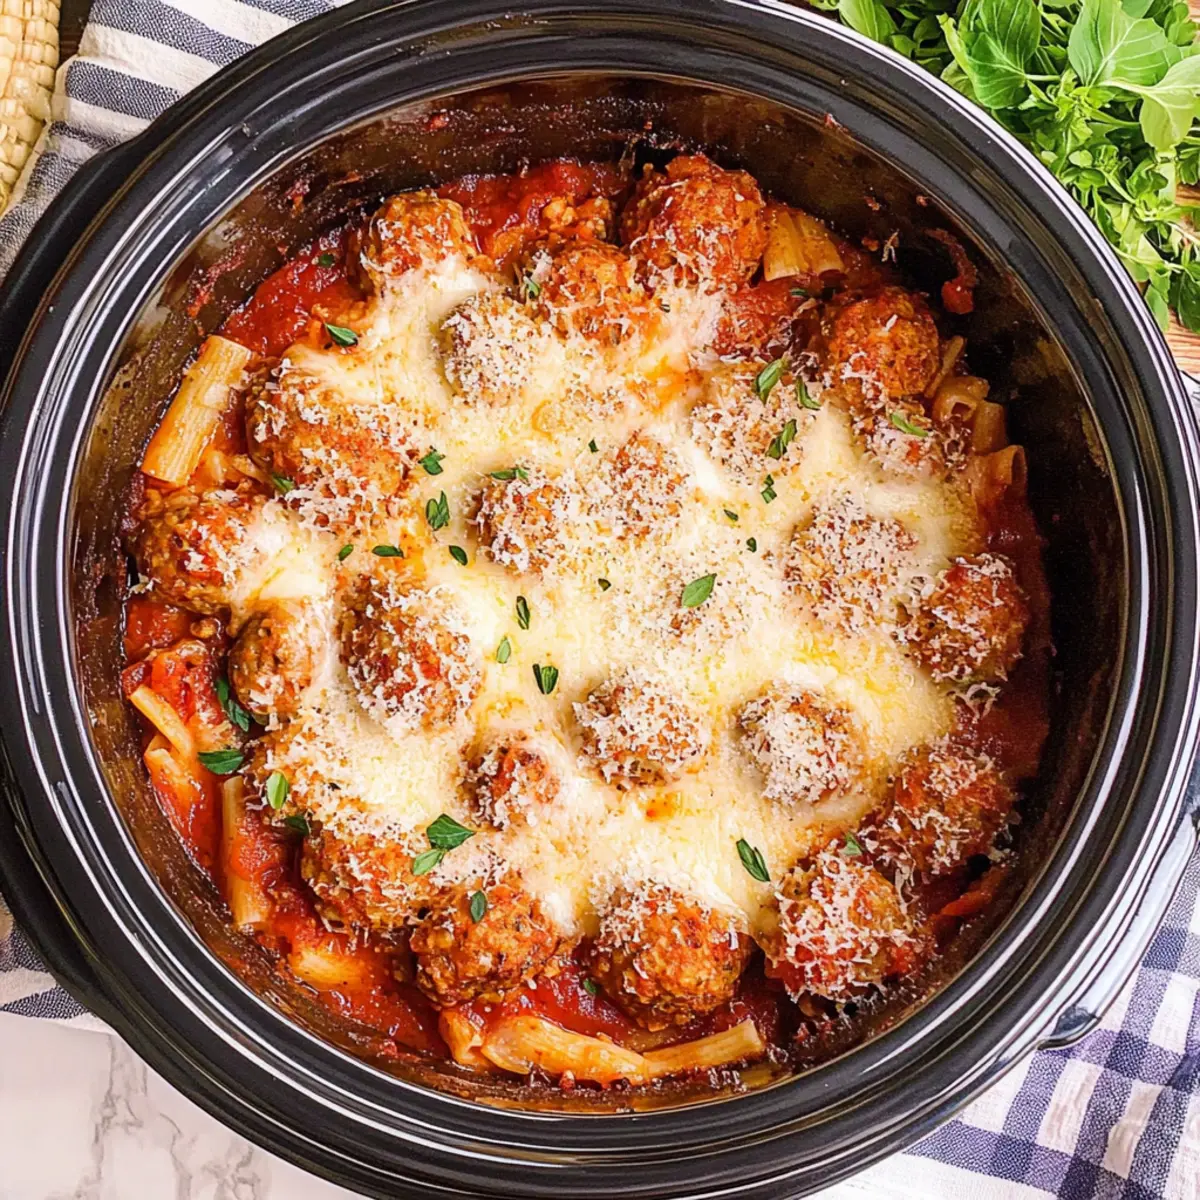
Once cooking time is complete, uncover the slow cooker and evenly distribute shredded mozzarella and grated Parmesan cheeses over the top. Cover again and cook on LOW for an additional 10-15 minutes until the cheeses are melted and bubbly, creating a deliciously gooey topping for your casserole.
Step 6: Garnish and Serve
After the cheeses are melted, carefully serve your Slow Cooker Meatball Casserole onto plates or bowls. Optionally, garnish each serving with freshly chopped basil or parsley for a vibrant finish. This final touch adds a pop of color and freshness to your comforting dish!
Slow Cooker Meatball Casserole Variations
Feel free to let your creativity shine by experimenting with these delightful twists!
-
Spicy Twist: Add red pepper flakes or use spicy Italian sausage meatballs for a kick. This version will warm your heart and your palate with every comforting bite.
-
Veggie Boost: Toss in bell peppers, mushrooms, spinach, or zucchini for a nutritious pop. By adding these veggies, you elevate not only the flavor but also the health factor of your casserole.
-
Gluten-Free Option: Swap in gluten-free pasta and double-check meatball ingredients for a delightful meal that welcomes everyone to the table. Now, everyone can enjoy the comfort of this dish without any worries.
-
Cheese Swap: Experiment with provolone or fontina cheese instead of mozzarella for varied flavor. The creamy textures will delight your taste buds and keep things interesting at your dinner table.
-
Creamy Version: Mix in cream cheese or heavy cream at the end for a sauce that’s rich and luscious. This indulgent twist creates a velvety mouthfeel that will have everyone coming back for seconds.
-
Herb Infusion: Sprinkle in fresh herbs like thyme or oregano for a fragrant freshness that elevates the entire dish. Fresh herbs can take your casserole from ordinary to extraordinary in just a few sprigs.
-
Smoky Flavor: Incorporate smoked paprika or chipotle powder to bring a deep, smoky flavor to the dish. This will tantalize your taste buds and give a new twist to the classic recipe.
-
Tangy Addition: Include some sun-dried tomatoes or olives for that extra zing! These unique ingredients add a burst of flavor and a Mediterranean flair, keeping the dish exciting every time you make it.
Don't forget that you can also find amazing recipes like my Spicy Miso Casserole or a delightful Sweet Potato Casserole to keep your meal rotation full of variety!
Expert Tips for Slow Cooker Meatball Casserole
- Use Fully Cooked Meatballs: Avoid raw meatballs; using pre-cooked ones ensures even heating and delicious results in your Slow Cooker Meatball Casserole.
- Choose Short Pasta: Opt for short pasta varieties like penne or rotini to prevent clumping and achieve the best texture throughout the dish.
- No High Cooking: Resist the urge to cook on HIGH; this may lead to mushy pasta. Cooking on LOW guarantees perfect results!
- Monitor the Cooking Time: Keep a close eye on the time and stir occasionally to maintain the integrity of your pasta, preventing overcooking.
- Mix Cheeses for Flavor: Consider combining mozzarella with other cheeses like provolone for a richer flavor profile in your casserole!
Make Ahead Options
These Slow Cooker Meatball Casserole preparations are perfect for busy home cooks looking to save time during hectic weeknights! You can combine the frozen meatballs, uncooked pasta, marinara sauce, and broth up to 24 hours in advance. Simply transfer the mixture to a sealed container and refrigerate it to maintain freshness. When you're ready to finish cooking, transfer the contents to the slow cooker, add your seasonings, and set it on LOW for 4 to 5 hours. This ensures a flavorful, hearty meal that feels just as delicious even after making it ahead of time. Enjoy a cozy dinner with minimal effort, knowing that your preparation has set you up for success!
How to Store and Freeze Slow Cooker Meatball Casserole
Fridge: Store any leftovers in an airtight container in the refrigerator for up to 4 days. This casserole tastes even better the next day as the flavors continue to meld!
Freezer: For longer storage, freeze the casserole in portions for up to 3 months. Make sure to cool it completely before sealing in freezer-safe bags or containers to prevent freezer burn.
Reheating: To reheat, simply thaw overnight in the fridge and warm in the microwave or oven. If it appears dry, add a splash of broth or marinara sauce for a creamy consistency.
Meal Prep: Consider prepping the casserole ahead of time. You can assemble all the ingredients in advance and keep it covered in the fridge for 1–2 days before cooking, allowing for an easy and quick weeknight dinner by just tossing it in the slow cooker!
What to Serve with Slow Cooker Meatball Casserole
This comforting dish pairs beautifully with a variety of sides, enhancing the heartwarming experience of your meal.
-
Garlic Bread: The warm, buttery flavors of garlic bread are perfect for soaking up the robust marinara sauce from the casserole. It's a classic pairing that elevates every bite.
-
Fresh Green Salad: A crisp salad with mixed greens, cherry tomatoes, and a light vinaigrette adds a refreshing contrast to the rich and cheesy casserole, brightening your plate.
-
Steamed Broccoli: Tender, vibrant broccoli brings a pop of color and nutrition, balancing the hearty flavors while providing a satisfying crunch with each forkful.
-
Roasted Vegetables: Seasonal roasted veggies like zucchini, bell peppers, or carrots offer a sweet and slightly charred element that complements the savory tones of the meatballs.
-
Homemade Coleslaw: A creamy, crunchy coleslaw brings a vibrant tang that cuts through the richness of the casserole, making each bite more exciting and refreshing.
-
Chianti Wine: A glass of Chianti, with its fruit-forward and earthy notes, enhances the Italian flavors, making it an excellent companion for your Slow Cooker Meatball Casserole.
-
Chocolate Chip Cookies: For dessert, warm chocolate chip cookies are a delightful conclusion to your meal, offering a sweet contrast to the savory main course while evoking that beloved nostalgic comfort.
Slow Cooker Meatball Casserole Recipe FAQs
What type of meatballs should I use?
Absolutely! You should use fully cooked meatballs for the best results in your Slow Cooker Meatball Casserole. You can use beef or turkey meatballs, either store-bought or homemade, as long as they are already cooked. Raw meatballs can lead to uneven cooking and safety concerns, so it's best to stick with the pre-cooked variety.
How should I store leftovers?
Very! Leftovers should be transferred to an airtight container and stored in the refrigerator for up to 4 days. I often find that the flavors actually improve over time, making it a delightful next-day meal. Just reheat it gently in the microwave or oven, adding a splash of broth or marinara sauce if it appears dry.
Can I freeze this casserole?
Absolutely! To freeze your Slow Cooker Meatball Casserole, allow it to cool completely first. Then, portion it into freezer-safe bags or containers and seal tightly. It can be stored in the freezer for up to 3 months. When you're ready to enjoy, thaw it overnight in the fridge and reheat in your oven or microwave for that creamy, comforting goodness.
What if my pasta is mushy after cooking?
Very! If you find that your pasta has become mushy, it may be due to cooking too long or the heat being too high. Always make sure to cook on the LOW setting for the recommended time and stir occasionally. For the best texture, stick with short pasta varieties like penne or rotini, as they hold up better in a slow cooker.
Are there any dietary considerations for this recipe?
Absolutely! This Slow Cooker Meatball Casserole can easily adapt to dietary needs. For a gluten-free option, just substitute the pasta with gluten-free varieties and check the meatball ingredients to ensure they're gluten-free as well. Additionally, feel free to sneak in some veggies like spinach or bell peppers for added nutrition without compromising flavor.
Can I make this casserole ahead of time?
Absolutely! You can prep your Slow Cooker Meatball Casserole in advance by mixing all the ingredients together and storing them in the refrigerator for 1-2 days before cooking. This way, all you need to do is transfer everything into the slow cooker and let it work its magic when you're ready for a hassle-free dinner!
Savory Slow Cooker Meatball Casserole for Cozy Nights
Ingredients
Equipment
Method
- Prepare the Slow Cooker by lightly greasing the inside with cooking spray or oil.
- Combine the frozen meatballs, uncooked short pasta, marinara sauce, and broth in a large mixing bowl.
- Add Italian seasoning, garlic powder, and onion powder, stirring to mix evenly.
- Set the slow cooker to LOW and cook for 4 to 5 hours. Stir occasionally.
- Top with shredded mozzarella and grated Parmesan, and cook for an additional 10-15 minutes.
- Garnish with chopped basil or parsley before serving.