tastytrendingredients

  • Home
  • Recipes
    • Appetizers
    • Breakfast
    • Dessert
    • Dinner
    • Drinks
    • Salads
    • Snacks
    • Soups
  • About me
  • Contact
menu icon
go to homepage
  • Home
  • Recipes
    • Appetizers
    • Breakfast
    • Dessert
    • Dinner
    • Drinks
    • Salads
    • Snacks
    • Soups
  • About me
  • Contact
search icon
Homepage link
  • Home
  • Recipes
    • Appetizers
    • Breakfast
    • Dessert
    • Dinner
    • Drinks
    • Salads
    • Snacks
    • Soups
  • About me
  • Contact
×

Delicious Lemon Lavender Thumbprint Cookies for Spring Celebrations

April 26, 2026 by Grace Snow Leave a Comment

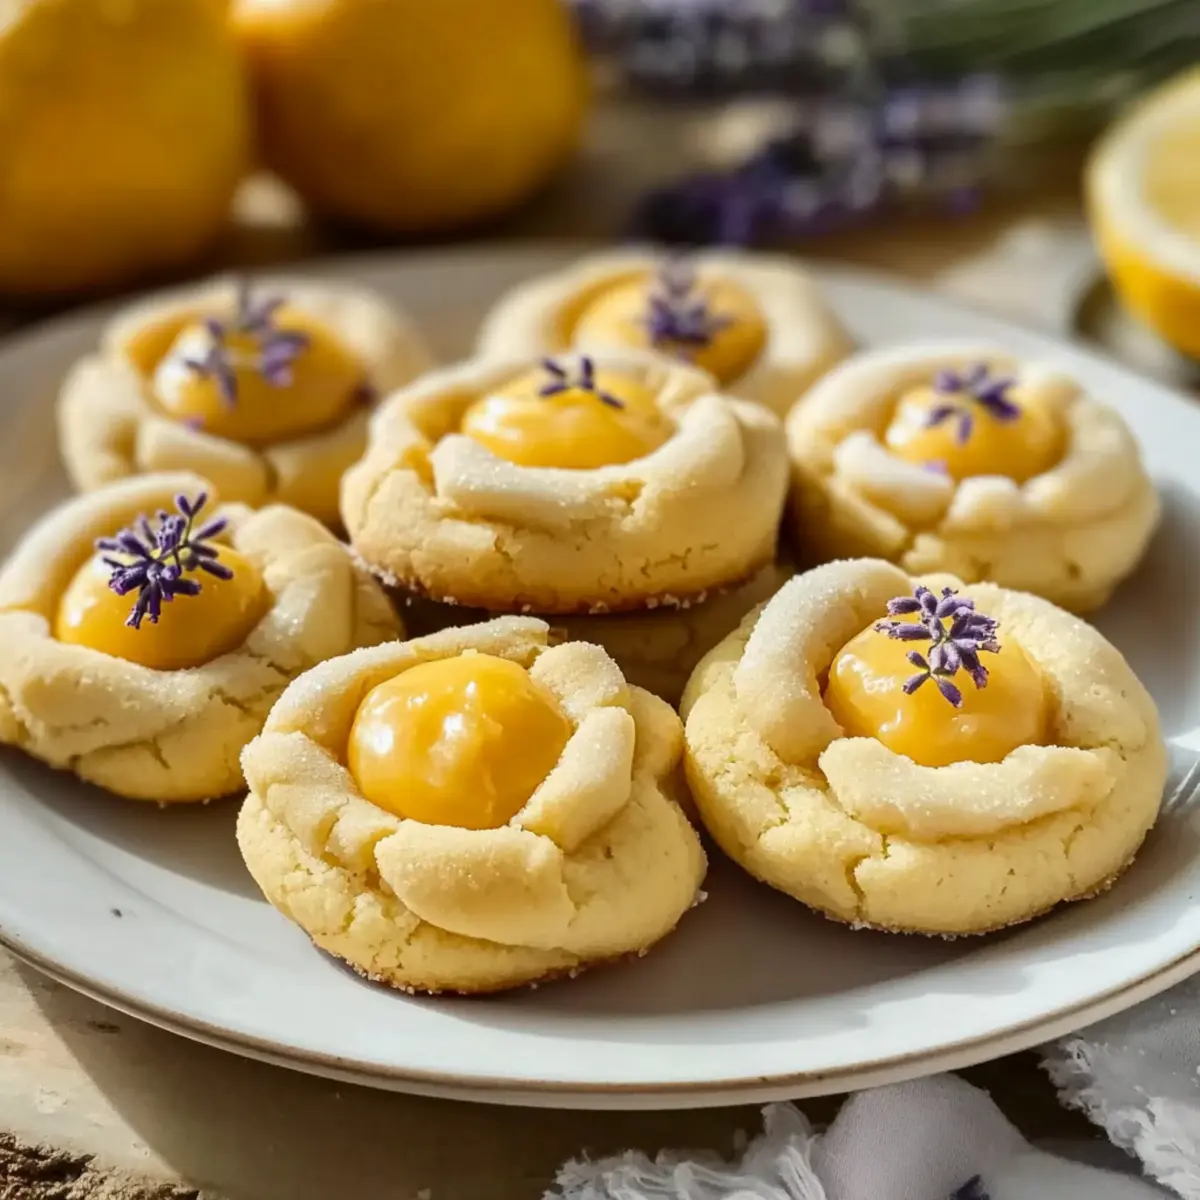
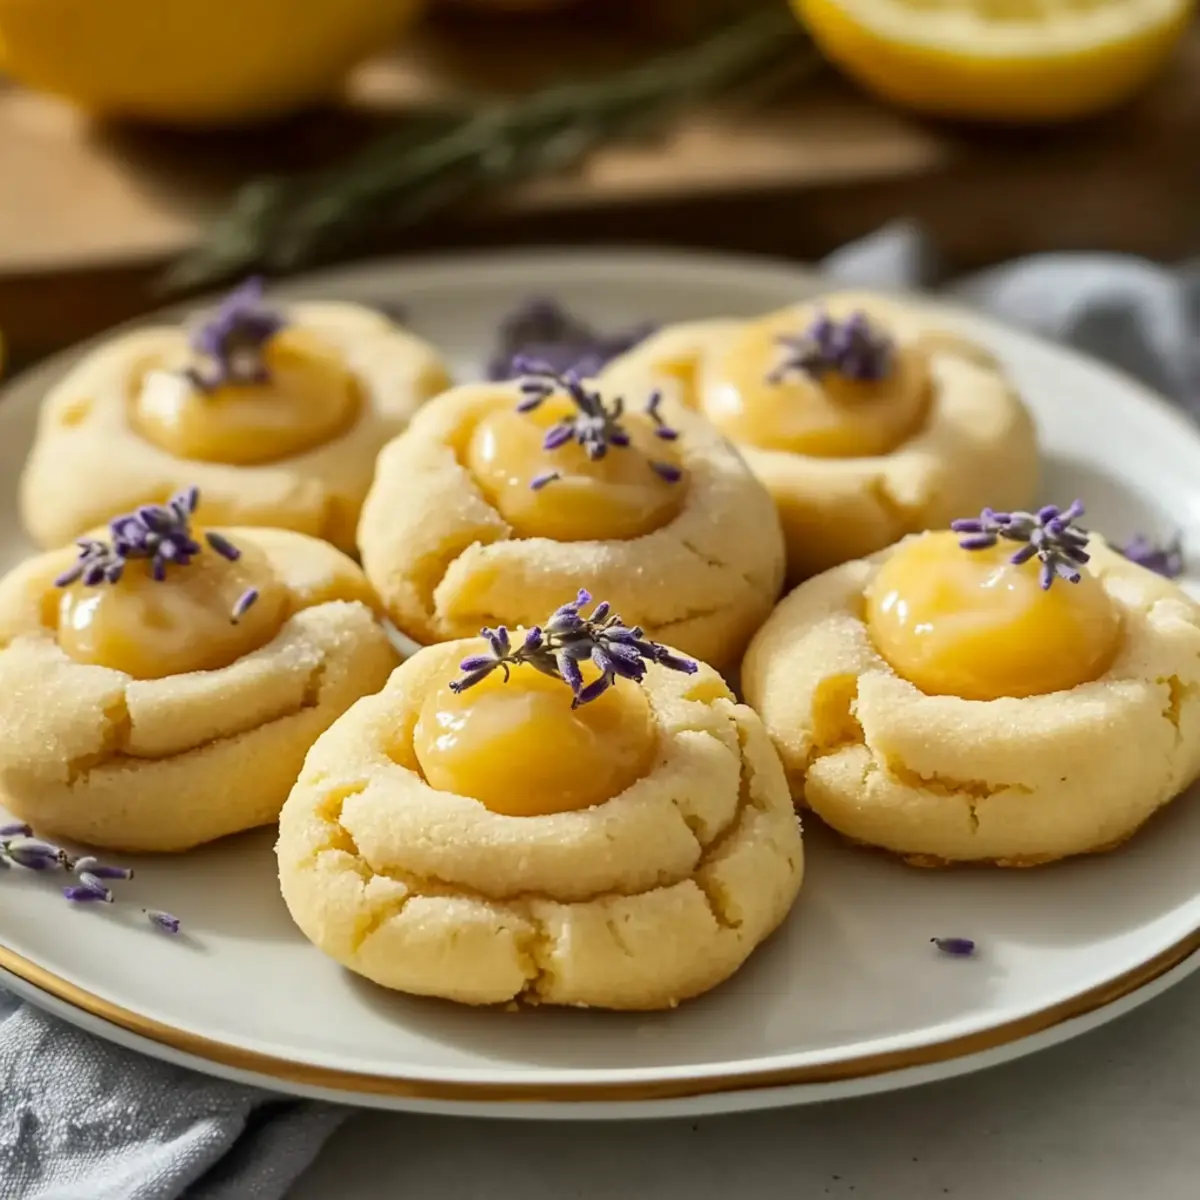
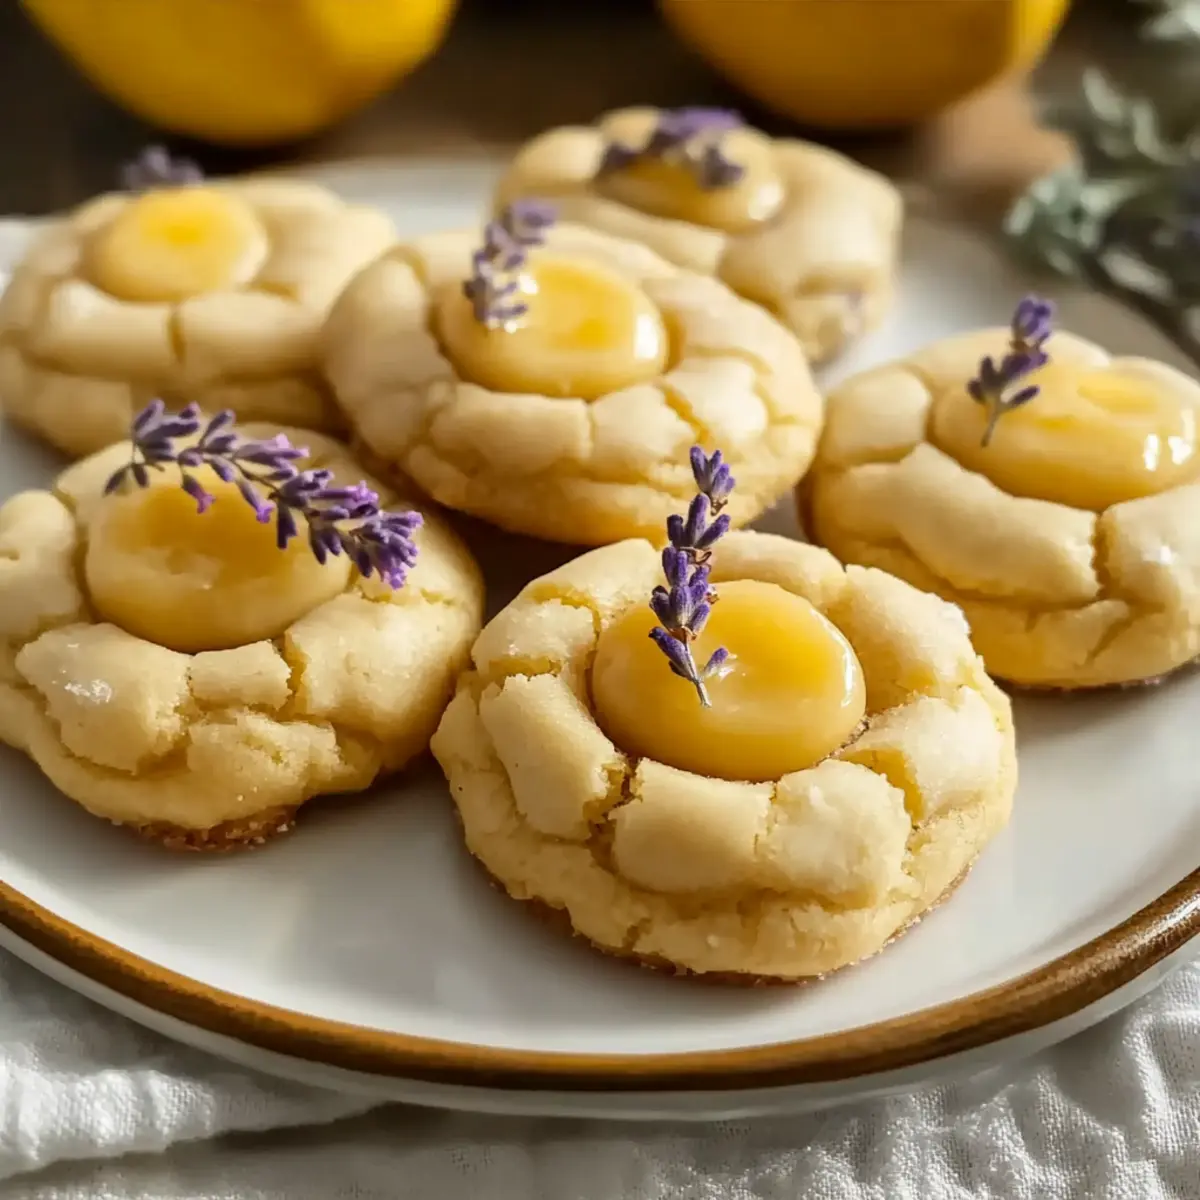
A fragrant wave of citrus and lavender greeted me as I stepped into my kitchen, signaling the perfect afternoon. Today, I’m diving into the delightful world of Lemon Lavender Thumbprint Cookies, an elegant spring treat that pairs beautifully with any occasion, from cozy tea parties to thoughtful gift-giving. The buttery shortbread base melts in your mouth while the zesty lemon curd provides a refreshing pop that transforms an ordinary day into an extraordinary one. Plus, these cookies are not only visually captivating but also make for a quick and easy baking project—a true triumph for any busy home chef! Ready to impress your friends and family with this sophisticated dessert? Let’s bring some sunshine into our kitchens!

Why Are These Cookies So Special?

Delightful Combination: The blend of zesty lemon and aromatic lavender creates a unique flavor sensation that’s both refreshing and elegant. Easy to Make: With just a few simple steps, you can whip up these delicious cookies in no time, perfect for busy bakers. Versatile Options: Swap lemon curd for berry jams or chocolate drizzle for varied tastes, making them suitable for any occasion. Elegant Presentation: These cookies not only taste divine but also look stunning, making them ideal for gifting or serving at tea parties. Explore pairing them with a warm cup of tea or even a delightful side of Lemon Chicken Soup for a well-rounded treat!

Lemon Lavender Thumbprint Cookies Ingredients

For the Cookies

  • Unsalted Butter – Provides richness and creates a tender crumb; make sure it's softened for easy creaming.
  • Powdered Sugar – Adds sweetness and helps create a delicate cookie texture; substitute with granulated sugar for a crunchier bite.
  • Lemon Zest – Infuses cookies with bright citrus flavor; opt for fresh lemons for the best taste, typically requiring zest from about 2 lemons for 1 tablespoon.
  • Dried Culinary Lavender – Introduces delicate floral notes; ensure it's food-grade and finely ground for even distribution.
  • Vanilla Extract – Enhances the floral flavor; feel free to substitute with almond extract if desired.
  • All-Purpose Flour – Key structural component for these cookies; vital for achieving that perfect chewy texture.
  • Salt – Balances the sweetness; don't skip it as it’s essential for flavor development.

For the Filling

  • Lemon Curd – This tangy filling adds moisture and brightness; you can use store-bought or homemade for the best results.

Tip

  • Keep in mind, the delightful Lemon Lavender Thumbprint Cookies will shine even more when paired with quality ingredients!

Step‑by‑Step Instructions for Lemon Lavender Thumbprint Cookies

Step 1: Cream the Butter and Sugar
In a medium mixing bowl, use an electric mixer to beat together 1 cup of softened unsalted butter and ½ cup of powdered sugar on medium speed until light and fluffy, about 3 minutes. The mixture should turn a pale yellow color and have a creamy consistency, indicating it’s ready for the next step.

Step 2: Mix in Flavorings
Add 1 tablespoon of fresh lemon zest, 1 teaspoon of finely ground dried culinary lavender, and 1 teaspoon of vanilla extract to the creamed mixture. Mix on low speed until just combined, and take a moment to enjoy the fragrant aroma filling your kitchen—it sets the stage for your Lemon Lavender Thumbprint Cookies.

Step 3: Combine Dry Ingredients
Gradually sift in 2 cups of all-purpose flour along with a pinch of salt while mixing on low speed. Continue mixing just until the flour disappears and the dough forms; be careful not to overmix, as this could lead to tough cookies. The dough should feel soft yet slightly sticky, ready for shaping.

Step 4: Shape Cookies
Preheat your oven to 350°F (175°C) and line two baking sheets with parchment paper. Roll the cookie dough into 1-inch balls and place them on the prepared baking sheets, spacing them about 2 inches apart. Press your thumb into the center of each ball to create an indent that will hold the tangy lemon curd.

Step 5: Bake
Carefully place the baking sheets in your preheated oven and bake for 12-15 minutes, or until the edges of the cookies turn golden while the centers remain soft. Keep an eye on them to prevent overbaking; they should look slightly puffy and pale in the middle, promising a delightful melt-in-your-mouth experience.

Step 6: Fill with Lemon Curd
Once baked, remove the cookies from the oven and allow them to cool for 5 minutes on the baking sheets. While they’re still warm, fill each thumbprint indentation with a teaspoon of lemon curd. The warmth of the cookie will help the curd adhere nicely, creating a deliciously sweet and tangy centerpiece in your Lemon Lavender Thumbprint Cookies.

Make Ahead Options

These Lemon Lavender Thumbprint Cookies are perfect for meal prep enthusiasts! You can prepare the cookie dough up to 24 hours in advance by rolling the dough into balls and refrigerating them in an airtight container. Alternatively, you can freeze the unbaked dough balls for up to 3 months; just place them on a baking sheet until firm, then transfer to a freezer-safe bag. When you're ready to bake, simply add an extra minute or two to the baking time if baking from frozen. This helps maintain their delicate texture and ensures they stay just as delicious as when freshly made. Enjoy the convenience of having these elegant treats ready to bake at a moment's notice!

Expert Tips for Lemon Lavender Thumbprint Cookies

  • Precision Matters: Use a kitchen scale for accuracy in measuring flour and sugar to ensure perfect cookie texture.
  • Butter Temperature: Make sure your butter is at room temperature to achieve the ideal creamy consistency when creaming it with sugar.
  • Chill the Dough: If the dough feels too soft, refrigerate for 15-20 minutes before shaping to maintain uniform cookie shapes while baking.
  • Lemon Curd Filling: Use room temperature lemon curd for easier filling. Cold curd can be difficult to spread into the thumbprints.
  • Experiment with Flavors: Don’t hesitate to explore variations like chocolate drizzle or berry jams, creating a unique twist on these Lemon Lavender Thumbprint Cookies.

Lemon Lavender Thumbprint Cookies Variations

Feel free to let your creativity shine as you customize these delightful cookies!

  • Berry Lavender: Replace lemon curd with raspberry or blackberry jam for a fruity twist that offers a beautiful burst of color and flavor. Imagine the sweet-tart surprises in each bite!
  • Chocolate Drizzle: Add melted white chocolate drizzled over cooled cookies for a luscious touch that pairs wonderfully with the lemon brightness. It’s all about that sophisticated flair!
  • Orange Blossom: Swap culinary lavender for orange blossom water and use orange curd for an equally refreshing yet different experience, perfect for spring gatherings.
  • Nutty Crunch: Fold in chopped walnuts or pecans into the cookie dough before baking for added texture and nutty flavors that elevate each bite. The crunch complements the soft crumb beautifully.
  • Herbal Infusion: Experiment with fresh herbs like rosemary or thyme to replace the lavender, giving your cookies a fragrant and earthy richness that’s unexpected yet delicious.
  • Gluten-Free: Substitute all-purpose flour with a gluten-free blend or almond flour for those sensitive to gluten, ensuring everyone can indulge!
  • Lemon Lavender Shortbread Bars: Press cookie dough into a baking dish instead of shaping cookies for shortbread bars that are easy to slice and serve. Perfect for casual gatherings!
  • Citrus Zing: Kick up the citrus flavor by adding a bit of lime or orange zest along with the lemon zest for a vibrant and zesty variant that sings of springtime joy!

Whether you're hosting a delightful tea party or simply craving a sweet treat, explore these variations to truly make the recipe your own! Don’t forget to save some for yourself when serving with a hot cup of Lemon Chicken Soup for a perfectly balanced indulgent snack!

What to Serve with Lemon Lavender Thumbprint Cookies

These charming cookies are perfect for brightening up any gathering, effortlessly taking your culinary experience to the next level.

  • Earl Grey Tea: The bergamot flavors in Earl Grey beautifully complement the floral notes of the cookies, making each bite feel like a sophisticated afternoon delight.
  • Fresh Fruit Platter: A medley of berries offers a refreshing tartness, balancing the sweetness of the thumbprint cookies for a vibrant, colorful addition.
  • Vanilla Ice Cream: The creamy richness of vanilla ice cream melts away the tanginess of the lemon curd, creating a delightful contrast in flavors and textures.
  • Sparkling Lemonade: A glass of sparkling lemonade enhances the citrus notes in the cookies, providing a crisp and bubbly refreshment that uplifts your palate.
  • Lavender-Infused Honey: Drizzling this on top of the cookies elevates the floral aroma while adding an interesting twist to both the taste and presentation – a true feast for the senses!
  • Zesty Lemon Sorbet: Its icy coolness offers a palate-cleansing experience, harmonizing with the lemony goodness of the cookies for a refreshing finish.
  • Chocolate Dipped Strawberries: The rich, dark chocolate pairs nicely with the light sweetness of the cookies, making for a decadent and elegant treat that's hard to resist.
  • Lemon Chicken Soup: Pairing with a light soup balances the sweetness and adds depth to your meal, perfect for a cozy afternoon gathering.

Storage Tips for Lemon Lavender Thumbprint Cookies

  • Room Temperature: Keep the cookies in an airtight container at room temperature for up to 5 days to maintain their tender texture and flavor.
  • Freezer: For longer storage, these Lemon Lavender Thumbprint Cookies can be frozen for up to 2 months. Place them in a single layer on a baking sheet to freeze, then transfer to an airtight container.
  • Thawing: Thaw frozen cookies at room temperature for about 30 minutes before serving to enjoy their delightful taste and texture.
  • Make-Ahead Tips: You can also freeze unbaked dough balls for up to 3 months. Bake them straight from frozen, adding an additional minute or two to the baking time for perfect results.

Lemon Lavender Thumbprint Cookies Recipe FAQs

How do I choose ripe lemons for this recipe?
Absolutely! When selecting lemons, look for firm, smooth-skinned ones that feel heavy for their size. Avoid lemons with dark spots or any signs of blemishes. Fresh lemons will yield vibrant zest—a key component to making your Lemon Lavender Thumbprint Cookies truly shine!

What is the best way to store Lemon Lavender Thumbprint Cookies?
To keep your cookies fresh, store them in an airtight container at room temperature for up to 5 days. This method helps maintain their soft texture. If you've made a big batch, they can also be frozen for up to 2 months. Just make sure to label the container with the date!

Can I freeze the dough for Lemon Lavender Thumbprint Cookies?
Definitely! You can freeze the unbaked dough balls for up to 3 months. Place them on a baking sheet in a single layer and freeze until solid. Then transfer the frozen dough balls to an airtight container. When you're ready to bake, simply preheat the oven and bake straight from frozen, adding an extra minute or two as needed.

What happens if my cookies spread too much during baking?
Very! If your cookies spread too much, it’s usually due to warm dough. To troubleshoot, refrigerate the dough for 15-20 minutes before shaping, which helps maintain their shape. Additionally, ensure your butter is softened but not melted, and be careful not to overmix the dough, as this can lead to overly warm consistency.

Do these cookies contain allergens I should be aware of?
Absolutely! If you're baking for someone with allergies, be cautious with ingredients. The Lemon Lavender Thumbprint Cookies contain butter and flour, which are not suitable for those with lactose intolerance or gluten allergies. You can experiment with dairy-free and gluten-free substitutes if needed! For the lavender, make sure you're using food-grade dried lavender to avoid any contaminants.

How can I make variations of these cookies?
The more the merrier! To vary your Lemon Lavender Thumbprint Cookies, consider substituting the lemon curd with berry jams like raspberry or blackberry. For a decadent twist, drizzle melted white chocolate over the cooled cookies. Don’t forget about trying orange blossom water in place of the lavender for a fresh citrus alternative!

Lemon Lavender Thumbprint Cookies

Delicious Lemon Lavender Thumbprint Cookies for Spring Celebrations

Lemon Lavender Thumbprint Cookies are an elegant spring treat with a buttery shortbread base and zesty lemon curd that transform any occasion.
Print Recipe Pin Recipe
Prep Time 20 minutes mins
Cook Time 15 minutes mins
Cooling Time 5 minutes mins
Total Time 40 minutes mins
Servings: 24 cookies
Course: Dessert
Cuisine: American
Calories: 150
Ingredients Equipment Method Nutrition Notes

Ingredients
  

For the Cookies
  • 1 cup unsalted butter softened
  • 0.5 cup powdered sugar or granulated sugar for crunchier cookies
  • 1 tbsp lemon zest zest from about 2 lemons
  • 1 tsp dried culinary lavender finely ground
  • 1 tsp vanilla extract or almond extract
  • 2 cups all-purpose flour
  • 1 pinch salt essential for flavor
For the Filling
  • 1 cup lemon curd store-bought or homemade

Equipment

  • Mixing Bowl
  • Electric mixer
  • Baking Sheets
  • Parchment Paper
  • sifter

Method
 

Step‑by‑Step Instructions
  1. Cream the butter and sugar by beating together the softened unsalted butter and powdered sugar until light and fluffy, about 3 minutes.
  2. Mix in flavorings by adding lemon zest, dried culinary lavender, and vanilla extract to the creamed mixture, then mix until just combined.
  3. Combine dry ingredients by sifting in all-purpose flour and salt while mixing, being careful not to overmix.
  4. Shape the cookies by rolling the dough into 1-inch balls and pressing a thumbprint into each before baking.
  5. Bake in a preheated oven for 12-15 minutes until edges are golden and centers remain soft.
  6. Fill the cookies with lemon curd while still warm, allowing the curd to adhere nicely.

Nutrition

Serving: 1cookieCalories: 150kcalCarbohydrates: 20gProtein: 1gFat: 7gSaturated Fat: 4gMonounsaturated Fat: 2gCholesterol: 30mgSodium: 50mgPotassium: 30mgSugar: 8gVitamin A: 200IUVitamin C: 1mgCalcium: 10mgIron: 0.5mg

Notes

These cookies pair well with a warm cup of tea and can be varied with chocolate drizzle or berry jams.

Tried this recipe?

Let us know how it was!

Classic Homemade Orange Candy That Brightens Your Day

April 25, 2026 by Grace Snow Leave a Comment

The kitchen was filled with the citrusy aroma of fresh oranges, instantly transforming the space into a vibrant haven. Today, I’m excited to share my recipe for Classic Homemade Orange Candy—a delightful twist on snacking that’s not only a feast for the senses but also remarkably simple to whip up! With just two ingredients, you’ll create chewy, tangy slices that elevate desserts or serve as an elegant garnish for cocktails. Plus, these candies are naturally vegan and gluten-free, making them a sweet treat everyone can enjoy. Best of all, they can be made ahead and stored, ready to brighten any occasion. Curious to see how easy it is to bring this citrus delight to life? Let's dive in!

Why Should You Make Orange Candy?

Simple Process: Candy-making can often seem intimidating, but with this recipe, you only need two main ingredients and minimal preparation.

Versatile Treat: These orange slices aren’t just snacks—they can enhance desserts like cheesecakes or tarts. As a garnish for cocktails, they become the centerpiece of your beverage presentation!

Vibrant Flavor: The chewy texture and tangy sweetness of fresh oranges create a delightful candy that’s both refreshing and satisfying.

Make Ahead and Store: You can prepare these candies in advance and enjoy them for up to a month, keeping your kitchen stocked with a delightful treat whenever the craving strikes.

Healthy Indulgence: Naturally vegan and gluten-free, this recipe is perfect for those seeking a healthier alternative to traditional sweets. If you love unique homemade goodies, you may also enjoy Homemade Hot Chocolate or Mini Tropical Pavlovas for a delightful culinary adventure!

Classic Homemade Orange Candy Ingredients

• Get ready to create a vibrant treat!

For the Candy

  • Oranges (3 small or tangelos) – These are the star ingredient, providing fresh flavor and a beautiful color; smaller oranges yield neater slices.
  • Granulated Sugar (3 cups) – Essential for candied orange texture and sweetness; don't reduce it, or the candy won't set properly.
  • Water (3 cups) – This forms the syrup base to gently cook the oranges until they reach that perfect candied finish.

These simple ingredients come together beautifully to create your very own Classic Homemade Orange Candy, perfect for snacking or as a lovely garnish!

Step‑by‑Step Instructions for Classic Homemade Orange Candy

Step 1: Prepare Oranges
Begin by slicing three small oranges or tangelos into ¼-inch rounds using a sharp knife or mandoline. Ensure your slices are uniform, as this promotes even cooking. Arrange the slices in a single layer on a clean cutting board, showing off their vibrant color and juicy texture.

Step 2: Make Syrup
In a large skillet, combine three cups of granulated sugar and three cups of water. Heat the mixture over medium-high heat, stirring gently until the sugar completely dissolves. Once dissolved, bring the syrup to a boil, showcasing tiny bubbles breaking on the surface, indicating it's ready for the next phase.

Step 3: Simmer Oranges
Carefully add the orange slices to the boiling syrup, making sure to accommodate them in a single layer. Reduce the heat to maintain a gentle simmer, and allow the slices to cook for 45–60 minutes. Turn the slices occasionally during this time, watching as their peels gradually transform into a translucent, jewel-like appearance.

Step 4: Dry Slices
After simmering, use tongs to carefully remove the candied orange slices from the syrup. Place them in a single layer on a wire rack, ensuring adequate airflow around each slice. Let them dry at room temperature for 24–48 hours, until they become tacky yet set, ready to showcase their candied charm.

Step 5: Optional Finishes
To add a touch of sweetness and sparkle, consider rolling the dried orange slices in additional granulated sugar for a frosted effect. Alternatively, for a decadent twist, dip the slices in melted chocolate. Allow any chocolate-dipped slices to cool on a wire rack, enhancing their elegance and richness.

What to Serve with Classic Homemade Orange Candy

Indulging in sweet, tangy candied orange slices opens up a world of delightful pairing possibilities for your next gathering or cozy night in.

  • Creamy Cheesecake: The rich creaminess of cheesecake beautifully contrasts with the refreshing citrus notes, creating a perfect balance of flavors.

  • Chocolate Tart: A decadent chocolate tart pairs harmoniously with the bright, zesty candy slices, elevating your dessert spread with visual appeal and taste.

  • Sparkling Water: Serve with sparkling water infused with fresh mint or lemon for a refreshing, bubbly complement that enhances the candy's citrusy essence.

  • Herbal Tea: A warm cup of chamomile or peppermint tea creates a soothing experience, harmonizing with the orange's sweetness while adding depth to your snacking.

  • Vanilla Ice Cream: The cold, creamy texture of vanilla ice cream wonderfully contrasts with the chewy orange candy, making for a delightful indulgence.

  • Fruit Salad: Toss in candied slices into a vibrant fruit salad for an unexpected twist, adding sweet notes and colorful flair to fresh fruit.

  • Mimosas: These brunch favorites get a special upgrade with a few candied orange slices as garnish, lending a lovely citrus twist to your brunch cocktails.

  • Dark Chocolate Dipping Sauce: Pair your candy with a warm, rich chocolate sauce for an indulgent sweet-and-sour treat that’s bound to impress.

Mix and match these delightful options to create a stunning presentation that will make any occasion feel extra special!

Classic Homemade Orange Candy Variations

Feel free to get creative with your orange candy creation for an even more delightful treat!

  • Citrus Swap: Use lemons, limes, or blood oranges instead of regular oranges for refreshing flavors and vibrant colors. Each citrus fruit offers its own unique twist, ensuring your candy remains interesting!

  • Half-Moon Shapes: Cut larger orange slices in half to create half-moon shapes, making them easier to manage during cooking and perfect for snacking. They still deliver all the chewy, tangy goodness!

  • Mandarins or Clementines: For bite-sized treats, opt for small mandarins or clementines. Their sweetness and convenience make them the ideal choice for holiday gatherings or casual snacking.

  • Spiced Sugar: Add a pinch of cinnamon or ginger to the sugar before candying for a warm, aromatic twist. The spices infuse the oranges with delightful new flavors that are sure to please.

  • Chocolate Dipping: Enhance your candy by dipping the final dried slices in melted dark or white chocolate. The rich chocolate coating adds an indulgent finish that'll impress any sweet tooth.

  • Flavored Syrup: Infuse your syrup with a splash of vanilla or a few sprigs of fresh mint for an extra layer of flavor. These subtle additions transform your candy into a sophisticated delight.

  • Zesty Garnish: For a citrus burst, sprinkle freshly grated orange zest on top of your sugar-dusted slices. This will amplify the orange flavor and add a pretty finishing touch!

  • Flaky Salt Finish: For a gourmet touch, sprinkle a pinch of flaky sea salt on chocolate-dipped slices, creating an enticing sweet-salty contrast that elevates the entire experience.

If you're a fan of unique homemade treats, you may also enjoy making Chicken Dumplings Cozy to warm up your kitchen or indulging in a rich serving of Homemade Hot Chocolate on chilly evenings. Happy candy-making!

Make Ahead Options

Preparing Classic Homemade Orange Candy is a wonderful way to save time, especially during busy weeks! You can slice the oranges and prepare the sugar syrup up to 24 hours in advance; simply refrigerate the prepared ingredients until you're ready to cook. After simmering the slices as directed, you can let them dry for 24–48 hours at room temperature. For best results, ensure they are stored in a single layer on a wire rack to maintain their shape and prevent stickiness. When you're ready to enjoy your homemade candy, simply finish with an optional roll in sugar or a dip in chocolate for a delightful touch. With this make-ahead strategy, your treats will be just as delicious, ready for any occasion!

How to Store and Freeze Classic Homemade Orange Candy

Fridge: Store your candied orange slices in an airtight container in the fridge for up to 1 month. Layer them with parchment paper to prevent sticking.

Room Temperature: You can keep the slices at room temperature for about 1 month. Just ensure they are in an airtight container, away from direct sunlight.

Freezer: For longer storage, freeze the orange slices in a single layer on a baking sheet, then transfer to a freezer-safe bag. They can last for up to 6 months.

Reheating: If thawing from the freezer, allow them to sit at room temperature for a few hours before enjoying. No need to reheat; they’re delicious as is!

Expert Tips for Classic Homemade Orange Candy

  • Uniform Slices: Ensure your orange slices are ¼-inch thick. This helps them cook evenly and achieve that perfect translucent texture without being soggy.
  • Simmer Time: Don’t rush the simmering process; 45–60 minutes is essential for softening the peels and achieving a chewy texture in your classic homemade orange candy.
  • Sugar Importance: Resist the urge to reduce sugar in the syrup; it’s crucial for preserving the fruit and achieving the candy texture. Less sugar will yield disappointing results!
  • Proper Drying: Make sure to let the slices dry for 24–48 hours at room temperature. This step helps them set properly and prevents them from sticking together.
  • Flavor Boost: For a unique twist, sprinkle a little flaky salt on chocolate-dipped slices for an enticing sweet-salty bite.

Classic Homemade Orange Candy Recipe FAQs

What kind of oranges should I use for this recipe?
Absolutely! For the best results, opt for small oranges or tangelos that have a bright color and are free from any dark spots. Smaller oranges yield more uniform slices, which not only look better but also candy evenly. If you're feeling adventurous, consider using blood oranges for a unique twist in both flavor and color!

How should I store my Classic Homemade Orange Candy?
Very important! Store your candied orange slices in an airtight container at room temperature for up to 1 month. To keep them fresh and prevent sticking, layer the slices with parchment paper. If you prefer to refrigerate them, they can last the same amount of time, just ensure they remain in an airtight environment.

Can I freeze the candied orange slices?
Of course! To freeze your Classic Homemade Orange Candy, start by spreading the slices in a single layer on a baking sheet to prevent them from sticking together. Freeze for about 2 hours, then transfer the slices to a freezer-safe bag or container. They can be stored in the freezer for up to 6 months. To thaw, simply leave them at room temperature for a couple of hours before enjoying!

What do I do if my orange slices are soggy after simmering?
If your slices are soggy, it typically means they haven't been simmered long enough for the pith to become translucent. To fix this, return them to the syrup and simmer for an additional 10-20 minutes, turning them occasionally. Patience is key! Once they reach that lovely translucent look, dried slices will hold their shape beautifully.

Are these candies safe for my pets?
While the Classic Homemade Orange Candy is a delicious treat for humans, it’s not suitable for pets, particularly dogs and cats. Citrus fruits can be toxic to some animals, causing stomach discomfort or more serious issues. Always keep these sweet treats far out of reach from your furry friends!

Can I reduce the sugar in the syrup?
I strongly advise against reducing the sugar in your recipe! The sugar is crucial not only for sweetness but also for the candying process and preserving the fruit. Less sugar may lead to a failed batch with soggy slices that don’t set properly. Stick to the recipe for the best results!

Classic Homemade Orange Candy

Classic Homemade Orange Candy That Brightens Your Day

Classic Homemade Orange Candy is a simple, delightful treat perfect for snacking or garnishing cocktails.
Print Recipe Pin Recipe
Prep Time 15 minutes mins
Cook Time 1 hour hr
Drying Time 1 day d
Total Time 1 day d 1 hour hr
Servings: 12 slices
Course: Dessert
Cuisine: Gluten-Free, Vegan
Calories: 120
Ingredients Equipment Method Nutrition Notes

Ingredients
  

For the Candy
  • 3 small Oranges or tangelos These are the star ingredient, providing fresh flavor and a beautiful color.
  • 3 cups Granulated Sugar Essential for candied orange texture and sweetness.
  • 3 cups Water Forms the syrup base to gently cook the oranges.

Equipment

  • Skillet
  • Knife
  • mandoline
  • wire rack
  • Tongs

Method
 

Step-by-Step Instructions
  1. Begin by slicing three small oranges or tangelos into ¼-inch rounds using a sharp knife or mandoline.
  2. In a large skillet, combine three cups of granulated sugar and three cups of water. Heat the mixture over medium-high heat, stirring until the sugar dissolves.
  3. Carefully add the orange slices to the boiling syrup, making sure they are in a single layer. Reduce heat and simmer for 45–60 minutes, turning occasionally.
  4. After simmering, use tongs to remove the candied orange slices from the syrup and place them on a wire rack to dry for 24–48 hours.
  5. Optionally, roll the dried orange slices in additional sugar or dip in melted chocolate for added sweetness.

Nutrition

Serving: 1sliceCalories: 120kcalCarbohydrates: 30gProtein: 1gPotassium: 50mgFiber: 1gSugar: 28gVitamin A: 2IUVitamin C: 70mgCalcium: 2mgIron: 2mg

Notes

Store in an airtight container in the fridge for up to 1 month, or freeze for up to 6 months.

Tried this recipe?

Let us know how it was!

Fluffy & Fun Cotton Candy Popcorn for Sweet Movie Nights

April 25, 2026 by Grace Snow Leave a Comment

The aroma of freshly popped popcorn fills the air, transporting me back to sun-soaked summer fairs, where the sweet, sugary scent of cotton candy danced with laughter and excitement. Today, I bring a slice of that nostalgia into your kitchen with my Fluffy & Fun Cotton Candy Popcorn recipe! In just 25 minutes, you can whip up this delightful snack that’s perfect for movie nights or birthday parties. It’s a surefire crowd-pleaser that combines a crunchy texture with a melt-in-your-mouth coating and the whimsical flavor of cotton candy. Plus, it’s an easy treat that you can make with the kids, sparking joy in every pop! So, are you ready to add a touch of carnival magic to your next gathering?

Why is Cotton Candy Popcorn So Special?

Sweet Nostalgia: This delightful treat captures the essence of summer fairs, filling your home with sugary memories.

Quick to Make: In just 25 minutes, you can create this sweet delight, making it ideal for spontaneous gatherings or movie nights.

Perfect for Sharing: It’s a crowd-pleaser that appeals to both kids and adults alike—every bite is a fun experience!

Endless Customization: Feel free to experiment with different flavors or colors, making each batch a unique creation. Check out my suggestions for variations to explore! Whether you're looking to blend flavors or add a colorful twist, the opportunities are endless.

Simple Preparation: With just a few ingredients and easy steps, even novice cooks can whip this up effortlessly. Grab some friends, and dive into the joy of homemade treats!

Fluffy & Fun Cotton Candy Popcorn Ingredients

For the Popcorn Base
• Popped Popcorn – about 10 cups deliver that perfect crunch; use 1/2 cup of unpopped kernels to yield the amount needed.

For the Sweet Coating
• Unsalted Butter – provides richness and helps the sugar adhere; you can substitute with margarine if needed.
• Granulated Sugar – adds sweetness and gives the coating its chewy texture.
• Light Corn Syrup – ensures a smooth coating by preventing sugar crystallization; dark corn syrup is a flavorful alternative.
• Water – assists in creating that silky sugar syrup.
• Salt – balances sweetness; kosher salt is recommended for better texture.
• Vanilla Extract – enhances the flavor profile; almond extract can give it a unique twist.
• Cotton Candy Flavoring (e.g., LorAnn’s) – the essential flavor that brings cotton candy taste to life; essential for authenticity.
• Gel Food Coloring – optional; vibrant colors like pink or blue add a whimsical touch.

For Extra Flourish
• Sprinkles – optional for decoration; they add extra charm and fun to your treat!

Get ready to whip up your very own Fluffy & Fun Cotton Candy Popcorn that will spark joy and excitement at your next gathering!

Step‑by‑Step Instructions for Fluffy & Fun Cotton Candy Popcorn

Step 1: Prep Popcorn
Begin by popping about 1/2 cup of unpopped popcorn kernels in an air popper or stovetop, then transfer the fluffy popcorn into a large mixing bowl. Make sure there are no unpopped kernels left, as they can ruin the joy of your Fluffy & Fun Cotton Candy Popcorn. Set the bowl aside while you prepare the sweet coating.

Step 2: Make Sugar Syrup
In a medium saucepan, combine 1/2 cup of unsalted butter, 1 cup of granulated sugar, 1/4 cup of light corn syrup, 1 tablespoon of water, and 1/4 teaspoon of salt. Heat the mixture over medium heat, stirring occasionally until the sugar fully dissolves, which will take around 2-3 minutes. Once dissolved, increase the heat, bringing it to a vigorous boil.

Step 3: Cook Syrup
Allow the syrup to boil without stirring for about 5 minutes, monitoring the temperature with a candy thermometer. You'll want it to reach the soft ball stage, which is around 240°F. Keep an eye on its color and thickness, as it will transform into a beautiful, glossy syrup perfect for coating your popcorn.

Step 4: Flavor and Color
Remove the saucepan from heat immediately once it reaches temperature, then carefully stir in 1 teaspoon of vanilla extract and 1 teaspoon of cotton candy flavoring. If you'd like a whimsical touch, add a few drops of gel food coloring at this stage, mixing it in until you achieve your desired hue. The syrup should smell delightful and look vibrant!

Step 5: Coat Popcorn
Pour the warm syrup gently over the prepared popcorn in the bowl. Use a large spatula to carefully mix and coat the popcorn, ensuring every fluffy piece is covered with the sticky, sweet syrup. This smooth coating will give your Fluffy & Fun Cotton Candy Popcorn its signature taste and texture, so blend thoroughly!

Step 6: Cool and Serve
Once coated, spread the popcorn mixture onto a baking sheet lined with parchment paper. Allow it to cool completely for about 15 minutes, as this will make it easier to break apart into clusters. Once cooled, use your hands to break the popcorn into bite-sized pieces, and feel free to add sprinkles for a festive touch before serving or storing.

Expert Tips for Fluffy & Fun Cotton Candy Popcorn

• Work Quickly: Once the syrup reaches the soft ball stage, it thickens rapidly. Ensure you coat the popcorn without delay to achieve that perfect texture.

• Use a Large Bowl: When mixing the popcorn and syrup, a spacious bowl allows for easier and more even coating—each fluffy kernel deserves its fair share of sweetness!

• Check for Unpopped Kernels: Before mixing in the syrup, double-check your popped popcorn for any unpopped kernels. Missing them can lead to disappointing crunches while enjoying your cotton candy popcorn.

• Adjust for Storage: Store your Fluffy & Fun Cotton Candy Popcorn in an airtight container to keep it crispy and fresh. Avoid exposure to humidity which can alter its delightful crunch.

• Customize Your Flavor: Don’t hesitate to get inventive! While cotton candy flavoring is the star, experiment with various extracts or food colorings to create personalized versions that reflect your unique taste.

How to Store and Freeze Fluffy & Fun Cotton Candy Popcorn

Room Temperature: Store your Fluffy & Fun Cotton Candy Popcorn in an airtight container at room temperature to keep it fresh and crunchy. This will last up to 1 week, making it perfect for snacking throughout the week.

Freezer: While freezing is not ideal due to potential loss of crispiness, if you must, place the popcorn in a freezer-safe bag or container. It can last for up to 3 months; just allow it to thaw at room temperature before enjoying.

Reheating: If you find your popcorn has lost its crispness, you can revive it by spreading it on a baking sheet and warming it in a preheated oven at 250°F for about 5-10 minutes. This can help restore freshness, allowing those delightful flavors to shine again!

Fluffy & Fun Cotton Candy Popcorn Variations

Get ready to personalize your snack with exciting twists that will tickle your taste buds and elevate your popcorn experience!

  • Flavor Swaps: Substitute cotton candy flavoring with bubblegum or strawberry for a fun twist that resonates with childhood favorites.

  • Nutty Delight: Add a sprinkle of finely chopped nuts, like almonds or peanuts, to give your popcorn an extra crunch and nutty flavor.

  • Choco-Boost: Drizzle melted chocolate over the cooled popcorn to create a decadent combination that balances the sweetness of cotton candy.

  • Savory Kick: Consider adding a pinch of cayenne pepper to the syrup for a surprising and delightful heat that contrasts with the sweetness.

  • Color Explosion: Mix in colorful candy pieces or M&Ms for a vibrant visual and an extra layer of sweetness—each handful becomes a treasure!

  • Festive Sprinkles: Enhance the fun by incorporating themed sprinkles that match your occasion—think holiday colors or confetti for birthdays!

  • Dairy-Free Version: Use coconut oil instead of butter and maple syrup in place of corn syrup for a deliciously creamy, dairy-free alternative without losing flavor.

  • Cinnamon Sugar: Before adding the syrup, toss the popcorn with a sprinkle of cinnamon sugar for a warm, cozy flavor that evokes memories of fall fairs.

Let your creativity soar and enjoy the delightful process of making this sweet snack truly your own! If you're curious about more ideas or flavor inspirations, don't hesitate to explore what matches your mood!

What to Serve with Fluffy & Fun Cotton Candy Popcorn

The sweet aroma of cotton candy popcorn pairs beautifully with a variety of treats, making your gatherings even more delightful.

  • Ice Cream Sundaes: The creamy, cold texture of ice cream complements the crunchy, sugary popcorn. Top it off with some popcorn for a playful twist!

  • Fruit Salad: A vibrant mix of fresh fruits adds a refreshing, juicy contrast. The natural sweetness balances out the sugary popcorn, making for a light treat.

  • Chocolate-Covered Pretzels: Salty and sweet, these crunchy snacks offer a delightful variation in texture. They introduce a savory element to enhance your dessert table's diversity.

  • Homemade Lemonade: The zesty tang of lemonade brightens your palate. Not only is it refreshing, but it also transforms your sweet snack into a nostalgic carnival experience.

  • Mini Cupcakes: These adorable, bite-sized treats are perfect for a party spread. Choosing vibrant frosting colors ties in nicely with your cotton candy theme.

  • Sparkling Water: Add a touch of elegance with sparkling water. Flavored varieties infuse a hint of zest, making it an ideal, refreshing beverage alongside your fluffy and fun treat.

For any festive occasion, these pairings make your gathering feel complete, ensuring that everyone has a memorable experience!

Make Ahead Options

These Fluffy & Fun Cotton Candy Popcorn treats are a fantastic choice for busy home cooks looking to save time! You can prepare the popcorn and coat it with the sweet syrup up to 24 hours in advance. Simply pop the popcorn, make the syrup, and coat the popcorn, then allow it to cool completely. Store the coated popcorn in an airtight container at room temperature to keep it crispy and fresh. When you're ready to serve, just break it into clusters and add sprinkles if desired. This way, you can enjoy sweet, carnival-inspired snacks with minimal stress!

Fluffy & Fun Cotton Candy Popcorn Recipe FAQs

How do I select ripe ingredients for my Fluffy & Fun Cotton Candy Popcorn?
Absolutely! For the best results, choose fresh, high-quality ingredients. Look for unsalted butter that’s creamy and smooth, and make sure your granulated sugar is free from clumps. The cotton candy flavoring should ideally be from a reputable brand, like LorAnn’s, for an authentic taste that brings that carnival essence to your kitchen!

How should I store Fluffy & Fun Cotton Candy Popcorn?
Store your Fluffy & Fun Cotton Candy Popcorn in an airtight container at room temperature to keep it fresh and crunchy. This delicious treat will maintain its delightful texture for about 1 week. Avoid placing it in the fridge as moisture will impact its crispiness.

Can I freeze Fluffy & Fun Cotton Candy Popcorn?
While freezing isn’t the best option due to the potential loss of crunch, if necessary, you can freeze it! Place the popcorn in a freezer-safe bag or container and it will last for up to 3 months. To enjoy later, simply allow it to thaw at room temperature before indulging in this sweet treat.

What if my sugar syrup doesn't reach the right temperature?
No worries! If your syrup doesn’t reach the soft ball stage (240°F), you can return it to heat. Continue cooking and monitoring with a candy thermometer until it reaches the right temperature. If it’s too thick, you can add a tablespoon of water to loosen it up slightly before pouring it over the popcorn.

Are there any dietary considerations for Fluffy & Fun Cotton Candy Popcorn?
If you have allergies or dietary restrictions, consider alternatives carefully. You can substitute the unsalted butter with margarine, and if you're avoiding gluten, this recipe is naturally gluten-free as long as your popcorn is certified gluten-free. For those with nut allergies, use vanilla extract instead of almond extract, and opt for simple, colorful sprinkles that do not contain allergens.

What are some common troubleshooting tips for making Fluffy & Fun Cotton Candy Popcorn?
Very! If your popcorn isn't coating well, make sure your syrup is warm enough to remain fluid; you may need to give it a gentle reheat. If it becomes too sticky, you might have cooked the syrup too long. When mixing, use a large spatula to ensure even coating—this way, every fluffy piece gets its share of sweetness! Happy popping!

Fluffy & Fun Cotton Candy Popcorn

Fluffy & Fun Cotton Candy Popcorn for Sweet Movie Nights

Experience the whimsy of Fluffy & Fun Cotton Candy Popcorn – a perfect treat for movie nights and parties!
Print Recipe Pin Recipe
Prep Time 10 minutes mins
Cook Time 15 minutes mins
Cooling Time 15 minutes mins
Total Time 25 minutes mins
Servings: 10 cups
Course: Snacks
Calories: 150
Ingredients Equipment Method Nutrition Notes

Ingredients
  

For the Popcorn Base
  • 10 cups Popped Popcorn Use 1/2 cup of unpopped kernels
For the Sweet Coating
  • 1/2 cup Unsalted Butter Can substitute with margarine
  • 1 cup Granulated Sugar
  • 1/4 cup Light Corn Syrup Dark corn syrup can be used as an alternative
  • 1 tablespoon Water
  • 1/4 teaspoon Salt Kosher salt recommended
  • 1 teaspoon Vanilla Extract Almond extract for a twist
  • 1 teaspoon Cotton Candy Flavoring Essential for authenticity
  • Gel Food Coloring Optional for color
For Extra Flourish
  • Sprinkles Optional for decoration

Equipment

  • Air Popper or Stovetop
  • Medium saucepan
  • large mixing bowl
  • candy thermometer
  • Baking Sheet
  • Parchment Paper

Method
 

Step-by-Step Instructions
  1. Begin by popping about 1/2 cup of unpopped popcorn kernels in an air popper or stovetop, then transfer the fluffy popcorn into a large mixing bowl. Set the bowl aside.
  2. In a medium saucepan, combine 1/2 cup of unsalted butter, 1 cup of granulated sugar, 1/4 cup of light corn syrup, 1 tablespoon of water, and 1/4 teaspoon of salt. Heat over medium, stirring occasionally until sugar dissolves (about 2-3 minutes).
  3. Allow the syrup to boil without stirring for about 5 minutes, monitoring the temperature until it reaches 240°F.
  4. Remove from heat and carefully stir in 1 teaspoon of vanilla extract and 1 teaspoon of cotton candy flavoring. Add gel food coloring if desired.
  5. Pour the warm syrup gently over the popcorn in the bowl. Use a large spatula to mix and coat thoroughly.
  6. Spread the coated popcorn onto a baking sheet lined with parchment paper and allow it to cool completely for about 15 minutes.
  7. Once cooled, break the popcorn into bite-sized pieces and add sprinkles if desired.

Nutrition

Serving: 1cupCalories: 150kcalCarbohydrates: 20gProtein: 1gFat: 7gSaturated Fat: 4gPolyunsaturated Fat: 1gMonounsaturated Fat: 1gCholesterol: 15mgSodium: 100mgPotassium: 30mgFiber: 1gSugar: 10gCalcium: 1mgIron: 1mg

Notes

Store in an airtight container at room temperature for up to 1 week. For freezing, use a freezer-safe bag for up to 3 months. To revive crispness, spread on a baking sheet and warm in a preheated oven at 250°F for 5-10 minutes.

Tried this recipe?

Let us know how it was!

Delicious Vanilla Cream Filled Caramel for Nostalgic Treats

April 25, 2026 by Grace Snow Leave a Comment

As I stood in my kitchen, the warm, rich smell of caramel began to envelop the room, taking me back to my childhood days filled with sweet discoveries. There's something so comforting about making homemade Vanilla Cream Filled Caramels—it’s the nostalgia of soft, chewy indulgence wrapped around a heavenly cream center that brings joy to anyone who bites in. This recipe not only allows you to create a delightful treat that’s perfect for gifting or sharing but also makes candy-making feel accessible and enjoyable, even for beginners. Plus, who can resist the allure of homemade candy that warms the heart and satisfies the sweet tooth? Are you ready to bring back those cherished memories in your kitchen?

Why Make Vanilla Cream Filled Caramels?

Nostalgic Taste: Each bite transports you back to simpler times, bringing a smile with that classic caramel flavor.

Easy Recipe: Perfect for beginner candy makers, this approachable recipe ensures a fun kitchen experience for anyone.

Customizable Fun: Want to switch things up? Try using almond extract or incorporating crunchy nuts for delightful variations.

Perfect for Gifting: Impress friends and family with beautifully wrapped caramels—ideal for sharing during holidays or special occasions!

Versatile Pairing: Enjoy these treats alone or pair them with a warm cup of coffee or hot cocoa to elevate your dessert experience.

Vanilla Cream Filled Caramel Ingredients

• Let’s gather everything you need to make these delightful homemade candies!

For the Caramel

  • Unsalted Butter – Provides richness and flavor; substitute with salted butter, reducing added salt.
  • Brown Sugar – Adds sweetness and a deep caramel flavor; can be replaced with coconut sugar for a less processed option.
  • Salt – Enhances flavor; use sea salt for a different taste profile.
  • Evaporated Milk – Contributes creaminess; regular milk can be used, but the texture will vary.
  • Heavy Cream – Adds richness; half-and-half can be used as a lighter option.
  • Corn Syrup – Prevents crystallization; substitute with glucose syrup or agave syrup.

For the Vanilla Cream

  • Powdered Sugar – Necessary for the vanilla cream texture; no alternative is recommended for this purpose.
  • Vegetable Shortening – Provides texture and stability to the cream; coconut oil can be a substitute but may alter flavor.
  • Vanilla – Essential for flavor; use pure vanilla extract for best results.

Remember, the journey of making your vanilla cream filled caramels is just as sweet as the end result!

Step‑by‑Step Instructions for Vanilla Cream Filled Caramels

Step 1: Prepare the Parchment
Start by preparing a large piece of parchment paper, large enough to create a 10" x 16" rectangle. Lay it on a clean, flat surface, and lightly grease the area to prevent sticking. This is where you’ll pour your warm caramel later, so ensure the parchment is securely in place and ready for the delicious vanilla cream filled caramels.

Step 2: Combine Ingredients
In a heavy-duty pot, combine unsalted butter, brown sugar, salt, evaporated milk, heavy cream, and corn syrup. Set the pot on the stovetop over medium-low heat, stirring continuously until the ingredients have melted and melded together into a smooth mixture, which should take about 5 minutes. Keep your eyes on it to prevent scorching!

Step 3: Bring to a Boil
Once your mixture is smooth, increase the heat to medium. Bring the caramel mixture to a gentle boil while stirring constantly. This will take approximately 5-7 minutes, so stay vigilant; you want to achieve that perfect bubbling hot texture to ensure even cooking as you move on to the next stage of creating your vanilla cream filled caramels.

Step 4: Reach the Soft Ball Stage
After boiling, turn up the heat to medium-high and keep stirring until the mixture reaches 241°F on your candy thermometer, which indicates the soft ball stage. This process may take around 10 minutes. You’ll notice the caramel thickening and turning a lovely golden hue—this is your cue to remove it from the heat.

Step 5: Pour the Caramel
Carefully pour the hot caramel onto your prepared parchment paper. Use a spatula to spread it evenly into a thin layer, about a half-inch thick. Let the caramel cool completely for about 1-2 hours at room temperature. This ensures that they set properly, ready for you to add that luscious vanilla cream filling.

Step 6: Make the Vanilla Cream
While the caramel cools, prepare the vanilla cream filling. In a mixing bowl, combine vegetable shortening, powdered sugar, corn syrup, and vanilla extract. Using a hand mixer, beat together until the mixture is crumbly yet cohesive. This should take about 3-5 minutes. The warmth of your homemade vanilla cream filled caramels will come from this sweet concoction!

Step 7: Achieve the Right Consistency
Gradually add water—a tablespoon at a time—to the cream mixture until it reaches a dough-like consistency that holds together well but isn’t too sticky. Expect this process to take around 5 minutes. Your goal is a creamy texture that will spread easily between the layers of caramel.

Step 8: Roll the Caramels
Once the caramel is fully cooled, cut it into four equal pieces. Spread a half-height layer of the luscious vanilla cream mixture on one side of each caramel piece. Gently roll each piece tightly like a cinnamon roll, then further roll them to lengthen. This technique helps achieve that dreamy swirl of cream inside each vanilla cream filled caramel.

Step 9: Cut and Wrap
Using a sharp knife, slice the rolled caramels into ½" pieces. For the neatest slices, heat your knife with warm water and spray it with cooking spray before cutting. Once cut, wrap each individual piece in cello or wax paper to keep them fresh and prevent them from sticking together.

Step 10: Enjoy Your Creation
Now that your vanilla cream filled caramels are beautifully wrapped, store them at room temperature in an airtight container for 1-2 months, or share them immediately with friends and family. Experience the joy of homemade candy that captures both flavor and nostalgia with every bite!

Make Ahead Options

These vanilla cream filled caramels are perfect for meal prep enthusiasts! You can prepare the caramel layer up to 24 hours in advance by following steps 1-5, allowing it to cool completely. Simply wrap the set caramel tightly in plastic wrap and store it in the refrigerator to maintain its chewiness and prevent any moisture absorption. Additionally, you can mix the vanilla cream filling (steps 6-7) a day before serving, storing it in an airtight container in the fridge as well. When you're ready to finish your vanilla cream filled caramels, simply roll, cut, and wrap them as per the final steps, ensuring they'll be just as delicious and nostalgic as if made fresh!

What to Serve With Vanilla Cream Filled Caramels?

Pairing homemade treats with delightful accompaniments creates a memorable dessert experience, perfect for sharing with loved ones.

  • Rich Hot Cocoa: The creamy chocolate pairs beautifully with the sweet caramel, enhancing the richness of both treats.

  • Fresh Berries: Bright, tart berries like strawberries or raspberries add a refreshing contrast to the sweetness of the caramels. Their natural acidity balances the rich flavors, making each bite delightful.

  • Salted Pretzels: The crunchy, salty pretzels bring an exciting texture and a savory touch, creating a fantastic sweet and salty combination. It’s an unexpected treat that elevates the entire experience!

  • Vanilla Ice Cream: A scoop of classic vanilla ice cream offers a creamy counterpart, allowing the warmth of the caramel to gently melt the ice cream—a delicious contrast in temperature and flavor.

  • Espresso or Coffee: A cup of bold espresso or smooth coffee perfectly complements the sweetness of caramel, making it an ideal pairing. The slight bitterness cuts through the sweetness, creating balance.

  • Chocolate Fondue: Dip pieces of the caramels into rich chocolate fondue for a decadent treat that brings a touch of elegance to your dessert table. It's a delightful way to elevate your homemade vanilla cream filled caramels.

  • Homemade Shortbread Cookies: The buttery, crumbly texture of shortbread pairs splendidly, providing a delightful crunch against the soft, gooey caramels. Together, they create a lovely harmony of flavors.

How to Store and Freeze Vanilla Cream Filled Caramels

Room Temperature: Store your homemade vanilla cream filled caramels in an airtight container at room temperature for up to 1-2 months to maintain freshness.

Fridge: If you prefer a firmer texture, refrigerate the caramels in an airtight container for up to 3 weeks. Just ensure they're wrapped individually to prevent sticking.

Freezer: For longer storage, freeze the caramels in an airtight container or heavy-duty freezer bags for up to 3 months. Thaw at room temperature before enjoying their delightful flavor.

Reheating: If you've refrigerated or frozen your caramels, let them come to room temperature before serving to restore their soft, chewy goodness.

Vanilla Cream Filled Caramel Variations

Feel free to get creative with your caramels—there's so much you can do to make them uniquely yours!

  • Almond Extract: Swap vanilla with almond extract for a nutty twist that enhances the flavor beautifully. It brings a warm, inviting note that adds depth to your caramels.

  • Chocolate Variation: Drizzle melted chocolate over your finished caramels for a rich, decadent touch. This adds a delightful contrast to the creamy center, elevating every bite.

  • Salted Caramel: Sprinkle a pinch of flaky sea salt on top of the warm caramel mix before it cools. This little tweak brings a burst of flavor upfront, marrying perfectly with the sweetness.

  • Nutty Delight: Incorporate finely chopped nuts such as pecans or walnuts into your cream filling. The added texture creates a delightful crunch, balancing the soft, chewy caramel.

  • Minty Freshness: Substitute vanilla for peppermint extract for a refreshing burst of flavor. These minty caramels are perfect for the holidays or whenever you're in the mood for something different.

  • Spiced Caramels: Add cinnamon or nutmeg to your caramel mixture for a warm, spiced flavor. This twist can evoke the cozy vibes of a fall gathering.

  • Fruit-Flavored Creams: Experiment with variations like orange or lemon extract for a fruity burst. This brightens the candy experience and adds a delightful zing.

While you’re at it, why not discover other delightful desserts like Vegan Cacao Cream or enjoy a luscious piece of Cajeta Ice Cream? Each variation and twist makes the charming craft of homemade candy even more enjoyable!

Expert Tips for Vanilla Cream Filled Caramels

• Use a Candy Thermometer: Precision is key in candy-making. Make sure to exactly read temperatures to achieve that perfect soft ball stage for your caramels.

• Wrap Neatly: To avoid sticky situations, ensure each vanilla cream filled caramel is individually wrapped. This keeps them fresh and prevents them from sticking together.

• Heat Your Knife: For clean cuts, heat your knife with hot water and give it a quick spray of cooking spray before slicing the caramels. It makes all the difference!

• Patience is Virtue: Allow the caramel to cool completely before rolling. Rushing this step can result in a gooey mess instead of the perfect chewy texture.

• Experiment with Flavors: Don’t hesitate to swap vanilla extract for almond or other flavorings for a delicious twist on your vanilla cream filled caramels!

Vanilla Cream Filled Caramels Recipe FAQs

What kind of ripeness should the ingredients be in?
Absolutely! The butter should be softened, losing its chill for easier incorporation. Use room temperature heavy cream and evaporated milk for the best mixing results. Fresh, high-quality vanilla extract is essential—look for a rich aroma to capture that lovely flavor in your vanilla cream filled caramels.

How should I store my finished caramels?
For best results, store your vanilla cream filled caramels in an airtight container at room temperature for up to 1-2 months. If you wrap each piece individually, you'll maintain freshness and prevent them from sticking together during storage. For an even firmer texture, consider refrigerating them in an airtight container for up to 3 weeks.

Can I freeze my caramel treats, and how?
Certainly! To freeze your vanilla cream filled caramels, first let them cool and wrap each piece individually in wax paper or plastic wrap to prevent freezer burn. Then, place them in an airtight container or heavy-duty freezer bags. They can be frozen for up to 3 months. When you're ready to enjoy, simply thaw them at room temperature for a few hours.

I've encountered a sticky caramel mixture; what could be wrong?
If your caramel is too sticky, it may not have reached the correct temperature during cooking. Ensure your candy thermometer reads 241°F for the soft ball stage before pouring onto parchment. If you happen to find your caramel mixture crystallizing, try adding a bit of water while cooking to help dissolve any sugar crystals that may form. Consistency is key!

Are there any dietary concerns with these caramels?
While these vanilla cream filled caramels are delicious, they do contain common allergens like dairy and wheat in the powdered sugar. If you're looking to make them allergy-friendly, you might experiment with dairy alternatives for the cream and shortening—but do note that this may change the overall flavor and texture. Always check all ingredient labels to avoid allergens.

What if I don't have a candy thermometer?
No worries! If you don’t have a candy thermometer, you can use the “cold water test.” Drop a small spoonful of the boiling caramel mixture into a cup of cold water; if it forms a soft, pliable ball that holds its shape when rolled between your fingers, it's ready to pour. This method can be a bit trickier but works well if you’re careful!

Vanilla cream filled caramel

Delicious Vanilla Cream Filled Caramel for Nostalgic Treats

Delight in these vanilla cream filled caramels, a nostalgic treat perfect for gifting and satisfying sweet cravings.
Print Recipe Pin Recipe
Prep Time 20 minutes mins
Cook Time 15 minutes mins
Cooling Time 2 hours hrs
Total Time 2 hours hrs 35 minutes mins
Servings: 24 pieces
Course: Dessert
Cuisine: American
Calories: 150
Ingredients Equipment Method Nutrition Notes

Ingredients
  

For the Caramel
  • 1 cup Unsalted Butter Substitute with salted butter, reducing added salt.
  • 2 cups Brown Sugar Can be replaced with coconut sugar.
  • 1 teaspoon Salt Use sea salt for a different taste.
  • 1 cup Evaporated Milk Regular milk can be used but texture will vary.
  • 1 cup Heavy Cream Half-and-half can be used for a lighter option.
  • 1 cup Corn Syrup Substitute with glucose syrup or agave syrup.
For the Vanilla Cream
  • 2 cups Powdered Sugar No alternative recommended.
  • 1/2 cup Vegetable Shortening Can substitute with coconut oil but may alter flavor.
  • 2 teaspoons Vanilla Use pure vanilla extract for best results.

Equipment

  • heavy-duty pot
  • candy thermometer
  • Mixing Bowl
  • Spatula
  • Sharp Knife

Method
 

Step-by-Step Instructions
  1. Prepare a large piece of parchment paper, large enough to create a 10" x 16" rectangle. Grease it lightly to prevent sticking.
  2. In a heavy-duty pot, combine unsalted butter, brown sugar, salt, evaporated milk, heavy cream, and corn syrup over medium-low heat, stirring until melted into a smooth mixture (about 5 minutes).
  3. Increase heat to medium and bring the caramel mixture to a gentle boil while stirring constantly for about 5-7 minutes.
  4. Turn up the heat to medium-high, keep stirring until the mixture reaches 241°F on a candy thermometer (around 10 minutes).
  5. Pour the hot caramel onto the prepared parchment paper and spread it evenly into a thin layer (about half an inch thick). Let it cool for 1-2 hours.
  6. In a mixing bowl, combine vegetable shortening, powdered sugar, corn syrup, and vanilla extract. Beat with a hand mixer until crumbly yet cohesive (about 3-5 minutes).
  7. Gradually add water, a tablespoon at a time, until the consistency is dough-like and holds together well (around 5 minutes).
  8. Once cooled, cut the caramel into four equal pieces. Spread a half-height layer of vanilla cream on one side of each piece, roll tightly like a cinnamon roll, then elongate.
  9. Slice the rolled caramels into 1/2 inch pieces, heating knife with warm water and spraying it with cooking spray for clean cuts. Wrap each piece in cello or wax paper.
  10. Store in an airtight container at room temperature for 1-2 months or share with friends and family.

Nutrition

Serving: 1pieceCalories: 150kcalCarbohydrates: 20gFat: 7gSaturated Fat: 4gPolyunsaturated Fat: 0.5gMonounsaturated Fat: 2gCholesterol: 15mgSodium: 30mgPotassium: 40mgSugar: 16gVitamin A: 200IUCalcium: 20mgIron: 0.2mg

Notes

Allow the caramel to cool completely before rolling to avoid a gooey mess. Experiment with almond extract or nuts for variations.

Tried this recipe?

Let us know how it was!

Delicious Homemade Sour Patch Kids with Fresh Fruit Flavors

April 25, 2026 by Grace Snow Leave a Comment

I recently stumbled upon a delightful surprise while experimenting in the kitchen: Homemade Sour Patch Kids! These fruity, chewy candies are a game-changer for anyone tired of artificial flavors and preservatives. With just a few simple ingredients, I transformed fresh fruit juice into vibrant treats that capture the joy of childhood without any guilt. This recipe is not only quick to whip up, but it also allows you to customize each batch with your favorite flavors—imagine a rainbow of tastes for parties or a cozy movie night! Plus, you'll love that they’re made with natural ingredients, making them a wholesome alternative to store-bought candy. Curious to find out how to make your own personalized Sour Patch Kids? Let’s dive in!

Why Make Homemade Sour Patch Kids?

Customization at Your Fingertips: Create these candies with your favorite fresh fruit juices, allowing everyone to enjoy their preferred flavors.
Natural Ingredients Only: Ditch artificial additives and indulge in treats made from wholesome ingredients—you’ll feel good about sharing them!
Quick to Prepare: With straightforward steps and minimal time needed, you’ll be enjoying your homemade delicacies in no time—perfect for movie nights!
Versatile Shapes: Use fun molds for different looks—great for parties or gifting. Pair them with a cheese platter or even a fruit salad for a balanced snack, just like with Homemade Hot Chocolate or Shakshuka Savor Bold.
Crowd Pleaser: These treats are sure to be a hit, whether for kids or adults, making them a sweet addition to any gathering!

Homemade Sour Patch Kids Ingredients

For the Candy Mixture

  • Fresh Fruit Juice – Use ripe, freshly squeezed juice for the best flavor and vibrant color.
  • Pectin – This gelling agent ensures that your homemade Sour Patch Kids have a delightful chewy texture; be precise while measuring.
  • Sugar – Essential for sweetness that balances the sour; feel free to adjust the amount to suit your taste preferences.
  • Citric Acid – Adds the signature tang that makes these candies irresistibly sour; adjust to your desired sourness.

For the Coating

  • Cornstarch – Prevents candies from sticking together after they set; can be replaced with powdered sugar if you prefer.
  • Additional Sugar – Used in the rolling process with citric acid for that perfect sweet-sour finish; essential for that signature crunch.

Step‑by‑Step Instructions for Homemade Sour Patch Kids

Step 1: Prepare Molds
Start by lightly greasing your candy molds with a small amount of vegetable oil or cooking spray. This will help ensure that your Homemade Sour Patch Kids easily release once they’ve set. Set the molds aside, and make sure your workspace is tidy and ready for the fun to begin!

Step 2: Mix Ingredients
In a medium saucepan, combine your freshly squeezed fruit juice, pectin, and sugar. Stir the mixture well over medium heat until the sugar and pectin fully dissolve, about 3-5 minutes. Look for a smooth consistency without any lumps, ensuring that your candy will have a delightful chewy texture.

Step 3: Cook Mixture
Continue heating the mixture until it reaches a gentle boil; keep an eye on it for about 5-7 minutes. Stir continuously during this process to prevent scorching, and watch for bubbling that indicates the pectin has activated. Your mixture should visibly thicken as it cooks.

Step 4: Pour into Molds
Once the mixture has thickened, carefully pour it into your prepared molds. Fill them evenly, making sure to leave room for any potential expansion. Allow the mixture to set at room temperature for about 1 hour, keeping an eye on it as it cools and begins to solidify.

Step 5: Coat with Citric Acid
After the candies have set in the molds, gently remove them and place them on a cooling rack. In a separate bowl, mix sugar with citric acid to create a sweet and sour coating. Roll each piece in this mixture to coat evenly, giving your Homemade Sour Patch Kids their signature flavor kick.

Step 6: Allow to Set
To achieve a firmer chew, place the coated candies uncovered in the refrigerator overnight. This will help them reach their optimal texture, allowing the flavors to intensify. Ensure there's enough space around them for air circulation, so they don’t become soggy.

Expert Tips for Homemade Sour Patch Kids

  • Use Fresh Juice: Start with freshly squeezed fruit juice for the best flavor and color; avoid store-bought juices that may contain additives.
  • Accurate Measurements: Make sure to measure pectin and sugar accurately; inconsistent amounts can lead to a gummy or overly soft texture.
  • Watch the Heat: Keep the cooking temperature controlled to prevent scorching; stirring constantly helps maintain the perfect consistency for your Homemade Sour Patch Kids.
  • Setting Time Matters: Allow candies to set uncovered overnight in the fridge for optimal firmness; this step is crucial for achieving that delightful chewy texture.
  • Avoid Airtight Containers: Store candies uncovered until they are fully set. Keeping them loosely covered helps maintain their chewiness and prevents sogginess.

How to Store and Freeze Homemade Sour Patch Kids

Fridge: Store your Homemade Sour Patch Kids uncovered in the fridge for up to 5 days to maintain their chewy texture and prevent sogginess.

Freezer: For longer storage, freeze candies in a single layer on a baking sheet, then transfer to an airtight container after they're frozen. Enjoy them within 3 months.

Thawing: When ready to enjoy, simply let the candies thaw at room temperature for about 30 minutes before serving. This ensures they’ll be soft and delicious!

Coating Reminder: Make sure candies are fully coated in cornstarch or powdered sugar before freezing to prevent sticking.

Make Ahead Options

These Homemade Sour Patch Kids are a fantastic treat to prepare in advance, saving you time and hassle when you're ready to indulge! You can make the candy mixture and pour it into the molds up to 24 hours ahead of serving. Just let it set at room temperature for about an hour, and then refrigerate uncovered overnight to achieve that perfect chewy texture. To keep your candies fresh, store them uncovered in the fridge, allowing them to breathe and avoid sogginess. When you're ready to enjoy, simply coat them in the sugar and citric acid mixture, and you'll have delightful, homemade treats just waiting to amaze your friends and family!

Homemade Sour Patch Kids Variations

Get ready to explore delectable possibilities that allow your creativity to shine in every fruity bite!

  • Flavor Combinations: Switch up your fruit juices! Try mixing watermelon and lime for a refreshing summer treat.

  • Candy Shapes: Use fun cookie cutters to create unique shapes that can bring a smile to anyone's face and lift your snack game.

  • Adjust Sweetness: Feel free to reduce the sugar for a slightly tangy version, letting the fruit flavors shine through even more.

  • Spicy Twist: Add a pinch of cayenne pepper for a surprising kick! The heat complements the sweetness beautifully, making it a new favorite.

  • Dye-free Colors: Rely on colorful fruit juices like beet or carrot juice to naturally color your candies, making them vibrant without any additives!

  • Coat Variations: Instead of traditional sugar, use coconut sugar or even sprinkles for a fun, textured finish that adds a delightful crunch.

  • Using Alternative Sweeteners: Try honey, agave, or maple syrup instead of sugar for a unique twist. Each option brings its own flavor profile to the candies.

For those cozy nights, pair your Homemade Sour Patch Kids with a warm mug of Homemade Hot Chocolate or share them alongside a savory dish like Spatchcock Chicken Flavor to balance out your taste experience. The world of homemade candy is truly endless!

What to Serve with Homemade Sour Patch Kids?

Creating a fun and memorable tasting experience is easy with the perfect accompaniment to your fruity, chewy treats!

  • Fresh Fruit Salad:
    A vibrant medley of seasonal fruits brings a refreshing balance to the tangy sweetness of your candies. This colorful combination is not only healthy but also visually appealing—perfect for sharing at parties!

  • Cheese Platter:
    Pairing your Homemade Sour Patch Kids with a selection of mild cheeses creates a delightful contrast. The creaminess of the cheese beautifully offsets the sourness of the candies, offering a unique flavor journey.

  • Air-Popped Popcorn:
    Light, airy popcorn serves as a delightful contrast to the chewy texture of the candies. Drizzle with a little melted chocolate for added sweetness, turning your snack into a sweet-and-salty adventure!

  • Veggie Sticks with Dip:
    Crisp veggie sticks dipped in hummus or ranch provide a fresh crunch that complements the chewy sour candies. This pairing balances health and indulgence, creating a guilt-free feast for any gathering.

  • Chocolate-Covered Pretzels:
    Sweet and salty chocolate-covered pretzels amplify your candy experience, creating a harmonious blend of flavors. Their satisfying crunch contrasts perfectly with the gummy texture of your Sour Patch Kids!

  • Mini Cupcakes:
    Fluffy mini cupcakes can bring a dose of sweetness to your candy experience. These easily customizable treats can match the fruit flavors of your candies for a cohesive dessert spread.

  • Sparkling Water or Lemonade:
    Refreshing drinks like sparkling water or tart lemonade enhance the sweet-and-sour flavors of your candies. Serve them in fun glasses for a festive touch during birthdays or movie nights!

  • Fruit Smoothies:
    Whip up a fruity smoothie to pair with the Sour Patch Kids for a fun, indulgent treat. The creamy texture balances the candy's chewiness and adds another layer of flavor to your snack table!

Homemade Sour Patch Kids Recipe FAQs

How do I choose the best fruit juice for my Homemade Sour Patch Kids?
Absolutely! For the best flavor, always opt for ripe, freshly squeezed juices. Look for juices from fruits that are in-season, as they will provide the richest taste. Avoid bottled juices that may contain added sugars or preservatives, which can dilute the freshness of your candies.

What is the best way to store Homemade Sour Patch Kids?
Store your Homemade Sour Patch Kids uncovered in the fridge for up to 5 days. This prevents them from becoming soggy and maintains their delightful chewiness. Placing them in an airtight container too soon can trap moisture, so be patient and let them cool completely before storage!

Can I freeze my Homemade Sour Patch Kids?
Certainly! For long-term storage, freeze the candies in a single layer on a baking sheet for 1-2 hours until firm. Afterward, transfer them to an airtight container or freezer-safe bag. They can be enjoyed within 3 months. Just remember to coat them in cornstarch or powdered sugar before freezing to avoid sticking.

What should I do if my candy mixture is too watery?
If you find that the mixture is thinner than expected, it may be due to inaccurate measurements or not enough cooking time. You can fix this by simmering it on low heat for a few extra minutes while stirring continuously. Keep an eye on it, and it should start to thicken. If it remains too thin, consider adding a bit more pectin, following the manufacturer’s instructions.

Are Homemade Sour Patch Kids safe for my pets?
Definitely not! These candies should not be shared with pets, especially because of the sugar and citric acid content, which can upset their stomachs. Always keep your candy creations out of reach, and enjoy them as a fun treat for humans only.

Can I substitute any ingredients for allergies?
Yes! If you have dietary restrictions or allergies, you can modify the recipe. Consider using alternative sweeteners with a similar texture to sugar, or look for pectin derived from different sources if you’re watching for food sensitivities. Just remember, some substitutions might alter the final texture or taste, so it may require some experimentation.

Homemade Sour Patch kids

Delicious Homemade Sour Patch Kids with Fresh Fruit Flavors

Make delightful Homemade Sour Patch Kids using fresh fruit juices and natural ingredients for a guilt-free sweet treat.
Print Recipe Pin Recipe
Prep Time 15 minutes mins
Cook Time 10 minutes mins
Setting Time 1 hour hr
Total Time 1 hour hr 25 minutes mins
Servings: 10 pieces
Course: Dessert
Cuisine: American
Calories: 50
Ingredients Equipment Method Nutrition Notes

Ingredients
  

For the Candy Mixture
  • 1 cup Fresh Fruit Juice Use ripe, freshly squeezed juice for the best flavor.
  • 1 tablespoon Pectin Gelling agent for chewy texture.
  • 1 cup Sugar Adjust according to taste.
  • 1 tablespoon Citric Acid For tangy flavor; adjust to taste.
For the Coating
  • 1 cup Cornstarch Prevents sticking.
  • 1 cup Additional Sugar For a sweet-sour finish.

Equipment

  • Candy Molds
  • Medium saucepan
  • Mixing Bowl

Method
 

Step‑by‑Step Instructions for Homemade Sour Patch Kids
  1. Lightly grease your candy molds with vegetable oil or cooking spray.
  2. In a medium saucepan, combine fruit juice, pectin, and sugar. Stir over medium heat until dissolved, about 3-5 minutes.
  3. Heat the mixture until it boils gently, stirring continuously for 5-7 minutes until it thickens.
  4. Pour the thickened mixture into prepared molds, leaving room for expansion. Let it set for 1 hour.
  5. Remove candies from molds and roll in a mixture of sugar and citric acid for coating.
  6. Place coated candies uncovered in the refrigerator overnight for optimal firmness.

Nutrition

Serving: 1pieceCalories: 50kcalCarbohydrates: 14gPotassium: 10mgSugar: 12gVitamin C: 10mg

Notes

Store uncovered in the fridge for up to 5 days. For longer storage, freeze in a single layer and transfer to an airtight container after freezing. Thaw at room temperature for about 30 minutes before serving.

Tried this recipe?

Let us know how it was!

Delightful Blueberry Swirl Yogurt Bites for a Healthy Snack

April 25, 2026 by Grace Snow Leave a Comment

With warm weather approaching, I’m reminded of those delightful afternoons spent in the kitchen, mixing and matching ingredients to create something special. Enter my Blueberry Swirl Yogurt Bites—an effortless no-bake treat that satisfies my sweet cravings while keeping it healthy. These dreamy bites showcase creamy Greek yogurt swirled with juicy blueberries, creating a refreshing snack that’s perfect for breakfast, a mid-afternoon pick-me-up, or even a light dessert. Plus, they’re incredibly versatile, allowing you to swap in your favorite fruits or dairy-free options with ease! Whether you’re entertaining guests or simply indulging on a quiet evening at home, these little delights promise to elevate your snacking game. Curiosity piqued? Let’s dive in and discover how to whip up these heavenly bites!

Why are yogurt bites so delightful?

Creamy Texture: The base of Greek yogurt provides an irresistibly smooth experience, while the fresh blueberries add bursts of juicy flavor.
No-Bake Convenience: Perfect for busy schedules, these bites require no baking, allowing you to enjoy a healthy snack in minutes.
Versatile Options: Easily customize the recipe by swapping blueberries for your favorite berries or even adding nuts for a delightful crunch.
Guilt-Free Indulgence: With only around 50 calories per bite, you can satisfy your sweet tooth without any added guilt.
Perfect for Any Occasion: Whether it’s breakfast, a snack, or a light dessert, these yogurt bites cater to every craving beautifully! Plus, consider pairing them with granola for a complete treat or check out variations like using coconut yogurt for a tropical twist in your kitchen adventures.

Blueberry Swirl Yogurt Bites Ingredients

For the Base

  • Greek yogurt – Use full-fat for a rich, creamy texture; swap for coconut or almond yogurt for a dairy-free option.
  • Honey or maple syrup – Sweeten to taste; consider agave nectar or stevia for a sugar-free alternative.
  • Lemon juice – Freshly squeezed enhances flavor; it’s a must for that zesty touch!
  • Vanilla extract – Adds depth and warmth to your bites, amplifying the overall flavor.

For the Fruit

  • Fresh blueberries – They provide the main flavor burst; feel free to experiment with strawberries or raspberries for variety.

For Thickening (optional)

  • Cornstarch – Acts as a thickening agent if you prefer a denser texture; you can omit this for a lighter feel.

Now that we have the ingredients lined up, you’re one step closer to crafting these delightful Blueberry Swirl Yogurt Bites! Let’s move on to the joyous creation process!

Step‑by‑Step Instructions for Blueberry Swirl Yogurt Bites

Step 1: Combine the Base Ingredients
In a mixing bowl, add 2 cups of full-fat Greek yogurt, 2 tablespoons of honey (or maple syrup), the juice of half a lemon, and 1 teaspoon of vanilla extract. Using a whisk or spatula, mix these ingredients together until the mixture is smooth and creamy, which should take about 2-3 minutes. Make sure there are no lumps for that perfect texture in your Blueberry Swirl Yogurt Bites.

Step 2: Incorporate Cornstarch (if desired)
If you prefer a thicker consistency, sprinkle in 1 tablespoon of cornstarch and gently stir to incorporate. Continue mixing for another minute until fully blended. The cornstarch will help your yogurt bites set better. Keep this mixture aside for just a moment as we prepare to add the delightful blueberries.

Step 3: Fold in Fresh Blueberries
Gently fold in 1 cup of fresh blueberries, taking care to maintain their shape for those lovely swirls. Use a spatula to lift and turn the mixture, ensuring even distribution without crushing the berries. This step is crucial for achieving the beautiful presentation of your Blueberry Swirl Yogurt Bites, so be gentle and patient.

Step 4: Portion and Chill
Spoon the mixture into small jars or muffin tins lined with mini cupcake liners for easy serving. Once filled, place them in the refrigerator to chill for at least 1-2 hours. Chilling allows the flavors to meld beautifully and helps the bites set, resulting in a delightful snack ready to be enjoyed!

Step 5: Serve and Enjoy Your Treat
After chilling, your Blueberry Swirl Yogurt Bites are ready to delight! Optionally, garnish each bite with extra blueberries or a drizzle of honey before serving. This final touch not only adds flavor but makes for a stunning presentation. Allow your family and friends to enjoy this healthy snack that’s perfect any time of day!

Make Ahead Options

These Blueberry Swirl Yogurt Bites are a wonderful choice for meal prep, making your busy days significantly easier! You can prepare the yogurt mixture up to 24 hours in advance. Simply follow the instructions to combine the Greek yogurt, sweetener, lemon juice, and vanilla, then gently fold in the blueberries. Spoon the mixture into jars or muffin tins and refrigerate. Cover them well to maintain freshness and prevent any drying out. On the day you want to serve them, simply add your optional garnishes like extra blueberries or a drizzle of honey, and enjoy these delightful bites that taste just as fresh as if they'd been made that day!

What to Serve with Blueberry Swirl Yogurt Bites

Pairing your delightful yogurt bites with complementary flavors and textures will elevate your snacking experience to new heights. Let’s explore some perfect accompaniments!

  • Granola: Adds a satisfying crunch that contrasts beautifully with the creamy yogurt and juicy blueberries. Enjoy as a topping or on the side for added texture.

  • Fresh Fruit Salad: A medley of seasonal fruits enhances the fruity flavor while providing a refreshing balance to the yogurt's richness. Think vibrant strawberries, kiwis, and more!

  • Chia Seed Pudding: Its creamy and slightly sweet consistency works wonderfully with yogurt bites, offering a nutritious combination that's also visually appealing.

  • Honey Drizzle: A touch of honey elevates the sweetness of the yogurt bites, making them feel even more indulgent without the guilt. Plus, it enhances the beautiful presentation!

  • Nuts & Seeds Mix: Adding a sprinkle of chopped nuts or seeds introduces a delightful crunch and nutty flavor that contrasts well with the smooth yogurt.

  • Herbal Tea: A calming cup of chamomile or mint tea complements the refreshing blueberries, creating a cozy atmosphere for enjoying your yogurt snacks.

  • Dark Chocolate Shavings: A pinch of dark chocolate adds a decadent touch, giving your yogurt bites an irresistible twist and a hint of richness.

Experiment with these pairings to create a multi-layered snacking experience!

Expert Tips for Blueberry Swirl Yogurt Bites

  • Full-Fat Preference: Use full-fat Greek yogurt for a creamier texture; low-fat options may result in a less satisfying bite.
  • Gentle Folding: Carefully fold in the blueberries to prevent mashing; this keeps the swirls intact and visually appealing.
  • Chill Time Matters: Allow the yogurt bites to chill for at least one hour for optimal flavor; this enhances the blending of ingredients.
  • Substitution Insights: Feel free to substitute blueberries with other berries or add nuts for variety, but ensure the ratios remain similar for best results.
  • Storage Tips: Keep uneaten bites in an airtight container in the fridge for up to 3 days or freeze for 2 months, thawing them in the refrigerator before serving.

Blueberry Swirl Yogurt Bites Variations

Invite your culinary creativity to shine as you explore delightful twists on this already scrumptious recipe!

  • Berry Medley: Substitute blueberries with strawberries, raspberries, or a mix for an exciting flavor explosion. Each berry brings its unique taste, creating a delightful symphony!
  • Nutty Crunch: Fold in chopped walnuts or almonds for added crunch and texture. This nutty addition elevates the bites while providing healthy fats—perfect for a satisfying snack.
  • Spiced Delight: Enhance warmth by adding a pinch of cinnamon or nutmeg to the yogurt mixture. It introduces a comforting flavor reminiscent of baked goods without the fuss!
  • Coconut Twist: Replace Greek yogurt with coconut yogurt for a tropical flair. This substitution offers a creamy texture that will transport you to a beachy paradise.
  • Frozen Treats: Freeze the mixture in ice cube trays for fun yogurt pops. Ideal for hot days, these pops make a playful yet healthy treat for kids and adults alike!
  • Chocolate Drizzle: After chilling, top your yogurt bites with a drizzle of melted dark chocolate for an indulgent yet nutritious touch. This sweet surprise will delight anyone who tries them!
  • Herbal Infusion: Experiment with adding fresh mint or basil to the mix for a refreshing and unique flavor profile that brightens the overall dish.
  • Creamy Avocado: Boost the creaminess by adding mashed avocado to the yogurt. It’ll give a lovely color and a silky texture while keeping things healthy!

Feel free to mix and match these variations to find your favorite combination, and remember to check out how to create bite-sized frozen yogurt pops for a sunny-day treat!

How to Store and Freeze Blueberry Swirl Yogurt Bites

  • Fridge: Store uneaten Blueberry Swirl Yogurt Bites in an airtight container for up to 3 days to maintain freshness and flavor.

  • Freezer: For longer storage, freeze portions for up to 2 months. Place bites in freezer-safe containers or bags and ensure they're well-sealed to prevent freezer burn.

  • Thawing: When ready to enjoy, simply thaw the bites in the refrigerator overnight for a creamy treat that tastes just as fresh!

  • Reheating: These bites are best enjoyed chilled, so skip the reheating; instead, savor them straight from the fridge for a refreshing snack!

Blueberry Swirl Yogurt Bites Recipe FAQs

How do I select the best blueberries for my yogurt bites?
Absolutely! Look for plump, firm blueberries with a deep blue color and a silvery bloom on the surface. Avoid berries with green or red hues, as they won't be as sweet. Dark spots or wrinkles indicate overripeness, so select fresh berries for that delightful burst of flavor in your Blueberry Swirl Yogurt Bites!

What’s the best way to store leftover yogurt bites?
Very! Store uneaten Blueberry Swirl Yogurt Bites in an airtight container in the refrigerator for up to 3 days. To keep them fresher longer, place parchment paper between layers if stacking, which helps absorb moisture and maintain texture.

Can I freeze Blueberry Swirl Yogurt Bites?
Absolutely! These bites freeze beautifully. Simply place them in a freezer-safe container or ziplock bag, ensuring they’re well-sealed to avoid freezer burn. You can freeze them for up to 2 months, and when you’re ready to enjoy, thaw them in the refrigerator overnight for a refreshing treat.

What if my yogurt bites don’t set properly?
No worries! If your yogurt bites are too runny, it may be due to insufficient chilling or not using full-fat yogurt, which provides the necessary creaminess. If you find they still need a thicker texture, try adding just a touch more cornstarch and gently mixing it in, then allow them to chill again.

Are Blueberry Swirl Yogurt Bites safe for pets or allergy-friendly?
Keep in mind! While these yogurt bites are a healthy snack for people, yogurt is not recommended for pets, especially dogs, as some might be lactose intolerant. Additionally, ensure none of the ingredients cause allergies—like honey for young children or while making swaps for nut allergies if using substituted ingredients. Always check labels to be sure!

Can I make these yogurt bites dairy-free?
Absolutely! Simply substitute the Greek yogurt with coconut or almond yogurt for a delicious dairy-free option. This not only caters to dietary restrictions but also adds a unique flavor twist that compliments the blueberries beautifully!

Blueberry Swirl Yogurt Bites

Delightful Blueberry Swirl Yogurt Bites for a Healthy Snack

Satisfy your sweet cravings with these Blueberry Swirl Yogurt Bites, a healthy no-bake treat made with Greek yogurt and fresh blueberries.
Print Recipe Pin Recipe
Prep Time 15 minutes mins
Chilling Time 2 hours hrs
Total Time 2 hours hrs 15 minutes mins
Servings: 4 bites
Course: Snacks
Cuisine: American
Calories: 50
Ingredients Equipment Method Nutrition Notes

Ingredients
  

For the Base
  • 2 cups full-fat Greek yogurt or coconut/almond yogurt for dairy-free option
  • 2 tablespoons honey or maple syrup sweeten to taste
  • 0.5 tablespoons lemon juice freshly squeezed
  • 1 teaspoon vanilla extract
For the Fruit
  • 1 cup fresh blueberries can substitute with other berries
For Thickening (optional)
  • 1 tablespoon cornstarch omit for a lighter feel

Equipment

  • Mixing Bowl
  • Whisk
  • Spatula
  • muffin tins or small jars

Method
 

Step‑by‑Step Instructions
  1. In a mixing bowl, add 2 cups of full-fat Greek yogurt, 2 tablespoons of honey (or maple syrup), the juice of half a lemon, and 1 teaspoon of vanilla extract. Mix until smooth and creamy.
  2. If you prefer a thicker consistency, sprinkle in 1 tablespoon of cornstarch and stir to incorporate. Mix for another minute until fully blended.
  3. Gently fold in 1 cup of fresh blueberries without crushing them to maintain their shape.
  4. Spoon the mixture into small jars or muffin tins lined with mini cupcake liners. Chill in the refrigerator for at least 1-2 hours.
  5. Optionally, garnish each bite with extra blueberries or a drizzle of honey before serving.

Nutrition

Serving: 1biteCalories: 50kcalCarbohydrates: 8gProtein: 2gFat: 1gSaturated Fat: 0.5gCholesterol: 5mgSodium: 30mgPotassium: 100mgFiber: 1gSugar: 4gVitamin A: 50IUVitamin C: 5mgCalcium: 50mgIron: 0.5mg

Notes

Store uneaten bites in an airtight container for up to 3 days or freeze for 2 months. Thaw in the refrigerator before serving.

Tried this recipe?

Let us know how it was!

Baked Salmon with Lemon Butter Cream Sauce: A Flavor Delight

April 25, 2026 by Grace Snow Leave a Comment

The aroma of fresh lemon and buttery goodness wafting through my kitchen always sparks joy, especially when I'm about to whip up my favorite weeknight dish: Baked Salmon with Lemon Butter Cream Sauce. This easy salmon recipe not only promises to have dinner on the table in under 30 minutes but also transforms a simple weeknight into a culinary delight with its rich and creamy sauce. The best part? It’s a dish that dazzles both family and guests without the fuss, making it a true crowd-pleaser. Ready to elevate your dinner game and make a meal that feels downright luxurious? Let’s dive into this scrumptious, zesty salmon recipe that just might become your new go-to!

Why is this salmon recipe a game-changer?

Easy Preparation: This baked salmon dish requires minimal effort and time, making it perfect for busy weeknights.

Flavor Explosion: The lemon butter cream sauce adds a rich, tangy layer that elevates the natural taste of the salmon.

Healthy Choice: Packed with protein and healthy fats, this is a delicious way to enjoy seafood without guilt.

Versatile Serving: Pair it with roasted asparagus or a fresh salad, creating a balanced meal that satisfies.

Impressive Presentation: With its vibrant colors and creamy sauce, this dish is sure to impress at any gathering.

Revolutionize your mealtime with this quick and flavorful dish, and don’t forget to try it alongside one-pot salmon and shiitake rice for a complete experience!

Baked Salmon with Lemon Butter Cream Sauce Ingredients

For the Salmon

  • Salmon Fillet – Use 1 lb of skinless salmon fillet for optimal texture and flavor.
  • Salt – Essential for enhancing the natural taste of the salmon; adjust according to preference.
  • Pepper – Freshly cracked pepper adds a delightful kick to your dish.

For the Lemon Butter Cream Sauce

  • Unsalted Butter – Adds richness to the sauce; using unsalted allows for better control of saltiness.
  • Heavy Cream – Creates the luscious, creamy texture; substitute with half-and-half for a lighter sauce.
  • Lemon Juice – Fresh lemon juice will brighten the flavor of the sauce, enhancing the overall dish.
  • Chopped Fresh Parsley – Provides color and a fresh touch; dried parsley can be a quick substitute if needed.

This delightful recipe for Baked Salmon with Lemon Butter Cream Sauce is sure to transform your weeknight dinners into gourmet experiences!

Step‑by‑Step Instructions for Baked Salmon with Lemon Butter Cream Sauce

Step 1: Preheat the Oven
Begin by preheating your oven to 375°F (190°C). This temperature will ensure that your salmon bakes evenly, creating a tender and flaky texture. While the oven heats, gather your other ingredients so you’re ready to assemble your Baked Salmon with Lemon Butter Cream Sauce.

Step 2: Prepare the Baking Sheet
Line a baking sheet with parchment paper to prevent sticking and make cleanup easier. Once lined, carefully place the skinless salmon fillet on the paper, ensuring it's centered. This setup will help the heat circulate evenly around the fish for successful baking.

Step 3: Season the Salmon
Generously season the salmon fillet with salt and freshly cracked pepper to taste. This step enhances the natural flavors of the fish, creating a delicious base for your dish. Make sure to cover the surface evenly for maximum flavor infusion as it bakes.

Step 4: Bake the Salmon
Slide the prepared baking sheet into the preheated oven and bake the salmon for approximately 15-20 minutes. You'll know it's ready when the fish is opaque and flakes easily with a fork, with an internal temperature reaching 145°F. The aroma will be irresistibly inviting!

Step 5: Melt the Butter
While the salmon is baking, melt unsalted butter in a saucepan over medium heat. Stir occasionally to keep the butter from browning too much. This will serve as the rich base for your creamy, zesty sauce that beautifully complements the Baked Salmon with Lemon Butter Cream Sauce.

Step 6: Make the Sauce
After the butter has melted, add in the heavy cream, fresh lemon juice, and chopped parsley. Continuously stir the mixture for about 5-7 minutes until it thickens slightly. You’ll notice a velvety texture forming, which will drizzle beautifully over your salmon once finished.

Step 7: Finish the Sauce
Once the sauce has thickened to your liking, remove it from the heat and set it aside. This pause allows the flavors to meld together perfectly, ensuring a fresh and zesty finish to your Baked Salmon with Lemon Butter Cream Sauce. Keep it covered to retain warmth.

Step 8: Serve the Salmon
Once the salmon is finished baking, carefully transfer it to a serving plate. Drizzle the luscious lemon butter cream sauce generously over the top, allowing it to cascade down the sides. The combination of colors and textures will make your dish visually stunning and ready to be enjoyed.

Step 9: Enjoy Your Meal
Serve the salmon hot, perhaps with a side of roasted vegetables or a fresh salad for a balanced meal. Feast your eyes on this delightful Baked Salmon with Lemon Butter Cream Sauce, and savor each bite of the rich, buttery goodness intertwined with zesty freshness!

Make Ahead Options

These Baked Salmon with Lemon Butter Cream Sauce are perfect for busy weeknights! You can prepare the lemon butter cream sauce up to 3 days in advance; simply store it in an airtight container in the refrigerator. To do this, melt the butter, mix in the cream, lemon juice, and parsley, then let it cool before sealing. When you're ready to serve, reheat the sauce gently over low heat, stirring until warmed through. Additionally, you can season and assemble the salmon on the baking sheet up to 24 hours in advance and refrigerate it, making it easy to pop in the oven after a long day. With these make-ahead options, you’ll savor the deliciousness of this recipe with minimal effort!

Storage Tips for Baked Salmon with Lemon Butter Cream Sauce

  • Fridge: Refrigerate leftovers in an airtight container for up to 3 days. Make sure the lemon butter cream sauce fully covers the salmon to prevent it from drying out.

  • Freezer: For longer storage, freeze the salmon in a freezer-safe container for up to 2 months. Be sure to shield it well with the sauce to maintain flavor.

  • Thawing: Thaw frozen salmon overnight in the refrigerator before reheating gently on low heat to keep it moist and delicious.

  • Reheating: Reheat in the oven at 350°F (175°C) for about 10-15 minutes, adding a splash of cream if needed to refresh the sauce for your Baked Salmon with Lemon Butter Cream Sauce.

What to Serve with Baked Salmon with Lemon Butter Cream Sauce

Brighten up your dining experience by pairing your salmon dish with sides that complement its vibrant flavors and creamy richness.

  • Garlic Mashed Potatoes: Creamy and buttery, these potatoes provide a comforting contrast to the tangy lemon sauce. They soak up any extra sauce beautifully, ensuring no flavor goes to waste.

  • Roasted Broccoli: Combining a tender, crispy texture with earthy flavors, roasted broccoli adds a delightful crunch alongside your succulent salmon. Drizzle it with a bit of lemon for a zesty kick!

  • Herb-Infused Quinoa: This nutty side brings a hint of chewiness and pairs exceptionally well with the buttery sauce, enhancing the overall dish experience while keeping it light and healthy.

  • Greek Salad: Fresh, crisp, and vibrant, a Greek salad with feta, olives, and tomatoes provides a refreshing balance to the richness of your baked salmon, making each bite a delightful contrast.

  • Crispy Asparagus: Roasted or grilled, asparagus adds a satisfying crunch that complements the tender salmon. The slight bitterness of the asparagus also elevates the creamy lemon sauce beautifully.

  • White Wine: A chilled glass of Sauvignon Blanc brings a bright acidity that mirrors the lemon and enriches the meal experience, ensuring an elegant dining affair.

These pairings will perfectly round out your meal, ushering you and your loved ones into a culinary delight that lingers on the palate.

Expert Tips for Baked Salmon

  • Monitor Cooking Time: Keep a close eye on your salmon to prevent overcooking, which can lead to a dry texture. Ideally, it should flake easily at 145°F.

  • Fresh Ingredients Count: Always opt for fresh lemon juice for vibrant flavor in your lemon butter cream sauce. Bottled juice can be overly acidic and artificial.

  • Sauce Consistency: Let the sauce simmer on low heat gently, without rushing the thickening process; a slow simmer enhances flavor and texture.

  • Versatile Pairings: Don’t hesitate to experiment! Try serving your baked salmon with different sides like herb-infused quinoa or crispy roasted asparagus for variety.

  • Leftover Storage: To keep your Baked Salmon with Lemon Butter Cream Sauce fresh, ensure the sauce coats the salmon when refrigerating leftovers to prevent drying out.

Baked Salmon with Lemon Butter Cream Sauce Variations

Feel free to get creative and personalize this delightful salmon dish to suit your taste buds!

  • Herb-Infused Quinoa: Serve the salmon on a bed of herb-infused quinoa instead of plain rice for a flavor boost. The nutty notes will enhance the dish beautifully.

  • Vegan Swap: Use tofu instead of salmon for a plant-based version while keeping the lemon butter sauce creamy with coconut milk. It will be rich and delicious!

  • Roasted Asparagus: Pair the salmon with roasted asparagus for a crunchy side that complements both the flavor and texture. The subtle sweetness of the asparagus contrasts nicely with the tangy sauce.

  • Spicy Kick: Add a pinch of red pepper flakes to the lemon butter cream sauce for a subtle heat. It adds an enticing twist that might surprise your guests!

  • Citrus Zest: Incorporate orange or lime zest into the sauce for added citrus complexity. It's an exciting way to elevate the traditional flavor profile.

  • Crispy Garlic Topping: For added texture, sprinkle a mixture of garlic breadcrumbs on top of the salmon before baking. This adds a delightful crunch you’ll love.

  • Serving Suggestion: Serve with crusty artisan bread to soak up the leftover lemon butter sauce. It turns your meal into a delightful dipping experience.

  • Swap Salmon for Other Fish: Try this recipe with other firm fish such as cod or halibut for a different flavor profile. Each choice brings a unique taste while maintaining that creamy, zesty sauce.

As you explore these variations, don’t forget the wonderful flavors of Lemon Chicken Soup or how you can enjoy a different take with Tagliatelle Asparagus Peas. Let your culinary adventure begin!

Baked Salmon with Lemon Butter Cream Sauce Recipe FAQs

How do I choose the best salmon for this recipe?
Absolutely! When selecting salmon, look for a fillet that is bright pink or orange, with moist flesh and no dark spots all over. The skin should be shiny and not slimy. Wild-caught salmon often has richer flavor, but farmed salmon can also work well. Aim for a fillet that feels firm and springy to the touch for the best results.

How long can I store leftover baked salmon?
You can keep your leftovers in the fridge for up to 3 days, refrigerated in an airtight container. To maintain moisture, ensure the lemon butter cream sauce covers the salmon entirely. If you want to keep it longer, consider freezing the salmon for up to 2 months.

Can I freeze the baked salmon with the lemon butter cream sauce?
Yes, you can freeze the Baked Salmon with Lemon Butter Cream Sauce! Place the salmon in a freezer-safe container, making sure the sauce fully coats it to lock in flavor and prevent freezer burn. Thaw it in the refrigerator overnight before gently reheating it.

What should I do if my lemon butter cream sauce is too thin?
If your sauce isn't thickening as you hoped, try simmering it for a little longer. Increase the heat slightly, but keep stirring constantly to prevent it from burning. If you're short on time, you can also whisk a tablespoon of cornstarch mixed in cold water into the sauce, cooking it until thickened. Let patience be your guide!

Is this recipe safe for people with allergies?
This dish is generally safe, but ensure you check for allergies, especially related to seafood, dairy, and lemon. Alternatively, if dairy is a concern, you can use non-dairy cream substitutes and eliminate butter for a dairy-free version. Always consult with your guests if you're serving them for the first time!

How do I know if my salmon is perfectly cooked?
To know if your salmon is perfectly cooked, it should be opaque and flake easily with a fork. The ideal internal temperature reaches 145°F (63°C). If you're unsure, a meat thermometer is an excellent tool! Just insert it into the thickest part of the fillet without touching the bones. Cooked salmon will also appear slightly darker in color and achieve a tender, moist texture.

Baked Salmon with Lemon Butter Cream Sauce

Baked Salmon with Lemon Butter Cream Sauce: A Flavor Delight

This Baked Salmon with Lemon Butter Cream Sauce is a quick and luxurious dish that's perfect for dinner.
Print Recipe Pin Recipe
Prep Time 10 minutes mins
Cook Time 20 minutes mins
Total Time 30 minutes mins
Servings: 4 servings
Course: Dinner
Cuisine: American
Calories: 450
Ingredients Equipment Method Nutrition Notes

Ingredients
  

For the Salmon
  • 1 lb skinless salmon fillet Use for optimal texture and flavor.
  • to taste salt Essential for enhancing taste.
  • to taste freshly cracked pepper Adds a delightful kick.
For the Lemon Butter Cream Sauce
  • 4 tbsp unsalted butter Adds richness to the sauce.
  • 1 cup heavy cream Creates a luscious texture.
  • 2 tbsp fresh lemon juice Brightens the flavor.
  • 2 tbsp chopped fresh parsley Provides color and a fresh touch.

Equipment

  • Oven
  • Baking Sheet
  • Parchment Paper
  • Saucepan

Method
 

Step-by-Step Instructions
  1. Preheat your oven to 375°F (190°C).
  2. Line a baking sheet with parchment paper and place the salmon fillet on it.
  3. Season the salmon fillet with salt and pepper.
  4. Bake the salmon for approximately 15-20 minutes until opaque and flakes easily with a fork.
  5. Melt the butter in a saucepan over medium heat.
  6. Add heavy cream, lemon juice, and parsley to the melted butter and stir for 5-7 minutes until thickened.
  7. Remove the sauce from heat and let it sit to meld flavors.
  8. Serve the salmon hot, drizzled with the lemon butter cream sauce.
  9. Enjoy your meal with a side of vegetables or salad.

Nutrition

Serving: 1servingCalories: 450kcalCarbohydrates: 2gProtein: 30gFat: 36gSaturated Fat: 20gPolyunsaturated Fat: 1gMonounsaturated Fat: 15gCholesterol: 90mgSodium: 350mgPotassium: 800mgVitamin A: 100IUVitamin C: 3mgCalcium: 30mgIron: 1mg

Notes

To keep leftovers fresh, ensure the sauce coats the salmon when refrigerating.

Tried this recipe?

Let us know how it was!

Savor the Sweetness: Maple Bourbon BBQ Salmon Recipe

April 25, 2026 by Grace Snow Leave a Comment

There’s something undeniably magical about the allure of grilling outdoors, especially when Maple Bourbon BBQ Salmon is sizzling over hot coals. This recipe captures not just the deliciousness of tender salmon fillets coated in a sweet and smoky glaze, but also the heartwarming essence of summer evenings spent with loved ones. The beauty of this dish lies in its simplicity; it's perfect for busy weeknights or delightful summer gatherings, providing a gourmet experience without all the fuss. With the option to substitute ingredients to match your pantry, this Maple Bourbon BBQ Salmon is a crowd-pleaser that's sure to impress. Curious about how this delightful combination can elevate your next meal? Let’s dive into the details!

Why is Maple Bourbon BBQ Salmon a must-try?

Flavor Explosion: The sweet and smoky glaze creates a taste sensation that will have your taste buds dancing with joy.
Easy to Prepare: This recipe simplifies gourmet cooking, making it suitable for both novice cooks and seasoned chefs.
Versatile Ingredients: With options to substitute bourbon and fish, you can tailor this dish to your preferences while using what you have on hand.
Crowd-Pleasing: Whether it’s a backyard BBQ or a cozy dinner at home, this dish is bound to impress family and friends.
Healthy Indulgence: Packed with protein and healthy fats, it’s a delicious choice that aligns with your health goals. If you’re looking for more amazing grilling ideas, try our Honey BBQ Chicken and experience another flavor fiesta!

Maple Bourbon BBQ Salmon Ingredients

For the Salmon
• Salmon Fillets – Tender and flaky when cooked correctly; can substitute with trout or halibut for variety.

For the Marinade
• Pure Maple Syrup – Adds sweetness and depth; always use pure to achieve the best flavor.
• Bourbon – Imparts a rich, smoky taste; feel free to substitute with whiskey if desired.
• Low-Sodium Soy Sauce – Balances sweetness with umami; tamari can be used for a gluten-free option.
• Garlic (minced) – Fresh garlic offers aromatic flavor; avoid jarred for optimal results.
• Black Pepper – Adds a subtle kick; adjust the amount to suit your taste buds.

For Garnish
• Green Onions – Adds freshness and a pop of color; chives work as a delightful substitute.

Step‑by‑Step Instructions for Maple Bourbon BBQ Salmon

Step 1: Preheat the Grill or Oven
Begin by preheating your grill to medium-high heat, aiming for approximately 375°F, or preheat your oven to 400°F. This ensures that the Maple Bourbon BBQ Salmon will cook evenly and develop that perfect caramelized glaze. For grilling, make sure to clean the grates and lightly oil them to prevent sticking. If using the oven, line your baking sheet with parchment paper for easy cleanup.

Step 2: Prepare the Marinade
In a mixing bowl, whisk together pure maple syrup, bourbon, low-sodium soy sauce, minced garlic, and freshly ground black pepper until the ingredients are fully combined. This sweet and smoky marinade is the heart of the Maple Bourbon BBQ Salmon, providing an irresistible flavor. Set aside about a quarter of the marinade for basting later, ensuring you have enough to brush onto the salmon while cooking.

Step 3: Marinate the Salmon
Place your salmon fillets in a shallow dish or a resealable bag, and pour half of the marinade over them, making sure each fillet is well coated. Seal the bag or cover the dish and allow the salmon to marinate in the refrigerator for at least 30 minutes. This process allows the flavors to penetrate deeply into the fish, enhancing its taste and tenderness.

Step 4: Grill the Salmon
If you’re grilling, carefully place the marinated salmon skin-side down onto the preheated grill grates. Brush the top evenly with the reserved marinade, and grill for approximately 5-6 minutes per side. You’ll know it’s done when the salmon is opaque and flakes easily with a fork, showcasing that beautiful glaze. Keep a close eye to prevent burning while achieving a nice char.

Step 5: Bake the Salmon
For the baking option, arrange the marinated salmon fillets on your lined baking sheet, brushing them generously with the remaining marinade for extra flavor. Bake in the preheated oven for about 12-15 minutes, or until the salmon is flaky and cooked through. The exterior should glisten with a golden hue, indicating the glaze has caramelized beautifully.

Step 6: Finishing Touches
Once your Maple Bourbon BBQ Salmon is fully cooked, drizzle any remaining marinade over the fillets for added zest. Garnish with finely chopped green onions for a touch of color and freshness. This final step enhances both the presentation and flavor of your dish, making it as delightful to the eyes as it is to the palate. Your warm and inviting Maple Bourbon BBQ Salmon is now ready to enjoy!

Storage Tips for Maple Bourbon BBQ Salmon

  • Fridge: Store cooked Maple Bourbon BBQ Salmon in an airtight container for up to 3 days. This keeps it fresh while preventing any strong odors from permeating the fridge.

  • Freezer: If you want to keep it longer, freeze the cooked salmon in a freezer-safe container or vacuum-sealed bag for up to 2 months. Thaw in the fridge before reheating for best results.

  • Reheating: To reheat, gently warm the salmon in the oven at 350°F for about 10-15 minutes or use a microwave on low power until heated through. This helps maintain its tenderness and flavor.

  • Marinade Storage: If you have leftover marinade, you can refrigerate it for up to 1 week. Just remember to bring it to a boil before using it again to ensure it's safe to consume.

Expert Tips for Maple Bourbon BBQ Salmon

  • Marinade Matters: Ensure the marinade is well-blended for consistent flavor. A poorly mixed marinade can lead to uneven taste across the salmon.

  • Monitor Cooking Time: Avoid overcooking by keeping an eye on the salmon. It should be opaque and flake easily, typically around 5-6 minutes per side when grilling.

  • Customize Heat Levels: For a bit of spice, add a pinch of cayenne pepper to the marinade. This can elevate the flavor and balance the sweetness of the maple glaze.

  • Herb Replacements: Feel free to experiment with herbs like dill or thyme. These can enhance the flavor of your Maple Bourbon BBQ Salmon, providing unique twists.

  • Leftover Storage: Store any leftovers in an airtight container for up to three days. Reheat gently to maintain tenderness, avoiding the dryness that can come from overheating.

What to Serve with Irresistible Maple Bourbon BBQ Salmon?

The perfect meal deserves equally delightful accompaniments that highlight each flavor beautifully.

  • Creamy Coleslaw: A cool and crunchy side, coleslaw adds a refreshing contrast to the rich, smoky salmon, refreshing your palate with every bite.

  • Garlic Butter Green Beans: These tender green beans, sautéed with garlic and butter, add a lovely savory note that complements the sweetness of the glaze.

  • Quinoa Salad: Light and nutritious, a fluffy quinoa salad with cherry tomatoes and cucumber offers a wholesome balance, soaking up the vibrant flavors of the maple bourbon sauce.

  • Roasted Corn on the Cob: Sweet, charred corn provides a delightful sweetness, enriching your BBQ experience and evoking memories of summer cookouts.

  • Crispy Potatoes: Oven-roasted potatoes topped with herbs make for a comforting texture, ensuring a satisfying crunch alongside the tender salmon.

  • Lemon Dill Rice: This fragrant rice dish, brightened with lemon and fresh dill, captures a lightness that enhances the dish's overall freshness.

  • Chilled White Wine: Pair your meal with a chilled glass of Pinot Grigio; its crisp acidity will cut through the richness of the salmon, elevating your dining experience.

  • Fruit Salad: A refreshing medley of seasonal fruits adds a sweet finish to your meal, cleansing the palate brilliantly after the smoky indulgence of the salmon.

  • Chocolate Mousse: For dessert, a light and airy chocolate mousse provides a decadent yet refreshing sweet to round out this gourmet experience.

Maple Bourbon BBQ Salmon Variations

Feel free to explore these delightful twists and substitutions, allowing you to create a unique culinary experience with every bite.

  • Whiskey Swap: Replace bourbon with your favorite whiskey for a similar flavor profile that packs a punch.
    It's a perfect choice for those who enjoy experimenting in the kitchen!

  • Fish Variety: Try using trout or halibut instead of salmon to change the texture while keeping the delicious marinade.
    Each fish brings a unique flavor, making this dish adaptable for any seafood lover.

  • Fruit Infusion: Add fruits like peaches or pineapple to the marinade for a refreshing, sweet contrast.
    The caramelization of the fruits on the grill brings an extra layer of summer vibes to your meal.

  • Gluten-Free Option: For a gluten-free dish, substitute low-sodium soy sauce with tamari to maintain the umami flavor.
    This minor change makes your recipe inclusive for everyone at the dinner table!

  • Heat It Up: Boost the spice level by adding a pinch of cayenne pepper or red pepper flakes to the marinade.
    This simple adjustment elevates the flavor and balances the sweetness, perfect for those who love a little kick.

  • Herb Twist: Experiment with fresh herbs such as dill, thyme, or even basil to elevate the flavor profile.
    Each herb brings a unique freshness, allowing you to tailor the dish to your cooking style.

  • Maple Variations: Substitute maple syrup with honey or agave nectar for a different kind of sweetness.
    Each syrup adds its own unique twist, transcending typical preparations into a gourmet experience.

For more delicious grilling ideas, don’t miss out on our Honey BBQ Chicken or try out the Maple Roasted Sweet for a truly delightful spread!

Make Ahead Options

These Maple Bourbon BBQ Salmon fillets are perfect for meal prep enthusiasts! You can prepare the marinade up to 24 hours in advance, allowing it to meld and enhance the flavors beautifully. Store the marinade in an airtight container in the refrigerator. Additionally, you can marinate the salmon fillets for up to 3 hours ahead of time, ensuring they soak in that delicious sweet and smoky goodness. When you're ready to grill or bake, simply follow the cooking instructions as outlined, and you’ll have restaurant-quality Maple Bourbon BBQ Salmon on your table with minimal effort. This makes it an ideal choice for busy weeknights or entertaining guests without the stress!

Maple Bourbon BBQ Salmon Recipe FAQs

What type of salmon should I choose for this recipe?
Absolutely! Look for fresh salmon fillets that are bright in color and free of any dark spots. Wild-caught salmon is often recommended due to its rich flavor and texture, but if you prefer, you can also use farmed salmon. If you’re feeling adventurous, trout or halibut can make delicious alternatives that still hold up well to the maple bourbon glaze.

How should I store leftovers of Maple Bourbon BBQ Salmon?
Very easily! Place any leftover salmon in an airtight container and refrigerate it for up to 3 days. This keeps the fish fresh while preventing odors from mingling with other foods in your fridge. For longer storage, you can freeze the cooked salmon in a freezer-safe container or vacuum-sealed bag for up to 2 months, and be sure to thaw it in the fridge before reheating to keep it tender.

Can I freeze Maple Bourbon BBQ Salmon?
Yes, you can! To freeze the salmon, allow it to cool completely before placing it in a freezer-safe container or wrapping it tightly in plastic wrap and then aluminum foil. This method helps prevent freezer burn and maintains its flavor. When you're ready to enjoy it again, thaw the salmon in the fridge overnight before reheating gently in the oven at 350°F for about 10-15 minutes.

What should I do if my salmon is overcooked?
If your salmon turns out overcooked, don’t worry too much! You can still salvage it by serving it with sauces or condiments that add moisture, such as a drizzle of additional maple syrup or a homemade tartar sauce. For next time, keep an eye on the cooking time—aim for 5-6 minutes per side on the grill or 12-15 minutes in the oven, checking for flakiness as a doneness indicator.

Is this recipe safe for people with dietary restrictions?
When it comes to dietary considerations, always check the labels of your soy sauce for gluten-free options if you’re cooking for someone with gluten sensitivity. For those with a fish allergy, consider using chicken breast as a substitute, though the cooking times may need adjustment. As for pets, it's best to avoid sharing cooked salmon with dogs, especially due to the seasonings and potential bones.

How do I ensure my marinade is flavorful?
To ensure your marinade is packed with flavor, mix the ingredients thoroughly until well combined. Let the salmon marinate for at least 30 minutes in the refrigerator; for even more intense flavor, consider marinating for up to 4 hours. Remember to set aside some marinade for basting while cooking, which helps build a deeper caramelized glaze, creating layers of flavor that resonate beautifully in every bite.

Maple Bourbon BBQ Salmon

Savor the Sweetness: Maple Bourbon BBQ Salmon Recipe

This Maple Bourbon BBQ Salmon combines sweet and smoky flavors, making for a delightful dinner option.
Print Recipe Pin Recipe
Prep Time 30 minutes mins
Cook Time 15 minutes mins
Total Time 45 minutes mins
Servings: 4 servings
Course: Dinner
Cuisine: American
Calories: 300
Ingredients Equipment Method Nutrition Notes

Ingredients
  

For the Salmon
  • 4 fillets Salmon Can substitute with trout or halibut for variety.
For the Marinade
  • 1/2 cup Pure Maple Syrup Always use pure for best flavor.
  • 1/4 cup Bourbon Can substitute with whiskey if desired.
  • 1/4 cup Low-Sodium Soy Sauce Tamari can be used for gluten-free option.
  • 2 cloves Garlic (minced) Use fresh for optimal flavor.
  • 1/2 teaspoon Black Pepper Adjust to taste.
For Garnish
  • 2 tablespoons Green Onions Chives work as a delightful substitute.

Equipment

  • Grill
  • Mixing Bowl
  • Baking Sheet

Method
 

Step-by-Step Instructions
  1. Preheat your grill or oven to medium-high heat, approximately 375°F, or preheat your oven to 400°F.
  2. In a mixing bowl, whisk together pure maple syrup, bourbon, low-sodium soy sauce, minced garlic, and black pepper until fully combined. Reserve a quarter of the marinade for basting.
  3. Place salmon fillets in a shallow dish or resealable bag, pour half of the marinade over them, ensuring they are well coated. Marinate in the refrigerator for at least 30 minutes.
  4. If grilling, place salmon skin-side down on the grill grates, brush the top with reserved marinade, and grill for 5-6 minutes per side.
  5. If baking, arrange salmon on a lined baking sheet, brush with remaining marinade, and bake for 12-15 minutes.
  6. Drizzle remaining marinade over cooked salmon and garnish with chopped green onions before serving.

Nutrition

Serving: 1filletCalories: 300kcalCarbohydrates: 25gProtein: 30gFat: 13gSaturated Fat: 3gPolyunsaturated Fat: 2gMonounsaturated Fat: 5gCholesterol: 75mgSodium: 400mgPotassium: 700mgSugar: 18gVitamin A: 500IUVitamin C: 2mgCalcium: 20mgIron: 1mg

Notes

Store leftovers in an airtight container for up to three days. Reheat gently to maintain tenderness.

Tried this recipe?

Let us know how it was!

Easy Salmon Caesar Salad That'll Elevate Your Dinner Game

April 25, 2026 by Grace Snow Leave a Comment

As I flipped through my recipe collection, a little voice nudged me to grab the salmon fillets lurking in the fridge. Suddenly, the idea of whipping up an Easy Salmon Caesar Salad sprang to mind—it's always my go-to when I crave something quick yet satisfying. This delightful dish combines the crispness of romaine with perfectly cooked salmon and a drizzle of creamy dressing, bringing together the best of healthy meals and indulgent flavors. It's not just an easy dinner recipe; it’s packed with protein to fuel your day and feels like a restaurant-quality treat right at home. Ready to make your taste buds dance and bring joy to your dinner table? Let's dive into this deliciously healthy creation!

Why is this salad a must-try?

Flavor-Packed Delight: The combination of savory salmon and zesty Caesar dressing creates a flavor explosion in every bite.

Health Hero: With protein-rich salmon and fresh romaine, this salad elevates your green game into a hearty meal.

Easy to Customize: Feel free to swap proteins or add favorites like avocado or cherry tomatoes for a unique twist.

Quick Preparation: Whip this up in under 30 minutes, making it perfect for busy weeknights.

Crowd-Pleasing Appeal: This salad is a fabulous conversation starter at dinner parties, impressing guests with minimal effort.

With this Easy Salmon Caesar Salad, you’ll never view healthy meals the same way again! For another comforting dish, try our delicious Chicken Salad with Apples!

Easy Salmon Caesar Salad Ingredients

• Dive into the deliciousness with these simple ingredients!

For the Salad

  • Romaine Lettuce – A crisp, crunchy base that can be swapped with kale or spinach for a different leafiness.
  • Salmon Fillets (4 x 6 oz) – The hero of this dish, loaded with omega-3 fatty acids; consider chicken or tofu for a change.
  • Shaved Parmesan Cheese (1/4 cup) – Adds a creamy texture; for a vegan option, try nutritional yeast!
  • Garlic & Herb Croutons (1 cup) – Adds delightful crunch; you can use homemade or store-bought, or get creative with toasted nuts for a gluten-free version.

For Cooking the Salmon

  • Extra Virgin Olive Oil (1 tbsp) – Gives richness and helps achieve a golden crust on the salmon; avocado oil is a great alternative.

For Seasoning

  • Dried Rosemary (1 tbsp) – Provides a lovely aromatic flavor; thyme or oregano can substitute nicely.
  • Smoked Paprika (1 tsp) – Introduces a smoky note to balance the salad; regular paprika works if you're looking for milder flavor.
  • Salt and Pepper to Taste – Essential for bringing out the flavors—adjust according to your personal preferences.

For the Dressing

  • Caesar Dressing (1/2 cup) – Adds creaminess and completes the dish; homemade dressing holds the freshest flavors, but store-bought is super convenient!

Ready to savor your Easy Salmon Caesar Salad? Let’s get cooking!

Step‑by‑Step Instructions for Easy Salmon Caesar Salad

Step 1: Cook the Salmon
Start by heating a large skillet over medium-high heat and adding 1 tablespoon of extra virgin olive oil. Once the oil is shimmering, season your salmon fillets with dried rosemary, smoked paprika, salt, and pepper. Place the salmon skin-side down in the skillet and cook for about 5 minutes, until the skin is crispy and the fillet is turning opaque. Flip the fillets carefully and cook for an additional 2 minutes for perfect doneness.

Step 2: Prepare the Salad Base
While the salmon is cooking, wash and chop 1 head of romaine lettuce into bite-sized pieces. In a large mixing bowl, add the chopped romaine along with 1/4 cup of shaved Parmesan cheese. To enhance the flavors, drizzle in 1/2 cup of Caesar dressing, then toss the ingredients together until the lettuce is well-coated in the creamy dressing, ensuring an even distribution of flavors in your Easy Salmon Caesar Salad.

Step 3: Plate the Salad
Once the salmon is cooked to perfection, remove it from the skillet and let it rest for a minute. To serve, divide the dressed romaine and Parmesan mixture evenly among four plates. Place one salmon fillet atop each salad portion to create a beautiful presentation. Finally, sprinkle 1 cup of garlic and herb croutons over the salads for that delightful crunch.

Step 4: Garnish and Serve
For an appealing finish, you can add a sprinkle of extra Parmesan or any additional toppings of your choice. Serve your Easy Salmon Caesar Salad immediately while the salmon is warm and the greens are crisp. Enjoy this healthy and satisfying meal that is sure to impress!

Expert Tips for Easy Salmon Caesar Salad

  • Crispy Skin Secret: Pat the salmon skin dry before cooking to ensure maximum crispiness. This simple step makes a world of difference in texture.

  • Perfectly Cooked Salmon: Use a meat thermometer to check for doneness. Salmon should reach an internal temperature of 145°F (63°C) for flakiness and flavor without compromising moisture.

  • Freshness Matters: Consider making homemade Caesar dressing for optimal freshness and flavor. It’s quick and elevates your Easy Salmon Caesar Salad to a whole new level.

  • Customize to Taste: Feel free to swap out proteins or add extras like avocado and cherry tomatoes. The versatility will keep your meals exciting and enjoyable.

  • Storage Tips: For freshness, store leftover salad in the fridge for 1-2 days. Keep salmon and dressing separate until serving to maintain crispness.

Make Ahead Options

This Easy Salmon Caesar Salad is perfect for busy home cooks seeking to streamline their meal prep! You can prepare the salad base (romaine lettuce, shaved Parmesan, and croutons) up to 3 days in advance, storing it in an airtight container in the refrigerator to maintain freshness. The salmon can be cooked up to 24 hours ahead of time—simply refrigerate it and reheat gently in the skillet or microwave before serving to keep it deliciously tender. For best results, add the Caesar dressing right before serving to prevent sogginess. With these make-ahead tips, you’ll have a healthy, flavor-packed meal ready to go in no time!

What to Serve with Easy Salmon Caesar Salad

Elevate your dining experience with complementary sides and drinks that enhance the flavors and textures of this delicious salad.

  • Roasted Asparagus: The tender yet slightly crisp asparagus adds a vibrant green touch, enhancing the freshness of your meal. Drizzle with lemon to elevate its bright flavor alongside the salad.

  • Quinoa Pilaf: This nutty, protein-packed side provides a satisfying contrast, making your meal hearty and filling. It’s a great way to add more texture and a slight chewiness that pairs beautifully with the salmon.

  • Grilled Sweet Potatoes: Their natural sweetness balances the savory notes of the Caesar dressing while adding a delightful creaminess in every bite. Serve them warm for a comforting element that works wonders alongside the salad.

  • Creamy Garlic Mashed Potatoes: Rich and smooth, these mashed potatoes offer a velvety texture that complements the crispy salmon perfectly. A sprinkle of fresh herbs can brighten the dish and add color.

  • Crisp White Wine: A chilled Sauvignon Blanc or Pinot Grigio enhances the flavors of the salad, providing a refreshing contrast to the rich salmon while accentuating the salad’s creaminess.

  • Lemon Sorbet: A light and refreshing dessert option that cleanses the palate beautifully after the richness of the meal. Its citrusy zing pairs perfectly with the flavors found in your Easy Salmon Caesar Salad.

With these delightful pairings, you’re set for a wholesome meal that brings together delicious, healthy elements that everyone will love!

How to Store and Freeze Easy Salmon Caesar Salad

Fridge: Store leftovers in an airtight container for up to 1-2 days. Keep the dressing and croutons separate to maintain the salad's crispness.

Freezer: Freezing is not recommended due to the fresh ingredients. However, you can freeze cooked salmon separately for up to 3 months; thaw in the fridge before using.

Reheating: If you’ve stored the salmon separately, reheat in the microwave or skillet until warmed through, and then toss it with fresh greens and dressing.

Enjoy Fresh: For the best experience and flavor, serve your Easy Salmon Caesar Salad immediately after preparation!

Easy Salmon Caesar Salad Variations

Feel free to let your creativity shine with these delicious twists on the classic Salad!

  • Protein Swap: Substitute salmon with grilled shrimp or chicken for a different flavor profile. The key is to maintain that juicy texture!

  • Leafy Greens Upgrade: Try kale or arugula instead of romaine for an exciting change in texture and flavor. Each green brings its own unique taste to the mix.

  • Creamy Alternatives: Replace shaved Parmesan with crumbled feta or goat cheese for a tangy surprise. This adds richness and depth, inviting your taste buds to explore!

  • Nutritional Boost: Toss in some chickpeas or black beans for an extra punch of protein and fiber. This will not only fill you up but also add a delightful creaminess.

  • Flavor Explosion: Mix in fresh herbs like basil or cilantro for an aromatic touch. They provide a burst of flavor that elevates your salad from good to extraordinary!

  • Vegan Delight: For a completely plant-based version, swap salmon for roasted tofu or tempeh and use nutritional yeast in place of cheese. Your vegan friends will thank you!

  • Vegetable Medley: Add cherry tomatoes, cucumbers, or avocado for a touch of freshness and color. These additions not only enhance the flavor but also boost the nutritional value.

  • Zesty Kick: Spice things up by drizzling in some sriracha or adding sliced jalapeños to your salad. The heat contrasts beautifully with the creamy dressing, igniting your taste buds!

Your customized Easy Salmon Caesar Salad is just waiting to be created! And if you’re looking for another comforting dish, try our delightful Avocado Egg Salad for a refreshing change!

Easy Salmon Caesar Salad Recipe FAQs

What type of romaine lettuce should I use?
I recommend using fresh and crisp romaine lettuce, as it provides the perfect crunchy base for your salad. If you'd like to mix things up, kale or spinach are great alternatives that will still give you a similar texture and nutritional value.

How should I store leftovers of the Easy Salmon Caesar Salad?
For the best taste, store any leftovers in an airtight container in the refrigerator for up to 1-2 days. Just be sure to keep the dressing and croutons separate from the salad to maintain the salad's crispness and prevent sogginess.

Can I freeze the Easy Salmon Caesar Salad?
Freezing this salad as a whole is not recommended due to the fresh ingredients; however, you can freeze cooked salmon alone. Wrap the salmon tightly in foil or plastic wrap, then place it in a freezer-safe bag. It will last up to 3 months in the freezer. When ready to enjoy, simply thaw the salmon in the fridge overnight before serving it with fresh greens.

What should I do if my salmon is overcooked?
If you find your salmon has become overcooked and dry, try slicing it into smaller pieces and mixing it into the salad with plenty of Caesar dressing. This will help impart moisture back into the dish and enhance overall flavor. Additionally, adding fresh avocado or a squeeze of lemon can further brighten the flavors.

Is this Easy Salmon Caesar Salad suitable for those with dietary restrictions?
Absolutely! If you have dietary restrictions such as lactose intolerance or a vegan diet, you can easily customize the recipe. Substitute the Parmesan cheese with nutritional yeast for a dairy-free option. To make it vegan, replace the salmon with grilled tofu or chickpeas as a protein source, and opt for a vegan Caesar dressing.

How do I tell if my salmon is fresh?
When selecting salmon, look for bright, moist flesh with no dark spots or strong fishy smells. The flesh should spring back when pressed, indicating freshness. If you can, purchase it from a trusted source and ideally on the day you plan to cook it for the best quality.

Easy Salmon Caesar Salad

Easy Salmon Caesar Salad That'll Elevate Your Dinner Game

Enjoy a quick and satisfying Easy Salmon Caesar Salad packed with protein and flavor, perfect for any dinner.
Print Recipe Pin Recipe
Prep Time 15 minutes mins
Cook Time 15 minutes mins
Total Time 30 minutes mins
Servings: 4 portions
Course: Salads
Cuisine: American
Calories: 450
Ingredients Equipment Method Nutrition Notes

Ingredients
  

For the Salad
  • 1 head Romaine Lettuce can be swapped with kale or spinach
  • 24 oz Salmon Fillets consider chicken or tofu for a change
  • 1/4 cup Shaved Parmesan Cheese for a vegan option, try nutritional yeast
  • 1 cup Garlic & Herb Croutons use homemade or store-bought
For Cooking the Salmon
  • 1 tbsp Extra Virgin Olive Oil avocado oil is a great alternative
For Seasoning
  • 1 tbsp Dried Rosemary thyme or oregano can substitute
  • 1 tsp Smoked Paprika regular paprika can be used
  • to taste Salt
  • to taste Pepper
For the Dressing
  • 1/2 cup Caesar Dressing homemade dressing holds the freshest flavors

Equipment

  • Large skillet
  • Mixing Bowl

Method
 

Step-by-Step Instructions
  1. Heat a large skillet over medium-high heat and add 1 tablespoon of olive oil. Season salmon fillets with rosemary, paprika, salt, and pepper. Cook skin-side down for about 5 minutes, flip and cook for an additional 2 minutes.
  2. Wash and chop romaine lettuce into bite-sized pieces. In a mixing bowl, combine chopped romaine, Parmesan cheese, and Caesar dressing. Toss until well-coated.
  3. Plate dressed romaine evenly on four plates. Place one salmon fillet atop each salad, sprinkle with croutons for crunch.
  4. Garnish with extra Parmesan or toppings of your choice. Serve immediately while the salmon is warm and the greens are crisp.

Nutrition

Serving: 1portionCalories: 450kcalCarbohydrates: 15gProtein: 35gFat: 28gSaturated Fat: 5gPolyunsaturated Fat: 5gMonounsaturated Fat: 15gCholesterol: 80mgSodium: 950mgPotassium: 800mgFiber: 4gSugar: 2gVitamin A: 200IUVitamin C: 15mgCalcium: 200mgIron: 3mg

Notes

For best flavor, consider making homemade Caesar dressing and serve immediately after preparation.

Tried this recipe?

Let us know how it was!

Stuffed Salmon with Cream Cheese: A Flavorful Delight Experience

April 25, 2026 by Grace Snow Leave a Comment

As I stood in my kitchen, the tantalizing aroma of garlic mingling with the freshness of lemon quickly transported me to a cozy seaside restaurant. My latest creation, the Irresistible Stuffed Salmon with Cream Cheese & Spinach, is a celebration of wholesome flavors that’s both healthy and oh-so-easy to whip up. This dish transforms ordinary salmon into an extraordinary meal that’s perfect for a quick weeknight dinner or a fancy gathering with friends. Not only is it a heart-healthy option rich in omega-3s, but it also takes just 30 minutes to prepare, leaving you more time to savor the moment. Ready to impress your taste buds and those of your loved ones? Let’s dive into the recipe that promises to bring warmth and joy right to your dining table!

Why is Stuffed Salmon with Cream Cheese Irresistible?

Irresistible Flavors: This dish brings together creamy cream cheese and fresh spinach, creating a stuffing that's both rich and vibrant. Each bite is an explosion of delightful taste!

Quick & Easy: In just 30 minutes, you can have a heart-healthy meal ready to serve. Say goodbye to fast food and hello to wholesome, homemade goodness!

Elegant Presentation: The golden, flaky salmon looks stunning on any table, making it perfect for both intimate dinners and larger gatherings. Impress your guests effortlessly!

Versatile Pairings: Serve with garlic roasted asparagus or with a refreshing salad for a well-rounded meal—this salmon dish shines alongside many sides!

Crowd-Pleaser: It’s not just healthy; everyone will love it! Whether you have picky eaters or foodies at the table, this recipe satisfies all palates.

Dive into this delightful dish and let it become a staple in your meal rotation!

Stuffed Salmon with Cream Cheese Ingredients

For the Salmon

• Salmon Fillets – Fresh fillets provide the perfect base for this dish; look for skinless, vibrant-colored options.
• Salt & Black Pepper – Essential for enhancing the salmon's natural flavors; adjust to your taste.
• Olive Oil or Melted Butter – Adds richness and aids in achieving a crispy top; 1 tablespoon is recommended.

For the Stuffing

• Cream Cheese – The star of the stuffing that binds everything together; can be substituted with dairy-free options if preferred.
• Fresh Spinach – Adds vibrant color and nutrients; ensure it’s well-drained to avoid excess moisture.
• Garlic – Minced garlic enhances the stuffing with savory depth; fresh packs the most flavor.
• Parmesan Cheese – Offers a nutty flavor that works wonderfully in the stuffing; nutritional yeast is a great dairy-free alternative.

For Garnishing

• Fresh Dill or Parsley – Optional garnish that adds an herbal freshness and a pop of color.
• Lemon Juice – Brightens and complements the salmon flavors perfectly; fresh juice is best.
• Extra Lemon Wedges – Serve alongside the salmon for an added zesty touch when eating.

This Stuffed Salmon with Cream Cheese recipe is not just easy to make—it’s a dinner that will impress both family and friends with its delightful flavors and heart-healthy benefits!

Step‑by‑Step Instructions for Stuffed Salmon with Cream Cheese

Step 1: Preheat the Oven
Preheat your oven to 375°F (190°C) to ensure a consistent cooking temperature for your Stuffed Salmon with Cream Cheese. While the oven heats up, line a baking sheet with parchment paper or lightly grease it with a bit of olive oil or melted butter—this will help the salmon crisp beautifully without sticking.

Step 2: Prepare the Filling
In a mixing bowl, combine softened cream cheese, well-drained fresh spinach, and minced garlic to create a rich stuffing. Add in grated Parmesan cheese along with salt and freshly cracked black pepper to taste. Mix the ingredients thoroughly until a creamy, vibrant filling forms, allowing the flavors to meld.

Step 3: Cut Salmon Pockets
Carefully place each salmon fillet on your prepared baking sheet. Using a sharp knife, cut a horizontal pocket into the thickest part of each fillet without cutting all the way through. This creates a snug space for the delicious filling, making your Stuffed Salmon with Cream Cheese both beautiful and flavorful.

Step 4: Stuff the Salmon
Generously fill each salmon pocket with the creamy spinach mixture you prepared earlier. Ensure the stuffing is heaping but secure, as the creamy filling will enhance the flavor and moisture of the salmon as it cooks. A proper stuffing will give you that delightful burst of flavor in every bite!

Step 5: Season and Drizzle
Sprinkle the tops of the stuffed salmon fillets with garlic powder, salt, and a bit of pepper to enhance the overall flavor profile. Next, drizzle the salmon with olive oil or melted butter for added richness, then squeeze fresh lemon juice over the top to brighten the dish, adding a zesty flavor that perfectly complements the salmon.

Step 6: Bake the Salmon
Transfer the stuffed salmon fillets to the preheated oven and bake for 18-22 minutes. Keep an eye on them; you’ll know they are done when the edges start to flake easily and the tops are golden brown. This ensures your Stuffed Salmon with Cream Cheese is perfectly cooked and full of flavor.

Step 7: Garnish and Serve
Once the salmon is done baking, remove it from the oven and let it rest for a minute. Optionally, garnish with fresh dill or parsley for an extra touch of color and flavor. Serve with extra lemon wedges on the side, allowing everyone to add a fresh splash of citrus to their personal portion of this delicious dish.

What to Serve with Stuffed Salmon with Cream Cheese

Elevate your dining experience with delightful sides that beautifully complement the rich flavors of your salmon masterpiece.

  • Garlic Roasted Asparagus: The tender, slightly charred asparagus adds a crisp contrast and complements the creamy stuffing perfectly.

  • Lemon Risotto: Creamy and zesty, lemon risotto enhances the fish’s brightness, creating a harmonious balance on your plate.

  • Crispy Roasted Potatoes: These golden-brown bites offer a satisfying crunch, making each bite feel indulgent while providing a hearty texture.

  • Fresh Garden Salad: A light, vibrant salad with mixed greens and a tangy vinaigrette adds freshness, balancing the rich flavors of creamy salmon.

  • Couscous or Quinoa: Fluffy grains provide a lovely base; their mild flavor allows the stuffed salmon to shine while contributing an extra layer of nutrition.

  • White Wine: Pair with a chilled glass of Sauvignon Blanc or Chardonnay to complement the dish’s delicate flavors and enhance the dining experience.

With these thoughtful pairings, your Stuffed Salmon with Cream Cheese will shine as the star of an exquisite meal!

Make Ahead Options

These Stuffed Salmon with Cream Cheese are perfect for busy weeknights! You can prepare the creamy spinach filling up to 3 days in advance; simply mix the softened cream cheese, fresh spinach, minced garlic, and grated parmesan in a bowl and store it in an airtight container in the fridge. Additionally, you can stuff the salmon fillets and refrigerate them for up to 24 hours before baking (this helps meld the flavors together). To maintain quality, cover the salmon well to prevent it from drying out. When you're ready to serve, just drizzle with olive oil, season, and bake at 375°F (190°C) for 18-22 minutes. This makes for a delightful, stress-free dinner!

Stuffed Salmon with Cream Cheese Variations

Feel free to explore these delightful twists on the classic stuffed salmon recipe that will entice your taste buds!

  • Dairy-Free: Use cashew cream or dairy-free cream cheese instead of regular cream cheese for a luscious, creamy texture without the dairy.

  • Cheese Swap: Substitute the Parmesan cheese with crumbled feta or tangy goat cheese to introduce a new flavor layer that complements the spinach beautifully.

  • Vegetarian Option: Instead of salmon, use large portobello mushrooms as the "stuffed" vessel—complete with the same creamy spinach filling for a heart-healthy meal anyone would love.

  • Herb Boost: Incorporate fresh herbs like basil or chives into the stuffing for an aromatic twist that adds a refreshing zing to each bite.

  • Mediterranean Flair: Include sun-dried tomatoes and olives in the filling to give the stuffed salmon a Mediterranean vibe that’s utterly irresistible.

  • Spicy Kick: Add a pinch of red pepper flakes to the stuffing to turn up the heat or mix in jalapeños for a delightful surprise.

  • Flavorful Crust: For a crispy topping, sprinkle breadcrumbs or panko over the salmon before baking, making it golden brown and extra crunchy.

Try these variations today and elevate your dining experience! And for more delicious ideas, consider serving your stuffed salmon with garlic roasted asparagus or a refreshing salad for a complete meal. Enjoy!

Storage Tips for Stuffed Salmon with Cream Cheese

Fridge: Store any leftover Stuffed Salmon with Cream Cheese in an airtight container for up to 3 days to keep it fresh and flavorful.

Freezer: If you want to enjoy it later, you can freeze the stuffed salmon for up to 3 months. Make sure it’s tightly wrapped to prevent freezer burn.

Reheating: To reheat, place the salmon in a preheated oven at 350°F (175°C) for about 15-20 minutes until warmed through, helping to maintain its moist texture.

Make-Ahead: Prepare the stuffing up to 3 days ahead and keep it refrigerated; stuff the salmon just before cooking for optimal flavor and freshness.

Expert Tips for Stuffed Salmon with Cream Cheese

Fresh Salmon: Always choose the freshest salmon fillets to enhance flavor. Look for vibrant color and a moist appearance without dark spots.

Stuffing Thickness: If the stuffing turns runny, add extra cream cheese or breadcrumbs to achieve the right consistency. This ensures your Stuffed Salmon with Cream Cheese holds its shape beautifully.

Serving Temperature: Let the salmon rest for about a minute after baking to help set the flavors before serving. This also makes it easier to cut and enjoy!

Storage Advice: Keep leftovers in an airtight container for up to 3 days in the fridge. Reheat in a preheated oven to maintain moisture and flavor.

Make-Ahead Tips: Prepare the stuffing two to three days in advance and store it in the fridge. Stuff the salmon just before cooking for maximum freshness.

Stuffed Salmon with Cream Cheese Recipe FAQs

How do I select the best salmon fillets?
Absolutely! When selecting salmon fillets, look for those that are vibrant in color and have a moist sheen, free from dark spots. Opting for wild-caught salmon can enhance the flavor and nutritional value. Skinless fillets are often preferred for this recipe, as they allow the stuffing to shine.

How should I store leftover stuffed salmon?
Very! Store your leftover Stuffed Salmon with Cream Cheese in an airtight container in the fridge for up to 3 days. To keep it fresh and flavorful, ensure it is well-sealed. When reheating, place it in a preheated oven at 350°F (175°C) for about 15-20 minutes to maintain its moist texture.

Can I freeze stuffed salmon, and if so, how?
Definitely! You can freeze your Stuffed Salmon with Cream Cheese for up to 3 months. To do this, wrap each filled fillet tightly in plastic wrap or foil and then place them in a freezer-safe bag. For added protection, label the bag with the date. When you're ready to enjoy it, thaw overnight in the refrigerator before cooking.

What should I do if my stuffing turns out runny?
No worries! If your stuffing is a bit runny, you can resolve it by adding an extra 1-2 ounces of cream cheese or a small handful of breadcrumbs to thicken it up. Mix thoroughly until you achieve the desired consistency before stuffing the salmon. This will help ensure that your Stuffed Salmon with Cream Cheese holds its shape beautifully during baking.

Is this recipe suitable for people with dairy allergies?
Absolutely! If you or your loved ones are lactose intolerant, you can easily substitute the cream cheese with a dairy-free alternative. There are many excellent vegan cream cheese options available in stores. Additionally, using nutritional yeast instead of Parmesan can still provide that nutty flavor without the dairy. Always check for the specific ingredients based on dietary needs.

Stuffed Salmon with Cream Cheese

Stuffed Salmon with Cream Cheese: A Flavorful Delight Experience

Stuffed Salmon with Cream Cheese blends creamy cheese and fresh spinach into a delicious, heart-healthy dish perfect for any occasion.
Print Recipe Pin Recipe
Prep Time 10 minutes mins
Cook Time 22 minutes mins
Total Time 30 minutes mins
Servings: 4 fillets
Course: Dinner
Cuisine: American
Calories: 350
Ingredients Equipment Method Nutrition Notes

Ingredients
  

For the Salmon
  • 4 fillets Salmon skinless and fresh
  • 1 teaspoon Salt to taste
  • 1 teaspoon Black Pepper to taste
  • 1 tablespoon Olive Oil or Melted Butter for drizzling
For the Stuffing
  • 8 ounces Cream Cheese softened
  • 2 cups Fresh Spinach well-drained
  • 2 cloves Garlic minced
  • 1/2 cup Parmesan Cheese grated
For Garnishing
  • 1 tablespoon Fresh Dill or Parsley optional
  • 1 tablespoon Lemon Juice fresh
  • 2 wedges Extra Lemon for serving

Equipment

  • Oven
  • Baking Sheet
  • Mixing Bowl
  • Knife

Method
 

Cooking Instructions
  1. Preheat your oven to 375°F (190°C) and prepare a baking sheet.
  2. In a bowl, mix softened cream cheese, spinach, minced garlic, Parmesan cheese, salt, and pepper until creamy.
  3. Cut a pocket into each salmon fillet to hold the stuffing.
  4. Stuff each salmon pocket with the spinach mixture generously.
  5. Season the stuffed fillets with garlic powder, salt, pepper, and drizzle with olive oil and lemon juice.
  6. Bake for 18-22 minutes, until the salmon flakes easily and the tops are golden.
  7. Let rest for a minute, garnish with dill or parsley, and serve with lemon wedges.

Nutrition

Serving: 1filletCalories: 350kcalCarbohydrates: 5gProtein: 30gFat: 20gSaturated Fat: 10gPolyunsaturated Fat: 3gMonounsaturated Fat: 7gCholesterol: 100mgSodium: 500mgPotassium: 600mgFiber: 2gSugar: 3gVitamin A: 400IUVitamin C: 15mgCalcium: 200mgIron: 2mg

Notes

This recipe can be made ahead by preparing the stuffing in advance and stuffing the salmon just before cooking.

Tried this recipe?

Let us know how it was!
  • « Previous Page
  • 1
  • …
  • 36
  • 37
  • 38
  • 39
  • 40
  • …
  • 246
  • Next Page »

Welcome!

Hi, I’m Grace, a Sydney-based home cook with a passion for bold flavors and trending ingredients. Whether you’re a busy beginner or a seasoned foodie, you’ll find dishes here that are fresh, fun, and full of flavor.

More about me

Popular Recipes

  • Tennessee Peach Pudding
    Heavenly Tennessee Peach Pudding for Cozy Gatherings
  • Peaches and Cream Cake
    Irresistible Peaches and Cream Cake for Sweet Gatherings
  • Joanna Gaines Peach Cobbler
    Joanna Gaines Peach Cobbler: The Ultimate Summer Comfort
  • No Bake Peach Dessert Cups
    No Bake Peach Dessert Cups That Refresh Every Bite

Footer

↑ back to top

About

  • Privacy Policy
  • Disclaimer
  • Terms & Conditions

Newsletter

  • Sign Up! for emails and updates

Contact

  • About me
  • Contact me

Copyright © 2025 TastyTrendIngredients