tastytrendingredients

  • Home
  • Recipes
    • Appetizers
    • Breakfast
    • Dessert
    • Dinner
    • Drinks
    • Salads
    • Snacks
    • Soups
  • About me
  • Contact
menu icon
go to homepage
  • Home
  • Recipes
    • Appetizers
    • Breakfast
    • Dessert
    • Dinner
    • Drinks
    • Salads
    • Snacks
    • Soups
  • About me
  • Contact
search icon
Homepage link
  • Home
  • Recipes
    • Appetizers
    • Breakfast
    • Dessert
    • Dinner
    • Drinks
    • Salads
    • Snacks
    • Soups
  • About me
  • Contact
×

Fluffy & Fun Cotton Candy Popcorn for Sweet Movie Nights

April 25, 2026 by Grace Snow Leave a Comment

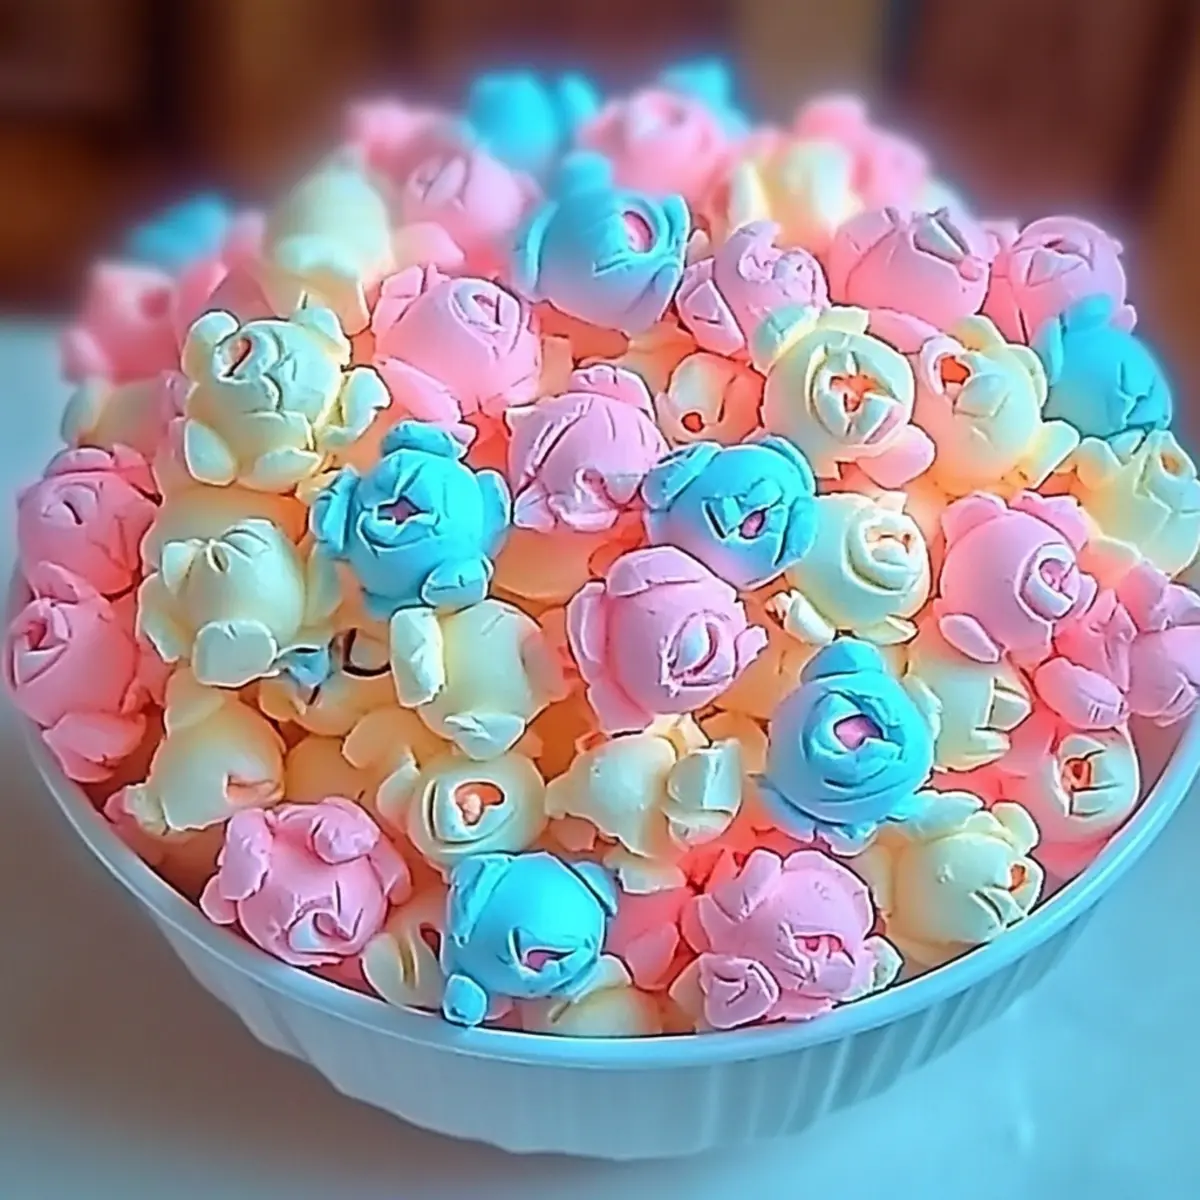
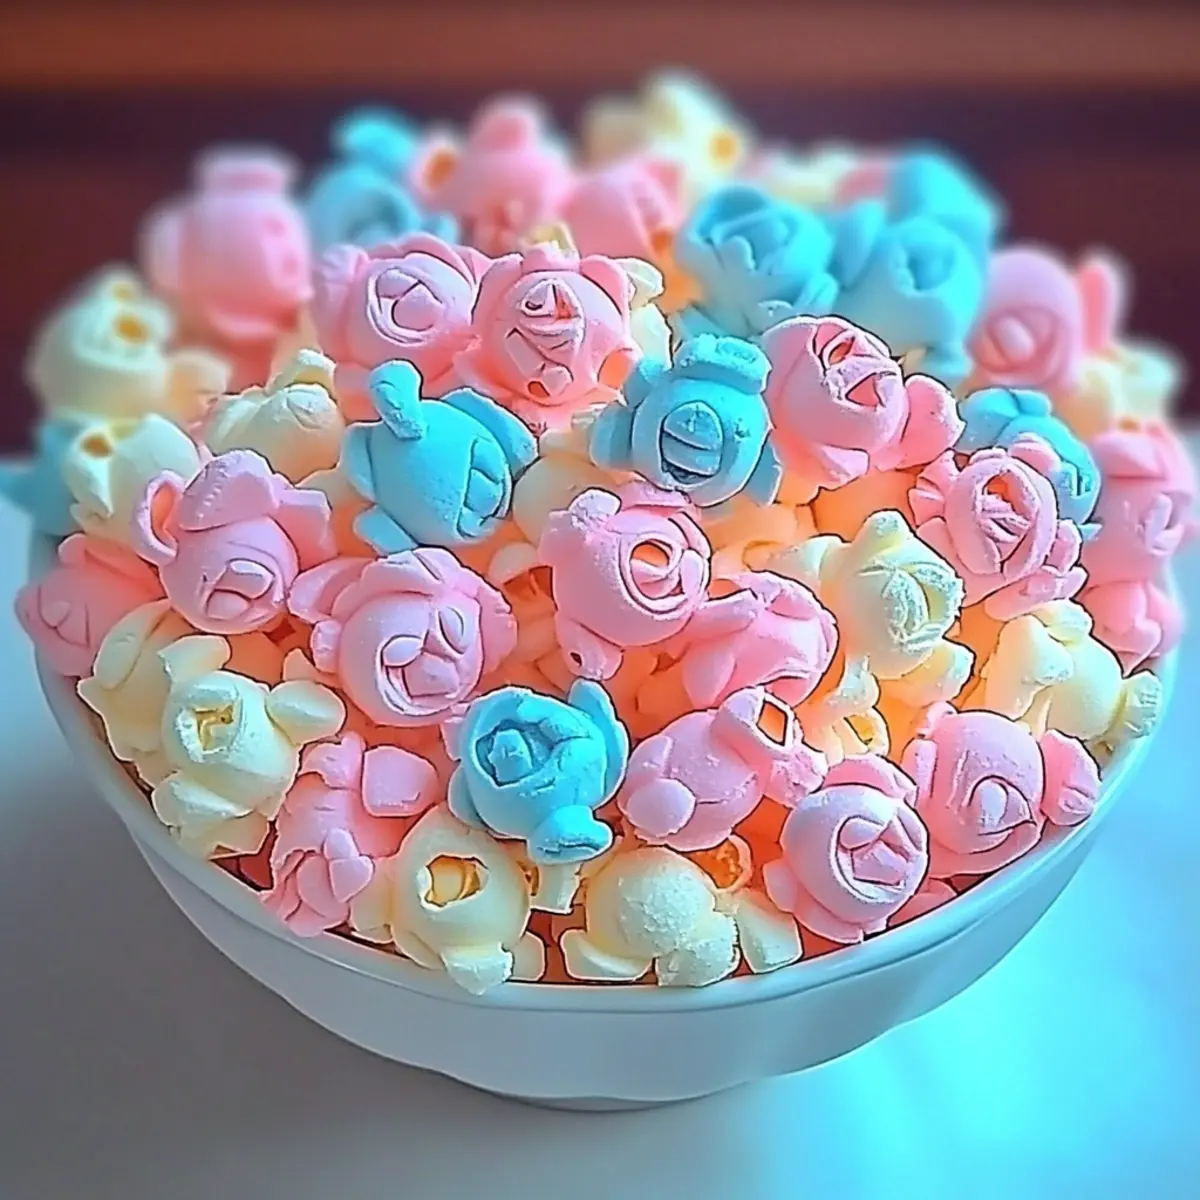
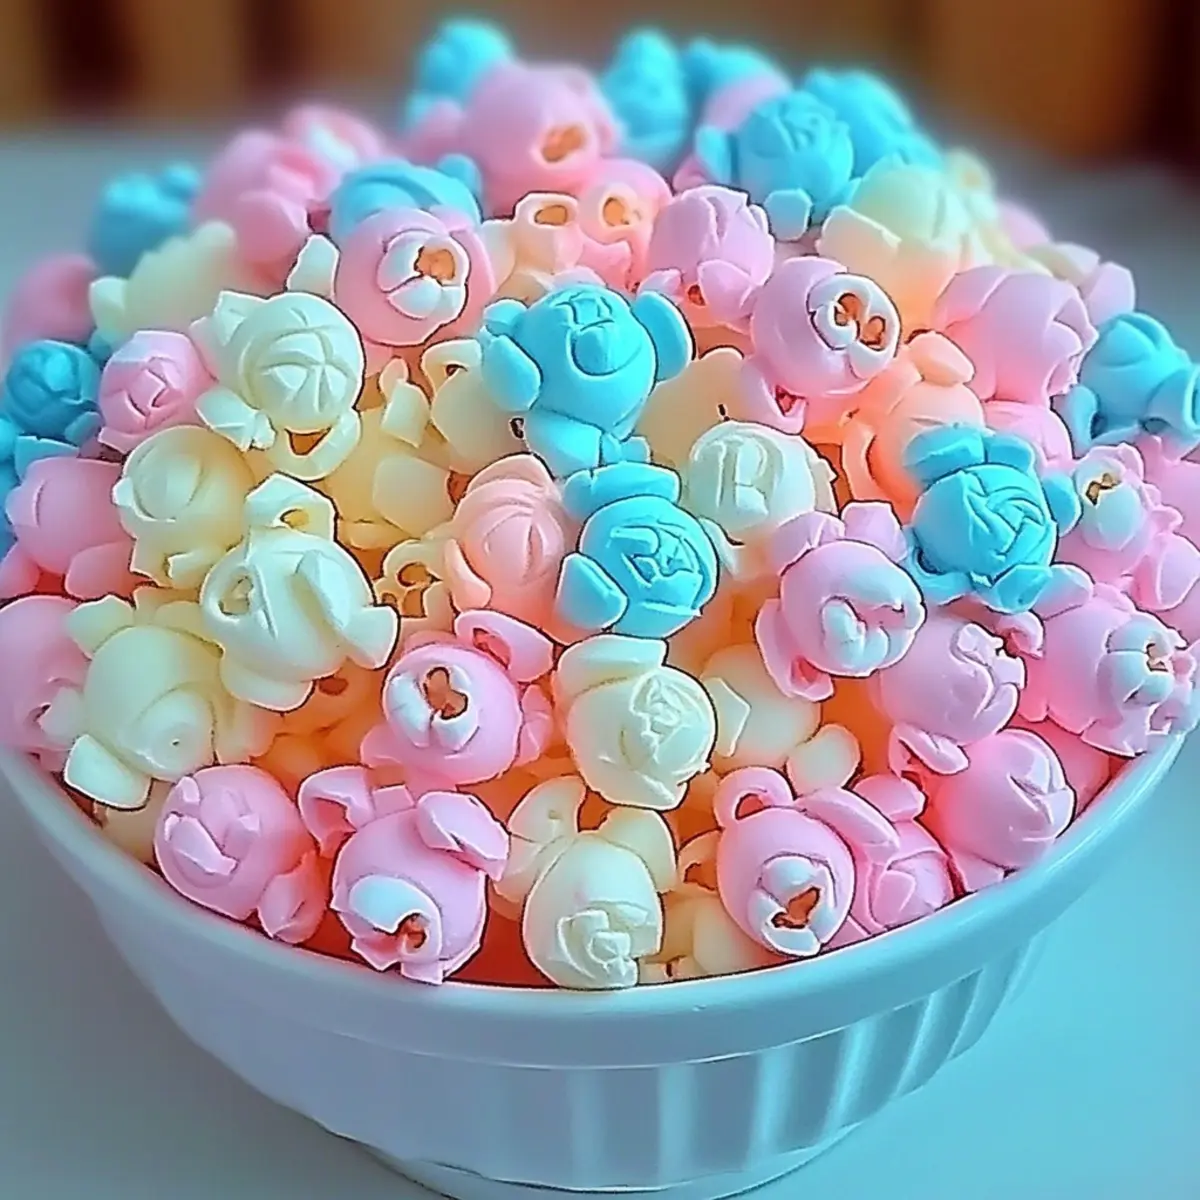
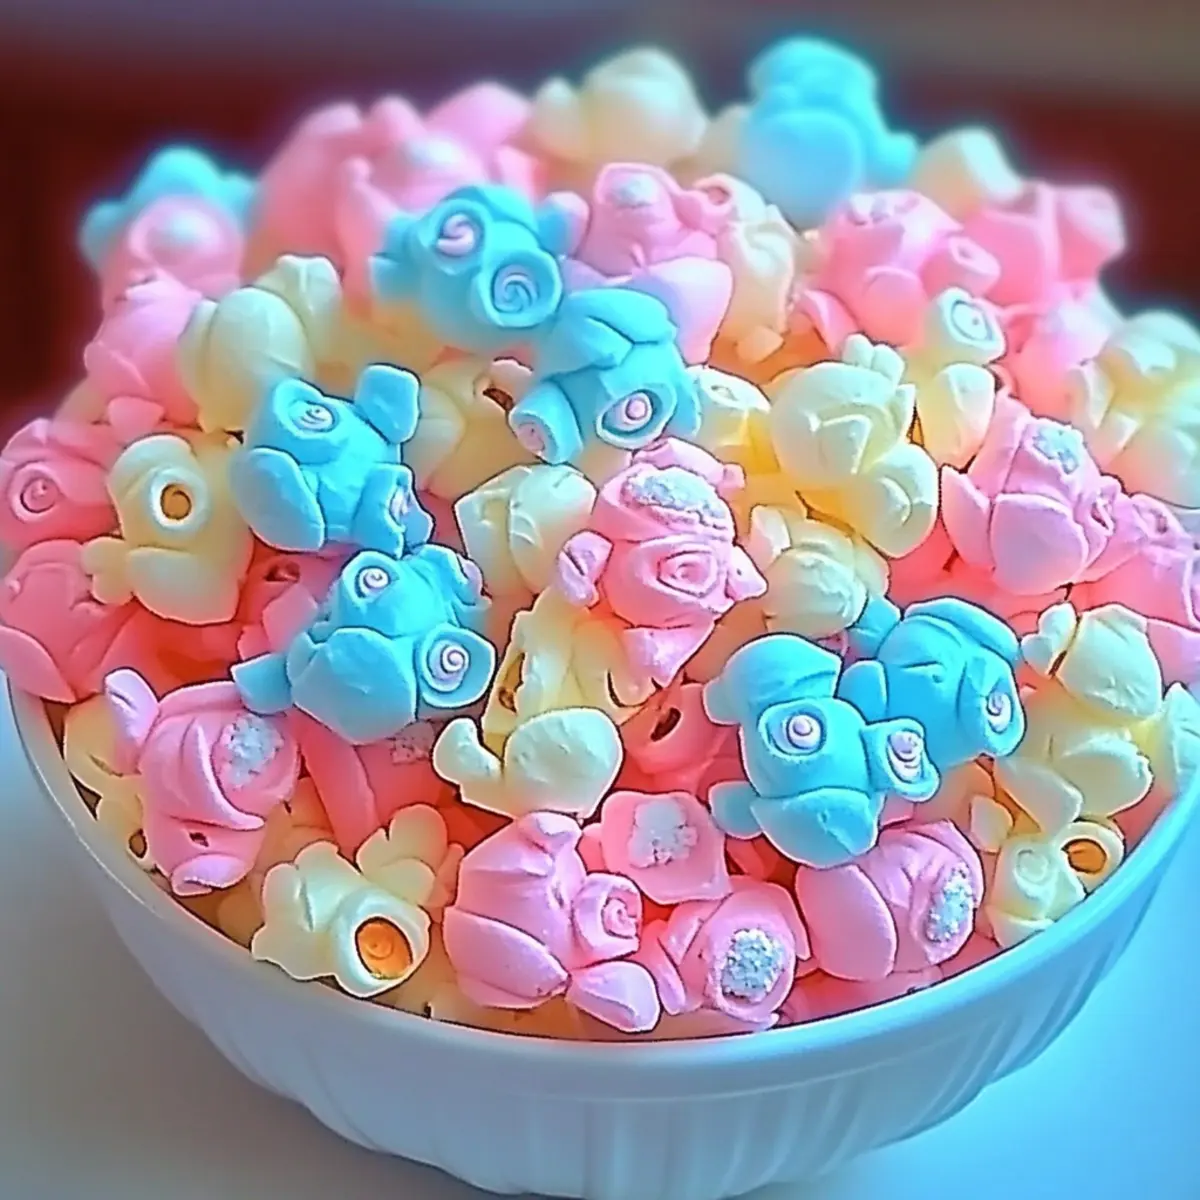
The aroma of freshly popped popcorn fills the air, transporting me back to sun-soaked summer fairs, where the sweet, sugary scent of cotton candy danced with laughter and excitement. Today, I bring a slice of that nostalgia into your kitchen with my Fluffy & Fun Cotton Candy Popcorn recipe! In just 25 minutes, you can whip up this delightful snack that’s perfect for movie nights or birthday parties. It’s a surefire crowd-pleaser that combines a crunchy texture with a melt-in-your-mouth coating and the whimsical flavor of cotton candy. Plus, it’s an easy treat that you can make with the kids, sparking joy in every pop! So, are you ready to add a touch of carnival magic to your next gathering?

Why is Cotton Candy Popcorn So Special?

Sweet Nostalgia: This delightful treat captures the essence of summer fairs, filling your home with sugary memories.

Quick to Make: In just 25 minutes, you can create this sweet delight, making it ideal for spontaneous gatherings or movie nights.

Perfect for Sharing: It’s a crowd-pleaser that appeals to both kids and adults alike—every bite is a fun experience!

Endless Customization: Feel free to experiment with different flavors or colors, making each batch a unique creation. Check out my suggestions for variations to explore! Whether you're looking to blend flavors or add a colorful twist, the opportunities are endless.

Simple Preparation: With just a few ingredients and easy steps, even novice cooks can whip this up effortlessly. Grab some friends, and dive into the joy of homemade treats!

Fluffy & Fun Cotton Candy Popcorn Ingredients

For the Popcorn Base
• Popped Popcorn – about 10 cups deliver that perfect crunch; use 1/2 cup of unpopped kernels to yield the amount needed.

For the Sweet Coating
• Unsalted Butter – provides richness and helps the sugar adhere; you can substitute with margarine if needed.
• Granulated Sugar – adds sweetness and gives the coating its chewy texture.
• Light Corn Syrup – ensures a smooth coating by preventing sugar crystallization; dark corn syrup is a flavorful alternative.
• Water – assists in creating that silky sugar syrup.
• Salt – balances sweetness; kosher salt is recommended for better texture.
• Vanilla Extract – enhances the flavor profile; almond extract can give it a unique twist.
• Cotton Candy Flavoring (e.g., LorAnn’s) – the essential flavor that brings cotton candy taste to life; essential for authenticity.
• Gel Food Coloring – optional; vibrant colors like pink or blue add a whimsical touch.

For Extra Flourish
• Sprinkles – optional for decoration; they add extra charm and fun to your treat!

Get ready to whip up your very own Fluffy & Fun Cotton Candy Popcorn that will spark joy and excitement at your next gathering!

Step‑by‑Step Instructions for Fluffy & Fun Cotton Candy Popcorn

Step 1: Prep Popcorn
Begin by popping about 1/2 cup of unpopped popcorn kernels in an air popper or stovetop, then transfer the fluffy popcorn into a large mixing bowl. Make sure there are no unpopped kernels left, as they can ruin the joy of your Fluffy & Fun Cotton Candy Popcorn. Set the bowl aside while you prepare the sweet coating.

Step 2: Make Sugar Syrup
In a medium saucepan, combine 1/2 cup of unsalted butter, 1 cup of granulated sugar, 1/4 cup of light corn syrup, 1 tablespoon of water, and 1/4 teaspoon of salt. Heat the mixture over medium heat, stirring occasionally until the sugar fully dissolves, which will take around 2-3 minutes. Once dissolved, increase the heat, bringing it to a vigorous boil.

Step 3: Cook Syrup
Allow the syrup to boil without stirring for about 5 minutes, monitoring the temperature with a candy thermometer. You'll want it to reach the soft ball stage, which is around 240°F. Keep an eye on its color and thickness, as it will transform into a beautiful, glossy syrup perfect for coating your popcorn.

Step 4: Flavor and Color
Remove the saucepan from heat immediately once it reaches temperature, then carefully stir in 1 teaspoon of vanilla extract and 1 teaspoon of cotton candy flavoring. If you'd like a whimsical touch, add a few drops of gel food coloring at this stage, mixing it in until you achieve your desired hue. The syrup should smell delightful and look vibrant!

Step 5: Coat Popcorn
Pour the warm syrup gently over the prepared popcorn in the bowl. Use a large spatula to carefully mix and coat the popcorn, ensuring every fluffy piece is covered with the sticky, sweet syrup. This smooth coating will give your Fluffy & Fun Cotton Candy Popcorn its signature taste and texture, so blend thoroughly!

Step 6: Cool and Serve
Once coated, spread the popcorn mixture onto a baking sheet lined with parchment paper. Allow it to cool completely for about 15 minutes, as this will make it easier to break apart into clusters. Once cooled, use your hands to break the popcorn into bite-sized pieces, and feel free to add sprinkles for a festive touch before serving or storing.

Expert Tips for Fluffy & Fun Cotton Candy Popcorn

• Work Quickly: Once the syrup reaches the soft ball stage, it thickens rapidly. Ensure you coat the popcorn without delay to achieve that perfect texture.

• Use a Large Bowl: When mixing the popcorn and syrup, a spacious bowl allows for easier and more even coating—each fluffy kernel deserves its fair share of sweetness!

• Check for Unpopped Kernels: Before mixing in the syrup, double-check your popped popcorn for any unpopped kernels. Missing them can lead to disappointing crunches while enjoying your cotton candy popcorn.

• Adjust for Storage: Store your Fluffy & Fun Cotton Candy Popcorn in an airtight container to keep it crispy and fresh. Avoid exposure to humidity which can alter its delightful crunch.

• Customize Your Flavor: Don’t hesitate to get inventive! While cotton candy flavoring is the star, experiment with various extracts or food colorings to create personalized versions that reflect your unique taste.

How to Store and Freeze Fluffy & Fun Cotton Candy Popcorn

Room Temperature: Store your Fluffy & Fun Cotton Candy Popcorn in an airtight container at room temperature to keep it fresh and crunchy. This will last up to 1 week, making it perfect for snacking throughout the week.

Freezer: While freezing is not ideal due to potential loss of crispiness, if you must, place the popcorn in a freezer-safe bag or container. It can last for up to 3 months; just allow it to thaw at room temperature before enjoying.

Reheating: If you find your popcorn has lost its crispness, you can revive it by spreading it on a baking sheet and warming it in a preheated oven at 250°F for about 5-10 minutes. This can help restore freshness, allowing those delightful flavors to shine again!

Fluffy & Fun Cotton Candy Popcorn Variations

Get ready to personalize your snack with exciting twists that will tickle your taste buds and elevate your popcorn experience!

  • Flavor Swaps: Substitute cotton candy flavoring with bubblegum or strawberry for a fun twist that resonates with childhood favorites.

  • Nutty Delight: Add a sprinkle of finely chopped nuts, like almonds or peanuts, to give your popcorn an extra crunch and nutty flavor.

  • Choco-Boost: Drizzle melted chocolate over the cooled popcorn to create a decadent combination that balances the sweetness of cotton candy.

  • Savory Kick: Consider adding a pinch of cayenne pepper to the syrup for a surprising and delightful heat that contrasts with the sweetness.

  • Color Explosion: Mix in colorful candy pieces or M&Ms for a vibrant visual and an extra layer of sweetness—each handful becomes a treasure!

  • Festive Sprinkles: Enhance the fun by incorporating themed sprinkles that match your occasion—think holiday colors or confetti for birthdays!

  • Dairy-Free Version: Use coconut oil instead of butter and maple syrup in place of corn syrup for a deliciously creamy, dairy-free alternative without losing flavor.

  • Cinnamon Sugar: Before adding the syrup, toss the popcorn with a sprinkle of cinnamon sugar for a warm, cozy flavor that evokes memories of fall fairs.

Let your creativity soar and enjoy the delightful process of making this sweet snack truly your own! If you're curious about more ideas or flavor inspirations, don't hesitate to explore what matches your mood!

What to Serve with Fluffy & Fun Cotton Candy Popcorn

The sweet aroma of cotton candy popcorn pairs beautifully with a variety of treats, making your gatherings even more delightful.

  • Ice Cream Sundaes: The creamy, cold texture of ice cream complements the crunchy, sugary popcorn. Top it off with some popcorn for a playful twist!

  • Fruit Salad: A vibrant mix of fresh fruits adds a refreshing, juicy contrast. The natural sweetness balances out the sugary popcorn, making for a light treat.

  • Chocolate-Covered Pretzels: Salty and sweet, these crunchy snacks offer a delightful variation in texture. They introduce a savory element to enhance your dessert table's diversity.

  • Homemade Lemonade: The zesty tang of lemonade brightens your palate. Not only is it refreshing, but it also transforms your sweet snack into a nostalgic carnival experience.

  • Mini Cupcakes: These adorable, bite-sized treats are perfect for a party spread. Choosing vibrant frosting colors ties in nicely with your cotton candy theme.

  • Sparkling Water: Add a touch of elegance with sparkling water. Flavored varieties infuse a hint of zest, making it an ideal, refreshing beverage alongside your fluffy and fun treat.

For any festive occasion, these pairings make your gathering feel complete, ensuring that everyone has a memorable experience!

Make Ahead Options

These Fluffy & Fun Cotton Candy Popcorn treats are a fantastic choice for busy home cooks looking to save time! You can prepare the popcorn and coat it with the sweet syrup up to 24 hours in advance. Simply pop the popcorn, make the syrup, and coat the popcorn, then allow it to cool completely. Store the coated popcorn in an airtight container at room temperature to keep it crispy and fresh. When you're ready to serve, just break it into clusters and add sprinkles if desired. This way, you can enjoy sweet, carnival-inspired snacks with minimal stress!

Fluffy & Fun Cotton Candy Popcorn Recipe FAQs

How do I select ripe ingredients for my Fluffy & Fun Cotton Candy Popcorn?
Absolutely! For the best results, choose fresh, high-quality ingredients. Look for unsalted butter that’s creamy and smooth, and make sure your granulated sugar is free from clumps. The cotton candy flavoring should ideally be from a reputable brand, like LorAnn’s, for an authentic taste that brings that carnival essence to your kitchen!

How should I store Fluffy & Fun Cotton Candy Popcorn?
Store your Fluffy & Fun Cotton Candy Popcorn in an airtight container at room temperature to keep it fresh and crunchy. This delicious treat will maintain its delightful texture for about 1 week. Avoid placing it in the fridge as moisture will impact its crispiness.

Can I freeze Fluffy & Fun Cotton Candy Popcorn?
While freezing isn’t the best option due to the potential loss of crunch, if necessary, you can freeze it! Place the popcorn in a freezer-safe bag or container and it will last for up to 3 months. To enjoy later, simply allow it to thaw at room temperature before indulging in this sweet treat.

What if my sugar syrup doesn't reach the right temperature?
No worries! If your syrup doesn’t reach the soft ball stage (240°F), you can return it to heat. Continue cooking and monitoring with a candy thermometer until it reaches the right temperature. If it’s too thick, you can add a tablespoon of water to loosen it up slightly before pouring it over the popcorn.

Are there any dietary considerations for Fluffy & Fun Cotton Candy Popcorn?
If you have allergies or dietary restrictions, consider alternatives carefully. You can substitute the unsalted butter with margarine, and if you're avoiding gluten, this recipe is naturally gluten-free as long as your popcorn is certified gluten-free. For those with nut allergies, use vanilla extract instead of almond extract, and opt for simple, colorful sprinkles that do not contain allergens.

What are some common troubleshooting tips for making Fluffy & Fun Cotton Candy Popcorn?
Very! If your popcorn isn't coating well, make sure your syrup is warm enough to remain fluid; you may need to give it a gentle reheat. If it becomes too sticky, you might have cooked the syrup too long. When mixing, use a large spatula to ensure even coating—this way, every fluffy piece gets its share of sweetness! Happy popping!

Fluffy & Fun Cotton Candy Popcorn

Fluffy & Fun Cotton Candy Popcorn for Sweet Movie Nights

Experience the whimsy of Fluffy & Fun Cotton Candy Popcorn – a perfect treat for movie nights and parties!
Print Recipe Pin Recipe
Prep Time 10 minutes mins
Cook Time 15 minutes mins
Cooling Time 15 minutes mins
Total Time 25 minutes mins
Servings: 10 cups
Course: Snacks
Calories: 150
Ingredients Equipment Method Nutrition Notes

Ingredients
  

For the Popcorn Base
  • 10 cups Popped Popcorn Use 1/2 cup of unpopped kernels
For the Sweet Coating
  • 1/2 cup Unsalted Butter Can substitute with margarine
  • 1 cup Granulated Sugar
  • 1/4 cup Light Corn Syrup Dark corn syrup can be used as an alternative
  • 1 tablespoon Water
  • 1/4 teaspoon Salt Kosher salt recommended
  • 1 teaspoon Vanilla Extract Almond extract for a twist
  • 1 teaspoon Cotton Candy Flavoring Essential for authenticity
  • Gel Food Coloring Optional for color
For Extra Flourish
  • Sprinkles Optional for decoration

Equipment

  • Air Popper or Stovetop
  • Medium saucepan
  • large mixing bowl
  • candy thermometer
  • Baking Sheet
  • Parchment Paper

Method
 

Step-by-Step Instructions
  1. Begin by popping about 1/2 cup of unpopped popcorn kernels in an air popper or stovetop, then transfer the fluffy popcorn into a large mixing bowl. Set the bowl aside.
  2. In a medium saucepan, combine 1/2 cup of unsalted butter, 1 cup of granulated sugar, 1/4 cup of light corn syrup, 1 tablespoon of water, and 1/4 teaspoon of salt. Heat over medium, stirring occasionally until sugar dissolves (about 2-3 minutes).
  3. Allow the syrup to boil without stirring for about 5 minutes, monitoring the temperature until it reaches 240°F.
  4. Remove from heat and carefully stir in 1 teaspoon of vanilla extract and 1 teaspoon of cotton candy flavoring. Add gel food coloring if desired.
  5. Pour the warm syrup gently over the popcorn in the bowl. Use a large spatula to mix and coat thoroughly.
  6. Spread the coated popcorn onto a baking sheet lined with parchment paper and allow it to cool completely for about 15 minutes.
  7. Once cooled, break the popcorn into bite-sized pieces and add sprinkles if desired.

Nutrition

Serving: 1cupCalories: 150kcalCarbohydrates: 20gProtein: 1gFat: 7gSaturated Fat: 4gPolyunsaturated Fat: 1gMonounsaturated Fat: 1gCholesterol: 15mgSodium: 100mgPotassium: 30mgFiber: 1gSugar: 10gCalcium: 1mgIron: 1mg

Notes

Store in an airtight container at room temperature for up to 1 week. For freezing, use a freezer-safe bag for up to 3 months. To revive crispness, spread on a baking sheet and warm in a preheated oven at 250°F for 5-10 minutes.

Tried this recipe?

Let us know how it was!

Delightful Blueberry Swirl Yogurt Bites for a Healthy Snack

April 25, 2026 by Grace Snow Leave a Comment

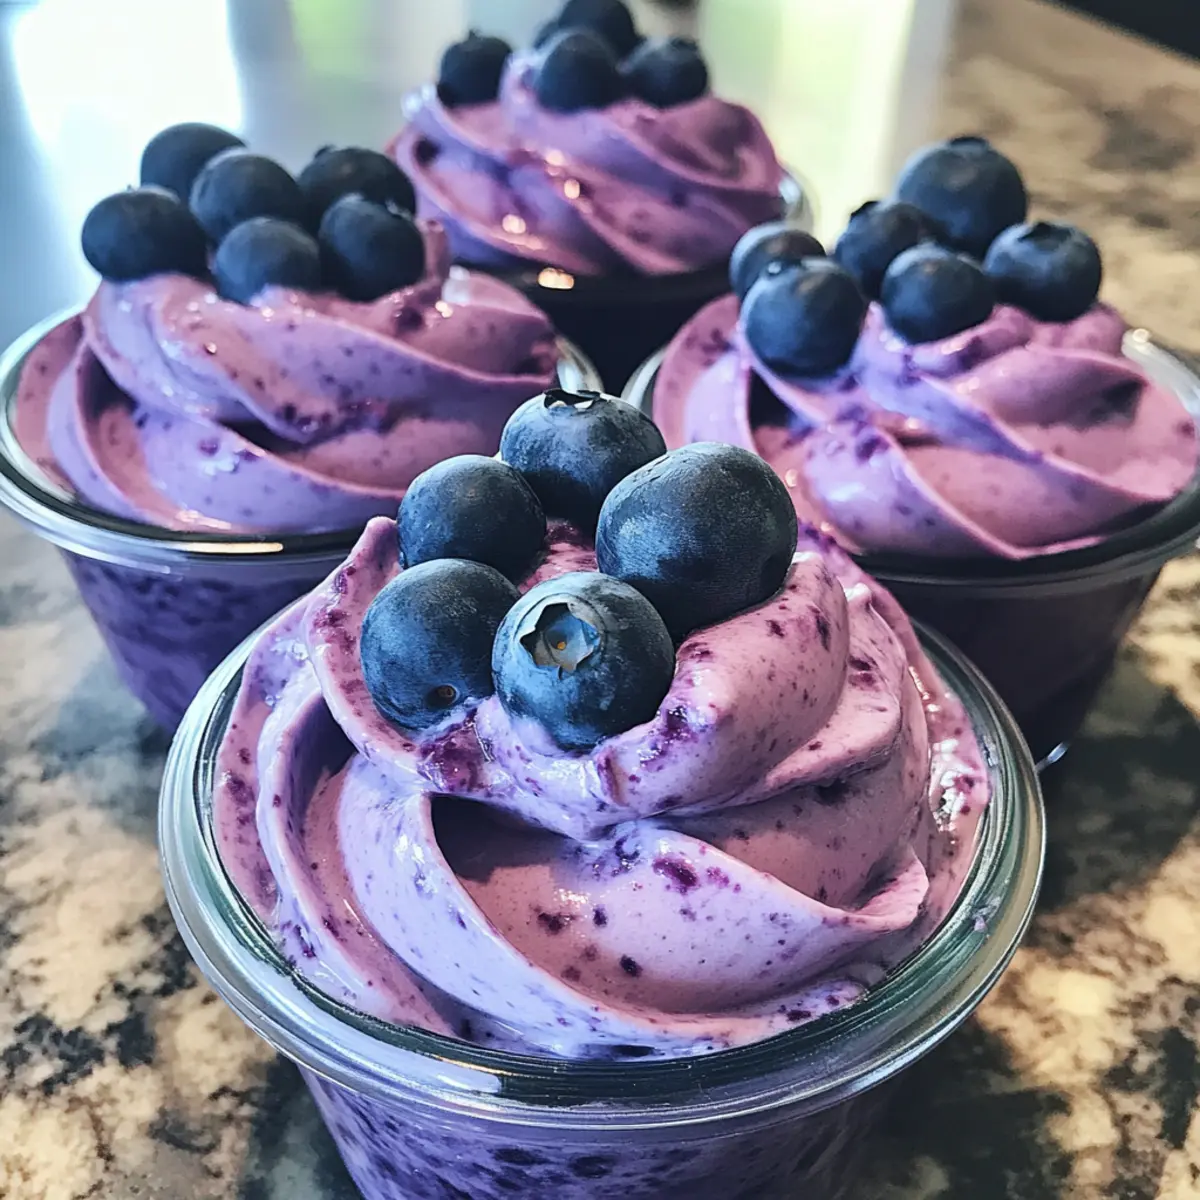
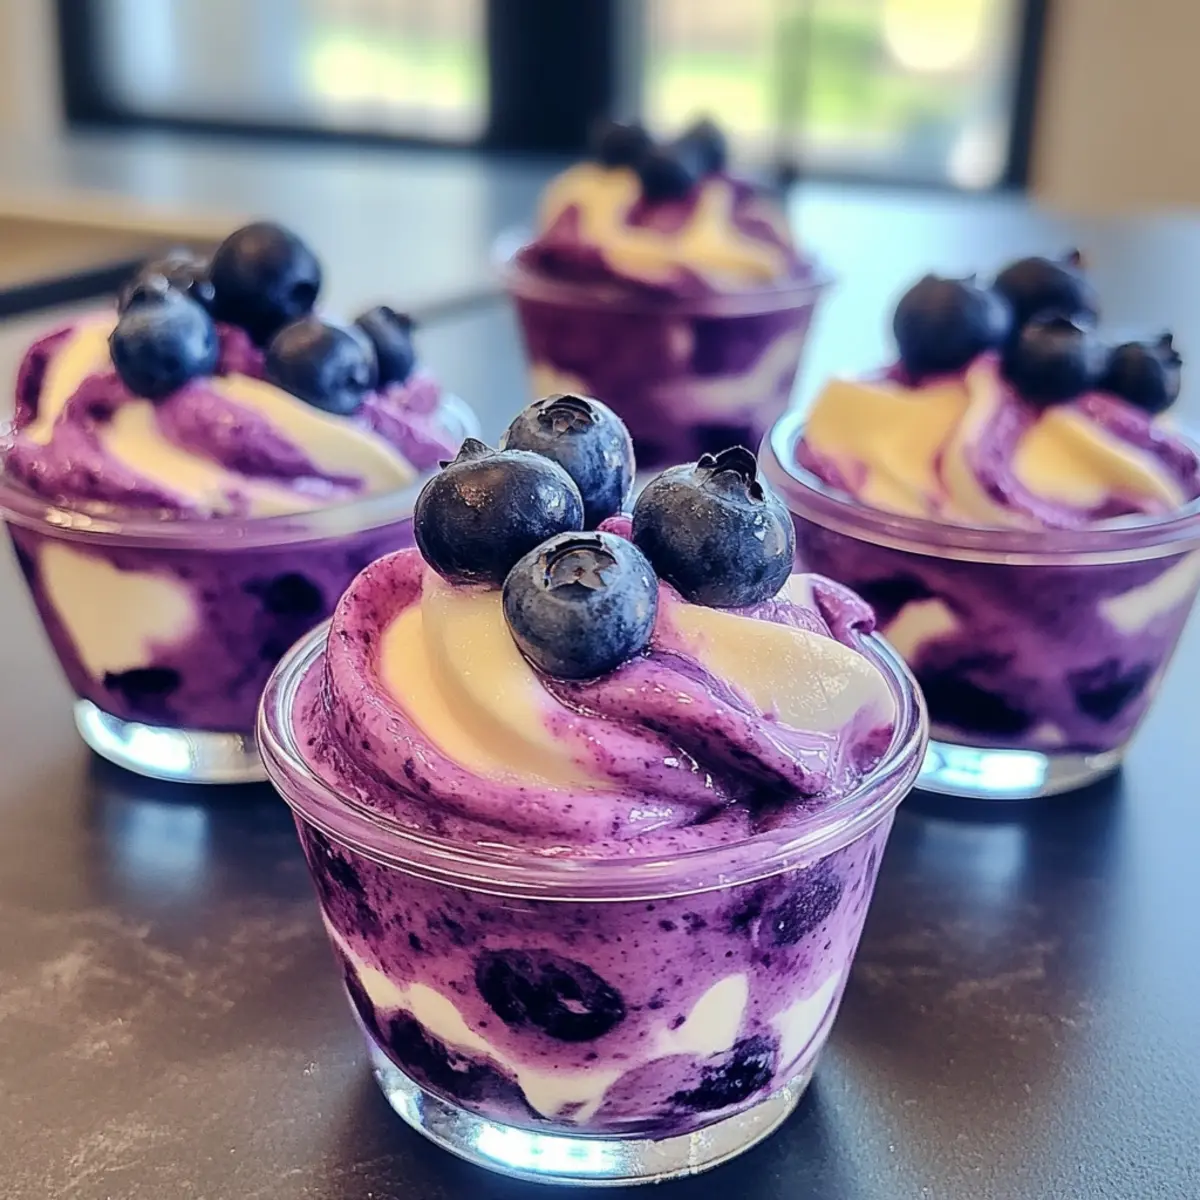
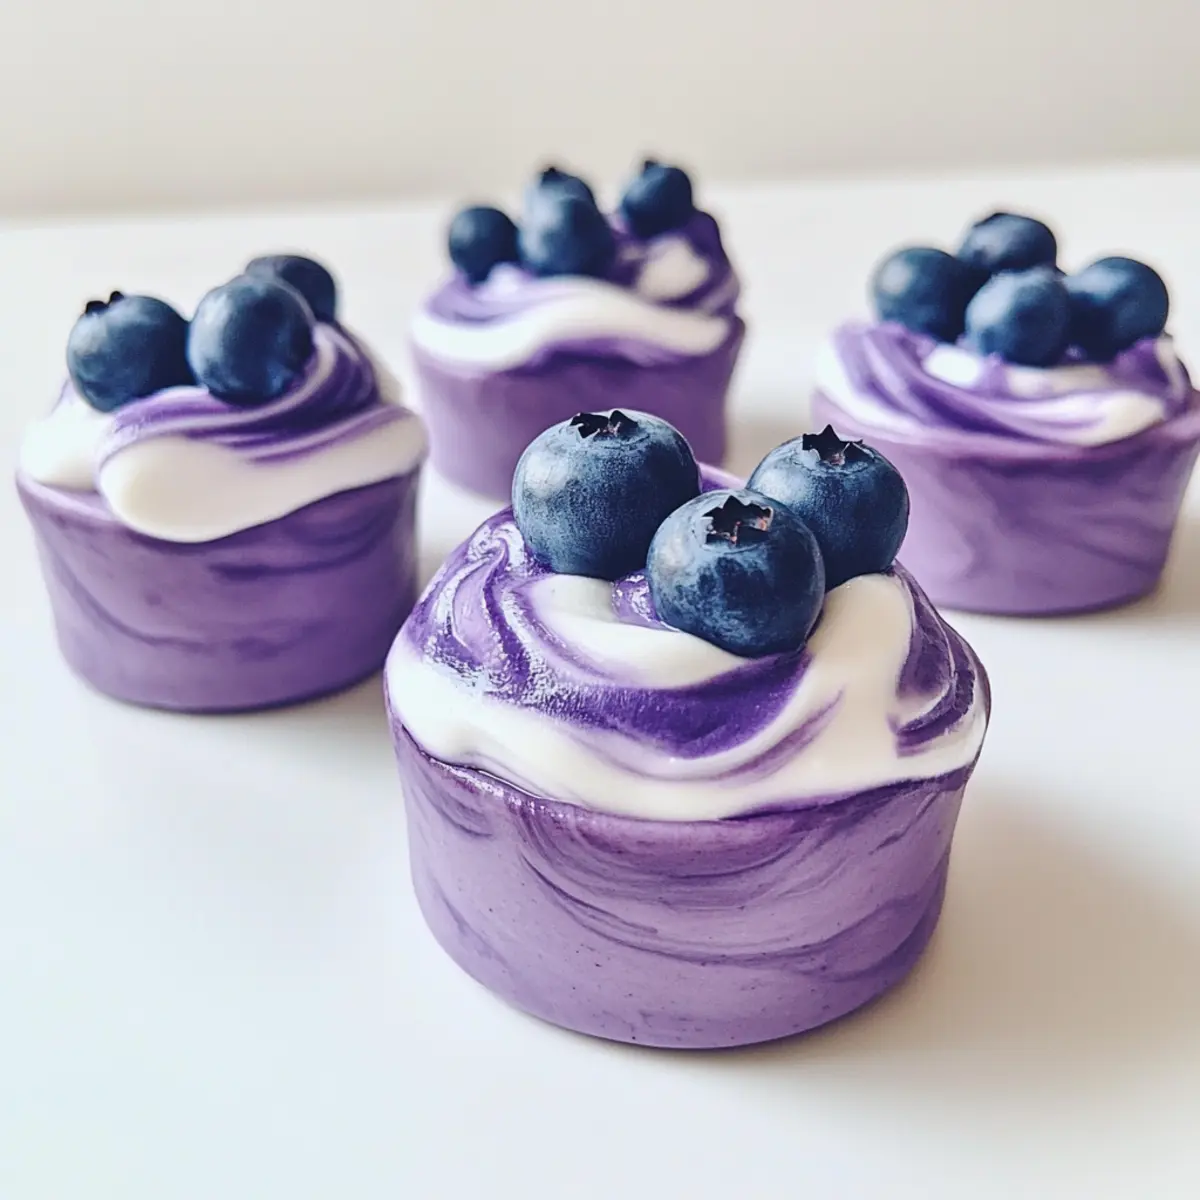
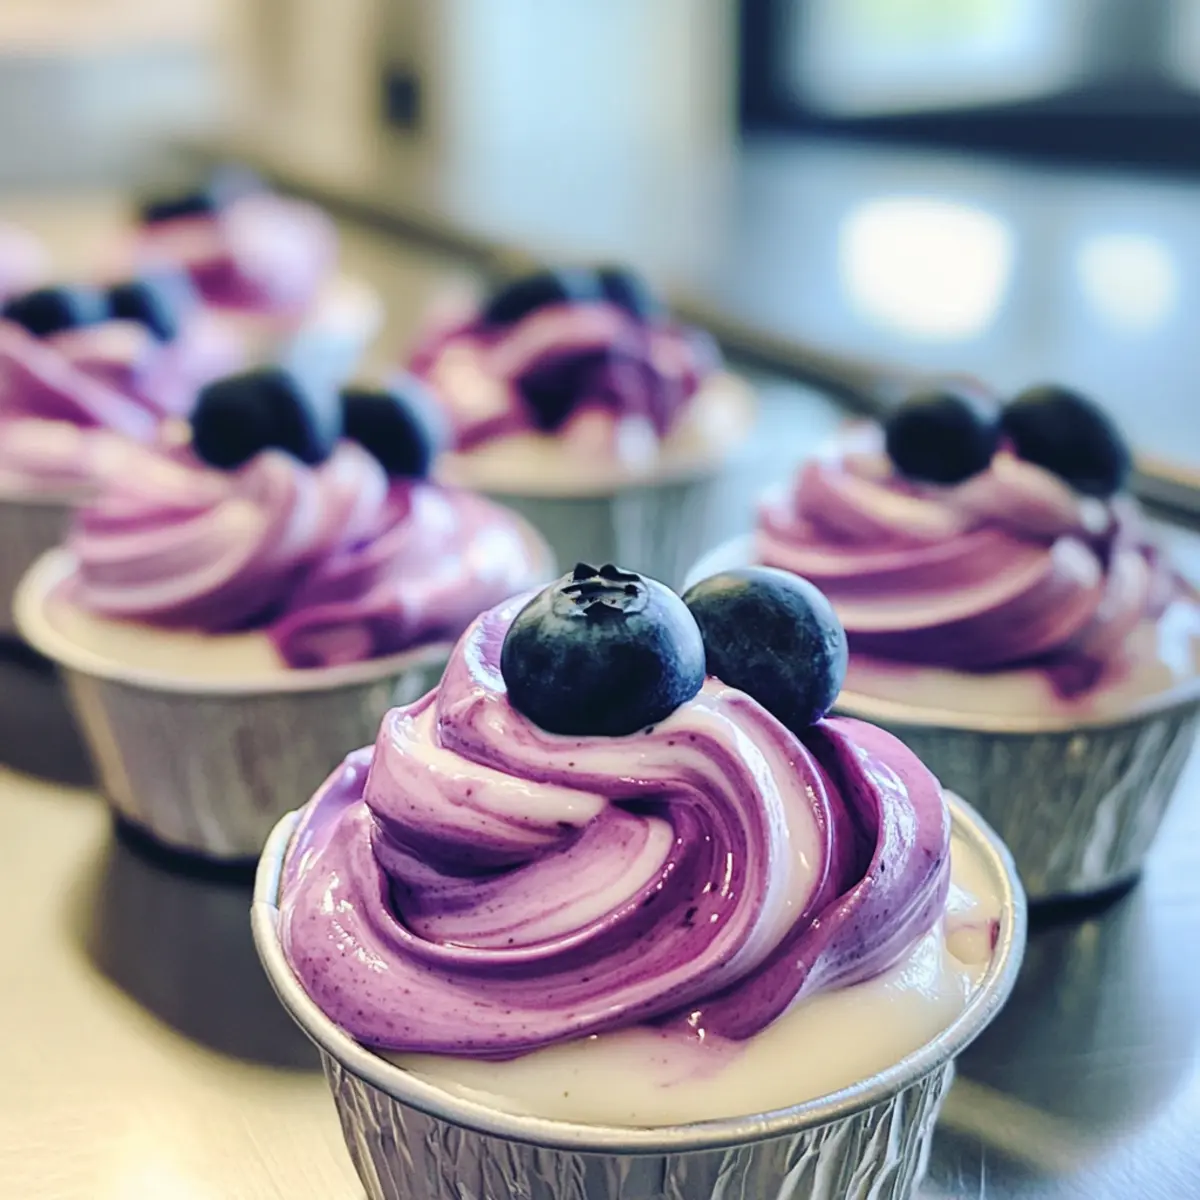
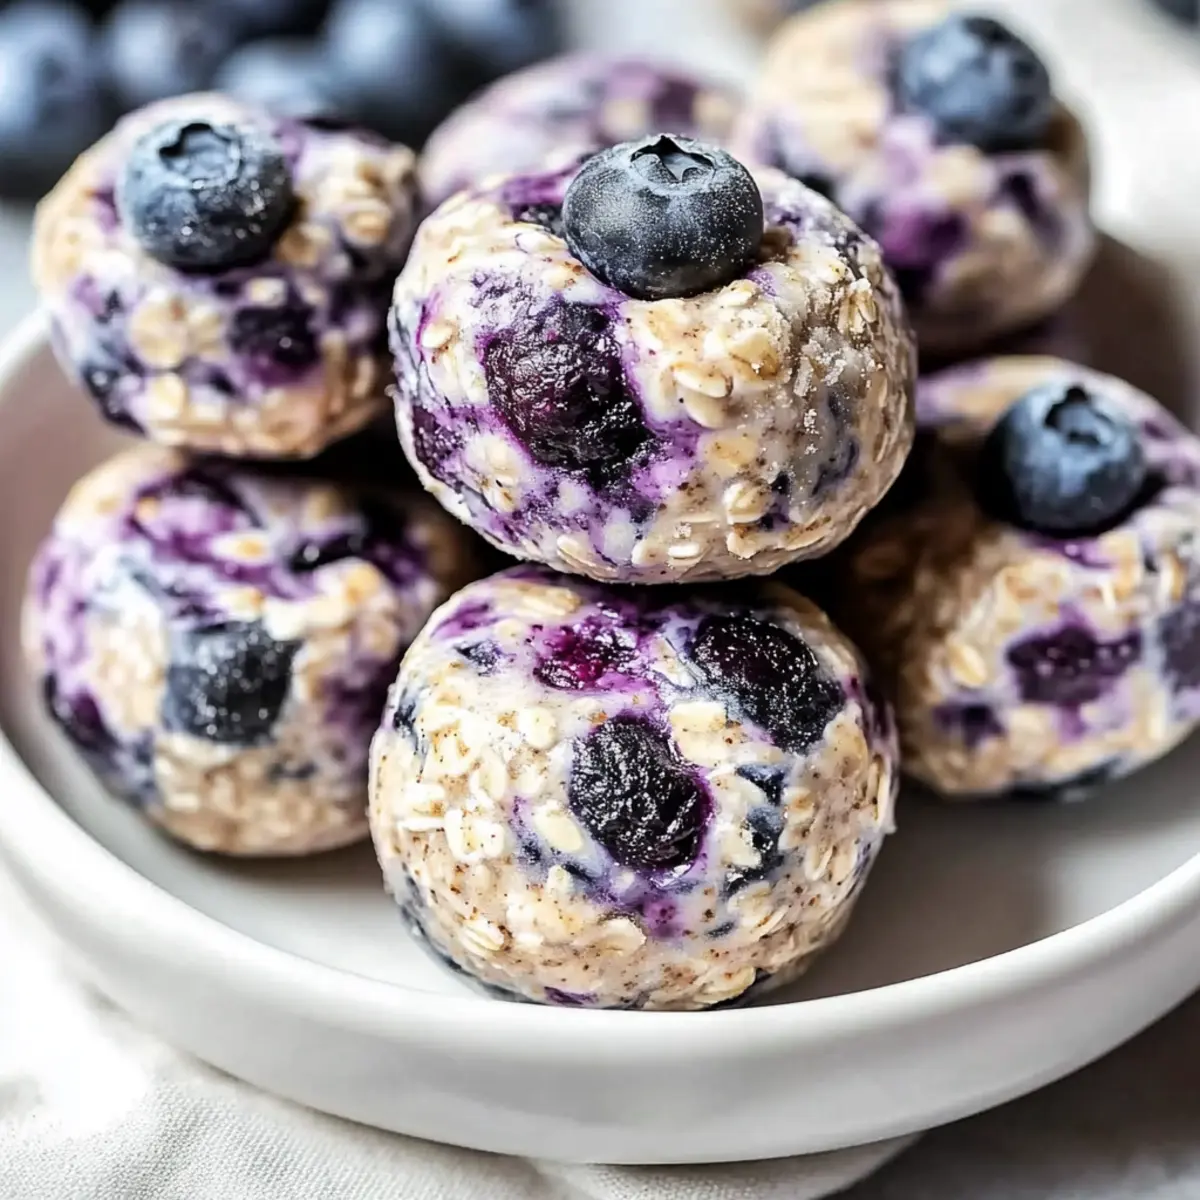
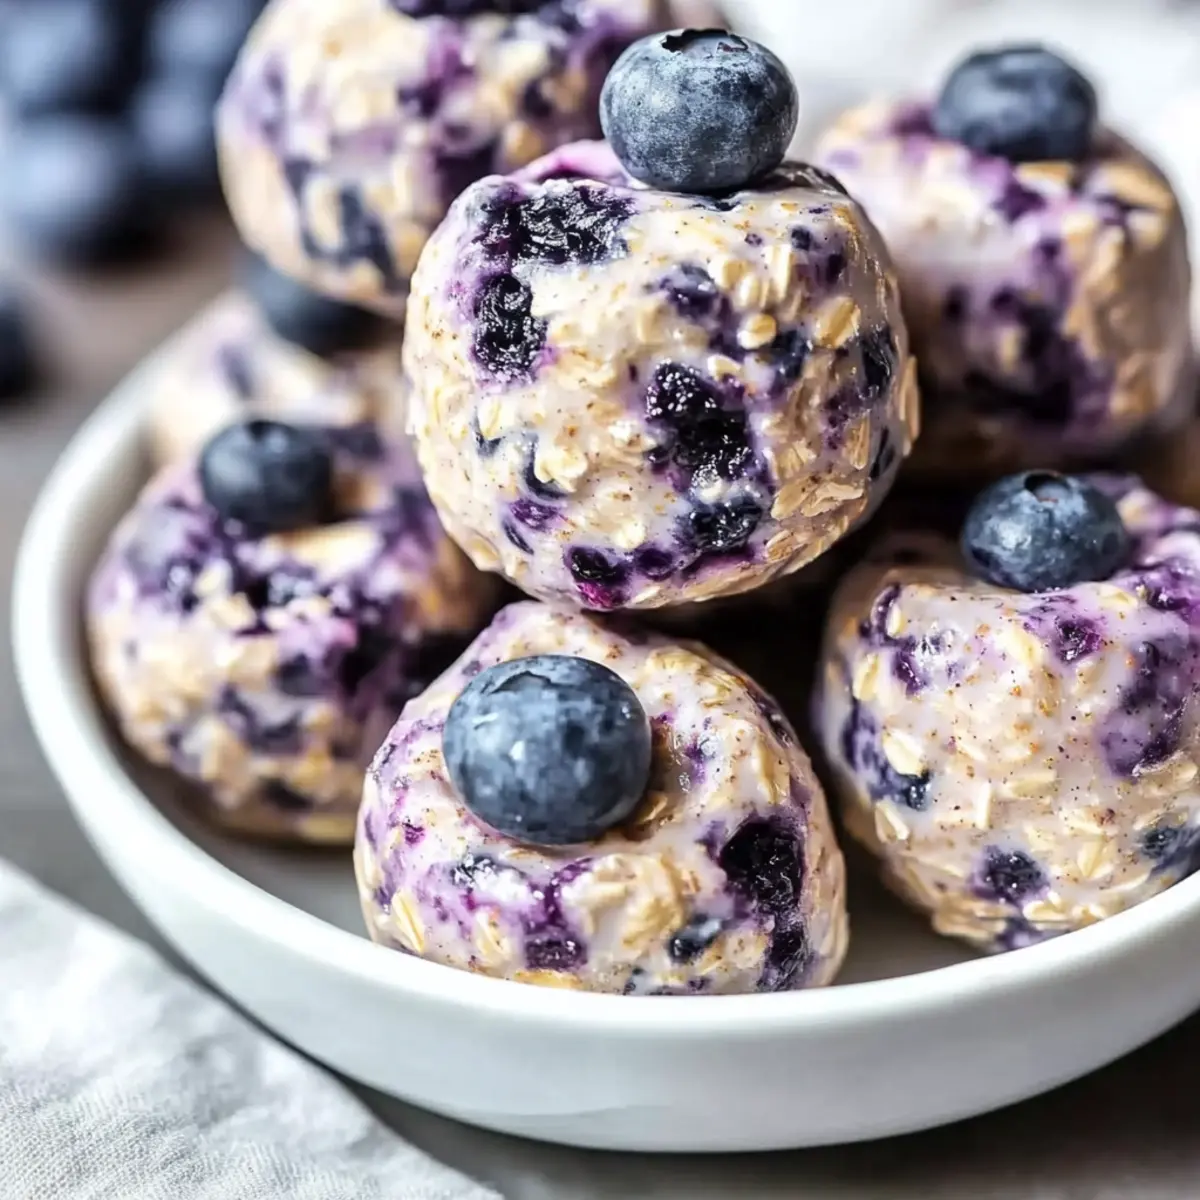
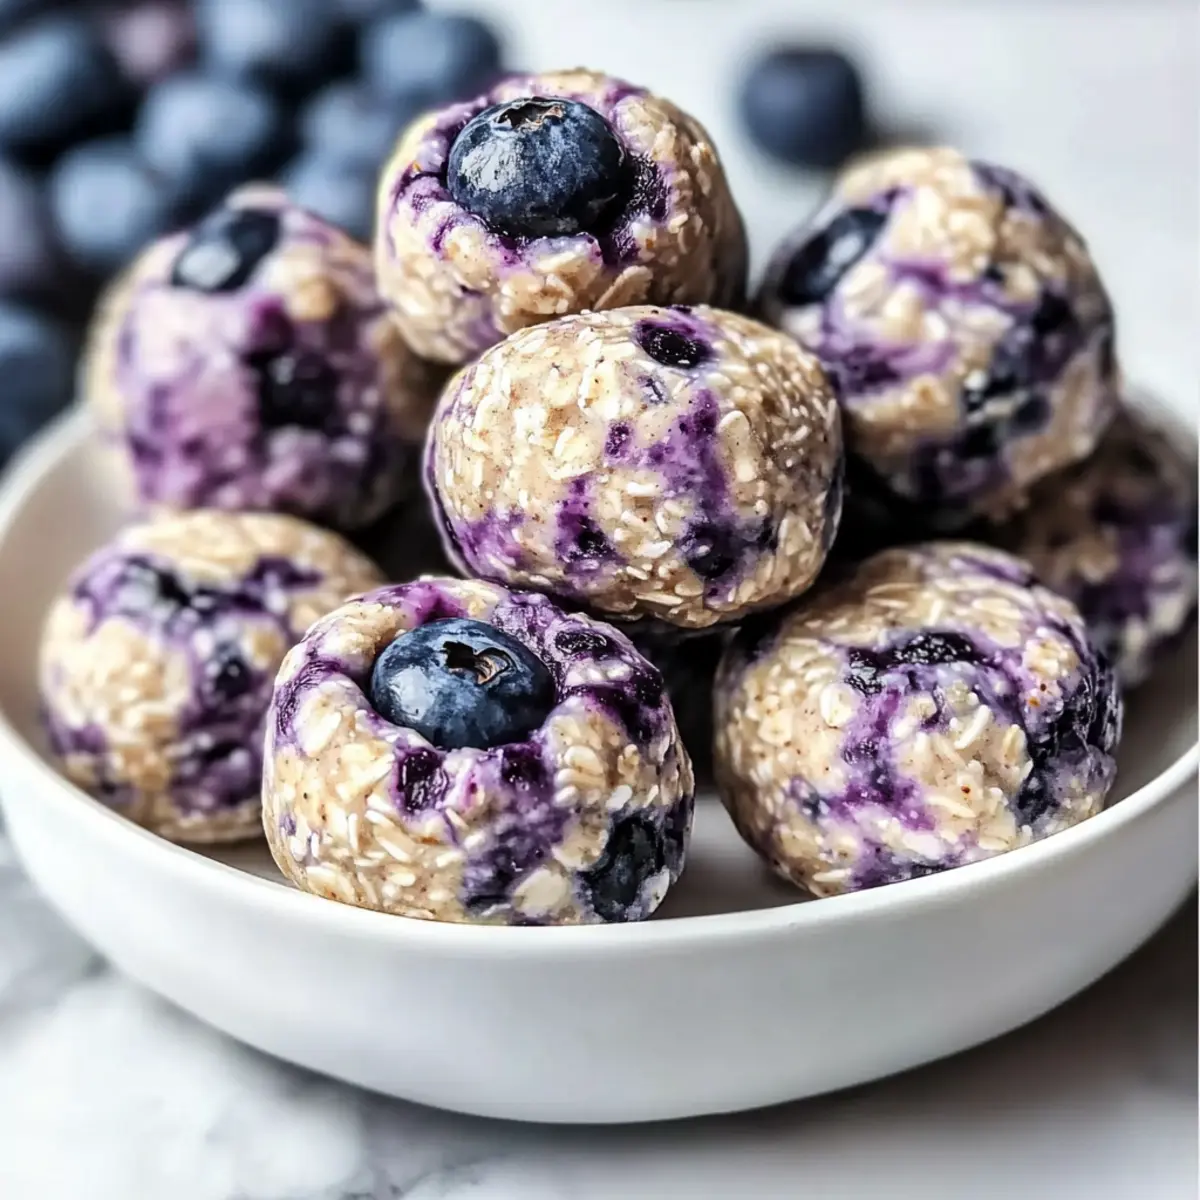
With warm weather approaching, I’m reminded of those delightful afternoons spent in the kitchen, mixing and matching ingredients to create something special. Enter my Blueberry Swirl Yogurt Bites—an effortless no-bake treat that satisfies my sweet cravings while keeping it healthy. These dreamy bites showcase creamy Greek yogurt swirled with juicy blueberries, creating a refreshing snack that’s perfect for breakfast, a mid-afternoon pick-me-up, or even a light dessert. Plus, they’re incredibly versatile, allowing you to swap in your favorite fruits or dairy-free options with ease! Whether you’re entertaining guests or simply indulging on a quiet evening at home, these little delights promise to elevate your snacking game. Curiosity piqued? Let’s dive in and discover how to whip up these heavenly bites!

Why are yogurt bites so delightful?

Creamy Texture: The base of Greek yogurt provides an irresistibly smooth experience, while the fresh blueberries add bursts of juicy flavor.
No-Bake Convenience: Perfect for busy schedules, these bites require no baking, allowing you to enjoy a healthy snack in minutes.
Versatile Options: Easily customize the recipe by swapping blueberries for your favorite berries or even adding nuts for a delightful crunch.
Guilt-Free Indulgence: With only around 50 calories per bite, you can satisfy your sweet tooth without any added guilt.
Perfect for Any Occasion: Whether it’s breakfast, a snack, or a light dessert, these yogurt bites cater to every craving beautifully! Plus, consider pairing them with granola for a complete treat or check out variations like using coconut yogurt for a tropical twist in your kitchen adventures.

Blueberry Swirl Yogurt Bites Ingredients

For the Base

  • Greek yogurt – Use full-fat for a rich, creamy texture; swap for coconut or almond yogurt for a dairy-free option.
  • Honey or maple syrup – Sweeten to taste; consider agave nectar or stevia for a sugar-free alternative.
  • Lemon juice – Freshly squeezed enhances flavor; it’s a must for that zesty touch!
  • Vanilla extract – Adds depth and warmth to your bites, amplifying the overall flavor.

For the Fruit

  • Fresh blueberries – They provide the main flavor burst; feel free to experiment with strawberries or raspberries for variety.

For Thickening (optional)

  • Cornstarch – Acts as a thickening agent if you prefer a denser texture; you can omit this for a lighter feel.

Now that we have the ingredients lined up, you’re one step closer to crafting these delightful Blueberry Swirl Yogurt Bites! Let’s move on to the joyous creation process!

Step‑by‑Step Instructions for Blueberry Swirl Yogurt Bites

Step 1: Combine the Base Ingredients
In a mixing bowl, add 2 cups of full-fat Greek yogurt, 2 tablespoons of honey (or maple syrup), the juice of half a lemon, and 1 teaspoon of vanilla extract. Using a whisk or spatula, mix these ingredients together until the mixture is smooth and creamy, which should take about 2-3 minutes. Make sure there are no lumps for that perfect texture in your Blueberry Swirl Yogurt Bites.

Step 2: Incorporate Cornstarch (if desired)
If you prefer a thicker consistency, sprinkle in 1 tablespoon of cornstarch and gently stir to incorporate. Continue mixing for another minute until fully blended. The cornstarch will help your yogurt bites set better. Keep this mixture aside for just a moment as we prepare to add the delightful blueberries.

Step 3: Fold in Fresh Blueberries
Gently fold in 1 cup of fresh blueberries, taking care to maintain their shape for those lovely swirls. Use a spatula to lift and turn the mixture, ensuring even distribution without crushing the berries. This step is crucial for achieving the beautiful presentation of your Blueberry Swirl Yogurt Bites, so be gentle and patient.

Step 4: Portion and Chill
Spoon the mixture into small jars or muffin tins lined with mini cupcake liners for easy serving. Once filled, place them in the refrigerator to chill for at least 1-2 hours. Chilling allows the flavors to meld beautifully and helps the bites set, resulting in a delightful snack ready to be enjoyed!

Step 5: Serve and Enjoy Your Treat
After chilling, your Blueberry Swirl Yogurt Bites are ready to delight! Optionally, garnish each bite with extra blueberries or a drizzle of honey before serving. This final touch not only adds flavor but makes for a stunning presentation. Allow your family and friends to enjoy this healthy snack that’s perfect any time of day!

Make Ahead Options

These Blueberry Swirl Yogurt Bites are a wonderful choice for meal prep, making your busy days significantly easier! You can prepare the yogurt mixture up to 24 hours in advance. Simply follow the instructions to combine the Greek yogurt, sweetener, lemon juice, and vanilla, then gently fold in the blueberries. Spoon the mixture into jars or muffin tins and refrigerate. Cover them well to maintain freshness and prevent any drying out. On the day you want to serve them, simply add your optional garnishes like extra blueberries or a drizzle of honey, and enjoy these delightful bites that taste just as fresh as if they'd been made that day!

What to Serve with Blueberry Swirl Yogurt Bites

Pairing your delightful yogurt bites with complementary flavors and textures will elevate your snacking experience to new heights. Let’s explore some perfect accompaniments!

  • Granola: Adds a satisfying crunch that contrasts beautifully with the creamy yogurt and juicy blueberries. Enjoy as a topping or on the side for added texture.

  • Fresh Fruit Salad: A medley of seasonal fruits enhances the fruity flavor while providing a refreshing balance to the yogurt's richness. Think vibrant strawberries, kiwis, and more!

  • Chia Seed Pudding: Its creamy and slightly sweet consistency works wonderfully with yogurt bites, offering a nutritious combination that's also visually appealing.

  • Honey Drizzle: A touch of honey elevates the sweetness of the yogurt bites, making them feel even more indulgent without the guilt. Plus, it enhances the beautiful presentation!

  • Nuts & Seeds Mix: Adding a sprinkle of chopped nuts or seeds introduces a delightful crunch and nutty flavor that contrasts well with the smooth yogurt.

  • Herbal Tea: A calming cup of chamomile or mint tea complements the refreshing blueberries, creating a cozy atmosphere for enjoying your yogurt snacks.

  • Dark Chocolate Shavings: A pinch of dark chocolate adds a decadent touch, giving your yogurt bites an irresistible twist and a hint of richness.

Experiment with these pairings to create a multi-layered snacking experience!

Expert Tips for Blueberry Swirl Yogurt Bites

  • Full-Fat Preference: Use full-fat Greek yogurt for a creamier texture; low-fat options may result in a less satisfying bite.
  • Gentle Folding: Carefully fold in the blueberries to prevent mashing; this keeps the swirls intact and visually appealing.
  • Chill Time Matters: Allow the yogurt bites to chill for at least one hour for optimal flavor; this enhances the blending of ingredients.
  • Substitution Insights: Feel free to substitute blueberries with other berries or add nuts for variety, but ensure the ratios remain similar for best results.
  • Storage Tips: Keep uneaten bites in an airtight container in the fridge for up to 3 days or freeze for 2 months, thawing them in the refrigerator before serving.

Blueberry Swirl Yogurt Bites Variations

Invite your culinary creativity to shine as you explore delightful twists on this already scrumptious recipe!

  • Berry Medley: Substitute blueberries with strawberries, raspberries, or a mix for an exciting flavor explosion. Each berry brings its unique taste, creating a delightful symphony!
  • Nutty Crunch: Fold in chopped walnuts or almonds for added crunch and texture. This nutty addition elevates the bites while providing healthy fats—perfect for a satisfying snack.
  • Spiced Delight: Enhance warmth by adding a pinch of cinnamon or nutmeg to the yogurt mixture. It introduces a comforting flavor reminiscent of baked goods without the fuss!
  • Coconut Twist: Replace Greek yogurt with coconut yogurt for a tropical flair. This substitution offers a creamy texture that will transport you to a beachy paradise.
  • Frozen Treats: Freeze the mixture in ice cube trays for fun yogurt pops. Ideal for hot days, these pops make a playful yet healthy treat for kids and adults alike!
  • Chocolate Drizzle: After chilling, top your yogurt bites with a drizzle of melted dark chocolate for an indulgent yet nutritious touch. This sweet surprise will delight anyone who tries them!
  • Herbal Infusion: Experiment with adding fresh mint or basil to the mix for a refreshing and unique flavor profile that brightens the overall dish.
  • Creamy Avocado: Boost the creaminess by adding mashed avocado to the yogurt. It’ll give a lovely color and a silky texture while keeping things healthy!

Feel free to mix and match these variations to find your favorite combination, and remember to check out how to create bite-sized frozen yogurt pops for a sunny-day treat!

How to Store and Freeze Blueberry Swirl Yogurt Bites

  • Fridge: Store uneaten Blueberry Swirl Yogurt Bites in an airtight container for up to 3 days to maintain freshness and flavor.

  • Freezer: For longer storage, freeze portions for up to 2 months. Place bites in freezer-safe containers or bags and ensure they're well-sealed to prevent freezer burn.

  • Thawing: When ready to enjoy, simply thaw the bites in the refrigerator overnight for a creamy treat that tastes just as fresh!

  • Reheating: These bites are best enjoyed chilled, so skip the reheating; instead, savor them straight from the fridge for a refreshing snack!

Blueberry Swirl Yogurt Bites Recipe FAQs

How do I select the best blueberries for my yogurt bites?
Absolutely! Look for plump, firm blueberries with a deep blue color and a silvery bloom on the surface. Avoid berries with green or red hues, as they won't be as sweet. Dark spots or wrinkles indicate overripeness, so select fresh berries for that delightful burst of flavor in your Blueberry Swirl Yogurt Bites!

What’s the best way to store leftover yogurt bites?
Very! Store uneaten Blueberry Swirl Yogurt Bites in an airtight container in the refrigerator for up to 3 days. To keep them fresher longer, place parchment paper between layers if stacking, which helps absorb moisture and maintain texture.

Can I freeze Blueberry Swirl Yogurt Bites?
Absolutely! These bites freeze beautifully. Simply place them in a freezer-safe container or ziplock bag, ensuring they’re well-sealed to avoid freezer burn. You can freeze them for up to 2 months, and when you’re ready to enjoy, thaw them in the refrigerator overnight for a refreshing treat.

What if my yogurt bites don’t set properly?
No worries! If your yogurt bites are too runny, it may be due to insufficient chilling or not using full-fat yogurt, which provides the necessary creaminess. If you find they still need a thicker texture, try adding just a touch more cornstarch and gently mixing it in, then allow them to chill again.

Are Blueberry Swirl Yogurt Bites safe for pets or allergy-friendly?
Keep in mind! While these yogurt bites are a healthy snack for people, yogurt is not recommended for pets, especially dogs, as some might be lactose intolerant. Additionally, ensure none of the ingredients cause allergies—like honey for young children or while making swaps for nut allergies if using substituted ingredients. Always check labels to be sure!

Can I make these yogurt bites dairy-free?
Absolutely! Simply substitute the Greek yogurt with coconut or almond yogurt for a delicious dairy-free option. This not only caters to dietary restrictions but also adds a unique flavor twist that compliments the blueberries beautifully!

Blueberry Swirl Yogurt Bites

Delightful Blueberry Swirl Yogurt Bites for a Healthy Snack

Satisfy your sweet cravings with these Blueberry Swirl Yogurt Bites, a healthy no-bake treat made with Greek yogurt and fresh blueberries.
Print Recipe Pin Recipe
Prep Time 15 minutes mins
Chilling Time 2 hours hrs
Total Time 2 hours hrs 15 minutes mins
Servings: 4 bites
Course: Snacks
Cuisine: American
Calories: 50
Ingredients Equipment Method Nutrition Notes

Ingredients
  

For the Base
  • 2 cups full-fat Greek yogurt or coconut/almond yogurt for dairy-free option
  • 2 tablespoons honey or maple syrup sweeten to taste
  • 0.5 tablespoons lemon juice freshly squeezed
  • 1 teaspoon vanilla extract
For the Fruit
  • 1 cup fresh blueberries can substitute with other berries
For Thickening (optional)
  • 1 tablespoon cornstarch omit for a lighter feel

Equipment

  • Mixing Bowl
  • Whisk
  • Spatula
  • muffin tins or small jars

Method
 

Step‑by‑Step Instructions
  1. In a mixing bowl, add 2 cups of full-fat Greek yogurt, 2 tablespoons of honey (or maple syrup), the juice of half a lemon, and 1 teaspoon of vanilla extract. Mix until smooth and creamy.
  2. If you prefer a thicker consistency, sprinkle in 1 tablespoon of cornstarch and stir to incorporate. Mix for another minute until fully blended.
  3. Gently fold in 1 cup of fresh blueberries without crushing them to maintain their shape.
  4. Spoon the mixture into small jars or muffin tins lined with mini cupcake liners. Chill in the refrigerator for at least 1-2 hours.
  5. Optionally, garnish each bite with extra blueberries or a drizzle of honey before serving.

Nutrition

Serving: 1biteCalories: 50kcalCarbohydrates: 8gProtein: 2gFat: 1gSaturated Fat: 0.5gCholesterol: 5mgSodium: 30mgPotassium: 100mgFiber: 1gSugar: 4gVitamin A: 50IUVitamin C: 5mgCalcium: 50mgIron: 0.5mg

Notes

Store uneaten bites in an airtight container for up to 3 days or freeze for 2 months. Thaw in the refrigerator before serving.

Tried this recipe?

Let us know how it was!

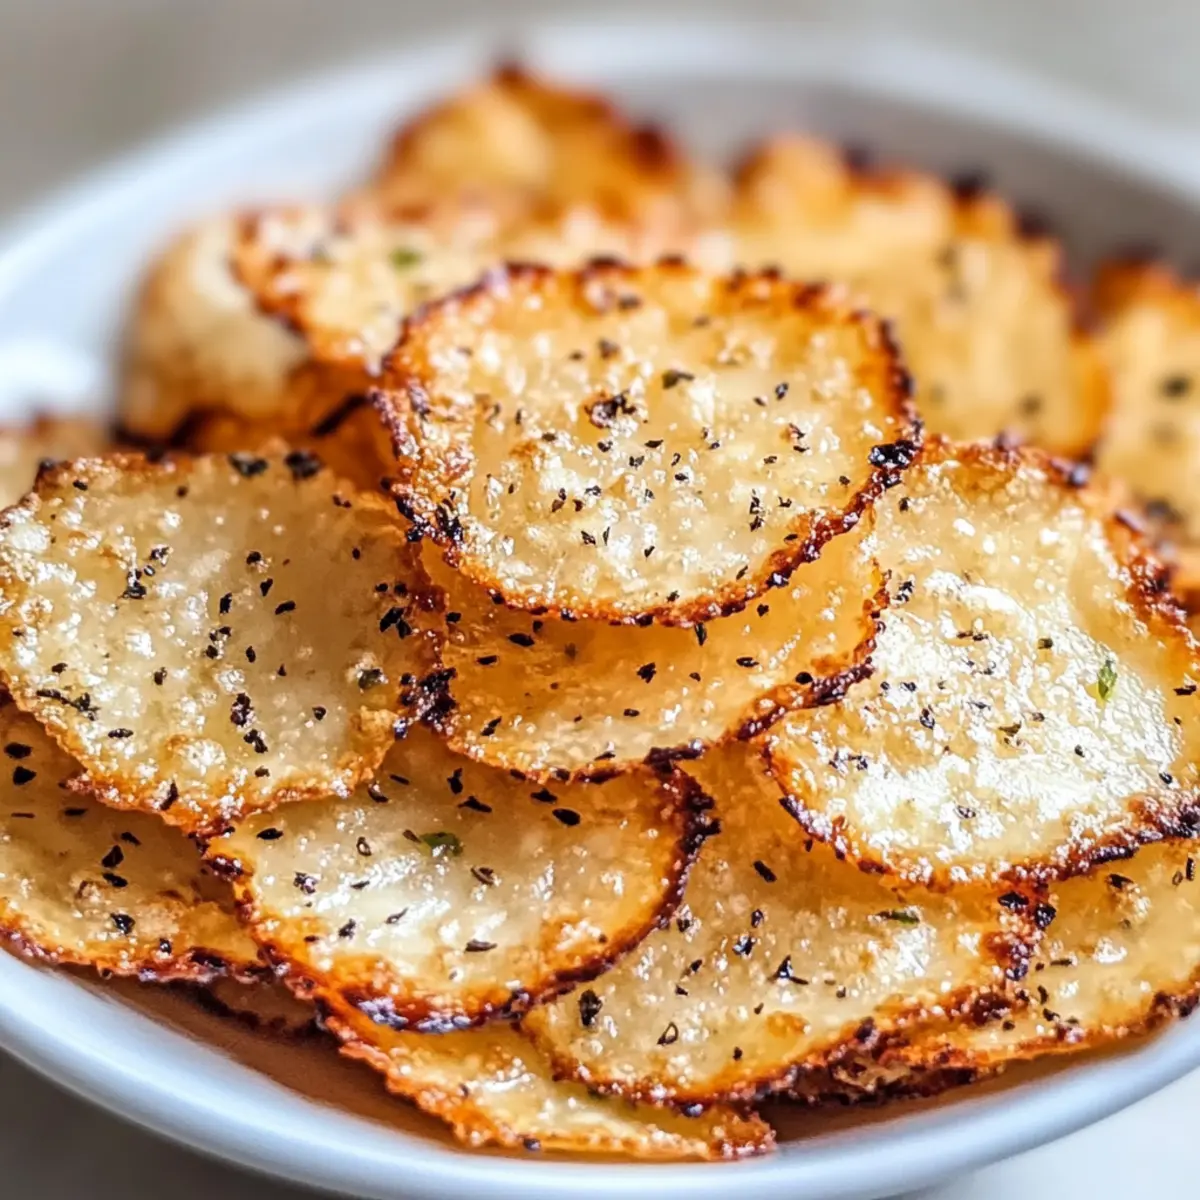
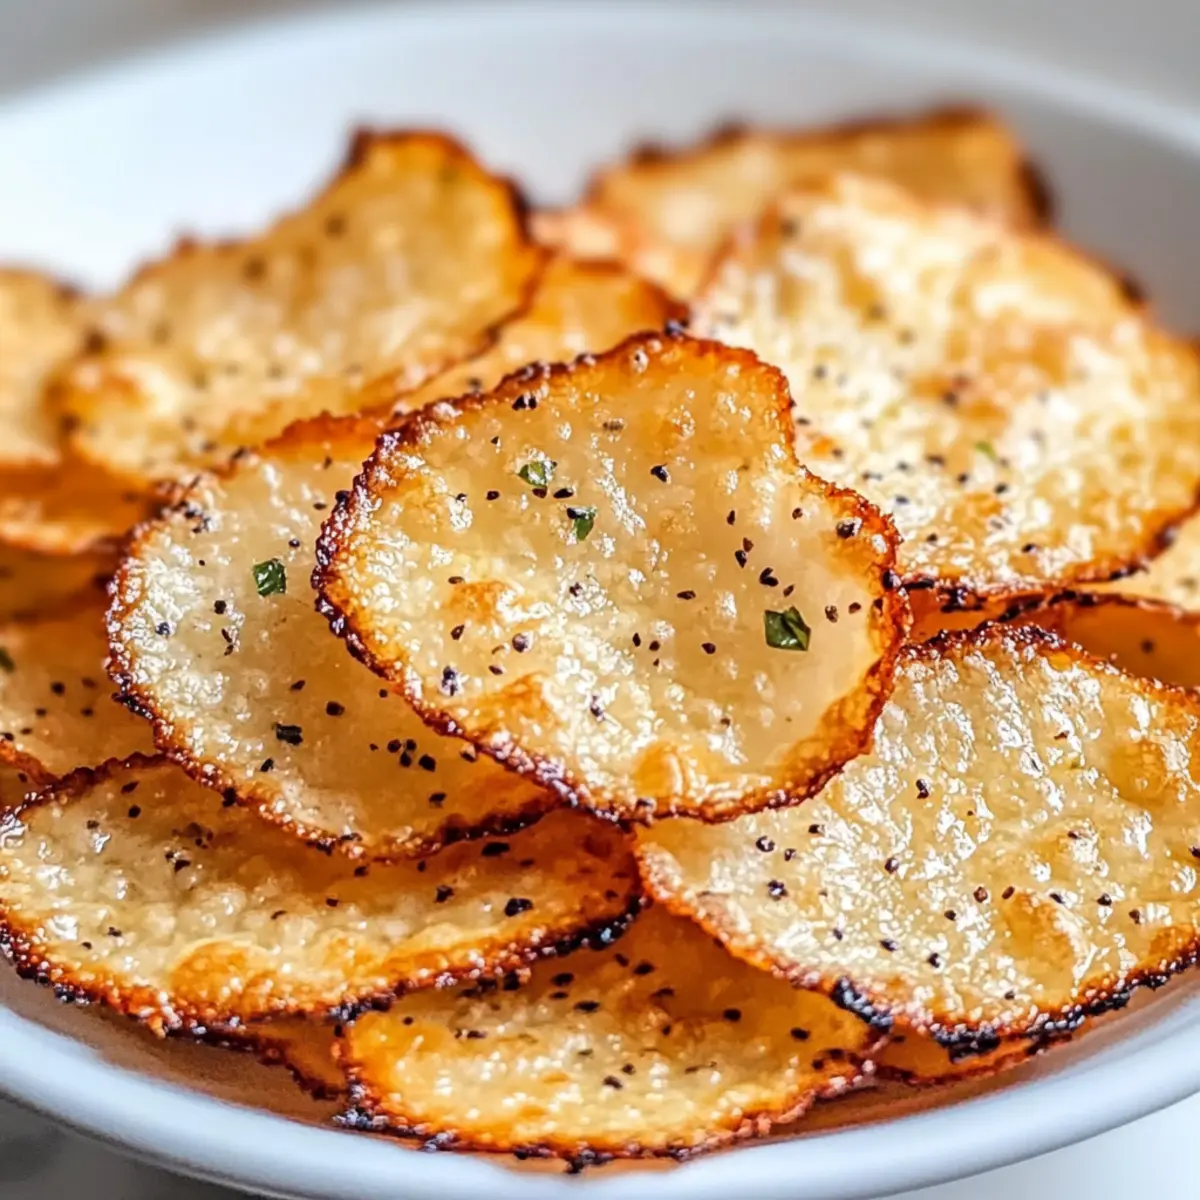
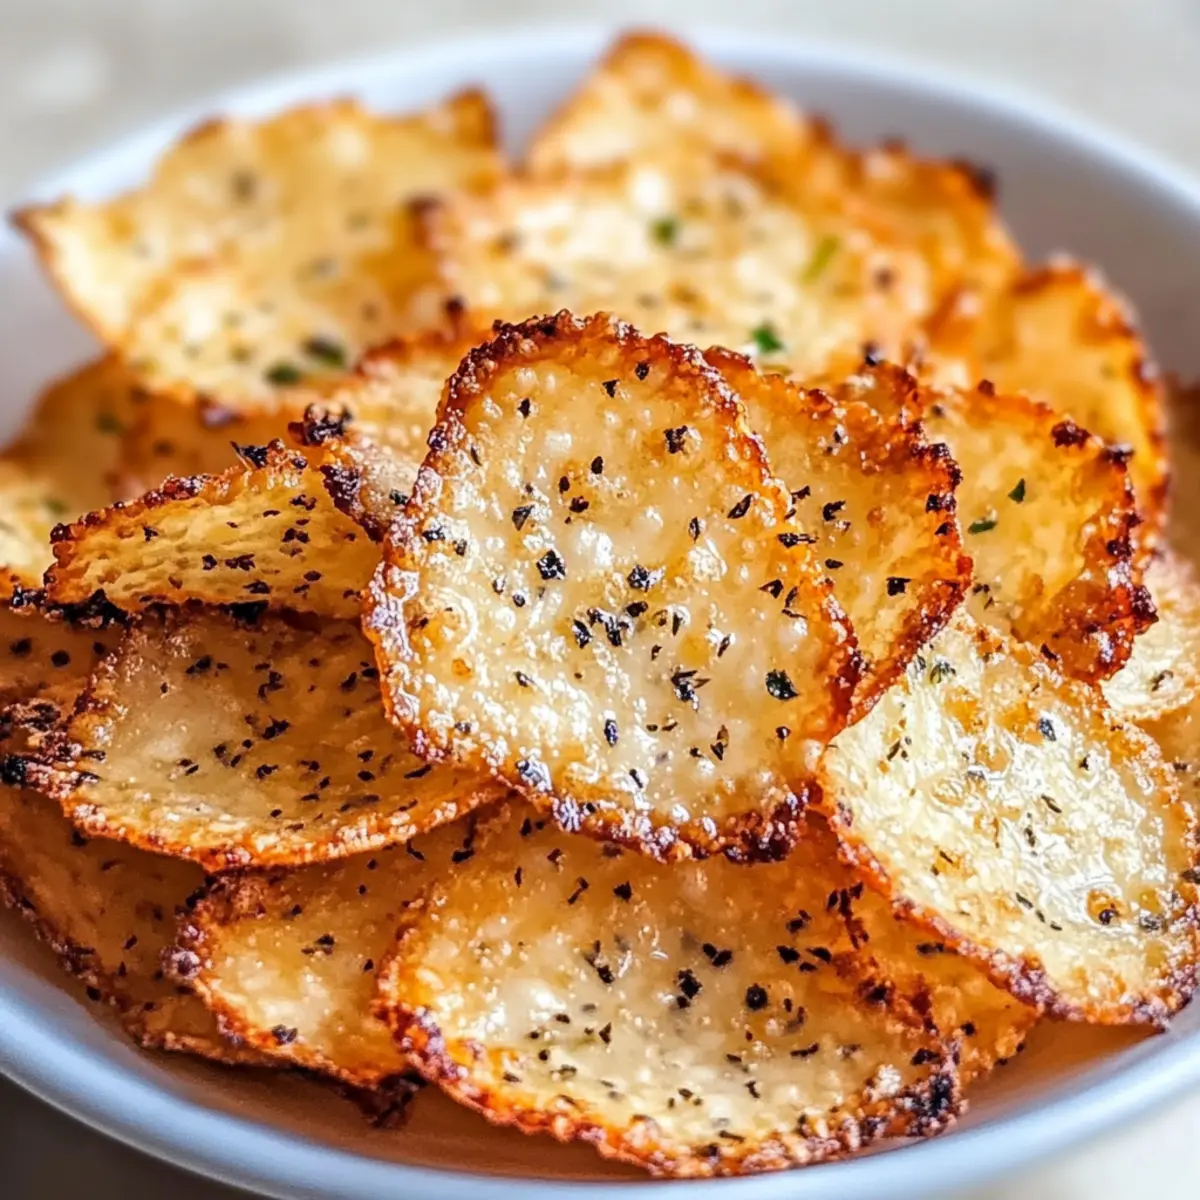
Cottage Cheese Chips: Crunchy, Healthy Snack Delight

April 24, 2026 by Grace Snow Leave a Comment

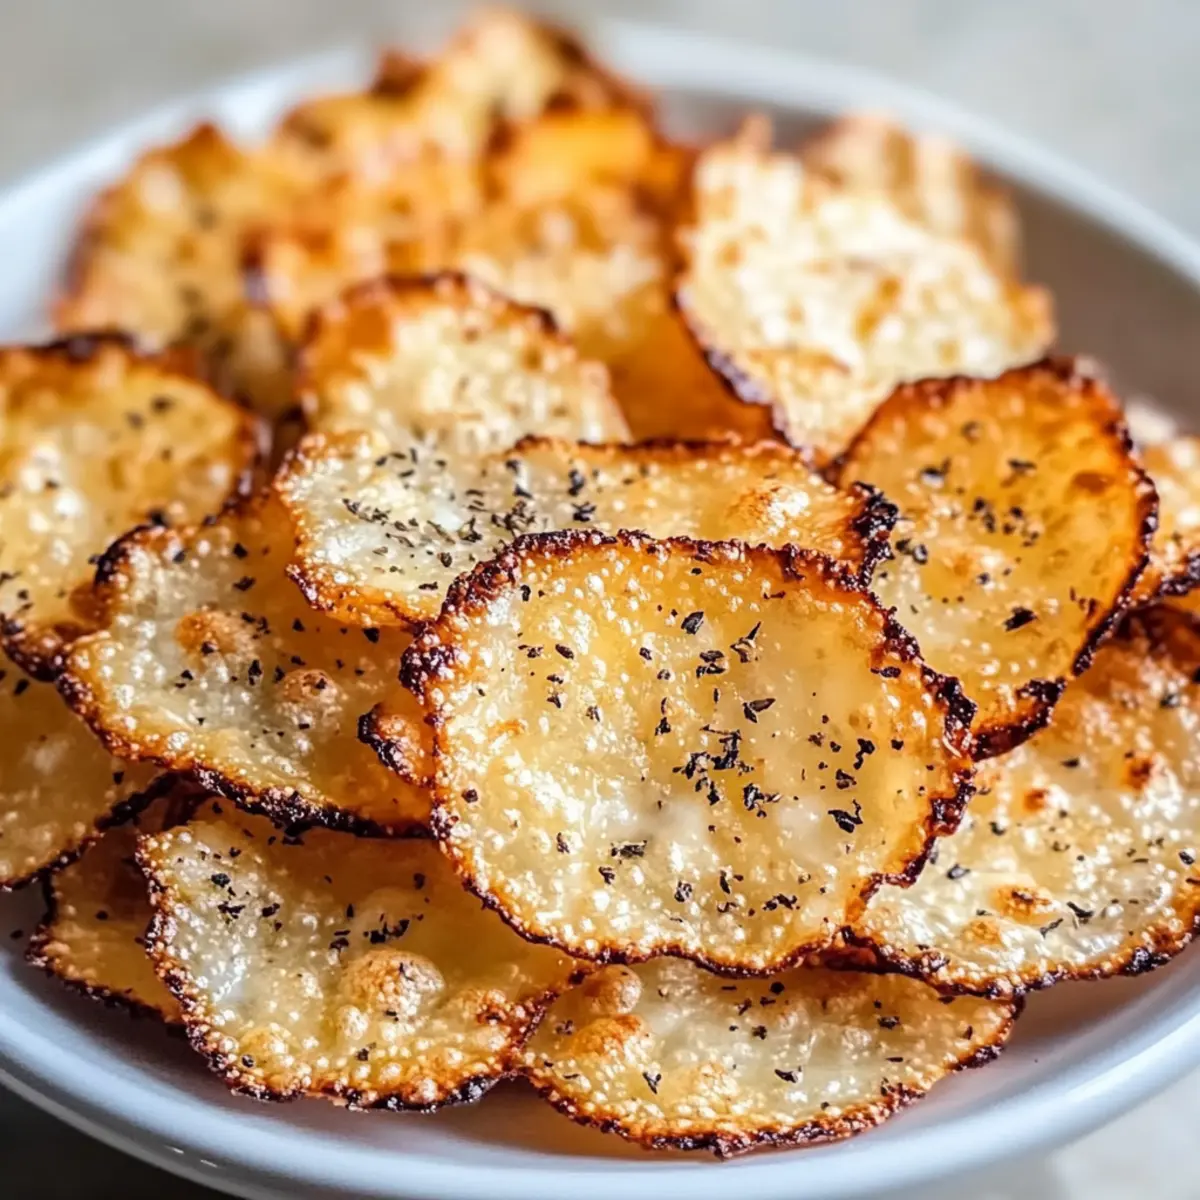
As I crunched down on my newest kitchen creation, a flood of nostalgia washed over me. Those familiar chip aisles at the grocery store felt light-years away, especially now that I’ve discovered a healthier, guilt-free option: Cottage Cheese Chips! Not only do these crispy bites deliver an addictive crunch that’s perfect for snacking, but they are also protein-packed and low-carb, making them a go-to for anyone craving something wholesome. Plus, with just two simple prep methods—one in the oven and the other in the microwave—these chips are a breeze to whip up. Imagine crafting a unique snack that’s both satisfying and good for you. Curious about how to master this deliciously light treat? Let’s dive into the details!

Why Choose Cottage Cheese Chips?

Healthier alternative: These Cottage Cheese Chips provide a guilt-free crunch that's rich in protein and low in carbs, perfect for any snack craving. Quick and easy: With just two preparation methods, oven-baked or microwave, there's a method for everyone, making them a hassle-free addition to your kitchen. Customizable flavors: Season to your liking with favorites like garlic powder or Parmesan cheese for a personalized touch. Versatile serving: Enjoy them solo, or pair them with dips like guacamole or salsa for a delightful appetizer. Nostalgic satisfaction: Enjoy the feel of classic chips without the guilt, reminding you of those grocery store aisles—just healthier! Have fun experimenting with toppings or trying different ingredients; for another spin on healthy snacking, check out our Jello Salad Cottage!

Cottage Cheese Chips Ingredients

For the Chips
• Cottage Cheese – Whole milk small curd cottage cheese provides a rich flavor and protein boost; opt for full-fat for extra crispiness.
• Seasonings (Optional) – Customize with your favorite spices like garlic powder or onion powder; Parmesan cheese adds a savory touch for an elevated flavor.

For Storage
• Airtight Container – Ensure your chips stay fresh longer; they’re best enjoyed within a few days.

Discover the delightful journey of creating Cottage Cheese Chips and let your snack cravings be guilt-free!

Step‑by‑Step Instructions for Cottage Cheese Chips

Step 1: Preheat the Oven
Begin by preheating your oven to 350°F (175°C). While the oven heats up, prepare a large baking sheet by lining it with parchment paper and lightly spraying it with cooking spray. This step ensures your cottage cheese chips won’t stick and will achieve the perfect crisp.

Step 2: Prepare the Cottage Cheese
Take your whole milk small curd cottage cheese and pour it into a bowl. If there is excess liquid, gently drain it to achieve a thicker consistency. This step is crucial as it allows the cottage cheese to create chips that are light and crispy while enhancing the overall flavor of your Cottage Cheese Chips.

Step 3: Scoop and Flatten
Using a 1-tablespoon scoop, place mounds of the cottage cheese mixture onto the prepared baking sheet. Make sure to space them about 2 inches apart. Once all mounds are in place, take the back of a spoon to gently flatten each mound to about 1/4 inch thick. This will help them cook evenly and turn out crispy!

Step 4: Season the Chips
Now it's time to customize your Cottage Cheese Chips! If desired, sprinkle your chosen seasonings, such as garlic powder, onion powder, or Parmesan cheese, over each flattened mound. This step adds flavor and character to your chips, so feel free to get creative with your spice choices.

Step 5: Bake the Chips
Slide the baking sheet into your preheated oven and bake the chips for 40-50 minutes. Start checking them at the 20-minute mark; the edges should turn dark brown, and the surface should be golden. Keep an eye on them to prevent overcooking, as ovens can vary in temperature.

Step 6: Cool the Chips
Once baked to perfection, remove the baking sheet from the oven and allow your Cottage Cheese Chips to cool completely on the baking sheet. This cooling time helps them firm up and reach their final crunchy texture. Once cool, they are ready to be enjoyed as a delightful snack!

Step 7: Microwave Method (Alternative)
For a quicker option, prepare a microwave-safe plate by lining it with parchment paper. Spread the drained cottage cheese evenly over the plate, then season as desired. Microwave on high for 2-3 minutes, checking for doneness; if needed, continue microwaving in 1-minute increments. Allow them to cool before enjoying.

How to Store and Freeze Cottage Cheese Chips

Room Temperature: Store your Cottage Cheese Chips in a cool, dry place in an airtight container for up to 2 days to maintain crispiness.

Fridge: If you want to keep your chips longer, refrigerate them in an airtight container for 3-4 days. Use parchment paper between layers to prevent sticking.

Freezer: For extended storage, you can freeze them. Place them in a single layer in a freezer-safe bag or container for up to 2 months. Thaw and re-crisp in the oven before eating.

Reheating: To enjoy leftover chips, warm them in the oven at 350°F (175°C) for about 5-10 minutes until they regain their crunch.

Expert Tips for Cottage Cheese Chips

  • Oven Monitoring: Ovens heat differently; check your chips at the 20-minute mark to ensure they don't overcook. Adjust baking time as needed.

  • Flatten Evenly: For the best texture, flatten each mound of cottage cheese to about 1/4 inch thick; this ensures uniform cooking and optimal crispiness.

  • Season Generously: Don't be shy with seasonings! Experiment with your favorite spices and herbs for a delicious twist on these Cottage Cheese Chips.

  • Store Wisely: Keep your chips in an airtight container for freshness. They taste best when enjoyed within a few days, so savor them soon!

  • Experiment with Cheese: Try flavored or seasoned cottage cheese for an exciting twist on your chips and to keep your snack game varied and interesting.

What to Serve with Crispy Cottage Cheese Chips?

These delightful, crunchy bites can be paired with a variety of flavors and textures to create a memorable dining experience.

  • Salsa: The zesty flavors of fresh salsa bring a burst of freshness that complements the crunch of the chips.
  • Guacamole: Creamy avocado dip provides a rich contrast to the crispy chips, making each bite utterly delicious and satisfying.
  • Hummus: This silky dip adds a nutty flavor, perfect for those craving a healthy and protein-packed snack.
  • Parmesan Sprinkles: Enhance the cheesy goodness by dusting some grated Parmesan for an extra savory kick.
  • Greek Yogurt Dip: A tangy yogurt dressing adds creaminess while keeping the overall dish healthy and fresh.
  • Veggie Sticks: Crunchy carrot or cucumber sticks pair nicely, adding coolness and color to your spread.
  • Red Pepper Flakes: Sprinkle a bit of heat for those who love a spicy punch to offset the mild cottage cheese flavor.
  • Light Beer or Sparkling Water: Refreshing drinks like a light beer or bubbly water enhance the snacking experience while keeping it light.
  • Fruit Salsa: Try a tropical twist with a fruit salsa; the sweetness pairs wonderfully with the savory chip crunch.
  • Chocolate-Dipped Version: For a sweet twist, dip half of the chips in melted dark chocolate – a perfect grown-up treat!

Make Ahead Options

These Cottage Cheese Chips are a fantastic choice for meal prep enthusiasts! You can prepare the cottage cheese mixture and scoop it onto the baking sheet, keeping it in the fridge for up to 24 hours before baking. To maintain the best quality, simply cover the baking sheet with plastic wrap to prevent drying out. When you’re ready to bake, just remove the mounds from the refrigerator, season them to your liking, and pop them in the oven. The chips will still turn out just as delicious, with a satisfying crunch that makes them a perfect snack for busy weeknights. Enjoy the convenience of having healthy Cottage Cheese Chips ready to bake whenever you need a quick bite!

Cottage Cheese Chips Variations

Get ready to elevate your cottage cheese chips experience with these delightful twists that will tantalize your taste buds!

  • Spicy Kick: Add a pinch of cayenne pepper or crushed red pepper flakes for a fiery version that brings the heat. The fusion of flavors creates a snack that’ll keep you reaching for more!

  • Herbed Delight: Mix in dried herbs such as oregano, thyme, or dill before baking for a fragrant twist. This variation will transport you to a sun-drenched herb garden with every crispy bite!

  • Cheesy Upgrades: Top your chips with a sprinkle of cheddar or mozzarella cheese just before the final minutes of baking. The melted cheese adds a ooey-gooey texture and irresistible flavor—a cheesy crunch dream come true!

  • Garlic Parmesan: Toss in fresh minced garlic or garlic powder with grated Parmesan cheese to create a savory and satisfying flavor profile. This classic combination is sure to please crowds and complements dips perfectly!

  • Sweet Variation: Blend in a dash of cinnamon or a drizzle of honey for a sweet treat. This unexpected twist can be a delightful dessert or a unique snack that satisfies that sweet tooth without the guilt.

  • Vegetable Medley: Incorporate finely chopped spinach or kale into the cottage cheese mixture for an added nutritional boost. Not only will it make your chips vibrant, but it’ll also pack them with extra goodness!

  • Flavored Options: Use flavored cottage cheese, such as spinach and herb or roasted red pepper, to skip the need for additional seasoning. This simple swap packs a huge punch in taste while simplifying your prep!

For more delightful variations inspired by fresh ingredients, you might want to check out our Potato Blue Cheese recipe! Feel free to experiment and enjoy crafting your perfect, personalized cottage cheese chips creation!

Cottage Cheese Chips Recipe FAQs

What kind of cottage cheese should I use?
Absolutely! For the crispiest Cottage Cheese Chips, opt for whole milk small curd cottage cheese with a 4% milkfat content. Full-fat cottage cheese yields better results due to its lower moisture content, enhancing both texture and flavor.

How should I store leftover cottage cheese chips?
To keep your chips fresh, place them in an airtight container at room temperature for up to 2 days. If you want them to last longer, store them in the refrigerator for 3-4 days. Just remember to use parchment paper between layers to prevent sticking.

Can I freeze cottage cheese chips?
Yes, you can! To freeze your Cottage Cheese Chips, arrange them in a single layer in a freezer-safe bag or container, ensuring they're not stacked on top of each other. They can be frozen for up to 2 months. When you're ready to enjoy them, simply thaw and re-crisp them in the oven at 350°F (175°C) for about 5-10 minutes.

What should I do if my chips aren't crispy?
If your chips aren’t turning out as crispy as you’d like, check a few things: first, ensure you’re using full-fat cottage cheese and flattening your mounds to about 1/4 inch thick. If they still lack crunch, consider baking them a bit longer, checking every 5 minutes until you achieve that delightful crispiness.

Can these chips be made with low-fat cottage cheese?
While you can certainly use low-fat cottage cheese, I recommend sticking with full-fat for the best results. Low-fat options can lead to a chewier texture, which might not give you that satisfying crunch you’re looking for. If you're aiming to keep the recipe low-carb, it's still worth the trade-off for flavor and texture!

Are these chips suitable for pets or anyone with allergies?
Cottage Cheese Chips can be tasty for humans but should not be shared with pets, especially those that are lactose intolerant. For those with dairy allergies or lactose sensitivity, it's best to skip this recipe. Always check for any specific allergens present in the seasonings you may want to add.

Cottage Cheese Chips

Cottage Cheese Chips: Crunchy, Healthy Snack Delight

Cottage Cheese Chips are a guilt-free, protein-packed, and low-carb snack perfect for any craving.
Print Recipe Pin Recipe
Prep Time 10 minutes mins
Cook Time 50 minutes mins
Cooling Time 10 minutes mins
Total Time 1 hour hr 10 minutes mins
Servings: 4 servings
Course: Snacks
Calories: 100
Ingredients Equipment Method Nutrition Notes

Ingredients
  

For the Chips
  • 2 cups Cottage Cheese Whole milk small curd for rich flavor
  • to taste Seasonings (Optional) Garlic powder, onion powder, Parmesan cheese, etc.
For Storage
  • 1 each Airtight Container To store chips and maintain freshness

Equipment

  • Oven
  • Baking Sheet
  • Parchment Paper
  • Microwave-safe plate

Method
 

Baking Instructions
  1. Preheat your oven to 350°F (175°C) and prepare a baking sheet lined with parchment paper.
  2. Pour cottage cheese into a bowl and drain excess liquid for thicker consistency.
  3. Scoop mounds of cottage cheese onto the baking sheet, spacing them about 2 inches apart, then flatten each mound to about 1/4 inch thick.
  4. Season the flattened mounds with your choice of garlic powder, onion powder, or Parmesan cheese.
  5. Bake in the preheated oven for 40-50 minutes, checking at 20 minutes.
  6. Cool the chips completely on the baking sheet before serving.
Microwave Method
  1. Prepare a microwave-safe plate with parchment paper, spread drained cottage cheese, season as desired, and microwave on high for 2-3 minutes.
  2. Check for doneness and continue microwaving in 1-minute increments if needed. Cool before enjoying.

Nutrition

Serving: 1cupCalories: 100kcalCarbohydrates: 5gProtein: 10gFat: 2gSaturated Fat: 1gPolyunsaturated Fat: 0.5gMonounsaturated Fat: 0.5gCholesterol: 10mgSodium: 200mgPotassium: 150mgSugar: 2gVitamin A: 2IUCalcium: 15mgIron: 2mg

Notes

Store in an airtight container; best enjoyed within a few days. Can be frozen for up to 2 months and reheated in the oven.

Tried this recipe?

Let us know how it was!

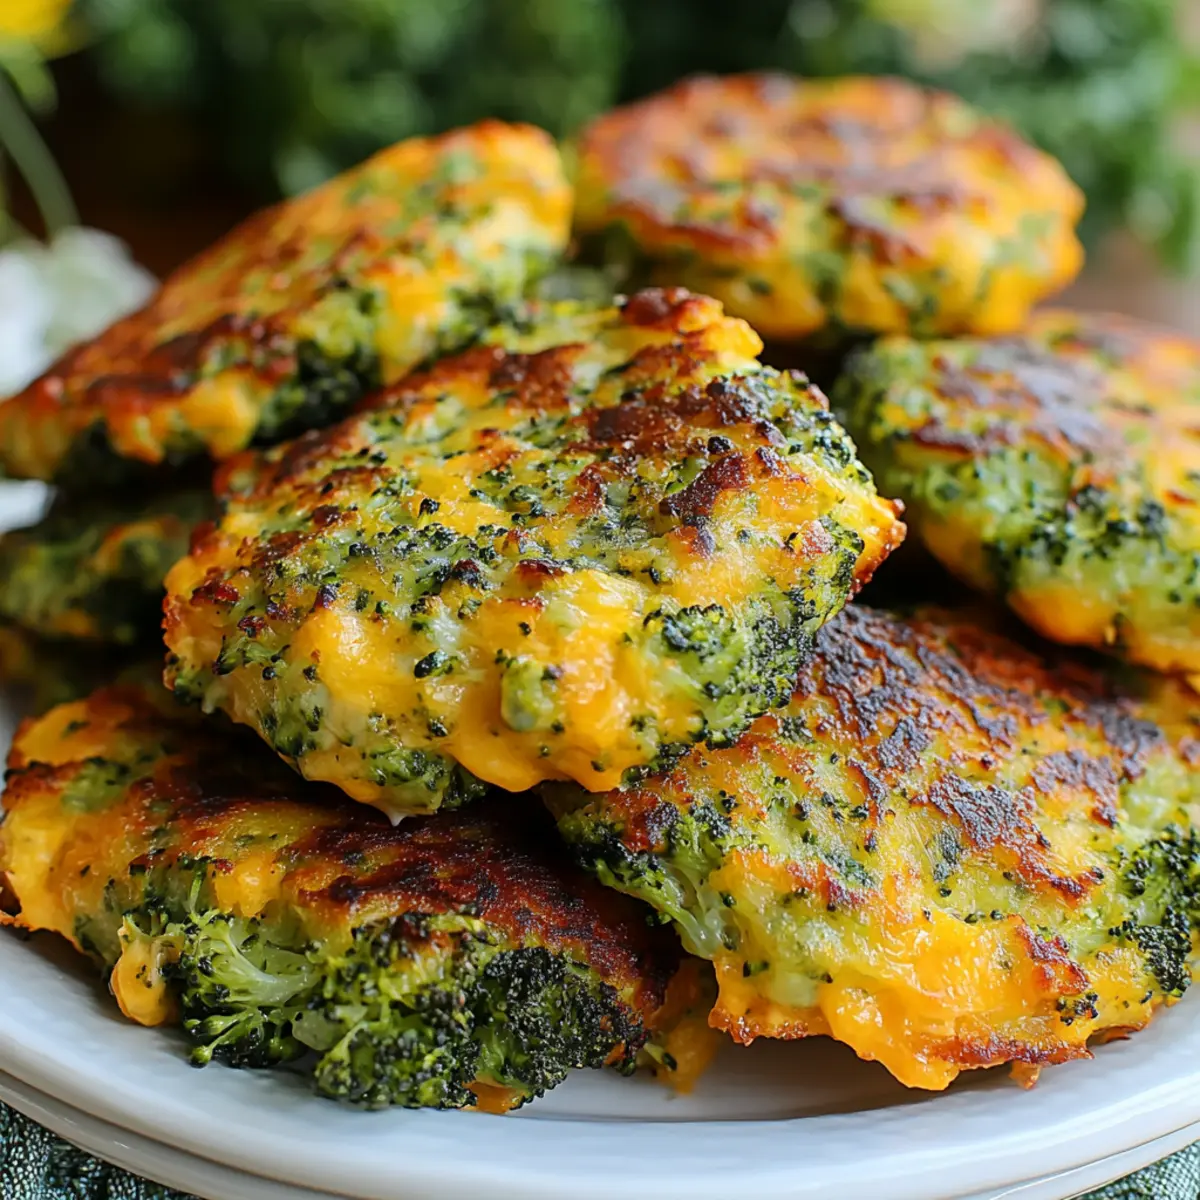
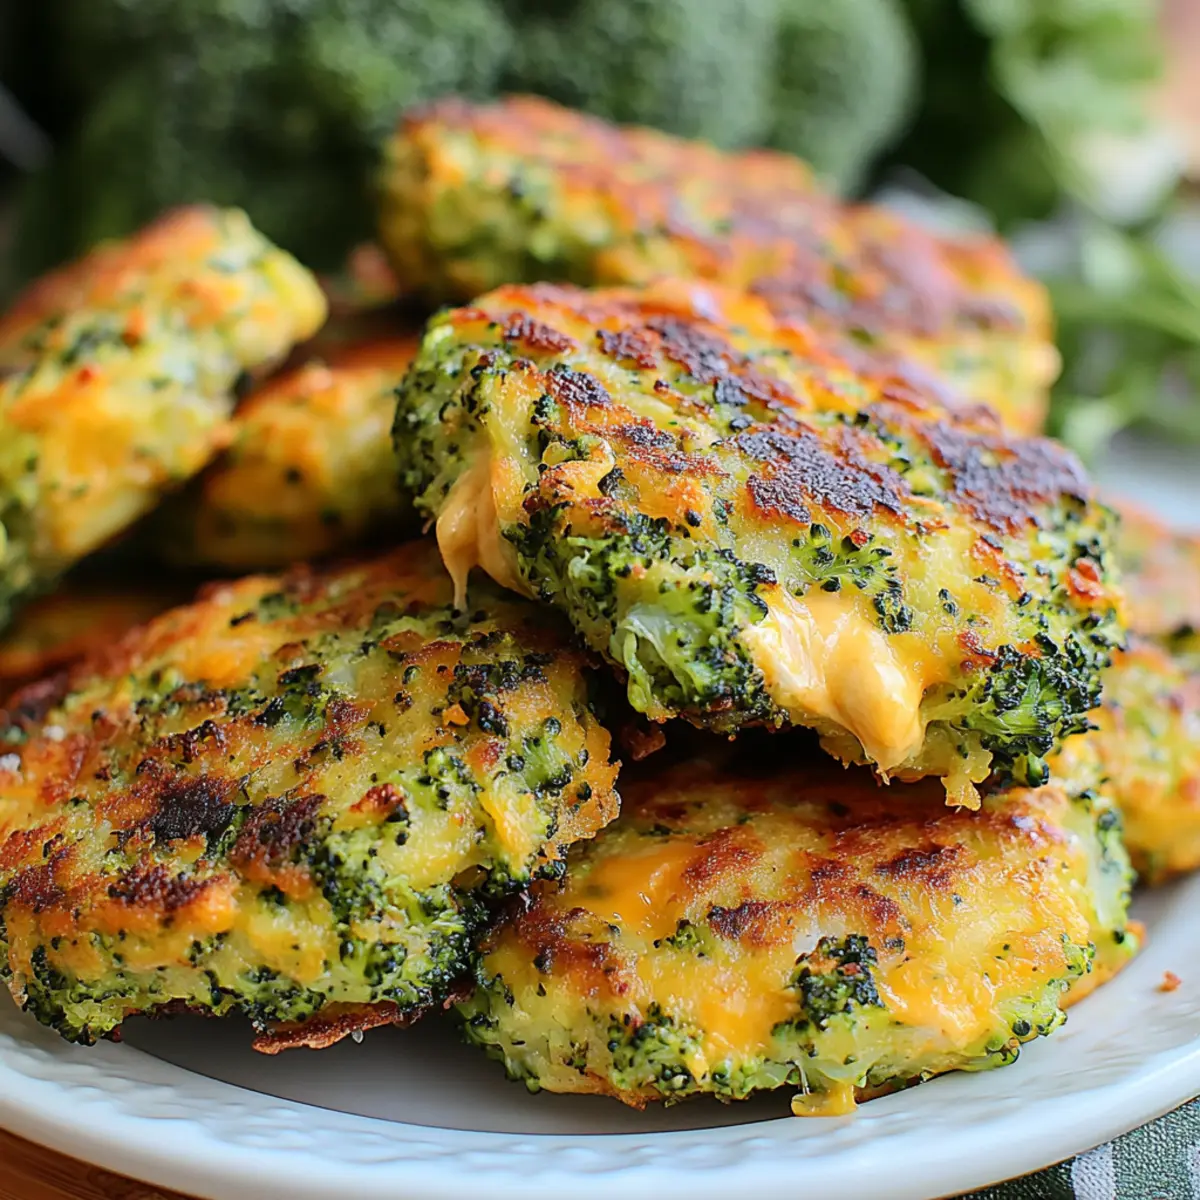
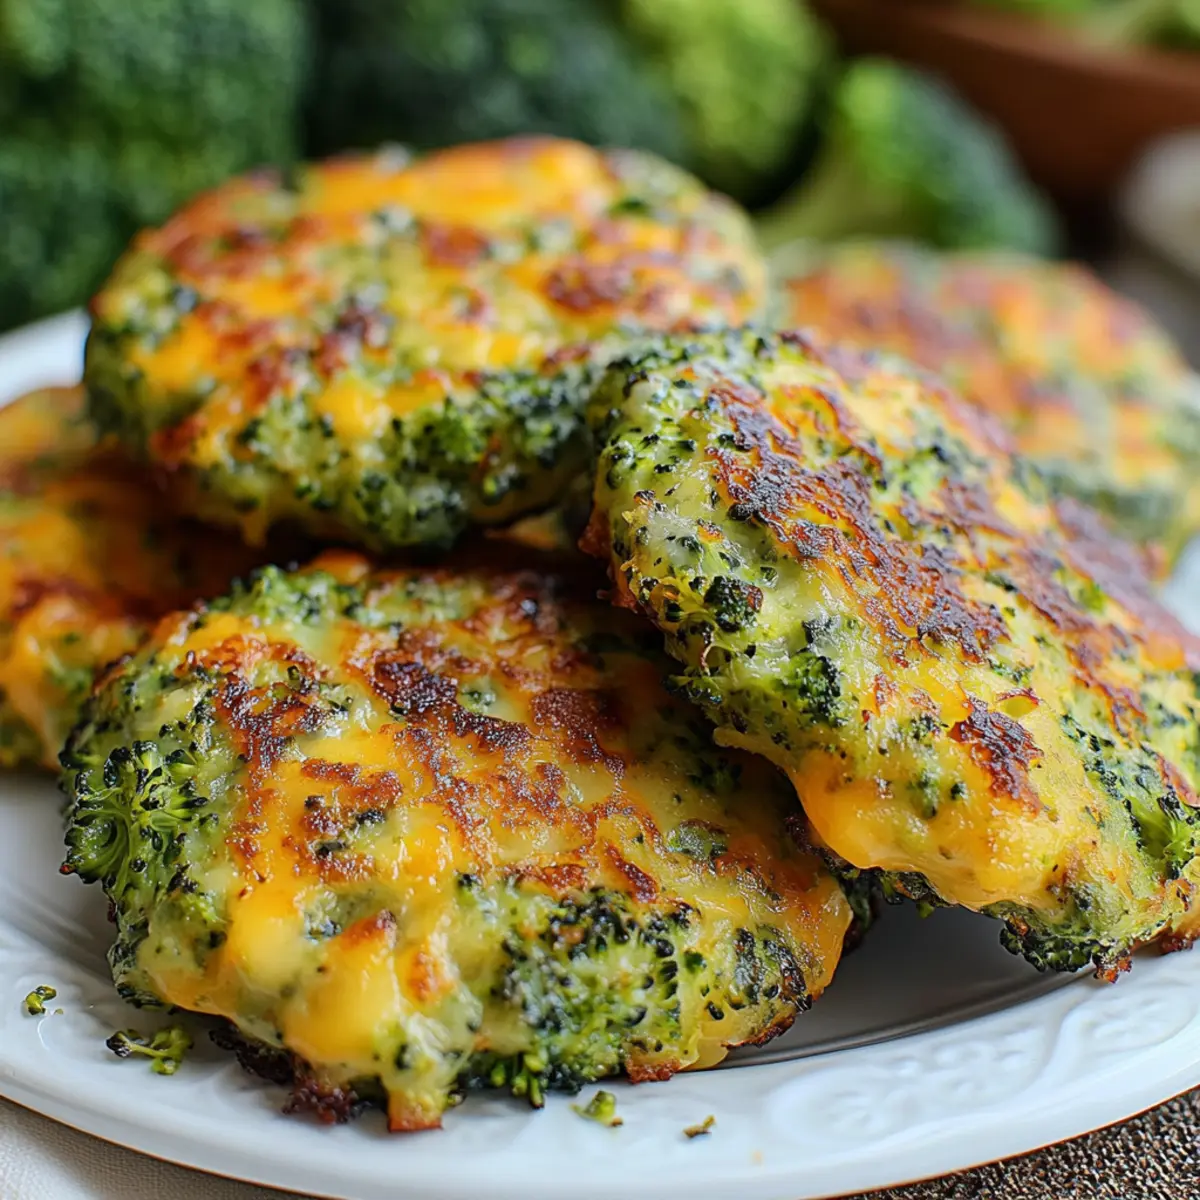
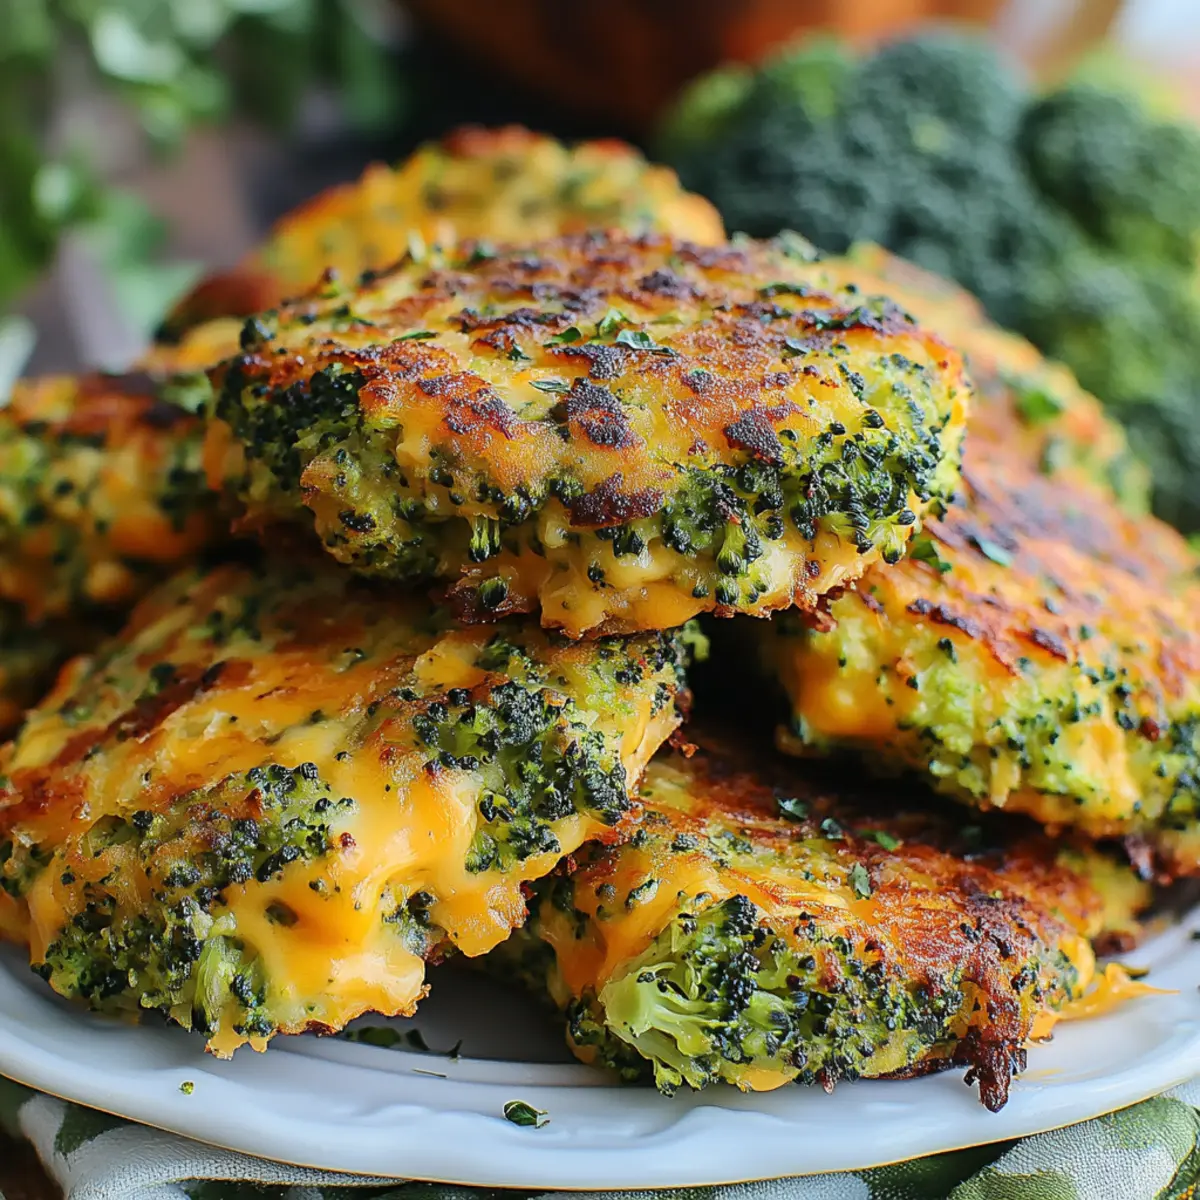
Crispy Broccoli Cheese Patties Your Family Will Love

April 21, 2026 by Grace Snow Leave a Comment

As I stood in my kitchen, the vibrant green of freshly chopped broccoli sparked a wave of nostalgia, reminding me of family dinners filled with laughter and the delicious aromas wafting through the air. Introducing my beloved Broccoli Cheese Patties—a recipe that not only brings back those cherished memories but also transforms healthy eating into a delightful experience. These patties are incredibly easy to whip up, making them a perfect solution for busy weeknights or spontaneous gatherings. Not to mention, they’re loaded with nutrients, providing a tasty way to sneak in those essential vitamins and fiber, which is just what we need to feel our best! Whether you choose to fry them for a golden crunch or bake them for a lighter touch, I promise these versatile pockets of joy will quickly become your new favorite snack. What unique twist will you add to make them your own?

Why are Broccoli Cheese Patties a Must-Try?

Simplicity at its Finest: These Broccoli Cheese Patties come together in just a few steps, making weeknight dinners easy and breezy.

Nutritious Goodness: Packed with vitamins C and K, these patties are a healthy choice, perfect for those looking to boost their veggie intake while enjoying rich flavors.

Versatile Appeal: Whether served as appetizers, snacks, or sides, they fit seamlessly into any meal, satisfying even the pickiest of eaters. Try pairing them with a yogurt-based dipping sauce for a delightful twist!

Customizable Options: With room for creativity, swap in various cheeses or add spices like garlic powder to cater to your family's taste buds.

Quick and Freezer-Friendly: Ideal for meal prep, you can make a batch ahead of time, freeze, and have them ready for any impromptu snack cravings. Don’t miss out—bring a touch of home-cooked warmth to your table today!

Broccoli Cheese Patties Ingredients

For the Patties
• Broccoli – Loaded with vitamins C and K, fresh or frozen works well; just ensure thawed broccoli is well-drained.
• Cheese (e.g., Cheddar) – Brings creaminess and binds the patties; feel free to substitute with mozzarella or feta for a unique twist.
• Eggs – Essential for holding everything together; if going vegan, use flaxseed or chia seeds mixed with water.
• Breadcrumbs – Provides that coveted crispy texture; gluten-free options or almond flour can substitute to cater to dietary needs.
• Seasoning (salt, pepper, herbs) – Elevates the flavor; adjust to suit your preferences and make each bite more enjoyable.

Step‑by‑Step Instructions for Broccoli Cheese Patties

Step 1: Prepare the Broccoli
Start by finely chopping fresh broccoli or pulse it in a food processor until uniform. If using frozen broccoli, make sure it’s thawed and well-drained to remove excess moisture. Lightly steam or blanch the broccoli for about 3-5 minutes until just tender, then allow it to cool slightly. This ensures the Broccoli Cheese Patties have the perfect texture.

Step 2: Mix the Ingredients
In a large mixing bowl, combine the chopped broccoli, shredded cheese, eggs, breadcrumbs, and your choice of seasonings such as salt, pepper, and herbs. Mix thoroughly until all ingredients are fully incorporated, creating a thick mixture that holds together well. This step is crucial for achieving flavorful Broccoli Cheese Patties that won’t fall apart during cooking.

Step 3: Shape the Patties
Using your hands, scoop up a portion of the mixture and form it into a compact patty, about 2-3 inches in diameter. Make sure each patty is firmly pressed together to maintain its shape during cooking. Arrange the formed patties on a tray lined with parchment paper. This preparation makes the next steps easy and keeps your cooking area organized.

Step 4: Choose Your Cooking Method
Decide whether to fry or bake your patties. For frying, heat a few tablespoons of oil in a large skillet over medium heat. Cook the patties in batches for about 4-5 minutes on each side until they are golden brown and crispy around the edges. If baking, preheat your oven to 400°F (200°C). Place the patties on a greased baking sheet and bake for 20 minutes, flipping them halfway through for even cooking.

Step 5: Serve and Enjoy
Once cooked, let the Broccoli Cheese Patties cool slightly before serving. They’re delicious enjoyed warm, paired with your favorite dipping sauce, such as a yogurt-based sauce or spicy aioli. These versatile patties can also be served as a delightful side dish alongside your favorite main course, adding a nutritious punch to your meal.

Broccoli Cheese Patties Variations & Substitutions

Feel free to unleash your creativity and customize these delightful patties with your favorite flavors and ingredients!

  • Cheese Swap: Use gouda or feta instead of cheddar for a unique flavor kick. Each cheese brings its distinct personality, transforming your patties beautifully.

  • Vegetable Boost: Add finely chopped bell peppers or carrots for extra color and nutrients. These additions enhance both the taste and visual appeal of your patties.

  • Gluten-Free Option: Substitute regular breadcrumbs with gluten-free breadcrumbs or almond flour. This ensures everyone can enjoy a crispy treat without compromise!

  • Herb Infusion: Incorporate fresh herbs like parsley or basil for a refreshing twist. They brighten up the flavor profile, making these patties even more inviting.

  • Spice it Up: Add heat with a dash of red pepper flakes or cayenne pepper. Warning: Your taste buds may thank you, but they might also raise their eyebrows in surprise!

  • Egg Alternative: For a vegan version, use flaxseed or chia seeds mixed with water as a substitute. Just mix 1 tablespoon of seeds with 3 tablespoons of water for each egg needed, letting it sit until it becomes gelatinous.

  • Baked Delight: Instead of frying, consider baking them with a light brush of olive oil. It creates a healthier option while still achieving that delicious crunch.

  • Dipping Dip: Serve with a creamy yogurt-based sauce or try something zesty like a lemon-herb aioli. These pairs elevate your patties to gourmet status!

For additional recipe inspirations, check out our delightful Potato Blue Cheese for a scrumptious twist on flavor or make an easy side of Jello Salad Cottage to round out your meal!

What to Serve with Broccoli Cheese Patties

Indulge in an unforgettable meal by pairing crispy, cheesy delights with complementary sides that elevate the entire dining experience.

  • Creamy Mashed Potatoes: These velvety potatoes provide a comforting base that perfectly balances the savory crunch of the patties. Their rich texture creates a harmonious contrast—ideal for a satisfying meal.

  • Fresh Garden Salad: Bright greens and vibrant veggies add a refreshing crunch, enhancing the meal's nutrition. Drizzle with a tangy vinaigrette for an inviting contrast to the cheese patties.

  • Garlic Aioli: A zesty dipping sauce that enhances the rich flavors of the patties while adding an irresistible kick. It’s perfect for those who crave that extra touch of flavor with each bite.

  • Roasted Vegetables: Caramelized carrots, zucchini, and bell peppers not only bring a burst of color to your plate but also an earthy complement to the cheesy patties—creating a well-rounded meal.

  • Quinoa or Rice Pilaf: This grain option offers a light and nutty base, which pairs beautifully with the rich, cheesy goodness. It also adds extra protein for a wholesome touch to your dinner table.

  • Spicy Sriracha Sauce: If you love heat, a drizzle of this fiery sauce can elevate the culinary experience. Its bold flavor adds dimension to the dish, making each bite exciting.

  • Herbed Yogurt Dip: A cooling dip made with Greek yogurt and fresh herbs complements the patties perfectly. Its creamy consistency and refreshing taste balance out the savory richness of the broccoli cheese patties.

  • Lemonade or Iced Tea: A refreshing beverage to wash everything down, these drinks bring a zesty brightness to your meal—perfect for enjoying on a warm day with loved ones.

Make Ahead Options

These Broccoli Cheese Patties are perfect for busy home cooks looking to save time during the week! You can prepare the mixture up to 24 hours in advance by combining broccoli, cheese, eggs, breadcrumbs, and seasonings, then refrigerating it in an airtight container. This allows the flavors to meld beautifully. Alternatively, you can shape the patties and store them in the fridge or even freeze them for up to 3 months. To maintain their quality, be sure to pack the patties carefully to prevent them from sticking together. When ready to enjoy, simply cook them straight from the fridge or freezer—just add a few extra minutes to the cooking time—affording you tasty, homemade snacks with minimal effort!

Expert Tips for Broccoli Cheese Patties

  • Well-Drained Broccoli: Make sure to thoroughly drain frozen broccoli to avoid a watery mixture; this prevents your patties from falling apart.
  • Binding Power: If your mixture feels too crumbly, add a bit more cheese or an extra egg for perfect binding in your Broccoli Cheese Patties.
  • Resting Time Matters: Allow your patties to rest for a few minutes before cooking; this helps them firm up and hold their shape better.
  • Crispiness Control: For extra crispiness, try coating the patties in breadcrumbs before frying or baking; it enhances the texture and flavor.
  • Flavor Enhancements: Enhance your patties with garlic or onion powder; adding these spices can elevate the overall taste profile significantly.

How to Store and Freeze Broccoli Cheese Patties

Fridge: Store cooked Broccoli Cheese Patties in an airtight container for up to 3 days, allowing you to enjoy them for quick snacks or meals later in the week.

Freezer: For longer storage, freeze uncooked patties on a baking sheet until firm, then transfer to a freezer bag. They can be stored for up to 3 months; simply cook from frozen when ready to eat.

Reheating: To reheat, bake thawed or frozen patties in a preheated oven at 375°F (190°C) for about 15-20 minutes until heated through and crispy again.

Make-Ahead Tip: Prepare the patty mixture ahead of time and refrigerate for about 1-2 days before cooking, making it a convenient meal option that saves time during busy evenings.

Broccoli Cheese Patties Recipe FAQs

What type of broccoli is best for Broccoli Cheese Patties?
Absolutely! Fresh broccoli is preferred for its vibrant flavor and texture, but frozen broccoli works just as well—just ensure it's thawed and excess moisture is removed to prevent sogginess.

How should I store leftover Broccoli Cheese Patties?
Cooked patties can be stored in an airtight container in the refrigerator for up to 3 days. This makes it easy to enjoy them as snacks or quick meals throughout the week!

Can I freeze these patties?
Yes! For freezing, place uncooked formed patties on a baking sheet lined with parchment paper and freeze until firm. Then transfer them to a freezer bag. They can be stored for up to 3 months. Just cook them directly from frozen when you're ready for a delicious treat!

What can I do if my patties are too crumbly?
Very! If your mixture turns out too crumbly, it often means more binding is needed. Try adding a bit more cheese or an extra egg to help hold everything together. Mixing in a tablespoon of water or vegetable broth can also improve the consistency.

Are there any dietary considerations I should keep in mind?
The more the merrier! While these Broccoli Cheese Patties are mainly vegetarian, they can be adapted to fit various dietary needs. You can make them gluten-free by substituting regular breadcrumbs with gluten-free options or almond flour. Additionally, for egg-free patties, mix one tablespoon of chia seeds or ground flaxseed with three tablespoons of water as a binding agent.

How can I enhance the flavor of my Broccoli Cheese Patties?
For a flavor boost, consider adding spices like garlic powder, onion powder, or even herbs like dill or parsley. Mixing in finely chopped vegetables like bell peppers or carrots can add color and nutrition. Remember, customizing the flavors is part of the fun!

Broccoli Cheese Patties

Crispy Broccoli Cheese Patties Your Family Will Love

These Broccoli Cheese Patties are crispy, nutritious, and customizable, making them a perfect snack for any occasion.
Print Recipe Pin Recipe
Prep Time 10 minutes mins
Cook Time 25 minutes mins
Cooling Time 5 minutes mins
Total Time 40 minutes mins
Servings: 4 patties
Course: Snacks
Cuisine: American
Calories: 150
Ingredients Equipment Method Nutrition Notes

Ingredients
  

For the Patties
  • 2 cups Broccoli fresh or frozen, thawed and well-drained
  • 1 cup Cheese e.g., Cheddar, can substitute with mozzarella or feta
  • 2 Eggs can substitute with flaxseed or chia seeds for vegan
  • 1 cup Breadcrumbs gluten-free options available
  • to taste Seasoning (salt, pepper, herbs) adjust to preference

Equipment

  • Mixing Bowl
  • Food Processor
  • Skillet
  • Baking Sheet
  • Parchment Paper

Method
 

Step-by-Step Instructions
  1. Finely chop fresh broccoli or pulse in a food processor. If using frozen, thaw and drain. Lightly steam or blanch for 3-5 minutes until tender.
  2. In a mixing bowl, combine broccoli, cheese, eggs, breadcrumbs, and seasonings. Mix thoroughly until a thick mixture forms.
  3. Shape the mixture into compact patties, about 2-3 inches in diameter, and place on a parchment-lined tray.
  4. For frying, heat oil in a skillet over medium heat and cook patties for 4-5 minutes on each side until golden brown. For baking, preheat oven to 400°F (200°C) and bake for 20 minutes, flipping halfway.
  5. Let the patties cool slightly before serving, best served warm with a yogurt-based dipping sauce or spicy aioli.

Nutrition

Serving: 1pattyCalories: 150kcalCarbohydrates: 15gProtein: 7gFat: 7gSaturated Fat: 4gPolyunsaturated Fat: 1gMonounsaturated Fat: 2gCholesterol: 70mgSodium: 200mgPotassium: 300mgFiber: 2gSugar: 1gVitamin A: 500IUVitamin C: 30mgCalcium: 200mgIron: 1mg

Notes

For extra crunch, coat patties in breadcrumbs before frying. Can store in fridge for up to 3 days or freeze uncooked for up to 3 months.

Tried this recipe?

Let us know how it was!

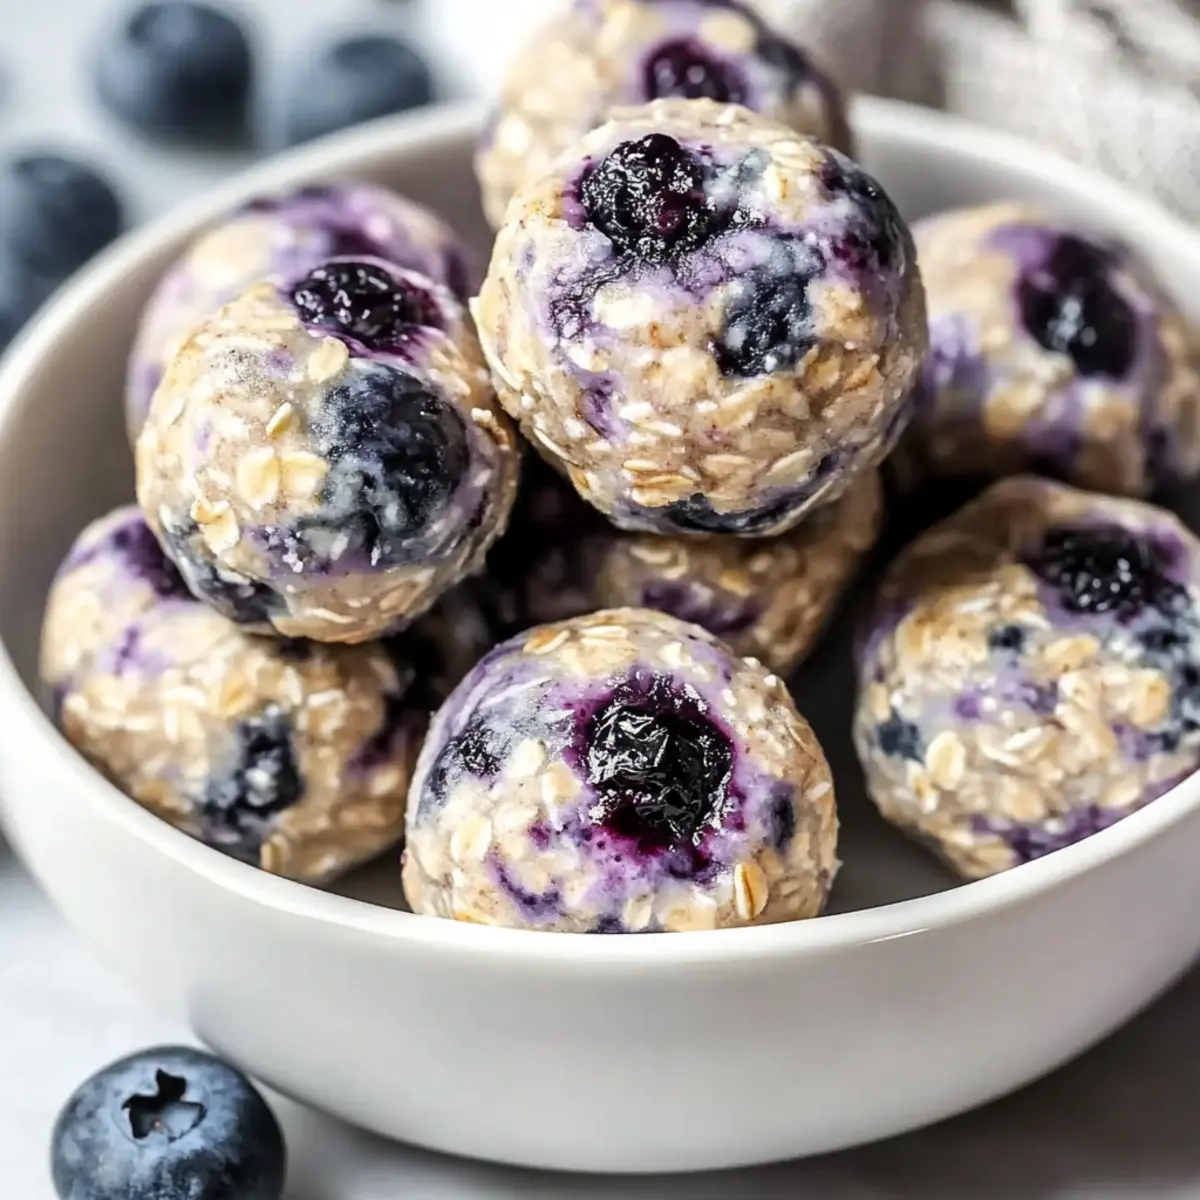
Blueberry Cheesecake Protein Bites for Guilt-Free Indulgence

April 19, 2026 by Grace Snow Leave a Comment

With every bite of these Blueberry Cheesecake Protein Bites, you'll feel like you've struck the perfect balance between indulgence and nutrition. Made without the oven and packed with protein, these delightful snacks are quick to whip up, making them an ideal treat for busy days or an after-school pick-me-up. The creamy cheesecake paired with sweet blueberry goodness will evoke fond memories of childhood desserts while keeping your health goals on track. Whether you're looking for a guilt-free snack or a fun recipe to impress friends, these no-bake bites are here to satisfy your cravings. Curious about how to whip up this simple yet scrumptious treat? Let's jump into the recipe!

Why are Blueberry Cheesecake Protein Bites a must?

Deliciously Guilt-Free: With every bite, you savor a creamy cheesecake flavor without the guilt!
Quick and Easy: No oven required, making this a hassle-free treat for any busy day.
Nutritious Goodness: Packed with protein from Greek yogurt and protein powder, they keep you fuller for longer.
Versatile Swaps: Feel free to get creative—swap in other berries or add nut butter for extra flavor!
Crowd-Pleasing Delight: Perfect as a healthy snack for kids or as an impressive treat for social gatherings. If you're looking for refreshing recipes, don't miss out on our Lemon Ricotta Protein for another delicious option.

Blueberry Cheesecake Protein Bites Ingredients

• These ingredients will make your no-bake snack a delight!

For the Blueberry Swirl

  • Frozen Blueberries – Perfect for that fruity swirl; fresh blueberries can brighten up the flavor!
  • Water – Helps to cook the blueberries down into a smooth puree.

For the Crust

  • Rolled Oats – Forms a wholesome base; substitute with certified gluten-free oats for a gluten-free version.
  • Almond Flour – Adds a lovely texture; can be replaced with all-purpose flour if needed.
  • Maple Syrup – Sweetens and binds the crust ingredients; agave syrup serves as a tasty alternative.
  • Coconut Oil – Provides richness; feel free to use butter or any neutral oil instead.
  • Chia Seeds – A great thickening agent while pumping up the fiber content; they support the protein bites' structure.

For the Cheesecake Filling

  • Light Cream Cheese – Creamy base for your filling; use plant-based cream cheese for a dairy-free option.
  • Vanilla Protein Powder – Boosts protein and flavor; choose your favorite plant-based or whey option.
  • Plain Non-Fat Greek Yogurt – Contributes creaminess along with extra protein; a dairy-free yogurt works great for vegans.
  • Powdered Sweetener – Adjusts sweetness; options like erythritol or stevia work fantastically.
  • Vanilla Extract – Enhances all the flavors; always opt for pure extract for the best taste.
  • Fresh Lemon Juice – Brightens the cheesecake flavor, making it irresistibly refreshing!

Note

  • Gather these ingredients to create your delicious Blueberry Cheesecake Protein Bites—perfect for satisfying your sweet tooth while keeping it healthy!

Step‑by‑Step Instructions for Blueberry Cheesecake Protein Bites

Step 1: Prepare the Blueberry Swirl
In a medium saucepan over medium heat, add the frozen blueberries and a splash of water. Cook for about 5 minutes until they soften and begin to break down, stirring occasionally. Use a fork to mash them into a smooth puree, then stir in the chia seeds and any optional sweetener. Remove from heat and let the mixture cool completely.

Step 2: Make the Crust
In a mixing bowl, combine rolled oats, almond flour, maple syrup, melted coconut oil, and a pinch of salt. Stir together until the mixture is well combined and crumbly. Press this crust mixture firmly into an 8x8 baking dish lined with parchment paper, ensuring an even layer. Place the dish in the freezer for 10-15 minutes to firm up while you prepare the filling.

Step 3: Create the Cheesecake Filling
In a blender or food processor, add the softened cream cheese, vanilla protein powder, Greek yogurt, powdered sweetener, vanilla extract, and fresh lemon juice. Blend the ingredients on low speed until smooth and creamy, being careful not to overmix, as a light texture is key for these Blueberry Cheesecake Protein Bites.

Step 4: Assemble
Once the crust has chilled, remove it from the freezer. Spread the creamy cheesecake filling evenly over the crust with a spatula. Next, drop spoonfuls of the blueberry swirl on top of the filling. Use a butter knife or skewer to gently swirl the blueberry mixture into the cheesecake filling, creating a marbled effect.

Step 5: Chill
Cover the baking dish with plastic wrap or a lid and refrigerate for at least 2-3 hours or until the mixture has set firm. After chilling, use a sharp knife to cut the Blueberry Cheesecake Protein Bites into squares or bars. Serve cold and enjoy a delicious, healthy snack!

What to Serve with Blueberry Cheesecake Protein Bites

These delightful no-bake treats can easily elevate any snack time, wrapping your senses in creamy and fruity bliss.

  • Refreshing Fruit Salad: A medley of fresh fruits enhances the sweetness of the blueberry bites, adding a burst of refreshing flavors.

  • Homemade Granola: The crunch of granola adds a satisfying texture contrast, making it a perfect dip for the creamy bites.

  • Yogurt Parfait: Layer these bites with Greek yogurt and honey for a delightful, nutritious breakfast that packs a protein punch.

  • Nutty Trail Mix: A blend of nuts and seeds offers a delightful savory balance with any sweet treat, enhancing your snacking experience.

  • Sparkling Lemonade: This refreshing drink cleanses the palate while complementing the creamy cheesecake flavors beautifully, making it perfect for warm days.

  • Hot Cocoa: A cozy pairing for cooler evenings, the rich chocolate flavor melds perfectly with the fruity notes of the protein bites.

Indulging in these delightful combinations will make your snack time feel like a special occasion every day!

Blueberry Cheesecake Protein Bites Variations

Feel free to get creative with these delicious Blueberry Cheesecake Protein Bites and discover new flavor combinations that excite your palate!

  • Berry Bliss: Swap frozen blueberries for other berries like raspberries or strawberries for a different fruity swirl. Each berry offers a unique taste profile!

  • Nutty Delight: Add 2 tablespoons of your favorite nut butter into the crust for extra richness and protein. This twist infuses a delightful nutty flavor into each bite.

  • Citrus Zest: Include a teaspoon of lemon or orange zest in the cheesecake filling for a refreshing citrus burst. It beautifully brightens the overall flavor profile.

  • Chocolate Indulgence: Drizzle melted dark chocolate over the top after chilling to elevate your bites to decadent treats. The combination of chocolate and cheesecake is simply irresistible!

  • Granola Crunch: Mix in a handful of crushed granola into the crust for added texture and a satisfying crunch. This variation enhances both flavor and enjoyment.

  • Gluten-Free Goodness: Use certified gluten-free oats and almond flour to keep your bites gluten-free without sacrificing flavor or texture. Everyone can enjoy these tasty treats!

  • Dairy-Free Option: Replace the light cream cheese with dairy-free cream cheese and yogurt to create a full vegan option. You won’t believe how creamy they are!

If you're after more protein-packed snacks, consider trying our delightful Lemon Ricotta Protein for a refreshing alternative! Enjoy your culinary adventures!

Expert Tips for Blueberry Cheesecake Protein Bites

  • Chill Time Matters: Be patient with the chilling time; allowing at least two hours will help the bites firm up properly for the best texture.
  • Avoid Overmixing: Blend the cheesecake filling just until smooth. Overmixing can lead to a dense texture, so keep it light and fluffy!
  • Even Crust Pressing: Use the bottom of a small glass to press the crust evenly into the pan; this ensures a sturdy base for your delicious Blueberry Cheesecake Protein Bites.
  • Fresh vs. Frozen: Although frozen blueberries work perfectly, consider using fresh blueberries for a brighter flavor in your swirl—each option provides a different taste experience!
  • Customize to Taste: Don't hesitate to adjust the powdered sweetener to your preference; everyone's sweetness sensitivity varies, and your bites should reflect your taste!

Make Ahead Options

These Blueberry Cheesecake Protein Bites are perfect for meal prep enthusiasts! You can prepare the blueberry swirl and crust up to 24 hours in advance. Simply make the blueberry mixture and let it cool before transferring it to an airtight container in the refrigerator. For the crust, press the mixture into the baking dish and store it wrapped in plastic. When you're ready to complete the recipe, blend the cheesecake filling, assemble, and refrigerate for at least 2-3 hours until set. This prep-ahead strategy not only saves you time but also ensures your bites are just as delicious and refreshing when you’re ready to indulge!

How to Store and Freeze Blueberry Cheesecake Protein Bites

Fridge: Store your Blueberry Cheesecake Protein Bites in an airtight container for up to 5-7 days. They make a perfect grab-and-go snack!

Freezer: For longer preservation, place the bites in a single layer on a baking sheet, freeze until solid, then transfer to a freezer-safe bag or container. They'll last for about 1 month.

Reheating: Enjoy them cold straight from the fridge or freezer for a refreshing treat. If desired, let them sit at room temperature for a few minutes before serving.

Wrapping: For optimal freshness, wrap individual bites in parchment paper before freezing to prevent sticking and maintain their delightful texture.

Blueberry Cheesecake Protein Bites Recipe FAQs

What’s the best way to select blueberries for this recipe?
Absolutely! When choosing blueberries, look for those that are firm, plump, and deep blue in color. Avoid any with dark spots or wrinkles; these can indicate overripeness. Fresh blueberries will provide a brighter flavor, while frozen ones are convenient and just as nutritious.

How should I store the Blueberry Cheesecake Protein Bites?
Store your Blueberry Cheesecake Protein Bites in an airtight container in the refrigerator for up to 5-7 days. They make for a perfect on-the-go snack. Just remember to keep them chilled to maintain their creamy texture!

Can I freeze Blueberry Cheesecake Protein Bites? How?
Very! To freeze, place the bites in a single layer on a baking sheet and freeze them for about 1-2 hours until solid. Once firm, transfer them to a freezer-safe bag or container. They can be frozen for up to 1 month. For best results, wrap individual bites in parchment paper before freezing to prevent them from sticking together.

What should I do if my cheesecake filling is too runny?
If you find your cheesecake filling is too runny, it may be due to overmixing or using too much liquid. To fix it, try adding a bit more protein powder or a small amount of extra cream cheese to thicken it. Blend gently to maintain a light and airy texture—this will help in achieving that signature creaminess!

Are these protein bites safe for people with nut allergies?
Great question! These Blueberry Cheesecake Protein Bites are not nut-free due to almond flour. For a nut-free version, simply substitute almond flour with sunflower seed flour or a gluten-free all-purpose flour blend. Ensure the labeled ingredients, like dairy-free yogurt or cream cheese, are also nut-free!

Can I make these bites vegan?
Yes! To make the Blueberry Cheesecake Protein Bites vegan, substitute the light cream cheese with dairy-free cream cheese and the Greek yogurt with a plant-based yogurt. Additionally, choose a plant-based protein powder and confirm that your sweetener is vegan-friendly. This way, you can enjoy all the delicious flavors while adhering to a vegan diet!

Blueberry Cheesecake Protein Bites

Blueberry Cheesecake Protein Bites for Guilt-Free Indulgence

Delicious Blueberry Cheesecake Protein Bites combine indulgence and nutrition for a guilt-free snack.
Print Recipe Pin Recipe
Prep Time 25 minutes mins
Chilling Time 2 hours hrs
Total Time 2 hours hrs 25 minutes mins
Servings: 12 bites
Course: Snacks
Calories: 120
Ingredients Equipment Method Nutrition Notes

Ingredients
  

For the Blueberry Swirl
  • 2 cups frozen blueberries fresh blueberries can be used as an alternative
  • 2 tablespoons water
For the Crust
  • 1 cup rolled oats or certified gluten-free oats
  • 1/2 cup almond flour or all-purpose flour
  • 1/4 cup maple syrup or agave syrup
  • 1/4 cup coconut oil melted, or butter
  • 2 tablespoons chia seeds for thickening
For the Cheesecake Filling
  • 8 oz light cream cheese or plant-based cream cheese
  • 1 scoop vanilla protein powder plant-based or whey
  • 1 cup plain non-fat Greek yogurt or dairy-free yogurt
  • 1/4 cup powdered sweetener like erythritol or stevia
  • 1 teaspoon vanilla extract preferably pure
  • 2 tablespoons fresh lemon juice for brightness

Equipment

  • Medium saucepan
  • Mixing Bowl
  • Blender or food processor
  • Spatula
  • Baking Dish

Method
 

Directions
  1. In a medium saucepan over medium heat, add the frozen blueberries and water. Cook for about 5 minutes until softened, then mash into a smooth puree, mixing in chia seeds and sweetener. Cool completely.
  2. In a mixing bowl, combine rolled oats, almond flour, maple syrup, melted coconut oil, and a pinch of salt. Mix until crumbly, then press into an 8x8 baking dish lined with parchment. Freeze for 10-15 minutes to firm up.
  3. In a blender, combine cream cheese, vanilla protein powder, Greek yogurt, sweetener, vanilla extract, and lemon juice. Blend until smooth and creamy.
  4. Remove the crust from the freezer. Spread cheesecake filling evenly over it. Drop spoonfuls of blueberry swirl on top and gently swirl to create a marbled effect.
  5. Cover with plastic wrap and refrigerate for at least 2-3 hours until set. Cut into squares or bars and serve cold.

Nutrition

Serving: 1biteCalories: 120kcalCarbohydrates: 12gProtein: 5gFat: 7gSaturated Fat: 3gPolyunsaturated Fat: 1gMonounsaturated Fat: 4gCholesterol: 20mgSodium: 50mgPotassium: 150mgFiber: 3gSugar: 5gVitamin A: 10IUVitamin C: 5mgCalcium: 50mgIron: 1mg

Notes

Customize sweetness and flavors according to your preferences. Great for meal prep and storing!

Tried this recipe?

Let us know how it was!

Frozen Yogurt Berry Bites for a Guilt-Free Treat

April 19, 2026 by Grace Snow Leave a Comment

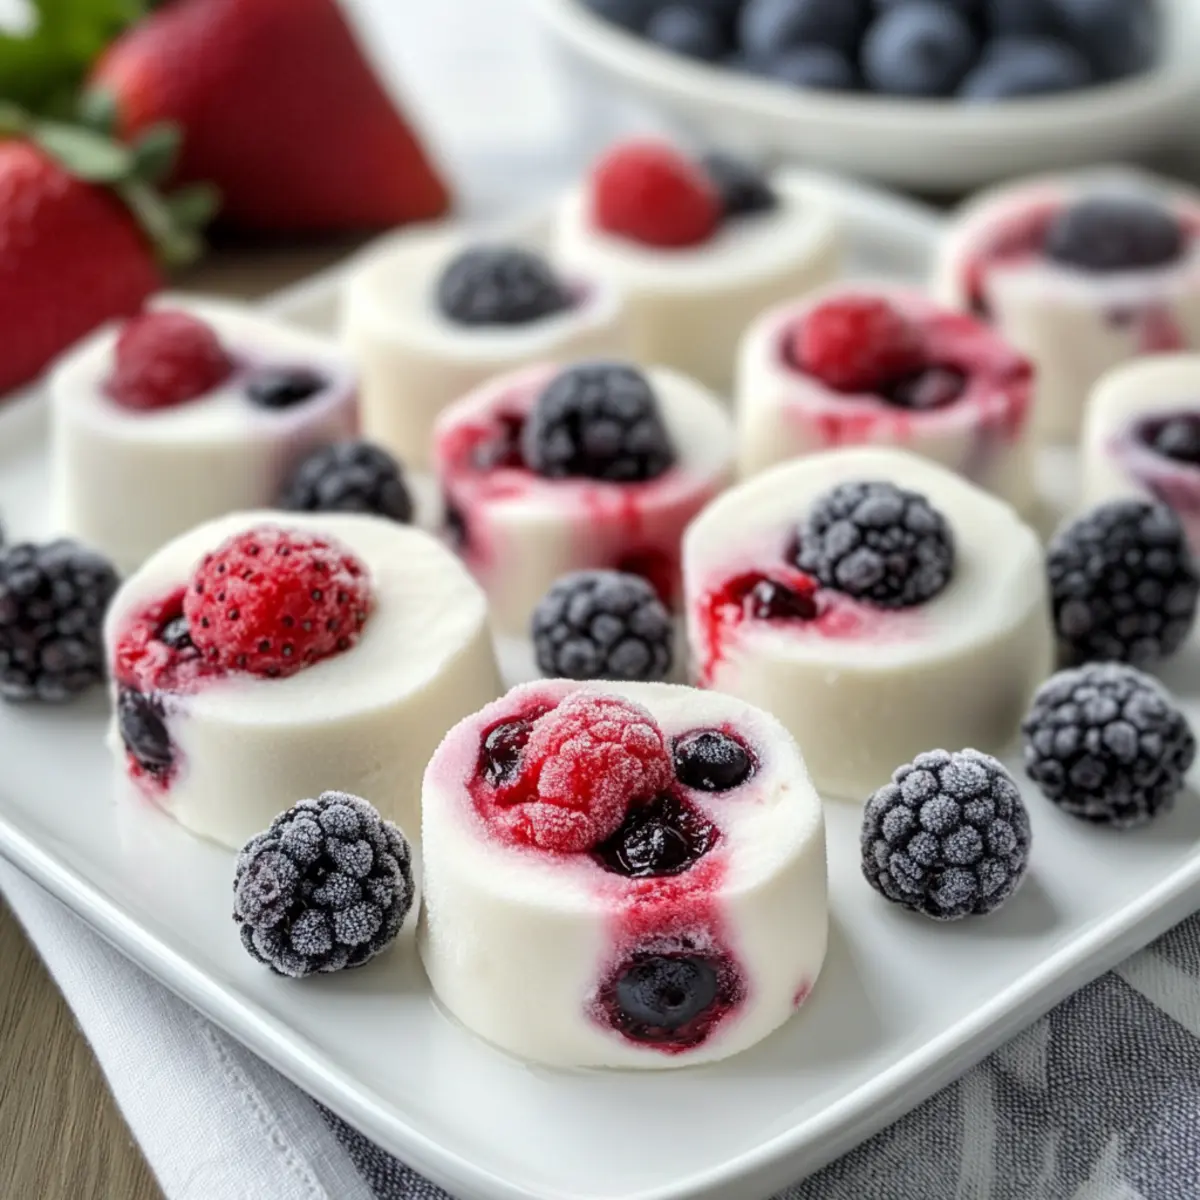
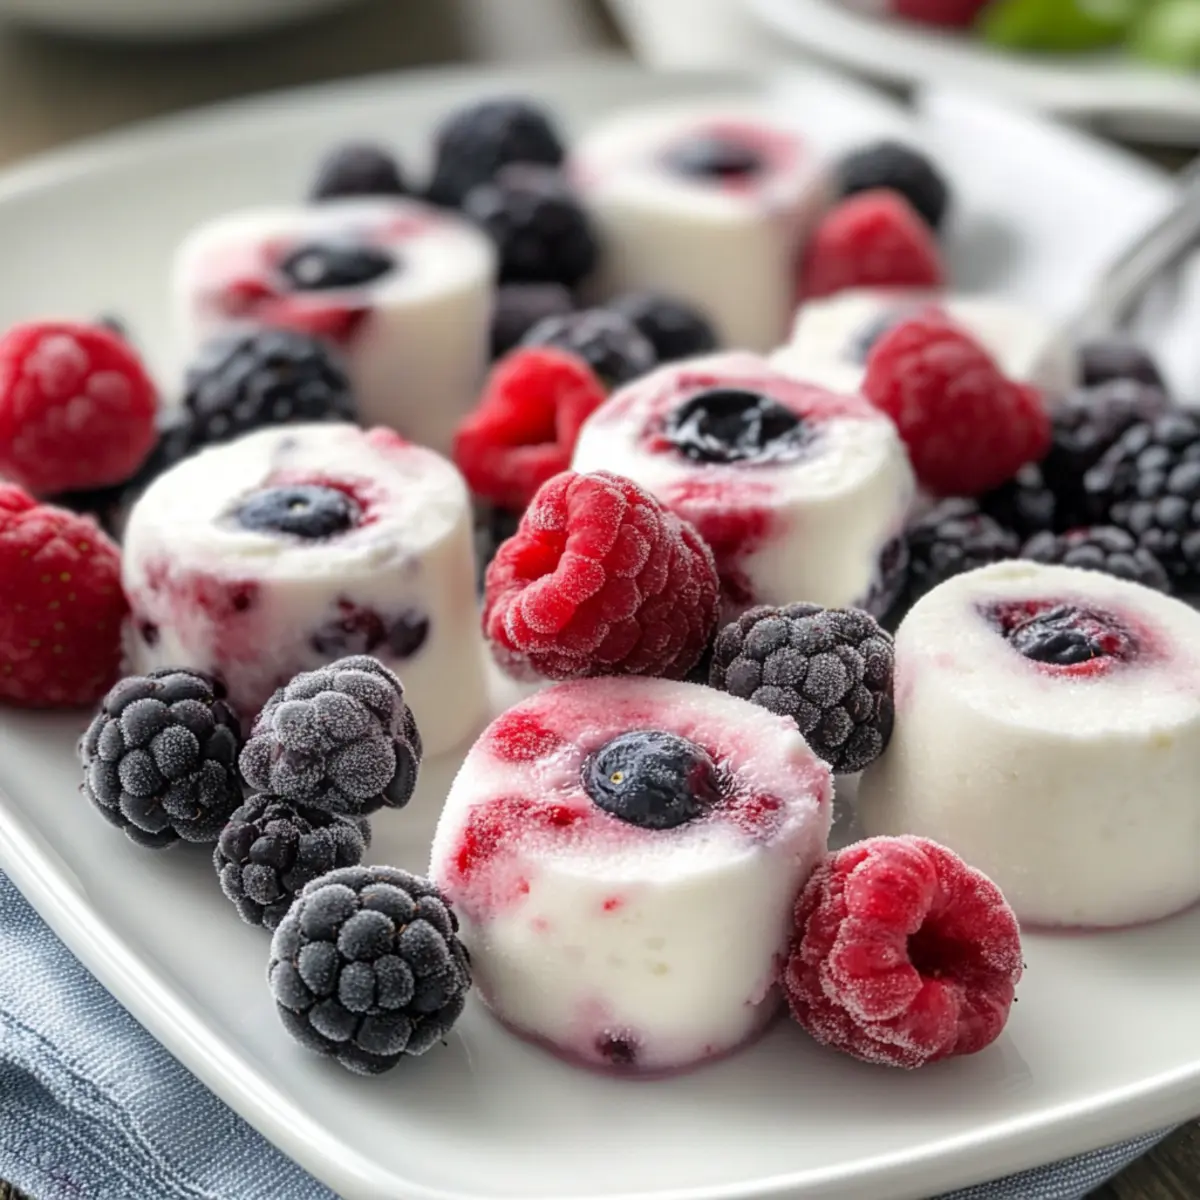
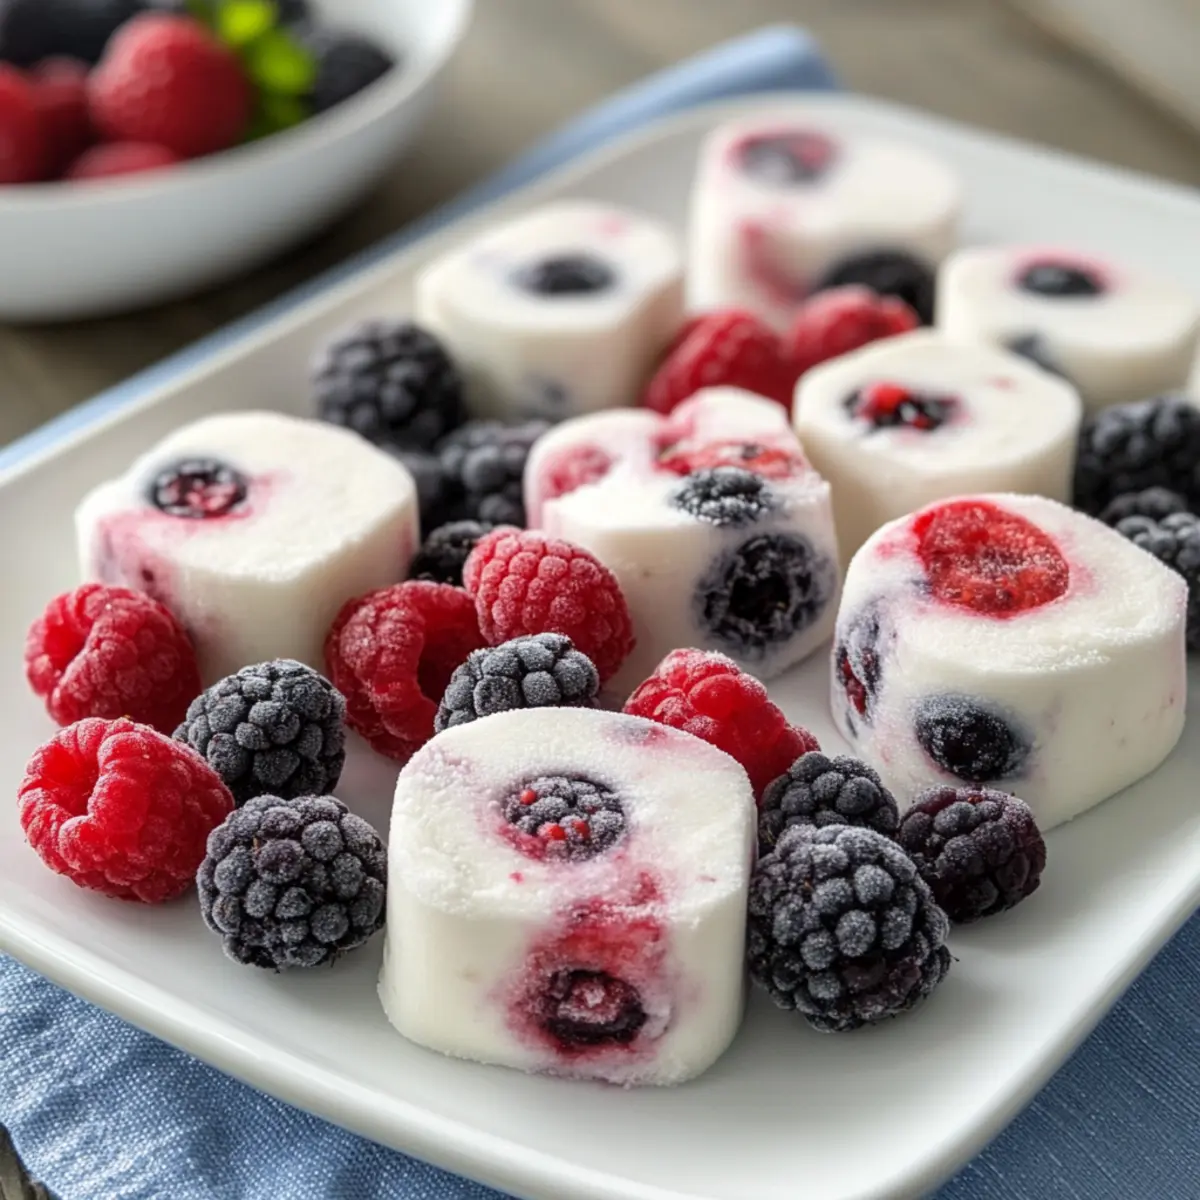
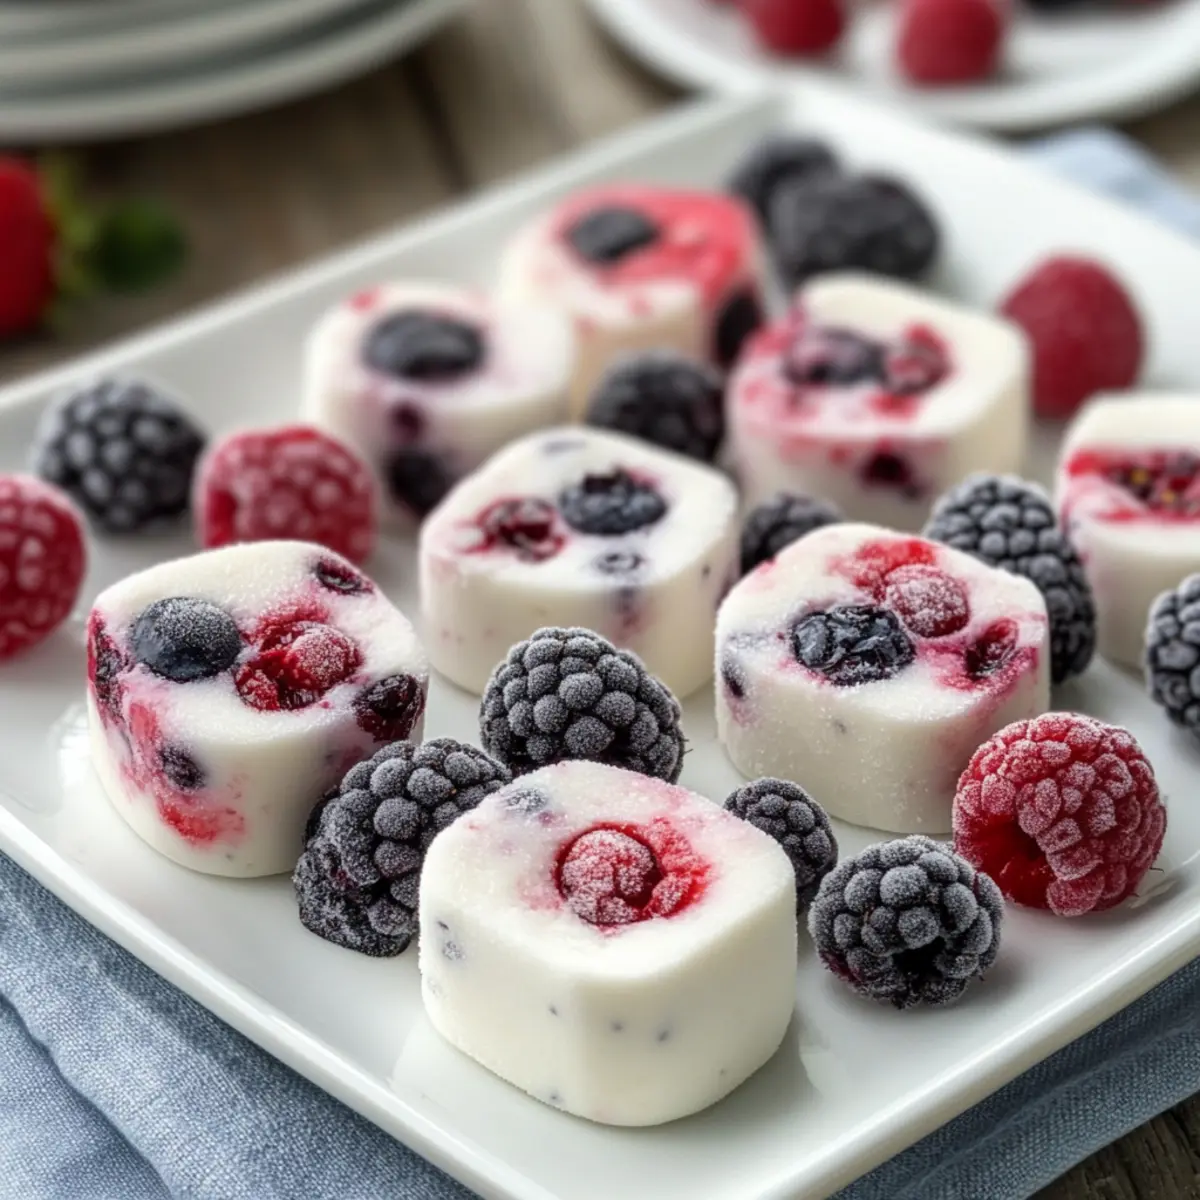
Heatwave season always seems to sneak up on me, that first sultry afternoon turning my kitchen into an oven. On days like those, I find myself desperately craving something cool and satisfying. Enter my No-Bake Frozen Yogurt Berry Bites, the antidote to summer heat! These delightful snacks combine the creamy goodness of Greek yogurt with a colorful medley of fresh berries, transforming a simple treat into a nutritious powerhouse that’s perfect for every occasion. Not only are they a no-fuss, guilt-free indulgence, but they are also customizable—mix in whatever fruit or sweetener strikes your fancy. Whether you're replenishing after a workout or need a quick pick-me-up for the kids, these frozen bites check all the boxes. Ready to dive into this easy and refreshing recipe that will keep your taste buds tingling? Let’s get started!

Why are Frozen Yogurt Berry Bites a Must-Try?

Cool, Delicious Bliss: Perfect for hot summer days, these bites are a refreshing treat that won’t weigh you down.
Healthy Indulgence: Packed with protein from Greek yogurt and antioxidants from mixed berries, they offer a guilt-free way to satisfy sweet cravings.
Customizable Flavors: Feel free to swap in your favorite fruits or sweeteners—each batch can be uniquely yours!
Easy Preparation: With no baking required, this fun recipe can be made in minutes, making it a no-fuss snack option. For time-strapped weeks, check out my Blackberry Crisp Amp for another quick dessert solution.
Crowd-Pleasing Snack: These bites are an instant hit at gatherings, and kids love them too! You can effortlessly prep a large batch, ensuring there’s plenty for everyone.

Dive into these delightful bites and embrace the joy of homemade, healthy snacking!

Frozen Yogurt Berry Bites Ingredients

• Create your own delightful treats with these essential ingredients!

For the Base

  • Greek Yogurt – Use thick Greek yogurt for the best creamy texture and shape after freezing.
  • Honey/Maple Syrup – Sweeten to taste with honey or maple syrup; substitute with agave syrup for a vegan option.

For the Berries

  • Mixed Berries (fresh or frozen) – A colorful mix of berries like strawberries, blueberries, and raspberries adds natural sweetness and antioxidants to your Frozen Yogurt Berry Bites!

Optional Additions

  • Granola – Add granola for an extra crunch; mix in before freezing for delightful texture.
  • Nut Butter – Incorporate a tablespoon of nut butter for a rich, creamy flavor twist.

Feel free to get creative with these ingredients and customize your frozen yogurt bites to perfection!

Step‑by‑Step Instructions for Frozen Yogurt Berry Bites

Step 1: Prep the Mixture
In a large mixing bowl, combine 2 cups of thick Greek yogurt with 2-4 tablespoons of honey or maple syrup, depending on your sweetness preference. Mix until the yogurt is completely smooth and creamy, ensuring there are no lumps. You'll want to see a luscious, airy texture that's ready to hold the berries beautifully.

Step 2: Add Berries
Gently fold in 1 to 2 cups of your favorite mixed berries—such as strawberries, blueberries, and raspberries—into the yogurt mixture. Be careful not to over-mix, as you want the berries to retain their shape and color. As the vibrant berries get intertwined, the mixture should become a colorful delight, bursting with flavor in every spoonful.

Step 3: Mold the Bites
Take your mini muffin cups or an ice cube tray and carefully scoop the berry-yogurt mixture into each mold. Fill them evenly, smoothing the tops with a spatula for a neat presentation. If using a tray, spread the mixture evenly, ensuring it’s approximately half an inch thick, ready to be sliced once frozen into perfectly sized bites.

Step 4: Freeze
Place the filled molds into the freezer and let them chill for a minimum of 2 hours, or until they are completely solid. The bites should feel firm to the touch when they are ready. This freezing process is crucial to create the perfect texture for your Frozen Yogurt Berry Bites, turning them into delightful, cool snacks.

Step 5: Serve
Once fully frozen, remove the bites from the molds carefully. You may need to twist or gently run a knife around the edges for easy release. Arrange the Frozen Yogurt Berry Bites on a serving platter and enjoy this refreshing treat as a healthy snack or dessert any time you crave a cool indulgence.

Expert Tips for Frozen Yogurt Berry Bites

  • Yogurt Consistency: Use thick Greek yogurt to prevent the bites from becoming too icy or falling apart after freezing.

  • Berry Choices: Choose a combination of berries for varied flavors; avoid over-mixing to keep beautiful berry shapes.

  • Sweetness Adjustment: Taste the yogurt mixture before freezing. Adjust sweetness with honey or maple syrup to suit your palate.

  • Mix-In Ideas: For added texture, incorporate granola or nuts before freezing. It provides a delicious crunch in every bite!

  • Freezing Time: Allow the bites to freeze for at least 2 hours to achieve a firm texture—rushing this step can lead to a mushy result.

Make Ahead Options

These Frozen Yogurt Berry Bites are a fantastic option for busy home cooks looking to save time during the week! You can prepare the entire mixture and mold it up to 24 hours in advance. Mix 2 cups of Greek yogurt with 2-4 tablespoons of honey or maple syrup, gently fold in your berries, and pour the mix into mini muffin cups. To maintain their creamy texture, ensure the yogurt is thick and freeze them immediately. When you're ready to enjoy, simply pop them out of the molds and let them sit for a few minutes to soften slightly—this way, you'll relish that perfect bite, all while keeping your schedule hassle-free!

Frozen Yogurt Berry Bites Variations

Feel free to get creative with these delightful bites and make them your own!

  • Fruit Swap: Replace mixed berries with sliced bananas or diced mango for a tropical twist. Each fruit brings its own unique flavor, turning the bites into something new and exciting.
  • Nutty Addition: Add a tablespoon of your favorite nut butter for a rich, creamy finish that complements the tartness of the berries. It’s a luscious layer, perfect for those craving something a bit indulgent.
  • Granola Crunch: Mix in a handful of granola for added texture and a delightful crunchy contrast to the creamy yogurt—perfect for a fun bite! A sprinkle of granola can make each snack even more satisfying.
  • Flavor Boost: Add a splash of vanilla or a pinch of cinnamon to the yogurt mixture to enhance the flavor profile, creating a warm undertone that pairs beautifully with fresh fruit. Just a little can elevate the overall taste!
  • Dairy-Free Version: Use coconut yogurt instead of Greek yogurt for a dairy-free alternative, ensuring you don’t miss out on the creaminess. This swap caters to different dietary needs while maintaining that coveted texture.
  • Berry Choices: Experiment with just one type of berry, like all blueberries for a burst of blueberry goodness, or use blackberries for a slightly tart twist. Simplifying the mix can provide a strong, singular flavor experience.
  • Chocolate Drizzle: Drizzle melted dark chocolate over the frozen bites just before serving for a sweet finish that adds a touch of decadence. It’s an easy way to jazz up the presentation!
  • Herbal Infusion: Add finely chopped fresh mint or basil to the berry mixture for a refreshing herbal kick that surprises your taste buds—an unexpected and delightful twist!

By mixing and matching these options, you can create a new version of these Frozen Yogurt Berry Bites every time you make them, so they never get boring!

How to Store and Freeze Frozen Yogurt Berry Bites

Fridge: Store any leftover Frozen Yogurt Berry Bites in an airtight container in the fridge for up to 3 days, but they are best enjoyed frozen for a longer-lasting treat.

Freezer: Keep your Frozen Yogurt Berry Bites in an airtight container or freezer bag in the freezer for up to 1 month. This ensures they maintain their texture and flavor.

Thawing: To enjoy, simply take out the desired number of bites and let them thaw at room temperature for about 10 minutes before serving, or pop them into your mouth straight from the freezer for an icy burst!

Reheating: There’s no need to reheat these bites; they are meant to be enjoyed straight from the freezer for a refreshing snack!

What to Serve with Frozen Yogurt Berry Bites?

These delightful bites are not just a treat on their own; they inspire a whole meal filled with refreshing flavors!

  • Fresh Fruit Salad: A medley of seasonal fruits adds brightness and variety, complementing the creaminess of the yogurt bites. Fresh fruit always enhances a warm day.

  • Granola Parfait: Layer yogurt, your favorite granola, and some extra berries in a glass for a visually stunning breakfast or snack. The crunch pairs beautifully with creamy textures.

  • Coconut Water: This hydrating beverage provides a tropical twist that aligns perfectly with the fruity yogurt bites, keeping your palate refreshed and light.

  • Chocolate-Dipped Strawberries: Add a touch of decadent sweetness to balance the tartness of the berries in the bites. The contrast of flavors creates a beautiful harmony!

  • Chilled Herbal Tea: Opt for a light mint or hibiscus tea served iced for a soothing complement to your snacks. The floral notes will elevate the fruity flavors.

  • Nut Butter Dip: Create a simple dip by mixing your favorite nut butter with a splash of maple syrup. This adds a creamy, nutty contrast, enriching each bite.

  • Frozen Banana Bites: For those extra chilly cravings, freeze banana coins and serve alongside the yogurt bites. The creaminess of bananas pairs nicely and keeps the theme consistent.

  • Yogurt-Based Smoothie: Blend up a rich smoothie with spinach, banana, and a splash of yogurt for a wholesome drink option that complements sweet or savory snacks.

  • Vanilla Pudding: The creamy sweetness of vanilla pudding makes for an exquisite pairing, creating a festive dessert spread that everyone will adore!

Frozen Yogurt Berry Bites Recipe FAQs

How do I choose ripe berries for my Frozen Yogurt Berry Bites?
Absolutely! When selecting fresh berries, look for vibrant colors and firm textures. Strawberries should be bright red with green tops, blueberries should have a good bloom (that dusty layer on the surface), and raspberries should be plump and intact. Avoid berries with dark spots or mold, as they affect both taste and texture.

How should I store my Frozen Yogurt Berry Bites?
These delightful bites can be stored in an airtight container in the freezer for up to 1 month. Just make sure to separate layers with parchment paper to prevent sticking, ensuring they remain easy to pop out when you’re ready for a refreshing snack!

Can I freeze my Frozen Yogurt Berry Bites for longer than a month?
While it's best to consume these bites within 1 month for optimal flavor and texture, they can technically be frozen for up to 3 months. Keep them in a well-sealed container or freezer bag to prevent freezer burn, but I recommend enjoying them fresh for the best experience!

What should I do if my yogurt mixture is too watery?
If you find your mixture too runny, this may be due to using low-fat yogurt or excess liquid from thawed berries. To fix this, try straining the yogurt using a cheesecloth or a fine sieve to remove excess moisture. Alternatively, mix in a small amount of cornstarch or increase the ratio of yogurt to help achieve the right thickness.

Are Frozen Yogurt Berry Bites suitable for people with food allergies?
Indeed! These Frozen Yogurt Berry Bites can be easily tailored to accommodate various dietary restrictions. Use lactose-free yogurt or coconut yogurt to make them dairy-free. Always check berry labels to ensure no cross-contamination with allergens, and if you're using a sweetener, opt for options like agave syrup to keep it vegan-friendly.

How long does it take for the bites to freeze solid?
For best results, freeze your bites for a minimum of 2 hours, but if you want them rock-solid, leave them in for 4 hours. Once they feel firm, they’re ready to be enjoyed! Just remember, if you need to thaw them for serving, let them sit at room temperature for about 10 minutes for a delightful, camplike treat!

Frozen Yogurt Berry Bites

Frozen Yogurt Berry Bites for a Guilt-Free Treat

Frozen Yogurt Berry Bites are a cool and satisfying snack, perfect for summer. This guilt-free treat combines Greek yogurt and mixed berries.
Print Recipe Pin Recipe
Prep Time 10 minutes mins
Freezing Time 2 hours hrs
Total Time 2 hours hrs 10 minutes mins
Servings: 12 bites
Course: Snacks
Cuisine: American
Calories: 50
Ingredients Equipment Method Nutrition Notes

Ingredients
  

For the Base
  • 2 cups Greek Yogurt Use thick Greek yogurt for the best creamy texture.
  • 2-4 tablespoons Honey or Maple Syrup Sweeten to taste, substitute with agave syrup for vegan option.
For the Berries
  • 1-2 cups Mixed Berries A mix of strawberries, blueberries, and raspberries adds flavor and nutrients.
Optional Additions
  • 1 cup Granola Add for extra crunch.
  • 1 tablespoon Nut Butter For a creamy flavor twist.

Equipment

  • Mixing Bowl
  • Mini Muffin Cups
  • Spatula
  • freezer

Method
 

Step-by-Step Instructions
  1. In a large mixing bowl, combine Greek yogurt with honey or maple syrup. Mix until smooth and creamy.
  2. Gently fold in the mixed berries into the yogurt mixture.
  3. Scoop the mixture into mini muffin cups or an ice cube tray.
  4. Freeze the molds for a minimum of 2 hours or until solid.
  5. Remove the bites from molds and serve. Enjoy!

Nutrition

Serving: 1biteCalories: 50kcalCarbohydrates: 10gProtein: 2gFat: 1gCholesterol: 5mgSodium: 20mgPotassium: 150mgFiber: 1gSugar: 6gVitamin C: 10mgCalcium: 2mgIron: 1mg

Notes

These bites can be customized with different fruits and sweeteners. Store them in an airtight container for up to 3 days in the fridge or 1 month in the freezer.

Tried this recipe?

Let us know how it was!

Delicious Protein Banana Pudding Yogurt Parfait to Savor

April 18, 2026 by Grace Snow Leave a Comment

As I stood in my kitchen, a ripe banana caught my eye, vibrantly speckled and perfectly sweet—a silent reminder of childhood indulgence. That moment sparked the creation of my Creamy Protein Banana Pudding Yogurt Parfait, a delightful twist on traditional flavors that combines nostalgia with the benefits of a healthy snack. This easy, no-bake recipe transforms simple ingredients like Greek yogurt and vanilla protein powder into a high-protein treat that you can customize to suit your taste. Whether you're enjoying it as a quick breakfast or a satisfying midday snack, it’s sure to please both the health-conscious and those craving comfort. Plus, with enticing variations—think Chocolate Peanut Butter or Tropical Escape—there’s an option for everyone. Ready to dive into this creamy delight and explore the delicious possibilities?

Why is this parfait a must-try?

Deliciously Versatile: With endless flavor variations like Chocolate Peanut Butter and Tropical Escape, you can customize this parfait to match your cravings and dietary preferences.

High-Protein Goodness: The inclusion of Greek yogurt and protein powder not only satisfies your sweet tooth but also supports your energy and fitness goals—a perfect post-workout snack!

Quick and Easy: This no-bake recipe takes just minutes to prepare, making it an ideal option for busy mornings or last-minute gatherings.

Crowd-Pleasing Delight: The layered textures of creamy yogurt, sweet bananas, and crunchy cookies provide a delightful contrast that will impress family and friends.

Make Ahead Convenience: Prep in advance and store in the refrigerator for up to 24 hours, ensuring you have a delicious treat ready whenever the cravings strike!

Try serving it alongside a Breakfast Banana Split or complement with a refreshing Lemon Ricotta Protein dish for a balanced meal!

Protein Banana Pudding Yogurt Parfait Ingredients

• Prepare to create a delicious Protein Banana Pudding Yogurt Parfait with these key components:

For the Parfait Base

  • Non-fat Plain Greek Yogurt – Provides creaminess and a protein boost; substitute with thick plant-based yogurt for a dairy-free option.
  • Vanilla Protein Powder – Increases protein content; can be omitted if preferred, just adjust sweetness with syrup.
  • Ripe Banana – Adds natural sweetness; make sure it’s fully ripe for the best flavor.

For the Crunch

  • Vanilla Wafer Cookies – Brings delightful crunch and flavor; opt for gluten-free cookies to keep it suitable for those with dietary restrictions.

Optional Enhancements

  • Vanilla Bean Powder – Boosts the vanilla flavor profile; choose alcohol-free for a purer taste.
  • Honey or Maple Syrup – Sweetens the parfait further; adjust based on taste preference or omit entirely.

Embrace the joy of creating your very own Protein Banana Pudding Yogurt Parfait, perfect for any time of day!

Step‑by‑Step Instructions for Protein Banana Pudding Yogurt Parfait

Step 1: Mash Banana
Begin by peeling a fully ripe banana and placing it in a mixing bowl. Using a fork, mash the banana until it reaches a smooth consistency, which should take about 1-2 minutes. Aim for a creamy texture without any lumps, as this will create a lovely base for your Protein Banana Pudding Yogurt Parfait.

Step 2: Combine Ingredients
Next, add 1 cup of non-fat plain Greek yogurt to the mashed banana, ensuring it blends well. Whisk the mixture vigorously for about 60 seconds until smooth and creamy. Then, incorporate 1 scoop of vanilla protein powder and optional vanilla bean powder, whisking until everything is fully blended and homogeneous, creating a delicious, protein-packed base.

Step 3: Sweeten to Taste
Taste your yogurt mixture to determine the sweetness level. If desired, add honey or maple syrup to enhance the flavor. Mix well for another 30 seconds, ensuring the sweetener is fully incorporated. This step is crucial for achieving the perfect balance of sweetness in your Protein Banana Pudding Yogurt Parfait.

Step 4: Layering
Now it’s time to assemble your parfait! In a clear glass or jar, start layering by spooning in 1/4 of the yogurt mixture at the bottom. Follow this with a layer of sliced bananas and sprinkle crushed vanilla wafer cookies on top. Repeat these layers until all ingredients are used, finishing with a layer of the yogurt mixture on top for a beautiful presentation.

Step 5: Chill
Place your assembled Protein Banana Pudding Yogurt Parfait in the refrigerator for at least 10 minutes. This chilling step allows the flavors to meld together and gives the parfait a refreshing coolness. If you prefer, let it chill longer for enhanced flavor—just be sure to cover it to maintain freshness.

Step 6: Serve and Enjoy
Once chilled, your luxurious Protein Banana Pudding Yogurt Parfait is ready to be savored. Serve immediately for the best texture, and consider keeping the wafer cookies separate until serving to maintain their crunch. Enjoy this delightful treat as a nutritious snack or satisfying breakfast, knowing that it's a healthy option the whole family will love!

How to Store and Freeze Protein Banana Pudding Yogurt Parfait

Fridge: Store your assembled Protein Banana Pudding Yogurt Parfait in the refrigerator for up to 24 hours to maintain its freshness and flavor.

Freezer: If you need to store it longer, layer the ingredients separately in airtight containers—freeze bananas, yogurt mixture, and cookies. Use within 1 month for best quality.

Reheating: While this parfait is best served cold, if you’ve frozen the yogurt mixture, allow it to thaw overnight in the fridge before enjoying.

Layering Tip: Keep the crushed vanilla wafer cookies stored separately until serving to ensure they remain crunchy and don't get soggy in the yogurt.

What to Serve with Protein Banana Pudding Yogurt Parfait

As you prepare to indulge in this creamy treat, consider these delightful pairings to elevate your meal experience.

  • Fresh Berries: Juicy strawberries or blueberries add a vibrant touch and complement the sweetness of the parfait beautifully. Their juicy burst enhances every spoonful, making each bite a refreshing delight.

  • Granola Crunch: A sprinkle of crunchy granola on top provides additional texture and a nutty flavor to balance the creaminess. It brings a satisfying crunch that contrasts perfectly with the smooth yogurt layers.

  • Nut Butter Swirl: Drizzling almond or peanut butter on top enriches the flavors while adding healthy fats and protein. This simple addition makes the parfait even more indulgent and satiating.

  • Smoothie Bowl: Pair with a refreshing smoothie bowl, packed with your favorite fruits. The chilled sweetness of the smoothie complements the richness of the parfait for a harmonious breakfast.

  • Coconut Chips: For a tropical flair, sprinkle toasted coconut flakes over the top. They add a delightful crunch and an enticing hint of coconut that pairs wonderfully with the bananas.

  • Iced Herbal Tea: A glass of iced herbal tea, lightly sweetened, pairs perfectly with the parfait as a refreshing drink. The soothing flavors of herbal tea enhance the sweet notes of the parfait without overwhelming them.

  • Dark Chocolate Shavings: Add a luscious touch of dark chocolate shavings for a decadent finish that elevates the dish to dessert status. The rich chocolate flavors blend beautifully with the banana, creating an irresistible treat.

  • Cinnamon Apple Slices: Serve alongside thinly sliced apples dusted with cinnamon for a nutritious crunch that complements the creamy parfait. The sweet and spicy notes of the apples enhance the overall experience while adding freshness.

Make Ahead Options

These Protein Banana Pudding Yogurt Parfaits are perfection for meal prep! You can prepare the yogurt mixture (Greek yogurt, mashed banana, and protein powder) and refrigerate it for up to 24 hours in advance, allowing the flavors to meld beautifully. To maintain quality, keep the vanilla wafer cookies separate until just before serving; this ensures they stay crunchy. When you're ready to enjoy, simply layer the yogurt mixture with sliced bananas and crushed cookies in a glass or jar, then chill for an additional 10 minutes if desired. This no-bake recipe makes it easy to have a nutritious, delicious treat ready for busy mornings or as a satisfyingly sweet snack.

Expert Tips for Protein Banana Pudding Yogurt Parfait

  • Smooth Mixture: Ensure you're whisking the yogurt and mashed banana for a full 60 seconds to achieve a perfectly smooth texture without lumps for your parfait.

  • Layer Smartly: For the best presentation, assemble the layers just before serving. This keeps the vanilla wafer cookies crunchy and enhances the overall experience of the Protein Banana Pudding Yogurt Parfait.

  • Seasonal Swaps: Experiment with different seasonal fruits in place of bananas. Sliced strawberries or peaches work wonderfully, adding new flavors while keeping the recipe high-protein.

  • Check for Ripeness: Choose bananas that are perfectly ripe, as they lend natural sweetness and creaminess. A dull-yellow peel with brown spots is the sweet spot!

  • Adjust Consistency: If your mixture seems too thick, add a splash of milk or almond milk to reach your desired consistency without sacrificing flavor.

Protein Banana Pudding Yogurt Parfait Variations

Feel free to embrace your culinary creativity and personalize this recipe to elevate your taste buds!

  • Chocolate Peanut Butter: Stir in cocoa powder and powdered peanut butter, then use chocolate graham crackers for an indulgent crunch. The rich flavors meld beautifully, satisfying both chocolate and peanut butter cravings.

  • Tropical Escape: Opt for creamy coconut yogurt, folding in toasted coconut and diced dried mango. This variation transports you straight to a sunny beach with every delicious bite.

  • Berry Cheesecake: Swirl in a mixture of blended berries and substitute graham cracker crumbs for cookies. It captures the essence of cheesecake while keeping it light and protein-packed!

  • Apple Pie: For a comforting twist, add sautéed apples with a sprinkle of cinnamon into your yogurt base. Each layer combines warm spice and creamy texture, bringing the essence of fall into every spoonful.

  • Nutty Delight: Mix in crunchy almond or walnut pieces for added texture and nutrition. The nutty crunch complements the creamy parfait, making every bite a delightful experience.

  • Spicy Kick: Add a dash of cayenne pepper or cinnamon to your yogurt for an unexpected heat boost. A hint of spice can elevate the flavors, making it truly unique.

  • Coffee Infusion: Mix in brewed and cooled coffee for a delightful morning pick-me-up. This twist pairs perfectly with Greek yogurt and banana, creating a deliciously caffeinated treat.

  • Minty Fresh: Fold in crushed peppermint candies or fresh mint leaves for a refreshing twist. It provides a fantastic burst of flavor that enhances the creamy base.

Consider pairing your parfait with a delicious Chocolate Pudding Cake or starting your day with a delightful Breakfast Banana Split to create a nutritious and enjoyable meal!

Protein Banana Pudding Yogurt Parfait Recipe FAQs

What type of bananas should I use for the parfait?
Absolutely! For the best flavor and texture, choose bananas that are fully ripe. Look for ones that have a dull yellow peel with small brown spots—this indicates maximum sweetness and creaminess, which is essential for your Protein Banana Pudding Yogurt Parfait.

How should I store the parfait?
Great question! You can store your assembled Protein Banana Pudding Yogurt Parfait in the refrigerator for up to 24 hours. Just keep an eye on it to avoid sogginess; I recommend keeping the wafer cookies separate until you're ready to enjoy your parfait to keep them crunchy.

Can I freeze the parfait?
Yes, you can! For optimal results, I suggest freezing the ingredients separately. Place the yogurt mixture, sliced bananas, and crushed cookies in airtight containers. You can freeze these for up to 1 month. When you're ready to enjoy, allow the yogurt mixture to thaw in the fridge overnight and layer it fresh for a delicious treat!

What if my yogurt mixture is too thick?
If you find your yogurt mixture a bit too thick, don’t worry! Just add a splash of milk or almond milk to reach your desired creamy consistency. This will ensure that your Protein Banana Pudding Yogurt Parfait maintains its delightful texture while still being high in protein.

Are there any dietary considerations I should keep in mind?
Definitely! If you're making this parfait for guests or family members with dietary restrictions, be sure to check for allergies related to dairy, nuts, or gluten. You can make it dairy-free by substituting Greek yogurt with a plant-based yogurt and using gluten-free wafer cookies. Enjoy the flexibility of customizing this recipe to cater to everyone’s needs!

Protein Banana Pudding Yogurt Parfait

Delicious Protein Banana Pudding Yogurt Parfait to Savor

Delight in the creamy and high-protein Protein Banana Pudding Yogurt Parfait, a perfect blend of nostalgia and nutrition.
Print Recipe Pin Recipe
Prep Time 10 minutes mins
Chill Time 10 minutes mins
Total Time 20 minutes mins
Servings: 4 servings
Course: Snacks
Calories: 200
Ingredients Equipment Method Nutrition Notes

Ingredients
  

For the Parfait Base
  • 1 cup Non-fat Plain Greek Yogurt Substitute with thick plant-based yogurt for a dairy-free option.
  • 1 scoop Vanilla Protein Powder Can be omitted if preferred.
  • 1 medium Ripe Banana Make sure it’s fully ripe for the best flavor.
For the Crunch
  • 1 cup Vanilla Wafer Cookies Opt for gluten-free cookies for dietary restrictions.
Optional Enhancements
  • 1 teaspoon Vanilla Bean Powder Choose alcohol-free for a purer taste.
  • to taste Honey or Maple Syrup Adjust based on taste preference.

Equipment

  • Mixing Bowl
  • Fork
  • Whisk
  • clear glass or jar

Method
 

Step-by-Step Instructions
  1. Begin by peeling a fully ripe banana and placing it in a mixing bowl. Using a fork, mash the banana until it reaches a smooth consistency.
  2. Add 1 cup of non-fat plain Greek yogurt to the mashed banana and whisk vigorously for about 60 seconds until smooth.
  3. Incorporate 1 scoop of vanilla protein powder and optional vanilla bean powder, whisking until fully blended.
  4. Taste your yogurt mixture and add honey or maple syrup if desired, mixing well for another 30 seconds.
  5. Layer the parfait by spooning in 1/4 of the yogurt mixture at the bottom of a clear glass, then add sliced bananas and crushed vanilla wafer cookies. Repeat until all ingredients are used.
  6. Chill your parfait in the refrigerator for at least 10 minutes to allow flavors to meld.
  7. Serve immediately for the best texture and enjoy as a nutritious snack or satisfying breakfast.

Nutrition

Serving: 1servingCalories: 200kcalCarbohydrates: 30gProtein: 10gFat: 5gSaturated Fat: 1gPolyunsaturated Fat: 0.5gMonounsaturated Fat: 3gCholesterol: 5mgSodium: 100mgPotassium: 300mgFiber: 3gSugar: 10gVitamin A: 500IUVitamin C: 10mgCalcium: 150mgIron: 1mg

Notes

Keep the crushed vanilla wafer cookies stored separately until serving to ensure they remain crunchy.

Tried this recipe?

Let us know how it was!

Deliciously Healthy Frozen Strawberry Yogurt Clusters You’ll Love

April 15, 2026 by Grace Snow Leave a Comment

As the sun beams down and summer heat wraps around me, my cravings take a delicious turn towards something cool and refreshing. Enter the world of Frozen Strawberry Yogurt Clusters—a delightful treat that balances creamy Greek yogurt with the natural sweetness of ripe strawberries. Not only are these little morsels a breeze to whip up, but they also serve as a guilt-free snack, making them perfect for anyone looking to break away from fast food habits. Plus, they’re fully customizable, allowing you to switch up ingredients based on your mood or pantry stock. What’s your favorite fruit combo to elevate this tasty frozen treat?

Why Are These Clusters So Irresistible?

Healthier Alternative: These Frozen Strawberry Yogurt Clusters are a deliciously guilt-free way to satisfy your sweet tooth while steering clear of processed snacks.

Customizable Bliss: Tailor them to your taste—swap in your favorite fruits or add some crushed nuts for an exciting twist!

Quick & Easy: Whipping these up takes just a few minutes, making them perfect for lazy weekends or last-minute gatherings.

Crowd-Pleaser: Whether it's a summer party or family movie night, these bite-sized delights are sure to impress guests of all ages!

Stay Fresh: They last in the freezer for up to three months, providing you with a quick snack anytime you need a tasty pick-me-up.

Enjoy this treat on its own, or serve it alongside homemade snacks like Homemade Granola Bars for a wholesome spread!

Frozen Strawberry Yogurt Clusters Ingredients

For the Clusters

  • Fresh Strawberries – Choose ripe, organic strawberries for natural sweetness and vibrant flavor.
  • Greek Yogurt – Use plain Greek yogurt to keep it creamy and packed with protein without added sugars.
  • Honey (or maple syrup) – Acts as a natural sweetener; swap for maple syrup if you're aiming for a vegan option.
  • Lemon Juice – Fresh lemon juice brightens flavors and prevents strawberries from browning, keeping them fresh.
  • Vanilla Extract – Adds a touch of aromatic sweetness; opt for pure vanilla extract for the best flavor quality.

These Frozen Strawberry Yogurt Clusters are simple and fun to make, ensuring you have a deliciously healthy snack ready whenever the craving strikes!

Step‑by‑Step Instructions for Frozen Strawberry Yogurt Clusters

Step 1: Prepare the Strawberries
Begin by washing 1 pound of fresh strawberries under cool running water. After rinsing, carefully hull each strawberry, removing the leafy tops, and chop them into small pieces—aiming for uniformity. You’ll want vibrant, ripe strawberries for the best flavor, as they'll lend natural sweetness to your Frozen Strawberry Yogurt Clusters.

Step 2: Mix the Yogurt Base
In a medium mixing bowl, combine 2 cups of plain Greek yogurt, 2 tablespoons of honey (or maple syrup for a vegan option), the juice of 1 lemon, and 1 teaspoon of pure vanilla extract. Whisk the mixture together until it’s smooth and creamy, ensuring all ingredients are well incorporated. This will create the delicious base that envelops your strawberries perfectly.

Step 3: Fold in the Strawberries
Gently add the chopped strawberries into the yogurt mixture. Use a spatula to fold the strawberries into the yogurt carefully, making sure they are evenly coated without mashing them. This preserves the integrity of the strawberries and ensures that each bite of your Frozen Strawberry Yogurt Clusters is bursting with fruity flavor.

Step 4: Scoop the Mixture
Line a baking sheet with parchment paper for easy removal. Using a tablespoon or a small cookie scoop, portion out the yogurt and strawberry mixture onto the prepared baking sheet, spacing them about an inch apart. Aim for bite-sized dollops, ensuring they’re not too large so they freeze uniformly, creating delightful little clusters.

Step 5: Freeze the Clusters
Place the baking sheet in the freezer and let the clusters freeze for at least 2 hours, or until they are solid. This step is crucial as it locks in the yogurt’s creaminess and the strawberry’s juiciness, resulting in the perfect texture for your Frozen Strawberry Yogurt Clusters.

Step 6: Store for Later
Once the clusters are frozen solid, carefully transfer them into an airtight container. Layer parchment paper between clusters if desired to prevent sticking. Store them in the freezer, where they can stay fresh for up to three months, giving you a quick, healthy snack option whenever cravings hit!

Expert Tips for Frozen Strawberry Yogurt Clusters

  • Perfect Strawberries: Ensure strawberries are perfectly ripe for maximum sweetness; underripe ones can lead to sour clusters, ruining the flavor.

  • Gentle Mixing: Avoid over-mixing the strawberries with the yogurt. Lightly fold them in to prevent mushing while ensuring every piece is coated in the creamy goodness.

  • Freezing Time: Adhere to the recommended freezing time of at least 2 hours. Insufficient freezing can produce mushy clusters, affecting the texture of your Frozen Strawberry Yogurt Clusters.

  • Airtight Storage: Store your clusters in an airtight container or use parchment paper between layers to prevent sticking and maintain their delightful bite-sized shape.

  • Flavor Variations: Don't hesitate to get creative with flavors! Substitute strawberries with your favorite fruits or add nuts, making your Frozen Strawberry Yogurt Clusters a truly tailored treat.

What to Serve with Frozen Strawberry Yogurt Clusters?

Elevate your snacking experience by pairing these delightful clusters with complementary flavors and textures that round out a refreshing meal.

  • Crunchy Granola: Adds a satisfying crunch, making it perfect for a wholesome breakfast or a snack pairing for these clusters.

  • Fresh Mint Leaves: A sprinkle of mint adds a burst of freshness, enhancing the fruity flavors beautifully.

  • Greek Yogurt Parfait: Layer these clusters with extra Greek yogurt and berries for a delicious and nutritious parfait idea.

  • Nut Butter Drizzle: A warm drizzle of almond or peanut butter brings a creamy richness that contrasts perfectly with the cool clusters.

  • Chilled Sparkling Water: A refreshing, bubbly drink cleanses the palate perfectly and enhances the fruity experience of these clusters.

  • Light Fruit Salad: A medley of seasonal fruits adds colorful freshness and makes for a delightful side dish that enhances the yogurt clusters.

  • Dark Chocolate Squares: The rich, bittersweet flavor of dark chocolate complements the sweetness of the clusters, turning snack time into a decadent treat!

How to Store and Freeze Frozen Strawberry Yogurt Clusters

Fridge: Keep your clusters in an airtight container in the fridge for up to 3 days for a quick snack that’s still cool and refreshing.

Freezer: Store in an airtight container or a resealable bag for up to 3 months. Use parchment paper between layers to prevent sticking and keep their shape intact.

Thawing: When you're ready to enjoy, simply take out the desired amount and let them thaw at room temperature for about 10-15 minutes for the best texture.

Reheating: These clusters are best enjoyed directly from the freezer; avoid reheating as they may lose their delightful texture.

Frozen Strawberry Yogurt Clusters Variations

Feel free to put your own spin on these tasty Frozen Strawberry Yogurt Clusters, making them uniquely yours!

  • Berry Blend: Substitute strawberries with a mix of raspberries, blueberries, or blackberries for a colorful twist. Each berry brings its own burst of flavor to this refreshing treat.

  • Nutty Crunch: Roll frozen clusters in crushed almonds or walnuts before freezing for a delightful crunch. This adds a nutritious boost and an irresistible texture to each bite.

  • Chocolate Drizzle: Drizzle melted dark chocolate over the frozen clusters for a rich, indulgent touch. The combination of chocolate and yogurt is simply heavenly!

  • Coconut Delight: Mix in unsweetened shredded coconut into the yogurt before adding strawberries for a tropical vibe. This addition brings a lovely texture and exotic flavor to your snack.

  • Spice It Up: Add a pinch of cinnamon or a dash of cayenne pepper to the yogurt mixture for a warm flavor accent. This unexpected twist creates a delightful contrast that's sure to impress.

  • Vegan Version: For a completely plant-based option, use coconut yogurt instead of Greek yogurt and replace honey with maple syrup. Not only does this cater to vegan diets, but it also provides a delicious coconut flavor.

  • Creamy Avocado: Blend in half a ripe avocado into your yogurt mixture for a creamy texture and added health benefits. This twist gives your clusters a richness that’s both delightful and nutritious.

Remember, the sky's the limit when it comes to your clusters! Pair them with a side of Homemade Granola Bars for a wholesome snack or enjoy them alongside refreshing Fruit Smoothies for a delightful mid-day treat!

Make Ahead Options

These Frozen Strawberry Yogurt Clusters are an excellent choice for meal prep, making your snack time a breeze! You can prepare the yogurt mixture (Greek yogurt, honey, lemon juice, and vanilla extract) up to 24 hours in advance and store it in the refrigerator. Additionally, feel free to chop the strawberries up to 3 days ahead—just remember to refrigerate them to keep them fresh and bright. When you’re ready to assemble, simply fold the strawberries into the yogurt mixture, scoop onto a baking sheet, and freeze until solid (about 2 hours). This way, you'll always have a delicious, healthy snack waiting for you, with minimal effort during your busy week!

Frozen Strawberry Yogurt Clusters Recipe FAQs

How do I choose the best strawberries?
Absolutely! When selecting strawberries, look for those that are rich red in color, with no dark spots or bruising. Ripe strawberries will be fragrant and firm to the touch, ensuring the best flavor for your Frozen Strawberry Yogurt Clusters. Organic strawberries are also a great choice as they are grown without harmful pesticides.

How long can I store the clusters in the freezer?
Very! Your Frozen Strawberry Yogurt Clusters can be safely kept in an airtight container in the freezer for up to 3 months. To prevent them from sticking together, consider layering them with pieces of parchment paper inside the container, which allows for easy portioning later on.

Can I thaw these clusters before eating?
Yes, you can! To enjoy your clusters at their best, remove the desired amount from the freezer and let them sit at room temperature for about 10-15 minutes. This will soften them slightly, enhancing the creamy texture while still being delightfully refreshing.

What should I do if my clusters are too mushy after freezing?
If you find your Frozen Strawberry Yogurt Clusters are mushy, it may be due to insufficient freezing time. Make sure to freeze them for at least 2 hours or until solid. If they end up mushy after thawing, you can repurpose them! Blend them into a smoothie or use them as a topping for yogurt or oatmeal.

Are these clusters suitable for people with allergies?
Great question! These clusters can be made allergy-friendly! If you're allergic to dairy, simply use a plant-based yogurt alternative. For those with allergies to honey, maple syrup is a perfect substitute to make your Frozen Strawberry Yogurt Clusters customizable for various dietary needs.

Can I add other fruits to the clusters?
Absolutely! These clusters are so versatile. You can mix in or substitute fruits like blueberries, raspberries, or bananas to create different flavor profiles. Just chop the fruits into smaller pieces, and they’ll mix perfectly with the yogurt base!

Frozen Strawberry Yogurt Clusters

Deliciously Healthy Frozen Strawberry Yogurt Clusters You’ll Love

These Frozen Strawberry Yogurt Clusters are a delightful and guilt-free treat perfect for snack lovers.
Print Recipe Pin Recipe
Prep Time 10 minutes mins
Freezing Time 2 hours hrs
Total Time 2 hours hrs 10 minutes mins
Servings: 4 clusters
Course: Snacks
Cuisine: American
Calories: 80
Ingredients Equipment Method Nutrition Notes

Ingredients
  

For the Clusters
  • 1 pound Fresh Strawberries Choose ripe, organic strawberries for natural sweetness and vibrant flavor.
  • 2 cups Greek Yogurt Use plain Greek yogurt to keep it creamy and packed with protein without added sugars.
  • 2 tablespoons Honey Acts as a natural sweetener; swap for maple syrup if you're aiming for a vegan option.
  • 1 tablespoon Lemon Juice Fresh lemon juice brightens flavors and prevents strawberries from browning.
  • 1 teaspoon Vanilla Extract Opt for pure vanilla extract for the best flavor quality.

Equipment

  • Mixing Bowl
  • Baking Sheet
  • Spatula
  • tablespoon
  • Cookie Scoop

Method
 

Step-by-Step Instructions
  1. Begin by washing 1 pound of fresh strawberries under cool running water, hull, and chop them into small pieces.
  2. In a medium mixing bowl, combine 2 cups of plain Greek yogurt, 2 tablespoons of honey, the juice of 1 lemon, and 1 teaspoon of pure vanilla extract and whisk until smooth.
  3. Gently fold the chopped strawberries into the yogurt mixture.
  4. Line a baking sheet with parchment paper and spoon out the mixture onto it, spacing them about an inch apart.
  5. Place the baking sheet in the freezer for at least 2 hours, or until clusters are solid.
  6. Once frozen, transfer clusters into an airtight container, layering with parchment paper if desired.

Nutrition

Serving: 1clusterCalories: 80kcalCarbohydrates: 15gProtein: 4gFat: 1gCholesterol: 5mgSodium: 30mgPotassium: 180mgFiber: 1gSugar: 10gVitamin A: 100IUVitamin C: 30mgCalcium: 80mgIron: 0.5mg

Notes

These clusters can be stored in an airtight container in the fridge for up to 3 days or in the freezer for up to 3 months. Thaw for 10-15 minutes at room temperature for best texture.

Tried this recipe?

Let us know how it was!

Frozen Yogurt Berry Bites: A Creamy, Guilt-Free Delight

April 15, 2026 by Grace Snow Leave a Comment

As summer rays beam down, I often find myself craving something cool and refreshing, and these Frozen Yogurt Berry Bites fit the bill perfectly! Not only are they a fun, no-bake treat to whip up in minutes, but they’re also a delightful way to savor the sweet taste of berries any time of the day. Imagine a creamy bite that’s both versatile and customizable; you can swap in your favorite fruits, a drizzle of honey, or even a dash of nut butter for added richness. With their healthy ingredients, these Frozen Yogurt Berry Bites make for a guilt-free dessert or the ideal snack after a workout. Ready to dive into a fruity, refreshing experience? Let’s get started!

Why Choose Frozen Yogurt Berry Bites?

Deliciously Customizable: With endless fruit combinations, you can easily create your own flavor profile by adding seasonal fruits like peaches or mangos.
No Baking Required: This quick and easy recipe means you can enjoy homemade treats without the fuss of heating up your oven.
Healthy Indulgence: Made with Greek yogurt, these bites are high in protein and low in calories, making them the perfect guilt-free snack.
Great for Any Occasion: Ideal for picnics, lunchboxes, or even as a satisfying post-workout snack. For more delicious summer treats, check out our Blackberry Crisp Amp for a delightful dessert option!
Kid-Friendly Fun: Kids will love helping to mix and match different fruits and toppings, making it a fun family activity.

Frozen Yogurt Berry Bites Ingredients

• Get ready to gather your goodies!

For the Base
• Greek Yogurt – Provides a creamy texture and protein; substitute with dairy-free yogurt for a vegan version.
• Honey or Maple Syrup – Sweetening agent to enhance flavor; adjust based on your preferred sweetness, or use agave syrup as a great vegan substitute.

For the Fruit
• Mixed Berries – Adds natural sweetness and vibrant flavors; interchangeable with any seasonal fruits like peaches or mango.

Optional Add-ins
• Granola – For added crunch; can be omitted for a smoother bite.
• Nut Butter – Adds richness and protein; any nut or seed butter will work beautifully.

Now that you have your Frozen Yogurt Berry Bites ingredients, let’s whip up some deliciousness!

Step‑by‑Step Instructions for Frozen Yogurt Berry Bites

Step 1: Prepare the Yogurt Base
In a mixing bowl, combine 2 cups of Greek yogurt and 2-3 tablespoons of honey or maple syrup until you achieve a smooth, creamy texture. Use a whisk or spatula for even mixing, ensuring no lumps remain. The yogurt should be thick yet spreadable, contributing to the delightful creaminess of your Frozen Yogurt Berry Bites.

Step 2: Fold in the Berries
Gently fold in 1 to 1.5 cups of mixed berries to the yogurt mixture, taking care not to overmix. The goal is to have your berries evenly distributed while keeping them intact for a burst of flavor in every bite. Look for a colorful blend as your Frozen Yogurt Berry Bites take shape, adding natural sweetness and vibrant hues to your creamy base.

Step 3: Add Optional Ingredients
If desired, mix in 1/2 cup of granola or a few tablespoons of nut butter at this stage. This step enhances both texture and flavor in your bites, creating a delightful crunch or rich taste. Stir gently to maintain the berries' integrity, ensuring your Frozen Yogurt Berry Bites will have delightful surprises with every bite.

Step 4: Spoon the Mixture into Molds
Spoon the yogurt and berry mixture into mini muffin cups or a silicone ice cube tray for bite-sized portions. Aim for filling each cup about three-quarters full to allow for expansion as they freeze. Use a small spatula or back of a spoon to smooth the tops, creating an inviting appearance for your Frozen Yogurt Berry Bites.

Step 5: Freeze Until Set
Place the filled molds in the freezer and allow them to freeze for at least 2 hours, or until solid. Check for a firm texture by gently pressing on the mixture; it should feel solidified and no longer soft. Once set, your Frozen Yogurt Berry Bites will be ready to delight your taste buds!

Step 6: Remove and Store
Carefully remove the bites from their molds by gently twisting or pressing them out. Store your Frozen Yogurt Berry Bites in an airtight container in the freezer, ensuring they remain fresh and ready to enjoy. These bites can last for up to a month, making them a perfect make-ahead snack for hot days!

What to Serve with Frozen Yogurt Berry Bites

Imagine a delightful spread of flavors and textures that elevates your Frozen Yogurt Berry Bites into a full dining experience!

  • Crunchy Granola Bars: These pair beautifully, offering an added crunch that complements the creaminess of your bites. A touch of sweetness ties the two together nicely.

  • Zesty Fruit Salad: A colorful fruit salad with a splash of citrus dressing enhances the fresh fruit flavor and adds a refreshing tang. Consider using honeydew, watermelon, or any seasonal fruit you love.

  • Refreshing Green Smoothies: Cool and invigorating, a green smoothie packed with spinach, banana, and almond milk creates a wholesome, nutrient-rich beverage alongside your bites.

  • Crispy Rice Cakes: Light and airy, these provide a perfect balance to the rich yogurt bites. Spread a bit of nut butter on top for an extra layer of flavor.

  • Sweetened Iced Herbal Tea: The light floral notes of iced hibiscus or chamomile tea complement the fruity flavors nicely, making it a perfect summer drink.

  • Dark Chocolate Dipped Strawberries: A touch of indulgence, these sweet treats add a dash of richness and more berry flavor, making your dessert selection even more irresistible.

  • Minty Yogurt Dipping Sauce: Serve a small bowl of mint-infused yogurt alongside for an unexpected twist. This fresh addition enhances the creamy bites splendidly.

  • Berry-infused Water: Stay hydrated with a pitcher of berry-infused water. The subtle flavoring adds a deliciously refreshing element to your snack time.

With these delightful pairings, you’re all set for a summery feast highlighting the refreshing appeal of your Frozen Yogurt Berry Bites!

Expert Tips for Frozen Yogurt Berry Bites

• Thick Yogurt Choice: Use a high-quality Greek yogurt for the creaminess that holds the bites together. Low-fat varieties might not freeze as well.

• Fold Gently: Be careful when folding in the berries. Overmixing can break them and lead to a less appealing texture in your Frozen Yogurt Berry Bites.

• Customize Wisely: Feel free to switch up the fruit, but aim for a balance of sweetness and tartness to keep the bites vibrant yet refreshing.

• Mold Options: Experiment with different molds for fun shapes. Silicone molds work best for easy removal after freezing, ensuring your bites retain their form.

• Serve Fresh: For the best flavor and texture, enjoy your Frozen Yogurt Berry Bites within a month; they’re tastiest when fresh!

Make Ahead Options

These Frozen Yogurt Berry Bites are an ideal choice for meal prep, making busy days so much smoother! You can prepare the yogurt and berry mixture up to 24 hours in advance; simply combine the Greek yogurt and sweetener, then fold in the berries before freezing. To maintain quality, store the mixture in an airtight container in the refrigerator until you're ready to scoop it into molds. Once you've filled the molds, freeze for at least 2 hours until solid. When you're ready to serve, just remove the bites from their molds and enjoy a delicious, healthy snack that feels like a treat without any last-minute fuss!

Frozen Yogurt Berry Bites Variations

Feel free to explore these delightful twists and substitutions, transforming your bites into a reflection of your tastes!

  • Dairy-Free: Substitute Greek yogurt with plant-based yogurt for a creamy vegan treat. Almond or coconut yogurts work wonders!

  • Tropical Delight: Swap out mixed berries for pineapple and mango for a sunny, beach-inspired flavor. Imagine tasting the ocean breeze with every bite.

  • Chocolate Lovers: Mix in cocoa powder and mini chocolate chips for a rich, decadent version. These chocolatey bites are sure to satisfy your sweet tooth.

  • Extra Crunch: Adding a layer of granola on top before freezing will give your bites a delightful crunch. This textural contrast adds a fun twist to each bite!

  • Flavored Yogurt: Use flavored yogurt, like vanilla or strawberry, instead of plain Greek yogurt for an effortless flavor boost. This simple swap makes each bite a delightful surprise.

  • Nutty Addition: Stir in some almond or peanut butter to the mixture for added richness and protein. The creamy nutty flavor pairs beautifully with fruits.

  • Spiced Up: Add a dash of cinnamon or a hint of vanilla extract for a warm flavor profile. Just a little sprinkle can elevate the taste immensely.

  • Fruit Swirl: Layer different fruit purees in the molds before adding the yogurt mixture for a stunning visual effect. It’s a fun way to play with flavors and appearances!

For even more tasty variations, don’t miss our delicious Blackberry Crisp Amp for a delightful dessert option or explore seasonal fruits for unique flavor combinations!

Storage Tips for Frozen Yogurt Berry Bites

Fridge: Store any leftovers in an airtight container in the fridge for up to 3 days, but these bites are best enjoyed straight from the freezer for optimal freshness.

Freezer: Keep your Frozen Yogurt Berry Bites in an airtight container in the freezer for up to one month to maintain their creamy and delicious texture.

Serving Suggestions: For a quick snack, take out a few bites from the freezer and let them sit at room temperature for 5-10 minutes before enjoying, creating a soft, indulgent treat.

Reheating: There’s no need to reheat these bites! They’re meant to be enjoyed frozen for a refreshing pick-me-up.

Frozen Yogurt Berry Bites Recipe FAQs

How do I choose the best berries for my Frozen Yogurt Berry Bites?
Absolutely! When selecting berries, look for those that are vibrant and plump. Avoid any with soft spots or dark patches, which indicate overripeness. Fresh berries taste best, but you can also use frozen mixed berries. If you choose frozen, ensure they’re unthawed so you don’t have excess moisture in your mixture.

How should I store my Frozen Yogurt Berry Bites, and how long will they last?
For optimal freshness, store your Frozen Yogurt Berry Bites in an airtight container in the freezer for up to one month. If kept well, they’ll maintain their creamy texture and vibrant flavor. I recommend labeling the container with a date to track how long they’ve been in the freezer!

Can I freeze my Frozen Yogurt Berry Bites for a longer duration?
While these delicious bites can technically last up to 2-3 months in the freezer, I suggest consuming them within a month for the best flavor and texture. When you’re ready to enjoy, let them sit at room temperature for about 5-10 minutes to soften slightly for a perfect bite.

What can I do if my Frozen Yogurt Berry Bites are too soft after freezing?
Very often, softness can be due to using a yogurt that’s too low in fat or not thick enough. I recommend using full-fat Greek yogurt for the best consistency. If the mixture is too soft before freezing, try adding a bit more yogurt or reducing the amount of sweetener to balance the moisture. Mixing in granola can also help provide additional structure!

Are these Frozen Yogurt Berry Bites safe for kids and pets?
Indeed, they are perfect for kids as a healthy snack! However, be cautious if you have pets; while yogurt is typically safe for dogs in small amounts, many pets can be lactose intolerant. If in doubt, check with your vet before sharing these delightful treats with furry friends.

Frozen Yogurt Berry Bites

Frozen Yogurt Berry Bites: A Creamy, Guilt-Free Delight

Frozen Yogurt Berry Bites are a healthy, no-bake treat packed with protein and customizable with your favorite fruits.
Print Recipe Pin Recipe
Prep Time 15 minutes mins
Freezing Time 2 hours hrs
Total Time 2 hours hrs 15 minutes mins
Servings: 12 bites
Course: Snacks
Cuisine: American
Calories: 60
Ingredients Equipment Method Nutrition Notes

Ingredients
  

For the Base
  • 2 cups Greek Yogurt or dairy-free yogurt for a vegan version
  • 2-3 tablespoons Honey or Maple Syrup adjust based on sweetness preference
For the Fruit
  • 1-1.5 cups Mixed Berries substitute any seasonal fruits
Optional Add-ins
  • 1/2 cup Granola for added crunch
  • few tablespoons Nut Butter any nut or seed butter works

Equipment

  • Mixing Bowl
  • Whisk
  • Silicone molds
  • Spatula

Method
 

Step-by-Step Instructions
  1. In a mixing bowl, combine 2 cups of Greek yogurt and 2-3 tablespoons of honey or maple syrup until smooth.
  2. Gently fold in 1 to 1.5 cups of mixed berries, ensuring they remain intact.
  3. Mix in 1/2 cup of granola or nut butter if desired, stirring gently.
  4. Spoon the mixture into mini muffin cups, filling each about three-quarters full.
  5. Place the molds in the freezer and freeze for at least 2 hours, or until solid.
  6. Carefully remove the bites from molds and store in an airtight container in the freezer.

Nutrition

Serving: 1biteCalories: 60kcalCarbohydrates: 8gProtein: 3gFat: 2gSaturated Fat: 1gCholesterol: 5mgSodium: 30mgPotassium: 120mgFiber: 1gSugar: 4gVitamin A: 100IUVitamin C: 3mgCalcium: 60mgIron: 0.5mg

Notes

Enjoy your Frozen Yogurt Berry Bites within a month for the best flavor and texture.

Tried this recipe?

Let us know how it was!

Delicious Frozen Greek Yogurt Peanut Butter Bites You Must Try

April 15, 2026 by Grace Snow Leave a Comment

The first bite of these Frozen Greek Yogurt Peanut Butter Bites is like a creamy hug for your taste buds! Mixing the tangy richness of Greek yogurt with the irresistible allure of peanut butter and a touch of maple syrup creates a heavenly snack that’s both indulgent and guilt-free. Perfect for busy days, these protein-packed bites are not only quick to prepare but also gluten-free, making them a fantastic option for anyone looking to ditch fast food in favor of something wholesome. Whether you’re nurturing a mid-afternoon craving or seeking a satisfying sweet treat, these little gems are sure to become a staple in your home. Curious about how to make this delightful snack? Let’s dive in!

Why try Frozen Greek Yogurt Bites?

Deliciously Creamy: The combination of Greek yogurt and peanut butter creates a rich, creamy texture that’s hard to resist.

Guilt-Free Indulgence: With a touch of maple syrup, these bites satisfy your sweet tooth without the added sugar guilt.

Quick and Easy: You can whip these up in no time, perfect for busy lifestyles!

Nutritious Snack: Packed with protein and healthy fats, they’re a much healthier alternative to fast food and sugary snacks.

Versatile Flavors: Customize them with chocolate chips, chopped nuts, or other nut butters for endless flavor possibilities! You’ll love pairing them with recipes like Crockpot Butter Chicken for a full meal.

Frozen Greek Yogurt Peanut Butter Bites Ingredients

These bites pack a delicious punch!

For the Base
• Plain Greek Yogurt – Creamy base; full-fat recommended for a richer texture.
• Creamy Peanut Butter – Adds richness and flavor; unsweetened, natural preferred for health benefits.
• Maple Syrup – Sweetener; can be substituted with honey or agave nectar to taste.
• Vanilla Extract – Enhances flavor; use pure extract for the best quality.

For the Mix-Ins
• Mini Chocolate Chips – Optional addition for sweetness and texture; perfect for a chocolatey twist.
• Chopped Peanuts – Optional garnish for crunch; adds delightful texture contrast.

For the Topping
• Flaky Sea Salt – Optional topping for added flavor; enhances the overall taste balance of the bites.

Dive into these Frozen Greek Yogurt Peanut Butter Bites, a snack that beautifully marries indulgence with nutrition!

Step‑by‑Step Instructions for Frozen Greek Yogurt Peanut Butter Bites

Step 1: Prepare Mixture
In a medium mixing bowl, combine plain Greek yogurt, creamy peanut butter, maple syrup, and vanilla extract. Use a spatula to mix thoroughly until the mixture is smooth and well blended—look for a creamy, even consistency without lumps. If you’re feeling indulgent, fold in mini chocolate chips for added sweetness and texture.

Step 2: Form Bites
Line a baking sheet with parchment paper to prevent sticking. Using a small cookie scoop or two spoons, drop rounded tablespoons of the yogurt-peanut butter mixture onto the sheet, ensuring they are well spaced apart for freezing. Aim for uniform sizes to help them freeze evenly, creating the perfect Frozen Greek Yogurt Peanut Butter Bites.

Step 3: Add Toppings
For a pop of crunch and flavor, optionally sprinkle chopped peanuts and flaky sea salt over each scoop on the baking sheet. These toppings not only enhance the taste but also add some delightful texture to your Frozen Greek Yogurt Peanut Butter Bites. Ensure the toppings are evenly distributed for a balanced flavor in every bite.

Step 4: Freeze
Carefully place the baking sheet in the freezer and allow the bites to freeze for at least 2-3 hours, or until they are firmly set. Check after 2 hours by gently pressing one of the bites; they should feel solid with a slightly firm texture. This freezing step is crucial for achieving the perfect snacking consistency.

Step 5: Store
Once the bites are frozen solid, transfer them to an airtight container or a freezer-safe bag for storage. Layer them with parchment paper if stacking, and keep them in the freezer for up to 2-3 weeks. These Frozen Greek Yogurt Peanut Butter Bites are now ready for quick snacking whenever you're craving something healthy and delicious!

What to Serve with Frozen Greek Yogurt Peanut Butter Bites?

These delightful bites are the perfect foundation for a nourishing meal or snack, pairing beautifully with a variety of options.

  • Fresh Fruit Salad: A refreshing mix of seasonal fruits enhances the yogurt bites’ creaminess, delivering bright flavors that elevate your snacking experience. Think juicy berries and tangy citrus for a well-rounded taste.

  • Crunchy Granola: Sprinkle some homemade or store-bought granola on top of the bites for a delightful crunch and an additional layer of texture that contrasts beautifully with their creamy base.

  • Nutty Energy Bars: Pair these bites with your favorite nut-based energy bars to step up your snack game. The protein boost complements the yogurt bites, making for a powerful combination.

  • Smoothie Bowl: Serve alongside a nutrient-packed smoothie bowl loaded with greens and fruits. The creamy texture of the smoothie beautifully contrasts the yogurt bites’ satisfying bite-size form.

  • Herbal Iced Tea: A light, refreshing herbal iced tea complements the creamy richness of the bites perfectly. The brisk flavors will cleanse your palate and enhance your overall snacking experience.

  • Dark Chocolate Dipped Fruit: For a sweet treat, serve dark chocolate dipped strawberries or bananas. The indulgence of chocolate wonderfully contrasts with the nutritious bites, creating an irresistible pairing.

Indulging in these combinations will not only satisfy your cravings but also transform your snacking routine into an enjoyable adventure of flavors and textures!

How to Store and Freeze Frozen Greek Yogurt Peanut Butter Bites

Fridge: Keep bites in the fridge for up to 3 days if you prefer a softer texture; however, for optimal freshness, freezing is recommended.

Freezer: Transfer bites to an airtight container or freezer-safe bag for storage. They can be frozen for up to 2-3 weeks, maintaining their creamy goodness.

Reheating: Enjoy these bites straight from the freezer for the best texture. Let them sit at room temperature for a few minutes if you prefer a softer bite.

Layering: When storing, place parchment paper between layers to prevent sticking. This ensures your Frozen Greek Yogurt Peanut Butter Bites stay intact and ready for snacking!

Make Ahead Options

These Frozen Greek Yogurt Peanut Butter Bites are a fantastic option for meal prep enthusiasts! You can prepare the yogurt and peanut butter mixture up to 24 hours in advance, storing it tightly covered in the refrigerator. Simply follow the mixing steps, then when ready to serve, scoop and freeze them for 2-3 hours. This way, the bites will maintain their creamy texture and flavors without any loss in quality. For an extra hint of freshness, consider adding toppings like chopped peanuts or flaky sea salt just before freezing, as this helps ensure they stay intact and crunchy. Enjoy these delicious protein-packed snacks without the last-minute rush!

Expert Tips for Frozen Greek Yogurt Peanut Butter Bites

  • Choose Full-Fat Yogurt: Using full-fat Greek yogurt improves the creaminess, as it freezes better compared to low-fat options, enhancing your Frozen Greek Yogurt Peanut Butter Bites.

  • Taste for Sweetness: Adjust the sweetness by tasting your mixture before freezing; remember, flavors will mellow when frozen, so make it a touch sweeter if needed.

  • Use a Cookie Scoop: For uniform bites, use a cookie scoop or two spoons. This helps them freeze evenly and makes for a neat cleanup process.

  • Freeze in a Single Layer: To prevent sticking, freeze the bites in a single layer initially. Once they’re firm, you can stack them in an airtight container.

  • Experiment with Mix-Ins: Don’t be afraid to customize! Consider adding coconut, dried fruits, or even different nut butters for varied flavor profiles in your Frozen Greek Yogurt Peanut Butter Bites.

Frozen Greek Yogurt Peanut Butter Bites Variations

Feel free to get creative and customize your Frozen Greek Yogurt Peanut Butter Bites to suit your taste preferences!

  • Nut Butter Swap: Switch creamy peanut butter for almond or cashew butter for a different nutty flavor.

  • Sweetener Change: Use honey or agave syrup instead of maple syrup for an alternative sweetness, tailoring the taste to your liking.

  • Flavor Boost: Add a teaspoon of cocoa powder for a chocolatey version that elevates your snacking experience.

  • Mix-In Magic: Fold in shredded coconut, dried fruits, or even fruit puree for a fruity twist that adds natural sweetness and unique textures.

  • Protein Punch: Stir in a scoop of your favorite protein powder to enhance the nutritional value without compromising flavor.

  • Heat it Up: For a spicy kick, sprinkle in a pinch of cayenne pepper or a dash of cinnamon, offering warmth and depth.

  • Crunchy Delight: Top your bites with a mix of chopped nuts and seeds for added crunch, creating a satisfying texture that contrasts with the creaminess.

  • Chocolate Drizzle: Drizzle melted dark chocolate over the frozen bites before serving for an indulgent, sweet finish that truly delights.

With these variations, you'll have a different snack experience every time! You might also love to serve them alongside a hearty meal like Crockpot Butter Chicken to create a perfect balance between flavors and textures. Enjoy exploring your creativity in the kitchen!

Frozen Greek Yogurt Peanut Butter Bites Recipe FAQs

How do I choose the right Greek yogurt?
Absolutely! For the creamiest and richest texture in your Frozen Greek Yogurt Peanut Butter Bites, I recommend using full-fat plain Greek yogurt. It freezes the best and has a delightful creaminess that enhances the overall bite. Look for one without added sugars or flavors, ensuring you have only the good stuff for your healthy snack!

What is the best way to store these bites?
To keep your Frozen Greek Yogurt Peanut Butter Bites fresh and ready for snacking, it’s best to store them in the freezer. Transfer the frozen bites to an airtight container or a freezer-safe bag. They can be kept for up to 2-3 weeks, so you always have a delicious, healthy snack on hand!

Can I freeze these bites for longer?
While I wouldn’t recommend keeping them in the freezer for too long, they can technically last up to 3 months if stored properly. However, for optimal flavor and texture, try to enjoy them within 2-3 weeks. Just make sure they’re in an airtight container to avoid freezer burn!

What should I do if my bites are too soft after freezing?
Very! If the Frozen Greek Yogurt Peanut Butter Bites turn out too soft, it might be due to the yogurt's fat content or the freezing duration. First, ensure you're using full-fat Greek yogurt, as it holds up best in the freezer. If they’re still too soft, try extending the freezing time to at least 4 hours. If they’re already slightly frozen but soft, pop them in the fridge to firm up for a few minutes before serving.

Are these bites suitable for people with allergies?
Great question! These Frozen Greek Yogurt Peanut Butter Bites are gluten-free, making them suitable for many dietary needs. However, if you or someone you’re serving has nut allergies, feel free to substitute the peanut butter with sunflower seed butter or tahini for a nut-free option. As always, double-check the yogurt you choose to ensure it’s free of any allergens.

Can I adjust the sweetness of the recipe?
Absolutely! One of the best parts about making your own Frozen Greek Yogurt Peanut Butter Bites is that you can tailor the sweetness to your liking. When mixing your ingredients, taste the mixture before freezing. If you prefer a sweeter snack, feel free to add more maple syrup or honey. Remember, flavors will mellow during freezing, so a little extra sweetness can go a long way!

Frozen Greek yogurt peanut butter bites

Delicious Frozen Greek Yogurt Peanut Butter Bites You Must Try

Delight in these Frozen Greek Yogurt Peanut Butter Bites, a creamy, indulgent yet guilt-free snack that's quick to prepare.
Print Recipe Pin Recipe
Prep Time 15 minutes mins
Freezing Time 3 hours hrs
Total Time 3 hours hrs 15 minutes mins
Servings: 12 bites
Course: Snacks
Cuisine: Greek
Calories: 100
Ingredients Equipment Method Nutrition Notes

Ingredients
  

For the Base
  • 2 cups Plain Greek Yogurt Full-fat recommended for a richer texture.
  • 1 cup Creamy Peanut Butter Unsweetened, natural preferred.
  • 2 tablespoons Maple Syrup Can be substituted with honey or agave nectar.
  • 1 teaspoon Vanilla Extract Use pure extract for the best flavor.
For the Mix-Ins
  • 1/2 cup Mini Chocolate Chips Optional addition for sweetness.
  • 1/2 cup Chopped Peanuts Optional garnish for crunch.
For the Topping
  • 1 teaspoon Flaky Sea Salt Optional topping for added flavor.

Equipment

  • Mixing Bowl
  • Baking Sheet
  • Parchment Paper
  • Cookie Scoop

Method
 

Step-by-Step Instructions
  1. In a medium mixing bowl, combine plain Greek yogurt, creamy peanut butter, maple syrup, and vanilla extract. Mix thoroughly until smooth.
  2. Line a baking sheet with parchment paper. Drop rounded tablespoons of the mixture onto the sheet.
  3. Sprinkle chopped peanuts and flaky sea salt over each scoop on the baking sheet.
  4. Place the baking sheet in the freezer and allow the bites to freeze for at least 2-3 hours.
  5. Transfer the frozen bites to an airtight container for storage.

Nutrition

Serving: 1biteCalories: 100kcalCarbohydrates: 10gProtein: 3gFat: 6gSaturated Fat: 1gPolyunsaturated Fat: 1gMonounsaturated Fat: 4gSodium: 50mgPotassium: 100mgFiber: 2gSugar: 4gCalcium: 50mgIron: 1mg

Notes

These Frozen Greek Yogurt Peanut Butter Bites can be adjusted with various mix-ins and stored in the freezer for up to 2-3 weeks.

Tried this recipe?

Let us know how it was!
  • « Previous Page
  • 1
  • …
  • 4
  • 5
  • 6
  • 7
  • 8
  • …
  • 25
  • Next Page »

Welcome!

Hi, I’m Grace, a Sydney-based home cook with a passion for bold flavors and trending ingredients. Whether you’re a busy beginner or a seasoned foodie, you’ll find dishes here that are fresh, fun, and full of flavor.

More about me

Popular Recipes

  • Honey Lime Chicken & Avocado Rice Bowl
    Honey Lime Chicken & Avocado Rice Bowl for a Flavor Burst
  • Tasty Italian Pasta Salad
    Delight in this Easy Tasty Italian Pasta Salad for Summer Fun
  • Garlic Butter Chicken Pasta
    Garlic Butter Chicken Pasta That’ll Wow Your Family Tonight
  • Creamy, Spicy Chicken Pasta
    Creamy, Spicy Chicken Pasta with Fresh Summer Veggies

Footer

↑ back to top

About

  • Privacy Policy
  • Disclaimer
  • Terms & Conditions

Newsletter

  • Sign Up! for emails and updates

Contact

  • About me
  • Contact me

Copyright © 2025 TastyTrendIngredients