tastytrendingredients

  • Home
  • Recipes
    • Appetizers
    • Breakfast
    • Dessert
    • Dinner
    • Drinks
    • Salads
    • Snacks
    • Soups
  • About me
  • Contact me
menu icon
go to homepage
  • Home
  • Recipes
    • Appetizers
    • Breakfast
    • Dessert
    • Dinner
    • Drinks
    • Salads
    • Snacks
    • Soups
  • About me
  • Contact me
search icon
Homepage link
  • Home
  • Recipes
    • Appetizers
    • Breakfast
    • Dessert
    • Dinner
    • Drinks
    • Salads
    • Snacks
    • Soups
  • About me
  • Contact me
×

Heavenly Custard-Filled Sweet Bread for Cozy Mornings

December 13, 2025 by Grace Snow Leave a Comment

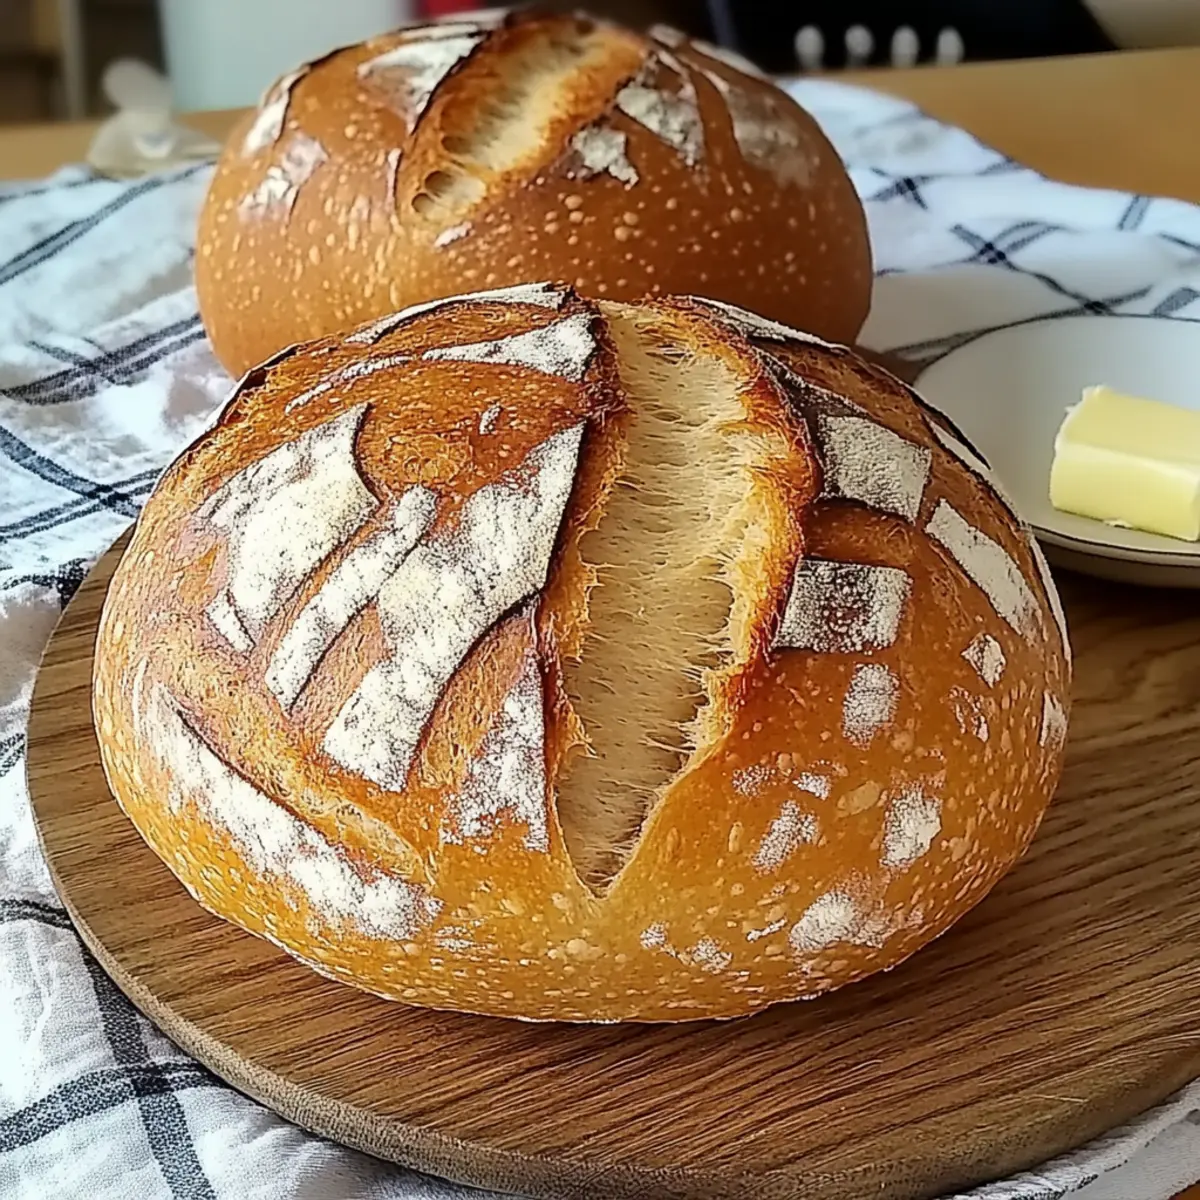
There's something magical about the smell of freshly baked bread wafting through the kitchen, isn't there? This Creamy Custard-Filled Sweet Bread is where comfort meets creativity, making it an ultimate crowd-pleaser for breakfast or dessert. What I love most about this recipe is its versatility: you can enjoy it warm with a cup of tea, or cool with a dusting of powdered sugar for a delightful treat. Imagine diving into that soft, pillowy texture, only to discover a luscious custard center that simply melts in your mouth. Not only is it easy to whip up, but it's also a fun way to bring a touch of sweetness to any gathering. Are you ready to indulge in this comforting delight and surprise your loved ones?

Why is Custard-Filled Sweet Bread Irresistible?

Versatile Delight: This Custard-Filled Sweet Bread shines at any occasion, perfect for brunch gatherings or cozy desserts at home.

Creamy Center: Imagine that moment when you sink your teeth into the warm, soft dough, revealing a dreamy, creamy custard filling.

Easy to Make: With a straightforward preparation method, even novice bakers can master this delightful recipe.

Customizable Flavors: Feel free to play with different extracts or fillings, like the delightful addition of chocolate chips or zesty orange, for a unique twist!

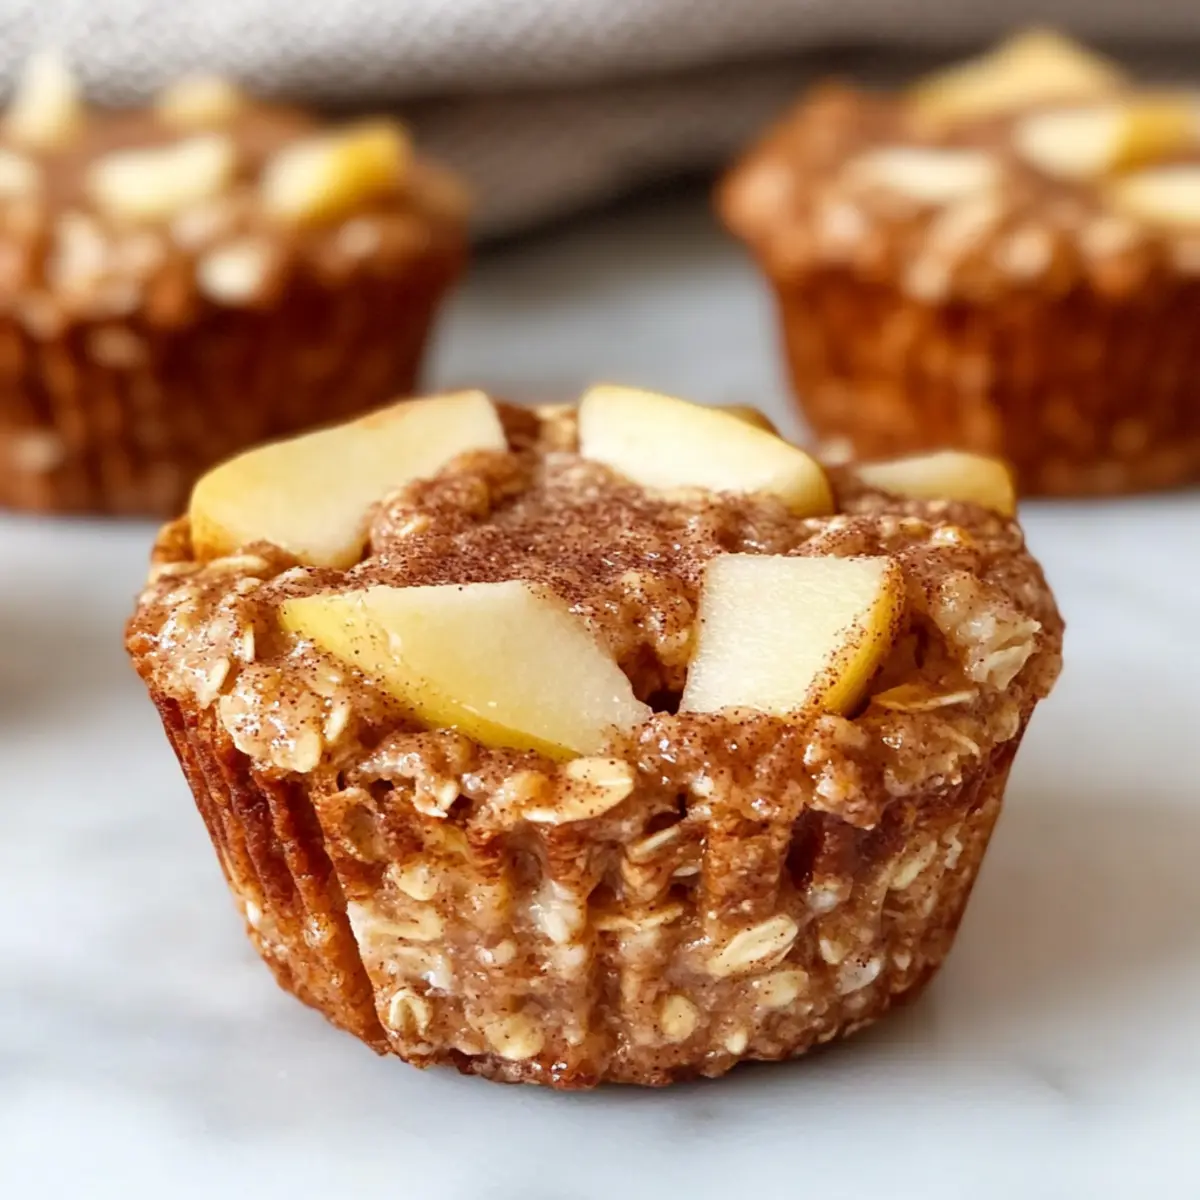
Crowd-Pleasing: Everyone will love it, making it a fantastic choice for family get-togethers or holiday celebrations. Don’t forget to serve it alongside a slice of Cheesy Garlic Bread for a complementary flavor experience!

Custard-Filled Sweet Bread Ingredients

For the Dough
• All-purpose flour – Provides structure; use bread flour for a chewier texture.
• Granulated sugar – Adds sweetness; substitute with coconut sugar for a lower glycemic option.
• Butter – Brings moisture and richness; opt for unsalted or use coconut oil for dairy-free goodness.
• Milk – Infuses flavor; any nut milk, like almond, works as a dairy alternative.
• Yeast – Essential for leavening; active dry yeast is ideal, but instant yeast can be used without adjustments.
• Eggs – Serve as a binding agent and enhance flavor; flax eggs can replace for a vegan option.
• Vanilla extract – Enhances flavor; swap for almond extract for a unique profile.

For the Custard Filling
• Custard filling – The star of the show; premade custard saves time while providing a creamy texture and sweetness.

For Finishing Touch
• Powdered sugar – A beautiful dusting; optional but adds an elegant touch before serving.

Step‑by‑Step Instructions for Custard-Filled Sweet Bread

Step 1: Dough Preparation
In a large mixing bowl, combine all-purpose flour, granulated sugar, active dry yeast, and salt. In a separate bowl, gently warm the milk and melt the butter together until just lukewarm. Whisk in the eggs and vanilla extract, then pour this mixture into the dry ingredients. Mix until a dough forms, and knead for about 8-10 minutes until the dough is smooth and elastic.

Step 2: First Rise
Place the kneaded dough into a greased bowl, covering it with a damp cloth or plastic wrap. Let it rise in a warm place for about 1 hour, or until it has doubled in size. You’ll know it’s ready when your dough feels light and puffy to the touch, indicating the yeast is working its magic.

Step 3: Custard Making
While the dough is rising, prepare the custard filling. In a saucepan, combine your chosen custard ingredients, whisking continuously over medium heat until the mixture thickens, which should take about 5-7 minutes. Once thickened, remove from the heat and allow it to cool slightly while your dough continues to rise.

Step 4: Shaping
After the dough has completed its first rise, punch it down gently to release any air. Roll it out onto a floured surface, shaping it into a rectangle. Cut the dough into equal squares, placing a generous spoonful of custard in the center of each piece. Carefully fold the edges over to seal the custard inside, ensuring a tight closure to prevent leaks.

Step 5: Second Rise
Place the shaped custard-filled dough balls on a baking sheet lined with parchment paper. Cover them lightly and let them rise again for about 30 minutes, or until puffy. The dough should visibly expand and feel airy, resembling small pillows ready for baking.
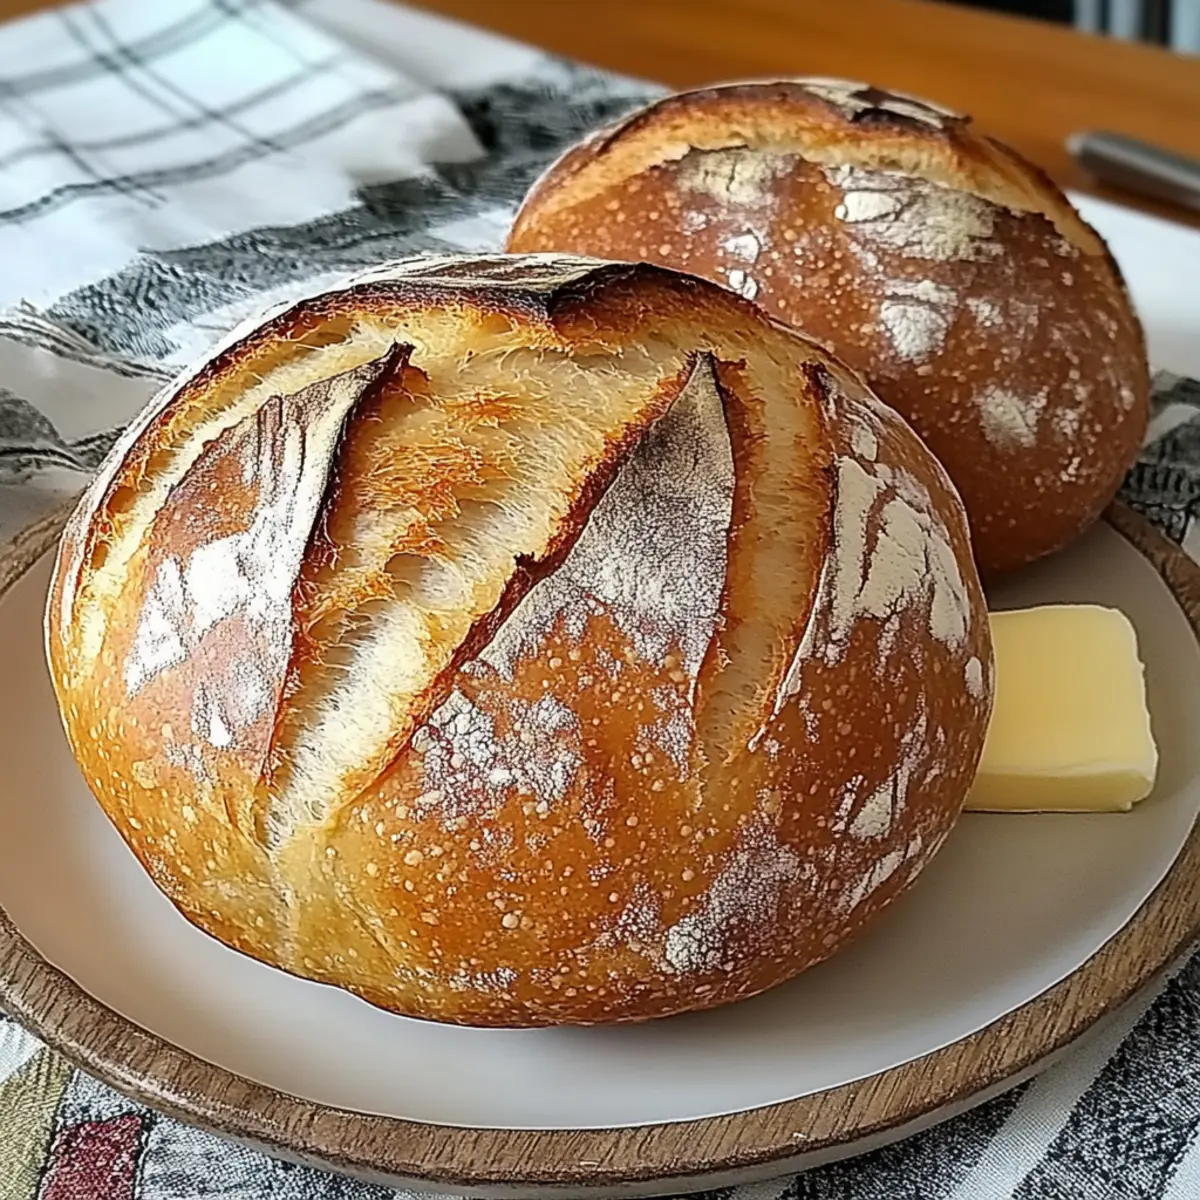
Step 6: Baking
Preheat your oven to 350°F (175°C). Once preheated, bake the filled sweet breads for approximately 20 minutes, or until they turn a lovely golden brown. You’ll know they’re done when the tops are beautifully browned, and your kitchen fills with that irresistible aroma of baked bread.
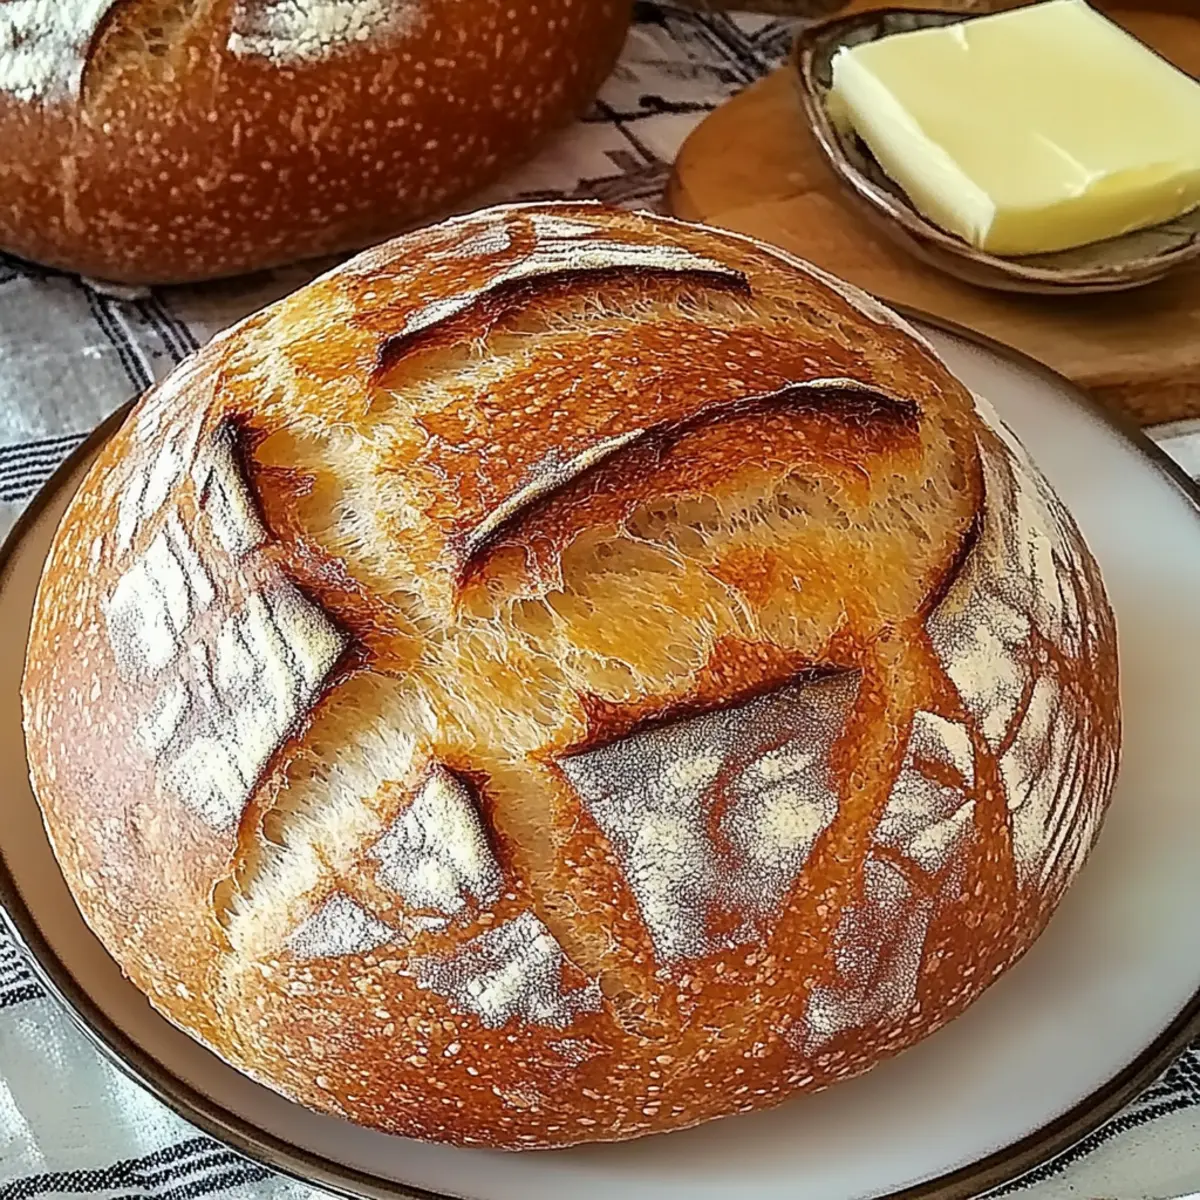
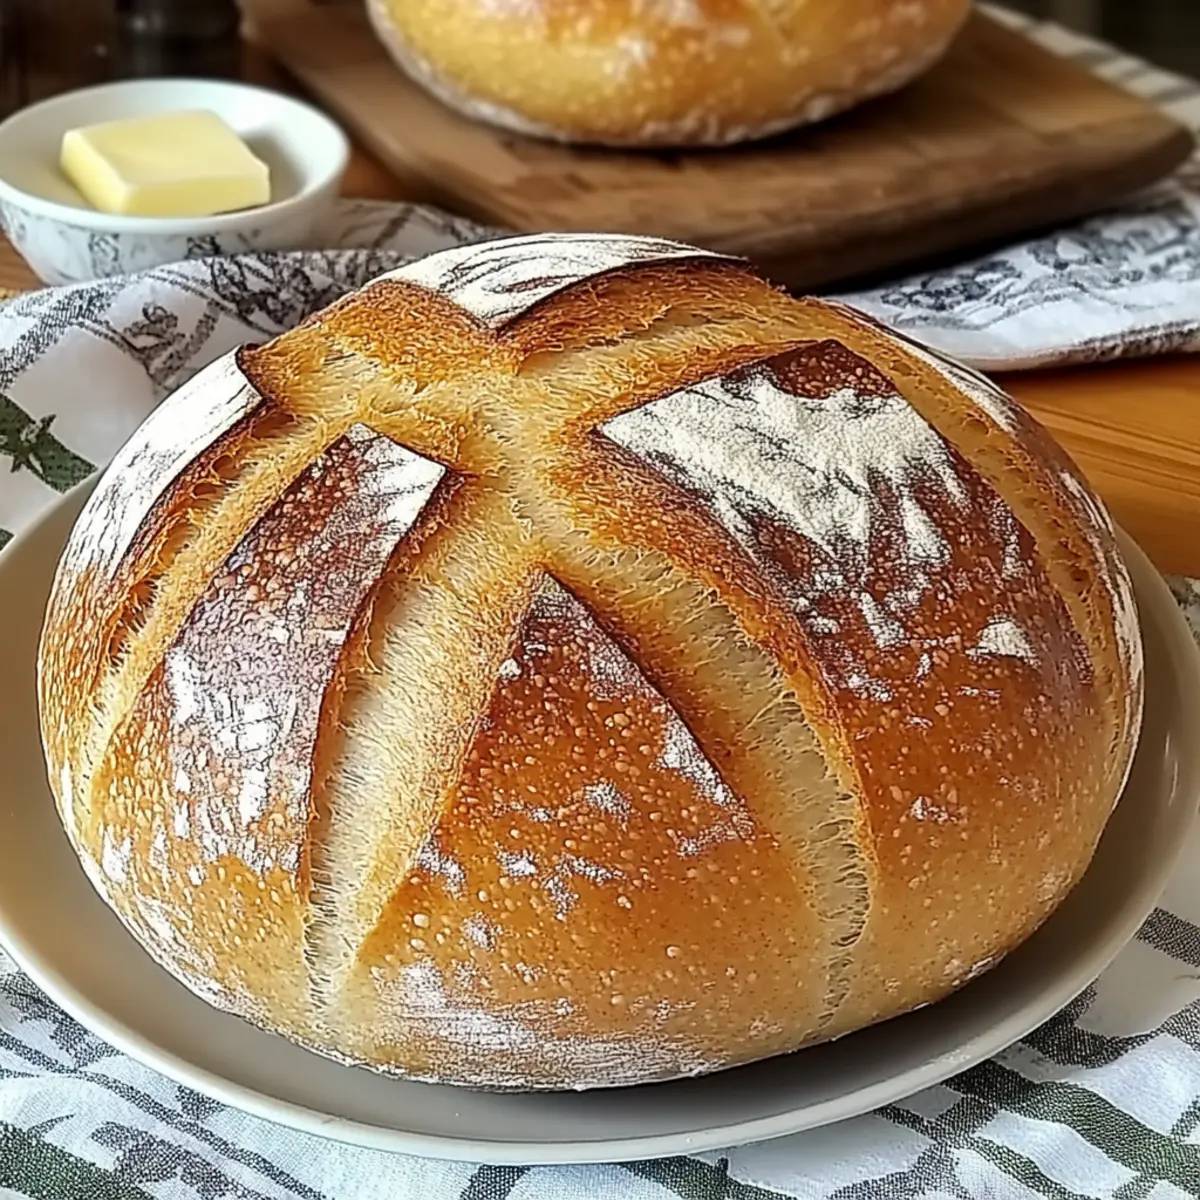
Step 7: Cooling
After baking, remove the custard-filled sweet breads from the oven and allow them to cool on wire racks. Let them rest for about 10-15 minutes, allowing the custard filling to set slightly before dusting with powdered sugar for an elegant finish. Enjoy them warm or at room temperature!

What to Serve with Custard-Filled Sweet Bread

There's nothing quite like crafting a well-rounded meal around your favorite sweet breads, where flavors and textures dance in harmony.

  • Fresh Berries: The tartness of strawberries, blueberries, or raspberries contrasts beautifully with the creamy custard, offering a burst of freshness.

  • Vanilla Ice Cream: A scoop of creamy vanilla ice cream melting over the warm sweet bread transforms dessert into a delightful treat. The cool versus warm creates a dreamy experience.

  • Maple Syrup: Drizzling warm maple syrup adds a sweet, earthy dimension that complements the rich custard filling, enhancing every bite.

  • Coffee or Tea: Sipping a cup of freshly brewed coffee or herbal tea rounds out the meal, balancing the sweetness and creating a cozy ambiance.

  • Yogurt Parfait: Stacking layers of creamy yogurt with granola and fruits beside your sweet bread adds a refreshing and healthy crunch to your brunch spread.

  • Chocolate Sauce: Warm, silky chocolate sauce drizzled over a slice offers a dessert experience that feels indulgent and utterly luxurious.

  • Whipped Cream: A dollop of freshly whipped cream can elevate your custard-filled sweet bread into a sophisticated dessert, adding lightness while enhancing its sweetness.

Let these pairings inspire your next meal, turning a simple occasion into a delightful culinary celebration!

How to Store and Freeze Custard-Filled Sweet Bread

Room Temperature: Store your custard-filled sweet bread in an airtight container for up to 3 days to maintain its softness and freshness.

Fridge: If you need to keep it longer, refrigerate it for up to a week. Wrap it tightly to prevent it from drying out.

Freezer: For longer storage, freeze the sweet bread for up to 2 months. Ensure it's wrapped securely to prevent freezer burn.

Reheating: Rewarm in the oven at 350°F (175°C) for about 10 minutes, or microwave for 15-20 seconds, to enjoy that freshly baked texture again.

Custard-Filled Sweet Bread Variations

Feel free to get creative and customize your Custard-Filled Sweet Bread with these delightful twists, perfect for a baking adventure!

  • Chocolate Bliss: Fold chocolate chips into the custard filling for a rich chocolate experience. Each bite becomes a heavenly treat that chocolate lovers will adore.

  • Zesty Citrus: Add the zest of one orange or lemon to the dough for a refreshing hint of citrus. The brightness elevates the flavor profile and adds a lovely aroma.

  • Nutty Extra: Stir in chopped nuts, like pecans or walnuts, into the custard for added crunch. The combination of creamy and crunchy will leave your taste buds dancing.

  • Spiced Delight: Sprinkle cinnamon or nutmeg into the dough for a warm, aromatic twist. This variation will transport you to cozy winter mornings no matter the season!

  • Boozy Flavor: A splash of rum or brandy in the custard elevates this bread into dessert territory. Just imagine the incredible depth and warmth from each luscious slice.

  • Fruit Filling: Swap out the custard for your favorite jam or fruit preserves for a fruity surprise. Strawberry or apricot complements the sweet bread beautifully!

  • Vegan Option: Replace eggs with flax eggs and use almond milk instead of regular milk to make this recipe vegan-friendly while still maintaining its deliciousness.

  • Syrupy Sweet: Drizzle maple syrup over the warm bread just before serving to add an extra touch of sweetness. Pair it with a side of fresh fruits for balance!

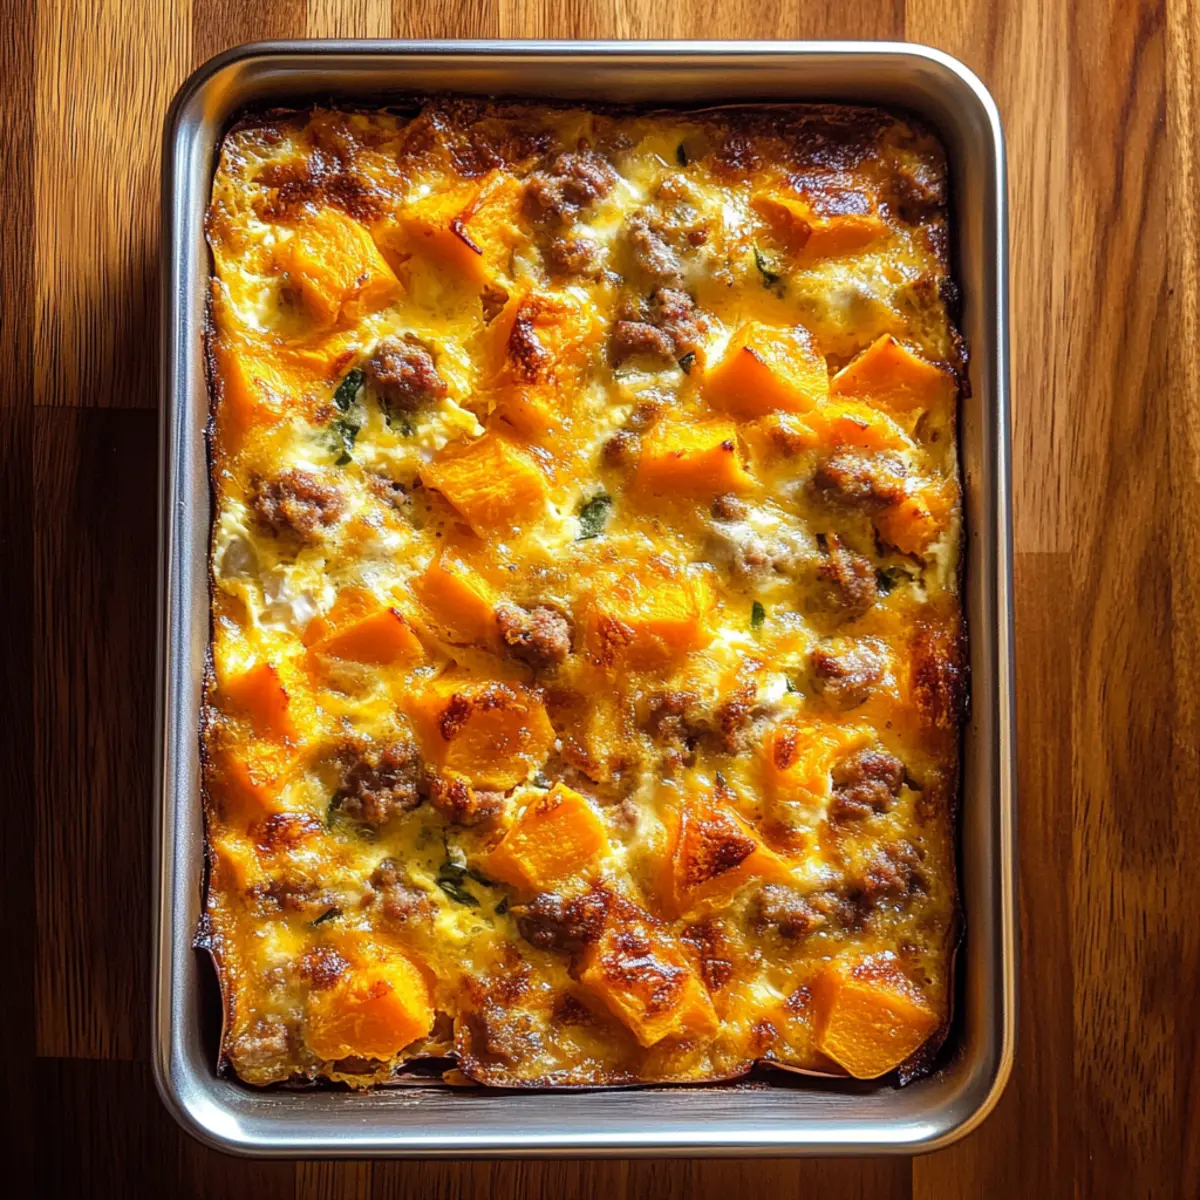
Adventure awaits in your kitchen! If you enjoy experimenting, consider also preparing a side of Cornbread Breakfast Casserole or a delightful Sweet Potato Casserole to diversify your table. Happy baking!

Expert Tips for the Best Custard-Filled Sweet Bread

Warm Milk: Ensure your milk is warm but not hot when adding yeast; too much heat can kill the yeast, preventing proper rising.

Seal Carefully: Be sure to seal the dough properly around the custard filling; this prevents any delightful custard from leaking out while baking.

Rest Before Slicing: Let the baked sweet bread cool for at least 10-15 minutes before slicing; this helps set the custard and enhances the texture.

Knead Well: Knead the dough thoroughly for at least 8-10 minutes to develop the gluten, ensuring a soft, fluffy bread that holds its shape.

Don’t Rush the Rises: Give the dough ample time to rise in both stages; this is key for the light and airy texture of the custard-filled sweet bread.

Make Ahead Options

These Custard-Filled Sweet Breads are perfect for busy home cooks who love to meal prep! You can make the dough up to 24 hours in advance; simply prepare it, let it rise, and then refrigerate it in a covered bowl to slow down the fermentation. For the custard filling, you can prepare and refrigerate it for up to 3 days; this not only saves time but ensures it’s ready to use when you’re ready to assemble. When you’re set to bake, allow the dough to come to room temperature and complete the second rise for about 30 minutes before filling and baking. This way, you'll enjoy warm, fluffy sweet bread with rich custard, just as delicious as if freshly made!

Custard-Filled Sweet Bread Recipe FAQs

What type of flour is best for Custard-Filled Sweet Bread?
All-purpose flour is ideal for this recipe due to its balanced properties. However, if you're aiming for a chewier texture, bread flour can be a fantastic substitute. Just keep in mind that bread flour has a higher protein content, which may affect the bread’s final softness.

How should I store leftover Custard-Filled Sweet Bread?
Store your sweet bread in an airtight container at room temperature for up to 3 days. If you want to keep it fresh for a longer period, it can last in the fridge for up to a week when tightly wrapped to prevent drying.

Can I freeze Custard-Filled Sweet Bread and how?
Absolutely! To freeze, wrap the completely cooled sweet bread tightly in plastic wrap, followed by aluminum foil to prevent freezer burn. It will stay fresh for up to 2 months. When you're ready to enjoy it, simply unwrap and rewarm in the oven at 350°F (175°C) for about 10 minutes or until warmed through.

What should I do if my dough doesn’t rise?
If your dough fails to rise, it could be due to a few factors. First, make sure that the yeast is fresh and active—check the expiration date. Second, ensure your milk was warm (not hot!) when mixed with the yeast. If the environment is too cool, try placing the dough in a slightly warm area like an oven with just the light on. You can also let it rise longer until it doubles in size.

Are there any dietary considerations for Custard-Filled Sweet Bread?
Yes, if you have dietary restrictions, you can easily adapt this recipe. For a dairy-free version, replace the butter and milk with coconut oil and any nut milk. Additionally, you can use flax eggs as a plant-based alternative to traditional eggs. Just mix 1 tablespoon of ground flaxseed with 3 tablespoons of water per egg and let it sit until it thickens before adding to your dough.

Can I use premade custard for the filling?
Definitely! Using premade custard is an excellent way to save time and still achieve that creamy filling we all love. Just ensure to cool it slightly before adding to the dough to prevent disrupting the rising process!

Custard-Filled Sweet Bread

Heavenly Custard-Filled Sweet Bread for Cozy Mornings

This Custard-Filled Sweet Bread is a magical blend of comfort and creativity, perfect for breakfast or dessert.
Print Recipe Pin Recipe
Prep Time 30 minutes mins
Cook Time 20 minutes mins
Rising Time 1 hour hr 30 minutes mins
Total Time 2 hours hrs 20 minutes mins
Servings: 8 slices
Course: Dessert
Cuisine: Bakery
Calories: 180
Ingredients Equipment Method Nutrition Notes

Ingredients
  

For the Dough
  • 4 cups All-purpose flour Use bread flour for a chewier texture.
  • 1/4 cup Granulated sugar Substitute with coconut sugar for a lower glycemic option.
  • 1/2 cup Butter Opt for unsalted or coconut oil for dairy-free.
  • 1 cup Milk Any nut milk, like almond, works as a dairy alternative.
  • 2 teaspoons Active dry yeast Instant yeast can be used without adjustments.
  • 2 large Eggs Flax eggs can replace for a vegan option.
  • 1 teaspoon Vanilla extract Swap for almond extract for a unique profile.
For the Custard Filling
  • 2 cups Custard filling Premade custard saves time.
For Finishing Touch
  • 1 cup Powdered sugar Optional but adds an elegant touch.

Equipment

  • Mixing Bowl
  • Saucepan
  • Baking Sheet
  • Parchment Paper
  • wire rack

Method
 

Dough Preparation
  1. In a large mixing bowl, combine all-purpose flour, granulated sugar, active dry yeast, and salt.
  2. In a separate bowl, gently warm the milk and melt the butter together until just lukewarm.
  3. Whisk in the eggs and vanilla extract, then pour this mixture into the dry ingredients.
  4. Mix until a dough forms, and knead for about 8-10 minutes until the dough is smooth and elastic.
First Rise
  1. Place the kneaded dough into a greased bowl, covering it with a damp cloth or plastic wrap.
  2. Let it rise in a warm place for about 1 hour, or until it has doubled in size.
Custard Making
  1. While the dough is rising, prepare the custard filling by combining your chosen custard ingredients in a saucepan.
  2. Whisk continuously over medium heat until the mixture thickens, about 5-7 minutes.
  3. Once thickened, remove from heat and allow it to cool slightly.
Shaping
  1. After the dough has completed its first rise, punch it down gently to release any air.
  2. Roll it out onto a floured surface, shaping it into a rectangle.
  3. Cut the dough into equal squares, placing a generous spoonful of custard in the center of each piece.
  4. Carefully fold the edges over to seal the custard inside.
Second Rise
  1. Place the shaped custard-filled dough balls on a baking sheet lined with parchment paper.
  2. Cover them lightly and let them rise again for about 30 minutes.
Baking
  1. Preheat your oven to 350°F (175°C).
  2. Once preheated, bake the filled sweet breads for approximately 20 minutes, or until golden brown.
Cooling
  1. After baking, remove the custard-filled sweet breads from the oven and allow them to cool on wire racks.
  2. Let them rest for about 10-15 minutes before dusting with powdered sugar.

Nutrition

Serving: 1sliceCalories: 180kcalCarbohydrates: 25gProtein: 4gFat: 7gSaturated Fat: 4gPolyunsaturated Fat: 0.5gMonounsaturated Fat: 2.5gCholesterol: 40mgSodium: 120mgPotassium: 80mgFiber: 1gSugar: 6gVitamin A: 200IUCalcium: 50mgIron: 1mg

Notes

Allow the sweet bread to cool for at least 10-15 minutes before slicing to enhance the texture.

Tried this recipe?

Let us know how it was!

Delicious Homemade German Bread in Just 5 Minutes

December 13, 2025 by Grace Snow Leave a Comment

As the warm scent of baking bread wafts through my kitchen, I'm reminded of cozy family gatherings shared around the table. Today, I’m excited to share my recipe for Quick German Bread, a rustic loaf that you can whip up in just 5 minutes of prep! With its golden, crackly crust and soft, chewy interior, this homemade bread is a fantastic option for those busy weeknights when you crave a comforting touch. Plus, it’s incredibly versatile—use it for sandwiches, or enjoy a slice warm with butter. Not only does it embrace the heartiness of traditional German bread, but it also simplifies the process, making homemade goodness accessible to everyone. Are you ready to dive into this delicious adventure in baking?

Why is this German Bread so special?

Quick, No Fuss: In just 5 minutes of prep, you can create a stunning rustic loaf that impresses family and friends.

Amazing Aroma: The smell of freshly baked bread fills your home, bringing warmth and comfort to any occasion.

Endless Possibilities: This bread is a blank canvas! Mix it up with seeds, herbs, or even sun-dried tomatoes for a personal touch.

Perfect Texture: Enjoy a beautifully crackly crust with a soft, chewy interior that’s far from ordinary. It pairs perfectly with soups or can be transformed into delicious sandwiches.

Time-Saving Delight: Say goodbye to store-bought bread! With minimal ingredients and effort, this bread is your go-to for tasty homemade goodness.

Don't forget to check out German Potato Salad as a delightful side to complement your freshly baked bread!

German Bread Ingredients

For the Dough

  • All-purpose flour or bread flour – Provides structure and chewiness; substitute with whole wheat flour for a nuttier flavor.
  • Instant yeast – Leavens the bread quickly; you can use active dry yeast if activated in warm water first.
  • Warm water (around 110°F / 45°C) – Hydrates the flour and activates the yeast; ensure it's warm but not hot to avoid killing the yeast.
  • Salt – Enhances flavor and strengthens gluten structure; no substitutions recommended.
  • Honey or sugar – Adds slight sweetness and aids browning; can be replaced with maple syrup or agave.
  • Olive oil (optional) – Adds richness and moisture; this can be omitted without significant impact on the bread.

For the Toppings (optional)

  • Flaky salt – Sprinkling on top creates a delightful contrast to the bread's texture.
  • Everything bagel seasoning – Adds a flavorful twist for those who enjoy a bit more seasoning.

Let’s get started on baking that delicious German bread!

Step‑by‑Step Instructions for Quick German Bread

Step 1: Combine the Dry Ingredients
In a large mixing bowl, combine 3 cups of all-purpose flour, 2 teaspoons of instant yeast, and 1 teaspoon of salt. Stir the ingredients together until they are well mixed, creating a uniform dry mixture. This blend forms the essential foundation for your rustic German bread, ensuring even distribution of the yeast and enhancing the overall flavor.

Step 2: Mix in the Wet Ingredients
Pour in 1 and 1/4 cups of warm water (about 110°F / 45°C) and 1 tablespoon of honey into the dry ingredients. Using a wooden spoon or your hands, gently mix until a sticky dough begins to form. This should take about 1 to 2 minutes; the dough should hold together but remain slightly tacky, signaling that it’s ready for the next step.

Step 3: Knead the Dough
Transfer the sticky dough onto a well-floured surface. Knead it for 1 to 2 minutes, apply gentle pressure, and fold it over itself until it becomes smoother and slightly elastic. This brief kneading helps develop gluten, which is crucial for achieving that delightful chewy texture characteristic of homemade German bread.

Step 4: Let the Dough Rest
Place the kneaded dough back into the mixing bowl and cover it with a clean kitchen towel. Allow it to rest in a warm location for 5 to 10 minutes. This resting period will help the dough relax, making it easier to shape into a rustic loaf and ensuring a perfect rise during baking.

Step 5: Preheat the Oven
While the dough rests, preheat your oven to 425°F (220°C). Position a Dutch oven inside the oven as it heats. This step is essential for creating steam, which helps achieve that beautiful, crackly crust on your German bread, making it even more appealing once baked.

Step 6: Shape the Dough
After the rest period, gently punch down the dough to deflate it. Shape it into a rustic loaf that’s about the size of your Dutch oven. Using parchment paper can help in transferring it easily later. Just make sure your bread is not overly tight; it should still retain some airiness to allow proper expansion while baking.

Step 7: Score the Loaf
Carefully place the shaped dough onto parchment paper, then take a sharp knife and make a few slashes across the top of the loaf. This scoring not only enhances the presentation of your German bread but also allows for better expansion during baking, ensuring a beautifully risen loaf with a fantastic crust.

Step 8: Bake the Bread
Using oven mitts, remove the heated Dutch oven from the oven. Carefully lift the parchment paper with the dough and place it inside. Cover with the lid and bake for 20 minutes. After 20 minutes, uncover the Dutch oven and bake for an additional 5 to 10 minutes, until the top is golden brown and the bread sounds hollow when tapped on the bottom.

Step 9: Cool the Bread
Once baked, remove the Dutch oven from the oven and carefully take out the bread using the parchment paper. Let the bread cool on a wire rack for at least 10 minutes. Cooling is vital to allow the crust to set properly, and it also helps prevent the bread from becoming gummy when sliced.

German Bread Variations & Substitutions

Customize your German bread experience with these delightful twists and swaps that will elevate its flavor and texture!

  • Whole Wheat: Substitute half of the all-purpose flour with whole wheat for a nutty taste and extra fiber.
  • Rye Flour: Mix in half rye flour to create a denser, more traditional German flavor profile that both hearty and satisfying.
  • Sweetness Switch: Replace honey with maple syrup for a unique touch of sweetness that pairs wonderfully with this rustic loaf.
  • Herb Infusion: Add fresh herbs like rosemary or thyme into the dough for an aromatic twist that adds flavor depth.

Whether you’re experimenting with savory elements or exploring fragrant additions, the possibilities are endless! A sprinkle of everything bagel seasoning on top can add a delightful crunch to your loaf.

  • Savory Add-ins: Fold in chopped olives, sun-dried tomatoes, or crumbled feta cheese to infuse vibrant flavors into each bite.
  • Seed Variety: Toss in seeds like caraway or sesame for added texture and a delightful crunch, giving your bread a rustic flair.
  • Spice it Up: For a little kick, mix in a dash of crushed red pepper flakes into the dough for unexpected warmth.

There you go! Personalizing your bread is as simple as picking a flavor direction you love. Happy baking! Don’t forget to pair your bread with a side of German Potato Salad for a hearty meal that'll warm your heart!

Make Ahead Options

These Quick German Bread loaves are a lifesaver for meal prep enthusiasts! You can prepare the dough up to 24 hours in advance by mixing the dry ingredients and adding the wet components, then storing the dough covered in the refrigerator. This allows the flavors to develop beautifully while saving you time on busy weeknights. To maintain the quality, let the dough warm up at room temperature for about 30 minutes before shaping it into a loaf. When you're ready to bake, simply shape the dough, preheat the oven, and follow the baking instructions as usual, ensuring you enjoy fresh, homemade German bread with minimal effort!

What to Serve with Quick German Bread in Just 5 Minutes

There's something special about pairing your freshly baked loaf with delightful accompaniments that elevate your dining experience.

  • Creamy Tomato Soup: This classic pairing offers a warm, comforting experience, perfectly balancing the rustic texture of your bread.
  • Savory Cheese Platter: A variety of cheeses—think sharp cheddar or creamy brie—create a delightful contrast to the bread's chewy bite.
  • Herbed Olive Oil Dip: Drizzle this fragrant blend of olive oil and fresh herbs to enhance the bread's flavor and add a touch of Mediterranean flair.
  • Roasted Vegetables: The caramelized sweetness of vegetables like carrots and bell peppers complements the hearty facets of the German bread.
  • Crisp Green Salad: A fresh salad with tangy vinaigrette adds brightness to every bite, making for a balanced meal with texture and flavor.
  • Homemade Jam: Spread a layer of fruit jam for a sweet juxtaposition to the bread's rustic notes, turning your loaf into a breakfast delight.
  • German Potato Salad: This tangy, warm salad with crispy bacon ties back to traditional German cuisine, making it a perfect side addition.
  • Fruity Iced Tea: Pair your meal with a refreshing glass of iced tea infused with fruits for a delightful, thirst-quenching finish.
  • Decadent Chocolate Cake: For dessert, indulge in a rich chocolate cake to save the best for last, making every meal memorable and sweet.

Storage Tips for German Bread

Room Temperature: Store your German bread in an airtight container at room temperature for up to 3 days to maintain freshness and texture.

Freezer: For longer storage, wrap the loaf tightly in plastic wrap or aluminum foil, then place it in a freezer-safe bag. It can be frozen for up to 3 months.

Reheating: To restore the bread's crusty exterior, reheat slices in a warm oven (350°F/175°C) for about 5-10 minutes or until warmed through.

Cutting: Avoid slicing the bread until you're ready to eat it; this helps retain moisture and keeps the loaf fresher for longer.

Expert Tips for Quick German Bread

  • Fresh Yeast Required: Ensure your yeast is fresh and active; expired yeast can lead to dense bread that doesn’t rise well.

  • Monitor Dough Stickiness: If the dough is too sticky while kneading, sprinkle a bit more flour to make it manageable, but avoid adding too much.

  • Utilize Steam for Crust: For a beautifully crackly crust, place a shallow pan of water in the oven while it preheats. This steam enhances the baking process.

  • Perfect Bread Texture: Tap the bottom of the baked loaf—if it sounds hollow, your German bread is ready. This indicates a perfect bake inside!

  • Kneading Time: Don’t over-knead; a quick 1-2 minutes is sufficient for developing the right texture, ensuring the bread remains soft and chewy.

Quick German Bread Recipe FAQs

How do I choose the right flour for this German bread?
Absolutely! You can use either all-purpose or bread flour for your Quick German Bread. If you're looking for a nuttier flavor, I recommend trying whole wheat flour as a substitute. Just keep in mind that using whole wheat may alter the texture slightly, resulting in a denser loaf.

How should I store my German bread after baking?
To maintain its freshness, store your German bread in an airtight container at room temperature for up to 3 days. This keeps the texture soft and delightful. If you want to save it for longer, wrap the loaf tightly in plastic wrap or aluminum foil and place it in a freezer-safe bag where it can last for up to 3 months.

Can I freeze German bread? How?
Yes, you can freeze your delicious German bread! After cooling, wrap the entire loaf tightly in plastic wrap or aluminum foil to prevent freezer burn. Then, place it in a freezer-safe bag for added protection. When you're ready to enjoy it, simply thaw it at room temperature or reheat it directly from the freezer in a warm oven at 350°F (175°C) for about 10-15 minutes.

What should I do if my dough is too sticky?
If you find your dough is too sticky while kneading, don't worry! Just sprinkle a little more flour, about a tablespoon at a time, until it becomes manageable. Remember, it should remain slightly tacky but not overly sticky—this balance is key to achieving that perfect chewy texture in your German bread.

Are there any dietary considerations I should keep in mind?
Certainly! This Quick German Bread recipe contains gluten from the flour, so it's not suitable for those on a gluten-free diet. If you're looking to reduce sugar intake, you can use agave syrup or omit the sweetener altogether. For those with yeast sensitivities, consider experimenting with a sourdough starter; it may yield different, yet delightful results!

German Bread

Delicious Homemade German Bread in Just 5 Minutes

This quick and easy German Bread recipe delivers a rustic loaf with a golden crust and chewy interior, perfect for any occasion.
Print Recipe Pin Recipe
Prep Time 5 minutes mins
Cook Time 30 minutes mins
Resting Time 10 minutes mins
Total Time 45 minutes mins
Servings: 10 slices
Course: Breakfast
Cuisine: German
Calories: 120
Ingredients Equipment Method Nutrition Notes

Ingredients
  

Dough Ingredients
  • 3 cups all-purpose flour or bread flour
  • 2 teaspoons instant yeast
  • 1 teaspoon salt
  • 1.25 cups warm water around 110°F / 45°C
  • 1 tablespoon honey or sugar
  • 1 tablespoon olive oil optional
Topping Ingredients (optional)
  • to taste flaky salt
  • to taste everything bagel seasoning

Equipment

  • Mixing Bowl
  • Wooden spoon
  • Dutch oven
  • Parchment Paper
  • wire rack
  • oven mitts

Method
 

Step-by-Step Instructions
  1. Combine the dry ingredients in a large mixing bowl: 3 cups of all-purpose flour, 2 teaspoons of instant yeast, and 1 teaspoon of salt.
  2. Mix in the wet ingredients: Pour in 1.25 cups of warm water and 1 tablespoon of honey.
  3. Knead the dough on a floured surface for 1 to 2 minutes until smoother.
  4. Let the dough rest covered in a warm place for 5 to 10 minutes.
  5. Preheat the oven to 425°F (220°C) with the Dutch oven inside.
  6. Shape the dough into a rustic loaf and place it on parchment paper.
  7. Score the top of the loaf with a sharp knife for better expansion.
  8. Bake the bread in the Dutch oven for 20 minutes covered, then 5-10 minutes uncovered until golden brown.
  9. Cool the bread on a wire rack for at least 10 minutes before slicing.

Nutrition

Serving: 1sliceCalories: 120kcalCarbohydrates: 22gProtein: 4gFat: 2gSaturated Fat: 0.5gPolyunsaturated Fat: 0.3gMonounsaturated Fat: 1gSodium: 250mgPotassium: 60mgFiber: 1gSugar: 1gCalcium: 10mgIron: 1.2mg

Notes

Store in an airtight container at room temperature for up to 3 days or freeze for up to 3 months.

Tried this recipe?

Let us know how it was!

Crack Breakfast Casserole: A Cheesy Morning Delight

December 10, 2025 by Grace Snow Leave a Comment

As I flipped through my collection of cherished family recipes, I stumbled upon a gem that instantly whisked me back to bustling brunches filled with laughter and warmth—the Crack Breakfast Casserole. This dish is not just any breakfast; it’s a comforting blend of savory meats, creamy cheeses, and crispy hash browns, all baked to golden perfection. The beauty of this recipe lies in its incredible versatility, allowing for quick prep and the option to make it ahead of time—perfect for those busy mornings or special gatherings. Trust me; your family will adore this crowd-pleaser just as much as mine does. So, are you ready to discover how to elevate your breakfast game with this delightful casserole?

Why is Crack Breakfast Casserole a Must-Try?

Ease of Preparation: This recipe is designed to fit into your hectic mornings. With its make-ahead feature, you can assemble it the night before and simply bake it in the morning.

Versatile Options: Whether you prefer spicy sausage or wish to sneak in some veggies like bell peppers or spinach, this casserole accommodates your tastes effortlessly.

Unmatched Flavor: With layers of creamy cheese, savory meats, and crispy hash browns, every bite is a delight! It's comfort food at its best, ready to satisfy even the pickiest eaters.

Crowd-Pleasing Delight: Perfect for family brunches or gatherings, this dish will impress your guests and become a staple in your recipe rotation, just like my Sweet Potato Casserole.

Nutritional Adaptability: This casserole can easily be made gluten-free with a simple swap for gluten-free hash browns, ensuring everyone can enjoy it.

Experience the joy of serving a warm, hearty breakfast that fills the room with enticing aromas and happy faces!

Crack Breakfast Casserole Ingredients

For the Casserole Base
• Pork Sausage – Adds savory flavor and protein; you can use turkey sausage for a leaner option.
• Bacon – Introduces a crispy, salty texture; consider turkey bacon for a lighter version.
• Cream Cheese – Provides creaminess; Neufchâtel cheese is a lower-fat alternative.
• Sour Cream – Adds tanginess and moisture; Greek yogurt can be a healthier twist.
• Milk – Keeps the egg mixture moist; substitute with almond milk for a dairy-free option.
• Eggs – The binding agent; choose fresh eggs for the best results.

For Seasoning & Flavor
• Dry Ranch Seasoning – Delivers herby flavor; homemade ranch seasoning can enhance freshness.
• Onion Powder – Enhances overall flavor; fresh onions can add natural sweetness.
• Garlic Powder – Boosts flavor; use fresh garlic for a robust taste.
• Salt & Pepper – Essential for seasoning; adjust to taste for personal preference.

For Texture & Creaminess
• Hash Browns – Provides heartiness; opt for frozen, gluten-free varieties if needed.
• Cheddar Cheese – Key for creaminess and flavor; mozzarella or pepper jack can be tasty substitutes.

Embrace the joy of a Crack Breakfast Casserole with these simple, easily adaptable ingredients that promise a delightful meal experience!

Step‑by‑Step Instructions for Crack Breakfast Casserole

Step 1: Cook the Meats
In a large skillet over medium-high heat, add the pork sausage and bacon, cooking them until they are nicely browned and crispy—about 8-10 minutes. Stir occasionally to ensure even cooking and then carefully drain any excess fat. This step builds a savory base for your Crack Breakfast Casserole.

Step 2: Prep Egg Mixture
In a mixing bowl, combine the cream cheese and sour cream, blending them together until smooth and creamy. Next, whisk in the milk, eggs, dry ranch seasoning, onion powder, garlic powder, salt, and pepper until the mixture is homogenous and well-combined. This flavorful egg mixture will hold the casserole together beautifully.

Step 3: Combine Ingredients
Add the cooked meats to the egg mixture, followed by the hash browns and one cup of shredded cheddar cheese. Stir everything together until all the ingredients are evenly coated and mixed. This will help ensure that every bite of your Crack Breakfast Casserole is filled with delicious flavors and textures.

Step 4: Bake
Preheat your oven to 350°F (175°C) while you prepare the baking dish. Pour the combined mixture into a greased 9x13-inch baking dish. Top with the remaining cheddar cheese and cover it with aluminum foil. Bake for 50-60 minutes, then remove the foil and bake for an additional 8-10 minutes until the cheese is bubbly and golden brown.

Step 5: Rest and Serve
Once baked, allow the Crack Breakfast Casserole to cool for about 5-10 minutes before slicing. This slight cooling period helps the casserole set, making it easier to serve. Cut into squares, and serve warm to enjoy the melty cheese and savory flavors.

What to Serve with Crack Breakfast Casserole?

Transform your breakfast routine into a delightful feast with perfect pairings for this creamy, cheesy casserole.

  • Fresh Fruit Salad: The sweetness of seasonal fruits adds a refreshing contrast to the rich flavors of the casserole, balancing each bite beautifully. Add a splash of citrus juice to elevate the fruity notes!

  • Crispy Bacon-Wrapped Asparagus: This combination introduces a savory crunch, enhancing the overall texture of your meal. The earthy asparagus will complement the richness of the casserole.

  • Hollandaise Sauce: Drizzling this creamy sauce over your casserole takes it to the next level of indulgence. Its lemony zing cuts through the richness, creating a delightful flavor explosion.

  • Green Side Salad: A bright green salad with mixed greens and a light vinaigrette provides an excellent contrast, adding freshness to your plate. Top it off with cherry tomatoes for a burst of color!

  • Breakfast Smoothie: A creamy smoothie packed with spinach, bananas, and yogurt adds nutrition and a refreshing sip to your meal. This smooth drink is a great way to kick-start your day!

  • Savory Scones: Cheesy or herb-infused scones add rich, buttery comfort to your breakfast table. Enjoy them warm next to the casserole for a cozy, satisfying combination.

  • Mimosas: For a special touch, serve mimosas with your casserole. The bubbly citrus drink adds brightness and a celebratory feel to your breakfast gathering.

Consider these delicious options to round out your meal and ensure a truly delightful breakfast experience. Each accompaniment enhances the main dish, creating a well-balanced and satisfying spread!

How to Store and Freeze Crack Breakfast Casserole

Fridge: Store leftover Crack Breakfast Casserole in an airtight container for up to 4 days. Reheat in the microwave or oven to enjoy it warm and delicious.

Freezer: For longer storage, freeze the casserole in a properly wrapped dish or freezer-safe container for up to 3 months. Thaw in the fridge overnight before reheating.

Reheating: When you're ready to serve, preheat your oven to 350°F (175°C) and reheat covered with foil for about 25 minutes, or until heated through.

Make-Ahead Tip: Assemble the casserole fully and refrigerate it overnight, then bake in the morning for a seamless breakfast experience!

Make Ahead Options

These Crack Breakfast Casserole preparations are a lifesaver for busy mornings! You can assemble the entire casserole up to 24 hours in advance by mixing all the ingredients and storing the unbaked dish in the refrigerator. Be sure to cover it tightly with aluminum foil to prevent drying out. When you're ready to enjoy, simply bake it straight from the fridge, adding an additional 10-15 minutes to the baking time if it’s cold. If you have leftovers, they can be refrigerated for up to four days and reheated individually in the microwave or oven, keeping every bite just as delicious as the first. Enjoy the convenience of having a warm, hearty breakfast ready to go!

Expert Tips

  • Make Ahead Magic: Prepare the casserole the night before and refrigerate it. Just pop it in the oven in the morning for effortless baking.

  • Vegetable Consideration: If adding vegetables, sauté them beforehand to reduce moisture and prevent a soggy texture in your Crack Breakfast Casserole.

  • Cheese Choices: Experiment with different cheeses like mozzarella or pepper jack for a delightful twist on flavor while maintaining creaminess.

  • Egg Freshness: Always use the freshest eggs you can find, as they contribute to a firmer and more flavorful casserole.

  • Proper Baking: Ensure your oven reaches the right temperature before baking; this ensures even cooking and a perfectly browned top.

Crack Breakfast Casserole Variations

Customize your Crack Breakfast Casserole to suit your taste buds and dietary needs with these delightful twists!

  • Veggie Boost: Add diced bell peppers or fresh spinach for a burst of color and nutrition. It’s a wonderful way to sneak in some greens!

  • Cheese Swap: Replace cheddar cheese with mozzarella or pepper jack for a different flavor profile. Each type of cheese will impart a unique vibe to your dish.

  • Turkey Twist: Substitute pork sausage and bacon with turkey sausage and turkey bacon for a leaner version. It’s delicious and still satisfying!

  • Creamy Alternative: Use Neufchâtel cheese instead of cream cheese for a lower-fat creamy base. Your guests won't even notice the difference!

  • Adding Heat: Crank up the spice by incorporating jalapeños or a dash of cayenne pepper. A zesty kick makes every slice exciting!

  • Herb Infusion: Mix in fresh herbs like chives or parsley before baking for an aromatic and fresh flavor boost. The herbs will elevate each bite beautifully!

  • Hash Brown Choice: Opt for sweet potato hash browns instead to introduce a hint of sweetness. This twist is perfect for those who love a touch of sweetness in their breakfast.

As you embrace these variations, consider serving alongside a fresh fruit salad or a light side like Breakfast Egg Muffins for balance. Enjoy your culinary journey with this comforting dish!

Crack Breakfast Casserole Recipe FAQs

What type of pork sausage should I use?
I recommend using a savory pork sausage for the best flavor. However, if you're looking for a leaner option, turkey sausage works wonderfully too.

How should I store leftover Crack Breakfast Casserole?
Store any leftover casserole in an airtight container and refrigerate it for up to 4 days. You'll love how easy it is to reheat in the microwave or oven—just warm it until it's nice and hot again!

Can I freeze Crack Breakfast Casserole?
Absolutely! To freeze, let the casserole cool completely, then transfer it to a freezer-safe container or wrap tightly in aluminum foil. It can be frozen for up to 3 months. When you're ready to enjoy it, thaw it in the fridge overnight and reheat it in the oven.

What if my casserole is too watery after baking?
If your Crack Breakfast Casserole turns out watery, it may be due to excess moisture from the added ingredients. To troubleshoot, make sure to sauté any vegetables beforehand to reduce moisture, and avoid using frozen hash browns that are not fully drained.

Is this recipe suitable for gluten-free diets?
Yes, you can make the Crack Breakfast Casserole gluten-free! Just ensure you use gluten-free hash browns and double-check that your other ingredients, like ranch seasoning, do not contain gluten.

Can I make this casserole ahead of time?
Absolutely! You can assemble the entire casserole the night before. Just cover it and refrigerate. In the morning, pop it in the oven for a hassle-free breakfast. Bake as usual, adjusting the cooking time slightly if it’s cold from the fridge. Enjoy the simplicity of a delicious make-ahead meal!

Crack Breakfast Casserole

Crack Breakfast Casserole: A Cheesy Morning Delight

Discover the Crack Breakfast Casserole, a comforting blend of meats, cheeses, and hash browns that's perfect for busy mornings.
Print Recipe Pin Recipe
Prep Time 15 minutes mins
Cook Time 1 hour hr
Resting Time 10 minutes mins
Total Time 1 hour hr 25 minutes mins
Servings: 8 slices
Course: Breakfast
Cuisine: American
Calories: 350
Ingredients Equipment Method Nutrition Notes

Ingredients
  

For the Casserole Base
  • 1 pound Pork Sausage You can use turkey sausage for a leaner option.
  • 6 slices Bacon Consider turkey bacon for a lighter version.
  • 8 oz Cream Cheese Neufchâtel cheese is a lower-fat alternative.
  • 1 cup Sour Cream Greek yogurt can be a healthier twist.
  • 1 cup Milk Substitute with almond milk for a dairy-free option.
  • 6 large Eggs Choose fresh eggs for the best results.
For Seasoning & Flavor
  • 1 packet Dry Ranch Seasoning Homemade ranch seasoning can enhance freshness.
  • 1 teaspoon Onion Powder Fresh onions can add natural sweetness.
  • 1 teaspoon Garlic Powder Use fresh garlic for a robust taste.
  • to taste Salt Adjust to taste for personal preference.
  • to taste Pepper Adjust to taste for personal preference.
For Texture & Creaminess
  • 24 oz Hash Browns Opt for frozen, gluten-free varieties if needed.
  • 2 cups Cheddar Cheese Mozzarella or pepper jack can be tasty substitutes.

Equipment

  • Skillet
  • Mixing Bowl
  • Baking Dish
  • Whisk

Method
 

Step-by-Step Instructions
  1. Cook the Meats: In a large skillet over medium-high heat, add the pork sausage and bacon, cooking them until they are nicely browned and crispy—about 8-10 minutes.
  2. Prep Egg Mixture: In a mixing bowl, combine the cream cheese and sour cream, blending them together until smooth. Whisk in the milk, eggs, dry ranch seasoning, onion powder, garlic powder, salt, and pepper until well-combined.
  3. Combine Ingredients: Add the cooked meats to the egg mixture, followed by the hash browns and one cup of shredded cheddar cheese. Stir everything together until evenly mixed.
  4. Bake: Preheat your oven to 350°F (175°C). Pour the mixture into a greased 9x13-inch baking dish. Top with remaining cheddar cheese, cover with foil, and bake for 50-60 minutes. Remove foil and bake for an additional 8-10 minutes until the cheese is bubbly and golden.
  5. Rest and Serve: Allow the casserole to cool for about 5-10 minutes before slicing. Cut into squares and serve warm.

Nutrition

Serving: 1sliceCalories: 350kcalCarbohydrates: 25gProtein: 20gFat: 22gSaturated Fat: 10gPolyunsaturated Fat: 1gMonounsaturated Fat: 9gCholesterol: 150mgSodium: 800mgPotassium: 400mgFiber: 2gSugar: 1gVitamin A: 500IUVitamin C: 2mgCalcium: 300mgIron: 2mg

Notes

This casserole can easily be prepared the night before and baked in the morning for a convenient breakfast option.

Tried this recipe?

Let us know how it was!

Savory Cheddar & Bacon Dutch Baby: A Cozy Brunch Treat

December 9, 2025 by Grace Snow Leave a Comment

The moment I took my first bite of a Savory Cheddar & Bacon Dutch Baby, I felt like I had been transported to a cozy café where the aroma of freshly cooked pancakes fills the air. This dish is truly a showstopper—a fluffy pancake, crisped to perfection, generously topped with sharp cheddar and crunchy bacon that will have everyone asking for seconds. What I love most about this recipe is not just its stunning presentation, but how incredibly quick it is to whip up, making it perfect for lazy weekend brunches or a special weekday treat. Plus, with an easy swap for gluten-free flour, everyone can enjoy it. Are you ready to impress your friends and family with this comforting breakfast delight? Let's dive into the recipe and make some kitchen magic happen!

Why is this Dutch Baby a Must-Try?

Simplicity: The recipe is easy to follow, making it accessible for both novice and experienced cooks. Quick Cooking Time: Ready in just 30 minutes, it’s perfect for those busy mornings or weekend brunches. Flavor Explosion: The savory blend of cheddar and bacon creates a delightful taste that can’t be beaten. Gluten-Free Option: Easily swap the flour for a gluten-free blend, ensuring everyone can enjoy this treat! Showstopping Presentation: Its puffed-up appearance will impress family and friends, making it a perfect centerpiece for any gathering. If you’re craving something light yet hearty, don’t forget to check out our Seafood Pasta Savory for another irresistible option!

Savory Cheddar & Bacon Dutch Baby Ingredients

For the Batter

  • Eggs – Provide structure and help the pancake puff up; they are essential for this Dutch baby.
  • All-Purpose Flour – Creates the pancake's body; substitute with a gluten-free flour blend for a gluten-free Savory Cheddar & Bacon Dutch Baby.
  • Milk – Adds moisture and richness; use whole milk for best results, or oat/almond milk as lactose-free alternatives.
  • Melted Butter – Adds flavor and assists in browning; can be replaced with oil for a dairy-free option.
  • Salt – Enhances flavor; it's crucial for balance, so no substitutes are needed.
  • Black Pepper – Adds a hint of spice; adjust according to taste or omit for a milder flavor.

For the Topping

  • Sharp Cheddar Cheese – Provides savory flavor and gooey texture; substitute with gouda, feta, or pepper jack for a twist.
  • Bacon – Adds a savory, crunchy topping; for a vegetarian option, replace with sautéed mushrooms or crispy tempeh.

Step‑by‑Step Instructions for Savory Cheddar & Bacon Dutch Baby

Step 1: Preheat the Oven
Start by preheating your oven to 425°F (220°C). While the oven heats up, place a cast-iron skillet inside to warm; this will ensure your Savory Cheddar & Bacon Dutch Baby puffs up beautifully. Let the skillet heat for about 10 minutes, so it's ready for the batter.

Step 2: Blend the Batter
In a blender, combine the eggs, all-purpose flour, milk, melted butter, salt, and black pepper. Blend until the mixture is smooth and frothy, which should take about 30 seconds. Let the batter rest for 5 minutes while the skillet continues to heat up, allowing air to incorporate for a fluffier result.

Step 3: Prepare the Skillet
Once preheated, carefully remove the hot cast-iron skillet from the oven. Add a tablespoon of butter to the skillet, swirling it around to coat the bottom and sides. Pour the rested batter into the skillet immediately; you should hear a delightful sizzle when the batter hits the hot surface, indicating a good start for your Dutch baby.

Step 4: Add Toppings
Sprinkle the shredded sharp cheddar cheese and crumbled bacon evenly over the batter. The cheese will melt and create a gooey, savory layer while the bacon crisps up beautifully during baking. This combination is what makes the Savory Cheddar & Bacon Dutch Baby such a breakfast delight.

Step 5: Bake to Perfection
Place the skillet in the oven and bake for 20 to 25 minutes. Keep an eye on it; the edges should puff up and turn a golden brown, while the center remains slightly soft but set. Avoid opening the oven door during baking to prevent deflation of your delicious creation.

Step 6: Serve Warm
Once baked, carefully remove the skillet from the oven, and let it rest for a minute. You can garnish your Savory Cheddar & Bacon Dutch Baby with fresh parsley or chives for a touch of color and flavor. Slice and serve warm straight from the skillet, allowing everyone to enjoy this impressive breakfast treat!

What to Serve with Savory Cheddar & Bacon Dutch Baby

Discover the perfect accompaniments to enhance your savory delight, creating a memorable meal experience.

  • Crispy Green Salad: A fresh salad with mixed greens, cucumbers, and a light vinaigrette adds a bright crunch that balances the richness of the Dutch baby.

  • Roasted Asparagus: Tender asparagus, roasted with olive oil and garlic, brings a delightful earthiness that pairs beautifully with the cheesy pancake.

  • Sliced Avocado: Creamy avocado slices give a luxurious texture and additional healthy fats to your brunch spread, creating a satisfying contrast.

  • Fresh Fruit Medley: A vibrant mix of seasonal fruits, like berries and melons, provides a refreshing sweet touch that complements the savory flavors perfectly.

  • Honey Drizzle: A light drizzle of honey on top provides a sweet counterpoint to the cheese and bacon, making every bite irresistible.

  • Sparkling Water with Citrus: For a refreshing drink, serve sparkling water infused with lemon or lime slices for a zingy, palate-cleansing beverage.

Make Ahead Options

These Savory Cheddar & Bacon Dutch Babies are a game-changer for busy home cooks! You can prepare the batter up to 24 hours in advance; simply blend all the ingredients, and refrigerate it in an airtight container. Before baking, let the batter sit at room temperature for about 15-30 minutes to ensure a fluffy texture. Additionally, you can pre-cook the bacon and store it in the fridge for up to 3 days to save even more time. When you're ready to serve, just preheat the oven, melt butter in the skillet, pour in the chilled batter, sprinkle with cheese and bacon, and bake until perfectly puffed. Enjoy this comforting breakfast delight with minimal effort!

Storage Tips for Savory Cheddar & Bacon Dutch Baby

  • Fridge: Store leftovers in an airtight container for up to 2 days. This will help keep the flavors intact while preventing them from drying out.
  • Freezer: For longer storage, freeze individual slices wrapped tightly in plastic wrap and then placed in a freezer-safe bag for up to 2 months.
  • Reheating: Reheat in the oven at 350°F (175°C) for 10-15 minutes, ensuring the Savory Cheddar & Bacon Dutch Baby regains its fluffy texture.
  • Make-Ahead: The batter can be made and refrigerated for up to 24 hours. Just let it come to room temperature before pouring into the hot skillet for baking.

Expert Tips for Savory Cheddar & Bacon Dutch Baby

  • Preheat Properly: Make sure your oven and skillet are fully preheated; this ensures maximum puffiness for your Savory Cheddar & Bacon Dutch Baby.

  • Avoid Oven Door: Resist the urge to peek while it bakes; opening the oven door can cause your fluffy pancake to deflate, ruining its beautiful rise.

  • Serve Immediately: For the best texture, serve your Dutch baby right after baking; reheating can lead to a denser pancake, losing that delightful fluffiness.

  • Mix Well: Blend the batter until smooth and frothy for an airy finish; lumps will prevent the pancake from rising properly.

  • Customize Toppings: Feel free to get creative with different toppings or cheeses; variations will keep the dish exciting for repeat meals!

Savory Cheddar & Bacon Dutch Baby Variations

Feel free to get creative and make this dish your own with these delightful tweaks!

  • Gluten-Free: Substitute all-purpose flour with a gluten-free flour blend for a fluffy, inclusive treat.
  • Veggie Delight: Swap bacon for sautéed vegetables like bell peppers and spinach for a wholesome meatless option. The vibrant colors and flavors will keep you coming back for more!
  • Cheese Exchange: Try gouda or pepper jack for a flavor twist that will surprise and delight your taste buds. Each option brings a new personality to this beloved pancake.
  • Herb Infusion: Add fresh herbs like thyme or rosemary to the batter for a fragrant uplift. This simple touch can elevate the dish to a new level of deliciousness!
  • Spicy Kick: Mix in a pinch of cayenne pepper or chili flakes to the batter for a touch of heat, perfect for those who enjoy a spicy breakfast. Your taste buds will thank you for the fiery surprise.
  • Creamy Add-On: Drizzle a bit of sour cream or Greek yogurt on top before serving for a tangy richness that complements the savory flavors quite nicely. It adds a layer of creaminess that perfectly balances the pancake texture.
  • Sweet Savory Fusion: For a unique twist, add a drizzle of maple syrup or honey right before serving. This sweet contrast with savory flavors creates a deliciously unexpected combination.
  • Air Fryer Alternative: If you’re looking for a quicker method, you can cook your Dutch baby in an air fryer for a similar fluffy outcome. Just keep an eye on the timing to ensure it's just right!

By experimenting with these variations, you can add your personal touch and keep this dish fresh every time. And if you're looking for more delicious recipes, don't forget to check out our Santa Soup Savory or even consider pairing this with some tasty Grilled Mushrooms Savory as a side. Enjoy the kitchen adventures!

Savory Cheddar & Bacon Dutch Baby Recipe FAQs

What type of cheese works best for the Savory Cheddar & Bacon Dutch Baby?
I highly recommend using sharp cheddar cheese for its strong flavor and gooey texture. However, feel free to experiment with other cheeses like gouda, feta, or pepper jack for a delightful twist. Each cheese brings its unique taste, allowing you to customize your Dutch baby to your liking.

How should I store leftovers of the Savory Cheddar & Bacon Dutch Baby?
To keep your leftovers fresh, store them in an airtight container in the refrigerator for up to 2 days. If you want to maintain the best texture, I suggest reheating it in the oven at 350°F (175°C) for about 10-15 minutes, which will help regain its fluffy goodness.

Can I freeze the Savory Cheddar & Bacon Dutch Baby?
Absolutely! You can freeze individual slices of the Dutch baby. Wrap each slice tightly in plastic wrap, then place them in a freezer-safe bag. They can be kept in the freezer for up to 2 months. When you're ready to enjoy, simply reheat in the oven as mentioned above to restore its wonderful texture.

How do I ensure my Savory Cheddar & Bacon Dutch Baby comes out fluffy?
To achieve maximum puffiness, make sure your oven and cast-iron skillet are fully preheated before adding the batter. Blend the ingredients until smooth and frothy, and avoid opening the oven door while baking, as it can cause the Dutch baby to deflate. Serve immediately after baking for the best fluffy experience!

Are there any dietary considerations for this recipe, especially for allergies?
Yes! If you're looking for a gluten-free option, simply substitute the all-purpose flour with a gluten-free flour blend. Additionally, for those with dairy allergies, you can use oil instead of melted butter and non-dairy milk alternatives like oat or almond milk. For a vegetarian version, swap out the bacon for sautéed mushrooms or crispy tempeh.

How can I customize the toppings of my Savory Cheddar & Bacon Dutch Baby?
Feel free to get creative with your toppings! Instead of bacon, try sautéed vegetables like bell peppers and spinach for a healthy twist. You can also add fresh herbs like chives or parsley for a burst of color and flavor. If you want to change the flavor profile, mix different cheeses to level up your breakfast game!

Savory Cheddar & Bacon Dutch Baby

Savory Cheddar & Bacon Dutch Baby: A Cozy Brunch Treat

Savory Cheddar & Bacon Dutch Baby brings a delightful taste and stunning presentation, perfect for brunch or a cozy breakfast treat.
Print Recipe Pin Recipe
Prep Time 10 minutes mins
Cook Time 25 minutes mins
Resting Time 5 minutes mins
Total Time 35 minutes mins
Servings: 4 slices
Course: Breakfast
Cuisine: American
Calories: 300
Ingredients Equipment Method Nutrition Notes

Ingredients
  

For the Batter
  • 3 large Eggs Provide structure and help the pancake puff up.
  • 1 cup All-Purpose Flour Substitute with a gluten-free flour blend for a gluten-free option.
  • 1 cup Milk Use whole milk or oat/almond milk for lactose-free.
  • 4 tablespoons Melted Butter Can be replaced with oil for a dairy-free option.
  • 1 teaspoon Salt Essential for flavor balance.
  • 1 teaspoon Black Pepper Adjust according to taste.
For the Topping
  • 1 cup Sharp Cheddar Cheese Substitute with gouda, feta, or pepper jack for a twist.
  • 4 slices Bacon For a vegetarian option, replace with sautéed mushrooms or tempeh.

Equipment

  • cast iron skillet
  • Blender

Method
 

Step-by-Step Instructions
  1. Preheat your oven to 425°F (220°C) with a cast-iron skillet inside for about 10 minutes.
  2. In a blender, combine the eggs, all-purpose flour, milk, melted butter, salt, and black pepper. Blend until smooth and frothy, then let rest for 5 minutes.
  3. Remove the hot skillet from the oven, add 1 tablespoon of butter, and swirl to coat. Pour in the rested batter.
  4. Sprinkle the shredded sharp cheddar and crumbled bacon over the batter.
  5. Bake for 20 to 25 minutes until puffed and golden brown, avoiding opening the oven door.
  6. Let it rest for a minute, garnish with parsley or chives, slice, and serve warm.

Nutrition

Serving: 1sliceCalories: 300kcalCarbohydrates: 29gProtein: 12gFat: 18gSaturated Fat: 9gPolyunsaturated Fat: 1gMonounsaturated Fat: 6gCholesterol: 170mgSodium: 600mgPotassium: 300mgFiber: 1gSugar: 1gVitamin A: 500IUCalcium: 150mgIron: 1mg

Notes

Serve immediately for the best texture; reheating can make it dense. Feel free to customize toppings for variety.

Tried this recipe?

Let us know how it was!

Tasty Baked Apple Cinnamon Oatmeal Cups for Cozy Mornings

November 24, 2025 by Grace Snow Leave a Comment

As I stood in my kitchen this morning, a symphony of cinnamon and apples wafted through the air, invoking memories of cozy fall mornings. These Tasty Baked Apple Cinnamon Oatmeal Cups are not just a beautiful way to start your day; they’re a perfect meal prep solution for those busy weekdays when breakfast can easily fall by the wayside. Packed with wholesome ingredients, each muffin-like cup combines sweet apples, hearty oats, and aromatic spices, ensuring a healthy, satisfying meal that fits seamlessly into your routine. The best part? They freeze like a dream, promising warmth and comfort even on the most hectic of mornings. Curious how to whip up these delightful breakfast gems? Let’s dive into this delightful recipe together!

Why are these oatmeal cups irresistible?

Health Conscious: These Tasty Baked Apple Cinnamon Oatmeal Cups are packed with nutritious oats and apples, making them a wholesome, healthy breakfast option.

Meal Prep Masterpiece: They store well in the fridge or freezer, allowing you to create a batch ahead of time and have delicious, homemade breakfasts ready to go.

Customizable Goodness: Feel free to swap the apples for your favorite fruits or experiment with spices for a personal touch that keeps things exciting.

Time-Saving Delight: With just a few simple steps, you can have a warm and comforting breakfast that’s ready in under 30 minutes—ideal for busy mornings!

Crowd-Pleasing Comfort: Whether served to family or friends, these oatmeal cups are sure to impress with their delightful texture and cozy flavors. You can even serve them alongside options like Pumpkin Cinnamon Roll for a seasonal twist!

Tasty Baked Apple Cinnamon Oatmeal Cups Ingredients

For the Oatmeal Mixture

  • Old-fashioned rolled oats – Provides structure and a chewy texture; avoid instant or steel-cut oats for best results.
  • Cinnamon – Infuses warm, cozy flavor; adjust according to your taste preference.
  • Eggs – Binds ingredients together and adds richness; can be swapped with flax eggs for a vegan option.
  • Milk (any type) – Combines ingredients; plant-based milk is a great substitute for a dairy-free version.

For the Sweetness

  • Apples – Adds natural sweetness and moisture; use firm varieties like Honeycrisp or Granny Smith, chopped into 1/4-inch pieces.
  • Maple syrup (optional) – Enhances sweetness; honey or agave syrup can be used as alternatives.
  • Coarse sugar (optional) – Sprinkled on top for a crunchy finish; can be omitted if avoiding added sugars.

For the Crunch

  • Chopped nuts (optional) – Adds protein and texture; walnuts or pecans work well, but can be left out for a nut-free option.

These Tasty Baked Apple Cinnamon Oatmeal Cups are a heartfelt choice for your breakfast table, melding wholesome ingredients that contribute to both flavor and nutrition.

Step‑by‑Step Instructions for Tasty Baked Apple Cinnamon Oatmeal Cups

Step 1: Preheat Your Oven
Begin by preheating your oven to 350°F (177°C). While the oven warms up, grab a standard muffin pan and generously spray it with nonstick cooking spray to ensure easy removal of your Tasty Baked Apple Cinnamon Oatmeal Cups once they’re done baking. The warm aroma of cinnamon will soon fill your kitchen!

Step 2: Mix the Oatmeal Base
In a large mixing bowl, whisk together the old-fashioned rolled oats, ground cinnamon, eggs, milk, and optional maple syrup until fully combined. Take your time to ensure that there are no dry clumps of oats, creating a smooth mixture. This oatmeal base forms the hearty foundation of your delicious breakfast treat.

Step 3: Incorporate Apples and Nuts
Gently fold in the chopped apples and any desired nuts, ensuring an even distribution throughout the mixture. Aim for uniform apple pieces to prevent them from sinking during baking. The sweetness of the apples combined with the nutty crunch creates the perfect balance in your Tasty Baked Apple Cinnamon Oatmeal Cups.

Step 4: Fill the Muffin Pan
Carefully spoon the oatmeal batter into the prepared muffin cups, filling each about 3/4 full. This will provide enough room for the oatmeal cups to rise without overflowing. As you fill each cup, visualize the delightful golden-brown goods you're about to create, bringing excitement to your kitchen.

Step 5: Add the Finishing Touch
If you’re looking for an extra sweet touch, sprinkle a pinch of coarse sugar on top of each filled muffin cup. This optional step will give your Tasty Baked Apple Cinnamon Oatmeal Cups a delightful, crunchy topping that complements the comforting flavors within.

Step 6: Bake to Perfection
Place the muffin pan in your preheated oven and bake for 28-30 minutes. You're looking for golden-brown edges and a firm, set top. The enticing aroma of baked apples and cinnamon will fill your kitchen, signaling that it’s almost time to enjoy your cozy breakfast masterpiece.

Step 7: Cool and Enjoy
Once baked, let the Tasty Baked Apple Cinnamon Oatmeal Cups cool in the muffin pan for 5-10 minutes. This brief cooling period makes them easier to handle and helps them set perfectly. Afterward, gently remove them from the pan and savor the warm, comforting flavors you've created.

How to Store and Freeze Tasty Baked Apple Cinnamon Oatmeal Cups

  • Fridge: Store your oatmeal cups in an airtight container for up to 5 days. This keeps them fresh and ready for a quick grab-and-go breakfast!
  • Freezer: Individually wrap each cup in plastic wrap or foil, then place them in a freezer-safe bag. They can be frozen for up to 3 months.
  • Thawing: To enjoy, thaw them overnight in the fridge and reheat in the microwave for 30-60 seconds, adding a splash of milk to keep them moist.
  • Room Temperature: For short-term storage, these oatmeal cups can sit at room temperature for a few hours but should be refrigerated or frozen for longer-lasting freshness.

Tasty Baked Apple Cinnamon Oatmeal Cups Variations

Feel free to get creative with these oatmeal cups, and customize them to your heart's content!

  • Fruit Swap: Replace the apples with your favorite fruits like blueberries or mashed bananas for a different flavor.
  • Spice It Up: Experiment with spices like nutmeg or pumpkin pie spice to elevate the cozy flavors.
  • Nut-Free Version: Omit the nuts or substitute them with seeds for a crunchy texture that’s nut-free and just as satisfying.
  • Protein Boost: Stir in a scoop of your favorite protein powder into the oatmeal mixture for an extra nutritional kick.
  • Sweetness Options: Instead of maple syrup, try using honey or agave for an alternative sweetener that suits your taste.
  • Oat Variety: Swap old-fashioned rolled oats for steel-cut oats if you're looking for a heartier texture—just remember they'll require a longer baking time.
  • Dairy-Free Delight: Use almond milk, coconut milk, or oat milk to make these oatmeal cups suitable for a dairy-free diet.
  • Texture Twist: Add a layer of granola on top before baking for an extra crunchy finish that also gives a delightful presentation.

These variations allow you to enjoy the Tasty Baked Apple Cinnamon Oatmeal Cups in so many delightful ways! You might even like to pair them with some Pumpkin Cinnamon Roll for an autumn-inspired breakfast spread!

Expert Tips for Tasty Baked Apple Cinnamon Oatmeal Cups

  • Oats Matter: Avoid quick oats as they can lead to mushy oatmeal cups. Stick to old-fashioned rolled oats for the best texture in your Tasty Baked Apple Cinnamon Oatmeal Cups.

  • Apple Sizes: Ensure apple pieces are uniformly chopped to prevent them from sinking during baking. This will keep your oatmeal cups evenly balanced and flavorful.

  • Fill Wisely: Fill each muffin cup about 3/4 full. This allows space for rising and ensures even baking, so you enjoy a perfectly fluffy cup.

  • Sugar Topping: If you choose to sprinkle coarse sugar on top, do so sparingly. Too much can make it overly sweet—just a pinch will give you that delightful crunch without overpowering the cozy flavors.

  • Baking Watch: Keep an eye on the cups during baking. If the tops brown too quickly, gently cover them with aluminum foil to help them bake evenly without burning.

What to Serve with Tasty Baked Apple Cinnamon Oatmeal Cups

These scrumptious oatmeal cups make a delightful centerpiece for a heartfelt breakfast; let's elevate your meal with perfect pairings.

  • Greek Yogurt: Creamy and tangy, it complements the sweetness of the oatmeal cups while adding a protein boost for a satisfying start.
  • Fresh Berries: A burst of juicy strawberries or blueberries adds a refreshing contrast—a delightful and nutritious way to brighten your plate.
  • Scrambled Eggs: Fluffy, savory eggs provide a lovely contrast to the sweet oatmeal cups, making your breakfast feel balanced and hearty.
  • Maple Syrup Drizzle: A warm drizzle of maple syrup enhances the comforting flavors, turning each bite into an indulgent treat. It’s an extra touch that feels special!
  • Chopped Nuts: Crushed walnuts or pecans sprinkled on top provide an added crunch and nutty flavor that pairs beautifully with the cinnamon.
  • Herbal Tea: A warm cup of chamomile or peppermint tea adds a cozy finish to your meal, creating a soothing morning ritual.
  • Banana Slices: Simple and nutritious, fresh banana rounds add a creamy sweetness that complements the apple and cinnamon wonderfully.

These options will not only adorn your breakfast table but also enhance the heartwarming experience of enjoying Tasty Baked Apple Cinnamon Oatmeal Cups.

Make Ahead Options

These Tasty Baked Apple Cinnamon Oatmeal Cups are a fantastic meal prep solution for those bustling mornings! You can mix the oatmeal base, including oats, cinnamon, eggs, and milk, and refrigerate it for up to 24 hours. Additionally, chop the apples and nuts, and store them separately to preserve freshness. When you're ready to bake, simply combine everything and fill the muffin pan, then bake as usual. If preferred, you can also freeze the baked cups in individual portions for up to 3 months; just thaw them overnight in the refrigerator and reheat in the microwave for a quick breakfast that’s just as delicious! This makes every busy day a little easier and ensures you have a warm, wholesome option on hand.

Tasty Baked Apple Cinnamon Oatmeal Cups Recipe FAQs

What kind of apples should I use for the best results?
Absolutely! For the most flavorful Tasty Baked Apple Cinnamon Oatmeal Cups, opt for firm varieties like Honeycrisp or Granny Smith apples. These types not only add the right amount of sweetness but also provide a lovely texture that holds up well during baking. Make sure to chop them into 1/4-inch pieces to ensure even distribution throughout the cups.

How should I store my oatmeal cups after baking?
Very simple! After they’ve cooled, place your oatmeal cups in an airtight container in the refrigerator, where they'll stay fresh for up to 5 days. This makes them perfect for quick breakfasts, ensuring you have a wholesome meal ready whenever you need it.

Can I freeze Tasty Baked Apple Cinnamon Oatmeal Cups?
Absolutely! To freeze, individually wrap each cup in plastic wrap or foil and place them in a freezer-safe bag. They can be stored for up to 3 months. When you’re ready to enjoy one, just thaw it in the fridge overnight and reheat in the microwave for 30-60 seconds, adding a splash of milk to keep it moist.

What do I do if my oatmeal cups come out too dry?
If you find your oatmeal cups are a bit dry, there are a couple of steps you can take to remedy this for future batches. First, ensure you’re not overbaking; keep an eye on them, as baking for too long can lead to dryness. Another tip is to add a bit of extra milk or apples as moistening agents during preparation. Lastly, next time you reheat them, try adding a splash of milk or water to the container to create steam and add moisture back into the cups.

Are there any dietary considerations I should be aware of?
Yes! If you or someone you serve these oatmeal cups to has dietary restrictions, they’re quite flexible. You can easily substitute the eggs with flax eggs for a vegan option. For a dairy-free version, simply use almond milk or coconut milk instead of regular milk. Additionally, if you’re preparing these for a nut-free audience, just skip the nuts entirely for a delicious, safe breakfast treat.

Can I make these oatmeal cups gluten-free?
Certainly! To make Tasty Baked Apple Cinnamon Oatmeal Cups gluten-free, just use certified gluten-free oats. This is an easy swap that allows those with gluten sensitivities to enjoy these delicious breakfast cups without worry! Just confirm all other ingredients are also gluten-free to ensure safety.

Tasty Baked Apple Cinnamon Oatmeal Cups

Tasty Baked Apple Cinnamon Oatmeal Cups for Cozy Mornings

These Tasty Baked Apple Cinnamon Oatmeal Cups are a wholesome way to start your day, perfect for busy mornings and meal prep.
Print Recipe Pin Recipe
Prep Time 10 minutes mins
Cook Time 30 minutes mins
Cooling Time 10 minutes mins
Total Time 50 minutes mins
Servings: 12 cups
Course: Breakfast
Cuisine: American
Calories: 150
Ingredients Equipment Method Nutrition Notes

Ingredients
  

For the Oatmeal Mixture
  • 2 cups Old-fashioned rolled oats Avoid instant or steel-cut oats for best results.
  • 1 teaspoon Cinnamon Adjust according to your taste preference.
  • 2 large Eggs Can be swapped with flax eggs for a vegan option.
  • 1 cup Milk (any type) Plant-based milk is a great substitute for a dairy-free version.
For the Sweetness
  • 2 cups Apples Use firm varieties like Honeycrisp or Granny Smith, chopped into 1/4-inch pieces.
  • 1/4 cup Maple syrup Optional; honey or agave syrup can be used as alternatives.
  • 2 tablespoons Coarse sugar Optional; can be omitted if avoiding added sugars.
For the Crunch
  • 1/2 cup Chopped nuts Optional; walnuts or pecans work well, but can be left out for a nut-free option.

Equipment

  • Muffin Pan
  • Mixing Bowl
  • Whisk
  • Nonstick Cooking Spray

Method
 

Step-by-Step Instructions
  1. Preheat your oven to 350°F (177°C) and spray a muffin pan with nonstick cooking spray.
  2. In a large mixing bowl, whisk together the oats, cinnamon, eggs, milk, and optional maple syrup.
  3. Gently fold in the chopped apples and any desired nuts.
  4. Spoon the oatmeal batter into the prepared muffin cups, filling each about 3/4 full.
  5. Optionally, sprinkle coarse sugar on top of each filled muffin cup.
  6. Bake for 28-30 minutes until golden-brown and firm on top.
  7. Let the cups cool in the muffin pan for 5-10 minutes before removing.

Nutrition

Serving: 1cupCalories: 150kcalCarbohydrates: 25gProtein: 4gFat: 5gSaturated Fat: 1gPolyunsaturated Fat: 0.5gMonounsaturated Fat: 3gCholesterol: 50mgSodium: 150mgPotassium: 200mgFiber: 3gSugar: 8gVitamin A: 200IUVitamin C: 5mgCalcium: 80mgIron: 1mg

Notes

These oatmeal cups can be stored in an airtight container in the fridge for up to 5 days or frozen for up to 3 months. Thaw overnight in the fridge before reheating.

Tried this recipe?

Let us know how it was!

Mini Breakfast Omelets in Crispy Tater Tot Cups

November 24, 2025 by Grace Snow Leave a Comment

The aroma of freshly baked tater tots wafts through my kitchen, and I can't help but smile at the thought of my family's upcoming breakfast. These Mini Breakfast Omelets with a Tater Tot Crust are not just any ordinary breakfast; they’re a delightful twist on morning classics that are as fun to make as they are to eat. Ideal for busy holiday mornings or a quick family brunch, these egg muffins are incredibly customizable, meaning everyone can fill them with their favorite ingredients, from savory meats to vibrant veggies. Plus, they’re freezer-friendly, allowing you to prepare a batch ahead of time for those hectic weekdays. Who wouldn't want to start their day with a fluffy omelet nestled in a crispy crust? Ready to learn how to whip these up? Let’s dive in!

Why Are These Mini Breakfast Omelets Amazing?

Customization, Each bite can be tailored to your family's tastes—think bacon, spinach, or even jalapeños! Fun to Make, These little omelet cups are not only enjoyable to prepare but also a hit at the breakfast table. Freezer-Friendly, Make a large batch, freeze, and simply reheat for effortless breakfasts all week. Crowd-Pleasing, They're perfect for brunch gatherings or lazy Sunday mornings, ensuring everyone leaves satisfied. If you’re on the lookout for more quick breakfast ideas, check out Breakfast Egg Muffins or Cornbread Breakfast Casserole.

Mini Breakfast Omelets Ingredients

For the Tater Tot Crust
• Tater Tots – The crispy foundational layer that adds a delightful crunch to your mini omelets; frozen works perfectly for convenience.

For the Omelet Filling
• Large Eggs – The heart of the dish, providing rich protein; fresh eggs yield the fluffiest results.
• Milk – Creaminess enhancer for the eggs; almond milk is a great dairy-free alternative.
• Shredded Cheese – Adds a savory, gooey texture; Colby Jack or cheddar is recommended, but reduced-fat cheese can lighten the dish.
• Meat & Veggies – Personalize each muffin with your favorite fillings like sausage, bacon, bell peppers, or spinach; using pre-diced veggies will save time.
• Seasonings – A dash of salt, pepper, or your favorite herbs can elevate the flavor of these Mini Breakfast Omelets to new heights!

Step‑by‑Step Instructions for Mini Breakfast Omelets

Step 1: Preheat and Prepare
Start by preheating your oven to 400°F (200°C) while you generously grease a standard muffin pan with cooking spray or butter. This ensures that the mini breakfast omelets will easily release once baked. Place the muffin pan aside as you gather your ingredients, preparing for the tater tot crust that will form the base of your delightful omelets.

Step 2: Create the Tater Tot Crust
Take your frozen tater tots and microwave them in a bowl for about 2-3 minutes to soften. Once thawed, place three tater tots into each muffin cup and use the back of a spoon to smash them down into a flat, even layer. Bake the crusts in the preheated oven for 10 minutes until they start to turn golden brown and crispy.

Step 3: Add Meats and Veggies
Once the tater tot crusts are ready, reduce the oven temperature to 350°F (175°C). Carefully remove the muffin pan from the oven and distribute your choice of pre-cooked meats and diced vegetables evenly into each cup, packing them slightly to add flavor. This step allows you to customize your Mini Breakfast Omelets to suit every family member’s taste preferences.

Step 4: Whisk the Egg Mixture
In a separate mixing bowl, crack in the large eggs and add about a splash of milk for creaminess. Whisk together until the mixture is well combined and slightly frothy. Season it with salt, pepper, or any herbs you like. Pour this egg mixture into each muffin cup, filling them about 90% full to allow for rising while baking.

Step 5: Sprinkle with Cheese
Finally, sprinkle a generous amount of shredded cheese over each muffin, ensuring they are all covered for that gooey texture. Place the muffin pan back into the oven and bake for an additional 20 minutes. Keep an eye on them; you’ll know the mini breakfast omelets are done when the eggs are set, and the cheese has melted into a lovely golden crust.

Step 6: Cool and Serve
Once baked, carefully remove the muffin pan from the oven and allow the mini breakfast omelets to cool for about 5 minutes. This waiting period makes them easier to remove from the pan. Gently lift each omelet out using a fork or your fingers, and serve warm as a delicious family-friendly breakfast or brunch treat!

Expert Tips for Mini Breakfast Omelets

  • Mind the Fill: Avoid overfilling each cup as the egg mixture expands during baking, which could create a mess in your oven.
  • Ingredient Flexibility: Customize your Mini Breakfast Omelets with your preferred meats or veggies, but ensure that they are pre-cooked and properly diced for even cooking.
  • Freezing Success: Allow the egg muffins to cool completely before freezing to preserve their texture and taste; they can last up to 2 months for an easy grab-and-go breakfast!
  • Cheese Choices: Don't hesitate to mix and match different types of cheeses or skip it entirely for a dairy-free version, adapting to your family's dietary needs.
  • Spice It Up: Experiment with adding spices like paprika or chopped jalapeños to give your Mini Breakfast Omelets an added kick, making them even more delicious!

What to Serve with Mini Breakfast Omelets

Start your day on a high note with delightful pairings that elevate these charming breakfast bites into a complete meal experience.

  • Fresh Fruit Salad: A vibrant mix of seasonal fruits brings a refreshing contrast to the savory omelets, perfect for brightening your morning table. A splash of citrus juice or a sprinkle of mint can add an extra zing.

  • Crispy Bacon Strips: These salty, crunchy slices perfectly complement the eggs, adding an irresistible flavor profile. Pair them together for a breakfast that feels indulgent yet balanced.

  • Herbed Toast: A slice of warm, crusty bread topped with fresh herbs and olive oil enhances the meal's overall texture and adds a fragrant touch. It’s perfect for mopping up any eggy goodness left on your plate.

  • Creamy Avocado Slices: Silky avocado adds a dose of healthy fats and creaminess, creating a delightful mouthfeel. Its subtle flavor works harmoniously with the tater tot crust and egg filling.

  • Savory Breakfast Sausage: Juicy, savory sausage links provide a hearty element to your meal, enriching it with a satisfying bite. They can be served alongside or crumbled into the omelets for an extra treat.

  • Iced Coffee or Fresh Juices: A chilled beverage like juicy orange or invigorating iced coffee balances the warm, hearty omelets. Think of the bright citrus flavors invigorating your taste buds for a lively breakfast experience.

  • Mini Corn Muffins: Sweet, light muffins offer a delightful contrast with the crispy tater tot crust. They are great for adding a comforting carb option without overwhelming the palate.

  • Breakfast Smoothie: A luscious smoothie packed with greens and fruits can round out your meal, providing a nutritious boost and a creamy sidekick that pairs wonderfully with the flavors in your omelets.

Each pairing radiates warmth and deliciousness, ensuring that your breakfast is not just a meal, but a loving start to your day.

Make Ahead Options

For busy home cooks, these Mini Breakfast Omelets with a Tater Tot Crust are a dream! You can prepare the tater tot crusts up to 24 hours in advance—just stick to the initial baking instructions and allow them to cool completely before covering and refrigerating. The filling can also be prepped 3 days ahead; simply chop your meats and veggies, and store them in an airtight container. When you’re ready to serve, whisk your egg mixture and pour it over the prepped ingredients, then add the cheese before baking. This makes it super easy to enjoy a delicious, homemade breakfast, saving precious time on hectic mornings while maintaining that delightful, fluffy texture!

Mini Breakfast Omelets Variations

Feel free to add your own twist with these delightful suggestions that will make your mini breakfast omelets even more delicious!

  • Dairy-Free: Substitute milk with almond milk and cheese with a plant-based cheese for a creamy, guilt-free version.
  • Veggie-Packed: Load up on fresh spinach, zucchini, or mushrooms for a nutrient boost and vibrant colors.
  • Meat Lovers: Add crispy bacon or spicy chorizo for a heartier filling that will satisfy every meat enthusiast at the table.
  • Spicy Kick: Introduce diced jalapeños or a sprinkle of cayenne for those who love a little heat in their breakfast routine.
  • Herb-Infused: Fresh herbs like chives, basil, or parsley can elevate your omelets with refreshing flavors and a garden essence.
  • Cheese Alternatives: Experiment with different cheese types, such as feta for a tangy twist or goat cheese for a creamy surprise.
  • Sweet Tooth Option: Swap savory fillings for sweet ones by adding chopped fruits, such as apples or berries, topped with a sprinkle of cinnamon for a breakfast treat.
  • Low-Carb Delight: Replace tater tots with a cauliflower crust for a healthy, low-carb alternative while still enjoying that satisfying crunch.

For more great breakfast ideas, don't forget to check out our Breakfast Banana Split or make a sweet treat with Mini Tropical Pavlovas. Happy cooking!

How to Store and Freeze Mini Breakfast Omelets

  • Fridge: Store the mini breakfast omelets in an airtight container in the refrigerator for up to 5 days. This is perfect for quick breakfast options throughout the week.
  • Freezer: Allow the omelets to cool completely before wrapping each individually in plastic wrap and placing them in a freezer-safe bag. They can last for up to 2 months in the freezer.
  • Reheating: To reheat, simply remove the desired number of omelets from the freezer and microwave for 1-2 minutes, or heat them in the oven at 350°F (175°C) for about 10-15 minutes for best results.
  • Avoiding Ice Crystal Formation: If you're freezing a large batch, try to expel as much air as possible from the bag to prevent ice crystals and maintain the quality of your Mini Breakfast Omelets.

Mini Breakfast Omelets Recipe FAQs

What type of tater tots should I use?
Absolutely! You can use frozen tater tots for convenience. If you prefer homemade, ensure they’re cooked to a golden crisp before smashing them into the muffin pan.

How long can I store the mini breakfast omelets in the fridge?
These delightful mini breakfast omelets will stay fresh in an airtight container in the refrigerator for up to 5 days. This allows for quick and easy grab-and-go breakfasts throughout the week!

Can I freeze mini breakfast omelets, and how?
Yes, you can! Allow the omelets to cool completely after baking. Wrap each one individually in plastic wrap and then place them in a freezer-safe bag. They will keep well for up to 2 months. This way, you'll have easy breakfasts ready whenever you need them. Just follow these steps:

  1. Let them cool fully on a wire rack.
  2. Wrap each omelet tightly in plastic wrap.
  3. Place all wrapped omelets into a labeled freezer-safe bag, pressing out as much air as possible.

What if the omelets overflow during baking?
Very important! To prevent overflow, make sure to fill the muffin cups only about 90% full with the egg mixture. If you see any spills, you can carefully wipe the edges of the muffin pan before baking to avoid burnt bits.

Are these mini breakfast omelets suitable for special diets?
Yes! You can easily adapt these mini breakfast omelets to fit various dietary needs. Use plant-based meats or omit them for vegetarian options, opt for dairy-free cheese or milk alternatives, and even increase the veggie count for a nutrient boost. The more the merrier, so feel free to mix and match ingredients according to your family’s preferences!

Can I reheat the frozen mini breakfast omelets?
Certainly! To enjoy these mini breakfast omelets from the freezer, remove the desired number and microwave for 1-2 minutes. For the best texture, reheat them in the oven at 350°F (175°C) for about 10-15 minutes until heated through. Enjoy them warm for the best flavor!

Mini Breakfast Omelets

Mini Breakfast Omelets in Crispy Tater Tot Cups

Delightful Mini Breakfast Omelets with a crispy tater tot crust, perfect for a quick breakfast or brunch.
Print Recipe Pin Recipe
Prep Time 15 minutes mins
Cook Time 30 minutes mins
Cooling Time 5 minutes mins
Total Time 50 minutes mins
Servings: 6 cups
Course: Breakfast
Cuisine: American
Calories: 240
Ingredients Equipment Method Nutrition Notes

Ingredients
  

For the Tater Tot Crust
  • 2 cups Tater Tots Frozen works perfectly for convenience.
For the Omelet Filling
  • 6 large Eggs Fresh eggs yield the fluffiest results.
  • 0.5 cup Milk Almond milk is a great dairy-free alternative.
  • 1 cup Shredded Cheese Colby Jack or cheddar recommended.
  • 1 cup Meat & Veggies Personalize with favorite fillings like sausage, bacon, bell peppers, or spinach.
  • 1 teaspoon Seasonings Dash of salt, pepper, or favorite herbs.

Equipment

  • Standard muffin pan

Method
 

Step-by-Step Instructions for Mini Breakfast Omelets
  1. Preheat your oven to 400°F (200°C) and generously grease a standard muffin pan with cooking spray or butter.
  2. Microwave the frozen tater tots in a bowl for about 2-3 minutes to soften. Smash three tater tots into each muffin cup to form a flat layer. Bake for 10 minutes until golden brown.
  3. Reduce the oven temperature to 350°F (175°C) and distribute choice of pre-cooked meats and diced vegetables evenly into each cup.
  4. Whisk the large eggs with a splash of milk until well combined and slightly frothy. Pour the mixture into each muffin cup, filling them about 90% full.
  5. Sprinkle shredded cheese over each muffin and bake for an additional 20 minutes.
  6. Allow the mini breakfast omelets to cool for about 5 minutes before serving.

Nutrition

Serving: 1cupCalories: 240kcalCarbohydrates: 15gProtein: 12gFat: 15gSaturated Fat: 7gPolyunsaturated Fat: 1gMonounsaturated Fat: 6gCholesterol: 265mgSodium: 500mgPotassium: 300mgFiber: 1gSugar: 1gVitamin A: 500IUVitamin C: 2mgCalcium: 200mgIron: 2mg

Notes

Allow the egg muffins to cool completely before freezing. They can last up to 2 months for an easy grab-and-go breakfast.

Tried this recipe?

Let us know how it was!

Wholesome Blueberry Cottage Cheese Breakfast Bake to Energize Mornings

November 24, 2025 by Grace Snow Leave a Comment

There’s nothing quite like waking up to the aroma of something warm and delicious wafting through the house. That’s why I’m thrilled to share my Easy High-Protein Blueberry Cottage Cheese Breakfast Bake with you. This recipe is a perfect solution for busy mornings, packing over 20 grams of protein per serving while remaining irresistibly delightful and satisfying. Made with creamy cottage cheese, sweet blueberries, and hearty oats, this bake can be prepared in advance and simply popped in the oven while you go about your morning routine. Imagine having a nutritious breakfast on the table without the hassle of cooking from scratch! Plus, this dish makes an excellent meal prep option, ensuring you and your loved ones can kick off the day on a healthy note. Ready to dive into a breakfast that feels like a warm hug? Let's get started!

Why is this breakfast bake a must-try?

Deliciously Creamy: The blend of creamy cottage cheese and sweet blueberries creates a rich, satisfying bite that will leave you craving more.

High-Protein Boost: With over 20 grams of protein per serving, this recipe is an excellent choice for fueling your morning activities and curbing hunger.

Make-Ahead Friendly: Prepare it the night before and pop it in the oven in the morning, making breakfast less hectic and more enjoyable!

Versatile Ingredients: Feel free to swap in different fruits like raspberries or even diced apples for a fun twist!

Crowd-Pleasing: It’s perfect for the family table; who can resist a warm, bubbly bake that smells amazing? Try it alongside a Breakfast Banana Split for an exciting morning feast!

Blueberry Cottage Cheese Breakfast Bake Ingredients

For the Bake

  • Low-Fat Cottage Cheese – Adds creaminess and protein; for a richer texture, consider using full-fat.
  • Large Eggs – Provides structure and moisture; essential for the bake's integrity.
  • Honey or Maple Syrup – Sweetens the dish; you can use agave syrup for a vegan alternative.
  • Vanilla Extract – Enhances flavor; crucial for bringing out the best in this blueberry bake.
  • Ground Cinnamon – Offers warmth and spice; feel free to experiment with nutmeg for a twist.
  • Salt – Balances sweetness and enhances flavors; don't skip this ingredient for the best taste.
  • Rolled Oats – Provides texture and fiber; use certified gluten-free oats for a gluten-free option.
  • Almond Milk – Adds moisture; feel free to swap for any milk of choice, dairy or non-dairy.
  • Fresh or Frozen Blueberries – Key ingredient for natural sweetness and antioxidants; substitute with raspberries if desired.
  • Chopped Nuts (optional) – Adds crunch and healthy fats; walnuts or pecans complement the recipe beautifully.
  • Chia Seeds (optional) – Boosts nutrition with added fiber; omit if not available.

Step‑by‑Step Instructions for Blueberry Cottage Cheese Breakfast Bake

Step 1: Preheat and Prepare
Begin by preheating your oven to 350°F (175°C). While the oven warms, grease a 9x9-inch baking dish with butter to prevent sticking. This will ensure your Blueberry Cottage Cheese Breakfast Bake slides out easily after baking, giving you that perfect slice to serve.

Step 2: Whisk the Wet Ingredients
In a large mixing bowl, whisk together low-fat cottage cheese, large eggs, honey or maple syrup, vanilla extract, ground cinnamon, and a pinch of salt until smooth. This step creates the creamy base for your breakfast bake. Aim for a uniform consistency, ensuring everything is well combined before moving on to the dry ingredients.

Step 3: Combine with Oats and Milk
Next, stir in the rolled oats and almond milk into the mixture, blending thoroughly. Let this sit for about 5 minutes, allowing the oats to absorb the liquid slightly. This helps create that delightful texture and ensures the flavors meld perfectly in your Blueberry Cottage Cheese Breakfast Bake.

Step 4: Fold in the Blueberries
Gently fold in the blueberries, taking care not to burst them. If using nuts or chia seeds, add them at this stage as well for added texture and nutrition. The blueberries will provide sweet bursts of flavor throughout the bake, making every bite a delightful experience.

Step 5: Pour and Spread
Pour the mixture into the prepared baking dish, spreading it evenly with a spatula. This ensures that the bake cooks uniformly, giving you that lovely golden crust on top. Make sure the blueberries are distributed throughout for optimal flavor in every serving of your breakfast bake.

Step 6: Bake to Perfection
Place the dish in the preheated oven and bake for 40–45 minutes, or until the top is golden brown and a toothpick inserted in the center comes out clean. The wonderful aroma of your Blueberry Cottage Cheese Breakfast Bake will fill your kitchen, promising a delicious treat once it’s ready!

Step 7: Cool and Serve
After baking, allow the dish to cool for about 5–10 minutes. This cooling time helps firm up the bake so it’s easier to cut and serve. Enjoy it warm, perhaps paired with a dollop of Greek yogurt or a drizzle of maple syrup for an extra touch of indulgence.

Expert Tips for Blueberry Cottage Cheese Breakfast Bake

  • Room Temperature Cheese: Let cottage cheese sit at room temperature for 30 minutes before mixing for a smoother batter that blends well into your Blueberry Cottage Cheese Breakfast Bake.

  • Immersion Blend Magic: For an ultra-creamy texture, use an immersion blender to mix your wet ingredients. This technique can make a noticeable difference in the consistency of your bake.

  • Avoid Overmixing: When folding in blueberries, be gentle to avoid bursting them. This keeps the berries intact, ensuring delightful pops of sweetness in every bite of your Blueberry Cottage Cheese Breakfast Bake.

  • Storage Solutions: Store leftovers in the refrigerator for up to 4 days. Consider cutting into individual portions for quick and easy access during busy mornings.

  • Garnish for Greatness: Enhance your serving with a dollop of Greek yogurt, a sprinkle of nuts, or a drizzle of honey for added flavor and nutritional benefits.

What to Serve with Blueberry Cottage Cheese Breakfast Bake

Start your day with a breakfast experience that tantalizes your taste buds and warms your heart.

  • Creamy Greek Yogurt: A dollop of Greek yogurt on top adds a luscious creaminess and boosts protein content.
  • Fresh Berry Medley: A mix of our favorite seasonal berries enhances the dish's fruity flavor and provides a burst of freshness.
  • Maple Syrup Drizzle: Drizzle a bit of pure maple syrup for a touch of sweetness; it pairs perfectly with the oats and blueberries.
  • Crunchy Granola: Sprinkle some granola on top for extra texture and a delightful crunch, making it feel like a wholesome breakfast bowl.
  • Nutty Trail Mix: Serve with a side of your favorite trail mix; the healthy fats will keep you fueled throughout the morning.
  • Chia Seed Pudding: Complement it with chia seed pudding filled with vanilla; it creates a lovely contrast in texture.
  • Smoothies: A refreshing fruit smoothie can round out the meal, offering more vitamins and a delicious sip to chase every bite.
  • Herbal Tea or Coffee: Pair with a soothing herbal tea or a warm cup of coffee; the warmth enhances the comforting morning vibe.
  • Cinnamon-Spiced Apples: Serve warm cinnamon-spiced apples as a side dish for a cozy feel that complements the bake beautifully.

Make Ahead Options

These Easy High-Protein Blueberry Cottage Cheese Breakfast Bake options are perfect for busy mornings! You can prepare the entire mixture up to 24 hours in advance by combining the cottage cheese, eggs, sweetener, and oats in a bowl. Simply cover it tightly with plastic wrap and refrigerate. When you're ready to bake, gently fold in the blueberries just before pouring the mixture into the baking dish, ensuring they stay intact for delicious bursts of flavor. Baking straight from the fridge will keep the bake's texture just right and ensure it remains just as delicious. Enjoy a nutritious breakfast with minimal effort on your busiest days!

How to Store and Freeze Blueberry Cottage Cheese Breakfast Bake

Fridge: Store any leftovers in an airtight container in the refrigerator for up to 4 days. This keeps the Blueberry Cottage Cheese Breakfast Bake fresh and ready to enjoy on busy mornings.

Freezer: For longer storage, freeze the baked dish in individual portions. Wrap each piece tightly in plastic wrap and then in aluminum foil for added protection. It can last for up to 3 months in the freezer.

Reheating: To reheat, simply thaw in the refrigerator overnight if frozen, then warm in the microwave or oven until heated through. A quick microwave method takes about 1-2 minutes, depending on your portion size.

Make-Ahead Tips: You can prepare the mixture and store it covered in the fridge overnight before baking in the morning. This way, your Blueberry Cottage Cheese Breakfast Bake will be a breeze to make!

Blueberry Cottage Cheese Breakfast Bake Variations

Feel free to get creative and customize your breakfast bake just the way you like it!

  • Fruit Swap: Try using raspberries or diced apples instead of blueberries for a fresh twist. Each fruit brings its own unique flavor and sweetness to the mix.

  • Nut-Free Option: Omit the chopped nuts entirely for a nut-free version or swap in sunflower seeds for added crunch without the allergens. Your breakfast will still be hearty and satisfying!

  • Savory Surprise: Experiment by replacing the sweet elements with herbs and cheese for a savory breakfast bake. Think crumbled feta and spinach, a delightful change from the usual sweet flavors.

  • Gluten-Free Twist: Use certified gluten-free oats to make this recipe gluten-free. This small adjustment ensures everyone can enjoy this wholesome dish.

  • Vegan Version: Swap the eggs with a flaxseed or chia egg and the cottage cheese with a plant-based alternative like silken tofu or non-dairy yogurt for a vegan delight. It’s still protein-packed and delicious!

  • Extra Spices: Boost the warmth by adding nutmeg or pumpkin spice to the mixture for a cozy autumn feel that’s perfect any time of year.

  • Creamy Upgrade: For an even richer texture, consider blending in a scoop of Greek yogurt into the wet ingredients. This not only enhances creaminess but also amps up the protein even more.

  • Heat It Up: If you like a bit of a kick, sprinkle in some cayenne or red pepper flakes for a surprising twist that beautifully contrasts the sweetness of the dish.

Once you try these variations, you might just find a new family favorite! Pair your Blueberry Cottage Cheese Breakfast Bake with a comforting side of Cornbread Breakfast Casserole or some delightful Breakfast Egg Muffins for an added breakfast feast. Enjoy experimenting!

Blueberry Cottage Cheese Breakfast Bake Recipe FAQs

What should I look for when selecting blueberries?
Absolutely! When choosing blueberries, opt for plump, firm berries that are deep blue in color. Avoid those with dark spots or wrinkles, as these indicators suggest overripeness. Fresh blueberries should have a silvery bloom on their surface, indicating freshness. If you're using frozen blueberries, make sure they are unsweetened for the best flavor!

How should I store leftovers of the Blueberry Cottage Cheese Breakfast Bake?
You can keep your Blueberry Cottage Cheese Breakfast Bake in an airtight container in the fridge for up to 4 days. This method helps maintain its delicious flavor while keeping it fresh for the next couple of mornings. To serve, simply reheat it in the microwave for a quick and convenient breakfast.

Can I freeze the Blueberry Cottage Cheese Breakfast Bake?
Very! To freeze, cut the bake into individual portions for easy handling. Wrap each piece tightly in plastic wrap, followed by aluminum foil for added protection against freezer burn. It can stay fresh in the freezer for up to 3 months. When you're ready to enjoy, thaw overnight in the refrigerator and reheat in the microwave or oven until warmed through—perfect for those busy mornings!

What if my bake turns out too dry?
If your Blueberry Cottage Cheese Breakfast Bake ends up too dry, it might be due to overbaking, which can happen if the timer is missed or the oven runs hot. To troubleshoot, next time, start checking for doneness a few minutes earlier and consider covering it with foil during the end of baking to retain moisture. Also, adding an extra splash of almond milk can help maintain that lovely creamy texture.

Is this breakfast bake suitable for those with dairy allergies?
For dairy-sensitive individuals, this Blueberry Cottage Cheese Breakfast Bake can be adapted easily! Substitute low-fat cottage cheese with a dairy-free alternative, such as cashew or almond-based cheese. Make sure the other ingredients you choose, like milk, are also suitable for your dietary needs, ensuring a delightful, allergy-friendly breakfast experience!

Blueberry Cottage Cheese Breakfast Bake

Wholesome Blueberry Cottage Cheese Breakfast Bake to Energize Mornings

A delicious Blueberry Cottage Cheese Breakfast Bake that’s high in protein and perfect for busy mornings.
Print Recipe Pin Recipe
Prep Time 10 minutes mins
Cook Time 45 minutes mins
Cooling Time 10 minutes mins
Total Time 1 hour hr 5 minutes mins
Servings: 6 slices
Course: Breakfast
Cuisine: American
Calories: 210
Ingredients Equipment Method Nutrition Notes

Ingredients
  

For the Bake
  • 2 cups Low-Fat Cottage Cheese Use full-fat for a richer texture.
  • 3 large Eggs Provides structure and moisture.
  • 1/4 cup Honey or Maple Syrup Agave syrup can be used as a vegan alternative.
  • 1 teaspoon Vanilla Extract Enhances flavor.
  • 1 teaspoon Ground Cinnamon Feel free to experiment with nutmeg.
  • 1/4 teaspoon Salt Balances sweetness.
  • 2 cups Rolled Oats Use certified gluten-free oats for a gluten-free option.
  • 1 cup Almond Milk Can be substituted with any milk of choice.
  • 2 cups Fresh or Frozen Blueberries Substitute with raspberries if desired.
  • 1/2 cup Chopped Nuts Optional, walnuts or pecans work well.
  • 2 tablespoons Chia Seeds Optional, boosts nutrition.

Equipment

  • Oven
  • Mixing Bowl
  • Baking Dish
  • Spatula

Method
 

Step-by-Step Instructions
  1. Preheat your oven to 350°F (175°C) and grease a 9x9-inch baking dish with butter.
  2. In a large mixing bowl, whisk together cottage cheese, eggs, honey or maple syrup, vanilla extract, cinnamon, and salt until smooth.
  3. Stir in rolled oats and almond milk, blending thoroughly, and let sit for about 5 minutes.
  4. Gently fold in blueberries and optional nuts or chia seeds.
  5. Pour the mixture into the prepared baking dish, distributing evenly.
  6. Bake for 40–45 minutes until golden brown and a toothpick comes out clean.
  7. Allow to cool for about 5–10 minutes before serving.

Nutrition

Serving: 1sliceCalories: 210kcalCarbohydrates: 30gProtein: 20gFat: 4gSaturated Fat: 1gPolyunsaturated Fat: 1gMonounsaturated Fat: 2gCholesterol: 70mgSodium: 150mgPotassium: 300mgFiber: 5gSugar: 8gVitamin A: 500IUVitamin C: 5mgCalcium: 150mgIron: 1mg

Notes

Store leftovers in the refrigerator for up to 4 days or freeze for up to 3 months. Reheat in the microwave or oven.

Tried this recipe?

Let us know how it was!

Easy Sweet Potato Egg Casserole for Busy Mornings

November 24, 2025 by Grace Snow Leave a Comment

As I poured that golden egg mixture over the sautéed sweet potatoes and savory sausage, a wave of anticipation washed over me. This Easy Sweet Potato Egg Casserole is more than just a breakfast option; it's a symphony of flavors and textures that transforms busy mornings into something special. The comforting sweetness of roasted sweet potatoes paired with protein-rich eggs creates a nutritious and filling meal that can be prepped the night before, ensuring a warm, delightful start to your day. Plus, it’s easily reheatable, making it a fantastic choice for those hectic weekdays when time is of the essence. Curious about how this casserole can elevate your mornings? Let’s dive into the recipe!

Why is this casserole a breakfast game-changer?

Versatile: This Easy Sweet Potato Egg Casserole is perfect for any palate, allowing you to swap in your favorite ingredients like different cheeses or vegetables. Meal Prep-Friendly: Assemble it the night before for a hassle-free morning; just pop it in the oven! Nutrient-Rich: Packed with protein and vitamins, it’s a wholesome start to your day. Crowd-Pleaser: Great for family brunches or gatherings—everyone will want a slice! Plus, consider pairing it with a fresh fruit salad for extra brightness on your plate.

Easy Sweet Potato Egg Casserole Ingredients

For the Casserole
• Sweet Potatoes – the star ingredient providing natural sweetness and nutrients; Garnet or Jewel varieties work best.
• Onion – adds savory depth and enhances the overall flavor profile of the casserole.
• Green Pepper – brings a refreshing crunch and vibrant color; can be substituted with any bell pepper you prefer.
• Garlic – infuses aromatic flavor, elevating the dish to a delightful experience.
• Turkey Sausage – offers hearty protein; feel free to swap with chicken sausage or a plant-based option for versatility.
• Eggs – the binding agent that holds this Easy Sweet Potato Egg Casserole together, ensuring a satisfying texture.
• Milk – adds creaminess and moisture; can be replaced with non-dairy milk for a lighter alternative.
• Fresh Thyme – contributes an aromatic touch; dried thyme can be used if fresh isn’t available.
• Shredded Cheese – a melty topping that adds richness; cheddar or Monterey Jack are popular choices.

Step‑by‑Step Instructions for Easy Sweet Potato Egg Casserole

Step 1: Preheat the Oven
Begin your delicious journey by preheating your oven to 350°F (175°C). This temperature is perfect for cooking the casserole evenly, ensuring that the sweet potatoes and egg mixture come together beautifully. While the oven heats, you can prepare your casserole dish for an effortless baking experience.

Step 2: Prepare the Casserole Dish
Grease a 9×13-inch casserole dish generously with your favorite cooking oil or non-stick spray. This step is crucial for preventing the Easy Sweet Potato Egg Casserole from sticking, allowing for easy serving later. Set aside this prepared dish while you move on to the flavorful filling.

Step 3: Sauté the Vegetables
In a Dutch oven, heat a tablespoon of avocado oil over medium heat. Add chopped onion, green pepper, and sweet potato cubes, stirring occasionally for about 8-9 minutes until they soften. The sweet potatoes should be tender but not falling apart. In the last minute, stir in minced garlic, allowing its aromatic flavor to bloom before removing the pot from heat.

Step 4: Layer the Vegetables in the Dish
Spread the sautéed vegetable mixture evenly in the prepared casserole dish, creating a vibrant and colorful base for your Easy Sweet Potato Egg Casserole. The combination of sweet, savory, and aromatic ingredients will form a delightful foundation. This is a moment to appreciate the fragrant blend you've created.

Step 5: Cook the Turkey Sausage
Return to your Dutch oven and add the turkey sausage, breaking it into small pieces as it cooks over medium heat. Stir until the sausage is fully cooked and no longer pink, which usually takes about 5-7 minutes. Once done, mix this savory sausage into the vegetable layer in the casserole dish, ensuring even distribution.

Step 6: Prepare the Egg Mixture
In a mixing bowl, whisk together eggs, milk, fresh thyme, salt, pepper, and shredded cheese until the mixture is smooth and well-combined. This creamy egg base is key to holding the layers together in your Easy Sweet Potato Egg Casserole. Make sure to incorporate the cheese thoroughly for maximum flavor.

Step 7: Combine and Pour
Pour the egg mixture over the sausage and vegetable layer in the casserole dish. Gently stir with a spatula to distribute the egg mixture evenly, ensuring every bite of your casserole will be packed with flavor. The colors and textures should blend beautifully, promising a hearty breakfast.

Step 8: Bake the Casserole
Place the filled casserole dish into your preheated oven. Bake for 40-45 minutes, or until the center is firm and a light golden color appears on top. If the surface browns too quickly, cover it loosely with aluminum foil to prevent overcooking. This time is crucial for achieving that perfect fluffy texture in your Easy Sweet Potato Egg Casserole.

Step 9: Rest Before Serving
Once baked, remove the casserole from the oven and let it cool for 15 minutes before slicing. This cooling period helps the casserole set, making it easier to serve and maintain its shape. The enticing aroma will fill your kitchen, making the wait all the more worthwhile!

Storage Tips for Easy Sweet Potato Egg Casserole

  • Fridge: Store leftover casserole in an airtight container for up to 4 days. Make sure it’s fully cooled before sealing to maintain freshness.
  • Freezer: For longer storage, freeze individual portions wrapped tightly in plastic wrap and then in aluminum foil for up to 3 months. This way, you can enjoy your Easy Sweet Potato Egg Casserole anytime!
  • Reheating: To reheat, thaw overnight in the fridge if frozen. Warm individual portions in the microwave for about 1-2 minutes, or heat in the oven at 350°F (175°C) until warmed through.
  • Refrigerator Storage: Remember to keep the casserole covered to prevent it from absorbing other fridge odors, keeping it delicious for longer.

Easy Sweet Potato Egg Variations

Feel free to get creative and make this casserole your own with these fun twists!

  • Pork Sausage: Substitute turkey sausage for pork sausage for a richer flavor that adds heartiness.

  • Dairy-Free: Use non-dairy milk and dairy-free cheese for a vegan-friendly version while keeping that creamy texture.

  • Spinach Addition: Fold in fresh spinach before baking; it wilt perfectly, adding nutrients and a pop of color!

  • Zucchini: Swap in diced zucchini for the green pepper for a tender bite and extra veggies in your morning meal.

  • Herb Twist: Experiment with fresh basil or dill for a herbal flair that brightens the classic flavor profile.

  • Spicy Kick: Add diced jalapeños or a dash of red pepper flakes to the egg batter for a spicy surprise in each bite.

  • Cheese Variety: Change up the cheese! Try feta or pepper jack for different flavors that enhance the overall dish.

  • Roasted Peppers: Incorporate roasted sweet or red peppers for a smoky depth that complements the sweet potatoes beautifully.

If you're in the mood for more comforting dishes, you might enjoy exploring our Sweet Potato Casserole or sampling the delightful Smoky Sweet Potatoes. Each option offers a unique flavor experience that's sure to please!

Expert Tips for Easy Sweet Potato Egg Casserole

  • Even Cubes: Cut sweet potatoes into uniform ½ inch cubes to ensure they cook evenly. This helps avoid undercooked or mushy spots in the casserole.
  • Sauté Wisely: Avoid overcrowding the pan when sautéing vegetables; this prevents steaming and allows them to caramelize for deeper flavor.
  • Drain Sausage Fat: Drain excess liquid from the cooked turkey sausage to keep your casserole from becoming watery. A dry base helps the casserole maintain its structure.
  • Rest Before Serving: Let the casserole sit for 15 minutes after baking. This allows it to set properly, making it easier to slice and serve without falling apart.
  • Extra Creaminess: Consider topping your casserole with sliced avocado after baking for added creaminess and a fresh touch!

Make Ahead Options

These Easy Sweet Potato Egg Casseroles are a fantastic choice for meal prep! You can assemble the entire casserole up to 24 hours in advance by preparing the sweet potatoes, sausage, and vegetable mixture, then layering everything in the dish. Before baking, tightly cover it with plastic wrap or foil and refrigerate. To maintain quality, let it sit at room temperature for 15 minutes before popping it into the preheated oven. When you’re ready to serve, simply bake as directed until it’s golden and firm. With this prep method, you’ll turn busy mornings into a breeze, enjoying a warm, delicious breakfast without the stress!

What to Serve with Easy Sweet Potato Egg Casserole

Brighten your breakfast table and turn your Easy Sweet Potato Egg Casserole into a well-rounded feast with these delicious pairings.

  • Fresh Fruit Salad: Juicy and vibrant, a medley of seasonal fruits adds a refreshing contrast that complements the casserole's rich flavors perfectly. It’s a light, energizing side!

  • Warm Croissants: Flaky and buttery croissants pair beautifully, offering a different texture that elevates your breakfast experience to a delightful bakery-style brunch.

  • Simple Green Salad: A crisp salad with a zesty vinaigrette adds a wholesome crunch to your meal, balancing the richness of the casserole and enhancing its heartiness.

  • Herbed Yogurt Dip: A cool and creamy yogurt dip flavored with fresh herbs brings a tangy brightness that contrasts nicely with the sweet potatoes, making each bite a little more exciting.

  • Oven-Roasted Asparagus: Tender asparagus drizzled with olive oil and seasoning brings an earthy green element, providing a delightful chew that is light yet satisfying.

  • Coffee or Herbal Tea: A warm mug of your favorite coffee enhances the comforting morning vibe, while herbal tea offers a calming balance, perfect for a peaceful breakfast moment.

Consider these delightful accompaniments to make your Easy Sweet Potato Egg Casserole the star of a revitalizing breakfast experience!

Easy Sweet Potato Egg Casserole Recipe FAQs

What kind of sweet potatoes should I use?
Absolutely! For the best flavor and texture in your Easy Sweet Potato Egg Casserole, I recommend using Garnet or Jewel sweet potatoes. They provide a natural sweetness and creamy texture that's perfect for this dish.

How should I store leftovers?
Very! Store your leftover Easy Sweet Potato Egg Casserole in an airtight container in the refrigerator for up to 4 days. Make sure it has completely cooled before sealing it up to keep it fresh and delicious.

Can I freeze the casserole?
Absolutely! To freeze, cut the cooled casserole into individual portions and wrap them tightly in plastic wrap followed by aluminum foil. This will help to prevent freezer burn. You can store these portions in the freezer for up to 3 months. When you're ready to enjoy, simply thaw overnight in the fridge, and reheat in the microwave or oven until heated through!

What if my casserole comes out too watery?
If your Easy Sweet Potato Egg Casserole turns out watery, it’s likely due to excess moisture from the turkey sausage or sweet potatoes. To troubleshoot, make sure that you drain any fat from the sausage before mixing it with the vegetables. Additionally, cutting the sweet potatoes into uniform ½ inch cubes will help them cook evenly and not release too much moisture during baking.

Is this recipe suitable for those with dietary restrictions?
Absolutely! You can easily customize your Easy Sweet Potato Egg Casserole to accommodate various dietary preferences. For instance, opt for plant-based sausage if you're looking for a meat-free option and substitute regular milk with non-dairy alternatives like almond or oat milk. Just be sure to check for any allergies with the specific ingredients you choose!

How can I prepare this casserole in advance?
Very! You can assemble your Easy Sweet Potato Egg Casserole the night before by prepping all the ingredients and layering them in the casserole dish. Cover it tightly and store it in the fridge. In the morning, just let it sit at room temperature for about 15 minutes before popping it in the oven for a hassle-free breakfast!

Easy Sweet Potato Egg

Easy Sweet Potato Egg Casserole for Busy Mornings

This Easy Sweet Potato Egg Casserole combines roasted sweet potatoes and protein-rich eggs for a nutritious breakfast option.
Print Recipe Pin Recipe
Prep Time 15 minutes mins
Cook Time 45 minutes mins
Cooling Time 15 minutes mins
Total Time 1 hour hr 15 minutes mins
Servings: 6 slices
Course: Breakfast
Cuisine: American
Calories: 250
Ingredients Equipment Method Nutrition Notes

Ingredients
  

For the Casserole
  • 2 cups cubed sweet potatoes Garnet or Jewel varieties work best
  • 1 medium onion chopped
  • 1 cup green pepper chopped; can substitute with any bell pepper
  • 2 cloves garlic minced
  • 1 lb turkey sausage can be swapped with chicken sausage or plant-based option
  • 6 eggs
  • 1 cup milk can be replaced with non-dairy milk
  • 1 tbsp fresh thyme can use dried thyme if fresh is unavailable
  • 1 cup shredded cheese cheddar or Monterey Jack

Equipment

  • Dutch oven
  • 9x13-inch casserole dish
  • Mixing Bowl

Method
 

Step‑by‑Step Instructions for Easy Sweet Potato Egg Casserole
  1. Preheat the oven to 350°F (175°C).
  2. Grease a 9×13-inch casserole dish with cooking oil or non-stick spray.
  3. In a Dutch oven, heat a tablespoon of avocado oil over medium heat and sauté onion, green pepper, and sweet potato cubes for about 8-9 minutes. Stir in minced garlic in the last minute.
  4. Spread the sautéed vegetable mixture evenly in the prepared casserole dish.
  5. Cook the turkey sausage in the Dutch oven until fully cooked, about 5-7 minutes, then mix into the vegetable layer in the casserole dish.
  6. In a mixing bowl, whisk together eggs, milk, fresh thyme, salt, pepper, and shredded cheese until smooth.
  7. Pour the egg mixture over the sausage and vegetable layer in the casserole dish and gently stir to combine.
  8. Bake for 40-45 minutes until the center is firm and golden on top. Cover loosely with aluminum foil if browning too quickly.
  9. Let the casserole cool for 15 minutes before slicing.

Nutrition

Serving: 1sliceCalories: 250kcalCarbohydrates: 20gProtein: 15gFat: 10gSaturated Fat: 4gPolyunsaturated Fat: 0.5gMonounsaturated Fat: 3gCholesterol: 180mgSodium: 500mgPotassium: 400mgFiber: 3gSugar: 5gVitamin A: 4000IUVitamin C: 30mgCalcium: 150mgIron: 2mg

Notes

Slice and serve paired with a fresh fruit salad for added brightness.

Tried this recipe?

Let us know how it was!

Creamy Pumpkin Whipped Cottage Cheese Breakfast Bowl Bliss

November 24, 2025 by Grace Snow Leave a Comment

On a chilly autumn morning, I often find myself craving something cozy and comforting to kick-start my day. Enter the Pumpkin Whipped Cottage Cheese Breakfast Bowl! This delightful combination of creamy cottage cheese and velvety pumpkin puree, kissed with warm spices, is not only a breeze to whip up in just five minutes but also packs a protein punch to keep you fueled. Perfect for those who are looking to break free from the fast-food routine, this healthy breakfast option is a creamy indulgence that evokes the flavors of fall without any guilt. Who says mornings can’t be deliciously easy? Ready to transform your breakfast game? Let’s dive into this fall-inspired treat!

Why is this breakfast bowl so great?

Simplicity at Its Best: This Pumpkin Whipped Cottage Cheese Breakfast Bowl comes together in just five minutes, making it a quick win for busy mornings!

Creamy Delight: The blend of cottage cheese and pumpkin creates a luscious, velvety texture that feels indulgent while being healthy.

Protein Power: With approximately 21 grams of protein per serving, it’s a great way to kick-start your day and keep you satisfied until lunch.

Seasonal Flavors: Enjoy the delightful taste of fall with comforting spices like cinnamon, making every spoonful feel like a cozy hug.

Versatile Toppings: Top it with granola, nuts, or fresh fruits for a personal touch—whichever way you choose, it’s sure to impress! If you're in the mood for other healthy breakfasts, try the Breakfast Egg Muffins or enjoy a sweet treat with Pumpkin Brownies Decadent.

Pumpkin Whipped Cottage Cheese Breakfast Bowl Ingredients

For the Whipped Base

  • Cottage Cheese – Provides creaminess and protein; for a tangy twist, substitute with Greek yogurt.
  • Pumpkin Puree – Adds natural sweetness and a smooth texture; ensure it's pure pumpkin without added sugar.
  • Honey – Sweetens the dish beautifully; feel free to swap with maple syrup for a vegan alternative.
  • Cinnamon – Infuses warm, comforting flavor; consider using pumpkin pie spice for an extra seasonal kick.
  • Vanilla Extract – Adds a lovely aromatic sweetness; omit for a more straightforward taste.

For the Crunch

  • Granola – Introduces crunch and additional texture; substitute with nuts or seeds for a gluten-free option.

This Pumpkin Whipped Cottage Cheese Breakfast Bowl is not just delicious; it's a high-protein, creamy, and seasonal breakfast you're sure to adore!

Step‑by‑Step Instructions for Pumpkin Whipped Cottage Cheese Breakfast Bowl

Step 1: Blend the Base Ingredients
In a high-speed blender, combine 1 cup of cottage cheese, ½ cup of pumpkin puree, 1 tablespoon of honey, ½ teaspoon of cinnamon, and ¼ teaspoon of vanilla extract. Blend on high for 30-45 seconds until the mixture is thick and creamy. If needed, stop to scrape down the sides to ensure everything is well combined. You’ll want a smooth, luscious consistency for your Pumpkin Whipped Cottage Cheese Breakfast Bowl.

Step 2: Prepare for Serving
Once blended, take a moment to taste the mixture. Adjust the sweetness with more honey if preferred, then transfer the whipped pumpkin blend into serving bowls. Use a spoon to evenly portion the thick, creamy texture, creating a delightful base for your toppings. The vibrant orange color paired with the creamy white will make for an inviting breakfast display.

Step 3: Add the Crunch
To make your Pumpkin Whipped Cottage Cheese Breakfast Bowl even more delightful, sprinkle each bowl with approximately ¼ cup of granola just before serving. This crunchy topping contrasts beautifully with the smooth whipped base, adding texture and flavor. Feel free to mix and match your granola varieties to keep your breakfast exciting and tailored to your taste.

Step 4: Store Leftovers
If you have any leftovers, store them in an airtight container in the refrigerator for up to 3 days. Make sure to keep the granola separate until you're ready to enjoy another serving to maintain its crispness. When ready to serve again, give the mixture a good stir to bring back its creamy texture, and enjoy this wholesome Pumpkin Whipped Cottage Cheese Breakfast Bowl fresh!

Pumpkin Whipped Cottage Cheese Breakfast Bowl Variations

Feel free to mix things up with these delightful variations that cater to your taste buds!

  • Greek Yogurt Swap: Substitute cottage cheese with Greek yogurt for a tangy twist that adds creaminess and protein.

  • Spice It Up: Experiment with different spices like nutmeg or ginger for an exciting flavor profile that elevates your bowl.

  • Fruity Fun: Add fresh fruits such as banana slices or berries on top for a burst of freshness that complements the creamy base beautifully.

  • Nutty Crunch: Instead of granola, sprinkle your favorite chopped nuts or seeds for an extra crunch and a boost in healthy fats.

  • Vegan Delight: Use maple syrup instead of honey and coconut yogurt in place of cottage cheese for a delicious vegan version.

  • Oatmeal Inspiration: Mix in some cooked oatmeal for additional texture and heartiness, making it even more filling for your morning.

  • Go Savory: For a savory twist, omit the sweeteners and spices, and top with sliced avocado, cherry tomatoes, or a sprinkle of feta cheese.

  • Mix and Match: Combine various toppings from nuts to seeds to make it your very own signature breakfast bowl. The more, the merrier!

There's truly no limit to how you can make this pumpkin whipped cottage cheese breakfast bowl perfect for you! For more inspiration, try the hearty Breakfast Banana Split or go for the wholesome Acai Bowl Nutritious.

How to Store and Freeze Pumpkin Whipped Cottage Cheese Breakfast Bowl

Fridge: Store any leftovers in an airtight container for up to 3 days. Stir the mixture well before serving again to restore its creamy consistency.

Room Temperature: Best enjoyed fresh, but if necessary, you can leave it at room temperature for up to 2 hours before refrigeration.

Freezer: It’s not recommended to freeze this Pumpkin Whipped Cottage Cheese Breakfast Bowl, as freezing alters its creamy texture and flavor.

Reheating: If serving again after refrigeration, simply stir and enjoy cold for a refreshing treat, as reheating may affect the texture.

What to Serve with Pumpkin Whipped Cottage Cheese Breakfast Bowl

Elevate your cozy morning with some delightful pairings that enhance this creamy breakfast experience.

  • Spiced Apple Slices: Sweet, crisp apples sprinkled with cinnamon bring a fresh crunch to your pumpkin bowl.

  • Warm Oatmeal: A creamy bowl of oatmeal provides a filling base, creating a comforting contrast to the fluffy whipped cottage cheese.

  • Toasted Whole Grain Bread: Enjoy the nutty flavors and crunchy texture of toasted bread, perfect for dipping into the pumpkin goodness.

  • Maple Syrup Drizzle: A light drizzle of maple syrup adds sweetness and warmth, echoing the fall flavors perfectly.

  • Chia Pudding: A side of chia pudding offers a creamy, nutritious complement, packed with fiber and protein for sustained energy.

  • Herbal Tea: A cup of soothing herbal tea balances the richness of your breakfast bowl while providing a calming start to the day.

These pairings not only complete your meal but also add layers of texture and flavor that make every bite a celebration of fall!

Make Ahead Options

This Pumpkin Whipped Cottage Cheese Breakfast Bowl is perfect for busy mornings, allowing you to prep in advance and save time. You can blend the creamy base (1 cup of cottage cheese, ½ cup of pumpkin puree, 1 tablespoon of honey, ½ teaspoon of cinnamon, and ¼ teaspoon of vanilla extract) up to 24 hours ahead. Store it in an airtight container in the refrigerator to maintain its luscious texture. When you're ready to serve, simply give the mixture a good stir, spoon it into bowls, and top with granola right before serving to keep that delightful crunch. With these simple make-ahead steps, enjoy a wholesome breakfast that feels gourmet without the fuss!

Expert Tips for Pumpkin Whipped Cottage Cheese Breakfast Bowl

  • Whip Thoroughly: Ensure a super smooth texture by blending the ingredients thoroughly. A high-speed blender works best to achieve that indulgent creaminess.

  • Taste Test: Always taste the mixture before serving. Adjust sweetness with more honey or maple syrup to match your personal preference.

  • DIY Granola: Consider making your own granola for a healthier option. This way, you can control the sweetness and add your favorite nuts and seeds.

  • Skip the Freezer: Avoid freezing leftovers, as it can change the creamy texture of your Pumpkin Whipped Cottage Cheese Breakfast Bowl. Always refrigerate in an airtight container.

  • Spice It Up: Experiment with spices like nutmeg or ginger to add warmth and depth to your dish, making breakfast even more exciting!

  • Serve Fresh: For the best experience, prepare and serve the bowl just before eating to enjoy the delightful contrast between the creamy base and crunchy toppings.

Pumpkin Whipped Cottage Cheese Breakfast Bowl Recipe FAQs

What kind of pumpkin puree should I use?
Absolutely! It’s best to use canned pumpkin puree or freshly cooked pumpkin without any added sugars. This keeps your Pumpkin Whipped Cottage Cheese Breakfast Bowl healthy and lets the natural sweetness shine through.

How long can I store leftovers?
Store any leftovers in an airtight container in the fridge for up to 3 days. Just give it a good stir before enjoying, and it will be just as creamy and delicious as when you first made it!

Can I freeze the Pumpkin Whipped Cottage Cheese Breakfast Bowl?
I wouldn't recommend freezing this dish, as it alters the creamy texture that makes it so delightful. Instead, enjoy it fresh or store it in the fridge for a few days!

What if the mixture is too thick?
If you find your Pumpkin Whipped Cottage Cheese Breakfast Bowl mixture turns out thicker than expected, simply stir in a little splash of milk or dairy-free alternative to achieve your desired consistency. Blend again for about 10 seconds if needed!

Is it safe for those with dairy allergies?
For those with dairy allergies, substitute cottage cheese with a dairy-free yogurt alternative, like coconut or almond yogurt. It won't be quite the same, but it still offers a delicious, creamy texture! Always check the ingredients to ensure they're allergy-friendly.

What if I want to add extra flavors or toppings?
The more the merrier! You can spice it up with a dash of nutmeg or add fresh fruits like berries or banana slices for a burst of flavor. Feel free to customize your bowl with your favorite granola or seeds for added crunch!

Pumpkin Whipped Cottage Cheese Breakfast Bowl

Creamy Pumpkin Whipped Cottage Cheese Breakfast Bowl Bliss

Enjoy a cozy Pumpkin Whipped Cottage Cheese Breakfast Bowl packed with protein and warm spices for a delightful start to your day.
Print Recipe Pin Recipe
Prep Time 5 minutes mins
Total Time 5 minutes mins
Servings: 2 bowls
Course: Breakfast
Cuisine: American
Calories: 250
Ingredients Equipment Method Nutrition Notes

Ingredients
  

For the Whipped Base
  • 1 cup Cottage Cheese For a tangy twist, substitute with Greek yogurt.
  • 1/2 cup Pumpkin Puree Ensure it's pure pumpkin without added sugar.
  • 1 tablespoon Honey Feel free to swap with maple syrup for a vegan alternative.
  • 1/2 teaspoon Cinnamon Consider using pumpkin pie spice for an extra seasonal kick.
  • 1/4 teaspoon Vanilla Extract Omit for a more straightforward taste.
For the Crunch
  • 1/4 cup Granola Substitute with nuts or seeds for a gluten-free option.

Equipment

  • High-speed blender

Method
 

Step-by-Step Instructions
  1. Blend the Base Ingredients: In a high-speed blender, combine 1 cup of cottage cheese, ½ cup of pumpkin puree, 1 tablespoon of honey, ½ teaspoon of cinnamon, and ¼ teaspoon of vanilla extract. Blend on high for 30-45 seconds until the mixture is thick and creamy.
  2. Prepare for Serving: Taste the mixture and adjust sweetness if preferred. Transfer to serving bowls, creating a delightful base for your toppings.
  3. Add the Crunch: Sprinkle each bowl with approximately ¼ cup of granola just before serving.
  4. Store Leftovers: Store in an airtight container for up to 3 days. Keep granola separate until ready to enjoy again.

Nutrition

Serving: 1bowlCalories: 250kcalCarbohydrates: 30gProtein: 21gFat: 6gSaturated Fat: 3gPolyunsaturated Fat: 1gMonounsaturated Fat: 2gCholesterol: 15mgSodium: 200mgPotassium: 300mgFiber: 4gSugar: 8gVitamin A: 4500IUVitamin C: 2mgCalcium: 150mgIron: 1mg

Notes

For the best experience, prepare and serve just before eating to enjoy the creamy base and crunchy toppings.

Tried this recipe?

Let us know how it was!

Mini German Pancakes Recipe: Fluffy Bites of Morning Joy

November 24, 2025 by Grace Snow Leave a Comment

Stepping into my kitchen on a busy Sunday morning, the aroma of melting butter and eggs wafting through the air instantly lifts my spirits. I can’t wait to share my beloved Mini German Pancakes Recipe with you—a delightful twist on traditional breakfast fare that’s both quick and deceptively simple. These fluffy bite-sized treats are perfect for lazy brunches or hectic weekdays, plus they’re fully customizable to suit any palate. Picture a golden brown pancake that’s light and airy, with a tender bite—ideal for topping with fresh fruits, maple syrup, or even a sprinkle of cinnamon for that extra punch. Want to make it gluten-free? No problem! With endless variations, these pancakes will quickly become your go-to breakfast delight. Curious to dive in? Let’s get cooking!

Why are Mini German Pancakes Special?

Fluffy Texture: Each pancake puffs up beautifully in the oven, creating a light and airy bite that’s a joy to savor.

Versatile Toppings: Cut down the morning chaos—these pancakes are just waiting for your favorite toppings, from fresh fruits to whipped cream.

Quick and Easy: With a simple blend of ingredients, you can whip up this delightful breakfast in no time, perfect for busy mornings!

Customizable Options: Whether you prefer gluten-free alternatives or want to mix in spices like cinnamon for a warming touch, the options are endless.

Crowd-Pleasing Delight: Ideal for family brunches or gatherings, everyone loves these adorable pancakes that bring smiles to the table!

Mini German Pancakes Recipe Ingredients

For the Batter

  • All-purpose flour – Provides structure for the pancakes; can substitute with whole wheat flour for a healthier version.
  • Milk – Adds moisture and richness; use almond milk for a dairy-free alternative.
  • Large eggs – Binds the ingredients and adds richness; room temperature eggs yield better consistency.
  • Sugar – Adds sweetness to the batter; can reduce quantity or substitute with honey or agave nectar.
  • Vanilla extract – Enhances flavor with a sweet aroma; almond extract can be used for variation.
  • Salt – Balances flavors; essential for enhancing taste in baked goods.
  • Butter – Adds richness and prevents sticking; use coconut oil for a dairy-free option.

For Serving

  • Maple syrup – Drizzle over pancakes for that classic touch.
  • Fresh fruits – Top with berries or sliced bananas for a refreshing contrast.
  • Powdered sugar – Dust lightly for an elegant finish that enhances sweetness.
  • Whipped cream – Indulge with a dollop for extra creaminess and flavor.

With this Mini German Pancakes Recipe, you can customize flavors and toppings to suit your taste, turning every breakfast into a delightful adventure!

Step‑by‑Step Instructions for Mini German Pancakes Recipe

Step 1: Preheat the Oven
Start by preheating your oven to 400°F (200°C). While the oven is heating, place a muffin tin inside to warm up. This step is crucial, as a hot muffin tin will help the Mini German Pancakes puff up beautifully. Allow about 10 minutes for the oven to reach the desired temperature.

Step 2: Blend the Batter
In a blender, add the all-purpose flour, milk, large eggs, sugar, vanilla extract, and salt. Blend everything together until the mixture is smooth and well combined; this should take about 30 seconds. Your batter should be thick yet pourable, creating a luscious base for your Mini German Pancakes.

Step 3: Prepare the Muffin Tin
Once the oven has preheated, carefully remove the hot muffin tin with oven mitts to avoid burns. Add ½ tablespoon of butter to each muffin cup, letting it melt completely. The melted butter will not only add richness but also prevent the pancakes from sticking, ensuring a perfect release when they're done baking.

Step 4: Fill the Muffin Cups
Pour the batter into each prepared muffin cup, filling them about ¾ full. This will leave enough room for the Mini German Pancakes to puff up while baking. You should hear a gentle sizzle as the batter hits the hot butter, assuring you that you're on the right track to making these delightful treats.

Step 5: Bake the Pancakes
Place the muffin tin back in the oven and bake the Mini German Pancakes for 15-20 minutes. You'll know they are done when they have puffed up beautifully and turned a lovely golden brown. Keep an eye on them to prevent over-baking, as the texture should be airy and light.

Step 6: Serve Warm
Once baked, remove the muffin tin from the oven and allow the Mini German Pancakes to cool slightly before gently removing them. Serve these delicious bites warm, topped with your favorite ingredients like maple syrup, fresh fruits, or a sprinkle of powdered sugar for that perfect finishing touch!

Make Ahead Options

These Mini German Pancakes are perfect for meal prep enthusiasts! You can prepare the batter up to 24 hours in advance, storing it in an airtight container in the refrigerator. This allows the flavors to meld beautifully while saving you precious time on busy mornings. Additionally, you can bake the pancakes ahead and store them in the fridge for up to 3 days; simply reheat them in the oven for a few minutes before serving to ensure they retain their delightful fluffiness. To maintain quality, avoid overmixing the batter and let the pancakes cool before refrigerating. With a little prep, you'll have these fluffy breakfast delights ready to go whenever you need them!

How to Store and Freeze Mini German Pancakes

Fridge: Store leftover Mini German Pancakes in an airtight container for up to 3 days. Reheat them in the microwave or pop them in the toaster for a quick breakfast.

Freezer: For longer storage, freeze pancakes in a single layer on a baking sheet until firm, then transfer to an airtight container. They can last up to 3 months, perfect for easy breakfasts!

Reheating: To enjoy frozen Mini German Pancakes, simply microwave for 30-60 seconds, or reheat in the oven at 350°F (175°C) for about 10 minutes. Serve with your favorite toppings for a delightful treat!

Expert Tips for Mini German Pancakes

Preheat Properly: Ensure your oven is fully preheated before baking. This helps the pancakes puff up beautifully and achieve that signature airy texture.

Use Room Temperature Ingredients: Take eggs and milk out beforehand. Room temperature ingredients blend more smoothly, creating a better batter for your Mini German Pancakes.

Don’t Overmix: Blend the batter just until smooth. Overmixing can lead to dense pancakes instead of the fluffy, light texture we crave.

Creative Toppings: Experiment with toppings for variety! Fresh berries, yogurt, or a drizzle of chocolate syrup can elevate your Mini German Pancakes to new heights.

Watch the Baking Time: Keep an eye on your pancakes as they bake. Remove them once they turn golden brown to avoid dryness or a chewy texture.

What to Serve with Mini German Pancakes Recipe

The perfect meal is all about harmonizing flavors and textures, and these Mini German Pancakes are no exception!

  • Crispy Bacon: The salty crunch of bacon contrasts beautifully with the fluffy sweetness of the pancakes, creating a delightful balance on your plate. Pairing these two breakfast staples will make your meal irresistible.

  • Fresh Berries: Strawberries, blueberries, or raspberries add a burst of juicy freshness that brightens each bite. Their natural sweetness complements the pancakes perfectly while adding a lovely pop of color.

  • Maple Syrup: A classic pairing, the rich and golden syrup drizzled over the pancakes enhances their flavor and adds a comforting sweetness. It's a simple yet delightful addition that's hard to resist!

  • Whipped Cream: Light and airy whipped cream adds an indulgent touch to your pancakes, elevating them to even greater heights of deliciousness. It’s an excellent choice for brunch gatherings or special occasions!

  • Yogurt Parfait: Layer creamy yogurt with fruits and granola alongside the pancakes for a satisfying contrast in texture and a well-rounded breakfast. This adds nutritious elements while keeping everything light.

  • Honey Drizzle: Replace syrup with a drizzle of honey for a floral sweetness that pairs wonderfully with the vanilla essence of the pancakes. It’s a delightful twist that adds complexity to your breakfast.

  • Powdered Sugar: A light dusting of powdered sugar not only adds sweetness but also gives a rustic, comforting charm to your pancakes. It's the perfect finishing touch for an elegant presentation.

  • Hot Cocoa or Coffee: For a warm drink, serve a cup of rich hot cocoa or freshly brewed coffee alongside your pancakes. The warmth and flavor complement the sweetness of the pancakes while creating a cozy breakfast atmosphere.

Mini German Pancakes Recipe Variations

Feel free to put your own spin on this delightful recipe and customize the flavors to your heart's content!

  • Gluten-Free: Swap all-purpose flour with a gluten-free flour blend to enjoy a lighter pancake guilt-free.

  • Dairy-Free: Use almond milk or any plant-based milk in place of dairy milk for a creamy, lactose-free breakfast.

  • Sweet Enhancements: Add cinnamon or nutmeg to the batter for a warm, cozy flavor that complements your favorite toppings beautifully.

  • Nutty Twist: Stir in some chopped nuts like almonds or walnuts to the batter for added crunch and flavor; they pair wonderfully with maple syrup.

  • Fruitful Addition: Mash in ripe bananas or fold in blueberries for a fruity surprise that brings freshness to every bite.

  • Indulgent Treat: Top with caramel sauce or drizzle chocolate syrup over the mini pancakes for a decadent morning delight that satisfies your sweet tooth.

  • Whipped Cream Wonder: Serve these fluffy pancakes with a generous dollop of whipped cream alongside fresh fruits for a truly indulgent brunch experience.

As you embark on this culinary adventure, don’t hesitate to explore and create your own favorites. After all, breakfast should be a canvas for your imagination! If you're curious for more inspiration, check out these delicious Ricotta Protein Pancakes or consider serving these alongside a flavorful German Potato Salad for a brunch platter that impresses.

Mini German Pancakes Recipe FAQs

How do I know if my ingredients are ripe or fresh?
Absolutely! For the best Mini German Pancakes, ensure your eggs are fresh and are not past their expiration date. Choose milk that is still within its sell-by date and has no off-smells. All-purpose flour should be free of insects, and you’ll definitely want to avoid any dark spots or clumps. If you’re using fruits for toppings, look for firm, brightly colored berries or bananas with minimal brown spots for optimal flavor.

What are the best storage methods for leftover Mini German Pancakes?
Very! You can store your leftover Mini German Pancakes in an airtight container in the fridge for up to 3 days. Be sure to let them cool completely before sealing them, so they remain soft and don’t become soggy. For couples or families, this is a fantastic way to stretch breakfast across several days!

Can I freeze Mini German Pancakes? If so, how?
Of course! Freezing your Mini German Pancakes means you can enjoy this delightful breakfast anytime. First, lay the pancakes in a single layer on a baking sheet and park them in the freezer until firm, usually about 30 minutes. Then, transfer them to an airtight container or a resealable freezer bag, separating layers with parchment paper to prevent sticking. They can last up to 3 months. When you’re ready to enjoy them, reheat in the microwave for 30-60 seconds, or pop them into a preheated oven at 350°F (175°C) for about 10 minutes.

What should I do if my Mini German Pancakes don’t puff up?
Ah, no worries! If they didn’t puff up, it might be due to insufficient preheating or the batter being overmixed. Make sure you preheat your oven and muffin tin thoroughly—around 10 minutes at 400°F (200°C) is ideal. If your batter was mixed too much, try blending it only until smooth next time. And double-check your oven’s temperature. If it’s lower than expected, your pancakes might not rise as they should.

Can people with gluten intolerance enjoy these Mini German Pancakes?
Yes, indeed! You can still enjoy Mini German Pancakes with a simple swap. Use a gluten-free all-purpose flour blend instead of regular flour. Make sure the blend you choose contains xanthan gum, which helps replicate the texture of traditional flour. This way, everyone can delight in these fluffy bites without worry!

What are some allergy considerations for this recipe?
Certainly! The main ingredients to watch out for include dairy and eggs, as those are common allergens. If you’re cooking for someone with these allergies, I recommend using almond milk in place of regular milk and flax eggs as an egg substitute (1 tablespoon ground flaxseed mixed with 3 tablespoons of water equals 1 egg). Be sure to check all packaging for hidden allergens, especially when it comes to baking powder or vanilla extract.

Mini German Pancakes Recipe

Mini German Pancakes Recipe: Fluffy Bites of Morning Joy

Delightful Mini German Pancakes Recipe offers fluffy, bite-sized treats perfect for any breakfast occasion.
Print Recipe Pin Recipe
Prep Time 10 minutes mins
Cook Time 20 minutes mins
Total Time 30 minutes mins
Servings: 4 pancakes
Course: Breakfast
Cuisine: German
Calories: 120
Ingredients Equipment Method Nutrition Notes

Ingredients
  

For the Batter
  • 1 cup all-purpose flour can substitute with whole wheat flour
  • 1 cup milk use almond milk for dairy-free option
  • 3 large eggs room temperature
  • 2 tablespoons sugar can reduce or substitute with honey
  • 1 teaspoon vanilla extract almond extract can be used for variation
  • 1/4 teaspoon salt
  • 1/2 tablespoon butter can use coconut oil for dairy-free option
For Serving
  • 1 cup maple syrup
  • 1 cup fresh fruits such as berries or bananas
  • 1 cup powdered sugar for dusting
  • 1 cup whipped cream for topping

Equipment

  • Muffin tin
  • Blender

Method
 

Step-by-Step Instructions
  1. Preheat your oven to 400°F (200°C). Place a muffin tin inside to warm up for about 10 minutes.
  2. In a blender, blend together all-purpose flour, milk, eggs, sugar, vanilla extract, and salt until smooth, about 30 seconds.
  3. Remove the hot muffin tin and add ½ tablespoon of butter to each muffin cup, letting it melt completely.
  4. Pour the batter into each muffin cup, filling them about ¾ full.
  5. Bake for 15-20 minutes until puffy and golden brown.
  6. Allow to cool slightly before gently removing and serve warm with toppings.

Nutrition

Serving: 1pancakeCalories: 120kcalCarbohydrates: 14gProtein: 3gFat: 6gSaturated Fat: 4gPolyunsaturated Fat: 0.5gMonounsaturated Fat: 2gCholesterol: 80mgSodium: 150mgPotassium: 100mgFiber: 0.5gSugar: 3gVitamin A: 300IUCalcium: 100mgIron: 1mg

Notes

Customize flavors and toppings for an adventurous breakfast experience.

Tried this recipe?

Let us know how it was!
  • « Previous Page
  • 1
  • …
  • 9
  • 10
  • 11
  • 12
  • 13
  • …
  • 17
  • Next Page »

Welcome!

Hi, I’m Grace, a Sydney-based home cook with a passion for bold flavors and trending ingredients. Whether you’re a busy beginner or a seasoned foodie, you’ll find dishes here that are fresh, fun, and full of flavor.

More about me

Popular Recipes

  • Cheesy Chicken Garlic Bread Sandwich
    Cheesy Chicken Garlic Bread Sandwich for Cozy Family Moments
  • Easy Chicken Ranch Wraps
    Easy Chicken Ranch Wraps: Quick, Creamy & Totally Satisfying
  • Chicken Caesar Sandwiches
    Delicious Chicken Caesar Sandwiches for Quick Comfort Food
  • best Cuban sandwich
    The Best Cuban Sandwich You’ll Want Every Weeknight!

Footer

↑ back to top

About

  • Privacy Policy
  • Disclaimer
  • Terms & Conditions

Newsletter

  • Sign Up! for emails and updates

Contact

  • About me
  • Contact me

Copyright © 2025 TastyTrendIngredients