tastytrendingredients

  • Home
  • Recipes
    • Appetizers
    • Breakfast
    • Dessert
    • Dinner
    • Drinks
    • Salads
    • Snacks
    • Soups
  • About me
  • Contact
menu icon
go to homepage
  • Home
  • Recipes
    • Appetizers
    • Breakfast
    • Dessert
    • Dinner
    • Drinks
    • Salads
    • Snacks
    • Soups
  • About me
  • Contact
search icon
Homepage link
  • Home
  • Recipes
    • Appetizers
    • Breakfast
    • Dessert
    • Dinner
    • Drinks
    • Salads
    • Snacks
    • Soups
  • About me
  • Contact
×

Deliciously Nutritious Healthy Quinoa Banana Bread Recipe

February 2, 2026 by Grace Snow Leave a Comment

The kitchen filled with the sweet, inviting aroma of baking can turn even the rainiest day into a moment of pure joy. This Healthy Quinoa Banana Bread is my go-to solution for those overripe bananas that seem to multiply on the counter. Not only does this recipe transform a classic comfort into a healthier option, but it also packs an impressive protein punch thanks to the quinoa. It’s perfect for a nutritious breakfast or a satisfying snack that leaves you feeling energized—not weighed down. With minimal prep time and the ability to make use of those neglected bananas, this bread is all about transforming your baking into something remarkably wholesome. So, are you ready to bring some sunshine to your mornings with this delightful twist on banana bread?
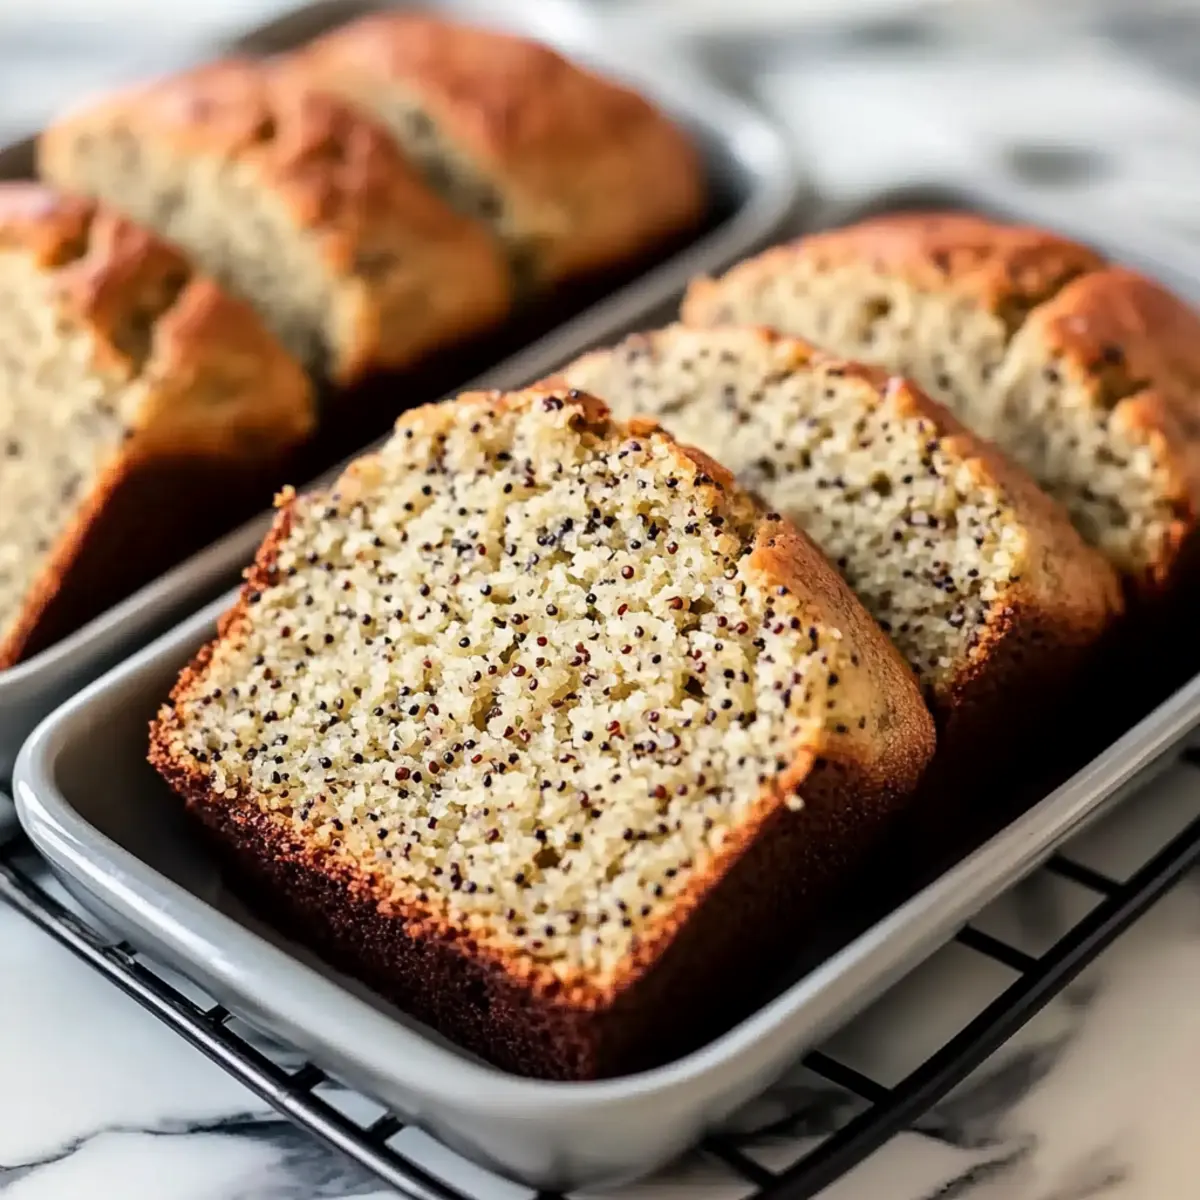
Why is this banana bread so special?

Nutritious Twist: This Healthy Quinoa Banana Bread uniquely combines classic comfort with nutritional benefits, making it a healthier choice for your family.

Protein-Packed: Thanks to the quinoa, you're not just enjoying deliciousness but also a filling, protein-rich snack.

Effortless Baking: With straightforward steps and minimal prep time, you’ll have this delightful bread ready in no time, perfect for busy mornings!

Versatile Variations: Feel free to explore with exciting add-ins like nuts, chocolate chips, or spices to customize the flavor to your taste.

Baked Goodness: The sweet aroma that fills your kitchen while baking is nothing short of heavenly—it's guaranteed to bring smiles all around!

Whether served warm with a dollop of cream cheese or paired with fresh berries and Greek yogurt, this banana bread is going to be a hit. It's a delicious way to use up those overripe bananas and create something truly delightful! Try serving it alongside a slice of Cheesy Garlic Bread for a full breakfast experience.

Healthy Quinoa Banana Bread Ingredients

For the Bread

  • Overripe Bananas – Adds natural sweetness and moisture; ensure they are very ripe with brown spots for optimal flavor.
  • Quinoa – Provides texture and a protein boost; must be properly cooked and cooled to prevent gummy bread.
  • Eggs – Binds the mixture, contributing to the overall structure; use room temperature eggs for better blending.
  • Sugar – Sweetens the bread; can be substituted with honey or maple syrup for a natural alternative.
  • Melted Butter – Adds richness and moisture; substitute with coconut oil for a dairy-free option.
  • Flour – Creates structure; opt for all-purpose flour or a gluten-free blend, and spoon it into the measuring cup to prevent compaction.
  • Baking Powder – Acts as a leavening agent for proper bread rise; ensure it’s fresh for effectiveness.
  • Salt – Enhances flavor; a pinch goes a long way—don't skip it!

This Healthy Quinoa Banana Bread is sure to impress your family while making good use of those overripe bananas!

Step‑by‑Step Instructions for Healthy Quinoa Banana Bread

Step 1: Preheat the Oven
Start by preheating your oven to 350°F (175°C). While the oven heats, prepare four mini loaf pans by spraying them with baking spray. This ensures that your Healthy Quinoa Banana Bread comes out easily after baking and maintains its lovely shape, ready to impress your family.

Step 2: Mix the Dry Ingredients
In a mixing bowl, combine your flour, baking powder, and salt. Stir these dry ingredients thoroughly to ensure even distribution, which is key in creating the perfect texture for your banana bread. This mixture will provide the structure needed for your loaves to rise beautifully in the oven.

Step 3: Prepare the Wet Mixture
In another bowl, whisk together the eggs, sugar, and melted butter until the mixture is smooth and well-combined. Make sure your ingredients are at room temperature for a uniform blend. This wet mixture will enrich your Healthy Quinoa Banana Bread with moisture and sweetness, enhancing its flavor profile.

Step 4: Fold in the Bananas
Gently fold in the mashed overripe bananas into the wet mixture. Aim to keep some small chunks of banana for texture but ensure they are mostly combined. The ripe bananas not only add natural sweetness but also moisture, making each slice of your banana bread delightful and indulgent.

Step 5: Combine Wet and Dry Ingredients
Gradually pour the dry mixture into the bowl with the bananas and wet ingredients. Mix just until the two mixtures are combined, being careful not to overmix. This step is crucial to maintain the lightness of your Healthy Quinoa Banana Bread, resulting in a fluffy loaf.

Step 6: Add the Quinoa
Carefully fold the cooled, cooked quinoa into your batter. This adds both protein and a unique texture, elevating your banana bread to a nutritious level. Avoid overmixing at this stage to ensure the quinoa is evenly distributed without compromising the airy quality of the batter.

Step 7: Fill the Mini Loaf Pans
Divide your batter evenly among the four prepared mini loaf pans. Smooth out the tops with a spatula to ensure an even bake. This step not only helps with presentation but also contributes to the overall baking process, allowing your Healthy Quinoa Banana Bread to rise nicely.

Step 8: Bake to Perfection
Place the loaf pans in your preheated oven and bake for 45-50 minutes. Start checking doneness around the 45-minute mark by inserting a toothpick into the center of the loaves; it should come out clean or with a few moist crumbs. This ensures your banana bread is baked perfectly throughout.

Step 9: Cooling Time
Once baked, allow the loaves to cool in the pans for about 10 minutes. This resting time helps them set properly. Then, carefully transfer the loaves to a wire rack to cool completely. Patience at this stage will reward you with a perfectly textured Healthy Quinoa Banana Bread that’s ready to slice and serve.
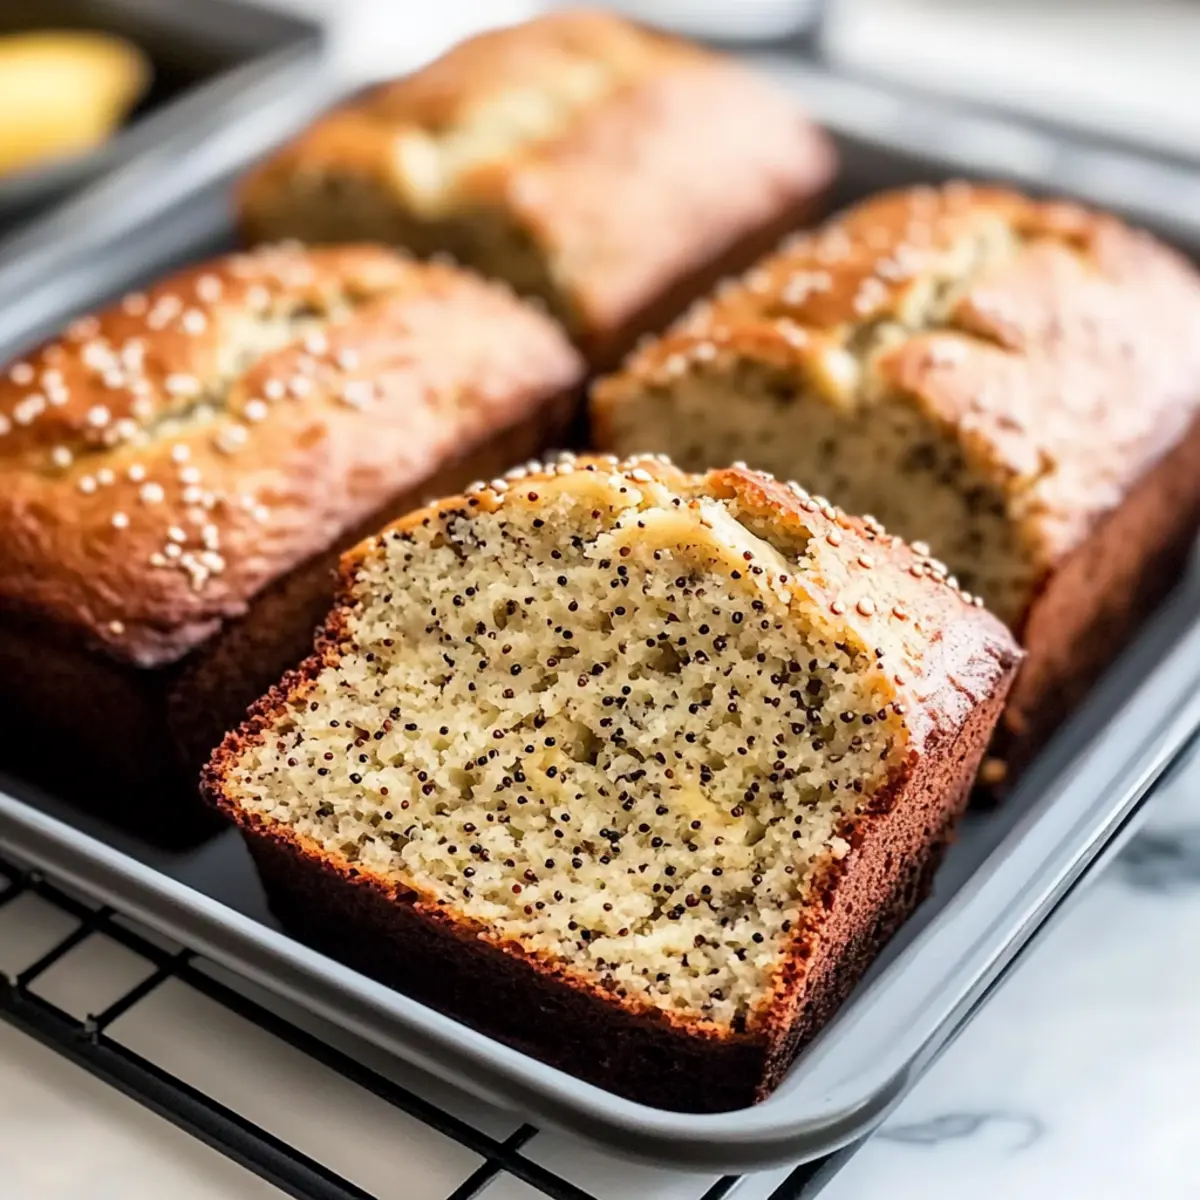
Healthy Quinoa Banana Bread Variations

Feel free to personalize your Healthy Quinoa Banana Bread with these delightful twists that will elevate your baking experience!

  • Gluten-Free: Substitute almond flour for all-purpose flour. This great option makes your banana bread suitable for gluten-sensitive friends and family.

  • Spiced Delight: Add cinnamon or nutmeg to the dry ingredients for a warm, inviting aroma that enhances the flavor. Just a half teaspoon can make a world of difference!

  • Nutty Crunch: Incorporate chopped walnuts or pecans into the batter for a satisfying crunch. They add texture and a touch of richness, making each bite even more delightful.

  • Choco-Lover’s Twist: Fold in dark chocolate chips for a decadent treat. The sweet chocolate compliments the banana beautifully, turning this healthy recipe into a delightful dessert.

  • Berry Boost: Add a handful of fresh or frozen blueberries for a fruity twist. They not only add flavor but also a pop of color, making your banana bread wonderfully inviting.

  • Nut Butter Swirl: Before baking, swirl in peanut butter or almond butter for an extra indulgence. This creamy addition creates a rich, nutty flavor that pairs perfectly with banana.

  • Coconut Lover: Mix in shredded unsweetened coconut for that tropical flair. It introduces a subtle sweetness and a chewy texture that adds a delightful contrast to the bread.

  • Zesty Surprise: Add the zest of a lemon or orange for a bright, citrusy feel. This refreshing addition can brighten up the flavors and make your banana bread sing!

No matter which variation you choose, each bite will bring a warm smile and the aroma of home-baked goodness. Pair it with a slice of Cornbread Breakfast Casserole for a weekend brunch that feels both special and cozy. Enjoy your delicious journey with Healthy Quinoa Banana Bread!

Expert Tips for Healthy Quinoa Banana Bread

  • Banana Ripeness: Use very ripe bananas with plenty of brown spots for maximum sweetness and flavor. Avoid under-ripe bananas for the best results.

  • Quinoa Prep: Always ensure quinoa is thoroughly cooked and cooled before folding it into the batter. This prevents any moisture issues in your Healthy Quinoa Banana Bread.

  • Gentle Mixing: To maintain the bread's light texture, mix gently, especially when combining dry and wet ingredients. Overmixing can lead to a dense loaf.

  • Accurate Measurements: Spoon flour into your measuring cup rather than scooping directly from the bag to avoid compaction, which can affect the batter consistency.

  • Baking Time: Keep an eye on the bread as it bakes. Start testing for doneness at 45 minutes to avoid overbaking, ensuring a moist texture throughout.

How to Store and Freeze Healthy Quinoa Banana Bread

Room Temperature: Store your Healthy Quinoa Banana Bread in an airtight container for up to 3 days, ensuring it stays moist and flavorful.

Fridge: If you need to keep it longer, refrigerate in an airtight container for up to a week—this helps maintain freshness while preventing spoilage.

Freezer: For extended storage, wrap slices tightly in plastic wrap and then aluminum foil, or use a freezer-safe bag. It can be frozen for up to 3 months!

Reheating: When ready to enjoy, thaw slices at room temperature or pop them in the microwave for about 15-20 seconds for a warm and delightful snack.

Make Ahead Options

These Healthy Quinoa Banana Bread loaves are perfect for meal prep enthusiasts! You can prepare the batter up to 24 hours in advance by mixing all the wet and dry ingredients, then storing it in the refrigerator. This helps the flavors meld together beautifully. Remember to cover the bowl tightly to prevent air exposure, which can affect the taste. When you’re ready to bake, simply preheat your oven, allow the batter to come to room temperature for about 30 minutes, and then pour it into your prepared mini loaf pans. Bake as directed for a delightful, fresh loaf that’s just as delicious as if it was made that day!

What to Serve with Healthy Quinoa Banana Bread

Warm, flavorsome options await you to elevate your Healthy Quinoa Banana Bread into a delightful meal experience!

  • Creamy Yogurt: A scoop of Greek yogurt adds creaminess and a tangy contrast to the sweet bread, perfect for breakfast.
  • Fresh Berries: Top with a mix of vibrant berries for a burst of fresh flavor and color that brightens each bite.
  • Nut Butter: Smooth nut butter spreads introduce healthy fats and protein, pairing beautifully with the banana bread's sweetness.

For a nutritious breakfast or snack, why not serve it alongside a warm cup of herbal tea? The delicate notes will harmonize perfectly, creating a soothing moment. Enjoy your meal!
Healthy Quinoa Banana Bread Recipe FAQs

What kind of bananas are best to use for this recipe?
Absolutely! For the healthiest and most flavorful Healthy Quinoa Banana Bread, use overripe bananas with lots of brown spots. These bananas are naturally sweeter and provide the moisture needed for the bread, so don't hesitate to use those that have been sitting on your counter a bit too long!

How should I store leftovers?
Very simple! After you've baked your Healthy Quinoa Banana Bread, if you have any leftovers, store them in an airtight container at room temperature for up to 3 days. For longer storage, place the bread in the fridge for up to a week. Just make sure to keep it sealed well to retain its moistness.

Can I freeze the banana bread?
Absolutely! To freeze your Healthy Quinoa Banana Bread, wrap the cooled slices tightly in plastic wrap, then cover them with aluminum foil or place them in a freezer-safe bag. This way, they’ll stay fresh for up to 3 months. When you’re ready to indulge, simply thaw the slices at room temperature or pop them in the microwave for about 15-20 seconds for a warm treat!

What if my quinoa is too gummy?
No worries! If you encounter gummy quinoa in your Healthy Quinoa Banana Bread, it likely means that the quinoa was either overcooked or not properly cooled before being added to the batter. To avoid this, always rinse quinoa well before cooking, and ensure it’s cooked until fluffy and then spread it out on a plate to cool completely before folding it into your mixture. This keeps the texture nice and light!

Is this banana bread safe for my pets?
Great question! While the ingredients in Healthy Quinoa Banana Bread are safe for humans, it's important to note that it contains sugar and other components that aren't ideal for pets. If you want to share it with your furry friends, it'll be best to stick with plain, unprepared bananas or make a pet-friendly version without those extra ingredients!

Can I substitute the ingredients for dietary restrictions?
Very much so! If you have dietary restrictions, you can make several easy swaps in this recipe. Use almond flour instead of all-purpose flour for a gluten-free option. Substitute coconut oil for the melted butter to keep it dairy-free, and opt for honey or maple syrup instead of sugar for a natural sweetener. Feel free to adjust to your taste and dietary needs!
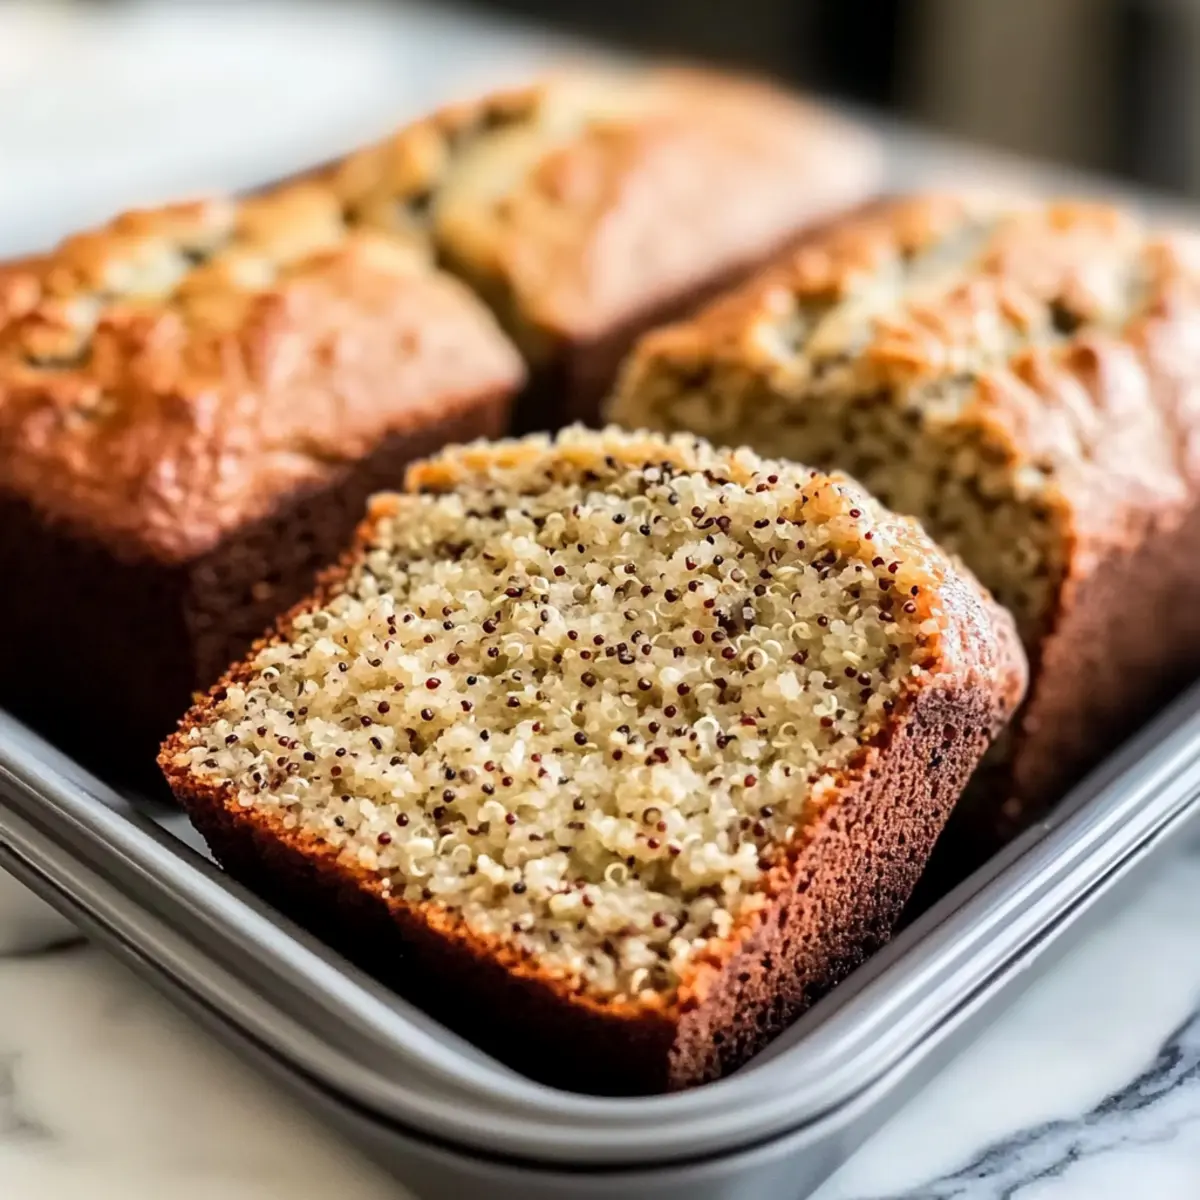
Healthy Quinoa Banana Bread

Deliciously Nutritious Healthy Quinoa Banana Bread Recipe

This Healthy Quinoa Banana Bread is perfect for transforming overripe bananas into a protein-packed, nutritious treat.
Print Recipe Pin Recipe
Prep Time 15 minutes mins
Cook Time 50 minutes mins
Cooling Time 10 minutes mins
Total Time 1 hour hr 15 minutes mins
Servings: 4 mini loaves
Course: Breakfast
Cuisine: American
Calories: 250
Ingredients Equipment Method Nutrition Notes

Ingredients
  

For the Bread
  • 4 medium Overripe Bananas Ensure they are very ripe with brown spots.
  • 1 cup Quinoa Cooked and cooled.
  • 3 large Eggs Room temperature for better blending.
  • 3/4 cup Sugar Can substitute with honey or maple syrup.
  • 1/2 cup Melted Butter Substitute with coconut oil for dairy-free.
  • 1 1/2 cups Flour All-purpose or gluten-free; spoon into measuring cup.
  • 1 tbsp Baking Powder Ensure it’s fresh.
  • 1/2 tsp Salt A pinch enhances flavor.

Equipment

  • Mixing bowls
  • Loaf Pans
  • Spatula
  • Whisk
  • measuring cups
  • Oven

Method
 

Step‑by‑Step Instructions
  1. Preheat your oven to 350°F (175°C) and prepare the mini loaf pans with baking spray.
  2. In a mixing bowl, combine the flour, baking powder, and salt. Stir thoroughly for even distribution.
  3. In another bowl, whisk together the eggs, sugar, and melted butter until smooth.
  4. Gently fold in the mashed overripe bananas into the wet mixture, keeping some small chunks.
  5. Gradually combine the dry mixture with the wet ingredients, mixing just until combined.
  6. Carefully fold in the cooled, cooked quinoa until evenly distributed.
  7. Divide the batter among the prepared mini loaf pans and smooth out the tops.
  8. Bake for 45-50 minutes, checking for doneness with a toothpick around the 45-minute mark.
  9. Allow the loaves to cool in the pans for about 10 minutes before transferring to a wire rack.

Nutrition

Serving: 1mini loafCalories: 250kcalCarbohydrates: 35gProtein: 5gFat: 10gSaturated Fat: 5gPolyunsaturated Fat: 1gMonounsaturated Fat: 3gCholesterol: 50mgSodium: 150mgPotassium: 200mgFiber: 3gSugar: 10gVitamin A: 200IUVitamin C: 5mgCalcium: 20mgIron: 1mg

Notes

This banana bread can be served warm with cream cheese or paired with fresh berries and Greek yogurt. Add nuts or chocolate chips for variations.

Tried this recipe?

Let us know how it was!

Savory Breakfast Protein Biscuits for Energizing Mornings

February 1, 2026 by Grace Snow Leave a Comment

“Is there anything better than the aroma of warm, savory biscuits fresh out of the oven?” That’s the thought that spurred me to create these delightful Breakfast Protein Biscuits. Crafted with protein-packed Greek yogurt and fresh spinach, these biscuits not only tantalize your taste buds but also serve as a healthy grab-and-go breakfast option. Perfect for busy mornings or a post-workout fuel-up, they come together quickly and can be easily customized with whatever veggies or cheeses you have on hand. Plus, with their gluten-free option, everyone can enjoy these delicious bites. Ready to elevate your breakfast routine? Let’s dive into this simple yet satisfying recipe!

Why Are These Biscuits a Must-Try?

Wholesome Ingredients: Made with Greek yogurt and spinach, each biscuit is packed with protein and nutrients, positioning them as a smart choice for your morning routine.

Quick And Easy: Ready in just 30 minutes, they’re perfect for busy mornings. Simply mix, bake, and enjoy!

Customizable Options: Feel free to swap in your favorite veggies, like kale or bell peppers, and cheese varieties, creating a personalized treat for your taste buds.

Gluten-Free Alternative: Offering a gluten-free version means everyone can savor these delicious bites without worry.

Ideal for Meal Prep: Make a batch over the weekend, store them, and grab them when you’re ready for a satisfying breakfast. Serve them alongside Breakfast Egg Muffins for a delightful brunch spread!

Breakfast Protein Biscuits Ingredients

  • For the Batter

  • Plain 2% Greek Yogurt – Provides moisture and protein for the biscuits; swap with dairy-free yogurt for a vegan option.

  • Large Eggs – Essential for binding and moisture; use flax eggs for a plant-based substitute.

  • All-Purpose Flour – Gives structure to the biscuits; substitute with gluten-free flour to accommodate dietary needs.

  • Ground Flaxseed – Adds fiber and healthy fats; optional but boosts nutrition.

  • Baking Powder – Acts as a leavening agent for a good rise; ensure it’s gluten-free if necessary.

  • Salt – Enhances flavor; opt for sea salt for a more complex taste.

  • Garlic Powder – Infuses savory depth; omit if a milder flavor is preferred.

  • Red Pepper Flakes – Optional for heat; adjust to taste or leave out entirely.

  • For the Filling

  • Spinach – Loaded with nutrients and flavor; wilt before use and squeeze out excess moisture.

  • Chives – Adds a fresh note; substitute with green onions if needed.

  • Cheddar Cheese – Delivers rich flavor and creaminess; use dairy-free cheese for a vegan option.

These delightful Breakfast Protein Biscuits not only provide nutrition but also make mornings a whole lot easier!

Step‑by‑Step Instructions for Breakfast Protein Biscuits

Step 1: Preheat Oven and Prepare Muffin Tin
Preheat your oven to 375°F (190°C). While it heats, take a 12-cup muffin tin and grease it lightly with cooking spray or line it with muffin liners. This ensures your Breakfast Protein Biscuits release easily after baking and achieve that perfect golden color.

Step 2: Mix Dry Ingredients
In a large mixing bowl, combine your all-purpose flour, ground flaxseed, baking powder, salt, garlic powder, and red pepper flakes. Use a whisk to blend these dry ingredients together thoroughly until the mixture is uniform in color and consistency. This step is key to achieving evenly risen biscuits.

Step 3: Combine Wet Ingredients
In a separate medium bowl, add the plain 2% Greek yogurt and large eggs. Beat the mixture with a fork or whisk until it becomes smooth and creamy. This fragrant blend will create the moist base of your Breakfast Protein Biscuits, so make sure it’s well mixed and free from lumps.

Step 4: Combine Mixtures
Gently fold the wet ingredients into the bowl of dry ingredients using a spatula or large wooden spoon. Mix just until combined; remember, overmixing will lead to tough biscuits. The goal is a light batter that maintains some fluffs, signaling you're ready for the next step.

Step 5: Add Veggies & Cheese
Now, stir in the wilted spinach, chopped chives, and one cup of cheddar cheese into the batter. Ensure everything is well-integrated for a delightful flavor in every bite of your Breakfast Protein Biscuits. The vibrant greens and gooey cheese should be evenly distributed throughout.

Step 6: Fill Muffin Tin
Using a spoon or scoop, divide the biscuit batter evenly among the prepared muffin cups, filling each about two-thirds full. For an extra touch, sprinkle a little reserved cheddar cheese on top of each filled cup, creating a deliciously cheesy crust as they bake.

Step 7: Bake
Carefully place the muffin tin in the preheated oven and bake for 20 to 22 minutes. Keep a close eye on them; they are ready when the tops are golden brown and a toothpick inserted into the center comes out clean. The aroma will fill your kitchen, promising a delightful breakfast ahead!

Step 8: Cool and Serve
Once baked to perfection, remove the muffin tin from the oven and let the Breakfast Protein Biscuits cool for a few minutes. Gently run a knife around the edges if necessary before popping them out. Serve warm to enjoy their cheesy goodness and delightful texture!

Make Ahead Options

These Breakfast Protein Biscuits are perfect for meal prep enthusiasts! You can prepare the batter up to 24 hours in advance, storing it tightly covered in the refrigerator. Additionally, you can make the individual biscuits and refrigerate them for up to 3 days or freeze them for up to 2 months. To maintain their delicious texture, be sure to tightly wrap them in plastic wrap or store in an airtight container. When you're ready to enjoy your biscuits, simply reheat from frozen in the microwave or toaster oven until warmed through. This thoughtful prep not only saves time but also guarantees you'll have nourishing breakfasts ready to go!

What to Serve with Breakfast Protein Biscuits

Start your morning off right by pairing these delightful biscuits with complementary sides that amplify their savory, cheesy deliciousness.

  • Fresh Fruit Salad: A medley of fruits adds a refreshing contrast, balancing the rich flavor of the biscuits and offering a burst of natural sweetness.

  • Creamy Avocado Slices: Smooth avocado provides healthy fats and creamy texture, making for a perfect accompaniment to the savory biscuits that enhances overall nutrition.

  • Herbed Greek Yogurt: Serve a side of herbed yogurt as a dip for your biscuits. It adds a creamy element that works beautifully with the cheesy flavors, keeping your meal nutritious.

  • Chilled Smoothie: Blend up a refreshing green smoothie to kick-start your day. It’s vibrant, packed with nutrients, and offers a refreshing contrast to the warm biscuits.

  • Roasted Sweet Potatoes: The natural sweetness of roasted sweet potatoes pairs perfectly with the savory notes of the biscuits, creating a satisfying breakfast that’s hearty and wholesome.

  • Coffee or Herbal Tea: Complement your breakfast with a robust cup of coffee or calming herbal tea, adding warmth and comfort to your morning routine.

Elevate your breakfast experience with these delicious pairings alongside your Breakfast Protein Biscuits!

Breakfast Protein Biscuits Variations & Substitutions

Feel free to make these delightful biscuits your own with these fun and easy tweaks!

  • Dairy-Free: Swap the Greek yogurt and cheese for coconut yogurt and vegan cheese to keep it plant-based and creamy.
  • Gluten-Free: Use gluten-free flour in place of all-purpose flour to accommodate your dietary needs without sacrificing taste.
  • Veggie Boost: Replace spinach with shredded carrots or zucchini for a sweet twist while packing in extra nutrients.
  • Cheesy Alternatives: Try adding feta or goat cheese for a tangy flavor that pairs beautifully with the warm biscuits.
  • Hearty Additions: Toss in cooked, crumbled turkey sausage or diced ham for a heartier breakfast option that delivers extra protein.
  • Herb Twist: Substitute chives with fresh herbs like basil or dill to infuse each biscuit with an exciting new flavor dimension.
  • Spicy Kick: For those who love a bit of heat, mix in some diced jalapeños or swap red pepper flakes for cayenne pepper.
  • Nutty Flavors: Incorporate a tablespoon of nutritional yeast into the dry ingredients for an extra cheesy flavor that’s entirely plant-based.

Once you’ve tried these variations, you might just find a new favorite version to greet your mornings! And if you’re looking for more breakfast inspirations, why not check out the flavors in Lemon Ricotta Protein or go sweet with a Breakfast Banana Split? Happy cooking!

How to Store and Freeze Breakfast Protein Biscuits

  • Room Temperature: Let the biscuits cool completely, then store them in an airtight container at room temperature for up to 1 day for optimum freshness.

  • Fridge: Place your Breakfast Protein Biscuits in an airtight container in the refrigerator for up to 5 days. They can be easily reheated in the microwave or toaster oven to enjoy warm.

  • Freezer: Individually wrap each biscuit in plastic wrap and store in a freezer bag for up to 2 months. When you're ready to eat, thaw overnight in the fridge, then reheat in the microwave or oven.

  • Reheating: To reheat, place biscuits in the microwave for about 30 seconds or in a toaster oven at 350°F (175°C) for 10 minutes, ensuring they stay warm and delicious!

Expert Tips for Breakfast Protein Biscuits

  • Avoid Overmixing: Gently combine wet and dry ingredients until just mixed. Overmixing can lead to tough biscuits that lack the desired fluffiness.

  • Proper Spinach Prep: Ensure spinach is well-wilted and thoroughly drained. Excess moisture can make your Breakfast Protein Biscuits soggy and affect their texture.

  • Cheese Variability: Experiment with different cheeses like feta or mozzarella for unique flavors. Just be cautious about the moisture content of different cheeses which can impact the biscuit's consistency.

  • Baking Watch: Keep an eye on the bake time. Check for doneness at 20 minutes, as ovens can vary and you want perfectly golden biscuits.

  • Customize Veggies: Feel free to substitute or add ingredients based on preference, but remember to chop them finely so they mix evenly throughout the biscuit batter.

  • Storage Ease: Store leftover biscuits in an airtight container in the fridge or freezer. They make a quick, nutritious meal prep option!

Breakfast Protein Biscuits Recipe FAQs

How do I know if my spinach is ready to use?
Absolutely! Fresh spinach should be wilted and have its moisture squeezed out before adding to your biscuits. If using frozen spinach, ensure it's completely thawed and well-drained to avoid sogginess.

What’s the best storage method for leftover biscuits?
Very! Store your Breakfast Protein Biscuits in an airtight container in the refrigerator for up to 5 days. For optimal freshness, let them cool completely before storing. To enjoy them warm, simply reheat in the microwave for 30 seconds or in a toaster oven.

Can I freeze Breakfast Protein Biscuits?
Yes, you can! Individually wrap each biscuit in plastic wrap before placing them in a freezer-safe bag. They can be stored for up to 2 months. When you’re ready to eat one, thaw it overnight in the fridge, and reheat as needed.

What should I do if my biscuits turn out too dry?
If you find your biscuits dry, it could be due to overmixing or baking them too long. I recommend checking them around the 20-minute mark. To counteract dryness, you can serve them with a dollop of Greek yogurt or avocado, adding moisture back into each bite.

Can my pet eat these biscuits?
While some ingredients like spinach and eggs can be safe for pets, the addition of cheese and spices like red pepper flakes may not be suitable. Always consult your veterinarian before sharing any human food with your furry friends to ensure it’s safe for them.

What can I substitute for all-purpose flour to make these gluten-free?
Great question! You can substitute all-purpose flour with a gluten-free flour blend. Look for blends that contain xanthan gum to help the biscuits rise and maintain their structure. Just make sure to check that your baking powder is also gluten-free!

Breakfast Protein Biscuits

Savory Breakfast Protein Biscuits for Energizing Mornings

These Breakfast Protein Biscuits are a healthy, protein-packed option for busy mornings.
Print Recipe Pin Recipe
Prep Time 10 minutes mins
Cook Time 22 minutes mins
Total Time 32 minutes mins
Servings: 12 biscuits
Course: Breakfast
Cuisine: American
Calories: 150
Ingredients Equipment Method Nutrition Notes

Ingredients
  

For the Batter
  • 1 cup Plain 2% Greek Yogurt Swap with dairy-free yogurt for a vegan option.
  • 2 large Eggs Use flax eggs for a plant-based substitute.
  • 2 cups All-Purpose Flour Substitute with gluten-free flour for dietary needs.
  • 1 tbsp Ground Flaxseed Optional but boosts nutrition.
  • 1 tbsp Baking Powder Ensure it’s gluten-free if necessary.
  • 0.5 tsp Salt Opt for sea salt for a more complex taste.
  • 1 tsp Garlic Powder Omit if a milder flavor is preferred.
  • 0.5 tsp Red Pepper Flakes Optional for heat; adjust to taste.
For the Filling
  • 2 cups Spinach Wilt before use and squeeze out excess moisture.
  • 0.25 cup Chives Substitute with green onions if needed.
  • 1 cup Cheddar Cheese Use dairy-free cheese for a vegan option.

Equipment

  • Muffin tin
  • Mixing bowls
  • Whisk
  • Spatula
  • Spoon or scoop

Method
 

Step-by-Step Instructions
  1. Preheat your oven to 375°F (190°C) and prepare a 12-cup muffin tin by greasing lightly.
  2. In a large mixing bowl, combine all-purpose flour, ground flaxseed, baking powder, salt, garlic powder, and red pepper flakes.
  3. In a separate bowl, mix plain Greek yogurt and large eggs until smooth.
  4. Fold the wet ingredients into the dry ingredients until just combined.
  5. Stir in wilted spinach, chopped chives, and cheddar cheese into the batter.
  6. Divide the batter evenly among the muffin cups, filling each about two-thirds full.
  7. Bake for 20 to 22 minutes until golden brown and a toothpick comes out clean.
  8. Let cool for a few minutes before serving warm.

Nutrition

Serving: 1biscuitCalories: 150kcalCarbohydrates: 18gProtein: 6gFat: 6gSaturated Fat: 3gCholesterol: 40mgSodium: 200mgPotassium: 120mgFiber: 2gSugar: 1gVitamin A: 500IUVitamin C: 5mgCalcium: 120mgIron: 1.5mg

Notes

Avoid overmixing and ensure spinach is well-drained. Store leftovers in an airtight container.

Tried this recipe?

Let us know how it was!

Cinnamon Swirl Protein Cake for a Guilt-Free Breakfast Delight

February 1, 2026 by Grace Snow Leave a Comment

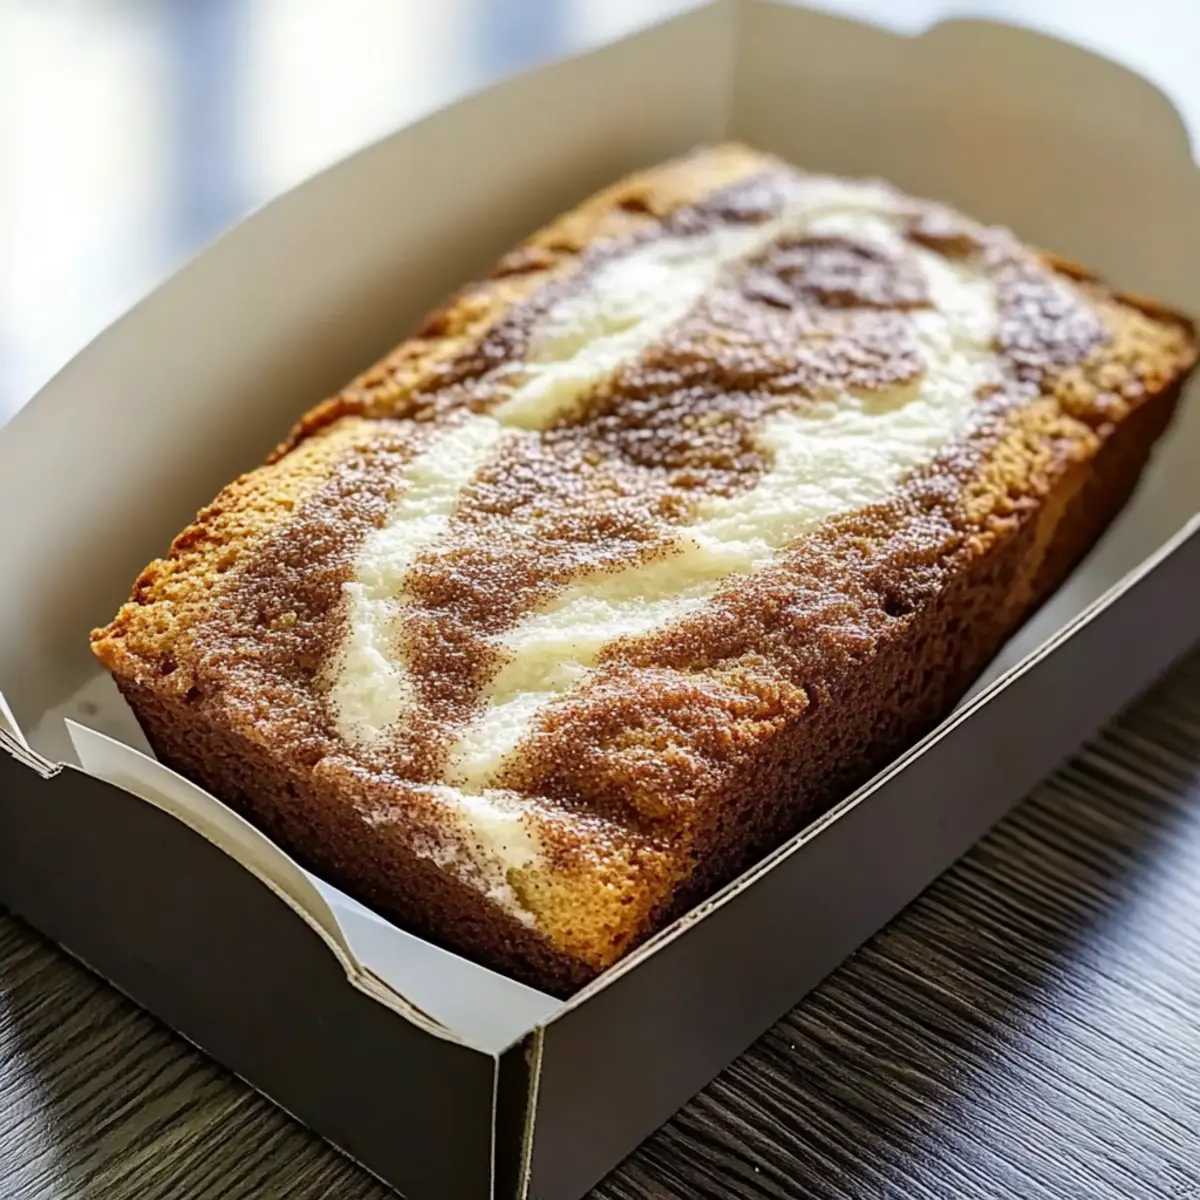
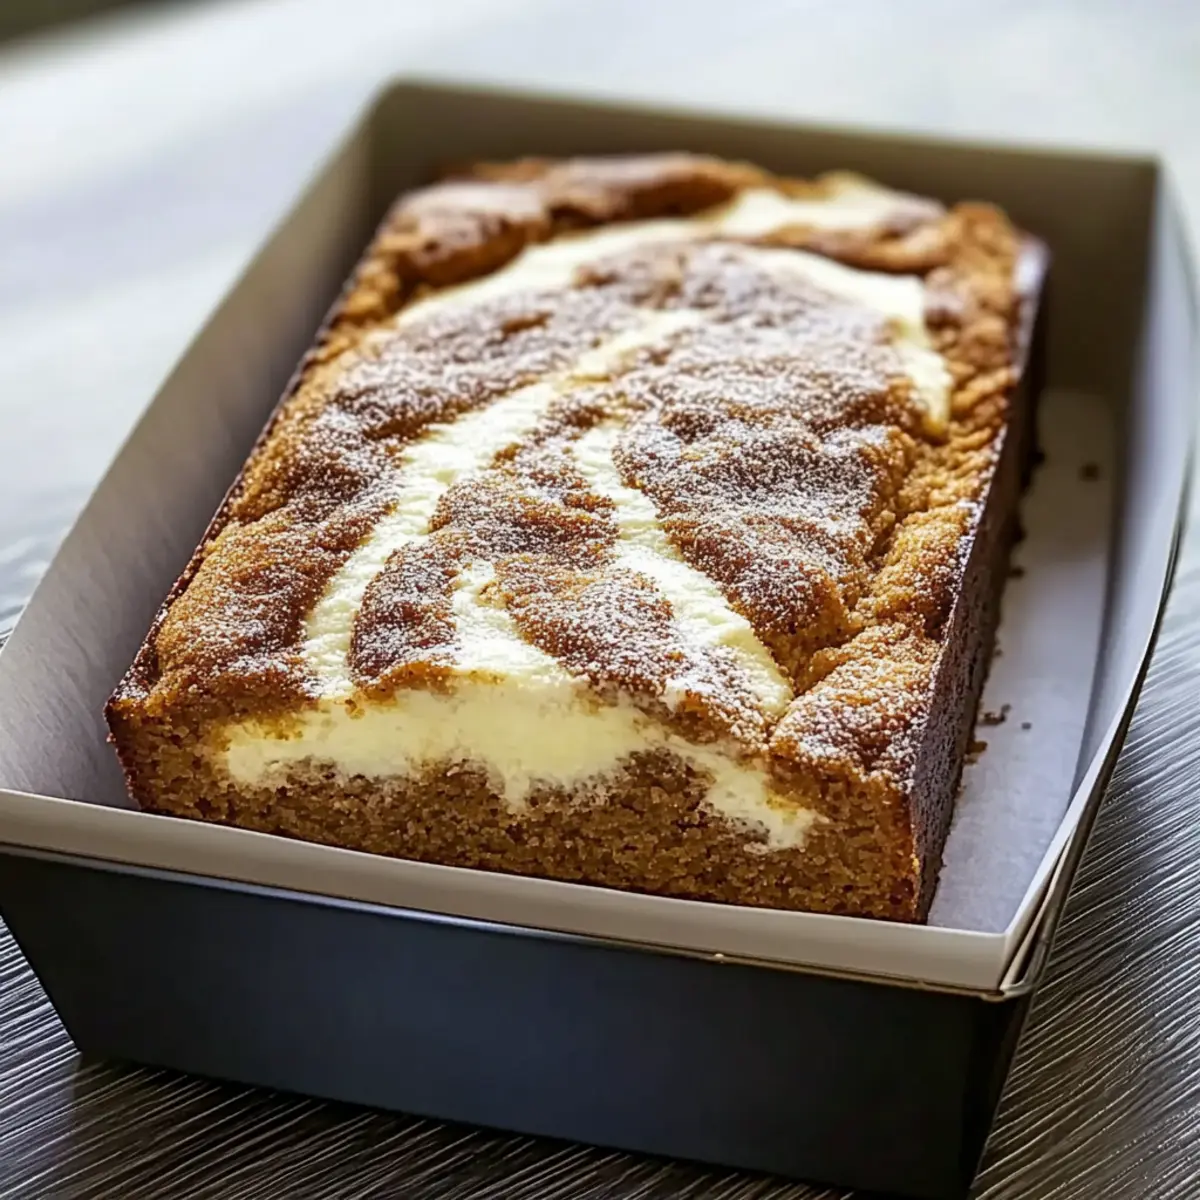
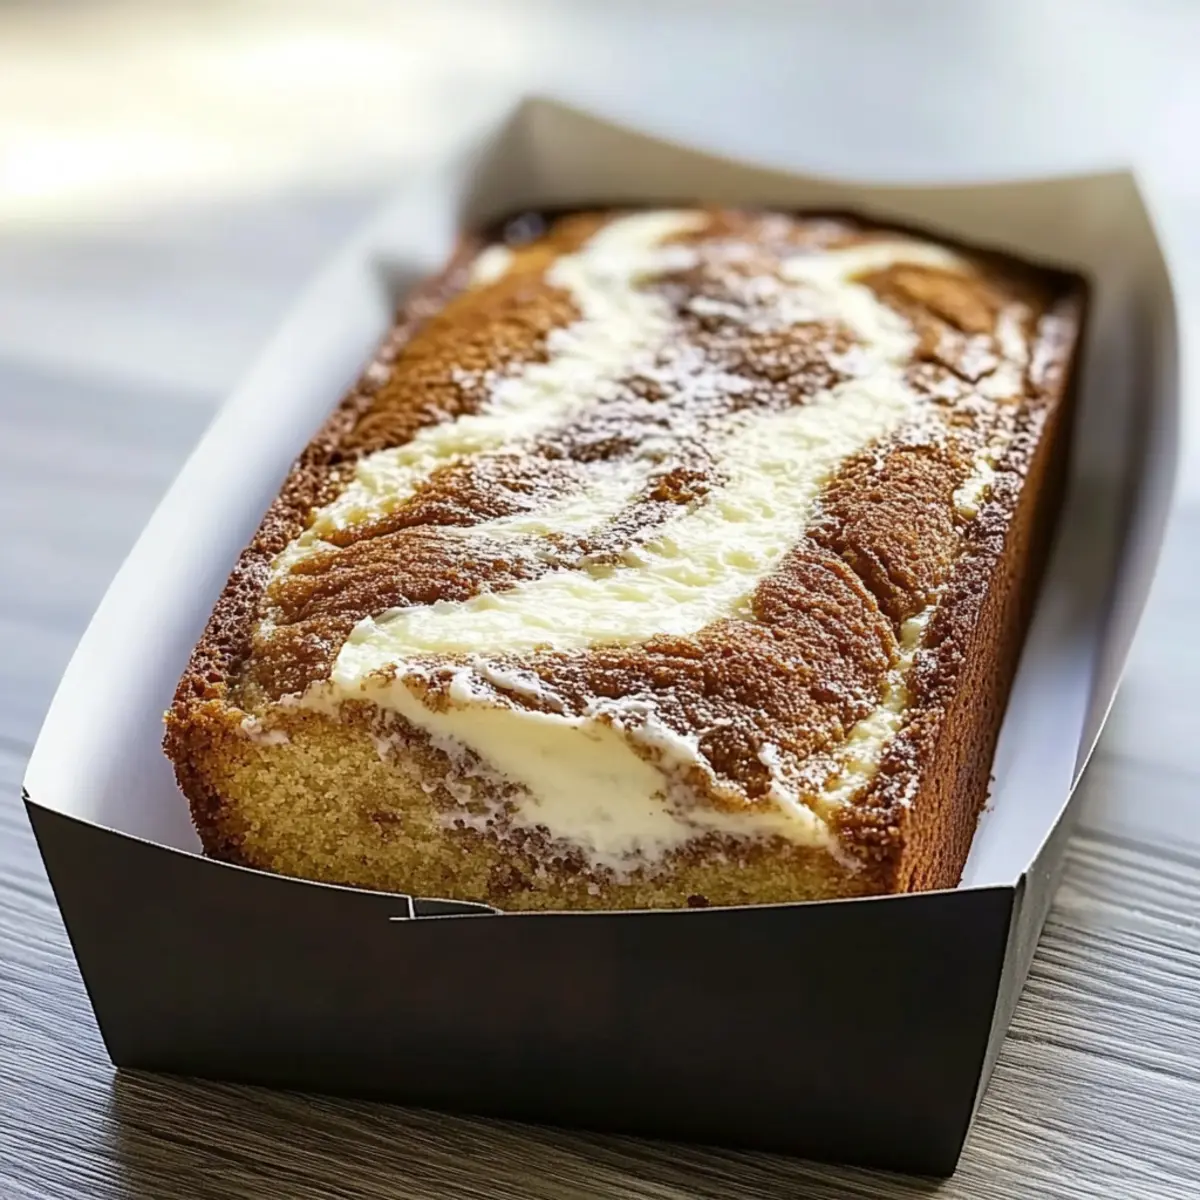
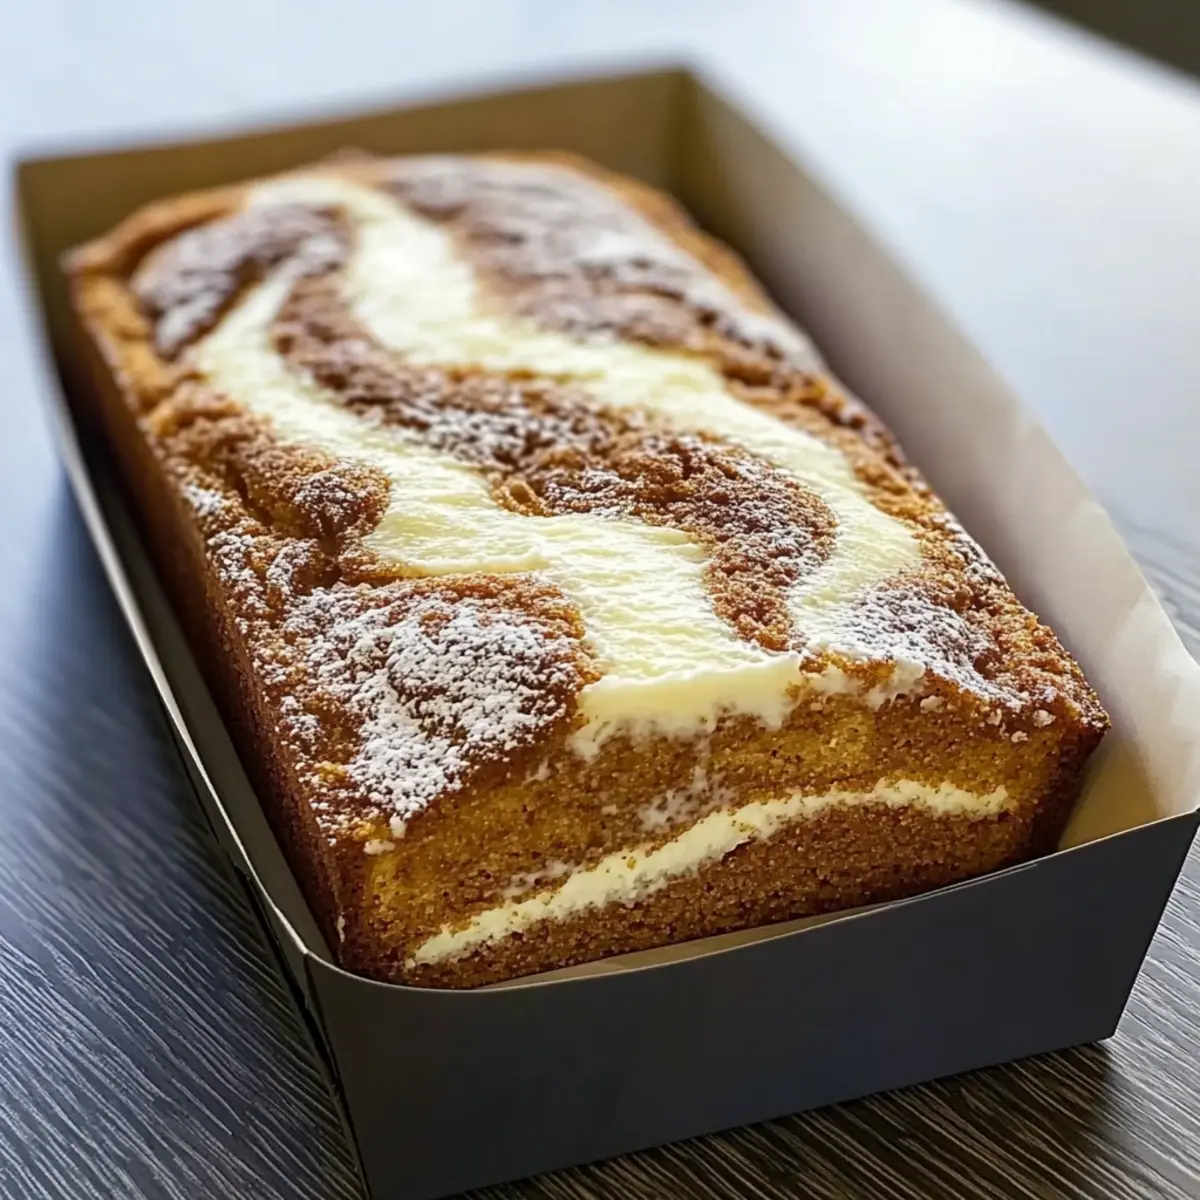
As I stood in my kitchen, a tantalizing aroma wafted through the air, instantly transporting me to my favorite coffee shop—only this time, I was the one crafting the treat! Enter my Cinnamon Swirl Protein Cake, a harmonious fusion of sweet cinnamon goodness wrapped in a high-protein package. Perfect for anyone wanting to kick fast food to the curb, this quick-prep delight takes just five minutes to whip up, making it a crowd-pleaser for busy mornings. Not only is it low in calories, but it also fuels your body with quality protein, ensuring you feel energized and satisfied without the dreaded sugar crash. Curious about how to make this warm, comforting cake that redefines breakfast? Let’s dive into the recipe and bring a little sweetness to your day!

Why Choose Cinnamon Swirl Protein Cake?

Deliciously Comforting: This protein cake brings the flavors of a classic cinnamon roll to your breakfast table, making it a delightful alternative to mundane morning meals.
Quick and Easy: Whip it up in just 5 minutes, perfect for those busy mornings when you need something nutritious without the wait.
Macro-Friendly: With 34 grams of protein and low carbs, it’s an ideal option for anyone watching their macros, whether you’re into fitness or just looking for healthier eats.
Versatile for All: Feel free to customize with your favorite toppings or variations, like using regular milk or adding nuts, to suit your preferences.
Satiating Yet Light: Enjoy this guilt-free treat without the sugar crash, keeping you energized throughout the day! Looking for more breakfast ideas? Check out these Ricotta Protein Pancakes for a wholesome twist!

Cinnamon Swirl Protein Cake Ingredients

For the Batter
• Protein Powder – A must for that essential protein base; opt for a vanilla-flavored variety to enhance sweetness.
• Almond Milk – Keeps the cake low in carbs; feel free to substitute with whole milk for richer flavor.
• Eggs – Adds a protein boost and structure; consider reducing other liquids if using extra eggs.
• Cinnamon – Brings that comforting, sweet spice; don’t skimp on this for a true cinnamon roll experience!
• Sweetener – Balances the sweetness while keeping it low-cal; tailor to your taste preference.
• Baking Powder – Ensures the cake rises beautifully; essential for achieving that perfect fluffy texture.

Optional Toppings
• Nuts or Dried Fruits – Add for extra crunch and nutrition; just be mindful of carb counts.
• Chocolate Chips – For a touch of indulgence; a great way to savor every bite without straying too far from your goals.

Note: This Cinnamon Swirl Protein Cake is bound to become a breakfast favorite that satisfies both cravings and dietary goals!

Step‑by‑Step Instructions for Cinnamon Swirl Protein Cake

Step 1: Preheat the Oven
Begin by preheating your oven to 350°F (175°C), ensuring it's ready for the perfect bake. This temperature is ideal for small cakes and will help your Cinnamon Swirl Protein Cake rise beautifully. Prepare a small baking pan by greasing it lightly with cooking spray or lining it with parchment paper for easy removal later.

Step 2: Mix Dry Ingredients
In a mixing bowl, combine protein powder, sweetener, baking powder, and cinnamon. Use a whisk to blend these dry ingredients thoroughly, ensuring there are no clumps. The cinnamon's aroma should start filling the air as you mix, promising the comforting flavors that await in this delicious protein cake.

Step 3: Add Wet Ingredients
Crack in the eggs and pour in the almond milk, adding moisture to the dry mixture. Using a spatula or a hand mixer, blend until you achieve a smooth, consistent batter, free of lumps. This step is crucial; the texture of your Cinnamon Swirl Protein Cake depends on a well-mixed batter, so take your time!

Step 4: Pour the Batter
Carefully pour half of the batter into your prepared baking pan, spreading it evenly across the bottom. Use a spatula to smooth the surface, ensuring it covers the entire base for uniform baking. This layer will serve as the foundation for your cinnamon swirl and help hold the entire cake together.

Step 5: Create the Cinnamon Swirl
Sprinkle a generous layer of cinnamon on top of the batter in the pan, distributing it evenly. This will create those delightful swirls that give the Cinnamon Swirl Protein Cake its signature flavor. Once spread, pour the remaining batter over the cinnamon layer, covering it completely and sealing in the sweetness.

Step 6: Swirl the Cinnamon
Take a knife and gently swirl it through the batter, creating a delightful marbled effect. Aim for an intricate pattern, moving the knife back and forth to blend the cinnamon into the batter without mixing it completely. This step is essential for that classic cinnamon swirl look and taste you desire.

Step 7: Bake the Cake
Place your baking pan in the preheated oven and bake for approximately 12 minutes. Keep an eye on it; you'll know it's done when a toothpick inserted into the center comes out clean. The cake should be puffed up and slightly golden on the edges, tempting you with its warm scent as it bakes.

Step 8: Let It Cool
Once baked, remove the Cinnamon Swirl Protein Cake from the oven and let it cool in the pan for a few minutes. This will make slicing easier while ensuring the structure holds together. Letting it cool slightly is key to enjoying the moist texture and avoiding any crumbles when you slice into it.

Expert Tips

  • Portion Control: Keep the servings small. Baking a larger loaf may result in uneven cooking and texture issues, so stick to smaller pans for the Cinnamon Swirl Protein Cake.

  • Choose Wisely: Use a well-rated protein powder known for solubility and flavor to avoid a chalky or gritty texture in your cake.

  • Cool Before Slicing: Allow the cake to cool slightly before cutting. This helps maintain its structure and prevents crumbling when you slice.

  • Perfect Swirls: Don’t overdo the swirling! Just a gentle motion with the knife creates beautiful patterns without losing the batter’s integrity.

  • Customizable Flavor: Feel free to mix things up! Adding nuts or varying the sweetener can enhance the flavor while keeping the recipe aligned with your dietary goals.

Make Ahead Options

These Cinnamon Swirl Protein Cakes are perfect for meal prep enthusiasts! You can mix your dry ingredients (protein powder, sweetener, baking powder, and cinnamon) and store them in an airtight container for up to 3 days in advance, maintaining their freshness. Additionally, you can prepare your wet ingredients (eggs and almond milk) and refrigerate them up to 24 hours prior to baking. When you’re ready to enjoy the cake, simply combine the wet and dry ingredients, pour the batter into the pan, and bake as instructed. This prep-ahead technique not only saves time on busy mornings but ensures your protein cake is just as delicious and satisfying!

How to Store and Freeze Cinnamon Swirl Protein Cake

Fridge: Store the cake in an airtight container for up to 1 week. Enjoy it cold or microwave a slice for a warm treat.

Freezer: Wrap individual slices or the whole cake tightly in plastic wrap, then place in a freezer-safe bag. It lasts for up to 3 months; thaw overnight in the fridge when ready to enjoy.

Reheating: To reheat, pop a cold slice in the microwave for about 20-30 seconds. This will soften it up and bring back that fresh-baked goodness!

Room Temperature: If you plan to eat the cake within a couple of days, you can keep it at room temperature in a sealed container. Enjoy the convenience without sacrificing flavor!

What to Serve with Cinnamon Swirl Protein Cake?

Elevate your breakfast experience with these delightful pairings that will complement your warm slice of cinnamon goodness.

  • Creamy Greek Yogurt: A dollop adds a tangy contrast that enhances the cake’s sweetness, making each bite even more satisfying.
  • Fresh Berries: Raspberries or blueberries bring a burst of freshness and a hint of acidity that balances the rich flavors beautifully. Pair them for a vibrant, nutritious boost!
  • Nut Butter Drizzle: A swirl of almond or peanut butter adds healthy fats and creaminess, turning your protein cake into a more indulgent treat without sacrificing health.
  • Sliced Bananas: Sweet, ripe bananas create a lovely texture that pairs perfectly, making the overall breakfast not just filling but exceptionally delicious. This is a favorite for a reason!
  • Nutty Granola: Add a sprinkle of granola on top for crunch. Its texture complements the moist cake while providing a satisfying crunch that enhances each bite.
  • Chai Tea: A spiced chai tea brings warmth and complements the cinnamon flavor, creating a cozy morning ritual perfect for welcoming the day.
  • Honey Drizzle: A light drizzle of honey amplifies sweetness naturally, making it a simple yet delightful way to elevate your cake to new heights.
  • Dark Chocolate Shavings: For a touch of indulgence, sprinkle some dark chocolate on top. The bitterness beautifully complements the sweet cake, transforming every bite into a delightful experience!
  • Coconut Flakes: Toasted coconut adds a tropical twist along with texture that perfectly contrasts against the soft cake, enticing your taste buds even further.
  • Coffee: Pair with a bold cup of coffee to enhance the cake's warmth and flavors, creating a balanced, comforting breakfast that feels like a hug in a mug.

Cinnamon Swirl Protein Cake Variations

Feel free to get creative and customize this delightful cake to suit your taste buds and dietary needs!

  • Dairy-Free: Substitute almond milk with oat milk or soy milk for a creamy, dairy-free option that doesn’t sacrifice flavor.

  • Nut-Free: Instead of almond milk, use coconut milk to keep it nut-free while still retaining that rich texture.

  • Low-Sugar: Use a natural sweetener like stevia or monk fruit to reduce sugar levels, allowing guilt-free indulgence in every slice.

  • Flavor Explosion: Try flavored protein powders like chocolate or caramel for a unique twist that adds a delightful dimension to each bite.

  • Add Crunch: Mix in chopped walnuts or pecans for a satisfying crunch and an excellent source of healthy fats. Remember to adjust the macros accordingly!

  • Spiced Up: Incorporate a pinch of nutmeg or pumpkin spice for an autumn-inspired flavor boost that enhances the cozy aroma as it bakes.

  • Chocolate Swirl: For chocolate lovers, add cocoa powder to half the batter for a delightful chocolate swirl that pairs beautifully with cinnamon.

  • Extra Protein: Toss in a tablespoon of Greek yogurt into the batter for a creamier texture and an additional protein boost. It makes it even more decadent!

If you're looking for more delicious breakfast ideas, why not give my Pumpkin Cinnamon Roll Muffins a try? They’re packed with flavor and oh-so-fun to bake!

Cinnamon Swirl Protein Cake Recipe FAQs

How do I choose the right protein powder for the Cinnamon Swirl Protein Cake?
Absolutely! When selecting a protein powder, look for one that is known for its solubility and taste. A vanilla-flavored protein powder works best, as it enhances the overall sweetness of the cake without overpowering it. Whey protein is a great option for its smooth texture, while plant-based powders can also be used for those maintaining a vegan diet. Avoid powders that contain sugar alcohols, which can affect the texture.

How should I store my Cinnamon Swirl Protein Cake?
You can store your cake in an airtight container in the fridge for up to 1 week. This is perfect if you want to enjoy it over a few days without losing freshness. If you're keeping it longer, wrap it tightly in plastic wrap and place it in a freezer-safe bag. This way, it can last for up to 3 months in the freezer! When you’re ready to enjoy it, simply thaw it in the fridge overnight.

Can I freeze the Cinnamon Swirl Protein Cake?
Definitely! Freezing is a fantastic option, especially if you want to make it ahead of time. To do so, wrap either individual slices or the whole cake tightly in plastic wrap. Then, place it in a freezer-safe bag. When you're ready to enjoy, just let it thaw in the fridge overnight. Reheat in the microwave for about 20-30 seconds to get that fresh-baked texture back!

What should I do if my cake comes out too dry?
Very! If your cake is dry, consider adding a little more moisture next time. You can try increasing the almond milk slightly or incorporating an extra egg. Be mindful of the baking time as well; even a minute can make a difference! Checking for doneness with a toothpick can also help ensure your cake is perfectly cooked through, so it’s not overbaked.

Are there any dietary considerations for the Cinnamon Swirl Protein Cake?
Yes! If you have dietary restrictions, this protein cake can be easily adjusted. For those allergic to eggs, consider using a flaxseed meal as an egg replacement (1 tablespoon of flaxseed meal mixed with 2.5 tablespoons of water equals one egg). To keep it dairy-free, stick with almond milk or use oat milk. It's always a good idea to double-check ingredient labels for potential allergens if you're serving it to guests!

Cinnamon Swirl Protein Cake

Cinnamon Swirl Protein Cake for a Guilt-Free Breakfast Delight

Enjoy this Cinnamon Swirl Protein Cake, a guilt-free breakfast delight packed with protein and low in calories.
Print Recipe Pin Recipe
Prep Time 5 minutes mins
Cook Time 12 minutes mins
Cooling Time 5 minutes mins
Total Time 22 minutes mins
Servings: 4 slices
Course: Breakfast
Cuisine: American
Calories: 150
Ingredients Equipment Method Nutrition Notes

Ingredients
  

Batter Ingredients
  • 1 cup Protein Powder Vanilla-flavored variety recommended
  • 1/2 cup Almond Milk Substitute with whole milk for richer flavor
  • 2 large Eggs Consider reducing other liquids if using extra eggs
  • 1 tablespoon Cinnamon Don’t skimp on this for a true cinnamon roll experience
  • 1 tablespoon Sweetener Tailor to your taste preference
  • 1 teaspoon Baking Powder Essential for achieving that perfect fluffy texture
Optional Toppings
  • 1/4 cup Nuts or Dried Fruits Add for extra crunch and nutrition
  • 1/4 cup Chocolate Chips For a touch of indulgence

Equipment

  • Oven
  • Mixing Bowl
  • Whisk
  • Spatula
  • Baking pan

Method
 

Preparation Steps
  1. Preheat your oven to 350°F (175°C) and prepare a small baking pan by greasing it lightly or lining it with parchment paper.
  2. In a mixing bowl, combine protein powder, sweetener, baking powder, and cinnamon. Whisk until thoroughly blended.
  3. Crack in the eggs and pour in the almond milk, then mix until smooth and free of lumps.
  4. Pour half of the batter into the prepared pan and smooth the surface.
  5. Sprinkle a generous layer of cinnamon on top and add the remaining batter over it.
  6. Use a knife to swirl the batter gently for a marbled effect.
  7. Bake for approximately 12 minutes, until a toothpick comes out clean.
  8. Let the cake cool in the pan for a few minutes before slicing.

Nutrition

Serving: 1sliceCalories: 150kcalCarbohydrates: 15gProtein: 34gFat: 3gSaturated Fat: 0.5gMonounsaturated Fat: 1gCholesterol: 70mgSodium: 150mgPotassium: 300mgFiber: 2gSugar: 1gVitamin A: 250IUCalcium: 80mgIron: 1.5mg

Notes

Feel free to customize with your favorite toppings or variations, like using regular milk or adding nuts, to suit your preferences.

Tried this recipe?

Let us know how it was!

Loaded Hash Browns with Scrambled Eggs: Your Cozy Breakfast Fix

January 28, 2026 by Grace Snow Leave a Comment

As I stood in the kitchen, the sizzle of potatoes sizzling in butter brought an instant smile to my face. There’s something so comforting about breakfast, especially when it’s a hearty dish like Loaded Hash Browns with Scrambled Eggs. This recipe transforms simple russet potatoes into crispy golden perfection, topped with fluffy scrambled eggs and a generous sprinkle of cheese. Not only is it quick and easy to whip up, but it’s also fully customizable—perfect for using up whatever veggies or toppings you have on hand. Whether you’re aiming to impress at Sunday brunch or just want a satisfying start to your day, this dish hits the spot. What will you choose to load onto your hash browns?

Why are Loaded Hash Browns the Best?

Versatile: The possibilities are endless! Customize your hash browns with a variety of toppings like fresh herbs or different cheeses—there’s no wrong way to enjoy them.
Quick Prep: In just a few simple steps, you can whip up this comforting breakfast dish that will leave everyone asking for seconds.
Hearty & Filling: Perfect for energizing your mornings, this meal combines crispy hash browns with fluffy, creamy scrambled eggs that keep you satisfied throughout the day.
Crowd-Pleaser: Serve this at your next brunch gathering, and watch your friends and family rave about it.
Easy Cleanup: Using a non-stick skillet means less fuss when it comes to cleaning up, making breakfast stress-free! Whether you pair it with some crispy bacon or a side of fresh fruit salad, these Loaded Hash Browns with Scrambled Eggs are sure to make your mornings brighter.

Loaded Hash Browns with Scrambled Eggs Ingredients

For the Hash Browns

  • 2 large russet potatoes – Provide the base of the dish with a crispy texture; substitute with sweet potatoes for a healthier twist.
  • 2 tablespoons butter – Used for frying to achieve a golden crust; substitute with olive oil or a plant-based butter for dairy-free versions.
  • Salt and pepper to taste – Essential for flavor enhancement; adjust quantities based on preference.

For the Scrambled Eggs

  • 4 eggs – Create fluffy, creamy scrambled eggs; use egg whites for a lower-fat option.
  • 1/2 cup shredded cheddar cheese – Adds richness and flavor; substitute with mozzarella or pepper jack for a different taste.

For the Veggies

  • 1/4 cup diced bell peppers – Provides color and a fresh crunch; can be replaced with zucchini or spinach for more greens.
  • 1/4 cup diced onions – Adds savory depth; green onions or scallions make a milder alternative.

Optional Toppings

  • Salsa, avocado, sour cream – Add personal flair and additional flavor; experiment with different toppings like hot sauce or fresh herbs.

Feel the comfort of a warm breakfast with these Loaded Hash Browns with Scrambled Eggs; they’re just waiting for your personal touch!

Step‑by‑Step Instructions for Loaded Hash Browns with Scrambled Eggs

Step 1: Prepare the Hash Browns
Begin by peeling the russet potatoes and grating them using a box grater or food processor. Transfer the grated potatoes to a clean kitchen towel and squeeze out excess moisture; this step is crucial for achieving crispy hash browns. Set the prepared potatoes aside while you preheat your skillet to medium heat.

Step 2: Cook the Hash Browns
In a large non-stick skillet, melt 1 tablespoon of butter over medium heat. Once melted, add the grated potatoes evenly to the skillet, spreading them out to form a flat layer. Cook for about 5-7 minutes without stirring, until the underside is golden brown and crispy. Using a spatula, flip the hash browns and cook for an additional 5-7 minutes.

Step 3: Scramble the Eggs
While the hash browns are cooking, crack the eggs into a mixing bowl and whisk them with a pinch of salt and pepper until well combined. When the hash browns are crispy on both sides, create a space in the center of the skillet and pour the egg mixture over the top. Gently scramble the eggs with a spatula, cooking until they are softly set and slightly creamy.

Step 4: Add Cheese and Vegetables
Once the eggs are nearly cooked to your liking, sprinkle the shredded cheddar cheese, diced bell peppers, and onions evenly over the hash browns and scrambled eggs. Make sure to cover everything generously for maximum flavor.

Step 5: Melt the Cheese
To melt the cheese perfectly, cover the skillet with a lid and let it cook for an additional 1-2 minutes, or until the cheese is gooey and bubbly. This step will elevate your Loaded Hash Browns with Scrambled Eggs, bringing everything together beautifully.

Step 6: Serve and Garnish
Remove the skillet from heat, and carefully uncover it to reveal your delicious creation. Feel free to top your dish with optional salsa, avocado, or sour cream for added flavor. Serve hot, and let the delightful aromas of your Loaded Hash Browns with Scrambled Eggs fill the kitchen!

How to Store and Freeze Loaded Hash Browns with Scrambled Eggs

Fridge: Keep cooked hash browns in an airtight container in the fridge for up to 2 days. Reheat in a skillet over medium heat for the best texture.

Freezer: For long-term storage, freeze leftover hash browns without the eggs for up to 3 months. To reheat, bake in the oven or sauté in a skillet until heated through and crisp.

Make-Ahead Tips: Prep the hash browns in advance and store them in the fridge overnight before cooking, making it a quick breakfast option.

Reheating: Leftovers can be reheated in the microwave, but for extra crispiness, give them a quick sauté in a non-stick skillet. Enjoy your Loaded Hash Browns with Scrambled Eggs fresh whenever you can!

Make Ahead Options

These Loaded Hash Browns with Scrambled Eggs are perfect for meal prep enthusiasts! You can prepare the hash browns up to 24 hours in advance by grating and squeezing out the moisture from the potatoes, then refrigerating them in an airtight container. The eggs can be whisked and stored separately, making them easy to combine later. When you’re ready to serve, simply cook the hash browns in a skillet until crispy, add the eggs, top with cheese and veggies, and melt under a lid. This method ensures you enjoy a satisfying breakfast with just a few final steps, saving precious time on busy mornings while maintaining delicious flavor and texture.

Expert Tips for Loaded Hash Browns with Scrambled Eggs

  • Maximize Crispiness: Squeeze out all moisture from the grated potatoes before cooking. This simple step is essential for that perfect crispy texture in your loaded hash browns.

  • Low Heat for Eggs: Cook the scrambled eggs on low heat and stir gently to achieve a soft, creamy consistency. Avoid high heat, as it can overcook them quickly.

  • Non-Stick Advantage: Using a non-stick skillet makes a world of difference. It helps to prevent sticking and ensures easy cleanup—saving you time and hassle.

  • Customize Your Toppings: Don’t hesitate to get creative with toppings for your loaded hash browns with scrambled eggs. Experiment with different veggies, cheeses, and sauces according to your preferences!

  • Scale Up Easily: If you’re cooking for a crowd, feel free to double the recipe. Leftovers also reheat well, making this a fantastic meal prep option.

What to Serve with Loaded Hash Browns with Scrambled Eggs

Start your breakfast experience with vibrant pairs that elevate your dish from satisfying to spectacular.

  • Crispy Bacon: The savory crunch of crispy bacon perfectly complements the fluffiness of the scrambled eggs, creating a delicious contrast in each bite.
  • Fresh Fruit Salad: A refreshing medley of fruits provides a bright and fruity balance to the hearty hash browns, making your meal feel lighter and more complete.
  • Golden Toast: Slices of warm, buttery toast offer a satisfying crunch, ideal for mopping up any leftover egg or cheese. It's classic comfort food!
  • Sautéed Spinach: This light, leafy green offers a nutritious touch and earthy flavor, adding depth to the hash brown dish without overwhelming it.
  • Herbed Yogurt Dip: A dollop of tangy yogurt blended with fresh herbs brings a creamy and zesty kick, harmonizing beautifully with the flavors of the hash browns.
  • Mimosa: The bubbly freshness of a mimosa made with orange juice adds a festive touch to your brunch table, making every bite even more celebratory.
  • Avocado Toast: Creamy avocado on toasted bread adds richness while balancing the flavors of the eggs, offering a modern twist to your plate.
  • Hot Sauce: A few dashes of your favorite hot sauce can lift the dish's flavor profile, adding a delightful heat that pairs well with the other ingredients.
  • Coffee: A warm cup of freshly brewed coffee just enhances the comforting vibes of your hearty breakfast, invigorating your morning experience.

Loaded Hash Browns with Scrambled Eggs Variations

Feel free to get creative and make these Loaded Hash Browns with Scrambled Eggs your own with these delightful twists!

  • Vegetarian Boost: Add sautéed spinach, diced mushrooms, or cherry tomatoes for an abundance of colors and nutrition. A medley of fresh veggies can brighten up your dish!

  • Different Cheeses: Swap the cheddar for feta for a tangy zing or try smoked gouda for a wonderful smoky richness. Each cheese will add its unique flair to your breakfast masterpiece.

  • Spice It Up: Sprinkle paprika, red pepper flakes, or toss in jalapeños for a spicy kick. The heat will awaken your taste buds and transform your morning routine.

  • Sweet Potato Swap: For a sweeter flavor profile, substitute russet potatoes with sweet potatoes. They bring a lovely natural sweetness that complements the savory ingredients beautifully.

  • Herb Infusion: Enhance the flavors with fresh herbs like chives, parsley, or cilantro mixed right into the eggs before cooking. Fresh herbs elevate your dish and add a delightful aroma.

  • Smoky Flavor: Incorporate cooked bacon or ham for a savory, smoky experience. Crispy bits of meat add a hearty touch that pairs well with the eggs.

  • Breakfast Burrito: Roll it all up in a tortilla, add some salsa, and you’ve got a delicious breakfast burrito! This makes for a hand-held indulgence that’s perfect on-the-go.

  • Frozen Hash Browns: If you're in a rush, using frozen hash browns can save time. Just remember, fresh grated potatoes will yield the ultimate crispiness that everyone loves!

If you're looking to recreate a cozy breakfast experience at home, don’t forget to check out recipes for Turkish Eggs or even some delicious Pan Fried Shrimp to accompany your dish!

Loaded Hash Browns with Scrambled Eggs Recipe FAQs

What type of potatoes should I use for hash browns?
Absolutely! I recommend using large russet potatoes for their starchy content, which helps achieve that perfect crispiness. You can also substitute with sweet potatoes for a healthier twist if you prefer a sweeter flavor.

How long can I store cooked hash browns in the fridge?
Cooked hash browns can be stored in an airtight container in the refrigerator for up to 2 days. When you're ready to enjoy them again, reheat them in a skillet over medium heat to retain their delicious crispiness.

Can I freeze the Loaded Hash Browns with Scrambled Eggs?
Yes, you can freeze the hash browns separately from the eggs! To freeze, let the cooked hash browns cool completely, then spread them in a single layer on a baking sheet. Freeze for about 1 to 2 hours until solid, then transfer to a freezer bag for up to 3 months. When ready to eat, reheat them in the oven or sauté in a skillet.

How can I ensure my hash browns are crispy?
To achieve optimal crispiness, drain as much moisture as possible from the grated potatoes using a clean kitchen towel before cooking. This step is key! Spread them evenly in a preheated non-stick skillet and let them cook undisturbed for 5-7 minutes before flipping. The result will be beautifully crispy hash browns!

What are some dietary considerations for this recipe?
If you have dietary restrictions, you can easily customize this recipe. Opt for egg whites instead of whole eggs for a lower-fat version. Use dairy-free butter or oil instead of regular butter if you're avoiding dairy. Plus, you can swap out the cheese for a lactose-free alternative or omit it altogether for a lighter dish. Always remember to check for any allergies related to the ingredients you choose!

Loaded Hash Browns with Scrambled Eggs

Loaded Hash Browns with Scrambled Eggs: Your Cozy Breakfast Fix

Experience Loaded Hash Browns with Scrambled Eggs, a hearty, customizable breakfast perfect for any morning.
Print Recipe Pin Recipe
Prep Time 10 minutes mins
Cook Time 20 minutes mins
Total Time 30 minutes mins
Servings: 2 servings
Course: Breakfast
Cuisine: American
Calories: 450
Ingredients Equipment Method Nutrition Notes

Ingredients
  

For the Hash Browns
  • 2 large russet potatoes Substitute with sweet potatoes for a healthier twist.
  • 2 tablespoons butter Substitute with olive oil or plant-based butter for dairy-free versions.
  • Salt To taste.
  • Pepper To taste.
For the Scrambled Eggs
  • 4 eggs Use egg whites for a lower-fat option.
  • 1/2 cup shredded cheddar cheese Substitute with mozzarella or pepper jack for a different taste.
For the Veggies
  • 1/4 cup diced bell peppers Can be replaced with zucchini or spinach for more greens.
  • 1/4 cup diced onions Green onions or scallions make a milder alternative.
Optional Toppings
  • Salsa
  • Avocado
  • Sour cream

Equipment

  • non-stick skillet

Method
 

Step‑by‑Step Instructions
  1. Prepare the Hash Browns: Begin by peeling the russet potatoes and grating them using a box grater or food processor. Transfer the grated potatoes to a clean kitchen towel and squeeze out excess moisture; set aside while you preheat your skillet to medium heat.
  2. Cook the Hash Browns: In a large non-stick skillet, melt 1 tablespoon of butter over medium heat. Once melted, add the grated potatoes evenly to the skillet, spreading them out to form a flat layer. Cook for about 5-7 minutes without stirring, until the underside is golden brown and crispy. Flip and cook for an additional 5-7 minutes.
  3. Scramble the Eggs: Crack the eggs into a mixing bowl and whisk them with a pinch of salt and pepper. When the hash browns are crispy on both sides, create a space in the center of the skillet and pour the egg mixture over the top. Gently scramble the eggs with a spatula until softly set and slightly creamy.
  4. Add Cheese and Vegetables: Once the eggs are nearly cooked, sprinkle the shredded cheddar cheese, diced bell peppers, and onions over the hash browns and scrambled eggs.
  5. Melt the Cheese: Cover the skillet with a lid and let it cook for an additional 1-2 minutes, or until the cheese is gooey and bubbly.
  6. Serve and Garnish: Remove the skillet from heat, uncover, and top your dish with optional salsa, avocado, or sour cream. Serve hot.

Nutrition

Serving: 1servingCalories: 450kcalCarbohydrates: 40gProtein: 20gFat: 25gSaturated Fat: 15gCholesterol: 400mgSodium: 600mgPotassium: 800mgFiber: 3gSugar: 1gVitamin A: 15IUVitamin C: 40mgCalcium: 15mgIron: 10mg

Notes

Maximize crispiness by squeezing out all moisture from the grated potatoes. Use low heat for scrambled eggs to achieve a soft, creamy consistency.

Tried this recipe?

Let us know how it was!

Classic Ensaymada Bread: Soft, Sweet, and Simply Irresistible

January 28, 2026 by Grace Snow Leave a Comment

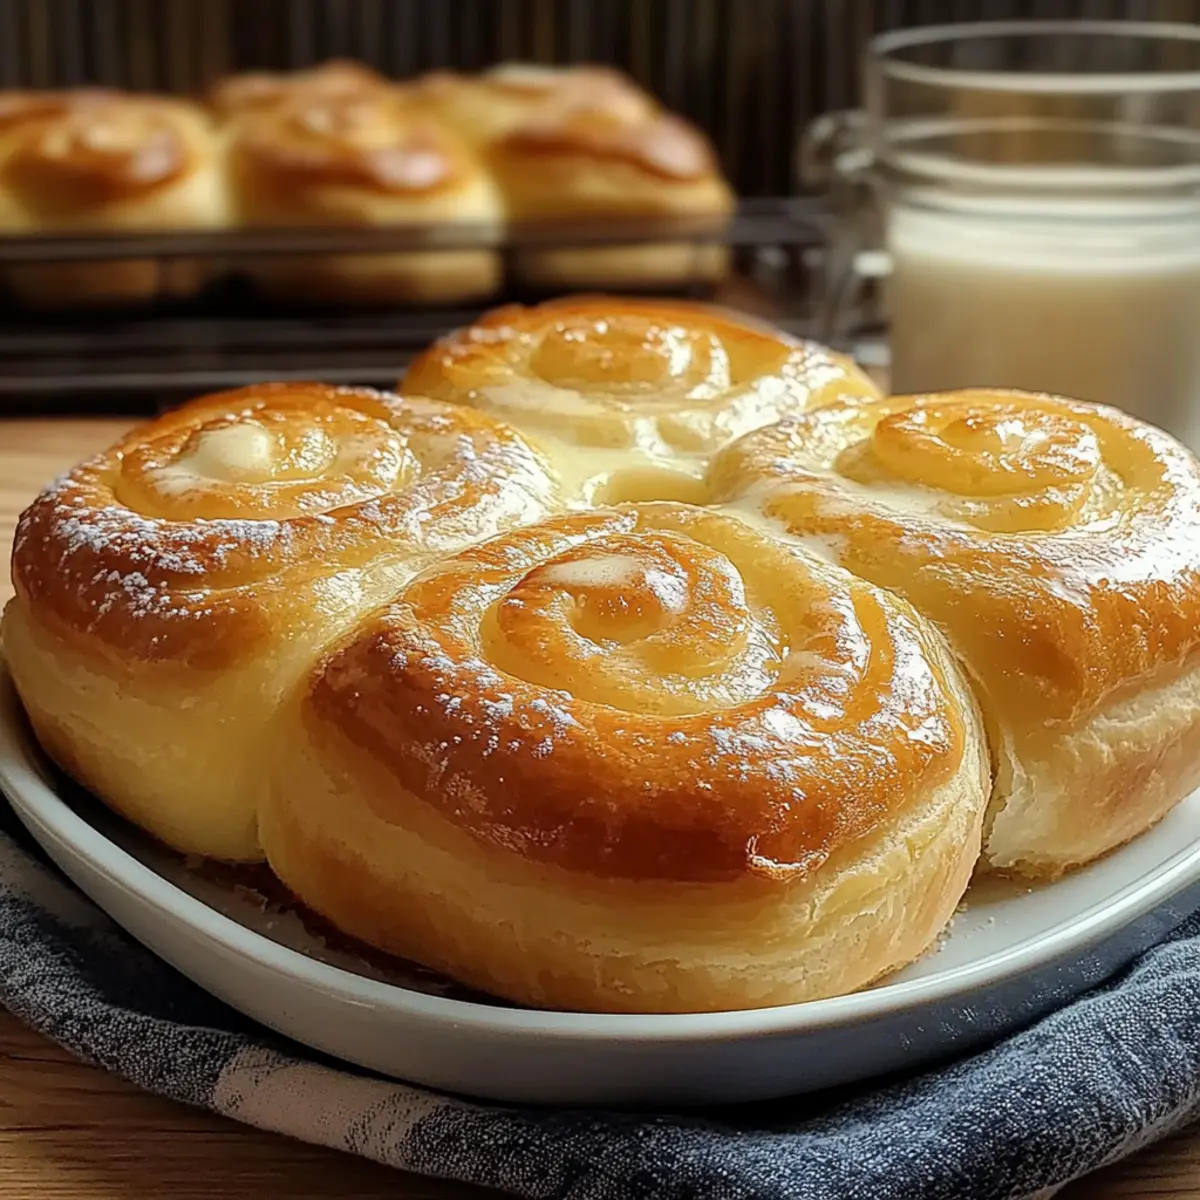
As the rich aroma of freshly baked bread wafts through the kitchen, there's an undeniable magic in the air—especially when I'm making Classic Ensaymada Bread. This fluffy Filipino delight not only captures my heart but also brings smiles to anyone lucky enough to taste it. With its tender, cloud-like texture and a slight hint of sweetness topped with savory cheese, it's perfect for breakfast or a cozy afternoon snack. The beauty of this recipe lies in its versatility; whether you choose the classic version or explore variations like Coconut, Ube, or even Chocolate Ensaymada, each bite takes you on a delightful journey. Not only is this bread a true comfort food, but it also comes together quickly, making it an ideal choice for both novice and seasoned bakers. Ready to impress your friends and family with a delightful twist on a beloved classic? Let’s get started!

Why is Classic Ensaymada Bread a Must-Try?

Irresistible Fluffiness: The light and airy texture of classic Ensaymada Bread is like biting into a cloud, making it an unforgettable treat.

Versatile Variations: Want to elevate your baking game? Try the Coconut, Ube, or Chocolate Ensaymada variations for added excitement and flair!

Quick and Easy: Perfect even for beginners, the recipe is straightforward, allowing you to create a stunning treat in no time.

Crowd Favorite: Whether for breakfast or an afternoon snack, this bread is sure to impress family and friends, delighting everyone with its unique sweet-savory blend.

Cultural Treat: Indulging in this Filipino classic connects you to a culture rich in flavor and tradition, making every bite a nostalgic experience.

Classic Ensaymada Bread Ingredients

For the Dough

  • All-Purpose Flour – Provides structure to the bread; whole wheat flour can be used for a denser texture.
  • Granulated Sugar – Adds sweetness and helps with browning; consider reducing if preferred.
  • Salt – Enhances flavor and balances sweetness.
  • Instant Yeast – Leavens the dough; ensure it’s fresh for proper rising.
  • Milk – Adds moisture; can substitute with plant-based milk for a lactose-free option.
  • Unsalted Butter – Provides rich flavor; use salted butter if desired, but adjust the added salt.
  • Eggs – Contributes to richness and structure; flaxseed meal or applesauce can replace eggs if needed.
  • Vanilla Extract – Adds aromatic sweetness for a lovely depth of flavor.

For the Topping

  • Melted Butter (for brushing) – Enhances flavor and creates a beautiful finish.
  • Grated Cheese (e.g., cheddar or queso de bolsa) – Adds a savory note; any soft cheese can work for a different flavor.
  • Sugar (for dusting) – Sweetens the top and gives a delightful finish to the bread.

Discover the warmth and joy of baking with Classic Ensaymada Bread—your taste buds will thank you!

Step‑by‑Step Instructions for Classic Ensaymada Bread

Step 1: Gather Your Ingredients
Start by collecting all the ingredients needed for the Classic Ensaymada Bread: all-purpose flour, sugar, salt, instant yeast, milk, unsalted butter, eggs, and vanilla extract. Having everything at hand makes the process smoother and enjoyable. Ensure your milk is warm (about 100°F or 38°C) to help activate the yeast for that perfect rise.

Step 2: Activate Your Yeast
In a small bowl, mix the warm milk with the instant yeast and 1 tablespoon of sugar. Allow this mixture to sit for 5-10 minutes. You'll know it’s ready when it becomes frothy and bubbly, which indicates that the yeast is active and ready to leaven your dough.

Step 3: Mix the Dry Ingredients
In a large mixing bowl, combine the all-purpose flour, the remaining sugar, and salt. Whisk these dry ingredients together until well blended. This step ensures an even distribution of the flavors and helps you avoid clumps, setting a solid foundation for the soft, fluffy Classic Ensaymada Bread.

Step 4: Combine Wet Ingredients
In a separate bowl, beat the eggs and whisk in the softened unsalted butter and vanilla extract. Mix until smooth and creamy. This combination adds richness to your dough, contributing to the delightful texture of the ensaymada bread.

Step 5: Create the Dough
Once your yeast mixture is frothy, pour it into the bowl with the dry ingredients, followed by the egg mixture. Stir everything together until a soft dough forms. You may need to use your hands to ensure all the flour is incorporated and to create a cohesive dough.

Step 6: Knead the Dough
Transfer the dough onto a lightly floured surface and knead it for about 8-10 minutes. You’re aiming for a smooth and elastic texture that springs back when pressed. If the dough feels too dry, add a little warm milk until it reaches the desired consistency.

Step 7: Let It Rise
Place your kneaded dough into a greased bowl, cover it with a kitchen towel, and let it rise in a warm area for 1 hour or until it doubles in size. Keep an eye on it; the dough should become puffy and airy, ready to transform into the delicious Classic Ensaymada Bread.

Step 8: Shape the Dough
After the dough has risen, punch it down gently to release the air. Divide it into smaller equal portions, shape each piece into a smooth ball, and then roll each into a spiral shape. This step is crucial for creating the signature fluffy layers of the ensaymada.

Step 9: Second Rise
Place the shaped dough spirals into greased molds or on a baking sheet. Cover them again with a towel and let rise for another 30-45 minutes. During this time, they should puff up again, becoming light and airy in preparation for baking.

Step 10: Preheat and Bake
Preheat your oven to 350°F (175°C). Once adequately heated, bake the risen dough for 20-25 minutes. Keep an eye on them; they are ready when they turn golden brown on top, and you can smell that delightful aroma wafting through the kitchen.

Step 11: Cool Down
After baking, allow the Classic Ensaymada Bread to cool in the molds for about 10 minutes. Then, gently transfer them to a wire rack to cool completely. This cooling process helps set the texture and flavor, leading to the perfect final product.

Step 12: Add Toppings
Once cool, brush each piece with melted butter, then sprinkle generously with grated cheese and a touch of sugar on top. This final touch adds a delightful sweet-savory flavor that is the hallmark of Classic Ensaymada Bread, making it irresistible to anyone who takes a bite!

Classic Ensaymada Bread: Tasty Twists Await

Get ready to unleash your creativity in the kitchen! The delightful sensory experience of creating variations of this beloved bread is sure to inspire you.

  • Coconut Ensaymada: Incorporate shredded coconut into the dough or sprinkle it on top for a tropical twist. The subtle texture adds a fun crunch along with a hint of sweetness!

  • Ube Ensaymada: Add ube extract or powder to your dough for a vibrant color and unique flavor that'll have everyone asking for the secret ingredient.

  • Chocolate Ensaymada: Stir cocoa powder into the dough and finish with velvety chocolate frosting on top for an indulgent treat that brings a touch of luxury to your bake.

  • Nutty Ensaymada: Fold in chopped walnuts or almonds for added texture and a delightful surprise in every fluffy bite. The nutty flavor enhances the overall richness of the bread.

  • Savory Mayonnaise Ensaymada: Brush with a mix of mayonnaise and hot sauce before the second rise for a spicy kick. It'll create an exciting flavor balance to the sweet elements!

  • Cheese-filled Ensaymada: Stuff the dough with a mixture of salty cheese before rolling for a cheesy surprise that melts beautifully, adding depth and flavor.

  • Fruit-Infused Ensaymada: Consider folding in dried fruits like raisins or cranberries for a fruity sweetness that contrasts beautifully with the savory cheese topping. It's a touch of nostalgic flavor!

  • Spiced Ensaymada: Add a touch of cinnamon or nutmeg to the dough for a warm, aromatic twist that evokes the coziness of festive gatherings.

Feel free to explore these variations, and while you're at it, don't forget to serve your Classic Ensaymada Bread warm with a side of Cheesy Garlic Bread or alongside a slice of Cornbread Breakfast Casserole. For a sweet finish, whip up some Mini Tropical Pavlovas to complete your feast! Enjoy the journey of flavors and creativity!

How to Store and Freeze Classic Ensaymada Bread

Room Temperature: Store classic Ensaymada Bread in an airtight container at room temperature for up to 3 days to maintain its fluffiness.

Fridge: While refrigeration is not recommended as it may dry out the bread, you can refrigerate it for up to 5 days if necessary; just make sure to wrap it well.

Freezer: For longer storage, wrap the bread tightly in plastic wrap, then place it in a freezer-safe bag. It can be frozen for up to 2 months.

Reheating: When ready to enjoy your Classic Ensaymada Bread, thaw overnight in the fridge, then reheat in the oven at 350°F (175°C) for 10-15 minutes until warmed through.

What to Serve with Classic Ensaymada Bread

As you revel in the sweet aroma of your freshly baked ensaymada, it’s time to think about the perfect companions that will elevate your meal experience.

  • Rich Coffee: The bold richness of a freshly brewed coffee enhances the sweet creaminess of the ensaymada, making it a classic way to start your day.

  • Fruity Smoothies: Refreshing fruit smoothies bring a burst of flavor and moisture, balancing the sweet, fluffy bread for a delightful contrast. Try a tropical mango or berry blend.

  • Zesty Fruit Salad: A vibrant fruit salad with citrus dressings complements the sweetness of ensaymada. The fresh acidity cuts through the richness, creating a harmonious flavor experience.

  • Creamy Hot Chocolate: Indulge in a warm mug of hot chocolate for a cozy dessert pairing. The chocolate’s sweetness harmonizes beautifully with ensaymada’s cheesy topping, creating a comforting treat.

  • Savory Cheese Platter: Serve a selection of cheeses alongside the ensaymada to amplify its savory topping. Options like sharp cheddar or a mild brie create a delightful contrast of flavors.

  • Toasted Coconut Flakes: Sprinkling some crispy toasted coconut on top adds a crunchy texture and nutty flavor that enhances the traditional experience of classic ensaymada.

  • Vanilla Ice Cream: For a decadent dessert, pairing warm ensaymada with a scoop of vanilla ice cream creates a classic combination of warm and cold that’s simply irresistible.

  • Sweet Iced Tea: A refreshing glass of iced tea, lightly sweetened with lemon, perfectly complements the rich flavors of ensaymada, rounding out your meal with a refreshing sip.

Expert Tips for Classic Ensaymada Bread

  • Room Temperature Ingredients: Ensure all ingredients, especially eggs and milk, are at room temperature for smoother mixing and better dough texture.

  • Kneading is Key: Knead the dough thoroughly for 8-10 minutes. This develops gluten, resulting in the fluffy, airy texture that characterizes Classic Ensaymada Bread.

  • Watch the Rising: Cover the dough with a kitchen towel while it rises to prevent drying out. Check on it regularly, as environmental factors can impact the rising time.

  • Check for Doneness: Ensure your bread is fully baked by looking for a golden brown color. You can also tap the bottom; it should sound hollow when done.

  • Flavor Variations: Don’t hesitate to try adding ingredients like shredded coconut or ube for a unique twist on the Classic Ensaymada Bread that adds depth to the flavor.

Make Ahead Options

These Classic Ensaymada Bread are perfect for busy home cooks looking to save time without sacrificing taste! You can prepare the dough up to 24 hours in advance by following the first six steps and then refrigerating the kneaded dough in a greased bowl covered with plastic wrap. When ready to bake, simply take it out and allow it to rise at room temperature for about 30 minutes before shaping and proceeding with the second rise. If you prefer to bake ahead, the fully baked ensaymada can be stored in an airtight container at room temperature for up to 3 days or frozen for up to 2 months. Reheat in the oven for a few minutes before serving to enjoy that freshly baked taste!

Classic Ensaymada Bread Recipe FAQs

What kind of flour is best for Classic Ensaymada Bread?
For the best results, all-purpose flour is ideal as it provides structure and a light texture to the bread. If you're looking for a different flavor profile, you can experiment with whole wheat flour, which gives a denser texture.

How should I store Classic Ensaymada Bread?
Store your ensaymada in an airtight container at room temperature for up to 3 days. This will help keep it soft and fluffy. You can refrigerate it for up to 5 days if necessary, though it's best to avoid the fridge to prevent it from drying out.

Can I freeze Classic Ensaymada Bread?
Absolutely! To freeze your Classic Ensaymada Bread, wrap it tightly in plastic wrap and then place it in a freezer-safe bag. It can be stored for up to 2 months. When you’re ready to enjoy, let it thaw overnight in the fridge, and then reheat in the oven at 350°F (175°C) for about 10-15 minutes until warmed through.

What should I do if my dough doesn’t rise properly?
If your dough isn't rising, it could be due to inactive yeast. Make sure your yeast is fresh and that you're using warm milk (around 100°F or 38°C) to activate it. If your dough feels too stiff, try adding a bit more warm milk while kneading. A warm, draft-free environment can also help the dough rise better.

Can I make Classic Ensaymada Bread without eggs?
Yes! If you have an egg allergy or prefer to make it egg-free, you can substitute eggs with 1/4 cup of unsweetened applesauce or 1 tablespoon of flaxseed meal mixed with 3 tablespoons of water. Keep in mind that this may alter the texture slightly but will still yield a tasty bread.

What cheese works best for topping Classic Ensaymada Bread?
I recommend using grated cheese such as cheddar or queso de bolsa for the topping; they melt beautifully and create that delicious sweet-savory contrast. If you want to try something different, any soft cheese like cream cheese or ricotta can work well!

Classic Ensaymada Bread

Classic Ensaymada Bread: Soft, Sweet, and Simply Irresistible

Classic Ensaymada Bread is a soft, fluffy Filipino treat that combines sweetness with savory cheese, perfect for breakfast or snacks.
Print Recipe Pin Recipe
Prep Time 30 minutes mins
Cook Time 25 minutes mins
Rising Time 1 hour hr 30 minutes mins
Total Time 2 hours hrs 25 minutes mins
Servings: 12 pieces
Course: Breakfast
Cuisine: Filipino
Calories: 250
Ingredients Equipment Method Nutrition Notes

Ingredients
  

Dough Ingredients
  • 4 cups All-Purpose Flour Whole wheat flour can be used for a denser texture.
  • 1 cup Granulated Sugar Consider reducing if preferred.
  • 1 teaspoon Salt Enhances flavor.
  • 2 teaspoons Instant Yeast Ensure it’s fresh for proper rising.
  • 1 cup Milk Can substitute with plant-based milk.
  • 1/2 cup Unsalted Butter Use salted butter if desired, adjust added salt.
  • 2 large Eggs Flaxseed meal or applesauce can replace if needed.
  • 1 teaspoon Vanilla Extract Adds aromatic sweetness.
Topping Ingredients
  • 1/4 cup Melted Butter For brushing.
  • 1 cup Grated Cheese e.g., cheddar or queso de bolsa.
  • 1 tablespoon Sugar For dusting.

Equipment

  • Mixing bowls
  • measuring cups
  • Measuring Spoons
  • Baking Sheet
  • Kitchen Towel
  • wire rack

Method
 

Preparation Steps
  1. Gather all ingredients: all-purpose flour, sugar, salt, instant yeast, milk, unsalted butter, eggs, and vanilla extract.
  2. Mix warm milk with instant yeast and 1 tablespoon of sugar; let sit for 5-10 minutes until frothy.
  3. In a large bowl, combine flour, remaining sugar, and salt; whisk until well blended.
  4. In a separate bowl, beat eggs and mix in butter and vanilla until smooth.
  5. Combine yeast mixture with dry ingredients, then add egg mixture; stir to form a soft dough.
  6. Knead the dough on a floured surface for 8-10 minutes until smooth and elastic.
  7. Place the kneaded dough in a greased bowl, cover, and let rise in a warm place for about 1 hour.
  8. After rising, punch down dough, divide into portions, shape into balls, and roll into spirals.
  9. Place shaped spirals in greased molds and cover; let rise again for 30-45 minutes.
  10. Preheat oven to 350°F (175°C) and bake for 20-25 minutes until golden brown.
  11. Allow bread to cool in molds for 10 minutes, then transfer to a wire rack.
  12. Brush cooled bread with melted butter, sprinkle with grated cheese and sugar.

Nutrition

Serving: 1pieceCalories: 250kcalCarbohydrates: 36gProtein: 5gFat: 10gSaturated Fat: 5gPolyunsaturated Fat: 1gMonounsaturated Fat: 4gCholesterol: 35mgSodium: 180mgPotassium: 90mgFiber: 1gSugar: 8gVitamin A: 200IUCalcium: 50mgIron: 1mg

Notes

Ensure all ingredients are at room temperature for best results. Knead thoroughly for fluffiness.

Tried this recipe?

Let us know how it was!

Fluffy Apple Yogurt Pancakes for a Sweet Morning Boost

January 28, 2026 by Grace Snow Leave a Comment

Every morning deserves a little magic, and that’s why I can’t wait to share my recipe for Apple Yogurt Pancakes with you. These delightful pancakes are not only fluffy and satisfying but also come with the nourishing goodness of fresh apples and creamy yogurt. Perfect for a quick breakfast that transitions smoothly into brunch, this recipe brings a healthy twist to your morning routine without sacrificing flavor. With just a few simple ingredients, you can whip up a batch that appeals to everyone around the table, whether you're serving them to kids or brunching with friends. Are you ready to awaken your taste buds and elevate your pancake game? Let’s get started!

Why are Apple Yogurt Pancakes a Must-Try?

Fluffy Texture: These pancakes are incredibly light and airy, providing the perfect base for your favorite toppings.
Natural Sweetness: Fresh apples infuse a delightful sweetness, making syrup optional for sweetness lovers.
Quick and Easy: Whip up a batch in just 30 minutes—ideal for busy mornings!
Healthier Twist: Packed with protein from yogurt, they're a nourishing alternative to traditional pancakes.
Versatile Base: Feel free to customize with mix-ins like blueberries or even swap apples for bananas!
Let these Apple Yogurt Pancakes usher in a sweet morning boost that the whole family will adore! For another delightful breakfast option, check out these Ricotta Protein Pancakes.

Apple Yogurt Pancake Ingredients

For the Batter
• All-Purpose Flour – Structure for fluffy pancakes; can substitute with whole wheat flour for added fiber.
• Plain Yogurt – Provides moisture and richness; Greek yogurt adds extra creaminess, while dairy-free yogurt is a great alternative.
• Milk – A liquid base that can be any variety; try using almond or oat milk for a dairy-free option.
• Grated Apple – Naturally sweet and flavorful; Fuji or Honeycrisp varieties are best, but feel free to use any sweet apple you love.
• Egg – Acts as a binding agent; a flax egg (1 tbsp flaxseed meal + 2.5 tbsp water) works for a vegan-friendly version.
• Sugar – Adds sweetness; adjust according to your taste or substitute with honey or maple syrup.
• Baking Powder – A leavening agent for a beautiful rise; ensure it's fresh for the best result.
• Ground Cinnamon – Enhances the flavor beautifully; consider adding a pinch of nutmeg for an aromatic spin.
• Salt – Balances sweet flavors and is essential for a well-rounded taste.
• Vegetable Oil – Adds moisture; melted butter or coconut oil can be used as alternatives.
• Optional Additions – Chopped nuts or raisins can offer extra texture and flavor, making these pancakes even more delightful.

Bring the joy of breakfast back to your mornings with these delicious Apple Yogurt Pancakes!

Step‑by‑Step Instructions for Apple Yogurt Pancakes

Step 1: Prepare Dry Ingredients
In a medium bowl, whisk together the all-purpose flour, baking powder, ground cinnamon, and salt until thoroughly combined. This step is crucial for ensuring an even distribution of the leavening agent and spices, which will help your pancakes rise beautifully. Set the bowl aside while you prepare the wet ingredients.

Step 2: Mix Wet Ingredients
In a separate large bowl, blend together the plain yogurt, milk, egg, sugar, and vegetable oil until smooth and creamy. This mixture creates a luscious base for your Apple Yogurt Pancakes. Make sure the yogurt is fully integrated, as any clumps can affect the texture of the batter.

Step 3: Add Apple
Gently fold the grated apple into the wet mixture using a spatula, ensuring the apple pieces are evenly distributed throughout the batter. This will infuse your pancakes with natural sweetness and moisture, making each bite delightful. Take a moment to appreciate the fresh aroma before moving on.

Step 4: Combine Mixtures
Gradually pour the wet mixture into the bowl with the dry ingredients. Stir gently until just combined; it’s okay if there are a few lumps. Overmixing can lead to dense pancakes, so keep it light and fluffy. At this stage, your batter should be thick and slightly lumpy, ready for cooking.

Step 5: Heat Pan
Preheat a non-stick skillet or griddle over medium heat, lightly greasing it with vegetable oil to prevent sticking. Let the pan heat for about 3-5 minutes. When it’s hot, you can sprinkle a few drops of water on it; if they sizzle, it's ready for your pancakes!

Step 6: Cook Pancakes
Pour 1/4 cup of the batter onto the skillet for each pancake, spacing them evenly apart. Cook until you see bubbles forming on the surface, which should take around 2-3 minutes. The edges will appear set, providing a visual cue that it’s time to flip.

Step 7: Flip Pancakes
With a spatula, carefully flip each pancake and cook for another 2-3 minutes until golden brown and fluffy. You want a lovely golden color on both sides, indicating they’re perfectly cooked. Be attentive; if they brown too quickly, it may be time to slightly lower the heat.

Step 8: Adjust Temperature if Needed
If you notice your pancakes are browning too fast, reduce the heat to medium-low. This allows the insides to cook thoroughly without burning the exterior. Keeping an eye on the cooking process is essential to achieve that perfect texture for your Apple Yogurt Pancakes.

Step 9: Keep Warm
Once cooked, transfer the pancakes to a plate and cover them with a clean kitchen towel to keep them warm while you finish the rest of the batch. This simple step ensures that every pancake remains fluffy and inviting when served. Enjoy the delightful aroma filling your kitchen.

Storage Tips for Apple Yogurt Pancakes

Fridge: Store leftover pancakes in an airtight container in the fridge for up to 3 days. Reheat in the microwave for 30-60 seconds or in a toaster for a crispier texture.

Freezer: Freeze pancakes in single layers separated by parchment paper in an airtight bag or container for up to 2 months. Simply reheat from frozen in the toaster or microwave until heated through.

Wrapping: For extra freshness, wrap pancakes individually in plastic wrap before placing them in a freezer bag. This prevents freezer burn and keeps your Apple Yogurt Pancakes tasting delightful.

Reheating: For best results, reheat pancakes on a skillet over low heat for a couple of minutes, flipping occasionally until warmed. Enjoy them as if they were freshly made!

What to Serve with Apple Yogurt Pancakes

These delightful pancakes invite creativity in crafting the perfect accompanying meal, ensuring every bite is a warm embrace of flavor.

  • Maple Syrup: A classic pairing that drizzles sweet warmth over the fluffy pancakes, enhancing their apple goodness.

  • Fresh Berries: Add a burst of juicy freshness with strawberries, blueberries, or raspberries; their tartness beautifully contrasts the sweetness of the pancakes.

  • Whipped Cream: Light and airy whipped cream adds a luxurious touch, perfectly complementing the rich flavor of yogurt and the crunch of apples.

  • Greek Yogurt: Serving a dollop of Greek yogurt on the side adds extra creaminess and protein, making for a satisfying brunch.

  • Sautéed Cinnamon Apples: Elevate the apple flavor with warm, cinnamon-sautéed apples that add warmth and a gourmet twist to your breakfast spread.

  • Nuts: Chopped walnuts or pecans provide a lovely crunch and additional nutrition; sprinkle them on top for texture and flavor.

  • Smoothie: A refreshing smoothie with spinach and fruit balances the meal with nutritious greens, perfect for a wholesome breakfast.

  • Coffee or Tea: Pair your pancakes with a steaming cup of coffee or herbal tea to enhance the comforting morning experience.

Let your imagination run wild, and create a breakfast spread that will make your taste buds dance with joy!

Apple Yogurt Pancakes Variations & Substitutions

Feel free to explore these exciting variations, each promising to elevate your Apple Yogurt Pancakes with delightful twists.

  • Gluten-Free: Substitute all-purpose flour with a gluten-free flour blend for a delicious alternative that everyone can enjoy.
  • Dairy-Free: Opt for coconut or almond milk and use dairy-free yogurt to make these pancakes perfect for lactose-intolerant friends.
  • Banana Twist: Replace grated apple with mashed bananas for a sweet, tropical carb that complements the fluffy texture wonderfully.
  • Spiced Delight: Add a pinch of nutmeg alongside the cinnamon for a spiced variation that'll warm your kitchen with cozy aromas.
  • Nutty Crunch: Fold in some chopped walnuts or pecans to introduce a satisfying crunch into your pancakes, making every bite exciting.
  • Berry Boost: Mix in fresh blueberries or raspberries for a burst of tartness and a gorgeous color contrast that’s pleasing to the eye.
  • Chocolate Indulgence: Stir in chocolate chips for a decadent treat that will quickly become the favorite among sweet-toothed family members.
  • Maple Infusion: Replace sugar with maple syrup in the batter for a fragrant, sweet flavor that pairs perfectly with breakfast favorites.

Whatever variation you choose, these pancakes will always be a hit! For more breakfast inspiration, check out my delightful Chicken Salad Apples for a fresh take on brunch.

Make Ahead Options

These Apple Yogurt Pancakes are perfect for busy mornings and make-ahead meal prep! You can prepare the dry ingredients (flour, baking powder, cinnamon, and salt) up to 3 days in advance and store them in an airtight container to maintain freshness. Additionally, you can mix the wet ingredients (yogurt, milk, egg, sugar, and oil) and refrigerate them overnight. When you’re ready to cook, simply combine the wet and dry mixtures, fold in the grated apple, and proceed to cook as instructed. This way, you'll enjoy fluffy pancakes with just a few moments of effort and savor every bite of the deliciousness!

Expert Tips for Apple Yogurt Pancakes

  • Don’t Overmix: To keep your pancakes fluffy, remember that some lumps in the batter are perfectly fine. Overmixing can lead to tough pancakes.

  • Fresh Baking Powder: Ensure your baking powder is fresh for the best rise. Stale baking powder can leave you with dense pancakes.

  • Uniform Size: Use a measuring cup to pour your batter onto the skillet, ensuring consistent pancake sizes for even cooking and a beautiful presentation.

  • Temperature Control: Keep an eye on your skillet's temperature. If pancakes brown too quickly, lower the heat to allow the insides to cook fully without burning.

  • Grate Apples Just Before Use: To maintain freshness, grate your apples right before adding them to the batter. This enhances flavor and moisture retention in your Apple Yogurt Pancakes.

Apple Yogurt Pancakes Recipe FAQs

How do I choose the best apples for this recipe?
Absolutely! I recommend using sweet varieties like Fuji or Honeycrisp for their flavor and moisture. You can also use Granny Smith apples if you enjoy a tart contrast—just balance it out with a touch more sugar!

How should I store leftover Apple Yogurt Pancakes?
Stored in an airtight container, leftover pancakes last up to 3 days in the fridge. Just reheat them in the microwave for about 30-60 seconds to enjoy them fresh again!

Can I freeze Apple Yogurt Pancakes?
Yes, you can! Place parchment paper between each pancake, then stack them in an airtight container or freezer bag. They’ll stay good for up to 2 months. When you’re ready to enjoy, reheat directly from the freezer in a toaster or microwave until warmed through.

What should I do if my pancakes turn out dense?
No worries! This can happen if the batter is overmixed—lumps are okay! Also, check that your baking powder is fresh, as stale powder can prevent your pancakes from rising properly. For next time, gently fold just until combined.

Are there any dietary considerations for Apple Yogurt Pancakes?
Very much so! You can make this recipe gluten-free by swapping the all-purpose flour with a gluten-free blend. Additionally, to cater to vegan diets, substitute the egg with a flax egg (1 tbsp flaxseed meal mixed with 2.5 tbsp water) and use dairy-free yogurt and milk.

Apple Yogurt Pancakes

Fluffy Apple Yogurt Pancakes for a Sweet Morning Boost

Start your morning with delicious Apple Yogurt Pancakes that are fluffy and healthy.
Print Recipe Pin Recipe
Prep Time 10 minutes mins
Cook Time 20 minutes mins
Total Time 30 minutes mins
Servings: 4 pancakes
Course: Breakfast
Cuisine: American
Calories: 100
Ingredients Equipment Method Nutrition Notes

Ingredients
  

For the Batter
  • 1 cup all-purpose flour can substitute with whole wheat flour for added fiber
  • 1 cup plain yogurt Greek yogurt adds extra creaminess
  • 1 cup milk any variety; try using almond or oat milk for a dairy-free option
  • 1 cup grated apple Fuji or Honeycrisp varieties are best
  • 1 large egg a flax egg can be used for vegan option
  • 2 tablespoons sugar adjust according to taste
  • 1 tablespoon baking powder ensure it's fresh for best results
  • 1 teaspoon ground cinnamon consider adding a pinch of nutmeg
  • 1/4 teaspoon salt balances sweet flavors
  • 2 tablespoons vegetable oil melted butter or coconut oil can be used
  • optional additions chopped nuts or raisins for extra texture

Equipment

  • medium bowl
  • large bowl
  • Whisk
  • Spatula
  • non-stick skillet
  • measuring cups
  • Measuring Spoons

Method
 

Step-by-Step Instructions
  1. In a medium bowl, whisk together the all-purpose flour, baking powder, ground cinnamon, and salt until thoroughly combined.
  2. In a separate large bowl, blend together the plain yogurt, milk, egg, sugar, and vegetable oil until smooth and creamy.
  3. Gently fold the grated apple into the wet mixture using a spatula.
  4. Gradually pour the wet mixture into the bowl with the dry ingredients. Stir gently until just combined.
  5. Preheat a non-stick skillet or griddle over medium heat, lightly greasing it with vegetable oil.
  6. Pour 1/4 cup of the batter onto the skillet for each pancake, spacing them evenly apart.
  7. With a spatula, carefully flip each pancake and cook for another 2-3 minutes until golden brown.
  8. If pancakes are browning too fast, reduce the heat to medium-low.
  9. Once cooked, transfer the pancakes to a plate and cover them with a clean kitchen towel to keep them warm.

Nutrition

Serving: 1pancakeCalories: 100kcalCarbohydrates: 15gProtein: 3gFat: 4gSaturated Fat: 1gMonounsaturated Fat: 2gCholesterol: 20mgSodium: 150mgPotassium: 120mgFiber: 1gSugar: 2gVitamin A: 100IUVitamin C: 2mgCalcium: 50mgIron: 0.5mg

Notes

To maintain freshness, grate your apples right before adding them to the batter.

Tried this recipe?

Let us know how it was!

Delicious Breakfast Protein Biscuits for Energized Mornings

January 28, 2026 by Grace Snow Leave a Comment

Stumbling into my kitchen early one morning, I was determined to create a breakfast that would power me through the day. That's when I whipped up these delightful Breakfast Protein Biscuits. Packed with Greek yogurt, eggs, fresh spinach, and cheese, they deliver a perfect balance of nutrition and flavor. Not only are they meal prep friendly—a true time-saver for busy mornings—but they're also gluten-free adaptable, ensuring everyone can enjoy them. As I took my first bite, I knew these biscuits were bound to become a staple in my breakfast rotation. Ready to elevate your morning routine and kick-start your day with some wholesome goodness? Let's dive into this recipe together!

Why You’ll Crave These Breakfast Biscuits?

Nutritious and Filling: These Breakfast Protein Biscuits are more than just delicious; they're packed with Greek yogurt and eggs, ensuring a satisfying meal that powers you through your morning.

Customizable Goodness: Have fun with variations! From adding veggies like bell peppers to swapping cheeses, you can tailor them to suit your taste.

Easy Meal Prep: Whip up a batch ahead of time, store in the fridge, and they'll be ready to grab on busy mornings—a great alternative to fast food.

Gluten-Free Friendly: No gluten? No problem! Just use a gluten-free flour blend and still enjoy these savory treats without compromise.

Delicious Again and Again: With the perfect balance of flavors and textures, you’ll find yourself reaching for these biscuits again and again—like a warm hug in biscuit form! Try serving them alongside a side of Breakfast Banana Split for a complete meal.

Breakfast Protein Biscuits Ingredients

For the Biscuits
• Plain 2% Greek Yogurt – Enhances moisture and protein, keeping your biscuits tender; substitute with dairy-free yogurt for a vegan option.
• Large Eggs – Act as a binder and add richness; a flaxseed egg (1 tbsp ground flaxseed mixed with 2.5 tbsp water for each egg) works as a vegan alternative.
• All-Purpose Flour – Provides structure; a 1:1 gluten-free all-purpose flour blend can make these biscuits gluten-free.
• Ground Flaxseed – Boosts fiber and omega-3 fatty acids; reduce the amount if you're using only all-purpose flour.
• Baking Powder – Essential for a fluffy biscuit texture; double-check for gluten-free certification if needed.
• Salt – Elevates the overall flavor; no substitution for effectiveness.
• Garlic Powder – Adds a savory depth; fresh minced garlic can be a delightful substitute.
• Red Pepper Flakes (optional) – Introduces a touch of heat; adjust the amount based on your heat preference.
• Spinach – Provides nutrients and moisture; frozen spinach works well if thoroughly drained.
• Chives – Offers a mild onion flavor; you can swap with green onions or omit entirely.
• Cheddar Cheese – Adds a rich flavor; try using mozzarella or vegan cheese for variety.

Topping
• Additional Cheddar Cheese – Sprinkling more cheese on top before baking enhances flavor and creates a golden crust.

Step‑by‑Step Instructions for Breakfast Protein Biscuits

Step 1: Preheat the Oven
Begin by preheating your oven to 375°F (190°C). While the oven heats up, take a moment to grease a muffin tin with cooking spray or butter to prevent the biscuits from sticking. This preparation ensures a perfect release and a golden, crusty exterior for your delicious Breakfast Protein Biscuits.

Step 2: Mix the Dry Ingredients
In a large mixing bowl, whisk together the all-purpose flour, ground flaxseed, baking powder, salt, garlic powder, and red pepper flakes until well combined. This step is crucial for evenly distributing the leavening agents, which will keep your biscuits light and fluffy. Set the bowl aside as you prepare the wet ingredients.

Step 3: Combine the Wet Ingredients
In a separate bowl, whisk together the plain Greek yogurt and large eggs until smooth and creamy. This mixture will serve as the binding agent for your Breakfast Protein Biscuits, adding moisture and richness. Once mixed, gently fold this wet mixture into the dry ingredients until just combined, being careful not to overmix.

Step 4: Add the Spinach and Cheese
Carefully stir in the wilted spinach, chives, and 1 cup of shredded cheddar cheese to the batter. Make sure each ingredient is evenly distributed to create a savory flavor profile in every biscuit. The spinach adds moisture while the cheese provides that scrumptious richness that makes these biscuits irresistible.

Step 5: Portion the Batter
Using a spoon or an ice cream scoop, divide the batter evenly among the greased muffin cups. Fill each cup about three-quarters full to allow room for rising. For an extra cheesy touch, sprinkle the remaining cheddar cheese evenly over the tops of the filled muffin cups, creating a delightful golden crust as they bake.

Step 6: Bake the Biscuits
Carefully place the muffin tin in the preheated oven and bake for 20–22 minutes. Keep an eye on them as they bake; they should turn a lovely golden brown and a toothpick inserted in the center should come out clean. This baking process is essential for achieving that perfect fluffy texture.

Step 7: Cool and Serve
Once baked, remove the muffin tin from the oven and let the Breakfast Protein Biscuits cool in the tin for about 5 minutes. After they’re slightly cooled, gently lift them out using a fork or spatula. Serve warm and enjoy the combination of flavors and textures that make these biscuits a delightful start to your day!

Breakfast Protein Biscuits: Variations & Substitutions

Feel free to get creative with these biscuits and make them your own with some exciting variations!

  • Kale Swap: Substitute spinach for kale to give a heartier texture and flavor with more nutrition.

  • Cheese Swap: Use feta or goat cheese instead of cheddar for a tangy twist that will elevate the flavor profile.

  • Veggie Boost: Add diced bell peppers or sautéed mushrooms for extra color and a flavor punch—perfect for your veggie lovers.

  • Herbs Galore: Fresh herbs like parsley or dill can replace chives, adding a burst of freshness to each bite.

  • Protein Power: Mix in cooked sausage or smokey bacon pieces for an extra protein kick that makes these biscuits even more satisfying.

  • Heat it Up: If you like heat, increase the red pepper flakes or add a dash of hot sauce to the wet mixture for flavorful warmth.

  • Gluten-Free: Use a gluten-free all-purpose flour for those avoiding gluten without sacrificing taste.

  • Sweet Option: For a sweeter twist, add a tablespoon of maple syrup to the wet mixture, or even some cinnamon for a delightful breakfast treat.

These variations not only keep your breakfasts exciting but also allow you to incorporate your personal touch. Why not try pairing these biscuits with a comforting side like Cornbread Breakfast Casserole or a refreshing Breakfast Banana Split to round out your morning spread? Enjoy the versatility!

What to Serve with Breakfast Protein Biscuits?

Elevate your morning experience by pairing these delightful biscuits with complementary sides that enhance their flavors and nutrition.

  • Avocado Slices: Creamy slices of avocado topped with a sprinkle of salt add a delightful richness and healthy fats that balance the biscuits' protein content.

  • Greek Yogurt Parfait: A refreshing parfait layered with Greek yogurt, fresh fruit, and granola not only boosts protein but also adds sweetness and texture.

  • Fresh Fruit Salad: A vibrant mix of seasonal fruits brightens your plate, bringing natural sweetness and a pop of color to your breakfast.

  • Scrambled Eggs: Fluffy scrambled eggs seasoned with herbs offer a seamless protein pairing, making for a hearty and satisfying meal.

  • Smoothie Bowl: A chilled smoothie bowl topped with nuts and seeds serves as a refreshing contrast and introduces a variety of textures.

  • Herbal Tea: A steaming cup of herbal tea, like chamomile or mint, brings warmth and comfort, perfectly complementing your savory biscuits.

  • Crispy Bacon: For those who enjoy a bit of indulgence, crispy bacon adds a savory crunch that pairs wonderfully with the softness of the biscuits.

  • Nut Butter Spread: A dollop of almond or peanut butter adds a luxurious creaminess, balancing the savory notes with a touch of sweetness.

  • Chilled Almond Milk: Enjoy a glass of chilled almond milk or your favorite plant-based milk for a refreshing and nutty drink option to accompany your meal.

How to Store and Freeze Breakfast Protein Biscuits

Room Temperature: Store cooled Breakfast Protein Biscuits in an airtight container for up to 2 days. Enjoy them warm or at room temperature for a quick snack!

Fridge: Keep the biscuits in the refrigerator for up to 5 days. Place them in a sealed container to maintain their moisture and freshness.

Freezer: Freeze individually wrapped Breakfast Protein Biscuits for up to 2 months. When ready to eat, just reheat from frozen in the microwave or toaster oven for the best texture.

Reheating: For optimal results, reheat in the microwave for 30-60 seconds or warm in a toaster oven to revive that golden, crispy crust before serving.

Make Ahead Options

These Breakfast Protein Biscuits are perfect for meal prep enthusiasts, helping you save precious time on busy mornings! You can mix the dry ingredients and store them in an airtight container for up to 3 days ahead. Additionally, the wet mixture can be prepared and refrigerated for up to 24 hours. To maintain quality, be sure to refrigerate the wet ingredients promptly to prevent spoilage. When you're ready to bake, combine the mixtures and fold in the spinach and cheese. Simply fill the muffin cups and pop them in the oven—within minutes, you'll have fresh, nutritious biscuits that are just as delicious as if they were made from scratch that morning!

Expert Tips for Breakfast Protein Biscuits

  • Avoid Overmixing: Keep your biscuits light and fluffy by mixing just until the dry and wet ingredients are combined. Overworking the batter can lead to dense biscuits.

  • Drain Spinach Well: To prevent soggy biscuits, make sure to thoroughly drain any frozen spinach. Excess moisture can affect the texture of your Breakfast Protein Biscuits.

  • Customize Wisely: Feel free to add in your favorite vegetables or proteins, but be mindful of the moisture content. This will help maintain the ideal biscuit consistency.

  • Perfect Portioning: Use an ice cream scoop for even sizing when dividing the batter. This ensures consistent baking and even cooking throughout your batch.

  • Cheese Variations: Experiment with different cheeses like feta or goat cheese for unique flavor profiles that add depth to your Breakfast Protein Biscuits.

Breakfast Protein Biscuits Recipe FAQs

What type of Greek yogurt should I use?
You can use plain 2% Greek yogurt for these biscuits, as it provides moisture and protein to keep them tender. If you're looking for a dairy-free option, feel free to substitute it with a dairy-free yogurt alternative!

How should I store my Breakfast Protein Biscuits?
To maintain freshness, store your cooled Breakfast Protein Biscuits in an airtight container in the refrigerator for up to 5 days. If they’ll be eaten within 2 days, keeping them at room temperature is perfectly fine, but they may dry out.

Can I freeze the biscuits, and if so, how?
Absolutely! To freeze your Breakfast Protein Biscuits, let them cool completely, then wrap each biscuit tightly in plastic wrap or aluminum foil. Place the wrapped biscuits in a freezer-safe bag and freeze for up to 2 months. When you're ready to enjoy them, simply reheat from frozen in the microwave for 30-60 seconds or in a toaster oven until warmed through.

What if my batter is too dry?
If you find that your biscuit batter is too dry, it's likely due to the flour measurement or the yogurt. Try adding a little more Greek yogurt, a tablespoon at a time, to achieve a moist and cohesive batter. It’s important to mix gently to avoid toughening the biscuits!

Can I make these biscuits gluten-free?
Yes, making these Breakfast Protein Biscuits gluten-free is easy. Simply substitute the all-purpose flour with a 1:1 gluten-free all-purpose flour blend. This way, everyone can enjoy these delicious biscuits without compromising on taste or texture.

Are these biscuits suitable for meal prep?
Definitely! These Breakfast Protein Biscuits are perfect for meal prep. You can make a big batch at once, store them in the fridge for a quick breakfast solution throughout the week, or freeze them for longer-term storage to bring simplicity and nutrition to your busy mornings.

Breakfast Protein Biscuits

Delicious Breakfast Protein Biscuits for Energized Mornings

Discover these Breakfast Protein Biscuits, perfect for energizing mornings and packed with nutrients.
Print Recipe Pin Recipe
Prep Time 15 minutes mins
Cook Time 22 minutes mins
Cooling Time 5 minutes mins
Total Time 42 minutes mins
Servings: 12 biscuits
Course: Breakfast
Cuisine: American
Calories: 150
Ingredients Equipment Method Nutrition Notes

Ingredients
  

For the Biscuits
  • 1 cup Plain 2% Greek Yogurt Substitute with dairy-free yogurt for a vegan option.
  • 2 large Eggs A flaxseed egg can work as a vegan alternative.
  • 2 cups All-Purpose Flour Use gluten-free all-purpose flour blend for gluten-free.
  • ¼ cup Ground Flaxseed Reduce if only using all-purpose flour.
  • 1 tbsp Baking Powder Check for gluten-free certification.
  • 1 tsp Salt No substitute for effectiveness.
  • ½ tsp Garlic Powder Fresh minced garlic can be a substitute.
  • ½ tsp Red Pepper Flakes Omitted if no heat is desired.
  • 2 cups Spinach Frozen works well if drained.
  • 2 tbsp Chives Can substitute with green onions.
  • 1 cup Cheddar Cheese Vegan cheese can be used.
Topping
  • ½ cup Additional Cheddar Cheese Sprinkle on top before baking.

Equipment

  • Muffin tin
  • Mixing bowls
  • Whisk
  • Spoon or Ice Cream Scoop

Method
 

Step‑by‑Step Instructions
  1. Preheat your oven to 375°F (190°C) and grease a muffin tin.
  2. In a large mixing bowl, whisk together the flour, flaxseed, baking powder, salt, garlic powder, and red pepper flakes.
  3. In a separate bowl, whisk together the Greek yogurt and eggs until smooth, then fold into the dry ingredients.
  4. Stir in the spinach, chives, and cheddar cheese until well combined.
  5. Divide the batter among the muffin cups and sprinkle the additional cheddar cheese on top.
  6. Bake for 20–22 minutes until golden brown and a toothpick inserted comes out clean.
  7. Let the biscuits cool in the tin for 5 minutes before lifting them out.

Nutrition

Serving: 1biscuitCalories: 150kcalCarbohydrates: 15gProtein: 7gFat: 6gSaturated Fat: 3gPolyunsaturated Fat: 1gMonounsaturated Fat: 2gCholesterol: 60mgSodium: 200mgPotassium: 150mgFiber: 2gSugar: 1gVitamin A: 500IUVitamin C: 10mgCalcium: 150mgIron: 1mg

Notes

These biscuits are perfect for meal prep and can be customized with your favorite cheeses and vegetables.

Tried this recipe?

Let us know how it was!

Thick & Chewy Breakfast Cookies for a Wholesome Start

January 28, 2026 by Grace Snow Leave a Comment

Who says cookies are only for dessert? These Thick & Chewy Trail Mix Breakfast Cookies are the ultimate morning game-changer, serving up wholesome goodness without sacrificing the delight that comes from a sweet treat. Packed with fiber-rich whole grains, crunchy nuts, and chewy dried fruits, these cookies offer a nutritious start to your day or a satisfying snack when those midday cravings hit. Plus, they’re totally customizable! No matter your flavor preferences, you’ll find endless ways to make them your own. So, are you ready to embrace the delicious revolution of breakfast cookies? Let’s dive into the recipe!

Why are breakfast cookies a game-changer?

Wholesome goodness: These Thick & Chewy Breakfast Cookies provide all the nutrition you need to kickstart your day, thanks to whole grains and protein-packed nuts.
Easy customization: With options to swap in your favorite nut butters and dried fruits, you can create a flavor profile that suits your unique taste.
On-the-go perfection: Perfectly sized for busy mornings or midday snacks, they’re a delicious alternative to fast food that’ll keep you satisfied.
Family-friendly appeal: Kids and adults alike will love these cookies—great for getting the whole family excited about breakfast!
Versatile ingredients: Swap out walnuts for pecans or experiment with different seeds as you go, just like our Breakfast Banana Split recipe!

Thick & Chewy Breakfast Cookies Ingredients

For the Base
• Unsalted Butter (6 tablespoons) – Adds moisture and richness. Substitute with margarine or coconut oil for dairy-free options.
• Light Brown Sugar (⅔ cup) – Provides sweetness and a slight caramel flavor. Can be reduced by 25% for less sweetness.
• Honey (2 tablespoons) – Acts as a natural sweetener and moisture contributor. Can be replaced with maple syrup.
• Large Egg (1) – Binds ingredients and adds moisture. Use a flax egg for a vegan alternative.
• Pure Vanilla Extract (1 teaspoon) – Enhances overall flavor. Try almond extract for a different flavor twist.
• Smooth Peanut Butter (¼ cup) – Contributes creaminess and nutty flavor. Almond butter or sun butter can be used as alternatives.

For the Dry Ingredients
• Large Flake Rolled Oats (½ cup) – Adds chewiness and fiber. Quick oats can work in a pinch.
• All-Purpose Flour (1 cup plus 2 tablespoons) – Provides structure. Whole wheat flour is a healthier option.
• Baking Soda (¾ teaspoon) – Helps cookies rise.
• Salt (½ teaspoon) – Enhances flavors.

For the Mix-ins
• Chopped Walnuts (⅓ cup) – Adds crunch and healthy fats. Pecans or almonds can be great substitutes.
• Pumpkin Seeds (¼ cup) – Introduces texture and nutrients. Sunflower seeds can be used instead if desired.
• Sunflower Seeds (3 tablespoons) – Offer protein.
• Dried Cranberries or Dried Apricots (½ cup) – Provide sweetness and chewiness. Swap in raisins or dates for variety.
• Dark Chocolate Chips (⅔ cup) – Adds sweetness and indulgence. White chocolate is a lovely alternative, or you can skip for less sugar.

Step‑by‑Step Instructions for Thick & Chewy Breakfast Cookies

Step 1: Cream the Butter and Sugars
In a large mixing bowl, beat together 6 tablespoons of unsalted butter, ⅔ cup of light brown sugar, and 2 tablespoons of honey until the mixture is fluffy and light in color, about 2-3 minutes. This creamy base is crucial for your Thick & Chewy Breakfast Cookies as it creates a rich texture and sweetness.

Step 2: Incorporate Wet Ingredients
Add 1 large egg, ¼ cup of smooth peanut butter, and 1 teaspoon of pure vanilla extract to the creamed mixture. Mix everything on medium speed until well combined and smooth, which should take about 1-2 minutes. The egg adds moisture, ensuring your cookies stay tender and chewy.

Step 3: Combine Dry Ingredients
In another bowl, whisk together 1 cup plus 2 tablespoons of all-purpose flour, ¾ teaspoon of baking soda, and ½ teaspoon of salt. This step is essential, as it separates your dry ingredients from your wet ones, preventing any clumping. The right balance will help your Thick & Chewy Breakfast Cookies rise perfectly.

Step 4: Merge Wet and Dry Mixtures
Gradually add the dry mixture into the wet mixture, stirring gently with a spatula or wooden spoon. Once combined, fold in ⅓ cup of chopped walnuts, ¼ cup of pumpkin seeds, and 3 tablespoons of sunflower seeds. This creates a hearty, textured dough that elevates the chewiness of your cookies.

Step 5: Add Sweet Mix-ins
Before finishing the cookie dough, gently fold in ½ cup of dried cranberries (or dried apricots) and ⅔ cup of dark chocolate chips. Mixing these in last allows for even distribution without overwhelming the base texture. Your Thick & Chewy Breakfast Cookies will be vibrant and filled with delightful morsels!

Step 6: Chill the Dough
Cover the bowl with plastic wrap and refrigerate the dough for about 30 minutes. Chilling the dough helps enhance the textures of your cookies, making sure they stay thick and chewy while baking. This crucial waiting period is well worth it for the ultimate cookie experience.

Step 7: Preheat and Prepare Baking Sheets
Preheat your oven to 350°F while the dough is chilling. Line two baking sheets with parchment paper to prevent sticking and ensure even baking. The warm aroma filling your kitchen as the oven preheats will surely build anticipation for these scrumptious Thick & Chewy Breakfast Cookies!

Step 8: Form the Cookies
Once the dough is chilled, scoop 1.5-ounce portions (about a heaping tablespoon) and roll them into balls. Flatten each ball slightly and place them on the lined baking sheets, leaving space between cookies. This step ensures they have room to spread while baking, promoting that desired thick texture.

Step 9: Bake to Perfection
Bake your cookies in the preheated oven for 11-13 minutes, or until the edges are golden brown but the centers remain slightly gooey. This will allow your Thick & Chewy Breakfast Cookies to achieve a lovely contrast of chewy and soft textures, making them irresistible.

Step 10: Cool Down
Allow the cookies to cool on the baking sheet for 1 minute before transferring them to a wire rack. This brief cooling period helps them maintain their shape and texture. Once completely cool, store the cookies in an airtight container for a delicious and nutritious snack anytime!

Thick & Chewy Breakfast Cookies Variations

Feel free to adapt and change these cookies to suit your tastes and dietary needs—there's a delightful world of options waiting for you!

  • Nut Butter Swap: Replace peanut butter with almond or cashew butter for a different flavor. The nutty richness will elevate your cookies in unexpected ways.
  • Dried Fruit Fiesta: Use raisins or dried figs instead of dried cranberries for a sweet twist. This tweak adds a burst of flavor that brightens each bite.
  • Gluten-Free Delight: Substitute all-purpose flour with a 1:1 gluten-free flour blend to make gluten-free Thick & Chewy Breakfast Cookies. These still pack in flavor and texture while being celiac-friendly!
  • Protein Boost: Add protein powder or use a scoops of your favorite protein-rich nut butter. Perfect for those needing extra energy for their busy mornings.
  • Lower Sugar Option: Reduce light brown sugar by half and incorporate mashed banana for natural sweetness. You’ll still get a deliciously chewy cookie without the added sugar crash!
  • Cocoa Kick: Add a couple of tablespoons of cocoa powder for chocolatey breakfast cookies! This delightful addition adds a rich depth of flavor that all chocolate lovers will adore.
  • Spicy Twist: Sprinkle in some cinnamon or a pinch of nutmeg for a warm, spiced flavor. These spices can beautifully enhance the overall taste and make your kitchen smell delightful.
  • Crunchy Seeds: Swap pumpkin seeds for chia seeds or flaxseeds for a different texture and nutritional boost. They add crunch and are rich in healthy omega-3 fatty acids.

These variations not only keep your breakfast exciting but perfect for anyone in the mood for some kitchen creativity! If you're looking for different flavors, why not try these alongside some Breakfast Egg Muffins or enjoy them as a delightful treat with your morning coffee while savoring the lovely taste of Thumbprint Cookies Melt?

Make Ahead Options

These Thick & Chewy Breakfast Cookies are perfect for meal prep, saving you valuable time on busy mornings! You can prepare the cookie dough up to 24 hours in advance by covering it tightly with plastic wrap and refrigerating it. This not only enhances the flavor but also helps maintain their chewy texture. When you're ready to bake, simply scoop and shape the chilled dough, then follow the baking instructions as outlined. If you're feeling extra organized, you can also freeze the shaped cookie dough balls for up to three months; just bake them straight from the freezer, adding a couple of extra minutes to the baking time. With these make ahead options, enjoying a nutritious breakfast is effortless!

How to Store and Freeze Thick & Chewy Breakfast Cookies

Airtight Container: Store cookies in an airtight container at room temperature for up to 1 week to maintain their delicious chewy texture.

Refrigeration: If you prefer, you can refrigerate the cookies for an extra layer of freshness, keeping them good for up to 10 days.

Freezer Storage: Freeze cookies in a single layer, then transfer to a freezer-safe container or bag for up to 3 months. Thaw them at room temperature when you're ready to enjoy!

Reheating: To reheat, pop your Thick & Chewy Breakfast Cookies in the microwave for about 10-15 seconds for that fresh-baked warmth.

Tips for the Best Thick & Chewy Breakfast Cookies

  • Chill the Dough: Refrigerating the dough for 30 minutes enhances the cookies' texture, ensuring they bake up thick and chewy.
  • Don’t Overmix: After adding the flour, mix just until combined. Overmixing can lead to tough cookies instead of the desired softness of Thick & Chewy Breakfast Cookies.
  • Keep an Eye on Baking: Bake until the edges are golden but the centers still look slightly underbaked for that gooey texture everyone loves.
  • Experiment Freely: Feel free to swap in different nut butters or dried fruits based on your preferences—customization is key to making your ideal breakfast cookie!
  • Ingredient Temperature: Ensure butter is at room temperature for easy creaming with sugar, resulting in the perfect rich base for your cookies.
  • Storage Tips: Store cookies in an airtight container to keep them fresh for up to a week, or freeze for a longer-lasting treat.

What to Serve with Thick & Chewy Breakfast Cookies

These delightful breakfast cookies can be paired with various flavors and textures for a complete morning experience!

  • Creamy Greek Yogurt: Adding a dollop of Greek yogurt provides a protein-packed complement that perfectly balances the sweetness of the cookies. It’s a delightful way to enhance your breakfast with a luscious, creamy texture.

  • Fresh Fruit Salad: A mix of vibrant, juicy fruits adds brightness and freshness alongside the rich flavor of the cookies. The sweetness of berries or citrus slices beautifully offsets the chewiness of each bite.

  • Nutty Granola: For added crunch, a bowl of nutty granola brings a satisfying texture contrast, transforming your breakfast into a wholesome feast. The mix of oats and nuts resonates perfectly with the flavors in your cookies.

  • Smoothie Bowl: A nutrient-rich smoothie bowl topped with seeds and fruits makes for a colorful, revitalizing addition. The cool, creamy texture pairs wonderfully with the warm, chewy cookies for a harmonious meal.

  • Hot Coffee or Tea: Sip on a steaming cup of coffee or herbal tea while enjoying your cookies. The warmth and robust flavors of a warm beverage enhance the soothing sweetness of your breakfast cookies.

  • Milk: Whether you prefer dairy or a plant-based option, a glass of cold milk offers the perfect, classic pairing that brings out the rich flavors of your Thick & Chewy Breakfast Cookies.

  • Chia Seed Pudding: Topped with fresh fruits, chia seed pudding adds an exotic touch to your morning. Its creamy texture combined with the hearty cookies creates a delightful and wholesome start to the day.

Thick & Chewy Breakfast Cookies Recipe FAQs

How do I select the right fruits and nuts for my cookies?
Absolutely! Look for dried fruits that are plump and not overly sticky or hard—avoid those with dark spots or an off smell. For nuts, choose ones that are fresh and crunchy; rancid nuts can spoil the flavor of your cookies.

How should I store my Thick & Chewy Breakfast Cookies?
Store your cookies in an airtight container at room temperature for up to a week to maintain their chewy texture. If you'd like to keep them fresher longer, refrigerating them will extend their shelf life to about 10 days.

Can I freeze these cookies for later?
Yes, you can! To freeze your Thick & Chewy Breakfast Cookies, place them in a single layer on a baking sheet until firm. After about 1-2 hours, transfer them to a freezer-safe container or bag while placing parchment paper between layers to prevent sticking. They can be frozen for up to 3 months. When ready to enjoy, simply let them thaw at room temperature!

What should I do if my cookie dough seems too dry?
Very often, dough can be dry due to flour measurement discrepancies. If this happens, try adding a little more peanut butter or a splash of milk to moisten the dough. Mix gently until it reaches your desired consistency. Remember, you want a soft, pliable dough that’s easy to scoop!

Can my pets enjoy these cookies too?
While some ingredients like oats and pure peanut butter are safe for pets in moderation, avoid giving them the chocolate chips. Chocolate is toxic to dogs and cats. If you want to make a pet-friendly version, simply omit the chocolate and be cautious with nuts, particularly if your pet has allergies.

Are there any allergy considerations with this recipe?
Yes! Ensure to check for nut allergies if you’re making these for others. If anyone in your household has nut allergies, consider using seeds like sunflower or pumpkin seeds in place of the nuts and opting for sunflower butter instead of peanut butter. Happy baking!

Thick & Chewy Breakfast Cookies

Thick & Chewy Breakfast Cookies for a Wholesome Start

These Thick & Chewy Breakfast Cookies are the ultimate morning game-changer, serving wholesome goodness without sacrificing delight.
Print Recipe Pin Recipe
Prep Time 30 minutes mins
Cook Time 13 minutes mins
Chilling Time 30 minutes mins
Total Time 1 hour hr 13 minutes mins
Servings: 12 cookies
Course: Breakfast
Cuisine: American
Calories: 180
Ingredients Equipment Method Nutrition Notes

Ingredients
  

For the Base
  • 6 tablespoons Unsalted Butter Adds moisture and richness.
  • ⅔ cup Light Brown Sugar Provides sweetness and a slight caramel flavor.
  • 2 tablespoons Honey Acts as a natural sweetener and moisture contributor.
  • 1 Large Egg Binds ingredients and adds moisture.
  • 1 teaspoon Pure Vanilla Extract Enhances overall flavor.
  • ¼ cup Smooth Peanut Butter Contributes creaminess and nutty flavor.
For the Dry Ingredients
  • ½ cup Large Flake Rolled Oats Adds chewiness and fiber.
  • 1 cup plus 2 tablespoons All-Purpose Flour Provides structure.
  • ¾ teaspoon Baking Soda Helps cookies rise.
  • ½ teaspoon Salt Enhances flavors.
For the Mix-ins
  • ⅓ cup Chopped Walnuts Adds crunch and healthy fats.
  • ¼ cup Pumpkin Seeds Introduces texture and nutrients.
  • 3 tablespoons Sunflower Seeds Offer protein.
  • ½ cup Dried Cranberries or Dried Apricots Provide sweetness and chewiness.
  • ⅔ cup Dark Chocolate Chips Adds sweetness and indulgence.

Equipment

  • Mixing Bowl
  • Baking Sheets
  • Parchment Paper
  • Spatula
  • Whisk
  • measuring cups
  • Measuring Spoons

Method
 

Step-by-Step Instructions
  1. In a large mixing bowl, beat together unsalted butter, light brown sugar, and honey until fluffy and light in color, about 2-3 minutes.
  2. Add large egg, smooth peanut butter, and pure vanilla extract to the creamed mixture. Mix until well combined and smooth, about 1-2 minutes.
  3. In another bowl, whisk together all-purpose flour, baking soda, and salt.
  4. Gradually add the dry mixture into the wet mixture, stirring gently. Fold in chopped walnuts, pumpkin seeds, and sunflower seeds.
  5. Gently fold in dried cranberries (or dried apricots) and dark chocolate chips.
  6. Cover the bowl with plastic wrap and refrigerate the dough for about 30 minutes.
  7. Preheat your oven to 350°F while the dough is chilling. Line baking sheets with parchment paper.
  8. Scoop 1.5-ounce portions and roll them into balls. Flatten each ball slightly and place them on the lined baking sheets.
  9. Bake your cookies for 11-13 minutes, until edges are golden brown and centers are slightly gooey.
  10. Let cookies cool on the baking sheet for 1 minute before transferring to a wire rack.

Nutrition

Serving: 1cookieCalories: 180kcalCarbohydrates: 23gProtein: 4gFat: 8gSaturated Fat: 2gPolyunsaturated Fat: 3gMonounsaturated Fat: 2gCholesterol: 25mgSodium: 120mgPotassium: 150mgFiber: 2gSugar: 10gVitamin A: 200IUCalcium: 20mgIron: 1mg

Notes

Refrigerating the dough enhances texture, ensuring thick and chewy cookies. Don't overmix after adding flour, and store in an airtight container for freshness.

Tried this recipe?

Let us know how it was!

Perfectly Fluffy English Muffins for Your Cozy Breakfasts

January 26, 2026 by Grace Snow Leave a Comment

The warm, buttery aroma wafting through the kitchen has a magical way of bringing everyone together, doesn’t it? As I flipped the last batch of homemade English muffins, memories of lazy Sunday breakfasts flooded my mind—each muffin boasting a perfectly crunchy exterior and a fluffy center just waiting to be toasted. This English muffin recipe is not just about deliciousness; it’s an effortless way to elevate your breakfast game. With simple ingredients and straightforward techniques, you can enjoy the satisfaction of creating something that’s both versatile and crowd-pleasing. Whether you enjoy them with jam and butter or piled high with eggs and bacon, these muffins are sure to become a new family favorite. So, ready to discover just how easy it is to make your own? Let’s dive in!

Why Make Your Own English Muffins?

Homemade goodness: There's nothing quite like the taste of homemade English muffins, warm and fresh from your kitchen. Versatile options: Whether you enjoy them with sweet jams or savory toppings, this recipe adapts effortlessly to your preferences. Simple process: With just a handful of ingredients, you can whip up a batch without the fuss. Family favorite: They’re perfect for cozy family breakfasts or brunches with friends, and you’ll impress everyone with your baking skills! For a delightful pairing, try serving them alongside homemade Cinnamon Roll Muffins. Get ready to elevate your breakfast game!

English Muffin Ingredients

For the Muffins

  • All-Purpose Flour – Structure and texture; substitute with whole wheat flour for a denser muffin.
  • Active Dry Yeast – The leavening agent that helps the muffins rise; ensure it's fresh for best results.
  • Whole Milk – Adds richness and flavor; can be replaced with half & half for a creamier texture.
  • Warm Water – Activates yeast; water should be between 105°F to 115°F.
  • Shortening – Provides moisture and tender texture; substitute with additional melted butter if desired.
  • Melted Butter – Enhances flavor and richness; can use vegetable oil as a substitution.
  • Salt – Balances flavor; essential for enhancing the taste of the other ingredients.
  • Sugar – Adds slight sweetness to the dough; a small amount of honey can be used as an alternative.
  • Cornmeal – For dusting and prevents sticking; may be omitted but adds texture.

Get ready to make those delightful English muffins!

Step‑by‑Step Instructions for Homemade English Muffins

Step 1: Dough Preparation
In a large mixing bowl or stand mixer, dissolve 2 teaspoons of active dry yeast in ¾ cup of warm water (105°F to 115°F) and let it sit for about 5 minutes until frothy. Next, add ¾ cup of warm milk, 2 tablespoons of melted butter, 2 tablespoons of shortening, 1 teaspoon of salt, and 1 tablespoon of sugar. Mix these ingredients until combined to form a cohesive mixture.

Step 2: Kneading
Gradually add 3 cups of all-purpose flour to the mixing bowl while kneading the dough. Continue until you achieve a soft, round dough ball, approximately 8-10 minutes of kneading. Place the dough into a lightly oiled bowl, cover it with a clean kitchen towel, and let it rise in a warm area for 1½ to 2 hours, or until it has doubled in size and feels light and airy.

Step 3: Shaping
Once the dough has risen, roll it out onto a lightly floured surface, pressing it to about ½ inch thickness. Use muffin rings or a round cutter to cut out the muffins, placing each onto a surface dusted with cornmeal to prevent sticking. Make sure to cover the cut muffins with a kitchen towel, allowing them to rise for an additional hour until they feel puffy and slightly increased in size.

Step 4: Cooking
Heat a large skillet over medium-high heat and add 1 tablespoon of melted butter. Cook the muffins in batches, about 5-6 minutes on each side, until they are golden brown and have a slightly airy texture. Keep an eye on them to achieve that perfectly crisp exterior while ensuring they are cooked through. Once ready, transfer them to a cooling rack to rest for a few minutes and enjoy!

English Muffin Variations & Substitutions

Feel free to get creative with these delicious English muffins! There are endless ways to tweak this recipe for even more delightful mornings.

  • Whole Wheat: Swap all-purpose flour for whole wheat for a heartier, nutritious muffin. It brings a nutty flavor that pairs beautifully with honey or jam.
  • Herb-Infused: Add fresh herbs like rosemary or thyme to the dough for a fragrant, savory twist. These muffins make fantastic mini sandwiches for brunch!
  • Cheese Boost: Fold in shredded cheese such as cheddar or feta for an extra cheesy delight. The melted cheese inside will create a savory surprise your family will love!
  • Gluten-Free: Use a gluten-free all-purpose flour blend to cater to gluten-sensitive folks. The result will still yield a lovely muffin, just a tad different in texture.
  • Sweet Surprise: Mix in dried fruits such as raisins or cranberries for a hint of sweetness. This makes for a delightful breakfast treat that pairs perfectly with creamy butter.
  • Spicy Kick: Add crushed red pepper flakes to the dough for a little heat. This variation elevates these muffins to new, exciting levels—perfect for those who love a bit of spice in their life!
  • Chia or Flaxseed: Mix in chia seeds or ground flaxseeds for added nutritional benefits. They offer a delightful crunch and can make your breakfast more wholesome.
  • Pumpkin Spice: Stir in a few tablespoons of pumpkin puree along with some cinnamon for an autumnal twist. For even more seasonal fun, serve them with a spicy pumpkin spread!

Whichever variation you choose, these muffins are sure to delight at any breakfast table! And if you’re seeking more breakfast inspiration, check out these homemade Breakfast Egg Muffins that will pair perfectly with your English muffins.

Make Ahead Options

These English muffins are perfect for meal prep enthusiasts! You can prepare the dough up to 24 hours in advance. Just follow the initial steps up to shaping, then place the cut muffins on a baking sheet, cover them with plastic wrap, and refrigerate. This will keep them fresh and puffed overnight. When you're ready to cook, simply take them out and let them sit at room temperature for about 30 minutes before cooking. To maintain that delightful texture, ensure your skillet is hot enough when cooking. You'll have freshly baked English muffins ready to serve with minimal effort, making your breakfast routine a breeze!

Storage Tips for English Muffins

  • Room Temperature: Store your English muffins in an airtight container at room temperature for up to 48 hours to maintain their freshness and soft texture.

  • Fridge: If you prefer, you can keep them in the fridge for up to 5 days. Just be sure to wrap them tightly to prevent drying out.

  • Freezer: For longer storage, freeze the muffins in a resealable freezer bag for up to three months. Make sure to remove as much air as possible.

  • Reheating: To enjoy your muffins again, simply toast them directly from the freezer, or let them thaw in the fridge overnight before lightly toasting. Enjoy your delicious English muffins!

Expert Tips for Homemade English Muffins

  • Fresh Yeast Check: Always confirm your active dry yeast is fresh by ensuring it bubbles when mixed with warm water. This guarantees a great rise!

  • Avoid Over-Kneading: Knead the dough just enough to achieve a soft, round ball. Over-kneading can lead to tough muffins instead of light, fluffy English muffins.

  • Temperature Matters: Make sure your skillet is preheated properly before cooking. This ensures even cooking and that delightful golden exterior.

  • Use Cornmeal Wisely: Dusting with cornmeal is key—it prevents sticking and adds a nice texture. Don’t skip this step for optimal results!

  • Cooling Time: Allow muffins to cool on a rack after cooking. This prevents sogginess and helps maintain that perfect texture inside.

What to Serve with Homemade English Muffins

The warm embrace of freshly baked English muffins invites a delightful breakfast spread, filled with contrasts and flavors that will awaken your senses.

  • Creamy Scrambled Eggs: Ready in minutes, they’re rich and fluffy, making a perfect contrast to the muffins’ airy texture.
  • Bacon or Sausage: Crispy or savory patties can add a hearty element, creating the ideal breakfast sandwich when paired together.
  • Avocado Slices: Fresh, creamy avocado on toasted muffins adds a nutritious element, enhancing flavor with a luscious, buttery texture.
  • Homemade Jam or Honey: Sweet spreads create a delightful balance with your English muffins, elevating a simple bite into a sweet indulgence.
  • Fresh Fruit Salad: A refreshing mix of seasonal fruits can offer a burst of color and sweetness, adding a fresh touch to your meal.
  • Greek Yogurt Parfait: Layered with granola and berries, it complements the muffins well while providing a delightful crunch and tangy flavor.
  • Freshly Brewed Coffee: The aromatic richness pairs beautifully with the warm muffins, enhancing the comforting breakfast experience.
  • Herb-Infused Butter: Mixing herbs into butter can elevate each bite, creating a fragrant spread that meshes well with the English muffins' texture.
  • Chai Latte: The spiced warmth of a chai latte can bring a cozy feel, perfect for slow mornings spent enjoying homemade muffins.

Transform your breakfast experience by discovering how each of these ideas balances perfectly with your homemade English muffins!

English Muffins Recipe FAQs

What should I look for when selecting ingredients for English muffins?
Absolutely! When selecting your ingredients, ensure your active dry yeast is fresh and bubbly, as this is crucial for a good rise. Choose all-purpose flour for a fluffy texture, but if you're after a denser muffin, whole wheat flour is a fantastic substitute. Look for whole milk with a rich flavor, or opt for half & half if you prefer added creaminess.

How long can I store homemade English muffins?
Very! You can store your English muffins at room temperature in an airtight container for up to 48 hours. If you want to keep them longer, consider refrigerating them; they can last for up to 5 days in the fridge if wrapped tightly.

Can I freeze English muffins for later use?
Absolutely! For freezing, allow the muffins to cool completely, then wrap each muffin tightly in plastic wrap. Place them in a resealable freezer bag, squeezing out as much air as possible, and they can be frozen for up to 3 months. When you're ready to enjoy them, you can toast them straight from frozen.

What should I do if my muffins don't rise enough?
The more the merrier! If your muffins don’t rise adequately, check if your yeast was active enough or if the dough was too cold during the rising process. Make sure to let the dough rise in a warm area, ideally around 75°F to 85°F. If the dough feels too sticky, you can gradually add small amounts of flour while kneading until you get a soft and pliable ball.

Can pets eat English muffins?
Very! While a small piece of plain English muffin is generally safe for dogs, avoid giving them muffins with butter or sweeteners, like sugar or honey, which can be harmful. Always consult your veterinarian if you're unsure about introducing any new foods to your pet's diet!

Is it possible to make gluten-free English muffins?
I often make gluten-free variations! To create gluten-free English muffins, you can use a 1:1 gluten-free flour blend that includes xanthan gum. Just follow the same instructions but keep an eye on their texture; you may need to adjust the amount of liquid used to achieve the desired dough consistency.

English Muffins

Perfectly Fluffy English Muffins for Your Cozy Breakfasts

Enjoy the magical warmth of homemade English muffins for breakfast, combining a crunchy exterior and a fluffy center. Perfect for jam, butter, or savory toppings.
Print Recipe Pin Recipe
Prep Time 10 minutes mins
Cook Time 12 minutes mins
Rising Time 1 hour hr 30 minutes mins
Total Time 1 hour hr 52 minutes mins
Servings: 12 muffins
Course: Breakfast
Cuisine: Baked Goods
Calories: 120
Ingredients Equipment Method Nutrition Notes

Ingredients
  

For the Muffins
  • 3 cups All-Purpose Flour Substitute with whole wheat flour for denser muffins.
  • 2 teaspoons Active Dry Yeast Ensure it's fresh for best results.
  • 3/4 cup Whole Milk Can be replaced with half & half for creamier texture.
  • 3/4 cup Warm Water Water should be between 105°F to 115°F.
  • 2 tablespoons Shortening Substitute with additional melted butter if desired.
  • 2 tablespoons Melted Butter Can use vegetable oil as a substitution.
  • 1 teaspoon Salt Essential for enhancing the taste of the other ingredients.
  • 1 tablespoon Sugar Small amount of honey can be used as alternative.
  • as needed Cornmeal For dusting, prevents sticking.

Equipment

  • Mixing Bowl
  • Stand Mixer
  • Skillet
  • Muffin Rings

Method
 

Step-by-Step Instructions for Homemade English Muffins
  1. Dissolve 2 teaspoons of active dry yeast in 3/4 cup of warm water (105°F to 115°F) and let it sit for 5 minutes until frothy. Add 3/4 cup of warm milk, 2 tablespoons of melted butter, 2 tablespoons of shortening, 1 teaspoon of salt, and 1 tablespoon of sugar. Mix until combined.
  2. Gradually add 3 cups of all-purpose flour while kneading the dough for about 8-10 minutes until a soft, round dough ball forms. Let it rise in a lightly oiled bowl for 1½ to 2 hours until doubled in size.
  3. Roll the dough onto a floured surface to about ½ inch thickness. Cut out muffins and place on cornmeal dusted surface. Cover and let rise for an additional hour.
  4. Heat a skillet over medium-high heat, add 1 tablespoon of melted butter, and cook muffins for about 5-6 minutes on each side until golden brown. Transfer to a cooling rack.

Nutrition

Serving: 1muffinCalories: 120kcalCarbohydrates: 24gProtein: 4gFat: 2gSaturated Fat: 1gMonounsaturated Fat: 1gCholesterol: 10mgSodium: 200mgPotassium: 100mgFiber: 1gSugar: 1gVitamin A: 100IUCalcium: 20mgIron: 0.5mg

Notes

Allow muffins to cool for a few minutes after cooking to maintain texture. Store properly to keep freshness.

Tried this recipe?

Let us know how it was!

Savory Ham Potato Casserole for Cozy Weeknight Comfort

January 26, 2026 by Grace Snow Leave a Comment

The aroma of buttery potatoes mingling with smoky ham filled the kitchen, instantly bringing back to life my fondest family dinners. Today, I’m excited to share my Creamy Leftover Ham and Potato Casserole—a hearty dish that turns yesterday's leftovers into a crowd-pleasing meal everyone will love. With its quick prep time and delightful creamy texture, this comfort food masterpiece is perfect for busy weeknights when you want something satisfying without the fuss. The combination of tender potato slices, savory ham, and a rich sauce topped with melted cheddar is sure to warm your heart and fill your home with the kind of warmth only homemade cooking can bring. Curious about how this dish can brighten up your next dinner? Let’s dive into the recipe!

Why is This Casserole a Must-Try?

Comforting, Simple Prep: This Ham Potato Casserole comes together effortlessly, making it ideal for those busy nights when you crave a hearty meal without the stress.

Flavorful Combination: The savory ham mingles beautifully with the creamy potatoes, elevating classic comfort food to the next level.

Family-Friendly Delight: Kids and adults alike will adore this dish, making it a sure winner for family dinners or gatherings.

Versatile Ingredient Use: Great for utilizing extra ingredients, you can also adapt this by adding veggies like spinach or even other proteins, such as shredded turkey.

Make-Ahead Convenience: Prep this casserole ahead of time and simply pop it in the oven when you're ready to enjoy it. For more delicious casserole ideas, check out my Sweet Potato Casserole and Cornbread Breakfast Casserole.

Satisfying Leftover Solution: Transforming yesterday’s meals into a fresh feast means fewer food waste and a good sense of accomplishment.

Ham Potato Casserole Ingredients

For the Casserole Base

  • Unsalted Butter – Adds richness and helps form the creamy sauce that binds everything together.
  • Chopped Onion – Provides flavor; sauté until translucent for the best results in taste.
  • Cubed Leftover Ham (3 cups) – The star of the dish; cut into 1-inch pieces for even heating.
  • Russet or Yukon Gold Potatoes (2½ lbs) – Their starchiness creates a creamy texture; ensure uniform-sized cubes for consistent cooking.

For the Sauce

  • All-Purpose Flour (3 tablespoons) – Essential for thickening the cream sauce and providing a sturdy base for the casserole.
  • Whole Milk (2 cups) – Creates that rich, creamy sauce; whisk in gradually to prevent lumps.
  • Salt (1 teaspoon), Black Pepper (½ teaspoon), Ground Mustard (½ teaspoon), Garlic Powder (½ teaspoon) – These seasonings add depth and enhance the flavor of the whole Ham Potato Casserole.

For the Topping

  • Shredded Cheddar Cheese (8 oz) – Adds creaminess and a wonderful flavor; save some for topping just before baking.

With these simple yet quality ingredients, you'll whip up a delicious casserole that can transform your leftovers into a delightful meal, perfect for cozy weeknight dinners!

Step‑by‑Step Instructions for Creamy Leftover Ham and Potato Casserole

Step 1: Preheat the Oven
Begin your Ham Potato Casserole by preheating the oven to 350°F (175°C). This temperature is perfect for achieving that golden, bubbly top while ensuring the casserole heats through evenly. While the oven warms up, get your baking dish ready by greasing it lightly with butter or cooking spray.

Step 2: Sauté the Onions
In a medium saucepan, melt 3 tablespoons of unsalted butter over medium heat. Once the butter is foaming, add in the chopped onion and sauté until they turn translucent, about 4–5 minutes. Stir occasionally to avoid burning and enhance the sweetness of the onions, which will elevate the flavor of your ham and potato casserole.

Step 3: Prepare the Ham and Potatoes
Cut your leftover ham into 1-inch cubes and set aside. Then, peel and cube 2½ lbs of russet or Yukon Gold potatoes, ensuring even-sized pieces for consistent cooking. Bring a pot of water to a boil, add the potato cubes, and parboil them for 5 minutes before draining well. This step helps achieve that perfect creamy texture in your casserole.

Step 4: Make the Cream Sauce
With the sautéed onions ready, sprinkle in 3 tablespoons of all-purpose flour and stir for about 1 minute to cook the flour. Gradually whisk in 2 cups of whole milk, cooking until the sauce thickens—around 5–7 minutes. Season your sauce with 1 teaspoon of salt, ½ teaspoon each of black pepper, ground mustard, and garlic powder for added depth before removing it from heat.

Step 5: Combine the Casserole Ingredients
In a large mixing bowl, combine the cubed ham, parboiled potatoes, and 8 oz of shredded cheddar cheese. Carefully pour the creamy sauce over the mixture and stir until everything is evenly coated. This will ensure that every bite of your Ham Potato Casserole is packed with flavor and creaminess.

Step 6: Bake the Casserole
Transfer the combined mixture to your greased baking dish, spreading it out evenly. Top with any reserved cheese to create a glorious cheesy crust. Place in the preheated oven and bake for 45 minutes, or until the top is golden brown and bubbly. This aromatic dish will fill your kitchen with warmth as it cooks.

Step 7: Let It Rest
Once baked, remove the Ham Potato Casserole from the oven and allow it to rest for 10–15 minutes. This resting period helps the casserole set, making it easier to serve and enhancing its consistency. The aroma wafting through your home will surely tempt everyone to gather around the table for this comforting meal.

Storage Tips for Ham Potato Casserole

Fridge: Store leftovers in an airtight container for up to 4 days to maintain freshness and flavor.

Freezer: For longer storage, freeze in portions for up to 3 months. Make sure to wrap tightly to prevent freezer burn.

Reheating: Reheat in an oven at 350°F for 20-25 minutes if refrigerated, or 35-40 minutes if frozen. Cover with foil to keep it moist and prevent drying out.

Serving Suggestion: When reheating, you can sprinkle a bit of extra cheese on top before baking for a delightful, melty finish to your Ham Potato Casserole.

Make Ahead Options

These Ham Potato Casserole preps beautifully for those hectic weeknights! You can chop your onions, cube the ham, and prepare the potatoes up to 24 hours ahead—just remember to store the potatoes in cold water to prevent browning. Additionally, you can make the creamy sauce and refrigerate it for up to 3 days to save time. When you're ready to serve, simply combine the ham, potatoes, and cheese with the sauce, transfer to your baking dish, and bake in a preheated oven. This not only saves you precious prep time but also ensures a delicious, hearty meal is on the table with minimal effort when it matters most!

Ham Potato Casserole Variations

Feel free to get creative with this Ham Potato Casserole and make it your own delightfully unique version!

  • Cheese Swap: Replace cheddar with Monterey Jack for a milder, creamy flavor that melts beautifully and adds a different dimension.

  • Veggie Boost: Add broccoli or spinach for a nutritious pop of color and added texture, making your casserole not just hearty but also wholesome.

  • Turkey Twist: Use shredded leftover turkey instead of ham when transforming holiday remnants into a comforting dish that's equally satisfying.

  • Spicy Kick: Mix in some jalapeños or a dash of cayenne into the sauce for those who love a little heat in their comfort food.

  • Crispy Top: Top the casserole with panko breadcrumbs mixed with melted butter before baking, achieving a flaky, crispy layer that contrasts delightfully with the creamy filling.

  • Dairy-Free: Swap whole milk for almond milk and use a dairy-free cheese alternative for a lighter, dairy-free version without sacrificing creaminess.

  • Herb Infusion: Add some fresh thyme or rosemary into the mixture for a fragrant, herbal note that elevates the dish, adding a little earthiness that complements the ham beautifully.

  • Smoking it Up: If you enjoy a smoky flavor profile, incorporate a bit of smoked paprika into the sauce, enhancing the depth and comfort of this classic recipe.

By experimenting with these variations, you can customize your casserole to fit any palate or occasion. For more delicious inspirations, check out my Potato Blue Cheese or the fragrant Smoky Sweet Potatoes for additional tasty twists!

What to Serve with Creamy Leftover Ham and Potato Casserole

Elevate your dining experience with these delightful pairings that complement the flavors and textures of your hearty casserole.

  • Fresh Green Salad: A light and crisp salad with a tangy vinaigrette balances the richness, providing a refreshing contrast.

  • Roasted Broccoli: The garnish of caramelized edges adds a nutty flavor that pairs perfectly with the creamy casserole's texture.

  • Glazed Carrots: These naturally sweet, tender carrots bring a lovely taste, harmonizing beautifully with the savory ham.

  • Garlic Bread: Crunchy and buttery, garlic bread is perfect for soaking up the lovely creamy sauce left on your plate.

  • Steamed Asparagus: The slightly crunchy and fresh green spears offer a lightness that wonderfully complements the dish.

  • Sparkling Water with Lemon: This refreshing drink cleanses the palate, making every bite of your casserole even more enjoyable.

Imagine sitting down with these delightful sides at the table, creating a meal filled with love, laughter, and the comforting essence of home-cooked goodness.

Expert Tips for Ham Potato Casserole

  • Uniform Cuts: Ensure potato pieces are uniformly cut for even cooking. Test with a fork before adding cheese to avoid any undercooked bites.

  • Lump-Free Sauce: Cook the flour with butter properly to avoid lumpy sauce. Gradually whisk in the milk, letting it thicken slowly for a smooth finish.

  • Moisture Control: Avoid overcrowding the casserole dish, as it can lead to a watery texture. If the ham is moist, pat it dry before mixing.

  • Rest for Success: Let the casserole rest after baking for 10-15 minutes. This crucial step enhances the serving consistency of your Ham Potato Casserole.

  • Grease the Dish: To prevent sticking, ensure your baking dish is well-greased before adding the mixture. This will make cleanup much easier.

Ham Potato Casserole Recipe FAQs

What type of potatoes should I use for this casserole?
I recommend using russet or Yukon Gold potatoes. Russets provide a creamy texture, while Yukon Golds offer a lovely buttery flavor. Just be sure to cut them into uniform-sized cubes for even cooking.

How can I store leftovers from the Ham Potato Casserole?
You can refrigerate leftovers in an airtight container for up to 4 days. This will keep the casserole fresh and tasty. For longer storage, freeze it in portions for up to 3 months. Just make sure to wrap it tightly to prevent freezer burn!

Can I freeze the Ham Potato Casserole?
Absolutely! To freeze, let the casserole cool completely after baking, then portion it out into freezer-safe containers. Wrap each portion tightly with plastic wrap, then place it in a freezer bag. Label it with the date and it will be good for up to 3 months. When ready to enjoy, thaw it overnight in the fridge and reheat in the oven.

What should I do if my casserole turns out too watery?
If your Ham Potato Casserole is too watery, check if you're overcrowding the baking dish. This can happen if you add too many ingredients. Also, if your ham was overly moist, pat it dry before adding it to the casserole. Next time, try parboiling the potatoes a little less or ensuring they’re dry before combining.

Can I use vegetable substitutes in the casserole?
Very! You can definitely swap out ingredients to suit your tastes or dietary needs. For example, consider adding vegetables such as broccoli or spinach to boost nutrition. You could also substitute the ham with shredded turkey or even a mix of different meats!

Is this casserole suitable for specific dietary needs?
If you're cooking for someone with dietary restrictions, consider using gluten-free flour to thicken the sauce and lactose-free milk for a dairy-free version. Always double-check ingredient labels to ensure all components fit your guests' needs, especially with respect to allergies.

Ham Potato Casserole

Savory Ham Potato Casserole for Cozy Weeknight Comfort

This Ham Potato Casserole is a hearty comfort food that transforms leftovers into a crowd-pleasing meal.
Print Recipe Pin Recipe
Prep Time 15 minutes mins
Cook Time 45 minutes mins
Resting Time 15 minutes mins
Total Time 1 hour hr 15 minutes mins
Servings: 6 servings
Course: Dinner
Cuisine: American
Calories: 450
Ingredients Equipment Method Nutrition Notes

Ingredients
  

Casserole Base
  • 3 tablespoons Unsalted Butter Adds richness
  • 1 medium Chopped Onion Sauté until translucent
  • 3 cups Cubed Leftover Ham Cut into 1-inch pieces
  • 2.5 pounds Russet or Yukon Gold Potatoes Ensure uniform cubes
Sauce
  • 3 tablespoons All-Purpose Flour For thickening the sauce
  • 2 cups Whole Milk Whisk in gradually
  • 1 teaspoon Salt
  • 0.5 teaspoon Black Pepper
  • 0.5 teaspoon Ground Mustard
  • 0.5 teaspoon Garlic Powder
Topping
  • 8 ounces Shredded Cheddar Cheese Reserve some for topping

Equipment

  • Oven
  • Medium saucepan
  • large mixing bowl
  • Baking Dish
  • Knife
  • Cutting Board

Method
 

Instructions
  1. Preheat the oven to 350°F (175°C). Grease the baking dish with butter or cooking spray.
  2. Melt the butter in a medium saucepan over medium heat, then sauté the chopped onion until translucent (4-5 minutes).
  3. Cut the leftover ham into 1-inch cubes. Peel and cube the potatoes, then parboil them in boiling water for 5 minutes before draining.
  4. Sprinkle the flour over the sautéed onions and stir for 1 minute. Gradually whisk in the milk, cooking until thickened (5-7 minutes). Season with salt, pepper, mustard, and garlic powder.
  5. In a bowl, combine the ham, parboiled potatoes, and cheddar cheese. Pour the sauce over and stir to coat.
  6. Transfer the mixture to the baking dish, top with reserved cheese, and bake for 45 minutes until golden brown and bubbly.
  7. Let the casserole rest for 10-15 minutes before serving.

Nutrition

Serving: 1servingCalories: 450kcalCarbohydrates: 45gProtein: 30gFat: 20gSaturated Fat: 10gPolyunsaturated Fat: 1gMonounsaturated Fat: 1gCholesterol: 80mgSodium: 900mgPotassium: 800mgFiber: 4gSugar: 2gVitamin A: 500IUVitamin C: 20mgCalcium: 300mgIron: 3mg

Notes

Ensure potato pieces are uniformly cut for even cooking. Cover with foil while reheating to maintain moisture.

Tried this recipe?

Let us know how it was!
  • « Previous Page
  • 1
  • …
  • 11
  • 12
  • 13
  • 14
  • 15
  • …
  • 25
  • Next Page »

Welcome!

Hi, I’m Grace, a Sydney-based home cook with a passion for bold flavors and trending ingredients. Whether you’re a busy beginner or a seasoned foodie, you’ll find dishes here that are fresh, fun, and full of flavor.

More about me

Popular Recipes

  • Honey Sriracha Salmon Bowls
    Delicious Honey Sriracha Salmon Bowls for Quick Dinners
  • Air Fryer Apple Pie Taquitos
    Crispy Air Fryer Apple Pie Taquitos for a Sweet Treat
  • Crispy Parmesan Crusted Cod
    Crispy Parmesan Crusted Cod: A Healthy Flavor Explosion
  • Air Fryer French Toast Bites
    Delicious Air Fryer French Toast Bites for Busy Mornings

Footer

↑ back to top

About

  • Privacy Policy
  • Disclaimer
  • Terms & Conditions

Newsletter

  • Sign Up! for emails and updates

Contact

  • About me
  • Contact me

Copyright © 2025 TastyTrendIngredients