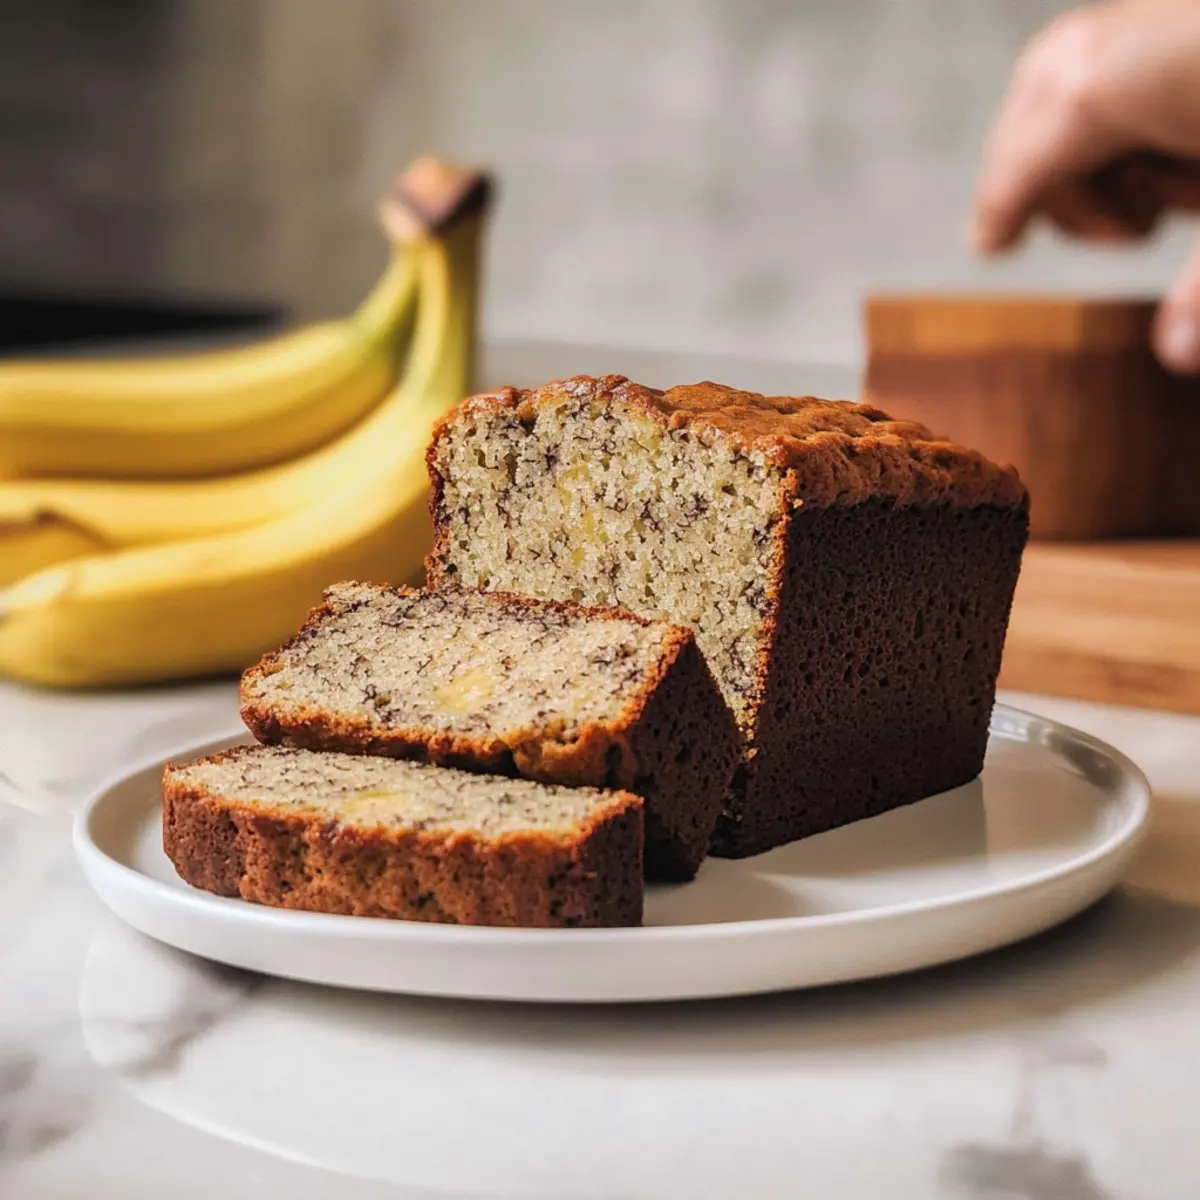
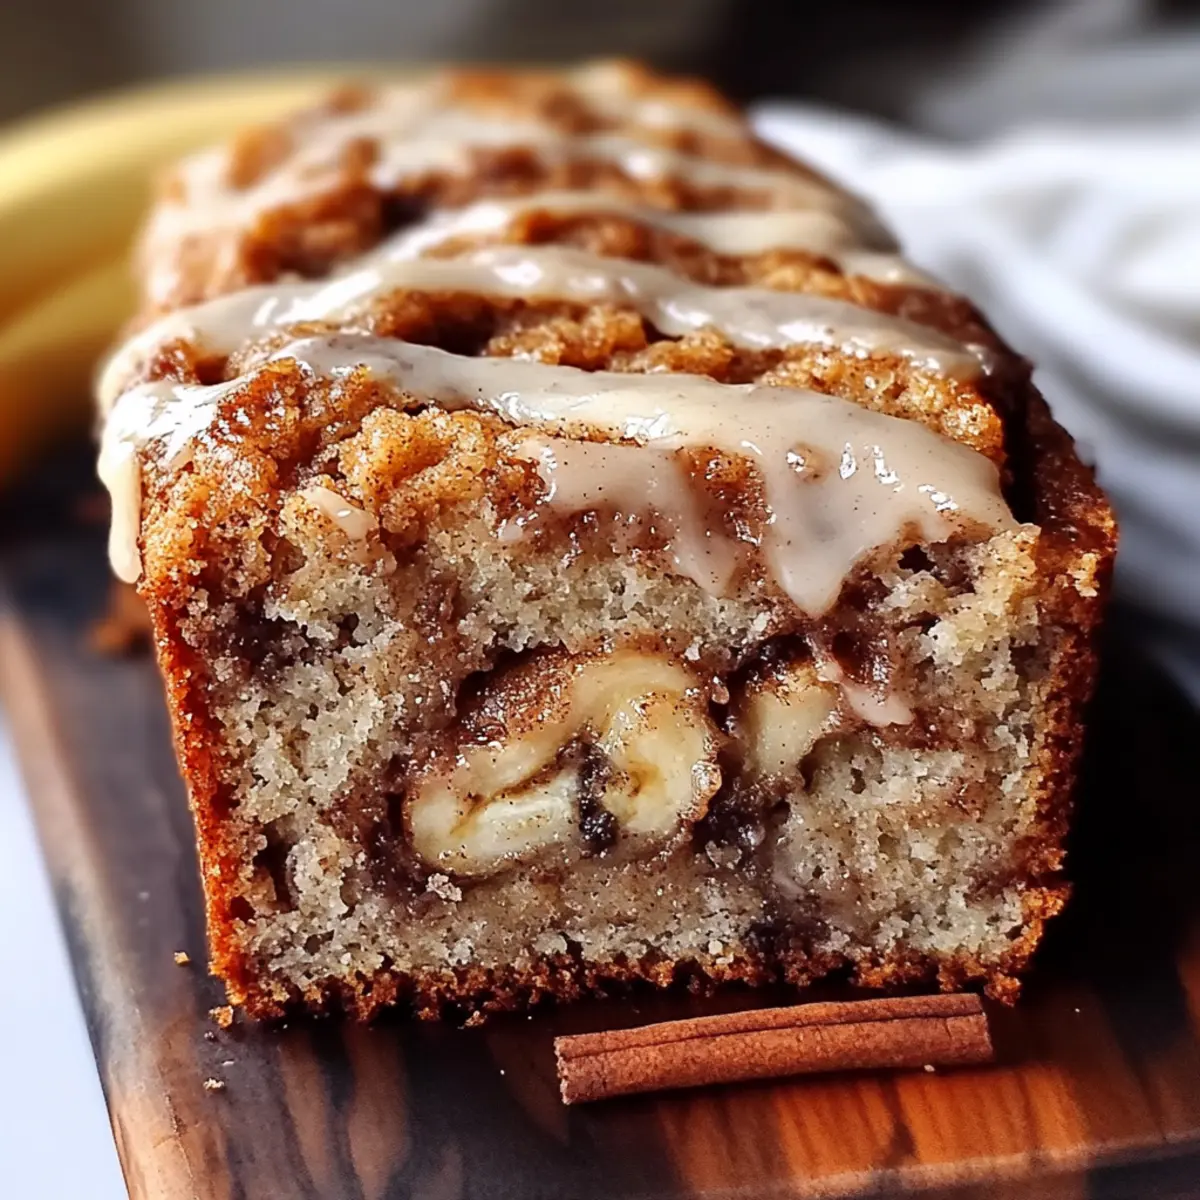
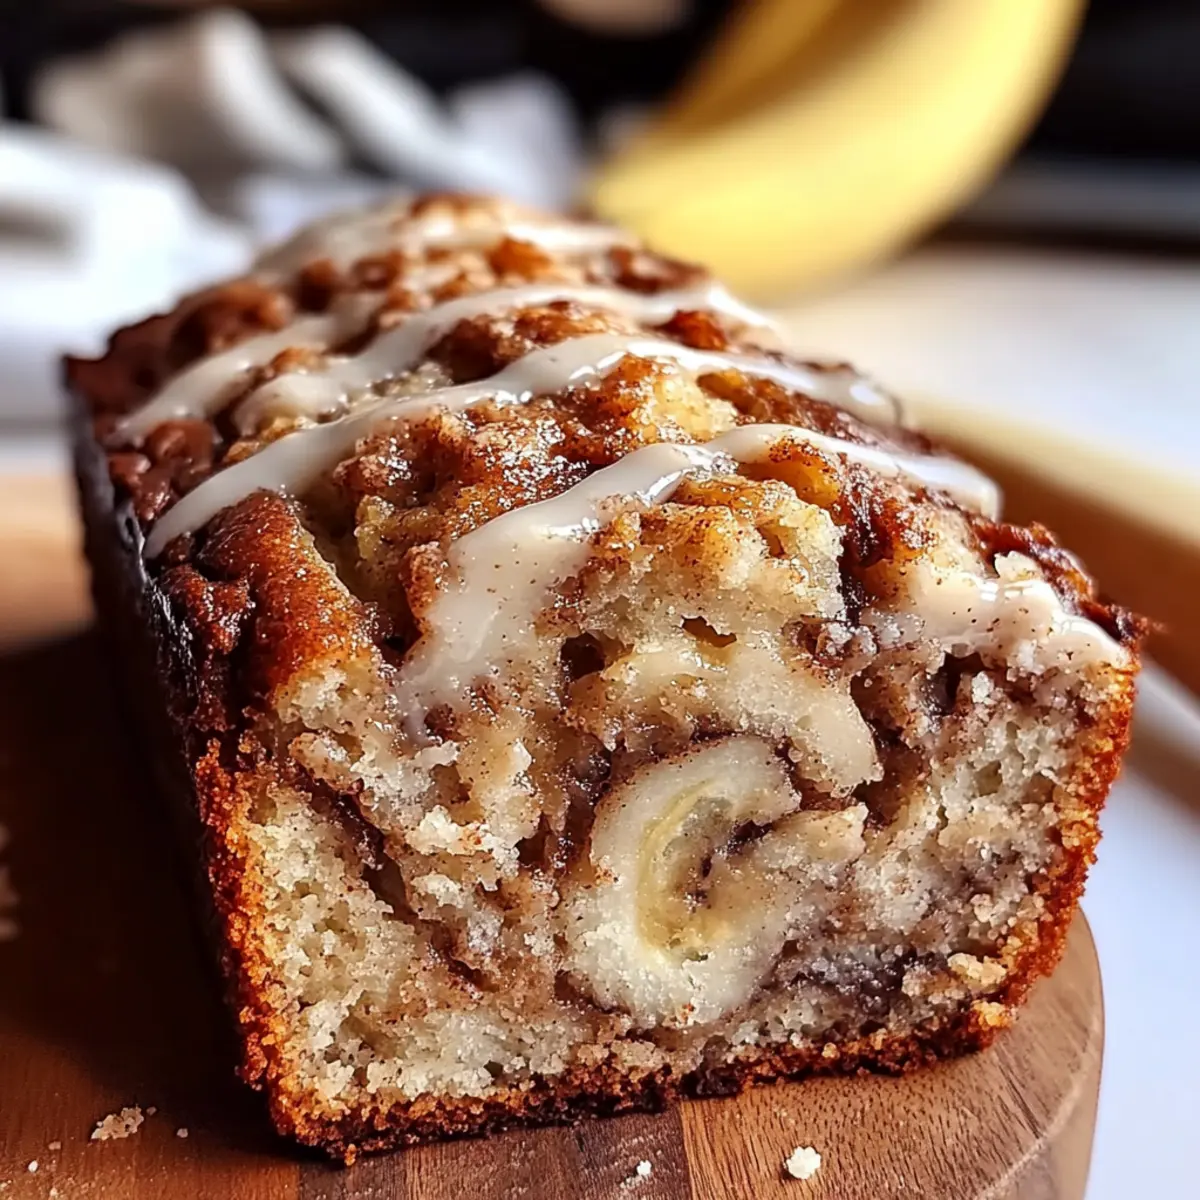
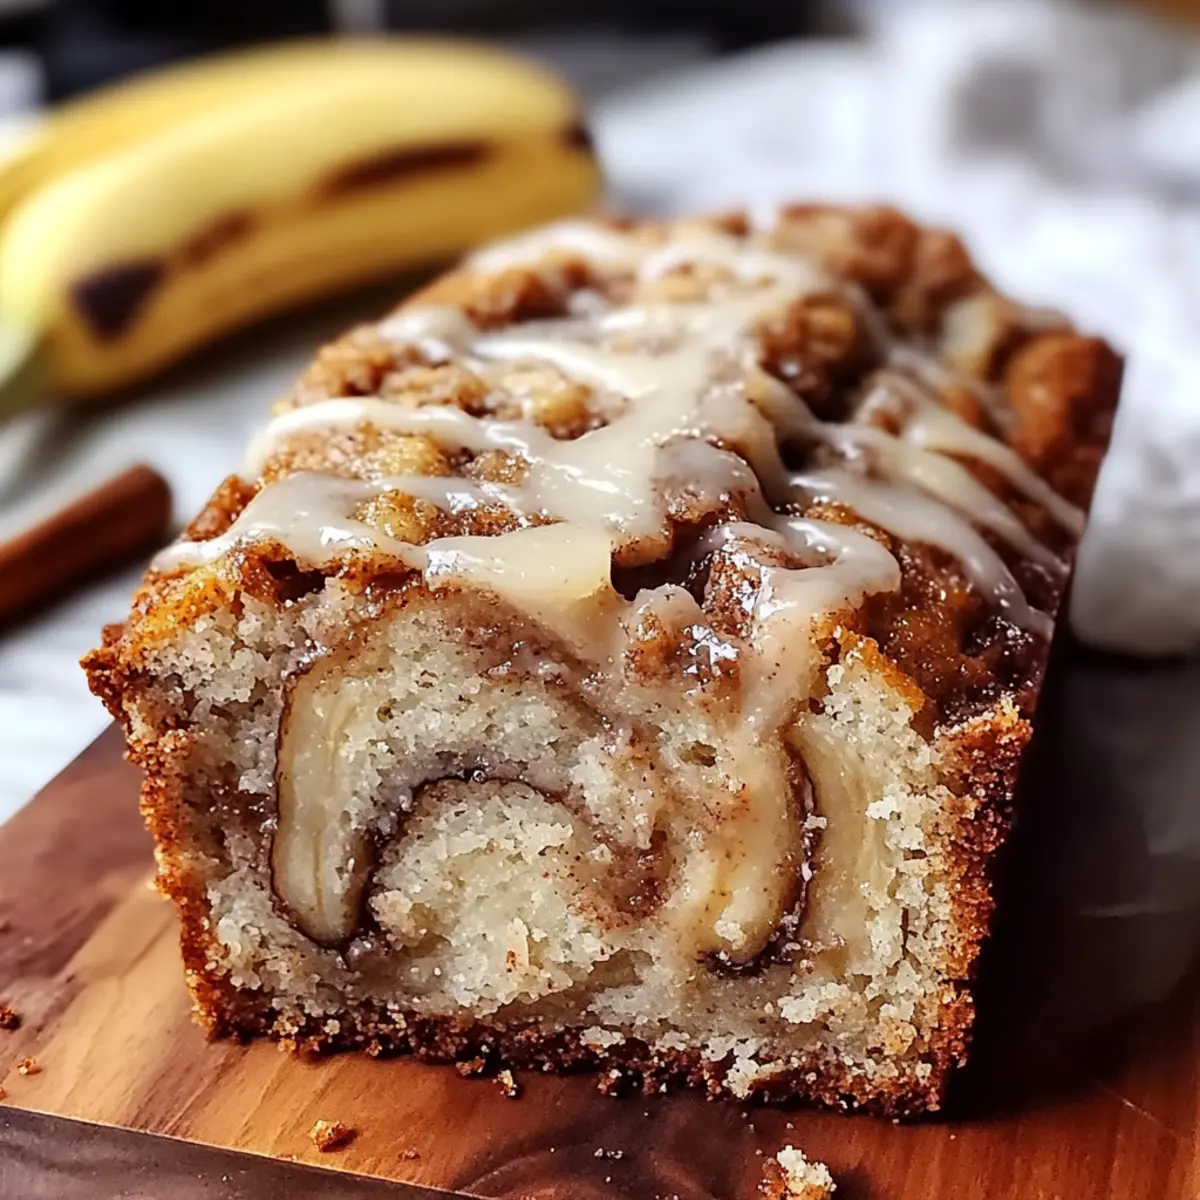
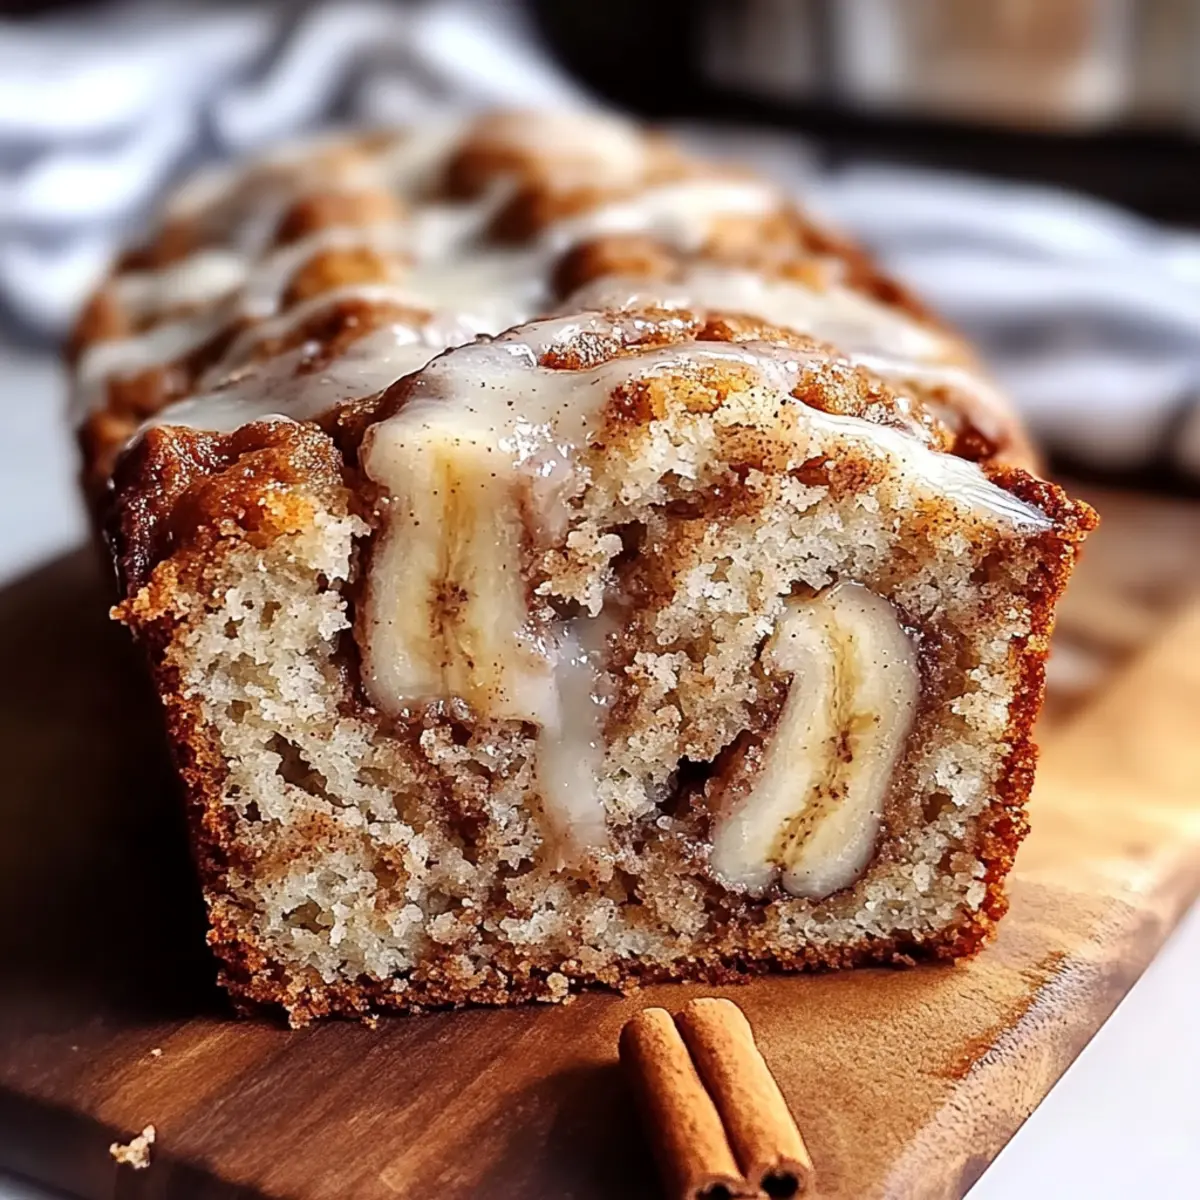
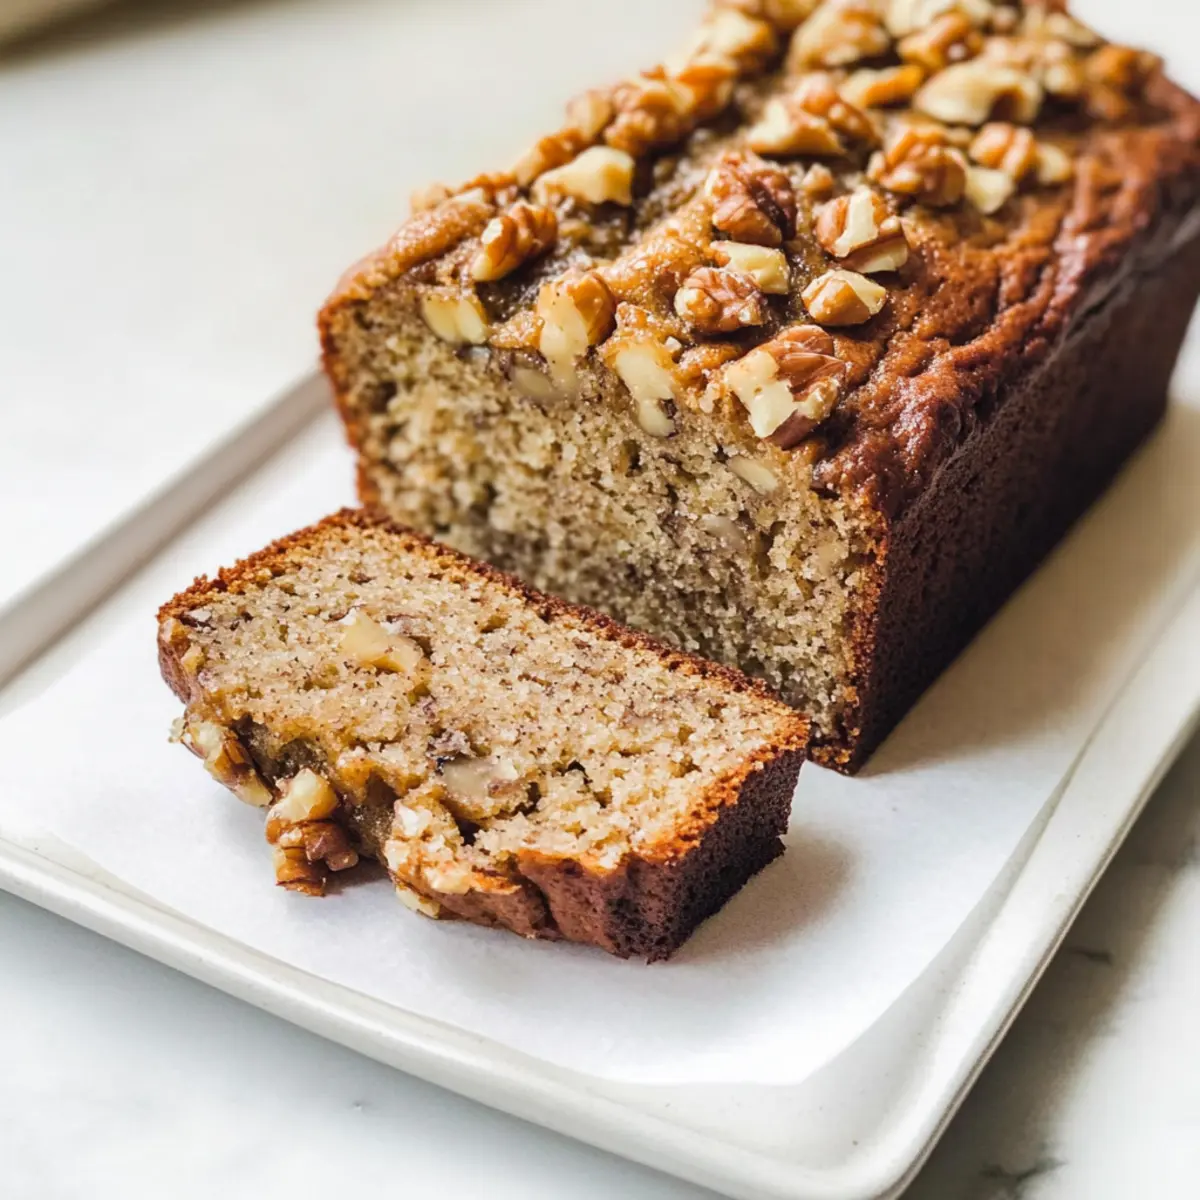
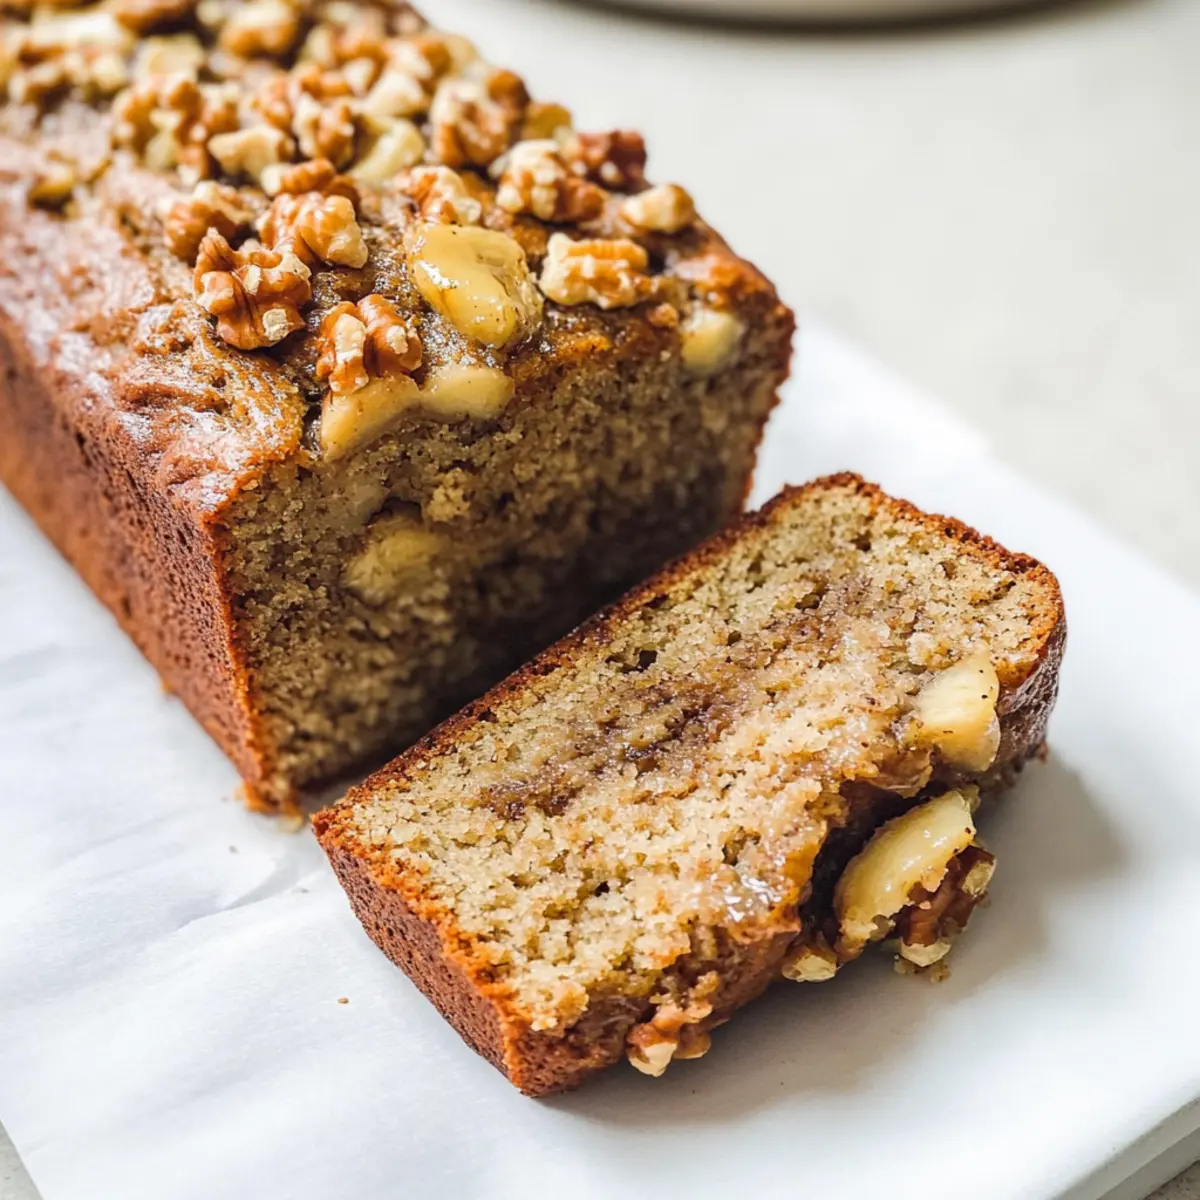
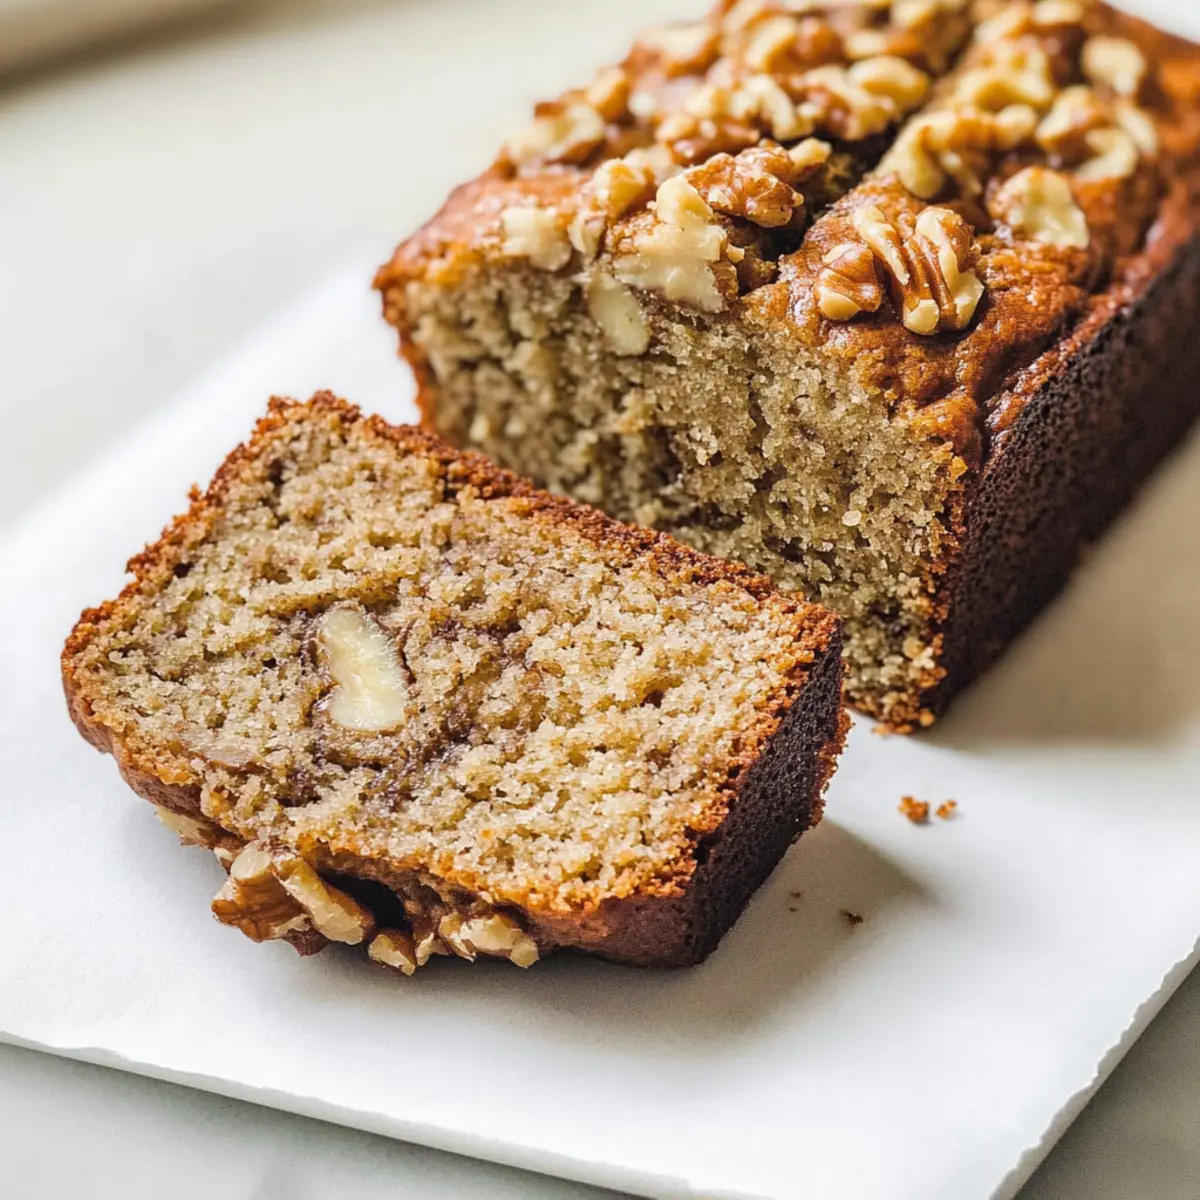
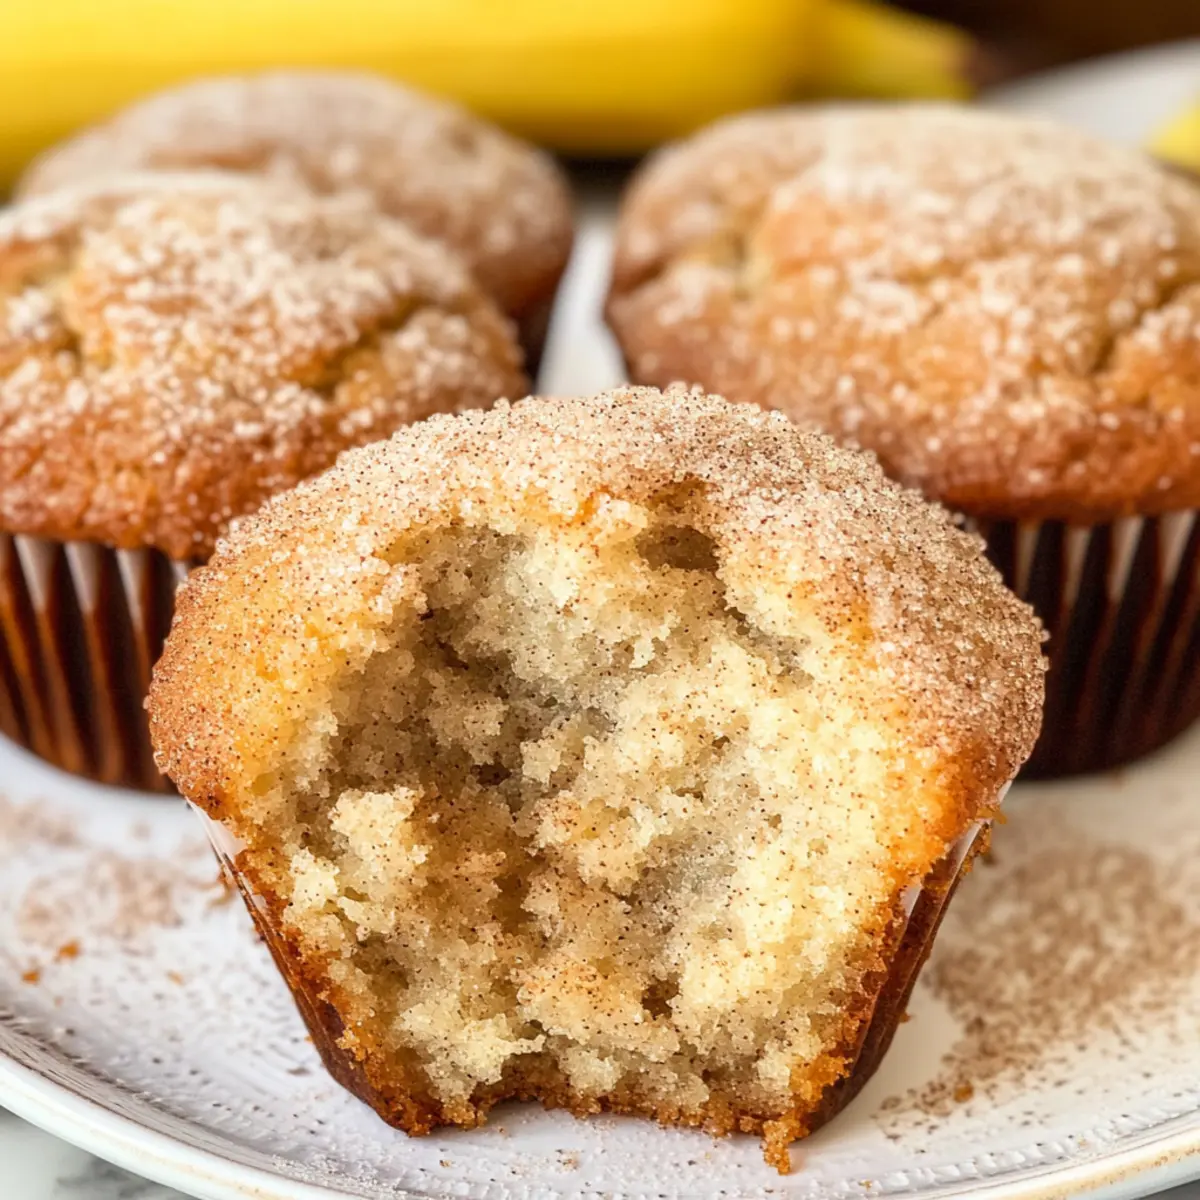
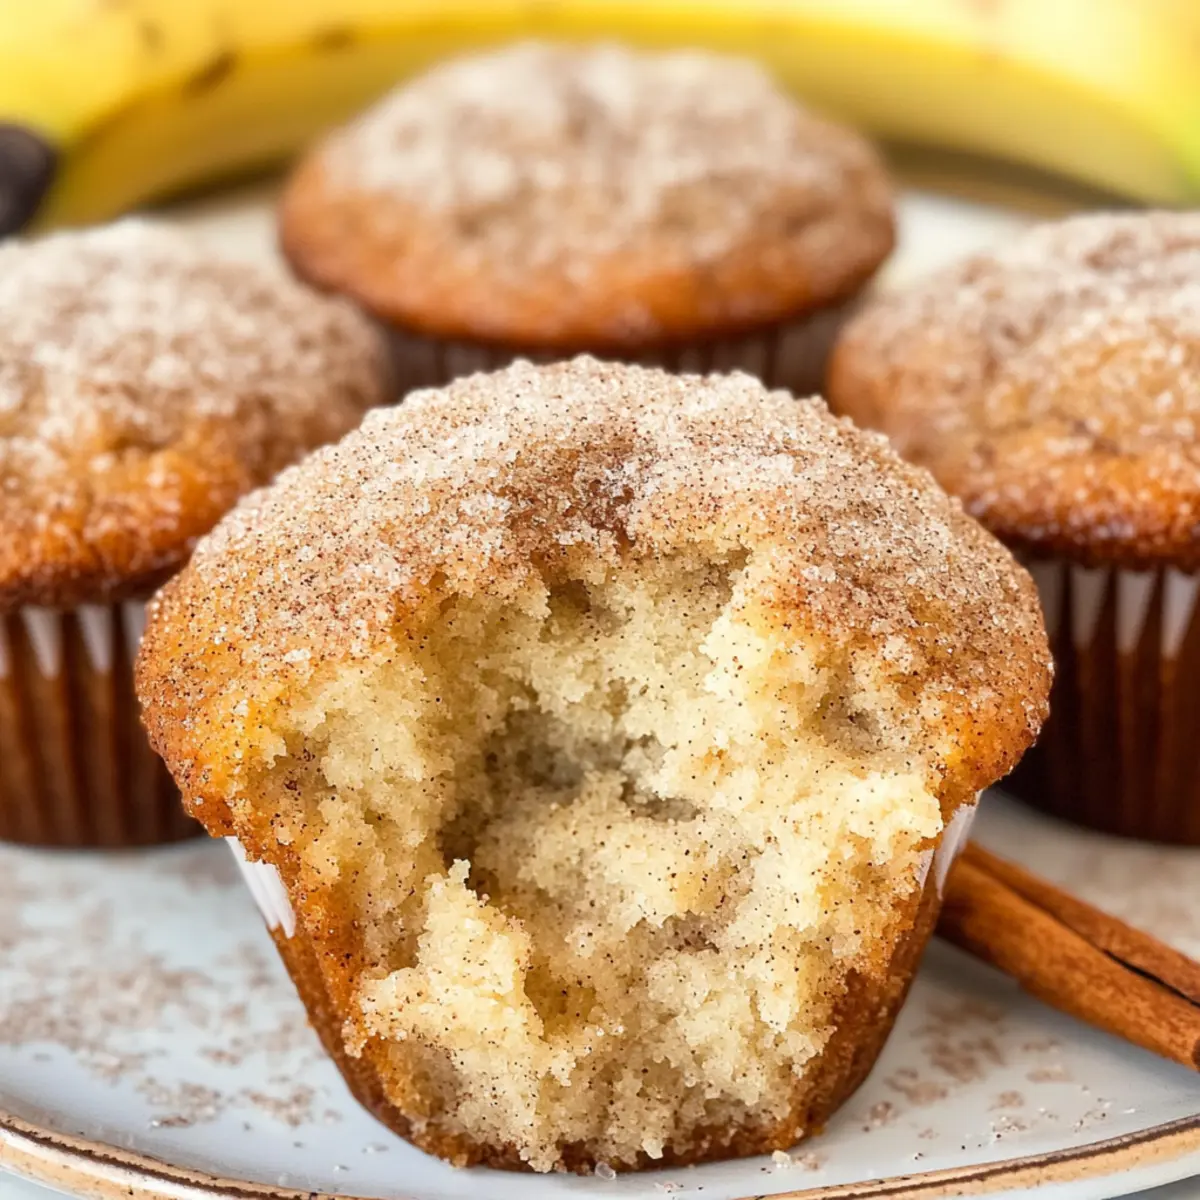
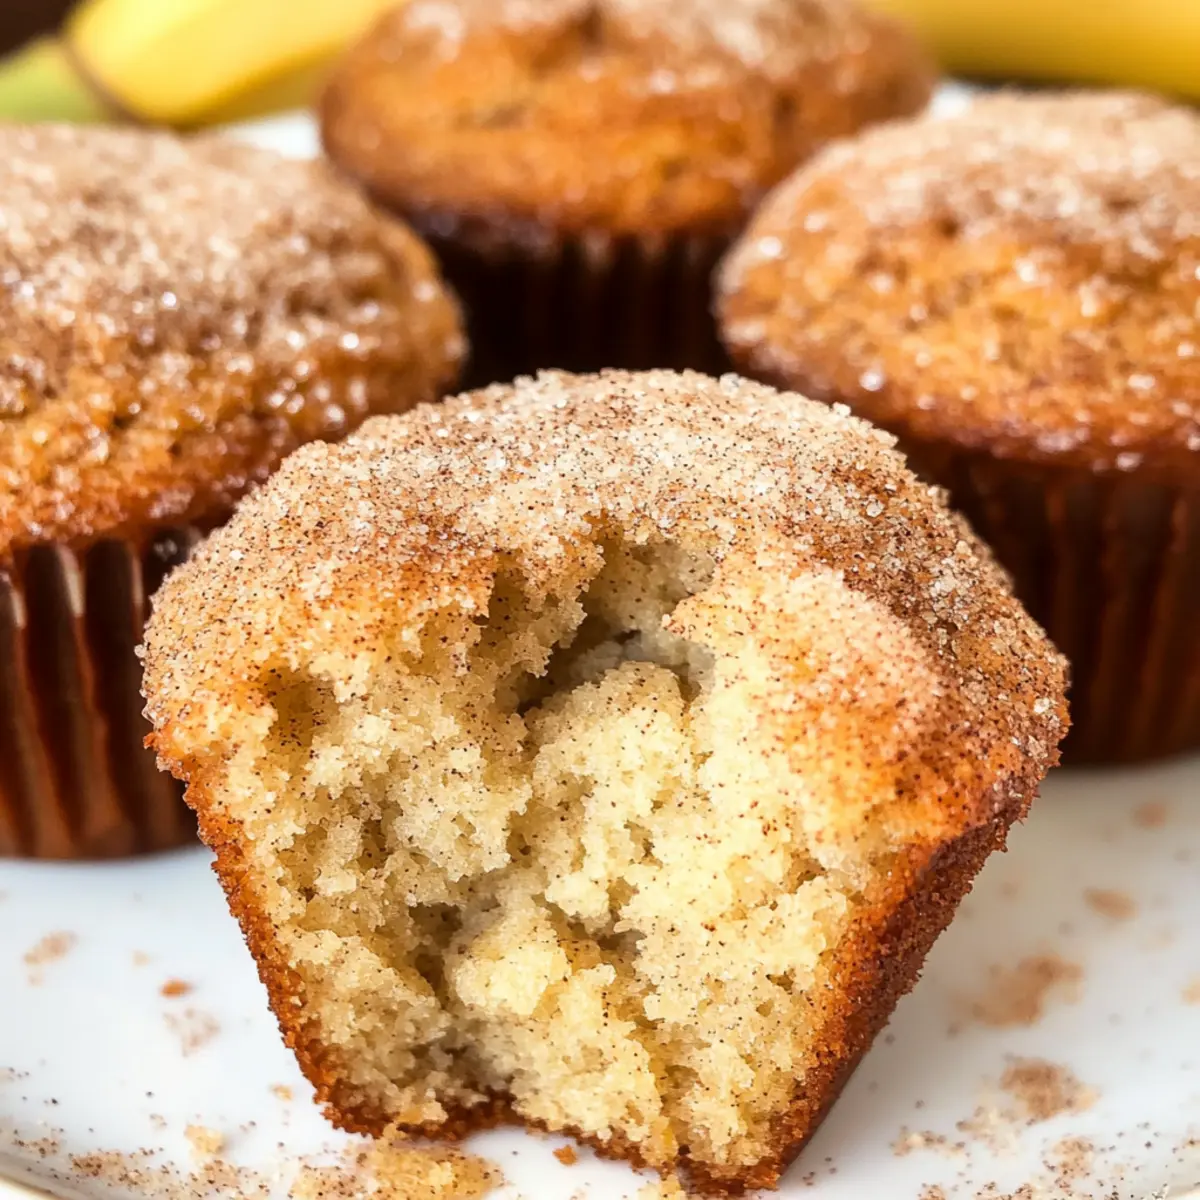
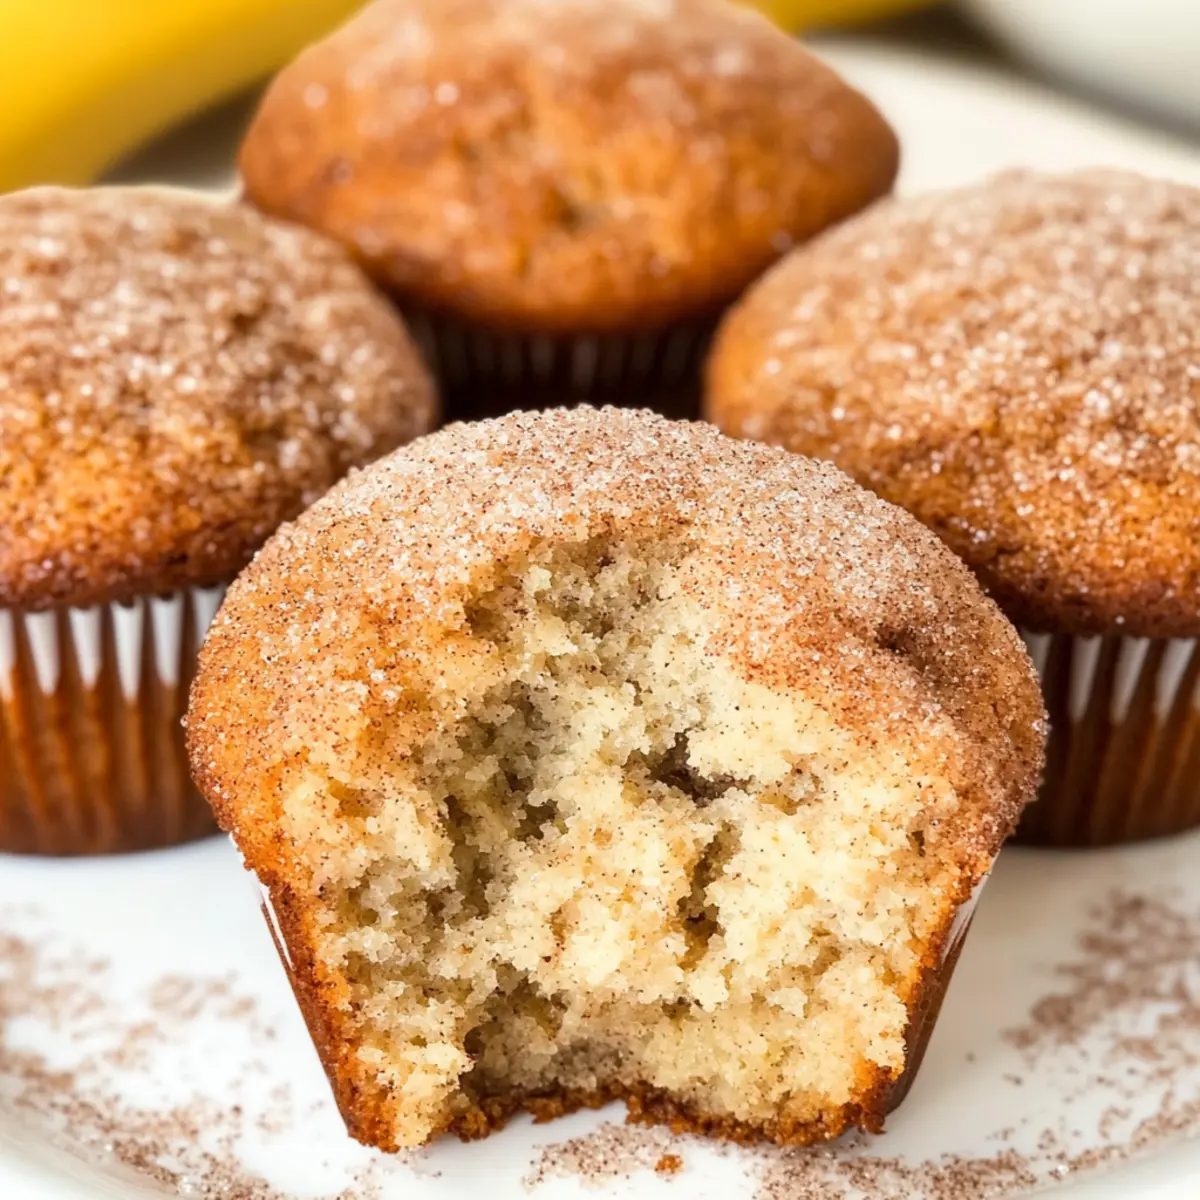
As I grabbed a ripe banana from the kitchen counter, the sweet aroma transported me to lazy weekends where the scent of freshly baked goods lingered in the air. These Easy Cinnamon Banana Bread Muffins are my go-to solution for transforming overripe bananas into a delightful moment of bliss. Not only do they promise soft, fluffy texture, but they also come together in a single bowl, making cleanup a breeze—perfect for busy mornings or a cozy afternoon at home. Topped with a buttery cinnamon sugar crunch, each muffin is a delicious hug for your taste buds. Who wouldn’t want to indulge in a treat that's utterly kid-friendly and easy to whip up? Ready to elevate your snack game with these delectable muffins? Let's dive into the recipe!
Why are These Muffins a Must-Try?
Simplicity Rules: With just one bowl needed, you can whip these up quickly, making them perfect for a busy morning.
Kid-Friendly: They’re not only easy to make but also delightful for kids to enjoy. Feel free to let them add their favorite mix-ins!
Moist & Flavorful: Those overripe bananas shine through, giving you incredibly moist muffins that burst with flavor.
Crunchy Topping: The cinnamon sugar dip creates a satisfying texture that elevates each bite.
Versatile Delight: Add chocolate chips or a sprinkle of nuts to mix things up; there’s no wrong way to enjoy these muffins!
For more enjoyable muffin recipes, check out my delicious Cinnamon Roll Muffins.
Cinnamon Banana Bread Muffin Ingredients
• For the Muffins
- Granulated Sugar – Sweetens the muffins and helps create a tender texture; consider using brown sugar for a deeper flavor.
- Vegetable or Canola Oil – Adds moisture and richness; melted butter or coconut oil can be used for a unique taste.
- Large Eggs – Provide vital structure, moisture, and richness to your muffins.
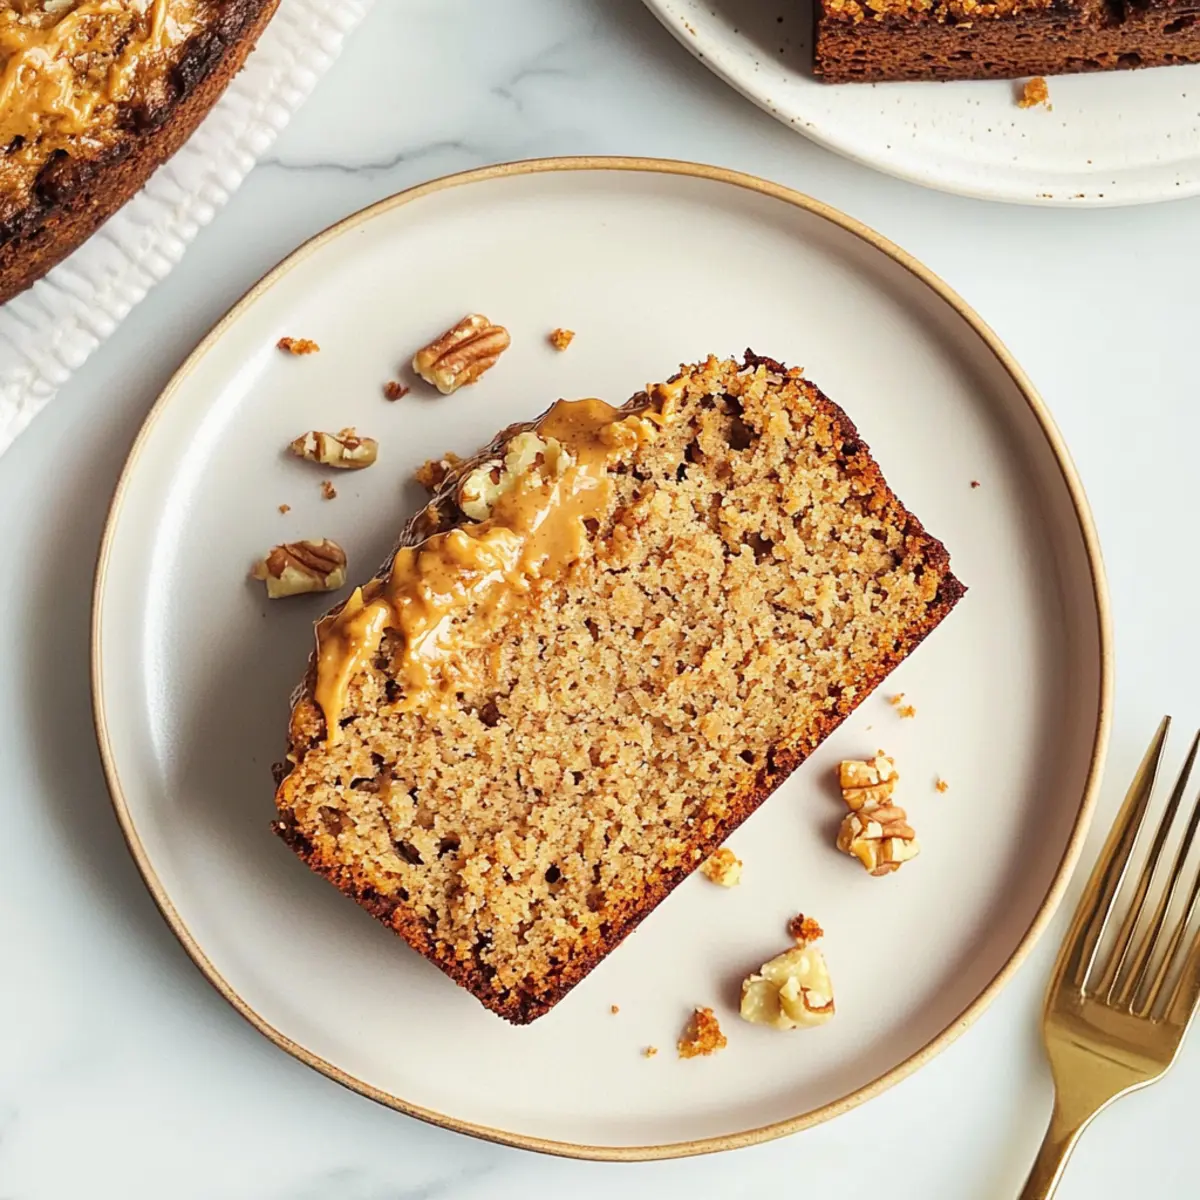
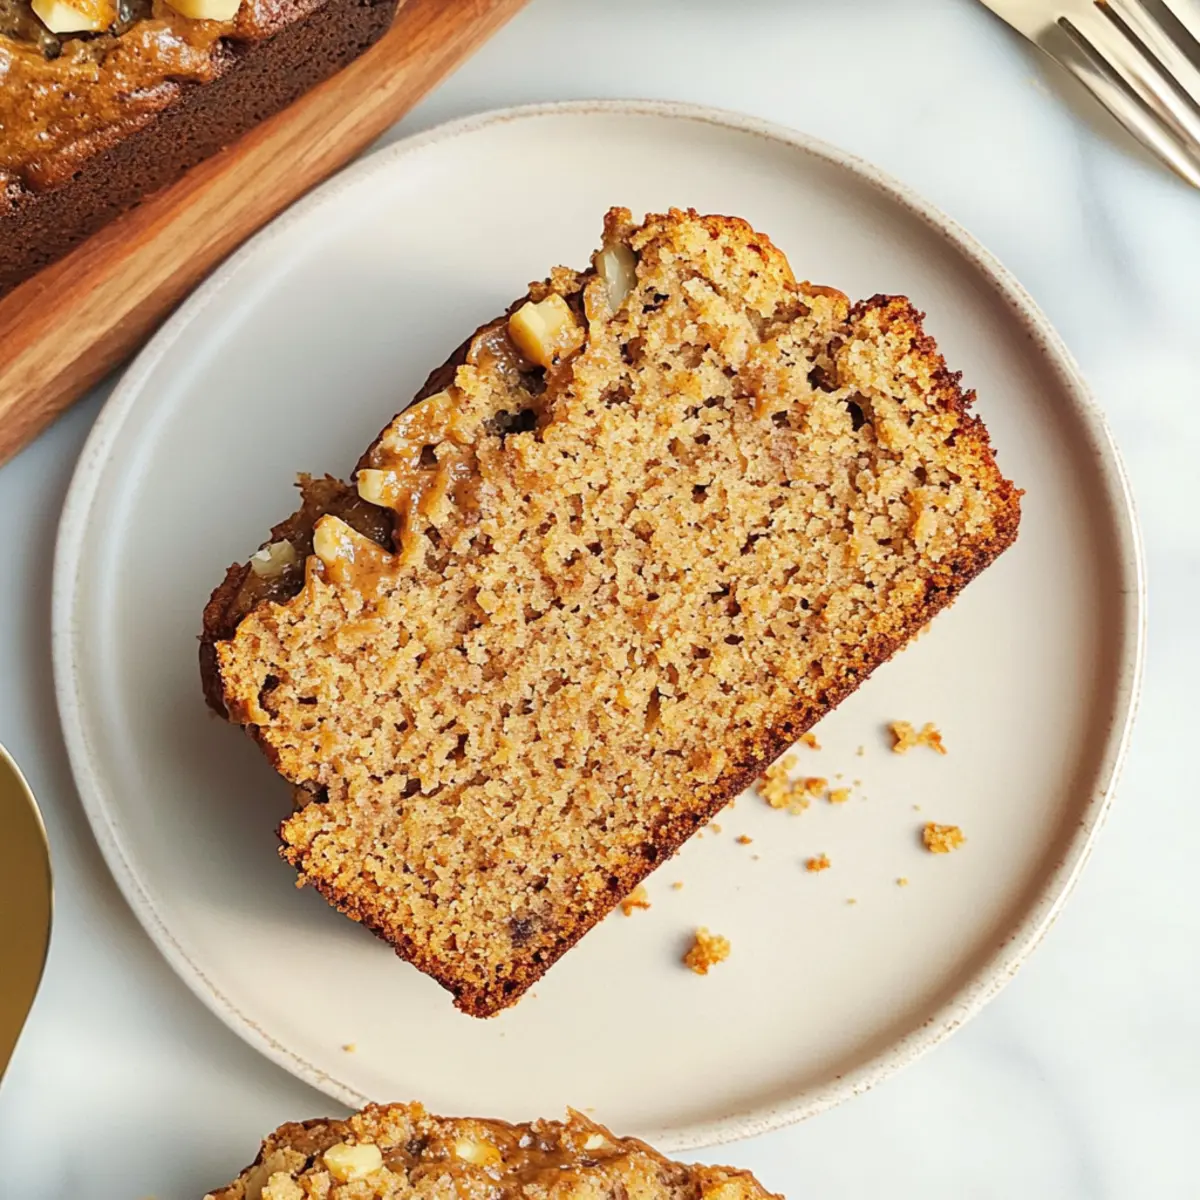
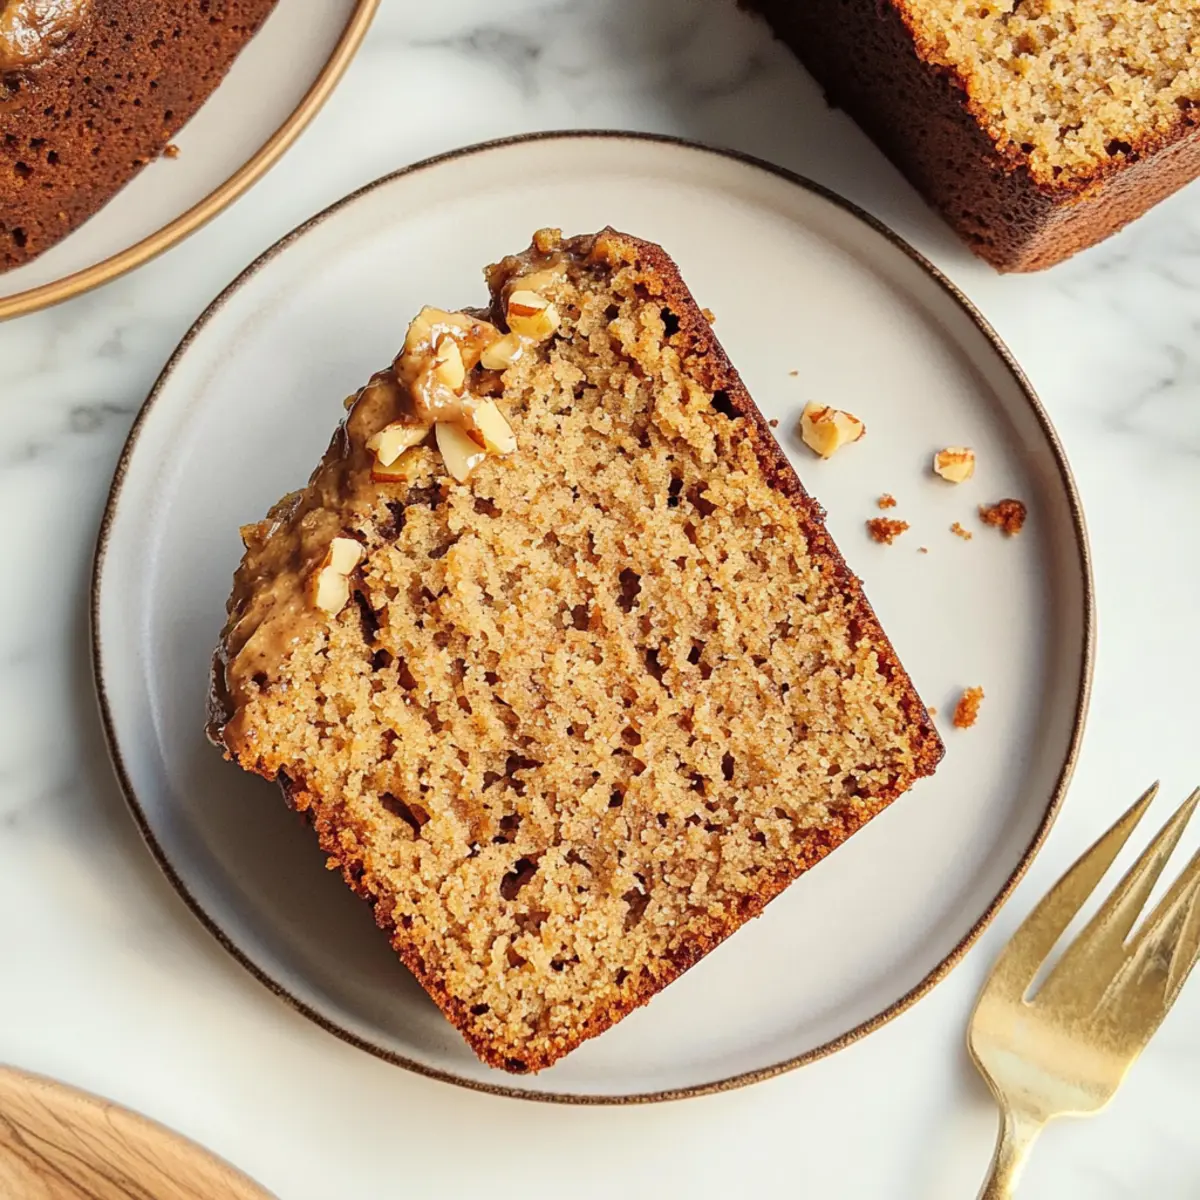
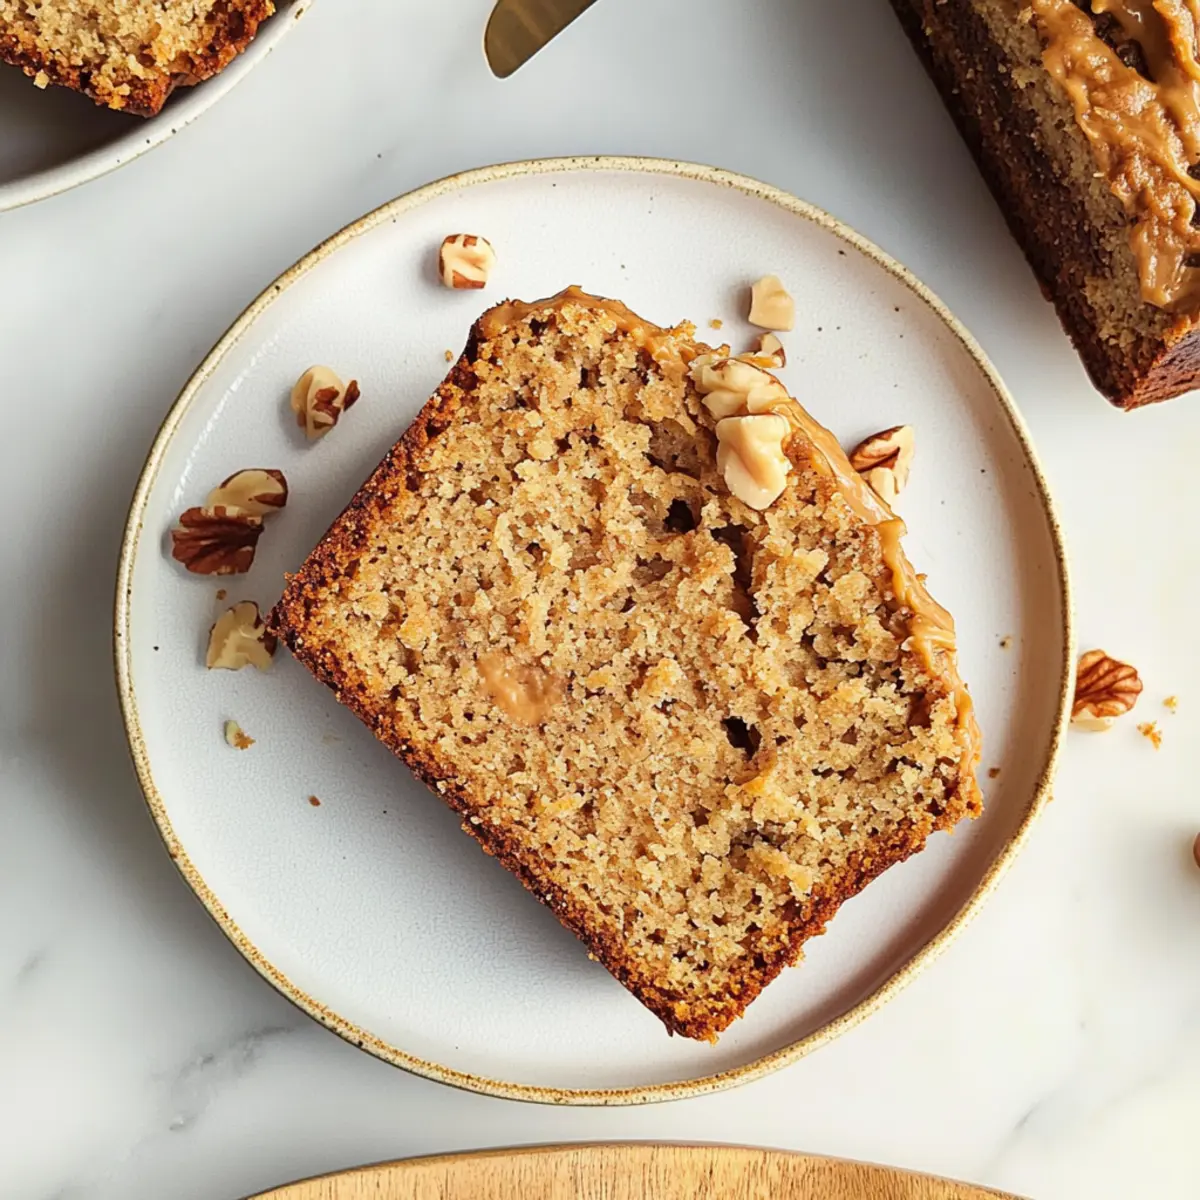
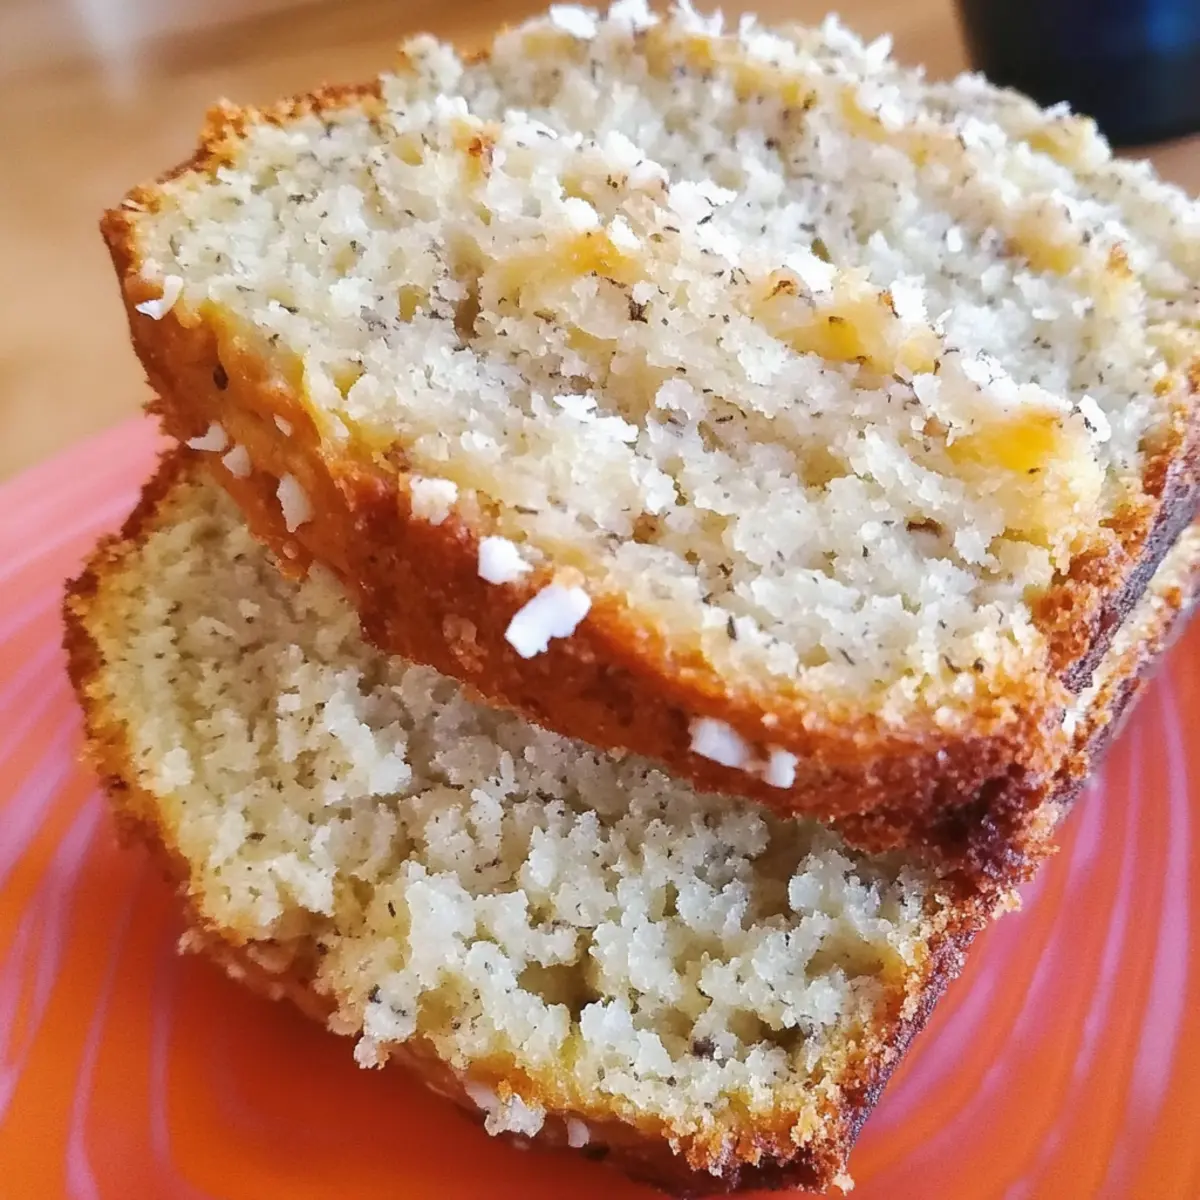
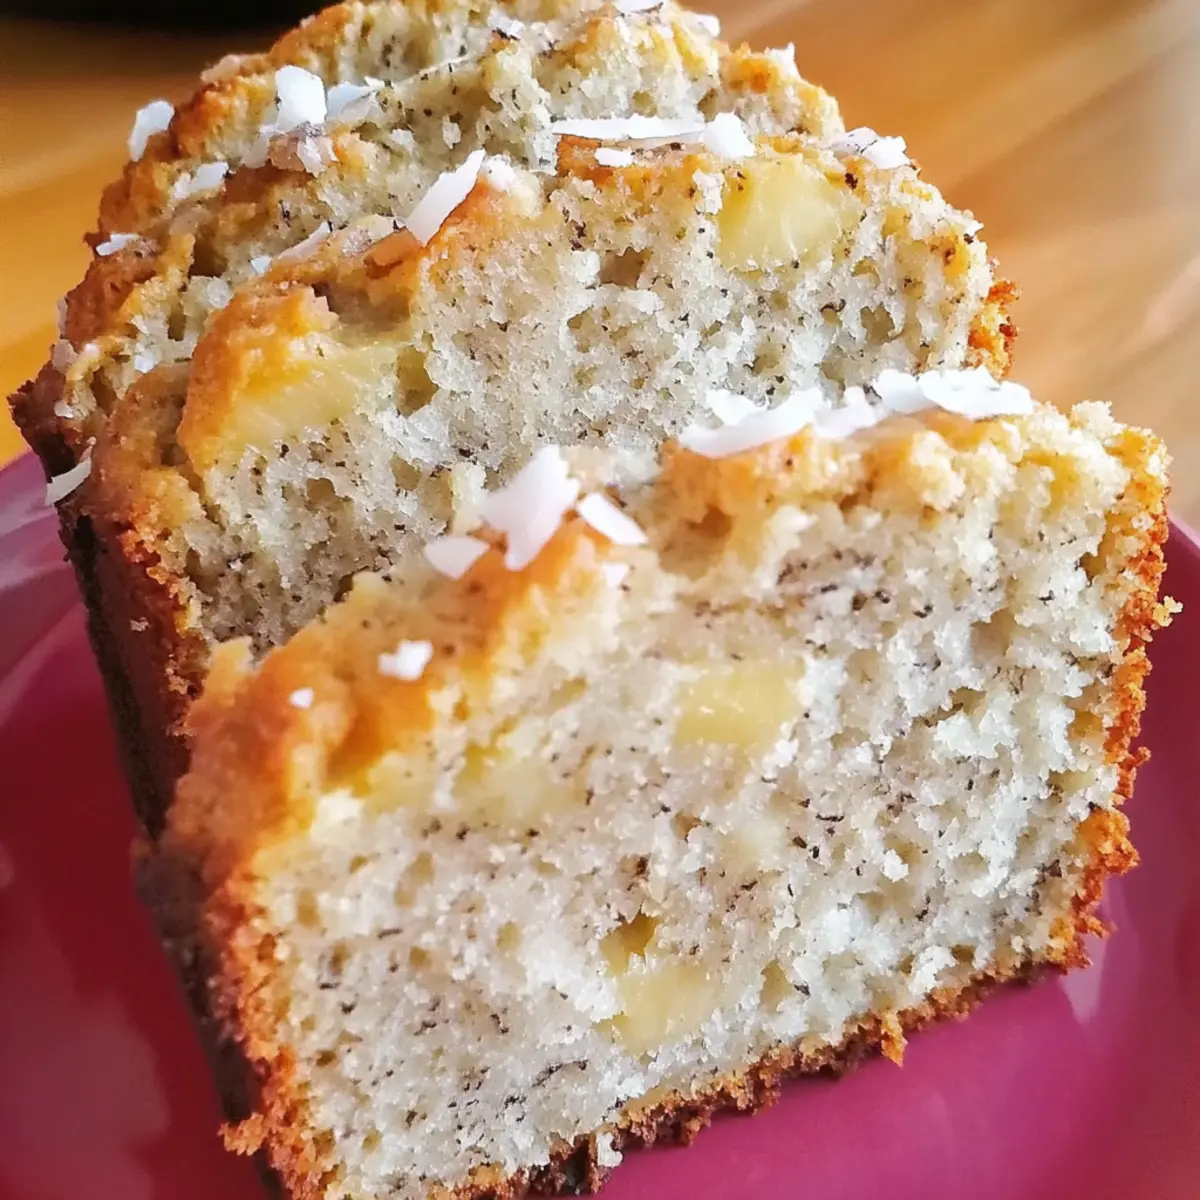
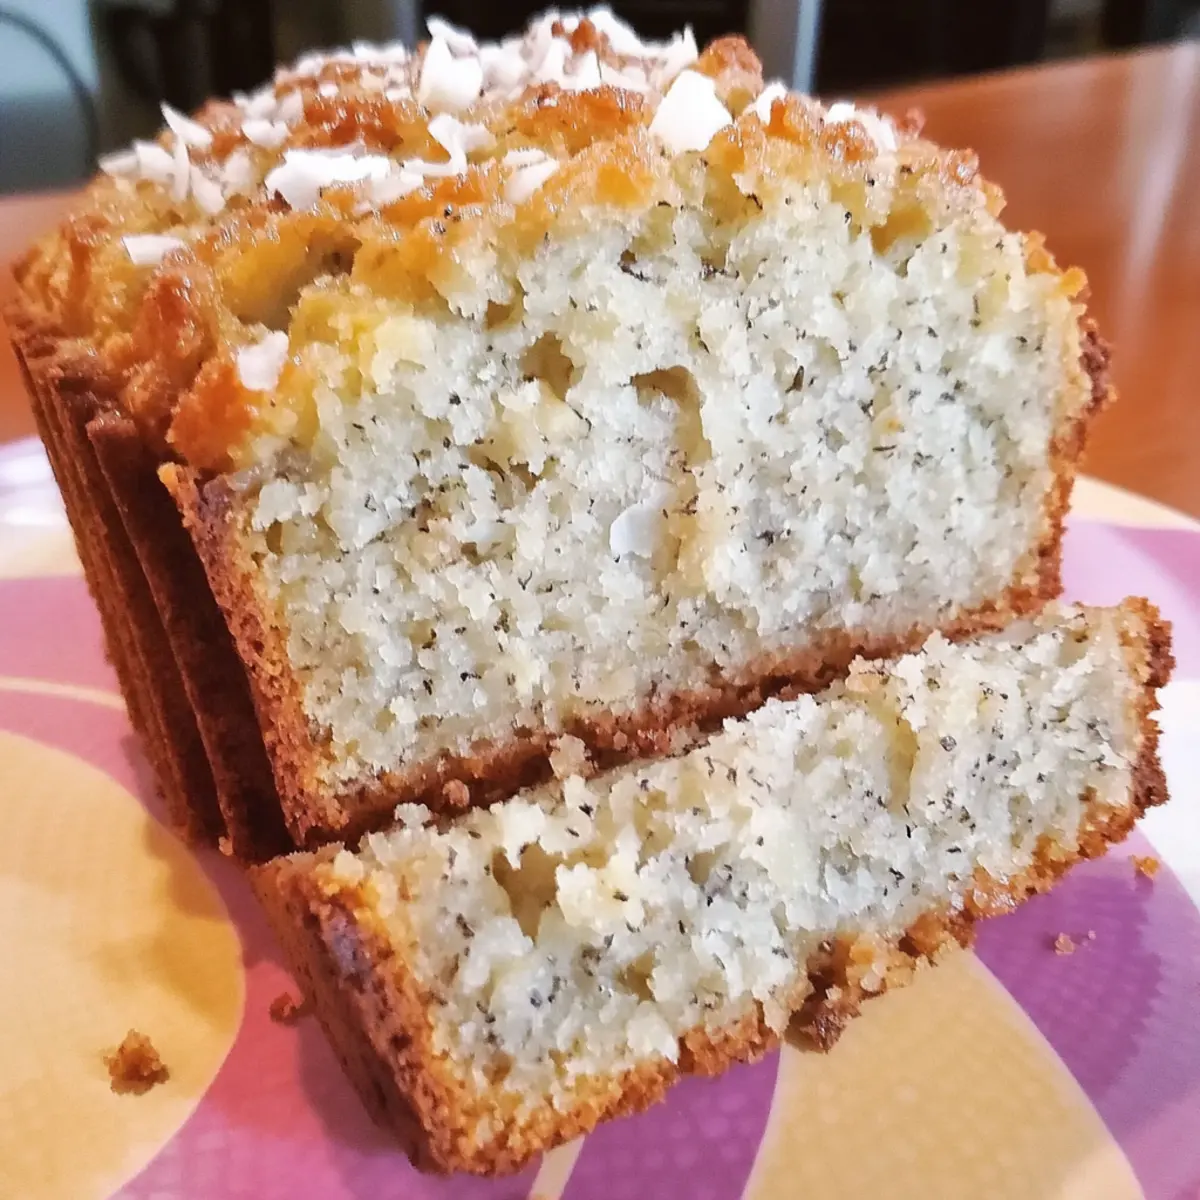
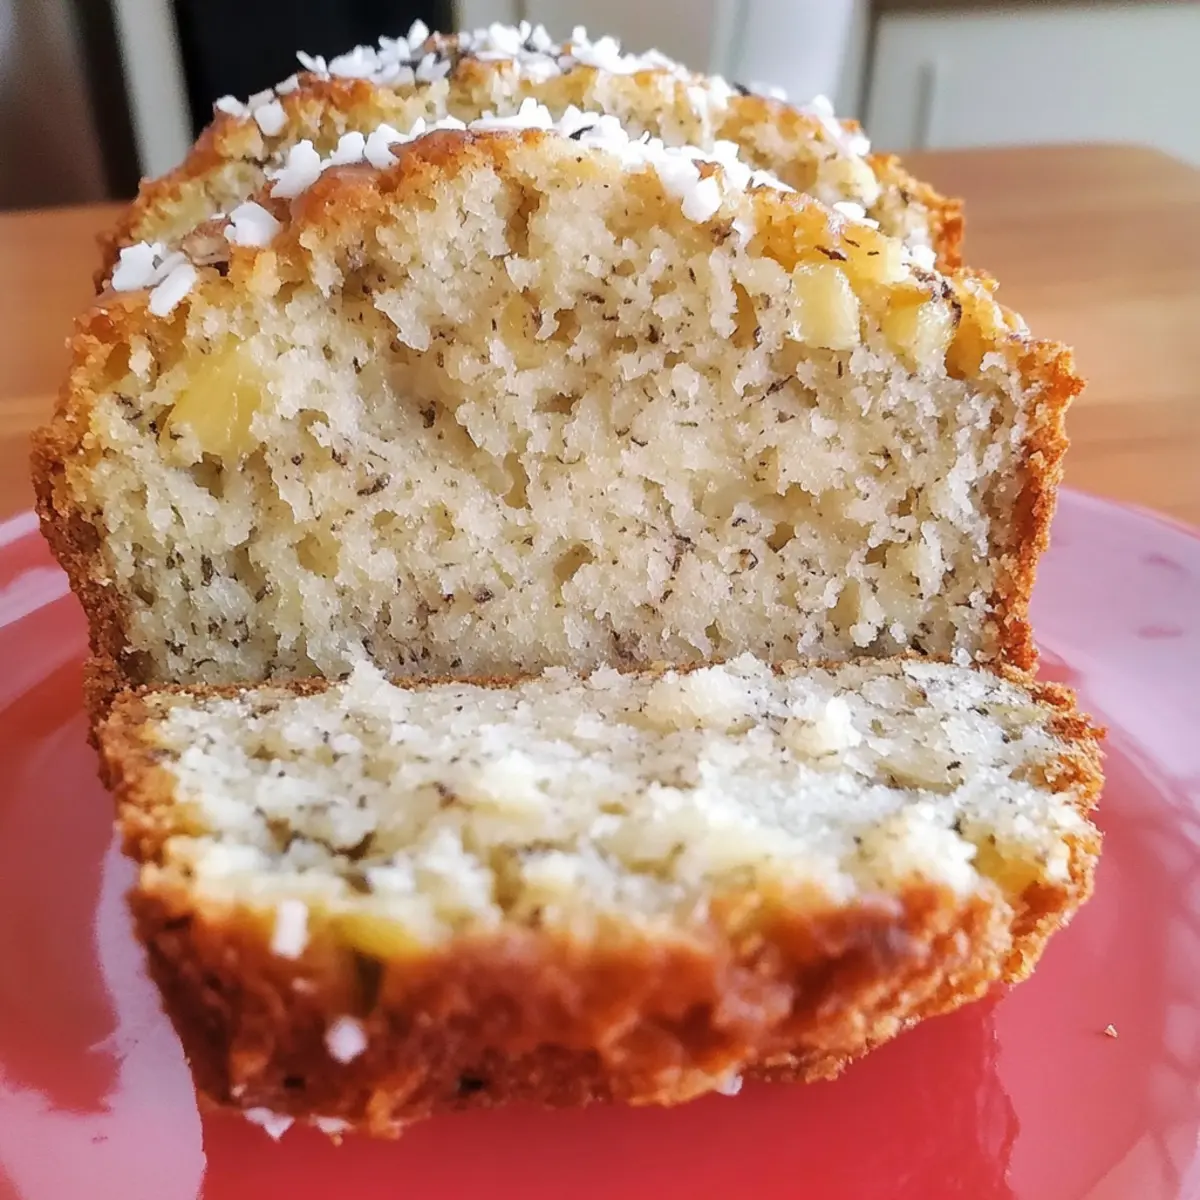
- Mashed Ripe Banana – The star of the show, offering flavor and moisture; best to use very ripe, browned bananas.
- Vanilla Extract – Enhances the overall flavor profile of these delightful muffins.
- All-Purpose Flour – Provides structure; swap it for whole wheat flour for added nutrition.
- Baking Soda – Acts as a leavening agent to help the muffins rise perfectly.
- Ground Cinnamon – This essential spice infuses warm flavor throughout the muffins.
- Salt – Balances sweetness and enhances all flavors for a remarkable taste.
• For the Topping
- Salted Butter – Adds richness and a beautiful finish when dipped into the cinnamon sugar mixture.
- Granulated Sugar (for topping) – Creates a sweet and crunchy coating that elevates each muffin’s flavor.
- Ground Cinnamon (for topping) – Essential for that classic cinnamon flavor that everyone loves.
These cinnamon banana bread muffins are not only a breeze to make, but they're also incredibly satisfying. Happy baking!
Step‑by‑Step Instructions for Cinnamon Banana Bread Muffins
Step 1: Preheat & Prepare Muffin Pan
Begin your baking adventure by preheating your oven to 375°F (190°C). Meanwhile, take a standard muffin pan (12 cups) and prepare it by greasing with nonstick spray or lining it with beautiful muffin liners to prevent sticking. This preparation is crucial for achieving perfectly baked Cinnamon Banana Bread Muffins without any mess.
Step 2: Mix Wet Ingredients
In a medium-sized mixing bowl, whisk together the granulated sugar, vegetable oil, and large eggs until the mixture is completely blended and smooth—this should take about 1-2 minutes. The sugar should appear dissolved, and the mixture will have a shiny texture. This step ensures that your muffins will be sweet, moist, and rich in flavor.
Step 3: Add Banana & Vanilla
Now, gently stir in the mashed ripe bananas and a splash of vanilla extract into your wet mixture. Use a spatula to fold the ingredients together until everything is fully incorporated, but avoid overmixing. The bananas should add a delightful sweetness and moisture, making your Cinnamon Banana Bread Muffins incredibly soft and flavorful.
Step 4: Combine Dry Ingredients
Next, sprinkle the all-purpose flour, baking soda, ground cinnamon, and salt over the wet mixture. Using a spatula, carefully mix these dry ingredients into the batter until just combined—basically until there are no more visible flour streaks. This step is key to ensuring your muffins rise beautifully while retaining a tender crumb.
Step 5: Fill Muffin Cups
Using a spoon or ice cream scoop, evenly distribute the muffin batter into the prepared cups of your muffin pan, filling each about 3/4 full. This will allow room for your Cinnamon Banana Bread Muffins to rise without spilling over. The cups should appear filled generously but not overflowing, creating lovely rounded tops as they bake.
Step 6: Bake to Perfection
Place the muffin pan in the preheated oven and bake for 16 to 21 minutes. Keep an eye on them as they bake: they are ready when a toothpick inserted into the center comes out clean and the tops spring back when gently pressed. The aroma of cinnamon and bananas will fill your kitchen, signaling that your muffins are nearly done.
Step 7: Cool & Transfer
Once baked, allow the muffins to cool in the pan for about 5 minutes. This resting time helps them set. After that, carefully transfer them to a wire cooling rack to cool completely. This will ensure your Cinnamon Banana Bread Muffins maintain their soft texture while preventing sogginess from the pan.
Step 8: Create the Topping
While your muffins cool, melt some salted butter in a small bowl. In another bowl, mix granulated sugar with ground cinnamon. Once your muffins have cooled slightly, dip the tops into the melted butter, then into the cinnamon-sugar mixture. This will create a sweet, crunchy topping that complements the soft, moist muffins perfectly for that delicious finishing touch.
How to Store and Freeze Cinnamon Banana Bread Muffins
Room Temperature: Store muffins in an airtight container at room temperature for up to 4 days. This keeps them soft while maintaining their delightful flavor.
Fridge: You can refrigerate muffins to prolong their freshness for up to a week, but they may lose some moisture. Reheat in the microwave for a few seconds before enjoying.
Freezer: For longer storage, freeze muffins in a single layer on a baking sheet and transfer to an airtight container after frozen solid. These Cinnamon Banana Bread Muffins can last up to 3 months.
Reheating: Thaw frozen muffins at room temperature or microwave for 15-20 seconds until warm; this restores their moisture and delightful texture, making them feel freshly baked!
What to Serve with Cinnamon Banana Bread Muffins?
Nothing pairs better with these warm, sweet treats than a few delightful accompaniments to create a heartwarming breakfast or snack.
-
Creamy Greek Yogurt: This tangy addition balances the sweetness of the muffins, adding a creamy texture that complement them beautifully.
-
Fresh Berries: Strawberries or blueberries add a pop of freshness and a burst of juicy flavor, making each bite a delightful experience.
-
Nut Butter: Spread almond or peanut butter on top for a protein-packed treat that enhances the muffins’ natural sweetness and provides a satisfying crunch.
-
Cinnamon-spiced Coffee: A warm, spiced brew elevates the cozy vibes while blending wonderfully with the muffins’ cinnamon flavor.
-
Chai Tea: The aromatic spices in chai create a comforting drink pairing that enhances the cozy notes of the muffins.
-
Apple Slices with Honey: Crisp, sweet apples drizzled with honey provide a refreshing contrast to the warm muffins, making each bite even more enjoyable.
-
Ice Cream: For a decadent twist, serve the muffins warm with a scoop of vanilla or cinnamon ice cream. It’s an indulgent treat everyone will love!
-
Muffin Sundae: Crumble a muffin over ice cream topped with caramel or chocolate sauce for a unique dessert that’s fun to share.
-
Spiced Tea Latte: For a warm, comforting drink, consider a spiced tea latte that complements the flavors of cinnamon in the muffins without overwhelming their sweetness.
Cinnamon Banana Bread Muffins Variations
Feel free to add your personal touch to these muffins and make them truly your own!
-
Chocolate Chip Delight: Fold in a cup of chocolate chips for a sweet twist that kids will love.
-
Nutty Banana Blend: Stir in some chopped walnuts or pecans for a satisfying crunch and added protein.
-
Applesauce Swap: Replace half the oil with unsweetened applesauce to lower fat content while keeping them moist.
-
Spiced Up Flavor: Add a teaspoon of nutmeg or pumpkin pie spice for a warm, aromatic kick.
-
Coconut Twist: Incorporate shredded coconut into the batter for a tropical flair that complements the banana beautifully.
-
Zesty Citrus: Add the zest of one orange or lemon to brighten the flavor profile and add a burst of freshness.
-
Baking for Breakfast: Transform them into breakfast muffins by adding oats or flaxseeds for extra fiber and heartiness.
For more delicious muffin ideas, don’t miss out on my fabulous Cinnamon Roll Muffins that offer a different but equally delightful experience!
Make Ahead Options
These Cinnamon Banana Bread Muffins are perfect for busy home cooks looking to save time during hectic mornings! You can prepare the batter up to 24 hours in advance; just mix all the wet and dry ingredients and store it in an airtight container in the refrigerator to keep it fresh. If you want to take it a step further, you can also bake the muffins and store them in an airtight container at room temperature for up to 3 days. To enjoy them warm, simply reheat them in the microwave for about 20 seconds. This way, you’ll have delicious muffins ready to go whenever you need a quick breakfast or snack!
Expert Tips for Cinnamon Banana Bread Muffins
Use Ripe Bananas: Always opt for very ripe, browned bananas. They provide the best sweetness and moisture, ensuring your muffins are wonderfully flavorful.
Avoid Overmixing: When combining wet and dry ingredients, mix until just combined to prevent dense muffins. The batter should be slightly lumpy for the best texture.
Check Doneness: Ovens can vary, so start checking for doneness at around 16 minutes, using a toothpick to ensure your Cinnamon Banana Bread Muffins are fully baked without being dry.
Cool Properly: Allow muffins to cool in the pan for a few minutes before transferring to a wire rack. This step helps them maintain their shape and prevents sogginess.
Explore Variations: Don't hesitate to get creative! Consider adding chocolate chips or nuts for added flavor and crunch, making your muffins even more delightful.
Cinnamon Banana Bread Muffins Recipe FAQs
What kind of bananas should I use for the best muffins?
Absolutely! The best choice is very ripe, browned bananas. Look for ones that are almost mushy with dark spots, as they provide maximum sweetness and moisture, ensuring your muffins are wonderfully flavorful.
How long do these muffins last once baked?
These delightful Cinnamon Banana Bread Muffins can be stored in an airtight container at room temperature for up to 4 days. If you need them to last longer, refrigerate them for up to a week, although they may lose some moisture.
Can I freeze these muffins?
Very! To freeze your muffins, first place them in a single layer on a baking sheet until they freeze solid. Afterward, transfer them to an airtight container. They can last for up to 3 months this way! When you’re ready to enjoy, simply thaw at room temperature or microwave for about 15-20 seconds to warm them up.
What should I do if my muffins turn out dense?
Mixing just until combined is key to avoiding dense muffins. If they are dense, it may be because the wet ingredients were over-mixed with the dry ones. To ensure a tender muffin, keep the batter slightly lumpy. Also, check that your baking soda is fresh to help with proper rising.
Are these muffins suitable for those with allergies?
It depends! The recipe contains eggs and can be made with all-purpose flour, which may not be suitable for those with gluten allergies. You can substitute the flour with a gluten-free blend if needed, and consider using flax eggs or applesauce as an alternative to make it egg-free. Always check all ingredients for allergens if serving to people with dietary restrictions.
Can I add mix-ins to the muffins?
Absolutely! Feel free to get creative! You can mix in chocolate chips, chopped nuts, or even dried fruit to customize your muffins. Just be mindful to not overfill the muffin cups to ensure they bake properly.
Cinnamon Banana Bread Muffins You'll Crave Every Morning
Ingredients
Equipment
Method
- Preheat your oven to 375°F (190°C) and prepare a muffin pan by greasing it or lining it with muffin liners.
- In a mixing bowl, whisk together the granulated sugar, vegetable oil, and eggs until smooth.
- Gently stir in the mashed bananas and vanilla extract until fully incorporated.
- Sprinkle all-purpose flour, baking soda, ground cinnamon, and salt over the mixture and stir until just combined.
- Evenly distribute the muffin batter into the prepared muffin pan, filling each cup about 3/4 full.
- Bake for 16 to 21 minutes, or until a toothpick inserted in the center comes out clean.
- Allow the muffins to cool in the pan for about 5 minutes before transferring to a wire rack.
- Melt salted butter and mix granulated sugar with ground cinnamon. Dip the tops of cooled muffins into the melted butter then into the cinnamon-sugar mixture.