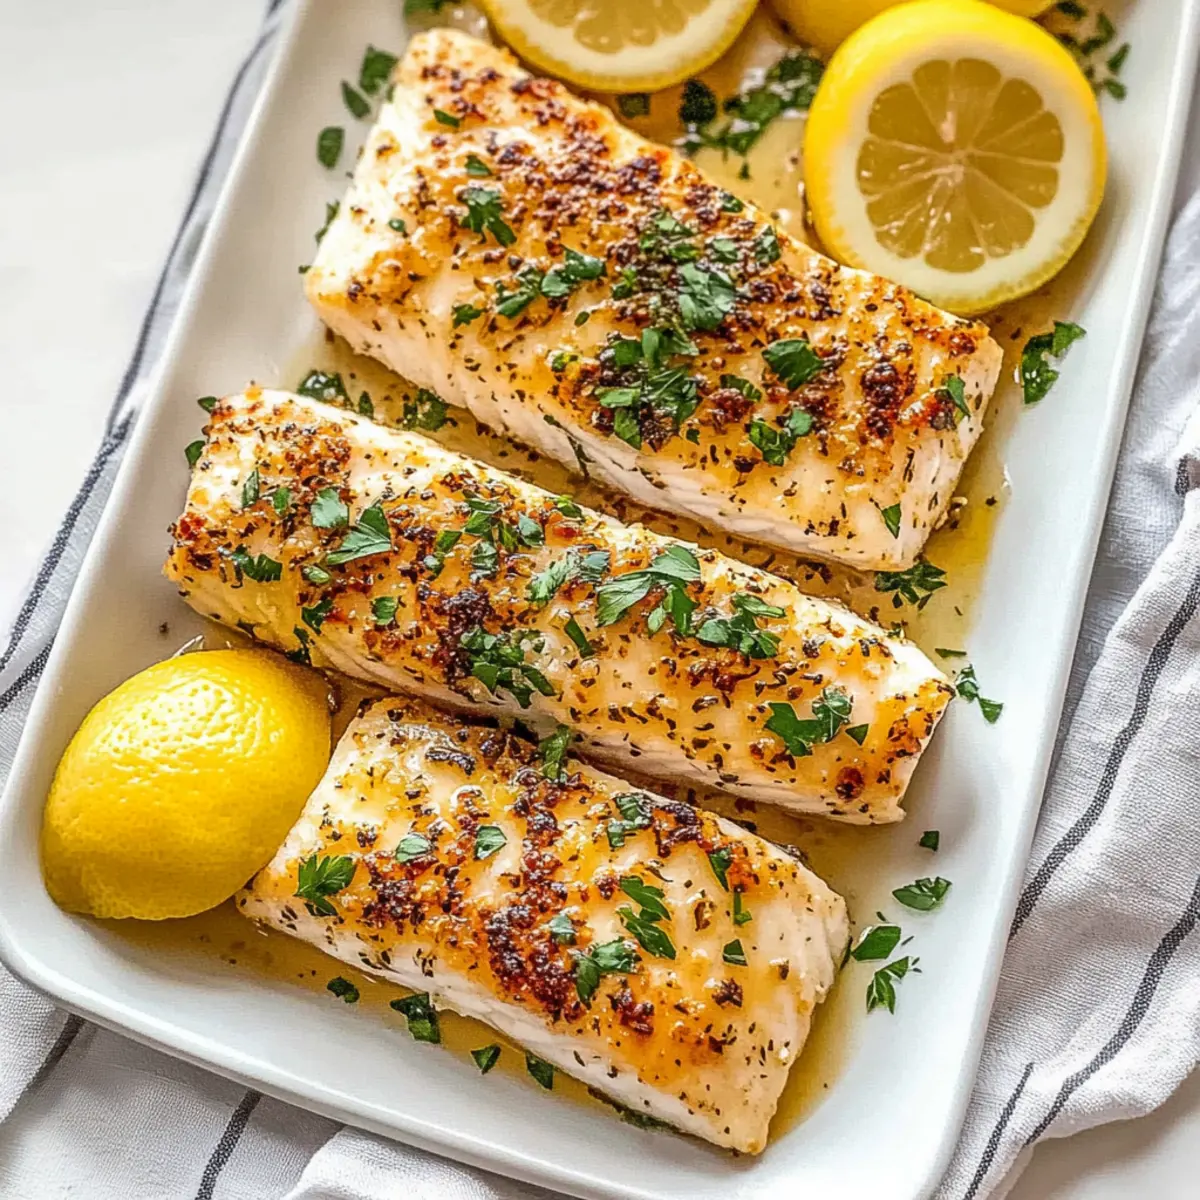
As I stood in my kitchen, the aroma of zesty citrus wafting through the air, I couldn’t help but smile at the simplicity of creating something so delightful. This Lemon Butter Baked Mahi Mahi is a revelation that transforms dinner into a flavorful celebration in just 20 minutes! Perfect for busy weeknights, this healthy seafood dish is not only quick to prepare but also bursting with deliciousness. The tender, flaky fish pairs beautifully with the bright notes of lemon and a rich butter sauce that will have your family asking for seconds. Whether served on its own or tucked into fish tacos, this recipe promises to elevate your evening meal. Curious to discover how to create this delightful dish that’s both satisfying and wholesome? Let’s dive in!
Why is Lemon Butter Baked Mahi Mahi a must-try?
Simplicity at its Finest: This recipe requires just a few ingredients and can be whipped up in a mere 20 minutes, allowing you to prepare a delightful homemade meal without the fuss.
Bursting with Flavor: The magical combination of zesty lemon and rich butter complements the flaky mahi mahi, making each bite a delicious experience.
Healthy and Satisfying: With low calories and high protein, this dish makes a great option for those looking to eat healthy without sacrificing taste.
Versatile Choice: Enjoy it as a standalone meal or transform leftovers into vibrant fish tacos, perfect for customization with your favorite toppings!
Crowd-Pleasing Appeal: Ideal for family dinners or impressing guests, this dish guarantees rave reviews from everyone at the table.
For a refreshing side, pair it with a light salad or roasted veggies, and if you're craving more seafood ideas, check out my Lemon Ricotta Protein Pancakes for a twist on breakfast or the comforting Lemon Chicken Soup for a heartwarming dish.
Lemon Butter Baked Mahi Mahi Ingredients
For the Fish
- Mahi Mahi Fillets – Choose firm, fresh fillets for the best texture; you can also substitute with other mild white fish.
- Butter – Adds richness and keeps the fish moist; opt for olive oil for a dairy-free alternative.
- Sea Salt – Essential for flavor; adjust according to your dietary preferences.
- Paprika – Provides mild sweetness and a beautiful color to the fish.
- Ground Black Pepper – For seasoning; use freshly cracked for enhanced flavor.
For the Citrus Base
- Lemons – Create acidity and brightness; don’t skimp on using fresh lemons for maximum flavor.
- Garlic Powder – Adds depth to the seasoning; feel free to swap with fresh minced garlic.
- Dried Oregano – Offers an herbal note; Italian seasoning can work as a substitute.
- Dried Thyme – Brings an earthy flavor; you can replace it with fresh thyme if you prefer.
- Red Pepper Flakes – Add a mild heat; adjust according to taste or omit for non-spicy preferences.
- Onion Powder – For savory depth; finely chopped fresh onion can be used instead.
For Garnish
- Chopped Parsley – Adds a pop of freshness to the dish; cilantro can be used for a different flavor profile.
Each ingredient plays a crucial role in creating the delicious Lemon Butter Baked Mahi Mahi you won't soon forget!
Step‑by‑Step Instructions for Lemon Butter Baked Mahi Mahi
Step 1: Preheat Oven
Begin by preheating your oven to 400°F (204°C). Line a baking sheet with aluminum foil or parchment paper to catch any drips and make cleanup a breeze. This initial step is crucial for achieving that perfectly flaky texture in your Lemon Butter Baked Mahi Mahi, ensuring the fish cooks evenly.
Step 2: Prepare Citrus Base
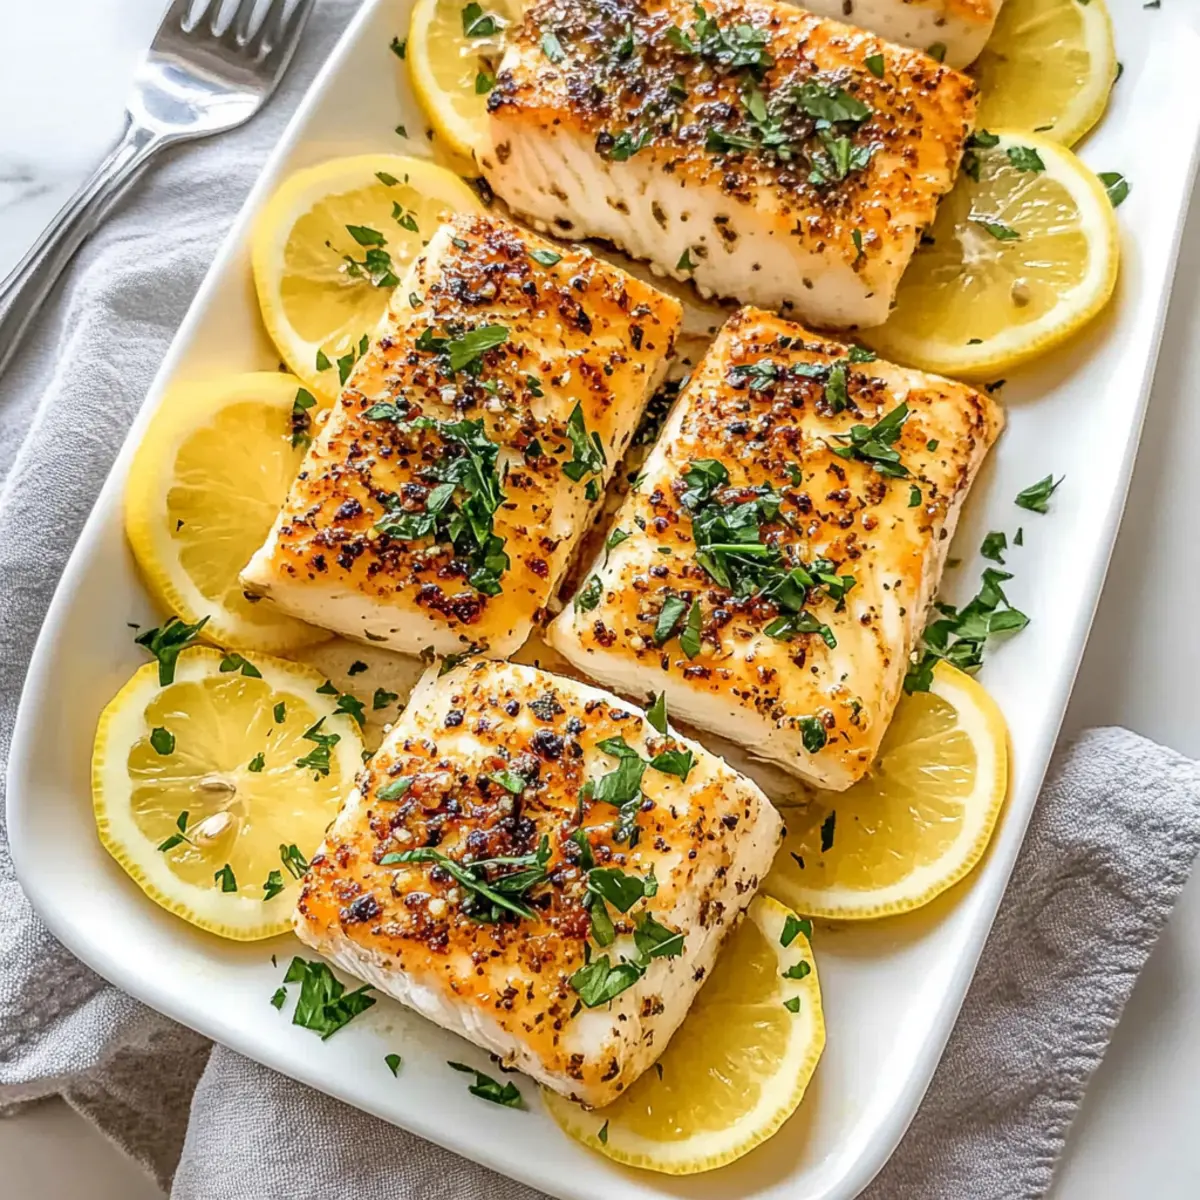
While the oven heats, take fresh lemons and slice them into thin rounds. Lay the lemon slices neatly on the prepared baking sheet, creating a flavorful bed for your mahi mahi fillets. This not only adds a delightful citrus flavor but also elevates the presentation of the dish as it bakes.
Step 3: Arrange Mahi Mahi
Now, place your mahi mahi fillets directly on top of the lemon slices. Using a brush, coat both sides of the fillets generously with melted butter, ensuring they remain moist during the baking process. This step is key in enhancing the flavor and preparing your Lemon Butter Baked Mahi Mahi for seasoning.
Step 4: Season Fish
In a small bowl, combine paprika, garlic powder, dried oregano, sea salt, dried thyme, red pepper flakes, onion powder, and ground black pepper to create a seasoning blend. Sprinkle this mixture evenly over both sides of the mahi mahi fillets, making sure each bite is packed with flavor.
Step 5: Bake
Slide the baking sheet into the oven and bake the mahi mahi for 10 minutes. After this initial cooking time, switch to the broiler setting for an additional 1.5 minutes to achieve a beautifully golden top. Keep an eye on the fish to prevent overcooking, ensuring it remains flaky and tender.
Step 6: Garnish and Serve
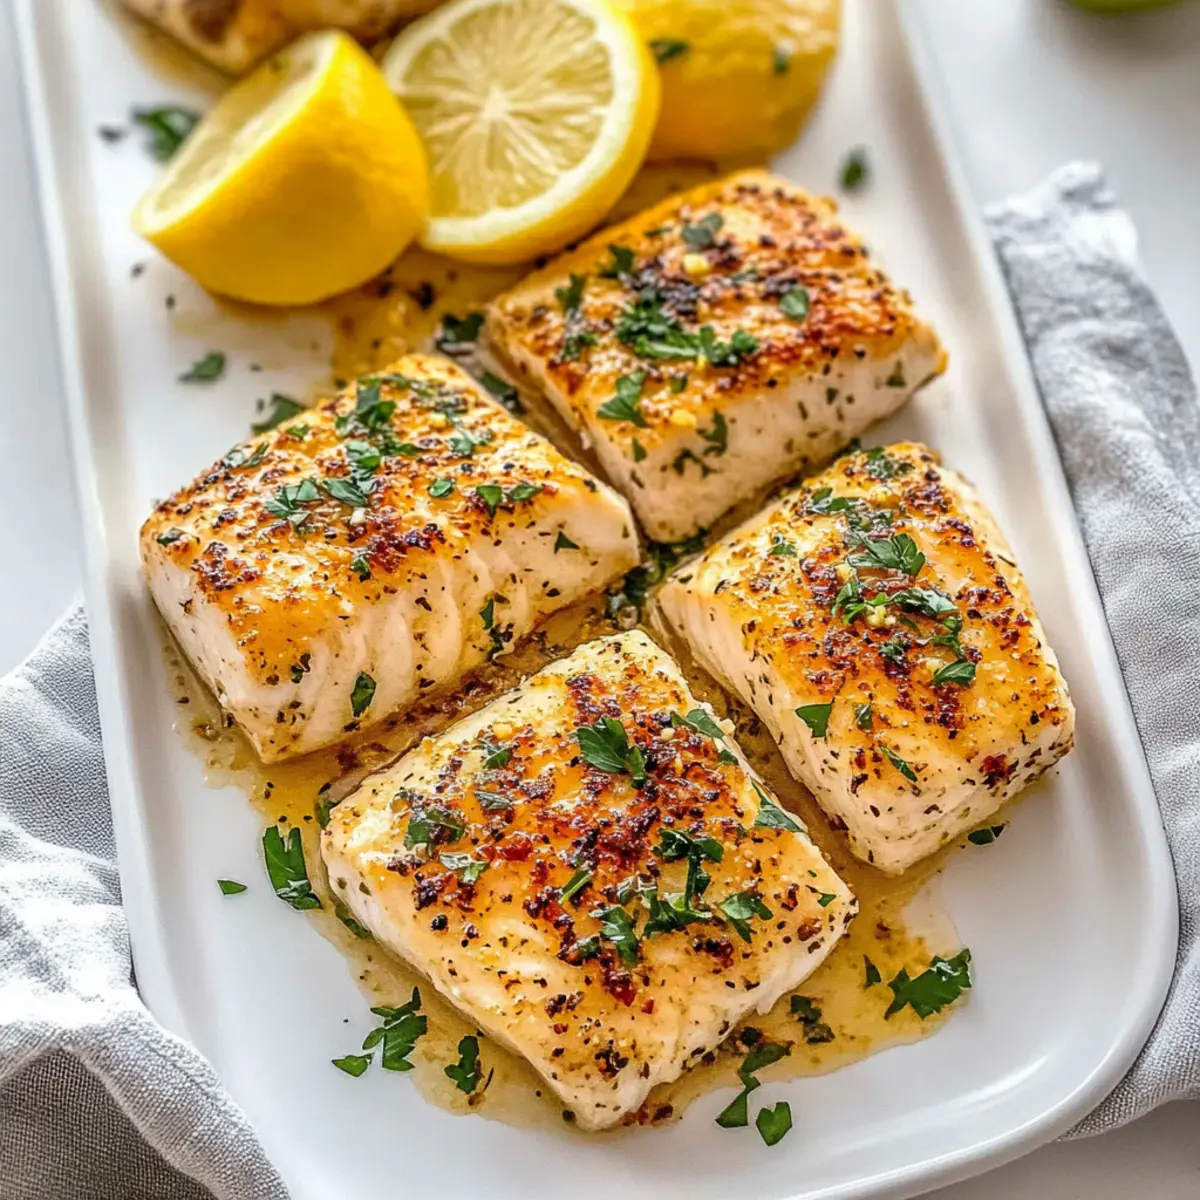
Once cooked, remove the Lemon Butter Baked Mahi Mahi from the oven and sprinkle with freshly chopped parsley for a vibrant touch. Serve immediately, allowing everyone at the table to indulge in the delightful flavors, with the fragrant lemon and buttery sauce stealing the show.
Lemon Butter Baked Mahi Mahi Variations
Feel free to explore different flavors and textures with these delightful variations!
- Fish Tacos: Serve your mahi mahi in soft tortillas, topped with crunchy cabbage slaw and a drizzle of lime juice for a zesty twist.
- Citrus-Infused: Add a splash of orange juice to the butter sauce for an extra fruity layer that complements the fish beautifully.
- Spicy Kick: Incorporate more red pepper flakes or diced jalapeños to the seasoning for those who enjoy a bit of heat.
- Herbaceous Delight: Swap in fresh herbs like dill or basil instead of parsley for a fragrant twist that'll brighten the dish.
- Alternative Fish: Use cod or tilapia as an alternative to mahi mahi, each offering its own unique texture and flavor profile.
- Grilled Variation: Instead of baking, grill the fish for a wonderfully smoky flavor; just be sure to oil the grill grates to prevent sticking.
- Nutty Crust: Combine ground almonds or crushed pistachios with the seasoning to create a crunchy, flavorful crust as it bakes.
- Creamy Sauce: For a twist on the classic butter sauce, mix in a splash of heavy cream or coconut milk to create a luscious, creamy topping.
No matter your choice, these variations ensure you can enjoy Lemon Butter Baked Mahi Mahi in styles that suit your taste each time! If you need more inspiration, check out my Crockpot Butter Chicken or try these delightful Matcha Baked Doughnuts as captivating dessert ideas!
Make Ahead Options
These Lemon Butter Baked Mahi Mahi are ideal for busy home cooks looking to streamline meal prep! You can slice the lemons and prepare the seasoning mix up to 24 hours in advance, storing them in airtight containers in the refrigerator to maintain freshness. Additionally, you can arrange the mahi mahi fillets on the lemon slices and coat them with butter the morning before to save time. When you’re ready to enjoy this delicious dish, preheat your oven and simply season the fish, bake for 10 minutes, broil for an additional 1.5 minutes, and serve! This way, you preserve the quality while significantly cutting your cooking time on a busy weeknight.
Expert Tips for Lemon Butter Baked Mahi Mahi
- Avoid Overcooking: Mahi mahi should be flaky yet moist. Use a meat thermometer to check for doneness at 145°F (63°C).
- Fresh Ingredients Matter: Always use fresh lemons and quality mahi mahi for the best flavor and texture in your dish.
- Butter Alternatives: For a dairy-free version of Lemon Butter Baked Mahi Mahi, substitute melted butter with olive oil or a plant-based butter.
- Broil Carefully: Watch closely when broiling the fish; it can quickly turn from golden to burnt if left unattended.
- Flavor Boost: For an extra layer of flavor, marinate the mahi mahi in lemon juice and spices for 15-30 minutes before cooking.
- Storage Secrets: Store leftovers in an airtight container; reheat gently in the microwave, covering with a paper towel to prevent drying out.
Storage Tips for Lemon Butter Baked Mahi Mahi
- Fridge: Store leftovers in an airtight container for up to 3 days. Keep them chilled to maintain freshness, and enjoy the delightful flavors for another meal!
- Freezer: For longer storage, wrap the baked mahi mahi tightly in plastic wrap and then place it in a freezer-safe bag. It can last up to 3 months in the freezer.
- Reheating: When reheating, place the fish in the microwave covered with a paper towel to retain moisture. A quick squeeze of lemon juice after reheating refreshes the flavors beautifully.
What to Serve with Lemon Butter Baked Mahi Mahi
Create the perfect meal by pairing your delightful fish dish with these complementary sides!
-
Light Garden Salad: A fresh garden salad with mixed greens and a citrus vinaigrette adds a refreshing contrast. It brightens the meal, making every bite feel light.
-
Garlic Roasted Asparagus: Tender asparagus roasted with garlic offers a savory crunch that pairs fantastically with the buttery fish. Its earthy tones elevate the dish beautifully.
-
Quinoa Pilaf: This nutty, protein-packed side offers a wholesome base for soaking up the lemon butter sauce, giving you heartiness without heaviness.
-
Coconut Rice: Sweet coconut-infused rice can balance the citrusy notes, creating a tantalizing contrast that your taste buds will love.
-
Creamy Coleslaw: A tangy coleslaw made with cabbage and a light dressing adds crunch and a creamy, zingy flavor that complements the flaky mahi mahi.
-
Chilled White Wine: A crisp Pinot Grigio or Sauvignon Blanc enhances the dish with refreshing acidity while accentuating the citrus elements.
-
Mango Salsa: Spicy mango salsa brings a tropical twist to your meal, with sweetness balancing the seasoning of the mahi mahi.
-
Lemon Sorbet: For dessert, lemon sorbet serves as a delightful palate cleanser, refreshing your taste buds after the savory main course.
These pairings will not only round out your meal but also leave your guests raving about the entire dining experience!

Lemon Butter Baked Mahi Mahi Recipe FAQs
What is the best way to select ripe lemons?
Absolutely! When choosing lemons, look for ones that are firm and heavy for their size. Fresh lemons will have a smooth, shiny skin and a vibrant yellow color. Avoid lemons that are dull or have dark spots, as these can indicate overripeness or spoilage.
How should I store leftover Lemon Butter Baked Mahi Mahi?
Store leftovers in an airtight container in the refrigerator for up to 3 days. Make sure to keep it chilled to maintain freshness. For the best reheating experience, cover the dish with a paper towel in the microwave to keep the fish moist.
Can I freeze Lemon Butter Baked Mahi Mahi?
Yes, you can! Wrap the baked mahi mahi tightly in plastic wrap and then place it in a freezer-safe bag. This method helps to prevent freezer burn and keeps the fish tasting great. Lemon Butter Baked Mahi Mahi can be frozen for up to 3 months. Whenever you’re ready to enjoy, thaw it in the refrigerator overnight before reheating.
What should I do if my fish is overcooked?
If you accidentally overcook your mahi mahi, don’t panic! Slice the fish into smaller pieces, then add a squeeze of fresh lemon juice or a drizzle of warm melted butter to bring some moisture back. Pair it with a light sauce or serve it over a bed of rice or greens to help mask the dryness.
Is this Lemon Butter Baked Mahi Mahi recipe suitable for those with seafood allergies?
Unfortunately, this recipe is not suitable for those with seafood allergies, as mahi mahi is a type of fish. For individuals looking to avoid seafood, I recommend trying similar flavors with chicken or firm tofu, seasoned with the same lemon and herb combination for a delightful alternative.
What are some good side dishes to serve with Lemon Butter Baked Mahi Mahi?
I often pair this dish with roasted vegetables like asparagus, zucchini, or bell peppers for a colorful dinner plate. A light salad with mixed greens and a lemon vinaigrette works beautifully, too. For a heartier option, consider serving it over fluffy quinoa or fragrant rice, making it a complete and satisfying meal.
Savory Lemon Butter Baked Mahi Mahi in Just 20 Minutes
Ingredients
Equipment
Method
- Preheat your oven to 400°F (204°C) and line a baking sheet with aluminum foil or parchment paper.
- Slice lemons into thin rounds and lay them on the prepared baking sheet.
- Place mahi mahi fillets on top of lemon slices and brush both sides with melted butter.
- In a bowl, combine paprika, garlic powder, oregano, sea salt, thyme, red pepper flakes, onion powder, and black pepper. Sprinkle over both sides of the fillets.
- Bake the mahi mahi for 10 minutes, then broil for 1.5 minutes until golden.
- Remove from oven, garnish with parsley, and serve immediately.