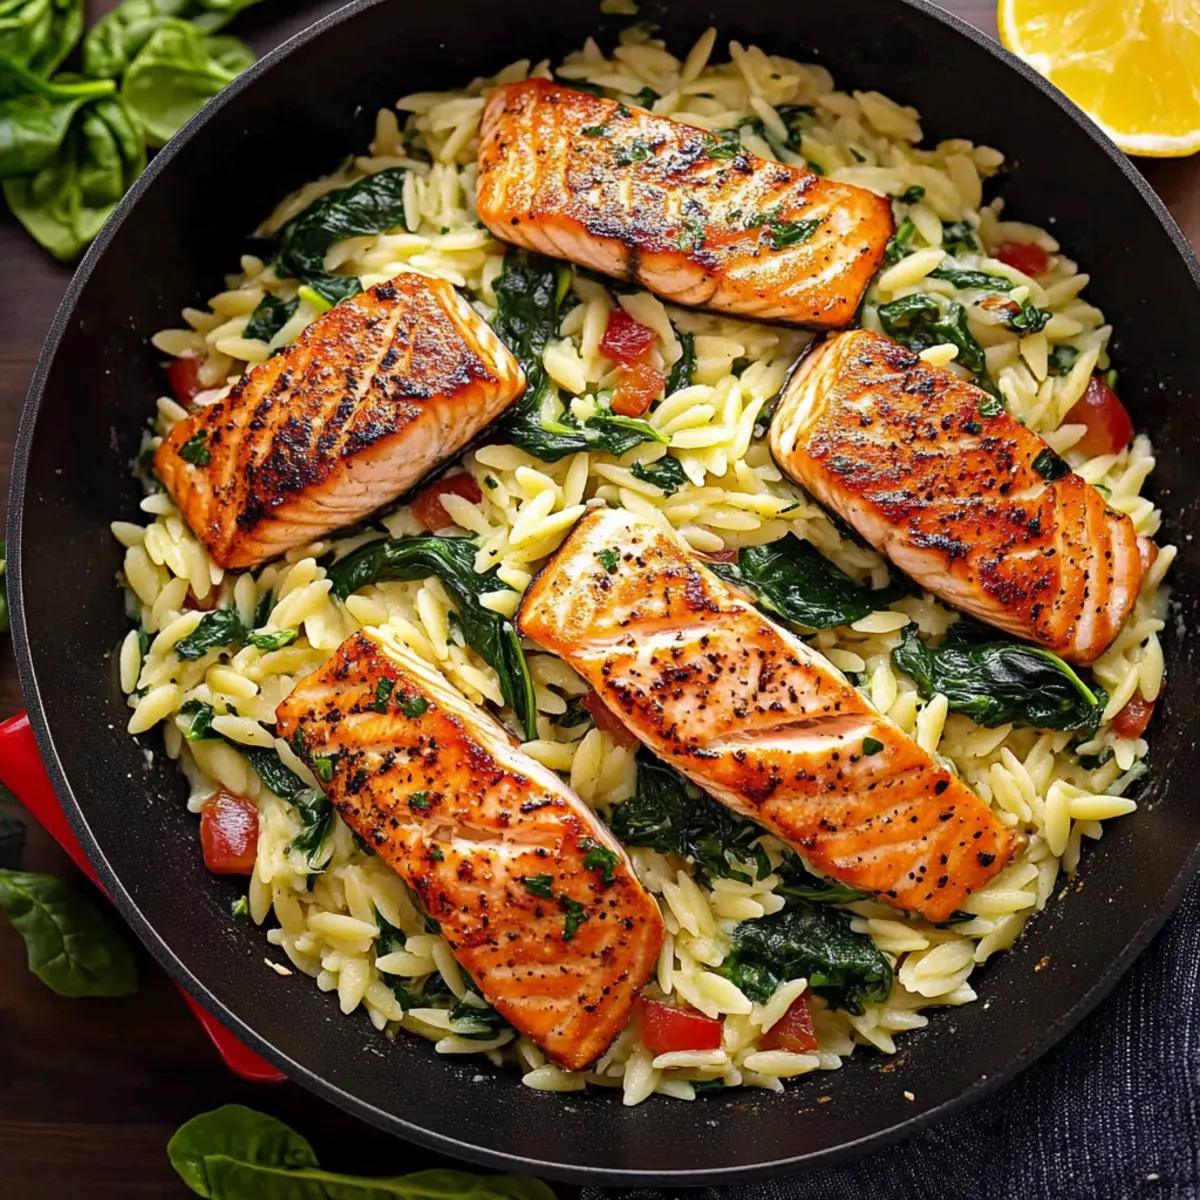
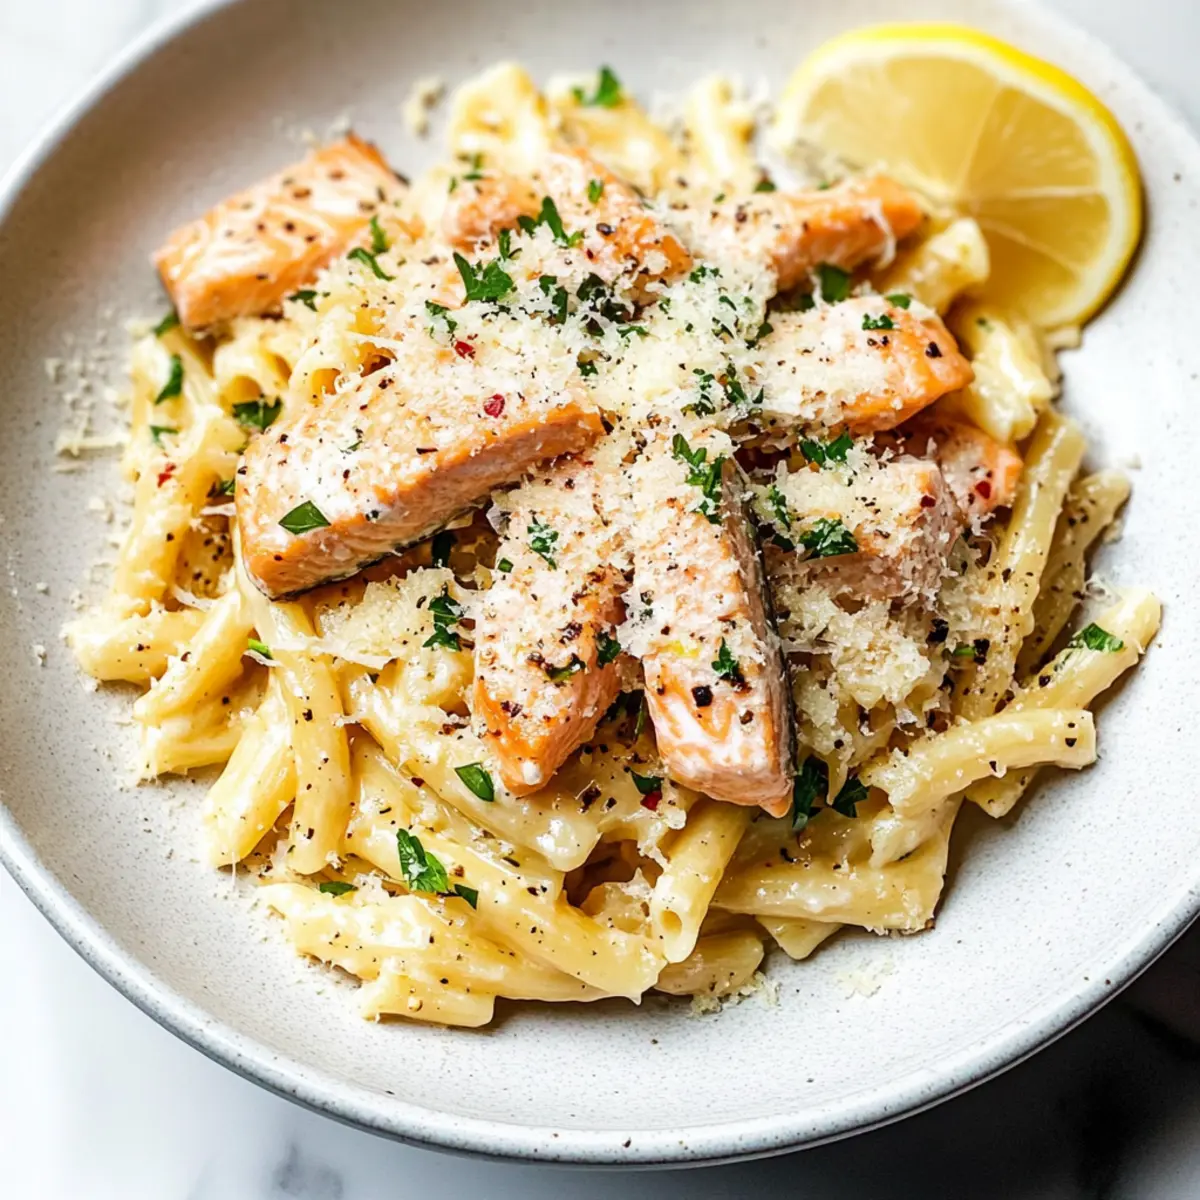
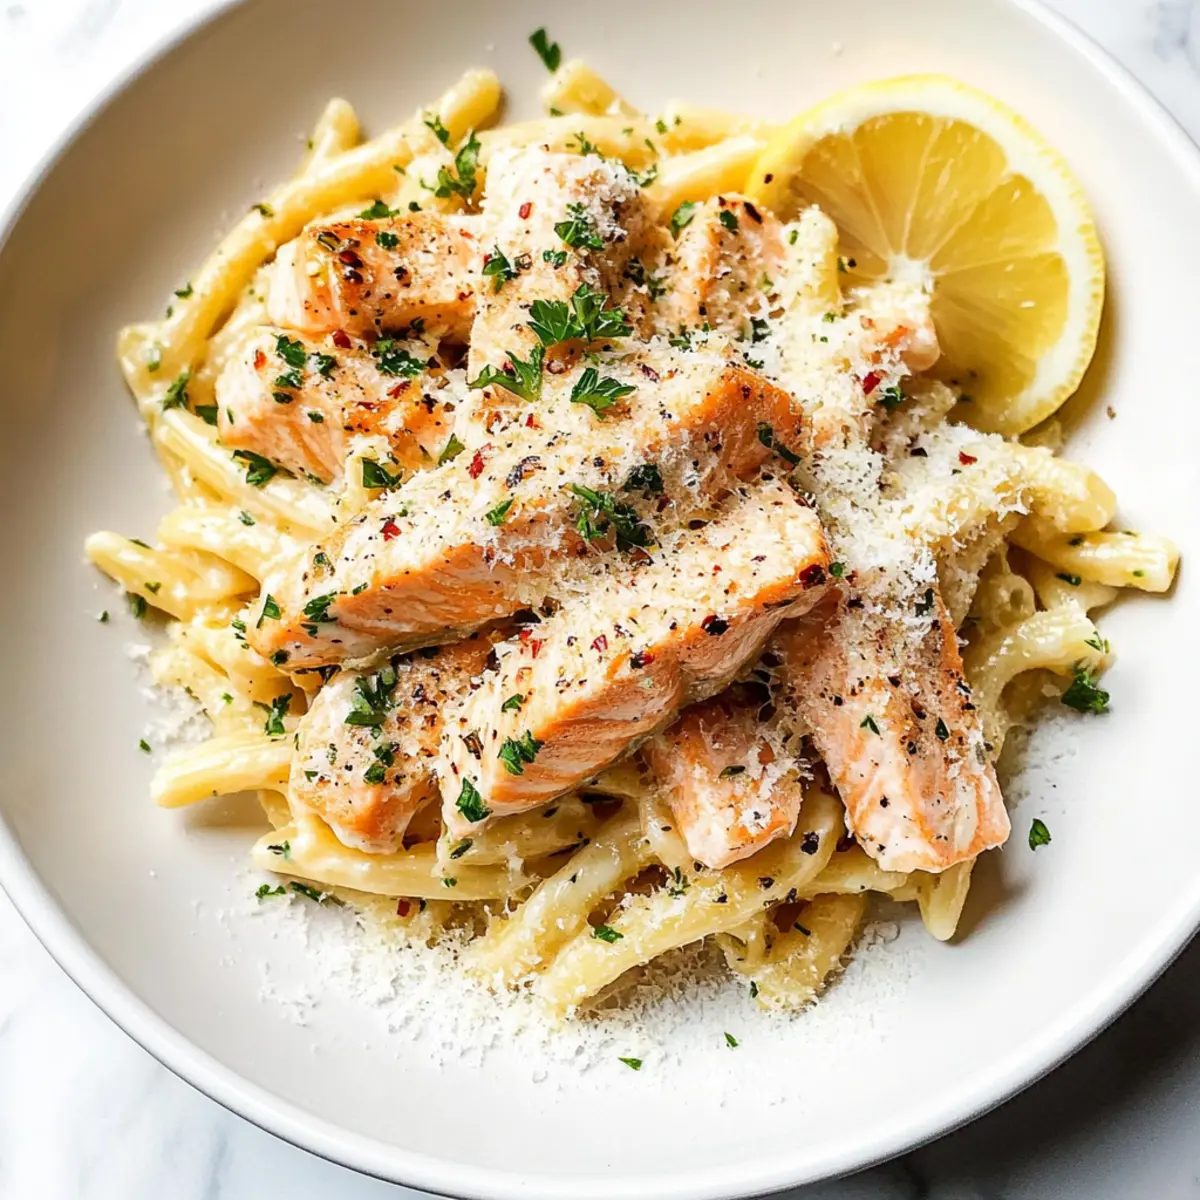
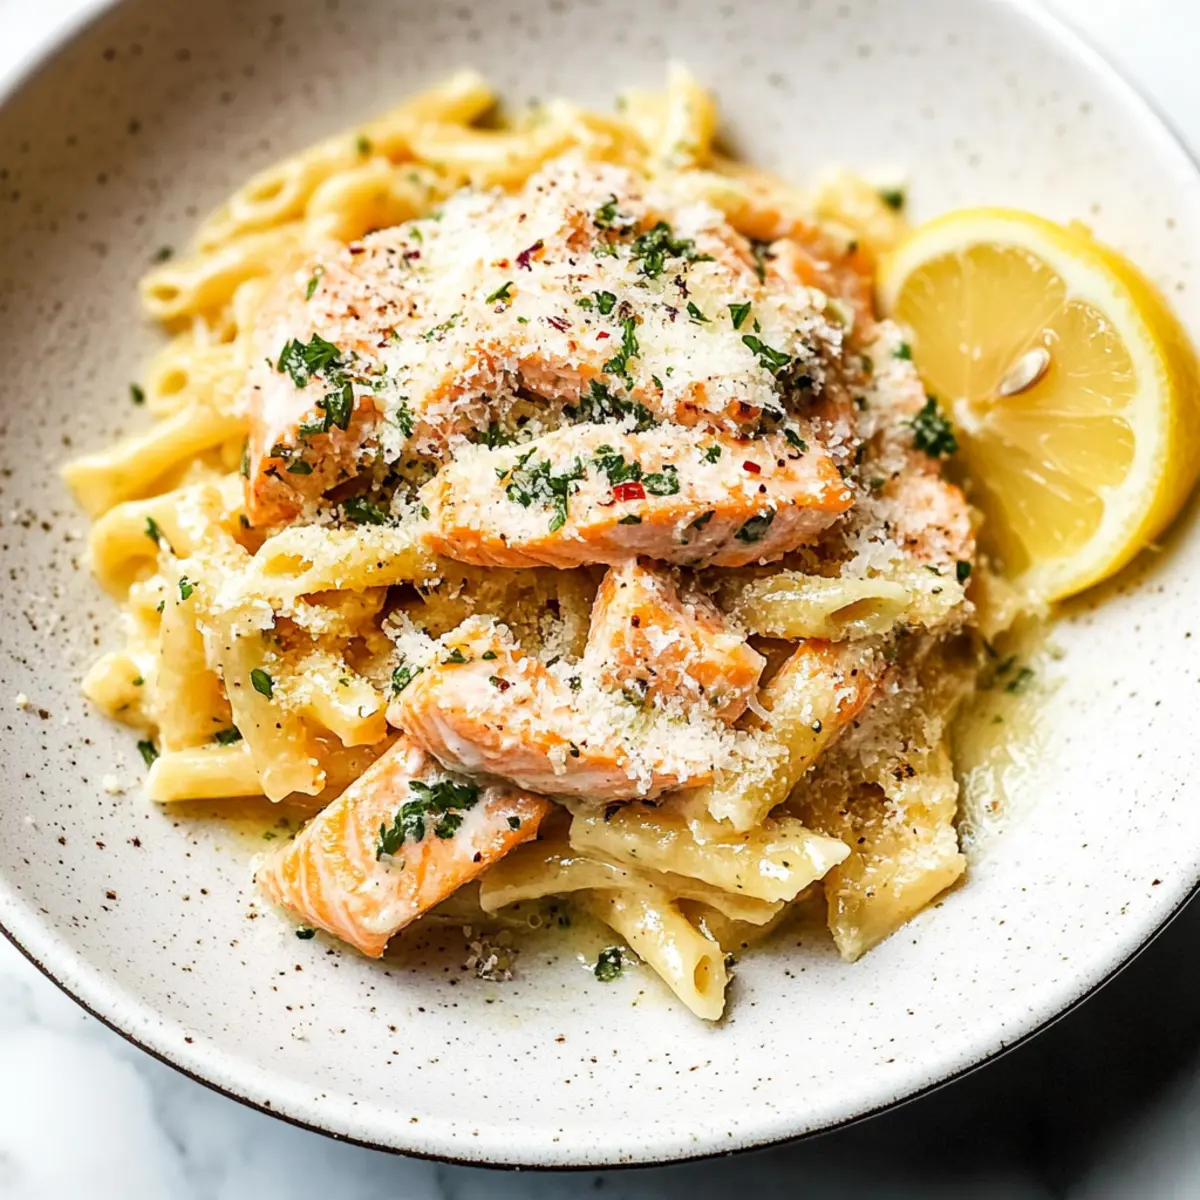
tastytrendingredients

  • Home
  • Recipes
    • Appetizers
    • Breakfast
    • Dessert
    • Dinner
    • Drinks
    • Salads
    • Snacks
    • Soups
  • About me
  • Contact me
menu icon
go to homepage
  • Home
  • Recipes
    • Appetizers
    • Breakfast
    • Dessert
    • Dinner
    • Drinks
    • Salads
    • Snacks
    • Soups
  • About me
  • Contact me
search icon
Homepage link
  • Home
  • Recipes
    • Appetizers
    • Breakfast
    • Dessert
    • Dinner
    • Drinks
    • Salads
    • Snacks
    • Soups
  • About me
  • Contact me
×

Crispy Roast Potatoes with Garlic and Rosemary Magic

February 16, 2026 by Grace Snow Leave a Comment

The sizzle of roasting potatoes fills the kitchen, drawing everyone closer in anticipation. Today, I’m excited to share my recipe for Crispy Roast Potatoes with Rosemary and Garlic, a side dish that promises to elevate any meal. These potatoes are not only Whole30 compliant and gluten-free; they also deliver the ultimate blend of crunchiness and fluffiness that will have your family asking for seconds. With simple ingredients and minimal prep, you can create a side that pairs beautifully with everything from roast chicken to grilled steaks. Want to discover the secrets behind achieving that perfect crispy exterior? Let’s dive into this recipe that’s bound to become a staple in your home!

Why are Crispy Roast Potatoes a Must-Have?

Irresistible Crunch: Each bite delivers a delightful crunch paired with a fluffy interior, making these potatoes incredibly satisfying.
Flavorful Aroma: Infused with garlic and rosemary, they fill your kitchen with enticing fragrances that will have everyone eagerly waiting at the table.
Easy Preparation: With just a few simple steps, these potatoes come together quickly—perfect for busy weeknights or special gatherings.
Versatile Side Dish: They complement a wide range of mains, whether it’s Fish Taco Bowls or Roasted Bratwurst Peppers, making your meals more exciting.
Crowd-Pleaser: Guaranteed to impress family and guests alike, they’re perfect for holidays or casual dinners.
Make Ahead: You can parboil them in advance, making meal prep a breeze while still achieving that coveted crispy finish when roasted fresh.

Crispy Roast Potatoes Ingredients

• Get ready to make a delightful side!

For the Potatoes

  • Yellow Potatoes – The star of the dish; cut into large chunks for the best texture.
  • Kosher Salt – Essential for enhancing flavor and achieving that perfect crispy crust.
  • Baking Soda – Helps create a wonderfully crisp exterior by breaking down the potato's surface.

For Roasting

  • Duck Fat – This rich fat elevates the flavor during roasting; feel free to swap with olive oil or ghee if needed.
  • Freshly-Cracked Black Pepper – Adds a depth of flavor that complements the dish beautifully.
  • Whole Head Garlic – Trimmed and roasted for an aromatic infusion that enhances the overall taste.
  • Chopped Fresh Rosemary – Brings a fresh herbal note, making these crispy roast potatoes truly enchanting.

For Finishing Touches

  • Extra-Virgin Olive Oil – Drizzle on at the end for a silky finish; grass-fed butter is a great alternative.
  • Flaky Sea Salt – This final sprinkle enhances both flavor and presentation for your crispy roast potatoes.

Step‑by‑Step Instructions for Crispy Roast Potatoes with Rosemary and Garlic

Step 1: Prep the Potatoes
Start by peeling the yellow potatoes and cutting them into large chunks for optimal texture; smaller potatoes can be left whole. Rinse the potatoes under cold water to remove excess starch, ensuring they will crisp up beautifully. Once prepared, set aside the potatoes while you boil water for the next step.

Step 2: Parboil the Potatoes
In a large pot, bring salted water to a rolling boil and add baking soda, which aids in achieving that coveted crispy exterior. Carefully add the potatoes and parboil for about 10 minutes until they're tender but still firm, not falling apart. Drain the potatoes in a colander and allow them to cool slightly, giving them a moment to relax.

Step 3: Coat and Season
While the potatoes are cooling, preheat your oven to 425°F (220°C). In a large bowl, toss the parboiled potatoes with duck fat, making sure each piece is well-coated. Season generously with kosher salt, freshly-cracked black pepper, chopped rosemary, and the whole head of garlic. This combination will infuse the potatoes with aromatic flavors as they roast.

Step 4: Roast the Potatoes
Spread the seasoned potatoes evenly on a large baking sheet, ensuring they’re not overcrowded for even roasting. Place them in the preheated oven and roast for 60 to 75 minutes. Keep an eye on them, turning the potatoes halfway through until they achieve a golden brown hue and a wonderfully crispy texture, bringing out that mouthwatering crunch.

Step 5: Finish and Serve
Once done, remove the crispy roast potatoes from the oven and let them cool for a few minutes. Drizzle with extra-virgin olive oil and sprinkle with flaky sea salt to enhance their flavor. Serve immediately, marveling at the crispy exteriors and fluffy insides that make these potatoes a delightful side dish to any meal.

How to Store and Freeze Crispy Roast Potatoes

Fridge: Store leftover crispy roast potatoes in an airtight container for up to 3 days. This will help retain some of their delightful flavors.

Freezer: For longer storage, freeze the parboiled potatoes before roasting. Place them in a freezer bag, and they’ll stay good for up to 3 months.

Reheating: To enjoy leftovers, reheat in a preheated oven at 400°F (200°C) for about 10-15 minutes, allowing them to regain some crispiness.

Make-Ahead Tip: Parboil and refrigerate the potatoes in advance; they can be roasted fresh when you're ready to serve crispy roast potatoes at your gathering!

Make Ahead Options

Crispy Roast Potatoes are perfect for meal prep, allowing busy home cooks to enjoy a delicious side with minimal last-minute fuss. You can parboil the potatoes up to 24 hours in advance; once cooled, simply refrigerate them in an airtight container. This step ensures they’re tender and ready for roasting without compromising their amazing texture. When you're ready to serve, toss the chilled potatoes in duck fat, rosemary, and seasoning before roasting at 425°F (220°C) for 60 to 75 minutes until crispy. This method guarantees that your potatoes will be just as delicious and satisfying, making this a fantastic solution for time-strapped weeknights!

What to Serve with Crispy Roast Potatoes with Rosemary and Garlic

Enhance your meal with a delightful medley of flavors and textures that beautifully complement your crispy roast potatoes.

  • Roasted Chicken: The juicy, tender chicken pairs perfectly with the crunch of the potatoes, creating a comforting meal that warms the heart.

  • Grilled Lamb Chops: Their rich flavor and herbaceous notes harmonize wonderfully with rosemary, making this pairing an elegant choice for gatherings.

  • Smoky Barbecue Ribs: The crispy potatoes make a wonderful contrast to the sticky sweetness of barbecue sauce, ideal for a casual feast.

  • Honey-Glazed Carrots: Sweet and tender, these vibrant carrots offer a lovely freshness that balances out the hearty potatoes beautifully.

  • Fresh Garden Salad: A crisp salad with mixed greens, cherry tomatoes, and a light vinaigrette adds a refreshing crunch to each bite, enhancing the meal.

  • Creamy Coleslaw: The tanginess of coleslaw provides a delightful contrast to the savory roast potatoes, bringing a creamy element to the table.

  • Red Wine: A silky, medium-bodied red wine like Pinot Noir will elevate your dining experience, pairing beautifully with both the potatoes and main dishes.

  • Apple Crisp: Finish with a warm apple crisp for dessert; the sweet, cinnamon flavors complement the savory theme while providing a comforting end to the meal.

Expert Tips for Crispy Roast Potatoes

Chunk Size Matters: Cut your potatoes into large, uniform chunks to prevent them from crumbling during cooking; this ensures maximum crispiness.

Perfect Parboil: Use salted water and baking soda during parboiling—this combination helps break down the potato surface for better texture.

Preheat Properly: Ensure your oven is fully preheated to 425°F (220°C) before roasting; this kick-starts the crisping process, yielding the best crispy roast potatoes.

Space Them Out: Spread the potatoes evenly on the baking sheet; overcrowding can lead to steaming instead of roasting, hindering that desired crunch.

Garnish Wisely: Finish with flaky sea salt right before serving to elevate flavor; avoid adding it too early to keep the integrity of the potatoes intact.

Crispy Roast Potatoes Variations

Feel free to get creative and tailor these crispy roast potatoes to your taste buds with these delightful twists!

  • Herb Swap: Exchange rosemary for thyme or oregano to refresh the flavor profile for a unique twist.
    Consider using a combination of these herbs to create a fragrant herb mix that captivates your senses.

  • Garlic Infusion: Enhance the garlic flavor by using roasted garlic oil instead of duck fat for a richer taste.
    Simply drizzle the oil over the potatoes while tossing, and enjoy the added depth of flavor.

  • Spicy Kick: Sprinkle crushed red pepper flakes or cayenne for a spicy variation that’ll warm your taste buds.
    This simple addition elevates the dish and adds a whole new layer of heat to savor.

  • Paprika Boost: Add smoked paprika for a hint of smokiness that can take these potatoes to another level.
    Toss the potatoes with a teaspoon of paprika before roasting to embrace a new flavor dimension.

  • Vegan Option: Substitute duck fat with avocado oil or melted coconut oil to keep the dish plant-based friendly.
    These swaps maintain delicious crunchiness while also catering to vegan diets.

  • Cheesy Flavor: Add grated Parmesan or nutritional yeast right before serving to introduce a delightful savoriness.
    This flavor enhancement not only adds richness but also an irresistible cheesy aroma.

  • Zesty Finish: A squeeze of fresh lemon juice right before serving can brighten flavors and add a refreshing zing.
    Pair it with a sprinkle of zest to make each bite burst with a delightful citrus note.

  • Twice-Roasted: For an extra crispy outer layer, roast the potatoes a second time at a higher temperature for the last 15 minutes.
    This technique adds a delightful crunch that elevates the overall texture and taste.

Enhance your dining experience by serving these crispy roast potatoes alongside Smoky Sweet Potatoes or Roasted Corn Fried for a vibrant spread that excites the palate!

Crispy Roast Potatoes with Rosemary and Garlic Recipe FAQs

How do I choose the best potatoes?
Absolutely! For crispy roast potatoes, yellow potatoes are ideal due to their creamy texture and ability to hold their shape. Look for firm potatoes without dark spots or blemishes, as these can indicate overripeness. A great selection will be smooth and evenly colored, perfect for achieving that delightful crunch.

What’s the best way to store leftover crispy roast potatoes?
After enjoying your crispy roast potatoes, let any leftovers cool down before placing them in an airtight container. They can be stored in the fridge for up to 3 days. To reheat, pop them back into a preheated oven at 400°F (200°C) for about 10-15 minutes to help restore some of that glorious crispiness.

Can I freeze parboiled potatoes instead of fully roasted ones?
Very! To freeze parboiled potatoes, first follow the parboiling steps, then drain and let them cool completely. Once cooled, spread them in a single layer on a baking sheet and freeze until solid. Transfer them to a freezer bag or airtight container, and they’ll keep well for up to 3 months. When you're ready to use them, roast straight from the freezer, adding a few extra minutes to the cooking time.

What should I do if my potatoes aren’t crispy enough?
If your crispy roast potatoes aren't as crispy as desired, check a few factors. First, ensure you’re using enough duck fat or oil to coat all potatoes evenly. Also, make sure your oven is preheated and that the potatoes are spread out on the baking sheet without overcrowding. If they are still not crisping up, increase the temperature by 25°F (about 15°C) and roast a bit longer. This will help achieve that coveted crunch.

Are crispy roast potatoes safe for pets?
While the ingredients in crispy roast potatoes are generally safe, make sure not to include any seasoning like salt or garlic if you plan to share with your pets, as these can be harmful. It's best to stick to plain, cooked potatoes for your furry friends.

Can I make this recipe in advance?
Absolutely! You can parboil the potatoes a day ahead and store them in the fridge. When you’re ready to serve, just toss them in duck fat and roast. This way, you can enjoy freshly roasted crispy potatoes without the last-minute scramble!

Crispy Roast Potatoes

Crispy Roast Potatoes with Garlic and Rosemary Magic

Crispy Roast Potatoes deliver an irresistible crunch with garlic and rosemary flavor, perfect for any meal.
Print Recipe Pin Recipe
Prep Time 15 minutes mins
Cook Time 1 hour hr 15 minutes mins
Cooling Time 5 minutes mins
Total Time 1 hour hr 35 minutes mins
Servings: 4 servings
Course: Dinner
Cuisine: American
Calories: 250
Ingredients Equipment Method Nutrition Notes

Ingredients
  

For the Potatoes
  • 2 lbs Yellow Potatoes cut into large chunks
  • 1 tbsp Kosher Salt for boiling
  • 1 tsp Baking Soda
For Roasting
  • 1/4 cup Duck Fat can swap with olive oil or ghee
  • 1 tsp Freshly-Cracked Black Pepper
  • 1 whole Head Garlic trimmed and roasted
  • 2 tbsp Chopped Fresh Rosemary
For Finishing Touches
  • 1 tbsp Extra-Virgin Olive Oil for drizzling
  • 1 tsp Flaky Sea Salt for finishing

Equipment

  • Large pot
  • Colander
  • large bowl
  • Baking Sheet

Method
 

Step-by-Step Instructions
  1. Start by peeling the yellow potatoes and cutting them into large chunks. Rinse under cold water to remove excess starch.
  2. In a large pot, bring salted water to a boil with baking soda. Add the potatoes and parboil for about 10 minutes. Drain and let cool slightly.
  3. Preheat oven to 425°F (220°C). Toss parboiled potatoes with duck fat and seasonings in a bowl. Ensure each piece is coated.
  4. Spread the seasoned potatoes on a baking sheet and roast for 60-75 minutes, turning halfway, until golden brown and crispy.
  5. Remove from the oven, let cool briefly, drizzle with olive oil, and sprinkle with sea salt. Serve immediately.

Nutrition

Serving: 1servingCalories: 250kcalCarbohydrates: 34gProtein: 3gFat: 12gSaturated Fat: 3gMonounsaturated Fat: 9gSodium: 360mgPotassium: 600mgFiber: 3gSugar: 1gVitamin C: 25mgCalcium: 2mgIron: 8mg

Notes

For best results, ensure potatoes are spaced out on the baking sheet and the oven is preheated to achieve optimal crispiness.

Tried this recipe?

Let us know how it was!

Energizing Green Protein Smoothie Bowl for a Fresh Start

February 16, 2026 by Grace Snow Leave a Comment

As I stood in my kitchen, a whirlwind of uneaten bananas and a crisper packed with greens caught my eye. What if I transformed these seemingly mundane ingredients into a vibrant bowl that could kick-start my day? Enter the Green Protein Smoothie Bowl—my go-to solution for those mornings that need a little extra energy boost. Packed with creamy avocado and sweet mango, this recipe is both gluten-free and dairy-free, ensuring that everyone can indulge in its tropical goodness. It’s exceptionally quick to whip up, making it the ideal breakfast or a refreshing snack that leaves you feeling nourished and satisfied. Excited to dive into the details of crafting this nutrient-packed delight? Let’s blend up something special!

Why is this smoothie bowl a game changer?

Vibrant Colors: This Green Protein Smoothie Bowl is not just good for you; it’s a feast for the eyes, with a bright and cheerful appearance.

Quick & Easy: Whip it up in minutes! Just blend, pour, and top—perfect for busy mornings or post-workout snacks.

Nutrient-Packed: Loaded with healthy fats, protein, and fiber, this bowl will keep you fuller longer while fueling your day.

Customizable: Feel free to mix and match fruits with options like blueberries or peaches to suit your taste or seasonal availability.

Dairy-Free Delight: It fits seamlessly into vegan, gluten-free, or dairy-free diets without compromising an ounce of flavor. Pair it with a refreshing Chocolate Cherry Smoothie for a delightful treat!

Crowd-Pleasing: Serve it to family and friends, and watch everyone enjoy this delicious and nutritious dish without any complaints!

Green Protein Smoothie Bowl Ingredients

• A deliciously vibrant mix awaits!

For the Smoothie

  • Coconut Milk – Provides creaminess and a hint of sweetness; almond milk or oat milk can also work beautifully.
  • Baby Spinach – A nutritional powerhouse that adds greens without overwhelming the flavor; kale can be a great substitute.
  • Frozen Mango – Adds a luscious sweetness and a tropical taste; try frozen pineapple or banana for a delightful twist.
  • Frozen Zucchini Slices – Enhances the creamy texture and boosts fiber; feel free to omit if you don’t have it on hand.
  • Frozen Avocado – Delivers healthy fats and a dreamy creaminess; fresh avocado can also work; adjust as needed.
  • Vanilla Protein Powder – Increases protein content, making this smoothie bowl satisfying; use plant-based protein for a vegan alternative or skip it for a lighter option.

For the Toppings

  • Chia Seeds – Boost nutrition and add a satisfying crunch; sprinkle generously!
  • Raspberries – Provide a burst of flavor and visual appeal, harmonizing wonderfully with the green base.
  • Granola – Adds a lovely crunch for texture; opt for gluten-free granola if desired.
  • Nuts – Use your favorite nuts for extra protein and a hearty feel.
  • Bananas – Slice them up for added sweetness and creaminess; they never disappoint!
  • Yogurt – Drizzle a dairy-free yogurt on top for an extra creamy element and pleasing tang.

Embrace the magic of this Green Protein Smoothie Bowl, and feel free to let your creativity shine with toppings that you love!

Step‑by‑Step Instructions for Green Protein Smoothie Bowl

Step 1: Blend the Base Ingredients
Start by adding 1 cup of coconut milk to a high-speed blender, followed by 1 cup of baby spinach, 1 cup of frozen mango, 1/2 cup of frozen zucchini slices, 1/2 cup of frozen avocado, and 1 scoop of vanilla protein powder. Secure the lid tightly and blend on high for 30-45 seconds, until the mixture is smooth and creamy, with a vibrant green hue.

Step 2: Check the Consistency
After blending, pause to check the consistency of your Green Protein Smoothie Bowl. If it's too thick for your liking, add a little more coconut milk, about 2 tablespoons at a time, then blend again for around 10 seconds. The goal is a luscious, thick texture that will hold up beautifully when poured into a bowl.

Step 3: Pour into a Serving Bowl
Once your smoothie has reached the desired creamy consistency, carefully pour it into your favorite bowl. Use a rubber spatula if necessary to scrape down the sides of the blender and ensure you don’t waste any of this delicious green goodness. The vibrant color will be a feast for the eyes as you prepare to add your toppings.

Step 4: Add Toppings for Texture and Flavor
Now comes the fun part—adding toppings to your Green Protein Smoothie Bowl! Sprinkle a tablespoon of chia seeds for a nutritional boost, followed by a handful of fresh raspberries for a pop of color and flavor. Add a generous sprinkle of granola, a few banana slices, and if desired, a dollop of dairy-free yogurt to create a delightful mix of textures.

Step 5: Serve Immediately
Your Green Protein Smoothie Bowl is ready to be savored! Enjoy it immediately to maintain the perfect texture. Grab a spoon and dig into the creamy, nutrient-packed bowl, relishing every bite of this quick and healthy meal, perfect for breakfast or a refreshing snack.

Expert Tips for the Best Green Protein Smoothie Bowl

  • Choose Quality Ingredients: Fresh, ripe fruits and high-quality protein powder make all the difference in flavor and nutrition. Opt for organic when possible!

  • Perfect Texture: To achieve a creamy consistency, ensure your blender is powerful enough to handle frozen ingredients. Don't hesitate to adjust the coconut milk amount for desired thickness.

  • Avoid Overloading: Stick to recommended quantities for each ingredient to prevent a watery smoothie bowl. Too much liquid can dilute the vibrant flavors of your green protein smoothie bowl.

  • Prep Ahead: For busy mornings, pre-portion your smoothie ingredients in freezer bags. Just grab a bag, blend, and enjoy!

  • Topping Variety: Don't be afraid to experiment with different toppings each time you make your smoothie bowl! Seasonal fruits, nuts, and seeds can give you a new experience.

  • Immediate Enjoyment: Enjoy your smoothie bowl right after preparation to maintain optimal texture and freshness. If storing leftovers, re-blend with a bit of coconut milk before serving again.

Make Ahead Options

These Green Protein Smoothie Bowls are perfect for meal prep, saving you precious time on busy mornings! You can blend the smoothie base (coconut milk, spinach, mango, zucchini, avocado, and protein powder) up to 24 hours in advance and store it in an airtight container in the refrigerator. To maintain its delicious quality, give it a good shake before serving; if it's thickened, add a splash of coconut milk and re-blend for a creamy consistency. You can also prepare and portion out your toppings, like chia seeds and granola, in advance so everything is ready to go when you're ready to indulge in this nutritious treat. Enjoying a nutritious breakfast has never been easier!

Green Protein Smoothie Bowl Variations

Feel free to get creative with your smoothie bowl to make it uniquely yours!

  • Dairy-Free Delight: Substitute the coconut milk with almond or oat milk for a different creamy flavor.

  • Tasty Greens: Swap baby spinach for kale or swiss chard for a heartier taste while keeping it nutritious.

  • Frozen Fruit Fun: Replace frozen mango with frozen pineapple or mixed berries for a different tropical vibe.

  • Zucchini Option: If frozen zucchini isn’t on hand, simply omit it; your bowl will still be delicious without it.

  • Avocado Switch: Fresh avocado can replace frozen avocado; just use more if you prefer a creamier texture.

  • Flavor Boost: Add a tablespoon of nut butter for extra creaminess and a protein punch that will keep you full longer.

  • Bowl Toppings Twist: Try topping with shredded coconut or pomegranate seeds for an unexpected crunch and vibrant flavor.

  • Protein Variation: Use your favorite plant-based protein powder or try a chocolate flavor for a delicious chocolaty twist; it pairs perfectly with the greens!

The flexibility of this recipe allows you to enjoy a different experience each time! If you're feeling adventurous, you can also check out my refreshing Pitaya Smoothie Bowl or indulge in the delightful layers of flavor from my Lemon Ricotta Protein Pancakes. Get blending for a creatively satisfying breakfast!

How to Store and Freeze Green Protein Smoothie Bowl

  • Room Temperature: It's best to avoid keeping the smoothie bowl at room temperature, as it can quickly lose its freshness and texture.

  • Fridge: Leftovers can be stored in an airtight container in the refrigerator for up to 24 hours. For best results, re-blend with a splash of coconut milk before serving to restore creaminess.

  • Freezer: If you want to extend its life, pour the smoothie mixture into ice cube trays or freezer bags and freeze for up to a month. Thaw in the fridge overnight or blend straight from frozen for a chilly treat.

  • Reheating: Since this is a cold dish, there's no need to reheat it. Just give it a good blend if it's been frozen or stored to bring back that delightful texture of your Green Protein Smoothie Bowl.

What to Serve with Creamy Green Protein Smoothie Bowl

Elevate your meal experience with delightful pairings that enhance the nourishing essence of this creamy bowl.

  • Toasted Whole Grain Bread: Its nutty flavor and crunchy texture make a perfect companion to your smoothie bowl, providing a satisfying crunch.

  • Tropical Fruit Salad: A refreshing mix of pineapple, kiwi, and passion fruit complements the smoothie’s tropical notes, adding brightness and zing.

  • Vegan Overnight Oats: Creamy oats topped with nuts and berries can add a hearty element, creating a balanced and nourishing breakfast spread.

  • Crispy Roasted Chickpeas: For a protein-packed munch, these crunchy bites bring a savory contrast that’s both satisfying and nutritious.

  • Herbal Tea: A light peppermint or chamomile tea would harmonize well, offering a soothing beverage option to balance the vibrant flavors of your bowl.

  • Nut Butter Energy Balls: These bites of goodness provide an extra energy boost, and their rich, nutty flavor perfectly complements the smoothie’s creaminess.

  • Dairy-Free Yogurt Parfait: Layered with granola and fresh fruits, this parfait adds a delightful crunch and a touch of creaminess, marrying well with the smoothie bowl’s texture.

  • Lemon Water: Infused with fresh herbs like mint, this refreshing drink cleanses the palate and harmonizes beautifully with the vibrant flavors of your smoothie.

Green Protein Smoothie Bowl Recipe FAQs

How do I choose the ripeness of my ingredients?
Absolutely! When selecting your fruits and greens, aim for bright, unblemished produce. Choose ripe avocados that yield slightly to gentle pressure, and mangoes that have a sweet aroma and give a little when pressed. For greens like baby spinach, look for crisp leaves that are vibrant without any dark spots.

What’s the best way to store leftovers?
To store leftover Green Protein Smoothie Bowl, transfer the mixture into an airtight container and refrigerate. It’s best if consumed within 24 hours to maintain flavor and texture. Just before serving, give it a re-blend with a splash of coconut milk to refresh its creamy consistency.

Can I freeze the smoothie bowl?
Yes! To freeze your Green Protein Smoothie Bowl, pour the mixture into ice cube trays or freezer-safe bags. It can be frozen for up to 3 months. When you're ready, simply thaw overnight in the fridge or blend straight from frozen if you want an ultra-cold treat!

What if the smoothie bowl is too thick?
No worries! If your smoothie mixture turns out too thick, you can easily adjust it. Begin by adding 2 tablespoons of coconut milk, then blend for another 10 seconds. Repeat this process until you reach your desired creamy consistency. Remember, a little liquid goes a long way!

Are there any ingredient substitutions for allergies?
Very much so! If you or someone you're serving has allergies, consider using nut-free milk alternatives in place of coconut milk, like oat milk or hemp milk. If nut allergies are a concern, skip the nuts in the toppings and opt for seeds such as pumpkin seeds or sunflower seeds for crunch without worry.

Is this smoothie bowl pet-friendly?
While the Green Protein Smoothie Bowl is loaded with healthy ingredients for us, it’s best not to share it with pets. Ingredients like avocado can be toxic to dogs, so stick to pet-friendly treats for your furry friends!

Green Protein Smoothie Bowl

Energizing Green Protein Smoothie Bowl for a Fresh Start

Discover a delicious Green Protein Smoothie Bowl, perfect for breakfast or a refreshing snack, packed with nutrients and energy.
Print Recipe Pin Recipe
Prep Time 5 minutes mins
Total Time 5 minutes mins
Servings: 2 bowls
Course: Breakfast
Cuisine: Vegan
Calories: 350
Ingredients Equipment Method Nutrition Notes

Ingredients
  

For the Smoothie
  • 1 cup Coconut Milk Almond milk or oat milk can also work beautifully.
  • 1 cup Baby Spinach Kale can be a great substitute.
  • 1 cup Frozen Mango Try frozen pineapple or banana for a delightful twist.
  • 1/2 cup Frozen Zucchini Slices Feel free to omit if you don’t have it on hand.
  • 1/2 cup Frozen Avocado Fresh avocado can also work; adjust as needed.
  • 1 scoop Vanilla Protein Powder Use plant-based protein for a vegan alternative or skip for a lighter option.
For the Toppings
  • 1 tablespoon Chia Seeds Boosts nutrition and adds a satisfying crunch.
  • 1 cup Raspberries Provides a burst of flavor and visual appeal.
  • 1/2 cup Granola Opt for gluten-free granola if desired.
  • 1/4 cup Nuts Use your favorite nuts for extra protein.
  • 1 banana Bananas Slice them up for added sweetness.
  • 2 tablespoons Yogurt Drizzle a dairy-free yogurt on top for creaminess.

Equipment

  • High-speed blender

Method
 

Step-by-Step Instructions
  1. Start by adding 1 cup of coconut milk to a high-speed blender, followed by 1 cup of baby spinach, 1 cup of frozen mango, 1/2 cup of frozen zucchini slices, 1/2 cup of frozen avocado, and 1 scoop of vanilla protein powder. Secure the lid tightly and blend on high for 30-45 seconds, until the mixture is smooth and creamy.
  2. After blending, check the consistency. If it's too thick, add a little more coconut milk, about 2 tablespoons at a time, and blend again for around 10 seconds.
  3. Once your smoothie has reached the desired consistency, carefully pour it into your favorite bowl.
  4. Now add toppings: sprinkle a tablespoon of chia seeds, a handful of fresh raspberries, a generous sprinkle of granola, a few banana slices, and a dollop of dairy-free yogurt.
  5. Your Green Protein Smoothie Bowl is ready to be enjoyed immediately for the best texture.

Nutrition

Serving: 1bowlCalories: 350kcalCarbohydrates: 45gProtein: 12gFat: 15gSaturated Fat: 8gPolyunsaturated Fat: 2gMonounsaturated Fat: 5gSodium: 150mgPotassium: 600mgFiber: 10gSugar: 18gVitamin A: 5000IUVitamin C: 60mgCalcium: 100mgIron: 2mg

Notes

Feel free to let your creativity shine with toppings that you love. For busy mornings, pre-portion ingredients in freezer bags to make blending easier.

Tried this recipe?

Let us know how it was!

Cinnamon Rolls Recipe - Soft, Gooey, and Irresistibly Homemade

February 16, 2026 by Grace Snow Leave a Comment

The moment I cracked open the oven door, I was greeted by the divine smell of cinnamon swirling through my kitchen—a scent that instantly transports me to my childhood. This Cinnamon Rolls Recipe is my secret weapon for turning any ordinary day into a cozy celebration, perfect for breakfast, brunch, or a sweet snack. Not only are these rolls soft, fluffy, and irresistibly gooey, but they also require minimal effort, making them a delightful treat for both novice bakers and seasoned pros. Whether you're hosting a weekend gathering or simply indulging yourself, these homemade cinnamon rolls promise a melt-in-your-mouth experience that will leave everyone asking for seconds. Ready to fill your home with that heavenly aroma? Let’s roll!

Why Are These Cinnamon Rolls Irresistible?

Unmatched Gooeyness: These cinnamon rolls are oozing with sweetness in every bite, giving you that delightful melt-in-your-mouth experience.
Simple to Make: Even if you're a beginner, this recipe makes it easy to impress friends and family with minimal fuss.
A Versatile Treat: Enjoy these rolls for breakfast, brunch, or as a sweet snack with your favorite coffee or tea!
Make-Ahead Convenience: Plan your mornings effortlessly by prepping the rolls the night before—wake up to fresh-baked bliss!
Satisfying Aroma: Just one whiff of cinnamon wafting through your home will elevate your mood and create the perfect cozy atmosphere, inviting everyone to gather around.
Don't forget to check out my Pumpkin Cinnamon Roll recipe for a festive twist on a classic!

Cinnamon Rolls Recipe Ingredients

Here’s everything you need to create the most irresistible cinnamon rolls!

For the Dough

  • Whole Milk – Provides moisture and softness to the dough; warm to about 110°F to activate yeast.
  • Active Dry Yeast – A leavening agent that helps the dough rise; ensure it blooms by sprinkling over warm milk.
  • Granulated Sugar – Sweetens the dough and filling; essential for browning during baking.
  • Eggs – Provide structure and richness; use one whole egg and an additional yolk for added tenderness.
  • Unsalted Butter – Adds flavor and moisture to the dough (melted) and filling, contributing to that gooey center.
  • All-Purpose Flour – Main structural component of the dough; can substitute with bread flour for a chewier texture.
  • Salt – Enhances flavor and strengthens the dough.

For the Filling

  • Brown Sugar – Adds rich sweetness and deeper flavor to the filling, enhancing the overall experience.
  • Ground Cinnamon – The key flavor for the filling, imbuing warmth and a characteristic taste.

For the Frosting

  • Cream Cheese – The base for the frosting; provides tanginess and creaminess to balance the sweetness.
  • Powdered Sugar – Sweetens and thickens the frosting to perfection, making it irresistible on warm rolls.

With this Cinnamon Rolls Recipe, you can create bakery-quality rolls that promise a melt-in-your-mouth experience with every bite!

Step‑by‑Step Instructions for Cinnamon Rolls Recipe

Step 1: Prepare the Dough
Warm the whole milk to about 110°F to activate the yeast, then sprinkle the active dry yeast and a tablespoon of granulated sugar over it. Allow it to bloom for 5-10 minutes until frothy. In a mixing bowl, combine the melted unsalted butter, one whole egg, an additional egg yolk, flour, and salt. Mix until combined, then knead the dough for 7-8 minutes until smooth and elastic.

Step 2: First Rise
Grease a large bowl with a little melted butter or oil and place the kneaded dough inside, turning to coat. Cover the bowl with a clean kitchen towel and let it rise in a warm area for 60-90 minutes, or until the dough has doubled in size. You’ll know it’s ready when it springs back slightly when gently poked.

Step 3: Make Filling
While the dough is rising, prepare the cinnamon filling. In a small bowl, combine melted butter, brown sugar, and ground cinnamon to form a thick paste. Mix until smooth and cohesive, making sure it's well combined to ensure each roll has that sweet, gooey center. Set this delicious mixture aside as you wait for the dough to rise.

Step 4: Shape Rolls
Once the dough has risen, punch it down gently to release air and turn it onto a lightly floured surface. Roll it out into an 18x12-inch rectangle, ensuring even thickness. Spread the prepared cinnamon filling evenly across the dough, leaving a small border around the edges. Tightly roll the dough into a log, then slice into 12 equal pieces using a sharp knife or dental floss.

Step 5: Second Rise
Grease a baking pan and place the sliced cinnamon rolls next to each other, cut sides up. Cover the pan with a towel and let the rolls rise for another 30-45 minutes until puffy. As they rise, preheat your oven to 375°F, ensuring a hot environment for baking that perfect Cinnamon Rolls Recipe.

Step 6: Bake
Once the rolls have risen and look beautifully puffy, place them in the preheated oven. Bake for 20-25 minutes, or until they are golden brown on top and the centers are cooked through. Check for doneness at around 20 minutes, and keep an eye on them to avoid overbaking.

Step 7: Prepare Frosting
While the rolls cool for a few minutes, make the frosting. In a bowl, beat together cream cheese and softened unsalted butter until smooth and creamy. Gradually add powdered sugar and a splash of vanilla extract, mixing until well combined and fluffy. This creamy topping will balance the sweetness of your cinnamon rolls perfectly.

Step 8: Frost and Serve
Once the cinnamon rolls are slightly cooled, generously spread the cream cheese frosting over the top while they're still warm. This allows the frosting to melt slightly into the rolls, creating a deliciously gooey topping. Serve your warm, frosted cinnamon rolls and watch as everyone enjoys this delightful homemade Cinnamon Rolls Recipe!

What to Serve with Ultimate Homemade Cinnamon Rolls

Elevate your cinnamon roll experience by pairing them with delightful accompaniments that will make your meal truly special.

  • Fresh Fruit Salad: A medley of vibrant fruits adds a refreshing contrast to the rich sweetness of cinnamon rolls, making for a balanced breakfast.
  • Scrambled Eggs: Fluffy, soft scrambled eggs provide protein and creaminess, pleasantly offsetting the gooeyness of the rolls.
  • Savory Breakfast Potatoes: Crispy, seasoned potatoes bring a satisfying crunch and hearty texture that complements the soft rolls perfectly.
  • Maple Syrup Drizzle: A pour of warm maple syrup over your cinnamon rolls enhances their sweetness, creating a luxurious brunch treat.
  • Coffee or Tea: A steaming cup of coffee or your favorite tea enhances the cozy ambiance, providing a delightful contrast to the sweet rolls.
  • Creamy Yogurt Parfait: Layered with granola and berries, yogurt adds a tangy twist that balances the sweetness of your gooey cinnamon rolls.
  • Whipped Cream Topping: Light and airy whipped cream, lightly sweetened, can take your cinnamon rolls to the next level of indulgence.
  • Homemade Hot Chocolate: A rich cup of hot chocolate envelops you in warmth, creating a comforting pairing with the gooey cinnamon rolls.

Storage Tips for Cinnamon Rolls Recipe

Room Temperature: Store leftover cinnamon rolls in an airtight container at room temperature for up to 3 days to maintain their softness and gooeyness.

Fridge: If you want to keep them fresh for longer, refrigerate the rolls for up to a week. Just ensure they're in an airtight container to prevent drying out.

Freezer: For longer storage, freeze the cinnamon rolls in a single layer, then transfer to a freezer bag for up to 3 months. They can be thawed overnight in the fridge before reheating.

Reheating: To enjoy your cinnamon rolls warm, simply wrap them in foil and heat in a 350°F oven for about 10-15 minutes, or microwave for 15-20 seconds until warmed through.

Cinnamon Rolls Recipe Variations

Feel free to get creative with this cinnamon rolls recipe and make it your own with these delightful twists!

  • Flavorful Dough: Swap regular sugar for brown sugar in the dough for added depth and warmth. The subtle difference will enhance the overall flavor profile beautifully.

  • Nutty Delight: Add chopped nuts like walnuts or pecans into the filling for a delightful crunch. This adds an unexpected textural element that pairs perfectly with the gooey cinnamon swirl.

  • Chocolate Chip Surprise: Sprinkle chocolate chips in the filling for a sweet, indulgent upgrade. The melty chocolate melds beautifully with the cinnamon, creating an irresistibly gooey treat.

  • Fruit Fusion: Incorporate fresh or dried fruit, such as raisins or chopped apples, into the filling. The fruity notes provide a refreshing twist that balances the rich flavors of cinnamon and sugar.

  • Decadent Frosting: Mix in a splash of maple syrup or vanilla extract into the cream cheese frosting for an extra flavor boost. This small addition will elevate the frosting, making it even more tempting!

  • Pumpkin Spice Twist: For a seasonal variation, add pumpkin puree to the dough and a sprinkle of pumpkin pie spice to the filling. Fall flavors will embrace you with every delectable bite! Speaking of pumpkin, you might also enjoy my Pumpkin Cinnamon Roll recipe for a festive treat.

  • Spicy Kick: If you love a bit of heat, add a pinch of cayenne or chili powder to the filling. This surprising twist will electrify your taste buds and leave everyone guessing!

  • Glaze Variations: Instead of traditional cream cheese frosting, drizzle the rolls with a simple glaze made from powdered sugar and milk for a lighter option. This keeps the rolls sweet without overwhelming their natural flavors.

Whatever you choose, each variation promises to enhance your homemade cinnamon rolls while satisfying your unique cravings!

Expert Tips for Cinnamon Rolls Recipe

  • Yeast Activation: Always ensure your yeast blooms properly in warm milk; a bubbly, foamy texture means it's good to use, vital for a successful rise.

  • Flour Measurement: Avoid excess flour during kneading by measuring accurately. Use the spoon and level method for soft, fluffy rolls.

  • Rolling Technique: Roll the dough tightly to lock in the filling, preventing it from spilling out during baking and creating beautiful spirals.

  • Cover Tightly: When letting dough rise, cover it well to prevent it from drying out, which can cause uneven textures in your cinnamon rolls.

  • Taste Testing: Don’t shy away from tasting your filling! Adjust sugar or cinnamon based on your preference for sweetness and spice.

  • Storage Tips: For longer freshness, store leftover cinnamon rolls in an airtight container at room temperature for up to 3 days, or refrigerate for longer enjoyment.

Make Ahead Options

These Cinnamon Rolls Recipe are perfect for busy mornings and can be easily prepared ahead of time! You can shape the rolls and refrigerate them up to 24 hours before baking. Simply follow the recipe until you've cut the rolls, then place them in a greased pan, cover tightly with plastic wrap, and refrigerate. To ensure they rise properly, remove them from the fridge and let them sit at room temperature for about 30-60 minutes before baking. This method keeps them just as delicious and fluffy while saving you time on hectic mornings, allowing you to enjoy fresh, warm cinnamon rolls with minimal effort!

Cinnamon Rolls Recipe FAQs

What type of milk is best for the cinnamon rolls?
For the best results in this Cinnamon Rolls Recipe, I recommend using whole milk. It provides the necessary moisture and richness that contributes to a soft and fluffy dough. If you don't have whole milk on hand, 2% milk will also work, though it may yield slightly less rich rolls.

How long can I store leftover cinnamon rolls?
Store leftover cinnamon rolls in an airtight container at room temperature for up to 3 days. If you want them to last longer, refrigerate them for up to a week. Just ensure the container is sealed tightly to keep them from drying out!

Can I freeze cinnamon rolls?
Absolutely! To freeze your cinnamon rolls, let them cool completely after baking. Place them in a single layer on a baking sheet and freeze until solid. Once frozen, transfer them to a freezer bag and store for up to 3 months. When you’re ready to enjoy, thaw them overnight in the fridge, then heat them gently in the oven or microwave.

What if my dough doesn’t rise?
If your dough doesn’t rise, it could be due to inactive yeast. Ensure you're using fresh, active dry yeast that blooms properly in warm milk. After sprinkling yeast over the milk, look for a foamy texture within 5-10 minutes. If it’s not frothy, you may need to start over with fresher yeast.

Can I make these cinnamon rolls ahead of time?
Definitely! You can prepare the dough and roll it into shape the night before. After cutting them into rolls, place them in a greased baking dish, cover tightly, and store in the refrigerator overnight. In the morning, let them rise at room temperature for about 30-45 minutes before baking—perfect for holiday mornings!

Are these rolls suitable for those with allergies?
This Cinnamon Rolls Recipe contains common allergens including eggs, dairy, and gluten. If you or your guests have allergies, I recommend experimenting with dairy-free milk, egg substitutes like flaxseed meal, and gluten-free flour blends. However, keep in mind that the texture and flavor may vary slightly from the original recipe.

Cinnamon Rolls Recipe

Cinnamon Rolls Recipe - Soft, Gooey, and Irresistibly Homemade

This Cinnamon Rolls Recipe delivers soft, gooey, homemade rolls that transform any day into a cozy celebration.
Print Recipe Pin Recipe
Prep Time 30 minutes mins
Cook Time 25 minutes mins
Rising Time 1 hour hr 30 minutes mins
Total Time 2 hours hrs 25 minutes mins
Servings: 12 rolls
Course: Breakfast
Cuisine: American
Calories: 250
Ingredients Equipment Method Nutrition Notes

Ingredients
  

Dough Ingredients
  • 1 cup Whole Milk Warm to about 110°F to activate yeast.
  • 2.25 teaspoons Active Dry Yeast Ensure it blooms by sprinkling over warm milk.
  • 1/4 cup Granulated Sugar Essential for browning during baking.
  • 1 large Eggs One whole egg and an additional yolk for tenderness.
  • 1/4 cup Unsalted Butter Melted.
  • 4 cups All-Purpose Flour Can substitute with bread flour.
  • 1 teaspoon Salt Enhances flavor.
Filling Ingredients
  • 1/2 cup Brown Sugar Adds rich sweetness.
  • 2 tablespoons Ground Cinnamon Key flavor for the filling.
Frosting Ingredients
  • 4 ounces Cream Cheese Softened.
  • 1 cup Powdered Sugar Sweetens and thickens the frosting.

Equipment

  • Mixing Bowl
  • Baking pan
  • Rolling Pin
  • Whisk
  • measuring cups
  • Measuring Spoons
  • Oven

Method
 

Dough Preparation
  1. Warm the whole milk to about 110°F to activate the yeast, then sprinkle the active dry yeast and a tablespoon of granulated sugar over it. Allow it to bloom for 5-10 minutes until frothy.
  2. In a mixing bowl, combine the melted unsalted butter, one whole egg, an additional egg yolk, flour, and salt. Mix until combined, then knead the dough for 7-8 minutes until smooth and elastic.
First Rise
  1. Grease a large bowl with a little melted butter or oil and place the kneaded dough inside, turning to coat. Cover the bowl with a clean kitchen towel and let it rise in a warm area for 60-90 minutes, or until the dough has doubled in size.
Filling Preparation
  1. While the dough is rising, prepare the cinnamon filling. In a small bowl, combine melted butter, brown sugar, and ground cinnamon to form a thick paste.
Rolling and Shaping
  1. Once the dough has risen, punch it down gently to release air and turn it onto a lightly floured surface. Roll it out into an 18x12-inch rectangle.
  2. Spread the prepared cinnamon filling evenly across the dough, leaving a small border around the edges. Tightly roll the dough into a log, then slice into 12 equal pieces.
Second Rise
  1. Grease a baking pan and place the sliced cinnamon rolls next to each other. Cover the pan with a towel and let the rolls rise for another 30-45 minutes until puffy.
  2. As they rise, preheat your oven to 375°F.
Baking
  1. Once the rolls have risen, place them in the preheated oven. Bake for 20-25 minutes, or until golden brown.
Frosting Preparation
  1. While the rolls cool, make the frosting by beating together cream cheese and softened unsalted butter until smooth. Gradually add powdered sugar and mix until well combined.
Frost and Serve
  1. Once the cinnamon rolls are slightly cooled, generously spread the cream cheese frosting over the top.

Nutrition

Serving: 1rollCalories: 250kcalCarbohydrates: 36gProtein: 3gFat: 11gSaturated Fat: 6gPolyunsaturated Fat: 1gMonounsaturated Fat: 4gCholesterol: 30mgSodium: 300mgPotassium: 100mgFiber: 1gSugar: 10gVitamin A: 500IUVitamin C: 1mgCalcium: 50mgIron: 1mg

Notes

For longer freshness, store leftover cinnamon rolls in an airtight container at room temperature for up to 3 days.

Tried this recipe?

Let us know how it was!

Thick and Creamy Snickers Smoothie Bowl for Guilt-Free Indulgence

February 16, 2026 by Grace Snow Leave a Comment

As I stood in my kitchen, pondering a healthier way to satisfy my sweet tooth, the idea for this Thick and Creamy Snickers Smoothie Bowl struck me like a lightbulb moment. Imagine a luscious blend of frozen bananas and ripe avocados coming together to create a decadent treat that’s not only guilt-free but also incredibly filling. This smoothie bowl is a perfect choice for breakfast, a snack, or even a dessert—offering all the sweet and salty goodness of a Snickers bar without any of the heavy hits. Plus, it’s vegan, gluten-free, and packed with protein to power your day. Who knew you could indulge in such creamy deliciousness while nourishing your body? Can you envision all the delightful toppings you could add to this delightful creation?

Why Will You Love This Smoothie Bowl?

Guilt-Free Indulgence: This Thick and Creamy Snickers Smoothie Bowl satisfies your cravings without any guilt, combining delicious flavors with wholesome ingredients.
Super Easy Prep: With just a few steps, you can whip up this delightful treat in minutes, perfect for busy mornings or lazy afternoons.
Nutrient-Packed: Filled with healthy fats from avocados and natural sweetness from bananas, it's a great way to fuel your body.
Versatile Customization: Feel free to swap in your favorite nut butter or tweak toppings to match your taste—try it with our Chocolate Cherry Smoothie for a delicious twist!
Crowd-Pleasing: Whether it's breakfast or dessert, this recipe is sure to impress everyone, making it a fantastic option for family gatherings or brunch with friends.
Thick & Creamy Texture: The smoothie bowl has a luxurious texture, providing a delightful experience that feels like soft-serve ice cream—perfect for satisfying sweet cravings!

Thick and Creamy Snickers Smoothie Bowl Ingredients

• Get ready to indulge in a delightful blend!

For the Smoothie

  • Frozen Banana Slices – Adds natural sweetness and creaminess; fresh bananas can be used, but expect a less creamy texture.
  • Frozen Avocado Chunks – Provides a rich and creamy texture along with healthy fats; thaw for 10 minutes before blending for easier mixing.
  • Plant Milk – Essential for blending; unsweetened almond, coconut, or oat milk are great for a dairy-free option.
  • Cocoa Powder – Enhances the chocolate flavor; cacao powder can be used for a raw alternative.
  • Peanut Butter (Natural) – Adds creaminess and protein; choose peanut butter with just peanuts (and salt) for the best results.
  • Pure Maple Syrup – Serves as a natural sweetener; honey or another sweetener can be substituted if desired.

For Toppings (Optional)

  • Banana Slices – Fresh banana slices add a delicious touch and enhance the smoothie bowl's visual appeal.
  • Chocolate Chips – Dark or dairy-free chocolate chips bring an extra dose of sweetness and richness.
  • Chopped Peanuts – Adds a crunchy texture and a delightful nutty flavor to complement the smoothie.
  • Peanut Butter Drizzle – A swirl of extra peanut butter on top provides additional creaminess and visual allure.

Enjoy this Thick and Creamy Snickers Smoothie Bowl to satisfy your sweet cravings while nourishing your body!

Step‑by‑Step Instructions for Thick and Creamy Snickers Smoothie Bowl

Step 1: Thaw the Avocado
Begin by removing your frozen avocado chunks from the freezer and allowing them to thaw for about 10 minutes. This slight thawing will make blending much easier and help achieve that luscious, thick texture in your Thick and Creamy Snickers Smoothie Bowl. Set them aside while you prep the other ingredients.

Step 2: Combine the Main Ingredients
In a high-powered blender, add the frozen banana slices, cocoa powder, pure maple syrup, and the slightly thawed avocado. Scoop in the natural peanut butter, ensuring everything is in there for a creamy delight. The combination of these ingredients creates the base of your smoothie bowl that mimics the taste of a Snickers bar.

Step 3: Add Plant Milk and Blend
Now it’s time to pour in the plant milk. Start with ⅓ cup and securely place the lid on the blender. Blend on high speed for about 30 seconds, or until the mixture becomes smooth and creamy. Remember to scrape down the sides occasionally to incorporate all the ingredients well. The aim is a thick, luscious consistency.

Step 4: Adjust for Flavor
After achieving a creamy mixture, taste your smoothie bowl base. If you desire a deeper chocolate flavor, add a little more cocoa powder and blend briefly again. This is your opportunity to customize the Thick and Creamy Snickers Smoothie Bowl to your preferred taste, making it even more scrumptious.

Step 5: Transfer and Top
Once blended to perfection, gently pour the mixture into a bowl. You’ll see it maintains a delectable thickness that's perfect for a smoothie bowl. Now, it’s time to get creative! Top your bowl with banana slices, chocolate chips, chopped peanuts, or a drizzle of peanut butter to make it visually appealing and even more delicious.

Step 6: Serve Immediately
To truly relish the flavors and enjoy the creamy texture, serve your Thick and Creamy Snickers Smoothie Bowl immediately. Gather your loved ones around, or savor it solo; either way, this delightful treat promises to satisfy your sweet cravings while keeping it nutritious.

Expert Tips for Thick and Creamy Snickers Smoothie Bowl

  • Consistent Thickness: Avoid adding too much liquid at once; if needed, add one tablespoon of plant milk at a time to maintain that rich, thick consistency.
  • Perfectly Thawed Avocado: Make sure to thaw your frozen avocado chunks for about 10 minutes to ensure easy blending; fresh avocado can also be used without thawing.
  • Blend It Right: A high-powered blender is key to achieving the creamy perfection of the Thick and Creamy Snickers Smoothie Bowl. Regular blenders may struggle with texture.
  • Flavor Adjustments: Always taste before serving! Adjust cocoa powder or maple syrup after blending to meet your sweetness and flavor preferences.
  • Creative Toppings: Get adventurous with your toppings! Mixing and matching different fruits, nuts, and drizzles can elevate your smoothie bowl experience.

How to Store and Freeze Thick and Creamy Snickers Smoothie Bowl

Best Enjoyed Fresh: Consume your Thick and Creamy Snickers Smoothie Bowl immediately for a fresh taste and optimal texture.

Fridge: If leftovers remain, keep them in an airtight container in the fridge for up to 1 day. The consistency may change slightly, so stirring before consumption is recommended.

Freezer: You can freeze any remaining smoothie bowl in an airtight container for up to a week. Be aware that it may require blending again to regain its creamy texture after thawing.

Reheating: To enjoy, allow it to thaw in the fridge overnight before blending with a splash of plant milk to restore creaminess.

What to Serve with Thick and Creamy Snickers Smoothie Bowl

Elevate your smoothie bowl experience with delightful sides that encourage a wholesome yet indulgent meal.

  • Granola Clusters: A sprinkle of crunchy granola adds texture and pairs perfectly with the creamy base, bringing extra nutrition and energy.

  • Fresh Berries: Bright berries like strawberries or blueberries not only add a burst of color but their tartness beautifully contrasts the creamy sweetness of the bowl.

  • Chia Seed Pudding: Creamy, protein-packed, and filled with fiber, chia seed pudding complements the bowl's rich flavors while enhancing the overall health factor.

  • Almond Butter Toast: Pairing with a slice of whole-grain almond butter toast makes for a filling combination that keeps you satisfied throughout the morning.

  • Iced Herbal Tea: A refreshing herbal tea, such as hibiscus or mint, provides a delightful contrast to the decadent flavors of your smoothie bowl while keeping you hydrated.

  • Coconut Yogurt Parfait: For a vegan-friendly dessert option, layer coconut yogurt with fruits and nuts. This satisfying treat complements the smoothie and adds a variety of textures.

  • Peanut Butter Cookies: Indulge in a couple of homemade peanut butter cookies for a sweet treat that echoes the nutty flavors of the smoothie bowl.

  • Coconut Water: Sip on coconut water for a hydrating drink that reflects the tropical vibes of the smoothie bowl while adding a touch of natural sweetness.

Make Ahead Options

These Thick and Creamy Snickers Smoothie Bowls are perfect for meal prep enthusiasts! You can prepare the ingredient components, such as slicing frozen bananas and measuring out cocoa powder, up to 24 hours in advance, storing them in airtight containers in the refrigerator to maintain freshness. Additionally, you can thaw avocado chunks overnight for easier blending before serving. When you're ready to enjoy, simply blend the prepped ingredients with plant milk, adjusting the consistency to your liking. This makes it super easy for those busy mornings, ensuring you can enjoy a nutritious and indulgent treat with minimal effort! Just remember, for the best texture, blend right before serving.

Thick and Creamy Snickers Smoothie Bowl Variations

Feel free to let your creativity flow as you customize this delightful smoothie bowl to suit your taste buds!

  • Nut Butter Swap: Replace peanut butter with almond or cashew butter for a different nutty flavor.

  • Fruit Fusion: Add a handful of spinach or kale to sneak in more greens without altering the yummy taste.

  • Sweetness Boost: Experiment with different sweeteners like agave nectar or stevia if you want a unique twist on sweetness.

  • Texture Twist: For a crunchy contrast, sprinkle some granola or seeds on top to elevate your smoothie bowl experience.

  • Protein Power: Mix in your favorite protein powder to amp up the protein content—vanilla or chocolate flavors work beautifully!

  • Cocoa Kick: Feel free to increase the cocoa or cacao powder for a more intense chocolate experience; it's all about your preference!

  • Added Spice: Sprinkle cinnamon or a pinch of cayenne for a surprising kick that beautifully complements the sweetness.

  • Serve with a Side: Pair with a refreshing green smoothie or our delicious Acai Bowl Nutritious for a complete breakfast that has something for everyone!

Embrace the fun of customizing your Thick and Creamy Snickers Smoothie Bowl!

Thick and Creamy Snickers Smoothie Bowl Recipe FAQs

What type of bananas should I use for the best texture?
Using frozen banana slices is key to achieving the creamy texture in your Thick and Creamy Snickers Smoothie Bowl. If fresh bananas are all you have on hand, they can work—just know that the smoothie won't be as thick and may be a bit less sweet.

How long can I store leftovers of the smoothie bowl?
Your smoothie bowl is best enjoyed immediately to savor that fresh taste and thick texture. However, if you have leftovers, store them in an airtight container in the fridge for up to 1 day. When ready to eat, give it a good stir as the consistency may change.

Can I freeze my Thick and Creamy Snickers Smoothie Bowl for later?
Absolutely! You can freeze the remaining smoothie bowl in an airtight container for up to a week. When you're ready to enjoy it, thaw it overnight in the fridge, then throw it back into your blender with a splash of plant milk to regain that fabulous creaminess.

What should I do if my smoothie bowl is too runny?
If you find that your smoothie bowl is too thin, don't worry! You can thicken it up by adding a few more frozen banana slices or a bit more avocado. Blend it again until it reaches your desired consistency. Remember to add any liquid gradually to avoid making it too runny!

Are there any nut-free alternatives for the peanut butter?
Yes, if you or someone in your household has a nut allergy, feel free to substitute with sunflower seed butter or pumpkin seed butter for a nut-free alternative. These options will still provide that creamy texture and delicious flavor while keeping it safe for everyone.

Can I use dairy milk instead of plant milk in this recipe?
Certainly! While the Thick and Creamy Snickers Smoothie Bowl is designed to be vegan, you can absolutely use dairy milk if you prefer. Just keep in mind that the recipe will no longer be dairy-free.

Thick and Creamy Snickers Smoothie Bowl

Thick and Creamy Snickers Smoothie Bowl for Guilt-Free Indulgence

Enjoy a Thick and Creamy Snickers Smoothie Bowl that's both indulgent and guilt-free, packed with protein and nutrients.
Print Recipe Pin Recipe
Prep Time 10 minutes mins
Total Time 10 minutes mins
Servings: 2 bowls
Course: Breakfast
Cuisine: Vegan
Calories: 300
Ingredients Equipment Method Nutrition Notes

Ingredients
  

Smoothie Ingredients
  • 2 cups Frozen Banana Slices Adds natural sweetness and creaminess; fresh bananas can be used for a less creamy texture.
  • 1 cup Frozen Avocado Chunks Provides rich texture; thaw for 10 minutes before blending.
  • ⅓ cup Plant Milk Unsweetened almond, coconut, or oat milk work well.
  • 2 tablespoons Cocoa Powder Enhances chocolate flavor.
  • 2 tablespoons Peanut Butter (Natural) Choose peanut butter with just peanuts (and salt).
  • 1 tablespoon Pure Maple Syrup Acts as a natural sweetener.
Toppings (Optional)
  • 1 banana Banana Slices Adds visual appeal and taste.
  • 2 tablespoons Chocolate Chips Dark or dairy-free for added sweetness.
  • 2 tablespoons Chopped Peanuts Adds crunchy texture and nutty flavor.
  • 1 tablespoon Peanut Butter Drizzle Extra creaminess on top.

Equipment

  • High-powered blender

Method
 

Preparation Steps
  1. Thaw the frozen avocado chunks for about 10 minutes.
  2. In a blender, combine the frozen banana slices, cocoa powder, pure maple syrup, and thawed avocado.
  3. Add the natural peanut butter and blend until smooth.
  4. Pour in the plant milk and blend again until creamy; adjust consistency if needed.
  5. Pour into a bowl and top with banana slices, chocolate chips, chopped peanuts, or a drizzle of peanut butter.
  6. Serve immediately for the best texture and flavor.

Nutrition

Serving: 1bowlCalories: 300kcalCarbohydrates: 40gProtein: 8gFat: 15gSaturated Fat: 3gPolyunsaturated Fat: 1gMonounsaturated Fat: 10gSodium: 150mgPotassium: 600mgFiber: 6gSugar: 14gVitamin A: 10IUVitamin C: 20mgCalcium: 6mgIron: 8mg

Notes

Best enjoyed fresh, but can be stored in the fridge for up to 1 day or frozen for up to a week. Re-blend with a splash of plant milk if necessary after freezing.

Tried this recipe?

Let us know how it was!

Green Protein Smoothie Bowl for a Tropical Boost of Energy

February 16, 2026 by Grace Snow Leave a Comment

As I lifted the vibrant green smoothie bowl off the counter, I could practically hear my taste buds cheering in anticipation. This Green Protein Smoothie Bowl is more than just a breakfast choice; it's a creamy tropical treat packed with the goodness of mango, avocado, and nutrient-rich greens that come together in mere minutes. Whether you're running out the door or need a midday pick-me-up, this recipe triumphs in providing an energizing, gluten-free, and dairy-free meal that won't weigh you down. Plus, it’s a fun way to sneak some superfoods into your diet without sacrificing flavor. As you explore the endless topping options, you might find yourself crafting a masterpiece that’s not only eye-catching but also delightfully delicious. What unique twist will you give your smoothie bowl today?

Why is This Smoothie Bowl a Must-Try?

Vibrant Colors: The green protein smoothie bowl bursts with colors, making it as visually appealing as it is delicious. Each ingredient contributes not only to the flavor but to a stunning presentation!

Nutrient-Packed: Every spoonful is loaded with vitamins and minerals from nutrient-dense ingredients like spinach and avocado. It's an effortless way to support your health without compromising on taste.

Quick and Easy: Prep time is minimal, taking just a few minutes. Perfect for busy mornings, you can whip up this energizing treat without any fuss!

Versatile Toppings: Get creative with toppings! From chocolate delights like cacao nibs to fresh fruits and crunch from granola, you can mix and match to suit your mood.

Energy Boosting: Thanks to the rich protein content from the added protein powder, this bowl provides a satisfying and long-lasting energy boost. Whether you snack or have it for breakfast, you'll love feeling fueled and ready for the day!

If you're looking for more refreshing options, check out my Acai Bowl Nutritious recipe that’s perfect to mix into your breakfast rotation!

Green Protein Smoothie Bowl Ingredients

  • For the Base

  • Coconut Milk – Adds creaminess and a subtle sweetness; substitute with almond or oat milk for a different flavor profile.

  • Baby Spinach – Provides vibrant color and essential vitamins; can be swapped with kale or other leafy greens, but taste may vary.

  • Frozen Mango – Offers a tropical sweetness and creamy texture; fresh mango may be used if available, but it will alter the consistency.

  • Frozen Zucchini Slices – Adds fiber and thickness without altering flavor; cauliflower may be used as a low-calorie alternative.

  • Frozen Avocado – Enhances creaminess and provides healthy fats; fresh avocado can be substituted, but frozen gives a better consistency.

  • Vanilla Protein Powder – Boosts protein content and flavor; vegan protein powder is a great alternative for those with dietary restrictions.

  • For the Toppings (optional)

  • Chia Seeds – Adds a delightful crunch and omega-3 fatty acids; these seeds can enhance the nutritional profile of your smoothie bowl.

  • Raspberries – Provide a burst of flavor and a pop of color; fresh or frozen berries work beautifully here.

  • Granola – Offers crunch and a hint of sweetness that complements the smooth textures; consider using gluten-free options to stay on theme.

Feel free to mix and match your toppings for a unique spin on the green protein smoothie bowl each time!

Step‑by‑Step Instructions for Green Protein Smoothie Bowl

Step 1: Blend Ingredients
In a high-speed blender, combine 1 cup of coconut milk, 1 cup of baby spinach, 1 cup of frozen mango, 1 cup of frozen zucchini slices, 1/2 cup of frozen avocado, and 1 scoop of vanilla protein powder. Secure the lid and pulse the ingredients together at a low speed, gradually increasing until all components are thoroughly incorporated and you see a vibrant green color, about 30 seconds.

Step 2: Achieve Consistency
Increase the blender speed to high and blend for an additional 30–45 seconds until the mixture is smooth and creamy. If the smoothie bowl appears too thick for your liking, pour in a little more coconut milk, blending briefly to reach your desired consistency. The final texture should be thick enough to hold its shape when poured into a bowl.

Step 3: Serve
Carefully pour the blended green protein smoothie mixture into a bowl, allowing it to form a beautiful mound in the center. Use a spatula to scrape down the sides of the blender for any leftover deliciousness to ensure nothing goes to waste. The rich, vibrant green color will make it an inviting sight.

Step 4: Add Toppings
Here's where the magic happens! On top of your green protein smoothie bowl, sprinkle chia seeds for a delightful crunch, add fresh raspberries to introduce a tangy flavor, and finish with a handful of granola for texture. Feel free to get creative with your choice of toppings to make your bowl truly unique and personalized.

Step 5: Enjoy Immediately
For the best flavor and freshness, dive into your green protein smoothie bowl right after preparing it. Not only does it taste great, but the bright colors and textures will also energize your day! Take a moment to appreciate the delightful presentation before savoring each spoonful of this nutritious and satisfying treat.

Storage Tips for Green Protein Smoothie Bowl

Fridge: Store any leftover smoothie bowl in an airtight container in the fridge for up to 24 hours. This will help maintain its vibrant color and flavor while keeping the nutrients intact.

Toppings: If you have added toppings, it's best to keep them separate until you're ready to enjoy your smoothie bowl again. This helps to preserve their crunch and freshness.

Reheating: While it's best enjoyed chilled, you can adjust the temperature by blending in a splash of coconut milk or warming the bowl slightly in the microwave for just a few seconds, if preferred.

Best Practices: For optimal flavor and texture, consume your green protein smoothie bowl fresh. If storing, add toppings just before serving to keep them crisp and delicious.

Expert Tips for the Best Green Protein Smoothie Bowl

  • High-Speed Blender: Ensure you use a high-speed blender for a creamy texture; less powerful blenders may leave chunks, ruining your smoothie bowl's consistency.

  • Adjust Thickness: If your smoothie bowl is too thick, add more coconut milk or a little water to reach your desired consistency without compromising flavor.

  • Freshness Matters: Enjoy your green protein smoothie bowl immediately after preparing it for the best taste and vibrant color; letting it sit can cause separation and loss of texture.

  • Experiment with Greens: While baby spinach is mild and mixes well, don’t hesitate to try different leafy greens like kale. Just remember, they will alter the flavor profile.

  • Customize Toppings: Get creative with your toppings! Mix chia seeds, nuts, or different fruits to make each bowl unique and full of textures and flavors you love.

  • Store Wisely: If you have leftovers, store them in an airtight container in the fridge for up to 24 hours, but save crunchy toppings for when you’re ready to enjoy again!

What to Serve with Green Protein Smoothie Bowl

As you prepare to dive into this refreshing bowl of goodness, consider these delightful accompaniments to create a well-rounded meal experience.

  • Whole Grain Toast: The crunchy texture pairs beautifully with the creamy smoothie bowl, offering a satisfying foundation for spreads like avocado or nut butter.

  • Fresh Fruit Salad: A medley of vibrant fruits adds extra vitamins and an inviting sweetness, making each bite of your smoothie bowl feel like a tropical escape.

  • Nuts and Seeds: Sprinkling a mix of almonds or pumpkin seeds on top adds a nutty crunch, while also boosting your bowl's protein and healthy fat content.

  • Homemade Granola: Offering an irresistible crunch, it perfectly complements the smooth textures of your smoothie bowl and brings a touch of sweetness.

  • Coconut Yogurt: This dairy-free alternative enhances creaminess while adding probiotics to your meal, balancing flavors and textures effortlessly.

  • Green Tea or Herbal Infusion: A light beverage that supports digestion and hydration, it pairs well with the fresh and cooling flavors of the smoothie bowl, ensuring harmony in your meal.

Make Ahead Options

These Green Protein Smoothie Bowls are perfect for busy home cooks looking to streamline meal prep! You can prepare the smoothie base (coconut milk, baby spinach, frozen mango, zucchini, avocado, and protein powder) up to 24 hours in advance by blending everything together and storing it in an airtight container in the refrigerator. To maintain the smooth and creamy texture, it's best to refrigerate it right after blending. When you're ready to enjoy, simply stir the mixture and pour it into a bowl. Top with your favorite toppings just before serving, and you’ll have a delicious, nutrient-packed smoothie bowl ready to fuel your day!

Green Protein Smoothie Bowl Variations

Embrace your creativity and customize your Green Protein Smoothie Bowl to make it uniquely yours with these delightful twists!

  • Choco-Boost: Add a scoop of cocoa powder or cacao nibs to introduce a rich chocolate flavor. Chocolate lovers will rejoice in this creamy combination!

  • Fruity Fusion: Swap in fresh banana or juicy pineapple for a new fruity twist. Mixing fruits not only changes flavors but adds vibrant colors to your bowl.

  • Nutty Delight: Stir in a tablespoon of nut butter, like almond or peanut butter, for an extra layer of richness and creaminess. This will also enhance the protein content!

  • Spicy Kick: Sprinkle a pinch of cayenne pepper or add a slice of fresh ginger for an unexpected heat element that refreshes the flavor profile. It’s a delightful adventure for your taste buds!

  • Texture Twist: For an added crunch, mix in some rolled oats or chia seeds into the base. This will also help keep you fuller for longer, making it a satisfying meal.

  • Herbal Infusion: Toss in a sprig of fresh mint or basil for a refreshing herbal note that will brighten your smoothie bowl. It is both aromatic and invigorating!

  • Berry Medley: Incorporate a blend of frozen mixed berries for an antioxidant boost. This colorful mix gives a gorgeous aesthetic and adds delightful sweetness.

  • Coconutty Fun: Top with shredded coconut flakes for a tropical crunch and an extra dose of healthy fats. It reminds you of island vibes with each spoonful!

For more thrilling smoothie experiences, you might enjoy my recipe for a Chocolate Cherry Smoothie or explore the nourishing bites in Coconutty Beans Greens. Now, what will you create?

Green Protein Smoothie Bowl Recipe FAQs

What type of coconut milk should I use for the Green Protein Smoothie Bowl?
Absolutely! You can use full-fat coconut milk for a rich creaminess, or light coconut milk for a lighter option. If you're looking to mix it up, almond or oat milk can work beautifully, bringing their unique flavors to the smoothie bowl without sacrificing its dairy-free nature.

How should I store leftovers of my smoothie bowl?
Great question! If you have any leftover Green Protein Smoothie Bowl, simply transfer it to an airtight container and refrigerate it for up to 24 hours. However, to maintain the best texture and flavor, it's ideal to enjoy it fresh! Keep any toppings like granola or chia seeds separate until you’re ready to dive in for a crunch that adds a delightful contrast to your creamy base.

Can I freeze the Green Protein Smoothie Bowl for later?
Certainly! To freeze your smoothie bowl, pour the blended mixture into ice cube trays or silicone molds. Once frozen solid, transfer the cubes into a freezer-safe bag for up to 3 months. When you're ready to enjoy, blend the cubes with a splash of coconut milk until smooth, and you'll have a refreshing smoothie bowl ready in no time!

What should I do if my smoothie is too thick?
If you find your Green Protein Smoothie Bowl too thick, no worries! Simply add a little more coconut milk or even some water, and blend again until you achieve your desired consistency. Remember, it’s about finding the perfect texture that works for you, so don’t hesitate to adjust until it’s just right!

Are there any allergens in this recipe?
Very important question! This smoothie bowl is naturally gluten-free and dairy-free, but if you're allergic to nuts, ensure you choose toppings that fit your dietary needs (like seeds instead of nut butter). Also, check your protein powder—some brands contain allergens like soy or dairy. Always read labels carefully to keep your smoothie bowl safe and enjoyable!

Can pets have any leftovers from the Green Protein Smoothie Bowl?
While the ingredients are wholesome, it's best not to share your smoothie bowl with your furry friends. Ingredients like spinach and avocado can be harmful to dogs in large amounts. If you'd like to treat your pets, consider veggie scraps or a little of the fruits, ensuring you stick to safe options. Always consult your vet for pet-specific dietary guidance.

Green Protein Smoothie Bowl

Green Protein Smoothie Bowl for a Tropical Boost of Energy

This Green Protein Smoothie Bowl is a delicious, energy-boosting breakfast choice packed with tropical flavors.
Print Recipe Pin Recipe
Prep Time 10 minutes mins
Total Time 10 minutes mins
Servings: 2 bowls
Course: Breakfast
Cuisine: Tropical
Calories: 350
Ingredients Equipment Method Nutrition Notes

Ingredients
  

For the Base
  • 1 cup coconut milk Substitute with almond or oat milk for a different flavor profile.
  • 1 cup baby spinach Can be swapped with kale or other leafy greens.
  • 1 cup frozen mango Fresh mango may be used but will alter consistency.
  • 1 cup frozen zucchini slices Cauliflower can be used as a low-calorie alternative.
  • 1/2 cup frozen avocado Fresh avocado can be substituted.
  • 1 scoop vanilla protein powder Vegan protein powder is a great alternative.
For the Toppings (optional)
  • 2 tablespoons chia seeds Adds crunch and omega-3 fatty acids.
  • 1/2 cup raspberries Fresh or frozen work beautifully.
  • 1/2 cup granola Consider using gluten-free options.

Equipment

  • High-speed blender

Method
 

Step-by-Step Instructions for Green Protein Smoothie Bowl
  1. In a high-speed blender, combine coconut milk, baby spinach, frozen mango, frozen zucchini slices, frozen avocado, and vanilla protein powder. Blend at low speed, gradually increasing until green and smooth.
  2. Increase blender speed to high for 30–45 seconds until smooth. Add more coconut milk if too thick.
  3. Pour the blended mixture into a bowl, ensuring a beautiful presentation.
  4. Top with chia seeds, raspberries, and granola. Get creative with your toppings!
  5. Enjoy immediately for the best flavor and freshness!

Nutrition

Serving: 1bowlCalories: 350kcalCarbohydrates: 45gProtein: 15gFat: 15gSaturated Fat: 9gPolyunsaturated Fat: 1gMonounsaturated Fat: 5gSodium: 200mgPotassium: 800mgFiber: 10gSugar: 20gVitamin A: 1500IUVitamin C: 50mgCalcium: 150mgIron: 2mg

Notes

Use a high-speed blender for a creamy texture. Store leftovers in an airtight container for up to 24 hours.

Tried this recipe?

Let us know how it was!

Decadent Chocolate Peanut Butter Smoothie Bowl Bliss

February 16, 2026 by Grace Snow Leave a Comment

As I stood in my kitchen the other morning, the enticing aroma of peanut butter wafting through the air transported me back to my childhood. I couldn’t resist whipping up a quick breakfast, and that’s when I decided on a Chocolate Peanut Butter Smoothie Bowl. This high-protein treat combines Greek yogurt, frozen banana, and creamy peanut butter for a guilt-free indulgence that’s perfect for busy days. In just 2 minutes, you can create a nutritious breakfast that’s as satisfying as it is delicious. Plus, the thick, smooth texture makes it feel like a decadent dessert rather than a regular morning meal. Why settle for boring when you can elevate your breakfast game? Curious about how to make this scrumptious bowl? Let’s dive in!

Why is this smoothie bowl irresistible?

Indulgent Flavor: The rich fusion of chocolate and peanut butter creates a heavenly taste that feels like a treat!

Quick & Easy: Ready in just 2 minutes, this recipe fits perfectly into your busy morning routine, making it a time-saver.

Healthy Breakfast: Packed with 28g of protein, this smoothie bowl is a guilt-free way to start your day with lasting energy.

Versatile Toppings: Customize with your favorite toppings like sliced bananas, granola, or even nuts for added crunch and flavor!

Satisfying Texture: Enjoy the thick, creamy consistency that not only looks amazing but tastes indulgent, like dessert!

Ready to elevate your breakfast? Try this decadent Chocolate Peanut Butter Smoothie Bowl and indulge without the guilt!

Chocolate Peanut Butter Smoothie Bowl Ingredients

• Dive into deliciousness with this healthy breakfast recipe!

For the Smoothie Base

  • Vanilla Low-Fat Greek Yogurt – Provides a luscious, creamy foundation and is packed with protein.
  • Banana (Sliced and Frozen) – Adds natural sweetness and creaminess; fresh bananas can be used, but frozen yields a thicker texture.
  • Peanut Butter – Infuses rich flavor and healthy fats; try almond or sunflower seed butter for a nut-free twist.
  • Cocoa Powder – Delivers a chocolatey essence without added sugars; opt for unsweetened for the healthiest choice.
  • Ice (Optional) – Chills the smoothie while enhancing thickness; skip if using frozen bananas.

For the Toppings

  • Sliced Bananas – Brightens the bowl with freshness and aesthetic appeal.
  • Chopped Chocolate – Elevates the chocolate experience and makes it even more indulgent.
  • Granola – Adds delightful crunch and texture; use your favorite blend for personalization.
  • Drizzled Peanut Butter – Enhances both flavor and presentation, creating a visually stunning finish.

With these ingredients, you’re just moments away from enjoying a delightful Chocolate Peanut Butter Smoothie Bowl that checks all the boxes for a healthy breakfast!

Step‑by‑Step Instructions for Chocolate Peanut Butter Smoothie Bowl

Step 1: Blend the Smoothie Base
In a powerful blender, combine 1 cup of vanilla low-fat Greek yogurt, 1 sliced frozen banana, 2 tablespoons of peanut butter, 1 tablespoon of unsweetened cocoa powder, and a handful of ice if desired. Blend on high for about 30 seconds, or until the mixture is smooth and creamy, with no chunks remaining. The consistency should be thick enough to hold your toppings beautifully.

Step 2: Pour into a Bowl
Once the smoothie base reaches that velvety consistency, carefully pour it into a bowl. Use a spatula to scrape down any remaining delicious remnants from the blender. This luscious Chocolate Peanut Butter Smoothie Bowl deserves a beautiful presentation, so aim for a generous, even layer in your bowl.

Step 3: Add Toppings
Now comes the fun part! Artfully arrange your toppings—slice up a fresh banana, chop some chocolate, and sprinkle your favorite granola over the smoothie base. Each topping adds texture and flavor, transforming your smoothie bowl into a delightful breakfast experience that looks as good as it tastes.

Step 4: Drizzle with Peanut Butter
For an extra touch of indulgence, melt a tablespoon of peanut butter in the microwave for about 10-15 seconds until it becomes pourable. Drizzle it over the top of your decorated smoothie bowl. This not only enhances the flavor profile but also provides a gorgeous visual appeal.

Step 5: Serve Immediately
Your decadent Chocolate Peanut Butter Smoothie Bowl is now ready to enjoy! Serve it immediately while it's fresh and creamy, inviting every spoonful to be savored. Feel free to get creative with additional toppings or variations according to your preference for an even more personalized breakfast experience.

What to Serve with Chocolate Peanut Butter Smoothie Bowl

Elevate your breakfast experience with delightful pairings that enhance every luxurious spoonful of your smoothie bowl.

  • Crunchy Granola: Adds a satisfying texture and extra nutty flavor that contrasts beautifully with the smoothness of the bowl.
  • Fresh Berries: Bright, tart berries like strawberries or blueberries bring a refreshing pop of acidity that balances the richness of chocolate and peanut butter.
  • Coconut Flakes: These add a light, tropical twist with a chewy texture that complements the creamy base while providing a hint of sweetness.
  • Chia Seed Pudding: Creamy and nutritious, chia puddings offer a lovely contrast, making every bite feel indulgent yet healthy and protein-packed.
  • Nutty Banana Oat Muffins: Soft and wholesome, these muffins pair wonderfully as a side, enriching your meal with fibers and hearty flavors.
  • Coffee or Cold Brew: A sip of your favorite morning brew will enhance the rich flavors of the smoothie bowl, blending beautifully for a cozy morning treat.
  • Dark Chocolate Squares: A decadent addition, these little bites provide a rich chocolate experience that will delight your taste buds alongside the smoothie.
  • Herbal Tea: A light chamomile or mint tea can cleanse the palate and balance the richness, creating a soothing morning moment.
  • Savory Toast: Try avocado or hummus toast for a contrast in flavors, bringing a savory note to your sweet breakfast for balance.

How to Store and Freeze Chocolate Peanut Butter Smoothie Bowl

Consume Immediately: Enjoy your Chocolate Peanut Butter Smoothie Bowl fresh for the best flavor and texture; it’s best served immediately after preparing.

Fridge: If you need to store it, keep the smoothie base in an airtight container in the fridge for up to 24 hours. However, the texture may not be as creamy.

Smoothie Components: You can prep smoothie ingredients in advance, such as blending the yogurt, banana, and peanut butter. Keep them separate and store in the fridge for up to 2 days before blending for freshness.

Reheating: Avoid reheating a smoothie bowl, as it’s best enjoyed cold. If you have leftovers, consider turning them into a smoothie by adding a splash of milk and re-blending.

Chocolate Peanut Butter Smoothie Bowl Variations

Feel free to get creative with your Chocolate Peanut Butter Smoothie Bowl—each twist brings encouragement to your palate!

  • Nut-Free: Swap peanut butter for sunflower seed butter, making it perfect for those with nut allergies. This substitution maintains that creamy texture while offering a deliciously unique taste.
  • Dairy-Free: Use coconut yogurt instead of Greek yogurt for a dairy-free option. This gives the smoothie a tropical vibe and a rich mouthfeel that pairs wonderfully with chocolate.
  • Extra Greens: Add a handful of fresh spinach or kale for an extra nutrient boost without sacrificing flavor. Your smoothie will still remain decadent while sneaking in those greens!
  • Banana-Free: Swap the banana for a frozen avocado to keep the creaminess but cut down on sugar—avocados add healthy fats while remaining subtle in flavor.
  • Flavor Boost: Experiment with flavored Greek yogurt, such as honey or chocolate, to elevate the overall taste even further. This provides new layers of deliciousness with each spoonful.
  • Allergy-Friendly: Mix in chia seeds or ground flax seeds for an added texture and an Omega-3 boost. This not only enhances nutrition but adds a pleasant crunch.
  • Spicy Kick: Looking for a bit of heat? Add a pinch of cayenne pepper to your blend for an unexpected twist. It creates a delightful contrast with the sweetness of the chocolate.
  • Chocolate Lovers: For an extra chocolatey treat, include chocolate protein powder or add cacao nibs as a topping. Indulgence at its finest!

Feel inspired to make your own unique version of this delightful Chocolate Peanut Butter Smoothie Bowl—your creativity will surely shine through with each delicious bite!

Make Ahead Options

These Chocolate Peanut Butter Smoothie Bowls are perfect for meal prep enthusiasts! You can prepare the smoothie base—1 cup of vanilla low-fat Greek yogurt, 1 sliced frozen banana, 2 tablespoons of peanut butter, and 1 tablespoon of cocoa powder—up to 24 hours in advance. Simply blend your ingredients as directed, pour into a bowl, cover, and refrigerate. For optimal freshness, store toppings like sliced bananas and granola separately and add them just before serving to maintain their crunchiness. When you're ready to enjoy, simply drizzle with melted peanut butter and indulge in a nutritious breakfast that’s just as delicious as when freshly made!

Expert Tips for Chocolate Peanut Butter Smoothie Bowl

  • High-Powered Blender: Use a high-powered blender for a creamy texture; this ensures the frozen banana and yogurt blend seamlessly without chunks.
  • Prep Ahead: Save time by preparing the smoothie base the night before; blend and store in the fridge, adding fresh toppings just before serving.
  • Adjusting Texture: If using fresh bananas, add a couple more ice cubes to maintain a thick consistency typical of a Chocolate Peanut Butter Smoothie Bowl.
  • Flavor Variations: For different tastes, experiment with flavored Greek yogurt or add spinach for nutty greens without altering the taste.
  • Garnishing Tips: Get creative with toppings! A sprinkle of chia seeds or a few berries can enhance flavor and nutrition beautifully.

Chocolate Peanut Butter Smoothie Bowl Recipe FAQs

What should I look for when selecting bananas for my smoothie?
Absolutely! When choosing bananas, look for ones that are slightly speckled with brown spots; this indicates they are ripe and will provide the sweetest flavor. Avoid bananas with dark spots all over, as they may be overripe and mushy.

How should I store my Chocolate Peanut Butter Smoothie Bowl?
To keep your smoothie bowl fresh, consume it immediately for the best texture and flavor! If you have leftovers, store the smoothie in an airtight container in the fridge for up to 24 hours, though keep in mind that the texture may not be as creamy.

Can I freeze the smoothie bowl for later?
Certainly! To freeze your Chocolate Peanut Butter Smoothie Bowl, pour the blended smoothie into freezer-safe containers, leaving some space for expansion, and seal tightly. It can be stored in the freezer for up to 3 months. To enjoy later, let it thaw in the fridge overnight before consuming, and if needed, re-blend with a splash of milk for a smoother consistency.

What if my smoothie bowl is too thick or too thin?
Not to worry! If your smoothie bowl is too thick, simply add a splash of milk or water and blend again until you reach your desired consistency. On the other hand, if it’s too thin, you can add a little more frozen banana or even some ice cubes to thicken it up.

Is this recipe suitable for people with nut allergies?
Very much so! If you or someone you’re serving has nut allergies, feel free to substitute the peanut butter with sunflower seed butter or another nut-free alternative. Just look for varieties that align with the dietary needs of those enjoying the dish.

Can I prep smoothie components in advance?
Absolutely! For convenience, you can prep the smoothie base components by mixing the yogurt, banana, and peanut butter in advance and storing them separately in the fridge for up to 2 days. This makes mornings less hectic, just blend before serving!

Chocolate Peanut Butter Smoothie Bowl

Decadent Chocolate Peanut Butter Smoothie Bowl Bliss

Enjoy a guilt-free Chocolate Peanut Butter Smoothie Bowl, packed with protein and deliciousness, perfect for busy mornings.
Print Recipe Pin Recipe
Prep Time 2 minutes mins
Total Time 2 minutes mins
Servings: 1 bowl
Course: Breakfast
Cuisine: American
Calories: 400
Ingredients Equipment Method Nutrition Notes

Ingredients
  

For the Smoothie Base
  • 1 cup Vanilla Low-Fat Greek Yogurt Provides a luscious, creamy foundation and is packed with protein.
  • 1 Banana (Sliced and Frozen) Adds natural sweetness and creaminess; frozen yields a thicker texture.
  • 2 tablespoons Peanut Butter Infuses rich flavor and healthy fats.
  • 1 tablespoon Cocoa Powder Delivers a chocolatey essence without added sugars.
  • 1 handful Ice Optional, enhances thickness.
For the Toppings
  • 1 Sliced Bananas Brightens the bowl with freshness.
  • 1 Chopped Chocolate Elevates the chocolate experience.
  • Granola Adds delightful crunch.
  • 1 tablespoon Drizzled Peanut Butter Enhances flavor and presentation.

Equipment

  • Blender

Method
 

Step‑by‑Step Instructions
  1. In a powerful blender, combine vanilla low-fat Greek yogurt, sliced frozen banana, peanut butter, unsweetened cocoa powder, and a handful of ice if desired. Blend on high for about 30 seconds, until smooth and creamy.
  2. Carefully pour the smoothie base into a bowl, using a spatula to scrape down any remaining mixture from the blender.
  3. Artfully arrange your toppings—slice up a fresh banana, chop some chocolate, and sprinkle your favorite granola over the smoothie base.
  4. For an extra touch, melt a tablespoon of peanut butter in the microwave until pourable, then drizzle it over the top of your smoothie bowl.
  5. Serve your Chocolate Peanut Butter Smoothie Bowl immediately while fresh and creamy.

Nutrition

Serving: 1bowlCalories: 400kcalCarbohydrates: 38gProtein: 28gFat: 18gSaturated Fat: 3gPolyunsaturated Fat: 1gMonounsaturated Fat: 8gCholesterol: 10mgSodium: 180mgPotassium: 800mgFiber: 6gSugar: 10gVitamin A: 200IUVitamin C: 10mgCalcium: 200mgIron: 2mg

Notes

Experiment with different toppings to personalize your smoothie bowl. Enjoy fresh for the best flavor and texture.

Tried this recipe?

Let us know how it was!

Revitalize Mornings with a Green Protein Smoothie Bowl

February 16, 2026 by Grace Snow Leave a Comment

As I stood in my kitchen, the vibrant greens of fresh spinach and kale called out to me like an old friend. That’s how my Green Protein Smoothie Bowl came to life, bursting with nutritious goodness and energy—exactly what I needed to kick-start my morning! One of the best things about this bowl is how quick it is to prepare; in less than 10 minutes, you can whip up a breakfast that not only satisfies your taste buds but also fuels your day. Plus, it’s endlessly customizable—throw in your favorite toppings for a fun twist! If you’re ready to elevate your breakfast game and say goodbye to bland cereals, you’ll love this easy recipe. So, what will you add to your Green Protein Smoothie Bowl? Let’s dive in!

Why is This Smoothie Bowl a Must-Try?

Energy-Boosting: Packed with vibrant greens like spinach and kale, this bowl fuels your morning with essential nutrients, keeping you energized throughout the day.

Quick Prep: With just a few minutes needed, you can effortlessly create a delicious breakfast—a perfect choice for busy weekdays or lazy weekends.

Customizable Delight: Make it your own! Add your favorite toppings, whether it’s fresh fruit or nuts, to create endless variations that'll satisfy your cravings.

Nutrient-Rich: Infused with protein, this smoothie bowl not only fills you up but supports your health goals, making it a smart choice for anyone exhausted by fast food options.

Crowd Pleaser: Everyone will love this refreshing treat! It’s a fantastic way to introduce your family to more greens, just like in my other favorites like the Pitaya Smoothie Bowl or the Acai Bowl Nutritious.

Dive into a bowl of energy and flavor, and elevate your breakfast routine today!

Green Protein Smoothie Bowl Ingredients

For the Base

  • Coconut Milk – Adds creaminess and a subtle sweetness; substitute with almond or oat milk for a different flavor profile.
  • Baby Spinach – Provides vibrant color and essential vitamins; can be swapped with kale or other leafy greens, but taste may vary.
  • Frozen Mango – Offers a tropical sweetness and creamy texture; fresh mango may be used if available, but it will alter the consistency.
  • Frozen Zucchini Slices – Adds fiber and thickness without altering flavor; cauliflower may be used as a low-calorie alternative.
  • Frozen Avocado – Enhances creaminess and provides healthy fats; fresh avocado can be substituted, but frozen gives a better consistency.
  • Vanilla Protein Powder – Boosts protein content and flavor; vegan protein powder is a great alternative for those with dietary restrictions.

For Toppings

  • Chia Seeds – Add a nourishing crunch and omega-3s; they also look beautiful sprinkled on top.
  • Raspberries – Provide a burst of tartness and color; swap for strawberries or blackberries for a different taste.
  • Granola – Enhances texture and adds crunch; opt for a gluten-free variety if needed.
  • Other Options – Experiment with nuts, seeds, nut butter, coconut flakes, bananas, berries, yogurt, cereal, or cacao nibs for even more deliciousness.

This Green Protein Smoothie Bowl is as delightful to make as it is to eat! Enjoy the burst of flavors while feeding both your body and soul.

Step‑by‑Step Instructions for Green Protein Smoothie Bowl

Step 1: Blend the Base Ingredients
In a high-speed blender, combine 1 cup of coconut milk, 2 cups of fresh baby spinach, 1 cup of frozen mango chunks, 1 cup of frozen zucchini slices, and 1/2 cup of frozen avocado. Add 1 scoop of vanilla protein powder for an extra protein boost. Secure the lid and blend on high for about 30–60 seconds until everything is smoothly combined, and you can no longer see any green leafy bits.

Step 2: Adjust Consistency
After blending, take a moment to check the texture of your Green Protein Smoothie Bowl mixture. If it appears too thick, add a splash more coconut milk and blend again for an additional 10–15 seconds. You want it to be creamy yet thick enough to hold your toppings. Aim for a luscious green consistency that resembles soft serve ice cream.

Step 3: Serve the Smoothie Bowl
Once blended to perfection, pour the creamy green smoothie into a wide, shallow bowl. It should create a nice wave pattern as it settles. To turn this into an inviting Green Protein Smoothie Bowl, smooth the top with a spoon, creating a canvas for your toppings.

Step 4: Add Toppings
Now for the fun part—adorn your smoothie bowl! Sprinkle a tablespoon of chia seeds in the center, add a handful of fresh raspberries for a pop of color, and generously scatter some granola around the edges for crunch. You can also add sliced bananas, coconut flakes, or nuts to customize your bowl to your liking.

Step 5: Savor the Freshness
Your Green Protein Smoothie Bowl is best enjoyed immediately while it’s fresh and flavorful. Grab a spoon, dig in, and relish every bite of this nutritious delight! The combination of creamy base and crunchy toppings will leave you energized and ready to tackle the day.

Green Protein Smoothie Bowl Variations

Feel free to play around with flavors and textures in your Green Protein Smoothie Bowl for a delightful twist every time!

  • Nut-Free: Substitute nut milk or protein powder with seed-based alternatives like sunflower seed butter or pumpkin seed protein for a nut-free treat.

  • Extra Creamy: Toss in a scoop of nut butter, like almond or cashew, to make your smoothie even richer and creamier—perfect for those nut lovers at heart!

  • Fruity Swaps: Replace frozen mango with fresh bananas or pineapple for a refreshing twist. The natural sweetness adds a delightful flavor that brightens your morning.

  • Protein Power Boost: Add a tablespoon of chia or hemp seeds to boost your smoothie bowl with extra protein and omega-3s. These tiny powerhouses take your energy to a whole new level!

  • Chocolate Indulgence: Mix in cocoa powder or cacao nibs for a chocolate-flavored twist. This variation turns your smoothie bowl into a luscious treat that feels like dessert.

  • Spicy Kick: Add a pinch of cayenne pepper or fresh ginger for a spicy zing! It not only heightens the flavor but also gives a delightful warmth that wakes up your palate.

  • Green Superfood: Enhance the nutrient boost by incorporating a teaspoon of spirulina or chlorella. This addition turns your bowl into a superfood powerhouse, brimming with vitamins and minerals.

  • Topping Play: Switch up your toppings from granola to homemade hemp seed clusters or even a sprinkle of coconut flakes for a tropical vibe. These little changes keep things exciting and delicious!

Experiment with these variations, and you might just discover your new favorite way to enjoy your Green Protein Smoothie Bowl. For other delicious ideas, consider trying the Lemon Ricotta Protein Pancakes or the hearty Coconutty Beans Greens for a full breakfast spread!

What to Serve with Green Protein Smoothie Bowl

Elevate your morning ritual with delightful pairings that enhance the fresh and vibrant flavors of a smooth, nourishing bowl.

  • Whole Grain Toast: This crunchy addition complements the creamy texture, providing a hearty base for avocado or nut butter spreads. Perfect for a well-rounded breakfast!

  • Yogurt Parfait: Layer creamy dairy-free yogurt with granola and fresh berries for a delightful mix of flavors and textures. It's a refreshing sidekick to your smoothie bowl.

  • Fruit Salad: A colorful medley of fresh fruits adds sweetness and bright flavors that harmonize with the smoothie. This refreshing side keeps everything light and uplifting.

  • Oatmeal: A warm bowl of oatmeal can balance the refreshing smoothie, adding a comforting, hearty element. Dress it up with cinnamon or nut butter for extra flair.

  • Nuts and Seeds Mix: A crunchy trail mix of almonds, walnuts, and pumpkin seeds perfectly complements the creamy bowl. It’s a fun way to add extra nutrients and a satisfying crunch.

  • Herbal Tea: Pair your smoothie bowl with a warm infusion, like peppermint or chamomile, for a soothing and aromatic touch that enhances the overall experience.

  • Coconut Water: Hydrate and refresh with this naturally sweet drink that echoes the tropical themes of the smoothie, adding an exotic flair to your meal.

  • Chia Seed Pudding: This can be prepared the night before for a delightful and nutritious side. Its jelly-like texture contrasts beautifully with your smooth bowl.

  • Dark Chocolate Chunks: For a sweet twist, add a few rich dark chocolate chunks on the side. The slight bitterness complements the smoothie’s tropical sweetness perfectly!

Make Ahead Options

These Green Protein Smoothie Bowls are perfect for meal prep enthusiasts! You can prep the smoothie base up to 24 hours in advance by blending together the coconut milk, baby spinach, frozen mango, frozen zucchini slices, frozen avocado, and protein powder. Store the mixture in an airtight container in the refrigerator to keep it fresh and flavorful. When you're ready to serve, simply stir the smoothie to restore its creamy consistency—if it thickens, add a splash of coconut milk and blend for a few seconds. Add your favorite toppings just before serving to ensure they remain crunchy and vibrant, providing you with a delicious, nutritious breakfast ready in minutes!

Expert Tips for Your Green Protein Smoothie Bowl

  • High-Speed Blender: Use a high-speed blender for the creamiest texture. This ensures all ingredients blend smoothly without any leafy bits remaining.

  • Thick or Thin: Adjust the thickness by adding more coconut milk if it's too thick, or frozen fruits for a thicker consistency. Find the right balance that suits your taste!

  • Freshness Is Key: Enjoy your Green Protein Smoothie Bowl immediately for optimal flavor and freshness. The longer it sits, the more the texture can change.

  • Colorful Toppings: Get creative with toppings! Use a variety of fruits, seeds, and nuts to make your bowl visually appealing and packed with nutrients.

  • Batch Prep: If you’re in a rush, prep your base ingredients in advance and freeze them in portions, making morning prep a breeze!

How to Store and Freeze Green Protein Smoothie Bowl

Fridge: Store any leftovers in an airtight container for up to 24 hours. Keep toppings separate and add them just before serving for the best flavor.

Freezer: For longer storage, freeze the smoothie base in portion-sized containers for up to 1 month. When ready to enjoy, simply thaw overnight in the fridge or re-blend with a bit of coconut milk.

Reheating: If it thickens after freezing, add a splash of coconut milk and blend until smooth again. It’s best to enjoy freshly made, but these options allow you to savor your Green Protein Smoothie Bowl later!

Green Protein Smoothie Bowl Recipe FAQs

How do I select the ripest ingredients for my Green Protein Smoothie Bowl?
Absolutely! When choosing fruits like mango and avocado, look for slight give when gently pressed—this indicates ripeness. Mango should have a sweet aroma, while avocados are perfect when they feel slightly soft but not mushy. For the spinach, fresh leaves should be vibrant green with no dark spots or wilting.

How should I store my Green Protein Smoothie Bowl leftovers?
You can store any leftover smoothie in an airtight container in the fridge for up to 24 hours. However, to maintain its fresh flavor and texture, I recommend consuming it immediately. If needed, keep your toppings separate and add them just before eating for the best experience.

Can I freeze my Green Protein Smoothie Bowl?
Yes! Freezing is a great option. Pour the smoothie base into portion-sized containers and freeze for up to 1 month. When you're ready to enjoy it, just thaw it overnight in the fridge. To re-blend, add a splash of coconut milk for a smooth consistency if it thickens after freezing.

What if my smoothie is too thick?
Very! If you find your smoothie mixture is too thick, you can easily adjust the consistency. Simply add a bit more coconut milk, about 1-2 tablespoons at a time, then blend again until you reach your desired creaminess. You want it to hold toppings but still be easy to eat, like soft serve ice cream!

Are there any dietary considerations for my Green Protein Smoothie Bowl?
Definitely! This recipe is vegan, gluten-free, and dairy-free, making it suitable for various dietary restrictions. However, always check for allergies when adding toppings—nuts and seeds are common allergens. If you're preparing this for pets, keep in mind that ingredients like avocado can be harmful; stick to pet-safe fruits when sharing.

How can I customize my Green Protein Smoothie Bowl?
The more the merrier! You can easily customize by adding a scoop of cocoa powder for a chocolate twist or swap fruits based on preference, like bananas or pineapples. You can even make it more filling by incorporating oats or nut butter. It’s a fun way to tailor each bowl to your taste!

Revitalize Mornings with a Green Protein Smoothie Bowl

Kick-start your day with a nutritious Green Protein Smoothie Bowl, packed with energizing greens and customizable toppings.
Print Recipe
Prep Time 10 minutes mins
Total Time 10 minutes mins
Servings: 2 bowls
Course: Breakfast
Cuisine: Healthy
Calories: 300
Ingredients Equipment Method Nutrition Notes

Ingredients
  

For the Base
  • 1 cup Coconut Milk Adds creaminess and a subtle sweetness; substitute with almond or oat milk for a different flavor profile.
  • 2 cups Baby Spinach Provides vibrant color and essential vitamins; can be swapped with kale or other leafy greens, but taste may vary.
  • 1 cup Frozen Mango Offers a tropical sweetness and creamy texture; fresh mango may be used if available, but it will alter the consistency.
  • 1 cup Frozen Zucchini Slices Adds fiber and thickness without altering flavor; cauliflower may be used as a low-calorie alternative.
  • 1/2 cup Frozen Avocado Enhances creaminess and provides healthy fats; fresh avocado can be substituted, but frozen gives a better consistency.
  • 1 scoop Vanilla Protein Powder Boosts protein content and flavor; vegan protein powder is a great alternative for those with dietary restrictions.
For Toppings
  • 1 tablespoon Chia Seeds Add a nourishing crunch and omega-3s; they also look beautiful sprinkled on top.
  • 1 handful Raspberries Provide a burst of tartness and color; swap for strawberries or blackberries for a different taste.
  • 1 cup Granola Enhances texture and adds crunch; opt for a gluten-free variety if needed.
  • Other Options Experiment with nuts, seeds, nut butter, coconut flakes, bananas, berries, yogurt, cereal, or cacao nibs for even more deliciousness.

Equipment

  • High-speed blender

Method
 

Step-by-Step Instructions
  1. Blend the Base Ingredients: In a high-speed blender, combine coconut milk, fresh baby spinach, frozen mango chunks, frozen zucchini slices, frozen avocado, and vanilla protein powder. Blend on high for about 30–60 seconds until smooth.
  2. Adjust Consistency: Check the texture of your mixture. If too thick, add a splash more coconut milk and blend for 10–15 seconds to achieve a creamy yet thick consistency.
  3. Serve the Smoothie Bowl: Pour the blended smoothie into a wide, shallow bowl and smooth the top with a spoon.
  4. Add Toppings: Sprinkle chia seeds, add raspberries, and scatter granola around the edges. Customize with sliced bananas or coconut flakes as desired.
  5. Savor the Freshness: Enjoy the smoothie bowl immediately while fresh for optimal flavor and texture.

Nutrition

Serving: 1bowlCalories: 300kcalCarbohydrates: 35gProtein: 10gFat: 15gSaturated Fat: 8gPolyunsaturated Fat: 1gMonounsaturated Fat: 6gSodium: 150mgPotassium: 600mgFiber: 8gSugar: 10gVitamin A: 2500IUVitamin C: 25mgCalcium: 150mgIron: 2mg

Notes

Use a high-speed blender for the best texture and adjust thickness as needed. Enjoy immediately for freshness.

Tried this recipe?

Let us know how it was!

Cheddar and Bacon Turkey Melt: The Ultimate Cozy Sandwich

February 14, 2026 by Grace Snow Leave a Comment

As I stood in my kitchen, the scent of sizzling bacon filled the air, instantly lifting my spirits. That's when it hit me: there’s nothing quite like a Cheddar and Bacon Turkey Melt on Sourdough to brighten up a day! This sandwich is the epitome of comfort food, combining sharp cheddar, crispy bacon, and tender turkey into a warm embrace between perfectly toasted slices of sourdough. What I adore most about this recipe is how quick it is to whip up—ideal for those lazy afternoons or surprise guests. Plus, with that delightful crunch and gooey interior, it's practically guaranteed to make your taste buds dance! Are you ready to discover your new favorite go-to meal?

Why is this sandwich so irresistible?

Comforting: The Cheddar and Bacon Turkey Melt is a warm hug in sandwich form, perfect for any day needing a little comfort.
Quick Preparation: With straightforward steps and common ingredients, you can enjoy this melt in no time—ideal for busy weekdays or leisurely weekends.
Versatile Options: Customize it to your liking by swapping cheeses like Swiss or adding veggies such as sautéed spinach to elevate your meal. Check out my Chickpea Spinach Curry for a delightful veggie idea!
Flavor Explosion: The combination of gooey cheddar, smoky bacon, and juicy turkey creates an irresistible flavor explosion that will have you craving more. So, why not pair it with some sweet potato fries for the ultimate comfort experience?
Crowd-Pleaser: Whether serving family or hosting friends, this sandwich is bound to impress everyone at the table!

Cheddar and Bacon Turkey Melt Ingredients

For the Sandwich
• Sourdough Bread – The sturdy base of the sandwich provides tang and crunch; can substitute with whole wheat or gluten-free bread if desired.
• Turkey Breast – A lean protein that allows other flavors to shine; use deli-style for convenience or freshly cooked for authenticity.
• Cheddar Cheese – Adds rich, creamy flavor and melts beautifully; consider substituting with Swiss, provolone, or mozzarella for variation.
• Cooked Bacon – Introduces smoky and salty crunch to the sandwich; opt for crispy bacon to enhance texture.

For the Spread
• Butter – Ensures a golden, crispy crust on the sourdough; margarine may be used as a dairy-free alternative.
• Mayonnaise – Adds creaminess and moisture to the sandwich; can substitute with avocado or hummus if avoiding mayo.
• Dijon Mustard – Provides a zesty contrast to rich flavors; substitute with yellow or whole-grain mustard if preferred.
• Black Pepper – Enhances flavor with a hint of heat; freshly ground will provide optimal flavor.

Step‑by‑Step Instructions for Cheddar and Bacon Turkey Melt

Step 1: Prepare the Bread
Start by laying out two slices of sourdough bread on a clean surface. Spread a generous layer of mayonnaise on one side of each slice, ensuring even coverage for moisture and flavor. This creamy base sets the stage for your Cheddar and Bacon Turkey Melt, giving it a delightful richness and making for a perfectly golden crust once toasted.

Step 2: Add the Mustard
On one of the slices, add a layer of Dijon mustard atop the mayonnaise. This tangy kick will elevate the flavors of your sandwich, harmonizing beautifully with the creamy cheddar and smoky bacon. Make sure to spread the mustard evenly to every edge so each bite is infused with that zesty goodness.

Step 3: Layer the Cheese
Next, place a layer of sharp cheddar cheese directly on top of the mustard. Stack it generously, as this will be the heart of your melt. The cheese adds not just flavor, but also creaminess when it melts. Be sure to cover the entire surface for a gooey experience in every bite as your Cheddar and Bacon Turkey Melt comes together.

Step 4: Add the Bacon
Now it’s time to introduce the crispy cooked bacon. Layer it evenly over the cheddar cheese, allowing the salty, crunchy goodness to complement the creamy elements of your sandwich. This smoky layer brings a wonderful contrast and a satisfying crunch, reinforcing the deliciousness of this turkey melt.

Step 5: Top with Turkey
Next, lay the turkey breast slices evenly on top of the bacon. This lean protein not only adds substance but also balances out the richness of the cheese and bacon. Spread it out well, ensuring every corner of the sandwich gets a taste of the tender turkey for the ultimate flavor experience in your Cheddar and Bacon Turkey Melt.

Step 6: Close the Sandwich
Take the second slice of sourdough and place it on top of the turkey, ensuring the mayo side faces down. Gently press the sandwich together to help the ingredients meld during cooking. This simple step is crucial for keeping all those delightful layers snug and intact as you prepare to cook your Cheddar and Bacon Turkey Melt.

Step 7: Heat the Skillet
Preheat a skillet over medium heat and add a tablespoon of butter. As the butter melts, swirl it around the pan, coating the surface well. The butter not only adds flavor but ensures your sandwich gets that lovely golden-brown crust while cooking. This step is key for achieving a deliciously crispy exterior on your melt.

Step 8: Cook the First Side
Carefully place the assembled sandwich in the skillet and let it cook for about 3-4 minutes. Keep an eye on it as you wait; you want a beautiful golden-brown crust to form on the bottom. The cheese should start melting at this stage, sending wonderful aromas wafting through your kitchen—signs of a delicious Cheddar and Bacon Turkey Melt in the making!

Step 9: Flip and Cook Again
Using a spatula, gently flip the sandwich over, pressing down slightly to help it brown evenly. Cook for an additional 3-4 minutes until the second side is golden and the cheese has fully melted. This step gives the sandwich a perfect balance of crispy texture and gooey warmth, ensuring every bite you take offers that irresistible comfort food experience.

Step 10: Slice and Serve
Once both sides of your Cheddar and Bacon Turkey Melt are beautifully golden, carefully remove it from the skillet and let it cool for just a minute. Then, slice it in half to reveal the melty, savory layers inside. Serve warm, enjoying the combination of flavors and textures that make this sandwich truly satisfying.

Cheddar and Bacon Turkey Melt Variations

Feel free to personalize your Cheddar and Bacon Turkey Melt with these delicious twists that will take your sandwich to the next level!

  • Dairy-Free: Use plant-based cheese alternatives to make a tasty dairy-free version without sacrificing flavor or texture.

  • Spicy Twist: Add sliced jalapeños or a drizzle of hot sauce to bring a fiery kick to your melt. The heat pairs wonderfully with creamy cheddar!

  • Veggie Packed: Layer in sautéed bell peppers and spinach for a hearty boost of vegetables, turning this classic into a healthier option. Check out my Chickpea Spinach Curry for more veggie ideas!

  • Herb Infusion: Sprinkle fresh herbs like basil or oregano between layers for an aromatic experience that elevates the melt's flavor profile.

  • Smoky Flavor: Try smoked turkey breast in place of regular turkey for an added depth of flavor. It will bring out the amazing smoky notes of the bacon, too.

  • Extra Crunch: Add a layer of crispy fried onions to the sandwich for a delightful crunch that contrasts beautifully with the creamy elements.

  • Mustard Variation: Swap Dijon for honey mustard for a hint of sweetness that balances the rich, savory components of your melt.

  • Sweet Finish: Serve with a side of apple slices or a light fruit salad for a refreshing contrast to the richness of the sandwich.

Make Ahead Options

These Cheddar and Bacon Turkey Melts are perfect for meal prep enthusiasts! You can assemble the sandwich (without cooking) up to 24 hours in advance by layering the mayonnaise, Dijon mustard, cheddar cheese, bacon, and turkey between the slices of sourdough. To maintain maximum freshness, wrap each sandwich tightly in plastic wrap or parchment paper and refrigerate. When you're ready to serve, simply heat a skillet over medium heat, melt butter, and cook the sandwich for about 3-4 minutes on each side until golden brown and the cheese is melted. This way, you’ll enjoy warm, delicious sandwiches with minimal effort on busy weeknights!

What to Serve with Cheddar and Bacon Turkey Melt

Experience the perfect cookout atmosphere while creating a delightful meal that everyone around the table will love.

  • Crispy French Fries: The classic side of crunchy fries perfectly complements the gooey goodness of the melt, offering a satisfying contrast in texture.
  • Sweet Potato Fries: These naturally sweet, crunchy delights add a nutritious flair and balance the savory flavors of your sandwich.
  • Fresh Green Salad: A vibrant salad with mixed greens and a light vinaigrette can cut through the richness, refreshing your palate between bites.
  • Tomato Soup: A warm, creamy bowl of tomato soup is just the cozy counterpart your turkey melt needs for a comforting and hearty combination.
  • Coleslaw: The crisp and tangy slaw brings a refreshing crunch, enhancing your meal while contrasting the sandwich's richness.
  • Pickles: A side of dill pickles introduces a zesty, briny flavor to each bite, enhancing the overall delicious experience.
  • Cold Brewed Iced Tea: Sip on a refreshing glass of iced tea—its lightness complements the sandwich without overshadowing its beautiful flavors.
  • Root Beer Float: For dessert, indulge in a root beer float that adds a nostalgic sweetness, rounding out your meal delightfully.

Expert Tips for Cheddar and Bacon Turkey Melt

• Choose Fresh Ingredients: Using freshly cooked turkey and crispy bacon keeps your cheddar bacon turkey melt deliciously flavorful. Deli meats can lack the same richness.

• Don’t Skip the Mayo: Mayonnaise on the bread adds moisture and helps achieve a perfect golden crust. Avoid overloading on mustard to keep it from overpowering the flavors.

• Use Quality Cheese: Opt for freshly grated cheddar instead of pre-shredded. This ensures a smoother melt and enhances the creamy texture of your sandwich.

• Press Down Gently: Pressing down on the sandwich while cooking helps meld the ingredients together and ensures even browning, keeping your cheddar bacon turkey melt intact.

• Watch the Heat: Cooking over medium heat gives time for the cheese to melt without burning the bread. Patience leads to a perfectly toasted sandwich!

How to Store and Freeze Cheddar and Bacon Turkey Melt

Fridge: Store leftover Cheddar and Bacon Turkey Melt in an airtight container for up to 2 days. Reheat in a skillet over low heat until warmed through for best texture.

Freezer: If freezing, wrap the sandwich tightly in plastic wrap, then place it in a zip-top bag. It will keep well for up to 2 months. Thaw overnight in the fridge before reheating.

Reheating: For a crispy finish, reheat in a skillet or use a toaster oven instead of the microwave, which can make the bread soggy.

Wrapping: Always wrap your sandwich carefully to maintain its shape and prevent freezer burn for the best results when storing your Cheddar and Bacon Turkey Melt.

Cheddar and Bacon Turkey Melt Recipe FAQs

How do I choose the best sourdough bread for my sandwich?
Absolutely! Look for sourdough bread that has a firm crust and a soft, chewy interior. It should have a slight tangy flavor without any dark spots all over, which indicate over-ripeness. If you’re looking for something lighter, whole wheat or gluten-free options work well, though they may alter the flavor profile a bit.

How can I store leftover Cheddar and Bacon Turkey Melt?
For sure! Wrap any leftover sandwiches tightly in parchment paper to keep their shape and refrigerate for up to 1-2 days. When you're ready to enjoy them again, reheat in a skillet over low heat to restore that delicious crispy exterior.

Can I freeze Cheddar and Bacon Turkey Melt for future meals?
Very much so! To freeze your sandwiches, wrap them tightly in plastic wrap, then place them in a zip-top bag to avoid freezer burn. They can be stored this way for up to 2 months. Thaw them in the refrigerator overnight before reheating in a skillet for that perfect crunch!

What should I do if my sandwich is soggy after cooking?
Oh no! A soggy sandwich can happen if the bacon isn’t crispy or if too much mayonnaise is used. Next time, ensure your bacon is thoroughly cooked and try using a lighter layer of mayonnaise. Pressing down gently while cooking also helps keep everything crispy.

Are there any dietary considerations I should remember?
Absolutely! If you're serving this sandwich to friends or family with dietary restrictions, remember that it contains both dairy and gluten. You can substitute mayonnaise with avocado or hummus for a dairy-free version and opt for gluten-free bread to make it suitable for gluten-sensitive folks.

Cheddar and Bacon Turkey Melt

Cheddar and Bacon Turkey Melt: The Ultimate Cozy Sandwich

Enjoy a delicious Cheddar and Bacon Turkey Melt, a comforting sandwich perfect for any day.
Print Recipe Pin Recipe
Prep Time 10 minutes mins
Cook Time 8 minutes mins
Total Time 18 minutes mins
Servings: 2 sandwiches
Course: Dinner
Cuisine: American
Calories: 500
Ingredients Equipment Method Nutrition Notes

Ingredients
  

For the Sandwich
  • 2 slices Sourdough Bread can substitute with whole wheat or gluten-free bread
  • 4 oz Turkey Breast use deli-style or freshly cooked
  • 2 oz Cheddar Cheese consider substituting with Swiss, provolone, or mozzarella
  • 2 slices Cooked Bacon opt for crispy bacon
For the Spread
  • 1 tbsp Butter or margarine as a dairy-free alternative
  • 1 tbsp Mayonnaise can substitute with avocado or hummus
  • 1 tbsp Dijon Mustard substitute with yellow or whole-grain mustard
  • to taste Black Pepper freshly ground will provide optimal flavor

Equipment

  • Skillet

Method
 

Step‑by‑Step Instructions for Cheddar and Bacon Turkey Melt
  1. Start by laying out two slices of sourdough bread on a clean surface. Spread a generous layer of mayonnaise on one side of each slice.
  2. On one of the slices, add a layer of Dijon mustard atop the mayonnaise.
  3. Next, place a layer of sharp cheddar cheese directly on top of the mustard.
  4. Now it’s time to introduce the crispy cooked bacon. Layer it evenly over the cheddar cheese.
  5. Next, lay the turkey breast slices evenly on top of the bacon.
  6. Take the second slice of sourdough and place it on top of the turkey, ensuring the mayo side faces down.
  7. Preheat a skillet over medium heat and add a tablespoon of butter. As the butter melts, swirl it around the pan.
  8. Carefully place the assembled sandwich in the skillet and let it cook for about 3-4 minutes.
  9. Using a spatula, gently flip the sandwich over, pressing down slightly to help it brown evenly.
  10. Once both sides are beautifully golden, carefully remove it from the skillet and let it cool for just a minute.
  11. Slice it in half to reveal the melty, savory layers inside. Serve warm.

Nutrition

Serving: 1sandwichCalories: 500kcalCarbohydrates: 40gProtein: 28gFat: 30gSaturated Fat: 15gPolyunsaturated Fat: 4gMonounsaturated Fat: 8gCholesterol: 75mgSodium: 1000mgPotassium: 700mgFiber: 3gSugar: 2gVitamin A: 600IUVitamin C: 1mgCalcium: 250mgIron: 2mg

Notes

Using freshly cooked turkey and crispy bacon enhances flavor. Mayonnaise adds moisture and aids in browning. Pressing down while cooking ensures even browning and melding of flavors.

Tried this recipe?

Let us know how it was!

Irresistibly Cheesy Hot Honey Chicken Quesadillas to Savor

February 14, 2026 by Grace Snow Leave a Comment

As I surveyed my fridge, a spark of creativity ignited—what if a little sweetness met spice in a comforting dish? That’s when I knew it was time to whip up my Cheesy Hot Honey Chicken Quesadillas with Spicy Jalapeño Cream Sauce. In just 30 minutes, you can transform everyday ingredients into a quick dinner that’s not only customizable for all tastes—whether you’re a chicken lover, a steak aficionado, or a bean enthusiast—but also a mouthwatering crowd-pleaser. Imagine crispy tortillas oozing with melted cheese, tender chicken, and a drizzle of zesty jalapeño cream sauce. It’s the perfect companion for a cozy night in or an impromptu gathering with friends. Ready to spice up your cooking routine? Let’s dive in and create some kitchen magic together!

Why will you crave these quesadillas?

Flavor Explosion: The combination of sweet honey and spicy jalapeños creates a mouthwatering experience that's hard to resist.

Customizable Options: Whether you're a chicken lover, enjoy steak, or prefer beans, these quesadillas cater to all preferences.

Quick and Easy: Ready in just 30 minutes, you can enjoy a delicious meal without spending hours in the kitchen.

Crowd-Pleaser: Perfect for gatherings, these cheesy delights will impress family and friends alike, making them your new go-to for shared meals.

Deliciously Satisfying: Gooey cheese, crispy tortillas, and zesty sauce come together for a comforting dish that's simply irresistible.

Ready to indulge? Pair them with guacamole or your favorite salsa for even more flavor!

Cheesy Hot Honey Chicken Quesadillas Ingredients

For the Quesadillas
• Boneless, Skinless Chicken Breasts – This main protein provides heartiness; feel free to substitute with steak or beans for a vegetarian option.
• Olive Oil – Essential for cooking the chicken, adding flavor while preventing sticking.
• Smoked Paprika – Enhances the chicken with a smoky flavor; adjust per your taste.
• Garlic Powder – Adds aromatic depth; feel free to experiment with fresh garlic for a bolder flavor.
• Onion Powder – Complements the other spices beautifully; you can omit if preferred.
• Salt and Pepper – Key seasonings that elevate the dish; adjust according to your taste preferences.
• Honey – Provides sweet balance to the heat; you can substitute with agave syrup when needed.
• Hot Sauce – Introduces spice; adjust the quantity depending on your heat tolerance.
• Sour Cream – Acts as the creamy base for the jalapeño sauce, offering a cool contrast.
• Fresh Jalapeños – They provide a fresh kick; you can slice them thinly for less heat.
• Lime Juice – Brightens the flavor of the cream sauce; it's an essential ingredient.
• Flour Tortillas – Provide the structure for the quesadillas, making them easy to handle; corn tortillas are a fantastic gluten-free option.
• Cheddar and Monterey Jack Cheese – Creates that melty, gooey texture; feel free to switch with other cheeses like pepper jack for added heat.
• Butter – Used for grilling to achieve that golden-brown, crispy finish.

For the Jalapeño Cream Sauce
• Sour Cream – This is your creamy base for a delightful sauce.
• Chopped Fresh Jalapeños – Add fresh spice to the sauce for that zesty kick.
• Lime Juice – A vital component that enhances the overall flavor.
• Garlic Powder – Complements the creaminess with a subtle garlic taste.
• Salt – Essential for bringing all the flavors together.

Get ready to enjoy Cheesy Hot Honey Chicken Quesadillas that are as thrilling to make as they are to eat!

Step‑by‑Step Instructions for Cheesy Hot Honey Chicken Quesadillas

Step 1: Cook the Chicken
Heat a tablespoon of olive oil in a skillet over medium-high heat. Season the boneless, skinless chicken breasts generously with smoked paprika, garlic powder, onion powder, salt, and pepper. Cook the chicken for about 10 minutes, turning occasionally, until golden brown and cooked through. You can check for doneness by ensuring the internal temperature reaches 165°F.

Step 2: Prepare Hot Honey Sauce
In a small bowl, whisk together honey and your preferred hot sauce to create the hot honey sauce. Once the chicken is cooked, remove it from the skillet and slice it into bite-sized pieces. Add the sliced chicken back to the skillet, pouring the hot honey mixture over it. Toss until the chicken is evenly coated, then keep warm on low heat.

Step 3: Make Jalapeño Cream Sauce
In a mixing bowl, combine sour cream, finely chopped fresh jalapeños, lime juice, garlic powder, and a pinch of salt. Stir until well blended and creamy. Refrigerate this zesty sauce while you prepare the quesadillas to allow the flavors to meld. This Spicy Jalapeño Cream Sauce adds a delightful contrast to the cheesy quesadillas.

Step 4: Assemble Quesadillas
Lay out a flour tortilla on a clean work surface. Layer with a generous amount of cheddar and Monterey Jack cheese, followed by the hot honey chicken, and a sprinkle of more cheese on top. Place another tortilla on the top to create a sandwich-like structure. Repeat the process until you’ve prepared the desired number of quesadillas.

Step 5: Grill Quesadillas
Melt a tablespoon of butter in a skillet over medium heat. Carefully place one assembled quesadilla in the skillet and grill for about 2-3 minutes, until the bottom is golden brown and the cheese begins to melt. Flip the quesadilla using a spatula, adding more butter if necessary, and grill the other side for another 2-3 minutes. The quesadilla should be crispy and well-sealed.

Step 6: Serve
Remove the quesadilla from the pan and let it rest for a minute before slicing it into wedges. Serve hot, drizzling with the chilled Spicy Jalapeño Cream Sauce on top. Garnish with fresh cilantro if desired. Enjoy these Cheesy Hot Honey Chicken Quesadillas with your favorite sides like guacamole or salsa for an added flavor boost!

Make Ahead Options

These Cheesy Hot Honey Chicken Quesadillas are perfect for busy weeknights or meal prep! You can cook and chill the chicken up to 3 days in advance; simply season and sauté as instructed, then store it in an airtight container in the refrigerator. Additionally, the Spicy Jalapeño Cream Sauce can be prepared and refrigerated up to 24 hours ahead to allow the flavors to meld. When it's time to serve, just warm the chicken on the stovetop, assemble the quesadillas, and grill them for a few minutes until crispy. With these make-ahead tips, you’ll have a delicious meal ready to enjoy with minimal effort!

Cheesy Hot Honey Chicken Quesadilla Variations

Let your culinary creativity shine and give these delicious quesadillas your personal twist!

  • Steak Swap: Use sliced steak instead of chicken for a robust, meaty flavor. The smoky marinade will enhance every bite!

  • Black Bean Delight: Replace chicken with black beans for a hearty, vegetarian option that still packs a protein punch. Perfect for meatless nights!

  • Cheese Experimentation: Try pepper jack cheese for an extra kick or gouda for a creamy, smoky addition. Cheese is the magical element in this dish!

  • Veggie Boost: Mix in bell peppers, onions, or corn before grilling for added texture and flavor. Think colorful and nutritious!

  • Gluten-Free Options: Substitute flour tortillas with corn tortillas to make your quesadillas gluten-free and just as delicious without compromising on taste.

  • Sweetened Heat: Drizzle a touch of maple syrup or agave syrup in the hot honey sauce for a unique flavor twist that's sure to surprise your taste buds!

  • Herbed Freshness: Introduce fresh herbs like cilantro or parsley in the filling or as a garnish for a refreshing lift. Your kitchen will smell like a garden!

  • Extra Zing: Add a pinch of cayenne pepper or diced serrano peppers to the filling for those who cherish even more heat. Spice it up, if you dare!

For an extra boost of flavor, these quesadillas can be nicely paired with a side of guacamole or lovely fresh salsa. The possibilities are endless—have fun experimenting!

How to Store and Freeze Cheesy Hot Honey Chicken Quesadillas

Fridge: Store leftover quesadillas in an airtight container for up to 3 days. Reheat in a skillet or microwave until warmed through.

Freezer: For longer storage, wrap individually in plastic wrap and freeze for up to 2 months. Reheat directly from frozen, cooking in a skillet until crispy.

Reheating: To maintain the crispiness, reheat quesadillas on the stovetop over medium heat, flipping occasionally until heated through.

Make-Ahead: Assemble the quesadillas, wrap tightly, and store in the fridge for up to 24 hours before grilling for convenience during busy weeknights.

What to Serve with Cheesy Hot Honey Chicken Quesadillas?

Elevate your meal experience with delicious complements that balance the savory and spicy goodness of these delightful quesadillas.

  • Guacamole: Creamy and rich, guacamole adds a refreshing contrast to the spicy quesadillas, making every bite more satisfying. Pair these two for a dip-worthy night!

  • Fresh Salsa: Bright, zesty salsa brings a burst of freshness that cuts through the richness of the melted cheese, enhancing the overall flavor profile. Try using mango salsa for a unique twist!

  • Crisp Side Salad: A light side salad with mixed greens, cherry tomatoes, and a tangy vinaigrette provides a refreshing crunch, balancing the cheesy richness of the quesadillas perfectly.

  • Corn on the Cob: Grilled corn brushed with a little butter and sprinkled with chili powder offers a sweet and smoky side that complements the flavors of the quesadillas well.

  • Spicy Black Beans: Rich, seasoned black beans add heartiness and protein, creating a complete meal that promises to satisfy both taste buds and hunger.

  • Cilantro Lime Rice: Fluffy rice infused with zesty lime and fresh cilantro provides a bright and filling side, ideal for soaking up extra jalapeño cream sauce.

  • Chilled Mexican Beverages: Pair with homemade horchata or a refreshing agua fresca to keep things cool while you enjoy the heat of the quesadillas.

These ideas not only complement the Cheesy Hot Honey Chicken Quesadillas but also create a festive feel for any dinner table!

Expert Tips for Cheesy Hot Honey Chicken Quesadillas

Watch the Heat: Adjust the hot sauce amount to suit your spice tolerance; it’s easy to start with less and add more later.

Perfectly Cooked Chicken: Ensure chicken reaches an internal temperature of 165°F for optimum safety and tenderness.

Non-Stick Skillet: Use a non-stick skillet or add enough butter to prevent the quesadillas from sticking and ensure a crispy finish.

Don’t Rush the Cheese: Let the cheese melt completely before flipping the quesadilla, achieving that delightful gooeyness in your Cheesy Hot Honey Chicken Quesadillas.

Experiment with Ingredients: Feel free to add extra veggies, like bell peppers or onions, to enhance flavor and nutrition.

Cheesy Hot Honey Chicken Quesadillas Recipe FAQs

What type of chicken should I use for the quesadillas?
Absolutely! Boneless, skinless chicken breasts work best as they are lean and cook evenly. However, feel free to substitute with sliced steak or black beans for a vegetarian option. Adjust your seasonings accordingly to complement the protein you choose.

How should I store leftover quesadillas?
Store any leftover Cheesy Hot Honey Chicken Quesadillas in an airtight container in the refrigerator for up to 3 days. When you're ready to enjoy them again, simply reheat in a skillet or microwave until warmed through for a quick and delicious meal.

Can I freeze these quesadillas?
Very! If you want to freeze your quesadillas, wrap them individually in plastic wrap and then place them in a freezer-safe bag. They can be frozen for up to 2 months. When you're ready to enjoy, reheat them straight from the freezer in a skillet over medium heat until crispy, flipping occasionally to ensure even heating.

What if the quesadillas start to stick while grilling?
No worries! Make sure you're using a non-stick skillet or adequately greased pan with enough butter. If they do stick, gently loosen them with a spatula and carefully flip them. Getting the pan hot enough before adding the quesadilla is key to a crispy finish.

Are these quesadillas spicy?
The spiciness can be easily adjusted! Start by using a smaller amount of hot sauce when preparing the chicken, and you can always add more to suit your taste. Additionally, if you find fresh jalapeños too hot, consider using fewer or opting for milder peppers. Customize it to your heat-loving heart’s content!

Can I make these quesadillas ahead of time?
Absolutely! You can assemble the quesadillas and wrap them tightly in plastic wrap. They can be stored in the fridge for up to 24 hours before grilling. This way, you can enjoy a freshly made meal in no time during busy nights without compromising on taste!

Cheesy Hot Honey Chicken Quesadillas

Irresistibly Cheesy Hot Honey Chicken Quesadillas to Savor

These Cheesy Hot Honey Chicken Quesadillas blend sweetness and spice for a quick, customizable dinner.
Print Recipe Pin Recipe
Prep Time 10 minutes mins
Cook Time 20 minutes mins
Total Time 30 minutes mins
Servings: 4 quesadillas
Course: Dinner
Cuisine: Mexican
Calories: 450
Ingredients Equipment Method Nutrition Notes

Ingredients
  

For the Quesadillas
  • 2 pounds Boneless, Skinless Chicken Breasts Substitute with steak or beans if desired
  • 1 tablespoon Olive Oil For cooking the chicken
  • 1 teaspoon Smoked Paprika Adjust per your taste
  • 1 teaspoon Garlic Powder Experiment with fresh garlic for bolder flavor
  • 1 teaspoon Onion Powder Can be omitted if preferred
  • to taste Salt Adjust according to your taste preferences
  • to taste Pepper Adjust according to your taste preferences
  • 1 tablespoon Honey Can substitute with agave syrup
  • to taste Hot Sauce Adjust quantity for heat tolerance
  • 1 cup Sour Cream Acts as base for the jalapeño sauce
  • 2 Fresh Jalapeños Slice thinly for less heat
  • 2 tablespoons Lime Juice Essential for cream sauce
  • 4 large Flour Tortillas Corn tortillas are a gluten-free option
  • 1 cup Cheddar and Monterey Jack Cheese Feel free to switch with pepper jack
  • 2 tablespoons Butter Used for grilling
For the Jalapeño Cream Sauce
  • 1 cup Sour Cream
  • 2 Fresh Chopped Jalapeños
  • 2 tablespoons Lime Juice Enhances overall flavor
  • 1 teaspoon Garlic Powder
  • to taste Salt

Equipment

  • Skillet
  • Mixing Bowl
  • Spatula

Method
 

Step-by-Step Instructions
  1. Heat a tablespoon of olive oil in a skillet over medium-high heat. Season chicken with smoked paprika, garlic powder, onion powder, salt, and pepper. Cook for about 10 minutes until golden brown and cooked through.
  2. In a small bowl, whisk together honey and hot sauce to create the hot honey sauce. Slice the cooked chicken into bite-sized pieces and add it back to the skillet, pouring the hot honey mixture over it. Toss to coat.
  3. In a mixing bowl, combine sour cream, chopped jalapeños, lime juice, garlic powder, and a pinch of salt. Stir until well blended and creamy. Refrigerate the sauce while preparing quesadillas.
  4. Lay out a flour tortilla, layer with a generous amount of cheese, followed by the hot honey chicken, and sprinkle more cheese on top. Place another tortilla on top. Repeat to make desired number of quesadillas.
  5. Melt a tablespoon of butter in a skillet. Grill one assembled quesadilla for 2-3 minutes until golden brown. Flip and grill the other side for another 2-3 minutes until crispy.
  6. Remove from skillet, let rest, then slice into wedges. Serve hot with the Spicy Jalapeño Cream Sauce drizzled on top, garnished with fresh cilantro if desired.

Nutrition

Serving: 1quesadillaCalories: 450kcalCarbohydrates: 40gProtein: 30gFat: 25gSaturated Fat: 12gPolyunsaturated Fat: 2gMonounsaturated Fat: 8gCholesterol: 85mgSodium: 800mgPotassium: 500mgFiber: 3gSugar: 6gVitamin A: 15IUVitamin C: 20mgCalcium: 25mgIron: 10mg

Notes

Adjust hot sauce amount to suit spice tolerance. Ensure chicken reaches 165°F for safety. Use a non-stick skillet or enough butter to prevent sticking. Let cheese melt completely for gooeyness.

Tried this recipe?

Let us know how it was!

Creamy Twisted Pasta with Honey Garlic Chicken Delight

February 14, 2026 by Grace Snow Leave a Comment

Chaos filled the kitchen as I scrambled to put together dinner on a busy weeknight. The clock was ticking, and my stomach was rumbling for something comforting. Enter my savior: Twisted Pasta with Honey Garlic Chicken. The golden chicken bites, glazed with a luscious honey garlic sauce, sit atop a dreamy bed of creamy Parmesan-tossed rotini. This dish is a masterpiece of sweet and savory flavors, giving you that restaurant-quality feel right at home. Not only does it come together in a flash, but it's also customizable to accommodate any dietary preferences—gluten-free options included! Ready to impress your taste buds and wow your loved ones? Let’s dive into this delicious recipe and bring some warmth back to your weeknight dinners!

Why is this pasta dish a must-try?

Quick and Easy: With minimal ingredients and straightforward steps, you can whip up this dish in under 30 minutes, making it perfect for busy weeknights.
Flavor Explosion: The sticky honey garlic sauce perfectly complements the creamy Parmesan sauce, creating a balance of sweet and savory flavors that will have everyone asking for seconds.
Versatile Options: Feel free to customize; swap rotini for your favorite pasta shape, or try using shrimp or tofu as a protein alternative.
Healthier Comfort Food: This recipe allows for gluten-free substitutions and the addition of vegetables like sautéed spinach or broccoli, making it a wholesome option.
Crowd-Pleaser: Kids and adults alike will fall in love with this comforting dish, making it a great option for family dinners or gatherings. Serve it alongside a fresh salad or a side of garlic bread for a complete meal!

Twisted Pasta with Honey Garlic Chicken Ingredients

For the Chicken:
• Chicken Breast – Cut into bite-sized chunks for easy cooking and absorption of flavors. Works well with thighs for added juiciness.
• Salt & Black Pepper – Essential seasoning for enhancing the chicken's flavor before cooking.

For the Sauce:
• Butter – Adds richness to chicken and helps sauté garlic.
• Garlic – Provides aromatic flavor to the sauce; sauté until fragrant.
• Honey – Adds sweetness to the glaze and balances savory soy sauce.
• Soy Sauce – Contributes depth and savory notes to the glaze; Tamari and coconut aminos work as gluten-free alternatives.

For the Pasta:
• Rotini Pasta – Ideal for holding sauce due to its spiral shape; can substitute with fusilli, penne, or farfalle.

For the Cream Sauce:
• Heavy Cream – Creates a rich and creamy sauce; can substitute with coconut cream for a dairy-free option.
• Parmesan Cheese – Adds cheesy flavor and thickens the cream sauce; alternatives can include dairy-free Parmesan.

For Garnish:
• Fresh Parsley – Adds a pop of color and freshness to the dish; optional for garnish.

Step‑by‑Step Instructions for Twisted Pasta with Honey Garlic Chicken

Step 1: Prepare Chicken
Begin by cutting the chicken breast into bite-sized chunks, ensuring they are even for uniform cooking. Season the pieces generously with salt and black pepper, allowing the flavors to meld while you heat the skillet over medium-high heat. You’ll be ready for the next step in just a moment!

Step 2: Sear Chicken
In your hot skillet, add 2 tablespoons of butter and wait for it to melt, creating a rich base for your chicken. Once melted, add the seasoned chicken pieces and sear for 5–6 minutes. You want them to turn golden brown and cooked through, so keep an eye on them. Once done, remove the chicken from the skillet and set aside.

Step 3: Make Sauce
Lower the heat to medium and add 3 minced garlic cloves to the same skillet, sautéing until they become fragrant, about 30 seconds. Stir in 1/4 cup of honey and 2 tablespoons of soy sauce. Allow this mixture to bubble gently, then return the chicken to the skillet, simmering everything together for 2–3 minutes until the sauce thickens and clings to the chicken beautifully.

Step 4: Cook Pasta
In a large pot, bring salted water to a rolling boil and add 8 ounces of rotini. Cook the pasta according to package instructions until al dente, which usually takes around 8–10 minutes. Before draining, remember to reserve a cup of the pasta water to adjust the cream sauce later if necessary.

Step 5: Prepare Cream Sauce
In a separate pan, melt the remaining butter over medium-low heat. Pour in 1 cup of heavy cream and whisk it together with 3/4 cup of grated Parmesan cheese until the sauce becomes smooth and creamy. If you find it too thick, add a little of the reserved pasta water to reach your desired consistency.

Step 6: Combine
With the cream sauce ready, add the drained rotini directly into the pan. Toss the pasta in the creamy mixture until it is fully coated in that luscious sauce. Serve immediately by plating a portion of the creamy twisted pasta and top it with the honey garlic chicken. For an extra touch, garnish with additional Parmesan and a sprinkle of fresh parsley for vibrant color.

What to Serve with Twisted Pasta with Honey Garlic Chicken

Cozy up your weeknight meal by pairing this creamy, decadent dish with delightful sides and beverages.

  • Garlic Bread: The crunchy, buttery goodness complements the creamy pasta, perfect for soaking up every delicious drop of sauce.
  • Crisp Green Salad: A refreshing blend of greens with a tangy vinaigrette balances the richness of the pasta, adding color and nutrition.
  • Sautéed Vegetables: Seasonal veggies like zucchini, bell peppers, or asparagus bring freshness and texture, enhancing the meal's overall flavor profile.
  • Roasted Asparagus: The earthy notes and slight char from roasting beautifully contrast the creamy pasta while adding a gourmet touch to the table.
  • Moscato Wine: A glass of chilled Moscato harmonizes with the sweet honey glaze, making for a lovely pairing that delights the palate.
  • Cheesy Garlic Knots: These buttery twists are a fun addition that brings extra flavor while being perfect for dipping in the creamy sauce.
  • Creamy Mashed Potatoes: The smooth texture of garlic mashed potatoes pairs exquisitely with the honey garlic chicken, adding heartiness to your meal.
  • Lemon Sorbet: A bright, zesty sorbet serves as a refreshing palate cleanser, making it a delightful way to finish the meal after that rich pasta.

Twisted Pasta with Honey Garlic Chicken Variations

Feel free to play with this recipe to suit your tastes and dietary needs; customizing is half the fun!

  • Pasta Alternatives: Swap rotini with fusilli, penne, or farfalle for fun shapes. Changing the pasta can bring a whole new flair to your dish!

  • Protein Substitutions: Use boneless skinless chicken thighs for a juicier bite; shrimp or tofu also make delicious alternatives. Each brings its unique flavor while pairing beautifully with that honey garlic glaze.

  • Vegetable Additions: Incorporate sautéed broccoli, spinach, or snap peas for a vibrant color and a nutrition boost. Plus, adding veggies makes it a wonderfully wholesome meal that everyone can enjoy.

  • Creamy Twist: Try substituting heavy cream with a mix of Greek yogurt and water for a lighter sauce. This twist keeps the dish creamy while cutting down on calories!

  • Gluten-Free: Swap regular pasta for GF pasta and make sure to use Tamari or coconut aminos instead of soy sauce for a gluten-free delight. This way, everyone can enjoy!

  • Herb Infusion: Experiment by adding fresh basil or thyme to the honey garlic glaze before serving. This adds an aromatic freshness that elevates the dish to new heights—perfect for herb lovers.

  • Spicy Kick: Add red pepper flakes or a splash of hot sauce to the glaze for a fiery twist. If you like heat, don't be shy—spice is nice!

  • Cheesy Options: Boost that cheesy flavor by mixing in some goat cheese or ricotta before tossing the pasta. These ingredients can offer a different, creamy texture that complements the dish beautifully.

For more delicious chicken ideas, check out my Honey Garlic Chicken or try some quick and tasty Honey BQ Chicken for variety!

Storage Tips for Twisted Pasta with Honey Garlic Chicken

  • Fridge: Store leftovers in an airtight container for up to 3 days. This helps maintain freshness and flavor while keeping your Twisted Pasta with Honey Garlic Chicken deliciously creamy.
  • Freezer: For longer storage, freeze portions in airtight containers for up to 2 months. Make sure to cool the dish completely before transferring it to avoid ice crystals.
  • Reheating: To reheat, thaw overnight in the fridge and warm gently on the stovetop over medium-low heat, adding a splash of milk or cream to restore creaminess.
  • Leftover Tips: If the sauce thickens upon cooling, add a bit of reserved pasta water while reheating to bring back that luscious, creamy texture.

Expert Tips for Twisted Pasta with Honey Garlic Chicken

  • Perfectly Cooked Chicken: Avoid overcooking by searing in batches; this prevents the chicken from becoming dry and tough.

  • Sauce Consistency: To achieve the ideal cream sauce thickness, gradually incorporate reserved pasta water, stirring until you reach your desired creamy texture.

  • Flavor Integration: Let the honey garlic sauce simmer a bit longer to meld the flavors beautifully, enhancing the overall taste of the Twisted Pasta with Honey Garlic Chicken.

  • Pasta Choice: Experiment with various pasta shapes if rotini isn’t your style; farfalle or penne can also hold the creamy sauce effectively.

  • Nutritional Boost: Consider adding in sautéed vegetables like spinach or broccoli for added nutrition and color, transforming this dish into a healthier comfort food option.

Make Ahead Options

These Twisted Pasta with Honey Garlic Chicken are perfect for meal prep enthusiasts! You can marinate and cook the chicken up to 24 hours in advance, allowing the flavors to deepen. Simply sear and glaze the chicken, then refrigerate it in an airtight container. The Parmesan cream sauce can also be made ahead and stored for up to 3 days; just reheat gently and adjust the consistency with reserved pasta water if necessary. When you're ready to enjoy your meal, cook the rotini fresh and combine everything together for restaurant-quality results with minimal effort. Your weeknight dinners just got a whole lot easier!

Twisted Pasta with Honey Garlic Chicken Recipe FAQs

How do I choose the right chicken for this recipe?
Absolutely! When selecting chicken, opt for chicken breasts for leaner meat or thighs for a juicier finish. Look for meat that is pale pink and free from dark spots, ensuring it's fresh. If you're short on time, pre-cut chicken pieces work just as well.

What’s the best way to store leftovers?
Very good question! Store any leftover Twisted Pasta with Honey Garlic Chicken in an airtight container in the fridge for up to 3 days. To keep the creamy sauce intact, reheat it gently over medium-low heat, adding a splash of milk or cream if necessary to bring back its original texture.

Can I freeze the pasta dish?
Absolutely! To freeze, allow the dish to cool completely, then transfer it to airtight containers, ensuring it's properly sealed. You can freeze it for up to 2 months. Thaw overnight in the fridge before reheating, and remember to add a little milk or reserved pasta water to revive the creaminess.

The sauce turned out too thick; how can I fix it?
If your cream sauce is thicker than you'd like, don’t worry! Gradually add reserved pasta water, a tablespoon at a time, while stirring over low heat, until you achieve your desired consistency. This method keeps it creamy without watering down the flavor!

Are there any dietary considerations for this recipe?
Very important! For gluten-free options, swap regular soy sauce for tamari or coconut aminos, and use gluten-free pasta like rice or chickpea pasta. Additionally, if you have lactose intolerance, substituting heavy cream with coconut cream or a dairy-free alternative works wonderfully without sacrificing the creamy texture.

What can I add to make this dish even healthier?
Great question! To amp up the nutrition, consider incorporating sautéed vegetables, such as spinach, broccoli, or bell peppers, directly into the pasta before serving. This not only adds a pop of color but also enhances the dish's health benefits and flavor complexity.

Twisted Pasta with Honey Garlic Chicken

Creamy Twisted Pasta with Honey Garlic Chicken Delight

This Twisted Pasta with Honey Garlic Chicken is a comforting dish featuring golden chicken bites over creamy Parmesan-tossed rotini.
Print Recipe Pin Recipe
Prep Time 10 minutes mins
Cook Time 20 minutes mins
Total Time 30 minutes mins
Servings: 4 servings
Course: Dinner
Cuisine: American
Calories: 600
Ingredients Equipment Method Nutrition Notes

Ingredients
  

For the Chicken
  • 1 pound Chicken Breast Cut into bite-sized chunks
  • to taste Salt
  • to taste Black Pepper
For the Sauce
  • 2 tablespoons Butter Adds richness to chicken
  • 3 cloves Garlic Minced
  • 1/4 cup Honey
  • 2 tablespoons Soy Sauce Tamari and coconut aminos work as gluten-free alternatives
For the Pasta
  • 8 ounces Rotini Pasta Can substitute with fusilli, penne, or farfalle
For the Cream Sauce
  • 1 cup Heavy Cream Can substitute with coconut cream for a dairy-free option
  • 3/4 cup Parmesan Cheese Grated
For Garnish
  • to taste Fresh Parsley Optional

Equipment

  • Skillet
  • pot
  • Whisk

Method
 

Step-by-Step Instructions
  1. Cut the chicken breast into bite-sized chunks, season with salt and pepper, and let them meld while you heat the skillet.
  2. In a hot skillet, melt 2 tablespoons of butter and sear the seasoned chicken for 5–6 minutes until golden brown. Remove and set aside.
  3. Lower the heat, add 3 minced garlic cloves, and sauté until fragrant. Stir in 1/4 cup of honey and 2 tablespoons of soy sauce, then simmer with the chicken for 2–3 minutes.
  4. In a large pot, bring salted water to a boil and cook 8 ounces of rotini according to package instructions until al dente, reserving a cup of pasta water.
  5. In a separate pan, melt remaining butter and whisk in 1 cup of heavy cream and 3/4 cup of grated Parmesan until smooth.
  6. Add the drained rotini to the cream sauce, toss until coated, and serve topped with honey garlic chicken and parsley.

Nutrition

Serving: 1plateCalories: 600kcalCarbohydrates: 50gProtein: 30gFat: 25gSaturated Fat: 15gPolyunsaturated Fat: 5gMonounsaturated Fat: 5gCholesterol: 100mgSodium: 800mgPotassium: 600mgFiber: 4gSugar: 10gVitamin A: 500IUVitamin C: 5mgCalcium: 200mgIron: 2mg

Notes

For a healthier version, consider adding sautéed vegetables like spinach or broccoli.

Tried this recipe?

Let us know how it was!
  • « Previous Page
  • 1
  • …
  • 41
  • 42
  • 43
  • 44
  • 45
  • …
  • 200
  • Next Page »

Welcome!

Hi, I’m Grace, a Sydney-based home cook with a passion for bold flavors and trending ingredients. Whether you’re a busy beginner or a seasoned foodie, you’ll find dishes here that are fresh, fun, and full of flavor.

More about me

Popular Recipes

  • Deli-Style Italian Grinder Salad
    Deli-Style Italian Grinder Salad: A Fresh Twist on Flavor
  • Quick and Easy Taco Bowl
    Savor the Flavor: Quick and Easy Taco Bowl That's Customizable
  • Taco Salad Bowls With Shredded Chicken
    Delicious Taco Salad Bowls With Shredded Chicken in 15 Minutes
  • Seven-Layer Taco Salad
    Savory Seven-Layer Taco Salad for Flavorful Gatherings

Footer

↑ back to top

About

  • Privacy Policy
  • Disclaimer
  • Terms & Conditions

Newsletter

  • Sign Up! for emails and updates

Contact

  • About me
  • Contact me

Copyright © 2025 TastyTrendIngredients