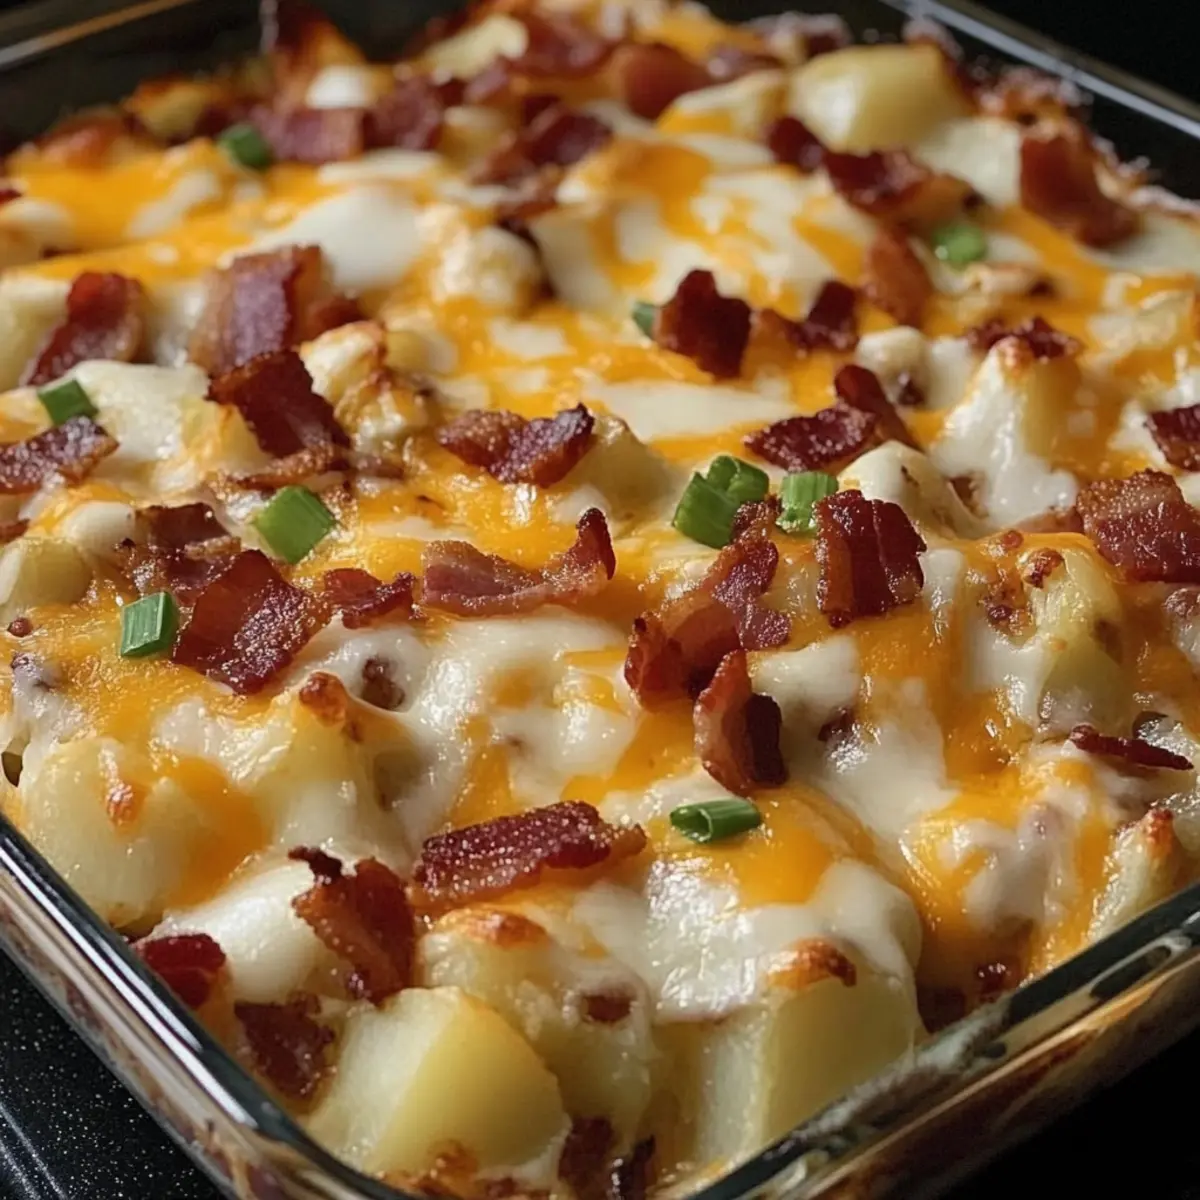
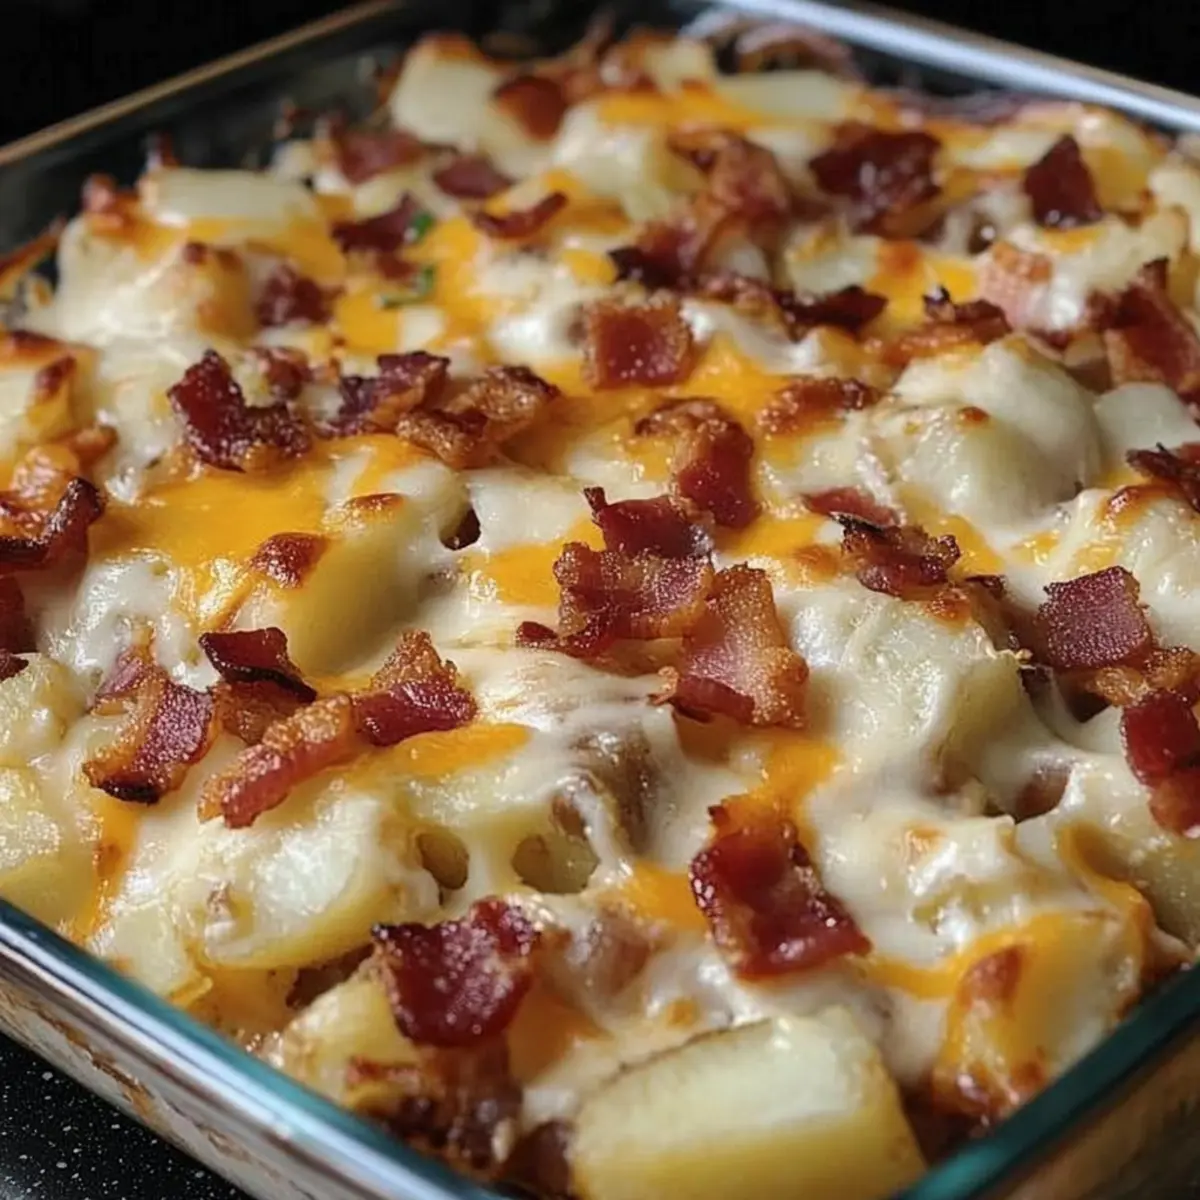
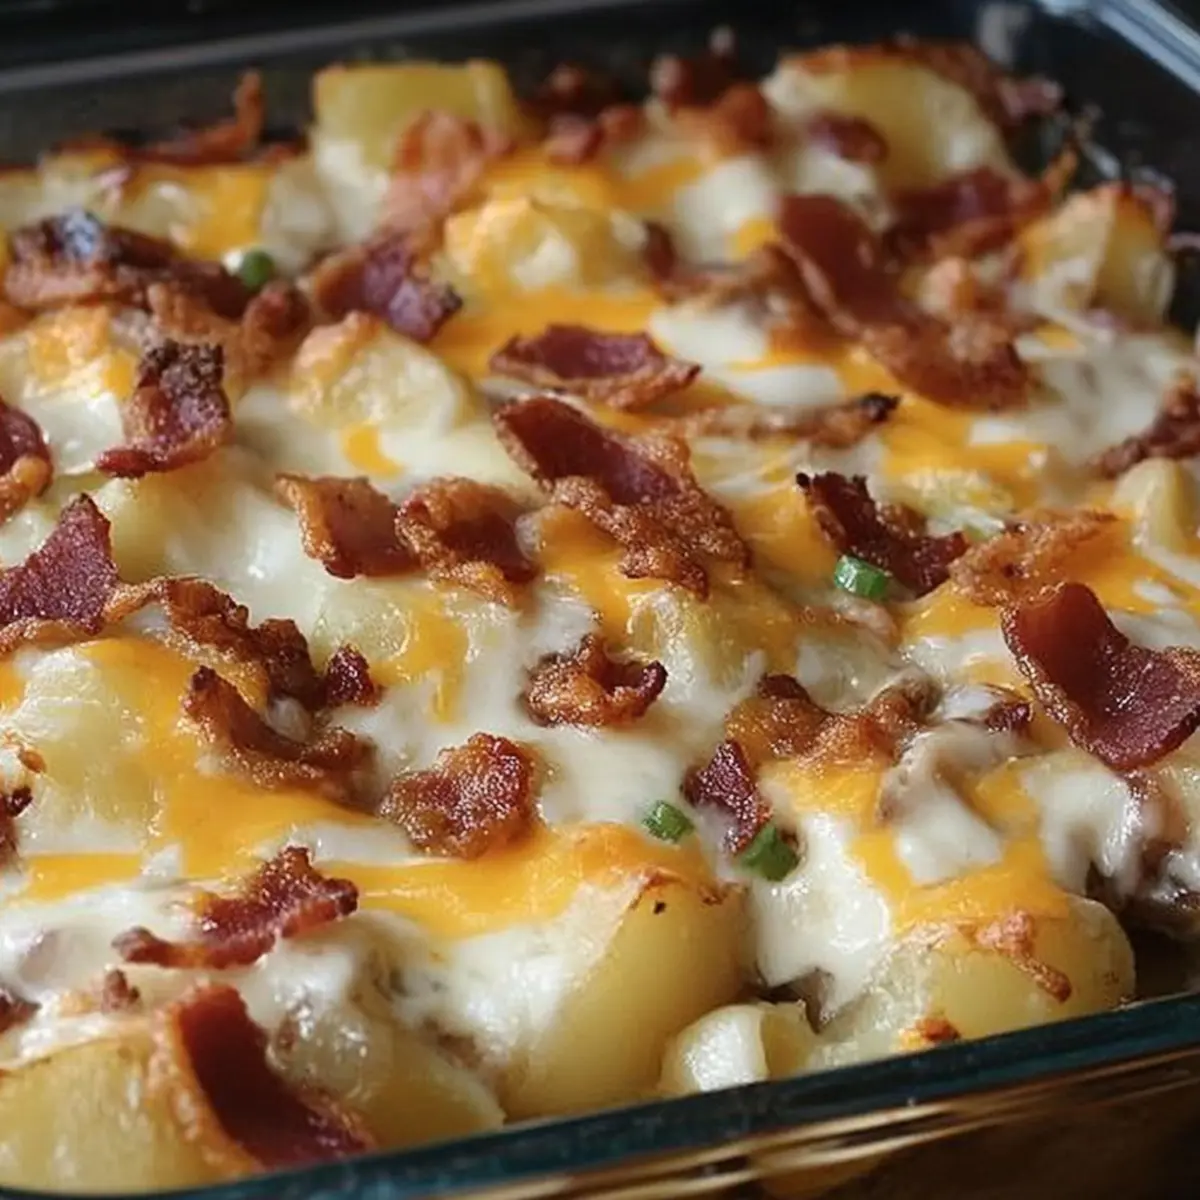
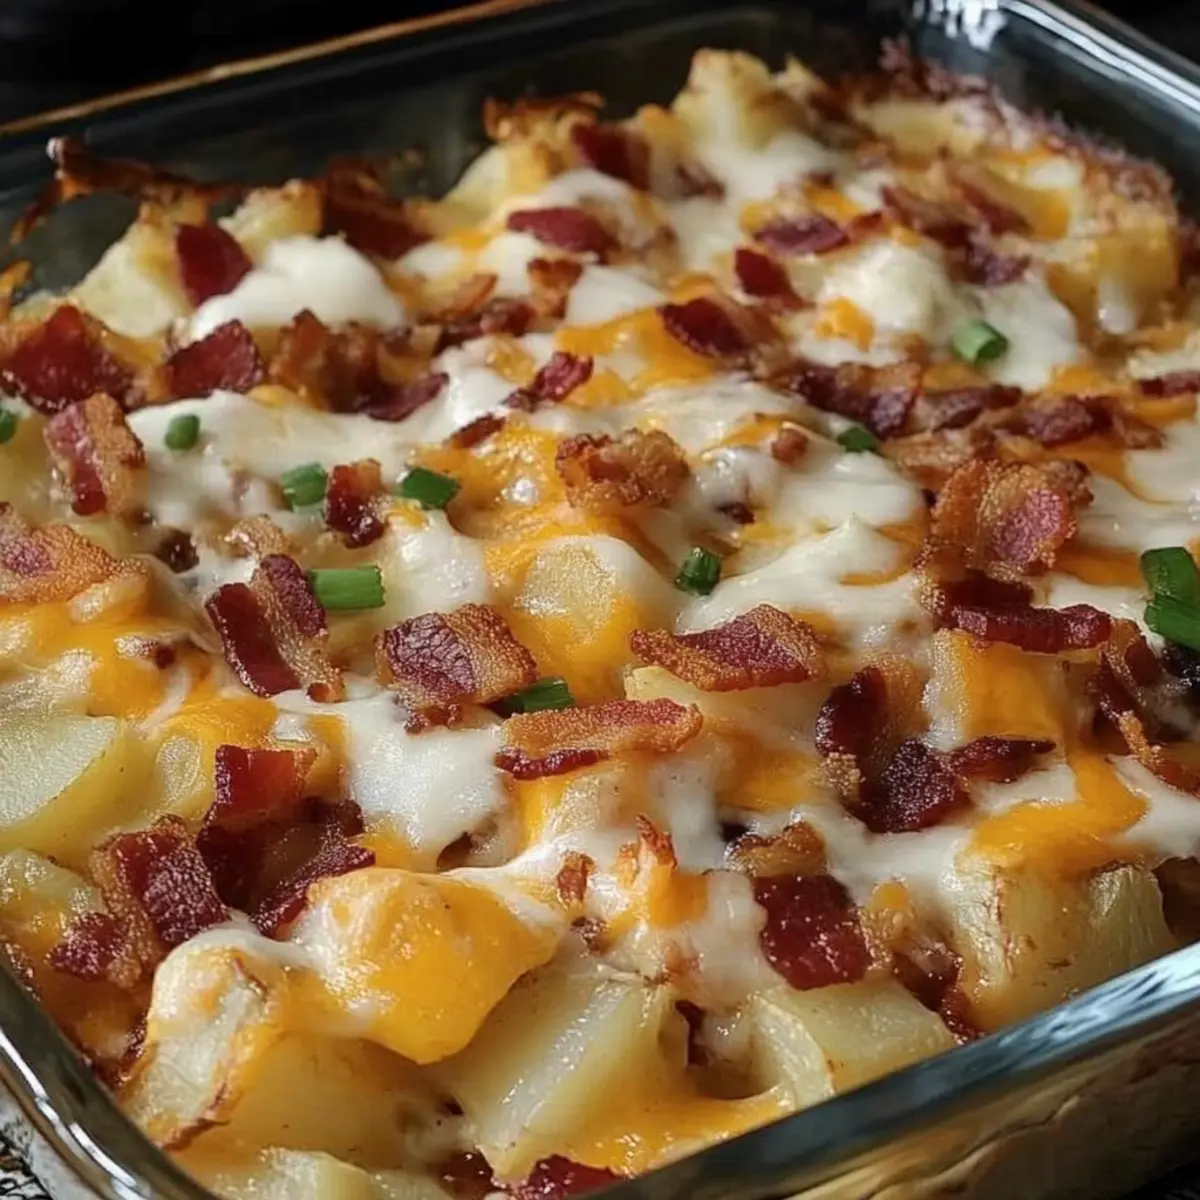
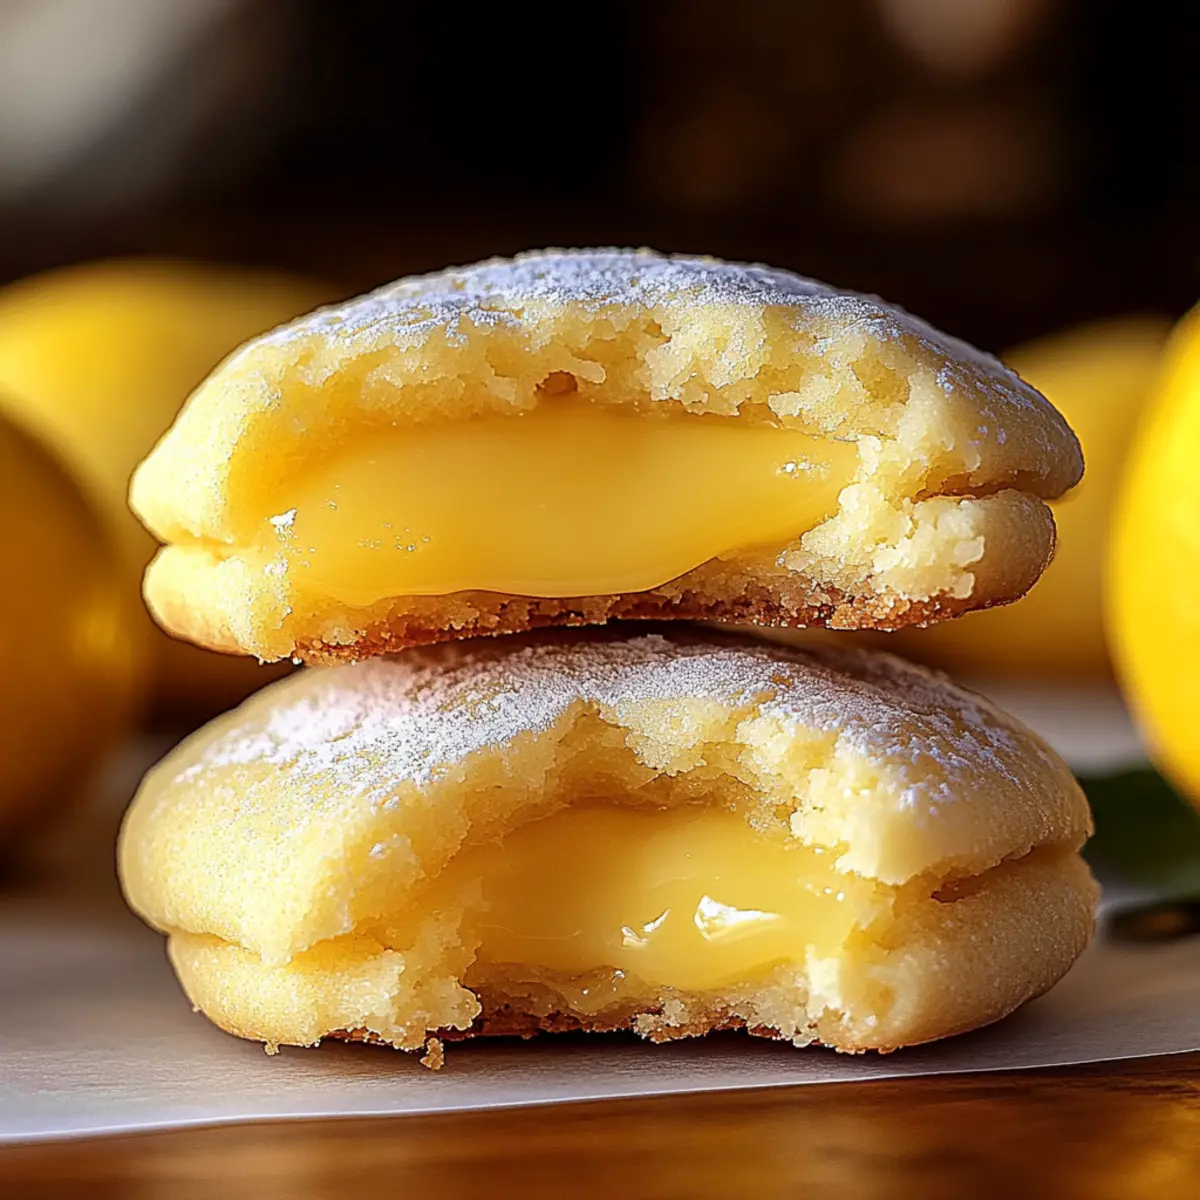
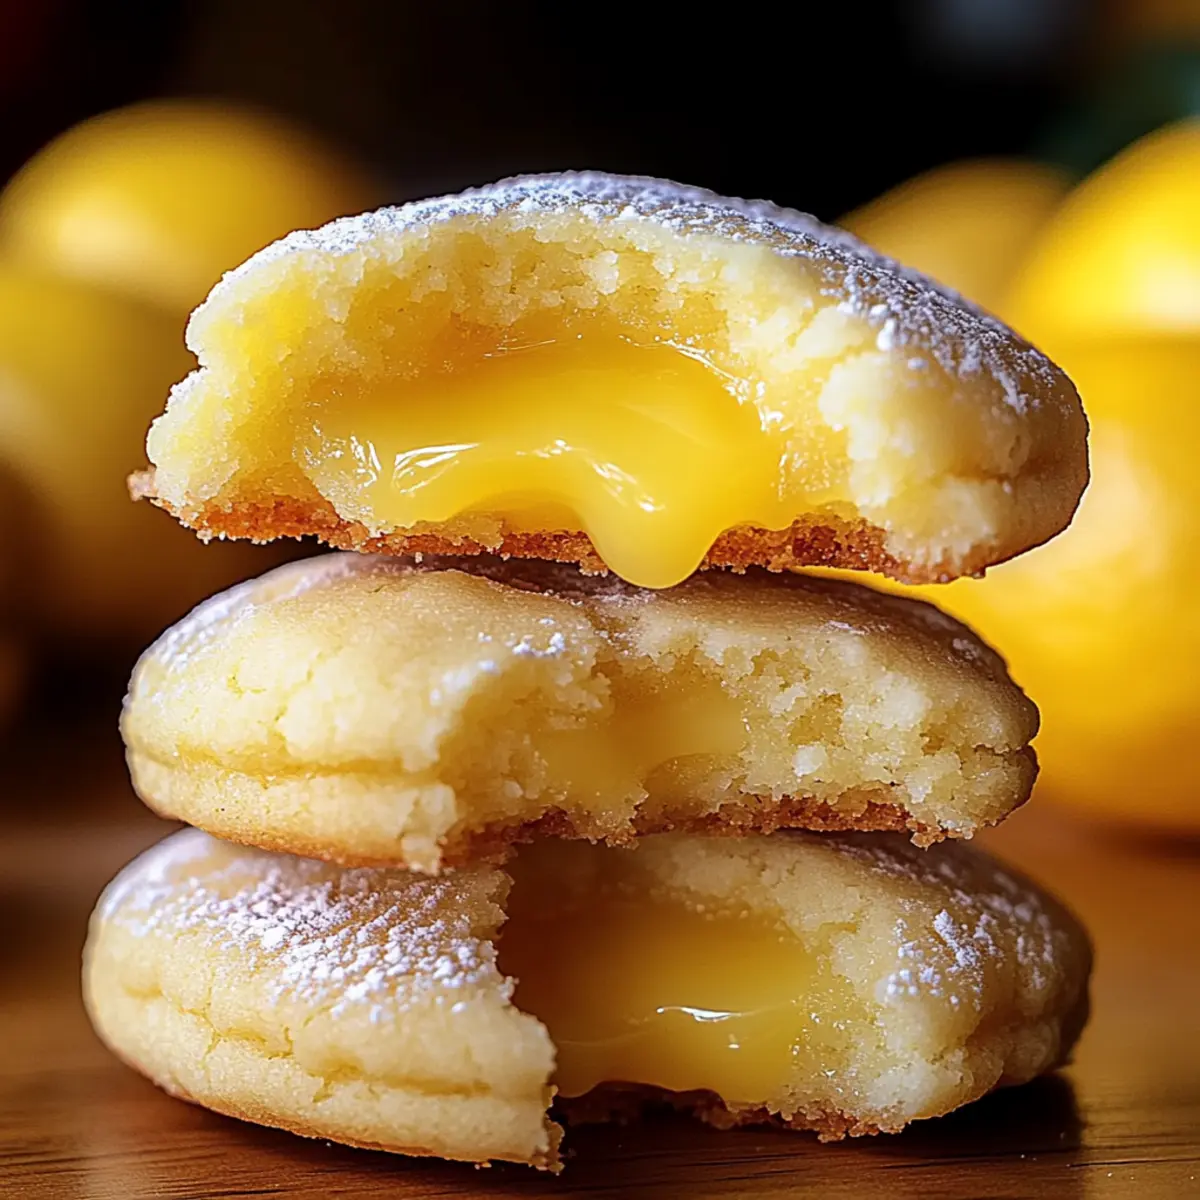
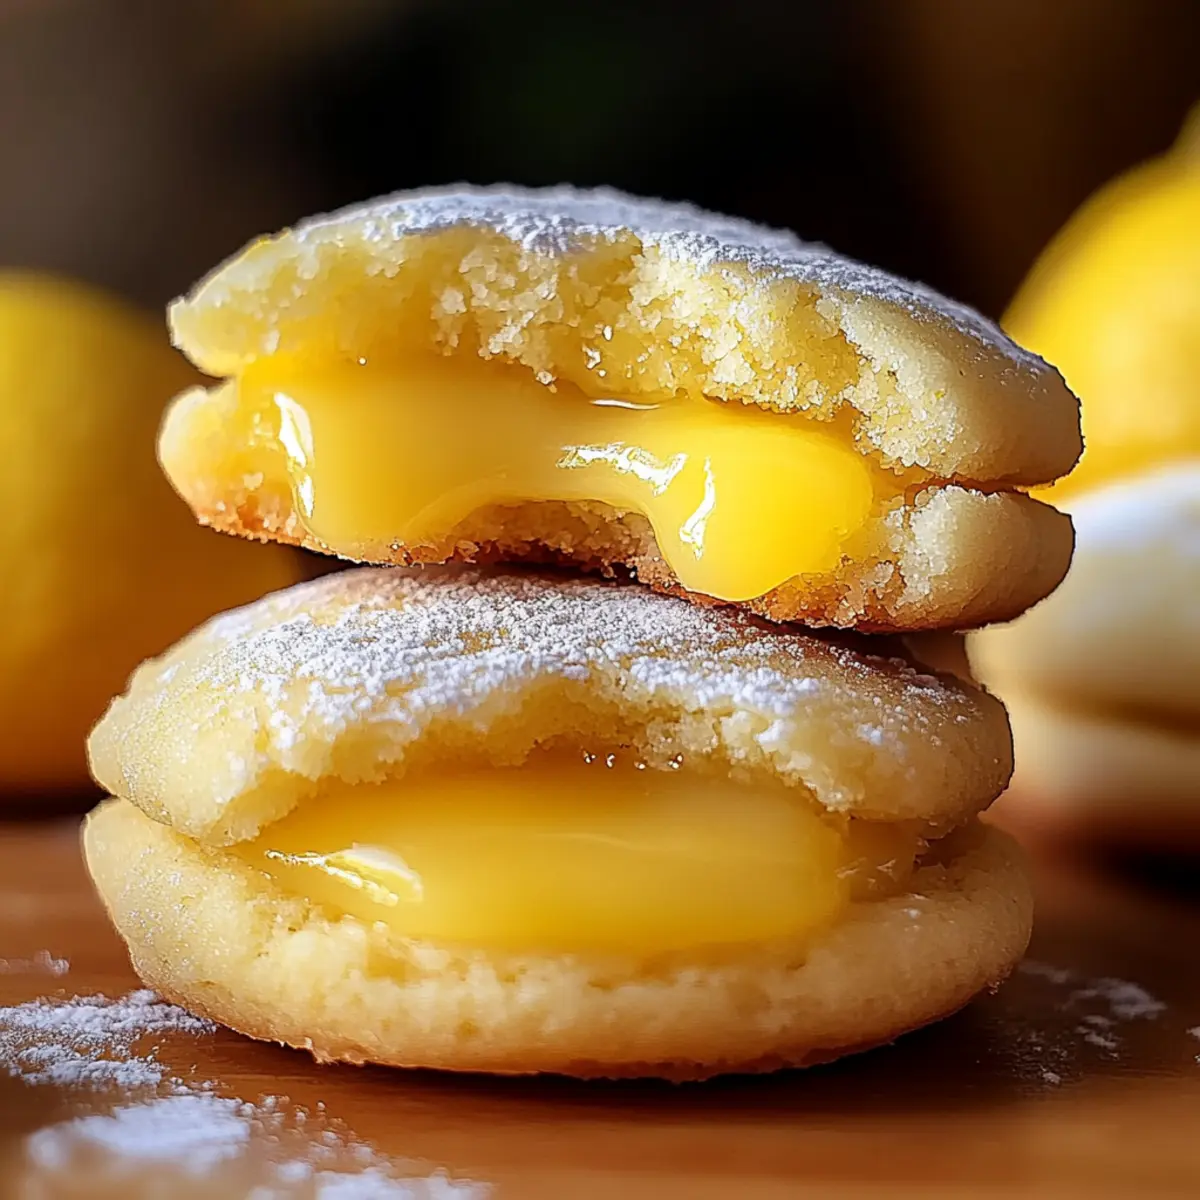
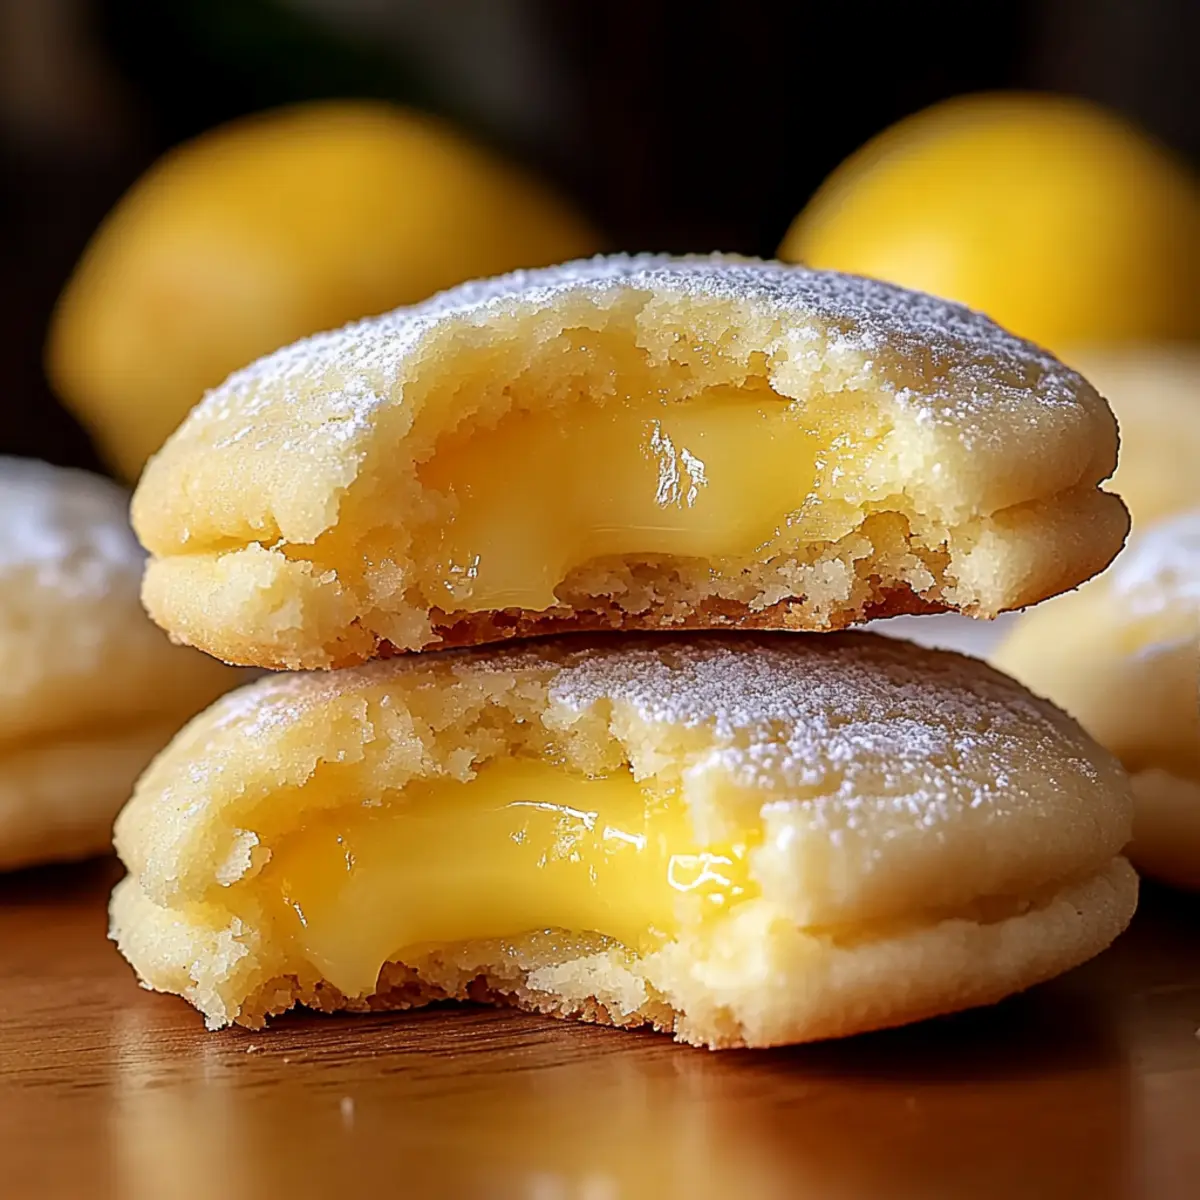
tastytrendingredients

  • Home
  • Recipes
    • Appetizers
    • Breakfast
    • Dessert
    • Dinner
    • Drinks
    • Salads
    • Snacks
    • Soups
  • About me
  • Contact me
menu icon
go to homepage
  • Home
  • Recipes
    • Appetizers
    • Breakfast
    • Dessert
    • Dinner
    • Drinks
    • Salads
    • Snacks
    • Soups
  • About me
  • Contact me
search icon
Homepage link
  • Home
  • Recipes
    • Appetizers
    • Breakfast
    • Dessert
    • Dinner
    • Drinks
    • Salads
    • Snacks
    • Soups
  • About me
  • Contact me
×

Worms in Dirt Mousse Cake: A Spooktacular Halloween Treat

October 7, 2025 by Grace Snow Leave a Comment

As I rummaged through my kitchen the other day, a delightful thought popped into my head: why not bring a touch of whimsy to Halloween with a "Worms in Dirt" Mousse Cake? This charming dessert features layers of luscious dark chocolate mousse and a crunchy cookie base, crowned with vibrant raspberry gummy worms that contrast beautifully with the rich flavors. Not only is this Halloween dessert quick to whip up, but it's also sure to become a crowd favorite, making it perfect for gatherings where nostalgia and fun take center stage. Imagine indulging in a treat that evokes childhood memories while impressing your loved ones with its spookily gorgeous appearance! Curious to find out how to create this delectable dessert that will leave everyone smiling? Let's dig in!

Why You'll Love This Mousse Cake

Simplicity at Its Best: This “Worms in Dirt” Mousse Cake is a breeze to make, requiring no advanced baking skills or complicated techniques.

Decadent Flavor: The luscious dark chocolate mousse paired with aromatic cinnamon cookie crumbles creates a rich, unforgettable dessert that will have everyone asking for seconds.

Playful Presentation: Topped with vibrant raspberry gummy worms, this dessert not only tastes divine but also adds a fun twist to your Halloween festivities.

Nostalgic Appeal: Transport yourself back to childhood with every bite, as this cake evokes fond memories of playful treats and festive gatherings.

Quick Prep Time: With most of the work done in advance, you can delight your guests without spending all day in the kitchen, making it a fantastic option for busy hosts.

Crowd-Pleasing Treat: Ideal for parties and gatherings, this mousse cake perfectly balances fun and indulgence, ensuring it's a showstopper at any Halloween celebration.

Worms in Dirt Mousse Cake Ingredients

For the Gummy Worms

  • Raspberry Jello – adds a sweet and tangy flavor for a spooktacular touch to your cake.
  • Unflavored Gelatin – helps create a firm structure for the gummy worms; necessary for that chewy texture.
  • Heavy Cream – enriches the gummy mixture, making it creamy and indulgent.
  • Food Coloring – to enhance the delightful appearance of your gummy worms; a little goes a long way!

For the Cookie Base

  • Chocolate Pecan Cookies – provide a crunchy and flavorful base; the combination of chocolate and cinnamon enhances the overall taste.
  • Butter – adds richness and moisture to the cookie dough; be sure it’s softened for easy mixing.
  • Sugar – sweetens the cookies and balances the chocolate; feel free to adjust based on your sweetness preference.

For the Dark Chocolate Mousse

  • Dark Chocolate – the star of this dessert; it gives a rich and velvety filling. Substitute with semi-sweet chocolate for a sweeter mousse if preferred.
  • Egg Yolks – help create a luxurious texture; be sure to use fresh eggs for the best results.
  • Espresso – intensifies the chocolate flavor; you can omit it or replace it with strong brewed coffee if you desire.
  • Whipped Cream – gently folded in for a light and airy mousse; can use regular whipped cream if chocolate flavor is not to your liking.

For the Topping

  • Chocolate Whipped Cream – adds a light yet indulgent finish to the cake; consider drizzling chocolate sauce for an extra touch of delight.
  • Cookie Crumbs – sprinkle on top for an aesthetic "dirt" effect that complements the gummy worms; make extra to enhance the presentation!

With this perfect concoction of ingredients, your “Worms in Dirt” Mousse Cake is sure to be a Halloween hit, bringing smiles and nostalgia to everyone at your gathering!

Step‑by‑Step Instructions for “Worms in Dirt” Mousse Cake

Step 1: Prepare the Gummy Worms
Start by boiling one cup of water and dissolving raspberry jello and unflavored gelatin until fully dissolved. Allow the mixture to cool slightly before mixing in heavy cream and a few drops of food coloring for a fun twist. Pour the combined mixture into straws, ensuring they are upright, and chill in the refrigerator for at least 9 hours until set firmly.

Step 2: Make Chocolate Pecan Cookies
Preheat your oven to 350°F (175°C). In a large mixing bowl, cream together softened butter and sugar until light and fluffy. Mix in the remaining cookie ingredients to form a smooth dough. Chill the dough for about 30 minutes before slicing it into rounds. Bake the cookies on a parchment-lined baking sheet for 8-10 minutes, until they are aromatic and slightly firm.

Step 3: Prepare Dark Chocolate Mousse
While your cookies cool, whip heavy cream in a mixing bowl until stiff peaks form. In a separate bowl, whisk egg yolks with sugar and espresso over simmering water until the mixture lightens in color and doubles in volume. Stir in melted dark chocolate, ensuring it’s smooth. Gently fold in the whipped egg whites and whipped cream until fully incorporated for a light, airy mousse.

Step 4: Assemble the Tart
Line a springform pan with plastic wrap to make removal easier. Crush the cooled chocolate pecan cookies into fine crumbs, then press them into the bottom of the pan as a crust. Spread the dark chocolate mousse evenly over the cookie base, making sure to smooth the top with a spatula. Top the mousse with a light layer of chocolate whipped cream, adding a decorative touch.

Step 5: Finish and Chill
Sprinkle any remaining cookie crumbs over the whipped cream layer to create that "dirt" look. Cover the tart with plastic wrap and place it in the refrigerator to chill for at least 4 hours, although overnight is ideal. This chilling time allows the flavors to meld beautifully, enhancing your "Worms in Dirt" Mousse Cake’s richness and creaminess before serving.

What to Serve with Halloween Mousse Tart with Raspberry Gummy Worms

Creating a magical atmosphere around your Halloween Mousse Tart can add to the fun and flavor of your gathering.

  • Crispy Apple Slices: These lightly sweet, crunchy slices provide a light contrast to the rich tart, offering a refreshing bite that complements the chocolate beautifully.

  • Pumpkin Spice Latte: A warm, cozy drink that encapsulates the essence of fall, this beverage's spicy notes pair well with chocolate while enhancing the Halloween vibe.

  • Sugary Snickerdoodles: Chewy and cinnamon-dusted, these cookies add a delightful crunch and warmth, creating a playful contrast with the velvety mousse.

  • Caramel Popcorn: The sweet, buttery crunch of caramel popcorn brings a fun texture to your dessert table, making it a festive and indulgent option next to your tart.

  • Spooky Fruit Skeletons: Use banana slices, grapes, and toothpicks to create whimsical skeletons. They introduce freshness and a touch of creativity that will delight kids and adults alike.

  • Chocolate Milkshake: Thick and creamy, this shake echoes the tart’s dark chocolate notes, and kids will love it, making your dessert spread utterly irresistible.

  • Ghostly Meringues: Light and airy, these whimsical treats add a festive flair to the table and their sweetness nicely balances the tart’s richness.

  • Warm Spiced Cider: A cozy beverage filled with warming spices offers a lovely contrast to the dessert. It wraps around the flavors of Halloween perfectly, making your meal feel complete.

  • Vanilla Ice Cream: A scoop of creamy vanilla not only complements the tart's chocolate flavor but also adds a delightful cold element that makes each bite more enjoyable.

  • Chocolate-Dipped Strawberries: These offer a fresh, sweet bite with surprising texture, tying in the chocolate theme while providing a vibrant pop of color to your dessert display.

Expert Tips for Worms in Dirt Mousse Cake

  • Chill Properly: Make sure to chill your gummy worms mixture adequately to achieve the perfect texture; under-chilling can lead to a runny consistency.

  • Gradual Chocolate Melting: Melt dark chocolate slowly over low heat and stir constantly to avoid seizing—this will ensure your mousse is silky smooth.

  • Cookie Crunch: For the best cookie base, let the chocolate pecan cookies cool completely before crushing them; warm cookies can clump and affect texture.

  • Whip with Care: When whipping cream, watch for stiff peaks; over-whipping can lead to a grainy texture in your chocolate whipped cream topping.

  • Longer Chill Time: For an extra decadent experience, allow the “Worms in Dirt” Mousse Cake to chill overnight—this lets the flavors deepen and meld together perfectly.

Make Ahead Options

These "Worms in Dirt" Mousse Cake components are perfect for meal prep, allowing you to enjoy your dessert with minimal effort on the big day! You can prepare the raspberry gummy worms up to 24 hours in advance by making the gelatin mixture and chilling it in straws overnight. Additionally, the chocolate pecan cookies can be baked ahead of time and stored in an airtight container for up to 3 days. When you’re ready to assemble, simply crush the cookies for the tart base and follow the steps to prepare the mousse. Chilling the assembled tart overnight is ideal for the best flavor and texture, ensuring your dessert remains just as delightful as freshly made!

Storage Tips for Worms in Dirt Mousse Cake

  • Fridge: Keep your delicious "Worms in Dirt" Mousse Cake stored in the refrigerator, wrapped tightly, for up to 3 days to maintain its creamy texture and flavors.

  • Freezer: For longer storage, you can freeze individual slices of the mousse cake wrapped in plastic wrap and aluminum foil for up to 2 months. Thaw in the fridge before serving.

  • Reheating: If desired, serve your mousse cake cold; there’s no need to reheat, as the chilled texture is part of its charm!

  • Extra Cookies: Store any leftover cookie crumbs in an airtight container at room temperature for up to a week, perfect for adding a crunchy touch to other desserts!

Worms in Dirt Mousse Cake Variations

Feel free to get creative and make this delightful Halloween dessert your own with these exciting twists!

  • Gummy Worm Swap: Use green apple gummy worms for a tart twist, adding a hint of fruity flavor to your mousse.

  • Nut-Free Option: For a nut-free base, substitute chocolate pecan cookies with crushed chocolate digestive biscuits, ensuring all your guests can enjoy!

  • Vegan Delight: Replace dairy products with coconut cream for a luscious vegan mousse; just ensure to use dairy-free cookies too.

  • Spiced Up: Add a pinch of cayenne or chili powder to the whipped cream for a surprising kick that perfectly complements the chocolate richness.

  • Fruit Infusion: Fold in pureed fruits like strawberries or raspberries into the mousse for natural sweetness and a pop of color.

  • Mint Chocolate: Mix in crushed mint candies or a drop of peppermint extract to the mousse to create a fresh minty delight that perfectly pairs with dark chocolate.

  • Oreo Base: Swap out chocolate pecan cookies for crushed Oreos for an even richer cookie crust with familiar flavors that everyone loves.

You can also serve this playful mousse with a drizzle of chocolate sauce, or pair it with a cheeky fruit salad to create a balanced and fun dessert experience. If you're feeling adventurous, try it next to a holiday favorite like this decadent Chocolate Poke Cake for even more spooky sweetness!

Worms in Dirt Mousse Cake Recipe FAQs

How do I choose the right raspberries for the gummy worms?
Absolutely! For the best gummy worms, look for fresh raspberries that are firm and vibrant in color, without any dark spots or mushiness. They should smell fragrant and sweet, indicating they are ripe and ready to use. If you can't find raspberries, using store-bought gummy worms is a great shortcut without losing the fun!

What’s the best way to store leftover mousse cake?
To keep your "Worms in Dirt" Mousse Cake fresh, tightly wrap it in plastic wrap and store it in the refrigerator for up to 3 days. This will help maintain its creamy texture and delicious flavors. I often make this dessert the day before a gathering so it has time to chill and set, making it an easy, fuss-free dessert on the day of the event.

Can I freeze the mousse cake for later?
Yes! If you want to enjoy your "Worms in Dirt" Mousse Cake later, wrap individual slices tightly in plastic wrap and then in aluminum foil. It can be stored in the freezer for up to 2 months. When you’re ready to indulge, just transfer it to the refrigerator to thaw for a few hours or overnight. This keeps the mousse beautifully creamy upon serving.

What if my mousse doesn’t set properly?
If your mousse appears too runny, it might not have chilled long enough, or the chocolate was too warm when mixed in. Make sure to give it plenty of time in the fridge—ideally overnight for best results. If it’s a texture issue related to whipped cream, ensure you've hit those stiff peaks without over-whipping, which can make it grainy. Next time, chill all components well before assembly for the best texture!

Are there any dietary allergies I should consider for this dessert?
The "Worms in Dirt" Mousse Cake contains dairy, eggs, and gluten, which are common allergens. If you’re catering to guests with allergies, you can create gluten-free options using gluten-free cookies for the crust, and check if dairy alternatives are suitable for your mousse, such as coconut or almond cream. Always be sure to label the dessert, so everyone is well-informed!

“Worms in Dirt” Mousse Cake

Worms in Dirt Mousse Cake: A Spooktacular Halloween Treat

Delight in this Worms in Dirt Mousse Cake, a fun and festive Halloween dessert featuring rich mousse and gummy worms.
Print Recipe Pin Recipe
Prep Time 30 minutes mins
Cook Time 20 minutes mins
Chilling Time 4 hours hrs
Total Time 4 hours hrs 50 minutes mins
Servings: 8 slices
Course: Dessert
Cuisine: American
Calories: 350
Ingredients Equipment Method Nutrition Notes

Ingredients
  

For the Gummy Worms
  • 1 cup Water
  • 1 package Raspberry Jello
  • 1 tablespoon Unflavored Gelatin
  • 1 cup Heavy Whipping Cream
  • a few drops Food Coloring
For the Tart Base
  • 1 cup Chocolate Pecan Cookies or regular pecans
For the Dark Chocolate Mousse
  • 8 ounces Dark Chocolate or semi-sweet chocolate
  • 1 cup Heavy Whipping Cream
  • 3 large Egg Yolks
  • 1/2 cup Sugar
  • 1 tablespoon Espresso
For the Topping
  • 1 cup Chocolate Whipped Cream or standard whipped cream
For Garnish
  • Additional Cookie Crumbs for replication of 'dirt' look

Equipment

  • Oven
  • Mixing Bowl
  • Springform pan
  • Parchment Paper
  • Whisk
  • plastic wrap
  • straws
  • Refrigerator

Method
 

Preparation Steps
  1. Prepare the Gummy Worms by boiling water and dissolving raspberry jello and gelatin, then mix in cream and food coloring, pour into straws and chill for 9 hours.
  2. Make Chocolate Pecan Cookies by creaming together butter and sugar, mixing in ingredients to form dough, chilling, slicing, and baking for 8-10 minutes.
  3. Prepare Dark Chocolate Mousse by whipping cream, whisking egg yolks with sugar and espresso, stirring in melted chocolate, then folding in whipped cream and egg whites.
  4. Assemble the Tart by lining a pan, crushing cookies for the crust, spreading mousse, and topping with chocolate whipped cream.
  5. Finish and Chill by sprinkling cookie crumbs on top, covering with plastic wrap, and chilling for at least 4 hours.

Nutrition

Serving: 1sliceCalories: 350kcalCarbohydrates: 35gProtein: 4gFat: 24gSaturated Fat: 14gPolyunsaturated Fat: 0.5gMonounsaturated Fat: 1.5gCholesterol: 150mgSodium: 100mgPotassium: 250mgFiber: 2gSugar: 20gVitamin A: 500IUCalcium: 40mgIron: 2mg

Notes

Chill the gummy worms properly for texture; melt dark chocolate slowly to avoid seizing; cool cookies completely before crushing. For best results, chill overnight to deepen flavors.

Tried this recipe?

Let us know how it was!

Delight in Homemade Harry Potter Chocolate Frogs Today!

October 7, 2025 by Grace Snow Leave a Comment

“Did you hear about the new magical treat that’s been enchanting kitchens everywhere?” Whisking up a touch of whimsy, these DIY Harry Potter Chocolate Frogs are the perfect way to delight family and friends at your next gathering. Ready in just a few simple steps, this recipe is an easy indulgence that will make you feel like a chocolatier, no special skills required! Imagine the joy on your loved ones' faces as they unwrap these glossy, frog-shaped confections filled with creamy or crunchy surprises. With versatile filling options ranging from rich peanut butter to sweet white chocolate, these treats not only cater to every chocolate lover's craving but also add a playful twist to birthday parties or Halloween festivities. So, are you ready to jump into your next culinary adventure and conjure up some magic in the kitchen?

Why Make Harry Potter Chocolate Frogs?

Easy to Create: This recipe is simple and straightforward, requiring no advanced baking skills.

Versatile Fillings: Customize your frogs with a variety of fillings, like smooth peanut butter or delightful white chocolate, making them perfect for everyone.

Show-Stopping Presentation: Their whimsical frog shape adds a fun element to your dessert table.

Family-Friendly Fun: Kids and adults alike will be excited to make and enjoy these magical treats together!

Make-Ahead Magic: Prepare them a day in advance, allowing you to enjoy the festivities stress-free.

Indulge your creativity with these unique Harry Potter Chocolate Frogs for any occasion!

Harry Potter Chocolate Frogs Ingredients

For the Chocolate

  • Chocolate – Choose dark, milk, or white chocolate based on your personal preference for a delectable experience.

For the Mold

  • Frog-shaped chocolate mold – This is essential to create the fun and whimsical shape of the frogs; you can find these online or at specialty kitchen stores.

For the Filling

  • Optional filling – Consider white chocolate, creamy peanut butter, or crunchy bits like almond or rice crisps for delightful texture and flavor combinations.

Feel the magic with these delicious Harry Potter Chocolate Frogs – each bite is a fun adventure!

Step‑by‑Step Instructions for Harry Potter Chocolate Frogs

Step 1: Melt the Chocolate
Begin by breaking your chosen chocolate into small, uniform pieces and placing them in a microwave-safe bowl. Heat the chocolate in the microwave in 30-second bursts at medium power, stirring after each interval until fully melted and smooth. This process generally takes about 1 to 2 minutes. Use high-quality chocolate for the best results, as it contributes to the glossy finish of your Harry Potter Chocolate Frogs.

Step 2: Prepare the Molds
Once your chocolate is melted, grab your frog-shaped chocolate molds and use a spoon to generously coat the insides with the melted chocolate. Make sure to leave enough room for your filling by filling them about halfway. Maintain an even layer, ensuring every detail of the mold is filled for a beautiful final appearance. Place the filled molds in the refrigerator for about 15 minutes to allow the chocolate to set slightly before adding the filling.

Step 3: Add Your Filling
After the initial chocolate layer has set, it's time to add your chosen filling into each frog-shaped mold. Using a teaspoon, carefully spoon in your fillings, whether it’s creamy peanut butter, crunchy rice crisps, or silky white chocolate. Avoid mixing the filling with the chocolate to keep distinct layers. Aim for a generous amount but leave space for a chocolate cover on top.

Step 4: Cover the Filling
Now that your filling is in place, return to your melted chocolate and pour the remaining chocolate over the filling in each mold. Ensure that the filling is completely covered, smoothing over the tops to create a nice finish. This layer will seal in the filling and form the outer shell of the Harry Potter Chocolate Frogs. For best results, tap the molds gently on the counter to eliminate air bubbles and ensure an even distribution.

Step 5: Set the Chocolate
Place the filled molds back into the refrigerator or, if you prefer, the freezer for around 30 to 60 minutes. The chocolate will harden during this time, creating a lovely, glossy shell around your delicious fillings. To check for doneness, gently press the surface of the chocolate; it should feel firm and solid. Patience is key for perfectly set Harry Potter Chocolate Frogs!

Step 6: Unmold the Frogs
Once completely set, carefully remove the molds from the refrigerator or freezer. Gently flex and squeeze the silicone molds to release your chocolate frogs. If they resist, you can use a toothpick to help coax any stubborn parts. Take a moment to admire your whimsical creations—these delightful Harry Potter Chocolate Frogs are now ready to enjoy or be shared at your next gathering!

Expert Tips for Harry Potter Chocolate Frogs

  • Smooth Chocolate: Ensure your chocolate is completely smooth before filling molds; any lumps could affect the final result and prevent easy removal.

  • Avoid Overheating: Melt chocolate in short bursts, stirring often—overheating can cause it to seize and lose its glossy appeal, making your Harry Potter Chocolate Frogs less appealing.

  • Sturdy Filling: Choose fillings that won’t ooze out; too runny options can make a mess and spoil the frog shape. Aim for creaminess or light crunch instead.

  • Cool Setting: Let the filled molds set completely in the fridge or freezer for the best texture; patience here ensures a perfect snap in each chocolate frog!

  • Cleaning Molds: After use, ensure molds are thoroughly cleaned and dry before storing; this avoids residue buildup that can affect future creations.

  • Personal Touch: Don’t hesitate to get creative with fillings or toppings; try mixing nuts or sprinkles for a whimsical twist on your Harry Potter Chocolate Frogs!

Harry Potter Chocolate Frogs Variations

Feel free to sprinkle your own magic on these delicious chocolate frogs with these fun twists!

  • Dark Chocolate: Swap milk chocolate for rich dark chocolate for a bolder flavor that’s perfect for grown-up palates.
  • Peanut Butter: Substitute creamy peanut butter for an indulgent filling that brings delightful richness to every bite.
  • White Chocolate: Replace dark or milk chocolate with smooth white chocolate for a sweeter, more decadent treat that's visually striking.
  • Crunchy Add-Ins: Toss in rice crisps or crushed almonds as a filling for an unexpected and delightful texture contrast. Crunch is key!
  • Flavored Ganache: Jazz up the fillings with flavored ganaches like espresso or raspberry for a sophisticated, gourmet twist.
  • Fruit Purees: Experiment with sweet fruit purees as filling; think strawberry or passion fruit for a bright, fruity surprise inside.
  • Spicy Heat: Add a dash of cayenne or chili powder to your chocolate for a surprising kick that dazzles the taste buds.
  • Swirl Varieties: Create a marbled effect by swirling different chocolates before setting, adding an artistic flair to your froggy friends.

Looking for more chocolate inspiration? Don’t miss out on these heavenly recipes: Homemade Hot Chocolate and German Chocolate Poke will keep your chocolaty adventures going!

Storage Tips for Harry Potter Chocolate Frogs

Room Temperature: Store your Harry Potter Chocolate Frogs in an airtight container at room temperature, where they will stay fresh for up to 5 days without losing their delightful crunch.

Fridge: If it's warm or humid, keep them in the refrigerator for up to a week to maintain their texture. Just make sure to let them come to room temperature before serving for the best flavor.

Freezer: For longer storage, you can freeze the chocolate frogs for up to 3 months. Wrap each one in plastic wrap and place them in a freezer bag to prevent freezer burn.

Reheating: If they harden too much after freezing, simply let them sit at room temperature for about 20 minutes before enjoying.

Make Ahead Options

These DIY Harry Potter Chocolate Frogs are perfect for meal prep enthusiasts! You can easily prepare the chocolate molds filled with your chosen fillings up to 24 hours in advance. Simply melt the chocolate, coat the molds, and leave space in each for fillings like peanut butter or rice crisps. After adding the fillings, cover them with chocolate and refrigerate. To maintain the quality, keep the unwrapped molds refrigerated until you're ready to set them. When it's time to serve, just let them sit for a few minutes at room temperature for easier unmolding, and you'll have delightful treats that are just as delicious as if made fresh!

What to Serve with DIY Harry Potter Chocolate Frogs

Dive into a whimsical feast that complements your magical treats with delightful pairings that will enchant everyone!

  • Festive Fruit Platter: A vibrant selection of seasonal fruits adds freshness to your dessert table, balancing the rich chocolate with zesty flavors.

  • Whipped Cream Clouds: Serve alongside a bowl of lightly sweetened whipped cream for dipping, enhancing the chocolate experience with creamy indulgence.

  • Savory Cheese Board: A mix of creamy brie and sharp cheddar creates a fun flavor contrast, making each sweet bite even more enjoyable. The variety will spark conversations and elevate your gathering.

  • Chocolate Milkshake: A rich chocolate milkshake is the ultimate charming drink to pair, making every bite of your Harry Potter Chocolate Frogs taste like a dream come true!

  • Mini Cupcakes: Light and fluffy mini cupcakes in flavors like vanilla or chocolate provide a delightful two-bite treat that pairs beautifully with the richness of your frogs.

  • Magical Butterbeer: Complement the enchanting theme with a glass of homemade butterbeer, offering a delightful cream soda-like taste that everyone will love!

  • Caramel Dipping Sauce: A warm caramel sauce provides a sweet addition that pairs perfectly with a teaspoon of frog-shaped sweetness, amplifying the fun.

  • Chocolate-Dipped Pretzels: These sweet and salty bites offer a fun crunch, contrasting beautifully with your smooth chocolate frogs while keeping things playful.

  • Ice Cream Sundae Bar: Set up a sundae bar where guests can top their bowls with chocolate frogs, allowing for interactive and delightful dessert creativity!

Harry Potter Chocolate Frogs Recipe FAQs

How do I choose the right chocolate for my Harry Potter Chocolate Frogs?
Absolutely! The type of chocolate you select can greatly affect the flavor of your frogs. I recommend using high-quality chocolate, whether it’s dark, milk, or white, based on your personal preference. Each type brings its unique sweetness and richness, so feel free to experiment!

What’s the best way to store Harry Potter Chocolate Frogs?
Great question! Store your chocolate frogs in an airtight container at room temperature for up to 5 days to maintain that delightful crunch. If you find yourself in a warm or humid environment, stick them in the refrigerator, and they’ll stay fresh for up to a week. Just remember to let them come to room temperature before you dig in—this will enhance the flavor!

Can I freeze the Harry Potter Chocolate Frogs? How?
Yes, you can! These tasty treats freeze incredibly well. Simply wrap each frog individually in plastic wrap, then place them in a freezer bag. They’ll stay good in the freezer for up to 3 months. When you’re ready to enjoy, allow them to thaw at room temperature for about 20 minutes, and they’ll be just as delightful as when you first made them!

What if my chocolate seizes during melting?
No worries; this happens to the best of us! If your chocolate seizes and becomes clumpy, it usually means it was overheated. To remedy it, try adding a small amount of vegetable oil or solid shortening (1 teaspoon at a time) to the chocolate while stirring continuously. If it still doesn't work, you might need to start over with a new batch of chocolate, melting it in short bursts while stirring frequently to maintain that silky smoothness.

Are there any dietary considerations I should keep in mind?
Very much! If you’re catering to specific dietary needs, consider the fillings you use. For a nut-free option, stick with fillings like white chocolate or rice crisps. Always check your chocolate’s labels to ensure there are no allergens present, especially for those with nut allergies. Happy cooking!

Can I make these Harry Potter Chocolate Frogs in advance?
Absolutely! These magical treats can be made a day or two ahead of your event. Just be sure to allow extra time for the chocolate layers to set properly. Storing them in an airtight container ensures they stay fresh until you’re ready to share the fun!

Harry Potter Chocolate Frogs

Delight in Homemade Harry Potter Chocolate Frogs Today!

Indulge in delightful Harry Potter Chocolate Frogs, a magical treat that enchants families and friends.
Print Recipe Pin Recipe
Prep Time 15 minutes mins
Cook Time 1 hour hr
Setting Time 30 minutes mins
Total Time 1 hour hr 45 minutes mins
Servings: 12 frogs
Course: Dessert
Cuisine: International
Calories: 150
Ingredients Equipment Method Nutrition Notes

Ingredients
  

For the Chocolate
  • 12 oz Chocolate Choose dark, milk, or white chocolate based on preference
For the Mold
  • 1 Frog-shaped chocolate mold Essential for creating the whimsical shape
For the Filling
  • 1 cup Optional filling Consider white chocolate, creamy peanut butter, or crunchy bits

Equipment

  • Microwave-safe bowl
  • Frog-shaped chocolate mold
  • Spoon
  • Teaspoon

Method
 

Step-by-Step Instructions
  1. Begin by breaking your chosen chocolate into small, uniform pieces and placing them in a microwave-safe bowl. Heat in the microwave in 30-second bursts, stirring after each interval until fully melted.
  2. Grab your frog-shaped chocolate molds and use a spoon to coat the insides with melted chocolate, filling them about halfway. Refrigerate for about 15 minutes.
  3. After the initial chocolate layer has set, add your chosen filling carefully without mixing it with the chocolate.
  4. Pour the remaining chocolate over the filling, ensuring it’s completely covered and smooth. Tap the molds gently to eliminate air bubbles.
  5. Place the filled molds back into the refrigerator or freezer for 30 to 60 minutes until the chocolate hardens completely.
  6. Carefully remove the molds and enjoy your whimsical Harry Potter Chocolate Frogs.

Nutrition

Serving: 1frogCalories: 150kcalCarbohydrates: 20gProtein: 2gFat: 8gSaturated Fat: 5gMonounsaturated Fat: 2gCholesterol: 5mgSodium: 30mgPotassium: 100mgFiber: 1gSugar: 15gCalcium: 2mgIron: 4mg

Notes

Let the filled molds set completely for the best texture and enjoy a delightful treat that can be stored or shared.

Tried this recipe?

Let us know how it was!

Decadent Cauldron Cakes to Spark Your Inner Wizard Baker

October 7, 2025 by Grace Snow Leave a Comment

As I wandered through a quaint little bakery recently, the aroma of warm chocolate filled the air, instantly transporting me to a world of sweet enchantment. That’s exactly the magic I want to share with you through my Cauldron Cakes, irresistibly chocolatey cupcakes inspired by the whimsical realms we adore. These delightful creations are not only a feast for the eyes but also a quick and easy way to bring a little celebration into your home. Imagine fluffy chocolate cupcakes with a luscious, gooey center and a swirl of dreamy buttercream—these treats are perfect for any gathering or a cozy night in. Ready to whip up some enchantment in your kitchen? Let’s dive into this scrumptious adventure together!

Why are Cauldron Cakes a must-try?

Magical, These Cauldron Cakes bring a whimsical touch to any dessert table, making them perfect for parties or cozy nights. Decadent flavor, the rich chocolate cupcakes envelop a gooey center, satisfying your sweet tooth. Easy to make, this recipe allows bakers of all levels to create a stunning treat without fuss. Versatile options are available; switch up the frosting or add festive decorations to match your occasion. Plus, they pair beautifully with a steaming cup of coffee or tea, inviting you to indulge. Looking for more delightful sweets? Don't miss our Crab Cakes Forget or Ricotta Protein Pancakes for your next culinary adventure!

Cauldron Cakes Ingredients

For the Cupcakes
• Chocolate Cupcake Mix – This forms the base of the Cauldron Cakes; for a homemade twist, substitute with your favorite chocolate cupcake recipe.
• Chocolate Chips (Semi-Sweet, 2 bags) – Adds rich texture and flavor; always opt for high-quality chocolate for the best taste.

For the Buttercream
• Butter (1 cup, room temperature) – Essential for a light, fluffy buttercream; remember to let it soften for easy mixing.
• Powdered Sugar (2 cups) – Sweetens and thickens the buttercream; sifting is key to avoid clumps.
• Vanilla Extract (2 tsp) – Amplifies the flavor; consider using almond extract for a delightful twist.

For the Topping
• Store-Bought Dark Chocolate Frosting (1 can) – Perfect for topping your cupcakes; feel free to make your own for an extra indulgence!

With these ingredients, you'll create your own magical Cauldron Cakes, sure to impress anyone who has a love for chocolatey desserts!

Step‑by‑Step Instructions for Cauldron Cakes

Step 1: Prepare the Cupcake Batter
Preheat your oven to 350°F (175°C). In a large mixing bowl, follow the instructions on your chocolate cupcake mix, combining it with the indicated ingredients until well blended. Grease your cupcake pans thoroughly to ensure easy release, and pour the batter into each cup, filling them about two-thirds full. Bake for 18–20 minutes, or until a toothpick inserted in the center comes out clean.

Step 2: Cool and Carve the Cupcakes
Once your cupcakes are baked, remove them from the oven and allow them to cool in the pans for about 10 minutes. Gently transfer them to a wire rack to cool completely. When cooled, invert each cupcake and carefully carve out a small hole at the bottom, using a sharp knife or spoon, creating a space for the luscious filling to come.

Step 3: Make the Fluffy Buttercream
In a microwave-safe bowl, melt 1 cup of chocolate chips until smooth. In a separate bowl, beat the room temperature butter on medium speed for about 2–3 minutes, until fluffy and pale. Gradually sift in the powdered sugar, mixing continuously. Once incorporated, add the melted chocolate and vanilla extract, whipping until the buttercream is rich and creamy, ready to fill your cupcakes.

Step 4: Dip the Cupcake Bases
Melt any remaining chocolate chips to create a glossy dipping chocolate. With each inverted cupcake, dip the bottom into the melted chocolate, ensuring an even coating. Allow the excess chocolate to drip off and place the cupcakes on wax paper to harden. This chocolate layer will give your Cauldron Cakes a fun, cauldron-like appearance once set.

Step 5: Pipe the Buttercream
Using a ziplock bag with a small snip in one corner, fill it with the prepared buttercream. Position the piping bag over each cupcake top and gently squeeze to create a swirling pattern, allowing the buttercream to rise gracefully like a cauldron’s edge. This step adds a visually appealing, dreamy swirl that perfectly complements your Cauldron Cakes.

Step 6: Create the Chocolate Handles
To add the finishing touches, melt some more chocolate and pour it onto wax paper in the shape of curved handles. Let your chocolate shapes cool until firm, which should take about 10–15 minutes in the fridge. Once set, carefully peel them off and attach one handle to each cupcake by gently pressing it into the buttercream, completing the magical look of your Cauldron Cakes.

How to Store and Freeze Cauldron Cakes

Room Temperature: Store your Cauldron Cakes in an airtight container at room temperature for up to 3 days to maintain their freshness and flavor.

Fridge: If you want to prolong their life, place the airtight container in the fridge, where they can last for up to a week. Just remember to bring them to room temperature before serving for the best taste!

Freezer: For longer storage, freeze your un-frosted Cauldron Cakes in a single layer on a baking sheet. Once firm, wrap each cupcake in plastic wrap and place them in a freezer-safe bag. They can be kept for up to 3 months.

Reheating: To enjoy your frozen Cauldron Cakes, simply thaw them overnight in the fridge and then warm gently in a 300°F (150°C) oven for about 5–10 minutes before serving.

Expert Tips for Cauldron Cakes

  • Cool Completely: Allow cupcakes to cool completely before carving; this prevents unwanted crumbling and makes for cleaner cuts when creating the filling space.

  • Use Quality Chocolate: Always choose high-quality chocolate for both the cupcakes and decorations. It makes a noticeable difference in flavor and overall enjoyment of your Cauldron Cakes.

  • Butter Temperature: Ensure your butter is at room temperature when making the buttercream. Cold butter can lead to a lumpy or greasy texture instead of the desired fluffy consistency.

  • Piping Precision: For neat piping, use a ziplock bag—cut a small opening for better control rather than struggling with conventional piping bags.

  • Chocolate Handle Tips: When crafting chocolate handles, let the melted chocolate cool slightly before shaping. This helps it hold its form without running.

Enjoy your baking adventure with these helpful tips, and create your enchanting Cauldron Cakes effortlessly!

Cauldron Cakes Variations & Substitutions

Get ready to infuse your Cauldron Cakes with creative flair and tasty twists that will surprise your taste buds!

  • Dairy-Free: Substitute dairy ingredients with plant-based alternatives, like vegan butter and almond milk, for a delightful lactose-free treat.
  • Nutty Twist: Incorporate chopped nuts, such as walnuts or pecans, into the batter for an added crunch and flavor.
  • Flavor Boost: Replace vanilla extract with a splash of orange or peppermint extract for a refreshing new layer of flavor.
  • Frosting Fun: Try using whipped cream or cream cheese frosting instead of chocolate frosting for a lighter finishing touch.
  • Gooey Center: Add a dollop of peanut butter or Nutella into the cupcake hollow before filling with buttercream for an indulgently gooey surprise.
  • Lighter Cupcakes: Use a vanilla cupcake mix instead of chocolate for a fluffy, cake-like Cauldron experience that’s just as fun.
  • Edible Glitter: Sprinkle some edible glitter or festive sprinkles on top of the frosting to enhance the magical theme and make them sparkle.
  • Milk Chocolate Frosting: Swap dark chocolate frosting for milk chocolate if you prefer a sweeter, less intense chocolate flavor.

With these variations, you can transform your Cauldron Cakes into surprisingly delightful treats for everyone to enjoy! Looking for more fun ideas? Don’t forget to check out our scrumptious Crab Cakes Forget and energizing Ricotta Protein Pancakes for your next baking adventure!

Make Ahead Options

These Cauldron Cakes are perfect for busy home cooks who want to save time without sacrificing quality! You can bake the chocolate cupcakes up to 24 hours in advance; simply let them cool completely before storing them in an airtight container at room temperature. To maintain their freshness, avoid frosting until just before serving. The buttercream can also be prepared ahead of time and refrigerated for up to 3 days; just allow it to come to room temperature before rewhipping to restore its creamy texture. When you’re ready to serve, dip the bases in melted chocolate, pipe on the buttercream, and add the chocolate handles for that magical, show-stopping finish!

What to Serve with Magical Cauldron Cakes

Bring the warmth of home-baked magic to your table with delightful pairings that enhance every bite.

  • Rich Hot Chocolate: A luxurious cup of creamy hot chocolate perfectly complements the chocolatey goodness of Cauldron Cakes, creating a cozy dessert experience. Imagine sipping it while relishing each bite of cupcake—pure bliss!

  • Vanilla Ice Cream: The creamy sweetness of vanilla ice cream is a classic match for these indulgent cupcakes, adding a cooling contrast to the rich flavors. Top each Cauldron Cake with a scoop for a magical touch!

  • Fresh Berries: Juicy strawberries, raspberries, or a medley of fresh berries brighten the dessert plate and introduce a refreshing tartness, balancing out the sweetness of the chocolate.

  • Coffee or Espresso: A steaming cup of coffee or espresso enhances the rich chocolate notes, making it a perfect pairing for those afternoon treats. The deep flavors of coffee meld beautifully with chocolate.

  • Chocolate Milkshake: For an extra special treat, serve Cauldron Cakes alongside a thick and creamy chocolate milkshake. It's a delightful throwback to childhood flavors that pairs wonderfully with the cupcakes.

  • Caramel Sauce: Drizzling warm caramel sauce over the cupcakes adds an extra layer of sweetness and dimension, turning your Cauldron Cakes into an even more enchanting dessert experience.

These delicious accompaniments not only taste wonderful but also infuse your gatherings with warmth and joy, just like every bite of the Cauldron Cakes.

Cauldron Cakes Recipe FAQs

What type of chocolate should I use for the cupcakes?
I always recommend using high-quality semi-sweet chocolate chips for the best flavor in your Cauldron Cakes. The richness of the chocolate elevates the overall taste of the cupcakes, making every bite an indulgent experience.

How should I store my leftover Cauldron Cakes?
To keep your Cauldron Cakes fresh, simply store them in an airtight container at room temperature for up to 3 days. If you want them to last longer, refrigerate them for up to a week. Just remember to let them come back to room temperature before enjoying them again for the best flavor and texture!

Can I freeze Cauldron Cakes?
Absolutely! For freezing, wrap each un-frosted Cauldron Cake tightly in plastic wrap after they’ve cooled completely. Place them in a freezer-safe bag and store them in the freezer for up to 3 months. When you're ready to enjoy them, thaw the cupcakes in the fridge overnight, then warm them gently in a 300°F (150°C) oven for about 5–10 minutes.

What if my buttercream turns out lumpy?
If your buttercream isn't smooth, it might be due to cold butter or not sifting the powdered sugar properly. To fix it, simply mix the buttercream again on medium speed until it becomes fluffy. If needed, add a splash of milk or cream to achieve a smoother consistency.

Are there any dietary considerations for these Cauldron Cakes?
Yes! If you have allergies, be mindful of the ingredients used. The chocolate may contain soy or dairy, and the frosting could have gluten if it’s store-bought. For a gluten-free option, use a gluten-free cupcake mix and double-check the labels on all ingredients to ensure they're safe for your dietary needs.

Can I modify the frosting recipe?
Very! You can easily switch the dark chocolate frosting for white chocolate or even a rich peanut butter frosting if you're looking for new flavors. You could also add fun sprinkles or edible glitter on top for a festive touch that enhances the magical theme of your Cauldron Cakes!

Cauldron Cakes

Decadent Cauldron Cakes to Spark Your Inner Wizard Baker

Indulge in magical Cauldron Cakes, irresistibly chocolatey cupcakes with a gooey center and dreamy buttercream, perfect for any gathering.
Print Recipe Pin Recipe
Prep Time 30 minutes mins
Cook Time 20 minutes mins
Cooling Time 10 minutes mins
Total Time 1 hour hr
Servings: 12 cupcakes
Course: Dessert
Calories: 250
Ingredients Equipment Method Nutrition Notes

Ingredients
  

For the Cupcakes
  • 1 box Chocolate Cupcake Mix For a homemade twist, substitute with your favorite chocolate cupcake recipe.
  • 2 bags Chocolate Chips (Semi-Sweet) Always opt for high-quality chocolate for the best taste.
For the Buttercream
  • 1 cup Butter Room temperature for easy mixing.
  • 2 cups Powdered Sugar Sifting is key to avoid clumps.
  • 2 tsp Vanilla Extract Consider using almond extract for a delightful twist.
For the Topping
  • 1 can Store-Bought Dark Chocolate Frosting Feel free to make your own for an extra indulgence!

Equipment

  • Mixing Bowl
  • Cupcake pans
  • wire rack
  • Microwave-safe bowl
  • Ziplock bag

Method
 

Step-by-Step Instructions for Cauldron Cakes
  1. Preheat your oven to 350°F (175°C). In a large mixing bowl, follow the instructions on your chocolate cupcake mix and combine it with the indicated ingredients until well blended. Grease your cupcake pans thoroughly and pour the batter into each cup, filling them about two-thirds full. Bake for 18–20 minutes, or until a toothpick inserted in the center comes out clean.
  2. Allow the cupcakes to cool in the pans for about 10 minutes, then transfer them to a wire rack to cool completely. When cooled, invert each cupcake and carefully carve out a small hole at the bottom to create a space for the filling.
  3. In a microwave-safe bowl, melt 1 cup of chocolate chips until smooth. In a separate bowl, beat the room temperature butter on medium speed for about 2–3 minutes, until fluffy. Gradually sift in the powdered sugar, mixing continuously. Once incorporated, add the melted chocolate and vanilla extract, whipping until creamy.
  4. Melt any remaining chocolate chips to create a glossy dipping chocolate. Dip the bottom of each inverted cupcake into the melted chocolate, ensuring an even coating, and allow it to set on wax paper.
  5. Fill a ziplock bag with the prepared buttercream, snip a small opening, and pipe it over each cupcake top to create a swirling pattern.
  6. Melt some more chocolate and pour it onto wax paper in the shape of handles. Once set, carefully peel them off and attach one handle to each cupcake by pressing it into the buttercream.

Nutrition

Serving: 1cupcakeCalories: 250kcalCarbohydrates: 35gProtein: 3gFat: 12gSaturated Fat: 7gCholesterol: 30mgSodium: 150mgPotassium: 130mgFiber: 1gSugar: 20gVitamin A: 300IUCalcium: 20mgIron: 1mg

Notes

Enjoy your baking adventure with these helpful tips to create enchanting Cauldron Cakes effortlessly.

Tried this recipe?

Let us know how it was!

Mushroom Skulls Spooky Pasta for a Fun Halloween Feast

October 7, 2025 by Grace Snow Leave a Comment

As the autumn leaves begin to swirl, I find myself drawn into the kitchen, excited to whip up something special for Halloween. This year, I’m thrilled to share my Mushroom Skulls Spooky Pasta recipe, a delightful dish that invites both fun and flavor to the table. With its striking squid ink spaghetti and whimsical mushroom skulls, this pasta is not only a feast for the eyes but also a creamy, savory comfort food the whole family will adore. Best of all, it comes together in a snap—perfect for busy weeknights when the promise of treats lingers in the air. Ready to give your dinner a spooky twist? Let’s dive into this delicious Halloween creation!

Why is Spooky Pasta a Must-Try?

Family-Friendly Fun: This Mushroom Skulls Spooky Pasta is an exciting dish that makes dinner a memorable event for everyone, even picky eaters!

Quick and Easy: With a preparation time that fits seamlessly into your busy evening, this cheerful meal can be on the table in no time.

Unique Presentation: The spooky skull-shaped mushrooms and rich black spaghetti bring an element of surprise that’s perfect for Halloween gatherings or themed dinners.

Creamy and Savory: The luscious sauce pairs beautifully with the squid ink spaghetti, creating a dreamy plate that’s indulgent and satisfying.

Versatile Dish: Whether you choose to go with traditional ingredients or opt for gluten-free or vegan versions, this recipe can easily be tailored to fit any dietary needs.

Mix in some fun sides like roasted veggies or garlic bread for a complete meal that will keep your family and friends coming back for seconds!

Mushroom Skulls Spooky Pasta Ingredients

For the Pasta
• Squid Ink Spaghetti – Offers a striking dark hue and a unique flavor; feel free to substitute with any preferred pasta.

For the Mushroom Skulls
• Button Mushrooms – Ideal for creating spooky skull shapes; you can use cremini or portobello for a richer taste.

For the Sauce
• Butter – Adds a rich flavor and helps brown the mushrooms nicely.
• Olive Oil – Prevents butter from burning while adding a delicious depth of flavor.
• Brown Onion – Serves as an aromatic base; shallots or leeks are great alternatives.
• Bacon – Introduces depth and savory flavor; consider turkey bacon or shredded chicken for a healthier option.
• Garlic – Boosts the overall flavor profile of the sauce.
• Dry White Wine – Brings acidity and depth to the sauce; use vegetable broth as a non-alcoholic substitute if desired.
• Thickened Cream – Creates a rich and velvety sauce; for a dairy-free alternative, coconut cream works nicely.
• Parmesan Cheese – Adds umami and creaminess; can be omitted for a dairy-free version.
• Fresh Thyme – Lends a fresh herbal note, perfect for finishing the dish.

This Mushroom Skulls Spooky Pasta is sure to be a hit at your Halloween table, bringing both fun and delightful flavor!

Step‑by‑Step Instructions for Mushroom Skulls Spooky Pasta

Step 1: Prepare Mushroom Skulls
Begin by carving spooky faces into the button mushrooms to create the skulls—this will make your Mushroom Skulls Spooky Pasta a festive hit. If the mushrooms are larger, halve them to enhance cooking and ensure even browning. Set aside the carved mushrooms for later use in your creamy sauce.

Step 2: Boil Water
In a large pot, fill with salted water and bring it to a rapid boil over high heat. This salted water will be used for cooking the squid ink spaghetti, ensuring that each strand is flavorful. Once boiling, keep an eye on it as you prepare the other components of the dish.

Step 3: Sauté Mushrooms
In a frying pan over medium heat, melt together 1 tablespoon of butter and 1 tablespoon of olive oil. Once the butter is bubbling, carefully add the mushroom skulls cut-side down and sauté for 4–5 minutes until they are golden brown and crisp. After browning, remove them from the pan and set aside.

Step 4: Make Sauce
In the same pan, add another tablespoon of butter, along with chopped onions and diced bacon. Cook over medium heat until the onions become translucent and the bacon is crispy, about 5–7 minutes. Stir in minced garlic and cook for another minute until fragrant, then pour in dry white wine, allowing it to reduce by half, approximately 5 minutes.

Step 5: Add Cream
Once the wine has reduced, lower the heat and stir in the thickened cream and grated Parmesan cheese. Keep stirring until the cheese melts and the sauce thickens, which should take about 2–3 minutes. The creamy sauce is now the perfect complement for your Mushroom Skulls Spooky Pasta.

Step 6: Cook Pasta
Add the squid ink spaghetti to the boiling water and cook according to package instructions until al dente, usually about 8–10 minutes. Stir occasionally to prevent the pasta from sticking and keep an eye on it to achieve the right level of tenderness.

Step 7: Combine
Once the pasta is cooked, drain it, reserving about half a cup of the pasta water. Add the drained squid ink spaghetti directly to the creamy sauce in the frying pan, tossing gently to combine. Fold in the sautéed mushroom skulls and, if the sauce seems too thick, add in a splash of the reserved pasta water to reach your desired consistency.

Step 8: Serve
Plate the Mushroom Skulls Spooky Pasta and garnish with fresh thyme and extra Parmesan cheese for a delightful finish. Serve immediately while the dish is hot and creamy, ensuring everyone enjoys the festive flavors of this Halloween treat!

Expert Tips for Mushroom Skulls Spooky Pasta

  • Simmer for Flavor: Allow the sauce to simmer adequately before adding cream to enhance its flavor and ensure it thickens properly.

  • Thickening Aid: If your sauce remains too thin after adding cream, mix 1 tablespoon of cornstarch with 2 tablespoons of cold water and stir it into the sauce until it thickens.

  • Mushroom Prep: When carving the mushroom skulls, keep your designs simple; intricate faces can be tricky and might not hold up during cooking.

  • Pasta Timing: Always check your squid ink spaghetti a minute or two before the package instructions recommend for that perfect al dente bite!

  • Make Ahead Magic: For convenience, prepare the mushroom skulls and sauce ahead of time and refrigerate them separately. Reheat before combining with pasta for dinner.

  • Healthy Substitutions: To lighten up this Mushroom Skulls Spooky Pasta, swap out regular bacon for turkey bacon or a plant-based alternative, maintaining flavor while reducing fat content.

Mushroom Skulls Spooky Pasta Variations

Feel free to get creative with your Mushroom Skulls Spooky Pasta! Whip up something truly unique with these fun twists to enjoy.

  • Gluten-Free: Swap squid ink spaghetti for your favorite gluten-free pasta to accommodate dietary needs while maintaining flavor.
  • Vegan Delight: Use coconut cream and plant-based cheese for a fully vegan adaptation that doesn’t skimp on taste.
  • Veggie Boost: Toss in spinach or roasted red bell peppers for another layer of color and nutrition—everyone loves a bit of extra greenery!
  • Herb Infusion: Sprinkle fresh basil or parsley instead of thyme to add a different herbal note that brightens your creamy sauce.
  • Mushroom Variety: Experiment with different kinds of mushrooms such as shiitake or oyster mushrooms for an exciting mix of textures and flavors.
  • Cheesy Twist: Add a sprinkle of mozzarella on top before serving for a melty finish that takes comfort food to another level.
  • Spicy Kick: Stir in some red pepper flakes or diced jalapeños to give your dish a fiery boost—perfect for those who love some heat!

Already love your spooky pasta? You might also enjoy whipping up some Skillet Pasta Sun or trying a wholesome Cauliflower Pasta Ready as a delightful twist to your pasta nights!

Make Ahead Options

These Mushroom Skulls Spooky Pasta are perfect for busy home cooks looking to save time during Halloween festivities! You can prepare the mushroom skulls and creamy sauce up to 3 days in advance. Simply carve the spooky faces in the mushrooms and sauté them, then store them in an airtight container in the refrigerator. Prepare the sauce, allowing it to cool before refrigerating separately. When you’re ready to serve, just reheat the sauce over low heat while cooking the squid ink spaghetti—this quick approach ensures your meal is just as delicious when served! For the best quality, avoid mixing the pasta with the sauce until right before serving to keep everything fresh and flavorful.

What to Serve with Mushroom Skulls Spooky Pasta

Elevate your Halloween dining experience by pairing this spooky pasta dish with delightful sides that will enchant your family and friends.

  • Creamy Garlic Bread: Perfectly toasted, this garlic bread adds a crispy texture that beautifully complements the rich creaminess of the pasta. With each bite, you’ll enjoy the flavor meld of the buttery, garlicky crunch that pairs well with the savory mushrooms.

  • Roasted Seasonal Vegetables: Roasting brings out the natural sweetness of vegetables like squash, carrots, and Brussels sprouts. Tossed with a hint of olive oil and herbs, their earthy flavors enhance the pasta’s rich sauce, creating a balanced plate that’s both healthy and satisfying.

  • Mixed Green Salad: A light, refreshing salad with crunchy lettuce, colorful bell peppers, and a tangy vinaigrette offers a wonderful contrast to the indulgent pasta dish. The crisp greens and zesty dressing awaken the palate, ensuring your meal feels bright and lively.

  • Pumpkin Spice Muffins: Embrace the autumn spirit with these soft, flavorful muffins that introduce a hint of sweetness to the meal. Their warm spices echo the cozy feelings of the season, making them a delightful way to end your Halloween dinner.

  • Spooky Themed Drinks: Pair your meal with fun Halloween-themed drinks like a bright orange pumpkin punch or a fizzy apple cider cocktail. Their vibrant colors and festive flavors will create a fun atmosphere that complements the whimsy of your Mushroom Skulls Spooky Pasta.

These exceptional pairings will not only enhance your Halloween feast but ensure that your table is filled with warmth, flavor, and festive charm!

How to Store and Freeze Mushroom Skulls Spooky Pasta

Fridge: Store leftovers in an airtight container for up to 3 days. Be sure to let the pasta cool before sealing to maintain freshness.

Freezer: Freeze the Mushroom Skulls Spooky Pasta for up to 2 months. For best quality, separate the sauce from the pasta before freezing to avoid sogginess upon reheating.

Reheating: When ready to enjoy again, thaw overnight in the fridge, then reheat on the stovetop over low heat, adding a splash of milk or reserved pasta water to revive the creamy texture.

Make-Ahead Tip: The mushroom skulls can be prepared ahead of time and stored in the fridge, while the sauce can be made and kept for up to 3 days before using.

Mushroom Skulls Spooky Pasta Recipe FAQs

How do I select the perfect mushrooms for this dish?
Absolutely! When choosing mushrooms for your Mushroom Skulls Spooky Pasta, look for button mushrooms that are firm and devoid of dark spots or blemishes. They should feel smooth to the touch and have a fresh, earthy scent. For a more robust flavor, opt for cremini or portobello mushrooms.

What is the best way to store leftover Mushroom Skulls Spooky Pasta?
Very! Store any leftovers in an airtight container in the fridge for up to 3 days. Allow the pasta to cool completely before sealing to maintain its freshness and flavor. Reheat gently on the stovetop with a bit of water or cream to restore its creamy texture when you're ready to enjoy it again.

Can I freeze Mushroom Skulls Spooky Pasta?
Absolutely! You can freeze this dish for up to 2 months. For optimal quality, I recommend separating the sauce from the pasta before freezing. To do this, let everything cool down, then store them in airtight containers. When you're ready to feast again, thaw the sauce overnight in the fridge, then reheat it gently while cooking the pasta fresh.

What should I do if my sauce doesn’t thicken properly?
Not a problem! If your sauce fails to thicken, you can create a cornstarch slurry by mixing 1 tablespoon of cornstarch with 2 tablespoons of cold water. Stir this mixture into the sauce gradually, keeping it on low heat until it reaches your desired consistency. This method works like a charm!

Are there any dietary considerations I should keep in mind?
Absolutely! If you're catering to dietary restrictions, you can easily adapt this recipe. For a gluten-free version, choose a gluten-free pasta; for a dairy-free dish, use coconut cream and skip the Parmesan. If considering allergies, always double-check packaging to ensure that none of the ingredients contain allergens widespread in your group.

Can I prepare the Mushroom Skulls in advance?
Very! You can prepare the mushroom skulls a day ahead. Just carve spooky faces into them and store them in an airtight container in the refrigerator. This makes for a quick assembly when you’re ready to whip up your Mushroom Skulls Spooky Pasta on Halloween night!

Mushroom Skulls Spooky Pasta

Mushroom Skulls Spooky Pasta for a Fun Halloween Feast

A delightful Halloween dish featuring squid ink spaghetti and whimsical mushroom skulls, perfect for a spooky family dinner.
Print Recipe Pin Recipe
Prep Time 15 minutes mins
Cook Time 30 minutes mins
Total Time 45 minutes mins
Servings: 4 servings
Course: Dinner
Cuisine: Halloween, Italian
Calories: 450
Ingredients Equipment Method Nutrition Notes

Ingredients
  

For the Pasta
  • 8 ounces Squid Ink Spaghetti Feel free to substitute with any preferred pasta.
For the Mushroom Skulls
  • 10 ounces Button Mushrooms You can use cremini or portobello.
For the Sauce
  • 2 tablespoons Butter Adds rich flavor.
  • 1 tablespoon Olive Oil Prevents butter from burning.
  • 1 medium Brown Onion Can substitute shallots or leeks.
  • 4 slices Bacon Consider turkey bacon for a healthier option.
  • 2 cloves Garlic Boosts flavor.
  • 1/2 cup Dry White Wine Use vegetable broth as a non-alcoholic substitute.
  • 1 cup Thickened Cream Coconut cream works for a dairy-free version.
  • 1/2 cup Parmesan Cheese Can be omitted for dairy-free.
  • 1 tablespoon Fresh Thyme

Equipment

  • Large pot
  • frying pan
  • Knife
  • Cutting Board

Method
 

Preparation Steps
  1. Begin by carving spooky faces into the button mushrooms to create the skulls. Halve larger mushrooms to enhance cooking. Set aside.
  2. In a large pot, fill with salted water and bring to a rapid boil for cooking the squid ink spaghetti.
  3. In a frying pan, melt together 1 tablespoon of butter and 1 tablespoon of olive oil. Add the mushroom skulls cut-side down and sauté for 4-5 minutes until golden brown.
  4. In the same pan, add another tablespoon of butter, chopped onions, and diced bacon. Cook until onions are translucent and bacon is crispy, about 5-7 minutes. Add minced garlic and cook for another minute. Pour in dry white wine and reduce by half for about 5 minutes.
  5. Once the wine has reduced, lower the heat and stir in thickened cream and grated Parmesan cheese. Stir until cheese melts and sauce thickens, about 2-3 minutes.
  6. Add squid ink spaghetti to boiling water and cook according to package instructions until al dente, about 8-10 minutes.
  7. Drain the pasta, reserving about half a cup of pasta water. Add drained spaghetti directly to creamy sauce, tossing gently to combine. Fold in sautéed mushroom skulls and add reserved pasta water if sauce is too thick.
  8. Plate the Mushroom Skulls Spooky Pasta, garnish with fresh thyme and extra Parmesan cheese, and serve immediately.

Nutrition

Serving: 1plateCalories: 450kcalCarbohydrates: 65gProtein: 18gFat: 15gSaturated Fat: 8gPolyunsaturated Fat: 0.5gMonounsaturated Fat: 4gCholesterol: 40mgSodium: 800mgPotassium: 450mgFiber: 4gSugar: 3gVitamin A: 10IUVitamin C: 5mgCalcium: 15mgIron: 10mg

Notes

For convenience, prepare the mushroom skulls and sauce ahead of time and refrigerate them separately. Reheat before combining with pasta for dinner.

Tried this recipe?

Let us know how it was!

Decadent Worms in Dirt Mousse Cake That Thrills Halloween!

October 7, 2025 by Grace Snow Leave a Comment

The kitchen was filled with the enchanting aroma of rich dark chocolate as I prepared for Halloween, my favorite time of the year. While the world swirls with spooky decorations and the promise of treats, nothing excites the imagination quite like this "Worms in Dirt" Mousse Cake. It’s an easy, yet impressive dessert that delights both kids and adults alike, layering silky mousse with a crunchy cookie base and topped with playful raspberry gummy worms. Not only does it add a fun twist to your Halloween celebration, but it also serves as a wonderfully indulgent treat that can be prepped ahead of time, allowing you to enjoy the festivities without the fuss. As you gather your ingredients, think about the joyful faces that will light up when they see this delectable cake. Ready to dive into a world of delicious spookiness? Let’s get started!

Why Will You Love This Mousse Cake?

Simplicity, this recipe is easy to follow, giving you a professional-looking dessert without the stress. Delectable layers of rich dark chocolate mousse and crunchy cookie crumbles will make every bite a delight. Festive fun comes in the form of raspberry gummy worms, adding a playful touch that kids adore. Make ahead options mean you can enjoy the party without spending all day in the kitchen. Impressive presentation will have your guests talking, making this a standout centerpiece for your Halloween festivities!

Worms in Dirt Mousse Cake Ingredients

For the Cookie Base
• Chocolate Pecan Cookies – These provide a rich base for the tart; you can substitute walnuts for a nutty crunch.

For the Mousse Filling
• Dark Chocolate Mousse – This decadent filling, made from dark chocolate and whipped cream, creates a creamy texture; feel free to use semi-sweet chocolate for a sweeter option.

For the Gummy Worms
• Raspberry Gummy Worms – A fun and colorful decoration that adds a sweet-tart flavor; store-bought gummy worms also work well if you’re short on time.

For the Topping
• Chocolate Whipped Cream – Adds a light and luscious finish; use regular whipped cream if you prefer a classic taste.

For the Final Touches
• Additional Cookie Crumbs – Sprinkle extra crumbs on top for added texture and a spooky look; keep some aside while making the base for convenience.

This delightful "Worms in Dirt" Mousse Cake offers simplicity, festive flair, and makes a visual impact perfect for Halloween celebrations!

Step‑by‑Step Instructions for “Worms in Dirt” Mousse Cake

Step 1: Prepare Gummy Worms
Start by combining raspberry jello and unflavored gelatin in a bowl with 1 cup of boiling water, stirring until dissolved. Let the mixture cool for about 15 minutes before mixing in 1 cup heavy cream and a few drops of red food coloring. Pour the mixture into drinking straws and refrigerate them upright for at least 9 hours or overnight to set the gummy worms.

Step 2: Make Chocolate Pecan Cookies
Preheat your oven to 350°F (175°C). In a large bowl, cream together ½ cup softened butter and ½ cup sugar until light and fluffy. Add in crushed chocolate pecan cookies, mixing until a dough forms. Chill this dough in the refrigerator for 30 minutes, then slice it into rounds and bake for 8–10 minutes until golden and aromatic, allowing them to firm up as they cool.

Step 3: Prepare Dark Chocolate Mousse
In a microwave-safe bowl, melt 8 ounces of dark chocolate until smooth, allowing it to cool slightly. In a separate bowl, beat 1 cup of heavy cream until stiff peaks form. Whisk together 3 egg yolks, 1 tablespoon of espresso, and ¼ cup sugar in a double boiler for about 5 minutes until lightened. Combine the melted chocolate and egg mixture, then gently fold in the whipped cream for a luscious filling.

Step 4: Assemble Tart
Line the bottom of a 9-inch springform pan with plastic wrap, ensuring it extends past the edges. Crush your chocolate pecan cookies into fine crumbs and press them evenly into the base of the pan, forming a solid layer. Carefully pour the rich dark chocolate mousse over the cookie base, spreading it evenly with a spatula, and smooth the top for an elegant finish.

Step 5: Add Topping
Once the mousse is spread out evenly, prepare 1 cup of chocolate whipped cream by beating heavy cream and cocoa powder to the desired thickness. Gently dollop this fluffy topping onto the mousse layer, creating beautiful swirls across the surface. Save a few cookie crumbs to sprinkle over the top for added texture and a fun, spooky look to your “Worms in Dirt” Mousse Cake.

Step 6: Chill and Garnish
Cover the assembled cake tightly with plastic wrap and refrigerate it for at least 4 hours, although chilling overnight enhances the flavors even further. Before serving, carefully remove the cake from the springform pan and peel off the plastic wrap. Garnish the top with your prepared raspberry gummy worms, creating a lively scene on this decadent mousse cake!

Variations & Substitutions for Worms in Dirt Mousse Cake

Feel free to let your creativity shine by customizing this delightful mousse cake with these fun twists and swaps!

  • Gluten-Free: Use gluten-free cookies or crushed nuts for the crust to accommodate gluten sensitivities without sacrificing flavor.

  • Nut-Free: Swap chocolate pecan cookies for chocolate sandwich cookies to ensure it's safe for nut allergies; no one will miss the nuts!

  • Berry Blast: Incorporate fresh or frozen berries, like raspberries or strawberries, into the mousse for a fruity twist that complements the chocolate beautifully.

  • Vegan Option: Substitute dark chocolate with vegan chocolate and use coconut cream to create a rich, indulgent mousse that's fully plant-based.

  • Spiced Up: Add a dash of cayenne or chili powder to the chocolate mousse for a surprising hint of heat that enhances the overall flavor.

  • Flavorful Gummy Worms: Try using different flavored gummy worms, such as blue raspberry or sour flavors, to add variation to the color and taste, giving your cake a personality!

  • Chocolate Overload: For true chocolate lovers, drizzle melted chocolate over the top before adding the whipped cream for an extra layer of richness.

  • Mini Versions: Create individual servings by layering mousse and cookie crumbles in small cups; this is perfect for Halloween parties and adds a cute presentation!

As you consider your variations, don’t forget to explore the decadent layers of Chocolate Pudding Cake or whip up an impressive Ice Cream Cake for another treat that’ll thrill your guests. The possibilities are endless, making your Halloween celebrations even more fun and delicious!

Expert Tips for “Worms in Dirt” Mousse Cake

  • High-Quality Chocolate: Use high-quality dark chocolate for the best flavor; avoid cheap brands that might not melt well.

  • Cool Before Mixing: Ensure the gelatin mixture for gummy worms is cool to prevent separation when adding the cream.

  • Right Mixing Technique: Be gentle when folding the whipped cream into the chocolate mousse; over-mixing can deflate it and alter the texture.

  • Chill Time Matters: Allow the mousse cake to chill overnight if possible; this enhances the flavors and helps the layers set perfectly.

  • Presentation Perfected: For a stunning finish, reserve some cookie crumbs to sprinkle on top for a spooky dirt effect with your gummy worms!

Make Ahead Options

These "Worms in Dirt" Mousse Cake is a fantastic dessert that fits seamlessly into your meal prep routine! You can prepare the chocolate pecan cookies and the raspberry gummy worms up to 24 hours in advance, allowing the flavors to meld beautifully. To do this, simply bake the cookies and store them in an airtight container at room temperature, while the gummy worms should be set and refrigerated. The dark chocolate mousse can also be made up to 3 days ahead; just ensure it’s kept covered in the fridge to prevent it from absorbing any odors. When you’re ready to serve, assemble the tart and chill for at least four hours or overnight for the best results, decorating with gummy worms just before presenting it to your guests. Enjoy less stress and more time with loved ones on Halloween night!

What to Serve with Worms in Dirt Mousse Cake

Dive into a Halloween feast by pairing your delicious mousse cake with delightful side dishes and treats that will thrill everyone at the table.

  • Crispy Apple Chips: Their sweet and crunchy texture complements the creamy mousse and adds a light, fruity note to the dessert table. These homemade chips are easy to make and are a healthier alternative to traditional snacks.

  • Spooky Fruit Salad: Combine seasonal fruits like oranges, grapes, and strawberries for a refreshing contrast that adds a pop of color to your spread. This fun, edible arrangement will appeal to both kids and adults, brightening your Halloween gathering.

  • Pumpkin Spice Cookies: Enhance the festive flavor with these soft, spiced cookies. They offer a deliciously cozy contrast to the rich chocolate in your mousse cake.

  • Chocolate-Covered Pretzels: Their salty crunch provides a delightful textural contrast, balancing the sweetness of your dessert. Plus, they're simple to prepare and add a fun element to your treat table!

  • Witch's Brew Smoothie: Blend up a vibrant green smoothie using spinach, bananas, and pineapple for a fun Halloween-themed drink. It's a refreshing counterpoint to the decadent sweetness of the mousse cake.

  • Ghostly Marshmallow Pops: Dip marshmallows into melted chocolate, then decorate them as ghosts for a whimsical addition to your dessert lineup. They’re not only adorable but also quick to make, matching your festive atmosphere perfectly.

  • Sparkling Cider: Elevate your celebration with a festive drink! Serve chilled sparkling cider for a bubbly experience that harmonizes beautifully with the sweetness of the mousse.

  • Chocolate Lava Cake: For true chocolate lovers, a warm chocolate lava cake serves as a rich complement to the mousse cake. The contrasting temperatures will be a delightful surprise for your guests.

These pairings will turn your Halloween gathering into a memorable feast bursting with flavors and festive flair!

How to Store and Freeze Worms in Dirt Mousse Cake

Fridge: Store leftover mousse cake in the refrigerator for up to 3 days, ensuring it's covered with plastic wrap to keep it fresh and prevent it from absorbing other odors.

Freezer: For longer storage, freeze the mousse cake tightly wrapped in plastic wrap and then aluminum foil for up to 2 months. Thaw it in the fridge overnight before serving.

Serving Suggestions: After chilling, allow the mousse cake to sit at room temperature for about 15 minutes before serving to enhance the flavors and texture.

Reheating: There’s no need to reheat the mousse cake, but if you prefer it slightly warmer, let it sit out for a bit before serving. Enjoy this delightful “Worms in Dirt” Mousse Cake anytime!

Worms in Dirt Mousse Cake Recipe FAQs

How do I choose the right chocolate for the mousse?
Absolutely! For the best flavor, select high-quality dark chocolate that is at least 60% cocoa. This ensures a rich, deep flavor that shines through. Avoid using cheaper brands as they may not melt well and can affect the final texture.

What’s the best way to store leftover mousse cake?
Leftover mousse cake should be stored in the refrigerator where it will stay fresh for up to 3 days. Be sure to cover it tightly with plastic wrap to keep it safe from absorbing any odors and to maintain its moisture.

Can I freeze the Worms in Dirt Mousse Cake?
Yes, you can freeze the mousse cake! To do so, wrap it tightly in plastic wrap, then in aluminum foil, to prevent freezer burn. It will keep well for up to 2 months. When you're ready to enjoy it, transfer the cake to the fridge and let it thaw overnight before serving.

What if my mousse doesn’t set properly?
If your mousse is too runny, it may not have cooled completely before you mixed in the whipped cream. To troubleshoot, you can chill the mousse in the refrigerator for an additional 30 to 60 minutes to let it firm up. If the problem persists, you can try adding a bit more melted chocolate, which helps thicken the mixture.

Are there any dietary considerations for this recipe?
If you're concerned about allergies, this recipe contains nuts from the pecans. For a nut-free version, simply substitute the pecans with gluten-free cookies or allow the cookie base to be made with crushed gluten-free crackers. Additionally, if using eggs is a concern, you can opt for egg replacers designed for baking.

Can I make these gummy worms with a different flavor?
Very much so! You can easily switch up the flavor of your gummy worms by using a different flavored jello, such as strawberry or blue raspberry, to create a fun mix of colors and tastes on top of your Worms in Dirt Mousse Cake. Enjoy experimenting with flavors!

“Worms in Dirt” Mousse Cake

Decadent Worms in Dirt Mousse Cake That Thrills Halloween!

This 'Worms in Dirt' Mousse Cake combines rich chocolate and playful gummy worms for an impressive Halloween dessert.
Print Recipe Pin Recipe
Prep Time 30 minutes mins
Cook Time 20 minutes mins
Chill Time 4 hours hrs
Total Time 4 hours hrs 50 minutes mins
Servings: 8 slices
Course: Dessert
Cuisine: American
Calories: 350
Ingredients Equipment Method Nutrition Notes

Ingredients
  

For the Cookie Base
  • ½ cup softened butter room temperature
  • ½ cup sugar
  • 1 cup chocolate pecan cookies crushed
For the Mousse Filling
  • 8 ounces dark chocolate melted
  • 1 cup heavy cream for whipping
  • 3 large egg yolks
  • 1 tablespoon espresso
  • ¼ cup sugar
For the Gummy Worms
  • 1 cup raspberry jello
  • 1 tablespoon unflavored gelatin
  • 1 cup boiling water
  • 1 cup heavy cream for mixing
  • few drops red food coloring
For the Topping
  • 1 cup chocolate whipped cream or regular whipped cream
For the Final Touches
  • ½ cup additional cookie crumbs for garnish

Equipment

  • 9-inch springform pan
  • Mixing bowls
  • Microwave
  • Whisk
  • Spatula
  • plastic wrap

Method
 

Preparation
  1. Combine raspberry jello and unflavored gelatin in a bowl with boiling water, stirring until dissolved. Let cool for 15 minutes before mixing in heavy cream and red food coloring. Pour into drinking straws and refrigerate upright for at least 9 hours.
  2. Preheat oven to 350°F (175°C). Cream butter and sugar until fluffy. Mix in crushed chocolate pecan cookies to form dough. Chill for 30 minutes, then shape into rounds and bake for 8-10 minutes.
  3. Melt dark chocolate until smooth. In a bowl, beat heavy cream until stiff peaks form. In a double boiler, whisk egg yolks, espresso, and sugar for 5 minutes. Combine melted chocolate with egg mixture and fold in whipped cream.
  4. Line the bottom of a springform pan with plastic wrap. Press chocolate pecan cookie crumbs evenly into the pan base. Pour chocolate mousse over cookie base and smooth the top.
  5. Prepare chocolate whipped cream by beating heavy cream and cocoa powder. Dollop onto the mousse layer and swirl. Reserve some cookie crumbs for garnish.
  6. Cover with plastic wrap and refrigerate for at least 4 hours. Before serving, remove from the pan, garnish with gummy worms, and enjoy!

Nutrition

Serving: 1sliceCalories: 350kcalCarbohydrates: 45gProtein: 4gFat: 18gSaturated Fat: 10gPolyunsaturated Fat: 1gMonounsaturated Fat: 5gCholesterol: 50mgSodium: 150mgPotassium: 200mgFiber: 2gSugar: 25gVitamin A: 10IUCalcium: 50mgIron: 2mg

Notes

For the best result, use high-quality chocolate and allow the cake to chill overnight for enhanced flavors.

Tried this recipe?

Let us know how it was!

Sleepy Hollow Cruller: Light, Crispy Delights Await

October 7, 2025 by Grace Snow Leave a Comment

As I stood in my kitchen, the aroma of warm, crispy pastries filled the air, pulling me back to cherished memories of family gatherings and celebrations. Today, I’m thrilled to share my recipe for Sleepy Hollow Crullers, inspired by the enchanting stories of Washington Irving. These delightful corkscrew-shaped treats strike the perfect balance between a light, airy texture and a satisfyingly crisp exterior—the ultimate comfort food that delights both young and old. With a straightforward method that invites playful creativity, these crullers are not just a sweet indulgence; they’re a delightful way to connect with history and make lasting memories in your own kitchen. Ready to twist your way to a scrumptious batch?

Why are Sleepy Hollow Crullers so irresistible?

Nostalgic flavors transport you back to joyful gatherings, evoking fond memories and warm feelings. Crispy, airy texture ensures each bite melts delightfully in your mouth, offering a perfect balance of crunch and fluff. Easy to make, these crullers invite you to unleash your creativity—twist them into corkscrew shapes and even experiment with flavors like cinnamon. Perfect for sharing, they make an ideal treat for family, friends, or cozy moments with tea or coffee. Plus, enjoy the historical essence—these pastries connect you to the rich tradition of Dutch-American baking, making your baking adventure feel that much more special!

Sleepy Hollow Cruller Ingredients

• Discover the essential components for these delightful pastries!

For the Dough

  • Butter – Adds richness and flavor; feel free to substitute with margarine for a dairy-free option.
  • Large Egg – Acts as a binder and adds moisture; make sure it’s at room temperature for the best results.
  • Flour – The main structural component; use all-purpose flour, or swap for a gluten-free blend if needed.
  • Cream (optional) – Enhances moisture and richness; omit if you prefer a stiffer dough.

For Frying

  • Oil – Essential for frying; choose a neutral oil like canola or vegetable for the best results.

For Dusting

  • Icing Sugar – Provides a sweet finish; adjust the amount based on your sweetness preference for these Sleepy Hollow Crullers.

Step‑by‑Step Instructions for Sleepy Hollow Cruller

Step 1: Prepare the Dough
Begin by creaming 1/2 cup of butter in a large mixing bowl using a hand mixer until it’s light and fluffy, about 2-3 minutes. Add a room temperature large egg and mix until fully combined. Gradually sift in 2 cups of all-purpose flour until the dough is soft and smooth, incorporating a few tablespoons of cream if the mixture feels too stiff.

Step 2: Shape the Crullers
Once your dough is ready, lightly flour a clean surface and roll it out to approximately 1/6 inch thick. Cut the rolled dough into strips around 3/4 inch wide, ensuring even sizes for uniform cooking. Take each strip and gently twist it around the handle of a wooden spoon to create the classic corkscrew shape, making sure they hold their form well.

Step 3: Fry the Crullers
Heat a deep pan with about 2 inches of neutral oil, bringing it to a temperature of 350°F (175°C). Once the oil is hot, carefully slide the twisted dough curls into the oil, ensuring not to overcrowd the pan. Fry them for 2-3 minutes on each side until they turn a beautiful golden brown, turning occasionally for even cooking and a delightful crisp texture.

Step 4: Drain and Dust
After frying, use a slotted spoon to remove the golden crullers from the oil and place them on paper towels to drain excess oil for about 1-2 minutes. For a sweet finishing touch, dust the Sleepy Hollow Crullers generously with icing sugar while they are still warm, allowing it to adhere beautifully to their crispy surfaces.

Sleepy Hollow Cruller Variations & Substitutions

Get ready to embrace your inner chef by customizing your Sleepy Hollow Crullers for a unique twist!

  • Spice it Up: Add a teaspoon of ground cinnamon or nutmeg to the dough for a warm, cozy flavor.

  • Dairy-Free Delight: Swap butter for coconut oil or margarine to create a lovely, rich dairy-free version that everyone can enjoy.

  • Gluten-Free Option: Use a 1:1 gluten-free flour blend to craft these crullers without gluten, making them accessible for those with dietary restrictions.

  • Sweetness Level: Adjust the amount of icing sugar dusting based on your taste preferences—less for a subtle sweetness and more for that delightful sugar rush.

  • Chocolate Dipped: Melt chocolate and dip half of each cruller for an indulgent treat that absolutely delights chocolate lovers.

  • Citrus Zing: Incorporate the zest of an orange or lemon into your dough for a refreshing, bright flavor that adds a delicious twist.

  • Rosemary Infusion: For a savory touch, finely chop fresh rosemary and blend it into the dough; these crullers work beautifully as a unique appetizer.

  • Nutty Texture: Fold in crushed nuts, such as hazelnuts or almonds, for a delightful crunch that adds another layer of flavor and texture to your crullers.

With these variations, your kitchen can transform into a haven of mouthwatering creations that celebrate both tradition and innovation. Happy baking!

How to Store and Freeze Sleepy Hollow Crullers

Room Temperature: Store crullers in an airtight container at room temperature for up to 2 days to maintain their crispy texture.

Fridge: For slightly longer storage, you can place the crullers in the fridge for up to 3 days. However, note that they may lose some crispiness.

Freezer: To freeze, wrap individual crullers tightly in plastic wrap and then place them in a freezer-safe bag or container. They can be frozen for up to 2 months.

Reheating: To enjoy frozen Sleepy Hollow Crullers, simply reheat them in an oven at 350°F (175°C) for about 5–7 minutes until warm and crispy again.

What to Serve with Sleepy Hollow Crullers?

Imagine a welcoming gathering where everyone savors these delicious pastries while enjoying the warmth of good company and delightful aromas.

  • Freshly Brewed Coffee: The rich, bold flavors of coffee beautifully contrast the sweet, crispy crullers, making each bite more enjoyable.
  • Earl Grey Tea: The subtle floral notes of this tea enhance the pastries’ sweetness, creating a charming afternoon treat that delights the senses.
  • Fruit Salad: A refreshing, vibrant mix of seasonal fruits provides a juicy burst that contrasts wonderfully with the crullers' crispy texture.
  • Cinnamon Sugar Dusting: Elevate the flavor profile by combining sugar and fragrant cinnamon to sprinkle over crullers, adding warmth and sweetness.
  • Homemade Chocolate Dip: An indulgent chocolate dipping sauce lends a decadent twist, perfect for those with a serious sweet tooth craving extra richness.
  • Vanilla Ice Cream: A scoop of creamy vanilla ice cream beside the warm crullers brings together temperatures and textures for a comforting dessert experience.
  • Maple Syrup Drizzle: A light drizzle of maple syrup offers a pleasant sweetness that pairs harmoniously with the crispy crullers, inviting everyone to dig in.
  • Caramel Sauce: A luscious caramel sauce added on the side adds a touch of luxury that complements the crullers' delicate crunch and airy feel.

Make Ahead Options

These Sleepy Hollow Crullers are perfect for busy home cooks looking to save time! You can prepare the dough up to 24 hours ahead; simply make the dough, wrap it tightly in plastic wrap, and refrigerate to keep it fresh and prevent drying out. Additionally, you can shape the crullers and place them on a baking sheet lined with parchment paper, then cover and refrigerate for up to 3 days. When you're ready to fry, just heat your oil and slip those curled beauties into the hot oil directly from the fridge! This method not only ensures that your crullers are just as delicious as freshly made but also seamlessly fits into your busy weeknight plans!

Expert Tips for Sleepy Hollow Crullers

  • Dough Consistency: Ensure your dough is not too sticky. If it sticks to your fingers, add a little more flour until it’s easier to handle for those perfect corkscrew shapes.
  • Room Temperature Ingredients: Using room temperature butter and eggs can help create a smoother dough, making it easier to blend and ensuring optimal texture in your Sleepy Hollow Crullers.
  • Oil Temperature Check: Always check your oil temperature with a small piece of dough; if it bubbles and sizzles immediately, you're ready to fry! This ensures even golden browning.
  • Fry in Batches: To avoid overcrowding and uneven frying, fry only a few crullers at a time. This keeps the oil temperature consistent, leading to a crisper finish.
  • Dusting Sugar Tips: For an extra touch, dust the crullers with icing sugar while they're hot, so it melts slightly into their crispy surface for that sweet surprise in every bite.

Sleepy Hollow Crullers Recipe FAQs

What’s the best way to choose ripe ingredients for my Sleepy Hollow Crullers?
Absolutely! For these crullers, focus mainly on using fresh ingredients. Look for butter that’s creamy and smooth, as this enhances the flavor. Ensure the egg is at room temperature for optimal mixing and texture. For flour, an all-purpose variety is ideal, and make sure it’s fresh, with no lumps or off-smells. If using cream, it should be fresh and not past its expiration date for the best results.

How should I store my Sleepy Hollow Crullers for optimal freshness?
I recommend storing the crullers in an airtight container at room temperature for up to 2 days. This way, they maintain their delightful crispiness. If you want to keep them longer, they can be stored in the refrigerator for up to 3 days, but be aware that refrigeration might make them lose some crunch.

Can I freeze my Sleepy Hollow Crullers? If so, how?
Absolutely! To freeze your crullers, start by waiting until they're completely cool. Then, wrap each one tightly in plastic wrap, ensuring no air can get in. Place the wrapped crullers in a freezer-safe bag or container, and they can be frozen for up to 2 months. Once you’re ready to enjoy, reheat them in an oven at 350°F (175°C) for about 5–7 minutes until they’re warm and crispy again.

What should I do if my cruller dough is too sticky or tough?
If your dough feels too sticky while handling, try adding a tablespoon of flour at a time until it’s manageable. It should be soft but not tacky. Conversely, if the dough seems too tough, you can mix in a little more cream to achieve the desired softness. Remember, the key to nice crullers is a consistent dough texture that allows for easy shaping.

Are there any dietary considerations I should be aware of with Sleepy Hollow Crullers?
Very much so! If you or your guests have dietary restrictions, these crullers can easily be adjusted. Substitute the butter with margarine for a dairy-free alternative, and use a gluten-free flour blend to make them suitable for gluten-sensitive eaters. Always double-check labels for any allergens, especially if you're serving these to guests with allergies.

Can I add flavors or toppings to my Sleepy Hollow Crullers?
Yes, indeed! I often infuse the dough with spices like cinnamon or nutmeg for a twist on flavor. After frying, you can drizzle a chocolate glaze on top or add flavored icing sugar to give your crullers a unique flair. The more the merrier; let your creativity shine while making these delicious treats!

Sleepy Hollow Cruller

Sleepy Hollow Cruller: Light, Crispy Delights Await

Sleepy Hollow Cruller are light, crispy pastries that evoke nostalgia and warmth, perfect for gatherings.
Print Recipe Pin Recipe
Prep Time 15 minutes mins
Cook Time 10 minutes mins
Cooling Time 2 minutes mins
Total Time 27 minutes mins
Servings: 8 crullers
Course: Dessert
Cuisine: Dutch-American
Calories: 150
Ingredients Equipment Method Nutrition Notes

Ingredients
  

For the Dough
  • 1/2 cup Butter Can substitute with margarine for a dairy-free option
  • 1 large Egg Ensure it's at room temperature
  • 2 cups Flour Use all-purpose or gluten-free blend if needed
  • optional cup Cream Enhances moisture
For Frying
  • 2 inches Oil Neutral oil like canola or vegetable
For Dusting
  • to taste cup Icing Sugar Adjust based on sweetness preference

Equipment

  • large mixing bowl
  • hand mixer
  • Rolling Pin
  • Deep pan
  • slotted spoon
  • Paper towels

Method
 

Step-by-Step Instructions
  1. Begin by creaming butter in a large mixing bowl using a hand mixer until light and fluffy, about 2-3 minutes. Add a room temperature egg and mix until fully combined. Gradually sift in flour until the dough is soft and smooth, incorporating cream if the mixture feels too stiff.
  2. Lightly flour a clean surface and roll the dough out to approximately 1/6 inch thick. Cut into strips about 3/4 inch wide. Twist each strip around the handle of a wooden spoon to create the corkscrew shape.
  3. Heat a deep pan with about 2 inches of oil to 350°F (175°C). Gently slide the twisted dough into the oil, frying for 2-3 minutes on each side until golden brown.
  4. Use a slotted spoon to remove crullers from the oil and drain on paper towels for about 1-2 minutes. Dust generously with icing sugar while still warm.

Nutrition

Serving: 1crullerCalories: 150kcalCarbohydrates: 20gProtein: 2gFat: 7gSaturated Fat: 4gPolyunsaturated Fat: 1gMonounsaturated Fat: 2gCholesterol: 40mgSodium: 200mgPotassium: 30mgSugar: 8gVitamin A: 200IUCalcium: 20mgIron: 0.5mg

Notes

Ensure your dough is not too sticky. Using room temperature ingredients helps in achieving the best texture. Fry in batches to avoid overcrowding.

Tried this recipe?

Let us know how it was!

Cemetery Soup: A Cozy Horror-Inspired Autumn Delight

October 7, 2025 by Grace Snow Leave a Comment

As the leaves crunch underfoot and daylight starts to fade, there's a certain thrill that ignites my kitchen. Enter Cemetery Soup, a dish that merges savory comfort with a touch of Halloween whimsy. Inspired by the chilling tales of Scary Stories to Tell in the Dark, this recipe captures the spirit of the season with its hearty blend of fresh vegetables and aromatic herbs. The best part? It’s not just delicious; it’s quick to prepare, taking just over an hour to embrace that cozy fall vibe. This soup isn’t only a feast for the senses; it's also a delightful addition to your Halloween festivities, certain to charm both family and friends. So, are you ready to stir up some spooky culinary fun?

Why is Cemetery Soup a Halloween Must?

Perfectly Themed: This dish transforms your dinner table into a spooky, literary wonderland, perfect for your Halloween gatherings.

Heartwarming Comfort: Each bowl serves a robust, hearty flavor that warms the soul, making it ideal for chilly autumn nights.

Quick Preparation: The soup comes together in just over an hour, allowing you to host or enjoy your festivity without the fuss.

Versatile Recipe: Feel free to adjust ingredients, substituting beef with chickpeas for a vegetarian twist or adding seasonal veggies like bell peppers.

Nostalgic Charm: Inspired by the beloved Scary Stories to Tell in the Dark, it brings delightful nostalgia, perfect for sharing stories around the dinner table.

Serve it alongside some crusty bread and watch it disappear! For more warming soups, you might enjoy our Lemon Chicken Soup or Zuppa Toscana Soup for a comforting meal.

Cemetery Soup Ingredients

For the Base

  • Water – Use chicken or vegetable broth for extra flavor.
  • Onions – Yellow or white onions work best for a savory foundation.

For the Vegetables

  • Carrots – Adds sweetness and crunch; consider parsnips for a lovely twist.
  • Green Beans – Provides texture and color; both fresh or frozen work beautifully.
  • Corn – Brings sweetness and texture; feel free to opt for canned or frozen.
  • Potatoes – Yukon gold or red potatoes add creaminess and body to the mix.

For the Heartiness

  • Barley – Adds a lovely heartiness; replace with rice or quinoa for a gluten-free option.
  • Beef – Offers depth of flavor; you can omit it for a vegetarian version.

For Seasoning

  • Salt & Pepper – Essential seasonings to elevate taste; adjust to your liking.
  • Thyme – Fresh or dried thyme adds herbal notes to the soup.
  • Bay Leaves – Enhance the depth of flavor, but remember to remove them before serving.

This Cemetery Soup is not just a dish; it’s an invitation to embrace the fall spirit while stirring up some spooky fun!

Step‑by‑Step Instructions for Cemetery Soup

Step 1: Prepare the Base
In a large pot, add 8 cups of water or chicken broth and bring it to a boil over high heat. This aromatic foundation will set the stage for your Cemetery Soup. As the liquid heats up, gather your ingredients and chop the onions, carrots, and potatoes, ensuring you have everything ready for the next steps.

Step 2: Add the Vegetables
Once the water is boiling, carefully add the chopped carrots, green beans, corn, barley, onions, and potatoes to the pot. Stir them together gently and allow the mixture to return to a rolling boil. This vibrant medley will cook down, softening and releasing their flavors into the soup.

Step 3: Season the Soup
Sprinkle in salt, pepper, thyme, and add the bay leaves to the bubbling pot. Stir well to ensure the seasonings are evenly distributed throughout the Cemetery Soup. Allow the soup to simmer gently, reducing the heat to low once it reaches a boil, enhancing the flavor profiles as they meld together.

Step 4: Incorporate the Beef
Next, add the diced beef into the simmering mixture, stirring to combine. Let the soup simmer uncovered for about 55 minutes, stirring occasionally. Watch as the vegetables become tender and the barley cooks through, creating a thick, hearty broth filled with comforting goodness.

Step 5: Final Touches
After simmering, taste your Cemetery Soup and adjust the seasoning with additional salt and pepper if needed. Remove the bay leaves carefully, as they’ve done their job infusing the dish with flavor. Serve hot, and enjoy the warm, comforting essence of this spooky seasonal delight!

Expert Tips for Cemetery Soup

  • Flavor Boost: Use bone broth instead of water for a richer, deeper flavor in your Cemetery Soup. It adds a wonderful complexity you’ll love!

  • Texture Check: Be cautious with long cooking times; while flavors develop, overcooking can mush the vegetables. Aim for tender yet firm textures.

  • Ingredient Substitutions: Feel free to swap beef with chickpeas or lentils for a vegetarian Cemetery Soup. This offers both nutrition and an earthy taste.

  • Seasoning Balance: Taste your soup during cooking! Adjust salt and pepper as necessary to make the flavors pop without overpowering them.

  • Storage Tips: Leftovers can be refrigerated for up to three days. Reheat gently on the stove to maintain the soup's comforting texture.

What to Serve with Cemetery Soup

As you gather around the table with loved ones, consider these delightful pairings that elevate the warmth and charm of your Halloween feast.

  • Crusty Bread: The perfect companion for dipping, its chewy texture enhances every savory spoonful of soup.
  • Garlic Bread: A fragrant twist that brings an irresistible aroma to the table, making each bite a little more scrumptious.
  • Autumn Salad: A mix of greens, apples, and nuts for a refreshing crunch, balancing the soup's hearty nature.
  • Roasted Pumpkin Seeds: Add a nutty crunch that plays beautifully against the smooth broth, offering an unexpected textural element.
  • Spiced Apple Cider: Warm and comforting, this sweet drink complements the flavors of the soup while embodying the essence of fall.
  • Cheesy Scarecrow Nachos: Layered with melted cheese and spicy toppings, these nachos provide a fun, festive element to your spread.
  • Chocolate-Covered Pretzels: A sweet and salty snack, perfect for indulging as you share spooky stories around the table.
  • Pumpkin Pie: A classic dessert to conclude a cozy meal, offering a sweet note that perfectly contrasts the savory soup.
  • Cranberry Juice: Its tartness brightens up the meal while embodying the flavors of the season.

Cemetery Soup: Customize Your Way

Start your culinary adventure with Cemetery Soup by adding your personal touch to this delightful dish!

  • Vegetarian Swap: Replace beef with chickpeas or lentils for a hearty twist that maintains all the comforting flavors. You'll be amazed by the nutty aroma this change brings!

  • Gluten-Free Alternative: Substitute barley with quinoa or rice for a gluten-free version. Both options will lend a unique texture while keeping the soup hearty and satisfying.

  • Veggie Variety: Toss in extra vegetables such as bell peppers or peas for a splash of color and flavor. Feel free to get creative—zucchini or kale would also be fantastic!

  • Herb Infusion: Enhance the flavor profile by adding fresh herbs like parsley or basil just before serving. These aromatic garnishes will brighten the dish and add freshness.

  • Spice It Up: If you crave heat, sprinkle in some red pepper flakes or diced jalapeños. Adjust according to your spice preference for a warming kick that's perfect for chilly nights!

  • Savory Alternative: Use chicken or vegetable broth instead of water to deepen the soup's savory foundation. This simple swap makes a world of difference!

  • Creamy Touch: Stir in a splash of heavy cream or a dollop of sour cream just before serving for a velvety finish that enriches every spoonful.

  • Smoked Flavor: Add a few drops of liquid smoke for a unique, smoky flavor that enhances the overall depth of your Cemetery Soup. It’s a fun way to intrigue your taste buds!

Embrace the spirit of Halloween with these variations, and don’t forget to pair your soup with warm bread or a delightful side like Santa Soup Savory for a perfect meal!

Make Ahead Options

These Cemetery Soup preparations are perfect for busy home cooks looking to save time during the hectic Halloween season! You can chop and store the vegetables (carrots, green beans, corn, and potatoes) in an airtight container in the refrigerator up to 3 days prior to cooking. Additionally, you can pre-cook the barley and store it separately, which helps maintain its texture. On the day you plan to serve the soup, simply bring your water or broth to a boil, add the prepped vegetables and cooked barley, and follow the final steps, adding the seasoned beef to simmer. This way, you'll enjoy the same delightful flavors of Cemetery Soup with minimal effort.

Storage Tips for Cemetery Soup

Fridge: Store leftovers in an airtight container for up to 3 days. Always let the soup cool to room temperature before sealing to prevent moisture buildup.

Freezer: Cemetery Soup can be frozen in freezer-safe containers for up to 3 months. Ensure it’s cooled completely before transferring to maintain texture.

Reheating: Reheat on the stove over low to medium heat until warmed through. If the soup thickens, add a splash of broth or water to reach your desired consistency.

Temperature Check: Always check the soup’s internal temperature, aiming for 165°F (74°C) before serving to ensure it’s hot and safe to eat.

Cemetery Soup Recipe FAQs

How do I select the right ingredients for Cemetery Soup?
Absolutely! For best flavor, choose fresh, vibrant vegetables. Look for firm, unblemished carrots and green beans, avoiding those with dark spots or wilting. For onions, yellow onions offer a mild sweetness, whereas white ones provide a sharper taste. Starchy potatoes like Yukon gold or red make for a creamy texture, layering delightful flavors into your soup.

How should I store leftovers of Cemetery Soup?
You can store your Cemetery Soup effortlessly! Let it cool to room temperature, then transfer it into an airtight container in the refrigerator. It will stay fresh for up to 3 days. Always remember, when it's time to reheat, do so on low heat to preserve that wonderful comfort texture.

Can I freeze Cemetery Soup for later?
Very! To freeze your Cemetery Soup, allow it to cool completely first. Then, pour it into freezer-safe containers, leaving a little space at the top for expansion during freezing. This soup can be stored in the freezer for up to 3 months. When you’re ready to enjoy it again, simply thaw overnight in the refrigerator and reheat on the stove for a warm, hearty meal.

What should I do if my Cemetery Soup is too thick?
No worries at all! If your soup turns out thicker than desired, simply add a splash of broth or water while reheating. Stir the mixture well to ensure a smooth consistency. Bring it to a gentle simmer and allow it to heat through until you reach your preferred texture.

Is Cemetery Soup suitable for vegetarians?
Absolutely! You can make a delicious vegetarian version by simply omitting the beef and substituting it with protein-rich ingredients like chickpeas or lentils. You can also tweak the vegetable selection, adding in your favorites to personalize the flavors even more, while still keeping all that cozy, hearty goodness!

How long does Cemetery Soup last in the fridge?
It’s best to savor your Cemetery Soup within 3 days when stored properly in the refrigerator. Always ensure it's in an airtight container, and feel free to enjoy it with a splash of excitement stirred in, as you share it with family and friends during your charming fall evenings!

Cemetery Soup

Cemetery Soup: A Cozy Horror-Inspired Autumn Delight

Cemetery Soup is a savory comfort dish blending fresh vegetables and herbs, perfect for Halloween gatherings.
Print Recipe Pin Recipe
Prep Time 15 minutes mins
Cook Time 1 hour hr
Total Time 1 hour hr 15 minutes mins
Servings: 6 servings
Course: Soups
Cuisine: American
Calories: 300
Ingredients Equipment Method Nutrition Notes

Ingredients
  

For the Base
  • 8 cups water or chicken broth Use chicken or vegetable broth for extra flavor.
  • 2 medium onions Yellow or white onions work best.
For the Vegetables
  • 3 medium carrots Adds sweetness and crunch.
  • 2 cups green beans Fresh or frozen work beautifully.
  • 1 cup corn Canned or frozen is acceptable.
  • 2 medium potatoes Yukon gold or red potatoes add creaminess.
For the Heartiness
  • 1 cup barley Replace with rice or quinoa for gluten-free.
  • 1 pound beef Optional for vegetarian version.
For Seasoning
  • 1 teaspoon salt Adjust to taste.
  • 1 teaspoon pepper Adjust to taste.
  • 1 teaspoon thyme Fresh or dried.
  • 2 leaves bay leaves Remove before serving.

Equipment

  • Large pot

Method
 

Step-by-Step Instructions
  1. In a large pot, add 8 cups of water or chicken broth and bring it to a boil over high heat.
  2. Once boiling, add the chopped carrots, green beans, corn, barley, onions, and potatoes.
  3. Sprinkle salt, pepper, thyme, and bay leaves into the pot.
  4. Add the diced beef into the mixture and let it simmer uncovered for about 55 minutes.
  5. Taste and adjust seasoning, then remove bay leaves before serving.

Nutrition

Serving: 1bowlCalories: 300kcalCarbohydrates: 50gProtein: 20gFat: 8gSaturated Fat: 3gPolyunsaturated Fat: 1gMonounsaturated Fat: 2gCholesterol: 40mgSodium: 800mgPotassium: 600mgFiber: 10gSugar: 5gVitamin A: 100IUVitamin C: 25mgCalcium: 4mgIron: 15mg

Notes

For a richer flavor, use bone broth. Leftovers can be refrigerated for up to three days.

Tried this recipe?

Let us know how it was!

Green Apple Monsters: Fun and Crunchy Halloween Snacks

October 4, 2025 by Grace Snow Leave a Comment

Tucked away in the corner of my kitchen during Halloween season, a delicious idea took shape: Green Apple Monsters. These whimsical snacks are not just fun to create; they effortlessly blend health with creativity, making them an ideal choice for the little ones. Picture this—crunchy green apples with creamy peanut butter, transformed into goofy monster mouths that are perfect for parties or after-school celebrations. The best part? They come together in just 20 minutes, so you can avoid any last-minute chaos as the kids come clamoring for something tasty and nutritious. With nut-free options and versatile ingredient swaps available, these delightful Green Apple Monsters are the kind of treat that everyone can enjoy. Ready to unleash your culinary creativity this Halloween? Let’s dive in and bring these adorable monsters to life!

Why Make Green Apple Monsters?

Crisp, Crunchy Goodness: These Green Apple Monsters offer a refreshing and healthy snack that kids will love, ensuring no more sugary chaos.

Quick Prep Time: With only 20 minutes needed to whip these up, they are perfect for busy parents or last-minute party planners.

Nut-Free Options: Easily adaptable for school and parties, substitutes like sunflower seed butter ensure everyone can enjoy these without any worries.

Creative Fun: Let your kids join the fun in assembling their own monsters! Experiment with various fruits and toppings for a unique twist, just like my Coconutty Beans Greens recipe or my Chicken Salad Apples for more delicious ideas.

Playful Presentation: These whimsical treats are not only delicious but also make for an eye-catching centerpiece at any Halloween gathering, guaranteed to be a hit among both kids and adults alike!

Green Apple Monsters Ingredients

For the Apples
• Green Apples – Choose firm varieties for the best texture and a juicy crunch.

For the Filling
• Creamy Peanut Butter – This adds a rich, nutty flavor; opt for almond or sunflower seed butter for nut-free versions.

For the Teeth
• Pumpkin or Sunflower Seeds – Perfect for "monster teeth"; you can substitute with other seeds if desired.

For the Savory Elements
• Cheddar or Colby Jack Cheese – Adds a savory kick; mozzarella or gouda can offer a creamier taste.

For the Monster Eyes
• Candy Eyes – These playful additions bring your monsters to life; chocolate chips can create a different look for a sweet twist.

Step‑by‑Step Instructions for Green Apple Monsters

Step 1: Prepare the Apples
Start by washing 2 to 4 green apples thoroughly under cold water, ensuring all dirt is removed. Then, carefully quarter each apple and remove the core using a knife or apple corer. Cut a V-shape in the flesh of each quarter to create the playful monster mouth. Set the apple quarters aside, ready for delicious fillings.

Step 2: Add Peanut Butter
Using a butter knife, generously spread creamy peanut butter into the V-shaped cavity of each apple quarter. Ensure the peanut butter fills the entire area where the teeth will go to hold them firmly in place. This will create a tasty base for your Green Apple Monsters, combining that luscious nutty flavor with the fresh crunch of the apples.

Step 3: Insert the Teeth
Press pumpkin or sunflower seeds into the peanut butter along the mouth’s edge to form the monster’s teeth. Aim for at least three to four seeds on each apple quarter for a fun and spooky effect. The seeds should stand upright, giving your creations a delightful and playful appearance that’ll enchant both kids and adults.

Step 4: Add Cheese
Now, cut small triangles of cheddar or Colby Jack cheese to suit the size of the apple mouths. Gently insert these cheese pieces behind the seeds to give the appearance of a bouncy monster tongue. The combination of savory cheese with the sweet apple and creamy peanut butter enhances the overall flavor of your Green Apple Monsters.

Step 5: Attach the Eyes
Using a small amount of leftover peanut butter, glue candy eyes onto the top of each monster face. Feel free to adjust their placement for a silly or spooky look—let your creativity shine! This final touch turns your apple quarters into whimsical little monsters, making them even more appealing for your Halloween gatherings.

Step 6: Serve Immediately
Serve your delightful Green Apple Monsters right away to keep their crunchiness intact. Place them on a colorful platter alongside crunchy vegetable sticks or a yogurt dip for added fun. If you have leftovers, store them in an airtight container in the refrigerator for up to three days, but be sure to keep separate components to maintain freshness.

Storage Tips for Green Apple Monsters

Fridge: Keep leftover Green Apple Monsters in an airtight container for up to 3 days to maintain their freshness and crunch.

Components: Store apple halves and fillings separately—this prevents the apples from browning and keeps the peanut butter from becoming soggy.

Assemble Fresh: For the best texture, assemble the components just before serving. This helps preserve the crispness of the apples.

Prevent Browning: If you prepare apples in advance, squirt lemon juice on the cut surfaces to maintain their vibrant color and prevent browning.

Green Apple Monsters Variations

Feel free to unleash your creativity and customize these playful snacks to suit your taste and dietary needs.

  • Nut-Free: Substitute peanut butter with sunflower seed butter for a school-friendly option. Enjoy all the creamy goodness without the worry of allergens.

  • Fruits: Use ripe pears instead of apples for a sweeter and softer bite. This twist creates delightful alternatives that cater to different fruit lovers.

  • Creative Teeth: Try mini marshmallows or dried fruit for unique “teeth.” The added sweetness from marshmallows will have kids giggling with delight!

  • Chocolate Option: Swap peanut butter for a chocolate spread for a dessert version. This decadent twist turns your monsters into a sweet treat that everyone will adore.

  • Mini Monsters: Use cookie cutters to create bite-sized apple shapes for fun portions perfect for parties. It’s like having a monster army ready to tackle any gathering!

  • Flavor Boost: Add a sprinkle of cinnamon to the peanut butter for an extra layer of flavor. This cozy spice can turn your snack into a nostalgic taste experience.

  • Veggie Delight: Replace cheese with thin slices of cucumber for a refreshing twist. This keeps things light and adds a satisfying crunch alongside the apple.

  • Spicy Kick: Introduce a dash of cayenne pepper or chili powder to your peanut butter for an exciting heat level. Your monsters will have a thrilling surprise that adventurous eaters will love!

These variations will keep your Green Apple Monsters lively and different with each batch you make. For even more delicious and healthy ideas, don't forget to check out my Coconutty Beans Greens and Chicken Salad Apples recipes!

What to Serve with Green Apple Monsters?

Elevate your festive gatherings with these delightful pairings that complement the playful energy of your Green Apple Monsters.

  • Crunchy Vegetable Sticks: Pair these vibrant snacks with a colorful assortment of carrots, cucumbers, and bell peppers for a refreshing crunch. The mix of flavors and textures balances the sweetness of the apples perfectly.

  • Creamy Yogurt Dip: A smooth, tangy yogurt dip adds a delightful creaminess that contrasts beautifully with the crunchy apple. You can flavor it up with honey or cinnamon to enhance the festive spirit.

  • Colorful Fruit Salad: Add a rainbow of sliced fruits to the table for a refreshing and healthy option. This light and fruity addition enhances the spirit of the season while keeping things nutritious and fun.

  • Cheese and Crackers Board: Create a small cheese board with assorted cheeses and whole-grain crackers. The savory profiles of the cheeses amplify the sweetness of the apples—it's a celebration of flavors!

  • Mini Marshmallow Treats: Whip up some mini marshmallow treats on the side for an extra dose of fun. Their soft, chewy texture provides a candy-like sweetness that complements the playful theme of your Green Apple Monsters.

  • Sparkling Apple Cider: Serve up chilled sparkling apple cider to keep the fun flowing. The bubbly nature of this drink elevates the festive atmosphere, making it a refreshing counterpart to your spooky snacks.

These sides and accompaniments beautifully elevate your gatherings, making every bite a moment of joy during the Halloween season!

Expert Tips for Green Apple Monsters

Choose the Right Apples: Use firm, blemish-free green apples for the best texture and crunch, ensuring your Green Apple Monsters hold their shape.

Prevent Browning: Squirt a little lemon juice on the cut apple surfaces to keep them looking fresh and lovely during serving.

Assemble Just Before Serving: To maintain the apples' crispness, prepare the components in advance, but assemble each monster right before serving.

Storage Secrets: Keep leftover pieces in a sealed container in the fridge for up to 3 days, but store the fillings separately to maximize freshness.

Get Creative: Encourage kids to personalize their monsters with various toppings, like mini marshmallows or dried fruit, for a unique twist on this fun treat!

Make Ahead Options

These Green Apple Monsters are ideal for meal prep! You can wash, quarter, and core your apples up to 24 hours in advance to save time when assembling your spooky snacks. To maintain their freshness and prevent browning, squeeze a little lemon juice on the cut surfaces before storing them in an airtight container in the refrigerator. You can also prepare the filling components—like the peanut butter, cheese, and seeds—and store them separately for up to 3 days. When you’re ready to serve, simply fill the apple mouths with peanut butter, add the seeds and cheese, and stick on those fun candy eyes. With these make-ahead tips, you’ll create delicious and delightful treats in no time!

Green Apple Monsters Recipe FAQs

How do I select the best green apples?
Absolutely! When choosing green apples, opt for firm, blemish-free varieties like Granny Smith. Look for ones with a shiny skin and a crisp feel; this guarantees a juicy crunch and a vibrant flavor that makes your Green Apple Monsters truly delightful!

What is the best way to store leftover Green Apple Monsters?
To keep those tasty treats fresh, store leftovers in an airtight container in the refrigerator for up to 3 days. However, I recommend storing components separately; place apple halves in one container and fillings in another. This prevents browning and maintains that crispness we all love!

Can I freeze Green Apple Monsters?
It's best to avoid freezing the assembled Green Apple Monsters, as they may lose their delightful crunch. Instead, freeze unused components separately! For best results, spread peanut butter on apple slices and layer in an airtight container, placing parchment paper between layers. This way, they’ll be ready for a quick assembly whenever the craving strikes.

What if my apples turn brown before serving?
If you notice browning, don’t worry! To prevent this, squirt a little lemon juice on the cut surfaces of the apples before assembly. This simple step keeps them looking and tasting fresh, adding a zesty flavor without changing the fun!

Are Green Apple Monsters suitable for children with nut allergies?
Very! These fun treats can easily cater to nut allergies by simply swapping out creamy peanut butter for sunflower seed butter or almond butter. This not only makes them school-friendly but still provides that delightful and creamy texture without compromising on taste.

Can I add other creative fillings to my Green Apple Monsters?
Absolutely! Let your culinary creativity flow. For a sweet twist, you could use chocolate spread instead of peanut butter. Or, for a fruity variation, try soft cream cheese mixed with small bits of dried fruits. The more flavors, the merrier!

Green Apple Monsters

Green Apple Monsters: Fun and Crunchy Halloween Snacks

Delightful Green Apple Monsters are fun and creative Halloween snacks that blend health with enjoyment, perfect for kids and parties.
Print Recipe Pin Recipe
Prep Time 20 minutes mins
Total Time 20 minutes mins
Servings: 4 monsters
Course: Snacks
Cuisine: American
Calories: 150
Ingredients Equipment Method Nutrition Notes

Ingredients
  

For the Apples
  • 2-4 pieces Green Apples Choose firm varieties for the best texture.
For the Filling
  • 1 cup Creamy Peanut Butter Opt for almond or sunflower seed butter for nut-free versions.
For the Teeth
  • 1/4 cup Pumpkin or Sunflower Seeds Substitutes with other seeds if desired.
For the Savory Elements
  • 1/2 cup Cheddar or Colby Jack Cheese Alternatively, use mozzarella or gouda.
For the Monster Eyes
  • 10 pieces Candy Eyes Chocolate chips can be used for a sweet twist.

Equipment

  • Knife
  • Butter knife
  • Apple Corer

Method
 

Step-by-Step Instructions
  1. Wash 2 to 4 green apples and quarter them. Remove the core and cut a V-shape to create monster mouths.
  2. Spread creamy peanut butter into the V-shaped cavity of each apple quarter.
  3. Press pumpkin or sunflower seeds into the peanut butter to form monster teeth.
  4. Cut small triangles of cheese and insert behind the seeds for monster tongues.
  5. Use peanut butter to attach candy eyes on top of each monster face.
  6. Serve immediately on a colorful platter alongside vegetable sticks or yogurt dip.

Nutrition

Serving: 1monsterCalories: 150kcalCarbohydrates: 20gProtein: 4gFat: 7gSaturated Fat: 1gPolyunsaturated Fat: 3gMonounsaturated Fat: 3gSodium: 120mgPotassium: 180mgFiber: 3gSugar: 10gVitamin A: 2IUVitamin C: 10mgCalcium: 4mgIron: 2mg

Notes

To keep apples fresh and prevent browning, squirt lemon juice on cut surfaces. Assemble right before serving for maximum crunchiness.

Tried this recipe?

Let us know how it was!

Ghostly Lasagna: Spooktacular Comfort Food for Family Fun

October 4, 2025 by Grace Snow Leave a Comment

As I strolled through my local farmer's market, the vibrant colors and scents of autumn embraced me. It was then that the playful idea of making Ghostly Lasagna struck—a comforting dish that would bring warmth and smiles to our Halloween gathering. Bursting with layers of tender chicken, creamy ricotta, and fresh spinach, this recipe is not just easy to prepare but is also a fantastic make-ahead option, leaving you more time to create lasting memories with loved ones. Whether you're a seasoned home chef or a kitchen beginner, this family-friendly meal invites everyone to partake, offering variation for dietary preferences like gluten-free and vegetarian options. Ready to add a little spooky fun to your dinner table? Let's dive into crafting this delightful lasagna together!

Why is Ghostly Lasagna a must-try?

Comforting and Whimsical: This delightful dish combines comforting flavors with a fun Halloween twist, making it perfect for family gatherings or spooky parties.
Easy to Prepare: With simple steps and easy-to-find ingredients, even novice cooks can create a stunning centerpiece.
Versatile: Gluten-free or vegetarian? No problem! This recipe offers variations to suit everyone's needs without sacrificing taste.
Make-Ahead Convenience: Prep it a day ahead for stress-free entertaining, allowing you to enjoy more time with your loved ones.
Crowd-Pleasing Appeal: The playful mozzarella ghosts and delicious layers ensure this lasagna is a hit among kids and adults alike. Enjoy with a side of crispy garlic bread or a refreshing caesar salad for a complete meal!

Ghostly Lasagna Ingredients

Get ready to craft the most delightful and spooky dish of the season with these key ingredients!

For the Pasta
• Lasagna Noodles – Essential for the structure of this Ghostly Lasagna; gluten-free options are available to suit dietary needs.

For the Filling
• Cooked Chicken (4 cups, shredded) – A hearty protein source; rotisserie chicken makes preparation quick and convenient.
• Spinach (4 cups, chopped) – Adds freshness and nutrients; can be switched with kale or drained frozen spinach for convenience.
• Ricotta Cheese (4 cups) – Provides creaminess and richness; you can substitute with cottage cheese for a lighter option.

For the Topping
• Shredded Mozzarella Cheese (4 cups) – Key for creating the whimsical ghosts on top; lower moisture content helps retain shape.
• Grated Parmesan Cheese (1 cup) – Enhances flavor and contributes a crispy, golden top layer.
• Black Olives – Serve as spooky “eyes” for the mozzarella ghosts; optional based on preference.

For the Sauce
• Marinara Sauce (6 cups) – The flavorful binder for all the layers; homemade is preferred for an extra touch of freshness.
• Salt and Pepper – Essential for seasoning to your taste.

Now that you have everything you need, let’s prepare to bring some spooky fun into your kitchen with this Ghostly Lasagna!

Step‑by‑Step Instructions for Ghostly Lasagna

Step 1: Preheat the Oven
Begin by preheating your oven to 375°F (190°C) to ensure it’s hot and ready for the Ghostly Lasagna. This temperature will give the cheese a perfect melt while creating a golden-brown topping. Set out a large baking dish and gather your ingredients to streamline the process.

Step 2: Cook the Noodles
In a large pot, bring water to a boil and add a generous amount of salt. Cook the lasagna noodles for about 8-10 minutes, until they are al dente—firm but tender. Once done, drain the noodles and gently lay them flat on a clean kitchen towel to prevent sticking while you prepare the filling.

Step 3: Prepare the Filling
In a medium bowl, thoroughly mix together the ricotta cheese, chopped spinach, salt, and pepper until well combined. This creamy filling is the heart of the Ghostly Lasagna, offering a delightful blend of flavors. Make sure the spinach is evenly distributed, ensuring each bite is packed with goodness.

Step 4: Create the Sauce Layer
Spread a thin layer of marinara sauce across the bottom of your baking dish—this will prevent the noodles from sticking and infuse flavor into the base. Use a spatula to ensure an even coating, creating a solid foundation for the layers to come.

Step 5: Layer the Ingredients
Start layering by placing a layer of cooked noodles over the marinara sauce. Then, add a generous scoop of the ricotta-spinach mixture, followed by the shredded chicken and a handful of shredded mozzarella. Repeat this process until you've exhausted all your ingredients, finishing with a final layer of marinara sauce topped with mozzarella to create a bubbly crown.

Step 6: Form the Mozzarella Ghosts
Use small pieces of mozzarella to fashion ghost shapes atop the last layer of cheese. Space them out to ensure a playful design and, for extra fun, press black olives into the cheese to create spooky eyes. This whimsical touch will elevate your Ghostly Lasagna to a festive masterpiece!

Step 7: Bake the Lasagna
Cover the assembled lasagna with aluminum foil to trap moisture and bake in the preheated oven for 30 minutes. This initial baking will meld the flavors beautifully. After 30 minutes, carefully remove the foil and bake for an additional 10-15 minutes until the cheese is bubbly and golden brown, giving it an inviting look.

Step 8: Rest Before Slicing
Once out of the oven, let your Ghostly Lasagna rest for 10-15 minutes. This crucial step allows the layers to set, making it easier to slice. During this time, the comforting aromas will fill the kitchen, enticing everyone to gather around the table for a delicious meal.

Expert Tips for Ghostly Lasagna

  • Dry the Spinach: Make sure to thoroughly dry your spinach after washing. Excess moisture can lead to a watery lasagna, ruining the delightful layers.

  • Layer Smartly: Stagger your ingredient layers, adding marinara sauce between each. This helps enhance flavors and keeps the lasagna well-bound.

  • Perfect Mozzarella Ghosts: Add the mozzarella ghosts during the last 5 minutes of baking to maintain their playful shape. Alternatively, broil them separately for quick melting.

  • Resting Time: Don’t skip the resting period after baking! Letting the lasagna sit for 10-15 minutes minimizes liquid loss and makes slicing easier, allowing each piece to look as great as it tastes.

  • Make-Ahead Magic: Prepare the Ghostly Lasagna a day in advance and refrigerate it. Just adjust the baking time if it’s cold from the fridge for a stress-free meal.

Ghostly Lasagna Variations & Substitutions

Feel free to personalize your Ghostly Lasagna with these delightful twists that elevate both flavor and comfort!

  • Gluten-Free: Swap in gluten-free lasagna noodles for a dish that fits your dietary needs while keeping all the delicious layers.

  • Vegetarian Delight: Eliminate the chicken and add a variety of veggies, like roasted mushrooms or zucchini, for a hearty, plant-rich option. This gives your lasagna a unique and vibrant flavor profile.

  • Spicy Kick: Stir in diced jalapeños or sprinkle crushed red pepper flakes into the marinara to bring some heat, making each bite an exciting adventure for your taste buds.

  • Plant-Based Option: Replace chicken with hearty lentils or chickpeas. This not only gives protein but also enhances the nutritional value while keeping the flavors robust.

  • Creamy Spin: For those craving richness, incorporate a dollop of mascarpone or cream cheese into the ricotta filling. This extra layer of creaminess can take the texture to a whole new level.

  • Olive Alternatives: If black olives aren't your thing, try cherry tomatoes or mozzarella pearls for the eyes. This playful substitution can bring new flavors and presentation styles that will bring a smile to your table!

When exploring these variations, don't hesitate to pair your Ghostly Lasagna with a side of roasted vegetable medley or a refreshing caesar salad to complete your festive feast. Create your own twist and make this dish truly your own!

Storage Tips for Ghostly Lasagna

Fridge: Store leftovers in an airtight container for up to 3 days. Reheat with a splash of marinara sauce to retain moisture and invigorate the flavors.

Freezer: Unbaked Ghostly Lasagna can be frozen for up to 3 months. Assemble it in advance, cover tightly, and just bake it directly from the freezer with a slight increase in cooking time.

Reheating: When reheating, warm individual portions in the microwave or re-bake in the oven at 350°F (175°C) for approximately 20 minutes until warmed through.

Make-Ahead: Prepare everything a day ahead for a stress-free gathering. Just store the assembled dish in the fridge and adjust baking times as needed.

Make Ahead Options

These Ghostly Lasagna layers are perfect for meal prep enthusiasts! You can assemble the entire dish up to 24 hours in advance, making dinnertime seamless for busy weeknights. Simply prepare the lasagna, cover it tightly with aluminum foil, and refrigerate until you’re ready to bake. When it's time to serve, preheat your oven and bake for an additional 10-15 minutes if chilled. To maintain the quality, be sure to lightly grease the baking dish and ensure your ingredients are fresh prior to assembly. You’ll savor every bite just as much as if it were freshly made, giving you the freedom to focus on what truly matters—creating spooky memories with your loved ones!

What to Serve with Ghostly Lasagna?

Enhance your Halloween feast with delightful pairings that will complement the comforting layers of ghostly goodness.

  • Crispy Garlic Bread: The crunchy texture and rich garlic flavor are the perfect contrast to the creamy lasagna, giving every bite a delightful zing.
  • Roasted Vegetable Medley: A mix of seasonal veggies brings freshness and color to your plate, while the caramelized sweetness complements the savory lasagna beautifully.
  • Caesar Salad: The crisp romaine and creamy dressing provide a refreshing balance to the rich layers of ghostly lasagna, making it a classic accompaniment.
  • Festive Sangria: This fruity drink adds a fun and colorful touch, echoing the playful spirit of Halloween while keeping things light and refreshing.
  • Pumpkin Spice Cupcakes: Finish on a sweet note with these cozy treats, their warm spices harmonizing perfectly with the comforting flavors of the lasagna.
  • Garlicky Spinach Sauté: Reinforce those fresh spinach notes with a quick sauté, offering a delightful texture and enhancing the overall plate with another layer of flavor.
  • Apple Cider: Warm or chilled, this seasonal beverage brightens up the table and pairs wonderfully with the savory elements of your Halloween spread.
  • Chocolate-Dipped Pretzels: For a crunchy, salty-sweet dessert, these treats are both fun and festive, making them a perfect conclusion to your meal that kids will love!

Ghostly Lasagna Recipe FAQs

What type of lasagna noodles should I use?
You can use regular lasagna noodles for this Ghostly Lasagna, but if you're looking for a gluten-free option, I highly recommend using gluten-free lasagna noodles. Many brands offer great alternatives that cook up beautifully, so you won't miss out on the comforting flavors.

How long can I store leftovers in the fridge?
Absolutely! Leftovers can be stored in an airtight container in the fridge for up to 3 days. I usually reheat mine with a splash of marinara sauce to keep it moist and give it a flavor boost, making each bite just as delicious as the first!

Can I freeze unbaked Ghostly Lasagna?
Yes, you can! Assemble your Ghostly Lasagna and cover it tightly with plastic wrap and then aluminum foil. It can be frozen for up to 3 months. When you’re ready to enjoy it, bake it directly from the freezer—just increase the cooking time by about 10-15 minutes.

What if my lasagna turns out watery?
Great question! To prevent a watery lasagna, make sure to dry your spinach thoroughly after washing. Excess moisture is often the culprit. Layering ingredients wisely by staggering with marinara sauce will help too, as it binds flavors and keeps everything together nicely.

Are there any allergy considerations with this recipe?
Yes, definitely! This Ghostly Lasagna contains dairy (ricotta, mozzarella, Parmesan) and gluten (unless using gluten-free noodles). If you're cooking for someone with allergies, I suggest looking for lactose-free cheese options and ensuring that your noodles are certified gluten-free.

Can I make this dish vegetarian-friendly?
Very much so! To adapt the Ghostly Lasagna for vegetarians, simply omit the chicken and amplify the veggie options—think mushrooms, zucchini, or even some delicious roasted red peppers. This way, everyone at your gathering can partake in this spooky delight!

Ghostly Lasagna

Ghostly Lasagna: Spooktacular Comfort Food for Family Fun

Ghostly Lasagna is a comforting, festive dish perfect for Halloween gatherings, featuring layers of chicken, ricotta, and whimsical mozzarella ghosts.
Print Recipe Pin Recipe
Prep Time 30 minutes mins
Cook Time 45 minutes mins
Resting Time 15 minutes mins
Total Time 1 hour hr 30 minutes mins
Servings: 8 slices
Course: Dinner
Cuisine: American
Calories: 400
Ingredients Equipment Method Nutrition Notes

Ingredients
  

For the Pasta
  • 12 oz Lasagna Noodles Gluten-free options available.
For the Filling
  • 4 cups Cooked Chicken Shredded; rotisserie chicken works well.
  • 4 cups Spinach Chopped; can substitute with kale or drained frozen spinach.
  • 4 cups Ricotta Cheese Can substitute with cottage cheese for a lighter option.
For the Topping
  • 4 cups Shredded Mozzarella Cheese Lower moisture content helps retain shape.
  • 1 cup Grated Parmesan Cheese Enhances flavor and provides a crispy top.
  • Black Olives Optional for spooky 'eyes'.
For the Sauce
  • 6 cups Marinara Sauce Homemade preferred for freshness.
  • Salt Essential for seasoning.
  • Pepper Essential for seasoning.

Equipment

  • Large baking dish
  • Large pot
  • medium bowl
  • Spatula
  • Kitchen Towel

Method
 

Step-by-Step Instructions
  1. Preheat your oven to 375°F (190°C).
  2. In a large pot, boil water and add salt. Cook lasagna noodles for 8-10 minutes until al dente, then drain and lay flat on a towel.
  3. Mix ricotta, spinach, salt, and pepper in a medium bowl until well combined.
  4. Spread a layer of marinara sauce on the bottom of the baking dish.
  5. Layer cooked noodles over sauce, add ricotta-spinach mixture, shredded chicken, and mozzarella. Repeat layers and finish with marinara and mozzarella on top.
  6. Form mozzarella ghosts on top and add olive eyes if desired.
  7. Cover with foil and bake for 30 minutes. Remove foil and bake for an additional 10-15 minutes until cheese is bubbly and golden.
  8. Let the lasagna rest for 10-15 minutes before slicing.

Nutrition

Serving: 1sliceCalories: 400kcalCarbohydrates: 40gProtein: 30gFat: 15gSaturated Fat: 8gCholesterol: 70mgSodium: 800mgPotassium: 600mgFiber: 2gSugar: 5gVitamin A: 20IUVitamin C: 15mgCalcium: 25mgIron: 10mg

Notes

For a stress-free meal, prepare Ghostly Lasagna a day prior and refrigerate. Adjust baking times as needed.

Tried this recipe?

Let us know how it was!

Witches Brew Green Pea Soup: A Spooktacular Comfort Bowl

October 4, 2025 by Grace Snow Leave a Comment

As the leaves begin to turn and the air fills with crispness, I find myself craving comfort in a bowl. That’s when my Witches Brew Green Pea Soup comes to the rescue! This vibrant, Halloween-themed delight is not just a feast for the eyes; it offers an easy, customizable way to warm up your gatherings. Packed with the earthy goodness of peas and spinach, it’s vegetarian-friendly and even has dairy-free options, making it a crowd-pleaser for all ages. Plus, it's a breeze to whip together, allowing you to spend more time enjoying the festivities and less time slaving in the kitchen. Are you ready to brew up some magic this Halloween?

Why is Witches Brew Green Pea Soup Special?

Festive Appeal: This soup isn’t just a meal; it’s a seasonal celebration, perfect for Halloween gatherings!

Colorful Presentation: The vibrant green hue makes it visually striking, captivating both children and adults alike.

Customizable Deliciousness: Add your favorite toppings like sautéed mushrooms or toasted pumpkin seeds for a personalized touch.

Easy to Make: With simple ingredients and straightforward steps, you’ll have a comforting dish ready in no time—ideal for busy cooks!

Nutritional Value: Packed with veggies like peas and spinach, it’s a nutritious option that warms both the heart and the stomach.

Consider pairing it with homemade pumpkin spice muffins or serving alongside warm apple cider for a complete, festive meal!

Witches Brew Green Pea Soup Ingredients

Get ready to brew a magical cauldron of flavor!

For the Soup

  • Olive Oil – Adds moisture and richness to the soup; can substitute with avocado oil.
  • Onion – Provides sweetness and depth of flavor; any variety works beautifully.
  • Garlic – Enhances flavor with aromatic qualities; fresh or 1/4 tsp garlic powder works fine.
  • Potatoes – Contributes to a creamy texture when blended; Yukon Gold is preferred.
  • Frozen Green Peas – Main ingredient for sweetness and vibrant color; fresh peas can be used if in season.
  • Baby Spinach – Adds nutritional value and a pop of green; kale is a good substitute.
  • Ground Pepper – To taste; enhances the overall flavor profile.
  • Salt – Essential for savoriness; sea salt or kosher salt is recommended.
  • Vegetable Stock – Provides a flavorful liquid base; can be homemade or store-bought.

For the Garnish

  • Mushrooms – Adds umami and texture; experiment with shiitake or cremini varieties.
  • Heavy Cream or Coconut Milk – For richness in garnish; almond milk can be a lighter alternative.
  • Micro Greens – A lovely aesthetic garnish to elevate presentation.
  • Ground Black Pepper & Crushed Red Pepper – For finishing touches and flavorful enhancement.

Brew up this Witches Brew Green Pea Soup and let the cozy vibes enchant your Halloween gathering!

Step‑by‑Step Instructions for Witches Brew Green Pea Soup

Step 1: Heat Olive Oil
Begin by warming 2 tablespoons of olive oil in a large pot over medium heat. Allow the oil to shimmer, indicating it’s ready for the next step. The beautiful golden hue will impart rich flavor to your Witches Brew Green Pea Soup.

Step 2: Sauté Aromatics
Add 1 chopped onion and 2 minced garlic cloves to the pot, stirring frequently. Cook for about 5 minutes until the onion becomes translucent and fragrant, filling your kitchen with a comforting aroma. This aromatic base is essential for a delicious soup.

Step 3: Cook Potatoes
Incorporate 2 diced Yukon Gold potatoes into the pot, stirring occasionally. Let them sauté for approximately 5 minutes until they become semi-soft, resulting in a creamy texture for your Witches Brew Green Pea Soup once blended.

Step 4: Mix the Greens
Next, stir in 4 cups of frozen green peas and 2 cups of baby spinach. Allow the mixture to cook for just 1 minute, ensuring the vivid green color brightens up. This step adds a nutritional boost and enhances the vibrant look of your soup.

Step 5: Add Stock
Pour in 4 cups of vegetable stock, and increase the heat to bring the mixture to a gentle boil. Once boiling, reduce the heat to a low simmer and let it cook for 10-15 minutes, or until the potatoes are tender. This simmering melds all the flavors beautifully.

Step 6: Blend Soup
Carefully transfer the mixture to a blender, blending until smooth and creamy. If needed, work in batches to avoid overflow. Return the blended soup to the pot, heating it briefly to warm through. This will ensure a velvety texture in your Witches Brew Green Pea Soup.

Step 7: Sauté Mushrooms
In a separate pan, heat 1 tablespoon of olive oil over medium heat. Add 1 cup of sliced mushrooms and sauté for about 1 minute, adding a dash of stock for moisture, until they're tender. This deliciously enhances the garnish for your soup.

Step 8: Serve
Ladle the Witches Brew Green Pea Soup into bowls and adorn with a swirl of heavy cream or coconut milk. Top with the sautéed mushrooms and a sprinkle of microgreens for presentation. This final touch transforms your soup into a stunning Halloween feast!

What to Serve with Witches Brew Green Pea Soup?

Indulging in a bowl of vibrant green comfort will have you dreaming of delightful pairings that elevate your Halloween feast.

  • Crusty Bread: Perfect for dipping and soaking up the soup, its rustic texture adds a heartiness that complements the smoothness of the soup.
  • Pumpkin Spice Muffins: These sweet treats bring a festive fall flavor, making your meal cozy and inviting. A lovely contrast to the savory notes of the soup.
  • Garlic Breadsticks: Crispy on the outside and soft on the inside, they provide a satisfying crunch that balances the velvety soup perfectly.
  • Sautéed Greens: A side of sautéed kale or Swiss chard enhances the meal's nutritional value while offering a fresh, earthy flavor that marries well with the soup’s sweetness.
  • Cheese Platter: Offer a variety of cheeses like sharp cheddar and creamy brie, which provide rich, contrasting flavors that enhance the experience of the Witches Brew Green Pea Soup.
  • Apple Cider: A warm mug of spiced apple cider beautifully complements the soup, adding a seasonal touch that invokes the spirit of autumn.

With these delightful options by your side, your Halloween gathering will surely be enchanting and memorable!

Make Ahead Options

These Witches Brew Green Pea Soup is perfect for busy home cooks who love to meal prep! You can prepare the soup base—completing steps 1 through 6—up to 24 hours in advance. Simply blend and store the soup in an airtight container in the refrigerator. When you're ready to serve, just reheat the soup over medium heat, stirring occasionally, and prepare your sautéed mushrooms (step 7) fresh to maintain their texture and flavor. If you want to enjoy the soup later, it can also be frozen for up to 3 months; just be sure to cool it completely before freezing. This preparation allows you to enjoy a delicious, comforting bowl without the fuss on the day of your gathering!

Expert Tips for Witches Brew Green Pea Soup

  • Perfectly Textured Soup: Blend until fully smooth to ensure a creaminess that delights every spoonful; no chunks should remain to maintain the luxurious feel.

  • Seasoning Wisdom: Always taste before serving! Adjust the salt and pepper as needed; often, a pinch more can elevate the flavors of your Witches Brew Green Pea Soup.

  • Mushroom Magic: Avoid overcooking the mushrooms; sauté just until tender for optimal texture. This step ensures every bite is a delightful experience.

  • Storage Savvy: Store any leftovers in an airtight container in the fridge for up to 3 days. Reheat gently to keep that comforting warmth!

  • Customize with Care: Feel free to add your favorite toppings, but ensure they complement the soup's flavors. Experiment with textures like crispy pumpkin seeds or creamy coconut milk.

How to Store and Freeze Witches Brew Green Pea Soup

Fridge: Store your Witches Brew Green Pea Soup in an airtight container for up to 3 days. Be sure to let it cool before sealing to maintain freshness.

Freezer: If you want to keep it longer, freeze the soup in freezer-safe containers for up to 1 month. Label containers with the date for easy tracking.

Reheating: Reheat the soup gently on the stove over medium heat, stirring occasionally. Add a splash of vegetable stock or water if it seems too thick after thawing, ensuring a smooth consistency.

Witches Brew Green Pea Soup Variations

Customize your Witches Brew Green Pea Soup for a unique twist that tantalizes the taste buds!

  • Dairy-Free: Substitute heavy cream with coconut milk for a creamy, plant-based option that still delivers on richness.

  • Nutritious Greens: Add in chopped broccoli or kale for an extra layer of nutrition and a delightful burst of color.

  • Spicy Kick: Spice things up by adding diced jalapeños or a dash of cayenne pepper for those who love a bit of heat!

  • Mushroom Medley: Experiment with different mushroom varieties like shiitake or oyster for a deliciously rich umami flavor.

  • Protein Boost: Toss in some cooked lentils or chickpeas for heartiness and a protein-packed finish that makes this soup more filling.

  • Crunch Factor: Add toasted pumpkin seeds or a sprinkle of crispy shallots on top for delightful crunch and extra flavor layers.

  • Smoky Essence: For a depth of flavor, sprinkle some smoked paprika as a finishing touch; it complements the sweetness of the peas beautifully.

Why not serve this spooktacular delight alongside some tasty sides like Zuppa Toscana Soup or a warming bowl of Lemon Chicken Soup? Your Halloween gathering will be truly unforgettable!

Witches Brew Green Pea Soup Recipe FAQs

What type of peas should I use for the soup?
Absolutely! Frozen green peas are perfect for this recipe, providing sweetness and vibrant color. If you have access to fresh peas during their season, feel free to use them for an even fresher taste. Just make sure to shell them before adding!

How should I store leftover Witches Brew Green Pea Soup?
Store your Witches Brew Green Pea Soup in an airtight container in the refrigerator for up to 3 days. Make sure it cools down before sealing to maintain its delicious flavor and freshness.

Can I freeze Witches Brew Green Pea Soup?
Yes, you can freeze it! To store, pour the cooled soup into freezer-safe containers, leaving about an inch of space at the top for expansion. Label with the date, and it should be good for up to 1 month. When you’re ready to enjoy it again, just thaw in the refrigerator overnight and reheat gently on the stove.

What if my soup is too thick after freezing?
No worries! If your Witches Brew Green Pea Soup seems too thick after thawing, just add a splash of vegetable stock or water and give it a good stir. Heat it gently on medium, and you’ll have that velvety texture back in no time!

Is this soup suitable for people with dietary restrictions?
Definitely! This soup is vegetarian and can easily be made dairy-free by substituting heavy cream with coconut milk or almond milk. Always check ingredient labels for possible allergens, especially with stock and garnishes, to ensure it aligns with your dietary needs.

What toppings work best for the soup?
The more, the merrier! Try adding sautéed mushrooms for a savory touch, or toasted pumpkin seeds for crunch. Microgreens add a beautiful presentation, while a pinch of smoked paprika will elevate the flavor profile beautifully. Enjoy customizing it to fit your taste!

Witches Brew Green Pea Soup

Witches Brew Green Pea Soup: A Spooktacular Comfort Bowl

Witches Brew Green Pea Soup is a vibrant, Halloween-themed delight that combines peas and spinach in a quick, customizable recipe.
Print Recipe Pin Recipe
Prep Time 15 minutes mins
Cook Time 30 minutes mins
Total Time 45 minutes mins
Servings: 4 bowls
Course: Soups
Cuisine: Vegetarian
Calories: 250
Ingredients Equipment Method Nutrition Notes

Ingredients
  

For the Soup
  • 2 tablespoons Olive Oil Can substitute with avocado oil
  • 1 medium Onion Any variety works beautifully
  • 2 cloves Garlic Fresh or 1/4 tsp garlic powder works fine
  • 2 medium Yukon Gold Potatoes Diced
  • 4 cups Frozen Green Peas Fresh peas can be used if in season
  • 2 cups Baby Spinach Kale is a good substitute
  • to taste Ground Pepper
  • to taste Salt Sea salt or kosher salt is recommended
  • 4 cups Vegetable Stock Can be homemade or store-bought
For the Garnish
  • 1 cup Mushrooms Sliced, shiitake or cremini recommended
  • to taste Heavy Cream or Coconut Milk Almond milk can be a lighter alternative
  • to taste Micro Greens For garnish
  • to taste Ground Black Pepper For finishing touches
  • to taste Crushed Red Pepper For finishing touches

Equipment

  • Large pot
  • Blender
  • Skillet

Method
 

Instructions
  1. Heat 2 tablespoons of olive oil in a large pot over medium heat.
  2. Add 1 chopped onion and 2 minced garlic cloves to the pot, stirring frequently until translucent.
  3. Incorporate 2 diced Yukon Gold potatoes, sautéing for approximately 5 minutes.
  4. Stir in 4 cups of frozen green peas and 2 cups of baby spinach, cooking for just 1 minute.
  5. Pour in 4 cups of vegetable stock and bring to a gentle boil, then reduce to a low simmer for 10-15 minutes.
  6. Blend the mixture until smooth and creamy, then heat briefly if needed.
  7. In a separate pan, heat 1 tablespoon of olive oil, add 1 cup of sliced mushrooms and sauté until tender.
  8. Ladle the soup into bowls, top with heavy cream or coconut milk, sautéed mushrooms, and microgreens.

Nutrition

Serving: 1bowlCalories: 250kcalCarbohydrates: 35gProtein: 7gFat: 10gSaturated Fat: 2gPolyunsaturated Fat: 2gMonounsaturated Fat: 5gSodium: 600mgPotassium: 700mgFiber: 8gSugar: 5gVitamin A: 3000IUVitamin C: 20mgCalcium: 80mgIron: 3.5mg

Notes

Perfectly textured soup, always taste and adjust seasoning before serving, avoid overcooking mushrooms, store leftovers in the fridge for up to 3 days.

Tried this recipe?

Let us know how it was!
  • « Previous Page
  • 1
  • …
  • 16
  • 17
  • 18
  • 19
  • 20
  • …
  • 67
  • Next Page »

Welcome!

Hi, I’m Grace, a Sydney-based home cook with a passion for bold flavors and trending ingredients. Whether you’re a busy beginner or a seasoned foodie, you’ll find dishes here that are fresh, fun, and full of flavor.

More about me

Popular Recipes

  • Autumn Harvest Grain Salad with Cranberries
    Autumn Harvest Grain Salad with Cranberries for Cozy Nights
  • Ground Beef Hot Honey Bowl
    Ground Beef Hot Honey Bowl for a Flavor-Packed Dinner Enjoyment
  • Autumn Harvest Grain Salad with Cranberries
    Autumn Harvest Grain Salad with Cranberries for Cozy Nights
  • Ground Beef Hot Honey Bowl
    Ground Beef Hot Honey Bowl for a Flavor-Packed Dinner Enjoyment

Footer

↑ back to top

About

  • Privacy Policy
  • Disclaimer
  • Terms & Conditions

Newsletter

  • Sign Up! for emails and updates

Contact

  • About me
  • Contact me

Copyright © 2025 TastyTrendIngredients