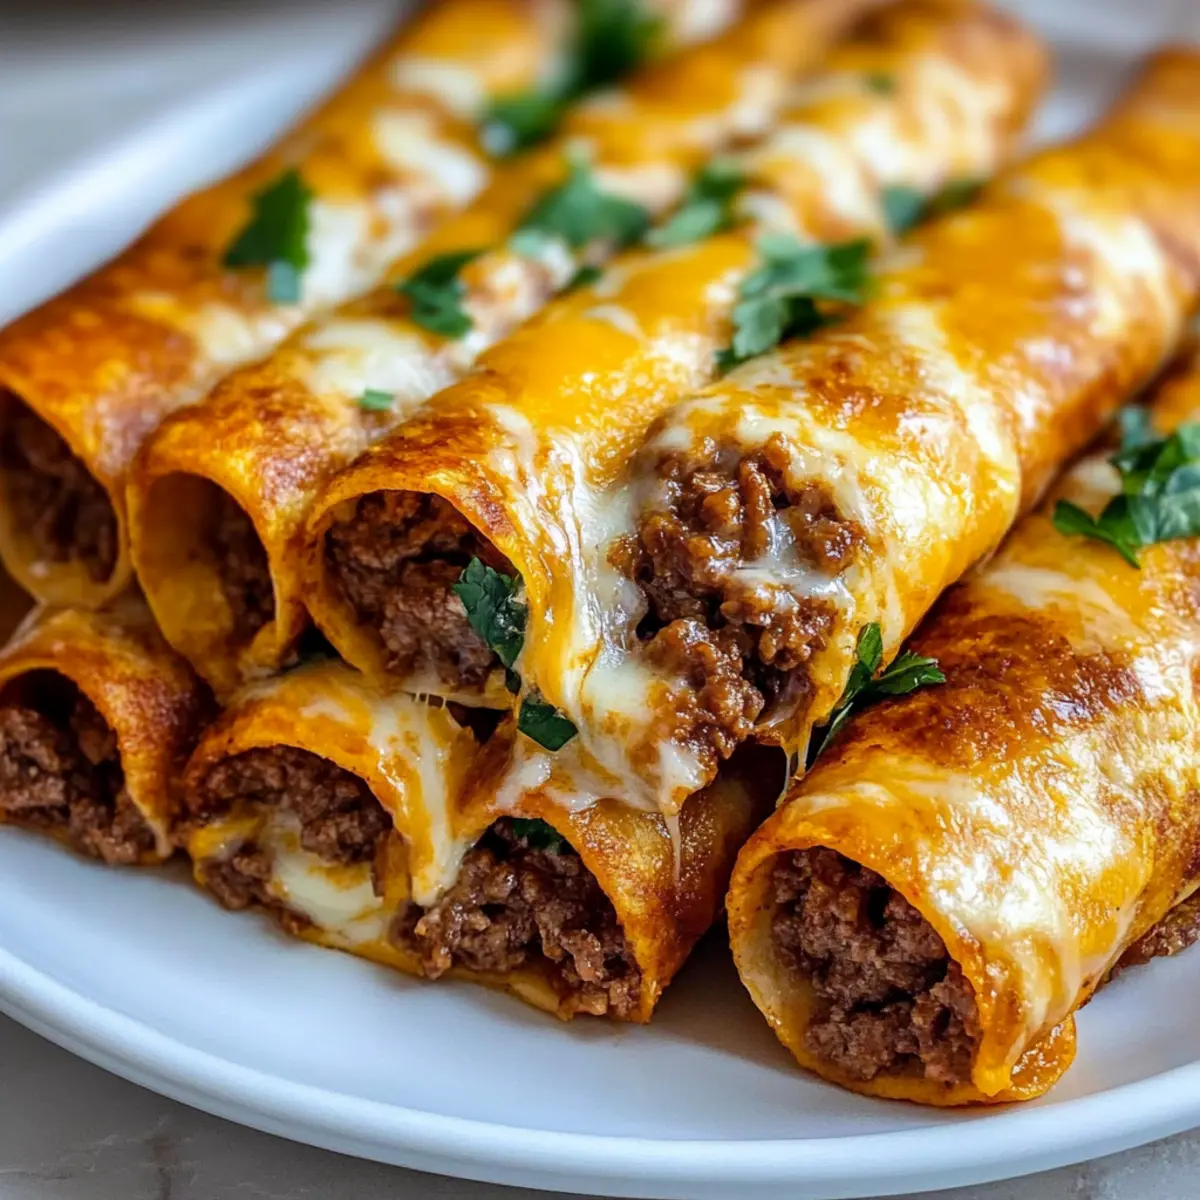
tastytrendingredients

  • Home
  • Recipes
    • Appetizers
    • Breakfast
    • Dessert
    • Dinner
    • Drinks
    • Salads
    • Snacks
    • Soups
  • About me
  • Contact me
menu icon
go to homepage
  • Home
  • Recipes
    • Appetizers
    • Breakfast
    • Dessert
    • Dinner
    • Drinks
    • Salads
    • Snacks
    • Soups
  • About me
  • Contact me
search icon
Homepage link
  • Home
  • Recipes
    • Appetizers
    • Breakfast
    • Dessert
    • Dinner
    • Drinks
    • Salads
    • Snacks
    • Soups
  • About me
  • Contact me
×

Sweet and Chewy Springtime Crinkle Cookies for a Festive Treat

March 25, 2026 by Grace Snow Leave a Comment

With the arrival of spring, the kitchen beckons for a splash of color and bright flavors. That’s why I can't help but crave these Springtime Crinkle Cookies—an easy dessert that’s as fun to make as it is to eat! They boast a delightful chewy center with perfectly crisp edges, making them a joy for both seasoned bakers and novices alike. Not only are these pastel delights perfect for adding a festive touch to your Easter table, but they also bring a sense of warmth to those sunny afternoons spent with friends and family. Whether you're planning a springtime gathering or simply want to treat yourself, these cookies will become a favorite in no time. So, are you ready to roll up your sleeves and whip up something special?

Why Are Springtime Crinkle Cookies a Must-Try?

Vibrant Colors: These cookies are not just delicious; their pastel hues bring joy to any table, making them a feast for the eyes as well as the palate.

Easy to Make: With straightforward steps, even beginner bakers will feel confident whipping up these delightful treats.

Perfectly Chewy: Enjoy a delightful chewiness at their center that contrasts beautifully with the crisp edges, ensuring each bite is satisfying.

Versatile Flavor: The subtle vanilla and optional almond essence make them endlessly customizable—try other extracts like lemon for a zesty twist!

Ideal for Sharing: Perfect for Easter gatherings or springtime picnics, these cookies are sure to delight friends and family alike, creating happy moments around the table.

Try Pairing: For more flavor inspiration, check out my Eggnog Cookies Soft or Thumbprint Cookies Melt.

Springtime Crinkle Cookie Ingredients

For the Cookie Base

  • All-Purpose Flour – Provides the necessary structure for your Springtime Crinkle Cookies.
  • Baking Powder – Helps the cookies rise and achieve a light, airy texture.
  • Salt – Balances the sweetness and enhances the overall flavor.
  • Unsalted Butter (softened) – Adds richness and moisture for a tender crumb.
  • Granulated Sugar – Sweetens your cookies and contributes to their chewy consistency.
  • Large Eggs – Binds the ingredients together and adds moisture to the dough.
  • Vanilla Extract – Imparts a comforting aroma and rich flavor.
  • Almond Extract (optional) – Introduces a subtle nutty nuance, giving the cookies depth.

For Coating and Coloring

  • Powdered Sugar – Coats the cookies to create that signature crinkle appearance.
  • Gel Food Coloring (pastel shades) – Provides vibrant color without altering the dough consistency; ideal for a festive look.

With these ingredients on hand, you'll be well-prepared to create these delightful Springtime Crinkle Cookies!

Step‑by‑Step Instructions for Springtime Crinkle Cookies

Step 1: Preheat the Oven
Begin by preheating your oven to 350°F (175°C). While the oven heats up, line a baking sheet with parchment paper, ensuring an easy release of your beautiful Springtime Crinkle Cookies. This setup will prevent sticking and make cleanup a breeze, allowing you to focus on creating these delightful pastel treats.

Step 2: Mix the Dry Ingredients
In a medium bowl, whisk together the all-purpose flour, baking powder, and salt. This crucial step helps evenly distribute the leavening agent and ensures your cookies rise beautifully. Set the bowl aside, taking in the comforting scent of fresh flour, as we move on to the next step of crafting our cookie dough.

Step 3: Cream the Butter and Sugar
In a large bowl, use a mixer to beat the softened unsalted butter and granulated sugar until the mixture becomes light and fluffy, about 3–4 minutes. The mixture should appear pale and airy, indicating it's perfectly whipped. This step is essential for achieving those chewy centers in your Springtime Crinkle Cookies, so take your time.

Step 4: Incorporate the Eggs and Extracts
Add the large eggs to the butter and sugar mixture one at a time, mixing well after each addition. Then, stir in the vanilla and optional almond extracts. This aromatic addition will enhance the flavor profile of your cookies. The batter should be smooth and cohesive, ready to embrace the dry ingredients.

Step 5: Combine Wet and Dry Ingredients
Gradually add the dry mixture to the wet ingredients, mixing gently with a spatula until a thick dough forms. Be careful not to overmix, as we want our cookie dough to maintain a tender texture. You’ll notice the beautiful dough becoming cohesive and slightly tacky—this is a good sign!

Step 6: Color the Dough
Divide the dough into several portions, depending on how many pastel colors you'd like for your cookies. Add a few drops of gel food coloring to each portion, folding the dough until the color is evenly distributed. The vibrant hues will give your Springtime Crinkle Cookies that cheerful, festive look, making them perfect for any celebration.

Step 7: Chill the Dough
Cover the colored dough portions with plastic wrap and chill them in the refrigerator for at least 30 minutes. Chilling the dough will help firm it up for easy rolling and enhance the overall texture of your cookies, ensuring they are just the right consistency when baked.

Step 8: Roll and Coat Cookie Balls
Once chilled, preheat your oven (if needed) and scoop tablespoon-sized balls of dough. Roll each ball in powdered sugar until completely coated. Their white powdered sugar jackets will create the signature crinkle effect once baked. Place the dough balls on the prepared baking sheet, spacing them about 2 inches apart to allow for spreading.

Step 9: Bake the Cookies
Slide the baking sheet into your preheated oven and bake for 10–12 minutes. Keep an eye on them until the tops crack and the edges are set, while the centers remain delectably soft. The delightful fragrances of the Springtime Crinkle Cookies will fill your kitchen, signaling that they’re almost ready!

Step 10: Cool the Cookies
After baking, let the cookies cool on the baking sheet for 5 minutes before transferring them to a wire rack. This initial cooling will allow the cookies to set properly, while the wire rack will ensure they cool completely, maintaining that perfect chewy texture. Enjoy the sight of your beautiful pastel cookies!

Springtime Crinkle Cookies: Fun Variations

Feel free to get creative and put your own spin on these delightful cookies before they hit the oven!

  • Citrus Twist: Substitute almond extract with lemon or orange for a zesty flavor that brightens each bite. The vibrant citrus notes will transport you to sun-kissed spring afternoons!

  • Color Play: Experiment with vibrant gel food coloring to annoy your colors; mix shades for a marbled effect that’s sure to dazzle everyone. Your cookies can become a fun spectrum, painting your dessert table with joy!

  • Nutty Crunch: Add in some chopped nuts, like walnuts or pecans, for a delightful texture twist. These lovely crunches will surprise your palate and add depth to the soft, chewy cookie.

  • Chocolate Delight: Incorporate mini chocolate chips into the dough for a sweet, chocolatey surprise. Who can resist the combination of sugar and chocolate? It's pure bliss in each bite!

  • Dairy-Free Version: Swap out the butter for plant-based alternatives like coconut oil or vegan butter, creating a deliciously dairy-free treat that everyone can enjoy. Soft, chewy, and totallyY scrumptious!

  • Sprinkling Joy: Top your cookies with festive sprinkles before baking for added flair and color. It turns each cookie into a cheerful celebration of spring with just a sprinkle of fun!

  • Spicy Kick: Introduce a pinch of cinnamon or cardamom for a warm, aromatic undertone. This subtle warmth can transform your cookies, giving them a cozy twist that suits the season perfectly.

For more delightful creations, consider trying my Mexican Wedding Cookies or the luscious Peaches Cream Cookies. They’re great options to spread the joy of springtime baking!

How to Store and Freeze Springtime Crinkle Cookies

Room Temperature: Store your cookies in an airtight container at room temperature for up to 5 days. This keeps them fresh and chewy, ready to enjoy anytime.

Fridge: If you prefer, these cookies can also be stored in the fridge for an extra layer of freshness, but be sure to seal them well to prevent them from drying out.

Freezer: For longer storage, freeze the cookies in a single layer on a baking sheet until solid, then transfer to an airtight container or freezer bag for up to 3 months.

Reheating: When you're ready to indulge, thaw at room temperature or pop them in the microwave for about 10-15 seconds for that fresh-baked warmth!

Expert Tips for Springtime Crinkle Cookies

  • Color with Care: Use gel food coloring instead of liquid to keep your dough thick and vibrant without compromising texture.

  • Chill for Success: Don’t skip chilling the dough! It makes rolling easier and ensures the cookies rise perfectly without spreading too much.

  • Powdered Sugar Coating: Make sure each cookie ball is fully coated in powdered sugar for that beautiful crackled effect—this is key for classic Springtime Crinkle Cookies.

  • Watch the Bake Time: Keep an eye on the cookies in the last few minutes of baking, looking for a slight crack on top and soft centers; this ensures they stay chewy.

  • Storage Tips: Store your cookies in an airtight container for up to five days, or freeze them for up to three months to enjoy later!

What to Serve with Springtime Crinkle Cookies?

Springtime Crinkle Cookies are the perfect bright addition to your celebratory spread, inviting joy and sweetness to each moment.

  • Fresh Fruit Salad: The vibrant colors and sweetness of fresh fruits complement the cookies' pastel hues and add a refreshing contrast.
  • Vanilla Ice Cream: A scoop of creamy vanilla ice cream elevates your cookies to a delightful dessert duo, perfect for warm afternoons.
  • Lemonade: The zesty, tangy notes of freshly squeezed lemonade balance the sweetness of the cookies, creating a refreshing harmony.
  • Coffee or Tea: A cup of rich coffee or fragrant herbal tea enhances the cookies' flavors, making them an ideal afternoon treat.
  • Mini Cupcakes: Light, fluffy mini cupcakes can create a charming dessert table alongside your cookies, offering a variety of textures and tastes.
  • Chocolate Dipped Strawberries: The balance of sweet, juicy strawberries with rich chocolate is sure to dazzle, making every bite a treat.
  • Cheese Platter: A selection of mild cheeses juxtaposes beautifully against the sugary cookies, adding a savory element to the meal.
  • Spring Vegetable Crudité: Crisp, fresh veggies with a light dip provide a healthy, crunchy contrast to the chewy sweetness of the cookies.
  • Sparkling Water: A bubbly, citrus-flavored sparkling water refreshes the palate and enhances the lightness of your springtime treats.

Make Ahead Options

Preparing these delightful Springtime Crinkle Cookies ahead of time is a breeze! You can chill the colored dough portions in the refrigerator for up to 24 hours, wrapped tightly in plastic wrap to maintain freshness. If you want to prep even further in advance, the dough can be frozen for up to 3 months; just scoop and roll your cookie balls before freezing them on a baking sheet, then transfer to an airtight container once solid. When you're ready to bake, simply thaw the dough overnight in the refrigerator, roll in powdered sugar, and follow the baking instructions as usual. This way, you can enjoy fresh, warm cookies without any hassle, perfect for busy springtime gatherings!

Springtime Crinkle Cookies Recipe FAQs

How do I choose the right ripeness for the ingredients?
Absolutely! For the best texture, use fresh, high-quality ingredients. Your butter should be softened, not melted; it should be room temperature, making it easy to cream with the sugar. Eggs should be large and at room temperature too, which helps them mix better into the batter, creating a unified dough.

How should I store leftover Springtime Crinkle Cookies?
Very! To keep your cookies fresh, store them in an airtight container at room temperature for up to 5 days. If you're looking for longer storage, consider placing them in the fridge sealed well to maintain moisture without drying out.

Can I freeze Springtime Crinkle Cookies?
Absolutely! To freeze, first arrange the unbaked dough balls on a parchment-lined baking sheet and freeze them until solid. Then, transfer the frozen cookie balls to an airtight container or zip-lock bag for up to 3 months. When you're ready to bake, there's no need to thaw—just bake them straight from the freezer, adding an extra minute or two to the baking time!

What if my dough is too sticky or dry?
Great question! If your dough is sticky, try chilling it in the refrigerator for about 30 minutes. This will firm it up, making it easier to roll. On the other hand, if it's too dry, adding a splash of milk or another egg can help bring it back to the right consistency. Mix well to ensure even blending!

Are these cookies safe for pets or those with allergies?
It's best to be cautious! Since these Springtime Crinkle Cookies contain sugar, butter, and flour, they're not suitable for pets—especially dogs, who can’t handle sugar well. Additionally, people with egg or nut allergies should skip the almond extract and be mindful of cross-contamination. Always check your specific dietary requirements before indulging!

Springtime Crinkle Cookies

Sweet and Chewy Springtime Crinkle Cookies for a Festive Treat

Springtime Crinkle Cookies are vibrant, chewy, and perfect for any celebration.
Print Recipe Pin Recipe
Prep Time 30 minutes mins
Cook Time 12 minutes mins
Chilling Time 30 minutes mins
Total Time 1 hour hr 12 minutes mins
Servings: 24 cookies
Course: Dessert
Cuisine: American
Calories: 120
Ingredients Equipment Method Nutrition Notes

Ingredients
  

For the Cookie Base
  • 2 cups All-Purpose Flour
  • 2 teaspoons Baking Powder
  • 1 teaspoon Salt
  • 1 cup Unsalted Butter (softened)
  • 1.5 cups Granulated Sugar
  • 2 large Large Eggs
  • 2 teaspoons Vanilla Extract
  • 1 teaspoon Almond Extract (optional)
For Coating and Coloring
  • 1 cup Powdered Sugar
  • to taste Gel Food Coloring (pastel shades)

Equipment

  • Oven
  • Mixing Bowl
  • Baking Sheet
  • Parchment Paper
  • Mixer

Method
 

Step-by-Step Instructions for Springtime Crinkle Cookies
  1. Preheat your oven to 350°F (175°C) and line a baking sheet with parchment paper.
  2. In a medium bowl, whisk together the all-purpose flour, baking powder, and salt.
  3. In a large bowl, beat the softened butter and granulated sugar until light and fluffy, about 3–4 minutes.
  4. Add the eggs one at a time, mixing well after each addition. Then stir in the vanilla and optional almond extracts.
  5. Gradually add the dry mixture to the wet ingredients, mixing gently until a thick dough forms.
  6. Divide the dough into portions and add gel food coloring to achieve your desired colors.
  7. Cover the dough with plastic wrap and chill in the refrigerator for at least 30 minutes.
  8. Scoop tablespoon-sized balls of dough, roll in powdered sugar, and place on a prepared baking sheet.
  9. Bake for 10–12 minutes until the tops crack and the edges are set, but centers remain soft.
  10. Let the cookies cool on the baking sheet for 5 minutes before transferring to a wire rack.

Nutrition

Serving: 1cookieCalories: 120kcalCarbohydrates: 16gProtein: 1gFat: 6gSaturated Fat: 4gCholesterol: 30mgSodium: 60mgPotassium: 30mgSugar: 10gVitamin A: 200IUCalcium: 10mgIron: 0.5mg

Notes

Store cookies in an airtight container at room temperature for up to 5 days. They can be frozen for up to 3 months.

Tried this recipe?

Let us know how it was!

Easter Herb-Roasted Lemon Chicken That's Simply Irresistible

March 25, 2026 by Grace Snow Leave a Comment

As I prepared for our family Easter gathering, the vibrant scent of herbs and citrus danced through the kitchen, reminding me why my Easter Herb-Roasted Lemon Chicken has become a cherished tradition. This dish strikes the perfect balance between festive elegance and easy preparation, making it a true crowd-pleaser for any occasion. With juicy, flavor-infused meat and crispy skin, it promises to be the star of your table, showcasing the bright, uplifting notes of lemon and fresh herbs. Plus, its simple steps mean you'll spend less time in the kitchen and more time enjoying the company of loved ones. Are you ready to elevate your holiday feast with this timeless recipe?

Why Is This Chicken Recipe a Must-Try?

Simplicity: Each step is easy to follow, making festive cooking stress-free. Flavor Explosion: The bright lemon and aromatic herbs come together for an irresistible taste. Crowd-Pleaser: Perfect for gatherings, this chicken will impress your guests without the fuss. Versatile: Easily adaptable with seasonal veggies or different cuts. Make-Ahead Friendly: Prepare the marinade the day before for a quick assembly, making it great for busy holidays. Elevate your meal with delicious sides like Lemon Chicken Soup or Crock Pot Chicken for a complete feast!

Easter Herb-Roasted Lemon Chicken Ingredients

  • For the Chicken
    • Whole Chicken (3-4 lbs) – This is the centerpiece of the dish; ensure it’s fresh for best results.

  • For the Marinade
    • Lemons (3) – Provide vibrant citrus flavor; substitute with oranges or limes if necessary.
    • Fresh Herbs (Rosemary, Thyme, Parsley) – Add depth and aroma; dried herbs can be used, just adjust the proportions.
    • Garlic Cloves (4-5) – Enhance savory notes; fresh is preferred for maximum flavor.
    • Olive Oil – Coats chicken, adds moisture, and aids in browning.
    • Butter (Unsalted) – Keeps the chicken moist; consider adding under the skin for extra richness.
    • Salt and Black Pepper – Essential for seasoning to enhance all flavors.

  • For the Vegetables
    • Onion (1 large) – Contributes to a savory base; onion flavor sweetens upon roasting.
    • Carrots (2-3 medium) – Adds sweetness and color to the side; they roast beautifully alongside the chicken.
    • Potatoes (1 lb, small or medium) – Absorb flavors and provide heartiness; use similar sizes for even roasting.

Step‑by‑Step Instructions for Easter Herb-Roasted Lemon Chicken

Step 1: Prepare the Chicken
Begin by preheating your oven to 400°F (200°C). While the oven warms, rinse the whole chicken (3-4 lbs) under cold water and pat it dry with paper towels. Remove any giblets from the cavity, ensuring the chicken is clean and ready to soak up the flavors of your Easter Herb-Roasted Lemon Chicken.

Step 2: Make the Herb-Lemon Marinade
In a mixing bowl, combine the juice and zest of three lemons, along with 4-5 minced garlic cloves, 2 tablespoons of olive oil, and a mix of fresh herbs such as rosemary, thyme, and parsley. Season generously with salt and black pepper. This fragrant marinade is key to infusing your chicken with vibrant flavor, so whisk until well blended.

Step 3: Marinate the Chicken
Using your hands or a spoon, carefully rub the herb-lemon marinade under the chicken's skin and inside the cavity. This step ensures the meat absorbs every drop of flavor. For extra moisture, consider placing small pats of unsalted butter underneath the skin as well. Let the marinated chicken sit for about 15-30 minutes at room temperature to enhance the flavors.

Step 4: Prepare the Vegetables
While the chicken marinates, chop one large onion, 2-3 medium carrots, and about 1 lb of small or medium potatoes into uniform pieces. This not only creates a beautiful presentation but also ensures even cooking. The vegetables will absorb the chicken's delicious drippings as it roasts, enhancing your Easter Herb-Roasted Lemon Chicken experience.

Step 5: Arrange in Pan
Grab a roasting pan and place the marinated chicken breast-side up in the center, surrounding it with the prepared vegetables. Ensure the potatoes and carrots are distributed evenly around the chicken for optimal roasting. This arrangement allows all ingredients to roast harmoniously, creating a lovely meal.

Step 6: Roast the Chicken
Transfer the pan to your preheated oven and roast the chicken for approximately 1.5 hours, or until the internal temperature reaches 165°F (74°C). You’ll know it’s done when the skin is golden-brown and crispy. To keep an eye on progress, consider checking the temperature with a meat thermometer around the 1-hour mark.

Step 7: Baste and Rotate
About halfway through the roasting time, take a baster and gently baste the chicken with the pan juices. This step keeps the meat moist and flavorful. If you like, you can also rotate the pan to ensure even cooking, especially if your oven has hot spots.

Step 8: Rest the Chicken
Once the internal temperature is perfect, remove the roasted chicken from the oven and let it rest for at least 10-15 minutes. This resting period allows the juices to redistribute throughout the meat, ensuring your Easter Herb-Roasted Lemon Chicken is tender and juicy when it’s time to carve.

Step 9: Carve and Serve
After resting, carve the chicken into serving pieces, allowing the rich aroma to waft through your kitchen. Arrange the succulent pieces on a platter alongside the beautifully roasted vegetables. This delightful Easter Herb-Roasted Lemon Chicken is ready to be the star of your family gathering!

Expert Tips for Easter Herb-Roasted Lemon Chicken

  • Butter Under the Skin: Place pats of butter under the skin to enhance moistness and add rich flavor, making each bite even more delicious.

  • Use a Meat Thermometer: For perfectly cooked chicken, use a meat thermometer to check that the internal temperature reaches 165°F (74°C).

  • Rest the Chicken: Let the chicken rest for 10-15 minutes after roasting to redistribute juices, resulting in tender, juicy meat that’s bursting with flavor.

  • Season Your Vegetables: Toss the vegetables with olive oil, salt, and pepper before adding them to the roasting pan; this ensures they’re flavorful and delicious alongside the chicken.

  • Experiment with Herbs: For a unique twist, try different fresh herbs such as sage or oregano to create a variation of your Easter Herb-Roasted Lemon Chicken that's tailored to your taste!

Storage Tips for Easter Herb-Roasted Lemon Chicken

  • Fridge: Store leftover chicken in an airtight container for up to 3 days, ensuring flavors remain intact and the meat stays moist.

  • Freezer: If you need to keep it longer, freeze the chicken in a well-sealed freezer bag for up to 3 months. Label with the date for easy tracking.

  • Reheating: When ready to enjoy the Easter Herb-Roasted Lemon Chicken again, reheat in the oven at 350°F (175°C) until heated through, about 20-25 minutes, to preserve its juiciness.

  • Serving Suggestions: Pair any reheated leftovers with fresh vegetables or a light salad for a delicious and effortless meal.

What to Serve with Easter Herb-Roasted Lemon Chicken

Creating a delightful meal to accompany your vibrant Easter Herb-Roasted Lemon Chicken can bring every bite to life!

  • Garlic Mashed Potatoes: Creamy and buttery, these rich potatoes absorb the chicken's flavorful juices, creating a symphony of tastes. Pair them with a sprinkle of fresh herbs for an added touch.

  • Roasted Asparagus: This green delight adds a satisfying crunch and fresh flavor, balancing the richness of the chicken with its bright, earthy profile. Toss them with a drizzle of olive oil and a pinch of salt before roasting.

  • Spring Greens Salad: A mix of crisp romaine, tender spinach, and seasonal veggies brings a refreshing contrast to the warm chicken. Top with a tangy lemon vinaigrette to enhance the meal's citrus notes.

  • Herbed Rice Pilaf: Fluffy rice sprinkled with fresh herbs and toasted nuts adds heartiness and a lovely texture. Its subtle flavor complements the robust seasonings of your chicken beautifully.

  • Grilled Corn on the Cob: Sweet and smoky, grilled corn creates a delightful contrast. A squeeze of lime can boost the flavors and tie the meal together perfectly.

  • Lemon Tart: For dessert, a zesty lemon tart offers a bright finish, harmonizing with the chicken's flavors while indulging your guests in a sweet treat.

  • Chilled White Wine: Pair this delicious meal with a crisp Sauvignon Blanc or a light Chardonnay to enhance the citrusy elements of the dish.

  • Lavender Lemonade: A refreshing drink that combines floral notes and citrus, perfect for elevating your Easter gathering and complementing the meal's lightness.

Make Ahead Options

These Easter Herb-Roasted Lemon Chicken preparations are a game-changer for your meal prep strategy! You can marinate the whole chicken up to 24 hours in advance, allowing the flavors to really penetrate the meat while you enjoy a stress-free cooking day. Just mix your herb-lemon marinade, rub it all over the chicken, and cover it tightly in the refrigerator. Additionally, you can chop the vegetables up to 3 days ahead, storing them in an airtight container in the fridge to maintain their freshness. When it's time to serve, simply arrange everything in the roasting pan, pop it in the oven, and enjoy the delight of a flavorful, home-cooked meal without the last-minute rush!

Easter Herb-Roasted Lemon Chicken Variations

Feel free to customize your Easter Herb-Roasted Lemon Chicken with these delightful variations that will tickle your taste buds!

  • Seasonal Veggies: Replace the carrots and potatoes with seasonal vegetables, like Brussels sprouts or sweet potatoes, for a festive twist. The roasting will bring out their natural sweetness and provide vibrant colors.

  • Dairy-Free: Omit the butter and use a little more olive oil or a dairy-free spread under the skin to maintain moisture while keeping things light.

  • Spicy Kick: Add a pinch of red pepper flakes or a dash of hot sauce to the herb-lemon marinade to spice things up! This small adjustment can add an exciting layer of flavor.

  • Herb Variation: Experiment with your choice of fresh herbs like sage or oregano to personalize the aroma profile of your dish. The difference will uplift the dish and tailor it to your family’s preferences.

  • Citrus Alternatives: Try substituting lemons with oranges or limes for a refreshing citrus twist! Each option lends a unique flavor dimension to the chicken.

  • Chicken Parts: Use bone-in chicken thighs or drumsticks instead of a whole chicken. This can cut down cooking time while retaining the tender, juicy goodness.

  • Marinated Ahead: Consider marinating the chicken overnight for a deeper flavor infusion. This makes the chicken even more delicious and provides a great make-ahead option.

  • Garnish Ideas: Serve with fresh herbs on top just before serving to add a bright finish. A sprinkle of parsley or thyme adds both flavor and appealing aesthetics!

By embracing these variations, your Easter Herb-Roasted Lemon Chicken will not only be a culinary highlight but also adaptable for every occasion, just like the beloved Honey Garlic Chicken!

Easter Herb-Roasted Lemon Chicken Recipe FAQs

What should I look for when selecting a whole chicken?
Absolutely! When selecting a whole chicken, look for one that is fresh, with a clean, unblemished skin. The meat should feel firm to the touch, and avoid chickens with any dark spots or an off smell. Opt for a bird in the 3-4 lb range for the best results with roasting, as it ensures even cooking and flavorful meat.

How do I store leftover Easter Herb-Roasted Lemon Chicken?
If you have any leftovers (which is always a possibility because it's so delicious!), store the chicken in an airtight container in the refrigerator for up to 3 days. This will keep the meat moist and flavorful. If you want to keep it longer, you can wrap the chicken tightly in a freezer bag and freeze it for up to 3 months; just be sure to label it with the date before putting it in!

Can I freeze Easter Herb-Roasted Lemon Chicken?
Absolutely! To freeze your Easter Herb-Roasted Lemon Chicken, let it cool completely first. Then, carve the chicken and place the pieces in a well-sealed freezer bag. Remove as much air as possible to prevent freezer burn. It should last in the freezer for up to 3 months. When you're ready to enjoy it again, simply thaw in the refrigerator overnight, then reheat in the oven.

What should I do if my chicken isn’t cooking evenly?
Very! If you find that your chicken isn't cooking evenly, it's likely due to variations in oven temperature or placement. To troubleshoot, check your oven's calibration, and consider rotating the pan halfway through roasting for more even cooking. Using a meat thermometer is essential; when the thickest part of the meat reaches 165°F (74°C), you know it's perfectly done!

Are there any dietary considerations for Easter Herb-Roasted Lemon Chicken?
The more the merrier! If you're serving guests with dietary restrictions, this recipe can easily be adjusted. Ensure that any herbs or additional spices used don’t pose an allergy risk. Also, consider offering a gluten-free version of side dishes. This chicken is naturally gluten-free and works well with a wide range of sides that can cater to different diets, ensuring everyone can enjoy your meal together!

Easter Herb-Roasted Lemon Chicken

Easter Herb-Roasted Lemon Chicken That's Simply Irresistible

Enjoy the festive flavors of Easter with this Herb-Roasted Lemon Chicken, a cherished tradition that’s easy to prepare and a crowd-pleaser.
Print Recipe Pin Recipe
Prep Time 30 minutes mins
Cook Time 1 hour hr 30 minutes mins
Resting Time 15 minutes mins
Total Time 2 hours hrs 15 minutes mins
Servings: 6 servings
Course: Dinner
Cuisine: American
Calories: 400
Ingredients Equipment Method Nutrition Notes

Ingredients
  

For the Chicken
  • 1 whole chicken (3-4 lbs) Ensure it’s fresh for best results.
For the Marinade
  • 3 pieces lemons Provide vibrant citrus flavor; substitute with oranges or limes if necessary.
  • 4-5 cloves garlic Enhance savory notes; fresh is preferred.
  • 2 tablespoons olive oil Coats chicken and adds moisture.
  • 1 stick unsalted butter Consider adding under the skin.
  • to taste salt Essential for seasoning.
  • to taste black pepper Essential for seasoning.
For the Vegetables
  • 1 large onion Contributes to a savory base.
  • 2-3 medium carrots Adds sweetness and color.
  • 1 lb potatoes Use similar sizes for even roasting.
For the Herbs
  • 1 bunch fresh herbs (rosemary, thyme, parsley) Add depth and aroma.

Equipment

  • Roasting pan
  • Mixing Bowl
  • Meat Thermometer

Method
 

Preparation Steps
  1. Preheat your oven to 400°F (200°C). Rinse the whole chicken under cold water and pat it dry with paper towels.
  2. In a mixing bowl, combine the juice and zest of three lemons with minced garlic, olive oil, and fresh herbs. Season with salt and pepper.
  3. Rub the herb-lemon marinade under the chicken's skin and inside the cavity. Let it marinate for 15-30 minutes.
  4. Chop onion, carrots, and potatoes into uniform pieces.
  5. Place the marinated chicken breast-side up in a roasting pan, surrounding it with the chopped vegetables.
  6. Roast in the oven for approximately 1.5 hours, or until the internal temperature reaches 165°F (74°C).
  7. Baste the chicken with pan juices halfway through roasting.
  8. Let the roasted chicken rest for at least 10-15 minutes before carving.
  9. Carve the chicken and serve alongside the roasted vegetables.

Nutrition

Serving: 1servingCalories: 400kcalCarbohydrates: 25gProtein: 30gFat: 20gSaturated Fat: 7gPolyunsaturated Fat: 2gMonounsaturated Fat: 10gCholesterol: 80mgSodium: 600mgPotassium: 800mgFiber: 3gSugar: 3gVitamin A: 10IUVitamin C: 30mgCalcium: 2mgIron: 8mg

Notes

Use a meat thermometer to ensure the chicken is perfectly cooked and consider seasoning your vegetables before roasting.

Tried this recipe?

Let us know how it was!

Brown Butter Pecan Pie Bars for Irresistible Indulgence

March 25, 2026 by Grace Snow Leave a Comment

“Have you ever found yourself in a baking dilemma, craving something sweet but short on time?” These Brown Butter Pecan Pie Bars are my ultimate solution for those moments; effortlessly satisfying, they blend gooey sweetness with crunchy, toasted pecans in a thrilling take on the classic pecan pie. With just 45 minutes from start to finish, this easy dessert is a fantastic way to impress friends and family without spending your whole day in the kitchen. As the warm, nutty aroma fills your home, expect to be hailed as the star of the gathering! Whether you’re hosting a festive celebration or simply treating yourself on a cozy evening, these handheld delights will elevate any occasion. Curious about how to create this irresistible treat that packs all the classic flavors into a convenient bar form? Let's dive into the recipe!

Why Are Brown Butter Pecan Pie Bars Amazing?

Irresistible Flavor: The rich nutty taste from browned butter adds a gourmet twist that sets these bars apart from regular pecan pie.

Quick Preparation: In just 45 minutes, you can whip up this delightful dessert without any fuss, perfect for busy days or spontaneous gatherings.

Crowd-Pleasing: These bars are the ideal sweet treat for potlucks, ensuring everyone leaves with a smile.

Versatile Indulgence: Feel free to experiment with different nuts or add chocolate chips for a new flavor adventure. Pair them with your favorite coffee for an irresistible afternoon pick-me-up, or enjoy them at festive gatherings alongside other desserts like Pumpkin Brownies Decadent.

Easily Storable: Made in bulk, these bars can be stored or frozen, making them a go-to option for future sweet cravings. Enjoy the nostalgia of classic pecan pie in a modern, fuss-free form!

Brown Butter Pecan Pie Bars Ingredients

For the Crust
• Unsalted Butter – Provides richness and moisture; you can use salted butter but reduce added salt by 1/4 teaspoon if substituting.
• Granulated Sugar – Adds sweetness and structure to the crust.
• All-Purpose Flour – Ensures a sturdy base for the bars.

For the Topping
• Brown Sugar – Deepens the flavor with notes of caramel; this can be substituted with more granulated sugar for a milder taste.
• Maple Syrup – Contributes distinct sweetness and flavor; consider corn syrup or honey as replacements, though they will alter the taste.
• Heavy Cream – Adds richness to the topping.
• Pecans – The key flavor and texture component; you might substitute with walnuts or almonds for a different nutty profile.
• Salt – Balances sweetness and enhances overall flavor.
• Vanilla Extract – Enhances the flavors throughout the dessert; using pure extract can elevate your dish.

For the Final Touch
• Flaky Sea Salt – A sprinkle on top can accentuate the sweetness of the bars and add a delightful contrast.

Step‑by‑Step Instructions for Brown Butter Pecan Pie Bars

Step 1: Preheat the Oven
Begin by preheating your oven to 350°F (177°C). This is crucial for ensuring that your Brown Butter Pecan Pie Bars bake evenly. While your oven heats up, you can prepare the baking pan, which will make your workflow smooth and efficient.

Step 2: Prepare the Baking Pan
Grease a 9x13-inch baking pan or line it with parchment paper for easy removal. This will help create a perfect texture and ensure your bars don’t stick. Once set up, you’re ready to move on to the next step of creating the rich crust.

Step 3: Brown the Butter
In a light-colored skillet, melt 1 cup of unsalted butter over medium heat, stirring frequently. Monitor closely as it turns golden brown, which should take about 5 to 8 minutes. The nutty aroma is your cue that it’s ready. Let the browned butter cool for 5 minutes to avoid cooking the eggs later on.

Step 4: Make the Crust
In a mixing bowl, combine the cooled browned butter with granulated sugar, vanilla extract, and salt. Stir until well mixed, then gradually add in the all-purpose flour. Mix just until combined; it should be crumbly. Press this mixture evenly into the bottom of your prepared baking pan. Bake for 15 minutes until lightly golden.

Step 5: Prepare the Topping
While the crust is baking, create the gooey topping. In a medium saucepan, combine 1/2 cup of unsalted butter, brown sugar, maple syrup, and heavy cream over medium heat. Whisk continuously until the mixture starts to bubble, about 3 minutes. Watch closely to prevent burning, and stir until everything is smoothly blended.

Step 6: Temper the Eggs
To prevent scrambling, whisk the eggs in a small bowl. Gradually add a few tablespoons of the hot butter mixture to the eggs while whisking vigorously. Then, pour the egg mixture back into the saucepan with the remaining hot mixture. This step ensures your topping is creamy and smooth.

Step 7: Add the Pecans
Stir in the chopped pecans into the warm filling mixture. The pecans will add a delightful crunch to your Brown Butter Pecan Pie Bars. Once combined, pour this glorious mixture over the pre-baked crust in the pan, ensuring an even distribution.

Step 8: Bake to Perfection
Bake the assembled pecan pie bars in the preheated oven for 30 to 35 minutes. Keep an eye on them; they are done when a toothpick inserted near the center comes out mostly clean. If the top browns too quickly, tent with foil to prevent burning.

Step 9: Cool and Slice
After baking, remove the bars from the oven and let them cool completely in the pan on a wire rack. This cooling time is crucial for easier slicing and allows the flavors to meld beautifully. Once cooled, cut them into squares.

What to Serve with Brown Butter Pecan Pie Bars?

These delightful bars are the perfect sweet ending to any meal, creating a cozy atmosphere that invites indulgence.

  • Vanilla Ice Cream: A scoop of creamy vanilla ice cream provides a luscious contrast to the chewy bars, enhancing their rich flavor.
  • Fresh Whipped Cream: Light and airy, whipped cream adds a delightful touch, balancing the sweetness with its airy texture.
  • Coffee or Espresso: The boldness of coffee complements the nutty flavors, making for a warm and comforting duo.
  • Chai Tea: The warming spices in chai tea harmonize beautifully with the sweetness of the bars, creating a well-rounded experience.
  • Salted Caramel Sauce: Drizzling with salted caramel adds an exciting salty-sweet depth that enchants every bite.
  • Chocolate Ganache: A drizzle of smooth chocolate ganache elevates the dessert, creating a luxurious chocolate-peanut harmony.
  • Fresh Fruit Salad: A refreshing, zesty fruit salad brings a burst of brightness, cutting through the richness of the bars.
  • Toasted Pecans: Serving warm bars with extra toasted pecans brings a satisfying crunch and deepens their nutty character.

Brown Butter Pecan Pie Bars Variations

Looking to add a personal touch to your delightful Brown Butter Pecan Pie Bars? Here are some exciting options to consider!

  • Nutty Alternatives: Swap pecans for walnuts or almonds for a different flavor profile. Each nut has its unique character, bringing a delightful twist to the bars.

  • Honeyed Goodness: Try using honey instead of maple syrup for an alternative sweetness. This swap adds a rich, floral note that complements the nuttiness beautifully.

  • Chocolate Indulgence: Add chocolate chips to the filling for a decadent twist. The richness of the chocolate pairs wonderfully with the buttery bars, creating a scrumptious flavor combination.

  • Gluten-Free: Replace all-purpose flour with a gluten-free blend to cater to dietary needs. This opens the recipe up to friends with gluten sensitivities while still being absolutely delicious.

  • Extra Flavor: Stir in a teaspoon of espresso powder for a subtle coffee note. This enhancement will wake up the flavors and give your bars a sophisticated touch.

  • Salted Caramel: Drizzle homemade or store-bought salted caramel over the top before serving. The sweet and salty contrast will elevate your bars to a new level of indulgence.

  • Spiced Icing: Top cooled bars with a light dusting of cinnamon sugar. This adds a warm ambiance to your dessert, perfect for cozy evenings or holiday gatherings.

  • Fruit Infusion: Mix in some dried cranberries or cherries to the pecan mixture for a fruity burst. This unexpected addition contrasts beautifully with the traditional flavors, offering a refreshing twist.

These variations will ensure your Brown Butter Pecan Pie Bars are as unique as your gatherings! Enjoy the creativity—these delightful treats are always a hit, whether served alongside other favorites like Crockpot Butter Chicken or a cozy Spinach Pie Deliciously.

Expert Tips for Brown Butter Pecan Pie Bars

  • Watch the Baking Time: Overbaking can lead to dry bars. Keep a close eye on them, especially during the last 5 minutes.

  • Cool Completely: Allow the bars to cool fully before slicing. This helps them set properly for cleaner cuts and enhanced flavor.

  • Quality Nuts Matter: Use fresh, high-quality pecans to get the best flavor in your Brown Butter Pecan Pie Bars. Stale nuts can ruin the taste.

  • Proper Crust Preparation: Ensure you fully par-bake the crust; underbaking can cause the topping to sink and affect the texture.

  • Experiment with Toppings: Feel free to sprinkle extra flaky sea salt on top or try adding chocolate chips for a fun twist on this classic dessert.

Make Ahead Options

These Brown Butter Pecan Pie Bars are a fantastic choice for meal prep! You can easily prepare the crust up to 24 hours in advance—just press it into the pan, cover it tightly, and refrigerate until you're ready to bake. The pecan topping can also be mixed and stored in the fridge for up to 3 days; simply stir it before pouring it over the crust. When you're ready to serve, bake the bars as directed, adding an extra few minutes to the baking time if the topping has been chilled. This let-ahead approach makes your baking process a breeze, ensuring delicious, gooey bars are just a few steps away!

Storage Tips for Brown Butter Pecan Pie Bars

Room Temperature: Store in an airtight container for up to 3 days; they maintain their gooey texture and flavor perfectly.

Fridge: For longer freshness, refrigerate these bars for up to a week; just make sure they’re in a sealed container to prevent drying out.

Freezer: Freeze for up to 2 months; wrap bars tightly in plastic wrap, then place them in an airtight container. Thaw at room temperature before enjoying your delicious Brown Butter Pecan Pie Bars!

Reheating: If you prefer warm bars, pop them in the microwave for a few seconds—just enough to get that gooey goodness back without overcooking.

Brown Butter Pecan Pie Bars Recipe FAQs

What should I look for when selecting pecans?
Absolutely! When selecting pecans for your Brown Butter Pecan Pie Bars, look for nuts that are fresh, plump, and slightly shiny. Avoid those with dark spots or a rancid smell. Fresh pecans will enhance the flavor of your bars significantly; I often pop a few in my mouth to check for that tasty crunch before baking!

How can I store my Brown Butter Pecan Pie Bars?
Very simple! You can store your Brown Butter Pecan Pie Bars in an airtight container at room temperature for up to 3 days. If you’d like them to last longer, refrigerate them for about a week. Just ensure the container is sealed tight to keep them from drying out.

Can I freeze these bars, and how?
Certainly! To freeze your Brown Butter Pecan Pie Bars, wrap them tightly in plastic wrap and then place them in an airtight container. They can be frozen for up to 2 months. When you’re ready to enjoy them, simply thaw them at room temperature for a few hours. If you fancy a warm treat, you can microwave individual squares for 10-15 seconds to restore that gooey texture.

What if my pecan topping is too runny?
If you find that your topping is too runny, it may be undercooked or not set properly. Make sure to keep an eye on the baking time—each oven can behave differently. If you think it needs more time, bake it a little longer but watch it closely to prevent over-browning. Allowing the bars to cool completely also helps them firm up, making cutting and serving easier.

Are these bars safe for people with nut allergies?
Unfortunately, Brown Butter Pecan Pie Bars contain pecans, which can be a problem for those with nut allergies. I recommend exploring nut-free alternatives, such as pumpkin seeds or sunflower seeds. However, be cautious as these ingredients will change the flavor, so it’s advisable to test small batches before serving to ensure everyone can enjoy them!

Brown Butter Pecan Pie Bars

Brown Butter Pecan Pie Bars for Irresistible Indulgence

These Brown Butter Pecan Pie Bars combine gooey sweetness and crunchy pecans, offering an irresistible dessert experience.
Print Recipe Pin Recipe
Prep Time 15 minutes mins
Cook Time 30 minutes mins
Total Time 45 minutes mins
Servings: 12 bars
Course: Dessert
Cuisine: American
Calories: 250
Ingredients Equipment Method Nutrition Notes

Ingredients
  

For the Crust
  • 1 cup unsalted butter can use salted butter, reduce added salt by 1/4 teaspoon
  • 1/2 cup granulated sugar
  • 1 cup all-purpose flour
For the Topping
  • 1 cup brown sugar can substitute with granulated sugar
  • 1/2 cup maple syrup corn syrup or honey can be used, may alter taste
  • 1/2 cup heavy cream
  • 1 cup pecans may substitute with walnuts or almonds
  • 1/4 teaspoon salt
  • 1 teaspoon vanilla extract using pure extract is recommended
For the Final Touch
  • 1 teaspoon flaky sea salt sprinkle on top

Equipment

  • 9x13-inch baking pan
  • Mixing Bowl
  • Medium saucepan
  • Skillet
  • Whisk

Method
 

Step-by-Step Instructions
  1. Preheat the oven to 350°F (177°C). Prepare the baking pan.
  2. Grease a 9x13-inch baking pan or line it with parchment paper.
  3. Brown the butter by melting it in a skillet over medium heat, stirring frequently until golden brown, about 5-8 minutes. Let cool for 5 minutes.
  4. In a mixing bowl, combine the browned butter with granulated sugar, vanilla extract, and salt. Gradually add all-purpose flour until crumbly. Press into the bottom of the prepared pan. Bake for 15 minutes until lightly golden.
  5. While the crust bakes, make the topping by combining brown sugar, maple syrup, and heavy cream in a saucepan over medium heat. Whisk continuously for about 3 minutes until bubbly.
  6. Whisk the eggs in a small bowl, then temper them by gradually adding a few tablespoons of the hot mixture, then add back to the saucepan.
  7. Stir in chopped pecans and pour the mixture over the pre-baked crust.
  8. Bake for 30 to 35 minutes. Check doneness with a toothpick.
  9. Let cool completely in the pan on a wire rack before slicing into squares.

Nutrition

Serving: 1barCalories: 250kcalCarbohydrates: 30gProtein: 3gFat: 14gSaturated Fat: 7gPolyunsaturated Fat: 2gMonounsaturated Fat: 4gCholesterol: 30mgSodium: 120mgPotassium: 150mgFiber: 1gSugar: 20gVitamin A: 300IUCalcium: 25mgIron: 1mg

Notes

Use fresh, high-quality pecans for the best flavor. Allow the bars to cool completely before slicing for cleaner cuts.

Tried this recipe?

Let us know how it was!

Buttery Sweet Butter Toffee Pretzels Recipe to Delight You

March 25, 2026 by Grace Snow Leave a Comment

With the hustle and bustle of life, it's easy to overlook the joy of homemade snacks. Enter my Butter Toffee Pretzels Recipe—a delightful treat that transforms the humble pretzel into a sweet-salty sensation. These crunchy morsels are unapologetically indulgent, thanks to their luscious buttery toffee coating that brings a gourmet touch to your snacking game. Ideal for holiday gifting or as a quick, delicious snack to share with friends, they're sure to become a staple in your kitchen. Plus, they’re incredibly versatile; you can customize them with nuts, spices, or drizzled chocolate for extra flair. Ready to discover how this simple recipe can elevate your snack game? Let’s dive in!

Why Make Butter Toffee Pretzels?

Indulgent Flavor: The luscious caramel coating perfectly complements the salty crunch of pretzels, creating a taste sensation that’s hard to resist.
Easy to Make: With only a few simple ingredients and straightforward steps, you can whip up these delicious bites in no time!
Customizable Options: Feel free to mix it up—try adding nuts or a chocolate drizzle for a unique twist that suits every palate.
Ideal for Gifting: These pretzels make for thoughtful edible gifts, easily packaged in jars for a homemade touch, especially during the holidays.
Crowd-Pleasing Snack: Whether for movie nights or festive gatherings, everyone will love these delightful treats, proving that homemade snacks are always a hit!
If you're looking for more delicious snack ideas, check out my Crockpot Butter Chicken or explore other savory options like Chicken Adobo Again.

Butter Toffee Pretzels Ingredients

• Get ready to make something special with this Butter Toffee Pretzels Recipe!

For the Pretzels

  • Mini Pretzels – These provide the perfect salty base; feel free to swap with gluten-free pretzels if desired.

For the Toffee Coating

  • Unsalted Butter – This is crucial for creating a luscious toffee; using salted butter can add a nice twist.
  • Brown Sugar – Adds sweetness and that signature caramel flavor; both light and dark varieties work well.
  • Vanilla Extract – A splash of this elevates the flavor; it’s optional but recommended for that gourmet taste.
  • Baking Soda – This helps aerate the toffee for the best texture; you can leave it out if avoiding baking soda.

For Toppings (Optional)

  • Flaky Sea Salt – This adds a delightful crunch and enhances the flavors; sprinkle on top before serving.
  • Melted Chocolate – Drizzling melted chocolate gives your pretzels an elegant touch and extra sweetness.

Embrace the joyful flavors of this Butter Toffee Pretzels Recipe—they're perfect for snacking, gifting, or just indulging!

Step‑by‑Step Instructions for Butter Toffee Pretzels Recipe

Step 1: Preheat and Prepare
Begin by preheating your oven to 250°F (120°C). While it heats up, line a baking sheet with parchment paper to prevent sticking. This step ensures a perfect baking surface for your Butter Toffee Pretzels, allowing them to cook evenly and achieve that deliciously crisp texture.

Step 2: Arrange the Pretzels
Spread the mini pretzels in a single layer on the lined baking sheet. Make sure to create an even layer without overcrowding, as this allows the buttery toffee coating to envelop each pretzel perfectly. The more space you provide, the better they will crisp up during baking.

Step 3: Make the Toffee Mixture
In a saucepan over medium heat, melt the unsalted butter. Once melted, stir in the brown sugar, and bring the mixture to a gentle boil while stirring constantly for about 3–4 minutes. You'll want to see the mixture bubble and thicken to a deep amber color—this is key for that rich toffee flavor in your Butter Toffee Pretzels.

Step 4: Combine Ingredients
Remove the saucepan from the heat and quickly stir in the vanilla extract and baking soda. Be cautious, as the mixture may foam up; this reaction is normal. Once combined, carefully pour the toffee sauce over the pretzels, using a spatula to gently toss and coat them evenly.

Step 5: Bake the Pretzels
Transfer the baking sheet into your preheated oven and bake for 45 minutes. To ensure even baking and prevent burning, stir the pretzels every 15 minutes. You’ll notice them taking on a glossy finish as they bake, which is an enticing sign of those delicious Butter Toffee Pretzels nearing completion.

Step 6: Cool and Add Toppings
Once the baking time is complete, remove the pretzels from the oven and allow them to cool completely on the baking sheet. If desired, sprinkle with flaky sea salt or drizzle with melted chocolate for a finishing touch before breaking them apart into bite-sized pieces.

Step 7: Store for Freshness
Once cooled, store your delectable Butter Toffee Pretzels in an airtight container. They can be kept at room temperature for up to one week, ensuring you can enjoy their sweet-salty crunch whenever the craving strikes—perfect for sharing or indulging alone!

Butter Toffee Pretzels Variations

Feel free to explore these fun twists to make your Butter Toffee Pretzels even more delightful and tailored to your taste!

  • Nutty Crunch: Add toasted chopped nuts like pecans or almonds for extra texture. They bring a satisfying bite that elevates every nibble.

  • Spiced Toffee: Incorporate spices such as cinnamon or a sprinkle of espresso powder into the toffee for a cozy twist. This adds warmth and depth, enhancing the overall flavor profile.

  • Chocolate Drizzle: Drizzle your finished pretzels with melted chocolate for a luxurious touch. This rich addition pairs beautifully with the sweet-salty elements of the pretzels.

  • Flavor Extracts: Substitute vanilla extract with almond or coconut extract in the toffee for a unique flavor profile. It offers a gentle twist that will surprise and delight your taste buds.

  • Coconut Topping: Sprinkle toasted coconut flakes over the pretzels before baking for a tropical vibe. This adds a sweet chewiness that beautifully contrasts the crisp pretzel.

  • Seasonal Spice: Experiment with pumpkin pie spice during autumn for a festive flair. This seasonal twist turns your pretzels into an irresistible holiday treat that everyone will love.

  • Chili Heat: Want to bring some heat? Add a pinch of cayenne or chili powder to the toffee mixture. The heat creates an unexpected balance with the sweet toffee and salty pretzels.

  • Crunchy Cereal Mix: Toss in some crushed cornflakes or Rice Krispies for an unexpected crunch. They add delightful crispiness and create an interesting texture contrast that’s fun to munch on.

Enjoy trying out these variations, and don’t forget to check out my other delicious recipes like Crockpot Butter Chicken or explore flavor sensations with Chicken Adobo Again. Happy snacking!

How to Store and Freeze Butter Toffee Pretzels

Room Temperature: Store your Butter Toffee Pretzels in an airtight container at room temperature for up to one week to maintain their delicious crunch.

Fridge: Avoid refrigeration; it can cause the toffee to lose its delightful crispness, turning the pretzels soft and chewy.

Freezer: For longer storage, place cooled pretzels in a freezer-safe container or bag, separating layers with parchment paper, and freeze for up to 3 months.

Reheating: If your pretzels soften, refresh them by placing them on a baking sheet and warming in a preheated oven at 300°F (150°C) for about 5-10 minutes before serving.

Expert Tips for Butter Toffee Pretzels

  • Use a Heavy Pan: A heavy-bottomed saucepan helps prevent the toffee from burning. This is crucial for achieving a smooth, luscious coating.

  • Watch the Color: Look for a deep amber color as you cook the toffee; this indicates the perfect caramelization for your Butter Toffee Pretzels.

  • Work Quickly: Once you mix in the vanilla and baking soda, act fast when coating the pretzels, as the toffee hardens quickly.

  • Avoid Graininess: If your toffee mixture turns grainy, use a wet pastry brush to clean any sugar crystals from the saucepan's sides during cooking.

  • Storage Tip: Keep your Butter Toffee Pretzels in an airtight container at room temperature for up to one week to maintain that delightful crunch!

Make Ahead Options

These Butter Toffee Pretzels are fantastic for meal prep! You can prepare the toffee coating up to 24 hours in advance and store it in an airtight container in the refrigerator. To maintain the quality, simply reheat the toffee mixture gently in a saucepan before coating your pretzels. Additionally, you can bake the pretzels ahead of time and keep them in an airtight container at room temperature for up to one week, which keeps them fresh and crunchy. When you're ready to serve, you can drizzle melted chocolate or sprinkle sea salt over the cooled pretzels for an extra touch of indulgence. This way, you’ll have a delightful snack ready to enjoy with minimal effort!

What to Serve with Butter Toffee Pretzels?

Looking to create a delightful spread alongside your buttery sweet pretzels? Indulge your senses with these perfect pairings.

  • Creamy Vanilla Ice Cream: A scoop of this classic dessert offers a cool contrast to the warm, caramel-coated pretzels, making for a mouthwatering treat.

  • Fresh Fruit Salad: Bright, juicy fruits add a refreshing balance to the sweetness and saltiness of the pretzels, enhancing the overall flavor experience and bringing a pop of color to your table.

  • Nutty Trail Mix: Mix in some roasted nuts and dried fruits for a crunchy and savory accompaniment that complements the pretzels' rich toffee flavor. This adds texture and variety to your snacking options.

  • Chocolate-Dipped Strawberries: These luscious bites bring an elegant touch and extra sweetness to your gathering. Their fresh, tart flavor cuts through the rich toffee, offering a delightful contrast.

  • Sparkling Apple Cider: A bubbly beverage elevates your snack time, providing a refreshing fizz that complements the sweetness of the pretzels while keeping the mood festive.

  • Hot Chocolate: Cozy and rich, this warm drink pairs beautifully with the buttery toffee pretzels, creating a lovely indulgence perfect for chilly evenings.

  • Caramel Dip: Serve alongside sliced apples for a delightful experience. The two caramel flavors harmonize beautifully, playing up the sweet-salty notes of your butter toffee pretzels.

  • Nutty Brownies: These fudgy treats offer a chewy contrast to the crunchy pretzels, making for a dessert spread that caters to all preferences, leaving everyone satisfied.

Butter Toffee Pretzels Recipe FAQs

What kind of pretzels should I use for this recipe?
You can use mini pretzels as the base for your Butter Toffee Pretzels since they provide the perfect salty crunch. If you need a gluten-free option, simply substitute with gluten-free pretzels, and you’ll still enjoy that satisfying texture and flavor.

How should I store leftover Butter Toffee Pretzels?
Store your Butter Toffee Pretzels in an airtight container at room temperature for up to one week. This method keeps them perfectly crunchy. Avoid refrigeration, as that can soften the toffee and take away the delightful crunch you're after!

Can I freeze Butter Toffee Pretzels, and how should I do it?
Absolutely! To freeze your Butter Toffee Pretzels, first ensure they are completely cooled. Then, layer them in a freezer-safe container with parchment paper between each layer. This prevents them from sticking together. They can be stored in the freezer for up to 3 months. When you're ready to enjoy them, simply thaw at room temperature!

Why did my toffee mixture turn grainy while cooking?
If your toffee mixture becomes grainy, don’t worry! This can happen if sugar crystals form on the sides of the pan. To fix it during cooking, use a wet pastry brush to gently wipe the sides of the pan down. This keeps the sugar crystals from falling back into the mixture. Maintaining a good stir while cooking will also help create a smooth consistency.

Are there any dietary considerations for Butter Toffee Pretzels?
This recipe is vegetarian-friendly, but if you have specific dietary needs, like nut allergies, be cautious with the optional toppings. You can always omit nuts or substitute them with seeds if you want that added crunch. Additionally, if you’re using salted butter instead of unsalted, remember it could affect the overall flavor balance, so adjust salt levels accordingly.

Butter Toffee Pretzels Recipe

Buttery Sweet Butter Toffee Pretzels Recipe to Delight You

This Butter Toffee Pretzels Recipe transforms pretzels into a sweet-salty sensation with a luscious toffee coating.
Print Recipe Pin Recipe
Prep Time 15 minutes mins
Cook Time 45 minutes mins
Total Time 1 hour hr
Servings: 8 servings
Course: Snacks
Cuisine: American
Calories: 180
Ingredients Equipment Method Nutrition Notes

Ingredients
  

For the Pretzels
  • 8 cups Mini Pretzels Can substitute with gluten-free pretzels
For the Toffee Coating
  • 1 cup Unsalted Butter Salted butter can be used for a twist
  • 1 cup Brown Sugar Both light and dark varieties work
  • 1 teaspoon Vanilla Extract Optional but recommended
  • 1 teaspoon Baking Soda Can be omitted if avoiding
For Toppings (Optional)
  • 1 teaspoon Flaky Sea Salt Sprinkle on top before serving
  • 1 cup Melted Chocolate For drizzling on top

Equipment

  • Oven
  • Baking Sheet
  • Parchment Paper
  • Saucepan
  • Spatula

Method
 

Step-by-Step Instructions
  1. Preheat your oven to 250°F (120°C) and line a baking sheet with parchment paper.
  2. Spread the mini pretzels in a single layer on the lined baking sheet.
  3. Melt the unsalted butter in a saucepan over medium heat, then stir in the brown sugar and bring to a gentle boil for 3–4 minutes.
  4. Remove from heat and quickly stir in vanilla extract and baking soda, then pour the toffee sauce over the pretzels.
  5. Bake for 45 minutes, stirring every 15 minutes to ensure even baking.
  6. Allow to cool completely, then add toppings if desired.
  7. Store in an airtight container for freshness.

Nutrition

Serving: 1servingCalories: 180kcalCarbohydrates: 24gProtein: 2gFat: 8gSaturated Fat: 5gMonounsaturated Fat: 2gCholesterol: 20mgSodium: 230mgPotassium: 60mgFiber: 1gSugar: 10gVitamin A: 500IUCalcium: 20mgIron: 0.5mg

Notes

For best results, use a heavy-bottomed saucepan and watch the color of the toffee closely during cooking.

Tried this recipe?

Let us know how it was!

Decadent Butter Pecan Praline Poke Cake to Impress Your Guests

March 25, 2026 by Grace Snow Leave a Comment

There’s something so enchanting about the way a house fills with the aroma of freshly baked cake, isn’t there? This Moist Butter Pecan Praline Poke Cake blends the warmth of caramel with the crunch of toasted pecans in a way that feels like a cozy hug for your taste buds. Ideal for special gatherings, this easy-to-make dessert is sure to impress your family and friends, giving you the chance to shine as a home chef without the fuss. Picture the moist layers soaked in rich praline sauce and capped with fluffy whipped cream—a beautiful contrast of texture and flavor. Plus, it can be made ahead of time, making serving a breeze! Who wouldn’t want to dive into a slice of this delightful indulgence? So, are you ready to bring a little sweetness into your kitchen?

Why is this cake a must-try?

Decadent Flavors: This Butter Pecan Praline Poke Cake delivers an irresistible blend of caramel and toasted pecans, making each bite a delightful experience.

Effortless Preparation: With simple ingredients and straightforward steps, you can whip this up without any baking stress. Perfect for home cooks of all levels!

Make-Ahead Magic: Prepare in advance so you can focus on your guests. It’s best after chilling, meaning flavors deepen beautifully.

Texture Contrast: The balance of moist cake, gooey sauce, and fluffy whipped cream creates a symphony of delightful bites.

Crowd-Pleasing Appeal: Ideal for special occasions, this cake is sure to impress at gatherings, making everyone coming back for seconds.

Whether you’re hosting a dinner party or simply treating yourself, this cake promises to be a showstopper. You’ll also love our Crockpot Butter Chicken for a complete meal experience!

Butter Pecan Praline Poke Cake Ingredients

• Here's everything you need to create this indulgent treat!

For the Cake

  • Butter Pecan Cake Mix – The base of the cake; a homemade mix can elevate your flavors.
  • Eggs – Provides essential structure; use room temperature eggs for best results.
  • Oil – Ensures moisture and tenderness; unsweetened applesauce is a great lighter substitute.
  • Milk – Adds moisture and richness; almond milk works well for a dairy-free option.

For the Toppings

  • Pecans – Offers a crunchy texture and enhances the butter pecan flavor; use toasted pecans for an extra boost.
  • Heavy Cream – Essential for that fluffy homemade whipped cream; keep it chilled for optimal whipping.
  • Powdered Sugar – Sweetens the whipped cream beautifully; granulated sugar can substitute but might not dissolve as smoothly.

For the Praline Sauce

  • Brown Sugar – Creates a rich base; dark brown sugar adds deeper caramel notes.
  • Butter – Contributes to the sauce's richness; choose unsalted for control over the sweetness.
  • Cream – Integrates all the ingredients for a luscious praline sauce; heavy cream is best for creaminess.

With these ingredients for your Butter Pecan Praline Poke Cake in hand, you're ready to embark on a baking journey that leads to pure deliciousness! Enjoy the anticipation as you create a dessert that tantalizes taste buds and sparks joy.

Step‑by‑Step Instructions for Butter Pecan Praline Poke Cake

Step 1: Prepare Cake Mix
Begin by preheating your oven to 350°F (175°C). In a large mixing bowl, combine the butter pecan cake mix, room temperature eggs, oil, and milk. Stir until the mixture is smooth and well-blended, ensuring there are no lumps. Pour the batter into a greased 9x13-inch baking pan and bake for 30-35 minutes, or until a toothpick inserted into the center comes out clean.

Step 2: Make Praline Sauce
While the cake is baking, prepare the praline sauce. In a saucepan over medium heat, combine brown sugar, butter, and cream. Stir continuously until the sugar dissolves and the mixture begins to thicken, approximately 5-7 minutes. Once it reaches a rich, syrupy consistency, remove from heat and allow it to cool slightly.

Step 3: Poke the Cake
After the cake has finished baking, remove it from the oven and let it cool in the pan for about 10-15 minutes. Using the end of a wooden spoon, poke holes all over the top of the cake, creating space for the praline sauce to seep in. Pour the warm praline sauce evenly over the cake, ensuring it fills the holes and covers the surface generously.

Step 4: Chill the Cake
Once the cake is fully covered in praline sauce, place it in the refrigerator to chill for at least 2 hours. This resting time allows the flavors to meld beautifully and ensures the cake absorbs the delicious sauce. Trust the process, as this step is crucial for a moist Butter Pecan Praline Poke Cake.

Step 5: Prepare Whipped Cream
As the cake chills, turn your attention to the homemade whipped cream. In a mixing bowl, pour in the chilled heavy cream and add powdered sugar. Using an electric mixer, whip on high speed until soft peaks form, which usually takes about 3-5 minutes. The whipped cream should be light and fluffy, perfect for topping the cake.

Step 6: Garnish and Serve
Once the cake is chilled and the whipped cream is ready, take the cake out of the refrigerator. Spread the whipped cream evenly over the top, creating a luscious blanket. Finally, sprinkle toasted pecans over the whipped cream for an added crunch and beautiful presentation. Your Butter Pecan Praline Poke Cake is now ready to impress!

What to Serve with Butter Pecan Praline Poke Cake

The perfect meal brings people together, and this delightful dessert can brighten any gathering.

  • Creamy Vanilla Ice Cream: A scoop of vanilla ice cream adds a cool, creamy contrast that complements the rich flavors wonderfully. It's an indulgent pairing that enhances each bite.
  • Fresh Berry Salad: A medley of tart berries will provide a refreshing balance to the sweet richness of the poke cake, offering vibrant color and a burst of flavor.
  • Coffee or Espresso: The warm, bold notes of coffee or a shot of rich espresso elevate the dessert experience, underscoring the caramel tones beautifully.
  • Chocolate Ganache Drizzle: Drizzling warm chocolate ganache over each slice adds an extra layer of indulgence and decadence, turning this dessert into a chocoholic’s dream come true.
  • Pecan Pie Milkshake: Whip up a pecan pie milkshake for an indulgent drink. The flavors blend seamlessly, making each sip nostalgic and satisfying.
  • Buttery Biscuit Crumble: Serve with a sprinkle of buttery biscuit crumble for texture contrast—each bite will offer warmth and a homey crunch.
  • Whipped Coffee: If you're looking to keep the caffeine theme going, a whipped coffee (Dalgona) is a trendy, frothy option that pairs surprisingly well with the cake’s sweetness.
  • Chai-Spiced Hot Chocolate: For a twist, serve a chai-spiced hot chocolate. Its warm spices will echo the cake’s flavors while providing a comforting drink option.
  • Toasted Coconut Flakes: Sprinkle toasted coconut on top for an exotic touch, adding flavor and texture that enhances the poke cake’s nutty essence.
  • Maple Pecan Tarte: A slice of maple pecan tarte layered with flavors similar to the poke cake will create delightful synergy at the dessert table.

Butter Pecan Praline Poke Cake Variations

Feel free to make this delicious cake your own with these creative twists that invite delightful personalization.

  • Nut Swap: Substitute pecans with walnuts for a different texture and flavor that’s equally crunchy and delicious.
    You'll still enjoy that delightful, nutty essence that makes this cake so enjoyable!

  • Chocolate Indulgence: Add cocoa powder to the cake mix or use a chocolate cake base for an exciting twist.
    It’s a brilliant fusion of flavors that will leave chocolate lovers begging for more.

  • Creamy Ganache Drizzle: After adding the whipped cream, drizzle chocolate ganache over the top for an extra touch of decadence.
    The richness of the ganache complements the cake's sweetness beautifully.

  • Fruit Infusion: Add sliced bananas or berries between the cake and whipped cream layer for a fruity surprise.
    It’s a refreshing contrast that brightens each bite while enhancing the moistness!

  • Spice It Up: Incorporate a sprinkle of cinnamon or nutmeg into the batter for a warm, spicy note that elevates the dessert.
    This twist gives a cozy, comforting sensation, perfect for chilly evenings.

  • Caramel Love: Replace the praline sauce with butterscotch or caramel sauce for a different sweet dimension.
    It creates a glaze that ties the whole cake together with a delightful sweetness.

  • Dairy-Free Delight: Use almond or coconut milk instead of regular milk, and opt for a dairy-free whipped topping to cater to lactose-intolerant friends.
    This way, everyone can indulge in that heavenly cake.

Ready to dive into these scrumptious alternatives? Whatever you choose, don't miss out on pairing a slice with a scoop of vanilla ice cream for a truly unforgettable treat!

Make Ahead Options

These Butter Pecan Praline Poke Cakes are ideal for busy weeknights and can be prepared up to 24 hours in advance. To prep ahead, you can bake the cake and poke the holes, allowing it to cool before covering it with praline sauce. Once you've poured the sauce, refrigerate the cake for at least 2 hours before topping it with whipped cream—this chilling period enhances flavor absorption. When you’re ready to serve, whip the cream and spread it over the chilled cake, then garnish with toasted pecans. By prepping in advance, you’ll ensure your dessert is just as delicious and stress-free for your gathering!

Expert Tips for the Best Butter Pecan Praline Poke Cake

  • Use Room Temperature Eggs: Bringing eggs to room temperature helps them incorporate better, leading to a more even texture in your cake.

  • Don’t Rush the Praline Sauce: Allow the mixture to thicken properly over medium heat for a rich, syrupy result. Rushing this step can compromise flavor.

  • Poke Holes Gently: Use the end of a wooden spoon carefully to avoid breaking apart the cake; this helps the praline sauce seep into every bite without crumbling.

  • Chill Thoroughly: For the best soaking effect, allow the cake to chill for at least 2 hours. This aids in achieving that moist Butter Pecan Praline Poke Cake you crave.

  • Whip Cream Just Right: Stop whipping once soft peaks form. Overwhipping can lead to a grainy texture, while underwhipping won’t provide the lightness needed.

How to Store and Freeze Butter Pecan Praline Poke Cake

Fridge: Store the cake in an airtight container or cover it with plastic wrap to keep it moist. It will stay fresh for up to 5 days.

Freezer: To freeze, cut the cake into individual slices and wrap each piece tightly in plastic wrap, then foil. It'll last for up to 3 months in the freezer.

Thawing: When you're ready to enjoy a slice, simply transfer it to the fridge for a few hours or overnight to thaw gently, preserving its delicious texture.

Reheating: If you prefer warm cake, microwave a slice for about 15-20 seconds until just heated. Be careful not to overheat, as it can dry out the cake.

Butter Pecan Praline Poke Cake Recipe FAQs

What type of pecans should I use?
For the best flavor and texture, I recommend using toasted pecans. Toasting enhances their natural oils and brings out a richer nutty flavor that beautifully contrasts with the sweetness of the cake and praline sauce.

How should I store the Butter Pecan Praline Poke Cake?
Store your poke cake in an airtight container or cover it tightly with plastic wrap. It should stay fresh in the refrigerator for up to 5 days, maintaining its delightful moisture.

Can I freeze Butter Pecan Praline Poke Cake?
Absolutely! To freeze, cut the cake into individual slices and wrap each slice tightly in plastic wrap, followed by aluminum foil. This will keep it fresh for up to 3 months. When ready to enjoy, simply transfer the desired number of slices to the refrigerator to thaw overnight; this helps preserve its moistness.

What if my whipped cream doesn’t whip up properly?
If your whipped cream isn’t forming soft peaks, make sure your heavy cream is very cold! I often chill both the mixing bowl and beaters for about 15 minutes before whipping. If you've over-whipped and it becomes grainy, you can reduce the mixture again by gently folding in a fresh splash of cold cream.

Can I substitute ingredients for dietary reasons?
Yes! If you’re looking for a lighter option, replace the oil with unsweetened applesauce. For a dairy-free version, you can use almond milk instead of regular milk and a non-dairy whipped topping in place of heavy cream. This way, everyone can enjoy the decadence of this Butter Pecan Praline Poke Cake!

Butter Pecan Praline Poke Cake

Decadent Butter Pecan Praline Poke Cake to Impress Your Guests

This Butter Pecan Praline Poke Cake blends caramel and toasted pecans for a delightful dessert experience.
Print Recipe Pin Recipe
Prep Time 15 minutes mins
Cook Time 35 minutes mins
Chilling Time 2 hours hrs
Total Time 2 hours hrs 50 minutes mins
Servings: 12 slices
Course: Dessert
Cuisine: American
Calories: 350
Ingredients Equipment Method Nutrition Notes

Ingredients
  

For the Cake
  • 1 box Butter Pecan Cake Mix A homemade mix can elevate your flavors.
  • 3 large Eggs Use room temperature eggs for best results.
  • 1/2 cup Oil Unsweetened applesauce can be a lighter substitute.
  • 1 cup Milk Almond milk works well for a dairy-free option.
For the Toppings
  • 1 cup Pecans Use toasted pecans for an extra boost.
  • 1 cup Heavy Cream Keep it chilled for optimal whipping.
  • 1/4 cup Powdered Sugar Granulated sugar can substitute but might not dissolve as smoothly.
For the Praline Sauce
  • 1 cup Brown Sugar Dark brown sugar adds deeper caramel notes.
  • 1/2 cup Butter Choose unsalted for control over sweetness.
  • 1/2 cup Cream Heavy cream is best for creaminess.

Equipment

  • Mixing Bowl
  • Saucepan
  • Electric mixer
  • Baking pan

Method
 

Preparation Steps
  1. Preheat your oven to 350°F (175°C). In a large mixing bowl, combine the butter pecan cake mix, room temperature eggs, oil, and milk. Stir until smooth.
  2. Pour the batter into a greased 9x13-inch baking pan and bake for 30-35 minutes, or until a toothpick comes out clean.
  3. While the cake is baking, prepare the praline sauce by combining brown sugar, butter, and cream in a saucepan over medium heat.
  4. Stir continuously until the sugar dissolves and the mixture thickens, about 5-7 minutes. Cool slightly after reaching syrupy consistency.
  5. Let the cake cool for 10-15 minutes, then poke holes all over the top using a wooden spoon. Pour warm praline sauce over the cake.
  6. Refrigerate the cake for at least 2 hours to absorb the praline sauce.
  7. To make whipped cream, mix chilled heavy cream and powdered sugar with an electric mixer on high until soft peaks form.
  8. Spread the whipped cream over the chilled cake and sprinkle toasted pecans on top for garnish.

Nutrition

Serving: 1sliceCalories: 350kcalCarbohydrates: 45gProtein: 4gFat: 18gSaturated Fat: 10gPolyunsaturated Fat: 3gMonounsaturated Fat: 3gCholesterol: 80mgSodium: 300mgPotassium: 150mgFiber: 1gSugar: 25gVitamin A: 500IUCalcium: 100mgIron: 1mg

Notes

For best results, use room temperature eggs and chill the cake before serving.

Tried this recipe?

Let us know how it was!

Irresistible Pecan Praline Honey Butter for Cozy Mornings

March 25, 2026 by Grace Snow Leave a Comment

As I stirred together simple, wholesome ingredients one chilly afternoon, an inviting aroma enveloped my kitchen, transforming it into a cozy retreat. That’s when I first crafted my Creamy Pecan Praline Honey Butter. This delightful spread is not just easy to make; it’s a luxurious treat that elevates any breakfast or snack experience. The rich taste of salted butter combined with the sweet notes of honey and the warm crunch of toasted pecans creates a texture that’s both creamy and spreadable. Plus, it makes for the perfect homemade gift, wrapped up in a charming jar, ready to warm someone’s heart. Are you ready to indulge in this sweet, buttery concoction? Let’s dive in!

Why Is This Honey Butter So Irresistible?

Comforting flavors: The blend of salted butter and honey creates a warm, nostalgic taste reminiscent of cozy mornings.

Easy to whip up: With just a few simple ingredients, you can create a homemade spread that feels luxurious without any fuss.

Gift-worthy treat: Packaged in a pretty jar, this Pecan Praline Honey Butter makes a delightful gift, perfect for sharing with loved ones.

Versatile uses: Whether you spread it on warm biscuits, pancakes, or toast, it can enhance any breakfast or snack time.

Customizable: Feel free to experiment by swapping in walnuts or adding a pinch of sea salt for a unique twist!

Your mornings deserve a touch of sweetness—try this Pecan Praline Honey Butter and elevate your breakfast game today!

Pecan Praline Honey Butter Ingredients

• For the Butter

  • Salted Butter (room temperature) – Provides creaminess and richness; you can use unsalted butter and add a pinch of salt if preferred.
  • Honey – Supplies sweetness and natural flavor; maple syrup can be a delightful alternative.
  • Vanilla Extract – Enhances overall flavor complexity; always opt for pure vanilla extract for the best taste.
  • Cinnamon – Adds warmth and aromatic spice; feel free to adjust the amount based on your preference.

• For the Crunch

  • Pecan Pieces – Adds lovely crunch and nuttiness; toasting them elevates their flavor beautifully.

Step‑by‑Step Instructions for Pecan Praline Honey Butter

Step 1: Toast Pecans
Begin by heating a dry skillet over medium heat. Add the pecan pieces, stirring frequently for 3-5 minutes, or until they're fragrant and lightly golden. Keep a close eye to prevent burning, as they can toast quickly. Once toasted, remove them from the heat and allow them to cool completely.

Step 2: Beat Butter
In a mixing bowl, combine your room-temperature salted butter. Using a hand mixer or a stand mixer, beat the butter on medium speed for about 2 minutes. You want it to become light and fluffy, with a pale color that indicates it's ready for the next step.

Step 3: Add Ingredients
Drizzle in the honey slowly while continuing to mix the butter. Then, add the vanilla extract and cinnamon, ensuring they're well incorporated into the mix. Keep blending until the mixture is smooth and creamy, with no lumps remaining. This step will enhance the sweet flavor profile of your Pecan Praline Honey Butter.

Step 4: Incorporate Pecans
Now, gently fold the cooled, toasted pecans into the honey butter mixture using a rubber spatula. Take your time, ensuring the nuts are evenly distributed throughout the spread. This will add that delightful crunch and nuttiness to your Pecan Praline Honey Butter, elevating its texture and flavor.

Step 5: Store
Once everything is well combined, transfer the creamy Pecan Praline Honey Butter into a glass jar or an airtight container. Seal it tightly and place it in the refrigerator, where it can be stored for up to two weeks. For easier spreading, let it sit out at room temperature for a few minutes before using.

Pecan Praline Honey Butter Variations

Feel free to get creative with this Pecan Praline Honey Butter recipe and make it truly your own with these delightful twists!

  • Nut Swap: Replace pecans with walnuts or almonds for a fresh flavor twist. Both nuts provide a unique crunch and nuttiness that enhances this already delightful spread.

  • Maple Sweetener: Use maple syrup instead of honey for a distinct sweetness. This swap adds a rich, caramel-like flavor that pairs exceptionally well with the buttery notes.

  • Chocolate Delight: Fold in dark chocolate chips for an indulgent addition. The sweet, creamy chocolate complements the honey butter beautifully and adds an irresistible richness.

  • Spicy Kick: Add a pinch of cayenne pepper for a warm, spicy kick! This unexpected twist brightens the flavor profile and is sure to surprise and delight your taste buds.

  • Herb Infusion: Mix in fresh rosemary or thyme to introduce an aromatic element. These herbs complement the sweetness and add an intriguing depth that elevates your honey butter.

  • Extra Salt: A small pinch of sea salt can truly enhance the sweetness of the butter. The contrast between sweet and salty creates an addictive flavor experience that keeps you coming back for more.

  • Cinnamon Variations: Substitute pumpkin pie spice for cinnamon to introduce a seasonal flair. This cozy mix brings a familiar taste of fall that beautifully harmonizes with any breakfast dish.

  • Vegan Option: Use coconut oil in place of butter for a dairy-free version. This simple swap allows everyone to enjoy the creamy texture while maintaining that traditional spreadable quality.

These variations promise to keep your Pecan Praline Honey Butter exciting! Try serving it on warm biscuits, pancakes, or even as a topping for your favorite desserts. If you’re looking for more tasty spreads, be sure to check out my recipes for Honey Garlic Chicken and Maple Roasted Pecans for delicious possibilities. Enjoy your culinary adventure!

Make Ahead Options

Pecan Praline Honey Butter is a fantastic choice for meal prep, saving you precious time during the busy week. You can prepare the entire mixture up to 24 hours in advance, giving the flavors time to meld beautifully. Simply follow the recipe up to the storage step, transferring the butter to a glass jar or an airtight container before refrigerating. To maintain quality, be sure to seal it tightly, preventing air from altering its creamy texture. When you're ready to serve, let the Pecan Praline Honey Butter sit at room temperature for about 10-15 minutes for easier spreading, ensuring it’s just as delightful as when freshly made!

Expert Tips for Pecan Praline Honey Butter

  • Temperature Matters: Allow your butter to soften at room temperature for 10-15 minutes to ensure easy spreading, making your Pecan Praline Honey Butter a delight to enjoy right away.

  • Mixing Consistency: For a smoother texture, add a teaspoon of oil if using dairy-free options; this creates that heavenly creamy spreadability without sacrificing flavor.

  • Gift Presentation: Elevate your homemade gift by packaging the Pecan Praline Honey Butter in a mason jar with decorative ribbon and a personalized label, making it a thoughtful treat for friends and family.

  • Avoid Over-Toasting: Keep a close eye on your pecans while toasting; they can quickly go from golden to burnt, so stir frequently to achieve that perfect crunch.

  • Flavor Enhancements: Feel free to swap out pecans for walnuts or almonds, and try adding a pinch of sea salt to enhance the sweetness for a custom flavor twist.

Storage Tips for Pecan Praline Honey Butter

  • Fridge: Keep your Pecan Praline Honey Butter in an airtight container in the refrigerator to maintain freshness for up to two weeks.

  • Room Temperature: Allow the butter to sit at room temperature for 10-15 minutes before serving for easier spreading and full flavor enjoyment.

  • Freezer: For longer storage, freeze the butter in a freezer-safe container for up to three months. Thaw overnight in the fridge before using again.

  • Reheating: If desired, gently warm a small portion in the microwave in 10-second increments to soften it up, making it perfect for spreading on your favorite breakfast treats.

What to Serve with Pecan Praline Honey Butter

Indulging in a cozy breakfast becomes even more inviting when paired with delightful accompaniments that elevate the experience.

  • Warm Biscuits: Fluffy and buttery, these serve as a perfect canvas for the honey butter, soaking up its rich flavors.
  • Fluffy Pancakes: The sweetness of pancakes complements the Pecan Praline Honey Butter, creating a breakfast that feels like a warm hug.
  • Toasted Bagels: Add a crispy texture by spreading this butter on a toasted bagel; its creamy richness is enhanced by the crunch.
  • Cinnamon Rolls: The warmth of freshly baked cinnamon rolls paired with the nutty sweetness of the butter makes for a delightful pairing.
  • Yogurt Parfaits: Layer creamy yogurt with fresh fruits and a dollop of honey butter for a refreshing breakfast treat. This adds a unique twist to traditional parfaits.
  • Coffee or Tea: Enjoy with a warm cup of your favorite beverage; the combination of flavors creates a comforting morning ritual.
  • Fruit Platter: Pair with sliced apples or pears, their natural sweetness and crispness harmonize beautifully with the Pecan Praline Honey Butter.
  • Homemade Muffins: Spread this luscious butter on warm muffins for a delightful indulgence, perfect for brunch gatherings.

Pecan Praline Honey Butter Recipe FAQs

What should I look for when selecting pecan pieces?
Absolutely! When choosing pecan pieces, look for ones that are plump, fresh, and free from dark spots or blemishes. If possible, opt for raw pecans and toast them to enhance their flavor. A light golden color with a crisp texture indicates they’re just right for your Creamy Pecan Praline Honey Butter.

How should I store Pecan Praline Honey Butter, and how long does it last?
Very! Store your Pecan Praline Honey Butter in an airtight container in the fridge, where it will stay fresh for up to two weeks. For maximum flavor retention, ensure it's sealed tightly. Before using, let it sit out for 10-15 minutes to soften for easier spreading—your taste buds will thank you!

Can I freeze Pecan Praline Honey Butter?
Of course! To freeze your Pecan Praline Honey Butter, transfer it to a freezer-safe container, leaving some space at the top since it will expand. It can be frozen for up to three months. When you’re ready to use it, thaw it overnight in the refrigerator. If it seems too firm after thawing, warm it gently in the microwave in 10-second bursts for a spreadable consistency.

What if my Pecan Praline Honey Butter is too hard to spread?
Not to worry! If your Pecan Praline Honey Butter is too hard right out of the fridge, simply let it sit at room temperature for about 10-15 minutes. This allows it to soften for easier spreading. If you need it even quicker, a brief microwave session of 10 seconds should do the trick—just be sure to stir it afterward for even consistency.

Is this recipe suitable for those with allergies?
Absolutely! This recipe contains nuts and dairy ingredients, which may not be suitable for everyone. Be cautious with allergies to nuts, specifically pecans. For a dairy-free alternative, consider using coconut oil in place of butter. Make sure to inform anyone you're serving to about the ingredients—safety first!

What are some delicious ways to use Pecan Praline Honey Butter?
The more the merrier! Spread it generously on warm biscuits, pancakes, or toast for a cozy breakfast treat. You can also use it as a sweet topping for oatmeal or even swirl it into yogurt for a delicious snack. Get creative—this butter can elevate any sweet dish into something truly special!

Pecan Praline Honey Butter

Irresistible Pecan Praline Honey Butter for Cozy Mornings

Delight in this Pecan Praline Honey Butter - a creamy, sweet spread perfect for elevating any breakfast or snack experience.
Print Recipe Pin Recipe
Prep Time 15 minutes mins
Cook Time 5 minutes mins
Cooling Time 15 minutes mins
Total Time 35 minutes mins
Servings: 1 jar
Course: Snacks
Cuisine: American
Calories: 100
Ingredients Equipment Method Nutrition Notes

Ingredients
  

For the Butter
  • 1 cup Salted Butter room temperature
  • 1/2 cup Honey or maple syrup
  • 1 teaspoon Vanilla Extract pure
  • 1/2 teaspoon Cinnamon adjust to taste
For the Crunch
  • 1 cup Pecan Pieces toasted; for best flavor

Equipment

  • Mixing Bowl
  • hand mixer
  • Skillet
  • Spatula
  • glass jar

Method
 

Step-by-Step Instructions
  1. Begin by heating a dry skillet over medium heat. Add the pecan pieces, stirring frequently for 3-5 minutes, or until they're fragrant and lightly golden. Remove them from heat and allow to cool completely.
  2. In a mixing bowl, combine your room-temperature salted butter. Using a hand mixer, beat the butter on medium speed for about 2 minutes until light and fluffy.
  3. Drizzle in the honey slowly while continuing to mix the butter. Add the vanilla extract and cinnamon, ensuring they're well incorporated. Blend until smooth and creamy.
  4. Gently fold the cooled, toasted pecans into the honey butter mixture with a rubber spatula until evenly distributed.
  5. Transfer the creamy Pecan Praline Honey Butter into a glass jar or airtight container. Seal tightly and refrigerate for up to two weeks.

Nutrition

Serving: 1tablespoonCalories: 100kcalCarbohydrates: 14gProtein: 1gFat: 5gSaturated Fat: 2gPolyunsaturated Fat: 0.5gMonounsaturated Fat: 2gCholesterol: 15mgSodium: 50mgPotassium: 30mgSugar: 12g

Notes

For smoother texture, add a teaspoon of oil if using dairy-free options. Allow butter to soften at room temperature for easier spreading.

Tried this recipe?

Let us know how it was!

Delicious High-Protein Veggie Bake with Cottage Cheese You’ll Love

March 25, 2026 by Grace Snow Leave a Comment

As I pulled the golden High-Protein Veggie Bake with Cottage Cheese from the oven, the delightful aroma of roasted vegetables and melted cheese filled my kitchen. This recipe has become a weekly staple for me, effortlessly blending vibrant veggies into a creamy, protein-packed dish that's both comforting and satisfying. Not only is it quick to prepare—perfect for busy weeknights—but it’s also remarkably versatile, allowing you to customize the mix of vegetables based on what you have on hand. Whether you’re serving it as a hearty main course or a delightful side dish, this veggie bake will leave your friends and family asking for seconds. Are you ready to discover a new favorite that fits seamlessly into your meal prep routine?

Why Is This Veggie Bake a Must-Try?

Healthy, high-protein goodness: Packed with cottage cheese, this dish delivers essential protein to fuel your day.
Effortless preparation: With just a few simple steps, you can have a nourishing meal ready in under an hour.
Versatile vegetable options: Swap in seasonal favorites or whatever’s in your fridge to keep it exciting—think spinach, bell peppers, or zucchini!
Satisfying textures: Enjoy the crispy top layer and creamy interior that mimics both a frittata and a comforting casserole.
Meal prep superstar: Perfect for making ahead, just bake and reheat for an easy weeknight dinner. This High-Protein Veggie Bake with Cottage Cheese is sure to be a crowd-pleaser, just like Cheesy Zucchini Bake or Jello Salad Cottage.

High-Protein Veggie Bake Ingredients

• The key to flavorful success!

For the Base
• Cottage Cheese – Offers creamy texture and high-protein goodness; can substitute with ricotta for a different twist.
• Eggs – Binds the mixture together and adds richness; remember to beat them lightly for even incorporation.

For the Veggies
• Mixed Vegetables (e.g., spinach, bell peppers, zucchini) – A vital source of nutrition and flavor; can swap based on what’s in season or what’s in your fridge.
• Garlic Powder – Elevates the flavor profile; fresh garlic can be used if you prefer a stronger taste.

For Seasoning
• Salt & Pepper – Essential for seasoning; adjust to your personal taste for the perfect balance.

For the Topping
• Cheddar Cheese – Adds a melty, rich finish on top; feel free to use mozzarella or a dairy-free alternative if desired.

This High-Protein Veggie Bake with Cottage Cheese is not only delicious but customizable to suit your tastes and pantry!

Step‑by‑Step Instructions for High-Protein Veggie Bake with Cottage Cheese

Step 1: Preheat Your Oven
Begin by preheating your oven to 375°F (190°C). This step is essential for ensuring that your High-Protein Veggie Bake with Cottage Cheese cooks evenly and achieves that perfect golden crust. Allow the oven to warm up while you prepare your ingredients, filling your kitchen with anticipation for the deliciousness to come.

Step 2: Prepare Your Baking Dish
While the oven heats up, take a baking dish and lightly grease it with nonstick spray or a drizzle of olive oil. This will prevent sticking and make the cleanup easier. A 9x9 inch or similar size works wonderfully for this recipe. Ensuring your dish is ready creates a seamless transition for pouring in your vegan mixture.

Step 3: Mix Cottage Cheese and Eggs
In a large mixing bowl, combine the cottage cheese and lightly beaten eggs. Use a whisk or fork to blend them together until smooth and creamy, about 2-3 minutes. This mixture will serve as the flavorful base for your High-Protein Veggie Bake, so aim for a consistent, lump-free texture to ensure even distribution of flavors.

Step 4: Season Your Base
Add garlic powder, salt, and pepper to the cottage cheese and egg mixture. Stir until all the seasonings are well incorporated, allowing the savory notes to meld beautifully. Taste the mixture to ensure it's seasoned to your liking. This step adds depth to the dish, setting the stage for the vibrant veggies to shine.

Step 5: Fold in the Vegetables
Gently fold in your choice of mixed vegetables such as spinach, bell peppers, and zucchini into the cottage cheese mixture. Be careful not to overmix; you want to retain the integrity of the veggies. Aim for even distribution so that every bite of the High-Protein Veggie Bake is packed with nutrition and flavor.

Step 6: Transfer the Mixture
Pour the vegetable and cottage cheese mixture into your prepared baking dish. Use a spatula to spread it out evenly across the dish, ensuring an even bake. This step is crucial as an even layer allows the bake to cook uniformly, helping you achieve a perfectly balanced texture throughout.

Step 7: Top with Cheese and Bake
Sprinkle cheddar cheese generously over the top of the mixture, adding that irresistible melty finish. Place the dish in the preheated oven and bake for 30-35 minutes. Keep an eye on it until the top is golden brown and the center is firm to the touch, signaling that it’s ready to be enjoyed.

Step 8: Cool Before Serving
Once baked to perfection, remove the High-Protein Veggie Bake from the oven and let it cool for about 10 minutes. This resting period allows the dish to set, making it easier to cut into squares without falling apart. The cooling not only enhances the flavors but also improves the texture, making each serving enjoyable.

High-Protein Veggie Bake with Cottage Cheese Variations

Feel free to get creative with this delicious High-Protein Veggie Bake, enhancing flavors and textures to suit your taste buds!

  • Dairy-Free: Substitute cottage cheese with almond or coconut yogurt for a creamy, non-dairy version. This helps cater to lactose intolerant friends without sacrificing flavor.

  • Protein-Packed Twist: Add cooked quinoa or lentils to boost the protein content further. It's a lovely way to make it even more filling while retaining the delightful vegetable flavors.

  • Spicy Kick: Stir in diced jalapeños or sprinkle red pepper flakes into the mixture for a fiery touch. The heat balances beautifully against the creamy texture, creating an exciting flavor profile.

  • Herb-Infused: Mix in fresh herbs like basil, thyme, or cilantro for an aromatic lift. These herbs can make the dish pop with freshness, elevating your meal experience.

  • Cheese Lovers: Experiment with different cheeses, like feta or goat cheese, instead of cheddar for unique flavors. These cheeses can add a tangy twist that perfectly complements the veggies.

  • Savory Additions: Incorporate sautéed mushrooms or caramelized onions into your veggie mix for an umami boost. These additions bring another layer of depth to your bake, making each bite irresistible.

  • Crunchy Topping: For a delightful texture contrast, sprinkle breadcrumbs or crushed nuts on top before baking. This creates a delightful crunch that pairs perfectly with the creamy interior.

Explore these delicious options to craft a High-Protein Veggie Bake with Cottage Cheese that reflects your unique culinary style. And don’t forget, this dish stands shoulder-to-shoulder with comforting favorites like Sweet Potatoes Black or the vibrant Tagliatelle Asparagus Peas!

Make Ahead Options

These High-Protein Veggie Bake with Cottage Cheese options are a game-changer for meal prep! You can mix the cottage cheese, eggs, and seasonings, then incorporate your chopped vegetables up to 24 hours in advance, storing the mixture in an airtight container in the refrigerator. This makes your prep efficient and your weeknights much easier. When you're ready to bake, simply pour the mixture into your greased dish, top with cheddar cheese, and bake as instructed. To maintain quality, avoid pre-baking the mixture, as it can dry out; the final dish will be just as delicious when baked fresh!

How to Store and Freeze High-Protein Veggie Bake with Cottage Cheese

  • Fridge: Store the High-Protein Veggie Bake in an airtight container for up to 3 days. Make sure it cools completely before sealing to prevent condensation.
  • Freezer: For longer storage, wrap individual portions tightly in plastic wrap and then place them in a freezer-safe bag. It will keep well for up to 3 months.
  • Reheating: When ready to enjoy, thaw overnight in the fridge if frozen. Reheat in a preheated oven at 350°F (175°C) for around 15-20 minutes until heated through.
  • Tips: To maintain freshness, avoid reheating more than once and try to consume within the recommended timeframes for the best taste and texture.

Expert Tips for High-Protein Veggie Bake

  • Season to Taste: Adjust salt and pepper levels based on your preference; under-seasoning can lead to a bland dish.

  • Vegetable Variety: Use seasonal vegetables for the freshest flavors or whatever you have on hand to keep the High-Protein Veggie Bake with Cottage Cheese exciting.

  • Cooling Time: Make sure to let the bake cool slightly before cutting; this helps maintain its structure and ensures a perfect serving.

  • Cheese Alternatives: Experiment with different cheeses like mozzarella, pepper jack, or vegan options to suit dietary preferences and enhance the flavor.

  • Protein Boost: Add cooked protein such as shredded chicken, turkey, or beans for an extra hearty dish that’s even more satisfying.

What to Serve with High-Protein Veggie Bake with Cottage Cheese

Creating a memorable meal around this hearty dish is a delightful culinary adventure.

  • Mixed Green Salad: A fresh, crisp salad with a zesty vinaigrette adds brightness and balances the creamy bake's richness.
  • Garlic Breadsticks: Warm, buttery breadsticks with a hint of garlic pair beautifully, perfect for mopping up every delicious bite!
  • Roasted Asparagus: Smoky, tender asparagus brings a wonderful contrast in texture and flavor, enhancing the vegetable medley.
  • Quinoa Pilaf: This light, fluffy quinoa tossed with herbs creates a nutritious, textural compliment that elevates your meal.
  • Herbed Yogurt Sauce: Drizzling a cool yogurt sauce seasoned with herbs and spices adds a refreshing touch to your plate.
  • Crispy Brussels Sprouts: Savory and crispy sprouts add depth and a satisfying crunch alongside the soft veggie bake.
  • Sparkling Water with Lemon: A bubbly drink infused with lemon zest refreshes your palate and complements the bake’s flavors beautifully.
  • Chocolate Mousse: End your meal on a high note with rich, velvety chocolate mousse—a sweet indulgence to contrast the savory bake.

Each of these pairings enhances the High-Protein Veggie Bake with Cottage Cheese, making your dining experience both satisfying and delightful!

High-Protein Veggie Bake with Cottage Cheese Recipe FAQs

What types of vegetables work best for this Veggie Bake?
Absolutely! You can use a variety of mixed vegetables based on what’s in season or what you have on hand. Spinach, bell peppers, and zucchini are excellent choices. Feel free to swap them out or add in cooked broccoli, mushrooms, or even sweet potatoes for a unique twist.

How should I store leftovers from the High-Protein Veggie Bake?
Very simple! Just place any leftovers in an airtight container and store them in the refrigerator. They can last up to 3 days. Make sure your bake has cooled completely before sealing to avoid condensation, which can make it soggy.

Can I freeze the High-Protein Veggie Bake with Cottage Cheese?
Definitely! To freeze, first, let the bake cool down. Then, slice it into individual portions, wrap each slice tightly in plastic wrap, and place them in a freezer-safe bag. This way, you can enjoy it later for up to 3 months! When you're ready to eat, thaw it overnight in the fridge and reheat in a preheated oven at 350°F (175°C) for about 15-20 minutes.

What if my Veggie Bake doesn't set properly?
This can happen if the eggs aren’t mixed thoroughly or if it’s undercooked. Make sure the eggs are well incorporated into the cottage cheese mixture and check for a firm center before taking it out of the oven. If you encounter this issue again, you can bake it a bit longer in 5-minute increments until it reaches that golden perfection you desire.

Are there any dietary considerations I should keep in mind?
Yes, indeed! If you're cooking for someone with a dairy allergy, you can substitute cottage cheese with a lactose-free version or a plant-based alternative like tofu. Before serving, double-check with your guests about potential allergies, especially as certain vegetables or seasonings may trigger sensitivities.

Can I add extra protein to the Veggie Bake?
Of course! You can easily enhance the protein content by adding cooked chicken, turkey, or beans to the vegetable mixture. Aim for about 1 cup of cooked protein mixed in with your veggies for a heartier dish that will keep everyone satisfied.

High-Protein Veggie Bake with Cottage Cheese

Delicious High-Protein Veggie Bake with Cottage Cheese You’ll Love

This High-Protein Veggie Bake with Cottage Cheese is a nutritious and satisfying dish packed with vegetables and creamy goodness.
Print Recipe Pin Recipe
Prep Time 15 minutes mins
Cook Time 35 minutes mins
Cooling Time 10 minutes mins
Total Time 1 hour hr
Servings: 4 slices
Course: Dinner
Cuisine: American
Calories: 200
Ingredients Equipment Method Nutrition Notes

Ingredients
  

Base
  • 2 cups Cottage Cheese Can substitute with ricotta
  • 4 large Eggs Beat lightly
Veggies
  • 2 cups Mixed Vegetables e.g., spinach, bell peppers, zucchini
  • 1 teaspoon Garlic Powder Fresh garlic can be used
Seasoning
  • 1 teaspoon Salt Adjust to taste
  • 1 teaspoon Pepper Adjust to taste
Topping
  • 1 cup Cheddar Cheese Can use mozzarella or dairy-free alternative

Equipment

  • Baking Dish
  • Mixing Bowl
  • Whisk

Method
 

Instructions
  1. Preheat your oven to 375°F (190°C).
  2. Lightly grease a baking dish with nonstick spray or olive oil.
  3. In a large mixing bowl, combine the cottage cheese and lightly beaten eggs until smooth.
  4. Add garlic powder, salt, and pepper, stirring to mix well.
  5. Gently fold in mixed vegetables.
  6. Pour the mixture into the prepared baking dish.
  7. Sprinkle cheddar cheese on top and bake for 30-35 minutes.
  8. Cool for about 10 minutes before serving.

Nutrition

Serving: 1sliceCalories: 200kcalCarbohydrates: 10gProtein: 18gFat: 10gSaturated Fat: 5gPolyunsaturated Fat: 1gMonounsaturated Fat: 3gCholesterol: 140mgSodium: 300mgPotassium: 400mgFiber: 2gSugar: 3gVitamin A: 1200IUVitamin C: 25mgCalcium: 200mgIron: 1mg

Notes

Experiment with different vegetables and cheeses for variety. Letting the bake cool helps maintain its structure.

Tried this recipe?

Let us know how it was!

Delightful Easy Easter Dip Recipe for a Sweet Spring Treat

March 25, 2026 by Grace Snow Leave a Comment

As I prepared for our family's Easter gathering, I decided that a splash of color and flavor was needed to brighten the table. Enter my Easy Easter Dip Recipe, a delightful combination of creamy goodness and fruity sweetness that takes a mere 15 minutes to whip up! It's the ultimate festive treat that promises to bring smiles and satisfaction to all—because who doesn't love a dish that's quick, easy, and a total crowd-pleaser? With creamy cream cheese blended harmoniously with vibrant fruits and playful candy melts, it’s not just pretty to look at; it's the perfect excuse to ditch fast food for something homemade and joyful. So, what will you pair with this dip—fresh fruit, crunchy cookies, or maybe even a few festive sprinkles?

Why Make This Easy Easter Dip?

Simplicity at its finest: This Easy Easter Dip only takes 15 minutes to whip up, making it a stress-free addition to your spring gathering.
Colorful & Inviting: Bursting with vibrant fruits, it not only tastes great but looks fantastic on any table, enticing guests of all ages!
Versatile Options: Feel free to customize colors with candy melts to suit any occasion or use a variety of fun dippers, just like with my Breakfast Egg Muffins for an unforgettable spread.
Crowd-Pleaser: With its creamy texture and sweet fruit blend, expect everyone to come back for more—perfect for family gatherings or Easter brunch!
Quick to Prepare: Save time with minimal prep—just mix, chill, and serve. Ditch the fast food and enjoy homemade comfort with this joyful dip!
Light & Sweet: Each serving is not only satisfying but also packs a punch of fruity goodness while keeping the calories in check.

Easy Easter Dip Ingredients

For the Dip
• Pineapple Chunks – Adds natural sweetness and a juicy texture. Note: Fresh or canned can be used, but drain well to avoid excess moisture.
• Maraschino Cherries – Provide a pop of color and sweetness. Note: Can substitute with fresh cherries if preferred.
• Mandarin Oranges – Contribute a tangy flavor and additional sweetness. Note: Use canned, but ensure they are well-drained.
• Cream Cheese (16 oz) – The base of the dip, providing a rich, creamy texture. Make sure it's softened for easier mixing.
• Sour Cream (½ cup) – Adds tanginess and creaminess. Note: Greek yogurt can be a lighter substitute.
• Powdered Sugar (½ cup) – Provides sweetness and balances the tang of the cream cheese.
• Bright Pink Candy Melts (1 cup) – Used for coloring the dip and adding sweetness. Note: Can customize color for different holidays (green for St. Patrick's Day, orange for Halloween).
• Spring Themed Sprinkles – For decoration. Note: Choose your favorite themed sprinkles for added festivity.
• Assorted Cookies/Graham Crackers/Fruit – Serve for dipping. Note: Use your preferred dippers to enhance the experience.

Step‑by‑Step Instructions for Easy Easter Dip Recipe

Step 1: Drain the Fruit
Begin by thoroughly draining the pineapple chunks and maraschino cherries in a colander. This step is crucial to prevent excess moisture from making your Easy Easter Dip soupy. Allow the fruit to sit for a few minutes while you prepare the next steps, ensuring that both the fruits are well-drained before mixing.

Step 2: Mash the Fruit
In a medium-sized mixing bowl, combine the drained pineapple and maraschino cherries. Using a fork, mash the fruit together until smaller pieces form, taking care not to puree them completely. Once mashed, drain any additional juice that might have collected, keeping your dip creamy and thick.

Step 3: Prepare the Cream Mixture
In another bowl, beat together the softened cream cheese, sour cream, and powdered sugar until the mixture is smooth and creamy. This should take about 2–3 minutes with a hand mixer or stand mixer on medium speed. The cream mixture serves as the luscious base for your Easy Easter Dip, ensuring every bite is rich with flavor.

Step 4: Combine Ingredients
Gently fold the mashed fruit into the cream mixture until fully combined, ensuring an even distribution of fruity goodness. Then, add the drained mandarin oranges and mix carefully, preserving their shape and adding a delightful burst of flavor to the dip. This is where your Easy Easter Dip starts to come together beautifully!

Step 5: Melt Candy Melts
In a microwave-safe bowl, heat the bright pink candy melts in 10- to 20-second intervals, stirring in between until completely melted. Ensure you do not overheat; the candy should be smooth and pourable. Once melted, let the candy cool slightly so it doesn’t curdle the cream mixture when added.

Step 6: Mix Candy with Dip
Pour the melted candy melts into the fruit and cream mixture, stirring until completely blended. The addition of candy melts not only colors the dip but also adds a sweet flavor that complements the fruits. Your Easy Easter Dip will turn a lovely pink, making it visually appealing for your festive gathering.

Step 7: Chill the Dip
Cover the bowl with plastic wrap and place the dip in the refrigerator to chill for about 30 minutes. Chilling allows the flavors to meld together and the dip to firm up slightly. This step is essential for achieving the perfect texture when you're ready to serve!

Step 8: Serve with Dippers
After chilling, remove your Easy Easter Dip from the refrigerator and garnish with spring-themed sprinkles for an extra festive touch. Serve it alongside a selection of assorted cookies, graham crackers, or fresh fruit for dipping. Enjoy the delightful combination of creamy dip and sweet dippers that will be a hit at your Easter gathering!

How to Store and Freeze Easy Easter Dip

Fridge: Store leftover dip in an airtight container for up to 2 days. Be sure to keep it covered to maintain freshness and prevent it from absorbing other odors.

Freezer: While you can freeze the Easy Easter Dip, it’s best enjoyed fresh. If needed, freeze in a labeled container for up to 1 month. Thaw in the fridge overnight before serving.

Reheating: If chilled dip is too thick after being in the fridge, give it a gentle stir to loosen. Avoid reheating in the microwave, as it may affect texture—better served cold!

Serving: After thawing, consider remixing or adding fresh fruits for a bright touch and to restore some of the original flavors before serving.

Expert Tips for Easy Easter Dip

  • Softened Cream Cheese: Make sure your cream cheese is at room temperature for smooth mixing. Cold cream cheese can lead to lumps in your Easy Easter Dip.

  • Drain Fruit Well: Don’t skip on draining the pineapple and cherries thoroughly. Excess liquid can make your dip watery, ruining the creamy texture.

  • Chill for Flavor: Allow the dip to chill for at least 30 minutes before serving; this helps the flavors meld beautifully for a richer taste experience.

  • Customization Ideas: Try swapping fruit, using festive sprinkles, or changing candy melt colors for various holidays. The flexibility of this Easy Easter Dip recipe makes it perfect for any occasion!

  • Serving Suggestions: Pairing your dip with dynamic dippers like chocolate-covered pretzels or fresh strawberries can elevate the flavor even more.

What to Serve with Easy Easter Dip?

As you gather with family and friends this spring, find harmony in textures and flavors to complement your festive dip.

  • Graham Crackers: Their slightly sweet and crunchy surface pairs beautifully with the creamy dip, enhancing every bite.
  • Fresh Strawberries: The juicy tartness of strawberries offers a refreshing contrast to the sweet dip, making them a colorful, healthy option.
  • Mini Marshmallows: Soft and fluffy, they echo the sweetness of the dip while adding a lovely chewiness. Consider letting your guests sprinkle them on top for added fun!
  • Chocolate-Covered Pretzels: Combining sweet and salty, these crunchy treats elevate the flavor profile and add a wonderful textural contrast to the creamy dip.
  • Assorted Cookies: Choose an array of cookies—think buttery shortbread or classic vanilla wafers—to provide flavorful variety and sweetness. Each cookie can bring its unique charm to your gathering.
  • Carrot Sticks: For a healthy twist, crunchy carrot sticks lend a bright, earthy flavor and vibrant color, tempting even those who prefer savory options.
  • Sparkling Lemonade: A bubbly, citrusy drink brightens up the table and cuts through the richness, keeping everyone refreshed during those festive moments.
  • Fruit Skewers: A colorful mix of pineapple, melon, and grapes not only looks beautiful but also enhances those fruity flavors in the dip, making every bite a celebration of spring!

Easy Easter Dip Recipe Variations

Feel free to personalize your dip experience with these fun and festive twists that can enhance flavor and creativity!

  • Colorful Candy Melts: Swap the bright pink melts for pastel colors to match your Easter theme. This playful touch will visually delight your guests. Experimentation is half the fun, so consider changing colors for seasonal celebrations like Halloween or Christmas too!

  • Fresh Fruit Medley: Incorporate strawberries, blueberries, or kiwi for a unique twist. These fresh additions elevate texture and flavor, creating a dreamy dip experience that's bursting with freshness.

  • Nutty Crunch: Add crushed nuts, like almonds or walnuts, for a delightful crunch. This also introduces a new layer of flavor that beautifully complements the creamy base of the dip.

  • Dairy-Free Delight: Use dairy-free cream cheese and coconut yogurt as alternatives for a vegan-friendly version. The fruity blend shines through, delivering a deliciously creamy experience for all!

  • Zesty Citrus Boost: Add the zest of a lemon or lime to amplify the dip's freshness. This zesty kick brightens each bite, perfect for those warm spring gatherings.

  • Spiced Up Sweetness: Mix in a sprinkle of cinnamon or nutmeg for a warm, comforting flavor. Pair this with sweeter fruits for an unexpected yet delightful flavor profile.

  • Texture Variation: Fold in mini marshmallows for an extra cushy feel. Their chewy texture creates a lovely balance to the creamy dip, making every scoop so much fun!

  • Tropical Twist: Use coconut flakes or diced mango to bring a taste of the tropics into your dip. This vibrant addition transports you straight to a sunny beach picnic!

Feel free to experiment with these variations or check out my other recipes, like Chicken Adobo Again for more festive inspiration to elevate your gatherings. Remember, the only limit is your creativity!

Make Ahead Options

These Easy Easter Dip recipes are perfect for meal prep enthusiasts! You can prepare the cream mixture (cream cheese, sour cream, and powdered sugar) up to 24 hours in advance and store it in an airtight container in the refrigerator. You can also drain and mash the fruits a day ahead, keeping them refrigerated to maintain their freshness. Just remember to combine all ingredients and fold in the melted candy melts shortly before serving to ensure a luscious texture. This way, your Easy Easter Dip will be just as delightful and ready to impress, saving you precious time on the day of your celebration!

Easy Easter Dip Recipe FAQs

What type of fruit should I use in the dip?
Absolutely! For the best results, I recommend using fresh pineapple and maraschino cherries. If you opt for canned fruits, ensure they are well-drained to prevent excess moisture. Fresh sweet cherries or mandarin oranges can also be excellent alternatives!

How should I store leftover Easy Easter Dip?
Store any leftover dip in an airtight container in the refrigerator for up to 2 days. Keeping it covered will help maintain its freshness and flavor. Just remember to give it a gentle stir before serving again, as it may thicken a bit in the fridge.

Can I freeze the Easy Easter Dip?
Very! Although this dip is best enjoyed fresh, you can freeze it for up to 1 month. To do so, transfer it into a labeled container and ensure it's sealed tightly. When you’re ready to enjoy it, thaw it overnight in the refrigerator. After thawing, stir it gently and consider adding a touch of fresh fruit to brighten the flavors again.

What should I do if my dip turns out too watery?
If your dip is too watery, it may be due to insufficiently drained fruit. To fix this, you can try to strain out any excess liquid using a fine mesh strainer. Additionally, adding a touch more powdered sugar or a bit of softened cream cheese can help thicken the mixture up. Don't hesitate to taste it and adjust the sweetness as per your preference!

Is this Easy Easter Dip suitable for kids and dietary restrictions?
Absolutely! This dip is kid-friendly and can cater to various dietary needs by using alternatives like Greek yogurt instead of sour cream for a lighter version. However, if anyone has specific dietary allergies—especially to dairy or certain fruits—be sure to double-check ingredient labels and adjust as necessary to keep everyone safe!

How do I enhance the flavors of my Easy Easter Dip?
To boost the flavors of your Easy Easter Dip, I suggest letting it chill for at least 30 minutes in the refrigerator before serving. This allows the flavors to meld beautifully. You can also experiment with adding different fruits like strawberries or blueberries for a twist, or different sprinkles to match your festive theme!

Easy Easter Dip Recipe

Delightful Easy Easter Dip Recipe for a Sweet Spring Treat

This Easy Easter Dip Recipe is a quick, delightful treat that combines creamy goodness with fruity sweetness, perfect for spring gatherings.
Print Recipe Pin Recipe
Prep Time 15 minutes mins
Chilling Time 30 minutes mins
Total Time 45 minutes mins
Servings: 8 servings
Course: Snacks
Cuisine: American
Calories: 180
Ingredients Equipment Method Nutrition Notes

Ingredients
  

For the Dip
  • 1 cup Pineapple Chunks Fresh or canned, drain well.
  • 1 cup Maraschino Cherries Can substitute with fresh cherries.
  • 1 cup Mandarin Oranges Canned and well-drained.
  • 16 oz Cream Cheese Softened for easier mixing.
  • ½ cup Sour Cream Greek yogurt can be a lighter substitute.
  • ½ cup Powdered Sugar
  • 1 cup Bright Pink Candy Melts Customize color for different holidays.
  • 1 cup Spring Themed Sprinkles Choose your favorite themed sprinkles.
  • Assorted Cookies/Graham Crackers/Fruit Use your preferred dippers.

Equipment

  • Mixing Bowl
  • Colander
  • hand mixer
  • Microwave-safe bowl
  • plastic wrap

Method
 

Step-by-Step Instructions
  1. Drain the pineapple chunks and maraschino cherries to prevent excess moisture.
  2. Mash the drained pineapple and maraschino cherries in a medium bowl.
  3. Beat together softened cream cheese, sour cream, and powdered sugar until smooth.
  4. Fold the mashed fruit into the cream mixture, then add drained mandarin oranges.
  5. Melt the bright pink candy melts in a microwave-safe bowl.
  6. Mix the melted candy melts into the fruit and cream mixture until blended.
  7. Chill the dip covered in the refrigerator for about 30 minutes.
  8. Serve chilled with assorted cookies, graham crackers, or fresh fruit.

Nutrition

Serving: 1servingCalories: 180kcalCarbohydrates: 25gProtein: 2gFat: 8gSaturated Fat: 5gCholesterol: 30mgSodium: 90mgPotassium: 100mgFiber: 1gSugar: 15gVitamin A: 500IUVitamin C: 15mgCalcium: 50mgIron: 0.5mg

Notes

Ensure cream cheese is at room temperature for smooth mixing. Drain fruit well and allow the dip to chill to meld flavors.

Tried this recipe?

Let us know how it was!

Irresistibly Soft Butter Pecan Cookies for Cozy Moments

March 22, 2026 by Grace Snow Leave a Comment

The sweet aroma of freshly baked cookies wafting through my kitchen always takes me back to cozy family gatherings during the holidays. When it comes to festive treats, nothing beats the irresistible charm of Soft and Chewy Butter Pecan Cookies. This delightful recipe marries rich, buttery goodness with the satisfying crunch of toasted pecans, creating a perfect bite that warms the heart. Plus, the best part? These cookies come together quickly using simple pantry staples, making them an easy go-to for unexpected guests or last-minute holiday baking. Whether you're serving them at a Christmas party or enjoying a quiet evening with family, these cookies are sure to be a hit. What fun twist will you put on your batch today—maybe some chocolate chips or a sprinkle of cinnamon?

Why Are These Cookies a Must-Bake?

Irresistible Flavor: Butter Pecan Cookies boast a delightful blend of rich butter and crunchy nuts that create a festive taste your family will love.

Quick and Easy: With only a few simple steps, you'll have these treats out of the oven in no time—perfect for last-minute cravings!

Versatile Treats: Feel free to switch it up! Add chocolate chips or try different nuts like walnuts for a new twist.

Crowd-Pleasing Delight: Whether for holidays or cozy family nights, these cookies will be the star of any gathering, sure to please everyone.

Warm and Cozy Vibes: Enjoy them fresh out of the oven with a scoop of vanilla ice cream, and experience a warm hug in cookie form!

Butter Pecan Cookies Ingredients

• Gather your pantry staples for this delightful recipe!

For the Cookies

  • Unsalted Butter – adds richness and moisture, choose this for better flavor control.
  • Granulated Sugar – provides sweetness while contributing to a crispy edge.
  • Brown Sugar – infuses moisture and depth of flavor, creating that chewy texture we all love.
  • Eggs – essential for structure and helping the cookies rise perfectly.
  • Vanilla Extract – enhances the flavor complexity of these Butter Pecan Cookies.
  • All-Purpose Flour – the foundation of the cookie; feel free to swap with gluten-free flour if desired.
  • Cornstarch – key for keeping the cookies soft and chewy; add a bit more for ultimate softness.
  • Cinnamon Powder – a warm spice that can be omitted if you prefer a more neutral flavor.
  • Baking Soda & Baking Powder – the leavening agents that ensure your cookies rise just right.
  • Chopped Pecans – brings a delightful crunch and nutty essence; walnuts or almonds make great substitutes.
  • Optional Toffee Bits – add a delicious flavor boost with a touch of caramel notes.

Step‑by‑Step Instructions for Butter Pecan Cookies

Step 1: Preheat the Oven
Begin by preheating your oven to 350°F (175°C) and lining two baking sheets with parchment paper. This prep step ensures your Butter Pecan Cookies bake evenly and won’t stick to the pan. While the oven warms up, gather your ingredients for easy access, which makes the entire baking process smoother and more enjoyable.

Step 2: Cream the Butters and Sugars
In a large mixing bowl, combine the melted unsalted butter, granulated sugar, and brown sugar. Using a hand mixer or a whisk, beat these ingredients together until the mixture becomes light and fluffy—about 2 to 3 minutes. This step introduces air into the mixture, setting the foundation for the soft texture of your cookies.

Step 3: Add Eggs and Vanilla
Next, mix in one large egg and one teaspoon of vanilla extract to the butter-sugar blend. Beat until smooth and fully incorporated, which should take about a minute. The egg adds moisture and helps bind the ingredients together, while the vanilla extracts enhance the overall flavor of these delightful Butter Pecan Cookies.

Step 4: Combine Dry Ingredients
Gradually incorporate the all-purpose flour, cornstarch, baking soda, baking powder, and cinnamon into the wet ingredients. Stir gently using a spatula or wooden spoon until just combined. Be careful not to overmix, as this could affect the cookie's texture. Your dough should appear slightly sticky but well-blended.

Step 5: Fold in Pecans and Optional Add-ins
Gently fold in the chopped pecans—ensure they are evenly distributed throughout the dough. If desired, you can also add optional toffee bits for an extra layer of flavor. This step brings in crunch and richness, making your Butter Pecan Cookies irresistible, so ensure every bite is filled with nuts.

Step 6: Chill the Dough
Cover the cookie dough with plastic wrap and chill it in the refrigerator for 30 to 45 minutes. Chilling the dough is crucial for preventing the cookies from spreading too much during baking, helping maintain their soft and chewy texture. Meanwhile, you can clean up your workspace and get ready for the next steps!

Step 7: Scoop the Cookie Dough
Once chilled, use a medium cookie scoop to portion the dough into balls, about 1.5 inches in diameter. For an added touch of sweetness, roll each ball in granulated sugar before placing them on the prepared baking sheets, spacing them about two inches apart to allow for expansion during baking.

Step 8: Bake the Cookies
Slide the baking sheets into the preheated oven and bake the cookies for 11 to 14 minutes. Watch for the edges to turn golden brown while the centers remain slightly soft. This contrast in texture is what makes Butter Pecan Cookies so delightful, so keep an eye on them to avoid overbaking.

Step 9: Cooling Time
Once baked, remove the cookies from the oven and let them cool on the baking sheet for about 5 minutes. This allows them to set properly before transferring them to a wire rack to cool completely. The warm, buttery aroma will fill your kitchen, making it hard to resist sneaking a taste!

What to Serve with Soft and Chewy Butter Pecan Cookies

The rich buttery aroma of fresh cookies fills the air, creating the perfect opportunity for delightful meal pairings that will sweep everyone off their feet.

  • Vanilla Ice Cream: A scoop of creamy vanilla melting over warm cookies creates a heavenly dessert experience—perfect sweetness and texture!
  • Hot Chocolate: Indulge in a warm cup of chocolate, its richness balancing the buttery notes of your cookies, crafting a cozy treat.
  • Spiced Chai Tea: The spiced warmth of chai perfectly complements the nutty flavors of butter pecan, kicking your snack time up a notch.
  • Caramel Drizzle: Add a luscious drizzle of caramel over these cookies to enhance their decadence and create a jaw-dropping dessert moment!
  • Fresh Fruit Salad: A vibrant bowl of fresh fruits introduces a refreshing contrast, balancing the richness of the cookies with bright, juicy notes.
  • Coffee or Espresso: The bold flavors of coffee elevate the cookie experience; a sip between bites enhances both flavors beautifully.
  • Pumpkin Pie: Embrace the season and serve these cookies alongside a slice of pumpkin pie for a nostalgic holiday-inspired dessert platter.
  • Chocolate Milk: A cold glass of chocolate milk brings a childhood nostalgia to the table, pairing delightfully with the crunchy pecans in every bite.

Make Ahead Options

These Butter Pecan Cookies are perfect for meal prep enthusiasts! You can prepare the cookie dough up to 24 hours in advance, allowing the flavors to meld beautifully. Simply follow the recipe up to the chilling step, cover the dough tightly with plastic wrap, and refrigerate it. If you’re looking to prep even further ahead, you can freeze the dough balls for up to 3 months—just scoop them into balls and freeze on a baking sheet before transferring to an airtight container. When you're ready to bake, there’s no need to thaw; simply add a couple of extra minutes to the baking time for freshly baked cookies that are just as delicious!

How to Store and Freeze Butter Pecan Cookies

Room Temperature: Store the cookies in an airtight container at room temperature for up to 1 week to keep them soft and chewy.

Fridge: If you prefer a cooler treat, Butter Pecan Cookies can be stored in the fridge for up to 2 weeks, but they may lose some softness.

Freezer: For longer storage, freeze the cookies in a single layer on a baking sheet, then transfer to a freezer-friendly bag for up to 3 months; they’ll taste just as delightful when thawed.

Reheating: To enjoy your Butter Pecan Cookies warm again, simply pop them in the microwave for 10-15 seconds, or bake at 350°F (175°C) for a few minutes.

Expert Tips for Butter Pecan Cookies

Warm Butter: Make sure your butter is melted and warm but not hot; this helps achieve the right texture.

Chill the Dough: Always chill the dough for 30-45 minutes. This prevents excessive spreading and keeps your cookies soft and chewy.

Don’t Overmix: Mix until just combined to maintain a light and airy texture in your Butter Pecan Cookies.

Oven Calibration: Use an oven thermometer to ensure your baking temperature is accurate; this leads to perfectly baked cookies every time.

Precise Measurements: Measure your ingredients accurately to prevent misproportioned cookies that can alter texture and taste.

Butter Pecan Cookies Variations & Substitutions

Customize your Butter Pecan Cookies to delight your taste buds and impress your family!

  • Nutty Alternatives: Substitute pecans with walnuts or almonds for a different nutty flavor that still brings that satisfying crunch.

  • Chocolate Indulgence: Add chocolate chips or butterscotch chips for a rich, sweet twist. The chocolate melts beautifully, creating pockets of gooeyness in each bite.

  • Toffee Crunch: Incorporate toffee bits for an extra level of sweetness and chewy texture, creating a delightful contrast with the crisp edges.

  • Spice It Up: Experiment with warm spices like nutmeg or ginger to enhance the complexity of flavors. A dash of nutmeg adds that cozy holiday aroma we all love.

  • Dairy-Free Delight: Use coconut oil or a dairy-free butter alternative for a buttery flavor without the milk. Your cookies will still remain soft and delicious!

  • Gluten-Free Option: Substitute all-purpose flour with gluten-free flour blend for a gluten-free version that everyone can enjoy at gatherings.

  • Flavor Infusion: Infuse your batter with citrus zest, like orange or lemon, for a refreshing twist that brightens the overall taste experience.

  • Heat it Up: For those who enjoy a kick, add a pinch of cayenne pepper or chili powder to your dough. This unexpected heat complements the sweetness in a unique way.

Feel free to explore these variations and make your Butter Pecan Cookies uniquely yours! Pair them with a comforting dessert like warm vanilla ice cream or even delectable Matcha Cookies Soft for a delightful dessert spread.

Butter Pecan Cookies Recipe FAQs

What type of pecans should I use?
Absolutely! Use raw or lightly toasted pecans for the best flavor. Toasting enhances their nutty aroma and gives a delightful crunch. You can also substitute them with walnuts or almonds if you prefer a different nutty taste.

How should I store Butter Pecan Cookies?
To keep your cookies soft and chewy, store them in an airtight container at room temperature for up to 1 week. If you live in a more humid area or want them to last longer, the fridge is a good option for up to 2 weeks, though they might lose slight softness.

Can I freeze Butter Pecan Cookies?
Yes! To freeze, first place the cookies in a single layer on a baking sheet and freeze for about 1 hour. Once firm, transfer them to a freezer-safe bag. They’ll maintain their delicious flavor for up to 3 months. When you’re ready to enjoy, simply thaw or reheat them in the microwave for a quick delight.

What if my cookie dough is too sticky?
Very! If your dough is too sticky to handle, it might be due to using too much butter or not enough flour. Add a little extra flour, a tablespoon at a time, until it reaches a workable consistency. Make sure your butter is melted and not too hot; it should be warm to the touch for the best results.

How can I make these cookies gluten-free?
If you want to enjoy Butter Pecan Cookies without gluten, swap out the all-purpose flour for a 1:1 gluten-free flour blend. It’s a fantastic way to include everyone in the cookie fun! Make sure to check the other ingredients for gluten, especially any mixes or additives.

Are Butter Pecan Cookies safe for pets?
No, these cookies aren’t suitable for pets. Ingredients like sugar and pecans can be harmful to dogs and cats. It’s best to enjoy them yourself or share pet-safe treats with your furry friends!

Butter Pecan Cookies

Irresistibly Soft Butter Pecan Cookies for Cozy Moments

These Butter Pecan Cookies are soft, chewy, and a delightful treat for any gathering.
Print Recipe Pin Recipe
Prep Time 15 minutes mins
Cook Time 12 minutes mins
Chill Time 45 minutes mins
Total Time 1 hour hr 12 minutes mins
Servings: 24 cookies
Course: Dessert
Cuisine: American
Calories: 150
Ingredients Equipment Method Nutrition Notes

Ingredients
  

For the Cookies
  • 1 cup Unsalted Butter melted
  • 3/4 cup Granulated Sugar
  • 3/4 cup Brown Sugar packed
  • 1 large Egg
  • 1 teaspoon Vanilla Extract
  • 2 cups All-Purpose Flour
  • 2 tablespoons Cornstarch
  • 1/2 teaspoon Cinnamon Powder optional
  • 1 teaspoon Baking Soda
  • 1 teaspoon Baking Powder
  • 1 cup Chopped Pecans toasted
  • 1/2 cup Optional Toffee Bits

Equipment

  • Mixing Bowl
  • hand mixer
  • Cookie Scoop
  • Baking Sheets
  • Parchment Paper

Method
 

Step-by-Step Instructions for Butter Pecan Cookies
  1. Preheat your oven to 350°F (175°C) and line two baking sheets with parchment paper.
  2. In a large mixing bowl, combine the melted unsalted butter, granulated sugar, and brown sugar. Beat until light and fluffy, about 2 to 3 minutes.
  3. Mix in one large egg and one teaspoon of vanilla extract until smooth, about a minute.
  4. Gradually incorporate the all-purpose flour, cornstarch, baking soda, baking powder, and cinnamon. Stir until just combined.
  5. Fold in the chopped pecans and optional toffee bits.
  6. Cover the dough with plastic wrap and chill in the refrigerator for 30 to 45 minutes.
  7. Use a medium cookie scoop to portion the dough into balls, about 1.5 inches in diameter. Optionally roll in granulated sugar.
  8. Bake for 11 to 14 minutes until the edges are golden brown and centers are soft.
  9. Let cool on the baking sheet for about 5 minutes before transferring to a wire rack.

Nutrition

Serving: 1cookieCalories: 150kcalCarbohydrates: 21gProtein: 2gFat: 7gSaturated Fat: 4gPolyunsaturated Fat: 1gMonounsaturated Fat: 2gCholesterol: 20mgSodium: 80mgPotassium: 50mgFiber: 1gSugar: 10gVitamin A: 100IUCalcium: 20mgIron: 0.5mg

Notes

Enjoy these cookies fresh out of the oven, ideally with a scoop of vanilla ice cream.

Tried this recipe?

Let us know how it was!

Decadent Turtle Bars: Indulge in Sweet Gooey Perfection

March 22, 2026 by Grace Snow Leave a Comment

The moment I first pulled a pan of Easy Turtle Bars from the oven, the sweet aroma of caramel and chocolate enveloped my kitchen, whisking me back to countless family gatherings centered around homemade desserts. These decadent Turtle Bars, with their rich layering of buttery shortbread, gooey caramel, and creamy chocolate, are not just a treat; they're a celebration of comfort, joy, and togetherness. One of the best parts about this recipe is its quick prep time; within minutes, you can have these crowd-pleasers ready to dazzle friends and family alike. Perfect for those occasions when you want a sweet indulgence without the fuss, these bars can also be made ahead of time, allowing you to enjoy the moments that truly matter. Curious about how to make these delightful treats? Let’s dive in!

Why are Decadent Turtle Bars a Must-Try?

Irresistible Flavor: The harmonious blend of chocolate, caramel, and pecans creates a taste sensation that's hard to resist.

Quick and Easy: With a simple step-by-step process, you'll be enjoying these bars in no time, making them perfect for last-minute gatherings.

Make-Ahead Delight: Prepare them in advance—they taste even better after a day in the fridge!

Crowd-Pleaser: These bars are sure to impress your guests, whether it's a family gathering or a potluck. Pair them with vanilla ice cream for an extra delicious experience.

For more indulgent treats, check out Pumpkin Brownies Decadent or consider making some Vegan Sushi Indulge for a unique twist!

Decadent Turtle Bars Ingredients

For the Crust
• Cold Butter – Ensures a buttery, crisp shortbread base; using unsalted butter helps control sweetness.
• All-Purpose Flour – Provides the structure necessary for a solid crust; you can use gluten-free flour for a gluten-free option.
• Granulated Sugar – Sweetens the crust and caramel layer; consider using coconut sugar for a deeper flavor.

For the Caramel Layer
• Unsalted Butter – Adds richness to the caramel layer; substitute with dairy-free butter for a vegan version.
• Heavy Cream – Creates a smooth texture in the caramel; coconut cream can replace it for a dairy-free option.
• Toasted Pecans – Introduces delightful crunch; swap in walnuts if preferred.

For the Topping
• Chocolate Chips – Use semi-sweet or milk chocolate for a velvety finish; dark chocolate can offer a bolder taste.
• Sea Salt (Optional) – Enhances flavor; a sprinkle can provide a sweet and salty contrast to the caramel.
• Extra Pecans (Optional) – Add these for decoration and extra crunch, elevating the experience of these decadent Turtle Bars.

Step‑by‑Step Instructions for Decadent Turtle Bars

Step 1: Preheat Your Oven
Begin by preheating your oven to 350°F (175°C). This ensures that your oven is ready for baking the crust to a lovely golden hue. While the oven warms up, gather your baking dish, preferably a 9x13-inch one, and line it with parchment paper, allowing for some overhang on the sides for easy removal later.

Step 2: Make the Shortbread Crust
In a large mixing bowl, combine cold butter, all-purpose flour, and granulated sugar. Use a pastry cutter or your fingers to mix until crumbly and resembles coarse sand. Press this mixture firmly into the bottom of your lined baking dish, ensuring an even layer. Bake for 15-18 minutes, or until the edges are lightly golden and slightly firm to the touch.

Step 3: Prepare the Gooey Caramel
While the crust is baking, prepare the caramel layer. In a medium saucepan, combine unsalted butter and granulated sugar over medium heat. Stir constantly until the mixture melts and starts bubbling, around 5 minutes. Gradually whisk in the heavy cream, cooking for an additional 2-3 minutes until smooth and thickened; then fold in the toasted pecans for a delightful crunch.

Step 4: Spread the Caramel Layer
Once your crust is baked, carefully remove it from the oven. Pour the warm caramel mixture evenly over your pre-baked crust, using a spatula to ensure full coverage. Return the dish to the oven and bake for an extra 10-12 minutes, or until the caramel begins to bubble slightly around the edges, indicating it's set.

Step 5: Add the Chocolate Topping
After removing the caramel-topped crust from the oven, allow it to cool for about 10 minutes. Next, place your chocolate chips in a microwave-safe bowl and heat them in 30-second intervals, stirring until melted and smooth. Pour the melted chocolate over the warm caramel layer and use a spatula to spread it evenly, creating a lovely glossy finish.

Step 6: Cool and Set
Let your decadent Turtle Bars cool at room temperature for at least 1 hour. To cut them into perfect squares, it’s best to refrigerate them for an additional 30 minutes; this makes slicing neater. Once cooled and set, lift the bars out of the dish using the parchment overhang, and slice them into squares to serve.

Make Ahead Options

These Decadent Turtle Bars are perfect for busy home cooks looking to save time during the week! You can prepare the shortbread crust and caramel layer up to 24 hours in advance. Simply make the crust, bake it, and prepare the caramel mixture, then allow it to cool before layering it over the crust. Once assembled, refrigerate the bars until you're ready to melt and spread the chocolate topping; this keeps everything fresh and delicious. For added convenience, you can also freeze the bars for up to 3 months; just thaw them in the refrigerator overnight before serving. Rest assured, they'll be just as irresistible when you finish them!

How to Store and Freeze Decadent Turtle Bars

Room Temperature: Keep your Turtle Bars in an airtight container at room temperature for up to 5 days; this helps maintain their delightful gooeyness.

Refrigerator: For longer freshness, store them in the fridge for up to 2 weeks; the flavors will deepen and improve over time, making each bite even more indulgent.

Freezer: Individual bars can be frozen for up to 3 months. Wrap each bar tightly in plastic wrap and then place them in a zip-top bag. Thaw at room temperature before serving for the best texture.

Reheating: If you prefer them warm, gently heat in the microwave for 10-15 seconds; this will make the chocolate a little melty again, enhancing the decadent experience.

Expert Tips for Decadent Turtle Bars

  • Keep It Cold: Always use cold butter for the crust to ensure it stays flaky and crumbly. Room temperature butter may lead to a dense base.

  • Stir Constantly: While preparing the caramel, stir continuously to prevent burning. If it starts to turn too dark too quickly, lower the heat immediately.

  • Cool Before Cutting: Let the bars cool completely at room temperature before refrigerating for clean cuts. This will help you achieve a smooth edge.

  • Customize with Toppings: Feel free to sprinkle some sea salt or additional nuts on the chocolate topping for enhanced flavor. It’s a delightful twist for your decadent Turtle Bars!

  • Add Texture Variations: Consider integrating toasted coconut or swapping nuts to create your unique flavor profile in these bars. Don't shy away from experimenting!

What to Serve with Easy Turtle Bars

A delightful assortment of sides can elevate your dessert experience, transforming simple indulgence into a memorable occasion.

  • Vanilla Ice Cream: The creamy, cool texture beautifully contrasts the rich, gooey nature of the Turtle Bars, enhancing each bite. Imagine the sweet melting into the warm bars—pure bliss!

  • Whipped Cream: A dollop of airy whipped cream adds a light touch to the richness of the bars, bringing a sense of freshness that perfectly balances the flavors.

  • Chocolate Sauce: Drizzling warm chocolate sauce over the bars creates an extra layer of decadence, amplifying that indulgent experience in every mouthful.

  • Fresh Berries: Juicy strawberries or tart raspberries provide a burst of freshness that cuts through the sweetness, offering a delightful flavor contrast.

  • Coffee: A rich, bold cup of freshly brewed coffee complements the sweet, chocolatey goodness, creating a warm, cozy vibe that rounds out your dessert plate.

  • Nutty Caramel Sauce: Extra caramel sauce can enhance the dessert substantially. Pour it over the bars and feel the harmony of flavors explode!

  • Toasted Coconut Flakes: Adding a sprinkle of toasted coconut introduces a beautiful texture and a tropical twist, making each bite even more exciting.

  • Milk: A classic pairing, a tall glass of cold milk balances the sweetness and creates a cozy, nostalgic experience.

  • Chocolate-Covered Pretzels: The salty crunchiness from pretzels dipped in chocolate makes for a delightful snack alongside the decadently sweet Turtle Bars.

Delight in the perfect combo of textures and flavors as you celebrate the simple joy of sharing homemade desserts!

Decadent Turtle Bars Variations

Customize your Turtle Bars to delight your taste buds even more with these fun twists!

  • Nut-Free: Substitute pecans with seeds like pumpkin or sunflower for a delightful crunch without the nuts. These changes will bring a whole new vibe to your bars.

  • Gluten-Free: Swap out all-purpose flour for a gluten-free blend or almond flour to make these treats accessible for everyone. The textures might differ, but the taste will still shine!

  • Vegan Delight: Use coconut cream, dairy-free butter, and dark chocolate to create a rich and creamy vegan version. Don't be surprised if everyone's raving about how indulgent they are!

  • Espresso Twist: Add a tablespoon of instant espresso powder to the chocolate layer for a caffeinated kick that elevates the chocolate flavor. This twist adds depth without overpowering the classic sweetness!

  • Caramel-Drizzled Bliss: Instead of spreading the chocolate over the caramel, consider drizzling warm caramel on top of the chocolate once set for an extra layer of sweetness. Let's be honest, can you ever have too much caramel?

  • Tropical Vibes: Mix in some toasted coconut into the caramel layer and top with chocolate-covered macadamia nuts. This variation transforms your Turtle Bars into a tropical vacation treat!

  • S'mores Edition: Incorporate mini marshmallows and crushed graham crackers into the crust for a s'mores-inspired twist. The nostalgic flavors will have everyone reminiscing about camping nights around the fire.

  • Spicy Kick: Sprinkle in a pinch of cayenne pepper or chili powder to the caramel for a surprising kick. The spicy-sweet combo makes for an exciting character in each bite!

For additional inspiring flavors, consider making some German Chocolate Poke or try your hand at crafting delicious Vegan Sushi Indulge for a unique culinary adventure!

Decadent Turtle Bars Recipe FAQs

How do I choose the right butter for the crust?
Absolutely! For the best results, use cold unsalted butter in your crust. This helps achieve a flaky and crumbly texture, while unsalted butter gives you more control over the sweetness of your bars. If you're looking for a dairy-free option, dairy-free butter works well, too!

What’s the best way to store leftover Turtle Bars?
You can store your decadent Turtle Bars in an airtight container at room temperature for up to 5 days. If you want them to last longer, I recommend refrigerating them for up to 2 weeks. The flavors actually deepen and improve over time, making them even more delicious!

Can I freeze Turtle Bars, and if so, how?
Certainly! To freeze individual bars, wrap each one tightly in plastic wrap and then place them in a zip-top bag. They can be frozen for up to 3 months. When you're ready to enjoy them, just thaw at room temperature for the best texture. If you prefer them warm, pop them in the microwave for about 10-15 seconds!

What should I do if my caramel burns while cooking?
Very good question! If your caramel starts to darken too quickly or if it appears to burn, immediately reduce the heat and keep stirring. If it has burned to a point where it’s not salvageable, it’s best to start over—caramel can be fickle! Keeping the heat medium and stirring constantly will help ensure it stays smooth and bubbly without burning.

Are there any dietary considerations for making these bars?
Absolutely! If you or your guests have nut allergies, you can substitute toasted pecans with sunflower seeds or omit the nuts entirely. For a vegan version, use dairy-free butter and coconut cream in place of heavy cream. Always double-check labels for allergies, especially with chocolate chips!

Can I add additional toppings to my Turtle Bars?
Yes, the more the merrier! You can enhance the flavor by adding a sprinkle of sea salt over the chocolate topping, or even using a mix of chocolate types—dark chocolate with a hint of espresso can elevate the flavor profile. Feel free to experiment with additional garnishes, like toasted coconut or extra nuts, to customize your decadent Turtle Bars!

Decadent Turtle Bars

Decadent Turtle Bars: Indulge in Sweet Gooey Perfection

These Decadent Turtle Bars feature a luscious blend of caramel, chocolate, and pecans for a sweet treat that's perfect for gatherings.
Print Recipe Pin Recipe
Prep Time 15 minutes mins
Cook Time 30 minutes mins
Cooling Time 1 hour hr
Total Time 1 hour hr 45 minutes mins
Servings: 12 bars
Course: Dessert
Cuisine: American
Calories: 250
Ingredients Equipment Method Nutrition Notes

Ingredients
  

For the Crust
  • 1 cup Cold Butter unsalted preferred for sweetness control
  • 2 cups All-Purpose Flour gluten-free option available
  • 1/2 cup Granulated Sugar coconut sugar can be used for deeper flavor
For the Caramel Layer
  • 1/2 cup Unsalted Butter dairy-free option available
  • 1 cup Heavy Cream coconut cream can replace for dairy-free option
  • 1 cup Toasted Pecans substitute with walnuts if preferred
For the Topping
  • 1 cup Chocolate Chips semi-sweet or milk chocolate
  • 1/2 teaspoon Sea Salt optional for enhanced flavor
  • 1/2 cup Extra Pecans optional for decoration and crunch

Equipment

  • 9x13-inch baking dish
  • Medium saucepan
  • Mixing Bowl
  • Spatula
  • Microwave-safe bowl

Method
 

Step-by-Step Instructions
  1. Preheat your oven to 350°F (175°C). Line a 9x13-inch baking dish with parchment paper.
  2. Combine cold butter, all-purpose flour, and granulated sugar in a large mixing bowl. Mix until crumbly. Press mixture into the bottom of the baking dish and bake for 15-18 minutes.
  3. In a medium saucepan, combine unsalted butter and granulated sugar over medium heat. Stir until melted. Gradually whisk in heavy cream and fold in the toasted pecans. Cook for 2-3 minutes until smooth.
  4. Pour the caramel mixture over the pre-baked crust and return to the oven. Bake for an additional 10-12 minutes until caramel is bubbly.
  5. Allow to cool for 10 minutes. Melt chocolate chips in a microwave-safe bowl in 30-second intervals, then pour over the caramel layer.
  6. Let the Turtle Bars cool at room temperature for at least 1 hour before cutting. Refrigerate for an additional 30 minutes for neat slicing.

Nutrition

Serving: 1barCalories: 250kcalCarbohydrates: 30gProtein: 3gFat: 15gSaturated Fat: 7gPolyunsaturated Fat: 2gMonounsaturated Fat: 5gCholesterol: 30mgSodium: 100mgPotassium: 120mgFiber: 1gSugar: 18gVitamin A: 400IUCalcium: 30mgIron: 1mg

Notes

For best results, use cold butter for a flaky crust and store bars in an airtight container at room temperature for up to 5 days or refrigerate for 2 weeks.

Tried this recipe?

Let us know how it was!
  • « Previous Page
  • 1
  • …
  • 17
  • 18
  • 19
  • 20
  • 21
  • …
  • 199
  • Next Page »

Welcome!

Hi, I’m Grace, a Sydney-based home cook with a passion for bold flavors and trending ingredients. Whether you’re a busy beginner or a seasoned foodie, you’ll find dishes here that are fresh, fun, and full of flavor.

More about me

Popular Recipes

  • Starbucks Copycat Banana Bread
    Starbucks Copycat Banana Bread: Moist, Flavor-Packed Delight
  • Mediterranean Chicken Bowl
    Mediterranean Chicken Bowl: Fresh, Flavorful, and Healthy Delight
  • Cottage Cheese Banana Bread
    Cottage Cheese Banana Bread: Moist, Protein-Packed Goodness
  • Banana Bread Donuts
    Irresistibly Soft Banana Bread Donuts You Can’t Resist

Footer

↑ back to top

About

  • Privacy Policy
  • Disclaimer
  • Terms & Conditions

Newsletter

  • Sign Up! for emails and updates

Contact

  • About me
  • Contact me

Copyright © 2025 TastyTrendIngredients