tastytrendingredients

  • Home
  • Recipes
    • Appetizers
    • Breakfast
    • Dessert
    • Dinner
    • Drinks
    • Salads
    • Snacks
    • Soups
  • About me
  • Contact
menu icon
go to homepage
  • Home
  • Recipes
    • Appetizers
    • Breakfast
    • Dessert
    • Dinner
    • Drinks
    • Salads
    • Snacks
    • Soups
  • About me
  • Contact
search icon
Homepage link
  • Home
  • Recipes
    • Appetizers
    • Breakfast
    • Dessert
    • Dinner
    • Drinks
    • Salads
    • Snacks
    • Soups
  • About me
  • Contact
×

Nando’s Portuguese Chicken and Rice: A Flavorful Family Feast

May 15, 2026 by Grace Snow Leave a Comment

As I stirred the pot, the enticing aroma of spices filled my kitchen, reminding me of summer barbecues and vibrant Portugal. This One-Pot Nando’s Inspired Portuguese Chicken and Rice dish captures all those delightful memories in a single, hearty meal. Juicy chicken thighs mingle with fluffy basmati rice in a quick-cooking adventure that you'll absolutely love. Perfect for those busy weeknights, this recipe not only minimizes cleanup but also packs a punch in flavor, making it an instant family favorite. Whether you’re entertaining friends or just treating your loved ones, you’ll appreciate how easily it comes together without sacrificing taste. Want to make your next dinner feel special with minimal fuss? Let’s dive into this delicious journey!

Why is this recipe a must-try?

Simplicity at its Core: This one-pot meal comes together effortlessly, making it a fantastic choice for busy weeknights. Rich, Zesty Flavor: The combination of spices and ingredients creates a mouthwatering taste that whisks you away to Portugal. Customization Options: Easily swap proteins or veggies to tailor it to your family's preferences; perhaps try it with tofu for a vegetarian twist! Quick Cooking Time: Ready in under 30 minutes, it's perfect for those last-minute dinner plans. Cleanup Made Easy: With everything cooked in a single pot, you’ll spend less time washing dishes and more time enjoying your meal. Transform a regular dinner into something special with this Nando’s Inspired Portuguese Chicken and Rice!

Nando’s Portuguese Chicken and Rice Ingredients

For the Chicken
• Chicken Thighs – A juicy protein source; opt for skinless, boneless for tenderness.
• Paprika – Adds warmth; smoked paprika can deepen the flavor profile.
• Garlic Powder – Enhances aroma; fresh minced garlic is a great alternative.
• Dried Oregano – Provides herbaceous notes; Italian seasoning works as a substitute.
• Cayenne Pepper – Adds heat; reduce or omit for a milder taste.

For the Rice Base
• Basmati Rice – The heart of the dish; you can swap with long or medium grain rice if needed.
• Chicken Stock/Broth – A flavorful cooking liquid; choose low-sodium for better control.
• Turmeric Powder – Adds beautiful color and earthiness; yellow curry powder can replace it.
• Frozen Peas – For color and nutrition; fresh peas can be substituted or omitted.

For the Veggies
• Onion – A foundational flavor; use yellow or white onion for best results.
• Red Capsicum (Bell Pepper) – Adds sweetness and vibrant color; any sweet bell pepper variety will do.

For Flavor Enhancement
• Extra Virgin Olive Oil – Essential for sautéing; feel free to use a neutral oil if preferred.
• Brown Sugar – Balances spices; light brown or coconut sugar are good substitutions.
• Chili Flakes – An optional component for those who like an extra kick; leave out if desired.
• Cooking Salt – Crucial for seasoning; kosher or sea salt is recommended.
• Lemon Juice – Adds a refreshing acidity; vinegar can also work in a pinch.

For Serving
• Perinaise or alternative hot sauce – This adds creaminess and extra zing.
• Green Onion – For garnishing; fresh herbs like parsley can create a lovely finish.

Dive into creating your own Nando’s Portuguese Chicken and Rice masterpiece, and savor the delightful mix of these ingredients that is sure to impress your family!

Step‑by‑Step Instructions for Nando’s Portuguese Chicken and Rice

Step 1: Season Chicken
In a large mixing bowl, combine paprika, garlic powder, dried oregano, cayenne pepper, brown sugar, and salt. Toss the chicken thighs in the spice mixture until they are evenly coated. Let them marinate for about 10 minutes, allowing the flavors to meld and penetrate the chicken, which will enhance your Nando’s Portuguese Chicken and Rice experience.

Step 2: Sear Chicken
Heat 2 tablespoons of extra virgin olive oil in a large pot over medium-high heat. Once the oil is shimmering, carefully add the seasoned chicken thighs and sear for about 5 minutes, turning them halfway through until they are golden brown. Remove the chicken from the pot and set aside, reserving the flavorful oil for the next steps.

Step 3: Sauté Aromatics
In the same pot, add diced onion and sauté for about 2 minutes until they become translucent and fragrant. Then, add minced garlic and diced red capsicum (bell pepper), cooking for an additional 1.5 minutes. The vibrant colors and aromatic scents will fill your kitchen, creating a wonderful base for your Nando’s Portuguese Chicken and Rice.

Step 4: Combine Ingredients
Stir in the basmati rice, ensuring it's well coated with the sautéed mixture for about 1 minute. Pour in the chicken stock and sprinkle in turmeric for color and flavor. Toss in frozen peas and gently place the seared chicken thighs on top without stirring again, allowing the rice to absorb all those amazing flavors during cooking.

Step 5: Cook
Increase the heat to bring the mixture to a gentle simmer, then reduce the heat to low. Cover the pot with a lid and let it cook undisturbed for about 15 minutes. This steaming step is essential to ensure the rice is fluffy and fully cooked, while the chicken becomes tender and juicy—a hallmark of your Nando’s Portuguese Chicken and Rice.

Step 6: Rest and Fluff
After the cooking time, remove the pot from heat but leave the lid on for about 10 minutes. This resting period helps to finish cooking the rice and lock in moisture. Once rested, carefully fluff the rice with a fork, mixing the chicken and peas to create a colorful and delicious dish.

Step 7: Serve
Scoop generous portions of Nando’s Portuguese Chicken and Rice into bowls. Drizzle with Perinaise or your favorite hot sauce, then garnish with freshly chopped green onions or herbs for a lovely finish. This vibrant meal makes for an eye-catching presentation and a hearty family feast!

How to Store and Freeze Nando’s Portuguese Chicken and Rice

Fridge: Store leftovers in an airtight container for up to 3 days. Make sure it’s completely cooled before sealing to maintain freshness.

Freezer: For best quality, avoid freezing this dish as the texture of the rice may suffer. However, if needed, freeze in a tightly sealed container and consume within 1 month.

Reheating: When ready to enjoy, reheat gently on the stove with a splash of chicken stock to revive moisture. Stir occasionally until heated through.

Make-Ahead Tips: You can prepare the spice mix and chop the vegetables ahead of time for a quicker cooking experience on busy nights.

Expert Tips for Nando’s Portuguese Chicken and Rice

  • Perfect Chicken Choice: Use skinless, boneless chicken thighs to ensure juiciness; avoid chicken breast to keep the meat tender and flavorful in your Nando’s Portuguese Chicken and Rice.

  • Heat Management: Keep the heat moderate when searing; too high can burn the rice, while too low might undercook it, leaving you with unevenly cooked flavors.

  • Resting Time: Never skip the resting time after cooking; it allows the flavors to meld and ensures perfectly fluffy rice. A little patience goes a long way!

  • Flavor Boost: For an extra kick, add fresh minced garlic or herbs just before serving. This will enhance the aromatic experience of your Nando’s Portuguese Chicken and Rice.

  • Ingredient Substitutions: Feel free to get creative with substitutes, whether swapping chicken for tofu or adjusting spice levels. Customize the recipe to suit your family’s taste buds!

Nando’s Portuguese Chicken and Rice Variations

Feel free to explore these delightful twists and substitutions that bring even more flair to your dish!

  • Vegetarian Delight: Substitute chicken with tofu or tempeh for a hearty vegetarian version. Marinate the tofu in the same spices for a flavorful experience.
  • Spice it Up: Increase the cayenne pepper or add fresh jalapeños for an extra fiery kick. Spice enthusiasts will love the added heat!
  • Citrus Twist: Replace lemon juice with lime juice for a zesty twist; it brightens the dish and complements the spices beautifully.
  • Grain Swap: Use quinoa or farro instead of basmati rice for a nutty flavor and added texture, making it a nutritious alternative.
  • Flavorful Add-ins: Toss in chopped spinach or kale during the last few minutes of cooking for vibrant color and extra nutrition.
  • Herbaceous Touch: Swap dried oregano with fresh herbs like parsley or cilantro for a fresh burst of flavor and aroma right before serving.
  • Richness Booster: Incorporate coconut milk into the chicken stock for a creamy base that brings a delicious twist to your Nando’s Portuguese Chicken and Rice.
  • Special Sauce Pairing: Serve with your favorite hot sauce alongside Perinaise for a flavorful dip—try a honey barbecue sauce to complement the smokiness.

For more delightful recipes, consider trying One Pot Rice or give your taste buds something sweet with Honey BBQ Chicken Rice. Each variation can turn an already beloved dish into something uniquely yours!

Make Ahead Options

These Nando’s Inspired Portuguese Chicken and Rice are perfect for busy weeknights, allowing you to save time without sacrificing flavor! You can season the chicken thighs and marinate them up to 24 hours in advance, which enhances the flavor. Additionally, you can prepare and chop the vegetables, such as onion and red capsicum, to have them ready for the pot on cooking day. Store everything in airtight containers in the refrigerator. When it's time to cook, simply sauté the aromatics and combine with the rice and stock as directed. Thanks to your thoughtful prep, you'll have a delicious, restaurant-quality meal ready to serve in no time!

What to Serve with Nando’s Inspired Portuguese Chicken and Rice

A delicious meal takes a little finesse, and pairing the right sides can elevate your dinner experience to new heights.

  • Light Garden Salad: Refreshing and crisp, a garden salad with mixed greens and a light vinaigrette complements the hearty chicken and rice perfectly.

  • Creamy Cucumber Raita: This cool, creamy dish offers a soothing contrast to the spicy elements in the chicken, calming the palate with each bite.

  • Roasted Vegetables: Seasonal roasted vegetables bring warmth and caramelization that pair wonderfully with the zesty notes of your chicken and rice dish.

  • Garlic Bread: Crunchy, buttery garlic bread provides a delightful texture contrast, inviting you to soak up all those delicious flavors from each plate.

  • Herbed Quinoa: For a protein-packed alternative, herbed quinoa blends well with the flavor profile and adds a nutty texture to your meal.

  • Red Wine: A smooth red wine with fruity undertones can enhance the spices in the dish, making for a cozy dining experience, especially for a relaxing evening at home.

Whichever options you choose, these pairings will create a remarkable feast, emphasizing the vibrant elements of your Nando's Inspired Portuguese Chicken and Rice!

Nando’s Portuguese Chicken and Rice Recipe FAQs

What type of chicken is best for this recipe?
Absolutely! For the juiciest results in your Nando’s Portuguese Chicken and Rice, I recommend using skinless, boneless chicken thighs. They remain tender during cooking, while chicken breasts might turn out dry. Thighs soak up the spices beautifully, enhancing the flavor of the dish.

How should I store leftovers?
Very simply! Refrigerate any leftovers in an airtight container for up to 3 days. It’s essential to let the dish cool completely before sealing it to keep it fresh and prevent sogginess. When you’re ready to enjoy it again, a quick gentle reheat does the trick!

Can I freeze Nando’s Portuguese Chicken and Rice?
While it’s best to enjoy it fresh, you can freeze leftovers if needed. Just store them in a tightly sealed container, and consume within 1 month. When you’re ready to enjoy it, thaw in the fridge overnight and reheat gently on the stove with a splash of chicken stock to maintain moisture.

What should I do if my rice is too dry?
A common hiccup, but don’t worry! If your rice ends up too dry during the cooking process, simply add a little extra chicken stock or water, cover the pot, and let it steam for a few more minutes over low heat. This should help revive the moisture.

Are there any allergies I should be aware of?
Very understandably! This dish includes ingredients such as chicken, garlic, and various spices, which may pose concerns for some individuals. Always check for allergies, especially regarding spices like paprika and cayenne pepper. For a safe alternative, you can substitute with non-allergenic proteins like tofu and adjust the spices to your preference.

What can I serve alongside this meal?
To add variety, consider pairing your Nando’s Portuguese Chicken and Rice with a light garden salad or some roasted vegetables. If you want extra creaminess, a side of cucumber raita also works wonderfully. Enjoy the burst of flavors together!

Nando’s Portuguese Chicken and Rice

Nando’s Portuguese Chicken and Rice: A Flavorful Family Feast

This Nando’s Portuguese Chicken and Rice recipe brings together juicy chicken and fluffy rice, delivering vibrant flavors in a one-pot dish.
Print Recipe Pin Recipe
Prep Time 10 minutes mins
Cook Time 30 minutes mins
Resting Time 10 minutes mins
Total Time 50 minutes mins
Servings: 4 servings
Course: Dinner
Cuisine: Portuguese
Calories: 450
Ingredients Equipment Method Nutrition Notes

Ingredients
  

For the Chicken
  • 4 pieces Chicken Thighs skinless, boneless
  • 1 tablespoon Paprika smoked paprika recommended
  • 1 teaspoon Garlic Powder or fresh minced garlic
  • 1 teaspoon Dried Oregano or Italian seasoning
  • 1/2 teaspoon Cayenne Pepper reduce for milder taste
  • 1 tablespoon Brown Sugar light brown or coconut sugar
  • 1 teaspoon Cooking Salt kosher or sea salt recommended
For the Rice Base
  • 1.5 cups Basmati Rice can substitute with long or medium grain rice
  • 3 cups Chicken Stock/Broth low-sodium preferred
  • 1 teaspoon Turmeric Powder or yellow curry powder
  • 1 cup Frozen Peas can omit or substitute with fresh peas
For the Veggies
  • 1 medium Onion yellow or white onion
  • 1 medium Red Capsicum (Bell Pepper) any sweet variety will do
For Flavor Enhancement
  • 2 tablespoons Extra Virgin Olive Oil or a neutral oil
  • 1 tablespoon Lemon Juice or vinegar
  • 1/2 teaspoon Chili Flakes optional for extra kick
For Serving
  • 1/2 cup Perinaise or alternative hot sauce for drizzling
  • 2 tablespoons Green Onion for garnishing

Equipment

  • Large pot
  • Mixing Bowl

Method
 

Step-by-Step Instructions
  1. In a large mixing bowl, combine paprika, garlic powder, dried oregano, cayenne pepper, brown sugar, and salt. Toss chicken thighs in the spice mixture until evenly coated and let marinate for 10 minutes.
  2. Heat olive oil in a large pot over medium-high heat. Add the seasoned chicken thighs and sear for about 5 minutes, turning until golden brown. Remove chicken from pot and set aside.
  3. In the same pot, add diced onion and sauté for about 2 minutes until translucent. Add minced garlic and diced red capsicum, cooking for an additional 1.5 minutes.
  4. Stir in basmati rice, coating it with the sautéed mixture for 1 minute. Pour in chicken stock and sprinkle in turmeric. Toss in frozen peas and place seared chicken on top.
  5. Increase heat to bring to a simmer, then reduce to low. Cover pot and let cook undisturbed for 15 minutes.
  6. Remove pot from heat and let rest covered for 10 minutes. Fluff rice with a fork and mix in chicken and peas.
  7. Serve in bowls, drizzling with Perinaise or hot sauce, and garnish with green onions or herbs.

Nutrition

Serving: 1bowlCalories: 450kcalCarbohydrates: 50gProtein: 30gFat: 15gSaturated Fat: 3gPolyunsaturated Fat: 1gMonounsaturated Fat: 2gCholesterol: 100mgSodium: 800mgPotassium: 600mgFiber: 4gSugar: 3gVitamin A: 10IUVitamin C: 70mgCalcium: 5mgIron: 15mg

Notes

Use skinless, boneless chicken thighs for juiciness and avoid chicken breast to keep meat tender. Adjust spice levels according to preference.

Tried this recipe?

Let us know how it was!

Homemade Gluten Free Hamburger That's Deliciously Simple

May 15, 2026 by Grace Snow Leave a Comment

The aroma of sizzling garlic and onions wafts through my kitchen, instantly transporting me to cozy weeknight dinners from my childhood. Today, I'm sharing my go-to recipe for Homemade Gluten Free Hamburger Helper—a delightful dish that captures all the comfort of the original but swaps in healthier, gluten-free ingredients. With just one pot and 30 minutes of your time, this family-friendly meal makes it easier than ever to say goodbye to fast food. Plus, it’s versatile enough to satisfy various dietary needs, whether you’re gluten-free or simply looking for a delicious meal that won’t break the bank. Have you ever craved that nostalgic taste without the guilt? Let’s dive into the recipe and make mealtime magic happen!

Why Choose Homemade Gluten Free Hamburger?

Simplicity at its Best: This recipe comes together in just one pot, making cleanup a breeze after a busy day.

Family-Friendly Delight: Everyone can gather around the table and enjoy this creamy, comforting dish that feels like a warm hug.

Healthy Ingredients: Crafted with wholesome components, it’s a meal you can feel good about serving, knowing it's packed with nutrients.

Versatile Options: Whether you prefer using ground turkey or chickpea pasta, you can tailor this recipe to fit various diets, including dairy-free.

Quick and Easy: With minimal prep time, this dish is a lifesaver for weeknight dinners. Say goodbye to fast food cravings and hello to homemade goodness! For a sweet finish, consider pairing it with a comforting dessert like Homemade Hot Chocolate.

Ingredients for Homemade Gluten Free Hamburger

For the Base

  • Olive Oil – Adds richness and helps sauté vegetables; use extra virgin for maximum flavor.
  • Yellow Onion – Provides a savory base flavor; can substitute with shallots for a milder taste.
  • Garlic – Enhances flavor with aromatic notes; fresh minced garlic is preferred.
  • Ground Beef – Main protein source; ground turkey or chicken can be used as a leaner alternative.

For the Liquid Ingredients

  • Beef Broth – Adds depth and moisture to the dish; low-sodium is preferable to control salt levels.
  • Tomato Paste – Contributes umami and thickening; can substitute with crushed tomatoes for a different texture.
  • Coconut Aminos – A soy sauce alternative providing a hint of sweetness; can substitute with soy sauce for non-gluten-free diets.
  • Dijon Mustard – Adds tanginess and depth; use whole grain mustard for an extra kick.

For Seasoning

  • Chili Powder – Offers spice and warmth; adjust quantity for desired heat level.
  • Dried Oregano – Provides herbaceous notes; Italian seasoning can be used as a substitute.
  • Smoked Paprika – Enhances flavor with a mild smokiness; sweet paprika is a suitable alternative.
  • Salt and Ground Black Pepper – Essential for seasoning; adjust to taste.

For Thicker Sauce

  • All-Purpose Gluten Free Flour – Optional thickening agent for creaminess; can omit for a lighter sauce.

For Pasta

  • Gluten-Free Pasta – Base of the dish; any preferred shape works to create the ultimate homemade gluten free hamburger experience.

Step‑by‑Step Instructions for Homemade Gluten Free Hamburger Helper

Step 1: Heat the Base
In a dutch oven or large skillet, heat 2 tablespoons of olive oil over medium heat. Allow the oil to shimmer but not smoke, signaling it's ready for cooking. This will serve as a flavorful base for your Homemade Gluten Free Hamburger Helper.

Step 2: Sauté Aromatics
Add 1 diced yellow onion and 2 minced garlic cloves to the skillet. Sauté for about 3-5 minutes, stirring frequently until the onions become translucent and fragrant. Watch for a slight golden hue to indicate they’re perfectly cooked and ready for the next ingredient.

Step 3: Brown the Meat
Introduce 1 pound of ground beef to the skillet, breaking it apart with a spatula. Cook for approximately 5-7 minutes, or until the beef is browned all over and no longer pink. This step ensures your meat is well-cooked and adds depth to the flavors in your homemade dish.

Step 4: Combine Liquid Ingredients
Pour in 2 cups of beef broth, followed by 2 tablespoons of tomato paste, 2 tablespoons of coconut aminos, and 1 tablespoon of Dijon mustard. Stir everything together and bring the mixture to a low simmer. Observe the bubbling around the edges as everything melds beautifully into a savory sauce.

Step 5: Thicken the Sauce
Sprinkle 2 tablespoons of all-purpose gluten-free flour over the mixture. Whisk briskly to combine, ensuring there are no lumps. This will create a thicker, creamier sauce, enhancing the overall texture of your Homemade Gluten Free Hamburger Helper.

Step 6: Cook the Pasta
Gently fold in 8 ounces of gluten-free pasta. Stir well and bring the mixture back to a simmer. Cook uncovered for 10-12 minutes, stirring occasionally. Keep an eye on the pasta; it should be tender but still firm, achieving that perfect al dente texture.

Step 7: Final Seasoning Touches
Once the pasta is cooked, taste the dish and adjust seasoning with salt and ground black pepper as needed. You can also add a pinch of chili powder, dried oregano, and smoked paprika for an extra flavor kick. Stir to incorporate the spices thoroughly into the sauce.

Step 8: Serve and Enjoy
Your Homemade Gluten Free Hamburger Helper is now ready! Serve it warm in bowls, optionally topped with shredded cheddar cheese and a sprinkle of red pepper flakes for an extra flavor boost. Enjoy the comforting and wholesome meal with your family gathered around the table.

What to Serve with Homemade Gluten Free Hamburger Helper

The perfect meal deserves perfect companions to enhance its flavors and textures.

  • Garlic Bread: This crunchy, buttery treat offers a delightful contrast to the creamy pasta, making every bite a joy.

  • Steamed Broccoli: Lightly seasoned, this vibrant green side adds a nutritious crunch, balancing the richness of the Hamburger Helper.

  • Caesar Salad: Crisp romaine and tangy dressing create a fresh and zesty contrast, complementing the hearty flavors of the main dish.

  • Roasted Vegetables: A medley of seasonal veggies brings warmth and sweetness, making your plate colorful and the meal even more satisfying.

  • Crispy Sweet Potato Fries: These sweet, lightly spiced fries provide a fun and flavorful twist that pairs wonderfully with the savory pasta.

  • Homemade Coleslaw: The creamy, tangy crunch of coleslaw can offer a refreshing balance to the richness of the Hamburger Helper.

  • Red Wine: A glass of medium-bodied red wine like Merlot harmonizes with the robust flavors, deepening your dining experience.

  • Chocolate Mousse: For dessert, a light mousse is the perfect way to end your meal on a sweet, indulgent note.

  • Fruit Salad: A refreshing and naturally sweet option to cleanse your palate, adding a light finish to your comforting dinner.

  • Herbal Tea: Wind down your meal with a warm cup of herbal tea, enhancing relaxation and rounding out your evening beautifully.

Expert Tips for Homemade Gluten Free Hamburger

  • Stir Often: Make sure to stir the gluten-free pasta frequently while cooking to prevent it from sticking together.

  • Adjust Cooking Time: Different pasta shapes may require varying cooking times. Always check your pasta for the perfect al dente texture.

  • Use Quality Broth: Opt for low-sodium beef broth to control salt levels and let the natural flavors of your dish shine in this homemade gluten-free hamburger recipe.

  • Creaminess Matters: For a creamier texture, consider adding more broth while cooking, and don’t hesitate to adjust the gluten-free flour for your preference.

  • Taste as You Go: Seasoning is key! Taste and adjust your spices—salt, pepper, and chili powder—before serving to elevate the flavor profile.

How to Store and Freeze Homemade Gluten Free Hamburger

Fridge: Store leftovers in an airtight container for up to 3-4 days. This allows you to enjoy your delicious homemade gluten free hamburger on busy days.

Freezer: Freeze individual portions in airtight containers for up to 3 months. Label with the date, so you know when to enjoy it again.

Reheating: Reheat on the stove or in the microwave, adding a splash of broth to restore moisture. Enjoy the same comforting taste as when it was freshly made!

Room Temperature: Avoid leaving your homemade gluten free hamburger out for more than 2 hours to keep it safe and tasty.

Make Ahead Options

These Homemade Gluten Free Hamburger Helper are perfect for busy weeknights when you need meal prep in your life! You can sauté the onion and garlic up to 24 hours in advance and refrigerate them in an airtight container. Additionally, you can brown the ground beef and combine it with other liquid ingredients (broth, tomato paste, etc.) up to 3 days ahead, just make sure to cool it completely before refrigerating to preserve quality. When you're ready to enjoy, simply reheat the mixture and then stir in the gluten-free pasta, cooking it for about 10-12 minutes until tender. This way, you’ll have a comforting, homemade dish ready with minimal effort!

Homemade Gluten Free Hamburger Variations

Feel free to make this dish your own with these tasty swaps and twists that will tantalize your taste buds!

  • Dairy-Free: Omit cheese for a completely dairy-free option, or replace it with a dairy-free cheese alternative for a similar taste.

  • Turkey Substitute: Swap the ground beef for ground turkey or chicken. It’s a leaner option that still delivers on flavor, offering a little twist on a classic recipe.

  • Chickpea Pasta: For a hearty protein boost, try using chickpea pasta. It adds a delightful texture and keeps the dish gluten-free, ensuring everyone feels satisfied.

  • Spicy Kick: Add a pinch of cayenne pepper or diced jalapeños for a bit of heat. This will elevate the flavor profile, transforming your dish into a spicy sensation.

  • Vegetarian Delight: Replace meat entirely with diced zucchini, bell peppers, and mushrooms for a hearty vegetarian version that’s bursting with garden-fresh flavors.

  • Crushed Tomatoes: Substitute tomato paste with crushed tomatoes for a chunkier sauce. This change will introduce a rustic element, perfect for family-style dining.

  • Herb Infusion: Experiment with different herbs like fresh basil or thyme instead of dried oregano. Fresh herbs can brighten the dish and add depth to the flavor.

  • Creamy Twist: For an extra creamy texture, stir in a tablespoon of cashew cream or coconut cream just before serving. It will bring a luscious mouthfeel that’s hard to resist.

With these variations, making this Homemade Gluten Free Hamburger can be a new culinary adventure each time! And if you feel inspired to explore even more cozy comfort dishes, check out Chicken Dumplings Cozy or delight your dessert cravings with Homemade Hot Chocolate. Happy cooking!

Homemade Gluten Free Hamburger Helper Recipe FAQs

What type of gluten-free pasta works best for this recipe?
You can use any gluten-free pasta shape you prefer! Options like penne, fusilli, or shells work wonderfully. Make sure to check the cooking time on the package, as some may require adjustment.

How should I store leftovers of Homemade Gluten Free Hamburger Helper?
Store any leftovers in an airtight container in the fridge for up to 3-4 days. It’s perfect for a quick reheating during busy days ahead! Just remember to let it cool down to room temperature before sealing it away.

Can I freeze Homemade Gluten Free Hamburger Helper?
Absolutely! For optimal freshness, freeze portions in airtight containers for up to 3 months. I recommend labeling them with the date so you can enjoy the comforting flavors again within that timeframe. When you're ready to eat, just pop it in the fridge to thaw overnight before reheating.

What if my pasta sticks together while cooking?
To prevent sticking, be sure to stir the gluten-free pasta often during cooking. If you find it still clumps together, try adding a splash more broth while it simmers. You can also drizzle a little olive oil to help keep it separated.

Is this recipe suitable for dairy-free diets?
Yes! This Homemade Gluten Free Hamburger Helper can easily be made dairy-free by omitting the cheese topping. You can still enjoy a creamy texture by adjusting the broth and flour as desired.

What are some good substitutes for the ground beef?
If you're looking for lighter options, ground turkey or chicken work beautifully in this recipe. Additionally, chickpea or lentil pasta can provide a hearty, protein-rich alternative to ensure it remains gluten-free and delicious!

Homemade Gluten Free Hamburger

Homemade Gluten Free Hamburger That's Deliciously Simple

A deliciously simple Homemade Gluten Free Hamburger that satisfies fast food cravings with wholesome ingredients.
Print Recipe Pin Recipe
Prep Time 10 minutes mins
Cook Time 20 minutes mins
Total Time 30 minutes mins
Servings: 4 portions
Course: Dinner
Cuisine: American
Calories: 400
Ingredients Equipment Method Nutrition Notes

Ingredients
  

For the Base
  • 2 tablespoons Olive Oil Use extra virgin for maximum flavor.
  • 1 large Yellow Onion Can substitute with shallots for a milder taste.
  • 2 cloves Garlic Fresh minced garlic is preferred.
  • 1 pound Ground Beef Ground turkey or chicken can be used as a leaner alternative.
For the Liquid Ingredients
  • 2 cups Beef Broth Low-sodium is preferable.
  • 2 tablespoons Tomato Paste Can substitute with crushed tomatoes.
  • 2 tablespoons Coconut Aminos A soy sauce alternative.
  • 1 tablespoon Dijon Mustard Use whole grain mustard for an extra kick.
For Seasoning
  • 1 teaspoon Chili Powder Adjust quantity for desired heat level.
  • 1 teaspoon Dried Oregano Italian seasoning can be used as a substitute.
  • 1 teaspoon Smoked Paprika Sweet paprika is a suitable alternative.
  • to taste Salt and Ground Black Pepper Essential for seasoning.
For Thicker Sauce
  • 2 tablespoons All-Purpose Gluten Free Flour Can omit for a lighter sauce.
For Pasta
  • 8 ounces Gluten-Free Pasta Any preferred shape works.

Equipment

  • Dutch oven
  • Skillet

Method
 

Cooking Instructions
  1. In a dutch oven or large skillet, heat 2 tablespoons of olive oil over medium heat.
  2. Add 1 diced yellow onion and 2 minced garlic cloves to the skillet. Sauté for about 3-5 minutes until translucent.
  3. Introduce 1 pound of ground beef to the skillet, breaking it apart with a spatula. Cook for approximately 5-7 minutes until browned.
  4. Pour in 2 cups of beef broth, followed by 2 tablespoons of tomato paste, 2 tablespoons of coconut aminos, and 1 tablespoon of Dijon mustard. Stir and bring to a low simmer.
  5. Sprinkle 2 tablespoons of gluten-free flour over the mixture and whisk to combine.
  6. Gently fold in 8 ounces of gluten-free pasta. Stir well and bring back to a simmer. Cook uncovered for 10-12 minutes, stirring occasionally.
  7. Once the pasta is cooked, taste and adjust seasoning with salt, pepper, chili powder, oregano, and smoked paprika.
  8. Serve warm in bowls, optionally topped with shredded cheddar cheese and red pepper flakes.

Nutrition

Serving: 1portionCalories: 400kcalCarbohydrates: 45gProtein: 25gFat: 15gSaturated Fat: 5gPolyunsaturated Fat: 0.5gMonounsaturated Fat: 9gCholesterol: 80mgSodium: 600mgPotassium: 600mgFiber: 5gSugar: 3gVitamin A: 500IUVitamin C: 5mgCalcium: 50mgIron: 3mg

Notes

Stir often and adjust cooking times as needed for various pasta shapes. Use low-sodium broth for better flavor control.

Tried this recipe?

Let us know how it was!

Easy Tater Tot Casserole with Ground Beef for Cozy Nights

May 15, 2026 by Grace Snow Leave a Comment

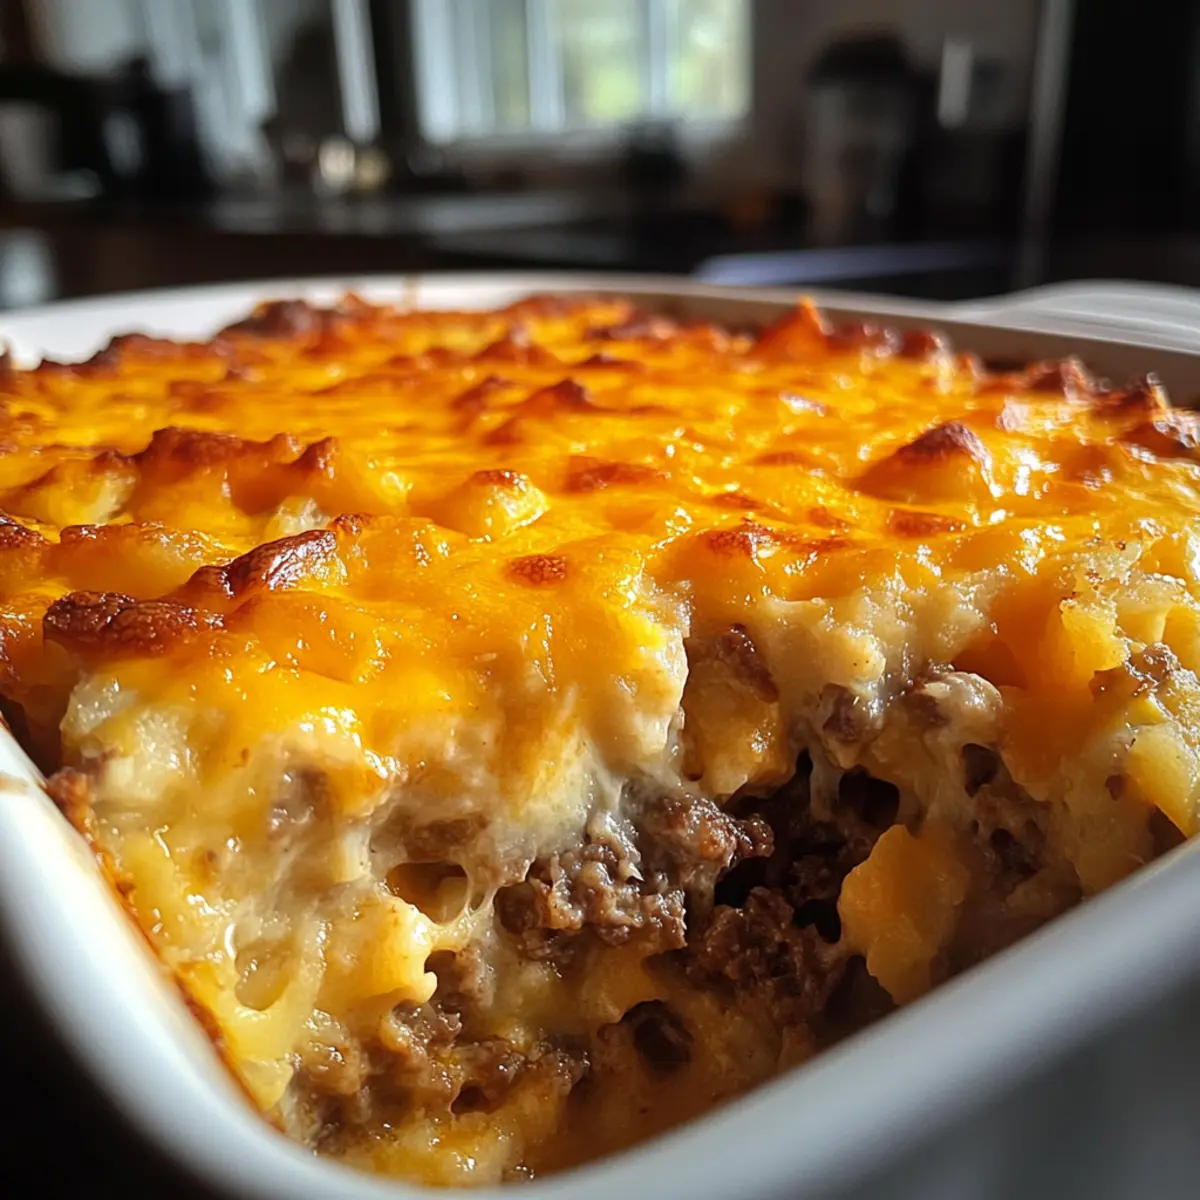
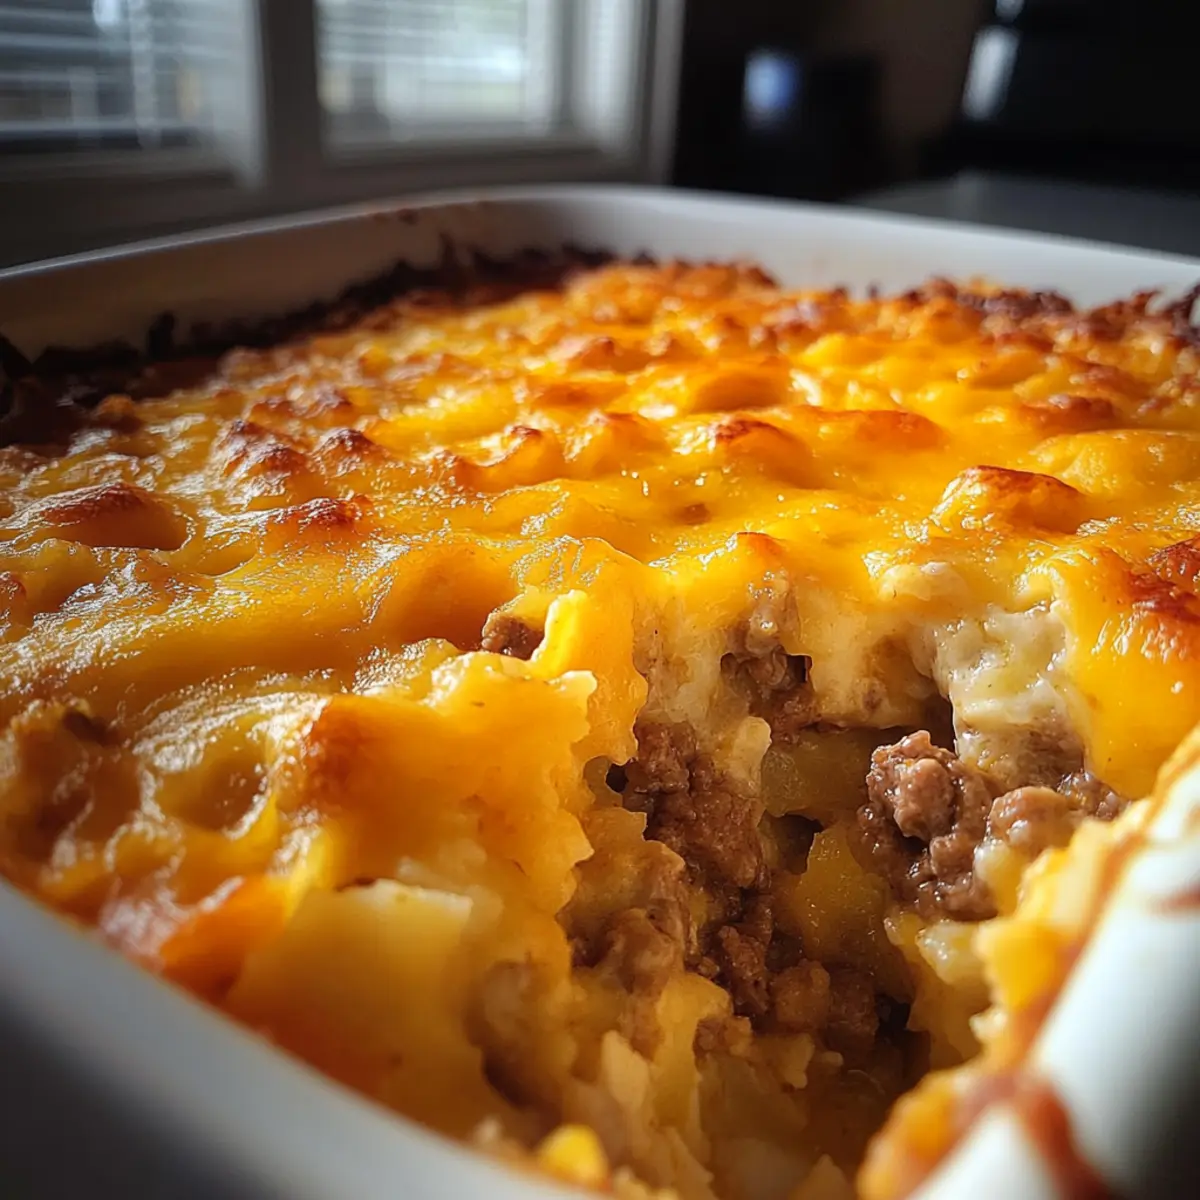
It was one of those chill evenings when all I wanted was a heartwarming meal that didn’t demand hours in the kitchen. Enter my Cozy Tater Tot Casserole with Ground Beef, a dish that wraps you in comfort with every bite. This fabulous casserole combines seasoned ground beef with a creamy mushroom sauce, topped with crispy tater tots for that satisfying crunch. The best part? It’s incredibly quick to whip up, making it perfect for busy weeknights or those impromptu family gatherings. Plus, it's customizable to suit everyone's taste—feel free to swap in ground turkey or add a medley of veggies for a personal touch. Ready to create a cozy classic that everyone will love? Let’s dive in!

Why is this casserole a must-try?

Comforting, crowd-pleaser: This Tater Tot Casserole with Ground Beef is the ultimate time-saver for hectic evenings while still delivering rich flavors that everyone will adore.

Customizable: Feel free to swap ground beef for ground turkey or even plant-based options, tailoring it to various tastes and diets. You can also increase the nutritional punch by adding in your favorite vegetables like spinach or bell peppers.

Crispy Top: The golden, crispy layer of tater tots creates a delectable contrast with the creamy, savory filling underneath, ensuring every bite offers delightful textures.

Easy Prep: With just one skillet and a few simple steps, you’ll have a comforting meal ready to pop into the oven—perfect for meal prep or when unexpected guests arrive.

Perfectly Cozy: It’s like a warm hug on a plate, ideal for chilly nights or family gatherings, making it a dish you’ll turn to again and again. Why not pair it with a refreshing salad or roasted vegetables for a well-rounded meal?

Tater Tot Casserole with Ground Beef Ingredients

For the Casserole

  • Ground Beef – Ideal for heartiness and protein; you can substitute with ground turkey for a lighter dish.
  • Cream of Mushroom Soup – Provides a creamy texture and savory flavor; try a dairy-free version for a vegan option.
  • Sour Cream – Adds richness and a tangy kick; swap in a dairy-free alternative as needed.
  • Diced Onion – Enhances overall flavor when sautéed; shallots can be used for a milder taste.
  • Cheddar Cheese – Melts beautifully to enrich the flavor; opt for freshly shredded cheese for the best results.
  • Frozen Tater Tots – Forms the crispy topping; consider sweet potato tots for a twist on the classic.
  • Optional Vegetables (e.g., peas, bell peppers, corn) – Boosts nutrition and texture; select according to your family's preferences.
  • Spices (e.g., Worcestershire sauce, hot sauce) – Enhances the flavor profile; adjust to your preferred spice level.

For Serving

  • Chopped Green Onions – A fresh garnish that adds color and a mild onion flavor to the finished dish.

This Tater Tot Casserole with Ground Beef invites you to enjoy a warm, comforting meal that’s as simple as it is delicious.

Step‑by‑Step Instructions for Tater Tot Casserole with Ground Beef

Step 1: Preheat Your Oven
Begin by preheating your oven to 375°F (190°C). This important step ensures that when you pop in your Tater Tot Casserole with Ground Beef, it will cook evenly and perfectly from the start, creating that delicious golden crust.

Step 2: Brown the Beef
In a large skillet, add 1 pound of ground beef over medium heat. Stir it occasionally for about 5-7 minutes until it’s browned and cooked through. Add in 1 diced onion, cooking for an additional 3-4 minutes until the onion is soft and translucent. Don’t forget to season with salt, pepper, and your choice of spices for added flavor.

Step 3: Create the Creamy Mixture
Once the beef and onion are cooked, reduce the heat to low and stir in a can of cream of mushroom soup and a half-cup of sour cream. Mix thoroughly until the ingredients are well combined and creamy. This luscious mixture is what makes your Tater Tot Casserole irresistible!

Step 4: Assemble the Casserole
Grease a 9x13-inch casserole dish with cooking spray or butter. Spoon the creamy beef mixture into the bottom of the dish, spreading it out evenly. This will serve as the hearty base for your casserole, inviting the golden tater tots on top.

Step 5: Add Cheese and Tater Tots
Sprinkle 1 cup of shredded cheddar cheese over the beef mixture, ensuring even coverage. Next, take your frozen tater tots and place them in a single layer on top of the cheese. This crispy layer will transform into a delightful crunch during baking, complementing the creamy filling below.

Step 6: Bake to Perfection
Place the casserole in your preheated oven and bake for 25-30 minutes. Keep an eye on it as the tater tots become golden and crispy. For even cooking, you may rotate the dish halfway through baking for a more uniform crispiness.

Step 7: Melt Extra Cheese
After the initial baking time, remove the casserole briefly from the oven and sprinkle an additional cup of cheddar cheese over the tater tots. Return it to the oven for another 5 minutes. This extra melting will create an irresistible cheesy layer atop your Tater Tot Casserole.

Step 8: Finishing Touches
If you desire an extra crispy finish, turn on the broiler for just 1-2 minutes, watching closely to avoid burning. Once done, allow the casserole to cool for about 5 minutes before serving. For a vibrant touch, consider garnishing with chopped green onions.

What to Serve with Tater Tot Casserole with Ground Beef

To create a delightful meal that balances flavors and textures, explore these delicious pairings that elevate your cozy casserole experience.

  • Garden Salad: A crisp and refreshing mix of greens, tomatoes, and cucumbers, this salad brightens up your plate and adds a crunchy contrast.

  • Garlic Bread: Warm and buttery garlic bread is the perfect side, inviting a delightful mingle of flavors with each bite—ideal for scooping up the creamy casserole.

  • Steamed Broccoli: The tender, vibrant green of steamed broccoli provides a nutritious and subtle flavor that complements the richness of the casserole beautifully.

  • Roasted Brussels Sprouts: Caramelized in the oven, roasted Brussels sprouts add a nutty flavor and crisp texture, creating a delightful balance with the creamy casserole.

  • Coleslaw: A tangy, crunchy coleslaw adds a refreshing bite that cuts through the casserole's richness. Its crunchiness brings a fun texture to the meal.

  • Mashed Potatoes: Creamy mashed potatoes amplify the comfort food vibe while enhancing the overall heartiness of the meal—perfect for those who crave extra indulgence.

  • Fruit Salad: Light and sweet, a refreshing fruit salad adds a vibrant contrast to the savory casserole, balancing out the meal with a hint of natural sweetness.

  • Sparkling Water or Lemonade: A fizzy sparkling water or homemade lemonade quenches thirst and complements the rich flavors of the casserole while keeping the meal light and refreshing.

Storage Tips for Tater Tot Casserole with Ground Beef

Fridge: Store your Tater Tot Casserole in an airtight container for up to 3-4 days to maintain freshness and flavor.

Freezer: For long-term storage, wrap the casserole tightly in plastic wrap and foil, freezing it for up to 2-3 months before baking.

Reheating: When ready to enjoy leftovers, bake them in the oven at 350°F (175°C) for 20-25 minutes or until heated through to keep the tater tots crispy.

Make-Ahead Option: Prepare the casserole in advance and refrigerate it unbaked. When you're ready, add 5-10 extra minutes to the baking time for the best results.

Tater Tot Casserole with Ground Beef Variations

Feel free to explore these delightful twists that make this dish uniquely yours!

  • Ground Meat: Substitute ground turkey or plant-based protein for a lighter or vegetarian-friendly option.
  • Creamy Alternatives: Swap cream of mushroom soup for homemade cream sauce or dairy-free alternatives for a healthier touch.
  • Veggie Boost: Add in vegetables like spinach, zucchini, or bell peppers for extra nutrition and vibrant color.
  • Cheesy Twists: Try using pepper jack or mozzarella cheese for a different flavor profile and creamy texture.
  • Herb Infusion: Sprinkle fresh herbs like thyme or parsley into the beef mixture for a fragrant taste.
  • Spice Level: Elevate the heat by incorporating jalapeños or a splash of hot sauce in the beef mixture.
  • Sweet Potato Tots: Replace regular tater tots with sweet potato tots for a sweet and savory twist that’s sure to impress.
  • Topping Variations: For a crunchy finish, sprinkle panko breadcrumbs mixed with parmesan cheese on top before baking.

By tailoring this comforting casserole to your preferences, you will create a memorable meal experience. If you're seeking more inspiration, why not check out our Sweet Potato Casserole for a tasty side or Spicy Miso Tuna Noodle Casserole when you're craving something different? Your kitchen is your playground!

Make Ahead Options

These Tater Tot Casserole with Ground Beef make-ahead tips are perfect for busy cooks looking to save time without sacrificing flavor! You can prepare the entire casserole up to 24 hours in advance by assembling it and refrigerating, covering it tightly to maintain freshness. Additionally, you can brown the ground beef and sauté the onions up to 3 days ahead, storing them in an airtight container in the refrigerator. When you're ready to cook, simply preheat your oven to 375°F (190°C) and bake the casserole directly from the fridge, adding an extra 5-10 minutes to the cooking time for optimal results. This way, you ensure a cozy and comforting meal is always within reach, ready to warm your family’s hearts!

Expert Tips for Tater Tot Casserole

  • Choose Quality Meat: Opt for 80% lean ground beef for better flavor and less grease; ground turkey is a perfect alternative for a lighter option.

  • Tater Tot Placement: Avoid overlapping tater tots to ensure each one becomes perfectly golden and crispy while baking.

  • Storage Savvy: Store leftovers in an airtight container for 3-4 days; reheat in the oven instead of the microwave to retain that crispy texture.

  • Make Ahead: Assemble the Tater Tot Casserole in advance and refrigerate. When ready to bake, simply add an extra 5-10 minutes to the cooking time.

  • Customization is Key: Don’t hesitate to mix in your favorite vegetables like bell peppers or spinach for added nutrition and flavor.

Tater Tot Casserole with Ground Beef Recipe FAQs

What kind of ground beef should I use for this casserole?
I recommend using 80% lean ground beef for optimal flavor with reduced grease. However, ground turkey is a fantastic alternative if you prefer a lighter option.

How should I store leftovers?
Store your Tater Tot Casserole in an airtight container in the fridge for up to 3-4 days. For the best reheating results, use the oven at 350°F (175°C) for 20-25 minutes to keep those tater tots crispy!

Can I freeze this casserole?
Absolutely! You can freeze the unbaked casserole tightly wrapped in plastic and foil for up to 2-3 months. When you're ready to enjoy it, bake directly from frozen, adding about 10-15 minutes to the baking time.

What can I do if my tater tots aren’t getting crispy?
Make sure that the tater tots are placed in a single layer without overlapping in the casserole. For an even crispier finish, consider rotating the casserole halfway through the baking process to ensure all sides get that delightful crunch.

Are there any dairy-free options for this recipe?
Yes, you can easily make this Tater Tot Casserole dairy-free! Substitute the cream of mushroom soup and sour cream with dairy-free alternatives, like coconut cream or a dairy-free sour cream alternative.

Can I add more vegetables to the casserole?
Very much so! Feel free to include your favorite vegetables like spinach, zucchini, or bell peppers. Just sauté them with the onions before adding to the beef mixture. This will enhance the nutrition and flavor of your casserole!

Tater Tot Casserole with Ground Beef

Easy Tater Tot Casserole with Ground Beef for Cozy Nights

This Tater Tot Casserole with Ground Beef is a comforting and quick dinner option perfect for cozy nights.
Print Recipe Pin Recipe
Prep Time 15 minutes mins
Cook Time 35 minutes mins
Cooling Time 5 minutes mins
Total Time 55 minutes mins
Servings: 6 portions
Course: Dinner
Cuisine: American
Calories: 350
Ingredients Equipment Method Nutrition Notes

Ingredients
  

For the Casserole
  • 1 pound Ground Beef or ground turkey
  • 1 can Cream of Mushroom Soup dairy-free version for vegan
  • 0.5 cup Sour Cream dairy-free alternative as needed
  • 1 cup Diced Onion or shallots for milder taste
  • 1 cup Cheddar Cheese freshly shredded for best results
  • 32 ounces Frozen Tater Tots consider sweet potato tots
  • Optional Vegetables e.g., peas, bell peppers, corn
  • Spices e.g., Worcestershire sauce, hot sauce
For Serving
  • 1 bunch Chopped Green Onions for garnish

Equipment

  • Large skillet
  • 9x13-inch casserole dish

Method
 

Step-by-Step Instructions
  1. Preheat your oven to 375°F (190°C).
  2. In a large skillet, add 1 pound of ground beef over medium heat. Stir occasionally for about 5-7 minutes until browned. Add 1 diced onion and cook for an additional 3-4 minutes.
  3. Reduce heat to low and stir in a can of cream of mushroom soup and a half-cup of sour cream until mixed.
  4. Grease a 9x13-inch casserole dish and spoon the creamy beef mixture into the bottom.
  5. Sprinkle 1 cup of shredded cheddar cheese over the beef mixture. Place frozen tater tots in a single layer on top.
  6. Bake for 25-30 minutes until tater tots are golden and crispy.
  7. Sprinkle an additional cup of cheddar cheese over the tater tots and bake for another 5 minutes.
  8. For an extra crispy finish, turn on the broiler for 1-2 minutes. Allow the casserole to cool for 5 minutes before serving, and garnish with chopped green onions.

Nutrition

Serving: 1portionCalories: 350kcalCarbohydrates: 30gProtein: 20gFat: 15gSaturated Fat: 7gPolyunsaturated Fat: 1gMonounsaturated Fat: 7gCholesterol: 70mgSodium: 600mgPotassium: 500mgFiber: 2gSugar: 2gVitamin A: 10IUVitamin C: 5mgCalcium: 20mgIron: 15mg

Notes

Customizable by using different ground meats or adding vegetables. Perfect for meal prep.

Tried this recipe?

Let us know how it was!

Savor the Flavor: Quick Egg Roll In A Bowl Made Healthy

May 15, 2026 by Grace Snow Leave a Comment

As I stood in my kitchen, the aroma of sizzling onions and garlic made my stomach rumble with anticipation. If you're like me and long for the delightful flavors of an egg roll without the hassle of frying or carbs, you’re in for a treat! This Quick Egg Roll In A Bowl recipe combines seasoned ground meat, crisp cabbage, and a flavorful sauce, all created in just 30 minutes. It's the perfect solution when you need a healthy meal that doesn't sacrifice taste, and the best part? You can easily switch up the ingredients to suit any craving or dietary need. Whether you’re meal prepping for the week or enjoying a quick weeknight dinner, this dish offers effortless customization and a scrumptious home-cooked experience. Ready to dig in and get creative?

Why Choose Quick Egg Roll In A Bowl?

Simplicity at Its Best: This recipe combines everyday ingredients, making it a breeze to whip up in just 30 minutes.

Flavor Explosion: With its mix of savory ground meat and fresh veggies, every bite bursts with the classic taste of egg rolls, but in a healthier form!

Endless Customization: Feel free to swap proteins or add extra veggies for a unique twist—ground turkey or shredded pork work great!

Meal Prep Friendly: Perfect for preparing in batches, this dish stores well in the fridge, making lunches easy all week.

Guilt-Free Indulgence: Enjoy the flavors you love, without the carbs—substituting soy sauce with coconut aminos keeps this dish gluten-free and light.

Whether you serve it in lettuce wraps or over rice, you can’t go wrong! Check out our Acai Bowl Nutritious for another satisfying recipe to try this week.

Quick Egg Roll In A Bowl Ingredients

  • For the Protein

  • Ground Beef – Main protein source, providing flavor and heartiness; substitute with ground turkey, chicken, or shredded pork.

  • For the Vegetables

  • Onion – Adds sweetness and depth; use any variety, diced.

  • Garlic – Enhances aroma and taste; always use fresh, minced.

  • Shredded Carrots – Adds sweetness and visual appeal; can substitute with diced bell peppers or omit.

  • Coleslaw Mix – Easy mix of cabbage and carrots, providing crunch; can replace with shredded cabbage and carrots.

  • For the Sauce

  • Soy Sauce or Coconut Aminos – Key seasoning for umami flavor; use coconut aminos for a gluten-free option.

  • Rice Vinegar – Adds tanginess to balance flavors.

  • Sesame Oil – Offers a nutty, aromatic essence.

  • Honey or Maple Syrup – Provides sweetness; can use a sugar alternative for a keto-friendly version.

  • Ground Ginger – Adds warmth and spice.

  • Garlic Powder – Intensifies the garlic flavor.

  • Red Pepper Flakes – Optional for added heat; adjust to your taste.

  • For the Toppings

  • Sesame Seeds – Adds a delightful crunch.

  • Sriracha – For those who love a spicy kick.

  • Crispy Wonton Strips – Offers fantastic texture; optional but highly recommended!

  • Peanuts – Provides a nutty flavor and extra crunch; a great topping addition.

This Quick Egg Roll In A Bowl is your delicious, hassle-free answer to healthy fast food cravings! Enjoy customizing your bowl as you embark on this culinary adventure.

Step‑by‑Step Instructions for QUICK EGG ROLL IN A BOWL

Step 1: Brown Meat
In a large skillet or wok, heat over medium-high heat and add your ground beef. As it cooks, break it apart with a spatula and stir occasionally, allowing it to brown evenly—around 5–7 minutes. Once it's browned and no longer pink, drain any excess grease to keep the dish healthier and set the beef aside momentarily.

Step 2: Sauté Onions and Garlic
Next, keep the skillet warm and add diced onion, cooking until it's softened and translucent, about 3-5 minutes. Stir in minced garlic and continue cooking until fragrant, roughly 30 seconds more. This step adds a rich depth of flavor essential for your QUICK EGG ROLL IN A BOWL, so watch for a gently golden hue.

Step 3: Add Vegetables
Stir in your coleslaw mix—this adds a delightful crunch and vibrant color. Sauté the mix for 5–7 minutes until the cabbage becomes tender but still crisp. Keep stirring to ensure even cooking and prevent sticking. The vegetables should look bright and inviting, signaling that they are ready for the sauce.

Step 4: Prepare Sauce
While the vegetables are cooking, grab a small bowl and whisk together soy sauce (or coconut aminos), rice vinegar, sesame oil, honey or maple syrup, ground ginger, garlic powder, and red pepper flakes. This flavor-packed sauce will enhance the essence of your QUICK EGG ROLL IN A BOWL, so ensure it is well combined.

Step 5: Combine
Pour the prepared sauce over the cooked meat and vegetable mixture in the skillet. Stir thoroughly to coat everything beautifully; then, let the mixture simmer on medium heat for 3–5 minutes or until the sauce thickens slightly. You'll know it's done when the dish smells heavenly and has a glossy finish.

Step 6: Garnish and Serve
Remove from heat and transfer your delicious QUICK EGG ROLL IN A BOWL to serving dishes. Garnish with sliced green onions, sesame seeds, and any desired toppings like crispy wonton strips or peanuts for added texture. Serve immediately, and relish the vibrant flavors and satisfying crunch in every bite!

Make Ahead Options

These Quick Egg Roll In A Bowl are perfect for busy weeknights and meal prep enthusiasts! You can prepare the seasoned ground meat and sautéed vegetables up to 3 days in advance, storing them together in an airtight container in the refrigerator. To prevent the cabbage from becoming too soggy, keep the sauce separate and add it when you're ready to reheat. When it's time to enjoy your meal, simply warm the mixture in a skillet over medium heat until heated through, then add the sauce and simmer for a few minutes to enhance the flavors. With these easy make-ahead options, dinner can be on the table with minimal effort and just as delicious as freshly made!

Expert Tips for Quick Egg Roll In A Bowl

  • Don’t Overcook Veggies: Aim for tender-crisp cabbage; overcooked vegetables can lose their vibrant taste and texture.
  • Customize Your Protein: Swap in ground turkey, chicken, or shredded pork to keep things interesting while still enjoying this quick egg roll in a bowl!
  • Taste as You Go: Adjust seasonings throughout cooking for a well-rounded flavor; adding more soy sauce or honey can enhance the umami or sweetness.
  • Meal Prep Magic: This dish keeps well in the fridge; prepare extra portions for quick lunches by storing in airtight containers.
  • Embrace Toppings: Enhance flavor and crunch with sesame seeds, sriracha, or crispy wonton strips—don’t skip this step for an elevated experience!

What to Serve with Quick Egg Roll In A Bowl?

Serve your delightful egg roll creation with these tasty sides and flavors.

  • Steamed Jasmine Rice: A fragrant base that absorbs the delicious flavors, offering a satisfying foundation for your egg roll.

  • Cauliflower Rice: A guilt-free alternative, this light and fluffy option pairs perfectly while keeping the dish low-carb!

  • Szechuan Noodles: The perfect companion; their chewy texture and savory notes enhance the overall dish. Add these for a comforting twist.

  • Sesame Broccoli: Steamed to perfection and drizzled with sesame oil, this nutritious side adds a fresh crunch that balances the flavors.

  • Sweet Chili Edamame: A sweet and spicy treat with a unique twist that complements the savory elements of the main dish beautifully.

  • Crispy Wonton Chips: For an extra crunch, these addictively crispy chips bring a delightful texture contrast. Dip them in the sauce for added fun!

Pair your Quick Egg Roll In A Bowl with these options, and treat your loved ones (and yourself!) to a fulfilling meal worth savoring.

QUICK EGG ROLL IN A BOWL Variations & Substitutions

Feel free to mix things up and personalize your Quick Egg Roll In A Bowl for a delightful twist that suits your cravings!

  • Protein Swap: Try ground turkey or ground chicken for a leaner option, or shredded pork for added richness. Each protein brings its unique flavor, making this dish versatile and enjoyable.

  • Vegetable Boost: Incorporate diced bell peppers, mushrooms, or even snap peas to enhance the texture and nutrients. Their colors will brighten your bowl and offer a delightful crunch!

  • Keto-Friendly Sweetener: Replace honey with a keto-approved sweetener like erythritol or monk fruit for a low-carb alternative. Enjoy the sweetness without the guilt while keeping the flavor intact.

  • Add Some Heat: Spice it up by including minced jalapeños or a dash of chili paste along with the red pepper flakes for a fiery kick. Adjust to your personal heat preference!

  • Tasty Toppings: Enhance your bowl with crunchy toppings like chopped cashews or crispy fried onions for added flavor and texture. Don't forget the toppings—they're the cherry on top!

  • Gluten-Free Option: Use coconut aminos instead of soy sauce for a gluten-free version that doesn’t compromise on flavor. Your tastebuds will thank you while keeping it healthy!

  • Fresh Herbs: Toss in some fresh cilantro or green onions right before serving to elevate the taste with fresh herbiness. It adds a burst of flavor that shines through every bite.

  • Serve in Style: For a lighter meal, serve your egg roll mixture in fresh lettuce leaves or over cauliflower rice instead of traditional rice. It’s a fun and refreshing way to enjoy this classic dish.

With these fun variations, your Quick Egg Roll In A Bowl will never get boring! And while you're at it, why not try our delicious Pumpkin Cinnamon Roll for an equally satisfying dessert? Enjoy your culinary adventure!

How to Store and Freeze Quick Egg Roll In A Bowl

Fridge: Store leftovers in an airtight container for up to 3-4 days. Reheat in a skillet over medium heat, adding a splash of water to prevent drying out.

Freezer: This dish freezes well for up to 2-3 months. Allow it to cool completely, then portion into freezer-safe containers or bags.

Thawing: To use frozen quick egg roll in a bowl, thaw overnight in the refrigerator before reheating. Ideally, heat it on the stovetop for best texture.

Reheating: When reheating, ensure it's heated through to an internal temperature of 165°F. Add a bit of water or broth to retain moisture and flavor.

Quick Egg Roll In A Bowl Recipe FAQs

What should I look for when choosing ground meat?
Absolutely! When selecting ground meat, look for fresh cuts with minimal discoloration. Whether you choose ground beef, turkey, or chicken, ensure it has a bright color and no dark spots. Leaner meats like ground turkey offer fewer calories, making them excellent alternatives for a lighter dish.

How should I store leftover Quick Egg Roll In A Bowl?
Very! Store your leftovers in an airtight container in the fridge for up to 3-4 days. When you're ready to enjoy it again, simply reheat it in a skillet over medium heat for the best texture, adding a splash of water if needed to maintain moisture.

Can I freeze Quick Egg Roll In A Bowl?
Absolutely! This dish freezes beautifully for up to 2-3 months. After cooking, let it cool completely, then portion it into freezer-safe containers or bags. When you're ready to eat, thaw it overnight in the refrigerator, then reheat on the stovetop until warmed through.

What can I do if my sauce is too salty?
No problem! If you find your sauce is on the salty side, consider adding a splash of unsweetened coconut milk or a bit of extra shredded cabbage to balance the flavors. Another option is to mix in a tablespoon of sugar or honey to counteract the saltiness without compromising flavor.

Is this dish suitable for gluten-free diets?
Absolutely! To keep your Quick Egg Roll In A Bowl gluten-free, simply substitute soy sauce with coconut aminos. It's a fantastic alternative that preserves the umami flavor while being mindful of dietary restrictions. Always double-check labels on other ingredients if you're strictly avoiding gluten.

Can I make this dish vegetarian?
Yes, indeed! To make a vegetarian version of Quick Egg Roll In A Bowl, simply replace the ground meat with crumbled tofu or tempeh. You can also increase the amount of vegetables like bell peppers, mushrooms, and zucchini for added heartiness. Adjust the seasonings to enhance flavor, and enjoy your delectable meat-free meal!

QUICK EGG ROLL IN A BOWL

Savor the Flavor: Quick Egg Roll In A Bowl Made Healthy

Delight in a healthy, flavorful Quick Egg Roll In A Bowl, combining seasoned ground meat, crisp cabbage, and a delicious sauce in just 30 minutes.
Print Recipe Pin Recipe
Prep Time 10 minutes mins
Cook Time 20 minutes mins
Total Time 30 minutes mins
Servings: 4 bowls
Course: Dinner
Cuisine: Asian
Calories: 350
Ingredients Equipment Method Nutrition Notes

Ingredients
  

For the Protein
  • 1 pound Ground Beef Can substitute with ground turkey, chicken, or shredded pork.
For the Vegetables
  • 1 medium Onion Diced.
  • 2 cloves Garlic Minced.
  • 1 cup Shredded Carrots Can substitute with diced bell peppers or omit.
  • 4 cups Coleslaw Mix Easy mix of cabbage and carrots.
For the Sauce
  • 3 tablespoons Soy Sauce or Coconut Aminos Use coconut aminos for a gluten-free option.
  • 2 tablespoons Rice Vinegar
  • 1 tablespoon Sesame Oil
  • 1 tablespoon Honey or Maple Syrup Can use a sugar alternative for a keto-friendly version.
  • 1 teaspoon Ground Ginger
  • 1 teaspoon Garlic Powder
  • 1/2 teaspoon Red Pepper Flakes Optional for added heat.
For the Toppings
  • 1 tablespoon Sesame Seeds
  • 2 tablespoons Sriracha Optional.
  • 1 cup Crispy Wonton Strips Optional but highly recommended.
  • 1/4 cup Peanuts Chopped.

Equipment

  • Skillet
  • Spatula
  • Wok
  • small bowl

Method
 

Cooking Instructions
  1. In a large skillet or wok, heat over medium-high heat and add your ground beef. Brown for about 5–7 minutes, breaking apart with a spatula, then drain excess grease.
  2. Add diced onion and cook until softened, about 3-5 minutes. Stir in minced garlic and cook until fragrant, about 30 seconds.
  3. Stir in the coleslaw mix and sauté for 5–7 minutes until tender but still crisp, stirring regularly.
  4. In a small bowl, whisk together soy sauce, rice vinegar, sesame oil, honey, ground ginger, garlic powder, and red pepper flakes.
  5. Pour the sauce over the meat and vegetable mixture. Stir well and let simmer for 3–5 minutes until the sauce thickens slightly.
  6. Remove from heat and garnish with sesame seeds, sriracha, crispy wonton strips, or peanuts before serving.

Nutrition

Serving: 1bowlCalories: 350kcalCarbohydrates: 25gProtein: 30gFat: 15gSaturated Fat: 4gPolyunsaturated Fat: 2gMonounsaturated Fat: 8gCholesterol: 100mgSodium: 700mgPotassium: 600mgFiber: 4gSugar: 6gVitamin A: 200IUVitamin C: 25mgCalcium: 6mgIron: 15mg

Notes

This dish keeps well and is great for meal prep. Store leftovers in airtight containers and reheat as needed.

Tried this recipe?

Let us know how it was!

One-Pot Cheesy Taco Pasta: A Quick Family Favorite Delight

May 15, 2026 by Grace Snow Leave a Comment

As I stirred my pot of simmering goodness, the rich aroma of taco seasoning wrapped around me like a warm hug. If you think dinner needs to be both quick and hearty, let me introduce you to my One-Pot Cheesy Taco Pasta. In just under 30 minutes, this family-friendly dish brings together savory ground beef and melted cheese for a blissful weeknight meal that even the pickiest eaters will rave about. The best part? There’s minimal cleanup since everything cooks in one pot! You can customize it with your favorite toppings or even sneak in some veggies for added nutrition. So, are you ready to turn your weeknight dinner into a fiesta?

Why is One-Pot Cheesy Taco Pasta a Must-Try?

Simplicity and Convenience: It’s made in just one pot, making cleanup a breeze on busy nights.
Quick and Delicious: Ready in under 30 minutes, making it the ultimate family-friendly dish.
Customizable: Tailor with your favorite toppings like fresh avocado or crushed tortilla chips for added flair.
Satisfying Texture: Enjoy creamy, cheesy goodness combined with tender rotini pasta, creating a delightful meal for all.
Nutrition Meets Flavor: Sneak in some veggies for a nutritious boost without sacrificing taste—perfect for health-conscious families!

Don’t miss trying this alongside a refreshing salad or whip up some Taco Spaghetti Cheesy for another easy dinner option!

One-Pot Cheesy Taco Pasta Ingredients

For the Pasta

  • Ground Beef – Provides protein and flavor; can substitute with ground turkey for a healthier option.
  • Uncooked Rotini Pasta – Main carb component that cooks perfectly; try other shapes but adjust cooking times accordingly.
  • Mild Salsa – Adds moisture and tang; use your favorite store-bought or homemade salsa for extra freshness.

For the Seasoning

  • Taco Seasoning – Infuses spiced flavor into the dish; a homemade mix can be made for a personalized kick.
  • Salt – Enhances the overall flavor; adjust to taste for a perfect balance.
  • Black Pepper – Adds warmth; freshly cracked provides better flavor.
  • Water – Helps cook the pasta and meld flavors—ensure you have the right amount for best results.

For the Creaminess

  • Shredded Mexican-Style Cheese – Adds creaminess and richness; feel free to substitute with cheddar or your favorite blend.

Optional Toppings

  • Chopped Tomatoes – Adds freshness and juiciness; perfect for brightening the dish.
  • Avocado – For a creamy texture; enhances the dish with healthy fats.
  • Crushed Tortilla Chips – Introduces a delightful crunch; sprinkle on top for extra layer.
  • Chopped Cilantro – Adds a fresh herb flavor; brightens up the overall taste of your One-Pot Cheesy Taco Pasta.

Bring your family to the dinner table and treat them to this comforting One-Pot Cheesy Taco Pasta! Enjoy the simplicity and satisfaction of a meal that everyone will love.

Step‑by‑Step Instructions for One-Pot Cheesy Taco Pasta

Step 1: Preheat Skillet
Begin by heating a large deep skillet over medium heat for about 2-3 minutes until it’s warm. This step prepares your cooking surface for the ground beef, ensuring that it sears nicely and develops flavor. As the skillet heats, enjoy the anticipation of the delicious One-Pot Cheesy Taco Pasta coming together.

Step 2: Cook Beef
Add the ground beef to the hot skillet, breaking it apart with a spatula. Season it with a pinch of salt and freshly cracked black pepper, then cook for about 5-7 minutes, stirring occasionally until it’s browned and fully cooked. The meat should turn from pink to a rich brown color, bringing that hearty flavor to your One-Pot Cheesy Taco Pasta.

Step 3: Remove Grease
Once the beef is cooked, carefully drain off any excess grease from the skillet. You can do this by tilting the skillet slightly and using the spatula to hold back the meat. This step is crucial for keeping your One-Pot Cheesy Taco Pasta from becoming too oily, allowing the flavors of the taco seasoning to shine through in the final dish.

Step 4: Combine Ingredients
Stir in the taco seasoning, ensuring the beef is evenly coated, about 1 minute. Then, pour in the water and mild salsa, stirring well to combine. Finally, add the uncooked rotini pasta to the skillet, ensuring it is submerged in the liquid. This layer of flavor sets the foundation for your savory One-Pot Cheesy Taco Pasta.

Step 5: Boil Mixture
Increase the heat to high and bring the mixture to a rolling boil, which should take about 3-4 minutes. Once boiling, cover your skillet with a lid, reduce the heat to a simmer, and let it cook for 15 minutes. Keep an eye on it to prevent sticking, and the pasta should become tender while soaking up all those delicious taco flavors.

Step 6: Cook Pasta
After simmering for 15 minutes, check the pasta’s doneness. It should be al dente and well-coated in the flavorful sauce. If it looks a little dry, you can add a splash more water to achieve the desired consistency. This step is the perfect moment to envision the creamy outcome of your One-Pot Cheesy Taco Pasta.

Step 7: Add Cheese
Turn off the heat and add the shredded Mexican-style cheese into the skillet, stirring until it’s fully melted and creamy. This will take about 1-2 minutes. The cheese should meld beautifully with the pasta, creating a rich and gooey mixture that defines your One-Pot Cheesy Taco Pasta.

Step 8: Serve
Finally, taste and adjust the seasoning if needed, then serve the One-Pot Cheesy Taco Pasta warm. You can sprinkle optional toppings like chopped tomatoes, crushed tortilla chips, or cilantro on top for added flavor and texture. Witness the joy on your family’s faces as they dig into this comforting meal!

One-Pot Cheesy Taco Pasta Variations

Feel free to sprinkle some creativity into your dish with these delightful twists that enhance flavors and textures!

  • Ground Turkey: Substitute ground beef for a lighter protein option that still offers great flavor. Perfect for health-conscious families!
  • Plant-Based Meat: Use plant-based crumbles for a vegetarian version that’s just as satisfying. Enjoy all the deliciousness without the meat!
  • Vegetable Medley: Fold in chopped bell peppers, zucchini, or spinach for a colorful and nutritious addition that brings freshness to your pasta.
  • Extra Spice: Kick up the heat by adding diced jalapeños or a sprinkle of cayenne pepper to the mix. Your taste buds will thank you!
  • Cheese Fun: Experiment with different cheeses such as pepper jack for a spicy melt or mozzarella for a smooth, gooey texture. Choose your favorite!
  • Creamy Replacement: Swap half of the salsa with sour cream or cream cheese for extra creaminess that will make every bite sumptuous.
  • Taco-flavored Couscous: Instead of pasta, substitute couscous for a different texture, cooking it according to package directions with taco seasoning.
  • Crunchy Toppings: Add toasted corn or crushed tortilla chips on top for an extra layer of crunch and delicious contrast to the creamy pasta.

Looking for more inspiration? Try this alongside our Taco Bell Crunchwrap for a fun family dinner or check out our Tuscan White Bean Pasta for a vegetarian twist!

What to Serve with One-Pot Cheesy Taco Pasta?

Elevate your taco-inspired dinner experience with these delightful sides and accompaniments that enhance both flavor and enjoyment.

  • Crispy Side Salad: A refreshing quinoa or mixed greens salad adds a crisp contrast to the creamy pasta. Toss in some cherry tomatoes and a zesty vinaigrette for that extra zing.

  • Guacamole: Rich, creamy guacamole complements the spice of the pasta and offers a smooth texture. Dipping tortilla chips into guacamole is a fun and tasty way to enjoy your meal!

  • Crushed Tortilla Chips: Serve a side of crunchy tortilla chips for a delightful textural contrast. Perfect for scooping up the cheesy pasta, they add a playful spin to the dish.

  • Spanish Rice: Fluffy Spanish rice bathed in spices and herbs can be an ideal side to absorb the bold flavors of the One-Pot Cheesy Taco Pasta. It brings a pop of color and additional carbohydrates!

  • Corn on the Cob: Grilled or boiled corn on the cob brings a touch of sweetness that balances the savory spice of the pasta. Drizzle with lime and sprinkle with chili powder for an added kick!

  • Margaritas: Pair your meal with a refreshing margarita or a non-alcoholic limeade for a festive touch. Their tartness will enhance the overall flavor profile of this comforting dish.

These delightful pairings will take your One-Pot Cheesy Taco Pasta from an ordinary dinner to an unforgettable family feast!

Make Ahead Options

These One-Pot Cheesy Taco Pasta are perfect for meal prep enthusiasts! You can cook the pasta and ground beef mixture up to 24 hours in advance, allowing the flavors to develop while saving time on busy weeknights. To ensure optimal quality, refrigerate the mixture in an airtight container. When you're ready to serve, simply reheat it over medium heat with a splash of water to loosen it up, then stir in the shredded cheese until melted. This way, you'll have a deliciously creamy and satisfying dish with minimal effort—just like a homemade meal should be!

Storage Tips for One-Pot Cheesy Taco Pasta

Fridge: Store leftover One-Pot Cheesy Taco Pasta in an airtight container for up to 3 days. This will keep it fresh and delicious for reheating later.

Freezer: For longer storage, freeze portions in freezer-safe containers for up to 2 months. Make sure to leave some space, as the pasta may expand when frozen.

Reheating: When ready to enjoy again, thaw overnight in the fridge if frozen, then reheat on the stovetop over low heat, adding a splash of water to refresh the texture.

Room Temperature: Avoid leaving the pasta out at room temperature for more than 2 hours to ensure food safety and taste quality.

Expert Tips for One-Pot Cheesy Taco Pasta

  • Quality Ingredients: Choose fresh and high-quality ingredients for the best flavor. A good ground beef or turkey can elevate your One-Pot Cheesy Taco Pasta experience.
  • Stir Occasionally: To prevent sticking, stir the pasta mixture while it simmers. This ensures even cooking and a creamy sauce that clings to every bite.
  • Taste as You Go: Don’t forget to taste your dish before serving! Adjust salt and spice levels based on your family's preferences for perfectly seasoned One-Pot Cheesy Taco Pasta.
  • Add Veggies: Sneak in some chopped bell peppers or spinach for extra nutrition without sacrificing taste, maintaining the dish’s delightful allure.
  • Perfect Toppings: Use a mix of fresh toppings like diced avocado and crushed tortilla chips to add layers of flavor and texture, making your pasta even more inviting.

One-Pot Cheesy Taco Pasta Recipe FAQs

How do I choose ripe ingredients for my One-Pot Cheesy Taco Pasta?
Absolutely! For the best flavor, select firm tomatoes that are vibrant in color and free from dark spots. When choosing avocado, pick ones that yield to gentle pressure, indicating ripeness. Fresh herbs like cilantro should be bright green, with no wilting or browning.

What’s the best way to store leftover One-Pot Cheesy Taco Pasta?
Very! You should keep your One-Pot Cheesy Taco Pasta in an airtight container in the fridge for up to 3 days. When properly stored, it stays fresh and maintains its rich flavors. Be sure to cool it completely before sealing and refrigerating.

Can I freeze One-Pot Cheesy Taco Pasta? How?
Of course! To freeze, portion the pasta into freezer-safe containers, leaving a little space for expansion, as the pasta will swell when frozen. It can last for up to 2 months. To thaw, place the container in the fridge overnight, then reheat on low on the stovetop. Adding a splash of water can help regain creaminess.

What should I do if the pasta is overcooked or soggy?
No worries! If your pasta becomes overcooked, try to reduce the cooking time next round to avoid mushiness. If it seems too wet, you can simmer it uncovered for a few extra minutes to allow some liquid to evaporate, stirring occasionally. Adding a bit of cheese can also help absorb excess moisture while enhancing the flavor.

Are there any dietary considerations for the One-Pot Cheesy Taco Pasta?
Absolutely! This dish is versatile; for gluten-free options, substitute regular pasta with gluten-free alternatives. If you're sensitive to dairy, use lactose-free cheese or nutritional yeast for cheesiness without the lactose. Always check labels for allergens if you're feeding someone with specific dietary needs.

One-Pot Cheesy Taco Pasta

One-Pot Cheesy Taco Pasta: A Quick Family Favorite Delight

One-Pot Cheesy Taco Pasta is a quick and hearty dish made with savory ground beef and melted cheese, perfect for family dinners.
Print Recipe Pin Recipe
Prep Time 10 minutes mins
Cook Time 15 minutes mins
Total Time 25 minutes mins
Servings: 4 servings
Course: Dinner
Cuisine: Mexican
Calories: 600
Ingredients Equipment Method Nutrition Notes

Ingredients
  

For the Pasta
  • 1 lb Ground Beef Can substitute with ground turkey for a healthier option.
  • 8 oz Uncooked Rotini Pasta Adjust cooking times if using different shapes.
  • 1 cup Mild Salsa Use your favorite store-bought or homemade.
For the Seasoning
  • 1 packet Taco Seasoning A homemade mix can be made for a personalized kick.
  • 1 tsp Salt Adjust to taste.
  • 1 tsp Black Pepper Freshly cracked provides better flavor.
  • 2 cups Water Ensure you have the right amount for best results.
For the Creaminess
  • 2 cups Shredded Mexican-Style Cheese Feel free to substitute with cheddar or your favorite blend.
Optional Toppings
  • 1 cup Chopped Tomatoes Perfect for brightening the dish.
  • 1 avocado Avocado Enhances the dish with healthy fats.
  • 1 cup Crushed Tortilla Chips Sprinkle on top for an extra layer.
  • 1/4 cup Chopped Cilantro Brightens up the overall taste.

Equipment

  • large deep skillet

Method
 

Cooking Steps
  1. Preheat a large deep skillet over medium heat for 2-3 minutes.
  2. Add ground beef, breaking it apart with a spatula. Season with salt and pepper, cook for 5-7 minutes until browned.
  3. Drain any excess grease from the skillet.
  4. Stir in taco seasoning, then add water and salsa. Add uncooked rotini pasta ensuring it is submerged.
  5. Bring to a rolling boil, cover, reduce heat to simmer and cook for 15 minutes.
  6. Check pasta doneness, and if needed add more water.
  7. Turn off heat, add shredded cheese, stirring until melted and creamy.
  8. Serve warm with optional toppings.

Nutrition

Serving: 1plateCalories: 600kcalCarbohydrates: 50gProtein: 30gFat: 25gSaturated Fat: 10gPolyunsaturated Fat: 2gMonounsaturated Fat: 8gCholesterol: 80mgSodium: 900mgPotassium: 700mgFiber: 5gSugar: 3gVitamin A: 500IUVitamin C: 15mgCalcium: 300mgIron: 3mg

Notes

Use high-quality ingredients and taste as you go to adjust seasoning for perfect results.

Tried this recipe?

Let us know how it was!

Creamy Cheese Tortellini Alfredo for Quick Comfort Nights

May 15, 2026 by Grace Snow Leave a Comment

As I stirred the creamy sauce, a wave of nostalgia swept over me, transporting me back to cozy family dinners filled with laughter and love. The star of the meal was always my creamy Cheese Tortellini Alfredo, an indulgent dish that balances the ease of weeknight cooking with the richness of gourmet dining. This easy yet decadent recipe is perfect for those evenings when you crave something comforting without spending hours in the kitchen. Plus, it’s versatile enough to offer healthier alternatives or a twist on store-bought tortellini. Whether serving it alongside garlic bread or fresh salad, this Creamy Cheese Tortellini Alfredo is bound to become a staple in your home. Are you ready to bring a taste of Italy to your dinner table?

Why choose Creamy Cheese Tortellini Alfredo?

Simplicity at its finest: This recipe offers an easy solution for busy weeknights, requiring minimal prep while delivering maximum comfort.

Decadent flavor: The rich blend of creamy sauce and cheese tortellini creates a dish that feels indulgent without the fuss of fine dining.

Versatile options: Want to lighten things up? Swap in light cream or toss in fresh veggies like spinach or mushrooms for a nutritious boost!

Family-friendly: With its irresistible creamy texture, this dish is sure to please even the pickiest eaters, making it perfect for family gatherings.

Quick to make: Enjoy a delicious meal in under 30 minutes—ideal for those last-minute dinners after a long day!

For a delightful side, check out a refreshing Avocado Egg Salad or pair it with some crispy garlic bread for a wholesome feast.

Creamy Cheese Tortellini Alfredo Ingredients

• The ingredients you need to create this comforting dish are both simple and satisfying!

For the Tortellini

  • Cheese Tortellini – This is the star of the dish; fresh or frozen will work beautifully for convenience.

For the Alfredo Sauce

  • Butter – Adds a rich base to your sauce; olive oil makes a lighter alternative.
  • Heavy Cream – Ensures a velvety texture for that creamy indulgence; half-and-half can be used for a lighter option.
  • Grated Parmesan Cheese – Adds depth and flavor; freshly grated cheese elevates the taste significantly.
  • Garlic Powder – Enhances the sauce's savory profile; fresh minced garlic packs an extra punch!
  • Salt and Pepper – Essential for seasoning; adjust to fit your palate.

For Garnish

  • Chopped Parsley (optional) – Adds a pop of color and a fresh herbal note that brightens up the dish.

Whether you’re whipping this up for a cozy family meal or impressing friends, this Creamy Cheese Tortellini Alfredo is sure to bring smiles around the table!

Step‑by‑Step Instructions for Creamy Cheese Tortellini Alfredo

Step 1: Cook the Tortellini
Begin by bringing a large pot of salted water to a boil over high heat. Once boiling, gently add the cheese tortellini and cook according to the package instructions, usually about 3-5 minutes, until they are al dente. Stir occasionally to prevent sticking, and once done, drain the tortellini in a colander and set aside.

Step 2: Prepare the Alfredo Sauce
In a large skillet, melt 2 tablespoons of butter over medium heat, allowing it to bubble gently without browning. Once melted, pour in 1 cup of heavy cream and sprinkle in 1 teaspoon of garlic powder. Stir well, and bring the mixture to a gentle simmer, allowing it to cook for 3-5 minutes until the sauce thickens slightly and becomes creamy.

Step 3: Add the Cheese
While the sauce simmers, gradually stir in 1 cup of freshly grated Parmesan cheese, mixing until it melts completely and forms a velvety texture. Keep cooking for another 2-3 minutes, ensuring the sauce does not boil, as you want it to remain smooth. Adjust the seasoning with salt and pepper to taste to enhance the flavors of your Creamy Cheese Tortellini Alfredo.

Step 4: Combine the Tortellini and Sauce
Once the tortellini are cooked and the sauce is ready, carefully add the drained tortellini into the skillet with the Alfredo sauce. Gently toss the pasta in the sauce to coat it evenly, ensuring every piece is enveloped in that creamy goodness. Allow it to cook together for an additional minute to marry the flavors beautifully.

Step 5: Serve and Garnish
Remove the skillet from heat and transfer the Creamy Cheese Tortellini Alfredo to serving plates. For a fresh touch, sprinkle with chopped parsley if desired, adding a pop of color and flavor. Serve immediately while it's warm, and enjoy this delightful comfort dish with your favorite sides!

Expert Tips for Creamy Cheese Tortellini Alfredo

  • Fresh Cheese Matters: Use freshly grated Parmesan cheese instead of the pre-grated kind for a richer flavor in your creamy Cheese Tortellini Alfredo.

  • Watch the Sauce: Keep an eye on the Alfredo sauce while it simmers. Boiling can cause it to separate, so aim for a gentle simmer instead.

  • Perfectly Al Dente: Be careful not to overcook your tortellini. They should be al dente for the best texture, so follow package instructions closely.

  • Thaw Frozen Tortellini: If using frozen tortellini, ensure they are completely thawed before cooking. This helps achieve even cooking and texture.

  • Season to Taste: Don’t forget to adjust your salt and pepper according to your taste preferences—this makes all the difference in enhancing your dish!

Creamy Cheese Tortellini Alfredo Variations

Embrace your creativity in the kitchen and make this dish your own with delightful twists and substitutions!

  • Dairy-Free: Substitute heavy cream with coconut milk or cashew cream for a luscious, vegan alternative that maintains richness.
    Imagine indulging in creamy goodness without the dairy. It’s a fantastic way to enjoy this comforting dish while keeping it plant-based.

  • Vegetable-Packed: Stir in sautéed spinach, mushrooms, or broccoli for a nutritious flavor boost.
    These vegetables not only add color but also enhance the dish's texture and nutritional value. Your family will love the added goodness!

  • Spicy Kick: Add red pepper flakes to the sauce for a tangy, spicy twist.
    Perfect for those who enjoy a bit of heat, this variation will awaken your taste buds and create a memorable meal.

  • Protein Boost: Toss in grilled chicken, shrimp, or cooked sausage for a heartier dish.
    Choosing a protein option will turn your creamy tortellini into a satisfying main course that’s sure to please even the hungriest of diners.

  • Pasta Alternatives: Use fettuccine, penne, or even zucchini noodles for a different texture.
    By opting for various pasta shapes or a veggie base, you can create a unique dish tailored to your preference.

  • Gourmet Touch: Drizzle with truffle oil before serving for an upscale finish that elevates your Alfredo experience.
    This luxurious addition turns a comforting classic into something extraordinary, perfect for impressing guests or treating yourself.

  • Lighter Creaminess: Swap heavy cream with light cream or half-and-half for a lower-calorie option.
    You can still savor the creamy texture while keeping the dish a bit lighter! It’s a great way to enjoy comfort food without the guilt.

Feel free to mix and match these variations to truly customize your Creamy Cheese Tortellini Alfredo. If you're in the mood for something different, consider pairing it with a refreshing Asparagus Soup or the delicious richness of Cajeta Ice Cream to round out your meal!

What to Serve with Creamy Cheese Tortellini Alfredo

Elevate your dinner table with delightful companions that perfectly balance the indulgence of this creamy dish.

  • Garlic Bread: The crispy, buttery goodness of garlic bread beautifully complements the rich Alfredo sauce, making every bite a savory delight.

  • Fresh Green Salad: A light, crisp salad with a tangy vinaigrette adds refreshing contrast to the creamy tortellini, ensuring a well-rounded meal. Toss in some cherry tomatoes for sweetness!

  • Steamed Broccoli: Adding vibrant, tender broccoli not only elevates the dish with a nutritious crunch but also offers a pop of color to your plate.

  • Roasted Asparagus: The slightly charred, earthy flavor of roasted asparagus pairs excellently with the rich flavors of the creamy sauce. A sprinkle of lemon zest enhances this delightful medley.

  • Italian Wine: A glass of light Pinot Grigio or a fruity Chianti can accentuate the flavors, giving a cozy Italian dining experience.

  • Lemon Sorbet: A scoop of refreshing lemon sorbet serves as a light and zesty dessert, cleansing the palate beautifully after the richness of the Alfredo.

Make Ahead Options

These Creamy Cheese Tortellini Alfredo are perfect for those busy weeknights when time is of the essence! You can cook the tortellini up to 24 hours in advance and refrigerate them in an airtight container. Additionally, the Alfredo sauce can be prepared ahead too; simply store it in the fridge for up to 3 days. When you’re ready to enjoy, gently reheat the sauce in a skillet over low heat, adding a splash of cream to restore its creamy texture. Toss in the pre-cooked tortellini to warm through, and you've got a meal that's just as delicious as if you'd made it fresh! This prep ahead strategy saves you precious time while still delivering comfort food at its best.

Storage Tips for Creamy Cheese Tortellini Alfredo

Fridge: Store any leftover Creamy Cheese Tortellini Alfredo in an airtight container for up to 3 days. Make sure it is completely cooled before sealing to avoid condensation.

Freezer: For longer storage, you can freeze the dish in a freezer-safe container for up to 2 months. To prevent freezer burn, cover with plastic wrap before sealing the container.

Reheating: When ready to enjoy, thaw frozen tortellini in the fridge overnight. Reheat gently on the stove over low heat, adding a splash of cream or milk to restore its creamy consistency.

Leftover Use: Transform leftovers into a comforting pasta bake! Add extra cheese and bake until bubbly for a delightful twist.

Creamy Cheese Tortellini Alfredo Recipe FAQs

How do I select the best cheese tortellini?
Absolutely! For the perfect Creamy Cheese Tortellini Alfredo, choose either fresh or frozen cheese tortellini based on your convenience. Fresh tortellini usually has a softer, more tender texture, while frozen tortellini can be a quick, time-saving alternative. Look for tortellini that is plump and firm, avoiding any packages with dark spots or signs of freezer burn.

What are the best storage methods for leftovers?
Very! To keep your Creamy Cheese Tortellini Alfredo fresh, store any leftovers in an airtight container in the refrigerator for up to 3 days. Make sure it's completely cooled before sealing to prevent condensation, which can make the sauce watery. When you’re ready to enjoy the leftovers, reheat gently over low heat on the stove to maintain its creamy texture.

Can I freeze my Creamy Cheese Tortellini Alfredo?
Of course! You can freeze this delicious dish for up to 2 months. To do this, allow the dish to cool completely, then transfer it to a freezer-safe container. To prevent freezer burn, cover the top with plastic wrap before sealing. When you're ready to eat, thaw it in the fridge overnight and reheat it gently on low heat, adding a splash of cream or milk to restore its creamy consistency.

What if my sauce separates during cooking?
Don't worry! If you notice that your Alfredo sauce has started to separate, it typically means the temperature was too high. To fix this, remove the sauce from heat and whisk vigorously until it comes back together. If it’s too thick, adding a splash of warm cream or milk can help smooth it out. The key is to simmer gently—you want to maintain that luscious creamy texture without boiling.

Are there any dietary concerns I should think about?
Absolutely! If you’re cooking for guests with dietary restrictions, keep in mind that tortellini often contains gluten and dairy. You can find gluten-free tortellini options or make your own at home if necessary. Also, if anyone has lactose intolerance, consider using lactose-free cream or a dairy-free cheese alternative to accommodate their needs—you can still enjoy delicious comfort food together!

Can I make this healthier?
Very! To lighten up your Creamy Cheese Tortellini Alfredo, consider using light cream or substituting half of the heavy cream with homemade vegetable broth. You can also sneak in more nutrition by adding sautéed vegetables like spinach, mushrooms, or zucchini into the mix. These adjustments maintain flavor while making this comforting dish a bit more wholesome!

Creamy Cheese Tortellini Alfredo

Creamy Cheese Tortellini Alfredo for Quick Comfort Nights

Indulge in this Creamy Cheese Tortellini Alfredo recipe, perfect for quick weeknight dinners and family gatherings.
Print Recipe Pin Recipe
Prep Time 10 minutes mins
Cook Time 15 minutes mins
Total Time 25 minutes mins
Servings: 4 servings
Course: Dinner
Cuisine: Italian
Calories: 560
Ingredients Equipment Method Nutrition Notes

Ingredients
  

For the Tortellini
  • 1 package Cheese Tortellini fresh or frozen
For the Alfredo Sauce
  • 2 tablespoons Butter or olive oil for lighter option
  • 1 cup Heavy Cream or half-and-half for a lighter option
  • 1 cup Grated Parmesan Cheese freshly grated for best flavor
  • 1 teaspoon Garlic Powder or fresh minced garlic for extra flavor
  • to taste Salt
  • to taste Pepper
For Garnish
  • 2 tablespoons Chopped Parsley optional

Equipment

  • Large pot
  • Skillet
  • Colander

Method
 

Step-by-Step Instructions
  1. Bring a large pot of salted water to a boil over high heat. Add the tortellini and cook according to package instructions, usually about 3-5 minutes.
  2. In a large skillet, melt butter over medium heat. Once melted, pour in heavy cream and sprinkle garlic powder. Bring to a gentle simmer for 3-5 minutes until slightly thickened.
  3. Gradually stir in Parmesan cheese until it melts completely, about 2-3 minutes, adjusting salt and pepper to taste.
  4. Carefully add the drained tortellini into the skillet, tossing to coat evenly in the sauce. Cook together for an additional minute.
  5. Remove from heat and transfer to serving plates. Garnish with chopped parsley if desired and serve immediately.

Nutrition

Serving: 1servingCalories: 560kcalCarbohydrates: 50gProtein: 20gFat: 33gSaturated Fat: 20gPolyunsaturated Fat: 1gMonounsaturated Fat: 10gCholesterol: 100mgSodium: 600mgPotassium: 300mgFiber: 2gSugar: 3gVitamin A: 800IUVitamin C: 1mgCalcium: 400mgIron: 1mg

Notes

For best results, use freshly grated cheese and watch the sauce to prevent boiling, which can cause separation.

Tried this recipe?

Let us know how it was!

Air Fryer Tilapia: Quick, Crispy, and Flavor-Packed Delight

May 13, 2026 by Grace Snow Leave a Comment

The moment I pressed the button on my air fryer, a wave of anticipation washed over me. In just 15 minutes, I would transform mild tilapia into a crispy, flaky delight that dances with deliciousness! This Air Fryer Tilapia recipe is not just quick—it’s an effortless way to enjoy a healthy meal packed with omega-3 fatty acids and customizable flavors to suit any palate. Whether you’re looking to impress guests or simply need a satisfying weeknight dinner, this dish has your back. The beauty of tilapia lies in its versatility, soaking up whatever spices you choose to highlight, from zesty lemon to smoky paprika. Did I mention it’s freezer-friendly? You can prepare a batch and always have a flavorful meal on hand. So, are you ready to elevate your cooking game with this easy and delightful recipe? Let's dive in!

Why is Air Fryer Tilapia a Game Changer?

Quick and Easy: In just 15 minutes, you can whip up a dinner that feels gourmet without the hassle. Perfect for those busy weekdays!

Health Benefits: Packed with omega-3 fatty acids, this dish is not only delicious but also nutritious—great for heart health.

Customizable Flavors: Dress it up with your favorite seasonings; whether you go for zesty lemon or spicy Cajun, this tilapia can take it all!

Crispy Texture: Expect a lovely, crispy exterior while the inside remains tender and flaky, offering a perfect balance that’s hard to resist.

Freezer-Friendly: Prep extra fillets and freeze for quick meals; simply reheat in the air fryer for that fresh-cooked taste.

Ready to take your meal prep to the next level? Pair with cilantro lime quinoa or some garlic roasted asparagus for a complete meal!

Air Fryer Tilapia Ingredients

For the Fish
• Tilapia Fillets – Rich in omega-3 fatty acids, fresh or frozen tilapia works perfectly for this dish.
• Olive Oil – A light spray ensures moisture and crispiness without excess grease.

For the Seasoning
• Paprika – Adds a mild sweetness and vibrant color; smoked paprika elevates the flavor profile.
• Garlic Powder – Infuses savory depth; feel free to swap with fresh garlic for a more intense taste.
• Onion Powder – Enhances the overall flavor; finely diced onion is a great substitute if you're feeling fresh.
• Salt – Key for elevating flavors; remember to adjust according to your dietary needs.
• Black Pepper – Introduces a touch of mild heat; you can omit it for a lighter option.

For Garnish
• Fresh Chopped Parsley – This optional garnish adds a burst of color and freshness to your serving.
• Lemon Juice – A squeeze of lemon brightens the dish and is highly recommended for a refreshing kick.

This Air Fryer Tilapia is not only quick to prepare but also offers endless possibilities for customizing flavors to suit any taste. Happy cooking!

Step‑by‑Step Instructions for Air Fryer Tilapia

Step 1: Prepare Seasoning
In a small bowl, mix together paprika, garlic powder, onion powder, salt, and black pepper to create your seasoning blend. This vibrant mixture will coat the fillets, enhancing the flavor of your Air Fryer Tilapia. Set it aside, ready to bring deliciousness to your fish!

Step 2: Preheat Air Fryer
Preheat your air fryer to 400°F (200°C). This step is crucial for achieving that crispy texture we all crave. Allow about 5 minutes for the air fryer to reach the desired temperature while you prepare the tilapia fillets.

Step 3: Coat Fillets
Take your tilapia fillets and lightly brush or spray olive oil on both sides. This coating ensures that the fish cooks evenly and stays moist while achieving that delightful crispiness. You’re already on your way to a satisfying meal!

Step 4: Season Fillets
Sprinkle the seasoning mixture generously over both sides of the tilapia fillets. Ensure that the spices cover the surface evenly for maximum flavor infusion. This step elevates your Air Fryer Tilapia to a whole new level of deliciousness!

Step 5: Arrange in Air Fryer Basket
Place the seasoned fillets in the air fryer basket in a single layer, making sure they don’t overlap. This allows hot air to circulate and cook the fish evenly, which is essential for that perfect flaky texture.

Step 6: Air Fry
Cook the tilapia for 8-10 minutes, or until the fish easily flakes with a fork and reaches an internal temperature of 145°F (63°C). Keep an eye on it as it cooks – you want that gorgeous golden-brown color to indicate it’s ready!

Step 7: Garnish and Serve
Once cooked, carefully remove the tilapia from the air fryer and place it on a serving plate. Finish with a sprinkle of fresh chopped parsley and a squeeze of lemon juice for a zesty, refreshing touch. Your Air Fryer Tilapia is now ready to shine on your table!

Air Fryer Tilapia Variations & Substitutions

Feel free to get creative and customize this dish to suit your preferences and pantry staples!

  • Different Fish: Swap tilapia for cod or haddock to explore new flavors and textures. Each fish brings its own character, creating delightful variations.

  • Herbaceous Twist: Replace dried spices with fresh herbs like dill or cilantro for an aromatic freshness that brightens the dish. It’s perfect for when you want that garden-fresh sensation.

  • Flavorful Seasonings: Change it up by using a Cajun or curry seasoning blend. Each spice mix offers a delicious adventure, making the tilapia uniquely your own.

  • Vegetable Addition: Toss in some sliced bell peppers or zucchini with the tilapia in the air fryer. Not only does it add color, but it also boosts the nutritional value of your meal.

  • Crunchy Texture: To create an extra crispy layer, coat the fillets with panko breadcrumbs before air frying. This adds a delightful crunch that everyone will love.

  • Zesty Alternatives: Use lime juice instead of lemon for a tangy twist that pairs wonderfully with fish. This brightens up the dish and adds an unexpected kick!

  • Avocado Oil: For higher smoke points and a subtle flavor, consider swapping olive oil with avocado oil while ensuring perfect crispiness.

  • Garnish Variations: Instead of parsley, try dill or chives for a fresh pop of color and flavor as a garnish. Both offer a unique twist to finish your dish beautifully.

Experimenting with your air fryer fish options is part of the fun, so let creativity guide your cooking journey!

Expert Tips for Air Fryer Tilapia

Prepare the Fillets: Make sure to pat frozen tilapia fillets dry before seasoning; this helps spices adhere better and ensures crispness.

Don’t Overcrowd: Avoid placing too many fillets in the air fryer at once. Overlapping can lead to uneven cooking and a soggy texture.

Check Temperature: Use a food thermometer to ensure the tilapia reaches an internal temperature of 145°F. This guarantees a safe and perfectly cooked fish.

Customize Seasoning: Feel free to adjust the seasoning to your taste. Experiment with different spice blends for a unique flavor profile with your Air Fryer Tilapia.

Reheat for Freshness: Store any leftovers in an airtight container. To maintain crispiness, reheat in the air fryer instead of the microwave.

What to Serve with 15-Minute Air Fryer Tilapia

Creating a full meal around your crispy tilapia can turn dinner into a delightful experience that your family will look forward to!

  • Garlic Roasted Asparagus: The earthy flavors of asparagus drizzled with garlic oil provide a crunchy contrast, enhancing the fish's mild taste.

  • Cilantro Lime Quinoa: This bright and zesty side dish pairs beautifully with tilapia, offering a refreshing bite that complements the fish's delicate flavors.

  • Mushroom Rice: Rich and savory, this creamy rice dish adds a comforting base that balances the lightness of the tilapia, creating a satisfying meal.

  • Caesar Salad: A crunchy, crisp mix with a creamy dressing makes for a classic pairing; the bold flavors enhance the tilapia without overpowering it.

  • Roasted Sweet Potatoes: Their natural sweetness and crispy texture contrast wonderfully with the seasoned fish, adding color and nutrition to your plate.

  • Lemon Herb Couscous: Light and fluffy, this dish infused with herbs mirrors the lemony brightness of tilapia, creating harmony in every forkful.

  • Chardonnay or Sauvignon Blanc: Both white wines are perfect accompaniments, enhancing the meal's flavors while providing a soothing sip alongside dinner.

  • Key Lime Pie: For a refreshing dessert, this tart pie echoes the citrus notes in your tilapia while offering a sweet ending to your meal.

How to Store and Freeze Air Fryer Tilapia

Fridge: Store any cooked Air Fryer Tilapia in an airtight container for up to 3 days. When ready to enjoy, simply reheat it to restore that delightful crispiness.

Freezer: For longer storage, you can freeze the cooked fillets for up to 2 months. Seal them well to prevent freezer burn, and reheat directly from frozen in the air fryer.

Reheating: To maintain that perfect texture, always reheat in the air fryer. Aim for about 5-7 minutes at 400°F until heated through and crispy again.

Thawing: If frozen, thaw in the fridge overnight for best results before reheating, if time allows; this keeps the tilapia juicy and flavorful.

Make Ahead Options

These Air Fryer Tilapia fillets are perfect for meal prep enthusiasts! You can season the fish up to 24 hours in advance, allowing the spices to deeply infuse flavor. First, prepare the seasoning mixture and coat the tilapia fillets with olive oil; then, place the fillets in an airtight container and refrigerate. To maintain quality, avoid overcrowding to ensure even flavor absorption. When you’re ready to serve, simply preheat your air fryer, arrange the fillets in a single layer, and air fry for 8-10 minutes until they flake easily with a fork. This way, you’ll enjoy a quick and healthy dinner with minimal effort!

Air Fryer Tilapia Recipe FAQs

How do I choose ripe tilapia fillets?
Absolutely! When selecting tilapia fillets, look for ones that are fresh and have a mild ocean scent. The flesh should be translucent with a firm texture and should bounce back when pressed. Avoid fillets that are discolored, dry, or have dark spots; these are indicators of spoilage.

What is the best way to store leftover Air Fryer Tilapia?
You can store cooked Air Fryer Tilapia in an airtight container in the fridge for up to 3 days. Make sure it's well-sealed to prevent it from drying out. When you're ready to enjoy it again, reheat in the air fryer for 5-7 minutes to restore that wonderful crispiness.

Can I freeze Air Fryer Tilapia?
Yes, you can! For freezing, allow the cooked tilapia to cool completely, then wrap it tightly in plastic wrap followed by aluminum foil or place it in a freezer-safe bag. It will maintain its quality for up to 2 months. When you're ready to eat, simply reheat directly from the freezer in the air fryer for a quick meal!

What should I do if my tilapia is overcooked?
If you find that your tilapia is overcooked and dry, don’t worry! Try serving it with a lemon or a creamy sauce, like a garlic butter sauce, to add moisture and flavor back into the dish. For the future, check the fish at the 8-minute mark, and use a food thermometer to ensure it reaches just 145°F for perfectly flaked fish.

Is Air Fryer Tilapia safe for pets or people with allergies?
Certainly! Generally, plain tilapia is safe for dogs; however, watch for any seasoning that may be harmful to pets, such as excessive salt or garlic. For those with food allergies, be cautious with any added ingredients; always tailor the recipe to fit dietary restrictions, avoiding any known allergens like certain spices or oils.

What if my tilapia doesn't get crispy in the air fryer?
If your tilapia isn’t achieving that desired crispiness, ensure you're not overcrowding the air fryer basket, as this will trap steam and lead to sogginess. Pat dry frozen fillets before seasoning; moisture can hinder crispiness. Preheating the air fryer to the necessary temperature is crucial, so never skip this step for best results!

Air Fryer Tilapia

Air Fryer Tilapia: Quick, Crispy, and Flavor-Packed Delight

This Air Fryer Tilapia recipe is quick, healthy, and packed with flavor, featuring crispy tilapia fillets in just 15 minutes.
Print Recipe Pin Recipe
Prep Time 5 minutes mins
Cook Time 10 minutes mins
Total Time 15 minutes mins
Servings: 4 fillets
Course: Dinner
Cuisine: American
Calories: 220
Ingredients Equipment Method Nutrition Notes

Ingredients
  

For the Fish
  • 4 fillets Tilapia fresh or frozen
  • 1 tablespoon Olive Oil light spray
For the Seasoning
  • 1 teaspoon Paprika smoked for better flavor
  • 1 teaspoon Garlic Powder can substitute with fresh garlic
  • 1 teaspoon Onion Powder or finely diced onion
  • 1 teaspoon Salt adjust to taste
  • 1/2 teaspoon Black Pepper omit for lighter option
For Garnish
  • 1 tablespoon Fresh Chopped Parsley optional
  • 1 tablespoon Lemon Juice for a refreshing kick

Equipment

  • Air fryer

Method
 

Step‑by‑Step Instructions
  1. Mix together paprika, garlic powder, onion powder, salt, and black pepper for the seasoning blend.
  2. Preheat the air fryer to 400°F (200°C) for about 5 minutes.
  3. Brush or spray olive oil on both sides of the tilapia fillets.
  4. Generously sprinkle the seasoning mixture over both sides of the tilapia fillets.
  5. Arrange the seasoned fillets in a single layer in the air fryer basket.
  6. Cook the tilapia for 8-10 minutes, or until it easily flakes with a fork.
  7. Garnish with chopped parsley and lemon juice before serving.

Nutrition

Serving: 1filletCalories: 220kcalCarbohydrates: 3gProtein: 30gFat: 10gSaturated Fat: 1.5gPolyunsaturated Fat: 2gMonounsaturated Fat: 7gCholesterol: 60mgSodium: 300mgPotassium: 500mgVitamin A: 500IUVitamin C: 5mgCalcium: 20mgIron: 1mg

Notes

This Air Fryer Tilapia is versatile and can be paired with various sides like quinoa or asparagus. Great for meal prep and freezer-friendly!

Tried this recipe?

Let us know how it was!

Creamy Salmon Fettuccine Alfredo with a Zesty Twist

May 13, 2026 by Grace Snow Leave a Comment

The moment I seasoned that fresh salmon with a sprinkle of salt and pepper, a wave of anticipation washed over me. It’s amazing how simple ingredients can come together to create something truly magical. This Creamy Lemon-Dill Salmon Fettuccine Alfredo is a delightful twist on classic comfort food, perfect for busy weeknights or cozy family gatherings. Not only is it family-friendly, but it also delivers indulgent flavors while packing in the healthy omega-3 fats from the salmon. It's a fast and elegant dish that transforms everyday meals into something special. Curious about how the bright notes of lemon and the aromatic drape of dill elevate this creamy pasta? Keep reading—your new favorite dinner awaits!

Why is this Salmon Fettuccine Alfredo a Must-Try?

Comforting and Indulgent: This dish wraps you in warmth with its creamy texture and zesty flavors, making it a perfect choice for family dinners or cozy nights in.

Flavor Explosion: The combination of lemon and dill enhances the rich Alfredo sauce, creating a refreshing twist on a classic favorite that your taste buds will adore.

Versatile Adaptations: Feel free to substitute proteins or pasta types—from succulent shrimp to whole wheat options, this recipe is as flexible as it is delicious!

Quick and Easy: In just 30 minutes, you can plate this impressive meal, making it ideal for busy weeknights; it's a fantastic alternative to fast food.

Healthy Goodness: Packed with omega-3 fatty acids from salmon, this recipe not only satisfies your cravings but also supports your health, making it a smart choice for the family.

Elevate your dinner routine by pairing this delightful dish with a crisp green salad or consider trying my One Pot Salmon for another quick meal option that's sure to impress!

Ingredients for Salmon Fettuccine Alfredo

For the Salmon
• Salmon fillets – Main protein providing lean, heart-healthy omega-3 fatty acids. Can substitute with frozen salmon if thawed properly.
• Olive oil – Enhances flavor while cooking.
• Salt – Essential for seasoning salmon and pasta.
• Black pepper – Adds spice to the dish.
• Garlic powder – Contributes depth of flavor to salmon.

For the Fettuccine
• Fettuccine pasta – Base of the dish providing structure and texture. Can experiment with whole wheat or gluten-free pasta.

For the Alfredo Sauce
• Unsalted butter – Forms the foundation of the Alfredo sauce’s creamy texture.
• Garlic (minced) – Gives aromatic flavor in the Alfredo sauce.
• Heavy cream – Creates the rich, luxurious sauce; essential for desired creaminess.
• Parmesan cheese (freshly grated) – Introduces umami and creaminess; pre-shredded cheese may affect sauce texture due to additives.
• Lemon juice – Brightens the flavors in both salmon and sauce.
• Fresh dill (chopped) – Adds freshness and an aromatic quality; can substitute with dried dill (adjust amount).
• Pasta water – Used to adjust sauce consistency; adds starch for creamier texture.

Step‑by‑Step Instructions for Creamy Lemon-Dill Salmon Fettuccine Alfredo

Step 1: Prepare the Salmon
Start by patting the salmon fillets dry with a paper towel and seasoning both sides with salt, pepper, and garlic powder. In a large skillet, heat 2 tablespoons of olive oil over medium heat. Once the oil shimmers, place the salmon skin-side down in the skillet and sear for 4 to 6 minutes until the skin is crispy and the salmon is halfway cooked through. Carefully flip it over and cook for another 3 to 5 minutes until the fish is flaky and opaque. Squeeze fresh lemon juice over the top.

Step 2: Cook the Fettuccine
While the salmon is cooking, bring a large pot of salted water to a rolling boil. Add the fettuccine pasta and cook according to package directions, usually about 10 to 12 minutes, until al dente. Once cooked, reserve about 1 cup of the pasta water, then drain the fettuccine in a colander. Set aside the pasta and allow it to cool slightly, ensuring it’s ready to coat in the creamy Alfredo sauce.

Step 3: Make the Alfredo Sauce
In the same skillet used for the salmon, melt 4 tablespoons of unsalted butter over medium heat. Add 2 cloves of minced garlic and sauté until fragrant, about 30 seconds, being careful not to let it brown. Slowly pour in 1 cup of heavy cream and bring the mixture to a gentle simmer, stirring frequently to avoid boiling. Gradually whisk in 1 cup of freshly grated Parmesan cheese until the sauce is smooth and creamy, adjusting the heat as needed.

Step 4: Combine the Ingredients
Once the Alfredo sauce is ready, squeeze in the remaining lemon juice and fold in 2 tablespoons of chopped fresh dill. Taste the sauce and adjust seasoning with more salt and pepper if desired. Gently add the drained fettuccine to the sauce, tossing to ensure every strand is beautifully coated. Add flaked pieces of the cooked salmon on top, stirring gently to combine without breaking up the salmon too much.

Step 5: Serve and Garnish
Once fully combined, transfer the creamy Lemon-Dill Salmon Fettuccine Alfredo to serving plates. For an elegant touch, garnish each serving with a sprinkle of extra freshly chopped dill and additional grated Parmesan cheese. Serve immediately while hot, allowing everyone to enjoy the delightful creamy goodness and fresh flavors of this comforting pasta dish.

How to Store and Freeze Salmon Fettuccine Alfredo

Fridge: Keep leftovers in an airtight container for up to 2-3 days. The creamy texture may change slightly, but the flavors will still shine brightly.

Freezer: For longer storage, freeze the Salmon Fettuccine Alfredo in a freezer-safe container for up to 1 month. When ready to enjoy, thaw overnight in the refrigerator.

Reheating: Gently reheat on the stovetop over low heat, adding a splash of heavy cream or milk to restore the creamy consistency. Stir frequently until warmed through.

Avoids Food Waste: If you have extra sauce, store it separately from the pasta to maintain the best texture when serving later.

Salmon Fettuccine Alfredo Variations

Feel free to get creative and make this dish your own with these exciting twists!

  • Protein Swap: Substitute salmon with grilled chicken or shrimp for a delightful variation. Both options pair wonderfully with the creamy sauce, offering a new flavor profile.

  • Whole Wheat or Gluten-Free: For a healthier option, use whole wheat or gluten-free fettuccine. Not only do they provide a unique texture, but they also meet dietary preferences while still embracing that creamy goodness.

  • Vegetable Boost: Add seasonal vegetables like asparagus or spinach to increase the nutritional value. They not only enhance flavor but add beautiful color to your dish!

  • Herb Variations: Experiment with different fresh herbs like basil or parsley instead of dill. Fresh basil brings a sweet yet peppery flavor, while parsley adds a bright touch.

  • Creamy Alternatives: Go for a lighter version by replacing heavy cream with Greek yogurt or reduced-fat sour cream. This swap adds protein and tang while keeping the creaminess.

  • Cheesy Upgrades: Try mixing different cheeses, like Gruyère or goat cheese, for an unexpected flavor twist. These options lend their unique character to the sauce, elevating every bite.

  • Adding Heat: For a spicy kick, sprinkle in some red pepper flakes or serve with a side of chili oil. This fiery addition can turn up the flavor while contrasting nicely with the creamy base.

  • Citrus Zing: Boost the lemony flavor by adding lemon zest to the sauce. It brightens up the dish and enhances the freshness of your Salmon Fettuccine Alfredo.

If you're looking for inspiration, don’t forget to check out my One Pot Salmon for another fantastic and easy weeknight meal option bursting with flavor!

Expert Tips for Salmon Fettuccine Alfredo

  • Fresh Cheese Only: Always use freshly grated Parmesan cheese for the best sauce texture and flavor. Pre-shredded cheese can lead to clumping.

  • Gentle Simmer: Avoid boiling the Alfredo sauce vigorously. A gentle simmer helps to keep the sauce creamy and prevents separation.

  • Perfectly Cooked Salmon: Make sure the salmon is cooked to the right tenderness. Undercook slightly to keep it flaky and moist for your Salmon Fettuccine Alfredo.

  • Save Pasta Water: Always reserve some pasta water before draining. Adding a splash helps adjust the sauce's consistency for a creamier finish.

  • Right Timing for Dill: If using dried dill, incorporate it earlier in the sauce cooking process to enhance its flavor as it hydrates fully.

Make Ahead Options

These Creamy Lemon-Dill Salmon Fettuccine Alfredo are perfect for busy weeknights! You can prepare the Alfredo sauce up to 3 days in advance and store it in an airtight container in the refrigerator. To ensure freshness, refrigerate flaked salmon separately and add it when you’re ready to combine everything. Alternatively, the fettuccine can be cooked and chilled up to 24 hours ahead of time. When it’s time to serve, simply reheat the sauce over low heat, adding a splash of reserved pasta water for creaminess, then toss in the fettuccine and salmon. You'll enjoy restaurant-quality results with minimal effort, making dinner a breeze!

What to Serve with Creamy Lemon-Dill Salmon Fettuccine Alfredo

Elevate your dining experience by pairing this warm, creamy pasta with delightful sides that complement its rich flavors and textures.

  • Crisp Green Salad: A refreshing salad with mixed greens and a light vinaigrette balances the richness of the Alfredo, offering a refreshing crunch with every bite.

  • Garlic Bread: The buttery, garlicky goodness of freshly baked bread is perfect for soaking up any remaining Alfredo sauce. It adds a comforting aspect to the meal that everyone loves.

  • Roasted Asparagus: Tender asparagus drizzled with olive oil and roasted until slightly charred complements the salmon beautifully, enhancing both flavors and presentation.

  • Steamed Broccoli: Bright green broccoli brings a vibrant color to the plate and provides a nice texture contrast against the creamy pasta. It's a healthy addition that kids often enjoy too.

  • Zesty Lemon Sorbet: For dessert, a light and refreshing lemon sorbet highlights the lemony notes in the pasta, leaving everyone with a bright finish to their meal.

  • Chardonnay: This crisp white wine with citrus notes pairs impeccably with your salmon fettuccine Alfredo, balancing the creamy sauce while enhancing the zesty flavors.

Each suggestion creates a delightful balance of flavors and textures, ensuring that your dining experience is as enjoyable as the main dish itself!

Creamy Lemon-Dill Salmon Fettuccine Alfredo Recipe FAQs

What should I look for when selecting salmon?
Absolutely! When selecting salmon, look for firm fillets that are bright in color without any dark spots. The flesh should be moist but not sticky, and it should have a fresh, ocean-like smell. Avoid salmon that looks dull or has a strong fishy odor. If using frozen salmon, ensure it’s completely thawed and not overly mushy when cooked.

How should I store leftover Salmon Fettuccine Alfredo?
Leftovers can be stored in an airtight container in the refrigerator for up to 2-3 days. While the creaminess of the sauce might change slightly, the flavors will still be delightful. Be sure to let the dish cool before sealing to prevent condensation, which can affect the texture.

Can I freeze my Salmon Fettuccine Alfredo?
Yes, you can! To freeze, transfer the Salmon Fettuccine Alfredo into a freezer-safe container, leaving a little room to allow for expansion. It can last up to 1 month in the freezer. When you’re ready to enjoy, thaw it overnight in the refrigerator. Reheat gently on the stovetop, adding a splash of heavy cream or milk to restore that wonderful creamy texture.

What if my pasta sauce is too thick?
No worries! If your Alfredo sauce is too thick, you can brighten it right up. Start by adding a couple of tablespoons of the reserved pasta water, stirring gently until you reach your desired consistency. If it needs a bit more, don’t hesitate to add a little more heavy cream or milk, which brings back creaminess while balancing flavor.

Is this recipe suitable for those with dairy allergies?
Unfortunately, the traditional recipe for Salmon Fettuccine Alfredo contains dairy ingredients like butter, heavy cream, and Parmesan cheese. However, you can make a dairy-free version using coconut cream or a dairy-free alfredo sauce made from blended cashews, nutritional yeast, and plant-based milk. It’s an excellent way to enjoy that creamy texture without the dairy!

How can I enhance the nutritional value of this dish?
Very! You can enhance the nutritional profile by adding seasonal vegetables like asparagus, spinach, or cherry tomatoes to the dish during the cooking of the fettuccine. These additions not only boost the vitamins and minerals but also add a lovely splash of color to your plate!

Salmon Fettuccine Alfredo

Creamy Salmon Fettuccine Alfredo with a Zesty Twist

This Salmon Fettuccine Alfredo combines creamy textures with zesty flavors, making it a must-try family dinner.
Print Recipe Pin Recipe
Prep Time 10 minutes mins
Cook Time 30 minutes mins
Total Time 40 minutes mins
Servings: 4 servings
Course: Dinner
Cuisine: Italian
Calories: 540
Ingredients Equipment Method Nutrition Notes

Ingredients
  

For the Salmon
  • 4 fillets Salmon Can substitute with frozen salmon if thawed properly.
  • 2 tablespoons Olive oil Enhances flavor while cooking.
  • to taste Salt Essential for seasoning salmon and pasta.
  • to taste Black pepper Adds spice to the dish.
  • 1 teaspoon Garlic powder Contributes depth of flavor to salmon.
For the Fettuccine
  • 12 ounces Fettuccine pasta Can experiment with whole wheat or gluten-free pasta.
For the Alfredo Sauce
  • 4 tablespoons Unsalted butter Forms the foundation of the Alfredo sauce’s creamy texture.
  • 2 cloves Garlic Minced, gives aromatic flavor in the Alfredo sauce.
  • 1 cup Heavy cream Creates the rich, luxurious sauce.
  • 1 cup Parmesan cheese Freshly grated, introduces umami and creaminess.
  • 2 tablespoons Lemon juice Brightens the flavors in both salmon and sauce.
  • 2 tablespoons Fresh dill Chopped, adds freshness and aromatic quality.
  • 1 cup Pasta water Used to adjust sauce consistency.

Equipment

  • Large skillet
  • Large pot
  • Colander

Method
 

Step-by-Step Instructions
  1. Pat the salmon fillets dry and season with salt, pepper, and garlic powder. Heat olive oil in a skillet over medium heat, add salmon skin-side down, and sear for 4-6 minutes. Flip and cook for another 3-5 minutes until flaky. Squeeze lemon juice over it.
  2. Boil salted water in a pot. Add fettuccine and cook according to package directions, about 10-12 minutes, until al dente. Reserve 1 cup of pasta water, drain and set aside.
  3. In the same skillet, melt butter over medium heat. Add minced garlic and sauté until fragrant. Pour in heavy cream and bring to a gentle simmer. Gradually whisk in Parmesan cheese until smooth.
  4. Once the sauce is ready, add remaining lemon juice and fold in chopped dill. Adjust seasoning. Toss drained fettuccine in the sauce and add flaked salmon.
  5. Transfer to serving plates, garnish with extra dill and grated Parmesan, and serve immediately.

Nutrition

Serving: 1servingCalories: 540kcalCarbohydrates: 45gProtein: 30gFat: 28gSaturated Fat: 15gPolyunsaturated Fat: 5gMonounsaturated Fat: 12gCholesterol: 100mgSodium: 600mgPotassium: 500mgFiber: 3gSugar: 2gVitamin A: 800IUVitamin C: 5mgCalcium: 200mgIron: 2mg

Notes

Always use freshly grated Parmesan cheese for best texture. Reserve pasta water for adjusting consistency.

Tried this recipe?

Let us know how it was!

Savory Lemon Butter Baked Mahi Mahi in Just 20 Minutes

May 13, 2026 by Grace Snow Leave a Comment

As I stood in my kitchen, the aroma of zesty citrus wafting through the air, I couldn’t help but smile at the simplicity of creating something so delightful. This Lemon Butter Baked Mahi Mahi is a revelation that transforms dinner into a flavorful celebration in just 20 minutes! Perfect for busy weeknights, this healthy seafood dish is not only quick to prepare but also bursting with deliciousness. The tender, flaky fish pairs beautifully with the bright notes of lemon and a rich butter sauce that will have your family asking for seconds. Whether served on its own or tucked into fish tacos, this recipe promises to elevate your evening meal. Curious to discover how to create this delightful dish that’s both satisfying and wholesome? Let’s dive in!

Why is Lemon Butter Baked Mahi Mahi a must-try?

Simplicity at its Finest: This recipe requires just a few ingredients and can be whipped up in a mere 20 minutes, allowing you to prepare a delightful homemade meal without the fuss.

Bursting with Flavor: The magical combination of zesty lemon and rich butter complements the flaky mahi mahi, making each bite a delicious experience.

Healthy and Satisfying: With low calories and high protein, this dish makes a great option for those looking to eat healthy without sacrificing taste.

Versatile Choice: Enjoy it as a standalone meal or transform leftovers into vibrant fish tacos, perfect for customization with your favorite toppings!

Crowd-Pleasing Appeal: Ideal for family dinners or impressing guests, this dish guarantees rave reviews from everyone at the table.

For a refreshing side, pair it with a light salad or roasted veggies, and if you're craving more seafood ideas, check out my Lemon Ricotta Protein Pancakes for a twist on breakfast or the comforting Lemon Chicken Soup for a heartwarming dish.

Lemon Butter Baked Mahi Mahi Ingredients

For the Fish

  • Mahi Mahi Fillets – Choose firm, fresh fillets for the best texture; you can also substitute with other mild white fish.
  • Butter – Adds richness and keeps the fish moist; opt for olive oil for a dairy-free alternative.
  • Sea Salt – Essential for flavor; adjust according to your dietary preferences.
  • Paprika – Provides mild sweetness and a beautiful color to the fish.
  • Ground Black Pepper – For seasoning; use freshly cracked for enhanced flavor.

For the Citrus Base

  • Lemons – Create acidity and brightness; don’t skimp on using fresh lemons for maximum flavor.
  • Garlic Powder – Adds depth to the seasoning; feel free to swap with fresh minced garlic.
  • Dried Oregano – Offers an herbal note; Italian seasoning can work as a substitute.
  • Dried Thyme – Brings an earthy flavor; you can replace it with fresh thyme if you prefer.
  • Red Pepper Flakes – Add a mild heat; adjust according to taste or omit for non-spicy preferences.
  • Onion Powder – For savory depth; finely chopped fresh onion can be used instead.

For Garnish

  • Chopped Parsley – Adds a pop of freshness to the dish; cilantro can be used for a different flavor profile.

Each ingredient plays a crucial role in creating the delicious Lemon Butter Baked Mahi Mahi you won't soon forget!

Step‑by‑Step Instructions for Lemon Butter Baked Mahi Mahi

Step 1: Preheat Oven
Begin by preheating your oven to 400°F (204°C). Line a baking sheet with aluminum foil or parchment paper to catch any drips and make cleanup a breeze. This initial step is crucial for achieving that perfectly flaky texture in your Lemon Butter Baked Mahi Mahi, ensuring the fish cooks evenly.

Step 2: Prepare Citrus Base
While the oven heats, take fresh lemons and slice them into thin rounds. Lay the lemon slices neatly on the prepared baking sheet, creating a flavorful bed for your mahi mahi fillets. This not only adds a delightful citrus flavor but also elevates the presentation of the dish as it bakes.

Step 3: Arrange Mahi Mahi
Now, place your mahi mahi fillets directly on top of the lemon slices. Using a brush, coat both sides of the fillets generously with melted butter, ensuring they remain moist during the baking process. This step is key in enhancing the flavor and preparing your Lemon Butter Baked Mahi Mahi for seasoning.

Step 4: Season Fish
In a small bowl, combine paprika, garlic powder, dried oregano, sea salt, dried thyme, red pepper flakes, onion powder, and ground black pepper to create a seasoning blend. Sprinkle this mixture evenly over both sides of the mahi mahi fillets, making sure each bite is packed with flavor.

Step 5: Bake
Slide the baking sheet into the oven and bake the mahi mahi for 10 minutes. After this initial cooking time, switch to the broiler setting for an additional 1.5 minutes to achieve a beautifully golden top. Keep an eye on the fish to prevent overcooking, ensuring it remains flaky and tender.

Step 6: Garnish and Serve
Once cooked, remove the Lemon Butter Baked Mahi Mahi from the oven and sprinkle with freshly chopped parsley for a vibrant touch. Serve immediately, allowing everyone at the table to indulge in the delightful flavors, with the fragrant lemon and buttery sauce stealing the show.

Lemon Butter Baked Mahi Mahi Variations

Feel free to explore different flavors and textures with these delightful variations!

  • Fish Tacos: Serve your mahi mahi in soft tortillas, topped with crunchy cabbage slaw and a drizzle of lime juice for a zesty twist.
  • Citrus-Infused: Add a splash of orange juice to the butter sauce for an extra fruity layer that complements the fish beautifully.
  • Spicy Kick: Incorporate more red pepper flakes or diced jalapeños to the seasoning for those who enjoy a bit of heat.
  • Herbaceous Delight: Swap in fresh herbs like dill or basil instead of parsley for a fragrant twist that'll brighten the dish.
  • Alternative Fish: Use cod or tilapia as an alternative to mahi mahi, each offering its own unique texture and flavor profile.
  • Grilled Variation: Instead of baking, grill the fish for a wonderfully smoky flavor; just be sure to oil the grill grates to prevent sticking.
  • Nutty Crust: Combine ground almonds or crushed pistachios with the seasoning to create a crunchy, flavorful crust as it bakes.
  • Creamy Sauce: For a twist on the classic butter sauce, mix in a splash of heavy cream or coconut milk to create a luscious, creamy topping.

No matter your choice, these variations ensure you can enjoy Lemon Butter Baked Mahi Mahi in styles that suit your taste each time! If you need more inspiration, check out my Crockpot Butter Chicken or try these delightful Matcha Baked Doughnuts as captivating dessert ideas!

Make Ahead Options

These Lemon Butter Baked Mahi Mahi are ideal for busy home cooks looking to streamline meal prep! You can slice the lemons and prepare the seasoning mix up to 24 hours in advance, storing them in airtight containers in the refrigerator to maintain freshness. Additionally, you can arrange the mahi mahi fillets on the lemon slices and coat them with butter the morning before to save time. When you’re ready to enjoy this delicious dish, preheat your oven and simply season the fish, bake for 10 minutes, broil for an additional 1.5 minutes, and serve! This way, you preserve the quality while significantly cutting your cooking time on a busy weeknight.

Expert Tips for Lemon Butter Baked Mahi Mahi

  • Avoid Overcooking: Mahi mahi should be flaky yet moist. Use a meat thermometer to check for doneness at 145°F (63°C).
  • Fresh Ingredients Matter: Always use fresh lemons and quality mahi mahi for the best flavor and texture in your dish.
  • Butter Alternatives: For a dairy-free version of Lemon Butter Baked Mahi Mahi, substitute melted butter with olive oil or a plant-based butter.
  • Broil Carefully: Watch closely when broiling the fish; it can quickly turn from golden to burnt if left unattended.
  • Flavor Boost: For an extra layer of flavor, marinate the mahi mahi in lemon juice and spices for 15-30 minutes before cooking.
  • Storage Secrets: Store leftovers in an airtight container; reheat gently in the microwave, covering with a paper towel to prevent drying out.

Storage Tips for Lemon Butter Baked Mahi Mahi

  • Fridge: Store leftovers in an airtight container for up to 3 days. Keep them chilled to maintain freshness, and enjoy the delightful flavors for another meal!
  • Freezer: For longer storage, wrap the baked mahi mahi tightly in plastic wrap and then place it in a freezer-safe bag. It can last up to 3 months in the freezer.
  • Reheating: When reheating, place the fish in the microwave covered with a paper towel to retain moisture. A quick squeeze of lemon juice after reheating refreshes the flavors beautifully.

What to Serve with Lemon Butter Baked Mahi Mahi

Create the perfect meal by pairing your delightful fish dish with these complementary sides!

  • Light Garden Salad: A fresh garden salad with mixed greens and a citrus vinaigrette adds a refreshing contrast. It brightens the meal, making every bite feel light.

  • Garlic Roasted Asparagus: Tender asparagus roasted with garlic offers a savory crunch that pairs fantastically with the buttery fish. Its earthy tones elevate the dish beautifully.

  • Quinoa Pilaf: This nutty, protein-packed side offers a wholesome base for soaking up the lemon butter sauce, giving you heartiness without heaviness.

  • Coconut Rice: Sweet coconut-infused rice can balance the citrusy notes, creating a tantalizing contrast that your taste buds will love.

  • Creamy Coleslaw: A tangy coleslaw made with cabbage and a light dressing adds crunch and a creamy, zingy flavor that complements the flaky mahi mahi.

  • Chilled White Wine: A crisp Pinot Grigio or Sauvignon Blanc enhances the dish with refreshing acidity while accentuating the citrus elements.

  • Mango Salsa: Spicy mango salsa brings a tropical twist to your meal, with sweetness balancing the seasoning of the mahi mahi.

  • Lemon Sorbet: For dessert, lemon sorbet serves as a delightful palate cleanser, refreshing your taste buds after the savory main course.

These pairings will not only round out your meal but also leave your guests raving about the entire dining experience!

Lemon Butter Baked Mahi Mahi Recipe FAQs

What is the best way to select ripe lemons?
Absolutely! When choosing lemons, look for ones that are firm and heavy for their size. Fresh lemons will have a smooth, shiny skin and a vibrant yellow color. Avoid lemons that are dull or have dark spots, as these can indicate overripeness or spoilage.

How should I store leftover Lemon Butter Baked Mahi Mahi?
Store leftovers in an airtight container in the refrigerator for up to 3 days. Make sure to keep it chilled to maintain freshness. For the best reheating experience, cover the dish with a paper towel in the microwave to keep the fish moist.

Can I freeze Lemon Butter Baked Mahi Mahi?
Yes, you can! Wrap the baked mahi mahi tightly in plastic wrap and then place it in a freezer-safe bag. This method helps to prevent freezer burn and keeps the fish tasting great. Lemon Butter Baked Mahi Mahi can be frozen for up to 3 months. Whenever you’re ready to enjoy, thaw it in the refrigerator overnight before reheating.

What should I do if my fish is overcooked?
If you accidentally overcook your mahi mahi, don’t panic! Slice the fish into smaller pieces, then add a squeeze of fresh lemon juice or a drizzle of warm melted butter to bring some moisture back. Pair it with a light sauce or serve it over a bed of rice or greens to help mask the dryness.

Is this Lemon Butter Baked Mahi Mahi recipe suitable for those with seafood allergies?
Unfortunately, this recipe is not suitable for those with seafood allergies, as mahi mahi is a type of fish. For individuals looking to avoid seafood, I recommend trying similar flavors with chicken or firm tofu, seasoned with the same lemon and herb combination for a delightful alternative.

What are some good side dishes to serve with Lemon Butter Baked Mahi Mahi?
I often pair this dish with roasted vegetables like asparagus, zucchini, or bell peppers for a colorful dinner plate. A light salad with mixed greens and a lemon vinaigrette works beautifully, too. For a heartier option, consider serving it over fluffy quinoa or fragrant rice, making it a complete and satisfying meal.

Lemon Butter Baked Mahi Mahi

Savory Lemon Butter Baked Mahi Mahi in Just 20 Minutes

This Lemon Butter Baked Mahi Mahi is a quick and healthy seafood dish bursting with flavor.
Print Recipe Pin Recipe
Prep Time 10 minutes mins
Cook Time 10 minutes mins
Total Time 20 minutes mins
Servings: 4 fillets
Course: Dinner
Cuisine: Seafood
Calories: 280
Ingredients Equipment Method Nutrition Notes

Ingredients
  

For the Fish
  • 4 fillets Mahi Mahi Choose firm, fresh fillets
  • 4 tablespoons Butter Or substitute with olive oil for a dairy-free alternative
  • 1 teaspoon Sea Salt Adjust according to dietary preferences
  • 1 teaspoon Paprika Provides mild sweetness and color
  • 1 teaspoon Ground Black Pepper Use freshly cracked for enhanced flavor
For the Citrus Base
  • 2 whole Lemons Use fresh lemons for maximum flavor
  • 1 teaspoon Garlic Powder Can substitute with fresh minced garlic
  • 1 teaspoon Dried Oregano Italian seasoning can work as a substitute
  • 1 teaspoon Dried Thyme Fresh thyme can be used if preferred
  • 1/2 teaspoon Red Pepper Flakes Adjust according to taste
  • 1 teaspoon Onion Powder Finely chopped fresh onion can be used
For Garnish
  • 2 tablespoons Chopped Parsley Or cilantro for a different flavor profile

Equipment

  • Oven
  • Baking Sheet
  • Aluminum Foil or Parchment Paper

Method
 

Step‑by‑Step Instructions
  1. Preheat your oven to 400°F (204°C) and line a baking sheet with aluminum foil or parchment paper.
  2. Slice lemons into thin rounds and lay them on the prepared baking sheet.
  3. Place mahi mahi fillets on top of lemon slices and brush both sides with melted butter.
  4. In a bowl, combine paprika, garlic powder, oregano, sea salt, thyme, red pepper flakes, onion powder, and black pepper. Sprinkle over both sides of the fillets.
  5. Bake the mahi mahi for 10 minutes, then broil for 1.5 minutes until golden.
  6. Remove from oven, garnish with parsley, and serve immediately.

Nutrition

Serving: 1filletCalories: 280kcalCarbohydrates: 1gProtein: 28gFat: 18gSaturated Fat: 10gPolyunsaturated Fat: 2gMonounsaturated Fat: 6gCholesterol: 70mgSodium: 600mgPotassium: 500mgVitamin A: 500IUVitamin C: 15mgCalcium: 20mgIron: 1mg

Notes

Fresh ingredients matter for the best flavor and texture. Store leftovers in an airtight container for up to 3 days.

Tried this recipe?

Let us know how it was!

Creamy Keto Turkey Meatballs That Taste Like Comfort Food

May 12, 2026 by Grace Snow Leave a Comment

"Can you believe a dish so flavorful can be low-carb?" Every time I whip up these Keto Turkey Meatballs in Creamy Parmesan Sauce, I’m reminded just how satisfying healthy can be! With rich, garlicky notes mingling beautifully with the silky cream that's loaded with parmesan, this dish is a game-changer for anyone craving comfort without the carbs. It’s not only quick to prepare—ideal for those busy weeknights—but also a family-friendly favorite that will have everyone asking for seconds. Whether you’re an experienced home chef or just starting your culinary journey, these meatballs will elevate your dinner routine and keep fast food at bay. Ready to discover a dinner that’s both indulgent and guilt-free? Let’s dive in!

Why Are These Meatballs So Irresistible?

Bold flavors: With a rich combination of creamy parmesan and aromatic garlic, each bite transports you to comfort food heaven.
Effortless preparation: These meatballs come together quickly, making them perfect for busy weeknights.
Family-approved: Everyone will enjoy this delightful, low-carb meal that doesn’t skimp on taste.
Versatile serving: Pair them with zoodles, cauliflower rice, or a fresh salad—adapt them to your preferences!
Nutrition without compromise: High in protein and low in carbs, these meatballs are a guilt-free indulgence. If you’d like more keto-friendly meal ideas, check out our delicious keto dinner options. Enjoy the comfort without the carbs!

Keto Turkey Meatballs Ingredients

For the Meatballs

  • Ground Turkey – Choose a higher-fat variety for juicier meatballs.
  • Egg – Acts as a binder; it helps keep the meatballs moist and together.
  • Salt – A key enhancer for flavor; use ½ teaspoon for the meatballs.
  • Black Pepper – Adds warmth and slight heat, complementing the other flavors.
  • Garlic (fresh) – One teaspoon brings a delightful aromatic flavor to the meat mixture.
  • Parsley – Two teaspoons of fresh parsley brighten up the dish with color and freshness.

For the Sauce

  • Heavy Cream – 1 ¾ cups create a luscious, creamy base for your sauce; handle gently to avoid separation.
  • Parmesan Cheese – Use one cup cut from the block for rich flavor; avoid pre-grated to maintain texture.
  • Garlic Powder – One teaspoon enhances the flavor of the sauce; adjust to taste if you love garlic!
  • Additional Salt – One teaspoon for the sauce rounds out the flavors perfectly.

With these Keto Turkey Meatballs ingredients, you’re well on your way to a comforting meal that everyone will love. So grab your grocery list and get ready to impress without the carbs!

Step‑by‑Step Instructions for Keto Turkey Meatballs in Creamy Parmesan Sauce

Step 1: Preheat the Oven
Begin by preheating your oven to broil, ensuring it reaches a temperature of about 500°F (260°C). This high heat will give your meatballs a beautiful golden finish. While the oven heats up, prepare your meatball mixture to keep the cooking process efficient.

Step 2: Prepare the Meatball Mixture
In a large mixing bowl, combine the ground turkey, egg, ½ teaspoon salt, black pepper, fresh garlic, and parsley. Use your hands to mix until just combined; the mixture will be sticky. To make handling easier, lightly oil your hands before forming the mixture into 15 medium-sized meatballs, about the size of a quarter.

Step 3: Brown the Meatballs
Heat a skillet over medium heat and add a bit of oil to prevent sticking. Carefully place the shaped meatballs in the skillet, making sure not to overcrowd the pan. Brown each meatball for about 10 minutes, turning occasionally until they're golden brown on all sides, creating a delicious crust.

Step 4: Make the Creamy Sauce
Once the meatballs are browned, remove them from the skillet and reduce the heat to low. Skim off any excess grease, and then pour in 1¾ cups of heavy cream. Add the cut parmesan cheese and stir continuously to combine. The sauce should be smooth, creamy, and just starting to thicken—this should take around 5 minutes.

Step 5: Combine Meatballs with Sauce
After the sauce has thickened slightly, reintroduce the browned meatballs back into the skillet. Coat each meatball generously with the creamy parmesan sauce, ensuring they're well-glazed. This delicious mixture will keep the meatballs moist while enhancing their flavor profile.

Step 6: Broil for a Crispy Finish
Carefully transfer the skillet to the preheated broiler in your oven. Broil for about 3-5 minutes, keeping a close eye to avoid burning. Look for the meatballs to be bubbling and golden on top—this final step creates a lovely texture and an irresistible crust.

Step 7: Garnish and Serve
Once broiling is complete, remove the skillet from the oven and let it cool slightly. For an extra touch of flavor and color, garnish your keto turkey meatballs with fresh parsley and an additional sprinkle of parmesan cheese. Serve immediately, and enjoy the comforting depths of this creamy dish!

Expert Tips for Keto Turkey Meatballs

  • Choose the Right Turkey: Opt for a higher-fat ground turkey for moist meatballs; lean varieties can lead to dryness.
  • Mix Gently: Over-mixing can result in tough meatballs; combine ingredients just until blended for tender results.
  • Mind the Heat: Heat the cream slowly to avoid curdling; keeping the temperature low helps maintain a smooth sauce.
  • Fresh Ingredients: Always use fresh garlic and freshly grated Parmesan for the best flavor and texture in your Keto Turkey Meatballs.
  • Batch Cooking: Consider making a double batch to store leftovers; just keep the sauce separate to avoid sogginess.

How to Store and Freeze Keto Turkey Meatballs

Fridge: Store leftover keto turkey meatballs in an airtight container for up to 3 days. This keeps them fresh while preserving their delicious flavor.

Freezer: Freeze the meatballs in a single layer on a baking sheet for about 2 hours, then transfer to a freezer-safe bag for up to 3 months.

Reheating: Thaw the frozen meatballs in the fridge overnight, then reheat gently in a skillet over low heat, adding a splash of heavy cream to revive the sauce's creaminess.

Note: For best results, avoid freezing the creamy parmesan sauce separately as it may separate when thawed.

Keto Turkey Meatballs Variations & Substitutions

Feeling adventurous? Let’s explore some delightful twists and substitutions to customize your keto turkey meatballs even further!

  • Ground Chicken: Swap turkey for ground chicken for a lighter, slightly different flavor profile that’s just as tasty.
    A nourishing change while keeping all the juiciness—perfect for those who may prefer chicken over turkey!

  • Spinach Boost: Stir in a handful of chopped spinach into the meat mixture for a nutrition kick and a pop of color.
    Not only does it enhance the richness, but it also adds a lovely vibrant texture, making your meal visually stunning!

  • Zucchini Noodles: Serve the meatballs over zoodles instead of traditional pasta for a low-carb alternative.
    This way, you can enjoy a comforting bowl of spaghetti vibes without the carbs—who says you can’t have your sauce and eat it too?

  • Mushroom Medley: Add diced mushrooms to the creamy sauce for an earthy flavor and extra texture.
    A delightful twist, mushrooms harmonize beautifully with the sauce, enhancing every bite of those juicy meatballs.

  • Lemon Zest: Just a teaspoon of lemon zest in the sauce brings a refreshing brightness to the dish.
    It balances the richness of the cream, making each bite feel light and invigorating—perfect for a refreshing dinner experience!

  • Spicy Kick: While browning the meatballs, add red pepper flakes for a little heat.
    This small addition transforms the dish and delights spice lovers, offering layers of flavor that keep your taste buds dancing!

  • Herb Variations: Experiment with different herbs like thyme or oregano instead of parsley for a unique twist on flavors.
    Each herb offers its own character, allowing the dish to change subtly with each variation you try!

  • Coconut Cream: For a dairy-free version, substitute heavy cream with full-fat coconut milk or cream for a rich, tropical flavor.
    You’ll still get that luxurious texture while catering to different dietary needs—perfect for the coconut lovers out there!

Explore these variations to make this delicious recipe your own! And if you’re looking for more inspiration, don’t miss our tasty keto-friendly sauces and quick meal ideas to keep your cooking exciting. Enjoy every culinary adventure!

What to Serve with Keto Turkey Meatballs in Creamy Parmesan Sauce

Transform your meatball dish into a delightful meal with these irresistible pairings that will please your palate!

  • Zoodles (Zucchini Noodles): These light noodles add a refreshing crunch and perfectly soak up the creamy sauce, enhancing every bite.

  • Cauliflower Rice: This low-carb alternative offers a fluffy texture and mild flavor, making it a wonderful canvas for the rich meatballs and sauce.

  • Steamed Broccoli: The bright green color and slightly crisp texture provide a nutritious balance that complements the richness of the creamy dish.

  • Garlic Bread (Keto-friendly): Indulge in a crispy, buttery slice of keto garlic bread for a comforting, yet low-carb side that pairs beautifully.

  • Fresh Garden Salad: A simple mix of greens and a tangy vinaigrette will add freshness and contrast the richness of the meatballs, refreshing your palate.

  • Roasted Asparagus: Tender asparagus drizzled with olive oil and sea salt brings a delightful crunch and a hint of earthiness to your meal.

  • Red Wine: A glass of dry red wine enhances the flavors of the meatballs, perfectly complementing the hearty, savory notes of the dish.

Elevate your dining experience by mixing and matching these suggestions, ensuring each meal is both satisfying and delicious!

Make Ahead Options

These Keto Turkey Meatballs in Creamy Parmesan Sauce are ideal for meal prep, allowing you to save time on busy weeknights! You can prepare the meatballs up to 24 hours in advance. Simply form the meatballs and store them in an airtight container in the fridge. For the sauce, you can also make it ahead, refrigerating it for up to 3 days. To maintain the creamy texture, reheat the sauce gently over low heat, stirring frequently. When ready to serve, simply brown the prepped meatballs and combine them with the reheated sauce before broiling for that golden finish. With this prep, you'll enjoy a delicious, home-cooked meal with minimal effort!

Keto Turkey Meatballs in Creamy Parmesan Sauce Recipe FAQs

How do I choose the best ground turkey for meatballs?
Absolutely! When selecting ground turkey, look for a higher-fat variety, ideally around 85% lean. The extra fat helps keep the meatballs juicy and tender, preventing them from becoming dry during cooking. This little detail can make a significant difference in the dish’s overall taste and texture!

How should I store leftover keto turkey meatballs?
Very! After cooking, let the meatballs cool completely before transferring them to an airtight container. They can be stored in the fridge for up to 3 days. Ensure they are sealed properly to keep them fresh and flavorful from batch to batch.

Can I freeze the keto turkey meatballs?
Absolutely! To freeze your meatballs, arrange them in a single layer on a baking sheet and freeze for about 2 hours until they are firm. Afterward, transfer them into a freezer-safe bag or container, separated by parchment paper to prevent sticking. They can be kept frozen for up to 3 months. When you’re ready to enjoy them, thaw overnight in the refrigerator, then reheat gently in a skillet with a splash of cream for extra creaminess.

What should I do if my meatballs are falling apart during cooking?
If your meatballs are crumbling apart, it may be due to a lack of binding ingredients. Make sure to thoroughly mix in the egg, which helps hold everything together. If your mixture seems too wet or too loose, you can add a bit of almond flour or ground chia seeds to help with binding without adding carbs. Avoid over-mixing, as this can cause the meatballs to turn tough!

Are these meatballs safe for all dietary needs?
Very! These keto turkey meatballs are gluten-free, making them suitable for those with gluten sensitivities. However, be cautious if cooking for pets or those with specific allergies, particularly to poultry or dairy. Always double-check ingredient labels—especially for the heavy cream and cheese—to ensure they meet your dietary needs.

Keto Turkey Meatballs

Creamy Keto Turkey Meatballs That Taste Like Comfort Food

These Keto Turkey Meatballs are flavorful, low-carb, and satisfying—perfect for a comforting dinner.
Print Recipe Pin Recipe
Prep Time 15 minutes mins
Cook Time 25 minutes mins
Total Time 40 minutes mins
Servings: 6 meatballs
Course: Dinner
Cuisine: Keto
Calories: 250
Ingredients Equipment Method Nutrition Notes

Ingredients
  

For the Meatballs
  • 1 lb Ground Turkey Choose a higher-fat variety for juicier meatballs.
  • 1 large Egg Acts as a binder to keep the meatballs moist.
  • 0.5 tsp Salt Key enhancer for flavor.
  • 0.5 tsp Black Pepper Adds warmth and slight heat.
  • 1 tsp Garlic (fresh) Brings a delightful aromatic flavor.
  • 2 tsp Parsley Fresh parsley brightens up the dish.
For the Sauce
  • 1.75 cups Heavy Cream Creates a luscious base for your sauce.
  • 1 cup Parmesan Cheese Use cut from the block for rich flavor.
  • 1 tsp Garlic Powder Enhances the sauce flavor.
  • 1 tsp Additional Salt Rounds out the flavors perfectly.

Equipment

  • large mixing bowl
  • Skillet
  • Oven

Method
 

Cooking Instructions
  1. Preheat your oven to broil, about 500°F (260°C).
  2. In a large mixing bowl, combine ground turkey, egg, ½ teaspoon salt, black pepper, garlic, and parsley. Mix until just combined and form into 15 meatballs.
  3. Heat a skillet over medium heat, add oil, and brown meatballs for about 10 minutes.
  4. Remove meatballs and reduce heat to low. Pour in heavy cream, add parmesan cheese, and stir until smooth and slightly thickened, about 5 minutes.
  5. Add browned meatballs back to the skillet and coat with creamy sauce.
  6. Transfer skillet to the broiler and broil for about 3-5 minutes until meatballs are bubbling and golden.
  7. Garnish with fresh parsley and additional parmesan cheese before serving.

Nutrition

Serving: 1meatballCalories: 250kcalCarbohydrates: 4gProtein: 25gFat: 16gSaturated Fat: 8gPolyunsaturated Fat: 1gMonounsaturated Fat: 6gCholesterol: 120mgSodium: 400mgPotassium: 300mgFiber: 1gVitamin A: 500IUVitamin C: 2mgCalcium: 200mgIron: 2mg

Notes

Store leftovers in an airtight container for up to 3 days or freeze for up to 3 months.

Tried this recipe?

Let us know how it was!
  • « Previous Page
  • 1
  • …
  • 25
  • 26
  • 27
  • 28
  • 29
  • …
  • 101
  • Next Page »

Welcome!

Hi, I’m Grace, a Sydney-based home cook with a passion for bold flavors and trending ingredients. Whether you’re a busy beginner or a seasoned foodie, you’ll find dishes here that are fresh, fun, and full of flavor.

More about me

Popular Recipes

  • Pomegranate Caramels
    Pomegranate Caramels - Irresistibly Chewy Homemade Treats
  • Blueberry–Lemon Curd Tart
    Blueberry-Lemon Curd Tart: A Refreshing Summer Delight
  • Winter Wonderland Chocolate Chip Christmas Cookies
    Winter Wonderland Chocolate Chip Christmas Cookies Bliss
  • Oreo Chocolate Chip Cookies
    Chewy Oreo Chocolate Chip Cookies You Can't Resist

Footer

↑ back to top

About

  • Privacy Policy
  • Disclaimer
  • Terms & Conditions

Newsletter

  • Sign Up! for emails and updates

Contact

  • About me
  • Contact me

Copyright © 2025 TastyTrendIngredients