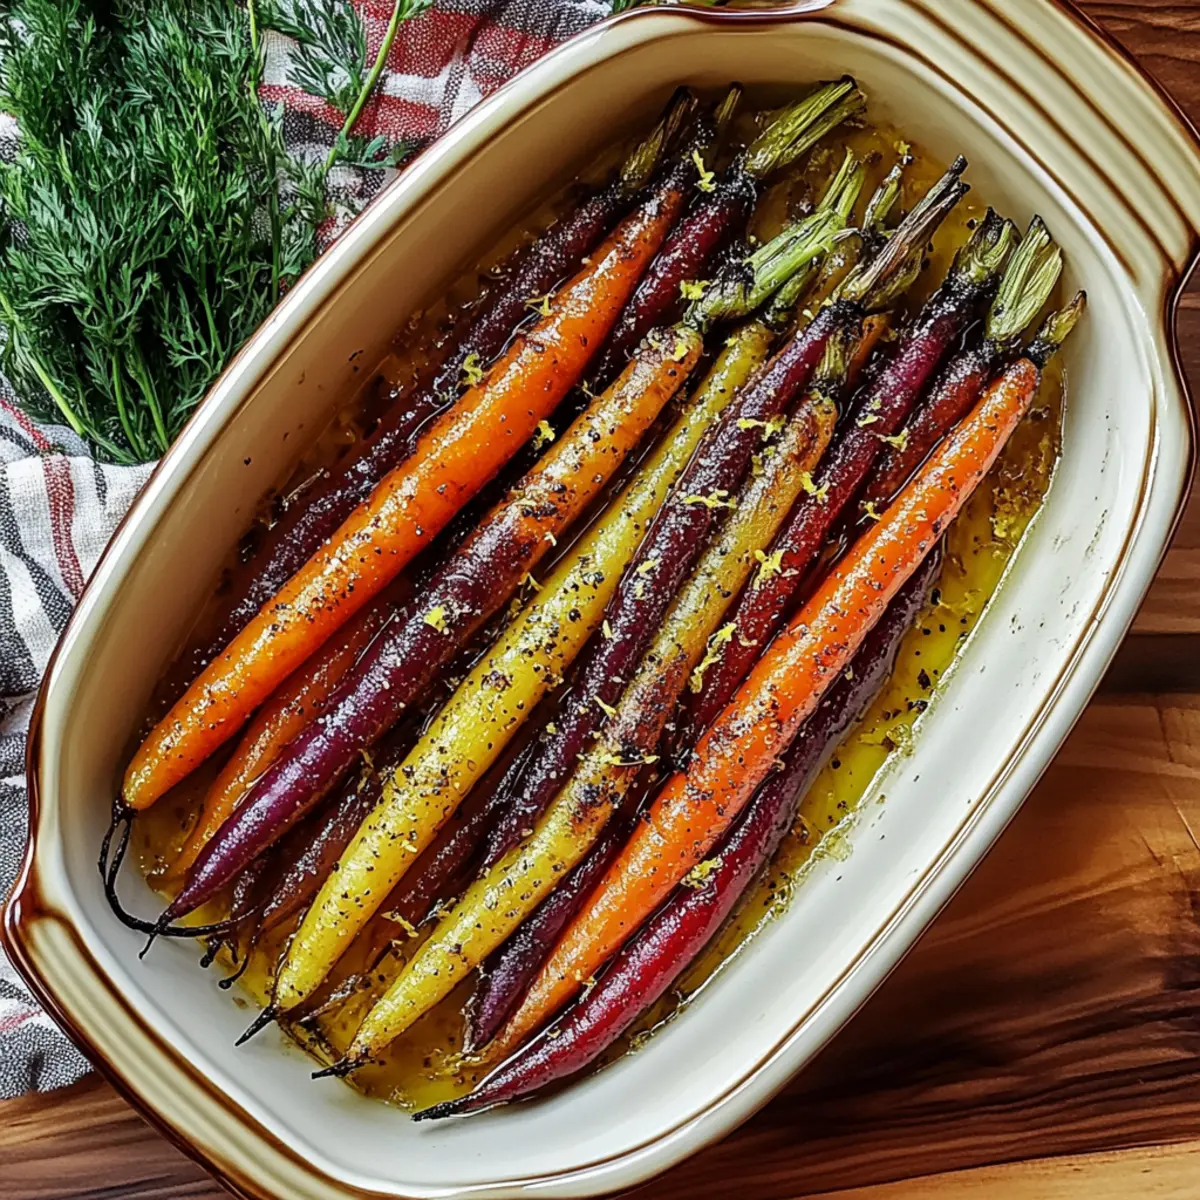
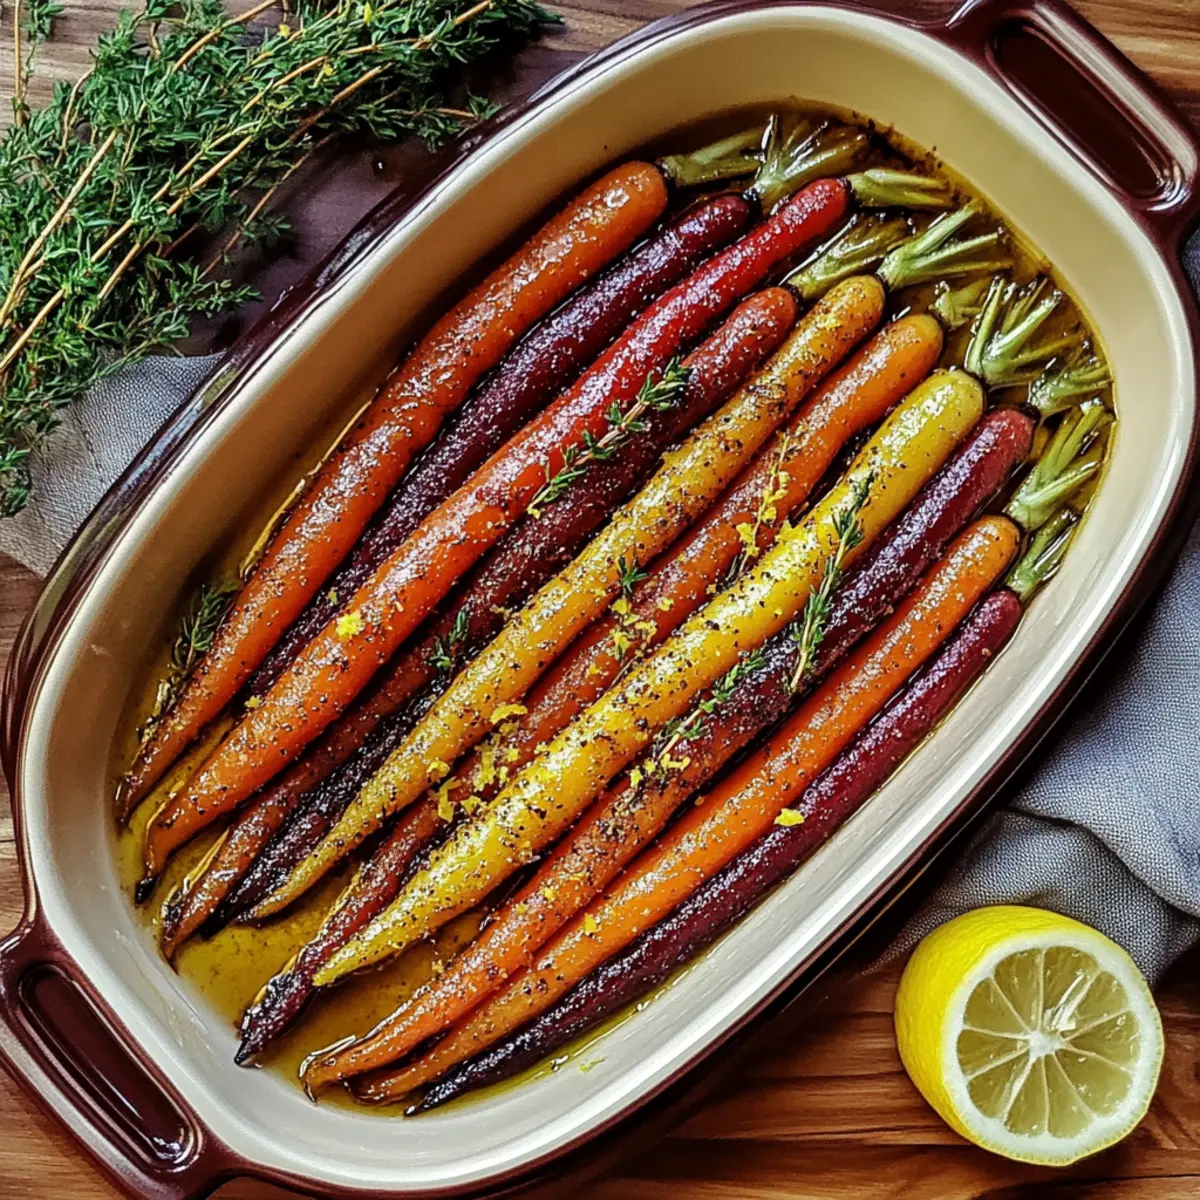
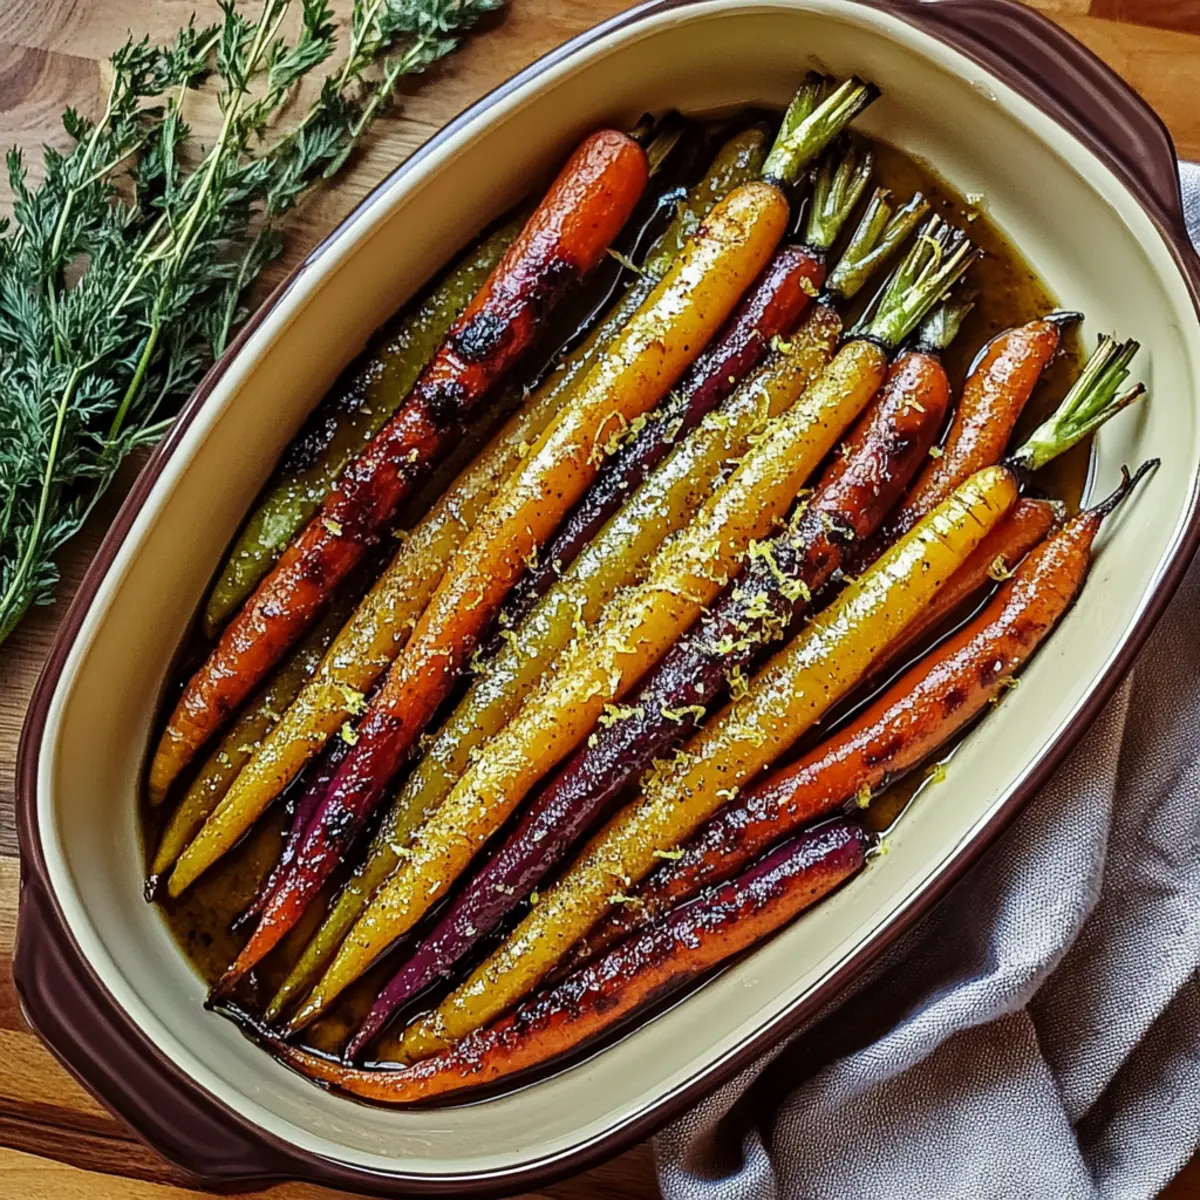
As the oven hums softly, I can't help but be drawn to the vibrant splash of colors in my kitchen—enter Roasted Rainbow Carrots! These beauties, with their mesmerizing mix of orange, yellow, purple, and red hues, are like a canvas of deliciousness just waiting to be painted with flavor. This recipe isn’t just about looks; roasting these carrots transforms them into a sweet, caramelized side dish that’s both vegan and gluten-free, making it a health-conscious choice without sacrificing taste. Perfect for busy weeknights or fancy dinner gatherings, these Roasted Rainbow Carrots offer a quick prep time and endless opportunities for customization. Curious about how to elevate your veggie game? Let’s dive into the delicious details!
Why Try Roasted Rainbow Carrots?
Vibrant Colors: These Roasted Rainbow Carrots aren’t just delicious; they add a stunning visual appeal to your table. Easy Preparation: With minimal ingredients and straightforward steps, this dish comes together quickly, meaning more time enjoying the meal! Nutrient-Dense: Packed with vitamins A, C, and K, they’re a healthy addition to any plate. Customizable Flavor: Want to get adventurous? Toss in fresh herbs or spices to create your own flavor profile. Crowd-Pleaser: Perfect for holiday gatherings or casual dinners, they impress even the pickiest eaters. Try serving alongside Maple Roasted Sweet Potatoes for a colorful spread!
Roasted Rainbow Carrots Ingredients
• Get ready to elevate your side dish with these colorful ingredients!
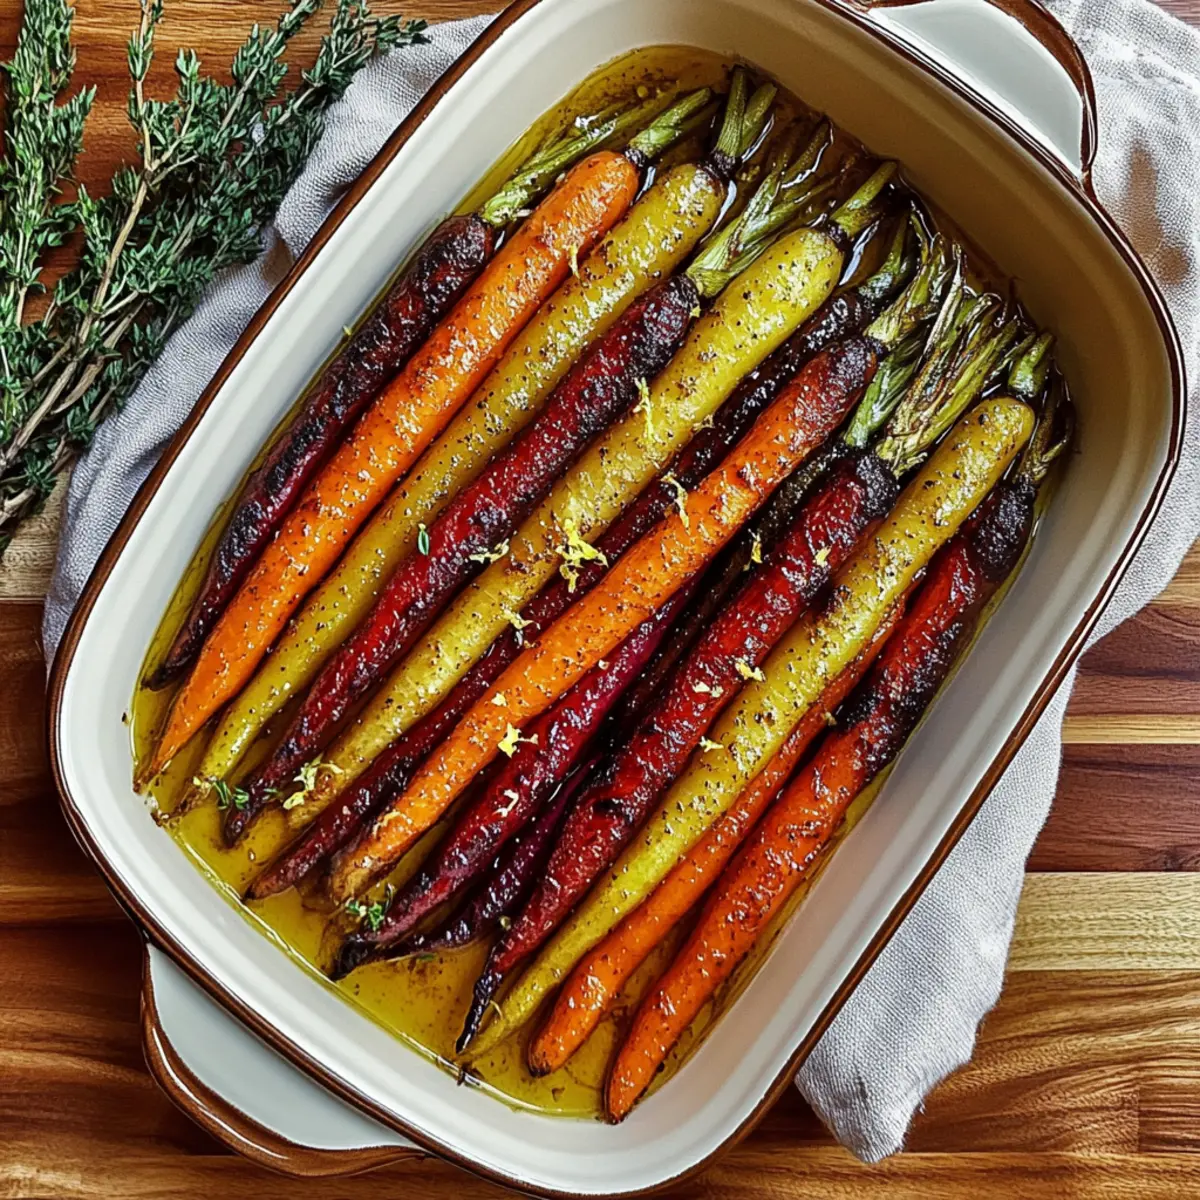
For the Carrots
- Rainbow Carrots – These beauties provide natural sweetness and vibrant color; you can substitute with regular orange carrots if needed.
- Olive Oil – Essential for caramelization while adding healthy fats; avocado oil or melted butter work great too.
- Salt – Enhances overall flavor balance and is necessary for best results; kosher or sea salt is preferred.
- Black Pepper – Adds mild heat and depth; freshly cracked black pepper provides the best flavor.
- Garlic Powder – Contributes savory notes to the dish; feel free to substitute fresh minced garlic if desired.
- Dried Thyme or Rosemary – Adds a lovely earthy flavor; fresh herbs can brighten the dish further if you have them on hand.
Optional Sweetness and Flavor Enhancements
- Honey or Maple Syrup – Increases caramelization and sweetness; agave nectar is a suitable vegan substitute if desired.
- Balsamic Vinegar – Adds a delicious tang; remember to drizzle it in the last 5 minutes of roasting to prevent burning.
- Lemon Zest – Brings a bright and fresh finish; if you're out of lemons, lime zest can work just as well.
These Roasted Rainbow Carrots are not only visually stunning but a delicious and healthy choice for any meal!
Step‑by‑Step Instructions for Roasted Rainbow Carrots
Step 1: Preheat the Oven
Begin by preheating your oven to 400°F (200°C). While it heats, prepare a baking sheet by lining it with parchment paper or foil, which will prevent the carrots from sticking and make cleanup a breeze. The oven should be hot enough to roast your carrots to golden perfection, enhancing their natural sweetness.
Step 2: Prepare the Carrots
Next, wash and peel the rainbow carrots thoroughly, ensuring you remove any dirt or blemishes. For larger carrots, halve them lengthwise to promote even roasting. This step is important, as uniform sizes allow for consistent cooking, ensuring each piece reaches the perfect tender and caramelized state.
Step 3: Season the Carrots
In a large mixing bowl, combine the prepared carrots with olive oil, salt, black pepper, garlic powder, and your choice of dried thyme or rosemary. Toss the mixture well, ensuring every carrot is evenly coated. If you desire an extra touch of sweetness, consider drizzling honey or maple syrup at this stage for enhanced caramelization during roasting.
Step 4: Arrange for Roasting
Spread the seasoned carrots in a single layer on the prepared baking sheet, making sure not to overcrowd them. This step is crucial for achieving that beautifully roasted exterior; overcrowding will lead to steaming instead. Gently slide the baking sheet into the preheated oven, ready to transform into the star of your meal.
Step 5: Roast the Carrots
Roast the carrots in the oven for about 25-30 minutes. Halfway through cooking, carefully flip the carrots with a spatula to encourage even browning and caramelization on all sides. You’ll know they’re done when they are tender and exhibit a beautiful golden-brown hue, a visual signal that they are perfectly roasted.
Step 6: Finishing Touches
During the last 5 minutes of roasting, drizzle balsamic vinegar over the carrots, adding a tangy glaze that elevates their flavor. Once removed from the oven, sprinkle freshly grated lemon zest over the warm carrots for a delightful burst of brightness. Serve your vibrant Roasted Rainbow Carrots warm for the best experience, or enjoy them as a simple yet flavorful snack.
Make Ahead Options
Preparing Roasted Rainbow Carrots in advance is a game changer for busy home cooks! You can wash, peel, and cut the carrots up to 24 hours ahead of time; simply store them in an airtight container immersed in water in the refrigerator to prevent browning. Additionally, you can mix the oil and seasonings an hour before cooking; this allows the flavors to infuse. When you're ready to serve, just drain the carrots, toss them with the seasoning mix, and roast as indicated. By prepping ahead, you’ll enjoy the same vibrant flavor with minimal last-minute effort, making weeknight cooking a breeze!
Expert Tips for Roasted Rainbow Carrots
-
Uniform Cutting: Ensure even roasting by cutting all carrots to similar sizes; this prevents some from being overcooked while others remain crunchy.
-
Single Layer Roasting: Avoid overcrowding the baking sheet; this allows proper caramelization, turning your Roasted Rainbow Carrots perfectly golden rather than steamed.
-
Midway Flip: Flip the carrots halfway through roasting for even browning; this simple trick will enhance their caramelized exterior and flavor profile.
-
Late Balsamic Drizzle: To avoid bitterness, add balsamic vinegar just 5 minutes before they finish roasting; this creates a delightful glaze without burning.
-
Enhance with Nuts: For added crunch and flavor, top your roasted carrots with toasted nuts or pomegranate seeds before serving; they're a beautiful complement to the dish.
How to Store and Freeze Roasted Rainbow Carrots
- Fridge: Keep any leftover Roasted Rainbow Carrots in an airtight container in the refrigerator for up to 4 days. This preserves their nutritiousness while making them easy to grab for a quick meal or snack.
- Freezer: For longer storage, freeze completely cooled carrots in a freezer-safe bag for up to 3 months. Be sure to remove as much air as possible to prevent freezer burn.
- Reheating: To enjoy them again, reheat frozen carrots at 375°F (190°C) for about 15 minutes or back in the oven at 350°F (175°C) for 10 minutes if thawed, ensuring they regain their crispy texture.
- Serving Suggestions: Before serving, consider sprinkling freshly chopped herbs or a drizzle of olive oil to refresh their flavors and colors for a delightful presentation.
Roasted Rainbow Carrots Variations & Substitutions
Get ready to discover fun ways to customize your Roasted Rainbow Carrots for an even more delightful experience!
- Dairy-Free: Substitute regular butter with coconut oil for a delicious vegan twist that adds a hint of tropical flavor.
- Herb-Infused: Use fresh basil or dill instead of thyme or rosemary to bring a fresh, aromatic flair to your dish.
- Sweet & Spicy: Sprinkle cayenne pepper along with the garlic powder to give these carrots a spicy kick that balances their natural sweetness.
- Nutty Crunch: Top the roasted carrots with some toasted almonds or sunflower seeds for a nutty texture that complements the tender veggies beautifully.
- Mediterranean Mix: Toss roasted carrots with chickpeas, lemon juice, and tahini for a wholesome, protein-packed salad that’s bursting with flavor.
- Citrus Zest Boost: Mix in orange or grapefruit zest along with the lemon for a vibrant zing that elevates the overall brightness of the dish.
- Rainbow Veggie Roast: Enhance the colors and flavors by adding other root vegetables like parsnips and beets, creating a stunning medley on your table.
- Carrot Fries: Cut the carrots into thin sticks, season, and roast them to make healthy carrot fries—perfect for dipping in a homemade garlic aioli.
Why not pair these vibrant carrots with a delightful side such as Roasted Corn Fried Egg Tacos for a meal that’s both heartwarming and satisfying? The possibilities are endless!
What to Serve with Roasted Rainbow Carrots?
Create a stunning meal that dazzles both the eyes and the palate with these deliciously caramelized treats!
-
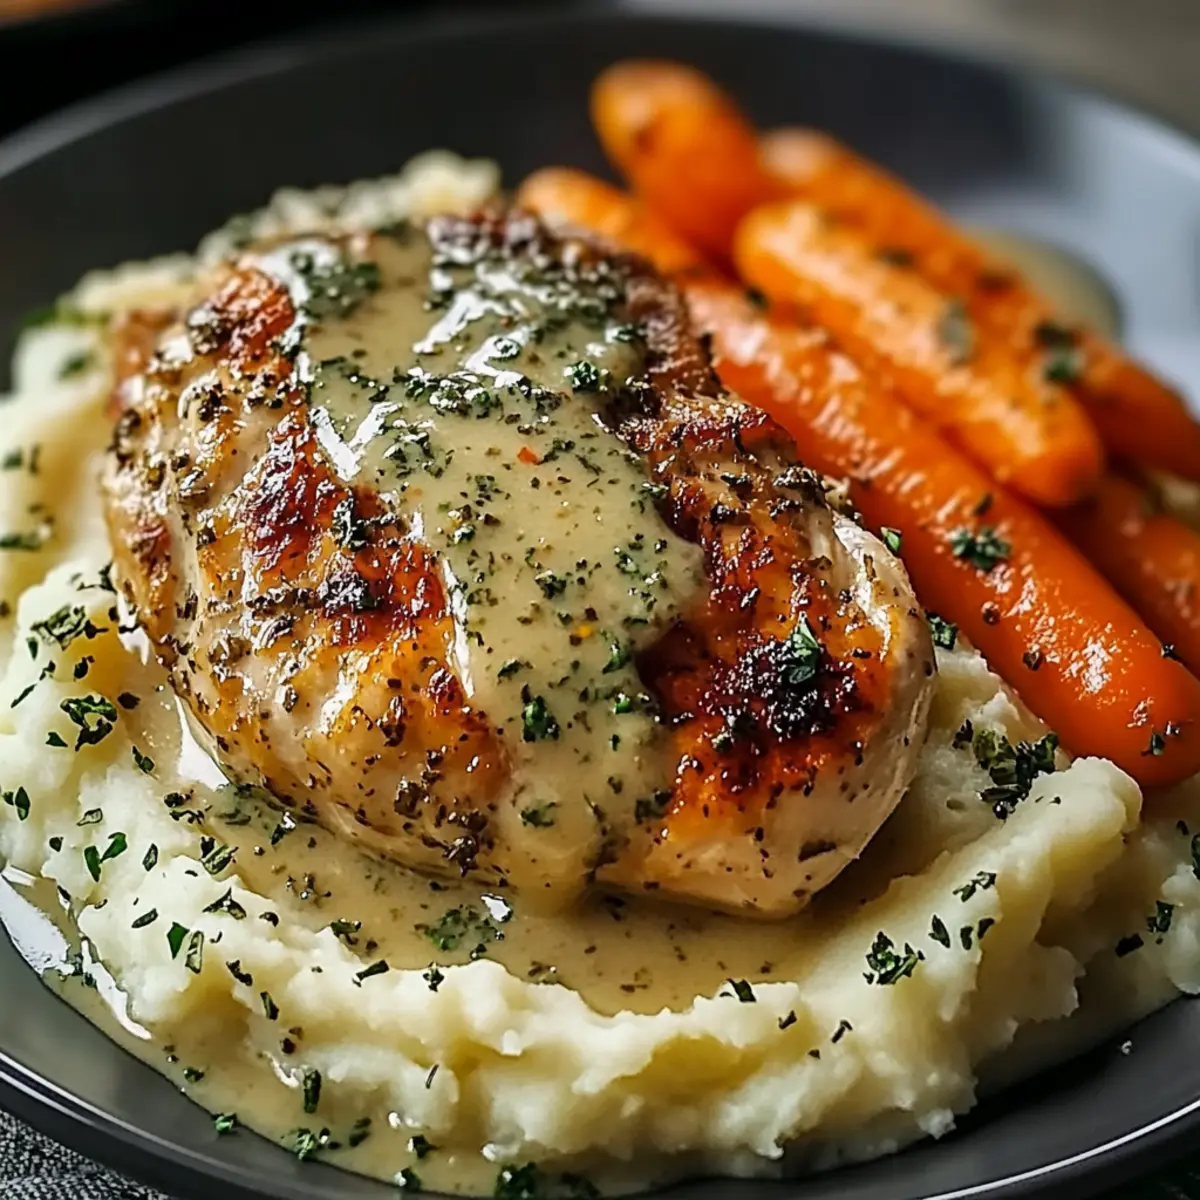
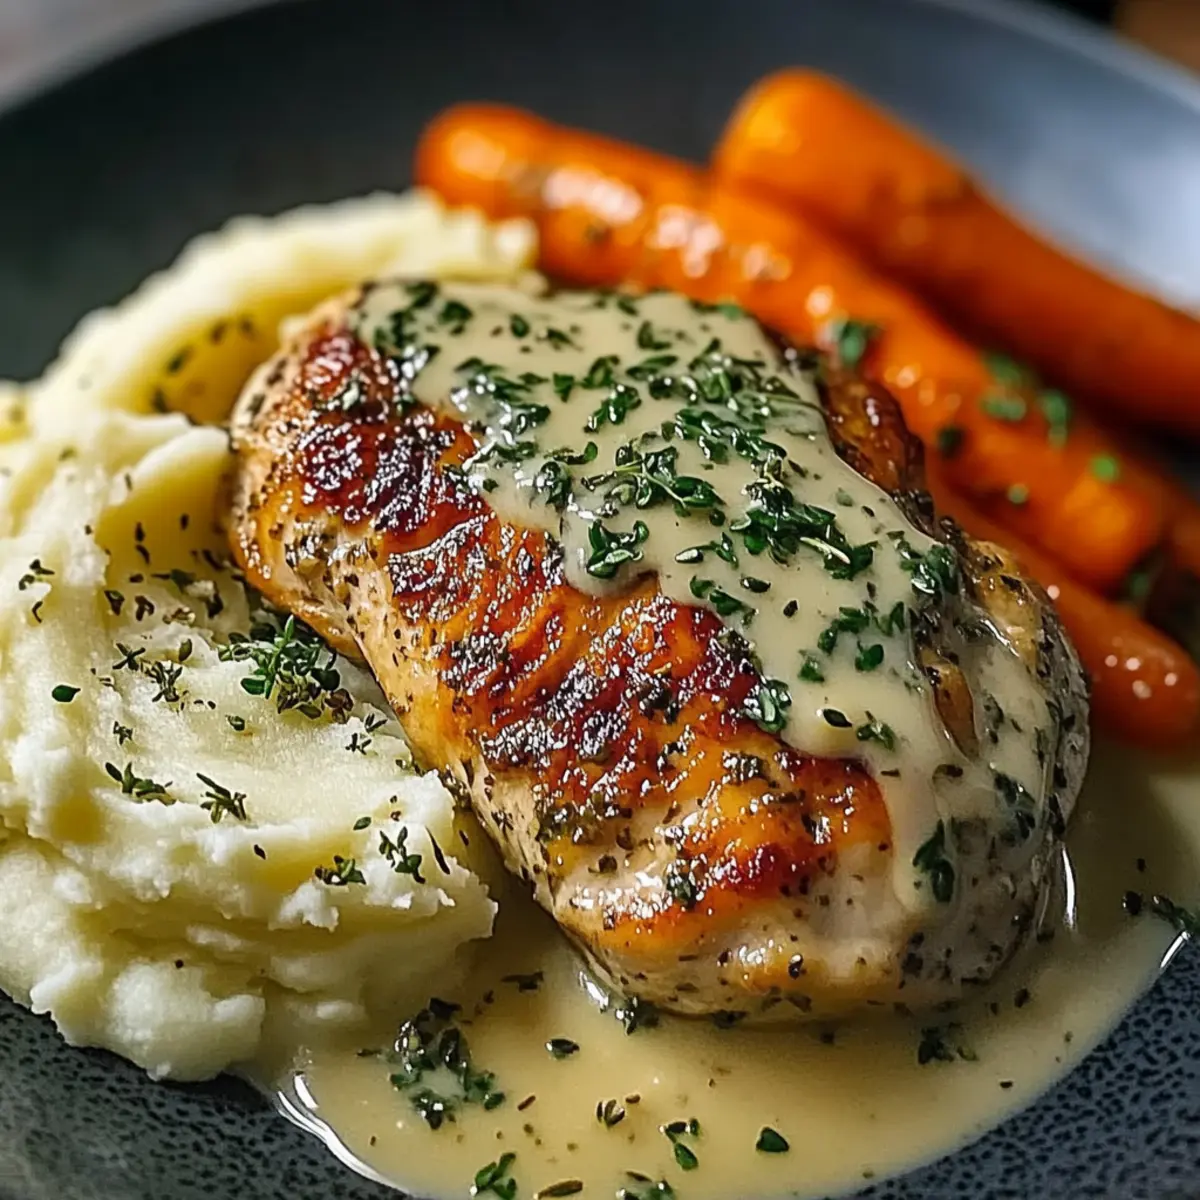
Creamy Mashed Potatoes: Their velvety texture is a perfect contrast to the crispy exterior of the roasted carrots. Together, they create a comforting pairing that delights the senses.
-
Herb-Crusted Salmon: The savory flavors of salmon beautifully complement the sweetness of the roasted rainbow carrots. This duo can elevate any dinner table into a gourmet experience.
-
Quinoa Salad: A refreshing quinoa salad with lemon vinaigrette offers a light, nutritious option that balances the richness of the carrots. Add in some diced cucumbers and cherry tomatoes for a splash of color.
-
Garlic Herb Chicken: Juicy, herb-infused chicken pairs wonderfully with the roasted carrots, enhancing the overall flavor palette of your meal. The caramelized sweetness of the carrots brings a delightful contrast to the savory chicken.
-
Roasted Brussels Sprouts: The crispy, slightly nutty flavor of Brussels sprouts complements the sweetness of the carrots while adding texture. It's a perfect combination for a festive holiday spread.
-
Chardonnay: A chilled glass of Chardonnay can elevate your dinner, offering crisp acidity that enhances the sweet and savory notes of the roasted rainbow carrots. Enjoy their vibrant flavors with each sip!
Roasted Rainbow Carrots Recipe FAQs
What should I look for when selecting rainbow carrots?
Absolutely! When selecting rainbow carrots, look for firm, smooth skin without any soft spots or dark blemishes. They should be vibrant in color—deep orange, yellow, purple, and red—with no wilting or shriveling. If you can, choose carrots that are roughly similar in size to ensure even cooking during roasting.
How should I store leftover roasted rainbow carrots?
Very! To store leftover roasted rainbow carrots, place them in an airtight container in the refrigerator. They’ll stay fresh for up to 4 days. Simply reheat them in the oven at 350°F (175°C) for about 10 minutes to retain their slight crispiness. It's a great way to make quick meals throughout the week!
Can I freeze roasted rainbow carrots?
Absolutely! To freeze roasted rainbow carrots, allow them to cool completely at room temperature. Then, place them in a freezer-safe bag, removing as much air as possible to prevent freezer burn. They will keep well for up to 3 months. When you're ready to enjoy them, reheat directly from the freezer at 375°F (190°C) for around 15 minutes. They'll be just as delicious!
What if my roasted carrots aren't caramelizing properly?
Don't worry! If your roasted rainbow carrots aren’t caramelizing as expected, it might be due to overcrowding on the baking sheet. Make sure the carrots are spread out in a single layer with space between each piece to allow for proper ventilation and browning. Flipping them halfway through the roasting time also helps ensure even caramelization for a delightful, golden-brown effect.
Are roasted rainbow carrots safe for pets?
Very! Roasted rainbow carrots are generally safe for cats and dogs in moderation. However, it’s best to omit any added seasonings like salt or garlic if sharing with your furry friends. Always consult your veterinarian if you have concerns about introducing new foods into your pet’s diet.
Can I use other types of carrots instead of rainbow carrots?
Absolutely! If rainbow carrots are not available, you can easily substitute them with standard orange carrots. The flavor remains delightful, and they will still roast beautifully. For a fun variation in texture and taste, consider mixing in some purple or yellow carrots if you can find them!
Roasted Rainbow Carrots: Colorful Flavor for Your Table
Ingredients
Equipment
Method
- Preheat your oven to 400°F (200°C) and line a baking sheet with parchment paper or foil.
- Wash and peel the rainbow carrots, halving larger ones lengthwise for even roasting.
- In a mixing bowl, combine the prepared carrots with olive oil, salt, black pepper, garlic powder, and dried thyme or rosemary; toss well.
- Spread the seasoned carrots in a single layer on the baking sheet.
- Roast the carrots for about 25-30 minutes, flipping halfway through for even browning.
- During the last 5 minutes of roasting, drizzle balsamic vinegar over the carrots, then sprinkle with lemon zest after removal from the oven.