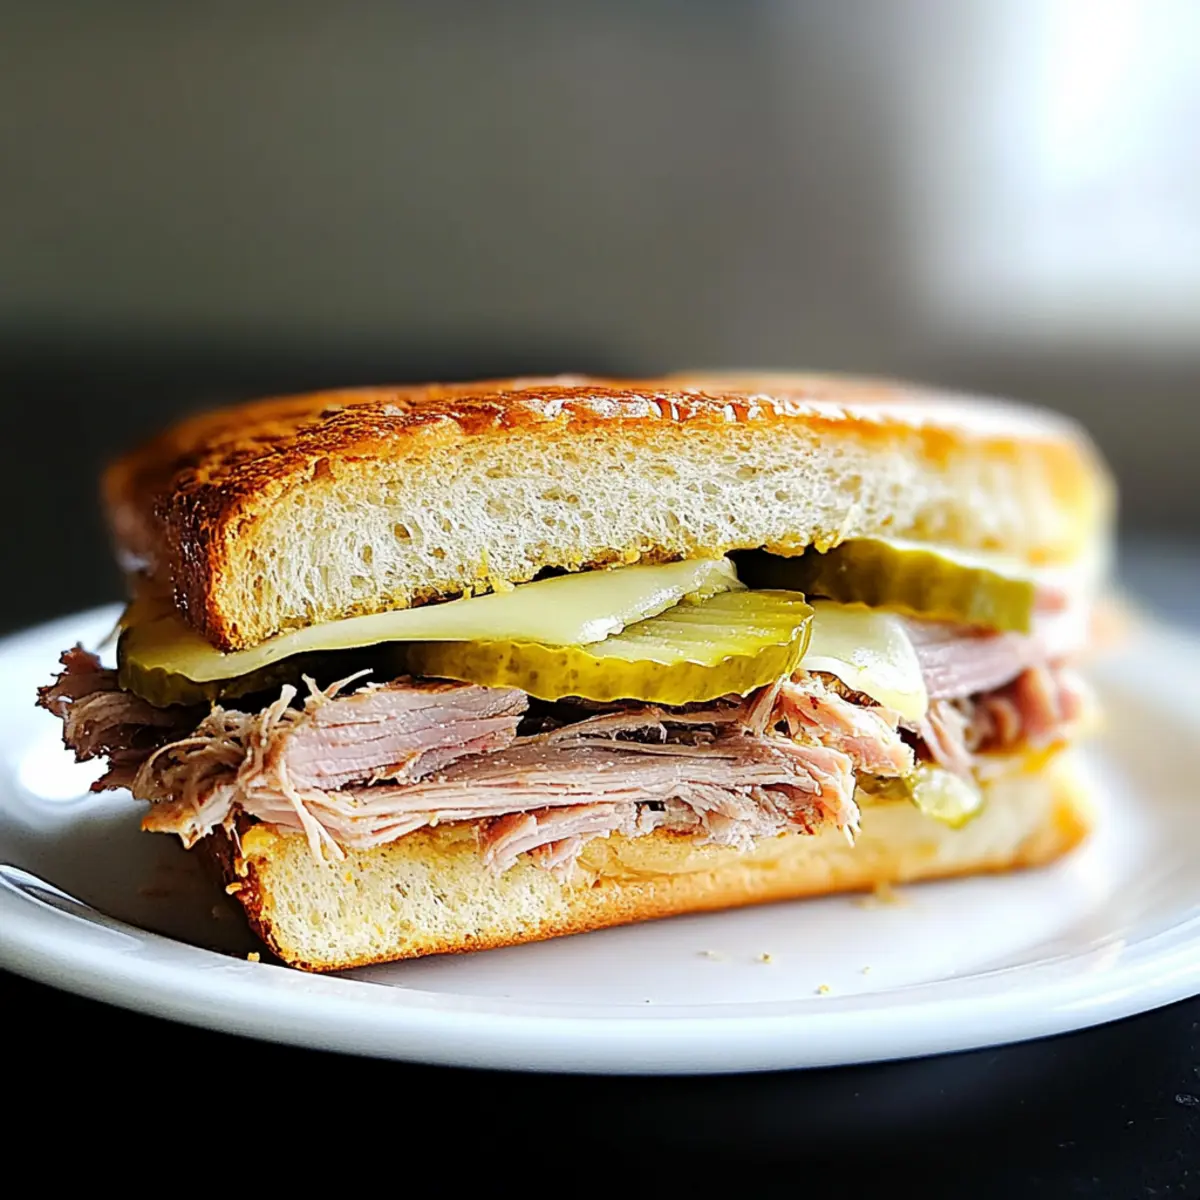
tastytrendingredients

  • Home
  • Recipes
    • Appetizers
    • Breakfast
    • Dessert
    • Dinner
    • Drinks
    • Salads
    • Snacks
    • Soups
  • About me
  • Contact me
menu icon
go to homepage
  • Home
  • Recipes
    • Appetizers
    • Breakfast
    • Dessert
    • Dinner
    • Drinks
    • Salads
    • Snacks
    • Soups
  • About me
  • Contact me
search icon
Homepage link
  • Home
  • Recipes
    • Appetizers
    • Breakfast
    • Dessert
    • Dinner
    • Drinks
    • Salads
    • Snacks
    • Soups
  • About me
  • Contact me
×

Easiest Ever Crockpot Lasagna – Cozy Layers of Comfort

January 14, 2026 by Grace Snow Leave a Comment

As I hustled around the kitchen, juggling a million tasks, the thought of a versatile dinner option popped into my mind: Easiest Ever Crockpot Lasagna. This hands-off recipe isn't just a meal; it’s a time-saver that transforms ordinary evenings into something special. With layers of tender noodles, savory meat sauce, and creamy cheeses, it beckons family gatherings and cozy nights in alike. Perfect for meal prep and freezer-friendly, this dish simplifies your life without sacrificing flavor or satisfaction. So, are you ready to dive into a comforting, aromatic journey that makes cooking a joy rather than a chore? Let’s get started!

What makes this lasagna a game-changer?

Effortless Preparation: This Easiest Ever Crockpot Lasagna takes the fuss out of dinner with minimal prep time, letting you focus on what really matters.

Mouthwatering Layers: Each bite is a delicious harmony of rich meat sauce, creamy cheese, and tender noodles that will have your taste buds dancing.

Perfect for Meal Prep: Ideal for busy lifestyles, this make-ahead marvel can be assembled in advance and cooked at your convenience, promising flavorful meals on hectic nights.

Freezer-Friendly Love: Got leftovers? You can easily store and freeze portions for later enjoyment, making it a wonderful solution for quick meals.

Crowd Pleaser: Whether for family dinners or gatherings with friends, this lasagna is sure to impress and satisfy everyone at the table, much like my Crockpot Butter Chicken.

Enjoy the cozy comfort of home-cooked goodness without the hassle – dive into this delectable dish today!

Easiest Ever Crockpot Lasagna Ingredients

For the Meat Sauce

  • Extra-lean ground beef – Provides protein and richness; substitute with ground turkey for a lighter dish.
  • Yellow onion – Adds sweetness and depth; you can use white onions or shallots instead.
  • Garlic – Offers aromatic flavor; freshly minced is ideal, but jarred works in a pinch.
  • Jarred tomato sauce – Forms the sauce base; any variety is good, but Classico's sweet basil marinara shines here.

For the Layers

  • Lasagna noodles – Create the dish's structure; use oven-ready or regular uncooked noodles, breaking them as needed.
  • Ricotta cheese – Adds creaminess; cottage cheese is a great alternative for a different texture.
  • Mozzarella cheese – Provides melty goodness; try adding extra parmesan for enhanced flavor.

For the Garnish

  • Fresh basil – Complements the dish with a burst of freshness; fresh parsley can work too if basil isn't available.

Embrace the vibrant flavors and textures of this Easiest Ever Crockpot Lasagna as you prepare to treat your loved ones to a meal they won't forget!

Step‑by‑Step Instructions for Easiest Ever Crockpot Lasagna

Step 1: Prepare Meat Sauce
In a skillet over medium-high heat, brown 1 pound of extra-lean ground beef until no longer pink, about 5-7 minutes. Once browned, add in a diced yellow onion and 3 minced garlic cloves, stirring for an additional 2-3 minutes until fragrant. Season with salt and pepper, then pour in one jar of jarred tomato sauce, mixing well to combine.

Step 2: Layer Ingredients
Spray the inside of your crockpot with cooking spray to prevent sticking. Start by adding a layer of meat sauce at the bottom, then place a layer of uncooked lasagna noodles, breaking them as needed to fit. On top, spread a layer of ricotta cheese and a generous handful of shredded mozzarella cheese. Repeat this process, creating about three layers, ensuring each layer is even.

Step 3: Final Assembly
Once layers are complete, pour the second jar of tomato sauce evenly over the top of the lasagna. Finish by sprinkling more mozzarella cheese across the top layer for an irresistible melty finish. To help keep the dish moist, pour approximately ½ cup of water around the edges of the lasagna, avoiding direct contact with the cheese layer.

Step 4: Cook
Cover your crockpot with the lid and set it to cook on high for 3 hours or on low for 6 hours. During this time, the noodles will become tender, and the flavors of the Easiest Ever Crockpot Lasagna will meld beautifully. Check for doneness by ensuring the cheese is bubbly and the noodles are soft.

Step 5: Serve
Once cooked, carefully remove the lid and allow the Easiest Ever Crockpot Lasagna to sit for 10 minutes. This will help the layers set for easier serving. Garnish with freshly chopped basil or parsley for a burst of color and flavor before scooping out servings and enjoying a deeply satisfying meal.

What to Serve with Easiest Ever Crockpot Lasagna

Cozy up your dinner table with these delightful sides that elevate your lasagna experience to new heights.

  • Garlic Bread: This classic favorite is crispy on the outside and buttery inside, perfect for scooping up leftover sauce.

  • Caesar Salad: A crisp Caesar salad brings a refreshing crunch that contrasts beautifully with the rich lasagna layers.

  • Roasted Vegetables: Seasoned roasted vegetables add a burst of color and nutrition, making each bite more vibrant and fulfilling.

  • Italian Wine: A glass of Chianti or Sangiovese enhances your meal with its fruity and earthy notes, complementing the lasagna's flavors perfectly.

  • Cheesy Stuffed Mushrooms: These tantalizing bites pack a punch of flavor and their creamy, cheesy filling pairs wonderfully with the lasagna.

  • Tiramisu for Dessert: A light, coffee-soaked tiramisu rounds off your meal, providing a sweet finish that leaves everyone happy.

Each of these pairings connects harmoniously with the Easiest Ever Crockpot Lasagna, making your meal an unforgettable experience!

Expert Tips for Easiest Ever Crockpot Lasagna

  • Choose Quality Ingredients: A great lasagna starts with great ingredients. Opt for high-quality tomato sauce and fresh cheese for the best flavors in your Easiest Ever Crockpot Lasagna.

  • Avoid Overcooking: Keep an eye on the cooking time; overcooking can lead to a mushy texture. If you prefer firmer noodles, cook on low for less time.

  • Layer Wisely: Ensure even distribution in every layer for balanced flavors. Start and end with meat sauce to keep the noodles moist.

  • Add Veggies: Boost the nutrition by mixing in chopped spinach, zucchini, or mushrooms. They add flavor and texture to your lasagna without compromising the recipe.

  • Chill Before Serving: Allow the lasagna to sit for a few minutes after cooking. This helps it set, making for cleaner slices and enhancing the overall presentation.

  • Freeze for Later: If you have leftovers, portion them out and freeze for quick meals. Just remember to thaw overnight in the fridge before reheating for the best results.

Easiest Ever Crockpot Lasagna Variations

Customize your Easiest Ever Crockpot Lasagna for a fresh twist that awakens your taste buds and suits your family's preferences.

  • High-Protein Upgrade: Swap ground beef for ground turkey or chicken for a leaner option without sacrificing flavor. You won't even miss the extra fat!

  • Vegetarian Delight: Replace meat with sautéed mushrooms, spinach, or zucchini. This variation adds a delicious earthiness, perfect for veggie lovers!

  • Dairy-Free Option: Use vegan cheese alternatives and cottage cheese made from almonds or cashews to create a creamy texture that everyone can enjoy. The flavors remain noteworthy!

  • Flavor Boost: Add Italian seasoning or crushed red pepper flakes to the tomato sauce for an extra kick. The subtle heat will elevate each heavenly bite of your lasagna.

  • Unique Cheese Blend: Experiment with different cheeses, like provolone or fontina, for a new depth of flavor. The melty goodness will have your guests asking for seconds!

  • Saucy Spin: Incorporate a layer of pesto between the cheese for a fresh, herby flavor. This dance of flavors adds a gourmet touch to your family dinner.

  • Whole Grain Noodles: Swap regular lasagna noodles for whole wheat varieties for a fiber boost. You may notice a heartier texture that complements the rich filling beautifully.

  • Spicy Kick: Toss in some diced jalapeños or a drizzle of hot sauce for an unexpected punch of heat. It’s a fun way to get adventurous with your flavors!

Now that you're brimming with inspiration, creating your personalized dish will surely make your culinary experience unforgettable! And if you're also in need of a delightful dessert, check out my easy recipe for Mexican Wedding Cookies to round off your meal.

How to Store and Freeze Easiest Ever Crockpot Lasagna

Fridge: Store leftover lasagna in an airtight container for up to 5 days. Allow it to cool completely before covering to maintain its delicious texture.

Freezer: You can freeze portions of the Easiest Ever Crockpot Lasagna for up to 3 months. Wrap individual servings tightly in plastic wrap and then in aluminum foil to prevent freezer burn.

Reheating: Thaw frozen lasagna overnight in the fridge. Reheat in the oven at 350°F (175°C) for about 20-25 minutes, or until warmed through, adding a splash of water if needed.

Cooked vs. Uncooked: You can also freeze the assembled uncooked lasagna. Simply cover tightly and freeze, then cook directly from frozen, adjusting the cooking time as needed.

Make Ahead Options

These Easiest Ever Crockpot Lasagna are perfect for busy home cooks looking to simplify meal prep! You can assemble the entire lasagna up to 24 hours in advance and refrigerate it until you’re ready to cook. To maintain its quality, make sure to cover it tightly with plastic wrap or foil before refrigerating. When you’re ready to enjoy this comforting dish, just cook it directly from the fridge on high for 3 hours or low for 6 hours. For best results, allow it to rest for 10 minutes after cooking to set the layers. This way, you'll have a delicious, satisfying meal with minimal day-of effort!

Easiest Ever Crockpot Lasagna Recipe FAQs

How do I choose the right ground beef for the lasagna?
Absolutely! For the best flavor and texture in your Easiest Ever Crockpot Lasagna, opt for extra-lean ground beef. Look for meat with about 90% lean to 10% fat for optimal richness without being greasy. If you prefer a lighter option, ground turkey or Italian sausage works well, too!

What’s the best way to store leftover lasagna?
Very! To store leftover Easiest Ever Crockpot Lasagna, place it in an airtight container in the fridge where it will stay fresh for up to 5 days. Let it cool completely before sealing to maintain that delicious texture and flavor.

Can I freeze the lasagna? If so, how?
Absolutely! You can freeze Easiest Ever Crockpot Lasagna for up to 3 months. To do this, wrap individual portions tightly in plastic wrap and then in aluminum foil to prevent freezer burn. For uncooked lasagna, assemble it as per the recipe, cover tightly, and freeze. When you're ready to cook, you can bake directly from frozen, adjusting the cooking time as needed.

What are some troubleshooting tips if my lasagna turns out mushy?
Oh no, let’s avoid that! If your Easiest Ever Crockpot Lasagna turns out mushy, it may be due to overcooking or excess moisture. To prevent this, ensure you’re using the correct cooking times (either 3 hours on high or 6 hours on low). Additionally, make sure to pour only about ½ cup of water around the edges during assembly. If you've layered the ingredients properly, the moisture should balance out without making it soupy.

Any dietary substitutes I should consider?
The more the merrier! If you're looking for dairy-free options for the Easiest Ever Crockpot Lasagna, you can substitute ricotta with almond or soy-based alternatives and use dairy-free mozzarella cheese. For gluten-free needs, be sure to use gluten-free lasagna noodles that can be cooked directly in the slow cooker. Always read labels to check for allergens, particularly if you’re serving guests!

Easiest Ever Crockpot Lasagna

Easiest Ever Crockpot Lasagna – Cozy Layers of Comfort

The Easiest Ever Crockpot Lasagna is a flavorful, comforting dish perfect for family gatherings.
Print Recipe Pin Recipe
Prep Time 20 minutes mins
Cook Time 3 hours hrs
Resting Time 10 minutes mins
Total Time 3 hours hrs 30 minutes mins
Servings: 8 slices
Course: Dinner
Cuisine: Italian
Calories: 350
Ingredients Equipment Method Nutrition Notes

Ingredients
  

For the Meat Sauce
  • 1 pound extra-lean ground beef can substitute with ground turkey
  • 1 yellow onion can use white onions or shallots
  • 3 cloves garlic freshly minced is ideal
  • 1 jar jarred tomato sauce any variety, Classico's sweet basil marinara recommended
For the Layers
  • 9 sheets lasagna noodles use oven-ready or regular, break as needed
  • 15 ounces ricotta cheese cottage cheese is a great alternative
  • 3 cups mozzarella cheese add extra parmesan for enhanced flavor
For the Garnish
  • 1 bunch fresh basil fresh parsley can substitute

Equipment

  • Crockpot
  • Skillet

Method
 

Step-by-Step Instructions
  1. In a skillet over medium-high heat, brown 1 pound of extra-lean ground beef until no longer pink, about 5-7 minutes. Add in a diced yellow onion and 3 minced garlic cloves, stirring for an additional 2-3 minutes. Season with salt and pepper, then pour in one jar of jarred tomato sauce.
  2. Spray the inside of your crockpot with cooking spray. Add a layer of meat sauce at the bottom, then a layer of uncooked lasagna noodles, breaking them as needed. Spread a layer of ricotta cheese and a handful of mozzarella cheese. Repeat this process for about three layers.
  3. Pour the second jar of tomato sauce evenly over the top. Sprinkle more mozzarella cheese on top. Pour approximately ½ cup of water around the edges.
  4. Cover your crockpot and set it to cook on high for 3 hours or on low for 6 hours.
  5. Once cooked, let the lasagna sit for 10 minutes before serving. Garnish with freshly chopped basil or parsley.

Nutrition

Serving: 1sliceCalories: 350kcalCarbohydrates: 40gProtein: 25gFat: 15gSaturated Fat: 7gPolyunsaturated Fat: 1gMonounsaturated Fat: 6gCholesterol: 70mgSodium: 800mgPotassium: 600mgFiber: 2gSugar: 5gVitamin A: 20IUVitamin C: 10mgCalcium: 25mgIron: 15mg

Notes

This lasagna is perfect for meal prep, can be frozen, and is sure to impress at gatherings. Consider adding veggies for extra nutrition.

Tried this recipe?

Let us know how it was!

Pepperoni Pizza Lasagna Roll Ups: Family Comfort Food Redefined

January 14, 2026 by Grace Snow Leave a Comment

As the aroma of bubbling cheese and savory spices fills the air, I find myself transported back to family dinners where everyone gathered around the table to enjoy a delicious meal together. Today, I'm excited to share my Easy Pepperoni Pizza Lasagna Roll Ups, a delightful twist on two classic favorites that your family will love. This quick and satisfying dish is perfect for busy weeknights, allowing you to whip up a cheesy, comforting meal in under 30 minutes. Plus, you can make these ahead of time, ensuring a hassle-free dinner that keeps everyone smiling. Curious about how to make this delectable fusion of pizza and pasta? Let's get rolling!

Why Are These Lasagna Roll Ups So Irresistible?

Quick, Effortless Meal: With just 30 minutes of prep and cooking, you can serve a hearty dish that pleases everyone.
Family-Friendly Flavor: The familiar taste of pizza wrapped in savory pasta creates an instant favorite for both kids and adults.
Cheesy Delight: Expect gooey mozzarella and creamy ricotta that melt in your mouth, ensuring every bite is filled with deliciousness.
Versatile Options: Customize by swapping pepperoni for turkey or salami, or even load up with veggies for a health boost.
Make Ahead: Prep in advance and freeze for a stress-free dinner option that lets you enjoy time with loved ones.
Perfect Pairing: Pair with a refreshing side salad or garlic bread to create a complete, satisfying meal the whole family will adore!

Pepperoni Pizza Lasagna Roll Ups Ingredients

• Gather your ingredients for this comforting, cheesy delight!

For the Roll Ups

  • Lasagna Noodles – Use traditional or no-cook noodles for convenience.
  • Ricotta Cheese – A creamy filling that adds richness; substitute with cottage cheese for a lighter choice.
  • Mozzarella Cheese – Melts beautifully for that gooey experience; opt for part-skim or dairy-free variants for healthier options.
  • Pepperoni – The classic pizza flavor; feel free to swap for salami or turkey pepperoni for a healthier option.
  • Marinara Sauce – Rich in flavor and moisture; pizza sauce can be a delightful alternative.
  • Italian Seasoning – Infuses the rolls with traditional pizza herbs; fresh basil or oregano can elevate the flavor even more.

Step‑by‑Step Instructions for Pepperoni Pizza Lasagna Roll Ups

Step 1: Prepare Noodles
Bring a large pot of salted water to a boil and cook the lasagna noodles until al dente, about 10 minutes. Stir occasionally to prevent sticking, then drain them in a colander and gently rinse with cold water to stop the cooking process. Lay the noodles flat on a clean kitchen towel to keep them from sticking together as you prepare the filling.

Step 2: Make Cheese Filling
In a mixing bowl, combine the ricotta cheese with Italian seasoning until well blended. This creamy mix will bring moisture and flavor to your Pepperoni Pizza Lasagna Roll Ups. Using a spatula or spoon, spread an even layer of the ricotta mixture over each lasagna noodle, covering the entire surface for a delicious bite in every roll.

Step 3: Add Pepperoni
Sprinkle sliced pepperoni evenly over the ricotta-covered noodles. Arrange the slices so every roll has a taste of that savory, pizza-like goodness. Take care not to overload the noodles, as you want to ensure they roll up neatly without spilling the filling.

Step 4: Roll Noodles
Starting from one end, carefully roll each noodle up tightly, securing the cheese and pepperoni inside. Once rolled, place each lasagna roll seam-side down in a greased baking dish to keep them from unraveling during the baking process. Repeat this process until all noodles are rolled and nestled together in the dish.

Step 5: Add Sauce & Cheese
Pour marinara sauce evenly over the assembled roll ups, ensuring each one is generously coated for flavor and moisture. Next, sprinkle a generous layer of mozzarella cheese atop the sauce, covering it beautifully to create that gooey, melty texture we all love.

Step 6: Bake
Preheat your oven to 350°F (175°C) and bake the assembled Pepperoni Pizza Lasagna Roll Ups for 15-20 minutes. Look for the cheese to be bubbly and slightly golden on top, indicating that everything is heated through and melding together into a delicious, comforting dish.

Step 7: Serve & Enjoy
Remove the baking dish from the oven and let it cool for a few minutes before serving. This brief cooldown allows the flavors to settle and makes for easier slicing. Serve warm, and watch everyone enjoy this delightful twist on classic lasagna—a family favorite that will surely please all!

Pepperoni Pizza Lasagna Roll Ups Variations

Feel free to make these delicious roll ups your own with these tempting twists and substitutions!

  • Vegetarian Delight: Replace pepperoni with sautéed mushrooms and spinach for a healthier, veggie-packed option. The earthy flavors blend beautifully with the creamy ricotta, creating a comforting meal.

  • Meat Lover's Twist: Add cooked ground beef or sausage for an extra meaty version that will satisfy hearty appetites. Just brown the meat before spreading it on the noodles.

  • Dairy-Free: Use cashew cream or tofu mixed with nutritional yeast as a ricotta substitute to create creamy textures without dairy. This makes for a fabulous vegan dish while keeping it rich and indulgent!

  • Spicy Kick: Mix in sliced jalapeños or crushed red pepper flakes for a spicy variant that will warm your soul. The heat brings an exciting twist that pairs wonderfully with the savory cheese.

  • Italian Herb Infusion: Swap out Italian seasoning for fresh basil and oregano to elevate the flavor profile. The freshness of the herbs will make your lasagna roll ups burst with springy taste!

  • Cheese Swap: Try pepper jack or sharp cheddar to give your roll ups a different melt and flavor combination. Experimenting with cheese leads to delightful surprises with every bite!

  • Sauce Variety: For a unique flavor, switch marinara for pesto or alfredo sauce. Each of these sauces offers a different experience, turning your roll ups into a totally new dish.

  • Grains and Greens Boost: Mix cooked quinoa or finely chopped zucchini into the ricotta for added nutrition and a delightful texture. This not only makes the dish heartier but also sneaks in some wholesome goodness!

Remember, there are endless possibilities when it comes to cooking! If you’re looking for more delicious comfort foods, check out these Pumpkin Cinnamon Roll recipes for a delightful treat! Find inspiration in the kitchen and enjoy making these Pepperoni Pizza Lasagna Roll Ups truly your own!

Storage Tips for Pepperoni Pizza Lasagna Roll Ups

Fridge: Store leftover Pepperoni Pizza Lasagna Roll Ups in an airtight container for up to 3 days. Reheat in the oven at 350°F (175°C) until warmed through.

Freezer: For long-term storage, freeze unbaked roll ups in a single layer on a baking sheet, then transfer to a freezer-safe container or bag. They can be kept for up to 1 month.

Reheating: Bake frozen rolls directly from the freezer at 350°F (175°C) for 25-30 minutes, or until heated through and cheese is bubbly.

Make-Ahead: Prepare and assemble the roll ups ahead of time and keep in the fridge or freezer to simplify your meal prep while maintaining delicious flavors.

Expert Tips for Pepperoni Pizza Lasagna Roll Ups

• Don’t Overcook Noodles: Ensure lasagna noodles are al dente to prevent tearing; they should still have a slight bite to hold up when rolled.

• Cheese Distribution: Use a small scoop for even filling across the noodles, ensuring a balanced cheesy flavor in each Pepperoni Pizza Lasagna Roll Up.

• Make-Ahead Friendly: For easy weeknight meals, freeze unbaked roll ups; bake from frozen, adding a few extra minutes to the cooking time.

• Experiment with Fillings: Feel free to swap pepperoni for cooked ground beef or load up with veggies like spinach for a nutritious twist.

• Check for Bubbly Cheese: Bake until cheese is golden and bubbly, indicating that the flavors have melded beautifully for that perfect comfort food experience.

What to Serve with Pepperoni Pizza Lasagna Roll Ups

Transform your meal into a delightful feast with these perfect pairings!

  • Garlic Bread: Crisp and buttery, this classic side complements the cheesy roll ups, adding a satisfying crunch. It's perfect for sopping up the extra marinara sauce.

  • Caesar Salad: A refreshing mix of romaine, parmesan, and creamy dressing balances the hearty flavors of the lasagna. The crunch of the croutons adds texture.

  • Roasted Vegetables: Seasonal veggies like zucchini and bell peppers provide a colorful, nutritious side dish that brightens up your plate and offers a light contrast to the richness of cheese.

  • Italian Wedding Soup: A warm bowl of flavorful broth with hearty meatballs and greens enhances the meal with comforting vibes that perfectly align with the lasagna's fulfilling nature.

  • Caprese Skewers: Juicy cherry tomatoes, fresh mozzarella, and basil drizzled with balsamic glaze add freshness and a burst of flavor to your table. These can be prepped ahead for convenience.

  • Red Wine: A glass of slightly chilled Chianti or Sangiovese enhances the meal's Italian flavors, creating a warm, inviting atmosphere perfect for family gatherings.

With these delightful accompaniments, you're set for a comforting and satisfying meal that everyone will cherish!

Make Ahead Options

These Pepperoni Pizza Lasagna Roll Ups are perfect for busy home cooks looking to save time during hectic weeknights! You can prepare the entire dish and refrigerate it for up to 3 days before baking, simply cover it tightly with plastic wrap or aluminum foil to prevent drying out. Alternatively, assemble the roll-ups, place them in a baking dish, and freeze before baking for up to 1 month. When you're ready to enjoy a mouthwatering meal, bake directly from the freezer, adding 10-15 minutes to the cooking time. This way, you’ll have restaurant-quality flavors with minimal effort, making dinner stress-free and delicious!

Pepperoni Pizza Lasagna Roll Ups Recipe FAQs

What should I look for when selecting lasagna noodles?
When choosing lasagna noodles, look for ones that are firm and unbroken; they should not have dark spots or signs of damage. If you're short on time, no-cook noodles are a convenient option that yield excellent results without sacrificing flavor or texture.

How should I store leftover Pepperoni Pizza Lasagna Roll Ups?
Store any leftover roll-ups in an airtight container in the fridge for up to 3 days. To reheating, preheat your oven to 350°F (175°C) and cover the dish with aluminum foil to keep them moist. Bake for about 20 minutes, or until warm and bubbly.

Can I freeze Pepperoni Pizza Lasagna Roll Ups, and how do I do it?
Absolutely! For freezing, assemble the roll-ups without baking them. Lay them in a single layer on a baking sheet and freeze until firm. Then, transfer them to a freezer-safe container or bag for long-term storage, where they can last up to 3 months. When you're ready to cook, bake them straight from the freezer, adding an additional 10 minutes to the baking time.

What can I do if my lasagna noodles tear during assembly?
If your lasagna noodles tear while rolling, don’t worry! You can patch them by simply using a smaller piece to cover the tear or use the damaged noodle as an added layer in the baking dish. Just make sure the filling is tightly packed so the flavor and texture still shine through.

Are there any dietary considerations for these roll-ups?
Yes! If you're making these for someone with dietary restrictions, consider using dairy-free cheese substitutes for a vegan option, or opt for turkey pepperoni to keep it lean. Always check ingredient labels to avoid allergens, particularly if cooking for children or guests with food sensitivities.

Can I customize the filling in these roll-ups?
The more the merrier! Feel free to experiment by adding cooked vegetables like spinach, mushrooms, or bell peppers directly into the ricotta filling. You could also replace pepperoni with cooked ground beef or chicken for a different protein experience. Just ensure to maintain balance by not overloading the noodles.

Pepperoni Pizza Lasagna Roll Ups

Pepperoni Pizza Lasagna Roll Ups: Family Comfort Food Redefined

Easy Pepperoni Pizza Lasagna Roll Ups offer a delightful twist on two classic favorites, perfect for busy weeknights.
Print Recipe Pin Recipe
Prep Time 10 minutes mins
Cook Time 20 minutes mins
Total Time 30 minutes mins
Servings: 4 rolls
Course: Dinner
Cuisine: Italian
Calories: 350
Ingredients Equipment Method Nutrition Notes

Ingredients
  

For the Roll Ups
  • 12 noodles Lasagna traditional or no-cook noodles
  • 15 oz Ricotta Cheese can substitute with cottage cheese
  • 8 oz Mozzarella Cheese part-skim or dairy-free variants
  • 4 oz Pepperoni swap for salami or turkey pepperoni
  • 2 cups Marinara Sauce pizza sauce is an alternative
  • 1 tsp Italian Seasoning substitute with fresh basil or oregano

Equipment

  • Large pot
  • Mixing Bowl
  • Baking Dish
  • Colander
  • Spatula

Method
 

Step-by-Step Instructions
  1. Bring a large pot of salted water to a boil and cook the lasagna noodles until al dente, about 10 minutes. Stir occasionally to prevent sticking, then drain them in a colander and gently rinse with cold water to stop the cooking process. Lay the noodles flat on a clean kitchen towel to keep them from sticking together as you prepare the filling.
  2. In a mixing bowl, combine the ricotta cheese with Italian seasoning until well blended. Spread an even layer of the ricotta mixture over each lasagna noodle.
  3. Sprinkle sliced pepperoni evenly over the ricotta-covered noodles.
  4. Starting from one end, carefully roll each noodle up tightly, securing the cheese and pepperoni inside. Place each lasagna roll seam-side down in a greased baking dish.
  5. Pour marinara sauce evenly over the assembled roll ups, then sprinkle mozzarella cheese atop the sauce.
  6. Preheat your oven to 350°F (175°C) and bake the assembled roll ups for 15-20 minutes until the cheese is bubbly and slightly golden.
  7. Remove from the oven and let it cool for a few minutes before serving. Enjoy!

Nutrition

Serving: 1rollCalories: 350kcalCarbohydrates: 40gProtein: 20gFat: 15gSaturated Fat: 8gPolyunsaturated Fat: 1gMonounsaturated Fat: 4gCholesterol: 50mgSodium: 800mgPotassium: 400mgFiber: 3gSugar: 4gVitamin A: 15IUVitamin C: 5mgCalcium: 25mgIron: 10mg

Notes

These lasagna roll ups are great for make-ahead meals. You can freeze unbaked roll ups for up to a month and bake from frozen.

Tried this recipe?

Let us know how it was!

Crispy Crunchwrap Supreme: Your Homemade Taco Delight

January 13, 2026 by Grace Snow Leave a Comment

As I stood in my kitchen, the scent of simmering taco seasoning wafted through the air, instantly transporting me to my favorite fast-food joint. This Copycat Crunchwrap Supreme captures all the crispy, savory joy of the original, but with a homemade twist that allows you to control every tasty layer. Perfect for busy weeknights or a weekend treat, this high-protein delight not only satisfies cravings but also makes meal prep a breeze. Bursting with flavorful ingredients like lean ground beef, fresh lettuce, and gooey nacho cheese, it’s a kid-friendly dish that even picky eaters will love. Curious how this delicious crunchwrap comes together? Let’s dive into the recipe!

Why Make Your Own Crunchwrap Supreme?

Homemade goodness: There’s something special about crafting your own meal, especially one as satisfying as a Crunchwrap Supreme. Healthier options: You can choose lean meats and fresh ingredients, making it a guilt-free indulgence. Kid-friendly fun: Kids love the layers of vibrant ingredients; it's a meal they can help assemble! Meal prep friendly: Whip up a batch ahead of time – perfect for busy days. Deliciously versatile: Customize with your favorite toppings or proteins, and enjoy a unique twist on each wrap. So, if you love fast food flavors but crave home cooking, this Crunchwrap Supreme is calling your name!

Crunchwrap Supreme Ingredients

For the Filling
• Extra-lean ground beef – This will be your main protein, providing rich flavor; opt for ground turkey for a leaner choice.
• Taco seasoning – Essential for that signature flavor; feel free to use your favorite homemade blend for a personal touch.
• Nacho cheese sauce – Adds creaminess and cheesy goodness; swapping in shredded cheese or queso is a great alternative.

For the Wrap
• Flour tortillas – These form the wrap; large tortillas work best for easy folding, while corn or whole wheat may not seal as well.
• Tostadas (or unsalted tortilla chips) – Provide the all-important crunch layer for your Crunchwrap Supreme.

For the Fresh Ingredients
• Sour cream – Brings creaminess to each bite; low-fat options are available for a lighter dish.
• Iceberg lettuce – Adds freshness and crunch; shredded romaine is a fine substitute.
• Plum tomato – Juicy and vibrant, adding color and taste; if you prefer, you can replace it with beefsteak tomatoes or omit altogether.
• Cheddar cheese – Offers rich flavor and meltability; Tex Mex blend or Monterey Jack are delicious alternatives.

For Cooking
• Cooking spray – Vital for frying, ensuring a beautifully crispy exterior on your Crunchwrap Supreme.

With these ingredients on hand, you're ready to transform your kitchen into a fast-food haven! Embrace the possibility of customizing each layer, creating a unique Crunchwrap Supreme that reflects your taste.

Step‑by‑Step Instructions for Copycat Crunchwrap Supreme

Step 1: Prepare the beef
In a medium skillet over medium-high heat, sauté the extra-lean ground beef along with taco seasoning for about 7-8 minutes until fully cooked and browned. Use a wooden spoon to break up the meat as it cooks, ensuring even browning and thorough flavor infusion. Once ready, set the skillet aside and let the beef mixture cool slightly.

Step 2: Cut tortillas
Take four large flour tortillas and stack them neatly. Place a tostada in the center and use a sharp knife to cut around it, creating four smaller circular tortillas. This will provide the perfect base for your Crunchwrap Supreme, allowing for easy layering of flavors while maintaining structural integrity.

Step 3: Assemble Crunchwraps
On one large tortilla, begin layering your Copycat Crunchwrap Supreme by adding a generous scoop of the seasoned ground beef first. Next, drizzle on some nacho cheese, then carefully place a tostada on top. Add a dollop of sour cream, followed by a handful of shredded lettuce, diced plum tomatoes, and sprinkle some cheddar cheese atop these fresh ingredients before finishing with a smaller tortilla.

Step 4: Fold and cook
Bring the edges of the large tortilla over the smaller one, folding them carefully to encase the filling and form a hexagon shape. In a heated skillet, spritz some cooking spray and place the folded crunchwrap seam-side down. Cook for about 2-3 minutes on each side, or until golden brown and crispy. Use a spatula to hold it in place and achieve an even crust.

Step 5: Serve
Once both sides are beautifully golden and crispy, remove the Crunchwrap Supreme from the skillet. Carefully cut it in half with a sharp knife to reveal the delightful layers inside. Serve warm for a satisfying meal that mirrors the flavors of your favorite fast-food treat with a homemade twist!

Helpful Tricks for Crunchwrap Supreme

  • Layer Smartly: Always place wet ingredients like sour cream inside the tostada to avoid sogginess and leaks.

  • Check Crispiness: Keep a close eye while frying; adjust time as needed since each stovetop varies in heat intensity.

  • Protein Swaps: For a vegetarian twist, replace ground beef with lentils or beans for a nutritious and satisfying Crunchwrap Supreme.

  • Baking Option: If you prefer a healthier method, bake your assembled crunchwraps at 400°F for 10-15 minutes, flipping halfway for even browning.

  • Ingredient Prep: Prepare your filling ahead of time; store it in the fridge for up to 5 days for effortless meal prep on busy nights.

What to Serve with Copycat Crunchwrap Supreme

Imagine a cozy meal with flavors and textures that bring everyone together for a delightful feast.

  • Zesty Salsa: A fresh salsa adds acidity to your meal, cutting through the richness of the crunchwrap and enhancing every bite.
  • Creamy Guacamole: The smooth avocado dip complements the crunchiness of the wrap, providing a luxurious texture that delights the palate.
  • Chilled Mexican Street Corn: This creamy and spicy corn dish brings brightness and sweetness, balancing the savory flavors of the crunchwrap beautifully.
  • Pico de Gallo: Vibrant and refreshing, this mix of tomatoes, onions, and cilantro adds a burst of freshness, elevating your meal with every scoop.
  • Crisp Side Salad: Tossed greens dressed with lime vinaigrette provide a light contrast to the hearty crunchwrap, making the meal feel balanced and wholesome.
  • Spicy Tortilla Chips: A crunchy side that adds extra texture and warmth, perfect for dipping into guacamole or salsa for a fun contrast.
  • Refreshing Lemonade: A cold drink like lemonade brings a sweet and tangy note, perfectly complementing the savory ingredients and making it a hit with everyone.
  • Brownies for Dessert: End the meal on a sweet note with fudgy brownies, their rich chocolate flavor a delightful way to wrap up your dinner.
  • Fruit Salad: A simple fruit salad offers a refreshing finish, lightening the meal and providing a sweet contrast to the savory crunchwrap.
  • Sparkling Water: Crisp and effervescent, it cleanses the palate between bites and enhances the flavors of your homemade crunchwrap.

Crunchwrap Supreme Variations & Substitutions

Feel free to get creative and make this Crunchwrap Supreme your own with these delightful tweaks!

  • Lean Protein: Substitute ground beef with ground chicken or turkey for a lighter dish. These options retain flavor while lowering fat content.

  • Vegan Delight: For a plant-based version, replace meat with refried beans or lentils. It adds great texture and is packed with protein!

  • Cheesy Choices: Swap nacho cheese for a creamy homemade queso dip or extra shredded cheese to elevate the cheesy goodness. More cheese means more comfort!

  • Extra Crunch: Add crushed tortilla chips inside for an additional layer of crunch. They create an exciting surprise in every bite.

  • Fresh Veggies: Boost freshness with diced peppers, corn, or spinach. These vibrant additions not only enhance nutrition but also add color and flavor.

  • Spicy Kick: Want some heat? Toss in sliced jalapeños or a splash of your favorite hot sauce. This little change will spice things up beautifully!

  • Herbaceous Twist: Try adding fresh cilantro or green onions for a fresh taste explosion. These herbs can elevate your Crunchwrap to new flavorful heights.

  • Serving Ideas: Pair with a side of guacamole or homemade salsa for a complete meal. Not only do they add freshness, but they also complement the crunchwrap deliciously.

Make Ahead Options

These Copycat Crunchwrap Supremes are perfect for meal prep enthusiasts! You can prepare the seasoned ground beef up to 3 days in advance, storing it in an airtight container in the refrigerator to maintain its flavor and moisture. Additionally, you can cut your tortillas and assemble your Crunchwraps, but it's best to keep the fresh ingredients (like lettuce and tomato) separate until just before serving to prevent sogginess. When you're ready to enjoy, simply heat the Crunchwraps in a skillet for about 2-3 minutes per side until golden brown and crispy, achieving that restaurant-quality result with minimal effort. Preparing ahead not only saves time but also makes weekdays less hectic, while still delivering a delicious homemade meal!

Storage Tips for Crunchwrap Supreme

Fridge: Store leftover Crunchwrap Supreme in an airtight container for up to 3 days. To maintain freshness, avoid stacking them directly on top of each other.

Freezer: Wrap individual crunchwraps in foil or plastic wrap, then place them in a zip-top freezer bag. They can be frozen for up to 2 months.

Reheating: For the best results, reheat frozen Crunchwrap Supremes in the oven at 375°F for about 15-20 minutes or until heated through. This keeps the wrap crispy.

Assembling Ahead: Prepare fillings and store them separately in the fridge for up to 5 days. Assemble and cook your Crunchwrap just before serving for maximum freshness and taste.

Crunchwrap Supreme Recipe FAQs

What kind of ground beef should I use for my Crunchwrap Supreme?
Absolutely! For a deliciously satisfying Crunchwrap Supreme, I recommend using extra-lean ground beef for the best flavor and texture. However, you can also substitute it with ground turkey if you prefer a leaner option or opt for plant-based proteins like lentils or black beans for a vegetarian version.

How should I store leftover Crunchwrap Supremes?
To keep your leftover Crunchwrap Supreme fresh, store it in an airtight container in the fridge for up to 3 days. Make sure to separate layers with parchment paper to prevent them from sticking together. When you’re ready to enjoy, simply reheat it in a skillet or oven to retain that crispy texture!

Can I freeze Crunchwrap Supremes?
Very! You can absolutely freeze your assembled Crunchwraps. Here’s how: Wrap each Crunchwrap individually in foil or plastic wrap, then place them in a zip-top freezer bag. They’ll stay good in the freezer for up to 2 months. When you’re ready to eat, reheat them in a preheated oven at 375°F for about 15-20 minutes until heated through.

What should I do if my Crunchwraps aren’t crispy enough?
If your Crunchwraps are coming out soggy, check your layering process: always place wet ingredients like sour cream inside the tostada to prevent leaks. Additionally, ensure that your skillet is hot enough before adding the crunchwrap and fry for about 2-3 minutes on each side until golden brown. If you notice they're not browning well, try adjusting the cooking time or increasing the heat slightly.

Are there any dietary considerations I need to keep in mind?
Definitely! If you're making Crunchwrap Supremes for a group, be mindful of any food allergies, especially regarding dairy products like sour cream and cheese. You can easily swap these out for non-dairy alternatives or simply omit them for a lighter version. Additionally, always double-check that your taco seasoning is gluten-free if that’s a concern for anyone.

How can I make my Crunchwrap Supreme more kid-friendly?
If you want to make your Crunchwrap Supreme appealing to picky eaters, consider simplifying the ingredients. You can omit the tomatoes or replace them with favorite veggies, like diced bell peppers or corn. Feel free to allow kids to customize their own crunchwraps; they’ll enjoy the process and may be more willing to try it!

Crunchwrap Supreme

Crispy Crunchwrap Supreme: Your Homemade Taco Delight

Enjoy a homemade twist on the classic Crunchwrap Supreme, packed with flavor and freshness.
Print Recipe Pin Recipe
Prep Time 15 minutes mins
Cook Time 10 minutes mins
Total Time 25 minutes mins
Servings: 4 wraps
Course: Dinner
Cuisine: Mexican
Calories: 450
Ingredients Equipment Method Nutrition Notes

Ingredients
  

Filling
  • 1 lb extra-lean ground beef or ground turkey for a leaner choice
  • 2 tbsp taco seasoning homemade blend option available
  • 1 cup nacho cheese sauce or shredded cheese/queso
Wrap
  • 4 large flour tortillas large tortillas work best
  • 4 pcs tostadas or unsalted tortilla chips
Fresh Ingredients
  • 1/2 cup sour cream low-fat options available
  • 1 cup shredded iceberg lettuce romaine is a substitute
  • 1 medium plum tomato or beefsteak tomatoes
  • 1 cup cheddar cheese Tex Mex blend or Monterey Jack are alternatives
Cooking
  • 1 tbsp cooking spray for frying

Equipment

  • medium skillet
  • Sharp Knife
  • Spatula

Method
 

Preparation
  1. In a medium skillet over medium-high heat, sauté the extra-lean ground beef along with taco seasoning for about 7-8 minutes until fully cooked and browned.
  2. Take four large flour tortillas and stack them neatly. Place a tostada in the center and use a sharp knife to cut around it, creating four smaller circular tortillas.
  3. On one large tortilla, layer your Copycat Crunchwrap Supreme by adding a generous scoop of the seasoned ground beef first.
  4. Drizzle on some nacho cheese, then carefully place a tostada on top. Add a dollop of sour cream, followed by a handful of shredded lettuce, diced plum tomatoes, and sprinkle some cheddar cheese.
  5. Bring the edges of the large tortilla over the smaller one, folding them to encase the filling to form a hexagon shape.
  6. In a heated skillet, spritz some cooking spray and place the folded crunchwrap seam-side down. Cook for about 2-3 minutes on each side, or until golden brown and crispy.
  7. Remove the Crunchwrap Supreme from the skillet and cut it in half to reveal the layers.

Nutrition

Serving: 1wrapCalories: 450kcalCarbohydrates: 35gProtein: 28gFat: 25gSaturated Fat: 10gPolyunsaturated Fat: 2gMonounsaturated Fat: 5gCholesterol: 70mgSodium: 800mgPotassium: 600mgFiber: 3gSugar: 2gVitamin A: 20IUVitamin C: 10mgCalcium: 30mgIron: 15mg

Notes

Layer wet ingredients wisely and consider baking for a healthier option. Ingredients can be prepped ahead for convenience.

Tried this recipe?

Let us know how it was!

Pepperoni Pizza Caesar Wraps for a Fun Dinner Twist

January 13, 2026 by Grace Snow Leave a Comment

A casual crunch echoed in my kitchen as I whipped together a quick dinner—a glorious blend of two favorites: pizza and Caesar salad. Meet my Cheesy Pepperoni Pizza Caesar Wraps, a delicious fusion that's as fun to make as it is to eat. This delightful recipe can be ready in under 10 minutes, making it perfect for any evening when time is tight but the desire for a home-cooked meal is strong. Plus, they’re endlessly customizable—swap in gluten-free tortillas or turkey pepperoni to suit your preferences! Whether you’re cooking for family or just treating yourself, these wraps promise an uncomplicated yet satisfying experience. Ready to take a bite into this flavor-packed adventure? Let's dive in!

Why Are These Wraps So Irresistible?

Simplicity at its finest: With just a handful of ingredients, you can whip up these Pepperoni Pizza Caesar Wraps in under 10 minutes!

Versatile and customizable: Feel free to swap in your favorite protein or sauce, like grilled chicken over turkey pepperoni or even ranch dressing to spice things up.

Crunchy and creamy: The combination of warm, melty cheese and crisp Caesar salad adds an extraordinary layer of texture, making each bite a delightful surprise.

Crowd-pleasing comfort: These wraps appeal to everyone from kids to adults, making them a perfect option for family dinners or fun gatherings.

Healthy options abound: Choose whole wheat, low-carb, or gluten-free tortillas to cater to dietary needs while enjoying all the flavors of pizza and salad in one dish.

For similar delicious recipes, try my Buffalo Tofu Caesar or explore the cheesy goodness of Blue Cheese Pizza.

Pepperoni Pizza Caesar Wraps Ingredients

  • For the Wraps

  • Tortilla Wraps – Use whole wheat, spinach, or gluten-free variants for added nutrition.

  • Marinara Sauce – Adds moisture and flavor; feel free to substitute with pesto or alfredo.

  • For the Filling

  • Mozzarella Cheese – Provides creaminess; can be swapped with provolone, cheddar, or vegan cheese.

  • Turkey Pepperoni – Classic pepperoni flavor; substitute with grilled chicken or veggie sausage for a different twist.

  • For the Salad

  • Caesar Salad Mix – A crunchy, flavorful blend; you can use a bagged mix or make your own with romaine and dressing.

  • Salt and Pepper – Essential for seasoning the salad mix to enhance each bite.

Step‑by‑Step Instructions for Pepperoni Pizza Caesar Wraps

Step 1: Preheat and Prepare
Begin by preheating your broiler to high. While it heats, line a baking sheet with parchment paper to prevent sticking and ease cleanup. This step sets the stage for your Pepperoni Pizza Caesar Wraps by ensuring that when you add your ingredients, they’ll crisp up nicely and melt together perfectly.

Step 2: Assemble the Tortillas
Arrange your tortilla wraps on the prepared baking sheet, ensuring they’re flat and ready to hold the fillings. Evenly spread a generous layer of marinara sauce across each tortilla, reaching all the way to the edges. This sauce not only flavors the wraps but also keeps everything moist while cooking.

Step 3: Add Cheese and Pepperoni
Sprinkle a handful of mozzarella cheese over the marinara sauce on each tortilla. Make sure to distribute it evenly for maximum meltiness. Next, layer on the turkey pepperoni, covering the cheese. The combination of cheese and pepperoni is crucial for achieving that delightful pizza flavor in your wraps.

Step 4: Broil to Perfection
Place the baking sheet on the bottom rack of the preheated broiler. Broil for 3-5 minutes, keeping a watchful eye until the cheese is gooey and bubbly, and the pepperoni starts to crisp up. This quick cooking method creates a delicious texture that mirrors your favorite pizza.

Step 5: Toss the Caesar Salad
While your wraps are broiling, take a mixing bowl and toss the Caesar salad mix with a pinch of salt and pepper. This simple seasoning will enhance the freshness of the greens, making each bite of your Pepperoni Pizza Caesar Wraps crisp and flavorful. Let the mix sit briefly to allow the flavors to meld.

Step 6: Fill and Roll the Wraps
Once the wraps are done broiling, allow them to cool for a minute for safe handling. Then, take a portion of the Caesar salad and place it on each tortilla. Roll them up tightly into wraps, keeping all that delightful filling secure inside. The warm wraps combined with the cold salad create a satisfying contrast.

Step 7: Serve Immediately
Slice the Pepperoni Pizza Caesar Wraps in half to reveal the gooey, delicious filling. Serve them right away while they’re still warm and crispy for the best experience. These flavorful wraps are perfect as a quick dinner option or as a tasty snack for gatherings, ready to enjoy in under 10 minutes!

Expert Tips for Pepperoni Pizza Caesar Wraps

  • Keep It Crisp: Ensure to toss the Caesar salad separately and only add it to wraps right before serving to maintain that delightful crunch.

  • Avoid Sogginess: Don’t store fully assembled wraps; this will lead to gummy lettuce. Instead, keep components separate until you’re ready to enjoy.

  • Tortilla Size Matters: Choose large enough tortillas so they can hold the filling without tearing; no one wants a leaking wrap!

  • Watch the Broil: Keep a close eye on your wraps while broiling to prevent burning. The cheese should melt and get bubbly without charring.

  • Customize Your Flavors: Experiment with different sauces, like ranch or BBQ, and proteins to make your Pepperoni Pizza Caesar Wraps your own!

Make Ahead Options

These Pepperoni Pizza Caesar Wraps are a fantastic meal prep option for busy weeknights! You can prep the marinara sauce and cheese layers up to 24 hours in advance by assembling them on the tortillas and covering them tightly with plastic wrap. Additionally, the Caesar salad mix can be prepped up to 3 days ahead—simply store it in an airtight container in the fridge to keep it crisp. When you’re ready to enjoy, broil the wraps as directed, then add the prepared salad just before serving. This way, you'll savor the warm, cheesy goodness alongside the refreshing crunch, all without the fuss!

Pepperoni Pizza Caesar Wraps Variations

Feel free to unleash your creativity and customize these wraps with these fantastic alternatives!

  • Gluten-Free: Use gluten-free tortillas to enjoy these tasty wraps without the gluten. They’re just as flavorful and satisfying!

  • Spicy Twist: Add jalapeños or a drizzle of hot sauce for an exciting kick, enhancing the overall flavor profile and satisfying heat seekers.

  • Extra Veggies: Incorporate fresh vegetables like spinach, diced bell peppers, or olives into your Caesar salad for added nutrition and crunch.

  • Different Proteins: Swap turkey pepperoni for grilled chicken or veggie sausage for an unexpected twist that caters to various dietary preferences.

  • Creamy Dressing: Change out the Caesar salad dressing for ranch or blue cheese dressing to create a new flavor profile that works wonderfully.

  • Vegan Option: Use vegan cheese and non-dairy tortillas, ensuring everyone can indulge in this delightful meal without sacrificing flavor.

  • Zesty Sauce: Experiment with different sauces like barbecue or buffalo sauce to surprise your taste buds and give the wraps a fresh zing!

For other delicious ideas, you might also enjoy my Buffalo Tofu Caesar or try the mouthwatering flavors in a Blue Cheese Pizza.

What to Serve with Pepperoni Pizza Caesar Wraps

Nothing complements the delightful crunch of these wraps quite like the perfect side dish or drink, so let’s explore some delicious options!

  • Garlic Knots: These warm, buttery bites are a crowd-pleaser and are perfect for dipping into marinara sauce, enhancing the Italian flavors.

  • Crispy Sweet Potato Fries: The sweetness and crunch of these fries provide a wonderful balance to the savory wraps, leaving you wanting more.

  • Caesar Salad: A classic choice, this salad echoes the fresh flavors of the wraps and adds an extra layer of Caesar deliciousness to your meal.

  • Bruschetta: Topped with fresh tomatoes and basil, this refreshing appetizer brings vibrant flavors to your table and complements the Italian theme beautifully.

  • Stuffed Mushrooms: Filled with cream cheese and herbs, these savory bites are a delightful addition, offering a warm contrast to the coolness of your Caesar salad within the wraps.

  • Sparkling Lemonade: A refreshing, fizzy drink with a hint of tartness brightens the meal, cutting through the creaminess of the wraps wonderfully.

  • Chocolate Chip Cookies: For dessert, these classic treats offer a sweet ending to your meal, creating a joyful experience with familiar flavors.

Each of these suggestions pairs seamlessly with your Pepperoni Pizza Caesar Wraps, elevating your dining experience!

How to Store and Freeze Pepperoni Pizza Caesar Wraps

Fridge: Store unassembled components in airtight containers in the fridge for up to 3 days. This keeps your Pepperoni Pizza Caesar Wraps fresh and ready to assemble when you're hungry.

Freezer: If you want to prepare ahead, freeze the individual tortilla wraps (filled with cheese and pepperoni only) wrapped tightly in plastic wrap for up to 1 month.

Reheating: To enjoy again, reheat the frozen wraps in an oven or air fryer at 350°F for about 10-12 minutes until warmed through and crispy.

Salad Storage: Keep the Caesar salad mix stored separately in the fridge to maintain its crunch, adding it to the wraps just before serving for the best experience.

Pepperoni Pizza Caesar Wraps Recipe FAQs

What type of tortillas should I use for the wraps?
Absolutely! You can use a variety of tortillas for your Pepperoni Pizza Caesar Wraps, including whole wheat, spinach, low-carb, or gluten-free options. The choice depends on your dietary preferences—each type provides a unique flavor and texture, making the wraps even more delightful!

How should I store the components after making the wraps?
To keep everything fresh, store the unassembled components—tortillas, cheese, pepperoni, and sauce—in airtight containers in the fridge for up to 3 days. This allows you to enjoy freshly assembled wraps whenever you're ready, without sacrificing flavor or quality!

Can I freeze the wraps? If so, how?
Yes, you can freeze the wraps! I recommend wrapping the individual tortilla filled with cheese and pepperoni tightly in plastic wrap. Store them in an airtight container or freezer bag for up to 1 month. To reheat, place the frozen wraps in an oven or air fryer at 350°F for approximately 10-12 minutes until they're warmed through and crispy.

What should I do if the wraps get soggy?
To prevent sogginess, avoid storing fully assembled wraps. Instead, keep the Caesar salad mix separate until you’re ready to serve. This ensures the lettuce stays crisp and prevents moisture from making the wraps soggy. Always add the salad just before rolling up the tortillas!

Are there any dietary restrictions I should consider?
Definitely! If you're cooking for someone with allergies or specific dietary needs, be mindful of the ingredients. For gluten-free options, use gluten-free tortillas and ensure your marinara sauce is also free from gluten. If someone is avoiding meat, feel free to substitute turkey pepperoni with grilled chicken, veggie sausage, or even a mix of your favorite vegetables.

How can I customize the flavor of my wraps?
Very! You can switch out the marinara sauce for alternatives like pesto, alfredo, or barbecue sauce for a different taste profile. Additionally, try adding extra veggies like bell peppers or spinach into your wraps for added nutrition and flavor. These adaptations can make your Pepperoni Pizza Caesar Wraps even more enjoyable and tailored to your liking!

Pepperoni Pizza Caesar Wraps

Pepperoni Pizza Caesar Wraps for a Fun Dinner Twist

Delight in these Pepperoni Pizza Caesar Wraps, a fun and quick dinner fusion of pizza and Caesar salad.
Print Recipe Pin Recipe
Prep Time 5 minutes mins
Cook Time 5 minutes mins
Total Time 10 minutes mins
Servings: 2 wraps
Course: Dinner
Cuisine: American
Calories: 400
Ingredients Equipment Method Nutrition Notes

Ingredients
  

For the Wraps
  • 2 tortilla wraps whole wheat, spinach, or gluten-free variants
  • 0.5 cup marinara sauce or substitute with pesto or alfredo
For the Filling
  • 1 cup mozzarella cheese or substitute with provolone, cheddar, or vegan cheese
  • 4 oz turkey pepperoni or substitute with grilled chicken or veggie sausage
For the Salad
  • 1 cup Caesar salad mix or make your own with romaine and dressing
  • to taste salt and pepper

Equipment

  • Baking Sheet
  • Mixing Bowl

Method
 

Step-by-Step Instructions
  1. Preheat your broiler to high and line a baking sheet with parchment paper.
  2. Arrange your tortilla wraps on the baking sheet and spread marinara sauce on each.
  3. Add mozzarella cheese evenly over the sauce, then layer turkey pepperoni on top.
  4. Broil for 3-5 minutes until cheese is gooey and bubbly.
  5. Toss Caesar salad mix with salt and pepper while wraps are broiling.
  6. After broiling, cool the wraps for a minute, then add Caesar salad and roll up tightly.
  7. Slice in half and serve immediately while warm and crispy.

Nutrition

Serving: 1wrapCalories: 400kcalCarbohydrates: 40gProtein: 20gFat: 20gSaturated Fat: 10gPolyunsaturated Fat: 2gMonounsaturated Fat: 5gCholesterol: 40mgSodium: 800mgPotassium: 300mgFiber: 3gSugar: 2gVitamin A: 500IUVitamin C: 10mgCalcium: 300mgIron: 2mg

Notes

Keep salad separate until serving for maximum crunch. Store components separately to avoid sogginess.

Tried this recipe?

Let us know how it was!

Homemade Doner Kebab: Juicy Flavor Everyone Will Love

January 13, 2026 by Grace Snow Leave a Comment

The aroma of seasoned meat drifting from the oven transports me straight to bustling Turkish street vendors, where luscious doner kebabs sizzle and swirl. Today, I’m excited to share my take on the viral homemade doner kebab, a delightful dish that turns your kitchen into a culinary adventure. Using the ingenious "meat sheet" method, this recipe not only delivers juicy, flavor-packed bites but also makes preparation a breeze, perfect for fellow home-chefs tired of fast food. Customizable to your taste, you can swap in different meats, like beef, lamb, or even chicken, ensuring everyone at your table finds their own perfect wrap. Get ready to impress your friends and family with this irresistible homemade doner kebab—dare I say, it’ll become your new go-to street food treat? What exciting toppings and sauces will you try?

Why You'll Crave This Doner Kebab?

Simplicity at Its Best: The clever "meat sheet" method means easy preparation without the need for complex tools, making it beginner-friendly.

Customizable Delight: Whether you prefer beef, lamb, or chicken, this recipe adapts to your taste. Feel free to experiment with different spices and sauces for a unique flavor profile every time.

Perfect for Any Meal: Serve it for lunch, dinner, or even a fun family gathering. Your family and friends will rave about this tasty homemade version that rivals any takeout!

Fresh and Flavorful: With crunchy lettuce, zesty pickles, and enriching sauces like tzatziki, every bite hits the mark.

Make-Ahead Magic: You can prepare the meat sheets ahead of time, saving precious minutes on busy weeknights. It’s perfect for planning ahead without sacrificing flavor!

Combine it with a refreshing Mediterranean chickpea salad for a meal that’s both hearty and satisfying. Don’t forget, leftovers can be enjoyed for days!

Homemade Doner Kebab Ingredients

  • For the Meat Mixture

  • Ground Beef or Lamb – Primary protein source; a 70/30 mix provides rich flavor, while lean meats may require added fat for juiciness.

  • Onion – Adds moisture and flavor; grate it for even distribution throughout the meat.

  • Garlic Cloves – Essential for flavor; fresh, grated garlic yields the best taste.

  • Plain Yogurt – Enhances moisture and tenderness; substitute with mayonnaise for a dairy-free option.

  • Olive Oil – Keeps the kebab juicy; any neutral oil works as a substitute.

  • Salt and Pepper – Essential for seasoning; adjust to taste for the best flavor.

  • Cumin – Adds warmth; feel free to adjust based on your taste preferences.

  • Sweet Paprika – Provides color and a mild sweetness; swap for hot paprika if you prefer heat.

  • Oregano – Complements the meat with herby notes; dried oregano works perfectly here.

  • Cayenne Pepper – Optional heat; adjust based on your spice tolerance.

  • Tomato Paste or BBQ Sauce – Enhances flavor and moisture in the mix; choose based on your preferred flavor profile.

  • For Serving

  • Warm Pita or Tortilla – Perfect for serving; consider large tortillas for gluten-free options.

  • Shredded Lettuce or Cabbage – Adds a fresh crunch; use as desired.

  • Red Onion – Provides a sharp, crisp bite; serve sliced for added texture.

  • Pickles – Add a tangy contrast to the meat; optional but recommended.

  • Tahini Sauce – Rich and creamy; serve as a dipping sauce for extra delight.

  • Tzatziki – A cool, refreshing sauce; perfect for dressing your kebab.

  • Fresh Parsley – Optional garnish for freshness to elevate your dish.

Create your own Homemade Doner Kebab masterpiece with these delightful ingredients and make every meal a memorable one!

Step‑by‑Step Instructions for Homemade Doner Kebab

Step 1: Prepare Meat Mixture
Begin by combining your ground beef or lamb with grated onion, minced garlic, yogurt, tomato paste, salt, pepper, cumin, paprika, oregano, and olive oil in a large mixing bowl. Use your hands or a spoon to mix until the mixture becomes cohesive and sticky, which should take about 3-5 minutes. This meat mixture will form the heart of your homemade doner kebab, ensuring juicy and flavorful bites.

Step 2: Form Meat Sheet
Once your meat mixture is ready, divide it into five equal portions. Take one portion and place it between two sheets of parchment paper. Using a rolling pin, spread it into a thin rectangle, about 1/4 inch thick, ensuring even thickness throughout. This step is crucial for achieving that delicious texture once baked. Repeat the process with the remaining portions.

Step 3: Roll Up Meat Sheet
Carefully remove the top sheet of parchment paper from your rolled-out meat. Starting from one edge, tightly roll the meat sheet into a compact log, ensuring the ends are sealed. This roll will create the traditional shape of doner kebab, so press gently but firmly to avoid any gaps. Once you have a neat log, set it aside while you preheat the oven.

Step 4: Bake
Preheat your oven to 200°C (400°F). Place the rolled meat log on a baking tray lined with parchment paper, ensuring it doesn’t touch the sides. Bake in the preheated oven for 20-25 minutes, or until the outside is golden brown and slightly crispy. Keep an eye on it to avoid overbaking, as you want a juicy interior for your homemade doner kebab.

Step 5: Slice & Shred
After baking, remove the doner kebab from the oven and let it rest for about 5 minutes. This resting period helps the juices redistribute within the meat. Once cooled slightly, use a sharp knife to slice the meat thinly, simulating the traditional doner texture. For a rustic touch, use forks to shred the meat if preferred, achieving that delicious, tender consistency.

Step 6: Assemble
To serve your homemade doner kebab, take a warm pita or tortilla and fill it generously with the sliced meat. Add toppings like shredded lettuce, sliced red onion, and pickles for an exciting crunch. Drizzle with your favorite sauces, such as tzatziki or tahini, to enhance the flavors. Each bite will transport you to the vibrant streets of Turkey, making your homemade doner kebab a delightful meal.

Make Ahead Options

These homemade doner kebabs are a fantastic choice for meal prep enthusiasts! You can prepare the meat mixture and shape the meat sheets up to 24 hours in advance. Just cover them tightly in plastic wrap or place them in an airtight container in the refrigerator to keep them fresh and prevent browning. When you're ready to enjoy your doner kebabs, simply preheat the oven and bake the meat rolls as instructed. This way, you’ll have delicious, juicy doner kebabs ready to impress your family with minimal effort, making them perfect for busy weeknights or impromptu gatherings.

What to Serve with Homemade Doner Kebab?

The joy of a homemade doner kebab can be fully experienced when paired with the right sides and drinks that enhance every bite.

  • Creamy Tzatziki: A cool, yogurt-based sauce that brings refreshing flavor, balancing the spices of the kebab beautifully.
  • Mediterranean Chickpea Salad: Bursting with fresh veggies and herbs, this salad adds crunch and a burst of color to your meal, making it vibrant and nutritious.
  • Spicy Hummus: A creamy dip with depth and spice that pairs perfectly with warm pita, offering a delightful contrast to the kebab.
  • Crispy Roasted Potatoes: Seasoned and golden, these chunks provide a hearty texture that complements the tender meat, making for a satisfying feast.
  • Pickled Vegetables: Tangy and crunchy, these enhance the kebab’s savory flavors, adding an extra zing that keeps every bite exciting.
  • Garlic Lemon Rice: Fluffy and aromatic, this rice serves as a blank canvas to soak up flavors from the doner, creating a delicious harmony on your plate.
  • Bubbly Sparkling Water: Refreshing and effervescent, it cleanses your palate, allowing you to enjoy the flavors of the doner kebab to the fullest.
  • Baklava: A sweet ending with layers of flaky pastry and honey; it contrasts beautifully with the savory kebab, rounding out your meal with a touch of indulgence.
  • Summery Lemonade: Its citrusy zing adds a brightness to your meal, revitalizing your taste buds with each sip.

Embrace these delightful pairings, and watch how each one elevates your homemade doner kebab experience to culinary heights!

Expert Tips for Homemade Doner Kebab

  • Fat Matters: Aim for ground meat with 20-30% fat for optimal juiciness. If using leaner meats, consider adding extra olive oil to keep it moist.

  • Keep an Eye on Time: Overbaking can lead to dryness. Monitor the cooking closely to ensure the kebab remains tender and flavorful.

  • Perfect Thickness: Roll the meat sheet as thin as possible for that authentic doner kebab texture. Thinner layers roast beautifully, giving you crispy edges and tender meat.

  • Rest is Key: Allow the meat to rest for at least 5 minutes post-baking. This step helps retain moisture and enhances the overall flavor profile.

  • Experiment Freely: Don’t hesitate to play with spices and sauces. Customizing your homemade doner kebab allows you to tailor flavors to your liking, so enjoy the creative process!

Homemade Doner Kebab Variations & Substitutions

Feel free to get creative with your doner kebab by customizing the flavors and ingredients to suit your tastes!

  • Ground Chicken: Use ground chicken for a lighter option, but keep the juicy texture with added olive oil.

  • Spicy Twist: Mix in some chili flakes or switch to hot paprika for a delicious heat that elevates your kebab experience.

  • Herb Lovers: Add fresh herbs like cilantro or mint to the meat mixture for a refreshing, aromatic flavor.

  • Plant-Based: Try using a store-bought meat alternative or a mix of lentils and mushrooms for a vegan version that’s packed with flavor.

  • Sweet and Savory: Incorporate a tablespoon of honey or brown sugar to achieve a delightful balance of sweet and savory in your kebab.

  • Tangy Sauce: Swap the yogurt for a tangy vinaigrette to give your kebab a zesty kick, pairing beautifully with the garlic and spices.

  • Charred Veggie Addition: Roast some bell peppers or zucchini and toss them into your pita as a tasty way to add flavor and texture.

  • Extra Crunch: Boost the crunch factor by adding fried onions or crispy chickpeas on top before drizzling with your favorite sauces.

With these variations, your homemade doner kebab can serve as a canvas for some truly tantalizing flavors. Pair it with a refreshing Mediterranean chickpea salad for a well-rounded meal, or enjoy it topped with tzatziki for that cool, creamy bite. Let your culinary imagination run wild!

How to Store and Freeze Homemade Doner Kebab

Fridge: Store leftover homemade doner kebab in an airtight container for up to 4 days. This helps maintain its juicy flavor while keeping it fresh.

Freezer: For longer storage, wrap the sliced doner kebab tightly in plastic wrap, then place it in a freezer-safe bag. It will last for up to 3 months while preserving its taste and texture.

Reheating: When ready to enjoy, thaw in the fridge overnight. Reheat in an oven at 180°C (350°F) for about 10-15 minutes, or until warmed through. This keeps the doner kebab juicy and delicious!

Make-Ahead: You can prepare and shape the meat sheets up to 24 hours in advance and store them in the fridge, ready for baking whenever you crave your homemade doner kebab!

Homemade Doner Kebab Recipe FAQs

How do I choose the right ground meat for my doner kebab?
Absolutely! For the juiciest results, I recommend a combination of 70% ground beef and 30% ground lamb. This mix offers an incredible flavor and richness. If you prefer a leaner option, ground chicken or turkey can be used, but you might need to add extra olive oil to maintain juiciness.

How should I store leftover doner kebab?
Very! To keep your leftover homemade doner kebab fresh, store it in an airtight container in the fridge for up to 4 days. This method helps preserve its delightful juiciness while preventing dryness.

Can I freeze my homemade doner kebab?
Absolutely! To freeze, wrap the sliced doner kebab tightly in plastic wrap and then place it in a freezer-safe bag. It will last for up to 3 months. You can thaw it in the fridge overnight when ready to enjoy, followed by reheating in the oven for the best flavor and texture!

What if my kebab turns out dry after baking?
Don't worry! If this happens, it could be due to overbaking. Make sure to monitor the cooking time closely, ideally around 20–25 minutes at 200°C (400°F). Also, keep in mind that using meat with at least 20-30% fat content significantly contributes to juiciness. Consider adding olive oil to leaner meats to help with moisture too.

Can I make this recipe ahead of time?
Absolutely! You can prepare and shape the meat sheets up to 24 hours in advance. Just store them in the fridge until you're ready to bake. This way, you can save time during busy weeknights while still enjoying a flavorful homemade doner kebab.

Is there a dairy-free option for the yogurt in this recipe?
Very! If you’re looking for a dairy-free alternative, mayonnaise works wonderfully in this recipe. Just substitute it in equal amounts for the yogurt, and you’ll still get that delightful moisture and taste you desire in your homemade doner kebab.

Homemade Doner Kebab

Homemade Doner Kebab: Juicy Flavor Everyone Will Love

This homemade doner kebab recipe is a flavorful and juicy dish that captures the essence of Turkish street food.
Print Recipe Pin Recipe
Prep Time 15 minutes mins
Cook Time 25 minutes mins
Resting Time 5 minutes mins
Total Time 45 minutes mins
Servings: 4 wraps
Course: Dinner
Cuisine: Turkish
Calories: 450
Ingredients Equipment Method Nutrition Notes

Ingredients
  

Meat Mixture
  • 500 grams Ground Beef or Lamb A 70/30 mix provides rich flavor.
  • 1 medium Onion Grated for even distribution.
  • 3 cloves Garlic Fresh and grated for best taste.
  • 100 grams Plain Yogurt Substitute with mayonnaise for dairy-free.
  • 2 tablespoons Olive Oil Any neutral oil can work.
  • 1 teaspoon Salt Adjust to taste.
  • 1 teaspoon Pepper Adjust to taste.
  • 1 teaspoon Cumin Adjust based on taste preferences.
  • 1 teaspoon Sweet Paprika Swap for hot paprika if preferred.
  • 1 teaspoon Oregano Dried oregano works perfectly.
  • 1/2 teaspoon Cayenne Pepper Optional heat; adjust based on spice tolerance.
  • 2 tablespoons Tomato Paste or BBQ Sauce Choose based on preferred flavor.
For Serving
  • 4 pieces Warm Pita or Tortilla Large tortillas can be used for gluten-free.
  • 2 cups Shredded Lettuce or Cabbage Add as desired for freshness.
  • 1 medium Red Onion Sliced for texture.
  • 1 cup Pickles Optional but recommended.
  • 1/2 cup Tahini Sauce Serve as a dipping sauce.
  • 1/2 cup Tzatziki Perfect for dressing your kebab.
  • 1/4 cup Fresh Parsley Optional garnish for freshness.

Equipment

  • Mixing Bowl
  • Rolling Pin
  • Baking tray
  • Parchment Paper
  • Sharp Knife

Method
 

Preparation
  1. Combine ground beef or lamb, grated onion, minced garlic, yogurt, tomato paste, salt, pepper, cumin, paprika, oregano, and olive oil in a mixing bowl. Mix until cohesive and sticky, about 3-5 minutes.
  2. Divide meat mixture into five equal portions. Spread one portion between two sheets of parchment paper into a thin rectangle, about 1/4 inch thick.
  3. Remove the top sheet of parchment and tightly roll the meat sheet into a compact log, sealing the ends.
  4. Preheat oven to 200°C (400°F). Place rolled meat log on a baking tray lined with parchment paper and bake for 20-25 minutes until golden brown.
  5. Let the doner kebab rest for 5 minutes before slicing thinly or shredding with forks.
  6. Assemble kebabs with warm pita or tortilla, sliced meat, toppings (lettuce, red onion, pickles), and sauces (tzatziki or tahini).

Nutrition

Serving: 1wrapCalories: 450kcalCarbohydrates: 40gProtein: 25gFat: 25gSaturated Fat: 8gPolyunsaturated Fat: 2gMonounsaturated Fat: 10gCholesterol: 70mgSodium: 600mgPotassium: 600mgFiber: 3gSugar: 4gVitamin A: 500IUVitamin C: 5mgCalcium: 50mgIron: 3mg

Notes

For best results, opt for ground meat with 20-30% fat for juiciness. Monitor cooking time closely to prevent dryness. Customize spices and sauces to your liking.

Tried this recipe?

Let us know how it was!

Crispy Chicken Bacon Ranch Wrap: A Flavorful Family Favorite

January 13, 2026 by Grace Snow Leave a Comment

“Did you hear that sizzle?” That’s the sound of crispy chicken coming to life, and boy, does it set the stage for my ultimate Crispy Chicken Bacon Ranch Wrap. This creation isn’t just a convenient meal; it’s a canvas for your culinary creativity. With its crunchy, breaded chicken perfectly complemented by the rich bites of bacon and a swirl of creamy ranch, this wrap makes for an easy, family-friendly choice that’s as satisfying as your favorite takeout. What’s more, this recipe is quick to whip up, making it an ideal solution for those busy weeknights when you want something delicious without the fuss. Whether you're meal prepping for the week or serving it fresh for dinner, this wrap is about to become your go-to favorite. Ready to roll up those flavors? Let’s dive in!

Why is this wrap a must-try?

Quick and Easy: This Crispy Chicken Bacon Ranch Wrap can be made in just minutes, perfect for busy days. Flavor Explosion: The blend of crispy chicken, savory bacon, and creamy ranch creates a taste sensation that your family will love. Customizable: Switch up the ingredients with your favorite toppings, making it your own every time. Meal Prep Friendly: Prepare multiple wraps in advance for quick lunches or dinners throughout the week. Crowd-Pleaser: Whether for a family meal or a gathering with friends, this wrap is sure to impress and satisfy. Spice things up by pairing it with a delicious side like Crock Pot Chicken or add a twist with some Honey Garlic Chicken Thighs!

Crispy Chicken Bacon Ranch Wrap Ingredients

For the Wrap
• Large flour tortillas – The perfect wrap base; try whole wheat or spinach tortillas for added nutrition.
• Chopped crispy chicken – Adds both protein and crunch; feel free to use fried, baked, or grilled chicken for your preference.
• Crispy bacon – Delivers that rich flavor and delightful crunch; swap for turkey bacon for a leaner option.
• Shredded cheese – Brings that creamy dimension; cheddar works beautifully, or choose dairy-free cheese for a lactose-free alternative.

For the Fresh Veggies
• Lettuce – Provides a refreshing crunch; you can't go wrong with romaine or iceberg.
• Tomato – Adds juicy sweetness; cherry tomatoes can make a great alternative if you prefer smaller bites.

For the Dressing
• Ranch dressing – The star of the show; substitute with dairy-free ranch for a vegan-friendly approach.

Now you’re all set to gather your ingredients and create a deliciously satisfying Crispy Chicken Bacon Ranch Wrap!

Step‑by‑Step Instructions for Crispy Chicken Bacon Ranch Wrap

Step 1: Warm the Tortillas
Start by warming your large flour tortillas to make them pliable and easy to roll. You can do this by microwaving them for about 15-20 seconds or briefly heating them in a skillet over medium heat until they're soft and warm to the touch. This crucial first step helps prevent tearing when you fill them with all those delicious ingredients for your Crispy Chicken Bacon Ranch Wrap.

Step 2: Layer the Ingredients
Once your tortillas are warm, place them flat on a clean surface. Begin layering by adding about ½ cup of chopped crispy chicken in the center, followed by two slices of crispy bacon. Sprinkle a generous amount of shredded cheese to give it that creamy texture, then top with fresh lettuce and a few slices of tomato. Finally, drizzle approximately 2 tablespoons of ranch dressing over the top, adding that signature flavor to your wrap.

Step 3: Fold the Wrap
Now it's time to fold your Crispy Chicken Bacon Ranch Wrap! Start by folding in the sides of the tortilla to tuck in the fillings, and then roll tightly from the bottom up, burrito-style. Make sure to keep the ingredients secure as you roll, ensuring each bite will be packed with flavor. The end result should be a neatly wrapped tortilla, ready to be toasted or served.

Step 4: Toast the Wrap (Optional)
For an extra layer of crunch, consider toasting your wrapped creation. Heat a skillet over medium heat and lightly brush it with oil or butter to prevent sticking. Place your prepared wrap seam-side down in the skillet and cook for about 2-3 minutes on each side, or until the tortilla is golden brown and crispy. This step adds a delightful texture to your Crispy Chicken Bacon Ranch Wrap.

Step 5: Slice and Serve
Once your wrap is beautifully toasted, remove it from the skillet and place it on a cutting board. Use a sharp knife to cut the wrap diagonally in half—this makes it easier to handle and visually appealing for serving. You can serve your Crispy Chicken Bacon Ranch Wrap warm alongside extra ranch dressing for dipping or other favorite sides to complete the meal.

Expert Tips for the Crispy Chicken Bacon Ranch Wrap

  • Crispy Chicken Success: Ensure your chicken is thoroughly crisped for the best texture in your Crispy Chicken Bacon Ranch Wrap. Use fried, baked, or grilled options to suit your taste.

  • Bacon Perfection: Cook the bacon until it's crisp and let it rest on paper towels. This helps absorb excess grease, ensuring every bite remains crunchy and flavorful.

  • Avoid Overfilling: Less is more when it comes to filling your wrap. Overfilling can lead to breakage, so keep layers even and manageable for easy rolling.

  • Warm Tortillas: Always warm your tortillas before assembling. This makes them more pliable, preventing tears and allowing for a smoother roll.

  • Creative Dressings: Experiment with different dressings! While ranch is a classic, trying buffalo sauce or a spicy mayo can add a twist to your Crispy Chicken Bacon Ranch Wrap.

Crispy Chicken Bacon Ranch Wrap Variations

Feel free to let your culinary creativity flourish with these fun twists on the Crispy Chicken Bacon Ranch Wrap!

  • Vegetarian Delight: Substitute chicken with grilled vegetables like zucchini and bell peppers for a fresh, meatless option. It’s a vibrant, colorful wrap bursting with flavors!

  • Spicy Kick: Switch out the ranch dressing for buffalo sauce to add a spicy zing. The heat will give your wrap a bold new dimension that’s hard to resist.

  • Sassy Southwest: Add a few spoonfuls of pico de gallo and a sprinkle of cilantro for a Southwestern twist. It elevates the flavor profile and adds a refreshing crunch.

  • Creamy Avocado: Boost creaminess by incorporating sliced avocado. This addition not only tastes amazing but also provides healthy fats, making the wrap even more satisfying.

  • Cheese Change-Up: Instead of cheddar, try pepper jack or feta cheese for a unique flavor kick. Each type of cheese will create a whole new taste experience!

  • Jalapeño Heat: If you love some heat, throw in sliced jalapeños for an extra spicy crunch. They’ll make each bite exciting and adventurous.

Explore delicious variations like those found in our Chipotle Lime Chicken for a Mexican flair or add a touch of sweetness with our Honey Garlic Chicken. The possibilities are endless!

How to Store and Freeze Crispy Chicken Bacon Ranch Wrap

Fridge: Store the wrap wrapped tightly in plastic wrap or aluminum foil for freshness, and keep it in the refrigerator for up to 2 days.

Freezer: For longer storage, freeze the wrapped Crispy Chicken Bacon Ranch Wrap in an airtight container for up to 3 months.

Reheating: To reheat, thaw overnight in the fridge, then warm in a skillet over medium heat until heated through, about 5 minutes per side. This keeps the wrap crispy.

Make-Ahead Tip: Prepare the wrap a day in advance, leaving out lettuce and tomato until ready to eat to maintain freshness.

Make Ahead Options

These Crispy Chicken Bacon Ranch Wraps are fantastic for meal prep, allowing you to enjoy delicious meals on busy days! You can prepare the wraps up to 24 hours in advance by assembling them without the lettuce and tomato, which helps prevent sogginess. Simply layer the crispy chicken, bacon, cheese, and ranch dressing in the tortilla, then wrap tightly in plastic wrap and refrigerate. When you're ready to serve, just add fresh lettuce and sliced tomato, and if desired, toast your wraps for 2-3 minutes in a skillet until golden brown for extra crunch. This way, you'll savor just as fresh and flavorful a wrap as if you made it on the spot!

What to Serve with Crispy Chicken Bacon Ranch Wrap

Elevate your mealtime with delightful sides that perfectly complement the zesty flavors of your wrap.

  • Crispy Sweet Potato Fries: These flavorful fries offer a sweet contrast to the savory wrap while adding a satisfying crunch. Perfect for dipping in ranch dressing, they bring a lovely sweetness to your plate.

  • Fresh Garden Salad: A light and refreshing salad balances the richness of the wrap. Toss in seasonal veggies and a citrus vinaigrette for an uplifting crunch that brightens up every bite.

  • Zesty Coleslaw: Creamy coleslaw adds a delightful crunch and tang that pairs beautifully with the crispy chicken and bacon. The coolness of the slaw also perfectly offsets the warm wrap, creating a fabulous texture combination.

  • Grilled Corn on the Cob: Sweet, juicy corn brings a fun, summery vibe to your meal. Slather it with butter and sprinkle with chili powder for a mouthwatering side that everyone will adore.

  • Stuffed Jalapeños: For spice lovers, stuffed jalapeños filled with cream cheese and herbs create an exciting, creamy contrast to the wrap. They add a kick that enhances the overall flavor experience.

  • Iced Lemonade: Refreshment is key, and a chilled glass of iced lemonade cuts through the richness of the wrap. The tangy, sweet flavor is a perfect pairing on a warm day, making for a delightful dining experience.

  • Chocolate Chip Cookies: For dessert, warm chocolate chip cookies offer a classic, nostalgic sweet ending. The melty chocolate provides a delicious contrast to your savory meal, satisfying that sweet tooth in a charming way.

Crispy Chicken Bacon Ranch Wrap Recipe FAQs

What type of chicken works best for this wrap?
Absolutely! For the Crispy Chicken Bacon Ranch Wrap, you can use fried, baked, or grilled chicken depending on your preference. Each option brings a unique flavor and texture. Fried chicken offers maximum crunch, while baked or grilled chicken provides a leaner alternative.

How should I store leftover wraps?
Very important! Wrap any remaining Crispy Chicken Bacon Ranch Wrap tightly in plastic wrap or aluminum foil and refrigerate for up to 2 days. This helps to keep the flavors fresh and prevents them from drying out. When you're ready to enjoy, simply reheat in a skillet for the best texture.

Can I freeze the Crispy Chicken Bacon Ranch Wrap?
You absolutely can! To freeze the wrap, first prepare it without the fresh vegetables, like lettuce and tomatoes, which can affect texture. Wrap the prepared Crispy Chicken Bacon Ranch Wrap securely in plastic wrap and then place it in an airtight container. It can be frozen for up to 3 months. When you're ready to eat, thaw it overnight in the fridge and reheat in a skillet for about 5 minutes on each side.

What if my wrap is too soggy?
Very common! If your wrap ends up soggy, ensure that any wet ingredients are applied sparingly. Layer drier components first, like the chicken and cheese, followed by lettuce and tomatoes. You can also try toasting the wrap after assembling to crisp it up, adding that delightful crunch.

Are there any allergy considerations I should keep in mind?
Absolutely! This recipe contains chicken, bacon, and dairy products, so keep allergies in mind. You can easily customize your wrap to be more allergen-friendly by using turkey bacon for those looking to reduce saturated fats or substituting with plant-based ingredients for lactose-intolerant individuals. Opt for a dairy-free ranch dressing if necessary too!

How can I make my wraps more kid-friendly?
The more the merrier! To cater to younger picky eaters, consider shortening the wrap and making smaller versions with less robust flavors. You could also offer additional dipping sauces, like honey mustard or barbecue, to make it more exciting for them. Letting kids participate in assembling their own wraps can also make it a fun family activity!

Crispy Chicken Bacon Ranch Wrap

Crispy Chicken Bacon Ranch Wrap: A Flavorful Family Favorite

Crispy Chicken Bacon Ranch Wrap offers a delightful blend of chicken, bacon, and ranch in a quick and easy meal.
Print Recipe Pin Recipe
Prep Time 10 minutes mins
Cook Time 10 minutes mins
Total Time 20 minutes mins
Servings: 4 wraps
Course: Dinner
Cuisine: American
Calories: 550
Ingredients Equipment Method Nutrition Notes

Ingredients
  

For the Wrap
  • 4 large flour tortillas Try whole wheat or spinach tortillas for added nutrition.
  • 2 cups chopped crispy chicken Use fried, baked, or grilled chicken.
  • 8 slices crispy bacon Swap for turkey bacon for a leaner option.
  • 2 cups shredded cheese Cheddar or dairy-free cheese works well.
For the Fresh Veggies
  • 1 cup lettuce Romaine or iceberg.
  • 1 cup tomato Cherry tomatoes can be used for smaller bites.
For the Dressing
  • 1 cup ranch dressing Substitute with dairy-free ranch for a vegan-friendly option.

Equipment

  • Microwave
  • Skillet
  • Cutting Board
  • Knife

Method
 

Step-by-Step Instructions
  1. Warm the large flour tortillas in the microwave for about 15-20 seconds or in a skillet until soft.
  2. Layer about ½ cup of chopped crispy chicken in the center of each tortilla, followed by two slices of crispy bacon, shredded cheese, lettuce, tomato, and ranch dressing.
  3. Fold the sides of the tortilla in and roll tightly from the bottom up, ensuring fillings are secure.
  4. Optional: Toast the wrapped creation in a skillet brushed with oil for 2-3 minutes on each side until golden brown.
  5. Slice the wrap diagonally and serve warm with extra ranch dressing on the side.

Nutrition

Serving: 1wrapCalories: 550kcalCarbohydrates: 45gProtein: 30gFat: 25gSaturated Fat: 10gPolyunsaturated Fat: 2gMonounsaturated Fat: 8gCholesterol: 70mgSodium: 900mgPotassium: 600mgFiber: 3gSugar: 2gVitamin A: 400IUVitamin C: 15mgCalcium: 250mgIron: 2mg

Notes

Ensure your chicken is crispy for the best texture. Warm tortillas before assembling to prevent tears.

Tried this recipe?

Let us know how it was!

Mediterranean Chicken Wraps: Fresh Flavors for Easy Lunches

January 13, 2026 by Grace Snow Leave a Comment

As I savored the last bite of my Mediterranean Chicken Wrap, I felt a wave of joy wash over me—this isn’t just any lunch; it’s a nourishing escape packed into a whole wheat tortilla. With tender grilled chicken mingling seamlessly with fresh vegetables and a creamy swipe of hummus, these wraps are the epitome of an easy lunch recipe. Not only are Mediterranean Chicken Wraps quick to assemble, but they also offer a healthful alternative to fast food cravings, proving that wholesome can be deliciously satisfying. The bright zesty notes of lemon and the unexpected crunch of fresh veggies turn every bite into a mini celebration. Curious how to bring this vibrant Mediterranean spirit to your kitchen? Let’s dive into this delightful recipe!

Why Are Mediterranean Chicken Wraps Perfect?

Easily customizable: These wraps can be tailored to your taste; swap grilled chicken for sautéed veggies or try different spreads like spicy harissa for a kick!

Flavor-packed: Each bite bursts with the vibrant flavors of the Mediterranean—from tangy feta to zesty lemon, it’s a taste adventure.

Healthy choice: Made with whole wheat tortillas, lean protein, and fresh veggies, these wraps are a wholesome alternative to fast food.

Quick assembly: Perfect for busy days, you can whip these up in under 30 minutes, making lunchtime stress-free.

Crowd-pleaser: Whether it's for a family meal or a picnic with friends, these wraps are sure to impress everyone's taste buds!

Mediterranean Chicken Wraps Ingredients

For the Chicken

  • Boneless Skinless Chicken Breasts – Provides lean protein and absorbs spices for a delicious flavor. Substitute with grilled vegetables or plant-based protein for a vegetarian option.
  • Olive Oil – Adds richness and ensures the chicken stays juicy during cooking.
  • Garlic Powder – Enhances flavor without the need for fresh garlic.
  • Dried Oregano – Imparts a quintessential Mediterranean herb profile that complements the chicken.
  • Paprika – Adds a smoky flavor and a vibrant color to the chicken.
  • Salt – Essential for enhancing all other flavors in the dish.
  • Black Pepper – Provides a hint of heat and balances flavors.

For the Wrap

  • Whole Wheat Tortillas – Adds whole grain goodness and a nutty flavor. You can also use spinach or gluten-free tortillas as alternatives.
  • Hummus – Acts as a creamy spread that balances the chicken and vegetables beautifully.
  • Mixed Greens – Adds freshness and crunch; arugula or spinach work well here.
  • Cucumber – Offers a refreshing, crisp texture that’s perfect for wraps.
  • Cherry Tomatoes – Brings sweetness and juiciness to each bite.
  • Red Onion – Adds mild heat and a pleasant crunch.
  • Feta Cheese – Gives a tangy, salty contrast that enhances the chicken and veggies.
  • Lemon Juice – Brightens the flavors and adds a zesty acidity to the wraps.

Ready to savor the flavors of Mediterranean Chicken Wraps? Let's get cooking!

Step‑by‑Step Instructions for Mediterranean Chicken Wraps

Step 1: Preheat the Grill
Begin by preheating your grill or grill pan to medium heat, which is around 350°F. This ensures that your chicken cooks evenly, achieving a perfect char. While the grill heats, prepare your chicken breasts by lightly pounding them to an even thickness for consistent cooking.

Step 2: Prepare the Chicken
Drizzle the boneless skinless chicken breasts with olive oil, using your hands to coat them evenly. Then, sprinkle a generous amount of garlic powder, dried oregano, paprika, salt, and black pepper on both sides. This aromatic mixture will infuse the chicken with vibrant Mediterranean flavors as it grills.

Step 3: Grill the Chicken
Carefully place the seasoned chicken breasts on the hot grill, cooking for about 6-7 minutes on each side. Keep an eye out for grill marks, and use a meat thermometer to check that the internal temperature reaches 165°F for fully cooked chicken. This step is crucial for tender Mediterranean Chicken Wraps.

Step 4: Rest the Chicken
Once grilled to perfection, remove the chicken from the grill and let it rest on a cutting board for 5 minutes. This resting period allows the juices to redistribute, ensuring that your chicken remains juicy and flavorful, making your wraps even more enjoyable.

Step 5: Slice the Vegetables
While the chicken is resting, prepare your fresh vegetables. Slice the cucumber, halve the cherry tomatoes, and thinly slice the red onion. This medley of crunchy veggies will add freshness and a delightful crunch to your Mediterranean Chicken Wraps.

Step 6: Slice the Chicken
After resting, slice the grilled chicken against the grain into thin strips. This method will keep the chicken tender and easy to bite into your wraps. The beautifully seasoned chicken will be a star component of your wraps, bursting with those Mediterranean flavors.

Step 7: Warm the Tortillas
To make the whole wheat tortillas pliable, warm them for about 20 seconds in a skillet over low heat or in the microwave. This small step ensures your tortillas are soft and easy to roll, enhancing your Mediterranean Chicken Wraps' overall texture.

Step 8: Assemble the Wraps
Spread a generous layer of hummus on each warm tortilla to create a creamy base. Then, layer those crisp mixed greens, sliced cucumber, halved cherry tomatoes, red onion, feta cheese, and the succulent chicken strips over the hummus. This colorful assembly will make each bite a feast for the senses!

Step 9: Drizzle with Lemon Juice
Finish the wraps by squeezing fresh lemon juice over the layered ingredients. This brightens the flavors and adds a zesty pop, elevating your Mediterranean Chicken Wraps to a whole new level. You'll appreciate the fresh acidity against the richness of the chicken and hummus.

Step 10: Roll and Serve
Carefully roll the tortillas tightly, folding in the sides as you go to secure the filling. Once wrapped, cut each one in half at a slight angle for a beautiful presentation. Enjoy your Mediterranean Chicken Wraps immediately, reveling in the delightful blend of flavors and textures!

Mediterranean Chicken Wraps Variations

Feel free to get creative with your Mediterranean Chicken Wraps and make them your own!

  • Vegetarian: Swap grilled chicken with sautéed vegetables like zucchini, eggplant, or mushrooms for a delicious meat-free option. This variation lets the vibrant flavors of the veggies shine while still delivering that satisfying wrap experience.

  • Cheese Swap: Try swapping out feta for goat cheese or ricotta. Each cheese brings its unique tangy profile, enhancing the creaminess of the wrap. The contrasting flavors will add a delightful twist to your wrap!

  • Spicy Twist: Add a sprinkle of chili flakes or switch out the hummus for a spicy harissa spread. This will crank up the heat and excite your taste buds, turning your wraps into a thrilling culinary adventure!

  • Crunchy Addition: Toss in some chopped nuts, like almonds or walnuts, for added crunch and texture. The combination of nutty flavors with the Mediterranean ingredients makes each bite even more enjoyable.

  • Herbed Up: Mix fresh herbs like parsley or mint into your mixed greens for an aromatic touch. A hint of freshness will elevate the entire experience, making every bite a Mediterranean delight.

  • Saucy Sensation: Drizzle with balsamic glaze or tahini sauce for a rich, creamy finish. This extra layer of flavor will take your wraps to the next level, pleasing even the pickiest of eaters!

  • Grain Boost: Add some quinoa or couscous to your wraps for extra heartiness. This addition provides a delightful chewy texture while boosting the nutritional profile.

As you experiment with these variations, don’t forget to check out our other flavorful recipes like Honey Garlic Chicken Thighs or Spatchcock Chicken Flavor to keep your meal rotation exciting!

What to Serve with Mediterranean Chicken Wraps

Creating a delightful meal around Mediterranean Chicken Wraps can transform lunchtime into a vibrant dining experience. Let’s explore some perfect pairings that complement the exciting flavors of these wraps!

  • Classic Greek Salad: A fresh mix of cucumbers, tomatoes, olives, and feta; this salad adds a refreshing crunch and enhances the Mediterranean flair.

  • Roasted Vegetable Medley: Seasoned with herbs and olive oil, roasted vegetables add a warm, savory contrast to the cool, crisp wraps.

  • Chickpea Salad: Packed with protein and zingy lemon, this hearty salad brings a delightful texture and flavor harmony to your meal.

  • Tzatziki Sauce: The cool creaminess of tzatziki, made with yogurt and cucumber, provides a refreshing dip that pairs perfectly with the warm chicken.

  • Quinoa Tabouli: This herby salad, rich in quinoa, adds a nutty flavor and a dose of whole grains, perfectly aligning with the nutritious theme.

  • Pineapple Mint Smoothie: A refreshing drink made with pineapple and mint, this smoothie cleanses the palate and adds a tropical twist.

  • Baklava: For dessert, treat yourself with sweet, flaky baklava. Its honey-sweetened layers offer a delicious end to your Mediterranean meal.

Each of these pairings not only complements the delicious flavors of the Mediterranean Chicken Wraps but also creates a wholesome, satisfying meal experience that everyone will love!

Expert Tips for Mediterranean Chicken Wraps

  • Check for Doneness: Use a meat thermometer to ensure the chicken reaches 165°F. Undercooked chicken can spoil your delicious wraps!

  • Rest Before Slicing: Allow the grilled chicken to rest for 5 minutes before slicing. This keeps the meat juicy and flavorful—essential for your Mediterranean Chicken Wraps.

  • Avoid Sogginess: Assemble wraps just before serving or store components separately to prevent them from getting soggy, keeping your lunch fresh.

  • Customize Your Veggies: Feel free to swap in your favorite veggies or even add some olives for a briny touch. Personalize your Mediterranean Chicken Wraps to suit your taste!

  • Warm the Tortillas: Warming your tortillas not only makes them pliable for easier rolling but also enhances the overall texture of your wraps.

Storage Tips for Mediterranean Chicken Wraps

  • Fridge: Keep assembled Mediterranean Chicken Wraps in the refrigerator for up to 2 days. Wrap them in foil or place them in an airtight container to maintain freshness and prevent sogginess.

  • Separate Storage: For the best texture, store the grilled chicken, vegetables, and hummus separately in the fridge. This keeps everything fresh and allows you to assemble your wraps just before enjoying.

  • Freezer: You can freeze the wraps for longer storage. Wrap each one tightly in plastic wrap or aluminum foil, then place them in a freezer-safe bag for up to 1 month. Thaw in the fridge before reheating.

  • Reheating: To reheat, remove the wrap from the freezer and heat in the oven at 350°F for about 15-20 minutes or until warmed through. Enjoy the vibrant flavors of your Mediterranean Chicken Wraps!

Make Ahead Options

These Mediterranean Chicken Wraps are fantastic for meal prep, saving you time on busy weekdays! You can grill the chicken and store it in an airtight container in the refrigerator for up to 3 days to keep its juicy flavor. Additionally, chop your vegetables—cucumber, cherry tomatoes, and red onion—up to 24 hours ahead and refrigerate them in separate containers to maintain freshness. When you're ready to serve, simply warm the tortillas for a few seconds and assemble the wraps with hummus, feta, and the prepped ingredients. By taking these steps, you can enjoy a quick, delicious lunch that tastes just as fresh and vibrant as if you made it that day!

Mediterranean Chicken Wraps Recipe FAQs

What type of chicken is best for Mediterranean Chicken Wraps?
Absolutely! Boneless skinless chicken breasts are ideal because they provide lean protein and absorb the spices beautifully. If you prefer a vegetarian option, grilled vegetables or plant-based proteins like tofu or tempeh work well too!

How should I store leftover Mediterranean Chicken Wraps?
For best results, keep assembled wraps in the refrigerator for up to 2 days, wrapped in foil or stored in an airtight container. If you're concerned about sogginess, store the grilled chicken, fresh veggies, and hummus separately to maintain freshness.

Can I freeze Mediterranean Chicken Wraps?
Yes, you can freeze these wraps for longer storage! Wrap each one tightly in plastic wrap or aluminum foil, then place them in a freezer-safe bag for up to 1 month. To reheat, simply thaw in the fridge overnight and warm at 350°F for 15-20 minutes.

What should I do if my grilled chicken is dry?
Very! If your chicken ends up dry, it may have been overcooked. Always use a meat thermometer to check for doneness, which should be 165°F. Consider using a marinade next time or letting the chicken rest for a few minutes after grilling to lock in juices.

How can I add more flavor to my Mediterranean Chicken Wraps?
To elevate your wraps, think about adding a layer of olives for a briny bite, or a sprinkle of fresh herbs like parsley or mint for extra aroma. You can also spice it up with chili flakes or try different spreads like a spicy harissa. The more the merrier when it comes to flavors!

Mediterranean Chicken Wraps

Mediterranean Chicken Wraps: Fresh Flavors for Easy Lunches

Mediterranean Chicken Wraps are a quick, healthy, and delicious lunch option packed with fresh ingredients and vibrant flavors.
Print Recipe Pin Recipe
Prep Time 20 minutes mins
Cook Time 15 minutes mins
Resting Time 5 minutes mins
Total Time 40 minutes mins
Servings: 4 wraps
Course: Dinner
Cuisine: Mediterranean
Calories: 450
Ingredients Equipment Method Nutrition Notes

Ingredients
  

For the Chicken
  • 2 pieces Boneless Skinless Chicken Breasts Substitute with grilled vegetables or plant-based protein for a vegetarian option.
  • 2 tablespoons Olive Oil Adds richness and ensures the chicken stays juicy during cooking.
  • 1 teaspoon Garlic Powder Enhances flavor without the need for fresh garlic.
  • 1 teaspoon Dried Oregano Imparts a quintessential Mediterranean herb profile.
  • 1 teaspoon Paprika Adds a smoky flavor and vibrant color.
  • 1 teaspoon Salt Essential for enhancing all other flavors.
  • 1 teaspoon Black Pepper Provides a hint of heat.
For the Wrap
  • 4 pieces Whole Wheat Tortillas Add whole grain goodness; alternatives include spinach or gluten-free tortillas.
  • 1 cup Hummus Acts as a creamy spread.
  • 2 cups Mixed Greens Add freshness; arugula or spinach can be used.
  • 1 cup Cucumber Offers a refreshing, crisp texture.
  • 1 cup Cherry Tomatoes Brings sweetness and juiciness.
  • 1 small Red Onion Adds mild heat and crunch.
  • 1/2 cup Feta Cheese Provides a tangy, salty contrast.
  • 2 tablespoons Lemon Juice Brightens flavors with zesty acidity.

Equipment

  • Grill
  • Grill pan
  • Knife
  • Cutting Board
  • Skillet

Method
 

Step-by-Step Instructions
  1. Preheat your grill or grill pan to medium heat, around 350°F.
  2. Drizzle the chicken breasts with olive oil and coat evenly. Sprinkle garlic powder, oregano, paprika, salt, and black pepper on both sides.
  3. Grill the seasoned chicken breasts for about 6-7 minutes on each side until the internal temperature reaches 165°F.
  4. Remove the chicken from the grill and let it rest on a cutting board for 5 minutes.
  5. While the chicken rests, slice the cucumber, halve the cherry tomatoes, and thinly slice the red onion.
  6. After resting, slice the grilled chicken against the grain into thin strips.
  7. Warm the tortillas for about 20 seconds in a skillet or microwave.
  8. Spread hummus on each warm tortilla, then layer with mixed greens, cucumber, cherry tomatoes, red onion, feta cheese, and chicken strips.
  9. Drizzle fresh lemon juice over the layers.
  10. Roll the tortillas tightly, folding in the sides, and cut each in half at a slight angle.

Nutrition

Serving: 1wrapCalories: 450kcalCarbohydrates: 40gProtein: 30gFat: 20gSaturated Fat: 4gPolyunsaturated Fat: 2gMonounsaturated Fat: 5gCholesterol: 70mgSodium: 600mgPotassium: 800mgFiber: 6gSugar: 3gVitamin A: 15IUVitamin C: 30mgCalcium: 10mgIron: 15mg

Notes

Wraps can be customized with your favorite veggies or spreads. Ideal for quick lunches or meal prep.

Tried this recipe?

Let us know how it was!

Vegan Quesadillas with Black Beans and Avocado in 10 Minutes

January 13, 2026 by Grace Snow Leave a Comment

You know those days when you crave something satisfying yet effortless? That's exactly how I felt when I discovered these Quick & Easy Vegan Quesadillas with Black Beans and Avocado. With just ten minutes of preparation, you can whip up a delicious meal that’s packed with creamy avocado, hearty black beans, and zesty cilantro. This recipe isn’t just a time-saver; it also offers endless customization options—throw in your favorite veggies or spices to make it your own. Perfect for busy weeknights or casual get-togethers, these quesadillas have a way of bringing both comfort and excitement to the dinner table. What fun combinations will you try?

Why Are These Quesadillas a Must-Try?

Quick preparation: In just 10 minutes, you can serve up these flavorful Vegan Quesadillas that delight both taste buds and busy schedules.

Endless customization: Whether you prefer spicy or mild, this recipe empowers you to add your favorite veggies or seasonings, from bell peppers to smoked paprika.

Crowd pleaser: These quesadillas appeal to everyone, making them ideal for family dinners or casual gatherings.

Nutritious ingredients: Packed with fiber and healthy fats, each quesadilla is a wholesome choice that satisfies cravings without the guilt.

Serve with flair: Pair these with fresh salsa or guacamole for an extra burst of flavor and a complete meal experience. Don’t forget to explore variations like our Sweet Potatoes Black for more healthy options!

Vegan Quesadillas with Black Beans and Avocado Ingredients

For the Quesadilla
• Tortillas – Use large whole wheat or gluten-free tortillas for the perfect base of your Vegan Quesadillas with Black Beans and Avocado.
• Avocados – Choose ripe avocados for a creamy texture and healthy fats that elevate the filling.
• Precooked Black Beans – Add protein and fiber; be sure to rinse canned beans to remove excess sodium.
• Corn – Fresh, frozen, or canned corn adds a touch of sweetness and a delightful texture to the mix.
• Red Onion – Provides sharpness and crunch; green onions can be used for a milder flavor.
• Lime Juice – Freshly squeezed lime juice brightens the dish; opt for fresh rather than bottled for the best flavor.
• Garlic Clove – Fresh minced garlic enhances the taste significantly; avoid powdered for the best impact.
• Cumin – A warm spice that adds depth; taco seasoning is a great substitution for a flavor boost.
• Crushed Red Pepper – Adjust to your spice preference for a kick; remember a little can go a long way!
• Fresh Cilantro – Adds freshness; you can omit it if you're not a fan of the flavor.
• Sea Salt & Cracked Pepper – Basic seasonings to taste; try Himalayan salt for a unique twist.
• Olive Oil – Essential for frying the quesadillas; vegetable oil or cooking spray are suitable alternatives.

Optional Extras
• Side Dishes – Enhance your meal with sides like salsa or guacamole; these add even more flavor and excitement.
• Additional Fillings – Try incorporating bell peppers, mushrooms, or spinach for added nutrition and variety.

Step‑by‑Step Instructions for Vegan Quesadillas with Black Beans and Avocado

Step 1: Mash the Avocados
In a medium mixing bowl, take two ripe avocados and mash them with a fork until smooth and creamy. This should take about 1-2 minutes. The avocados should be luscious without any large lumps, ensuring a delightful base for your Vegan Quesadillas with Black Beans and Avocado.

Step 2: Add Flavor Enhancers
Next, add one minced garlic clove, juice from half a lime, sea salt, cracked pepper, and crushed red pepper to the mashed avocados. Mix everything together thoroughly for about 1 minute until well combined, creating a zesty and flavorful filling that perfectly complements the creamy texture of the avocado.

Step 3: Incorporate the Black Beans and Veggies
Fold in one cup of rinsed black beans, half a cup of corn, one diced red onion, and a handful of chopped cilantro into the avocado mixture. Stir gently for about 1-2 minutes until the ingredients are evenly distributed, creating a vibrant and nutritious filling for your quesadillas.

Step 4: Heat the Skillet
Preheat a non-stick skillet over medium heat and add 1-2 tablespoons of olive oil. Allow the oil to warm for about 2 minutes until shimmering. This step ensures that the quesadillas cook evenly and develop a beautiful golden color during frying.

Step 5: Fill and Fold the Tortillas
Take a large whole wheat or gluten-free tortilla and spoon half of the avocado filling onto one half, then fold the tortilla over. Press gently to secure the filling. Repeat with the remaining tortillas until all are filled, ensuring you have a delicious pocket of goodness ready to cook.

Step 6: Cook the Quesadillas
Place the filled quesadillas in the preheated skillet, making sure not to overcrowd them. Cook for about 3-4 minutes per side, or until golden brown and crispy. Keep an eye on them, flipping carefully with a spatula for even browning and a satisfying crunch.

Step 7: Slice and Serve
Once the Vegan Quesadillas with Black Beans and Avocado are cooked to perfection, remove them from the skillet and let them cool slightly. Using a sharp knife or pizza cutter, slice each quesadilla into wedges. Serve immediately with your favorite salsa or guacamole for an extra burst of flavor.

Storage Tips for Vegan Quesadillas with Black Beans and Avocado

Fridge: Store any leftovers in an airtight container for up to 3 days. Reheat in a skillet for a few minutes to regain crispiness.

Freezer: You can freeze these quesadillas for up to 2 months. Wrap each one tightly in plastic wrap and place them in a freezer bag.

Reheating: To reheat from frozen, let them thaw in the fridge overnight, then warm in a skillet until heated through and crispy.

Airtight Containers: Always use airtight containers for both refrigeration and freezing to maintain freshness and prevent freezer burn.

Expert Tips for Vegan Quesadillas

  • Ripe Avocados: Ensure your avocados are perfectly ripe for the best creamy consistency in your Vegan Quesadillas with Black Beans and Avocado. Underripe avocados can be hard and flavorless.

  • Avoid Overcrowding: Cook the quesadillas in batches to prevent overcrowding in the skillet, ensuring even browning and crispiness on each side.

  • Customize Fillings: Don't hesitate to add your favorite vegetables such as bell peppers or spinach to boost nutrition and flavor in the quesadilla filling.

  • Monitor Cooking Time: For a perfectly crispy exterior, keep an eye on the cooking time; adjusting slightly can enhance the texture without burning them.

  • Serving Suggestions: Pair with fresh salsa or guacamole to elevate the overall dining experience, making it a delightful treat for everyone at the table.

Vegan Quesadillas with Black Beans and Avocado Variations

Explore exciting ways to personalize your vegan quesadillas and take them to a whole new level!

  • Bean Swap: Replace black beans with pinto beans or chickpeas for a different taste and texture, offering a delightful twist.
  • Veggie Boost: Add colorful bell peppers, mushrooms, or spinach to the filling for extra nutrition and flavor excitement in every bite.
  • Spice Options: Use chili powder or smoked paprika in place of cumin for a unique flavor kick that’ll make your taste buds dance.
  • Cheesy Experience: If you’re not strictly vegan, sprinkle some shredded cheese before cooking for melted goodness and a creamy finish.
  • Herb Variations: Experiment with different herbs like parsley or basil if cilantro isn’t your favorite. Each herb brings a distinct flavor to your quesadillas.
  • Heat Adjustment: Add jalapeños or a dash of hot sauce to give your quesadillas a fiery kick, perfect for spice lovers.
  • Sweet Addition: Toss in some diced sweet potato or roasted corn for a hint of natural sweetness that complements the savory ingredients beautifully.
  • Zesty Accompaniment: Pair with a zesty avocado crema or a tangy yogurt sauce for a refreshing dip that enhances the overall flavor profile.

With these variations, you can mix and match to create your perfect vegan quesadilla experience. And if you're craving more delicious plant-based ideas, don’t forget to check out my recipes for Coconutty Beans Greens or Fiesta Lime Chicken with Avocado for inspiration!

What to Serve with Vegan Quesadillas with Black Beans and Avocado

Enhance your meal with delightful accompaniments that complement the vibrant flavors of these delicious quesadillas.

  • Fresh Salsa: A zesty, chunky salsa adds a refreshing kick that balances the richness of the quesadillas. Choose tomato-based or fruity salsas for a fun twist.

  • Creamy Guacamole: The extra layer of creamy guacamole harmonizes beautifully with the ingredients, enriching each bite with more velvety goodness. Try adding lime juice and cilantro for increased flavor.

  • Simple Green Salad: A light salad, tossed with fresh greens and a tangy vinaigrette, provides a crisp and vibrant texture that contrasts perfectly with the warm quesadillas.

  • Grilled Corn on the Cob: Sweet, smoky corn on the cob is a delightful summer addition, enhancing the comfort food vibe of a quesadilla feast and adding a pop of color to your plate.

  • Cilantro Lime Rice: This fragrant rice dish brings a fresh herbaceous note, creating a tasty and filling side that amplifies the Mexican-inspired flavors of the meal.

  • Chilled Beverage: Pair your meal with a cool and refreshing beverage like iced hibiscus tea or a margarita. These drinks perfectly cut through the richness and add a festive feel to the table.

  • Roasted Veggies: Include roasted vegetables for a warm side dish that adds color and a hint of sweetness, balancing the savory notes in your quesadillas.

  • Fruit Salad: To lighten the meal, a fresh fruit salad of seasonal fruits provides a refreshing finish, cleansing the palate and concluding the feast on a sweet note.

Make Ahead Options

These Vegan Quesadillas with Black Beans and Avocado are perfect for meal prep enthusiasts! You can prepare the avocado filling up to 24 hours in advance by mashing the avocados and mixing in the garlic, lime juice, and seasonings. Store it in an airtight container, pressing a piece of plastic wrap directly onto the surface to prevent browning. The black beans and corn can also be prepped ahead, ready to combine just before cooking. When you're ready to serve, simply fill the tortillas, cook them in the skillet for 3-4 minutes per side, and enjoy warm, delicious quesadillas that are just as satisfying as if you made them fresh!

Vegan Quesadillas with Black Beans and Avocado Recipe FAQs

What kind of avocados should I use for the quesadillas?
Absolutely! Choose ripe avocados for the best creaminess and flavor in your Vegan Quesadillas with Black Beans and Avocado. Look for avocados that yield slightly to gentle pressure without being overly soft. If they have dark spots all over, they may be overripe.

How should I store leftover quesadillas?
Store any leftovers in an airtight container in the refrigerator for up to 3 days. When you want to enjoy them again, reheat the quesadillas in a skillet over medium heat for a few minutes on each side to regain their crispiness.

Can I freeze the quesadillas?
Very! You can freeze these tasty quesadillas for up to 2 months. Wrap each one tightly in plastic wrap and place them in a labeled freezer bag for easy identification. To reheat, let them thaw in the fridge overnight, then warm them in a skillet until heated through and crispy.

What can I do if my quesadillas aren't crispy enough?
If they aren't crispy, ensure you’re cooking them over medium heat and not overcrowding the skillet, which can trap steam. You can also increase the cooking time slightly, just keep a close eye on them to avoid burning. Drizzling a touch more oil before cooking can also help achieve that delightful crunch.

Are these quesadillas allergy-friendly?
Absolutely! This recipe is naturally vegan and can be made gluten-free by using suitable tortillas. However, if you or your guests have specific allergies, be cautious with ingredients like garlic or specific spices. Make sure to check labels for store-bought items, especially tortillas, for allergens like soy or wheat.

Can I add extra ingredients to my quesadillas?
Definitely! Feel free to customize your quesadillas with additional fillings. Some great options include spinach, bell peppers, or mushrooms. Just ensure that the extra ingredients are pre-cooked or tender to ensure your quesadillas cook evenly while maintaining a delightful texture.

Vegan Quesadillas with Black Beans and Avocado

Vegan Quesadillas with Black Beans and Avocado in 10 Minutes

Discover how to make satisfying Vegan Quesadillas with Black Beans and Avocado in just ten minutes.
Print Recipe Pin Recipe
Prep Time 10 minutes mins
Cook Time 10 minutes mins
Total Time 20 minutes mins
Servings: 2 quesadillas
Course: Dinner
Cuisine: Mexican, Vegan
Calories: 350
Ingredients Equipment Method Nutrition Notes

Ingredients
  

For the Quesadilla
  • 2 large whole wheat or gluten-free tortillas
  • 2 ripe avocados
  • 1 cup precooked black beans rinsed
  • 0.5 cup corn fresh, frozen, or canned
  • 1 red onion diced
  • 0.5 tablespoon lime juice freshly squeezed
  • 1 clove garlic minced
  • 1 teaspoon cumin
  • 0.5 teaspoon crushed red pepper to taste
  • 0.25 bunch fresh cilantro chopped
  • to taste sea salt & cracked pepper
  • 1-2 tablespoons olive oil for frying
Optional Extras
  • salsa for serving
  • guacamole for serving
  • bell peppers, mushrooms, or spinach optional additional fillings

Equipment

  • non-stick skillet
  • Mixing Bowl
  • Fork
  • Spatula

Method
 

Step-by-Step Instructions
  1. Mash the avocados in a medium mixing bowl until smooth and creamy.
  2. Add minced garlic, lime juice, sea salt, cracked pepper, and crushed red pepper to the avocados and mix thoroughly.
  3. Fold in black beans, corn, diced red onion, and chopped cilantro into the avocado mixture.
  4. Preheat a non-stick skillet over medium heat with olive oil.
  5. Fill tortillas with half of the avocado filling, fold, and press gently.
  6. Cook the quesadillas in the skillet for 3-4 minutes per side until golden brown and crispy.
  7. Slice the quesadillas into wedges and serve immediately with salsa or guacamole.

Nutrition

Serving: 1quesadillaCalories: 350kcalCarbohydrates: 40gProtein: 10gFat: 15gSaturated Fat: 2gPolyunsaturated Fat: 1gMonounsaturated Fat: 10gSodium: 400mgPotassium: 600mgFiber: 8gSugar: 2gVitamin A: 1000IUVitamin C: 20mgCalcium: 50mgIron: 3mg

Notes

Ensure avocados are ripe for the best results. Avoid overcrowding the skillet for even cooking.

Tried this recipe?

Let us know how it was!

Crispy Shredded Chipotle Tofu Wraps for Smoky Flavor Lovers

January 13, 2026 by Grace Snow Leave a Comment

The aroma of smoky chipotle wafts through the kitchen as I prepare to make my favorite quick meal—Crispy Shredded Chipotle Tofu Wraps. These delectable wraps take just minutes to whip up, making them perfect for anyone tired of fast food or looking for a wholesome, high-protein vegan option that skews deliciously satisfying. Using super firm tofu, the crispy texture marries beautifully with the spicy, rich chipotle flavor, creating a harmonious experience in every bite. Each wrap is not only customizable—allowing you to play with veggies and sauces—but they’re also an excellent meal prep option for busy weeknights. Are you ready to elevate your dinner game? Let’s dive in!

Why are these wraps a must-try?

Flavorful Bliss: Enjoy the irresistible combination of crispy, smoky chipotle goodness with chewy tofu. Each bite is a flavor explosion that will have everyone coming back for more!
Customizable Convenience: Easily swap ingredients to suit your taste. Add different veggies or spice levels to keep meals exciting!
Quick and Easy: Perfect for meal prep, these wraps come together in just minutes. Say goodbye to fast food and hello to home-cooked deliciousness!
Protein-Packed: High in protein thanks to super firm tofu, this meal will keep you satisfied and energized.
Crowd-Pleaser: Whether you're serving family or friends, these wraps are sure to impress. For more quick and delightful ideas, check out my Buffalo Tofu Caesar and Fish Taco Bowls.

Crispy Shredded Chipotle Tofu Wraps Ingredients

For the Tofu
• Super Firm Tofu – This is the main ingredient that provides your wraps with protein and the ideal chewy texture.
• Chipotle Peppers – These canned peppers in adobo sauce bring a deep smoky heat; for a milder flavor, substitute with soy sauce and smoked paprika.
• Cornstarch – Essential for achieving that crispy texture you crave; don't skip this step!

For the Seasoning
• Adobo Seasoning – Adds a mix of spices that enhance the overall flavor. You can use any preferred seasoning salt as a substitute.
• Nutritional Yeast – Brings a cheesy umami flavor; if you want to avoid cheesiness, you can swap this with soy sauce.
• Dry Oregano – A pleasant aromatic herb to balance the spiciness of the chipotle.

For the Sauce
• Dairy-Free Mayo – Gives creaminess to the dip; you can also try plain unsweetened plant-based yogurt if you prefer a lighter alternative.
• Garlic – Adds pungency and depth to the sauce.

For the Veggies
• Onions – Adds sweetness and flavor when sautéed; feel free to swap for leeks or shallots if desired.
• Peppers – Bell peppers provide a crunchy texture; substitute with zucchini or mushrooms based on your taste preference.

For the Wraps
• Large Tortillas – Perfect for holding all those tasty ingredients together; smaller corn tortillas can be used for mini wraps or for more portable snacking.

With these simple yet flavorful ingredients, your Crispy Shredded Chipotle Tofu Wraps will soon become a household favorite!

Step‑by‑Step Instructions for Crispy Shredded Chipotle Tofu Wraps

Step 1: Preheat and Prepare Tofu
Start by preheating your oven to 425°F (220°C). While the oven warms, crumble or shred super firm tofu using a box grater or your hands until you have fine pieces. This will help the tofu crisp up beautifully in the oven, providing that essential texture for your Crispy Shredded Chipotle Tofu Wraps.

Step 2: Mix Ingredients Together
In a large mixing bowl, combine the shredded tofu with nutritional yeast, cornstarch, chopped chipotle peppers, adobo seasoning, dry oregano, and a pinch of salt. Stir everything together thoroughly, ensuring each piece of tofu is well-coated. This mixture is crucial for achieving the robust flavor and crispy texture that makes these wraps so delicious.

Step 3: Bake the Tofu Mixture
Spread the seasoned tofu mixture evenly on a parchment-lined baking sheet, ensuring there’s space between the pieces for airflow. Bake in the preheated oven for 15 minutes, then remove and flip the tofu for even cooking. Return to the oven and bake for an additional 5-10 minutes until golden and crispy. The aroma wafting from the oven will signal that it’s nearly time to enjoy your wraps!

Step 4: Sauté the Vegetables
While the tofu is baking, heat a tablespoon of oil in a skillet over medium heat. Add sliced onions and bell peppers, sautéing until they are softened and slightly caramelized, about 5-7 minutes. Once tender, squeeze in some lime juice to enhance the flavors, then remove from heat and set aside. These veggies will add delightful sweetness to your Crispy Shredded Chipotle Tofu Wraps.

Step 5: Prepare the Chipotle Mayo
In a mixing bowl, prepare the chipotle mayo by combining dairy-free mayo, chopped chipotle pepper, nutritional yeast, minced garlic, a splash of lime juice, and a drizzle of maple syrup. Whisk everything together until smooth to create a rich, flavorful sauce that will elevate your wraps. Taste and adjust seasonings if necessary; you want it perfectly creamy with a hint of smoky heat.

Step 6: Assemble and Cook the Wraps
To assemble, warm a large tortilla in a skillet over medium heat, then spread a generous layer of chipotle mayo on one half. Fill with the crispy tofu mixture and the sautéed veggies, then fold the tortilla over. Cook in the skillet for about 2-3 minutes on each side until golden and crispy, giving the wraps a satisfying crunch while sealing in all that delicious flavor.

Step 7: Serve Your Delicious Wraps
Once cooked, remove your Crispy Shredded Chipotle Tofu Wraps from the skillet and let them cool slightly. Slice in half and serve immediately, perhaps with a side of guacamole or salsa for an extra burst of flavor. These wraps are not only tasty but also an exciting way to switch up your meal routine!

Crispy Shredded Chipotle Tofu Wraps Variations

Feel free to let your creativity flow as you customize these wraps for a delightful twist on flavor and texture!

  • Mushroom Swap: Try shredded oyster mushrooms for a woodsy flavor; just note this will reduce the protein content.
  • Spicy Addictive: For an extra kick, add diced jalapeños or a drizzle of your favorite hot sauce.
  • Creamy Delight: Top with vegan cheese or avocado slices for a rich and creamy layer that balances the spicy chipotle.
  • Garden Fresh: Toss in your favorite veggies like zucchini or spinach for added vitamins and crunch.
  • Herb Infusion: Enhance flavor with fresh cilantro or parsley mixed into the filling for a burst of freshness.
  • Zesty Lime Drizzle: Squeeze fresh lime juice over the assembled wraps for an exciting pop of citrus that brightens every bite.
  • Wrap Variety: Switch to lettuce wraps for a low-carb option, retaining the delicious filling while adding a refreshing crunch.
  • Dip Options: Serve with homemade avocado dip or a smoky salsa on the side for a flavor-packed experience that’s both fun and delicious.

Experimenting with these variations opens the door to endless possibilities, making meal prep both exciting and flavorful! If you love satisfying wraps, be sure to pair them with some zesty Chipotle Lime Chicken or crispy Parmesan Artichoke Hearts for a complete feast!

Storage Tips for Crispy Shredded Chipotle Tofu Wraps

Fridge: Store leftover wraps in an airtight container for up to 3 days. To maintain crispiness, consider storing crispy tofu and veggies separately from the wraps.

Freezer: For longer storage, freeze the cooked crispy tofu mixture in a freezer-safe bag for up to 2 months. Reheat it directly from the freezer for quicker meals.

Reheating: To reheat, use an oven at 350°F (175°C) for about 10-15 minutes, or a skillet on medium heat until warmed through. Avoid microwaving to keep that fabulous crunch intact!

Meal Prep: If planning ahead, prepare the tofu, veggies, and sauce and store them separately in the fridge. This keeps everything fresh and allows for easy assembly when ready to enjoy your Crispy Shredded Chipotle Tofu Wraps.

Make Ahead Options

These Crispy Shredded Chipotle Tofu Wraps are perfect for busy home cooks who want to save time! You can prepare the tofu mixture (without cooking) and sautéed vegetables up to 3 days in advance, storing them separately in airtight containers in the refrigerator. This way, the flavors meld beautifully while keeping the textures intact. When you're ready to serve, simply bake the tofu and warm the tortilla as described in the recipe. To ensure the wraps remain crispy, avoid adding the chipotle mayo until you are ready to assemble. You'll enjoy delicious, restaurant-quality wraps with minimal effort!

What to Serve with Crispy Shredded Chipotle Tofu Wraps?

Indulging in a vibrant meal is a delight, especially when accompanied by wonderful sides that enhance the star of the show.

  • Zesty Guacamole: This creamy, tangy dip balances the smoky flavors of the wraps, adding freshness in every bite. A scoop of guacamole elevates the dish, turning a simple dinner into a fiesta!

  • Savory Black Bean Salad: Packed with protein and fiber, a black bean salad brings a burst of colors and textures. The vibrant ingredients enhance your wraps, making every forkful a celebration of flavors.

  • Fiesta Street Corn: Sweet corn mingled with lime and spices offers a fun, crunchy side that pairs beautifully with the wraps. The freshness of the corn complements the smoky tofu and spices, creating a balanced meal.

  • Sweet Potato Fries: Crispy, sweet potato fries provide a satisfyingly crunchy contrast to the chewy filling of your wraps. Seasoned with paprika, they marry beautifully with chipotle, playing up the texture and flavor dynamics.

  • Cilantro Lime Rice: This light, aromatic rice dish adds a fresh touch that brightens the entire meal. With a zesty kick, it harmonizes wonderfully with the richness of the crispy tofu, creating a satisfying experience.

  • Mango Salsa: This vibrant, fruity salsa brings a sweet and slightly spicy component to the table. Its freshness is perfect for cutting through the richness of the wraps while adding a delightful contrast.

  • Chilled Agua Fresca: A refreshing drink like hibiscus agua fresca cleanses the palate, making each bite more enjoyable. It complements the smoky flavors of the wraps and is a delightful way to stay hydrated.

Expert Tips for Crispy Shredded Chipotle Tofu Wraps

  • Choose the Right Tofu: Use super firm tofu for the best texture; extra firm may crumble and won't hold the shape as well.
  • Don't Skip Cornstarch: This ingredient is essential for achieving that desired crispy exterior. Make sure all pieces are coated evenly.
  • Adjust Spice Levels: If you're sensitive to heat, start with fewer chipotle peppers and gradually add more to suit your taste.
  • Warm Tortillas Properly: Heating tortillas before filling prevents them from getting soggy, allowing for a better wrap experience.
  • Meal Prep Like a Pro: Store the tofu mixture, veggies, and sauce separately for quick assembly during busy weeknights, keeping your Crispy Shredded Chipotle Tofu Wraps fresh.

Crispy Shredded Chipotle Tofu Wraps Recipe FAQs

What type of tofu should I use for the best texture?
Absolutely! I recommend using super firm tofu for these wraps. It's key to achieving the perfect chewiness and crispiness. If you only have extra firm tofu on hand, that's fine too, but be mindful that it can crumble more easily when shredded.

How should I store leftover wraps to maintain their freshness?
To keep your leftovers delicious, store the wraps in an airtight container in the fridge for up to 3 days. For optimal crispiness, I suggest keeping the crispy tofu mixture and veggies separate from the wraps until you're ready to enjoy!

Can I freeze the tofu mixture for later use?
Yes, you can! To freeze, place the cooked crispy tofu mixture in a freezer-safe bag, ensuring you remove as much air as possible. It will last for up to 2 months. When you're ready to make your wraps, you can reheat the mixture straight from the freezer—just warm it in a skillet until heated through.

What if my wraps get soggy?
Very much a concern! To avoid sogginess, make sure to heat your tortillas before filling them—this step creates a slight barrier that helps maintain the wrap's integrity. If you notice your wraps are soft after storage, re-crisp them in a skillet for a few minutes before eating.

Are these wraps suitable for those with allergies or dietary restrictions?
Absolutely! They're vegan and can easily be tailored for various dietary needs. For nut allergies, simply stick to the ingredients listed, like dairy-free mayo and avoid any potential nut-based sauces. When serving to pets, keep the seasonings mild and be cautious with any components they may not tolerate, such as onions.

What can I substitute if I don't have chipotle peppers?
If you're looking for a milder flavor, you can substitute chipotle peppers with a mix of soy sauce and smoked paprika to still deliver that smoky essence without the heat. Alternatively, experiment with different seasoning blends you enjoy—cooking is all about creating flavors you love!

Crispy Shredded Chipotle Tofu Wraps

Crispy Shredded Chipotle Tofu Wraps for Smoky Flavor Lovers

Enjoy these Crispy Shredded Chipotle Tofu Wraps, a high-protein vegan option that's quick, satisfying, and customizable.
Print Recipe Pin Recipe
Prep Time 10 minutes mins
Cook Time 25 minutes mins
Total Time 35 minutes mins
Servings: 4 wraps
Course: Dinner
Cuisine: Vegan
Calories: 330
Ingredients Equipment Method Nutrition Notes

Ingredients
  

For the Tofu
  • 1 block Super Firm Tofu Crumble or shred
  • 2 tbsp Chipotle Peppers Chopped, from adobo sauce
  • 1 tbsp Cornstarch For crispy texture
For the Seasoning
  • 1 tsp Adobo Seasoning
  • 2 tbsp Nutritional Yeast
  • 1 tsp Dry Oregano
For the Sauce
  • 1/2 cup Dairy-Free Mayo
  • 1 clove Garlic Minced
For the Veggies
  • 1 medium Onion Sliced
  • 1 cup Peppers Bell peppers, sliced
For the Wraps
  • 4 large Tortillas

Equipment

  • Oven
  • Skillet
  • Mixing Bowl
  • Baking Sheet
  • Grater

Method
 

Preparation Steps
  1. Preheat your oven to 425°F (220°C) and crumble or shred the super firm tofu.
  2. Mix shredded tofu with nutritional yeast, cornstarch, chipotle peppers, adobo seasoning, dry oregano, and salt in a bowl.
  3. Spread the mixture on a parchment-lined baking sheet and bake for 15 minutes, flip and bake for another 5-10 minutes until crispy.
  4. Sauté sliced onions and bell peppers in oil until softened and caramelized, about 5-7 minutes, then squeeze in lime juice.
  5. Prepare chipotle mayo by mixing dairy-free mayo, chopped chipotle pepper, nutritional yeast, garlic, lime juice, and maple syrup until smooth.
  6. Warm a tortilla, spread chipotle mayo on one half, fill with crispy tofu and sautéed veggies, fold over and cook on both sides until crispy.
  7. Slice the wraps and serve immediately with guacamole or salsa if desired.

Nutrition

Serving: 1wrapCalories: 330kcalCarbohydrates: 35gProtein: 20gFat: 15gSaturated Fat: 3gPolyunsaturated Fat: 1gMonounsaturated Fat: 11gSodium: 420mgPotassium: 500mgFiber: 5gSugar: 2gVitamin A: 20IUVitamin C: 80mgCalcium: 10mgIron: 15mg

Notes

These wraps are customizable; swap veggies and sauces to suit your taste. Ideal for quick meals and meal prep.

Tried this recipe?

Let us know how it was!

Easy Grilled Cheese Burrito: Quick, Cheesy Comfort in 30 Minutes

January 9, 2026 by Grace Snow Leave a Comment

The sizzle of a skillet and the heavenly aroma of melting cheese always brings a smile to my face. Today, I'm excited to share my take on a nostalgic favorite: the Easy Grilled Cheese Burrito. In just 30 minutes, you can create this deliciously customizable dish that's perfect for busy weeknights. Whether you're satisfying a craving for comfort food or trying to please finicky kiddos, this burrito ticks all the boxes. You can easily adapt it to make a vegetarian or dairy-free version, ensuring everyone at your table has something to enjoy. So, are you ready to dive into a crunchy exterior that hides a gooey, cheesy treasure within? Let’s get cooking!

Why Choose This Easy Grilled Cheese Burrito?

Quick and Easy: The recipe is designed to whip up in just 30 minutes, perfect for those busy weeknights when you crave comfort food without the wait.

Customizable Delights: You can easily adapt this dish for any dietary preference, whether you’re opting for a vegetarian version using black beans or a dairy-free twist with coconut yogurt and vegan cheese.

Crowd-Pleasing Flavor: With gooey cheese and crispy tortillas, this burrito is guaranteed to be a hit with both kids and adults, making it a great addition to your weeknight meals.

Healthy Substitutions: Feel free to swap out ingredients as needed, such as using quinoa instead of rice or whole wheat tortillas for a healthier options. There’s something for everyone!

Perfect Pairing: Serve with creamy guacamole or zesty chipotle sauce to elevate your dining experience—just like with my other favorites, Grilled Mushrooms Savory or Poor Man's Burrito.

Easy Grilled Cheese Burrito Ingredients

For the Filling:

  • Ground Beef – Provides protein and a hearty flavor; substitute with turkey or plant-based alternatives for a lighter or vegetarian option.
  • Taco Seasoning – Adds spice and depth to your filling; make a homemade mix using chili powder, cumin, garlic powder, and paprika for more control over the flavor.
  • Cooked White Rice – Acts as a filler for substance; consider brown rice or quinoa for added fiber and nutrients.
  • Nacho Cheese Sauce – Delivers cheesy warmth; feel free to use homemade or vegan cheese sauce to cater to dietary preferences.
  • Shredded Cheddar Cheese – Melts beautifully and adds flavor; replace with mozzarella or a Mexican cheese blend for variety.
  • Shredded Mozzarella Cheese – Enhances cheesiness; optional and can be replaced with a lower-fat cheese if desired.
  • Chipotle Sauce – Provides a smoky kick; adjust the amount depending on your heat preference.

For the Tortilla:

  • Flour Tortillas – Encase all the delicious filling; swap for whole wheat or gluten-free tortillas for healthier or gluten-free options.

For Grilling:

  • Butter or Oil – Helps achieve a golden, crispy crust; substitute with olive oil or non-stick spray for a lighter approach.

This Easy Grilled Cheese Burrito is not only a quick and easy meal option but also fully customizable, ensuring that everyone finds a version they love!

Step‑by‑Step Instructions for Easy Grilled Cheese Burrito

Step 1: Cook the Beef
In a large skillet over medium heat, add 1 pound of ground beef. Use a wooden spoon to break it apart as it cooks for about 8–10 minutes, or until browned and no longer pink. Add taco seasoning along with a splash of water, stirring to combine. Let it simmer for an additional 5 minutes, allowing the flavors to meld beautifully for your Easy Grilled Cheese Burrito.

Step 2: Warm Tortillas
While the beef is simmering, heat 4 flour tortillas in a dry skillet over low heat for about 30 seconds on each side, or until warm and pliable. Alternatively, you can microwave them for 20 seconds. Keeping them covered with a clean kitchen towel will help maintain their warmth while you prepare the burritos.

Step 3: Assemble Burrito
On each warmed tortilla, layer about 1/2 cup of cooked white rice, followed by the seasoned beef mixture. Drizzle some nacho cheese sauce generously over the top, then add a dollop of sour cream and a dash of chipotle sauce. To enhance the cheesy goodness, sprinkle shredded cheddar and mozzarella cheese before folding the tortillas tightly around the fillings.

Step 4: Grill Burrito
In the same skillet, heat a tablespoon of butter or oil over medium heat until melted and bubbly. Carefully place the assembled burrito seam-side down in the skillet. Grill for about 3–4 minutes until the bottom is crispy and golden brown, then flip the burrito and grill the other side for another 3–4 minutes, achieving that irresistible crunch on your Easy Grilled Cheese Burrito.

Step 5: Serve & Enjoy
Once grilled to perfection, remove the burrito from the skillet and let it cool slightly. Slice it in half to reveal the melty, cheesy filling inside, and serve it warm with a side of guacamole or extra chipotle sauce for dipping. Each bite of the Easy Grilled Cheese Burrito promises happiness and satisfaction!

Easy Grilled Cheese Burrito Variations

Feel free to play with these ideas to make the Easy Grilled Cheese Burrito truly your own!

  • Vegetarian Option: Replace ground beef with black beans, lentils, or sautéed veggies for a delicious plant-based twist. Each bite will be bursting with vibrant flavors.

  • Dairy-Free Delight: Use vegan cheese sauce and dairy-free sour cream to create a creamy, indulgent experience that's perfect for those avoiding dairy.

  • Extra Crunch: For a delightful textural change, add a layer of tortilla chips or crushed cornflakes inside the burrito for a surprise crunch.

  • Spicy Kick: Add jalapeños, diced green chiles, or a drizzle of your favorite hot sauce for those who crave extra heat in their burrito.

  • Fresh Herb Boost: Enhance freshness by incorporating chopped cilantro, green onions, or even a squeeze of lime juice for a zesty finish.

  • Whole Grain Goodness: Swap standard tortillas for whole wheat or spinach tortillas to give your burrito a nutty flavor and added nutrition.

  • Protein Punch: Boost your burrito's substance by adding grilled chicken, shrimp, or even juicy steak to satisfy meat lovers in the family.

  • Cauliflower Rice: For a lower-carb version, substitute cooked white rice with cauliflower rice, adding a healthy twist while still keeping it delicious.

Feel free to explore these diverse options—perhaps even combine a few! For a flavor-packed side, consider serving them alongside my Grilled Balsamic Steak Salad or some savory Grilled Mushrooms. Each variation is a new opportunity for culinary creativity!

Make Ahead Options

These Easy Grilled Cheese Burritos are perfect for meal prep, making it easier for busy home cooks! To save time, you can prepare the seasoned beef and rice mixture up to 3 days in advance; simply refrigerate in an airtight container. You can also assemble the burritos a day ahead (up to 24 hours), wrapping them tightly to ensure freshness while chilling. When you're ready to enjoy, just grill each burrito for 3–4 minutes on each side until crispy—this method ensures they will taste just as delicious as when freshly made! With these convenient make-ahead options, you can delight your family with a comforting meal in no time.

How to Store and Freeze Easy Grilled Cheese Burrito

Fridge: Store leftovers in an airtight container for up to 3 days to maintain freshness and prevent them from becoming soggy.

Freezer: Wrap individual burritos tightly in foil and place them in a freezer bag for up to 1 month. This ensures the cheesy goodness stays intact while frozen.

Reheating: To reheat, unwrap the burrito and bake at 350°F (175°C) for about 20 minutes, restoring that delightful crispiness to the tortilla.

Make Ahead: You can prepare the beef filling and rice mix up to 3 days in advance, making mealtime easier without sacrificing taste in your Easy Grilled Cheese Burrito.

Expert Tips for Easy Grilled Cheese Burrito

  • Preheat the Skillet: Ensure your skillet is preheated before grilling; a cold skillet can lead to a soggy burrito instead of the crispy exterior you want.

  • Layering Order: Spread out fillings evenly and don't overstuff; too many ingredients can make it difficult to wrap your Easy Grilled Cheese Burrito tightly.

  • Press While Grilling: Gently press down on the burrito while it grills to improve the crispiness and ensure the cheese melts perfectly.

  • Make-Ahead Filling: Prepare the beef filling and rice mixture up to 3 days in advance, making it quicker to assemble on busy nights.

  • Creative Variations: Experiment with different cheeses or add-ins like spinach or jalapeños to personalize your burrito and keep things exciting!

  • Storage Tips: Keep leftovers in airtight containers for up to 3 days or freeze individually wrapped burritos for up to a month for a quick meal anytime.

What to Serve with Easy Grilled Cheese Burrito?

Pairing delicious sides with your burrito can elevate your meal into an unforgettable experience.

  • Guacamole: Fresh and creamy, it adds a smooth texture that perfectly complements the burrito's crunch.
  • Mexican Street Corn: Spicy and sweet, this vibrant dish brings an extra pop of flavor that pairs beautifully with cheesy burritos.
  • Crispy Tortilla Chips: Serve alongside with a side of salsa for satisfying crunch and a zesty touch—you can't go wrong!
  • Chipotle Sauce: A drizzle of this smoky sauce amplifies the flavor profile and adds extra flair to each bite.
  • Side Salad: A light, refreshing mix of greens and tomatoes balances the richness of the burrito, making your meal feel well-rounded.
  • Pico de Gallo: This fresh salsa adds brightness and a burst of flavor, enhancing each cheesy mouthful.
  • Margaritas: A fruity or classic margarita brings a festive touch to your dinner, creating a fun and relaxing atmosphere.
  • Homemade Coleslaw: This crunchy, tangy side contrasts wonderfully with the warm, cheesy burrito.
  • Zucchini Fries: Crispy, baked zucchini fries are a healthy alternative to traditional fries, providing a delightful crunch.

Easy Grilled Cheese Burrito Recipe FAQs

What ingredients should I choose for the best flavor?
Absolutely! When selecting your ground beef for the Easy Grilled Cheese Burrito, look for 80/20 ground beef, which offers a perfect balance of lean meat and fat, ensuring a juicy filling. For a lighter option, choose ground turkey or plant-based alternatives. Fresh taco seasoning can elevate the flavor, and don’t hesitate to use homemade spices for more control over the taste!

How can I store leftovers properly?
Very! To store your Easy Grilled Cheese Burrito leftovers, place them in an airtight container in the fridge, where they will stay fresh for up to 3 days. Just be sure to allow them to cool to room temperature before sealing. This helps prevent condensation from making them soggy!

Can I freeze these burritos for later use?
Absolutely! To freeze the Easy Grilled Cheese Burrito, wrap each burrito tightly in foil. Then, place the wrapped burritos in a freezer bag to avoid freezer burn. They can be stored for up to 1 month. When you’re ready to enjoy, unwrap and bake at 350°F (175°C) for about 20 minutes to restore their delightful crispiness.

What are some common troubleshooting tips for grilling the burrito?
If you're having trouble getting the perfect crisp on your burrito, try preheating your skillet thoroughly before grilling. A cold pan can lead to a soggy burrito. If the filling is spilling out, be sure to not overstuff them, and wrap them tightly. Press gently while grilling to ensure that the cheese melts evenly and the outside gets nicely browned.

Any dietary considerations I should be aware of?
Definitely! For those with dairy allergies, you can easily substitute the nacho cheese sauce and sour cream with dairy-free options, like vegan cheese and coconut yogurt. If you have gluten sensitivities, opt for gluten-free tortillas. It's so customizable that everyone can partake in the deliciousness of the Easy Grilled Cheese Burrito!

Easy Grilled Cheese Burrito

Easy Grilled Cheese Burrito: Quick, Cheesy Comfort in 30 Minutes

Experience the Easy Grilled Cheese Burrito, a deliciously customizable dish perfect for busy weeknights.
Print Recipe Pin Recipe
Prep Time 10 minutes mins
Cook Time 20 minutes mins
Total Time 30 minutes mins
Servings: 4 burritos
Course: Dinner
Cuisine: Mexican
Calories: 450
Ingredients Equipment Method Nutrition Notes

Ingredients
  

Filling
  • 1 pound Ground Beef Substitute with turkey or plant-based alternatives for lighter option.
  • 1 packet Taco Seasoning Homemade mix option available.
  • 2 cups Cooked White Rice Consider brown rice or quinoa for added fiber.
  • 1 cup Nacho Cheese Sauce Use homemade or vegan cheese sauce as needed.
  • 1 cup Shredded Cheddar Cheese Can replace with mozzarella for variety.
  • 1 cup Shredded Mozzarella Cheese Optional, can use lower-fat cheese.
  • 2 tablespoons Chipotle Sauce Adjust according to heat preference.
Tortilla
  • 4 pieces Flour Tortillas Swap for whole wheat or gluten-free if desired.
Grilling
  • 1 tablespoon Butter or Oil Can substitute with olive oil or non-stick spray.

Equipment

  • Skillet
  • Wooden spoon
  • Microwave
  • Airtight Container

Method
 

Preparation
  1. In a large skillet over medium heat, add 1 pound of ground beef. Cook for about 8–10 minutes until browned and no longer pink. Add taco seasoning and a splash of water, stirring to combine.
  2. While the beef is simmering, heat 4 flour tortillas in a dry skillet over low heat for about 30 seconds on each side, or until warm.
  3. On each warmed tortilla, layer about 1/2 cup of cooked white rice, the seasoned beef mixture, drizzle nacho cheese sauce, add a dollop of sour cream and a dash of chipotle sauce. Sprinkle with shredded cheddar and mozzarella cheese before folding the tortilla.
  4. In the same skillet, heat 1 tablespoon of butter or oil over medium heat. Place the assembled burrito seam-side down and grill until crispy and golden brown.
  5. Remove the burrito from the skillet, slice in half, and serve with a side of guacamole or extra chipotle sauce for dipping.

Nutrition

Serving: 1burritoCalories: 450kcalCarbohydrates: 45gProtein: 25gFat: 20gSaturated Fat: 10gPolyunsaturated Fat: 2gMonounsaturated Fat: 5gCholesterol: 70mgSodium: 800mgPotassium: 300mgFiber: 3gSugar: 2gVitamin A: 500IUVitamin C: 2mgCalcium: 250mgIron: 2mg

Notes

Prep the filling in advance for quick assembly on busy nights. Creative variations can include different cheeses or add-ins like spinach or jalapeños.

Tried this recipe?

Let us know how it was!
  • « Previous Page
  • 1
  • …
  • 28
  • 29
  • 30
  • 31
  • 32
  • …
  • 71
  • Next Page »

Welcome!

Hi, I’m Grace, a Sydney-based home cook with a passion for bold flavors and trending ingredients. Whether you’re a busy beginner or a seasoned foodie, you’ll find dishes here that are fresh, fun, and full of flavor.

More about me

Popular Recipes

  • Chocolate Cake Pops
    Delightful Chocolate Cake Pops for Your Sweet Cravings
  • Cottage Cheese Banana Bread
    Cottage Cheese Banana Bread: Moist, Protein-Packed Delight
  • Flourless Oat Waffles
    Flourless Oat Waffles for a Quick, Healthy Breakfast Boost
  • Cinnamon Waffles
    Fluffy Cinnamon Waffles with Dreamy Whipped Cream Bliss

Footer

↑ back to top

About

  • Privacy Policy
  • Disclaimer
  • Terms & Conditions

Newsletter

  • Sign Up! for emails and updates

Contact

  • About me
  • Contact me

Copyright © 2025 TastyTrendIngredients