
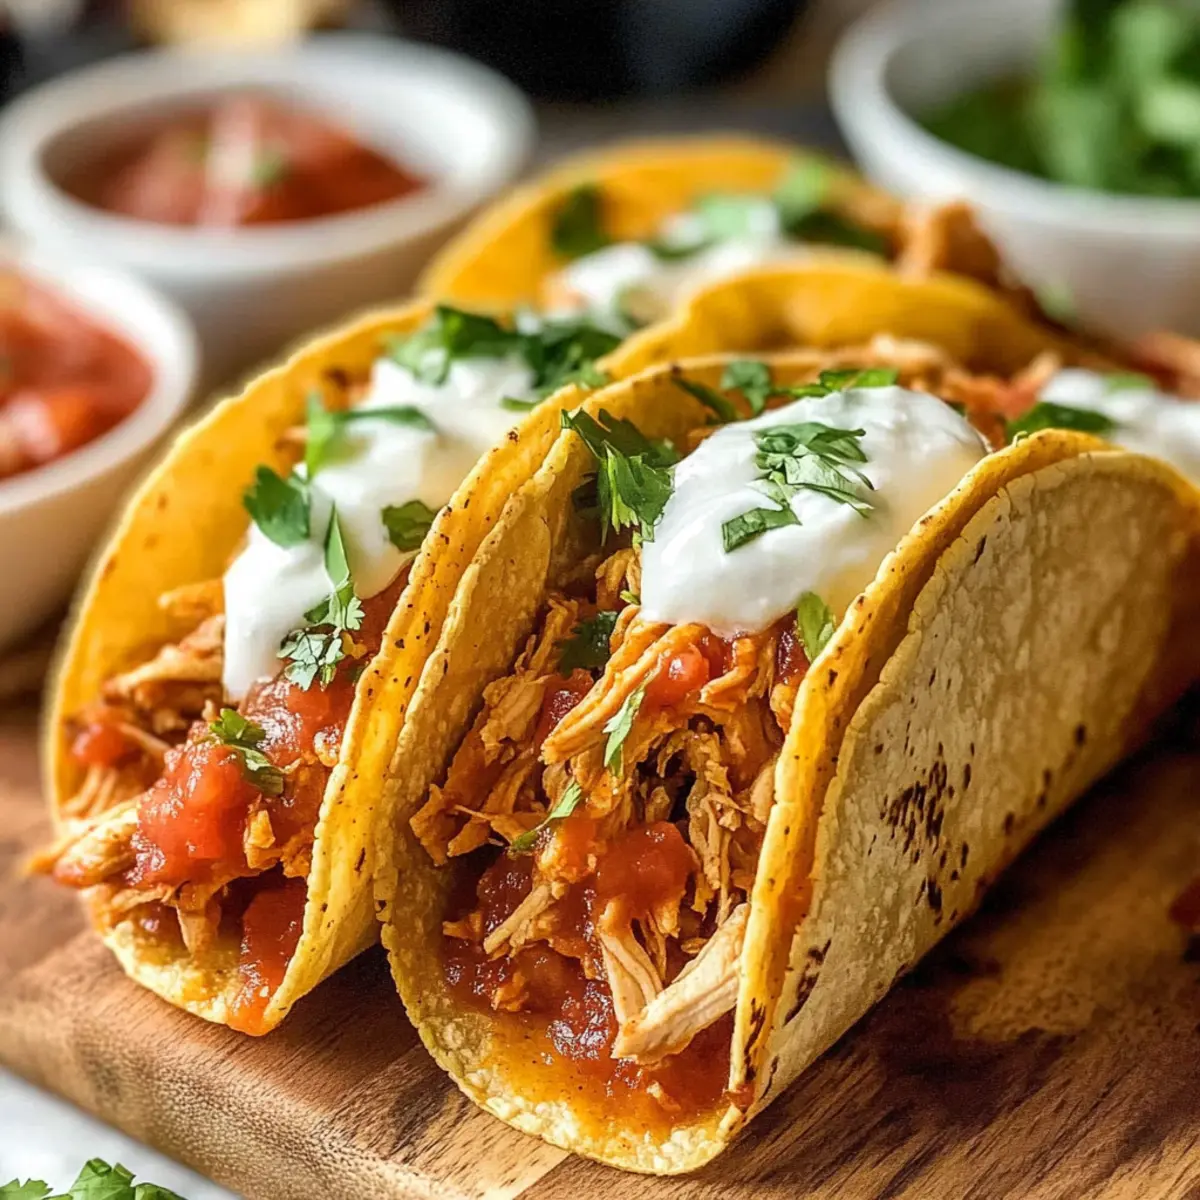
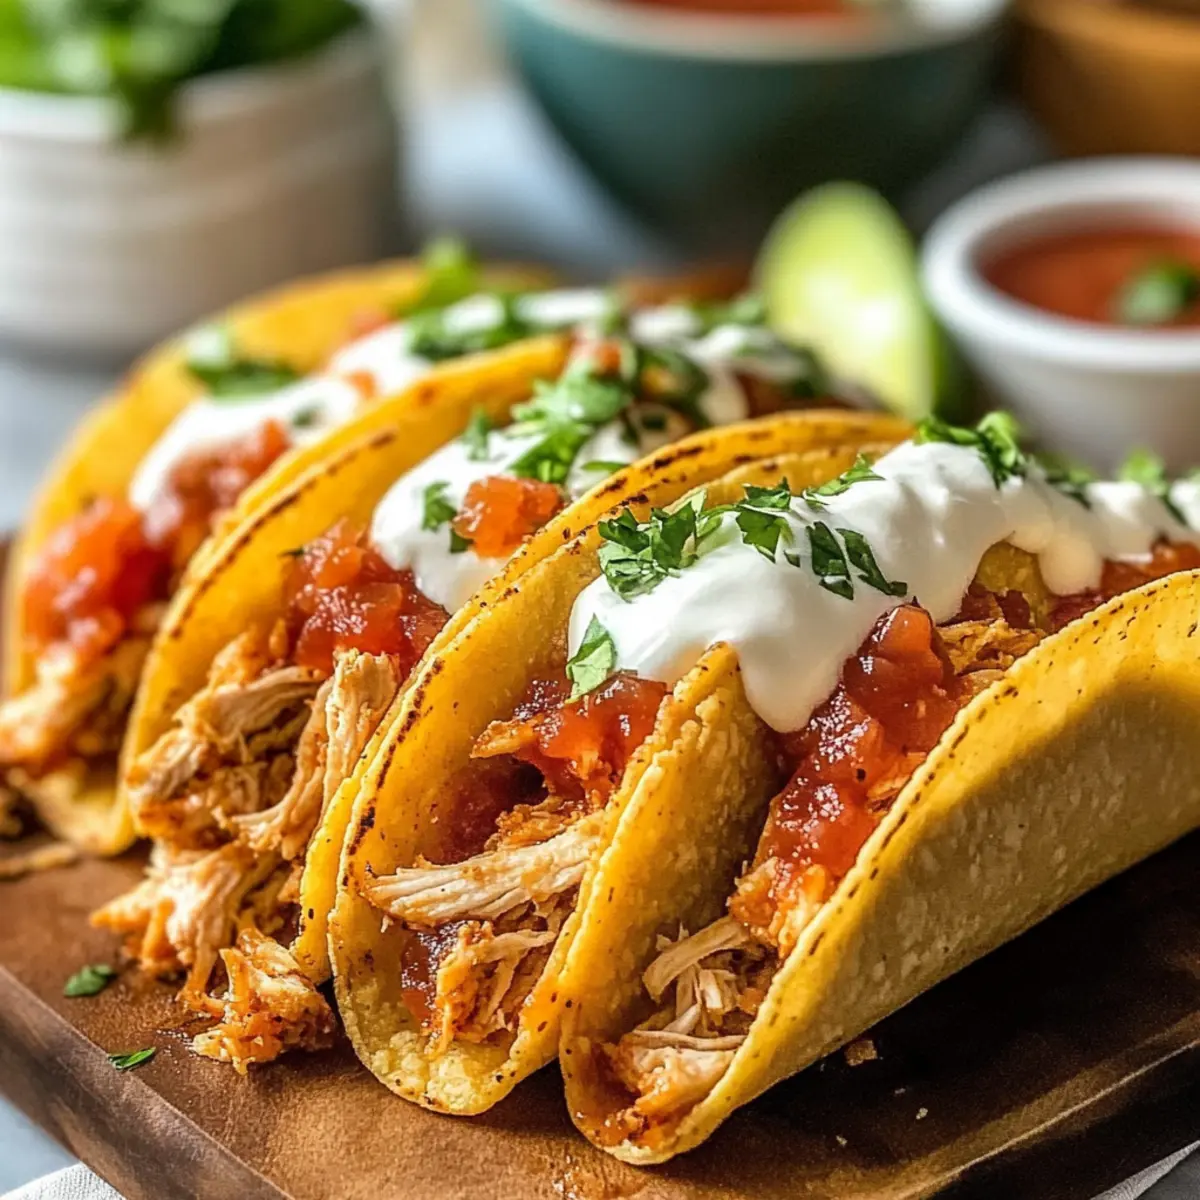
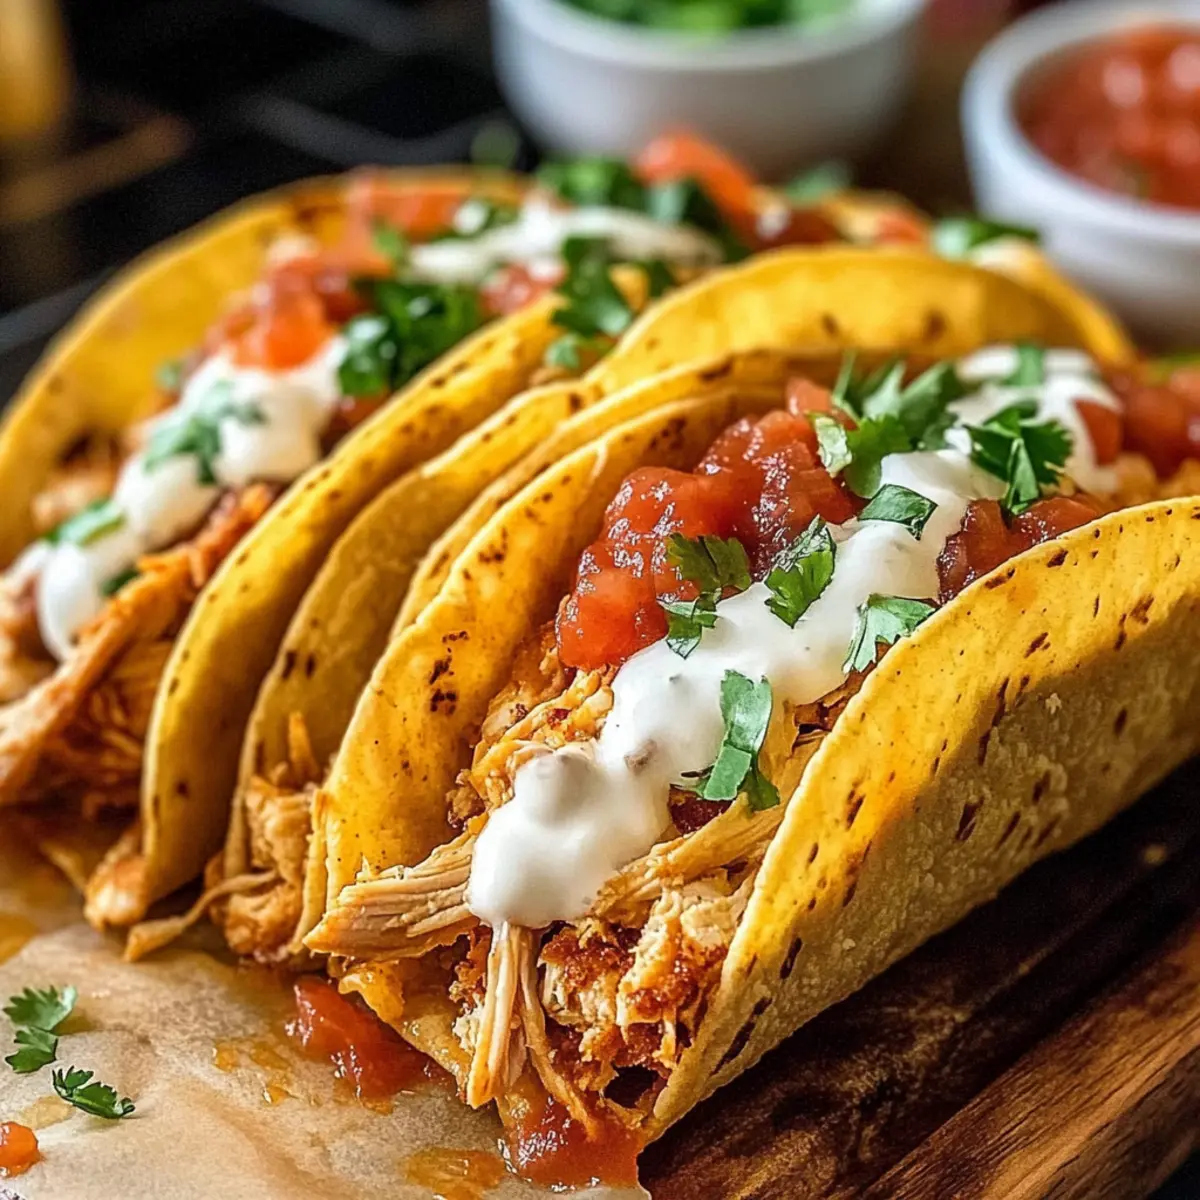
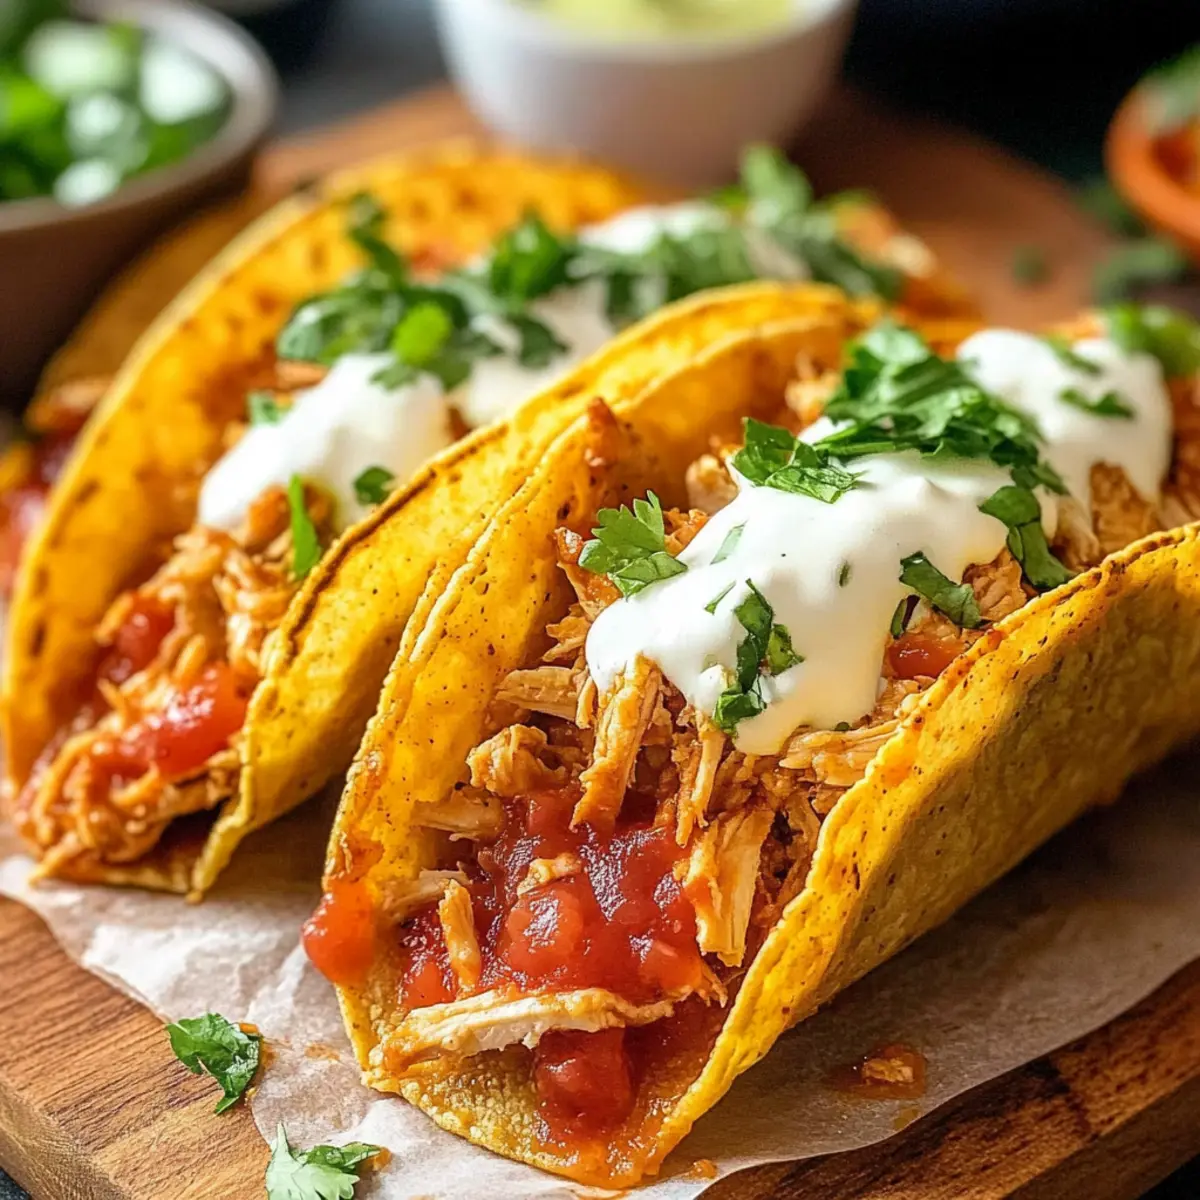
The aroma wafting through the kitchen is a surefire sign that a family favorite is in the works. Today, I’m thrilled to share my Baked Crispy Chicken Tacos recipe—your ticket to a delicious meal that’s as satisfying as it is easy to prepare. With tender, seasoned chicken nestled in golden taco shells, these Crispy Chicken Tacos deliver the perfect crunch without the guilt of frying. They’re not just a feast for the taste buds; they’re a crowd-pleaser that’ll leave everyone craving seconds. Plus, this recipe is a breeze to whip up, making it ideal for busy nights or casual gatherings with friends. Are you ready to discover how simple and scrumptious homemade tacos can be? Let’s dive in!
Why Choose Baked Crispy Chicken Tacos?
Simplicity. These tacos come together with minimal effort, making them a go-to for weeknight dinners. Mouthwatering Flavor. Juicy chicken seasoned to perfection combined with melted cheese ensures each bite is packed with taste. Healthier Alternative. Baked instead of fried, they satisfy cravings without the extra calories. Crowd-Pleasing. Perfect for gatherings, everyone will appreciate this delightful twist on traditional tacos. Versatile. You can easily customize fillings, whether by adding veggies or switching proteins to suit your family’s preferences. These Crispy Chicken Tacos might just become your new favorite meal!
Crispy Chicken Tacos Ingredients
Elevate your taco night with these delightful, easy-to-make ingredients!
For the Chicken Filling
- Cooking Oil – Adds moisture and helps achieve crispiness on the taco shells. Substitution: Avocado or olive oil works best; adjust based on preference.
- Chicken Breast – The main protein source, boneless and skinless, for a tender filling. Prep Note: Use fresh or thawed chicken.
- Taco Seasoning – Provides essential Mexican flavor. Substitution: Homemade or store-bought varieties can be used.
- Salsa – Contributes moisture and flavor to the chicken. Note: Use mild or medium salsa based on spice preference.
- Chicken Broth – Adds additional moisture and enhances flavor during cooking. Prep Note: Ensure there’s enough liquid for the sauce consistency.
For the Taco Shells
- Corn Tortillas – Forms the crispy taco shells after baking. Recommendation: Warming them beforehand prevents cracking during folding.
- Mexican Blend Cheese – Melts into the filling, binding the ingredients while adding creamy texture. Substitution: Any shredded cheese can be used; however, a blend gives better flavor.
This Chicken Tacos recipe is all about simplicity and flavor! Enjoy your cooking adventure!
Step‑by‑Step Instructions for Crispy Chicken Tacos
Step 1: Preheat Oven
Begin by preheating your oven to 425°F (220°C). Position the oven racks in the middle and upper thirds to ensure even cooking. This step is crucial for achieving those perfectly golden, crispy taco shells that are the hallmark of your delicious Crispy Chicken Tacos.
Step 2: Cook Chicken
In a large skillet, heat a tablespoon of cooking oil over medium-high heat. Once the oil is shimmering, add the chicken breasts, along with half of the taco seasoning. Cook until the chicken is golden on one side, about 5-6 minutes, then flip it over. Add the remaining seasoning, salsa, and a splash of chicken broth, cover, and simmer for 10-12 minutes or until the chicken is cooked through and tender.
Step 3: Warm Tortillas
While the chicken is cooking, warm each corn tortilla. To do this, place them in a dry skillet over medium heat, warming each side for about 10 seconds. Keep the tortillas covered with a clean kitchen towel to retain warmth and prevent them from cracking when you fill and fold your Crispy Chicken Tacos.
Step 4: Shred Chicken
Once the chicken has finished cooking, remove it from the skillet and allow it to cool slightly. Using two forks, shred the chicken into bite-sized pieces, ensuring it remains juicy and mixed with the salsa and seasoning from the pan. Now your filling is ready for these delectable tacos!
Step 5: Assemble Tacos
Prepare two baking sheets by lining them with parchment paper. Take a warmed tortilla and sprinkle a layer of cheese on one half, followed by a generous scoop of the shredded chicken. Drizzle a touch of the reserved sauce for extra moisture, then top with more cheese before folding the tortilla in half. Lightly brush the tops with cooking oil to ensure they crisp beautifully.
Step 6: Bake Tacos
Place the assembled tacos on the baking sheets and bake in the preheated oven for 20-25 minutes. Rotate the baking sheets halfway through cooking, and keep an eye out for that perfect golden color on the taco shells—they should be wonderfully crispy and crispy to perfection.
Step 7: Serve
After baking, allow the Crispy Chicken Tacos to cool slightly on a wire rack or a plate. This brief resting time helps prevent the filling from spilling out. Serve warm with your favorite sides, like guacamole or sour cream, and watch your family enjoy every delightful bite!
What to Serve with Baked Crispy Chicken Tacos?
When crafting the perfect taco night experience, complement your crispy creations with delightful sides and beverages that elevate every bite.
-
Guacamole: This creamy avocado dip adds richness and balances the crunch of the tacos, making every bite even more delightful.
-
Mexican Street Corn Salad: Bright, fresh, and zesty, this salad offers a refreshing contrast, bursting with flavors that harmonize beautifully with the tacos.
-
Pico de Gallo: This fresh salsa adds a vibrant burst of flavor, with the crunch of diced tomatoes, onions, and cilantro enhancing the overall taste experience.
-
Refried Beans: Creamy with a touch of smokiness, refried beans provide a satisfying dip that perfectly pairs with the crispy chicken filling.
-
Spanish Rice: Fluffy and fragrant, seasoned rice complements the meal, adding delicious texture and a comforting element to your taco night.
-
Chilled Horchata: This sweet, creamy rice milk is a refreshing drink that cools the palate, making it a perfect match for spicy or savory tacos.
-
Churros: End your meal on a sweet note with these crispy, cinnamon-sugar-covered pastries. They offer the perfect crunchy contrast to the savory tacos!
As you put together your meal, each of these pairings will amplify the flavors of your Baked Crispy Chicken Tacos, creating a true fiesta on your table.
Crispy Chicken Tacos: Flavorful Twists Await!
Feel free to let your creativity shine with these delightful variations for your crispy chicken tacos, enhancing every bite with excitement!
-
Vegetable Boost: Add sautéed onions and bell peppers to the chicken filling for a colorful and nutritious twist.
-
Protein Swap: Substitute chicken with ground beef or turkey for a hearty, savory alternative that satisfies different palates.
-
Spicy Kick: Toss in jalapeños or use a zesty salsa to heat things up if you're seeking a fiery bite!
-
Cheesy Delight: Experiment with different cheese blends or even a spicy pepper jack for an extra layer of flavor.
-
Crunchy Topping: Add crushed tortilla chips or a sprinkle of crispy fried onions on top before baking for a delightful crunch.
-
Fresh Herbs: Incorporate chopped cilantro or green onions into the filling for an aromatic freshness that brightens each taco.
-
Creamy Sauce: Drizzle your tacos with a homemade chipotle sauce or ranch dressing to bring a creamy texture that pairs wonderfully with the crunch.
-
Sweet Twist: For a unique twist, mix in some diced pineapple or mango with the chicken for a hint of sweetness that balances the savory flavors.
As you explore these variations, don’t hesitate to serve your tacos alongside classic sides like guacamole or refried beans, ensuring a delightful meal that caters to every taste bud!
Expert Tips for Crispy Chicken Tacos
-
Preheat Properly: Always preheat your oven thoroughly to ensure even cooking for your Crispy Chicken Tacos. A hot oven is key for achieving that perfect crunch!
-
Chicken Shred Technique: Use two forks to shred your chicken for a tender filling. This ensures even distribution of flavors in your tacos and avoids large chunks.
-
Tortilla Care: Warm your corn tortillas before assembling; this helps prevent cracking and makes folding much easier. Trust me, you'll thank yourself later!
-
Oil Brushing: Don’t skip brushing the tops of your tacos with oil. It not only prevents burning but gives your Crispy Chicken Tacos that irresistible golden color.
-
Watch for Browning: Keep an eye on your tacos as they bake. If any start to open up, simply press them closed gently—no one wants a filling explosion!
Make Ahead Options
These Crispy Chicken Tacos are a fantastic choice for meal prep, saving you valuable time during busy weeknights! You can prepare the shredded chicken filling up to 3 days in advance by cooking and shredding the chicken with salsa and spices, then storing it in an airtight container in the refrigerator. Additionally, you can warm the corn tortillas and assemble the tacos a day ahead—just layer the ingredients and store them in the fridge with parchment paper between layers to maintain crispness. When you're ready to serve, simply bake the assembled tacos for about 20-25 minutes until golden, and they’ll be just as delicious as if made fresh!
How to Store and Freeze Crispy Chicken Tacos
Fridge: Store cooled Crispy Chicken Tacos in an airtight container for up to 3 days. They’ll maintain their flavor but may lose some crispiness.
Freezer: For longer storage, freeze the chicken filling separately in an airtight container for up to 3 months. Thaw overnight in the fridge before use for easy taco assembly.
Reheating: To enjoy them warmed, reheat baked tacos in a 350°F (175°C) oven for about 10-15 minutes, ensuring they regain their crunch.
Make-Ahead: Prepare the chicken filling ahead of time and assemble the tacos just before baking for a quick dinner option.
Crispy Chicken Tacos Recipe FAQs
How do I choose the right chicken for this recipe?
Always opt for boneless, skinless chicken breasts for the filling. Fresh chicken will yield the best flavor and texture, but if you're pressed for time, thawed frozen chicken works too. Look for chicken without dark spots or an unpleasant odor to ensure freshness.
What’s the best way to store leftovers?
Store cooled Crispy Chicken Tacos in an airtight container in the refrigerator for up to 3 days. To maintain flavor, consider reheating in a preheated oven at 350°F (175°C) for about 10-15 minutes—this helps them regain some of that original crispiness.
Can I freeze the chicken filling?
Absolutely! You can freeze the shredded chicken filling in an airtight container for up to 3 months. To do this, let the filling cool completely before portioning, then seal well. Thaw overnight in the fridge before using it to make quick tacos on busy nights.
What if my tacos don’t turn out crispy?
If your tacos aren't crispy, it could be due to insufficient oil brushing or overcrowding on the baking sheet. Make sure to lightly brush the tops with oil to enhance crispness, and arrange them in a single layer on the sheet—this allows hot air to circulate evenly. Also, rotating the baking sheets halfway through baking is essential for uniform crisping.
Is this recipe suitable for any dietary restrictions?
While these Crispy Chicken Tacos are not gluten-free due to the corn tortillas, they can easily be adapted. Opt for gluten-free tortillas, and check your taco seasoning for hidden gluten if necessary. Additionally, for dairy-free options, you can use dairy-free cheese alternatives without sacrificing flavor.
What can I do to spice them up?
If you're looking to add a kick to your tacos, consider mixing diced jalapeños or adding a splash of hot sauce to the chicken filling before assembling. Also, using spicy salsa or sprinkling some cayenne pepper into the taco seasoning can elevate the heat to your liking!
Crispy Chicken Tacos for the Perfect Taco Tuesday Night
Ingredients
Equipment
Method
- Preheat your oven to 425°F (220°C) and position the oven racks in the middle and upper thirds.
- In a large skillet, heat a tablespoon of cooking oil over medium-high heat. Add the chicken breasts and half of the taco seasoning. Cook until golden, about 5-6 minutes, then flip. Add remaining seasoning, salsa, and chicken broth. Cover and simmer for 10-12 minutes until cooked through.
- Warm each corn tortilla in a dry skillet over medium heat, about 10 seconds per side. Keep them covered with a towel to retain warmth.
- Remove chicken from skillet and shred it into bite-sized pieces using two forks, mixing it with salsa and seasoning.
- Prepare baking sheets with parchment paper. On a warmed tortilla, sprinkle cheese on one half, add shredded chicken, drizzle with sauce, top with more cheese, and fold.
- Bake tacos on baking sheets for 20-25 minutes, rotating halfway through. They should be golden and crispy.
- Allow tacos to cool slightly on a wire rack or plate before serving warm with sides like guacamole or sour cream.


Leave a Reply