tastytrendingredients

  • Home
  • Recipes
    • Appetizers
    • Breakfast
    • Dessert
    • Dinner
    • Drinks
    • Salads
    • Snacks
    • Soups
  • About me
  • Contact
menu icon
go to homepage
  • Home
  • Recipes
    • Appetizers
    • Breakfast
    • Dessert
    • Dinner
    • Drinks
    • Salads
    • Snacks
    • Soups
  • About me
  • Contact
search icon
Homepage link
  • Home
  • Recipes
    • Appetizers
    • Breakfast
    • Dessert
    • Dinner
    • Drinks
    • Salads
    • Snacks
    • Soups
  • About me
  • Contact
×

Savory Mongolian Ground Beef Noodles that Quick-Fix Cravings

March 17, 2026 by Grace Snow Leave a Comment

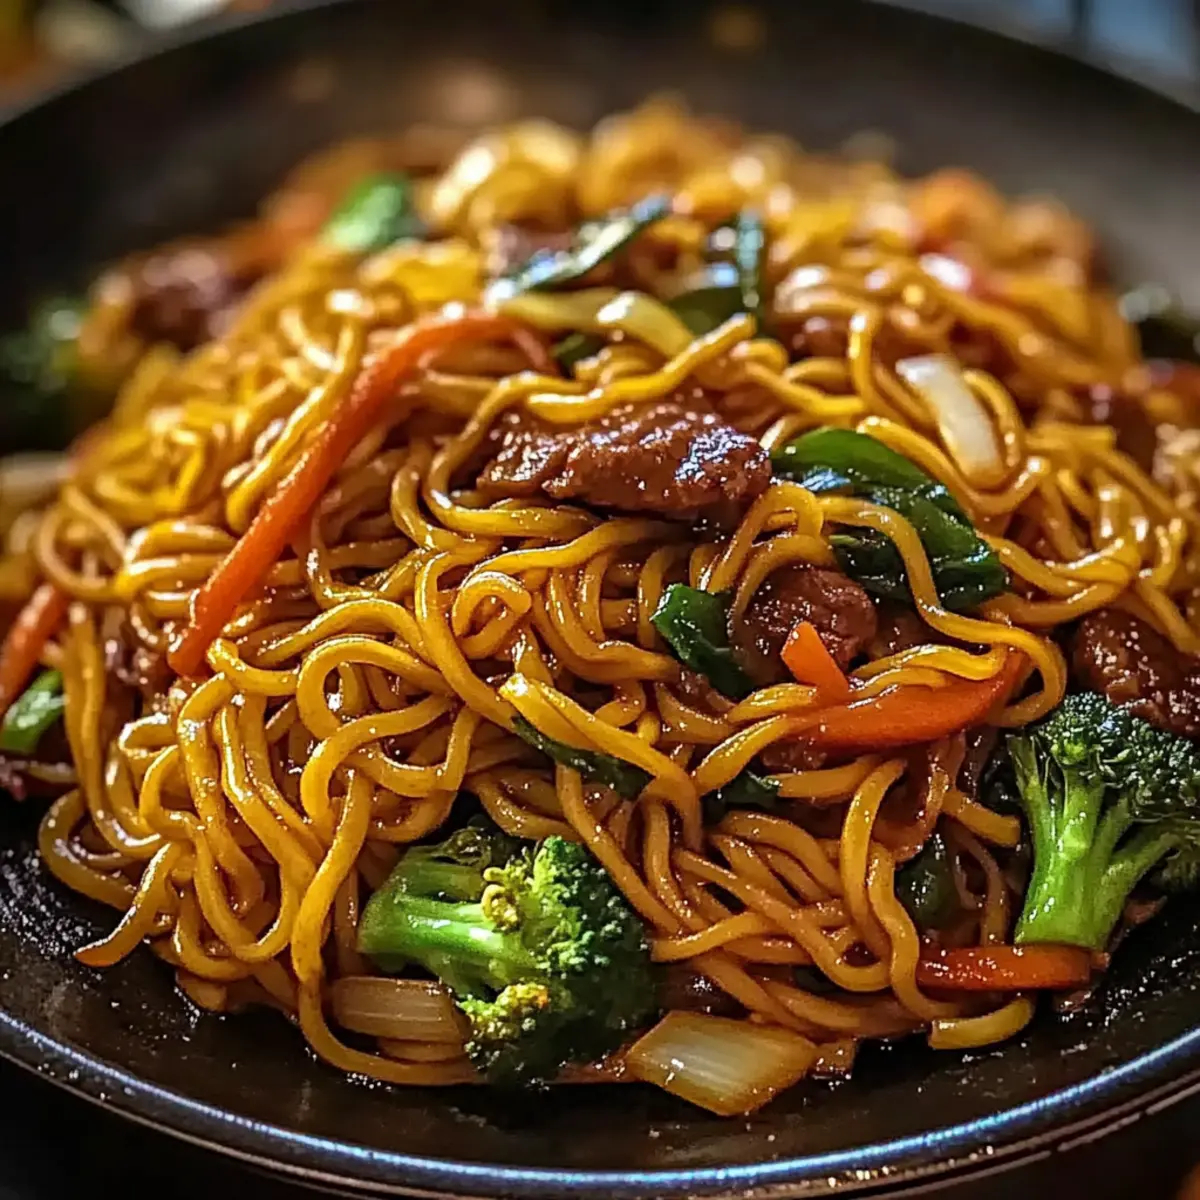
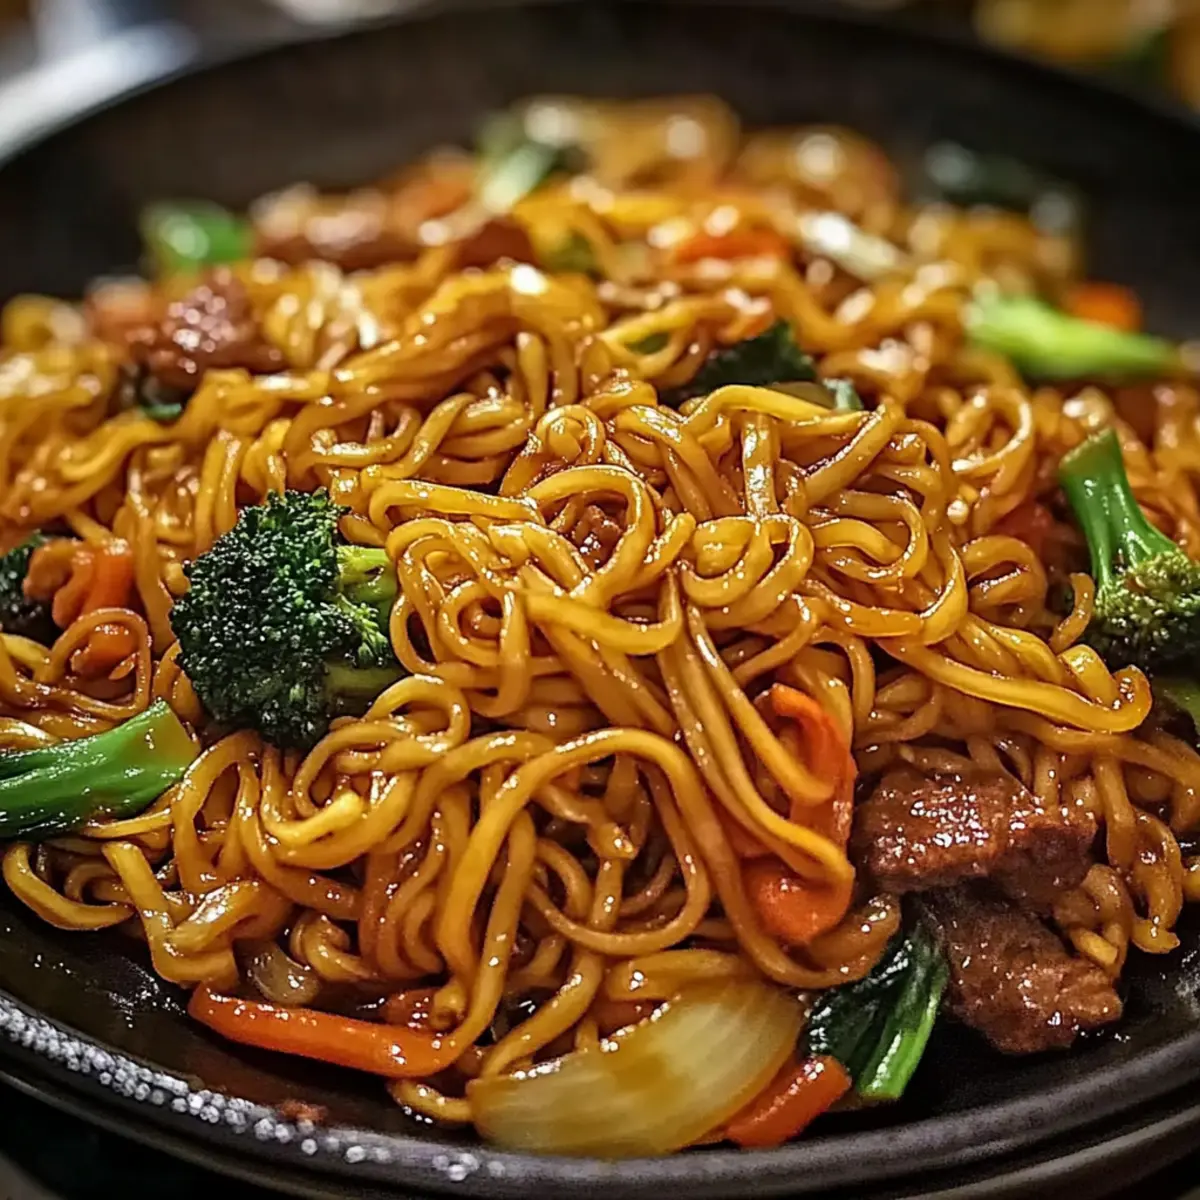
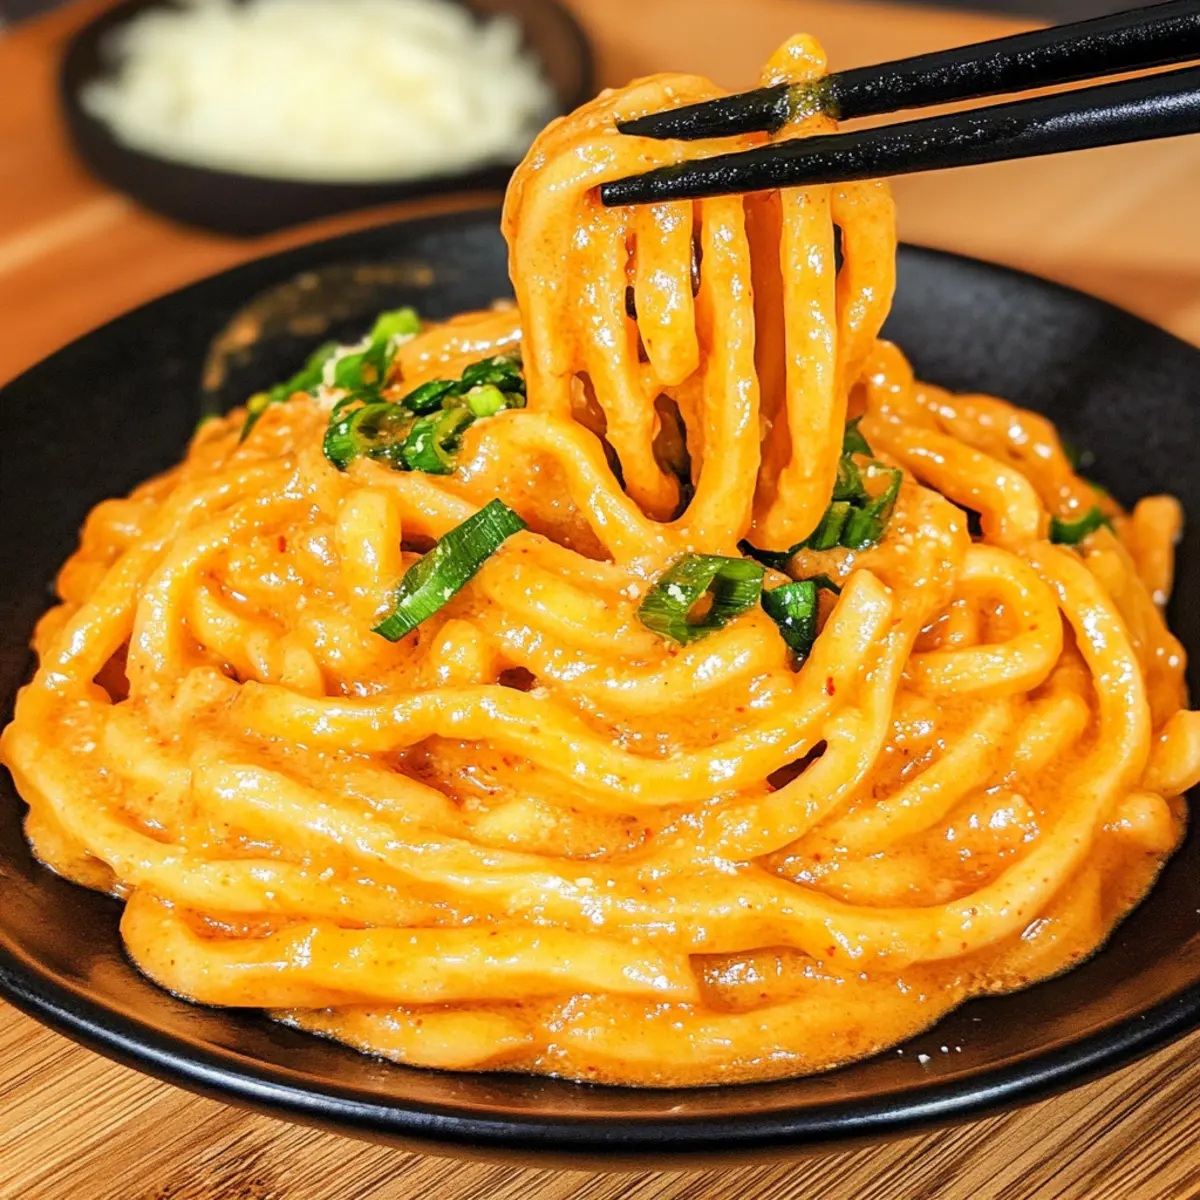
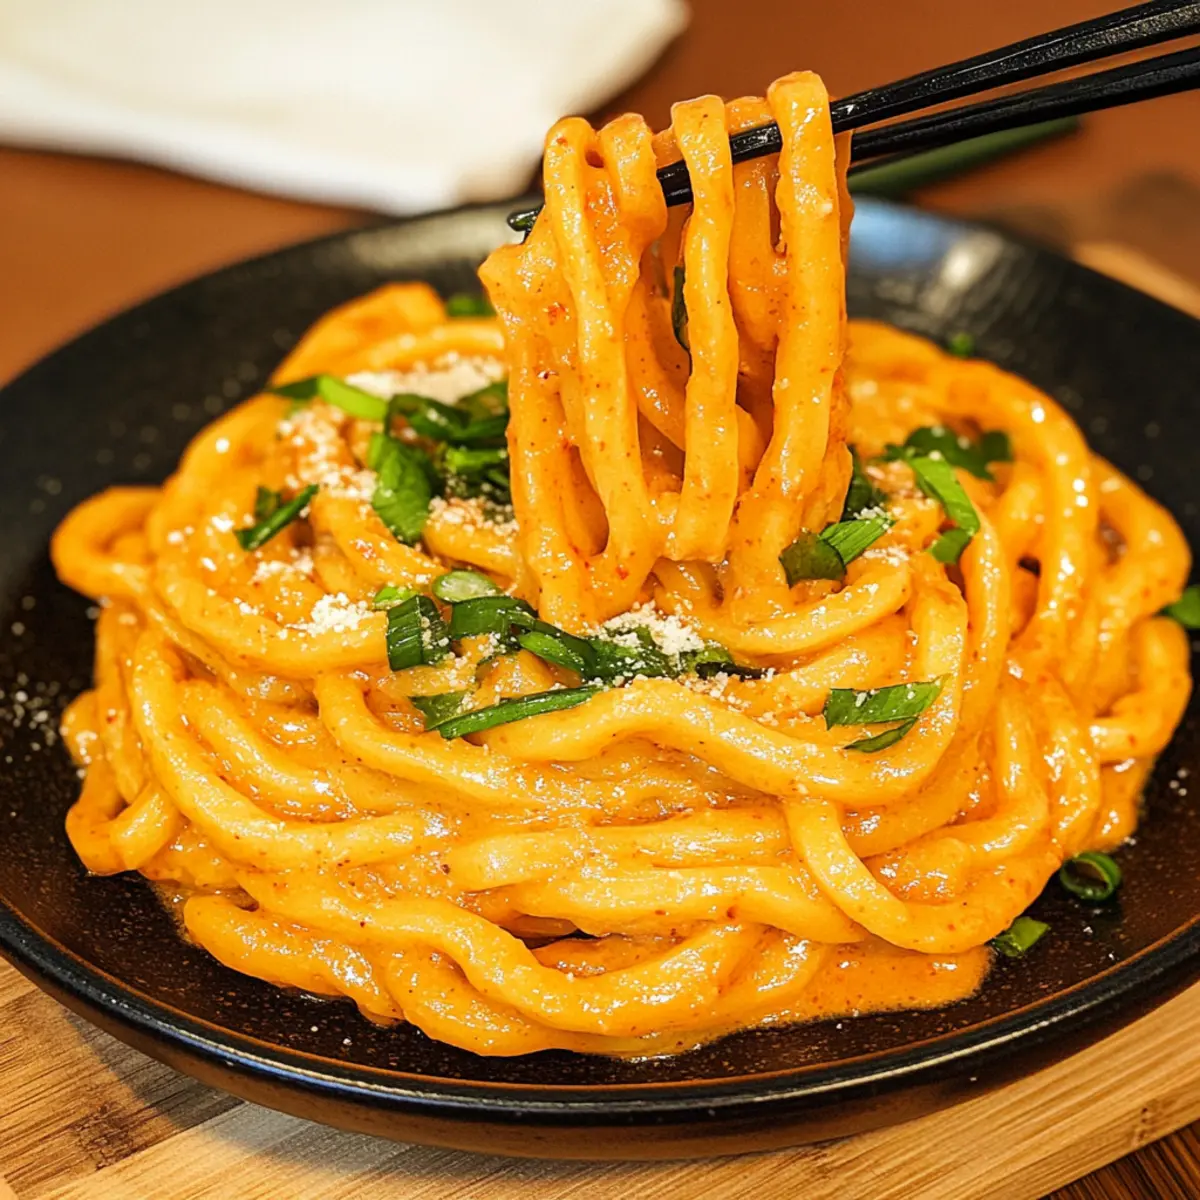
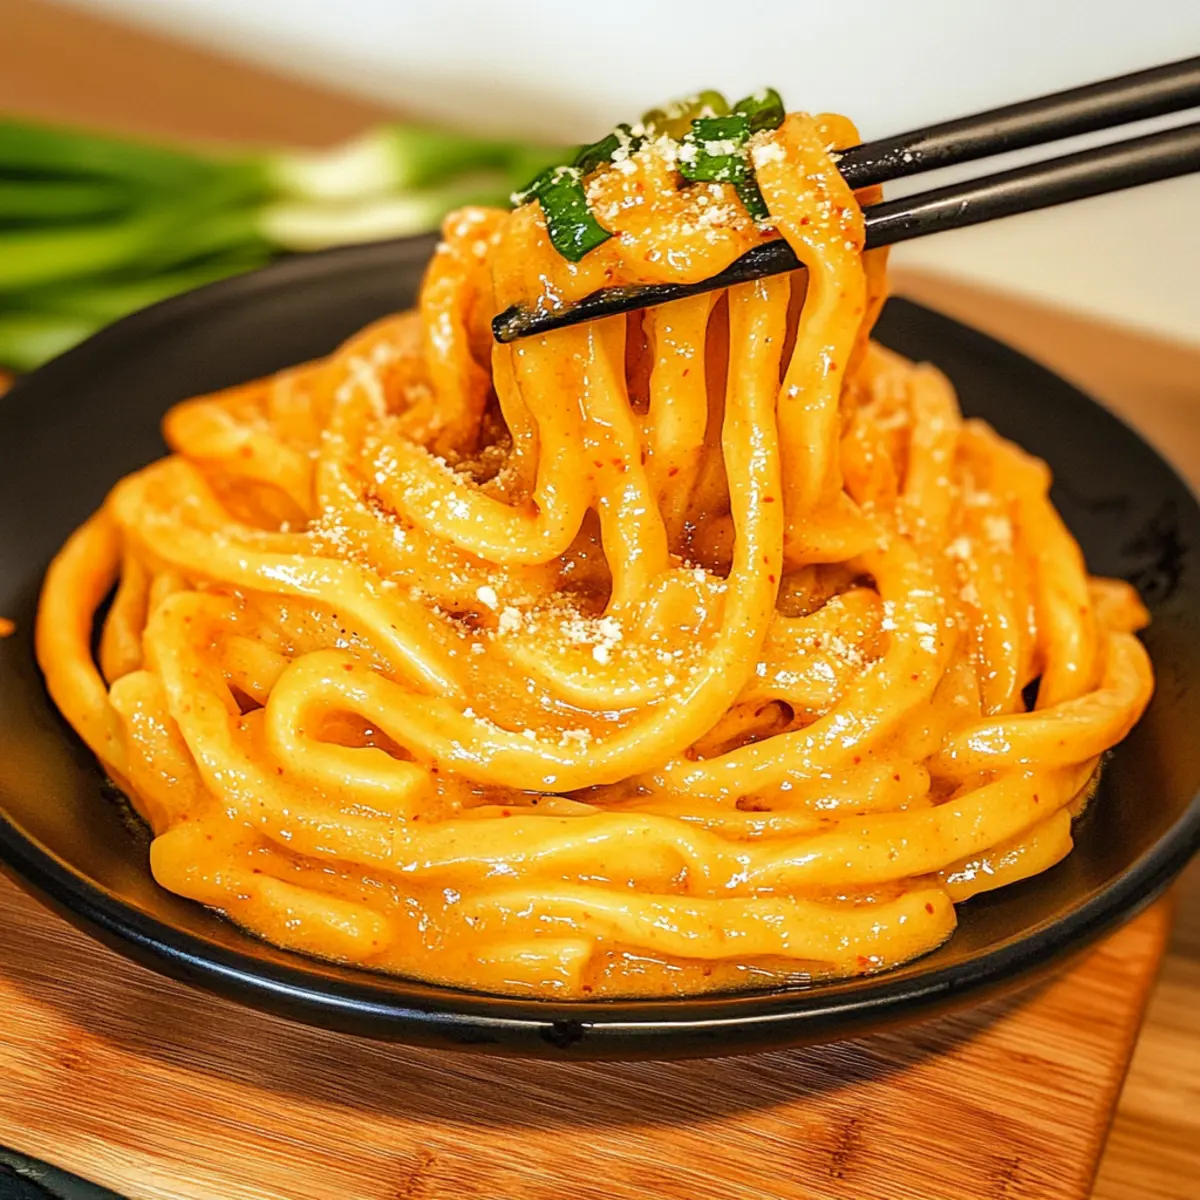
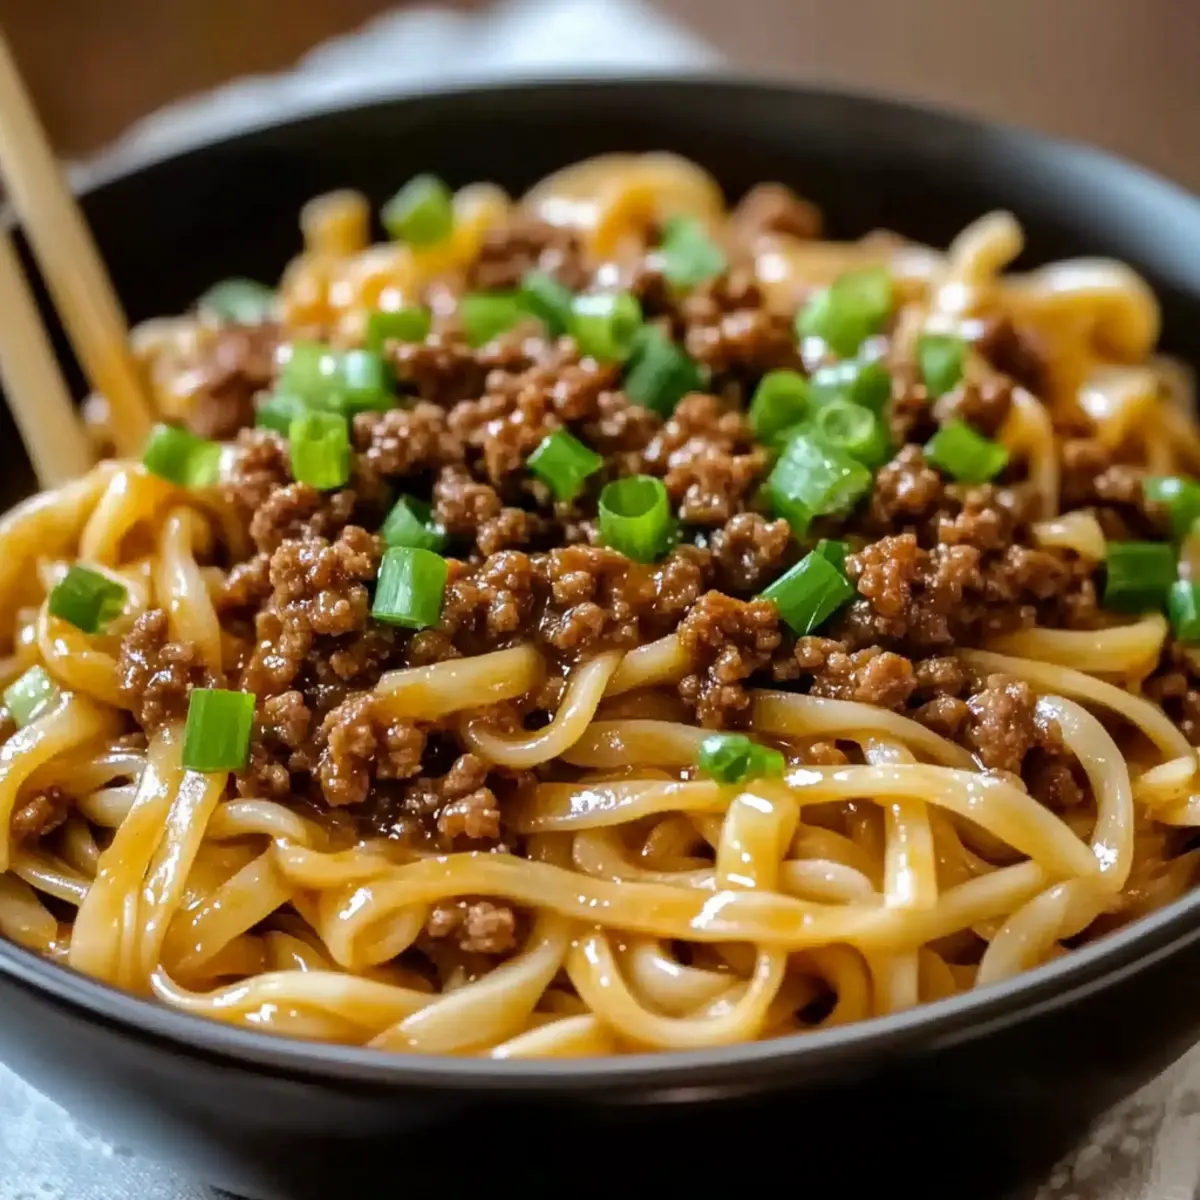
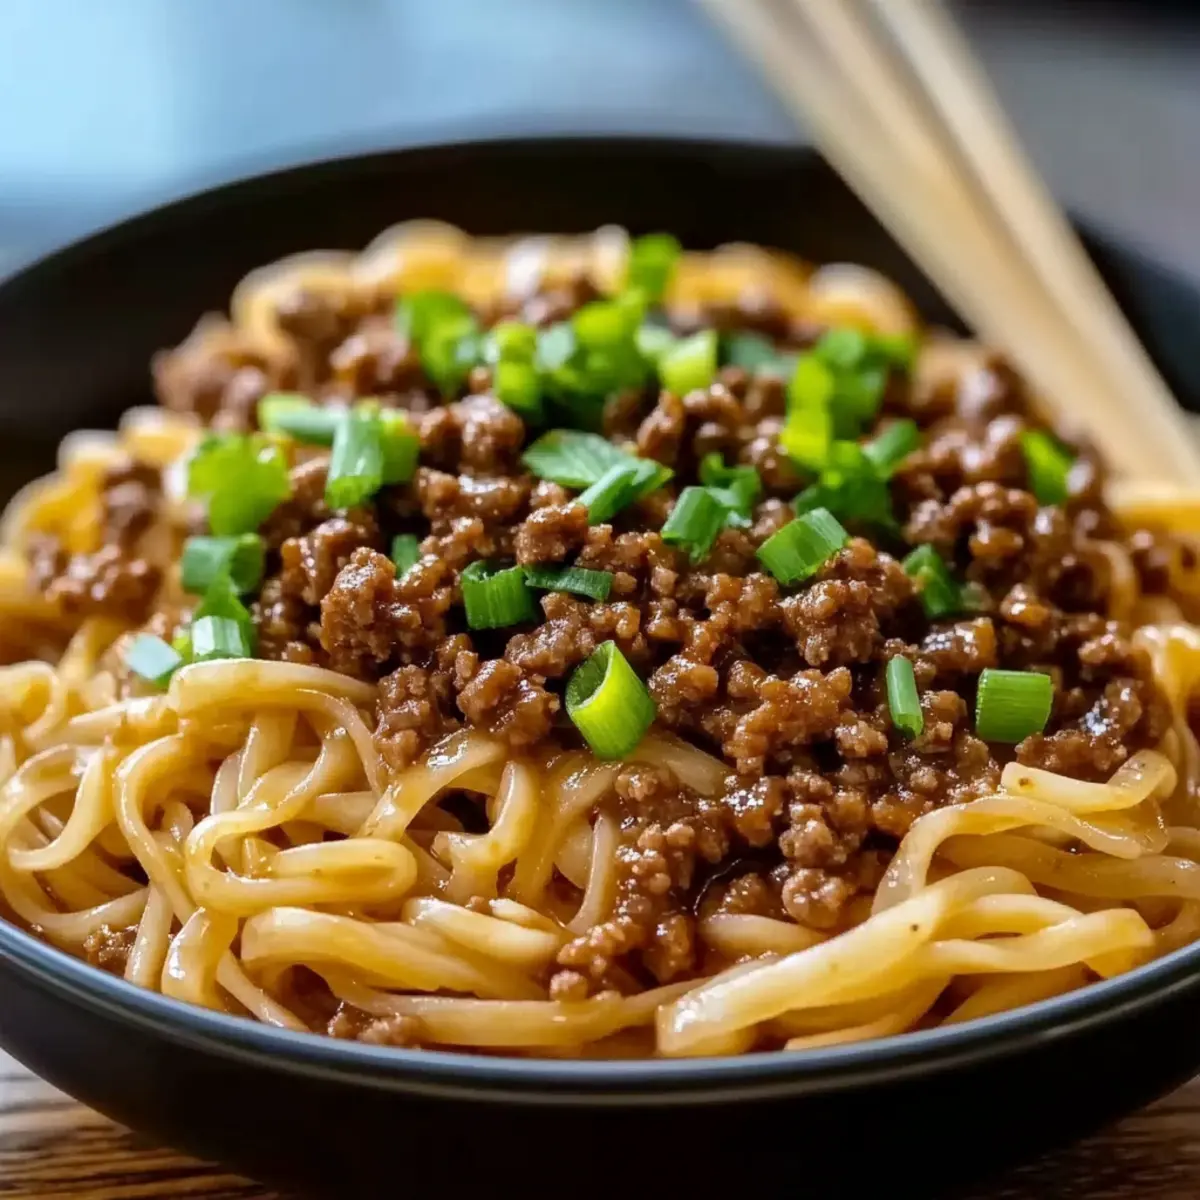
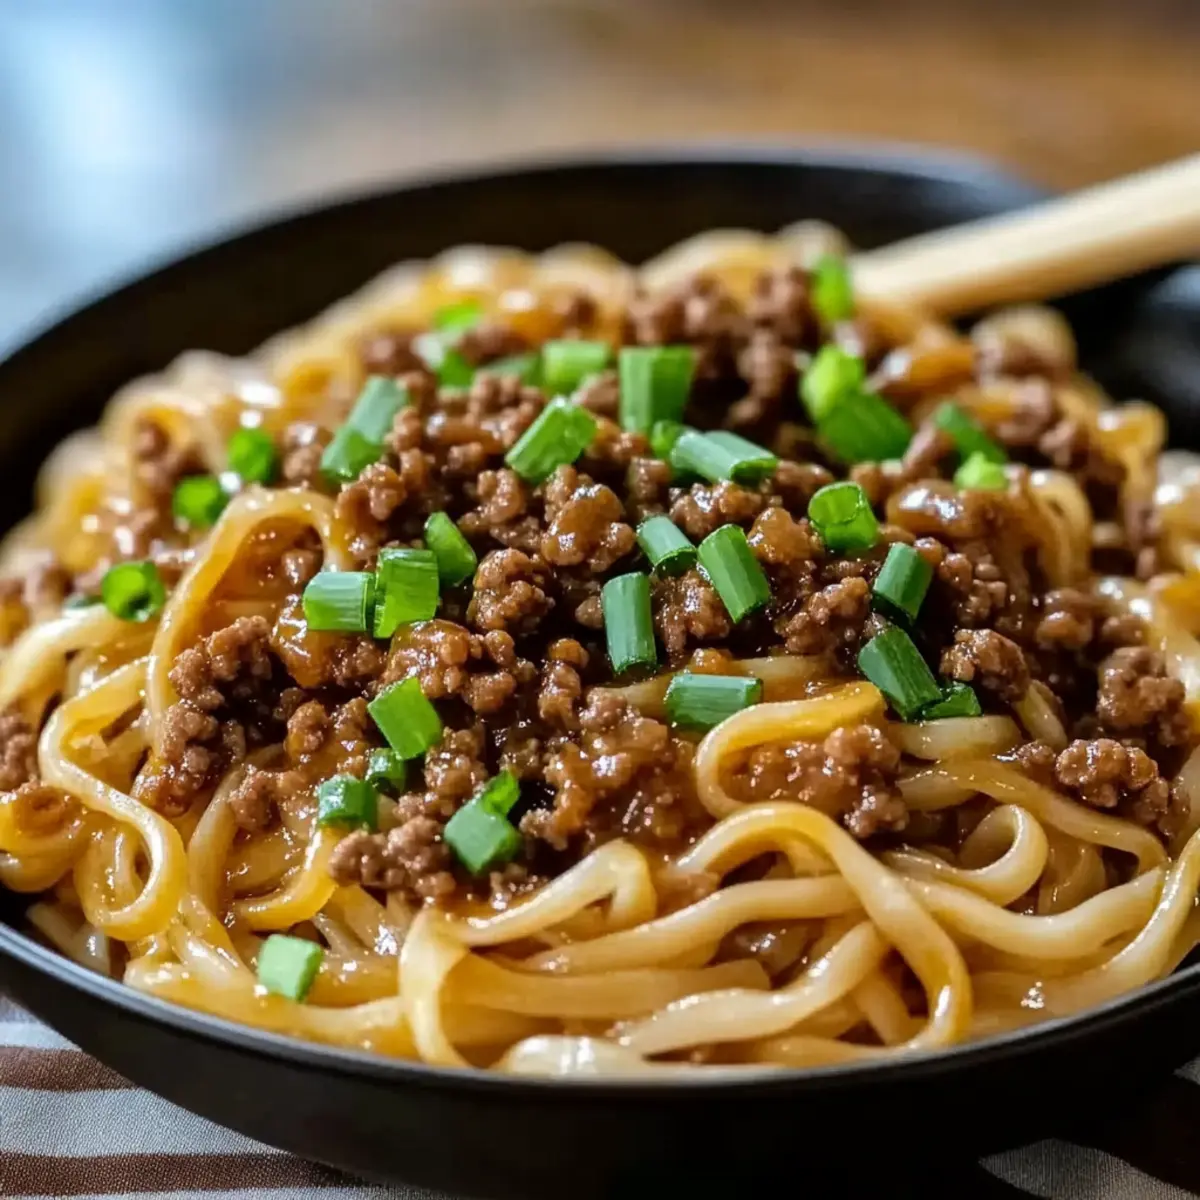
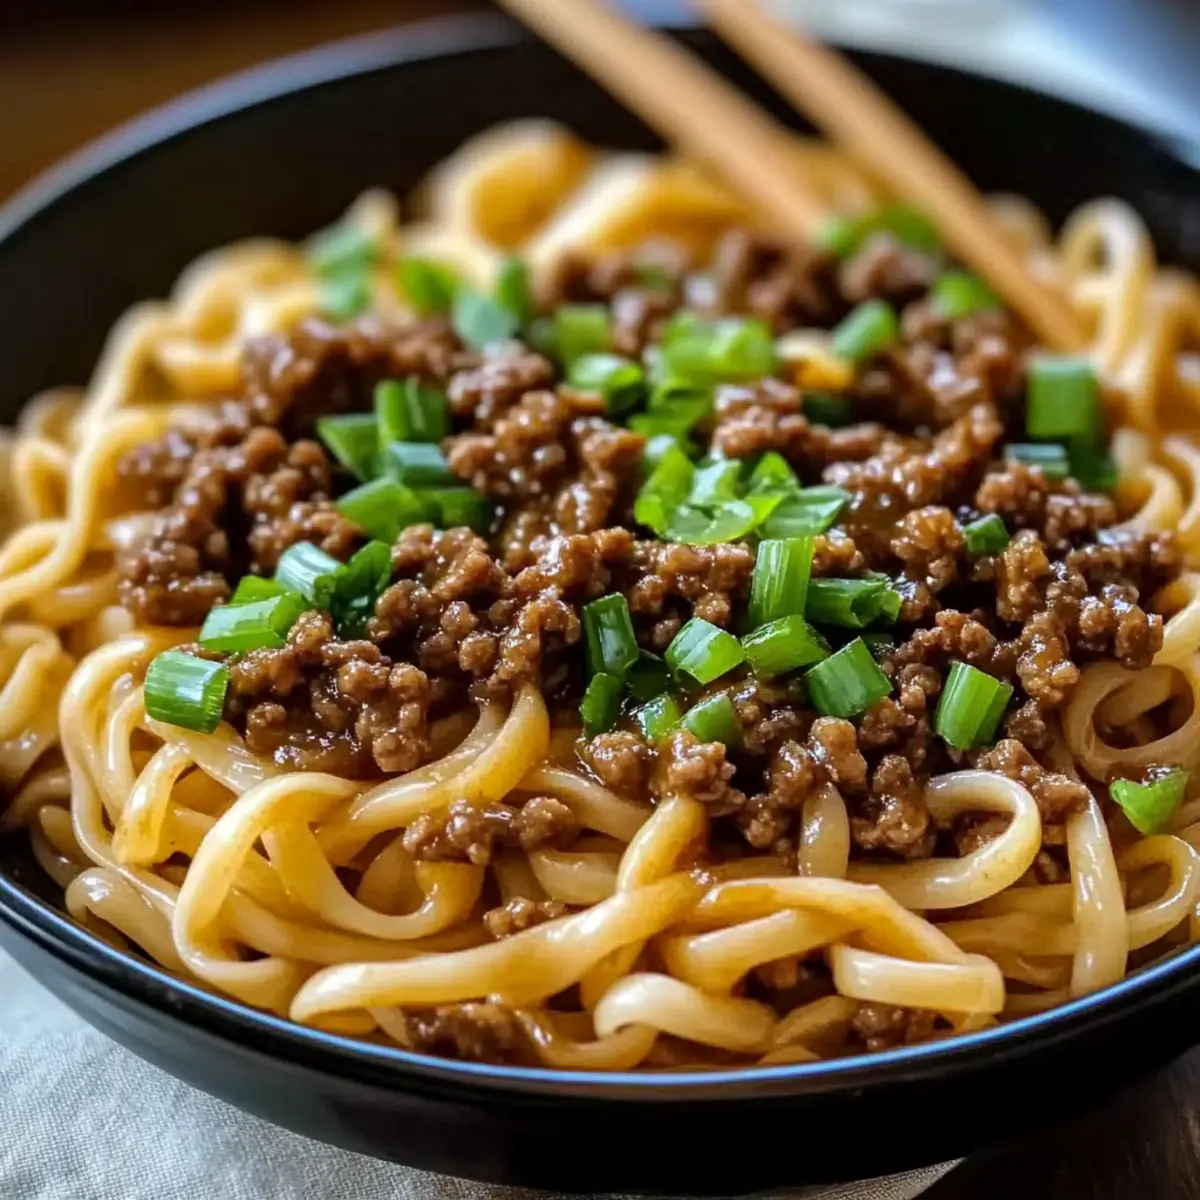
As the sun dipped below the horizon, the kitchen filled with the enticing aroma of spices and savory ground beef. That's the moment I knew I had to share my twist on Mongolian Ground Beef Noodles. This quick and easy dish delivers a delightful fusion of umami and sweetness, promising to satisfy those weeknight cravings in just 30 minutes. Perfectly paired with tender linguine, this recipe is not only a cinch to make, but it also welcomes endless variations—whether you want to spice things up or inject some fresh veggies into your meal. You won't believe how a few simple ingredients can create a comforting feast that feels like dining out, right in the comfort of your home. Curious about how to make this flavorful dish your own? Let’s dive in!

Why Try Mongolian Ground Beef Noodles?

Simplicity at Its Best: This recipe comes together in just 30 minutes, making it a perfect option for busy weeknights.

Rich Umami Flavor: A delightful blend of savory beef and a hint of sweetness will transport your taste buds to Asian cuisine heaven.

Versatile Ingredients: Feel free to customize with ground turkey, chicken, or your favorite veggies, ensuring there's something for everyone.

Crowd-Pleasing Appeal: Serve this to family or guests, and watch how it sparks joy around the dinner table, competing with any takeout!

Make-Ahead Friendly: Prep the sauce ahead of time and store it for a quick weeknight fix. Pair it with Chicken Teriyaki Noodles for a fun dinner party!

Mongolian Ground Beef Noodles Ingredients

  • For the Beef Mixture
    • Ground Beef – Hearty base; use ground turkey or chicken for a lighter dish.
    • Garlic – Adds aromatic flavor; fresh minced garlic is recommended for best taste.
    • Brown Sugar – Balances savory flavors with sweetness; adjust to taste.
    • Soy Sauce – Essential for umami depth; low-sodium soy sauce can be used for less salt.
    • Hoisin Sauce – Contributes a sweet and savory depth; can substitute with teriyaki sauce in a pinch.
    • Ground Ginger – Provides warmth and spice; fresh ginger is an excellent substitute.
    • Ground Black Pepper – Basic seasoning; adjust based on preference.
    • Red Pepper Flakes – Adds heat (optional); omit for a milder dish.

  • For the Noodles & Sauce
    • Linguine – Acts as the main carbohydrate; sub spaghetti or rice noodles based on preference.
    • Beef Broth – Infuses a rich, beefy flavor; swap with vegetable broth for a vegetarian version.
    • Cornstarch – Thicker for sauce consistency; arrowroot powder can be used as an alternative.
    • Water – Used to make the cornstarch slurry.

  • For Garnish
    • Green Onions – Garnish for freshness and crunch; adds final touch to your Mongolian Ground Beef Noodles.

Step‑by‑Step Instructions for Mongolian Ground Beef Noodles

Step 1: Cook the Linguine
Start by bringing a large pot of salted water to a boil over high heat. Add the linguine and cook according to the package instructions until al dente, usually about 8-10 minutes. Once done, drain the noodles and set them aside, making sure to leave a small amount of pasta water in case you need to adjust the sauce later.

Step 2: Brown the Beef
In a large skillet, heat a splash of oil over medium heat. Add the ground beef to the pan, breaking it apart with a spatula as it cooks. Stir occasionally and cook until the beef is fully browned, about 5-7 minutes. Make sure to drain any excess fat once the beef is cooked to keep the dish from becoming greasy.

Step 3: Sauté Garlic
Reduce the heat to low and add the minced garlic to the skillet with the ground beef. Stir it in for about 1 minute, or until you notice a fragrant aroma rising from the pan. This step brings depth to your Mongolian Ground Beef Noodles, so be sure the garlic doesn’t burn - keep a close eye on it!

Step 4: Combine Sauces
Next, pour in the brown sugar, beef broth, soy sauce, hoisin sauce, ground ginger, black pepper, and optional red pepper flakes into the skillet. Stir well to combine all ingredients, allowing the mixture to heat through for about 3-4 minutes, until bubbles start forming. This rich sauce infuses the beef with delicious flavor.

Step 5: Thicken the Sauce
In a small bowl, mix the cornstarch with a couple of tablespoons of water until smooth. Pour this slurry into the simmering sauce and stir continuously for about 2-3 minutes. The sauce should thicken and become glossy, coating the beef nicely and creating a delicious foundation for your Mongolian Ground Beef Noodles.

Step 6: Combine Noodles and Sauce
Add the drained linguine to the skillet, tossing it gently with the sauce until every strand is coated. Let it cook together for another minute on low heat, allowing the flavors to meld. If the noodles seem too dry, you can add a splash of the reserved pasta water to achieve a creamier consistency.

Step 7: Garnish and Serve
Once your Mongolian Ground Beef Noodles are well mixed, remove the skillet from the heat. Serve hot, garnishing with freshly sliced green onions for a pop of color and crunch. This finishing touch will elevate your dish and make it visually appealing, ensuring a delightful meal everyone will love!

How to Store and Freeze Mongolian Ground Beef Noodles

Fridge: Store leftovers in an airtight container for up to 3 days. This allows the flavors to meld, making your Mongolian Ground Beef Noodles even tastier on day two!

Freezer: You can freeze the dish for up to 2 months. Make sure to separate the noodles and sauce in airtight bags to maintain their quality.

Reheating: To reheat, thaw overnight in the fridge, then heat in a skillet over medium heat, adding a splash of water if needed to restore moisture.

Make-Ahead Tip: The sauce can be made in advance and stored in the fridge for up to 2 days, making weeknight meals easier and quicker to prepare!

What to Serve with Mongolian Ground Beef Noodles

Unleash a feast of flavors by pairing your savory centerpiece with delightful sides and drinks that elevate your dining experience.

  • Stir-Fried Vegetables: A colorful mix of bell peppers, broccoli, and snap peas adds crunch and nutritional balance to your meal. The vibrant veggies beautifully complement the saucy noodles while keeping the dish light and healthy.

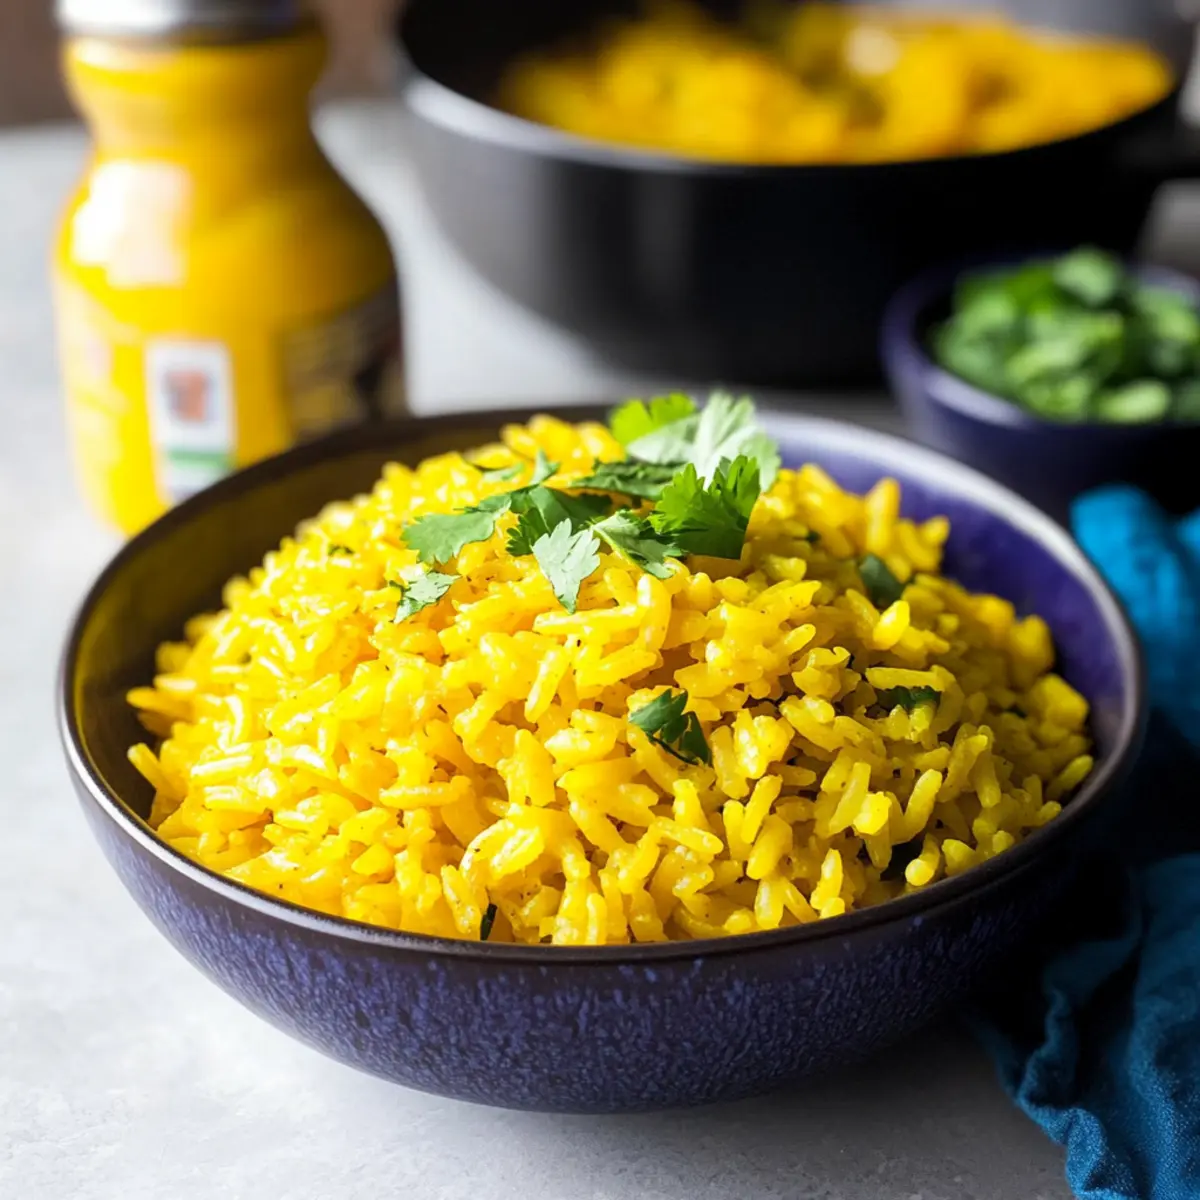
  • Coconut Rice: Creamy, fragrant coconut rice offers a delightful sweetness that contrasts the umami-rich flavors of the beef. This dish creates an inviting aroma that enhances the overall dining experience.

  • Asian Slaw: A refreshing crunchy slaw made with cabbage, carrots, and a tangy dressing brings brightness to your plate. The crispness of the slaw cuts through the richness of the noodles, providing a satisfying texture.

  • Egg Rolls: Crispy egg rolls stuffed with vegetables or meat make for a fun finger food addition. Their crunchiness and savory filling are perfect for those who can't get enough of Asian-inspired flavors.

  • Sesame Cucumber Salad: A cooling cucumber salad dressed in a sesame soy vinaigrette offers a fresh, light touch. Its coolness washes over your palate, making each bite of the warm noodles even more enjoyable.

  • Sparkling Water with Lime: For a refreshing drink, serve sparkling water with a hint of lime. The fizz and zest will cleanse your palate between bites, enhancing your dining experience.

  • Mango Sticky Rice: As a sweet conclusion, this dessert combines fragrant sticky rice with sweet mango and coconut cream. The tropical flavors will linger on your taste buds, wrapping up the meal on a delightful note.

Variations & Substitutions for Mongolian Ground Beef Noodles

Feel free to get creative with this recipe—your taste buds will thank you!

  • Spicy Twist: Add more red pepper flakes or incorporate Sriracha for a fiery kick to your noodles. Adjusting the heat can elevate the dish to a new level of flavor!

  • Meat Swap: For a healthier take, substitute ground beef with ground turkey or chicken. Both options provide a lighter, yet still tasty, rendition of this beloved dish.

  • Veggie Boost: Toss in colorful veggies like broccoli, bell peppers, or snap peas for added nutrition and a vibrant touch. The crunch from fresh vegetables brings life to every bite!

  • Noodle Variety: Not a fan of linguine? Substitute it with spaghetti or even rice noodles to suit your preference. Each type adds a unique texture to the dish.

  • Saucy Flavor Enhancer: Want to amp up the umami? Drizzle in a bit of oyster sauce or add a splash of sesame oil for an aromatic boost that tingles the senses.

  • Gluten-Free Option: Use gluten-free soy sauce and swap traditional noodles for zucchini noodles or rice for a healthy, gluten-free alternative that doesn’t skimp on flavor.

  • Mild Version: Omit the red pepper flakes altogether for a warm, comforting dish that's perfect for those with a gentler palate. This way, everyone in the family can enjoy their meal!

  • Savory Garnish: Finish with crushed peanuts or sesame seeds for a delightful crunch. Pair this with your favorite stir-fried veggies, like in my Gochujang Sesame Noodles, to create a colorful, delicious plate!

Embrace the culinary journey and tailor your Mongolian Ground Beef Noodles just the way you like!

Expert Tips for Mongolian Ground Beef Noodles

  • Quality Ingredients: Use fresh minced garlic and high-quality soy sauce to enhance the flavor profile of your Mongolian Ground Beef Noodles. Fresh ingredients make a noticeable difference!

  • Don’t Rush the Browning: Allow the ground beef to brown properly by cooking it evenly. This step enhances its flavor, so don’t skip it!

  • Sauce Taste Test: Before adding the cornstarch slurry, taste the sauce and adjust the seasoning as needed. Balancing the flavors is key to achieving the perfect taste.

  • Perfect Noodle Texture: Cook the linguine al dente to avoid mushy noodles. They should maintain a slight bite, providing a great texture that complements the sauce.

  • Customize Wisely: Experiment with various proteins or add more vegetables, but be mindful of cooking times. Adjust your cooking method to ensure everything is perfectly tender.

  • Store Correctly: If you have leftovers, store them in an airtight container in the fridge. This dish tastes even better the next day as the flavors meld!

Make Ahead Options

These Mongolian Ground Beef Noodles are perfect for meal prep enthusiasts! You can prepare the sauce up to 3 days in advance, storing it in an airtight container in the refrigerator to maintain its rich flavors. Additionally, you can brown the ground beef ahead of time and refrigerate it for up to 24 hours. When you're ready to serve, simply reheat the beef and sauce together in a skillet, then add the cooked linguine, tossing until well coated. This method ensures that your noodles remain tender and flavorful, letting you enjoy a delicious homemade meal without the last-minute rush.

Mongolian Ground Beef Noodles Recipe FAQs

What kind of ground beef should I use?
Absolutely! For this dish, I recommend using ground beef for its rich flavor and texture. However, if you prefer a leaner option, ground turkey or chicken works wonderfully as substitutes.

How should I store leftovers?
Store your Mongolian Ground Beef Noodles in an airtight container in the fridge for up to 3 days. This way, you can enjoy the delicious flavors even the next day!

Can I freeze this dish?
Yes, you can freeze the dish for up to 2 months. I recommend separating the noodles and sauce into airtight bags before freezing to ensure they maintain their quality. To reheat, thaw overnight in the fridge and warm in a skillet over medium heat, adding a splash of water if needed to prevent drying out.

What if my sauce isn’t thick enough?
If your sauce is a bit runny, mix a tablespoon of cornstarch with a couple of tablespoons of cold water to create a slurry. Stir this into the sauce over low heat, and it should thicken within 2-3 minutes. Just remember to stir continuously to avoid clumping!

Can I add vegetables to the recipe?
Very! Adding veggies like broccoli, bell peppers, or snap peas is a fantastic way to enrich the dish and enhance its nutritional profile. Just toss them in when you're cooking the beef, so they soften and absorb all those savory flavors.

Is this recipe pet-friendly?
While the ingredients are generally safe, it’s best to avoid feeding your pets any meals containing soy sauce, garlic, or excessive spices, as they can be harmful. Always consult with your veterinarian if you're unsure!

Mongolian Ground Beef Noodles

Savory Mongolian Ground Beef Noodles that Quick-Fix Cravings

This Mongolian Ground Beef Noodles recipe combines umami and sweetness for a quick and easy dinner option.
Print Recipe Pin Recipe
Prep Time 10 minutes mins
Cook Time 20 minutes mins
Total Time 30 minutes mins
Servings: 4 servings
Course: Dinner
Cuisine: Asian
Calories: 450
Ingredients Equipment Method Nutrition Notes

Ingredients
  

For the Beef Mixture
  • 1 pound Ground Beef or ground turkey/chicken
  • 3 cloves Garlic minced
  • 2 tablespoons Brown Sugar adjust to taste
  • 1/4 cup Soy Sauce low-sodium recommended
  • 2 tablespoons Hoisin Sauce or teriyaki sauce
  • 1 teaspoon Ground Ginger fresh is great
  • 1/2 teaspoon Ground Black Pepper to taste
  • 1/2 teaspoon Red Pepper Flakes optional
For the Noodles & Sauce
  • 8 ounces Linguine or spaghetti/rice noodles
  • 1 cup Beef Broth or vegetable broth
  • 1 tablespoon Cornstarch or arrowroot powder
  • 2 tablespoons Water to make cornstarch slurry
For Garnish
  • 2 stalks Green Onions sliced

Equipment

  • Large pot
  • Large skillet
  • Spatula
  • small bowl

Method
 

Step-by-Step Instructions
  1. Cook the linguine according to package instructions in a large pot of salted boiling water until al dente.
  2. In a skillet, heat oil and brown the ground beef, breaking it apart until fully cooked.
  3. Add minced garlic to the beef, cooking for about 1 minute until fragrant.
  4. Stir in brown sugar, beef broth, soy sauce, hoisin sauce, ground ginger, black pepper, and optional red pepper flakes.
  5. Mix cornstarch with water in a bowl, then stir into the sauce, cooking until thickened.
  6. Add drained linguine, tossing to coat with sauce, adding pasta water if needed.
  7. Serve hot, garnished with sliced green onions.

Nutrition

Serving: 1servingCalories: 450kcalCarbohydrates: 55gProtein: 30gFat: 15gSaturated Fat: 5gPolyunsaturated Fat: 2gMonounsaturated Fat: 8gCholesterol: 80mgSodium: 800mgPotassium: 500mgFiber: 3gSugar: 6gVitamin A: 500IUVitamin C: 3mgCalcium: 40mgIron: 3mg

Notes

Use fresh ingredients for the best flavor. Customize with various proteins or vegetables as desired.

Tried this recipe?

Let us know how it was!

Mom's Creamy Cafeteria Noodles: A Cozy One-Pot Delight

March 17, 2026 by Grace Snow Leave a Comment

The aroma of creamy goodness filled the air as I stirred a pot of Mom's Creamy Cafeteria Noodles, and suddenly, I was transported back to my school days. This delightful one-pot meal is a quick, nostalgic embrace that whispers comfort and warmth, perfect for any busy weeknight. With a mere six ingredients, you can create a dish that not only tantalizes the taste buds but also brings back cherished memories. Whether you're feeding a family or just treating yourself, this recipe is a true crowd-pleaser, and it’s easily customizable to suit your preferences. Want a vegetarian twist? Swap in vegetable broth and cream of mushroom. Craving something heartier? Add shredded chicken for an extra protein kick! What’s your favorite way to cozy up with comfort food?

Why You’ll Love Mom’s Creamy Cafeteria Noodles

Nostalgic flavor: Dive into a dish that brings back warm memories of school lunches with every creamy bite.
Quick and Easy: With just six ingredients, you can whip up this comforting meal in under 30 minutes.
Customizable Options: Make it your own! Try using cream of mushroom or adding shredded chicken for a heartier twist.
One-Pot Wonder: Simplify your cleanup with this all-in-one meal that allows you to enjoy more time at the table.
Family Friendly: Kids and adults alike will adore this creamy delight, making it a perfect choice for busy weeknights or gathering loved ones around the dinner table.

Mom’s Creamy Cafeteria Noodles Ingredients

For the Noodles

  • 12 oz wide egg noodles – Provide the main structure and heartiness of the dish. (Consider whole wheat noodles for added fiber.)

For the Broth Base

  • 32 oz low-sodium chicken broth – Forms the flavorful base of the sauce and cooks the noodles. (Substitute with vegetable broth for a vegetarian option.)
  • 2 tsp chicken bouillon (granules or paste) – Enhances the broth's flavor. (Adjust quantity for salt preference.)

For the Sauce

  • 10.5 oz condensed cream of chicken soup – Adds creaminess and richness. (Cream of mushroom or cream of celery can be substituted for different flavors.)
  • 4 tbsp unsalted butter – Provides richness and helps emulsify the sauce. (Use oil for a lighter version.)

For Seasoning

  • Freshly ground black pepper – Adds seasoning and enhances taste. (Adjust to preference.)
  • Fresh parsley (optional) – For garnish, adds color and freshness. (Omit if not available.)

Step-by-Step Instructions for Mom’s Creamy Cafeteria Noodles

Step 1: Build the creamy broth base
In a large pot or Dutch oven, pour in the 32 ounces of low-sodium chicken broth and place it over medium-high heat. Bring the broth to a gentle simmer, allowing the warm steam to fill the kitchen with savory aromas. This will form the flavorful base for your Mom’s Creamy Cafeteria Noodles.

Step 2: Dissolve flavor boosters
Once the broth is bubbling, add 2 teaspoons of chicken bouillon and a generous sprinkle of freshly ground black pepper. Whisk the mixture until the bouillon granules dissolve completely, creating a richly seasoned broth. This step infuses the dish with depth and enhances the delicious flavor profile of the creamy noodles.

Step 3: Create the rich sauce
Next, stir in the 10.5 ounces of condensed cream of chicken soup along with 4 tablespoons of unsalted butter into the pot. Keep stirring until the mixture is smooth and fully combined. Watch for the sauce to turn creamy and velvety, as the butter melts beautifully into the broth, creating a luscious sauce for your noodles.

Step 4: Add the egg noodles
Carefully add the 12 ounces of wide egg noodles into the pot, pressing them down to immerse as much of the noodles in the sauce as possible. Stir gently to ensure the noodles are coated with the rich sauce, setting yourself up for the perfect creamy texture once cooked.

Step 5: The two-minute boil
Turn up the heat and bring the pot to a vigorous boil, leaving it uncovered for exactly 2 minutes. Stir the noodles occasionally to prevent sticking as they begin to soften and absorb the flavors of Mom’s Creamy Cafeteria Noodles. You'll see the noodles starting to swell and become tender.

Step 6: The magic resting step
After boiling, turn off the heat and cover the pot tightly. Allow it to rest for 10 minutes undisturbed, letting the steam work its magic. This crucial step ensures that the noodles soak up the creamy broth completely, yielding a satisfying and hearty dish.

Step 7: Stir, rest, and serve
Remove the lid and gently stir the noodles, noticing their creamy transformation. Allow them to sit for another 2-3 minutes for the sauce to thicken a bit more. Finally, garnish with fresh parsley if desired, adding a touch of color before serving up this comforting plate of Mom's Creamy Cafeteria Noodles.

Make Ahead Options

These Mom's Creamy Cafeteria Noodles are perfect for busy weeknights and can be made ahead to save time! You can prepare the broth and sauce (steps 1-3) up to 24 hours in advance; simply refrigerate them in an airtight container. The noodles can also be cooked and incorporated into the sauce and refrigerated for up to 3 days, keeping the flavors intact. To finish, just reheat the mixture over low heat, stirring gently to prevent sticking, and if it seems too thick, add a splash of chicken broth or water. This way, your comforting dish will be just as delicious as when it was first made!

What to Serve with Mom's Creamy Cafeteria Noodles

As you savor each creamy bite of nostalgia, create a complete meal with delightful pairings that elevate your dining experience.

  • Garlic Bread: Perfect for soaking up the rich sauce, this crispy delight adds a crunchy contrast to the creamy noodles.
  • Steamed Broccoli: A pop of vibrant green and fresh flavor, steamed broccoli balances the heaviness of the noodles and adds a nutritious element to your plate.
  • Caesar Salad: Crisp romaine lettuce and tangy dressing provide a refreshing contrast that brightens up the entire meal. The crunch of croutons complements the creamy texture beautifully.
  • Roasted Carrots: Sweet and caramelized, they add a touch of earthiness alongside the comforting dish. Their natural sweetness pairs beautifully with the savory notes of the noodles.
  • Sparkling Lemonade: A citrusy fizz invigorates your taste buds and cuts through the richness of the creamy pasta, making it a perfect thirst-quencher alongside your meal.
  • Apple Crisp: This warm, cinnamon-spiced dessert wraps up the meal with sweetness, and the comforting crumbly topping works as a homage to the nostalgic theme.

Each element brings something special, ensuring a balanced, heartfelt dinner that you and your loved ones will cherish.

How to Store and Freeze Mom's Creamy Cafeteria Noodles

Fridge: Store leftovers in an airtight container in the refrigerator for up to 3 days. Reheat gently on the stove with a splash of water or milk to restore creaminess.

Freezer: If you want to save for later, freeze the noodles in a securely sealed container for up to 2 months. Thaw in the fridge overnight before reheating.

Reheating: Reheat on the stovetop over low heat, adding a bit of water or milk as needed to revive the creamy texture of your Mom’s Creamy Cafeteria Noodles.

Make-Ahead: This dish can be made ahead of time; just store it in the fridge or freezer and enjoy a cozy meal anytime!

Helpful Tricks for Mom's Creamy Cafeteria Noodles

  • Don’t Peek: Avoid lifting the lid during the resting step. This keeps the steam in, ensuring perfectly cooked noodles.
  • Creamy Upgrade: For a richer taste, incorporate a splash of heavy cream right before serving for even more sumptuous flavors.
  • Reheat Right: If you have leftovers, add a bit of water or milk when reheating to resurrect the creamy texture of Mom's Creamy Cafeteria Noodles.
  • Prevent Overcooking: Stick to the specified boiling time and resting time to keep your noodles tender and avoid mushiness.
  • Season to Taste: Don’t hesitate to tweak the black pepper and chicken bouillon levels—everyone's taste buds are unique!

Mom's Creamy Cafeteria Noodles Variations

Feel free to put your own spin on this comforting classic and create a dish that suits your taste buds perfectly!

  • Dairy-Free: Substitute the cream of chicken soup with a dairy-free cream alternative and use olive oil instead of butter for a lighter touch.
    This option doesn't skimp on flavor and keeps the creamy texture everyone loves.

  • Vegetarian Delight: Use vegetable broth and cream of mushroom soup to create a rich vegetarian version.
    It's a perfect way to savor creamy noodles without the meat while still enjoying that nostalgic flavor.

  • Heartier Option: Fold in 1-2 cups of shredded rotisserie chicken after adding the broth for a protein-packed meal.
    The addition of chicken takes this comfort food to the next level, ensuring it satisfies even the biggest appetites.

  • Cheesy Twist: Stir in 1 cup of shredded cheese, like cheddar or mozzarella, after creating the sauce for a cheesy version.
    This twist combines the best of both worlds—creamy noodles and cheesy goodness that kids will adore.

  • Spice It Up: Add a pinch of red pepper flakes or a dash of hot sauce for a mild kick to the dish.
    A little heat can elevate the flavors, giving you that extra warmth and depth with every bite.

  • Mushroom Lovers: Sauté sliced mushrooms in the pot before adding the broth for an earthy flavor boost.
    The mushrooms add a fantastic umami richness that complements the creamy sauce beautifully.

  • Fresh Veggie Boost: Toss in some steamed broccoli or peas just before serving for a pop of color and nutrition.
    This not only enhances the dish’s visual appeal but also gives it a fresh crunch that balances the creaminess.

  • Asian Flavor Fusion: Turn this dish into a creamy noodle bowl by adding soy sauce and a hint of sesame oil for unique flavors.
    If you love Asian cuisine, consider trying it with a side of Gochujang Sesame Noodles for a delicious contrast!

Remember, the beauty of home cooking lies in your creativity! Serve this dish alongside a fresh salad or steamed vegetables for a complete meal.

Mom's Creamy Cafeteria Noodles Recipe FAQs

How do I choose the right noodles for Mom's Creamy Cafeteria Noodles?
Absolutely! For this dish, wide egg noodles are the best choice as they provide a hearty texture that holds the creamy sauce beautifully. If you're looking for a healthier alternative, consider using whole wheat noodles, which add a bit of fiber while still delivering that comforting taste.

What’s the best way to store leftovers of Mom's Creamy Cafeteria Noodles?
Store any leftovers in an airtight container in the refrigerator for up to 3 days. When reheating, add a splash of water or milk to help restore the creamy texture. Gently heat on the stove over low heat to avoid burning the sauce.

Can I freeze Mom's Creamy Cafeteria Noodles?
Yes, you can! To freeze, let the noodles cool completely, then transfer them to a securely sealed container or freezer bag. They can be stored in the freezer for up to 2 months. When ready to enjoy, thaw in the refrigerator overnight, and reheat on the stovetop, adding a bit of liquid to maintain creaminess.

What should I do if the noodles turn mushy when cooking?
Very! To avoid mushy noodles, adhere strictly to the cooking times outlined in the recipe. Make sure to boil the noodles uncovered for just 2 minutes and allow them to rest undisturbed for 10 minutes afterward. If you think the noodles are overcooked, consider reducing the boiling time slightly during your next preparation.

Are there any dietary considerations for Mom's Creamy Cafeteria Noodles?
Of course! If you or someone you're serving has dietary restrictions, you can easily customize this recipe. Use vegetable broth and cream of mushroom soup for a vegetarian version. Be sure to check the labels on your chicken broth and cream of chicken soup to avoid any allergens like gluten. Always feel free to substitute any ingredients that might not align with your dietary needs.

Can I add protein to Mom's Creamy Cafeteria Noodles?
Absolutely! For a heartier meal, you can add 1-2 cups of shredded rotisserie chicken after creating the sauce. Simply stir it in before adding the noodles to integrate the protein seamlessly into this comforting dish. The more the merrier!

Mom’s Creamy Cafeteria Noodles

Mom's Creamy Cafeteria Noodles: A Cozy One-Pot Delight

Mom’s Creamy Cafeteria Noodles is a quick one-pot meal perfect for any busy weeknight.
Print Recipe Pin Recipe
Prep Time 10 minutes mins
Cook Time 20 minutes mins
Resting Time 10 minutes mins
Total Time 40 minutes mins
Servings: 4 servings
Course: Dinner
Cuisine: American
Calories: 400
Ingredients Equipment Method Nutrition Notes

Ingredients
  

For the Noodles
  • 12 oz wide egg noodles Consider whole wheat noodles for added fiber.
For the Broth Base
  • 32 oz low-sodium chicken broth Substitute with vegetable broth for a vegetarian option.
  • 2 tsp chicken bouillon (granules or paste) Adjust quantity for salt preference.
For the Sauce
  • 10.5 oz condensed cream of chicken soup Cream of mushroom or cream of celery can be substituted for different flavors.
  • 4 tbsp unsalted butter Use oil for a lighter version.
For Seasoning
  • freshly ground black pepper Adjust to preference.
  • fresh parsley (optional) For garnish, adds color and freshness.

Equipment

  • Large pot or Dutch oven

Method
 

Step-by-Step Instructions
  1. In a large pot or Dutch oven, pour in the 32 ounces of low-sodium chicken broth and place it over medium-high heat. Bring the broth to a gentle simmer, allowing the warm steam to fill the kitchen with savory aromas.
    Mom’s Creamy Cafeteria Noodles
  2. Once the broth is bubbling, add 2 teaspoons of chicken bouillon and a generous sprinkle of freshly ground black pepper. Whisk the mixture until the bouillon granules dissolve completely.
    Mom’s Creamy Cafeteria Noodles
  3. Stir in the 10.5 ounces of condensed cream of chicken soup along with 4 tablespoons of unsalted butter into the pot. Keep stirring until the mixture is smooth and fully combined.
    Mom’s Creamy Cafeteria Noodles
  4. Carefully add the 12 ounces of wide egg noodles into the pot, pressing them down to immerse as much of the noodles in the sauce as possible.
    Mom’s Creamy Cafeteria Noodles
  5. Turn up the heat and bring the pot to a vigorous boil, leaving it uncovered for exactly 2 minutes. Stir the noodles occasionally to prevent sticking.
    Mom’s Creamy Cafeteria Noodles
  6. After boiling, turn off the heat and cover the pot tightly. Allow it to rest for 10 minutes undisturbed.
    Mom’s Creamy Cafeteria Noodles
  7. Remove the lid and gently stir the noodles, allowing them to sit for another 2-3 minutes for the sauce to thicken a bit more. Garnish with fresh parsley if desired.
    Mom’s Creamy Cafeteria Noodles

Nutrition

Serving: 1servingCalories: 400kcalCarbohydrates: 40gProtein: 15gFat: 20gSaturated Fat: 10gPolyunsaturated Fat: 1gMonounsaturated Fat: 5gCholesterol: 40mgSodium: 800mgPotassium: 300mgFiber: 2gSugar: 2gVitamin A: 100IUVitamin C: 1mgCalcium: 30mgIron: 1mg

Notes

For a richer taste, incorporate a splash of heavy cream right before serving for even more sumptuous flavors.

Tried this recipe?

Let us know how it was!

Simple Stir-Fried Noodles: Quick, Flavorful Family Meal

March 17, 2026 by Grace Snow Leave a Comment

The sizzle of garlic and ginger fills the room, pulling everyone out of their cozy corners and into the heart of the kitchen. With my Simple Stir-Fried Noodles, “Noodle Night” transforms into a culinary celebration that’s not just about satisfying your hunger but also about bringing the family together. This recipe is an absolute lifesaver when time is short; it’s quick, customizable, and can cater to any dietary preference—from zesty vegetables to protein-packed options like beef or tofu. Plus, it’s a fantastic way to use up those errant veggies lying around in the fridge! Ready to dive into a meal that’s both effortless and delightful? Let’s get cooking!

Why Are Stir-Fried Noodles So Loved?

Quick and Easy: This recipe comes together in under 30 minutes, making it a perfect go-to for busy weeknights.

Customizable Goodness: With endless options for protein and vegetables, your stir-fried noodles can be tailored to please even the pickiest eaters!

Savory Flavor: A harmonious blend of soy sauce and sesame oil creates a mouthwatering umami depth that will tantalize your taste buds.

Healthful Ingredients: Packed with nutritious veggies and a balance of protein, this dish is as wholesome as it is delicious.

Family Favorite: It’s a meal that everyone will love, making it a great shared experience, perfect for your next “Noodle Night.” Don’t forget to check out my Gochujang Sesame Noodles or Chicken Teriyaki Noodles for more comforting noodle inspiration!

Simple Stir-Fried Noodle Ingredients

• Get ready to whip up a culinary delight with simple yet flavorful components!

For the Noodles

  • Noodles – The foundation of your dish; feel free to swap for gluten-free noodles if needed.

For the Protein

  • Beef – A classic choice that brings heartiness; replace with extra-firm tofu for a tasty vegetarian twist.

For the Sauces

  • Low-Sodium Soy Sauce – Adds that essential umami richness; tamari works just as well for gluten-free diets!
  • Oyster Sauce – Deepens the flavor profile; consider vegan oyster sauce for a plant-based option.
  • Toasted Sesame Oil – Amplifies aroma and taste; any neutral oil will do if sesame isn’t on hand.
  • Brown Sugar – Perfect for balancing the savory; maple syrup serves as a delightful alternative.
  • Rice Vinegar – Infuses a subtle tang; you could also use apple cider vinegar for a similar bite.

For the Vegetables

  • Broccoli – A nutritious option that adds crunch; swap with any preferred veggies if you’re feeling creative!
  • Carrots – Sweet and colorful, brightening up your dish; look for fresh, firm ones.
  • Bell Pepper – Introduces sweetness and color; any variety will make for a stunning presentation.
  • Onions – Essential for seasoning, bring out their sweetness; shallots can work too if that’s what you have.
  • Garlic – A flavor powerhouse that elevates the entire dish; fresh garlic is best!
  • Ginger – Adds warmth and spice; you could use ground ginger in a pinch.

For Thickening

  • Cornstarch – Helps thicken the sauce and tenderize beef; arrowroot powder can substitute effectively.

For Garnishing

  • Green Onions – Adds freshness and a pop of color to finish your dish; consider chopped herbs as a fun substitute.
  • Toasted Sesame Seeds – Bring a nutty crunch; chopped nuts can add fantastic texture as an alternative.

Step‑by‑Step Instructions for Simple Stir-Fried Noodle

Step 1: Prepare Sauce and Marinate Beef
In a small bowl, whisk together low-sodium soy sauce, oyster sauce, toasted sesame oil, brown sugar, and rice vinegar to create your sauce. In a separate bowl, marinate thinly sliced beef in a mix of soy sauce and cornstarch for about 10 minutes. This helps tenderize the beef and adds flavor, ensuring your Simple Stir-Fried Noodles are deliciously rich right from the start.

Step 2: Cook Noodles
Bring a large pot of salted water to a boil over high heat. Add your choice of noodles and cook for about 5-7 minutes until they are slightly undercooked—al dente. Once ready, drain and rinse the noodles under cold water to prevent them from sticking together, leaving them ready for the ultimate stir-fry in your Simple Stir-Fried Noodles.

Step 3: Sear Beef
Heat a large wok or non-stick skillet over medium-high heat and add a tablespoon of oil. Once hot, add the marinated beef in a single layer, searing for about 1-2 minutes on each side until browned, but still slightly pink in the center. Remove the beef from the pan and set aside, allowing the perfect texture that will enhance your Simple Stir-Fried Noodles.

Step 4: Stir-Fry Vegetables
Using the same pan, add a bit more oil if needed, and toss in chopped onions. Sauté them for about 2 minutes until they turn translucent. Next, add the broccoli and carrots, stirring for another 2-3 minutes until they start to soften. Finally, add minced garlic and ginger, cooking for about 30 seconds until fragrant, filling your kitchen with irresistible aromas that herald the making of Simple Stir-Fried Noodles.

Step 5: Combine and Sauce
Pour the prepared sauce into the pan with the vegetables, letting it simmer for about 1-2 minutes to thicken slightly. Stir continuously to coat the vegetables in that savory goodness. This combination will elevate the flavors of your Simple Stir-Fried Noodles, making them truly mouthwatering.

Step 6: Final Toss
Add the cooked noodles and the seared beef back into the pan, tossing everything together over medium heat for about 2-3 minutes until everything is well coated and heated through. The noodles should glisten with sauce, and the beef should mingle perfectly with the vibrant vegetables of your Simple Stir-Fried Noodles.

Step 7: Serve Immediately
Remove from heat and transfer your Simple Stir-Fried Noodles to a serving platter. Garnish with sliced green onions and toasted sesame seeds for that perfect finishing touch. Serve hot and watch as your family gathers to enjoy this delightful, comforting meal that brings everyone together.

Expert Tips for Simple Stir-Fried Noodles

  • Mise en Place: Organize all ingredients before cooking to ensure smooth preparation. This will help you create your Simple Stir-Fried Noodles effortlessly.

  • Don't Crowded the Pan: When searing the beef, avoid overcrowding the pan. Working in batches allows for better browning and avoids steaming.

  • Rinse Noodles Thoroughly: After boiling, rinse the noodles under cold water to remove excess starch and prevent them from sticking together during stir-frying.

  • Vegetable Variations: Feel free to mix and match your vegetables based on what's in season or on hand, ensuring your Simple Stir-Fried Noodles are always fresh and exciting.

  • Tweak the Sauce: Adjust seasoning in the sauce to your taste; if you love a bit of heat, consider adding crushed red pepper or sriracha for a spicy kick!

Simple Stir-Fried Noodle Variations

Feel free to explore these delightful twists that will add unique flavors and textures to your Simple Stir-Fried Noodles!

  • Vegetarian Delight: Replace beef with pressed extra-firm tofu or tempeh for a satisfying vegetarian option. Both ingredients soak up flavors beautifully, making them the perfect meat alternative.

  • Gluten-Free: Use gluten-free noodles and tamari instead of soy sauce. Your delicious noodles remain flavorful and accessible to those with gluten sensitivities.

  • Extra Crunch: Add a mix of crunchy vegetables like snap peas or cabbage for a vibrant texture. The freshness of these additions elevates the dish, making it even more exciting!

  • Spicy Kick: Stir in some crushed red pepper flakes or sriracha to the sauce for those who love an extra heat. Just a little can transform your stir-fried noodles into a spicy sensation.

  • Herby Freshness: Toss in fresh basil or cilantro just before serving. This not only adds a pop of color but also enhances the dish's aroma and flavor, creating a beautiful balance.

  • Nutty Flavor: Drizzle a bit of peanut sauce over the finished dish for a rich, nutty taste. This little twist will make your Simple Stir-Fried Noodles feel gourmet!

  • Meaty Richness: Swap beef for cooked chicken or shrimp for a different protein experience. This provides a satisfying and hearty meal that’s always a hit at the dinner table.

  • Rich Creaminess: Finish with a touch of coconut milk in the sauce for a creamy texture and a hint of sweetness. This adds exotic flair while keeping the dish comforting and delicious.

Make any of these variations to suit your tastes and occasion! Plus, don't forget to check out my other noodle recipes for inspiration like Miso Tuna Noodle and Gochujang Sesame Noodles. Enjoy your culinary journey!

Make Ahead Options

These Simple Stir-Fried Noodles are a fantastic choice for busy schedules and meal prep enthusiasts! To save time on hectic weeknights, you can prepare the sauce and marinate the beef (or tofu) up to 24 hours in advance. Just store both in airtight containers in the refrigerator to maintain their flavors. Additionally, chop your vegetables and keep them refrigerated for up to 3 days, ensuring they're perfectly fresh when you're ready to stir-fry. When it’s time to serve, simply cook the noodles and stir-fry everything together as instructed. This way, you'll enjoy a delicious and satisfying meal without the last-minute rush!

How to Store and Freeze Simple Stir-Fried Noodles

Fridge: Store your Simple Stir-Fried Noodles in an airtight container for up to 3-4 days. Make sure to let the dish cool before sealing to preserve freshness.

Freezer: If you want to keep them longer, place portions in freezer-safe bags, removing excess air. They’ll last up to 2 months—just be sure to label them for easy identification!

Reheating: To enjoy your noodles again, thaw in the fridge overnight, then reheat on a skillet over medium heat with a splash of water. This keeps them moist and delicious.

Vegetable Consideration: For best quality, avoid freezing any vegetables that don't freeze well, like leafy greens, as they may lose their texture upon thawing.

What to Serve with Simple Stir-Fried Noodles?

Elevate your “Noodle Night” with delightful pairings that bring freshness and balance to your meal.

  • Steamed Edamame: These tender soybeans are a perfect side, offering a light, healthful crunch that complements the rich noodles.

  • Crisp Cucumber Salad: Refreshing and tangy, a cucumber salad with rice vinegar brings bright acidity to balance the savory noodles.

  • Garlic Toast: Crunchy and buttery, garlic toast adds a comforting element that’s perfect for soaking up extra sauce.

  • Sweet and Sour Dressing: Drizzle this on a side of mixed greens to add a fun, tangy contrast to your stir-fried noodles.

  • Sesame Broccoli: Lightly sautéed broccoli with sesame seeds complements the flavor while bringing extra crunch to your meal.

  • Fruit Salad: A vibrant mix of seasonal fruits introduces a sweet note that brightens the dining experience and refreshes the palate.

  • Chrysanthemum Tea: This floral tea is light and fragrant, making it an elegant drink to sip while enjoying flavorful bites of noodles.

  • Chocolate Mousse: End with a rich dessert that’s creamy and indulgent, a luscious way to finish off your noodle-filled adventure!

Simple Stir-Fried Noodles Recipe FAQs

What should I look for when choosing noodles?
Absolutely! Look for noodles that are firm and not broken. Fresh noodles should have a smooth texture, while dried noodles should be free from any dark spots. If you're going gluten-free, ensure to select a certified gluten-free option to avoid any cross-contamination.

How should I store leftovers of Simple Stir-Fried Noodles?
To maintain freshness, store your Simple Stir-Fried Noodles in an airtight container in the refrigerator for up to 3-4 days. Allow the dish to cool completely before sealing it to lock in moisture and flavor.

Can I freeze Simple Stir-Fried Noodles?
Yes! For longer storage, you can freeze your Simple Stir-Fried Noodles. Portion them into freezer-safe bags, ensuring to remove as much air as possible. They'll last up to 2 months in the freezer. When you’re ready to enjoy, thaw overnight in the fridge and reheat in a skillet over medium heat. This keeps the noodles from drying out!

What if my sauce isn’t thickening?
Very! If your sauce isn’t thickening as desired, make a slurry by mixing 1-2 teaspoons of cornstarch with an equal amount of water in a small bowl, then stir it into the sauce. Let it simmer for a couple of minutes; this should help it reach that perfect consistency. Remember to ensure that your heat is at a medium level so it cooks evenly!

Are there any dietary considerations I should keep in mind?
Indeed! Always check ingredient labels for allergens; soy sauce can contain wheat, making it unsuitable for those with gluten intolerance. For a vegetarian option, swap beef for pressed tofu or tempeh. If cooking for pets, avoid feeding them any onion or garlic, as these can be harmful to animals.

Simple Stir-Fried Noodle

Simple Stir-Fried Noodles: Quick, Flavorful Family Meal

Simple Stir-Fried Noodles are quick to prepare, customizable, and perfect for family dinners, bringing everyone together for a delicious meal.
Print Recipe Pin Recipe
Prep Time 10 minutes mins
Cook Time 20 minutes mins
Total Time 30 minutes mins
Servings: 4 servings
Course: Dinner
Cuisine: Asian
Calories: 450
Ingredients Equipment Method Nutrition Notes

Ingredients
  

For the Noodles
  • 1 package Noodles Feel free to swap for gluten-free noodles if needed.
For the Protein
  • 1 pound Beef Can replace with extra-firm tofu for a vegetarian option.
For the Sauces
  • 1/4 cup Low-Sodium Soy Sauce Tamari works just as well for gluten-free diets.
  • 2 tablespoons Oyster Sauce Consider vegan oyster sauce for a plant-based option.
  • 1 tablespoon Toasted Sesame Oil Any neutral oil can substitute if sesame isn’t available.
  • 1 tablespoon Brown Sugar Maple syrup serves as a delightful alternative.
  • 1 tablespoon Rice Vinegar Apple cider vinegar can be used for a similar tang.
For the Vegetables
  • 2 cups Broccoli Swap with any preferred veggies if desired.
  • 1 cup Carrots Choose fresh and firm ones for the best texture.
  • 1 cup Bell Pepper Any variety adds flavor and color.
  • 1 medium Onion Shallots can work too if needed.
  • 3 cloves Garlic Fresh garlic is preferred for the best flavor.
  • 1 teaspoon Ginger Ground ginger can substitute in a pinch.
For Thickening
  • 1 tablespoon Cornstarch Arrowroot powder can be used as a substitute.
For Garnishing
  • 2 tablespoons Green Onions Chopped herbs can be a fun substitute.
  • 2 tablespoons Toasted Sesame Seeds Chopped nuts can add great texture as an alternative.

Equipment

  • Large pot
  • Wok
  • Mixing Bowl
  • non-stick skillet

Method
 

Step-by-Step Instructions for Simple Stir-Fried Noodle
  1. In a small bowl, whisk together low-sodium soy sauce, oyster sauce, toasted sesame oil, brown sugar, and rice vinegar to create your sauce. Marinate thinly sliced beef in a mix of soy sauce and cornstarch for about 10 minutes.
  2. Bring a large pot of salted water to a boil over high heat. Add your choice of noodles and cook for about 5-7 minutes until slightly undercooked. Drain and rinse under cold water.
  3. Heat a large wok or non-stick skillet over medium-high heat and add a tablespoon of oil. Add the marinated beef, searing for about 1-2 minutes on each side until browned, then remove from the pan.
  4. In the same pan, sauté chopped onions for 2 minutes until translucent. Add broccoli and carrots, stirring for another 2-3 minutes. Then add minced garlic and ginger, cooking for about 30 seconds until fragrant.
  5. Pour the prepared sauce into the pan with the vegetables, letting it simmer for about 1-2 minutes to thicken slightly. Stir continuously to coat the vegetables.
  6. Add the cooked noodles and the seared beef back into the pan, tossing everything together for about 2-3 minutes until well coated and heated through.
  7. Remove from heat and transfer the noodles to a serving platter. Garnish with sliced green onions and toasted sesame seeds, serve hot.

Nutrition

Serving: 1servingCalories: 450kcalCarbohydrates: 50gProtein: 30gFat: 15gSaturated Fat: 3gPolyunsaturated Fat: 4gMonounsaturated Fat: 7gCholesterol: 70mgSodium: 800mgPotassium: 600mgFiber: 4gSugar: 5gVitamin A: 250IUVitamin C: 100mgCalcium: 6mgIron: 20mg

Notes

Mise en place is key for smooth preparation. Avoid overcrowding the pan when searing beef for better browning. Rinse noodles well to prevent sticking, and don't be afraid to creatively use available veggies.

Tried this recipe?

Let us know how it was!

Creamy Gochujang Udon Noodles for a Spicy Comfort Hit

March 17, 2026 by Grace Snow Leave a Comment

As I stirred the pan, the vibrant aroma of garlic and shallots filled my kitchen, transporting me to a bustling street market in Seoul. This is how my journey to creating the ultimate Creamy Gochujang Udon Noodles began, combining comfort food with a spicy kick for an Asian-inspired dish that's ready in just 20 minutes. These noodles are a fantastic way to swap out fast food for something that warms the heart and excites the palate. You’ll love how easily these comforting noodles come together, transforming busy weeknights into moments of culinary delight. So, are you ready to indulge in a bowl of deliciousness that’s packed with bold flavors?

Why are these noodles a must-try?

Speedy Preparation: This dish comes together in just 20 minutes, making it a perfect weeknight meal or last-minute dinner solution.

Bold Flavor Fusion: The combination of gochujang and creamy sauce delivers a unique flavor profile that tantalizes your taste buds, setting it apart from traditional pasta.

Versatile Options: Feel free to customize your bowl with vibrant vegetables or proteins like chicken or tofu, ensuring a nutritious and satisfying meal every time.

Comforting Appeal: Each bite of these creamy udon noodles exudes warmth, offering the perfect antidote to a long day or a quick indulgence.

Crowd-Pleasing Goodness: Whether for family dinners or entertaining friends, these noodles are sure to be a hit — just like my Gochujang Sesame Noodles or Chicken Teriyaki Noodles.

Creamy Gochujang Udon Noodles Ingredients

• Get ready to spice up your life with these delightful noodles!

For the Sauce

  • Gochujang – A Korean chili paste that adds essential spice and complexity; use less for milder heat.
  • Butter – Provides richness; substitute with olive oil for a lighter version if desired.
  • Minced Garlic – Offers aromatic flavor; use fresh for the best results.
  • Chopped Shallots – Adds a touch of sweetness; yellow onion can work as a substitute.
  • Heavy Cream – Creates a luscious texture; coconut cream makes a great dairy-free alternative.
  • Soy Sauce – Introduces umami flavor; tamari is an excellent gluten-free option.
  • Gochugaru – Korean red pepper flakes that elevate the heat; adjust based on your spice tolerance.

For the Noodles

  • Frozen Udon Noodles – The star of this dish, providing a chewy texture; fresh udon or soba can be substituted for variety.

For the Topping

  • Grated Parmesan Cheese – Adds a savory finish; nutritional yeast offers a vegan alternative.
  • Chopped Green Onions – For a fresh, vibrant garnish; elevate your bowl aesthetically!
  • Egg Yolk – Optional but enriches the dish; can be omitted for a lighter meal.

Enjoy crafting these Creamy Gochujang Udon Noodles that will warm your spirit and excite your taste buds!

Step‑by‑Step Instructions for Creamy Gochujang Udon Noodles

Step 1: Cook the Noodles
Begin by bringing a large pot of salted water to a boil. Add the frozen udon noodles and cook according to package instructions, typically 3-5 minutes, until they are tender yet chewy. Before draining, reserve 1/2 cup of the noodle water to help thicken the sauce later. Drain the noodles in a colander and rinse them briefly under cool water to prevent sticking.

Step 2: Sauté Aromatics
In a large skillet, melt 2 tablespoons of butter over medium heat. Once melted and bubbling, add 2-3 minced garlic cloves and 1 chopped shallot. Sauté for about 2-3 minutes until the mixture is fragrant and the shallots turn translucent. Keep an eye on the aromatics to prevent burning, as you want them golden and aromatic for the base of your Creamy Gochujang Udon Noodles.

Step 3: Build the Sauce
Stir in 2 tablespoons of gochujang and sauté for another 30 seconds to release its fragrant qualities. Then, slowly pour in 1 cup of heavy cream along with the reserved noodle water. Add 2 tablespoons of soy sauce and 1 tablespoon of gochugaru. Mix well and bring the mixture to a gentle simmer for about 3-4 minutes until the sauce has thickened slightly, creating a creamy, spicy base for your noodles.

Step 4: Combine
Once the sauce has thickened to your liking, add the cooked udon noodles directly into the skillet. Gently toss everything together, ensuring the noodles are evenly coated in the creamy gochujang sauce. If the sauce appears too thick, you can add a splash more of the reserved noodle water to achieve the desired creaminess.

Step 5: Serve
Transfer your Creamy Gochujang Udon Noodles into serving bowls. For an extra touch, sprinkle each bowl with grated Parmesan cheese, chopped green onions, and if desired, an egg yolk for added richness. Serve hot and enjoy the warm, comforting flavors of this delightful dish!

What to Serve with Creamy Gochujang Udon Noodles

Elevate your dining experience by complementing these flavorful noodles with delightful side dishes and pairings.

  • Pickled Vegetables: A crisp contrast to the creamy noodles, pickled radishes or cucumbers add a refreshing crunch and tang.
  • Steamed Broccoli: Lightly steamed broccoli brings vibrant color and a nutritious boost, balancing the dish's richness beautifully.
  • Spicy Kimchi: The fermentation and spice of kimchi add another layer of flavor, perfect for those who love a bit of heat.
  • Sesame Spinach Salad: Tossed with soy sauce and sesame oil, this salad offers fresh, earthy flavors that marry well with the noodles.
  • Coconut Rice: The creamy, slightly sweet coconut rice helps temper the dish’s heat while adding a delightful texture.
  • Miso Soup: A warm, soothing bowl of miso soup complements the spicy udon noodles, creating an inviting dining experience.
  • Chilled Green Tea: This refreshing drink balances the noodles’ richness while providing a calming finish to your meal.
  • Chocolate Mousse: End your culinary journey on a sweet note; this light and airy dessert will leave you satisfied and happy.

Storage Tips for Creamy Gochujang Udon Noodles

Fridge: Store any leftovers in an airtight container and refrigerate for up to 3 days to maintain freshness.

Freezer: For longer storage, you can freeze the Creamy Gochujang Udon Noodles in a freezer-safe container for up to 2 months.

Reheating: When ready to eat, reheat on the stove over medium-low heat, adding a splash of water or additional cream to restore creaminess and prevent sticking.

Make Ahead Options

These Creamy Gochujang Udon Noodles are perfect for meal prep enthusiasts! You can prepare the sauce up to 3 days in advance by cooking and combining the butter, garlic, shallots, gochujang, heavy cream, soy sauce, and gochugaru, then storing it in an airtight container in the refrigerator. To maintain quality, ensure it’s cooled completely before sealing. You can also cook the frozen udon noodles up to 24 hours ahead, refrigerating them after cooling to prevent sticking. When ready to enjoy, reheat the sauce in a skillet, add a splash of reserved noodle water for creaminess, toss in the cooked noodles, and serve with toppings for a comforting, quick meal that’s just as delicious as when freshly made!

Creamy Gochujang Udon Noodles Variations

Feel free to get creative and make this dish your own with exciting variations and substitutions!

  • Vegetable Boost: Add bell peppers, spinach, or peas for extra nutrition and vibrant color. Tossing in some crisp greens really brightens up the dish.

  • Protein-Packed: Incorporate chicken, shrimp, or tofu to enhance heartiness. This way, you can transform your noodles from a side dish into a satisfying main course.

  • Dairy-Free Delight: Substitute heavy cream with coconut cream for a lighter, dairy-free version that still retains richness. You'll find it adds a tropical flair to the creamy sauce.

  • Gluten-Free Option: Use tamari instead of soy sauce for a gluten-free alternative without sacrificing flavor. It's a little twist that ensures everyone can indulge.

  • Fresh Herb Lift: Top your noodles with fresh cilantro or basil for an aromatic finish that elevates both the flavor and presentation. It’s the kind of vibrant touch that makes your dish pop!

  • Milder Heat: Reduce the amount of gochujang and gochugaru for a milder version that’s still delicious. This is a great option for those who prefer a gentler spice kick.

  • Umami Swap: Replace Parmesan cheese with nutritional yeast for a vegan-friendly topping that still packs a savory punch. It’s a crowd-pleaser for both plant-based eaters and cheese lovers alike.

  • Cashew Cream Addition: Blend soaked cashews with water until smooth and stir it into the sauce for extra creaminess and a nutty flavor profile.

Each twist offers a unique take on your Creamy Gochujang Udon Noodles, making them a delightful treat for any occasion. Why not experiment with your personal favorites? For more spicy inspiration, check out my recipe for Pan Fried Shrimp with Cabbage Slaw and Gochujang Mayo, or try a sweet ending with my Cajeta Ice Cream.

Expert Tips for Creamy Gochujang Udon Noodles

  • Spice Adjustment: Start with a small amount of gochujang, then gradually add more to manage the heat based on your taste preferences.

  • Rinse Thoroughly: After cooking, rinse the udon noodles well to prevent them from sticking together. This ensures an even coating with the sauce.

  • Simmer for Depth: Allow the sauce to simmer longer for more complexity in flavor; just keep stirring to avoid burning the base of your Creamy Gochujang Udon Noodles.

  • Creamy Consistency: If you prefer a thicker sauce, add a little extra reserved noodle water gradually; this helps maintain a creamy texture without drying out.

  • Topping Variety: Get creative with toppings! Chopped cilantro or radishes can add a pop of freshness and color, enhancing the overall dish.

Creamy Gochujang Udon Noodles Recipe FAQs

How do I choose ripe ingredients for the sauce?
Absolutely! For the best flavor, select fresh garlic - it should be firm and without any dark spots. Shallots should be well-shaped and free from blemishes. Gochujang can be found at Asian grocery stores; look for vibrant color and a well-sealed jar to ensure freshness.

How should I store leftover Creamy Gochujang Udon Noodles?
Store any leftovers in an airtight container in the fridge for up to 3 days. Make sure to let the noodles cool down before sealing them to prevent condensation, which can affect the texture.

Can I freeze Creamy Gochujang Udon Noodles?
Yes! To freeze, let the noodles cool completely, then transfer them to a freezer-safe container. They can be frozen for up to 2 months. I suggest portioning them out for convenient meals later. When you’re ready to eat, reheating on the stove with a splash of water or additional cream helps restore creaminess.

What if my sauce is too thick when I combine it with the noodles?
If the sauce appears too thick, add a little of the reserved noodle water gradually while stirring until you reach your desired consistency. This will keep the sauce creamy without having to start the cooking process over again.

Are there any dietary considerations I should be aware of?
Good question! If you have peanut allergies, you can rest easy since all the ingredients are nut-free. For a dairy-free version, simply substitute the heavy cream with coconut cream and skip the parmesan cheese. Always remember to check labels if you’re using store-bought ingredients like soy sauce or gochujang, as they may contain traces of allergens.

Can I modify the spice level in the recipe?
Very much so! If you prefer a milder flavor, start with half the amount of gochujang and gochugaru. You can always add more to your taste. Cooking is all about personal preference, so feel free to adjust according to your spice tolerance!

Creamy Gochujang Udon Noodles

Creamy Gochujang Udon Noodles for a Spicy Comfort Hit

This Creamy Gochujang Udon Noodles recipe combines comfort food with a spicy kick, ready in just 20 minutes.
Print Recipe Pin Recipe
Prep Time 10 minutes mins
Cook Time 10 minutes mins
Total Time 20 minutes mins
Servings: 2 bowls
Course: Dinner
Cuisine: Asian, Korean
Calories: 650
Ingredients Equipment Method Nutrition Notes

Ingredients
  

For the Sauce
  • 2 tablespoons Gochujang A Korean chili paste that adds essential spice and complexity
  • 2 tablespoons Butter Provides richness; substitute with olive oil for a lighter version
  • 2-3 cloves Minced Garlic Use fresh for the best results
  • 1 medium Chopped Shallots Yellow onion can work as a substitute
  • 1 cup Heavy Cream Coconut cream makes a great dairy-free alternative
  • 2 tablespoons Soy Sauce Tamari is an excellent gluten-free option
  • 1 tablespoon Gochugaru Korean red pepper flakes that elevate the heat
For the Noodles
  • 2 servings Frozen Udon Noodles Substitute with fresh udon or soba for variety
For the Topping
  • 1/4 cup Grated Parmesan Cheese Nutritional yeast offers a vegan alternative
  • 2 tablespoons Chopped Green Onions For a fresh, vibrant garnish
  • 1 large Egg Yolk Optional, enriches the dish

Equipment

  • Large pot
  • Skillet
  • Colander

Method
 

Step-by-Step Instructions
  1. Cook the Noodles: Bring a large pot of salted water to a boil. Add the frozen udon noodles and cook according to package instructions, typically 3-5 minutes, until tender. Reserve 1/2 cup of noodle water, drain the noodles, and rinse briefly under cool water.
  2. Sauté Aromatics: In a large skillet, melt 2 tablespoons of butter over medium heat. Add minced garlic and chopped shallot. Sauté for about 2-3 minutes until fragrant and translucent.
  3. Build the Sauce: Stir in 2 tablespoons of gochujang, sauté for another 30 seconds. Slowly add 1 cup of heavy cream and reserved noodle water, then stir in 2 tablespoons of soy sauce and 1 tablespoon of gochugaru. Simmer for about 3-4 minutes until thickened.
  4. Combine: Add the cooked udon noodles to the skillet, gently toss to coat in the sauce. If too thick, add more reserved noodle water.
  5. Serve: Dish out into serving bowls. Top with grated Parmesan cheese, chopped green onions, and an optional egg yolk. Serve hot.

Nutrition

Serving: 1bowlCalories: 650kcalCarbohydrates: 50gProtein: 15gFat: 40gSaturated Fat: 25gPolyunsaturated Fat: 3gMonounsaturated Fat: 12gTrans Fat: 1gCholesterol: 150mgSodium: 800mgPotassium: 500mgFiber: 3gSugar: 4gVitamin A: 500IUVitamin C: 5mgCalcium: 200mgIron: 2mg

Notes

Feel free to customize your bowl with vibrant vegetables or proteins like chicken or tofu, ensuring a nutritious meal every time.

Tried this recipe?

Let us know how it was!

Ultimate Viral TikTok Ramen Recipe for Creamy Comfort

March 16, 2026 by Grace Snow Leave a Comment

As I sat at my kitchen table scrolling through TikTok, I stumbled upon a video that transformed my weeknight dinners forever: the Viral TikTok Ramen Recipe. This dish is not just a quick meal; it's a creative twist on traditional ramen that you can whip up in a mere 15 minutes! With the perfect blend of sweet brown sugar and the richness of a scrambled egg, each luscious bite becomes a comforting escape from the fast-food monotony. Plus, its ease makes it a crowd-pleasing favorite—ideal for busy nights or spontaneous gatherings. Ready to dive into your own ramen adventure? Let's make this viral sensation happen in your kitchen!

Why is this TikTok Ramen a Must-Try?

Quick & Easy: Ready in just 15 minutes, this dish is perfect for busy weeknights when you crave comfort without hours of cooking.

Irresistible Flavor: The dynamic mix of brown sugar and soy sauce creates a unique sweet-savory balance that tantalizes your taste buds.

Rich & Creamy Texture: The buttery sauce combined with scrambled egg provides an indulgent texture, elevating your ramen game.

Versatile Ingredients: Easily customize with your favorite vegetables or protein like tofu or chicken for a complete meal. Plus, it’s a fantastic way to use up pantry staples!

Crowd-Pleaser: Whether it’s a family dinner or a gathering with friends, this viral sensation is bound to impress and satisfy everyone! If you love bold flavors, you might also enjoy Spatchcock Chicken Flavor or explore the hearty rich taste of Chicken Adobo.

Viral TikTok Ramen Ingredients

For the Noodles
• Ramen Noodles – The foundation of the dish; use instant ramen for minimal cooking time.

For the Sauce
• Butter – Adds richness; substitute with olive oil for a lighter taste.
• Garlic (minced) – Imparts aromatic flavor; fresh garlic enhances the taste even more.
• Red Pepper Flakes – Adds a kick of heat; adjust to your spice preference.
• Brown Sugar – Provides a sweet note to balance flavors; honey is a great substitute.
• Soy Sauce – A key umami flavor; tamari can be used for a gluten-free option.
• Reserved Broth – Gives depth and moisture to the ramen.

For Protein & Garnish
• Egg (lightly beaten) – Enhances creaminess and adds protein; use silken tofu for a vegan variety.
• Everything Bagel Seasoning – Adds a delightful flavor twist; swap it for sesame seeds and garlic powder if needed.
• Sliced Green Onions – A fresh garnish that brightens the dish and adds color.

With this viral TikTok ramen recipe, you’re just a few ingredients away from a comforting, delicious meal!

Step‑by‑Step Instructions for Viral TikTok Ramen Recipe

Step 1: Cook the Ramen Noodles
Begin by boiling water in a large pot over high heat. Once boiling, add your instant ramen noodles and cook according to the package instructions until al dente, typically about 3 minutes. Once done, reserve ¼ cup of the cooking broth, then drain the noodles and set them aside in a bowl.

Step 2: Sauté the Aromatics
In a non-stick skillet, melt 2 tablespoons of butter over medium heat. As it melts, add 2 minced garlic cloves and a pinch of red pepper flakes. Sauté for about one minute, stirring well, until the garlic becomes fragrant and lightly golden. This will form the flavorful base for your Viral TikTok Ramen recipe.

Step 3: Mix in the Sauce Ingredients
Gradually incorporate 2 tablespoons of brown sugar and 3 tablespoons of soy sauce into the skillet. Pour in the reserved ramen broth, stirring continuously. Allow the mixture to simmer gently for about 2 minutes until the sugar dissolves and the sauce thickens slightly, creating a rich and savory coating for the noodles.

Step 4: Combine Noodles with Sauce
Add the cooked ramen noodles to the skillet, using tongs or chopsticks to toss them in the sauce. Ensure that every strand of noodle is fully coated, soaking up that delicious sweet and savory goodness. This step is crucial to achieving the signature flavor of the Viral TikTok Ramen.

Step 5: Create the Creamy Egg Ribbons
Push the noodles to one side of the skillet to make room, then pour in 1 lightly beaten egg. Allow it to sit for a few moments until it starts to set, then gently stir it into the noodles, creating creamy ribbons as it mixes into the hot noodles. This adds a silky texture to the dish.

Step 6: Garnish and Serve
Carefully transfer the finished ramen to a bowl for serving. Sprinkle a generous amount of everything bagel seasoning over the top for a delightful crunch and flavor. Finish with thinly sliced green onions for freshness. If desired, add a drizzle of sriracha for an extra kick, making your Viral TikTok Ramen a comforting and fulfilling meal.

How to Store and Freeze Viral TikTok Ramen

Fridge: Store your Viral TikTok Ramen in an airtight container for up to 3 days. This will help maintain its delicious flavors and creamy texture.

Freezer: For longer storage, you can freeze portions of ramen for up to 1 month. Make sure to freeze without the egg or any garnishes to maintain quality.

Reheating: When ready to enjoy again, reheat in a skillet over medium heat, adding a splash of broth to help rehydrate the noodles and keep them creamy.

Leftovers Tip: The noodles may absorb too much liquid when stored. Stir in some additional broth before reheating for the best results!

Make Ahead Options

These Viral TikTok Ramen preparations are perfect for those busy weeknights! You can cook the ramen noodles and store them in an airtight container for up to 3 days in the refrigerator. Prepare the sauce (butter, garlic, red pepper flakes, brown sugar, soy sauce, and reserved broth) ahead of time and keep it in a separate container for up to 2 days. When you're ready to serve, simply reheat the sauce over medium heat, toss in the reserved noodles, and follow with the beaten egg to create those creamy ribbons. By prepping the individual components in advance, you ensure a delightful meal that saves you precious cooking time, all while maintaining the rich flavors and textures that make this dish a viral hit!

Viral TikTok Ramen Recipe Variations

Feel free to get creative with this ramen dish to match your taste buds and pantry finds!

  • Vegetarian Boost: Add sautéed mushrooms or spinach for an extra layer of nutrition and flavor. This variation not only enhances the dish but also brings a delightful texture.

  • Proteins Galore: Swap the egg for diced chicken or firm tofu for a heartier meal. Both options will elevate the protein factor while maintaining that creamy goodness.

  • Creamy Vegan Option: Use silken tofu instead of the egg to create a rich texture while keeping it plant-based. It blends beautifully, giving you that indulgent feeling without the animal products.

  • Spicy Kick: Mix in some chili garlic sauce or sriracha for an extra punch of heat. Adjust the amount based on your spice tolerance, and you'll have a bowl that truly warms you up!

  • Flavorful Add-Ins: Consider tossing in a spoonful of miso paste or a splash of fish sauce for a savory umami boost. This can take your ramen to a whole new depth of flavor.

  • Nutty Twist: Sprinkle some crushed peanuts or cashews on top for added crunch and a nutty essence that complements the dish beautifully.

  • Sour Touch: Add a splash of lime juice or a sprinkle of lime zest for a refreshing zing that brightens the overall flavors. It’s a little twist that can elevate your ramen experience!

  • Gourmet Upgrade: Use a drizzle of truffle oil instead of butter for a luxurious touch. This simple swap transforms your ramen into an elegant dish worthy of any special occasion.

With these variations, your viral TikTok ramen can always feel new and exciting! Don't forget to check out some other delicious recipes like Spatchcock Chicken Flavor or dive into the flavors of Chicken Adobo for your next culinary exploration.

Expert Tips for Viral TikTok Ramen

  • Timing is Key: Avoid overcooking the ramen noodles; they should be al dente for the best texture in your viral TikTok ramen recipe.

  • Adjust for Creaminess: If you prefer a richer sauce, don't hesitate to add a touch more butter, enhancing the dish's indulgent feel.

  • Non-stick Skillet Advantage: Using a non-stick skillet helps prevent the egg from sticking when you stir it into the noodles, ensuring a smoother finish.

  • Rehydrating Leftovers: If storing leftovers, remember to add some broth when reheating to restore moisture and enhance flavors.

  • Customize Your Flavor: Feel free to switch up the everything bagel seasoning with sesame seeds and garlic powder if you're out; it's a great way to keep the flavor fresh and exciting!

What to Serve with Viral TikTok Ramen with Brown Sugar & Egg

Savor a delightful experience by adding complementary dishes that enhance the warm, comforting vibes of this creamy ramen.

  • Crispy Tempura Vegetables: These light and crunchy bites add a delightful contrast to the rich noodles, offering a burst of flavor in every mouthful. Tempura, especially when fresh, perfectly balances the tenderness of the ramen, making it an ideal side.

  • Sesame-Cucumber Salad: This refreshing salad brings a cool crunch paired with a hint of acidity, enhancing your meal’s overall brightness. The crisp cucumbers and soy-sesame dressing will cleanse your palate between bites.

  • Steamed Edamame: Simple yet delightful, these tender soybeans add a nutty flavor and serve as a nutritious, protein-packed side. Enjoyed warm, they create a lovely tactile experience alongside your indulgent ramen.

  • Kimchi: The spicy, fermented tang of kimchi provides a zesty kick that cuts through the creaminess of the ramen. Its bold flavors invigorate your meal, offering a delightful explosion of taste with each bite.

  • Miso Soup: A cup of savory miso soup completes the dining experience beautifully, echoing the flavors in the ramen while adding warmth and depth. It’s a comforting way to start your meal, inviting a moment of tranquility.

  • Green Tea: Warm or chilled, green tea harmonizes with the comforting essence of ramen, elevating the dining experience. Its subtle notes soothe and refresh your palate after each rich bite, making it a perfect drink pairing.

  • Chocolate Mochi: For dessert, indulge in these chewy rice bites filled with sweet red bean or ice cream. Their unique texture and sweetness provide a lovely finish to your meal, ensuring a memorable experience.

Viral TikTok Ramen with Brown Sugar & Egg Recipe FAQs

What type of ramen noodles should I use?
Absolutely! I recommend using instant ramen noodles for this recipe as they are quick to prepare and have the right texture. Look for a brand that does not contain excess additives for the best flavor.

How long can I store leftover ramen in the fridge?
You can store your Viral TikTok Ramen in an airtight container in the refrigerator for up to 3 days. Just make sure the container is sealed well to keep it fresh!

Can I freeze this ramen?
Yes, you can freeze portions of your ramen! It's best to freeze it without the egg or garnishes. Place it in airtight containers or freezer bags and store for up to 1 month. When you're ready to enjoy, just thaw in the fridge overnight and reheat gently.

What if my noodles become too soggy?
No worries! If your noodles have overcooked and become soggy, unfortunately, there's not much that can be done to reverse that. In the future, cook the noodles just until al dente to prevent this. Adding a splash of broth when reheating can help restore a bit of moisture and flavor.

Are there any dietary considerations for this recipe?
Very! If you're cooking for someone with allergies, take care to ensure your soy sauce is gluten-free if needed (use tamari), and you can substitute the egg with silken tofu for a vegan option. Always check ingredient labels for allergens and adjust as necessary!

How can I enhance the flavor of the broth further?
Definitely! You can add sliced mushrooms or baby spinach when cooking the noodles for extra flavor and nutrition. Additionally, experimenting with different seasonings like chili garlic sauce can add a spicy twist that brings the dish to a whole new level!

Viral TikTok Ramen Recipe

Ultimate Viral TikTok Ramen Recipe for Creamy Comfort

Quick and delicious Viral TikTok Ramen Recipe ready in 15 minutes that transforms weeknight dinners into a creamy comfort.
Print Recipe Pin Recipe
Prep Time 5 minutes mins
Cook Time 10 minutes mins
Total Time 15 minutes mins
Servings: 2 servings
Course: Dinner
Cuisine: Asian
Calories: 500
Ingredients Equipment Method Nutrition Notes

Ingredients
  

For the Noodles
  • 2 packs instant ramen noodles The foundation of the dish.
For the Sauce
  • 2 tablespoons butter Adds richness; substitute with olive oil for a lighter taste.
  • 2 cloves garlic (minced) Impacts aromatic flavor.
  • 1 pinch red pepper flakes Adds a kick of heat.
  • 2 tablespoons brown sugar Provides a sweet note to balance flavors.
  • 3 tablespoons soy sauce A key umami flavor.
  • ¼ cup reserved broth Gives depth and moisture to the ramen.
For Protein & Garnish
  • 1 large egg (lightly beaten) Enhances creaminess and adds protein.
  • 2 tablespoons everything bagel seasoning Adds a delightful flavor twist.
  • 2 stalks sliced green onions A fresh garnish.

Equipment

  • Large pot
  • non-stick skillet

Method
 

Step-by-Step Instructions
  1. Begin by boiling water in a large pot over high heat. Once boiling, add your instant ramen noodles and cook according to the package instructions until al dente, typically about 3 minutes. Once done, reserve ¼ cup of the cooking broth, then drain the noodles and set them aside in a bowl.
  2. In a non-stick skillet, melt 2 tablespoons of butter over medium heat. As it melts, add 2 minced garlic cloves and a pinch of red pepper flakes. Sauté for about one minute, stirring well, until the garlic becomes fragrant and lightly golden.
  3. Gradually incorporate 2 tablespoons of brown sugar and 3 tablespoons of soy sauce into the skillet. Pour in the reserved ramen broth, stirring continuously. Allow the mixture to simmer gently for about 2 minutes.
  4. Add the cooked ramen noodles to the skillet, using tongs or chopsticks to toss them in the sauce until fully coated.
  5. Push the noodles to one side of the skillet to make room, then pour in 1 lightly beaten egg. Allow it to sit for a few moments until it starts to set, then gently stir it into the noodles.
  6. Carefully transfer the finished ramen to a bowl for serving. Sprinkle a generous amount of everything bagel seasoning and thinly sliced green onions over the top.

Nutrition

Serving: 1bowlCalories: 500kcalCarbohydrates: 60gProtein: 15gFat: 20gSaturated Fat: 10gPolyunsaturated Fat: 5gMonounsaturated Fat: 5gCholesterol: 200mgSodium: 1200mgPotassium: 300mgFiber: 2gSugar: 10gVitamin A: 500IUVitamin C: 2mgCalcium: 40mgIron: 2mg

Notes

Customize with your favorite vegetables or protein like tofu or chicken for a complete meal. Avoid overcooking the noodles for best texture.

Tried this recipe?

Let us know how it was!

Creamy Homemade Cheesy Potatoes for Cozy Family Feasts

March 16, 2026 by Grace Snow Leave a Comment

The kitchen is filled with the comforting aroma of buttery potatoes sizzling on the stove, and it hits me—there’s nothing quite like homemade cheesy potatoes to warm the heart. Today, I'm excited to share my recipe for Homemade Cheesy Potatoes, a dish that embraces scratch cooking without the need for canned soup or frozen shortcuts. With tender russet potatoes blanketed in a creamy, cheesy sauce adorned with sautéed onions and garlic, this recipe is a guaranteed showstopper for family gatherings or simple weeknight dinners. Plus, it’s the perfect blend of comfort and indulgence that’ll make you forget about fast food altogether. Curious about how to transform your meals with this cheesy delight? Let’s dive into the recipe!

Why Will You Love Homemade Cheesy Potatoes?

Simplicity at Its Best: This recipe is easy to follow, requiring no advanced cooking skills.

Rich, Savory Flavor: The creamy, cheesy sauce, fused with sautéed onions and garlic, creates an irresistible taste that elevates any meal.

Ultimate Comfort Food: These cheesy potatoes are the epitome of cozy, making them perfect for family gatherings and holidays.

Versatile Dish: Pair them with ham, turkey, or even a fresh green salad for a delightful meal. If you're looking for more veggie options, try adding broccoli or mushrooms!

Make-Ahead Magic: Prepare these a day in advance and bake when ready—great for busy weeknights!

Experience the magic of homemade comfort food without the shortcuts found in processed options. Your taste buds will thank you for this delightful switch!

Homemade Cheesy Potatoes Ingredients

For the Potatoes
• Russet Potatoes – the key player that forms the dish’s comforting base; peel and dice into bite-size pieces for even cooking.
• Kosher Salt & Black Pepper – essential for enhancing the flavors; adjust according to your own taste preferences.

For the Sauce
• Unsalted Butter – adds rich flavor and is perfect for sautéing; can substitute with olive oil for a lighter option.
• Medium Yellow Onion – lends a sweet undertone when sautéed; shallots can substitute for a milder taste.
• Green Onions – introduces fresh notes and a mild crunch; regular onions can be used if green onions aren't available.
• Garlic – provides aromatic depth to the sauce; use fresh or prepared garlic based on your preference.
• Unbleached All-Purpose Flour – thickens the sauce for a creamy texture; gluten-free flour may be substituted.
• Low-Sodium Chicken Broth – forms the sauce's heart with added flavor; vegetable broth is a great alternative for a vegetarian version.
• Whole Milk – contributes to the luxuriously creamy sauce; heavy cream can be swapped for a richer result.
• Sour Cream – adds a delightful tanginess to the dish; Greek yogurt can be used for a lighter option.

For the Cheesy Delight
• Sharp Cheddar Cheese – provides that irresistible cheesy flavor and texture; consider other cheeses, but sharp cheddar offers the best flavor for these homemade cheesy potatoes.

Get ready to elevate your meals and make your family gatherings memorable with these delightful homemade cheesy potatoes!

Step‑by‑Step Instructions for Homemade Cheesy Potatoes

Step 1: Boil Potatoes
Begin by adding the diced russet potatoes to a large pot and cover them with cold water. Bring the water to a rolling boil over high heat, then reduce to medium, cooking for 8-10 minutes. The potatoes should be tender yet firm enough to hold their shape. Drain and set aside while you prepare the rest of the dish.

Step 2: Prep Baking Dish
Preheat your oven to 350°F (180°C). While the oven warms up, take a 2-quart baking dish and grease it generously with unsalted butter to prevent sticking. This will help create a deliciously golden crust on top of your homemade cheesy potatoes as they bake.

Step 3: Sauté Aromatics
In a large skillet, melt about two tablespoons of butter over medium heat. Add the diced yellow onion and a pinch of kosher salt, sautéing until the onions are soft and translucent, about 5-7 minutes. Then, incorporate the chopped green onions and minced garlic, continuing to sauté for another minute until fragrant and softened.

Step 4: Make Sauce
Sprinkle in the flour and stir the onion mixture for about 2 minutes to cook out the raw flour taste. Gradually pour in the low-sodium chicken broth and whole milk, whisking constantly to prevent lumps. Allow the sauce to thicken, which should take about 3-5 minutes over medium heat, becoming creamy and luscious—this forms the base for your homemade cheesy potatoes.

Step 5: Combine Sauce & Potatoes
Once your sauce has thickened beautifully, remove it from heat and stir in the sour cream, salt, and black pepper to taste. Gently fold in the drained potatoes, ensuring every cube is coated in that rich, creamy sauce. This step is key to achieving irresistible flavor in your homemade cheesy potatoes.

Step 6: Layer & Bake
Transfer the potato mixture into the greased baking dish, spreading it out evenly. Top generously with the sharp cheddar cheese, allowing it to melt and bubble as it bakes. Place the dish in the preheated oven, baking for 40-50 minutes until golden brown and bubbly.

Step 7: Cool & Serve
Once baked, remove the dish from the oven and let it cool for about 10 minutes before serving. This cooling time will help the sauce set up slightly, making it easier to dish out. Each serving of your homemade cheesy potatoes will be a comforting delight, perfect alongside any meal!

What to Serve with Homemade Cheesy Potatoes?

The perfect meal companion elevates the comfort and joy of homemade cheesy potatoes, creating a delightful dining experience.

  • Honey-Glazed Ham: This sweet and savory treat enhances the rich flavors of cheesy potatoes, creating a harmonious balance on your plate. The smoky notes of the ham pair beautifully with the creamy cheese, making dinner a celebration of flavors.

  • Roasted Vegetables: A medley of roasted carrots, Brussels sprouts, and bell peppers adds a pop of color and fresh crunch. Their natural sweetness complements the creaminess of the potatoes, ensuring a vibrant and nutritious meal that feels wholesome.

  • Grilled Chicken: Juicy, seasoned chicken is a versatile protein choice that melds well with the comforting cheesy potatoes. Whether infused with herbs or a smoky marinade, the chicken enhances your meal while keeping it satisfyingly light.

  • Mixed Green Salad: A refreshing salad with crisp greens, cucumbers, and a tangy vinaigrette brings balance to the meal. The brightness of the salad cuts through the richness of the potatoes, offering a delightful contrast that will keep everyone coming back for more.

  • Crispy Garlic Bread: Golden, crunchy garlic bread is perfect for mopping up any extra cheesy goodness. Its buttery, fragrant crunch is a delightful textural contrast to the creamy potatoes.

  • Apple Pie: Cap off the meal with a slice of warm apple pie. The sweet, cinnamon-infused apples provide a comforting finish, perfect for those cozy family moments around the table.

Taking these pairings into account will not only enhance your dining experience but will also create a memorable meal for you and your loved ones!

How to Store and Freeze Homemade Cheesy Potatoes

Fridge: Store cooked homemade cheesy potatoes in an airtight container for up to 3 days. Ensure they’re cooled before sealing to prevent condensation.

Freezer: For longer storage, freeze leftovers in a well-sealed freezer-safe container for up to 2 months. Thaw overnight in the fridge before reheating.

Reheating: Reheat covered in the oven at 350°F (175°C) for about 20-25 minutes, or until heated through. Add a splash of milk to restore creaminess if needed.

Make-Ahead: Assemble the dish a day in advance, refrigerate without baking, and pop it in the oven when ready to serve. It's an ideal way to enjoy your cheesy potatoes at a family gathering or special occasion!

Expert Tips for Homemade Cheesy Potatoes

  • Potato Prepping: Ensure the potatoes are cut into even, bite-sized pieces to guarantee uniform cooking. This step is vital for achieving perfectly tender homemade cheesy potatoes.

  • Cheese Quality: Always opt for fresh sharp cheddar cheese. Pre-grated cheese often contains anti-caking agents that can prevent it from melting smoothly.

  • Sauce Thickness: If the sauce seems too thick after adding the potatoes, don’t hesitate to add a splash more chicken broth or milk. Adjusting the consistency can make all the difference in your final dish.

  • Seasoning Adjustment: Taste your sauce before mixing in the potatoes. Adding a bit more salt or pepper can elevate the flavors, ensuring your homemade cheesy potatoes are perfectly seasoned.

  • Cooling Time: Allow the dish to cool for about 10 minutes after baking. This gives the sauce time to set, making it easier to serve and enhancing the overall texture.

Homemade Cheesy Potatoes Variations

Feel free to customize your cheesy potatoes for a delightful twist that caters to your family’s taste buds!

  • Creamy Vegan: Substitute dairy with cashew cream and nutritional yeast for a rich flavor without cheese. This creamy alternative will still keep everyone coming back for seconds.

  • Smoky Flavor: Mix in some smoked paprika or chipotle powder for a spicy kick and a wonderful smoky flavor. It adds depth that will impress even the most discerning of taste buds.

  • Extra Veggies: Fold in steamed broccoli or sautéed mushrooms to boost nutrition and flavor. The added veggies not only look inviting but also add a bite of freshness to this comforting dish.

  • Herb Infusion: Add fresh herbs like thyme or rosemary to the sauce for a fragrant backdrop. The aromatic herbs will dance beautifully with the cheesy potatoes, giving each bite a little extra zing.

  • Cheesy Combo: Try mixing half sharp cheddar with other cheeses like Gruyère or Parmesan for a gourmet touch. This creates layers of flavor and texture that turn simple potatoes into a culinary masterpiece.

  • Onion Twist: Incorporate caramelized onions instead of sautéed for a sweet, rich flavor. The sweet contrast will elevate your cheesy potatoes to a restaurant-quality dish.

  • Chili Heat: Add diced jalapeños or a sprinkle of crushed red pepper flakes for a spicy twist. This fiery addition is perfect for those who love to turn up the heat in their dishes.

  • Bacon Lovers: Mix in crispy bacon bits for that irresistible smoky, savory touch. This classic combination will satisfy everyone at the table and is perfect for special occasions. For a gourmet pairing, serve alongside your Smoky Sweet Potatoes!

By exploring these variations, you can make your homemade cheesy potatoes uniquely yours and keep the family coming back for more!

Make Ahead Options

These Homemade Cheesy Potatoes are an excellent choice for meal prep, saving you precious time on busy weeknights! You can prepare the entire dish up to 24 hours in advance by assembling it beforehand and covering it tightly with plastic wrap before refrigerating. This allows the flavors to meld beautifully, ensuring a delicious outcome. When you’re ready to bake, simply remove the dish from the fridge while preheating your oven to 350°F (180°C) and add an extra 10-15 minutes to the baking time to ensure they heat through properly. For optimal quality, cover with foil for the first half of baking to prevent over-browning. Enjoy a comforting homemade side with minimal effort!

Homemade Cheesy Potatoes Recipe FAQs

How do I select the right potatoes for homemade cheesy potatoes?
Absolutely! For the best results, use starchy russet potatoes as they provide a fluffy texture when cooked. Look for potatoes that are firm with smooth skin and avoid those with dark spots or blemishes. Choosing the right potatoes is essential to achieving that comforting, creamy base for your dish.

How should I store leftovers of homemade cheesy potatoes?
To keep your leftover cheesy potatoes fresh, store them in an airtight container in the fridge for up to 3 days. Be sure to let them cool completely before sealing to avoid condensation inside the container, which can make them soggy.

Can I freeze homemade cheesy potatoes? If so, how?
Very! Freezing is a great option for storing leftovers. To freeze, allow the dish to cool completely, then transfer it to a well-sealed freezer-safe container or a freezer bag. Homemade cheesy potatoes can be frozen for up to 2 months. When you're ready to enjoy them again, thaw overnight in the fridge and reheat in the oven at 350°F (175°C) for 20-25 minutes until heated through.

What if my sauce is too thick for the cheesy potatoes?
The more the merrier! If your sauce turns out thicker than desired, simply add a splash of chicken broth or milk to reach your preferred consistency. Stir it in gradually while heating the sauce on low to ensure it mixes well. This step can help maintain the creamy richness of your homemade cheesy potatoes.

Are there any dietary considerations for homemade cheesy potatoes?
Absolutely! If you have dietary restrictions, feel free to substitute ingredients as needed. For a lactose-free version, you can use dairy-free cheese and milk alternatives, like almond or oat milk. For gluten-free options, replace the all-purpose flour with a gluten-free blend. Always check your labels if you or your guests have specific allergies.

Can I make homemade cheesy potatoes ahead of time?
Yes, you can! Assemble all the ingredients up to the baking step a day in advance and cover the dish tightly with plastic wrap or aluminum foil. Refrigerate and bake it straight from the fridge when you're ready to serve. This make-ahead method is wonderful for entertaining or hectic weeknights!

Homemade Cheesy Potatoes

Creamy Homemade Cheesy Potatoes for Cozy Family Feasts

Experience the comfort of homemade cheesy potatoes, overflowing with creamy goodness and perfect for family gatherings.
Print Recipe Pin Recipe
Prep Time 20 minutes mins
Cook Time 50 minutes mins
Cooling Time 10 minutes mins
Total Time 1 hour hr 20 minutes mins
Servings: 6 servings
Course: Dinner
Cuisine: American
Calories: 320
Ingredients Equipment Method Nutrition Notes

Ingredients
  

For the Potatoes
  • 4 cups Russet Potatoes peeled and diced
  • 1 teaspoon Kosher Salt adjust to taste
  • 1 teaspoon Black Pepper adjust to taste
For the Sauce
  • 2 tablespoons Unsalted Butter can substitute with olive oil
  • 1 medium Yellow Onion diced
  • 2 tablespoons Green Onions chopped
  • 2 cloves Garlic minced
  • 1/4 cup Unbleached All-Purpose Flour
  • 2 cups Low-Sodium Chicken Broth vegetable broth for vegetarian
  • 1 cup Whole Milk can substitute with heavy cream
  • 1 cup Sour Cream can substitute with Greek yogurt
For the Cheesy Delight
  • 2 cups Sharp Cheddar Cheese freshly grated

Equipment

  • Large pot
  • 2-quart baking dish
  • Large skillet
  • Whisk

Method
 

Step-by-Step Instructions
  1. Add diced russet potatoes to a large pot and cover with cold water. Bring to a boil, reduce heat, and cook for 8-10 minutes. Drain and set aside.
  2. Preheat the oven to 350°F (180°C). Grease a 2-quart baking dish with unsalted butter.
  3. In a skillet, melt butter over medium heat. Add the diced onion and a pinch of salt, sauté until soft, about 5-7 minutes. Add green onions and garlic, sauté for another minute.
  4. Stir in flour and cook for about 2 minutes. Gradually whisk in chicken broth and milk, cooking until thickened, about 3-5 minutes.
  5. Remove from heat and stir in sour cream, salt, and pepper. Fold in the drained potatoes, ensuring they are coated in the sauce.
  6. Spread the potato mixture into the greased baking dish. Top with cheddar cheese. Bake for 40-50 minutes until golden brown.
  7. Let cool for about 10 minutes before serving.

Nutrition

Serving: 1cupCalories: 320kcalCarbohydrates: 36gProtein: 10gFat: 15gSaturated Fat: 9gPolyunsaturated Fat: 1gMonounsaturated Fat: 3gCholesterol: 40mgSodium: 400mgPotassium: 500mgFiber: 3gSugar: 2gVitamin A: 500IUVitamin C: 15mgCalcium: 250mgIron: 2mg

Notes

Ensure potatoes are evenly cut for uniform cooking. Use fresh cheese for better melting.

Tried this recipe?

Let us know how it was!

Fluffy Arroz Amarillo Recipe: Quick, Flavorful Comfort Dish

March 14, 2026 by Grace Snow Leave a Comment

As the aroma of simmering spices weaves through my kitchen, I’m transported to sun-soaked markets bustling with vibrant colors. This Classic Arroz Amarillo recipe is my go-to for instantly transforming a simple meal into something extraordinary. With its fluffy texture and rich flavor enhanced by turmeric and adobo seasoning, this Spanish yellow rice makes a delightful companion for any main dish. Best of all, it’s a quick and easy side dish that allows you to spend less time in the kitchen and more time with loved ones. Whether you’re hosting a festive gathering or simply elevating a weeknight dinner, this versatile Arroz Amarillo truly shines. Curious about how to create this flavorful addition to your meals? Let’s dive in!

Why is Arroz Amarillo a Must-Try?

Fluffy Excellence: This Arroz Amarillo recipe is designed to yield perfectly fluffy rice every time, making it a guaranteed crowd-pleaser.

Flavorful Infusion: The use of turmeric and adobo seasoning ensures a vibrant, flavorful experience that elevates your dishes wonderfully.

Quick Preparation: Whip it up in just 30 minutes—perfect for weeknight dinners when time is limited.

Versatile Pairing: Pairs beautifully with grilled meats or vegetarian options, adapting seamlessly to complement any meal. For inspiration, check out my Baked Chicken Cutlets that would be an awesome match!

Simple Ingredients: With pantry staples, this dish transforms regular mealtime into something special without extra hassle.

Nutritional Boost: Each serving is not only delicious but also nutrient-rich, packed with vitamins that your body craves. Don’t cheat your taste buds—create an unforgettable culinary experience!

Arroz Amarillo Recipe Ingredients

For the Rice
• Dried Long Grain Rice – This is the foundation of your Arroz Amarillo; make sure to coat it well with butter for a fluffy texture.
• Butter or Oil – This adds richness; you can substitute with vegetable oil for a dairy-free option.
• Water – Essential for cooking; measure precisely to avoid soggy rice.

For the Aromatics
• Finely Diced Onion – This brings sweetness and depth; sauté until it’s soft and translucent.
• Minced Garlic – Known for enhancing aroma and flavor; use fresh for the best result.

For Seasoning
• Chicken Base or Bouillon/Vegetable Base – This boosts umami flavor; for vegetarian needs, use vegetable bouillon.
• Turmeric – The star spice that gives the rice its signature vibrant yellow color; adds a delicate earthiness.
• Adobo Seasoning – Adds complexity and warmth; feel free to adjust for your desired spice level.

For Finishing Touch
• Chopped Cilantro – Adds a refreshing touch and color just before serving; it brightens up the dish beautifully.

With these simple, wholesome ingredients, you’ll create a tantalizing Arroz Amarillo Recipe that captivates your taste buds and transforms your table into a feast!

Step‑by‑Step Instructions for Arroz Amarillo Recipe

Step 1: Sauté Aromatics
In a 4-quart saucepot, melt 2 tablespoons of butter over medium heat, watching for it to foam slightly. Add 1 finely diced onion and sauté for 3-5 minutes until it becomes soft and translucent, releasing a delightful aroma. Then, stir in 2 minced garlic cloves, cooking for an additional minute until fragrant.

Step 2: Coat the Rice
Next, add 1 cup of dried long grain rice to the pot, ensuring it is well coated with the buttery mixture. Stir continuously for about 2 minutes, allowing the rice to toast slightly and absorb the flavors from the onion and garlic. This step enhances the final texture of your Arroz Amarillo.

Step 3: Incorporate Seasonings
Pour in 2 cups of water and add 1 tablespoon of chicken base, 1 teaspoon of turmeric, and 1 tablespoon of adobo seasoning. Stir everything well to combine, ensuring that the water and seasonings are evenly distributed among the rice. Bring the mixture to a boil, watching for bubbles to appear on the surface.

Step 4: Cook the Rice
Once boiling, reduce the heat to low, cover the pot, and let it simmer for 15-18 minutes. Check occasionally for steam holes forming in the rice, which indicates it's cooking properly. The rice should absorb all the liquid and fluff up beautifully, transforming into a vibrant yellow.

Step 5: Steam Off Heat
After cooking, remove the pot from the heat but keep it covered. Let it steam for an additional 5 minutes; this allows the rice grains to settle and become even fluffier. Avoid lifting the lid during this time, as the steam is crucial for the texture.

Step 6: Fluff and Finish
With a fork, gently fluff the rice to separate the grains, revealing its light and airy texture. Finally, stir in 1/4 cup of chopped cilantro for a fresh, vibrant touch right before serving. Your delicious Arroz Amarillo is ready to accompany your favorite dishes!

Make Ahead Options

These Arroz Amarillo make-ahead options are perfect for busy cooks looking to save time! You can prepare the sautéed onions and garlic up to 24 hours in advance; simply store them in an airtight container in the refrigerator. Additionally, the rice can be rinsed and measured beforehand, ready to mix with seasonings when you're ready to cook. To maintain quality, ensure that any prepped components are kept refrigerated and tightly sealed to prevent drying out. When it's time to serve, just follow the cooking instructions as usual, and you'll have fluffy, flavorful Arroz Amarillo ready to impress your family or guests with minimal effort!

What to Serve with Classic Arroz Amarillo?

As you savor each fluffy bite of Arroz Amarillo, imagine the delightful medley of flavors that can accompany this vibrant dish.

  • Honey Garlic Pork Chops: This sweet and savory combination pairs beautifully, complementing the aromatic spices of the rice.
  • Baked Chicken Cutlets: The crispy texture and mild flavor of chicken cutlets provide a satisfying contrast to the buttery rice.
  • Tacos Al Pastor: A fiesta of flavors, these tacos with their zesty salsa bring a fresh touch that elevates your meal.
  • Grilled Vegetables: Lightly charred veggies add a smoky element and crunchy texture, balancing the richness of the Arroz Amarillo.
  • Black Bean Salad: The earthiness of black beans mixed with fresh cilantro and lime brightens up the plate, adding a refreshing note.
  • Avocado Salsa: Creamy avocado blended with tomatoes and lime creates a luscious topping that enhances the dish's overall flavor.
  • Chilled White Sangria: This fruity, refreshing drink adds a splash of fun and pairs exceptionally with the Latin-inspired flavors.
  • Churros with Chocolate Sauce: Finish off your meal with these sweet, crispy treats— a delightful way to close a flavorful feast.

With these pairings, your table will be a joyful celebration of tastes and textures, perfect for any occasion!

How to Store and Freeze Arroz Amarillo

• Room Temperature: Allow your Arroz Amarillo to cool completely before placing it at room temperature for no more than 2 hours.

• Fridge: Store leftover Arroz Amarillo in an airtight container in the fridge for up to 4 days. Reheat gently in the microwave with a splash of water to restore moisture.

• Freezer: To freeze, place the cooled rice in a freezer-safe bag, flattening it out to save space. It can last up to 3 months in the freezer. Thaw overnight in the fridge before reheating.

• Reheating: When ready to eat, reheat the rice in the microwave or on the stovetop, adding a little water as needed to prevent drying out. Enjoy that fluffy, flavorful Arroz Amarillo again!

Expert Tips for Arroz Amarillo Recipe

• Rinse Rice: Rinsing your rice before cooking helps remove excess starch, resulting in extra fluffy Arroz Amarillo that won't clump together.

• Water Measurement: Always measure your water accurately—too much can lead to sogginess while too little won't cook the rice through.

• Vegetable Variation: For added texture and flavor, consider mixing in sweet peas or shredded coconut. They're delightful additions to the Arroz Amarillo recipe!

• Proper Steaming: Allowing the rice to steam after cooking is crucial for perfect fluffiness—don’t skip this step, and resist the urge to peek!

• Serving Suggestions: Enhance your meal by pairing Arroz Amarillo with grilled meats or vegetarian dishes, elevating your dinners with this vibrant side.

Arroz Amarillo Recipe Variations

Feel free to get creative with this Arroz Amarillo recipe and adapt it to suit your palate!

  • Dairy-Free: Substitute butter with vegetable oil for a light, creamy texture without dairy. It's a great way to keep that richness vegan-friendly.

  • Vegetarian Bouillon: Instead of chicken base, use vegetable bouillon for a wonderfully umami flavor that caters to vegetarian diets without sacrificing taste.

  • Saffron Upgrade: For an elegant twist, swap turmeric for saffron. This adds a luxurious aroma and a beautiful golden hue that will impress at dinner parties.

  • Add Vegetables: Toss in sweet peas or spinach towards the end of cooking for added nutrients and a pop of color. It enhances flavor and gives an extra layer of texture.

  • Heat It Up: Incorporate diced jalapeños or a pinch of cayenne pepper for a spicy kick. Adjust to your heat level, and watch your taste buds dance!

  • Tropical Touch: Mix in shredded coconut for a hint of sweetness and a tropical flair. This twist perfectly complements roasted meats or shrimp.

  • Citrus Zing: Squeeze in fresh lime juice right before serving for an electrifying brightness that lifts the dish's flavors. A hint of zest can make all the difference!

  • Protein Booster: Stir in cooked chickpeas or shredded rotisserie chicken after the rice is fluffy. This turns your side dish into a hearty main course in no time!

Experimenting with these variations not only highlights the flexibility of this dish but also makes each meal a unique experience. Pair it with my Honey Garlic Pork Chops or serve it alongside Chicken Adobo for a delightful feast that everyone will cherish!

Arroz Amarillo Recipe FAQs

How do I choose the right rice for Arroz Amarillo?
Absolutely! For the best results, use long-grain rice, which helps achieve that fluffy texture we all love. Look for high-quality, non-sticky varieties. Rinsing the rice before cooking removes extra starch, promoting separation of the grains.

How should I store leftovers of Arroz Amarillo?
Leftover Arroz Amarillo can be stored in an airtight container in the refrigerator for up to 4 days. Make sure you allow it to cool completely before sealing it up. When reheating, add a splash of water in the microwave or on the stovetop to restore moisture and fluffiness!

Can I freeze Arroz Amarillo?
Very! To freeze Arroz Amarillo, wait until it has cooled completely, then transfer it to a freezer-safe bag. Flatten it out to save space, and it can last up to 3 months in the freezer. When you’re ready to enjoy, simply thaw overnight in the fridge and reheat as needed.

What should I do if my Arroz Amarillo turns out soggy?
If your Arroz Amarillo is soggy, it likely means too much water was used during cooking. Always measure your water precisely. In case you find yourself in this situation, you can try spreading the rice on a baking sheet and letting it cool and dry out for a while. This can help improve the texture!

Is this Arroz Amarillo recipe suitable for vegetarians?
Absolutely! You can easily make this dish vegetarian by substituting the chicken base with vegetable bouillon. This way, you'll still achieve the same rich flavor without any meat products. Enjoy this flavorful comfort dish without compromising your dietary preferences!

Can I use other spices or ingredients to alter the flavor?
Yes! The beauty of Arroz Amarillo lies in its versatility. Consider adding saffron for a luxurious flavor boost instead of turmeric. You can also mix in fresh vegetables like peas or even dried fruits like raisins for a sweet twist. The more the merrier! Feel free to experiment with the seasonings and toppings according to your taste!

Arroz Amarillo Recipe

Fluffy Arroz Amarillo Recipe: Quick, Flavorful Comfort Dish

This Arroz Amarillo recipe transforms simple meals into extraordinary dishes with its fluffy texture and rich flavor, making it a must-try comfort food.
Print Recipe Pin Recipe
Prep Time 10 minutes mins
Cook Time 30 minutes mins
Steaming Time 5 minutes mins
Total Time 45 minutes mins
Servings: 4 servings
Course: Dinner
Cuisine: Spanish
Calories: 200
Ingredients Equipment Method Nutrition Notes

Ingredients
  

For the Rice
  • 1 cup Dried Long Grain Rice coated with butter for fluffiness
  • 2 tablespoons Butter or Oil substitute with vegetable oil for dairy-free
  • 2 cups Water measure precisely to avoid sogginess
For the Aromatics
  • 1 Finely Diced Onion sauté until soft and translucent
  • 2 cloves Minced Garlic use fresh for the best result
For Seasoning
  • 1 tablespoon Chicken Base or Bouillon/Vegetable Base for vegetarian, use vegetable bouillon
  • 1 teaspoon Turmeric adds yellow color and earthiness
  • 1 tablespoon Adobo Seasoning adjust for desired spice level
For Finishing Touch
  • 1/4 cup Chopped Cilantro add just before serving

Equipment

  • 4-quart saucepot

Method
 

Step-by-Step Instructions
  1. In a 4-quart saucepot, melt 2 tablespoons of butter over medium heat. Add 1 finely diced onion and sauté for 3-5 minutes until soft and translucent. Stir in 2 minced garlic cloves and cook for an additional minute until fragrant.
  2. Add 1 cup of dried long grain rice to the pot, ensuring it is well coated. Stir continuously for about 2 minutes to toast the rice.
  3. Pour in 2 cups of water and add 1 tablespoon of chicken base, 1 teaspoon of turmeric, and 1 tablespoon of adobo seasoning. Stir well and bring to a boil.
  4. Once boiling, reduce heat to low, cover the pot, and simmer for 15-18 minutes, checking occasionally for steam holes.
  5. Remove the pot from heat and let it steam, covered, for an additional 5 minutes.
  6. Fluff the rice with a fork and stir in 1/4 cup of chopped cilantro before serving.

Nutrition

Serving: 1cupCalories: 200kcalCarbohydrates: 38gProtein: 4gFat: 5gSaturated Fat: 3gPolyunsaturated Fat: 1gMonounsaturated Fat: 1gCholesterol: 10mgSodium: 500mgPotassium: 200mgFiber: 1gVitamin A: 80IUVitamin C: 2mgCalcium: 20mgIron: 1mg

Notes

Rinsing the rice before cooking helps achieve extra fluffiness. Pair Arroz Amarillo with grilled meats or vegetarian dishes for a flavorful meal.

Tried this recipe?

Let us know how it was!

Irresistible Southwest Chicken Wraps in Just 30 Minutes

March 14, 2026 by Grace Snow Leave a Comment

As I unwrapped my first Southwest Chicken Wrap, the warm tortilla cradled a medley of vibrant colors and tantalizing aromas, instantly transporting me to a sun-soaked summer day. Packed with tender, marinated chicken and crisp veggies, these wraps are not just a feast for the eyes; they also make for a quick meal that doesn’t compromise on health. With just 30 minutes of prep time, you can turn what would be a rushed dinner into a delightful family-friendly experience. Customize each wrap with your favorite fillings and sauces to suit any palate—it's a culinary canvas waiting for your personal touch! What creative twist will you add to your wraps tonight?

Why are Southwest Chicken Wraps so special?

Quick and Easy: Whip up these wraps in just 30 minutes, making them ideal for busy weeknights or last-minute gatherings.

Customizable Delight: Each bite can be tailored to your favorite flavors—swap in turkey, beef, or tofu, or try different beans for a unique touch.

Healthful Goodness: Packed with lean protein and colorful veggies, these wraps are a nutritious choice for the whole family, ensuring everyone leaves the table satisfied.

Vibrant Flavors: The combination of chipotle and fresh lime juice brings an exciting zing that elevates the taste profile while providing a robust kick.

Crowd-Pleaser: Perfect for meal prep or parties, these wraps are always a hit and can easily please even the pickiest eaters.

Serve them alongside a light salad, and for a sweet touch, consider trying Honey Garlic Chicken Thighs as a delightful complement!

Southwest Chicken Wrap Ingredients

For the Chicken Marinade
• Chicken Breasts – Lean protein for the main filling; ensure they are boneless and skinless for better texture.
• Lime Juice – Provides acidity and brightness; use fresh lime for the best flavor.
• Chili Powder – Adds spice and warmth; adjust the quantity based on your heat preference.
• Onion Powder – Enhances overall flavor without the texture of fresh onions.
• Garlic Powder – Provides a savory depth; can be replaced with fresh garlic if preferred.
• Smoked Paprika – Contributes a smoky flavor dimension; regular paprika can be used as a substitute.
• Salt – Enhances all flavors; adjust to taste.
• Olive Oil – Used for marinating chicken; can substitute with avocado oil.
• Chipotle Pepper in Adobo – Adds smokiness and heat; consider adjusting based on spice tolerance.

For the Wrap
• Tortillas – Forms the wrap; whole grain tortillas can increase fiber content.
• Rice – Acts as a filler to add texture and heartiness; use brown rice for added nutrition.
• Bell Pepper/Jalapeño/Onion – Provides freshness and crunch; swap with available vegetables for variety.
• Corn Kernels – Adds sweetness and texture; frozen or fresh can be used interchangeably.
• Black Beans – Increases protein and fiber content; rinse to reduce sodium.
• Cotija Cheese – Offers a salty and tangy element; feta cheese can be an alternative.
• Sour Cream – Brings creaminess; can substitute with Greek yogurt for a healthier version.
• Honey – Balances the spice with sweetness; maple syrup is a viable alternative.
• Fresh Cilantro – Adds brightness and freshness; omit if not a fan.

These Southwest Chicken Wrap ingredients bring together a delightful mix of tastes and textures, ensuring each wrap is not only delicious but also customizable to your preferences!

Step‑by‑Step Instructions for Southwest Chicken Wrap

Step 1: Marinate Chicken
Begin by patting the boneless, skinless chicken breasts dry and dicing them into bite-sized pieces. In a mixing bowl, combine the chicken with olive oil, lime juice, chili powder, onion powder, garlic powder, smoked paprika, salt, and chopped chipotle pepper. Let the mixture marinate for at least 15 minutes to deepen the flavors, or refrigerate it for up to 24 hours for enhanced taste.

Step 2: Cook Rice
While the chicken marinates, prepare the rice according to package instructions for the desired texture. Use brown rice for added nutrition, and cook until fluffy and fully tender, usually about 25 minutes. Once done, fluff with a fork and set aside to cool slightly, keeping it warm for later assembly of the Southwest Chicken Wraps.

Step 3: Sauté Chicken
Heat a large skillet over medium heat and add the marinated chicken, cooking for 12-15 minutes. Stir occasionally to ensure even cooking, until the chicken is no longer pink and reaches an internal temperature of 165°F (74°C). Once fully cooked, remove it from the skillet and set it aside to keep warm while you prepare the vegetables.

Step 4: Sauté Vegetables
In the same skillet, add a bit more olive oil if needed and then toss in diced bell pepper, jalapeño, and onions. Sauté for about 8 minutes until the vegetables are tender but still crisp. Add garlic and cook for an additional minute until fragrant, allowing the colors and flavors to meld beautifully for your Southwest Chicken Wrap.

Step 5: Combine
Return the cooked chicken to the skillet with the sautéed vegetables. Stir well and cook for an additional 2-3 minutes to heat everything through and combine the flavors. The mixture should be fragrant and colorful, showcasing the vibrant ingredients that make this Southwest Chicken Wrap so appealing.

Step 6: Assemble Wraps
Warm the tortillas briefly in a dry skillet or microwave for better pliability. Begin layering each tortilla with a scoop of rice, followed by the chicken and vegetable mixture, black beans, corn, Cotija cheese, and a drizzle of sour cream or your favorite sauce. Wrap tightly, tucking in the sides as you go, ensuring all the delicious fillings are secure inside.

Step 7: Serve and Enjoy
Slice each wrapped Southwest Chicken Wrap in half to showcase the colorful filling and arrange them on a platter. Serve immediately, allowing everyone to dive into these hearty yet healthy wraps. Pair them with a light salad or your favorite side dish for a complete meal.

Expert Tips for Southwest Chicken Wraps

  • Marinate Longer: Allow the chicken to marinate for at least 30 minutes or up to 24 hours for the deepest flavor in your Southwest Chicken Wrap.

  • Quality Tortillas: Choose high-quality tortillas; they not only hold the wrap together but also enhance your overall eating experience.

  • Fresh Veggies: Use fresh, crisp vegetables and avoid overcooking to maintain their crunch and nutritional value in the wraps.

  • Customize: Feel free to mix things up! Add your favorite ingredients or sauces to make your Southwest Chicken Wrap truly unique and satisfying.

  • Avoid Overstuffing: Be mindful not to overfill the wraps, as this can make them difficult to roll up and enjoy without spilling.

What to Serve with Southwest Chicken Wraps

Looking to elevate your meal experience? Pair these flavorful wraps with delightful side dishes that complement their bold tastes.

  • Crispy Wedge Fries: The crunchiness of well-seasoned wedges contrasts beautifully with the tender wraps, adding a satisfying texture to your plate.

  • Zesty Quinoa Salad: A light and refreshing option, this salad offers a mix of textures and bursts of citrus that pair wonderfully with the zesty flavors of the wraps.

  • Grilled Corn on the Cob: Sweet and smoky, grilled corn brings a seasonal touch and sweet contrast, making your meal feel like a fiesta.

  • Classic Guacamole: Creamy and rich, guacamole adds a velvety layer of flavor and a fresh kick that enhances every bite of the wraps.

  • Mango Salsa: The sweetness of mango salsa brightens the dish, offering a vibrant, fruity zing that complements the spices in the wraps perfectly.

  • Chilled Limeade: Refreshing and tangy, a glass of limeade provides the perfect thirst-quencher and balances the hearty flavors of the wraps.

  • Simple Coleslaw: Crisp and cool, coleslaw offers a crunchy contrast that keeps your meal light while adding a delightful crunch.

  • Roasted Veggies: Roasting vegetables brings out their natural sweetness and adds depth to your plate, creating a harmonious blend of flavors.

  • Chocolate Chip Cookies: End your meal on a sweet note! These buttery treats provide comfort and nostalgia, making them the perfect dessert after your vibrant wraps.

How to Store and Freeze Southwest Chicken Wraps

Fridge: Store any leftover Southwest Chicken Wraps in an airtight container for up to 3 days. This ensures they stay fresh and flavorful for your next meal.

Freezer: If you’d like to keep wraps for longer, freeze them wrapped tightly in plastic wrap and stored in a freezer bag for up to 2 months.

Reheating: When you're ready to enjoy your frozen wraps, thaw them overnight in the fridge, then reheat in a skillet over medium heat until warmed through, about 5-7 minutes.

Assembly Tip: If you prefer to assemble your wraps in advance, keep the components separate in the fridge and assemble fresh just before serving to maintain their textures.

Southwest Chicken Wrap Variations

Ready to infuse a twist of creativity into your Southwest Chicken Wrap? Let your imagination soar with these delightful variations!

  • Protein Swap: Use turkey, beef, or tofu instead of chicken for a different flavor profile. Each option brings its unique taste—perfect for mixing things up!

  • Bean Bonanza: Substitute black beans with pinto or white beans for a delightful change. The texture and flavor can enhance your wraps beautifully.

  • Sauce Sensation: Experiment with different sauces, such as ranch or salsa, in place of the chipotle crema. This opens a new taste dimension that can elevate each bite.

  • Veggie Variety: Swap the bell peppers and onions for seasonal vegetables like zucchini or spinach. Fresh, crisp choices can change the wraps’ character entirely, embracing whatever is in season.

  • Cheesy Upgrade: Try pepper jack cheese instead of Cotija for a spicy, melty twist. The cheesy richness adds an irresistible layer to your wraps.

  • Heat Infusion: For a spicy kick, add diced jalapeños or a sprinkle of cayenne pepper to the chicken marinade. Perfect for those who crave an extra zing!

  • Wrap It Up: Instead of tortillas, use lettuce leaves for a low-carb version, creating a fresh, crunchy wrap option that feels light yet satisfying.

  • Flavored Rice: Stir in taco seasoning or a squeeze of lime into the rice for flavor and vibrancy. Making every layer of your wrap dynamic adds unexpected excitement!

Feel free to get playful with these variations, and check out my recipes for Honey BBQ Chicken or Crock Pot Chicken as more avenues for your culinary creativity!

Make Ahead Options

These Southwest Chicken Wraps are perfect for meal prep, allowing you to save time on busy weeknights! You can marinate the chicken up to 24 hours in advance, letting those bold flavors deepen—just remember to cover it tightly in the refrigerator. Additionally, you can cook the rice and sauté the vegetables a few days prior (store in airtight containers for up to 3 days) to keep everything fresh. When you're ready to serve, simply reheat the chicken, vegetables, and rice together. Assemble the wraps with your favorite toppings, and you'll have a delicious meal that’s just as vibrant and tasty as if you made it from scratch that day!

Southwest Chicken Wrap Recipe FAQs

What is the best type of chicken for Southwest Chicken Wraps?
Absolutely! Boneless, skinless chicken breasts work best for this wrap. They provide lean protein and a tender texture that complements the other fresh ingredients. You can also use chicken thighs if you prefer a slightly richer flavor.

How should I store leftover Southwest Chicken Wraps?
Store any leftover wraps in an airtight container in the fridge for up to 3 days to keep them fresh and tasty. If you find you won't finish them within that time, it's best to freeze them for longer storage.

Can I freeze Southwest Chicken Wraps?
Yes, you can freeze them! Wrap each prepared Southwest Chicken Wrap tightly in plastic wrap and store in a freezer bag for up to 2 months. When you're ready to enjoy them, thaw them overnight in the fridge and reheat in a skillet over medium heat for about 5-7 minutes until warmed through.

What should I do if my tortillas tear when wrapping?
Very common! If your tortillas tear while you're wrapping, try warming them first in a skillet or microwave for about 10-15 seconds. This makes them more pliable. Also, don’t overstuff the wraps; it can help prevent tearing.

Are there any dietary considerations for this recipe?
Definitely! If you have dietary restrictions, you can customize this recipe. For a gluten-free option, use corn tortillas instead of flour. If you're watching your sodium intake, rinse the black beans thoroughly to cut back on added salt. You can also omit the cheese or substitute it with a dairy-free alternative if you're lactose intolerant.

How can I make Southwest Chicken Wraps more kid-friendly?
Super easy! To make them more appealing for kids, you can let them build their own wraps by setting up a "wrap station" with all the ingredients laid out. Offer milder sauces instead of chipotle for those with sensitive palates, and consider adding familiar toppings like shredded lettuce or avocado for a comforting touch.

Southwest Chicken Wrap

Irresistible Southwest Chicken Wraps in Just 30 Minutes

Quick and delicious Southwest Chicken Wraps make a satisfying meal packed with flavor.
Print Recipe Pin Recipe
Prep Time 15 minutes mins
Cook Time 30 minutes mins
Marinating Time 15 minutes mins
Total Time 30 minutes mins
Servings: 4 wraps
Course: Dinner
Cuisine: Tex-Mex
Calories: 420
Ingredients Equipment Method Nutrition Notes

Ingredients
  

For the Chicken Marinade
  • 2 pieces Chicken Breasts Boneless and skinless
  • 2 tablespoons Lime Juice Fresh for best flavor
  • 1 teaspoon Chili Powder Adjust to taste
  • 1 teaspoon Onion Powder
  • 1 teaspoon Garlic Powder Can substitute with fresh garlic
  • 1 teaspoon Smoked Paprika Regular paprika is a substitute
  • 1 teaspoon Salt Adjust to taste
  • 2 tablespoons Olive Oil Can use avocado oil
  • 1 chipotle pepper Chipotle Pepper in Adobo Adjust according to spice tolerance
For the Wrap
  • 4 pieces Tortillas Whole grain recommended
  • 1 cup Rice Brown rice for added nutrition
  • 1 cup Bell Pepper Can substitute with jalapeño or onion
  • 1 cup Corn Kernels Fresh or frozen
  • 1 cup Black Beans Rinse to reduce sodium
  • 1/2 cup Cotija Cheese Feta can be an alternative
  • 1/2 cup Sour Cream Can be replaced with Greek yogurt
  • 1 tablespoon Honey Maple syrup is a suitable alternative
  • 1/4 cup Fresh Cilantro Omit if not preferred

Equipment

  • Skillet
  • Mixing Bowl
  • Fork

Method
 

Step-by-Step Instructions for Southwest Chicken Wrap
  1. Marinate Chicken: Combine chicken with olive oil, lime juice, chili powder, onion powder, garlic powder, smoked paprika, salt, and chipotle pepper. Marinate for at least 15 minutes.
  2. Cook Rice: Prepare rice according to package instructions until fluffy and tender, about 25 minutes.
  3. Sauté Chicken: Cook marinated chicken in a skillet over medium heat for 12-15 minutes until fully cooked.
  4. Sauté Vegetables: In the same skillet, sauté bell pepper, jalapeño, and onions until tender but still crisp, about 8 minutes. Add garlic for 1 more minute.
  5. Combine: Return chicken to the skillet, stir well, and heat further for 2-3 minutes.
  6. Assemble Wraps: Warm tortillas, layer with rice, chicken and vegetables, black beans, corn, Cotija cheese, and sour cream. Wrap tightly.
  7. Serve and Enjoy: Slice wraps in half, arrange on a platter, and serve immediately.

Nutrition

Serving: 1wrapCalories: 420kcalCarbohydrates: 50gProtein: 30gFat: 15gSaturated Fat: 5gPolyunsaturated Fat: 2gMonounsaturated Fat: 8gCholesterol: 70mgSodium: 800mgPotassium: 600mgFiber: 10gSugar: 5gVitamin A: 1000IUVitamin C: 40mgCalcium: 200mgIron: 3mg

Notes

Customize wraps with your choice of fillings and sauces. Fresh ingredients enhance the overall flavor profile.

Tried this recipe?

Let us know how it was!

Beef Chile Colorado: A Heartwarming Stew You'll Love

March 14, 2026 by Grace Snow Leave a Comment

Just the other day, while sifting through old family recipes, I stumbled upon one that never fails to evoke warm memories—Beef Chile Colorado. This authentic Mexican stew warms the soul with its hearty chunks of tender beef simmered in a robust, spicy red chile sauce. What I adore about this dish is not just its ability to feed a crowd but also how it transforms into an even more delicious meal as leftovers. Picture a cozy weeknight dinner, with the tantalizing aroma wafting through your kitchen, and a table set with warm tortillas and Mexican rice—the perfect setting to rally friends and family around. If you’re tired of fast food and crave something truly comforting, my Beef Chile Colorado recipe is here to rescue dinnertime. Ready to dive into this flavorful adventure? Let’s get cooking!

Why is Beef Chile Colorado a Must-Try?

Authenticity at Its Finest: This recipe captures the essence of traditional Mexican cooking, delivering rich flavors that transport you to the heart of Mexico.

Feed a Crowd: Perfect for gatherings, this hearty stew can easily serve a large group, making it ideal for family dinners or celebrations.

Leftover Love: The flavors intensify after a day in the fridge, offering a delightful second act that’s even better than the first.

Versatile Pairings: Serve it with warm tortillas, Mexican rice, or even borracho beans for a complete, satisfying meal.

Time-Saving Simplicity: With mostly hands-off cooking, you can spend less time in the kitchen and more time enjoying the company of loved ones.

Dive into this comforting stew and rediscover what homemade meals are all about!

Beef Chile Colorado Ingredients

• Get ready to create a mouthwatering dish with these essential ingredients!

For the Stew

  • Beef Chuck – A flavorful cut perfect for slow cooking; swap with brisket if you prefer.
  • Kosher Salt – Essential for enhancing the dish's flavors; sea salt works too!
  • Black Pepper – Adds just the right amount of spice; use a milder pepper for less heat.
  • Flour – Thickens the sauce beautifully; cornstarch is a great gluten-free alternative.
  • Neutral Oil – Ideal for browning beef; canola or vegetable oil will suffice.
  • Yellow Onion – Boosts the stew's sweetness; red onion can be used if you like!
  • Garlic Cloves – Adds delightful aromatic flavor; swap for garlic powder though taste may vary.
  • Guajillo Chilies – Key to the stew's authentic flavor; pasilla chiles can be a fun alternative.
  • Ancho Chilies – Brings a rich sweetness; use other dried chiles if you're missing this.
  • Chiles de Arbol – For that extra heat; adjust to your spice preference.
  • Ground Cumin – Infuses warmth and depth; coriander can substitute if needed.
  • Ground Coriander – Complementary flavor for the spices; can be omitted without much loss.
  • Dried Mexican Oregano – Enhances flavor; regular oregano can be a last-minute substitute.
  • Beef Broth – The delicious base of your stew; vegetable broth works for vegetarian options.
  • Bay Leaves – Adds a subtle herbal aroma; optional but highly recommended.

For Serving

  • Corn Tortillas – Perfect for scooping up the stew; warm them for the best flavor.
  • White Onion – Adds crunch when served fresh; feel free to substitute with green onions.
  • Cilantro – Freshness and color for your stew; omit if you're not a fan!
  • Radishes – Crisp and refreshing, perfect for topping; they add a delightful bite.
  • Lime Wedges – A squeeze enhances flavor; don’t skip this brightening touch!

Whip up this Beef Chile Colorado with these simple ingredients and enjoy the comforting embrace of a homemade Mexican stew!

Step‑by‑Step Instructions for Beef Chile Colorado

Step 1: Prepare Chilies
Begin by toasting guajillo, ancho, and chiles de árbol in a dry skillet over medium heat for 2–3 minutes. Stir constantly until they release a fragrant aroma but do not burn. Next, remove the chiles from the skillet and soak them in hot water along with chopped onion and garlic cloves for about 10 minutes, until they soften.

Step 2: Blend Sauce
Once softened, drain the chiles, onion, and garlic and transfer them to a blender. Add soaking liquid, ground cumin, ground coriander, dried Mexican oregano, and beef broth. Blend on high until smooth and velvety. This rich sauce is the heart of your Beef Chile Colorado, so ensure there are no lumps for a perfect consistency.

Step 3: Brown Beef
Cut your beef chuck into 2-inch cubes and season with kosher salt and black pepper. Lightly coat each piece with flour to help thicken the stew. In a large dutch oven, heat neutral oil over medium-high heat, then add the beef in batches; brown on all sides for about 5–7 minutes. Aim for a deep, golden color for maximum flavor.

Step 4: Combine
After browning the beef, remove any excess oil from the pot, then return the beef to the dutch oven. Pour in enough of the blended sauce to cover the meat and add bay leaves for extra aroma. Bring to a gentle simmer over low heat, cover, and let it cook for about 2 hours, stirring occasionally, until the beef is fork-tender.

Step 5: Finish and Serve
Once the beef is tender, skim any excess oil from the surface of the stew for a cleaner presentation. Serve your Beef Chile Colorado in bowls alongside warm corn tortillas. Garnish with fresh white onion, cilantro, radishes, and lime wedges for a burst of freshness that complements the stew beautifully.

Make Ahead Options

Beef Chile Colorado is a fantastic choice for meal prep, making weeknight dinners a breeze! You can prepare the sauce and brown the beef up to 24 hours in advance. Simply follow the initial steps to toast the chilies and blend the sauce, then cook the beef until browned, and store both components in airtight containers in the refrigerator. To maintain flavor and texture, be sure to cool them completely before refrigerating. When you're ready to serve, combine the beef and sauce in a pot, add bay leaves, and simmer for about 30 minutes until heated through. This way, you’ll enjoy a comforting, delicious stew with minimal effort on busy nights!

What to Serve with Beef Chile Colorado?

Building a satisfying meal around your flavorful stew can elevate your dining experience.

  • Warm Corn Tortillas: These are ideal for scooping up the rich sauce, making each bite truly comforting.
  • Mexican Rice: Fluffy and subtly seasoned, it absorbs the stew's flavors beautifully, enhancing every forkful.
  • Borracho Beans: Rich, savory beans add a creamy texture, creating a hearty meal that's perfect for sharing.
  • Guacamole: Creamy avocado dip adds freshness and a slight tang, balancing the spice of the beef stew.
  • Sizzling Fajita Veggies: Caramelized onions and bell peppers add crunch and sweetness, offering vibrant textures alongside the stew.

Pair these delicious sides to create a full Mexican feast that turns your Beef Chile Colorado into a memorable meal!

How to Store and Freeze Beef Chile Colorado

Fridge: Store leftovers in an airtight container for up to 5 days. This allows the flavors to meld and intensify, making your Beef Chile Colorado even tastier on day two!

Freezer: For longer storage, freeze in airtight containers for up to 3 months. This is a great way to save portions for quick, future meals when the craving strikes.

Reheating: When ready to enjoy, thaw overnight in the fridge. Reheat gently on the stove over low heat, adding a splash of beef broth if it seems too thick, for a luscious, comforting dish.

Expert Tips for Beef Chile Colorado

  • Chili Toasting: Always toast the chilies before soaking them. This enhances the flavor, giving your Beef Chile Colorado a deeper, richer taste.

  • Browning Technique: Brown the beef in batches to prevent overcrowding. This ensures each piece gets a lovely sear, locking in flavor and moisture.

  • Simmer Time: Let the stew simmer for at least two hours. This allows the beef to become fork-tender and the flavors to meld beautifully.

  • Seasoning Adjustment: Taste the sauce before serving; if it needs more depth, adjust with additional spices or a bit of salt. This tip is crucial for perfecting your Beef Chile Colorado!

  • Resting Period: If you can, prepare the stew a day ahead. Letting it rest overnight intensifies the flavors, making it even more delicious as leftovers.

Beef Chile Colorado Variations

Feel free to explore these tempting twists that make this hearty stew even more delightful!

  • Pork Shoulder: Swap out beef for pork shoulder for a richer and slightly sweeter flavor profile. The pork will become incredibly tender, adding a whole new dimension to the dish.

  • Vegetarian Option: Use hearty vegetables like mushrooms and eggplant instead of meat, simmering them to absorb the incredible flavors of the sauce. This option invites everyone to the table without sacrificing taste!

  • Heat Levels: Adjust the amount of chiles de árbol to dial up or down the spice level. If you're in the mood for a kick, go all out; if not, a milder approach can be just as delicious.

  • Beans Addition: Add black or pinto beans to the mix for extra heartiness. This twist not only enhances the stew but also adds protein and fiber, making it a complete meal.

  • Rice Bed: Serve the stew over a bed of fluffy rice for a comforting twist. It soaks up the savory sauce beautifully, creating a satisfying dining experience.

  • Smoky Flavor: Incorporate smoked paprika for a subtle smokiness that enhances the overall depth of flavor. This unique addition can turn the ordinary into something extraordinary.

  • Herb Infusion: Toss in fresh herbs like thyme or rosemary towards the end of cooking for a fragrant lift. This brightens up the stew and adds a delightful freshness.

  • Incorporate Dark Chocolate: A small piece of dark chocolate in the final simmer can add a mysterious richness that pairs beautifully with the spices. Just a hint transforms the flavor profile to something uniquely delicious!

Each variation is designed to let your creativity shine and make this classic dish fit your taste and dietary needs. And don’t forget, leftover Beef Chile Colorado is fantastic in tacos or burritos—check out my recipe for Ground Beef Enchiladas for another delicious way to repurpose those delightful flavors!

Beef Chile Colorado Recipe FAQs

Which kind of beef is best for Beef Chile Colorado?
For Beef Chile Colorado, I recommend using beef chuck as it’s flavorful and tenderizes beautifully through slow cooking. However, if you can’t find chuck, brisket makes a nice alternative as it also has great marbling.

How should I store leftover Beef Chile Colorado?
Absolutely! Store your leftovers in an airtight container in the refrigerator for up to 5 days. The flavors will actually deepen over time, making it even more delicious on subsequent days. When you reheat it, do so gently on the stove for best results!

Can I freeze Beef Chile Colorado?
Yes, you can freeze your Beef Chile Colorado! Simply let it cool completely, then transfer it to airtight containers or freezer-safe bags. It will keep well for up to 3 months. When you’re ready to enjoy it, thaw overnight in the fridge and reheat slowly on low heat, adding a splash of beef broth if it looks too thick.

What’s the best way to adjust the spice level?
If you prefer a milder dish, you can reduce the amount of chiles de árbol or omit them entirely. Instead, enhance the flavor with extra guajillo or ancho chiles, which are sweeter and less spicy. You can always adjust the spice level to suit your family’s taste preferences!

Are there any dietary considerations for Beef Chile Colorado?
Certainly! This recipe can be modified for dietary needs. If you're looking for a gluten-free option, simply swap the flour for cornstarch to thicken the sauce. Additionally, replace beef broth with vegetable broth for a delicious vegetarian version. Just ensure all ingredients are checked for allergens!

How do I know when the beef is tender enough?
The beef should be fork-tender, which typically takes about 2 hours of slow simmering. You can check for tenderness by using a fork to see if it easily separates. If not, let it simmer a bit longer; the low and slow method is key to achieving that rich texture we all love in Beef Chile Colorado.

Beef Chile Colorado

Beef Chile Colorado: A Heartwarming Stew You'll Love

Discover the rich flavors of Beef Chile Colorado, an authentic Mexican stew that warms the soul.
Print Recipe Pin Recipe
Prep Time 30 minutes mins
Cook Time 2 hours hrs
Total Time 2 hours hrs 30 minutes mins
Servings: 6 servings
Course: Dinner
Cuisine: Mexican
Calories: 400
Ingredients Equipment Method Nutrition Notes

Ingredients
  

For the Stew
  • 2 pounds Beef Chuck can swap with brisket
  • 1 teaspoon Kosher Salt sea salt works too
  • 1 teaspoon Black Pepper use milder pepper for less heat
  • 1/4 cup Flour cornstarch is a gluten-free alternative
  • 2 tablespoons Neutral Oil canola or vegetable oil
  • 1 large Yellow Onion red onion can be used
  • 4 cloves Garlic Cloves can substitute with garlic powder
  • 4 pieces Guajillo Chilies key for authentic flavor
  • 2 pieces Ancho Chilies can use other dried chiles
  • 2 pieces Chiles de Arbol adjust for spice preference
  • 1 teaspoon Ground Cumin coriander can substitute
  • 1 teaspoon Ground Coriander can be omitted
  • 1 teaspoon Dried Mexican Oregano regular oregano can work
  • 4 cups Beef Broth vegetable broth for vegetarian options
  • 2 pieces Bay Leaves optional but recommended
For Serving
  • 8 pieces Corn Tortillas warm for best flavor
  • 1 small White Onion can substitute with green onions
  • 1/2 cup Cilantro omit if not a fan
  • 1 cup Radishes for topping
  • 2 pieces Lime Wedges for flavor enhancement

Equipment

  • Dutch oven
  • Blender
  • Skillet

Method
 

Step-by-Step Instructions
  1. Begin by toasting guajillo, ancho, and chiles de árbol in a dry skillet over medium heat for 2–3 minutes. Stir constantly until they release a fragrant aroma but do not burn. Next, remove the chiles from the skillet and soak them in hot water along with chopped onion and garlic cloves for about 10 minutes, until they soften.
  2. Once softened, drain the chiles, onion, and garlic and transfer them to a blender. Add soaking liquid, ground cumin, ground coriander, dried Mexican oregano, and beef broth. Blend on high until smooth and velvety.
  3. Cut your beef chuck into 2-inch cubes and season with kosher salt and black pepper. Lightly coat each piece with flour. In a large dutch oven, heat neutral oil over medium-high heat, then add the beef in batches; brown on all sides for about 5–7 minutes.
  4. After browning the beef, remove any excess oil from the pot, then return the beef to the dutch oven. Pour in enough of the blended sauce to cover the meat and add bay leaves. Bring to a gentle simmer over low heat, cover, and let it cook for about 2 hours, stirring occasionally.
  5. Once the beef is tender, skim any excess oil from the surface of the stew. Serve your Beef Chile Colorado in bowls alongside warm corn tortillas. Garnish with fresh white onion, cilantro, radishes, and lime wedges.

Nutrition

Serving: 1bowlCalories: 400kcalCarbohydrates: 30gProtein: 35gFat: 15gSaturated Fat: 5gPolyunsaturated Fat: 2gMonounsaturated Fat: 7gCholesterol: 90mgSodium: 800mgPotassium: 700mgFiber: 4gSugar: 2gVitamin A: 2000IUVitamin C: 15mgCalcium: 40mgIron: 3mg

Notes

Letting the stew rest overnight intensifies flavors and makes it even more delicious as leftovers.

Tried this recipe?

Let us know how it was!

Hot Honey Pepperoni Ricotta Pizza: Your New Summer Favorite

March 11, 2026 by Grace Snow Leave a Comment

As the sun sets on a warm summer evening, the smell of something incredible wafts through the air—it's not just any pizza; it's the Hot Honey Pepperoni Ricotta Pizza. With spicy pepperoni and velvety ricotta marrying together under a luscious drizzle of sweet hot honey, this homemade pizza promises a sensational burst of flavors in every bite. What I love most about this recipe is its effortless assembly and quick cook time, making it a perfect choice for impromptu gatherings or cozy nights in. Plus, it's a guaranteed crowd-pleaser, leaving everyone craving a second slice! Are you ready to elevate your pizza game and impress your friends and family this summer?

Why is this pizza a game-changer?

Flavor Explosion: This Hot Honey Pepperoni Ricotta Pizza delivers a perfect balance of sweet, spicy, and savory that tantalizes your taste buds.

Quick and Easy: You can whip it up in no time, making it ideal for last-minute summer cookouts or casual dinners.

Versatile Toppings: Feel free to mix and match toppings! Swap pepperoni for vegetables or try different cheeses like feta for a unique twist. Check out my recipe for Herby Ricotta Stuffed Peppers to inspire your creativity.

Perfect for Sharing: This pizza is not only satisfying but it’s also a crowd-pleaser, great for any gathering or family night.

Gourmet Experience: Elevate your pizza game and create a gourmet experience right at home with minimal effort, reminiscent of pizzeria favorites!

Get ready for a flavor-packed summer!

Hot Honey Pepperoni Ricotta Pizza Ingredients

For the Dough
• Pizza Dough – Use store-bought for convenience or make your own for a personal touch.

For the Sauce
• Tomato Sauce – Adds moisture and tang; feel free to swap it with pesto for a different flavor profile.

For the Cheese
• Mozzarella Cheese – Provides that melty goodness; consider using provolone or vegan cheese as a substitute.
• Ricotta Cheese – Adds a creamy texture; cottage cheese works too, just dollop it instead of spreading.

For the Toppings
• Pepperoni – Brings a spicy crunch; replace with sliced bell peppers for a vegetarian option.
• Hot Honey – The secret ingredient that adds sweetness and heat; you can make your own by infusing honey with chili flakes.
• Fresh Basil – Offers a delightful aroma; highly recommended for an extra layer of flavor.
• Red Pepper Flakes – Sprinkle for added heat; simply omit if you prefer a milder taste.

Enjoy making your Hot Honey Pepperoni Ricotta Pizza, where every bite is a delicious adventure!

Step‑by‑Step Instructions for Hot Honey Pepperoni Ricotta Pizza

Step 1: Preheat the Oven
Begin by preheating your oven to 500°F (260°C), placing a pizza stone or a baking sheet inside to heat for 30 minutes. This ensures a crispy crust for your Hot Honey Pepperoni Ricotta Pizza. While you wait, take in the anticipation of deliciousness to come as the oven warms up.

Step 2: Prepare the Dough
On a floured surface, roll out your pizza dough into a 12-inch round. Aim for an even thickness for a uniform bake, and create a slight border around the edges. This base will hold all those yummy toppings and provide a sturdy foundation for your flavorful pizza.

Step 3: Add Tomato Sauce
Spread a generous amount of tomato sauce over your rolled-out dough, leaving about a ½-inch border around the edges. Ensure an even layer, as this will keep the dough moist and flavorful without overwhelming the toppings. This layer adds the perfect tangy contrast to your Hot Honey Pepperoni Ricotta Pizza.

Step 4: Layer the Cheese
Next, sprinkle mozzarella cheese evenly across the sauce, covering it well for that melty goodness. Then, strategically place slices of pepperoni atop the cheese, ensuring they are evenly distributed. This arrangement allows the flavors to meld beautifully as you layer on dollops of creamy ricotta in the next step.

Step 5: Add Ricotta
Now, take your ricotta cheese and dollop it around the pizza, avoiding a complete spread to maintain its creamy texture. The ricotta's richness will create a delightful contrast to the spiciness of the pepperoni. This combination is what truly makes your Hot Honey Pepperoni Ricotta Pizza shine!

Step 6: Bake the Pizza
Carefully transfer your assembled pizza onto the preheated stone or baking sheet. Bake for 8–12 minutes, watching closely for the crust to turn golden brown and the cheese to bubble. The enticing aromas filling your kitchen will signal that your delicious pizza is nearly ready.

Step 7: Drizzle with Hot Honey
Once your pizza is golden and bubbling, remove it from the oven and immediately drizzle hot honey over the top. This step is crucial, as it elevates the flavors, balancing the savory and spicy elements with its sweet kick. The hot honey is what makes the Hot Honey Pepperoni Ricotta Pizza a standout!

Step 8: Garnish and Serve
Finish your pizza by topping it with fresh basil and a sprinkle of red pepper flakes if you want an extra kick. Slice into pieces and serve warm, allowing everyone to enjoy the delightful combination of flavors. This pizza is now ready to impress at your summer gatherings!

Expert Tips for Hot Honey Pepperoni Ricotta Pizza

• Preheat Properly: Ensure your oven is fully preheated with a pizza stone or baking sheet for the crispiest crust.

• Dollop the Ricotta: Avoid spreading ricotta; dollop it around the pizza to maintain its creamy texture and elevate each bite.

• Generous with Hot Honey: Drizzle a generous amount of hot honey after baking; it’s the star ingredient that beautifully ties all flavors together.

• Use a Pizza Peel: A pizza peel makes transferring your pizza to and from the oven easier, preventing any messy mishaps during cooking.

• Experiment with Toppings: Don’t hesitate to mix up toppings! The Hot Honey Pepperoni Ricotta Pizza is versatile—swap ingredients to suit your taste.

Storage Tips for Hot Honey Pepperoni Ricotta Pizza

Fridge: Store leftover pizza in an airtight container in the refrigerator for up to 3 days. This keeps it fresh while maintaining flavor.

Freezer: If you need to freeze your Hot Honey Pepperoni Ricotta Pizza, wrap it tightly in plastic wrap and aluminum foil. It can be frozen for up to 2 months.

Reheating: To restore crispiness, reheat individual slices in a preheated oven at 375°F (190°C) for about 10 minutes. This method helps keep the crust crunchy.

Avoid Moisture: Make sure the pizza is completely cooled before storing. Any moisture can lead to sogginess, diminishing that delightful taste!

Make Ahead Options

These Hot Honey Pepperoni Ricotta Pizza components are perfect for meal prep, saving you time on busy weeknights! You can prepare the pizza dough and toppings up to 24 hours in advance. Simply roll out the dough and store it in an airtight container in the refrigerator to prevent drying out. For the toppings, chop the pepperoni and prepare ricotta, storing them separately to maintain freshness. When you’re ready to bake, spread the sauce on the dough, layer the toppings, and bake as instructed. This way, you can enjoy a delicious homemade pizza with minimal effort and maximum flavor, keeping your evenings stress-free and delightful!

Hot Honey Pepperoni Ricotta Pizza Variations

Feel free to let your creativity run wild with these fun and delicious twists on this delightful pizza!

  • Gluten-Free: Use gluten-free pizza dough or a cauliflower crust for a lighter option. This makes it accessible for everyone to enjoy!
  • Vegetarian: Replace pepperoni with a colorful assortment of vegetables like bell peppers, onions, or mushrooms. Add a touch of brightness and flavor!
  • Spicy Kick: Add jalapeños or banana peppers for an extra spicy zing. Perfect for those who love a little more heat on their plate!
  • Herbed Twist: Mix fresh herbs like thyme and oregano into your ricotta for an aromatic flavor boost. You’ll enjoy a delightful herbaceous note with every bite.
  • Different Cheeses: Swap mozzarella for provolone, gouda, or even blue cheese for a unique flavor profile. Imagine the tanginess of blue cheese mingling with the sweet hot honey!
  • Barbecue Style: Replace the tomato sauce with barbecue sauce and add diced chicken for a BBQ chicken-inspired pizza. It’s a delicious change of pace! You can also try my recipe for Honey BBQ Chicken for more BBQ inspiration.
  • Sweet Twist: Top your pizza with thinly sliced figs or pears along with the ricotta for a sweet and savory combination. Each bite will be a delightful surprise!
  • Asian Influence: Drizzle with soy sauce or teriyaki sauce before serving for a flavor-packed pizza with an Asian flair. The sweet and salty accents complement the hot honey beautifully!

These variations will surely elevate your pizza experience to new heights. Enjoy experimenting!

What to Serve with Hot Honey Pepperoni Ricotta Pizza

As you prepare to savor this delicious pizza, consider these delightful pairings that will create a beautifully complete meal experience.

  • Fresh Green Salad: A crisp salad with mixed greens and a tangy vinaigrette lightens the meal, balancing the pizza's richness perfectly.
  • Garlic Bread: Warm, buttery garlic bread offers a comforting crunch that complements the soft, creamy pizza textures beautifully. A perfect precursor to the main event!
  • Grilled Vegetables: The smoky flavors of grilled zucchini, bell peppers, and eggplant add a refreshing contrast, enhancing the overall flavor profile of the meal.
  • Crispy Potato Wedges: Seasoned potato wedges provide a flavorful crunch. Their hearty nature makes them a satisfying addition alongside your pizza.
  • Red Wine: A light-bodied red wine like Pinot Noir pairs excellently, cutting through the richness of ricotta while enhancing the sweet heat of the hot honey.
  • Lemonade: Refreshing homemade lemonade balances the pizza's spicy notes with its citrusy sweetness— offering a delightful, thirst-quenching companion!
  • Panna Cotta: For dessert, consider a light panna cotta infused with vanilla. Its smooth creaminess stands in sweet contrast to the spicy pizza, providing a well-rounded finish to your meal.
  • Fruit Salad: A vibrant mix of seasonal fruits with a hint of mint offers a refreshing, sweet ending. The colors and flavors will brighten your dining table as well!
  • Craft Beer: A hoppy IPA complements the spicy pepperoni, enhancing the flavor while cleansing the palate after each cheesy bite.
  • Chocolate Mousse: For a rich dessert, a light and airy chocolate mousse provides a decadent yet refreshing end after your satisfying pizza.

Hot Honey Pepperoni Ricotta Pizza Recipe FAQs

How do I choose the right ripeness for my ingredients?
Absolutely! For this pizza, select fresh ingredients to enhance the flavor. Choose ripe tomatoes for your sauce and creamy ricotta without any excess moisture. When picking basil, look for vibrant green leaves with no dark spots. For the pepperoni, opt for quality slices that are firm and free of any discoloration.

How do I store leftover Hot Honey Pepperoni Ricotta Pizza?
You can store leftover pizza in an airtight container in the refrigerator for up to 3 days. This keeps it fresh while maintaining its delicious flavor. Just make sure to let the pizza cool down completely before sealing it away. You’ll love how it stays tasty!

Can I freeze Hot Honey Pepperoni Ricotta Pizza?
Certainly! To freeze, wrap the pizza tightly in plastic wrap and then in aluminum foil to prevent freezer burn. It can be frozen for up to 2 months. When you're ready to enjoy it again, just thaw in the fridge overnight before reheating, and enjoy that crispy crust!

What if my pizza doesn’t cook evenly?
If your pizza doesn’t cook evenly, it may be due to insufficient preheating. Ensure your pizza stone or baking sheet is preheated for a full 30 minutes before baking. Also, remember not to overload your pizza with toppings, as this can make it soggy. Stick to moderate amounts for the best results!

Are there any dietary considerations for this pizza?
Very! For a vegetarian option, you can easily swap the pepperoni for a variety of colorful veggies like bell peppers or mushrooms. If you're concerned about allergies, ensure your cheese, dough, and sauce are free from allergens, like nuts or gluten, depending on your needs. You can find gluten-free pizza dough at most grocery stores!

Hot Honey Pepperoni Ricotta Pizza

Hot Honey Pepperoni Ricotta Pizza

Experience a flavor explosion with the Hot Honey Pepperoni Ricotta Pizza, the perfect summer delight.
Print Recipe Pin Recipe
Prep Time 15 minutes mins
Cook Time 12 minutes mins
Total Time 27 minutes mins
Servings: 4 slices
Course: Dinner
Cuisine: Italian
Calories: 300
Ingredients Equipment Method Nutrition Notes

Ingredients
  

Dough
  • 1 lb Pizza Dough Store-bought or homemade
Sauce
  • 1 cup Tomato Sauce Or substitute with pesto
Cheese
  • 1 cup Mozzarella Cheese Or use provolone or vegan cheese
  • 1/2 cup Ricotta Cheese Can substitute with cottage cheese
Toppings
  • 1 cup Pepperoni Or substitute with sliced bell peppers
  • 1/4 cup Hot Honey Can make by infusing honey with chili flakes
  • 1 cup Fresh Basil Highly recommended for extra flavor
  • 1 tsp Red Pepper Flakes Omit if you prefer a milder taste

Equipment

  • Oven
  • Pizza stone
  • Baking Sheet
  • Rolling Pin
  • Pizza Peel

Method
 

Preparation Steps
  1. Preheat your oven to 500°F (260°C) with a pizza stone or baking sheet inside for 30 minutes.
  2. Roll out your pizza dough into a 12-inch round on a floured surface.
  3. Spread a generous amount of tomato sauce over the dough, leaving about a ½-inch border.
  4. Sprinkle mozzarella cheese evenly over the sauce, then add pepperoni slices.
  5. Dollop ricotta cheese around the pizza.
  6. Transfer the pizza to the preheated stone or baking sheet and bake for 8–12 minutes.
  7. Drizzle hot honey over the pizza once it’s baked.
  8. Garnish with fresh basil and red pepper flakes, slice, and serve.

Nutrition

Serving: 1sliceCalories: 300kcalCarbohydrates: 30gProtein: 15gFat: 12gSaturated Fat: 5gPolyunsaturated Fat: 1gMonounsaturated Fat: 4gCholesterol: 30mgSodium: 600mgPotassium: 200mgFiber: 2gSugar: 4gVitamin A: 500IUVitamin C: 2mgCalcium: 200mgIron: 1mg

Notes

Allow the pizza to cool before storing if you have leftovers. It can be stored in the fridge for 3 days or frozen for up to 2 months.

Tried this recipe?

Let us know how it was!
  • « Previous Page
  • 1
  • …
  • 29
  • 30
  • 31
  • 32
  • 33
  • …
  • 87
  • Next Page »

Welcome!

Hi, I’m Grace, a Sydney-based home cook with a passion for bold flavors and trending ingredients. Whether you’re a busy beginner or a seasoned foodie, you’ll find dishes here that are fresh, fun, and full of flavor.

More about me

Popular Recipes

  • One Pot Keto Tuna Casserole
    One Pot Keto Tuna Casserole: Creamy Comfort in Minutes
  • Ultimate Jalapeno Popper Chicken Salad
    Ultimate Jalapeno Popper Chicken Salad That'll Wow Your Tastebuds
  • Green Chile Cheese Dip
    Mouthwatering Green Chile Cheese Dip for Cozy Gatherings
  • Easy Chimichurri Sauce
    Fresh and Zesty Easy Chimichurri Sauce in Just Minutes

Footer

↑ back to top

About

  • Privacy Policy
  • Disclaimer
  • Terms & Conditions

Newsletter

  • Sign Up! for emails and updates

Contact

  • About me
  • Contact me

Copyright © 2025 TastyTrendIngredients